




Zebraoutrider joins the Ordo Xenos and the Mubraxis Dustdogs



Recommendations: 471
About the Project
Inspired by the Warhammer 40K Dark Heresy Role Play tome ‘The Radical’s Handbook’, I’ve decided to finish off a project I started ten years ago but failed to complete with any real focus. My Spring Clean 2020 project ‘13th Armoured Division - Sable Knights - Commander Glofski’s Squadron’ has encouraged me to try out some new skills and techniques. I will be creating an Radical Ordo Xenos Inquisitor’s Exploration Team using a variety of characters and support them with Astra Militarum units from the Mubraxis Dustdogs... including some tanks which I want to try salt weathering on during the painting stage.
Related Game: Warhammer 40,000: Kill Team
Related Company: Games Workshop
Related Genre: Science Fiction
Related Contest: Spring Clean Hobby Challenge (Old)
This Project is Active
Mubraxis Dustdogs Rough Rider Units Completed
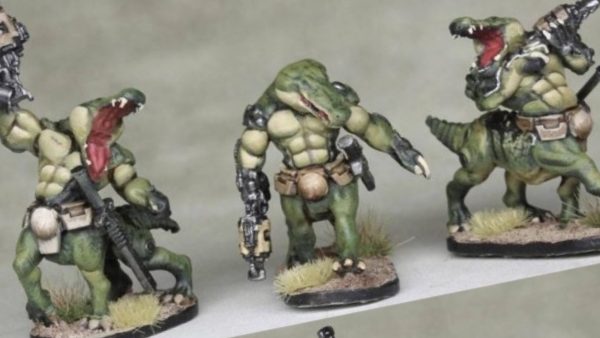
So, after a little hiatus I’ve returned to the Mubraxis Dustdogs Rough Rider units and gone all out to finish them to a decent table top standard. As with the tanks, the main colours in the palette are Averland Sunset and Wraithbone, along with Steel Legion Drab, Lothern Blue, Leadbelcher and Blazing Orange with washes of Carroburg Crimson, Cassandora Yellow, Drachenhof Nightshade, Sepia and Reikland Fleshshade.
The bases are the standard size oval 40K bike and cavalry bases but coated with Polyfilla around the Lizard’s feet and play sand applied to a coat of PVA glue.
I’m generally happy with how they’ve come out from conversion to painting, although I may return to them for more detailing at a later stage and once I’ve moved on and completed the Ordo Xenos party.
The Rough Riders mounted on lizards suited my rather impressionist and dirty (rough and ready) painting style. I’m always inspired by the Blanchitsu School of Miniatures Painting so fine detailing is only really reserved for the standout pieces.
 Mubraxis Dustdogs Rough Riders Unit A
 Mubraxis Dustdogs Rough Riders Unit B
 Mubraxis Dustdogs Rough Riders @Lloyd Shot A
 Mubraxis Dustdogs Rough Riders @Lloyd Shot B


Leman Russ Battle Tank - salt weathering in memoriam
Sadly our faithful greyhound Ollie passed away last week aged nearly 13 (around 88 in human terms)… so he had a good innings and above all a good life. As someone who works from home, Ollie was my constant companion coming to interrupt my day-to-day paid jobs and my hobby time.
Whilst my Mubraxis Dustdogs Rough Riders were drying in the paint queue, I started the salt weathering experiment on an old Leman Russ Battle Tank with the aim of making a very old vehicle to accompany the very new Leman Russ Incinerator. Ollie watched me start this tank, but as he’s not now here to see the end creation, so I’ve dedicated it to him with a few personal touches – it may be old and knackered but it never gives up and brings much joy and happiness.
RIP Ollie (the fifth member of the family) 01-11-07 to 16-07-20.
 Leman Russ Battle Tank No.5 Mubraxis Dustdogs
Once the tank was clean and dry, I used artist’s masking tape to cover areas that I wanted to retain the original paint colour – I.e. guns and tracks. Then using a wet cotton bud I randomly dabbed cool water onto the tank’s surfaces and before this could dry, I poured bog-standard table salt all over the tank and left to dry in the sun for an hour.
I then carefully shook the tank so that the excess salt fell away leaving patches of salts mounds and I sprayed the whole tank with Averland Sunset and left to dry for another hour. After an appropriate time I used an old toothbrush to remove the salt mounds and the reddish undercoat came through to appear as rust. With a bit of fine detailing with Blazing Orange and Nihilakh Oxide the damage looked suitably weathered. The tank was washed with Cassandora Yellow and edges worn with sponged on Chainmail.
The Hunter Killer Missile had its end drilled out and attached to a bent out paper clip and then stuck in to the missile firing box. The wire was covered in corse flock and painted with a smorgasbord of smokey colours.
The base was made out of a CD-ROM in a similar fashion to the Leman Russ Incinerator base. However, this time I’ve added my interpretation of Ollie with the nearest dog in my collection that could be ‘converted’ into a greyhound – it needed a long tail!


 Leman Russ Incinerator and Leman Russ Battle Tank


 The Mubraxis Dustdogs Armoured Division grows


Mubraxis Dustdogs Rough Riders - Lizard Mount dry brush and wash
It was time to turn back to the Mubraxis Dustdogs Rough Riders. As I’ve stuck the riders to the lizard mounts, I thought it was best to get these beasts painted before tackling the more detailed riders.
I toyed with the idea of painting the lizards light brown with black stripes akin to a rattle snake or horned lizard, but as I want to use khaki on the riders, something a little bit more exotic but also realistic would need to be developed. Turning to the Internet, I found just what I wanted – a blue and yellow, black collared lizard that normally lives in a desert environment. So for the rear legs and upper tail I used Lothern Blue and for the head and front legs Averland Sunset. For the fleshy belly I used Wraithbone. These are all colours that I’ve used on the Leman Russ Incinerator, so they should tie together.
I worked through the ten rough riders dry brushing the three base colours in turn. After each round by the time I had finished the tenth lizard, the first one was dry. Dry brushing is ideal for scaly creatures.
Once the base colours were applied and dry, I began to apply a wash to compliment each base colour. So Drachenhof Nightshade was used on the Lothern blue and Casondora Yellow on the Averland Sunset. For the belly, I wanted to add a bit of variable colour yet retain a fleshy look, so I randomly dabbed Carroburg Crimson over the Wraithbone.
This whole process took approximately 2 hours non-stop. Next will be patterned highlights on the scales and detailing of the claws and teeth, before I begin on the riders.


 Mubraxis Dustdogs Rough Rider - Base colours dry brushed and washed with complimentary colours. Next will be highlights and then focus on the riders.
Basing the Leman Russ Incinerator
As with previous tank projects, I’ve opted to make my own scenic base out of a 120mm diameter CD-ROM. Stick a piece of gaffer tape over both sides of the CD across the hole. Then apply a fairly thin coat of readymix Polyfilla. I want this to be a desert rather than an industrial scene, so there will be very little debris other than an old, broken-up, plastic skeleton horse embedded on one edge and a skull on another edge. The Polyfilla was left to dry overnight before spraying both sides with Averland Sunset. Again, this was allowed to dry and a fair coating of PVA glue was applied to the base before real children’s play sand was scattered across the base fairly thickly. A water based 3:1 Water:PVA was then soaked over the sand. Track imprints were pressed in to the wet sand and it was then allowed to dry.


 Leman Russ Incinerator based. Weathering by adding sand and metal chips will be applied when all the tanks come together. I also want to add a little lizard to the tank base to link with the native desert beasts that roam on Mubraxis and are used as mounts by the Rough Riders.


Tank ‘2’ - 2nd Armoured Division Mubraxis Dustdogs WIP
A fairly productive session today creating the Dustdogs Insignia, applying transfers and painting Sgt. Roach.
For the insignia, I drew around an upturned 25mm round base using a .005 black pen to get a circle on the hull. This was then blocked in using Blazing Orange. This process was then repeated on the other side of the hull. The circle required two coats of orange paint and was left to dry for a couple of hours while I got on with painting Sgt. Roach.
Once the orange was dry I was able to freehand sketch out the outline of the Pitbull dog using the Internet image for guidance. Again I replicated a reversed image on the other side of the hull. The dog’s face was painted with Wraithbone (two layers) on either side and again once dry finer details of the insignia were brought out with the use of the black pen. A border using Lothern Blue expanded the insignia and was highlighted with a band of Wraithbone. This was done in order to incorporate a rectangle at the top for the tank number to be applied.
Painting Roach was fun! The mini is so full of character that I wanted to make the conversions sympathetic and not overwhelming. Hence the right hand which normally had a knuckleduster now holds a grenade launcher. On any other standard sized trooper the grenade launcher would look heavy, but for Roach it’s like a pistol and remains in proportion to his size. I cut the handle down from a meltabomb and attached that to the closed left fist. As far as any extras, he has a gourd from the Bretonnian man at arms kit and a Space Marine litanies of faith on his left shoulder. I used colours that blended with the tank – Blazing Orange socks, Zandri Dust trousers, Wraithbone vest, Leadbelcher shoulder pads, Chaos Black leather, Shining Gold bling and Cadian Flesh. Skin was washed with Reikland Fleshshade, the vest washed with Drachenhof Nightshade, and Trousers washed with Yellow. Once dry, he was mounted onto the Turret.
Transfers used came from the Imperial Guard tank sheet, including the eagle insignia on the back of Roach’s vest. All transfers, once applied, were coated with ‘ardcoat.
Next up will be to build a desert base and matt varnish the transfers and finish with some weathering.
 Sergeant Patronius Roach and Tank No. 2 from the 2nd Armoured Division Mubraxis Dustdogs - Leman Russ Incinerator


 Sgt. Patronius Roach prepares to throw his meltabomb!
Leman Russ Incinerator Camouflage Painting WIP
Returning to the Leman Russ Incinerator, I wanted to create a ‘cracked’ camouflage pattern across the hull. This was achieved by dabbing Wraithbone in a curvy series of lines around 2-3mm wide. This was a fairly laborious task and I removed the turret to ensure I could constantly flip the tank over to follow the flowing direction of the camouflage stripes. I repeated the Wraithbone dabbing to provide a more solid layer.
Whilst the Wraithbone stripes dried, I was inspired to created a different crewman to the original one that I had planned. This was in part due to browsing the Forge World website to look for another tank, but clicking on Blood Bowl characters and immediately recognising that I had an unopened ‘Mighty Zug’ miniature somewhere which reminded me of the Nazi Mechanic played by the legend Pat Roach (RIP) in Indiana Jones and the Raiders of the Lost Ark. With a bit of converting, he will stand proud on the turret of the tank shouting orders!
Once the Wraithbone was dry, I used a .005 fine knibbed black pen to draw a line down the middle of the stripes to create the ‘crack.’
Next up will be the freehand Mubraxis Dustdogs insignia followed by transfers and painting ‘Sgt. Roach’.
 Leman Russ Incinerator camouflage.


Mubraxis Dustdogs Leman Russ Incinerator Painting WIP
I added a customised flamer from the Solar Auxilia Basilisk kit utilising fuel tanks from the Cadian Command squad kit and the standard search light to the turret of the Leman Russ Incinerator.
The tank was them sprayed white to provide a foundation for a second spray of Averland Sunset (which I think is now OOP from GW). Once dry I was able to start with the tracks using Leadbelcher and a brown wash of Griffone Sienna. Whilst that dried, I highlighted elements on the cannon and flamer and lascannon with Leadbelcher and Shining Gold. The silver foundation was washed with blue Drachenhof Nightshade while the gold was washed with Carroburg Crimson.
The whole tank was then washed with Cassandora yellow.


 Leman Russ Incinerator - start of the fine detailing such as Nickel Oxide on the cannon and ‘ardcoat on the search light lens. Next will be camouflage and the freehand Mubraxis Dustdogs insignia
Mubraxis Dustdogs Leman Russ Incinerator construction
So, having cleaned the Leman Russ Battle tank and Chimera with warm water and cotton wool, I prepared and cleaned the resin parts from the Forge World Leman Russ Incinerator in warm but soapy water to remove the mould greasing agent. I used a standard kitchen washing up liquid for this job and then rinsed and dried with paper kitchen towels.
The kit looks really interesting with a very detailed and intricate turret. The kit comes in 14 parts including the option of having either a hull mounted lascannon or heavy bolter. It looks like for gaming purposes you could leave this hull gun unglued to switch over as it slides into a front slot, but I’m going to glue in the lascannon. The incerator gun needs to be glued in to its mounting on the turret… so be wary of what angle you want to set it at. The main elements were pretty easy to put together with the handy pictorial guide, although there is a lot of excess moulding flashing to remove, especially at the rear of the upper hull component.
In fact the only real trouble I had was with the plastic components. For some reason that I’ve not figured out yet I had a frustrating time trying to fit the tracks in and after a 30 minute gluing and unsticking session ending in an expletive I went off and watched Wycombe Wanderers thrash Fleetwood Town 4-1 in the League 1 play offs and returned to the tank afterwards and all the parts just came together without any issue! Mystery?
I also built a crewman from a FW Renegade Militia Enforcer leader body and a pair of Catachan legs. I’ve toyed with a pointing arm and a standard bearer’s arm and I’m leaning towards the latter so that I can incorporate the standard as part of the tank and the crew is using the pole as support.
Soon be ready for painting…
 Leman Russ Incinerator constructed and joining the painting queue. Note I needed a little liquid green stuff to fill in a couple of gaps between the resin upper hull and the plastic sides towards the rear of the tank on both sides due to slight warping of the resin.