




Johns Zaku Painting Showcase Entry


Recommendations: 49
About the Project
This is my Project for my entry to Gundam Assemble's Zaku Online Painting Showcase. A great opertunity to get my hands on a Gundam Assemble model kit and see what I can do with it.
Related Game: Gundam Assemble
Related Company: Bandai
Related Genre: Science Fiction
This Project is Active
Gloss, ink, chipping, weathering!
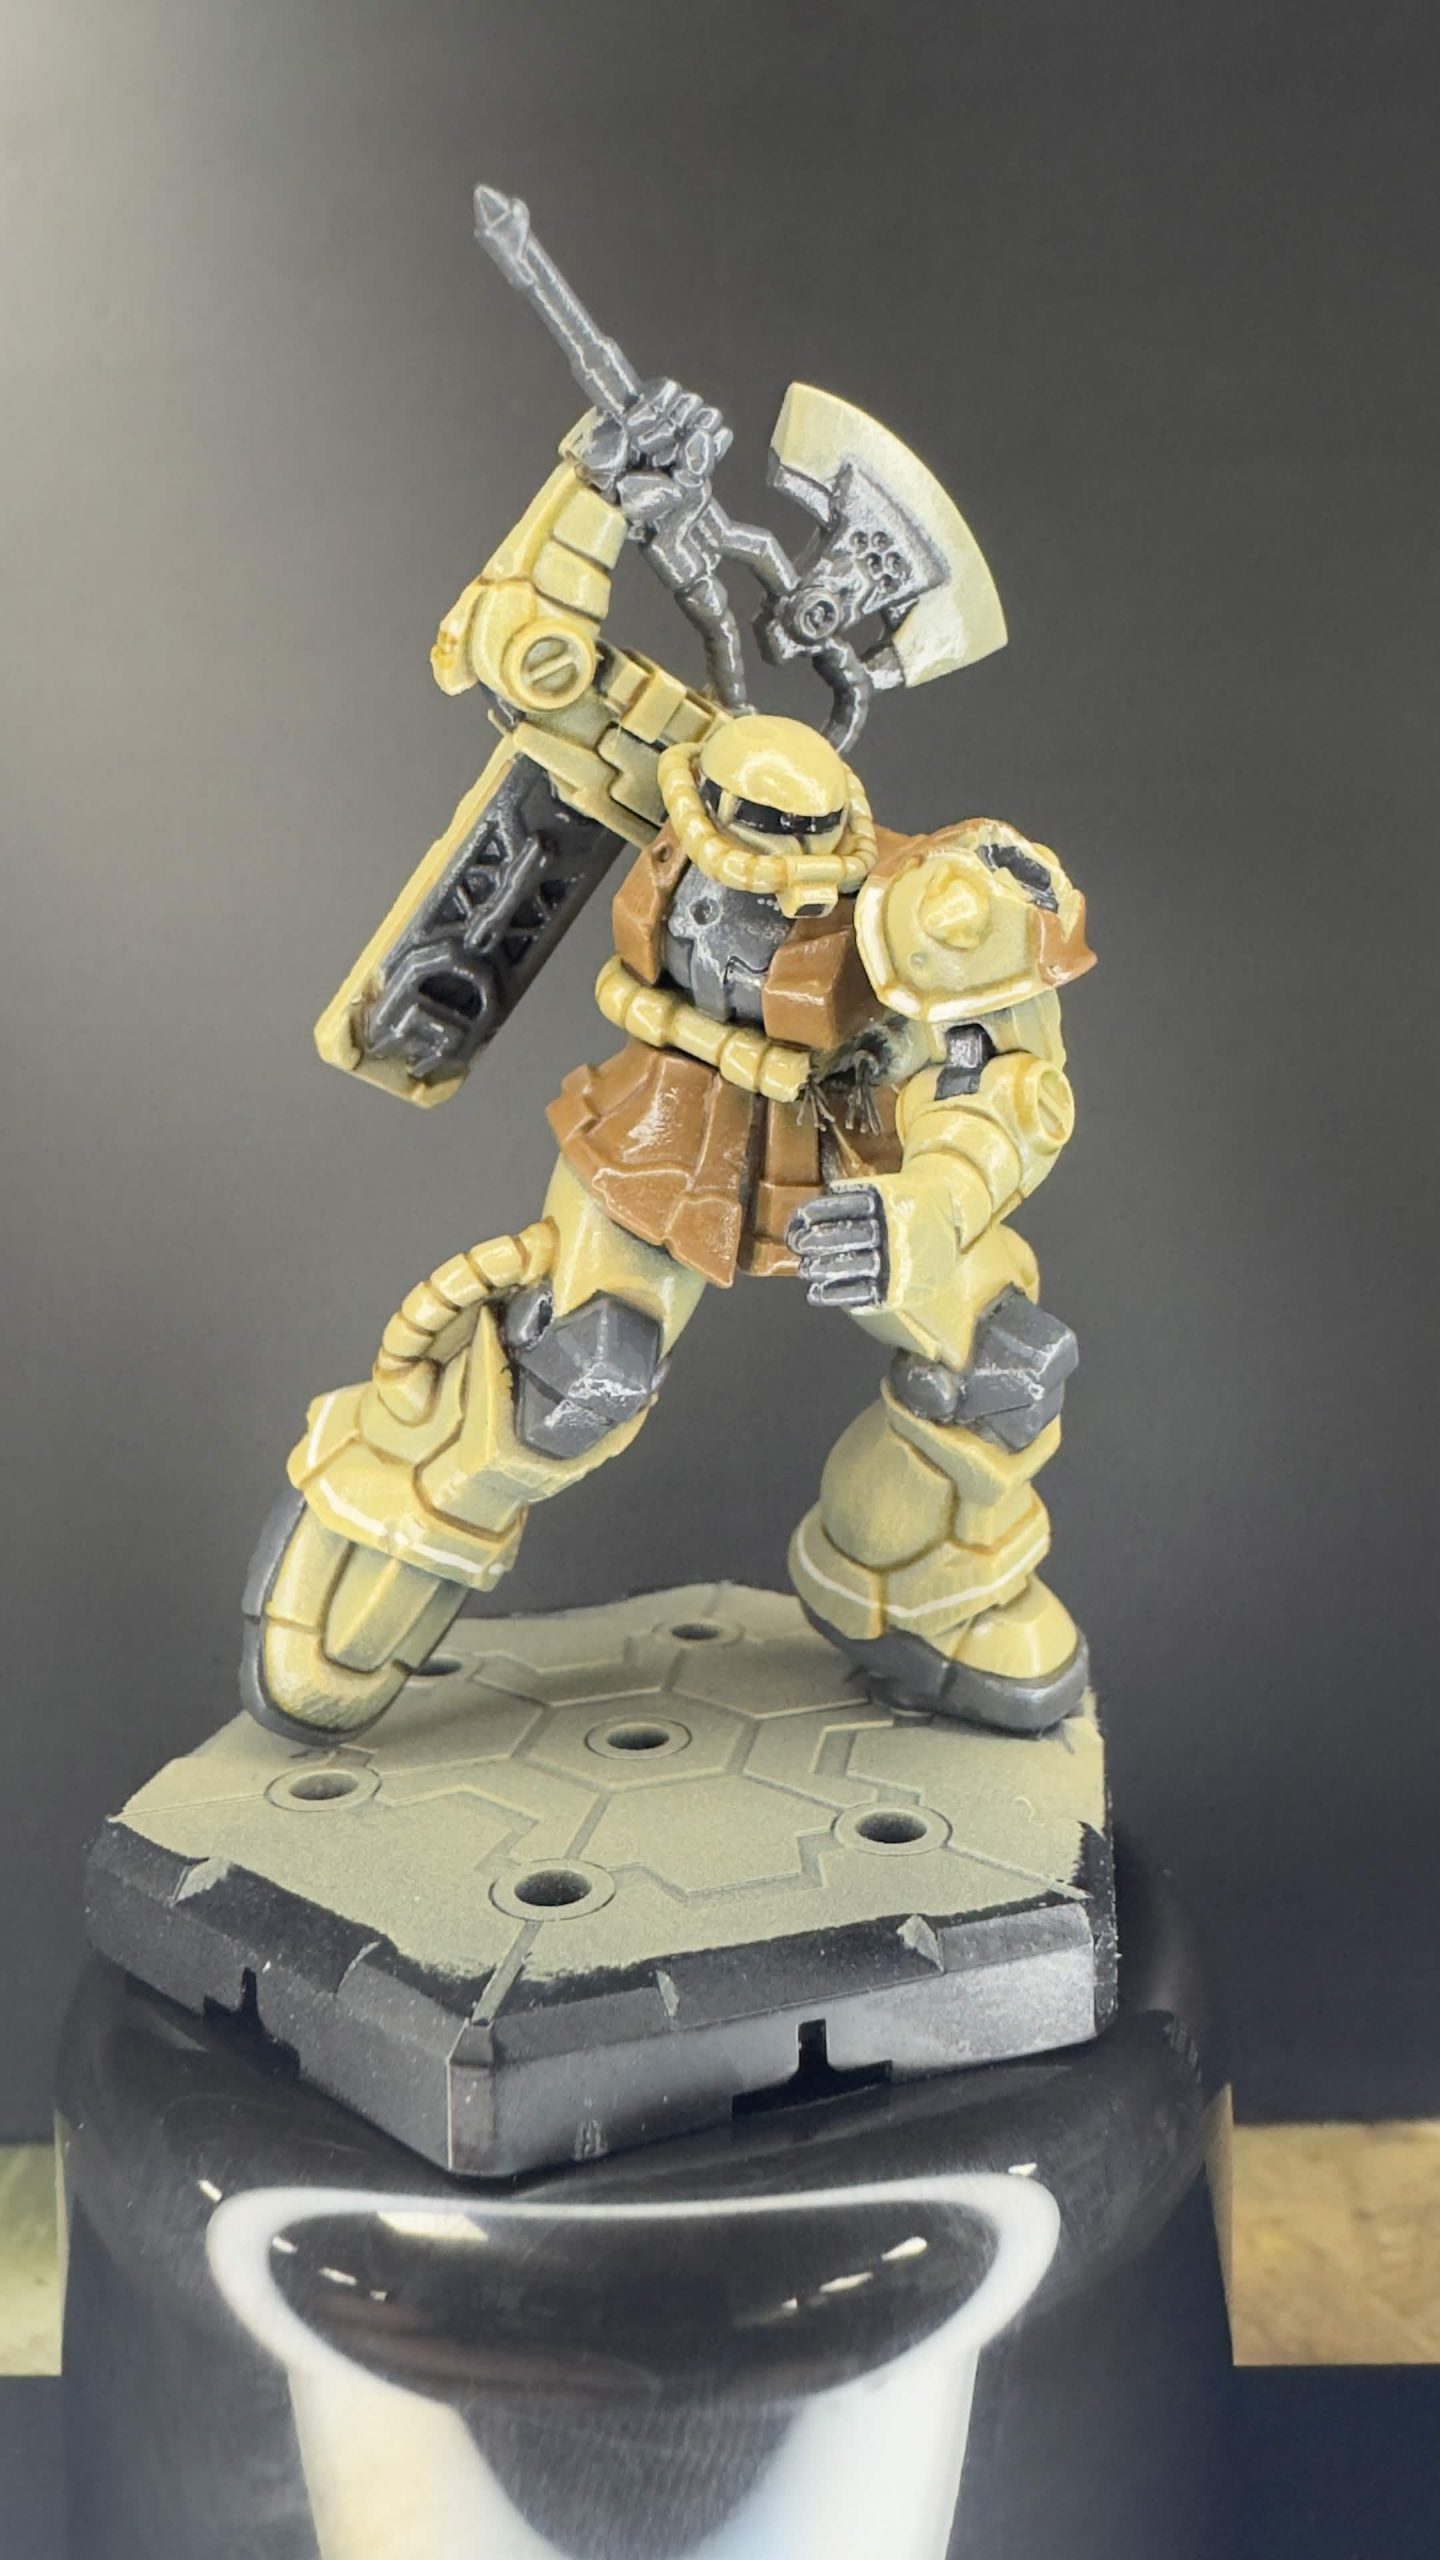
Next was three coats of gloss varnish. I used Citadel Ardcoat thinned and appliued through an airbrush.
Once that was dry (and it took a while) I gave the model a pin wash with GSW Transparent Brown Ink. Trying to warm up the shaded areas and make the panel lines look a little more prominent.
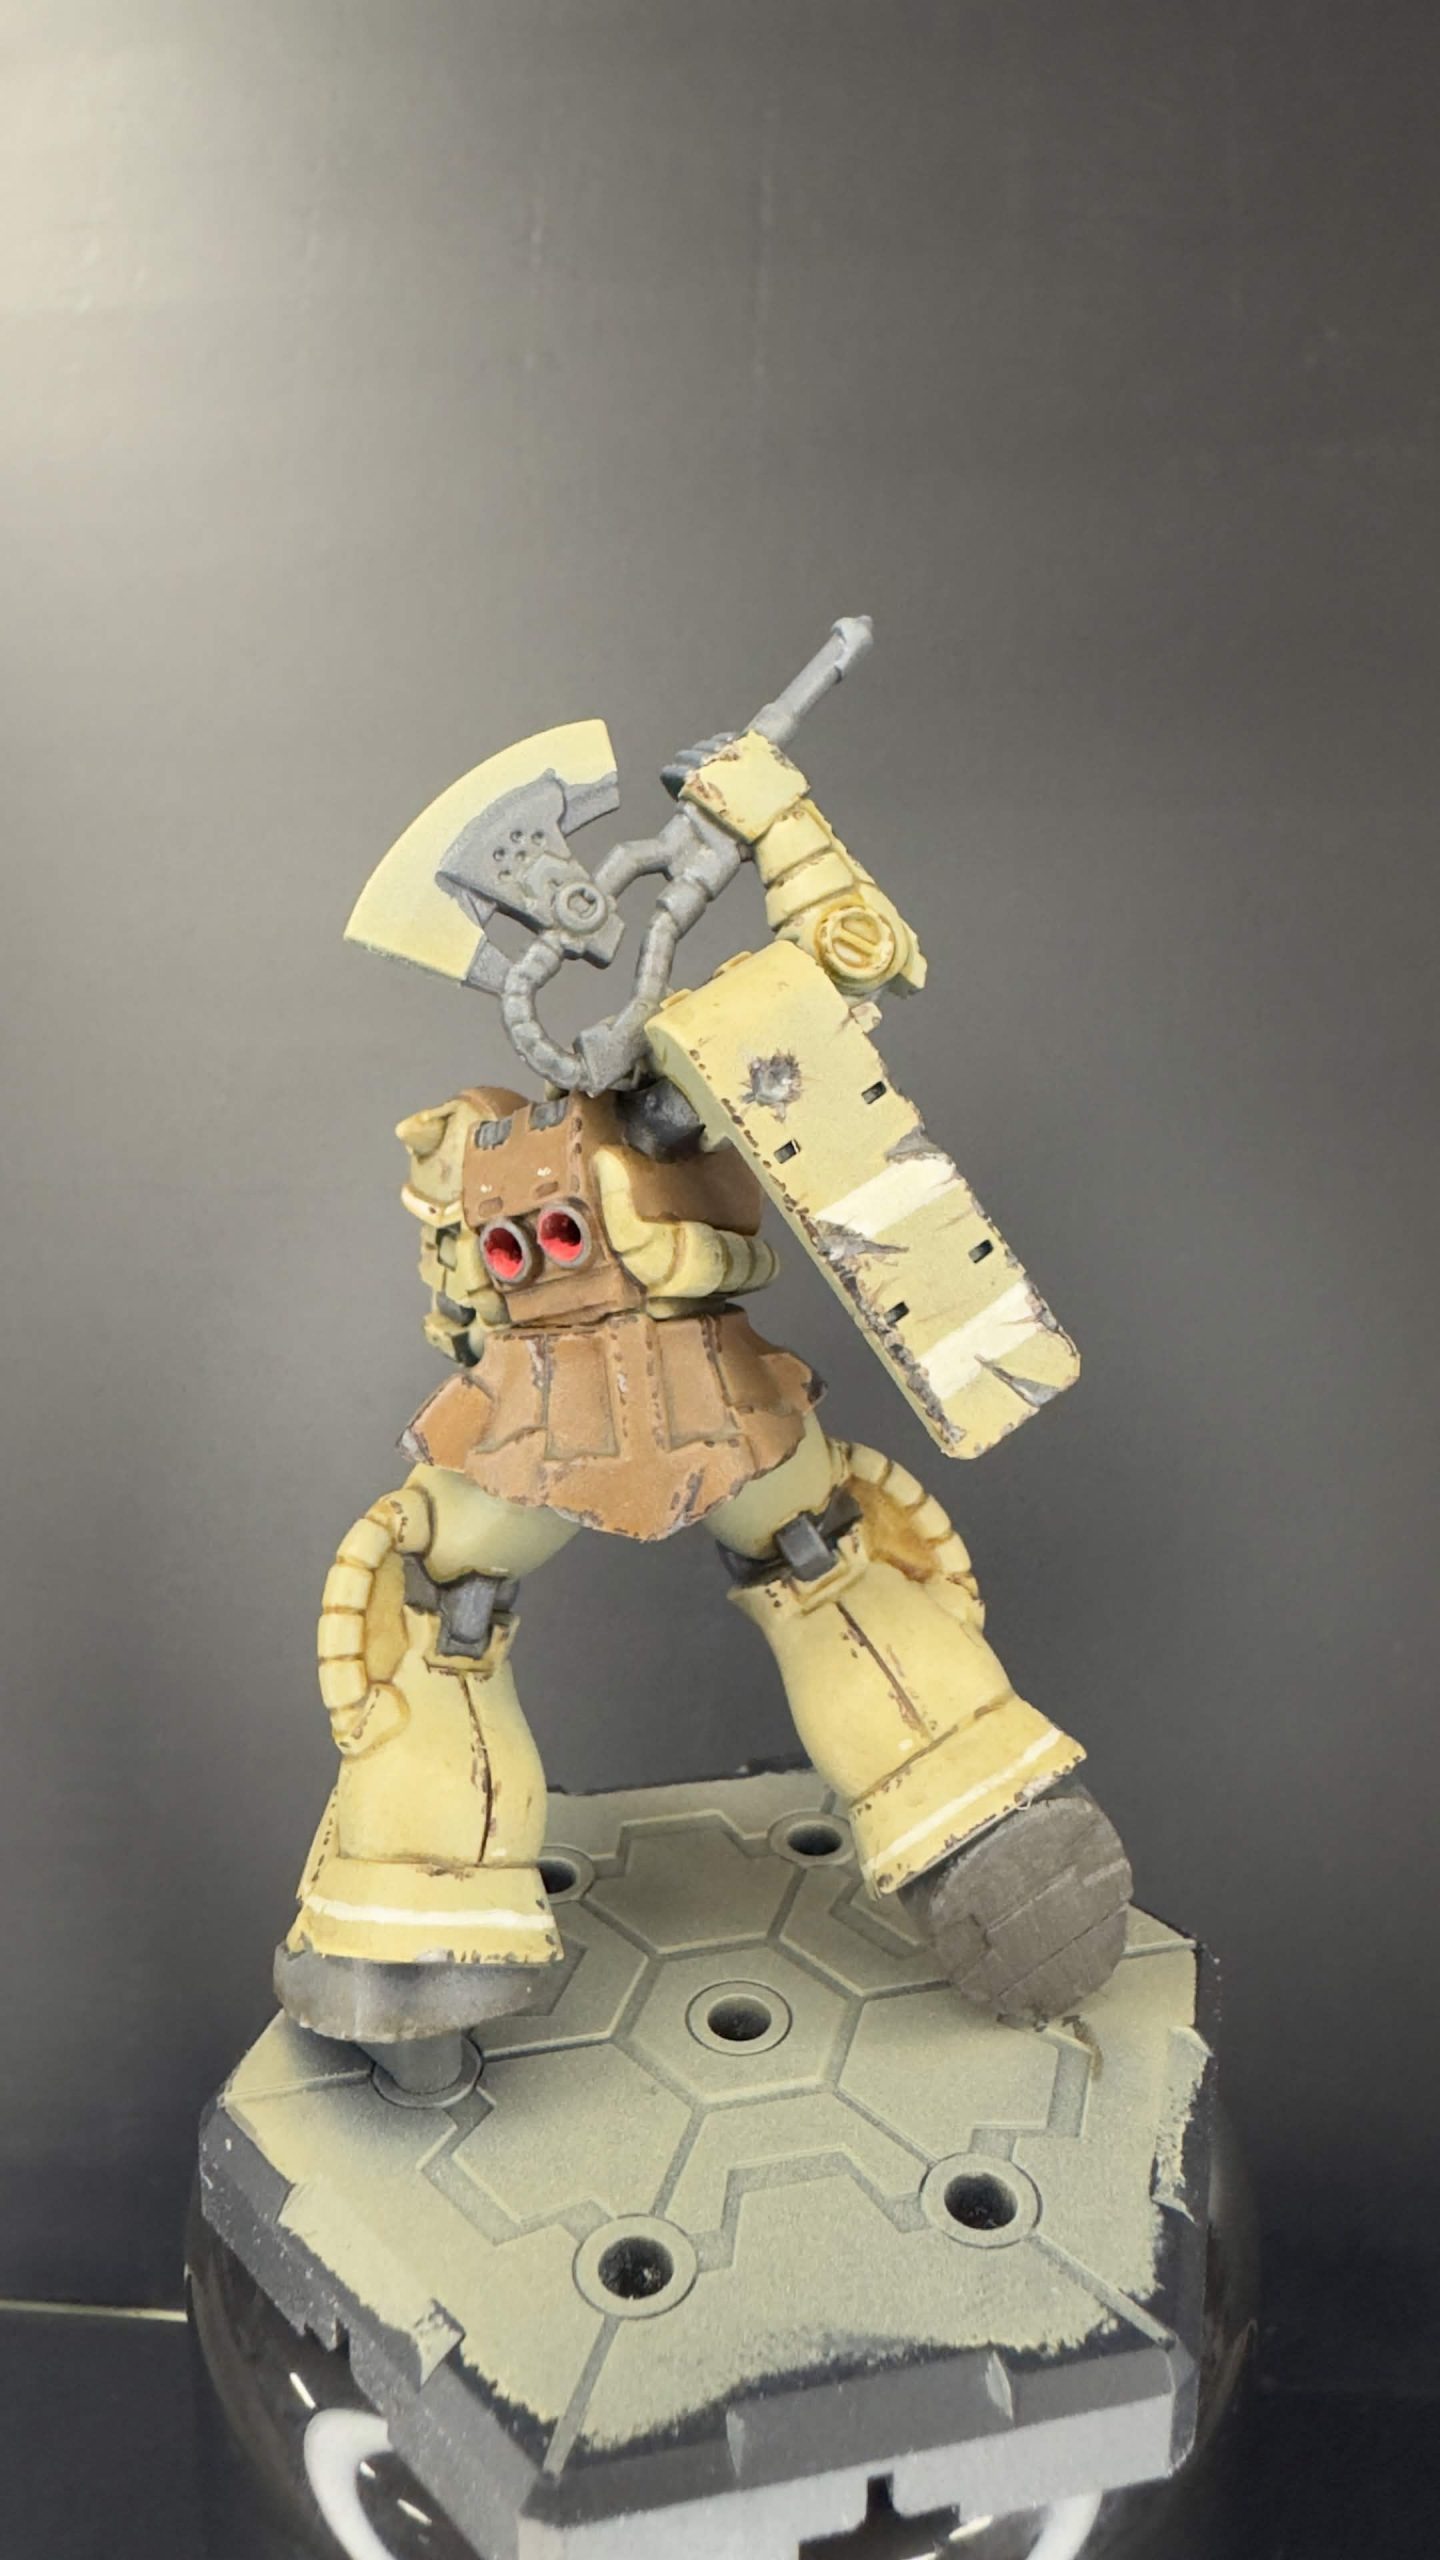
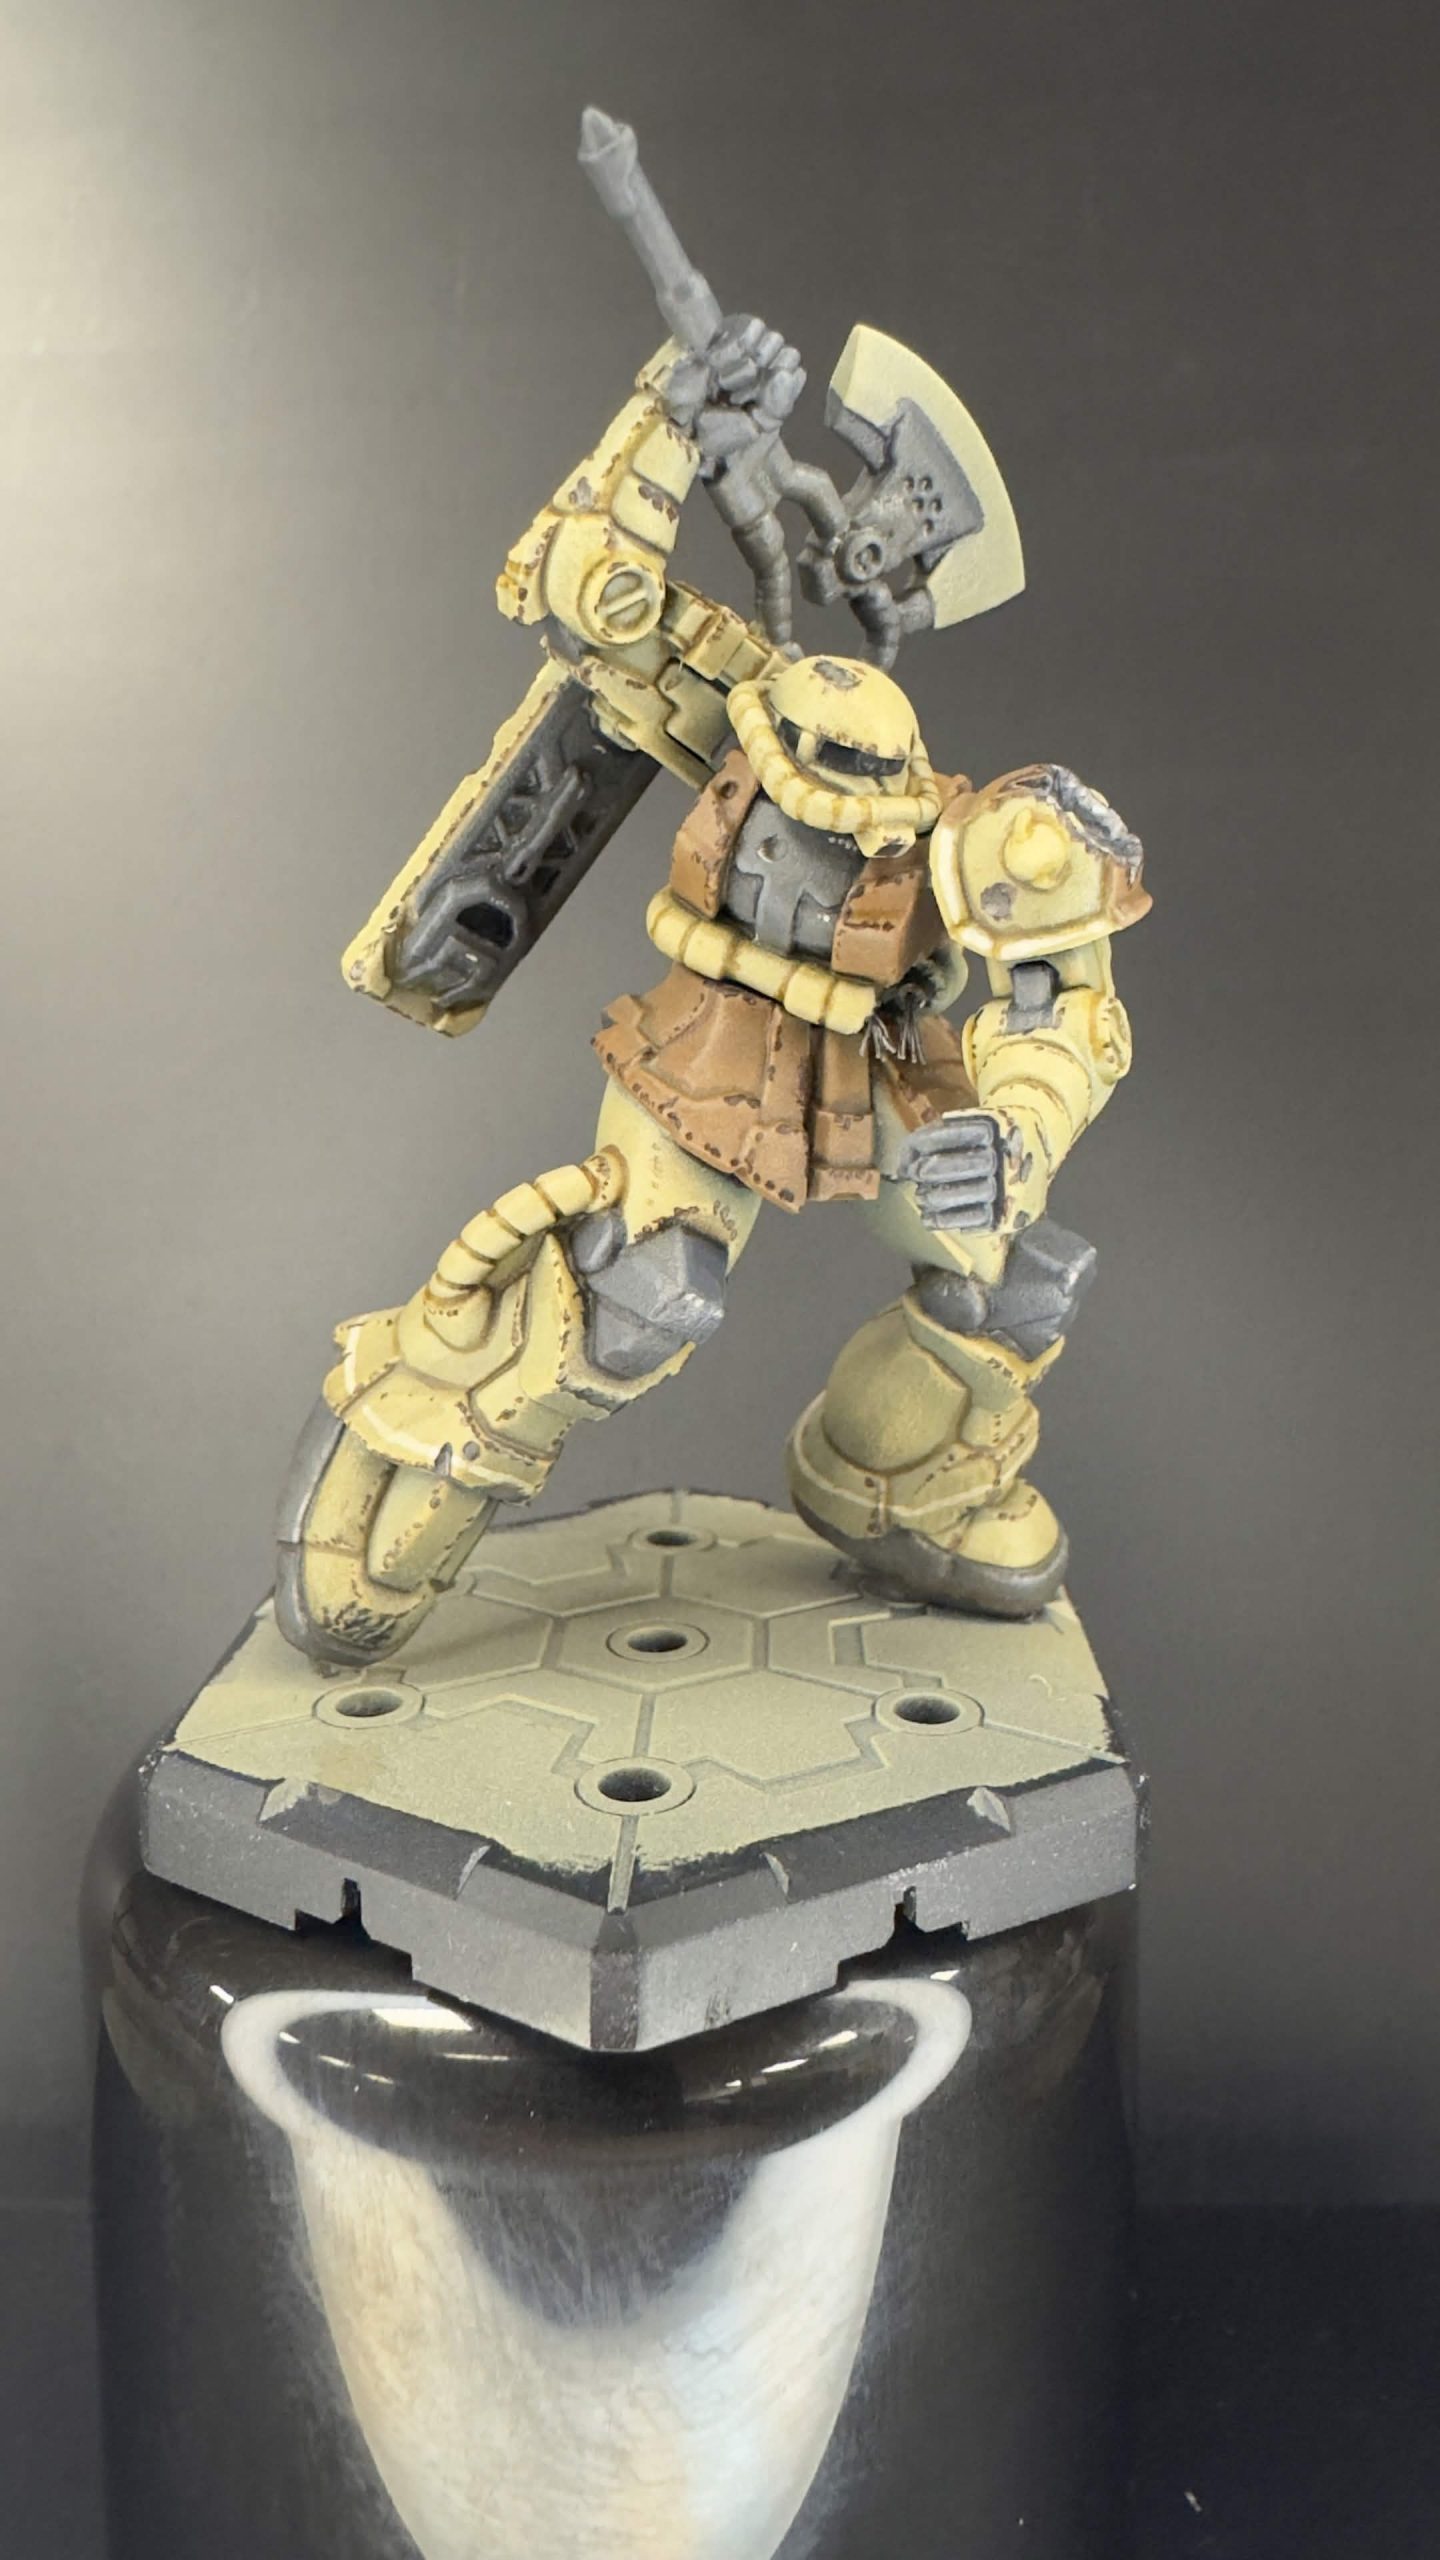
There’s a lot to explain here. I did a lot of steps between photos so here we go..
used Rinox Hide as my chipping colour of choice and applied it with a 5/0 brush. I then took all the battle damage areas and used Strap Grey to paint them in.
After that I mixed 50/50 Strap Grey and Gunmetal to fill the majority of the damaged areas before using straight Gunmetal to add a little bit of a bare metal shimmer.
I then started putting on some enamel washes.
AK Atmospheric spaceship dirt was applied all over and allowed to settle to add some dust and dirt buildup.
AK Fresh mud on the underside and sides of the feet.
Some Pure Red on the inside of the backpack thrusters with some Slaughter Red Speed Paint to force some shadow into the thrusters.
What I have now is something that looks more heavy and used. I can;t wait to paint that red eye lense…but that’ll be my reward for the next few hours of layering in some highlights and tightening up some of the chipping effects.
Blocking colours and markings. ...maybe some highlighting....a lot.
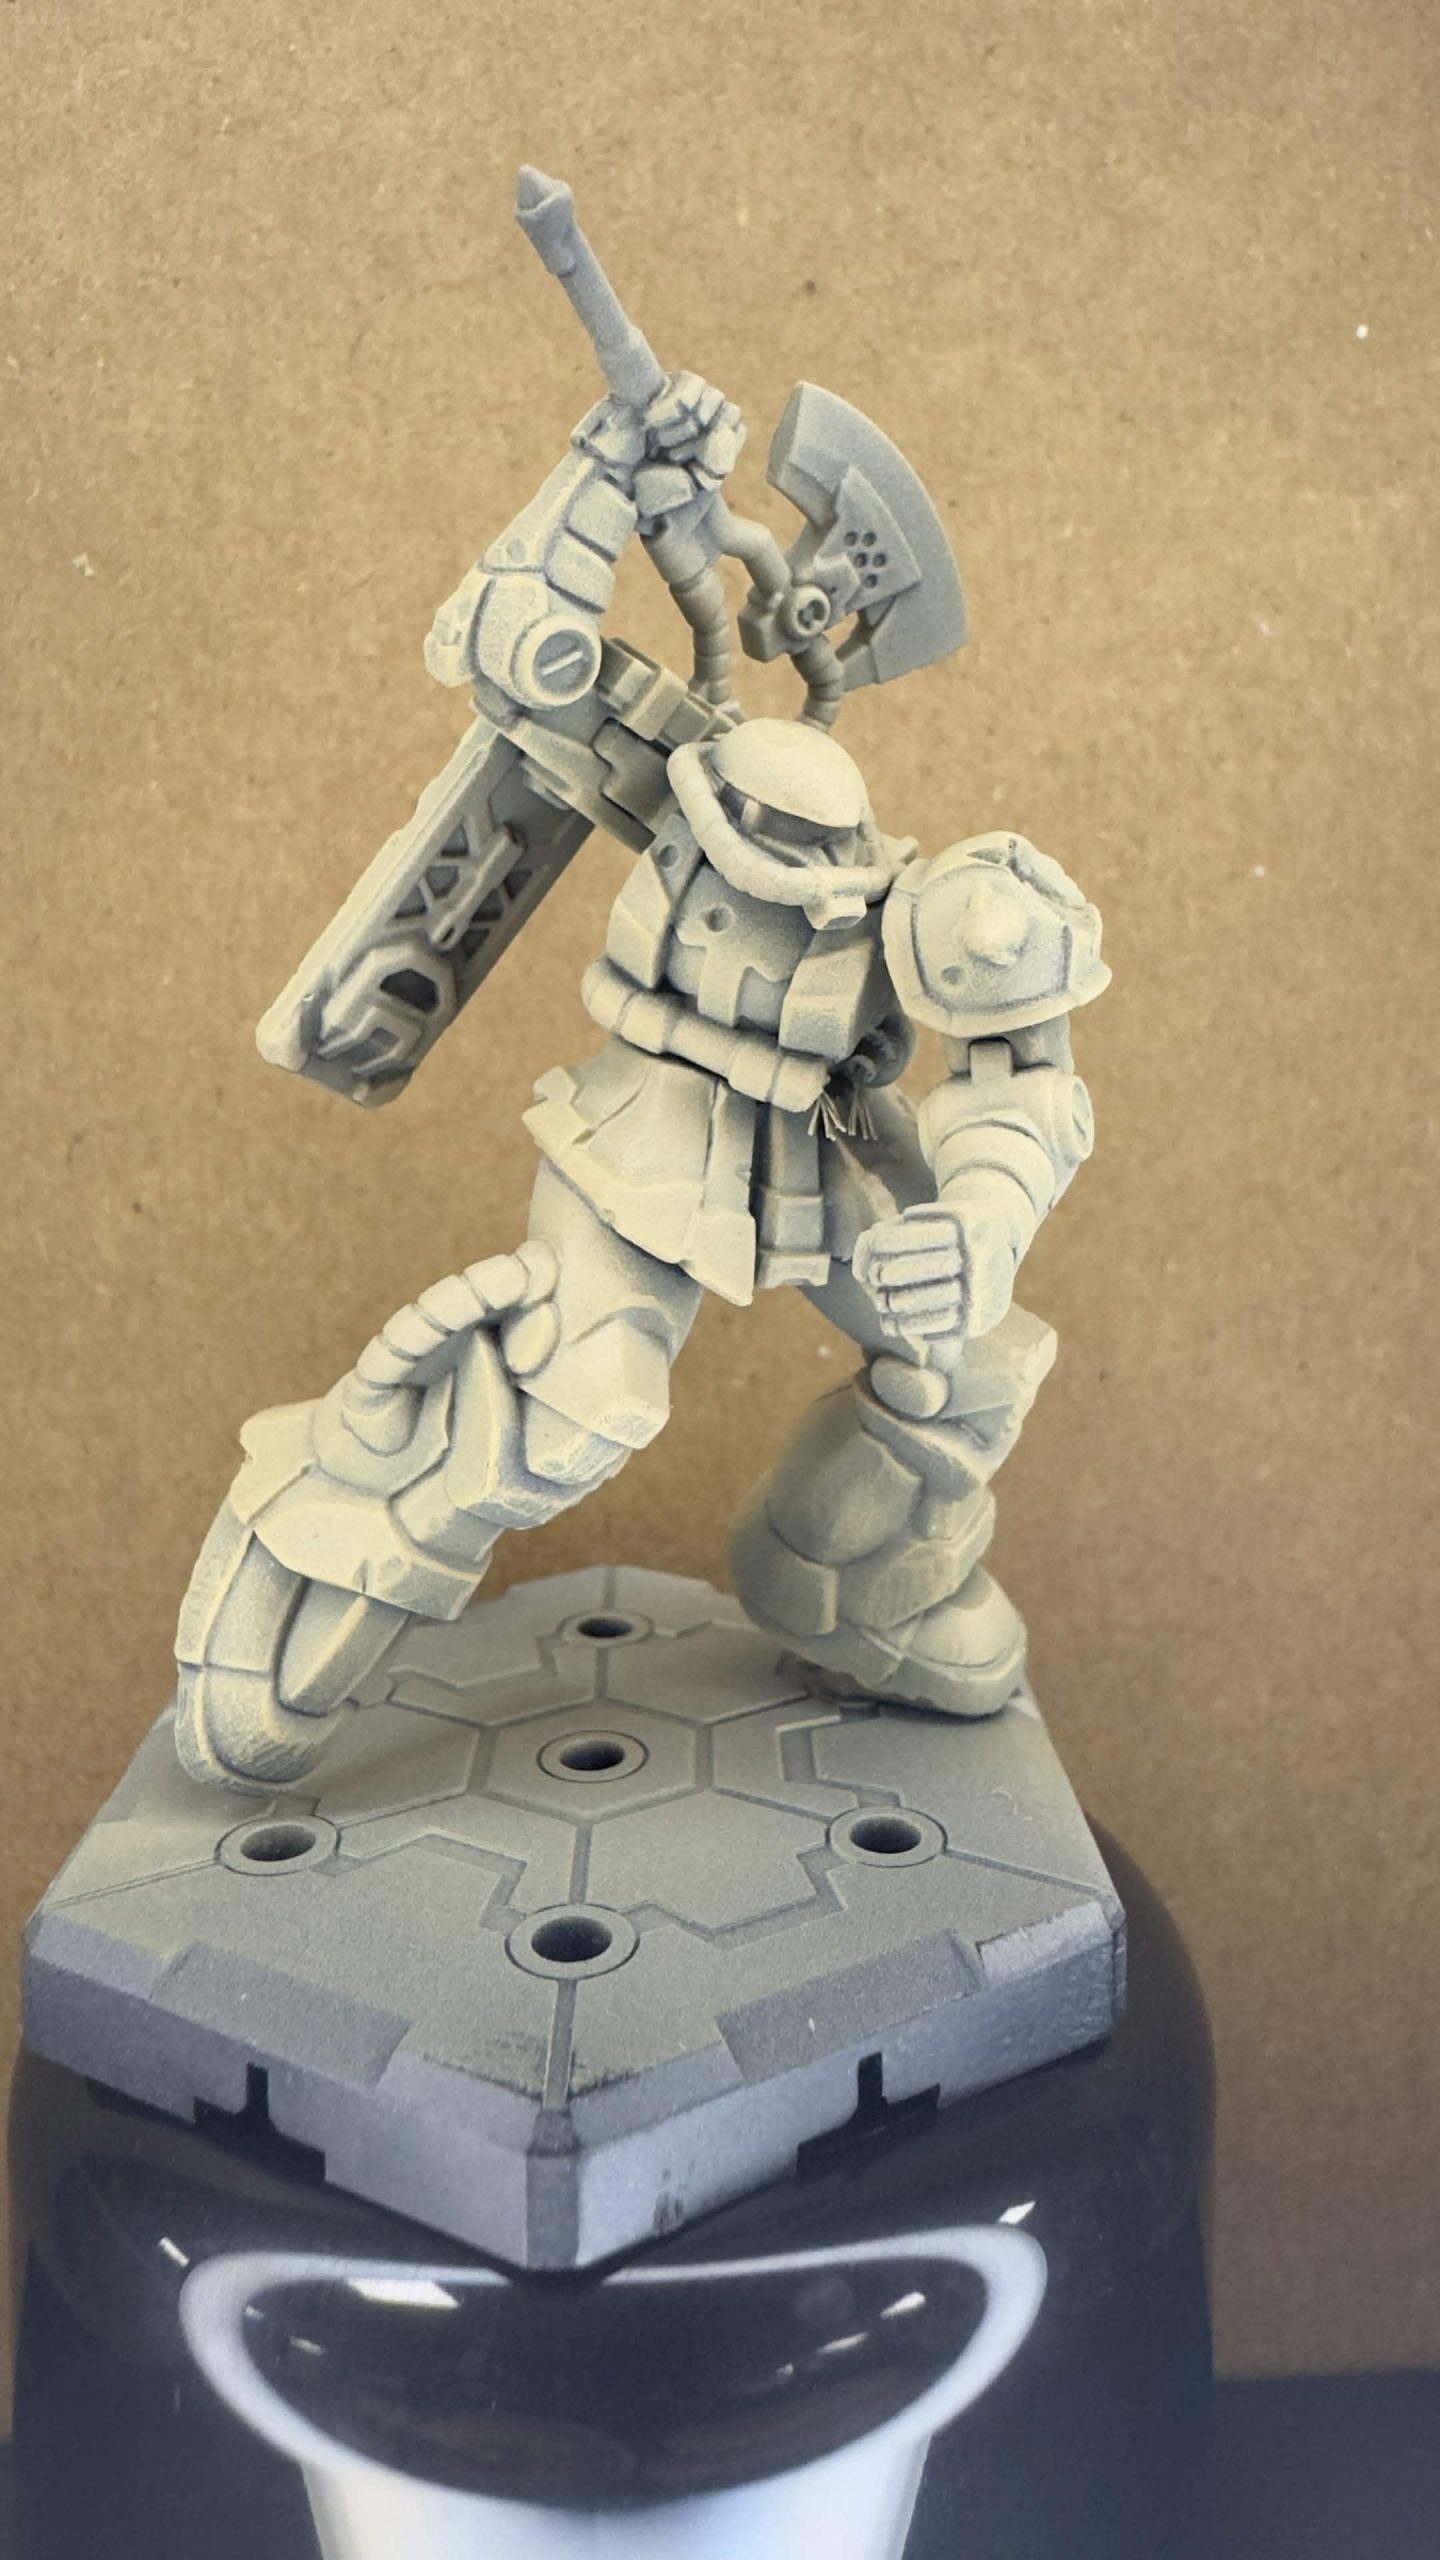 Army Painter Air, thinned roughly 4-1 and applied in three layers, adding two drops of Worn Stone on each application.
 Im glad, at this point, that all my preshading work wasn’t obliterated with my generally hamfisted airbrushing! So I have a good looking base to work up from.
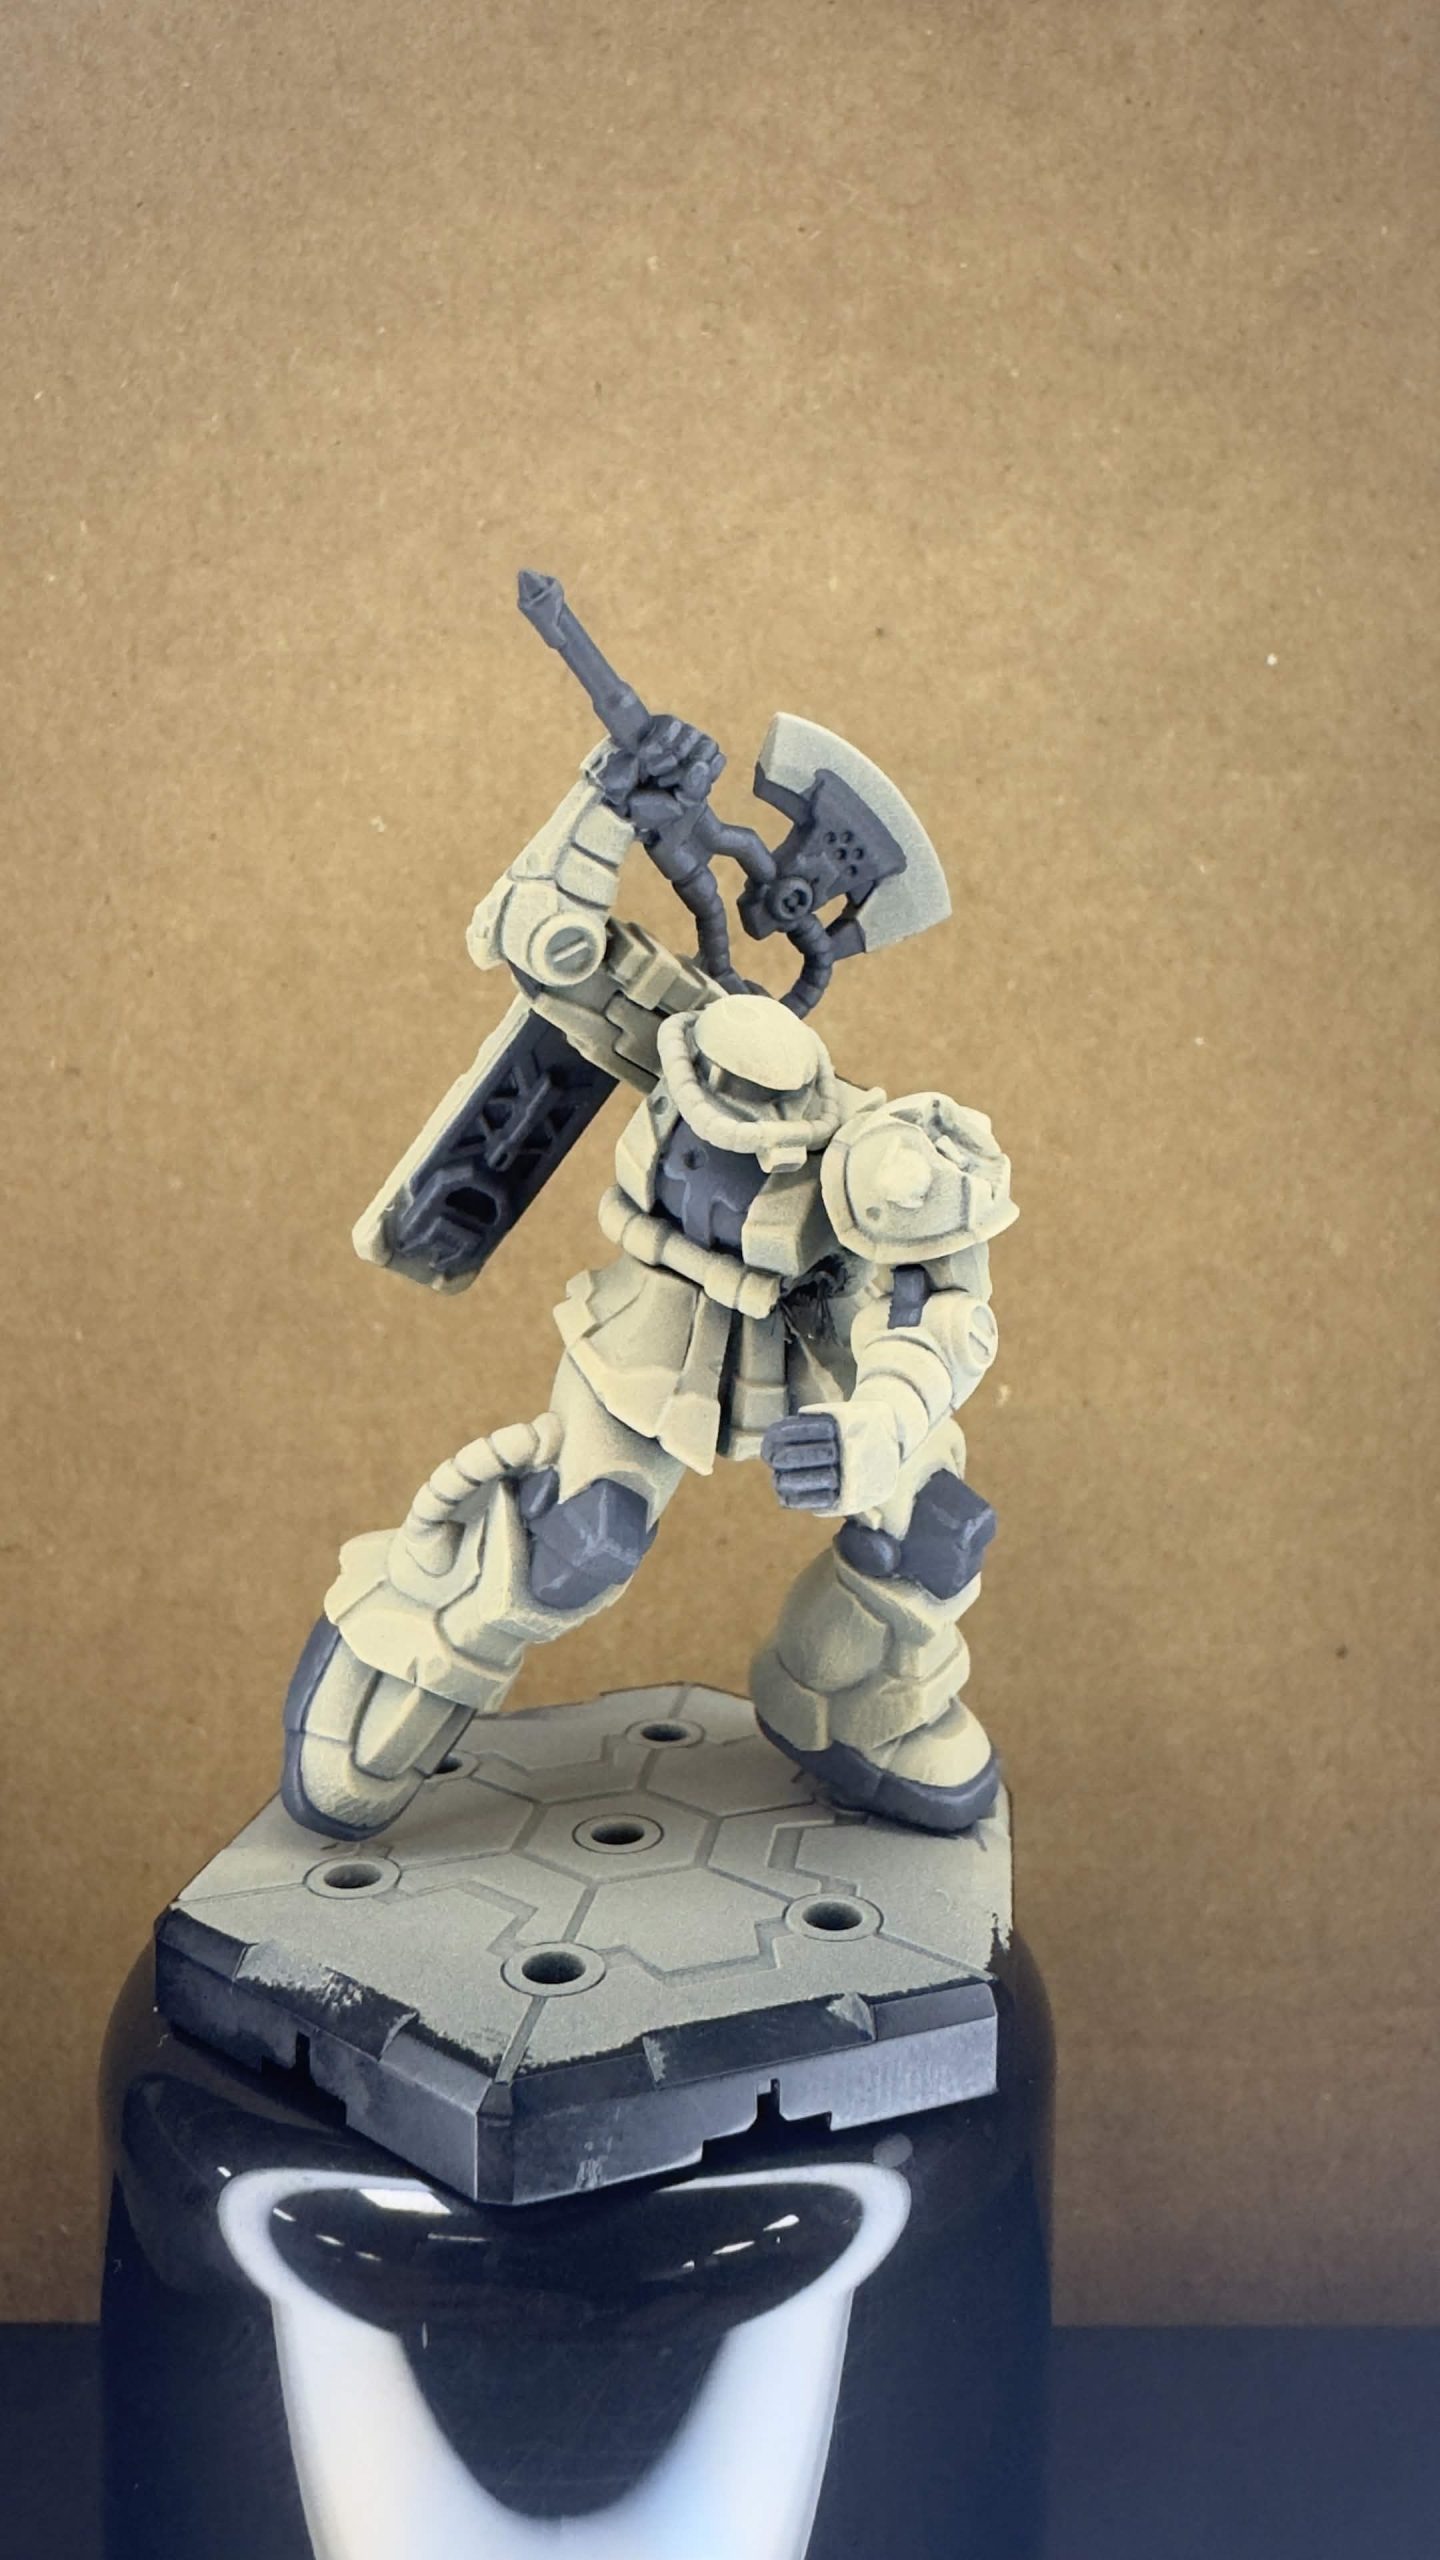
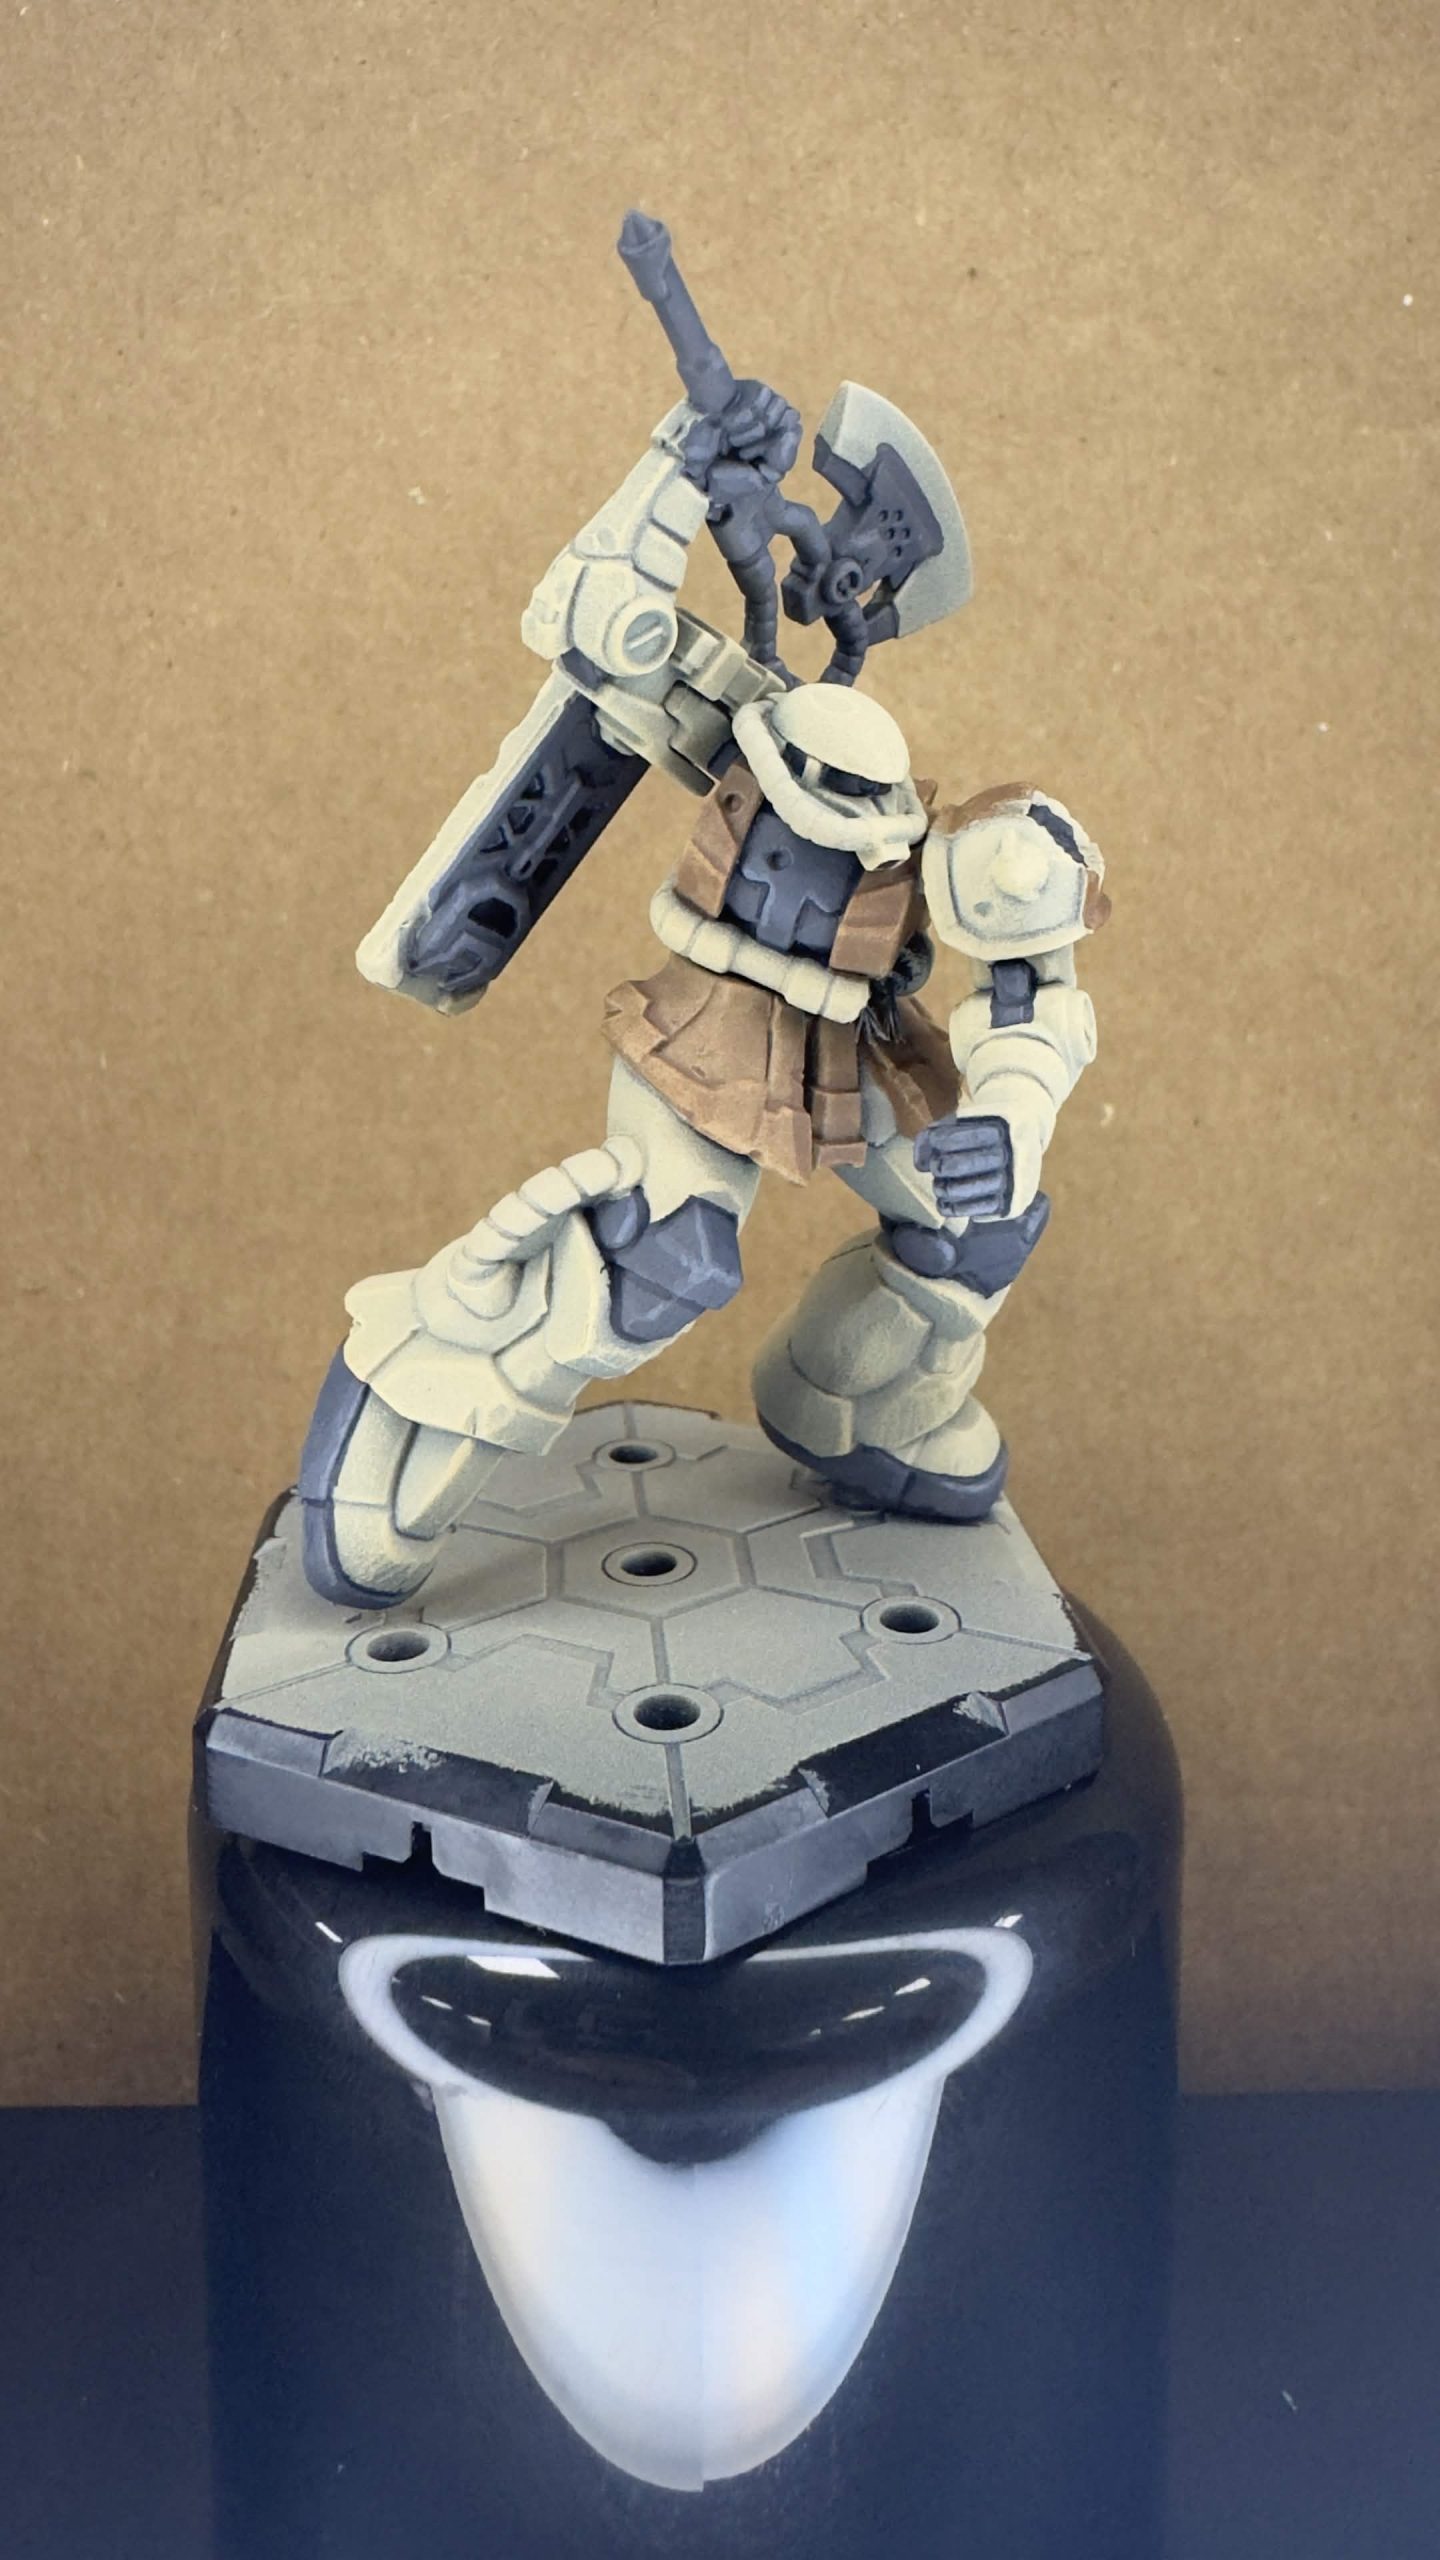
Using Army Painter Historical “Strap Grey” watered down and applied thinly for the mechanical and trim areas gave a nice, soft finish, and adding Worn Stone to the colour to bring up my highlights, which also “warms” the colour and softens the contrast.
After that, the same process was done with the brown armour areas, using Army Painter Air Leather brown and, yep oyu guessed it, Worn Stone to mix up the Highlights.
All highlighting is done in three layers, going sharper on each step. I could do a third, but I feel my “realism” idea would start to look cartoony.
Markings!
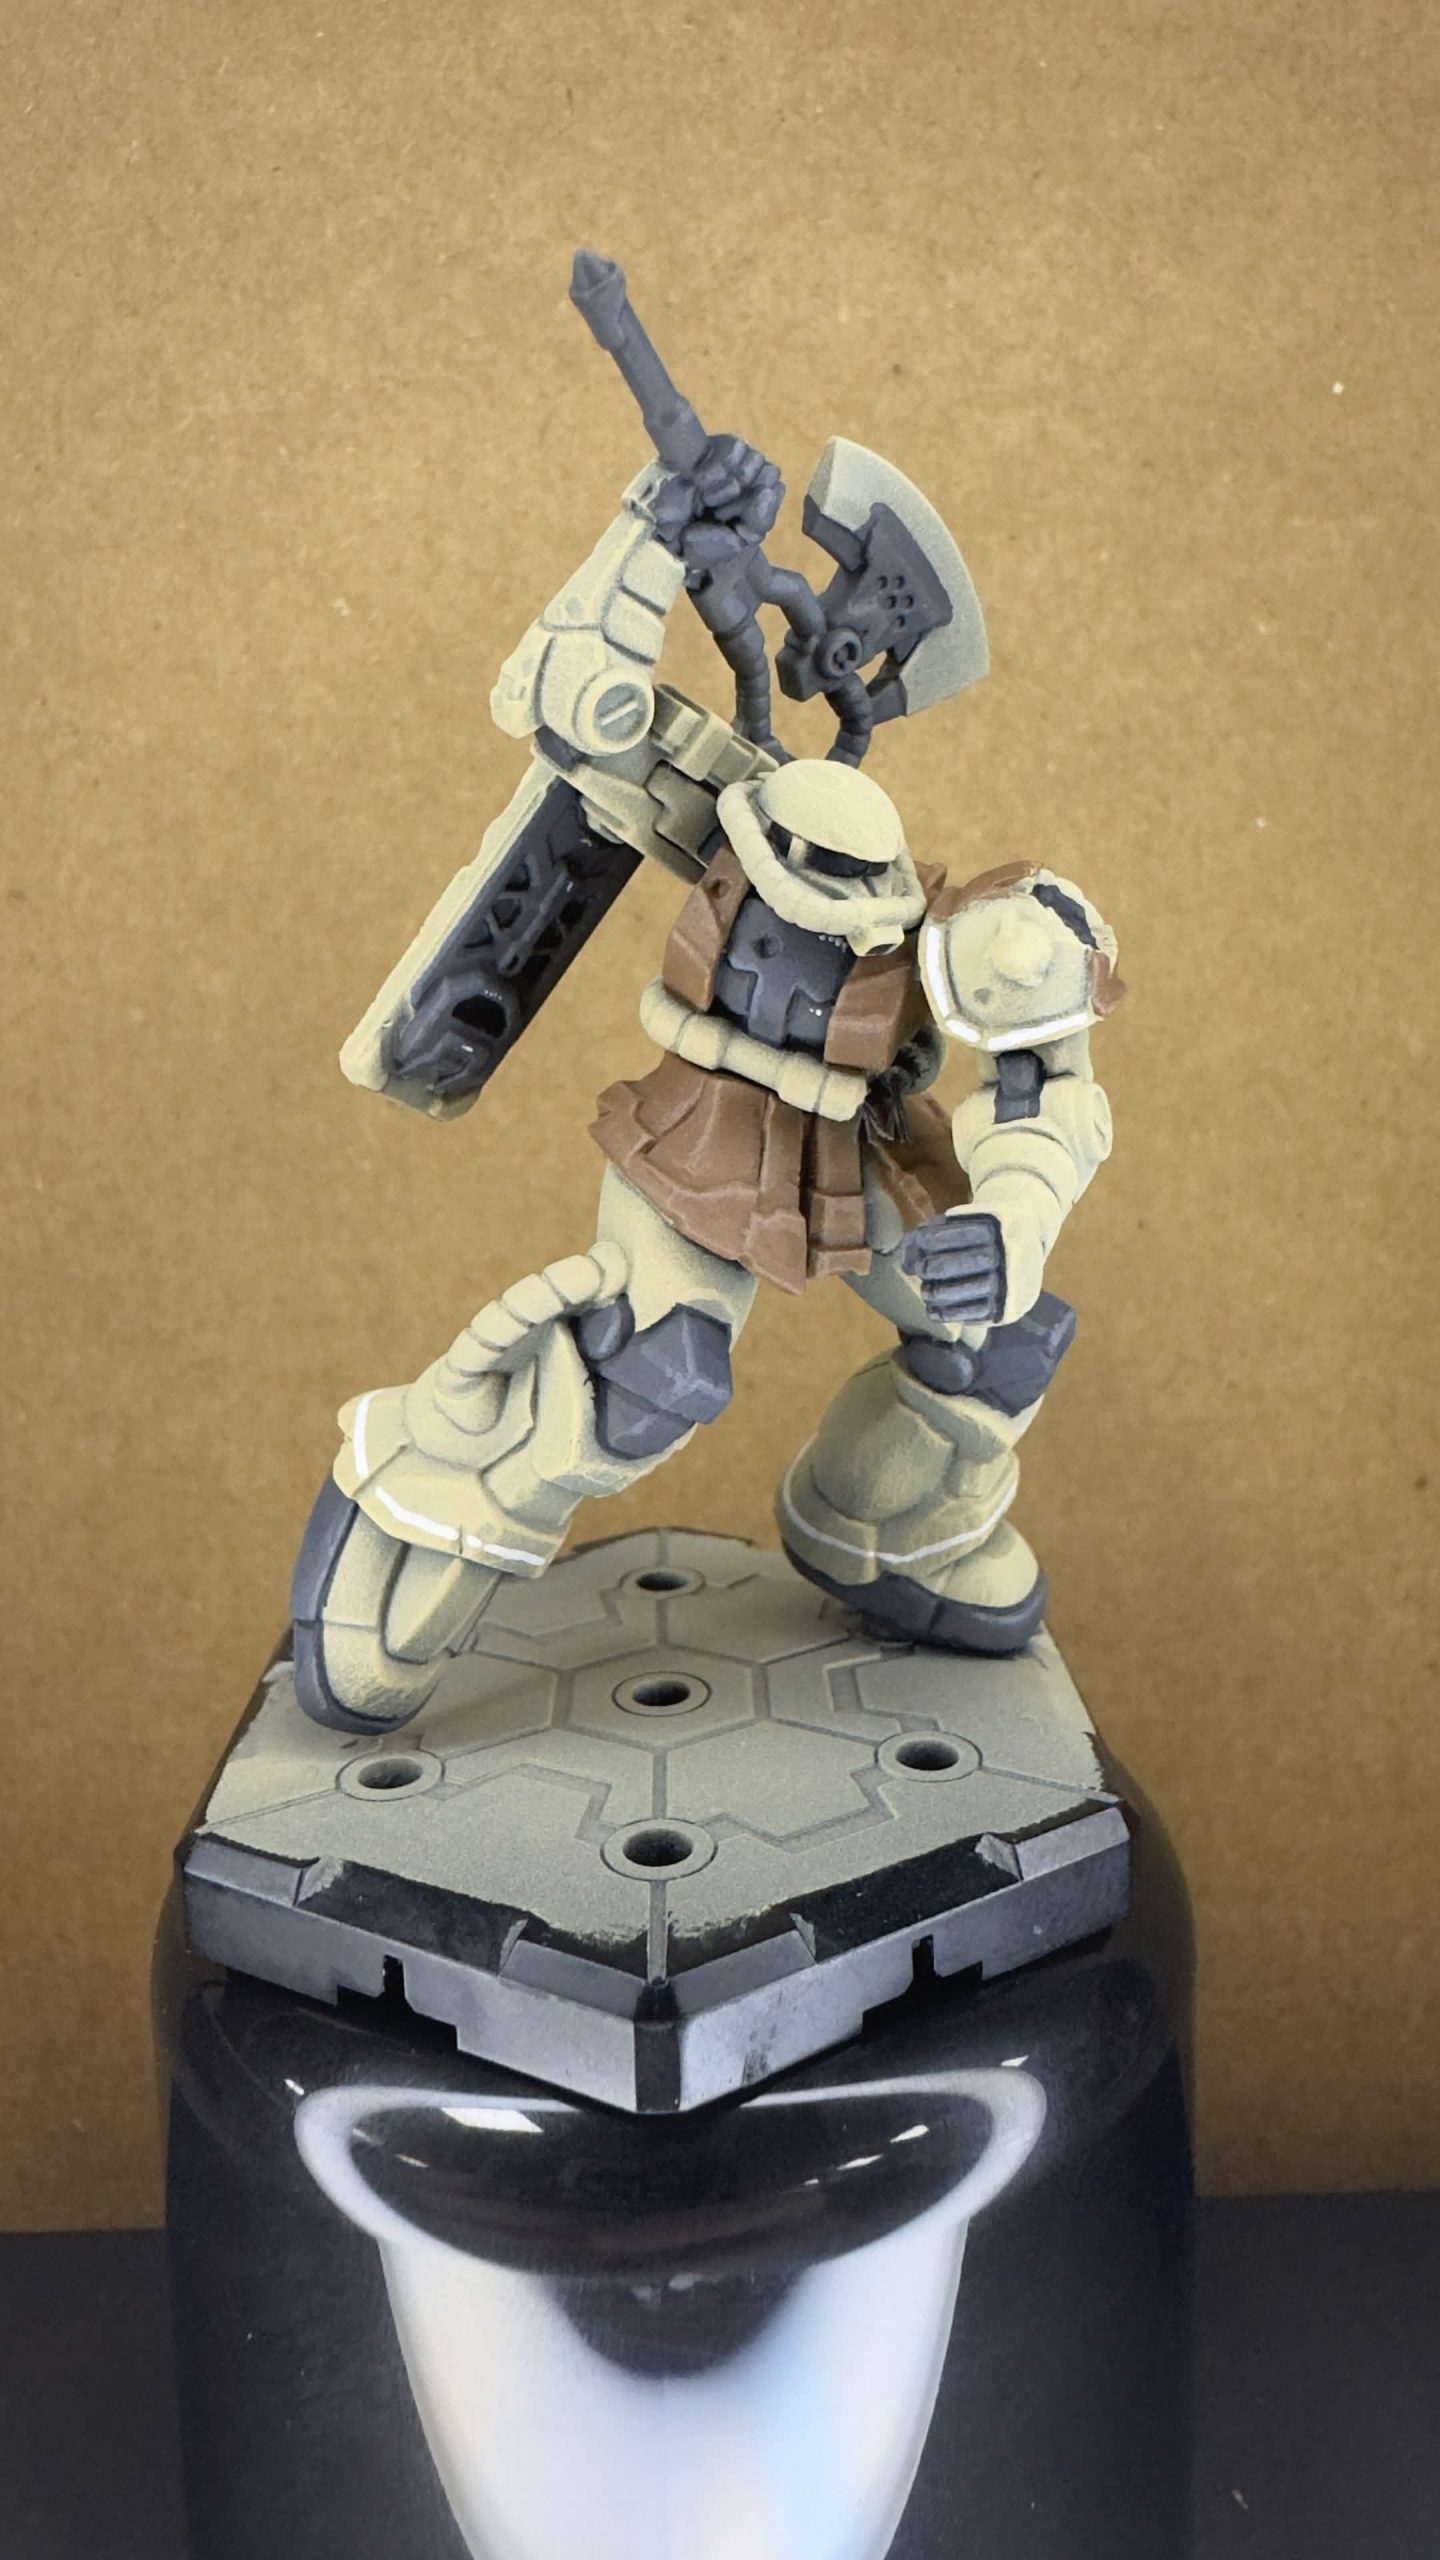
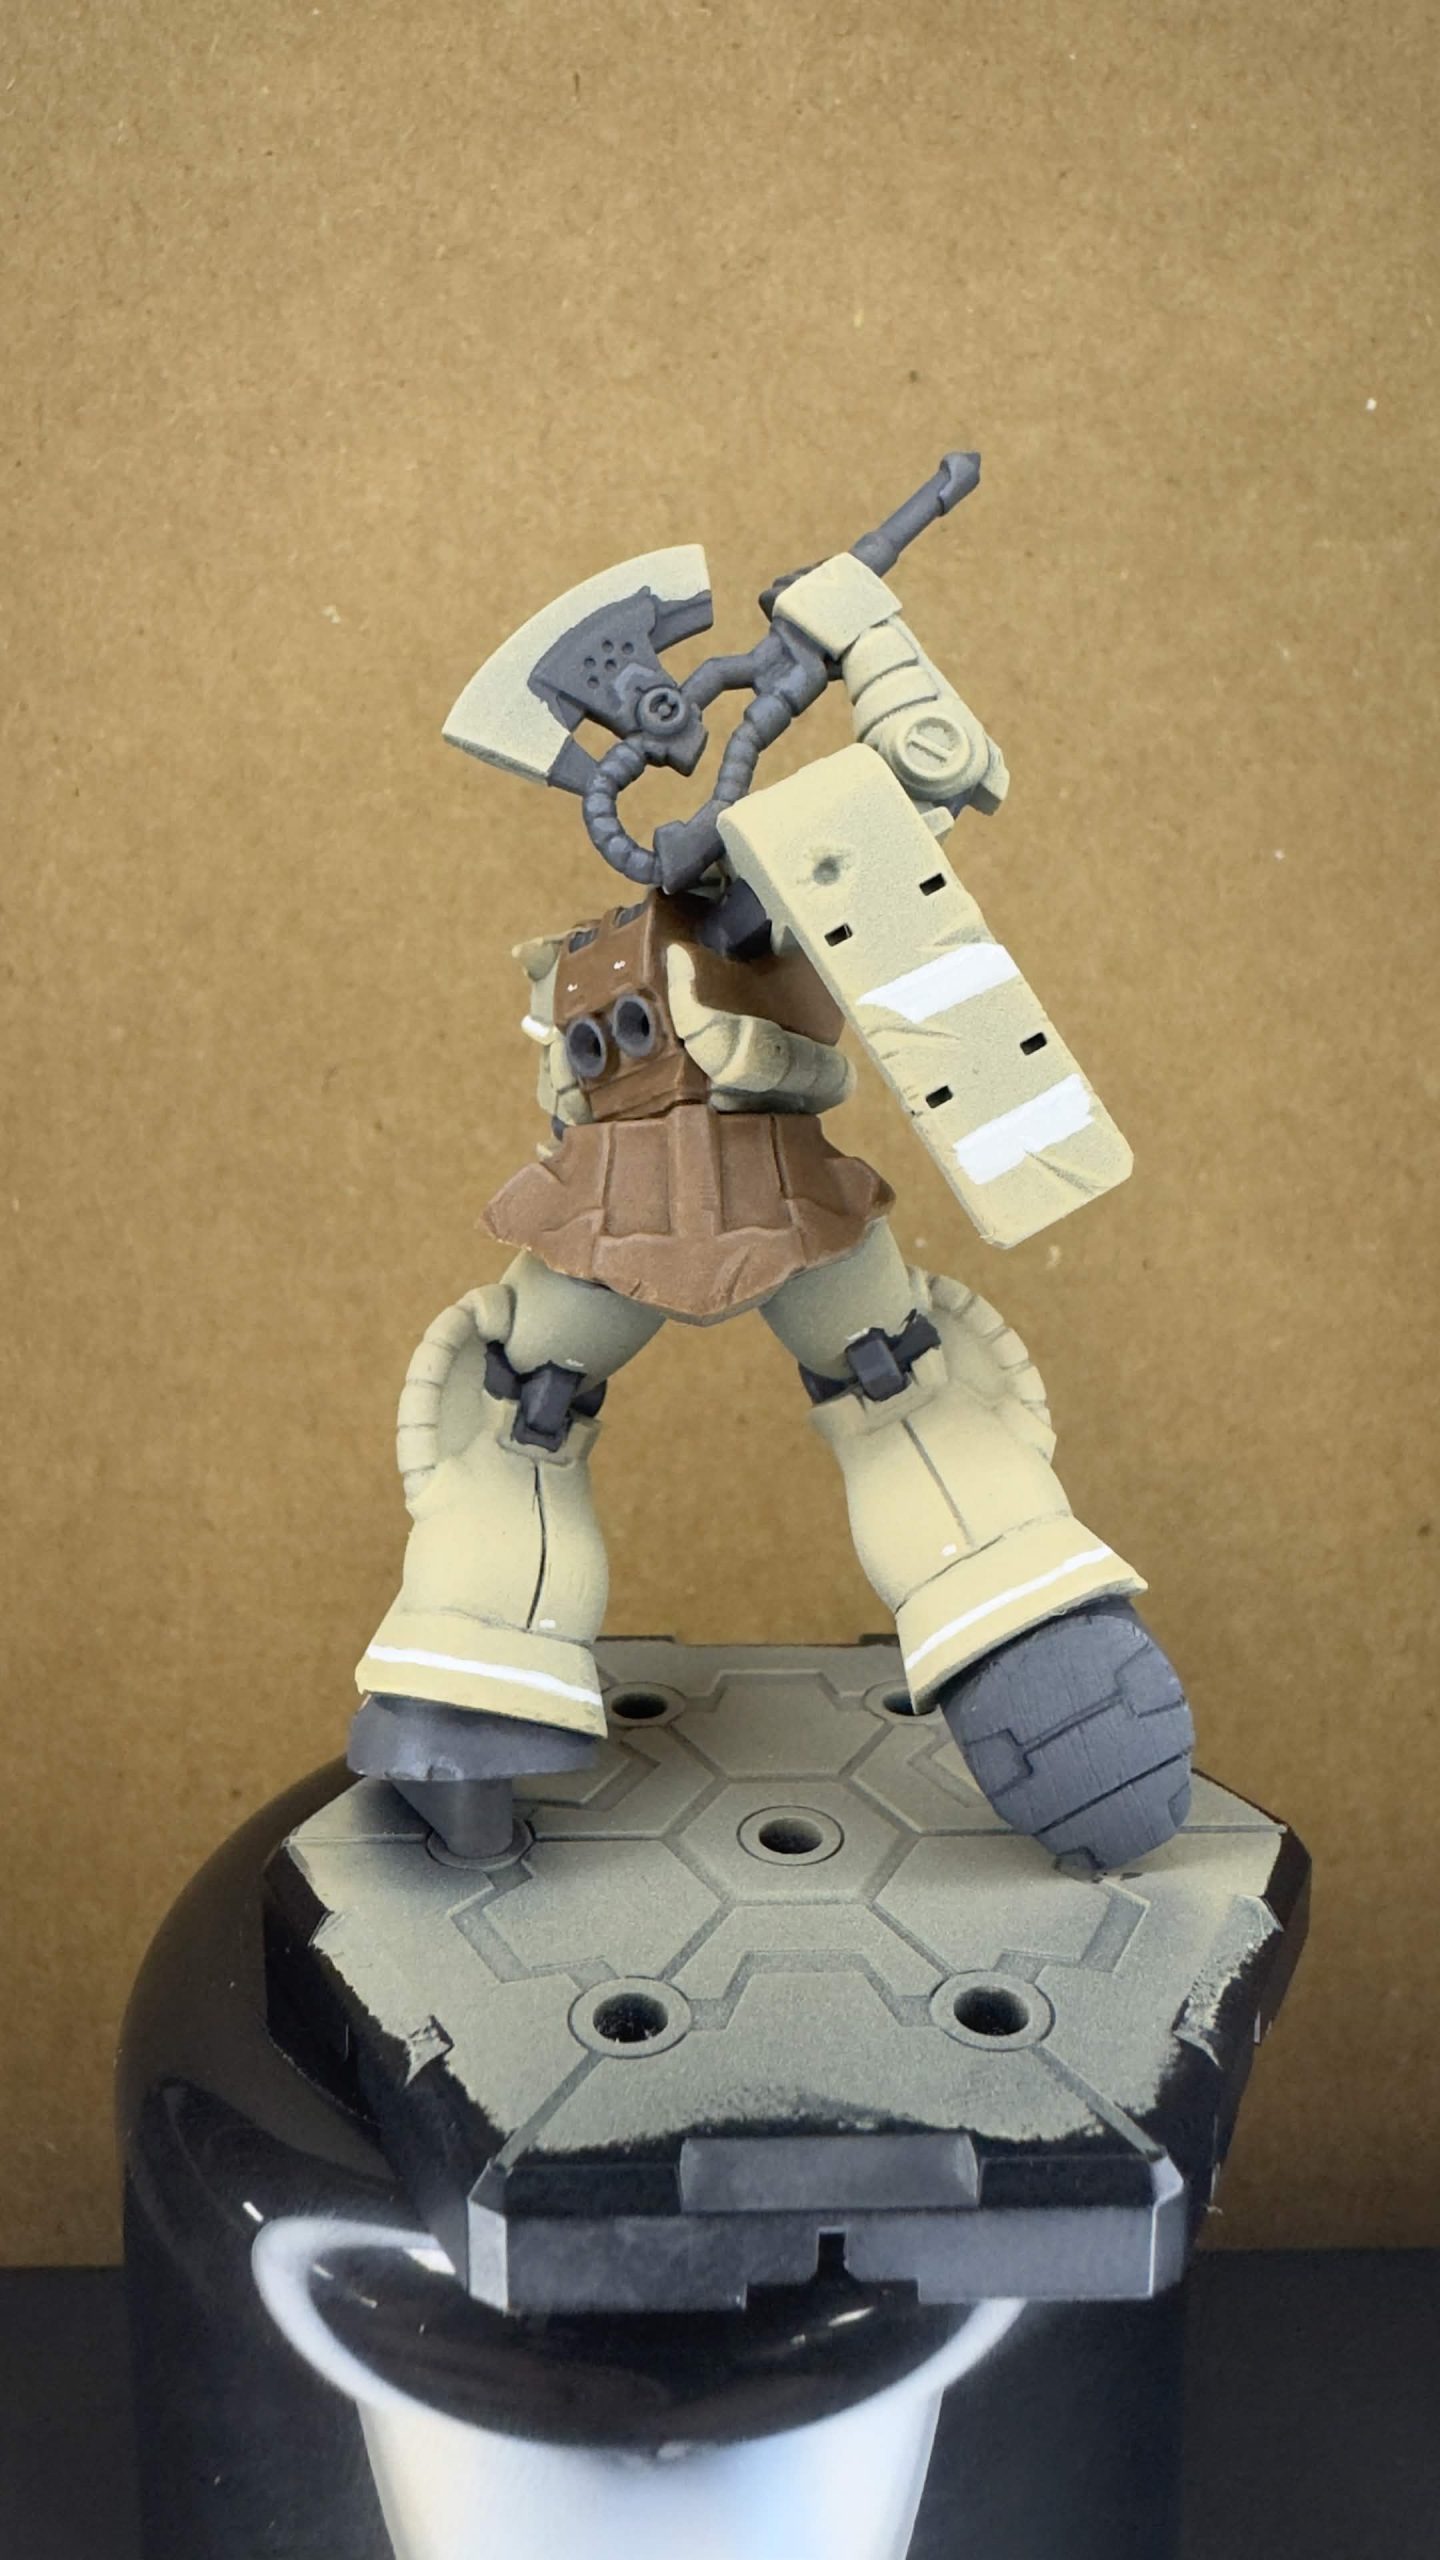
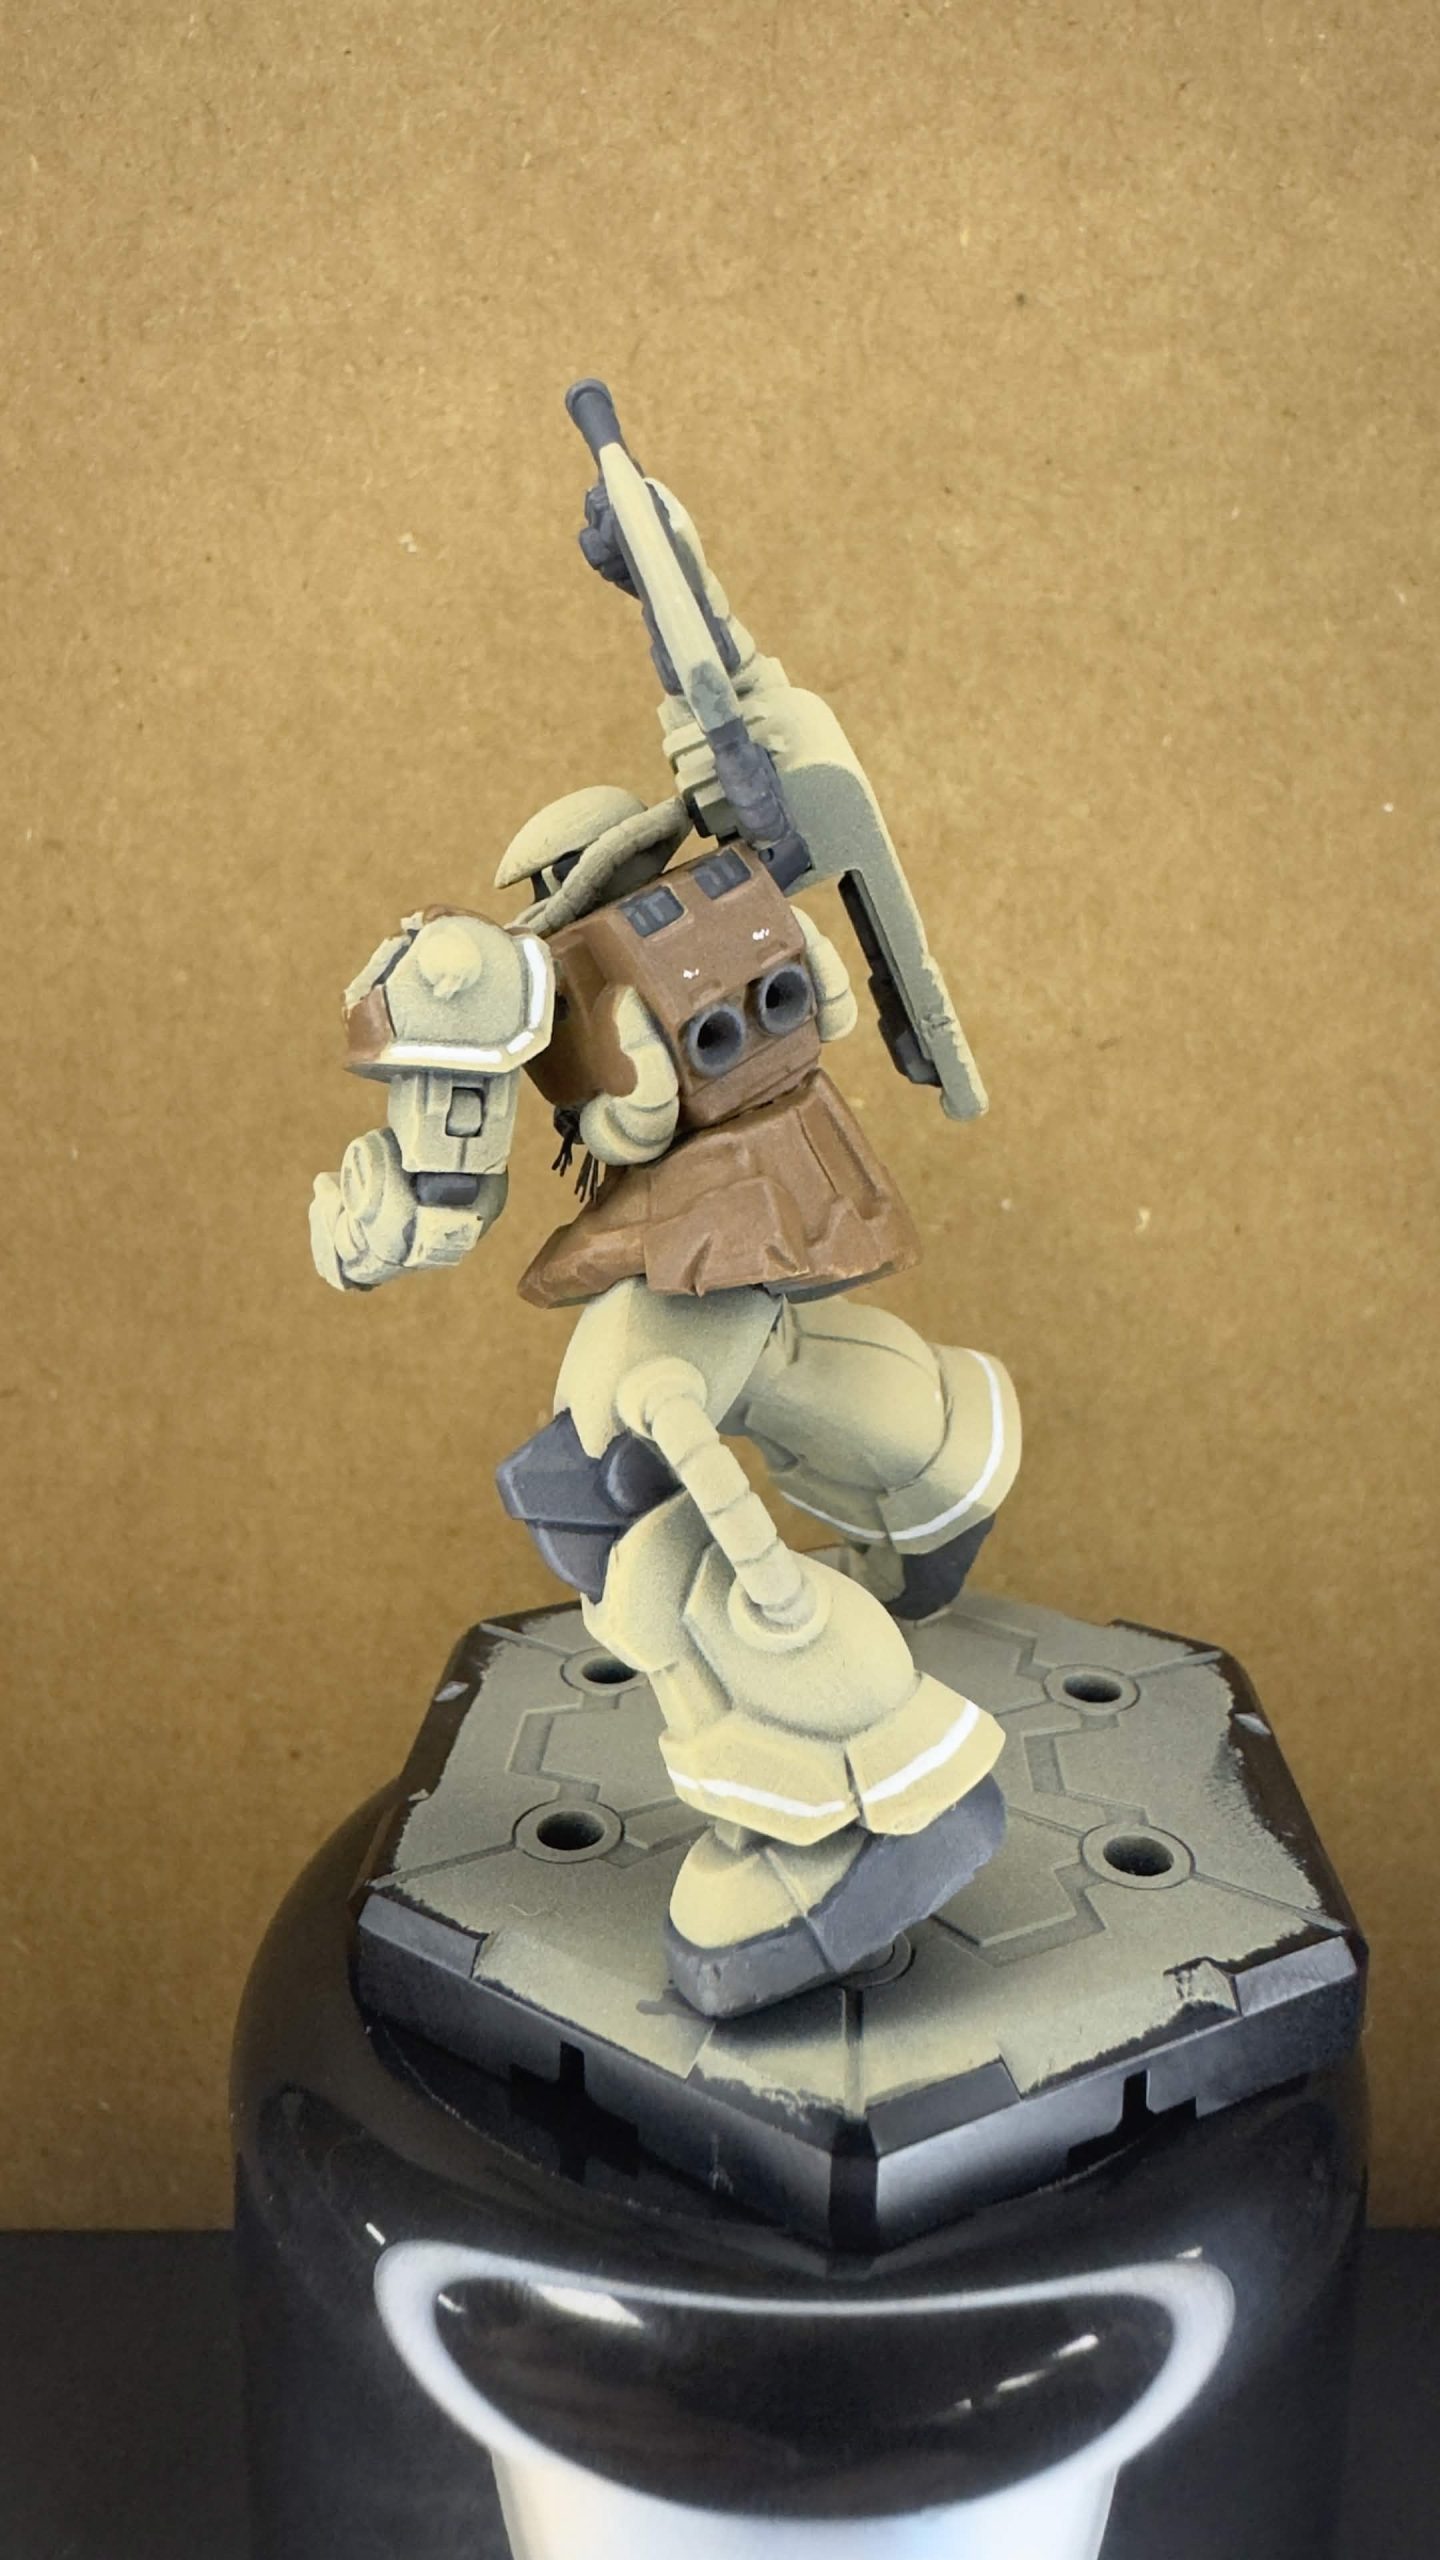
I really wanted to have this tiny model carry some markings, so using Army Painter Brainmatter Beige to create some linework and some very small “warning” markings on some areas on the model gives the Zaku more life to it. And because I wanted to punish myself, I have also given the markings some vauge highlights with Matt White.
I am starting to see where I’m going more clearly, and my confidence in the end result is slowly growing. but since the model is for a competition, I am having to draw myself back and really think out my next steps, from fear of just going ham and making a mess!
The Painting Begins!
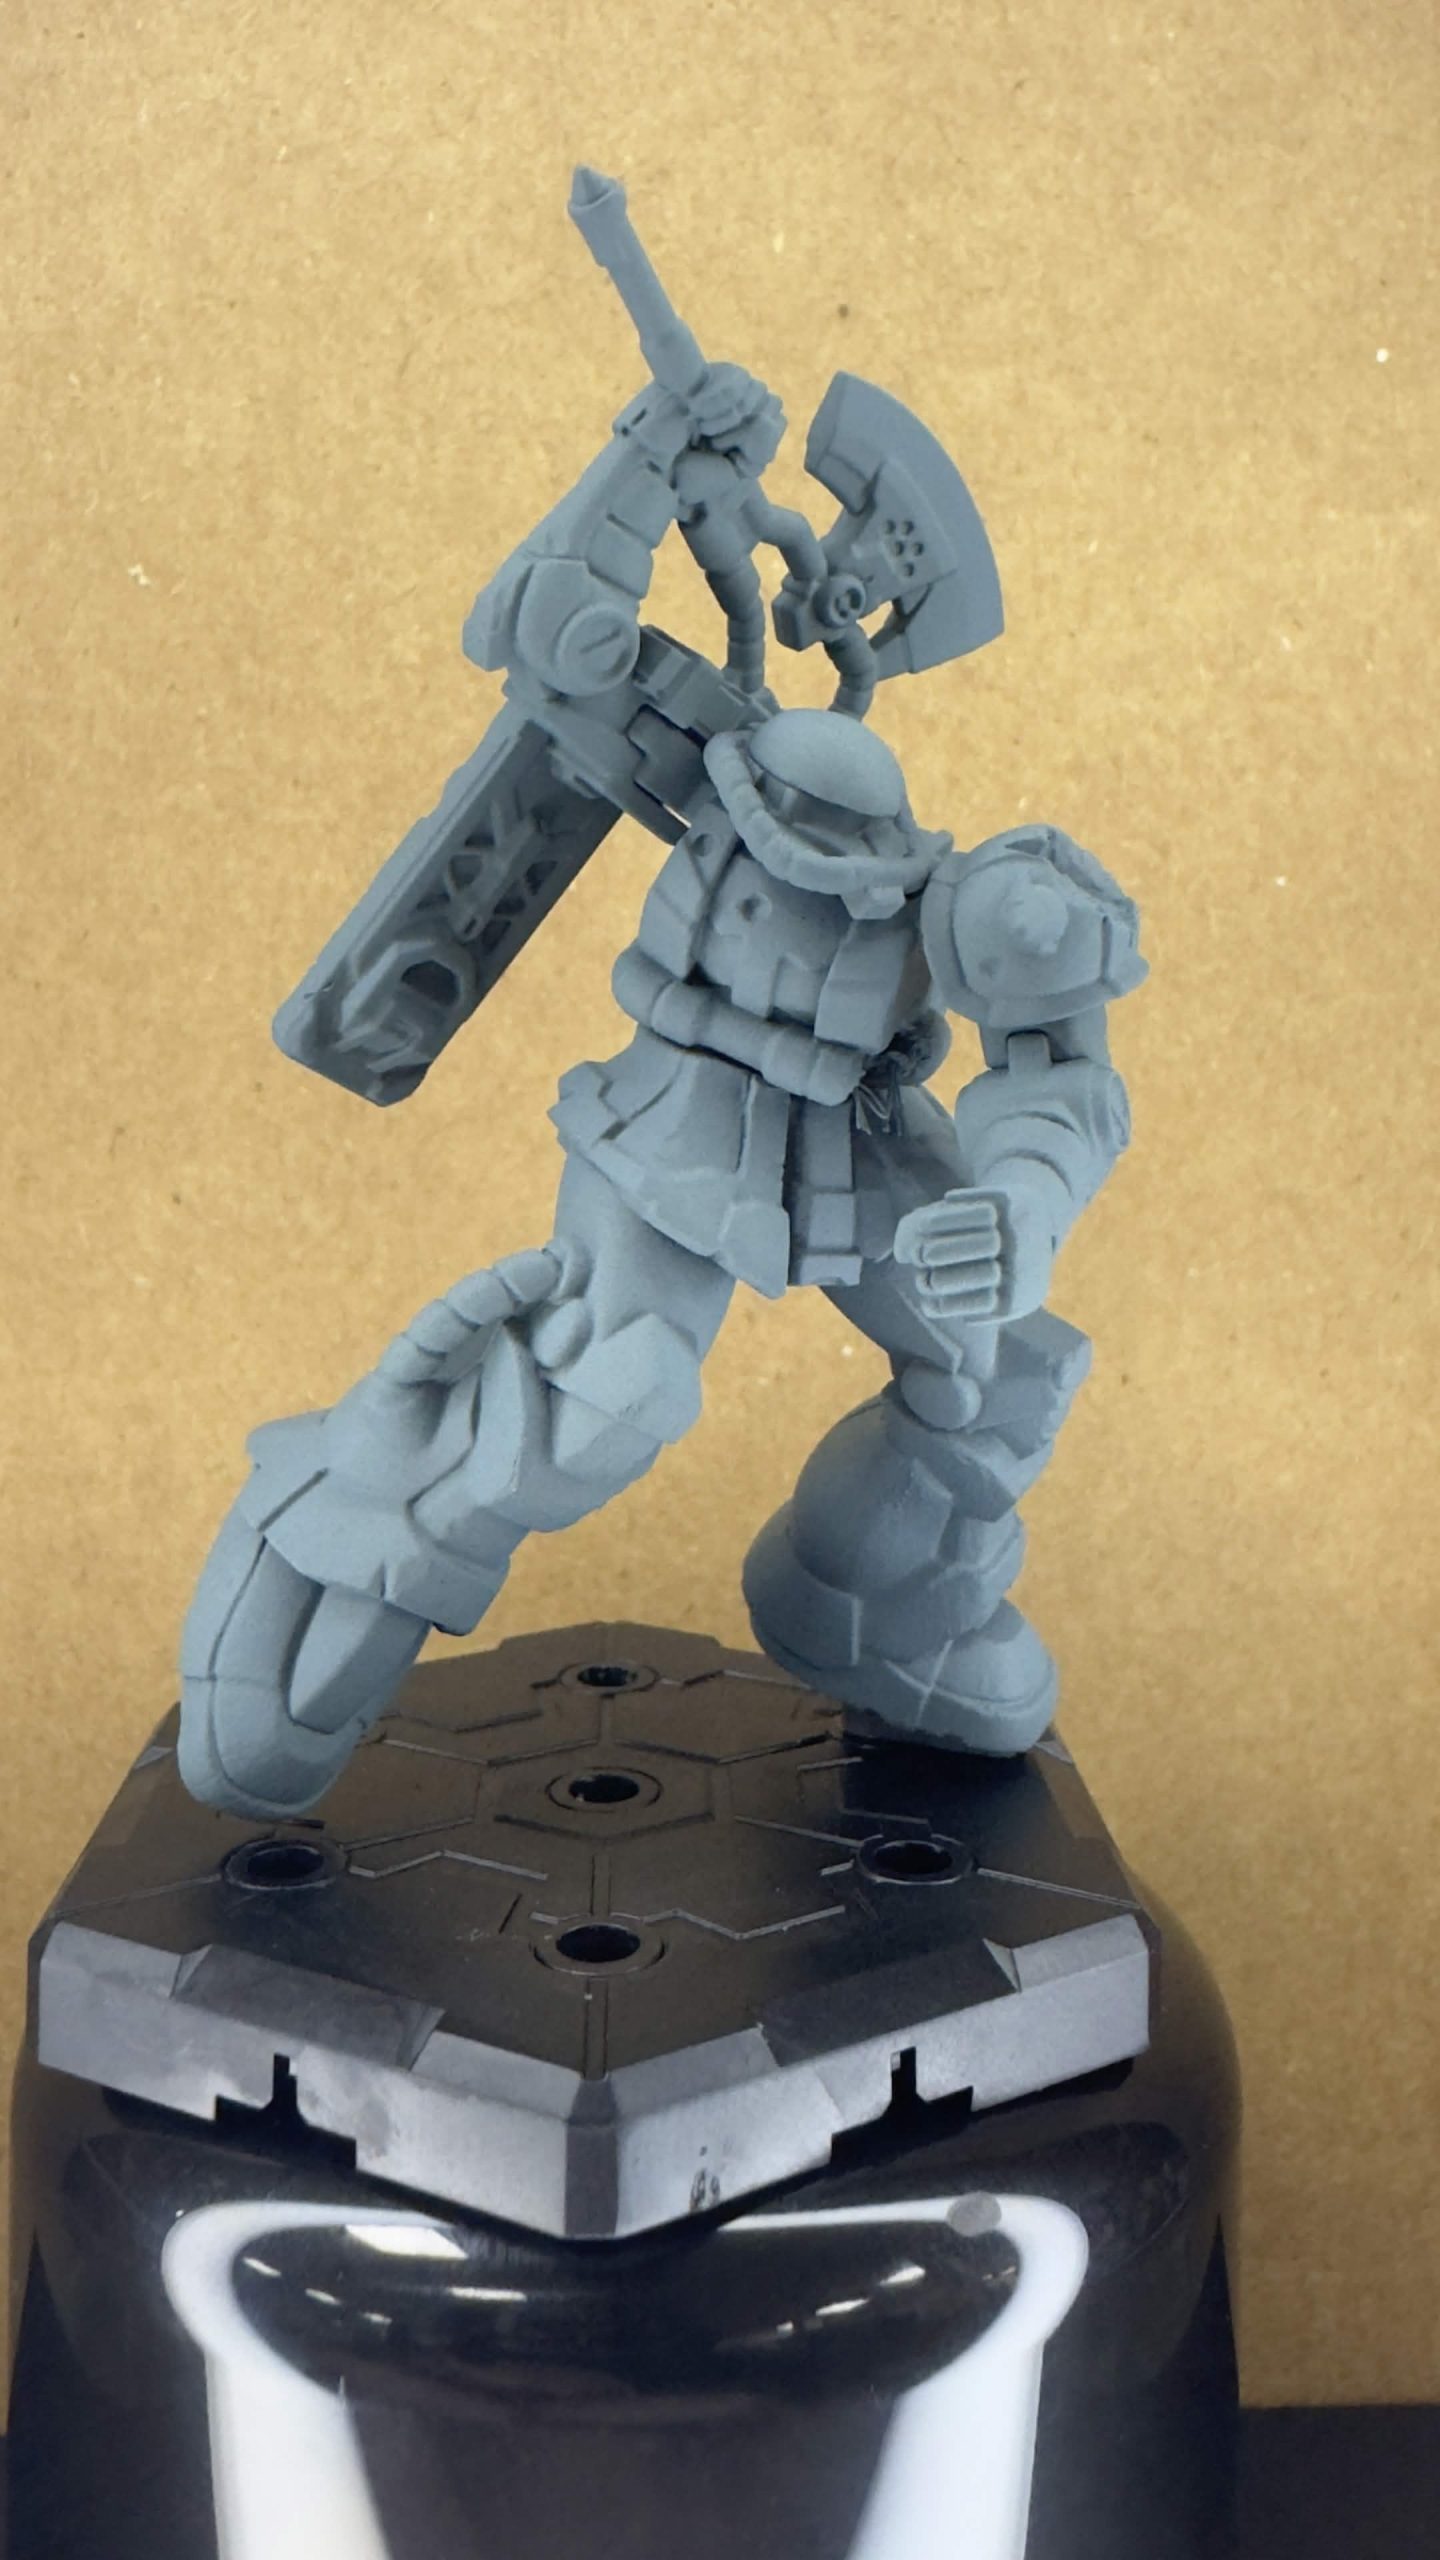 Mechanicus Standard Grey Spray Primer.
 I decided to go grey for my base as it wouldn;t be as stark as black or white, and I feel that it is less cold than either of the colours, and should allow me to control the tone of the base coats going forward.
Slapchop? Preshading?
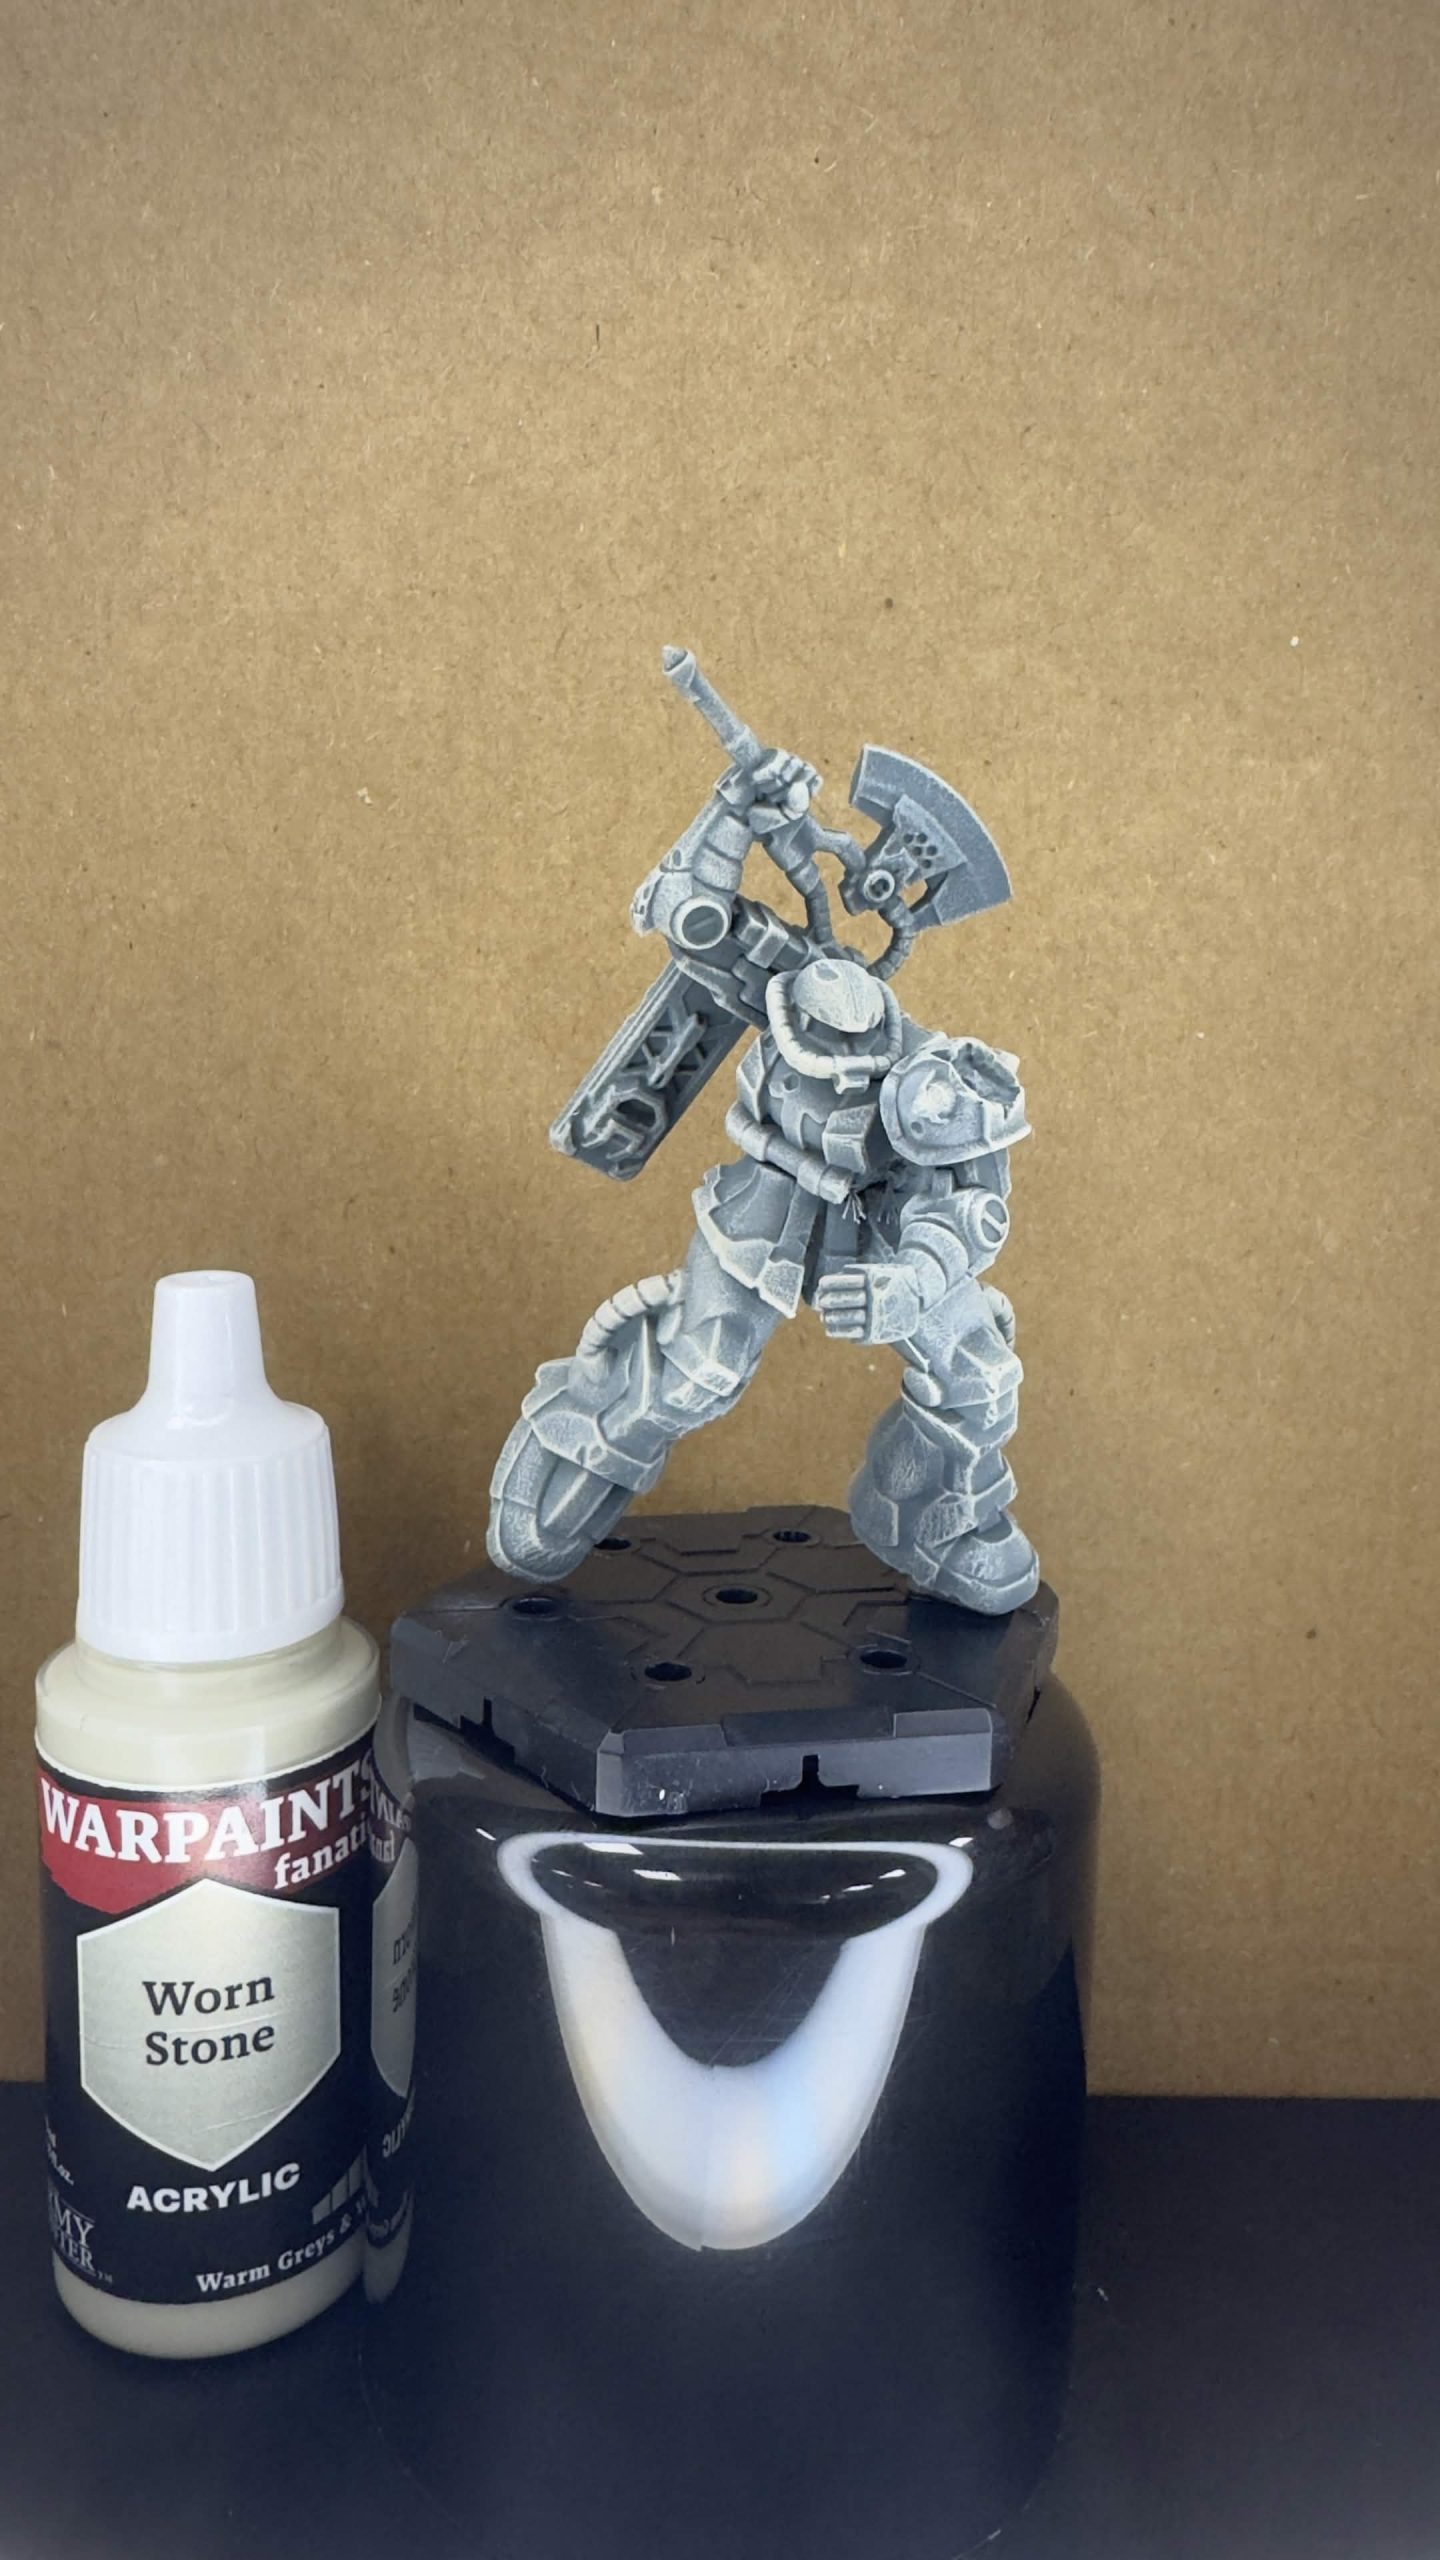 Worn Stone makes a nice drybrush over the grey.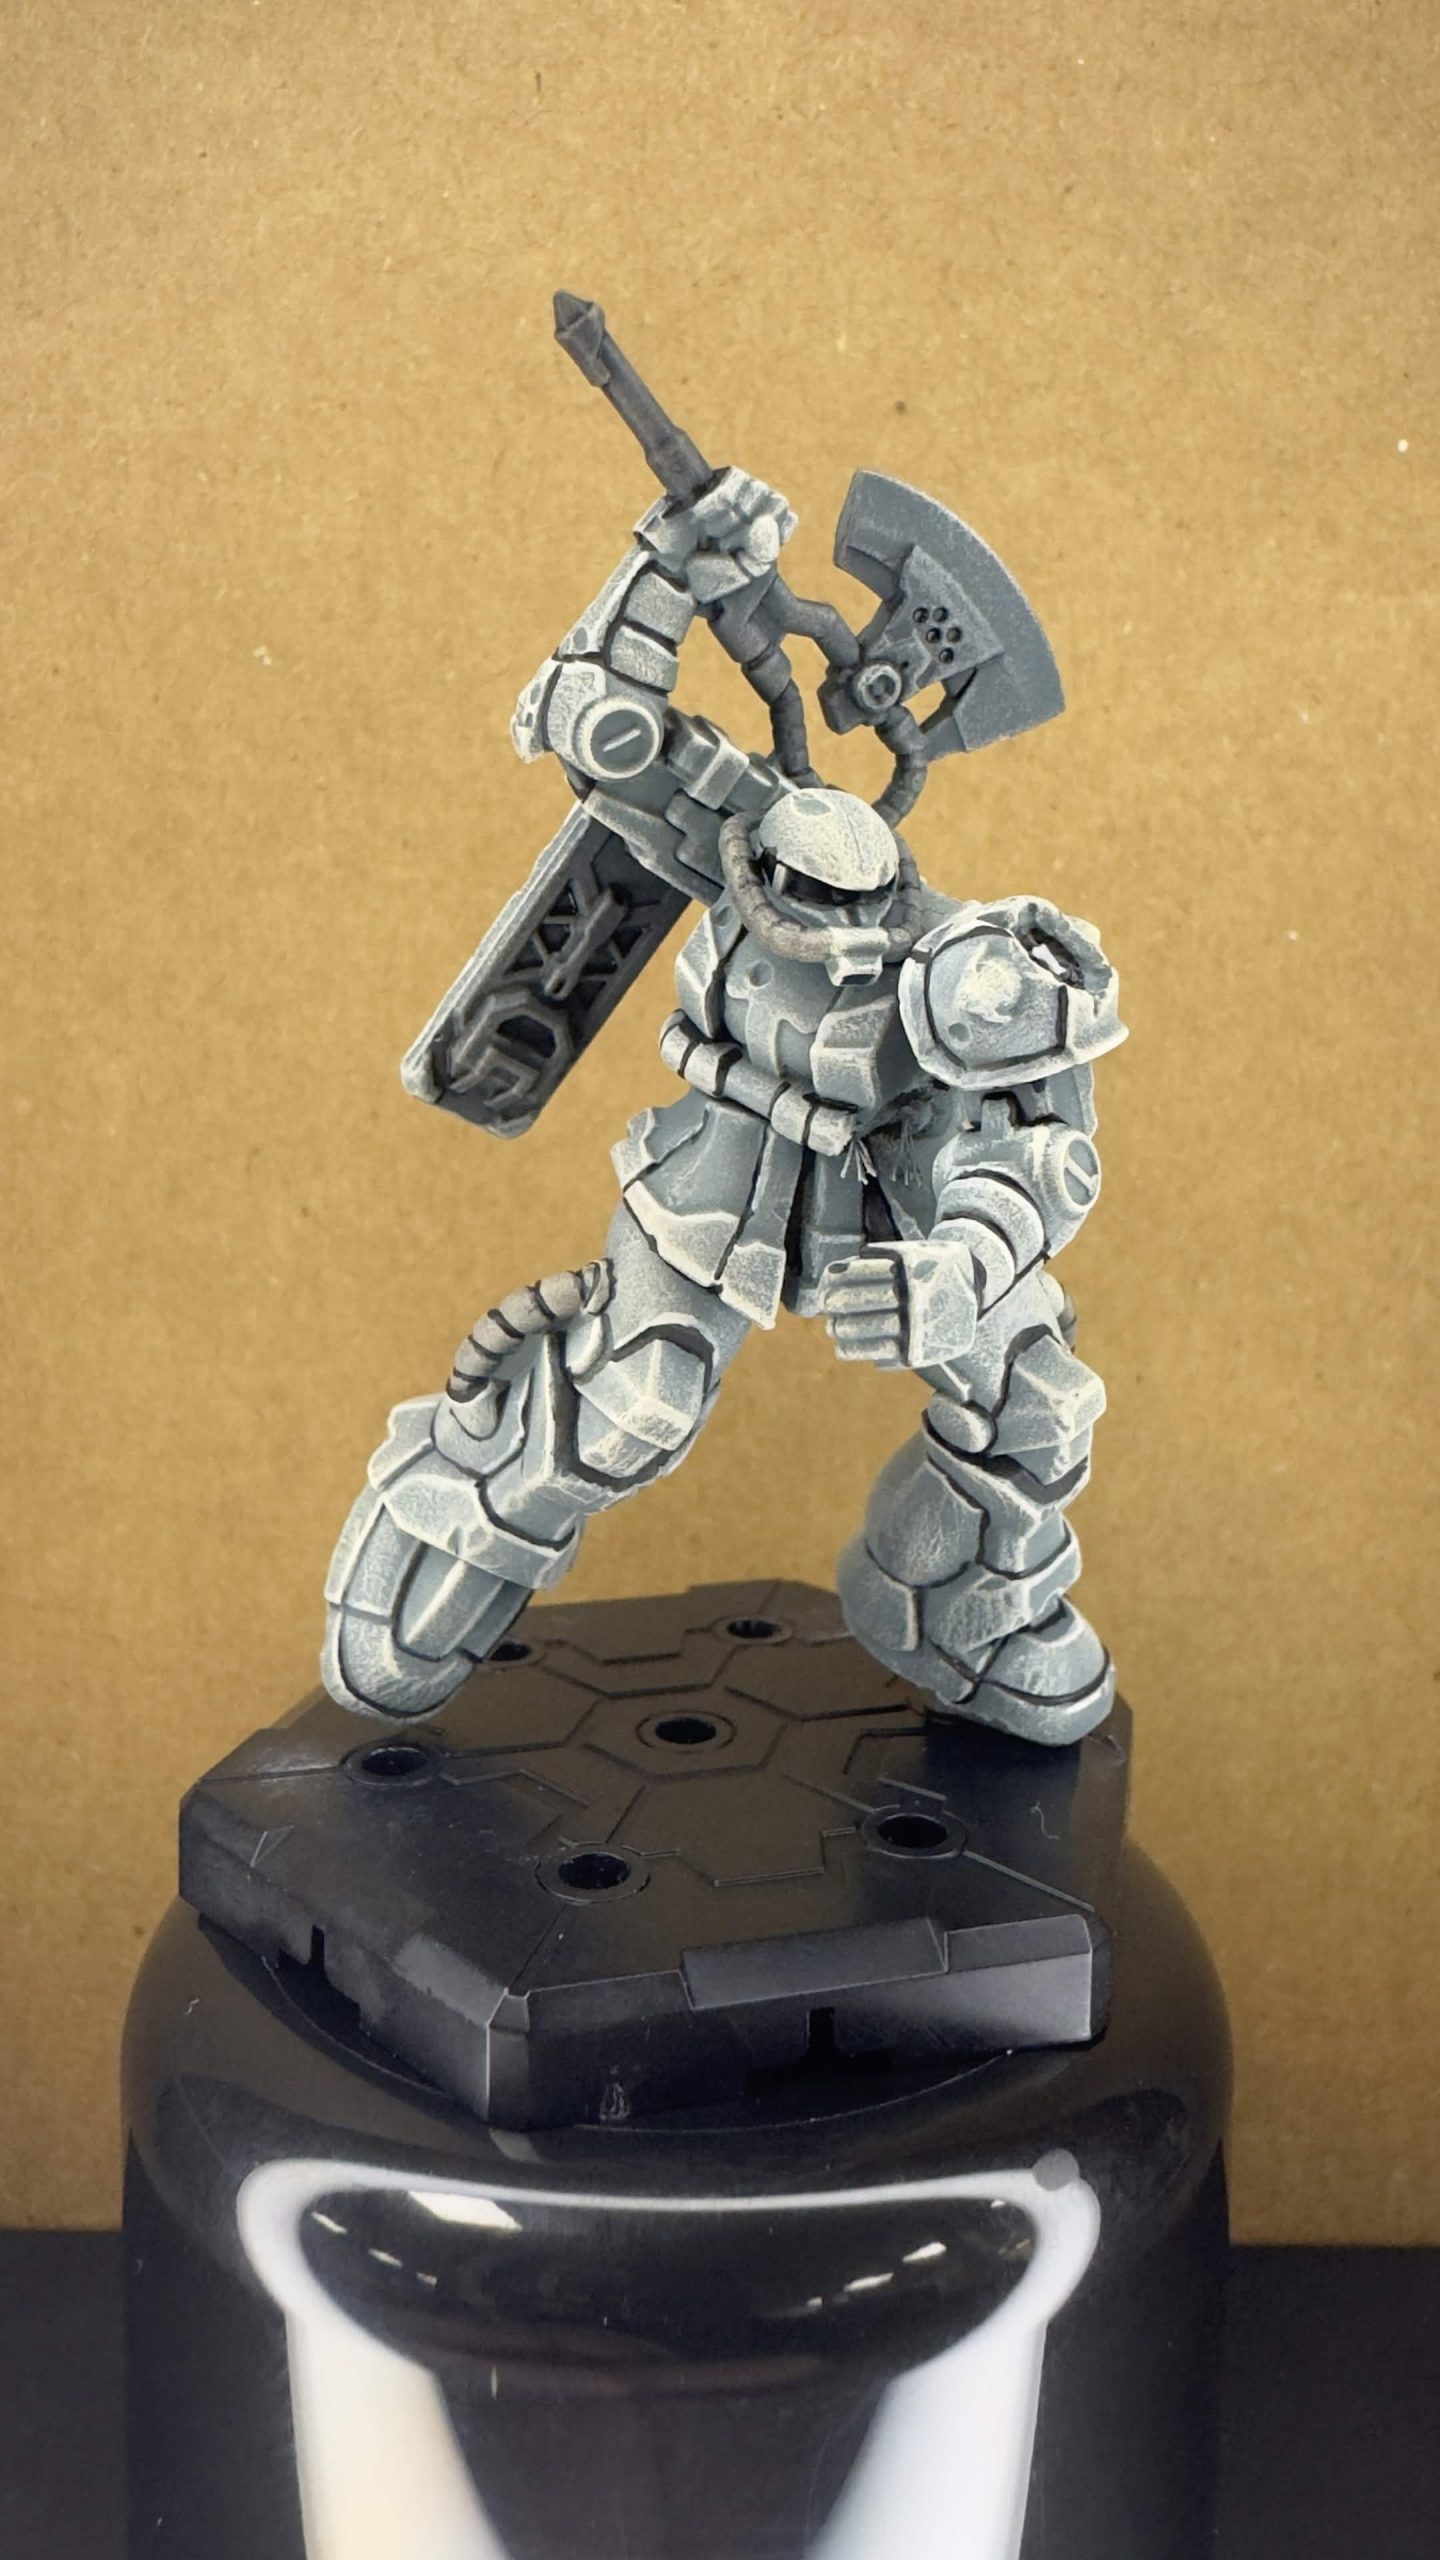
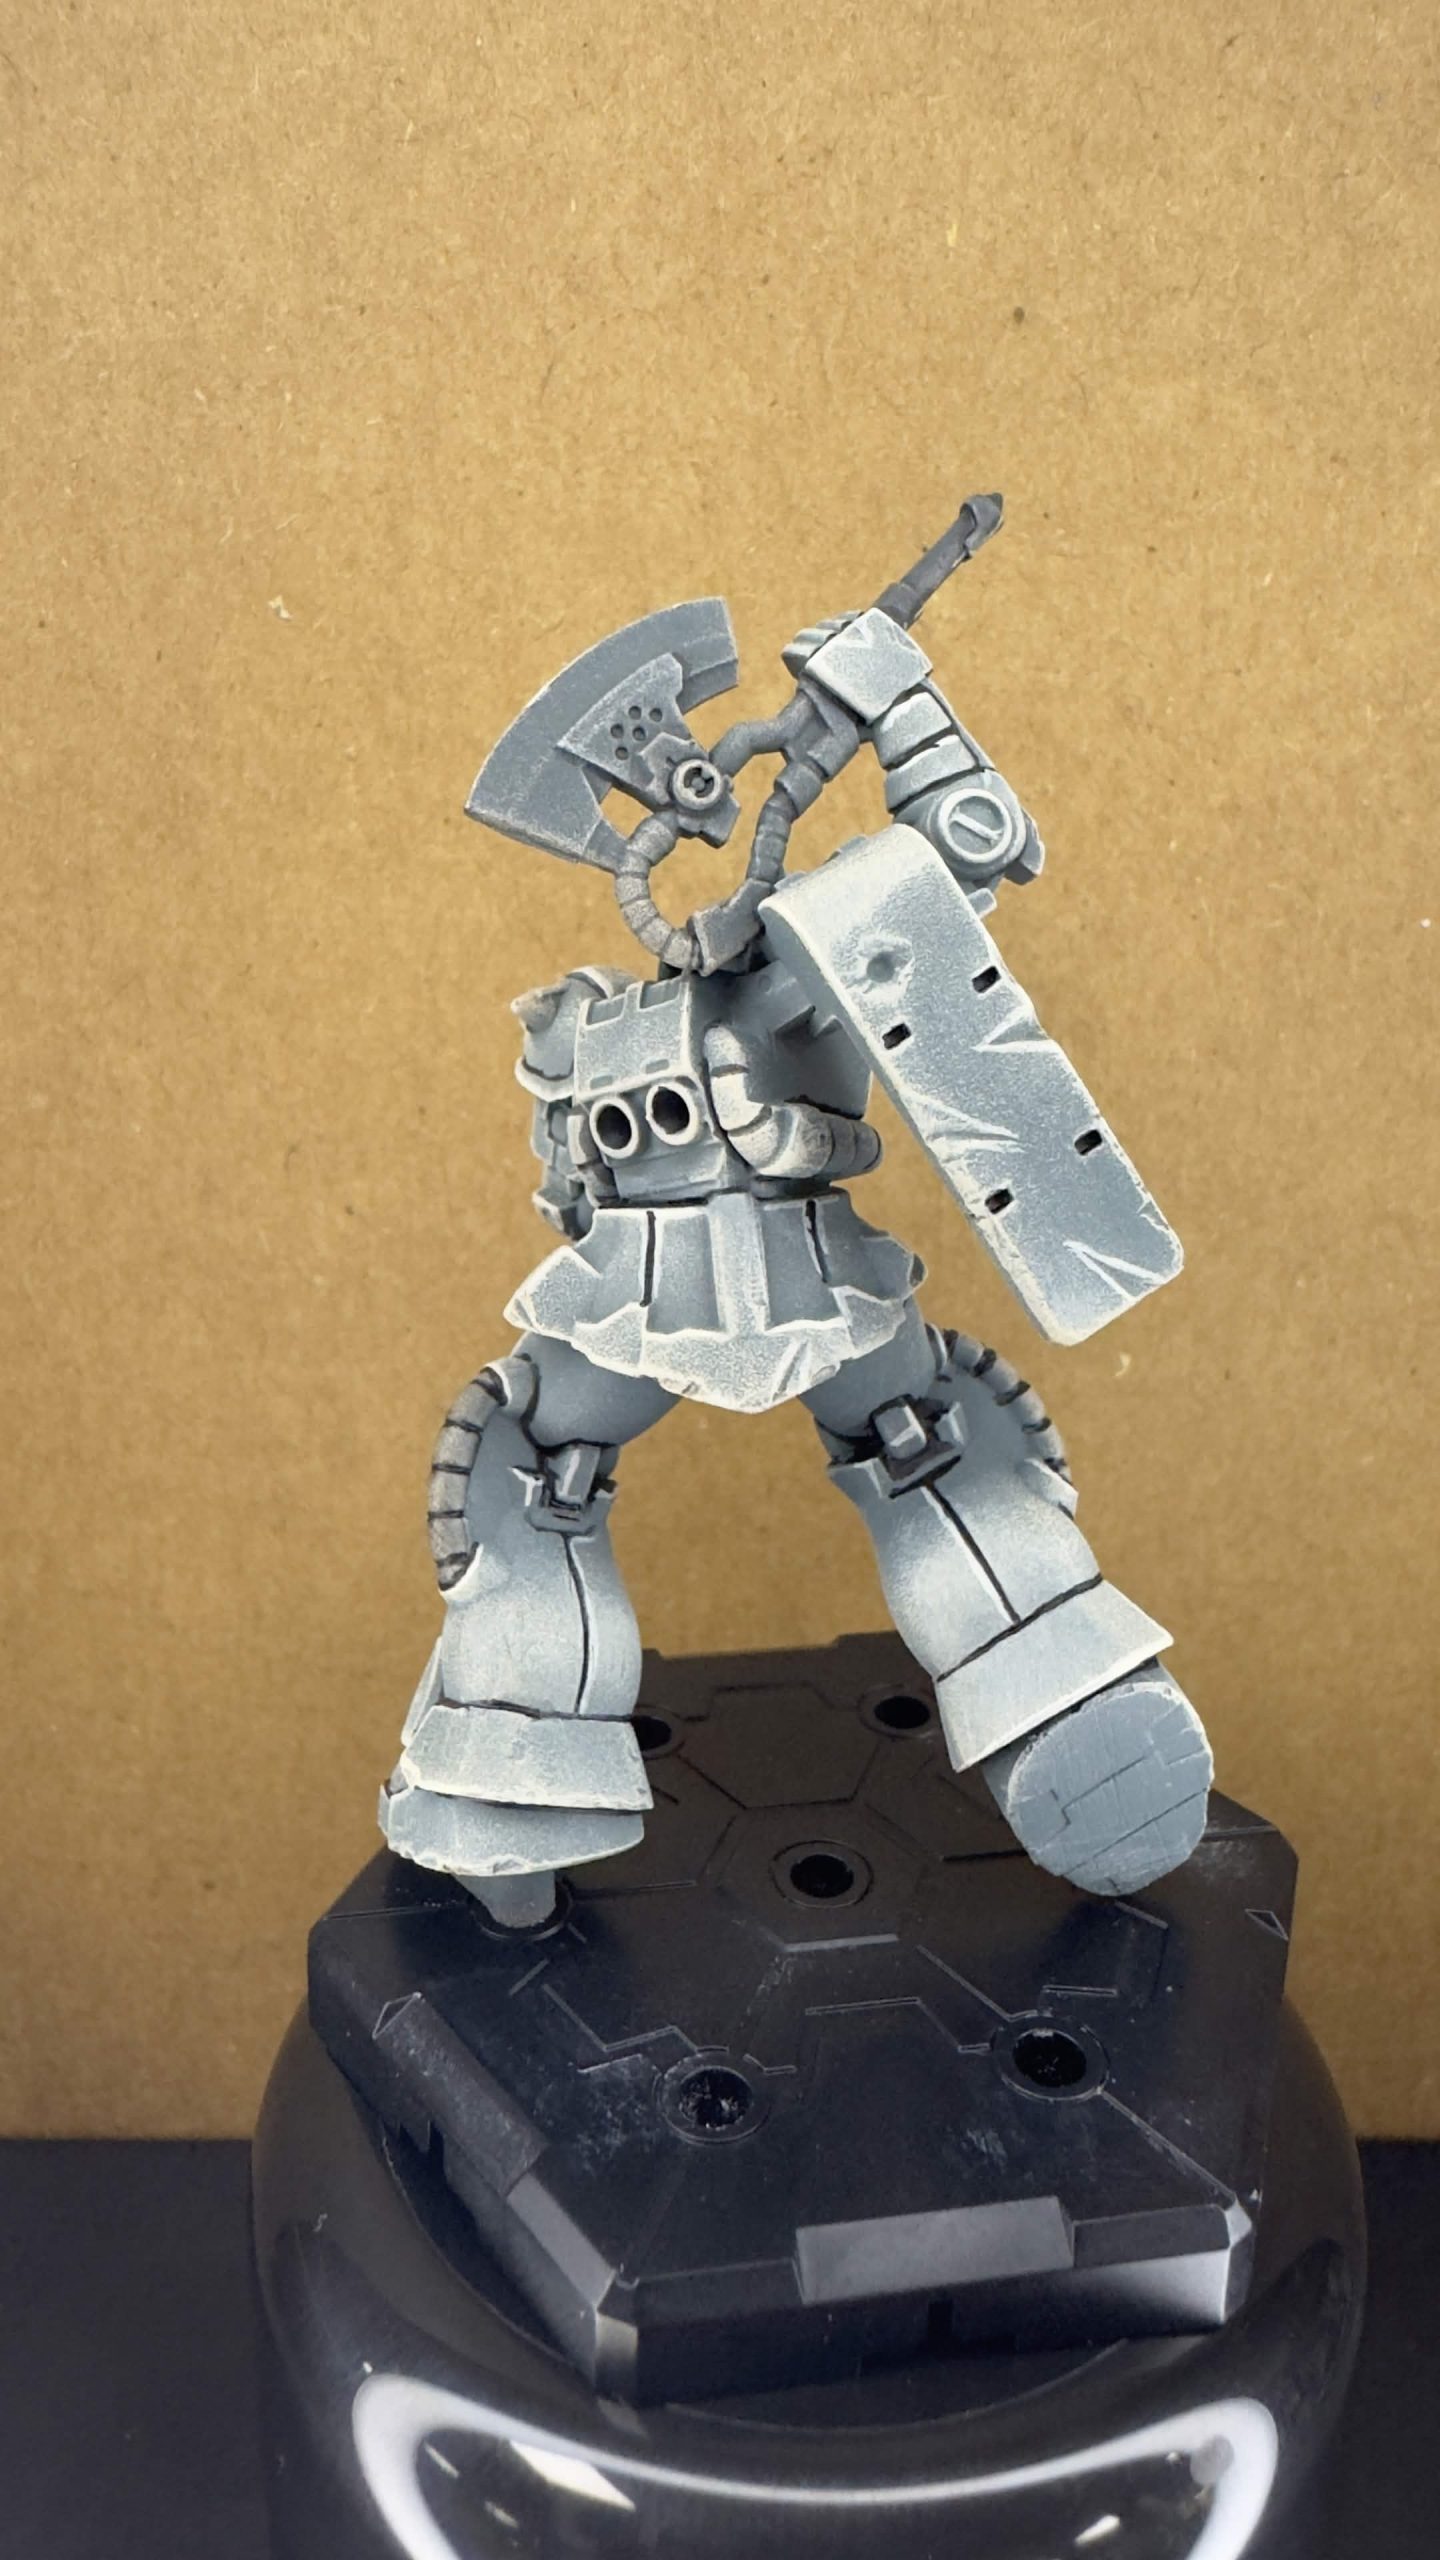
What was important to me was ensuring that shadows and shading were punched harder than the drybrushing highlight. I wanted the Grey to help form the neutral shade/shadow with the deeper areas on the model having a sharp black to give more contrast in these areas.
At least at this point it looks cool!
Model complete! Ready for priming!
After three hours of modelling, this is the result before I take it away to begin my paint job!
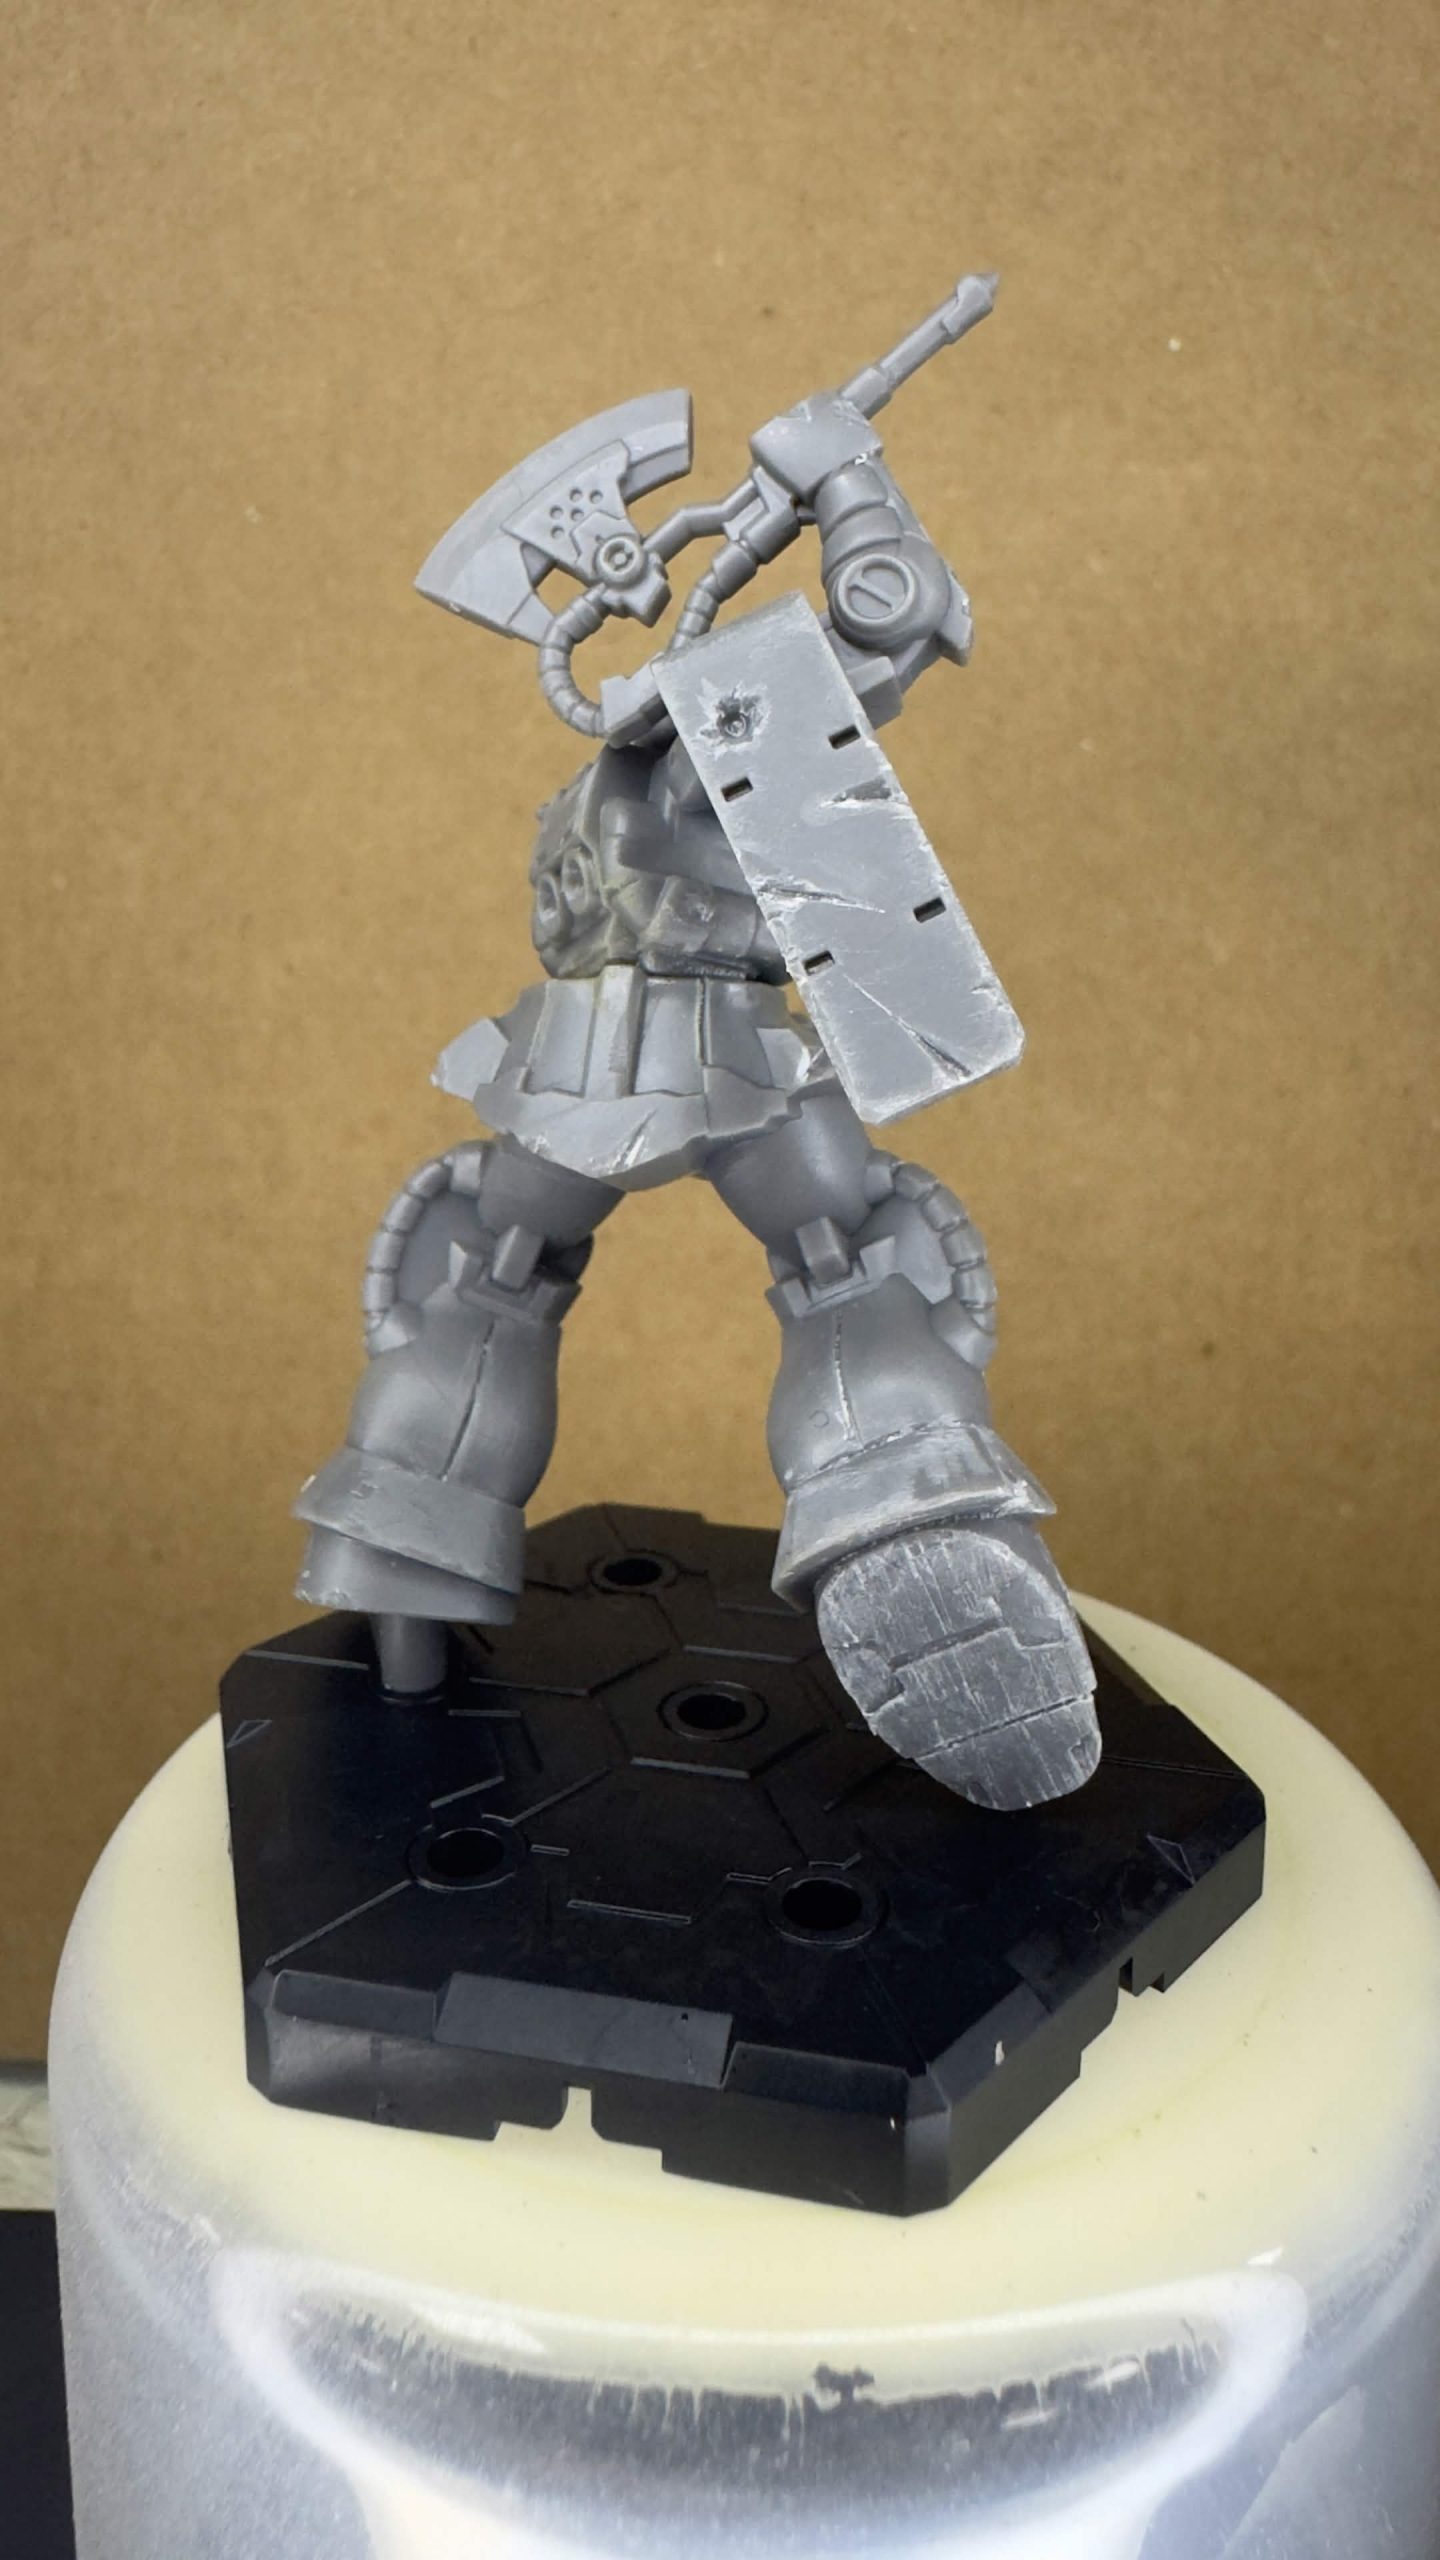
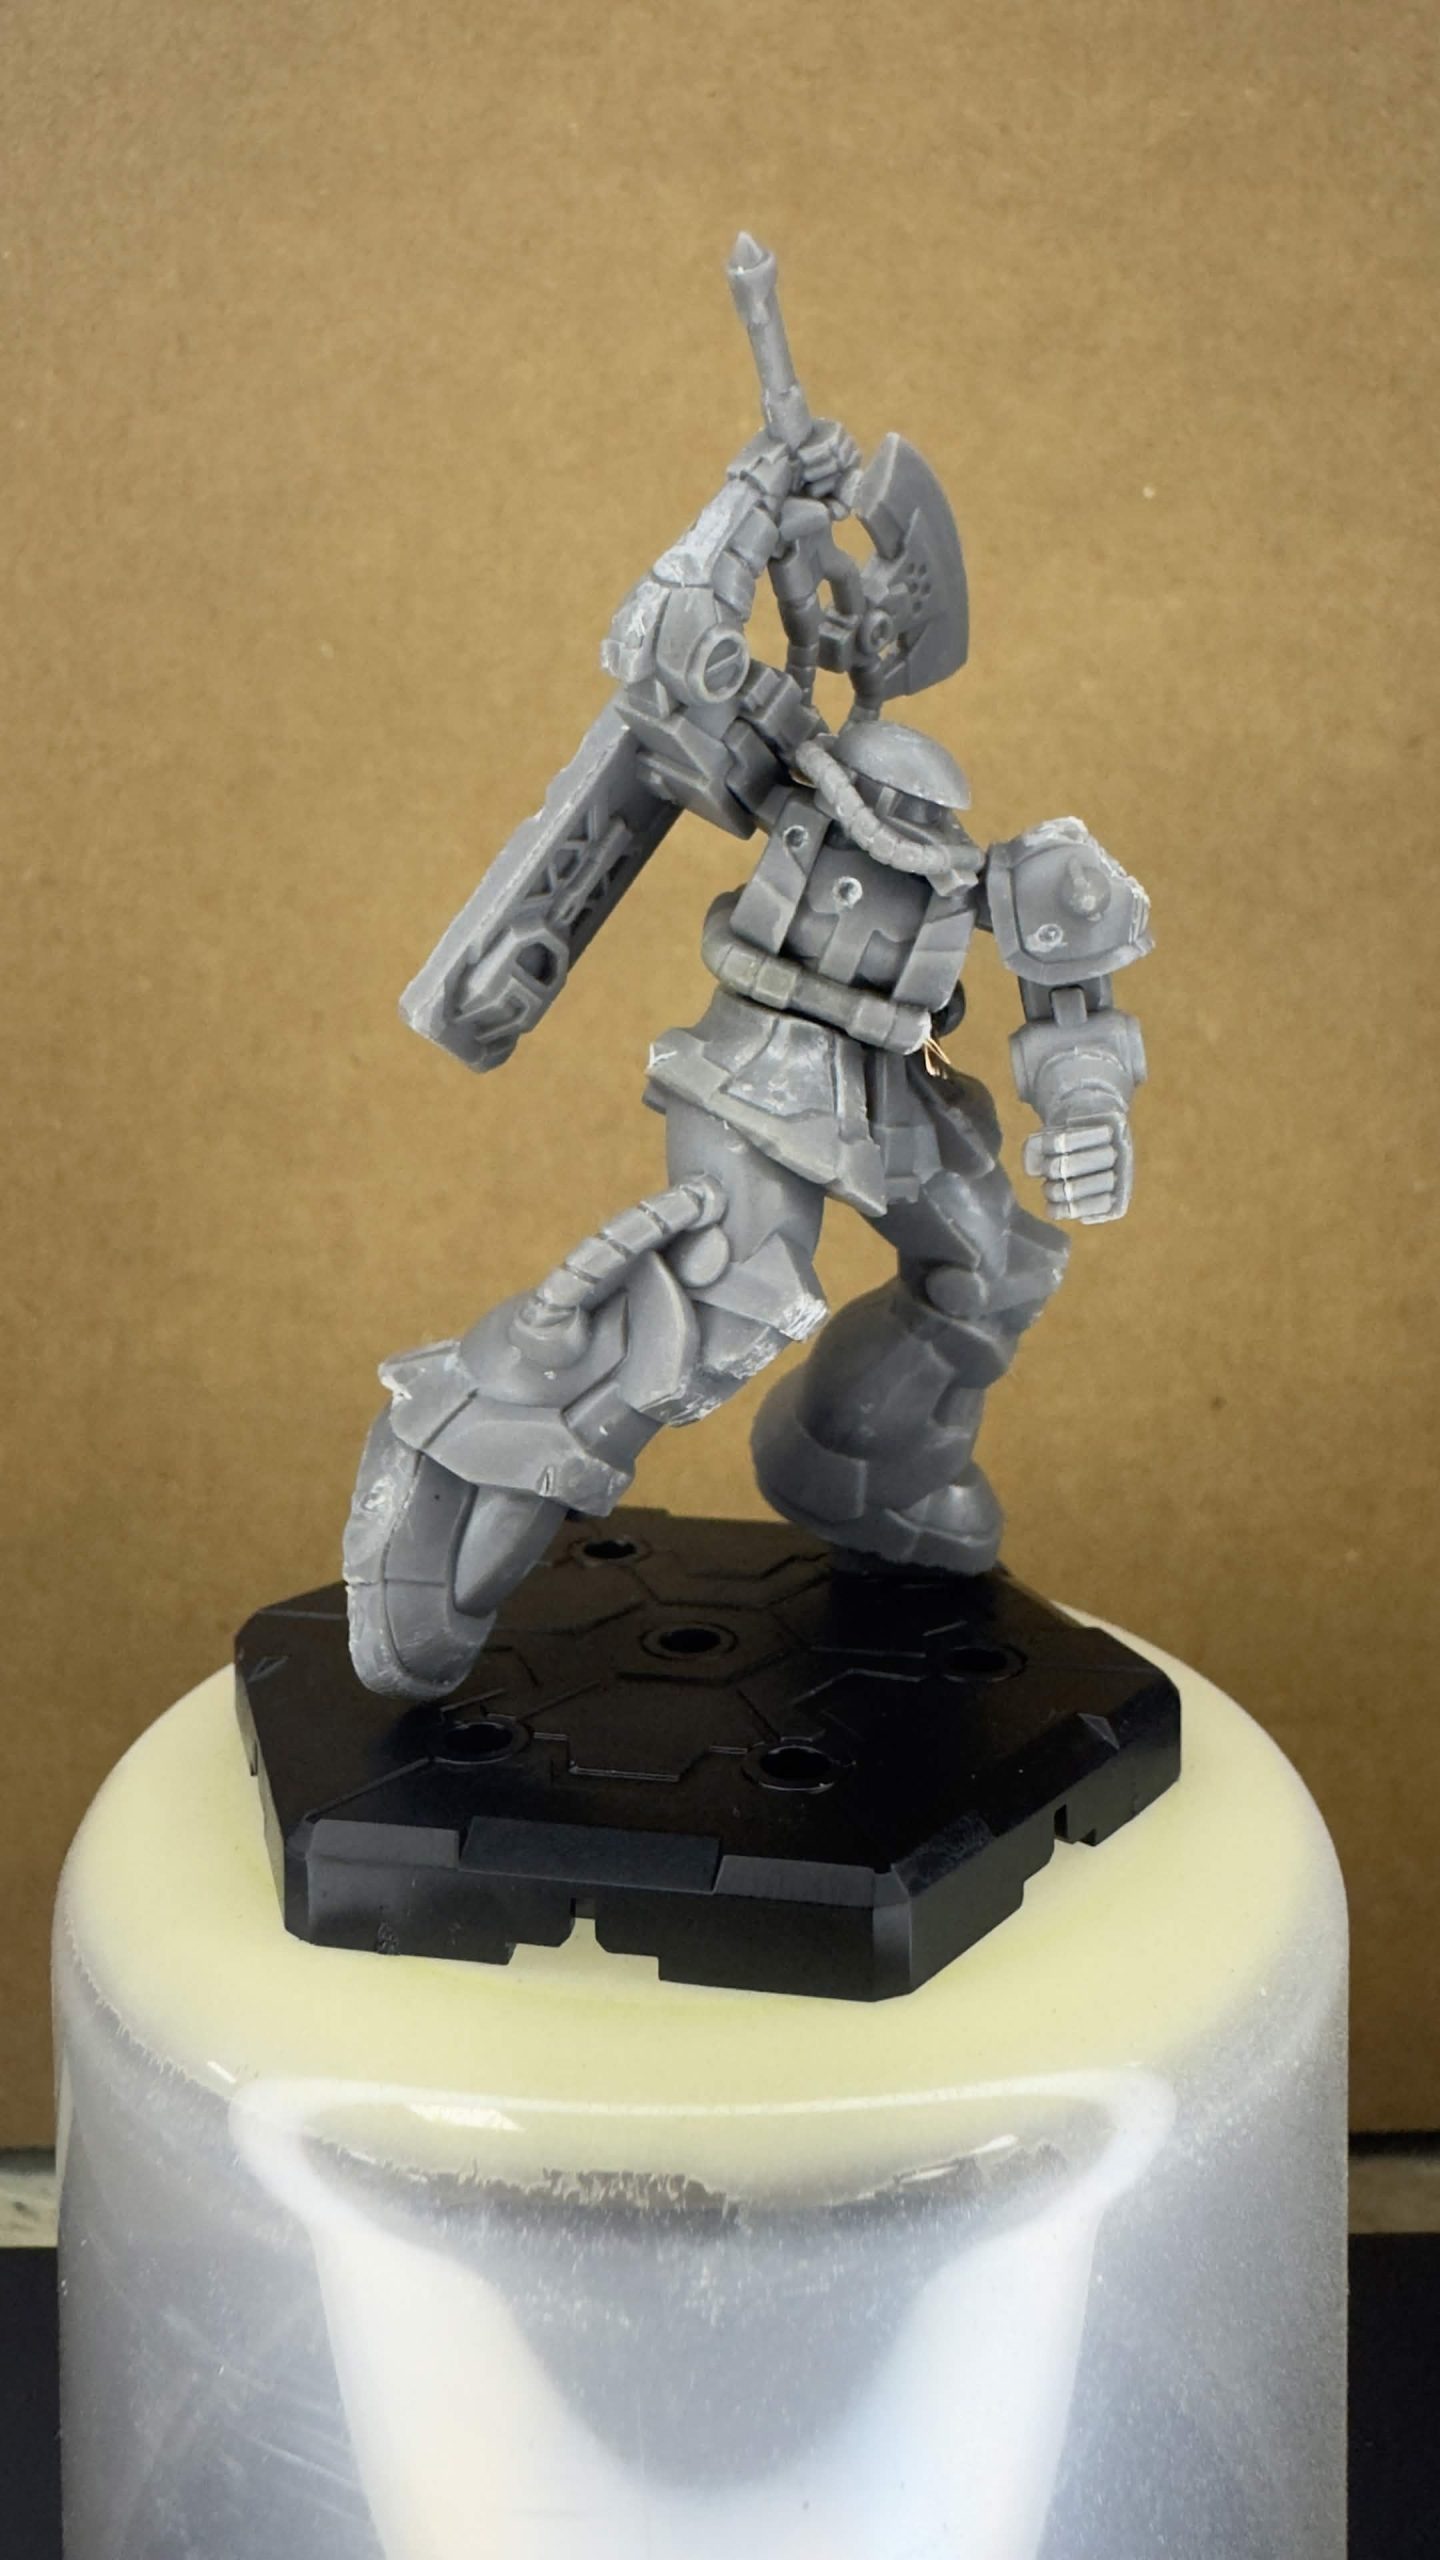
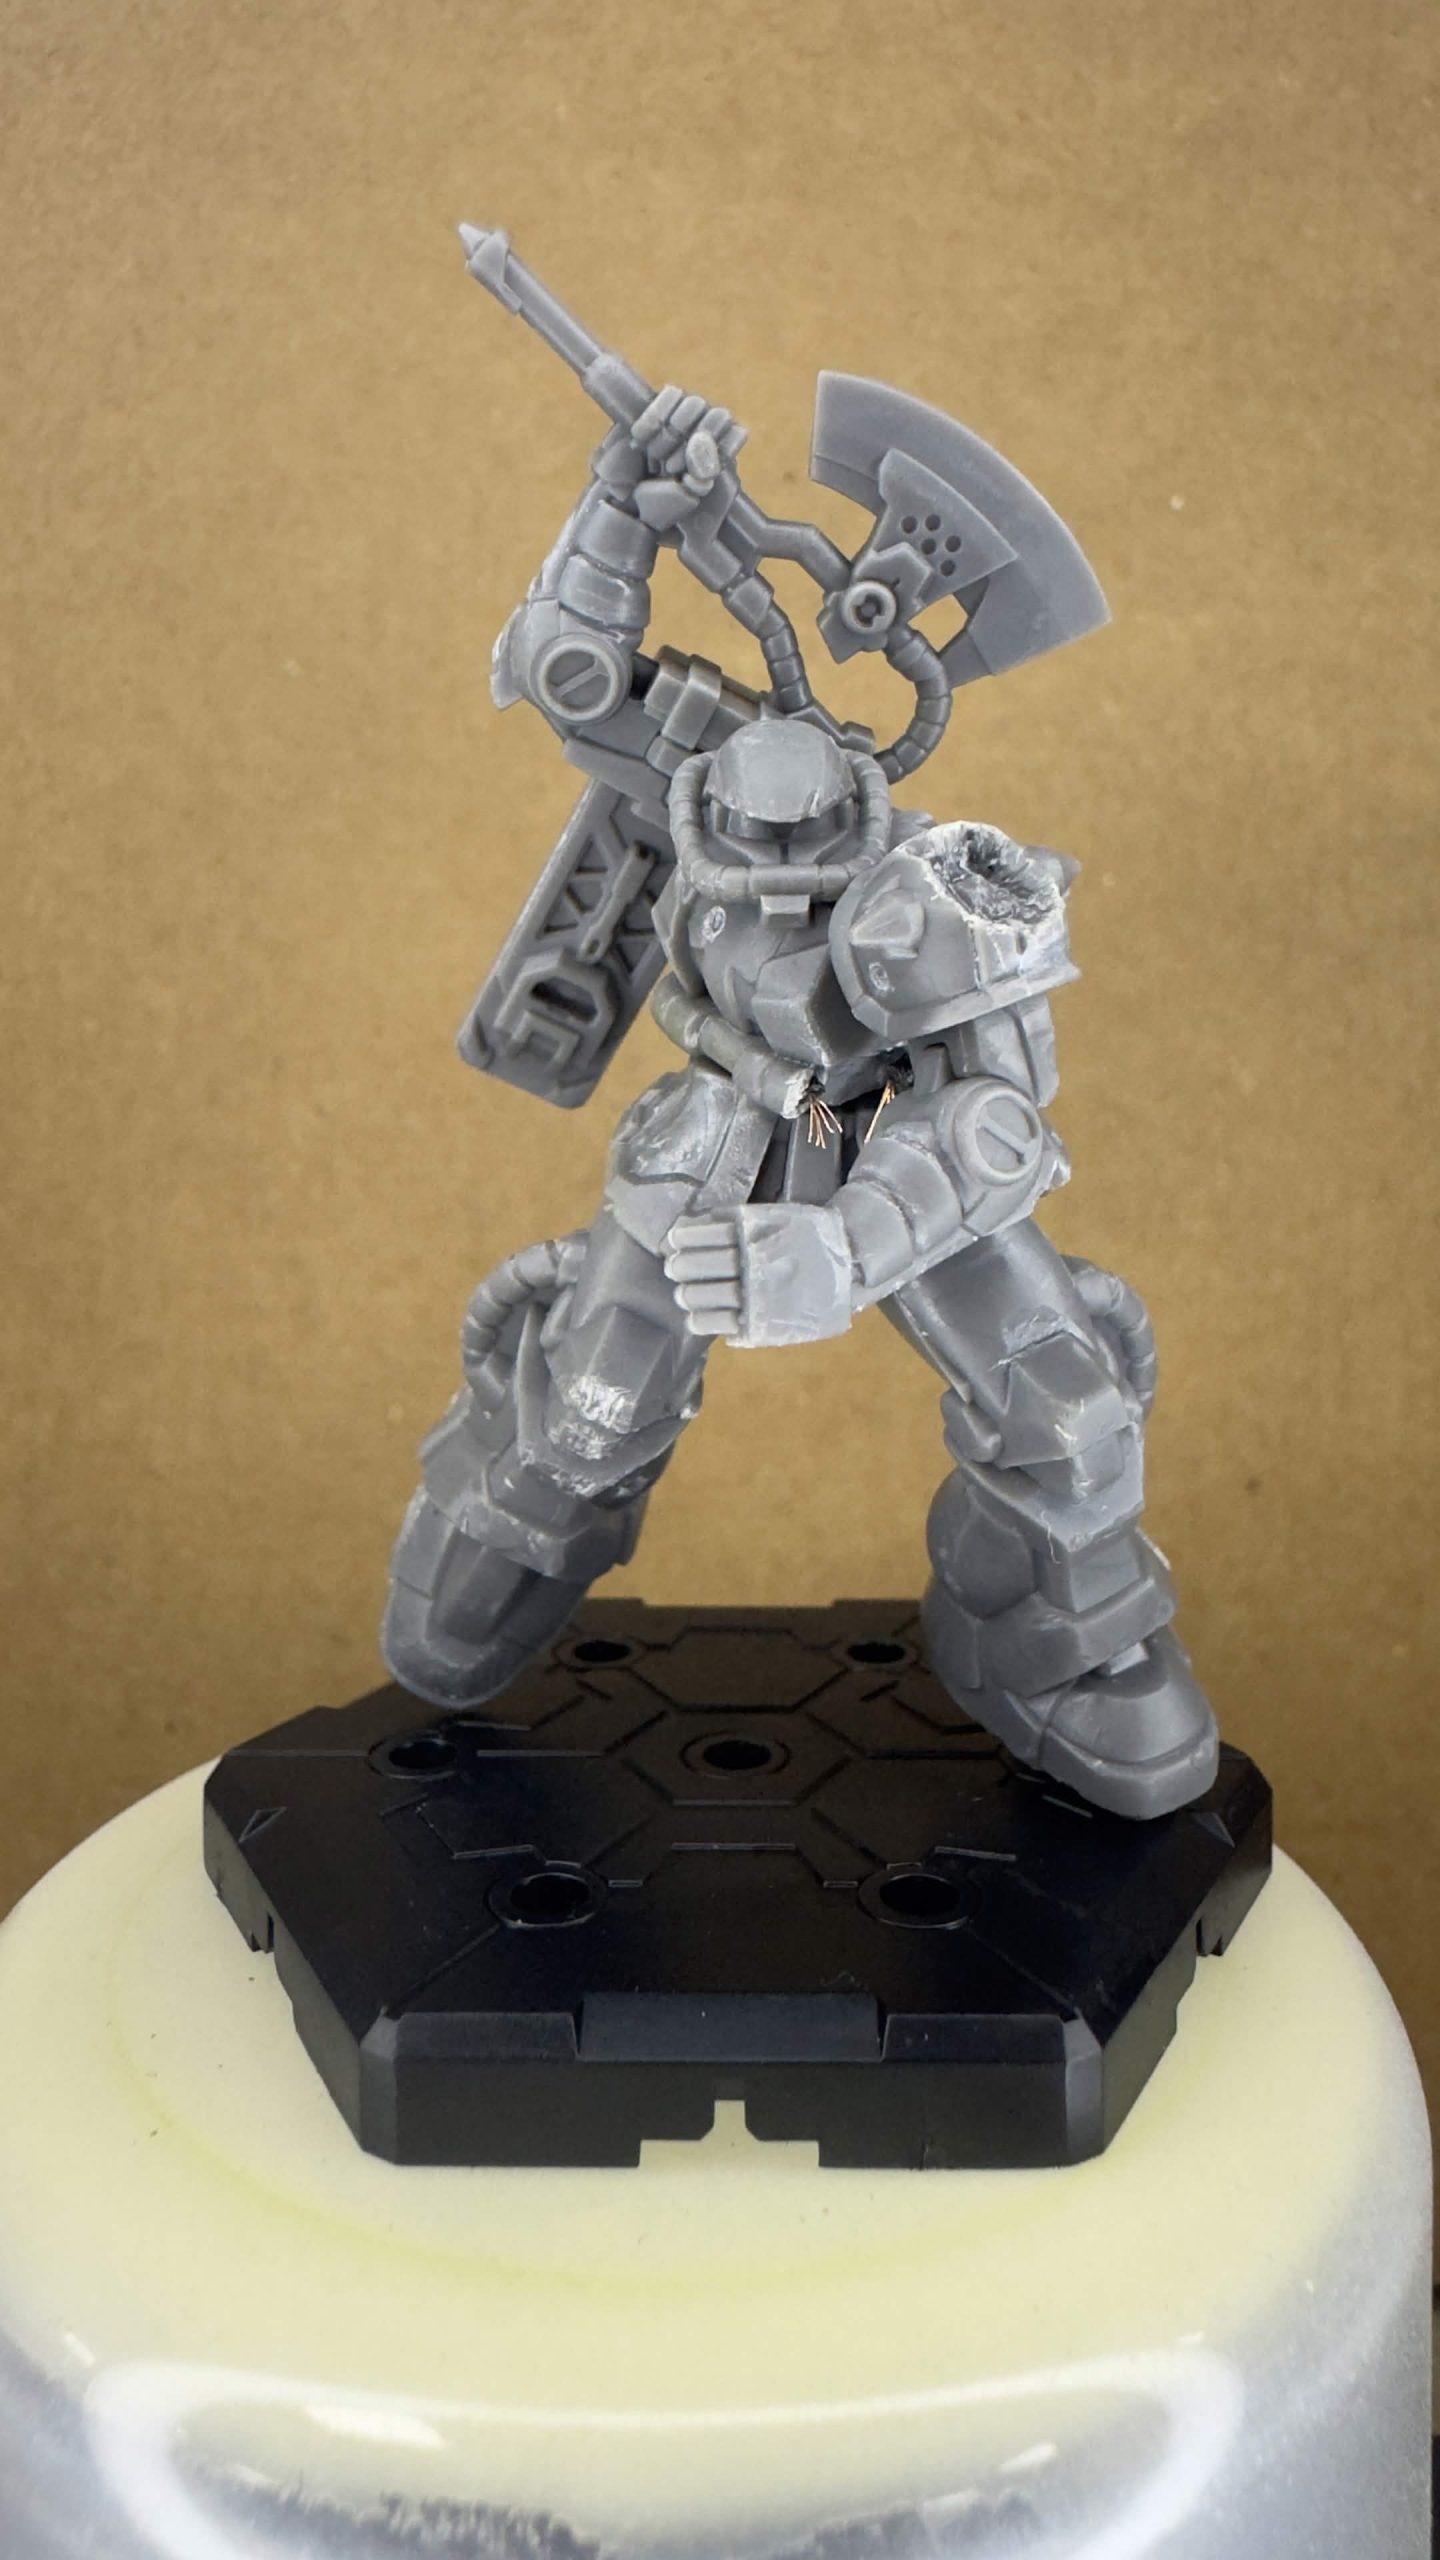
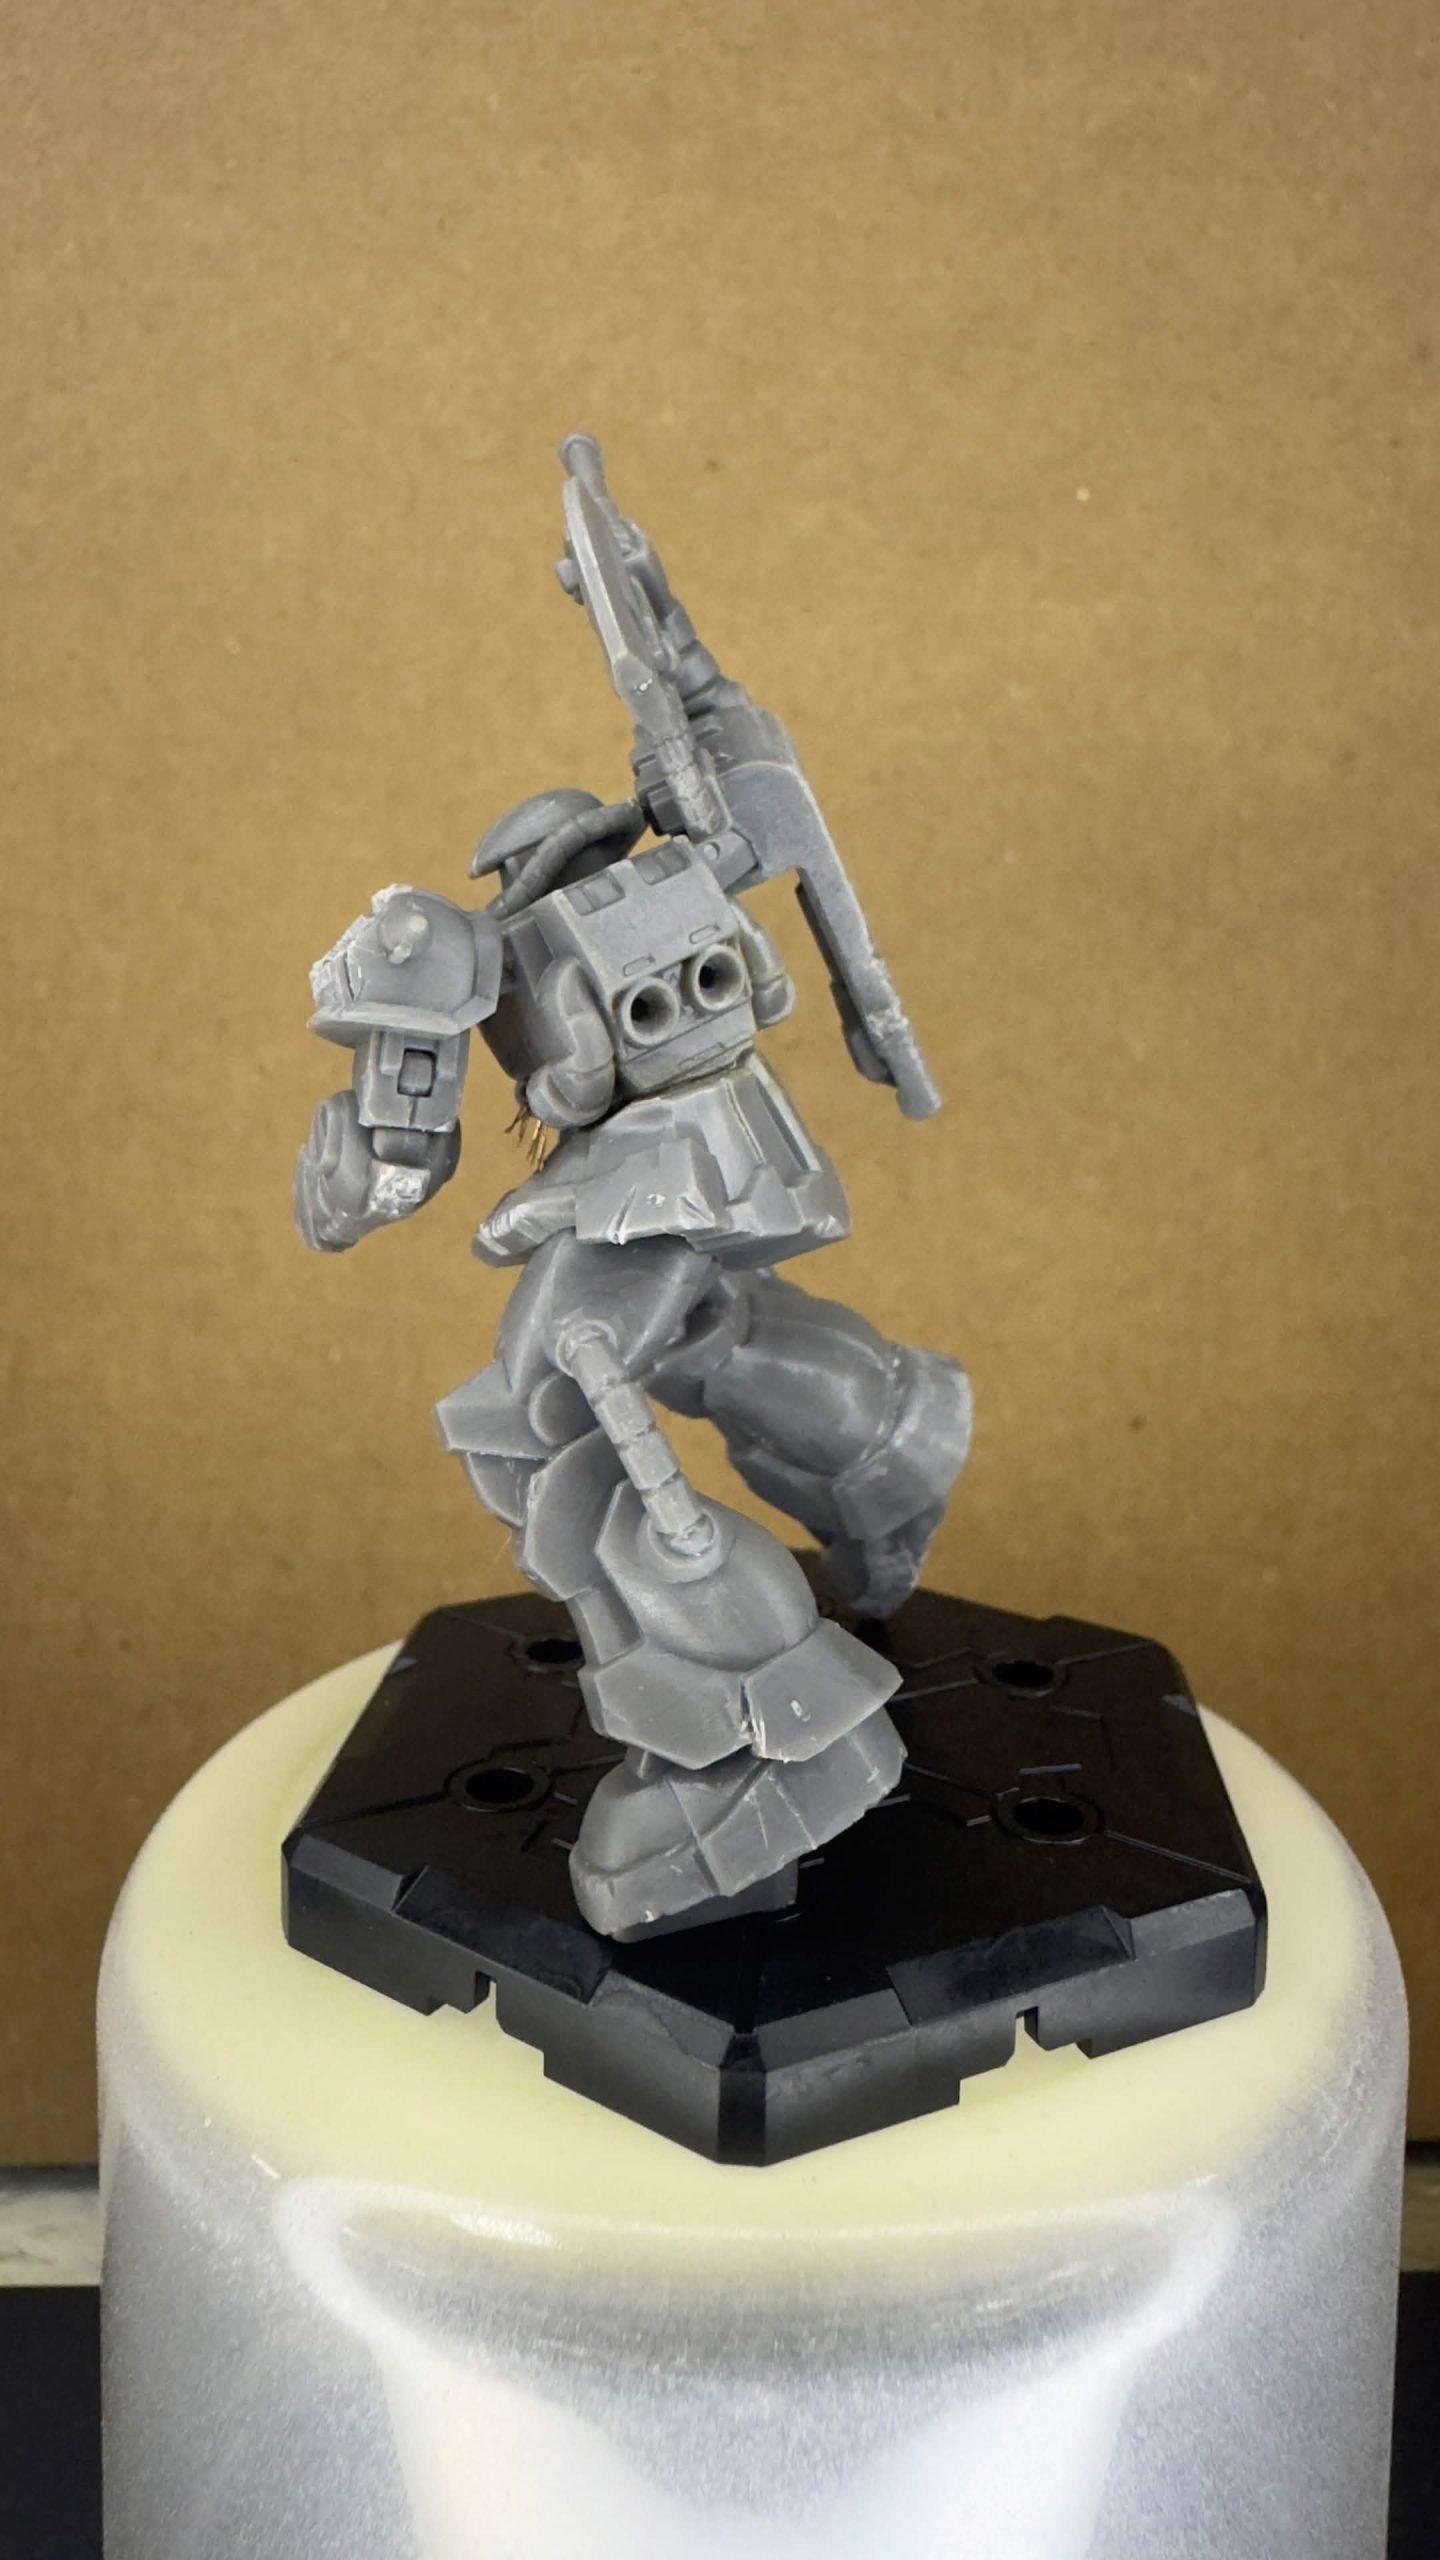
I’ll worry about the basing later, but I have some ideas, again using episode 8 as my guide. Now off to splash some paint!
The Build of my Zaku
When the sprue arrived, I was glad to see I got the pose I was hoping for, as there was a random choice between three available. (as far as I know)
This pose is nice and open, with plenty of room for playing around with my battle damage idea and trying to replicate the particular damage patterns from the one in the show!
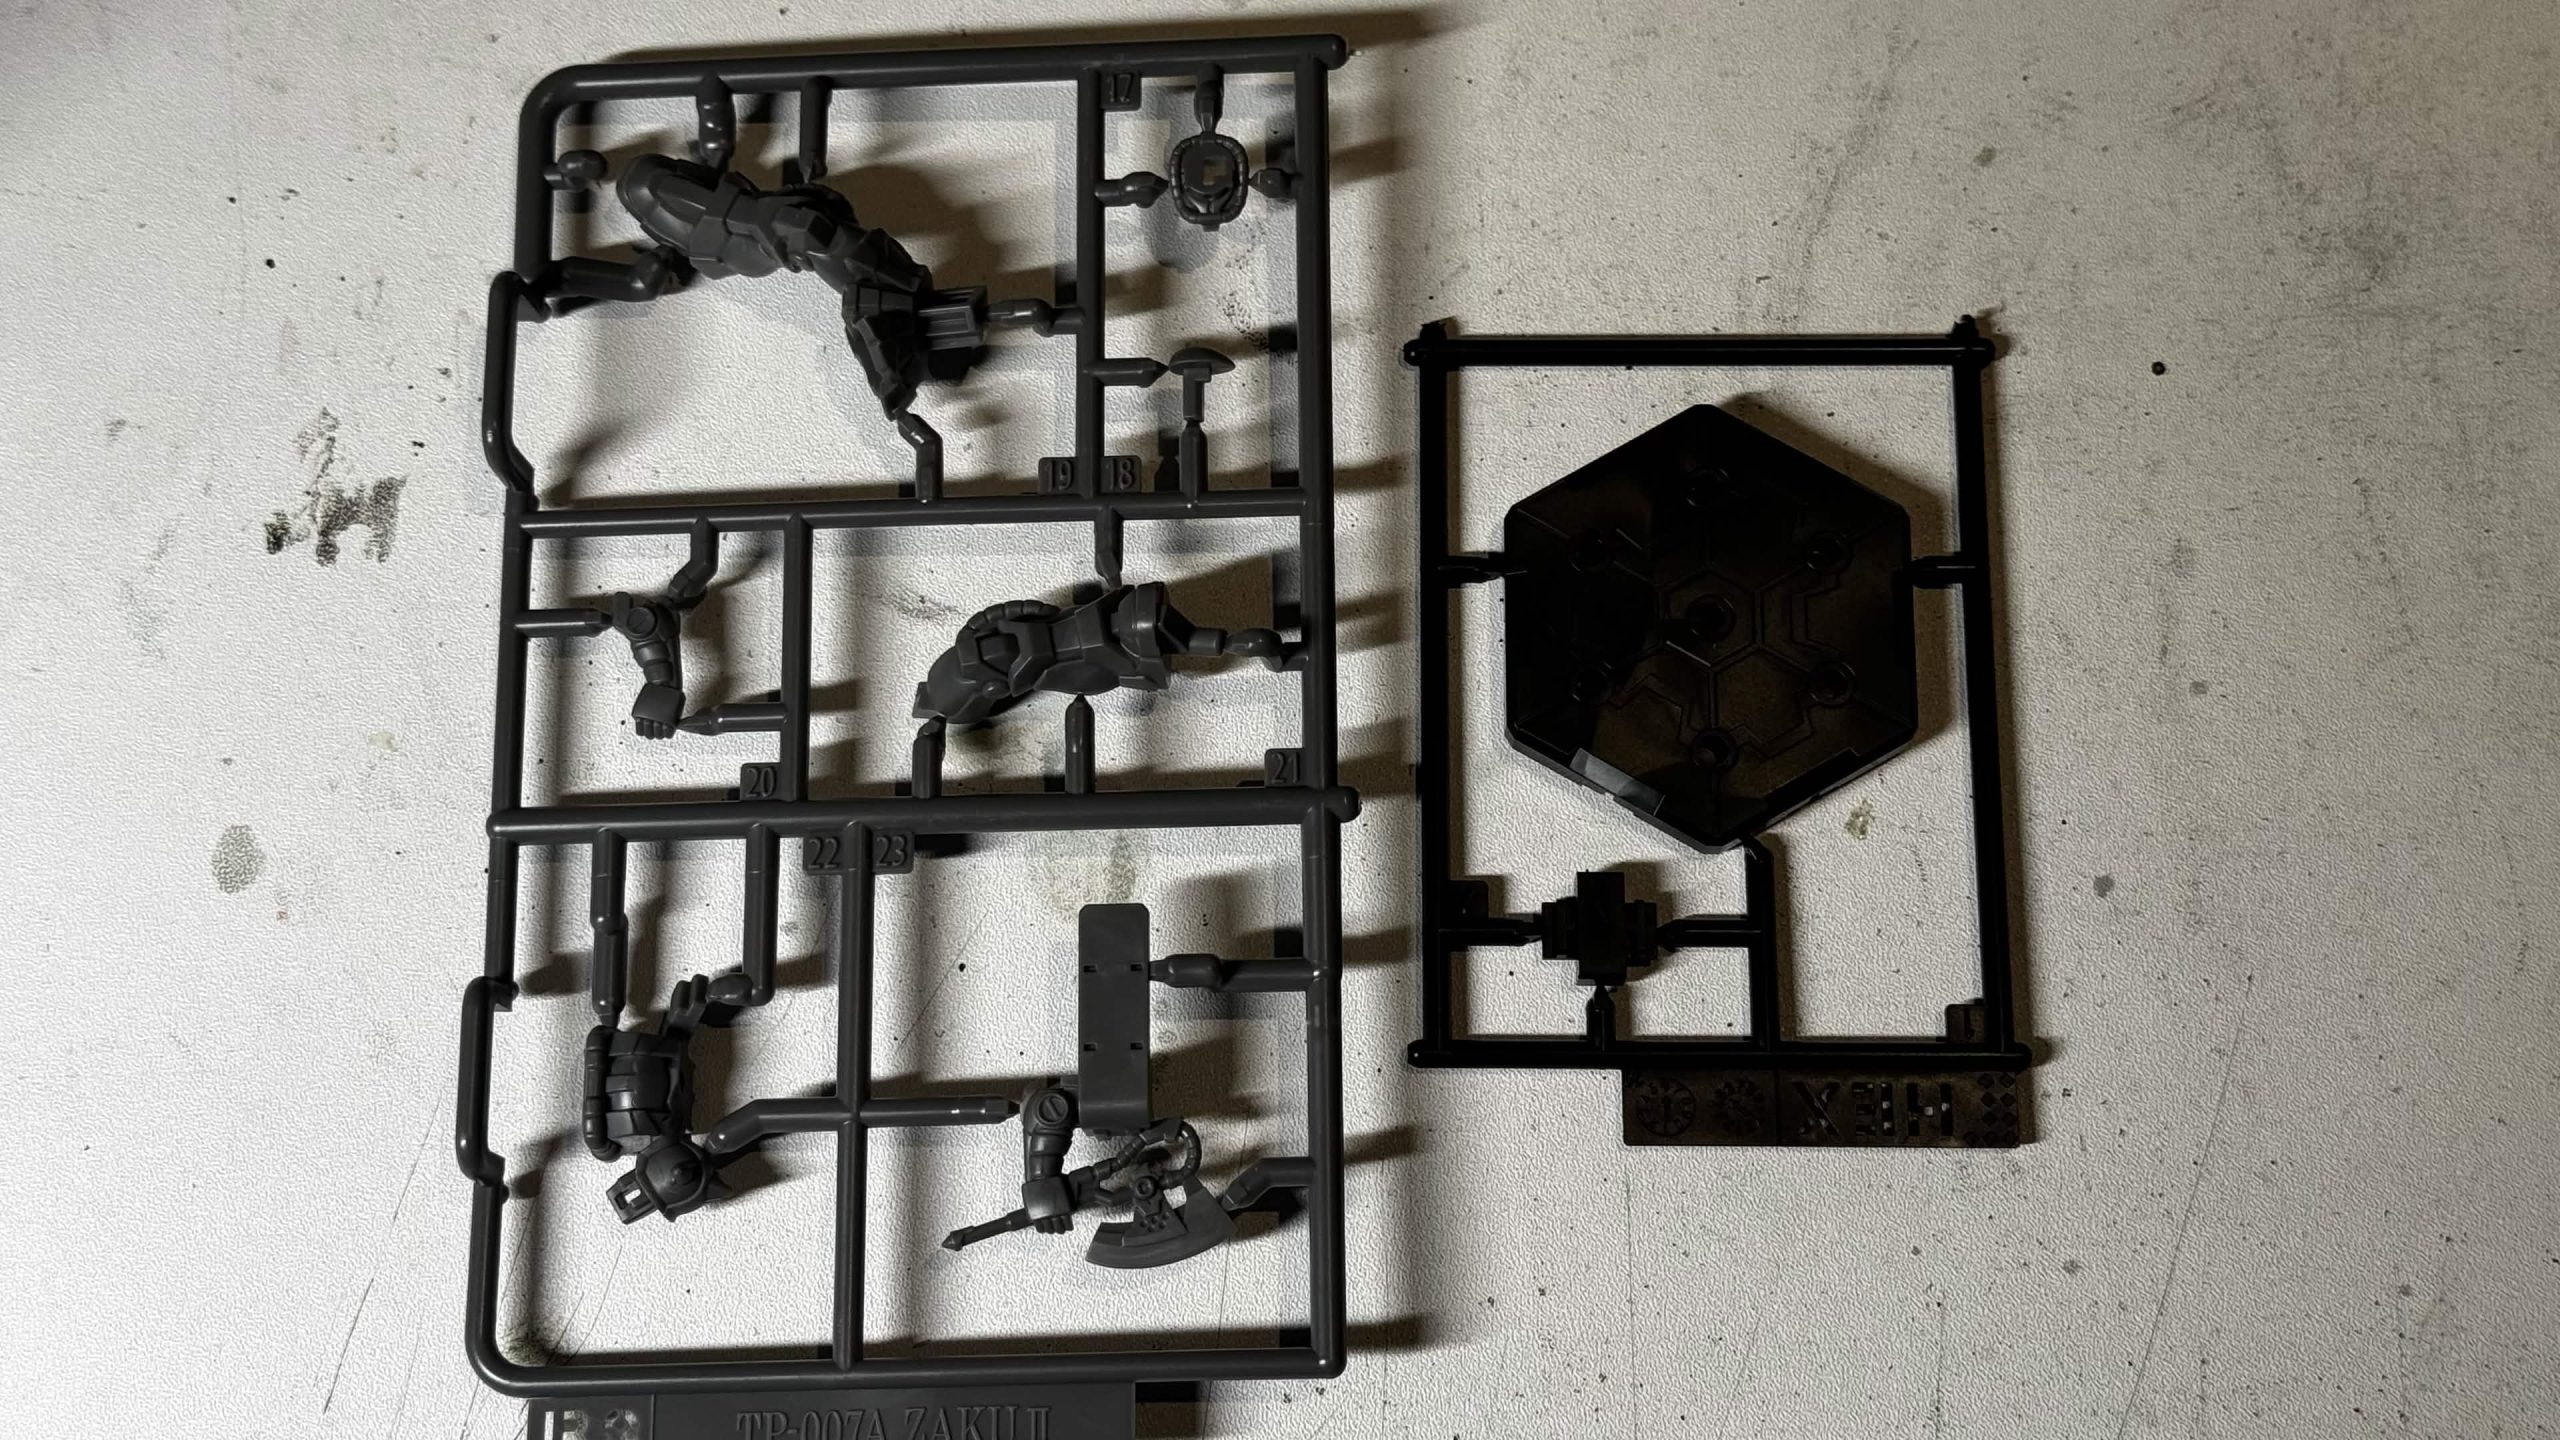
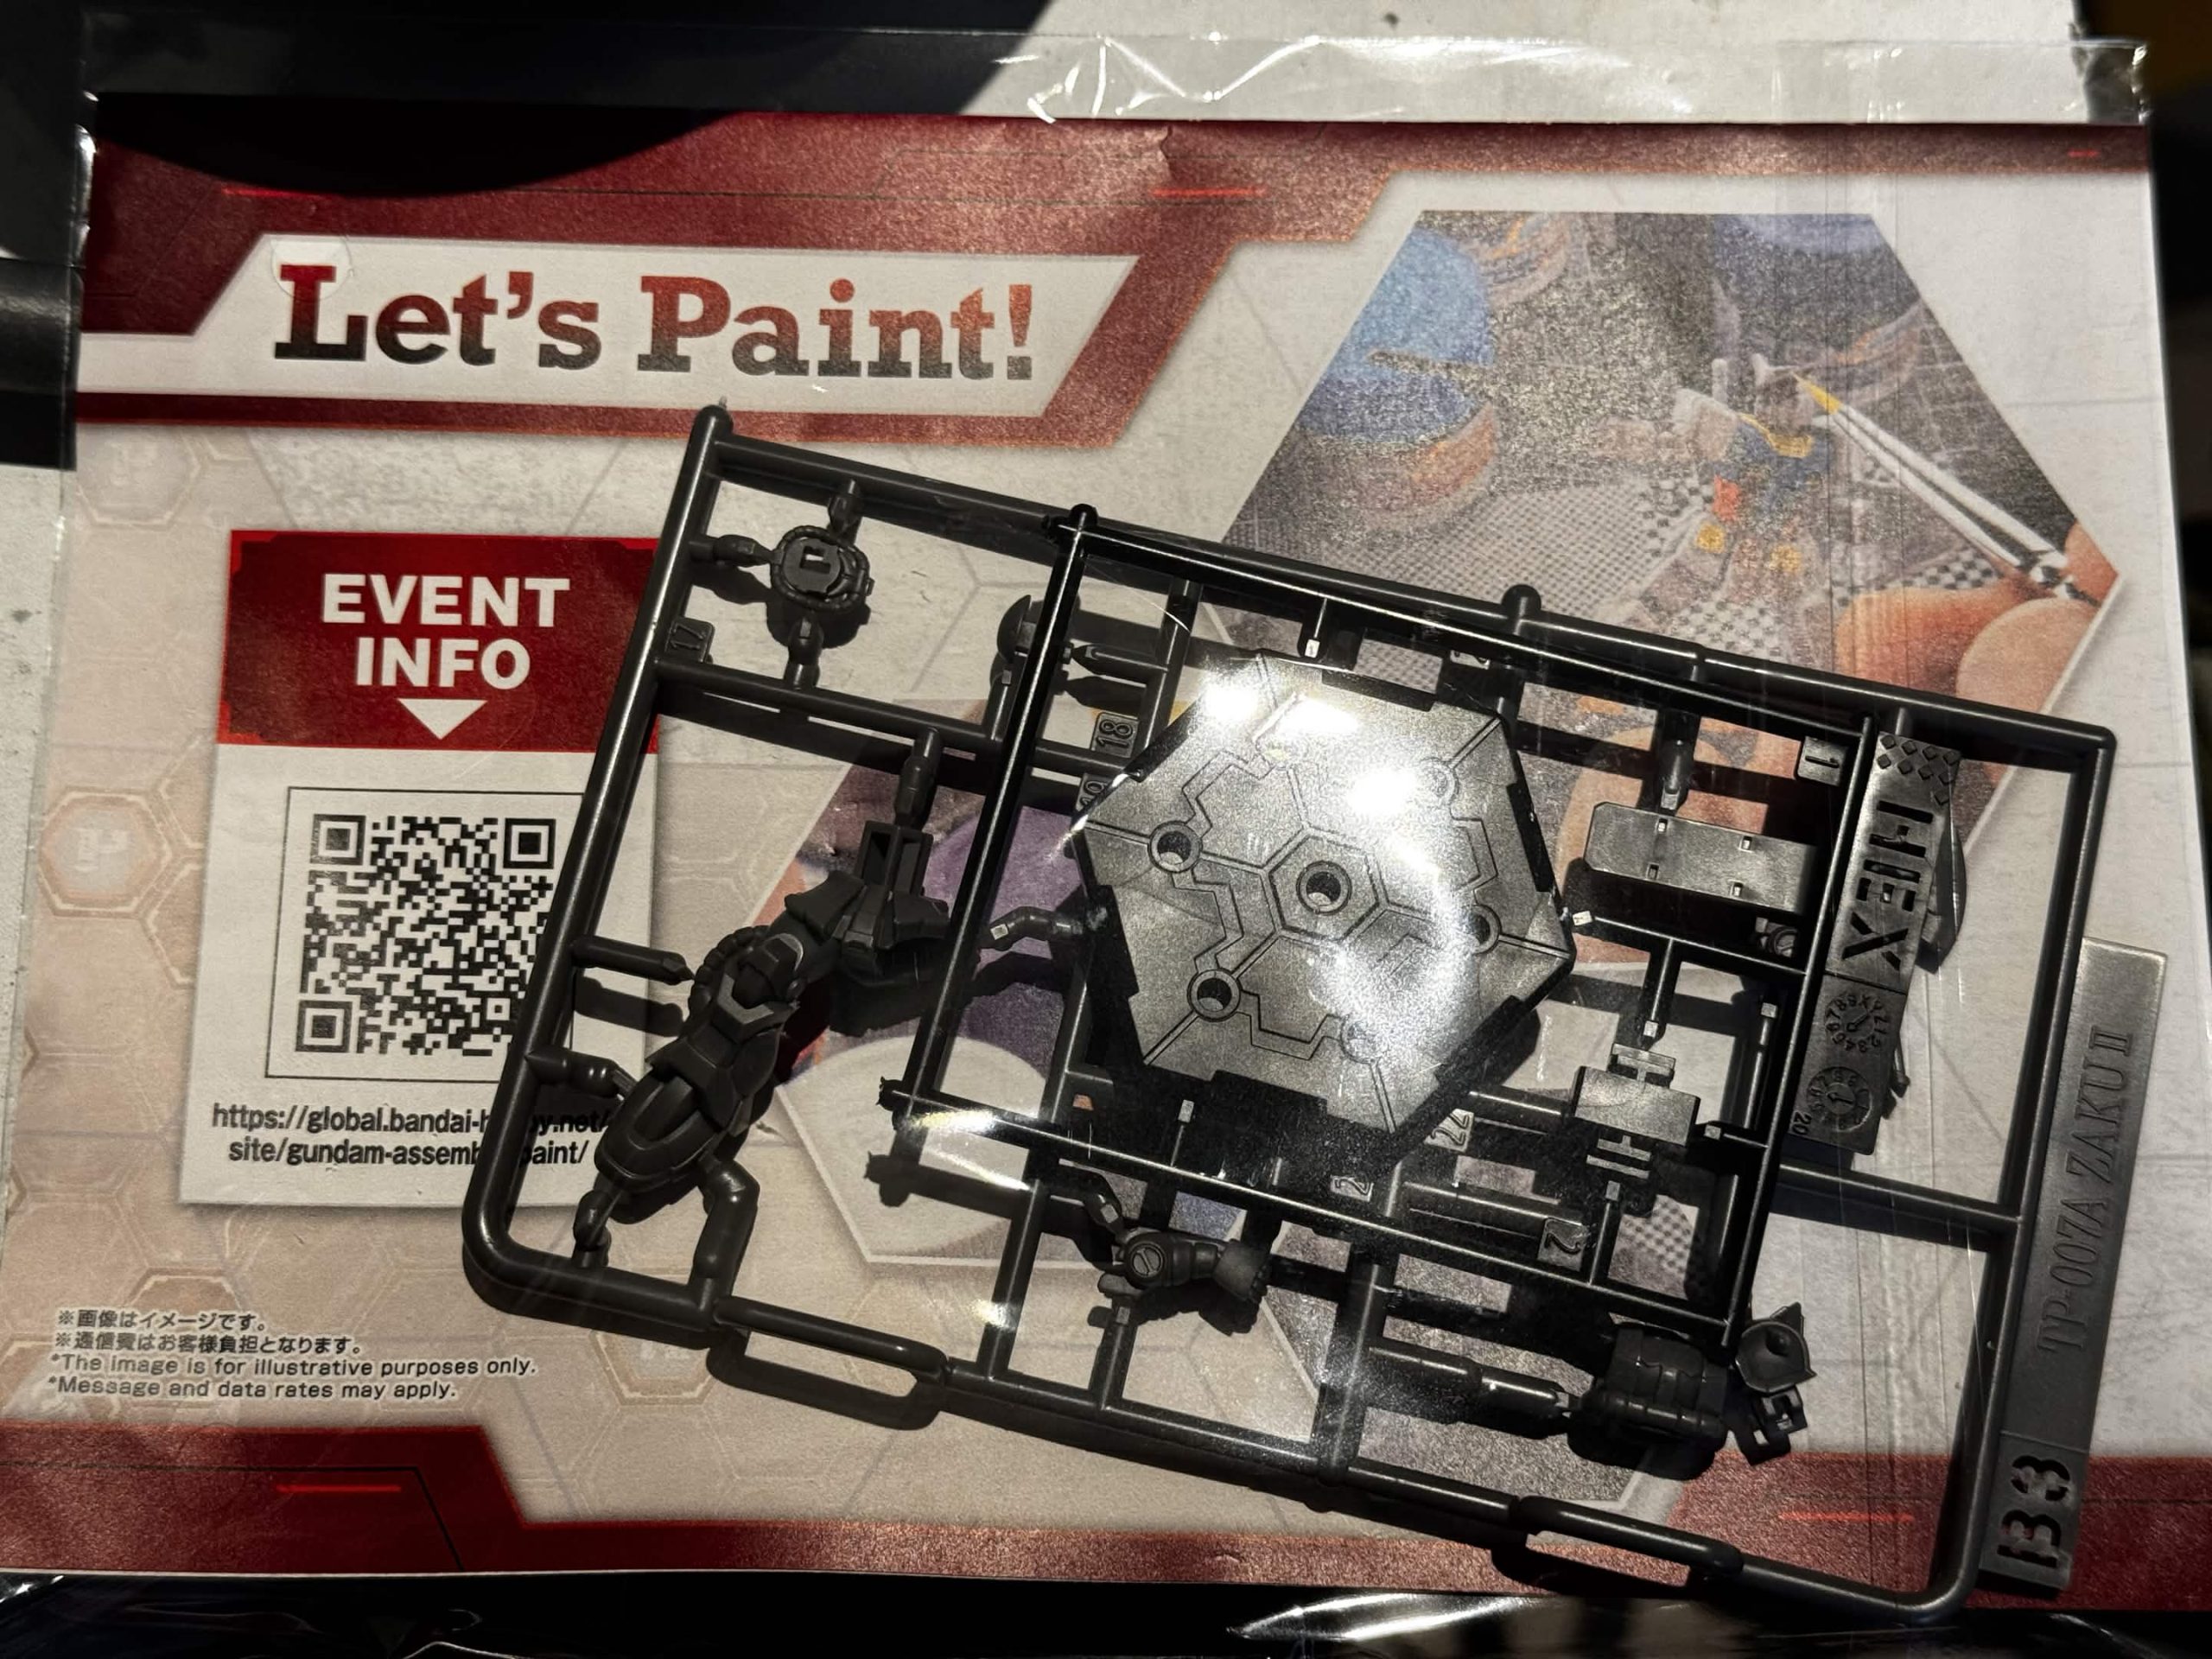
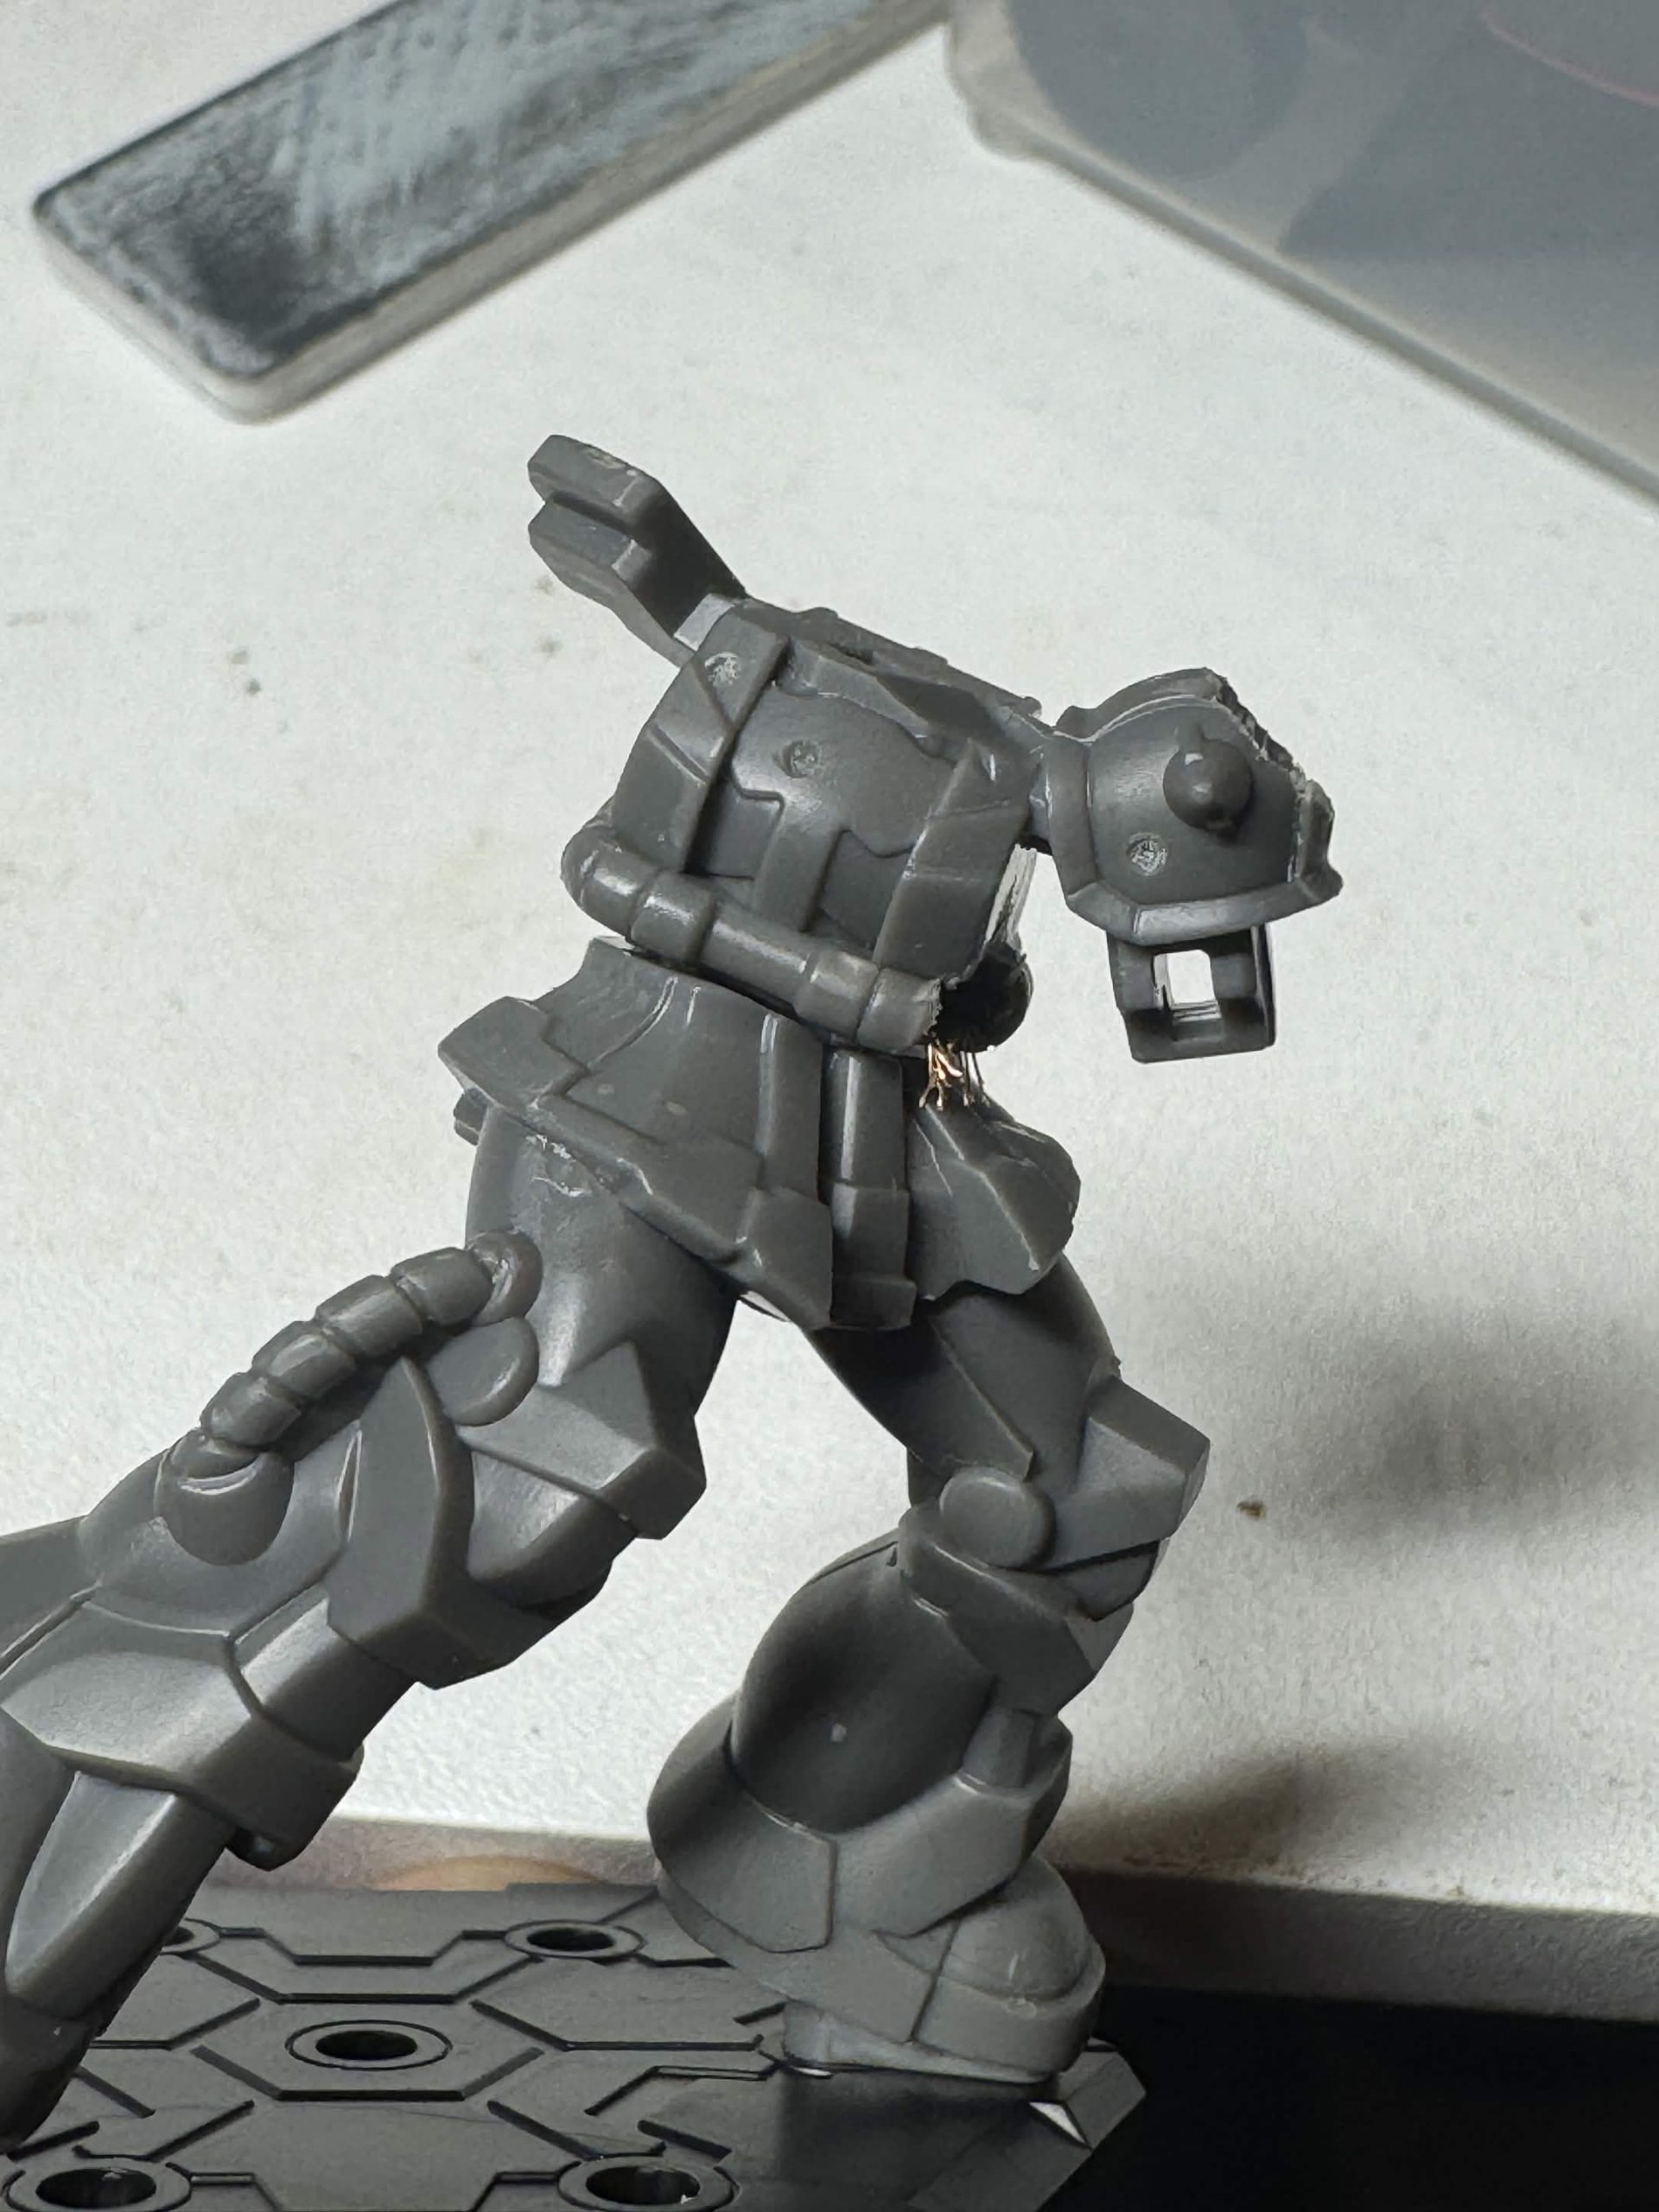
I clipped, cleaned and dryfitted the parts before taking it apart and beginning the damage work. I wanted to ensure I could do the damaged shoulder and broken piping before going too far, as they were the areas I was least comfortable with modelling.
clippers, Pin vice, electric sanding thingy and a hobby knife let me dig out the material I wanted, and I was able to leave a bit inside the shoulder to represent the mechanical part under the armoured shape of the shoulder guard.
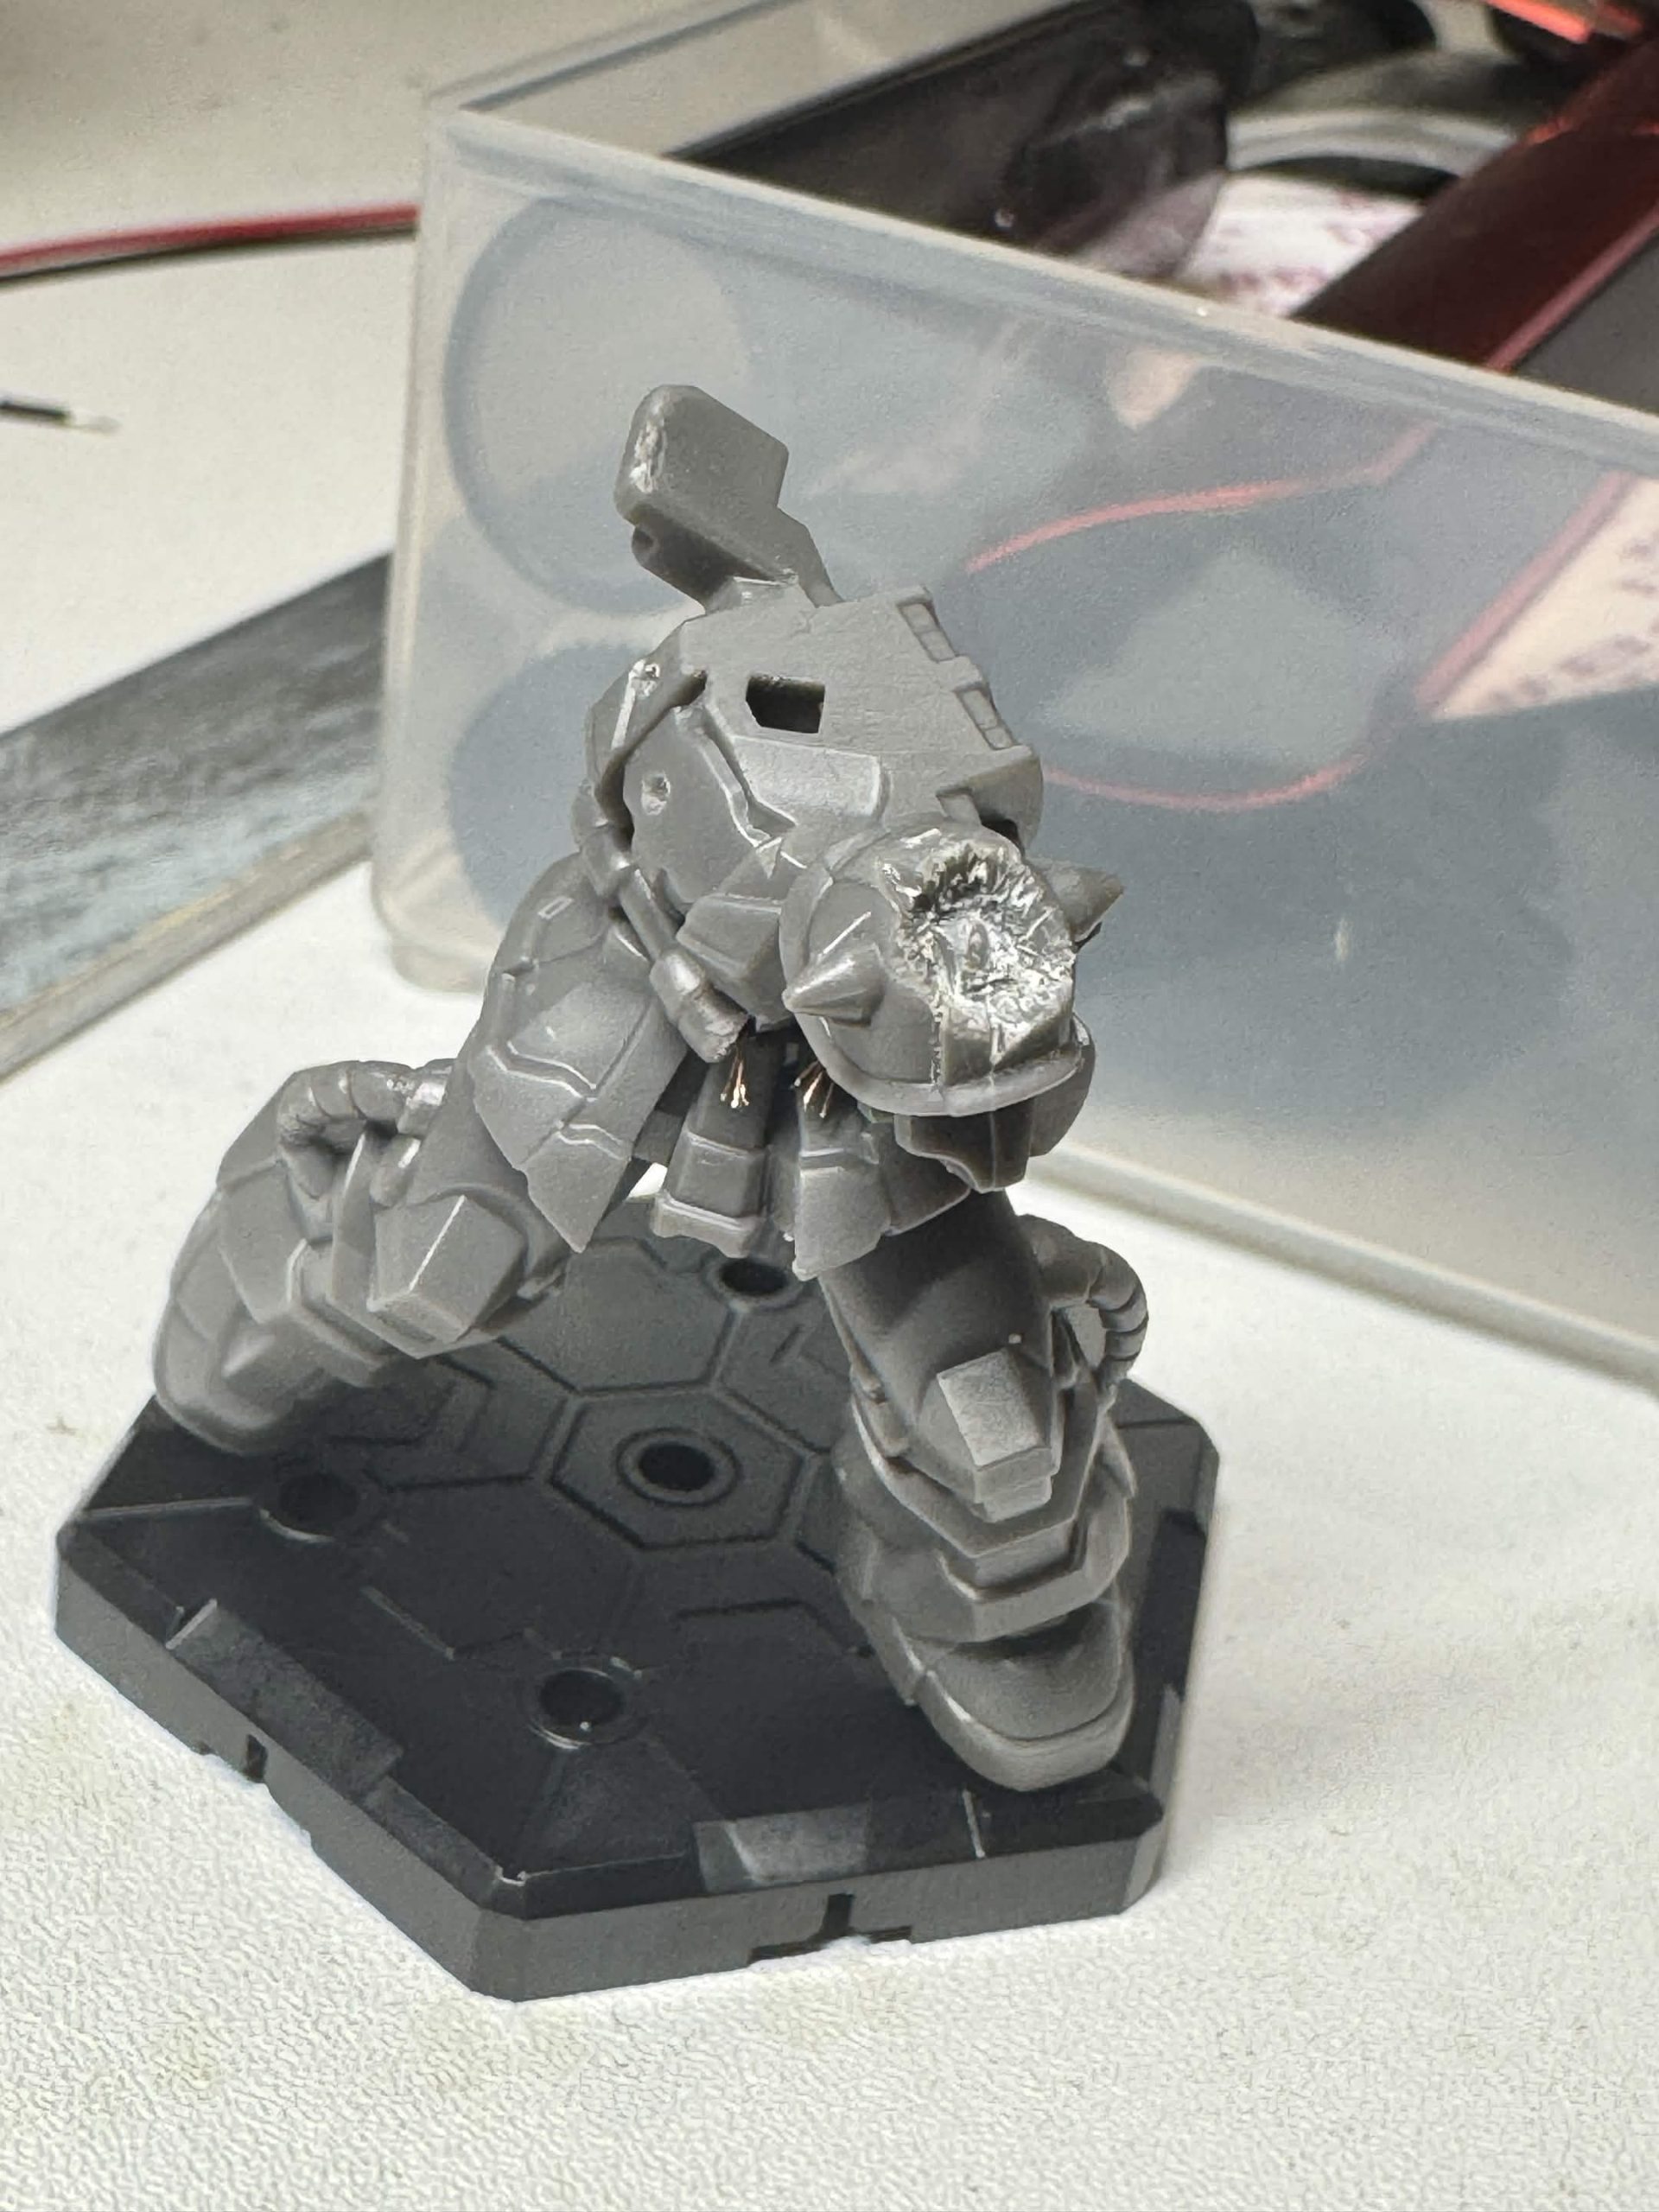
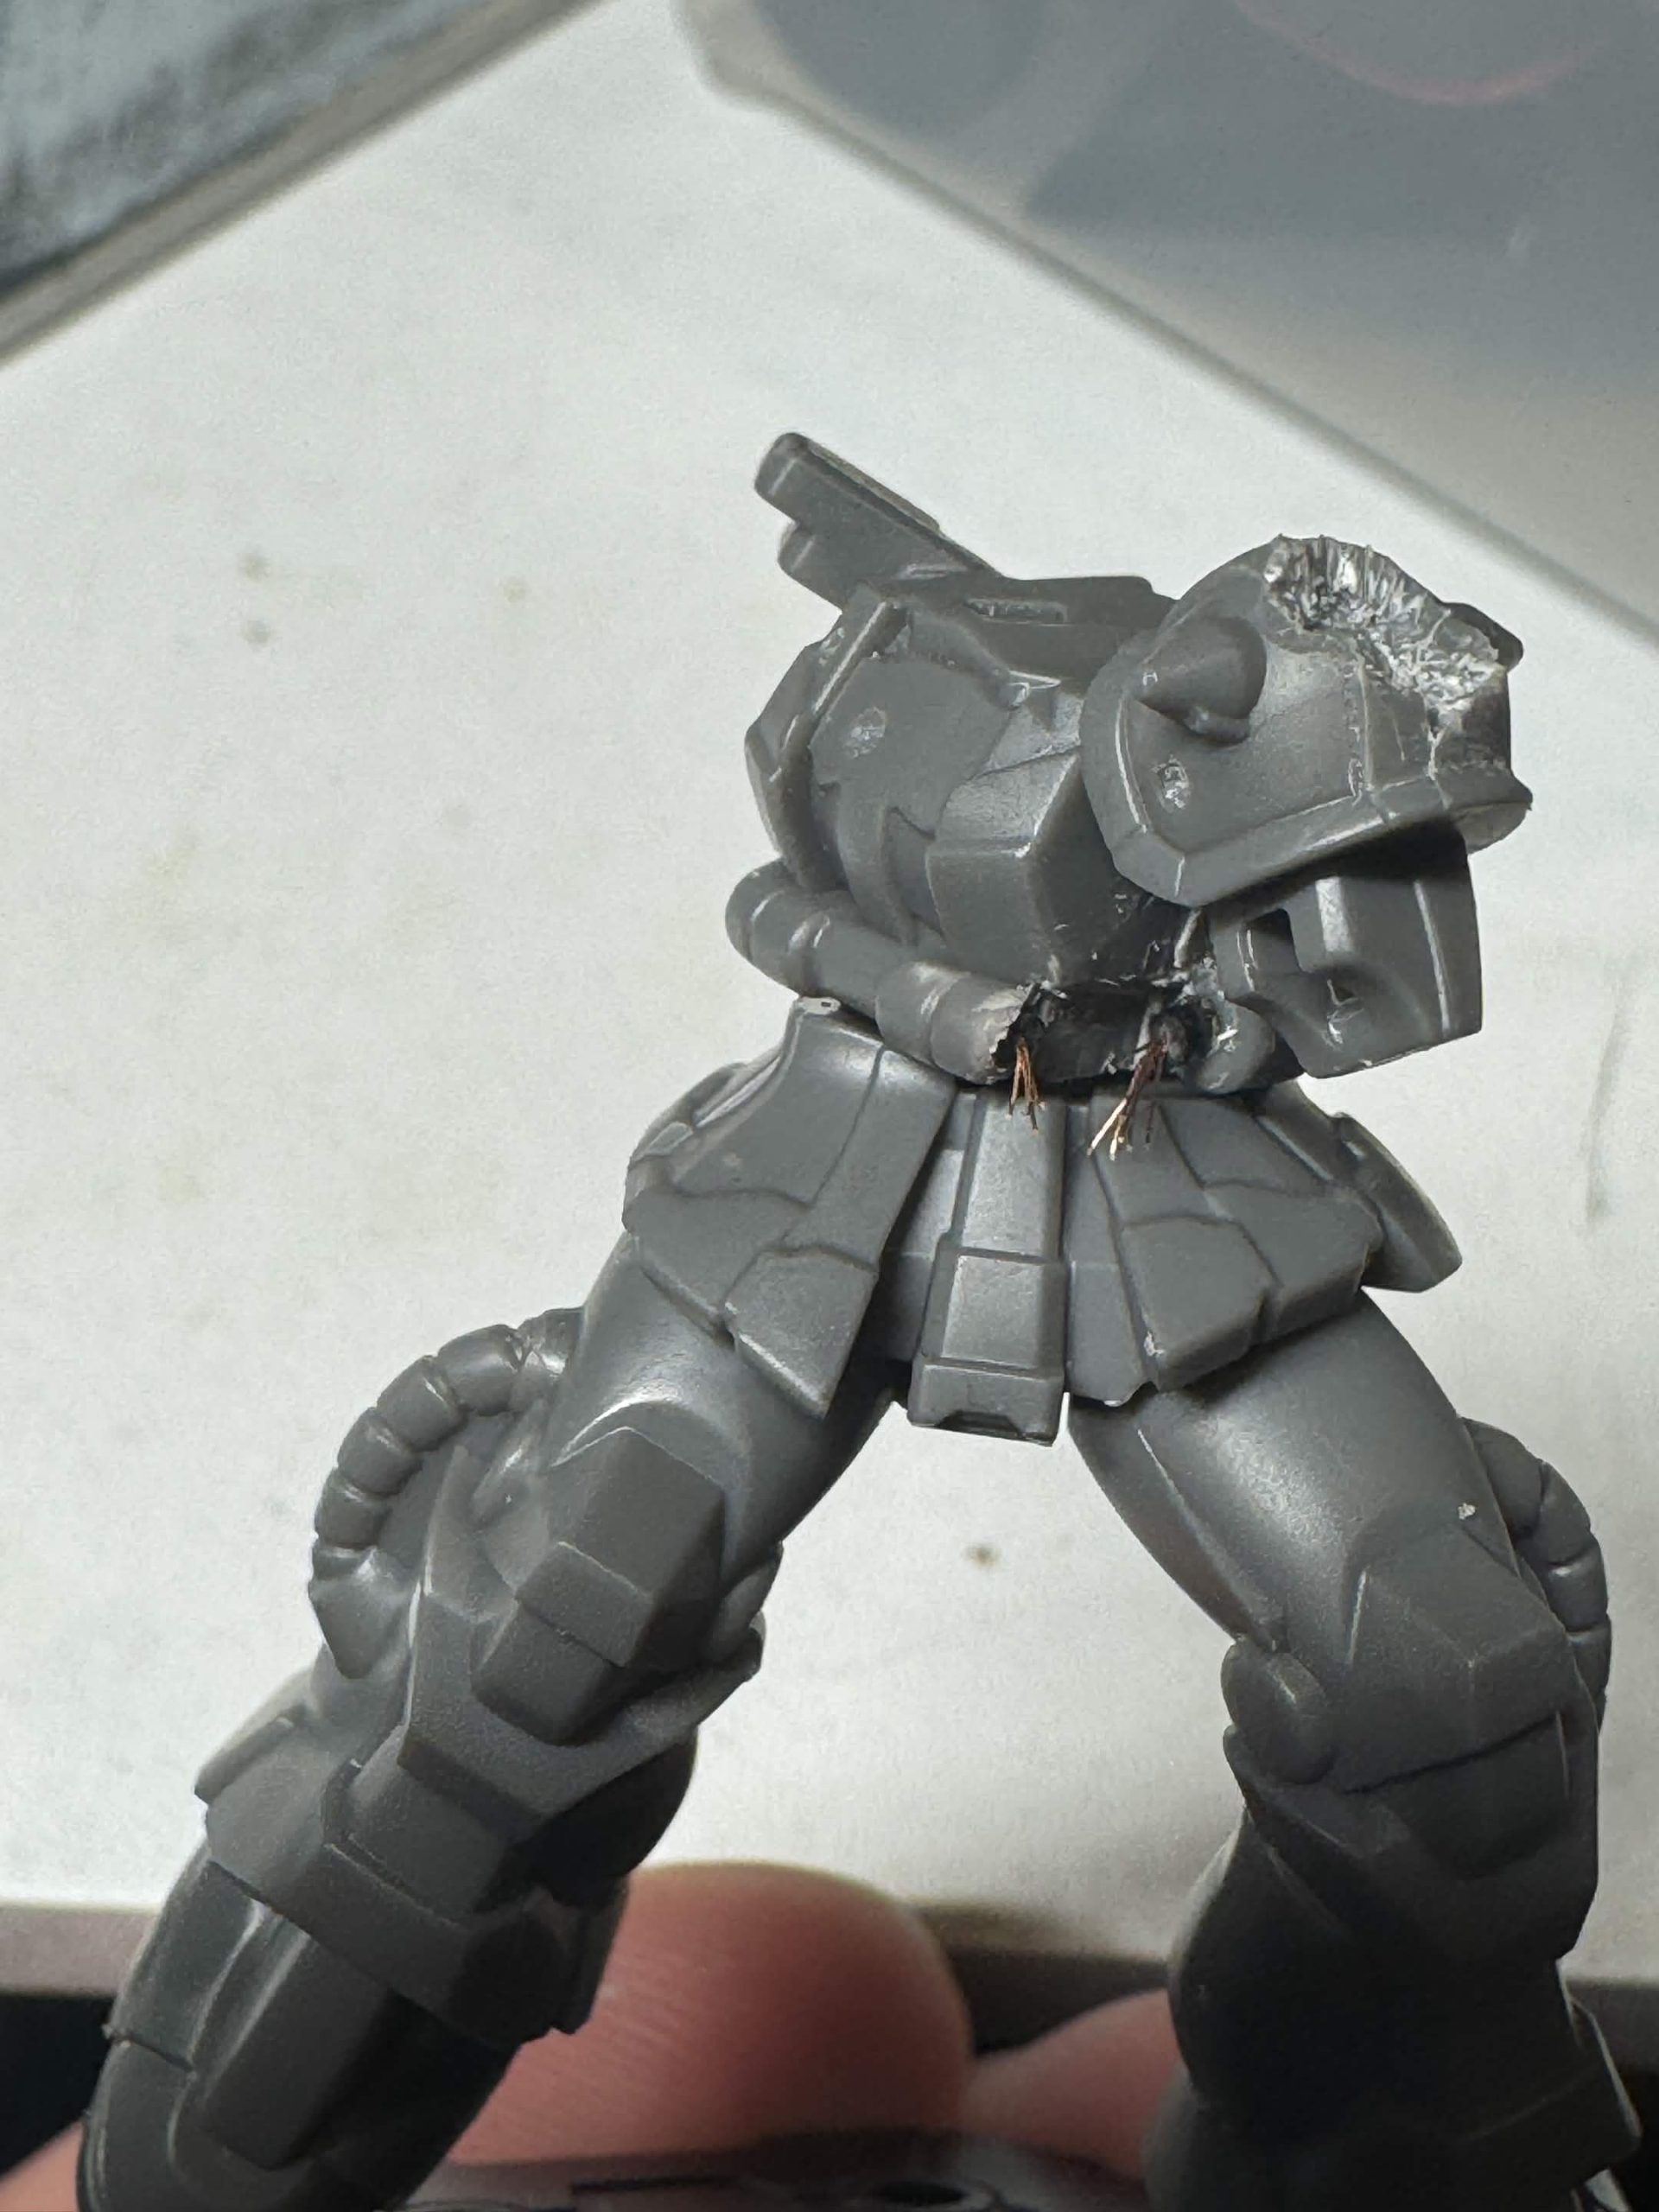
The broken piping was tricky, having to brutally cut away what was molded on the model was an exercise in patience I don’t often get! Especially at this scale (roughly T-gauge railway or 1/425?)
One I had it cut away I drilled into the remains of the piping and carefully took some LED wire, cut and stripped the insulation and used my hobby knife and splay out the fine, copper wiring to give it a more frayed look.
References!
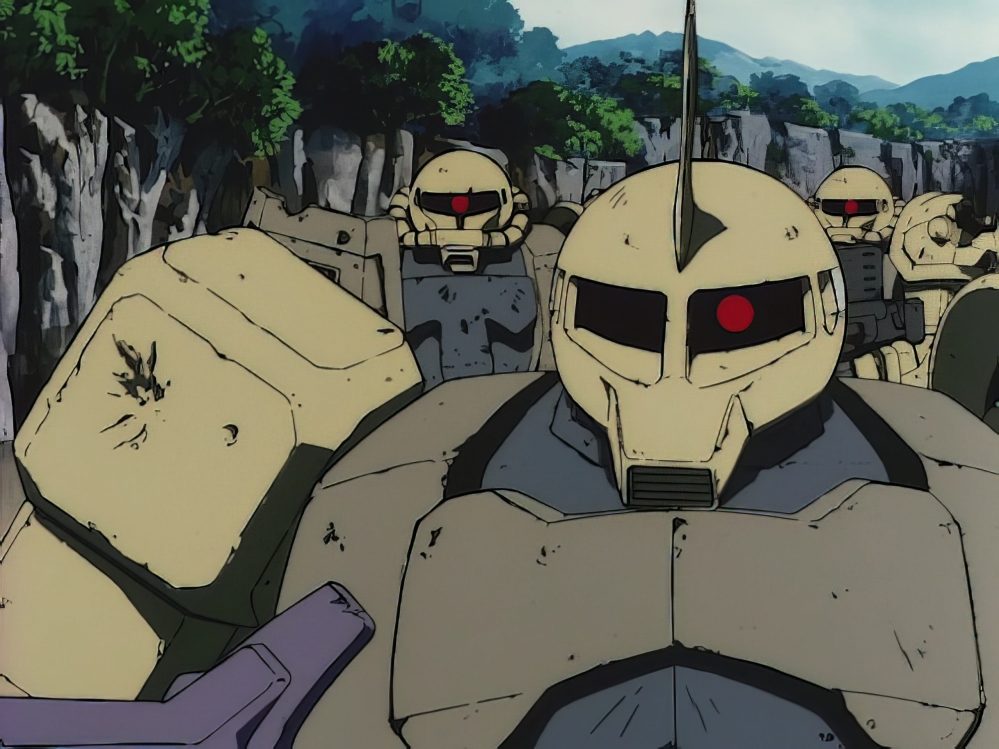
Here is the collection of references I am using for the battle damage for my Zaku, from Episode 8 of Gundam 08th MS team.
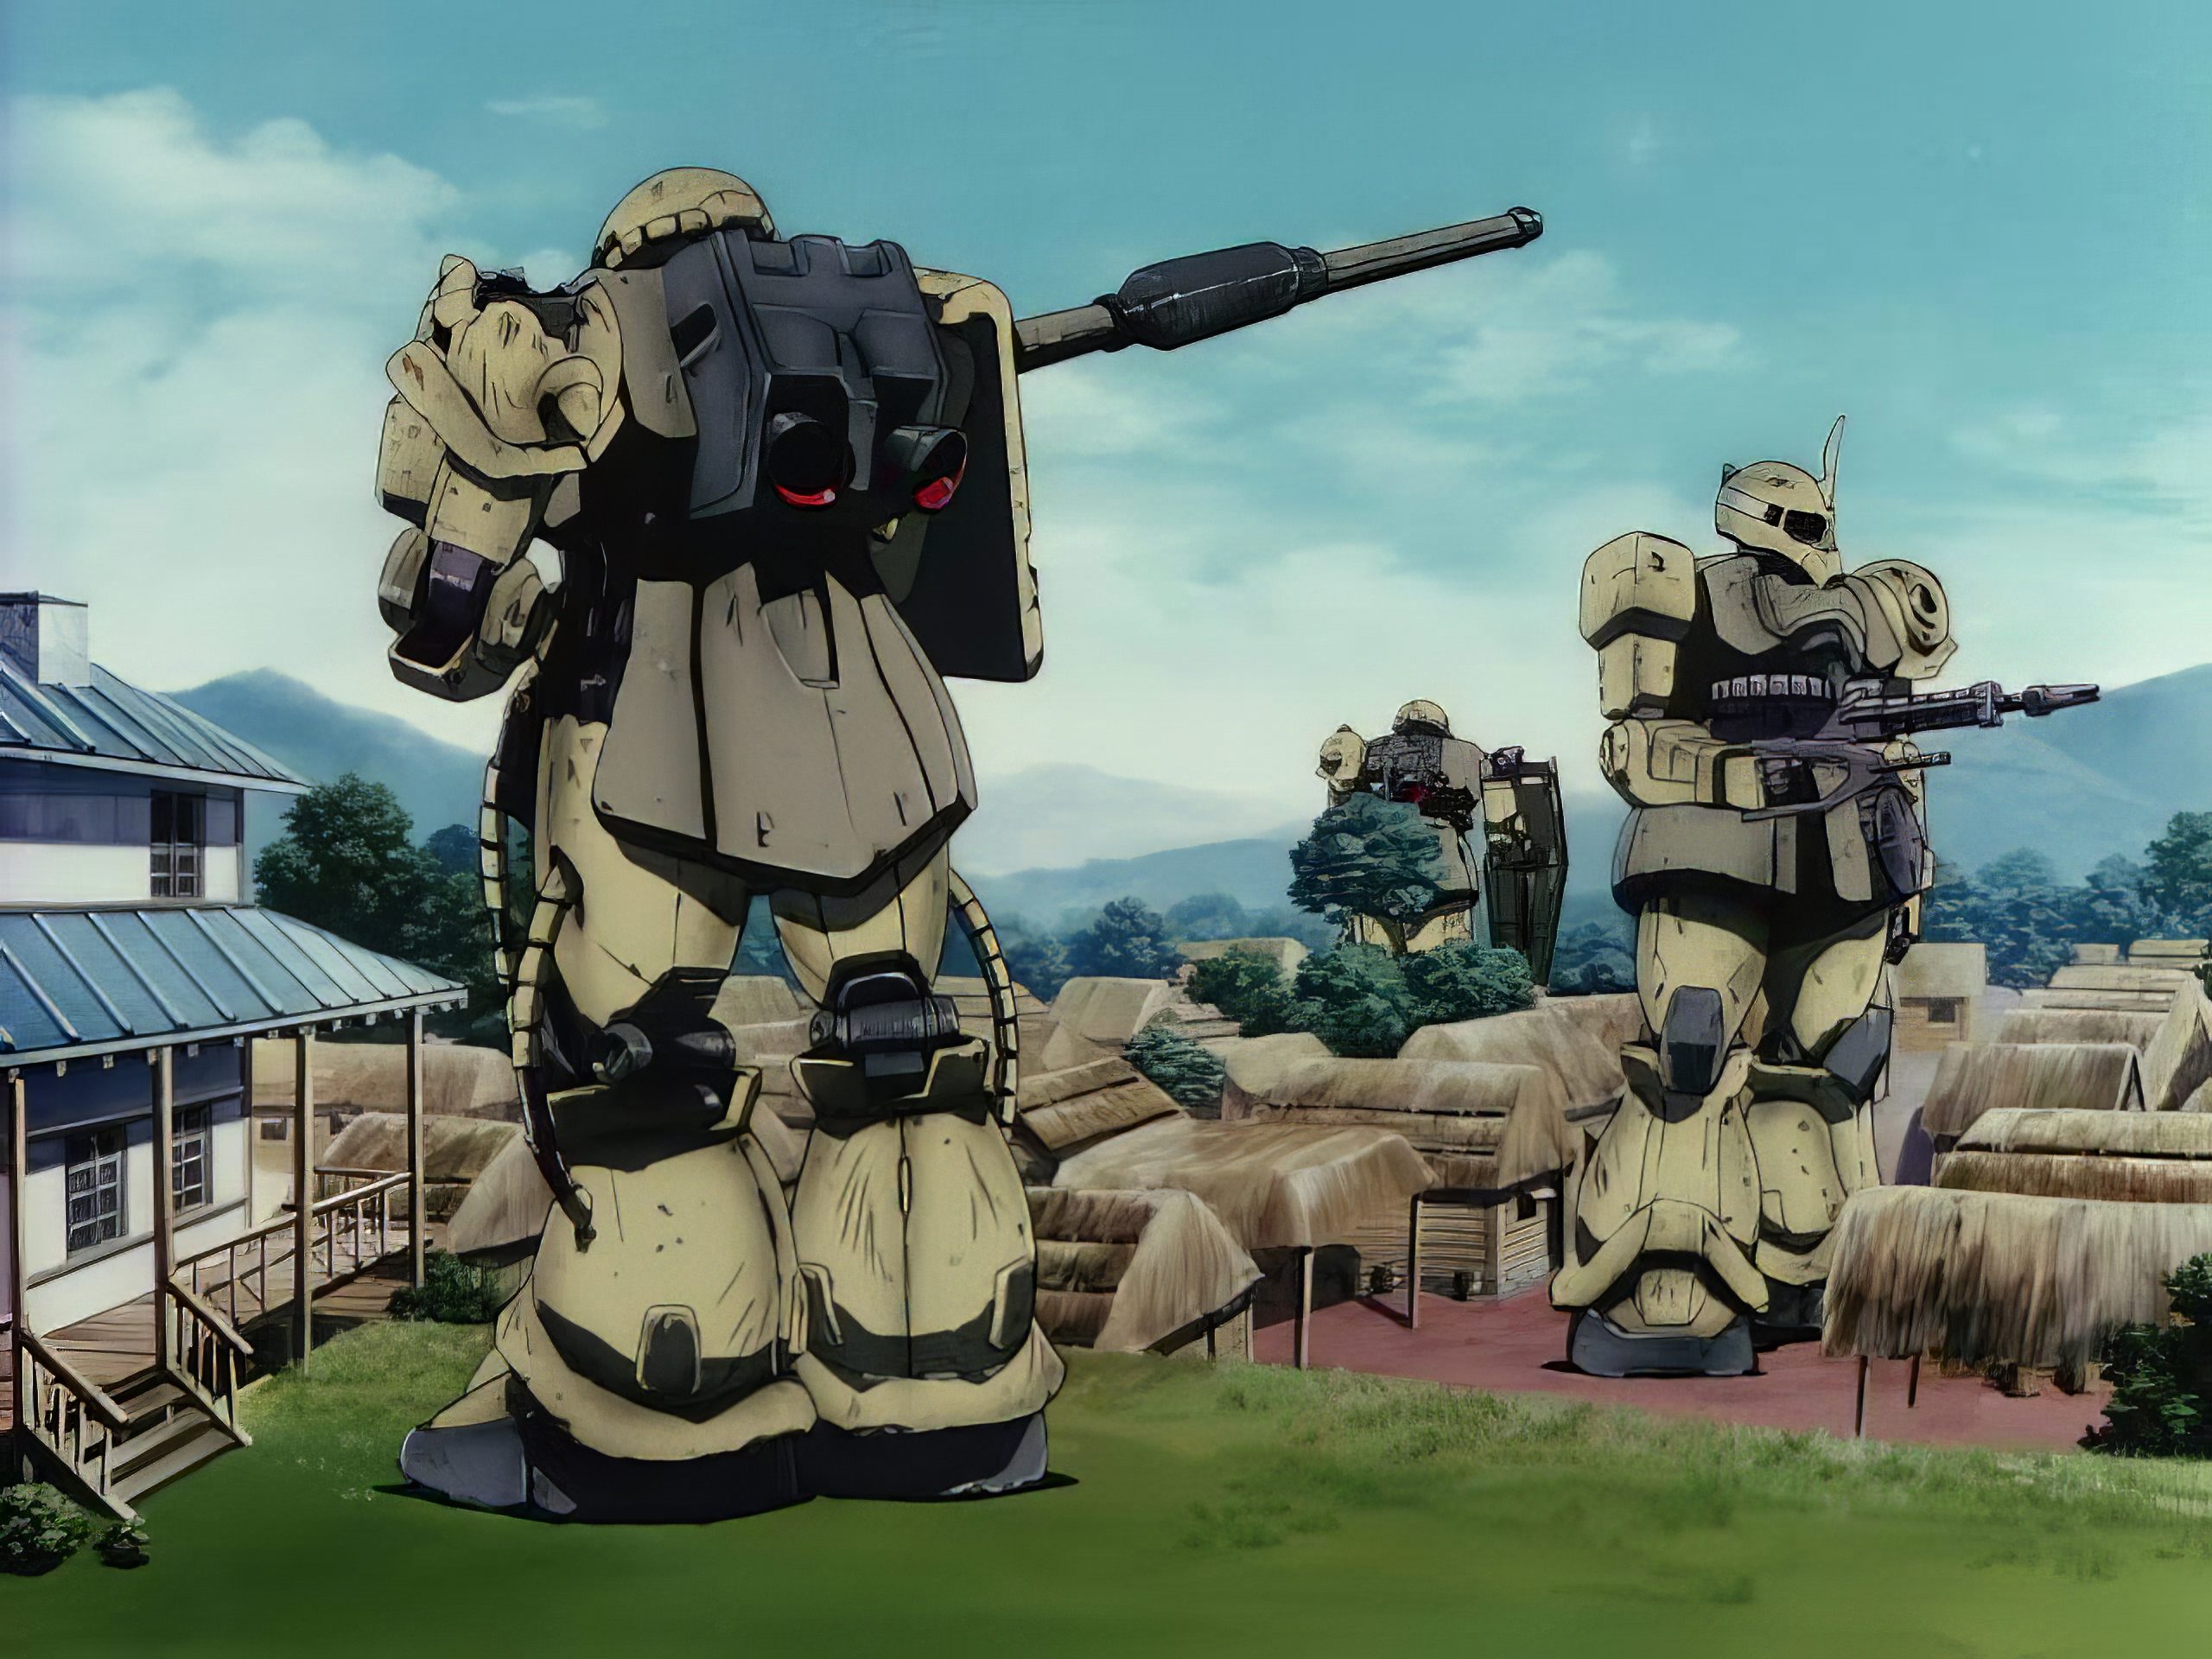
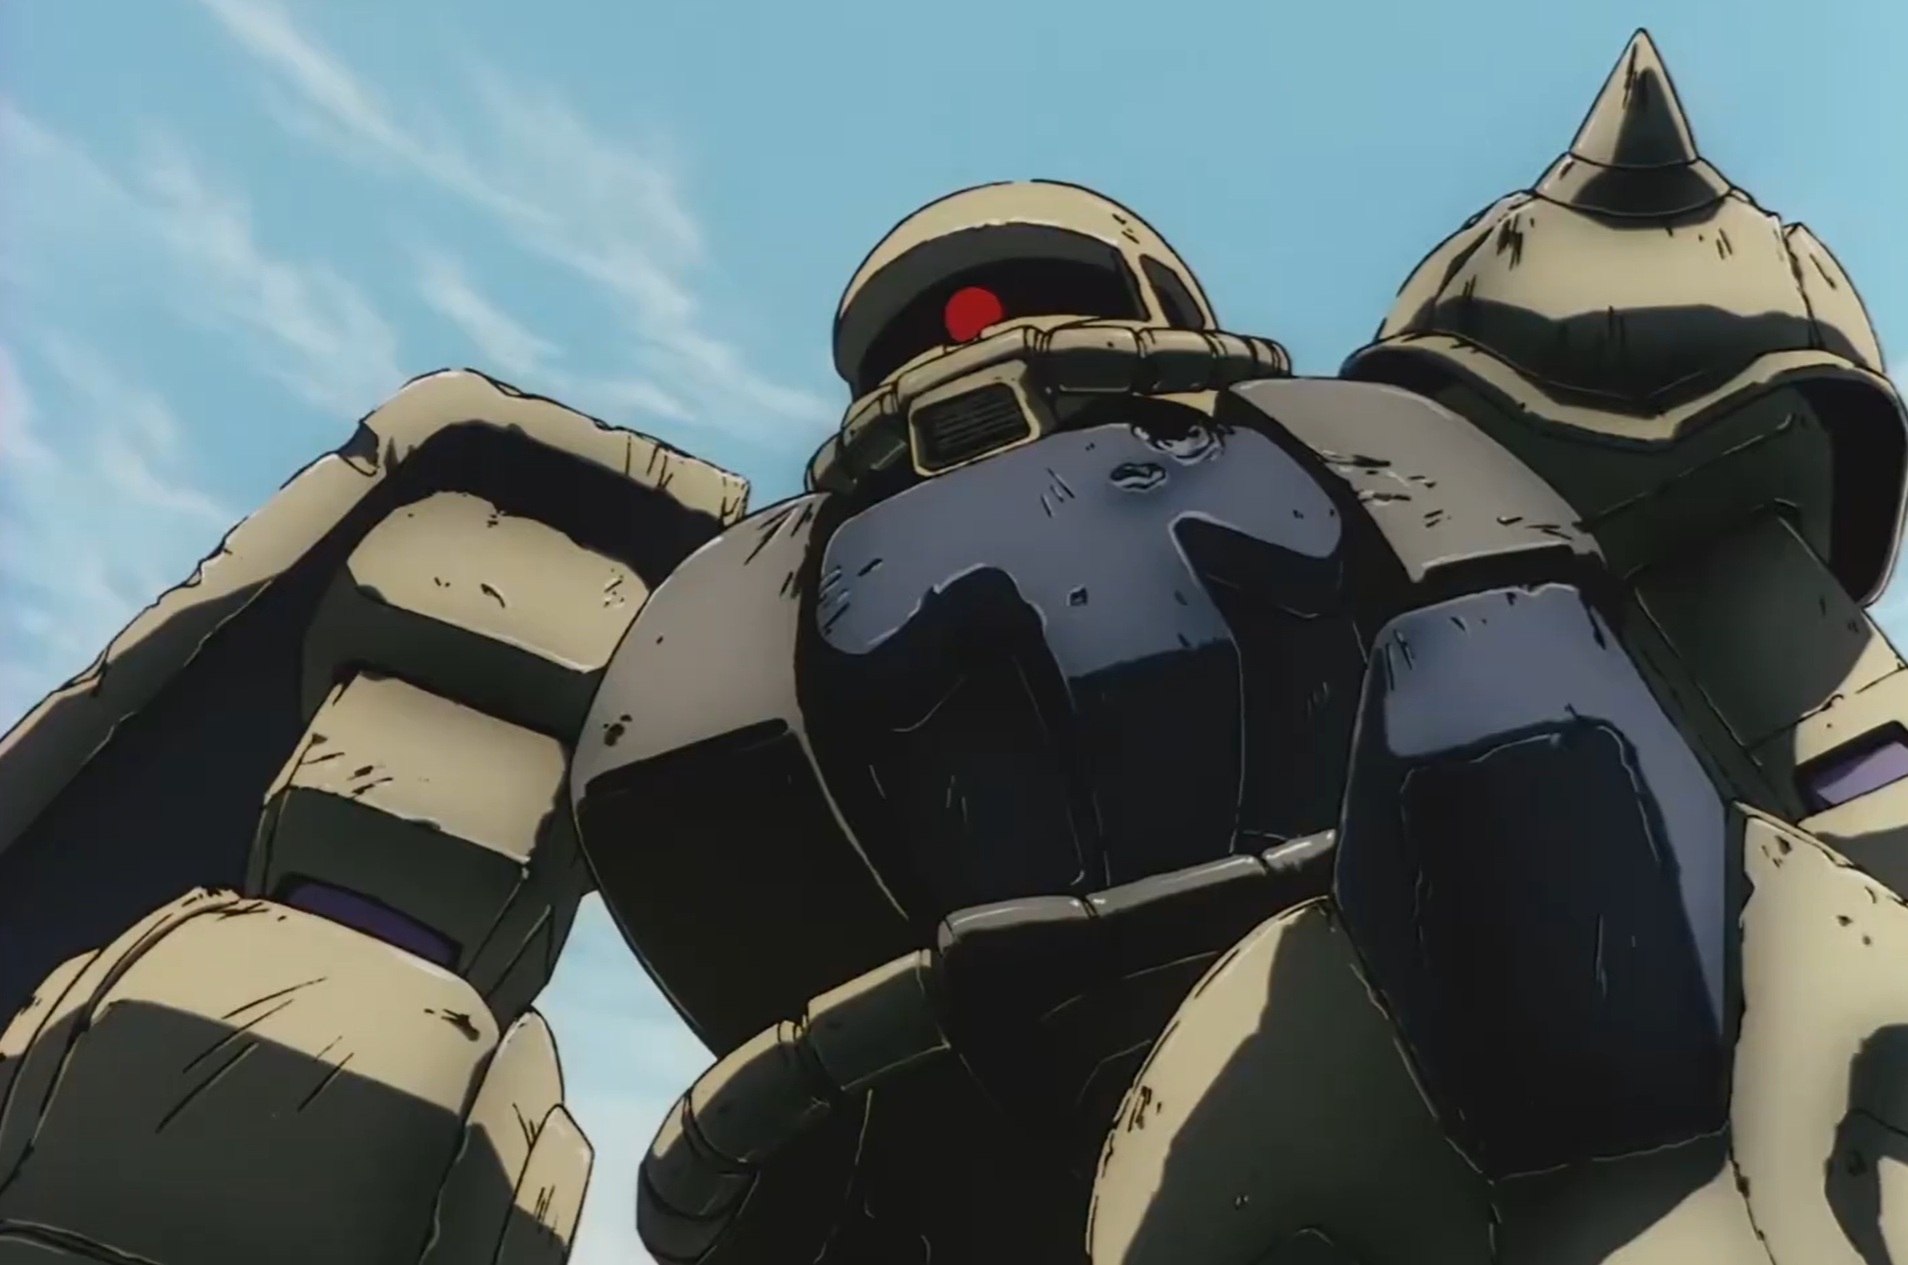
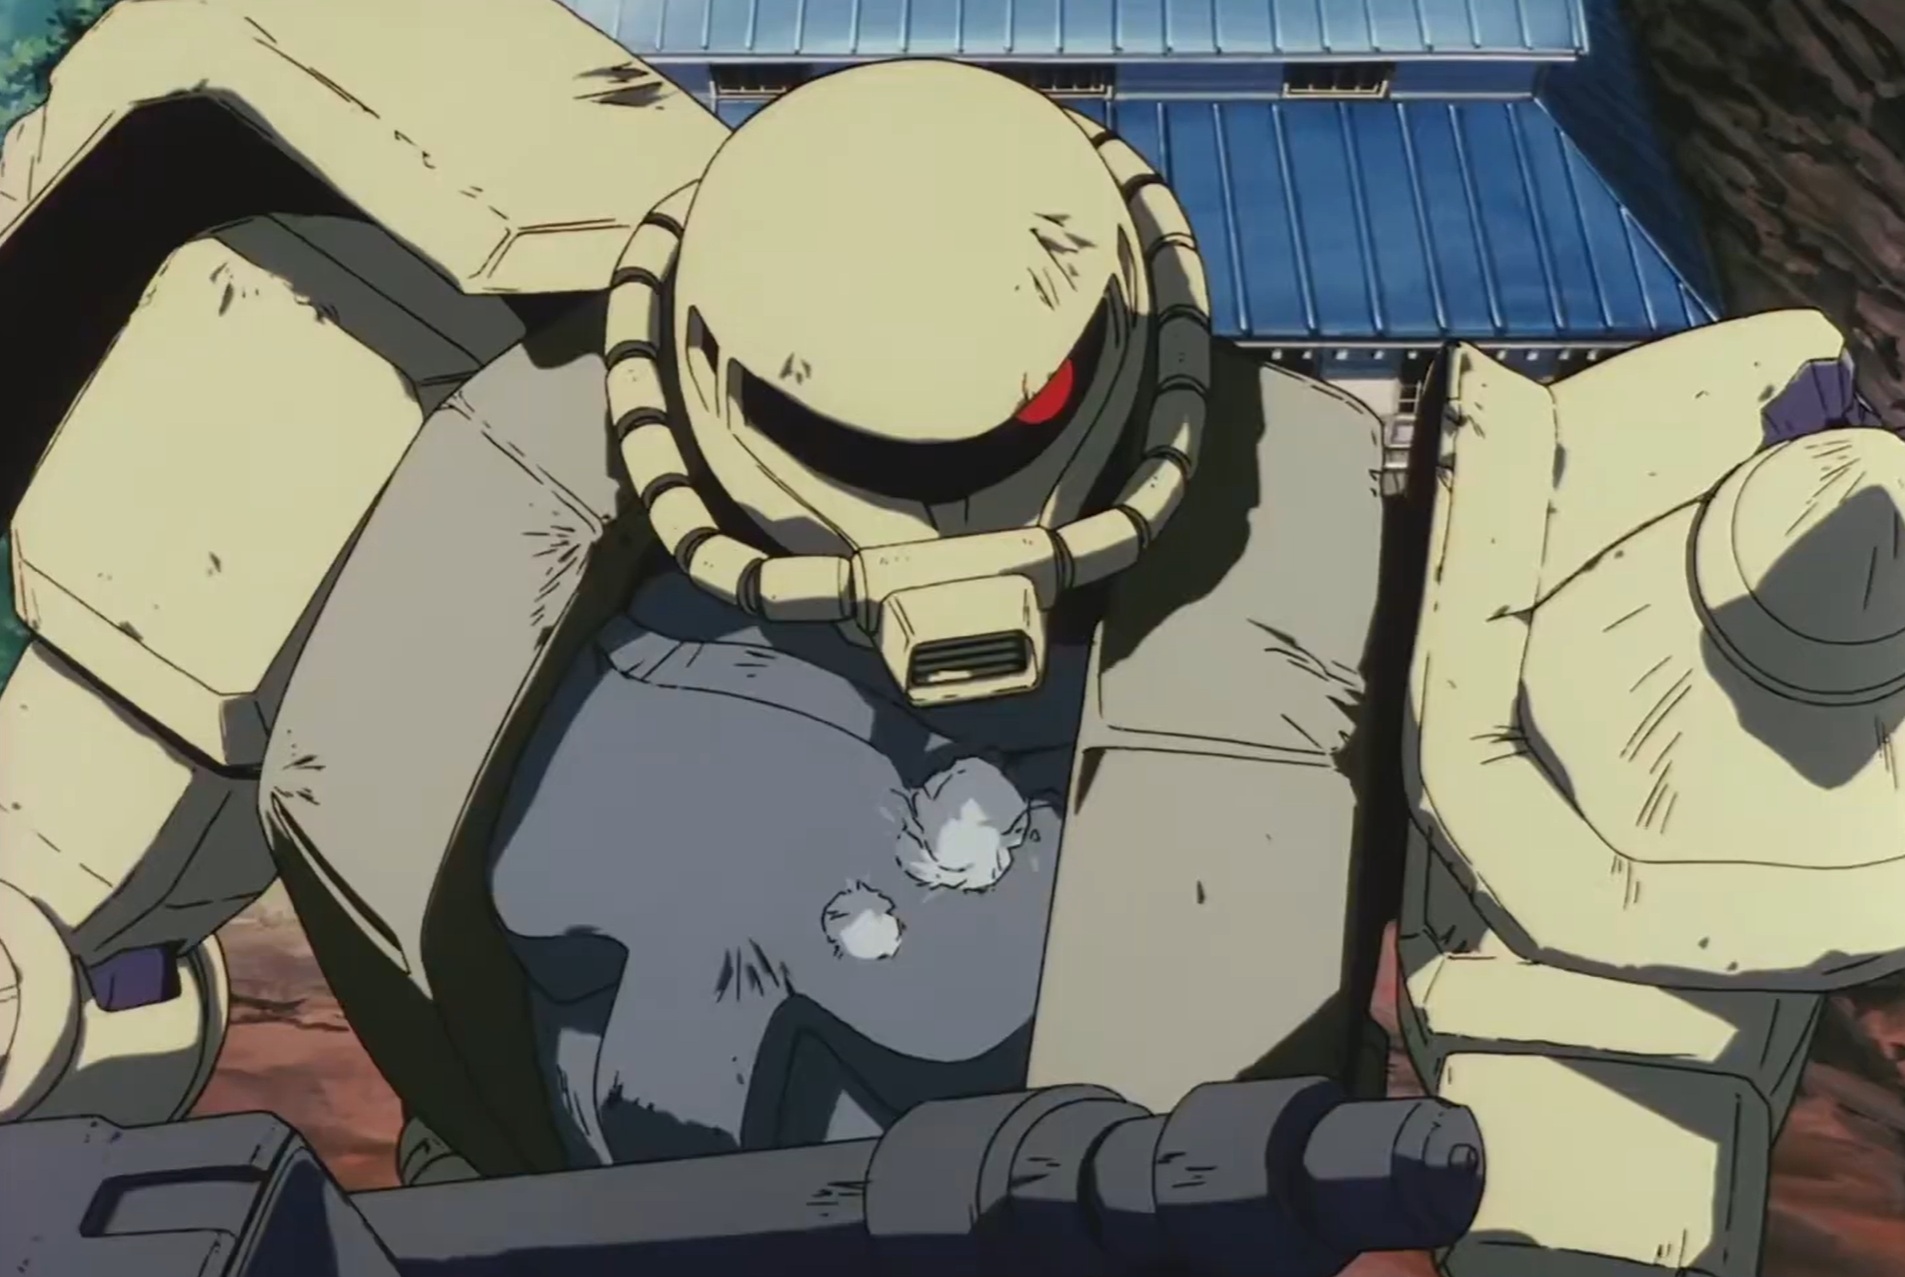
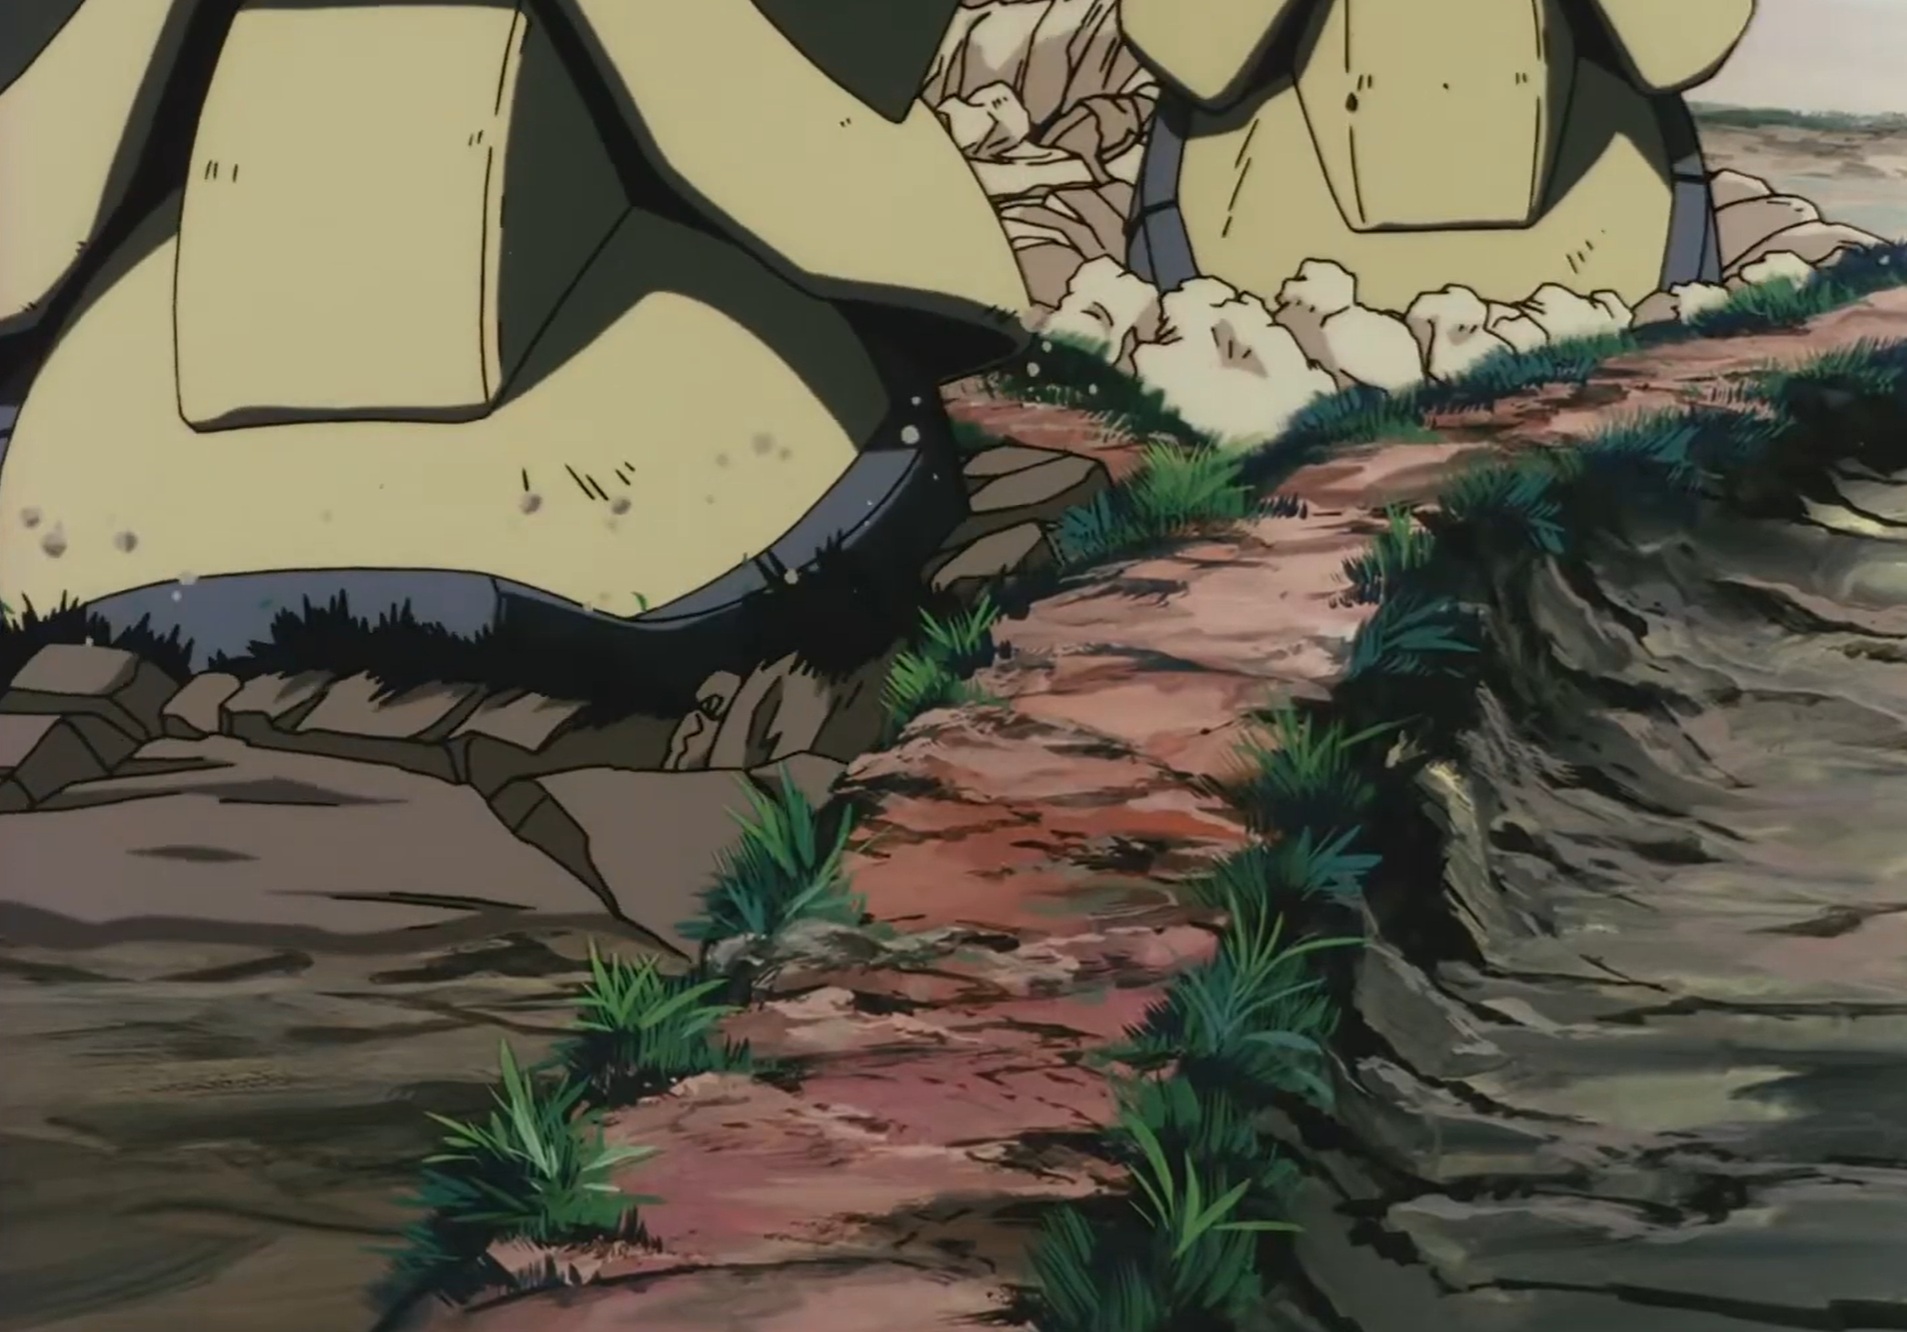
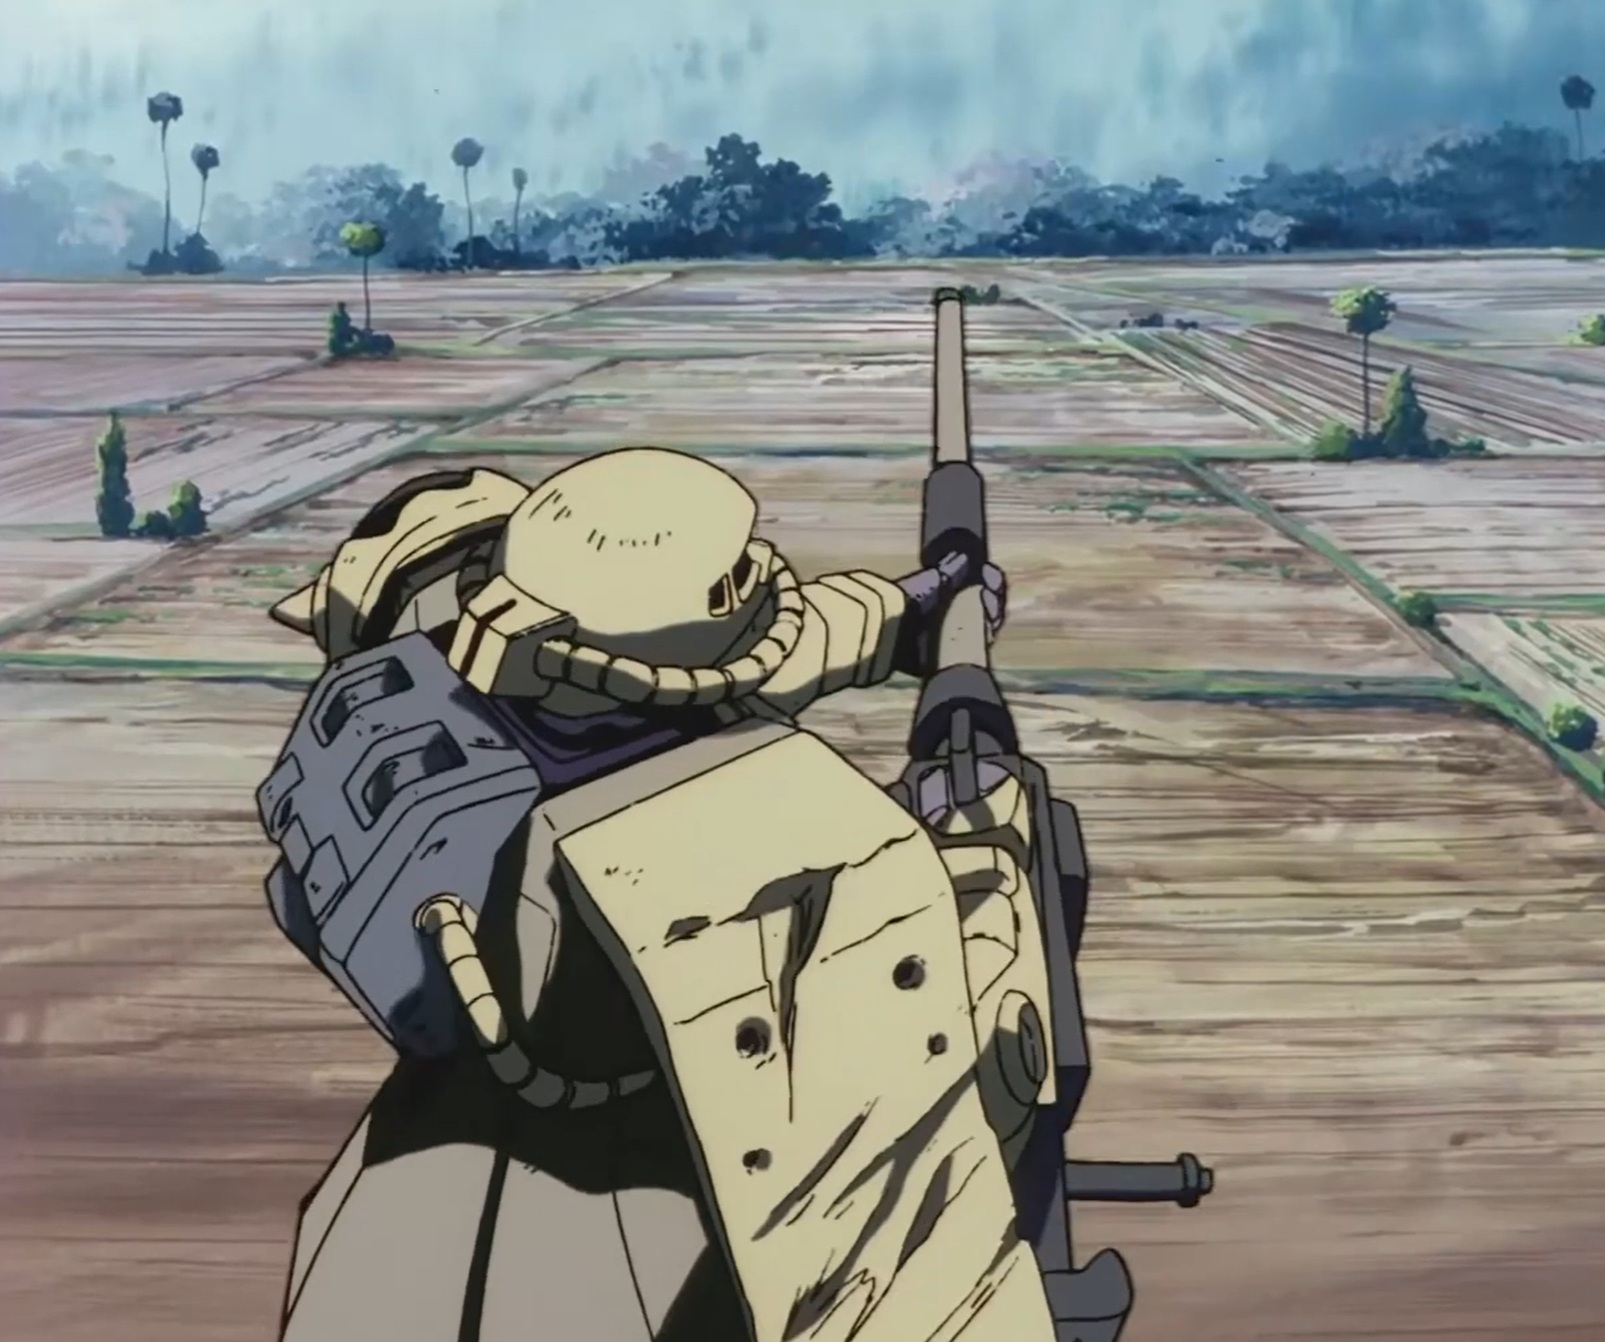
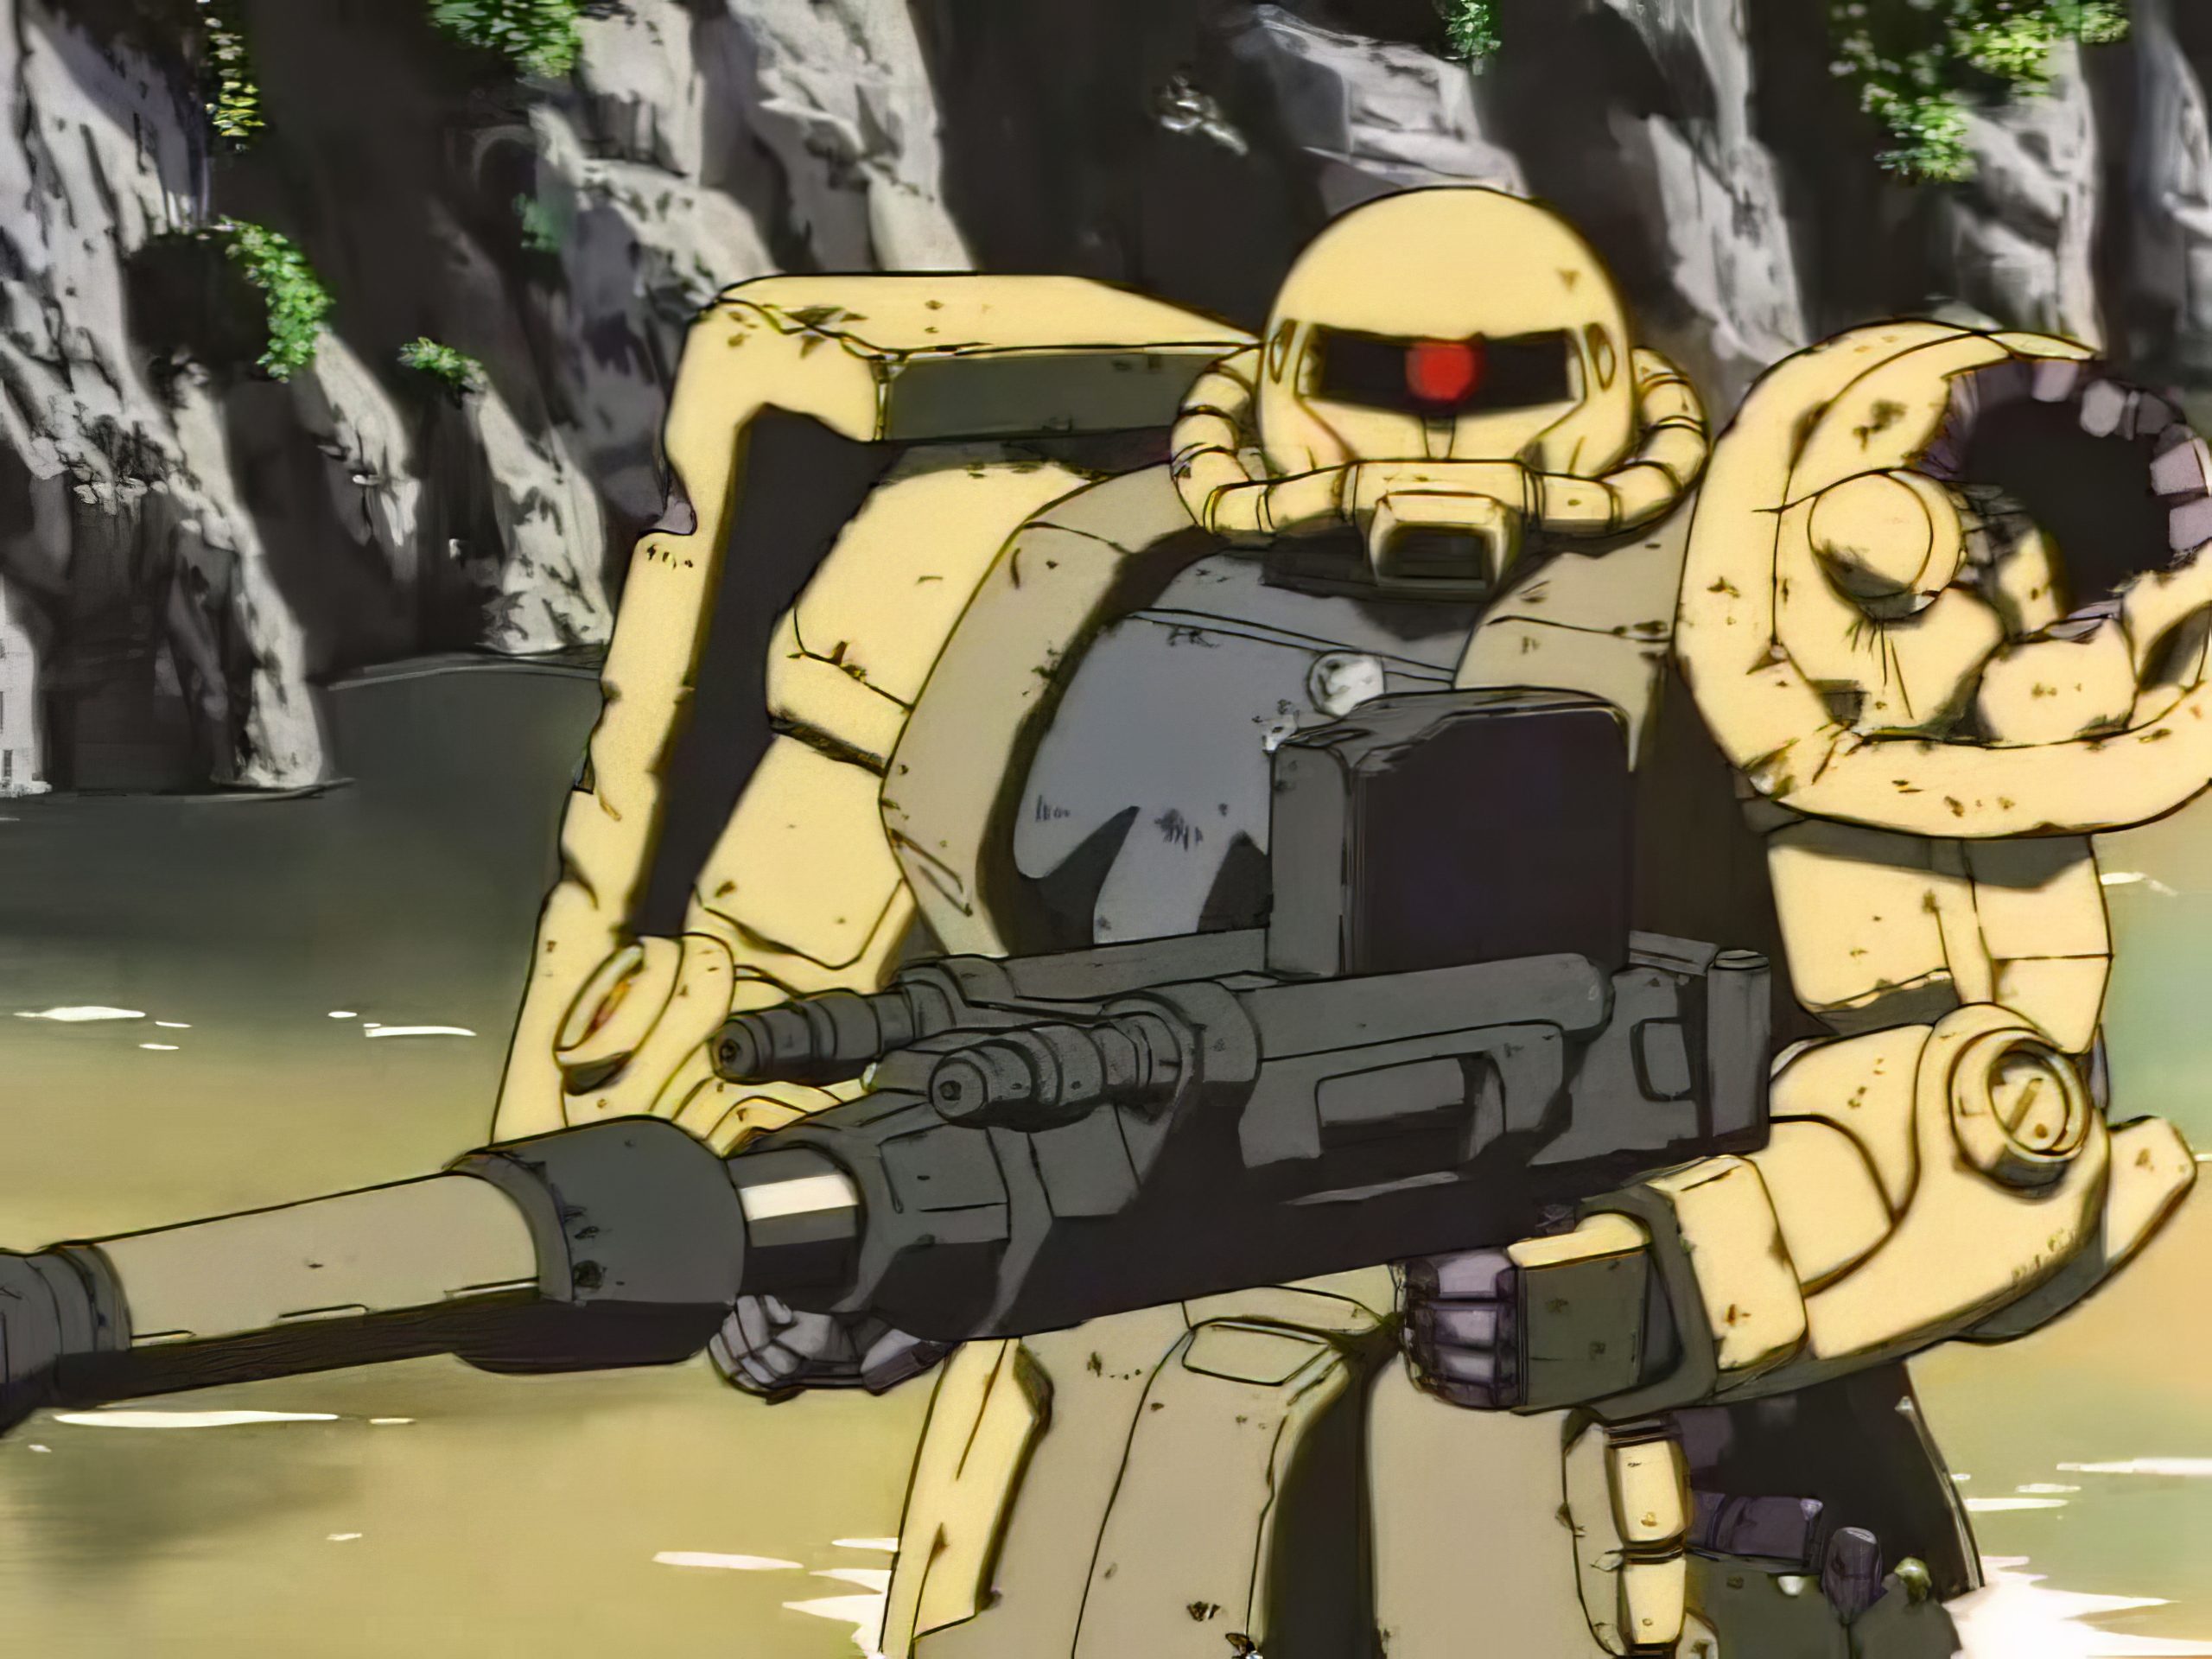
Now all of my references are set out, I can finally put my hands on some plastic!
Ideas and Inspiration.
For my Zaku, I was immediately thinking of a scene from the series “08th MS Team” Which is loosely set in a Vietnam style setting. The combat is grounded, harsh and very “human” in this series, which appeals to my historical head, and adding giant, walking machines with guns and armour only makes it more my kind of playground for modelling in a Sci-Fi setting.
It’s in episode 8 of the series that I focussed my idea for my Zaku.
A team of three, battleworn and tired looking Zaku’s are on a patrol when they stop at a village for rest and food. The village is home to a group of Guerrilla fighters and things don’t go well.
What’s interesting to me in the context of a model project is that the Zakus in this scene are not the typical colours of green and dark grey, but more of a pale sandy yellow and brown.
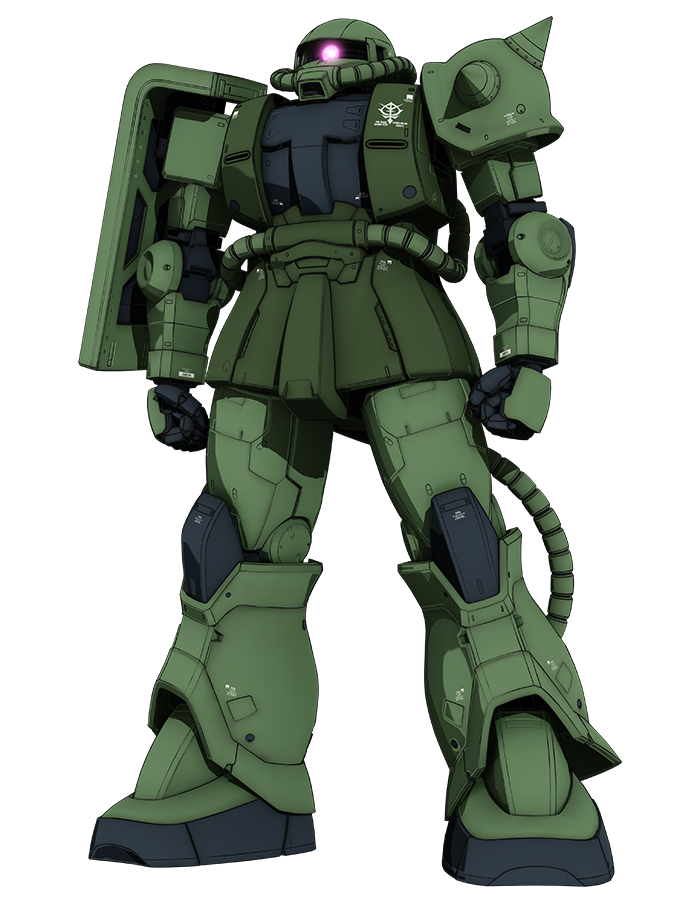
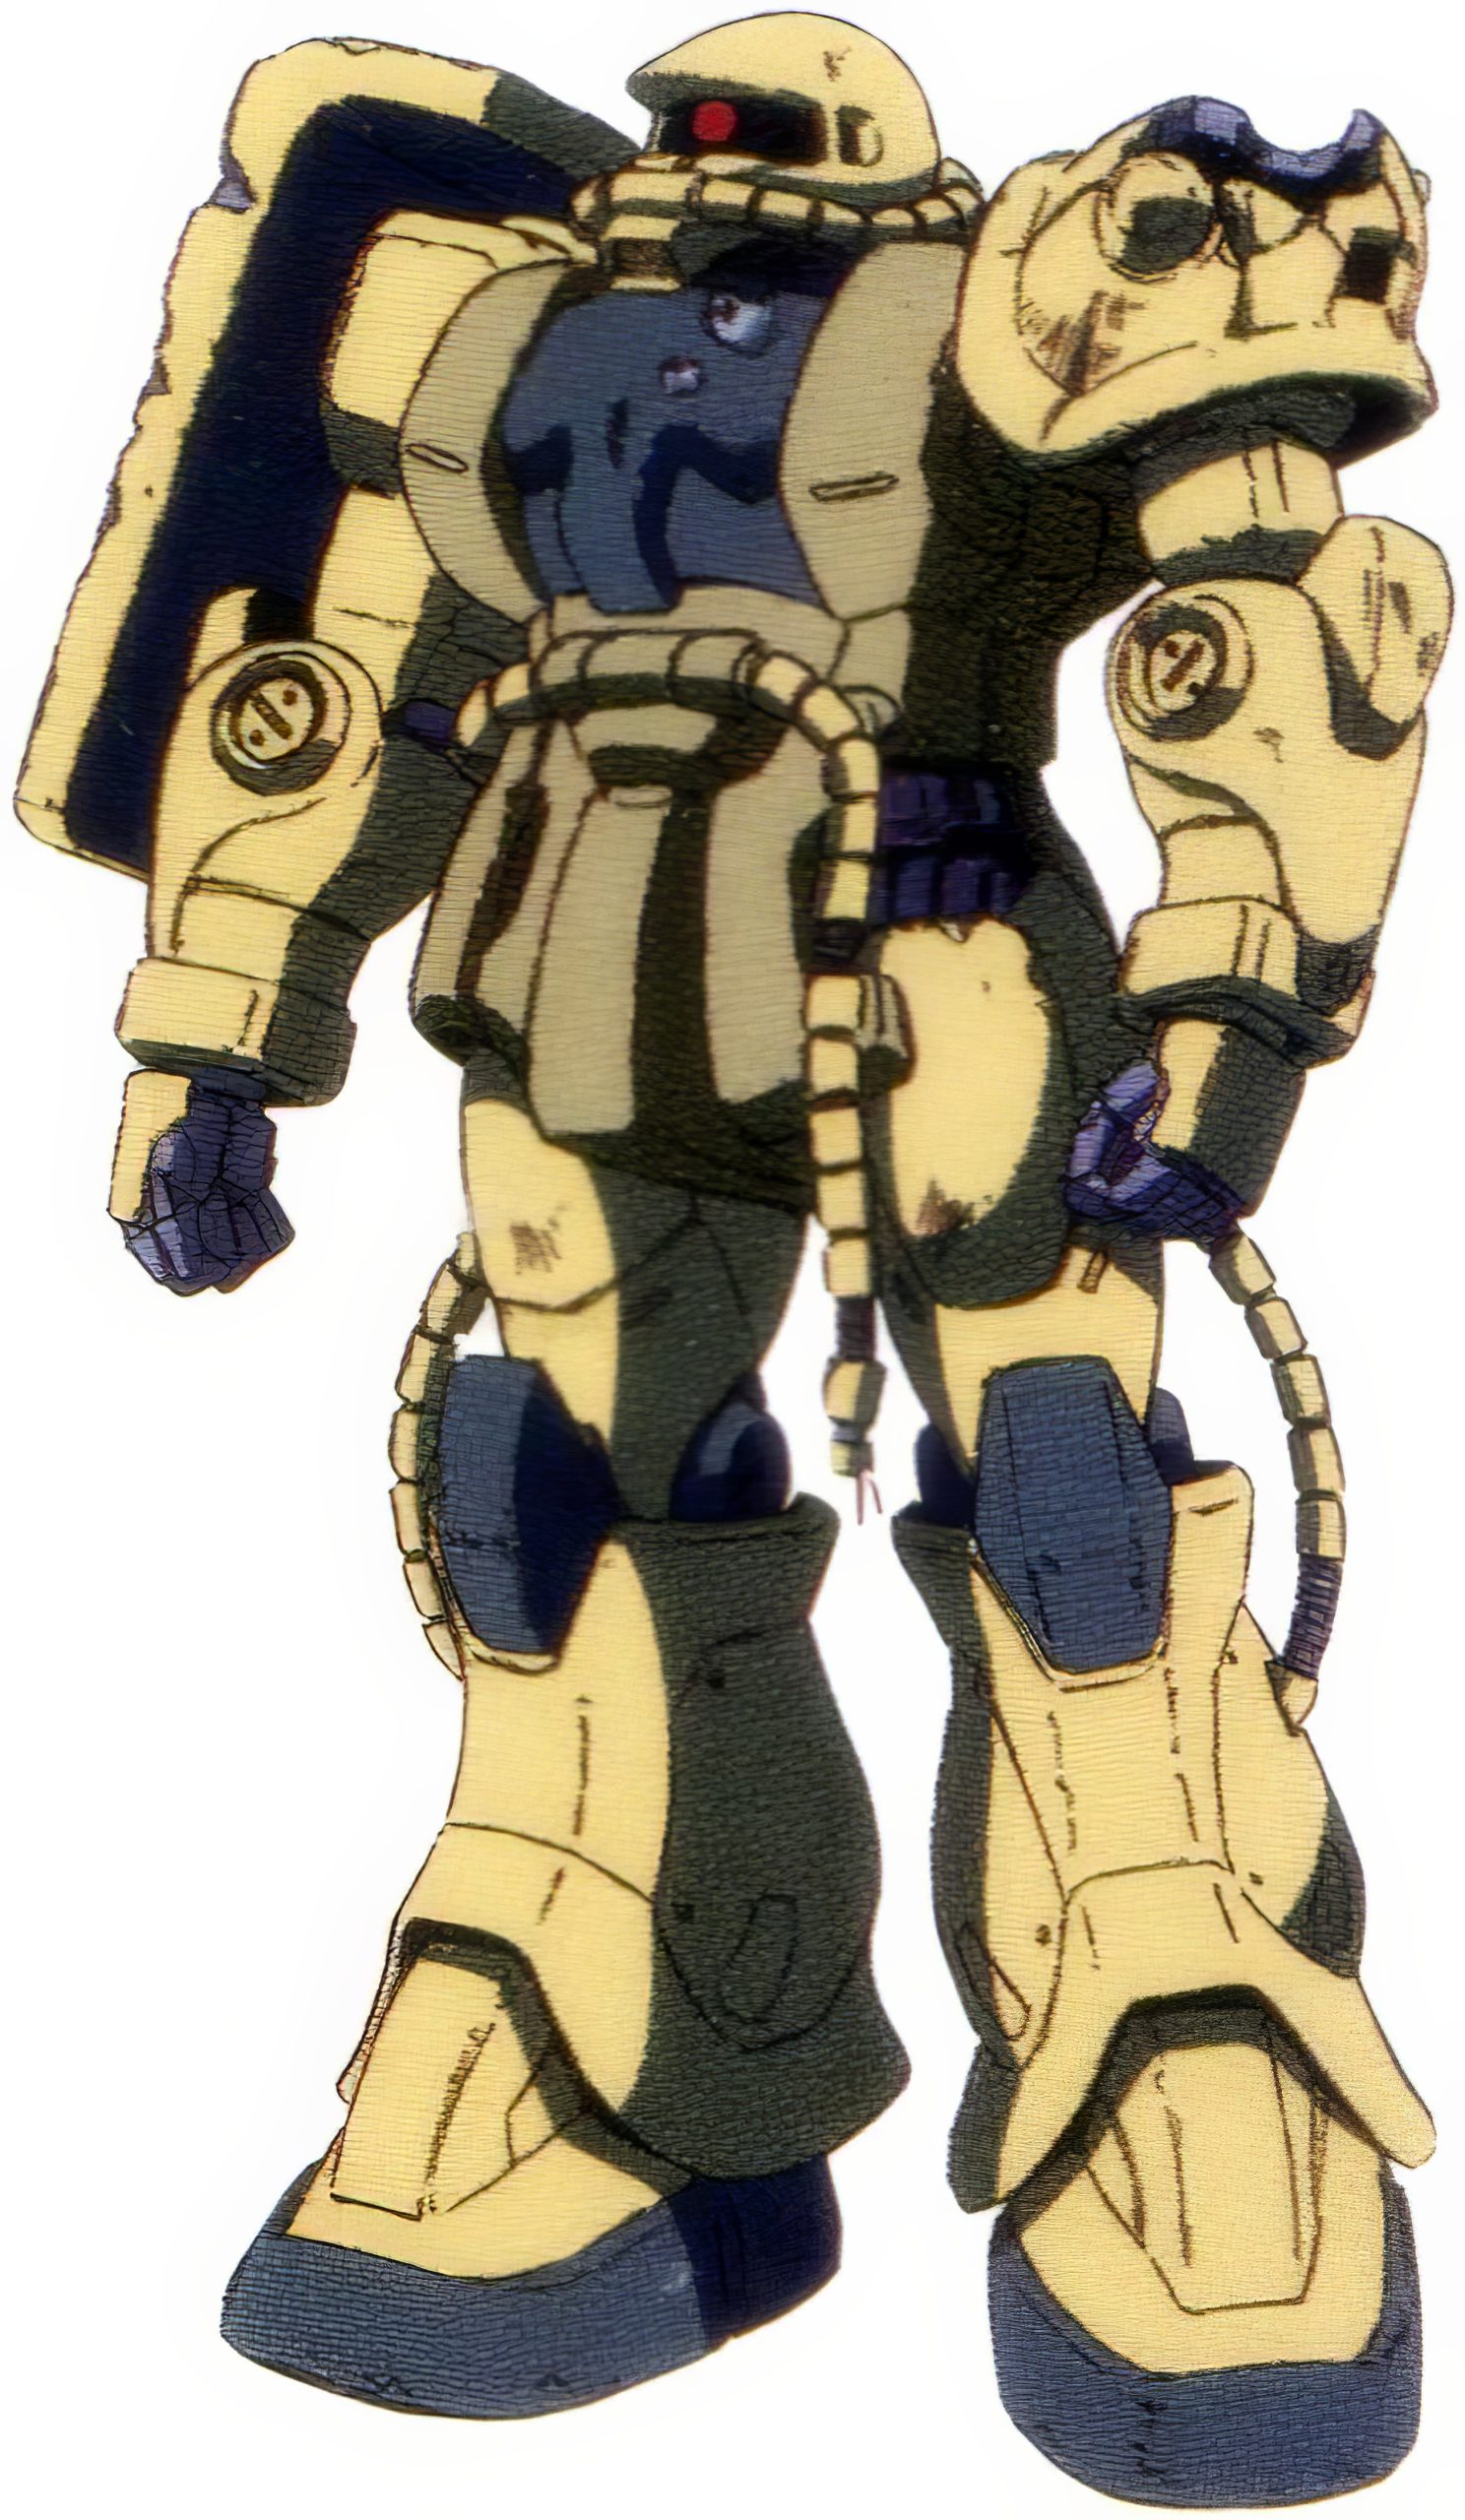
The particular Zaku here is the one I am trying to replicate. Some good and interesting battle damage that makes it stand out as more unique to the pilot in the show.
I figured I should work to my interests and strength for the competition, so keeping it grounded and realistic in my approach might help keep the process engaging for me and give me a result I can be proud of!

![Gripping Beast Announce They Are Closing Their Doors [Updated]](https://images.beastsofwar.com/2026/09/gripping-beast-announcement-cover-600-338.jpg)