




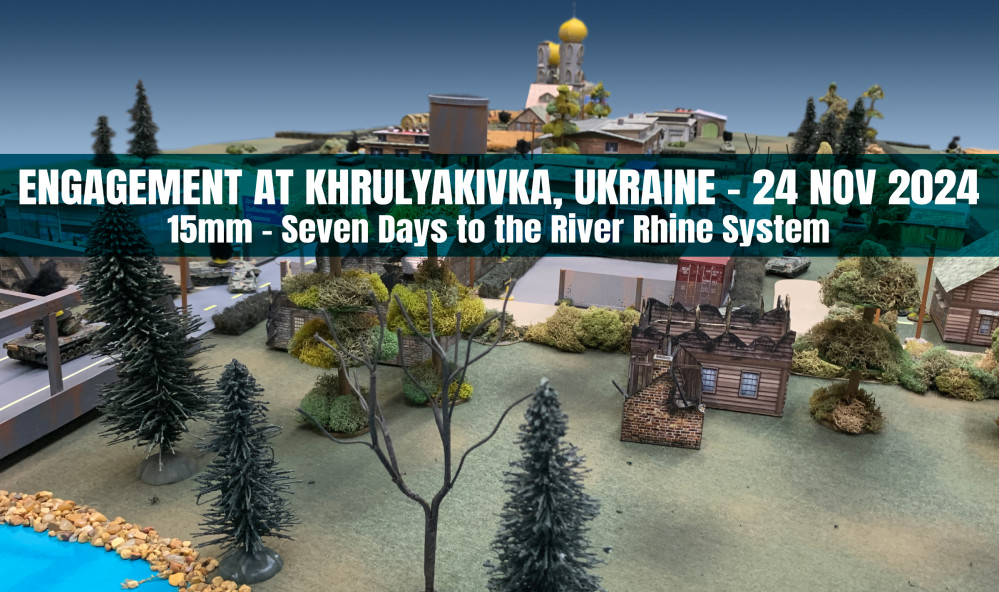
Ultramodern Wargaming – Ukraine 2024




Recommendations: 13004
About the Project
Lately, I've been running war games every weekend with members of the community via web conference. Players log on and play wargames with each other in real time, regardless of location, and we usually have at least a couple spectators as well. Many times it’s been Darkstar, but we’re also running wargames in Panzer Leader, Arab-Israeli Wars, and now Valor & Victory.
BoW/OTT community members @brucelea, @damon, @davehawes, and @rasmus have taken the plunge, leading battalions across thousands of meters of desert, starfleets in pitched battles across the heavens, or vicious firefights in the jungles of Vietnam, all without leaving the comfort of their home.
Hard-core, old-school command-tactical wargames can now be run (complete with spectators and recordings) in real time, with BOTH PLAYERS moving pieces across THE SAME virtual game board, thus maintaining player agency, speedy and instant results (no play by e-mail), interwoven turn sequences, any questions / feedback instantly received and addressed, and with the game being virtually recorded as it goes, a ready-made battle report can actually be created as we go.
All of this without the players having to install any new software on their computer, on any platform (PC or Mac). All that's needed is to agree on a time, a handful of dice, and a bellyful of courage!
Every weekend can now be a boot camp! All without costing me thousands of dollars in airfare, too!
Related Game: PanzerBlitz
Related Genre: Historical
This Project is Active
Damon vs. Oriskany: Yom Kippur War 1973
Good afternoon everyone. I’d like to present a belated battle report for the game Damon and I had a couple Sundays ago. The system was Avalon Hill’s The Arab-Israeli Wars, where Damon and I recreated one of the sharp, vicious engagements that took place in the closing days of the 1973 Yom Kippur War.
The game recreates one of the frantic counterattacks launched by the Egyptian 4th Armored Division (3rd Armored Brigade and 113th Mechanized Brigade), part of the Third Field Army that had been cut off in the Israeli-counter-crossing of the Suez Canal in Operation Gazelle. Now, as General Bren Adan’s 162nd Armored Division crushes its way south to Port Suez (thus completing the encirclement of the Egyptian Third Field Army), Colonel Natke Nir’s 217th Reserve Armored Brigade finds itself struck in the right wing by this desperate and hastily-mounted Egyptian counterattack.
Damon is playing the Israelis, I am playing the Egyptians.
 Here is the broad view of the battle’s location. Note it is on the west bank of the Suez Canal, the waterway which more or less formed the start line for the 1973 Yom Kippur War here in the Sinai.
 After suffering stunning setbacks and appalling losses in the face of the initial Egyptian onslaught across the Suez Canal, the Israelis have regained their balance and mounted Operation Gazelle (alternatively Operation Abirey-Halev, “Stouthearted Men”), a counter-crossing back across the Suez Canal. The Israeli objective is to turn south and take Port Suez, which will slice off the whole Third Army in vast pocket.
 The Egyptians, of course, CANNOT let this happen. Units not in the imminent pocket are hastily mobilized and hurled against the Israeli spearhead. One of the most powerful of these was made up of the bulk of 3rd Armored Brigade and 113th Mechanized Brigade, 4th Egyptian Armored Division, which struck the side of Adan’s 162nd Division on 19 October 1973. This game will create Colonel Natke Nir’s 217th Brigade (reinforced with elements of 890th Para Battalion / 35th Brigade) part in stopping the Egyptian counterattack.
 Here are the forces both sides will have in the game. For reference, each counter is a unit (platoon or half-company) of five tanks, a platoon of 40-50 men, or a battery of 3-6 guns. Note I also have three batteries of SA-2 “Guideline” surface-to-air missiles. These were critical targets for the Israelis on the West Bank of the canal, as their vaunted air force couldn’t operate safely until their ground units took out some of these firing sites. That’s right, the ground forces had to “soften things up” for the air force, instead of the other way around. So I’ve got about two battalions of about 60 tanks, a battalion of mechanized infantry in BTR-60 troop carriers, and some support assets like combat engineers, Czech 107mm recoilless rifles, and of course a few of the dreaded AT-3 “Sagger” antitank guided missiles. Damon has a battalion-sized task force of Nir’s Brigade in the superlative “Sh’ot” Centurion upgrade, a battalion of elite paratroopers I WW2-era M3 halftracks and a few odds and ends like recon jeeps with 106mm recoilless rifles. I should also note he has four A-4 Skyhawks on standby. For their strike packages Damon has selected two with American-supplied Rockeye cluster bombs for antitank work, two with Walleye TV-guided bombs for installations.
 The map before the battle. Note my SA-2s are already set up. They are as much objectives as much as combat units. Damon is coming on from the roads to the northeast, I am coming on from the west and southwest. We each get a point for any objective hexes we take and hold at the end of ten turns. I also get a point for each SA-2 site still operational at the end of the game, Damon gets one for each SA-2 site eliminated. Each hex is 250 meters, or about eight feet on a 15mm table. A turn is 6-10 minutes.
 Turns 01 and 02 are now complete. Already Damon has a bit of an upper hand, having seized three of the five objective hexes: (1) the crossroad by the rail line, (2) the Test Road exit to the far east, (3) and the Port Suez Exit to the southeast. I lunged at him in the north with my two battalions of armor, I’ve taken a 20-tank salvo at him in those palm groves but missed with a “6” (worst roll in Arab-Israeli Wars). I’ve started to flank him, however, while in the south my mech battalion has rolled up in their BTR-60s and is now unloaded en masse for an attack against that Port Suez road objective.
 Things jump off in the north on Turn 03. Damon’s counter-fire to my opening salvo is pretty devastating, he’s disordered five of my tanks and killed ten more at a range of 1500 meters. But forty MORE tanks have already swept around behind him, and now threaten that rail line objective hex. Note Damon’s use of displace fire tactics, firing and them using split-move-and-fire rule to displace his armor 250 meters to the northwest. It’s correct to lunge like this, but he lunges the wrong way, and thus allows himself to be flanked. If he’d moved east one hex instead of northwest, he could have contested that flanking maneuver with point-blank opportunity fire and cost me at least 15 more T-55 main battle tanks.
 In the south, after three turns of preparation and staging, I finally launch a massive infantry assault out of the palm groves along the “Sweetwater Canal” (a fresh water irrigation canal that ran along the Suez Canal). I’ve already done quite a bit of damage with massed fire from twenty-five BTR-60s. My assault is also partially protected (ironically) by an Israeli smoke screen (SSC = smoke shell concentration). My RPG-armed infantry even get close enough to some of Damon’s dreaded Sho’t Centurion tanks, and a platoon of these beasts is now on fire. For one glorious moment, the southern objective hex is in my grasp as well.
 In the north, the battle is (by contrast) oddly quiet. This is because I’ve maneuvered in such a way that Damon really can’t do much about my presence. I blow up his 120mm mortar carriers, I try to fire when he side-steps with those 15 Sho’ts to get an angle on my T-55s … but AGAIN I miss. But now with 45 T-55s on the objective, Damon’s gonna have a helluva time shifting me out of here. And I have 80 infantry (two platoons) with RPGs creeping on his tanks from the southwest.
 Damon is losing the game, and realizes he’s out of time. He’s shot the ever-living hell out of my infantry battalion that’s taken the Port Suez Road objective, and now masses his remaining paratroopers, their halftracks, 10 Sho’t Centurions (two counters) and even the battalion commander’s M-113 sections in a do-or-die counterassault on the Port Suez Road. It works, my entire contingent of the 113th Mechanzied Brigade is more or less shattered in a horrific slaughter. Damon and I really tore each other apart down here, we count up later that no less than twenty-one PLATOONS have been destroyed here. That’s twenty-one Bolt Action “ARMIES” shot up to the point of combat ineffectiveness. That about 130 dead and somewhere around 400 wounded to one degree or another, along with 30 armored vehicles destroyed. But he retakes the hex. Damon also bits the bullet and calls in his air strikes directly against my SAMs (never having taken any of them out on the ground). He dodges a bullet here, I don’t shoot down any A-4 Skyhawks, only forcing one to abort. The other three strikes go in, and two of them hit. That’s two of my three SA-2 sites blown off the map. I’ve also sent on five T-55s (one counter) over the canal to try and take a poke at the Test Road objective hex, held by Damon’s recon jeeps and one platoon of paratroopers – but nothing comes of it.
 In the end, this game goes down as a hard-fought draw. I own three objective hexes and still have one SAM battery operational = four victory points. Damon has two objective hexes (Test Road and Port Suez Road) and has destroyed two of my SAM batteries = four victory points as well. WELL DONE DAMON! Not many players can fight me to a draw in Arab-Israeli Wars!
New Wargame Expansion Published for Community Download.
Iraq. Afghanistan. The Falklands. Lebanon. Somalia. Vietnam …
Ever wondered what it would be like to play Valor & Victory in these settings?
This document is presented as a modern-warfare rules expansion for the Valor & Victory rules system originally created by Barry W. Doyle for World War II squad-based infantry combat.
This expansion is in no way intended as a replacement or critique of the original Valor & Victory system.
No rule presented here replaces or overwrites any rule presented in the original system.
You must have the original rules to play this expansion.
Valor & Victory Modern Expansion (hereafter referred to as VVME) offers new options for players interested in creating Valor & Victory scenarios set in more modern eras and conflicts after 1945.
While these new modern rules could be used with most editions of Valor & Victory, using the most recent update to the rules (V&V D+1 Standard Game Rules) is recommended. These VVME rules are most directly designed to “stack on top” of the D+1 Standard rules.
Of course, any and all of these rules are optional. No VVME scenario would ever use all of them. Players should feel free to pick and choose when designing your own modern-era scenarios.
And just so everyone knows, I checked with Barry first and made sure I had his blessing before I published these.

Video Replay: Counter-Insurgency Ops Game - Dylan v. Oriskany
There is the video replay of yesterday’s live community game of Sitrep Skirmish, where @elessar2590 and @oriskany go head-to-head in a recreation of the Battle of Same (promounced “Sam-ay”) in March 2007.
This was an engagement in East Timor where Australian operators tried to capture Alfredo Reinaldo, a former major in the East Timorese Defense Force turned renegade leader.
As we see in so many modern conflicts, Elessar’s mission is very non-kinetic, more about who he doesn’t shoot than who he does shoot. Making use of stealth, insurgent diplomacy, bribes, and plea-deals with a local interpreter an FDTL-loyalist, the Australians have keep the incursion as low-profile as possible for as long as possible, getting close to the rebel leader they’re trying to capture before the situation “goes loud.”
As always, these kind of streams may be useful to have on in the background while painting or hobbying.
SpecOps Wargame: Australians in East Timor (Operation Astute - 2007)
Join Dylan and I as we try the “Sitrep Skirmish” special operations wargame system in East Timor.
We’ll be pitting operators of the 4th Royal Australian Regiment / Commando against the paramilitary renegade formerly of the Timor Leste Defense Force (FDTL).
This is the kind of non-kinetic operations we see around the world in more recent decades, where certain tactical goals must be achieved without precipitating a full-scale pitched battle. Our stream is at 5PM Eastern US Time / 10PM UK time.
Come by and see if Dylan can carry out his mission!
Sunday, April 25
10PM UK Time, 5PM US East Time
 Area of Operations - East Timor 2006/07
 Map: Work in Progress
 The map is finally finished to my satisfaction
 Australian Operators.
 Revised Pieces for East Timor soldiers. Again, these "insurgents" are actually renegade Timorese FDTL Regulars. So they look like regular (if low-grade) soliders, and have "regular" combat values for their weapons. Also, I have updated Australian pieces. From what I can tell, most 4th RAR/C and Royal Asutralian SAS troops in East Timor 2006-7 were weaing "bush" hats.
 Some of the initial set up, with the East Timorese FDTL renegades and irregular gang members hanging out in their jungle village before they get attacked by the Australians.
Video Replay - Damon v. Oriskany on the West Bank of the Suez Canal, Yom Kippur War 1973
We had a great stream yesterday, where community member Damon and I sat down for a game of Avalon Hill’s The Arab Israeli Wars.
The scenario took place in the closing days of the Yom Kippur War, where Israeli armor and mechanized infantry (paratroopers in halftracks) had counter-crossed over to the west bank of the Suez Canal behind Egyptian positions, and were driving south to Port Suez to cut off the Egyptian Third Army on the east bank.
To prevent this, the Egyptians launched a hasty counterattack with the 3rd Armored Brigade and 113th Mechanized Brigade (4th Armored Division) against the right wing of Bren Adan’s 162nd Armored Division as it drove south toward the Port Suez objective.
I won’t spoil how the game turned out, only to say it was deperately, desperately close … and in fact neither of us knew who had actually won until after the game was over and we pointed up the results.
We hope you like it! Might be a pleasant distraction to put on in the backgrond while painting or building for your hobby.
 The full table with both sides' opening moves.
 Oriskany loses his first T-55 platoons, but maneuvers the rest in a way that will leverage Damon's 15 "Sho't" Centurions off that norther objective hex by the Suez-Ismailia rail line. Will Damon be able to take it back?
 A huge battle kicks off in the south, where Damon has seized an objective hex controlling a key road the divisional commander will need to continue the overall drive down to Port Suez. This one ... will get messy.
 A key part of Israeli operations on the west bank of the canal was elimination of Egyptian surface-to-air missile (SAM) sites. These SAM sites had largely checked the Israeli Air Force out of the war, only by eliminating these could the IAF get back to its devastating ground support role.
Live Wargame Today: Damon v. Oriskany, Avalon Hill's "The Arab-Israeli Wars"
Crossing the Suez Canal: Community Wargaming in the 1973 Yom Kippur War
Damon and Oriskany Jim sit down for a game of Avalon HIll’s “The Arab-Israeli Wars.” The scenario is set in one of our favorite historical periods, the 1973 Yom Kippur War. This game specifically will deal with Operation Abirey-Halev (Stouthearted Men), where Israeli tanks and infantry carried out a counter-crossing of the Suez Canal, turning the tide of this war against Egypt in the Sinai.
Sunday, April 18
5PM UK Time, 12 Noon US East Time
 The general location of today's battle.
 Operation Gazelle (or Abirey-Halev "Stouthearted Men"), where the Israelis recovered from initial Egyptian successes in the Yom Kippur War, turning the tide by COUNTER-crossing the Suez Canal back onto the west bank.
 One of the last Egyptian offensives of the war, where Egyptian 4th Armored Division (spearheaded by 3rd Armored Brigade) tried to hit the flank of Adan's Division as it pressed toward Port Suez. Taking this port would seal off the whole Egyptian Third Army on the east bank of the canal, so the Egyptians were desperate not to let that happen.
 The actual game map for today's engagement. Yes, this is on the westbank of the Suez, which is much more lush and cultivated than the arid Sinai deserts we've seen in other recent wargames.
Battle Report: Battle of Novoselivka Druna
Good afternoon, everyone.
So last week my friend Damon and I had an interesting game of Panzer Leader (TCME modern rules, with a few additions of my own thrown in). My objective with the scenario design was to take an imagined, educated, “wargamer’s guess” at what a full-scale engagement might look like between larger-scale maneuver formations of the Russian Federation Army and the Ukrainian Armed Forces.
While honestly not exhaustive, I did invest some relatively robust research into the kinds of units these formations actually have, their interrelationships and technical progression, and actual combat capabilities against each other (as best I could). I’ll admit my findings clashed badly with presumptions I had erroneously made which earlier attempts at these find of RFA-UAF scenarios. So I wanted to run and broadcast this game as much as a correction as anything else.
Damon ran the Ukrainians on defense, I played the role of Putin’s invaders. I started with the more powerful force, but as the attacker I also carried the “burden of victory” and Damon’s task was simply to hold on and inflict as much damage as he could. However, Damon also had some high-tech gadgets in his force, reflecting some 21st Century additions to the battlespace, like Javelin ATGWs and surveillance drones supplied by the United States and Turkey.
The fuill battle reply is available on video below, but here is a quick summary for those with less time on their hands.
Let’s see what happens!
 So first off, here is a map of Ukraine for context. To the far east, we see the Luhansk and Donetsk oblasts (roughly, districts), the epicenter of the current conflict and rising tensions. I have broadly marked where this IMAGINED Russian invasion is taking place. Please note this imagines an open, conventional forces mass-army invasion, not the covert Russian incursions which have been made through separatist-controlled border crossing points since 2014. The site I chose for the battle was just north of Adviika, which saw heavy fighting in 2014-15 phase of this war, and another major incident (bordering on full-scale battle) in January 2017. In the case of a Russian “above-board” invasion, I would venture a guess Adviika would again be center stage, given its southward access routes toward Donetsk International Airport, just north of Donetsk itself. This is still a massive separatist stronghold, and I would imagine Russian planners may want to link a northern artery to Donetsk as a means of dividing the oblast and perhaps cutting off UAF forces further east.
 Here is the battle map, with 200-meter hexes, based on satellite imagery, showing a few square kilometers of the countryside immediately north of Adviika. The scenario will imagine the advanced guard (reinforced battalion with brigade support assets) of 27th Motorized Rifle Brigade / 1st Guards Tank Army moving onto the norther edge of the board. This is a real unit recently transferred near the Ukrainian border. If (God forbid) this war actually kicks off, we may be hearing from these guys in particular. Opposing them are elements of the actual Ukrainian Armed Forces unit charged with defending this area, the 93rd UAF Mechanized Brigade (CDO East). The Ukrainians currently hold all five objective hexes. The Russians have to take at least three.
 Things start off well for the Damon’s Ukrainians. My Russian column of T-90A main battle tanks rolls down that two-lane highway (three counters = 15 tanks), confident that the trees will protect them from the Ukrainian Mi-24V Hind-E gunships lurking beyond. Well, normally that would be true. But note Damon has high-altitude drones in Hex 1411. At high-altitude, they see OVER those trees, spot my tanks as soon as they enter, and with special rules for thermal imaging and laser range-finding, they succeed in their roll and track the T-90As through the trees. This is picked up by the UAF HQ unit (out of shot), who downloads the target acquisition telemetry to the Hinds. This allows the Hinds to engage the T-90As as soon as they emerge from cover, rather than the “1/4 of target unit’s movement rate in continuous LOS” normally required for Panzer Leader opportunity fire. In game terms, the drones spot, the “pass” that spot to the Hinds via the HQ unit, and the Hinds can bushwhack the T-90s as soon as they break cover. One unit of T-90As is lost. A second is lost as I roll up to the crossroads highway rest stop to spot Ukrainian BTR-80As and UAF infantry. The BTRs 30mm chain gun disrupts one of my Hinds (who shot at Damon’s Hinds but missed) while the infantry close-assaulted and destroyed a SECOND unit of T-90As. Putin is not pleased.
 To the east, things are going better for my Russians. Here, my column of T-72B3 upgrades comes down that wooded country track, running into concealed UAF antitank section with AT-4s, RPGs, etc. Okay, my lead unit of T-72B3s took the hit and was disordered, but quickly recovered. Meanwhile, a company of motorized rifles dismounted from BMP-3s behind the tanks. On my next turn, the other ten T-72B3s (again, five tanks per counter) blew the AT section off the map and this battalion-minus juggernaut plowed south, past the woodland crossroads, using the gully to screen in approach.
 Those American-supplied Javelins make their presence felt. Given their extremely broad field of fire (good job on deploying these, Damon) and their incredible range and hitting power, they cause me to basically avoid the whole western third of the table. Avoid them as I may, I still get clipped as I maneuver BTR-82s with motorized infantry into the western wing of that highway overpass rest stop. Yes, I have that objective hex (yellow target icon) flanked, but it cost me. Good news, I have that Javelin position spotted now, and two batteries of BM-21 “Grad” rocket trucks with nothing to do …
 By the end of Turn 3, the battle has well and truly kicked off. To the east, that T-72B3 / BMP-3 task forces has thundered up out of that wooded gully and smashed headlong into the town of Novaselivka Druna, assisted by insurgents and mobs of the “Vostok Battalion” separatists. The Vostok Separatists take hideous losses, as do my BMP-3 motorized infantry. But concentrated tank and autocannon fire soon pin down two platoons of UAF mechanized infantry, then followed up by a “close assault” street battle of my thoroughly-disposable Vostok Separatists. They succeed in mopping up Damon’s infantry and HQ unit, which means the laptops controlling the drones are lost. Gotta admit, I breathe a sigh of relief on that one, given their “spot under cover on a 1-4 roll” rule, NOTHING was hidden from Damon’s missiles with those surveillance drones in the air. Damon scrambles to reinforce his crumbling right at Novoselivka Druna, including his two flights of Mi-24V Hind-E gunships. I try to counter with my own two “Krokodil” Mi-24 gunships (no, Russians do NOT call Mi-24s “Hinds” – that is a NATO designation) – but Damon SHOOTS ONE OF THEM DOWN with a hidden section of SA-18 “Grouse” MANPADS missiles. You can see the crash site in Hex 2311.
 Stinging as Russian losses may be, they’re still steadily winning this battle, especially in the southeast. Sadly for me, Turn 3 is also where Ukrainian reinforcements arrive in the form of 15 T-80UD main battle tanks. However, they are brought on directly in my path, in a vain hope of saving the objective hex 3020 (just cleared by my Vostok separatists). I’m not saying that hex didn’t need saving, but the Ukrainians might have been better served doing so with nearby infantry rather than sending two counters (ten tanks) of T-80UDs directly into point-blank range of fifteen T-72B3s, ten BMP-3s, and a flight of Mi-24V Krokodil gunships (two birds). Yeah, Ukrainians lose 2/3 of their reinforcements in a single throw, and my Vostok separatists move into the target hex anyway. However, Ukrainian gunships, AT-5 Spandrel ATGWs (launched from BMP-2s) and American-supplied Javelins also destroy two units of my T-72B3s (if those hapless T-80s had emerged from cover NOW … this whole end of the table might have seen a radically different outcome). Long story short, the “Battle of Novoselivka Druna” has definitely become one for the record books.
 A wider angle of that same moment, showing the launch points of some of those Ukrainian missiles (some from 2800 meters away). It also shows where my SA-25 “Verba” MANPADS slung up a missile at Damon’s Mi-24V Hind-Es … and missed. In other news, I’ve taken that highway overpass and surrounding buildings in the center of the table (upper left) giving me three of five objective hexes. I’ve paid a brutal price getting here, but if I can hold what I’ve got, I win.
 End of Turn 5, and looks like I have this one about wrapped up. I can’t even claim credit, Damon had some “brick” dice results and then I threw some good dice (a “6” for him and a “2” for me, which means his autocannon on some Vostock Separatists didn’t go well, and then those same Separatists close-assaulted and destroyed his last units in Novoselivka Druna. Once that happened, he no longer had my last T-72B3 unit spotted for a second Javelin / Hind / Grad strike. That was *basically* the last real shot he had to shift me out of those objective hexes. In fact, I wound up taking one more. So I now hold four of five … and the Ukrainians have lost any real chance of taking any of them back.
 One of the last face-offs is where the five remaining Ukrainian T-80UDs and a platoon of mechanized infantry stared down my last unit of T-90As, two platoons of motorized infantry, an ATGW section, and three BTR-82 sections which tried flanking around that tree line, perhaps with an eye toward engaging that SA-18 Grouse MANPADS section or even his two batteries of BM-21 Grad rockets. But honestly I don’t think either of us had the weight left to shift each other out of these covered positions. THANKS TO DAMON for the great game!
Video Replay: Damon vs. Oriskany
The replay video is up for our community wargame is now up, with 90% of the “background discussion” removed – just to get to the game faster!
@damon (elements UAF 93rd Mechanized Brigade, CDO East)
vs.
@oriskany (Advance Guard, 27th Motor Rifle Brigade, 1st Guards Tank Army)
Hypothetical assault vs. defense scenario, full-scale Russian invasion of Donetsk Oblast, Ukraine.