






A Veteran Wargamer’s Journey Into Kings Of War Part 4: Army Assembly – Build, Model, & Paint
August 12, 2026 by avernos


Zoidpinhead returns for the next instalment of his award-winning Kings of War project, [editor alpha: have we given his project a buttbuttding?] [editor beta: watch this space].
Follow The Entire Getting Started In Kings Of War Series
This week he's tackling the core of the project, making his tournament list and getting stuck into the building and painting of his army.
Basic Guidance for Newbie Army Builders
Mantic is pivotal in the development of Kings of War armies as both game publisher and army manufacturer. The change to 4th Edition has seen Mantic encouraging players to play with more miniatures, as many mandatory core options are cheap, mass infantry units. Fair enough, they want to sell more models.[editor: also, it was to prevent min-max players from spamming filth without bringing an army. Basileans full of angels and no humans I'm looking at you!] I’m all for that. It is a mass battle system, so let’s see lots of miniatures, please. Advice is that the contents of a box are a guide as to what makes a unit, e.g. a new core infantry Regiment box has 20 miniatures.
As Mantic works on bringing out new armies and updating old ones, they are also carefully looking at the army lists. Units that Mantic don’t make models for are at risk of being dropped, as happened to Longhorns when the new version of Forces of Nature came out in Fracture. Mantic are now making some fabulous Herd sets. Longhorns were on the 4th Edition army list but weren’t included with the new range. That meant the option in the army list was redundant, and it was removed. So something to bear in mind as we look to build our own army. If Mantic didn’t or don’t make models for it, be wary. For more on this, see the Mantic Livestream (above).
Some Fun - Mantic Points
If you are buying Mantic, you can have a bit of fun and save up for a free miniature or two. Mantic packaging includes Mantic Points. Usually these are hidden in the box flaps. These are coupons that you clip and save up (yes, teenagers, like the old Co-Op ones) for exclusive miniatures only available from Mantic Direct.
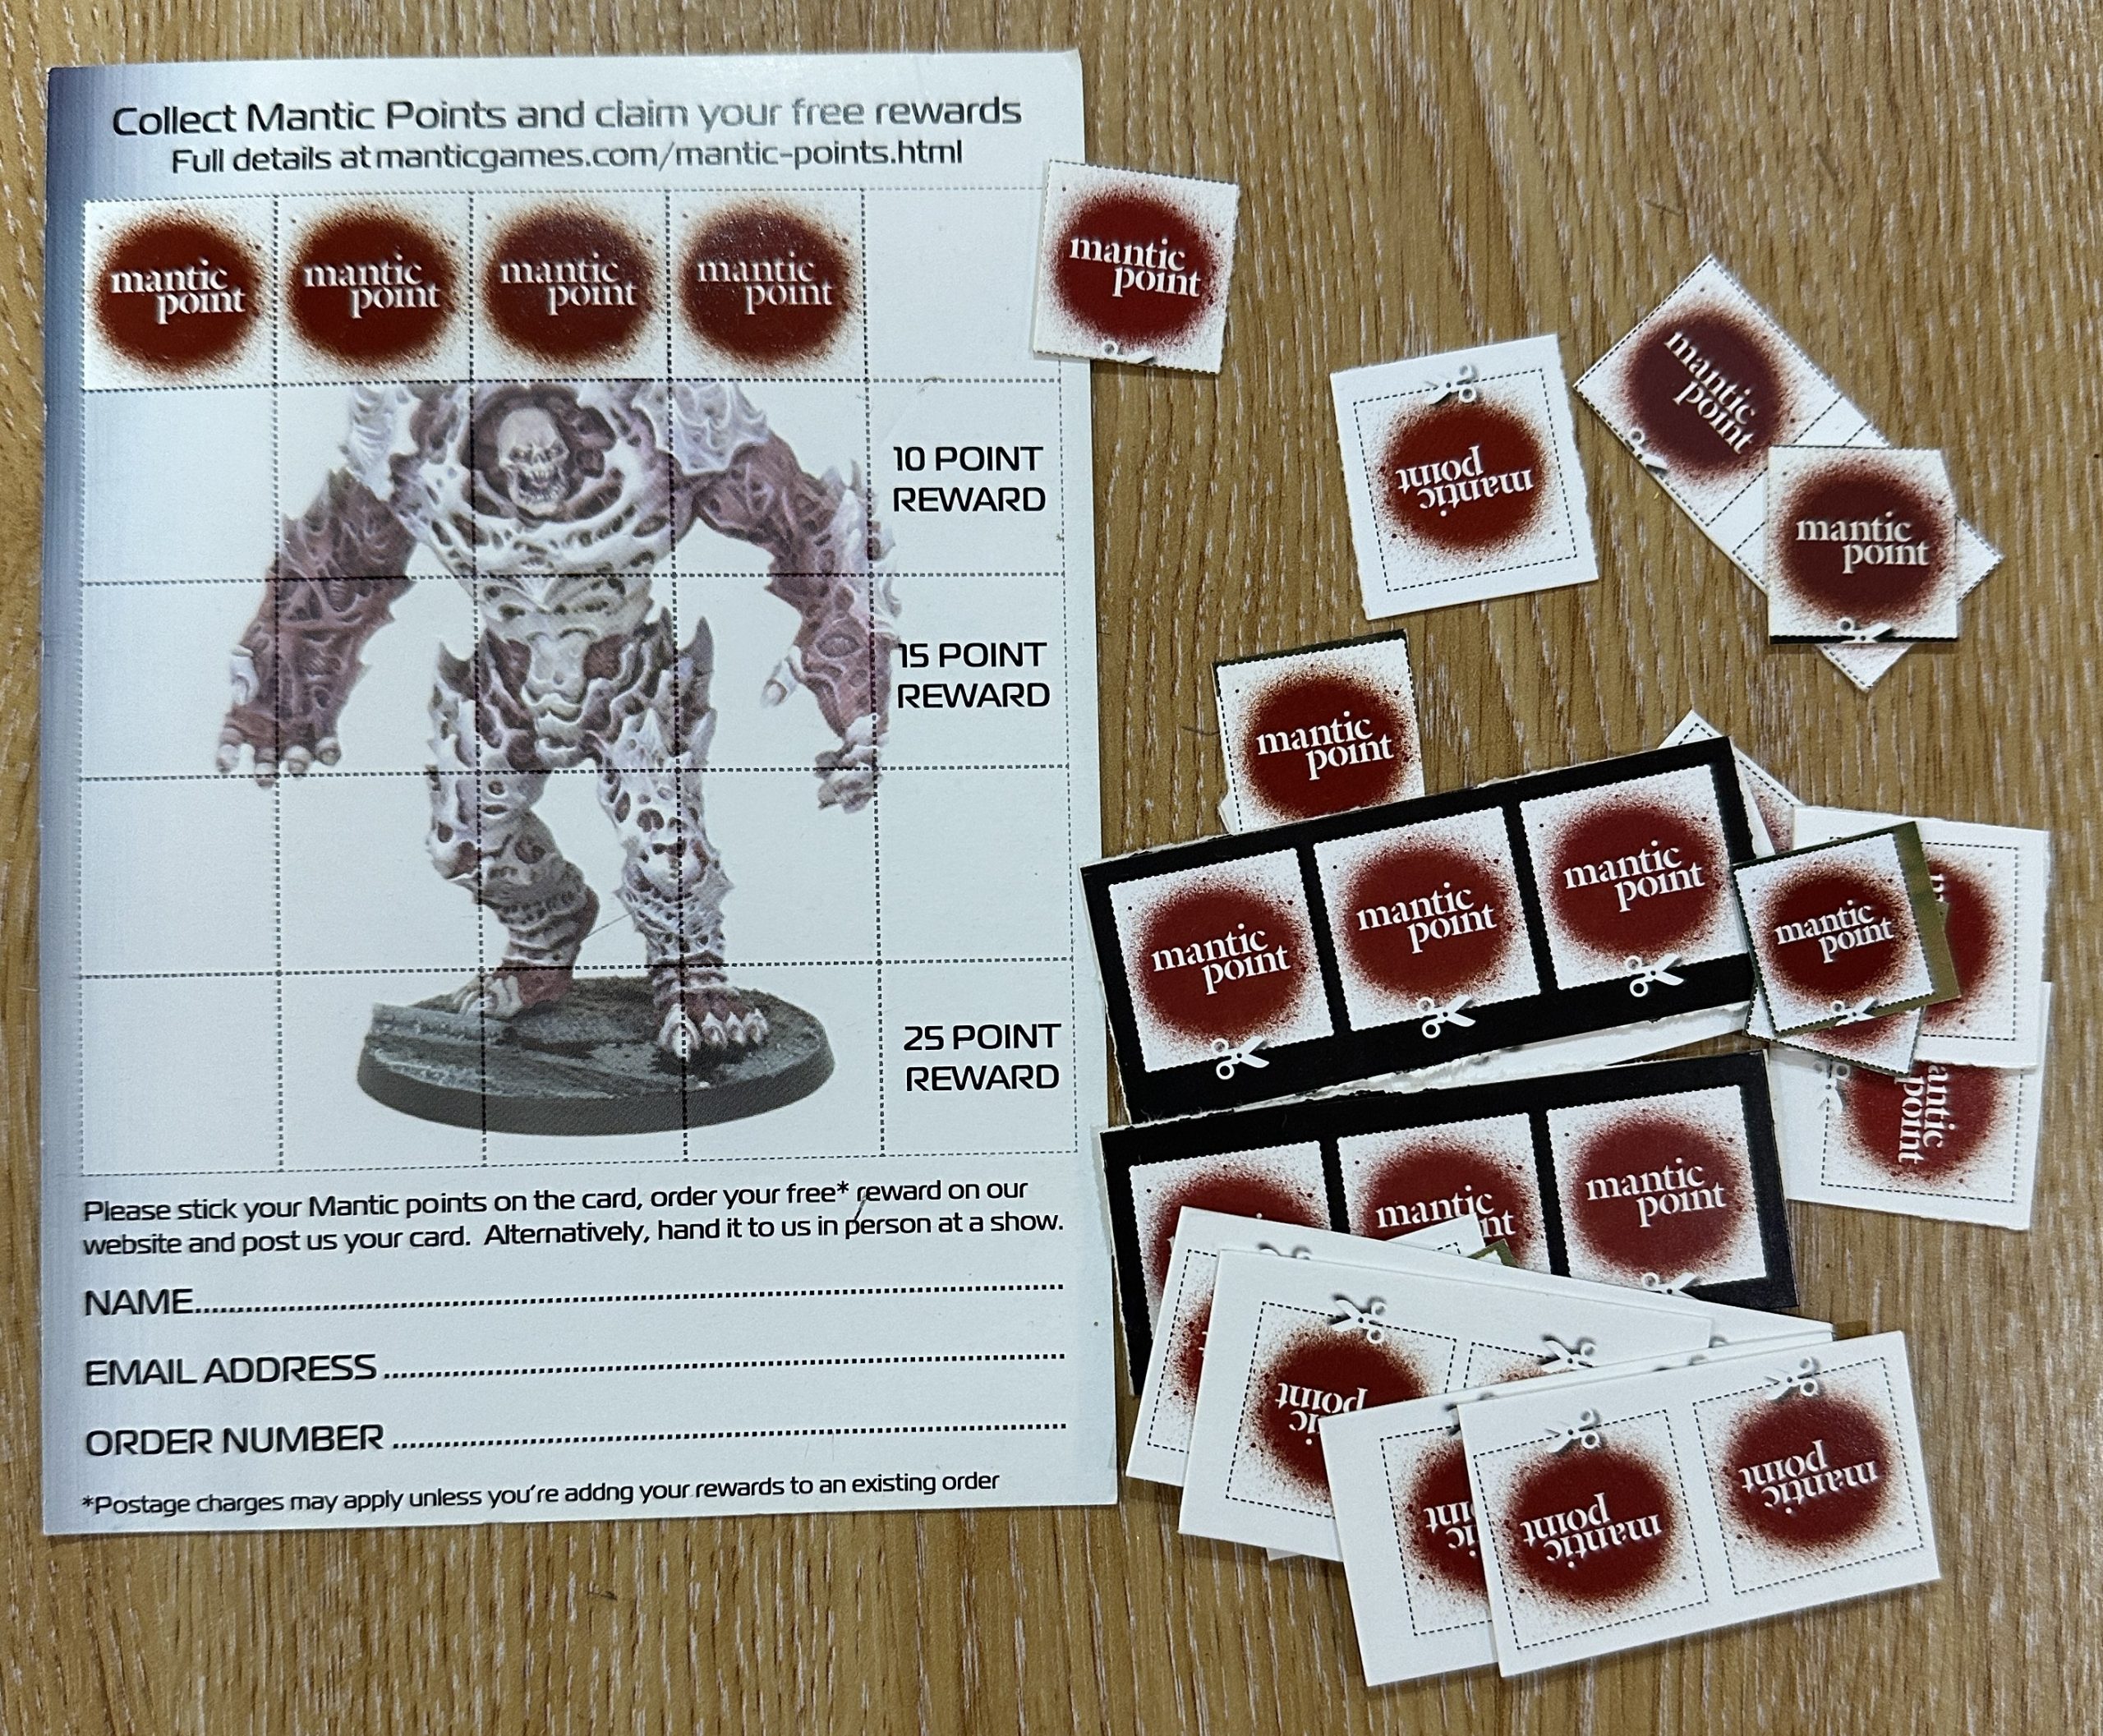
Mantic Points = Free Models!
When you have enough, you can post them in alongside an online order and get a freebie. I’ve not cashed any of mine in yet...
Army List Review
The Clash of Kings Tournament is the largest in the world for Kings of War, and the points value for each army is set at 2300 points. This became the standard for tournaments during 3rd edition, giving the opportunity for players to take more of the fun stuff while balancing out the synergies across the armies. With the new style of army building, this may change in the future but for the first year of the edition, the 2300 points has carried over. Here's what I've put together for my Abyssal Dwarfs currently.
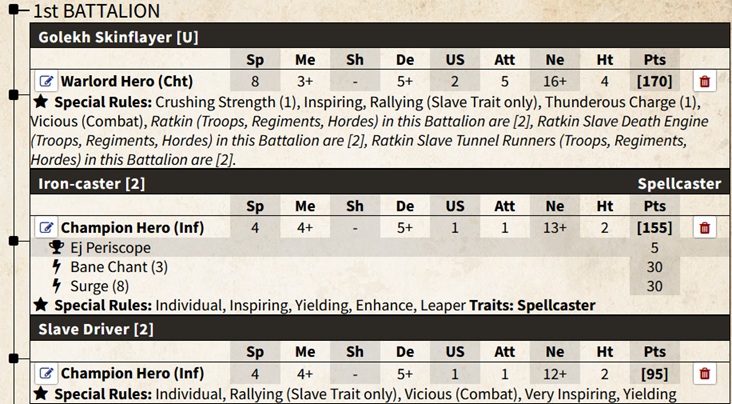
Commanders: Golekh Skinflayer as the Warlord gives the option to take Ratkin Slave units. Mounted in his chariot, he is quick and packs a decent punch. Support comes from an Iron-caster with Bane Chant to help boost the melee value of the infantry units and Surge for the Golems. Finally, a Slave Driver to back the Ratkin Hordes with Rally and Very Inspiring for the Anvil line.
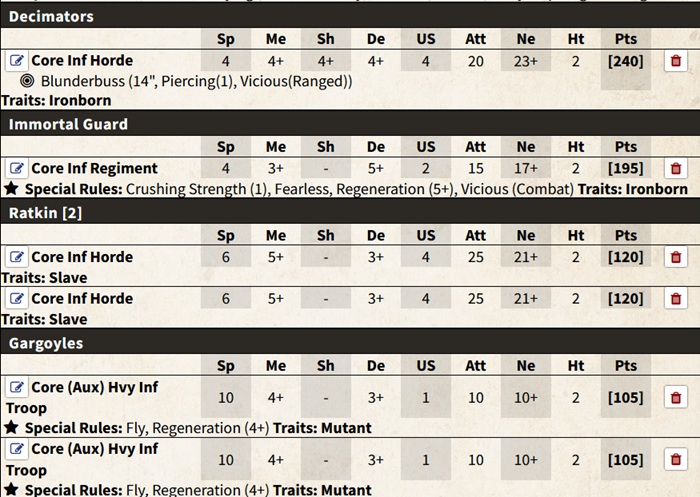
Core: A Tar Pit of cheap Ratkin Hordes and a big block of Decimators as a Gun Line will be the Anvil in the centre. The Immortal Guard are the best combat option in the core as they offer De 5+ combined with Crushing Strength (1), which the army is a bit short of. No room or need for Blacksouls (sadly; they are painted), as the Ratkin offer a cheaper source of Nerve and the Decimators and Immortal Guard give better offensive options. Gargoyles use Aux slots but are the only Flying in the army and are cheap and effective Chaff.
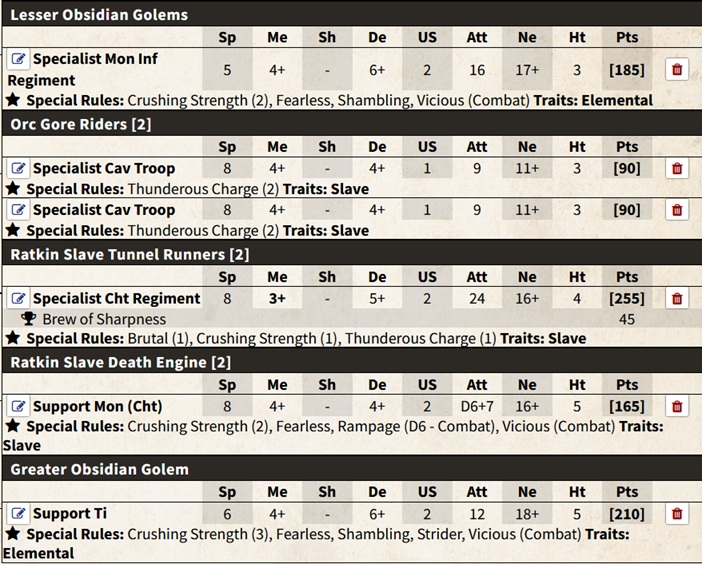
Specialist & Support: Ratkin provide a couple of hard-hitting units which will be fun to play, as they are whipped up on one flank by Golekh screened by Gore Riders speedy Chaff. The Golems make a solid option on the other flank, being both Hammer and/or Anvil. They are more difficult to use well, but I’m looking forward to the challenge and their De 6+ is the best in the list.

My army summary compares well with the overall data about all tournament armies. I have 15 units (overall ave. 13.1), Unit Strength 30 (ave. 23.9). Unit Speed average 6.6 (ave. 6.3). My concerns are that there isn’t enough Crushing Strength to damage high Defence armies and that a swarm army will significantly outnumber me (one of the US Masters Goblin lists had 42 drops! Yuck!).
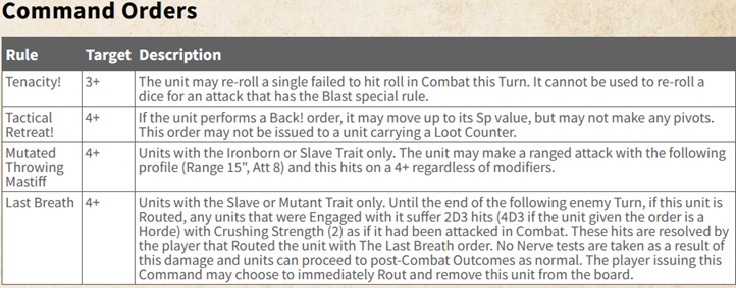
Command Orders: The key Command Order will be Last Breath. With eight Slave or Mutant units, four being cheap chaff, there is plenty of opportunity to blow units up in my opponent’s face. They inflict an average of four Crushing Strength (2) automatic hits every time this happens. Whilst that won’t be decisive in itself, that is nasty damage that should mount up over the game. [editor: Command Orders are a mix of generic orders, the top two, and army-specific orders. These can be issued by the heroes in your army to nearby units.]
Mass Basing Choices And Scenery
Multi-basing is new for me. I’m excited by the scenic modelling opportunities. The rules say...
“It’s okay to have a few less models on the base … so long as the unit base is full and still looks like the mass ranks of troops the unit is representing.” (Kings of War 4th Edition, pg 8)
This is reinforced by some tournament guidance. At the Clash of Kings tournament, they expect that “the base looks full and clearly represents the unit in question”.
Before I can start painting, I need a clear picture in my head of how I’d like the army to look. Mass basing is a new thing for me. After so long in the hobby, this is a delight. I intend to take full advantage of it and get some scenery onto the bases along with the minis.
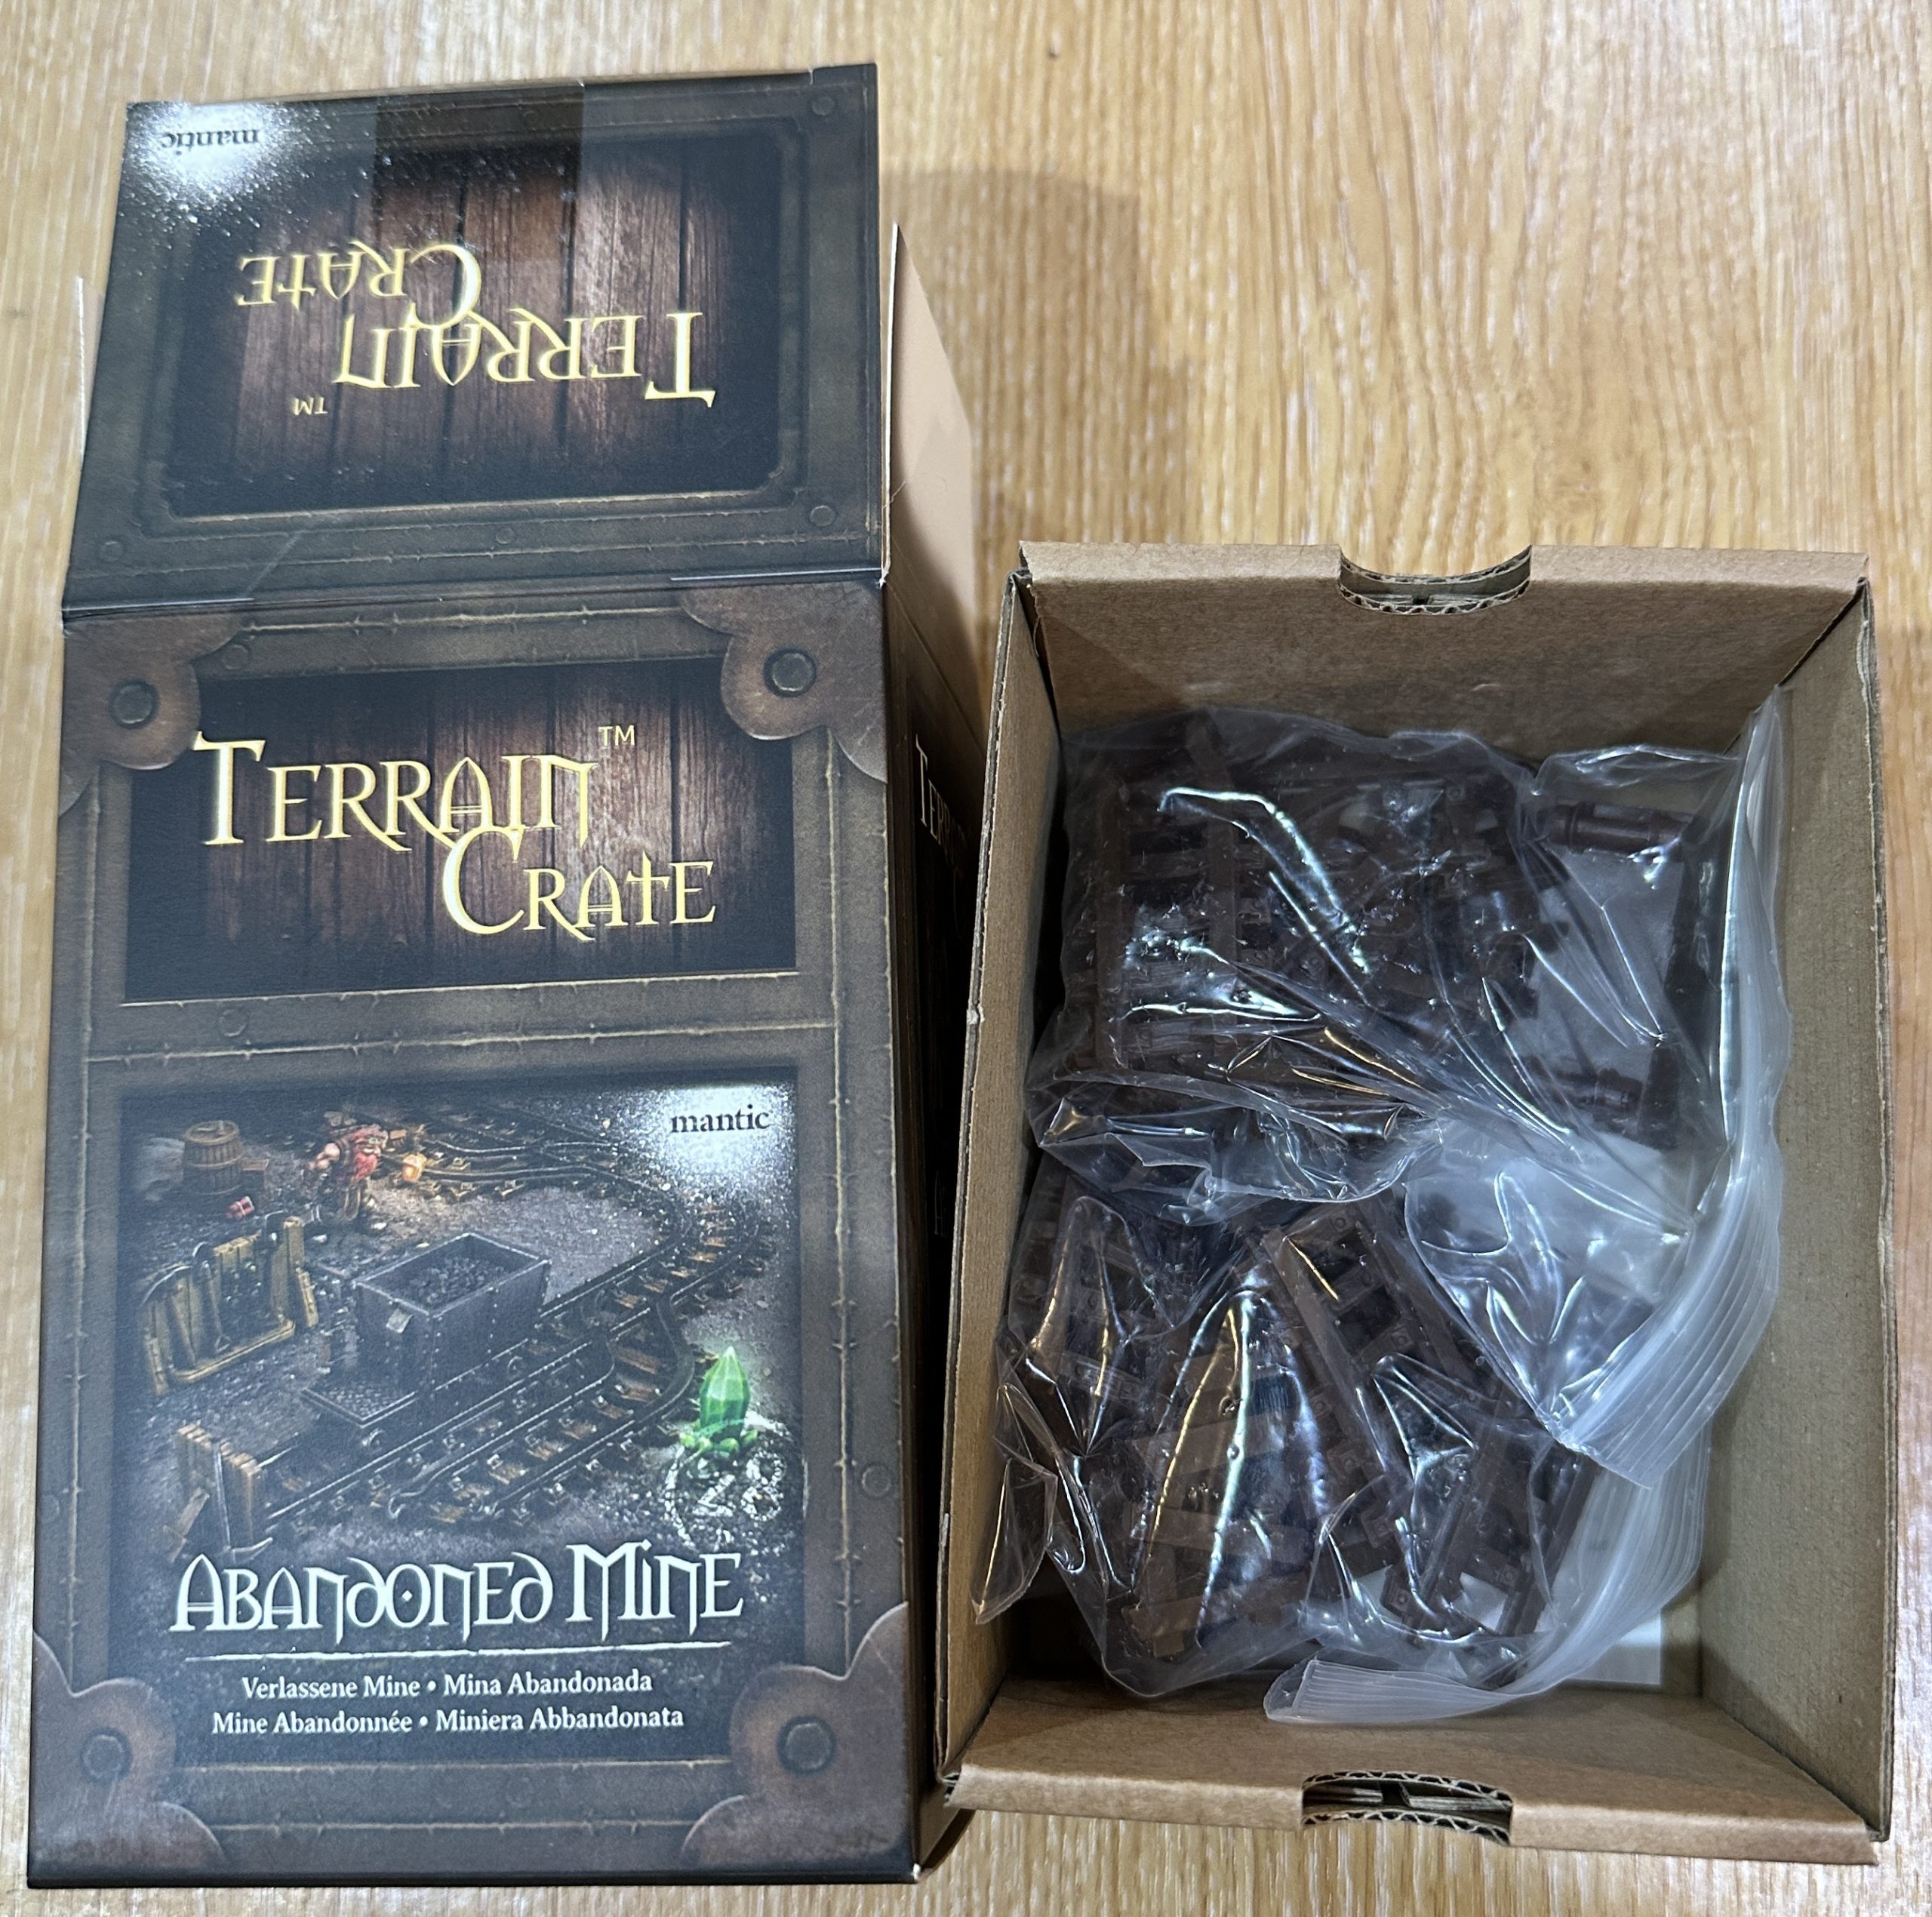
Abandoned Mine // Mantic Games Terrain Crate
I find the background lore (fluff) helpful when getting ideas together. The Abyssal Dwarfs are notorious for their successful campaign to drive the Free Dwarfs out of their holds. My basing concept is that my Abyssal Dwarfs are emerging from one of these captured holds through the entrance to some abandoned mine works to wreak havoc on the world.
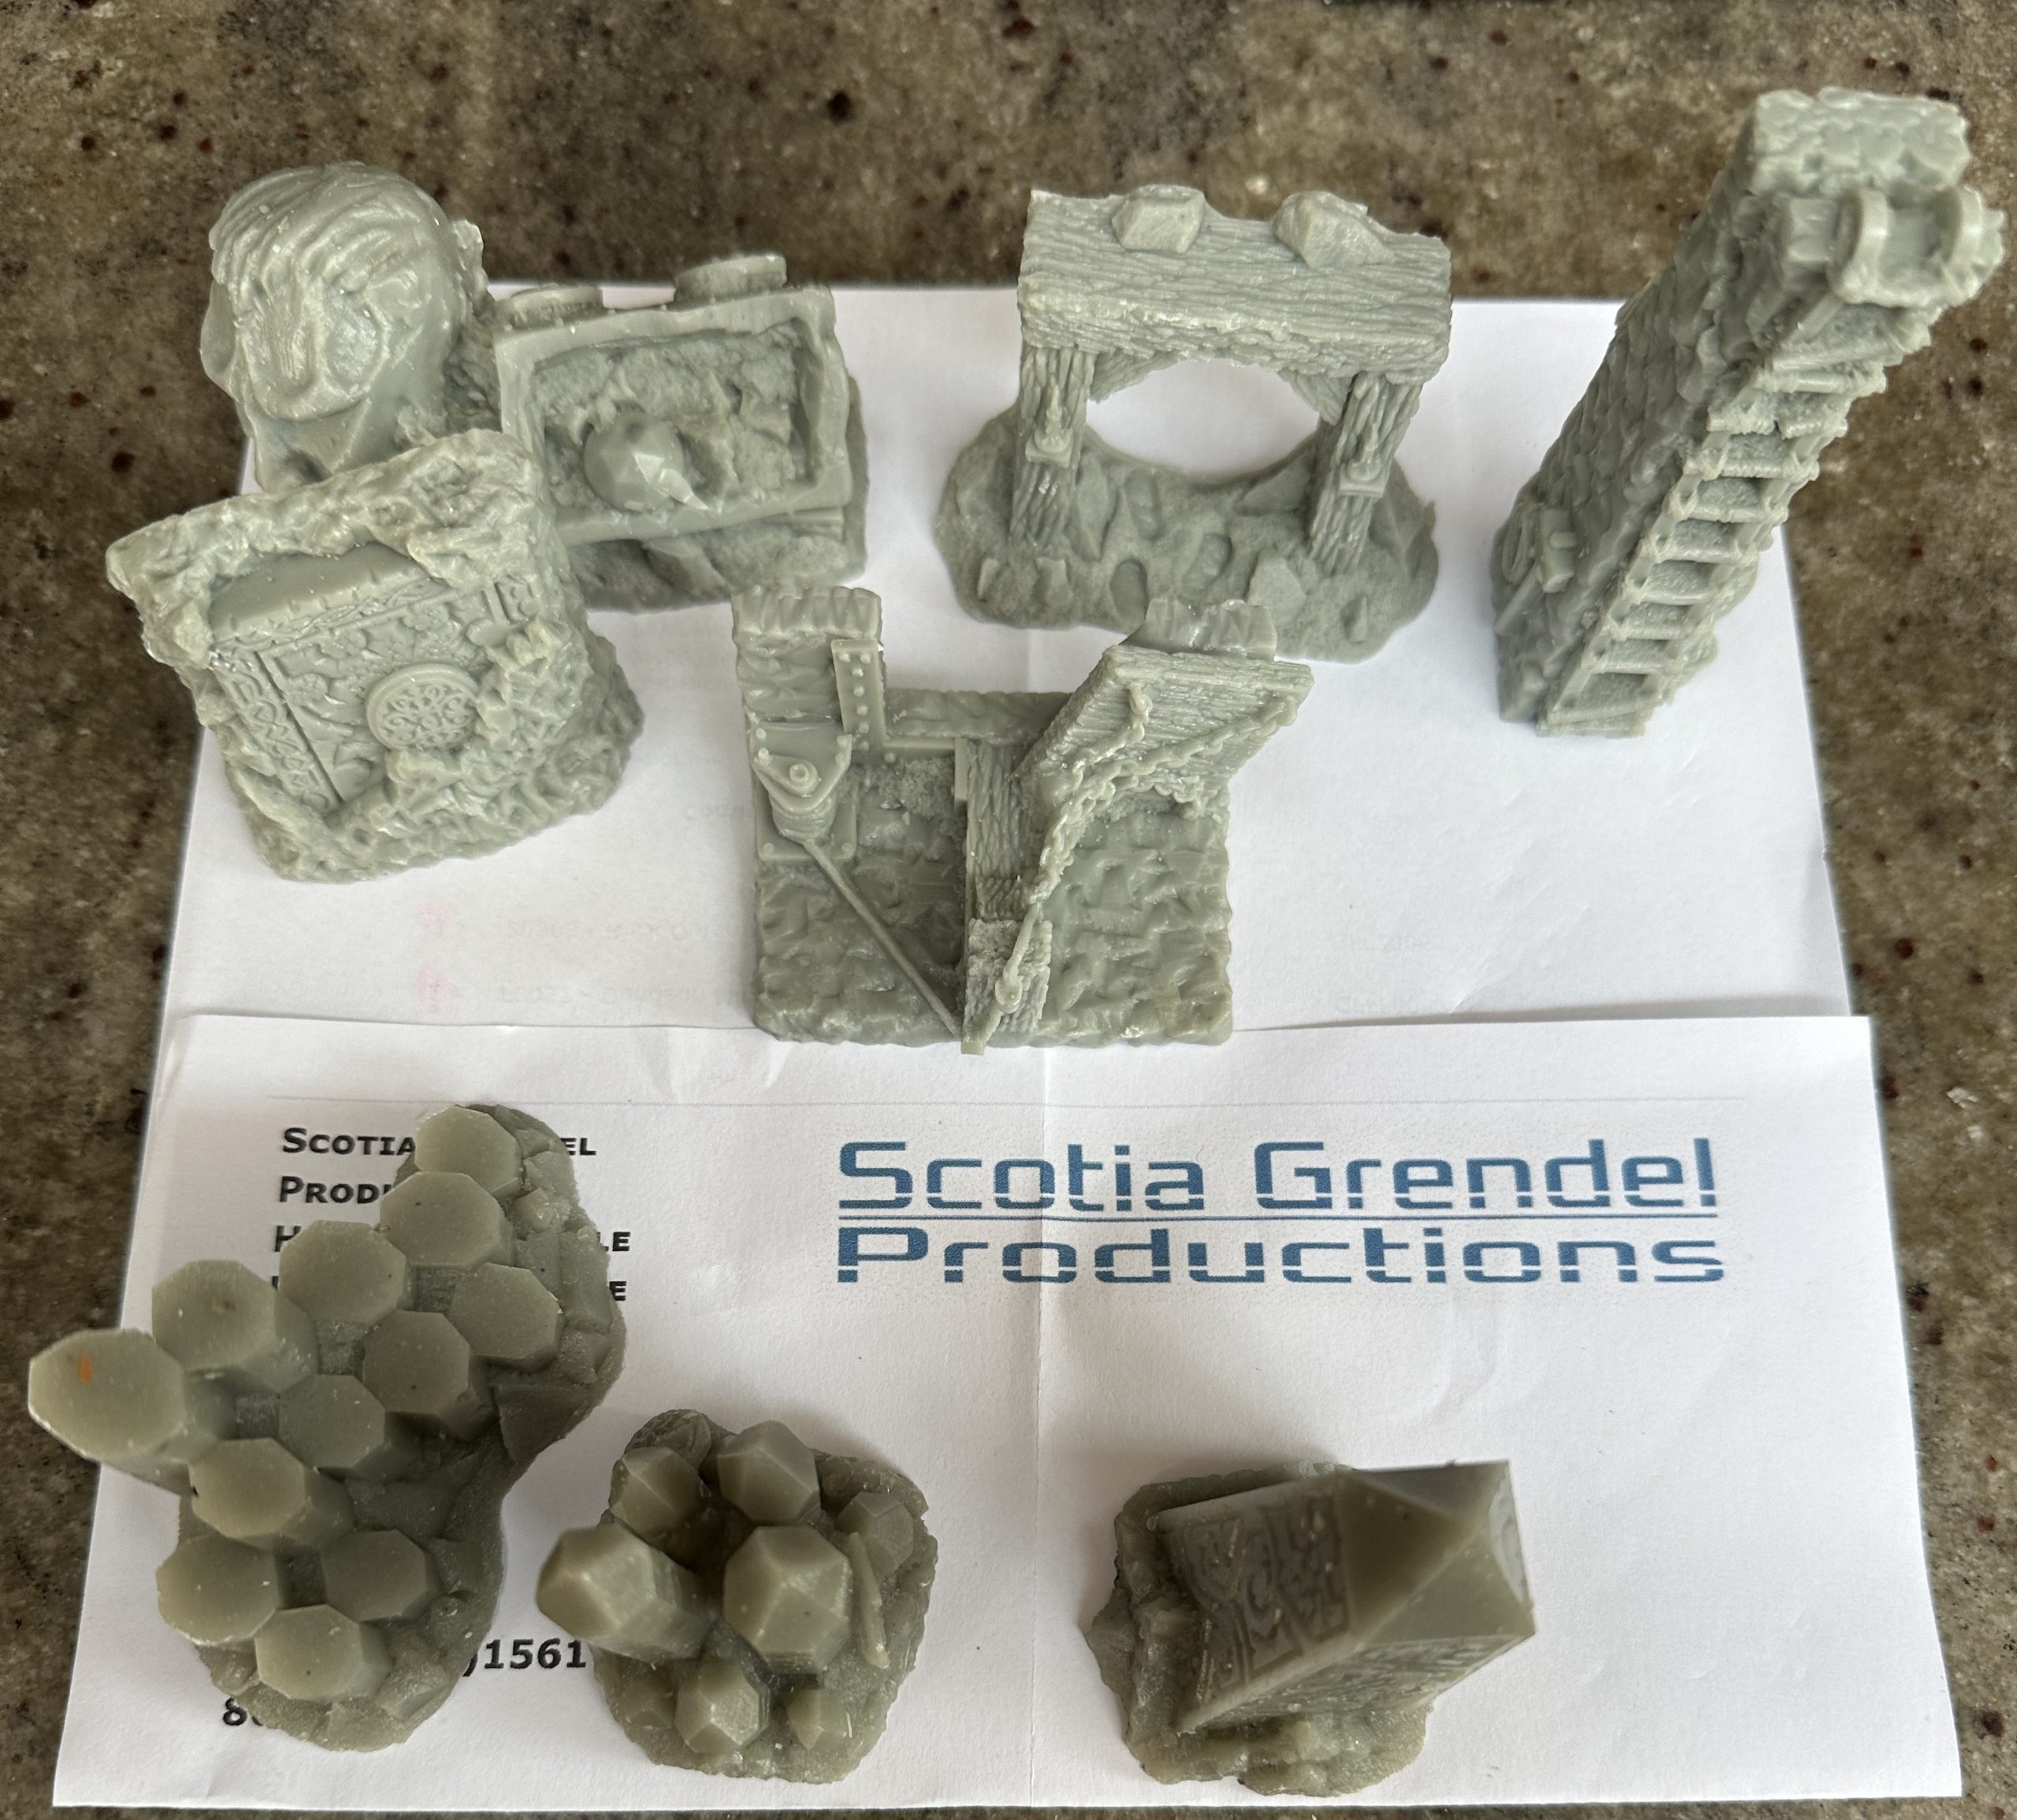
Scotia Grendel Resins
Concept in place; it’s off to the internet to find some scenery options. I’m sticking to traditional suppliers rather than 3D prints, so I went to Scotia Grendel and found some of their lovely (and inexpensive) cast resin fantasy terrain sets. I’ve dipped into Mantic’s Terrain Crate and bought the Abandoned Mine box, which hopefully will win me some Brownie points in any ‘all Mantic army’ or army painting competitions.
Quick Base Coverage Solution
I’ll need a very quick scatter solution. Usually I’d base miniatures in several stages involving scatter, dry brushing and lots of different tufts. On a recent big army project, I started using Krautcover mixed scatter. This stuff is great because it has a variety of elements blended in a single tub, thus saving me lots of individual stages.
These are becoming very popular and, rather like the templates in PowerPoint, using them can be a bit obvious to those in the know. My plan therefore is to look at a blend. Here we have two off-the-shelf tubs with example flocked bases, and on the middle base a 50/50 blend of the two.
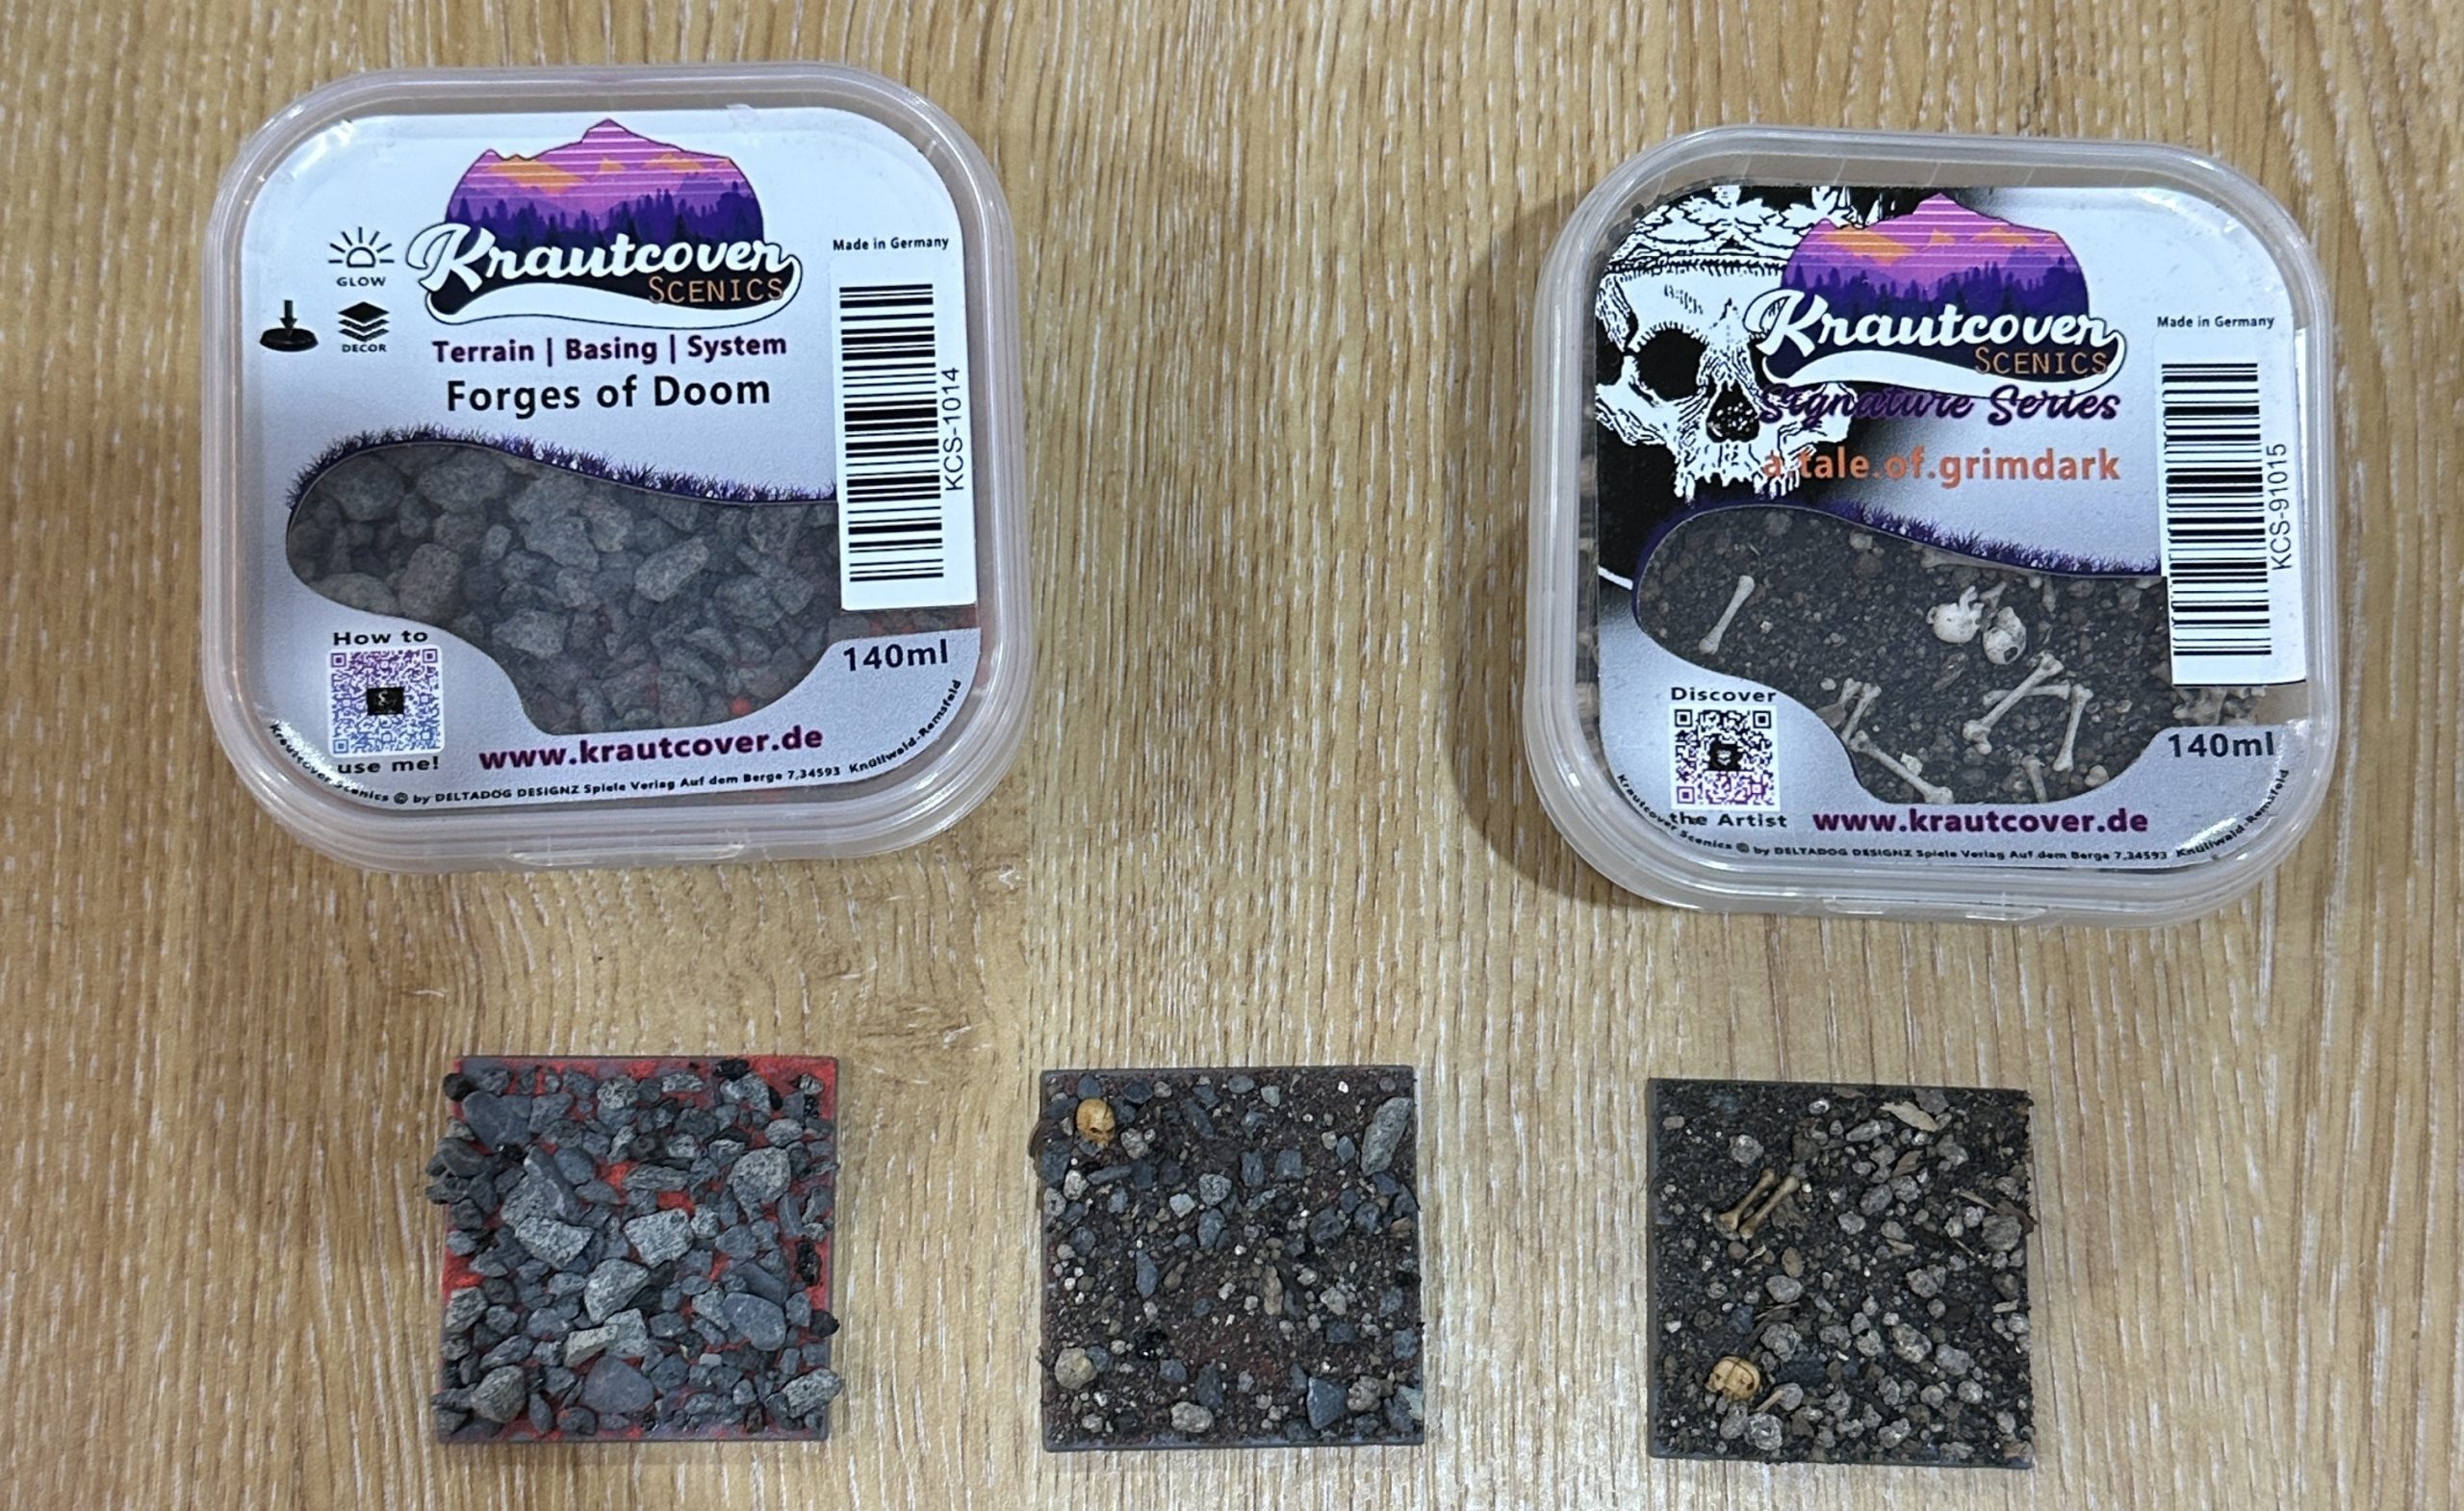
Krautcover - Like Gerry's Base Mix But Branded
The ‘Tale of Grimdark’ on the right is a good brown groundcover with some skulls and bones in. This one is super popular and would be instantly recognisable to many. The ‘Forges of Doom’ set (left) you would think would be perfect for Abyssal Dwarfs, but the neon red colour between the stones is super bright (doesn’t really show in the photo as my iPhone is working hard to make the colour look more “normal”). This would be great for Abyssal demon forces but is a bit much for my concept. Step forward the blend (middle base). We get an even cover of toned-down red dirt, bones and mine spoil with bits of obsidian, and nobody else will have this finish. Perfect.
Getting a Better-Than-Basic Paint Job
The basic guidance offered by my tournament pack is:
“All models must be painted with at least three colours and bases painted and/or finished with basing material.”
It is a bit of a standing joke amongst non-tournament wargamers that it is possible to paint an army with only three colours. I’ve never seen an army painted like that and I don’t think anyone takes this literally. [editor: I have seen three-colour armies at the old ETC, in fact, there was an argument over whether the colour of the base counted as one of the three]. This guidance does make it clear to players that painted models and expected and bare plastic or using a single-colour spray can isn’t acceptable.
Painting Abyssal Dwarfs
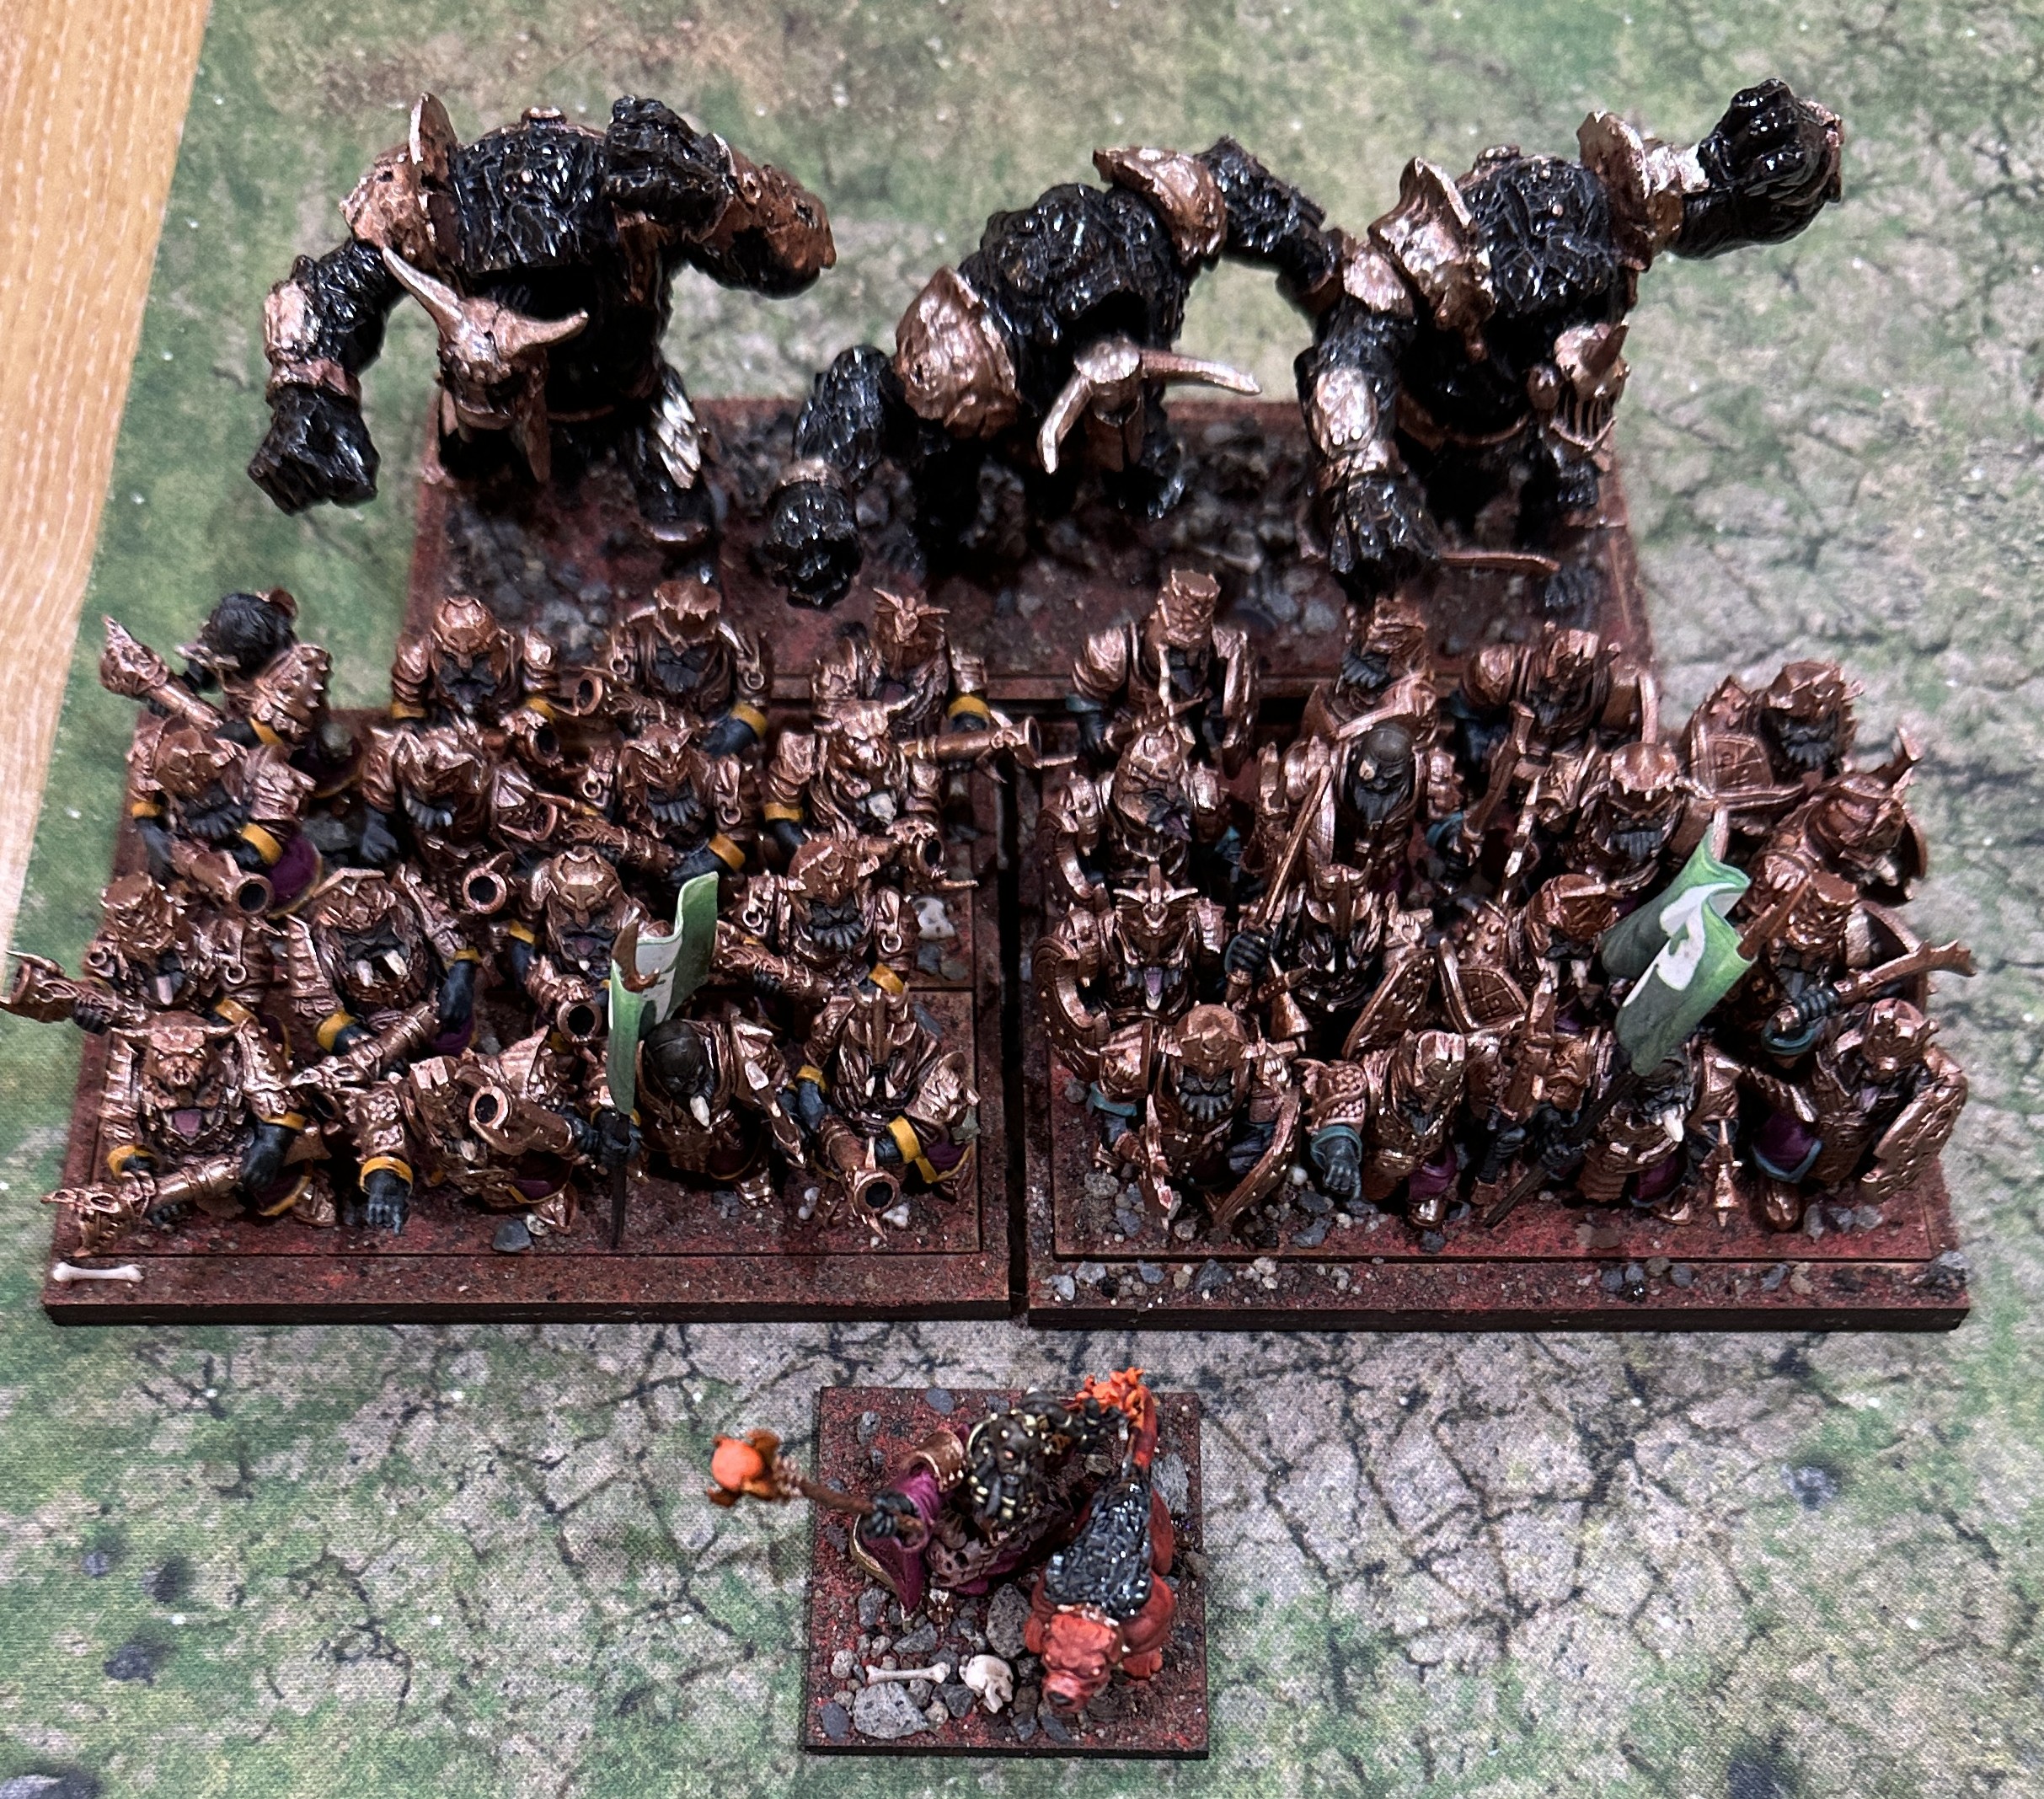
The basics of painting are beyond the scope of this article. To go quickly, I Blu-Tacked (Blu-Tack = poster putty) the assembled miniatures onto strips of card cut from a packing box. This made handling the quantity easier when undercoating and still gave sufficient brush access when batch painting. Miniatures were painted in unit batches of 20. Only ten steps. The basic principle is to get as much tonal variety as possible into every stage, making a simple process look much better than basic block colours.
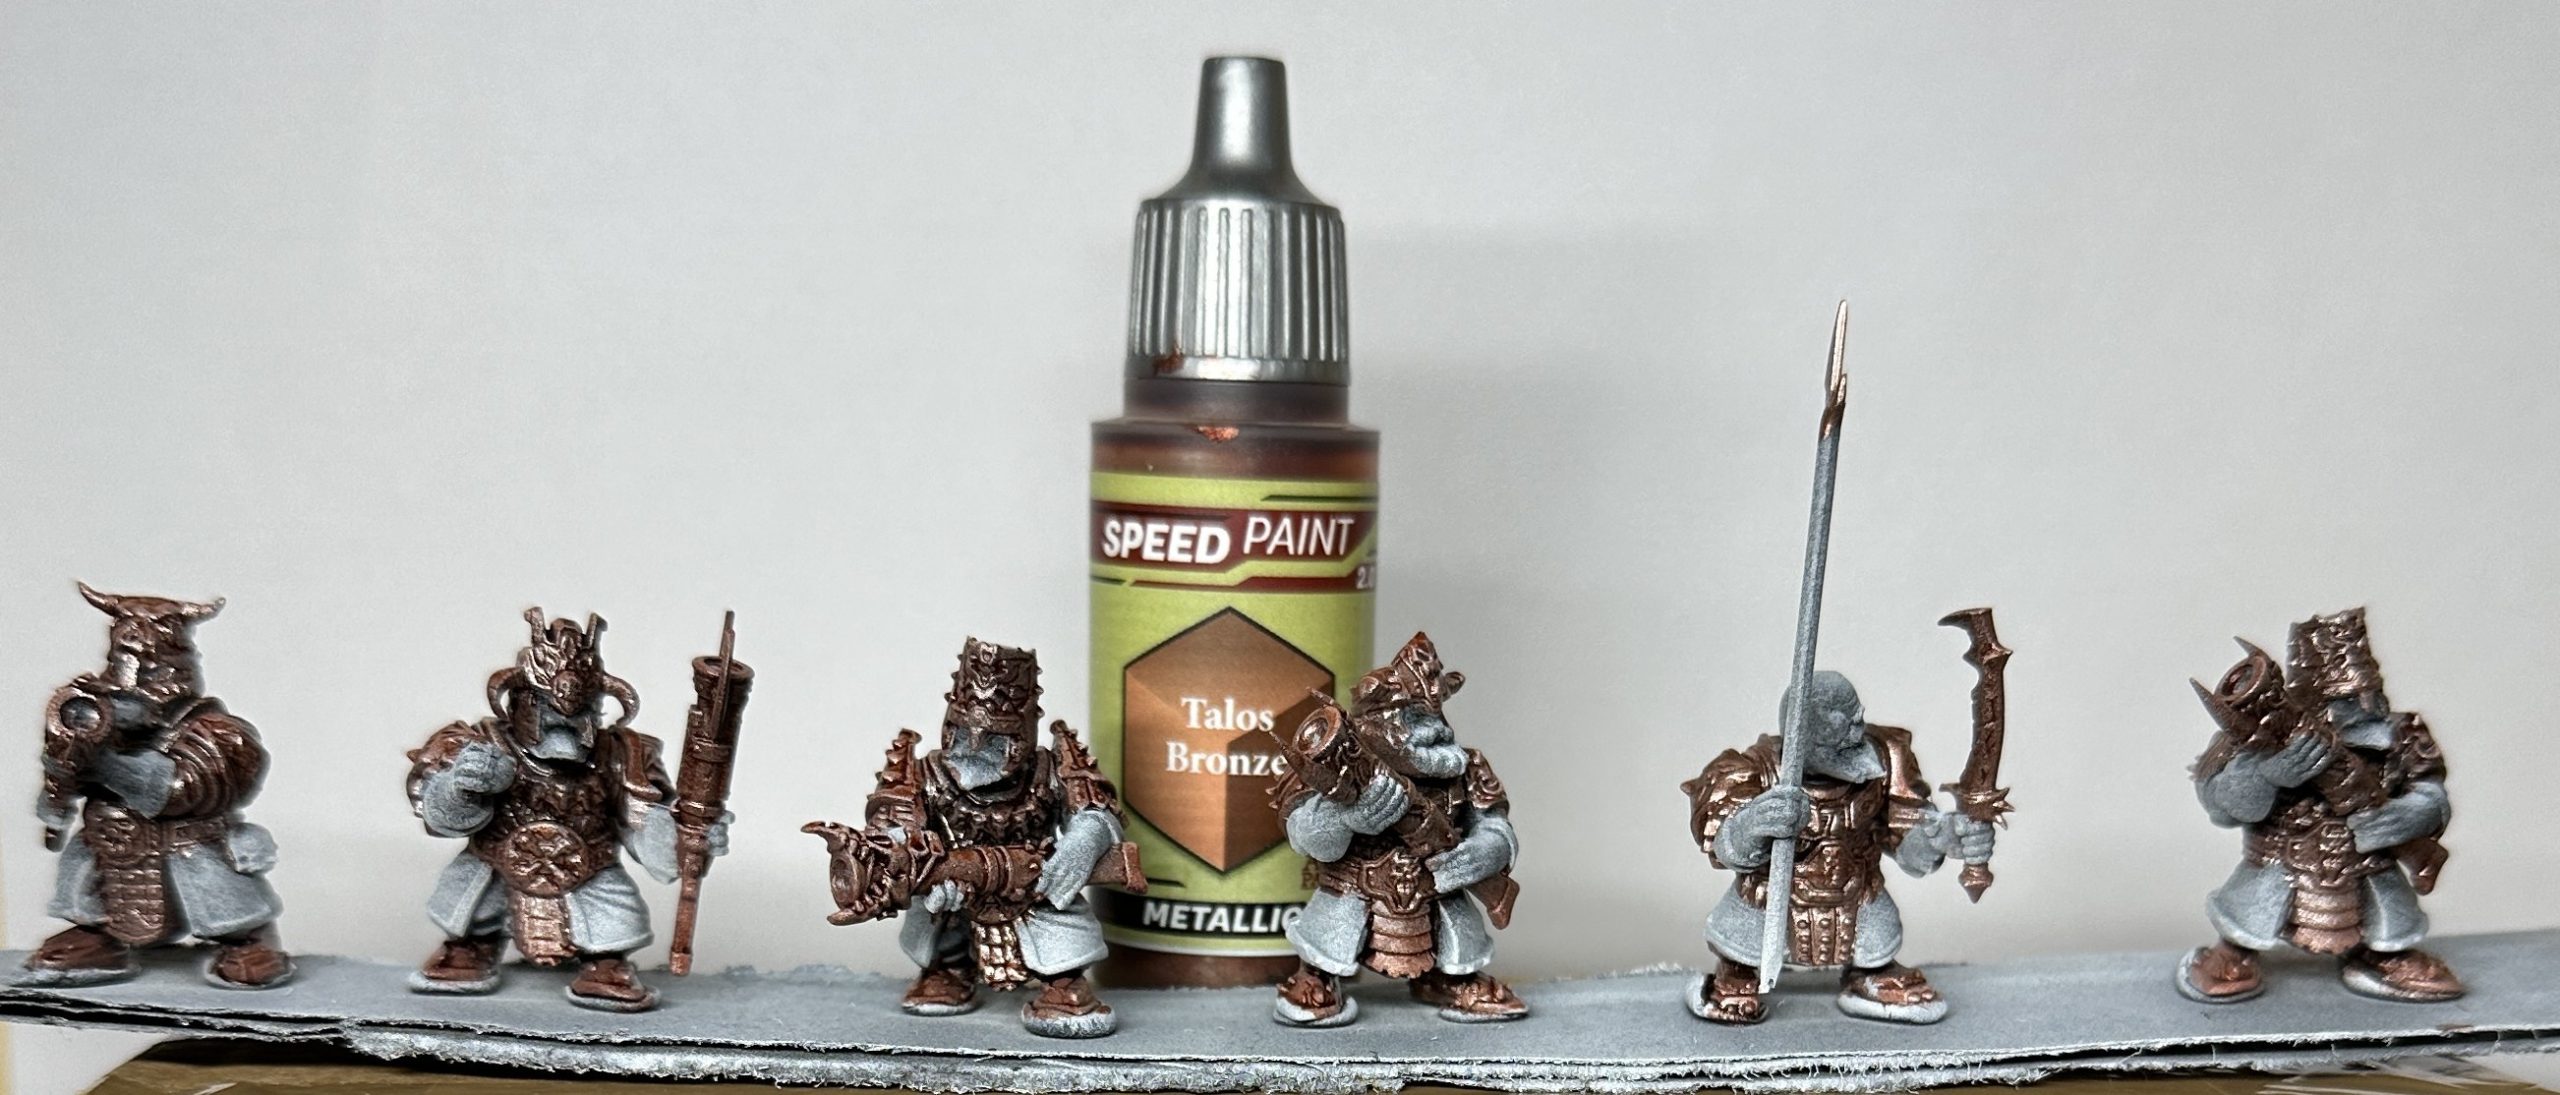
Step 1: Miniatures were primed with a zenithal spray, Halfords White over Halfords Black. All of the armour and metal was painted with Talos Bronze Speedpaint. I didn’t worry about areas that might be a mixture of leather and metal – it’s all going to be metal. A great mid-tone block, with the zenith helping the Speedpaint provide good variety so it looks more interesting than a standard acrylic would.
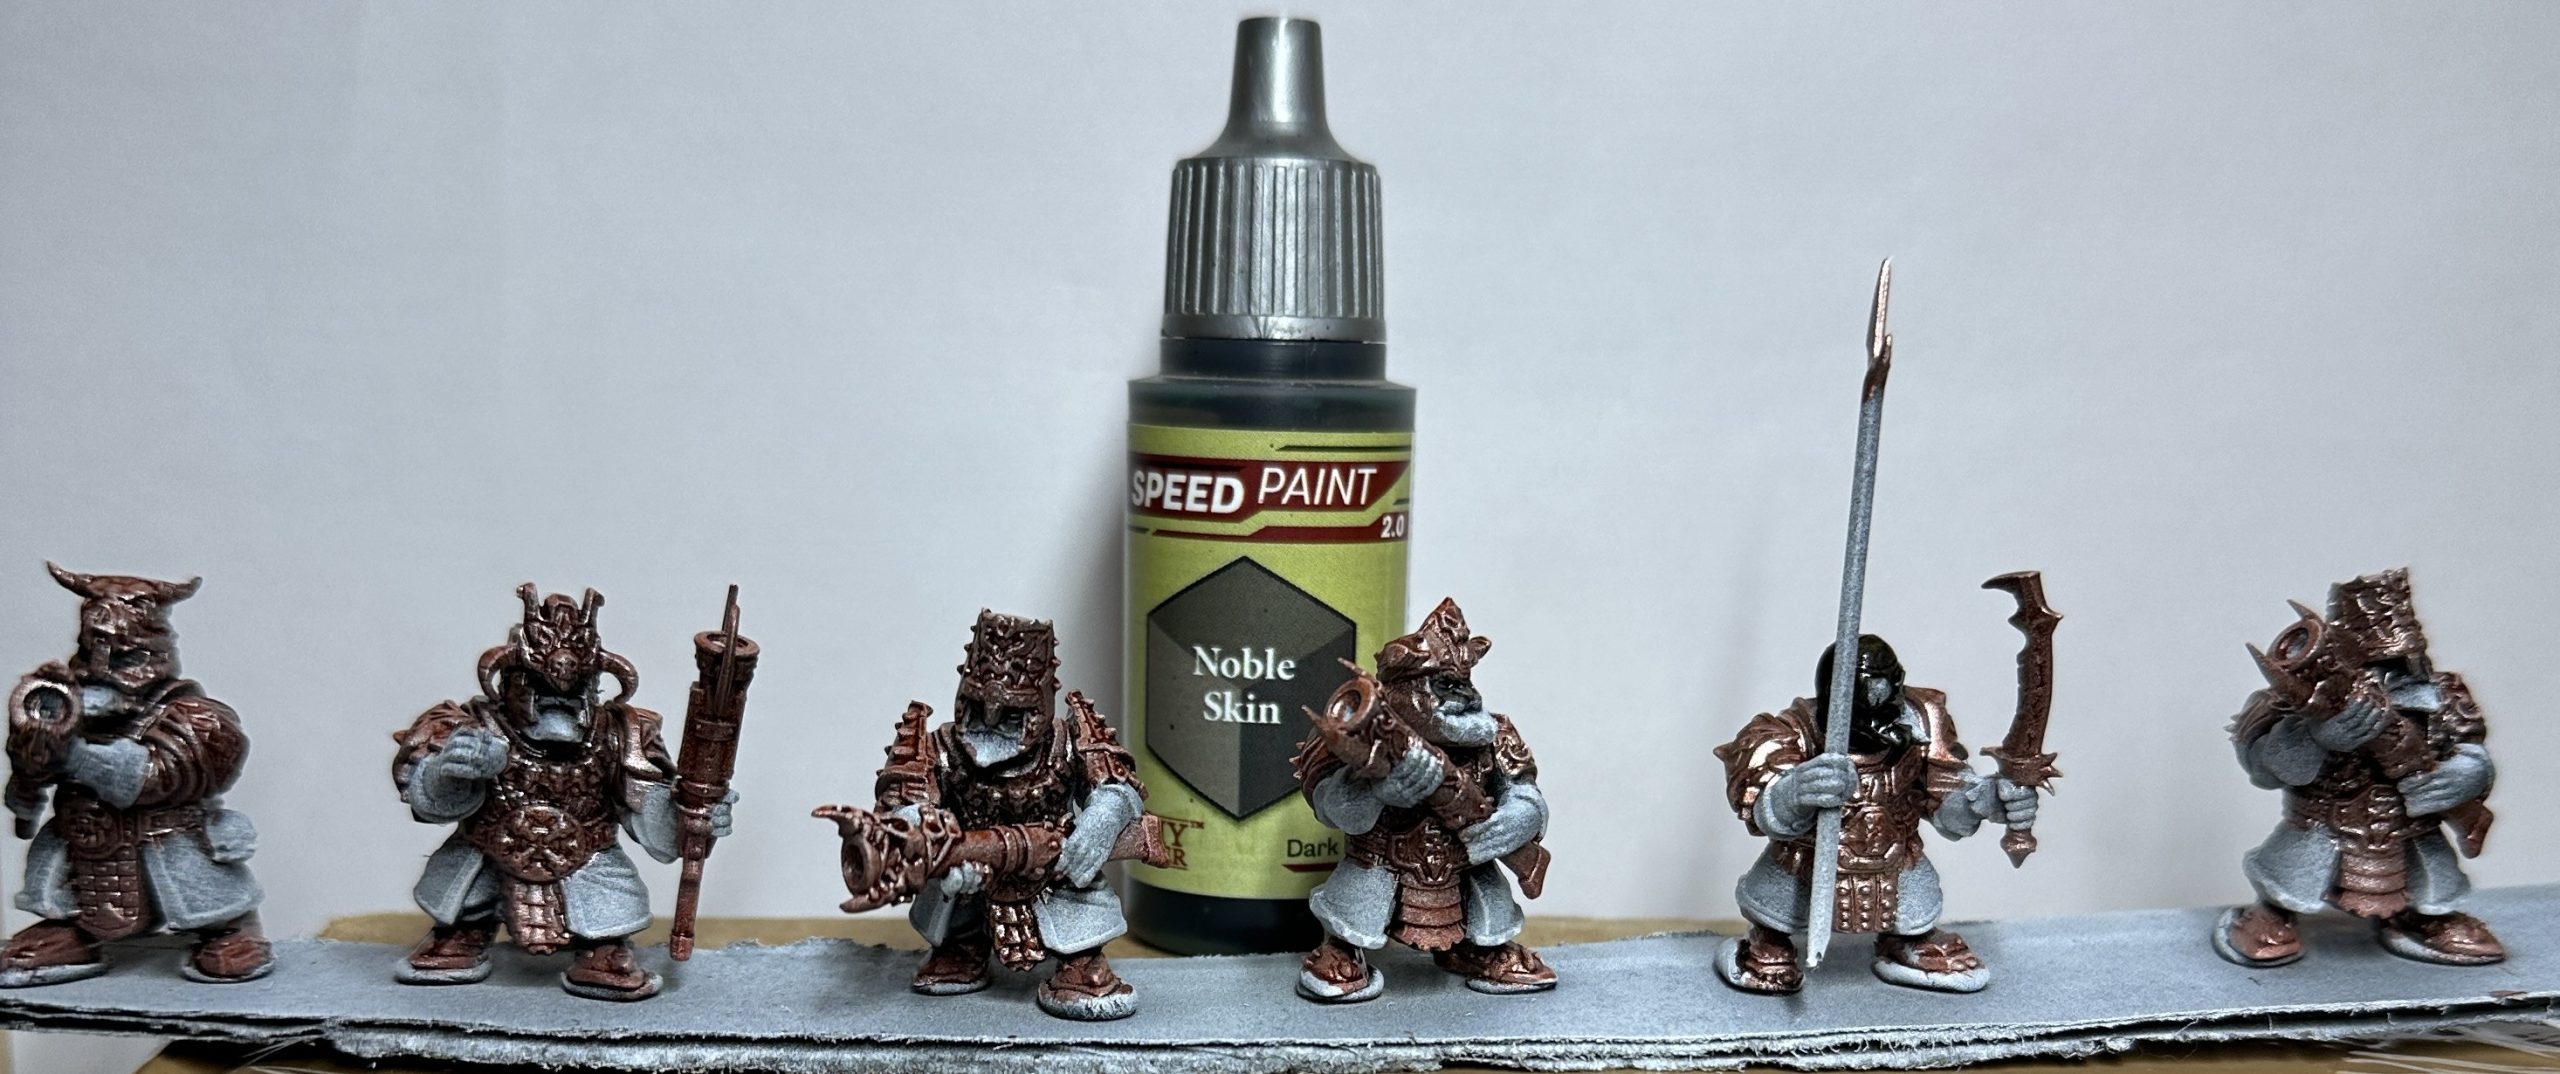
Step 2: Faces were painted with Noble Skin. A dark tone is good here because it is a better contrast with the bronze. Pale skin won’t be visible and will need a lot of work to be seen.
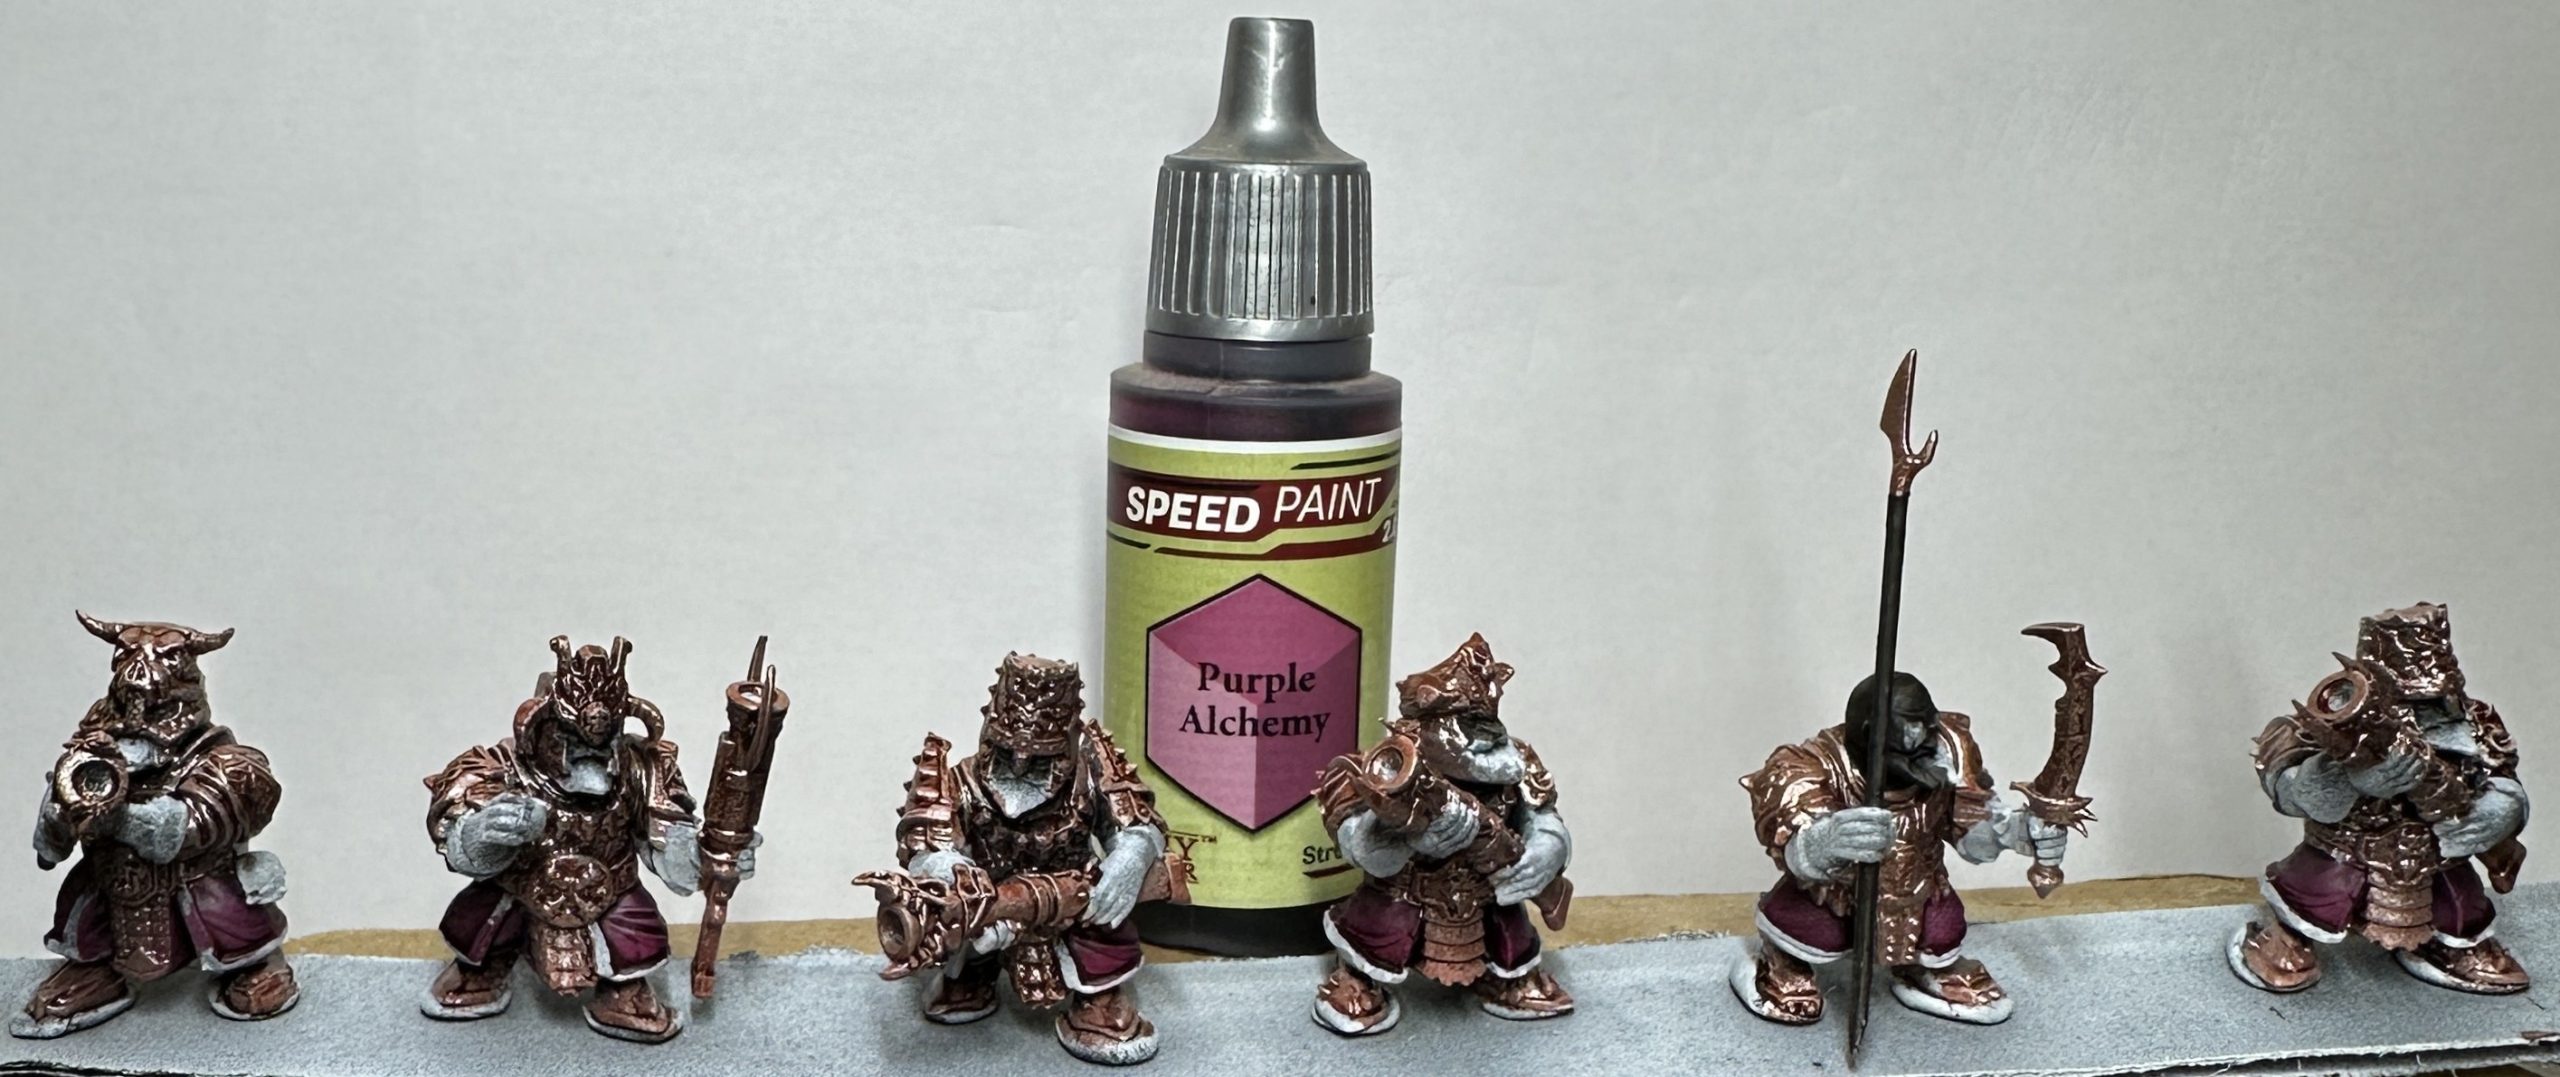
Step 3: Tunics are Purple Alchemy. This is a good contrast to the bronze both in colour and tone.
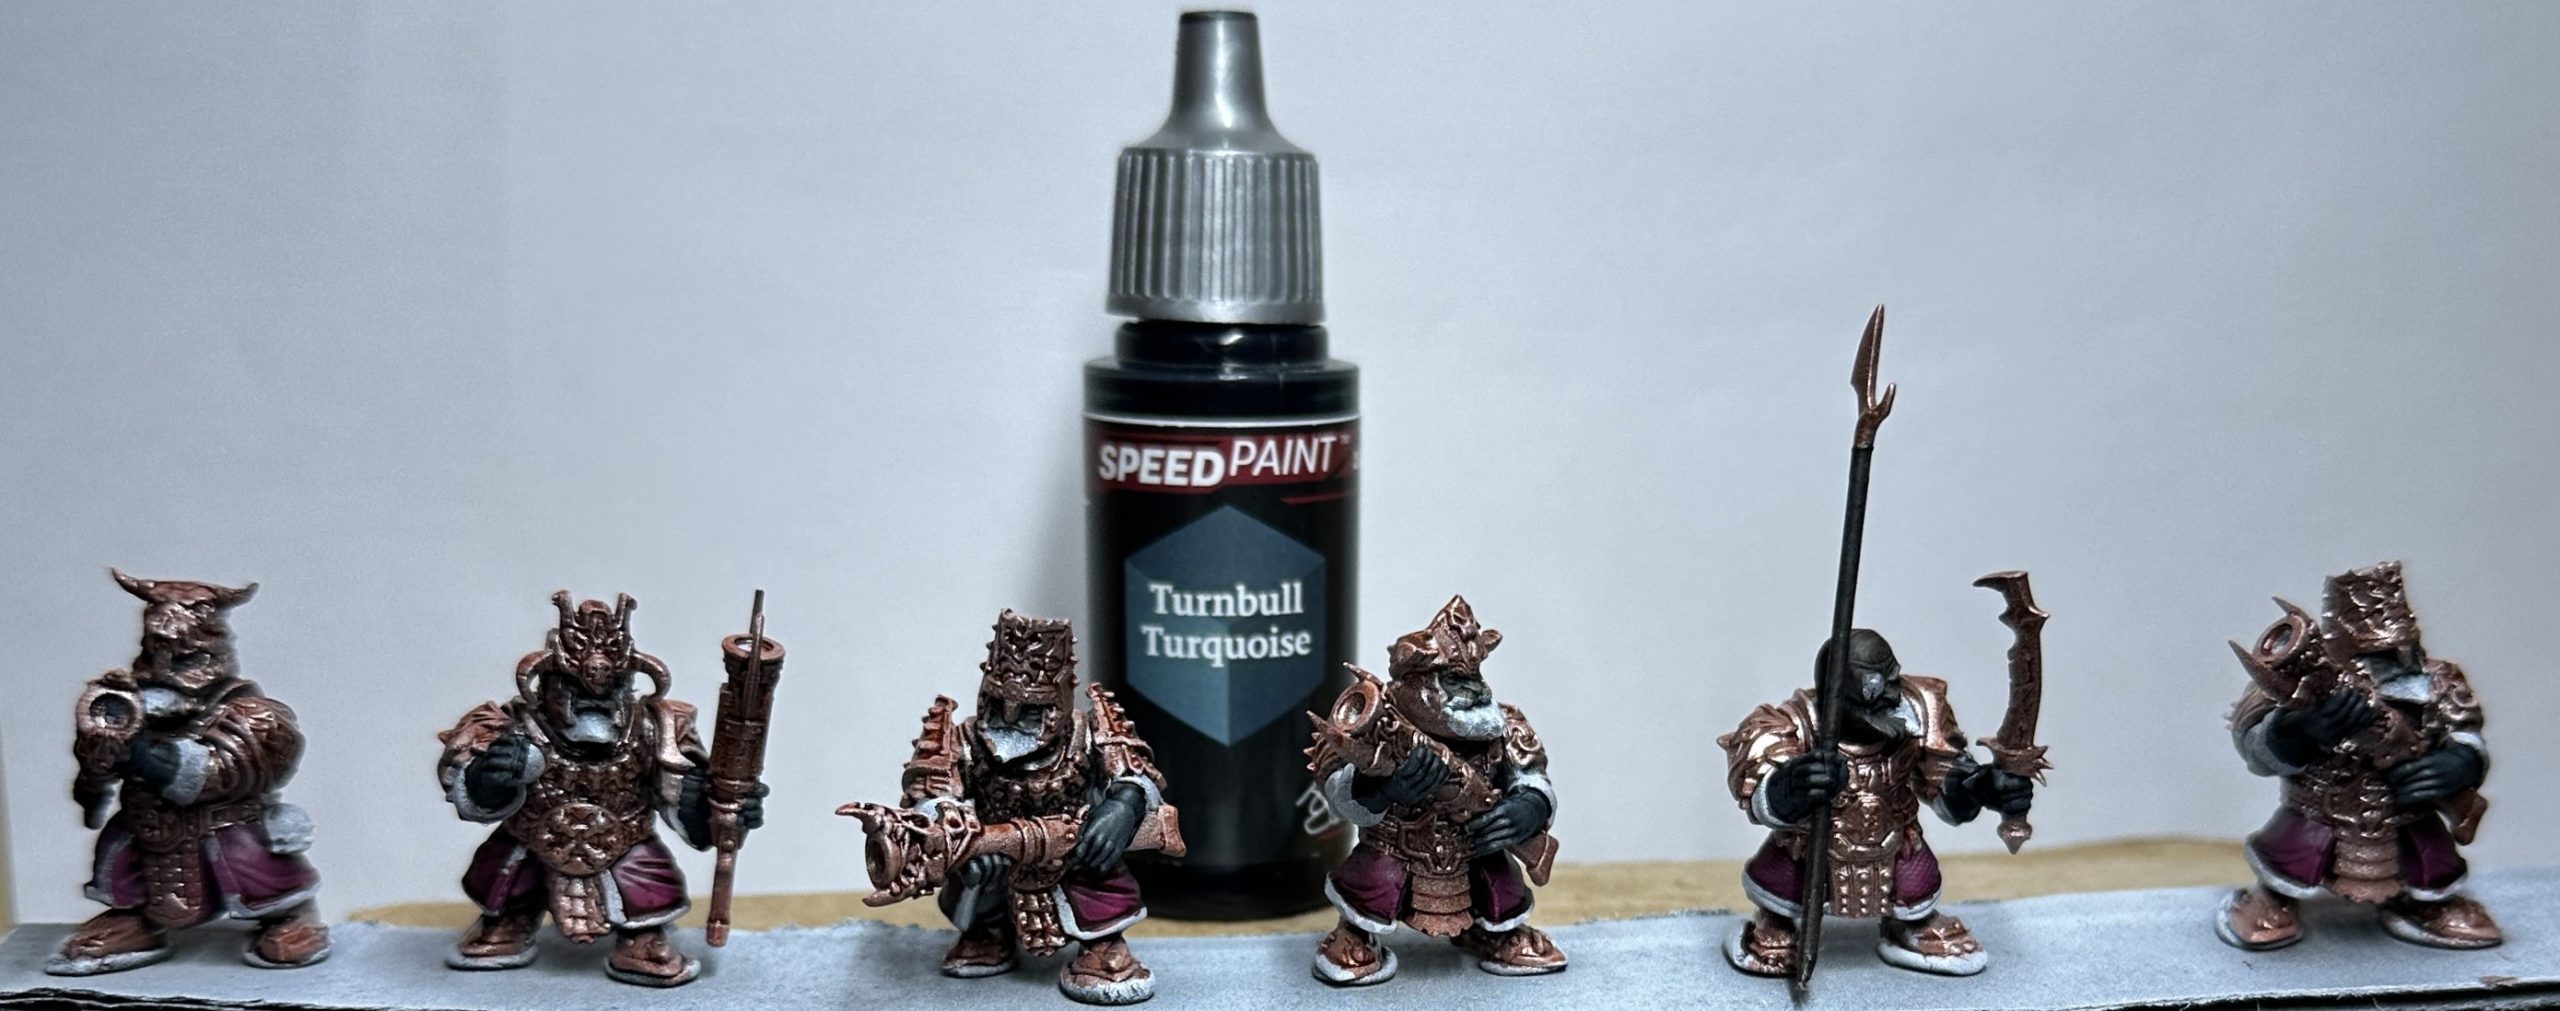
Step 4: Gloves are black leather done with Turnbull Turquoise. This paint from the John Blanche range is so dark when it dries that it looks like black that has a subtle, not-grey highlight.
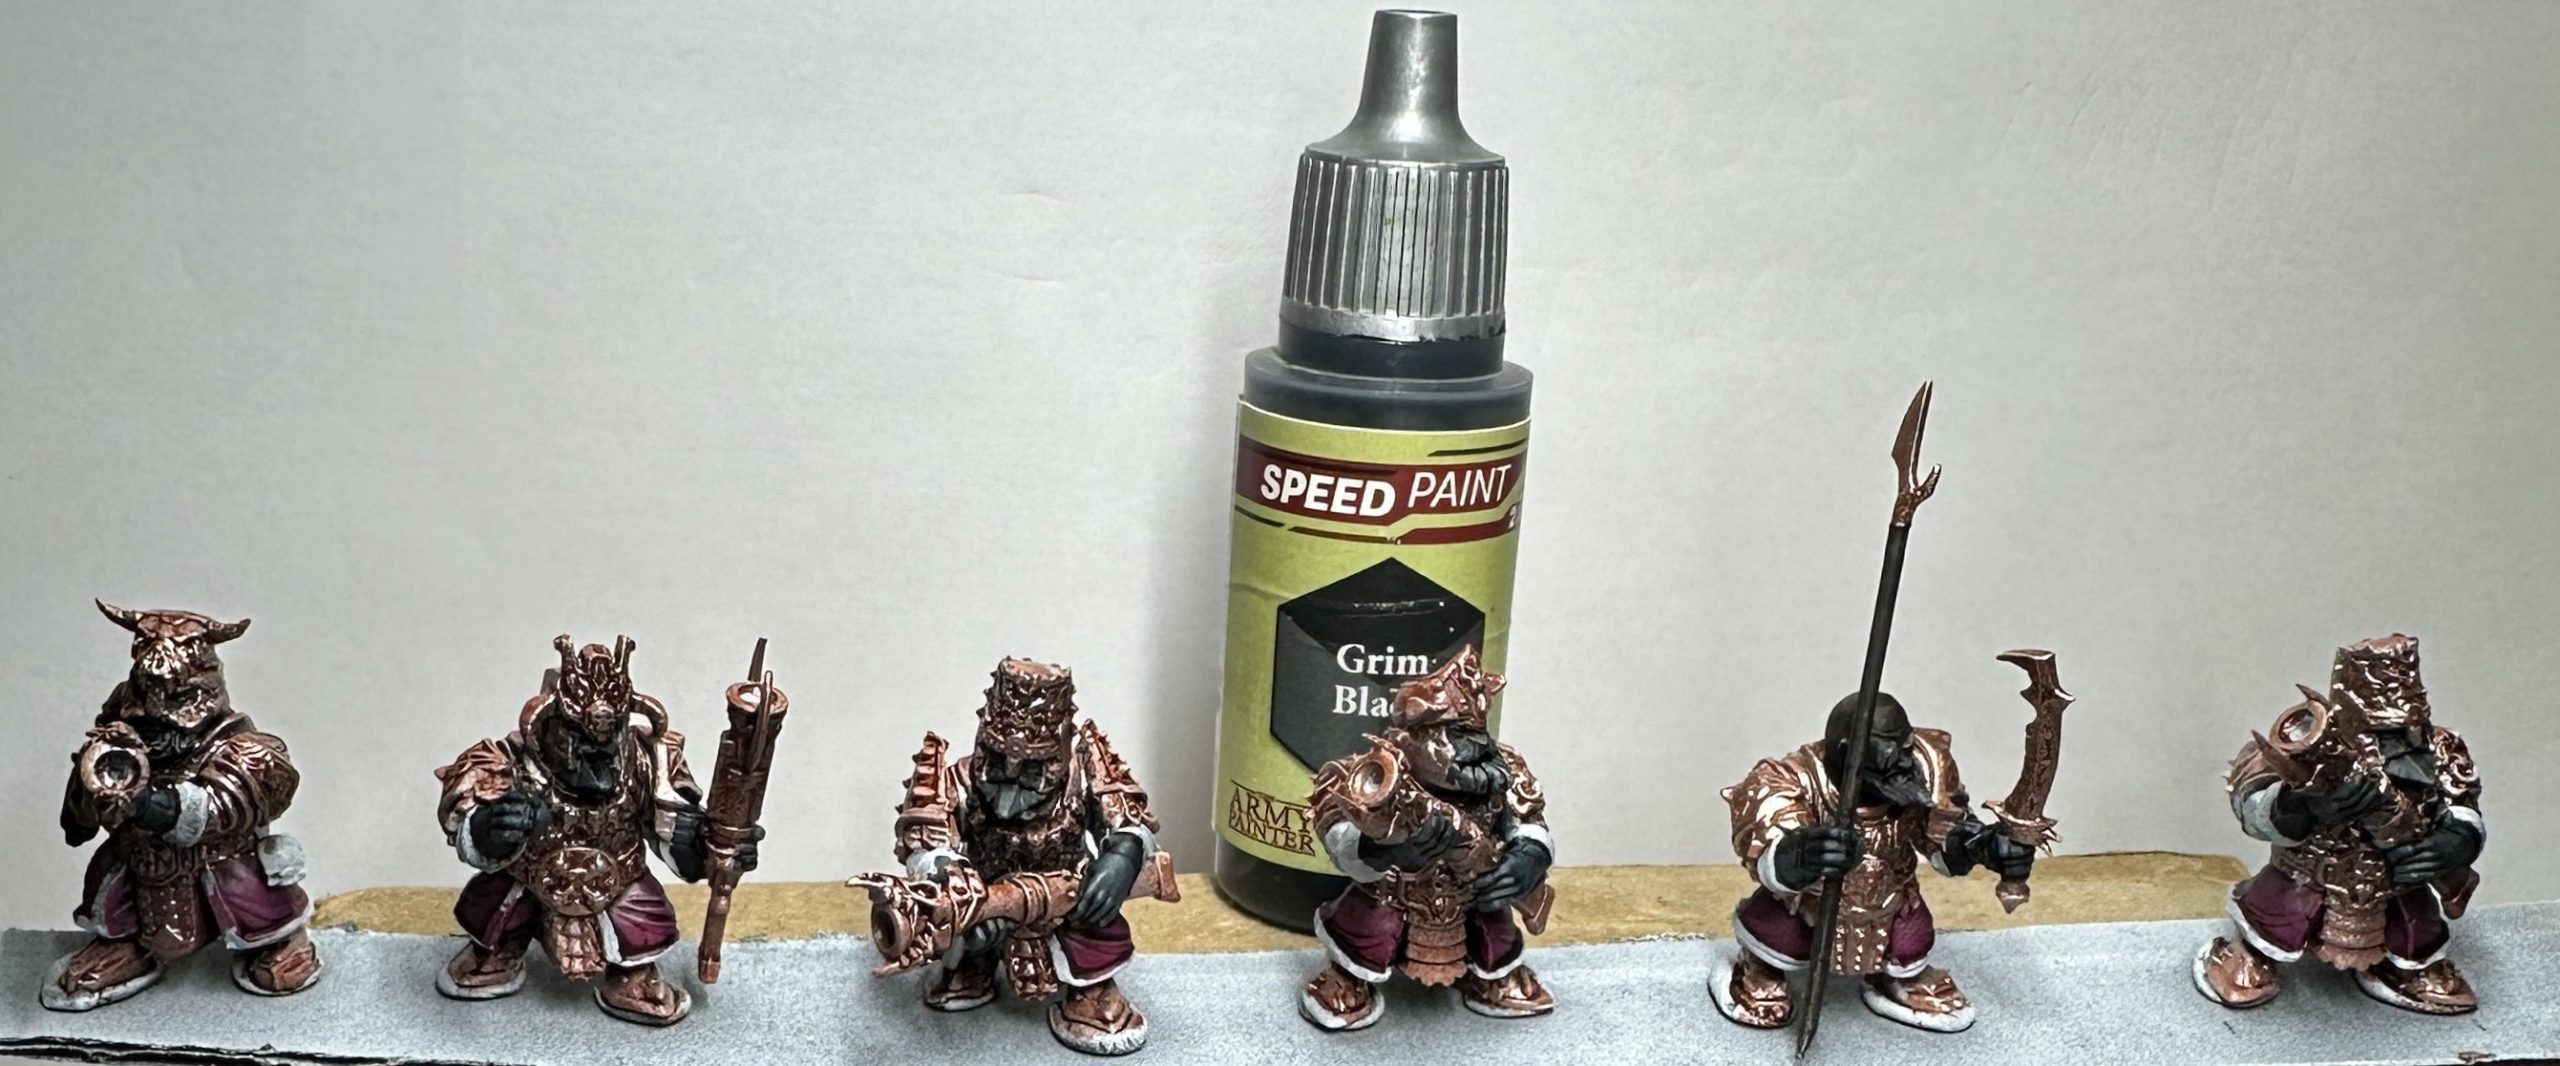
Step 5: Grim Black on the beards. Dwarfs love a good beard.
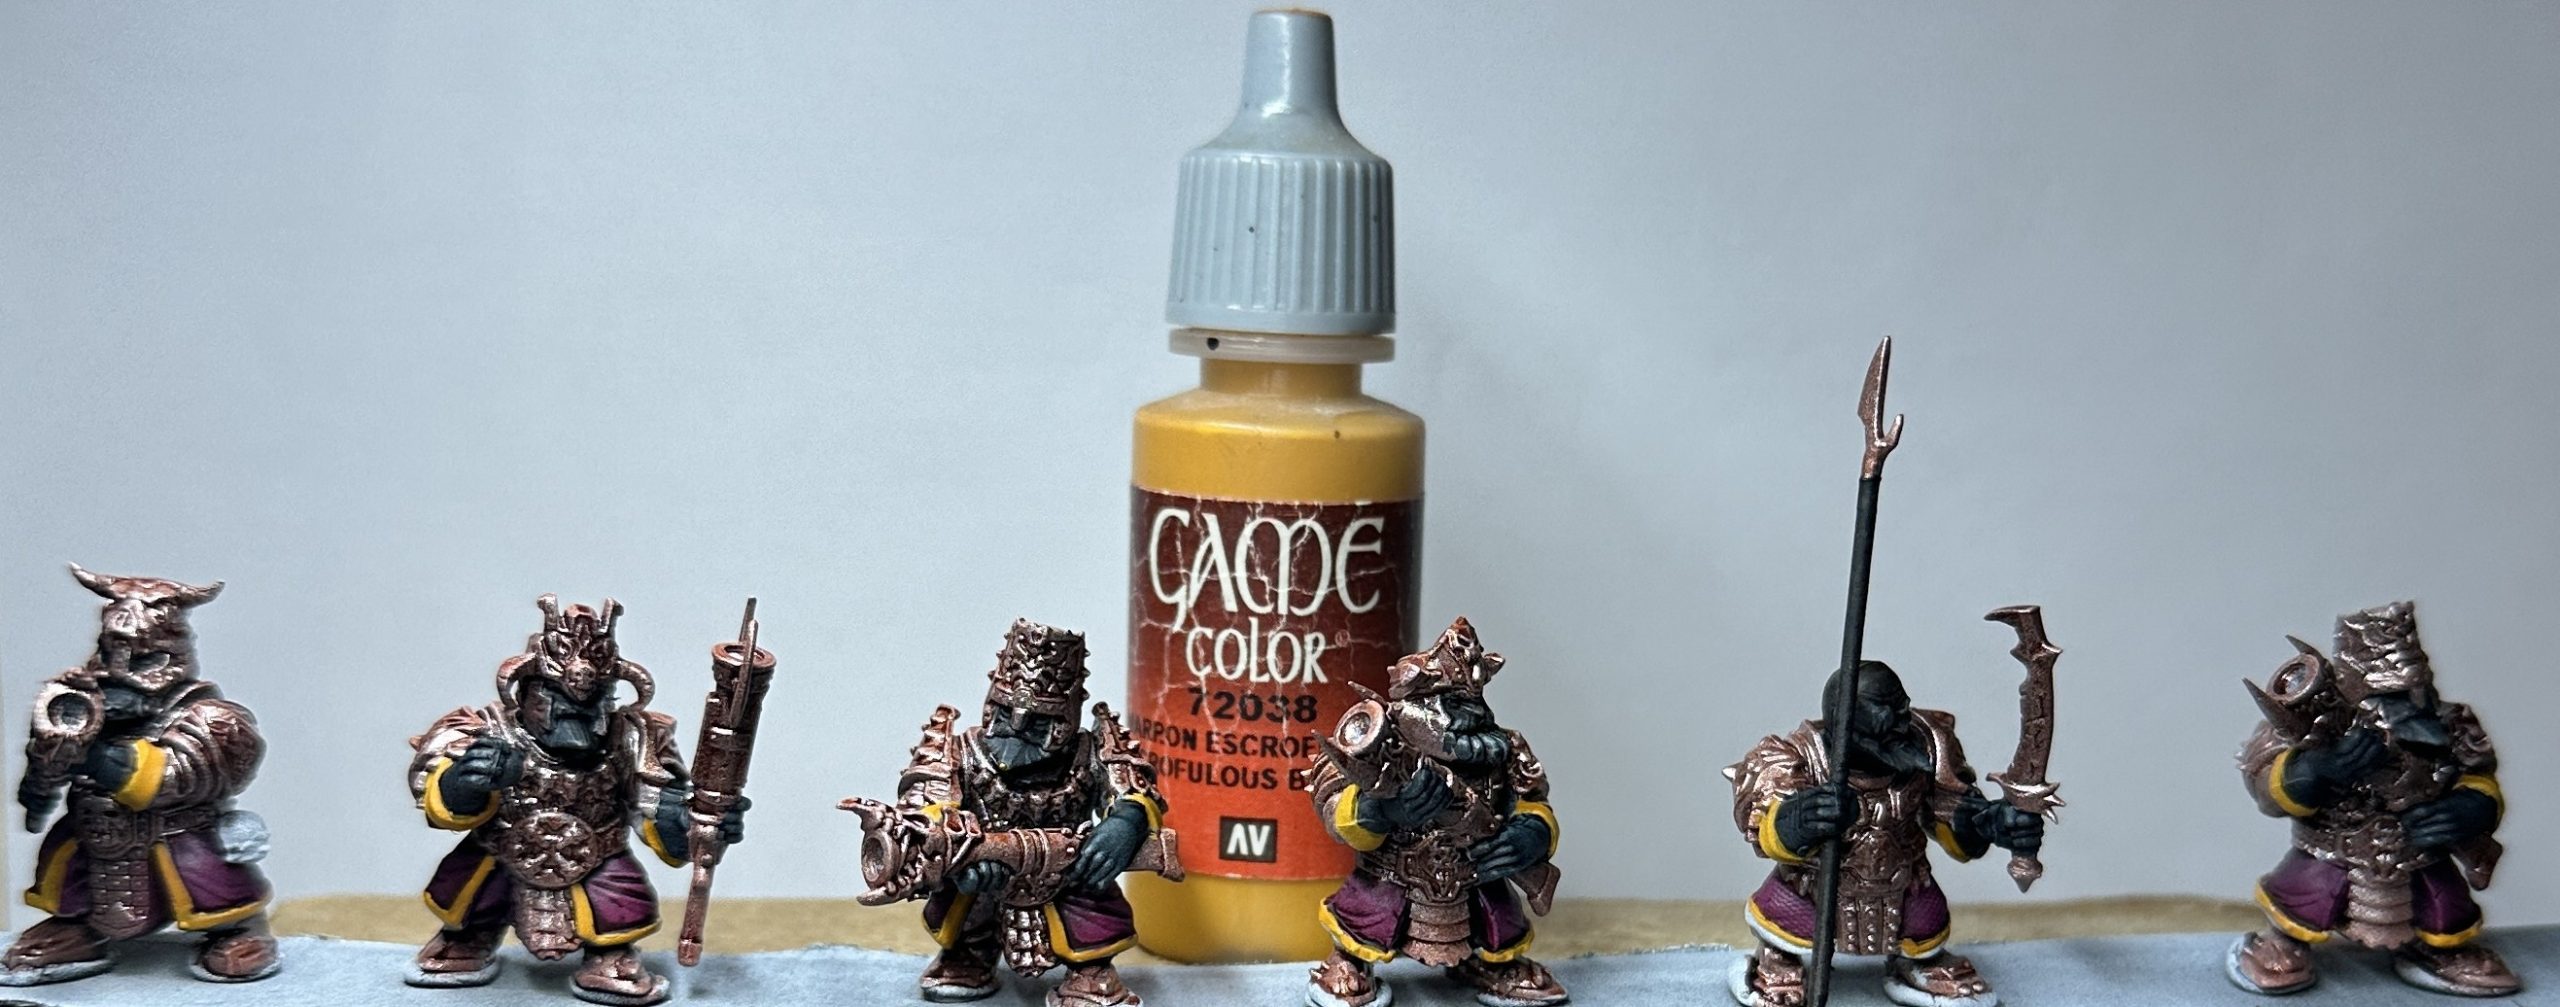
Step 6: Orange/Yellow (Scrufulous Brown) on the edge of the gloves and tunic trim. This bright colour with a light tone is a good complement to the purple and helps both colours stand out against all that mid-tone bronze.
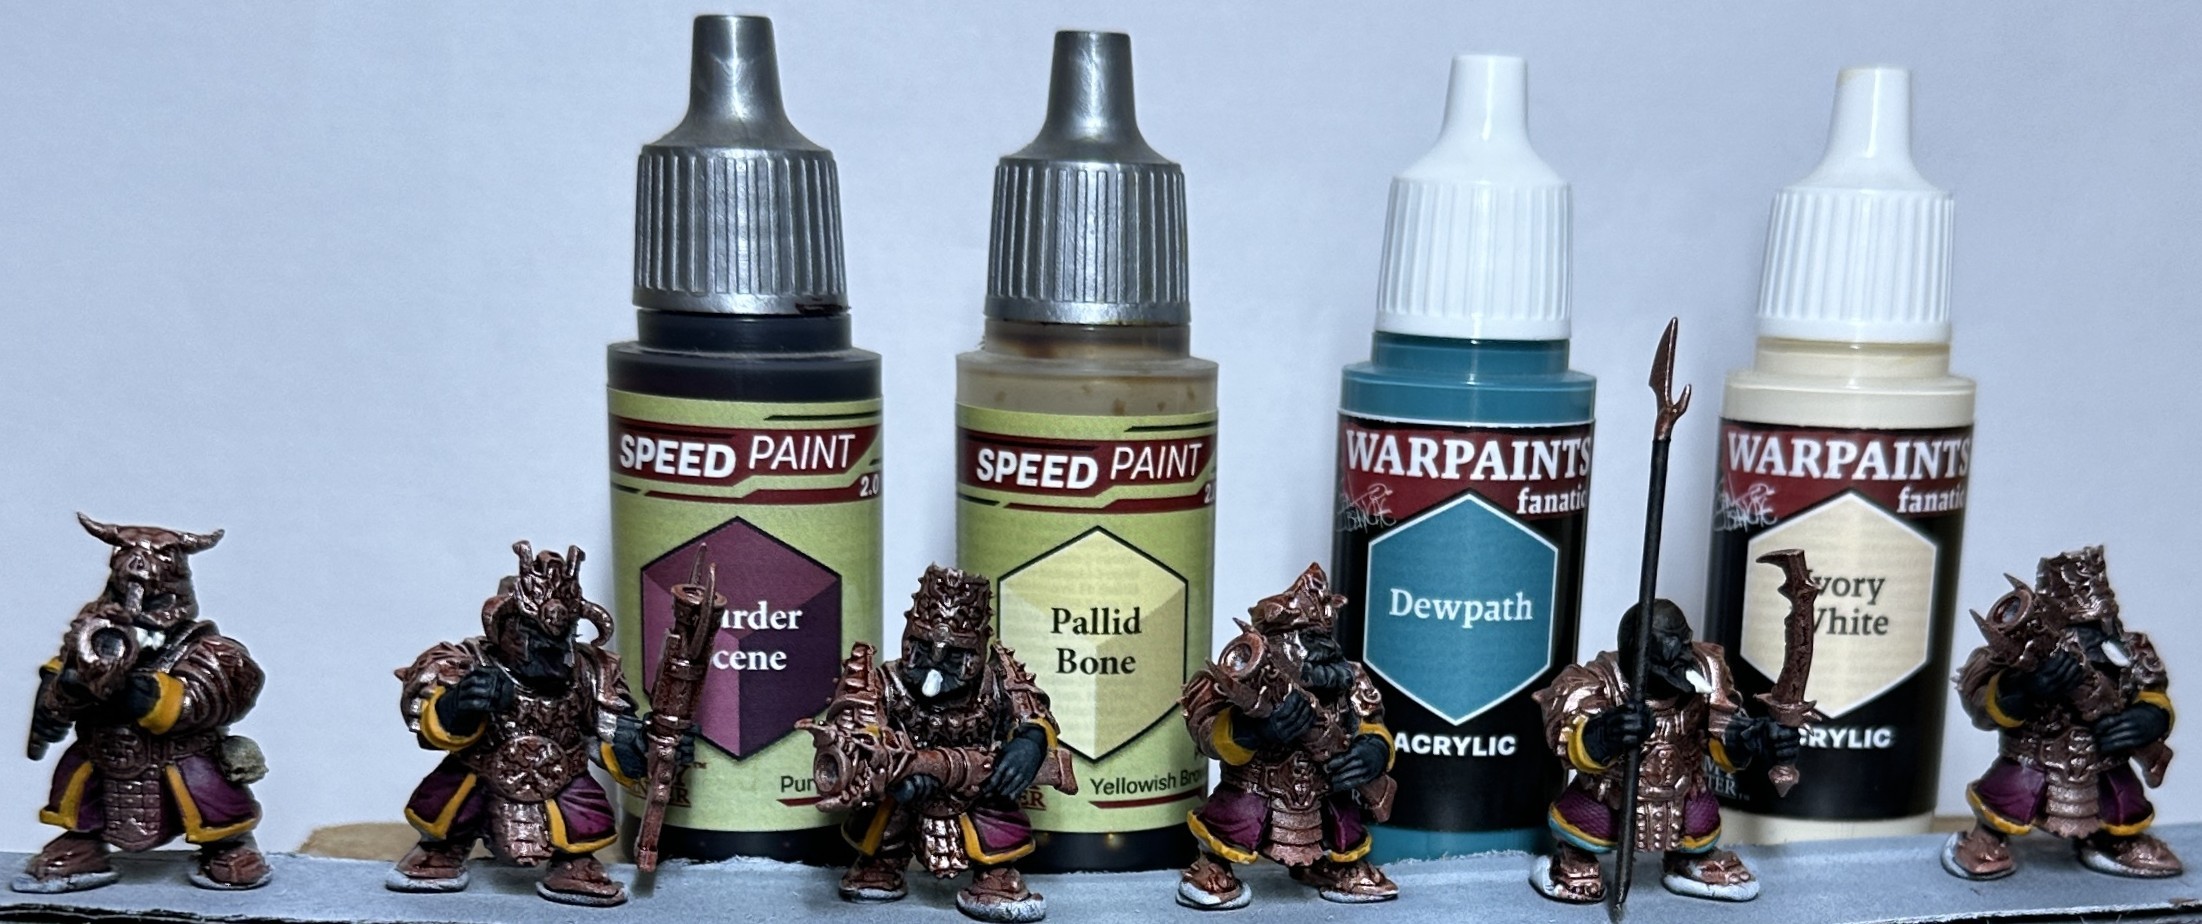
Step 7: Fine details. Faces get cream on tusks and thinned Murder Scene in open mouths. Skull details get Pallid Bone and the odd double tunic trim gets a Dewpath turquoise contrast (it’s the trim colour on the Blacksouls). You can absolutely stop here. They look great. I wanted a richer and warmer feel to the armour, so I did a little bit more work on that...
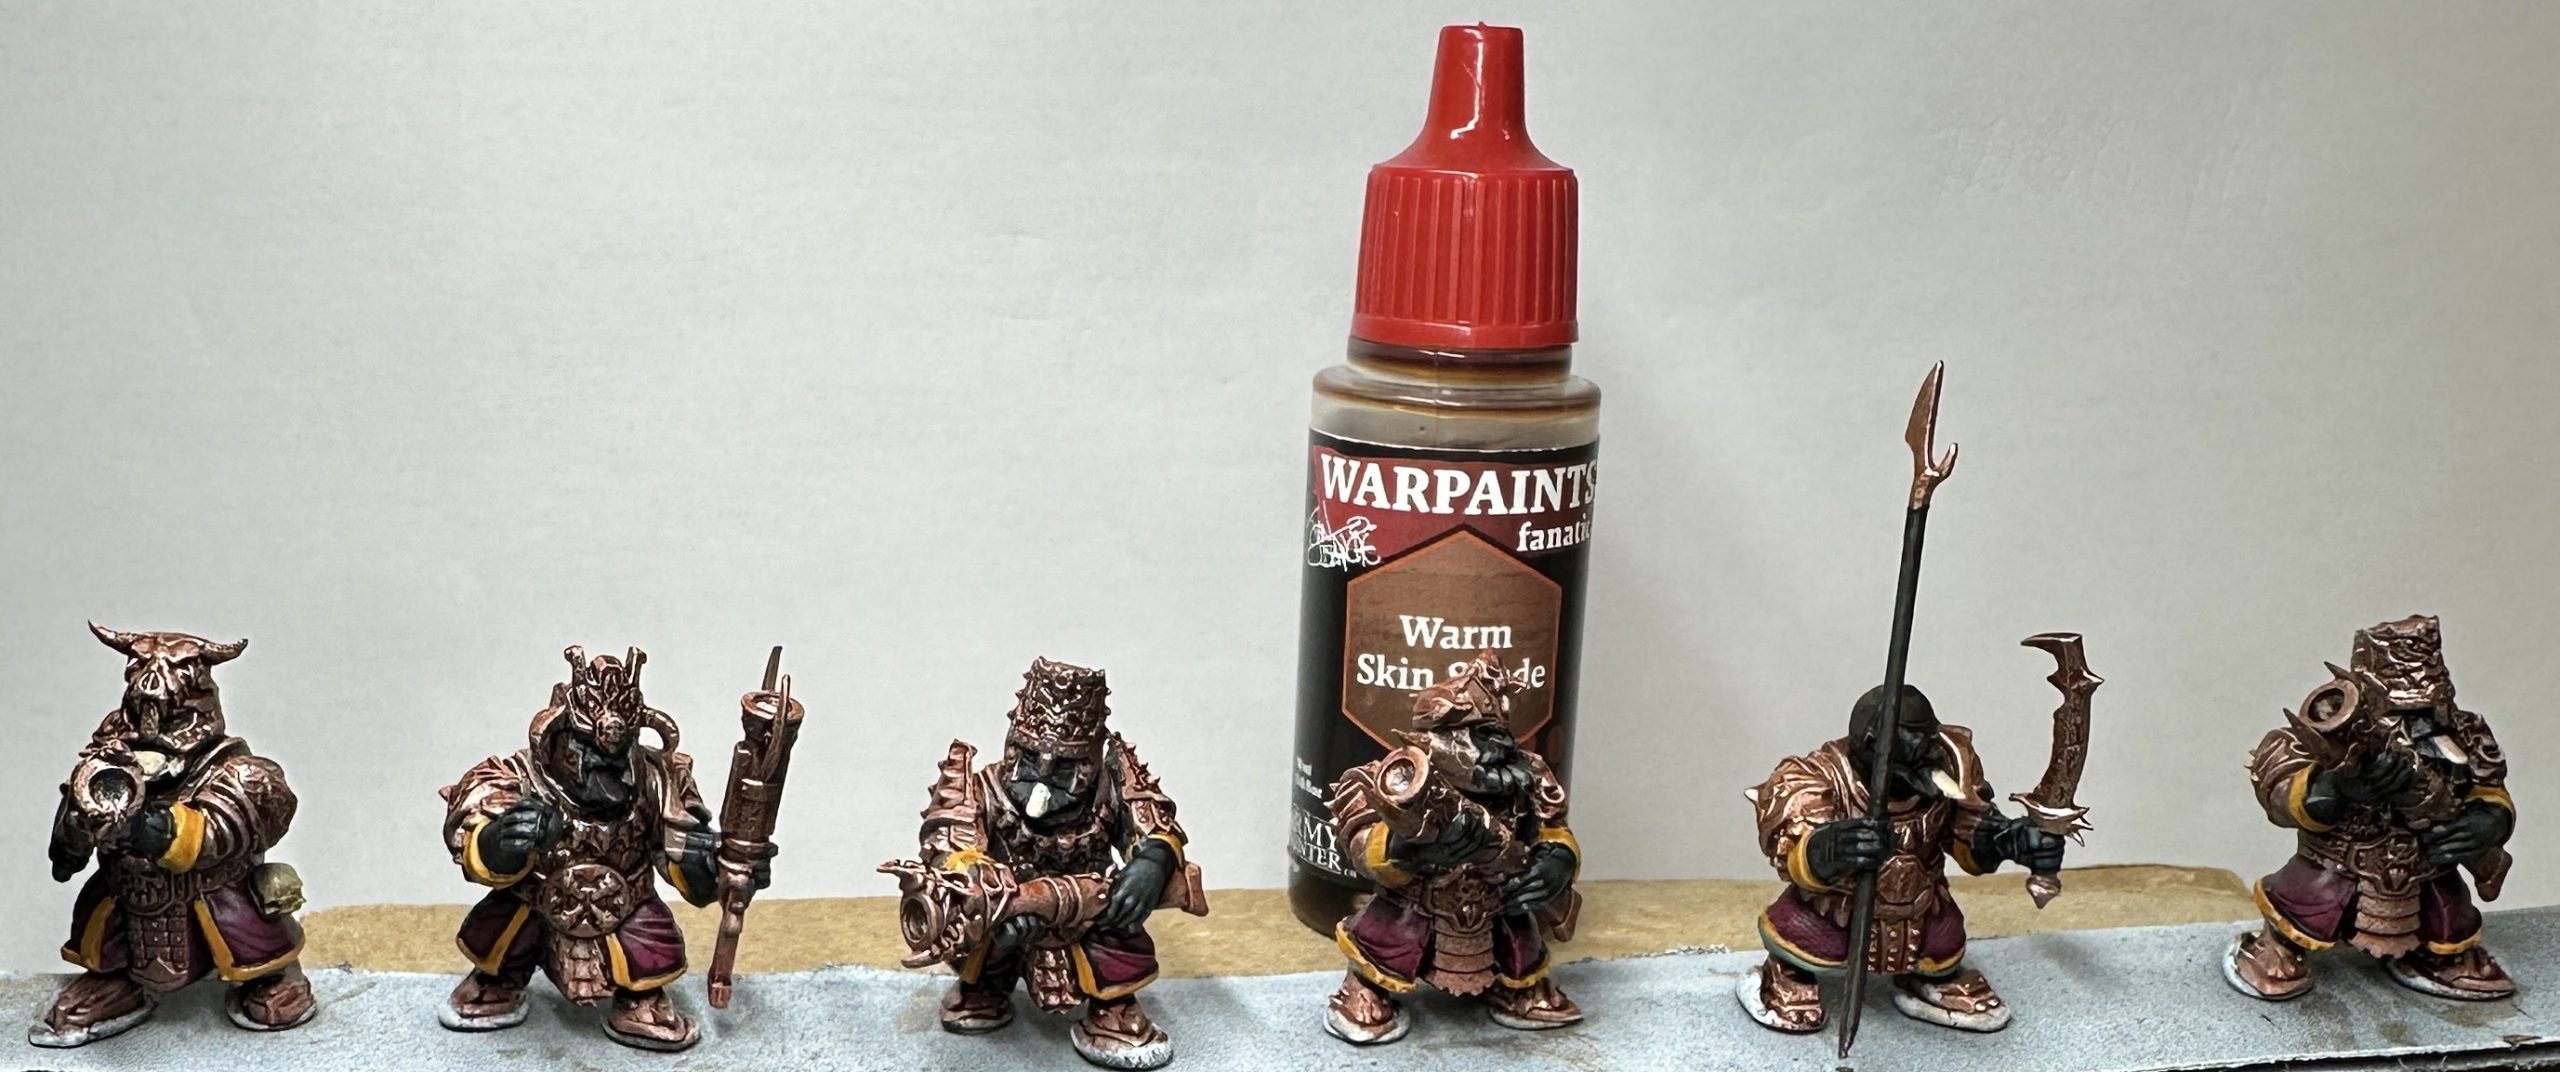
Step 8: Wash the whole miniature with Warm Skin Shade.
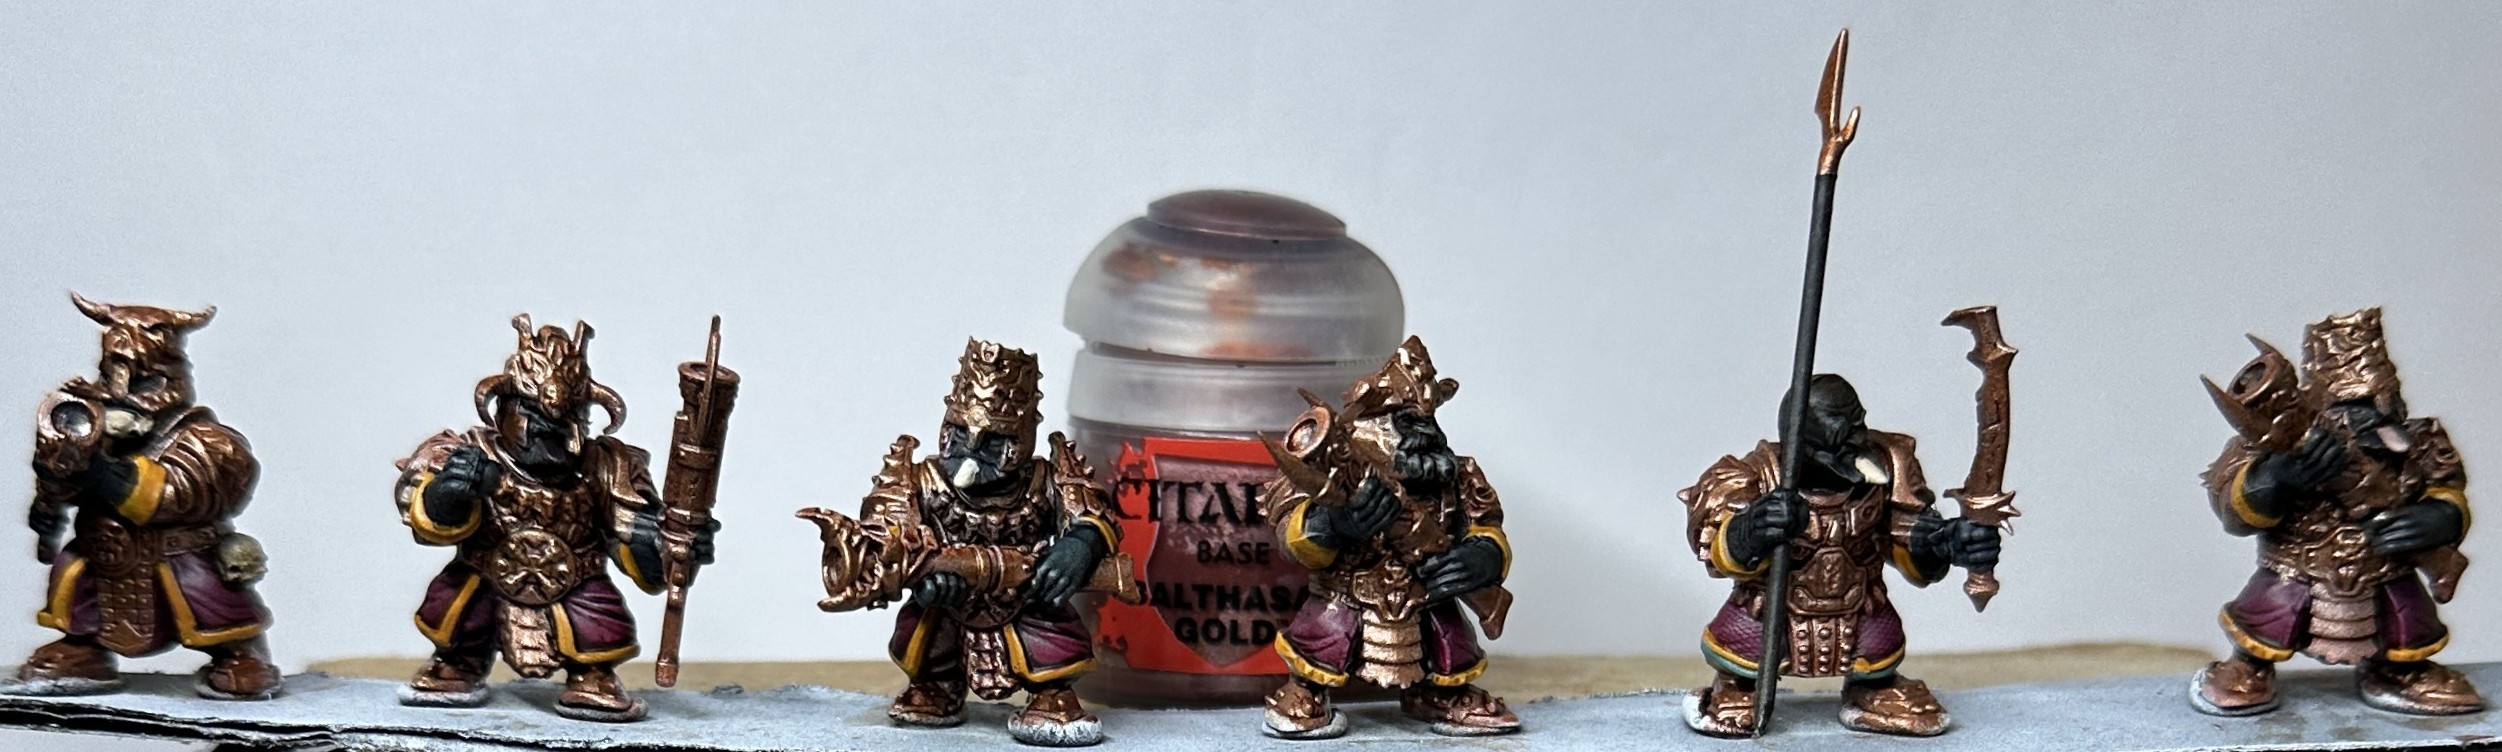
Step 9: Balthasar Gold is “over-brushed” onto the bronze. “Over-brushing” is my term for a sort of wet dry-brush. The technique is the same as dry-brushing, but you don’t remove most of the paint from the brush before you start. Instead, you drag a wet brush over the miniature, intending to catch the upper and middle detail but not completely. You don’t want to obliterate all that tonal variety you’ve worked to get. The aim here is to provide extra tones and re-establish the metallic sheen that the wash has muted. You need control over where the paint goes, so I use a regular brush that has lost its point rather than a makeup brush.
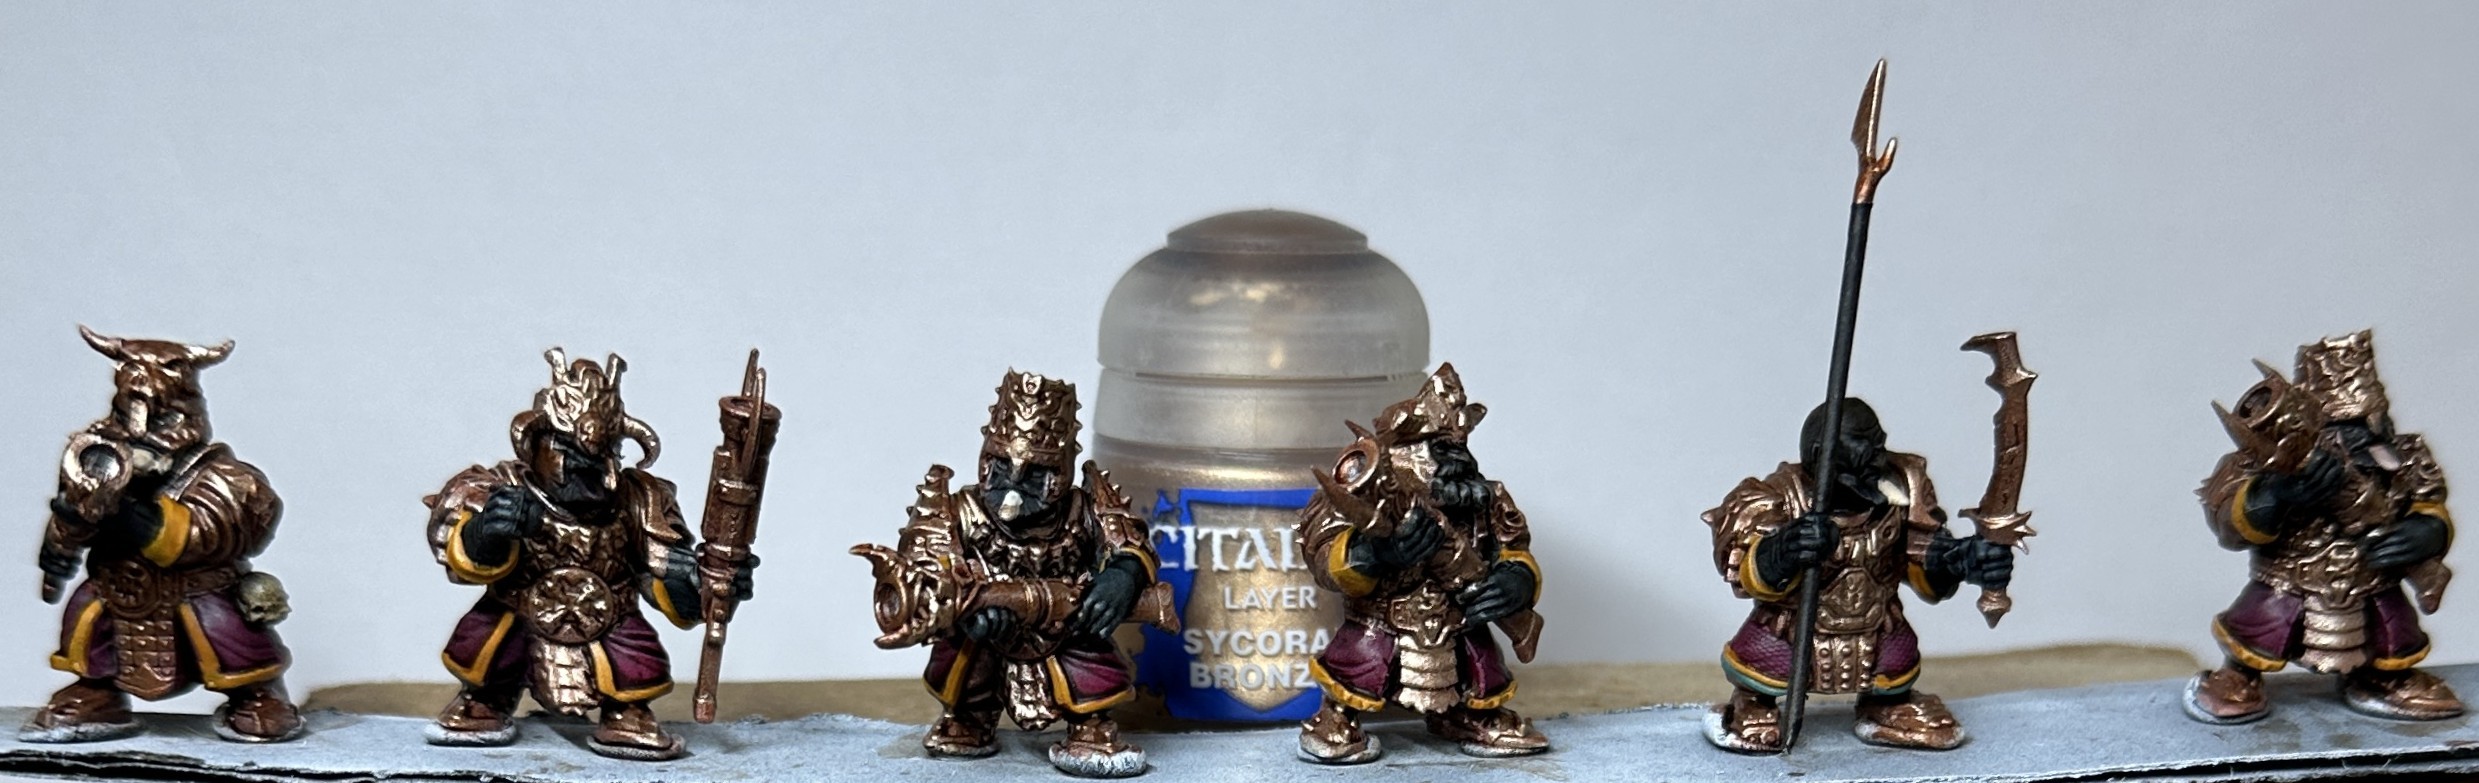
Step 10: Sycorax Bronze top highlights. I don’t do hard edge highlights, but you can if you like. It takes far too long and spoils the paint job if it isn’t perfect. Instead, I do a light “over-brush” using less paint than on the previous stage and focusing only on upper detail surfaces and top edges - anything that would catch the light.
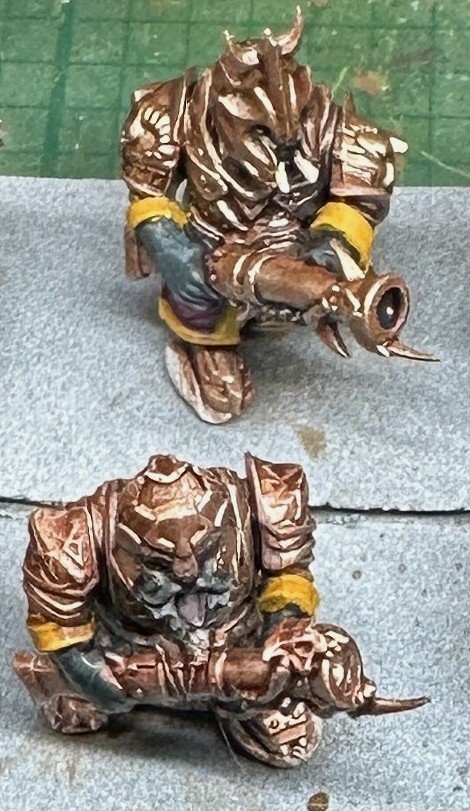
You can judge for yourselves if this makes much difference. The top figure has the extra stages; the bottom one doesn’t. The tonal flattening effect of photography perhaps doesn’t show the whole effect, which is quite obvious in person. [editor: there is a prize for anyone who can spot the difference from this photograph]
Painting Ratkin Slaves
Step 1: Priming. Most of the “work” is done in this stage. The miniatures are hit with a three-step rattle-can process. Part 1 is an under-spray of black; the can is held below the level of the miniature strip and sprayed up from underneath at a 45° angle, painting only the lower surfaces.
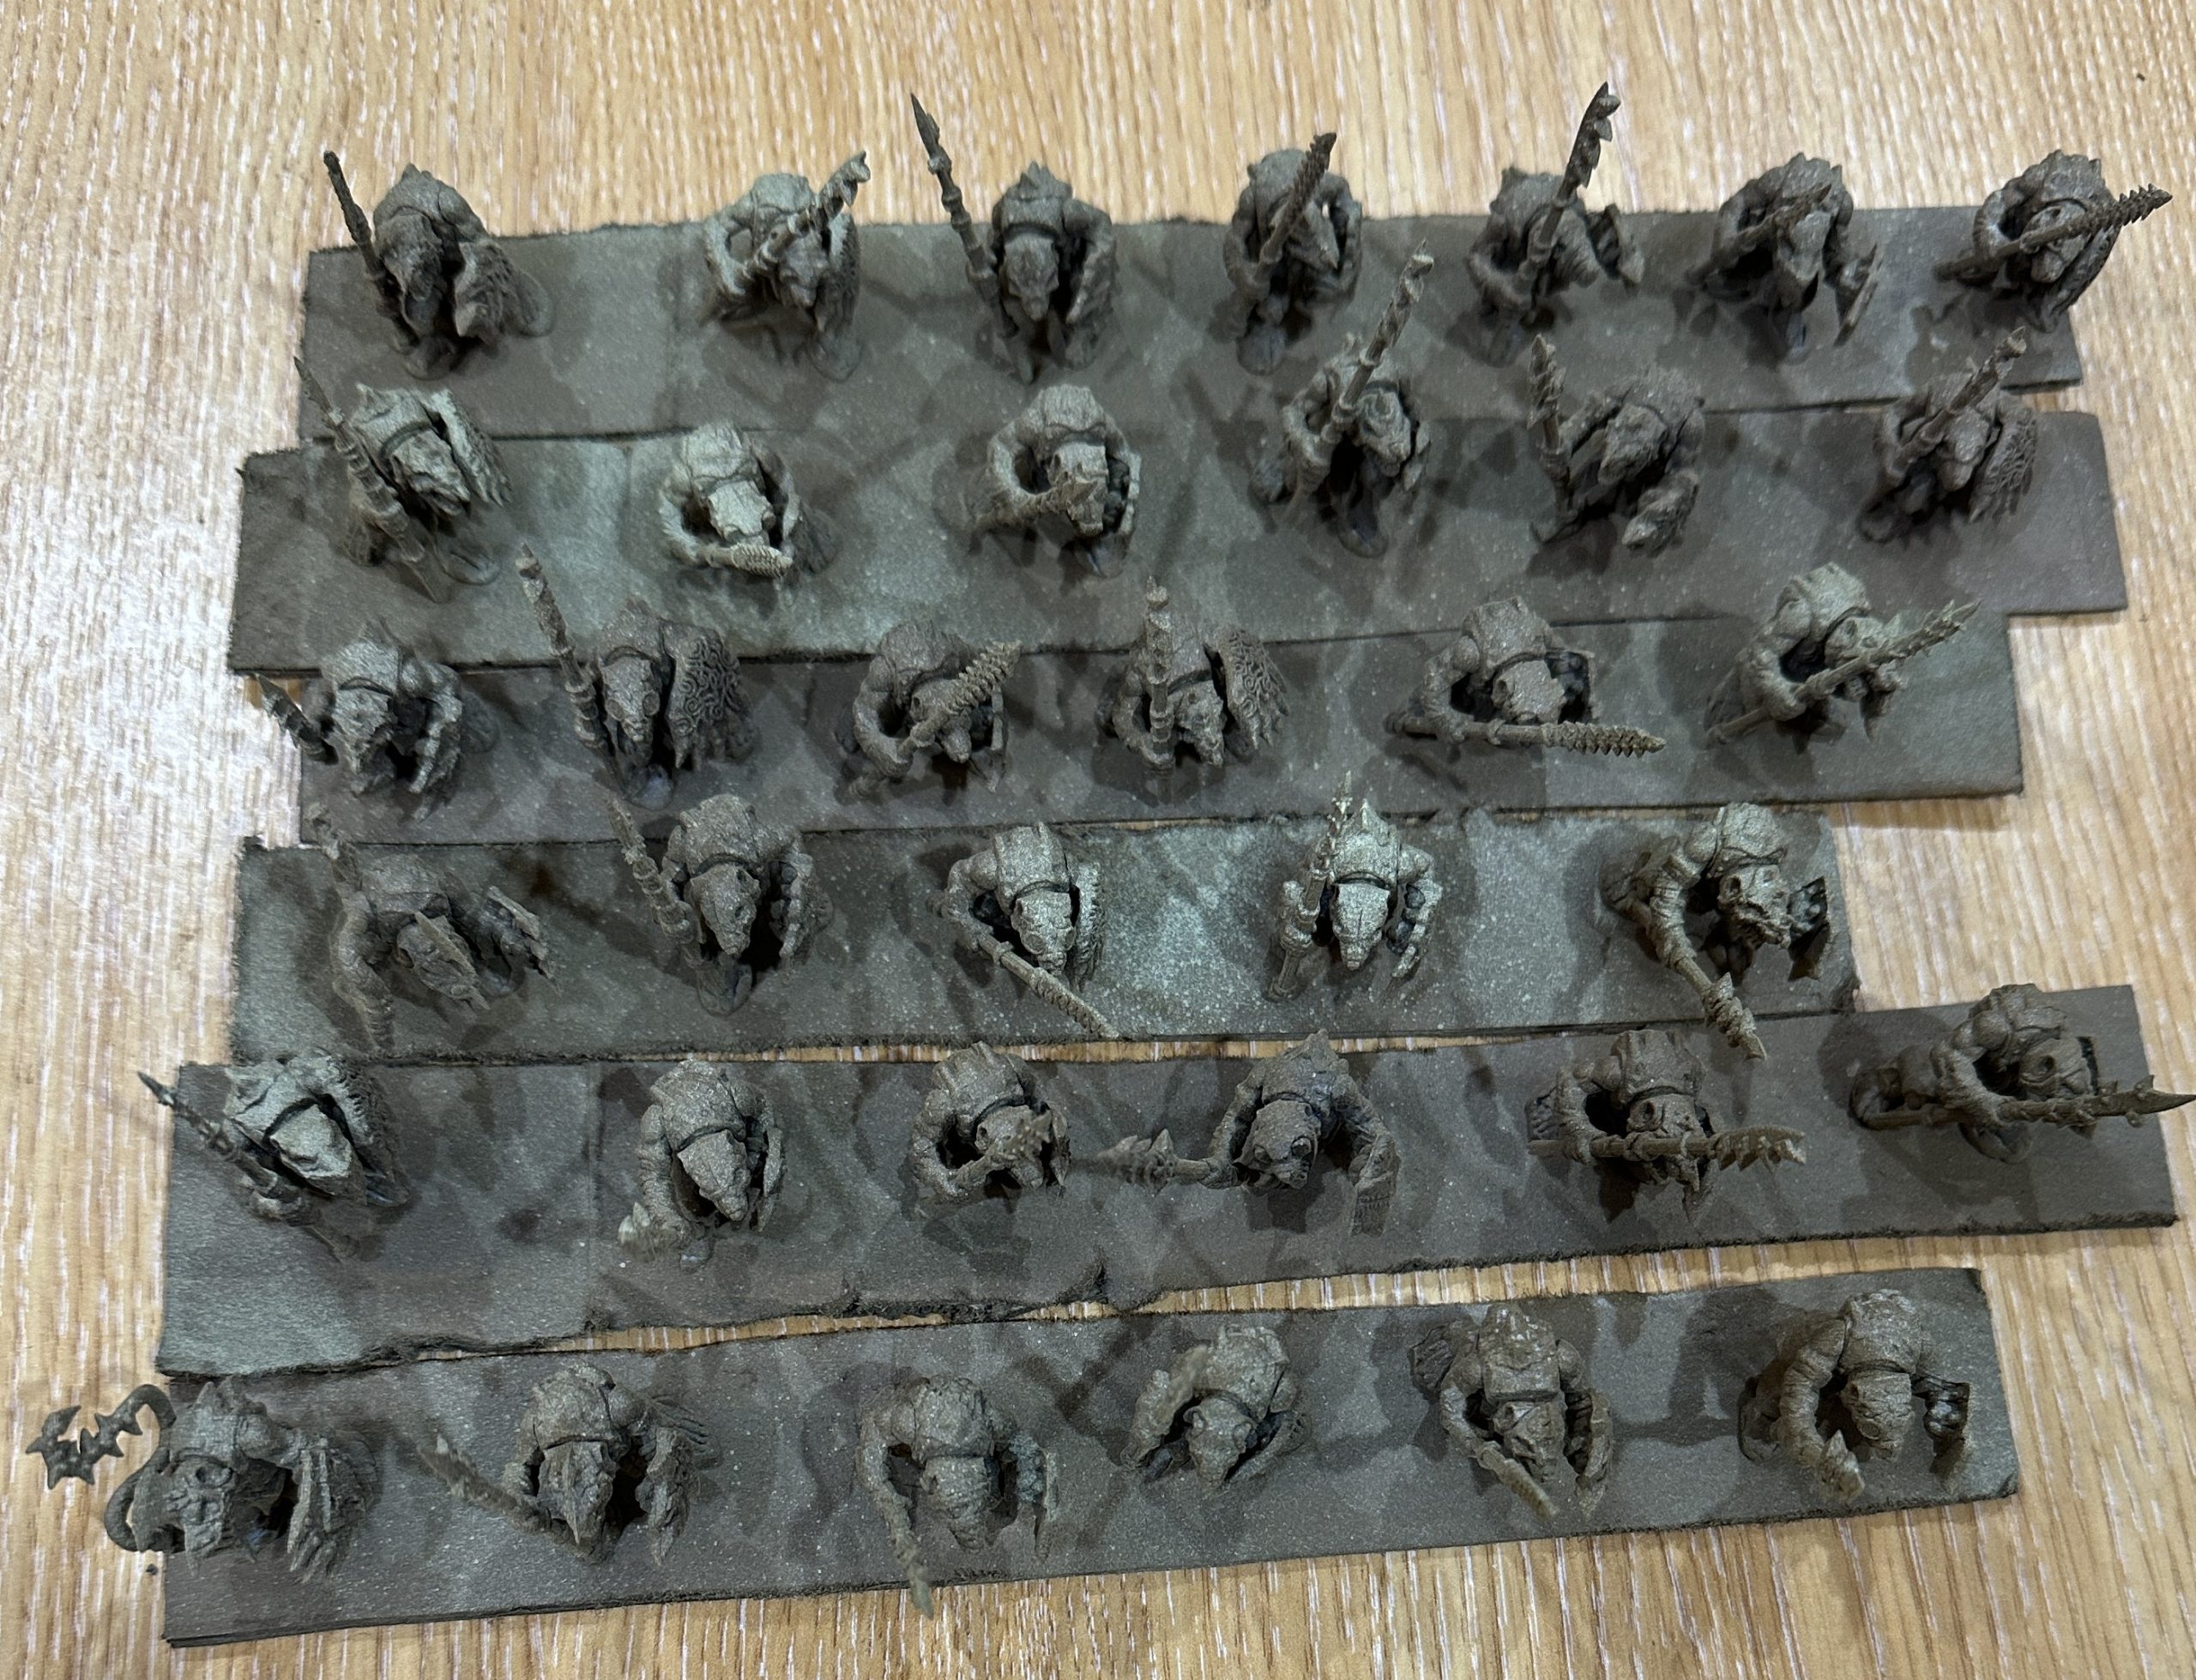
Part 2 - Leather Brown, sprayed from 45° above the miniatures. Now all the bare plastic is covered. The majority of the miniature is brown, with black only showing on the under-most surfaces and a black-to-brown blend showing in the lower recesses.
Part 3 requires deliberately poor technique, as we want a very patchy finish with speckling and overspray all helping. Hold the can vertically above the miniatures at 90°. Using very short bursts of paint, lightly spot-zenith very pale green (AP Necrotic Flesh) unevenly over the whole batch at once. This gives a sketchy top highlight, with some miniatures getting a full zenith and some only patches, stray dots or overspray. Perfect.
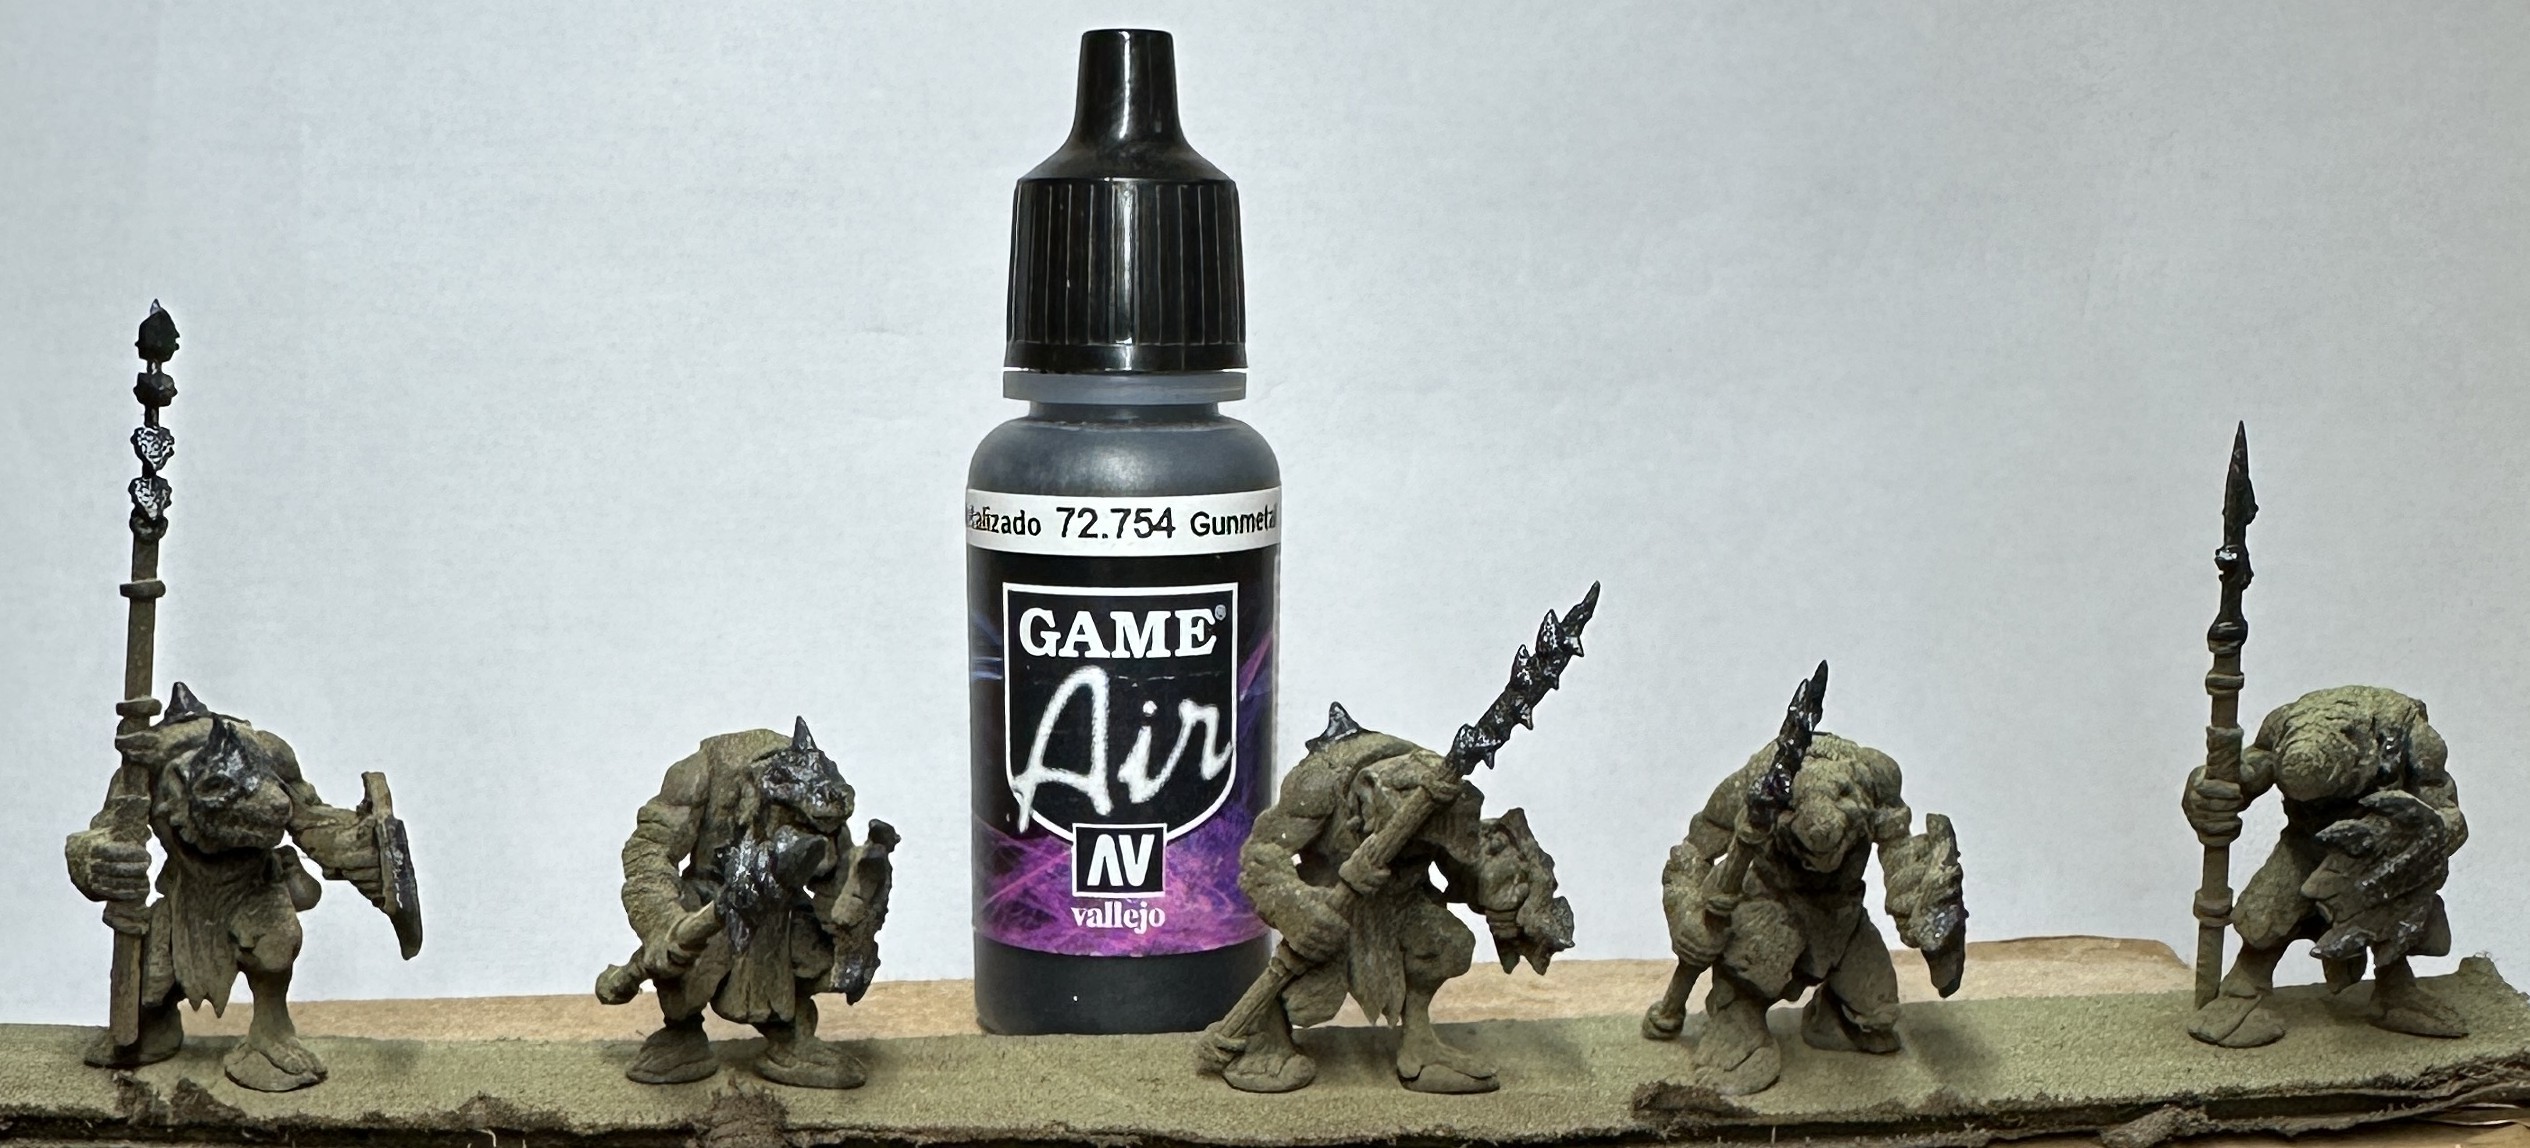
Step 2: The metal is covered with a Vallejo airbrush gunmetal. It gives good coverage over the zenith primer and is pre-thinned out of the bottle.
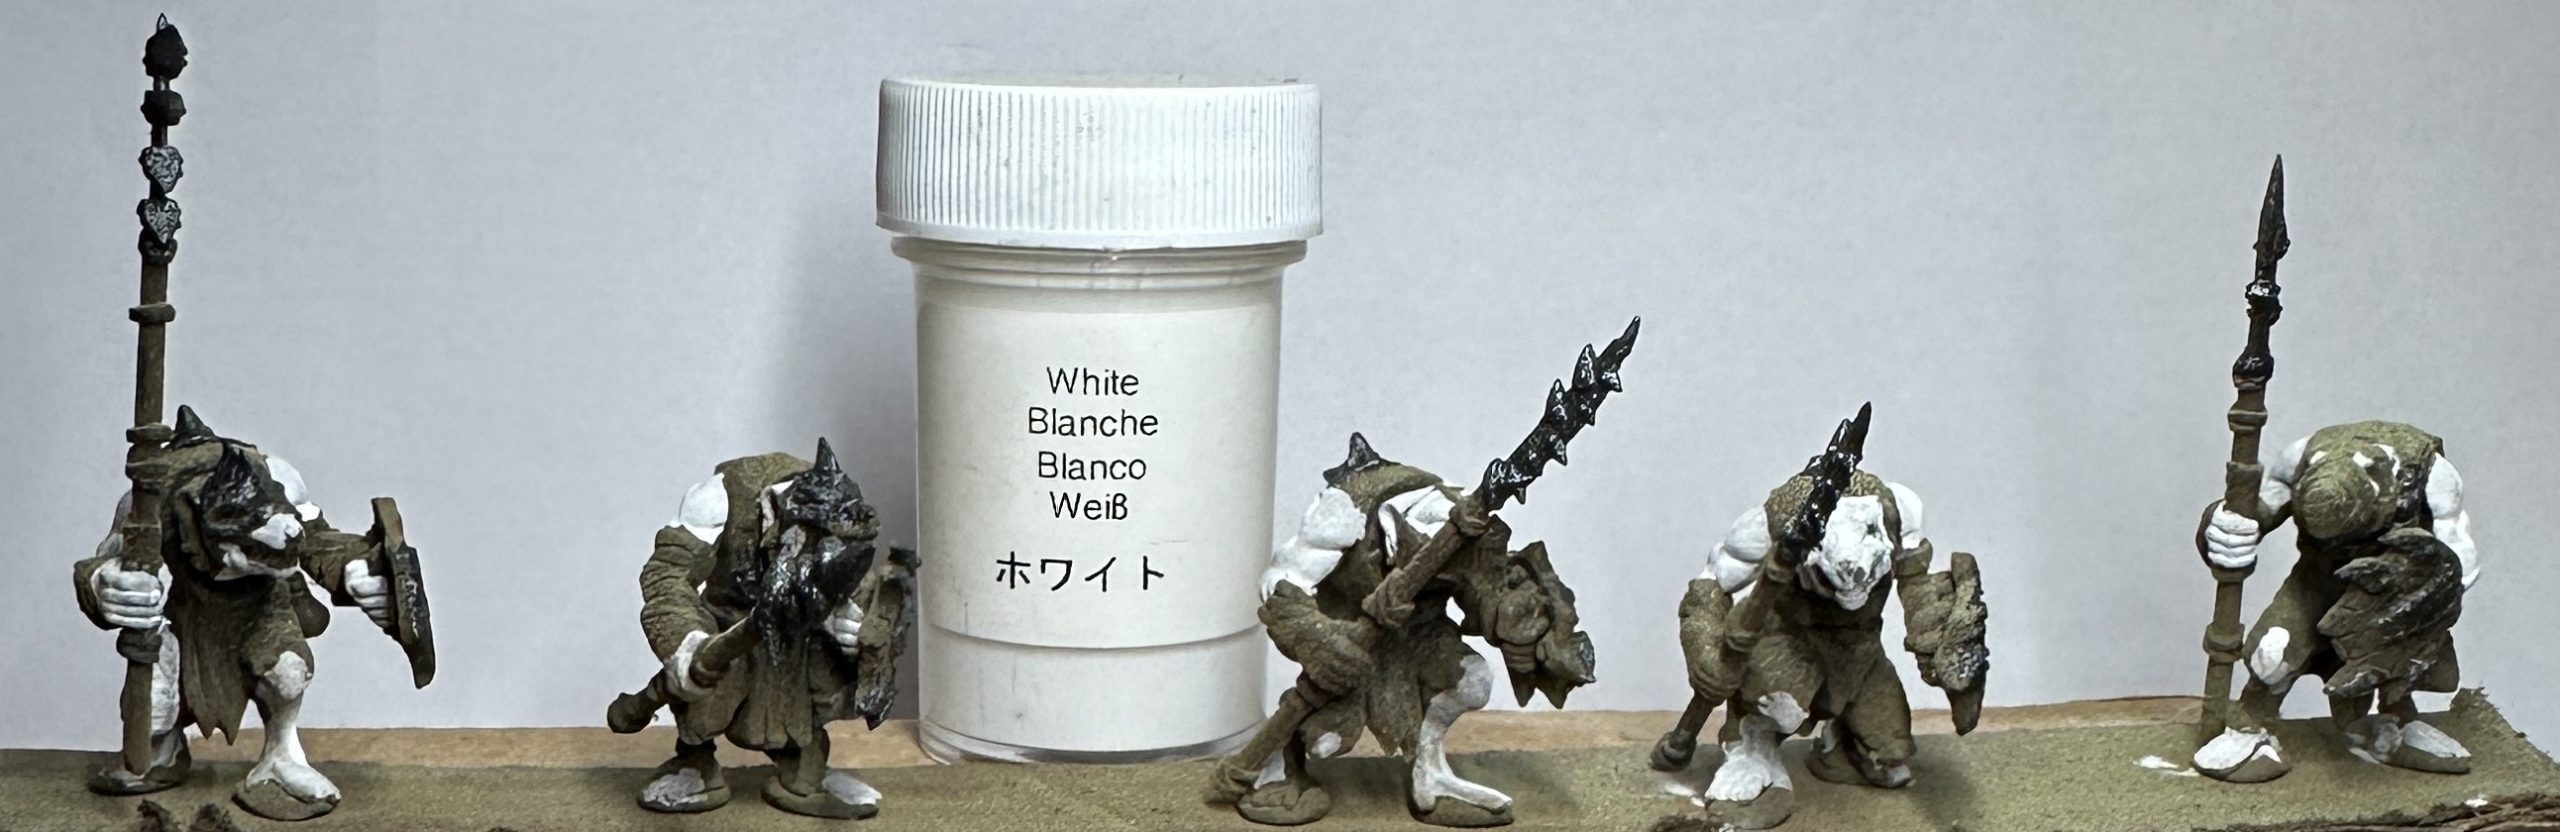
Step 3: Fur is painted white. My basic concept is Pinky and The Brain. A bit of a left-field idea perhaps, but here’s why: Ratkin were bred by the Abyssal Dwarfs as slaves. In my head, it would be logical for them to be white (easier to see in the mines), just like lab rats. I use a terrain paint by Woodland Scenics, as this covers the brown primer well, as it has high pigment content, which then settles as it dries to give some tonal variation.
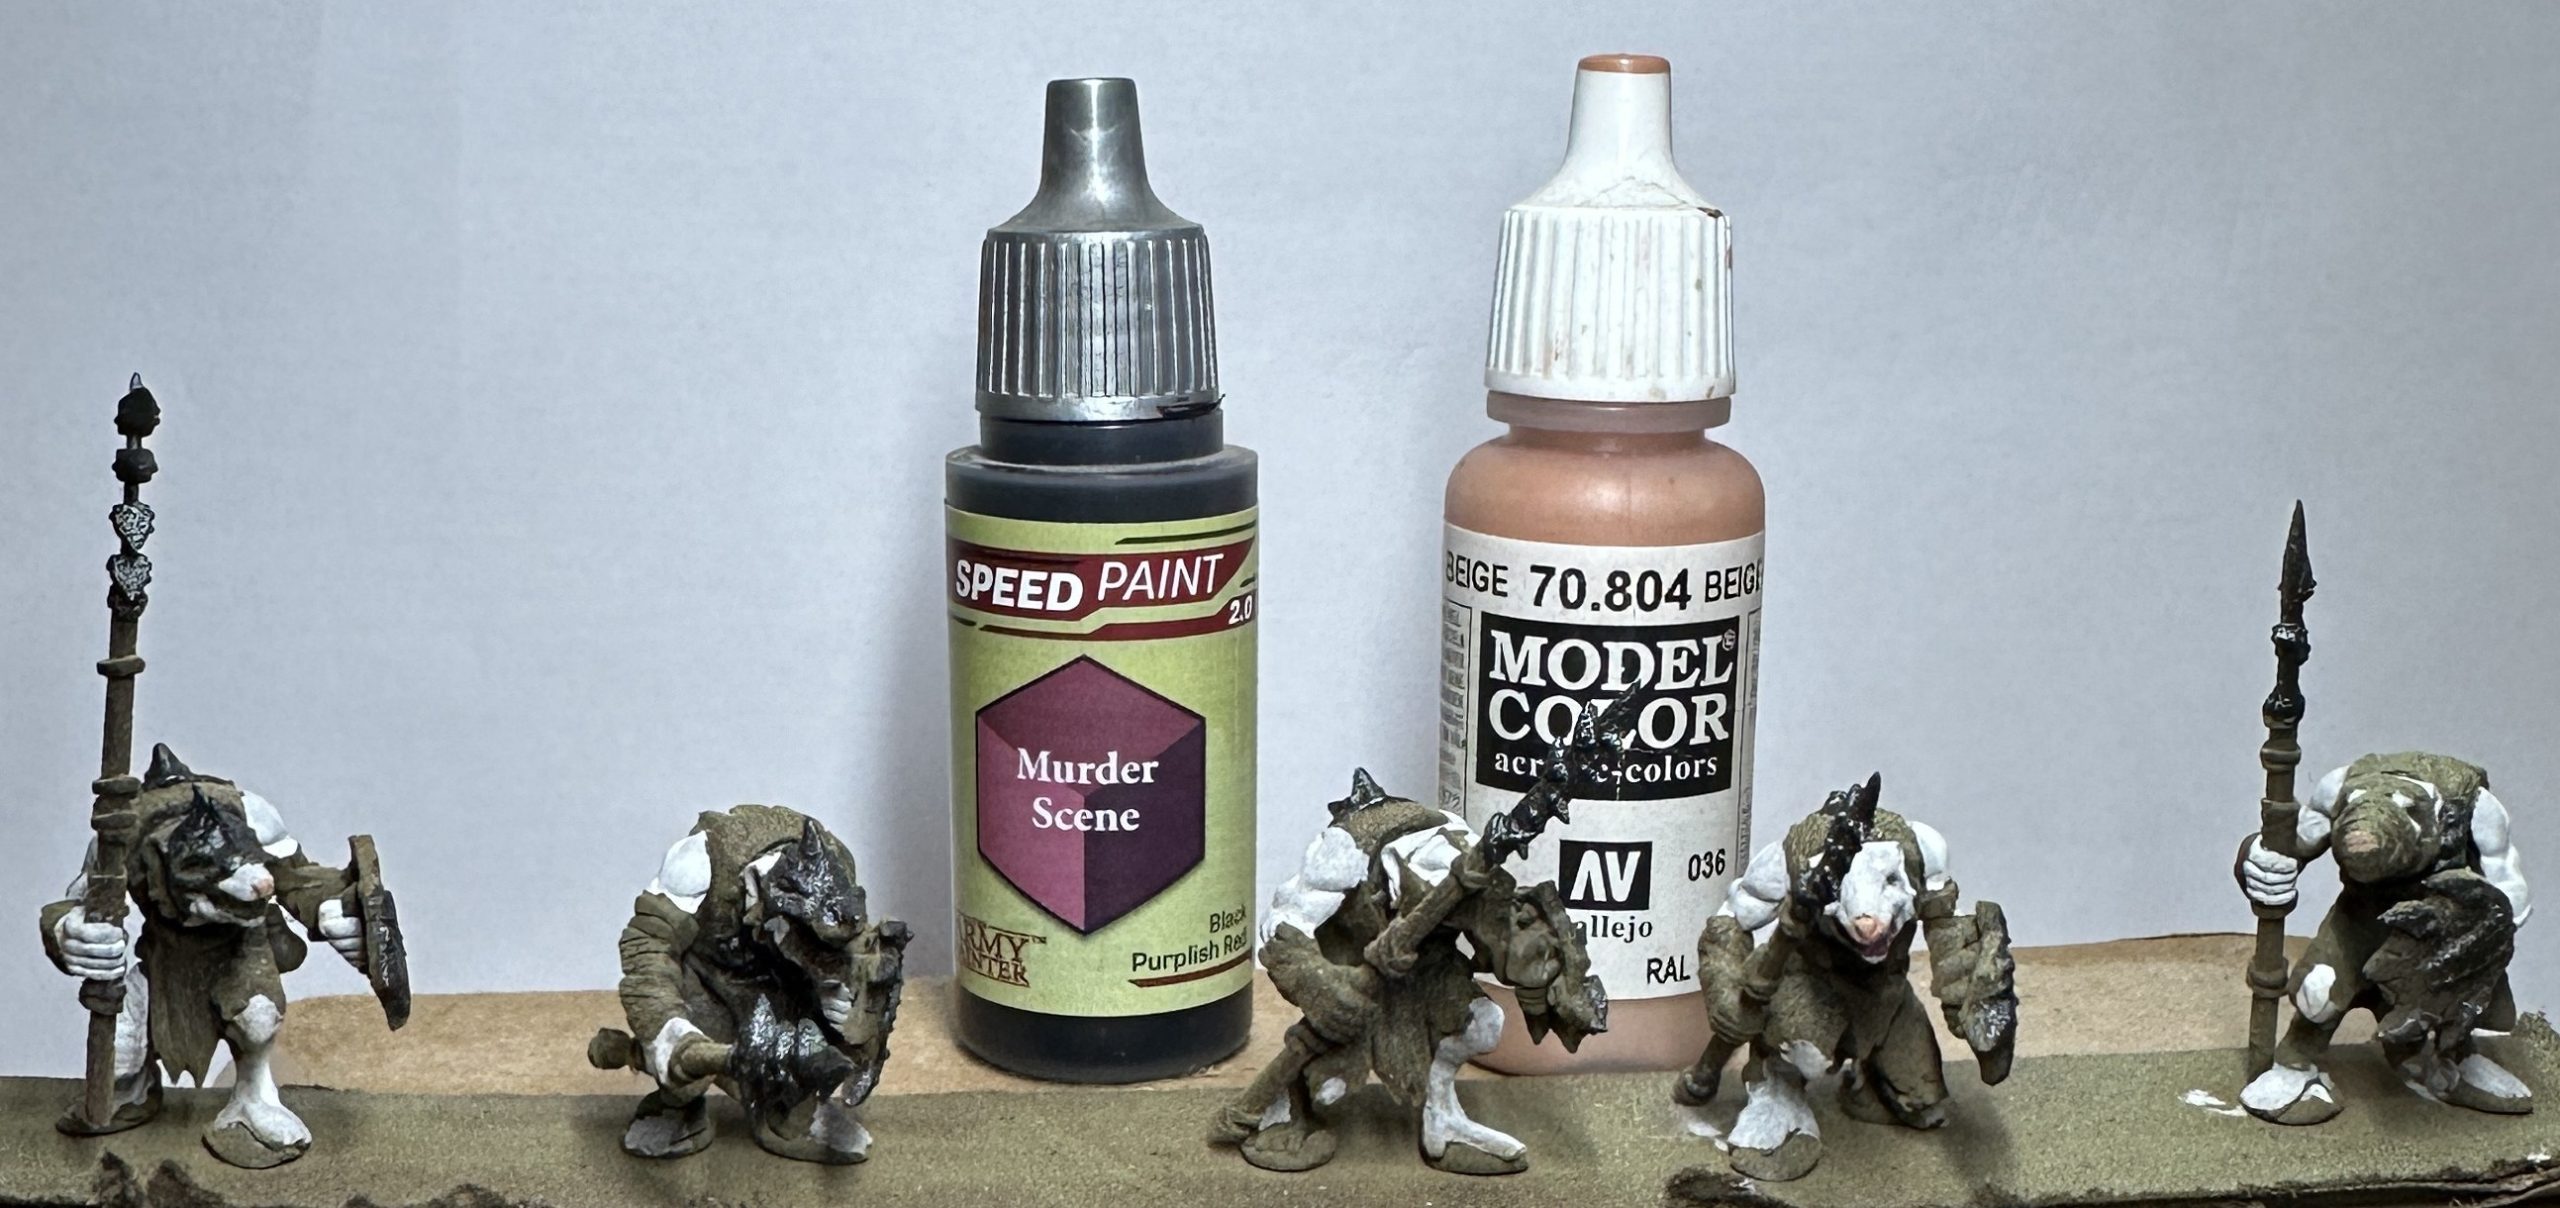
Step 4: Fine details are added. Inside mouths are painted with thinned-down Murder Scene, and tails and noses are in skin-tone pink. Cute.
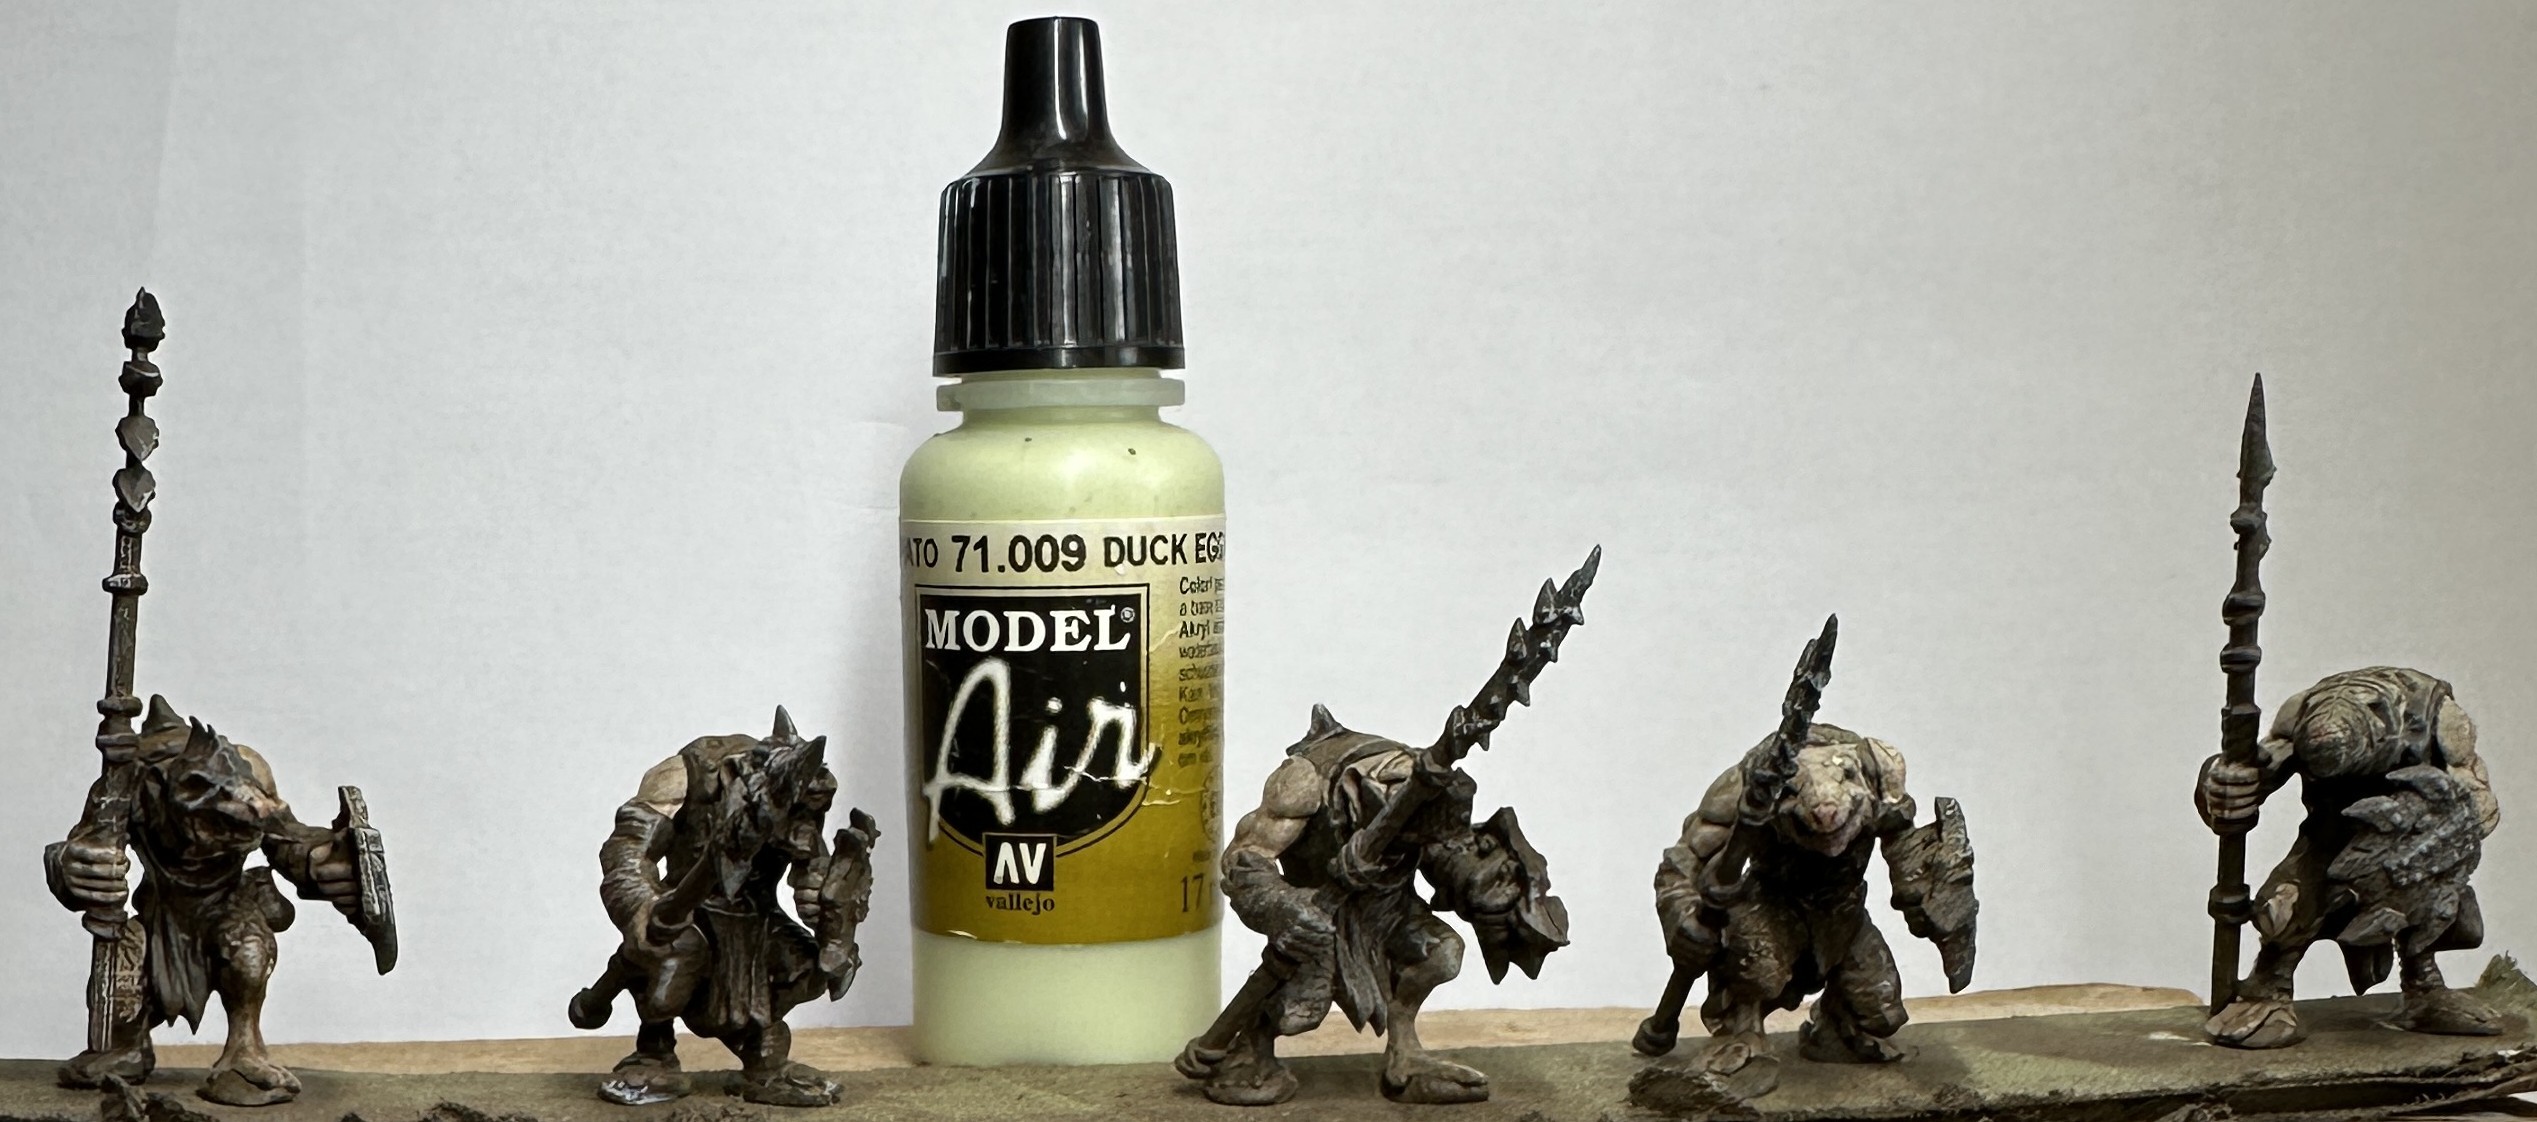
Step 5: The entire model is painted with AP Quickshade Strong Tone dip. They don’t photograph well as this is a high-gloss finish. Strong Tone has a brown pigmentation, and this dulls and evens the colouration to a suitably slave-like homogeneity, with the random patchy zenith adding subtle variety.
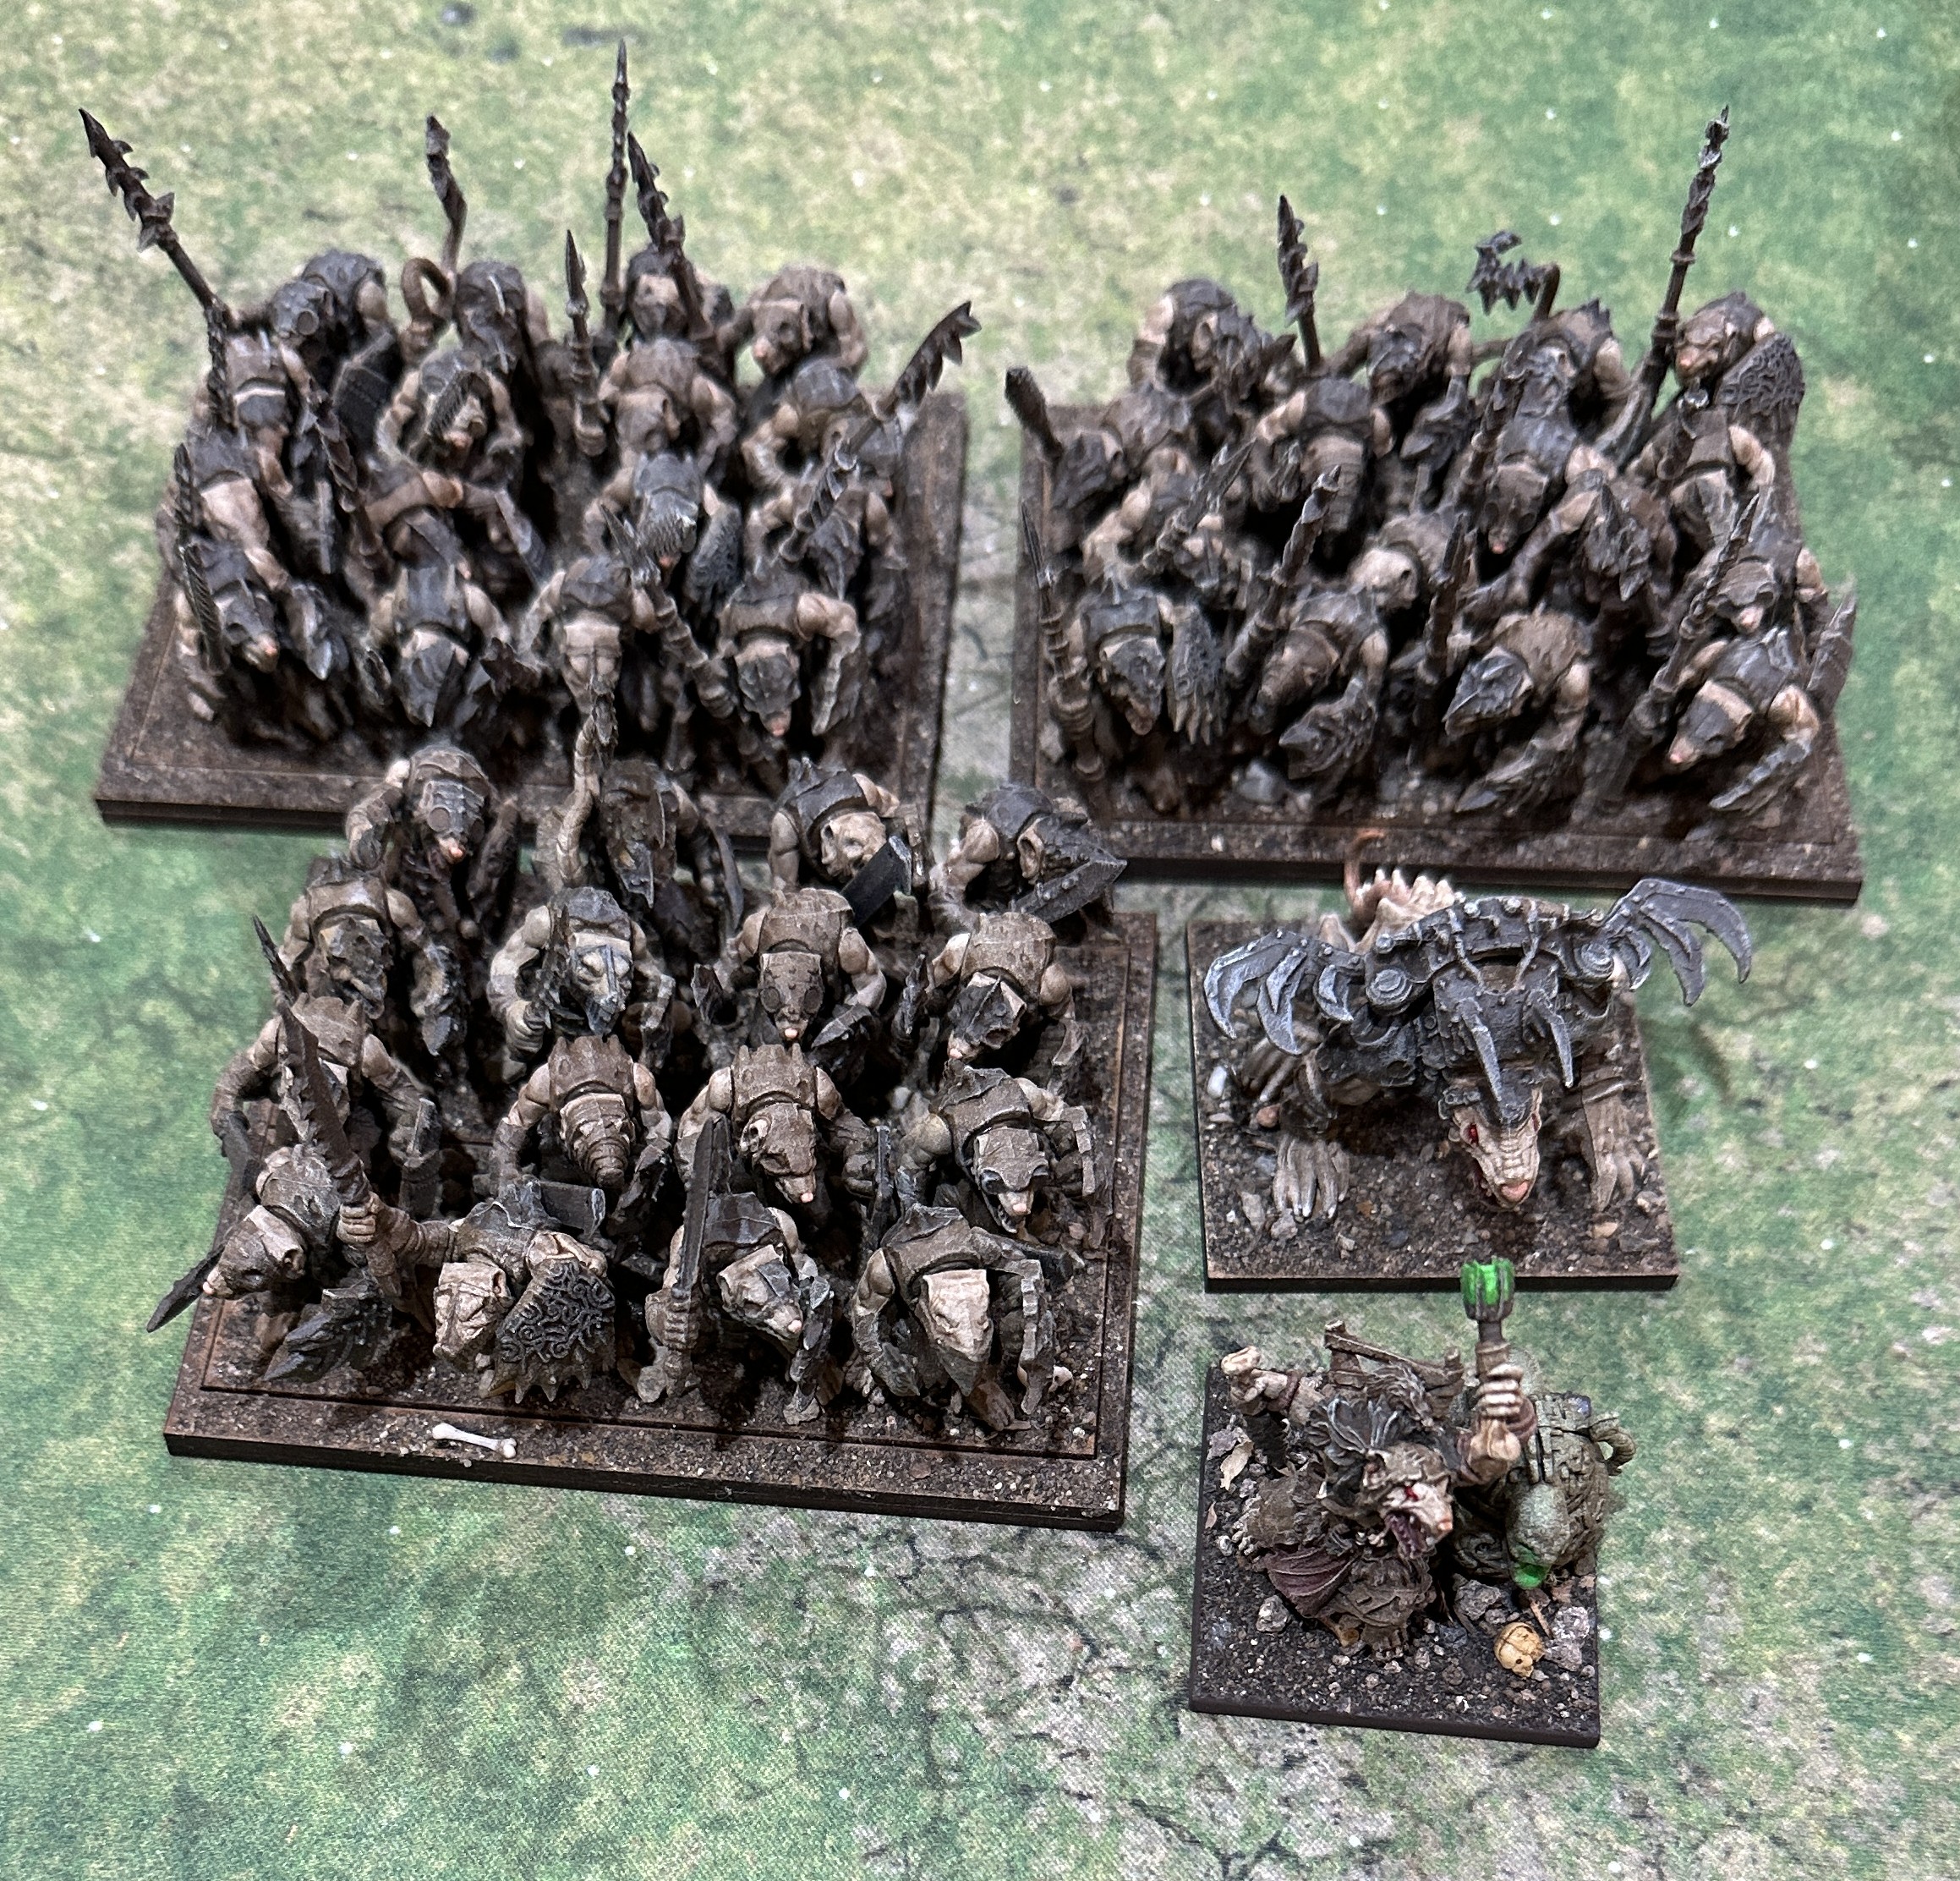
Step 6: A spray of matt varnish to kill the shine and then drybrush everything to re-establish some highlights. I know at least one community member who will be shouting “Brainmatter Beige” now, but I’m going with very pale green to match the earlier zenith. I don’t have AP Necrotic Flesh in my collection, but the Duck Egg Green is perfect. You don’t see it as green on the miniature and it gives a delightful edge of “wrongness” about the overall paint job.
Finally, noses are re-highlighted in pink. Cute.
Just six steps and done. Overall, there are no three-layer acrylics, fine details or hard-edge highlights for these guys. They are in mass units, and that sort of detail just won’t show. You can get a whole unit batch of 16-20 done in two sessions of a couple of hours, with a day in between for the dip to fully dry on the Ratkin. Easy.
Zoid’s Adaptable Basing System™
I’ve been working with Warbases to design a basing solution for my Kings of War armies. I’ve used Warbases for years. Their products are great, prices reasonable, and customer service excellent. I’ll get my bases from them, and I’d like movement trays too. They sell options for Kings of War but not quite what I want.
The standard issue is with players basing their miniatures on the right-sized bases, so Ogres go on a 40mm2, and three make a Troop (like the Berserkers below left). To move the unit together, you use a movement tray (below right). However, the movement tray is now larger than the unit base size, meaning players need to fiddle about measuring to the miniature base, rather than the more obvious edge of the movement tray. No thanks. I need a better solution.
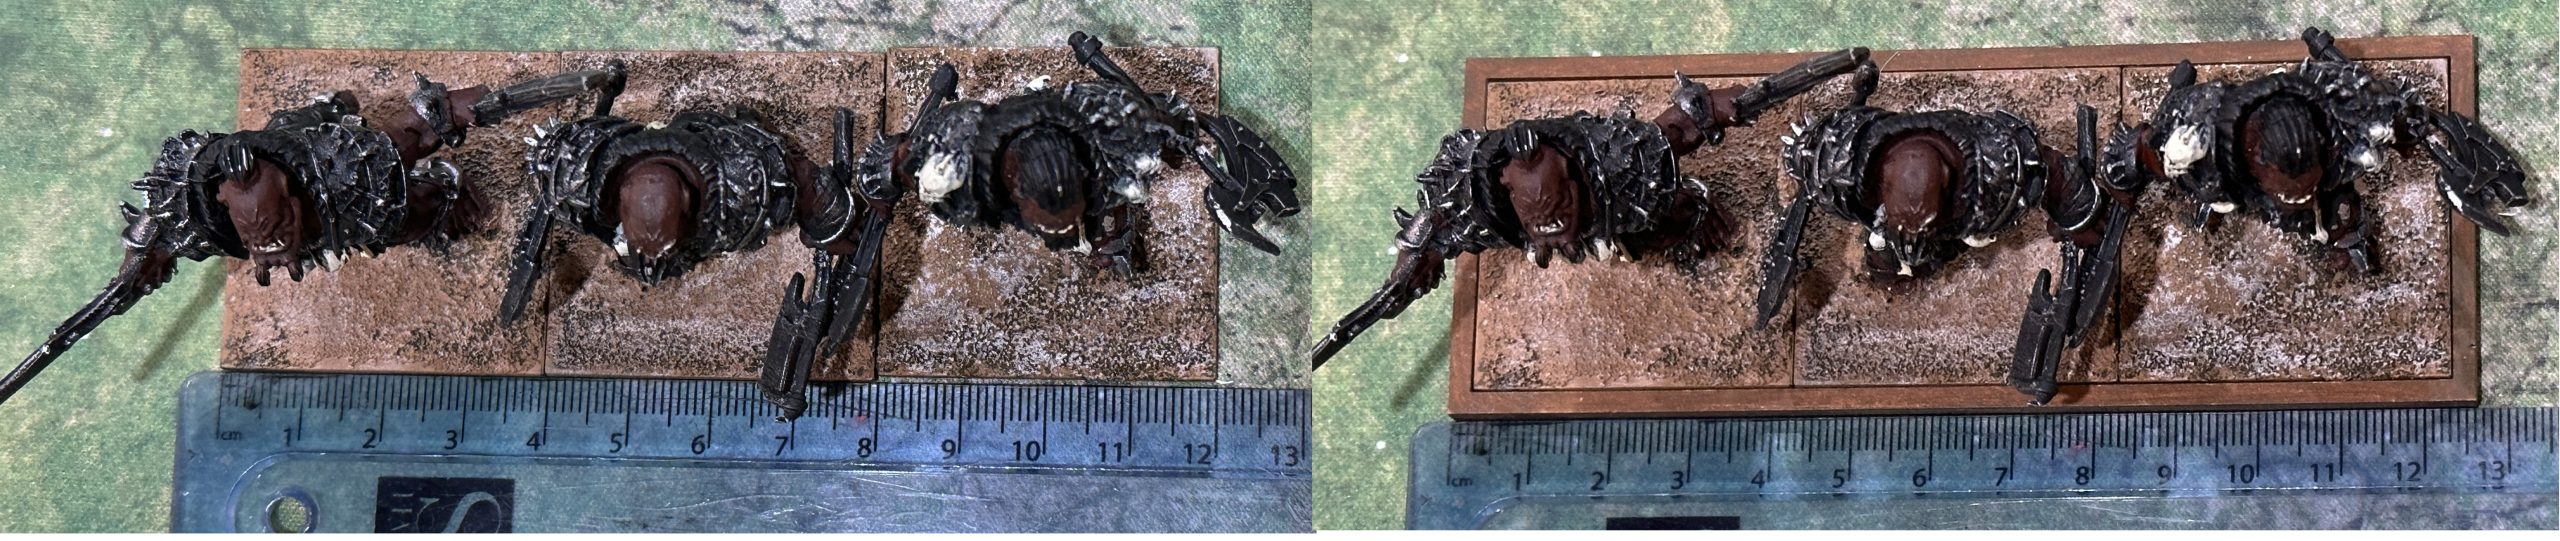
As a newbie, multi-basing is exciting but also rather worrying. I don’t know what the best unit size is for each option in the army. I may start by fielding a Regiment and then realise that I’d be better off with two Troops instead. That would mean tearing the minis off the bigger base and rebasing them on two smaller ones. No thanks. Instead, I want all of my army on multi-bases that fit into all of the different movement trays that are themselves also the correct unit footprint size. So a multi-base will be a bit smaller than a Troop movement tray, which will be the correct dimensions for play. I’ll then be able to have four Troops or two Regiments or one Horde with the same four multi-bases. (That’s also only 28 miniatures painted instead of 40!) Like this...
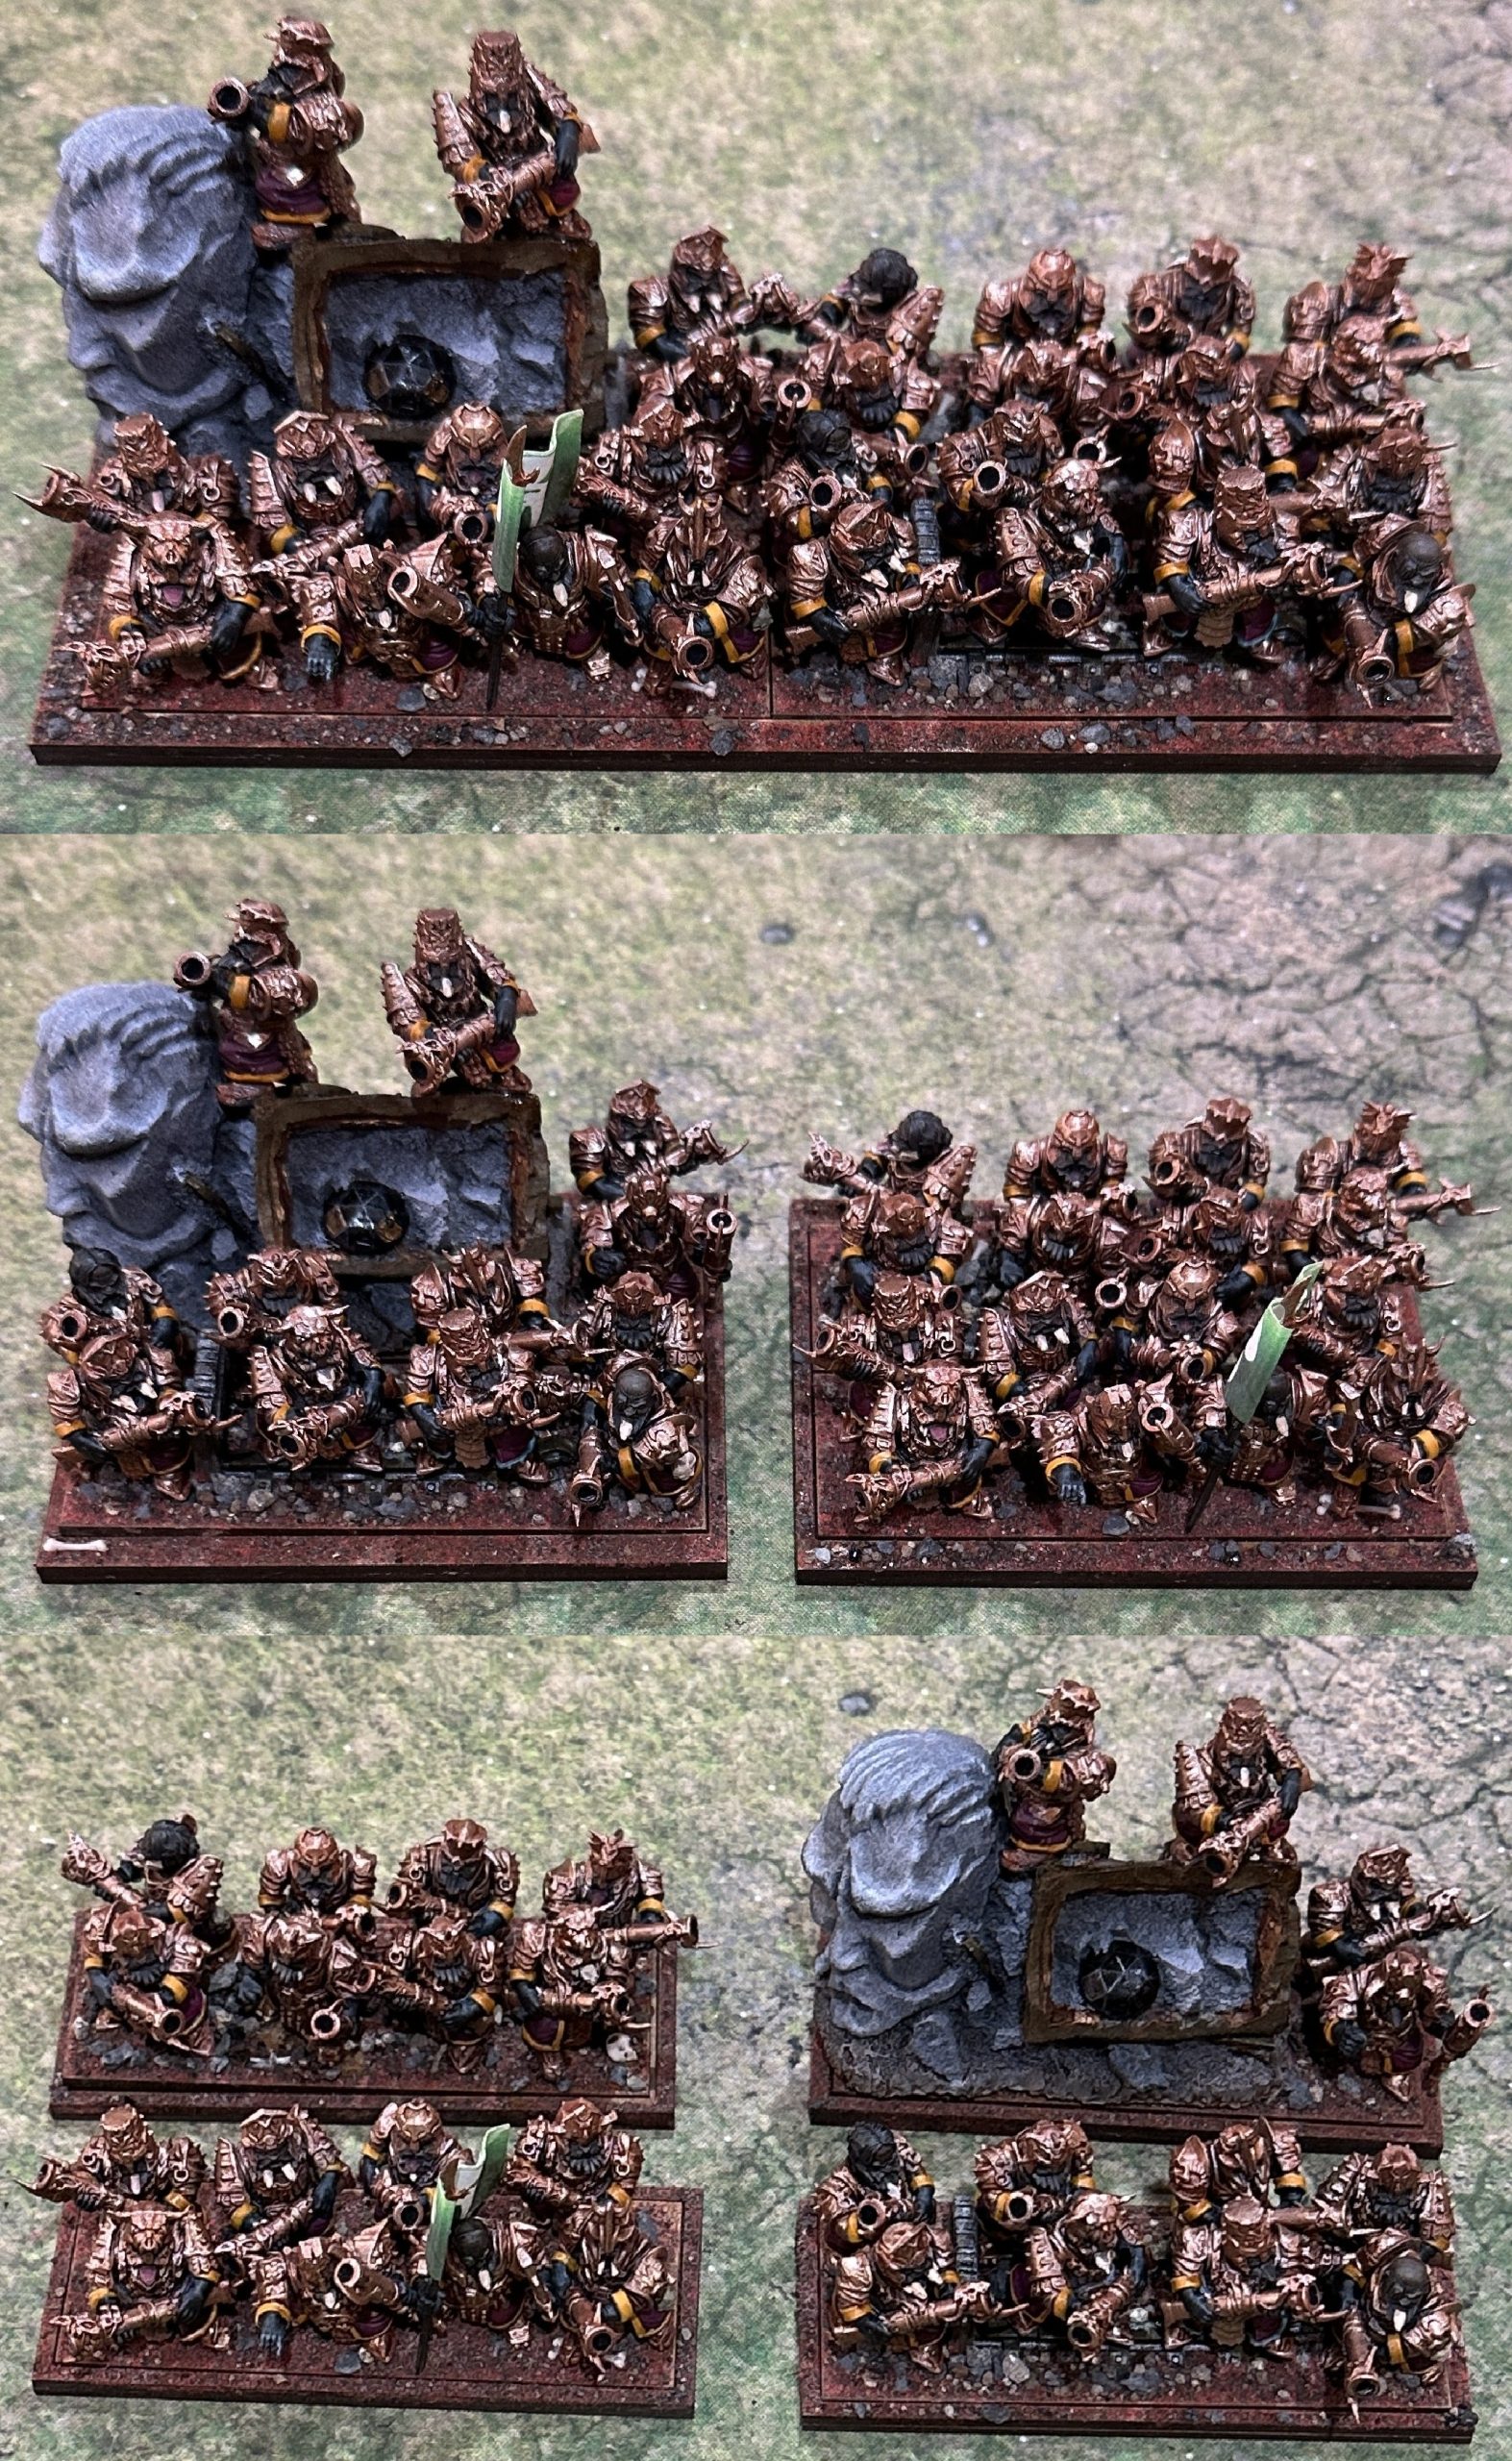
Zoidpinheads Adaptable Base System
I worked with Diane at Warbases, and together we came up with a schedule of dimensions for all of the different troop types and movement tray sizes needed. I’ve provided the details for all of this in my project, so if you’d like to try some for yourselves, you don’t have to do any working out.
Please note that the movement trays aren’t supplied with a base insert in them; it is just the underneath and the rim, which you glue together yourself. You need to order bases separately, and I’ve given their dimensions in the project too.
These are done as bespoke orders, so email the details in, including the full set of measurements, and they will confirm and send you an invoice. They usually turn these orders around in a couple of days. Do mention that you got the idea here, as this will make it easier at their end because they know they have made them before.
Next time…
As practice games continue, I’m busy modelling and painting units to get up to the full 2,300 points needed for full games. Next time I’ll cover the final list tweaks and also show how I put a second 2300 point army together to act as my practice opponents. Has anyone else been tempted to start or refresh a Kings of War army? Which one are you doing?
Article by zoidpinhead
Supported by (Turn Off)

Supported by (Turn Off)
Supported by (Turn Off)




Thank you @avernos for the wonderful job editing this.
I can spot the difference – what do I win? Is it getting an article published on OTT? Exciting!!!
For those playing along at home: if you look closely at the shoulder pads and top of the helmet; the bottom mini has a much more homogeneous finish and the upper mini has much shinier edges and an overall warmer colour with better tonal variation. I admit that’s a bit of a stretch to see in the photo (okay – borderline impossible). It is a lot easier for me looking at the mini in person 😀
The multibasing element of Kings of War is the bit that would be something I’d have to get used to for sure. So used to the Warhammer Fantasy way of doing things! I think it would be fun to see what designs you could come up with, though.
Really like what you’ve done with the Abyssal Dwarfs 🙂
Thank you. Multibasing is one of the most different things about this system and the creative opportunities it offers are huge. I’m looking forward to seeing what more experienced players have done at the tournaments. Only a month to go until Clash of Kings 🙂
Weirdly, multibasing came from the Warhammer tournament scene. People would use spacers and unit fillers so they could field bigger units without having to buy more models. Then it came over to Kings, and people realised they could double down on that concept.