


75th Anniversary of the Battle of Monte Cassino and Northern Italy (Gaming The Battles)


Recommendations: 781
About the Project
BEST READ IN REVERSE ORDER! The project charts and recreates the battles of Monte Cassino, fought between January 1944 to May 1944, and the onward Allied push through Northern Italy.
Related Game: Flames of War: The World War II Miniatures Game
Related Company: Battlefront Miniatures
Related Genre: Historical
This Project is Active
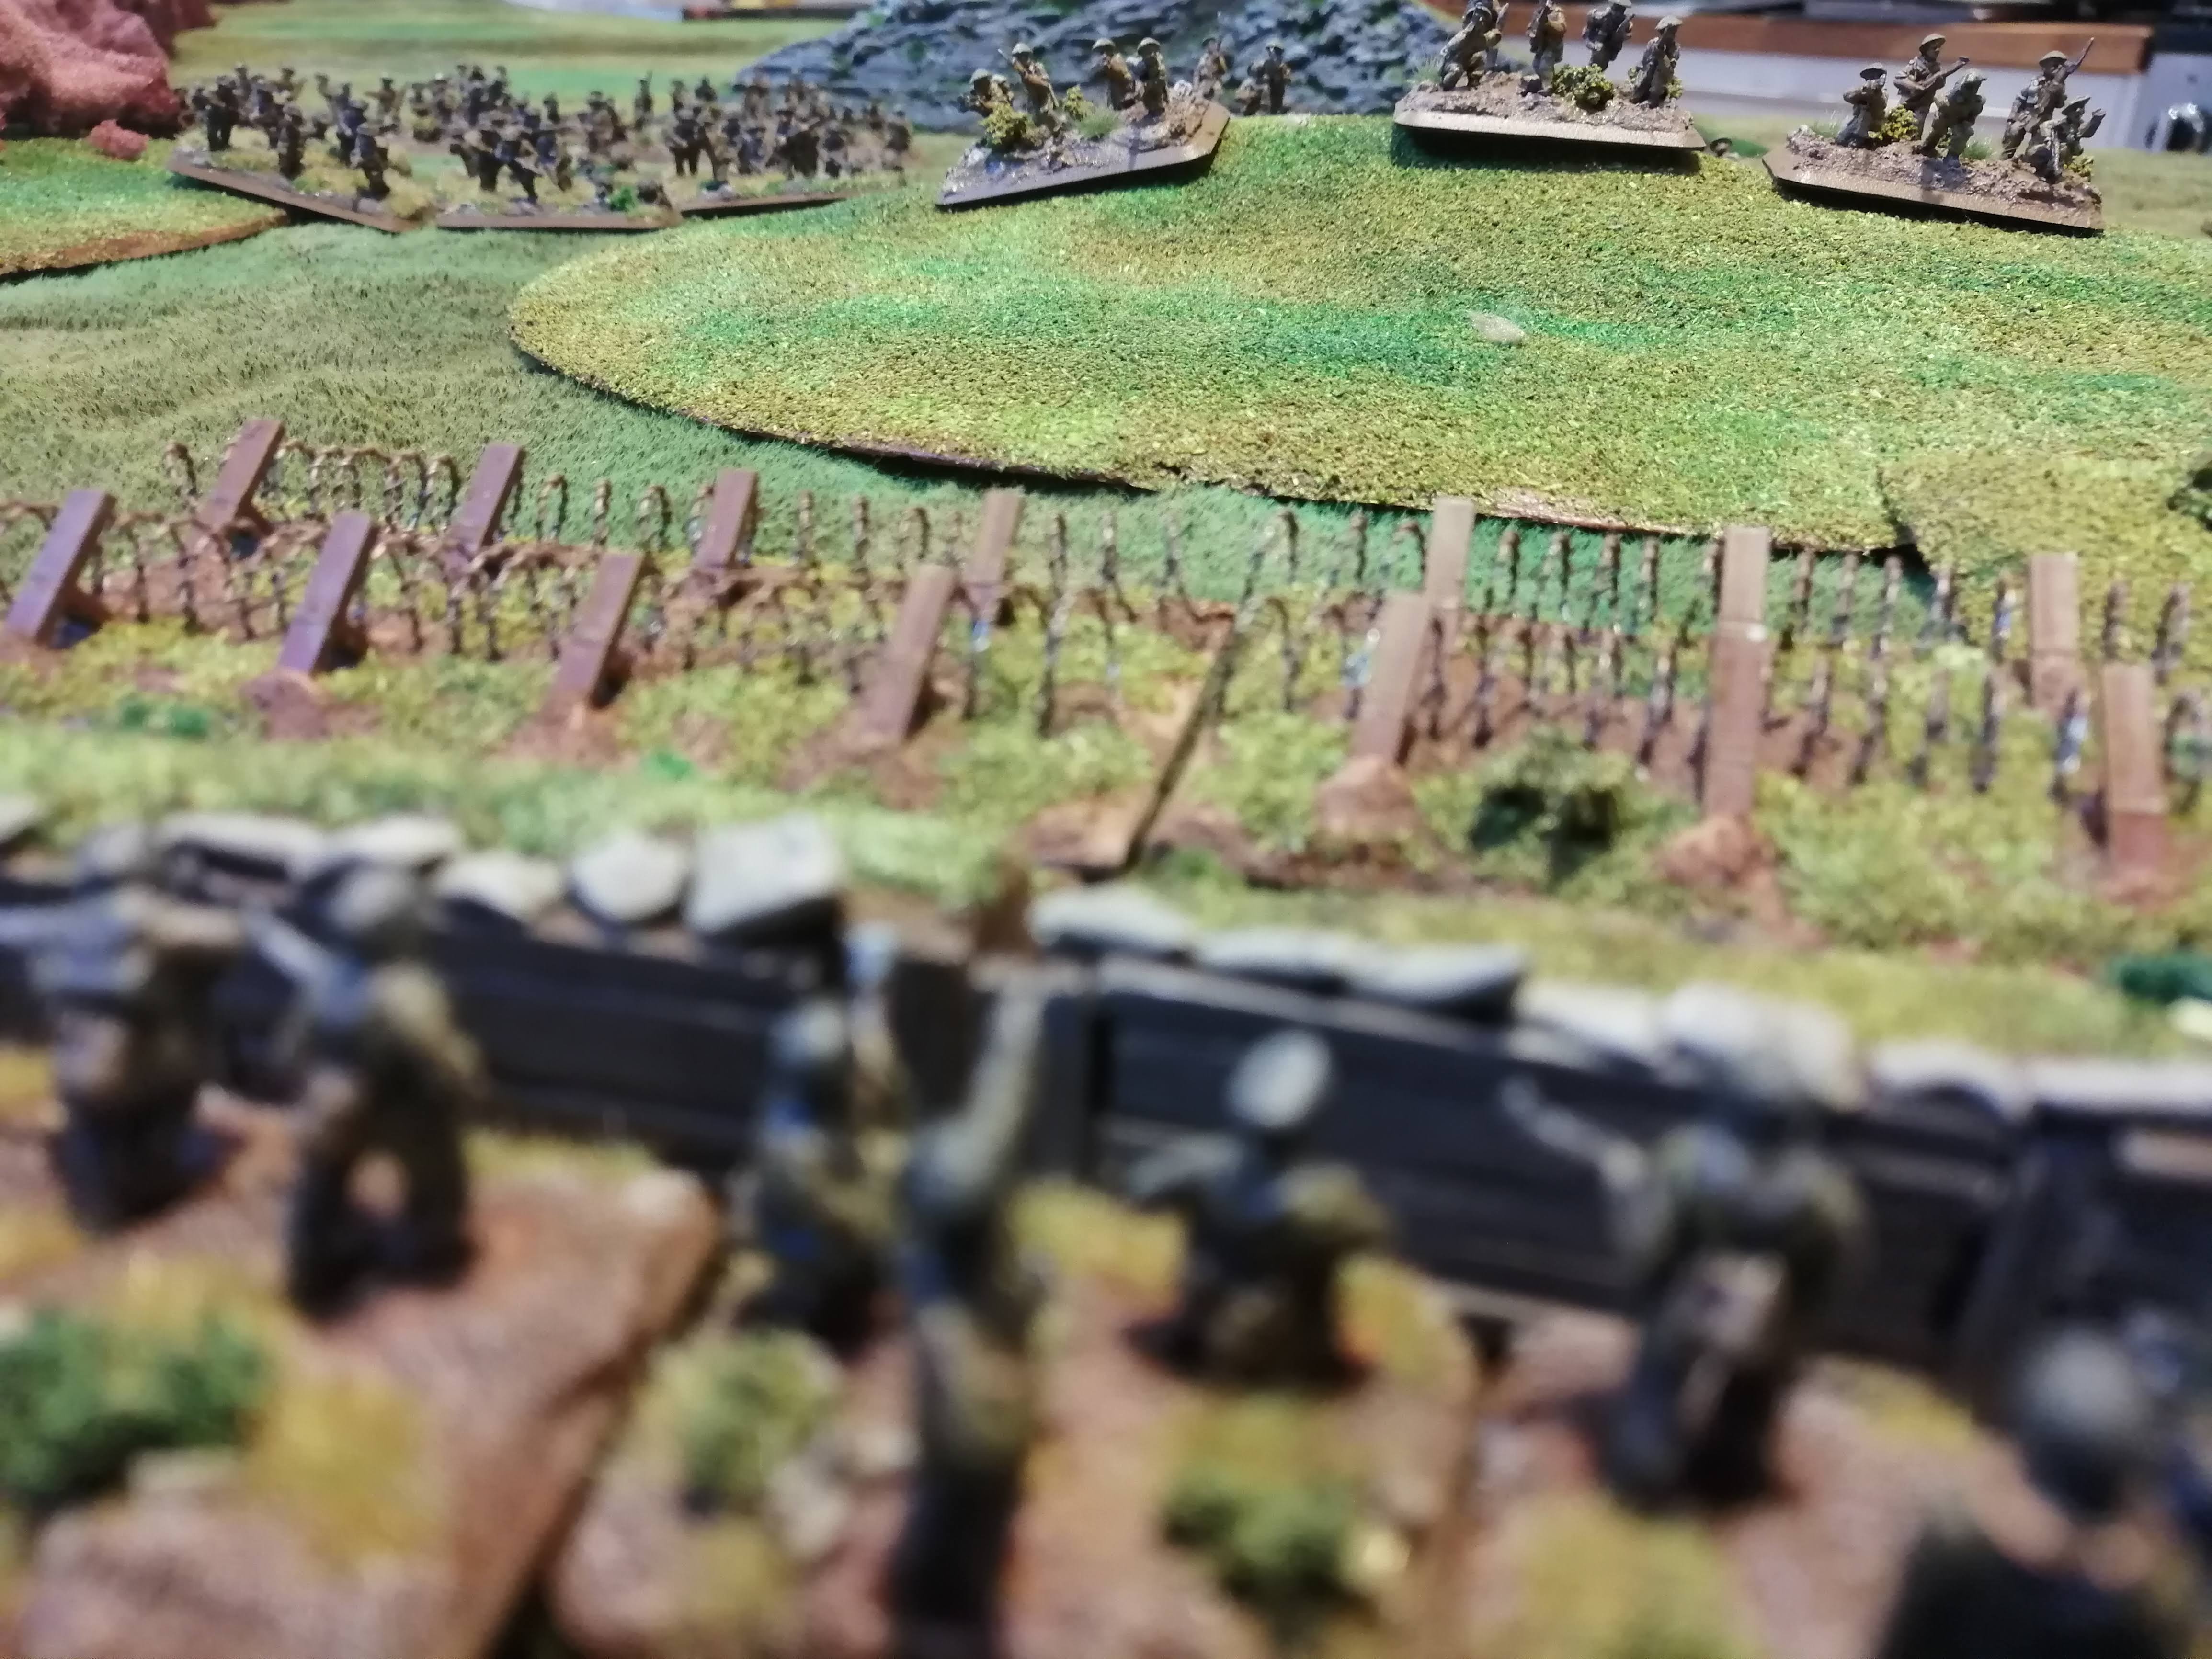
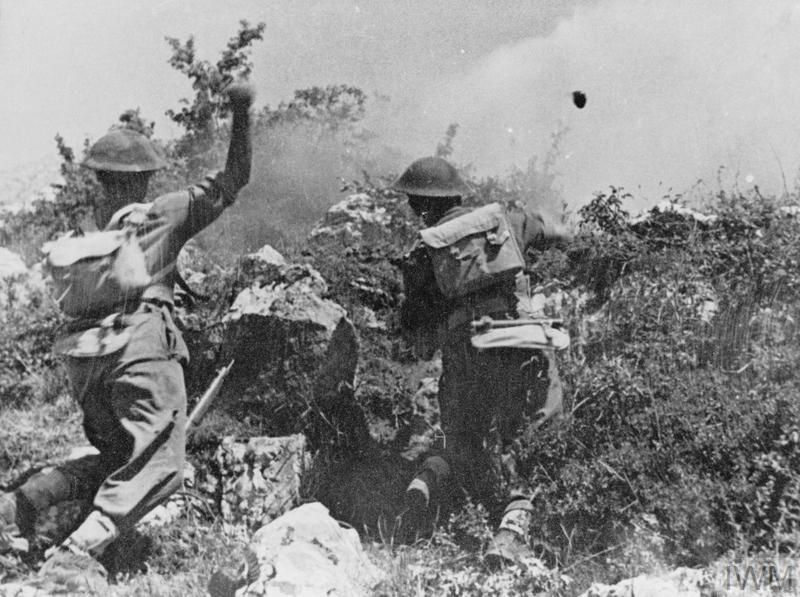
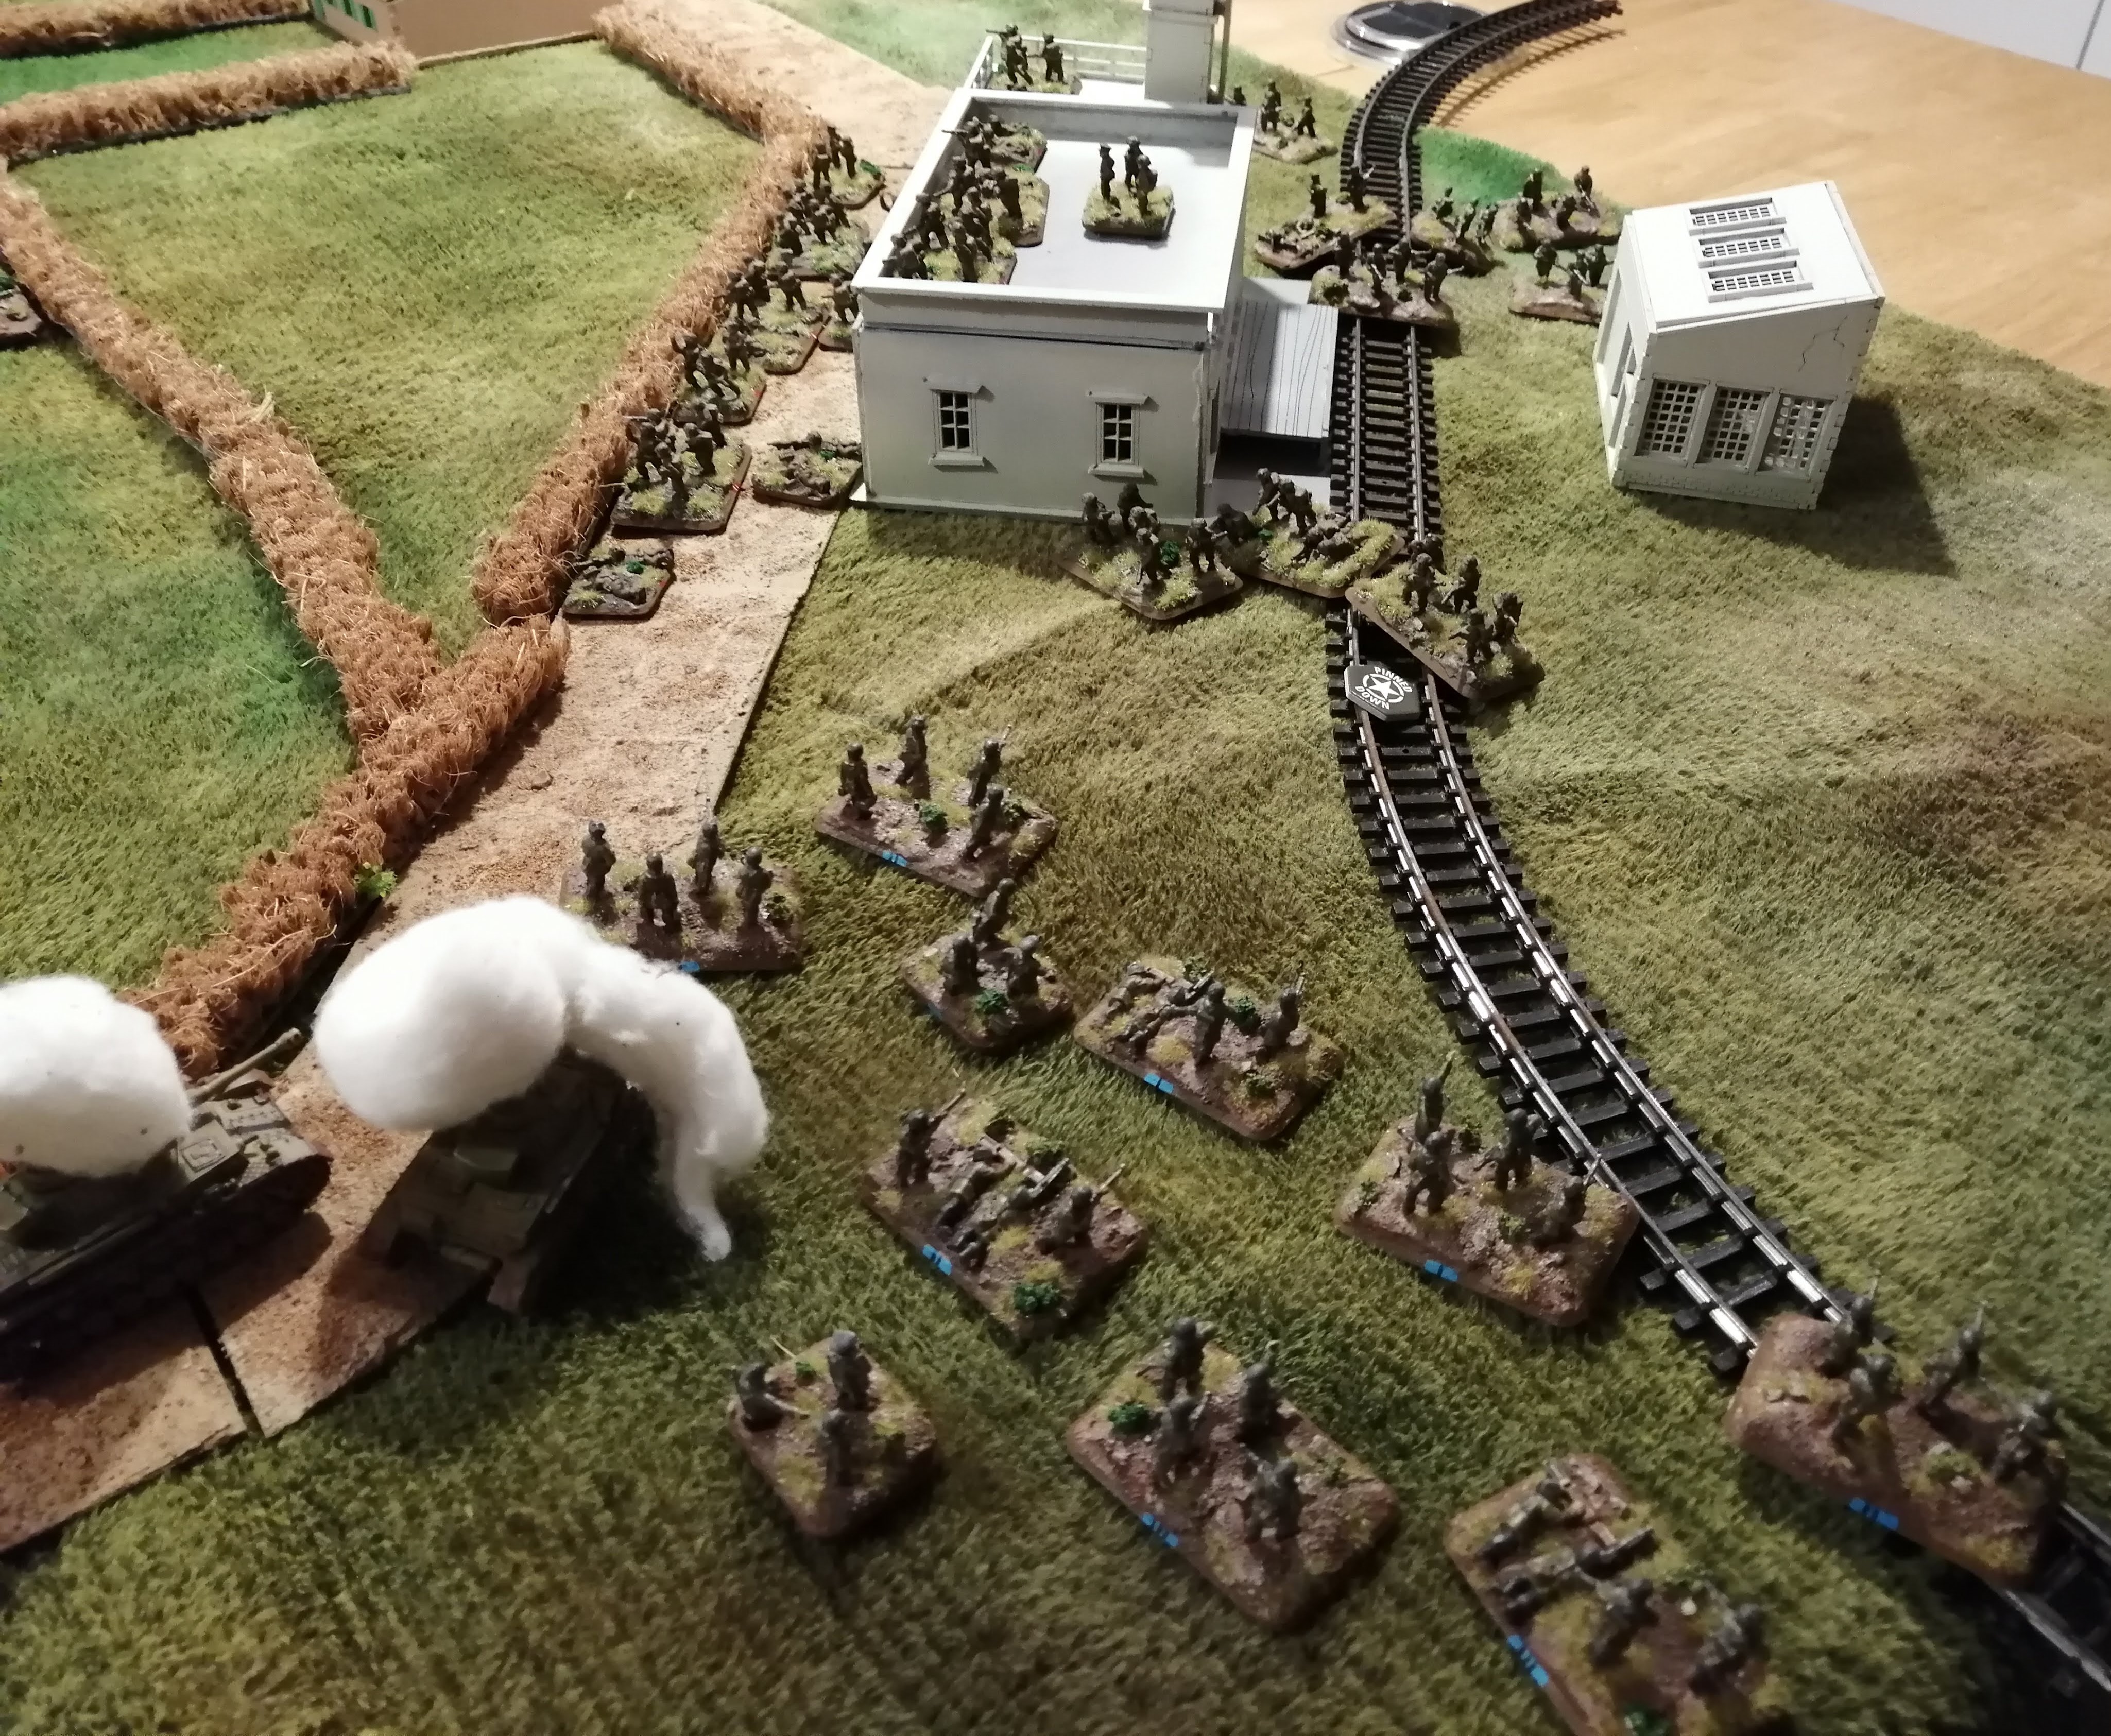
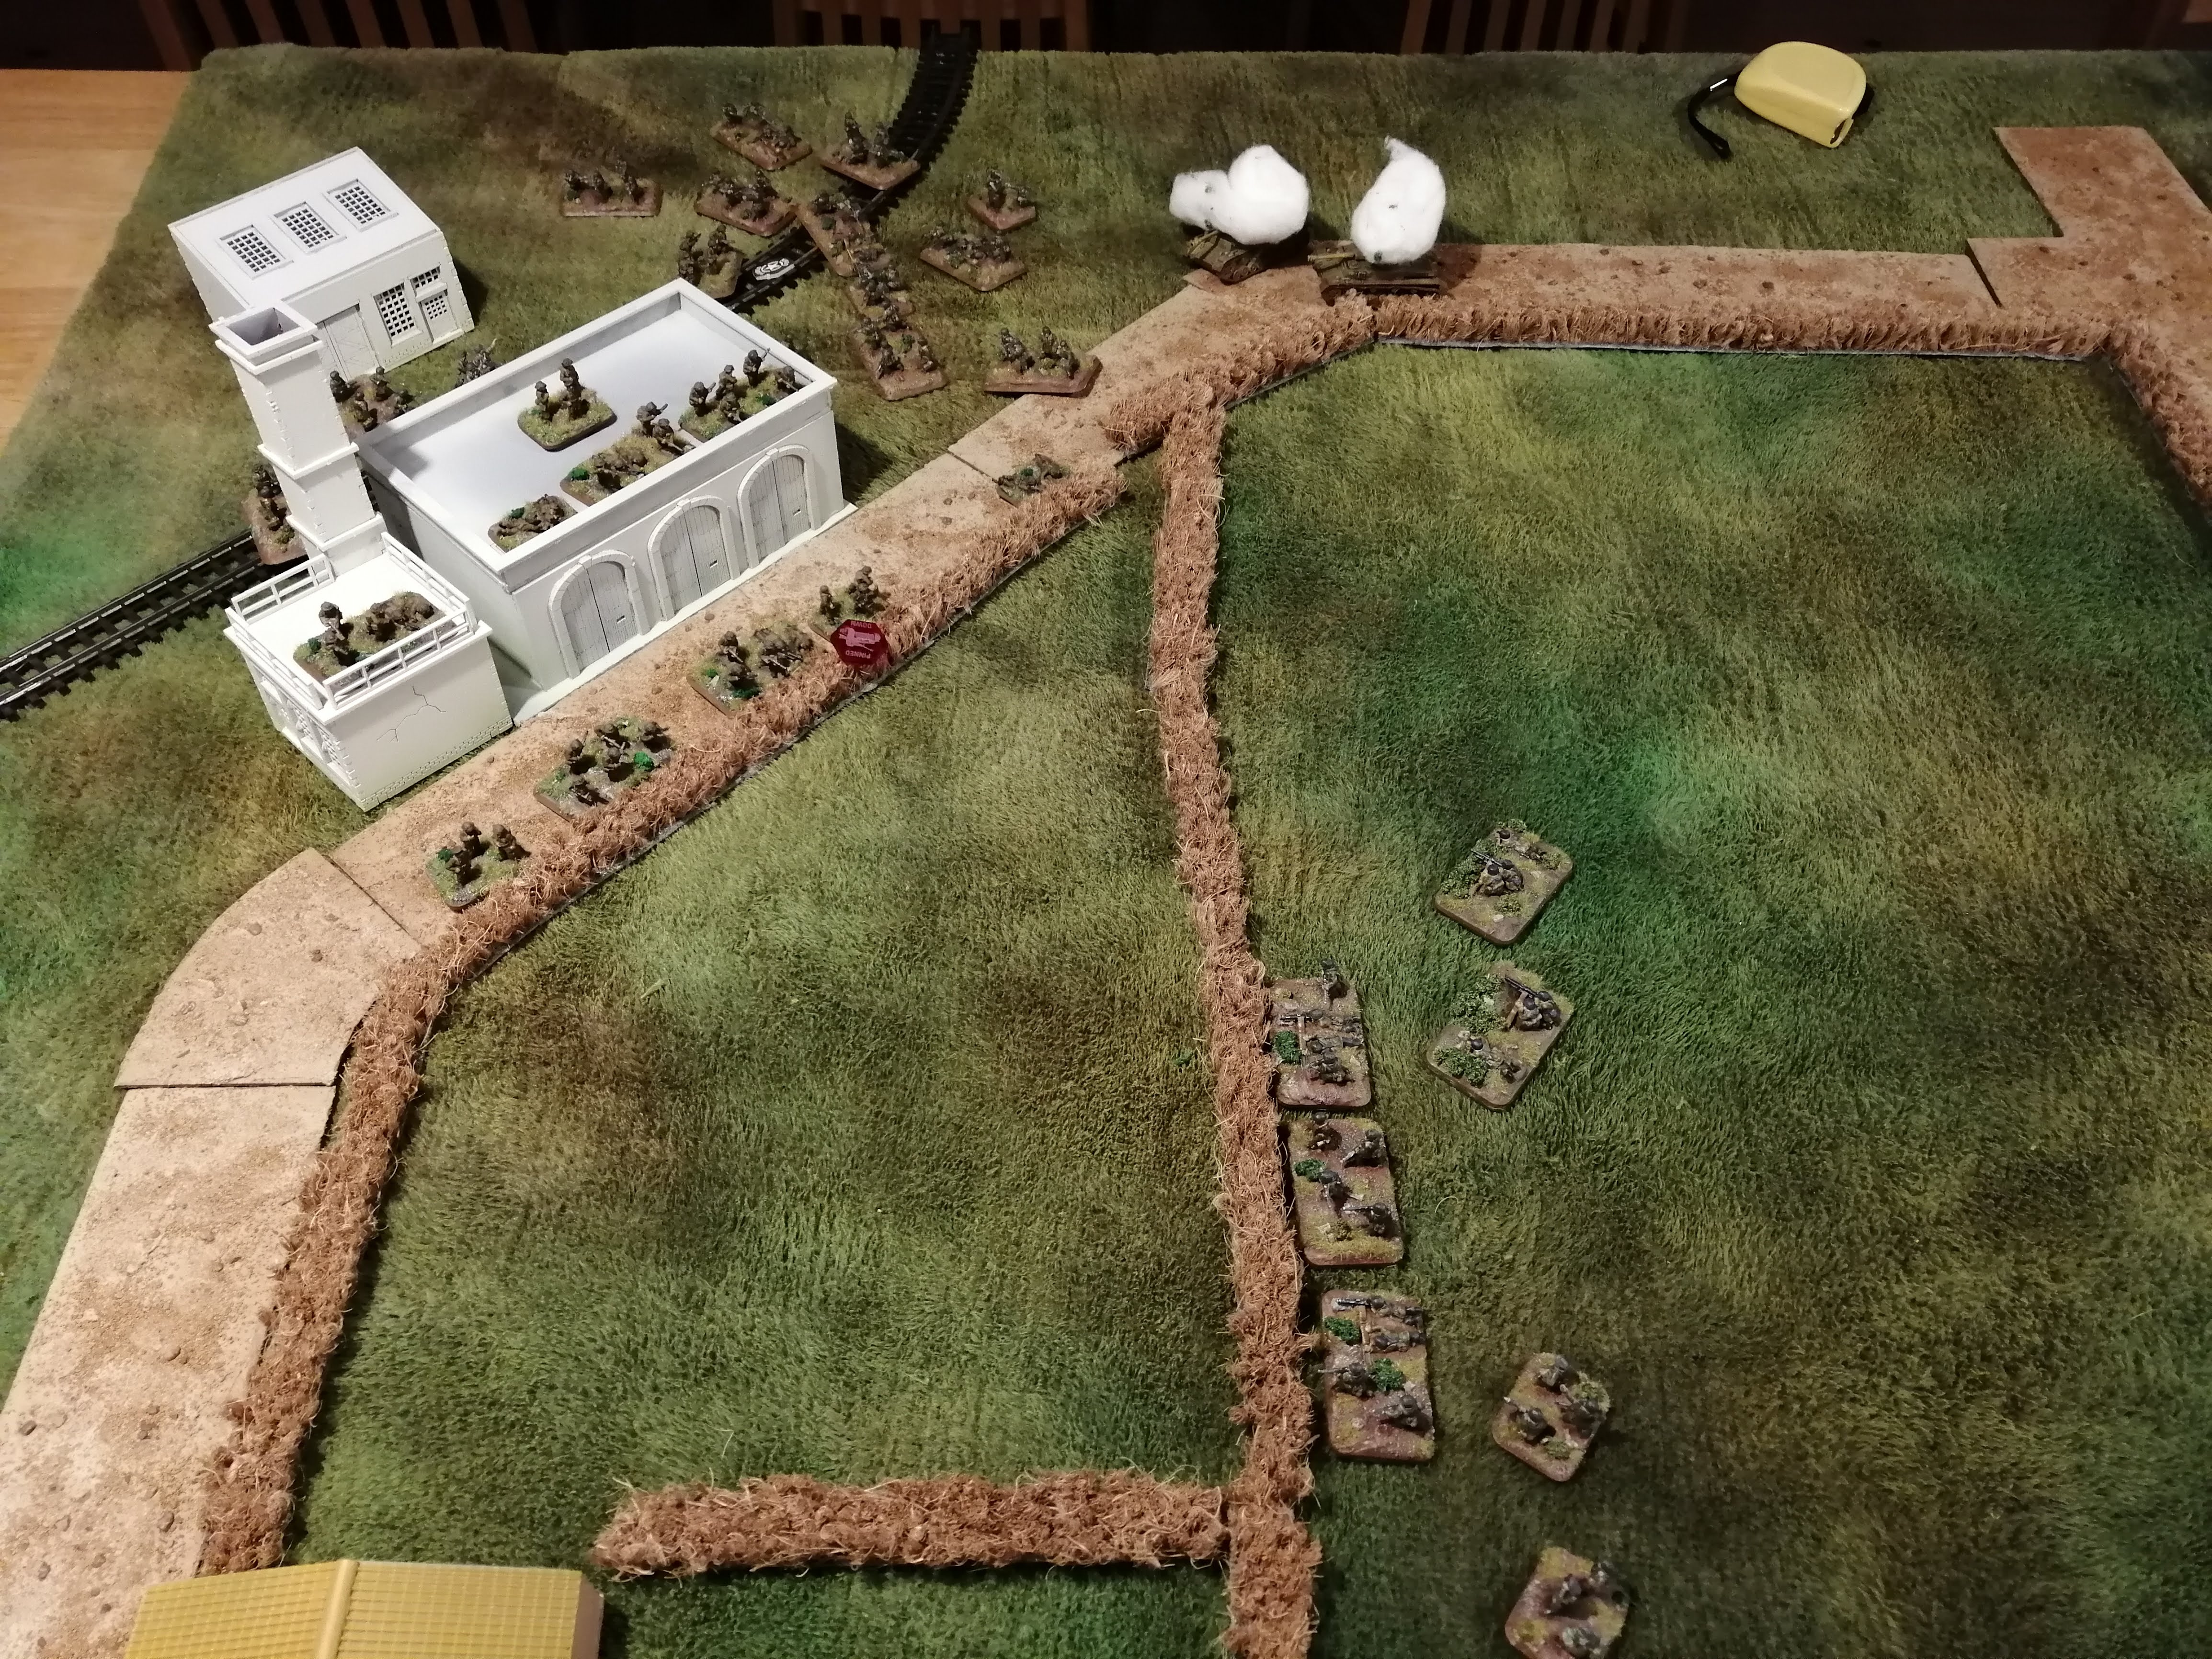
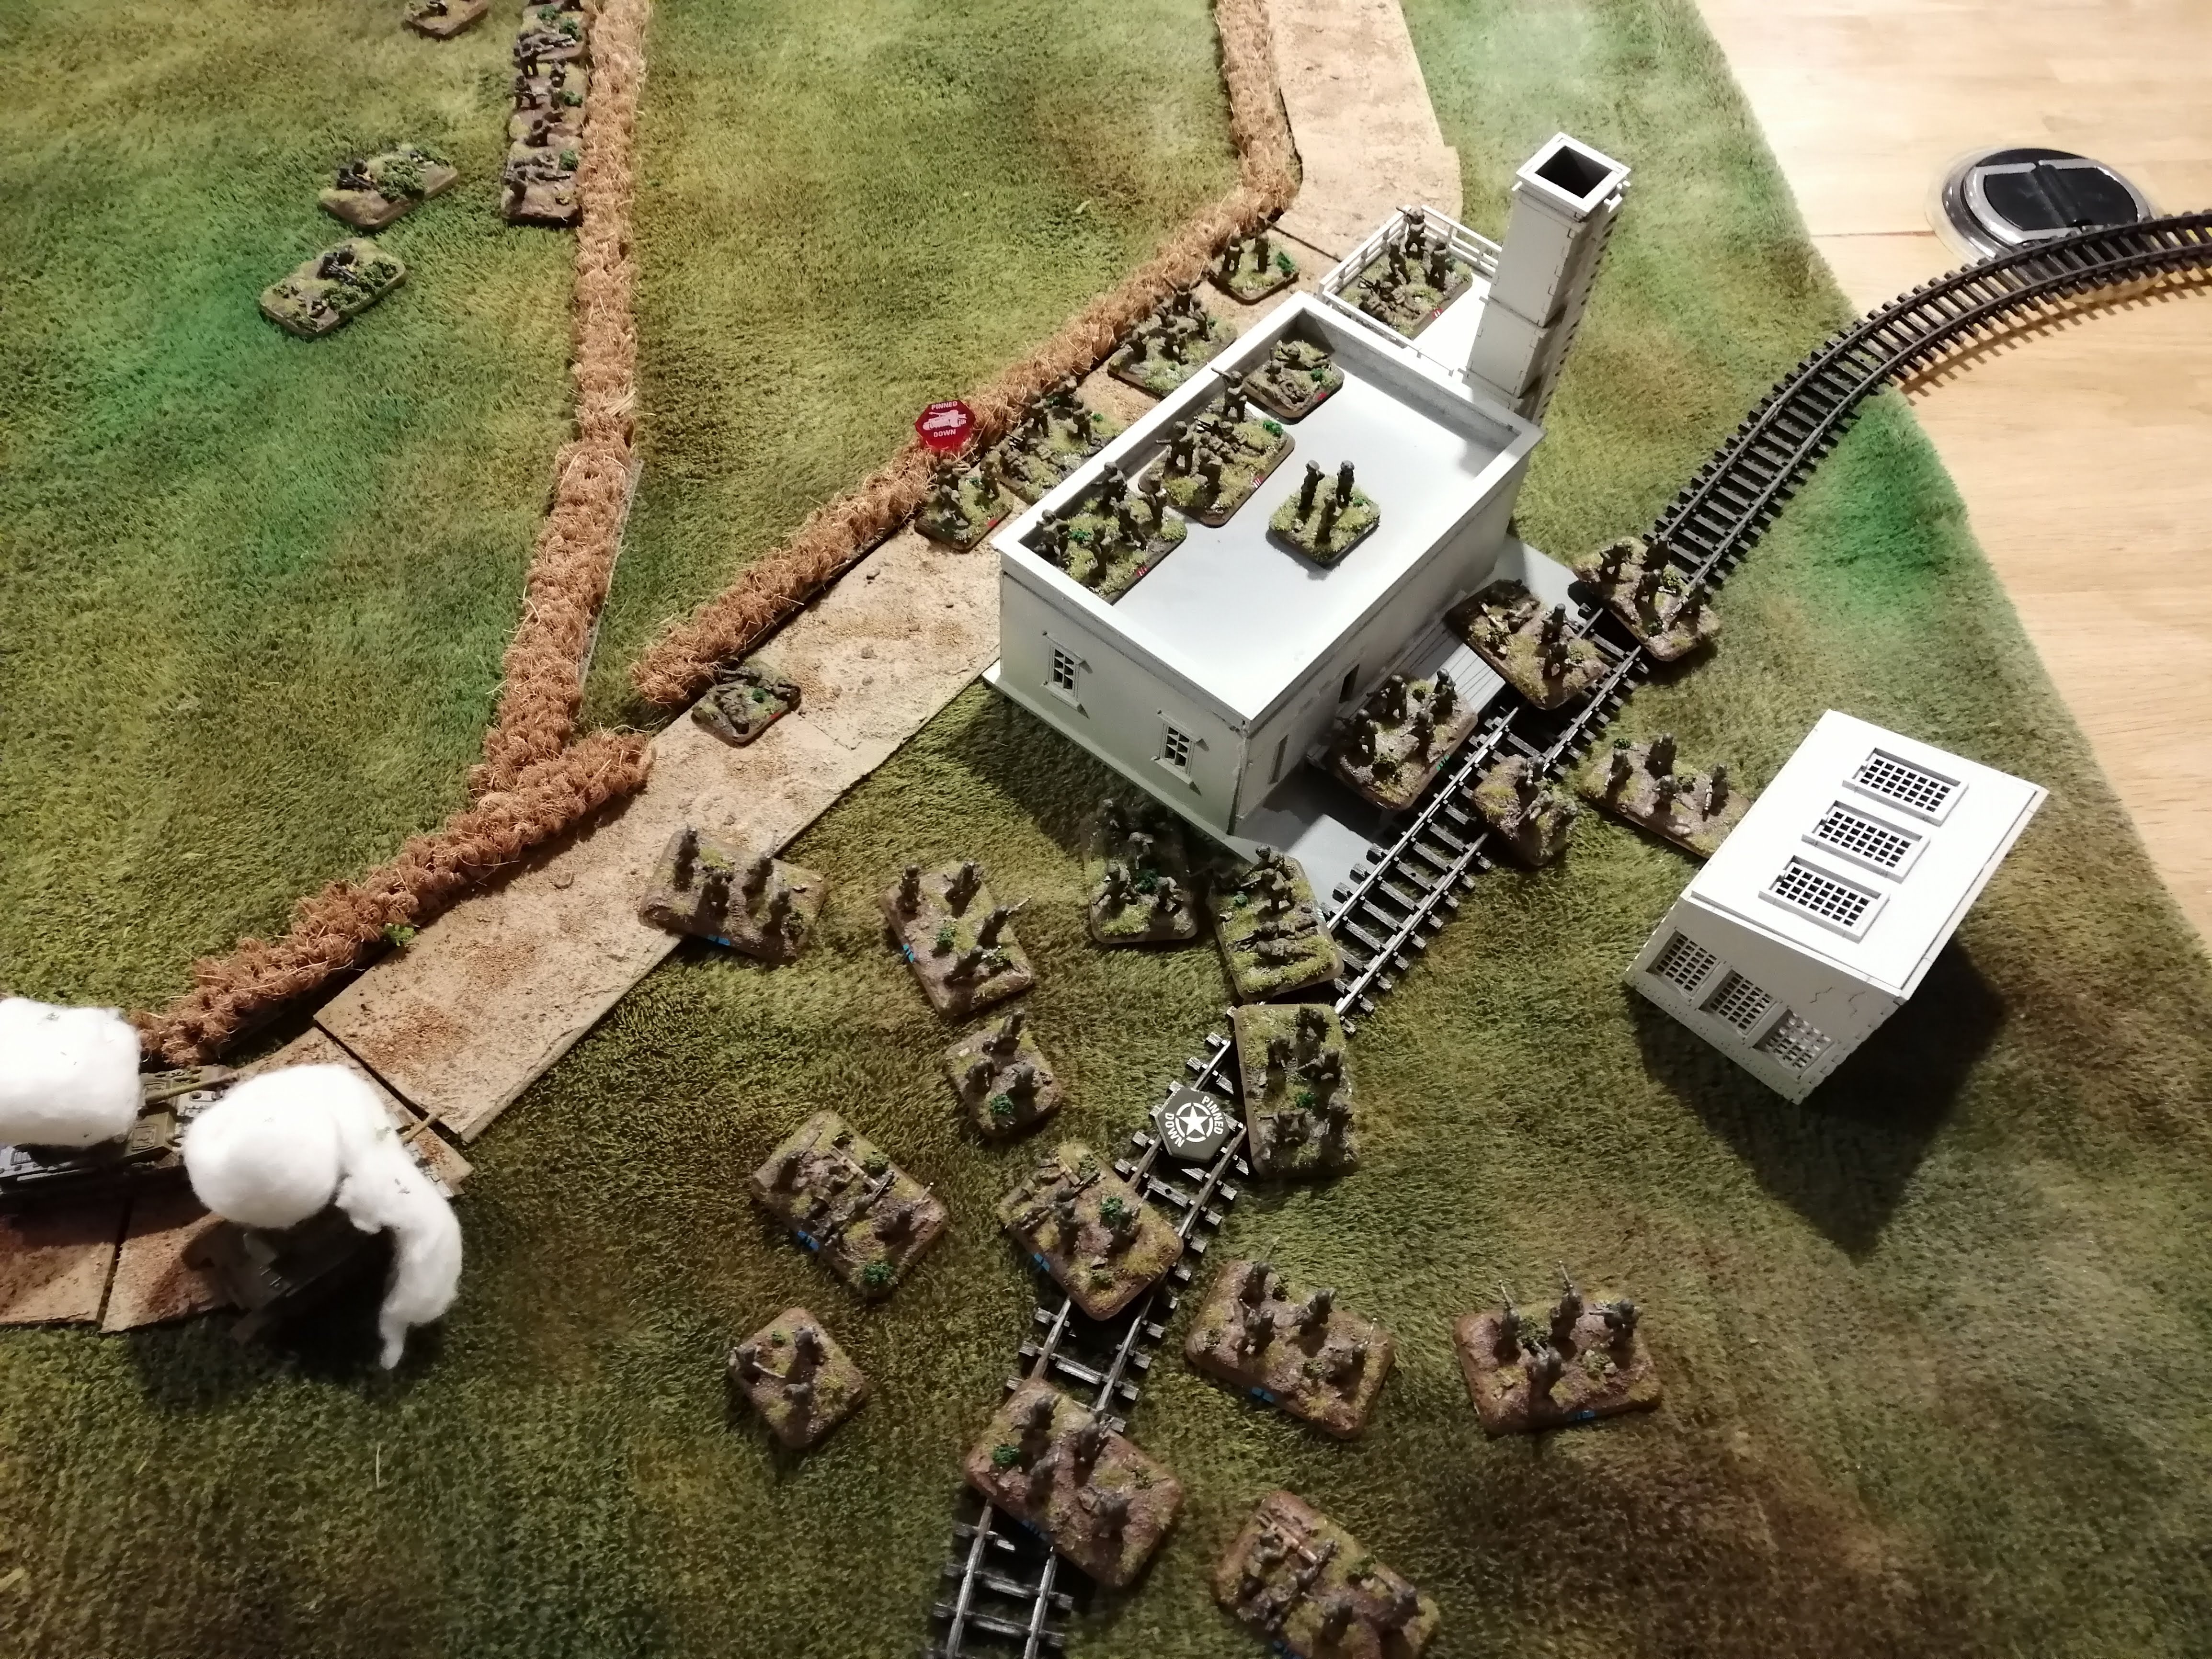
3rd Battle or Monte Cassino - Assault on the Town
It’s been some time since the last battle report – the summer and then work got in the way but I feel it is time to pick this project back up again and continue with the battles of the Italian campaign and, in particular, the battle for Monte Cassino.
The last battle report focused on the 4th Indian Division’s unsuccessful attempt to take Monte Cassino up in the mountains. While this assault was taking place, the New Zealand 2nd Division was tasked with pushing along the Rapido river into the town of Cassino itself. It was then hoped that with the town captured, the NZ 2nd Division could then swing around the back of Monte Cassino and link up with the 4th Indian Division, surrounding and cutting off the defenders.
The assault started on 15th March 1944 and began with a massive air and artillery bombardment. The 6th NZ Brigade led the attack and were supported by the 19th Armoured Regiment. This was the first time that armour had been able to cross the Rapido and join the assault on the town itself. The Infantry and tanks advanced behind a creeping artillery barrage however progress was slow going. The heavy rain combined with the bombardments had churned the ground and the heavily dug in defenders were able to keep up a constant barrage of fire.
Over the coming few days, the 2nd NZ Division did manage to push into the town and to capture Castle Hill, a key point overlooking the town. However, the Fallschirmjager refused to give up the fight and, as we saw in the last battle report, kept control of Monte Cassino. Eventually, the Allied commander Alexander, knowing that his men were spent, called off the assault and both the 4th British Indian in the heights above Cassino and the 2nd NZ Division fell back.
The Battle
In this battle, we will look to recreate the initial push by the 19th Armoured Regiment into the outskirts of the town of Cassino. Here are the army lists;
2nd NZ Division:
Infantry HQ
3 Infantry Platoons of 7 teams Rifle/MG, PIAT and mortar
3 Platoons of Sherman tanks (3 tanks to a platoon)
3” mortar platoon of 4 teams
3 Universal Carriers equipped with .50 cal MG
1 Engineer Platoon of 4 teams and a PIAT team. Also a supply truck
1 Artillery Strike from off board to be used whenever the Allied player wishes to call it in
German Fallschirmjager:
Infantry HQ equipped with SMG and Panzerfaust
Infantry Platoon of 9 teams and Cmd with SMG and Panzerfaust
Infantry Platoon of 6 teams and Cmd with SMG and Panzerfaust
Heavy MG Platoon of 2 teams
MG Nest
1 PaK 40 anti tank gun
2 7.5cm Recoilless infantry guns
Scout Infantry platoon of 5 teams
Marder II anti-tank gun
Special Rules:
Lay the defences. The defenders have barbed wire and tank traps to place where they wish on the board. They also have 7 mine tokens but only three of these are real mine fields. They are to be placed on the board before deployment and are flipped over whenever any unit moves within 4”, revealing whether the token was a dummy or an actual mine field.
Surprise deployment. The defender places 15 tokens on the board where German troops could be deployed. 15 pieces of paper are put into a hat on which 6 there is a blank written. The remaining 9 pieces of paper each have one of the units written on from the list above. Whenever an Allied unit gets within 20” of any of the tokens, at the start of the next German turn, the German player draws a random piece of paper from the hat. If it is a blank, no unit is placed however if a unit is drawn, that unit is placed on the token. The token and the piece of paper are removed from the game.
Creeping Artillery. On the turn that the German unit is revealed, it is pinned and cannot attempt to unpin. It starts its turn, gone to ground, concealed and in bullet proof cover (dug in).
Muddy ground. Infantry cannot move at dash speed. Vehicles can only move at dash speed on the roads.
Random smoke. The battlefield was clogged with smoke and rain. At the start of each turn, three smoke counters will be randomly placed within the defender’s half of the table. They provide concealment to anything within or shooting through the smoke.
Victory Conditions:
The Allies have 9 turns to reach the objective at the far end of the battlefield and hold it uncontested. The Defenders win if they stop this happening.
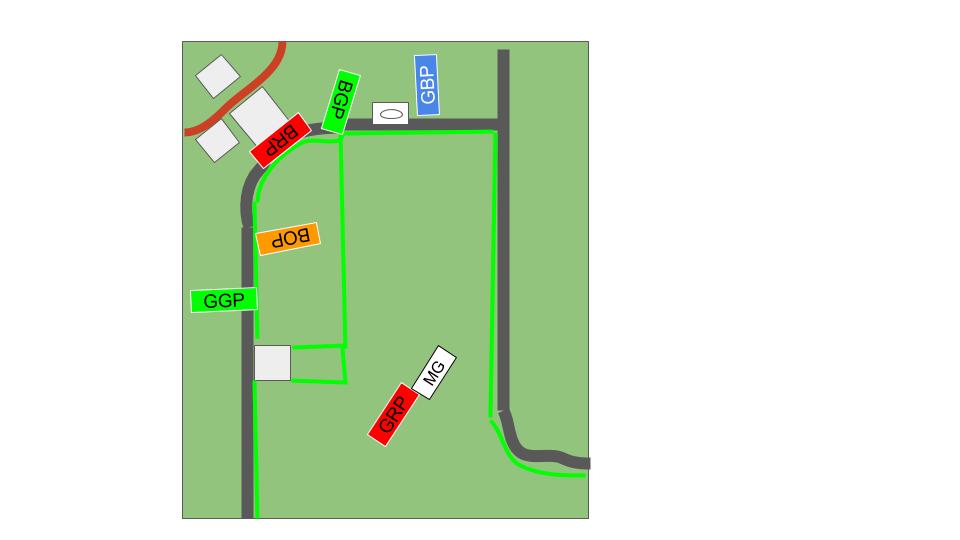
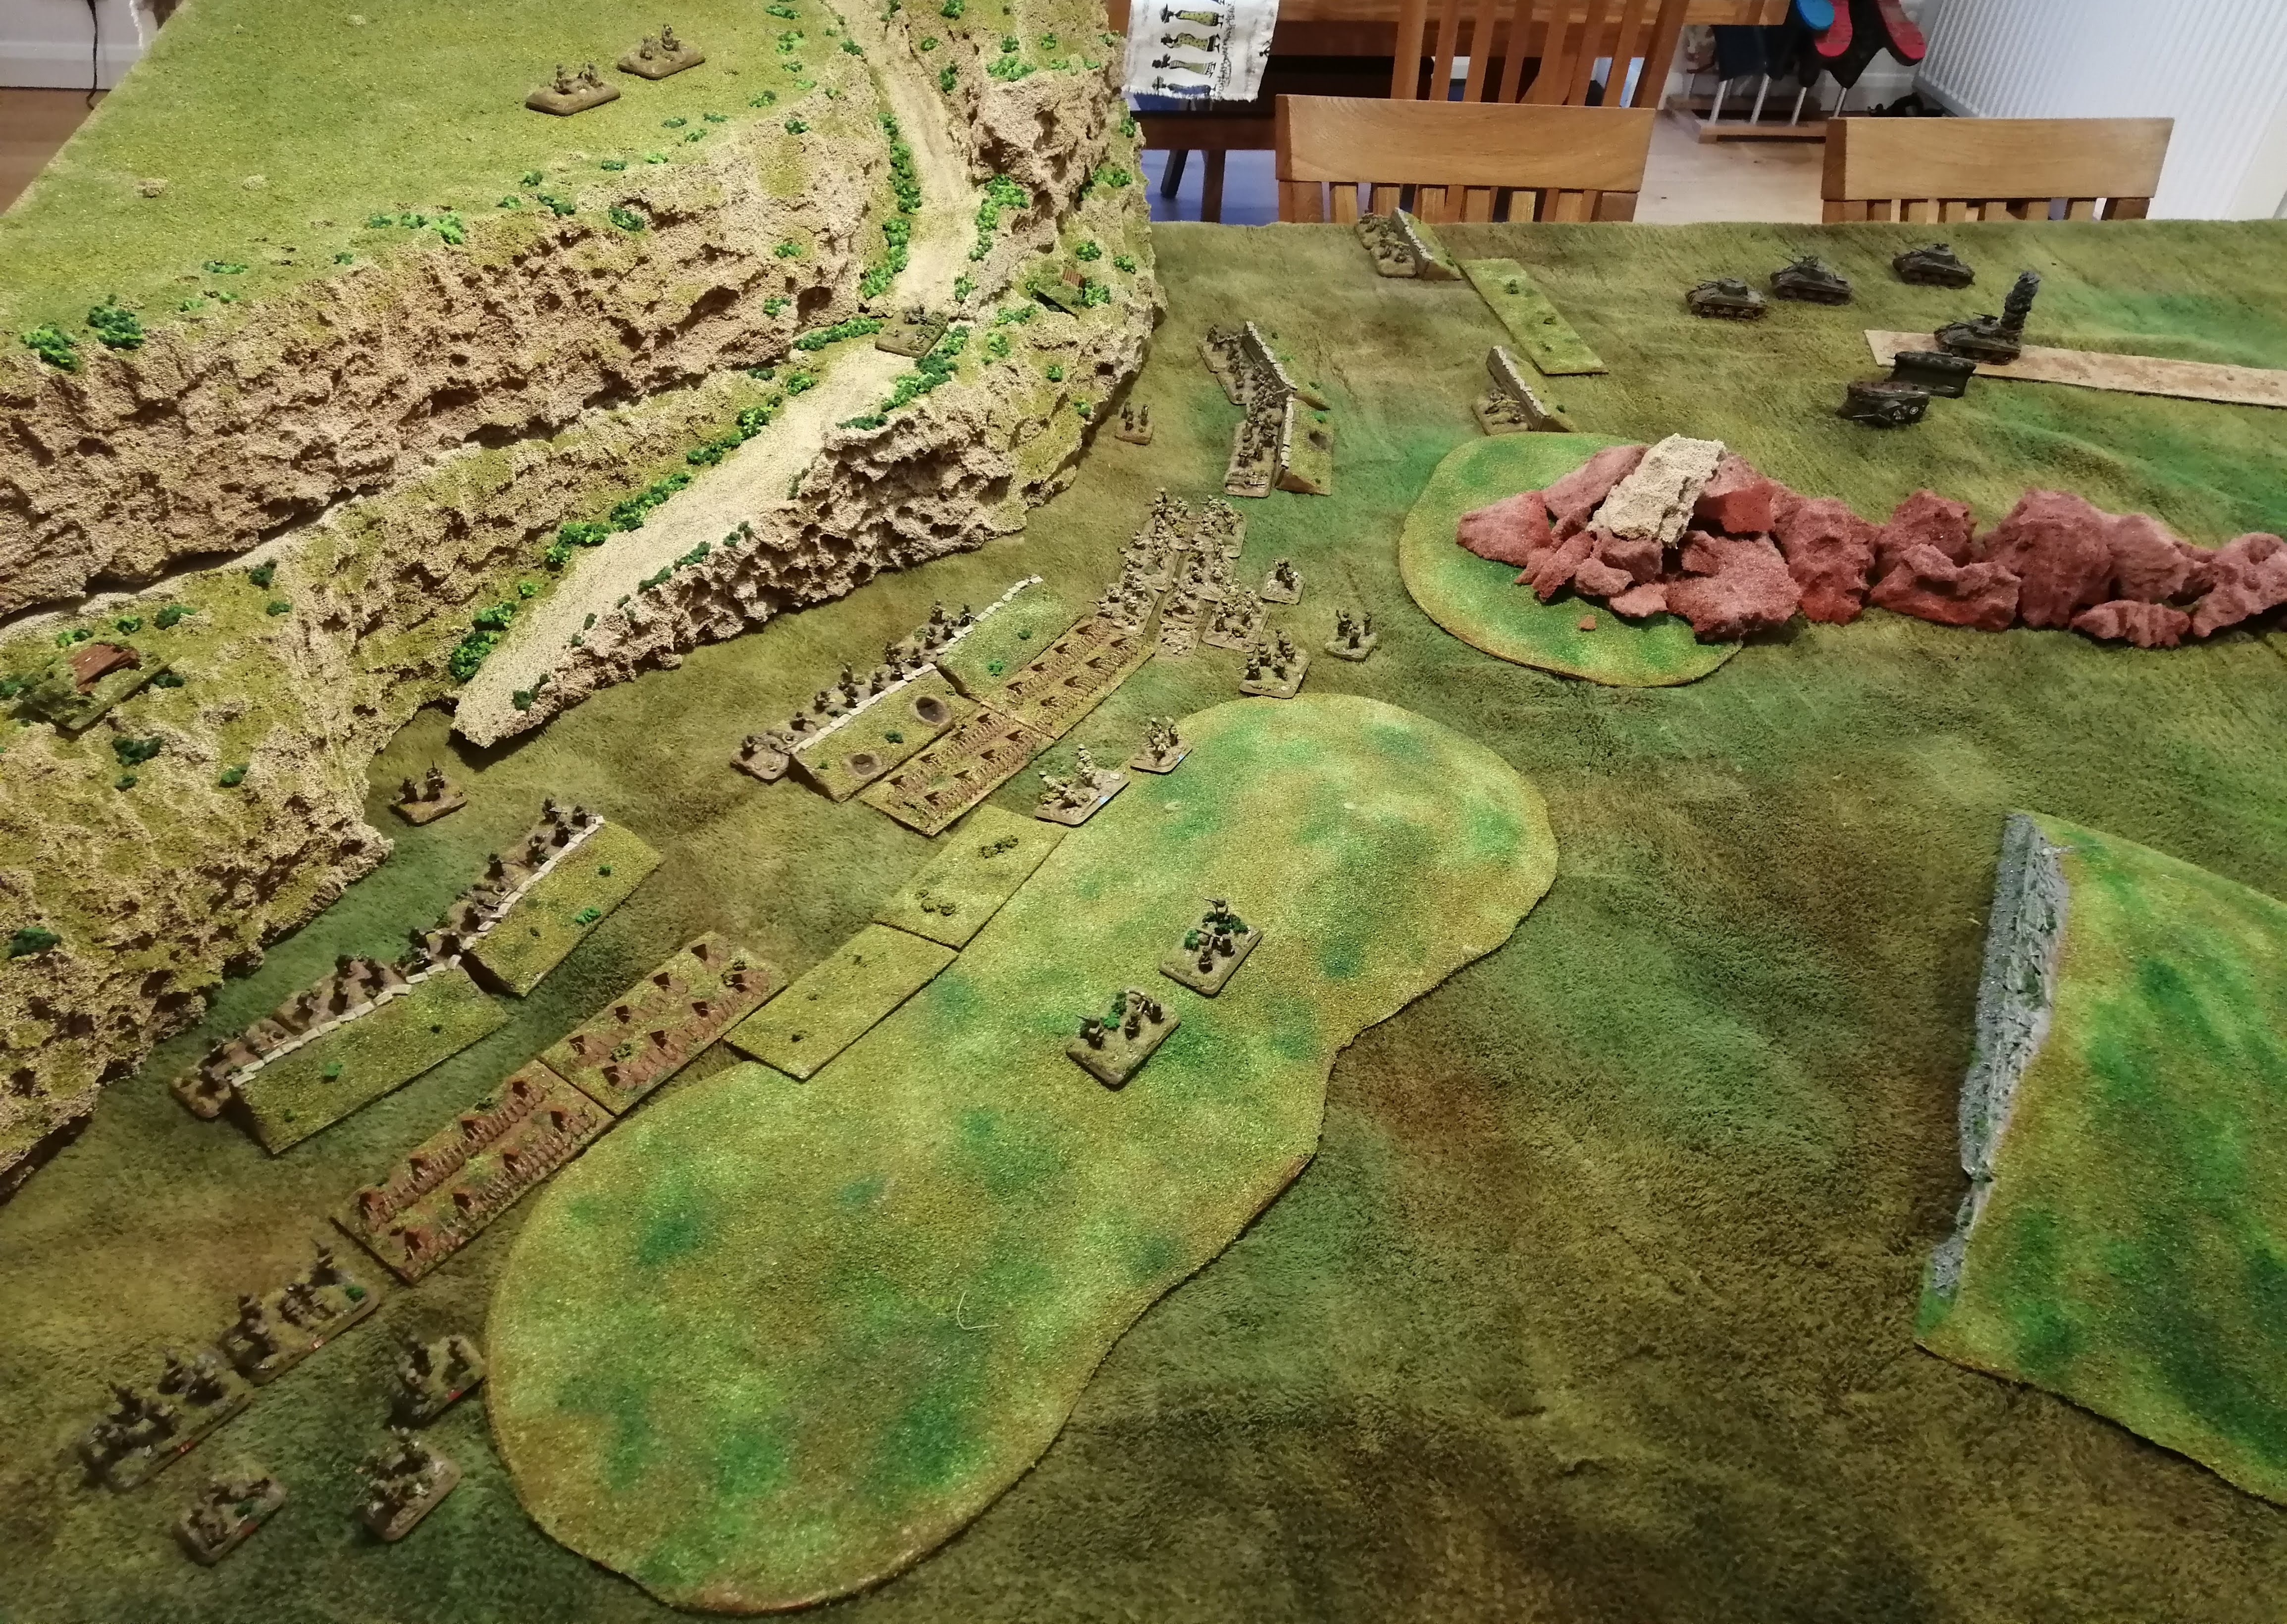
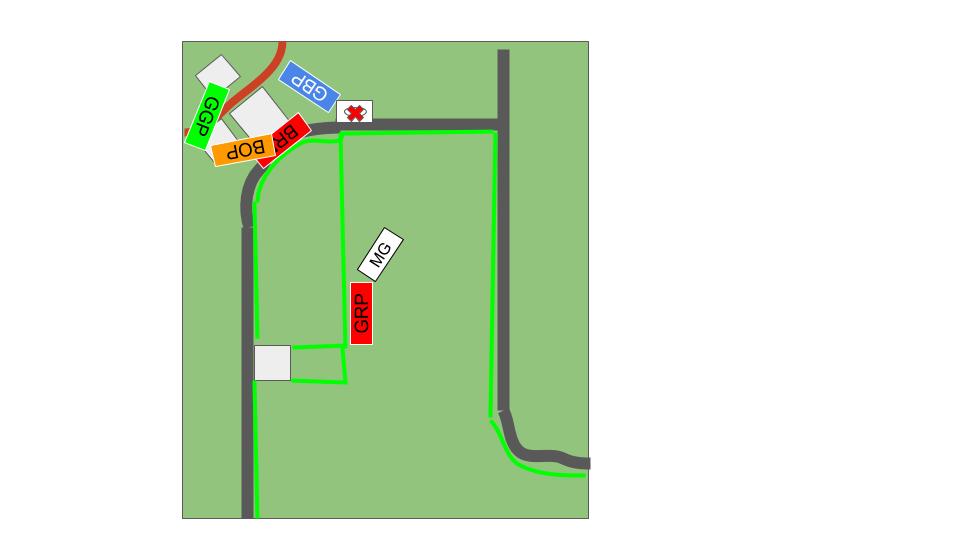
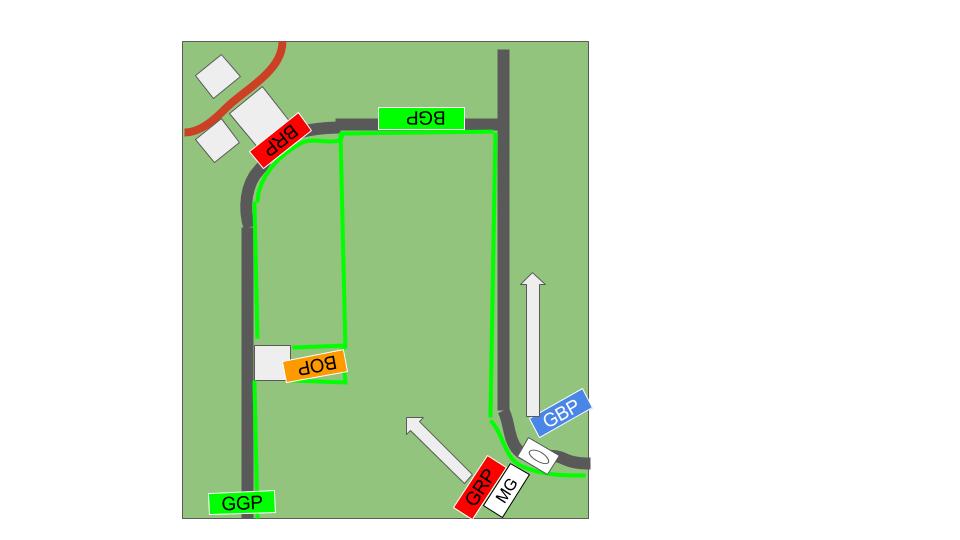
 A very rough tactical view of the battlefield
Above is a very rough tactical view of the battlefield. The Allied army are deployed on the right which, in this case, is roughly the North East. The map key is as follows,
Brown area – hills
Blue area – Rapido River
Grey lines – roads
Black squares – buildings and walled areas
OOOOO – barbed wire
XXXXX – Tank traps
red dots – possible deployment areas for the Germans
purple dots – possible minefields
Red donut – Allied objective
NRP – New Zealand Red Platoon
NOP – New Zealand Orange Platoon etc
T1, T2, T3 – Tank Platoons
Eng – Engineers, UC – Universal Carriers, Mo – Mortars
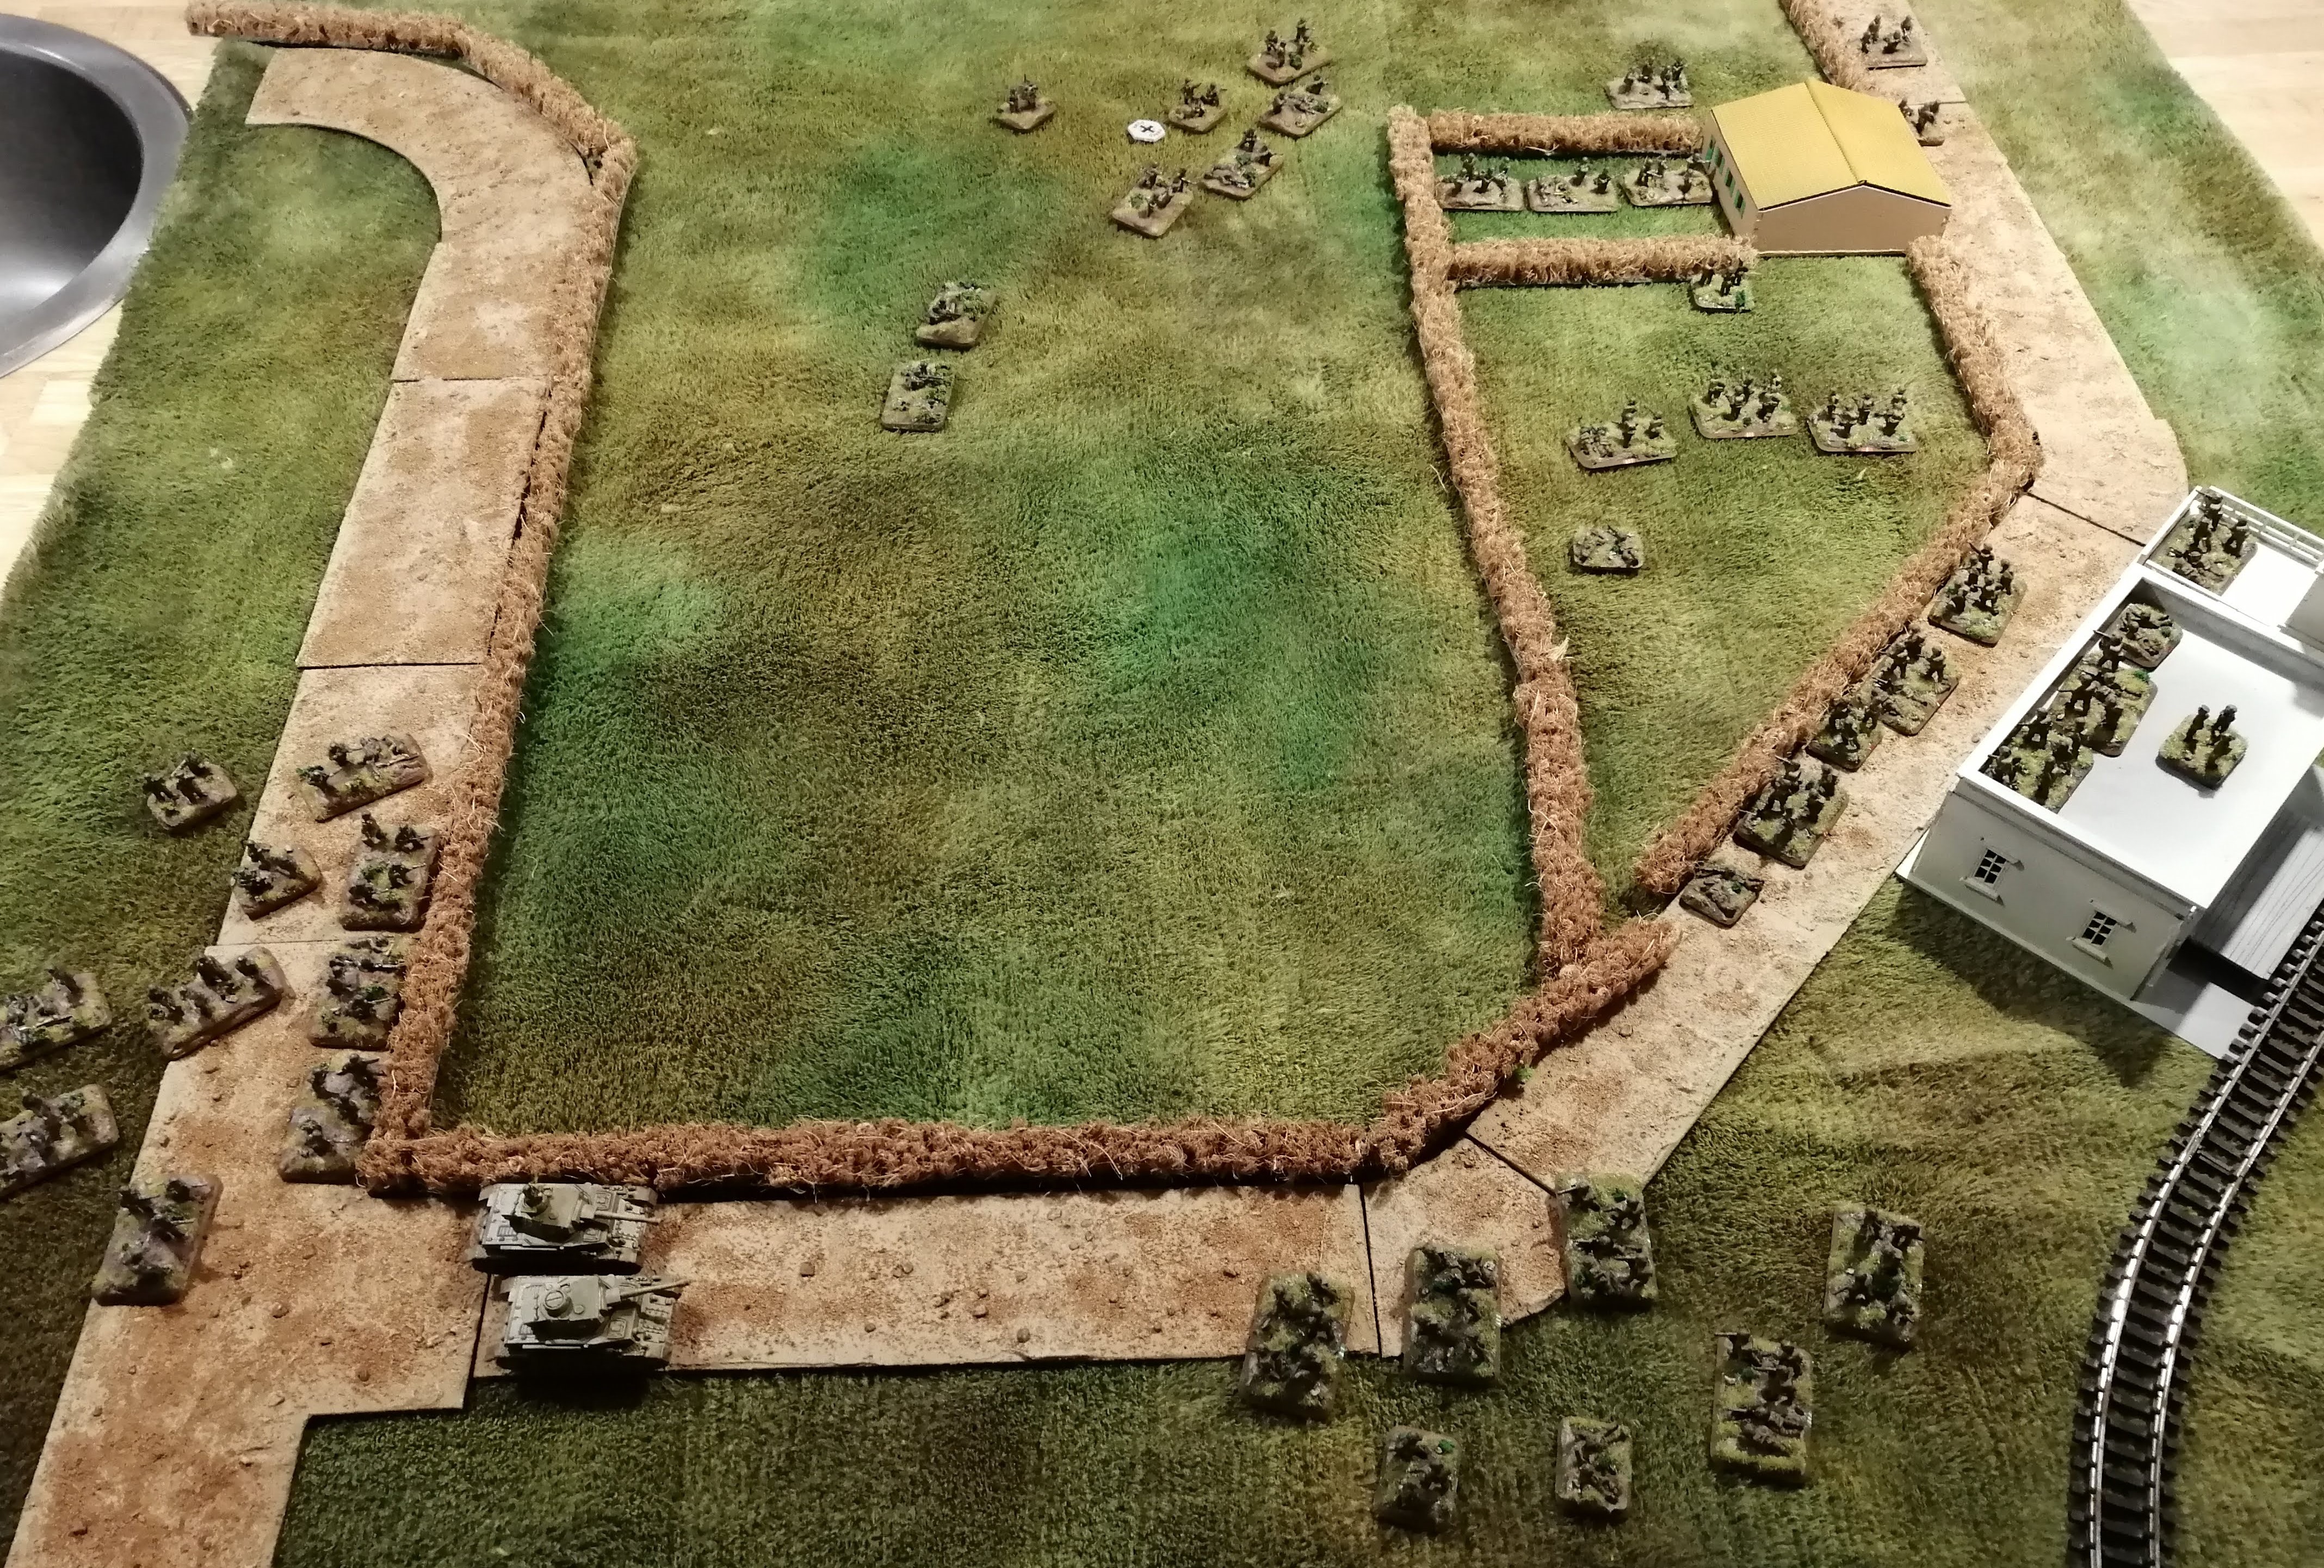
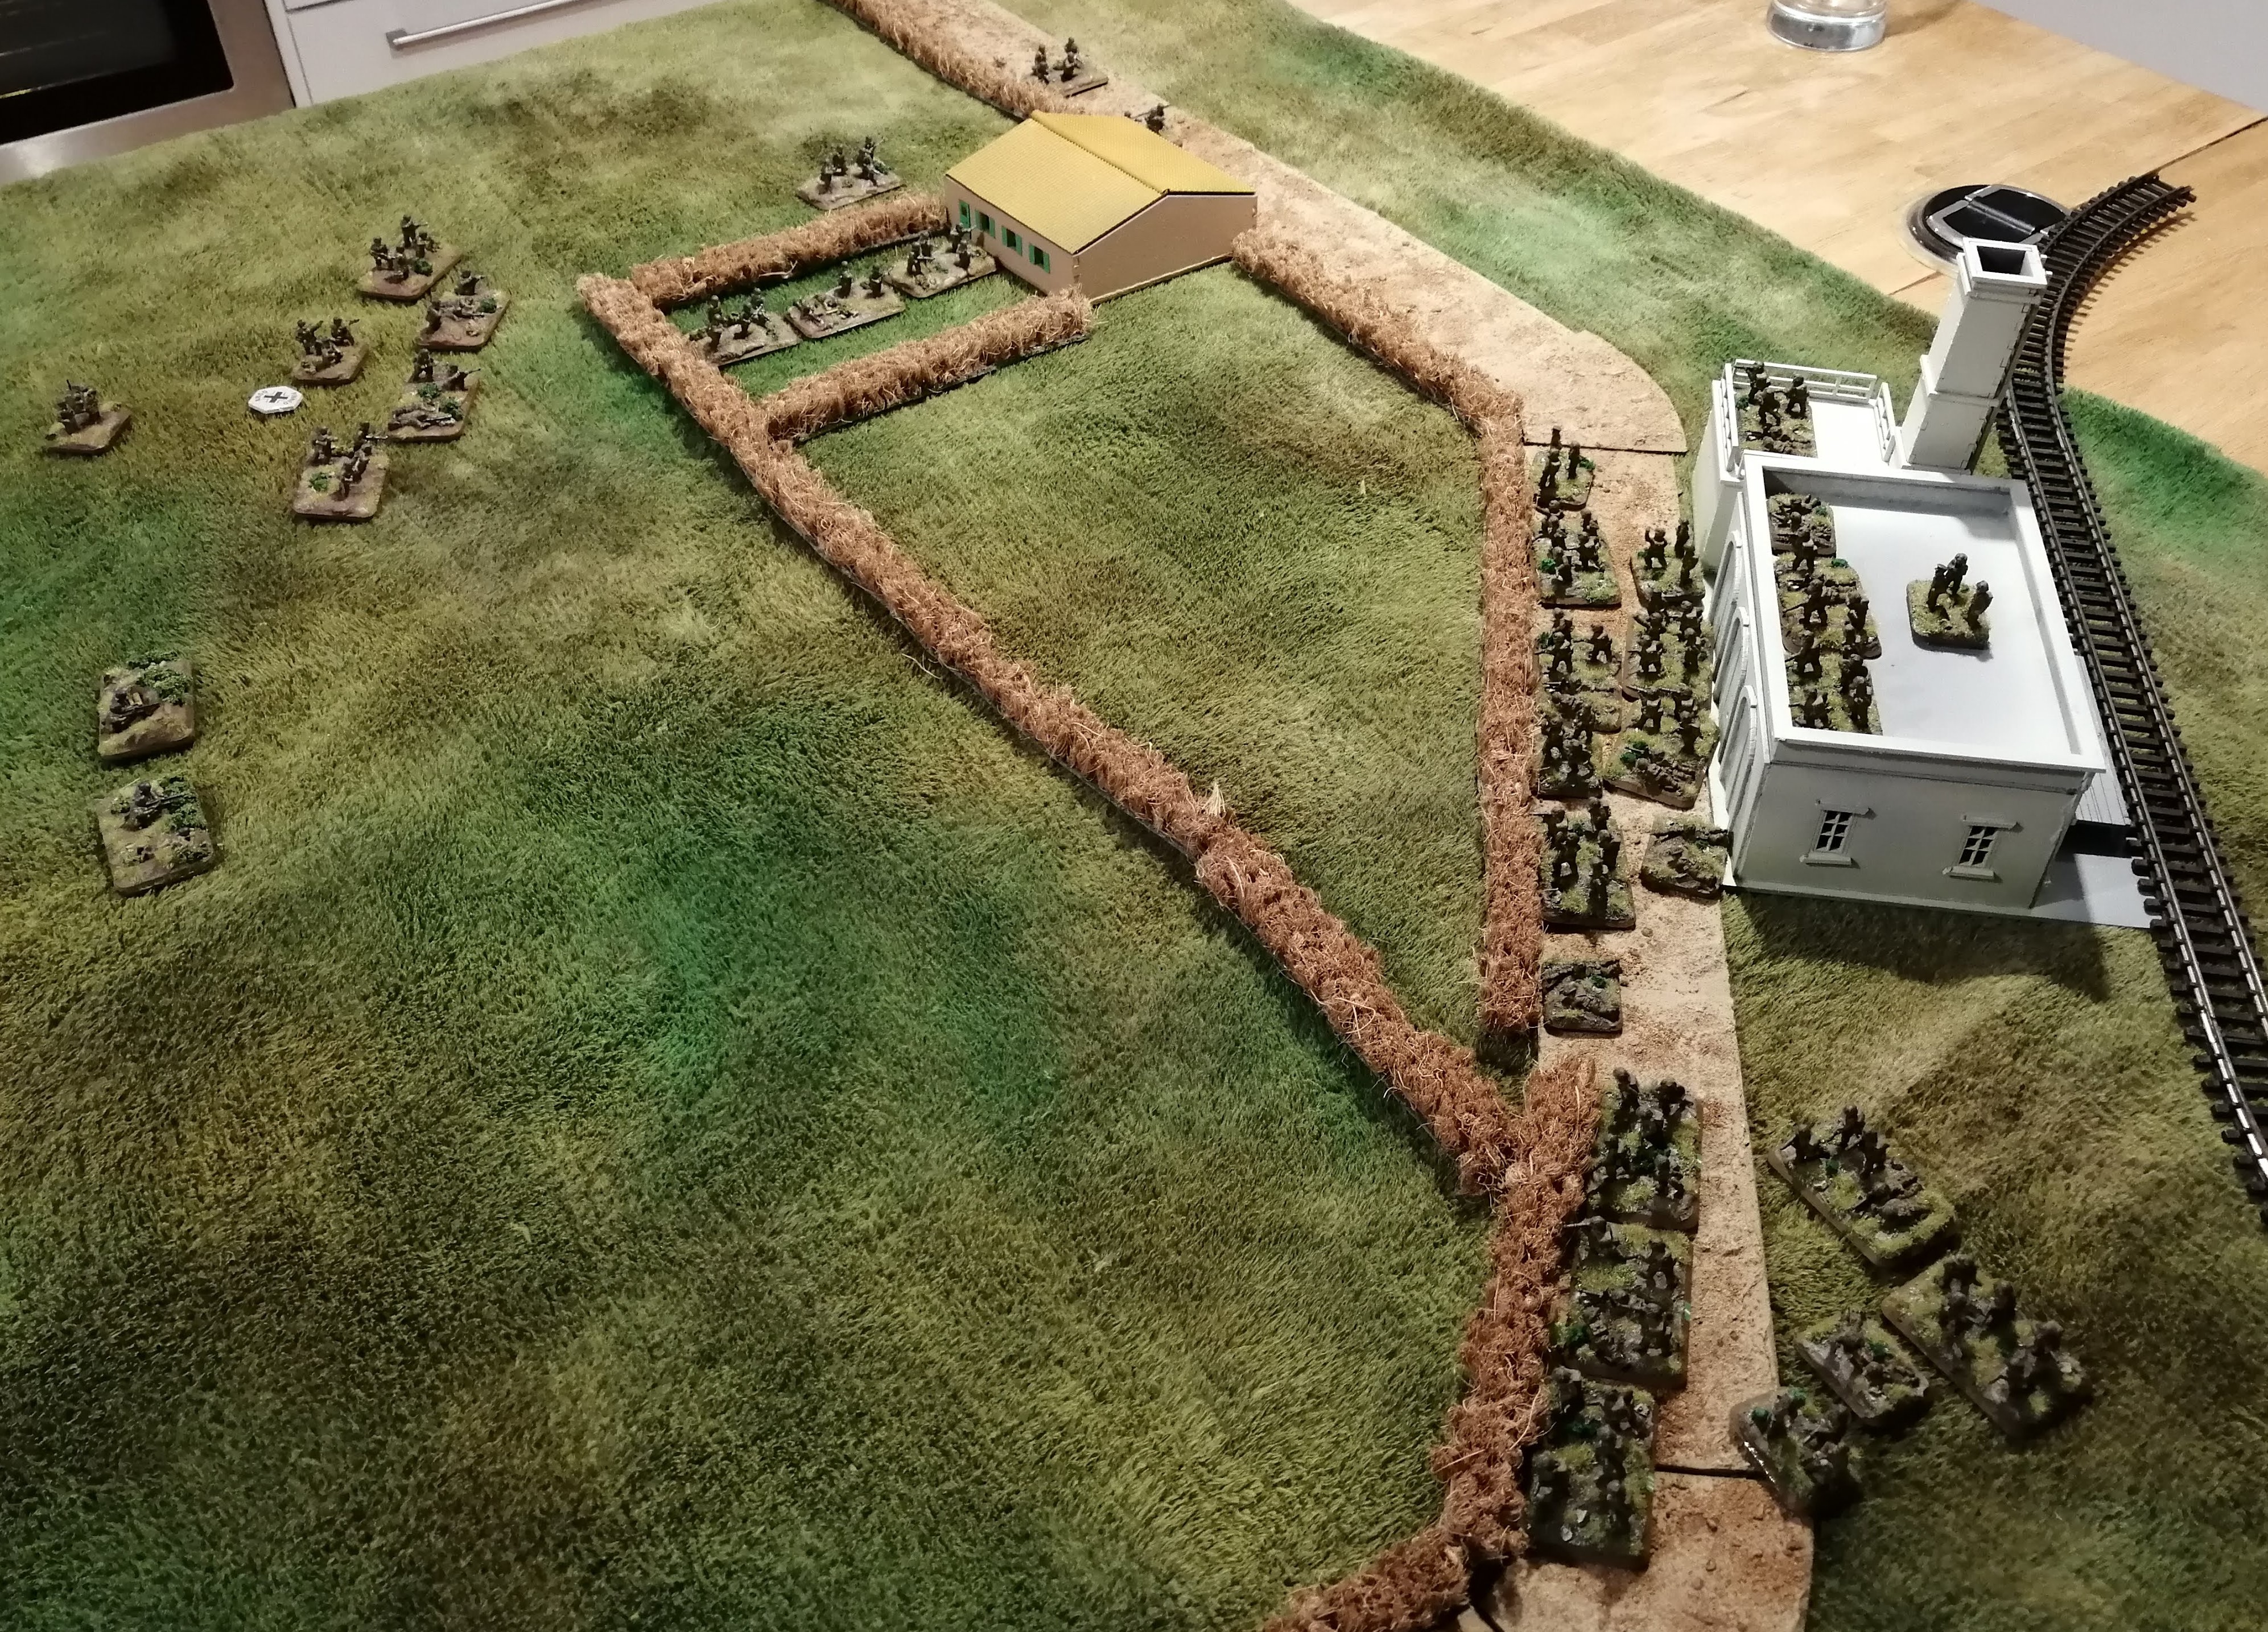
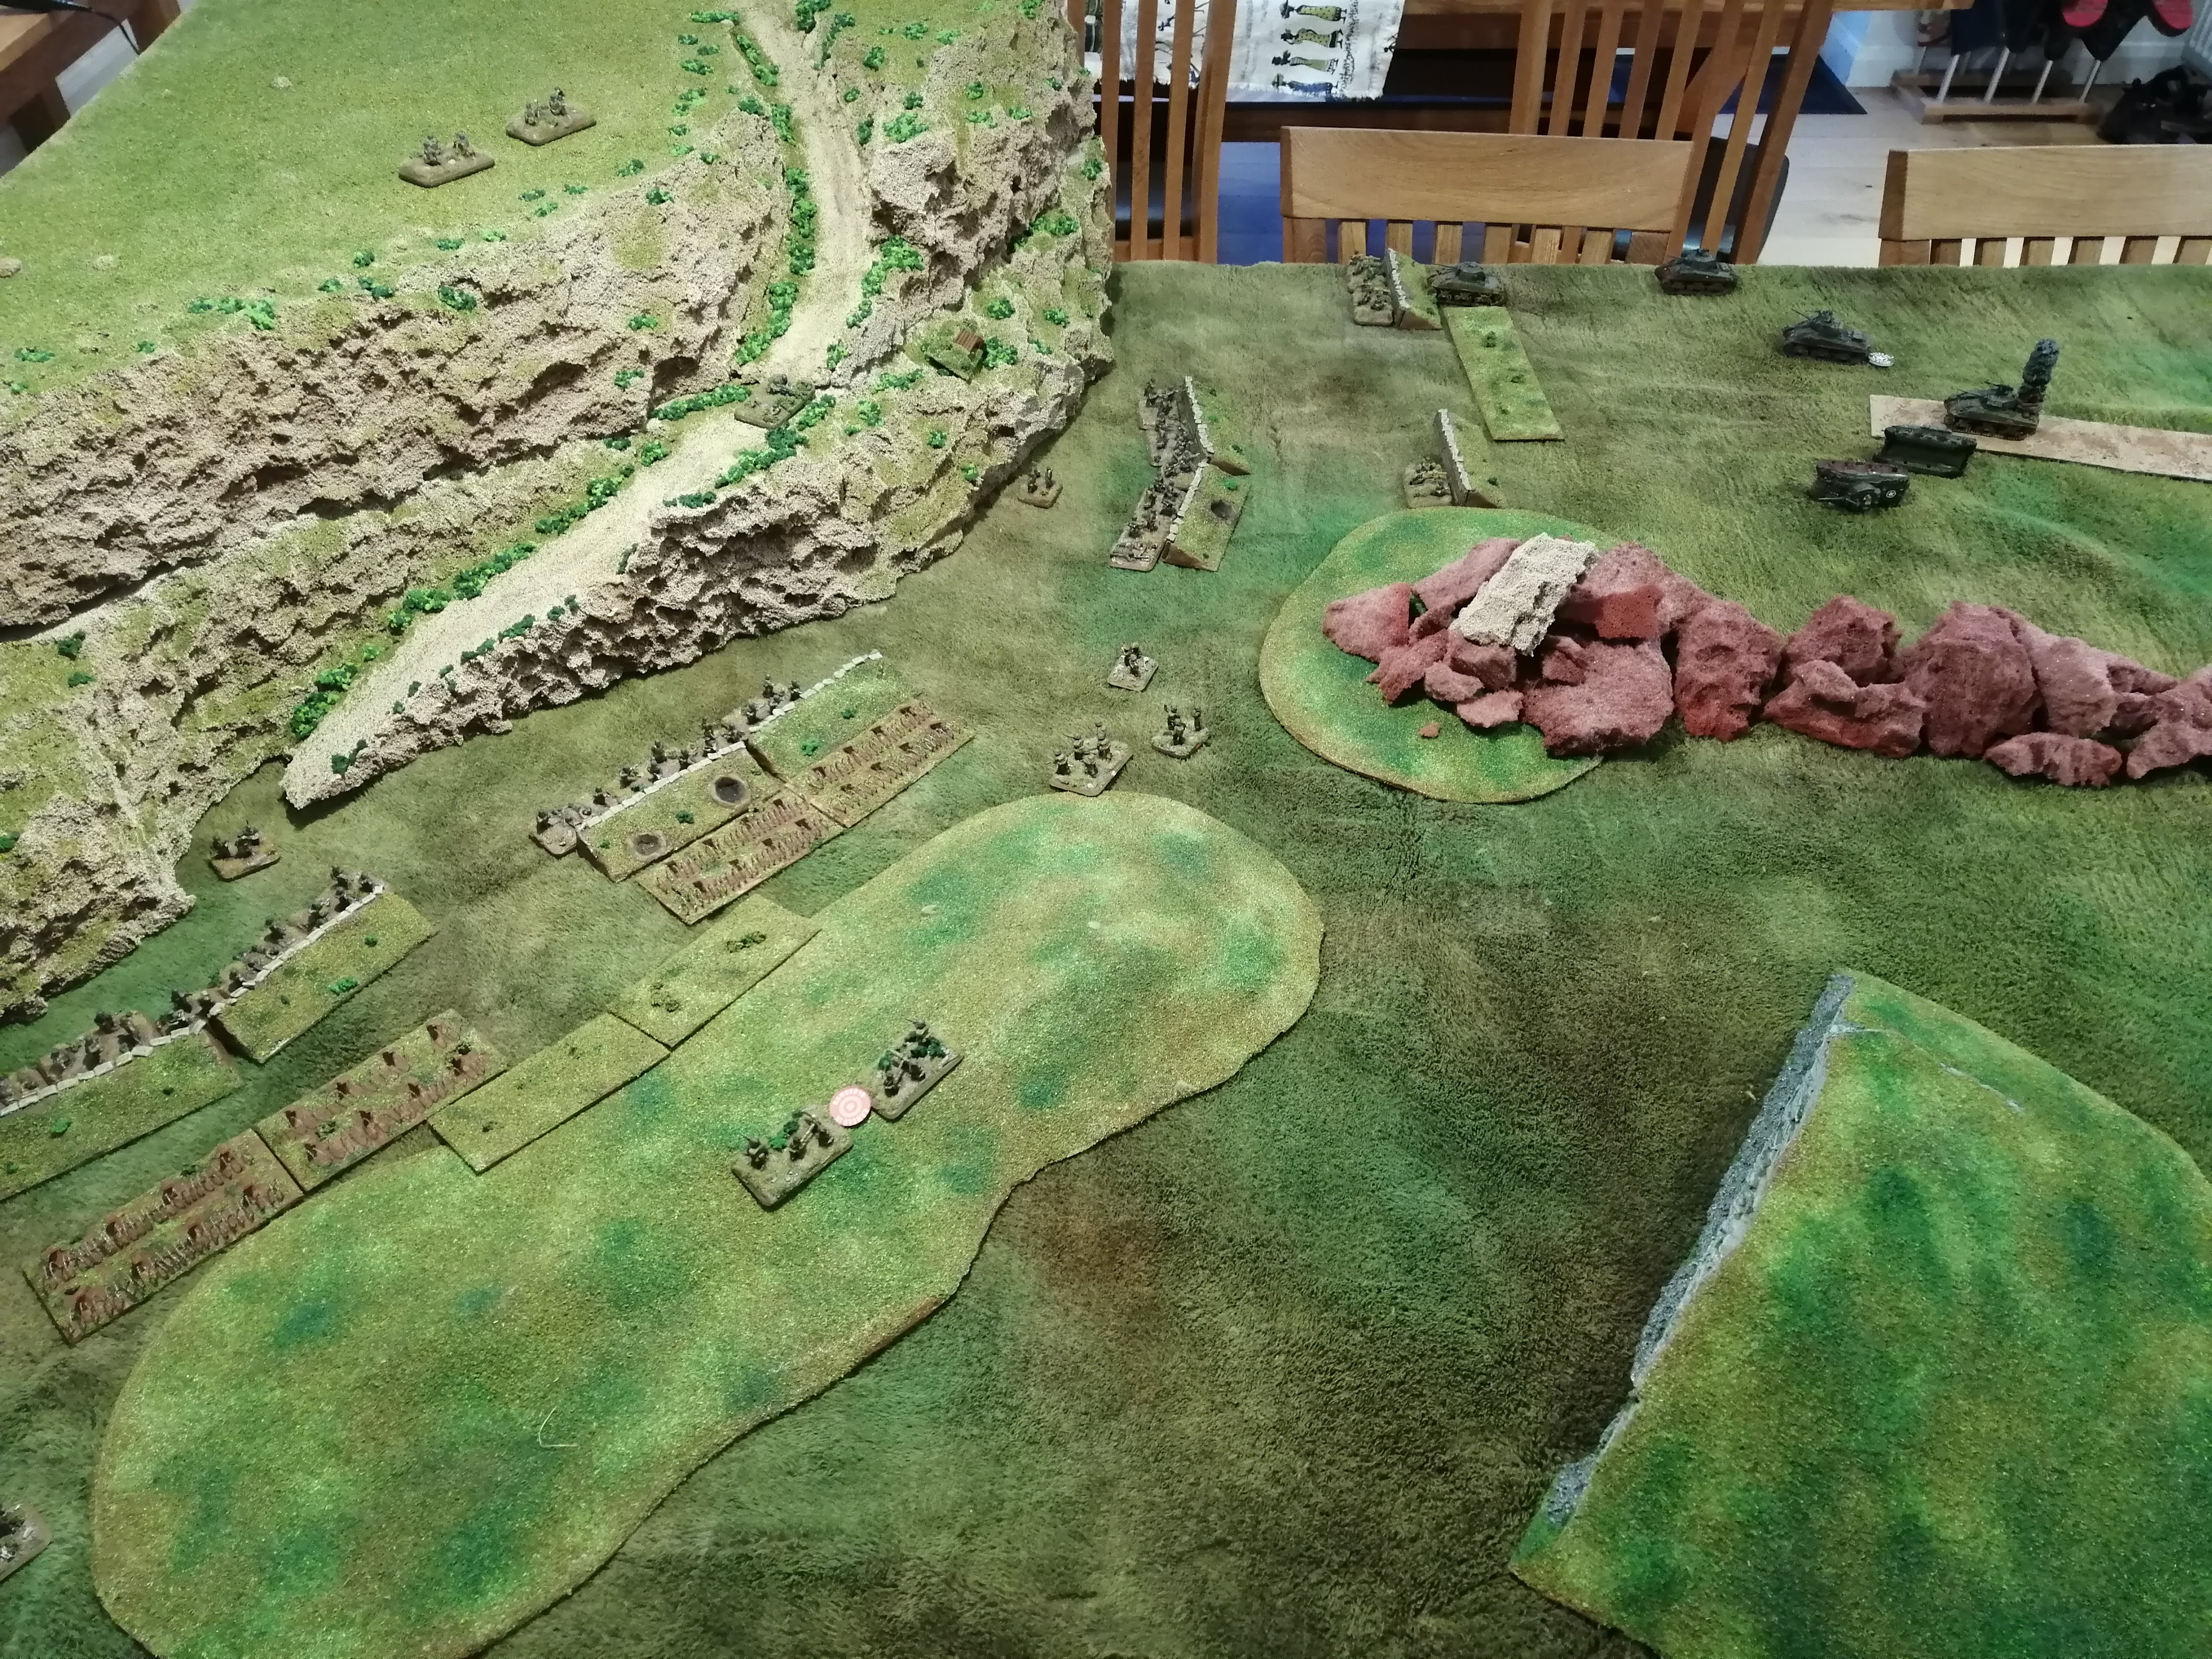
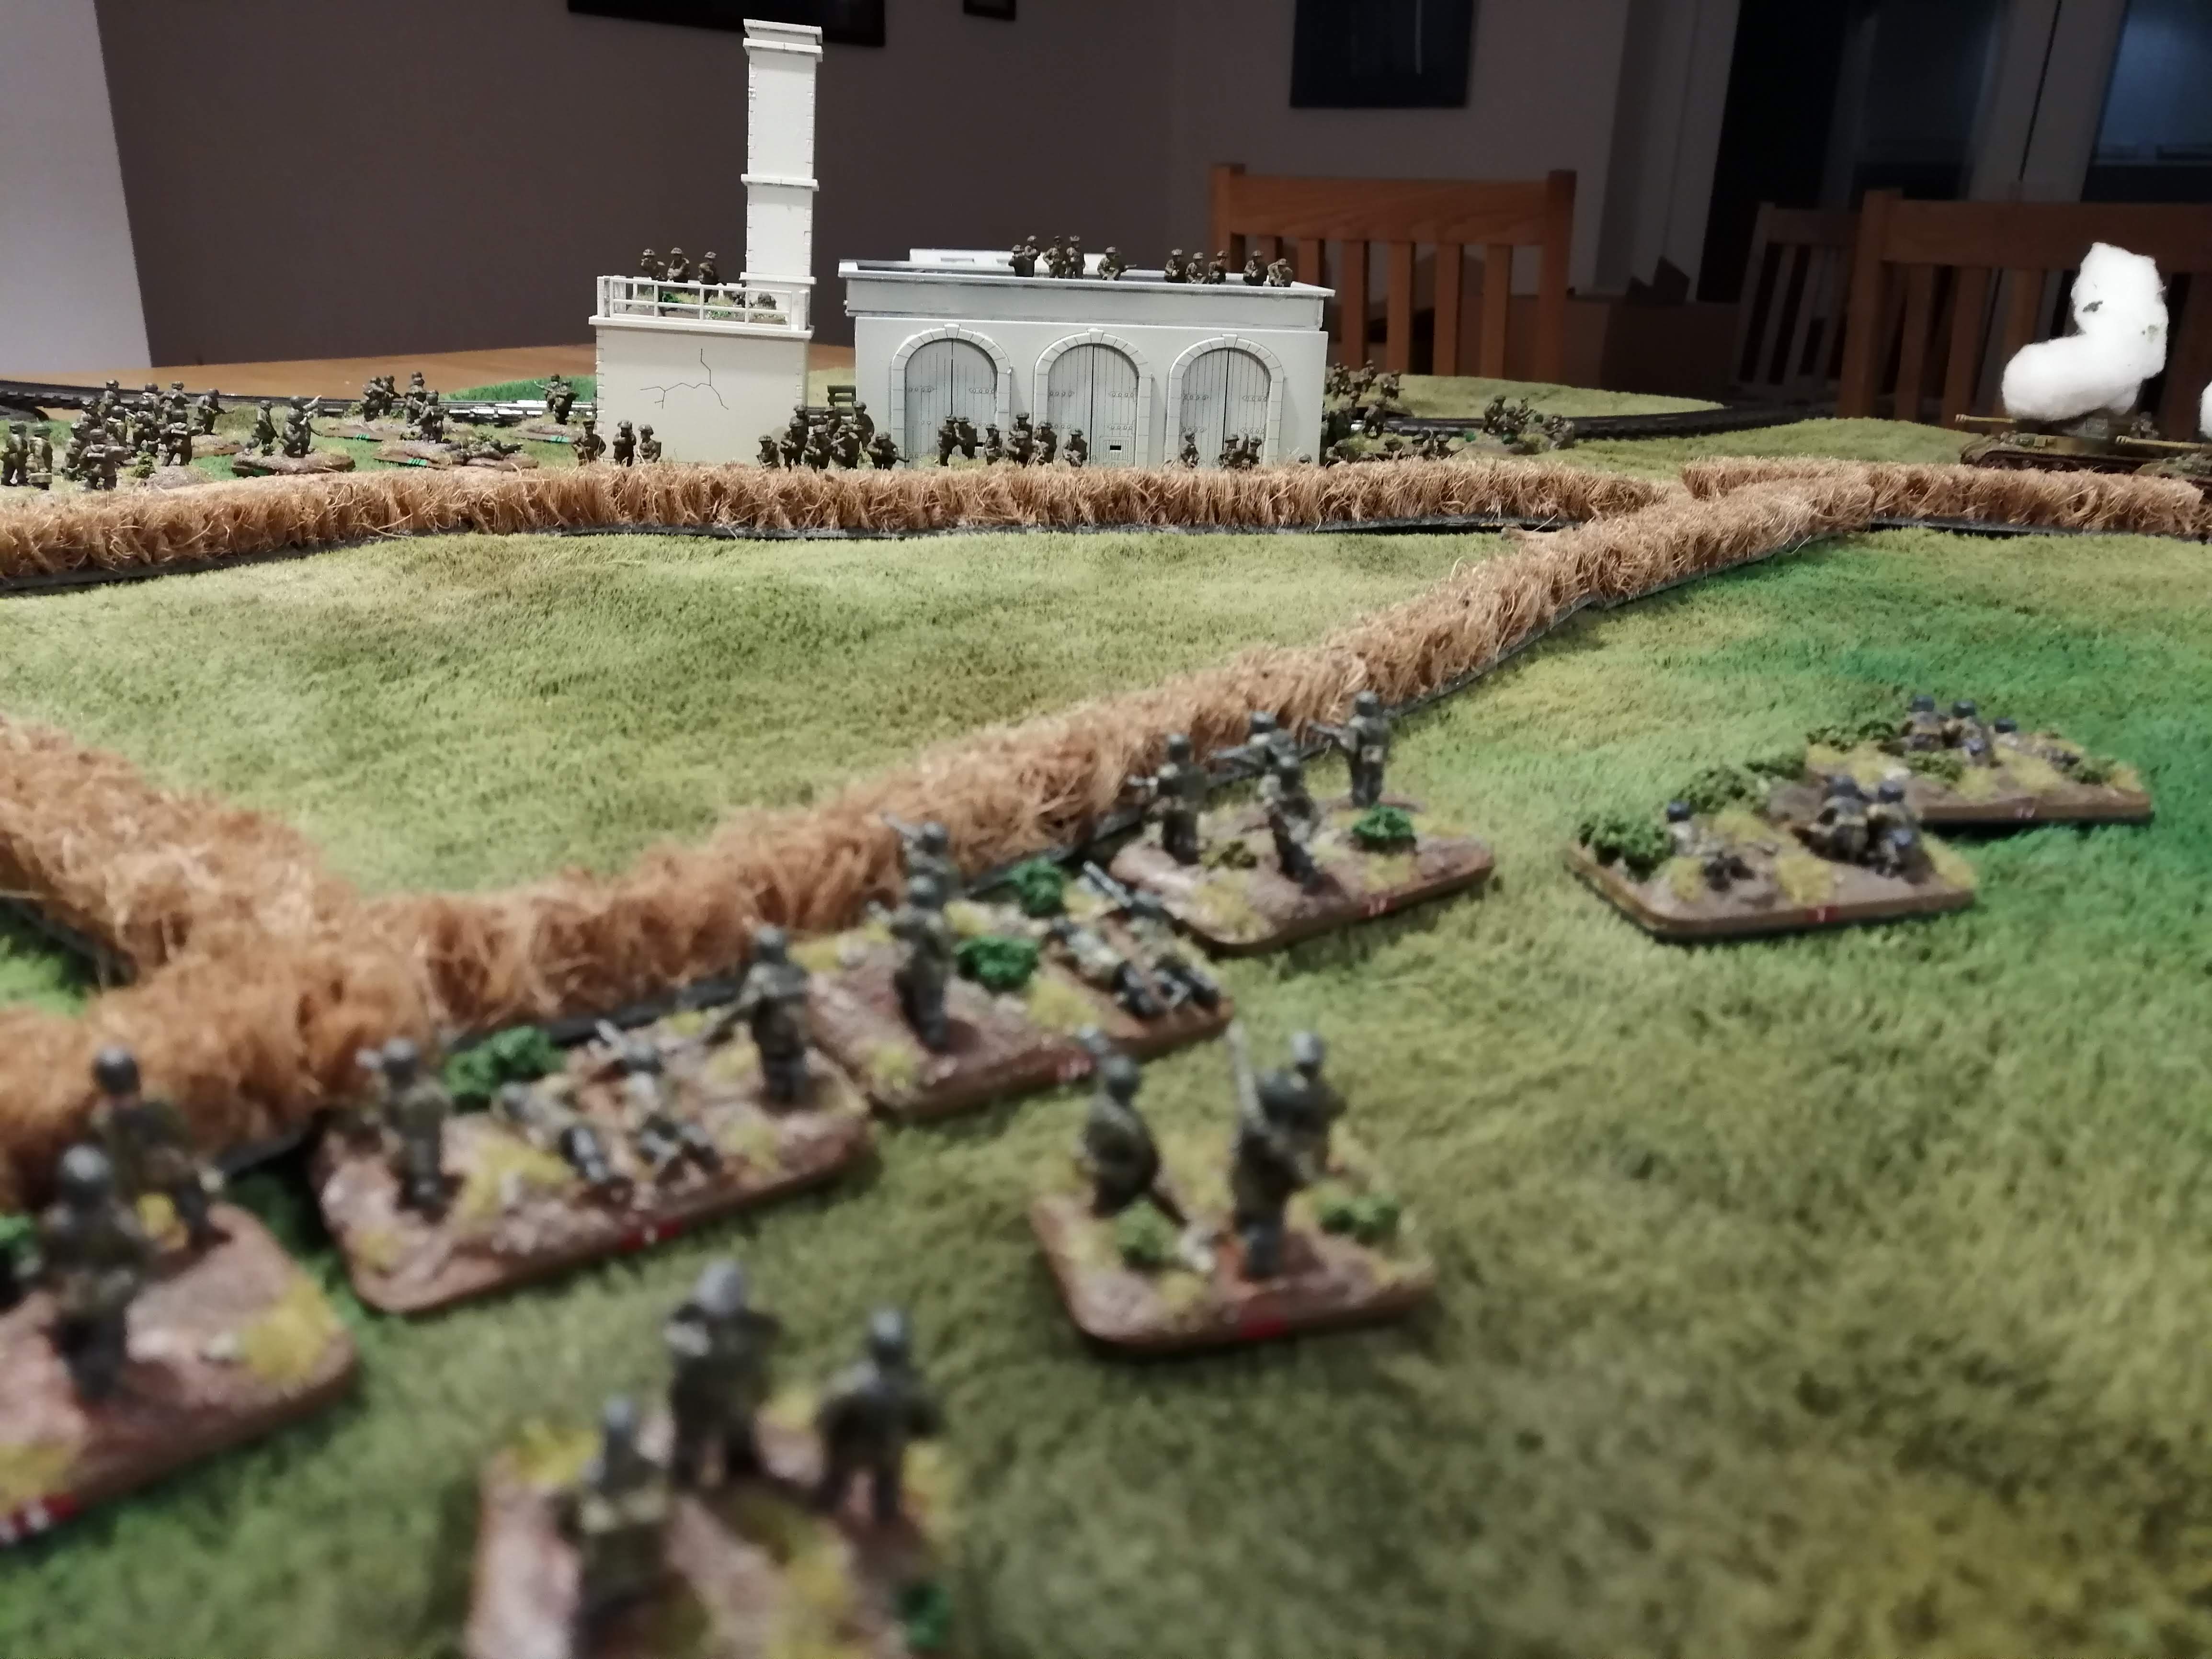
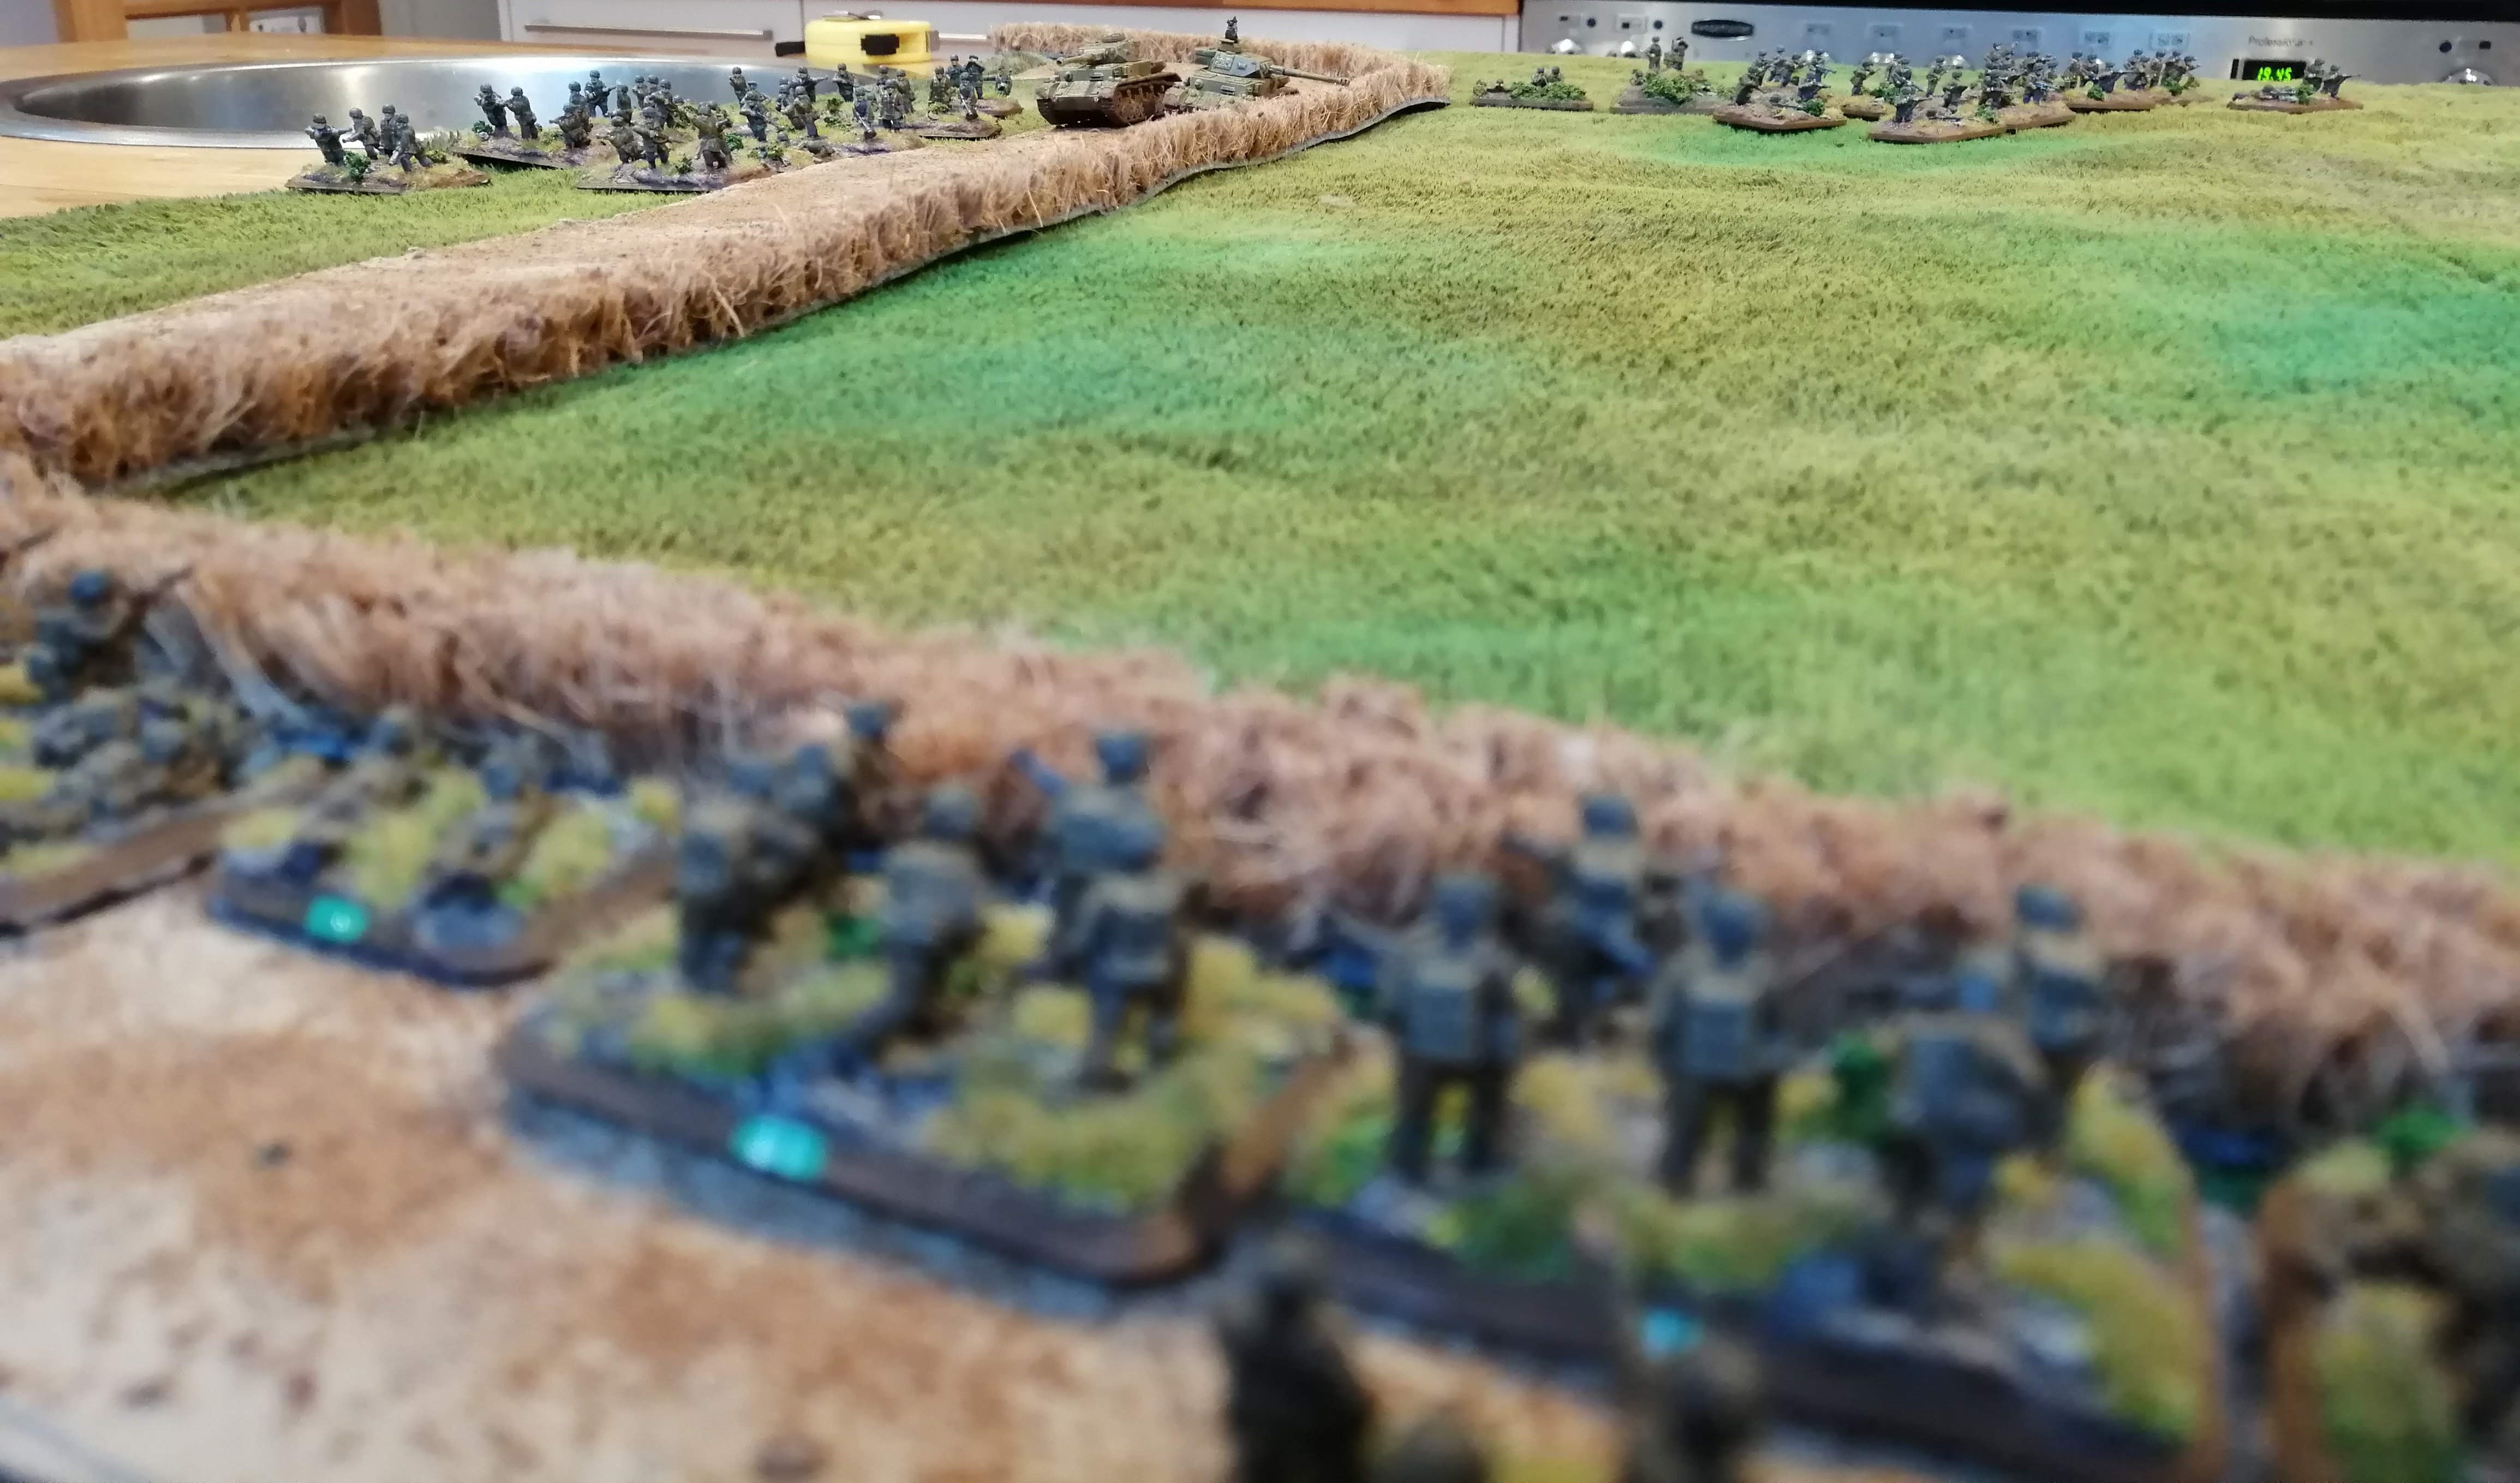
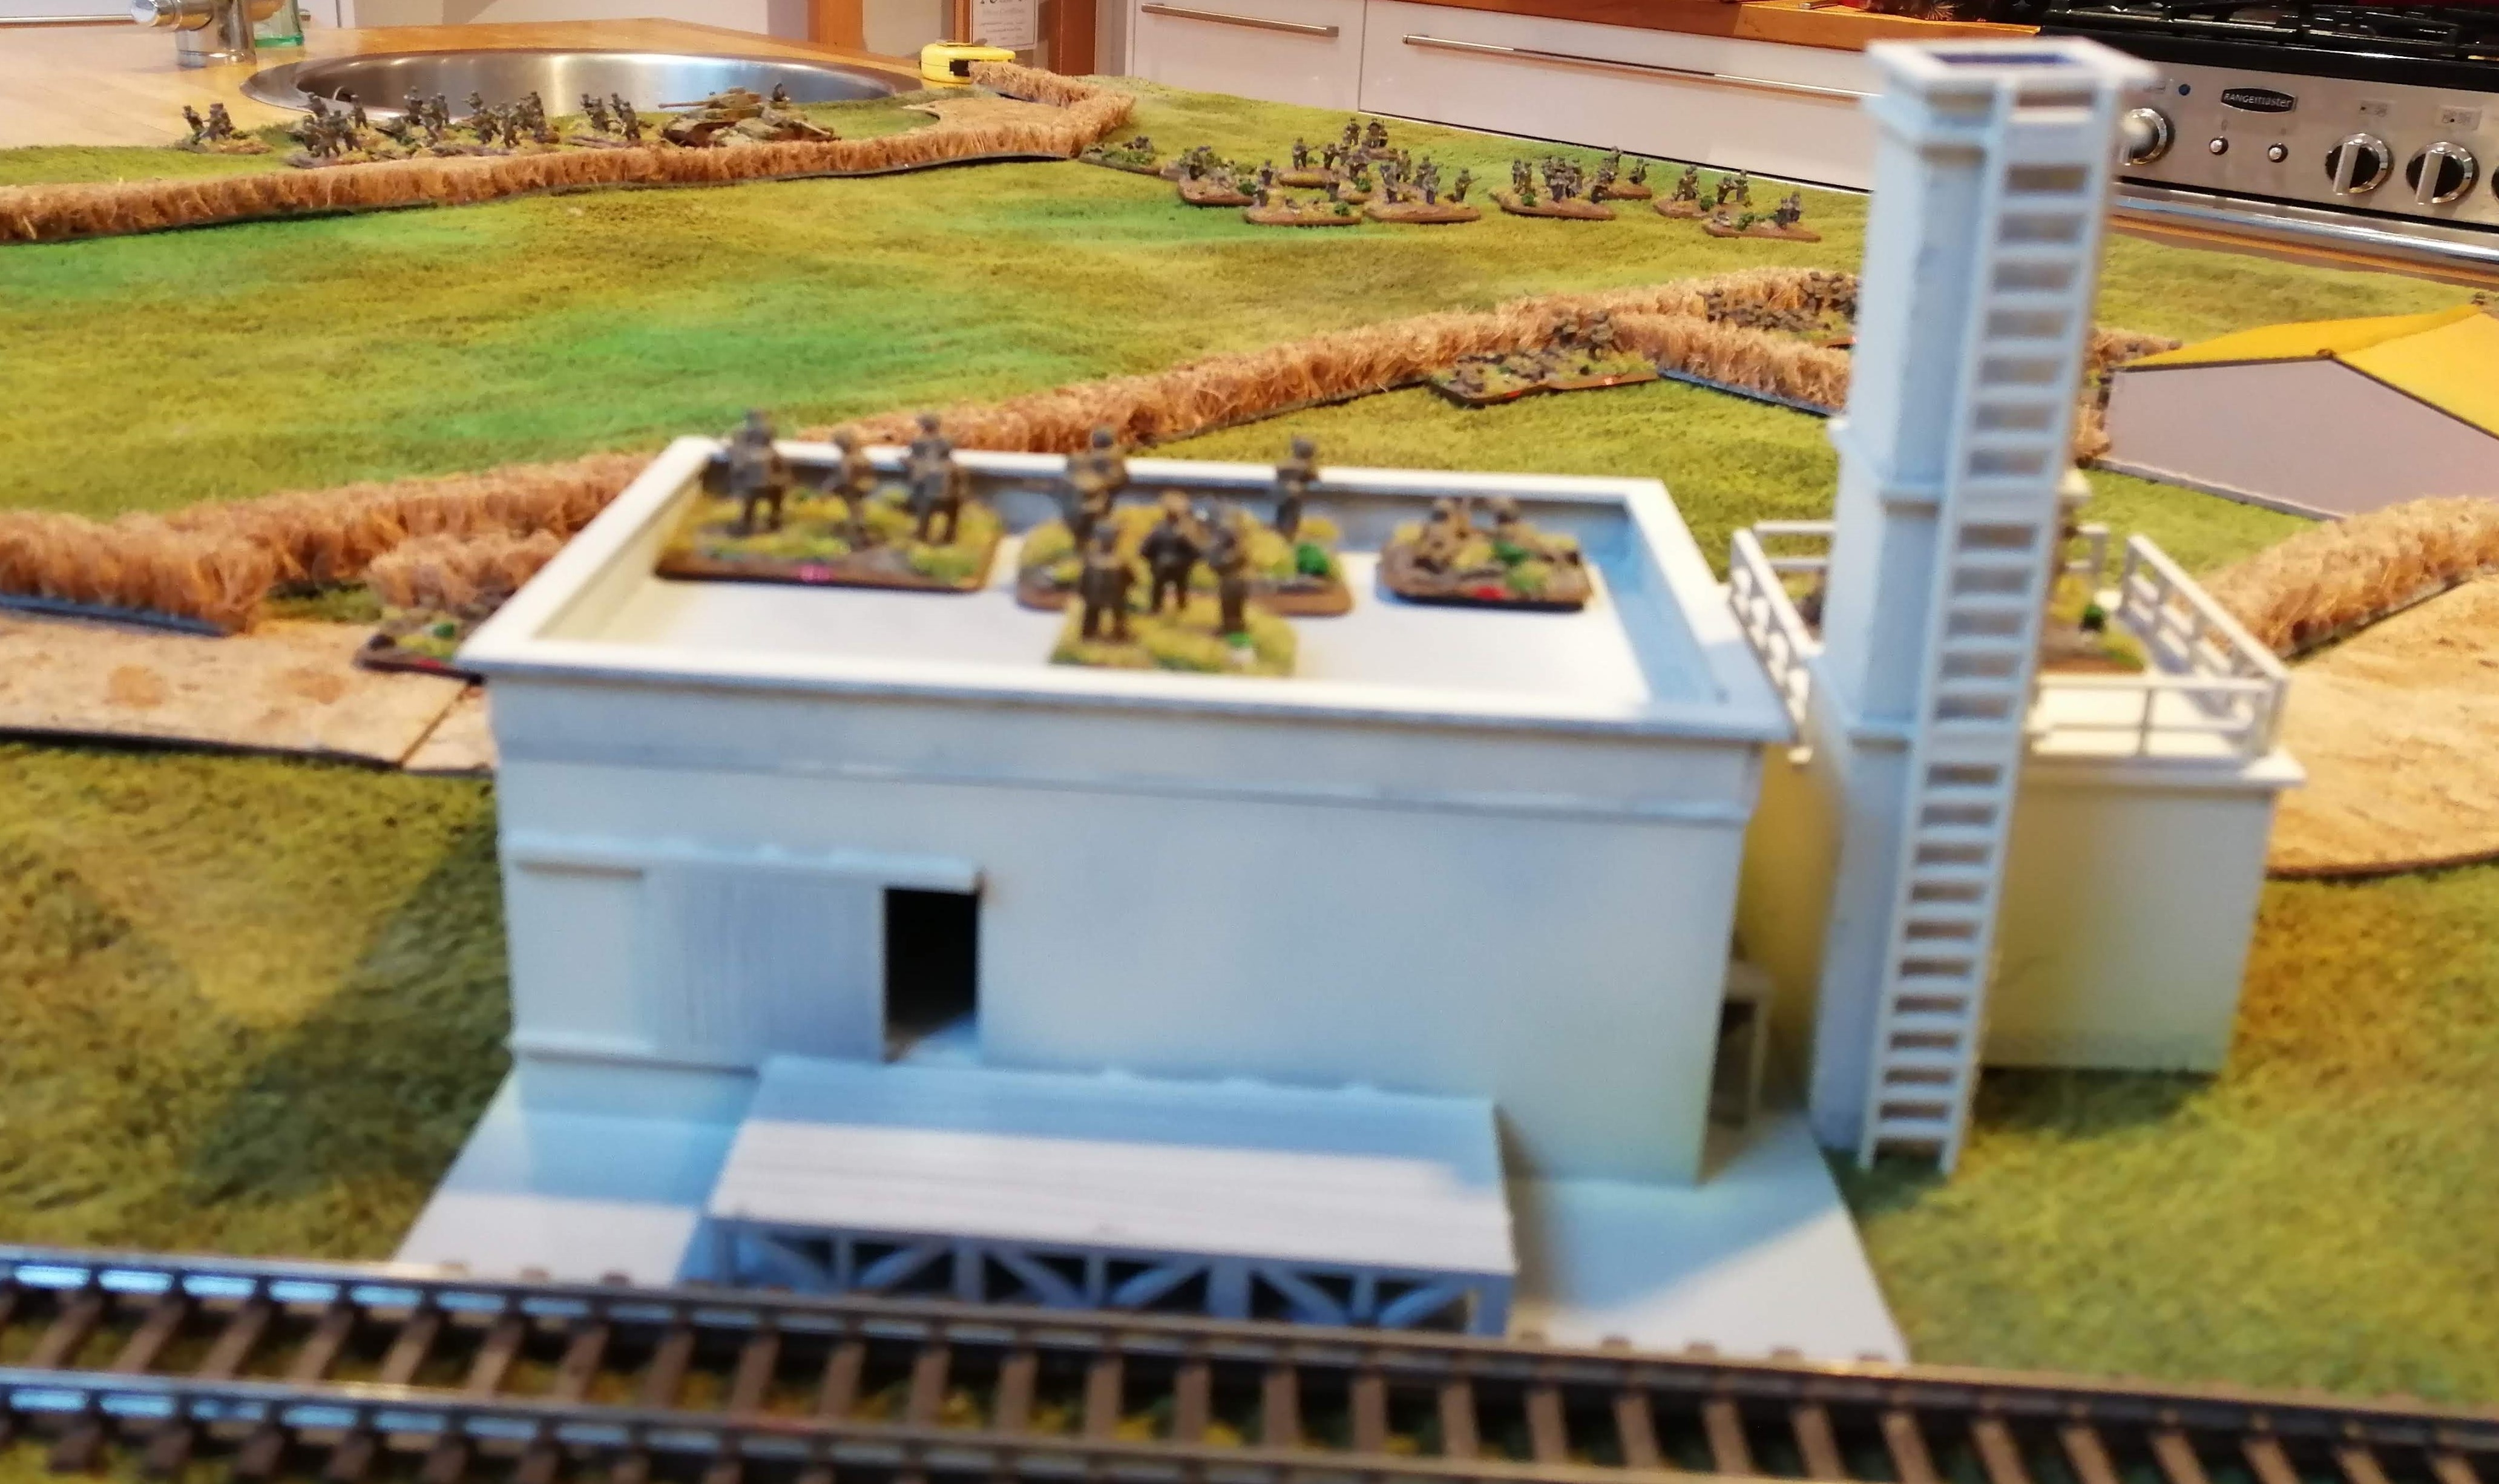
 The German end of the battlefied
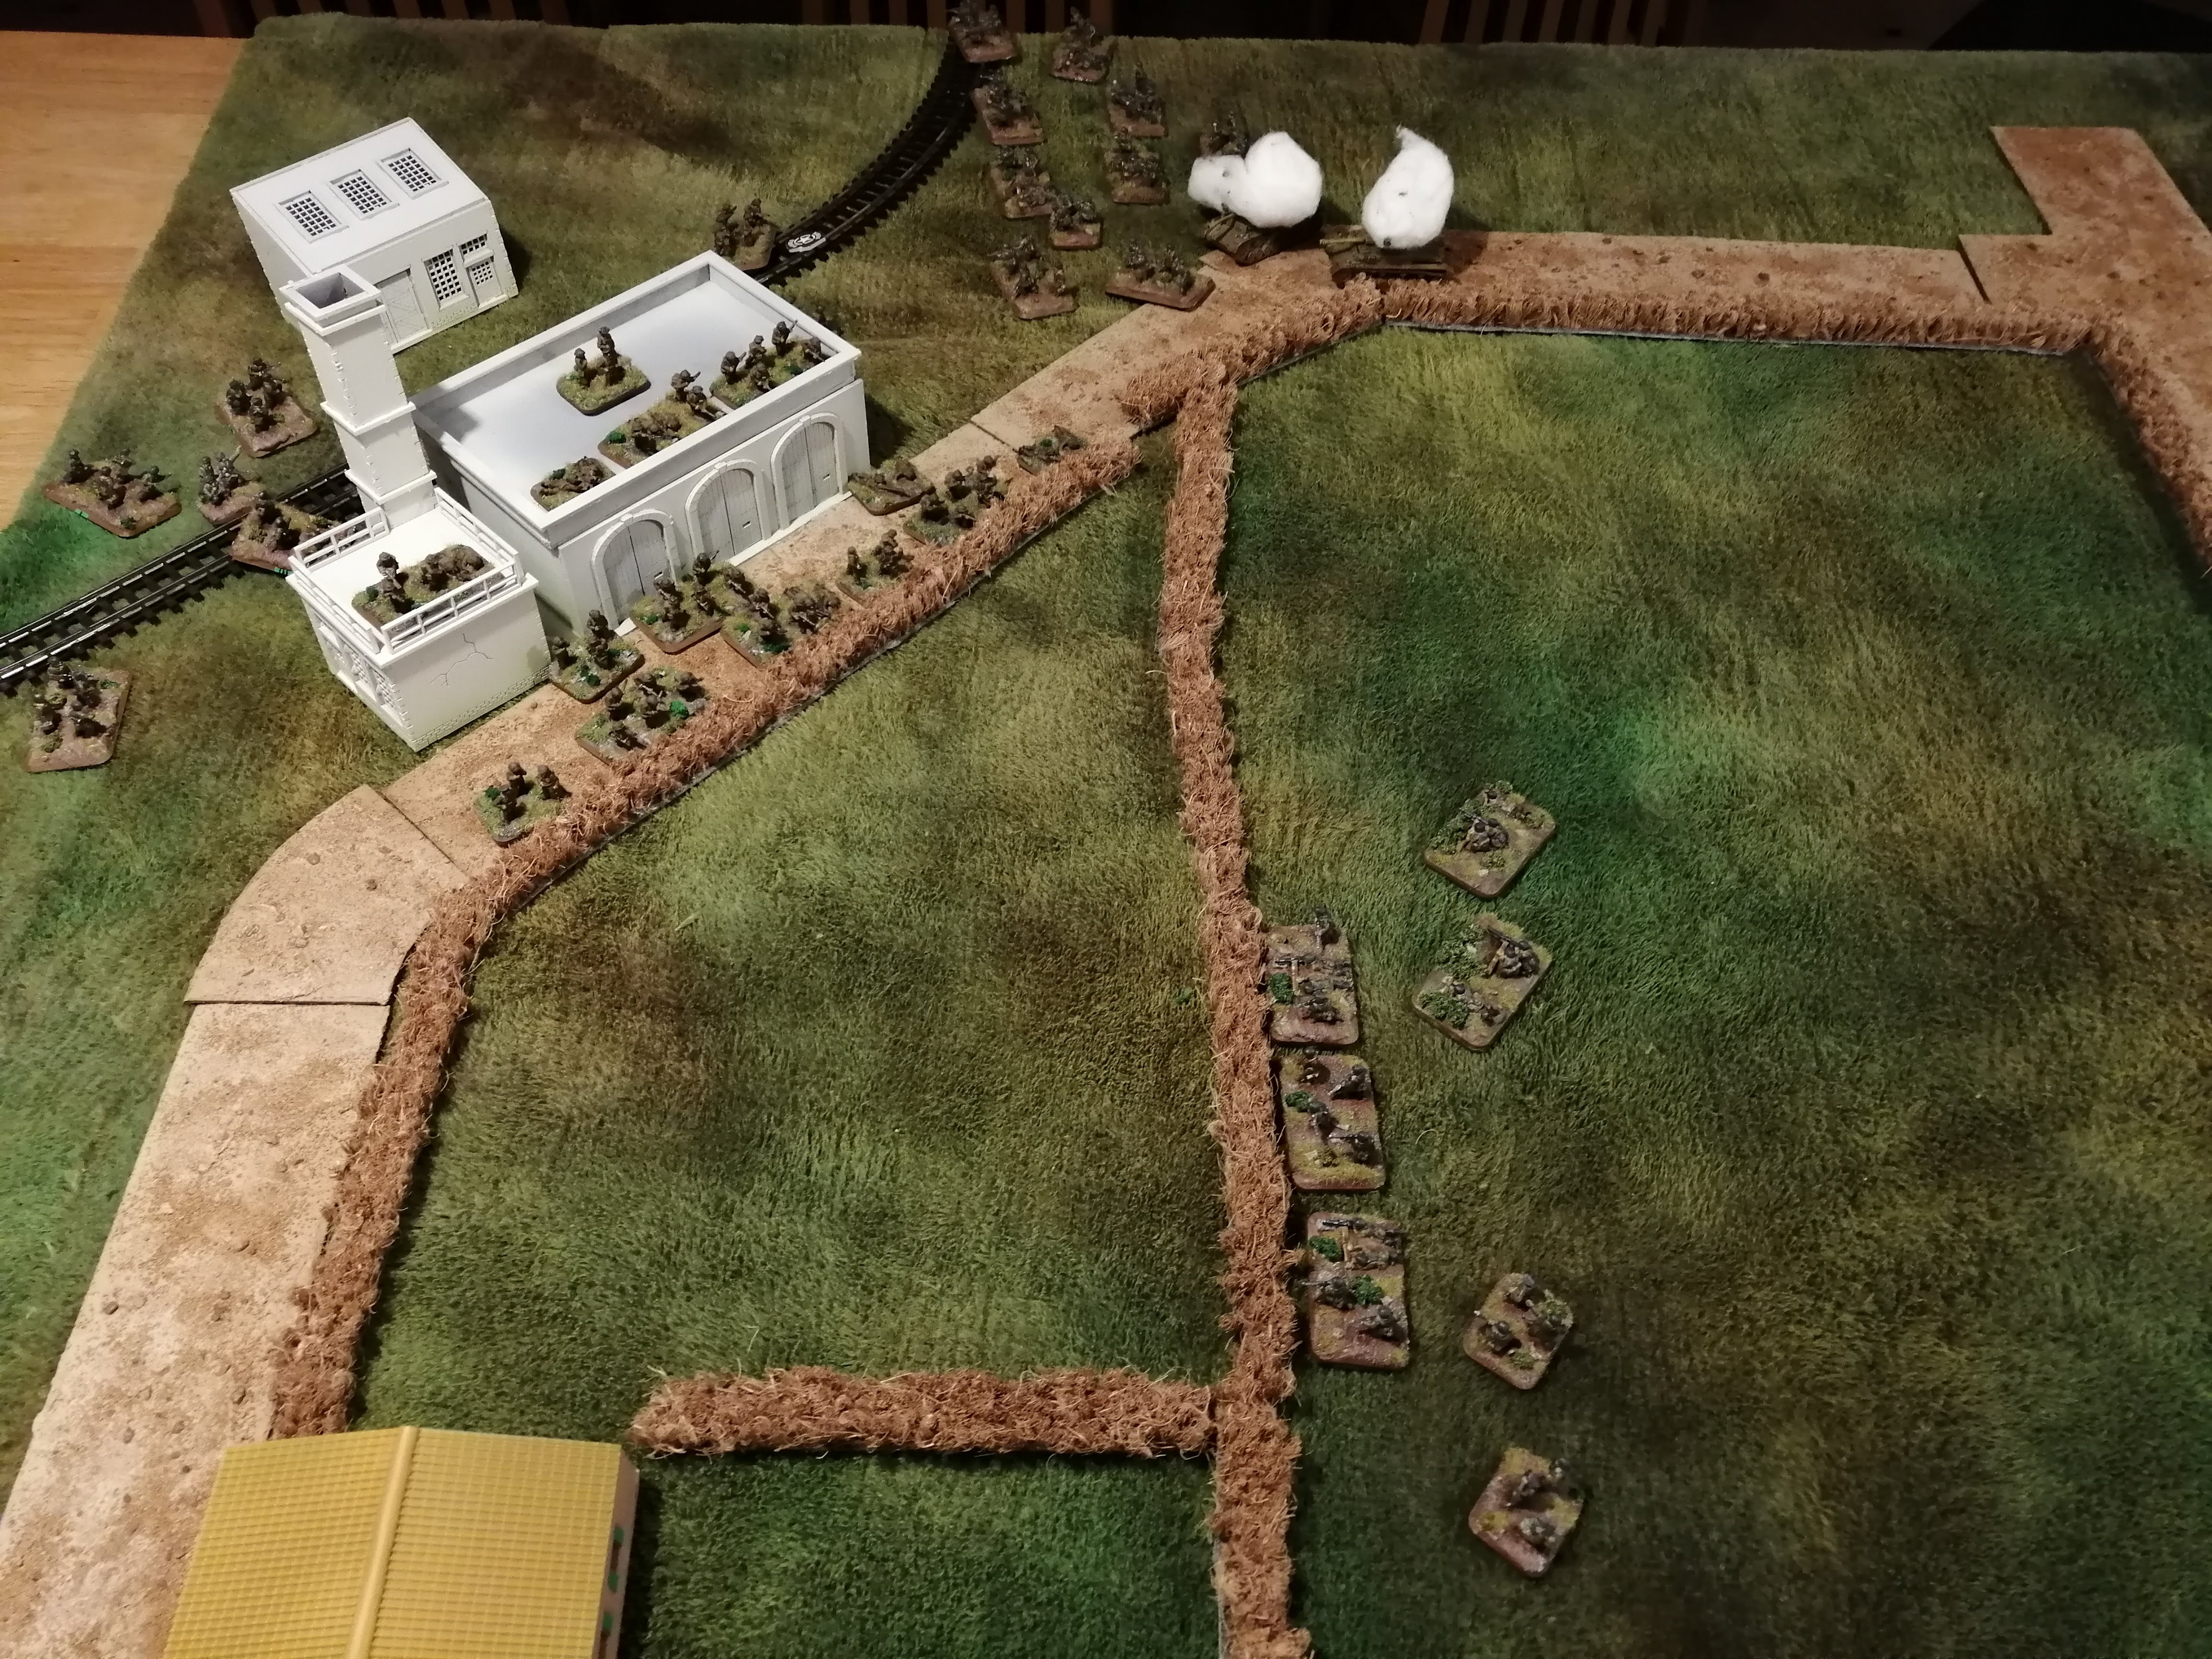
 The New Zealand end of the battlefield
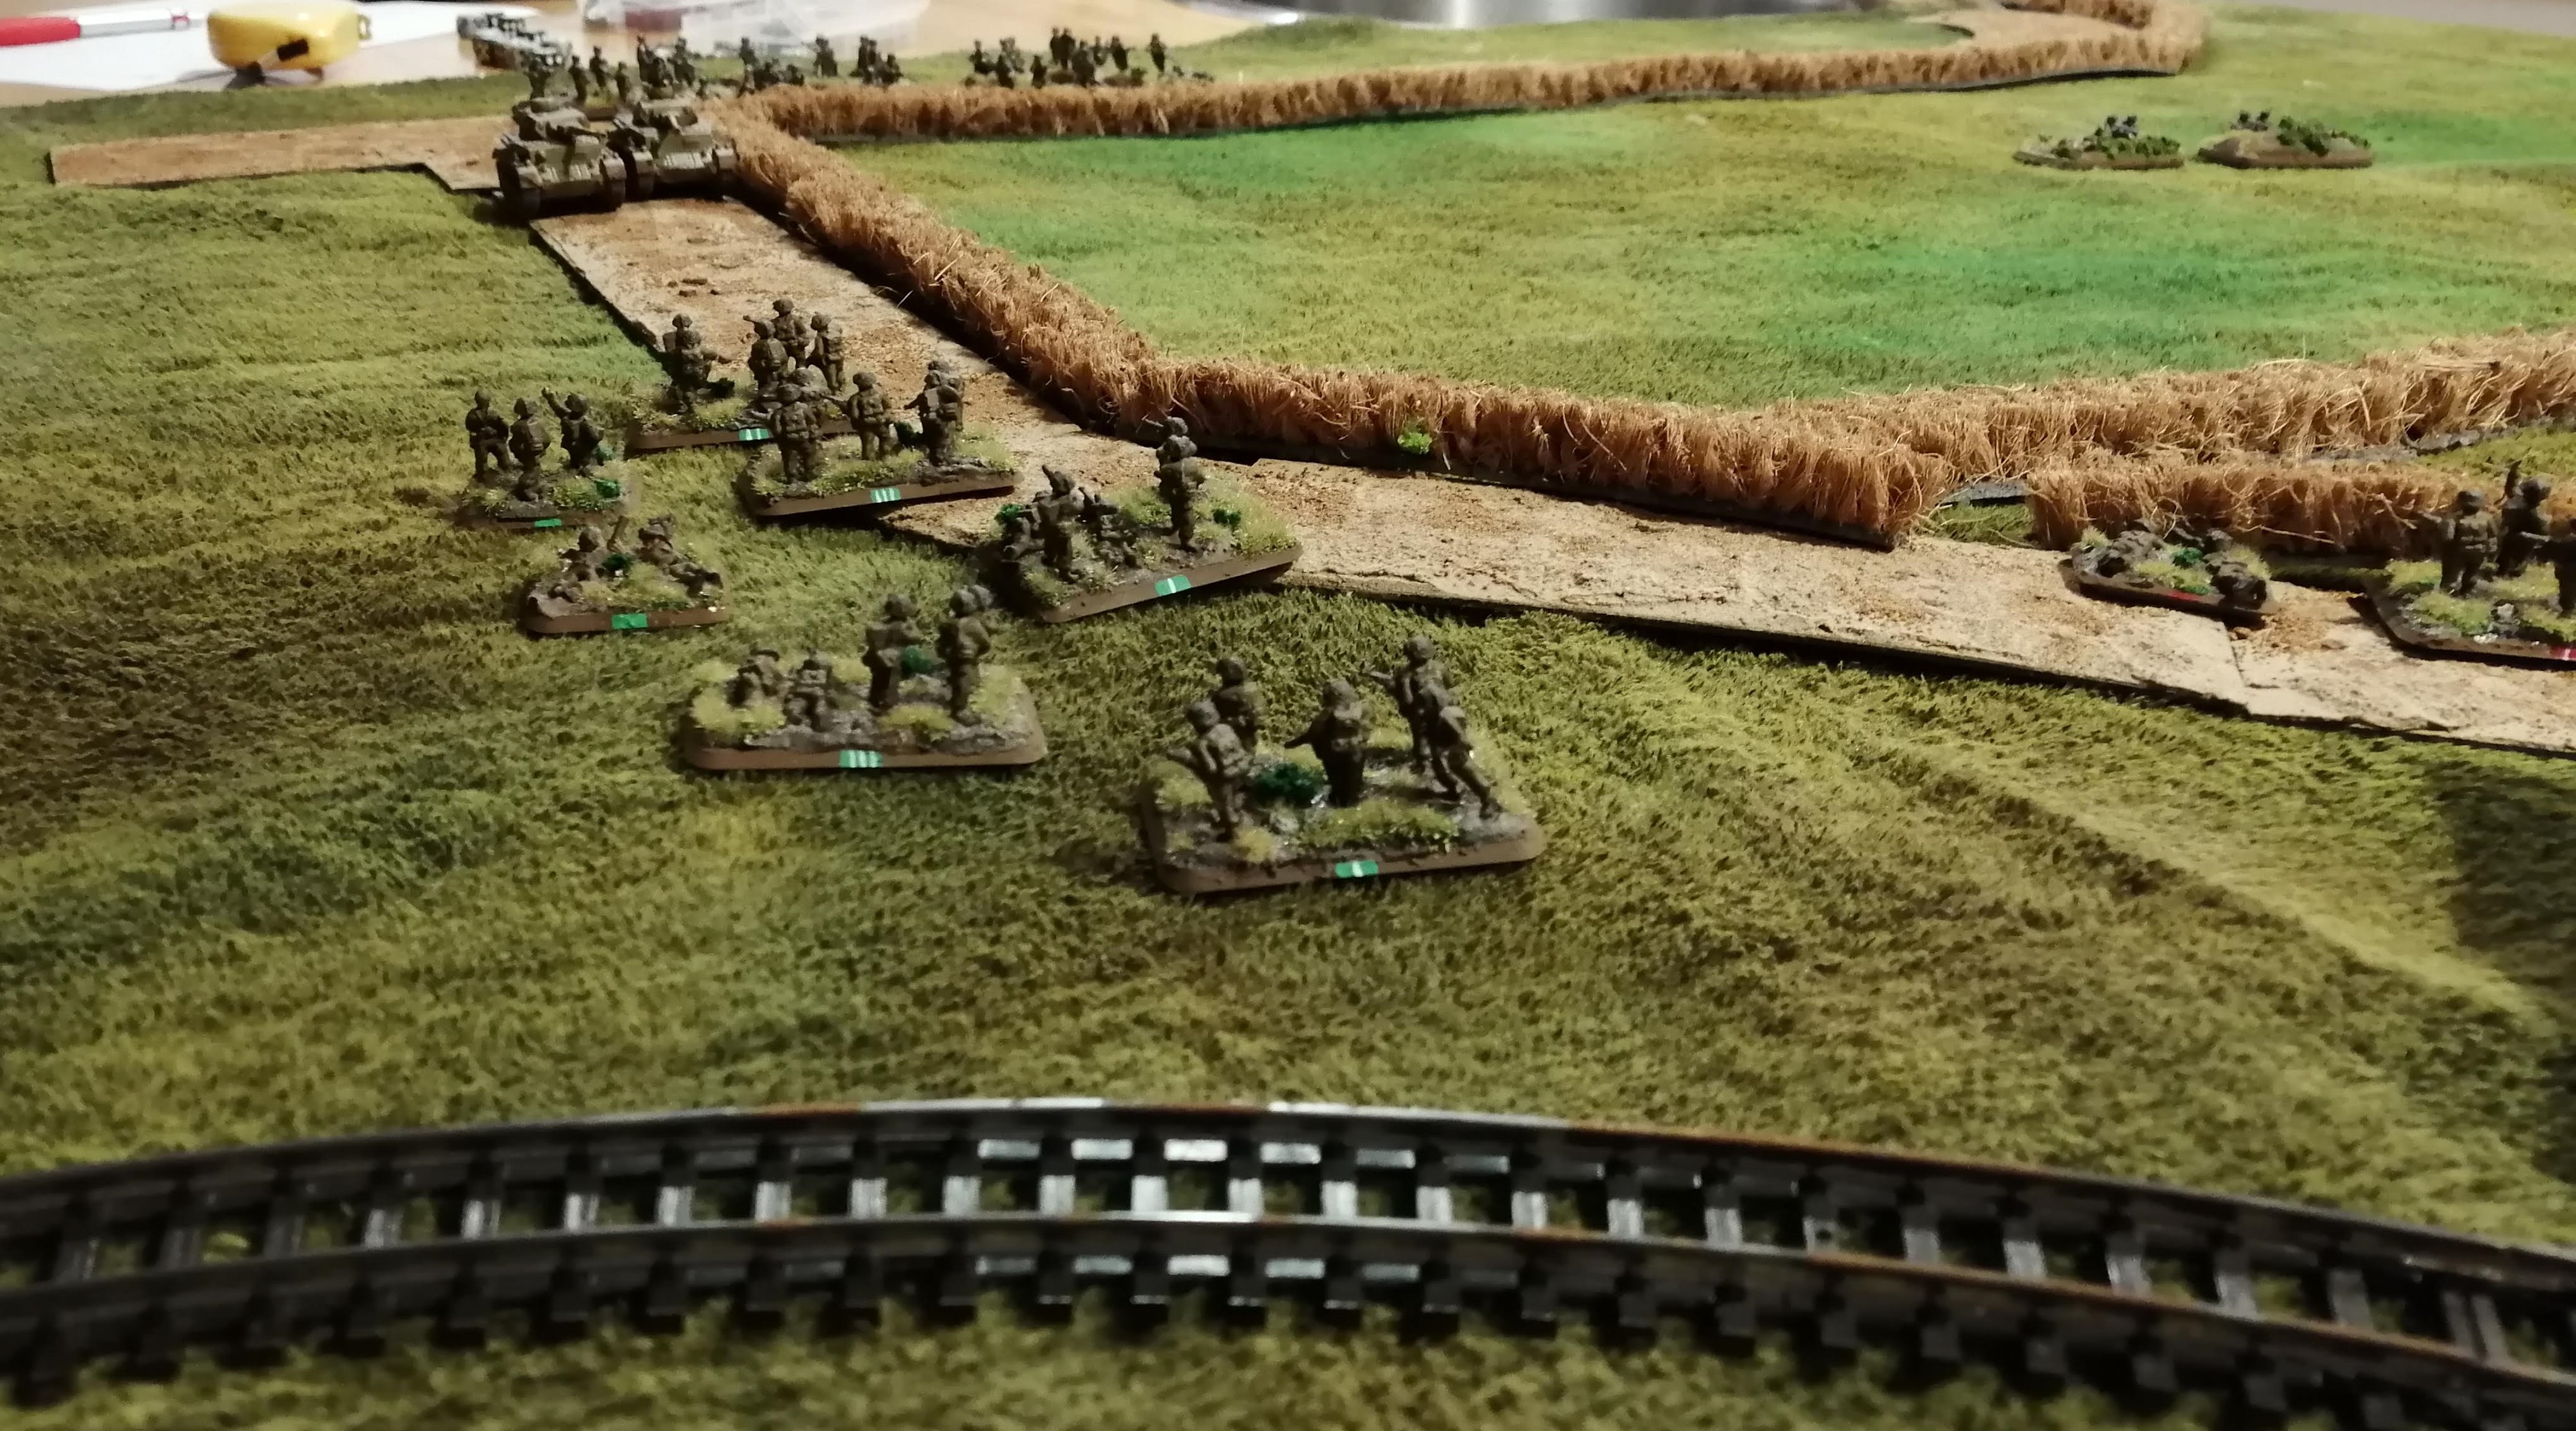
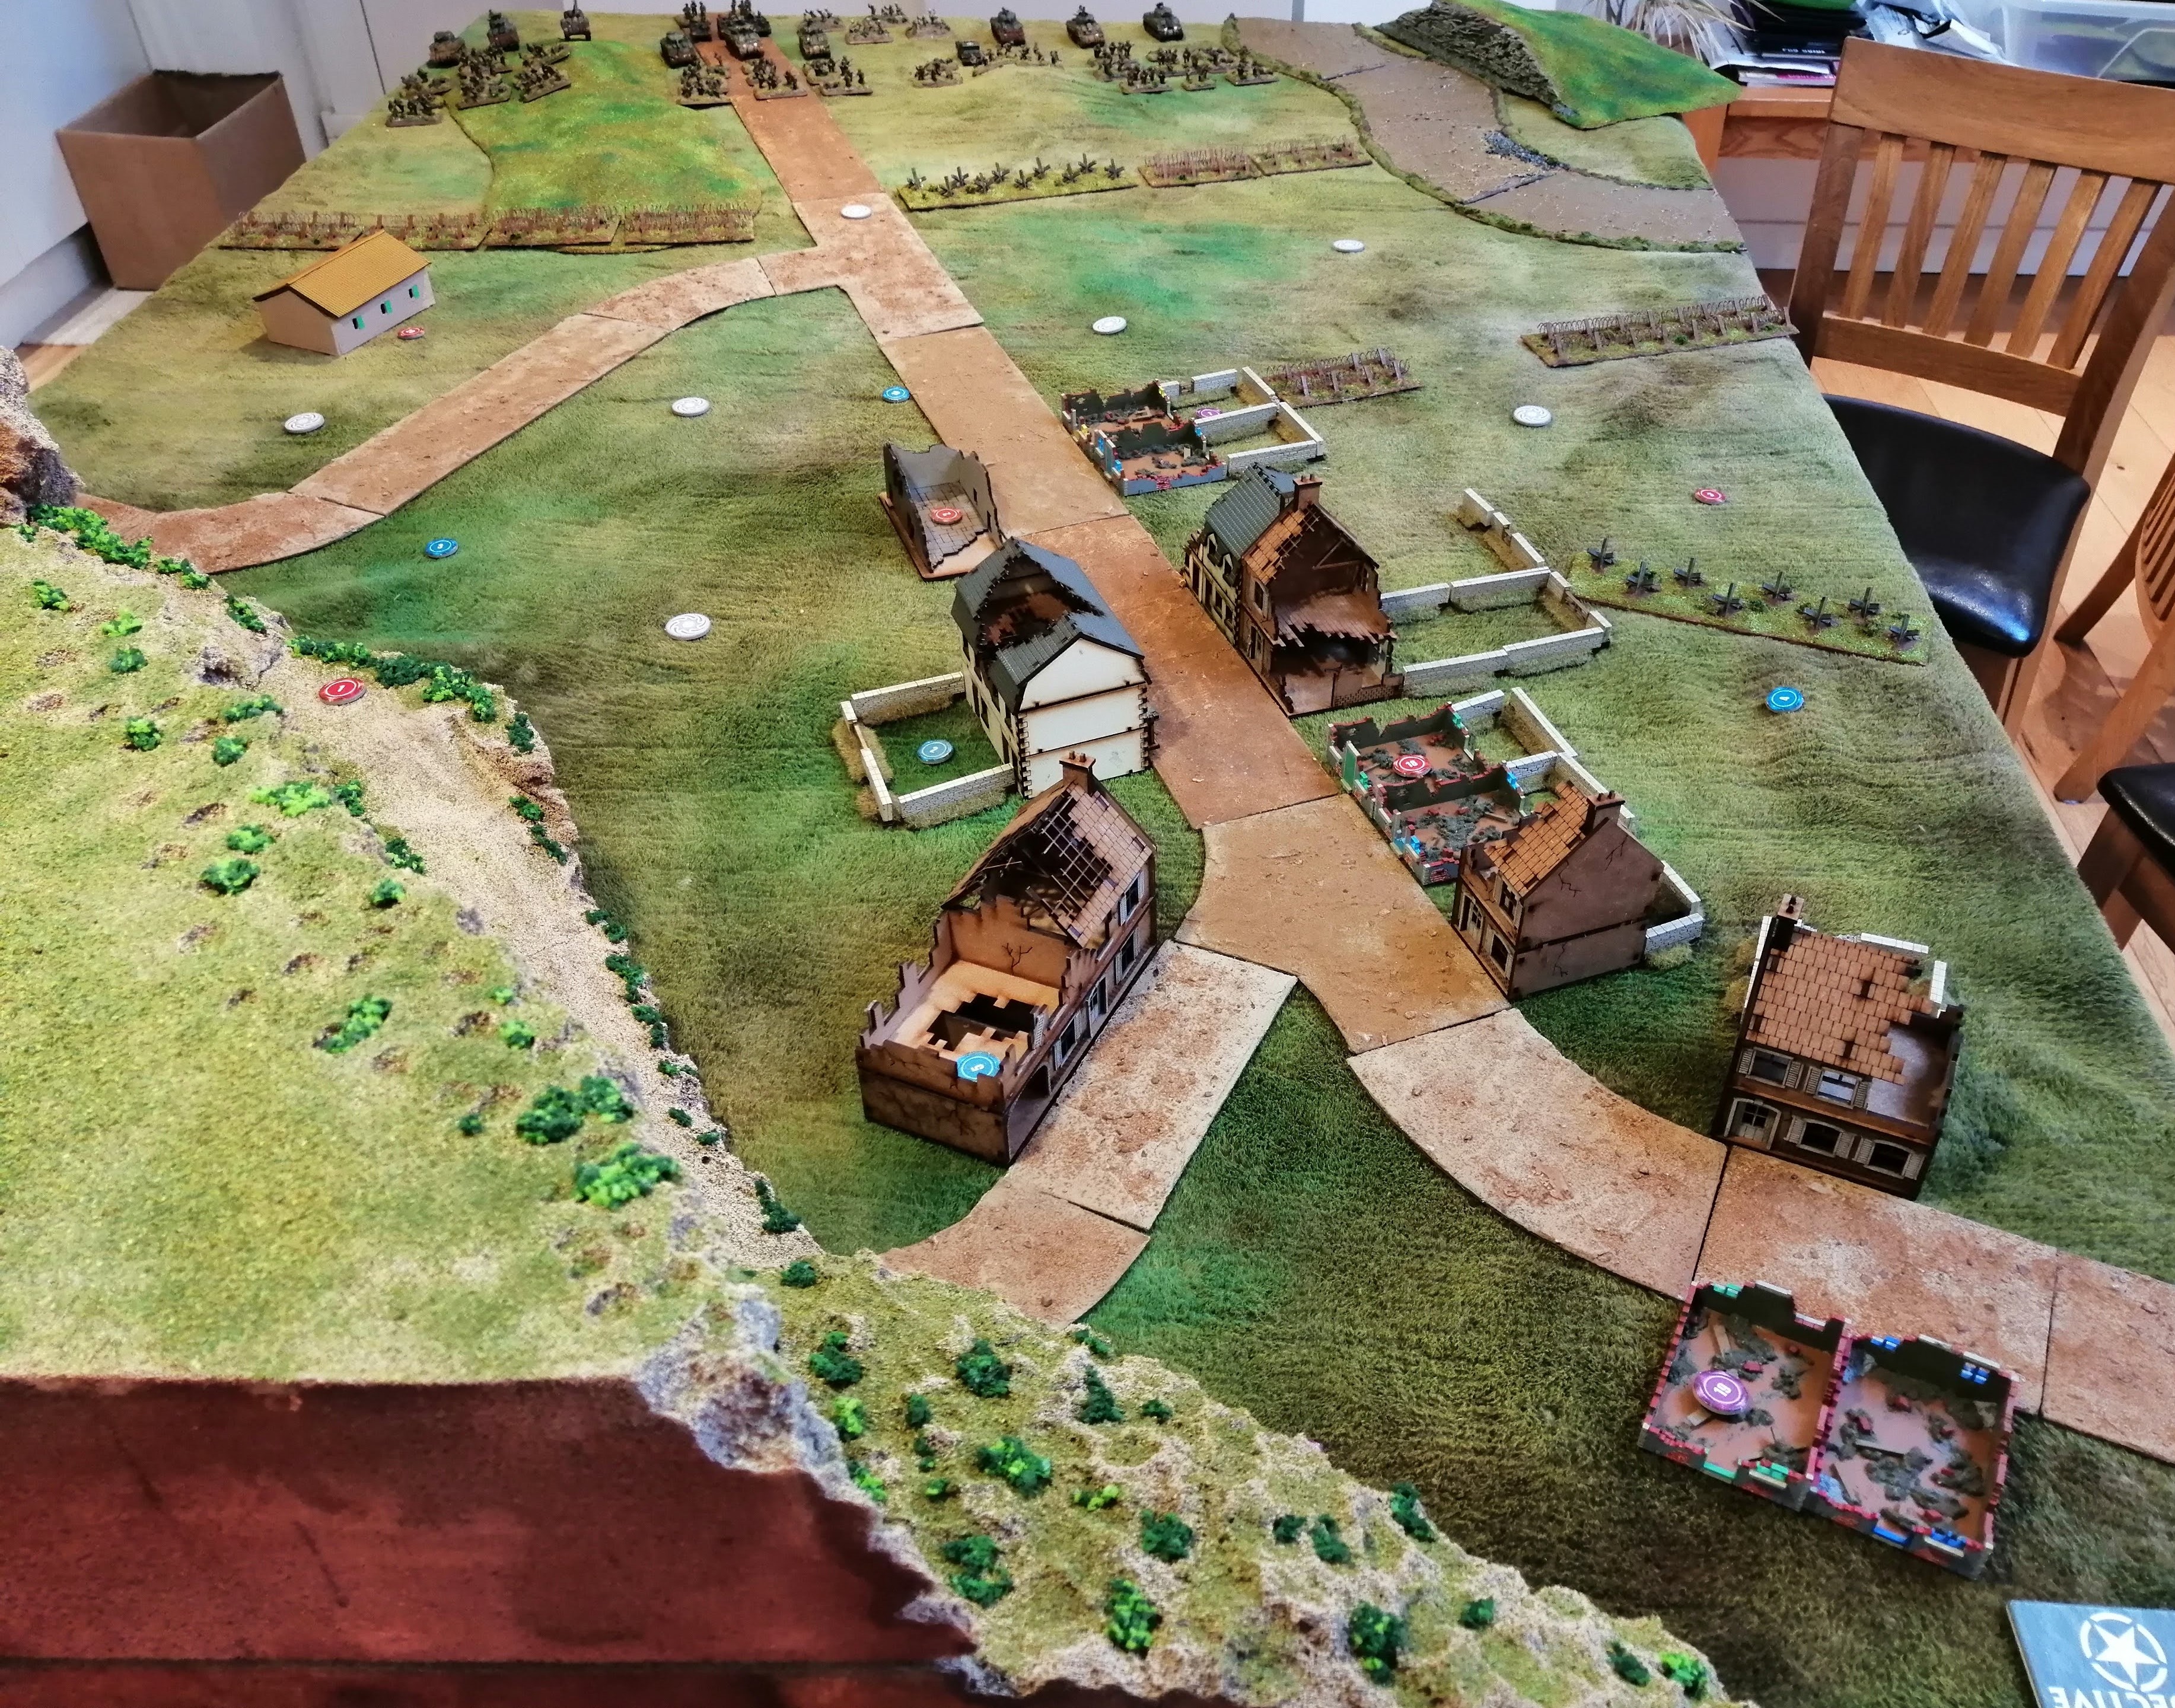 Looking up the battlefield from the German positions in the town of Cassino
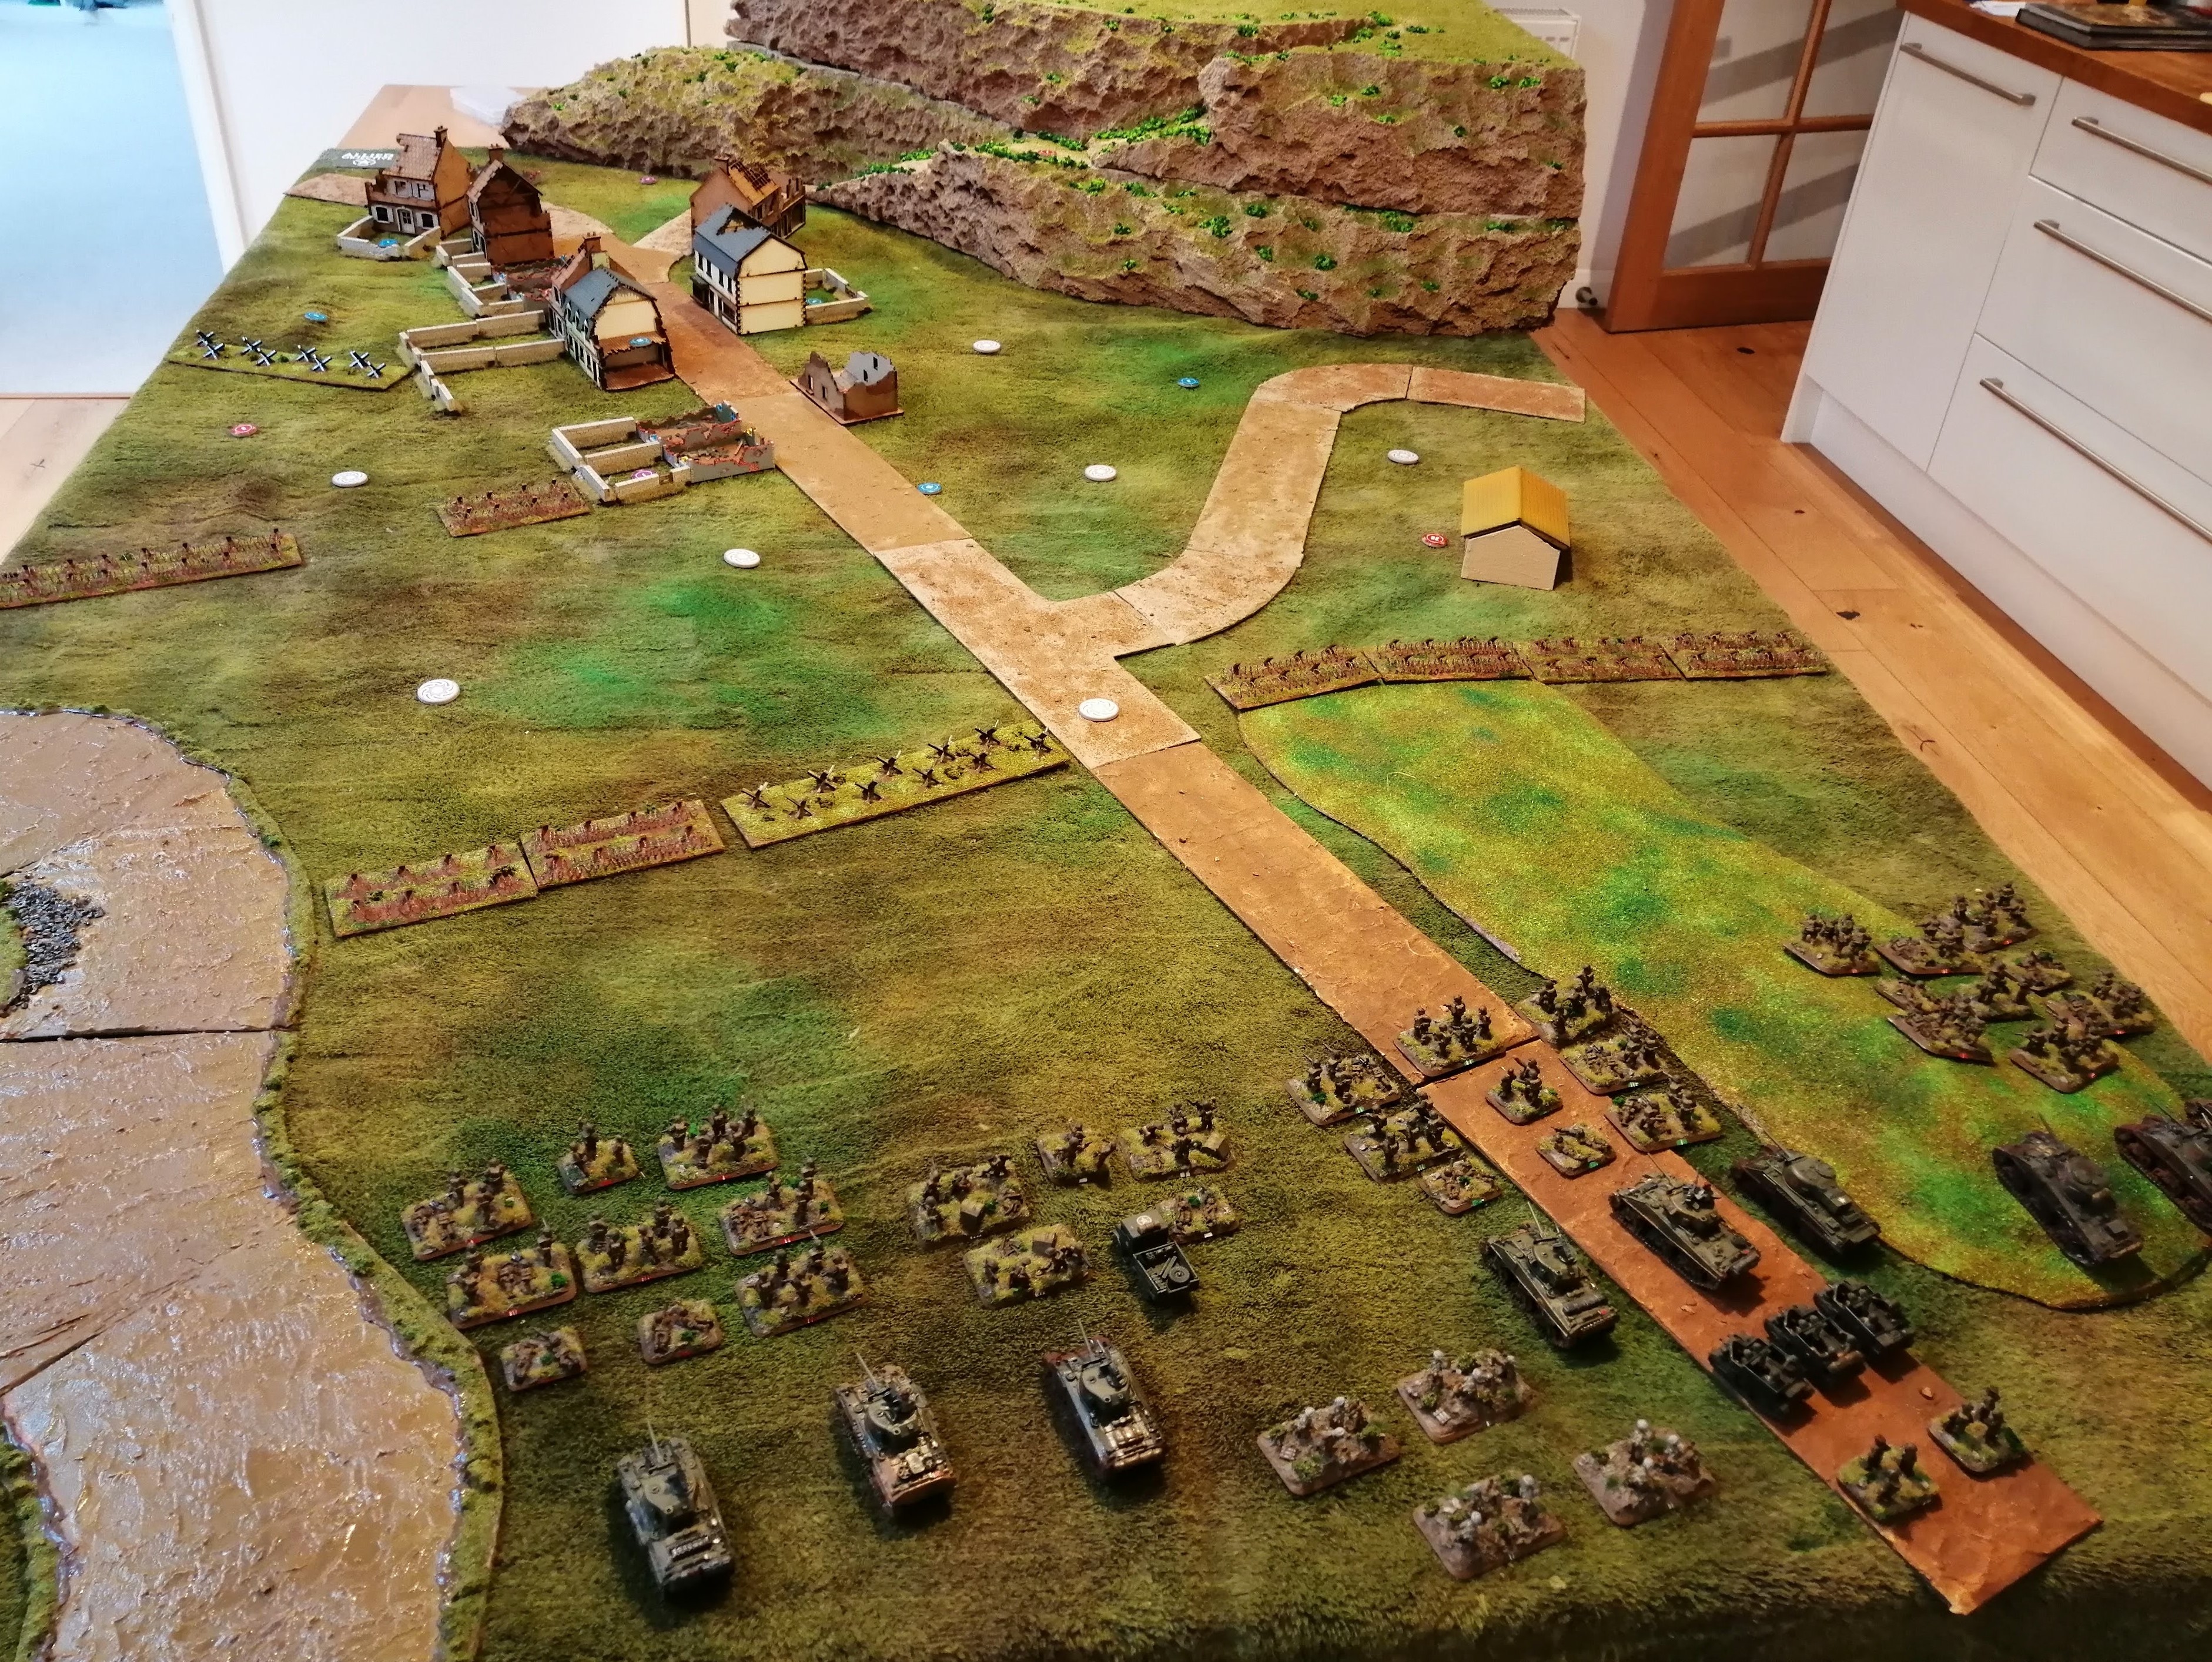 And the view from the New Zealand commander's perspective
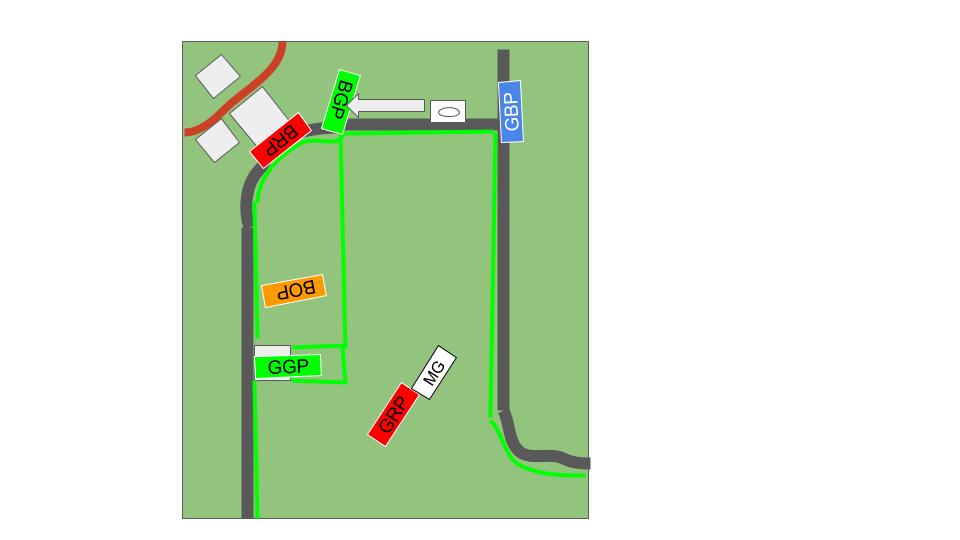
 3rd Battle of Monte Cassino - Point 593 (again) Turns 4 and 5
Turn 4
GBP and BOP fail to unpin and the remaining tank from the first platoon runs, leaving just the second tank platoon to take on the guns. All the units that can advance do so but the Allied shooting is woeful, failing to hit anything.
The Germans return fire and BRP is destroyed completely. The HMG team and the MG Nest punish GGP and destroy 6 teams. The remaining Germans platoons destroy another team from GBP.
The LG40 guns fire upon the second tank platoon and manage the bail the command tank but do little else.
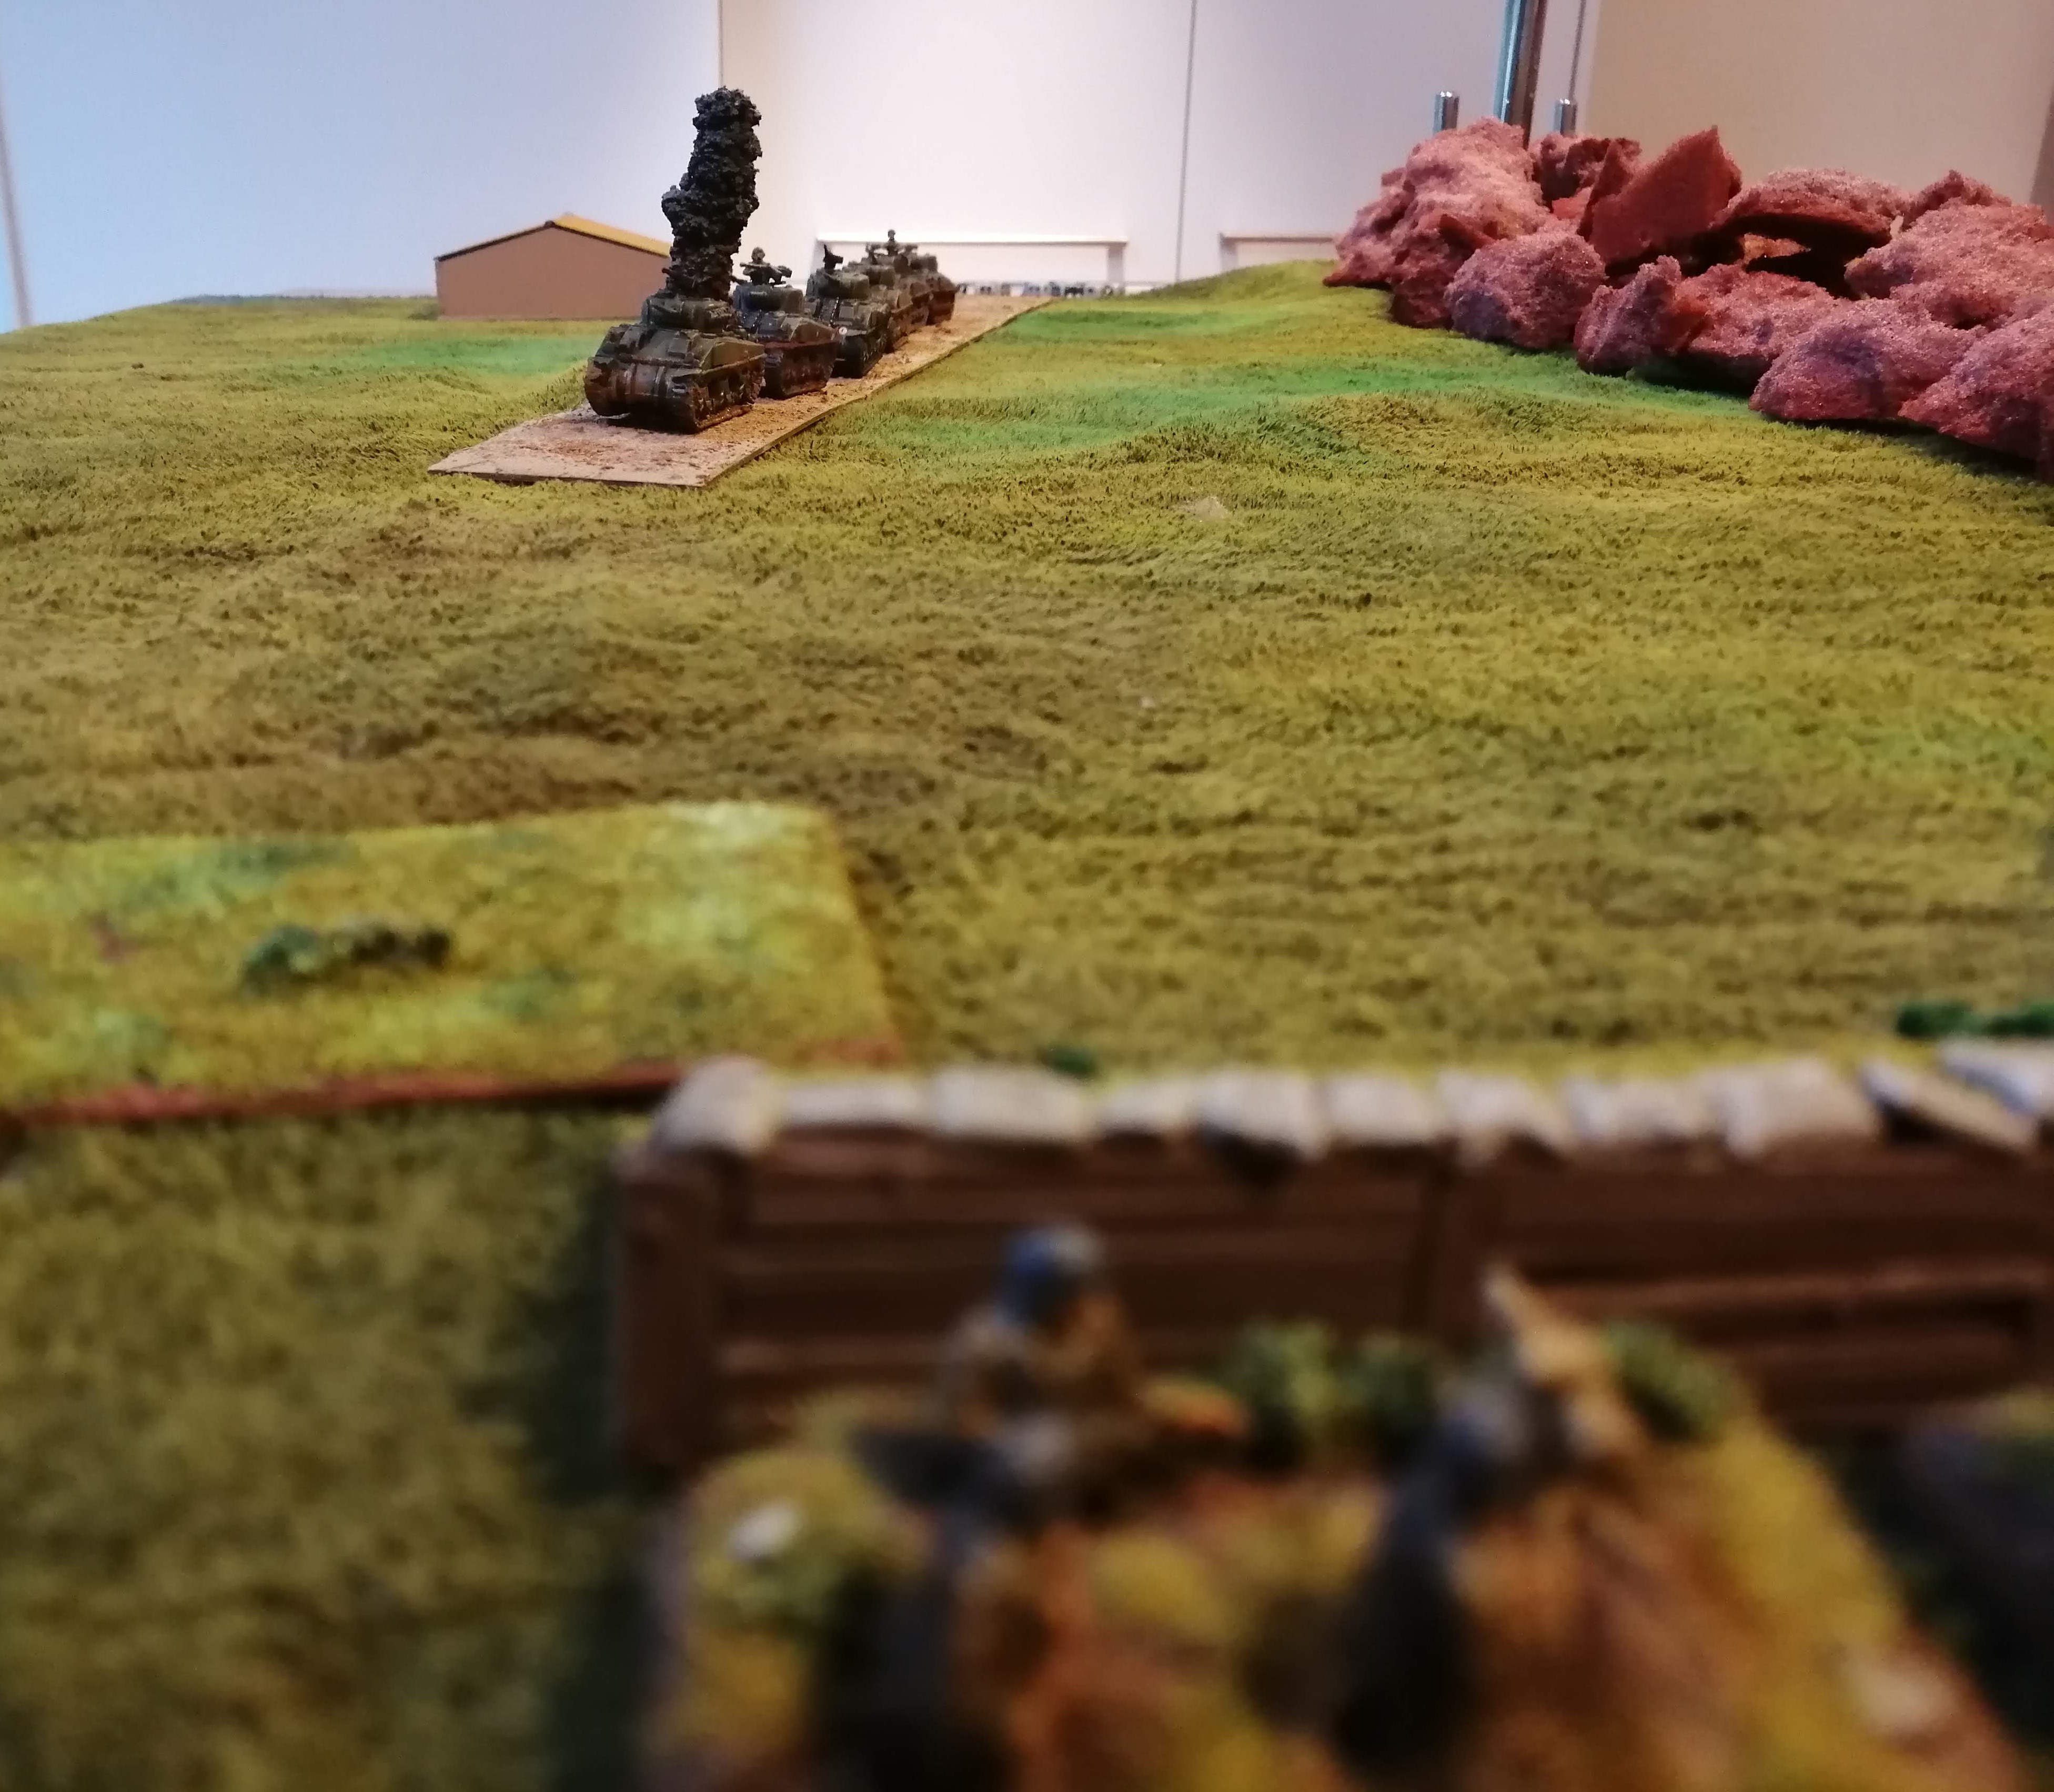
 The decimated Allied force at the end of Turn 4
Turn 5
GBP and GGP fail their morale checks and fallback from the battle. The command tank of second tank platoon fails to remount this turn but otherwise, what’s left of the Allied attack unpins and advances. BOP manage to kill one of the Fallschirmjager HMG teams with their fire but the tanks fail to hit anything.
The tanks are now close enough to assault the guns in their trenches. The guns manage to get their defensive fire off as the tanks close and it’s effective, destroying the tanks as they close!
The LG40 guns turn their fire upon the last remaining bailed out tank and destroy it. And with that, the Allied assault is well and truly stopped.
 The end of the battle
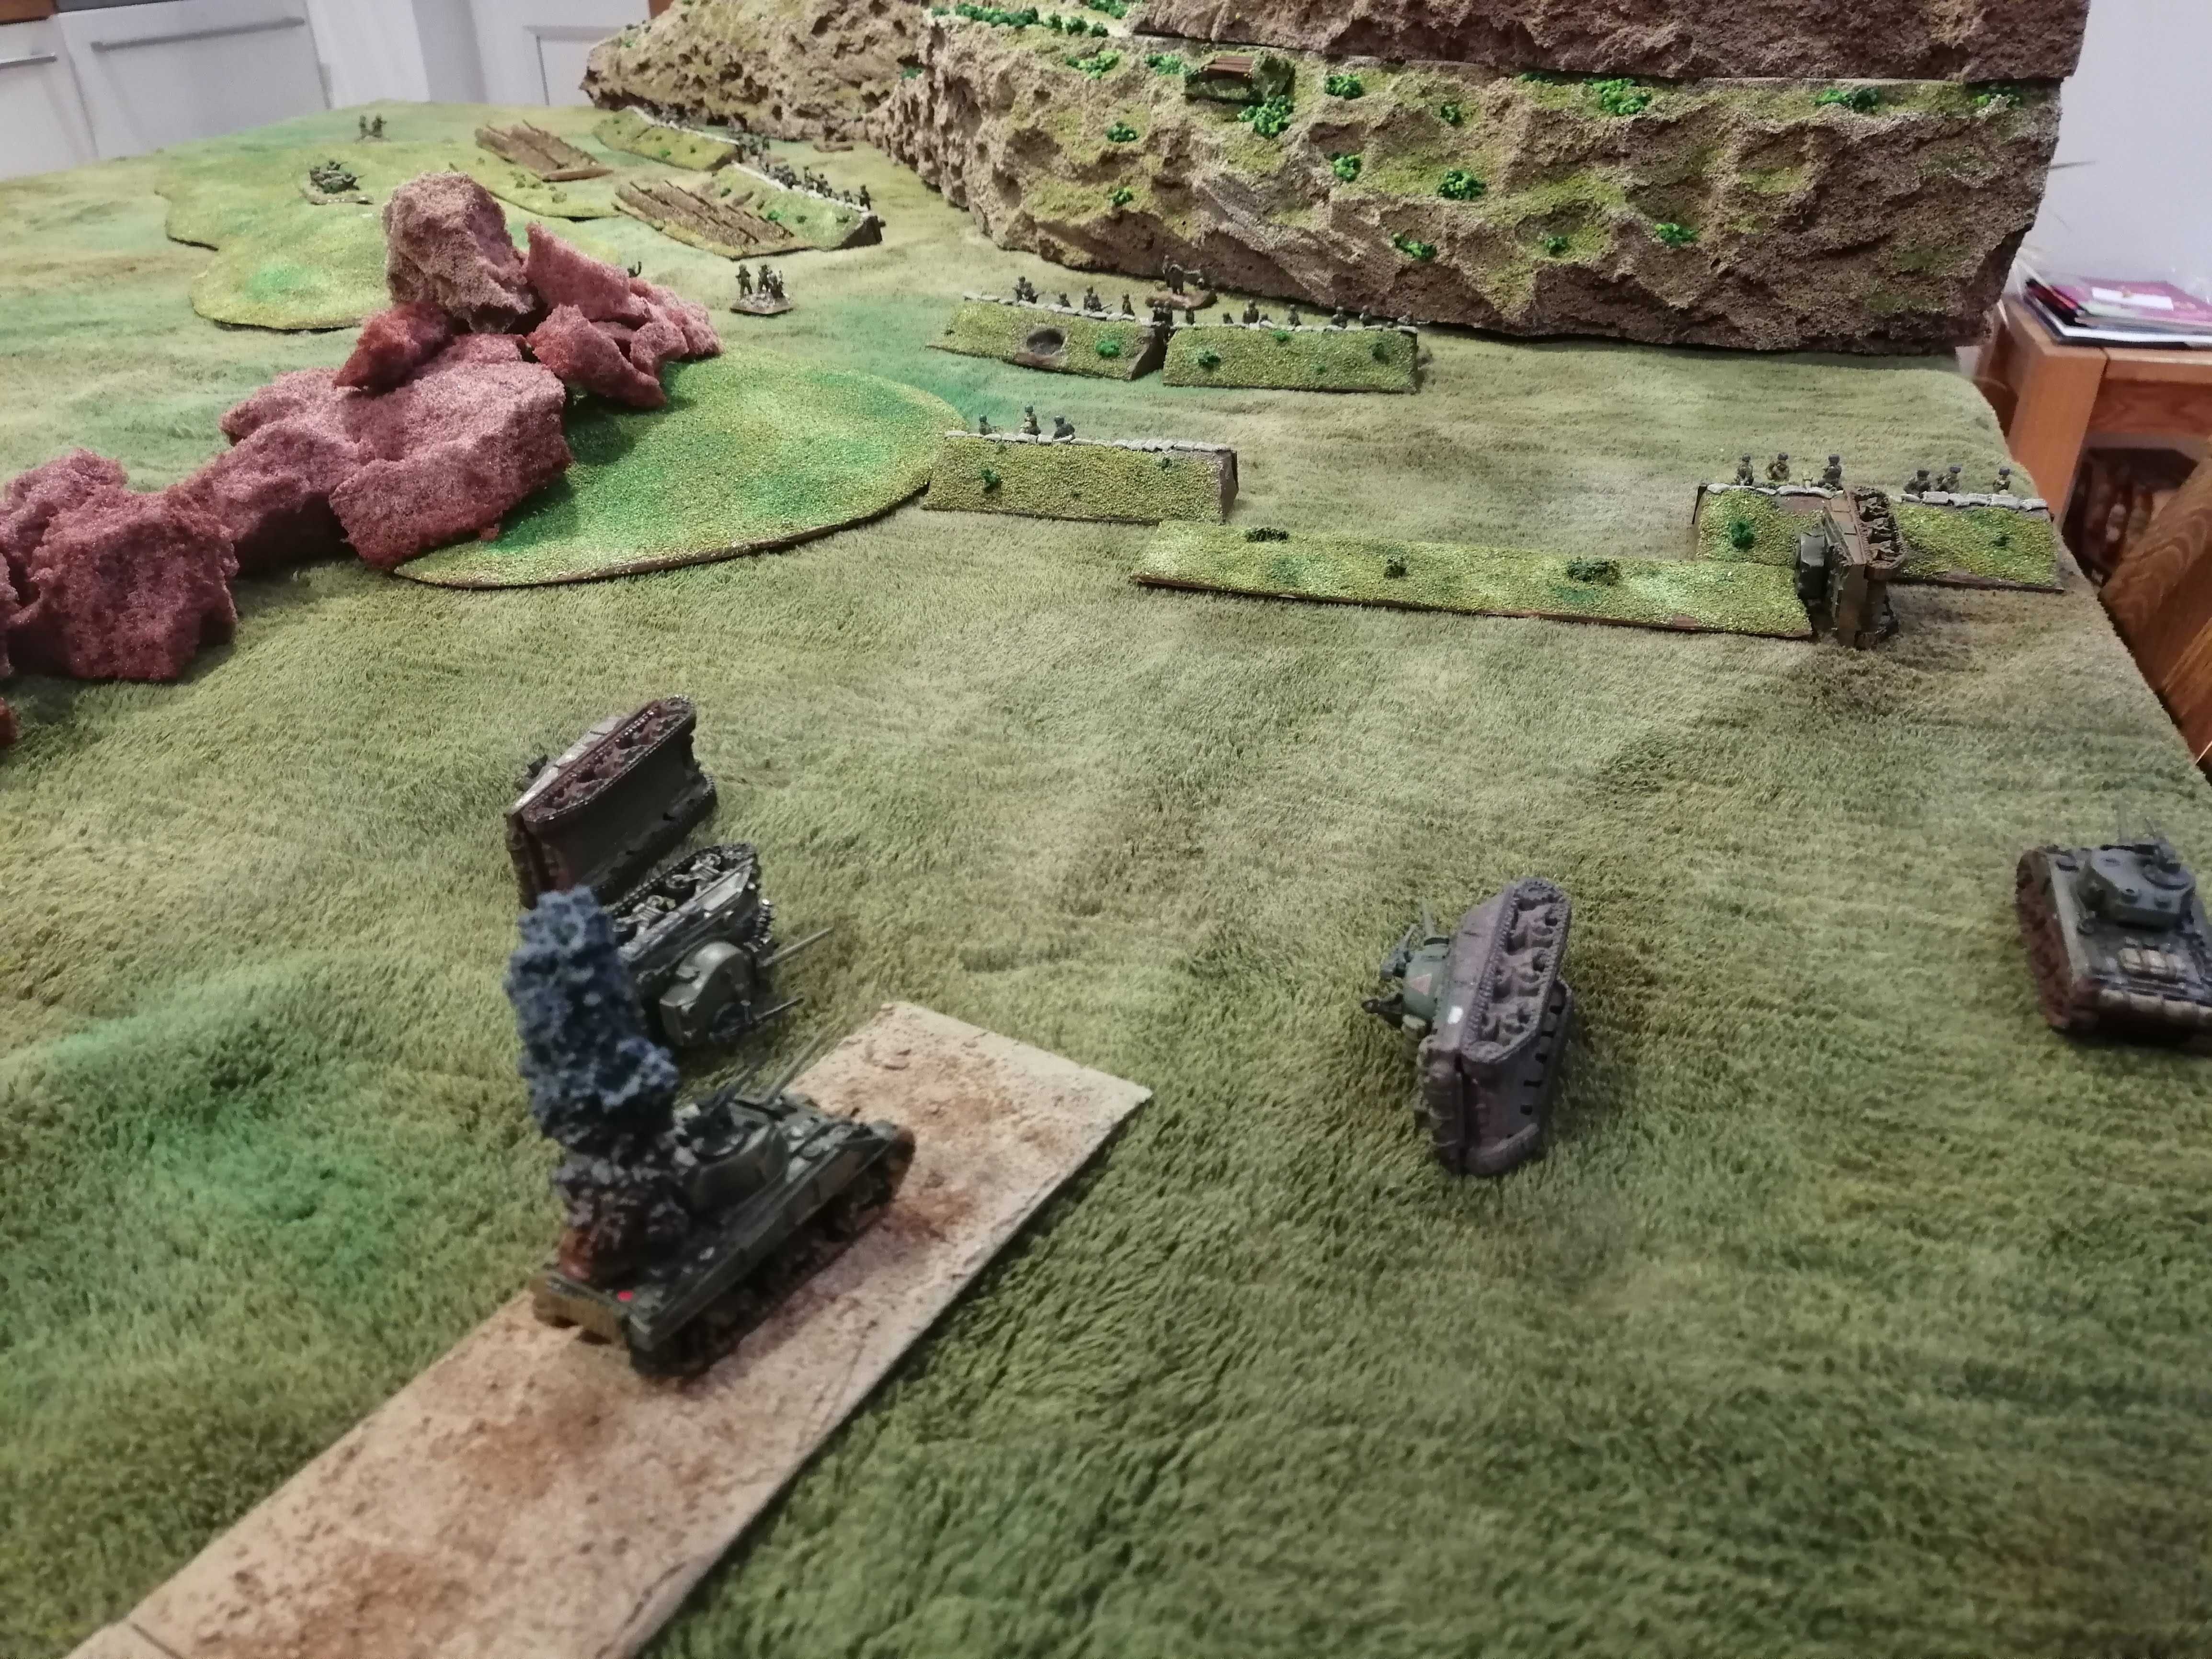 What's left of the tank assault
Wrap Up
While the battle went the same way as history, it was arguably far more one sided than the real battle. The Allied infantry, especially the Gurkha platoons were fairly ineffective and could have done with having another platoon or two to make a real fight of it. The tanks were exposed without infantry support and paid the price, which was true to history.
All in all, an interesting battle but it could have done with being a little more competitive. Perhaps one to be replayed in the future with more Allied forces involved to try to level the playing field.
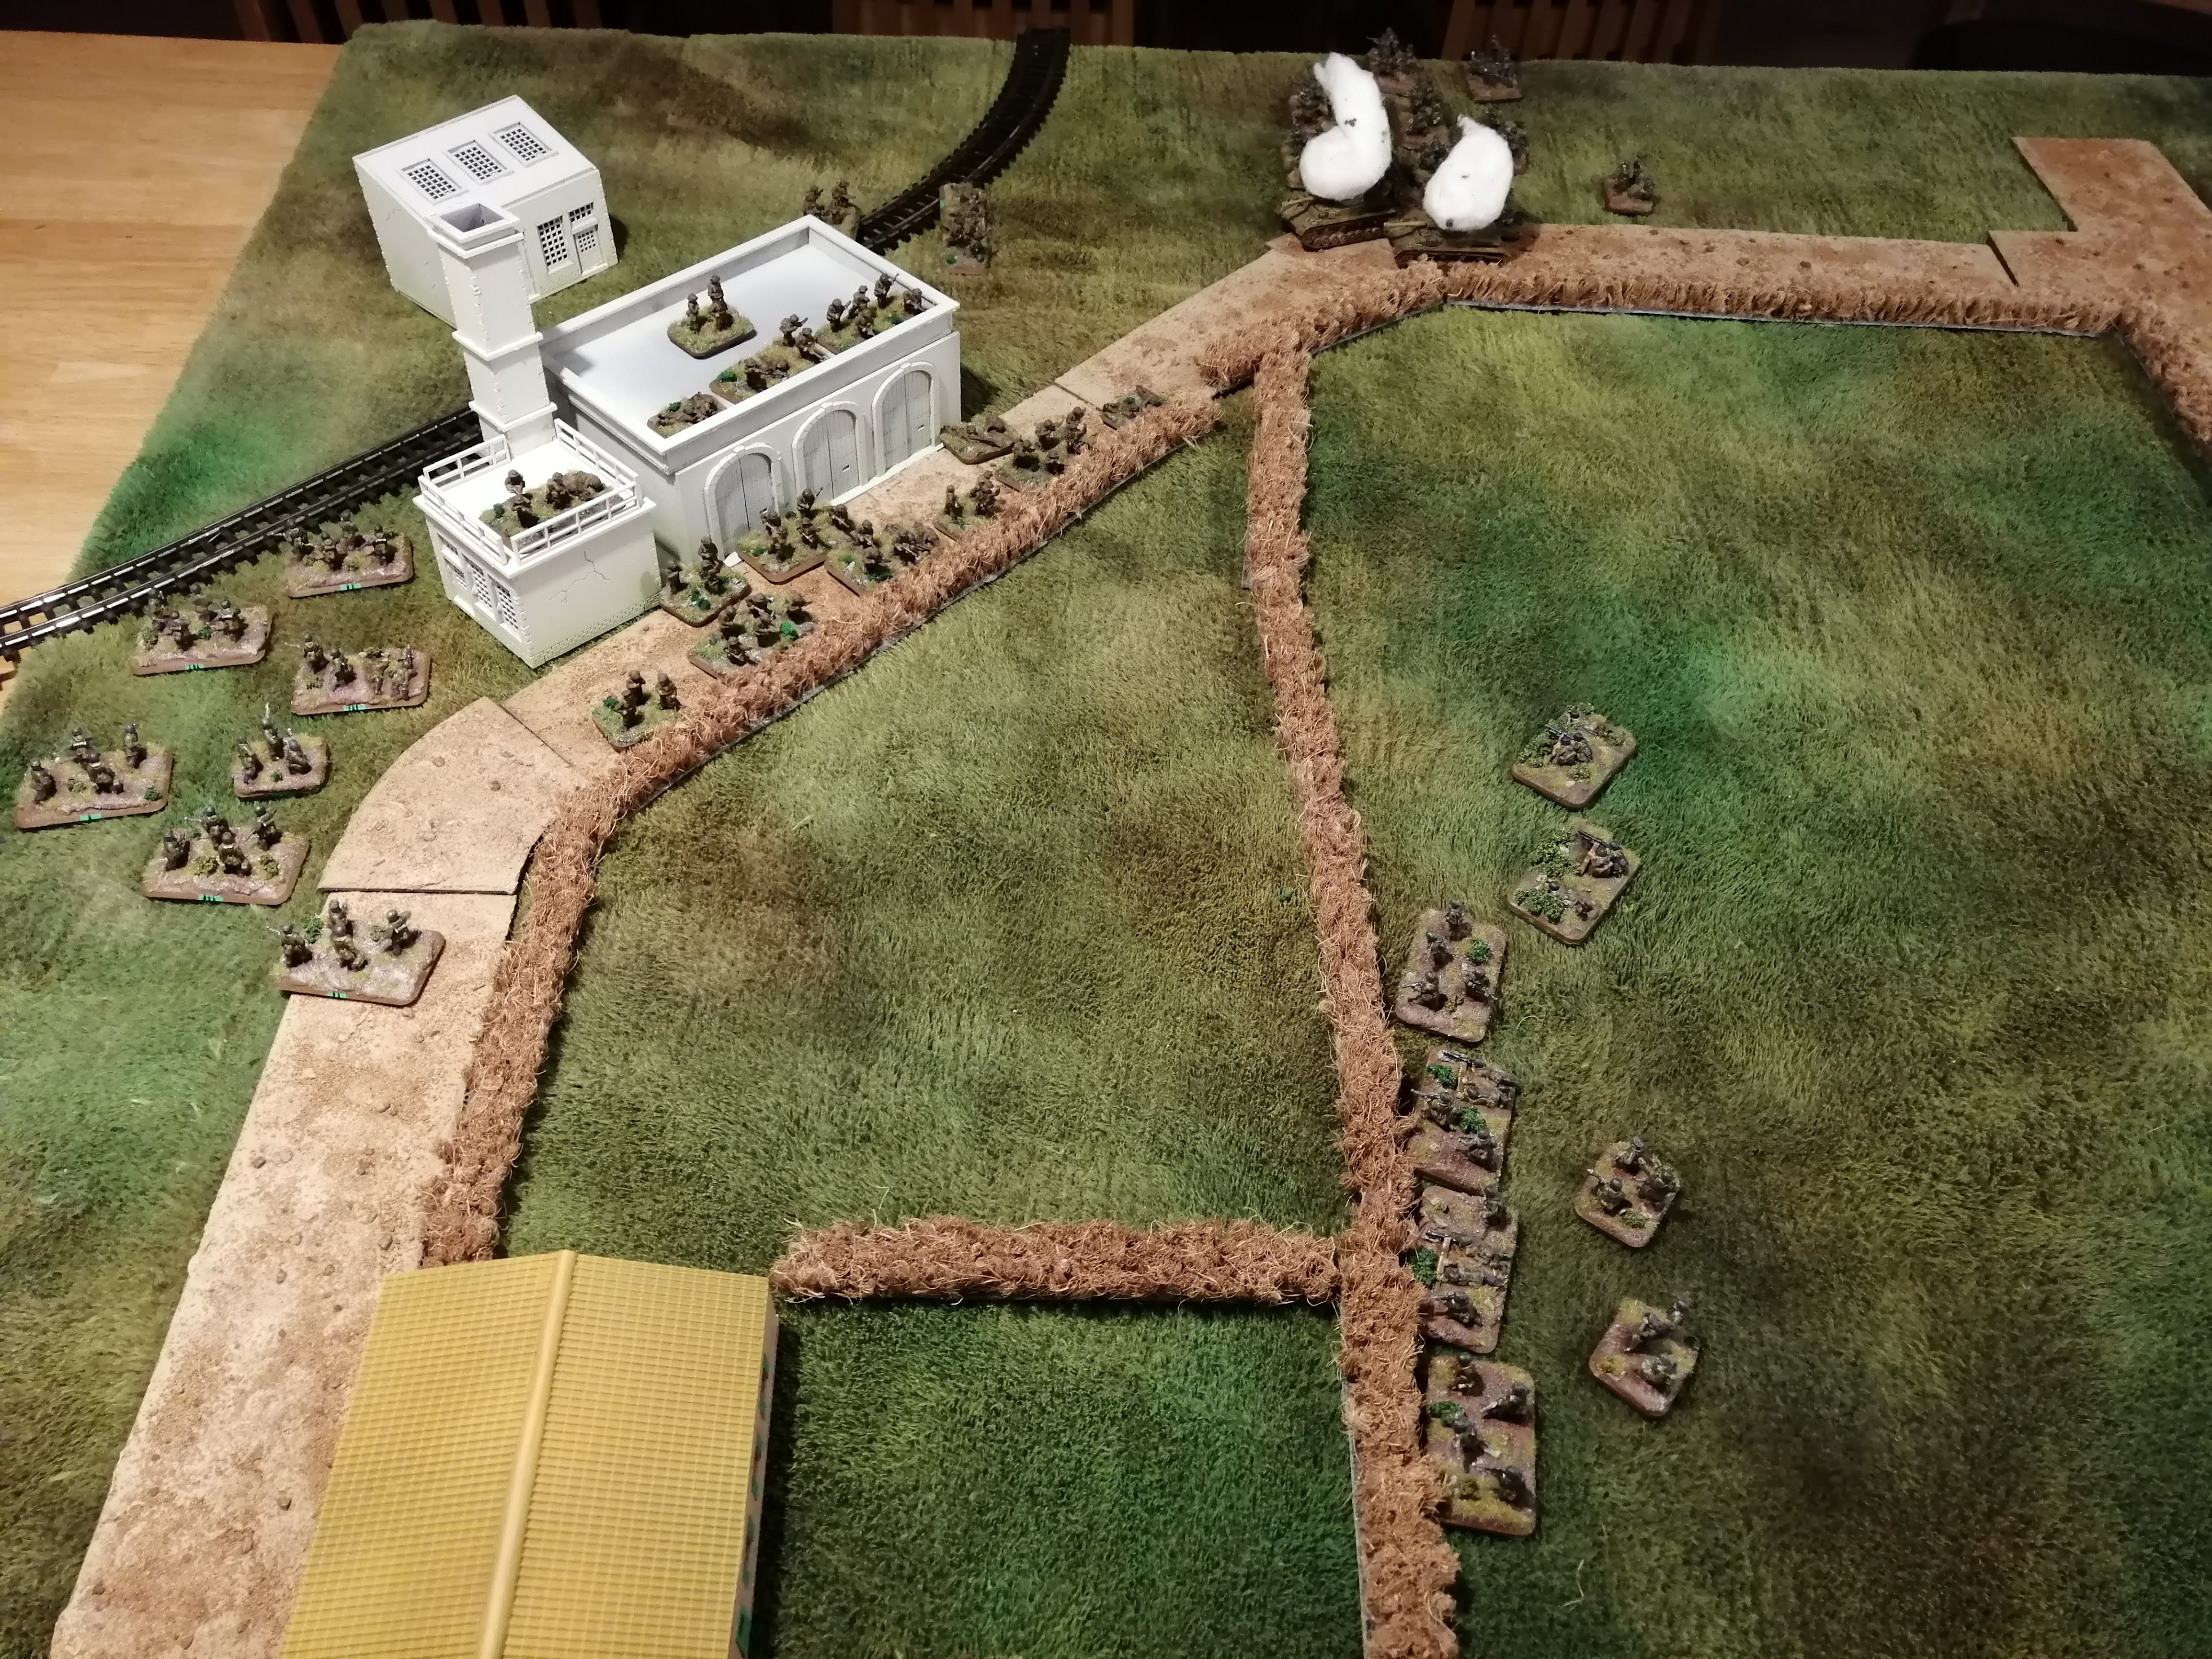
3rd Battle of Monte Cassino - Point 593 (again) Turns 1-3
Before we start, I’ve taken some shots of the defending Fallschirmjager in their trenches around Point 593 and the Allied units preparing the assault. Just to set the scene.


Some additional rules that I forgot to mention.
The ground is broken and it is not possible to move at Dash speed.
Apart from the first turn, all infantry units start the turn pinned due to the lack of cover between them and the guns on Point 593.
The German Infantry Guns are hidden and cannot be fired upon until the German guns open fire, exposing their positions.
For this battle, I’ve chosen not to include the tactical maps. It’s largely a straight push by the 4th British Indian and 20th Armoured toward point 593 so probably doesn’t need a tactical view.
Turn 1.
The allied forces need to get forward quickly and so all of the Infantry units advance straight forward. The armour also needs to get up the board from Albaneta Farm to support the assault but, as in the real battle, there is no coordination between the two forces and so the tanks have no infantry support during their advance. At the end of the movement, the few Allied infantry teams that can fire miss and the tanks have no targets.
The Germans, during their first turn clearly have no need to move and just return fire. The infantry guns are out of range of the tanks so stay quiet, not wanting to expose their positions. The HMG and MG2 nest are able to kill 1 team from BOP and pin the platoon in place.
 The Allies after their initial move
Turn 2.
All but one of the British Indian Division platoons unpin and continue their advance. They’re now well within range of the German trenches. The tanks continue their advance up the road. The shooting is largely ineffective with only a couple of shots hitting home and easily saved by the German defenders in their trenches. The 2” mortar teams attached to each platoon do manage to lay down some smoke to provide at least some cover.
The lead tanks are now in range of the German LG40 guns and the Germans decide to open up, revealing their ambush. Despite the range, a shot ploughs through the front armour of the lead tank, destroying it. Meanwhile, with the 4th BI in range of the German trenches, the bullets start to fly. With the volume of MG fire available, BOP loses 3 teams whilst the Gurkha’s of Blue Platoon lose 5 teams.
 The Fallschirmjager LG40 takes out the lead tank
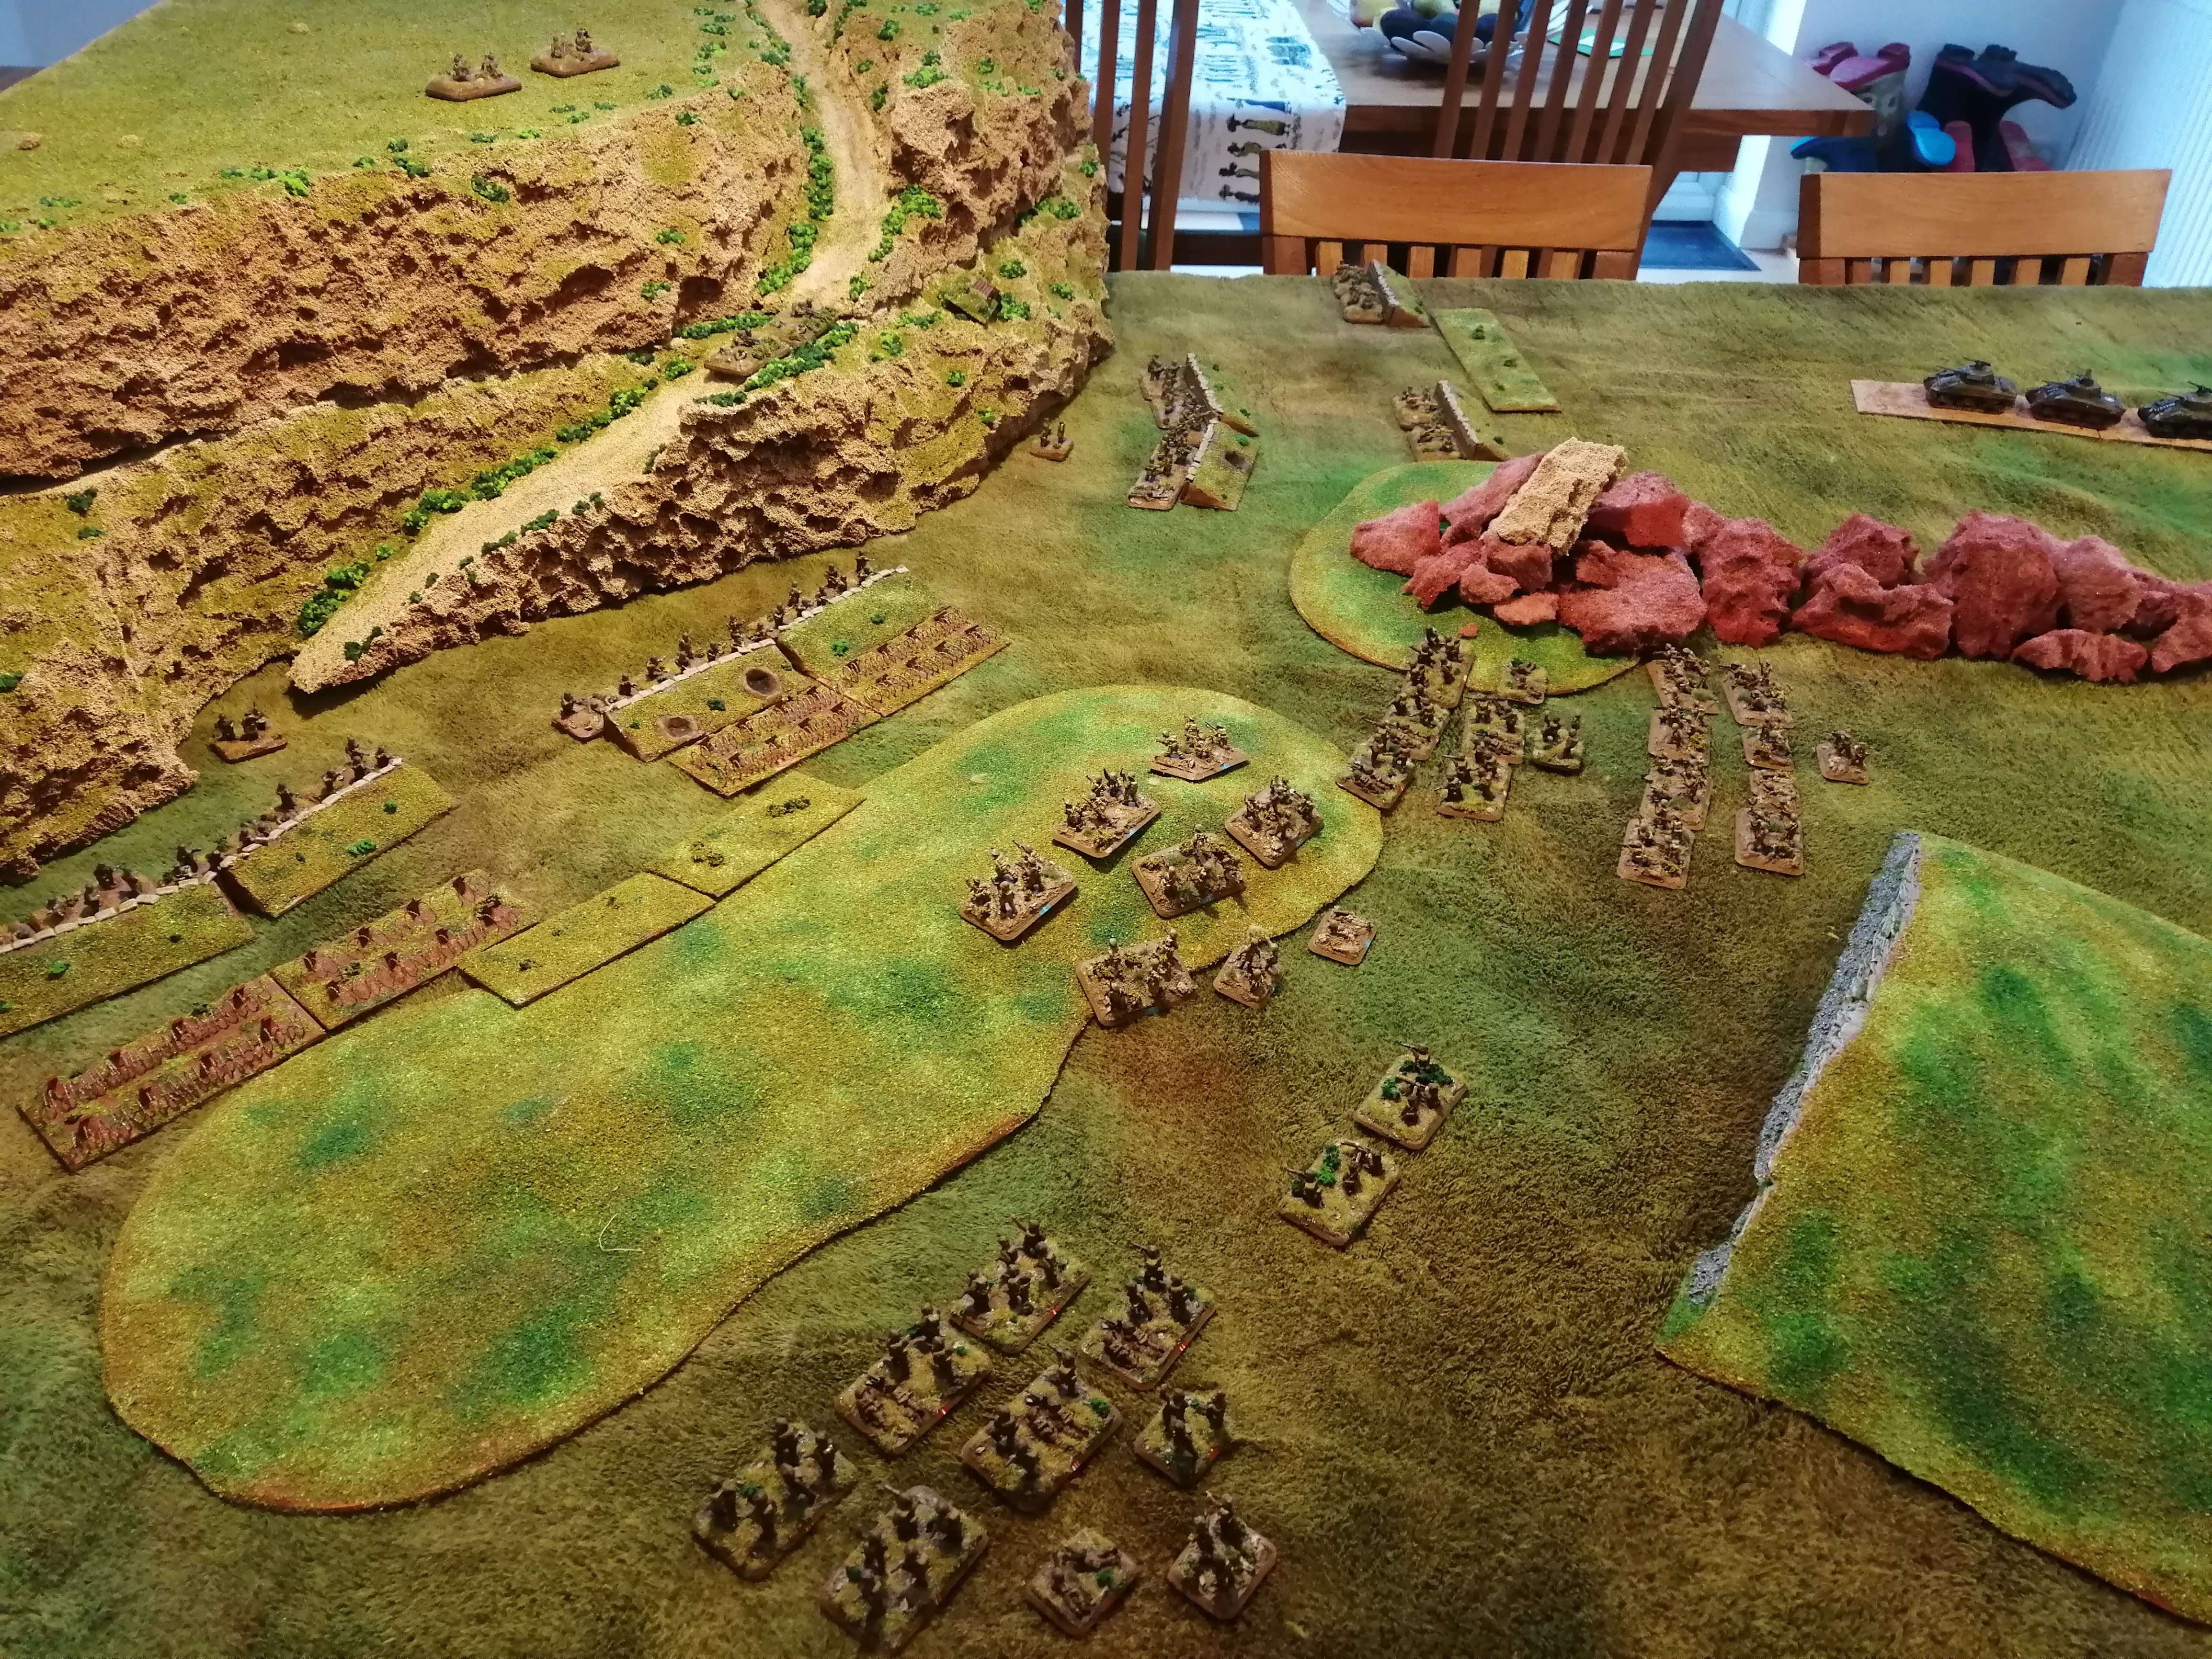
Turn 3.
The entire Allied army is able to unpin and move forward. The tanks, now under attack and able to see the guns advance and spread out to maximise their return fire. These extra shots from the tanks are able to destroy one of the gun teams. The infantry fair better this turn, destroying one German HMG team and a team from FRP. They also manage to get some more smoke down.
With the tanks spread out, there are now more targets for the LG40 guns and they put this to good use. One tank brews up and the crew from another bail out after taking a hit at relatively close range. This leaves one tank platoon with no operational tanks!
The 4th BI fair no better with GBP losing 1 team, BOP losing 2 and BRP losing 4 teams. The infantry assault is being stopped quickly by the German MGs.
 After their third turn move, the Gurkhas and Rajputana Rifles are closing in on the German trenches
3rd Battle of Monte Cassino - Point 593 (again)
I’ve been grossly negligent in updating this project for a whole host of reasons, most related to real life, some related to cricket and generally my ambition for this project being far greater than my ability to deliver.
Still, I’ve had time to play out another key battle fought at Monte Cassino.
The third battle for Monte Cassino started on 15th March following a huge artillery bombardment, particularly on the town of Cassino. The 2nd New Zealand Corps would attack along the rail way line and into the town in the valley. Up on the hill, the 4th British Indian Division would once again attempt to take the monastery against the heavily dug in Fallschirmjager.
By 17th March, the 4th British Indian Division had advanced to within 200m of the monastery. The well defended Point 593 stood between them and a direct route to the ruins of the monastery. The 4th British Indian Division had been here before during the 2ndBattle of Monte Cassino (also fought out in this project earlier) and they had then failed to take point 593 and at huge cost. This time it would be the turn of 9th Gurkha Rifles and the 6th Rajputana Rifles to carry the assault.
During the cover of darkness, engineers toiled to prepare a track leading up to Albaneta Farm, making it accessible for the tanks of the 20th Armoured Regiment. This route ran up a valley separated from the troops around point 593 by a rocky, exposed ridge, making the joining of the two forces difficult except where their combined assaults met around point 593. It took a couple of nights to complete the track and by the 19th March, the allies were able to launch their surprise attack.
Unknown to the Allies, the defending Fallschirmjager were prepared and were able to counter attack against the tanks. Without infantry support, the tanks were destroyed and by mid morning, the tank assault had failed. Without the armour supporting, the infantry assault against Point 593 would ultimately fail.
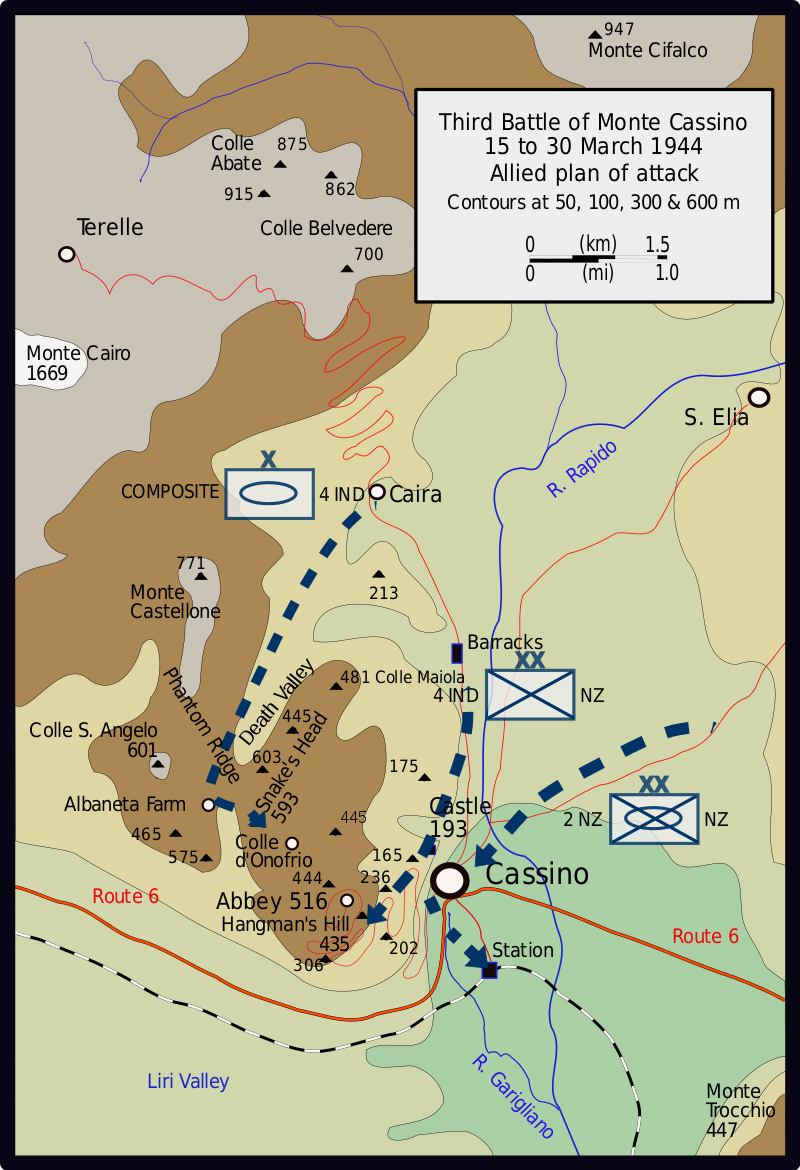 The overall plan of attack. Albaneta Farm can be seen just above Route 6
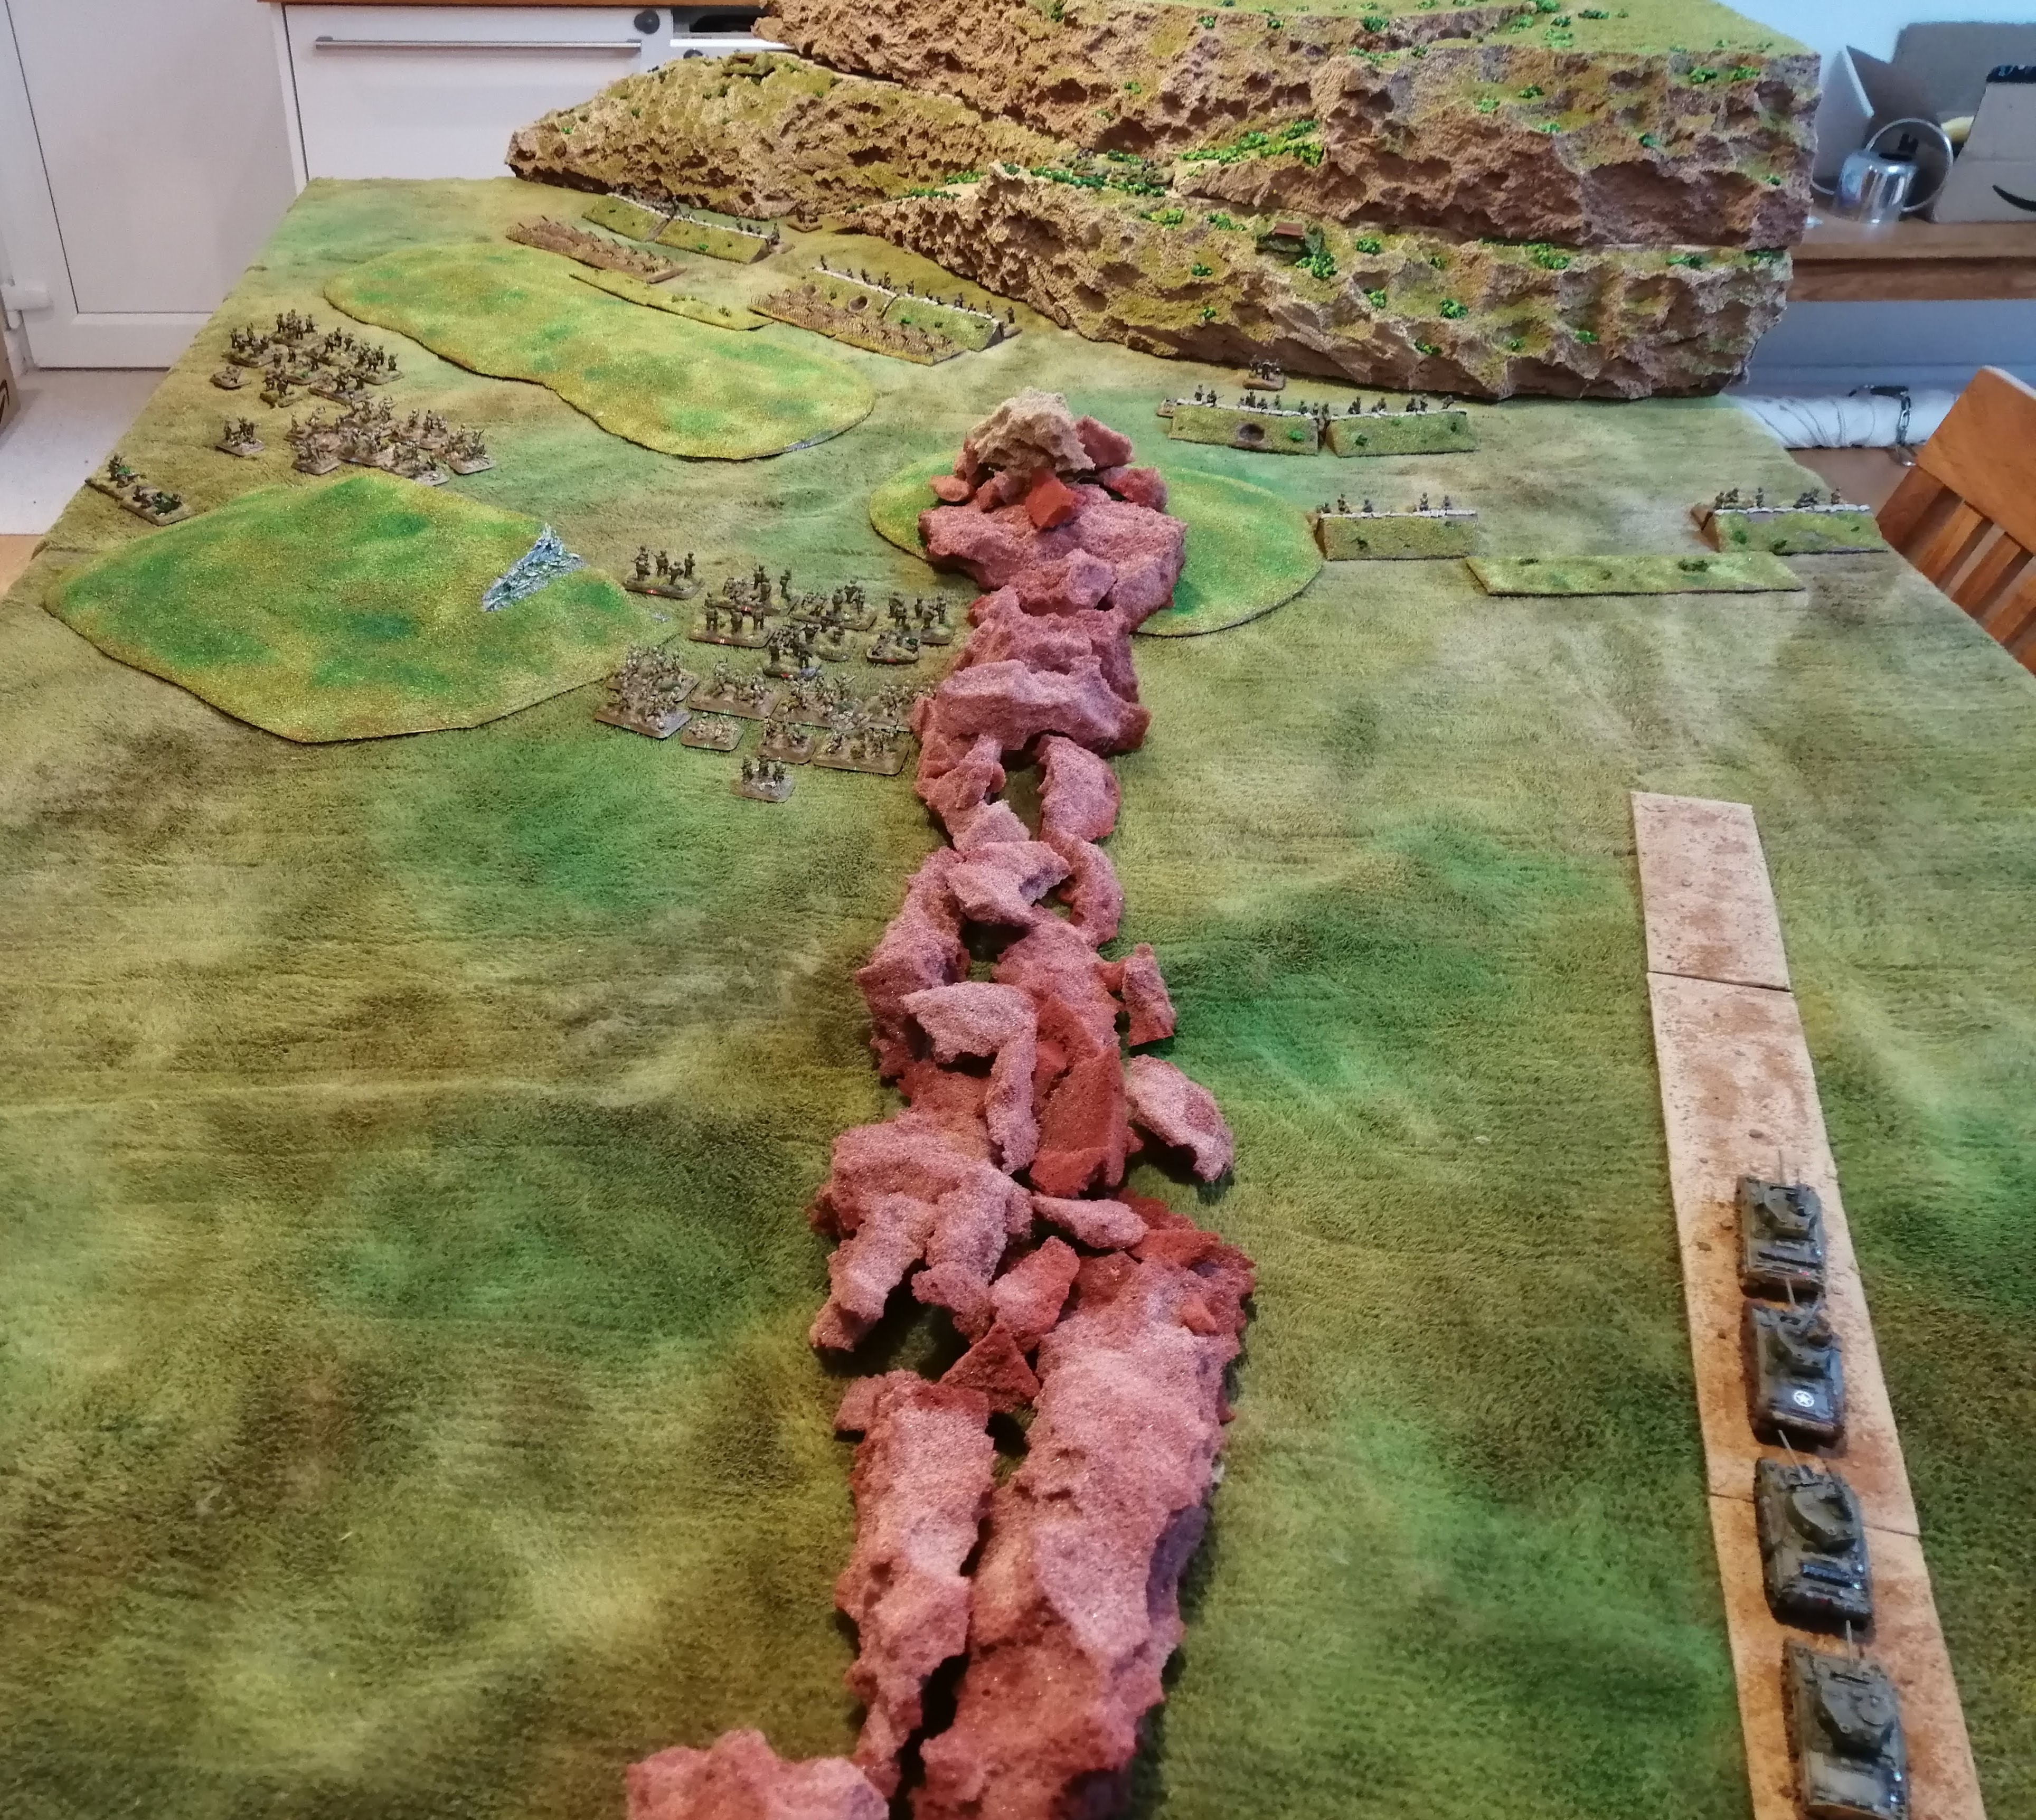
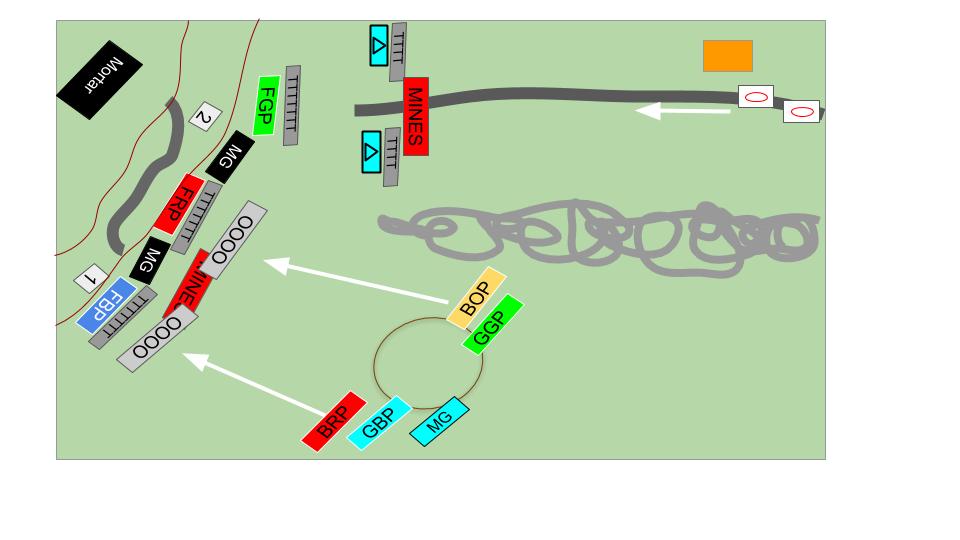
For this battle, we will use roughly the same set up as we did for the previous 4th Indian Division assault on point 593 however we will extend the table a little to make room for Albaneta Farm and the track up to Point 593. This has been separated from the infantry by a ridge of rocks, unpassable for tanks and unpassable for troops without the Mountaineer special rule (which only the Gurkha’s have).
It’s a little unclear what equipment the Fallschirmjager had however, given the terrain and the logistics of getting large equipment into place, I have assumed that in addition to Mortars and infantry anti tank weapons, small infantry guns could have been put in place. In this case, I have assumed that four 7.5cm LG40 recoilless infantry guns are present and defending the approach up from Albaneta Farm.
Victory Conditions:
In this battle, the Allies win if they can take the top of Point 593. The Germans win if they can hold on.
German Troops:
Command: 1iC and 2iC infantry teams armed with SMG and Panzerfaust
Fallschirmjager: 3 Infantry Platoons of cmd team and 4 Rifle/MG teams
Mortar: Two mortar teams
2 HMG nests
2 MG teams
4 teams equipped with 7.5cm recoilless infantry gun
Allies:
Command: 1iC and 2iC Infantry Teams
2 Rifle/MG platoons: Cmd team, 6 teams and 2” mortar team
2 Rifle/MG Gurkha platoons: Cmd team, 6 teams and 2” mortar team
HMG Platoon of 2 teams
2 Platoons of Sherman Tanks (3 tanks per platoon)
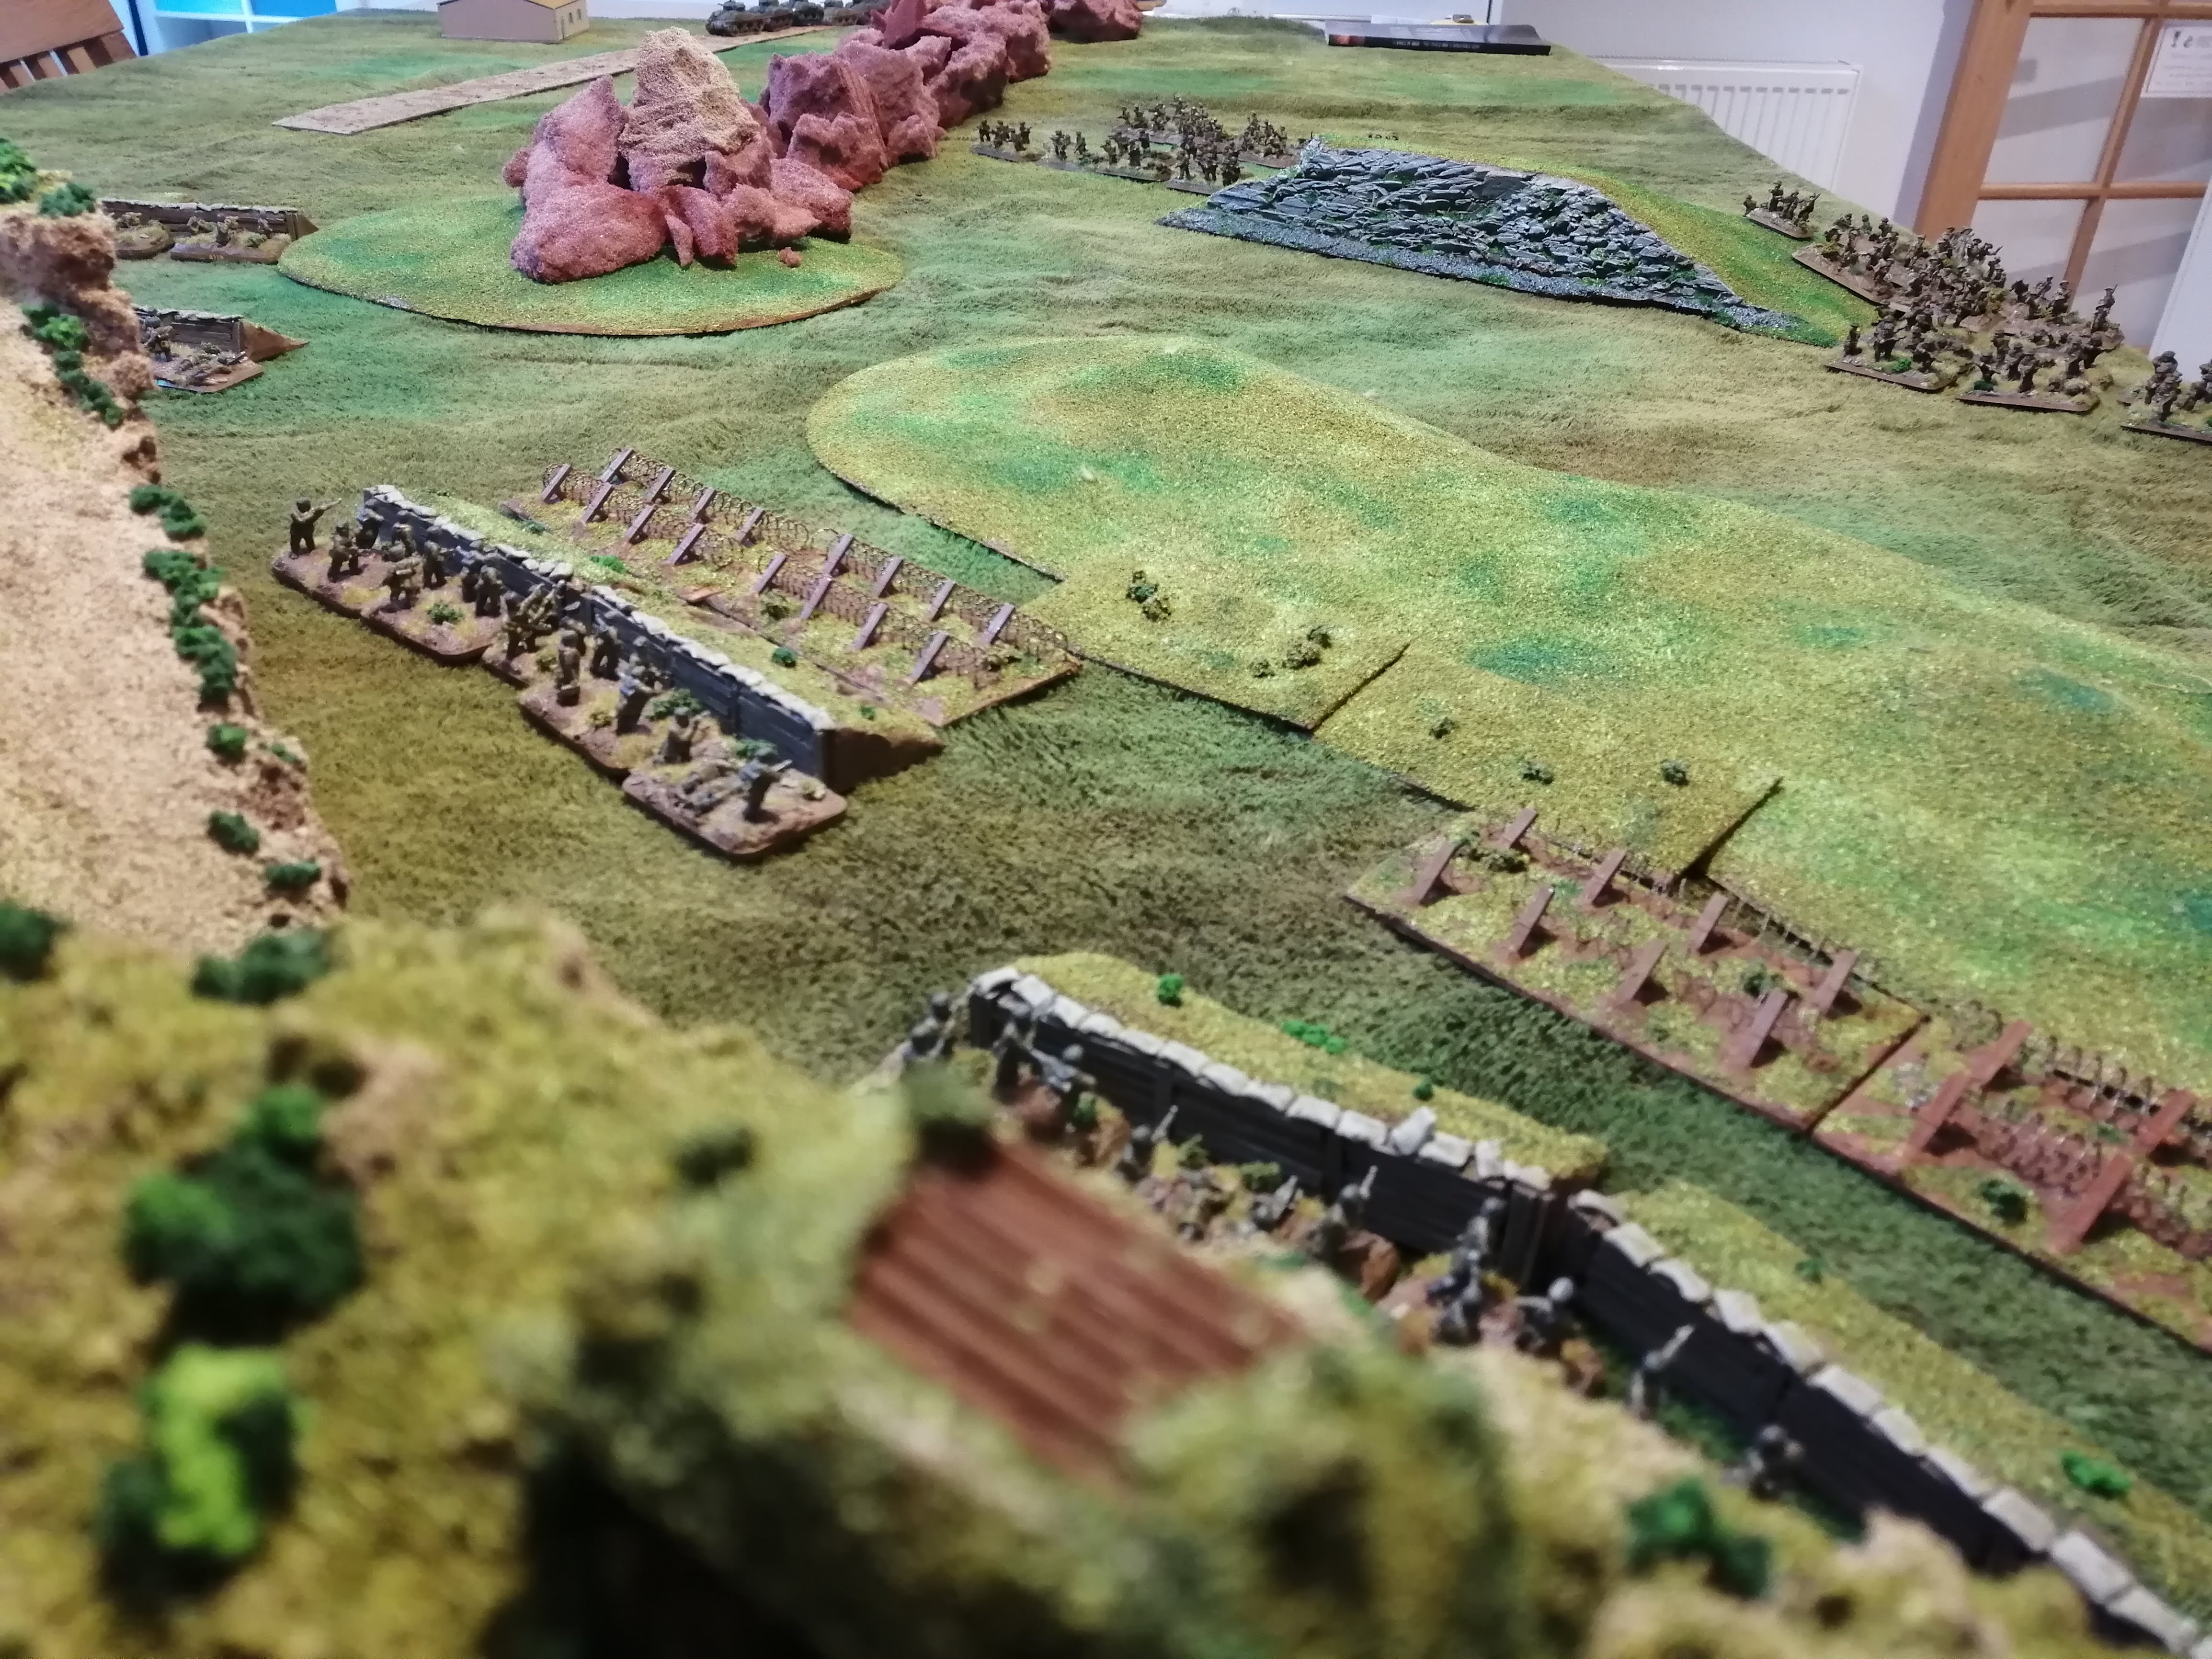
Defences:
The Germans are well prepared and all teams are dug in within trenches (marked as TTTT on the map). Barbed wire is positioned in front of several trench sections (marked as OOOOO) and there are two mine fields in place.
Unlike the previous assault on Point 593 which was conducted at night, this assault will be carried out during the day.
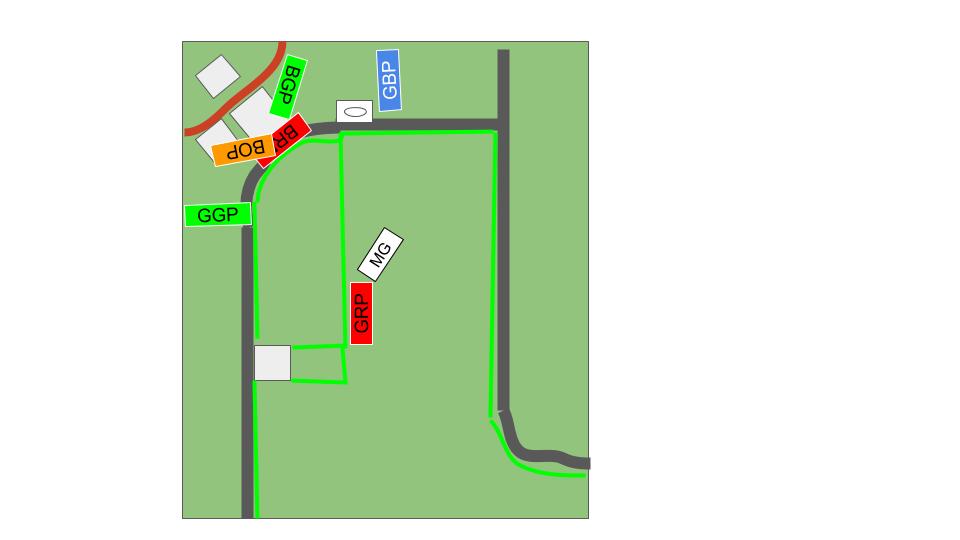
 The force disposition
Naming conventions are as before. FGP would be Fallschirmjager Greep Platoon. BOP = British Orange Platoon. GBP = Gurkha Blue Platoon.
Boxes numbered 1 and 2 and the HMG nests.
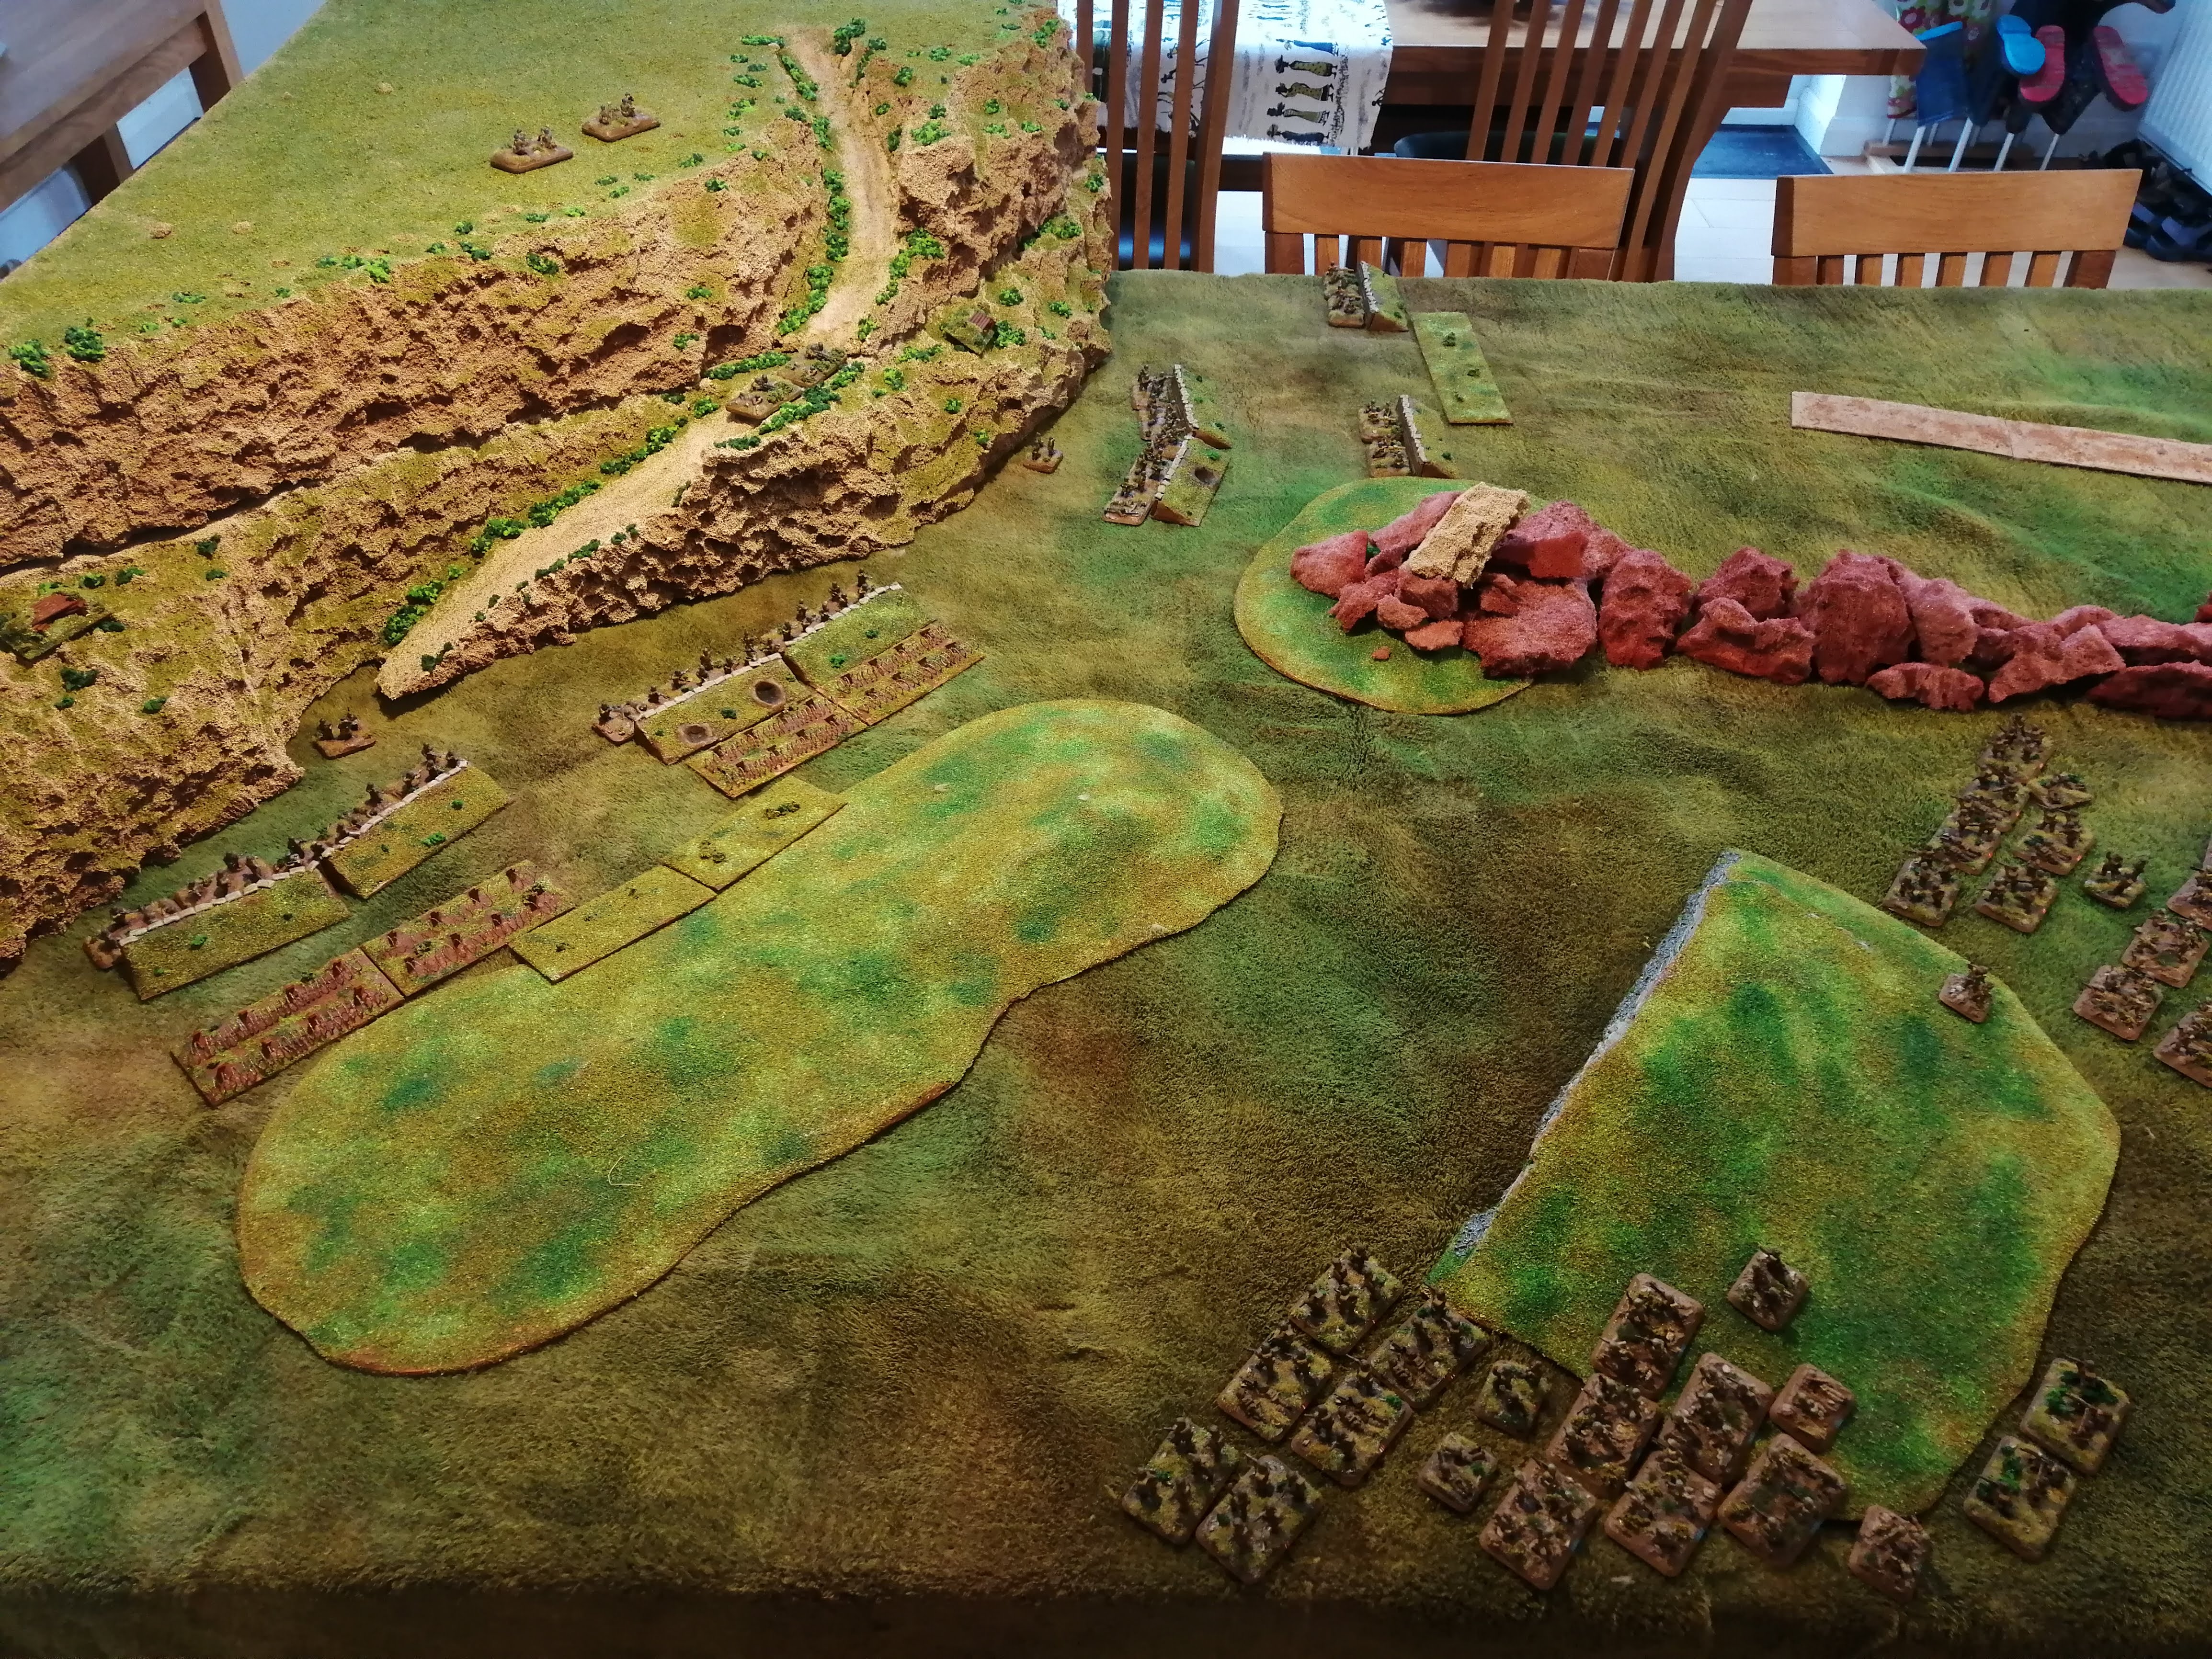 Table set up from the 4th British Indian perspective. 20th Armoured are deployed off picture to the right
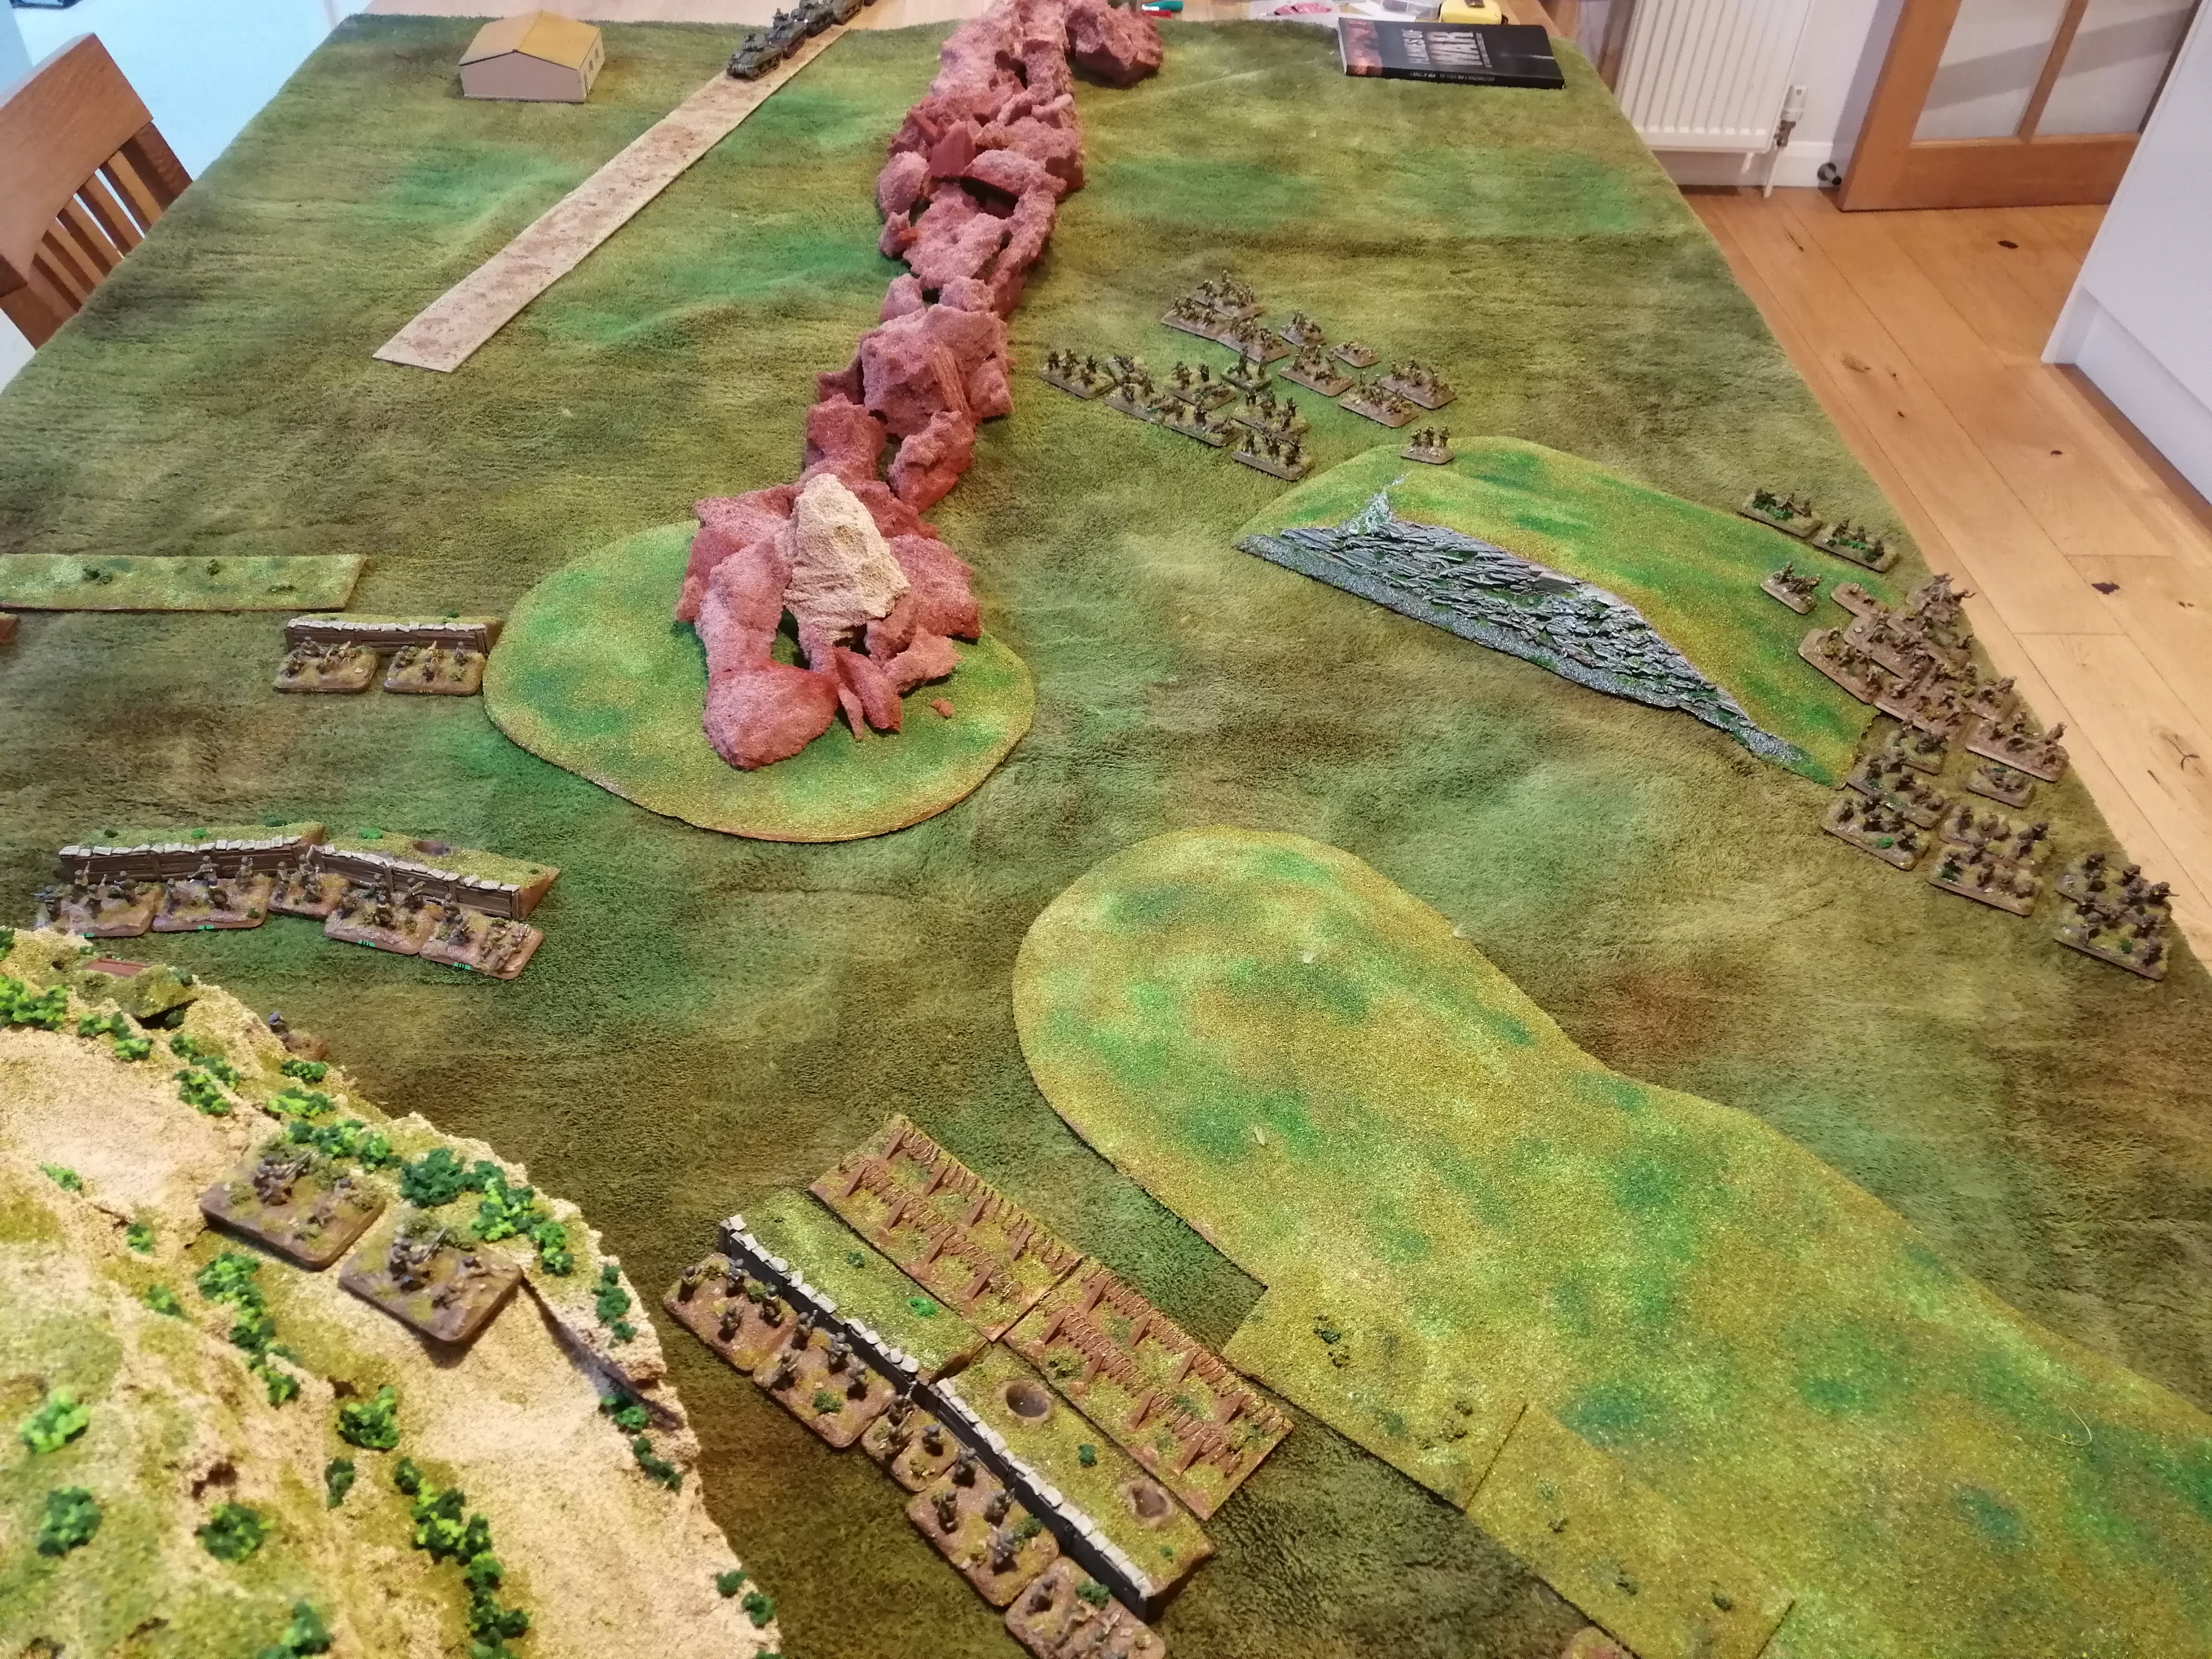 The view from above point 593. You can just see Albaneta Farm and the lead tanks from 20th Armoured at the top left.
I now need to spend some time writing up the actual battle.
Rome Falls
With the German 10th Army now mounting a fighting withdrawal from Cassino, the next line of defence was the Caesar C line. This defensive line extended from the west coast near Ostia, over the Alban Hills south of Rome to Avezzano and then to Pescara on the Adriatic coast. It was manned by the German 14th Army who were in position to delay the Allied advance and allow the German 10th Army to retreat up Route 6 in the Liri Valley and take up positions either alongside the 14th Army or further North.
With the fall of Monte Cassino, Operation Diadem could now move into phase two, the break out from Anzio. The US VI Corps had now been embattled at Anzio for nearly 3 months with neither the support nor the man power to breakout. With Cassino taken, German reserves were already committed and at stretching point. This was the opportunity to finally link up with the rest of the US 5th Army and continue the advance up the Italian Peninsula.
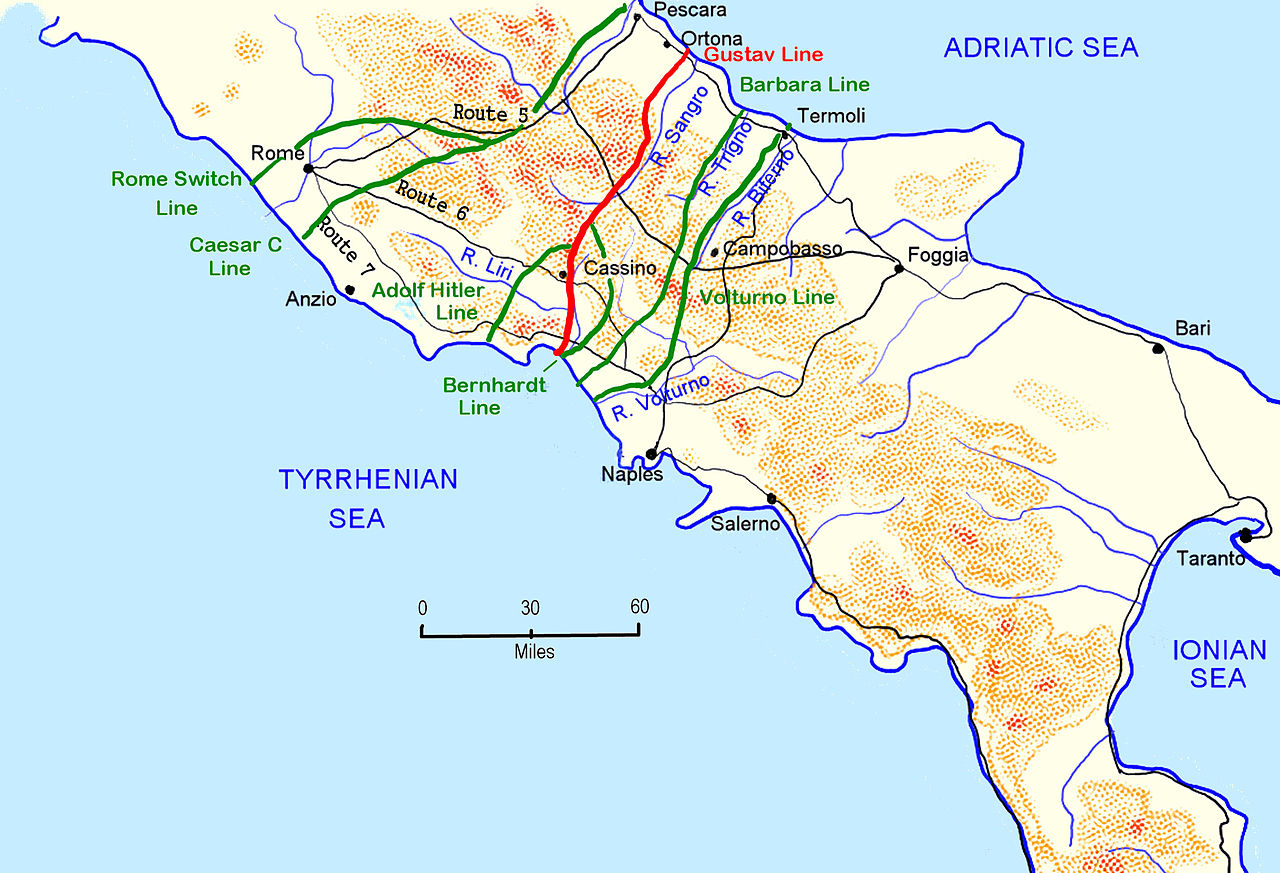 The Defensive Lines in Italy
Operation Buffalo started on the morning of 23rd May and like the Cassino offensive, started with an enormous artillery barrage targeting the defences around Cisterna. The assault was launched across the entire Anzio line and spearheaded by the US 1st Armoured Division (Old Ironsides) and US 3rd Infantry Division.
The initial assault was met with heavy resistance and a formidable set of defences. The minefields began to take their toll on the advancing troops however by mid afternoon, Route 7 to the South of Cisterna had been taken and this allowed the 1st Armoured to rapidly advance upon and take the rail line and punch through the German defenses. During this offensive, the defending German 362nd InfantrieDivision had lost nearly 50% of its fighting capability and the 715th had suffered almost as badly.
The German situation at Cisterna was increasingly looking worse. The newly refitted Herman Goring Fallschirmpanzerdivision, which was about to depart for France, was diverted South in an attempt to reinforce the defenders. Attacks by British 1st and 5th Divisions pinned German units further North on the Anzio line leaving Cisterna increasingly isolated. General von Mackensen requested to withdraw from Cisterna but this request was denied.
The following day 1st Armoured Division looped around to the North of Cisterna and took Route 7. US 3rd Infantry looped around Cisterna from the other direction and encircled the town. The German defenders surrendered later in the day with over 1,000 pows taken by the US forces.
By 26th May, US forces had continued to advance North and encountered the Caesar line. German defences had reorganised and the first elements of the HG Fallschirmpanzerdivision were beginning to arrive into the defensive line and were able to hold up the advancing VI Corps. Once again, the 1st Armoured Division led the assault and, despite counter attacks from the HG Panzerdivision, were able to breach the Caeser line on 30th May.
 US Infantry advancing following the capture of Cisterna
With the defensive line now breached, General Alexander, commander of the Allied forces in Italy, ordered General Clark to advance his VI Corps Eastward to cut of Route 6 and trap a large portion of the retreating German 10th Army between the VI Corps and the advancing British 8th Army. Such a move would almost certainly have resulted in the removal of much of the German 10th Army and greatly reduced the defensive fighting power of German in Italy.
In one of the most debated moves of the Italian campaign, General Clark disobeyed the order and turned his VI Corps North West toward Rome and continued to advance up Route 6. The advance was led by the First Special Service Force who quickly captured the bridges required for the armour to advance into Rome. Rome itself was captured by the Allies on 4th June, to much celebration among the locals in the city.
However, Rome itself had been declared a Free City, indicating that there would be minimal occupying forces and that taking the city would require minimal force. Indeed, barely a shot was fired as the US forces entered Rome itself. Response to the capture of Rome from the Allies was markedly different. Across the Atlantic, in the US Clark was hailed as hero and a liberator. In Europe, he was portrayed as insubordinate and vainglorious.
 US Forces advance into Rome
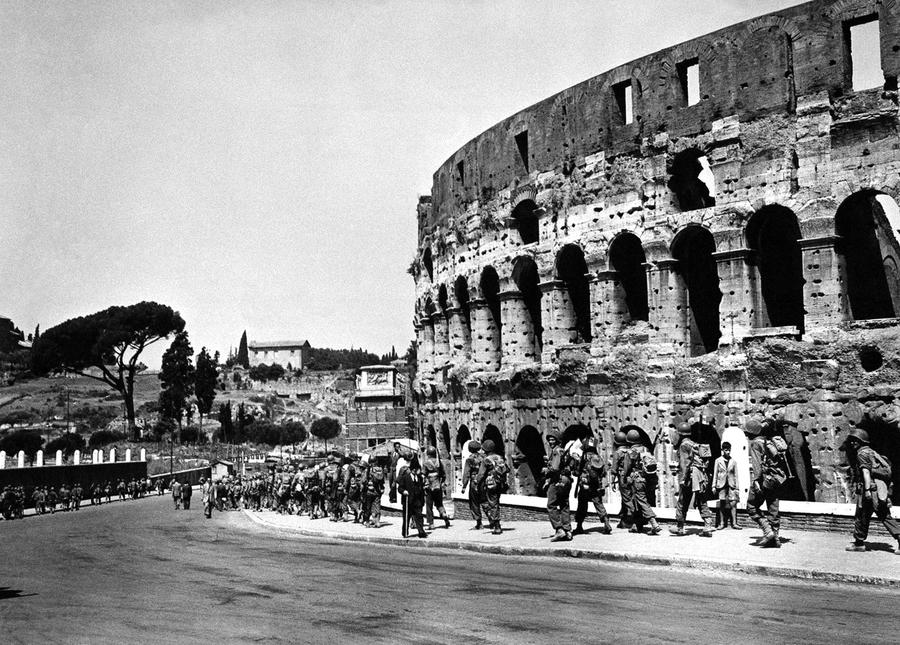 US Forces at the famous Colosseum
 Italian celebrations
Speculation is still rife today as to why Clark went for Rome and not follow the orders of Alexander. Was Clark in possession of information the forced him into this tactical move? There are intercepts received at the time indicating the movements of the HG Fallschirmpanzerdivision and a move toward Rome would have cut off their ability to plug holes in the defensive line. Or was Clark interested in claiming the glory of capturing Rome? Either way, the capture of Rome and indeed the entire Italian campaign became a backstory as two days after Clark arrived in Rome, Allied boots hit the shores of Normandy and the entire focus of the war in Western Europe shifted.
And so, even 75 years on from the fall of Rome, the entire Italian campaign passes most people by. I’ll continue with this project and explore the battles in the Gothic line and Northern Italy but for now, the lime light should pass to Normandy and Northern France. It would however be nice if Battlefront brought forward the 4th Edition books for the Italian campaign!
4th Battle of Monte Cassino
Following the unsuccessful third attempt to capture Cassino, the Allies needed time to reorganise and resupply their forces to enable them to punch through and relieve the US VI Corps, still encircled at Anzio some 80km to the North. The early spring conditions in Italy also forced a degree of caution on any assault as the wet weather made ground conditions far more suited to defence. General Sir Harold Alexander therefore took time to better coordinate the attack and reorganise his forces.
Alexander’s first move was to shift the bulk of Lieutenant-General Sir Oliver Leese’s British 8th Army across the spine of Italy from the Adriatic coast and to take up positions to the right of Lieutenant General Mark Clark’s US 5th Army. The remaining British Divisions that were part of US 5th Army (with the exception of those stuck at Anzio) were also transferred to British 8th Army, finally resolving the logistical problem US 5th Army had of trying to supply troops equipped with US and British army equipment.
Once in position, US 5th Army had US II Corps on the West coast with the French Expeditionary Corps to the right ready to move up into the Aurunci Mountains. To the right of the FEC, British XIII Corps sat ready to push up Route 6 into the Liri valley while Polish II Corps were tasked with accomplishing what the British 4th Indian Division had failed to accomplish twice, namely loop around Cassino to the East, assault up Snakeshead Ridge and take the Monastery. Once the German defenders had been defeated, US VI Corps were tasked to break out of their Anzio beach head and cut off the retreating German 10th Army.
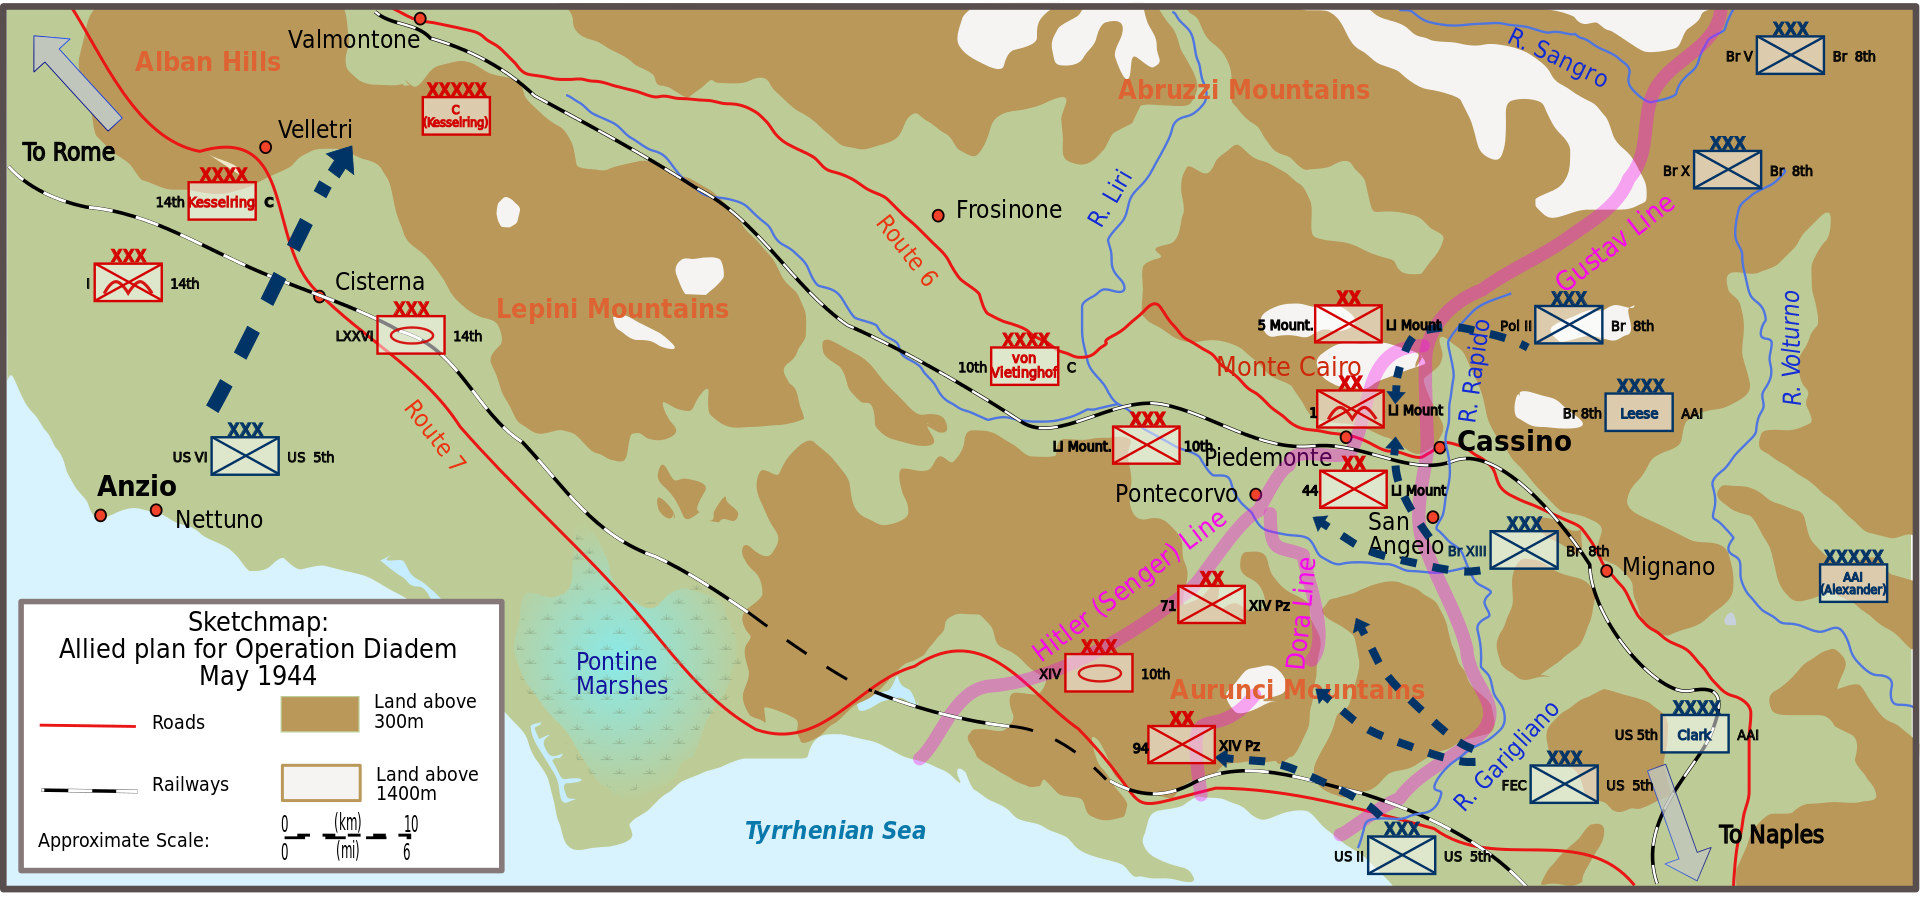 Operation Diadem plan of attack
The entire offensive was codenamed Operation Diadem. Its primary goal was to break through to Rome but its size and scope was also designed to tie down as much of the German forces in Italy as possible to improve the chances of the planned Normandy landings. In all, the initial offensive was planned to take place across nearly a 30km front, from the Western Italian Coast stretching inland along the Rapido and Garigliano rivers.
Reorganising the units along the front was carried out in secrecy to hide the intentions from Kesselring, still commanding the German defences in Italy. To reduce the chance of detection, troop movements were kept to small units at a time and changes along the front took place at night. British 8th Army left behind dummy tanks and vehicles along the Adriatic Coast to confuse enemy aerial reconnaissance and shift all but one Corps to the other side of the Appenines. To further confuse the defenders, US 36th Division were sent on amphibious assault training and dummy radio traffic was used indicating locations North of Rome. The deception was aimed at keeping German reserves further to the North. Overall, the deception was largely a complete success as Kesselring maintained his reserve close to Rome and even after the assault was launched, the Germans believed that they were facing six Allied Divisions at Cassino, rather than the 13 that had actually gathered there.
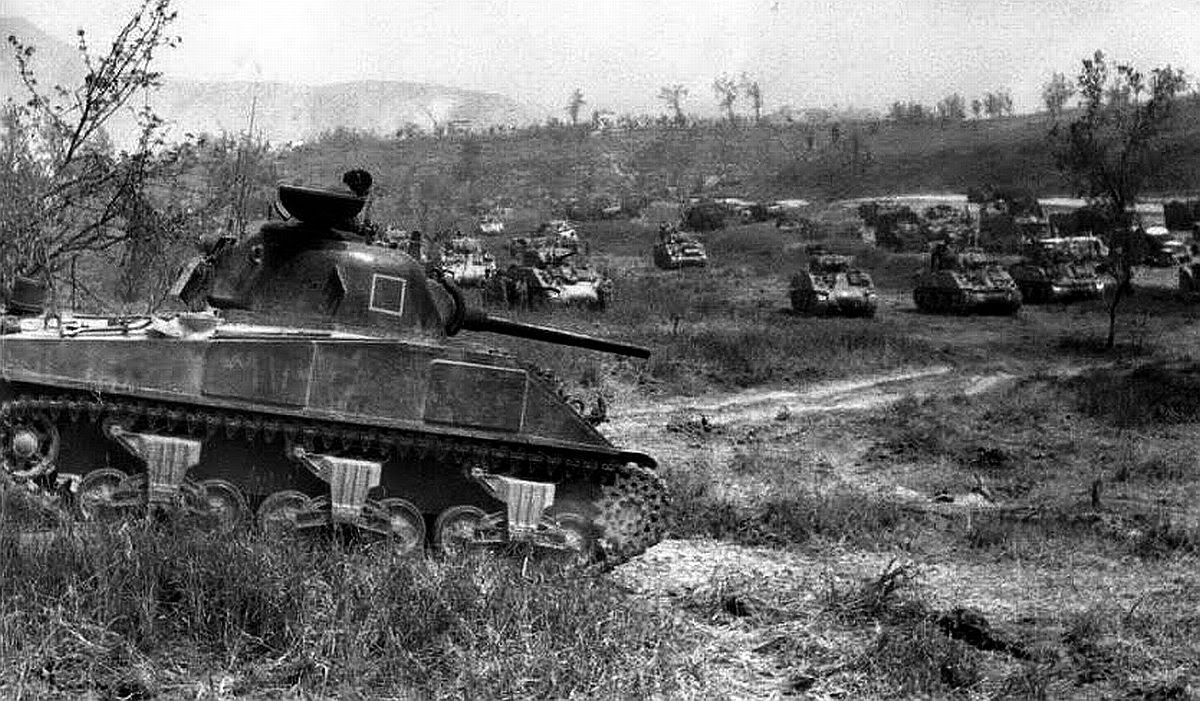 6th Armoured Division, part of British XIII Corps, gathered before the assault is launched
The start of the assault was sounded on 11th May at 23:00 by over 1600 artillery guns from the US Fifth and British Eighth Armies bombarding the German defensive positions. Within two hours, the Allied troops began their advances.
On daybreak of the 12th May, by the coast and along route 7, the US II Corps were making slow progress, meeting strong resistance from the defenders. The French Expeditionary Corps (FEC) to their right were making better progress into the Aurunci Mountains and had largely achieved their objectives. As the morning progressed, the FEC were beginning to fan out to the East to meet up with the British Eighth army who were tasked with pushing up Route 6 with a view to encircling the remaining German defensive positions in the mountains.
The British Eighth Army’s XIII Corps had met significant resistance as they tried to cross the Garigliano river but by day break, the British 4th Infantry Division and 8th Indian Division had succeeded in creating bridge head and, more significantly, the engineers of the 8th Indian had managed to bridge the river allowing the 1st Canadian Armoured Brigade to cross and fully engage.
The Polish II Corps had advanced up Snakeshead ridge and met the fierce resistance of the 4th Fallschirmjager dug in around the monastery. Once again the allies assaulted point 593 and briefly managed to take the position before being repelled by a German counterattack. This was a pattern that would continue for 3 days as the Polish repeatedly assault the German positions before being driven back by counter attacks. During this time, the Polish II Corps would lose nearly 3,900 men.
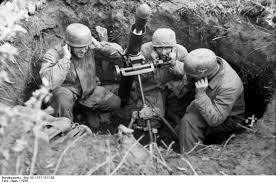
[In the pictures below, you can see Allied mortar teams around Cassino launching their bombardment, German MG teams dug in around the ruins of the town and German mortar teams returning fire]


As the 12th May progressed, the central thrust from the XIII Corps began to gain ground and held against increasingly desperate German counter attacks. On both flanks, attrition on both sides was high however given the significantly larger manpower of the Allies, the strain was increasingly showing on the defenders.
By the morning of the 13th May, the US Fifth Army on the coast was starting to make progress and push the defenders back. The FEC had achieved their objectives and captured Monte Maio. They were now begining to turn Eastward as planned and provide increasing support to the British XIII Corps still making headway up Route 6 in the Liri Valley. Kesselring was becoming increasingly concerned about holding the positions and threw all of his remaining reserves into the Liri Valley to, at the very least, hold open the rout of retreat to an already prepared defensive line 13KM to the North, the so called Hitler line.
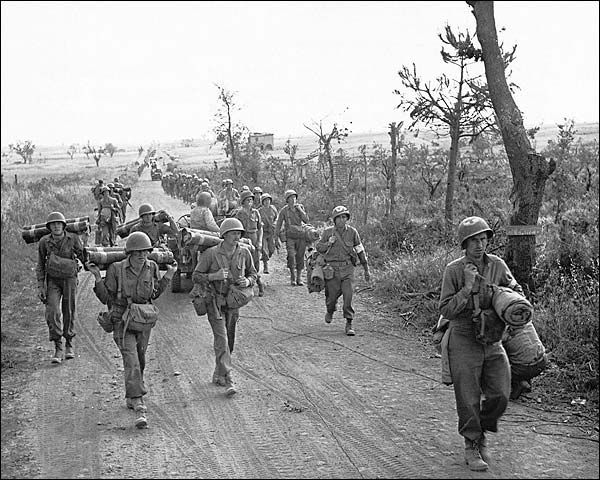
Over the coming few days, all elements of the Allied assault continued to make gradual progress against the determined defenders. The Moroccan Goumiers of the FEC particularly excelled in the rough mountain country and carried out a number of daring night attacks that the defenders found difficult to resist. Lieutenant General Mark Clark, commander of the US Fifth Army, was particularly complimentary writing ‘[The towns of] Cerasola, San Giorgio, Mt D’Oro, Ausonia and Esperia were seized in one of the most brilliant and daring advances of the war in Italy… key to the success of the entire drive to Rome’.
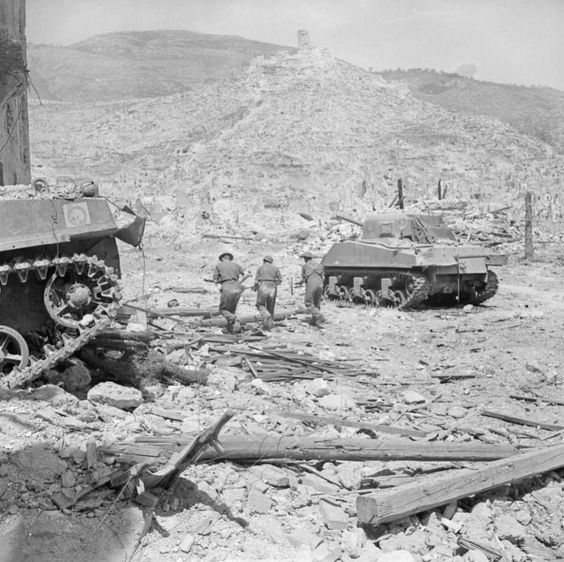
[In the pictures below, you see Shermans supporting the advance through the town of Cassino and Polish troops assaulting up Snakeshead Ridge]
The British 78th Infantry Division joined the main XIII Corps assault from reserve on the 15th May. Rather than push forward up the Liri Valley, they turned East and began to isolate Cassino. This act made retreat increasingly difficult for the defenders and effectively turned the battle as Kesselring began to realise that holding on to Cassino and the Gustav line was now almost hopeless.
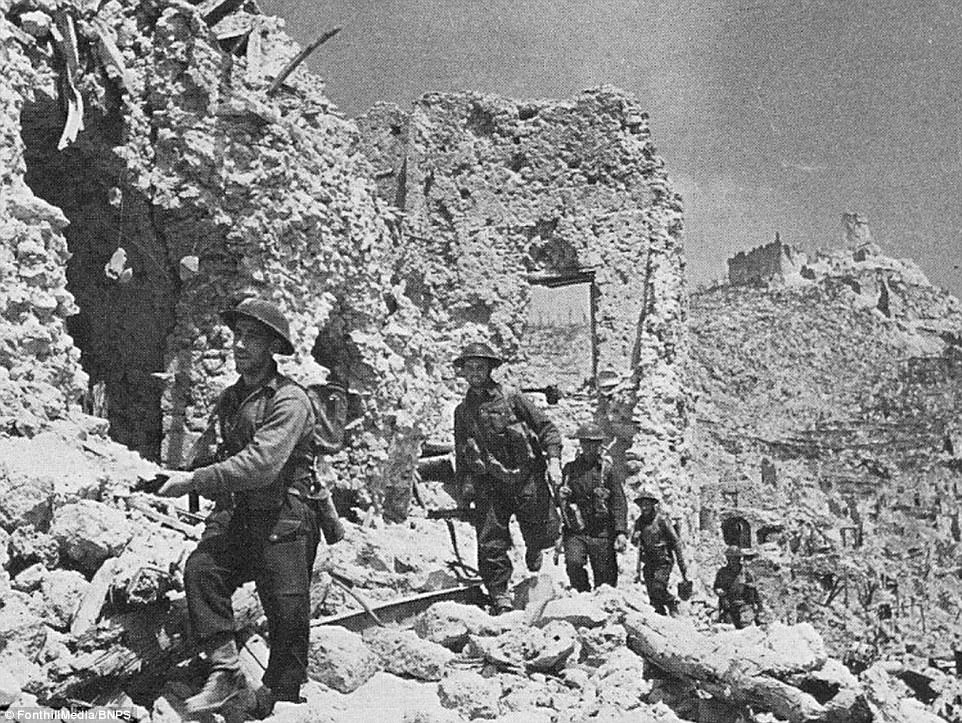
Polish II Corps, who had called off their assault on Monte Cassino two days earlier launched their second assault. Once again the troops were met with a near constant artillery and mortar bombardment as they tried to cross the open ground. The fighting was once agin fierce, up close and desperate. But, with the supply lines from the Liri valley increasingly getting restricted and the route of retreat gradually closing, Kesselring finally ordered the withdrawal from Monte Cassino. As night fell on the 17th, the German defenders quietly slipped away leaving the Polish II Corps alone on the high ground. By the early hours of the 18th May, Polish troops linked up with British troops from the 78th Infantry Division in the Liri Valley.
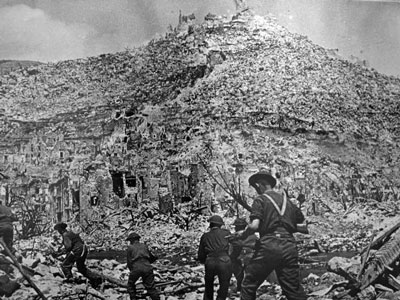
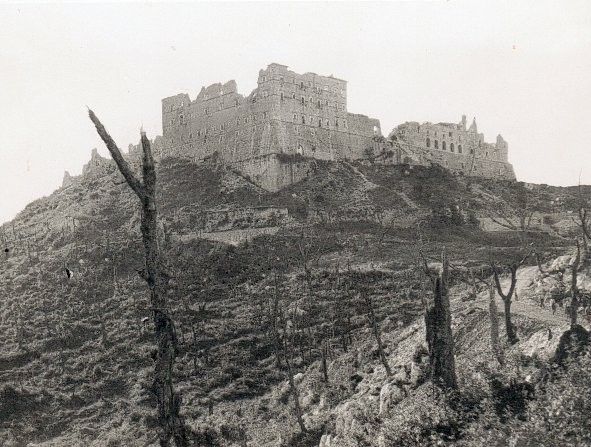
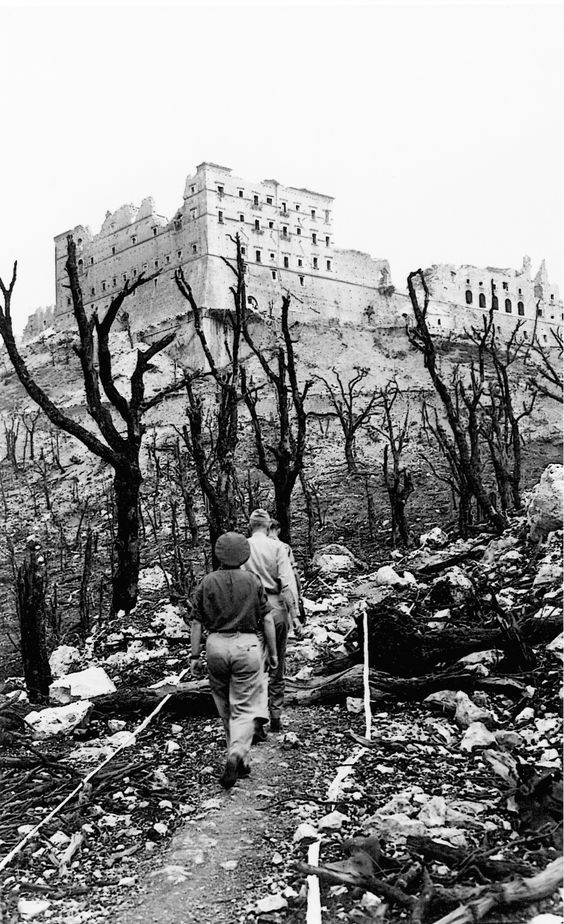
Such was the devastation that the Polish II Corps had suffered, ‘it took some time to find enough men with the strength to cover the remaining few hundred metres to the ruined monastery and capture the summit’. When they got there, they found around 30 wounded German defenders who were too injured to move. As sun rose over Monte Cassino on 18th May, men from the Polish 12th Podolian Cavalry raised the Polish flag on the hilltop. After 4 months of fighting, Monte Cassino had finally fallen.
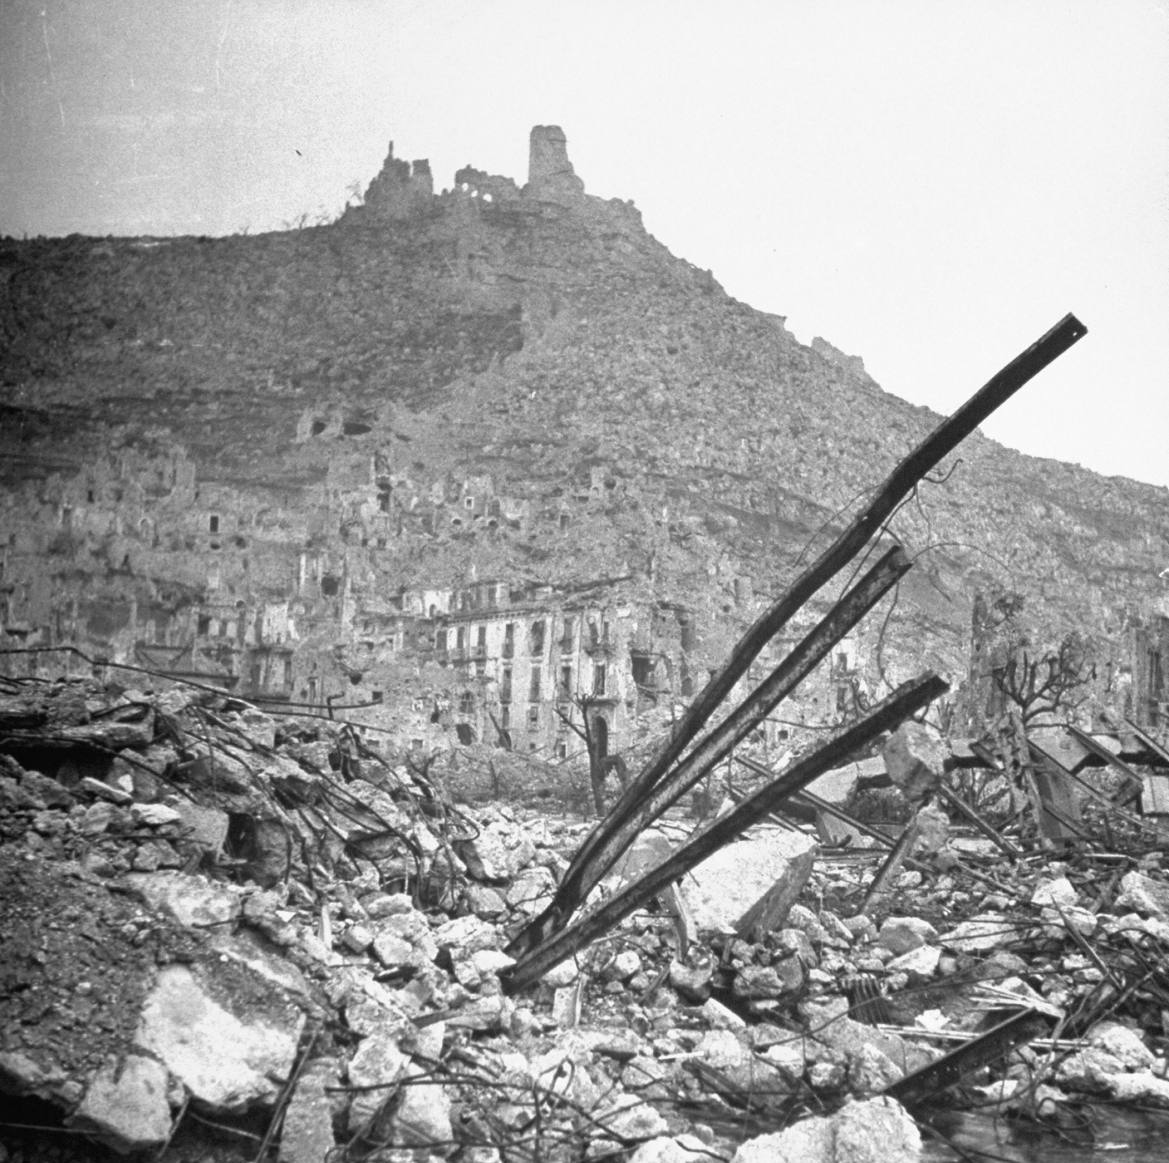
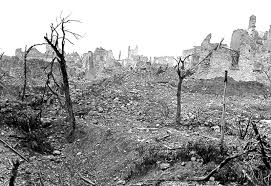
[The pictures below show the level of devastation wrought upon Cassino and the surrounding landscape]
2nd Battle of Monte Cassino - Cassino Station (Part 3)
Turn 5:
The smoke closes in, reducing the visibility to 14” this turn.
GRP unpins and advances along the hedge. The MG team cannot see anything due to the smoke so also advance up toward the station, staying behind the hedge. GBP advances up behind the two smoking tanks and GGP looks to advance around the side of the station and cut off the retreat area. The German shooting is woeful and they can only pin BRP, causing no further damage.
The Maori’s can now begin to fall back if they wish, having survived to Turn 5. But, with the Panzers destroyed, there is a chance that they could hold the station from the assaulting Germans. Adding to the complexity is BRP remain pinned and cannot withdraw, so the Maori’s stay put and fight on. Pinned BRP shoots at GRP and causes another casualty, if the Maori’s can break GRP, they could shake the entire German force and cause them to withdraw. The 2iC is able to kill a team from GGP but otherwise, the Maori’s just aren’t causing enough damage.
Turn 6:
The smoke visibility is again 14”.
GGP advances around the back of the station to the rail line and GBP also advance, creating a pincer movement and surrounding the Maoris. GGP and GBP kill two teams from BGP and also pin them in place. The MG team is able to kill a team from BRP.
The Maoris fail to unpin and cannot withdraw. With their shooting restricted, they can only manage to kill one team from GGP but little else. The situation is deteriorating rapidly for the Maoris but they hold the station and gain 1VP.
Turn 7:
The smoke clears, giving a 22” visibility although everyone is now so close, the smoke is having little impact on the battle.
The Germans now completely surround the station building and continue to fire upon the pinned BGP, removing the last three teams and wiping out the platoon and giving the Germans 2VP.
GGP assault BOP but fail to cause any damage while BOP reply and are able to kill one team from GGP and force them to fall back.
The Maoris manage to lift the pin on BRP but being surrounded, can’t really fall back. They do manage to kill a team apiece from GRP and GBP and gain another 1 VP for still holding the station.
Turn 8:
The MG team cause another team on BRP to be removed and pin BRP in place. The Germans are able to pin BOP as well with volume of fire and the Maori 2iC is killed by GGP’s fire. During the assault phase, GBP manages to kill a team from BRP and forces them to fall back. GBP is also able to assault BOP and kills 2 teams on BOP but can’t push home the assault, being forced to fall back. BOP though is now reduced to just two teams.
The Maori’s start their turn having to make morale checks. BOP passes theirs but with just one platoon in good spirits, the Maori’s are faced with a company morale check which they fail. Surrounded, and with no hope of retreat, the Maori defenders surrender to the superior German force
So this battle played out differently to history. The only similarity was the the tenacity of the Maori to defend against the German counter attack. Unlike history, the Maori’s were able to destroy both tanks but ended up surrendering whereas in 1944 they actually made their way back to Allied lines.
 The Germans surround the Station, cutting off all hope of retreat
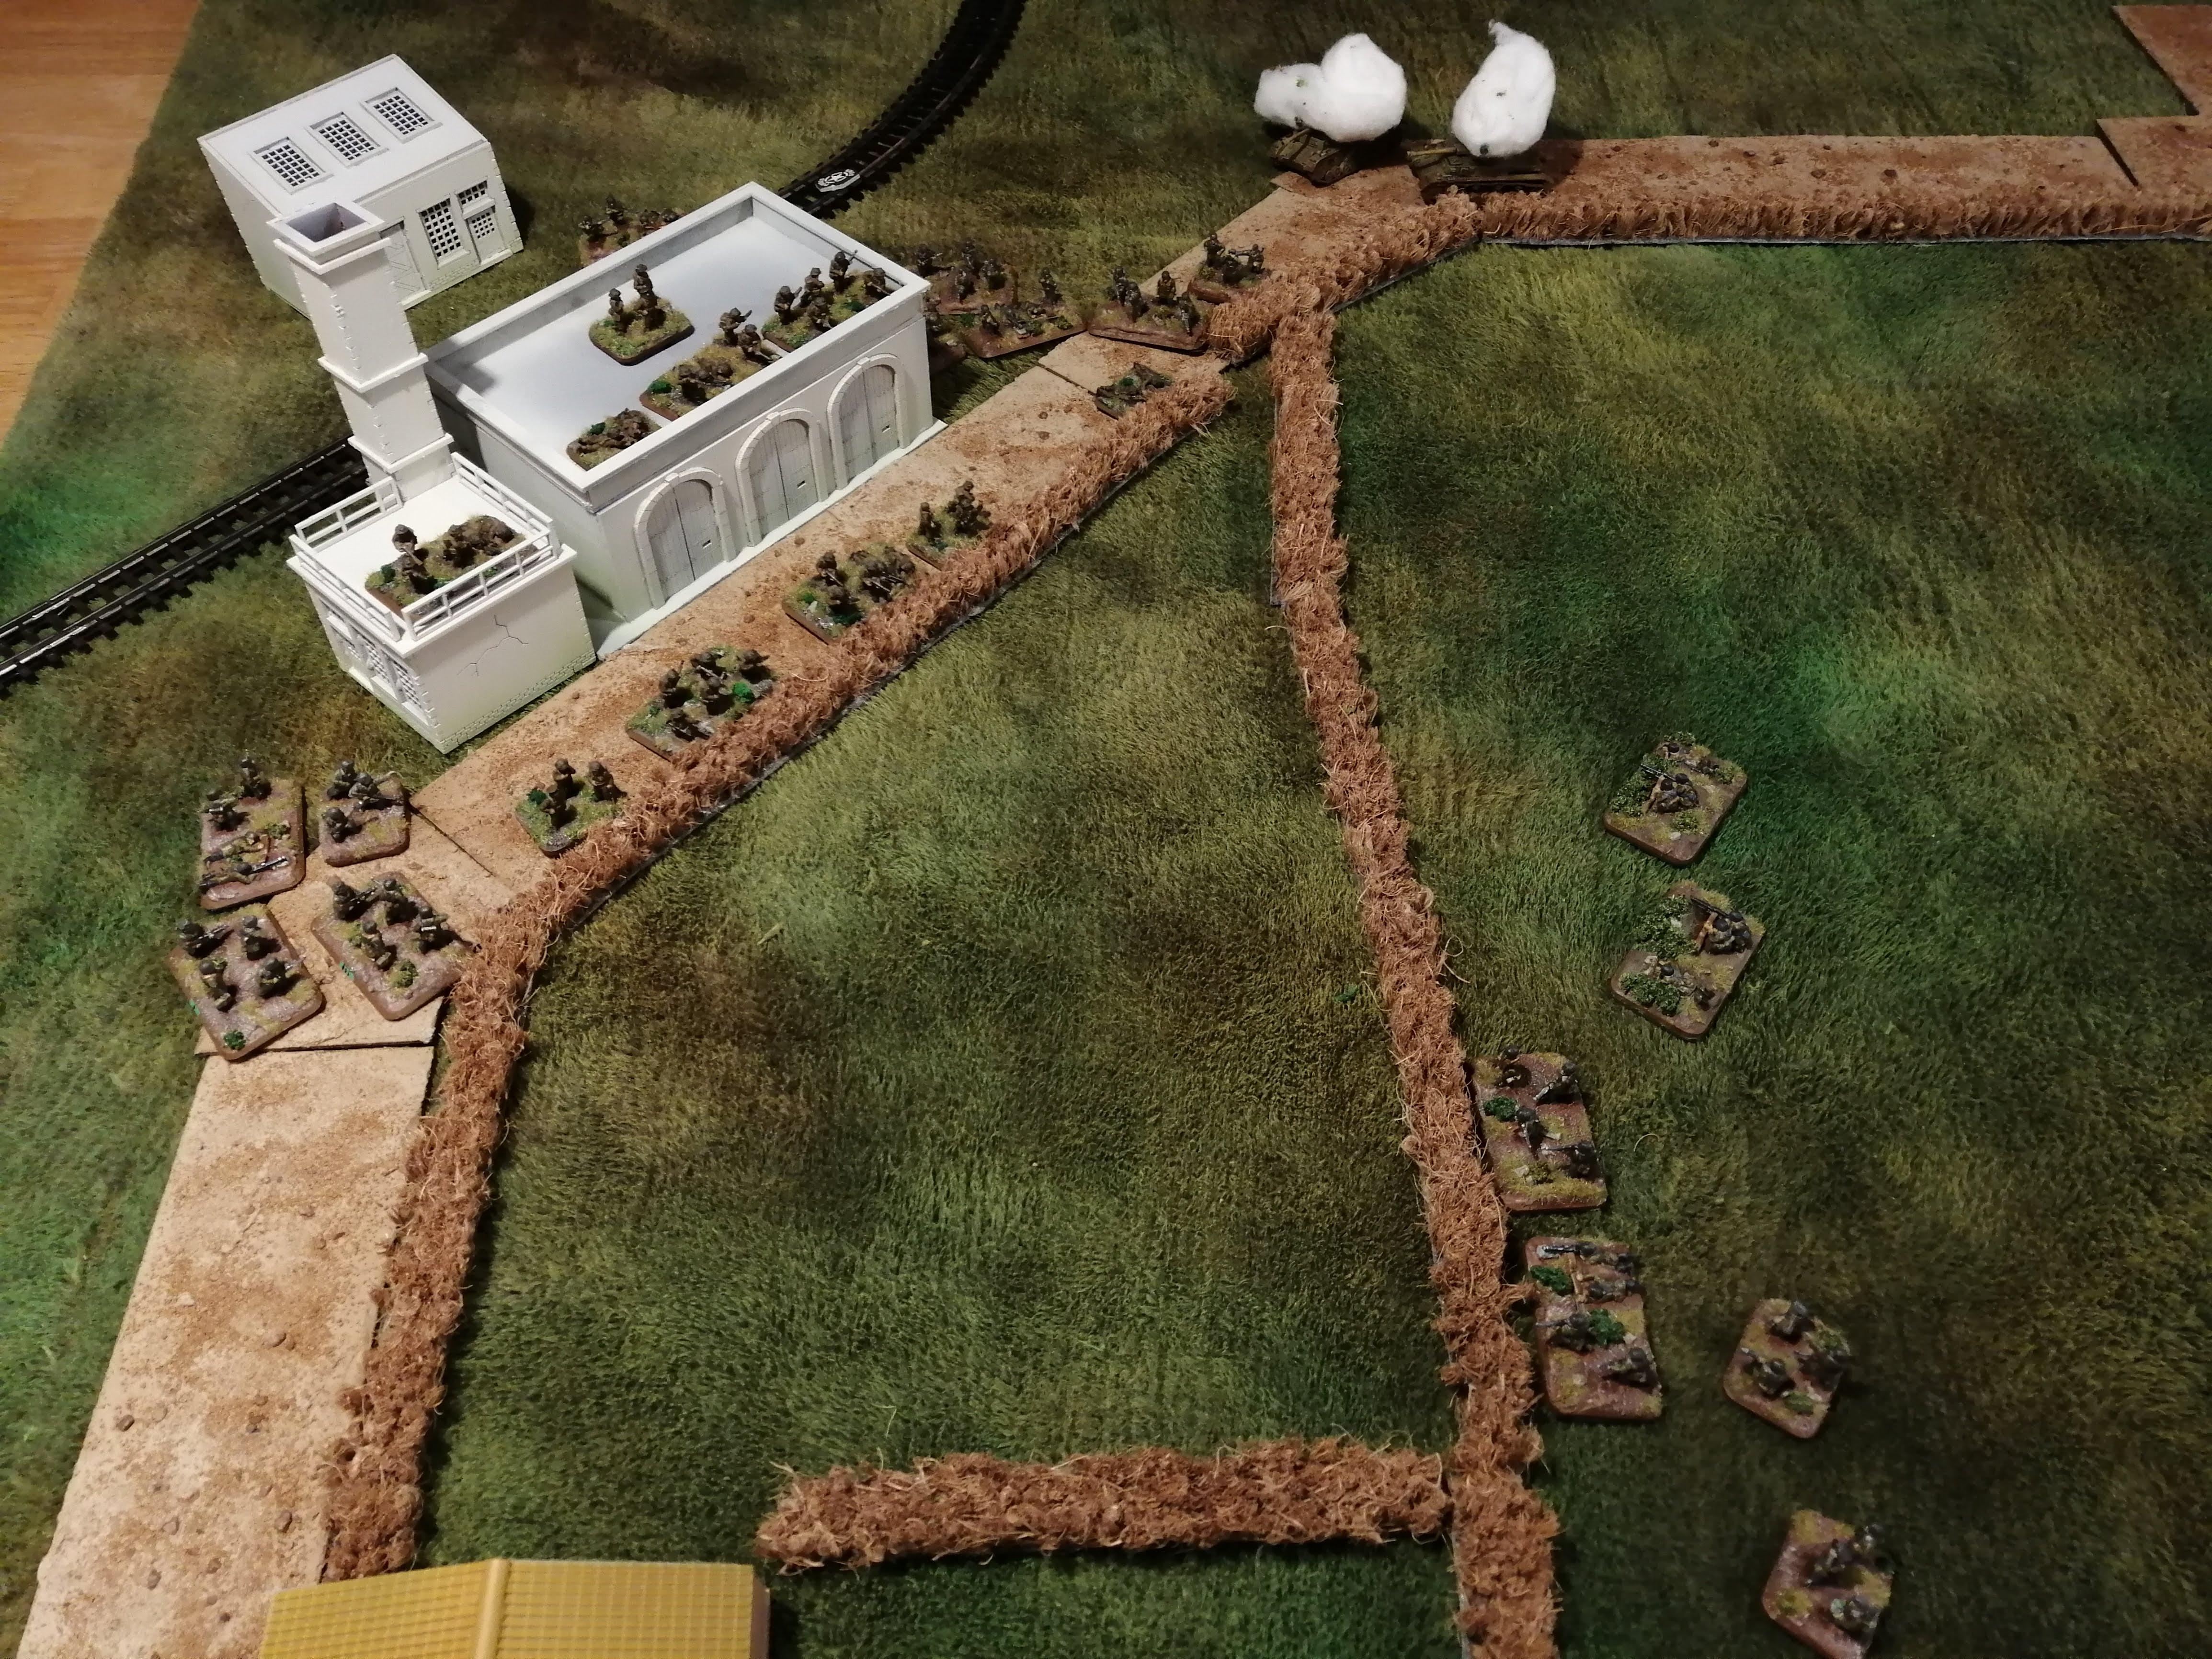 The Maoris surrender, completely surrounded and cut off
2nd Battle of Monte Cassino - Cassino Station (Part 2)
Turn 1:
The smoke visibility this turn is 24”.
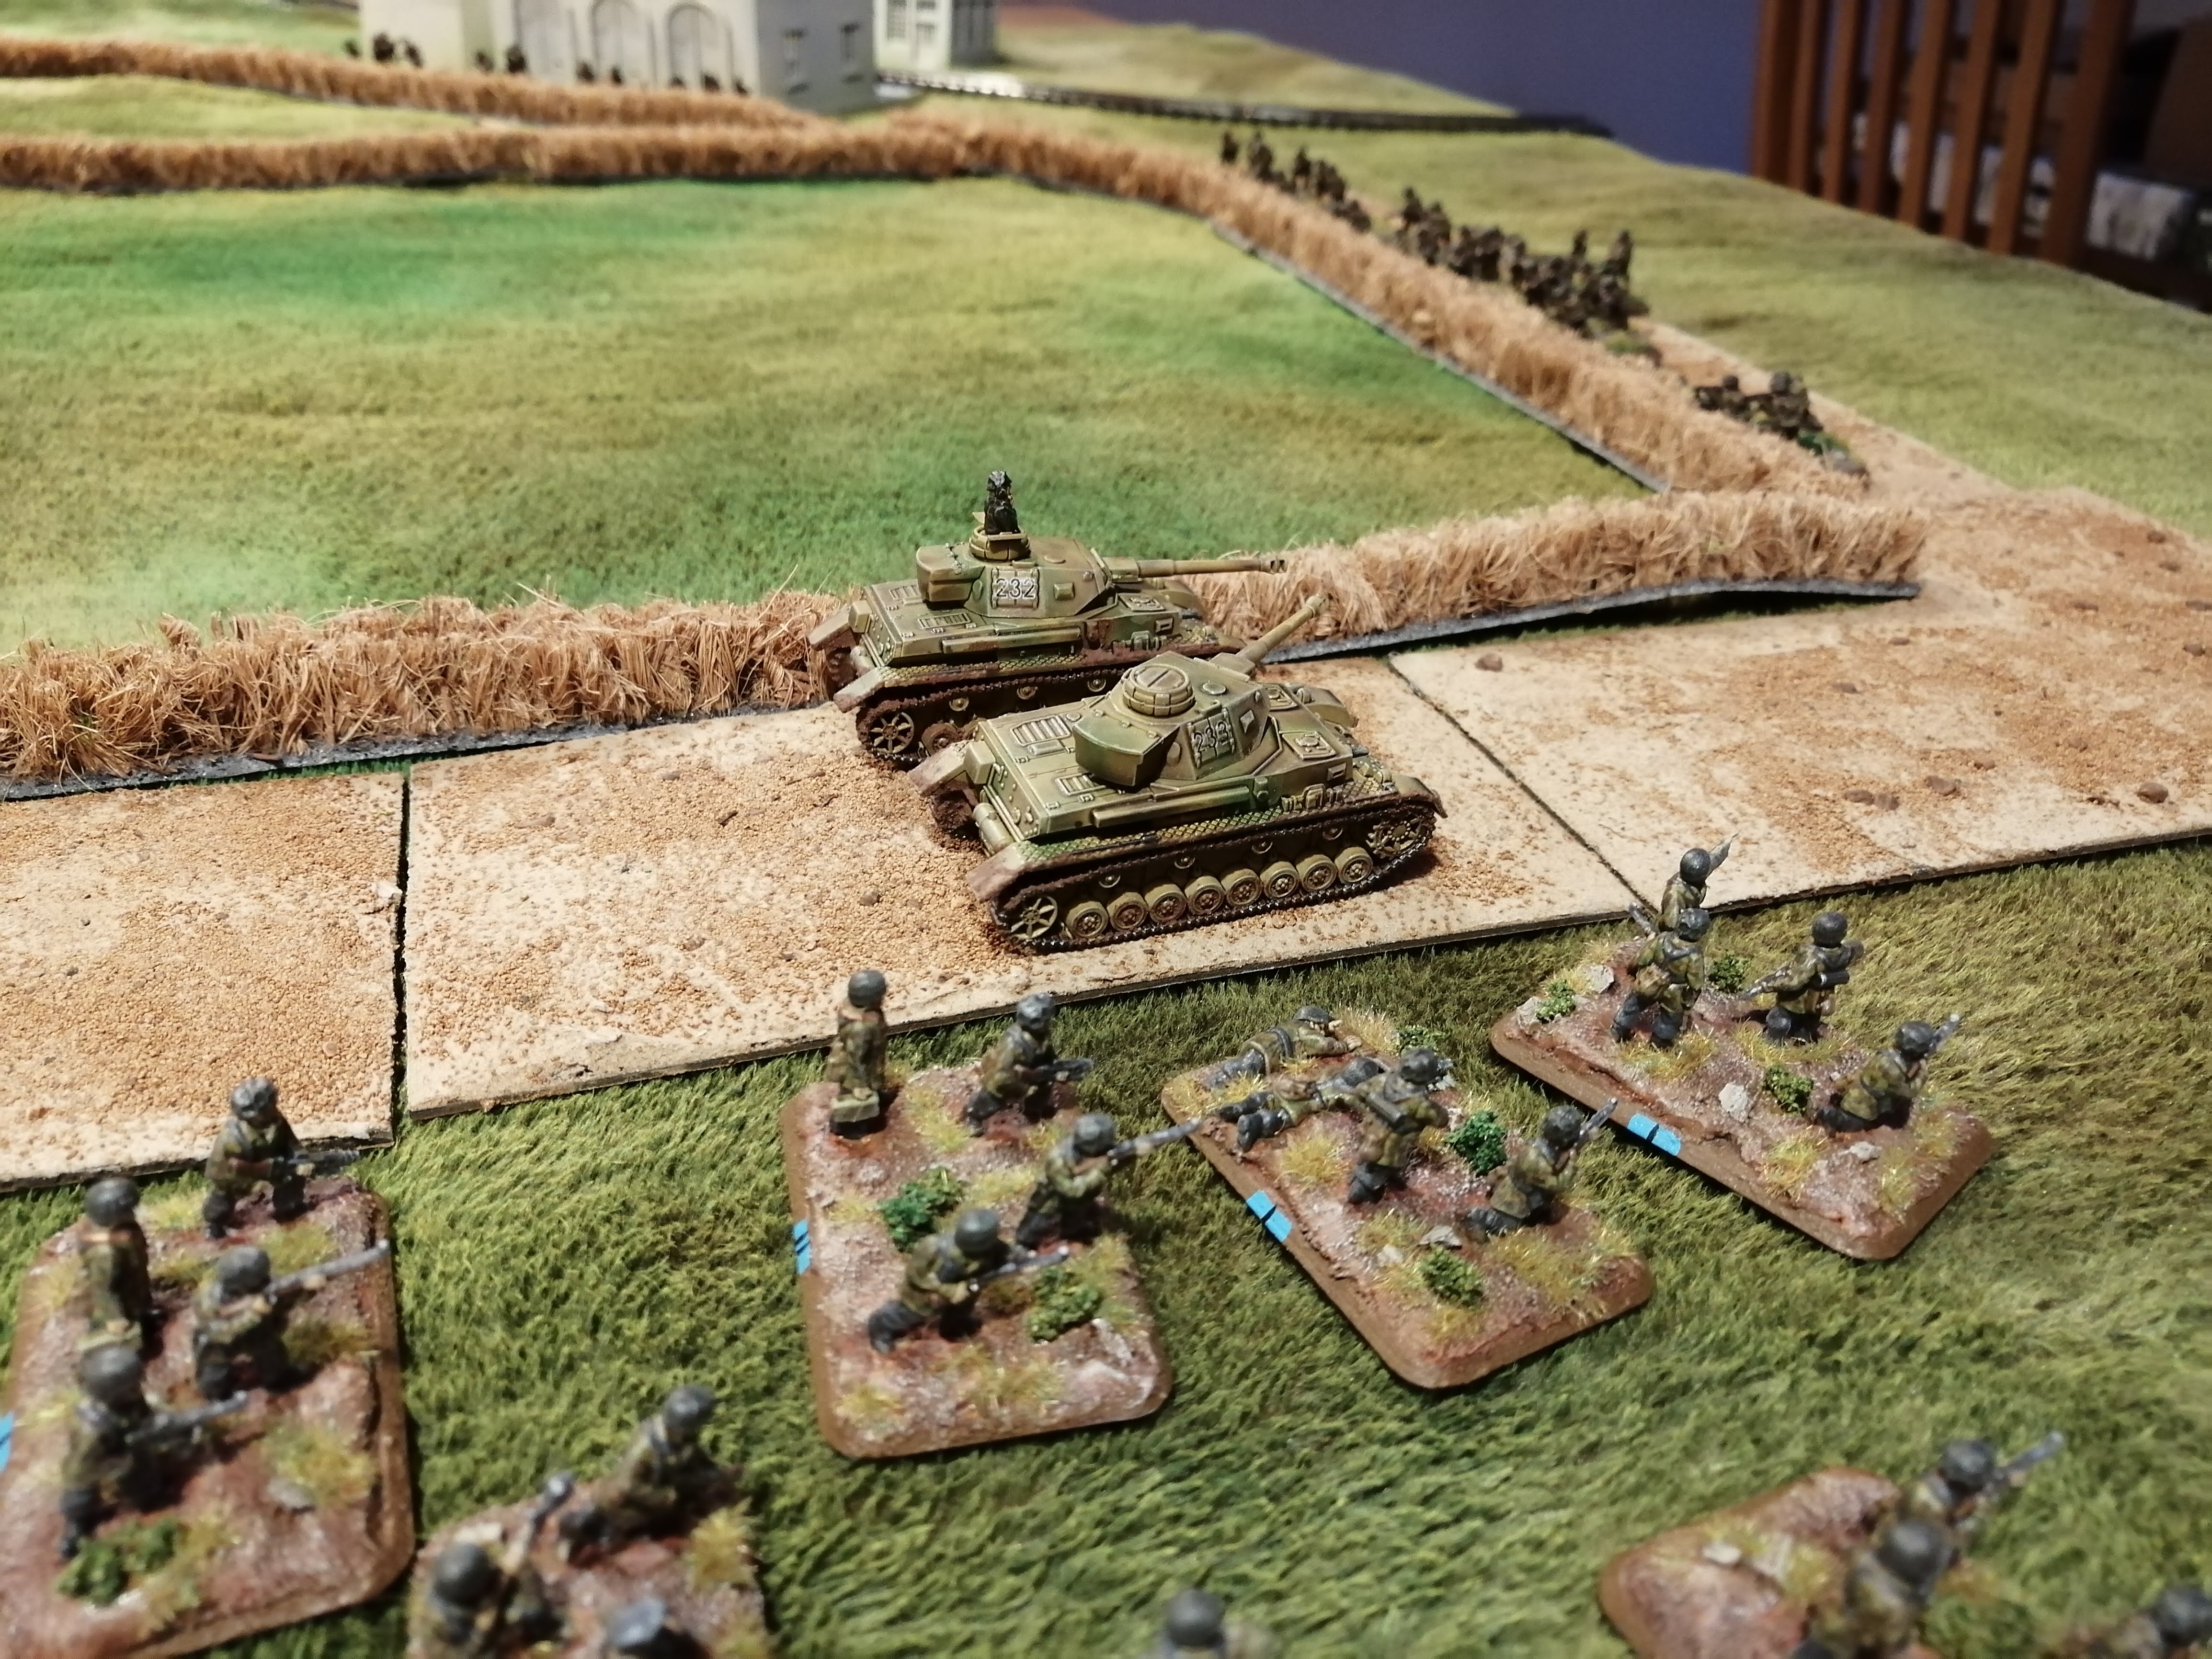
The German intention is to push the two Panzer IV’s up the road and swing a right hook at the Maori Green Platoon dug in along the top of the map. Red and Green platoons (GRP and GGP respectively) will attempt to take the small house before pushing on toward the station. Red Platoon will advance on the house while the MG and Green platoon attempt to provide covering fire. Blue Platoon (GBP) will support the two Panzers. Movement progresses as per the plan however the shooting is largely ineffective – only the Allied Orange Platoon (BOP) takes a single casualty.
The Maori’s will attempt to remain in position for as long as possible. Their only real advantage is that they are dug in and concealed behind terrain, so will take some effort to shift. If they can remain that way for a few turns, they should be able to pick off the advancing Germans with some accurate shooting. In their first turn, they can only really fire at GRP but do manage to remove two bases from the platoon and pin them in place.

Turn 2:
The smoke closes in a little this turn, reducing visibility to 16”.
The Panzers and GBP continue their advance. GRP is able to unpin and closes to within assault range of BOP. The MG teams also move up in support. A few teams from GGP advance up the road to put pressure on the building and take cover behind the hedge. The German shooting fails to cause any wounds however BOP takes a lot of incoming fire and gets pinned down. This is exactly what GRP wants and they can now launch an assault. Leaping up and charging, GRP rushes toward BOP but BOP are well organised and their defensive fire kills two of GRP’s teams and pins them down as the assault fails.
BOP unpin and decide to move two teams into the house to defend it from the advancing GGP. BOP is able to cause another kill on GRP but otherwise, the Maori shooting is ineffectual.


Turn 3:
Once again, the smoke visibility remains at 16”. GRP remains pinned in place.
The two panzers reach the end of the road and turn toward BGP, well within charge range. GBP advances behind them. GGP advances to the building and within assault range of BOP. GGP, GRP and the MG teams all shoot at BOP and collectively pin them and kill two teams. The Panzers’ MG’s remove a single team from BGP and also pin BGP in place. It’s nicely set up for the assault now.
GGP assaults BOP both in the house and behind the hedge. The defensive fire kills 2 teams from GGP but fails to stop the assault which kills three teams from BOP, including the platoon HQ. BOP are forced to fall back and GGP takes up their positions.
The Panzers assault BGP and the single PIAT team is unable to hit the tanks. The assault results in the PIAT team being destroyed and BGP falling back toward the station. It appears that the German plan is working.
The Maoris elect to fall back a bit further as BOP gets behind the hedge line that BRP are using as cover. 2iC appoints a new HQ for BOP to bring them back in command. BRP is able to kill a team from GGP but otherwise cannot deliver any further damage from their collapsing position.


Turn 4:
Smoke visibility is 20” this turn and GRP fail to unpin.
GGP, having taken the house, looks to advance further up the road toward the Station. The Panzers and GBP also advance along the top of the table toward the station, with the Panzers once again moving within assault range.
BOP takes a further casualty from the shooting this turn but otherwise it is all about the Panzers’ second assault on BGP. As the Panzers move forward, the PIAT teams attached to BRP and BOP both fire defensively, with one of the shots penetrating and bailing a tank. The remaining tank kills a team and, following an unsuccessful counter attack, kills a second team before BGP falls back again.
The Maori’s elect to stay put and concentrate on shooting. BRP’s PIAT team shoots at the operational tank and hits. The shot penetrates the armour and, against the odds, destroys the tanks. Encouraged by this success, BOP’s PIAT team shoots at the bailed Panzer and also hits, penetrating the armour causing the occupants to bail for a second time and rendering the tank useless. In just two shots, the Germans have lost both their tanks and the odds swing significantly!