


Redvers and Son Get Into Bushido


Recommendations: 1281
About the Project
My son and I were looking for a new game to get into. Something that was low on models, fun and reasonably quick to play. We decided on Bushido.
Related Game: Bushido
Related Genre: Fantasy
This Project is Active
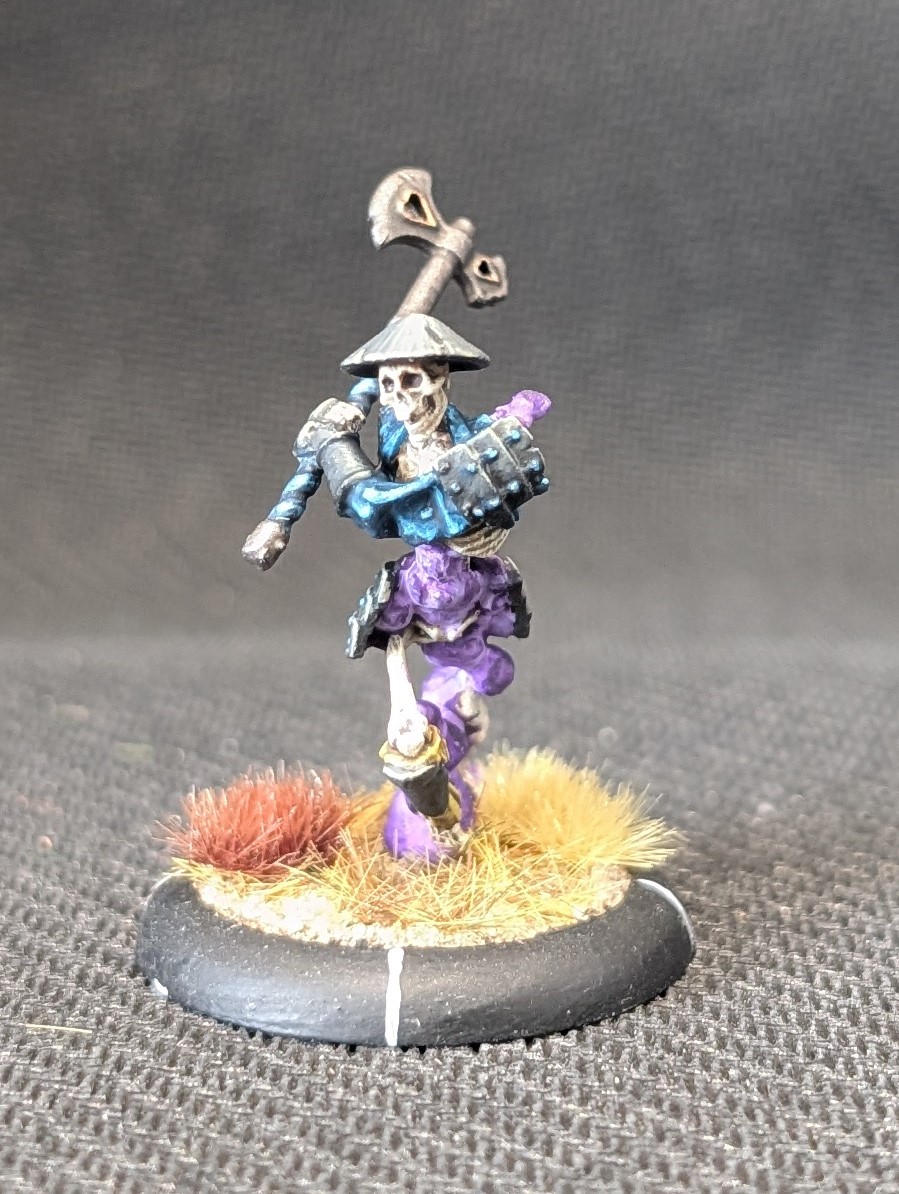
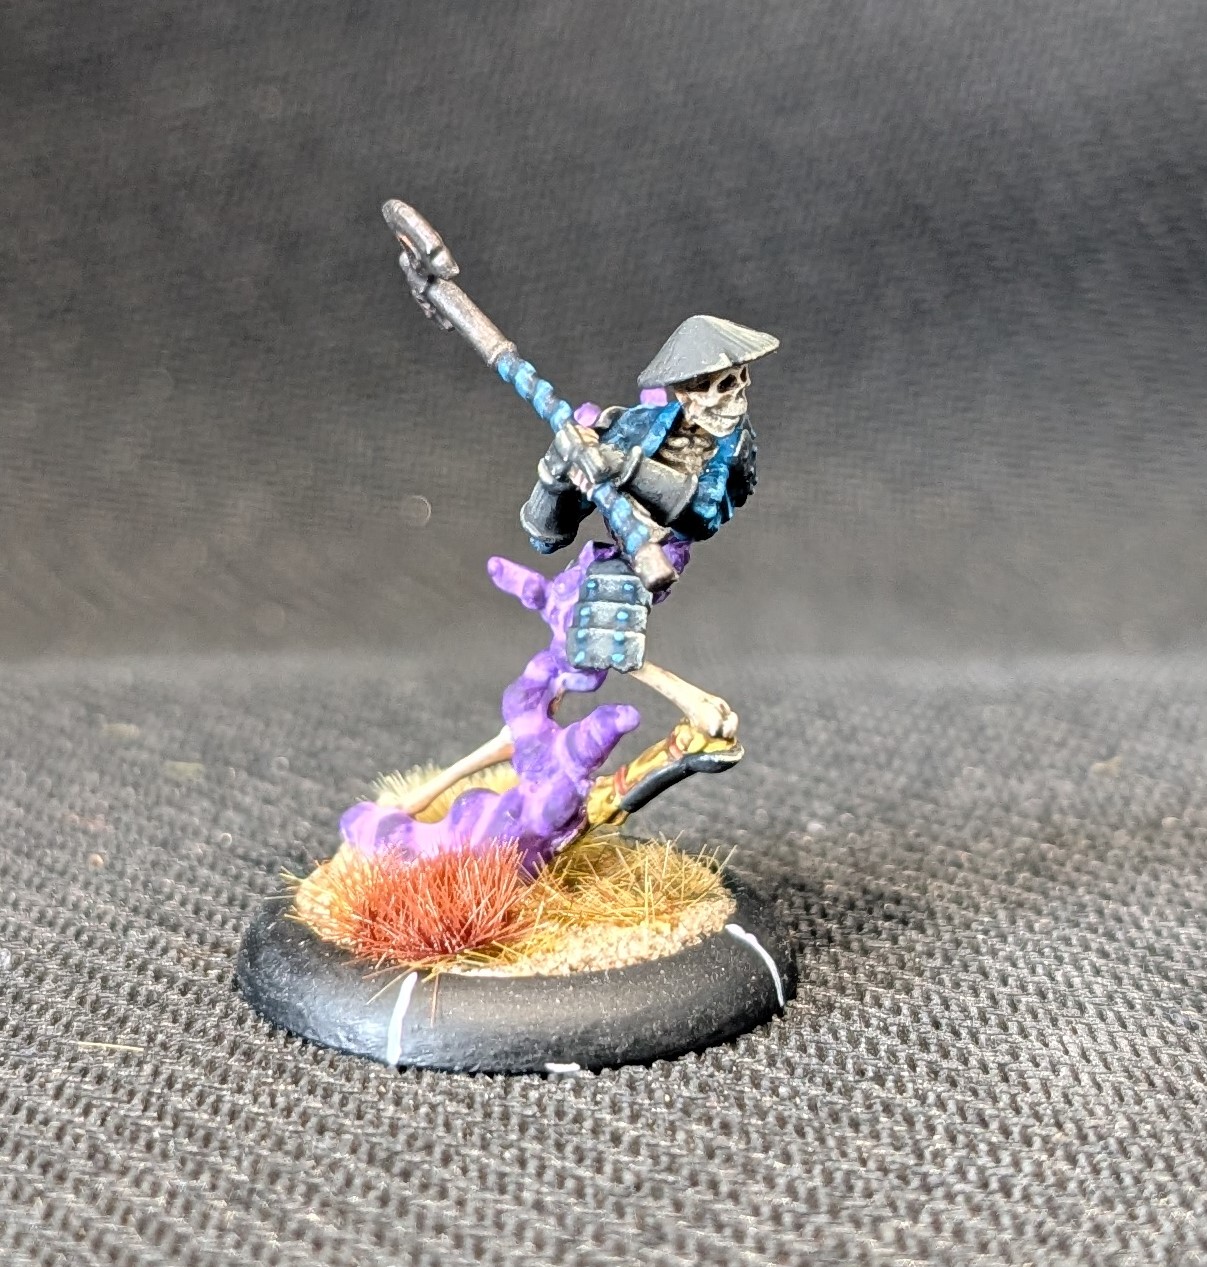
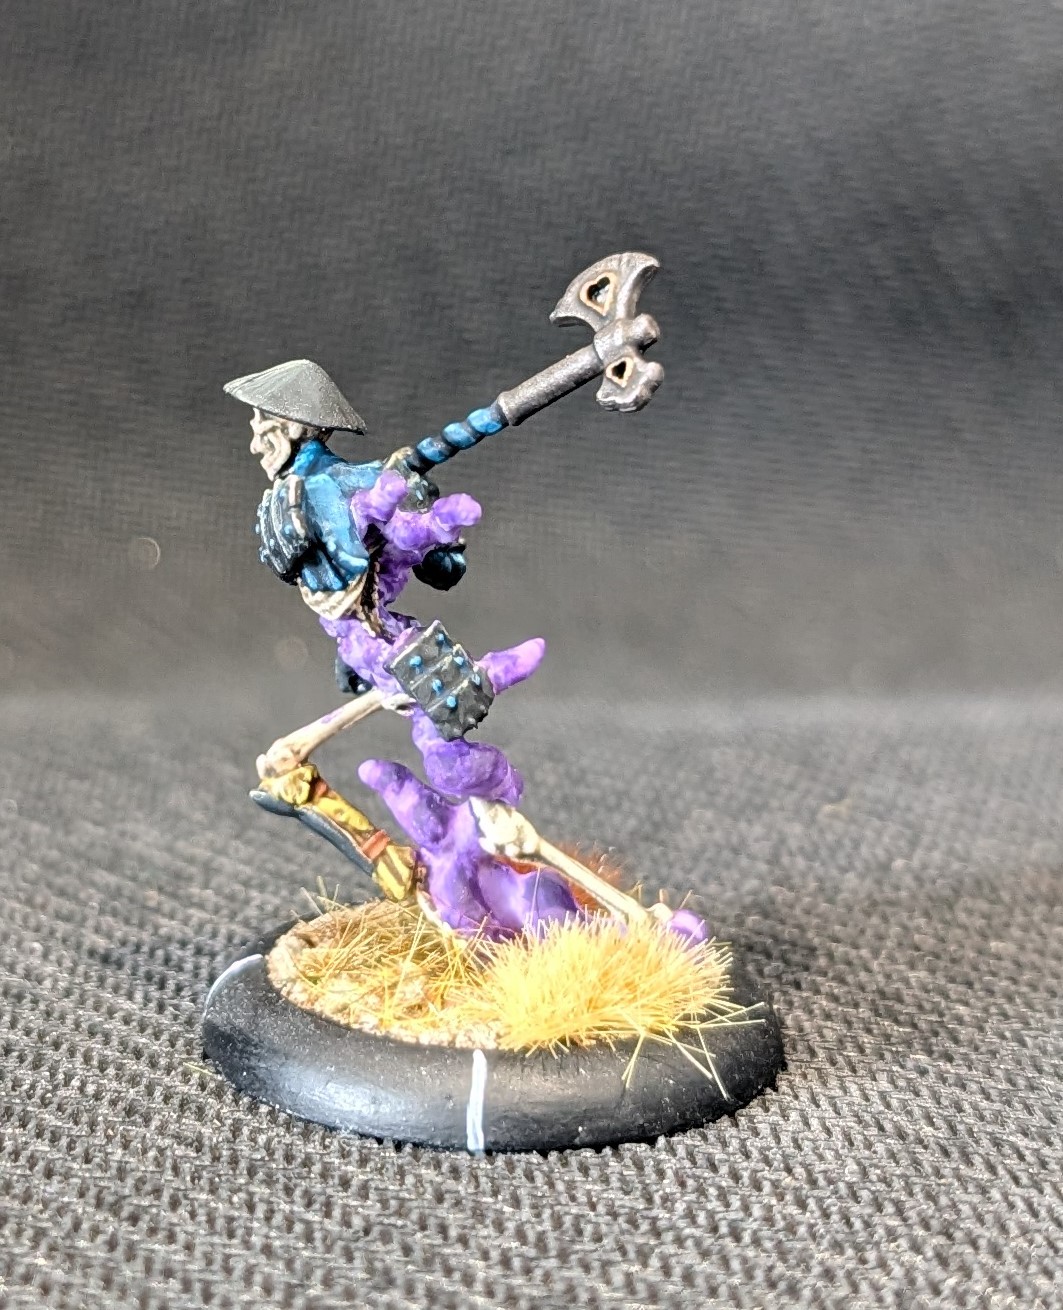
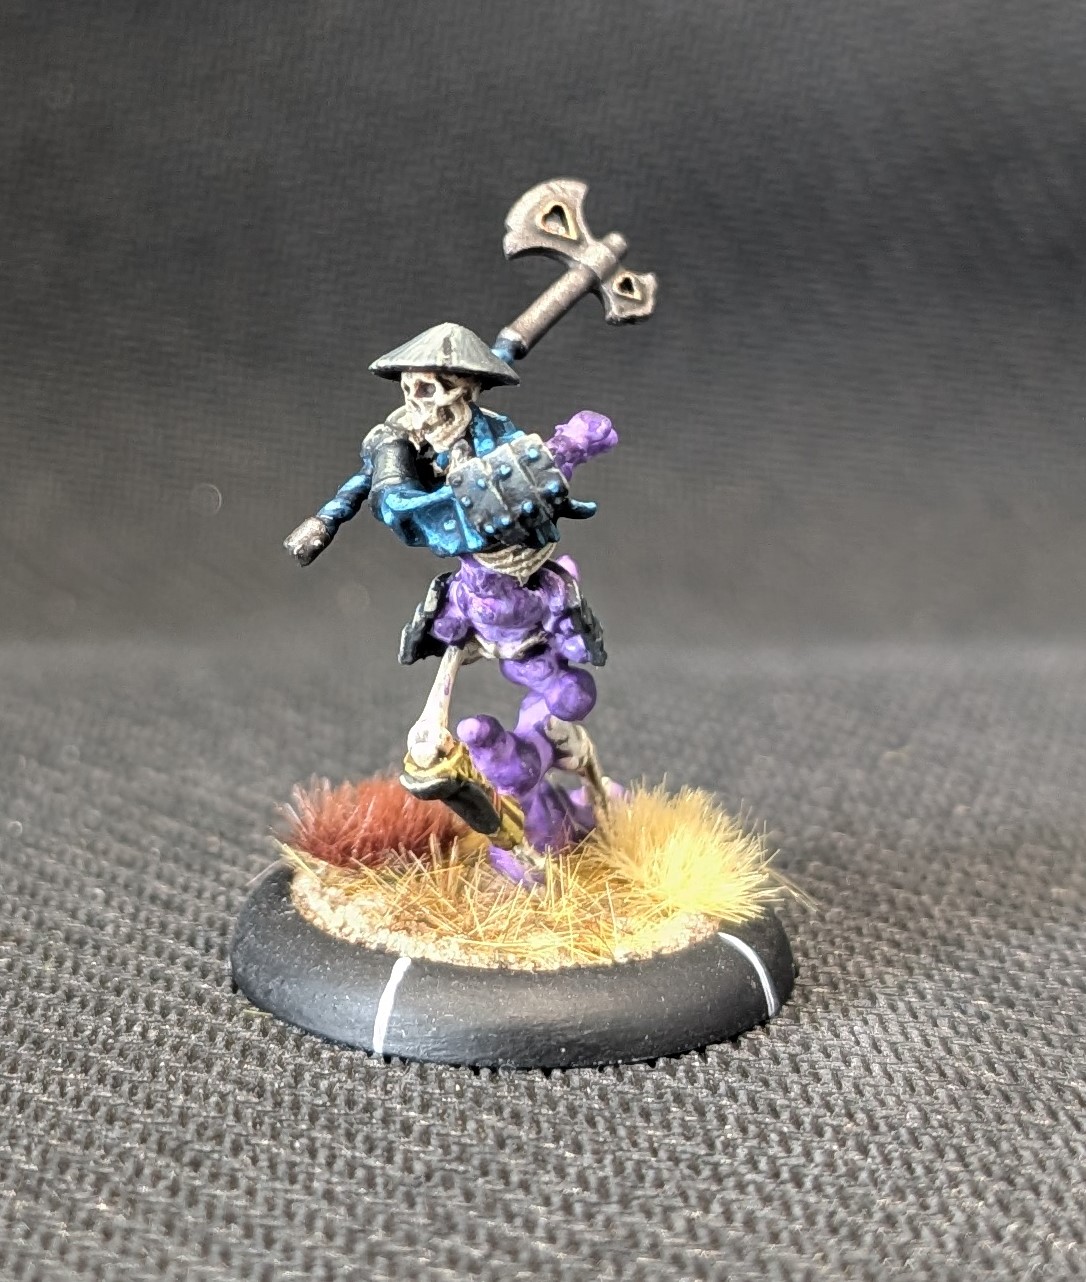
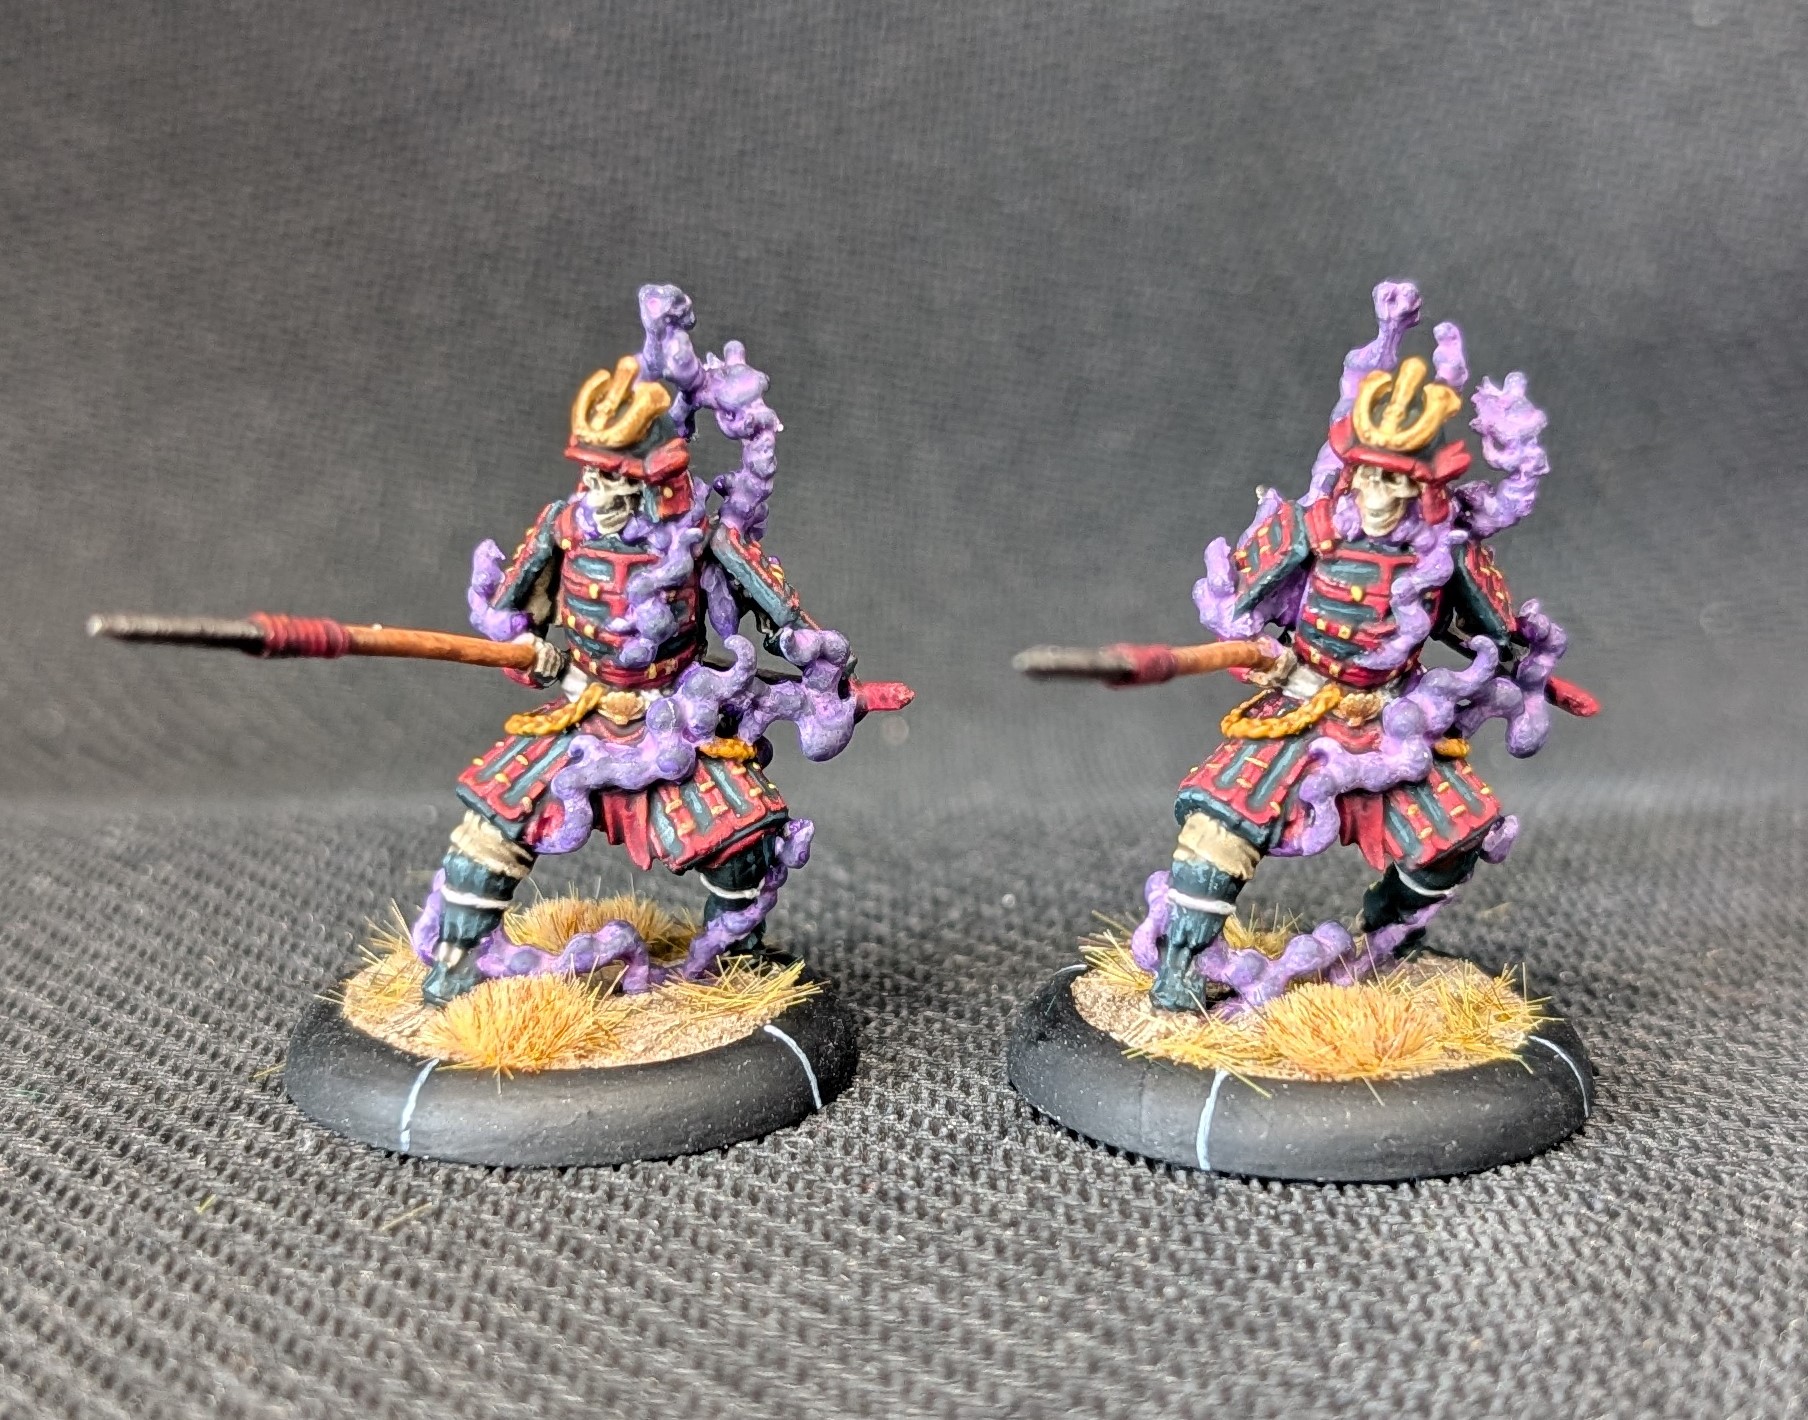
Eiko
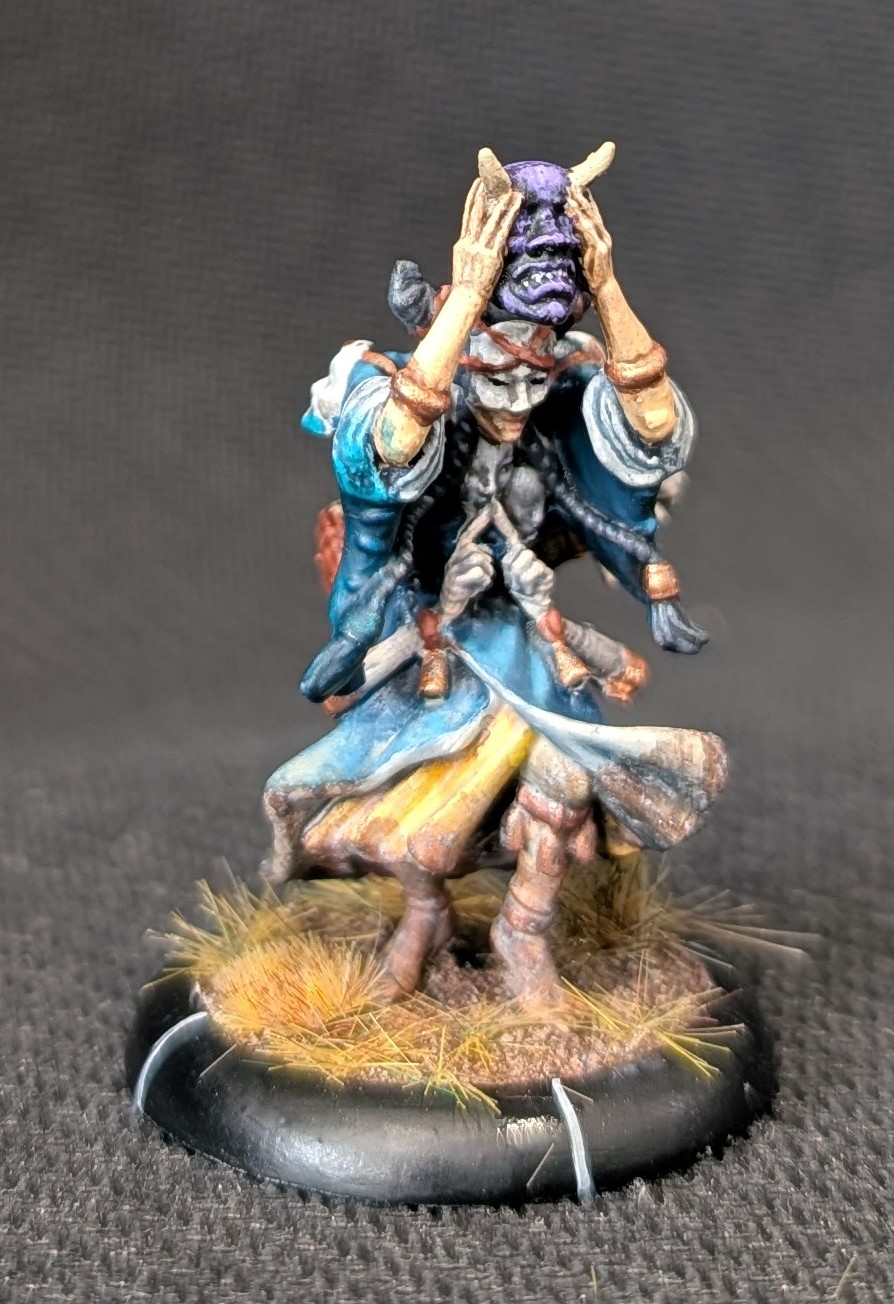
Working my way through my skeletons (or Gashadokuro) we have Eiko. I like this model in the game and have used him quite a lot. For a reasonable points cost, he adds a bit of punch to the Cult of Yurei’s front line. He has no Ki abilities and only has 3 melee dice but his axe gives him brutal that provides a +1 to the attack roll which is almost as good as another melee dice. He’s also durable, so he’s only going to take one wound at a time, regardless of how many wounds the opponent does, so you can put all your melee dice into attack knowing that the worst downside is he takes a single wound in return. And he has regenerate, so he’ll get that wound back at the end of the round. Being a skeleton he is immune to all states and he causes Fear, albeit at a low level.
To paint the bones, I took the same approach as Satou Hatchi in a previous post. That’s German Black Brown base, a wet brush of light brown, a light dry brush of bleached bone with a final highlight of Iraqi sand.
The armour was painted a base of dark rubber and given a nuln oil wash. I’ve then picked out all of the non recessed areas with dark rubber again before adding light grey into the dark rubber to begin highlighting up the raised parts. I’ve finished with a light dry brush of light grey. The blues started with a base of Prussian Blue with a nightshade wash. Then gradually mixing ice blue into the prussian blue to highlight up.
The metal axe was given a base of gunmetal with a couple of nuln oil washes. The edges were then picked out in gunmetal and then the very highest points given a touch of polished metal.
The purple smoke was the same as for Satou Hatchi. This was multiple glazes to try to tie everything together.
I picked up some new dry grass tufts at UKGE, so I’ve added these to the base. I think I’ll now have to go back through the rest of my collection and add these to the older models to tie everything together.

Update on my Son's Painting
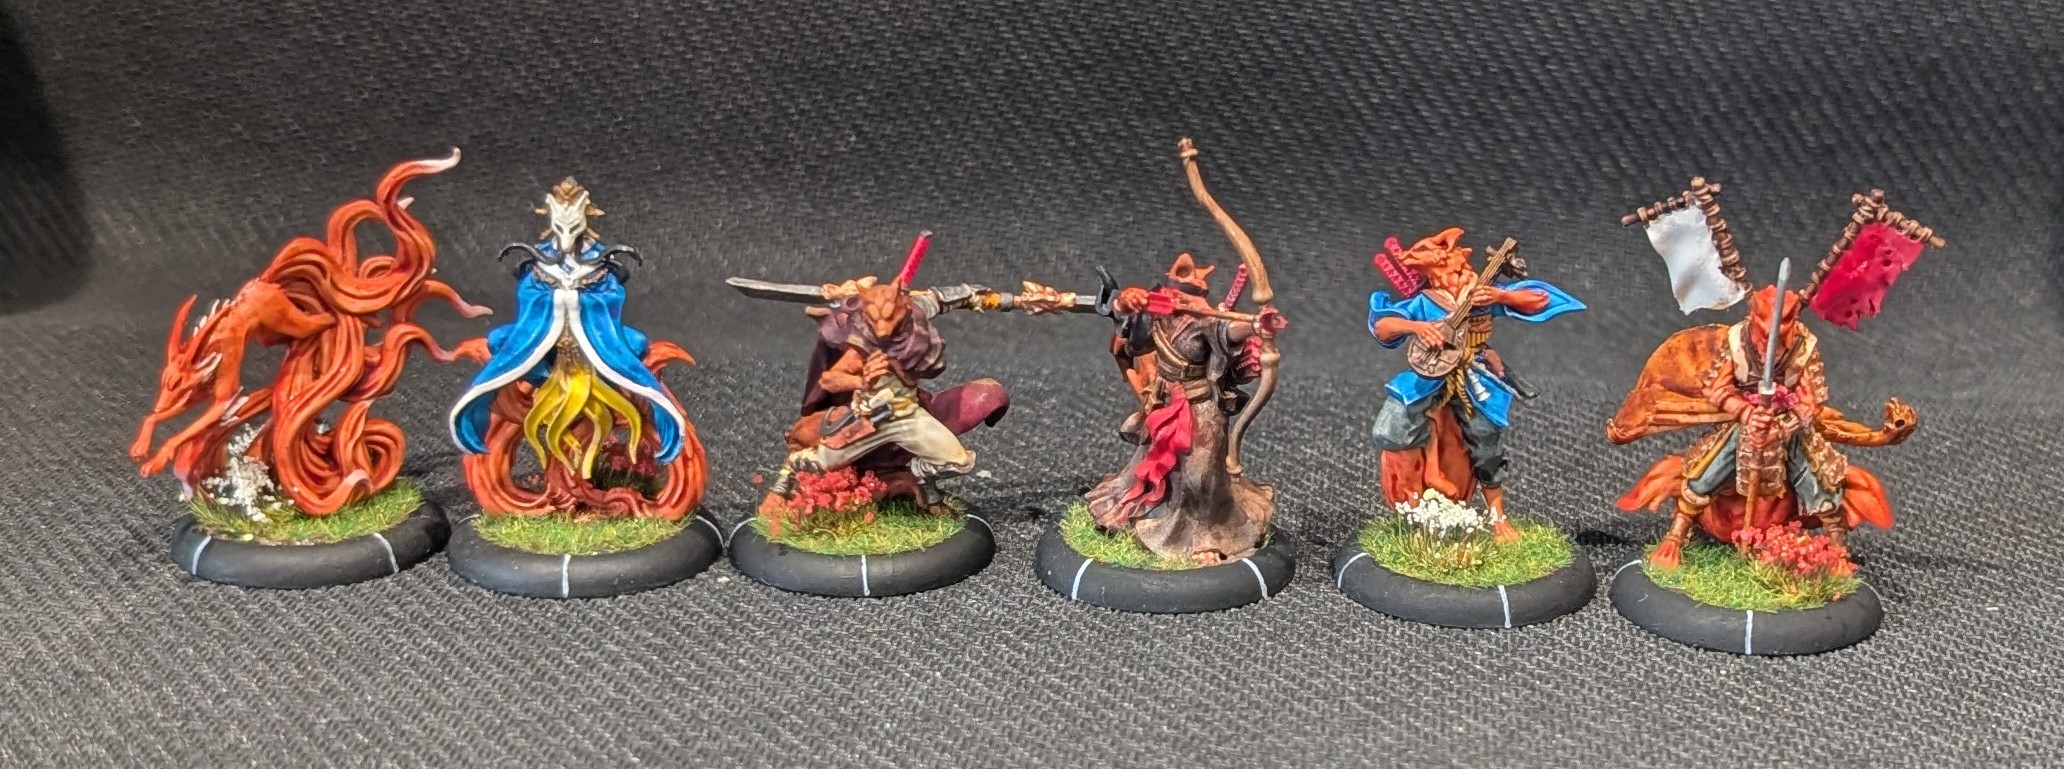
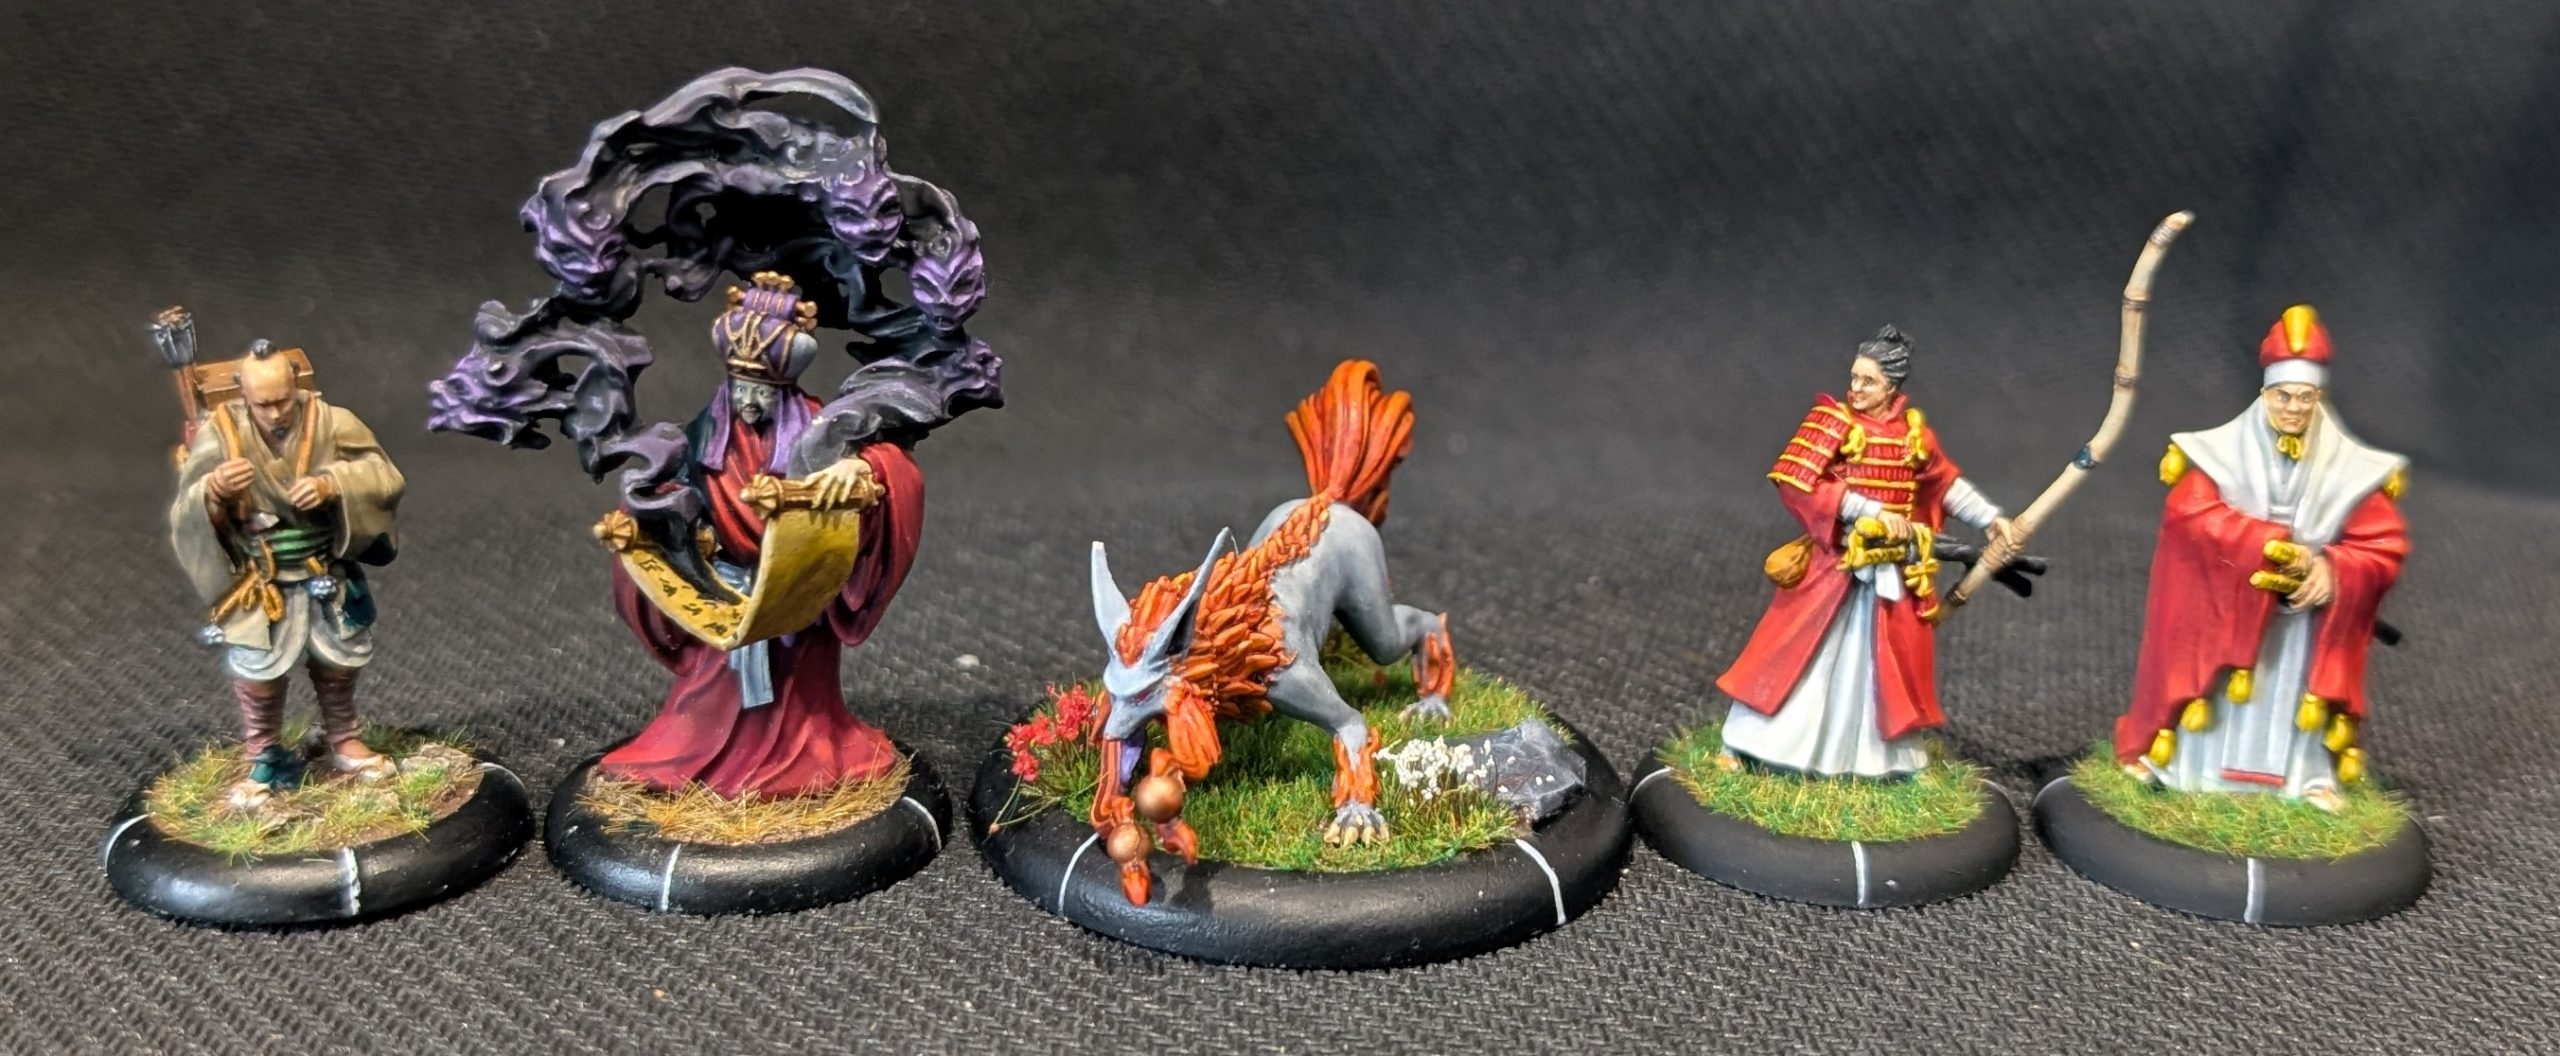
I’m not the only one being busy with the paint brush, my son has also been working on his Temple of Rokan faction. He’s not that bothered with the painting and so is quite happy with the speed paints and he seems to get more out of them than I’ve managed so far.
Here’s what he’s finished off. Firstly, the Kitsune sub faction for the Temple. No idea of their names apart from the Nine Tailed Fox on the left
 Foxy people
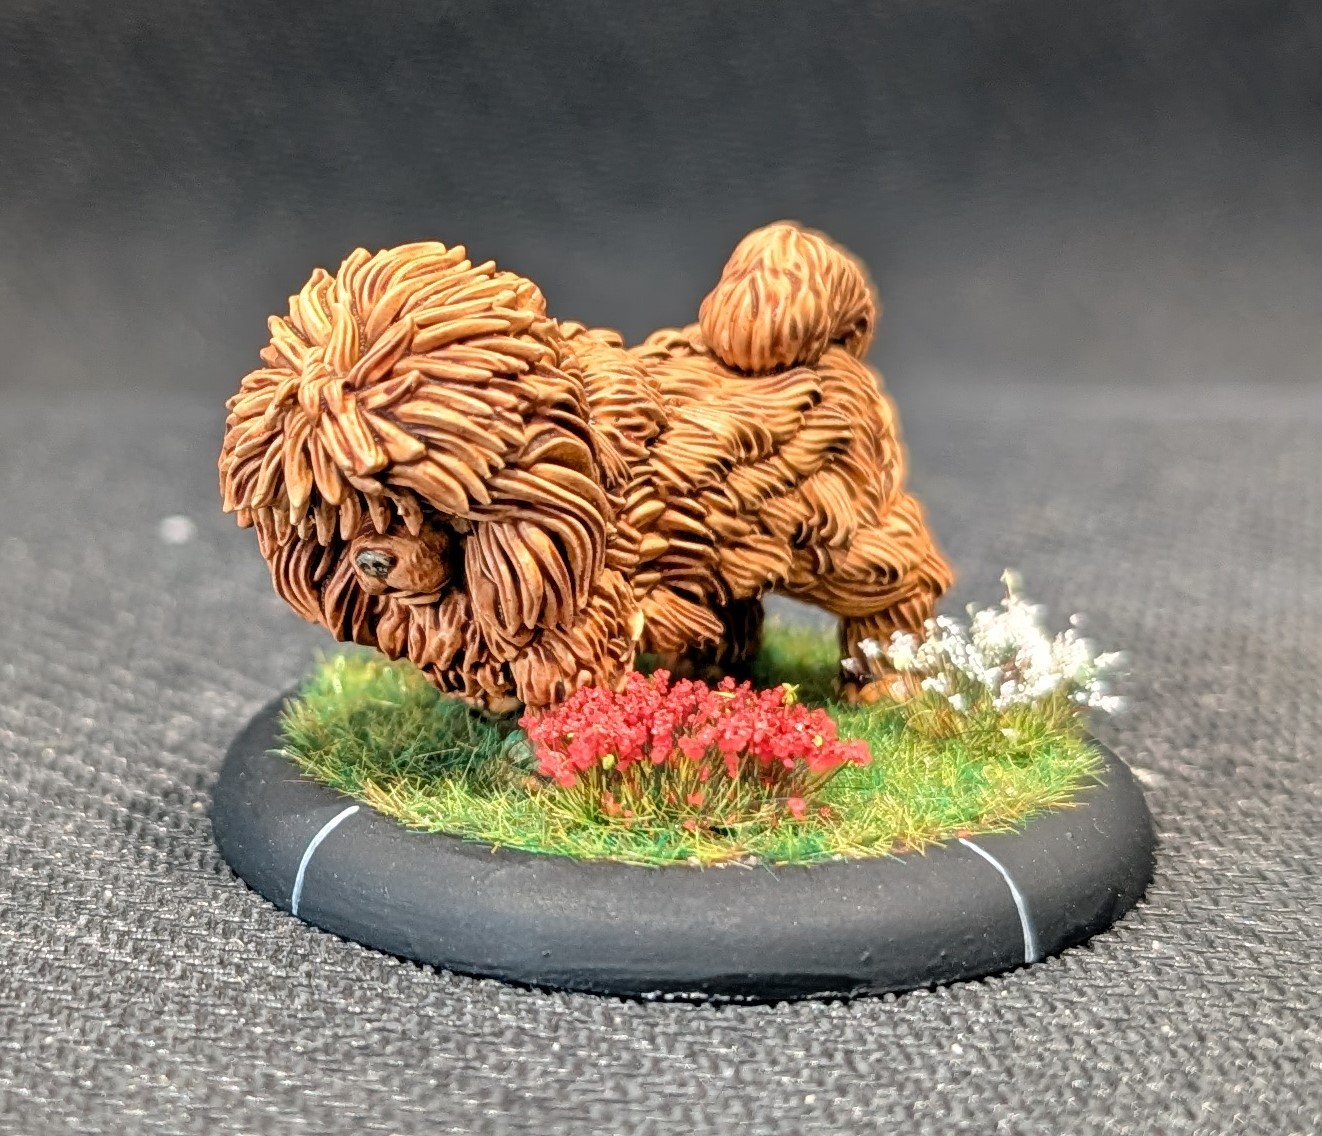 Byiba, a massive shaggy dog
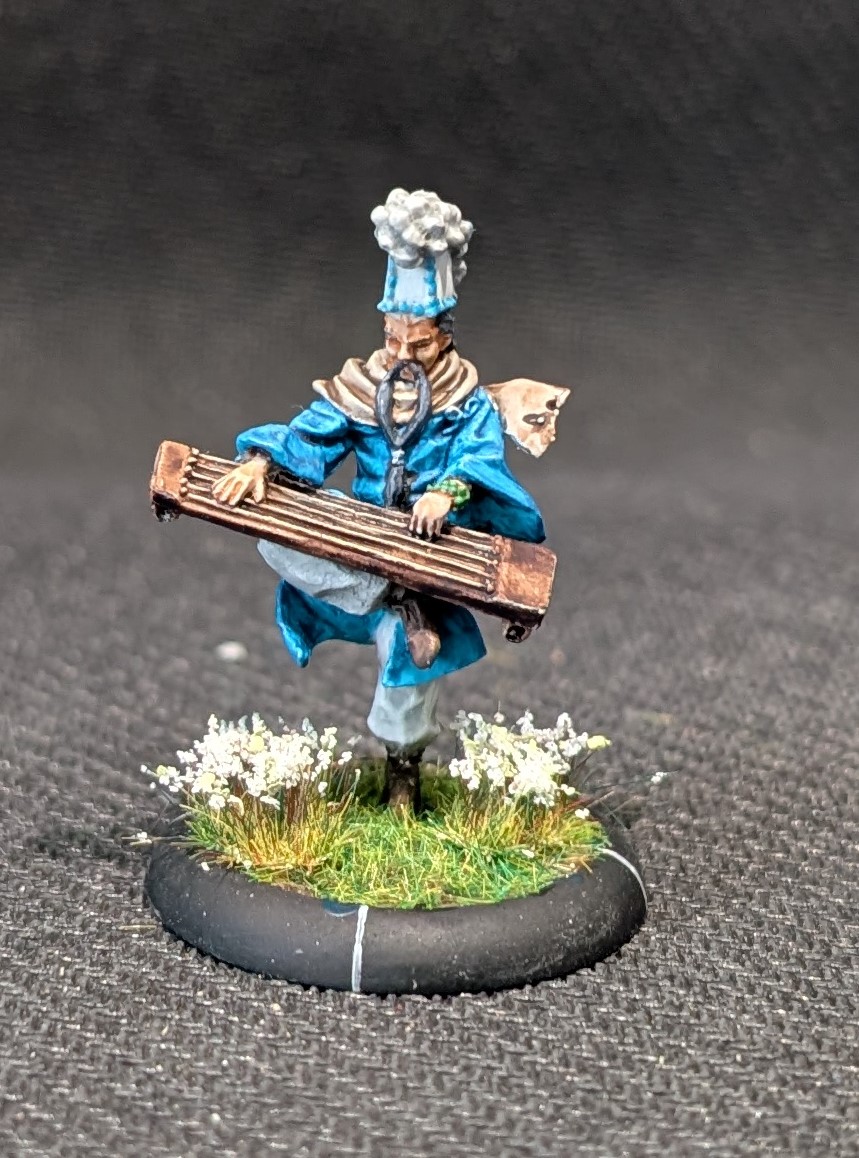 Tsutsumi, an elderly monk playing an instrument while balanced on one leg
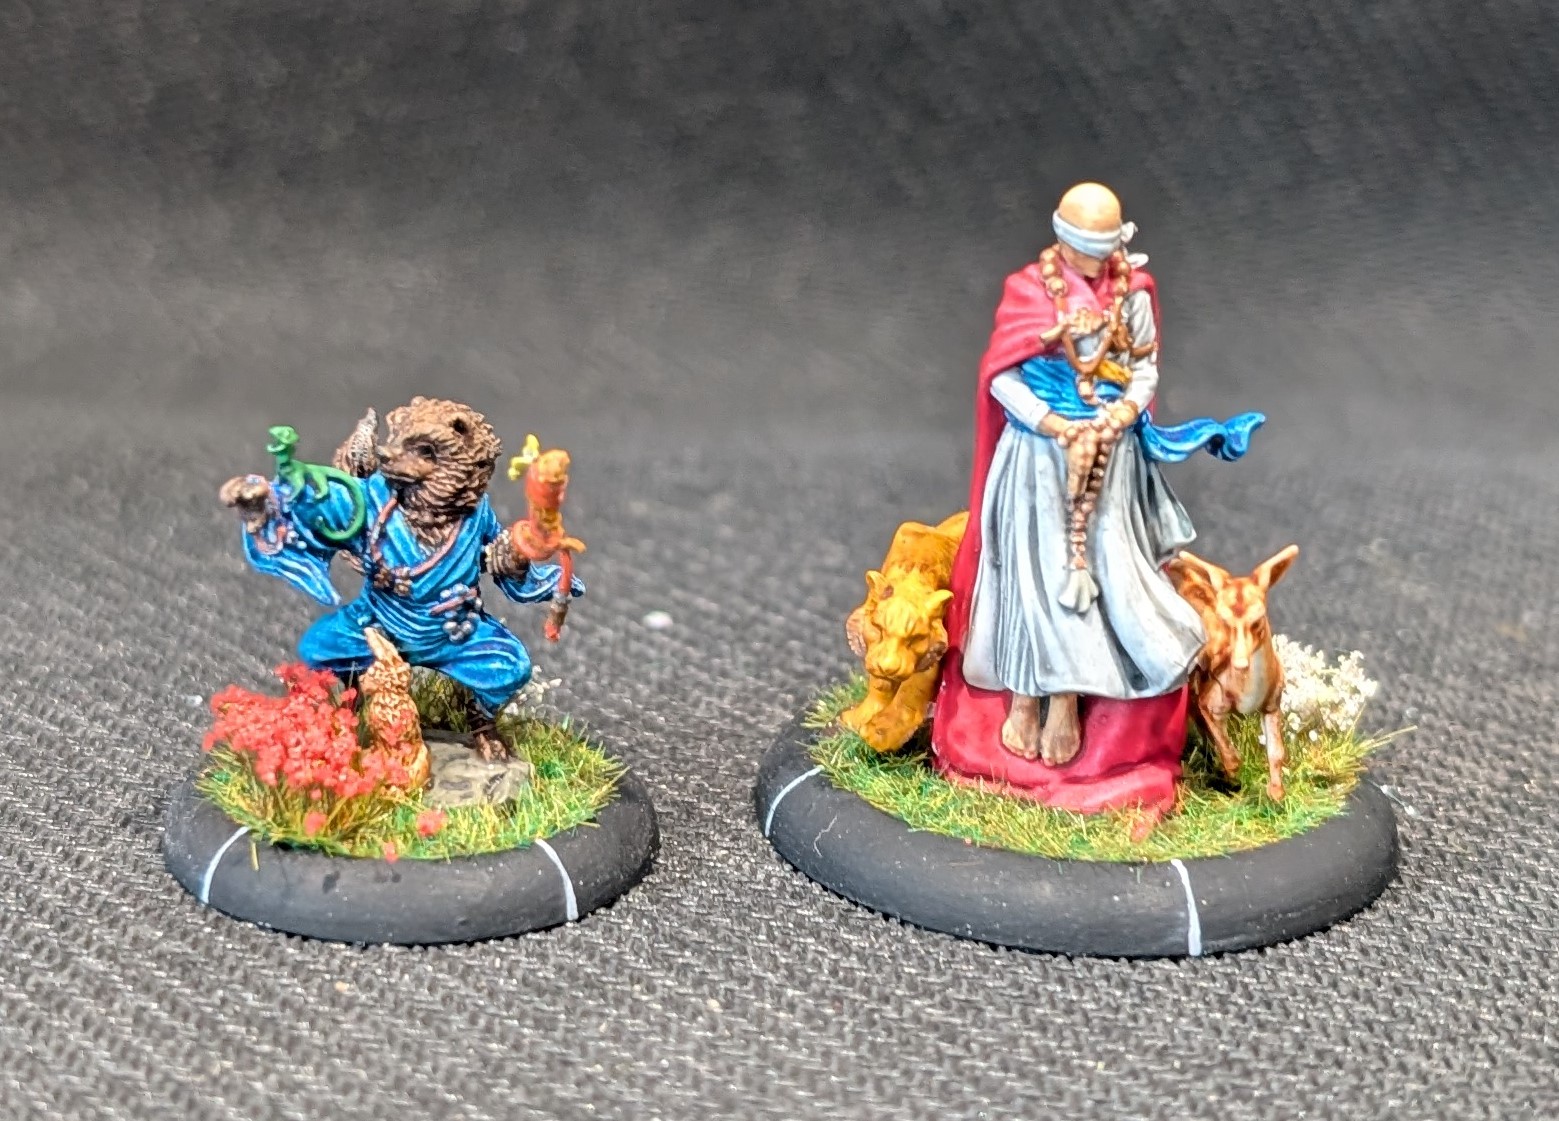 Two Masters, on the left Master Akari and on the left Master Koju
Satou Hatchi
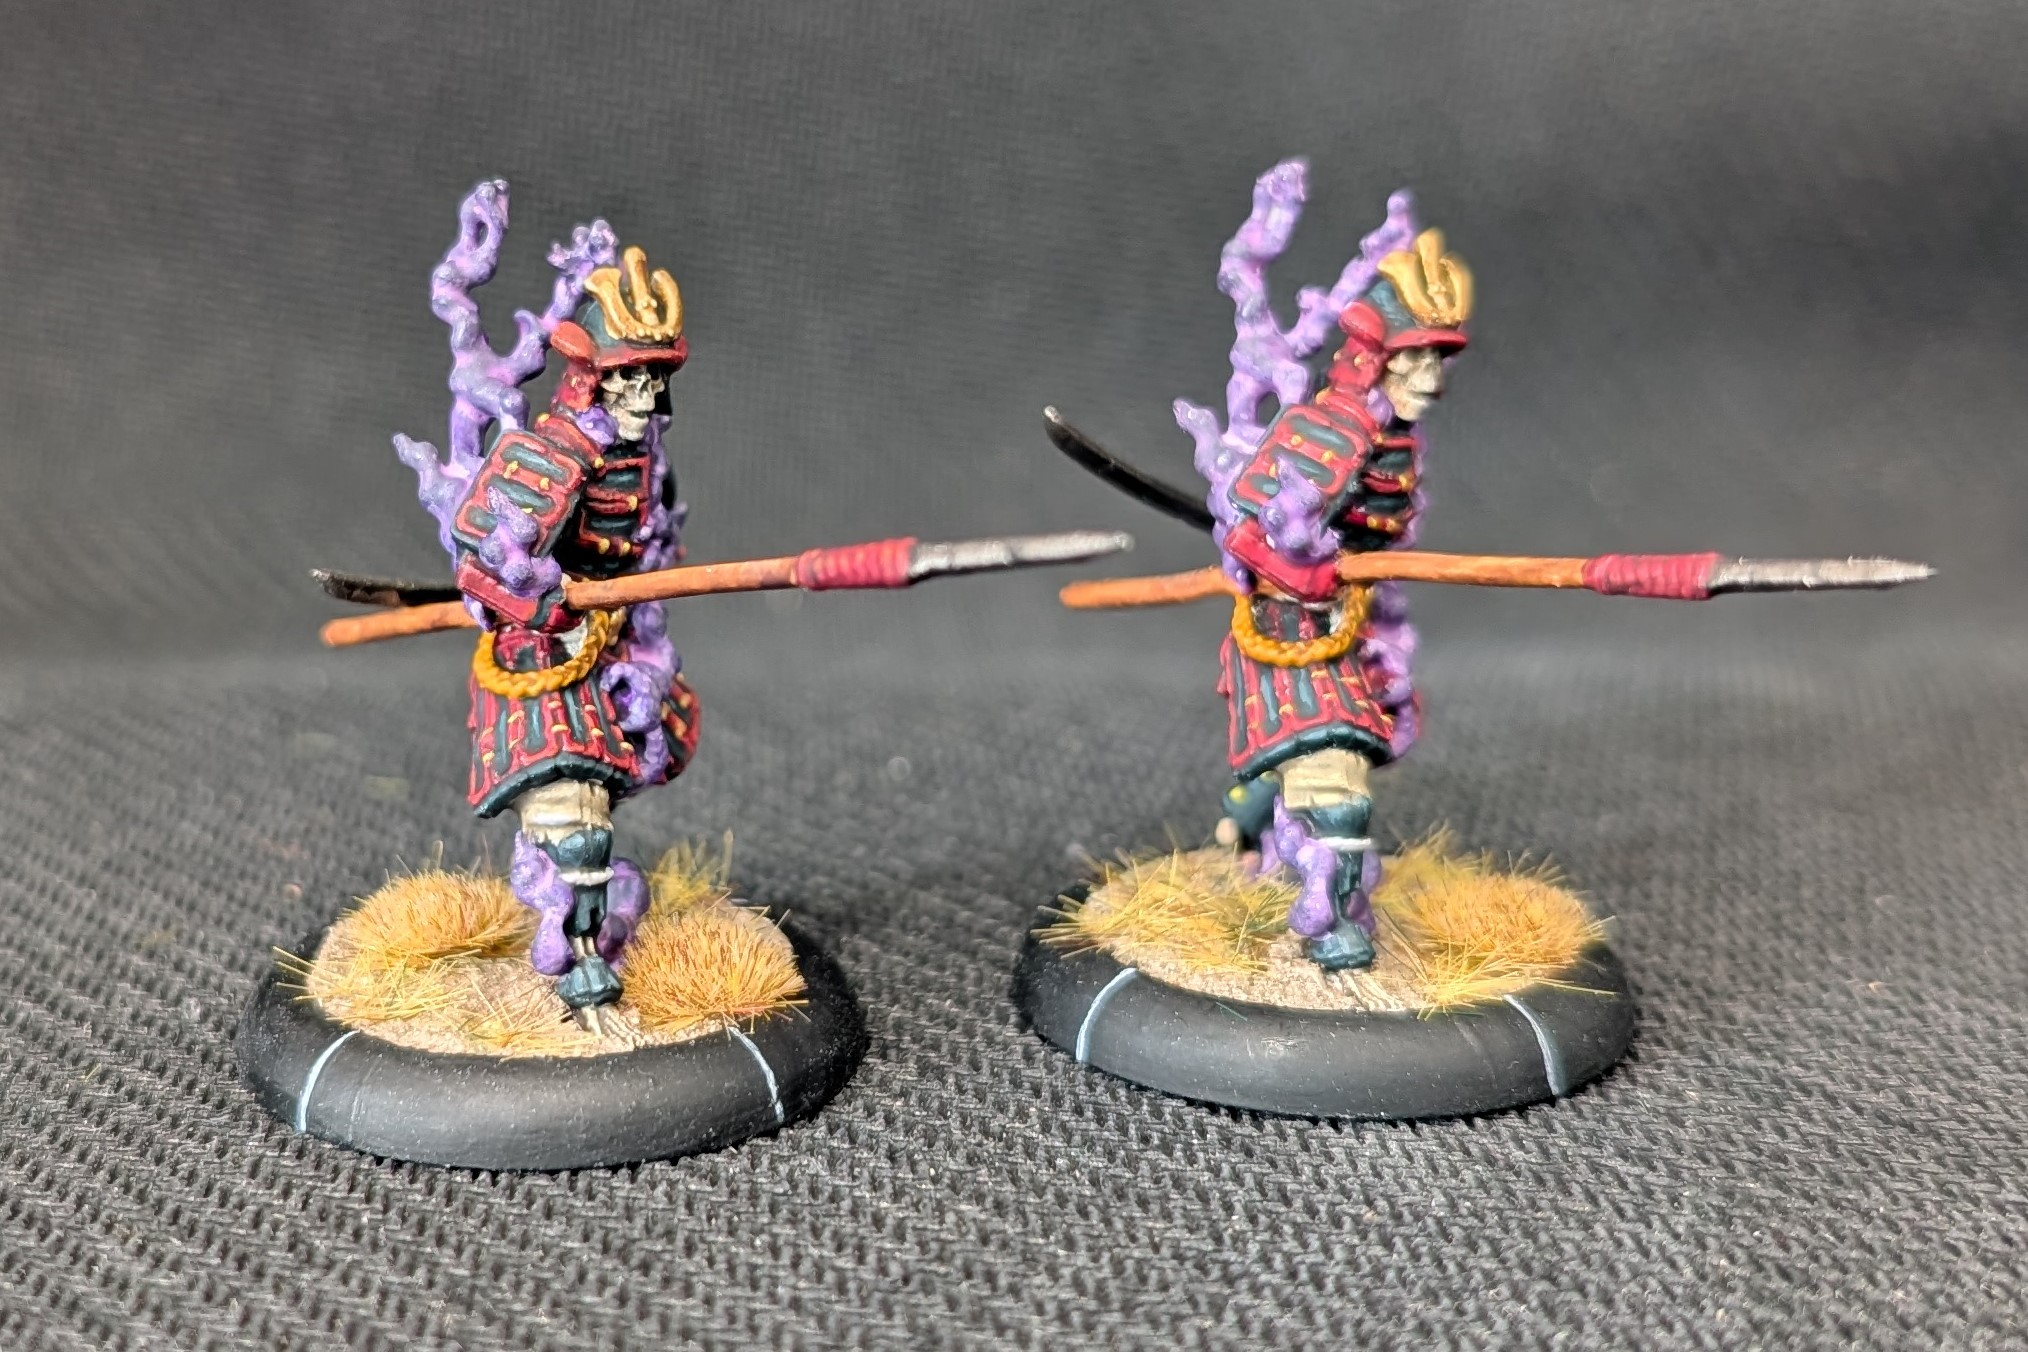
For some reason I have two of these models, not sure why as you’re only allowed one. Satou Hatchi is the first of my Gashadokuro (meaning starving skeleton) and decided to paint all of my skeletons together to get a similar bone colour.
In game, he’s a high value model. He comes with 4 melee dice which is very unusual for Cult of Yurei models but also very handy. He does not have an special Ki abilities and does not generate Ki either. His strength lies in combat, where he can use either his Katana that provides a reroll to his opponents defence dice (handy for getting rid of any 6’s that were rolled) or he can use his Yari that gives him Reach (attack first) and gains a +1 on his defence roll.
In addition to his combat abilities, he comes with Armour (reduces the damage roll) and Fear. Like all skeletons in the game, he’s immune to just about all states (like blind, disease, poison etc). He has Prowess in Melee, so he can re-roll one dice of his choosing.
He only comes with 4 wounds, which is normally a problem but like all skeletons, he is Durable, meaning that he can only ever take 1 wound at a time, regardless of how many wounds are dealt. He also regenerates 1 wound at the start of every turn and an extra wound if you win the tactical roll at the start of the turn.
I painted all of the bones first (not just here but on all of the skeletons I have). Base cost of German Black brown followed by a wet brush of light brown with the idea of just leaving the very deepest recesses with the black brown. Once dry, I then applied a light dry brush of bleached bone followed by Iraq Sand on the highest points. I’m quite happy with the effect that it has created.
I spent some time looking at pictures of Japanese samurai armour. I really like the black/red effect, so opted for that. The black was firstly a dark grey given a couple of washes of nuln oil. I’ve then picked out the higher points with dark grey, dark grey/light grey and then and then just light grey. The red was a crimson then highlighted up using scarlet and orange to finish. I picked out the cord with scruffulous brown.
The purple smoke was a base of imperial purple followed by a wash of purple/off white mix (smoke is lighter in the thinner areas and darker in the thicker areas). I’ve then glazed the thicker areas with a dark purple glaze to get the contrast. Final step was to apply a mid purple glaze over everything to tie this together.
The rest of the model was made up of some gold, light brown with a wash for the Yari shaft and gun metal with nuln oil for the steel areas.
 Satou Hatchi(s)
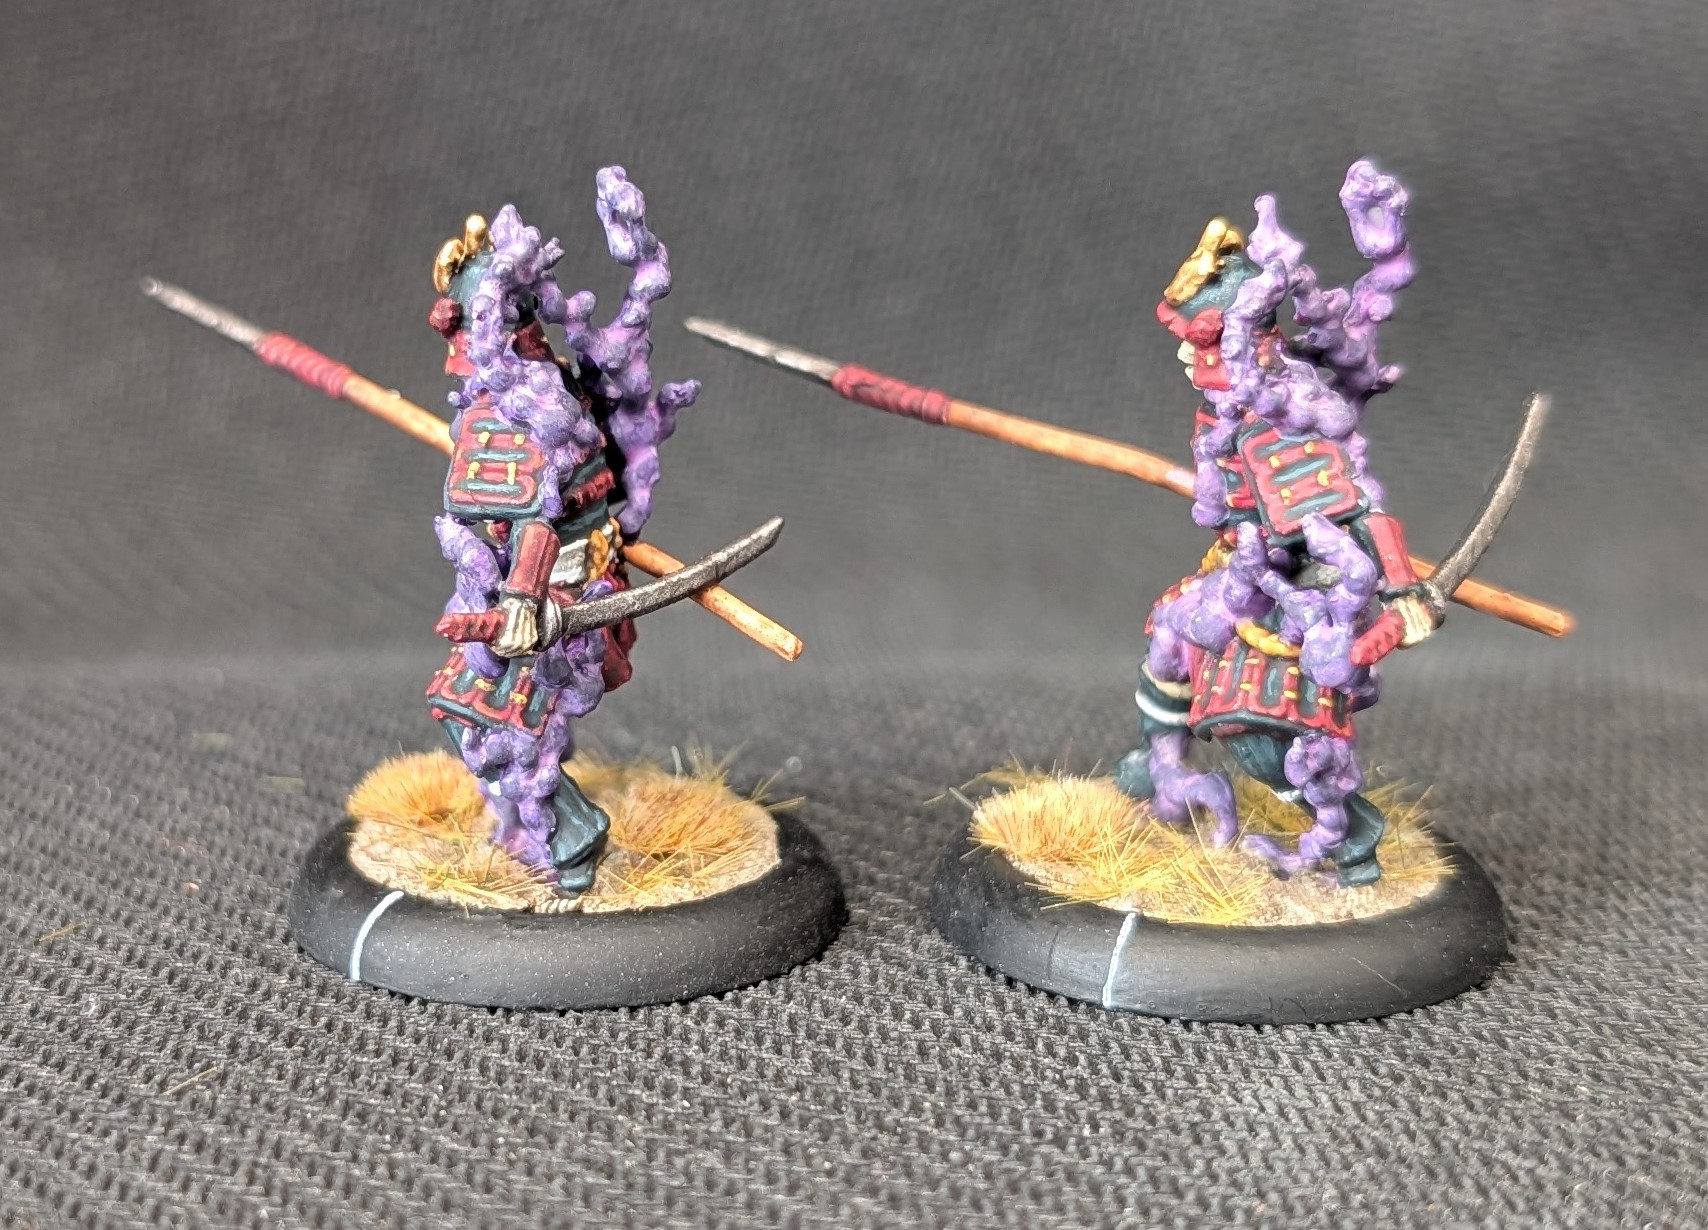

Completing the Starter Set
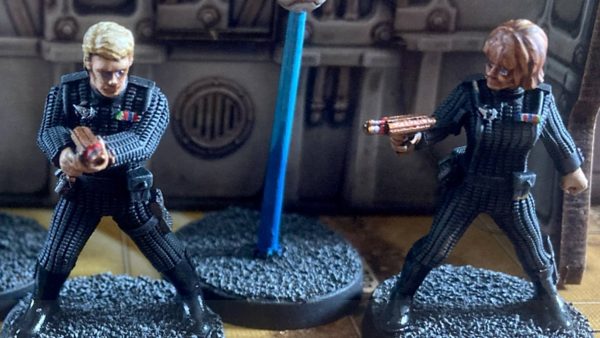
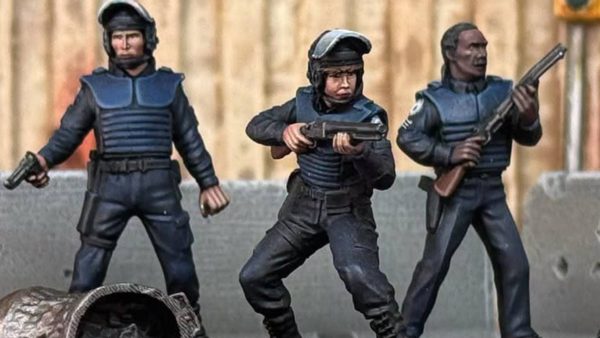
To get into Bushido, we initially picked up the starter set. This came with 10 models listed as Ronin. Ronin can fight for any faction listed on their card, so whichever faction you decide to opt for, there’s at least a couple of the starter box models that you can draft into your warband. The starter box also has a Romes and Juliet love story between the two factions.
I’ve painted up three of the models but the rest had sat unpainted since. Time to correct this travesty and get the painted. And an opportunity to try some speed paints out to see if I can figure out how to get the best out of them.
I’ve really taken the quickest approach to painting these with a white undercoat and then just a quick speed paint over the top. I’ve picked out the smaller details with ordinary paints and then given the model a quick dry brush, but otherwise these were finished in a couple of evenings. The basing took almost as long!
Annoyingly, I had a paint accident while they were sat on my painting table. A pot of paint splattered while I was squeezing some into a palette and some of the splatter went over the models. I could clean these up but I’m not sure that these models are going to be used enough to warrant the time.
First up, we have the Hozumi Family. The first three models I had painted previously and aren’t speed paints.
 In order, Taiyo, Hozumi Maha, Ryokeen, Hozumi Koga, Hozumi Daihanji
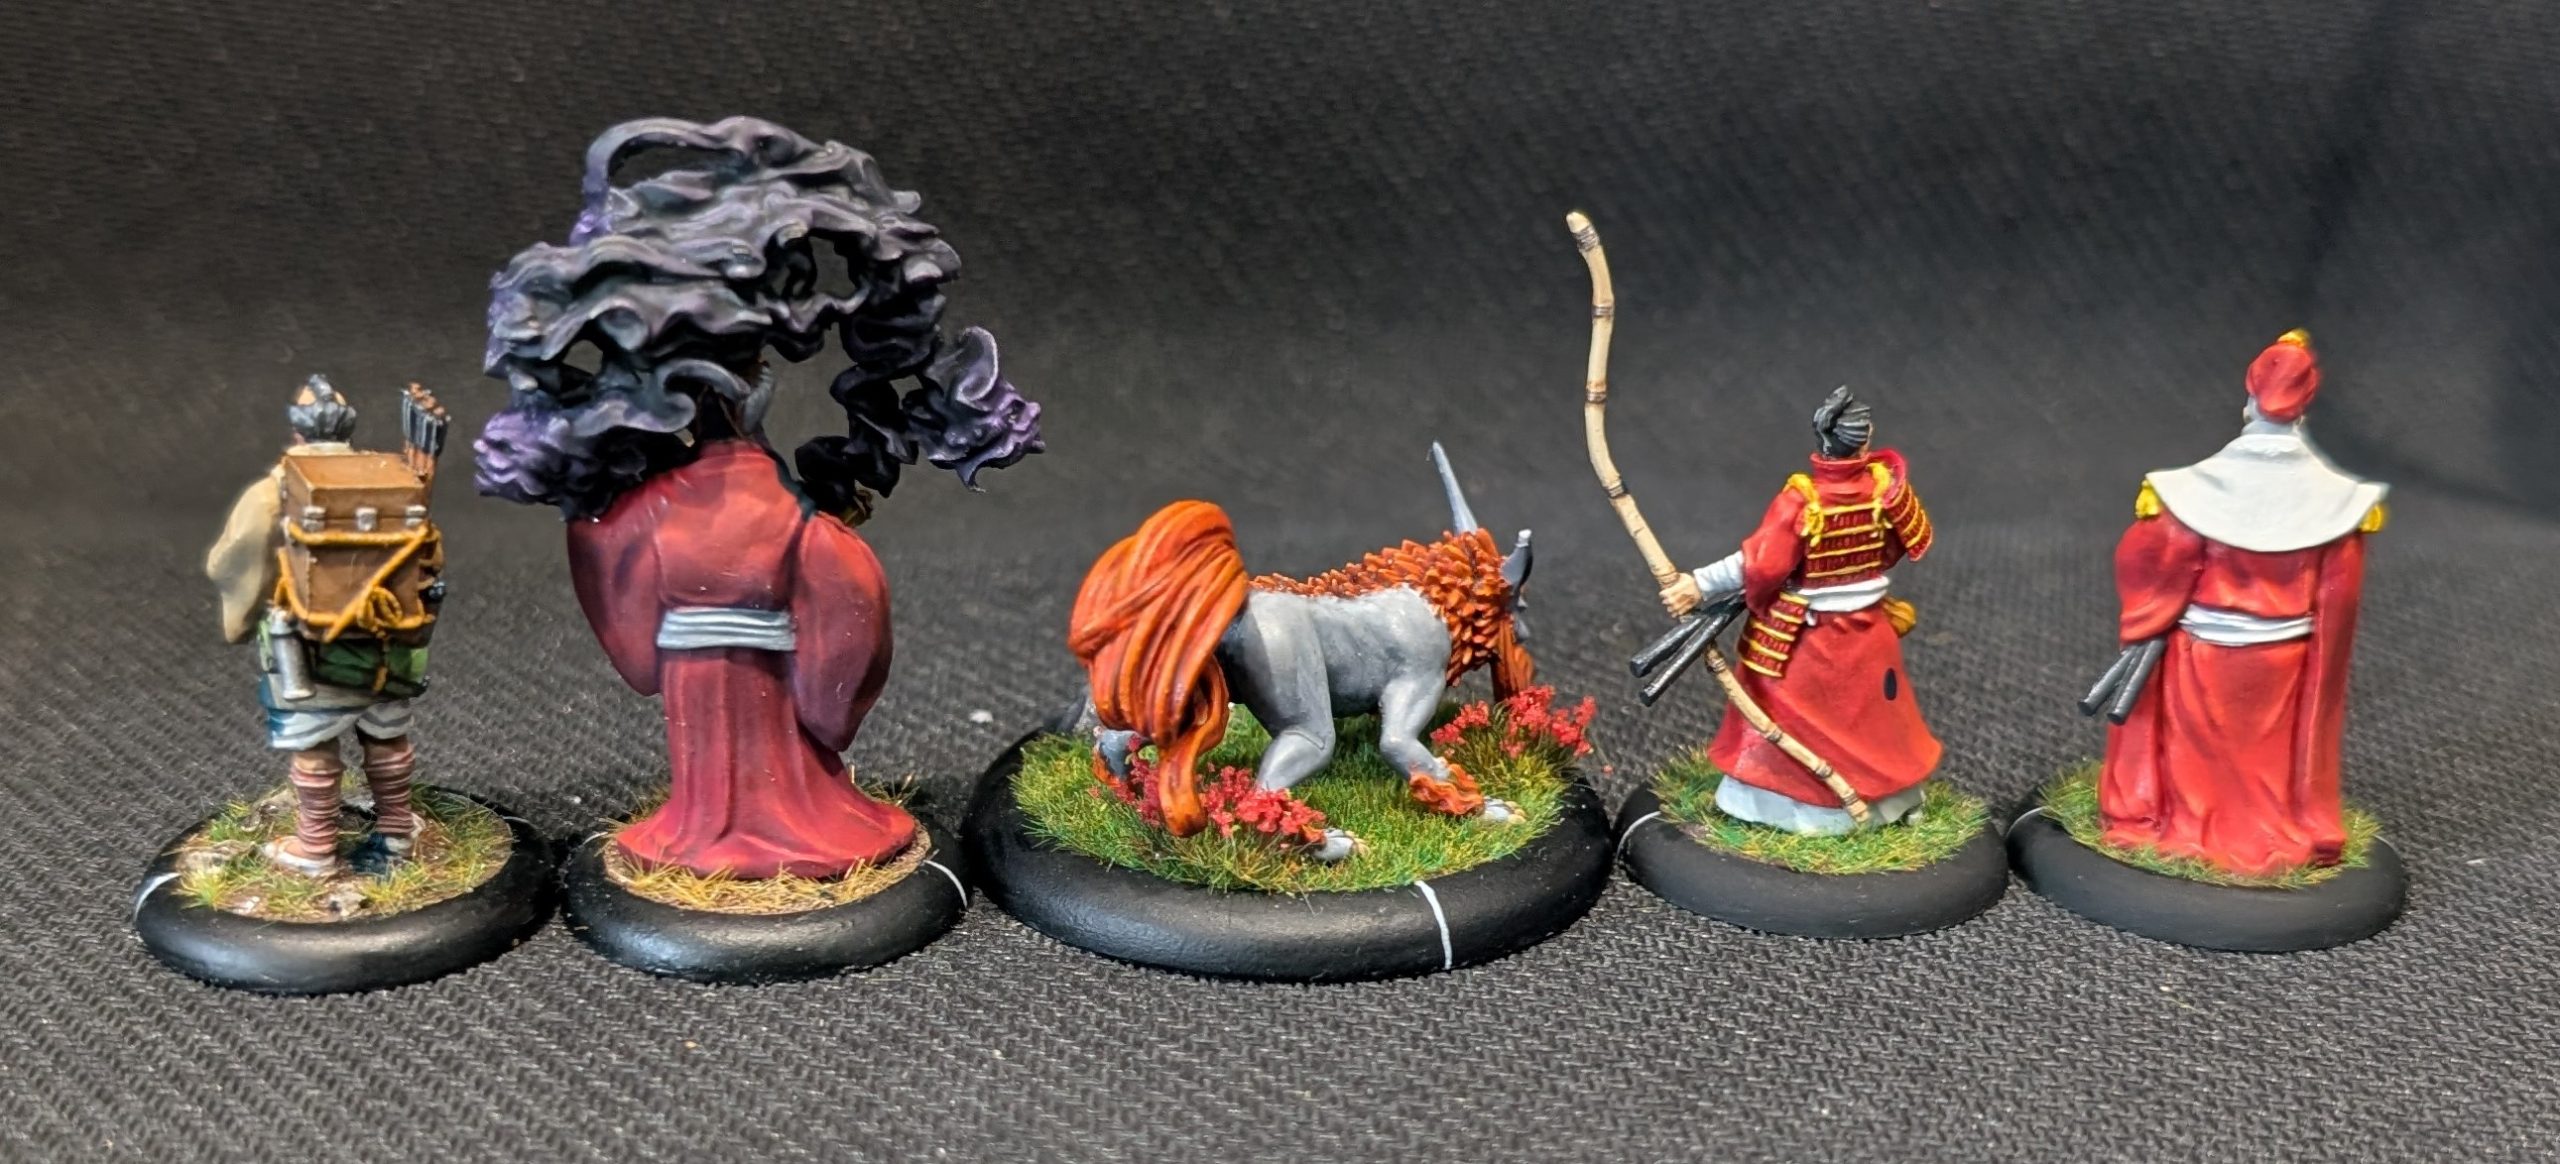
And then we have the Kiyozumi family
 Kiyozumi Hinadori, Kiyozumi Haiboku, Kiyozumi Kicho, Kiyozumi Sadaka and Kenmeina
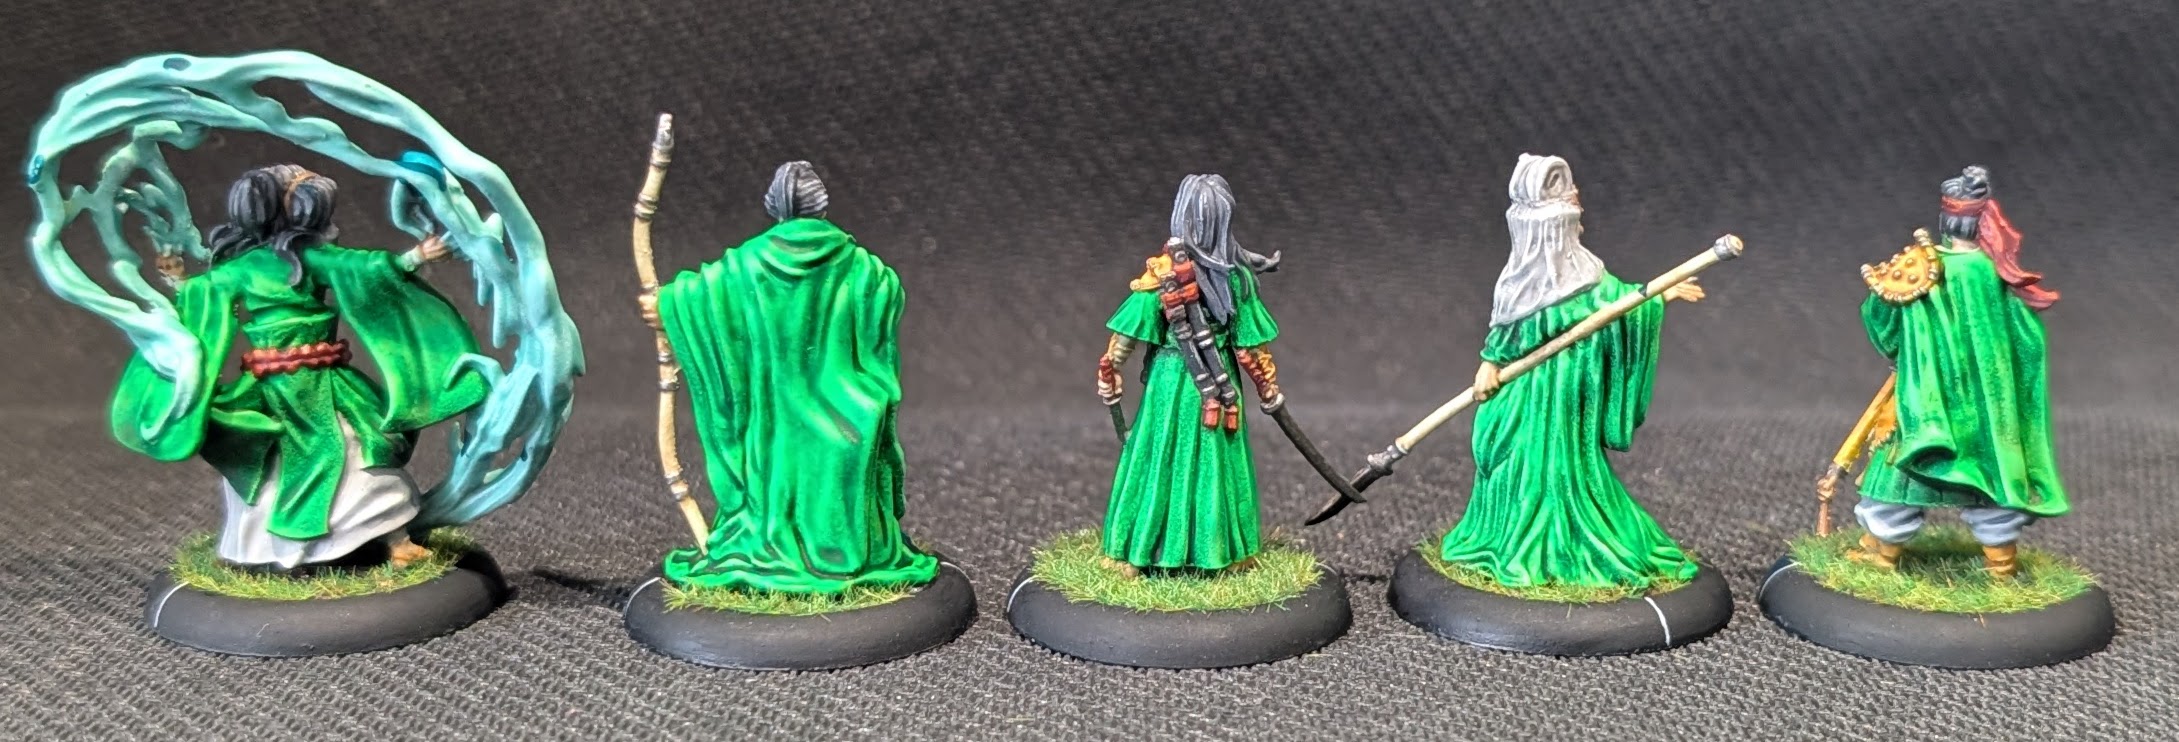
I’m still not sure about the speed paints. The green worked quite well, as did the hardened leather I used. Some of the others not so well. I can’t decide whether it is my application or my expectations being too high. Jury is still out for me.
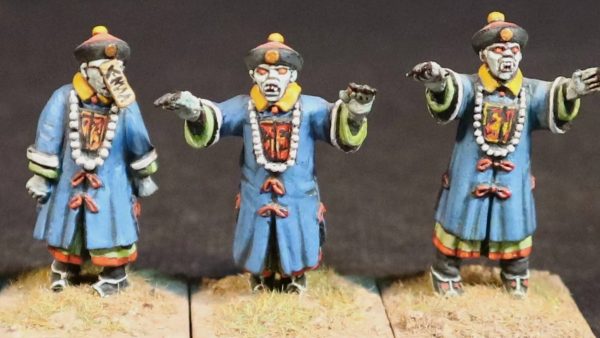
Josei
Josei is the last of the four sisters to be offered power by Yurei and one of the three that accepted the power. Josei synergies well with the zombies (or Kairai) that Yurei can field and any such zombie in the army gets a regeneration bonus of +1 every turn that Josei is still around. Otherwise she is much like the other sisters in that she shares her Ki with a common pool card and can use any of the shared abilities on it. She also has the Death Magic ranged attack as well.
In addition, she has her own Ki feats. First up is Sacrifice that allows you to remove a friendly model but gain 4 Ki tokens – very useful if there is a decisive moment where a well placed Ki feat will swing the game. Seed of Destruction places a ‘bomb’ on an enemy model. After their next two activations, they explode and all enemy models within 2″ of the exploding model share out 8 wounds, so your opponent has the choice of almost certainly losing one model or taking damage across a lot of models.
Finally, if this model kills an enemy model with a ranged attack, the enemy model can be replaced with a zombie.
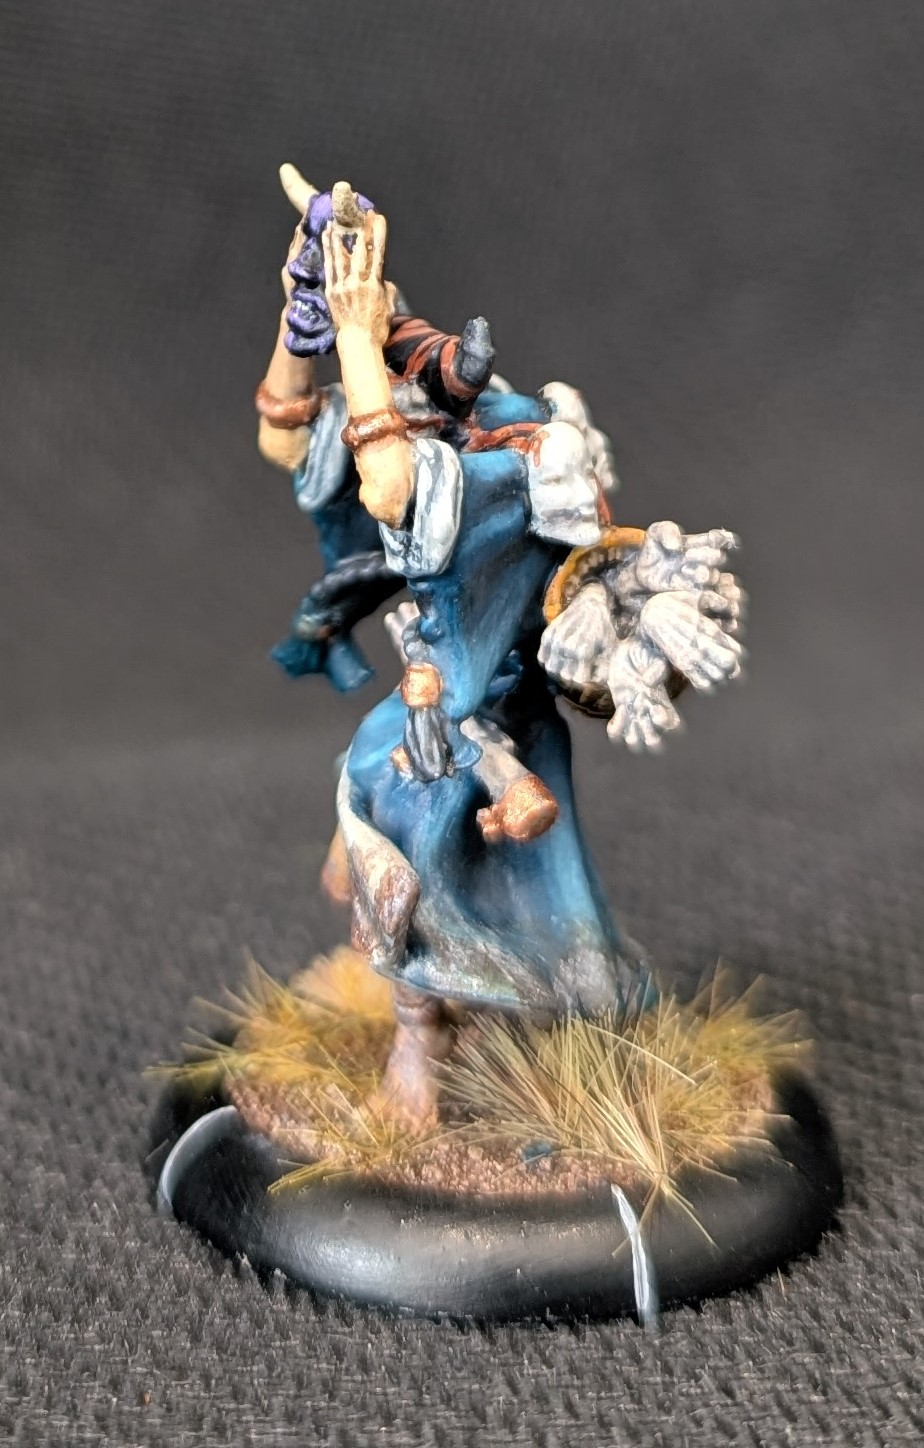
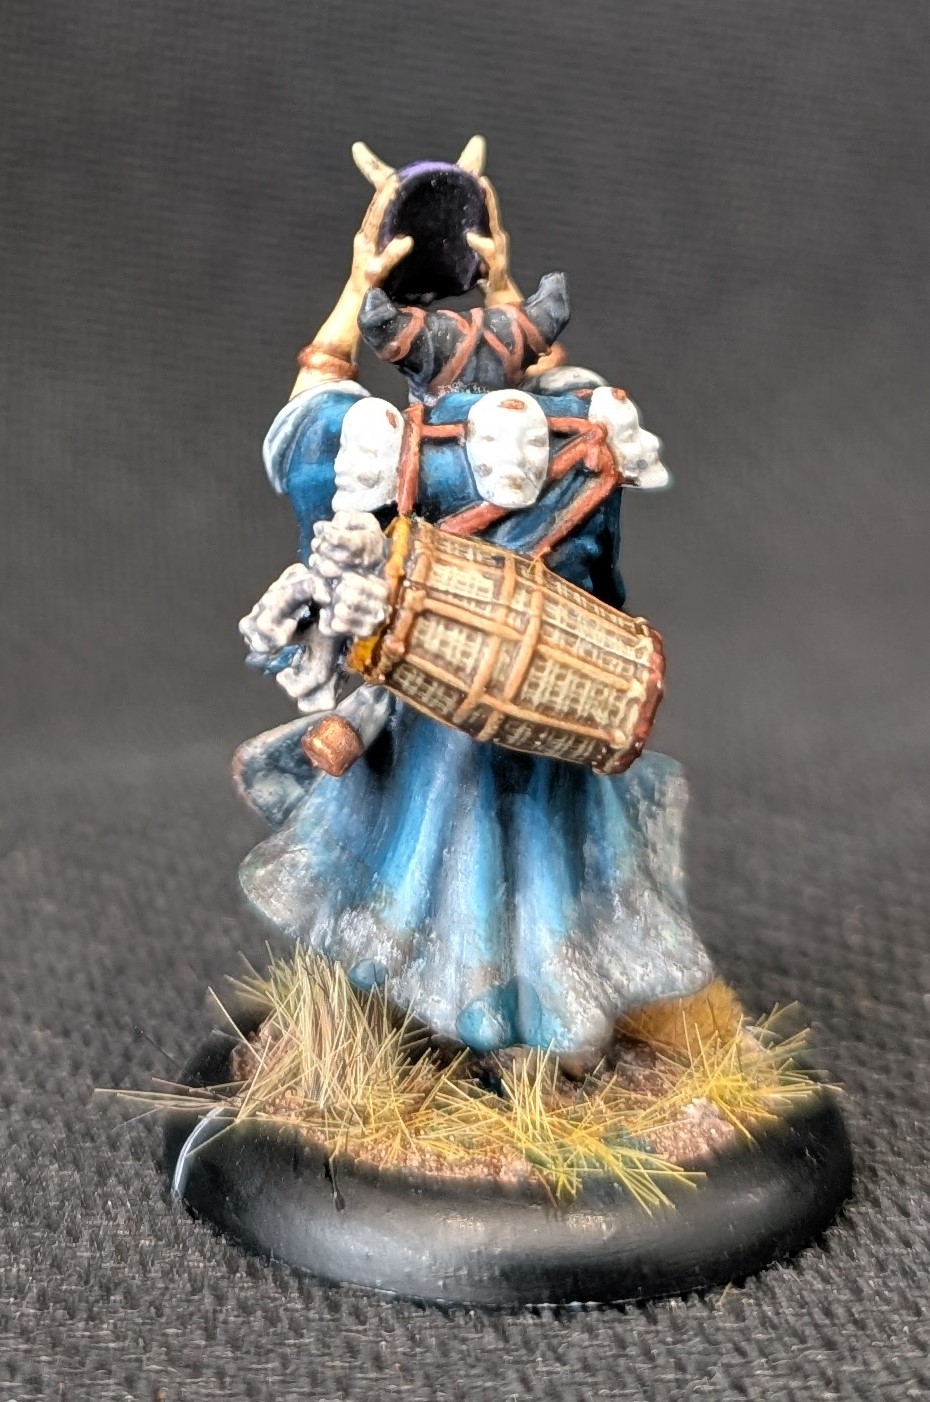
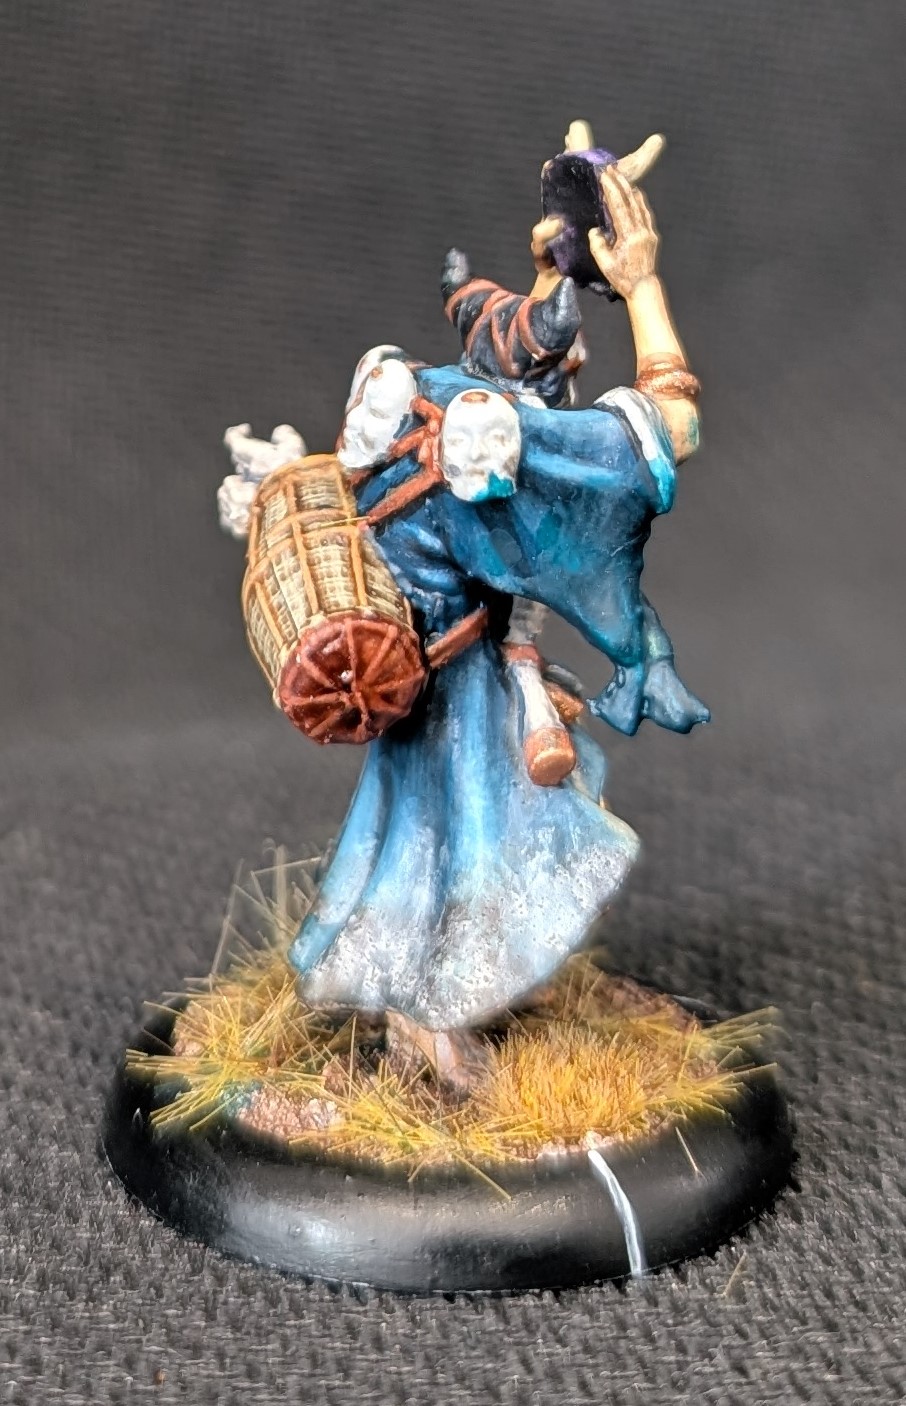
Painting wise, as I wanted the sisters to be colourful, I opted for blue as the main colour here. One of my favourite blues is Periscopes which formed the base coat. I’ve then used a nightshade wash to darken the recesses and gradually mixed in ice blue to the periscopes to get lighter shades that were applied as glazes. Skin tone was as before, a light skin tone given a wash followed by highlights of pale skin tone. The dismembered body parts started as pale skin tone and then I’ve applied a grey wash as I wanted to make the skin look decayed.
The wicker basket started as light brown followed by a dark brown wash. I’ve then highlighted with light brown before adding an Iraqi sand highlight. The white, including the masks, were a light grey followed by off white and then a white highlight.
As Josei likes zombies, I assumed that should would have been wandering around digging up old bodies. I therefore thought that some mud and dust applied to the lower regions would reflect this. I’ve used enamel mud effects from MiG for this, firstly a wet mud splatter and then dry dust thinned and washed over the top.
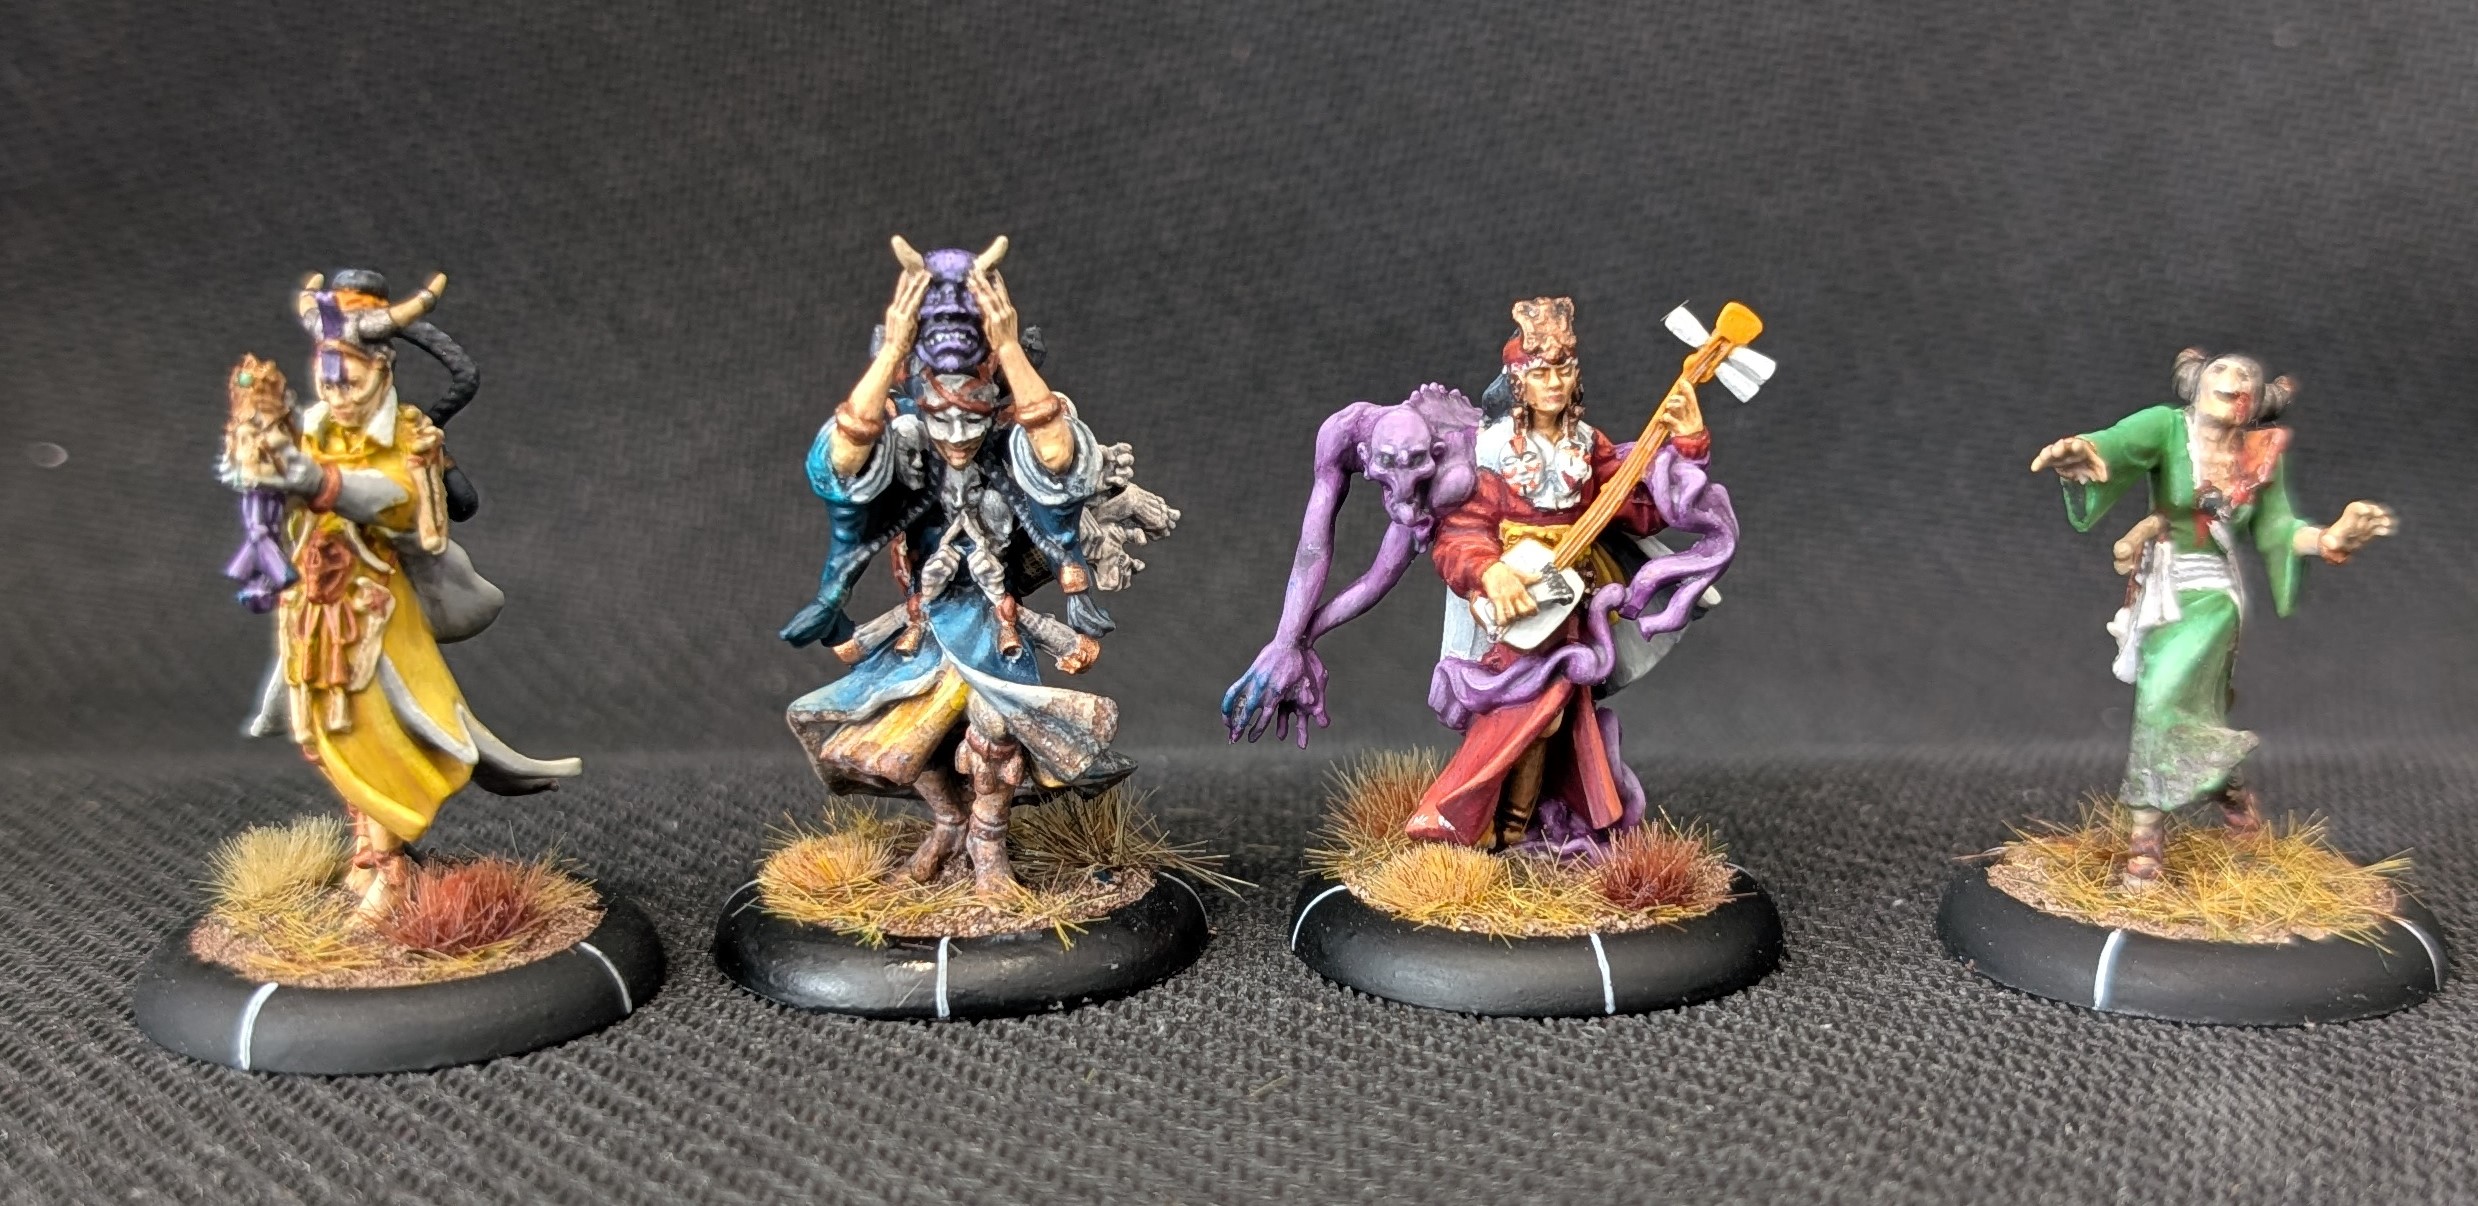
That’s all of the witches completed, so here they all are together
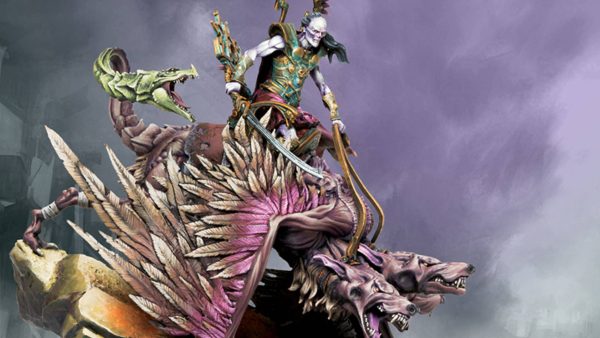
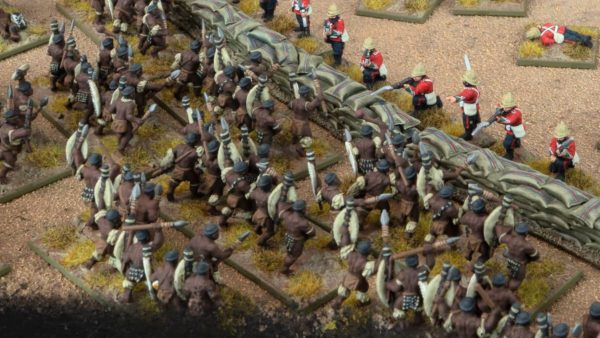
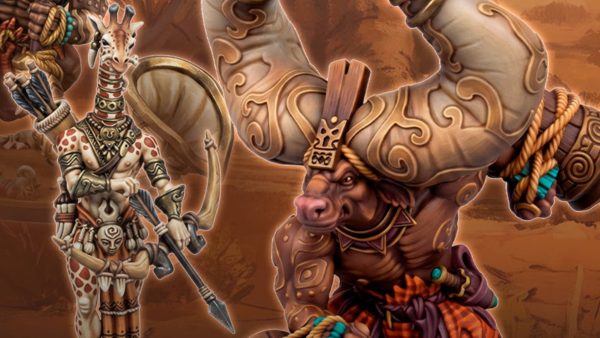
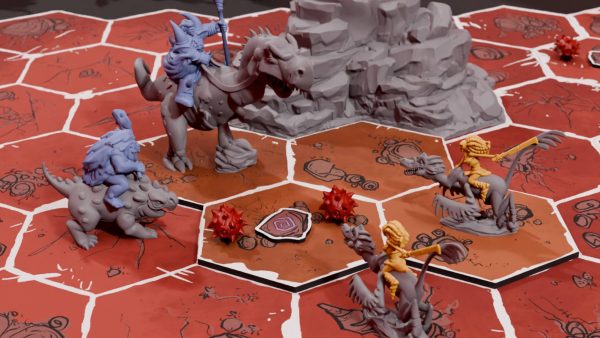
Horselords
Since I started this project, several new factions have been released for the game. We have the Awoken, a spider infested faction (don’t tell Justin), the Imperial Court (which was part of the Ronin mercenaries but is now its own faction) and we have the Horselords of Ataka.
The Horselords are currently only available at conventions, so while I was lucky enough to attend UKGE, this was mu opportunity to pick these up, which I did.
The models are resin 3d print and there is some assembly but apart from removing some 3d supports and a little bit of smoothing around the joins, these went together very easily. Here are the base set and the extra model fully built.
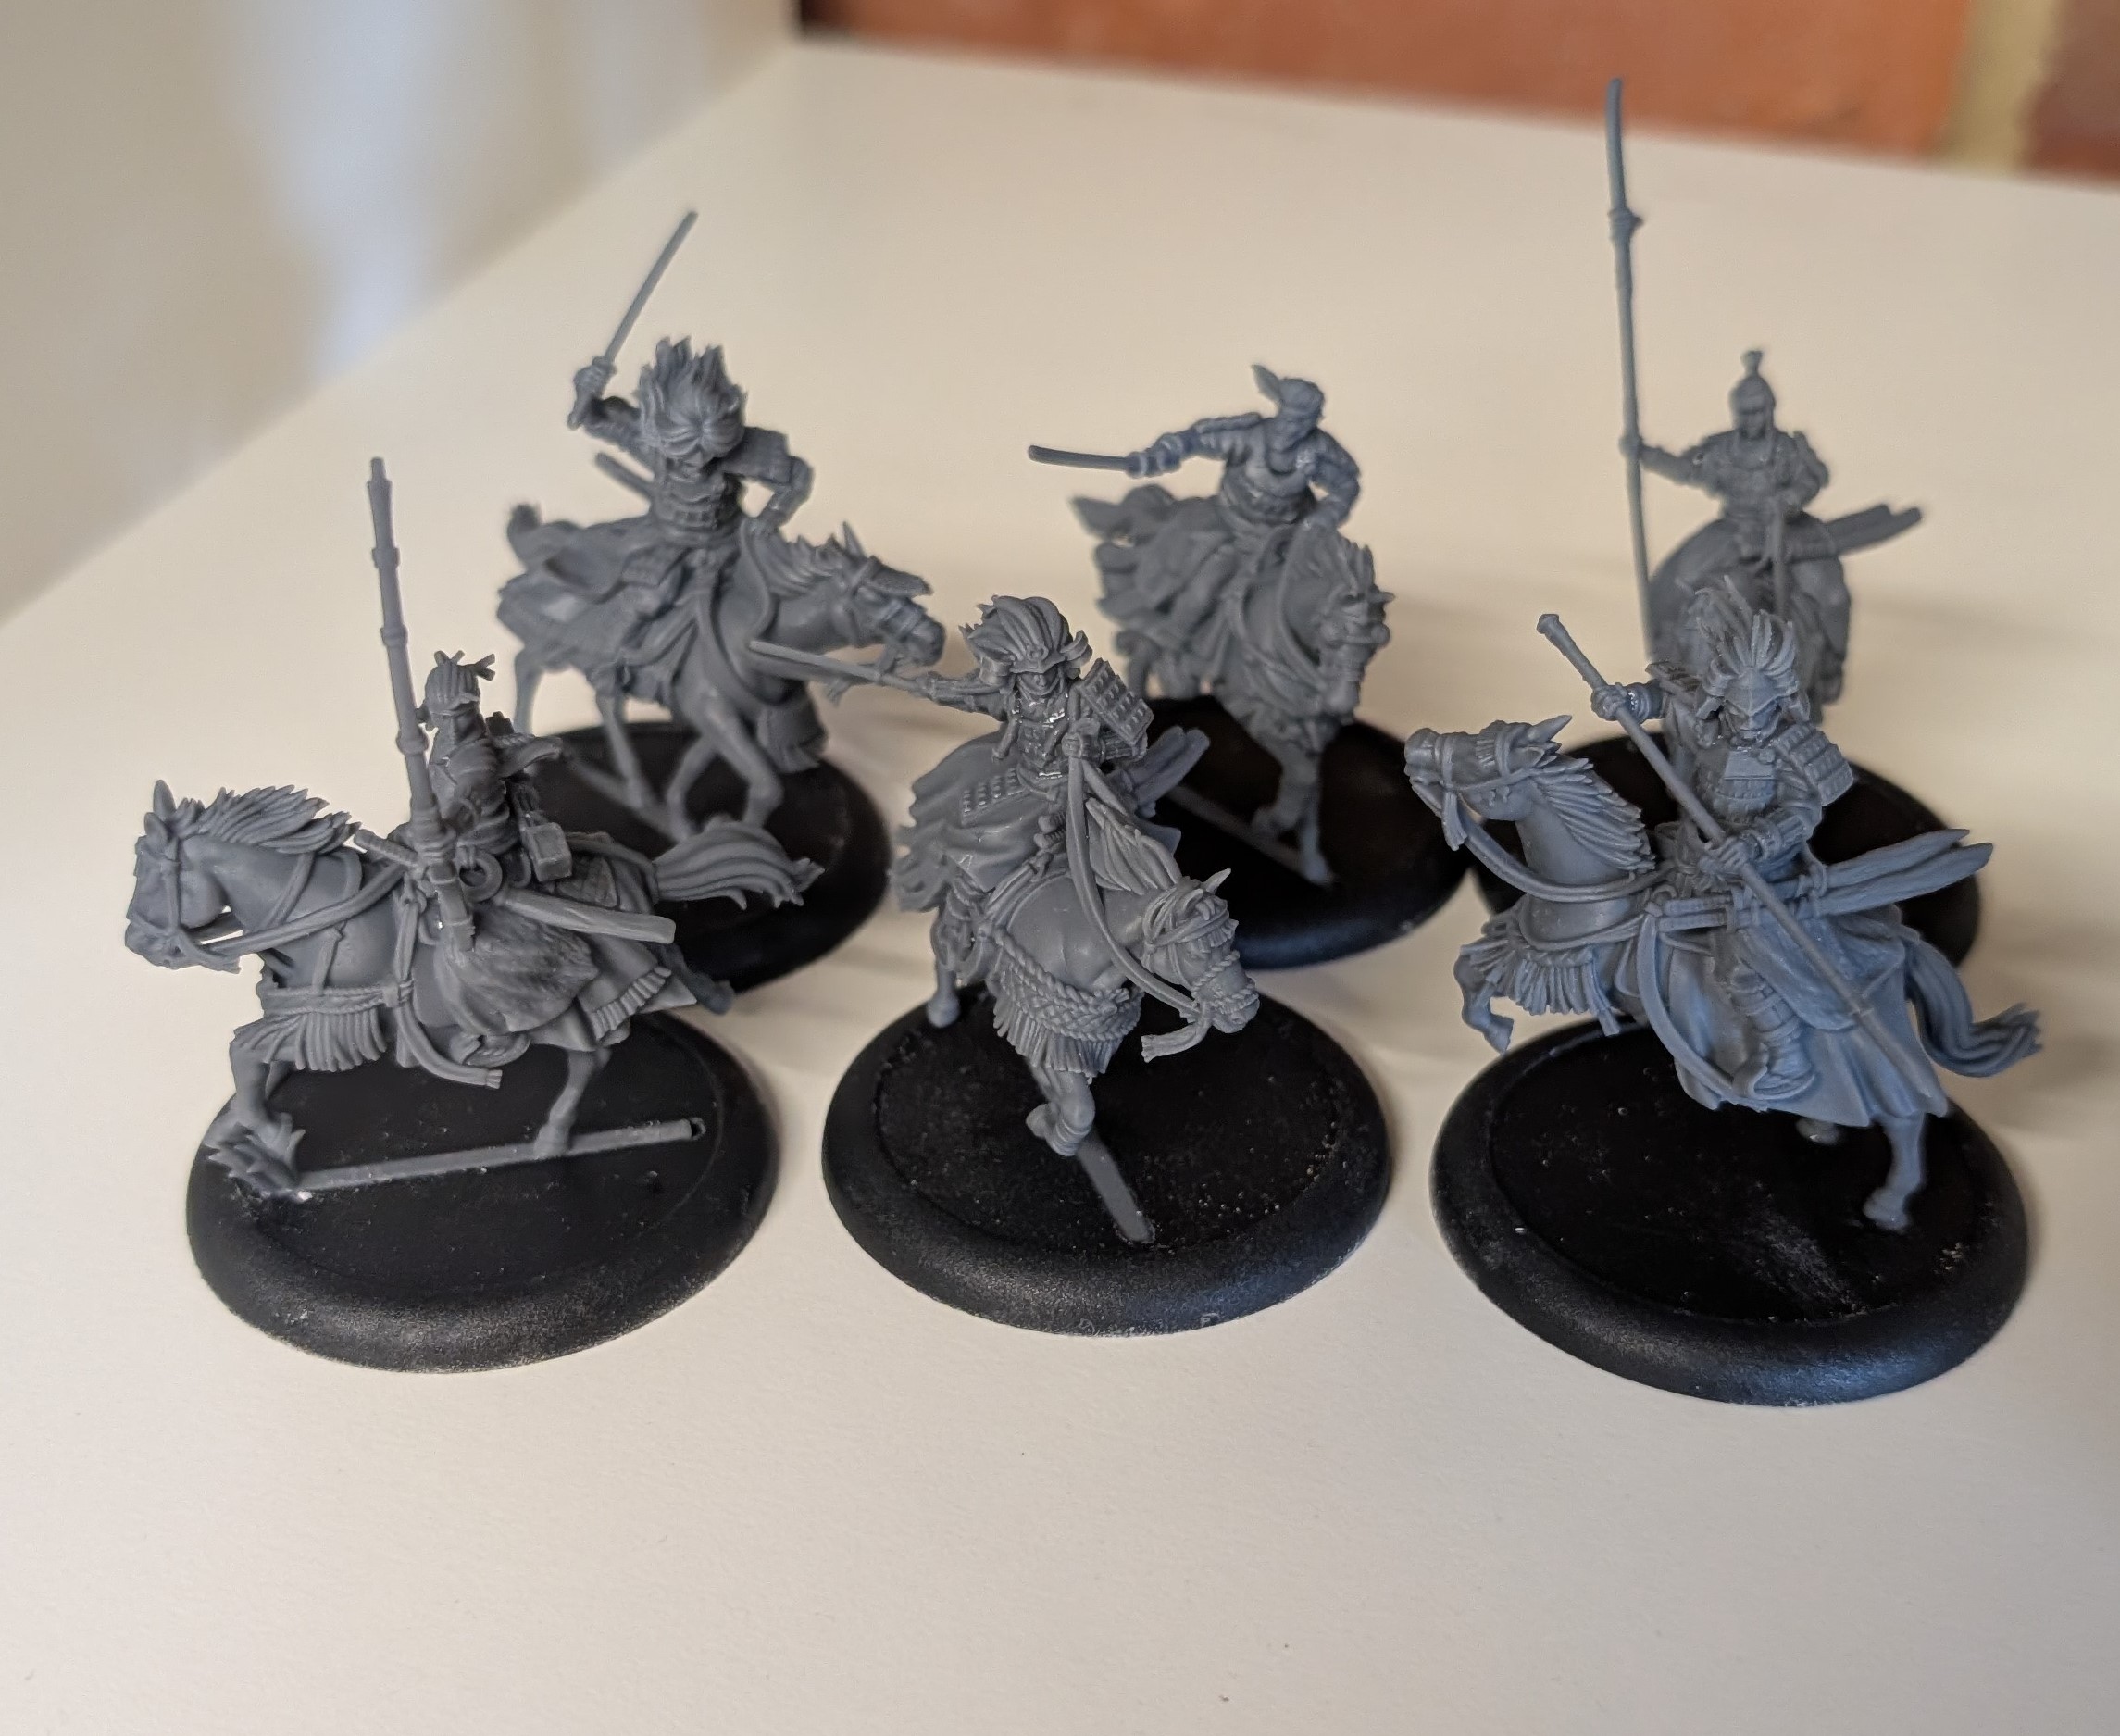 Some people on horses looking hard
I’m paranoid about models with small contact points, so I also pinned these wherever I could. Overall, these look lovely and have some very different rules to what I am used to in playing the Cult of Yurei, so looking forward to getting these to the table.
But, disaster struck. After building the models (as per the picture above), I put them in my garage for storage. Then it got hot in Sussex and my garage had internal temperatures of something like 40 degrees. The resin didn’t like this and, with very small contact points on some of the models, the had what can best be described as brewer’s droop.
The two footed leaping horse was on its knees and one of the models was lying flat on its side on the base. Not good. Fortunately, as it was still warm I was able to bend these back to roughly their original position and then either glue them or shove something under them to provide some support. Not ideal and I may need to look into additional supports for these models.
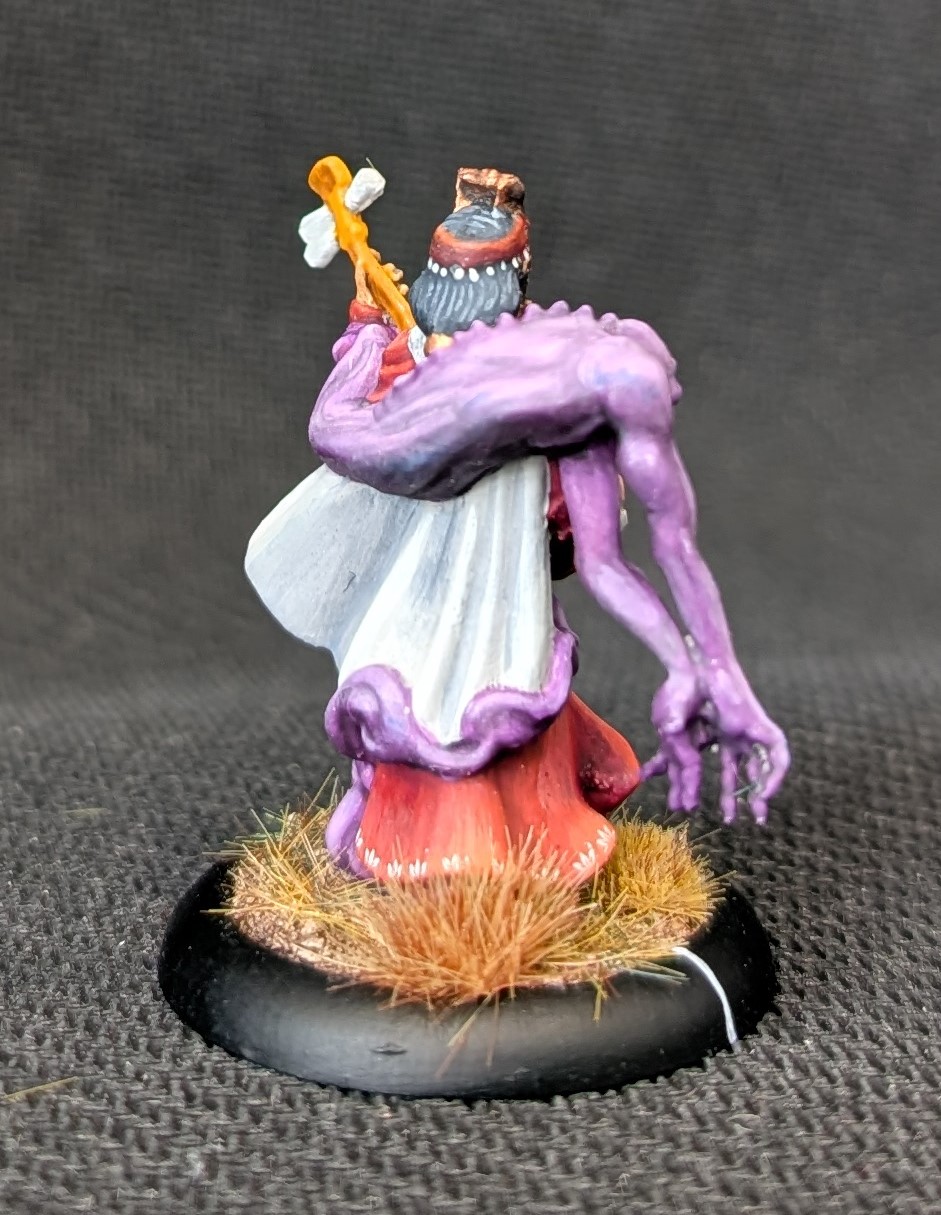
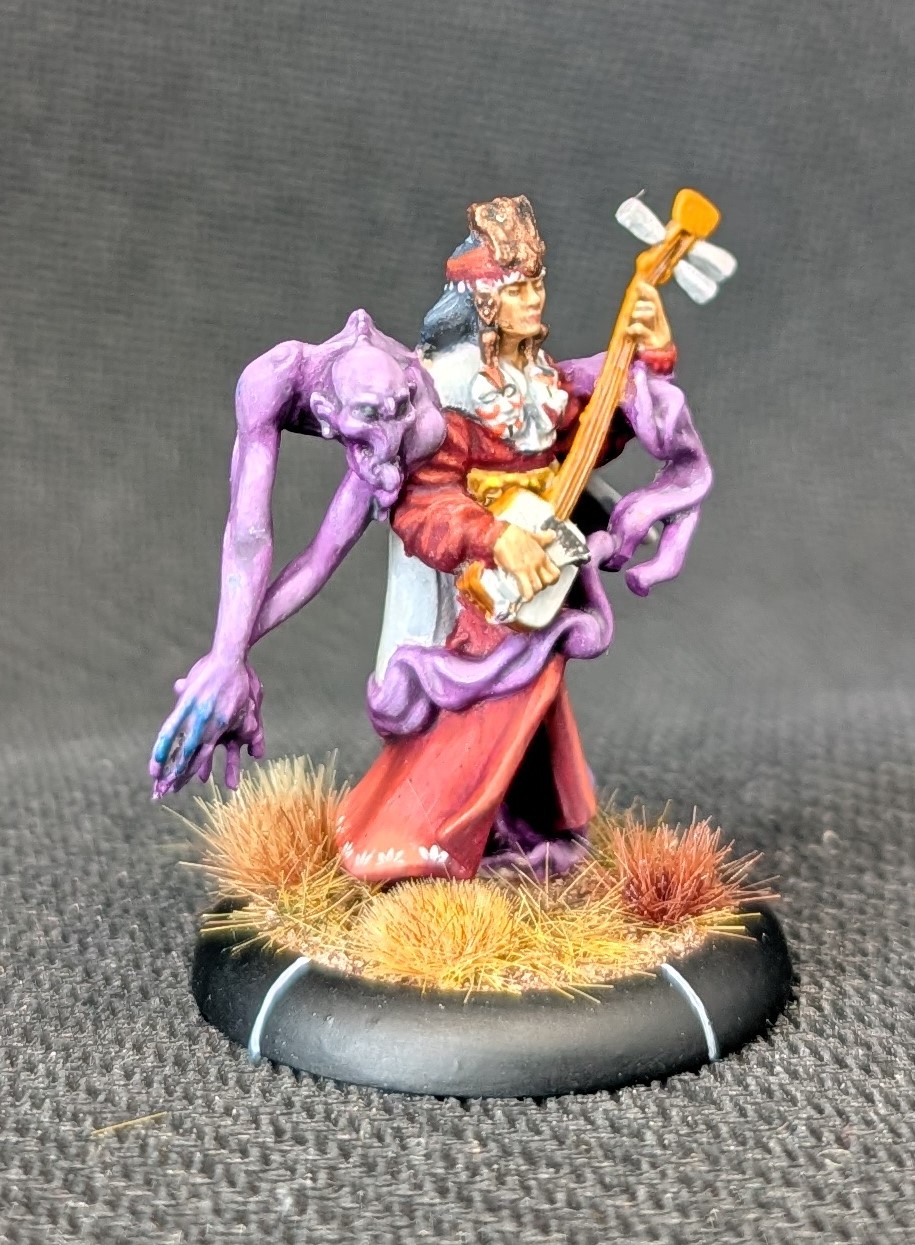
Shojo
Shojo is another of the four sisters like Akuba and Hikari below. In game, she gets to pool her Ki tokens with the other sisters giving some good flexibility on what to focus on each turn. She also comes with a short range attack (as do the other sisters) that if it hits, allows any of the sister’s to heal a wound.
She also has some interesting Ki Feats. Her first creates a 6” aura around her that, should any enemy model spend a Ki token while within it, that enemy model gains a control marker at the end of their activation. That would allow me to take control of that enemy model and take an activation with it as if it were part of my warband. So this could really put a dampener on the enemy within the aura, especially if they are heavy Ki users (like my son’s Temple of RoKan).
Her second Ki feat allows her to attempt to steal an activation from an opposing model and give it to a friendly model within 6”. As every model gets 2 Activations per turn, losing one is quite a blow but then having a friendly model gain it is doubly so. There are certain Cult of Yurei models that become a real problem with 3 Activations in a turn!
She also allows all models with the Burakumin key word heal a wound at the end of every turn, so useful for keeping them alive.
Painting wise, like the other witches, I wanted to bring some colour to the table, so red was the main choice here. I’m still experimenting with how to get a good red and I’ve been thinking that a dark base and highlight up is perhaps the way to go. I’ve started with a maroon mixed with a bit of dark brown as the base, applied only to the lower parts or areas in shadow. Over that, I’ve applied a thin maroon. I’ve then worked up using glazes of maroon/scarlet, just scarlet, scarlet/orange and finally a very fine orange over the top. Then, in an attempt to blend this together, I’ve used a maroon glaze for the recessed/shadow areas and scarlet for the lighter areas – a couple of applications of both. The white ‘petals’ along the hem of the dress are a decal I purchased from Mastercrafted.co.uk.
The purple ‘ghost’ was an imperial purple to start given a deep purple wash. I’ve then reapplied the imperial purple to raised areas and then through gradually adding in off-white into the purple, highlighted up. A couple of imperial purple glazes over at the end helps blend it together.
White areas where a light grey base, thin luftwaffe grey glaze into the recessed areas and then Off-white highlights. The instrument was scrofulous brown with a wash. Skin was a Scale 75 light skin tone with a wash, then back in again with the light skin tone to highlight and finally a pale skin tone to pick out the raised areas.
The rest of the ornaments and jewellery were a shiny bronze with a wash, interspersed with some other metallic colours to break things up.
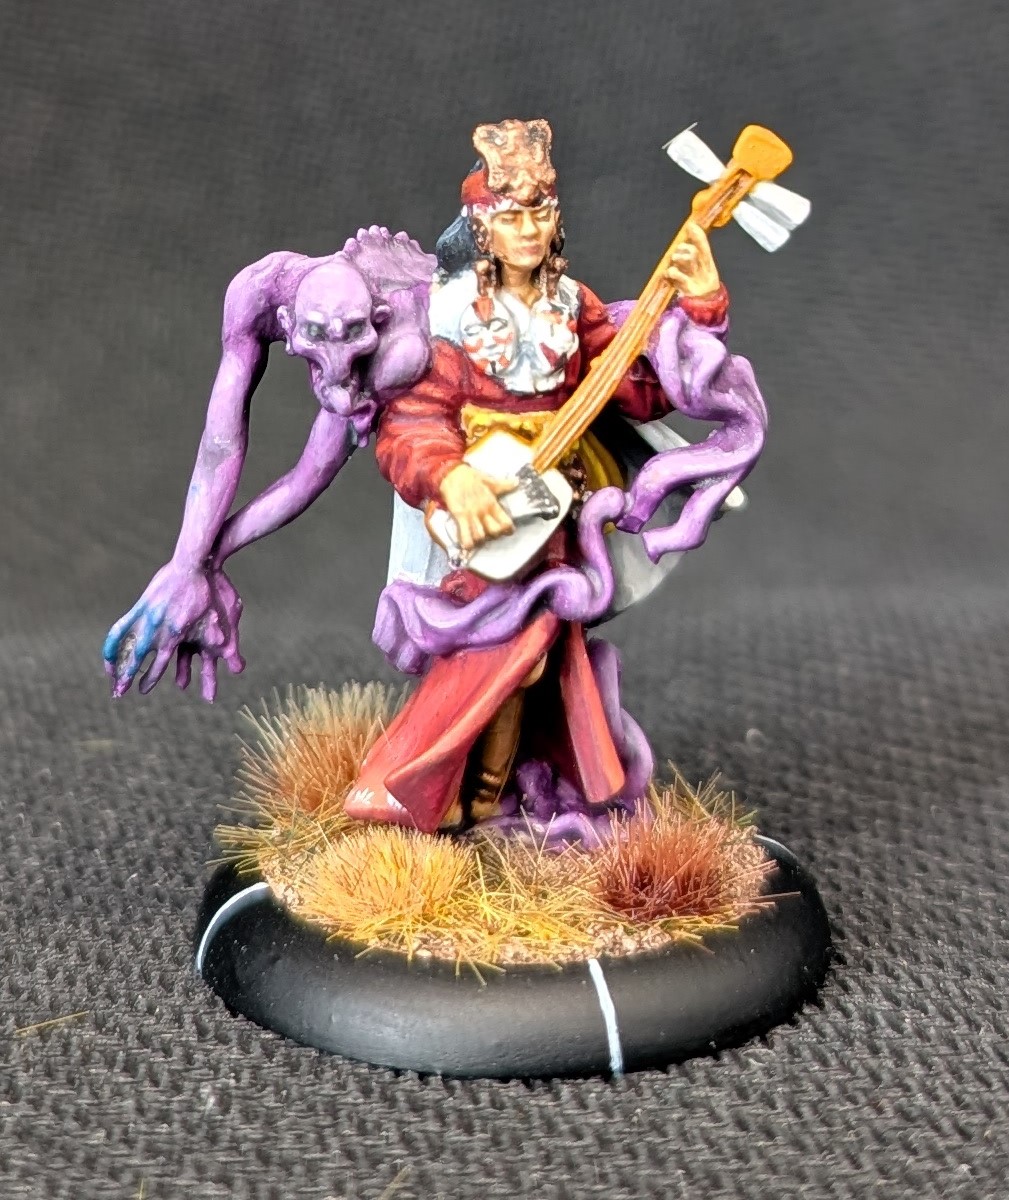 Shojo and her friendly ghost
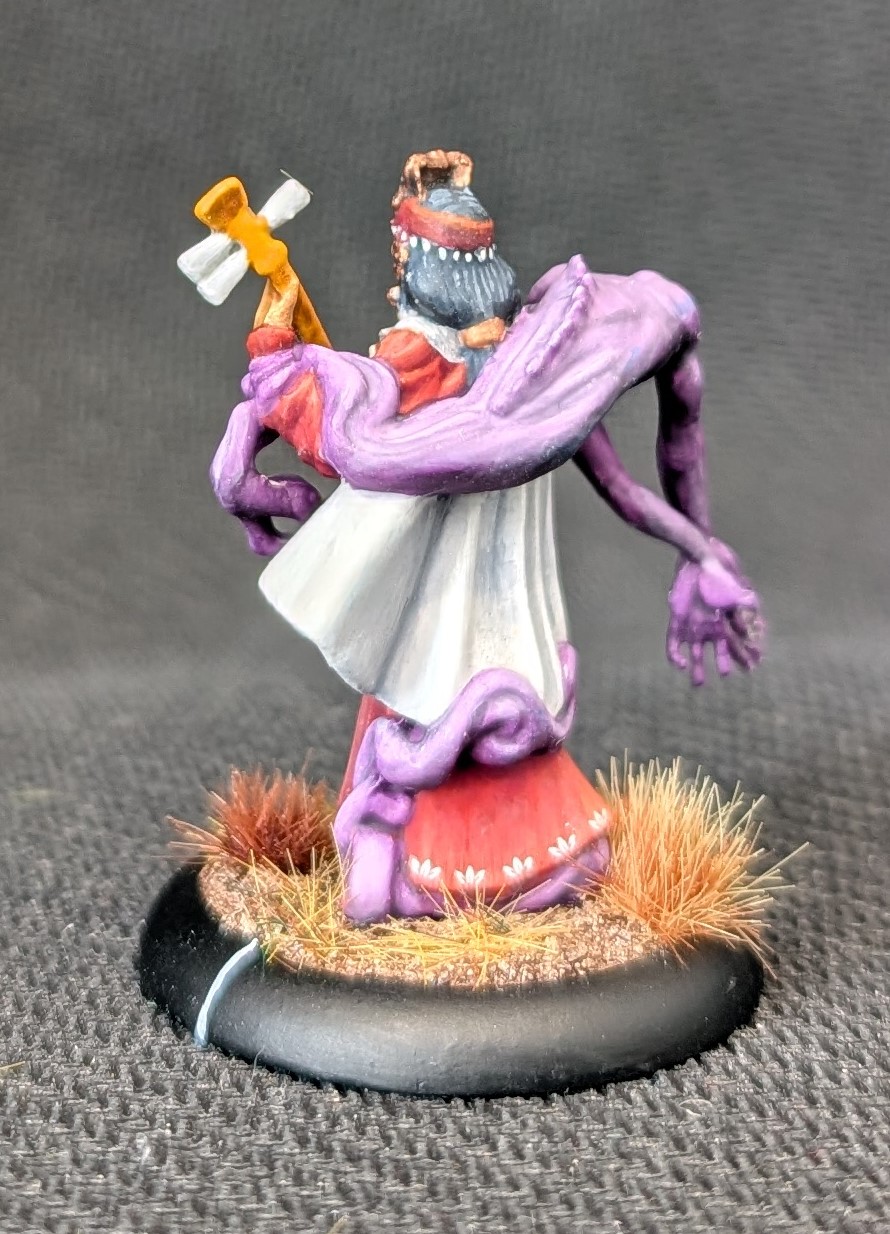 Lloyd shot of Shojo and ghost
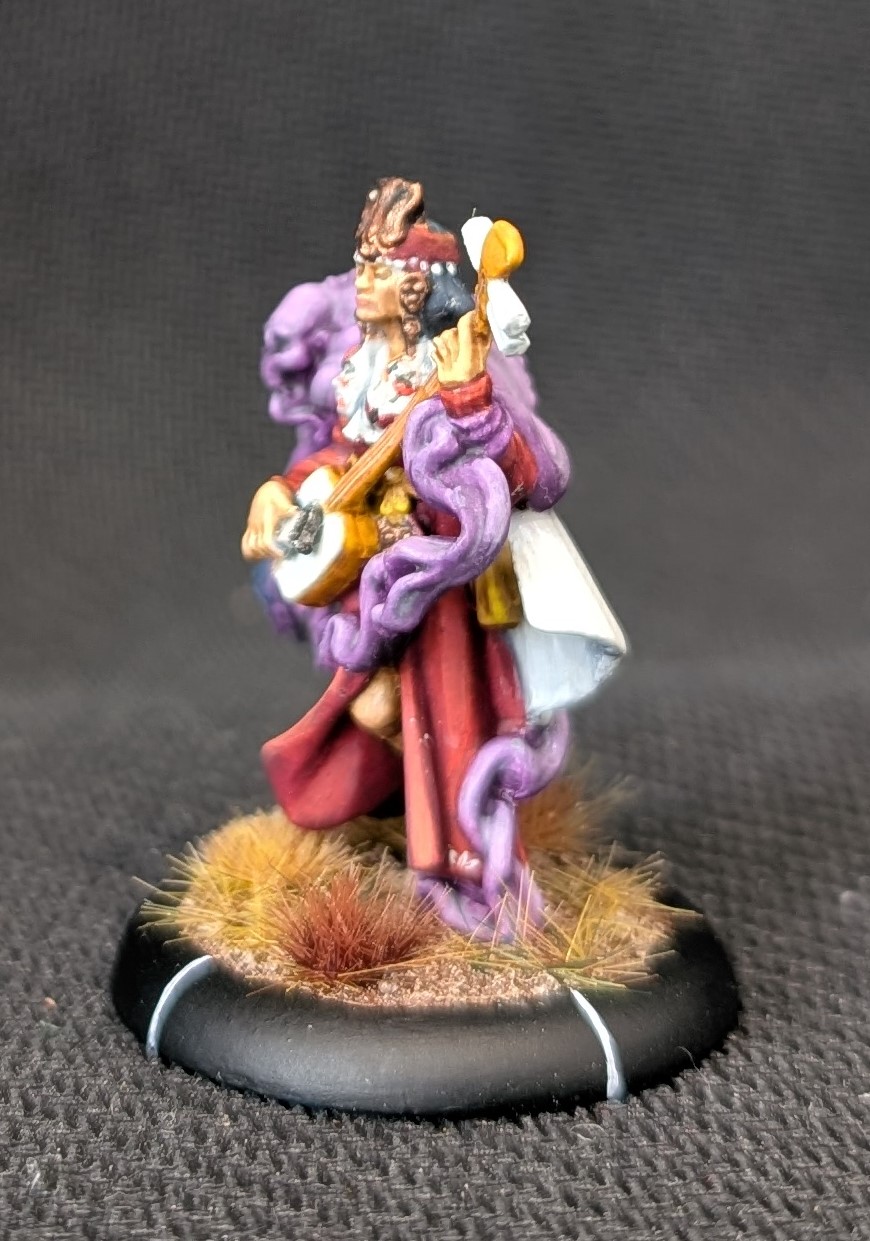
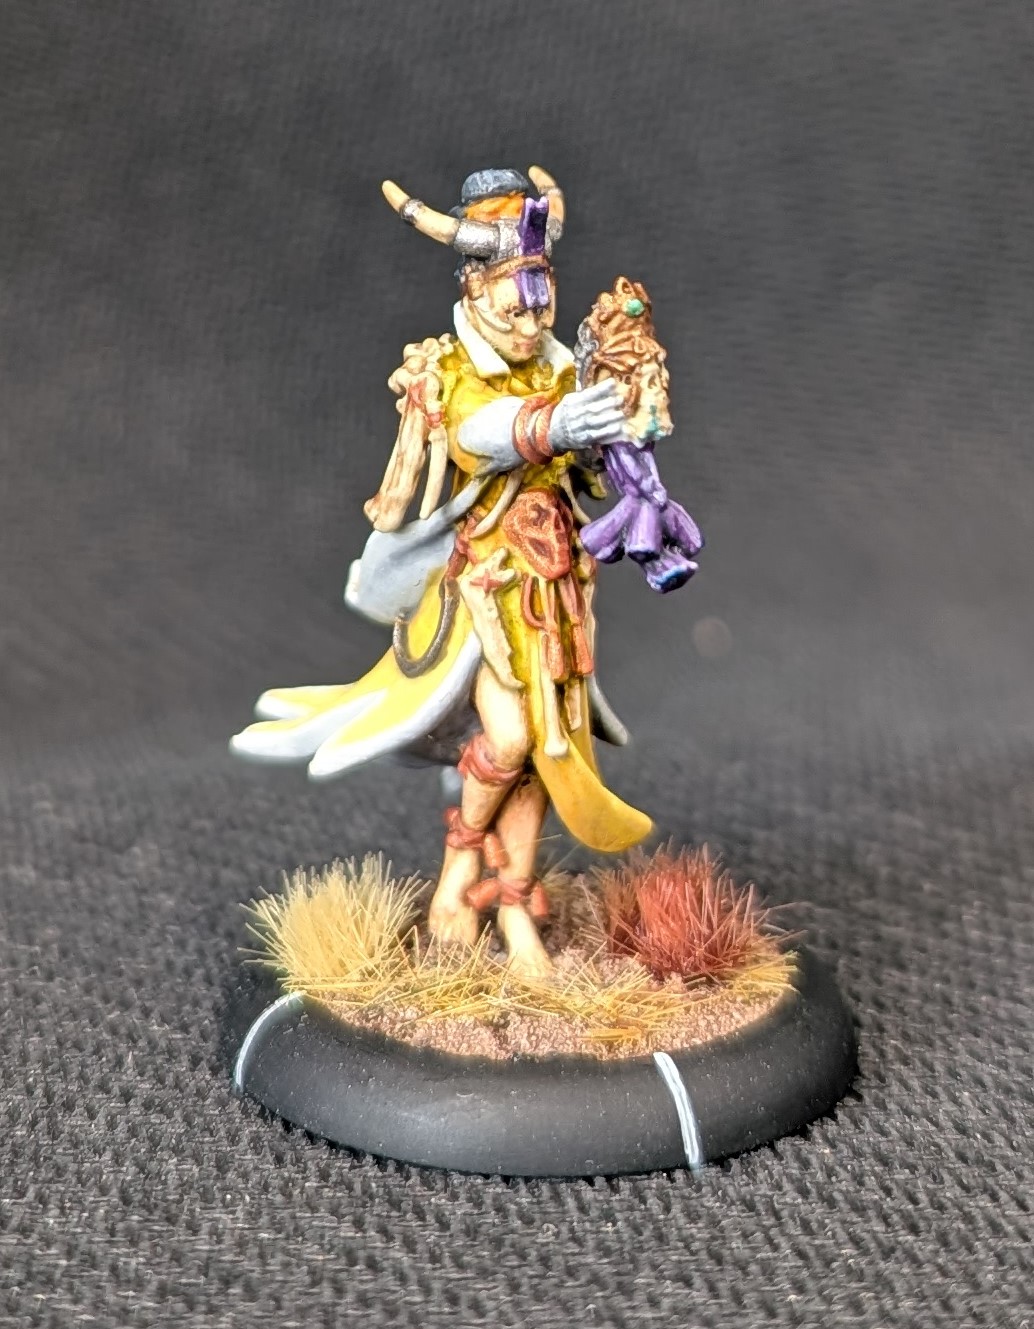
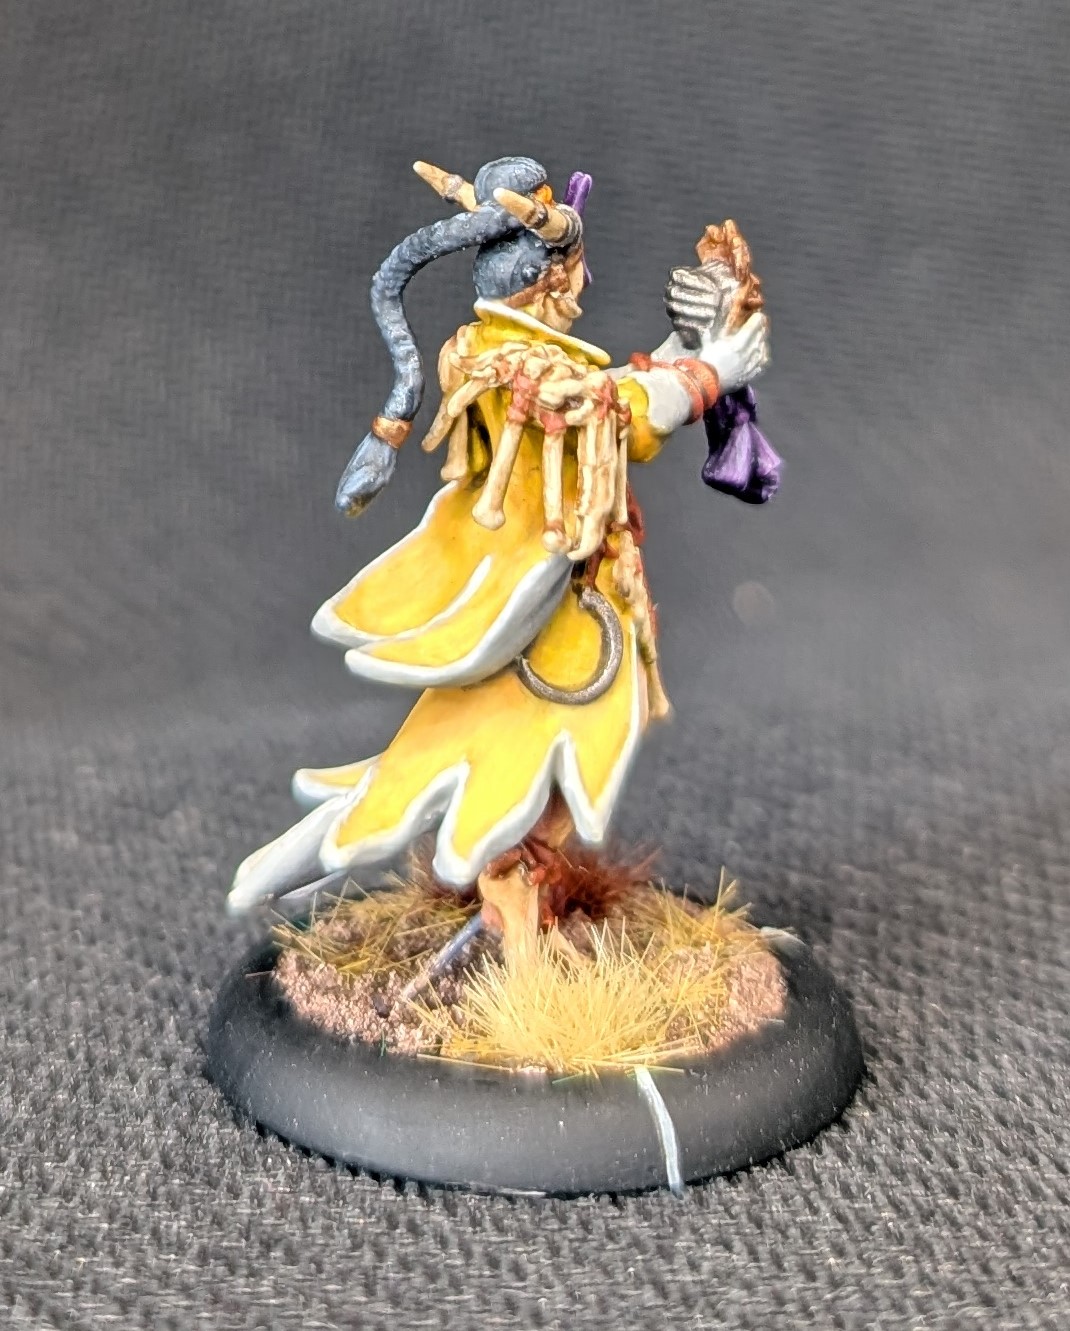
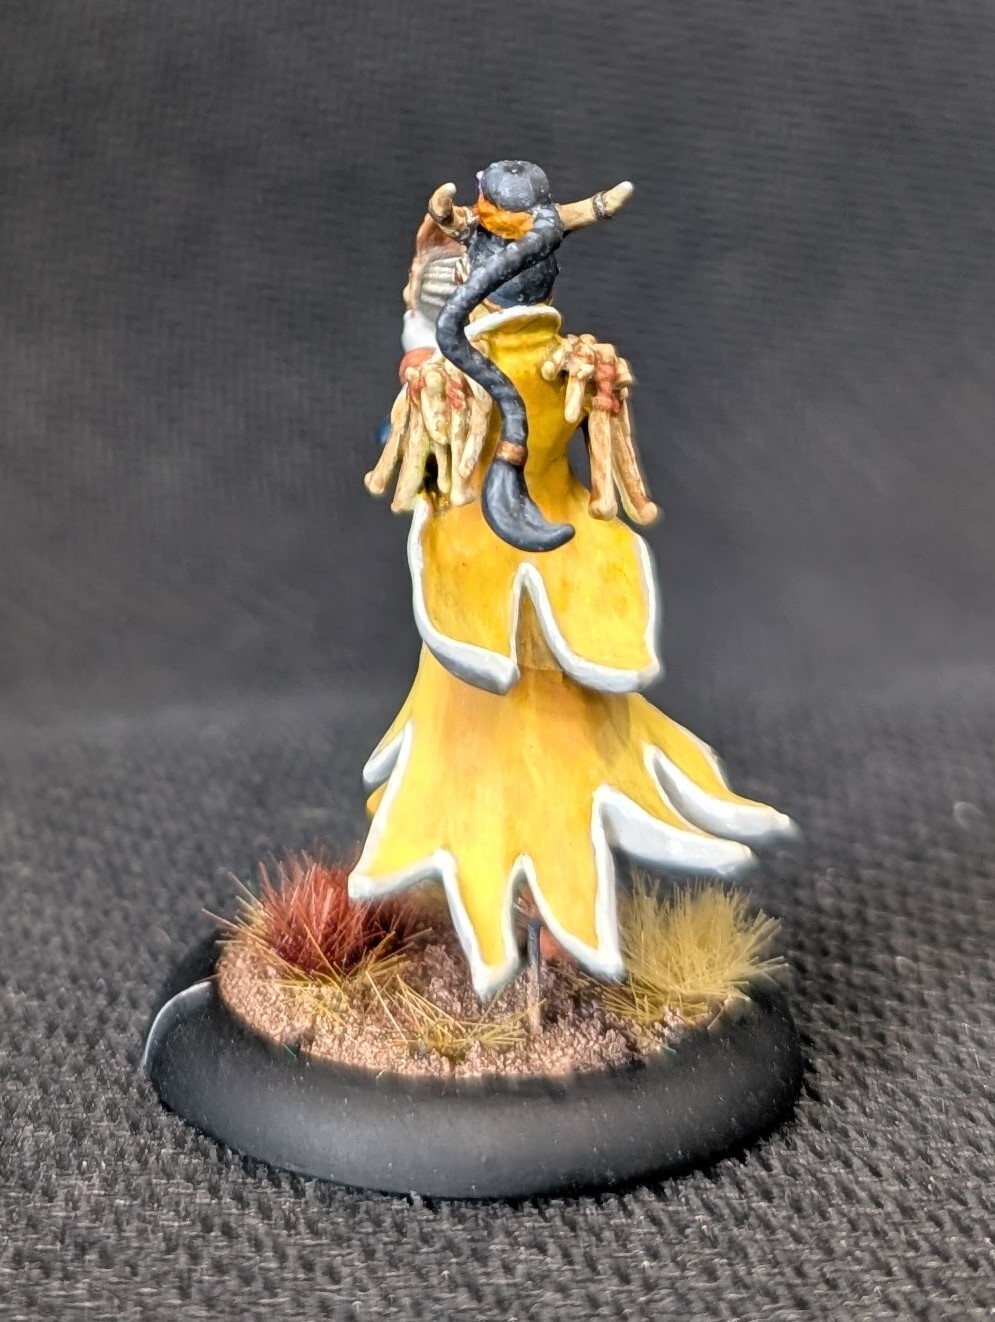
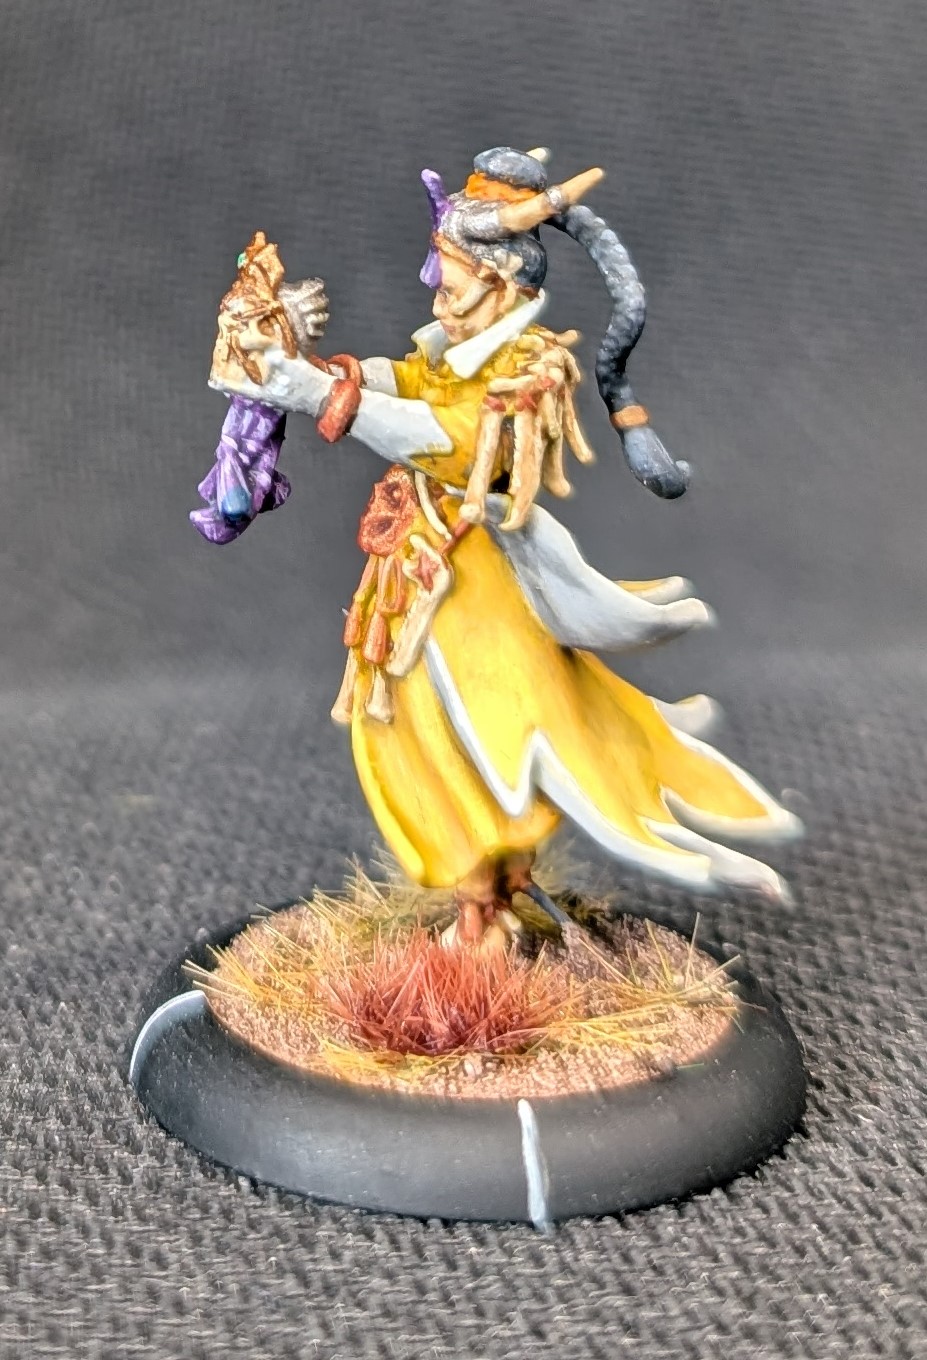
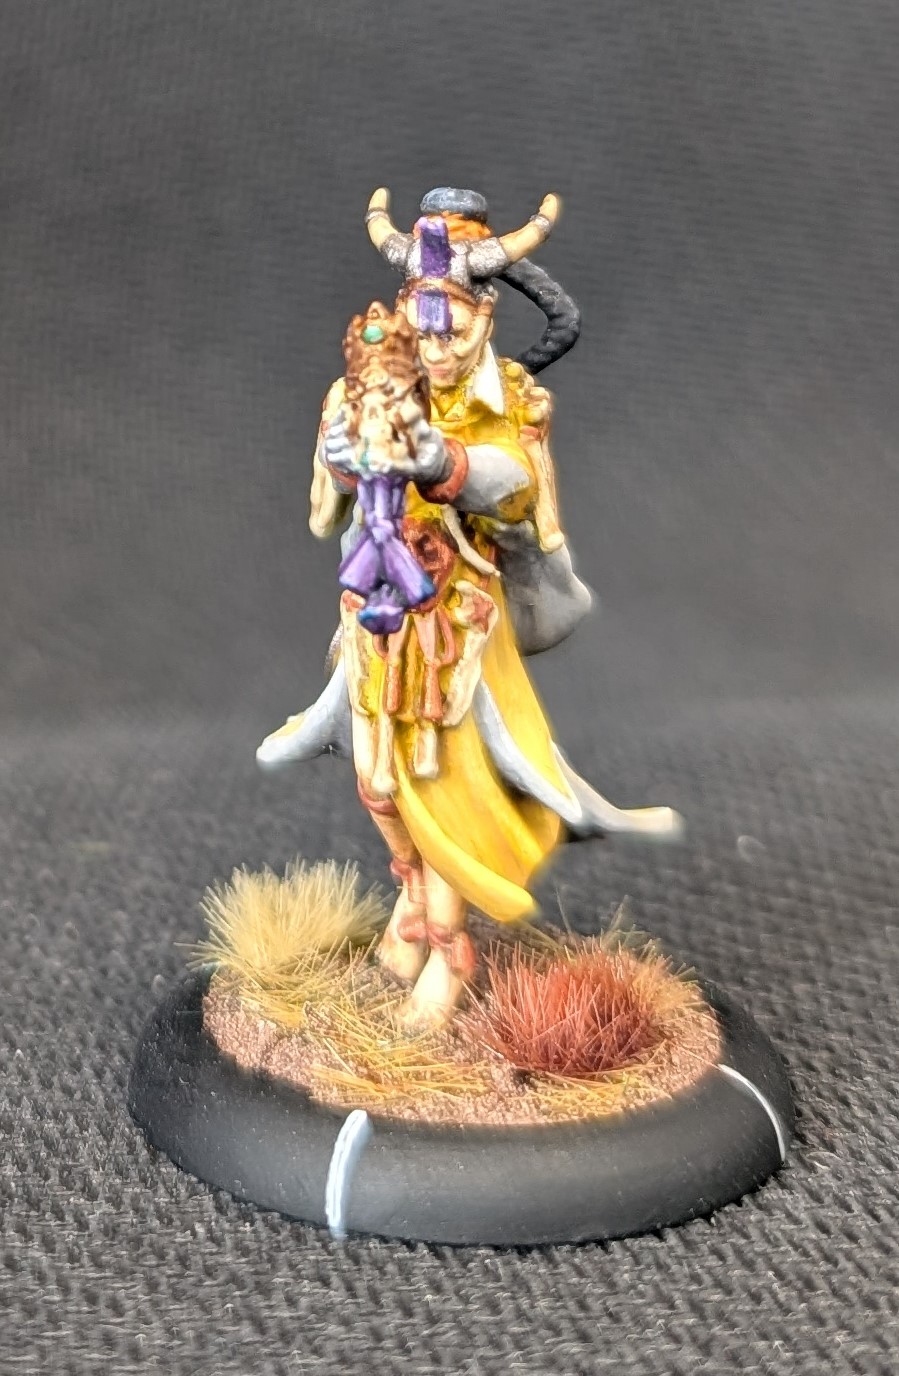
Akuba
Akuba is one of the four sisters who were offered power by Yurei but with the caveat that all four had to agree. Three did but Hikari didn’t, so the other three killed Hikari (who I painted up earlier and posted up here). Akuba shares common abilities with the other sisters and they have a common ability card where all of their Ki tokens go, giving some good flexibility on who gets to use them (if you take more than one of the sisters). She also has a ranged attack that if it deals wounds, generates healing for one of the sisters.
Her special abilities are very useful if you are taking skeletons. Every skeleton on the board gets regenerate 1 while she is alive (meaning they heal a wound at the start of every turn). She can also summon a skeleton once per game. While this is quite a big Ki token cost, you can add a new model to the table! Very handy.
Painting wise, I wanted the four sisters to add a bit of colour to the battlefield. With this in mind, I opted for a yellow paint scheme and started with a base of scruffulous brown. This is already a yellowish brown and hopefully a good base. Yellow has always been my bogey colour to paint, so I’ve invested in some other brands of yellow to try to help out, so I’ve used a Golden Fluid Acrylic cadmium yellow (don’t lick the brush with this one!), Pro Acrylic golden yellow and a Vallejo ice yellow. To get the final yellow colour on the model (that I’m quite pleased with!) I mixed the cadmium yellow into the brown (with some glaze medium) to create the first highlight, then added progressively more golden yellow, adding each lighter tone to the raised areas. Finally, I’ve added ice yellow to the highest points.
The white was a light grey with a luftwaffe grey glaze applied to the deeper areas. The higher areas received an off white/light grey mix and then just off white.
For the skin tones, I’ve used Light Skin and Pale Skin from Scale 75 with a darker wash.
The bones started as light brown, received a bleached bone highlight, a wash and then another highlight.
The purple areas (to tie the model into my faction colour), strapping and other bits I’ve probably described before.

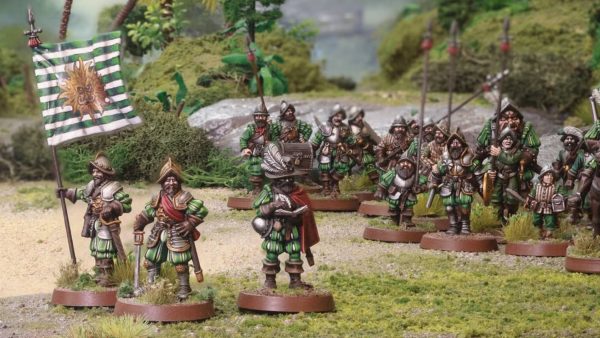

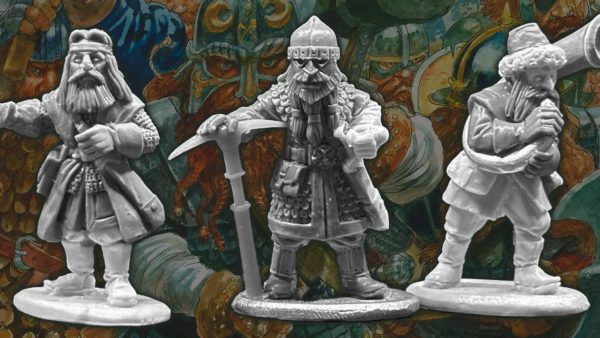
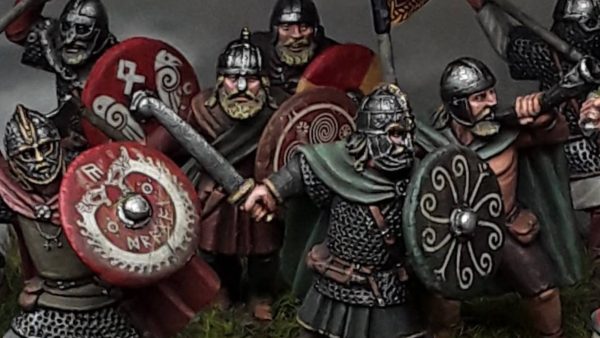
![New Carolingians & A Pillage Starter Set From Victrix? [Updated]](https://images.beastsofwar.com/2026/07/pillage-introductory-cover-600-338.jpg)