


Project Cornetto


Recommendations: 363
About the Project
This is a little tale of how Zombies became a favourite genre of mine and sparked a hobby project to honour the films and books that have influenced my tastes over the years. Project Cornetto began as an idea back in 2016 following the release of The Walking Dead All Out War and became a full scale terrain project finished in 2023.
Related Game: The Walking Dead: All Out War
Related Genre: Post-Apocalyptic
This Project is Completed
Back on the Road again.
I must be overloading with trying to get more than five images on. I am going to try and break it down as much as I can. I’m not getting any error messages and all that seems to happen is it looks like things submit, but then nothing happens. All my writing disappears as does any pictures I upload. So I will try this a different way.
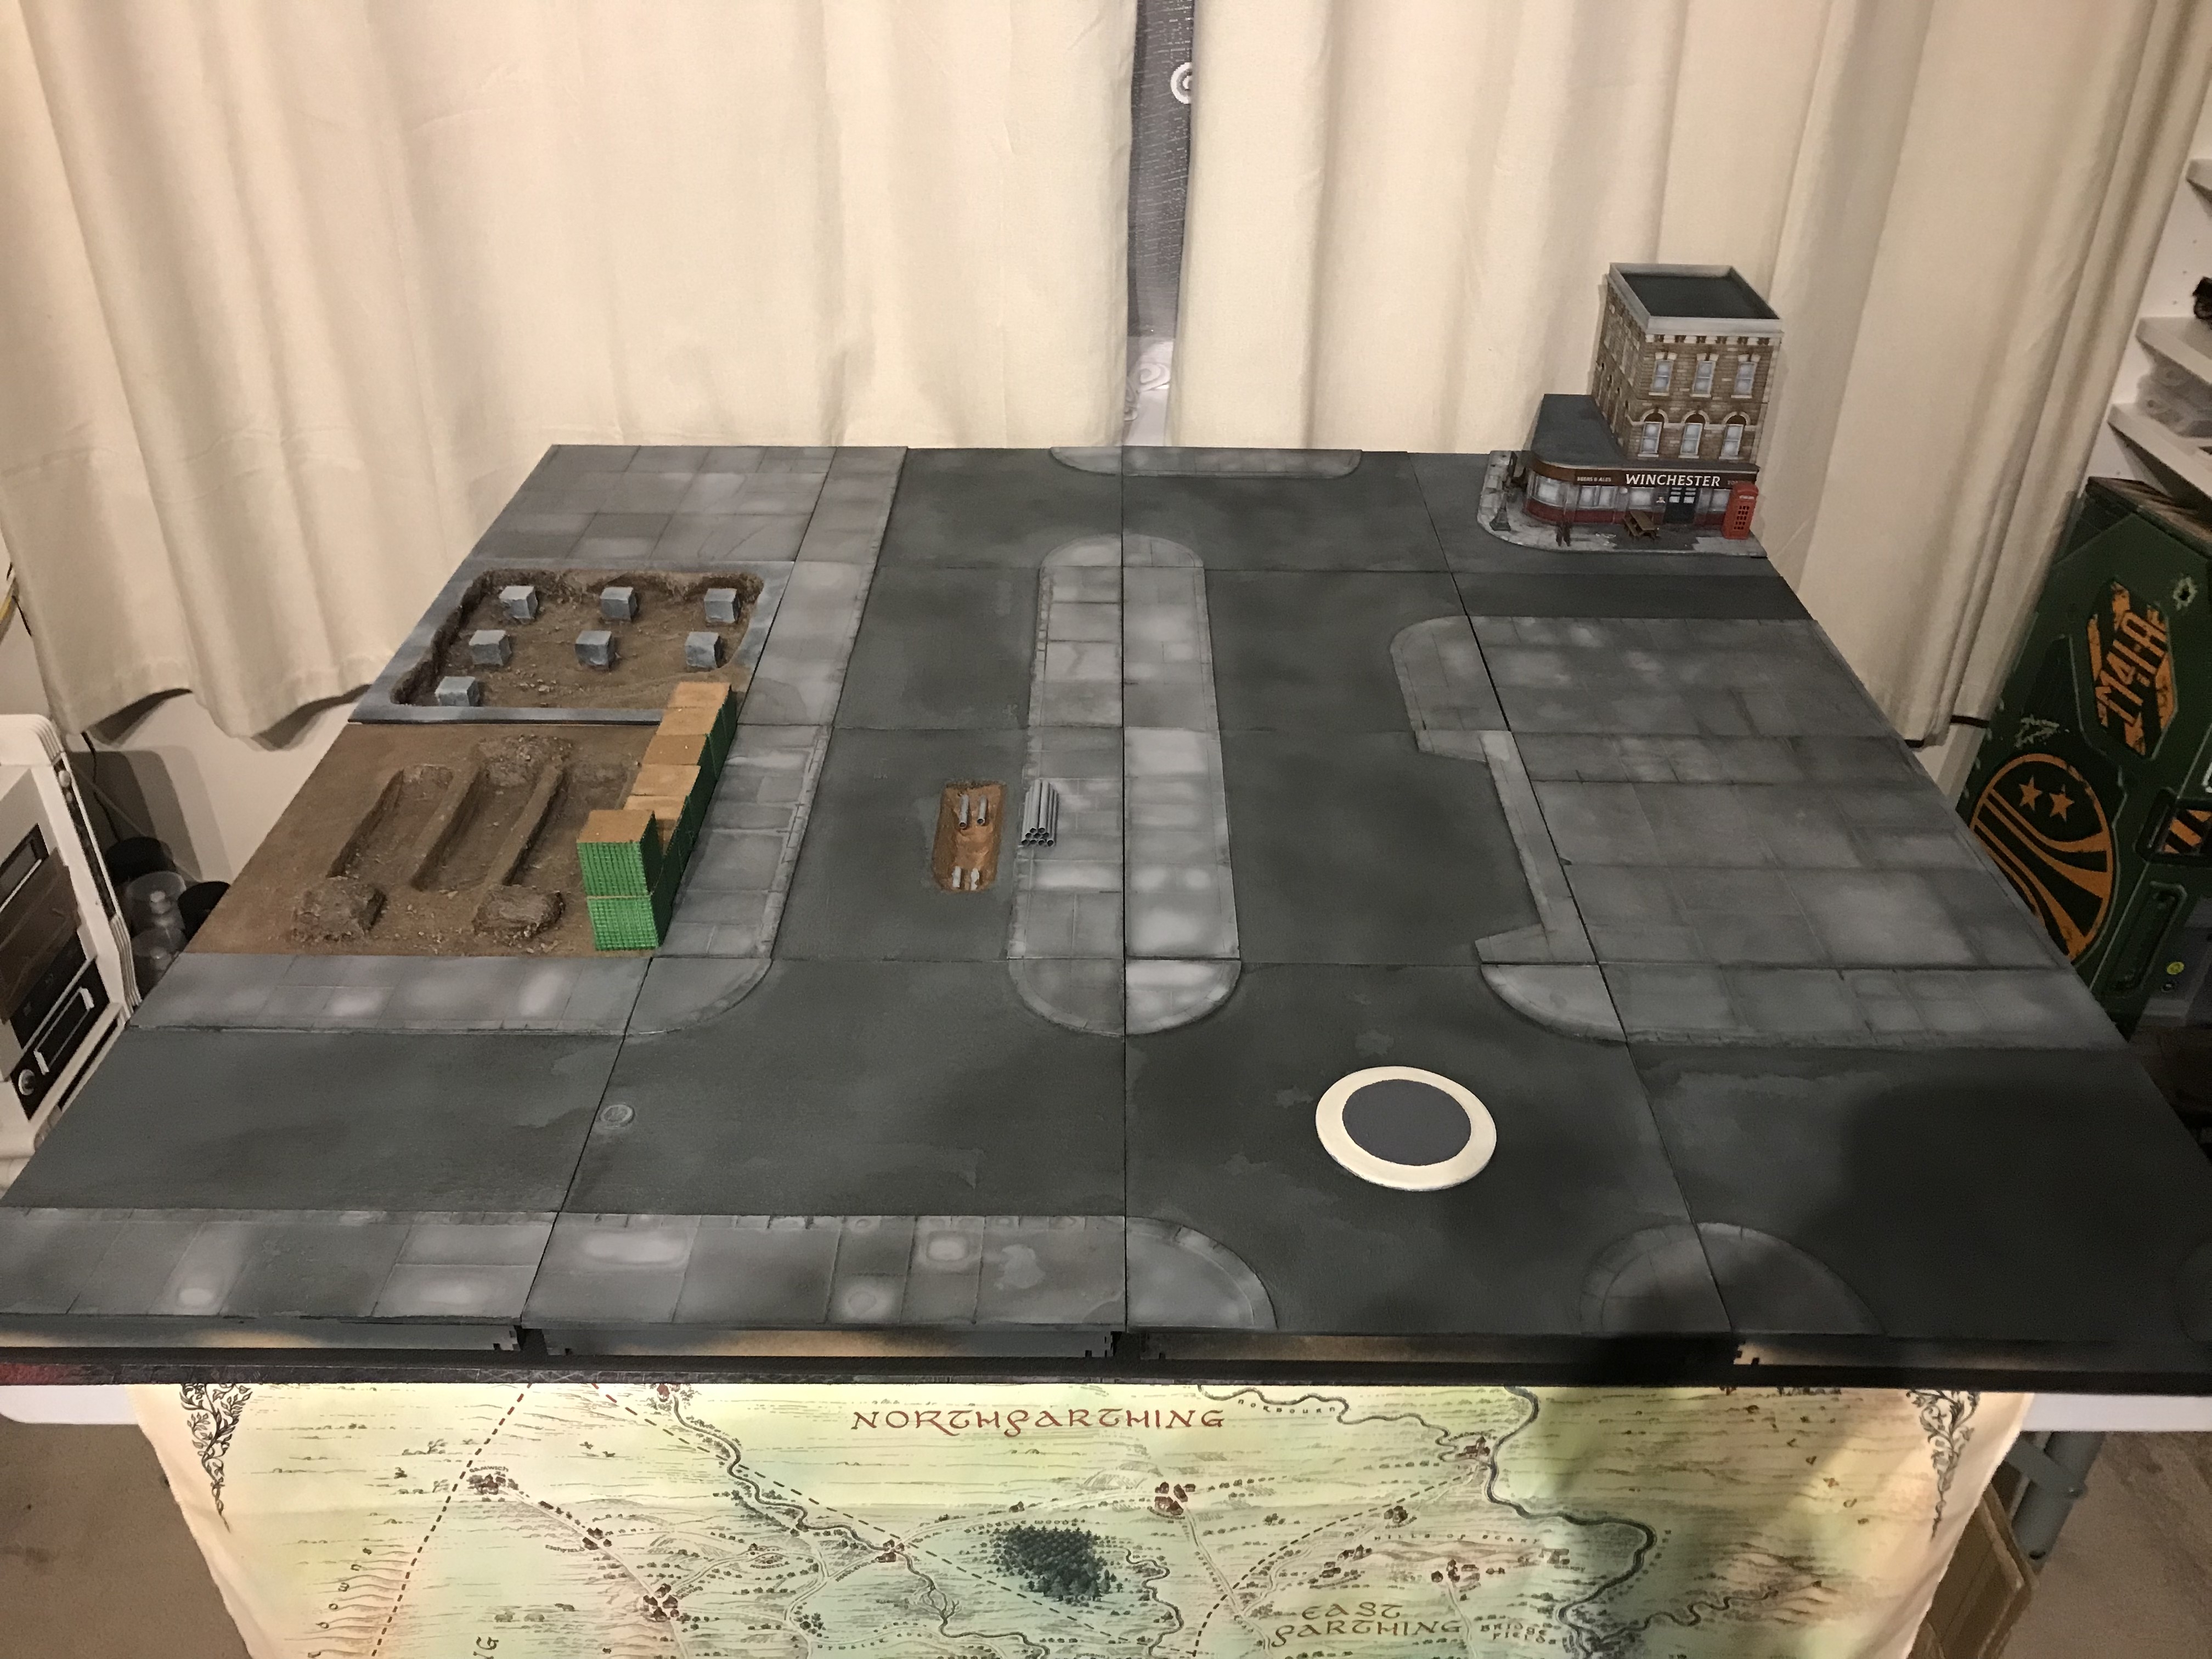
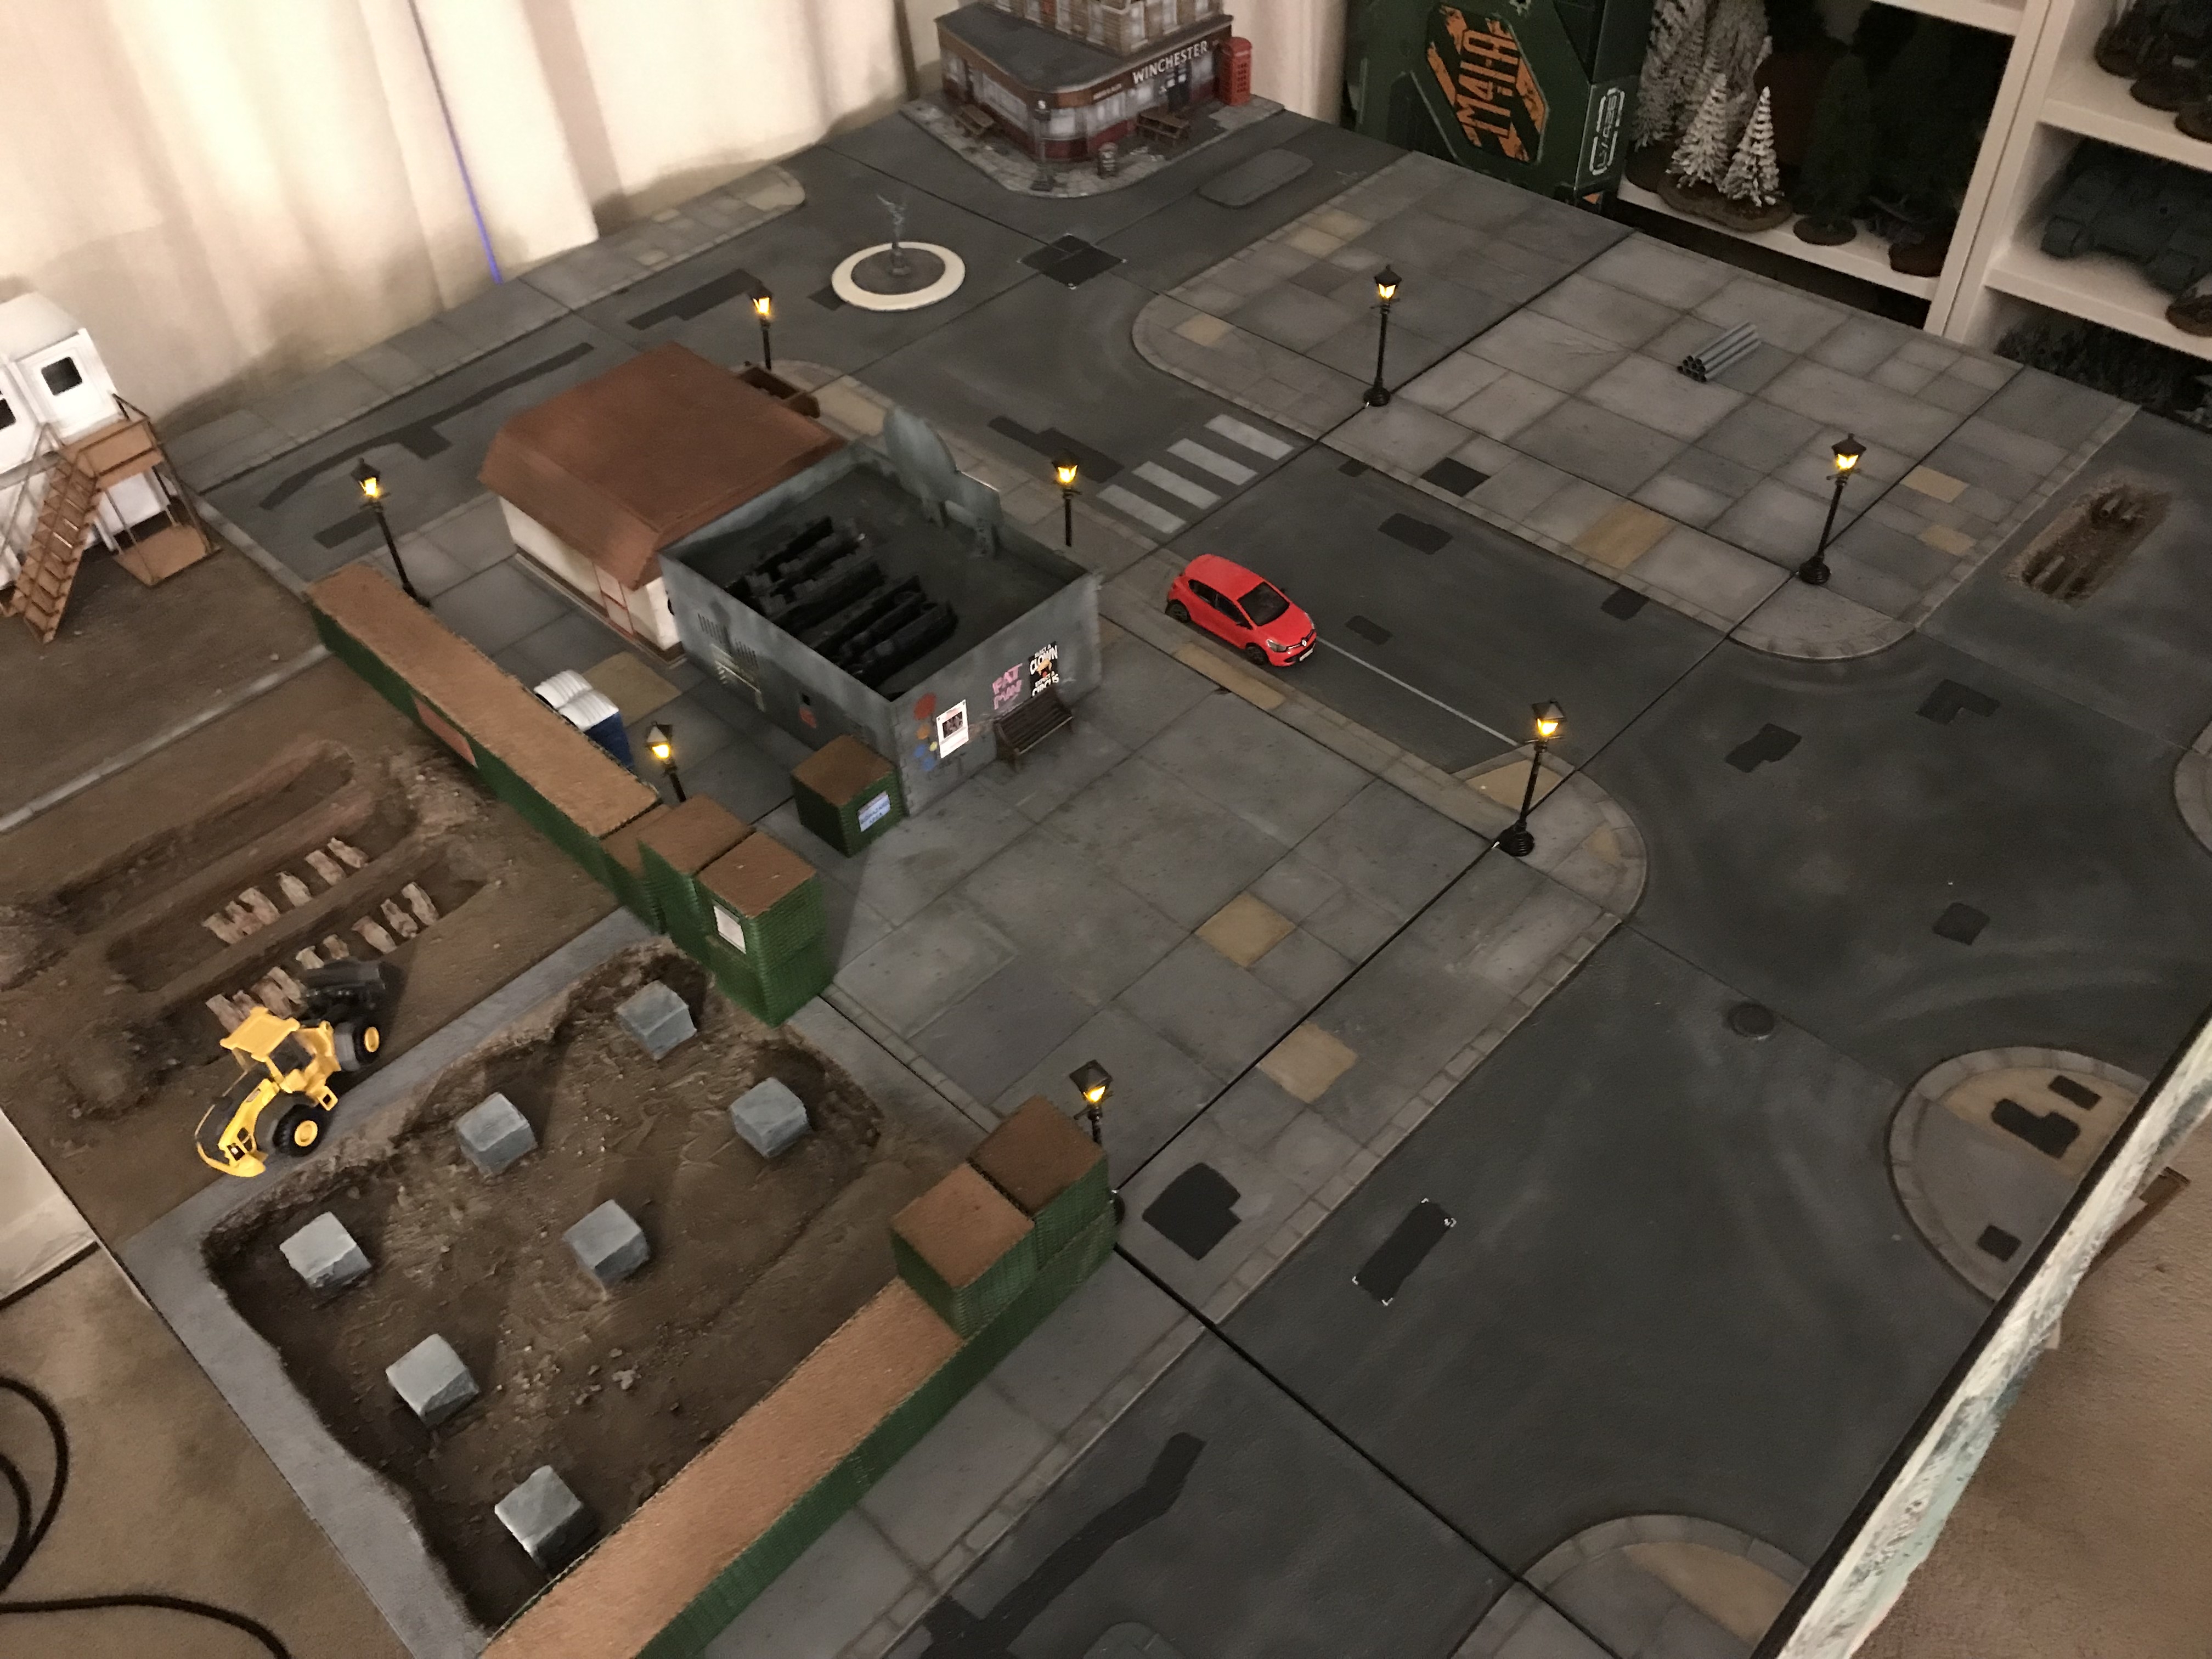
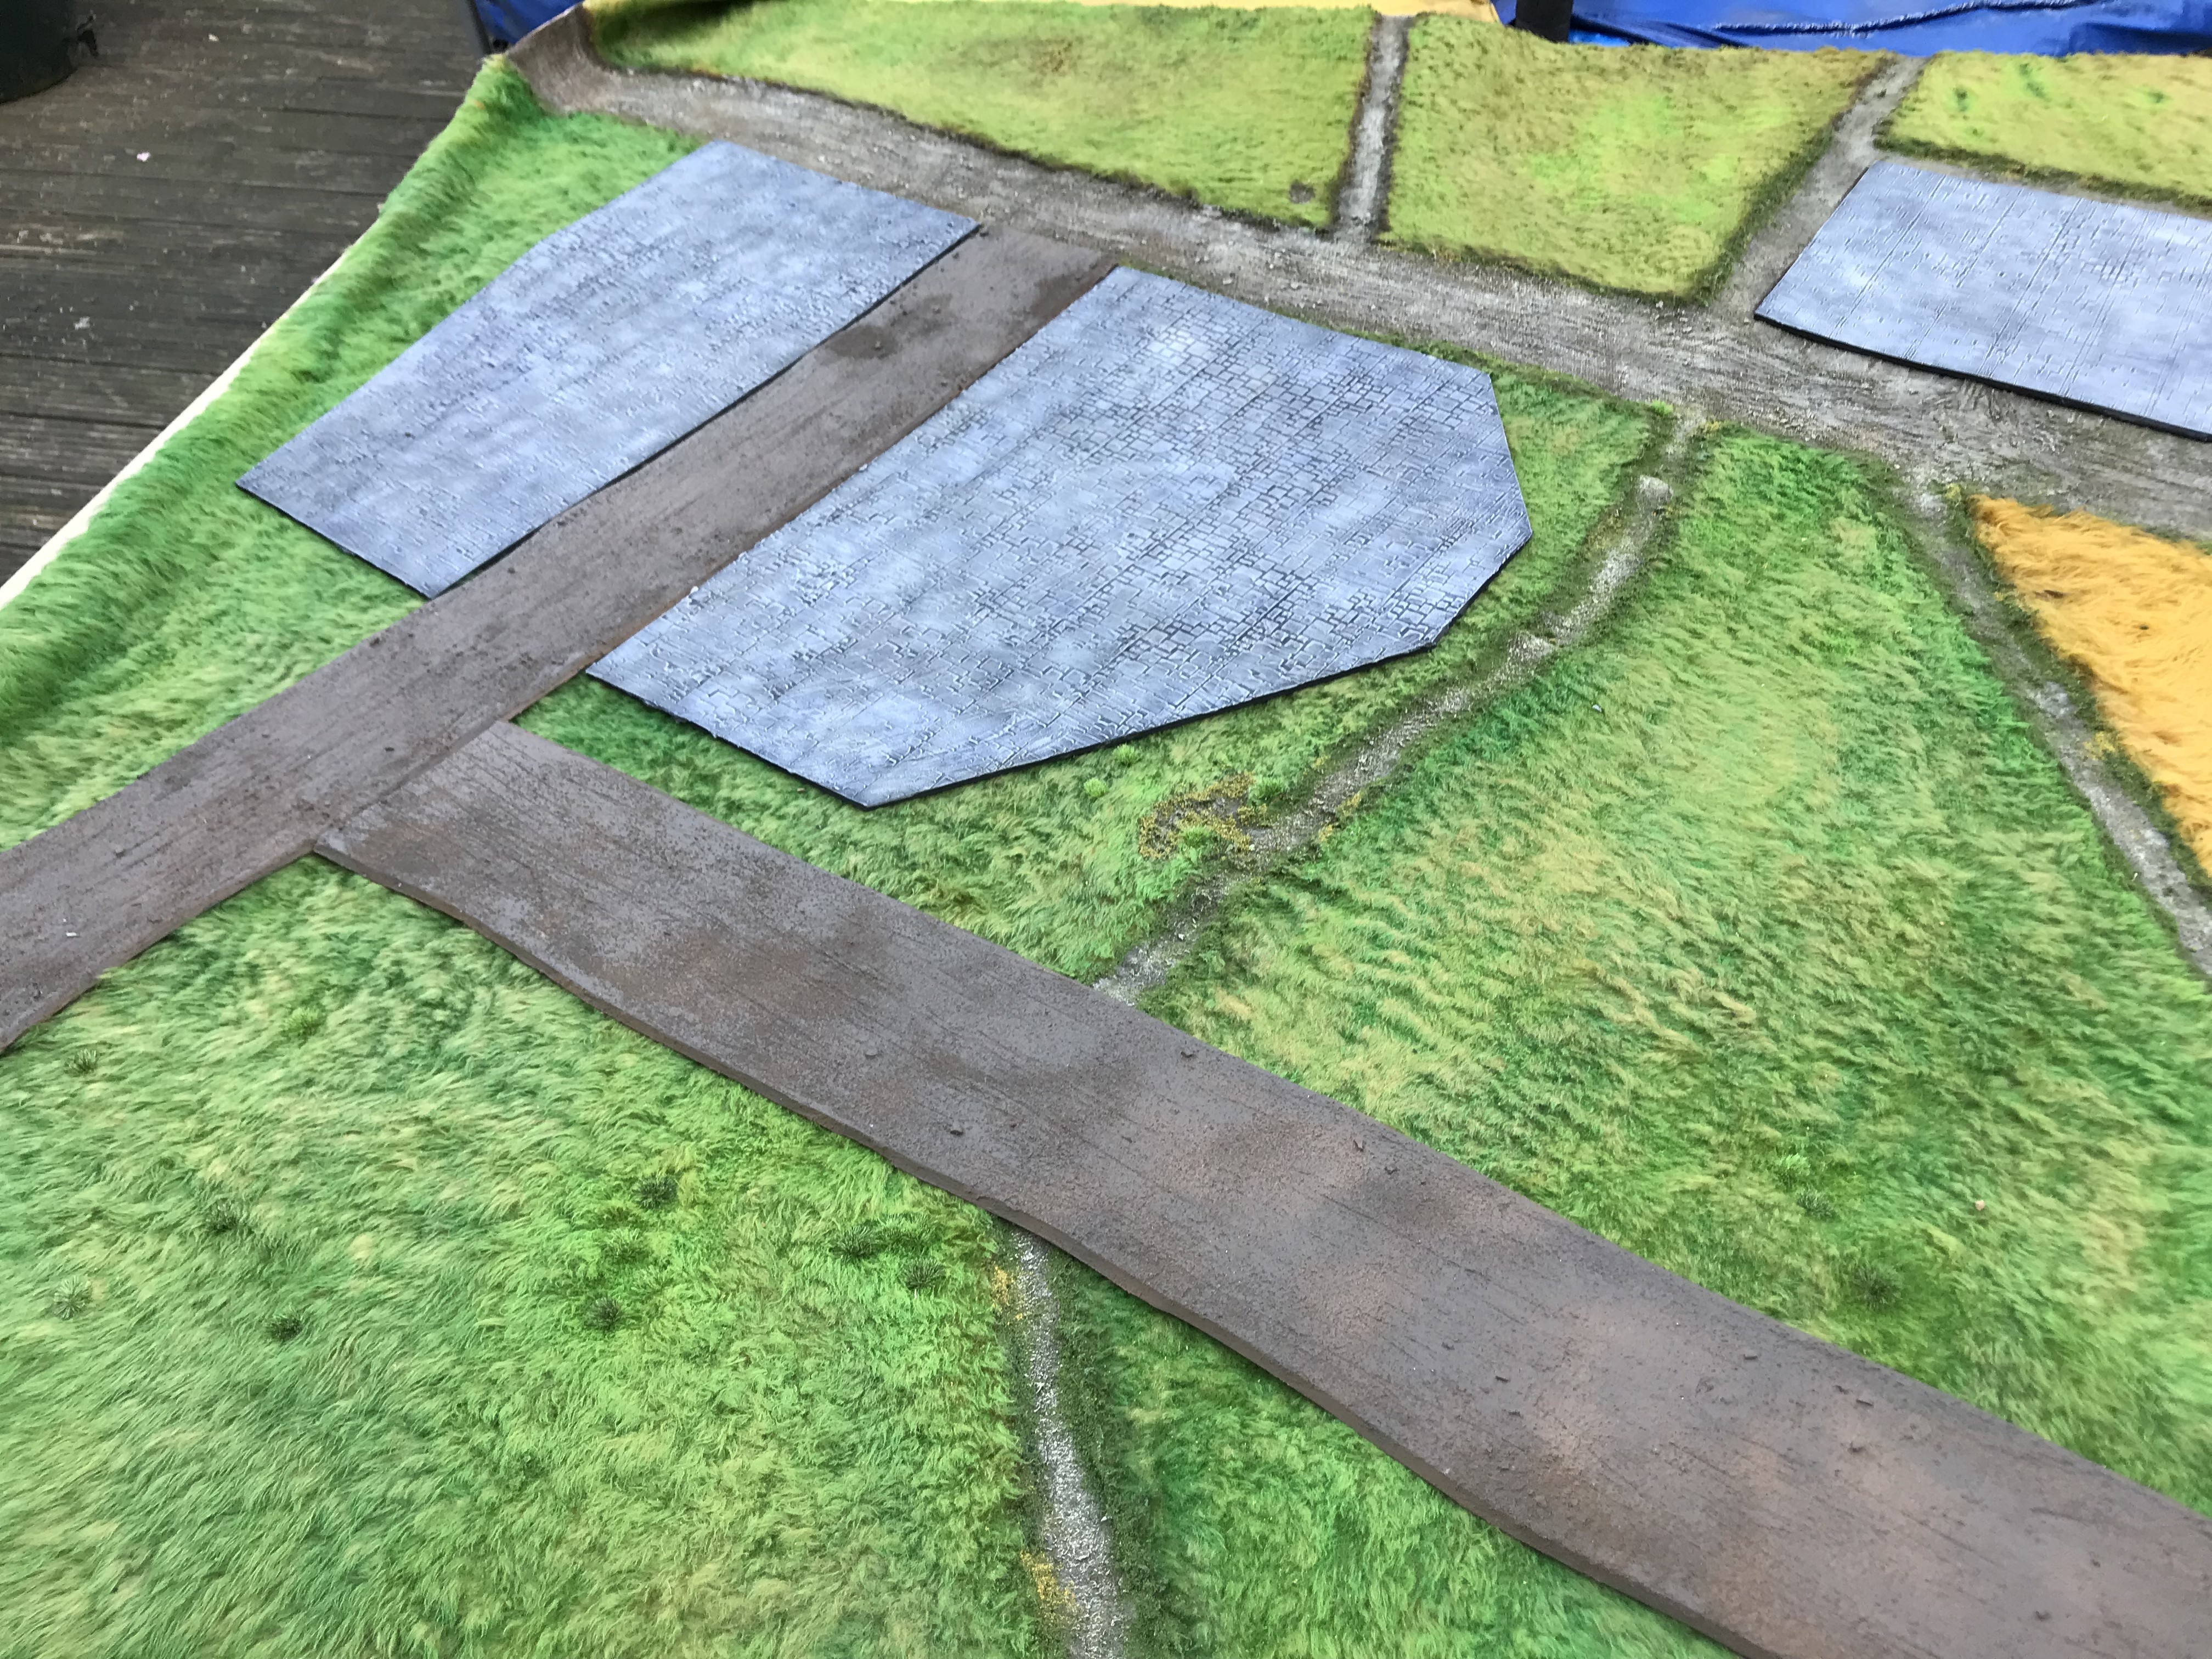
With my back starting to heal and a bit more mobility, I moved back onto finishing the road tiles and adding details.
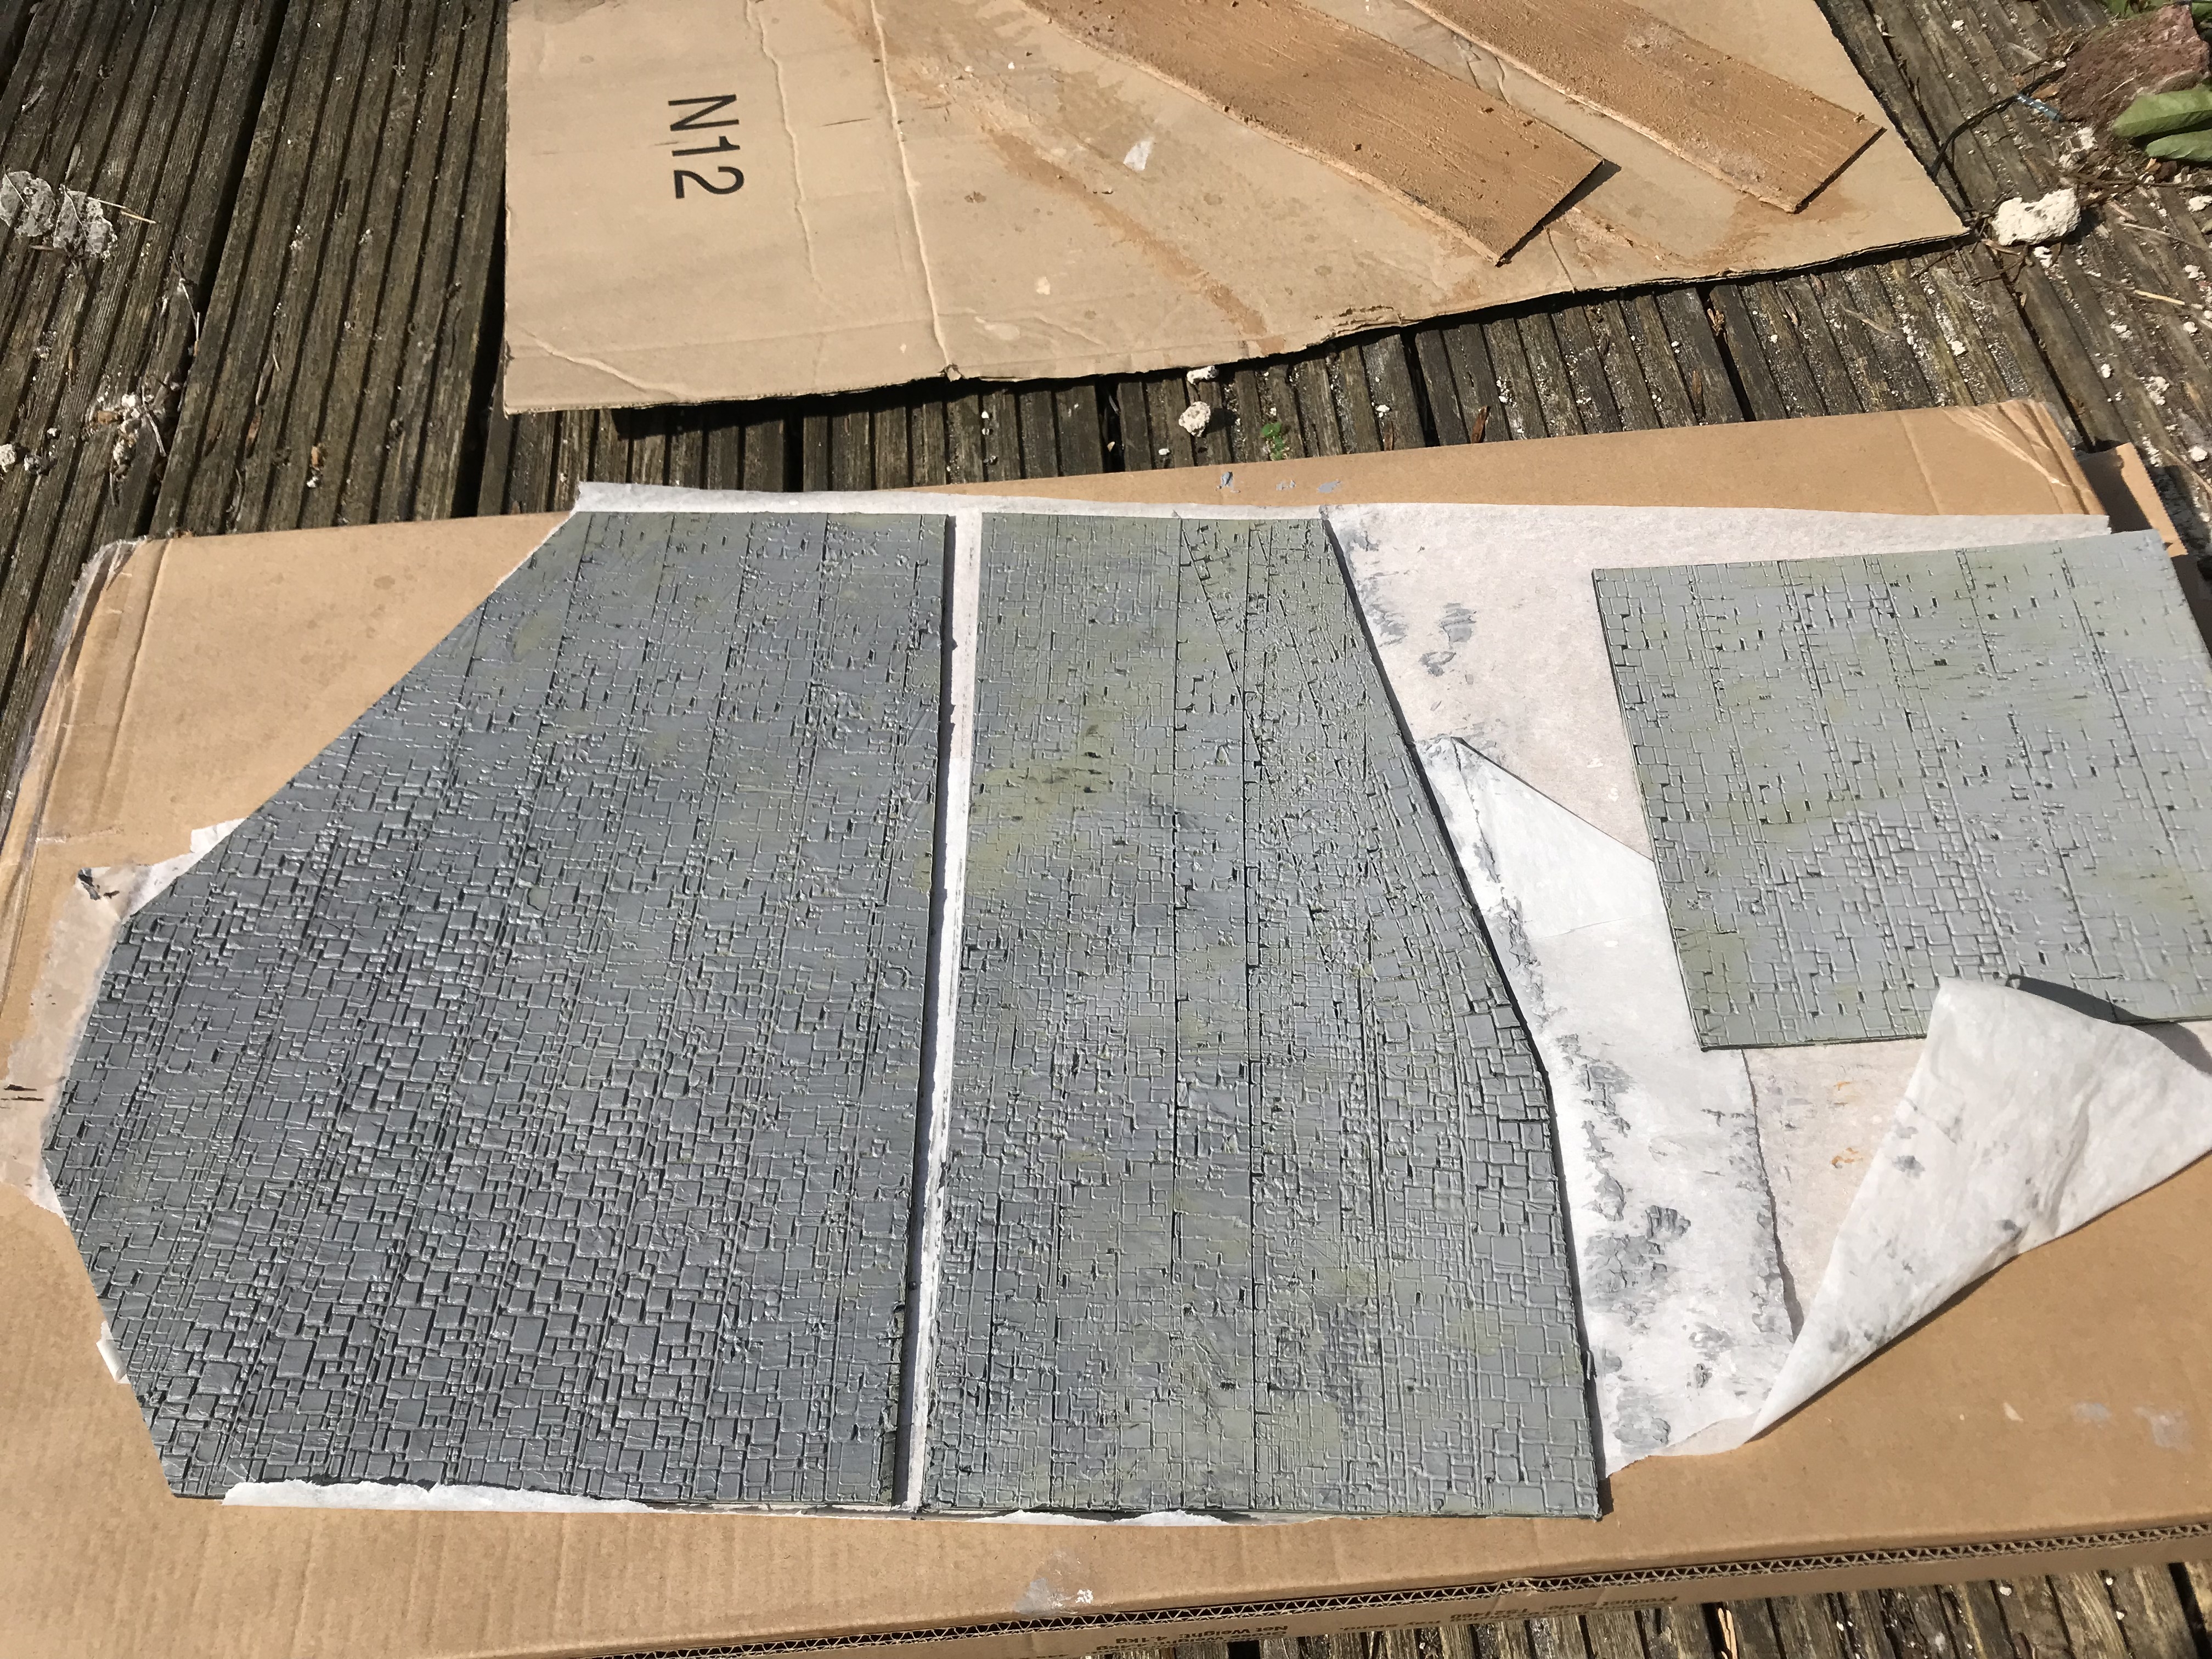
I spray up a few more tiles and hit them with the light grey airbrush. I then used a homebrew black in wash to soak the tiles, wiping away excess. Back on my gaming/work table, I started to dry brush the already primed tiles.
I used administratum grey and karak stone to dry brush the pavement and road. I only light drybrushed the road as the darker colour gave it a really good tarmac appearance. I broke up the paving slab colours with karak stone and then finished with an agrax eartshade select application. I would take drops of earthshade and blob some areas and smear others, then rub it in roughly. This gave it a nice stain over the lighter tiles. Then I followed the recess lines where the ink wash had originally settled, to again emphasise the gaps between each slab.
To note, as I don’t think I mentioned before, the slabs were created by gluing down sheets of 3mm MDF to TT combat tiles and then carving deep with a Stanley knife to give the appearance of individual laid slabs.
I then finished with earthshade again to flick droplets all over the tiles. This gave the nice appearance of rain stains/general wear and tear.
I started to pick out the unique tile to bring them up to scratch with the others.
 Dry brushing begins.
Back on the Road. Part 2
Yep. I was overloading.
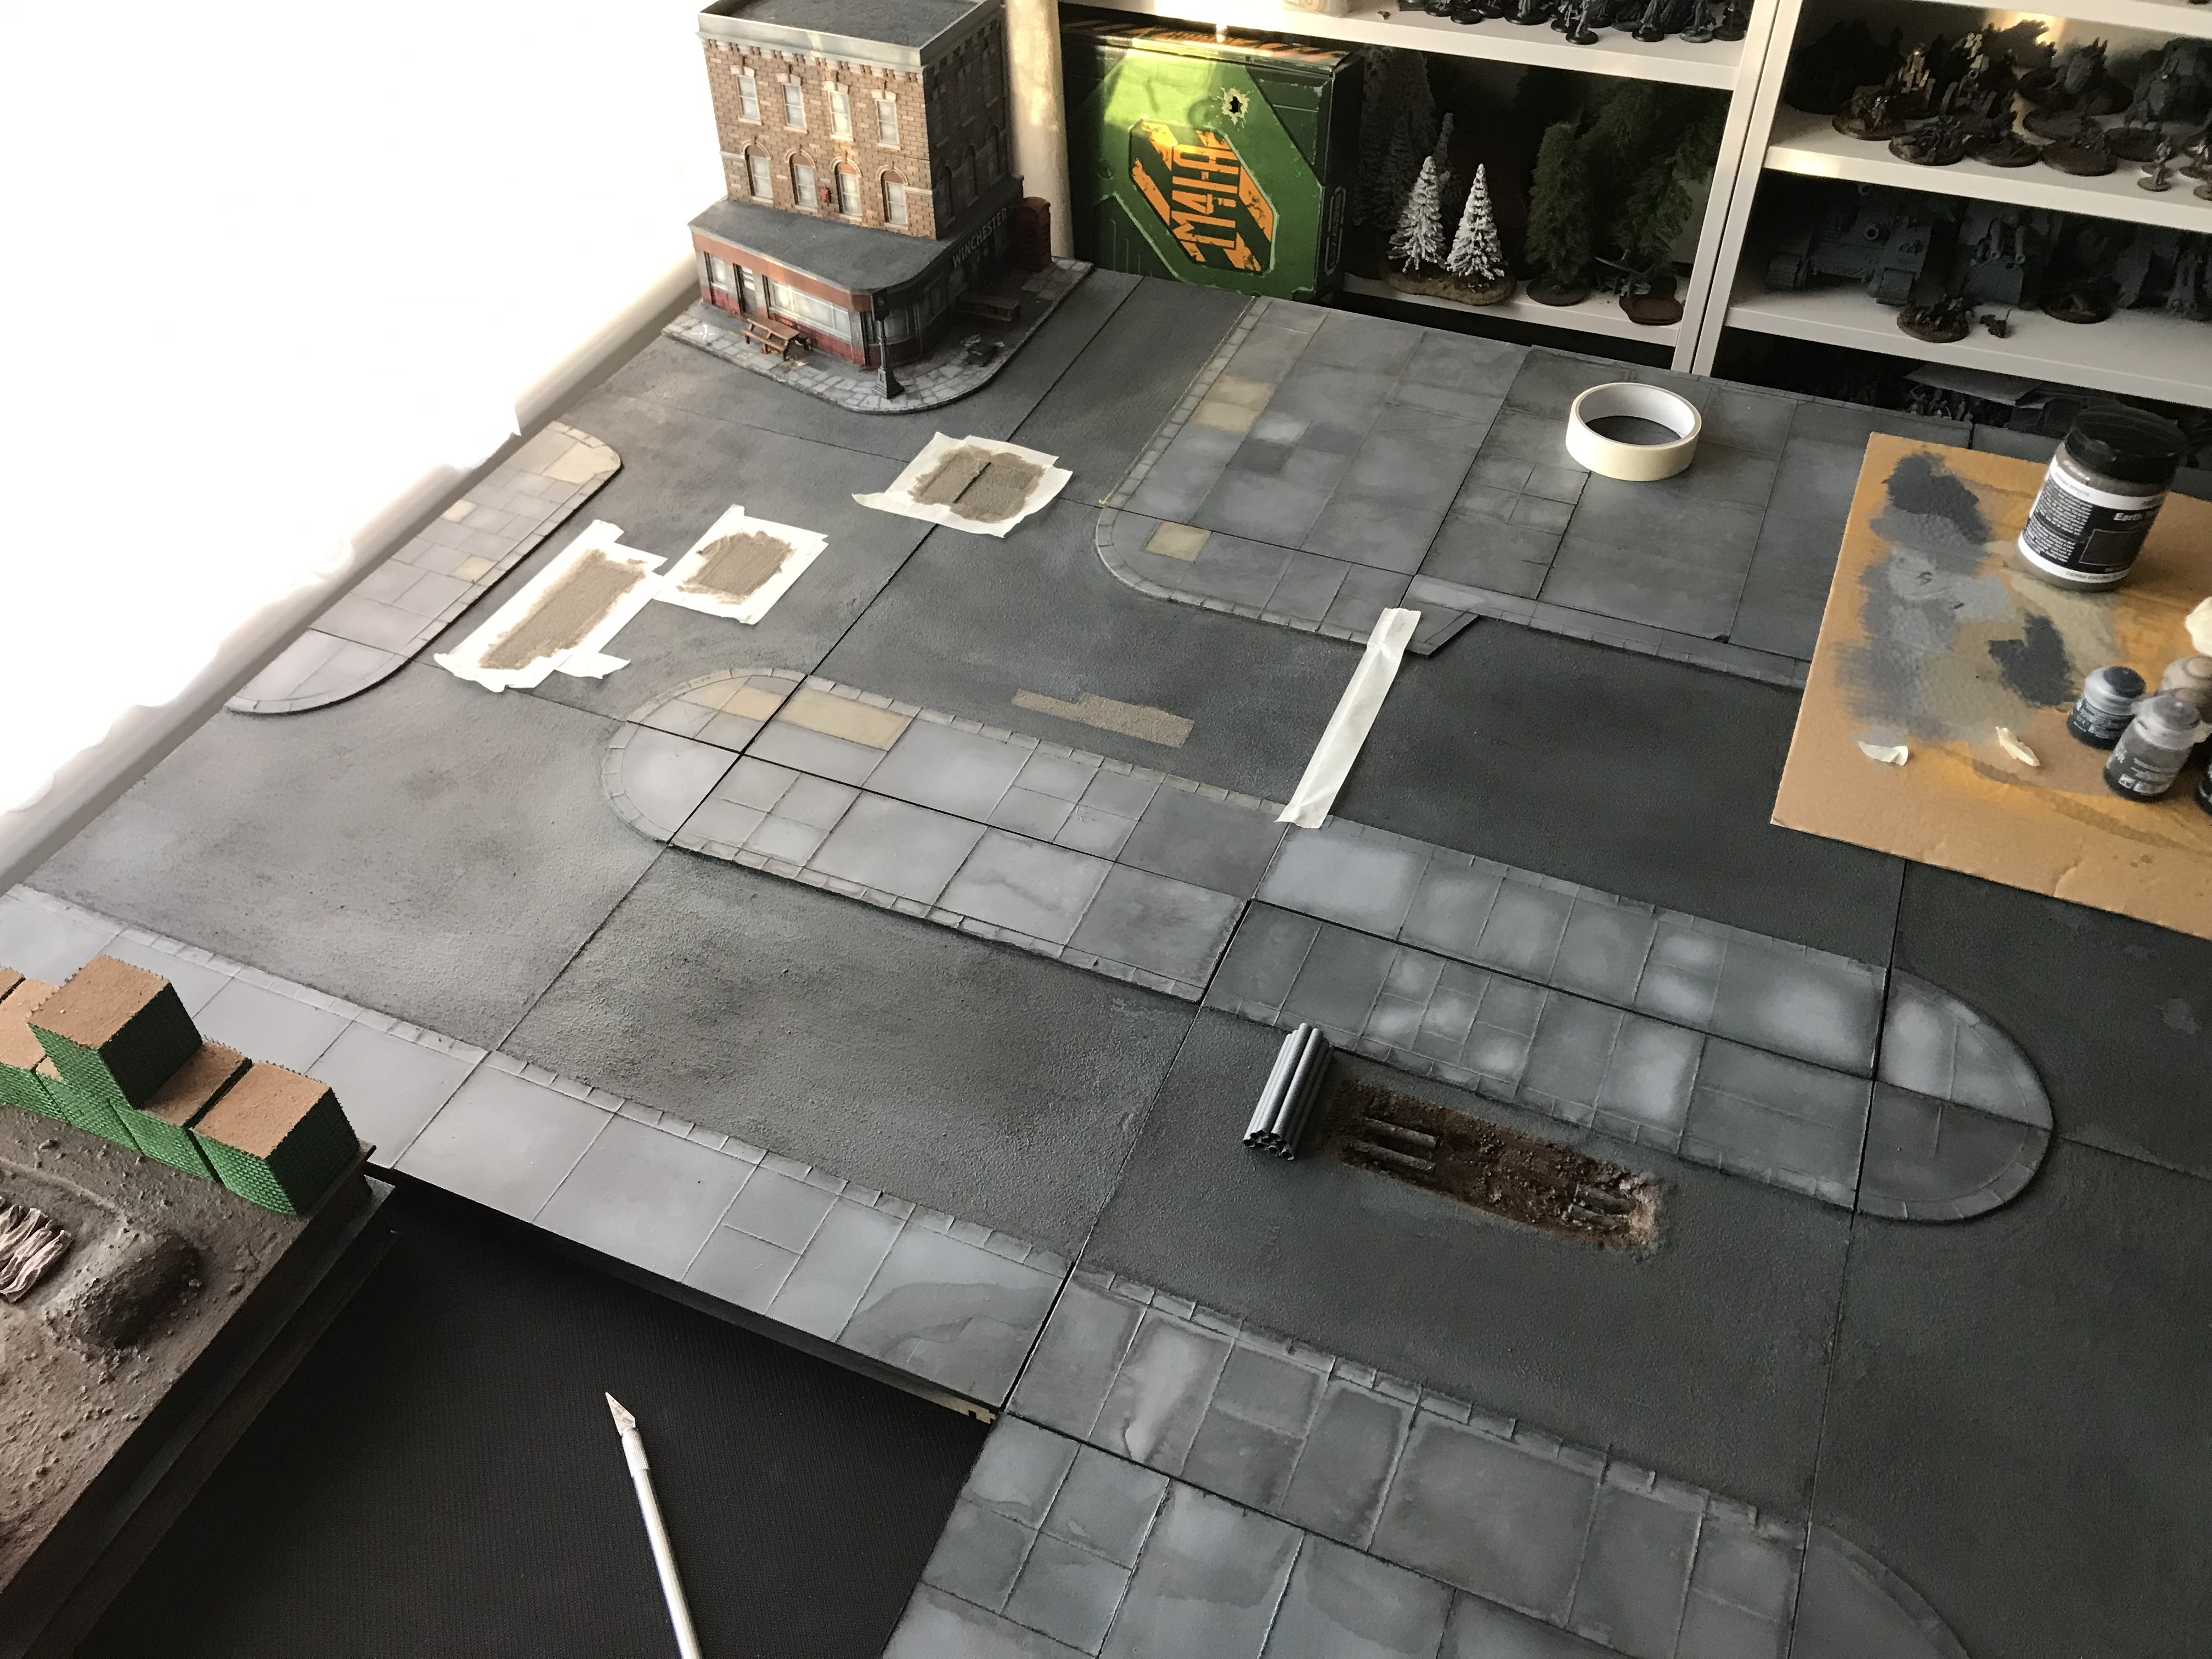
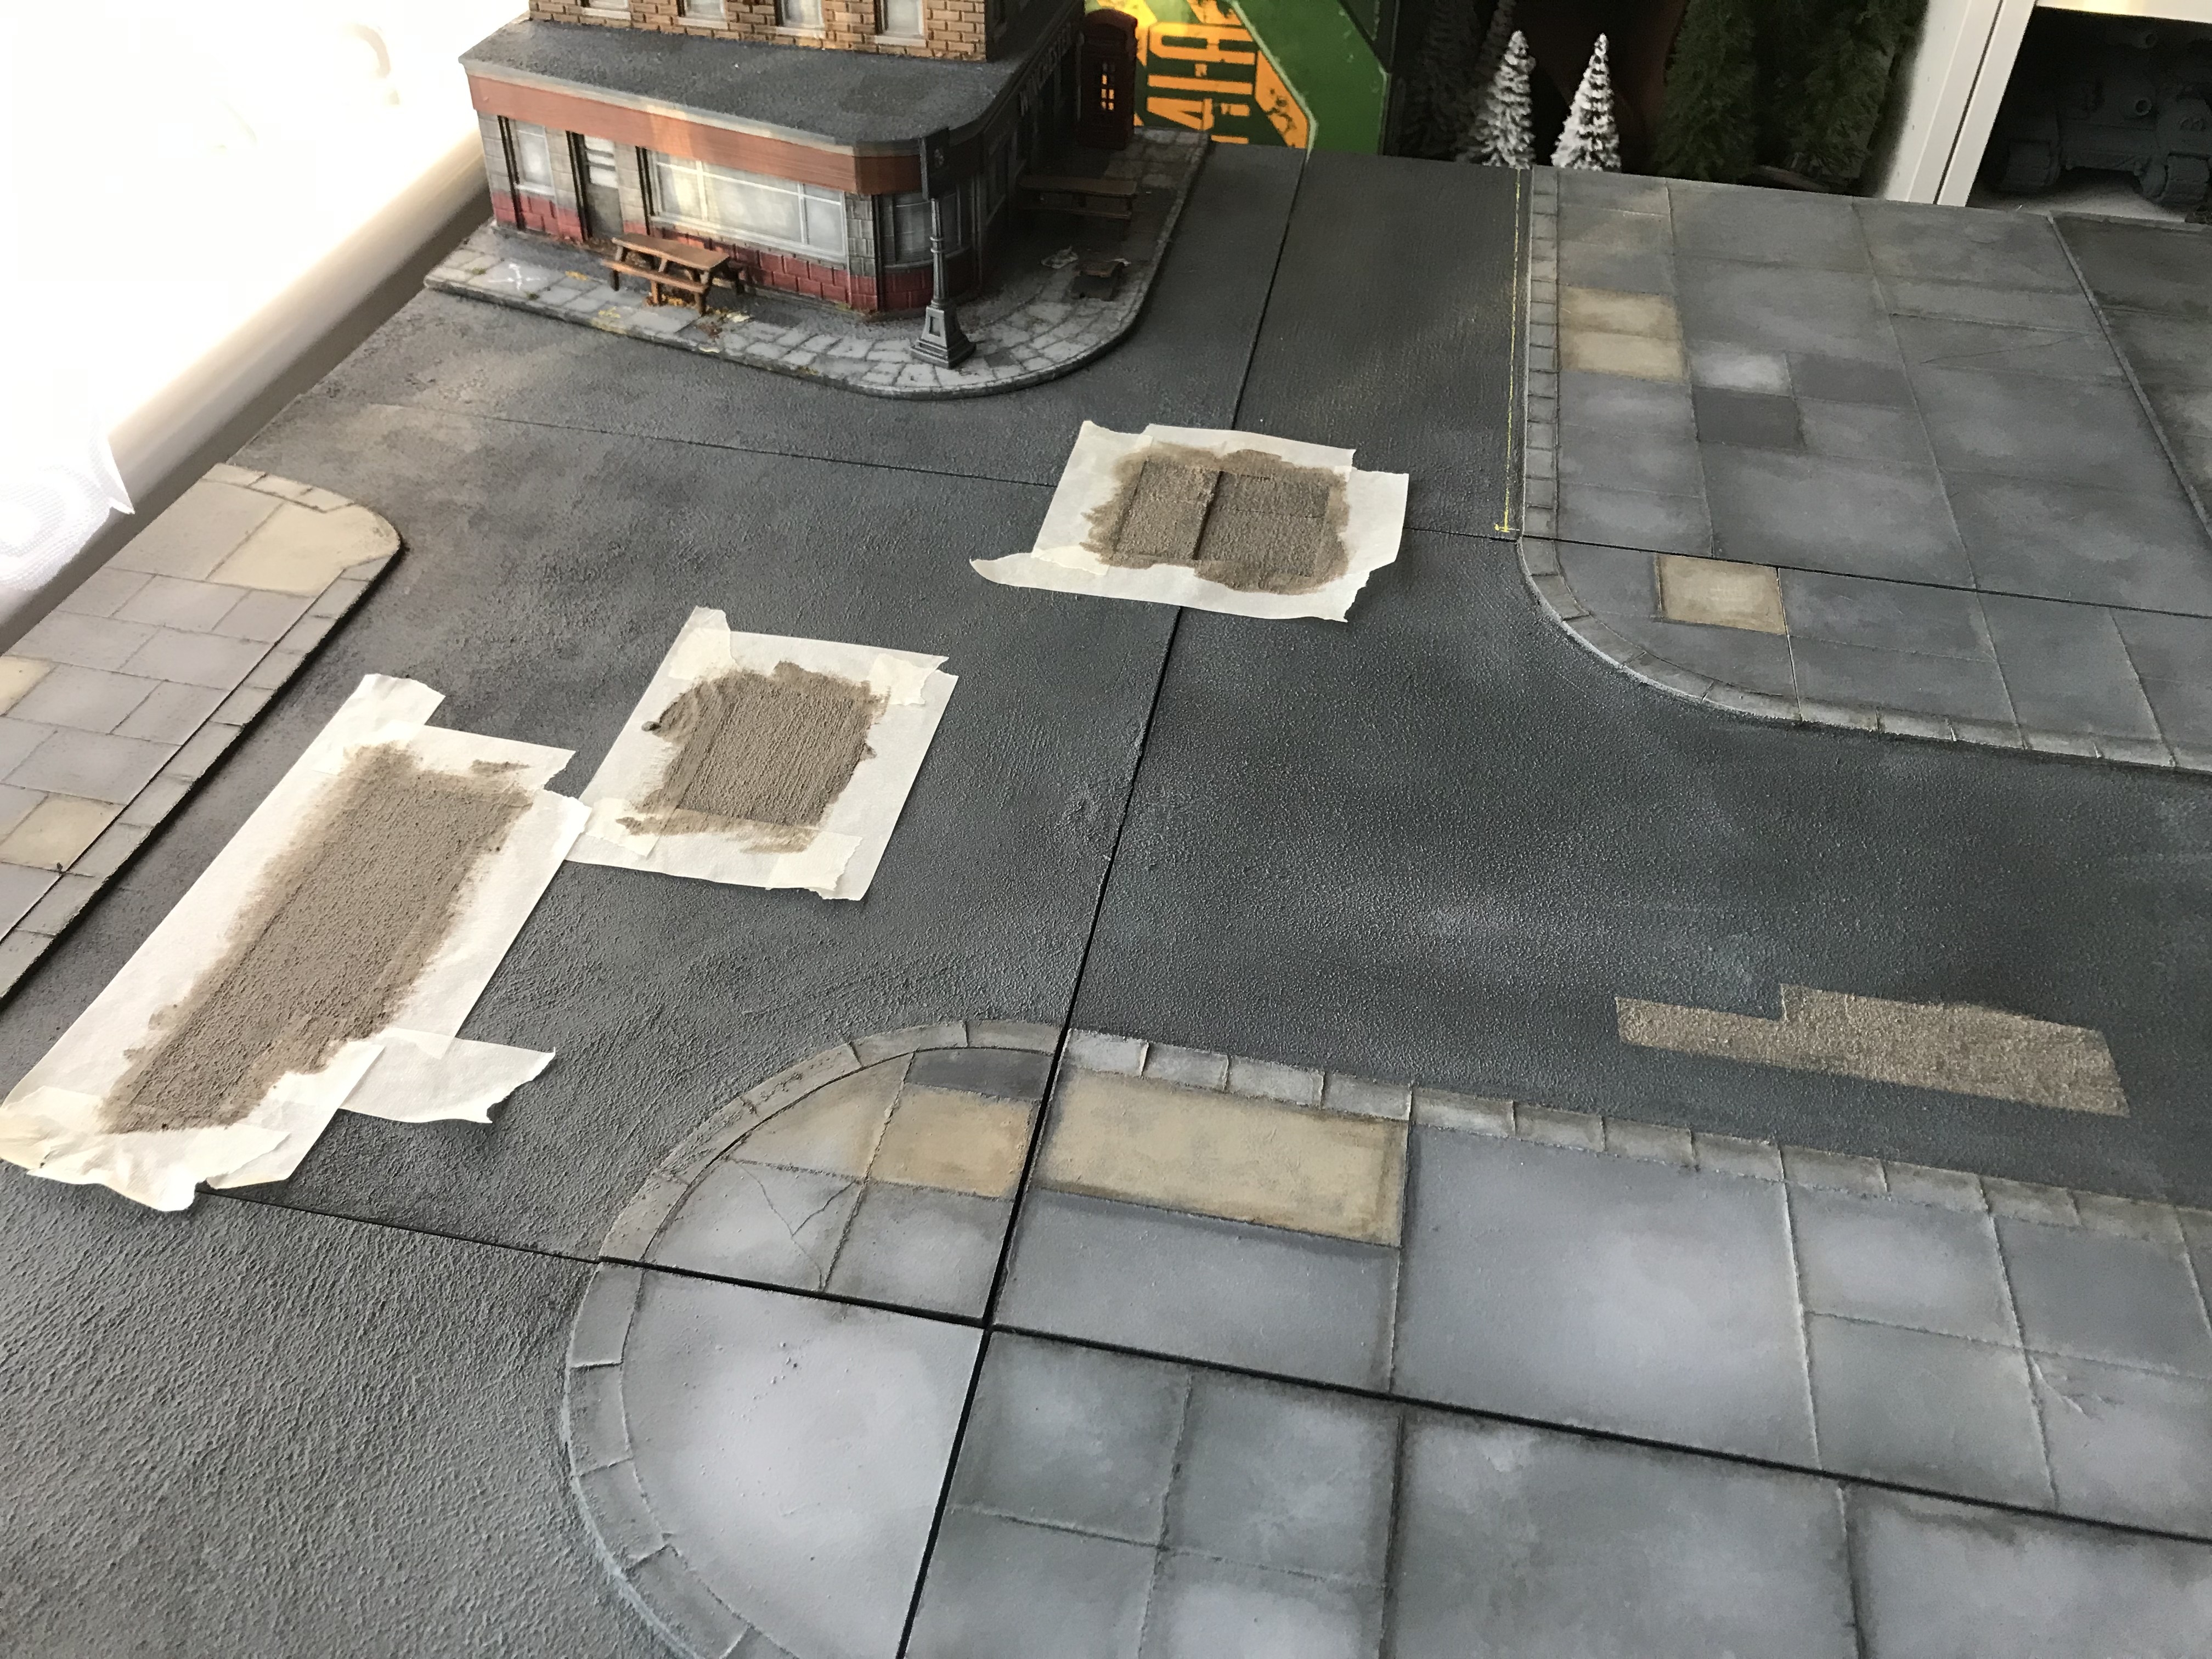 Road repairs/
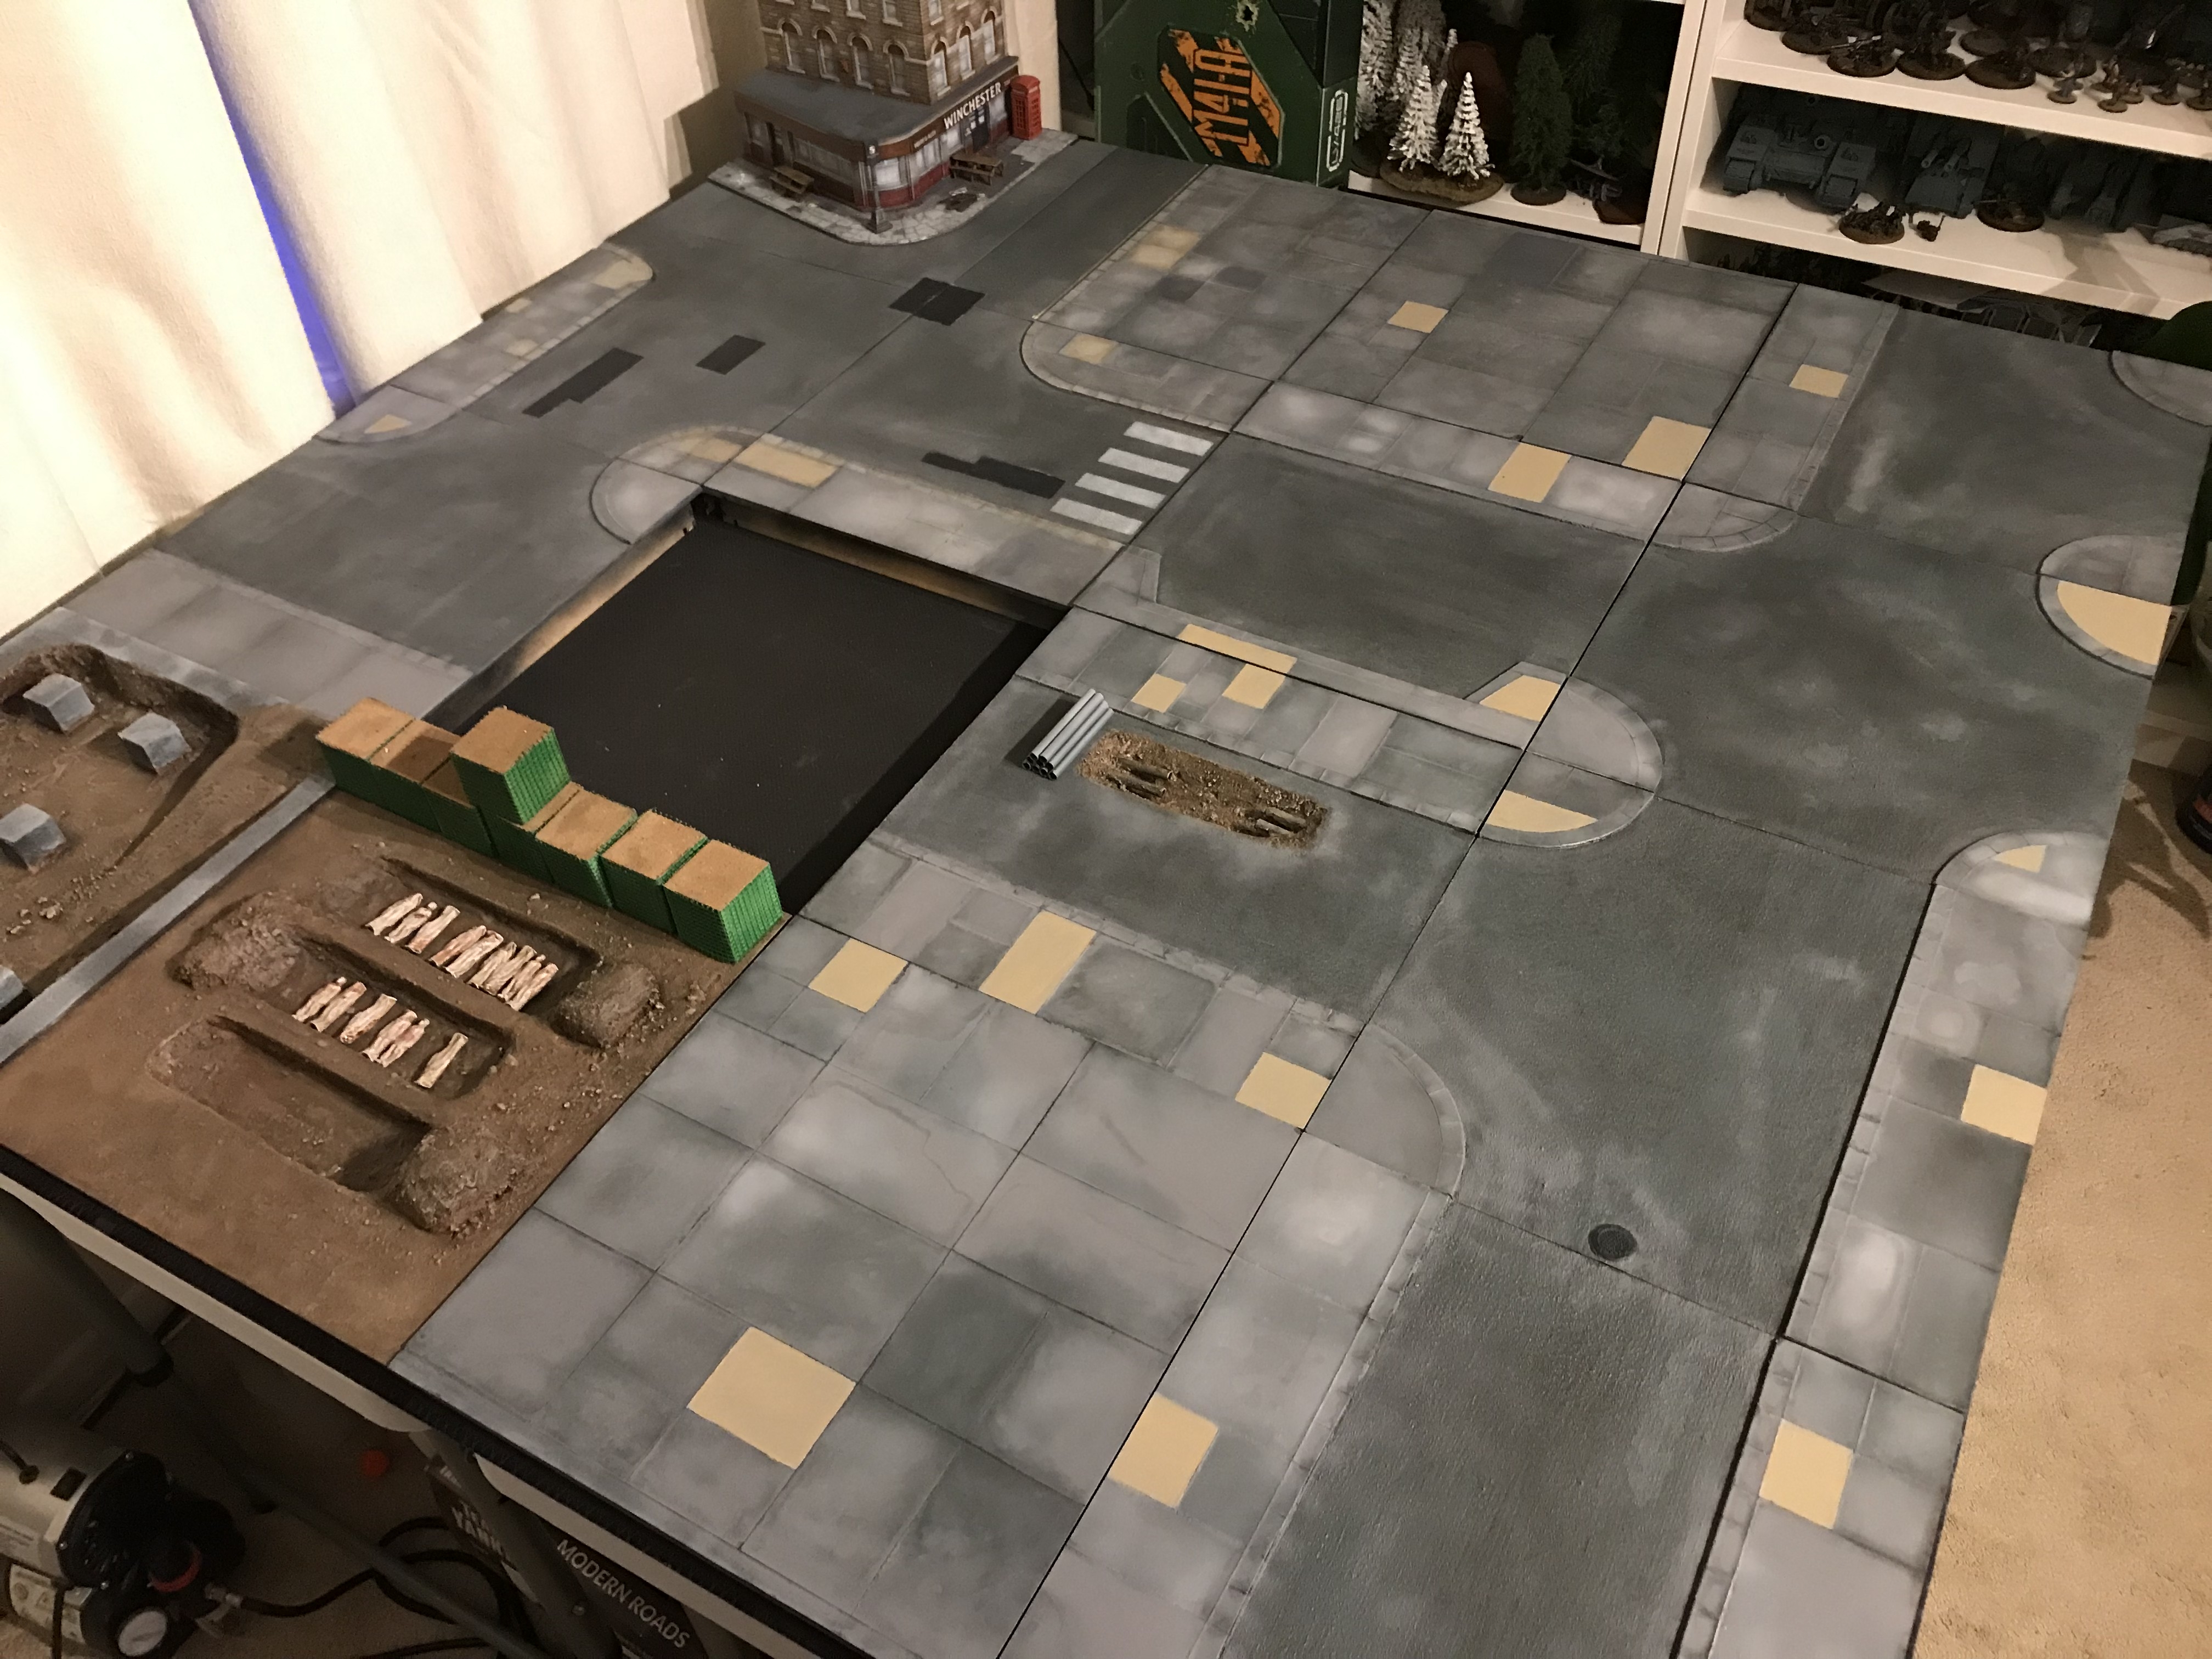 Drybrushing the town.
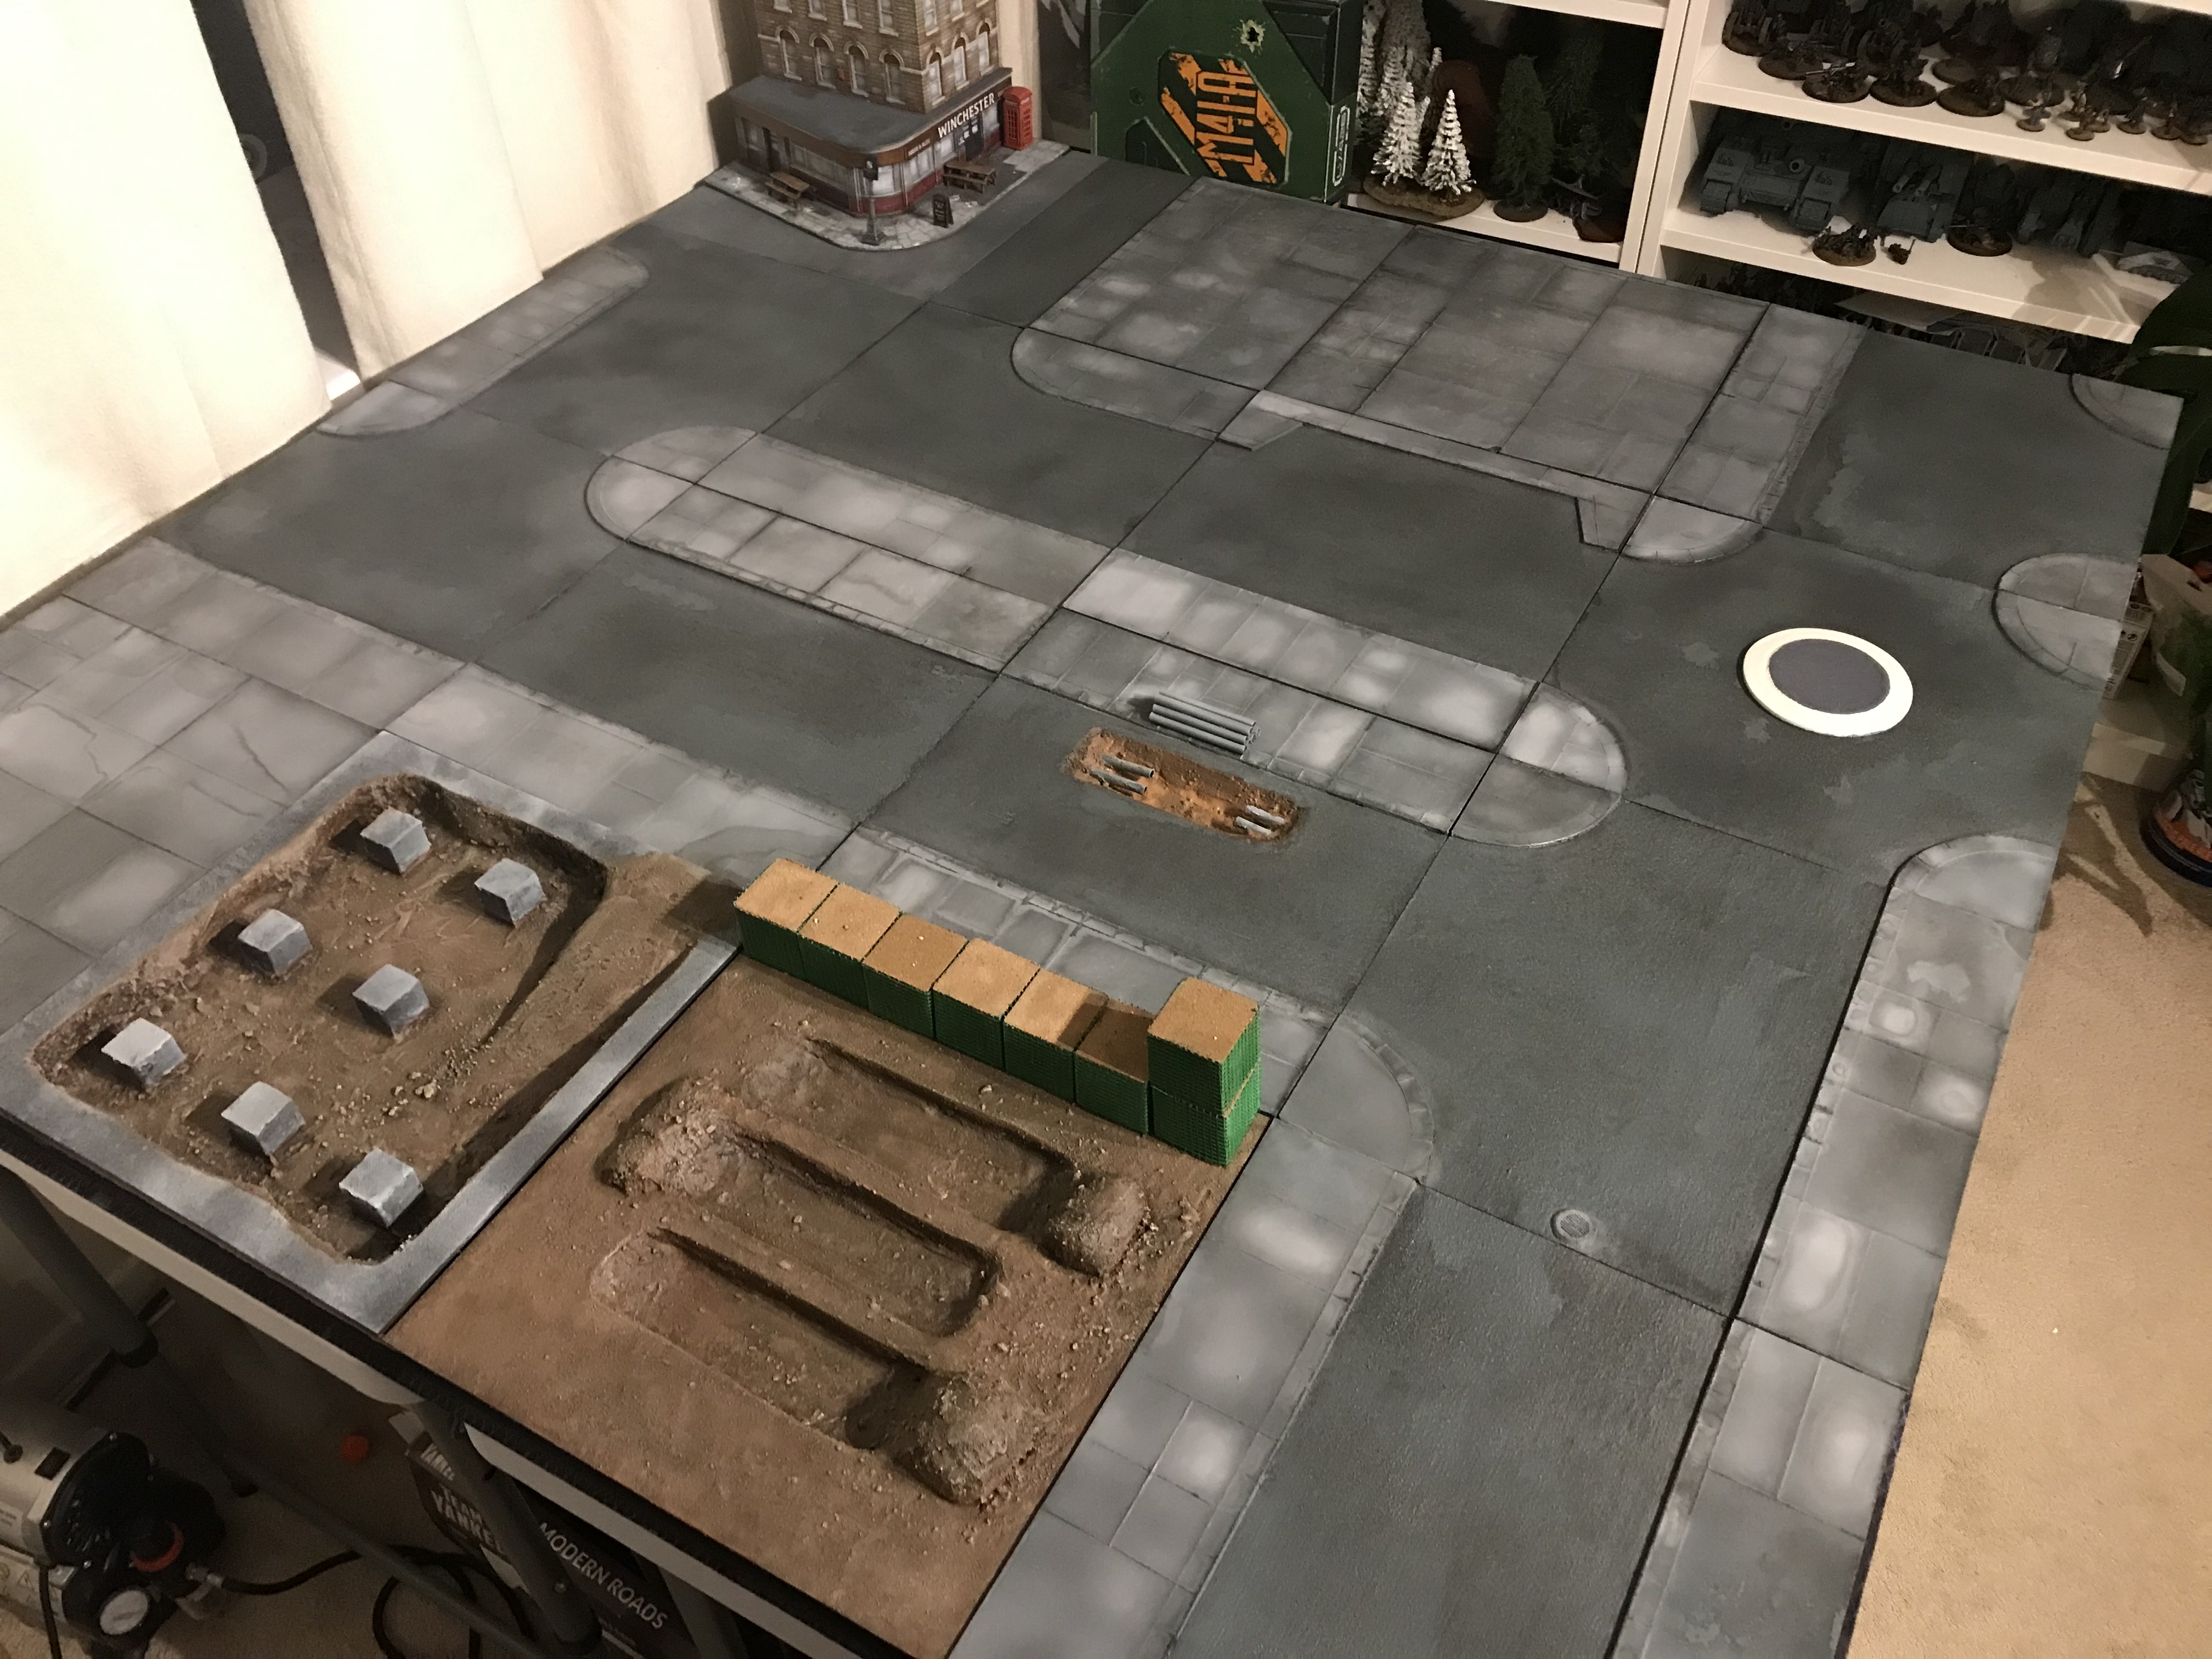
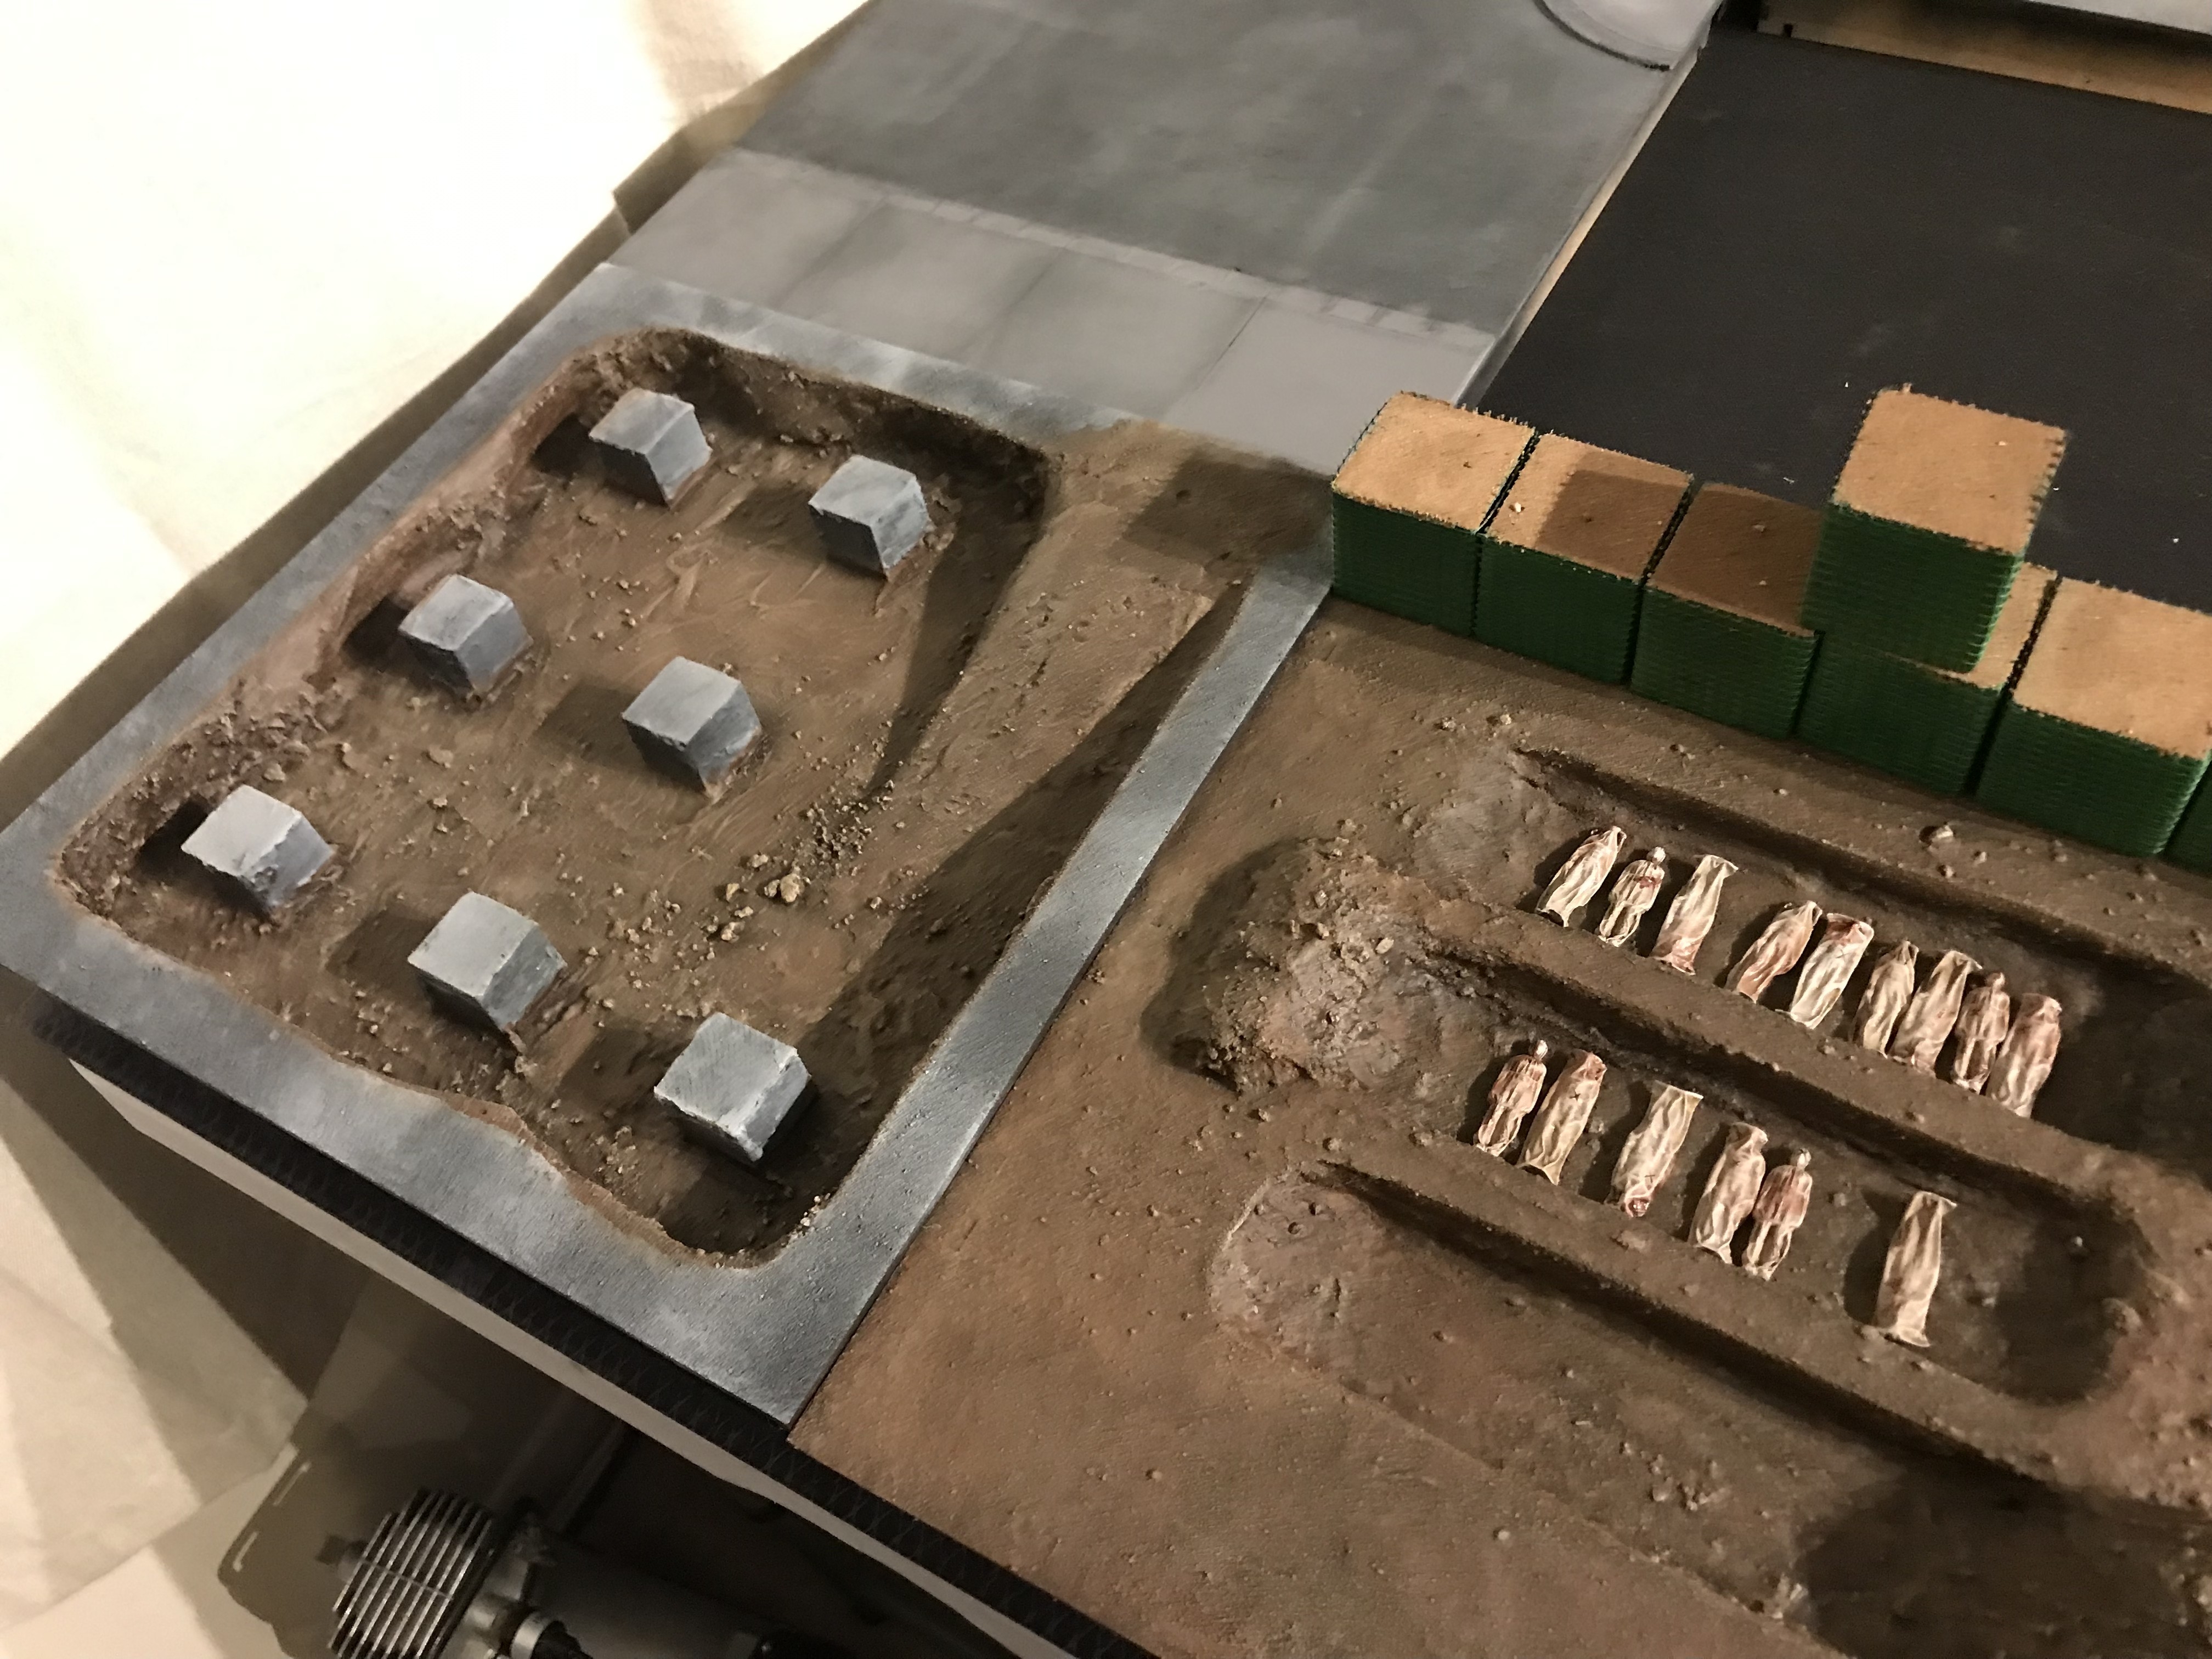
 I finished the mass grave and added in some of the bodies from Antenocitis workshops to finish the touch. Very grim.
I finished painting the road works, where I had copied Solo Wargamers idea of card straws and filler to look like protruding pipes.
I then started to add more textured paint over masking tap to create the illusion of repair works on the road. This ended up being a bit of a long process and so I skipped to just painting corvus black over the road still using the masking tape. This saved so much time and looked the same as the sections where I applied more textured paint.
I dry brushed on corax white road markings for pedestrian crossings, but I had already decided that I would not add any other UK style road markings as I still wanted to be able to use the tiles for American roads as well. I will make unique roads for the big build but this would be separate from the tile system anyway.
 Road repairs close up
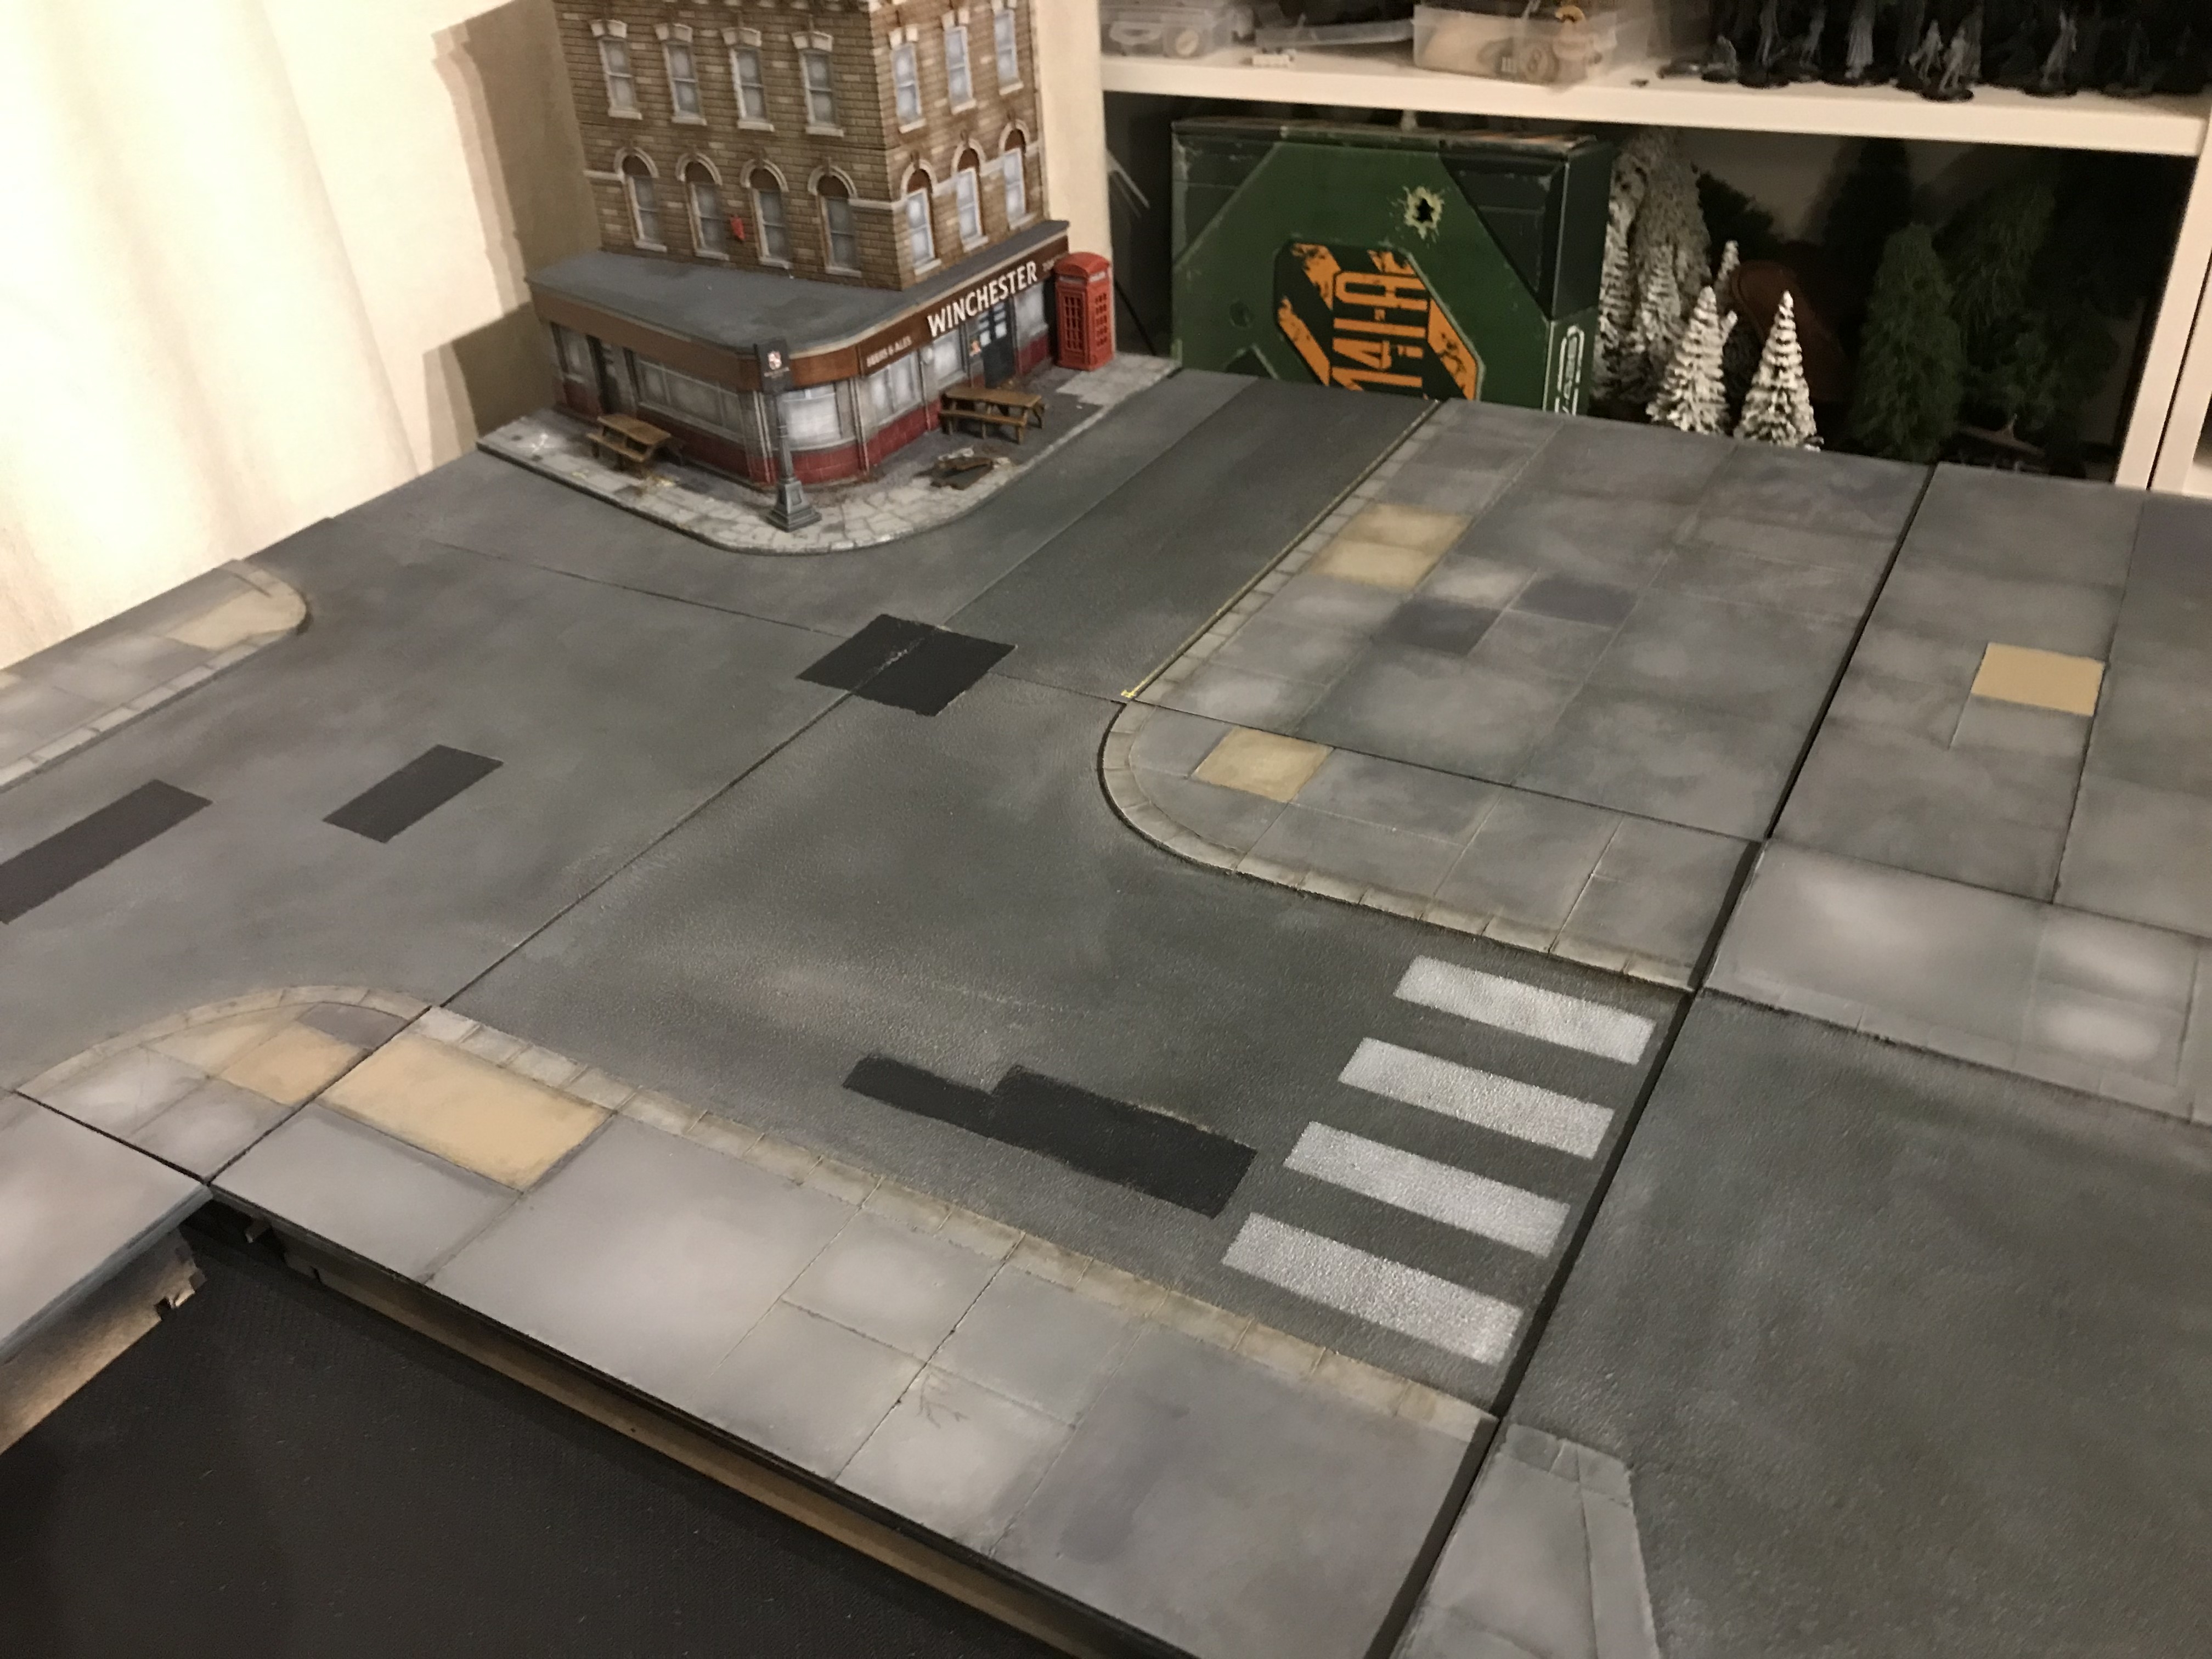 Dry brushed pedestrian walk.
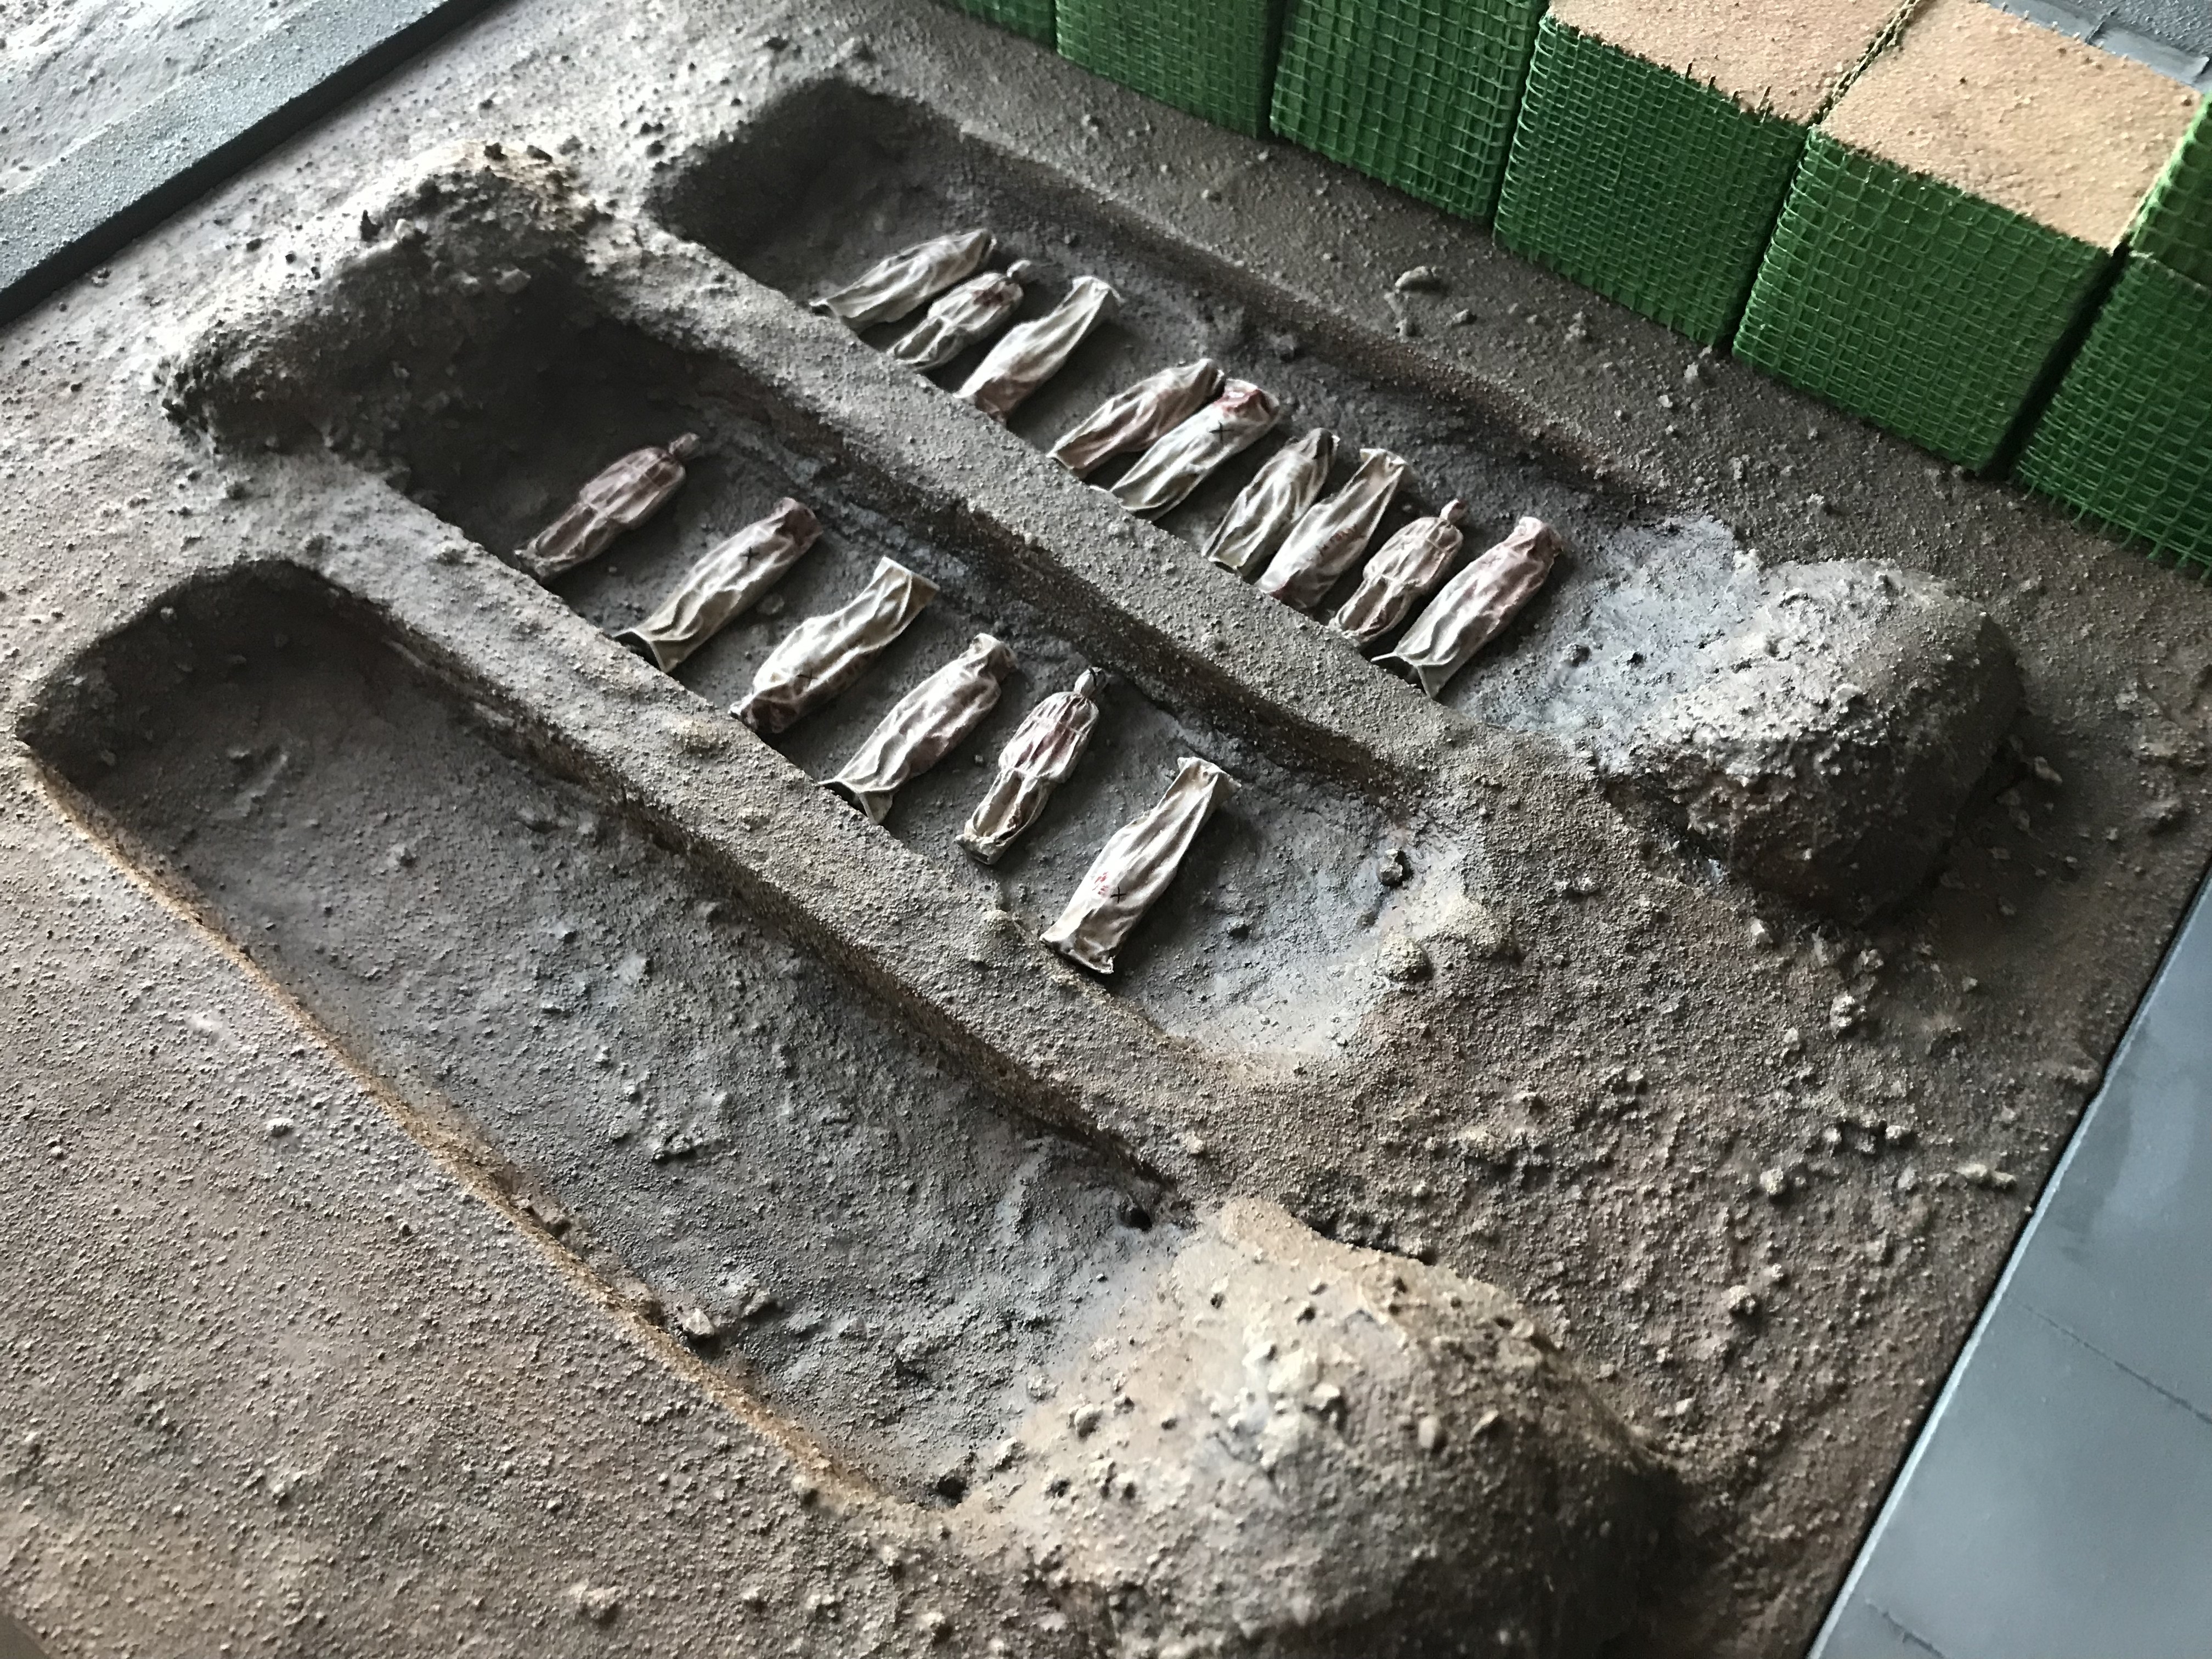
Back on the Road. Part 3.
90% of the tiles were now don’t, so I began to do some testing with buildings and other ideas. One idea I had was street lighting. I found some wired Christmas lampposts that fit the size perfectly and were battery powered. I haven’t implemented this full but as a test run, it didn’t look half bad to have working lampposts. The wires were still lightly visible and they would be difficult to fully hide with just the tiles, but scatter and other things would make this simple enough. Its biggest pain is that it they are wired in a single strip, so you have to figure our best placement first before moving like a nokia snake weaving back and forth across the tiles.
I’ll probably only use the lights for special occasions.
A precursor. The shape of things to come.
Before I began work on my Cornetto project and having already been inspired by the Solo Wargamer, I started to spruce up terrain pieces I already had.
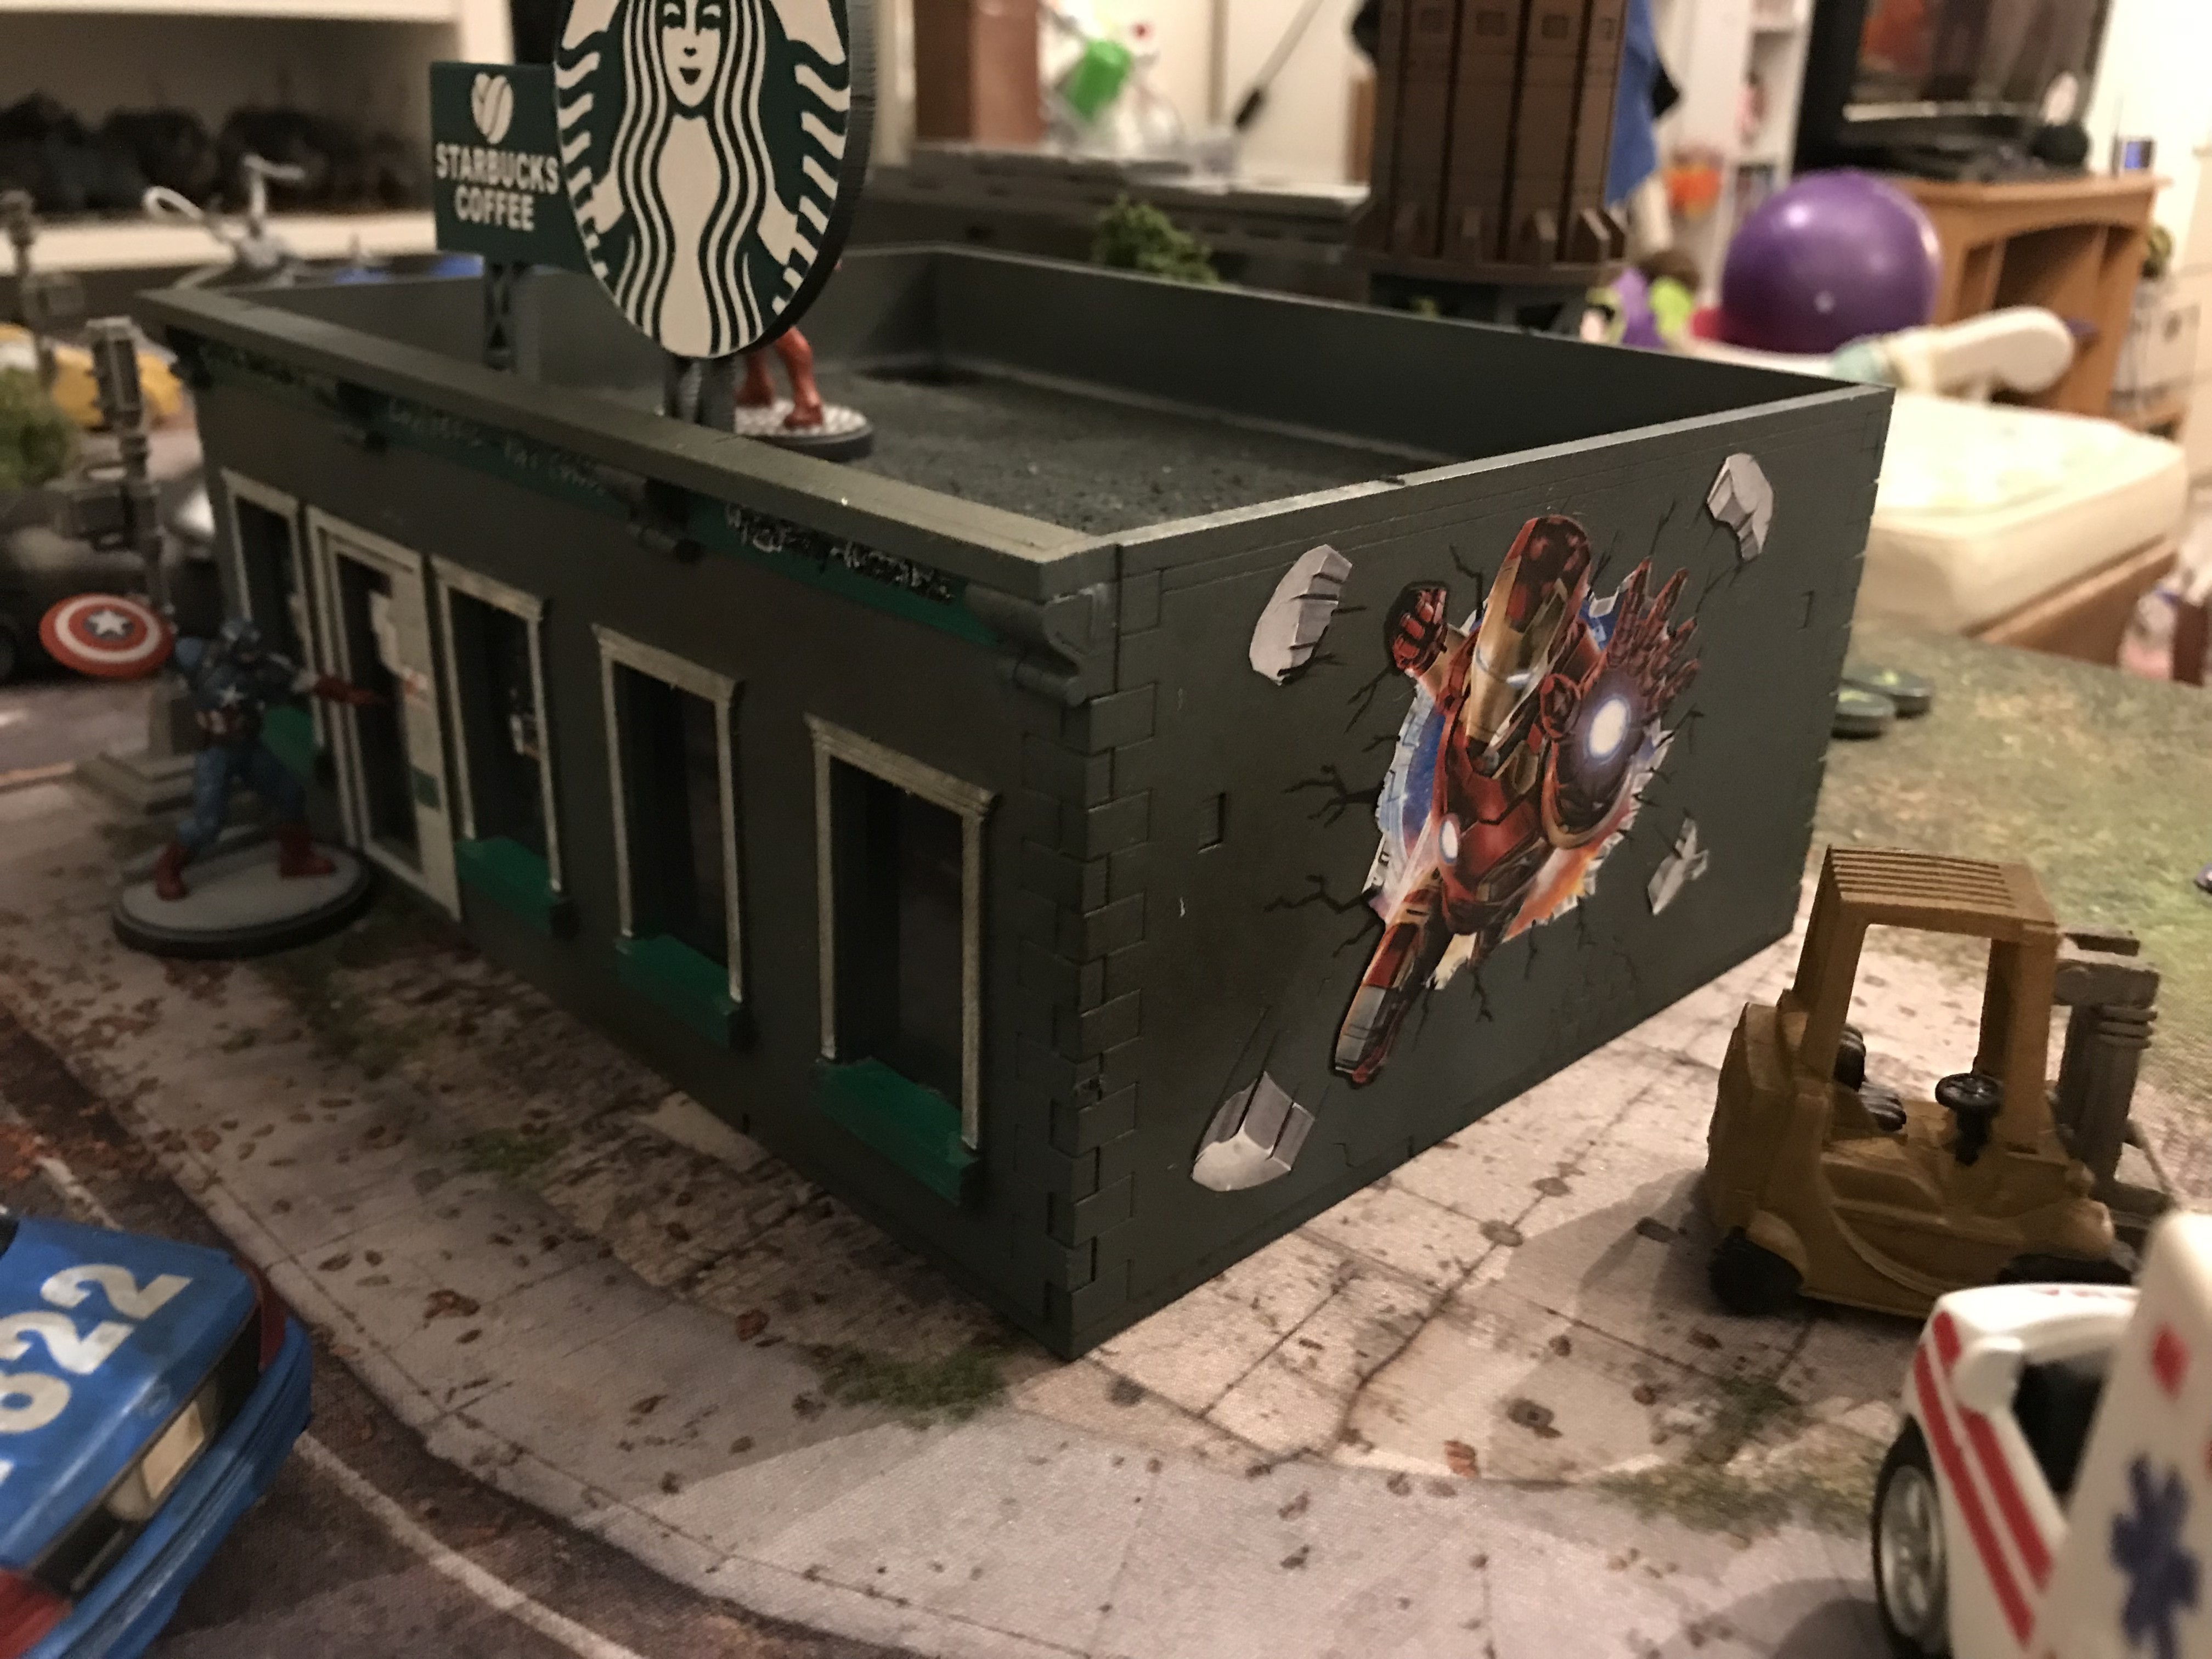
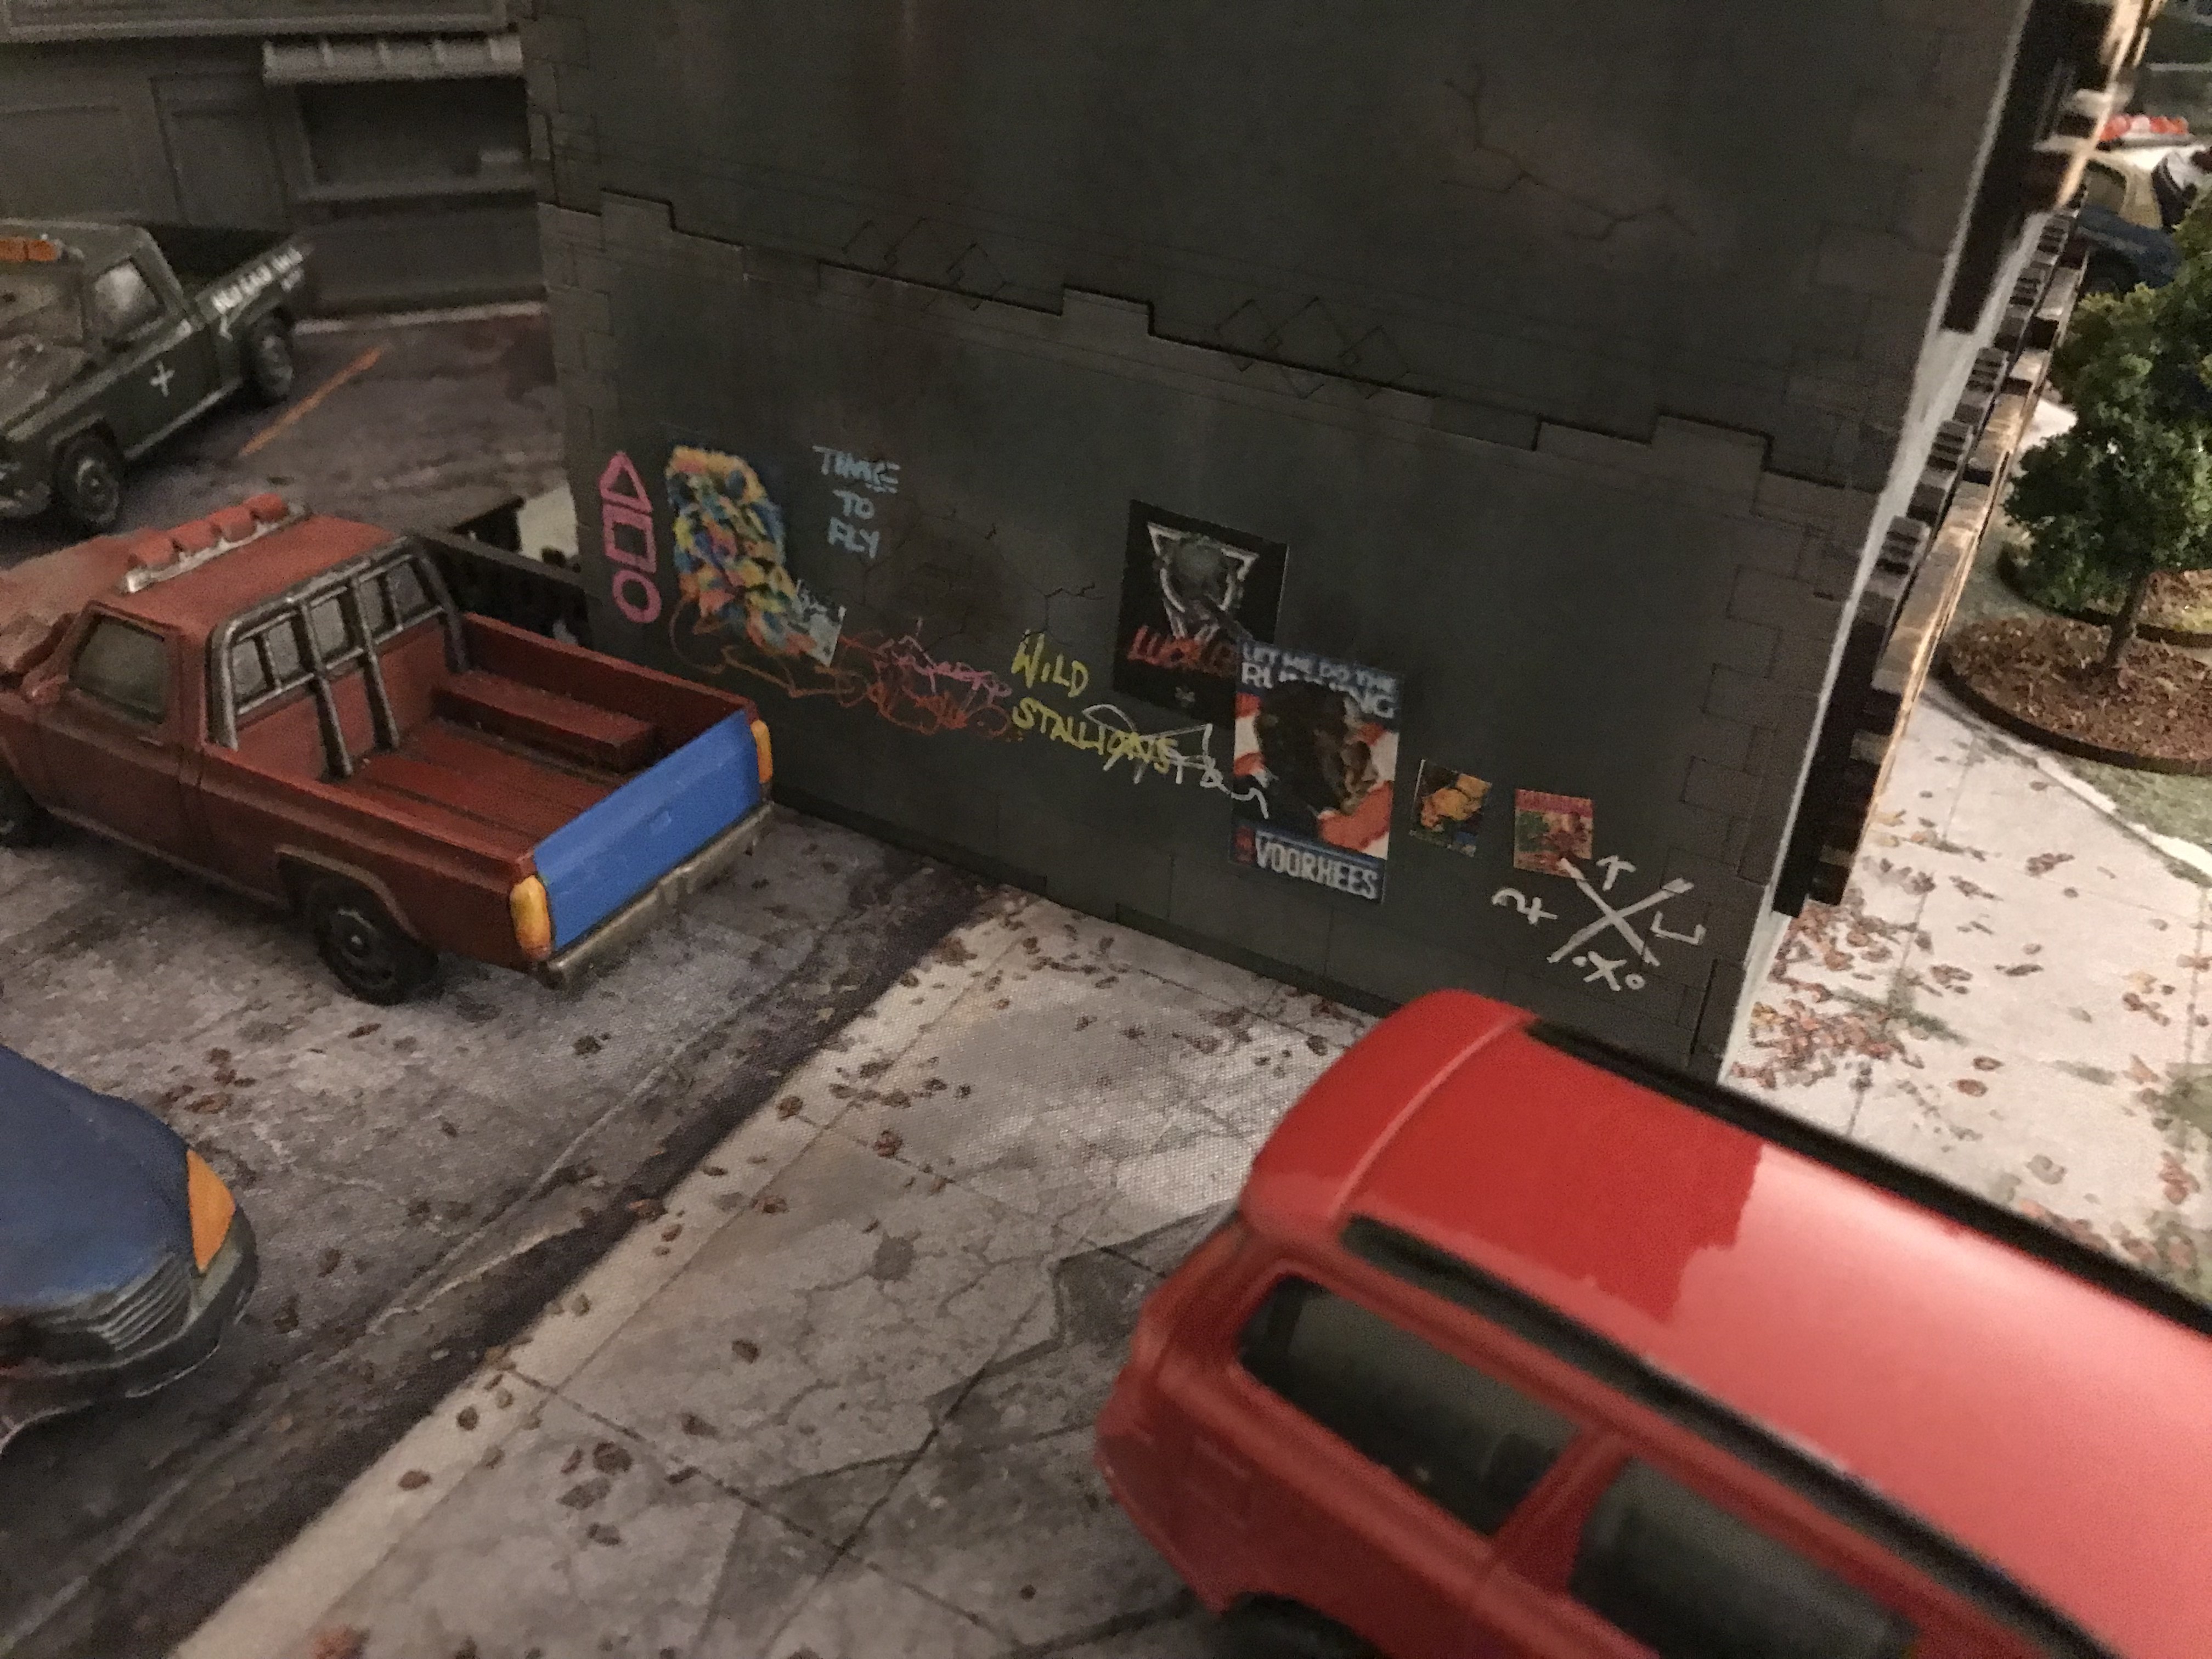
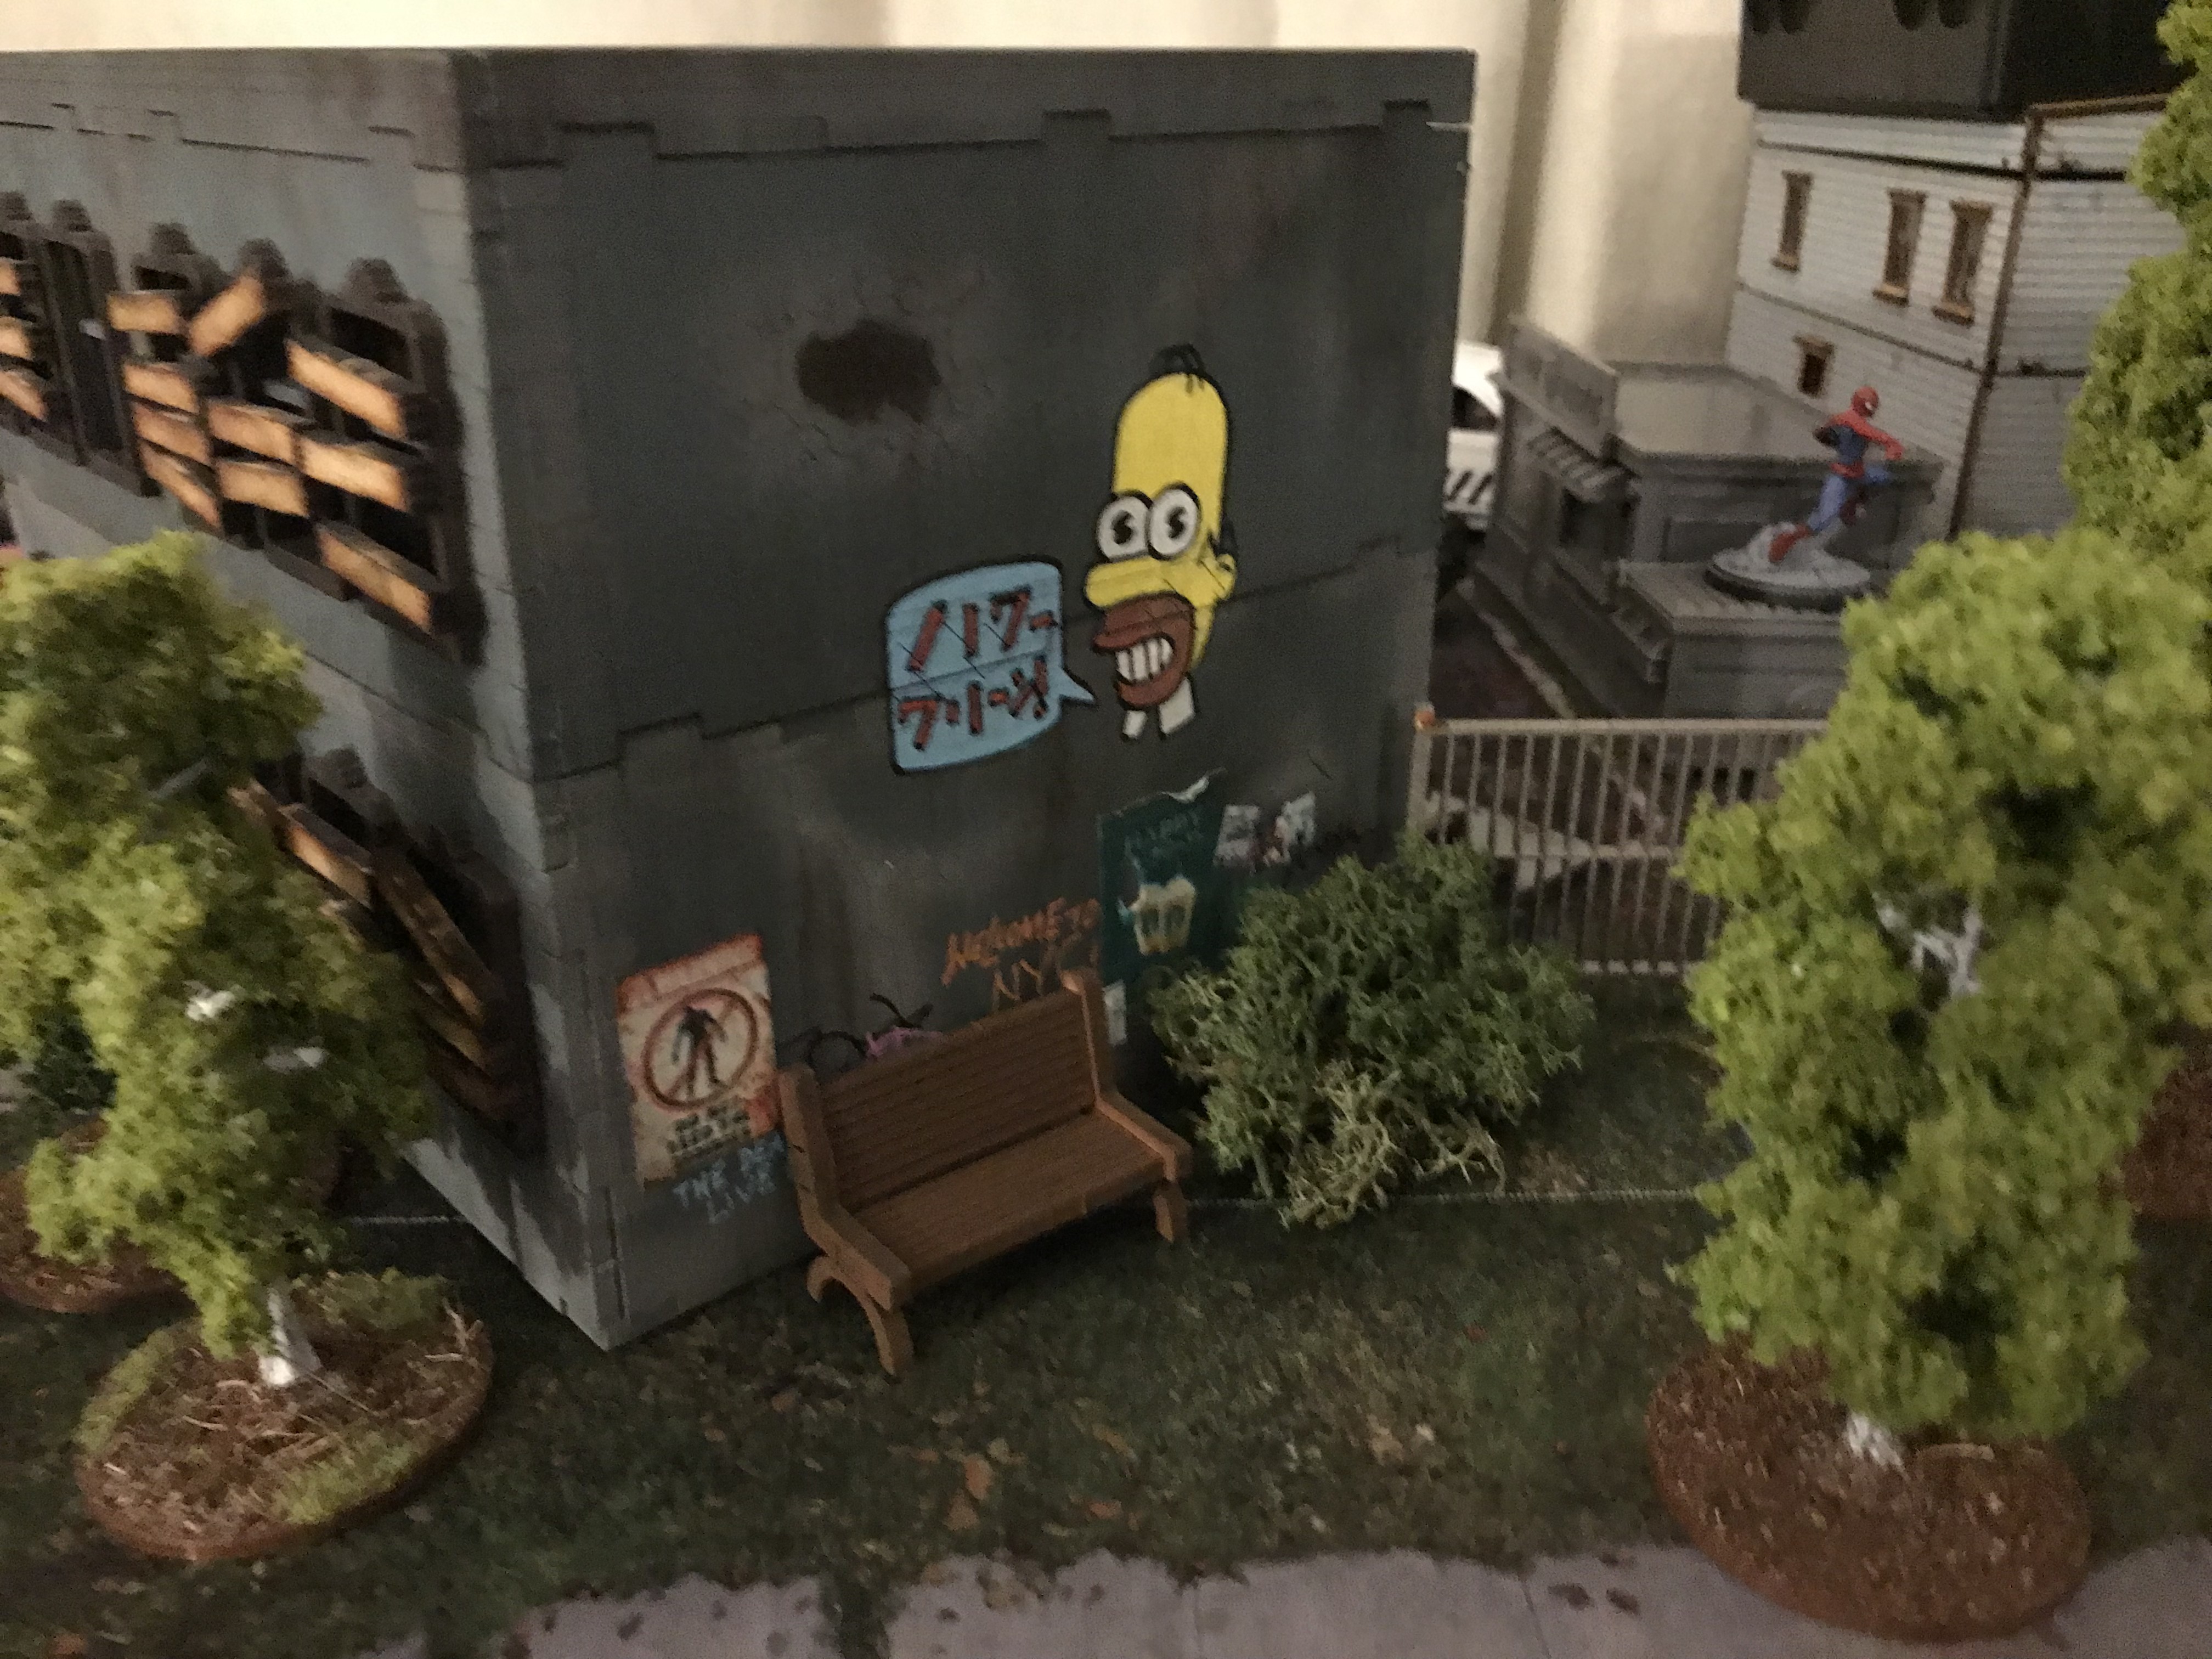
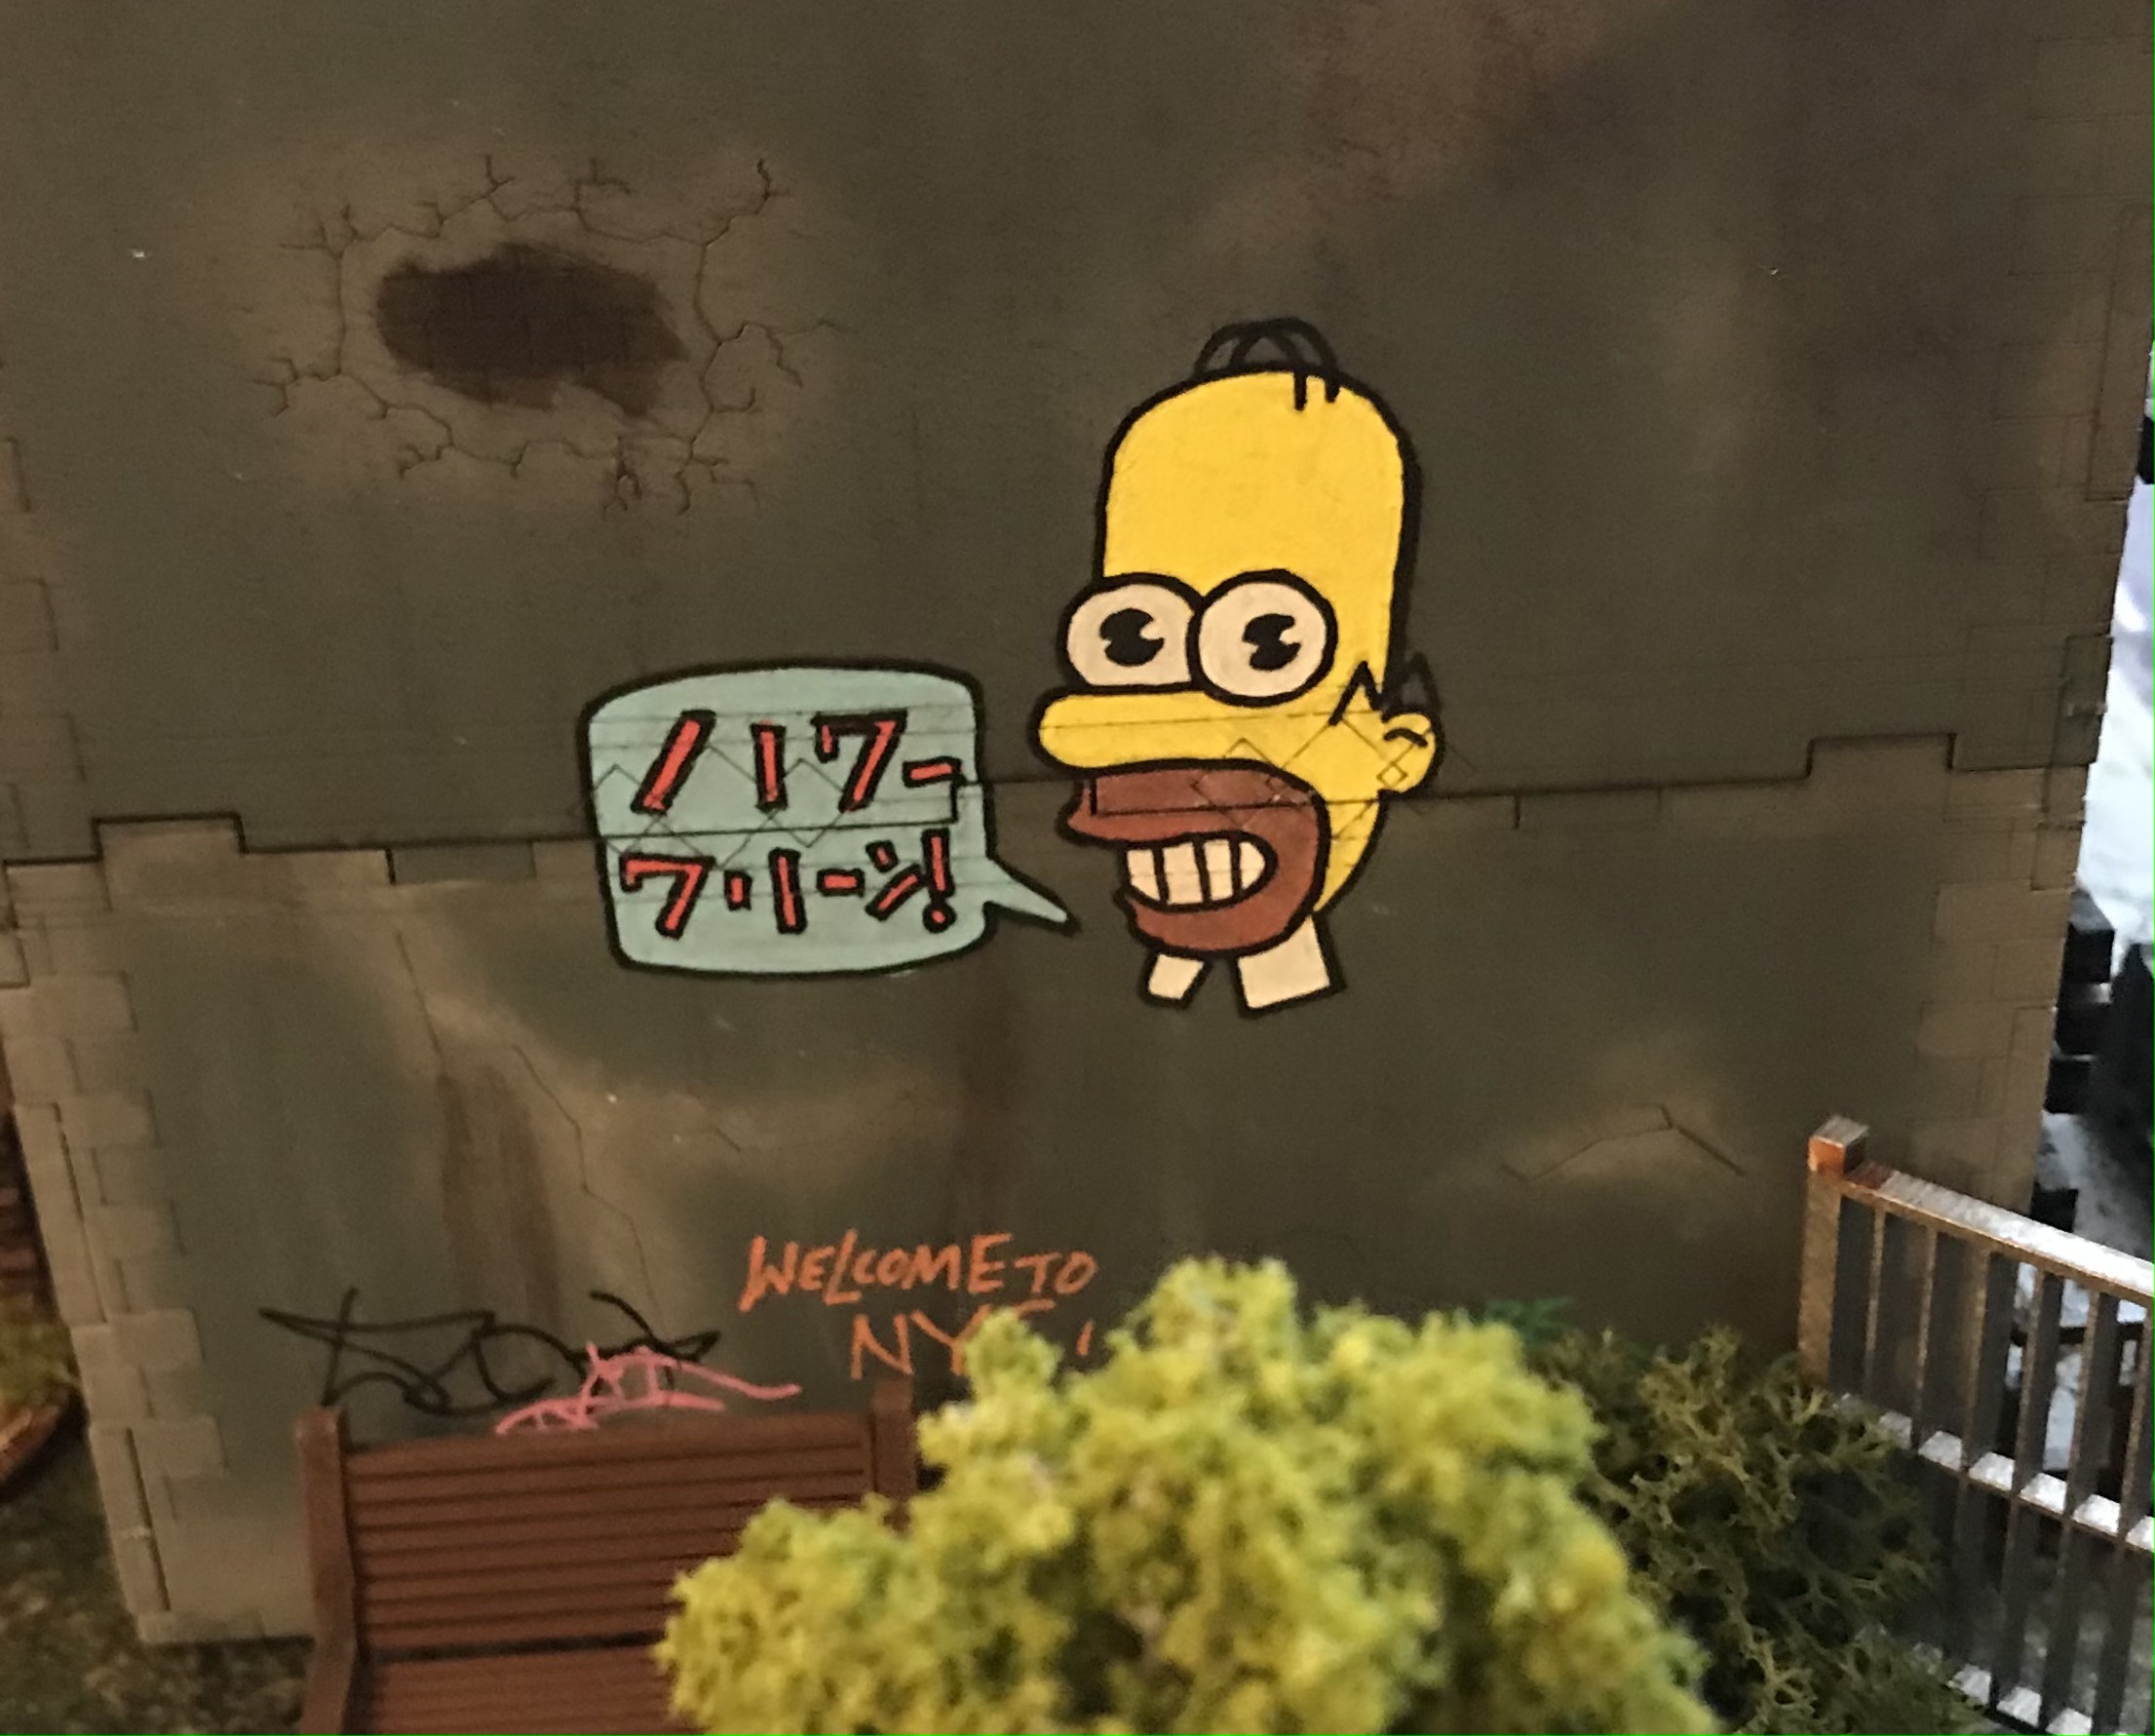
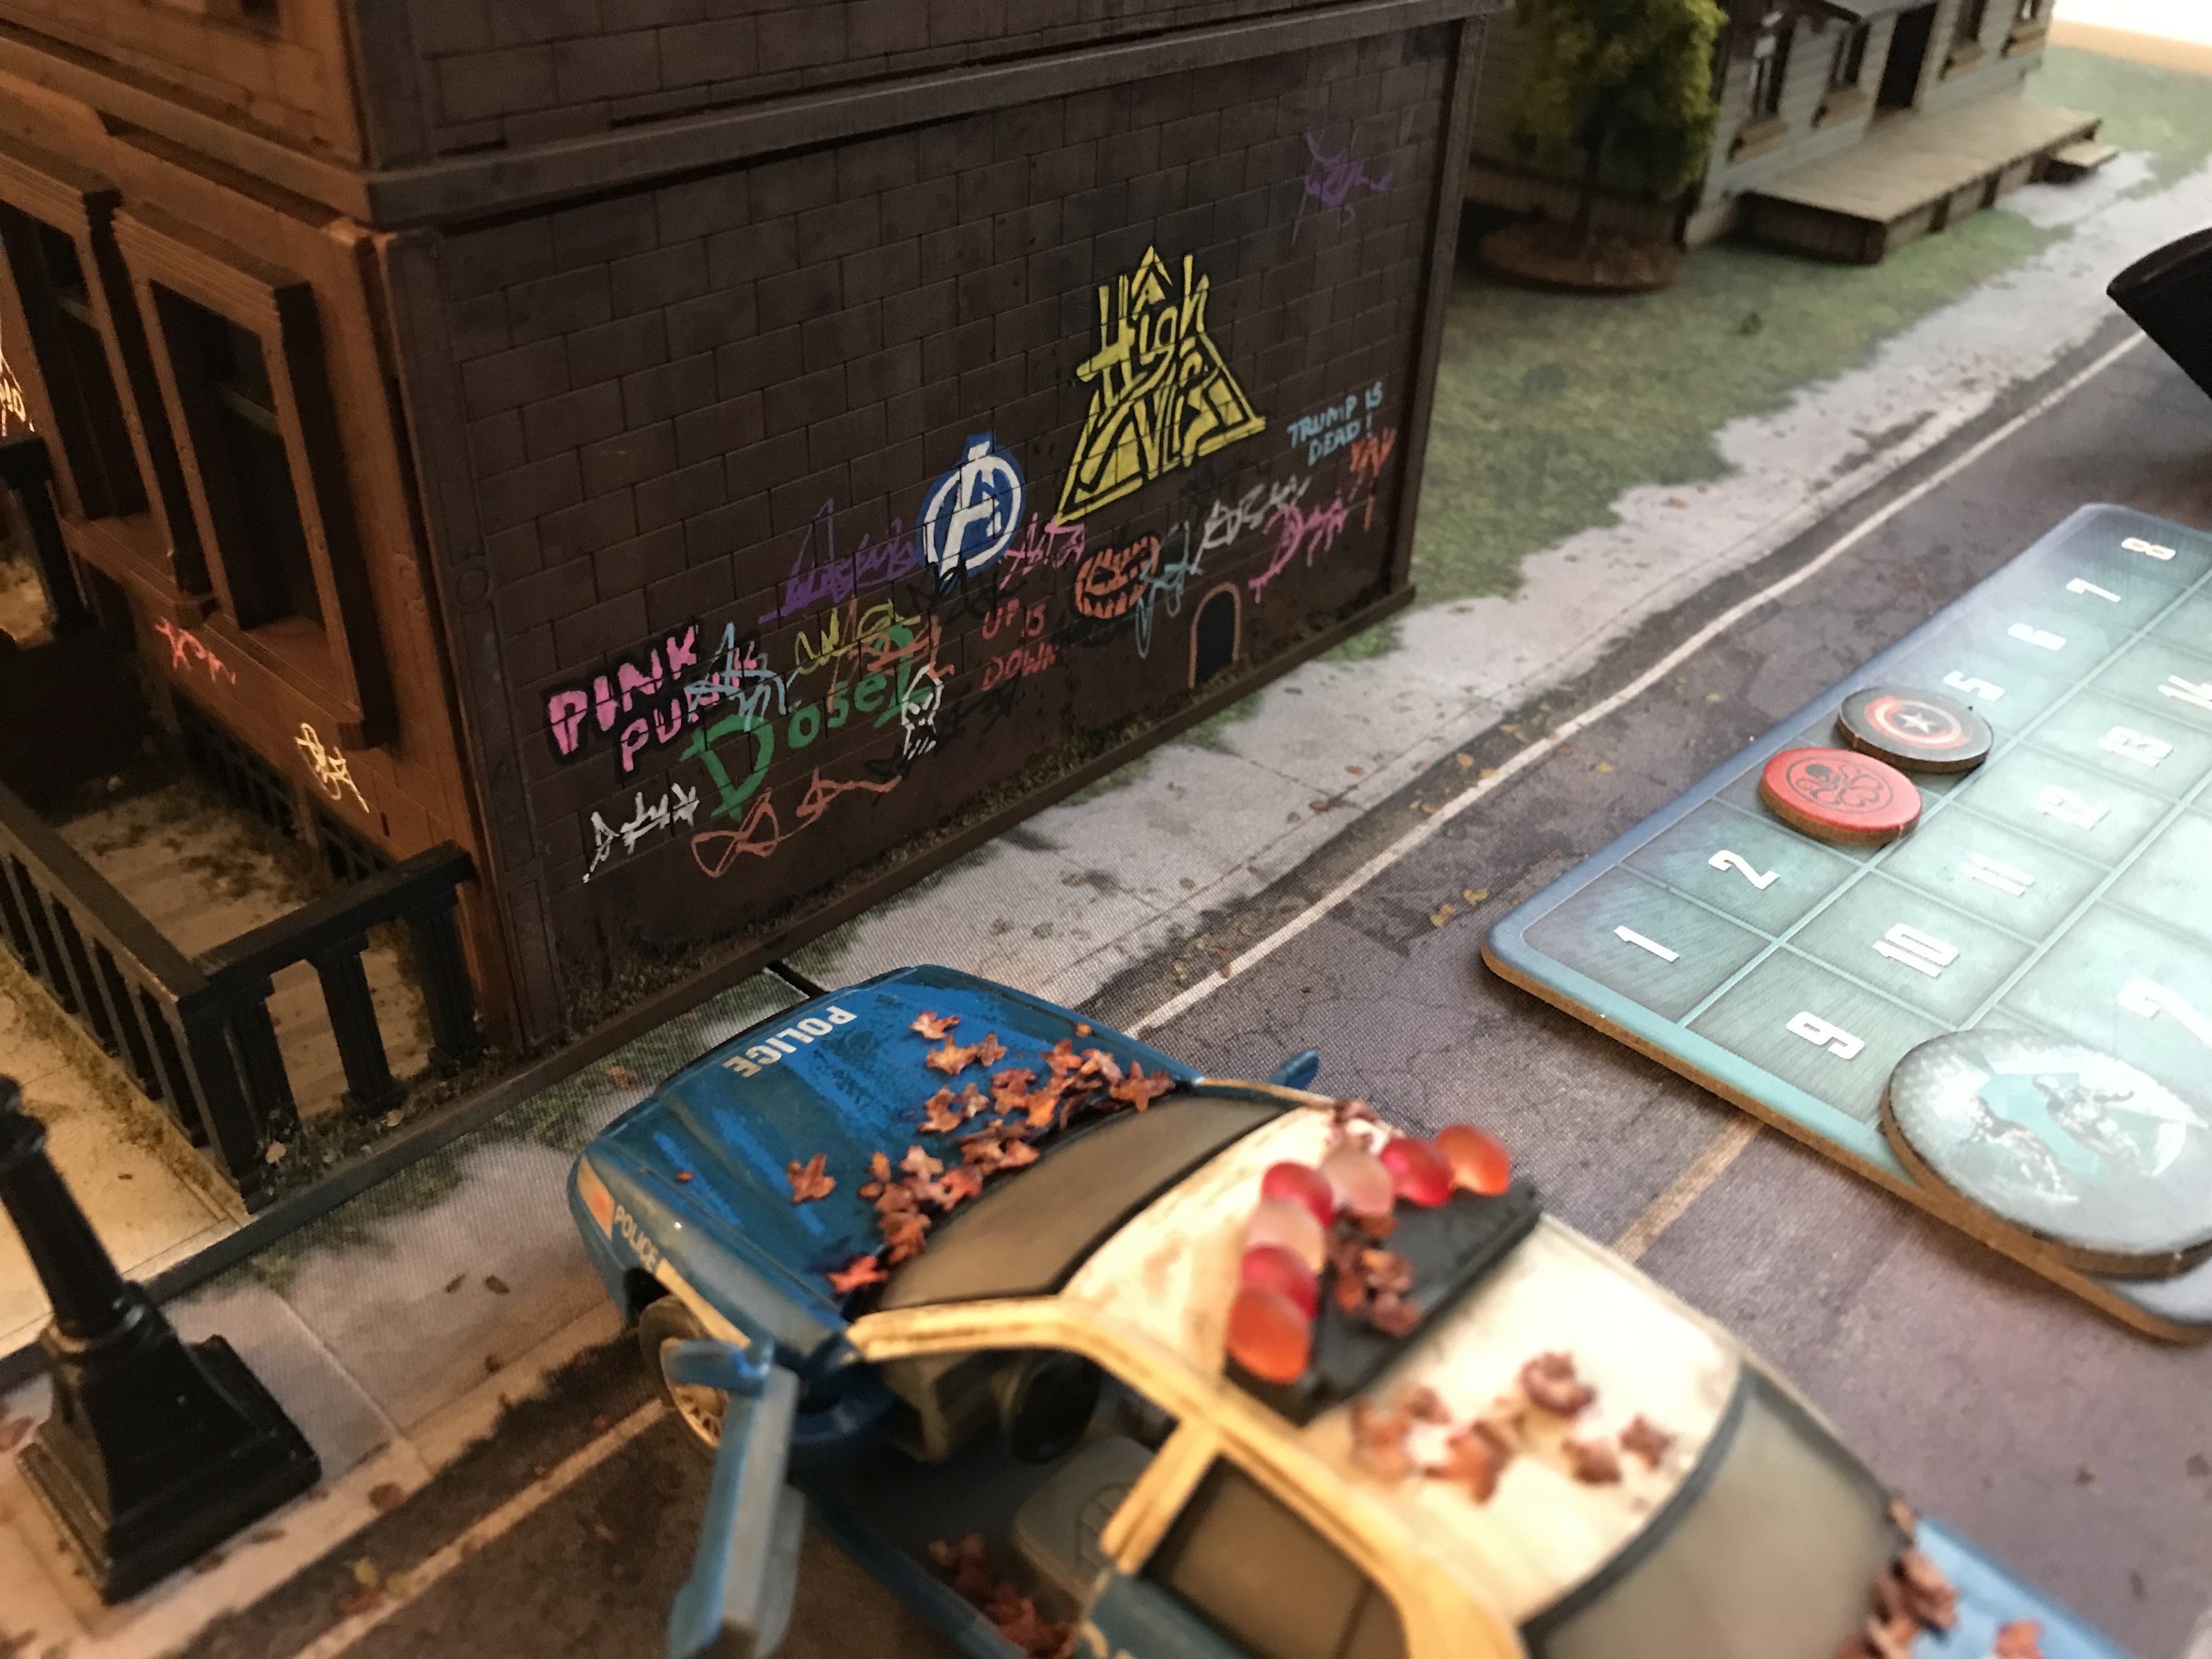
This was turning the café into a starbucks and adding details to the brownstone flats. I scribbled on graffiti using acrylic paint pens, which were perfect for graffiti in this scale. I was particularly pleased with how Mr Sparkle turned out.
I set up a quick table for Marvel Crisis to test out my buildings, but it was when everything was place down that I was even more keen to build the UK setting.
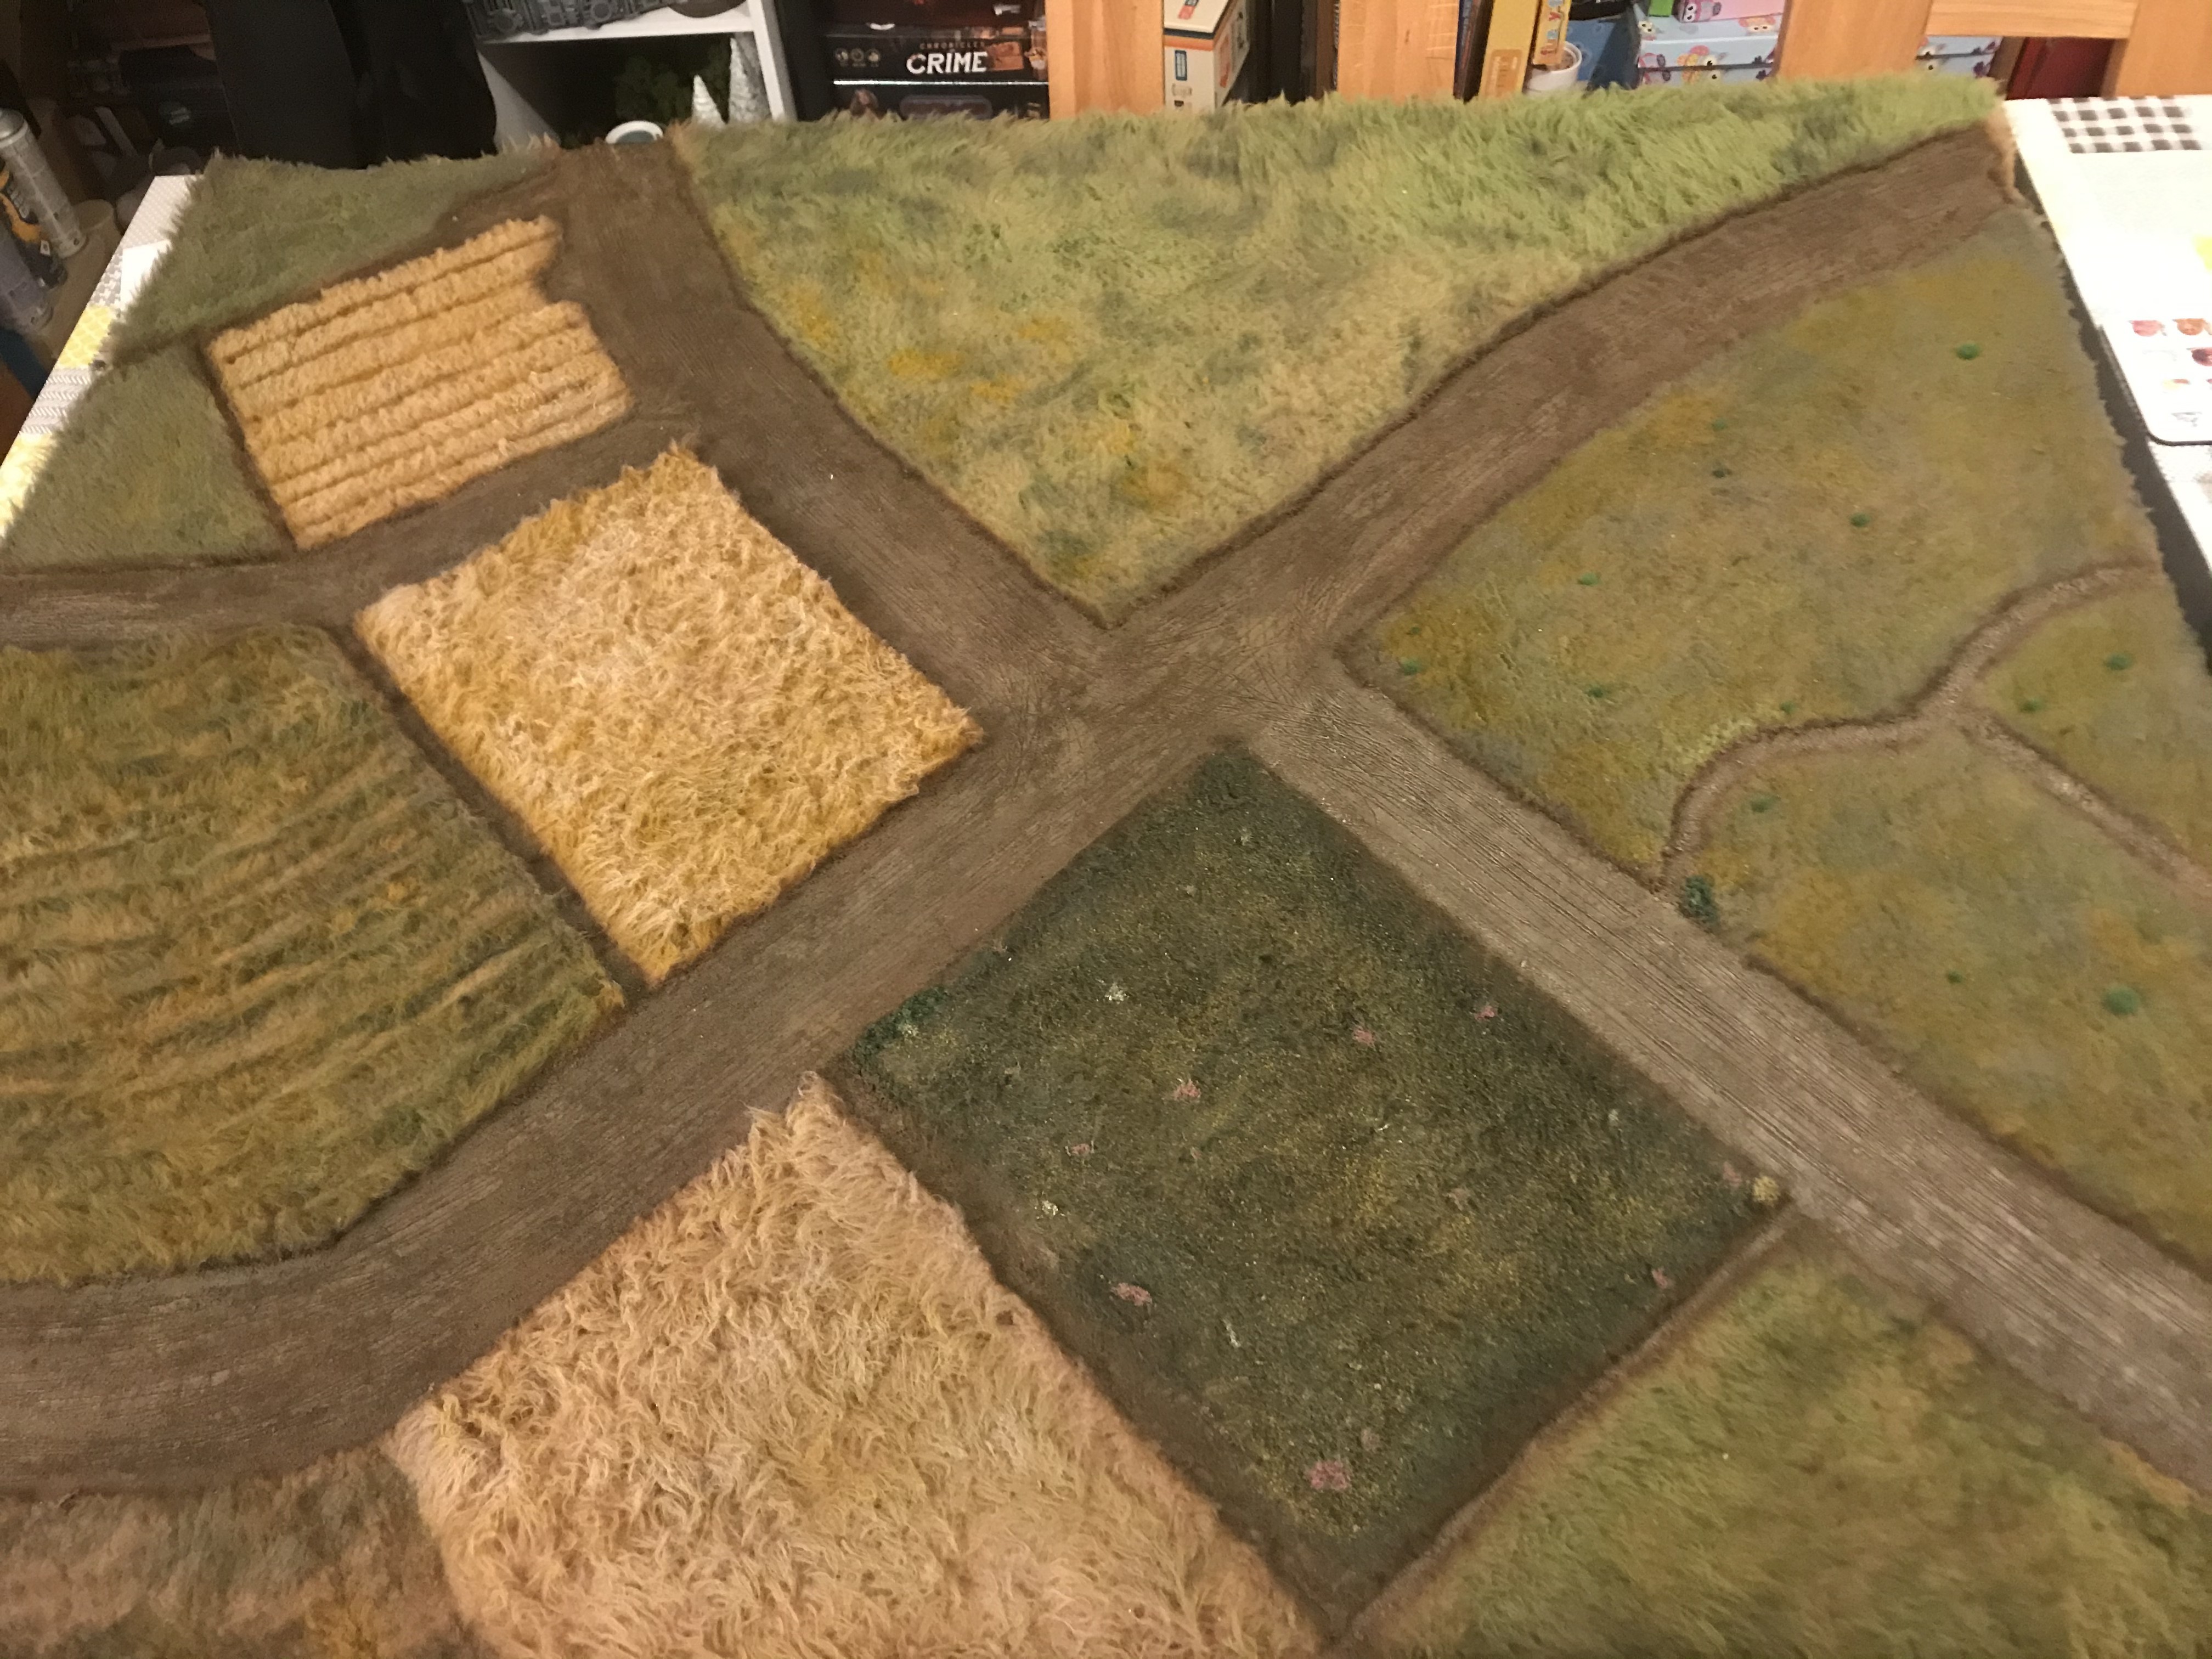
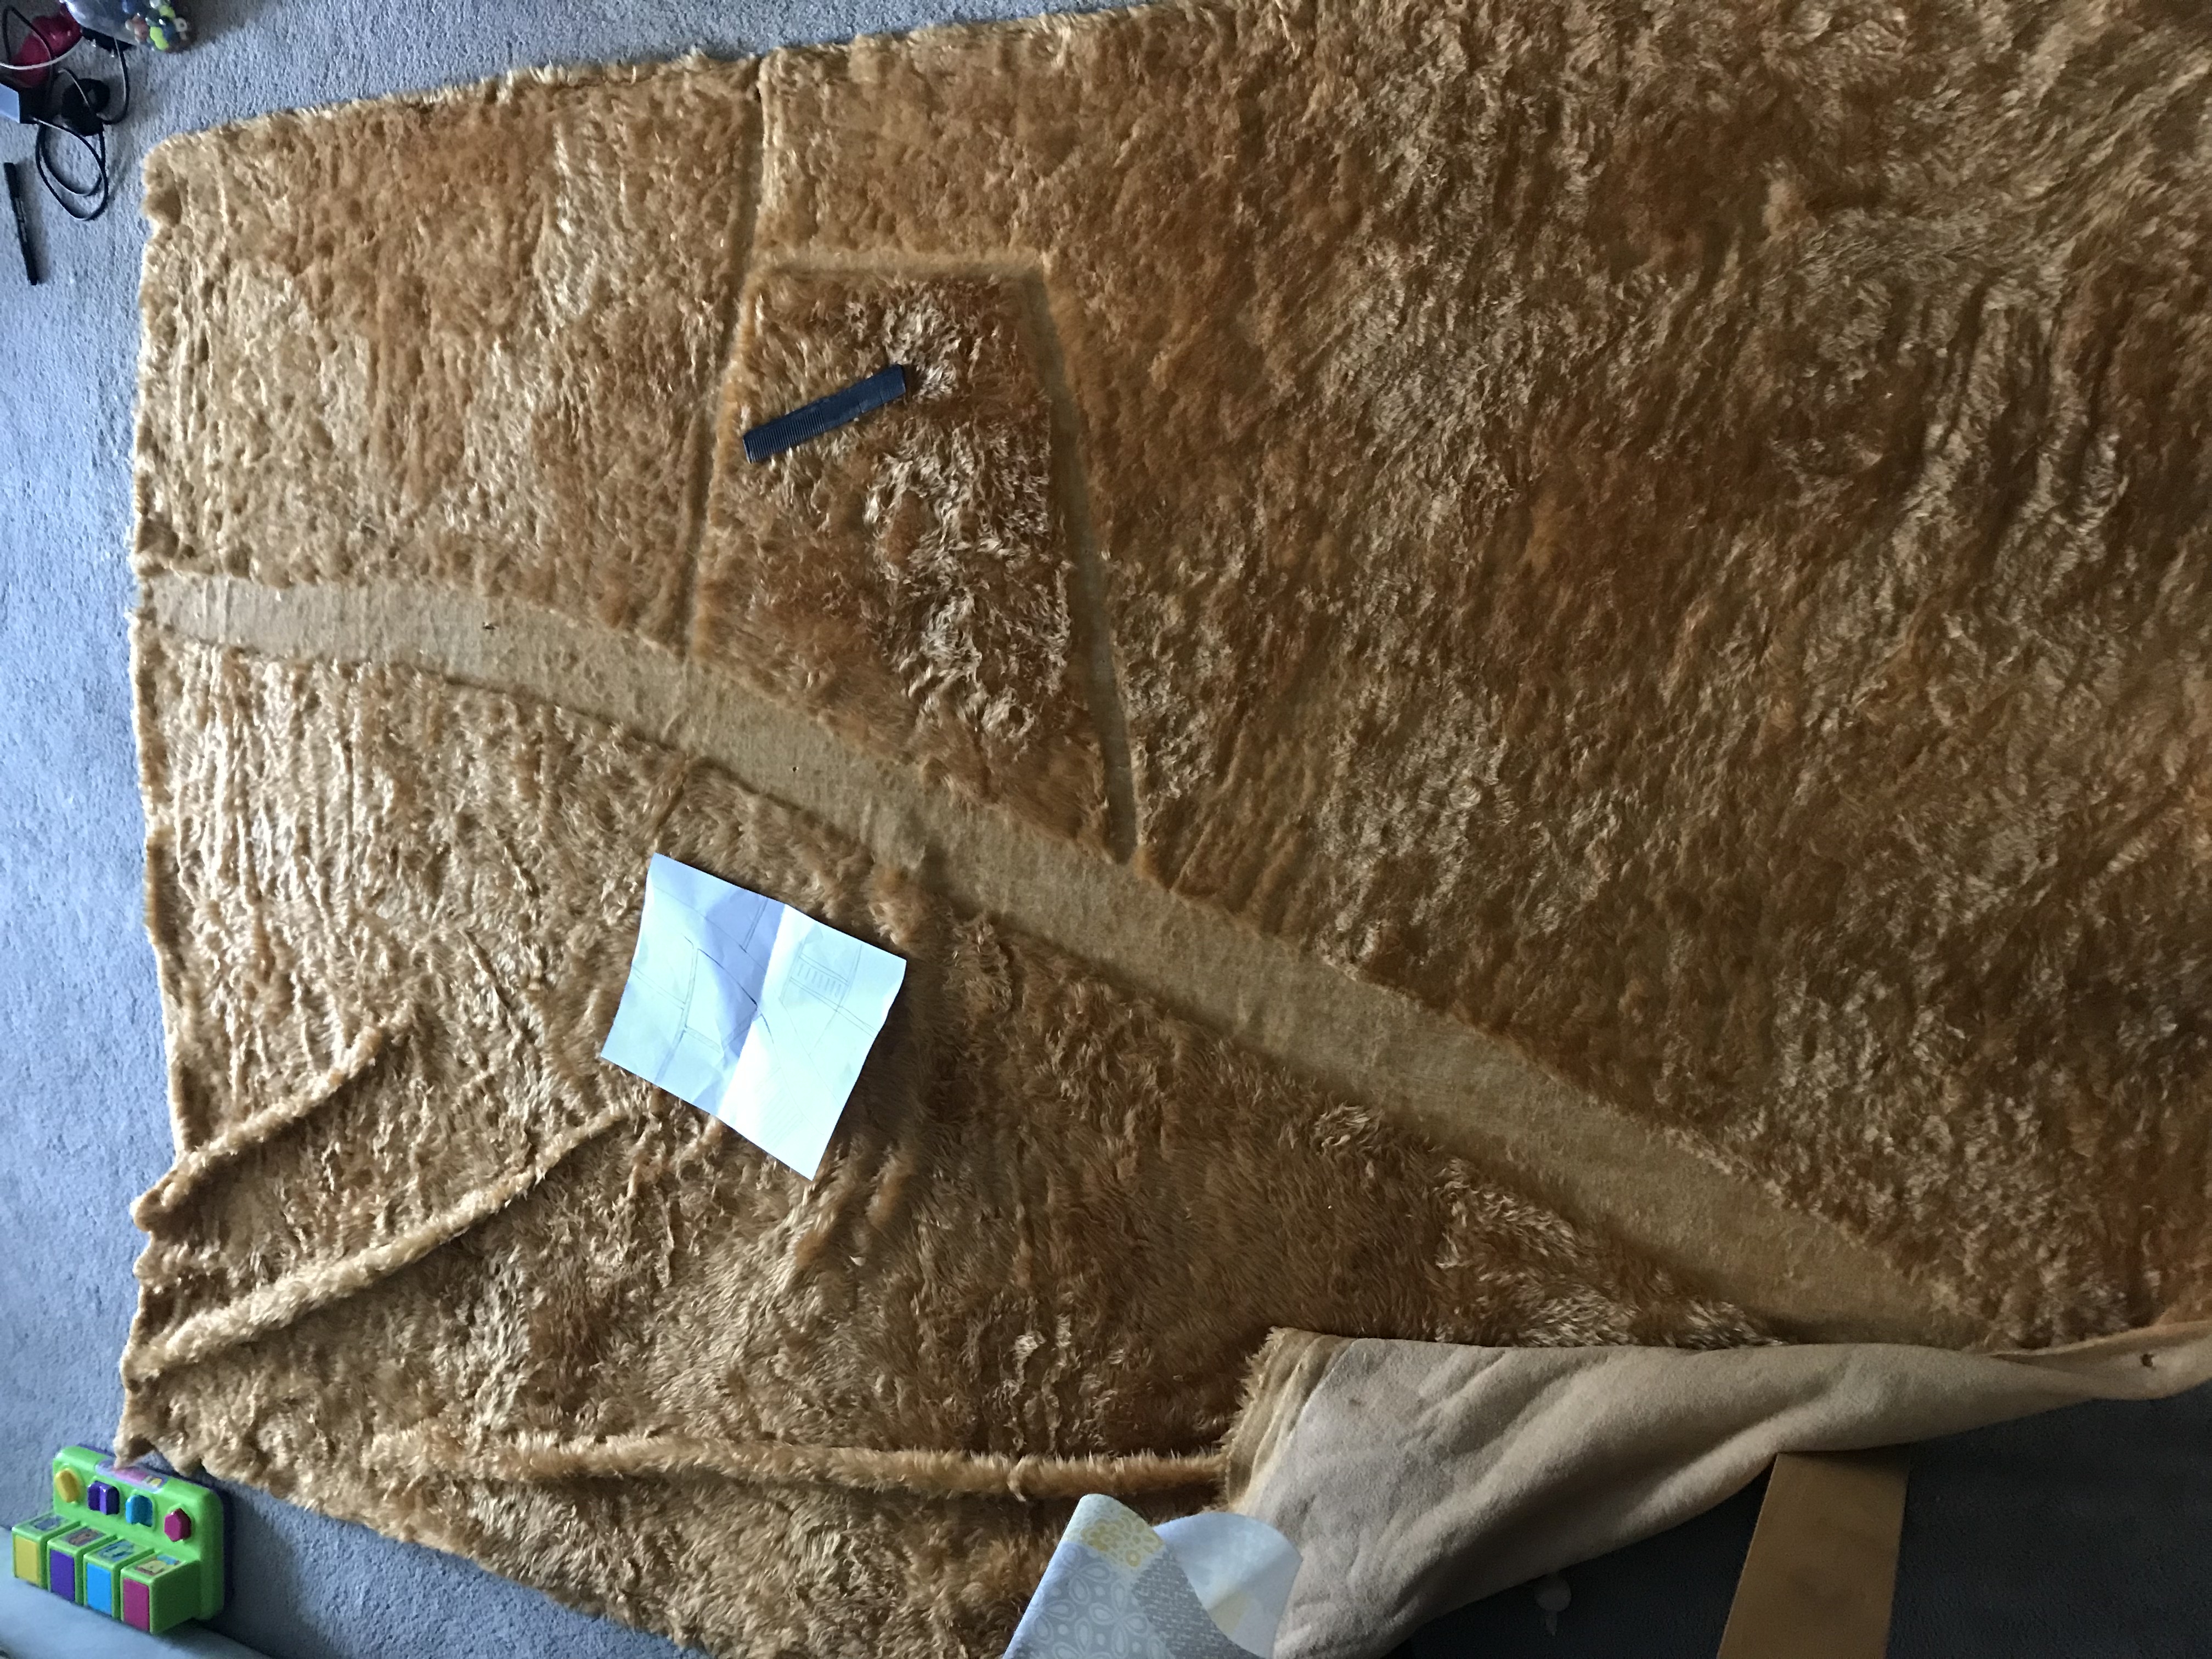
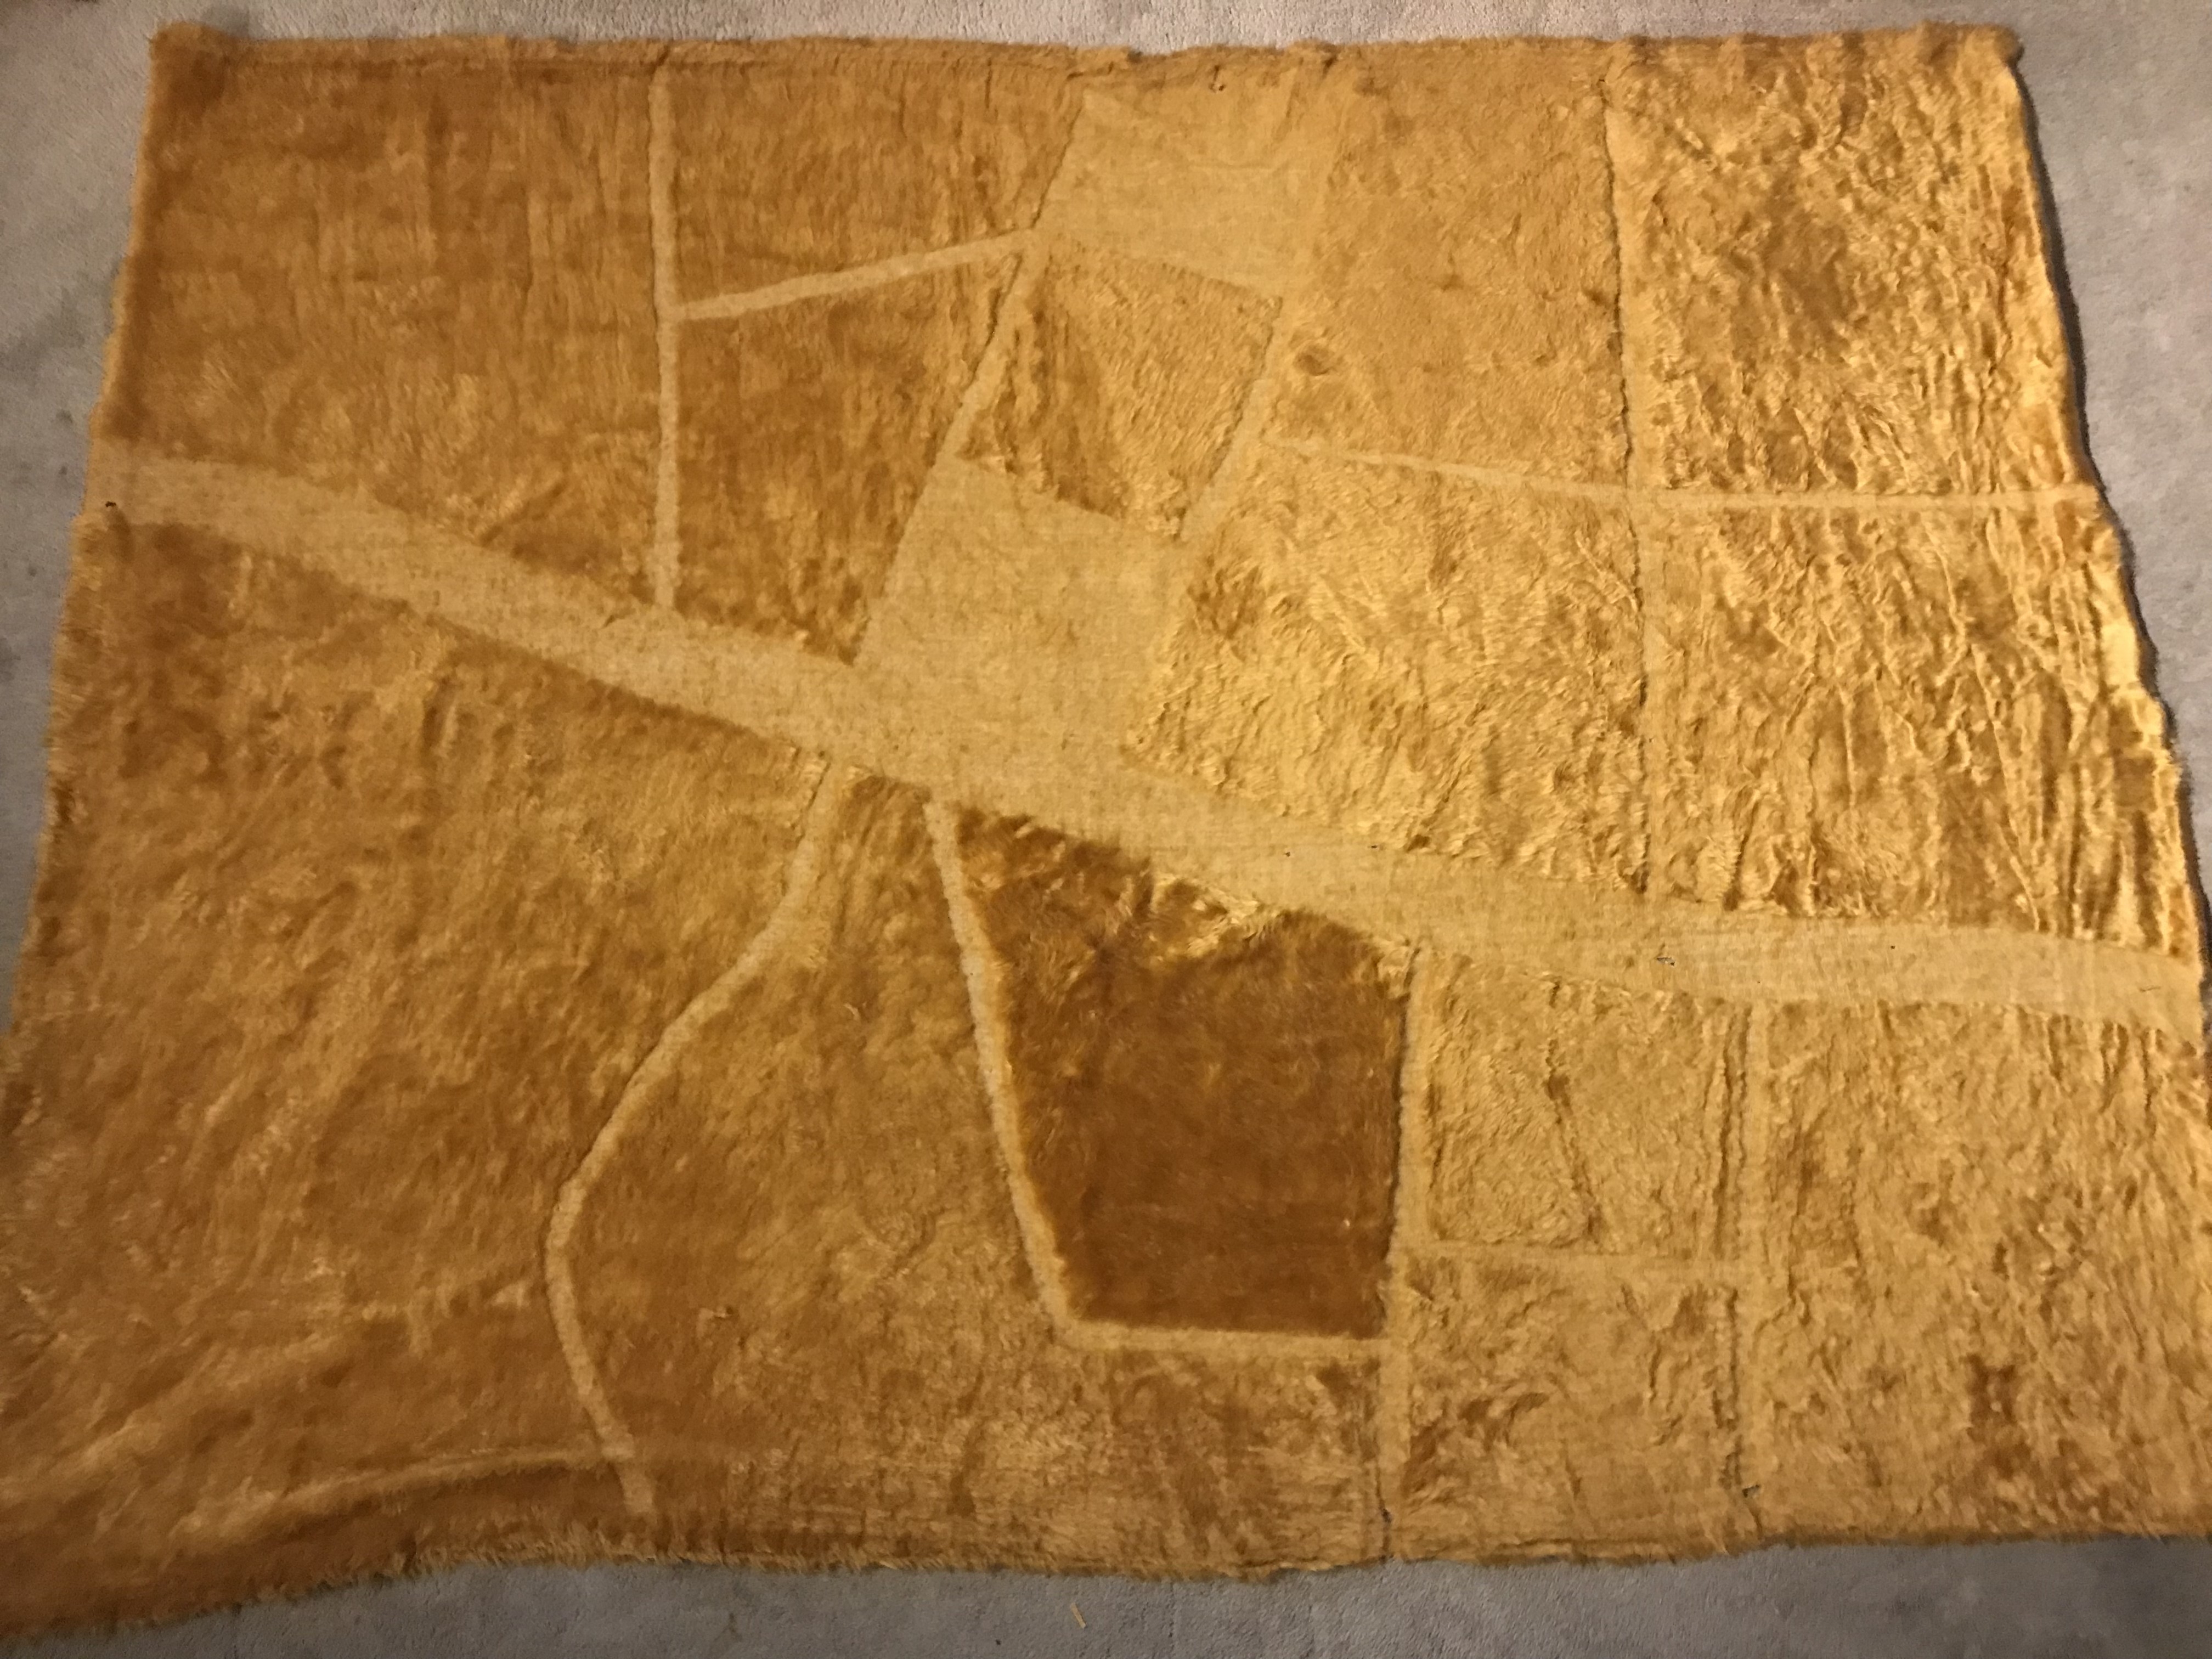
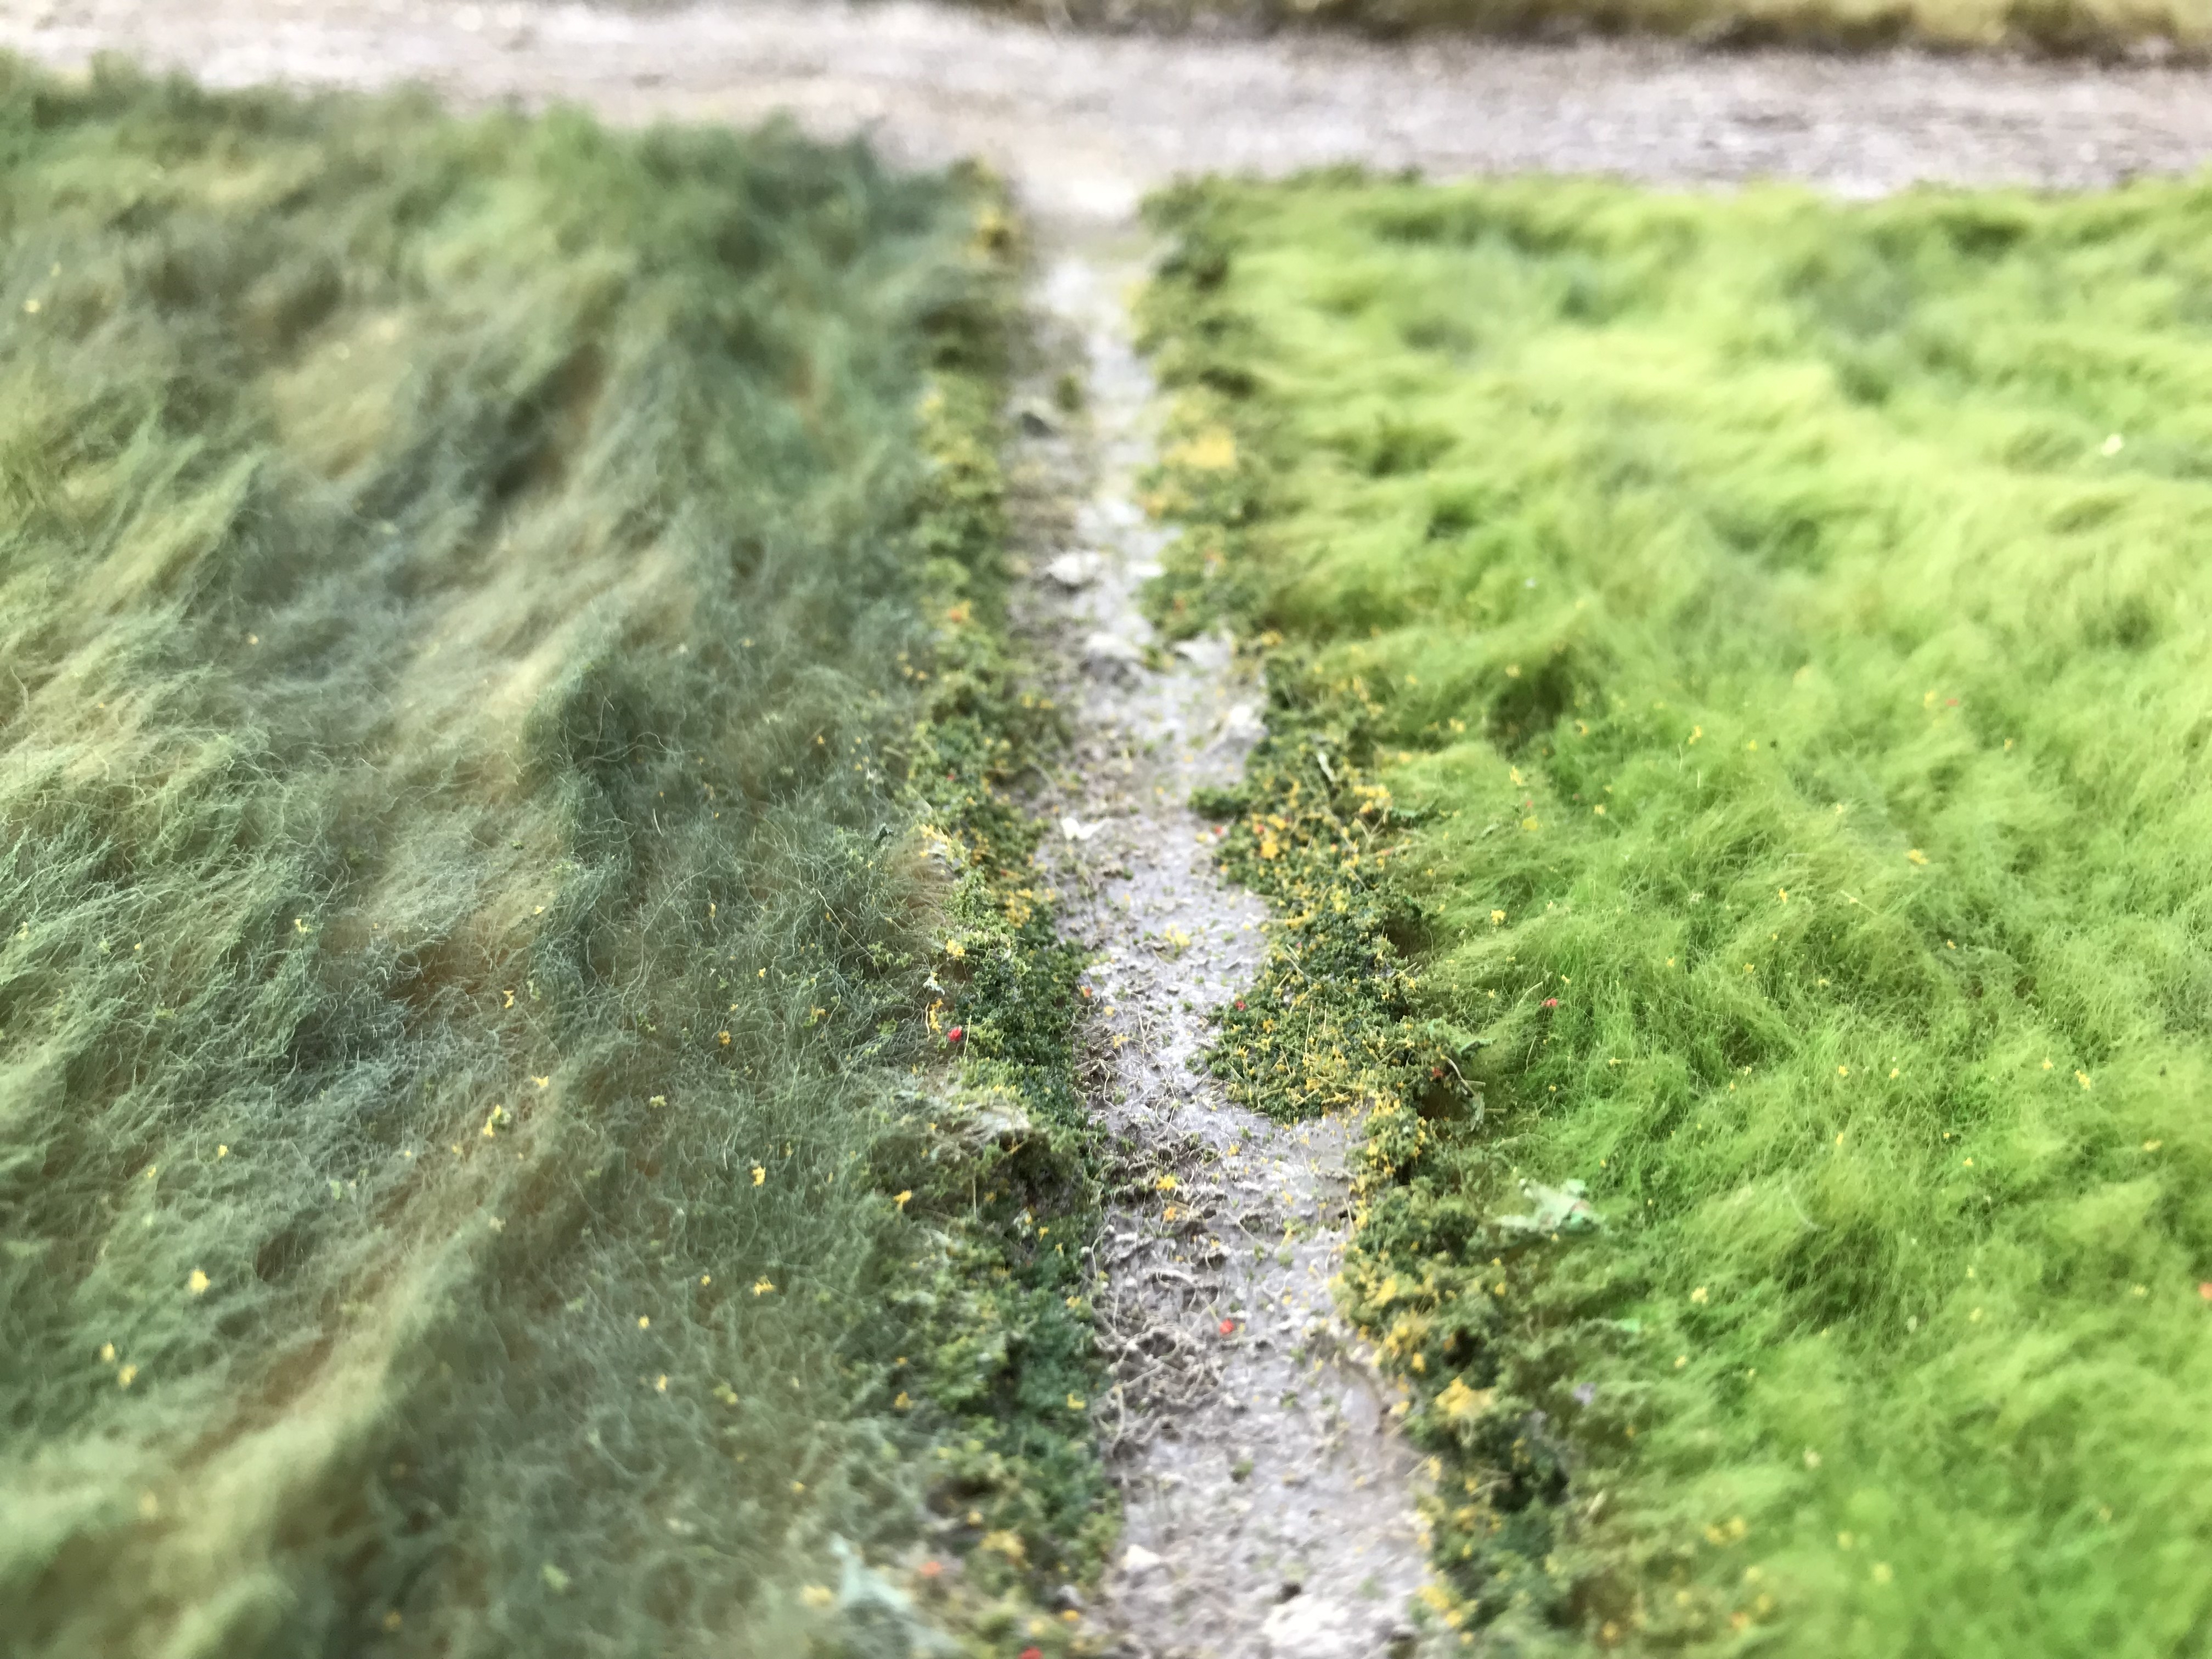
To hark back to the first post on the history of this project. I mentioned that I had built a faux fur mat 4×4. Here are some shots of the mat in progress and then with both 15mm and 28mm terrain over the top,
It worked well in both scales which is what encouraged me to make a 6×4 mat.
The process was relatively simple. The only issues to working with faux fur was keeping it somewhere it can remain flat for time to dry.
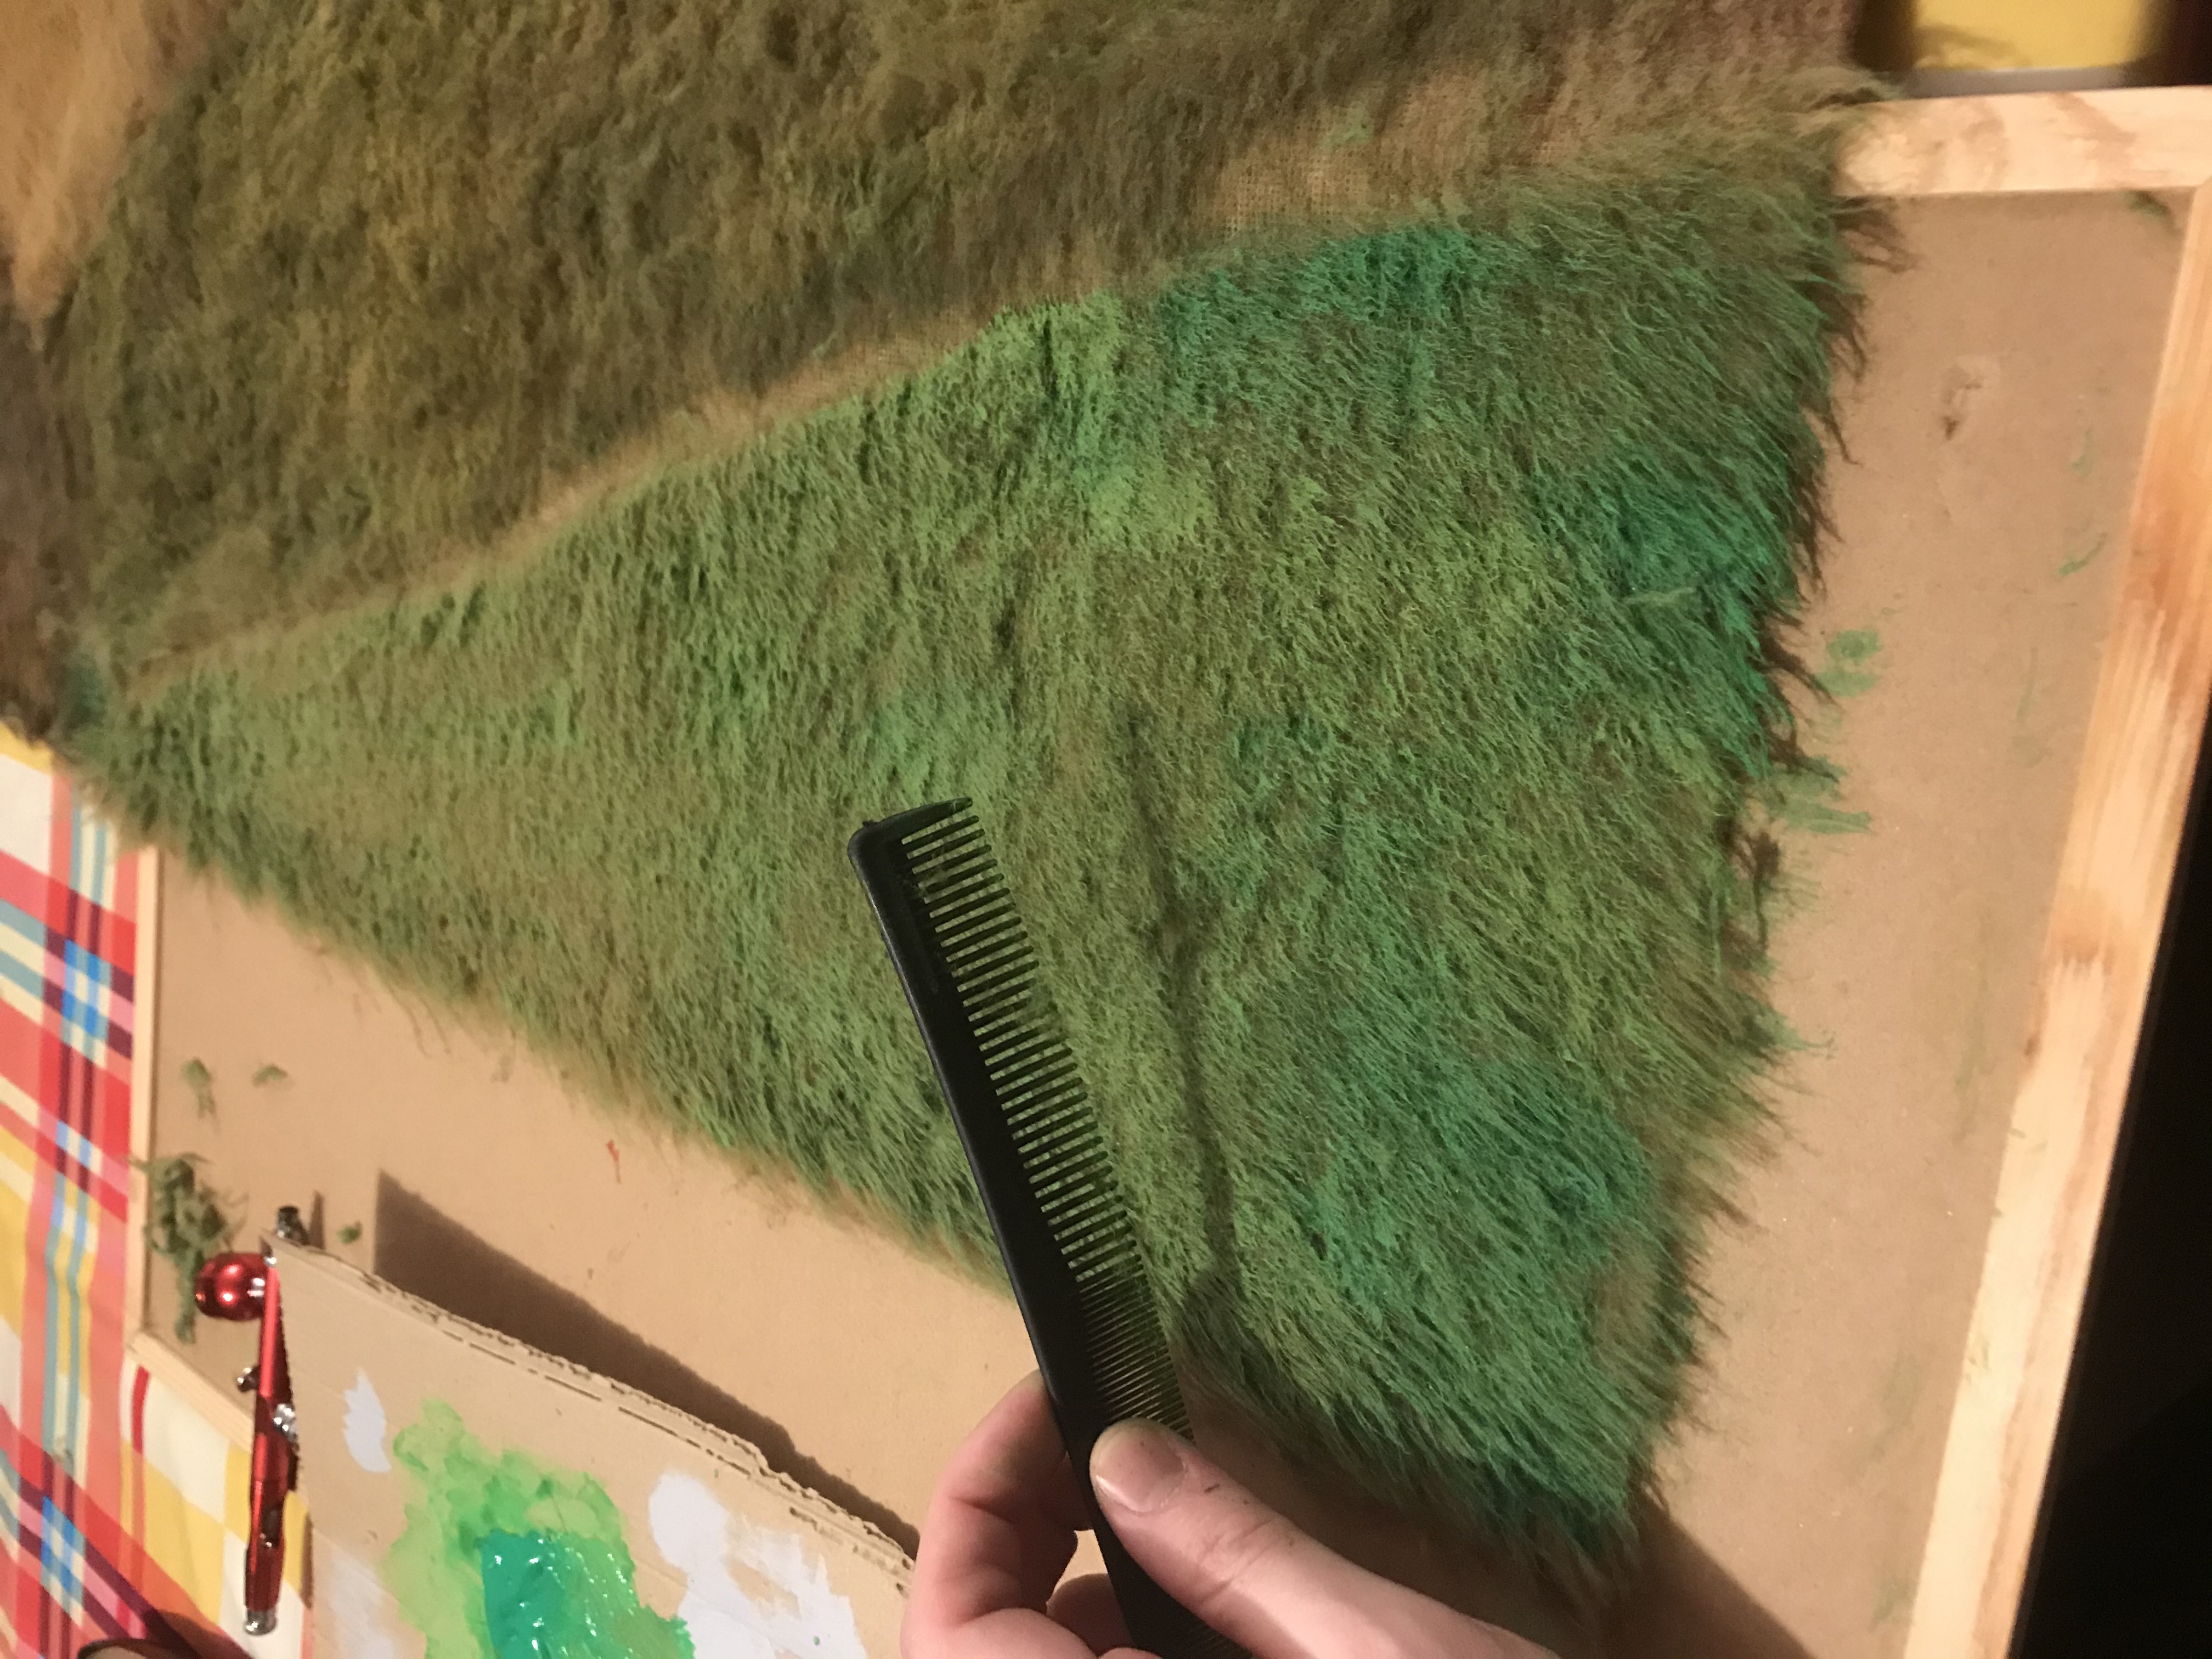
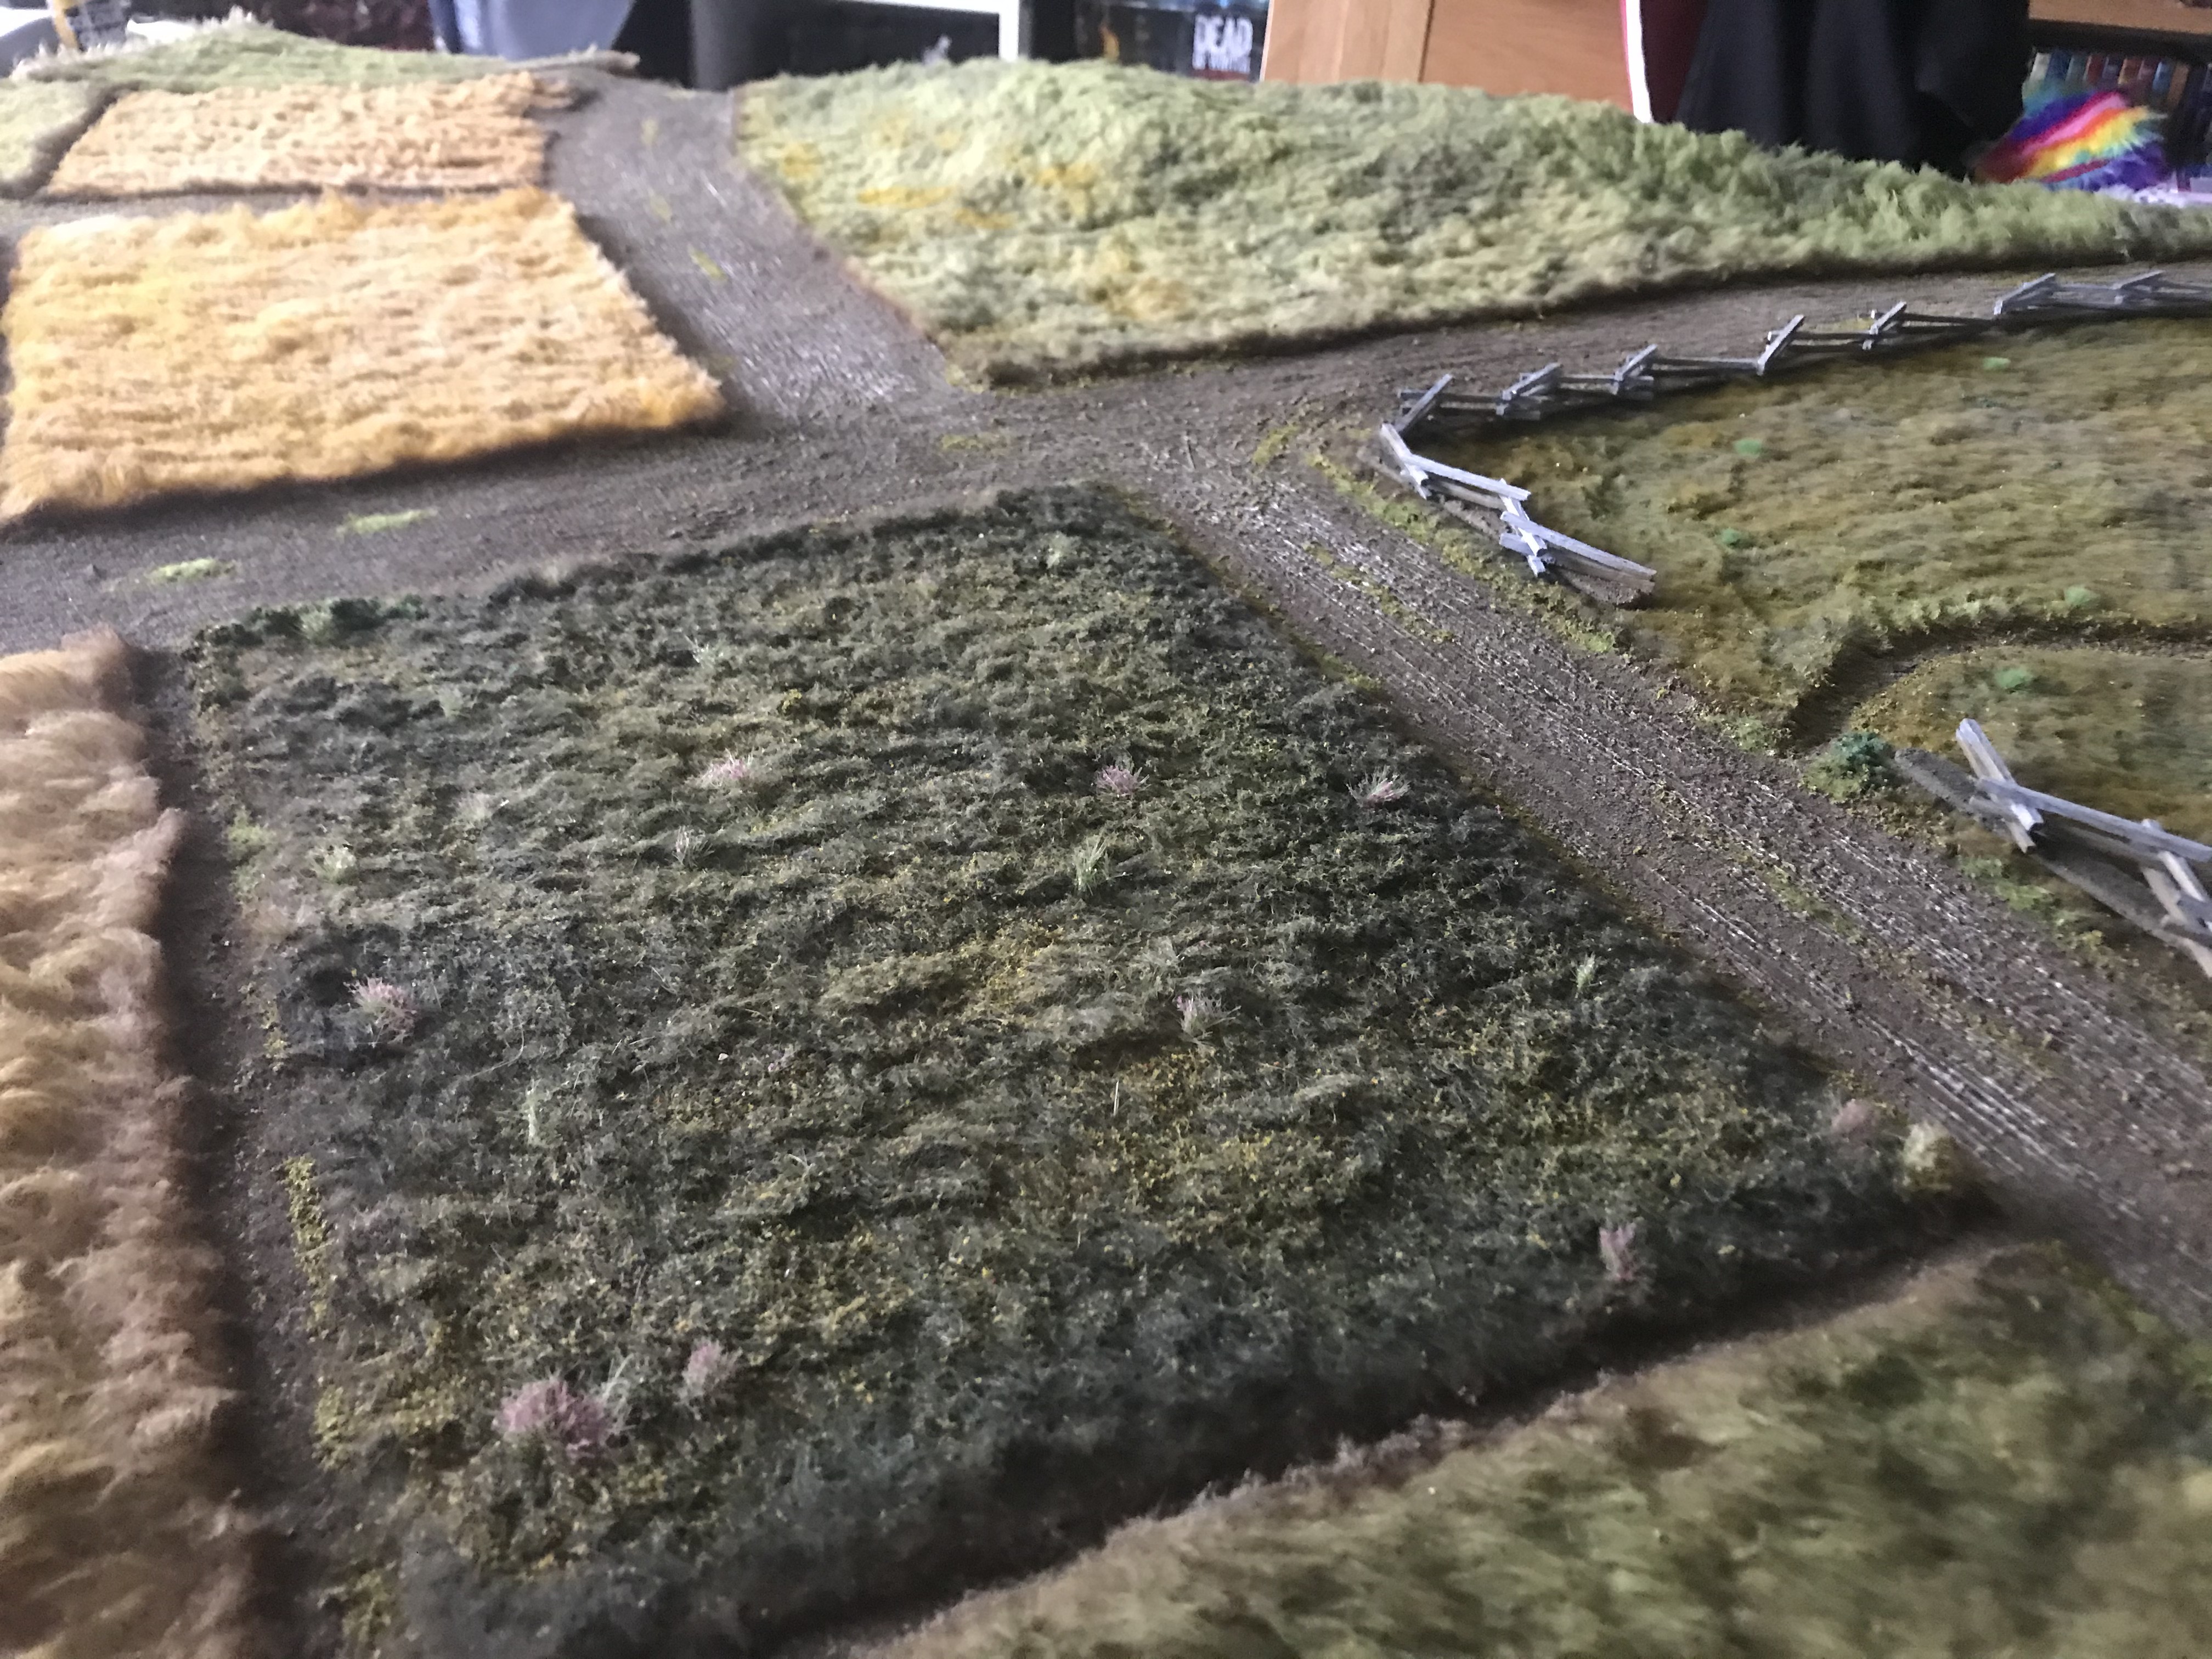
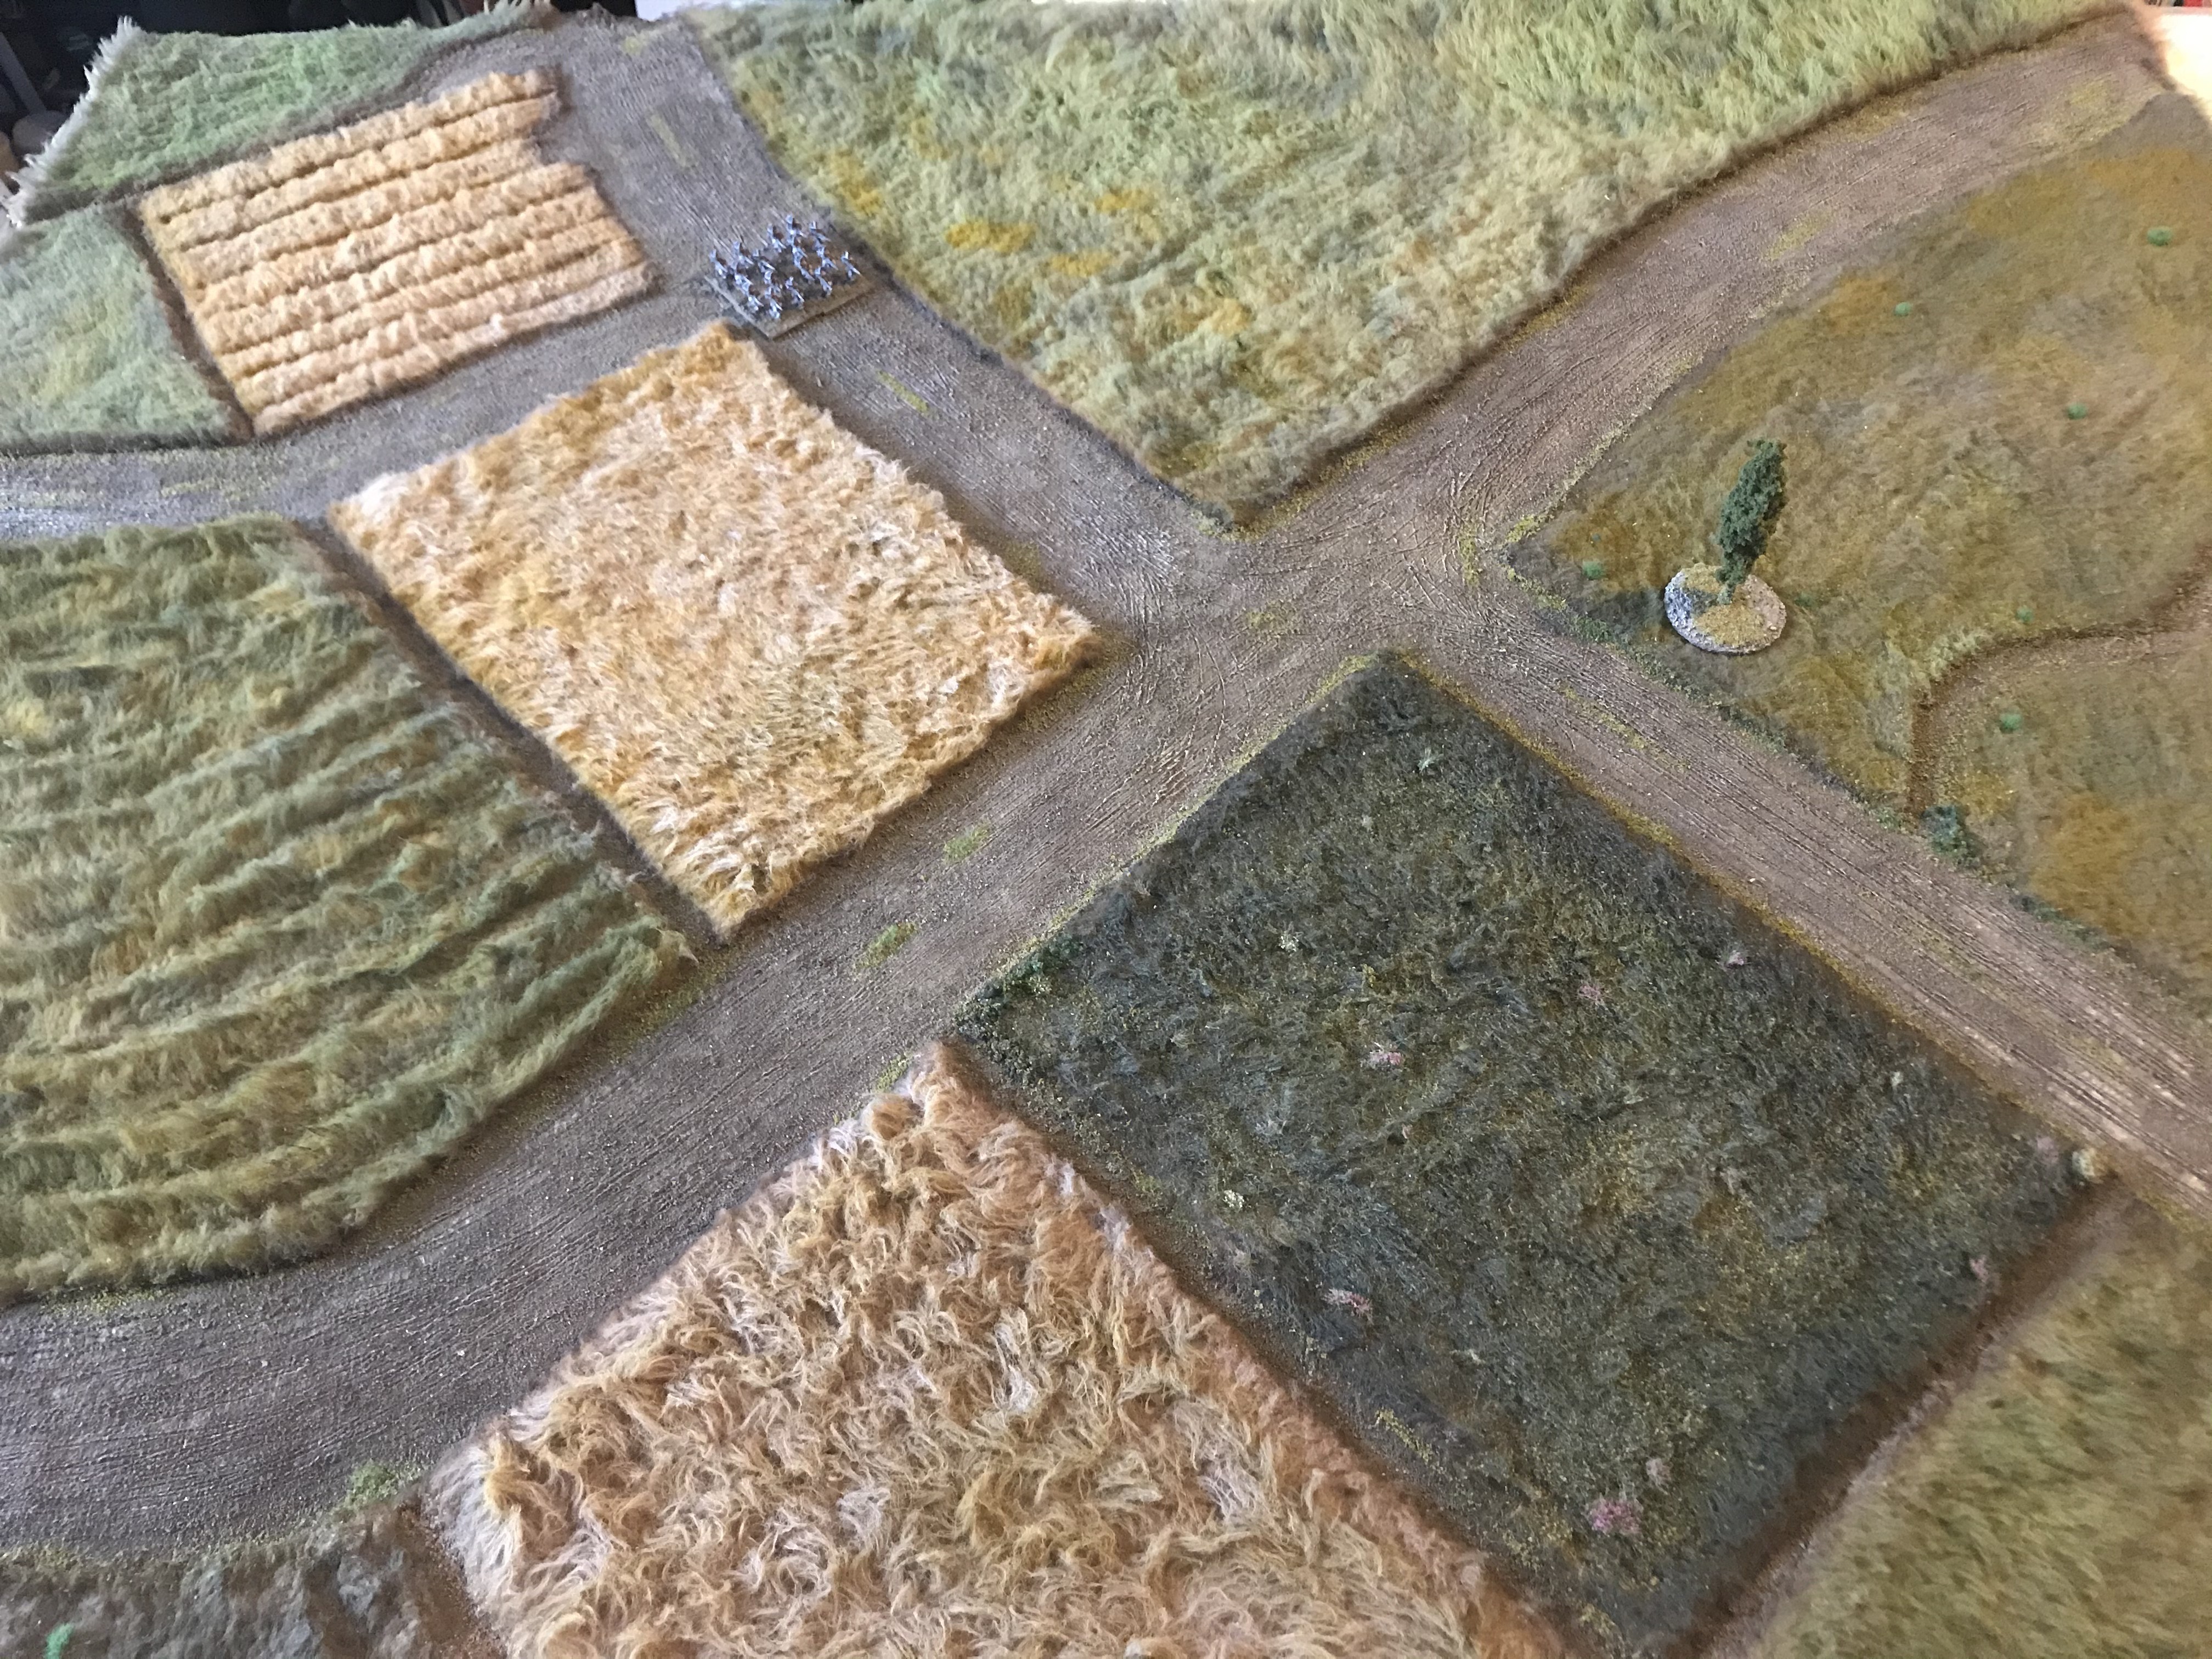
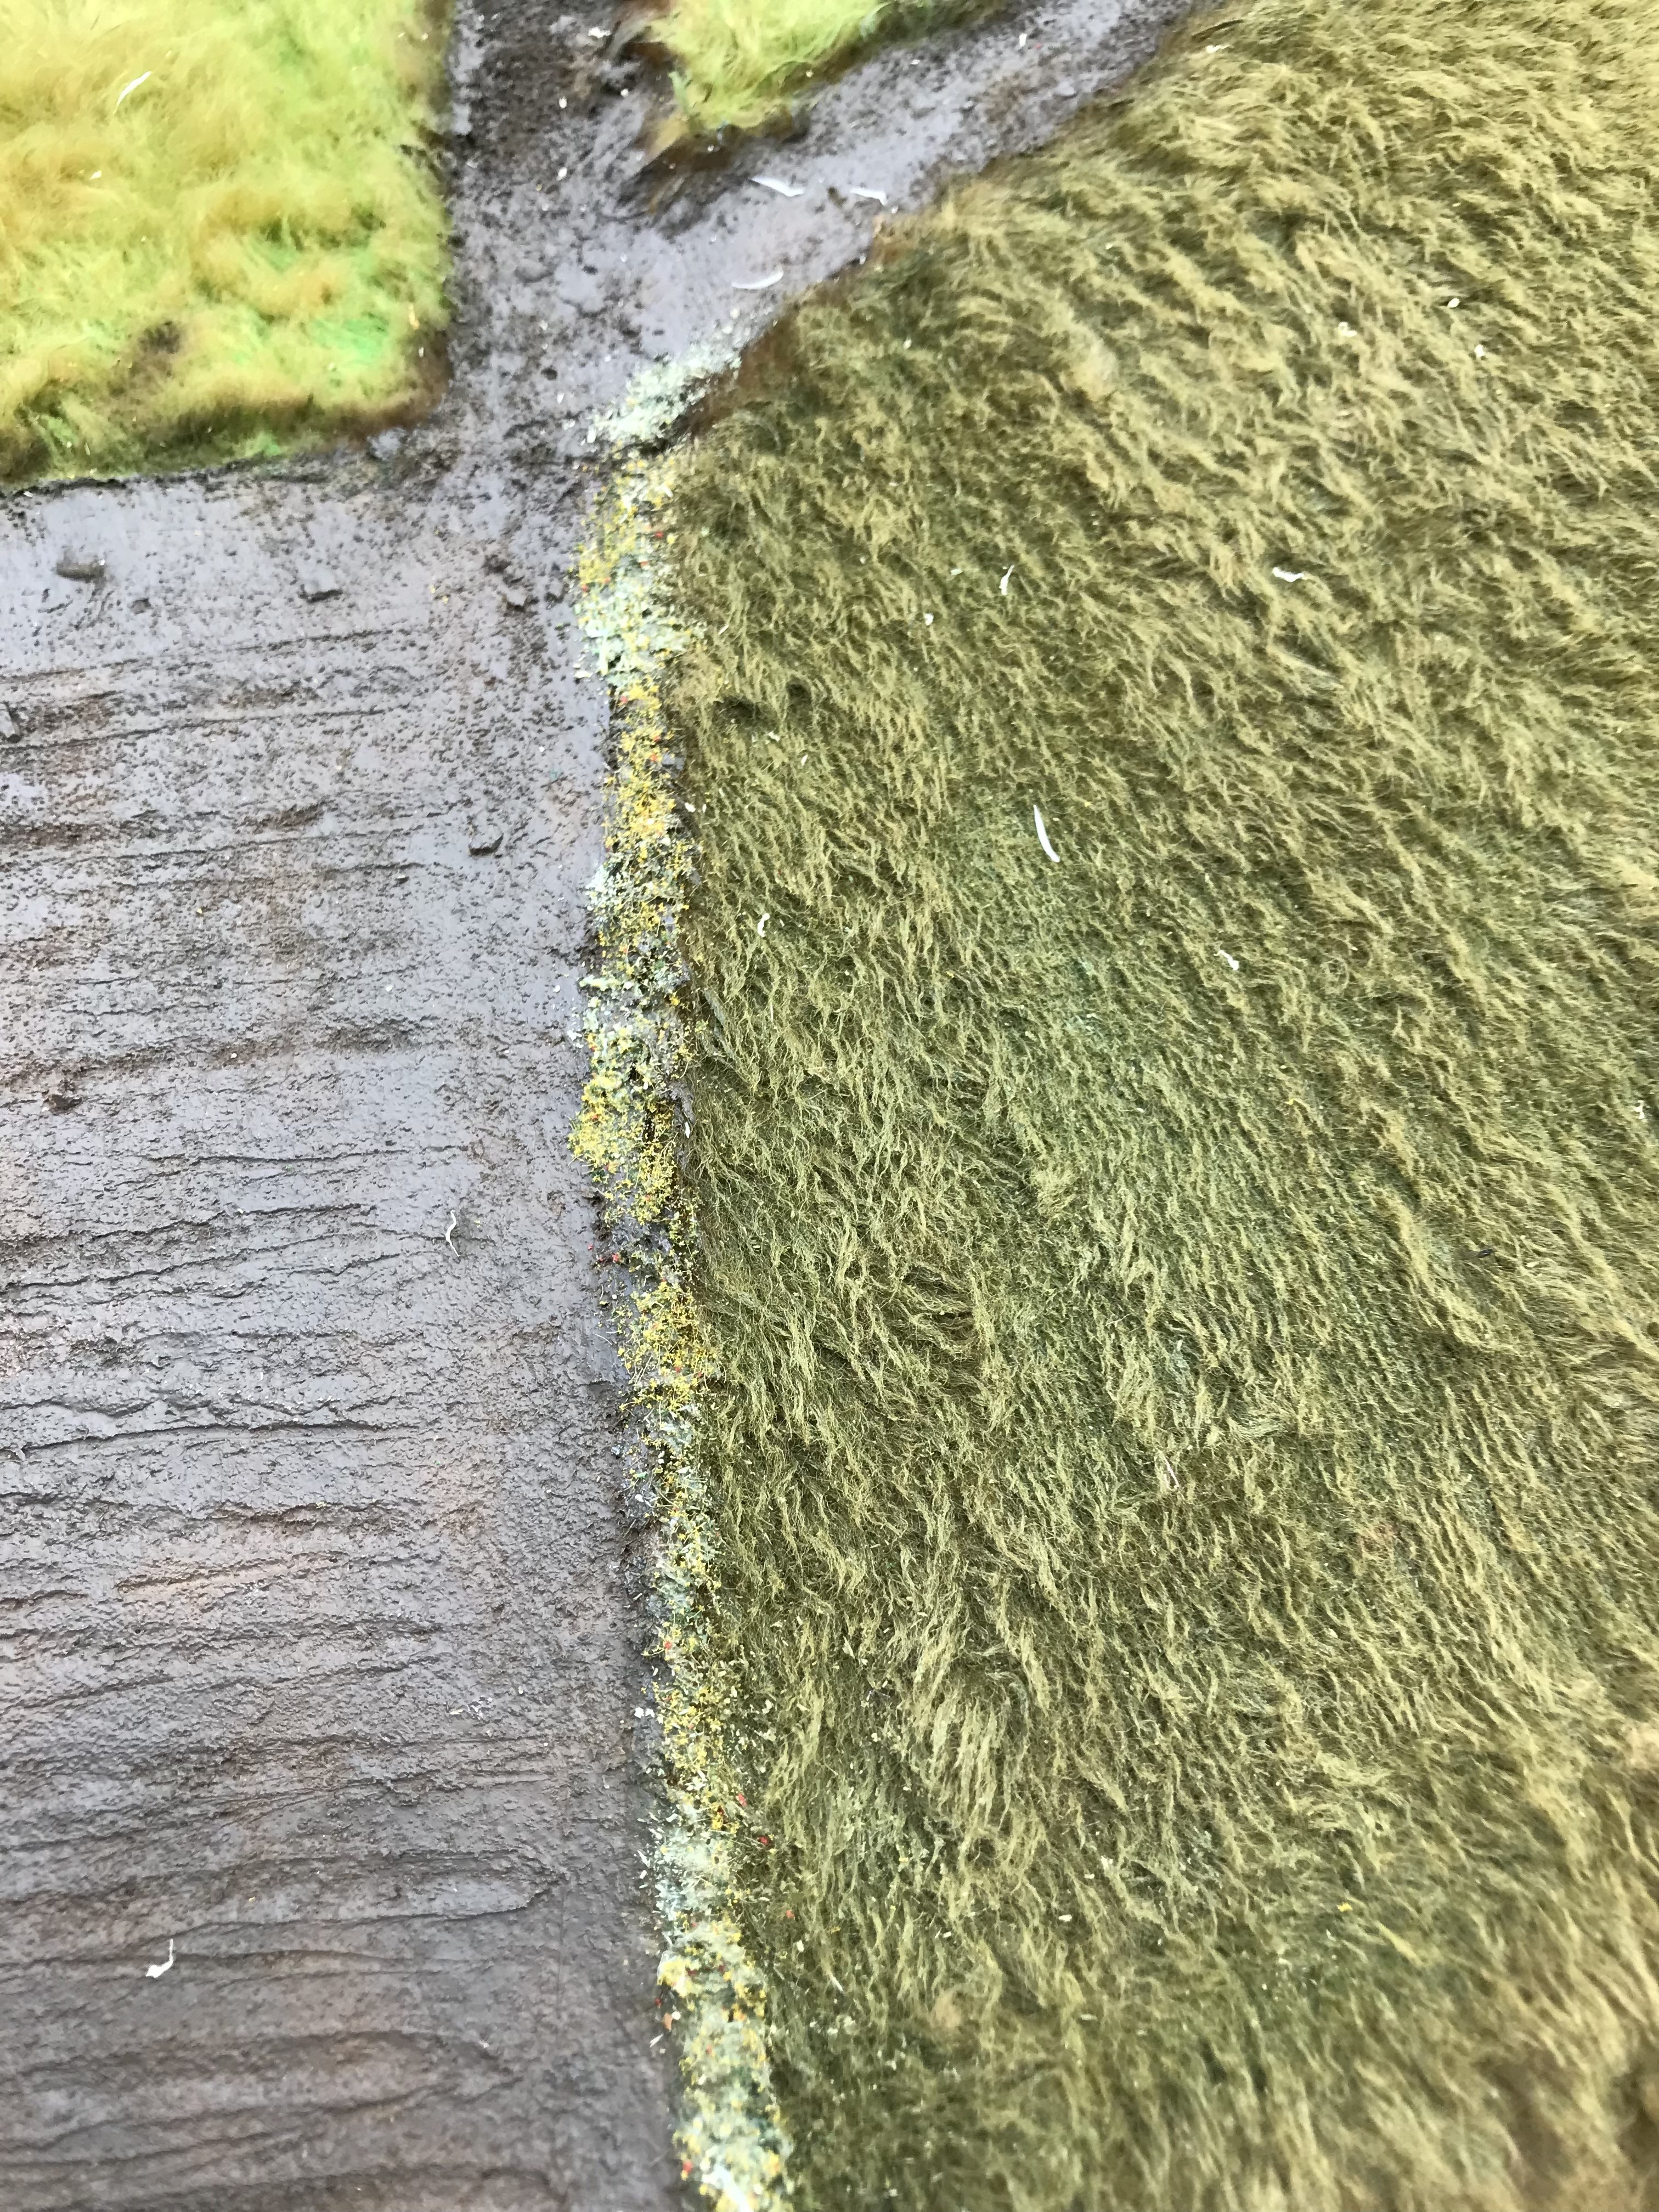
To start I would shave out the areas I wanted to become textured road. I would then shave about 15mm sized pathways to represent the gaps between fields. This served a double purpose of both being small foot paths, but also gaps to be filled with edges of fences that wouldn’t bounce around on the fur. One the fields were outlined, I used a mix of general acrylic paint from any craft store and a comb, to brush the paint into the fur staining it.
I used more selective greens through an airbrush to cover smaller fields and add variation colours to greens already present.
I used caulk mixed with brown paint to spread onto the areas of the road and paths. Pair of latex gloves and water made this spread easier.
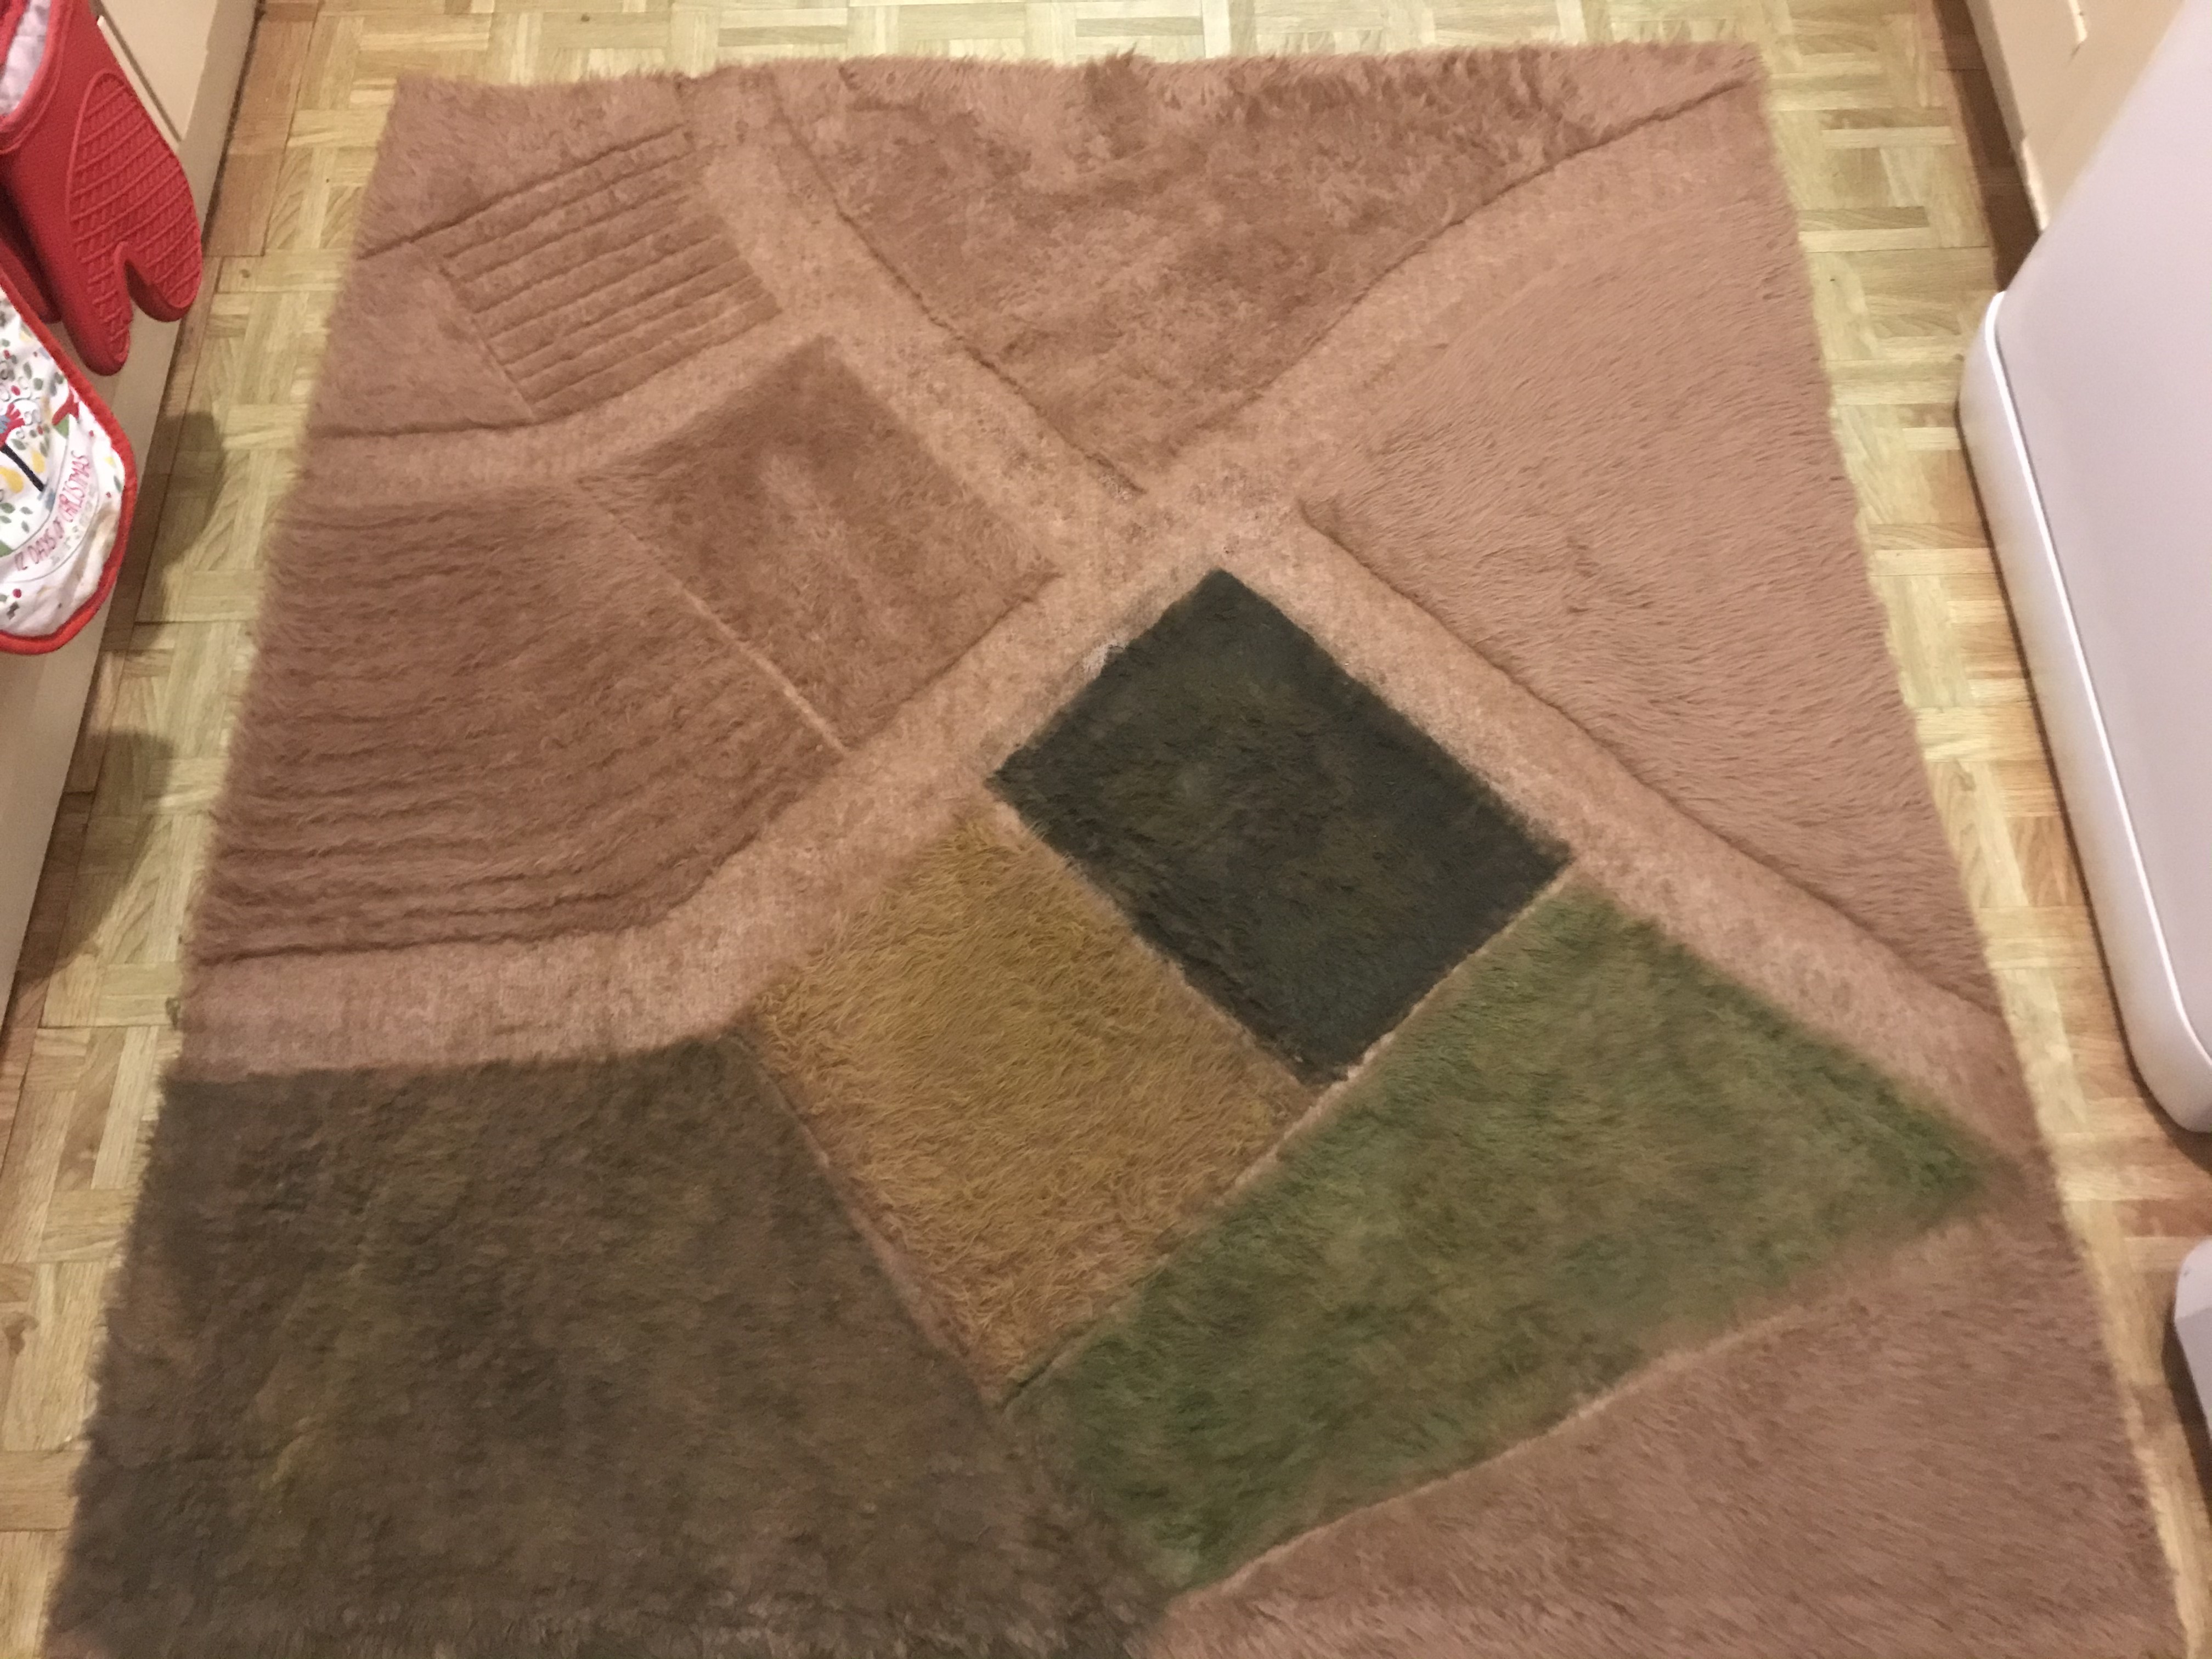
I left it to cure for a bit before I went in with a tooth pick to create diverts and tracks in the dirt. I also pressed in sand to give a rougher texture.
Once fully cured, I hit the roads with a dark brown airbrush and followed up with stone and ushabiti bone dry brush. The mat made for a perfect 4x4ft rural zone. It came out better than hoped and looks great for both 28mm and 15mm.
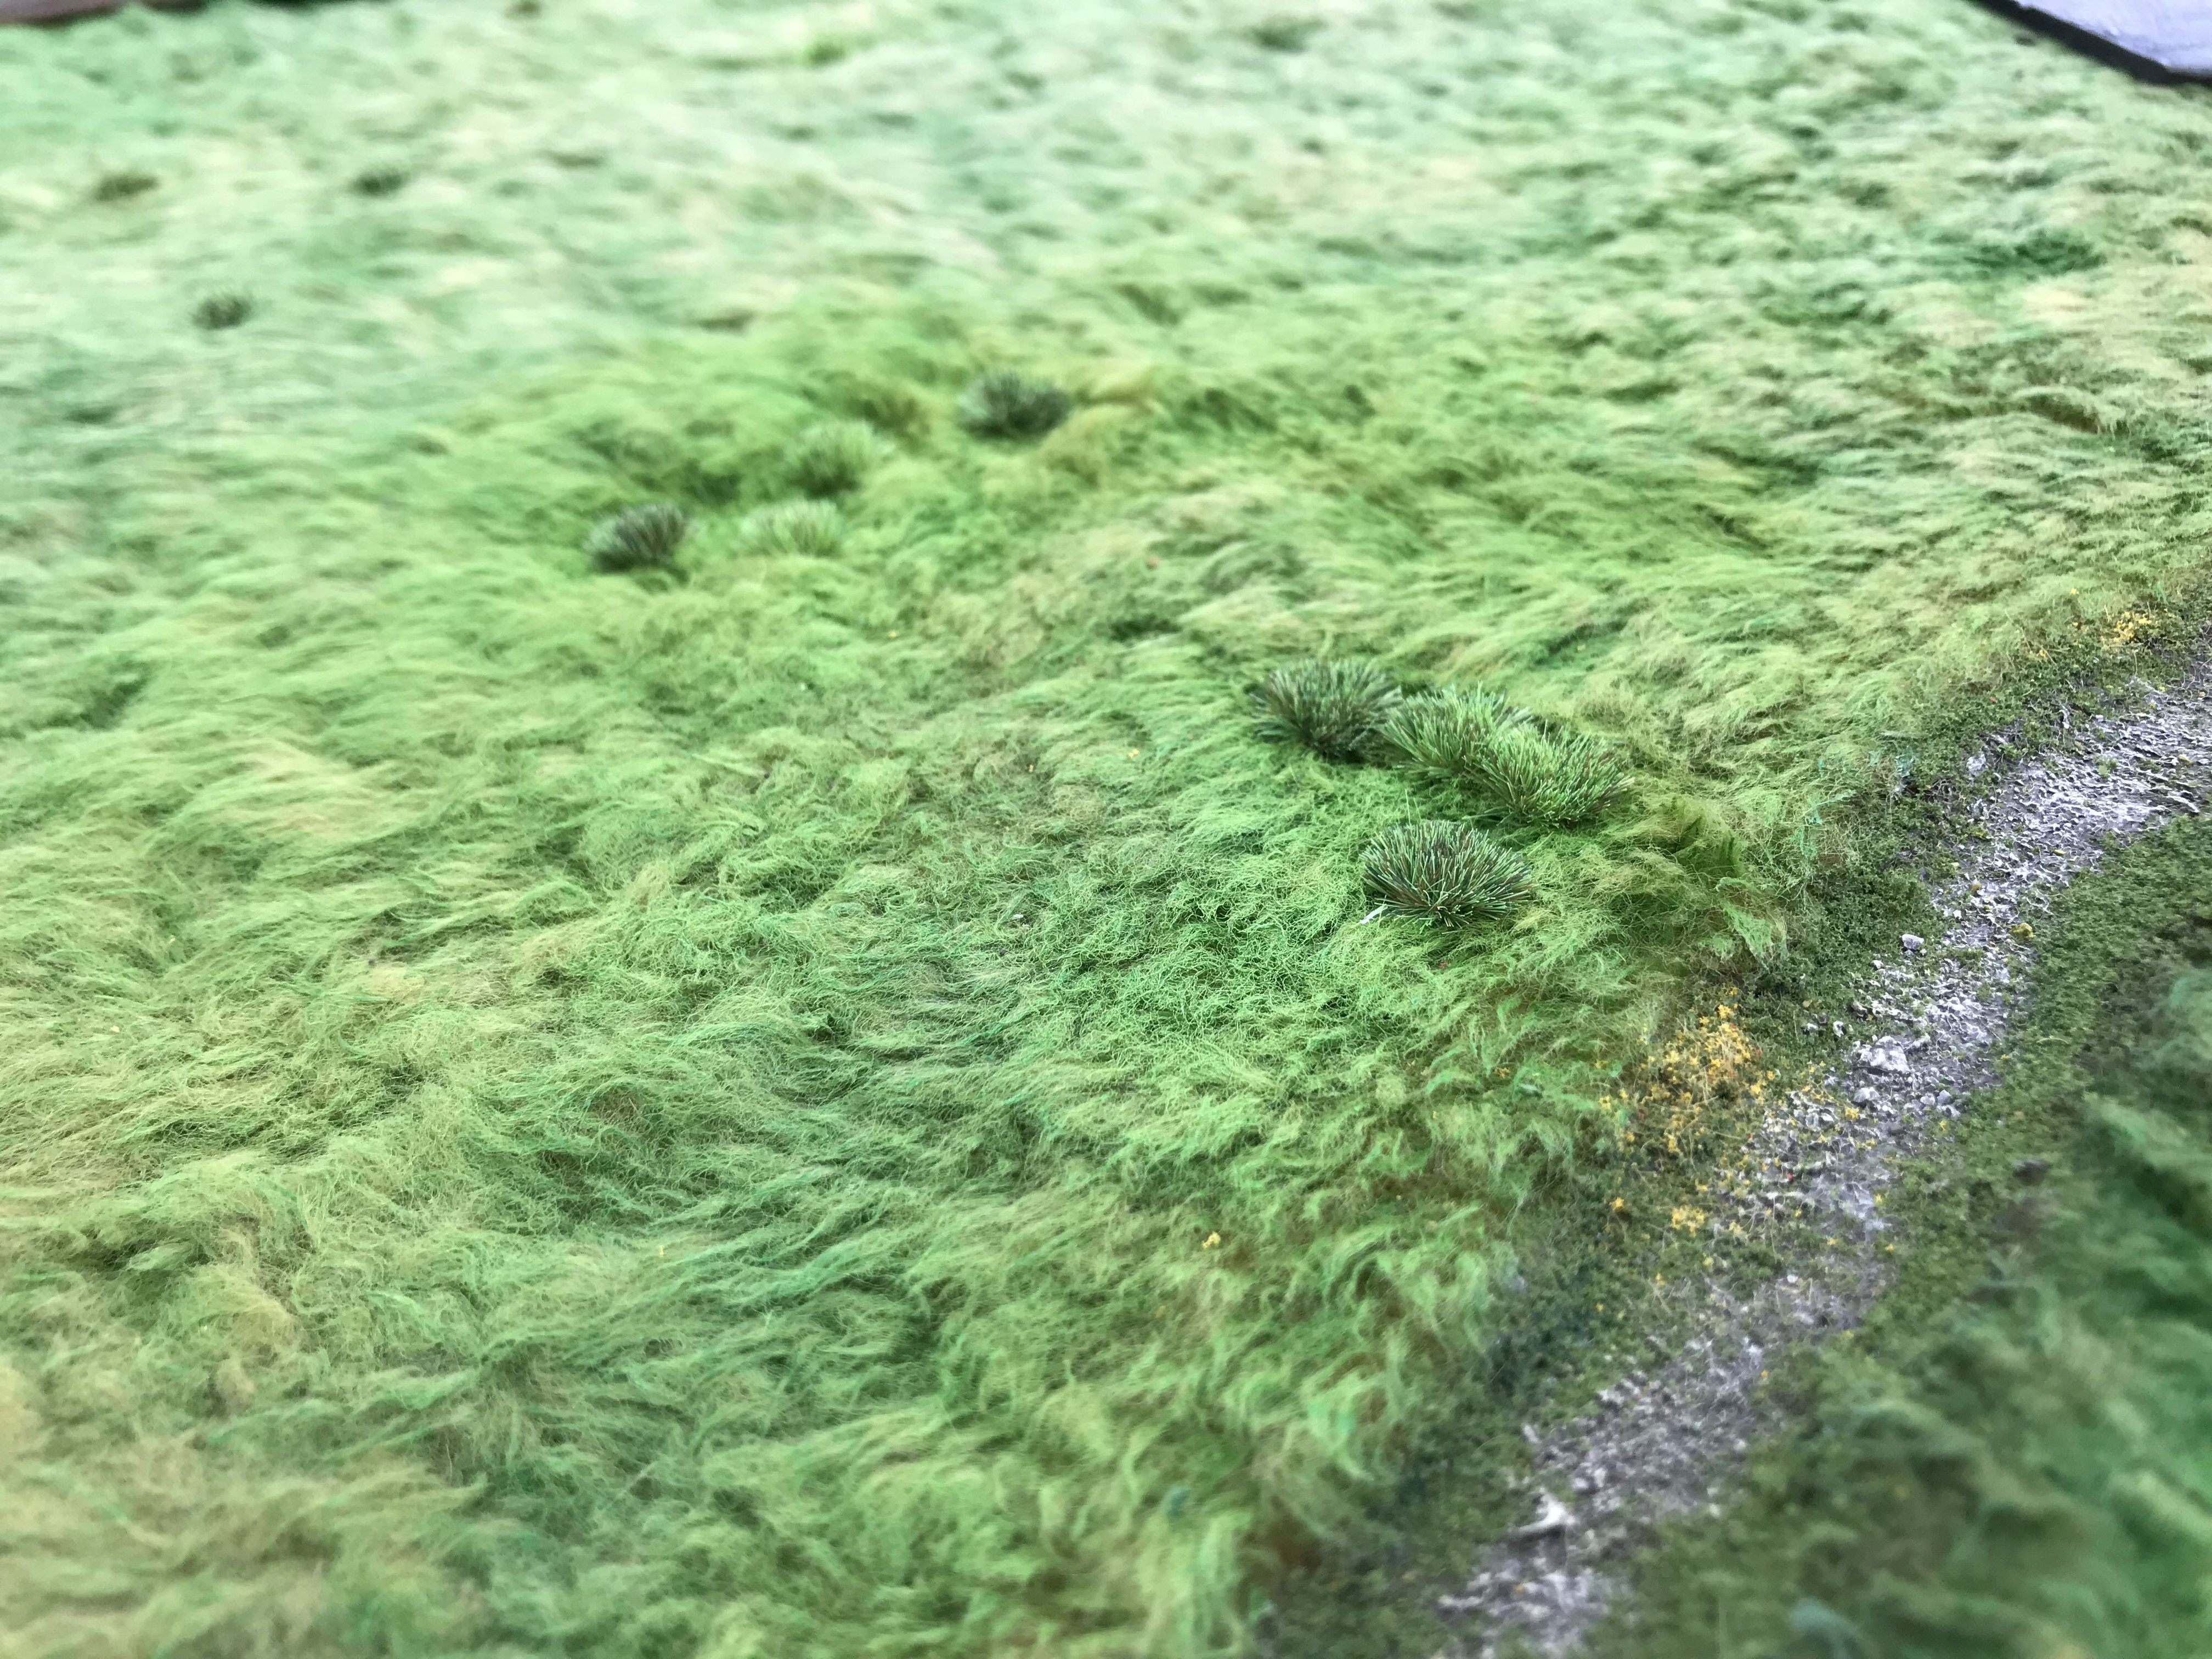
I did add a couple of tufts and also spread a bit more grit along the sides of the paths. I dotted a few flowers here and there just to give a bit of variation to the ground scatter.
The mat rolls up and folds out neatly and I have had no issues with it and its still in use it today.
This will become my baseline for what I hoped to achieved with the 6×4 when I finally got around to it.
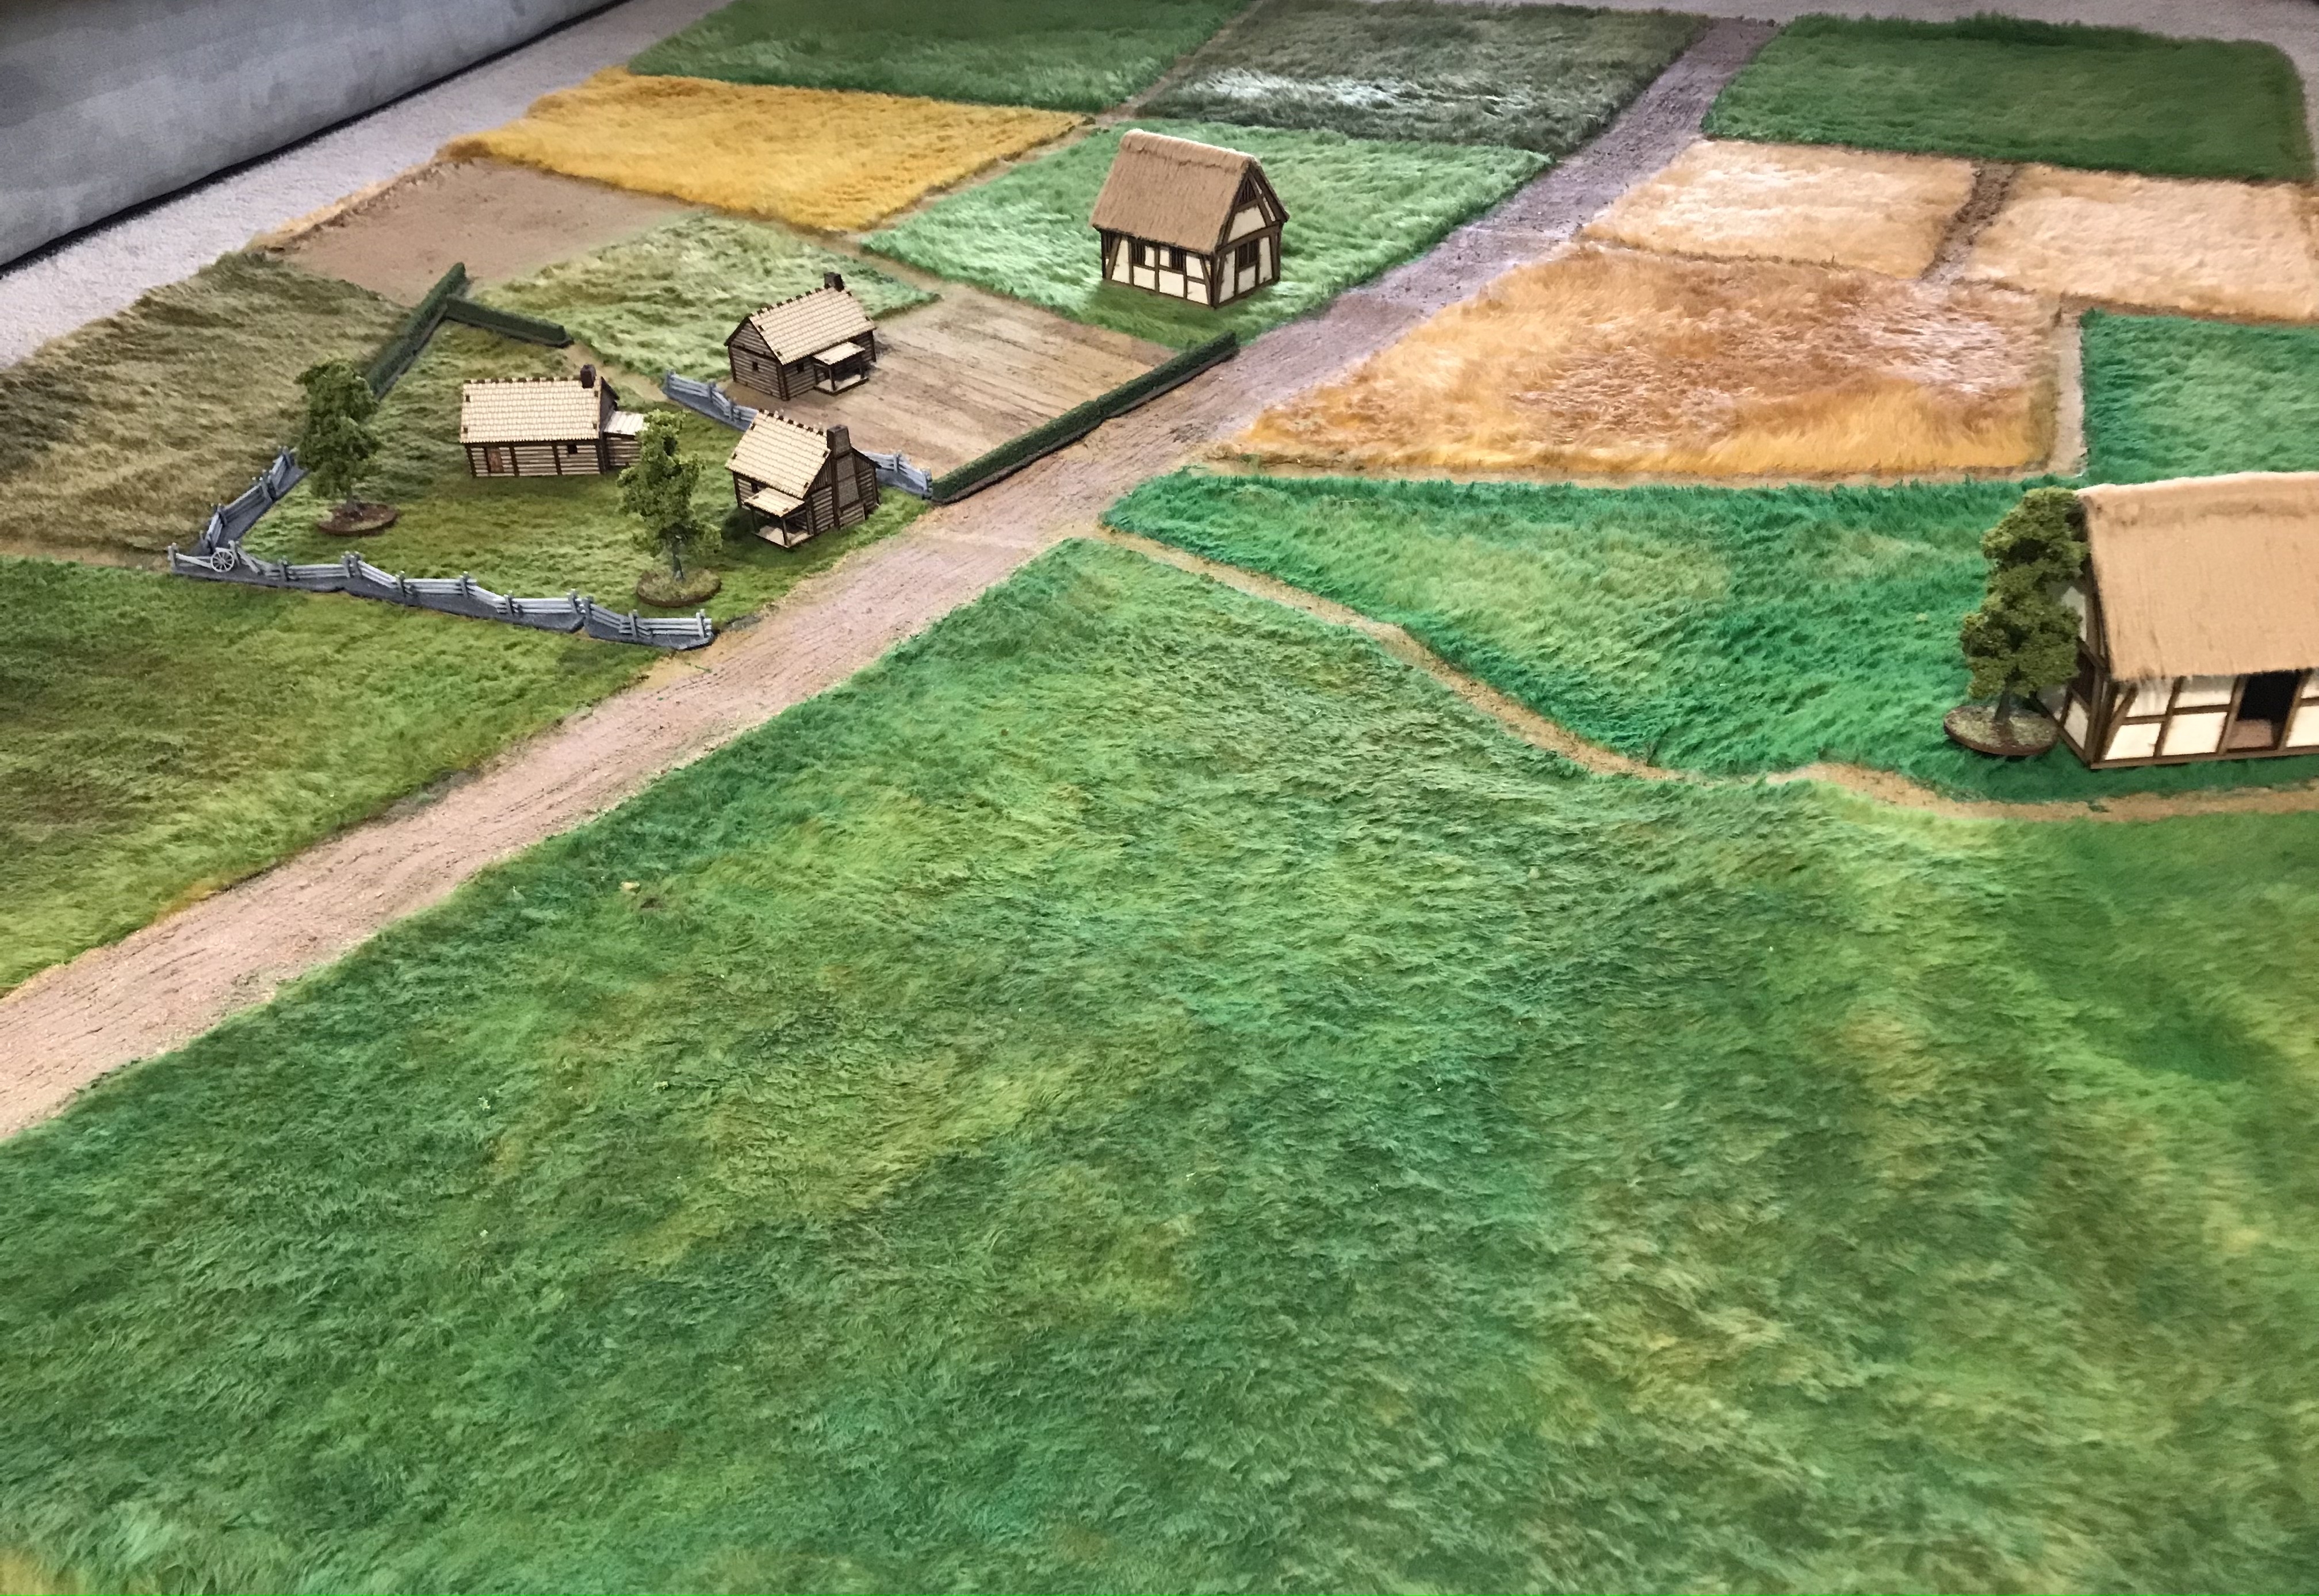
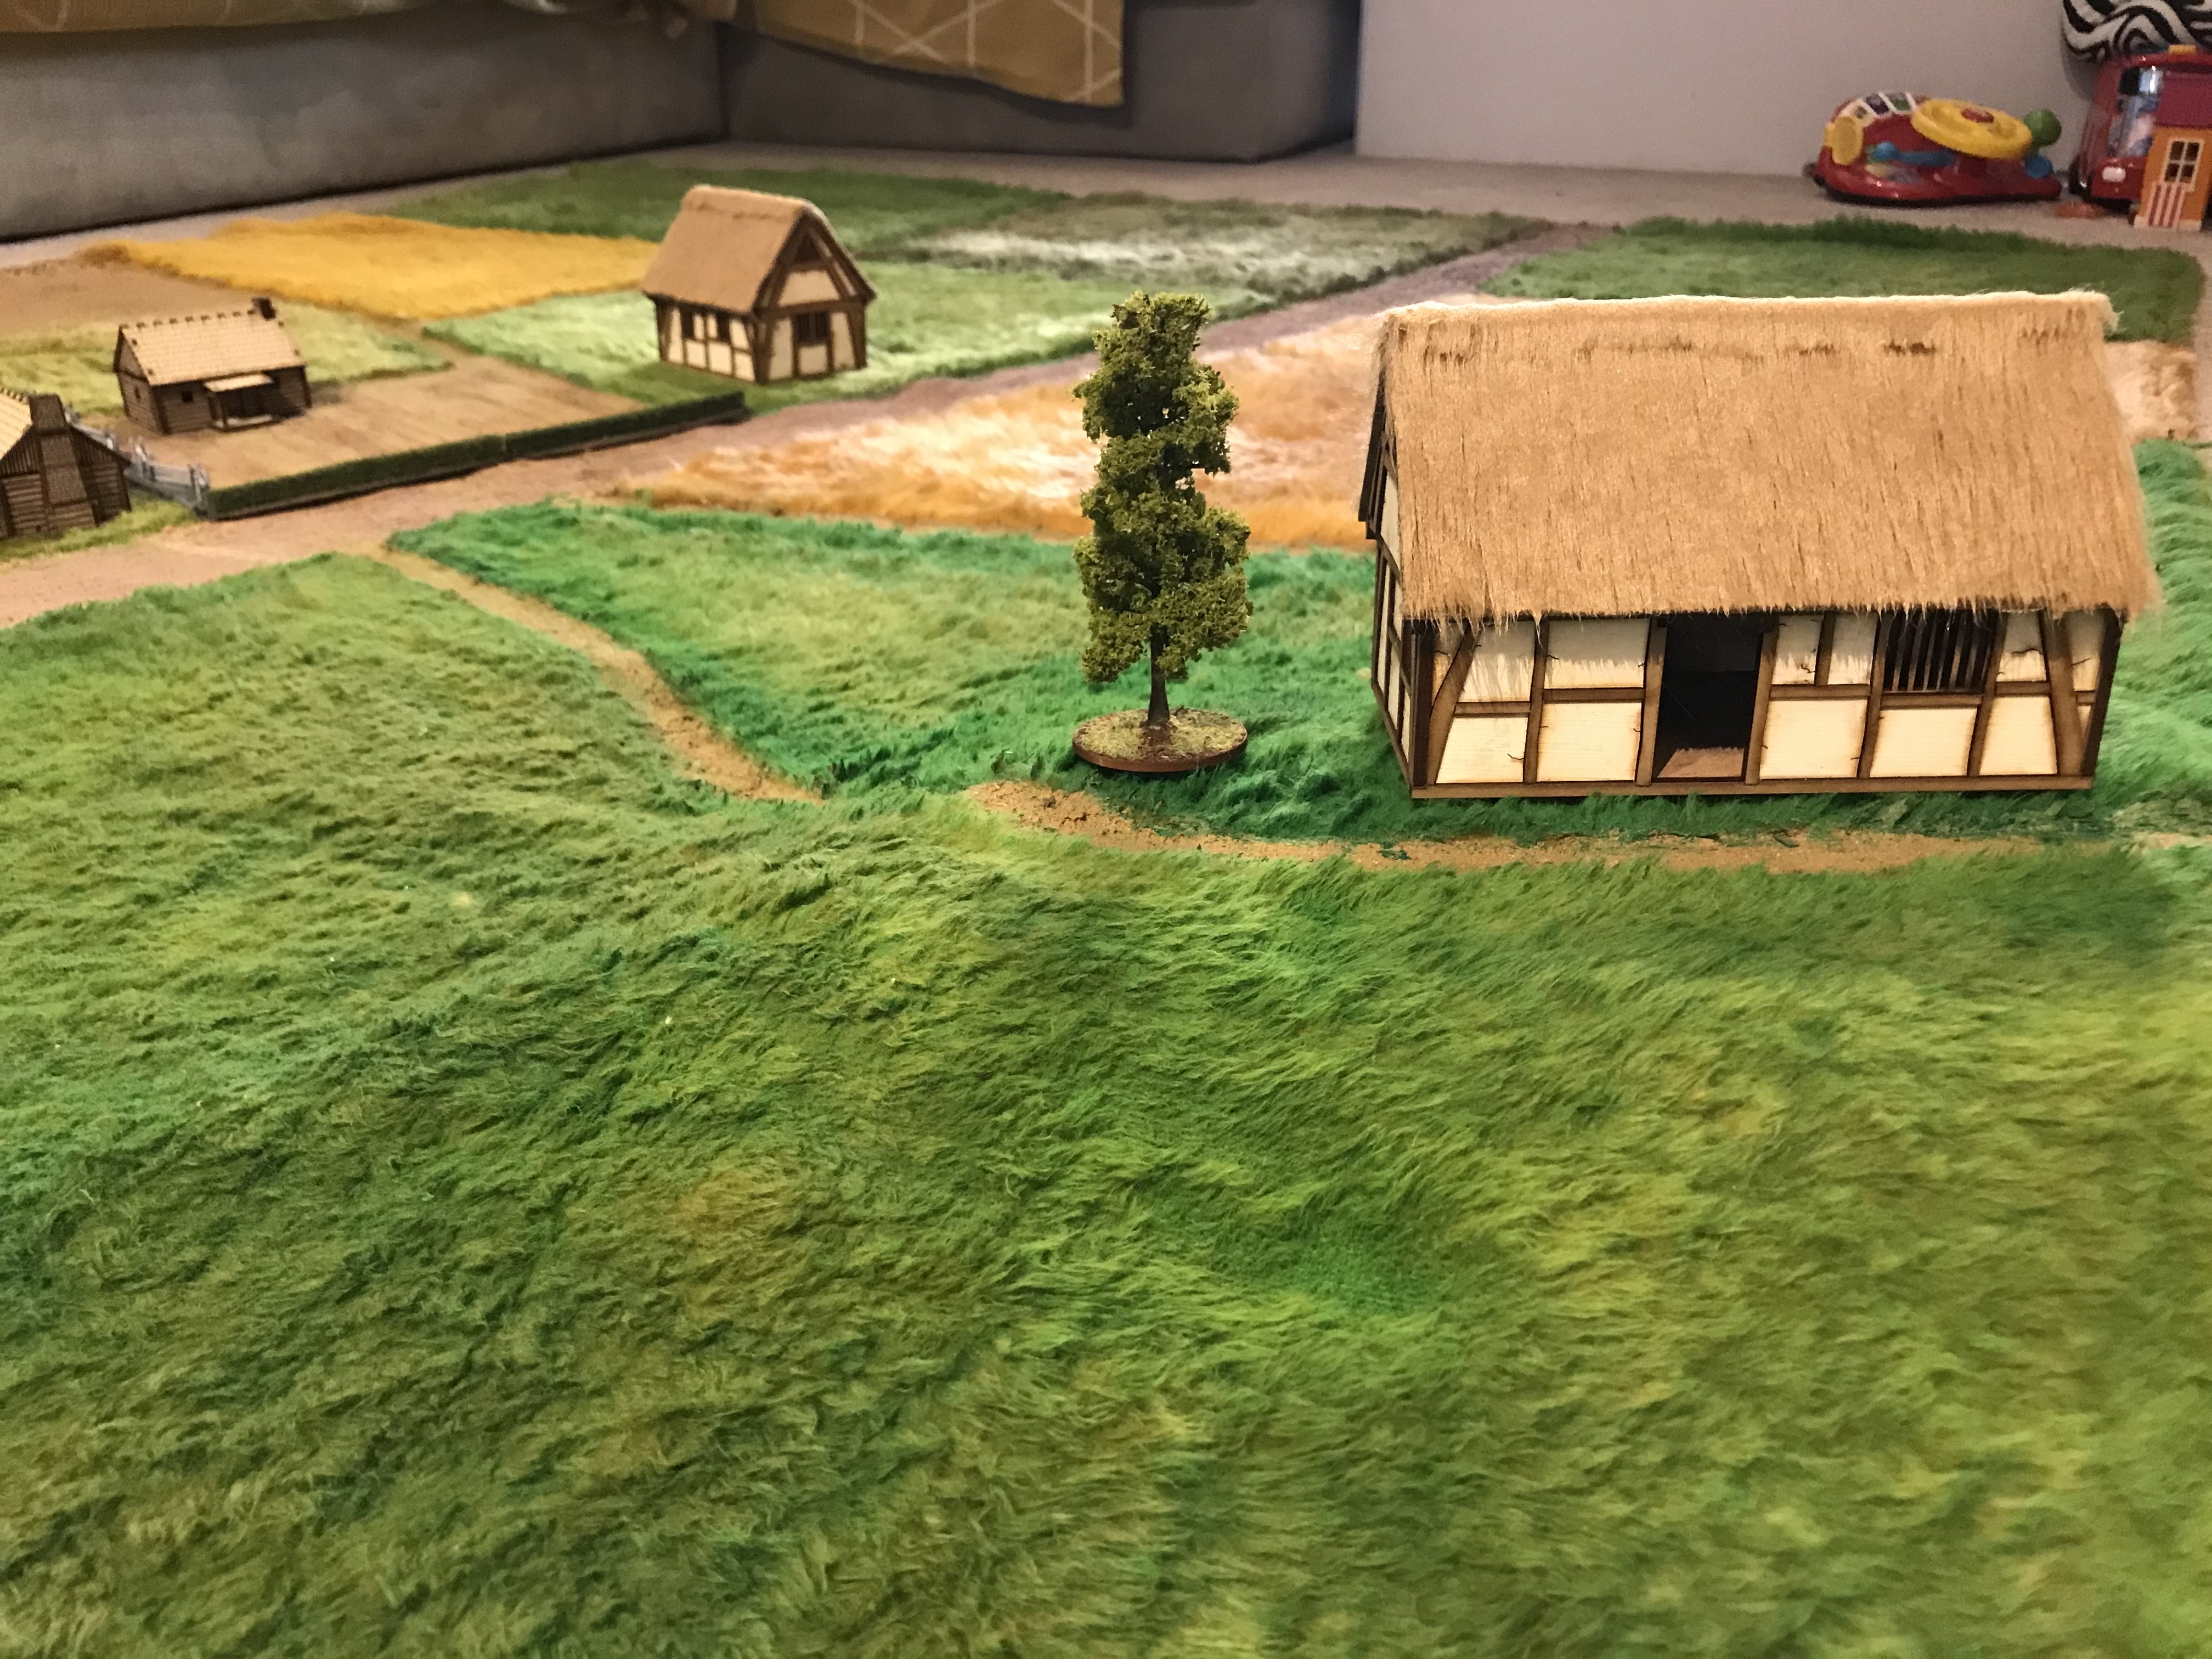
 15mm on the mat for Normandy operations.
  Another angle.
 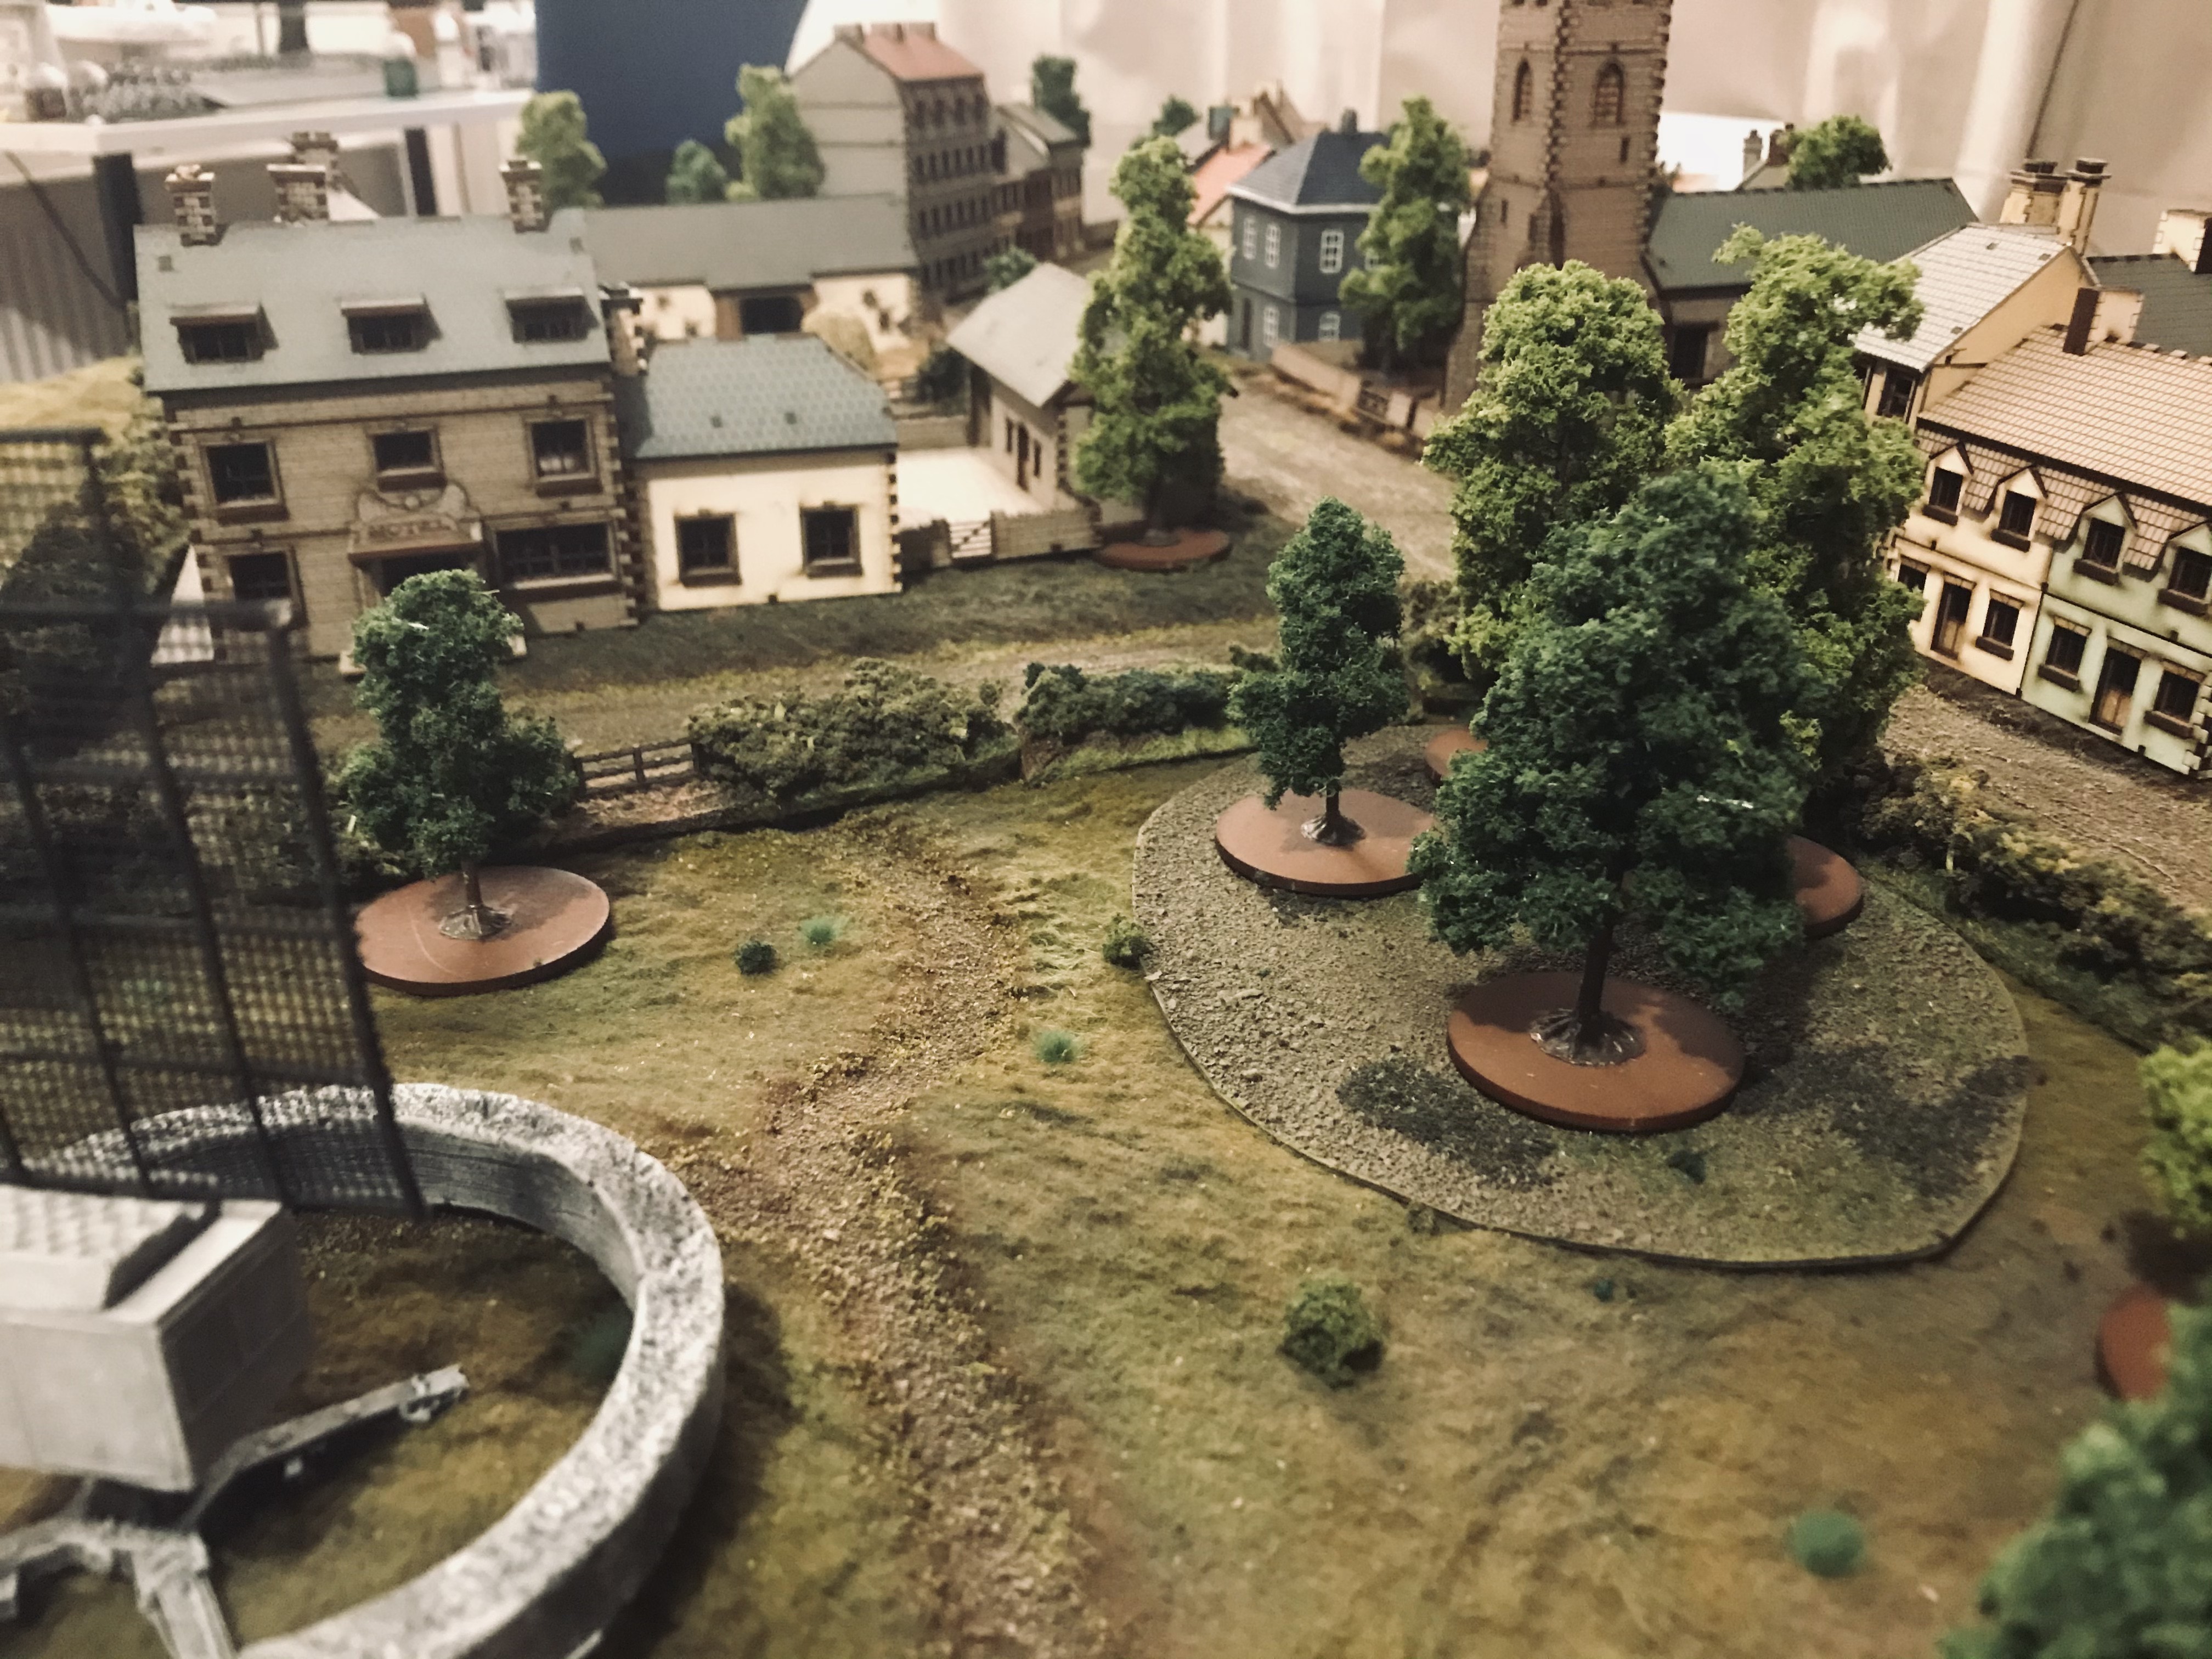 As the mat sits heavy, you can place it on raised surfaces to create hills. Perfect for Radar towers.
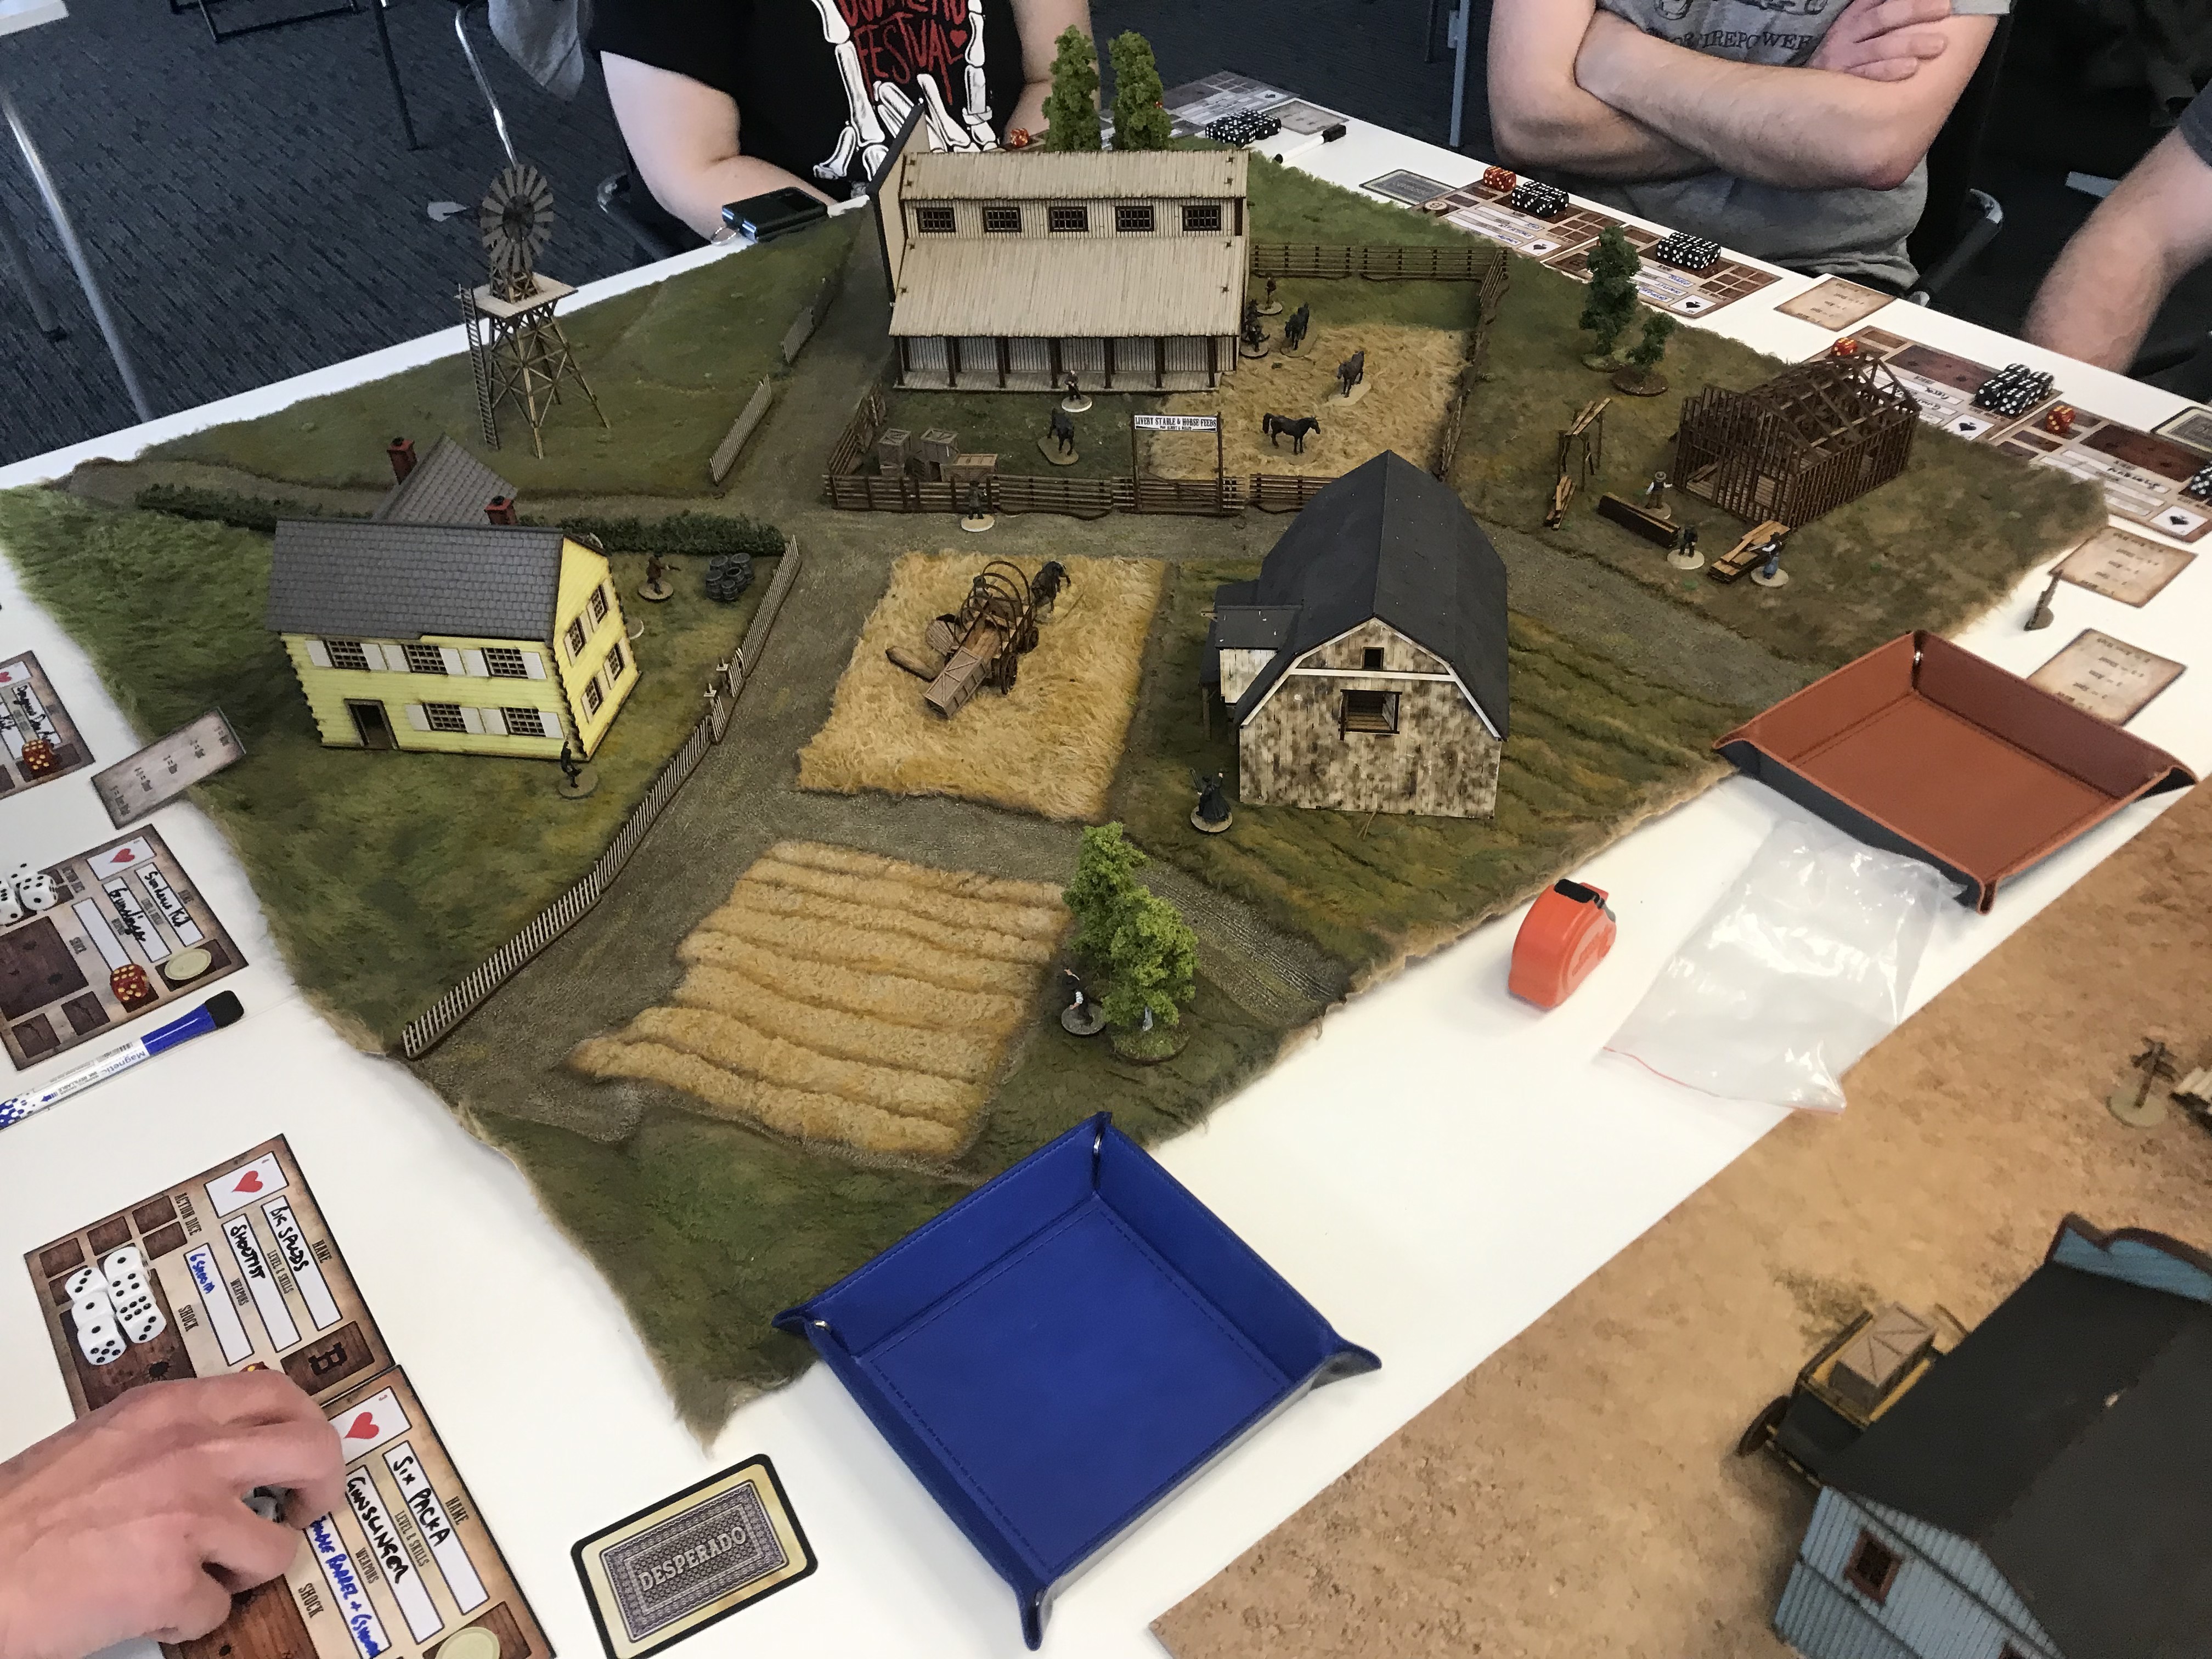 And finally 28mm farmstead for What a Cowboy recently played with work friends.
Denizens of Cornetto.
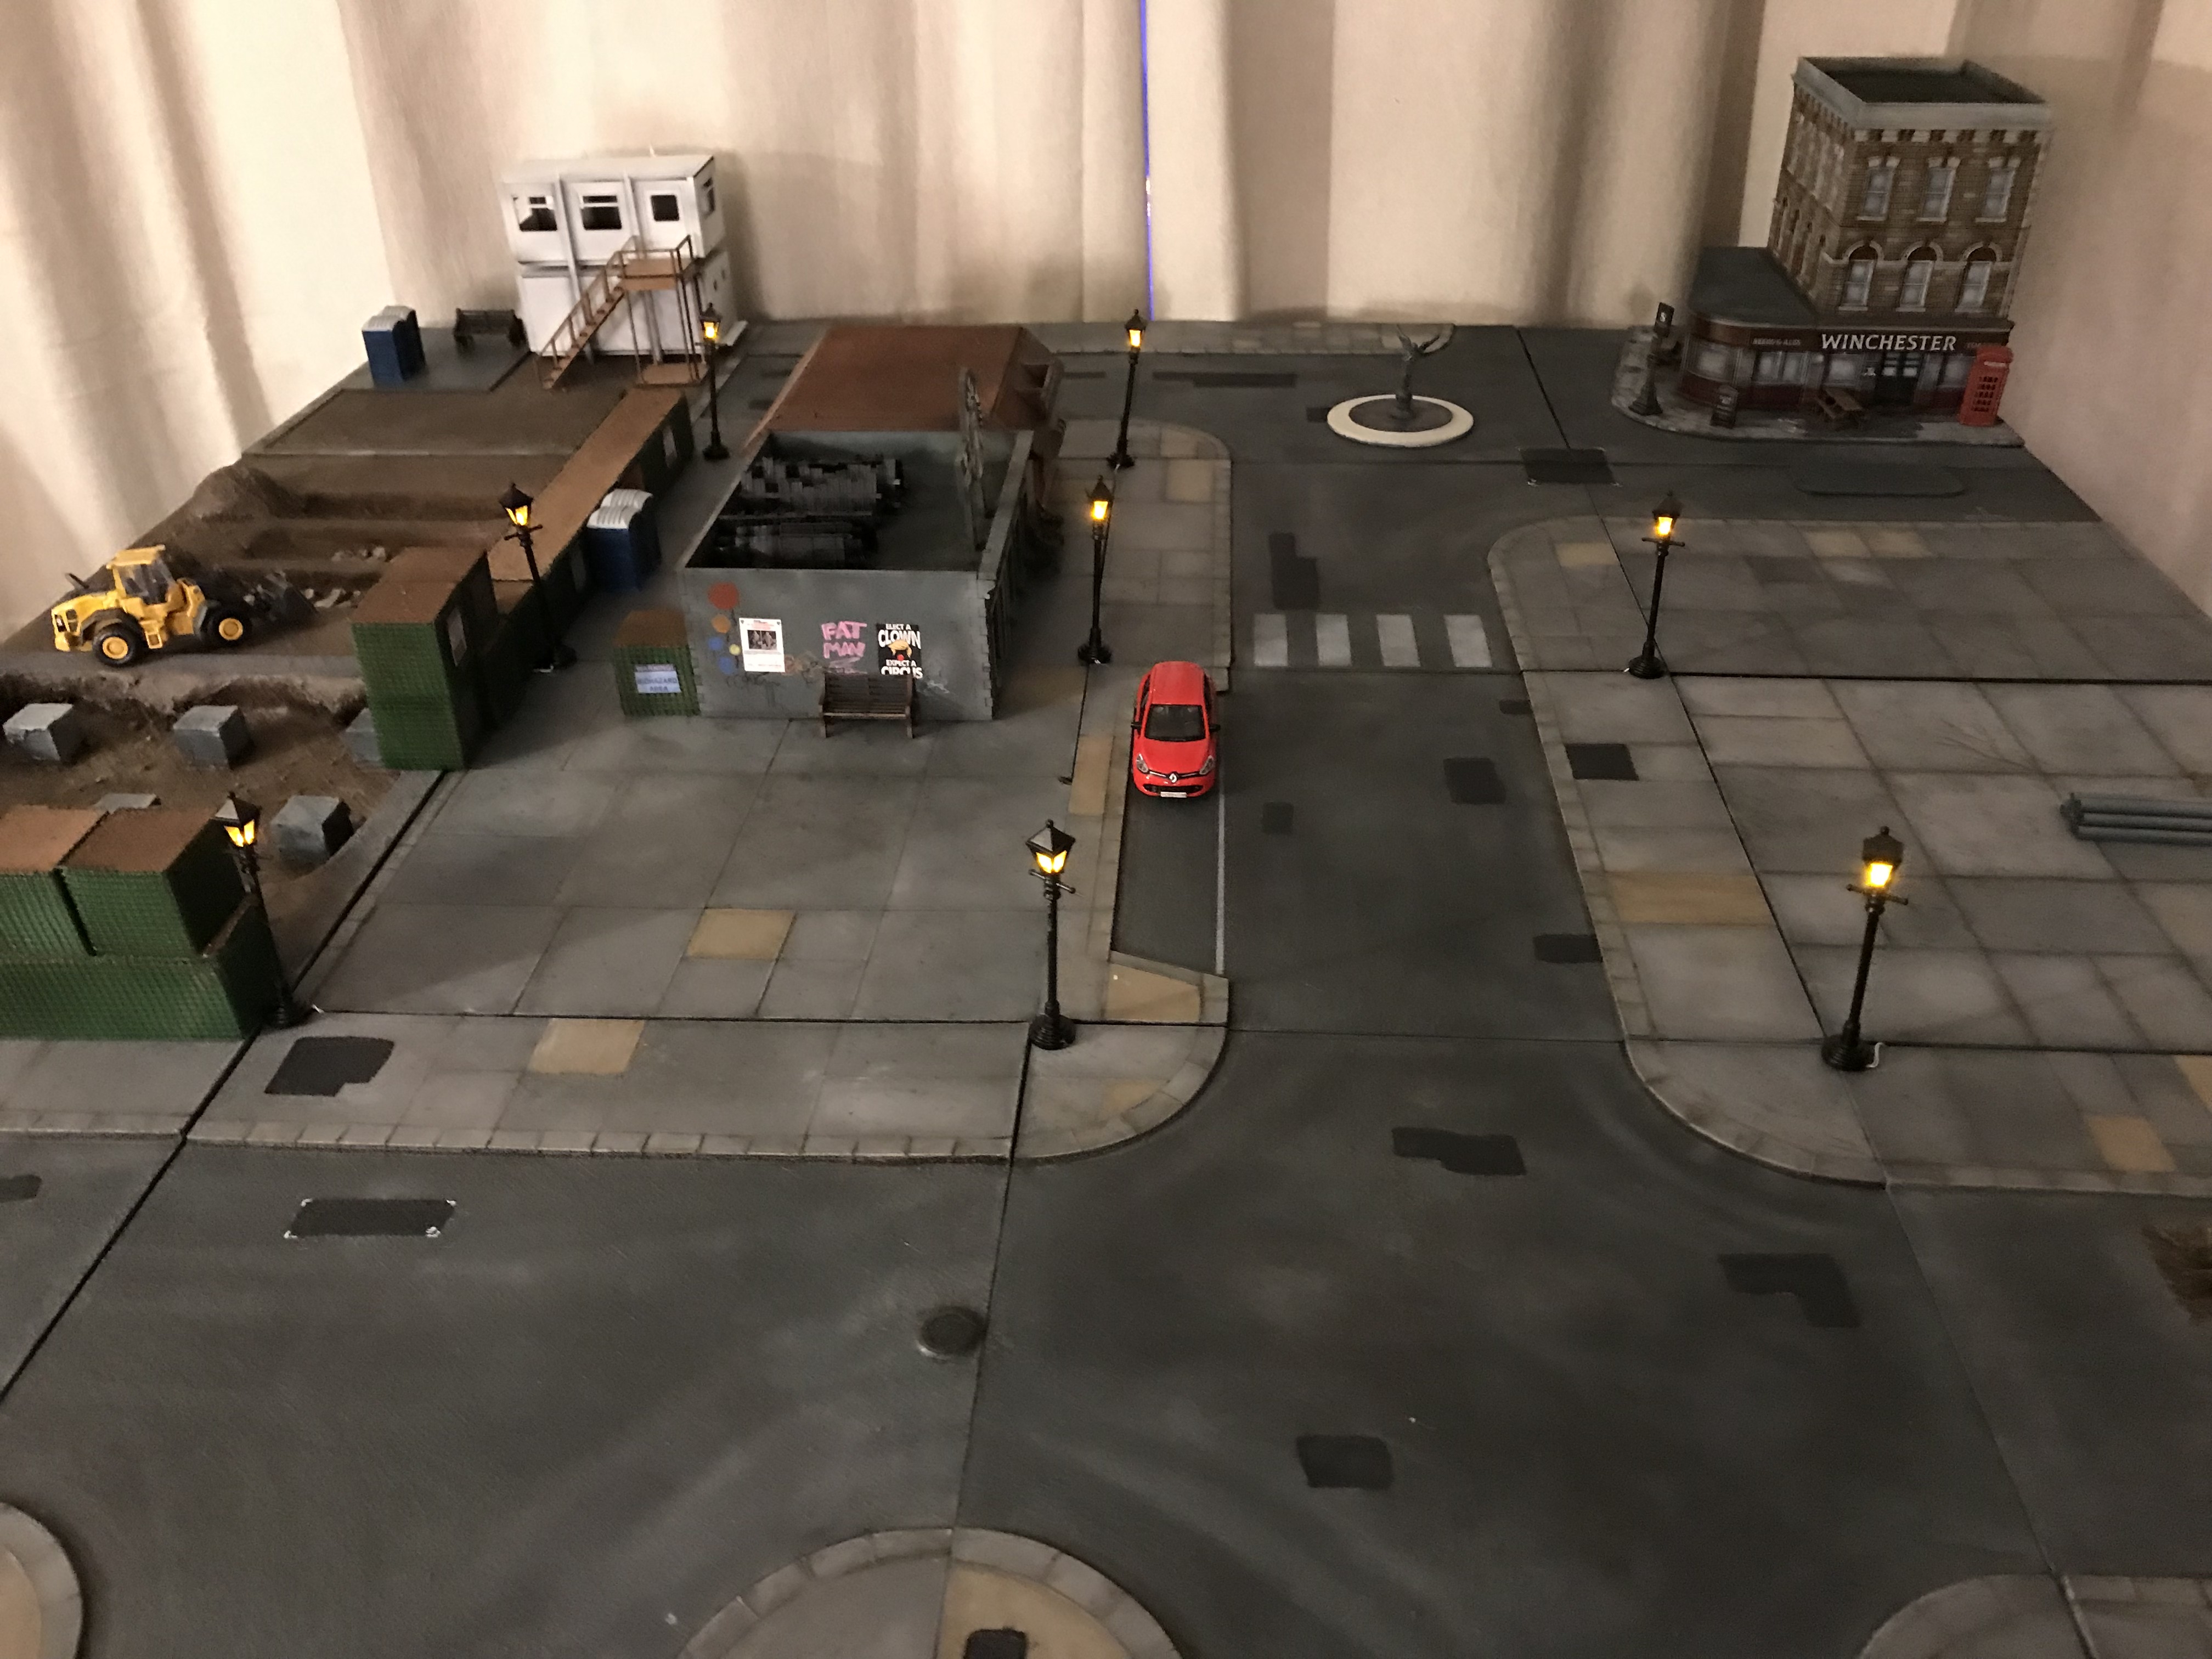
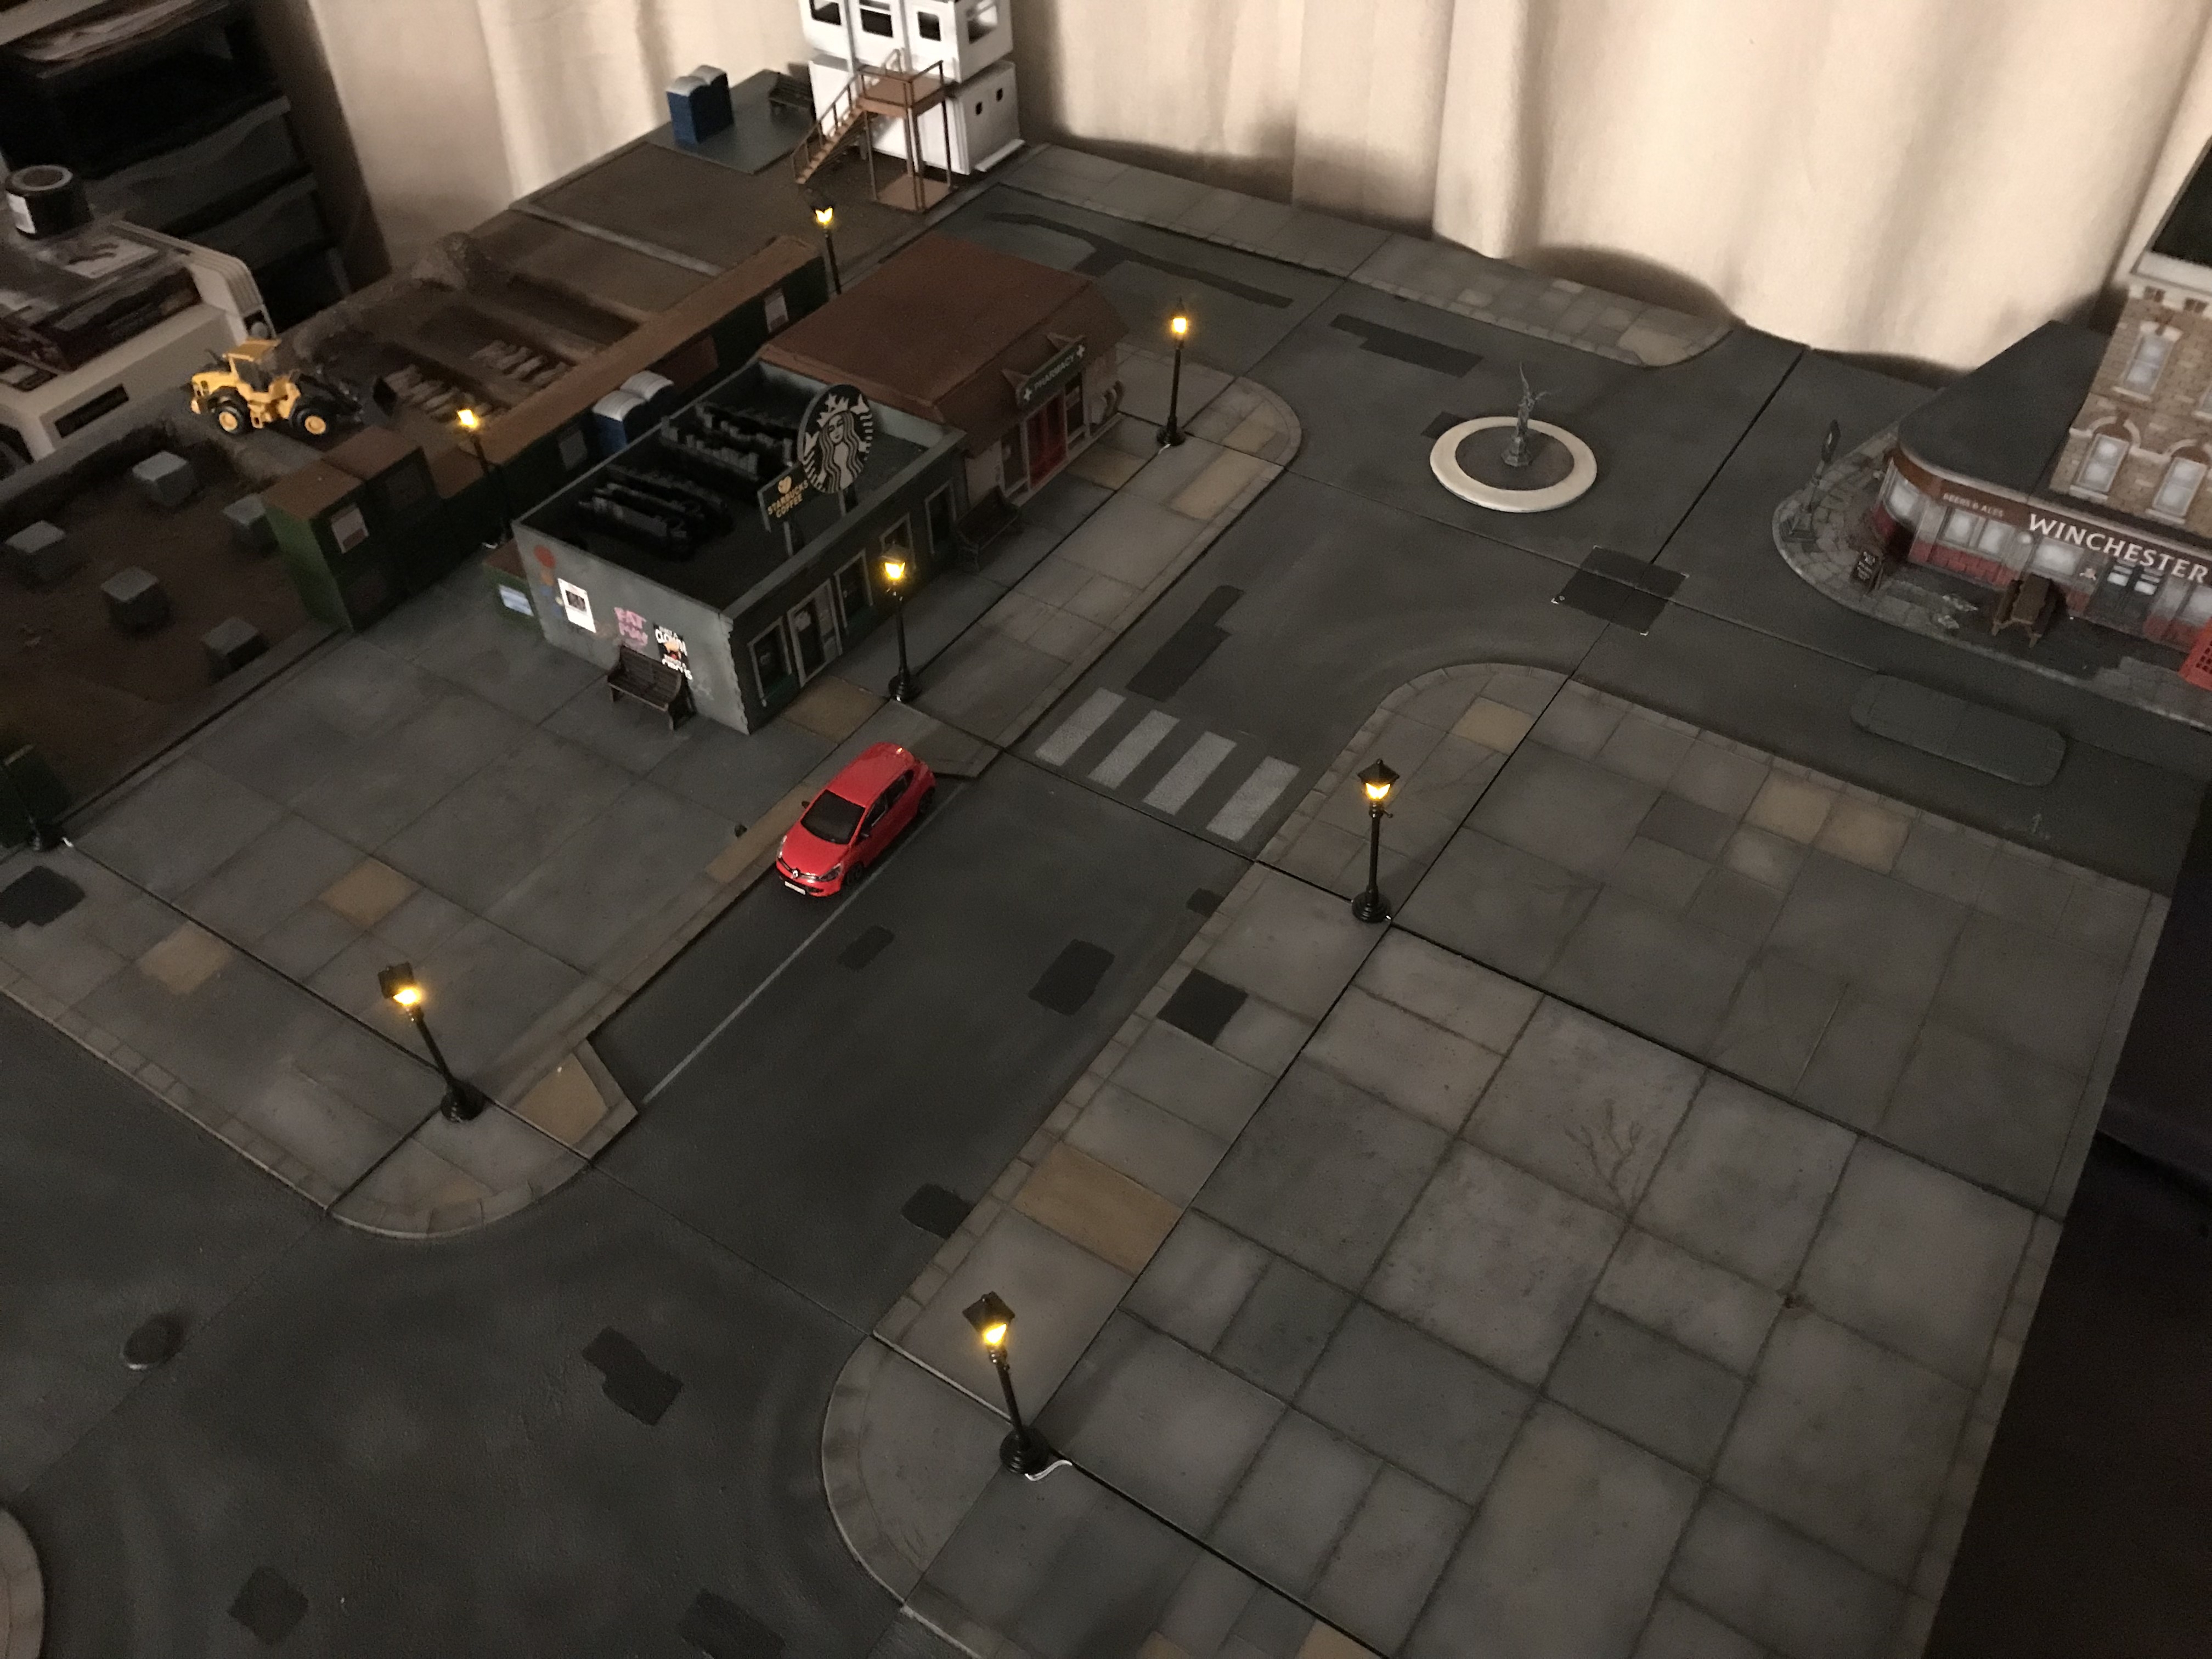
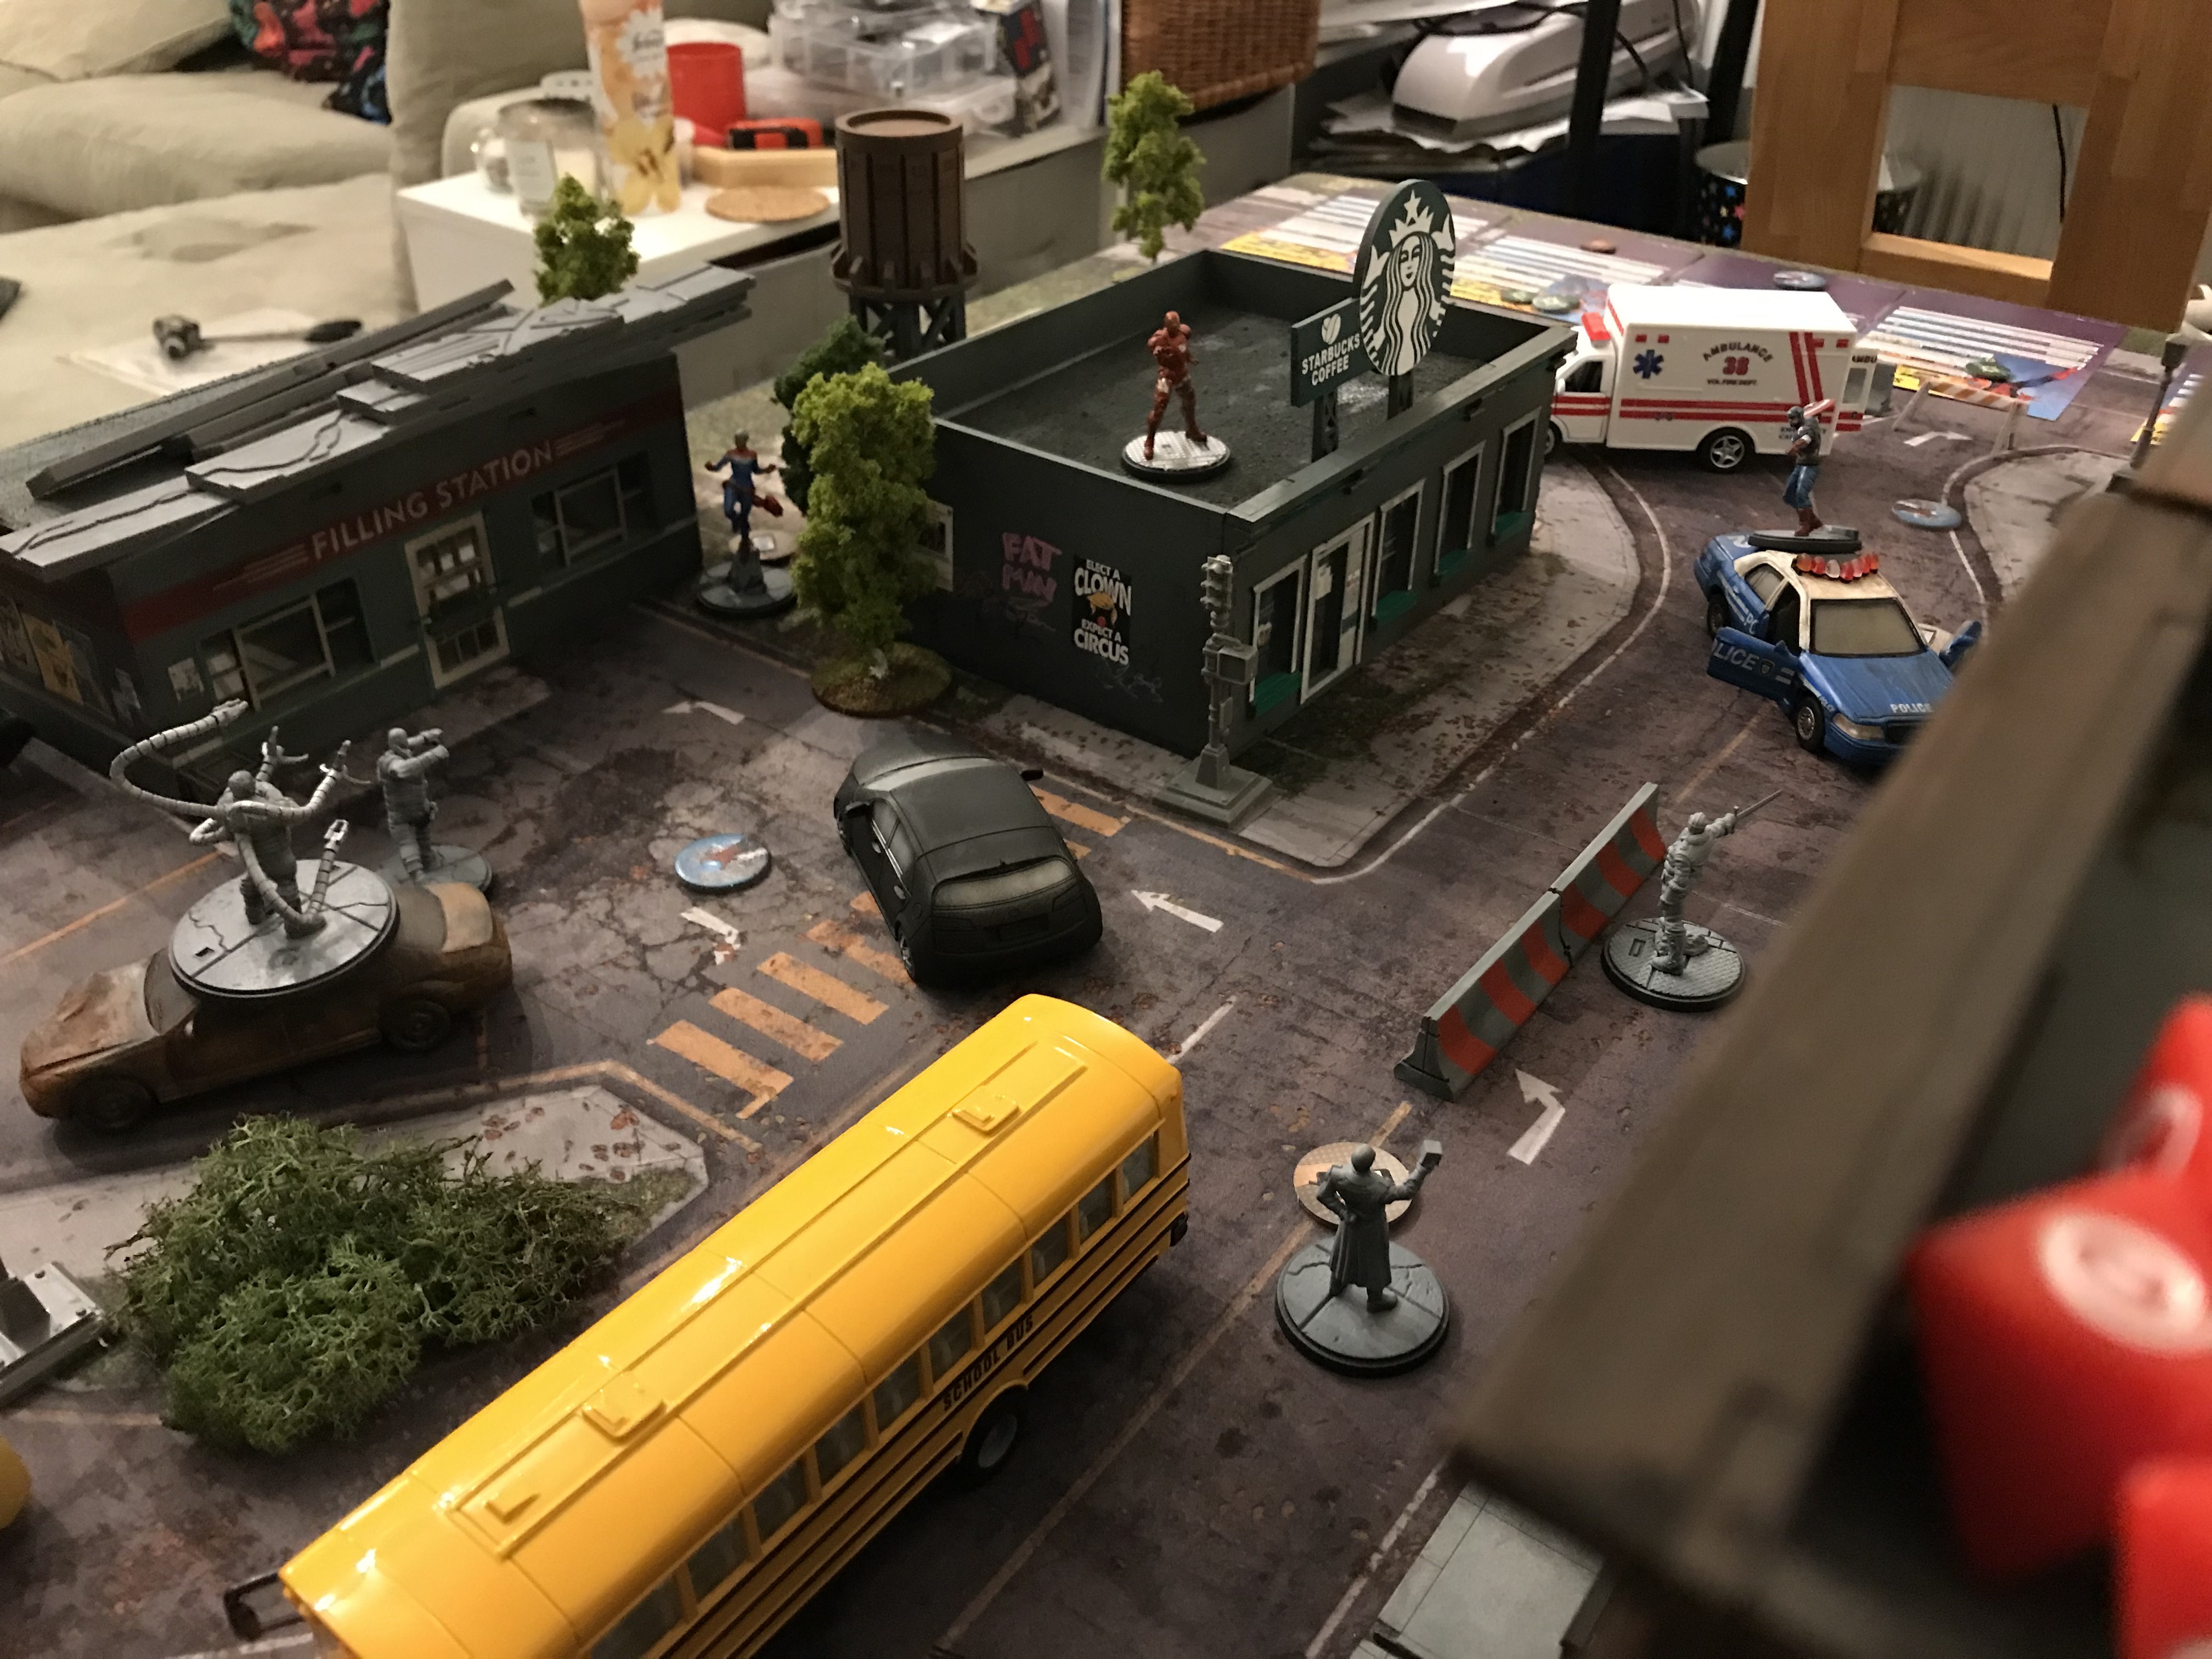
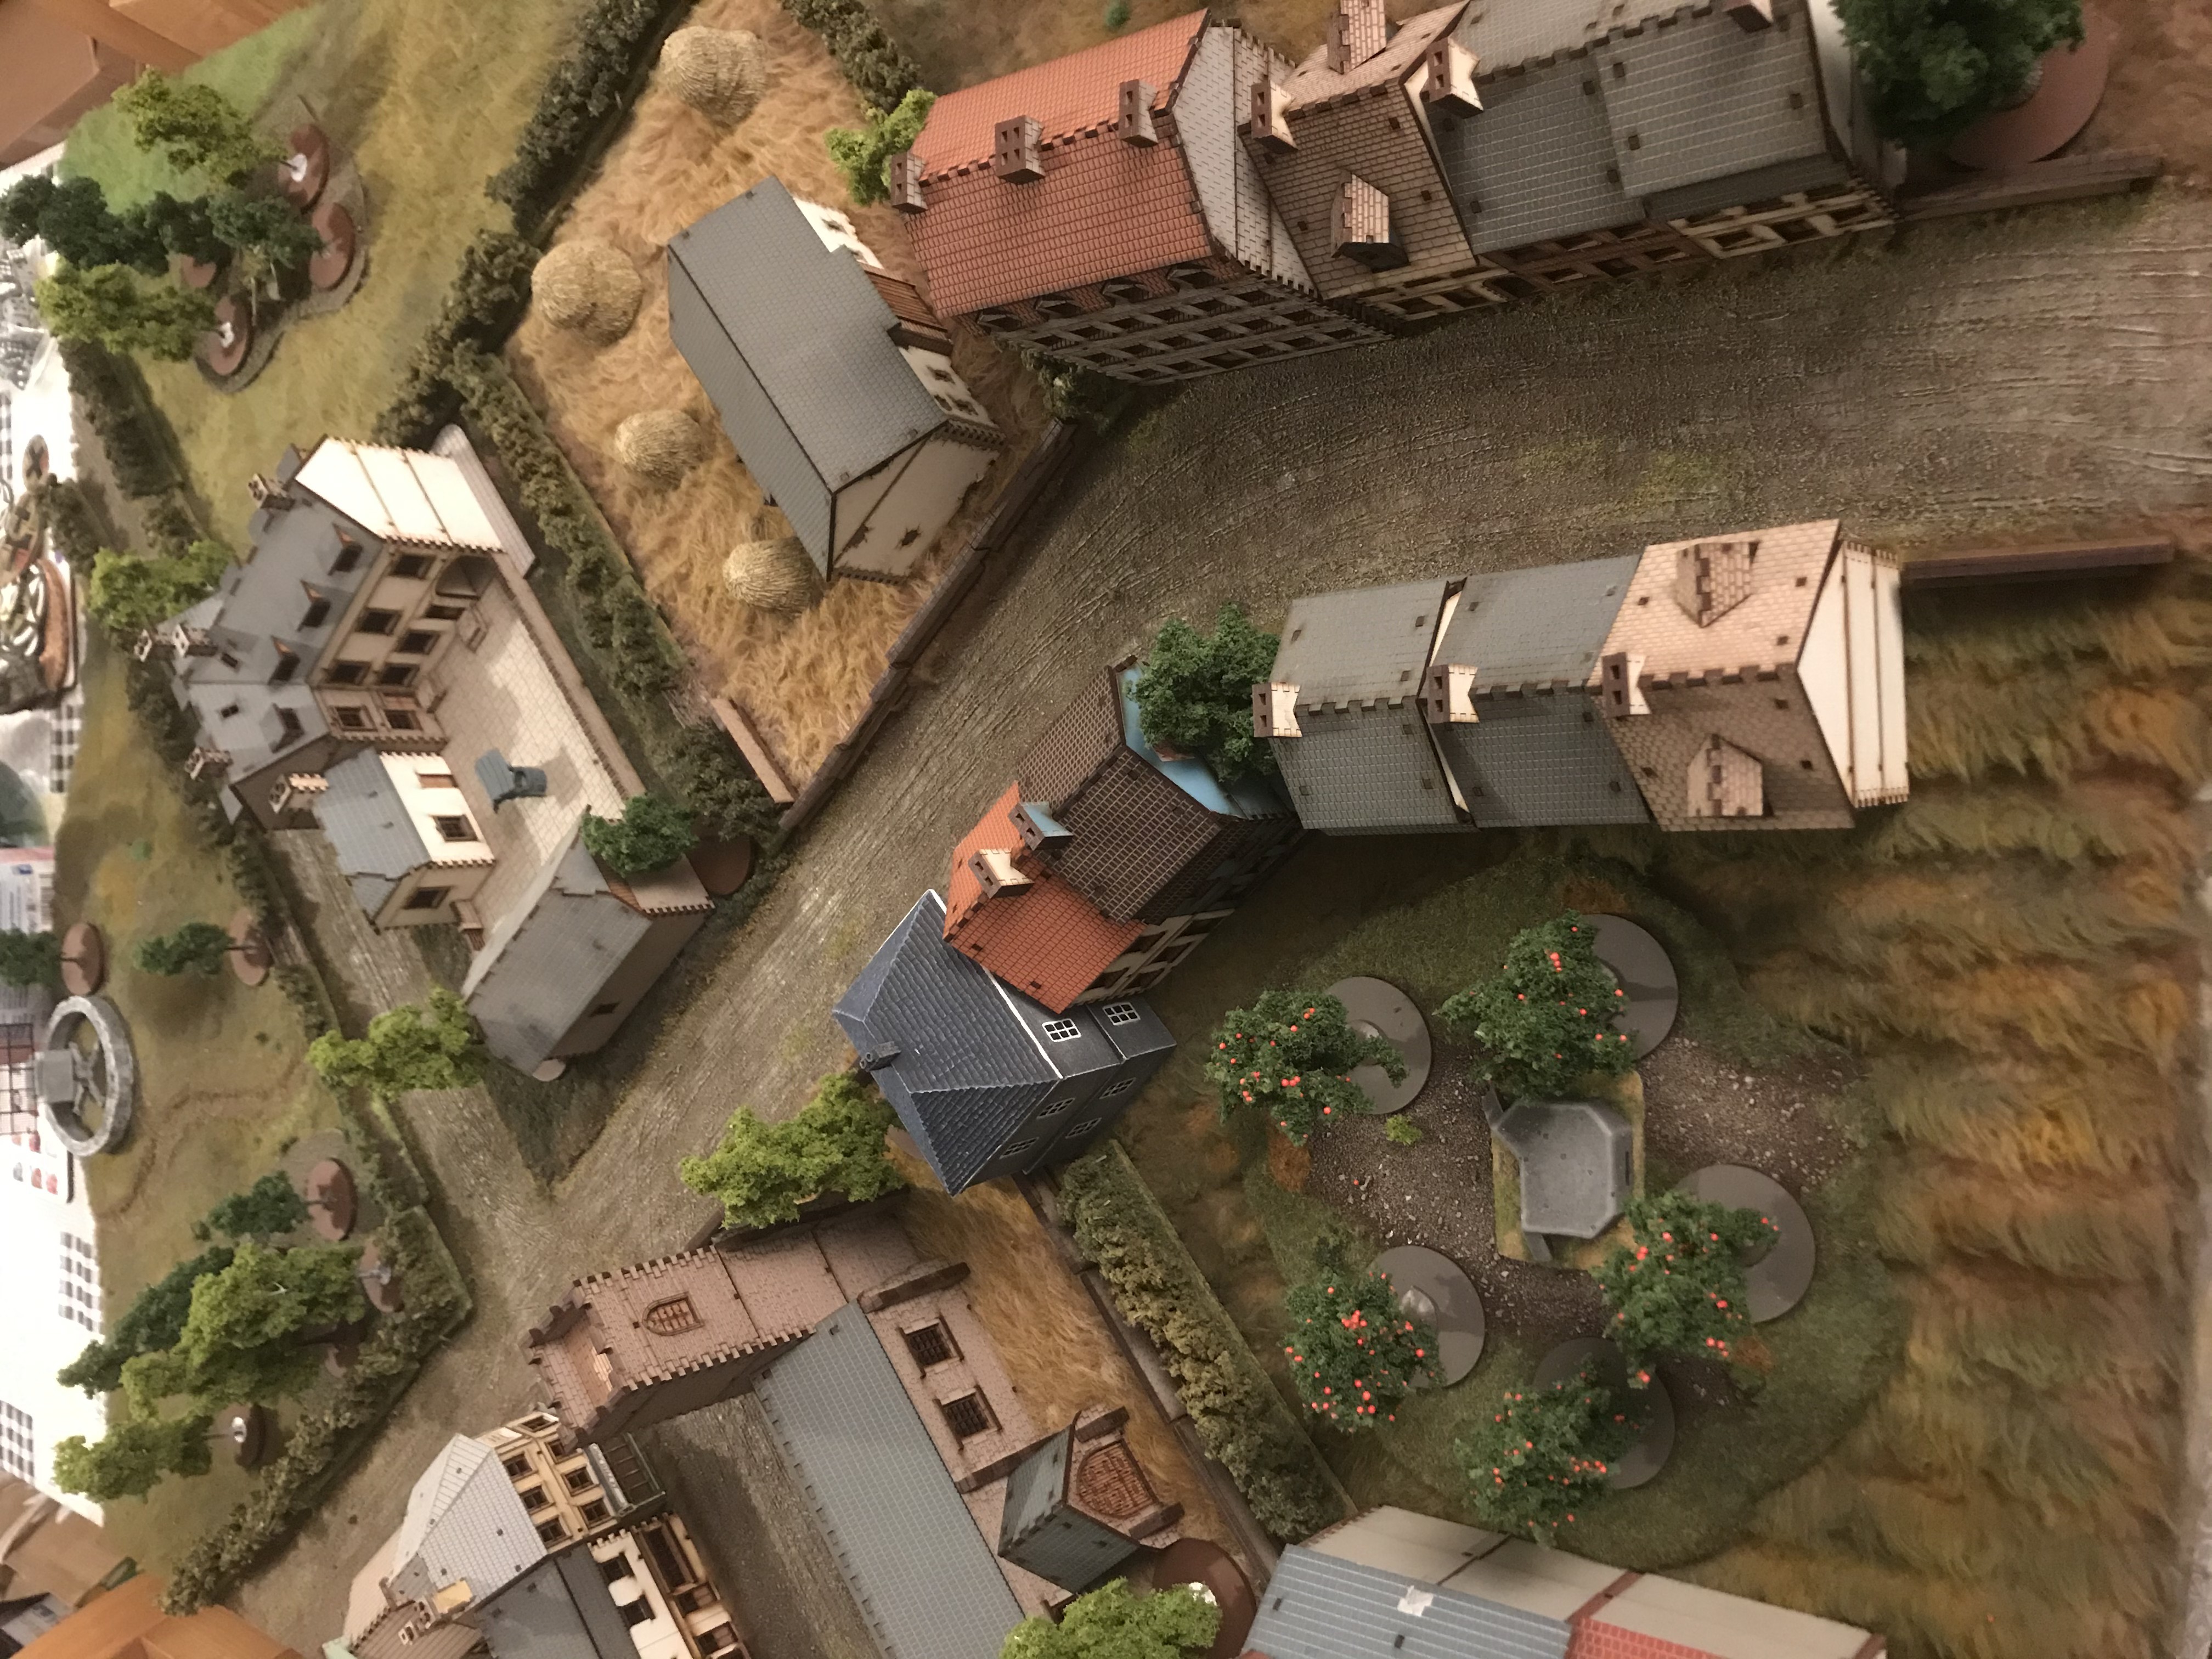
With the tiles complete, I moved back into buildings and modern models to suit the setting.
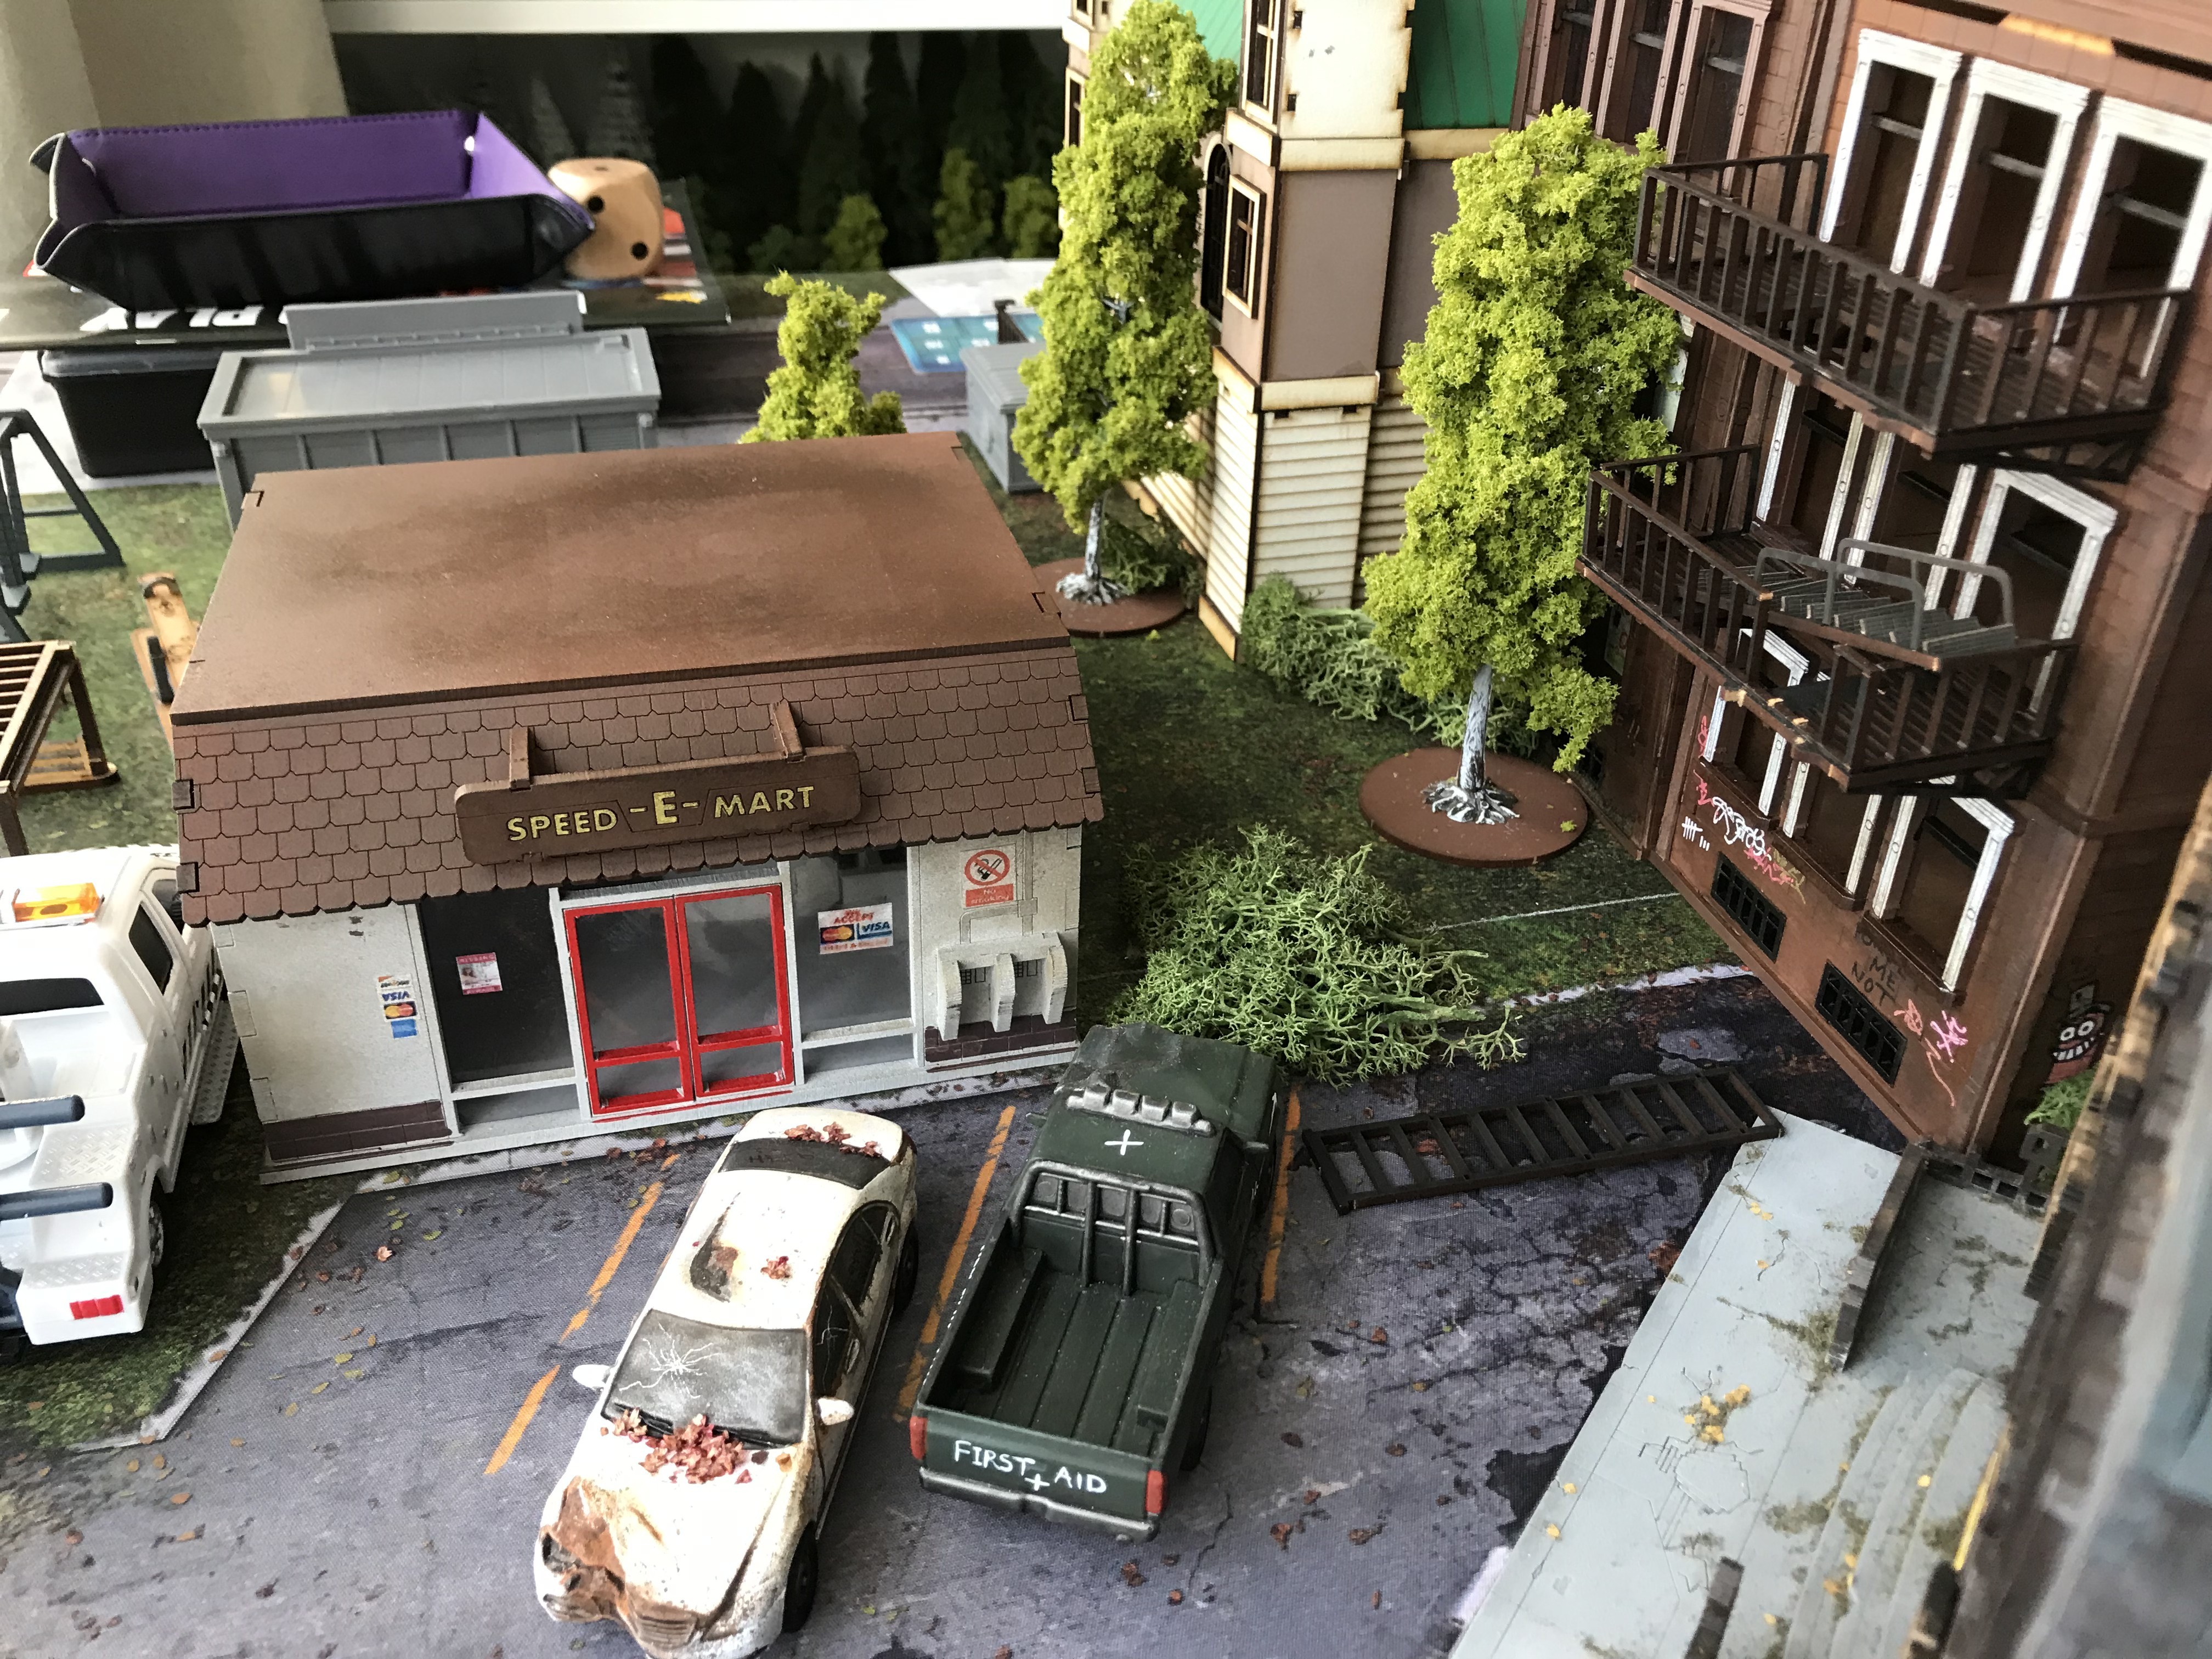
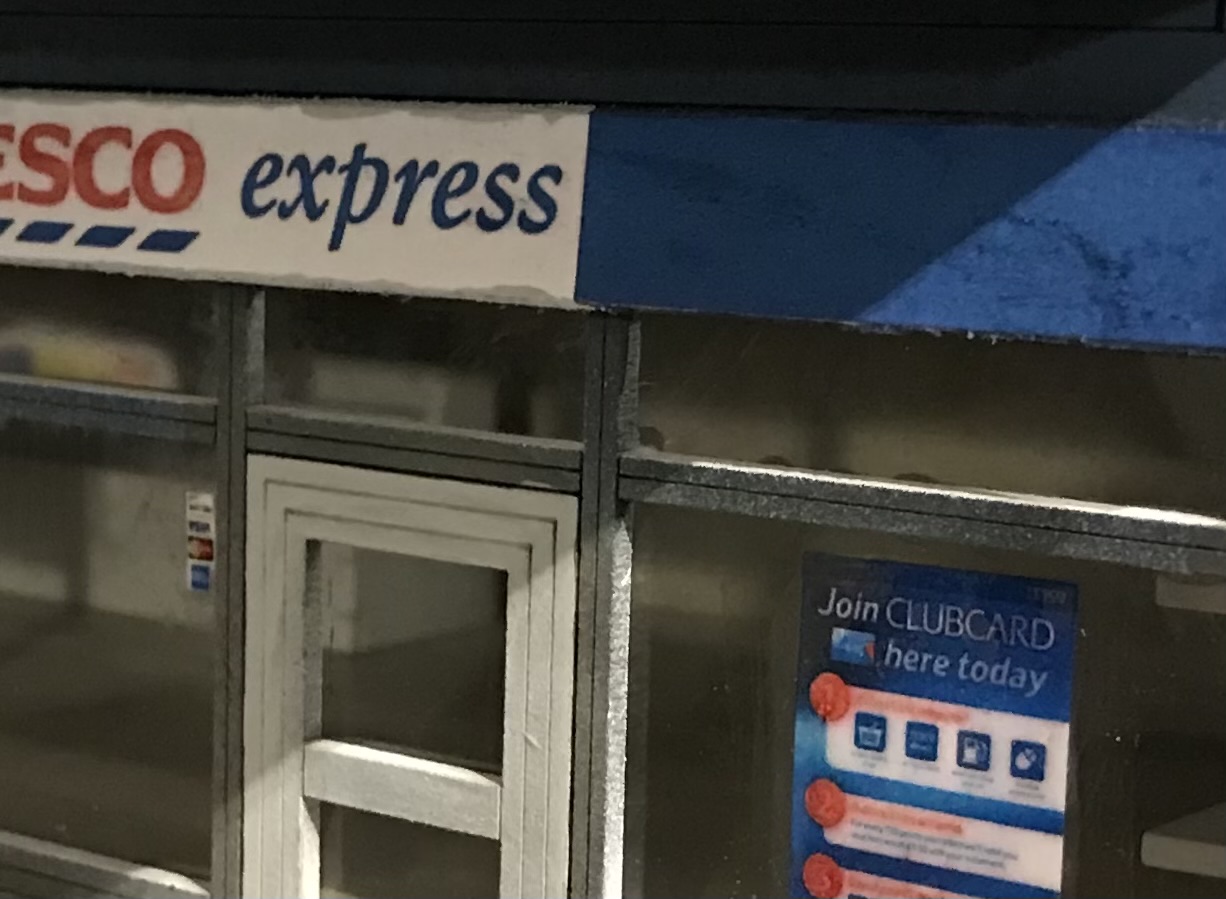
I picked up a shop and construction buildings from Sarris Precision. Using standard grey spray and some white, I primed both the models. I chose to make the small shop a local UK mart of a USA mart, however I made a magnetised sign to swap out on demand. I chose the UK location to be Tescos as this is quite recognisable in the UK. I didn’t mind gluing Tescos poster as it didn’t really matter if I swapped the sign out to a Walmart or whatever.
I gave the roof a layer of grit and sand to give it texture and then added the thin clear sheets to make windows on both the store and construction site. I added posters glued on from the inside with PVA.
I managed to pick up some more body bags from Antenocitis before they closed down and spread them out in the mass grave.
I have plenty of bin bag piles from both TTcombat and Debris of war. I painted most black but also painted a few piles as hazard bags for the grave site. To enhance the bin backs, I used the clear study card sleeves to group scatter together with an invisible base.
I made myself some custom A4 pages full of posters, newspapers, shop signs and rubbish to print of cut and glue to add depth and trash to the bags. The effect was very pleasing to the eye.
Following the recommendation from the Solo Wargamer, I picked up some wood beams around 40mm x 40mm and scotch tape to make cheap Hesco barrier.
Oddstv.minaitures on Instagram also gives instructions on how to build the Hesco barriers.
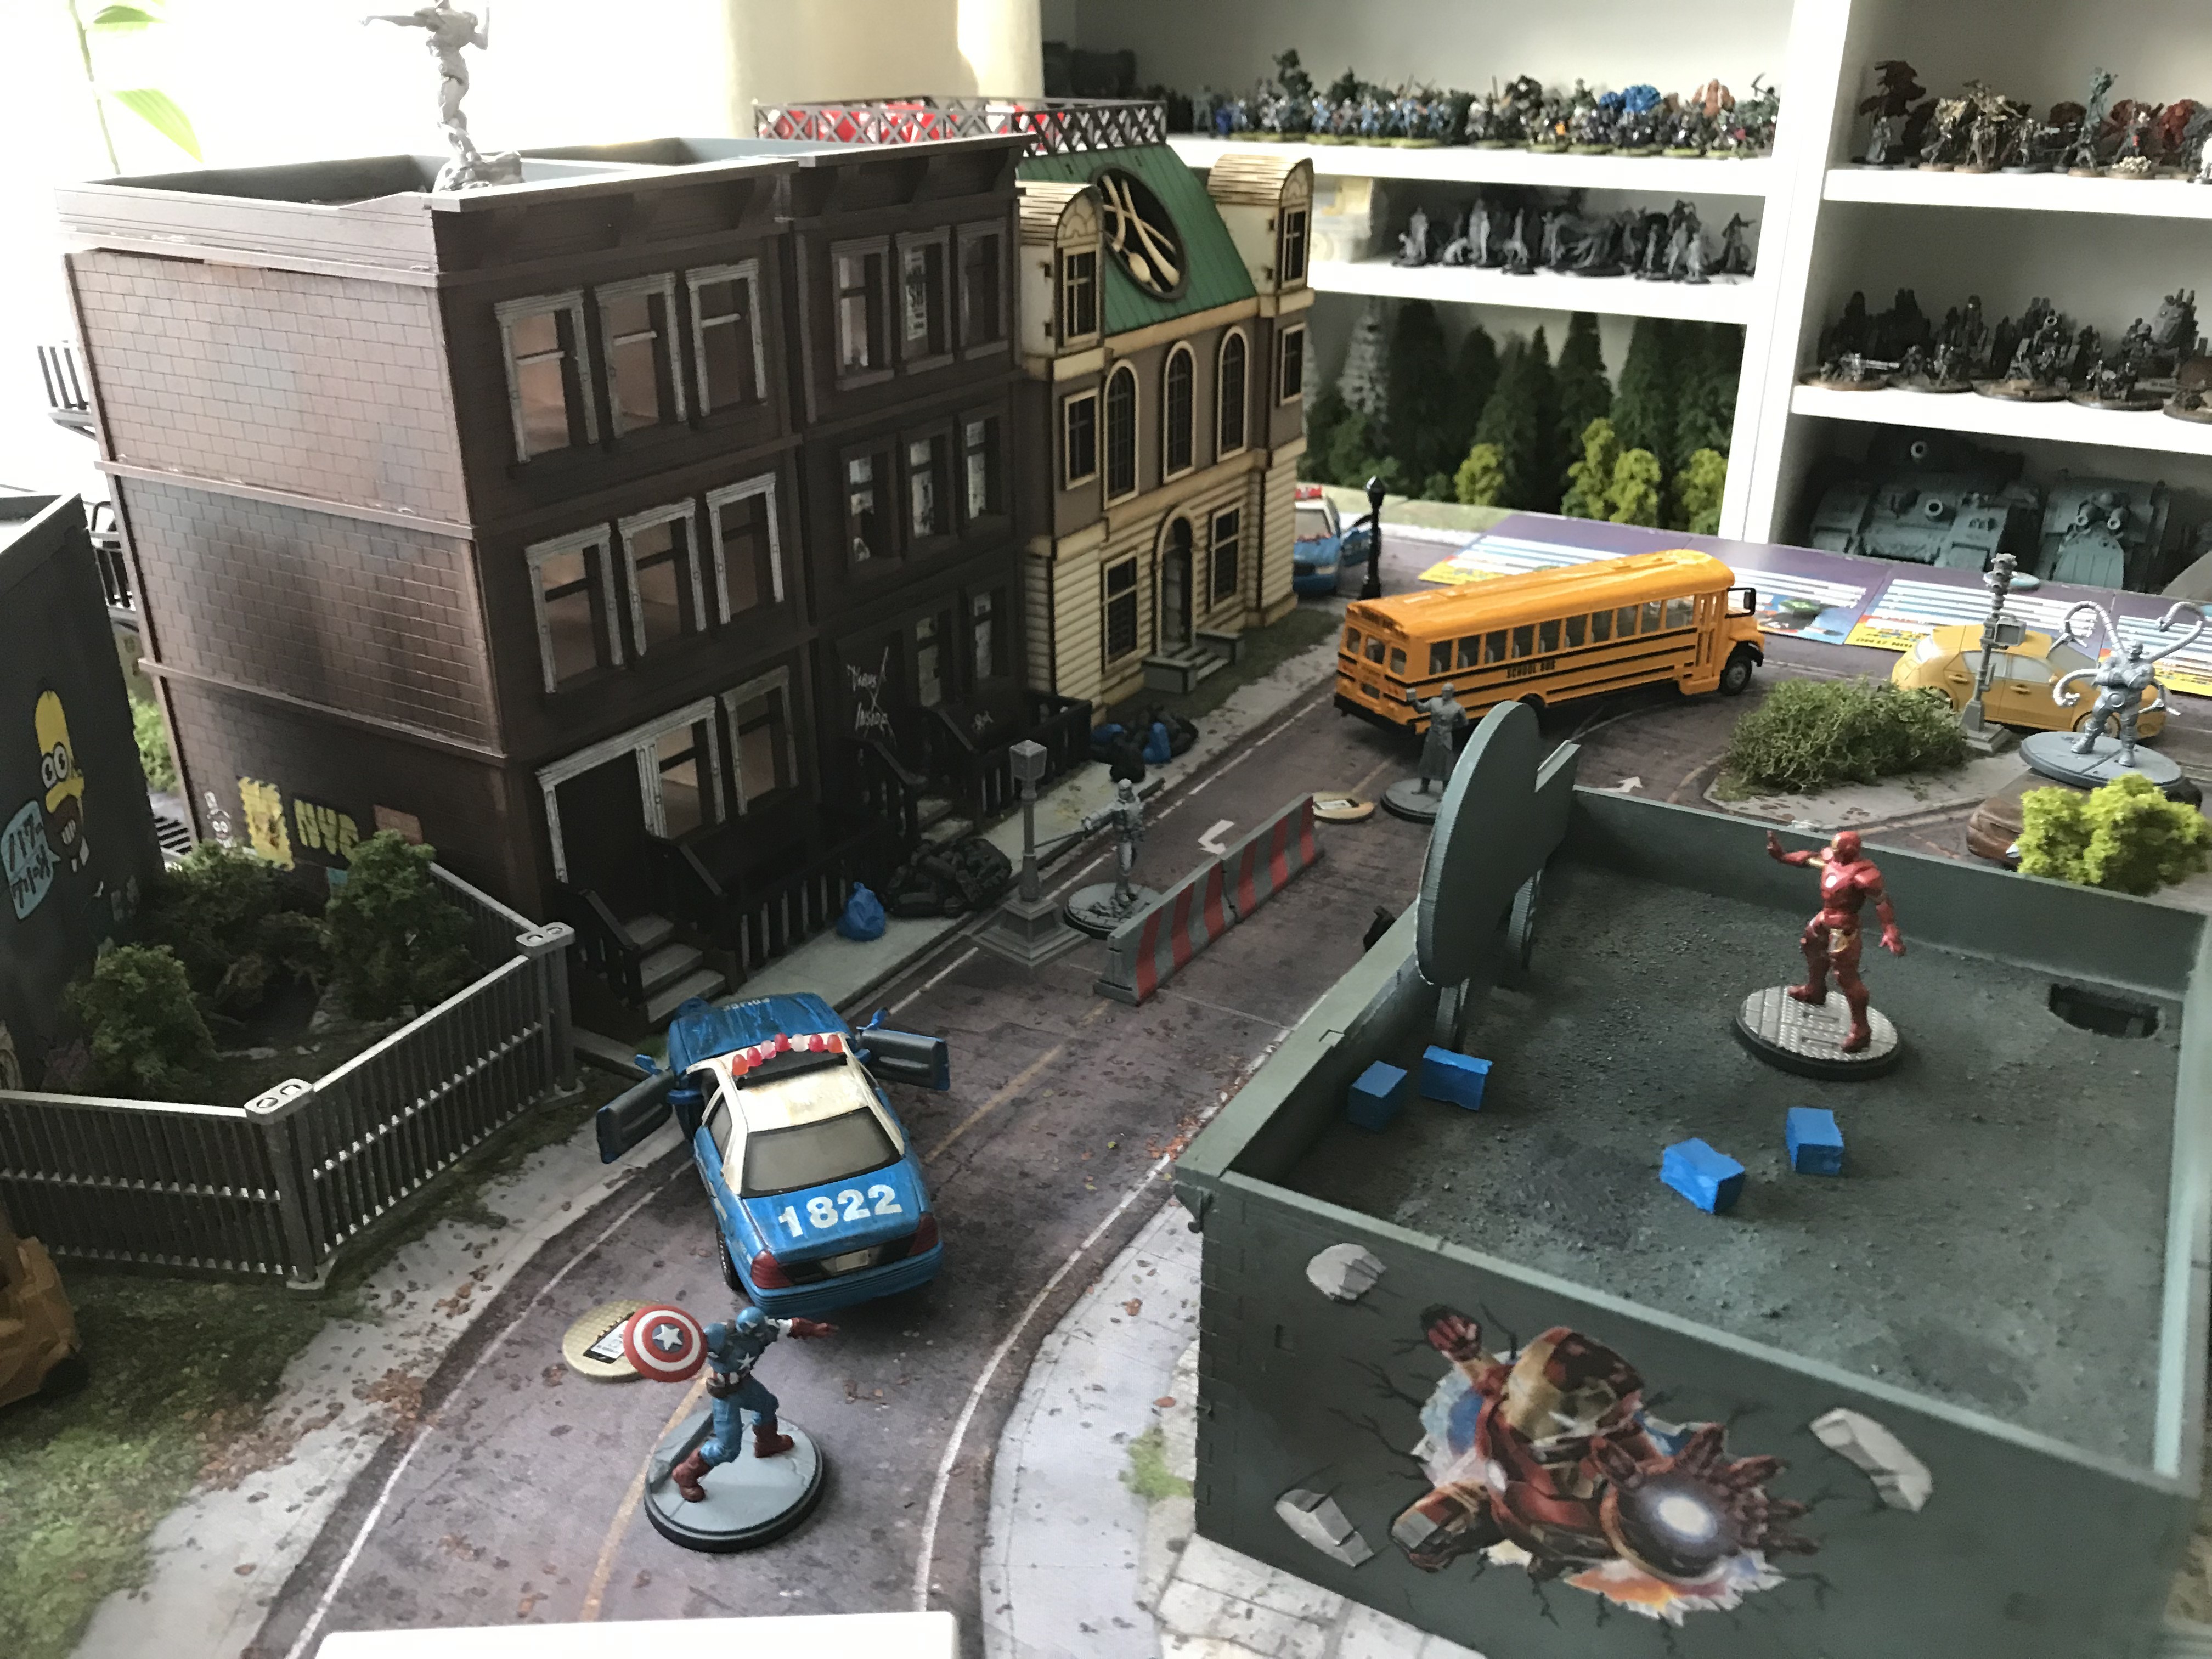
I used custom posters made by the Solo Wargamer to stick on quarantine signs to the barriers. I then put it all down with some cars and building to see if the product will look good mixed together. I was liking how this looked, it was really coming together.


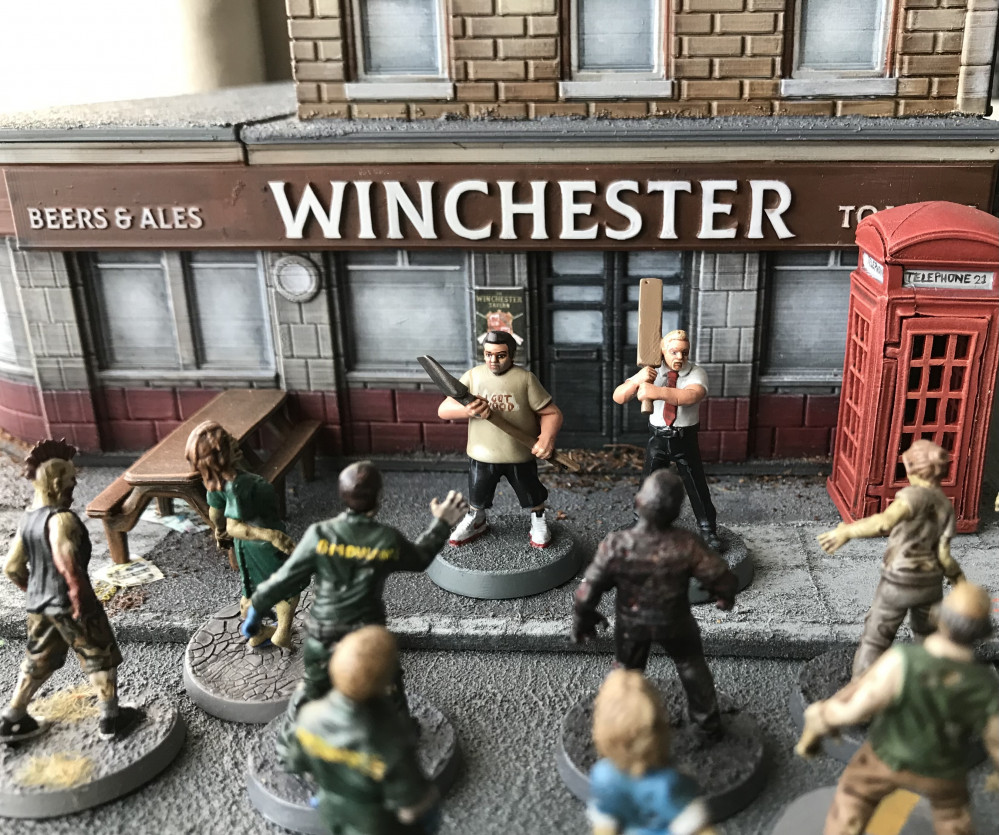
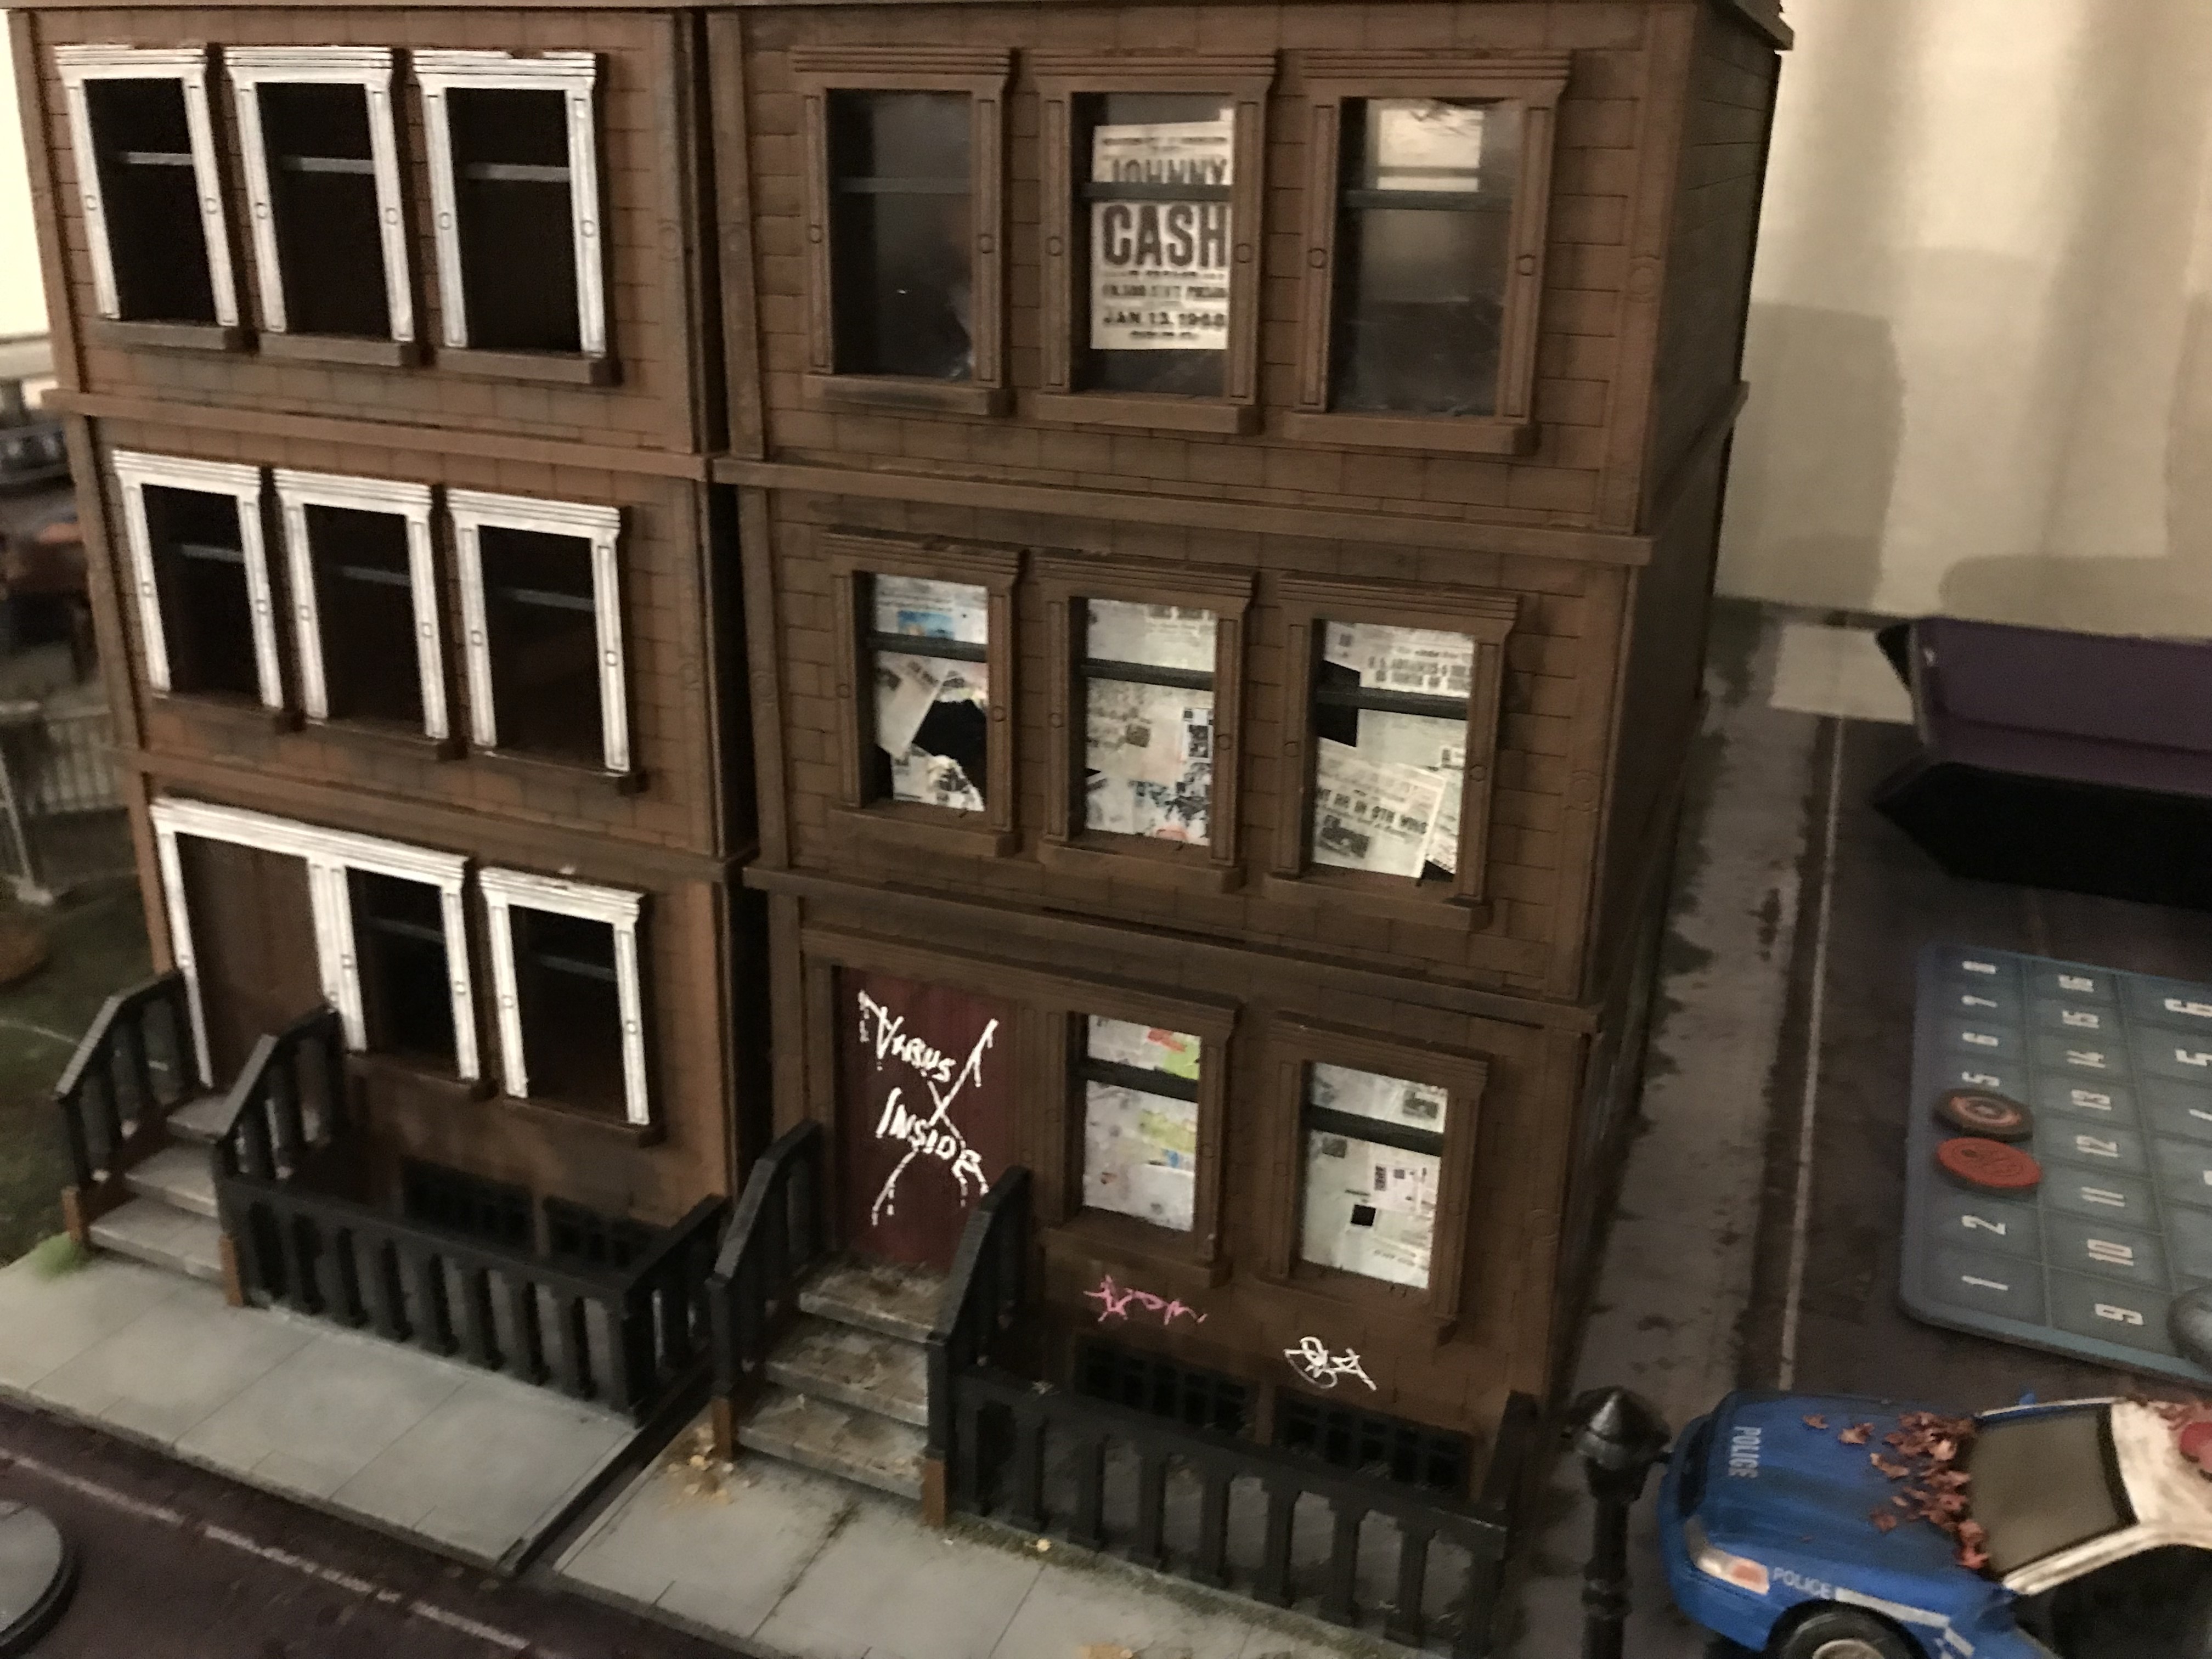
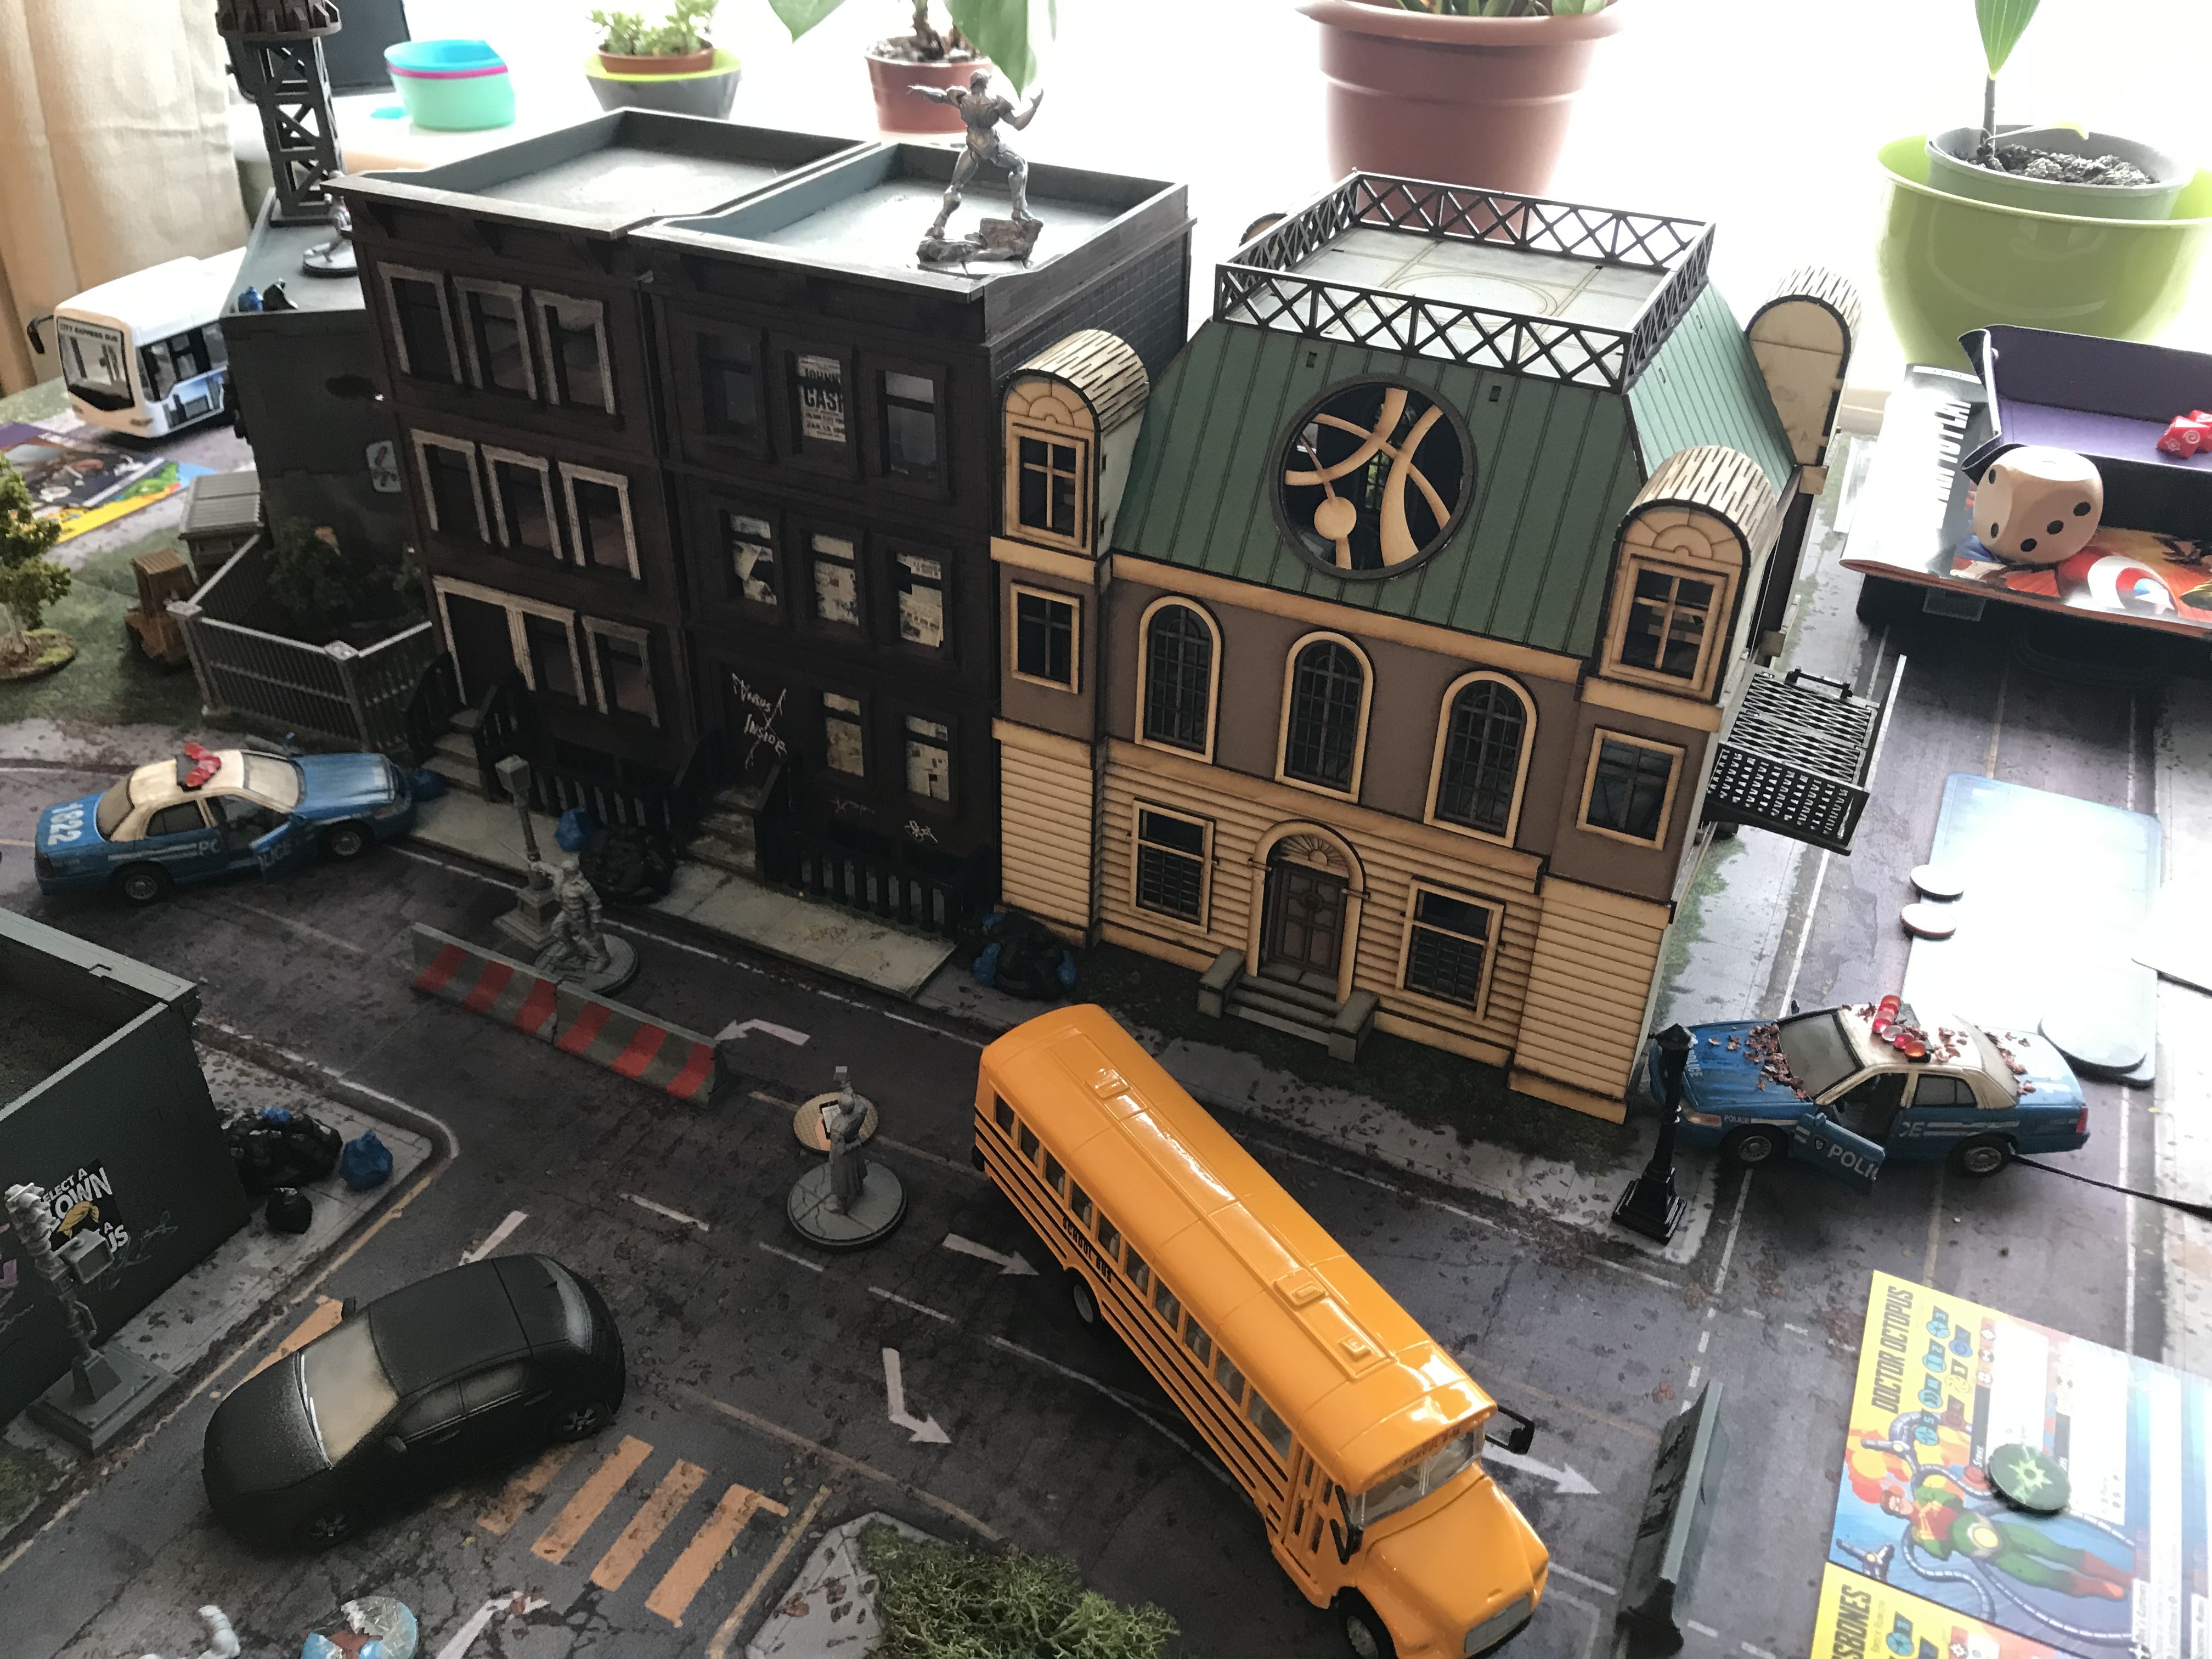
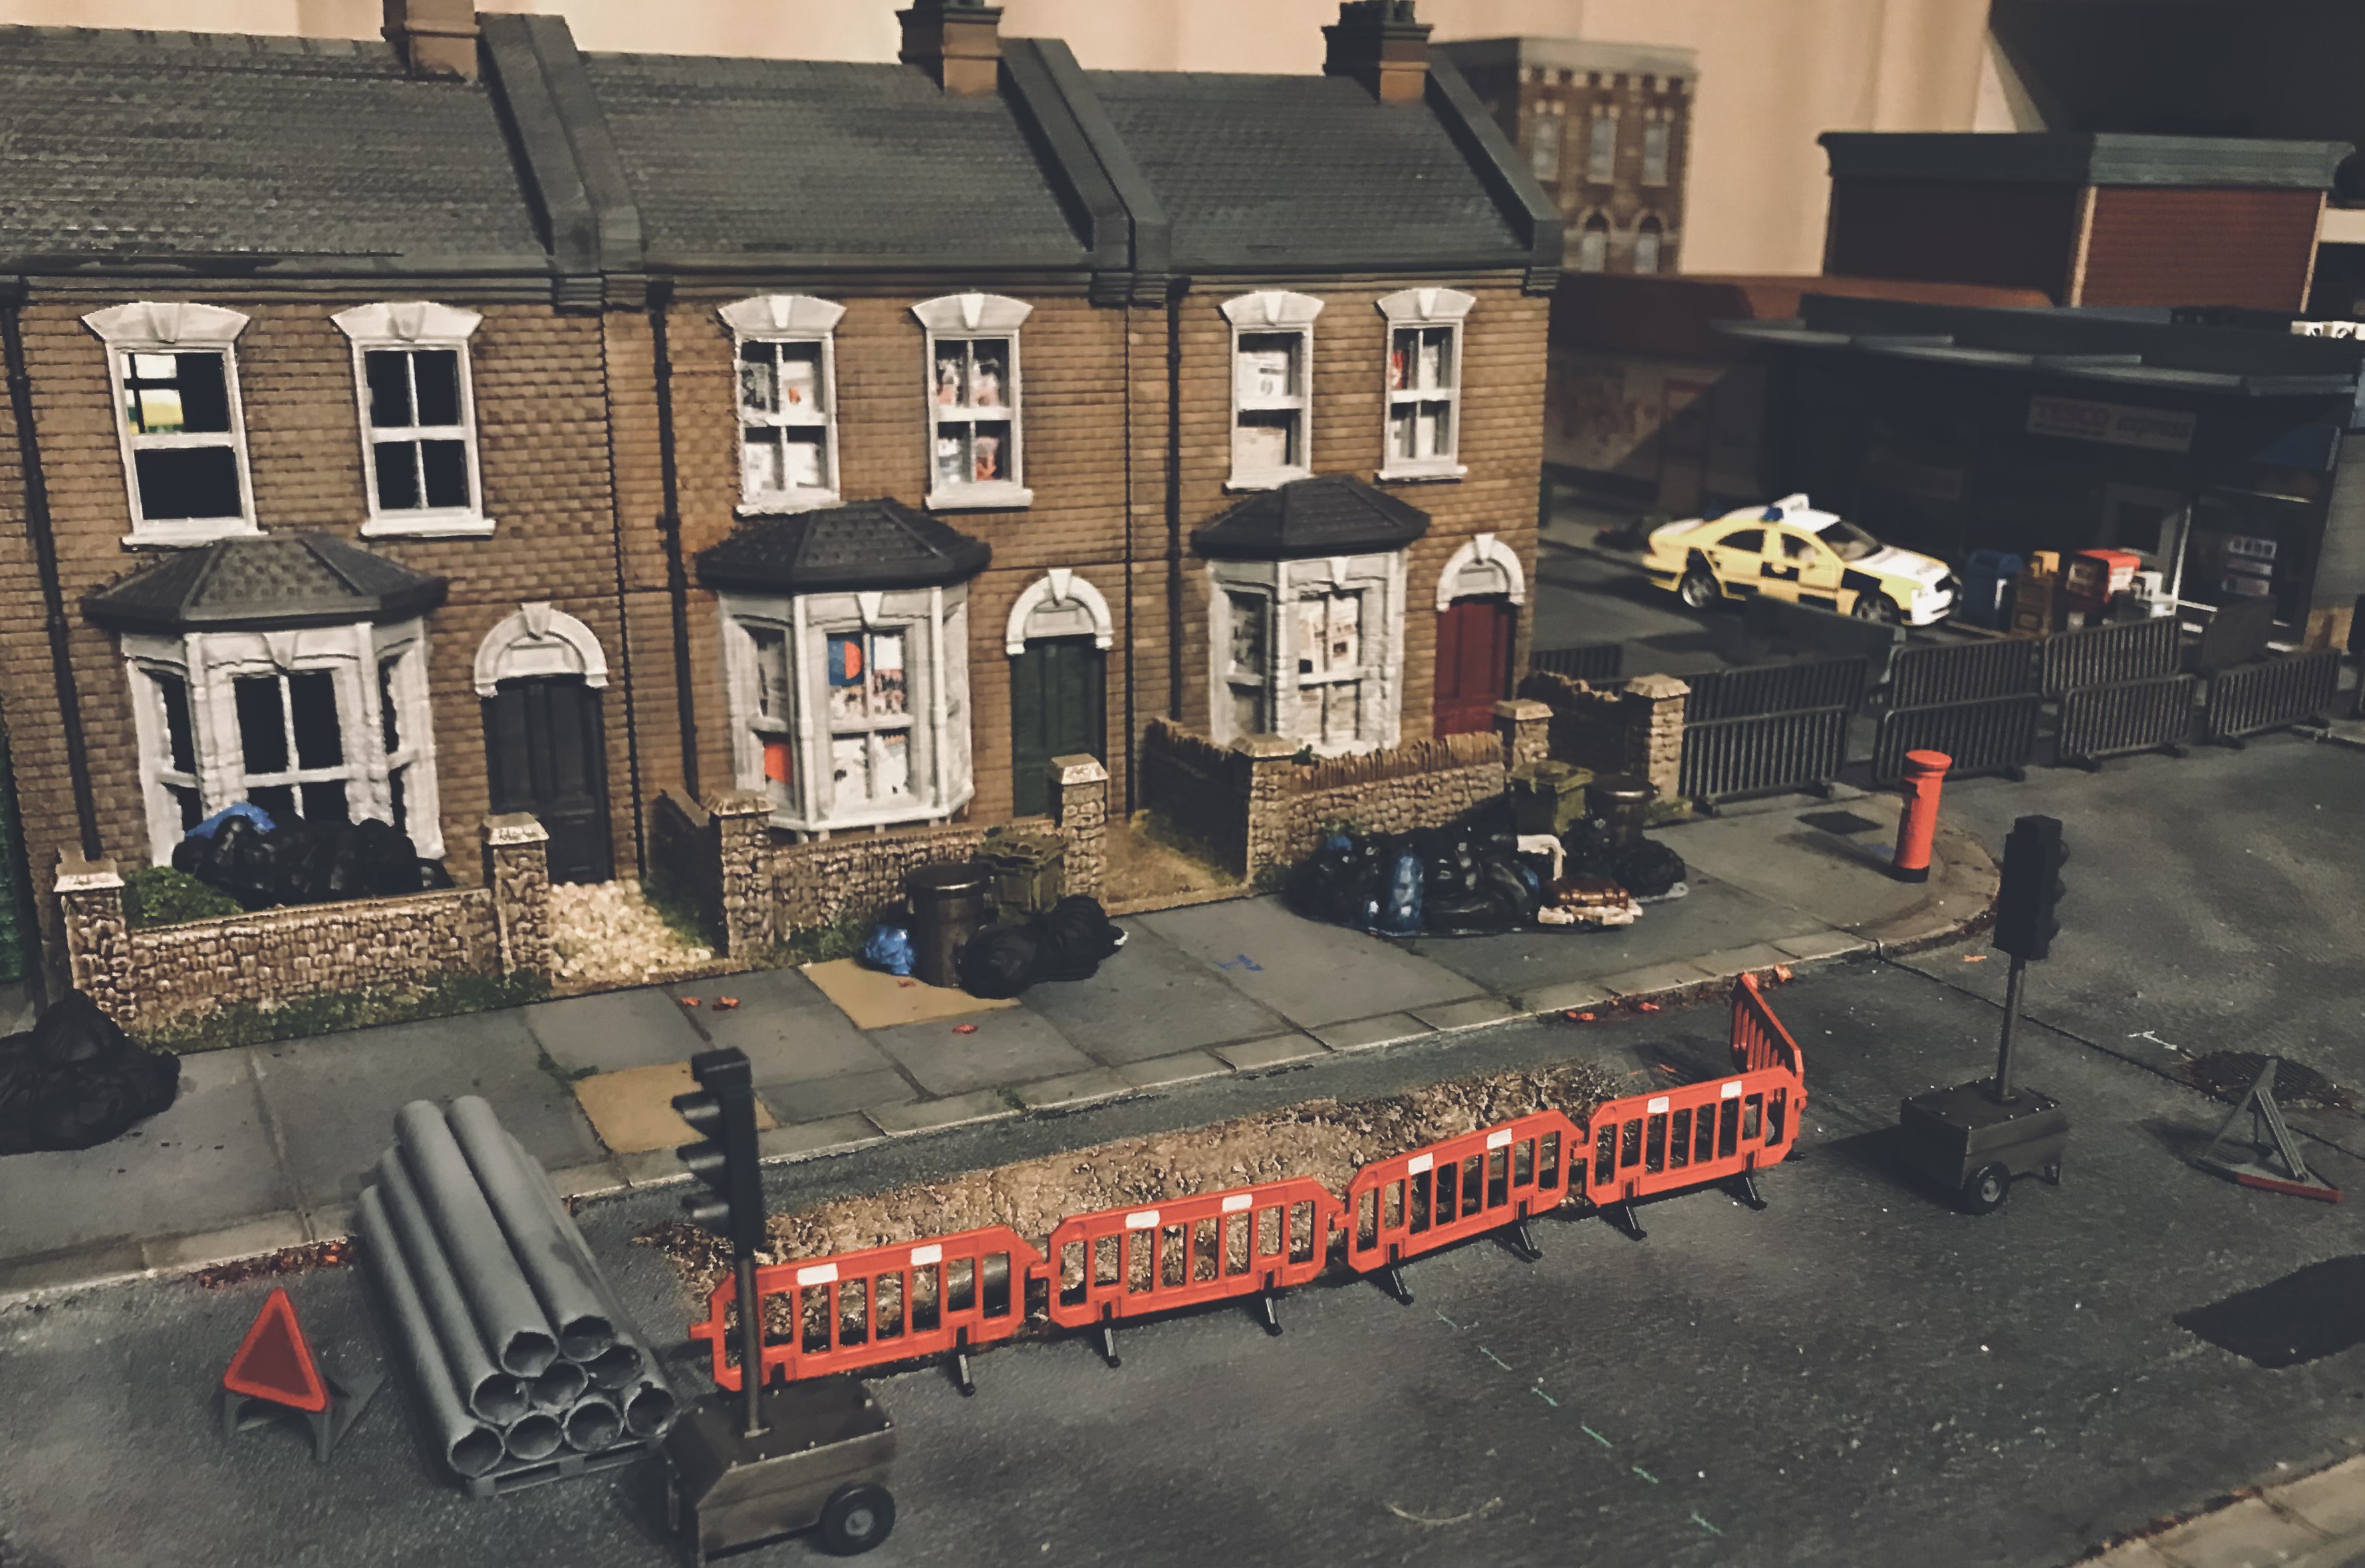
Having picked up lots of Uk street scatter, I got to painting all the small bits and the terraced houses/shops.
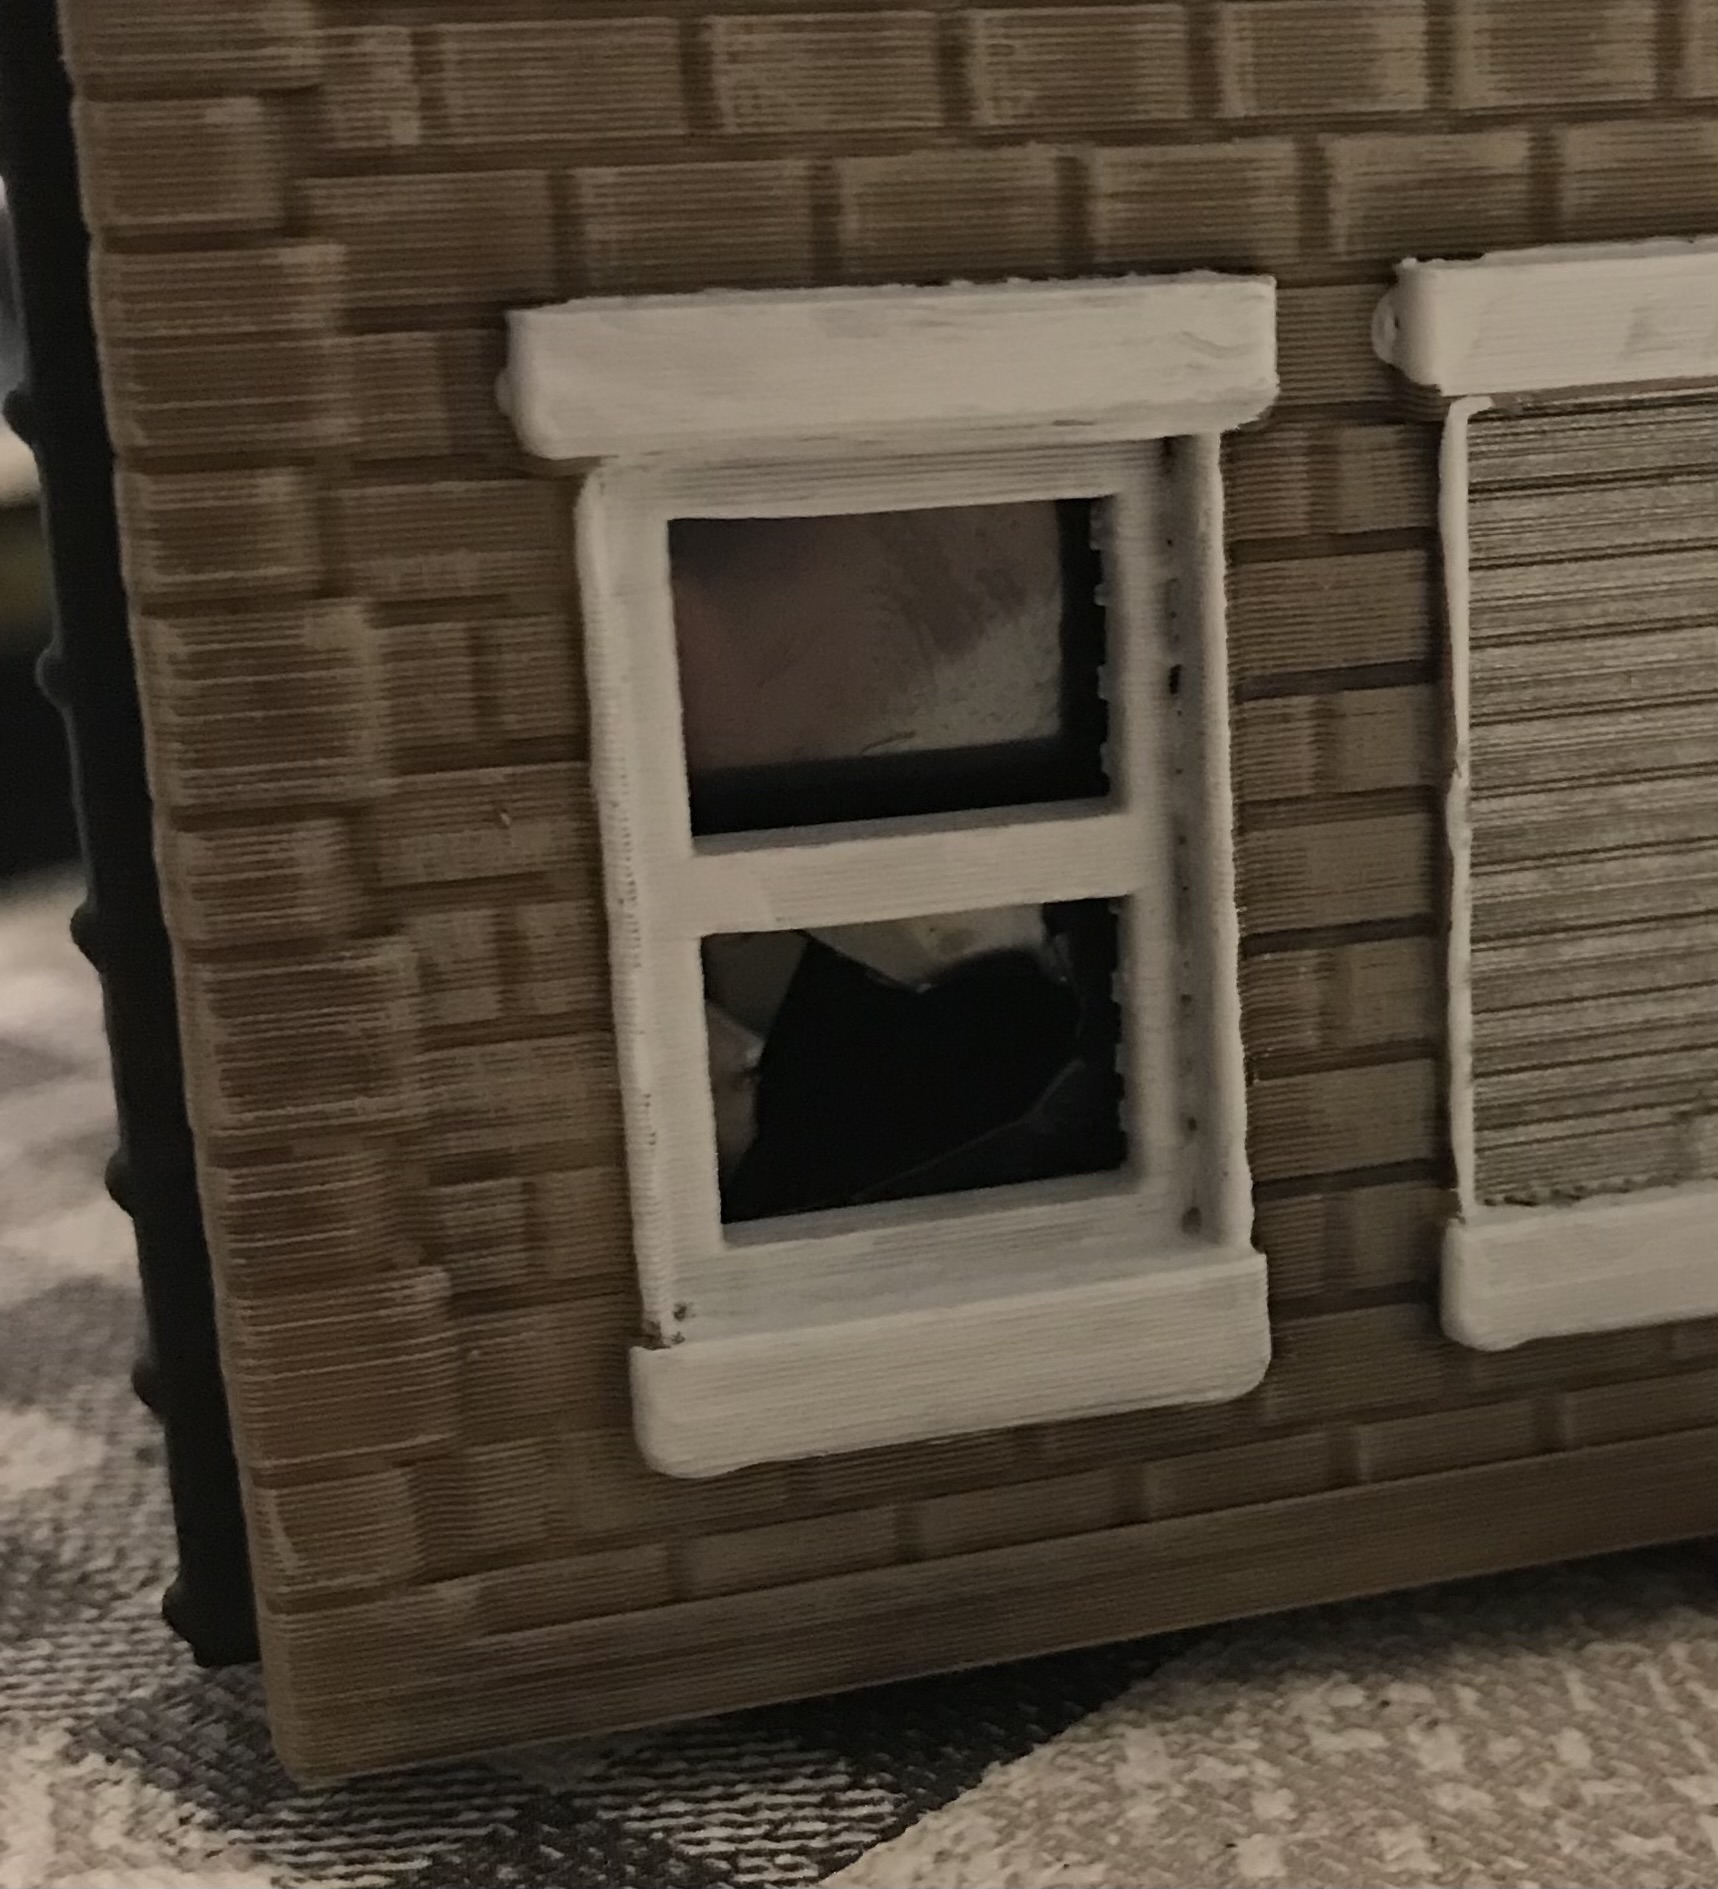
I kept to the same paint theme for the Winchester to match the houses with a base of trench brown and standard grey on the roofs. I hand painted in the window frames and doors with just whites and different coloured doors.
I used the thin clear sheets on the windows and glued on the inside lots of newspapers to show that residents were trying to hide away in the apocalypse.
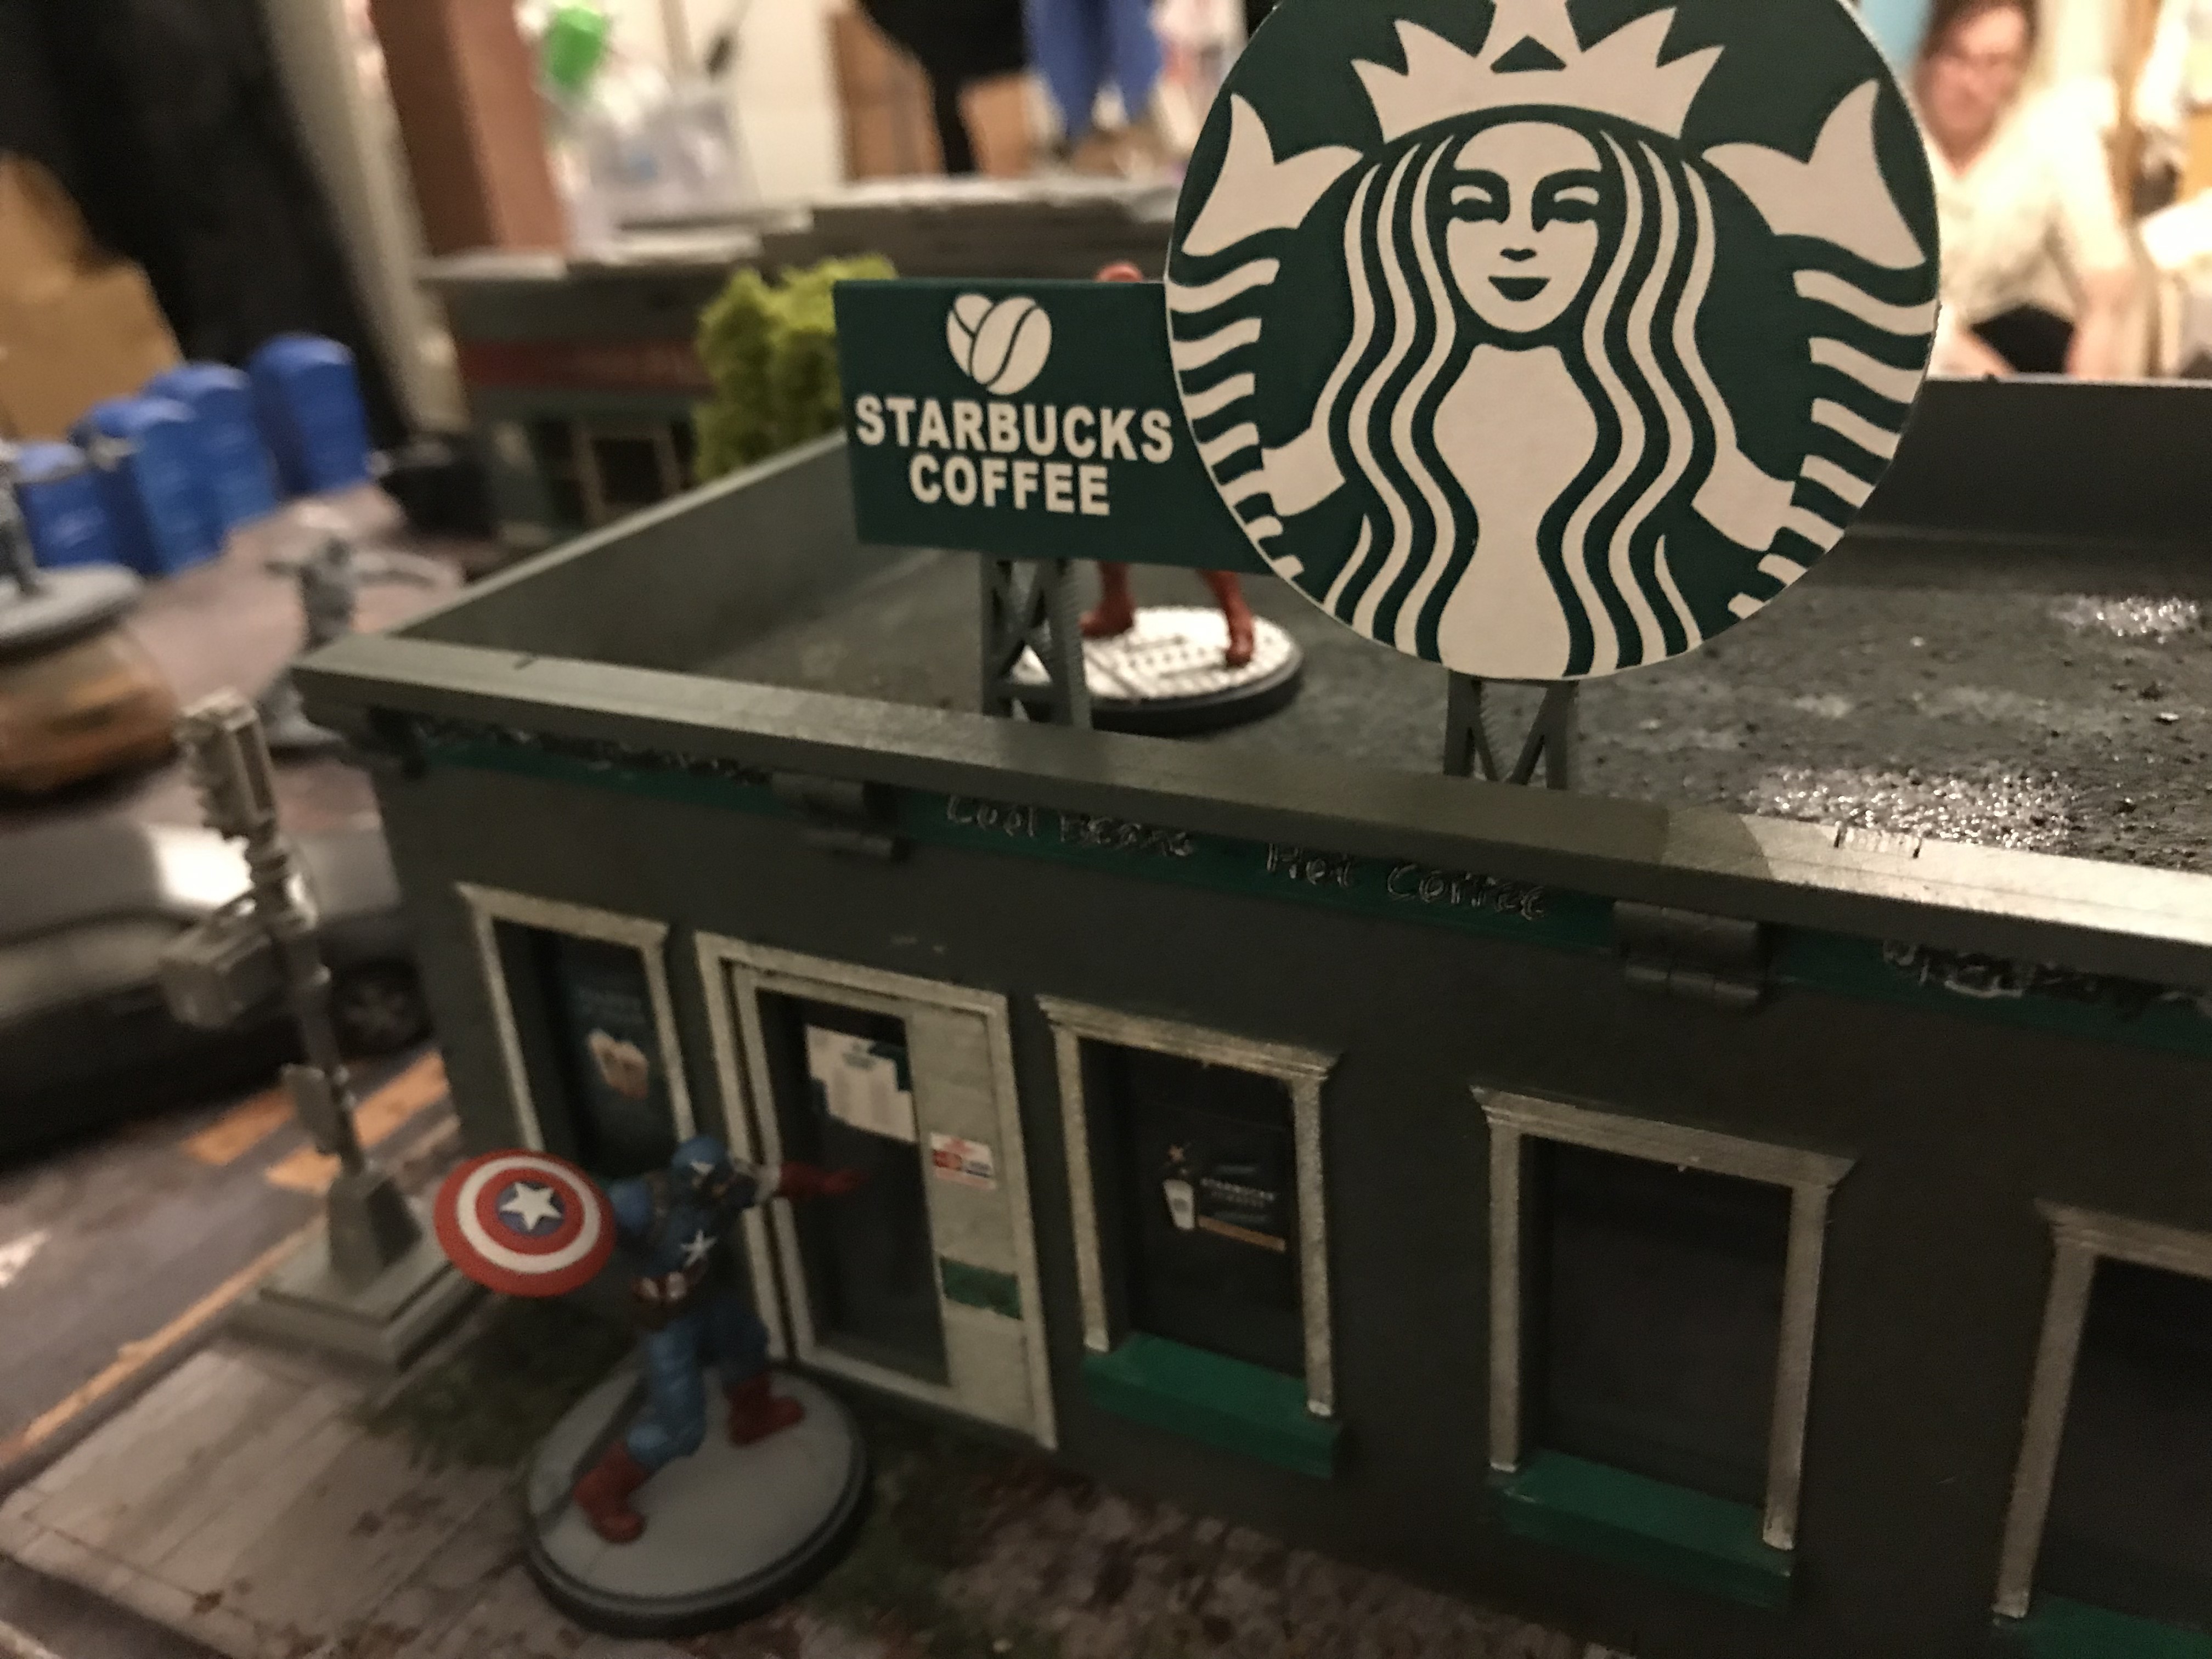
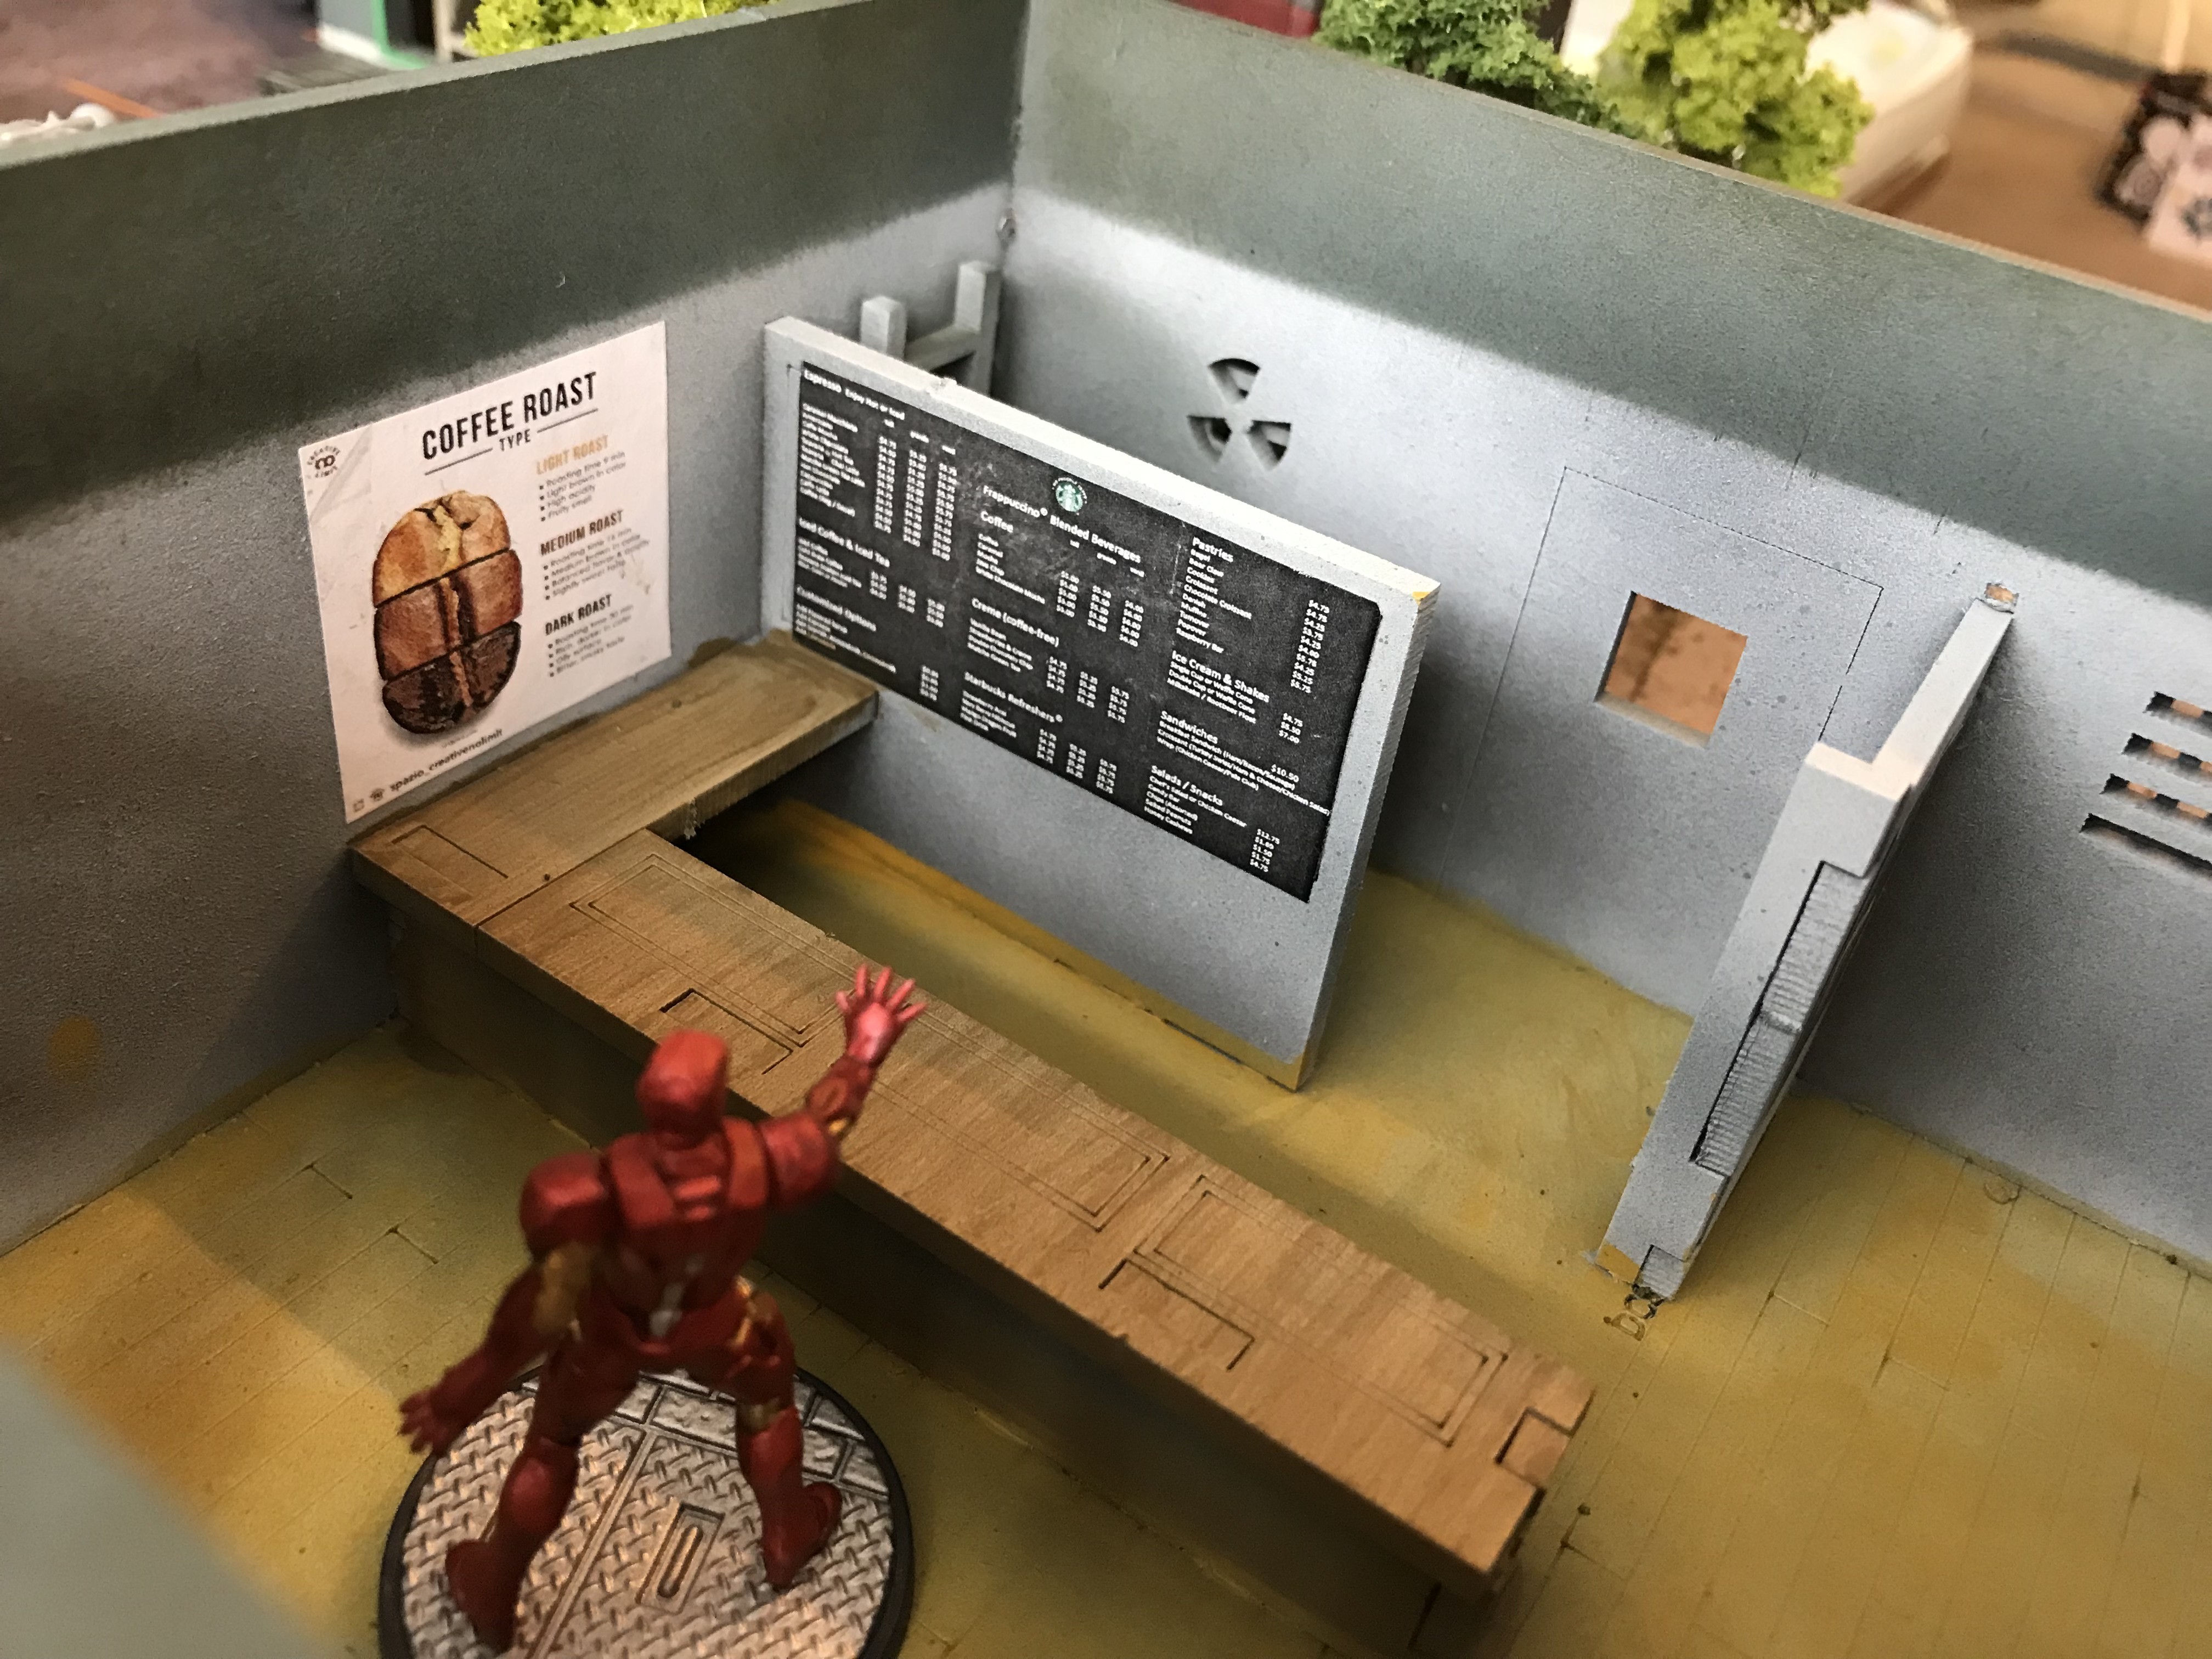
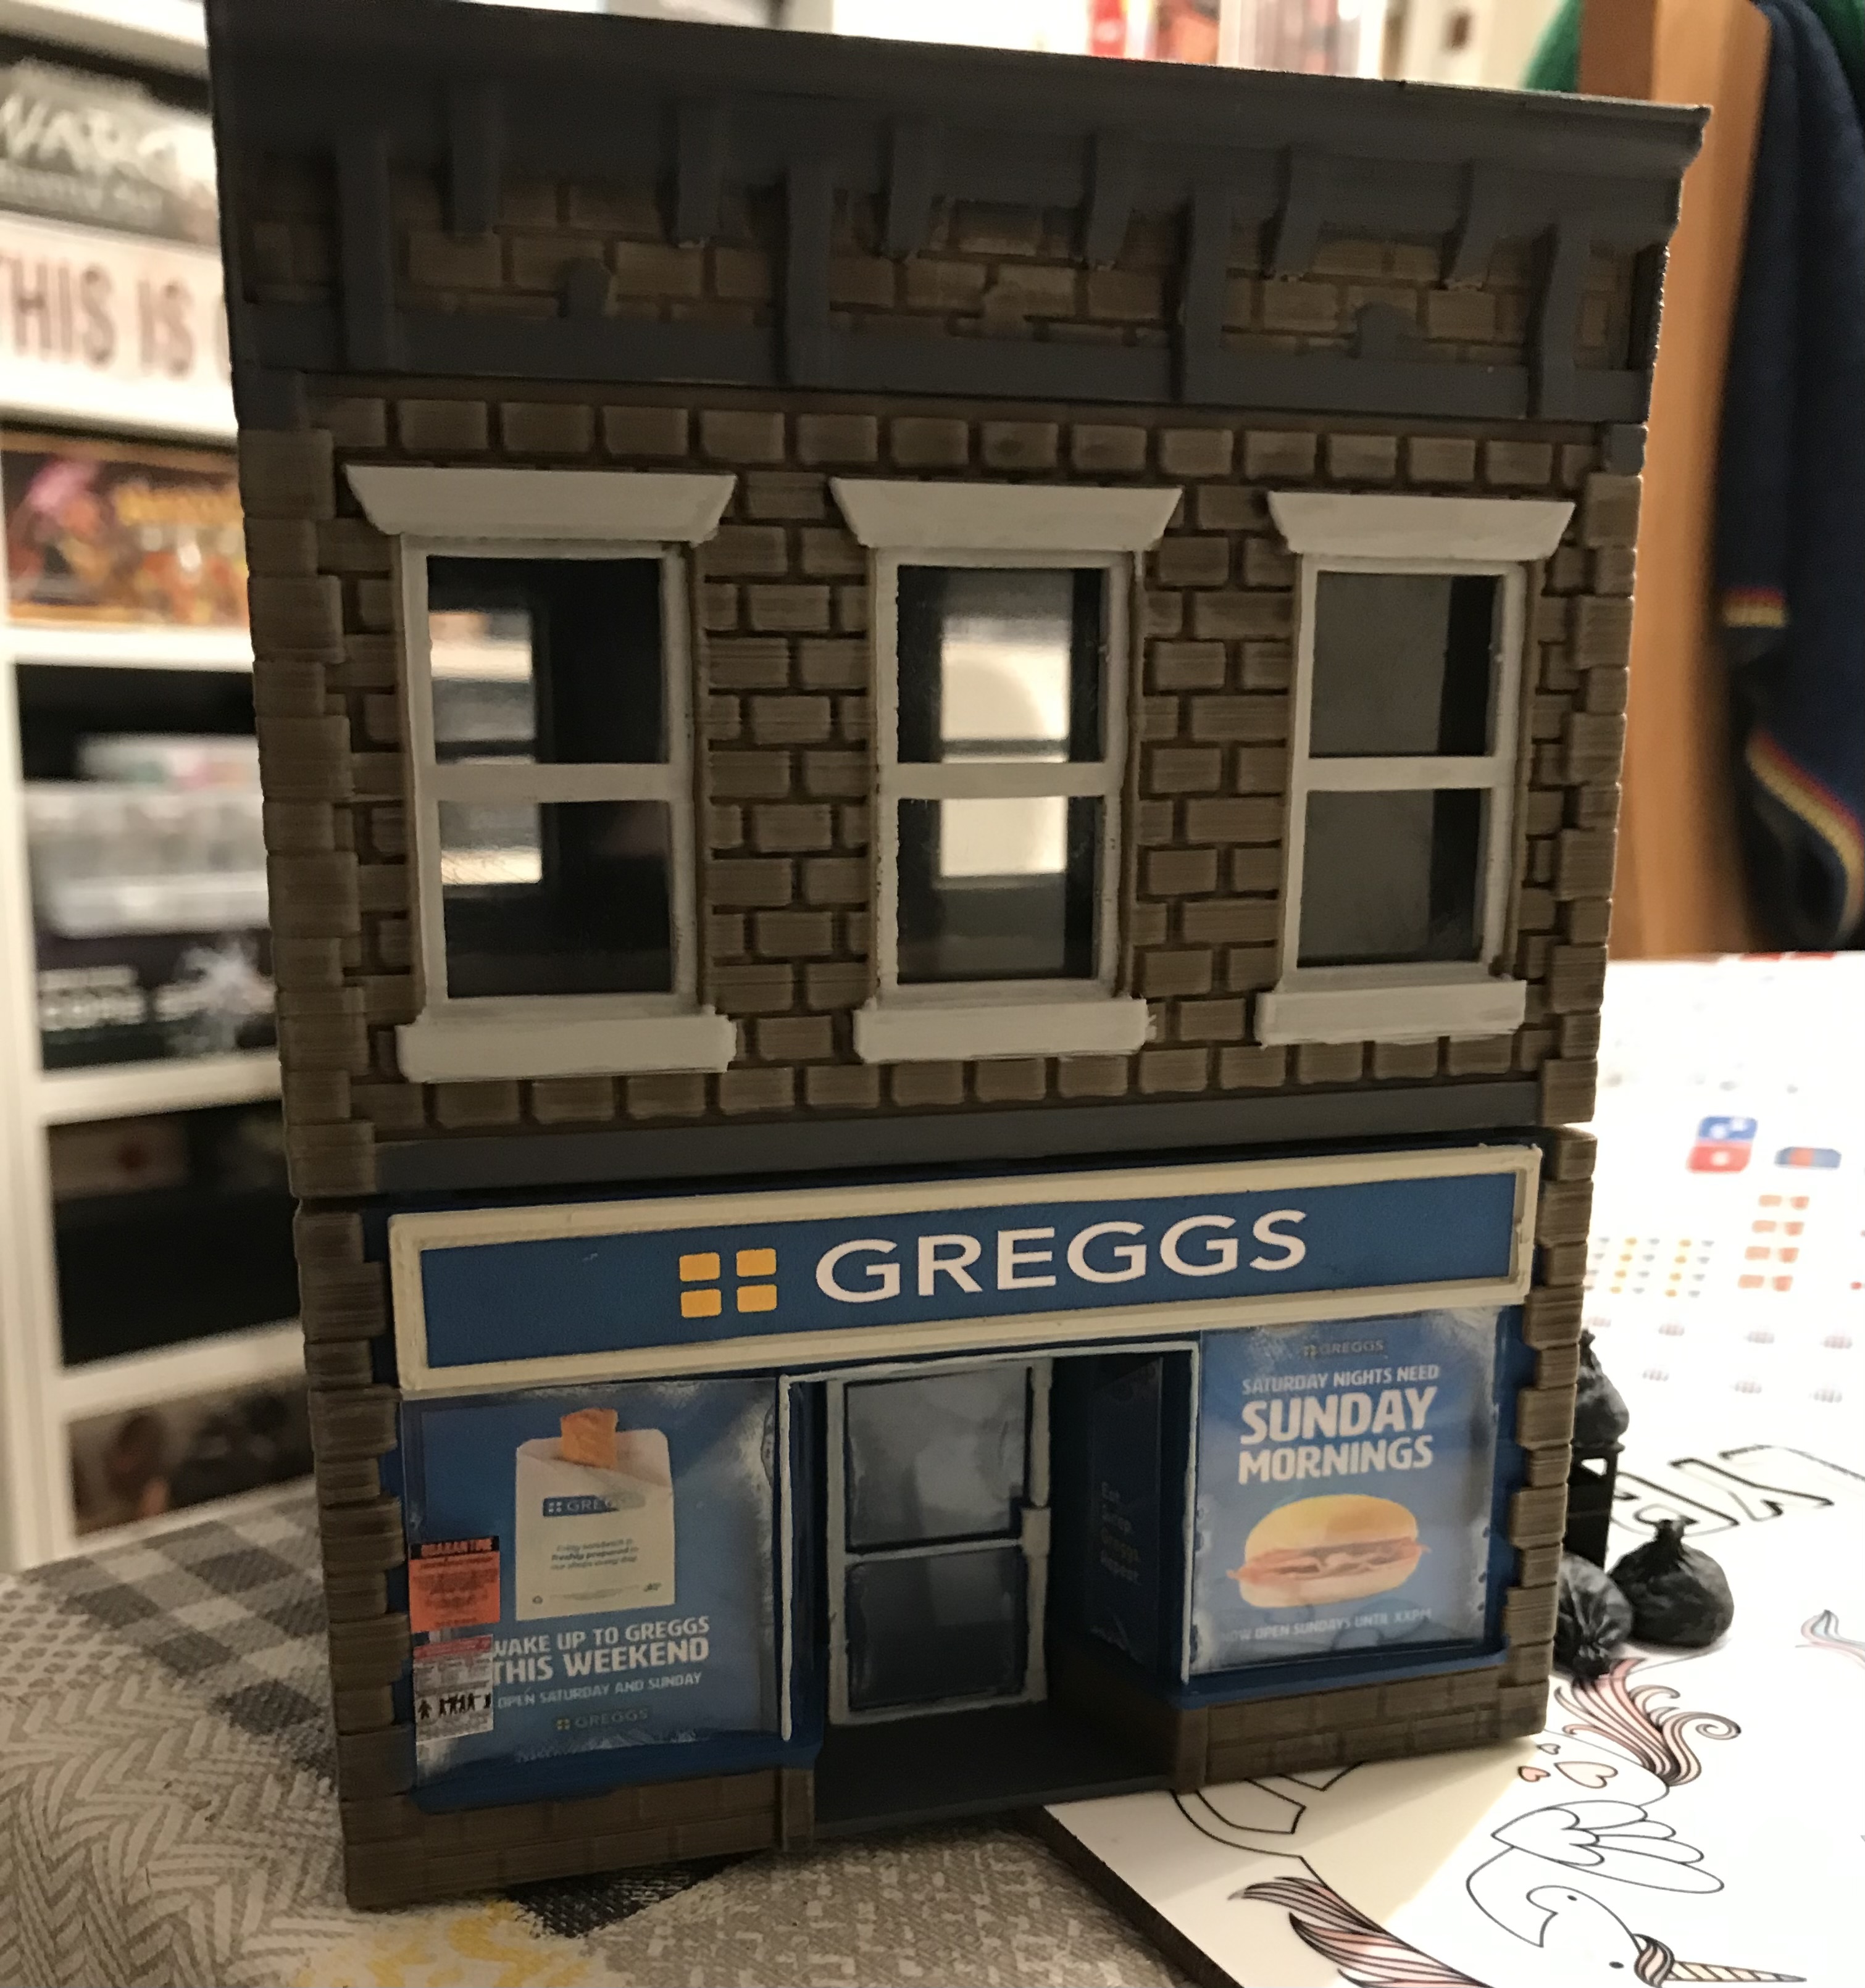
I turned the UK shops into local recognisable locations. It was only natural that the coffee store was Starbucks and the food shop was Greggs. I made the other store a hardware store as the sign came with the 3D model. I again used clear sheets for the windows but had to a lot more measuring and cutting to ensure they fit into the grooves and gave the appearance of glass in front of posters.
To note, the coffee shop was an old TTcombat model I had laying around, but Starbucks works for both USA and UK.


 I sadly didn’t take progress pictures of the terraced houses. Only the finished products in situ.
 With the buildings and scatter done at this stage, I moved onto painting some models for both modern warfare situations and Walking Dead.
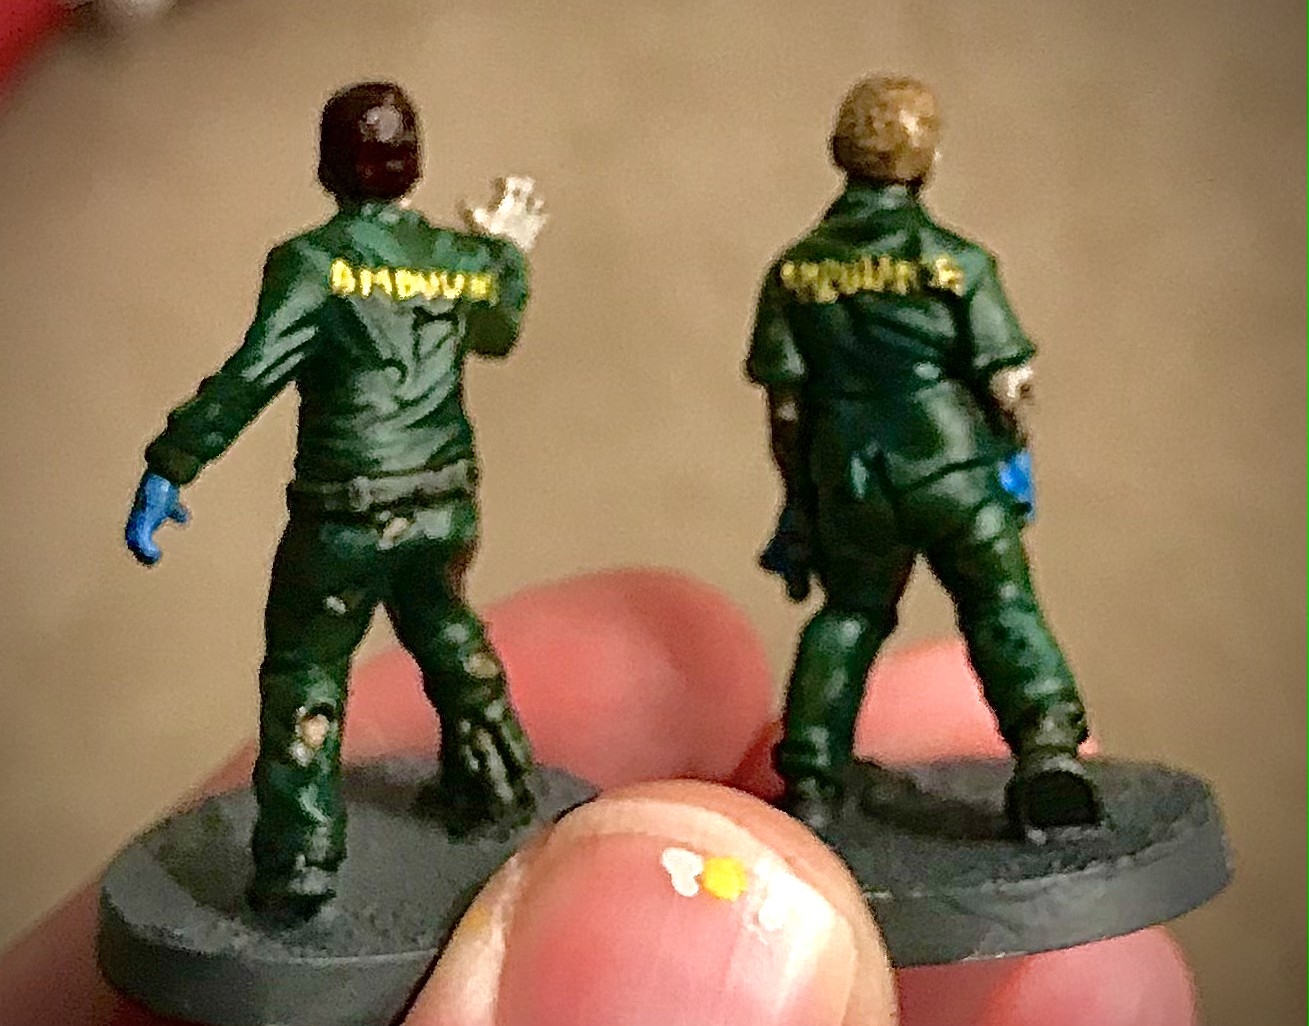
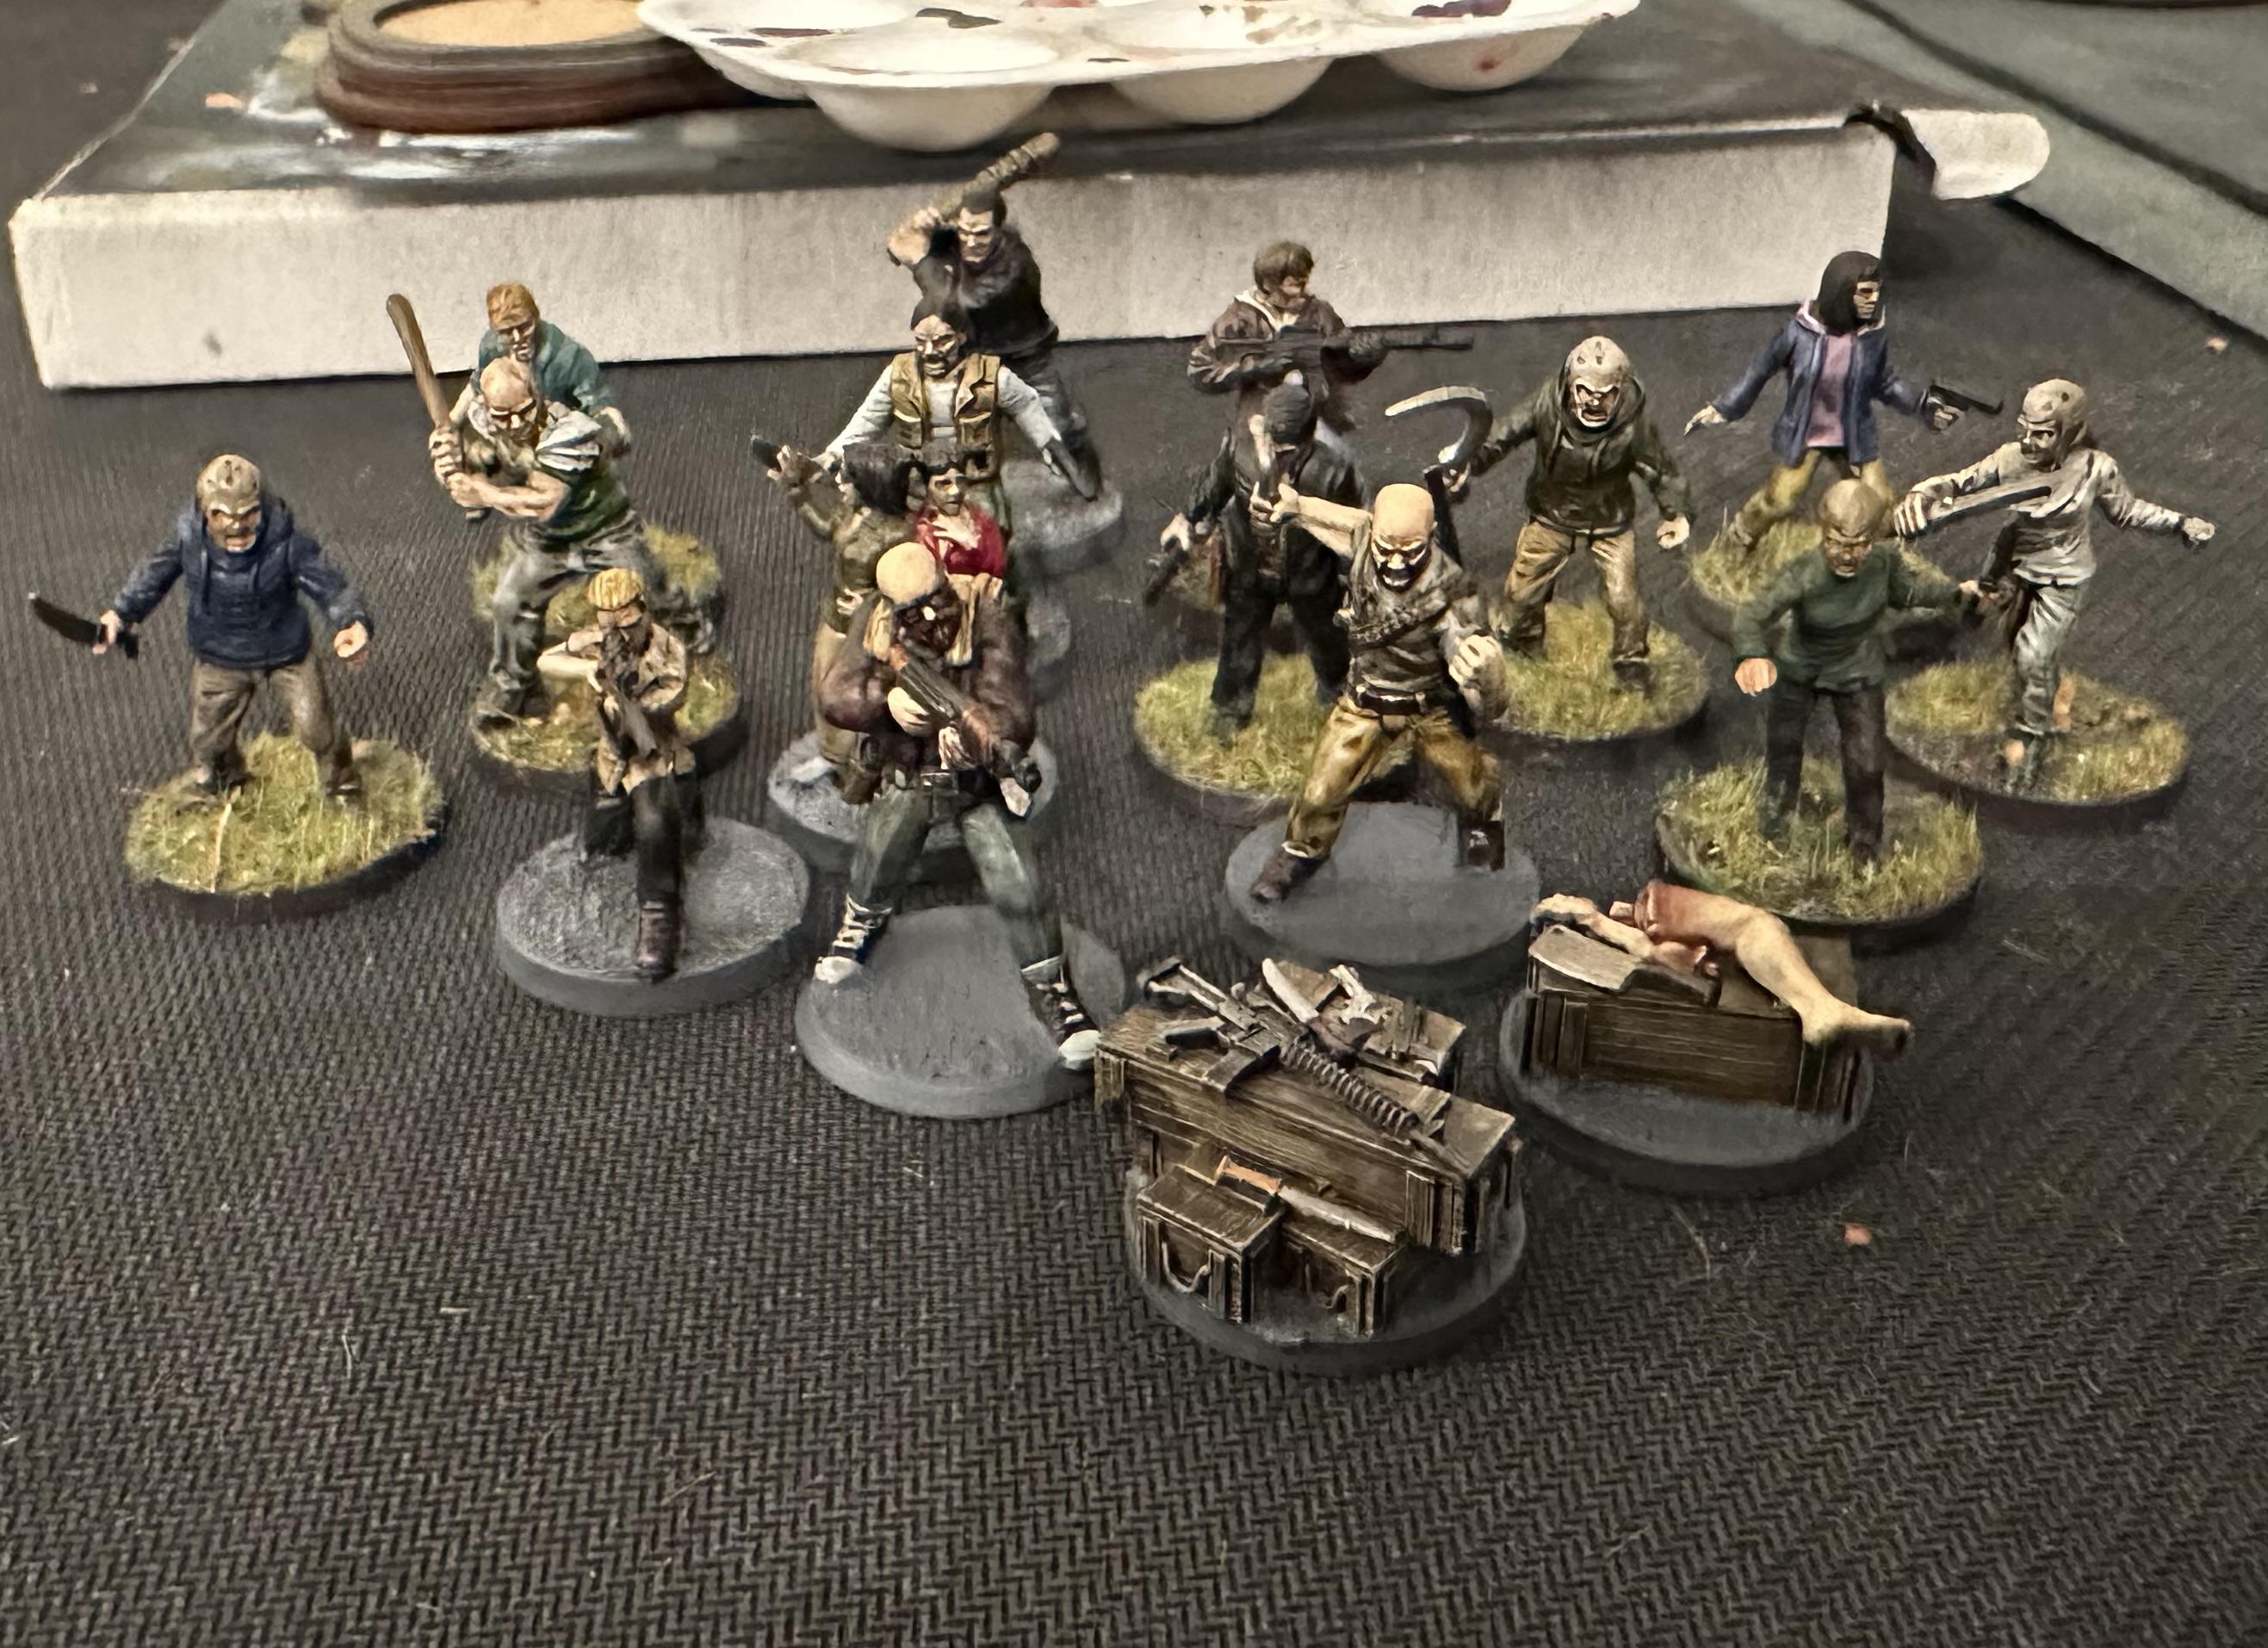
Not long after painting the Winchester, I had an inspired idea to customise some of the Walking Dead models I had and paint them to fit the theme of the board. So I painted some NHS paramedics and using head supplied from 7TV, I painted up some construction workers.
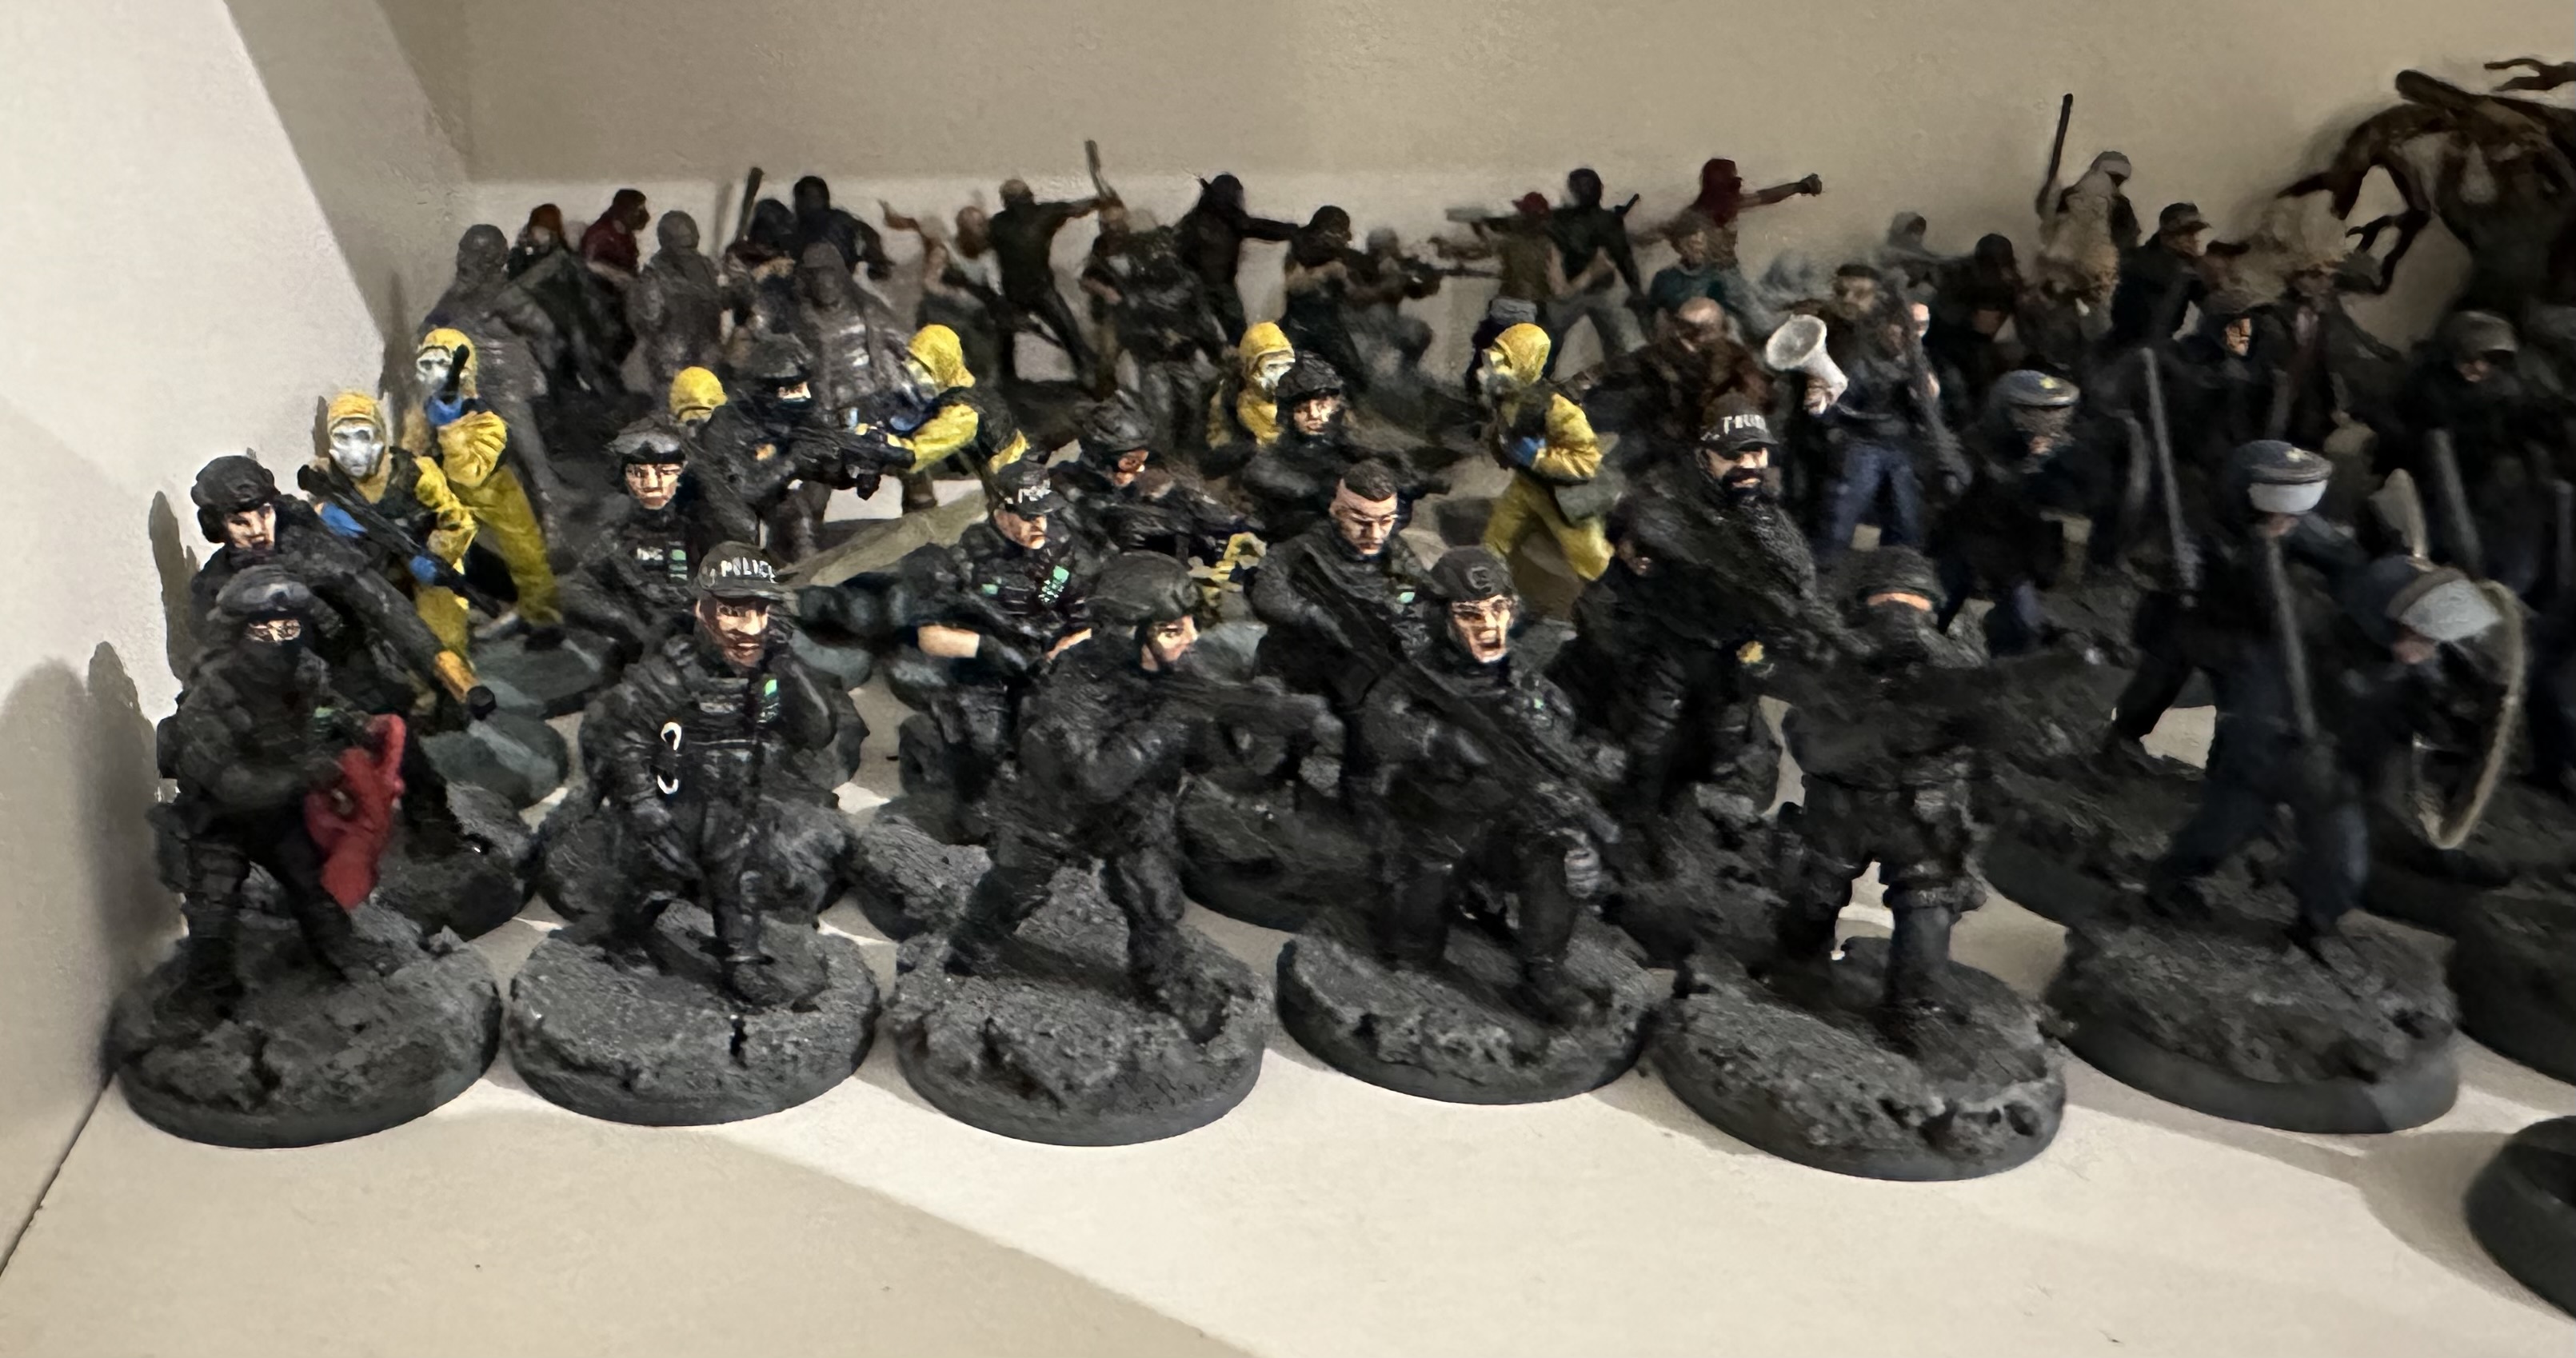
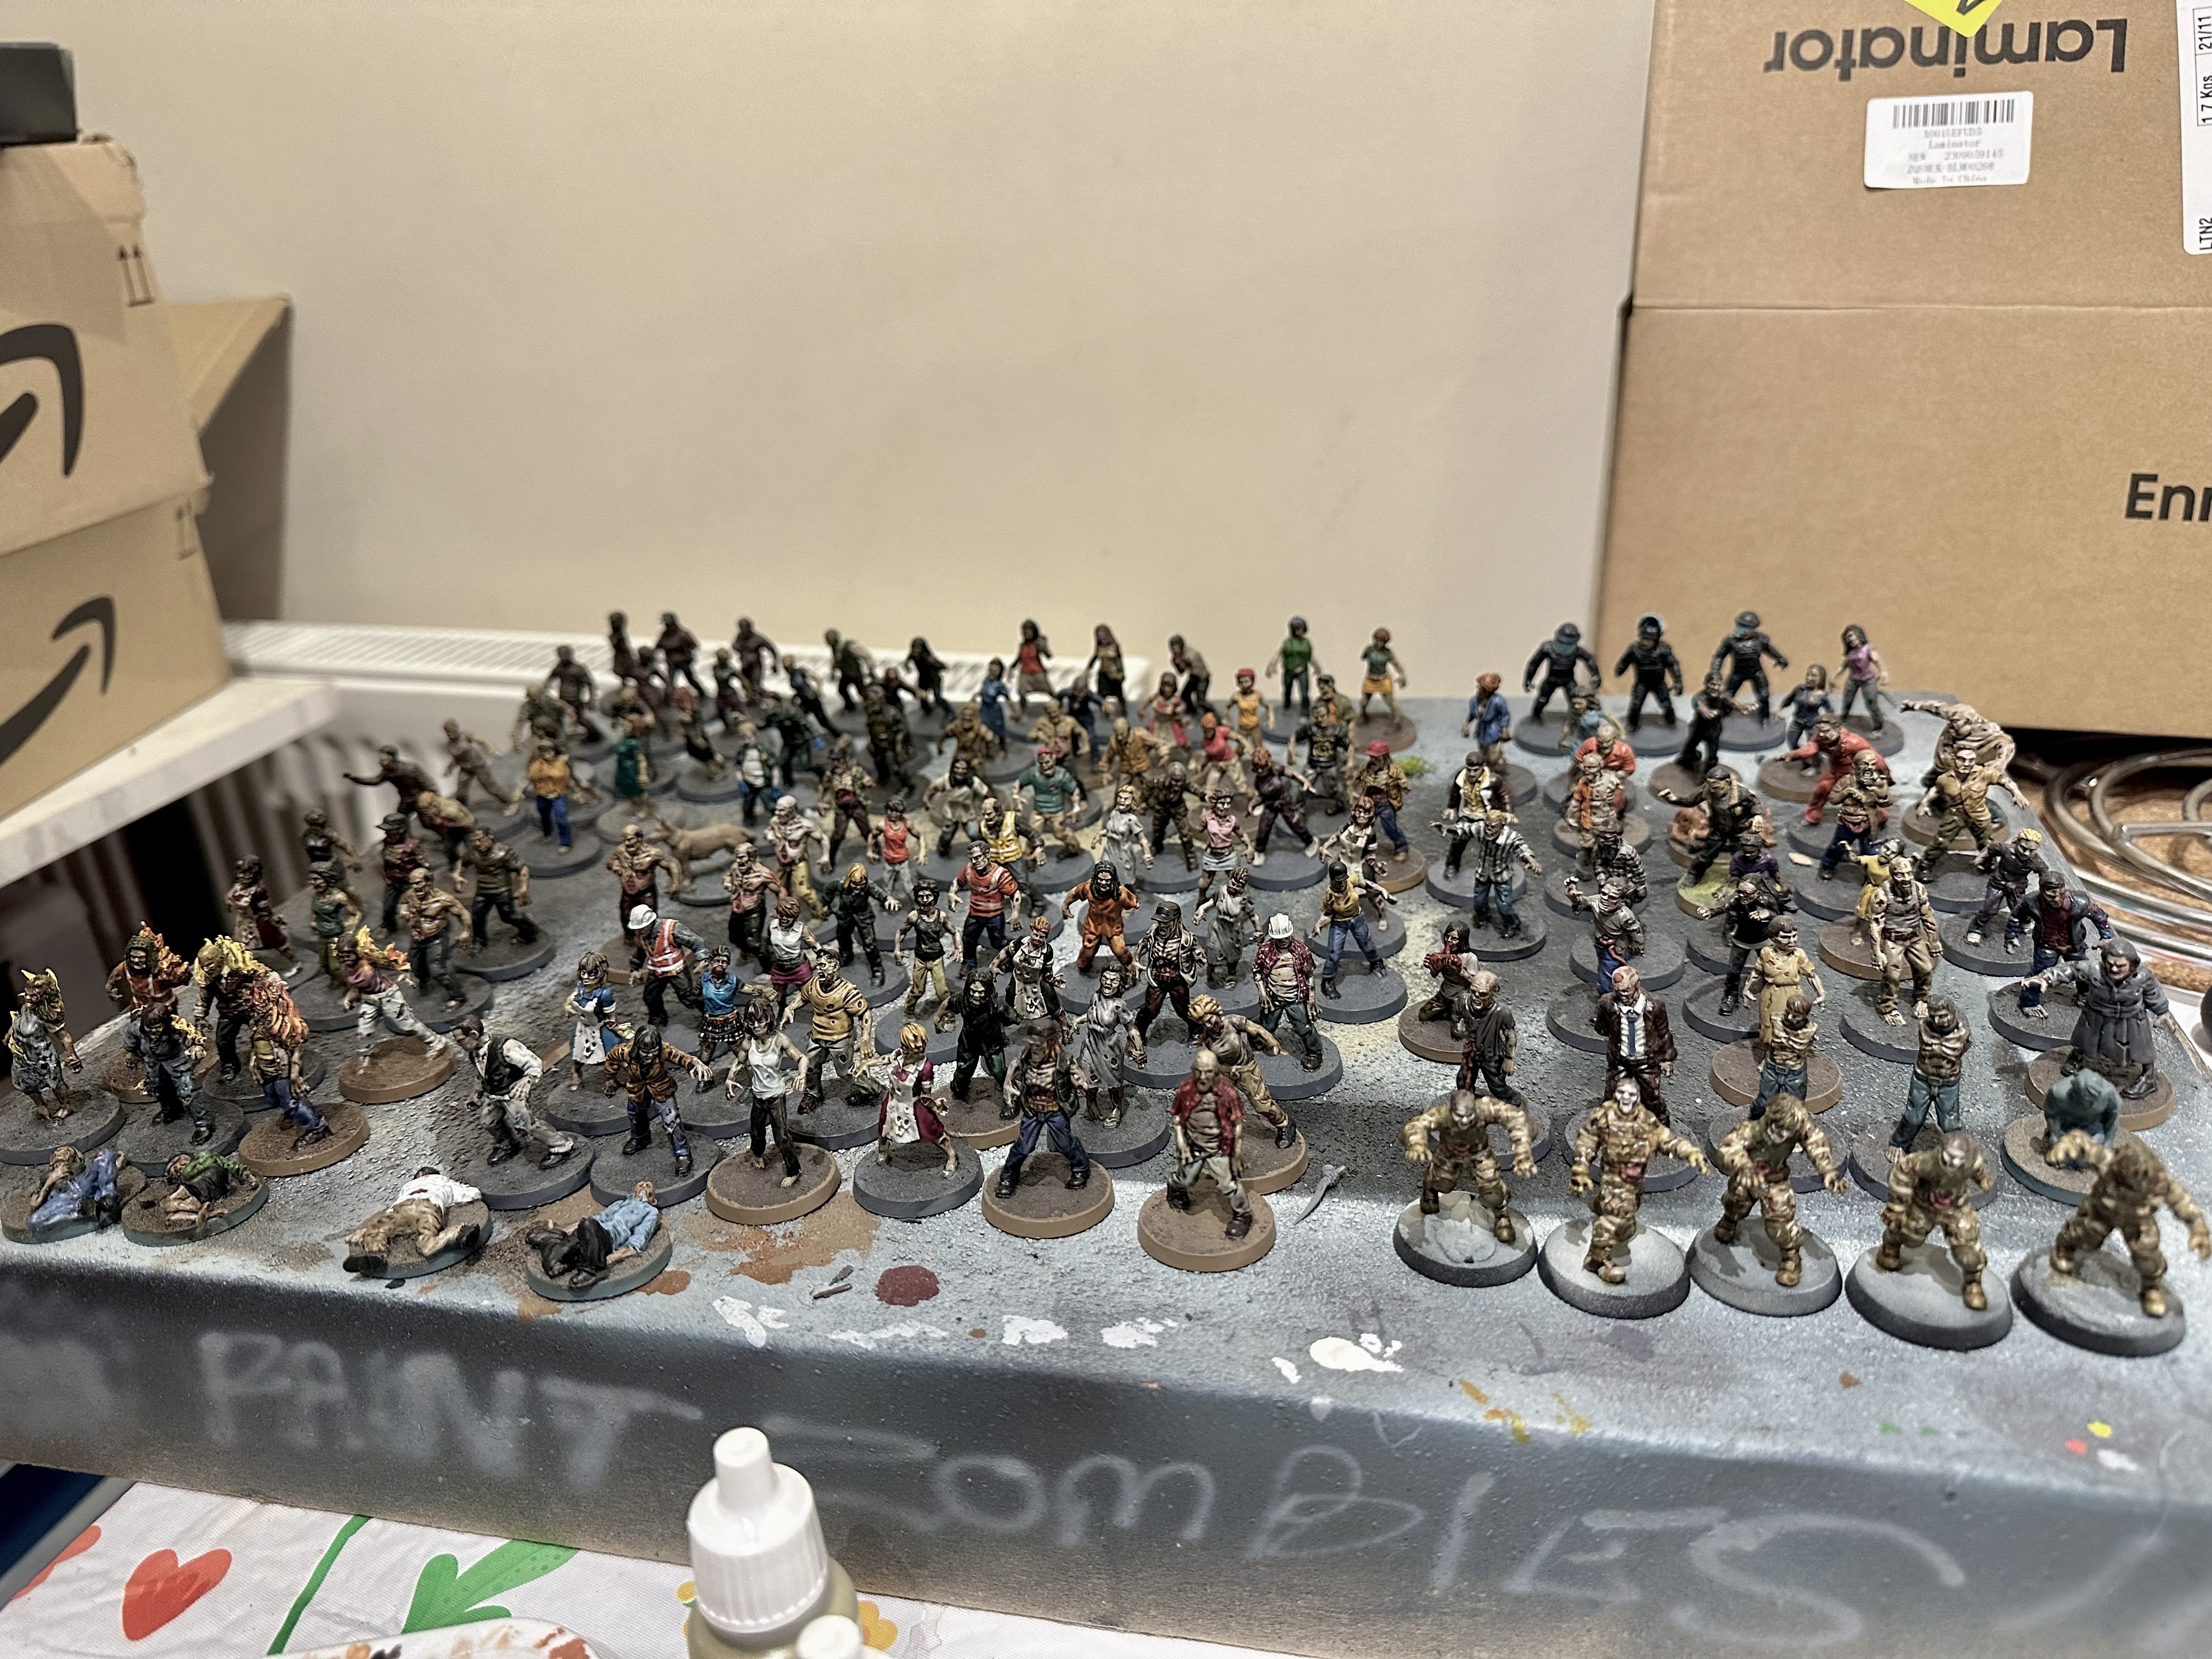
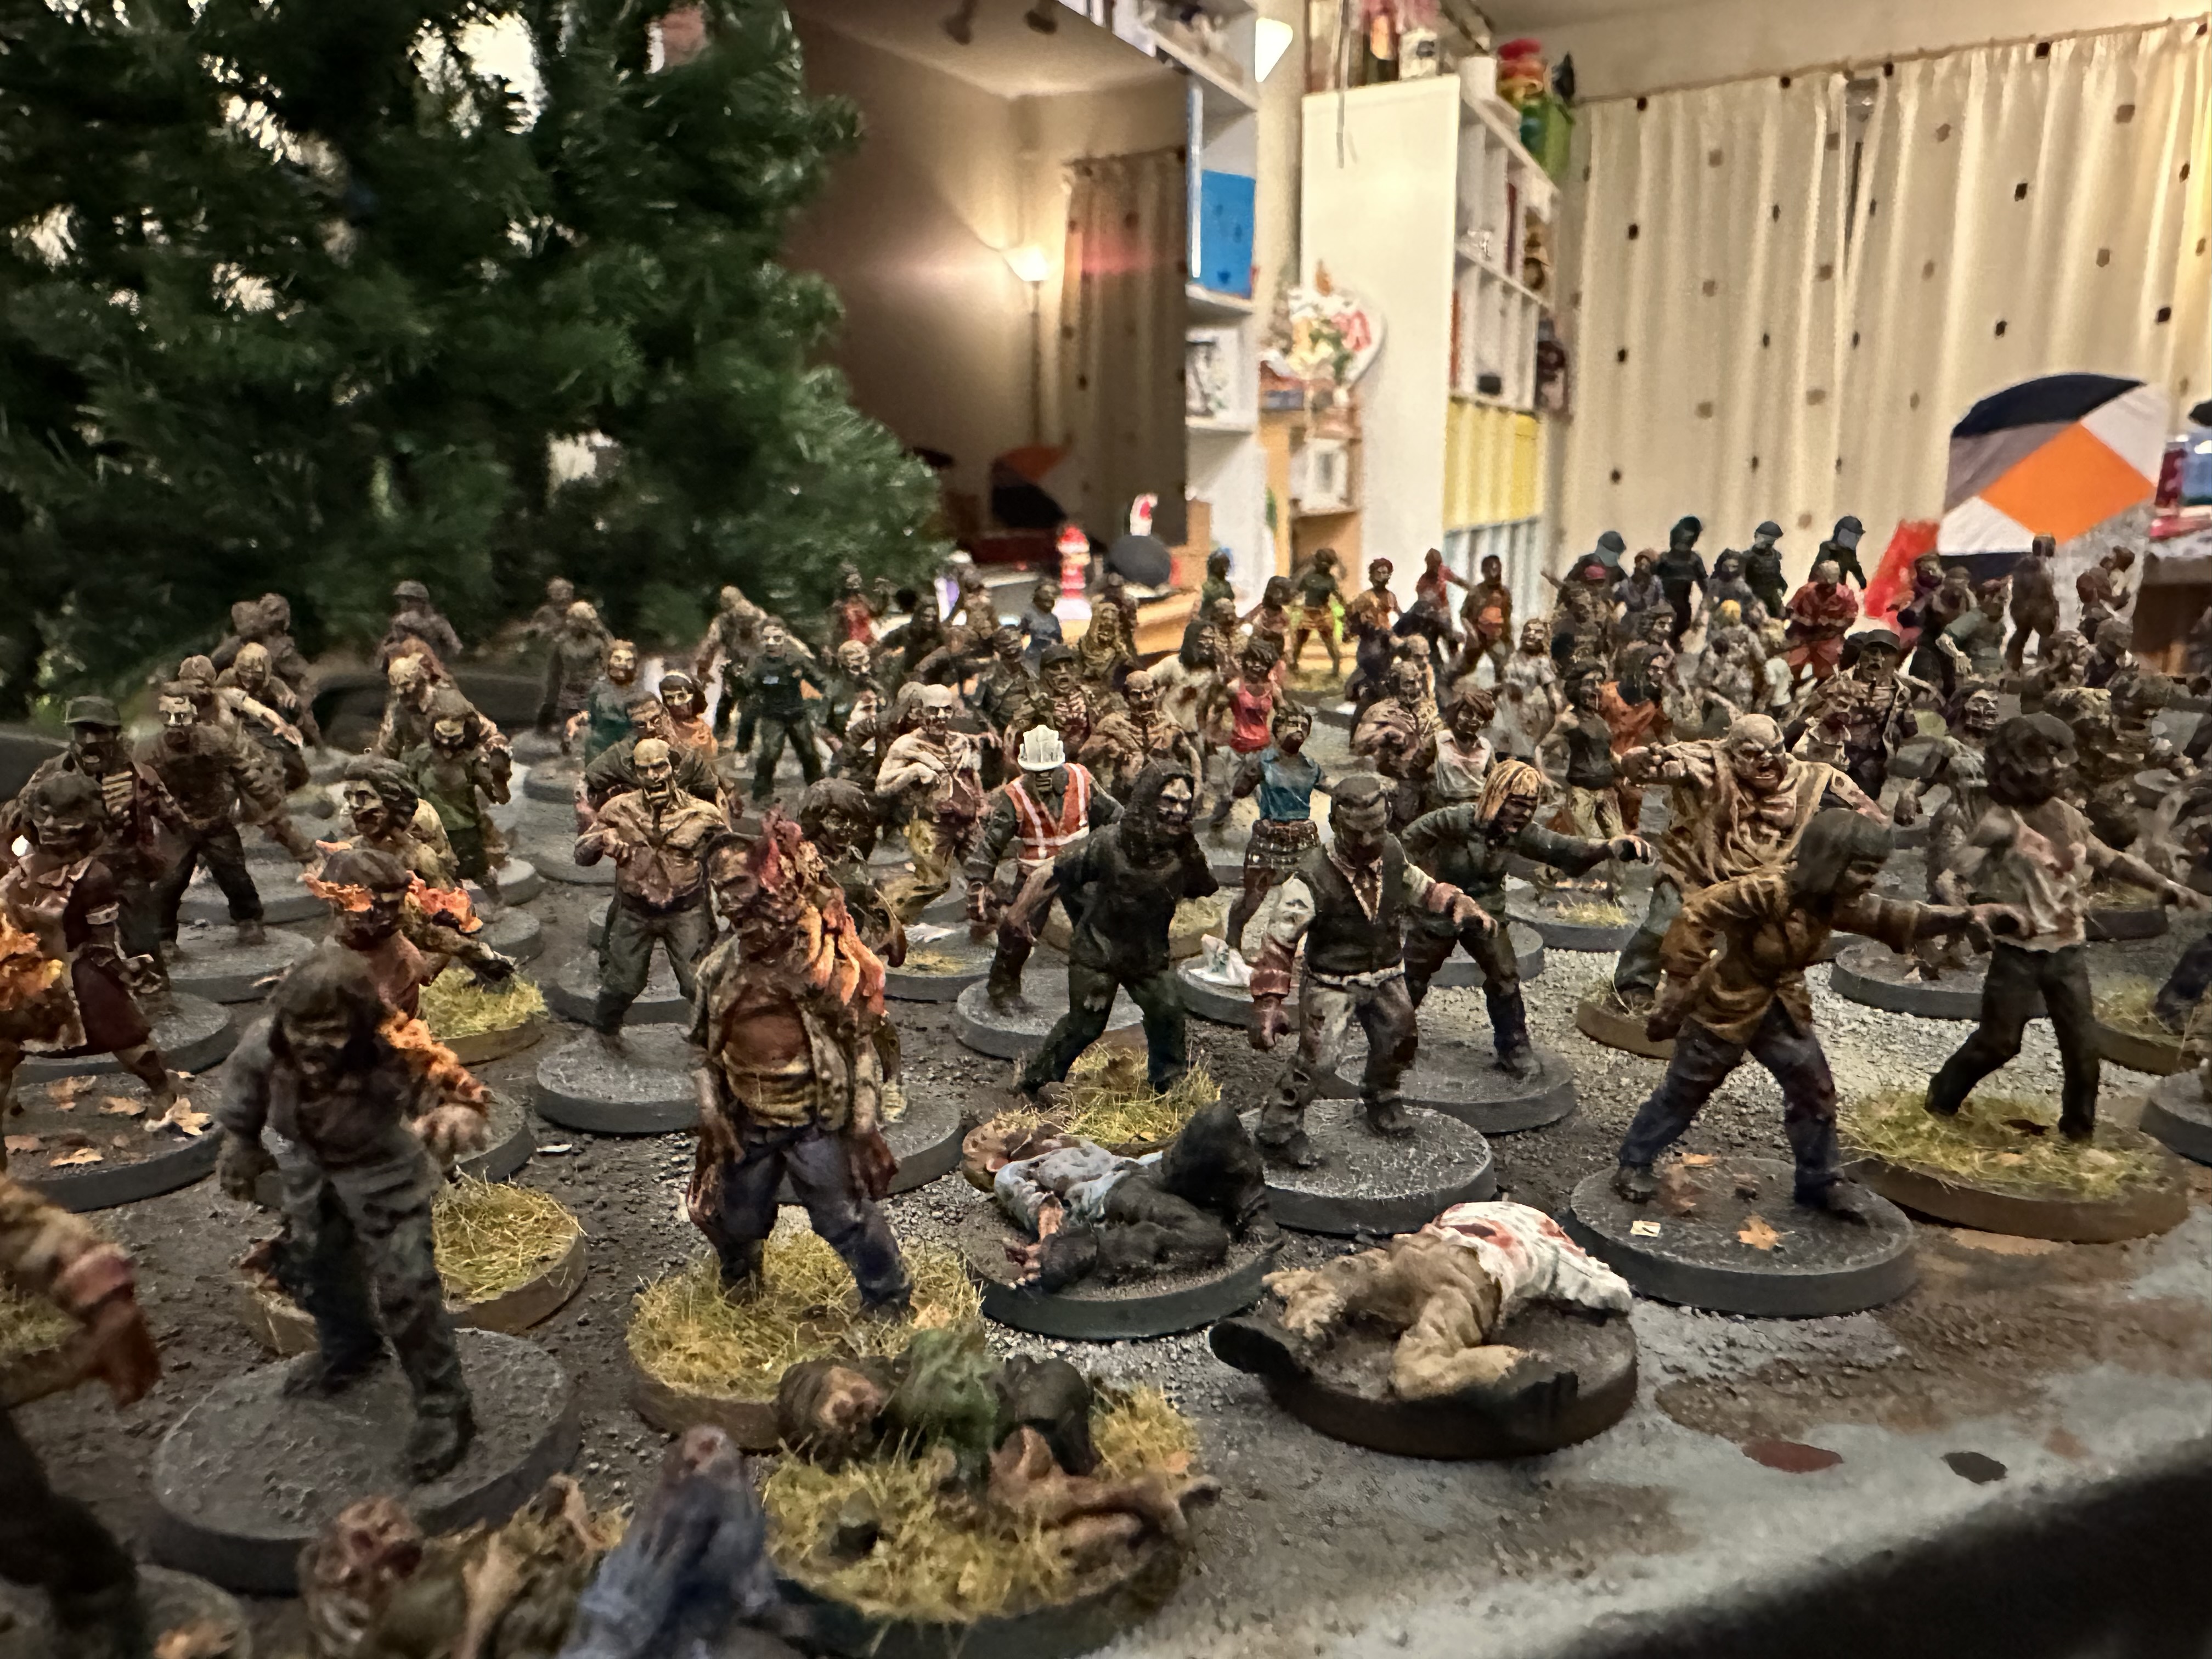
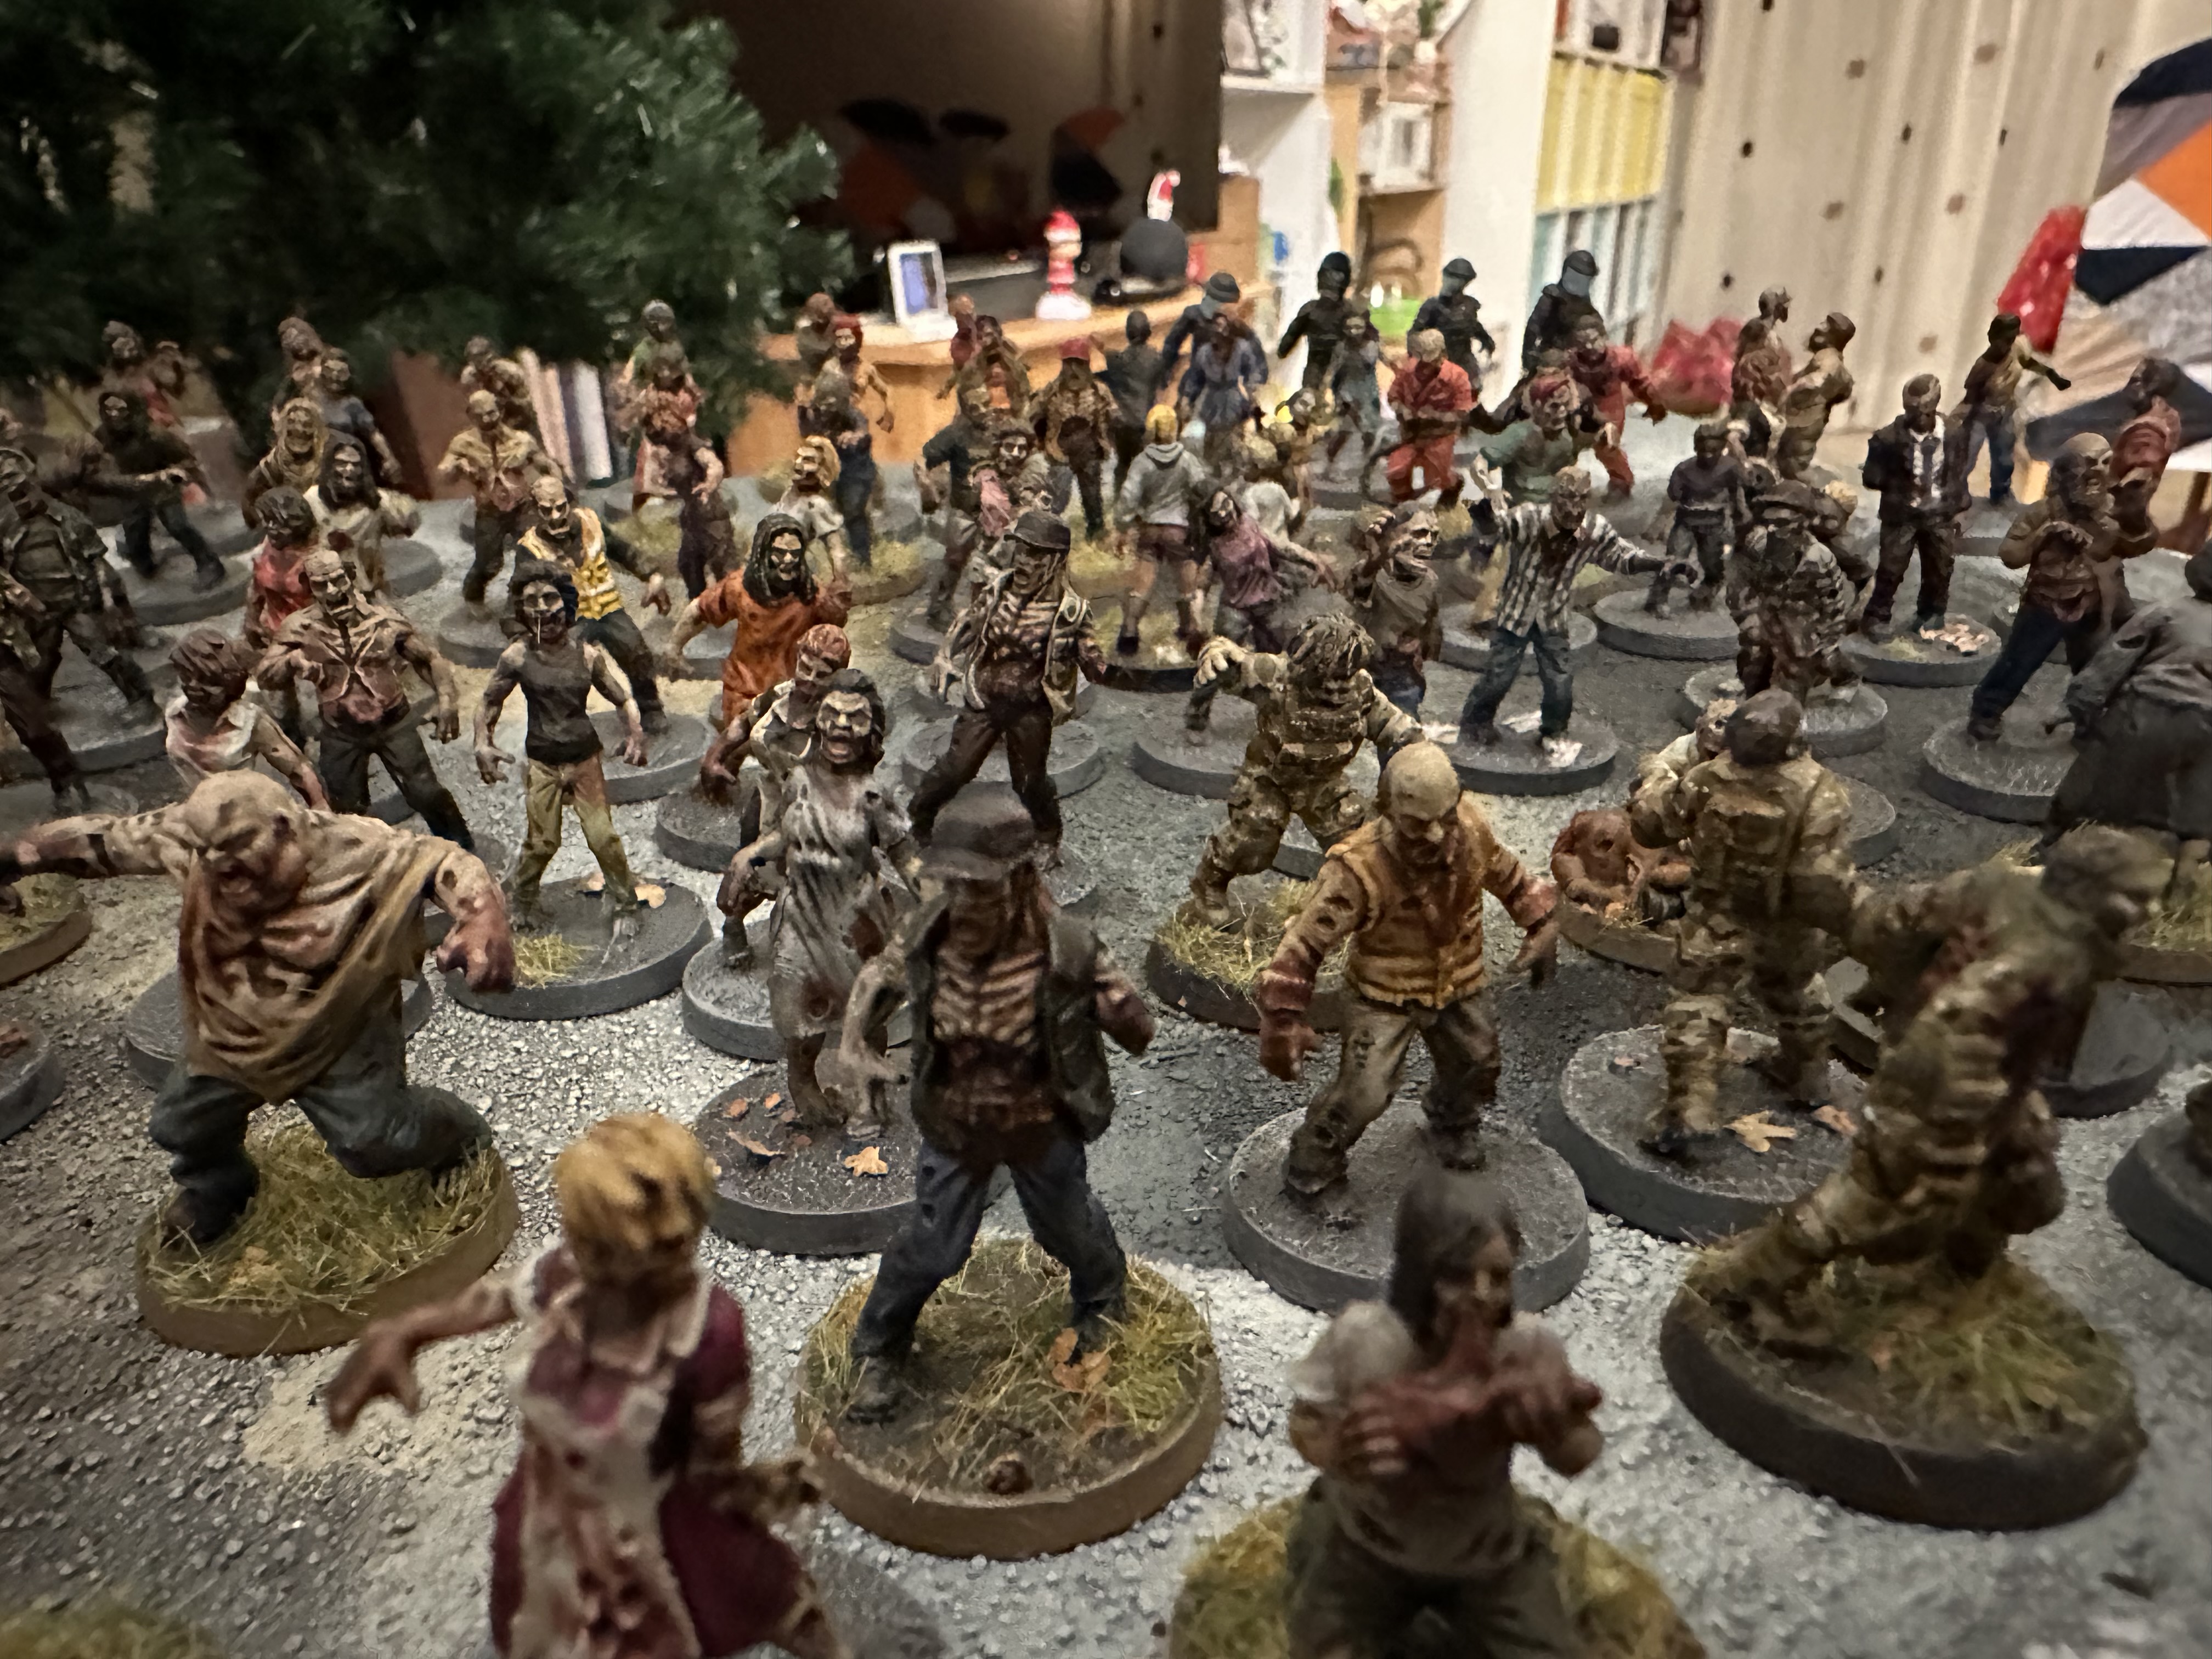
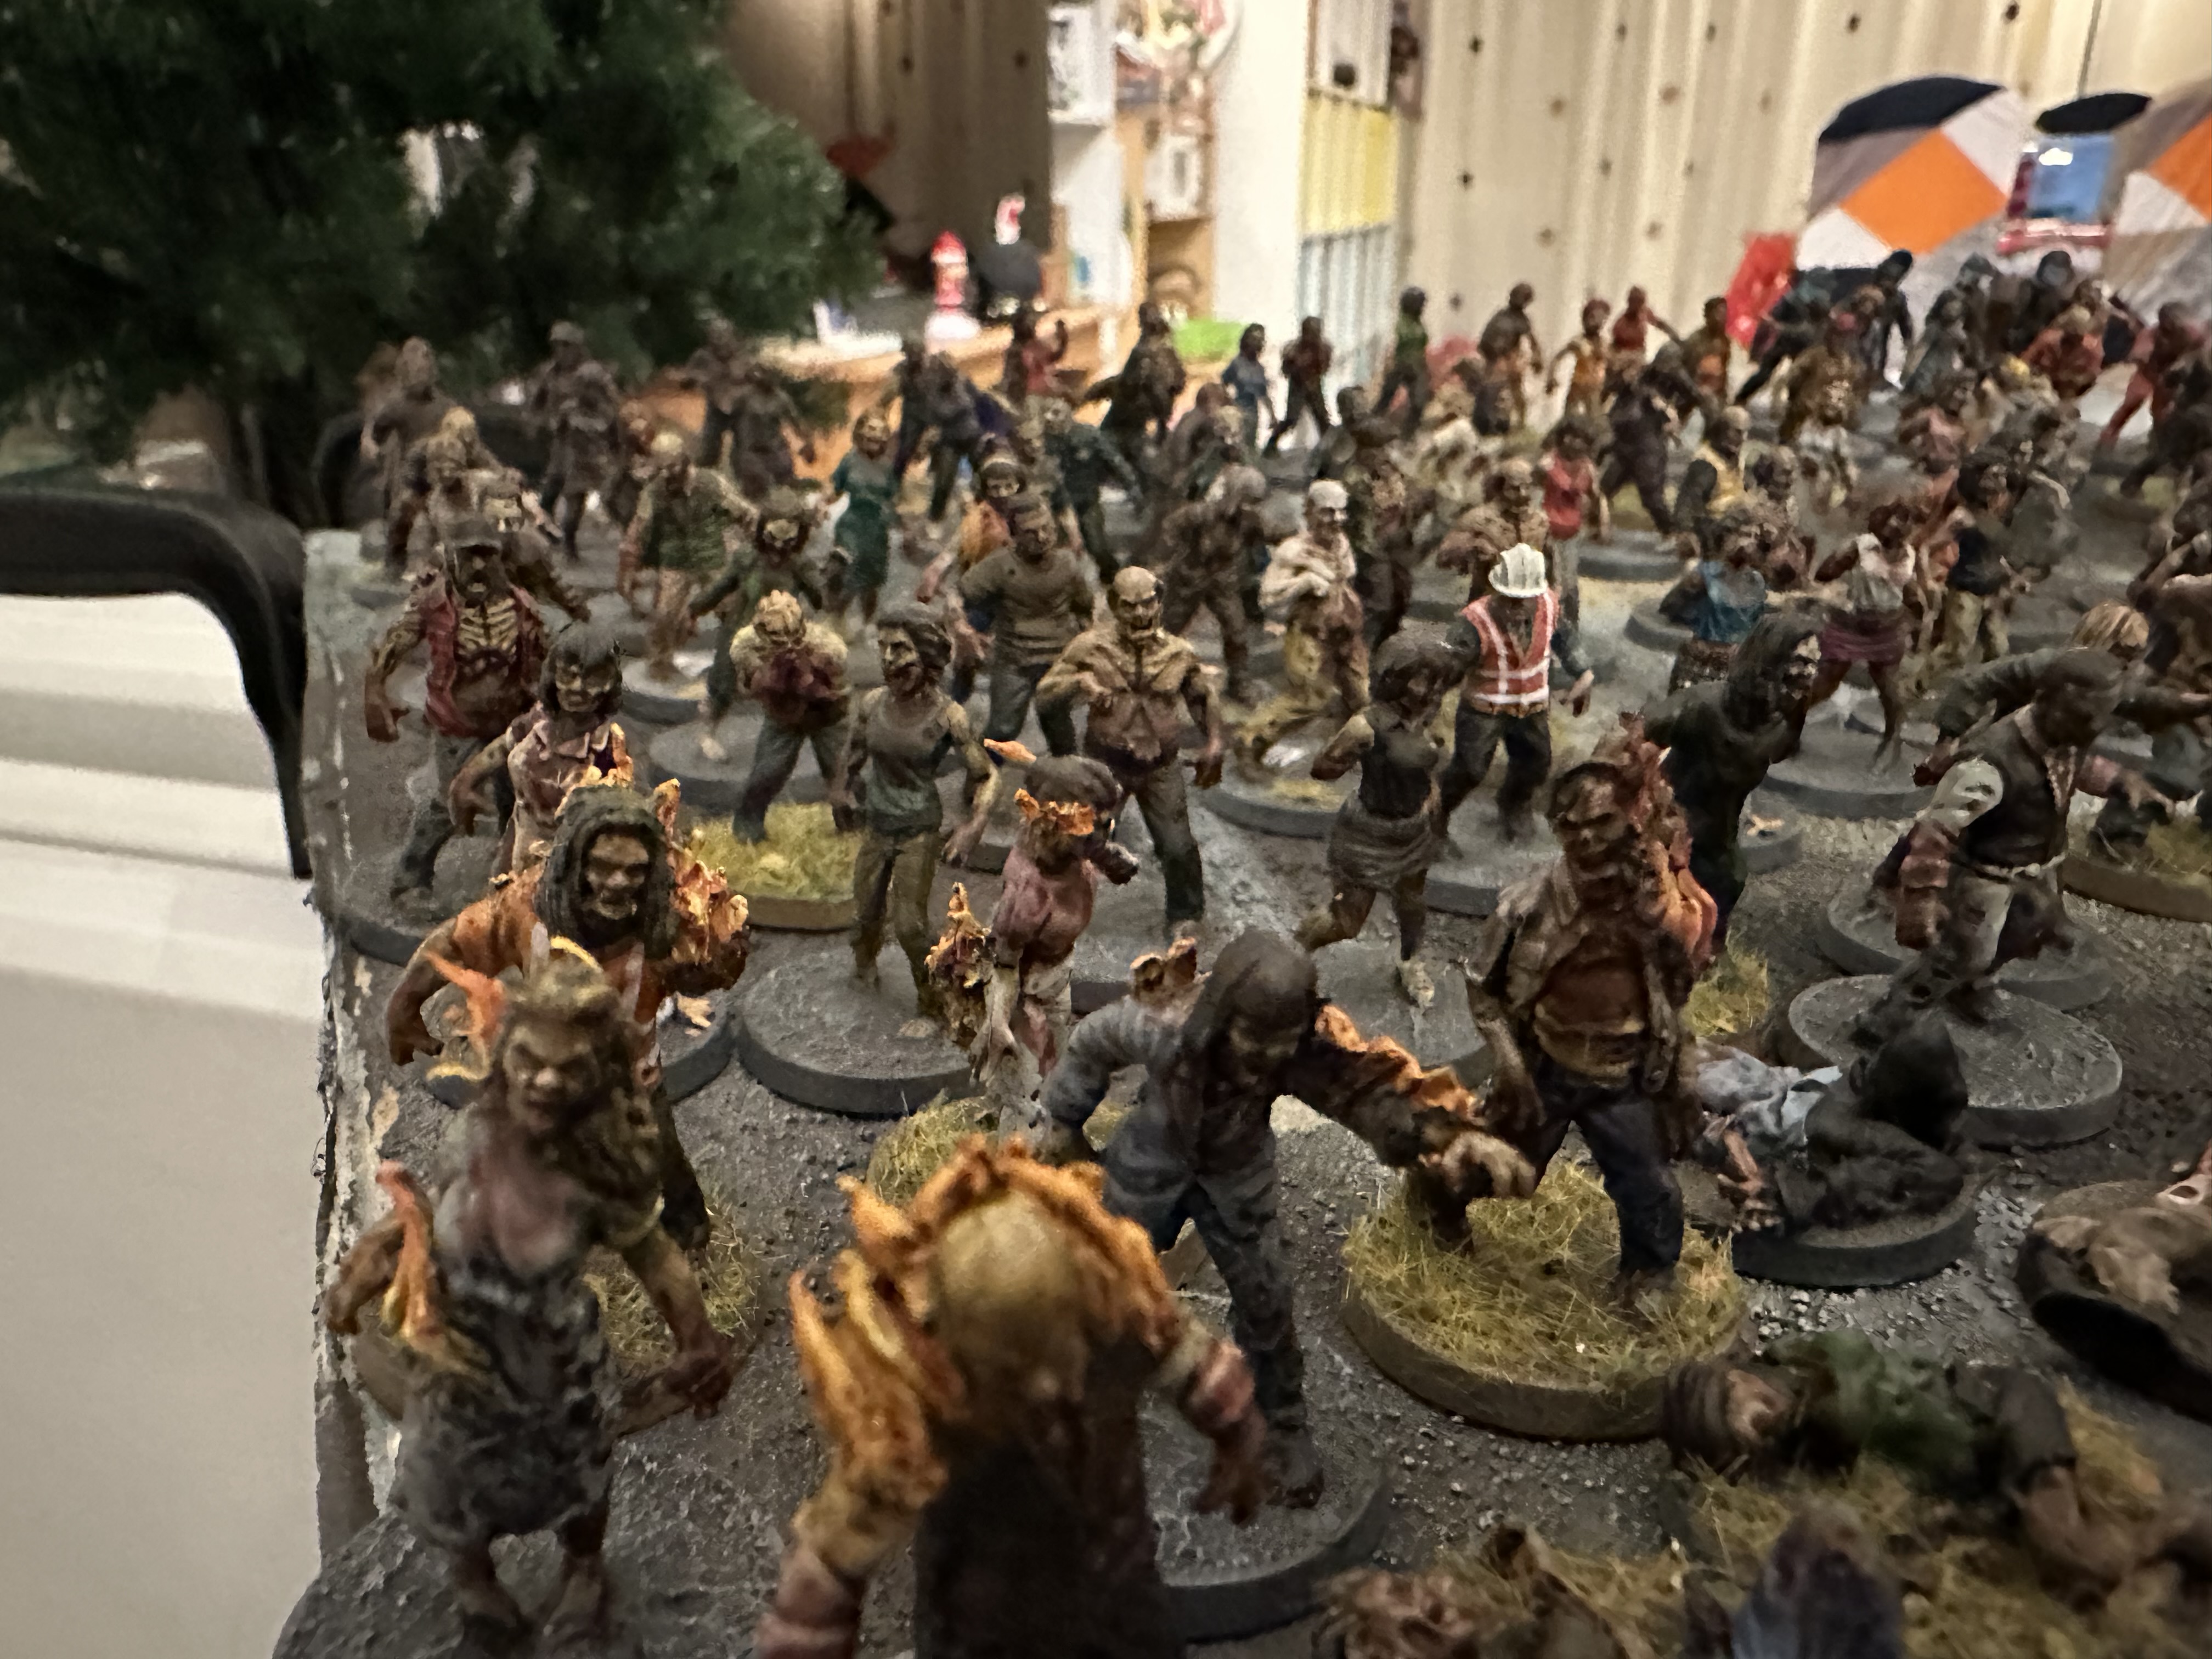
I bought up a bunch of extra Walkers from the core game and chopped and changed a bunch of head to keep the visuals fresh. I started work on painting the 150 walkers I now had each in various stages of being painted. I put this on hold around January and didn’t return to the Walker until start of December this year.
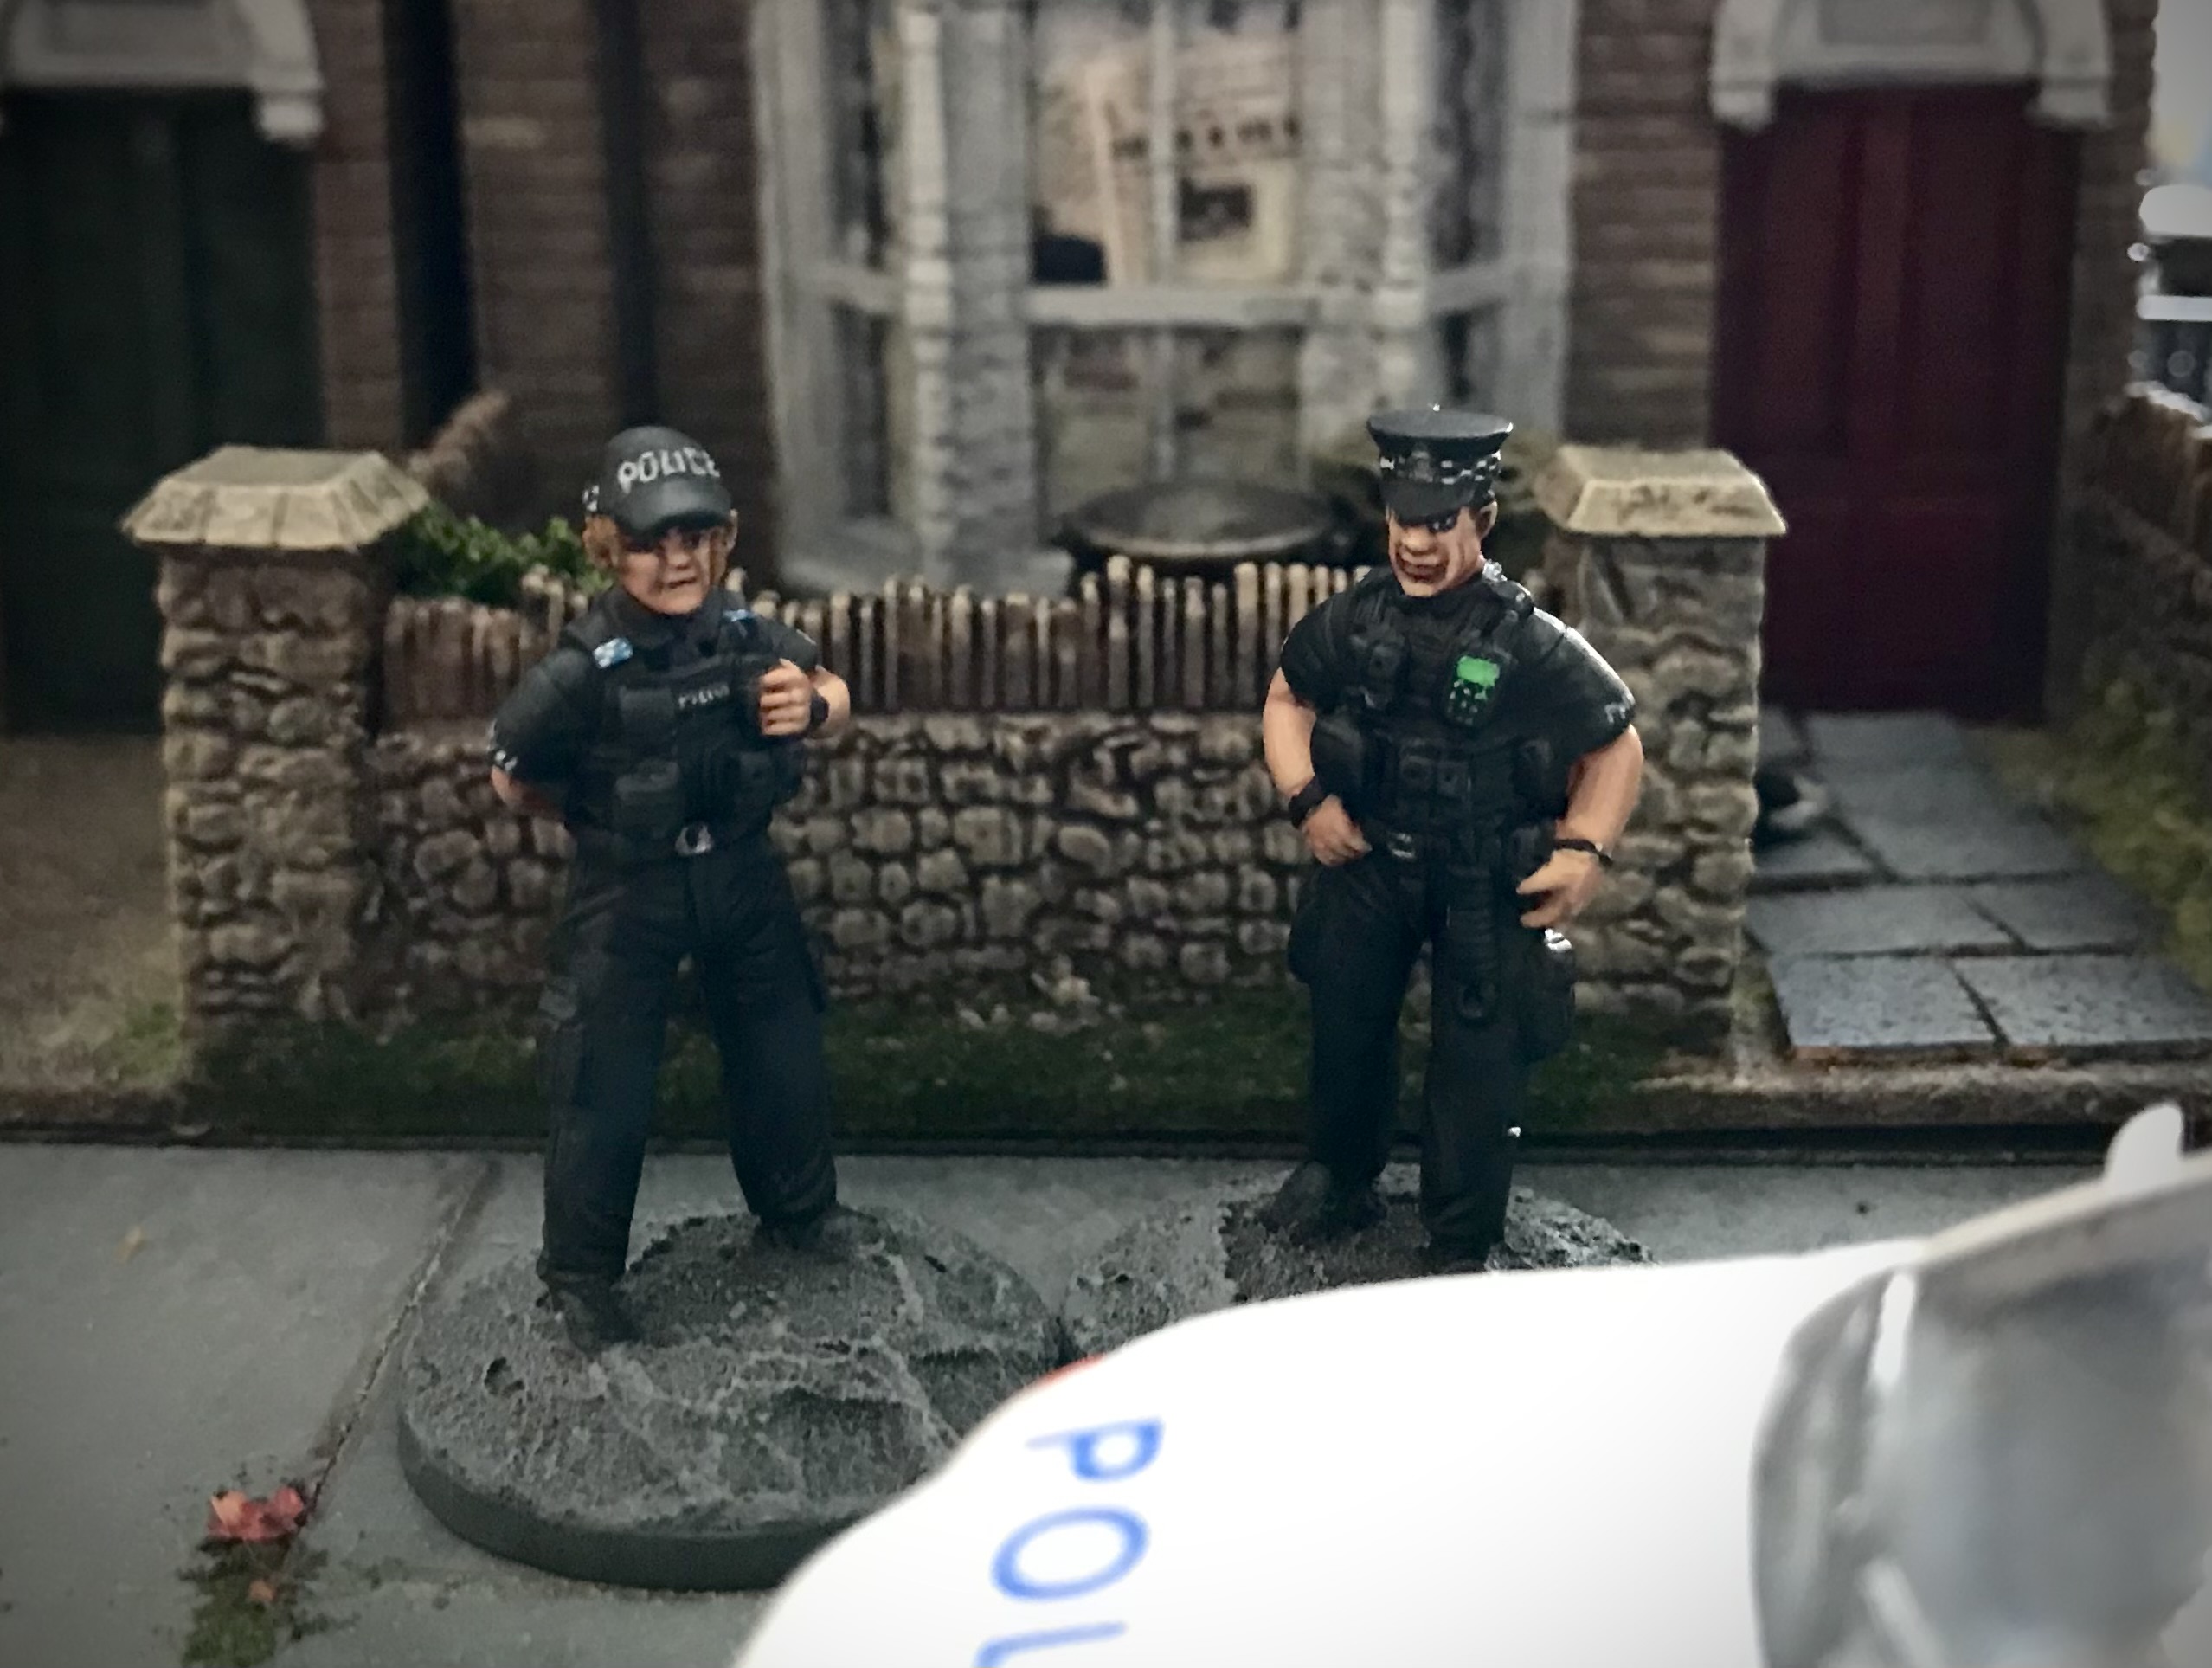
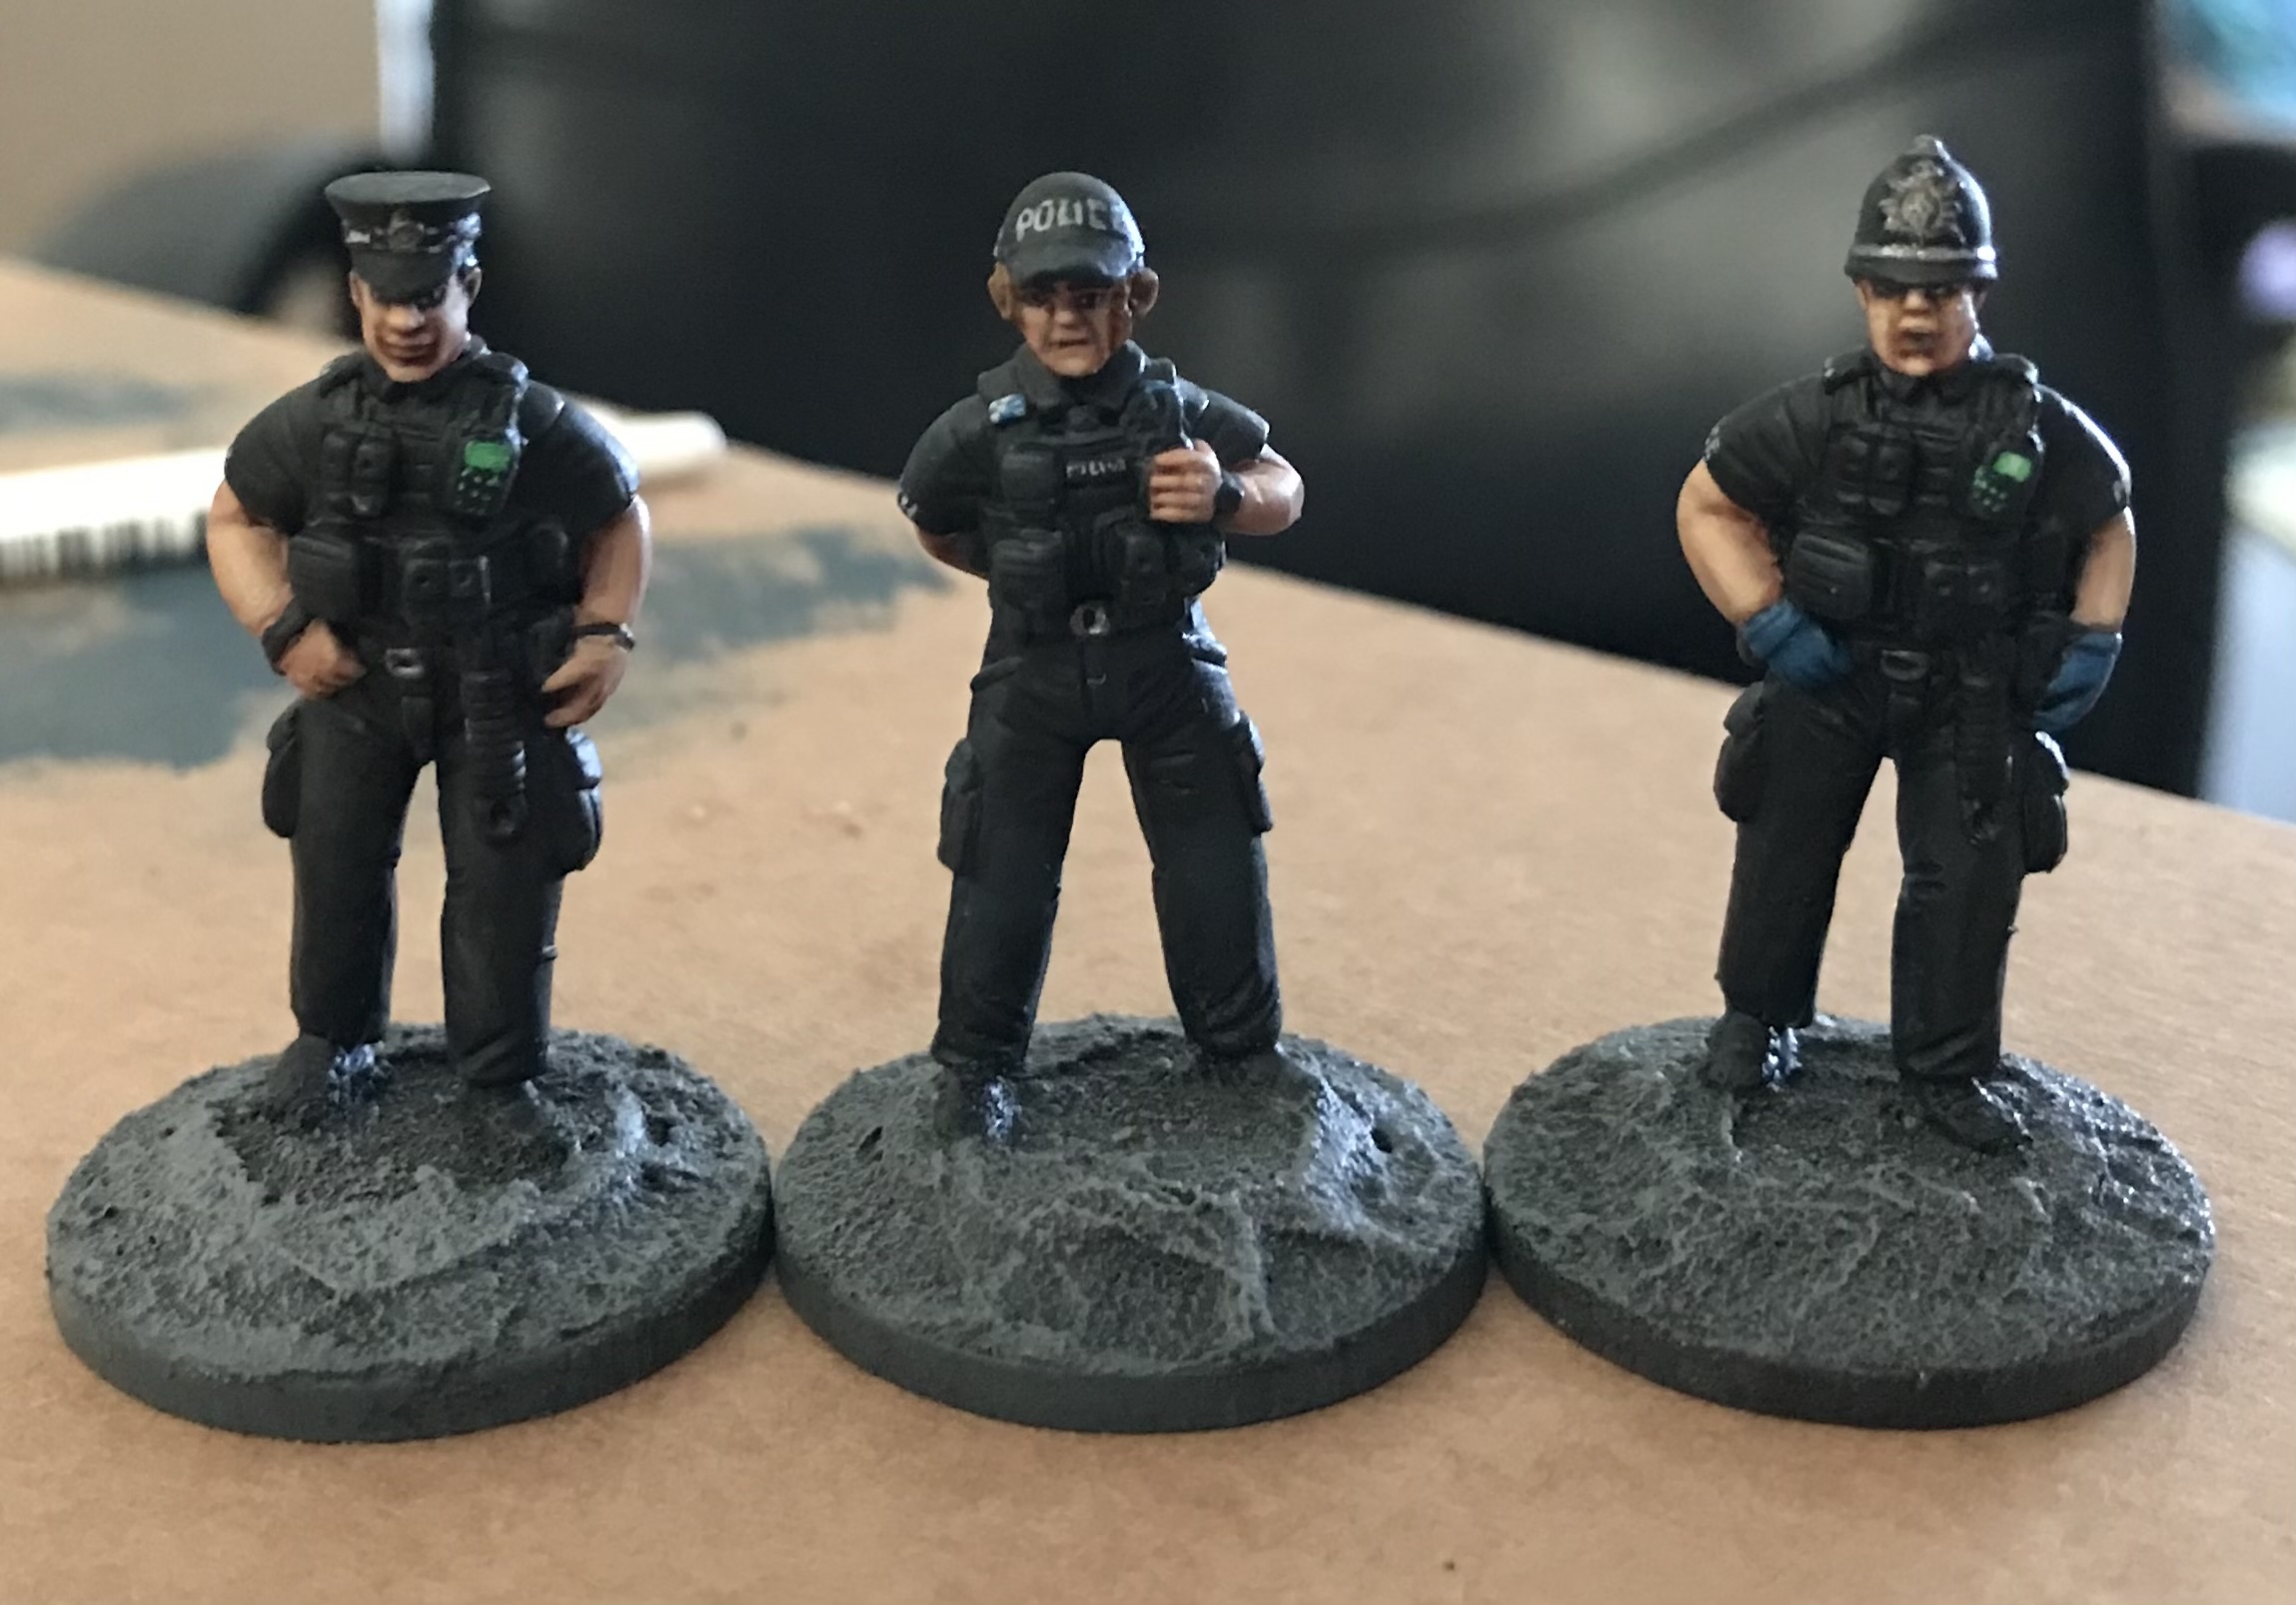
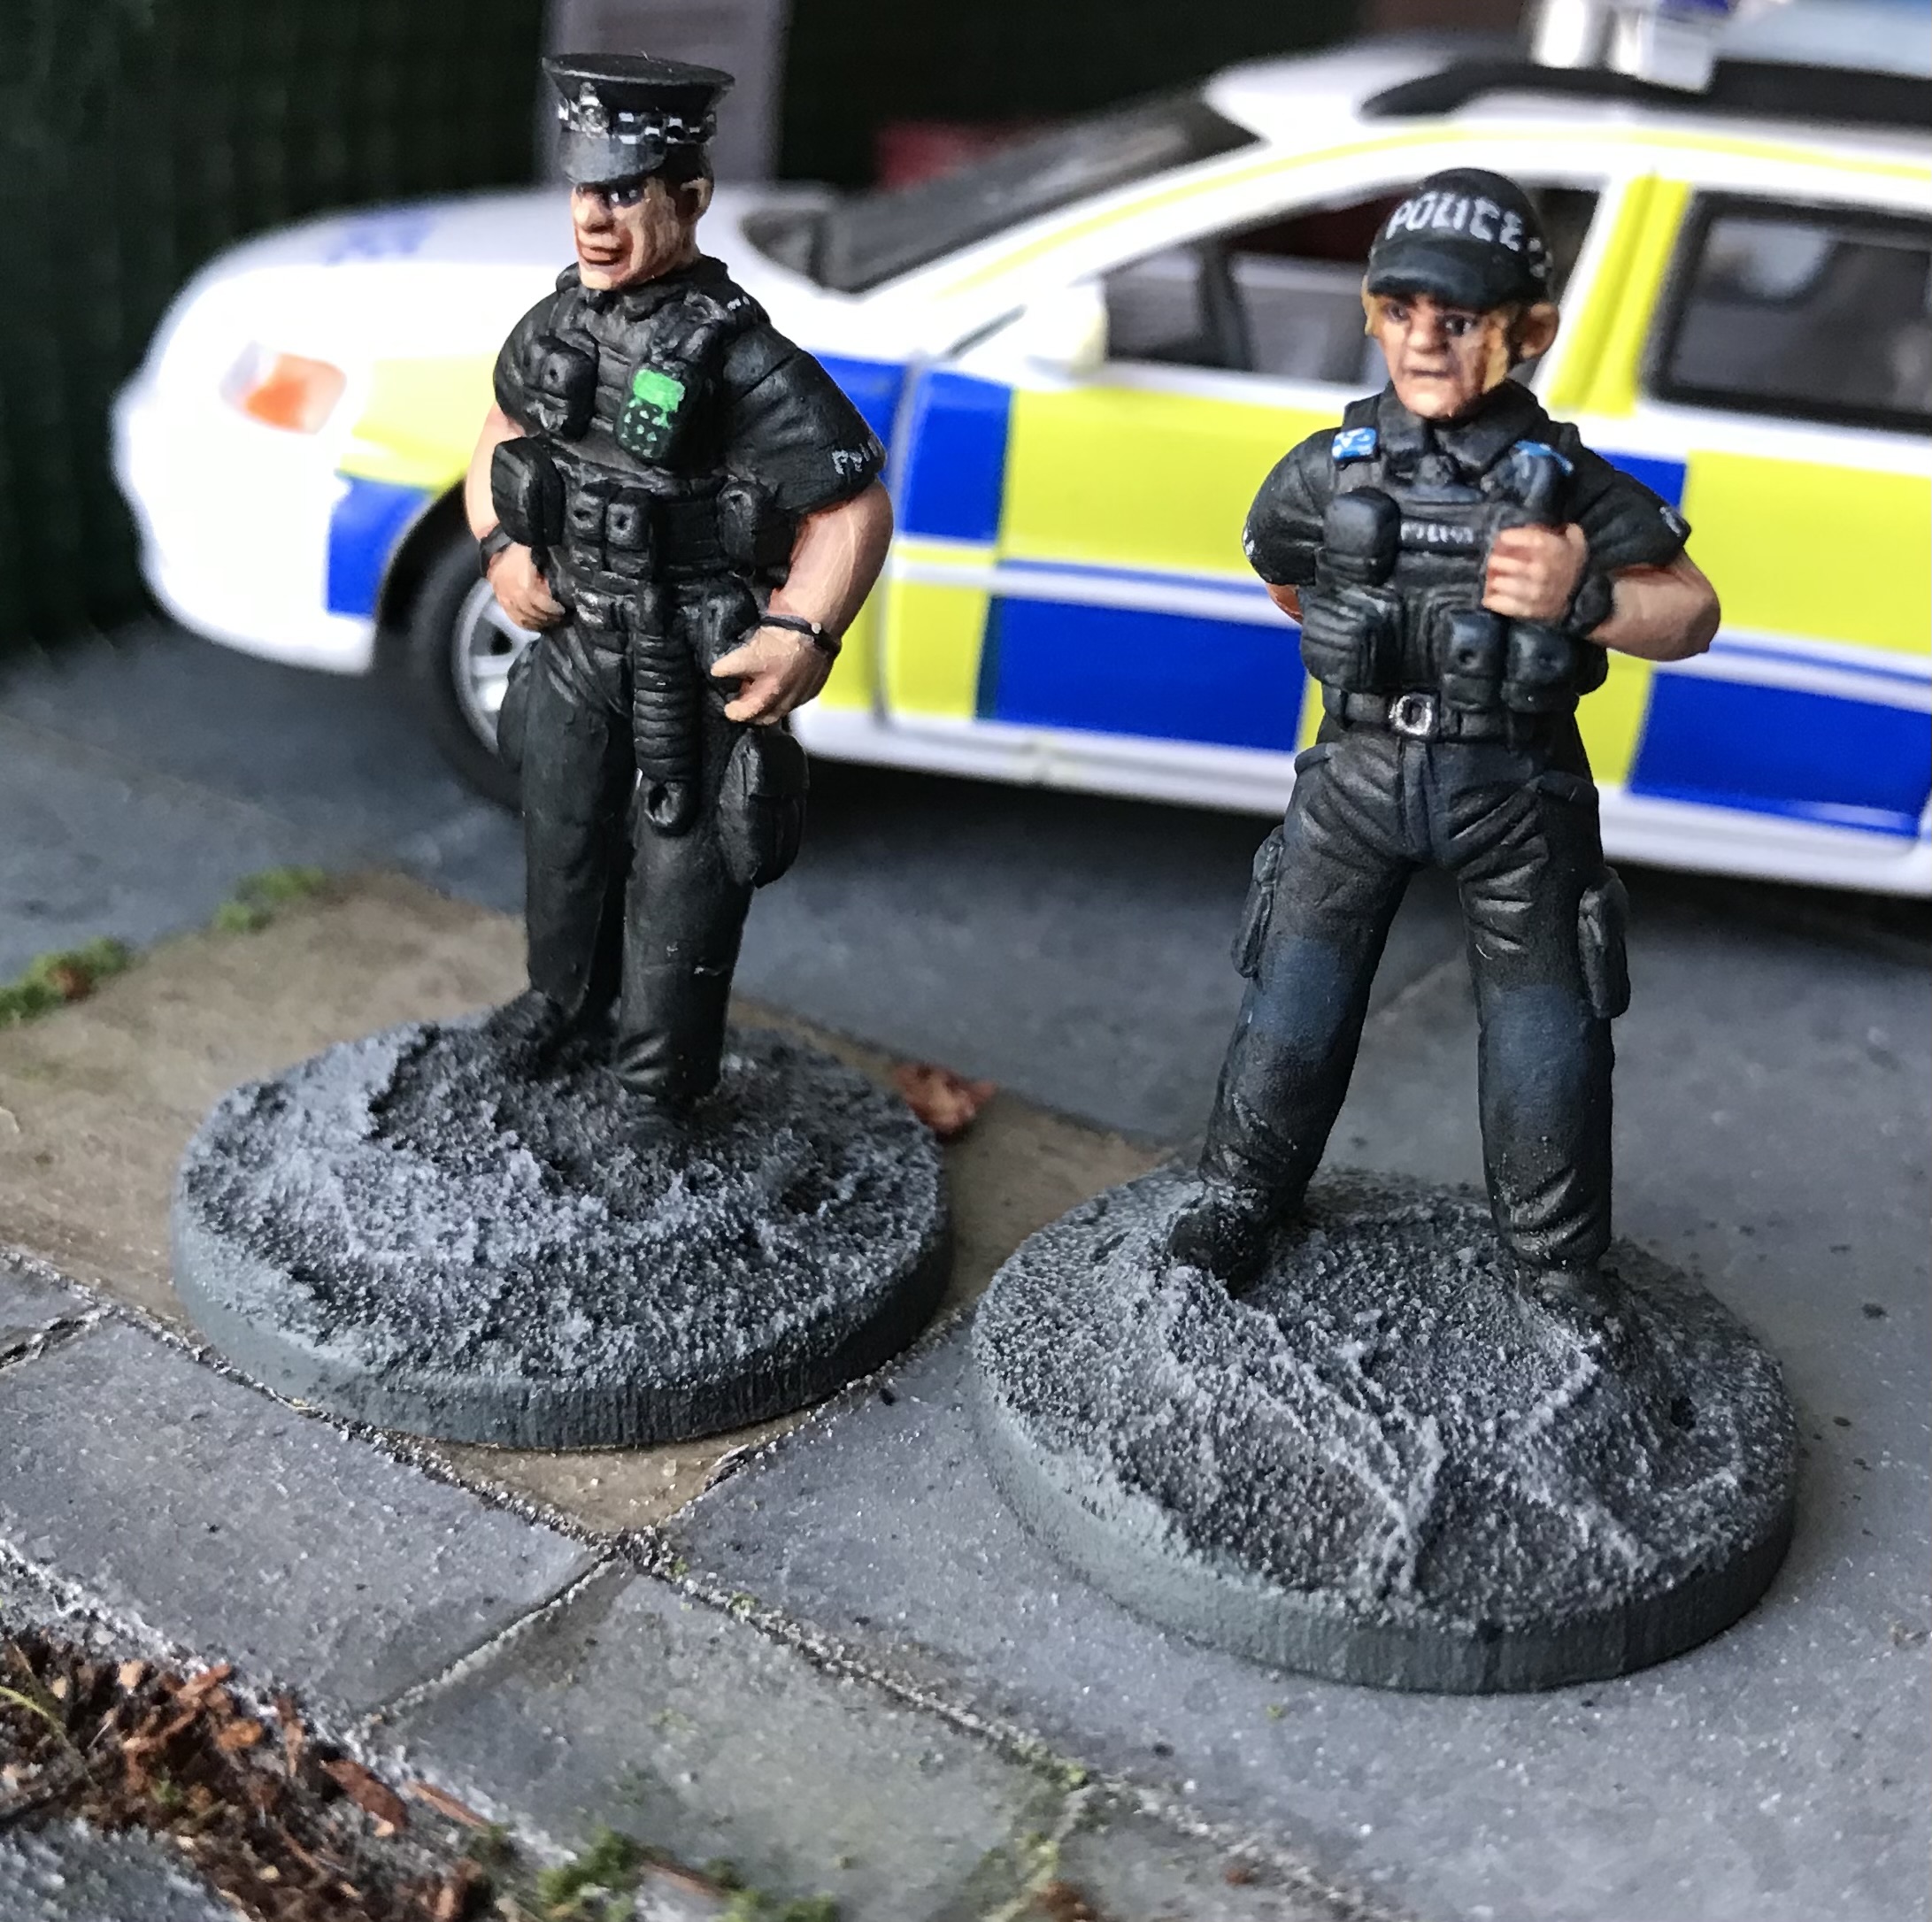
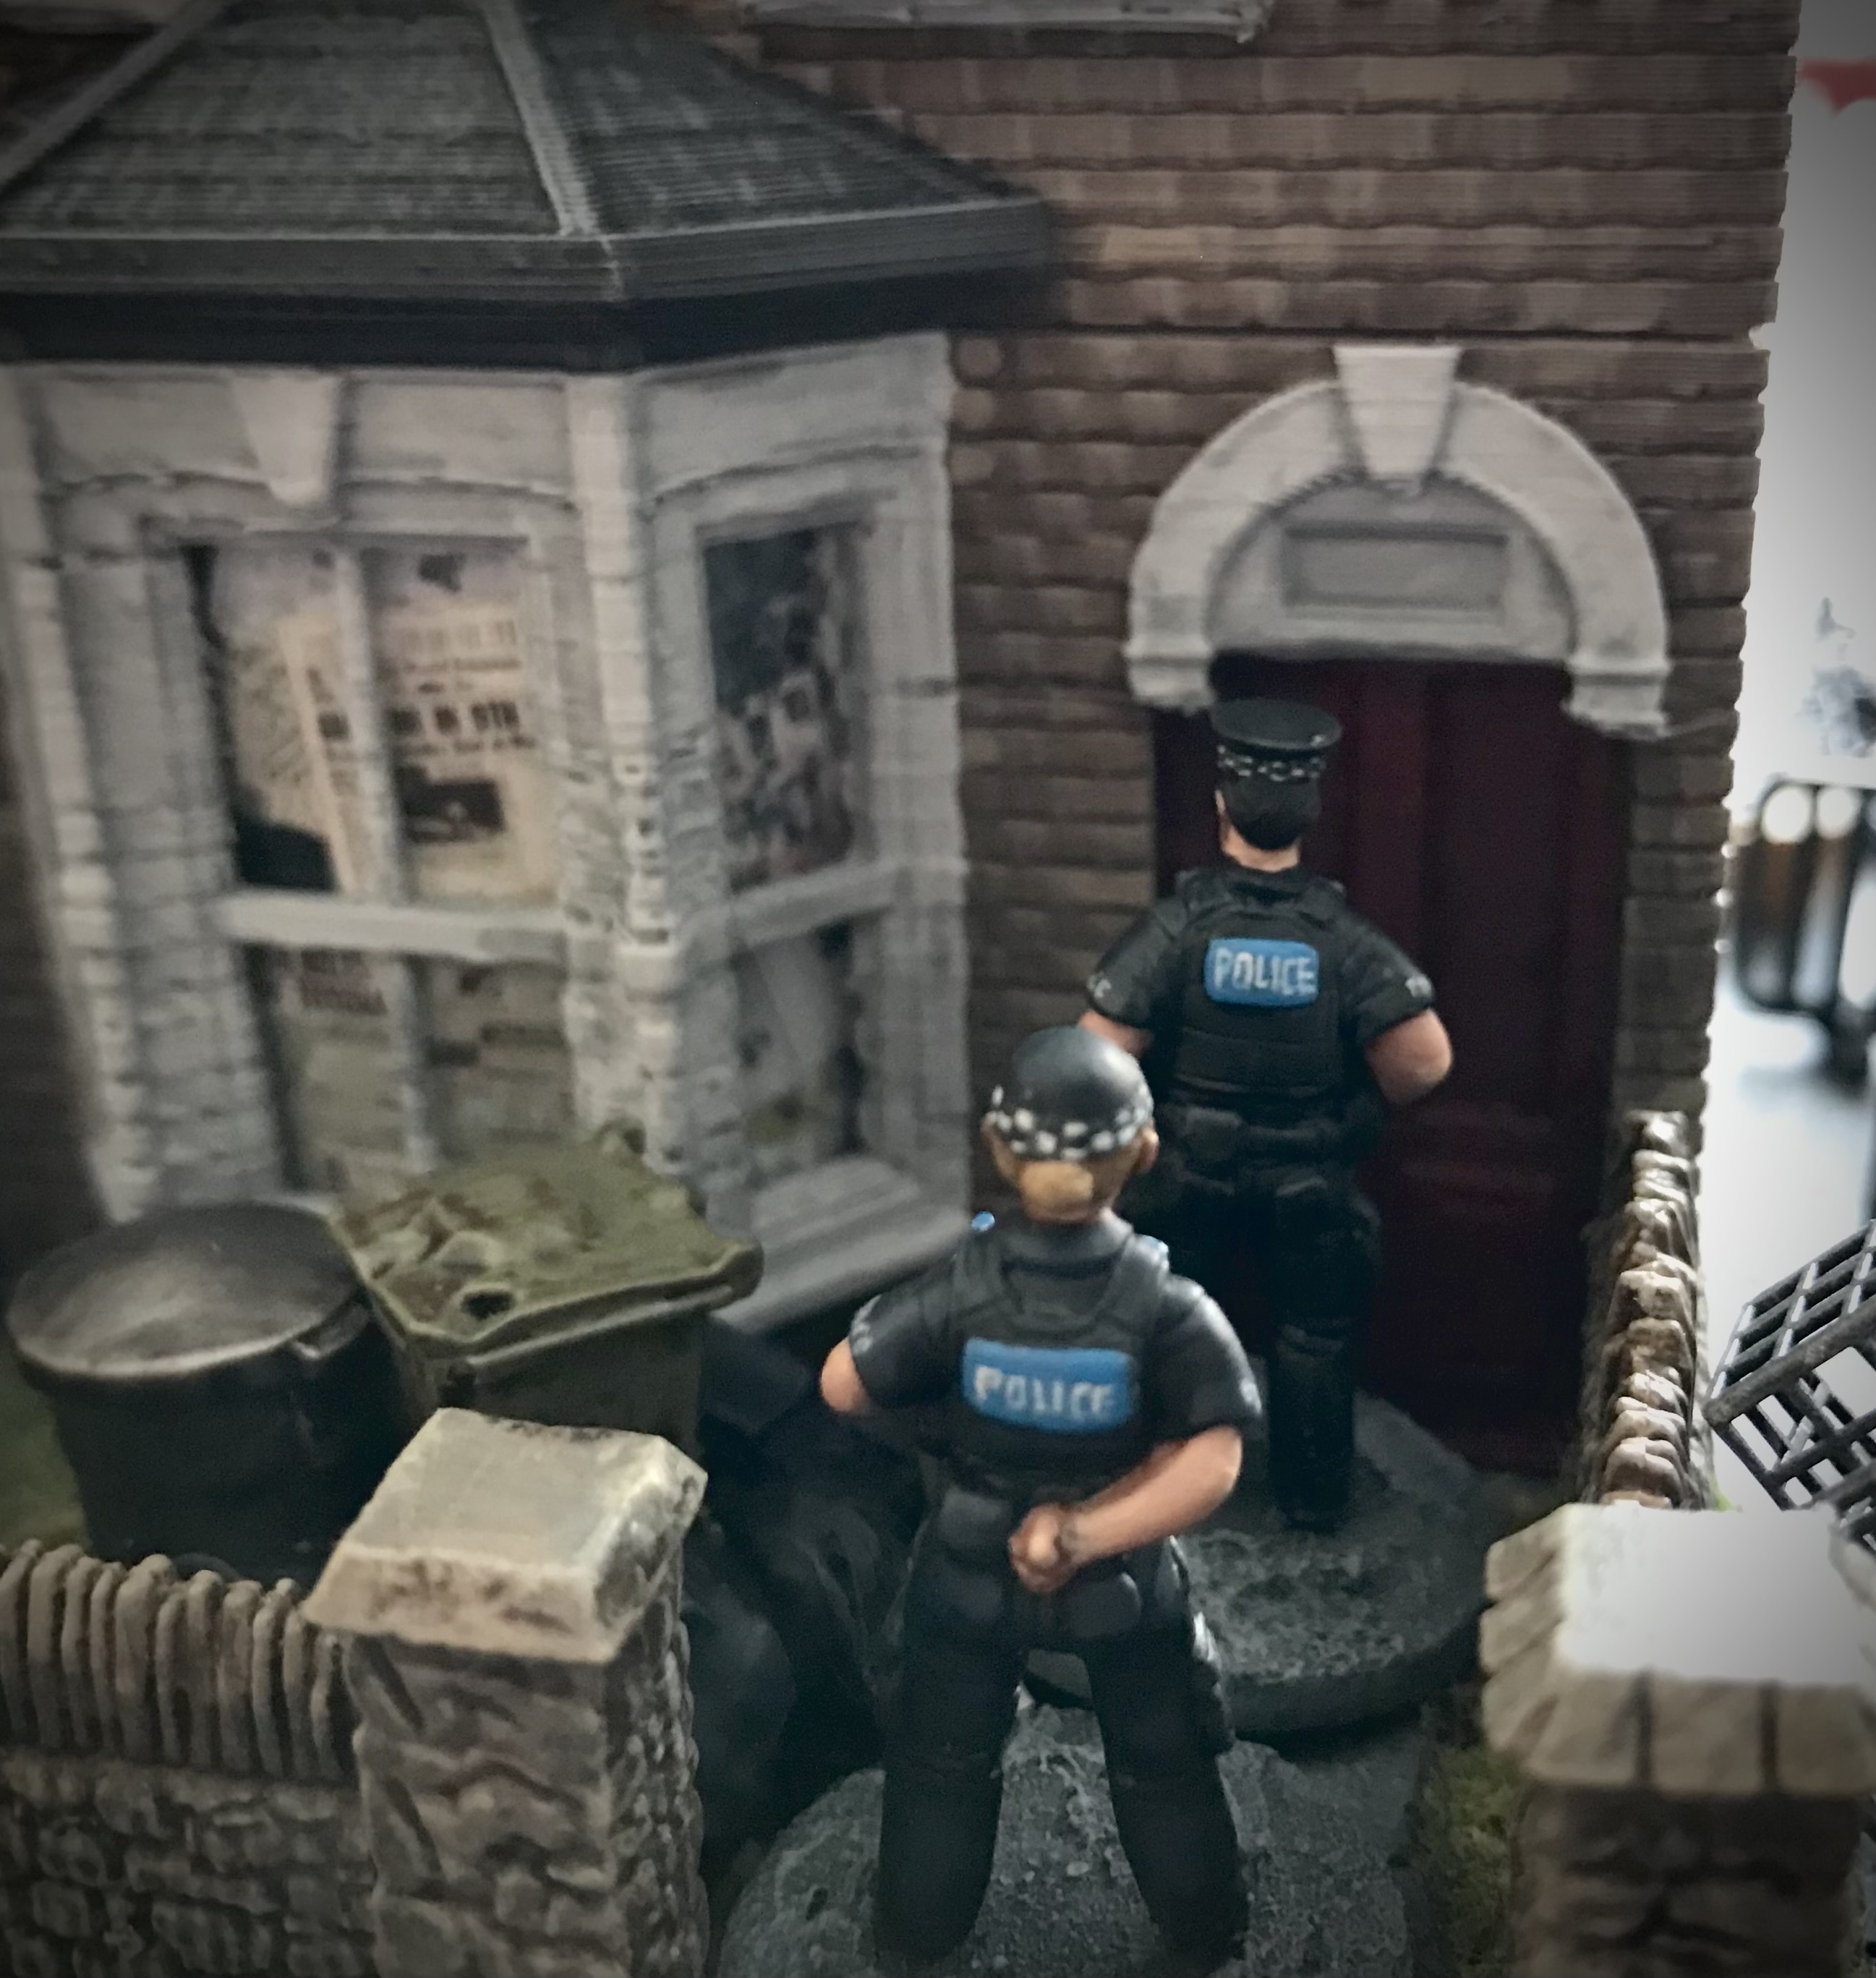
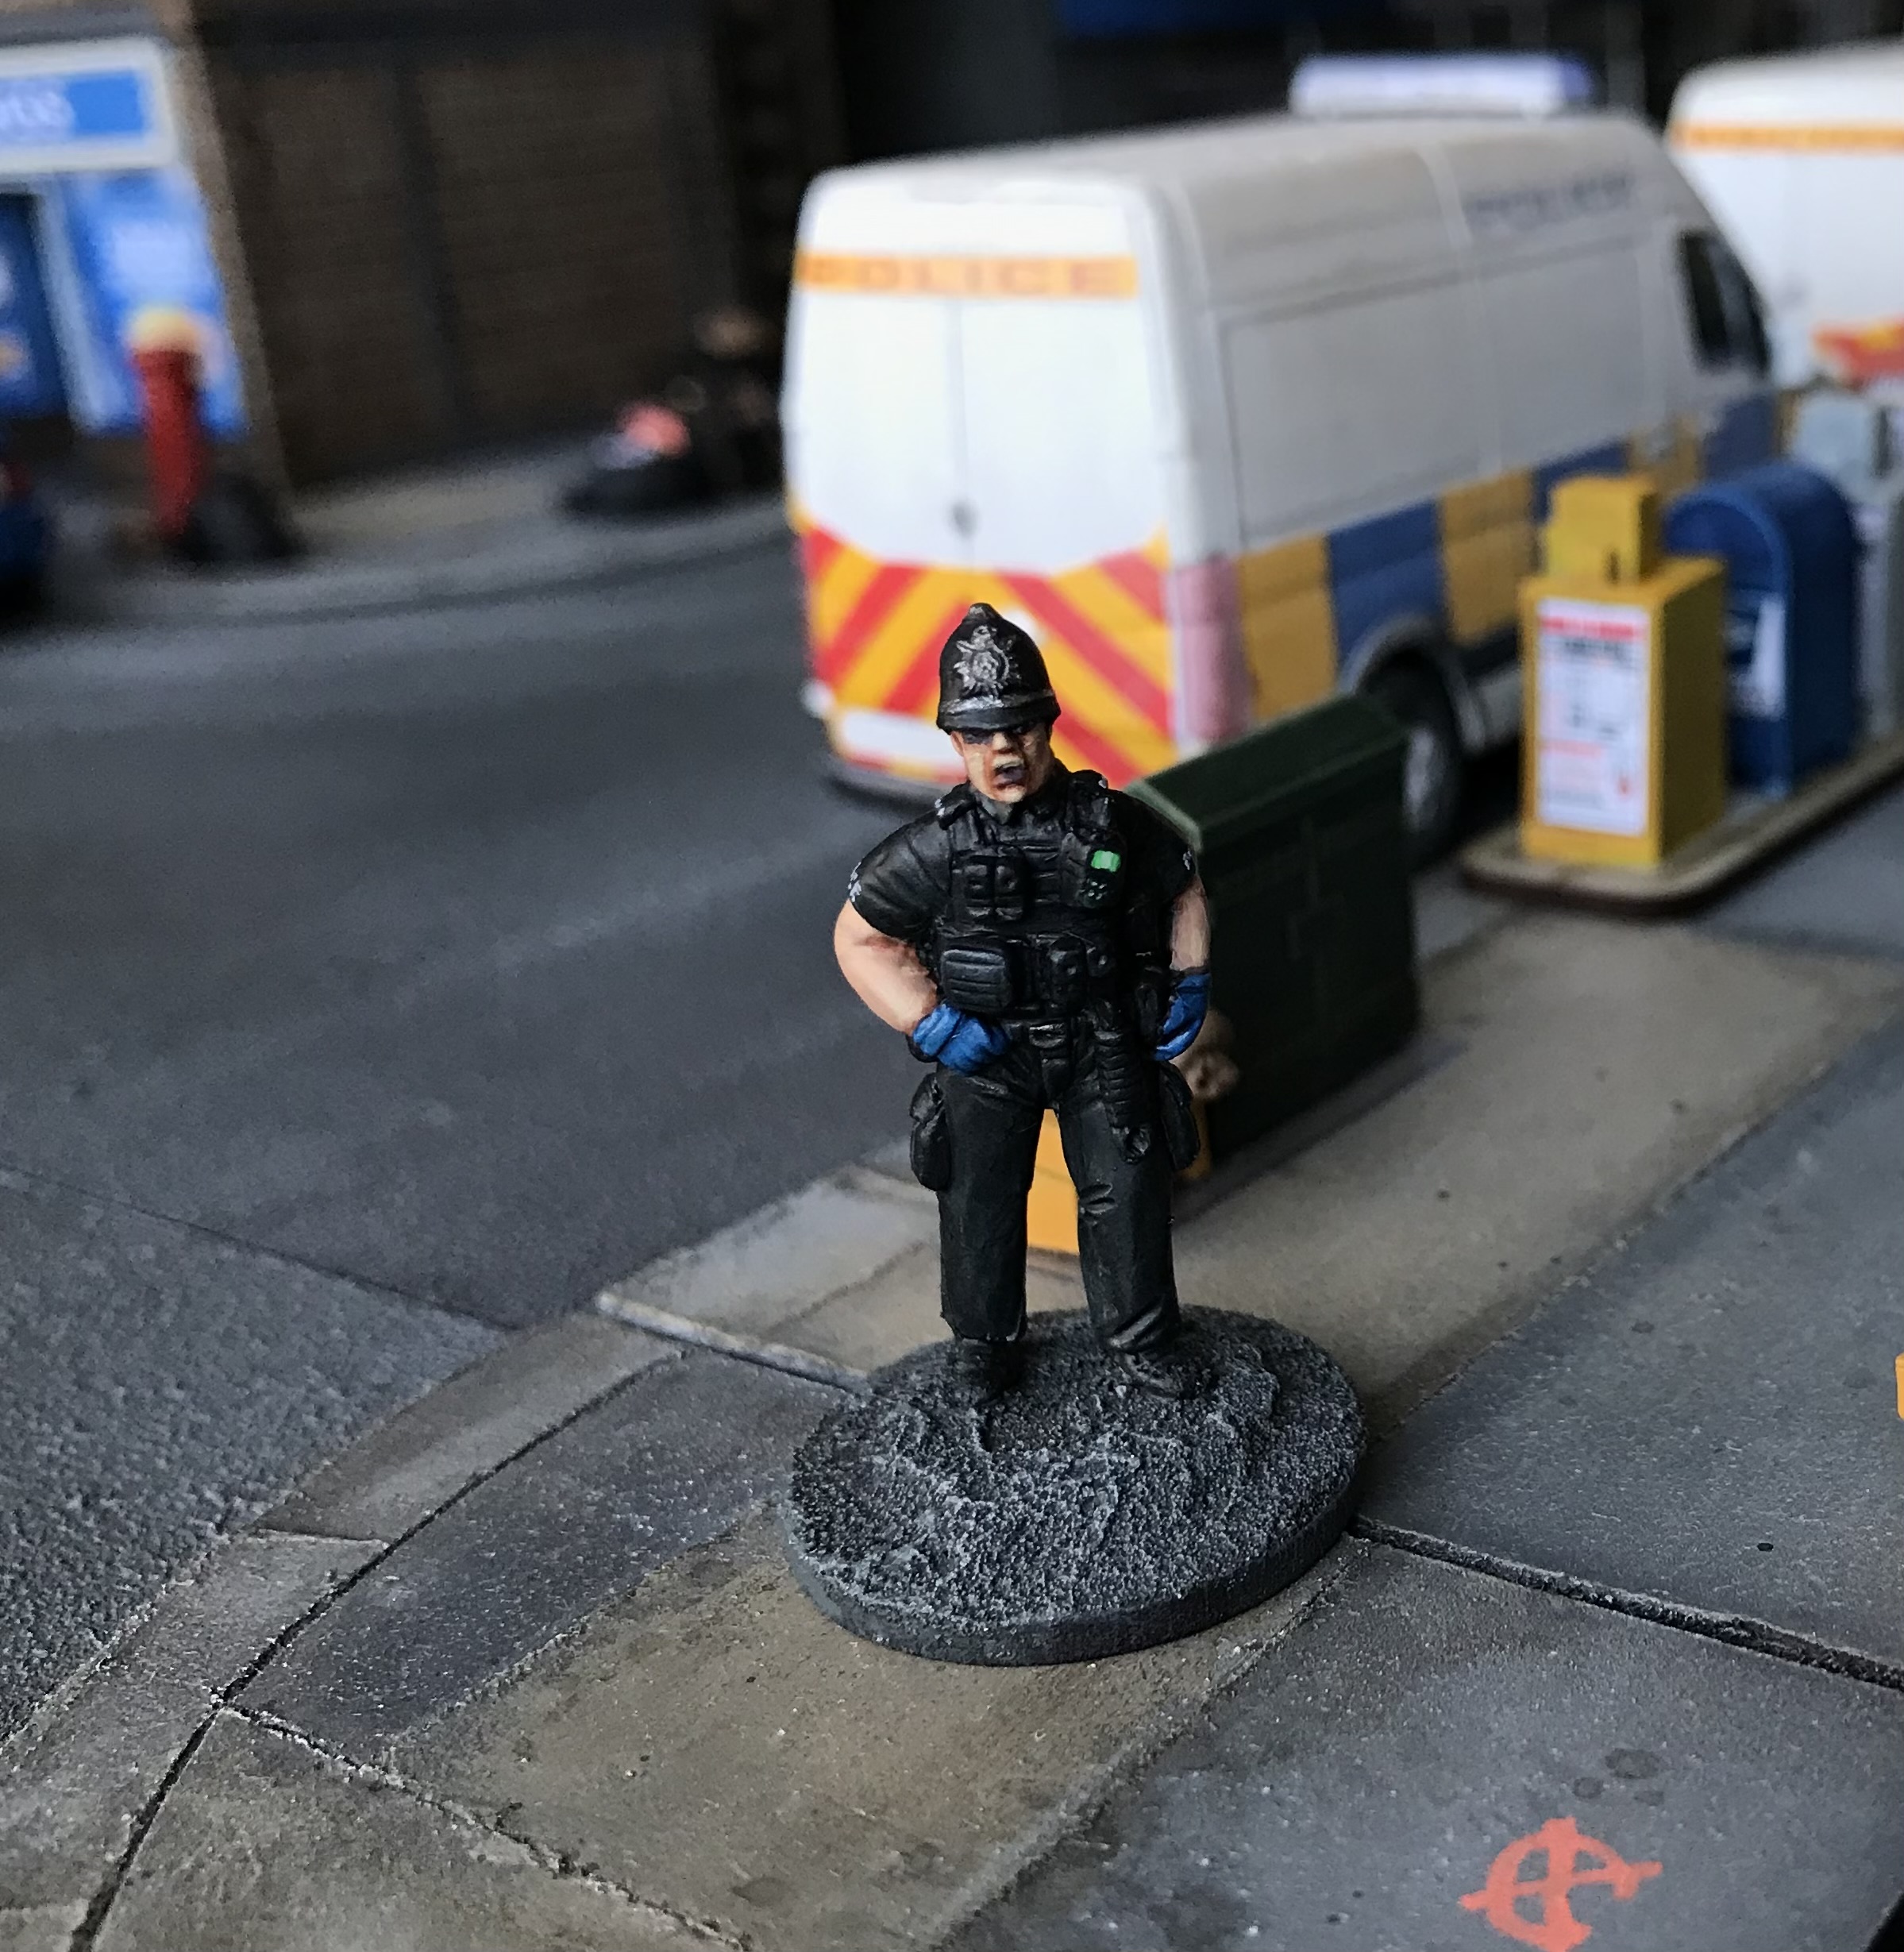
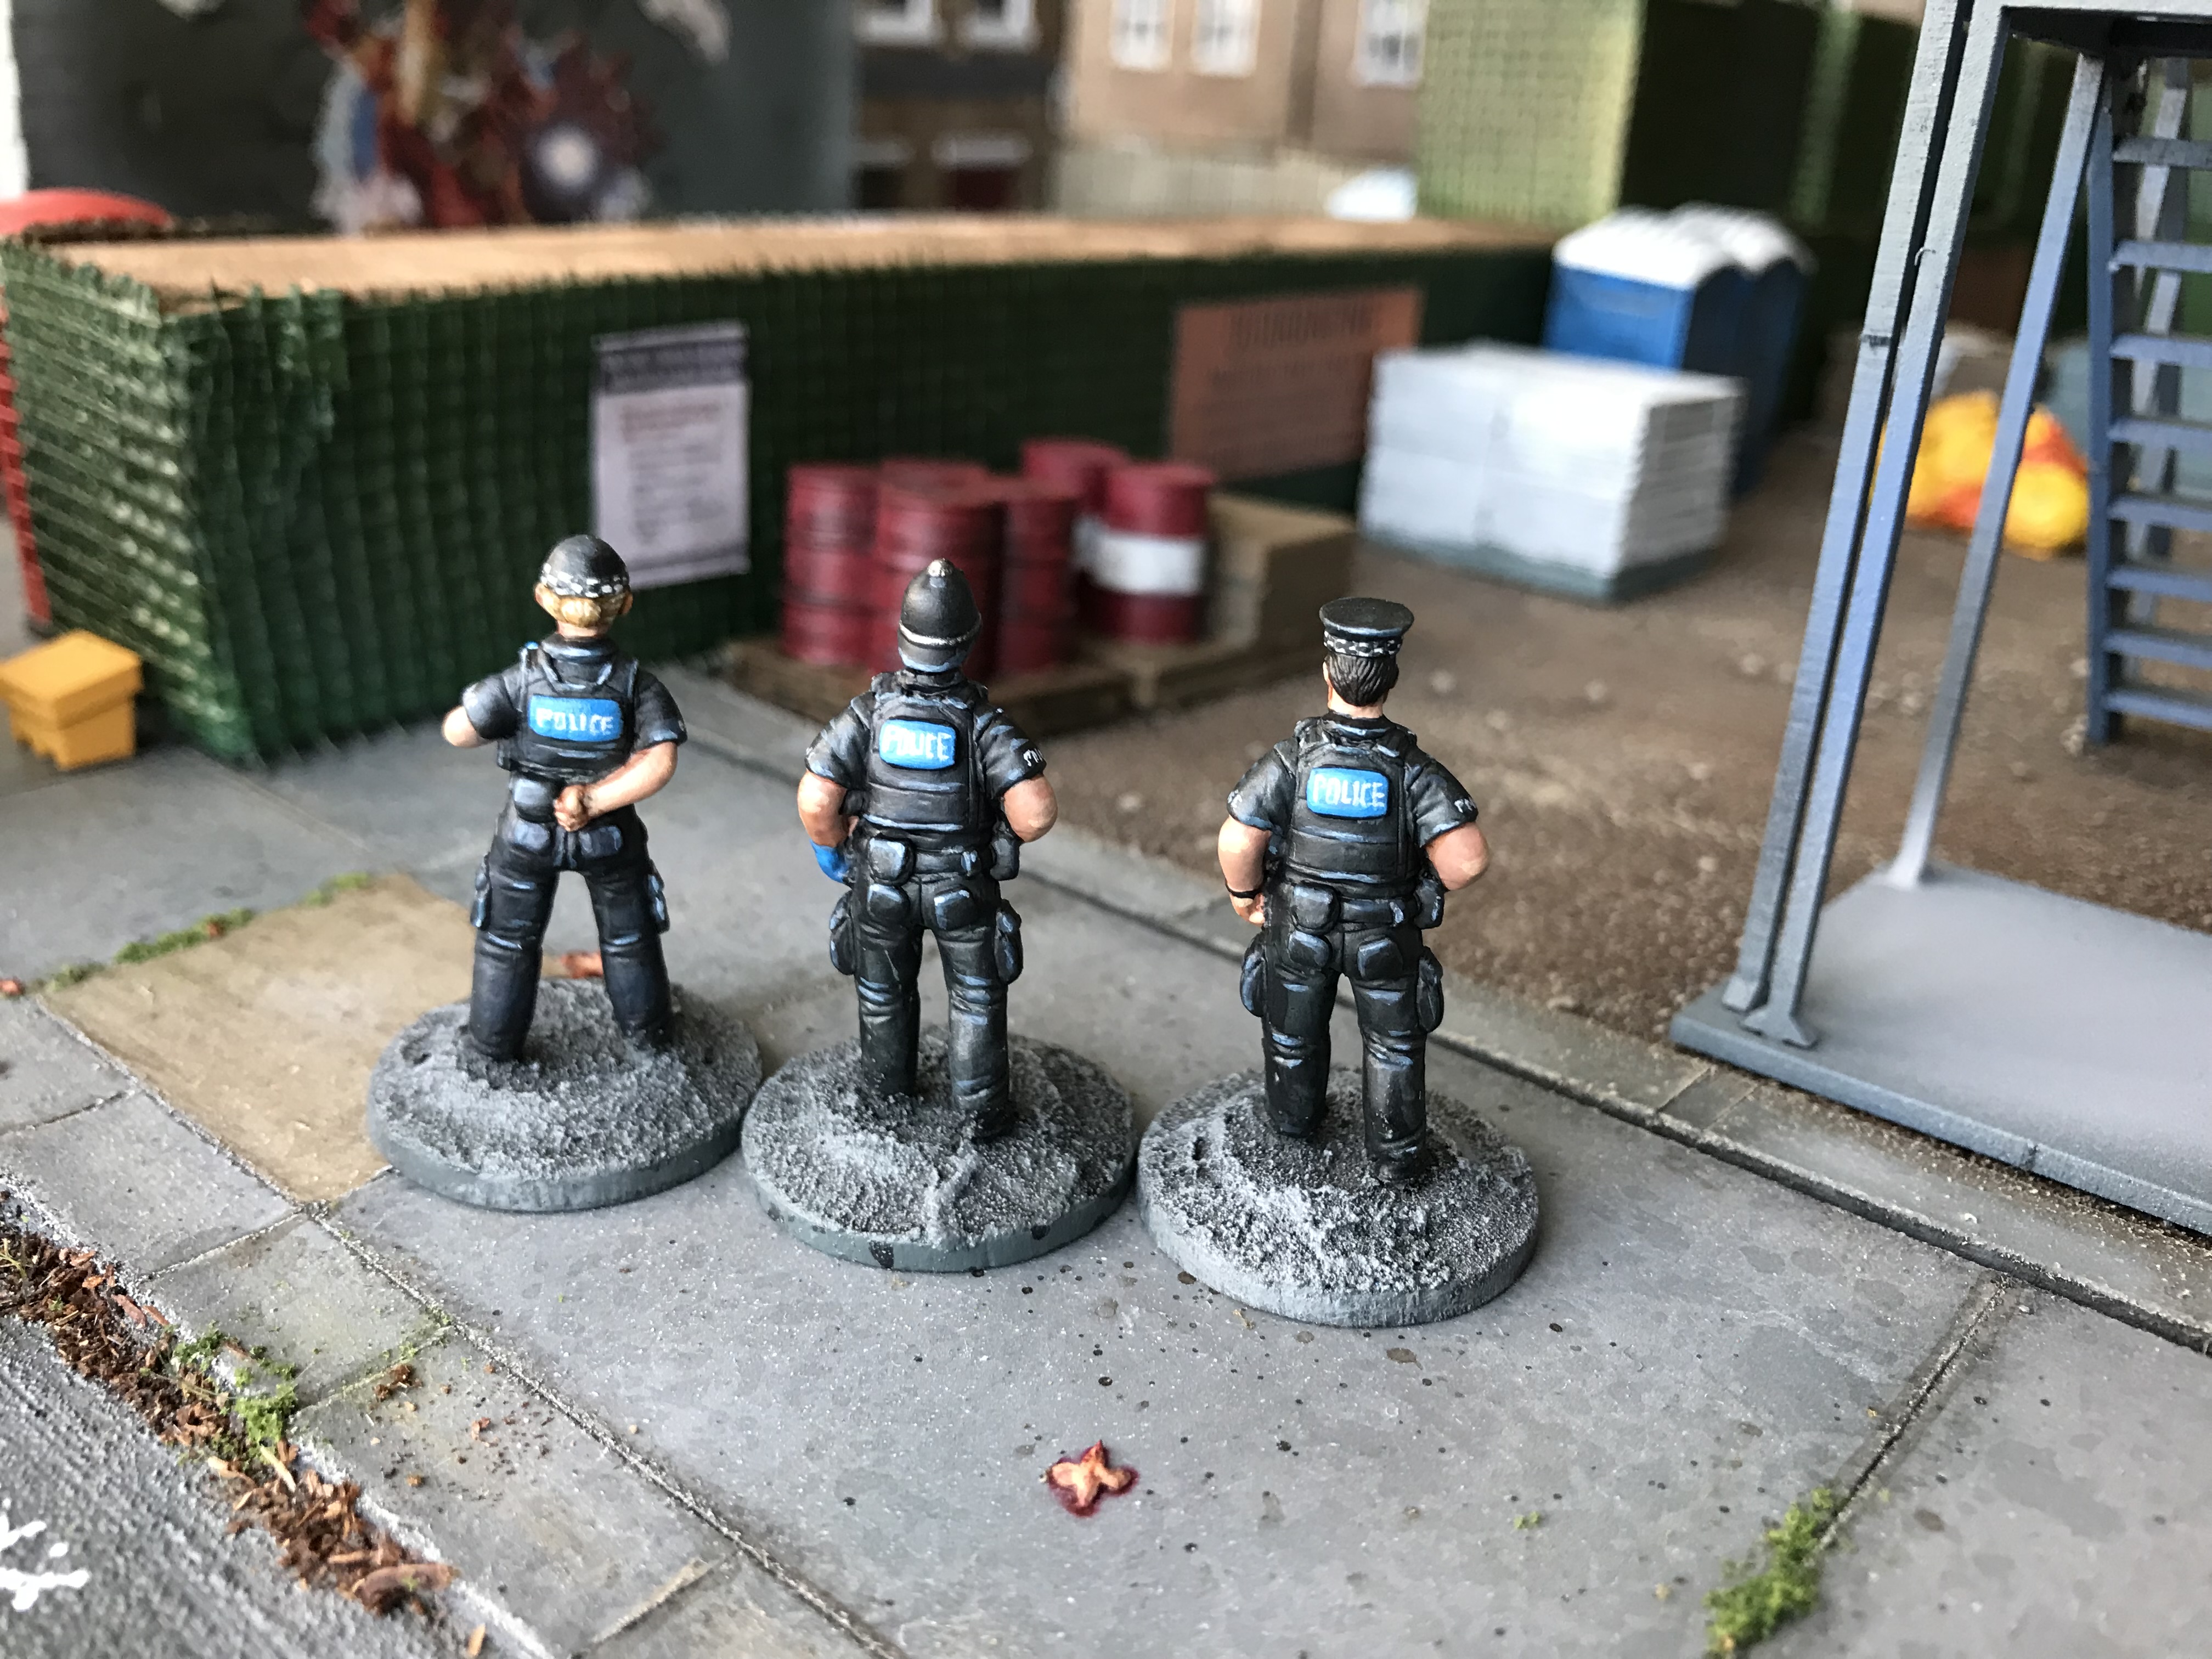
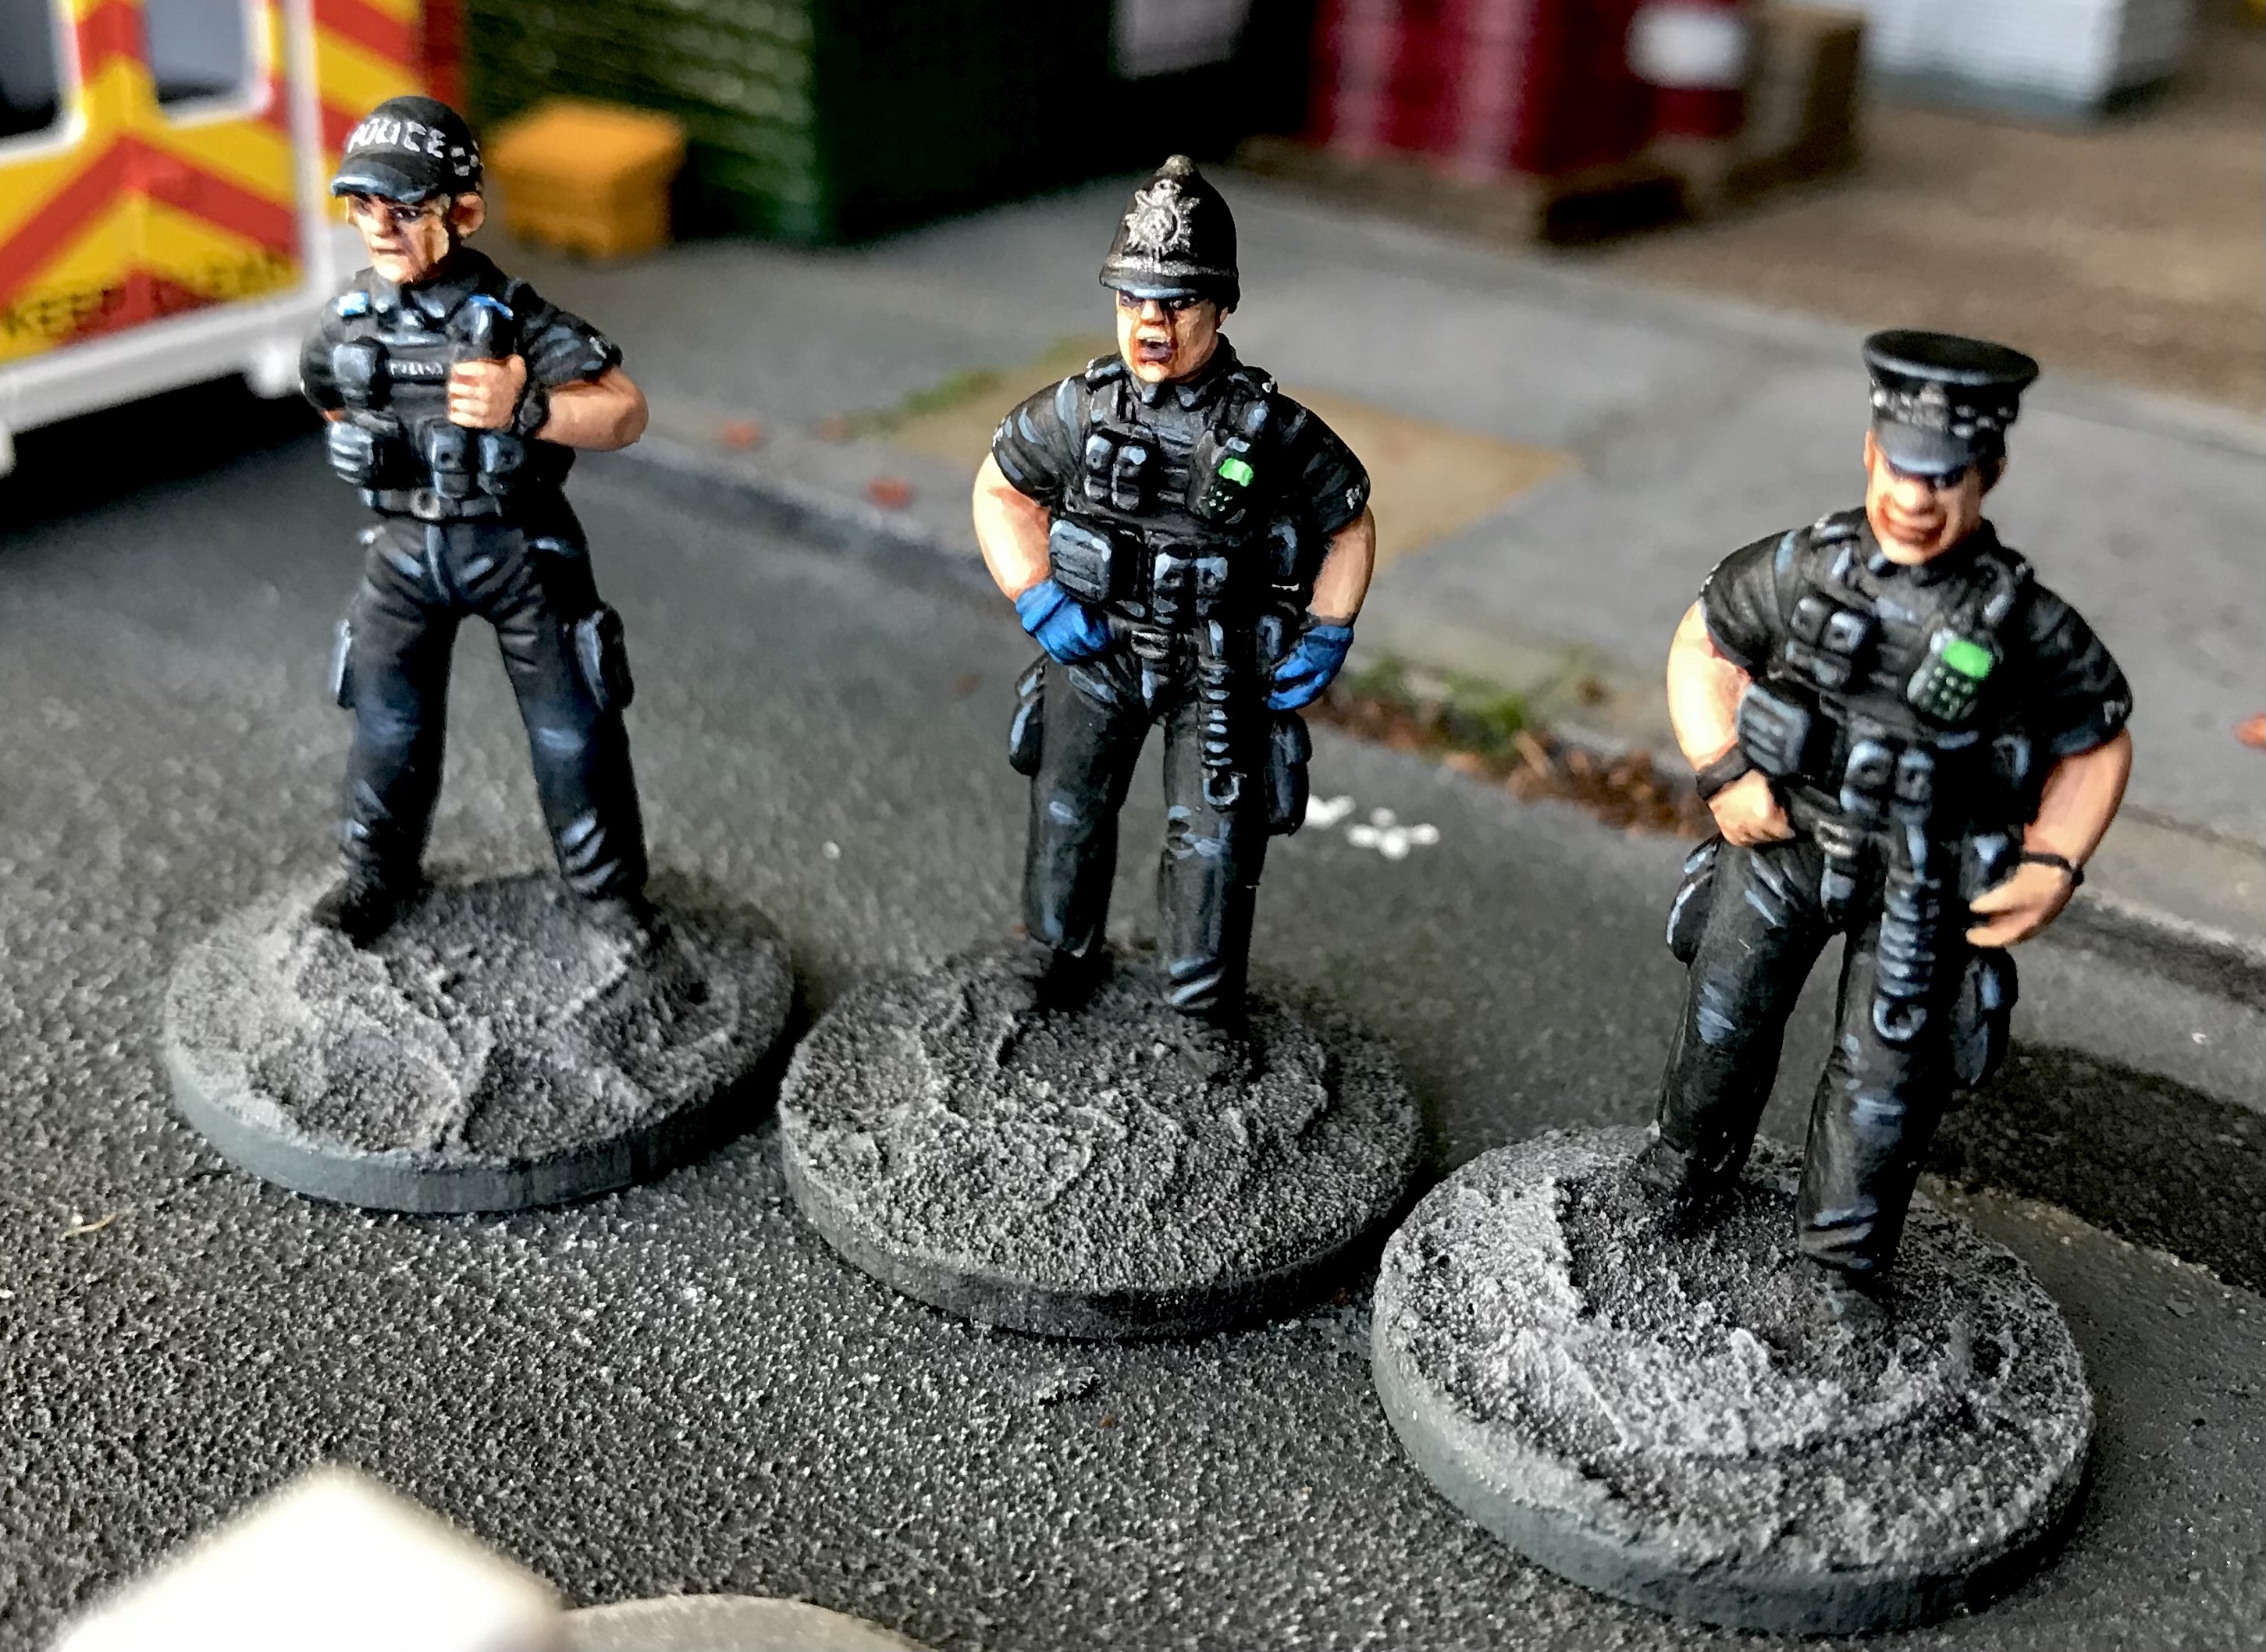
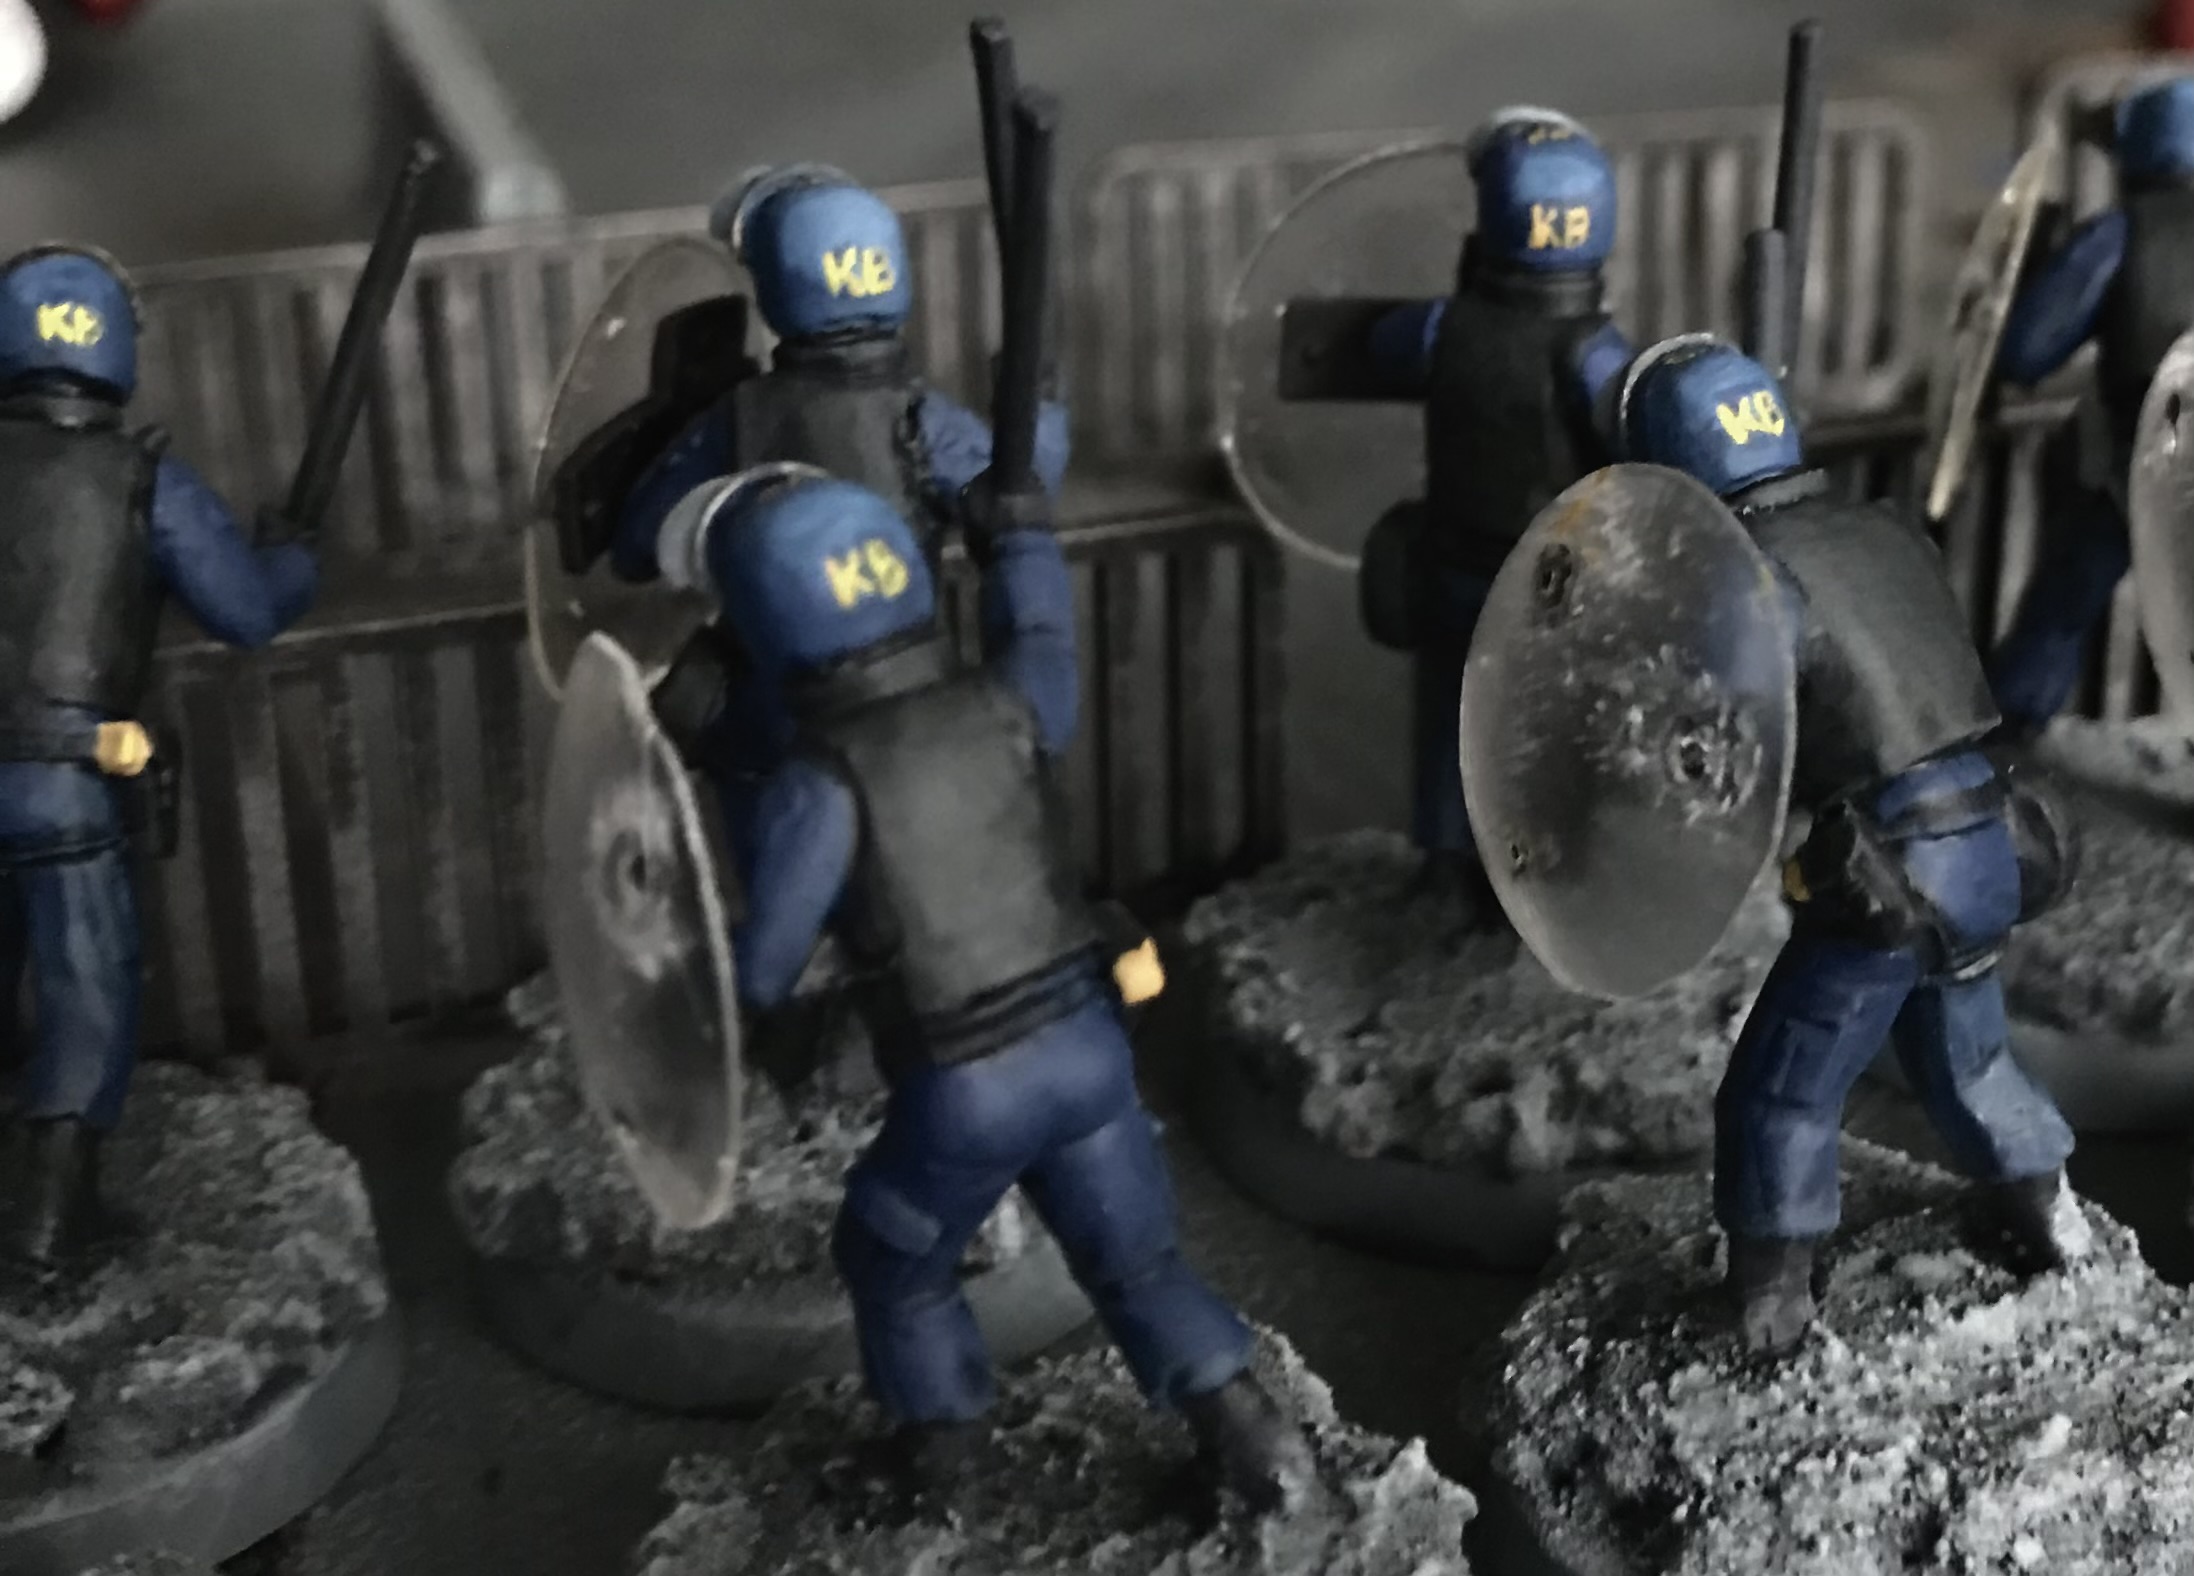
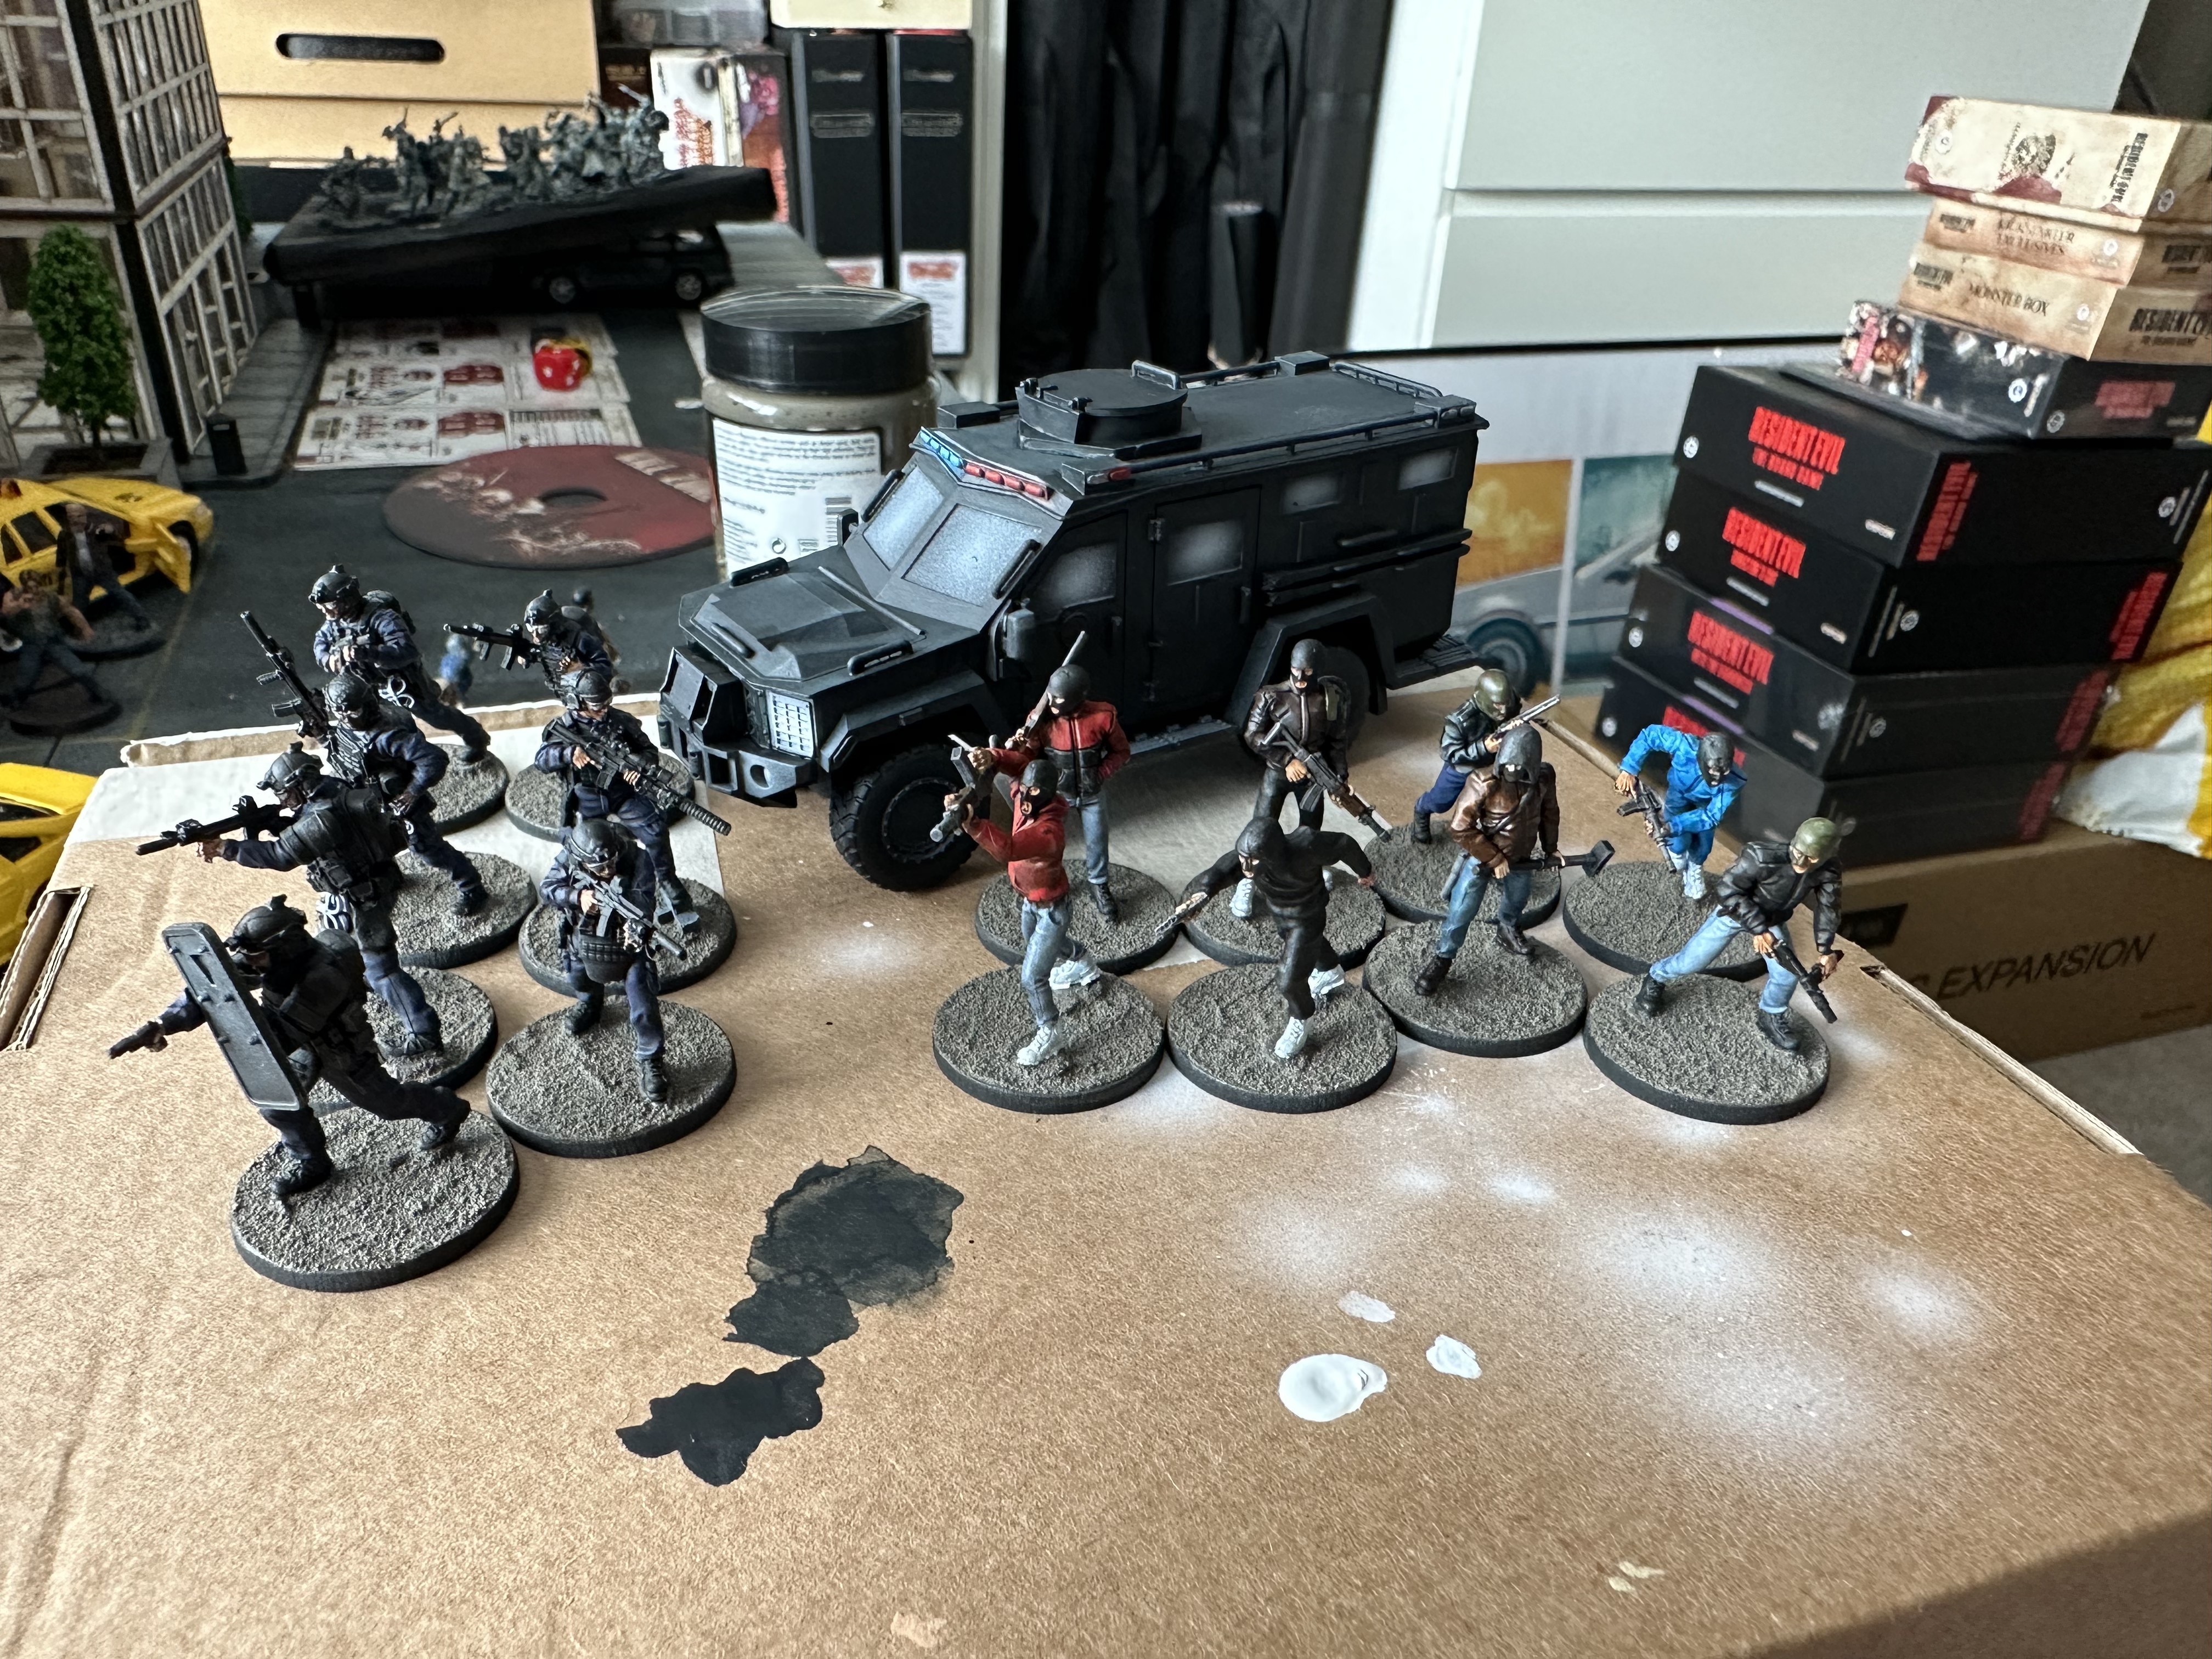
I did start painting up modern models for if the world were to end that day or just for modern set games. I picked up some Police officers and firearms officers from Antholonica Blue Light range. I did some head swaps with 7tv Police wearing custodial helmets.
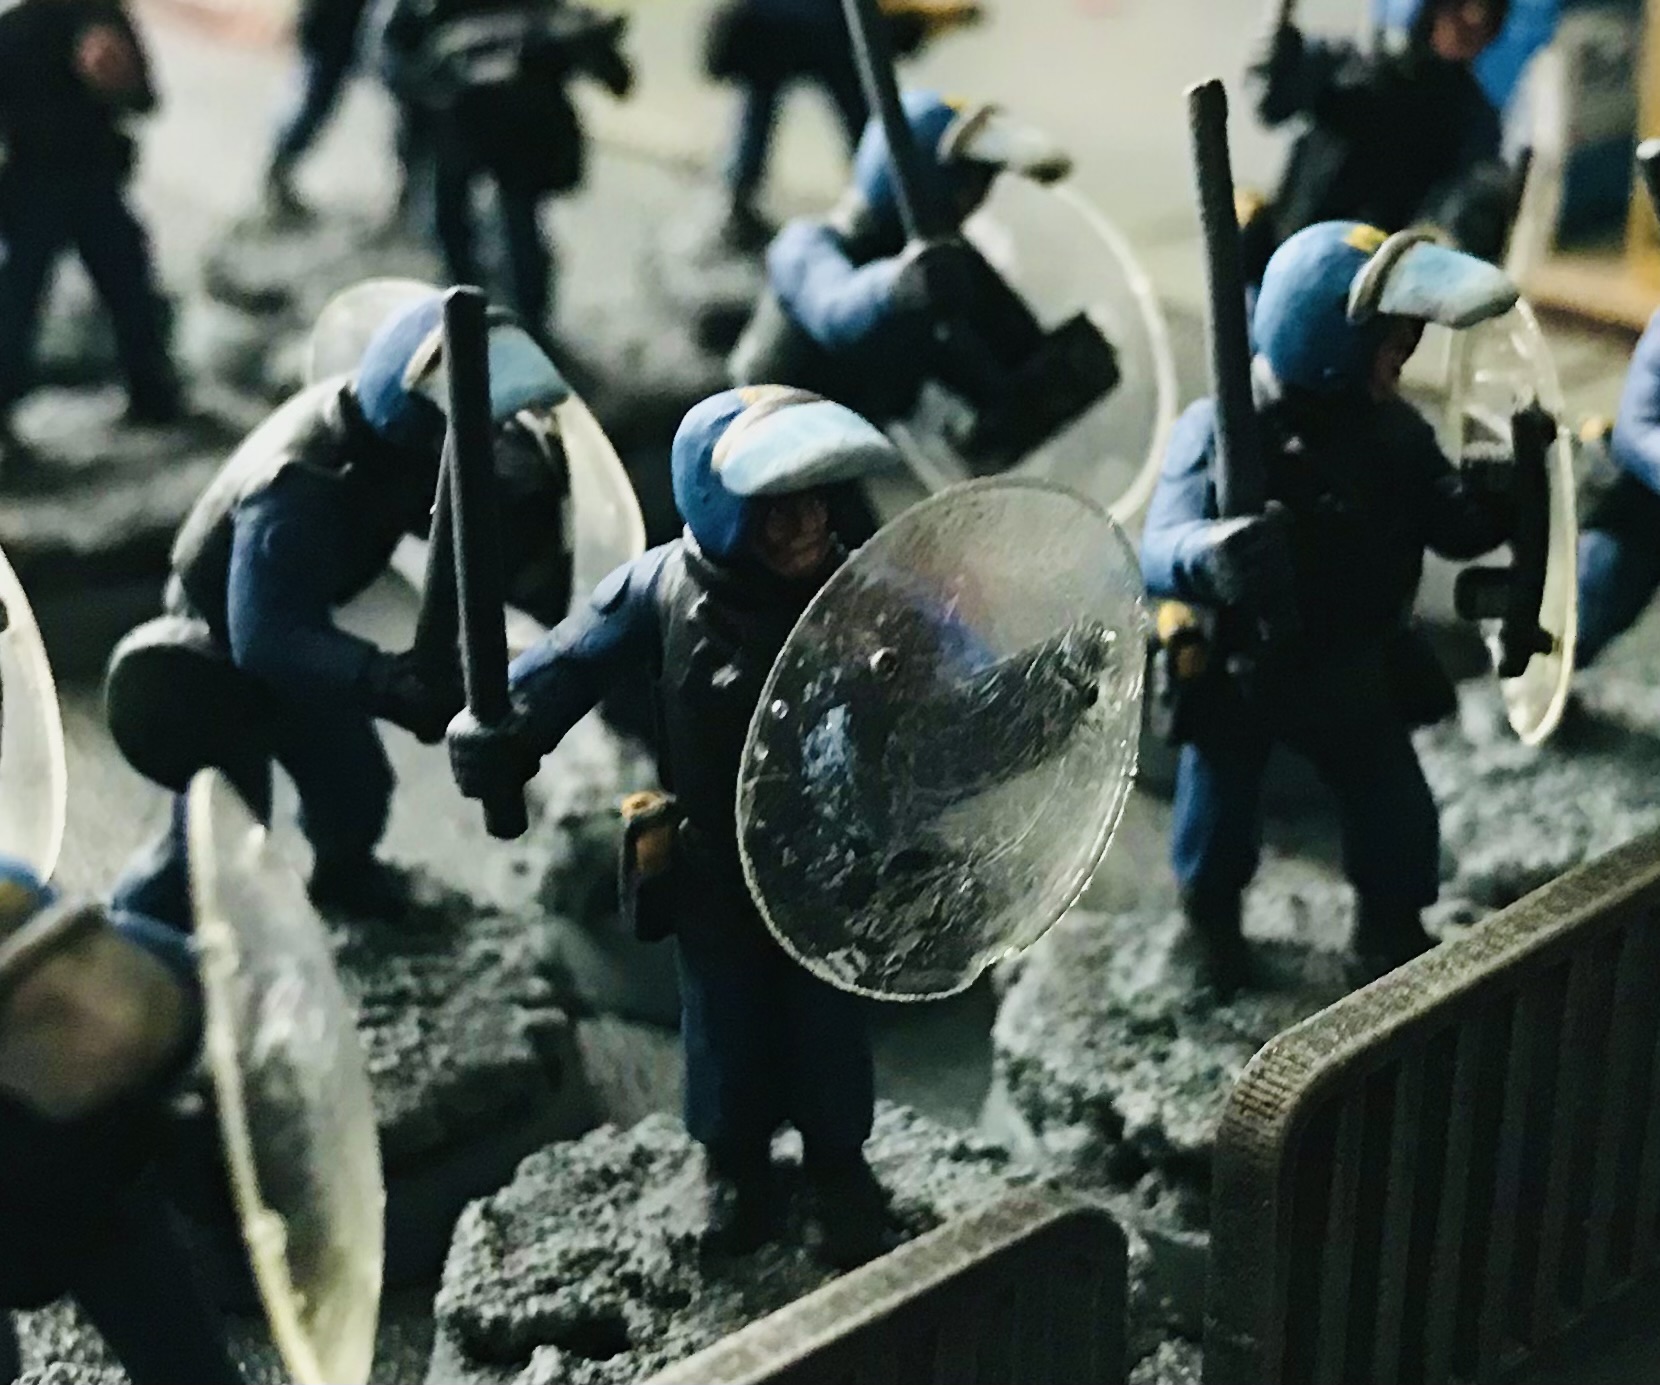
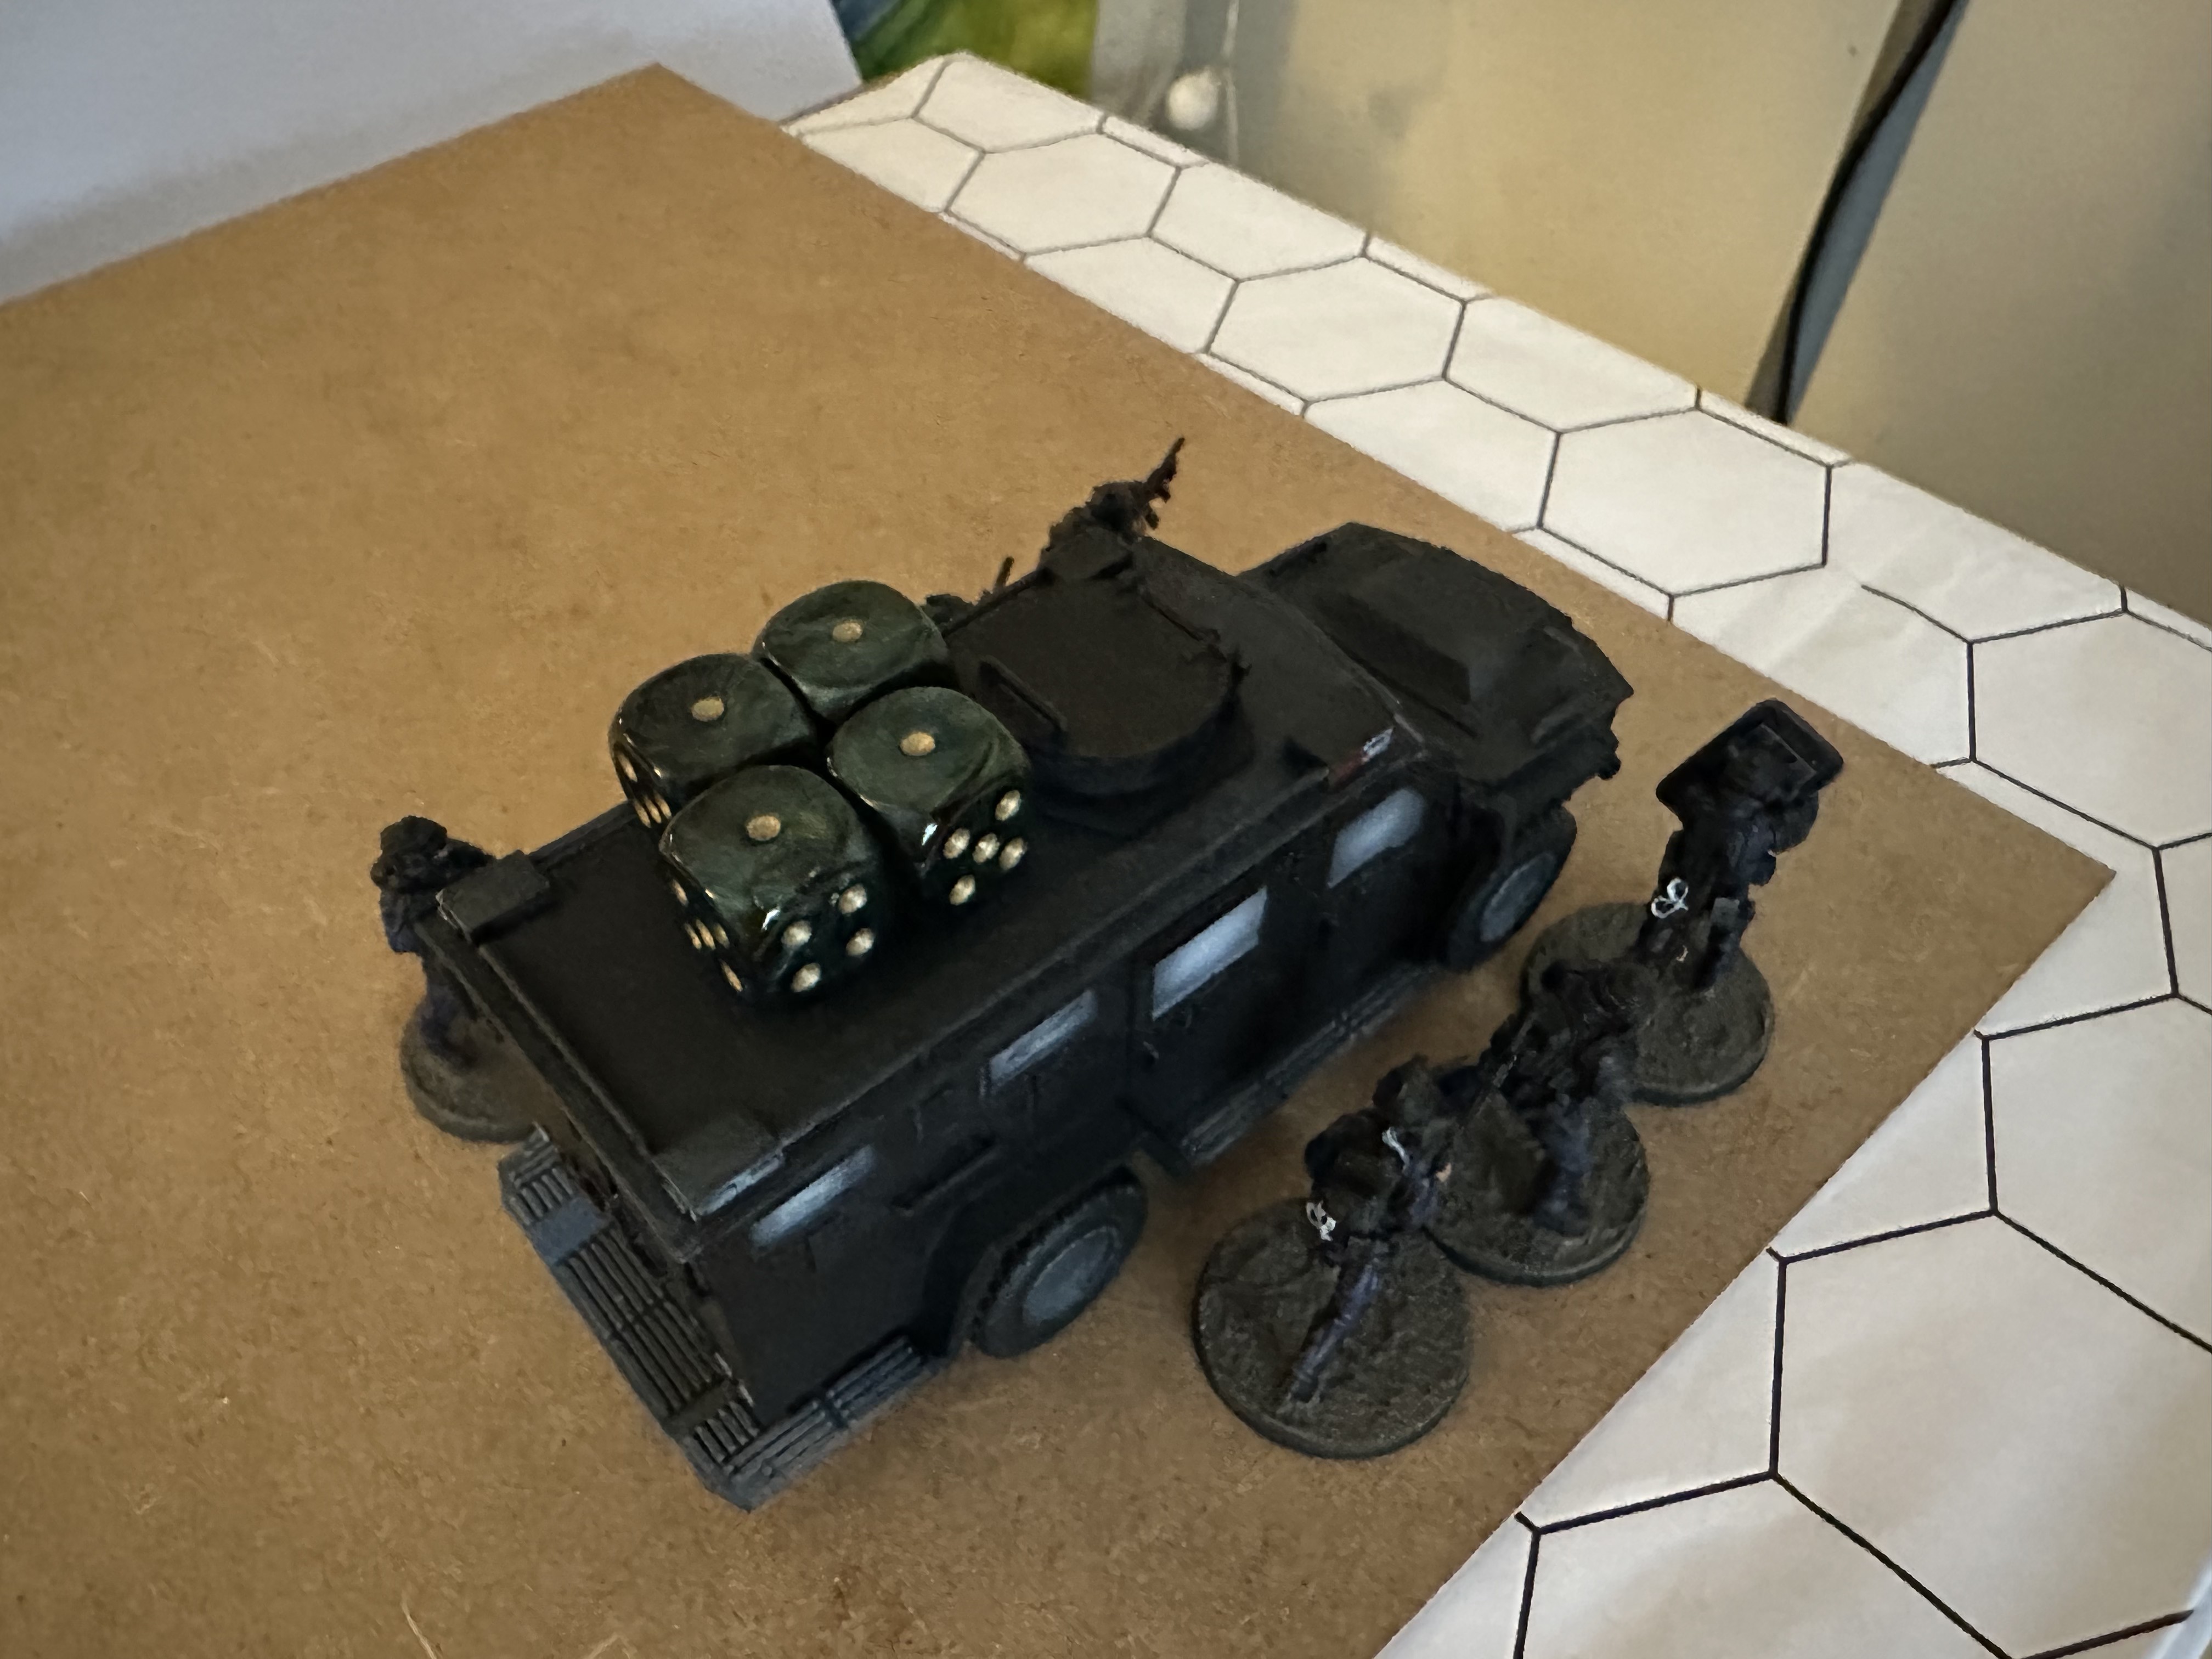
I picked up some riot models from offensive minis who I eye up every year at salute. My partner bought me them for Christmas last year. I also picked up riot vans from ebay. They are just Police vans but they look suitable as Police Riot Carriers.


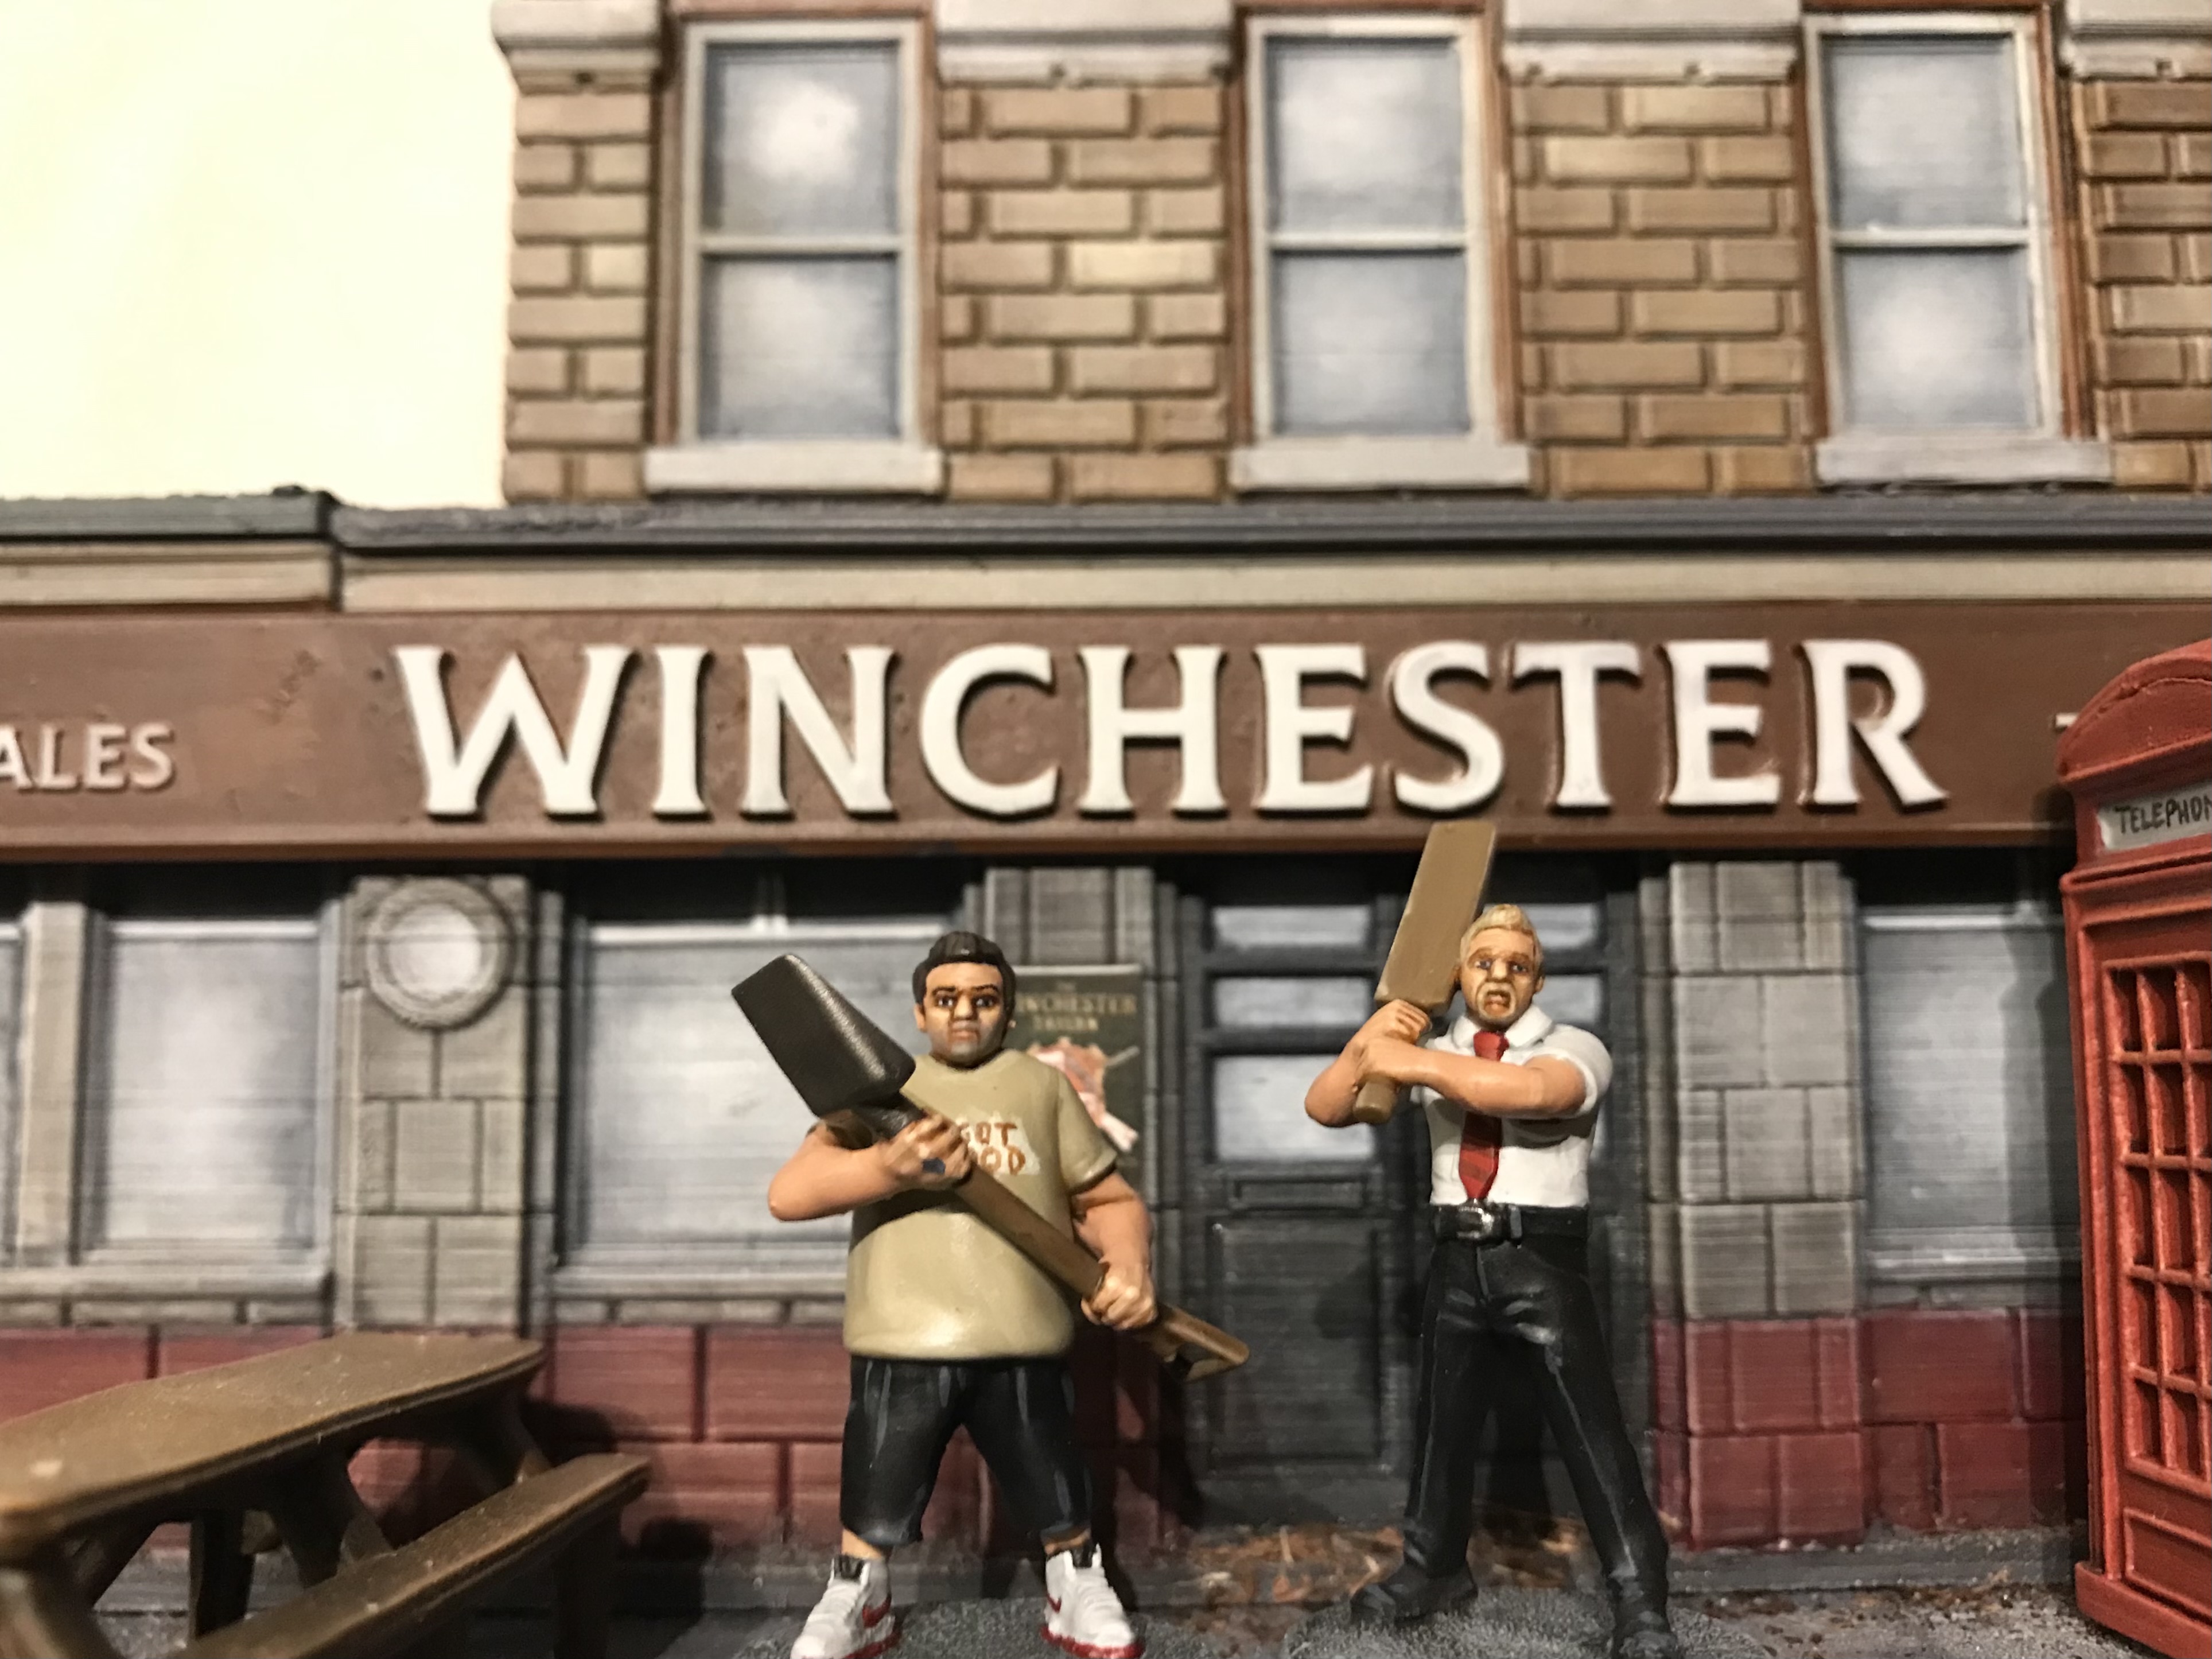
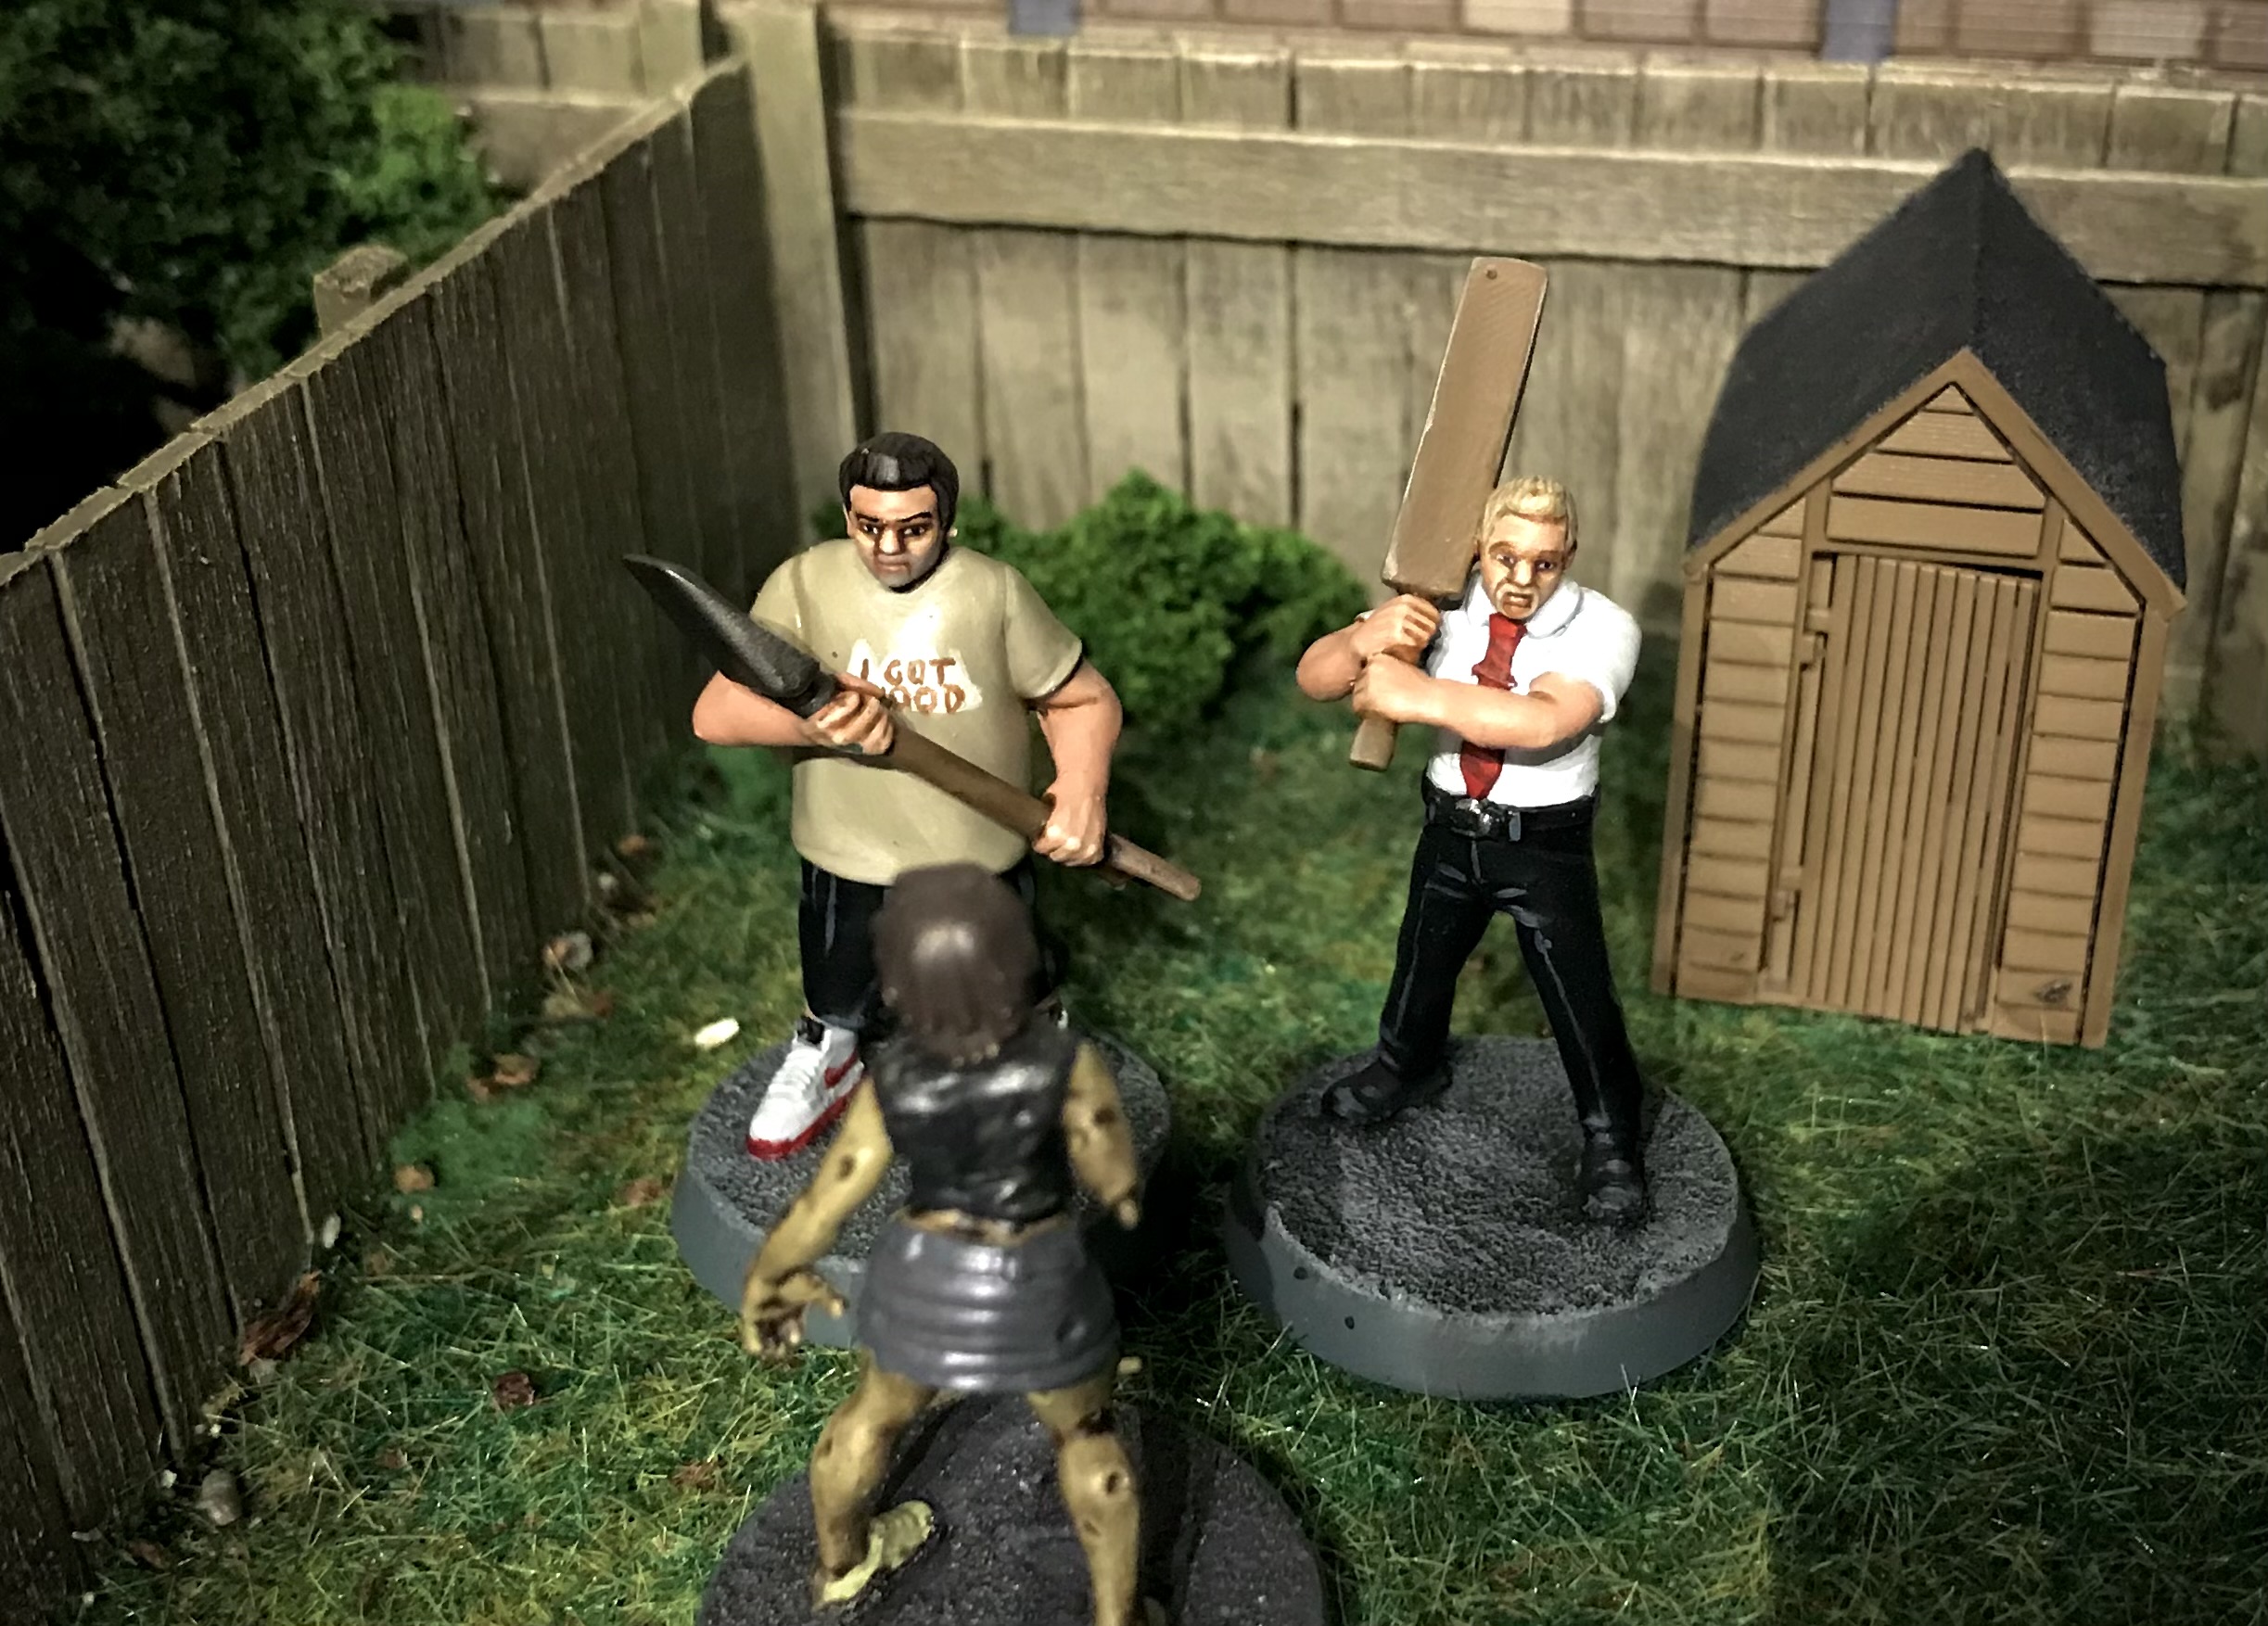
I really enjoyed these models but the piers de resistance came with an etsy page called the Meeplesmith. I am sad to say this page seems to have gone so maybe he shut shop.
The meeplesmith had 3D prints of Shaun and Ed. I made enquiries to scale and if there was another option to Shaun’s head as he was wearing the tie both on his shirt and on his head which made me itch. Meeplesmith came back to me to say he cant change the head due to the files, but he could rescale to fit the Walking Dead bulk. He did this for free for me, which I was very grateful for.
The models arrived not long after The Winchester and I had to get some paint straight on them. I hand carved off the head bandana, but this did give Shaun a funky head. I didn’t mind though, the models still looked great and scaled perfectly to Walking Dead.
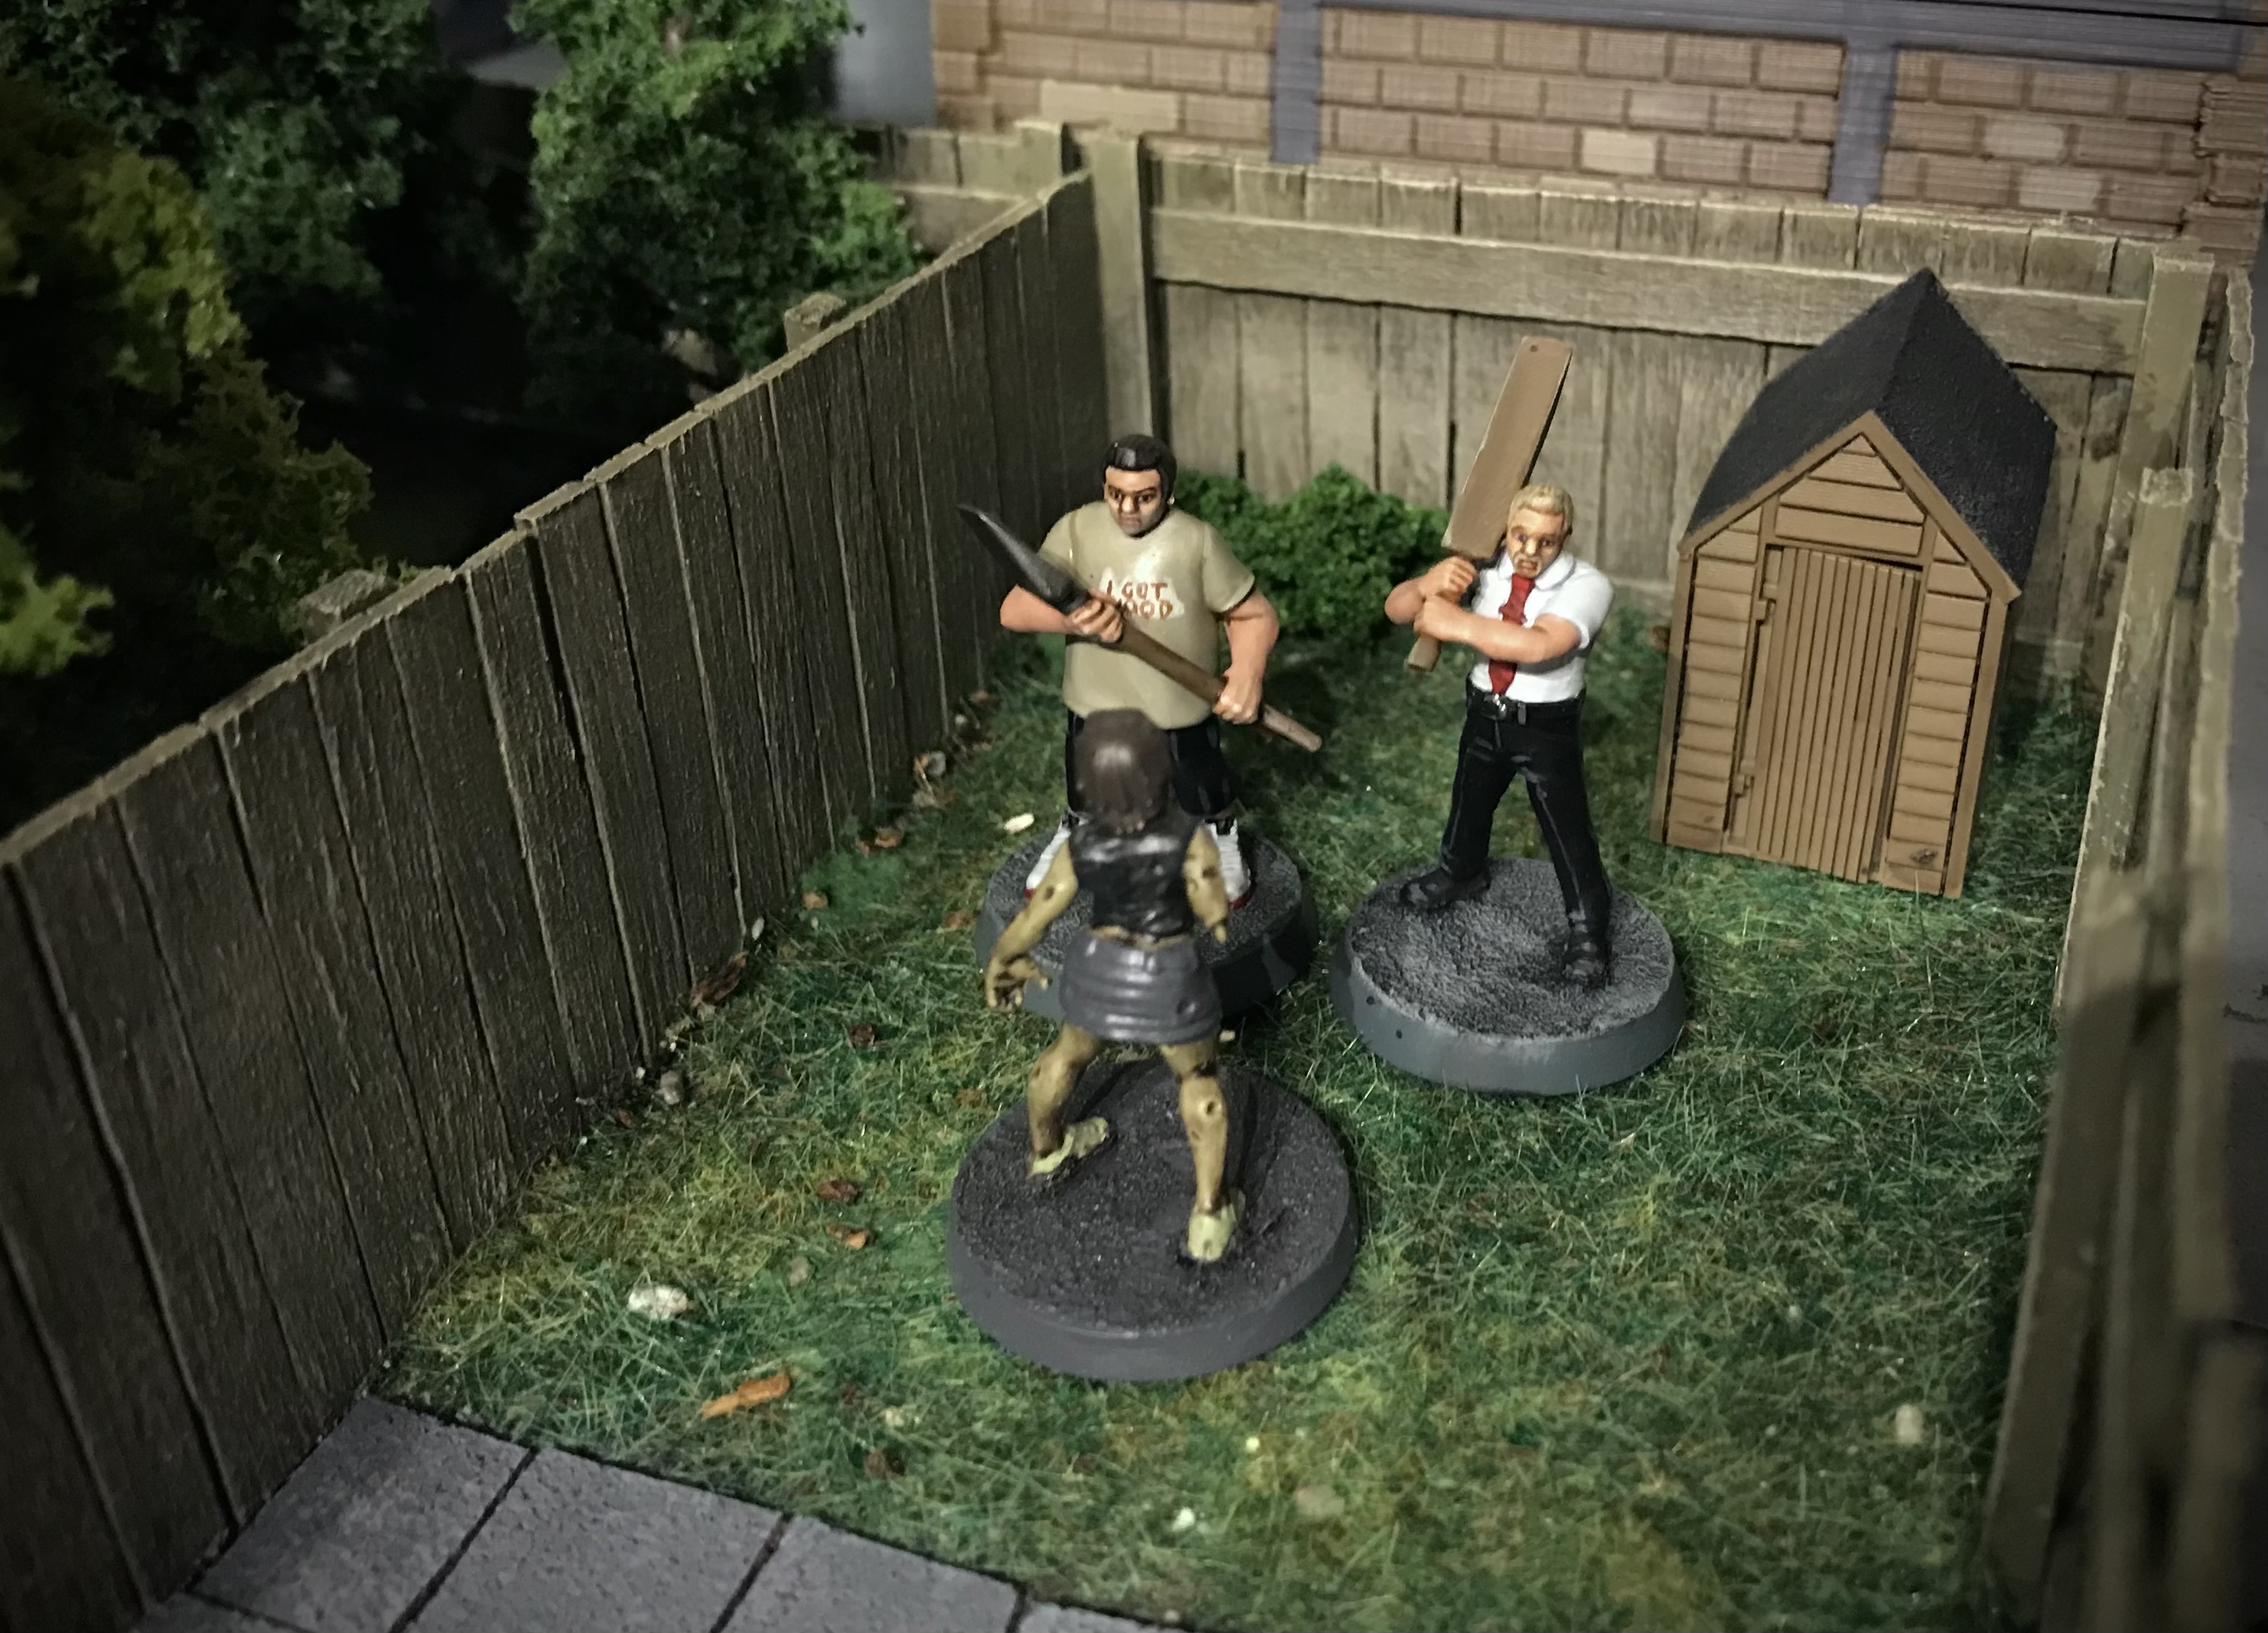
Once I had finished the models, I had to get them into the City which gave me the idea to turn one of the terraced houses in Shauns place and customise it with a few little easter eggs like the Shed in the garden. I even researched the colour of the door as mentioned in the history post.
I then finished my modern warfare models. This encouraged me to continue work my on own rule set and the shopping mall models.


 “Yeah boi” clang
I got side tracked with a side quest.
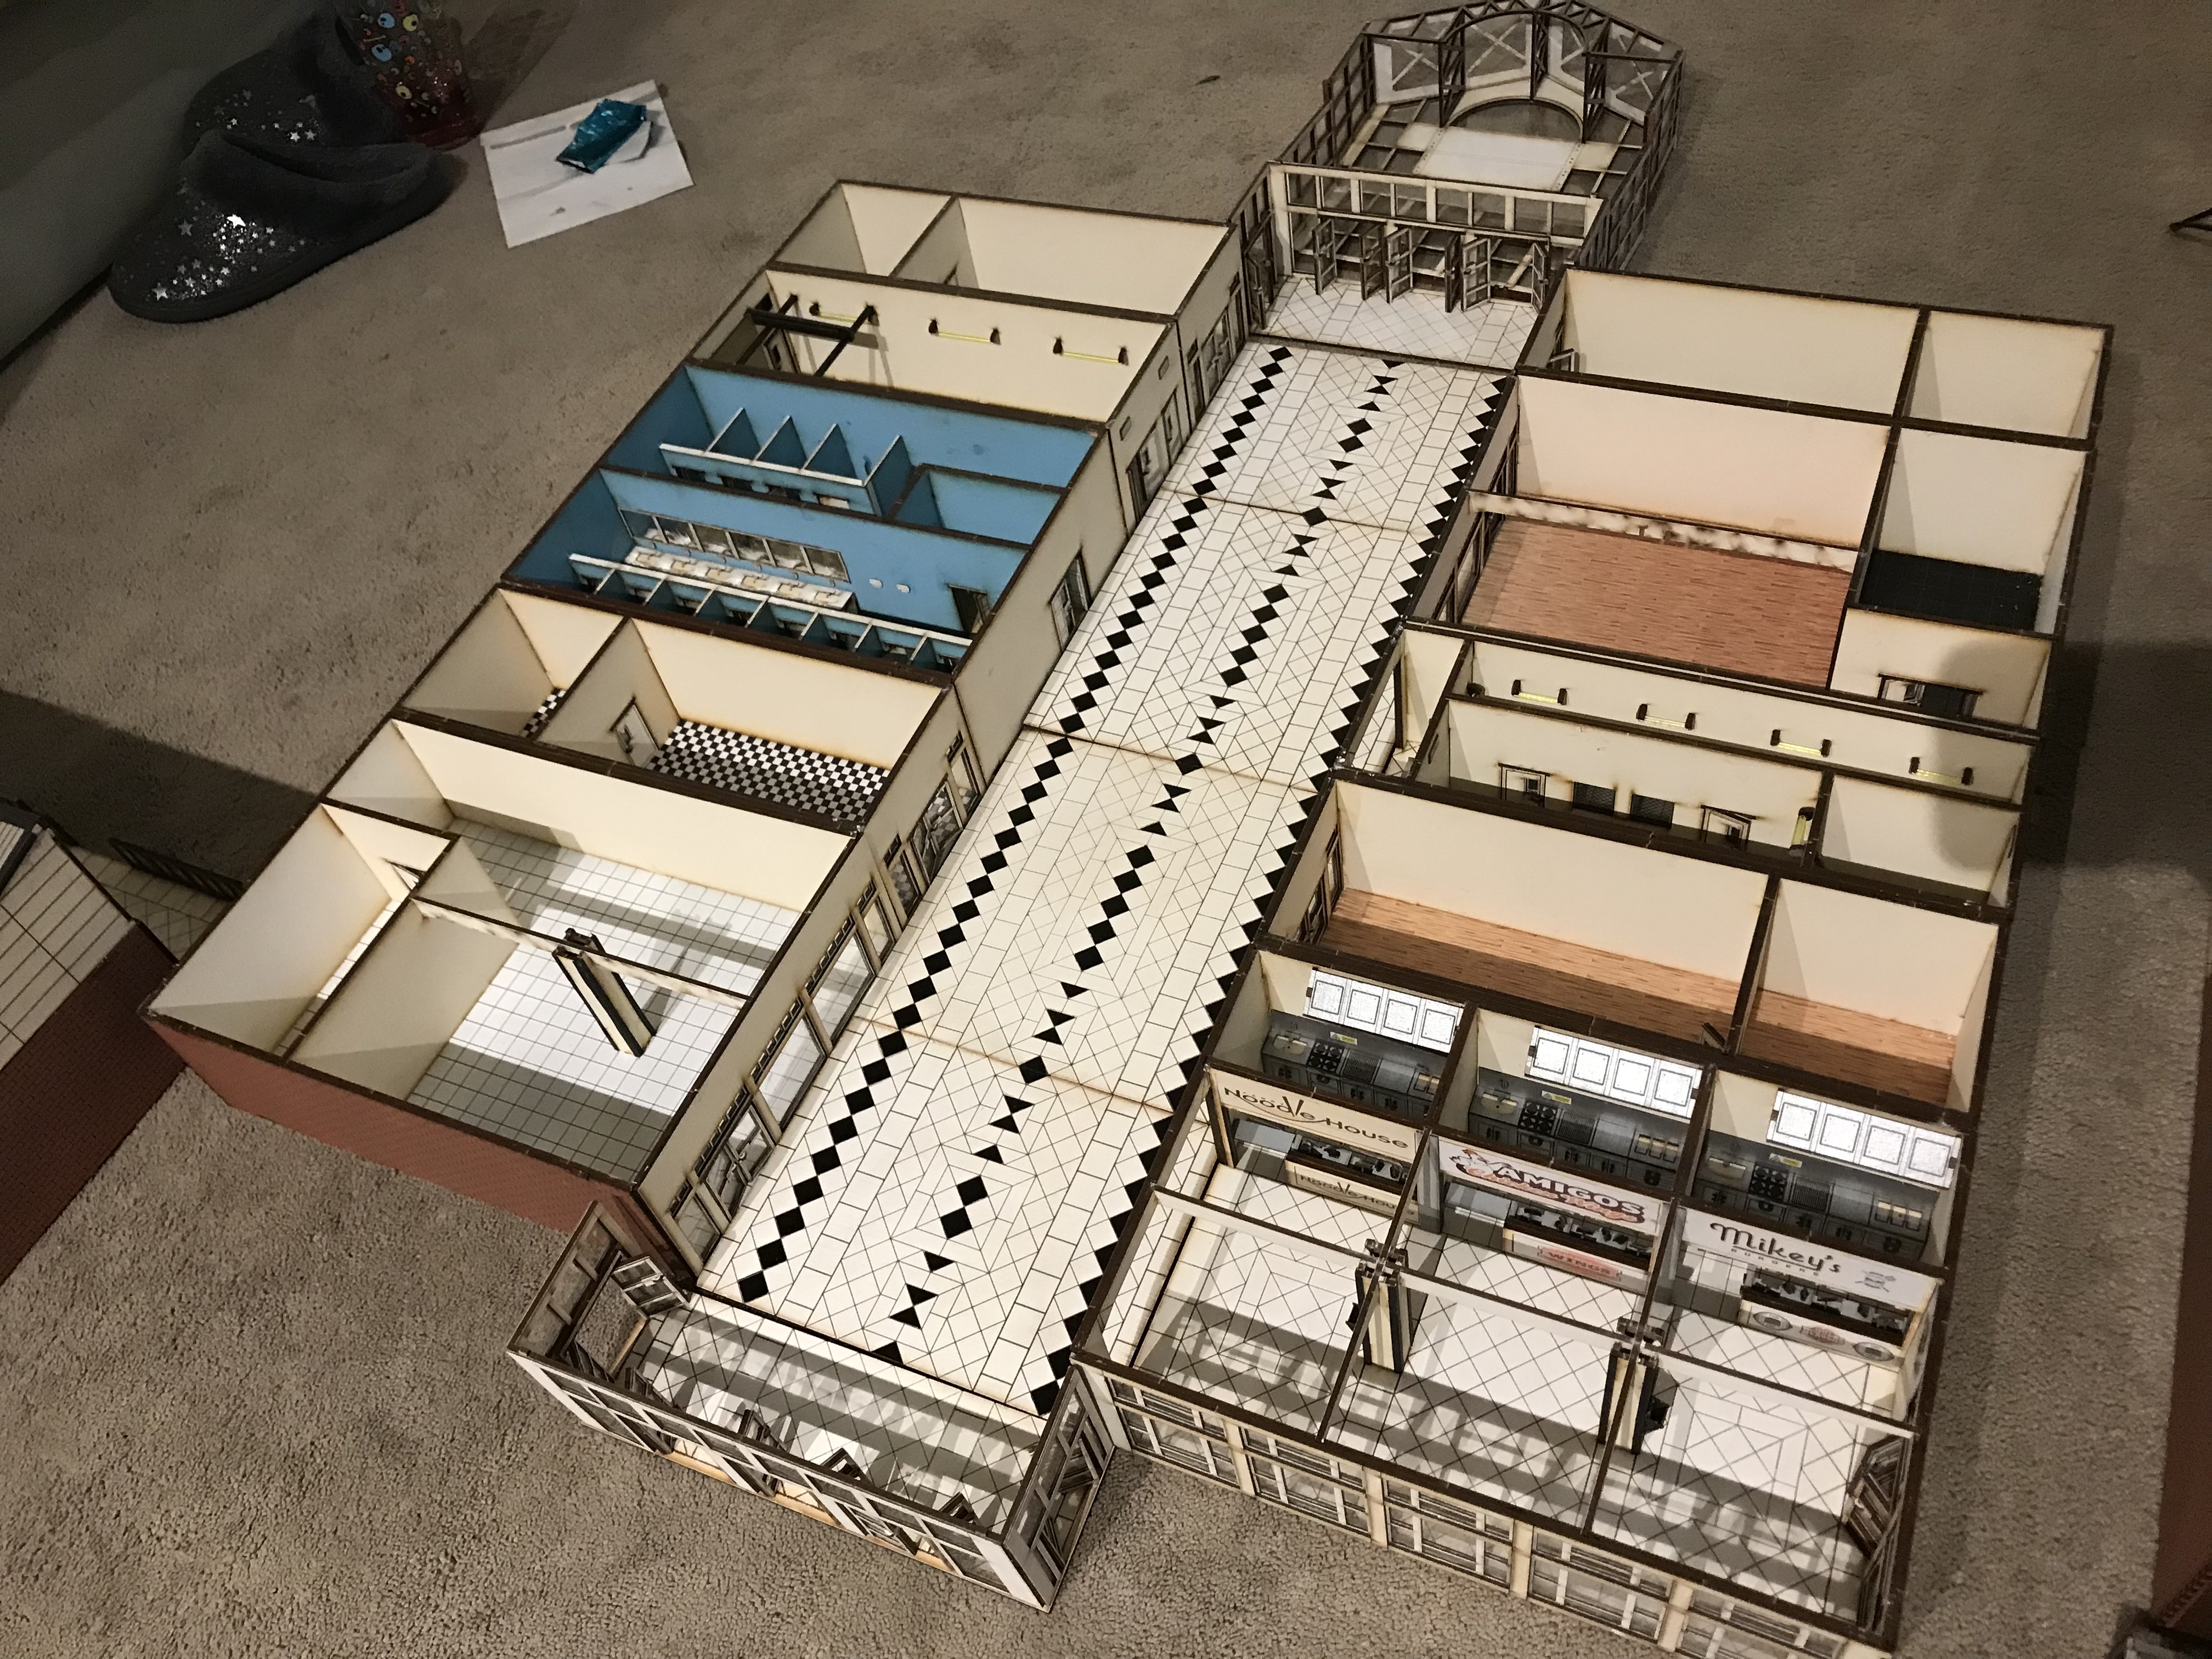
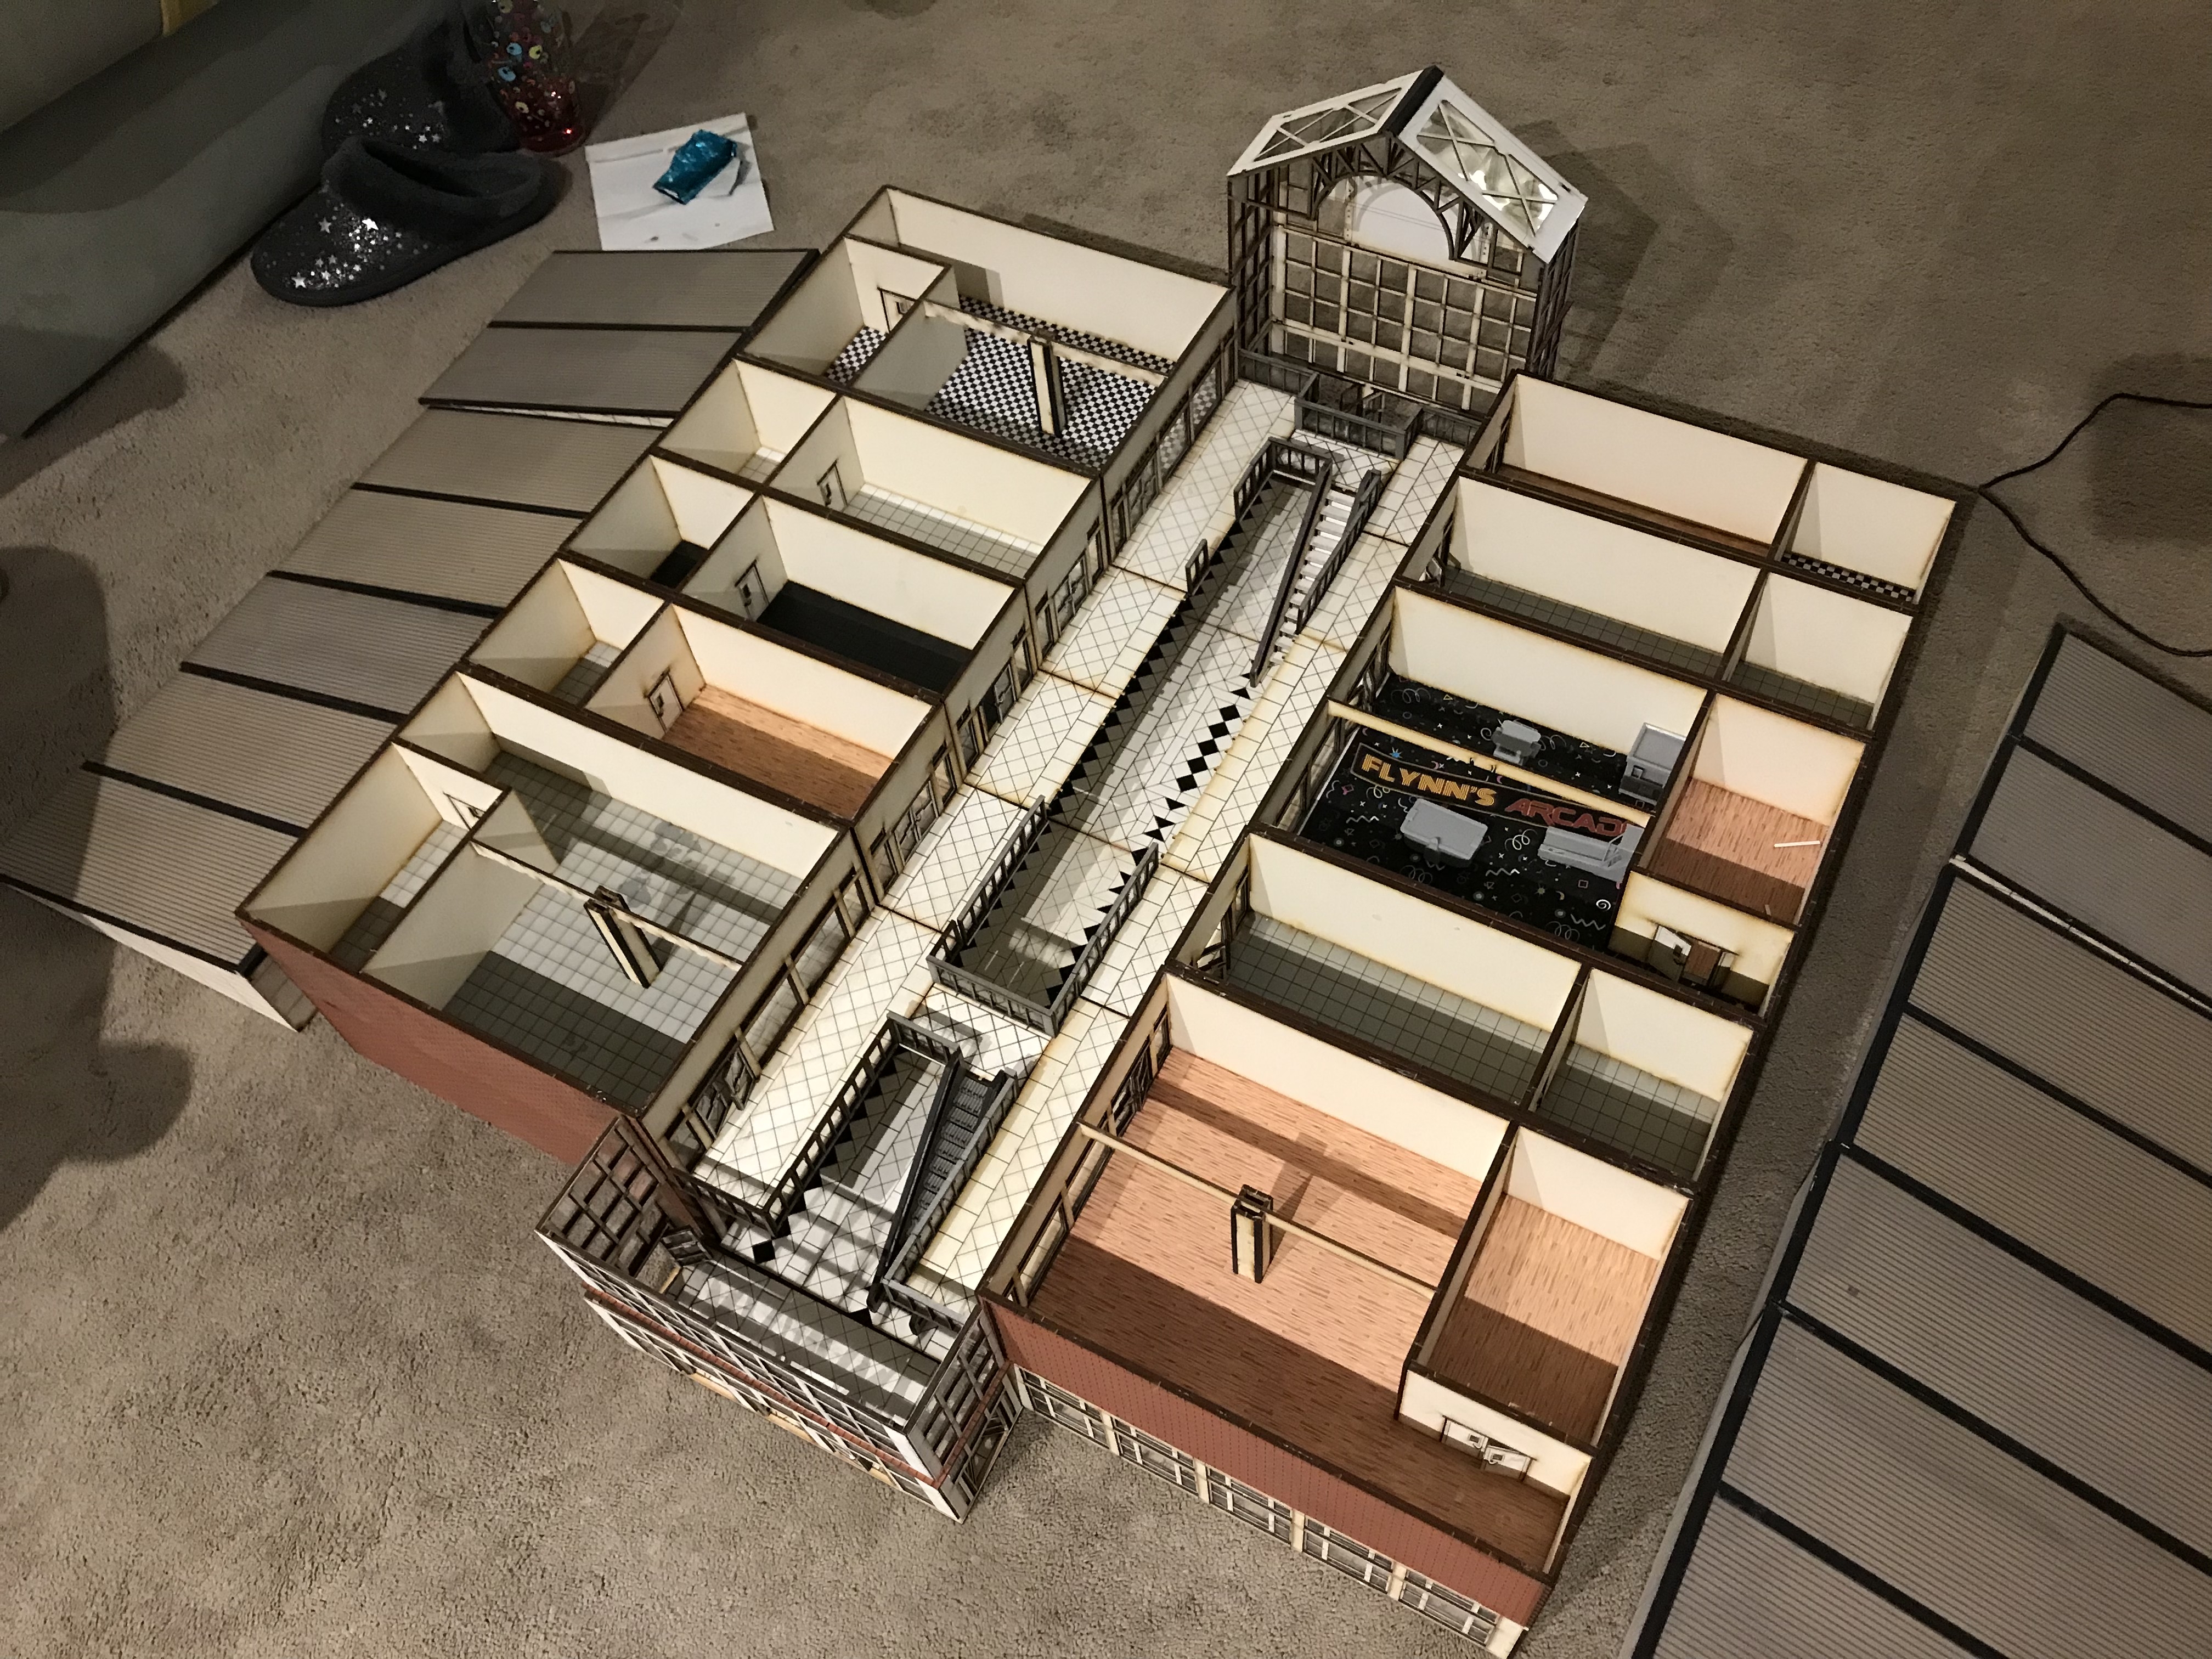
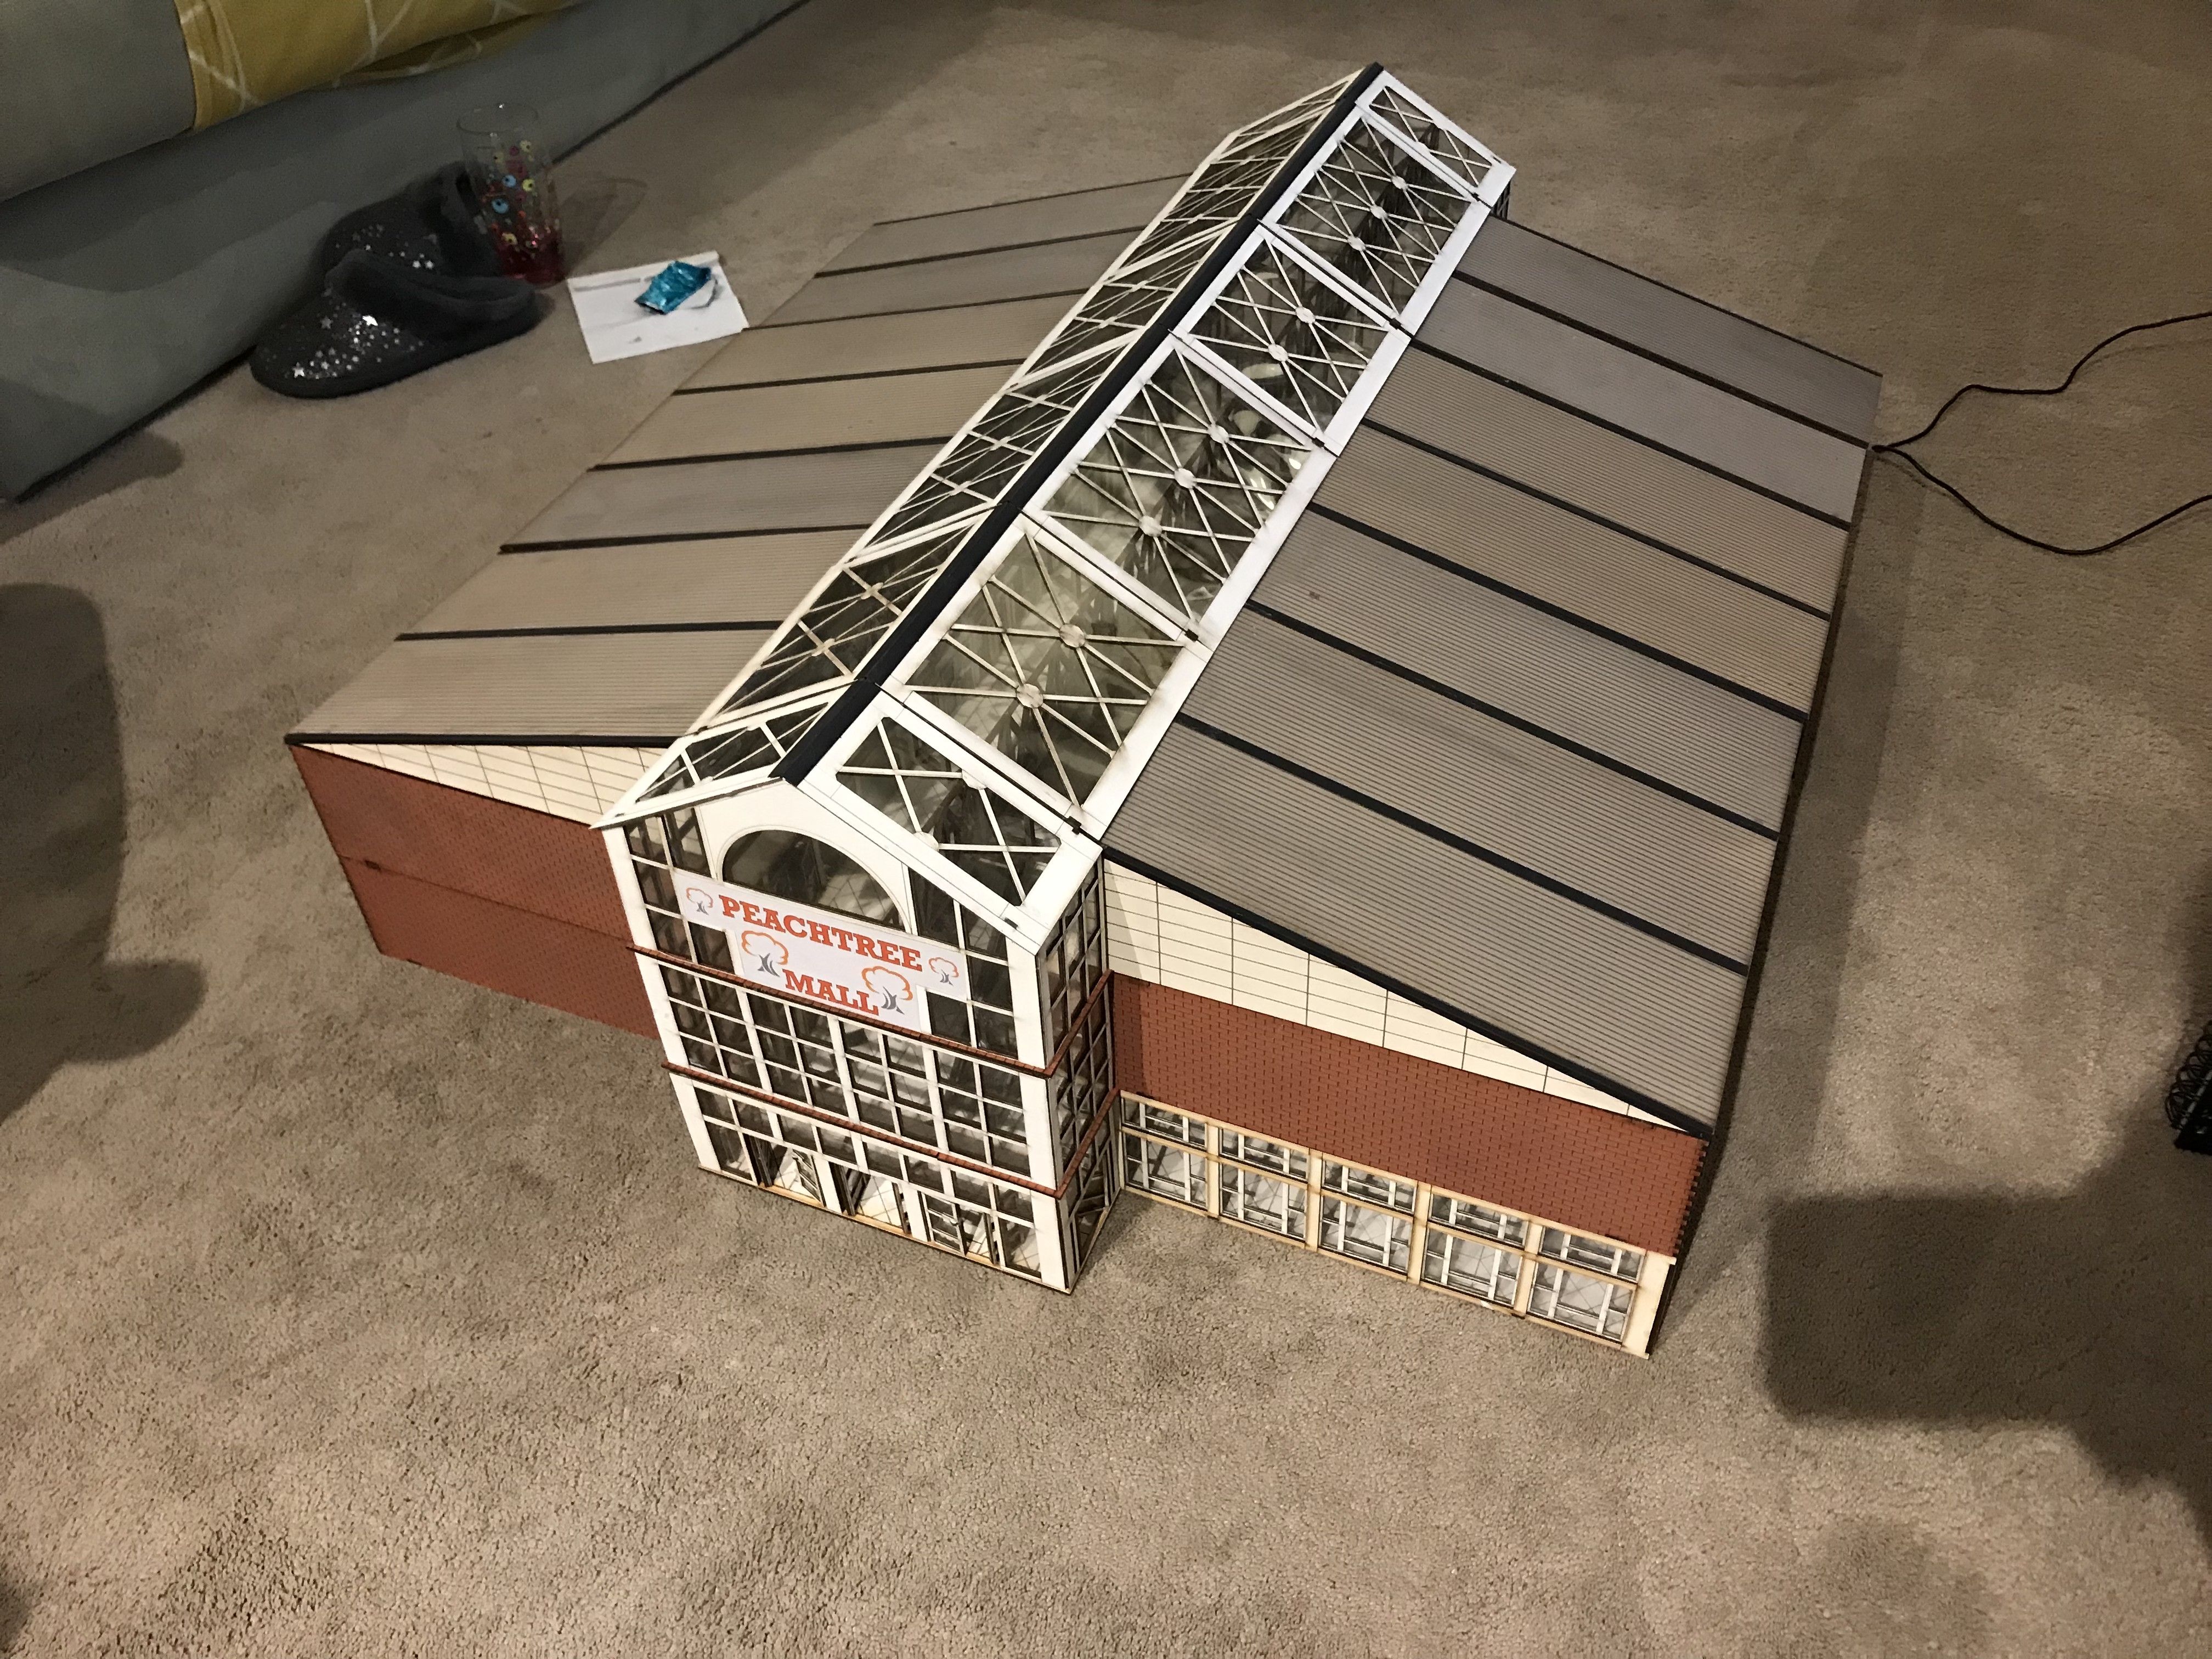
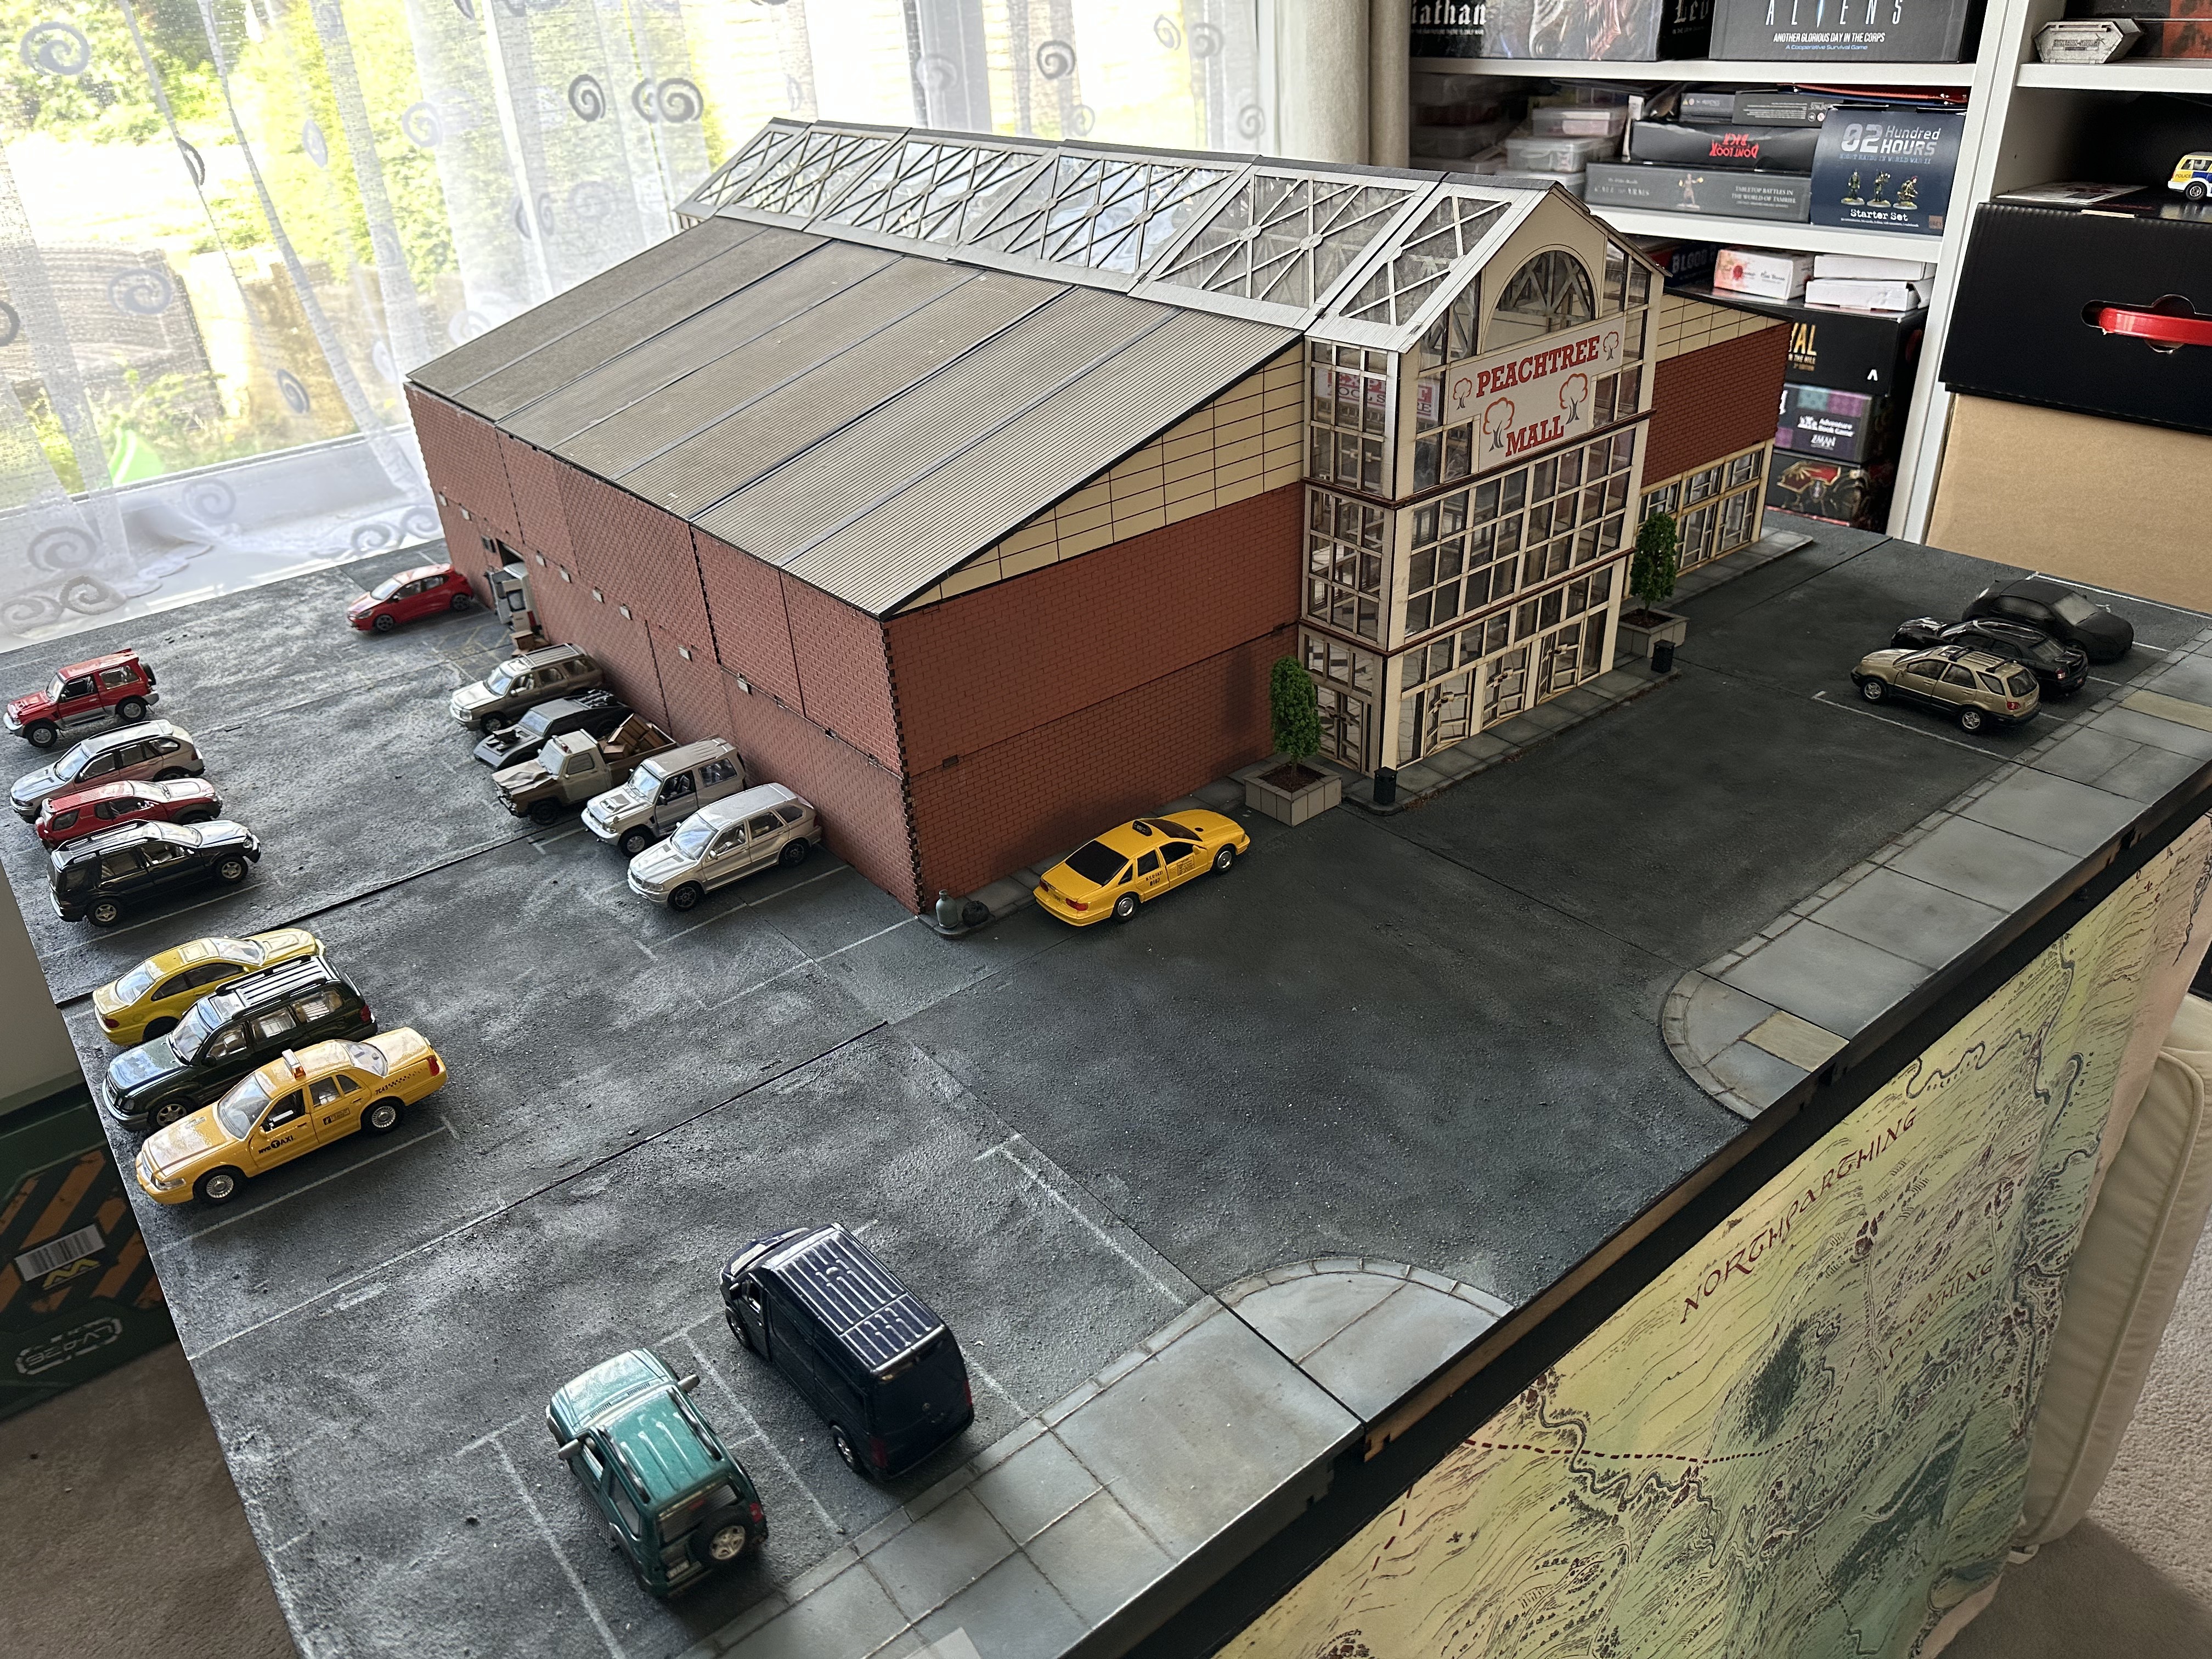
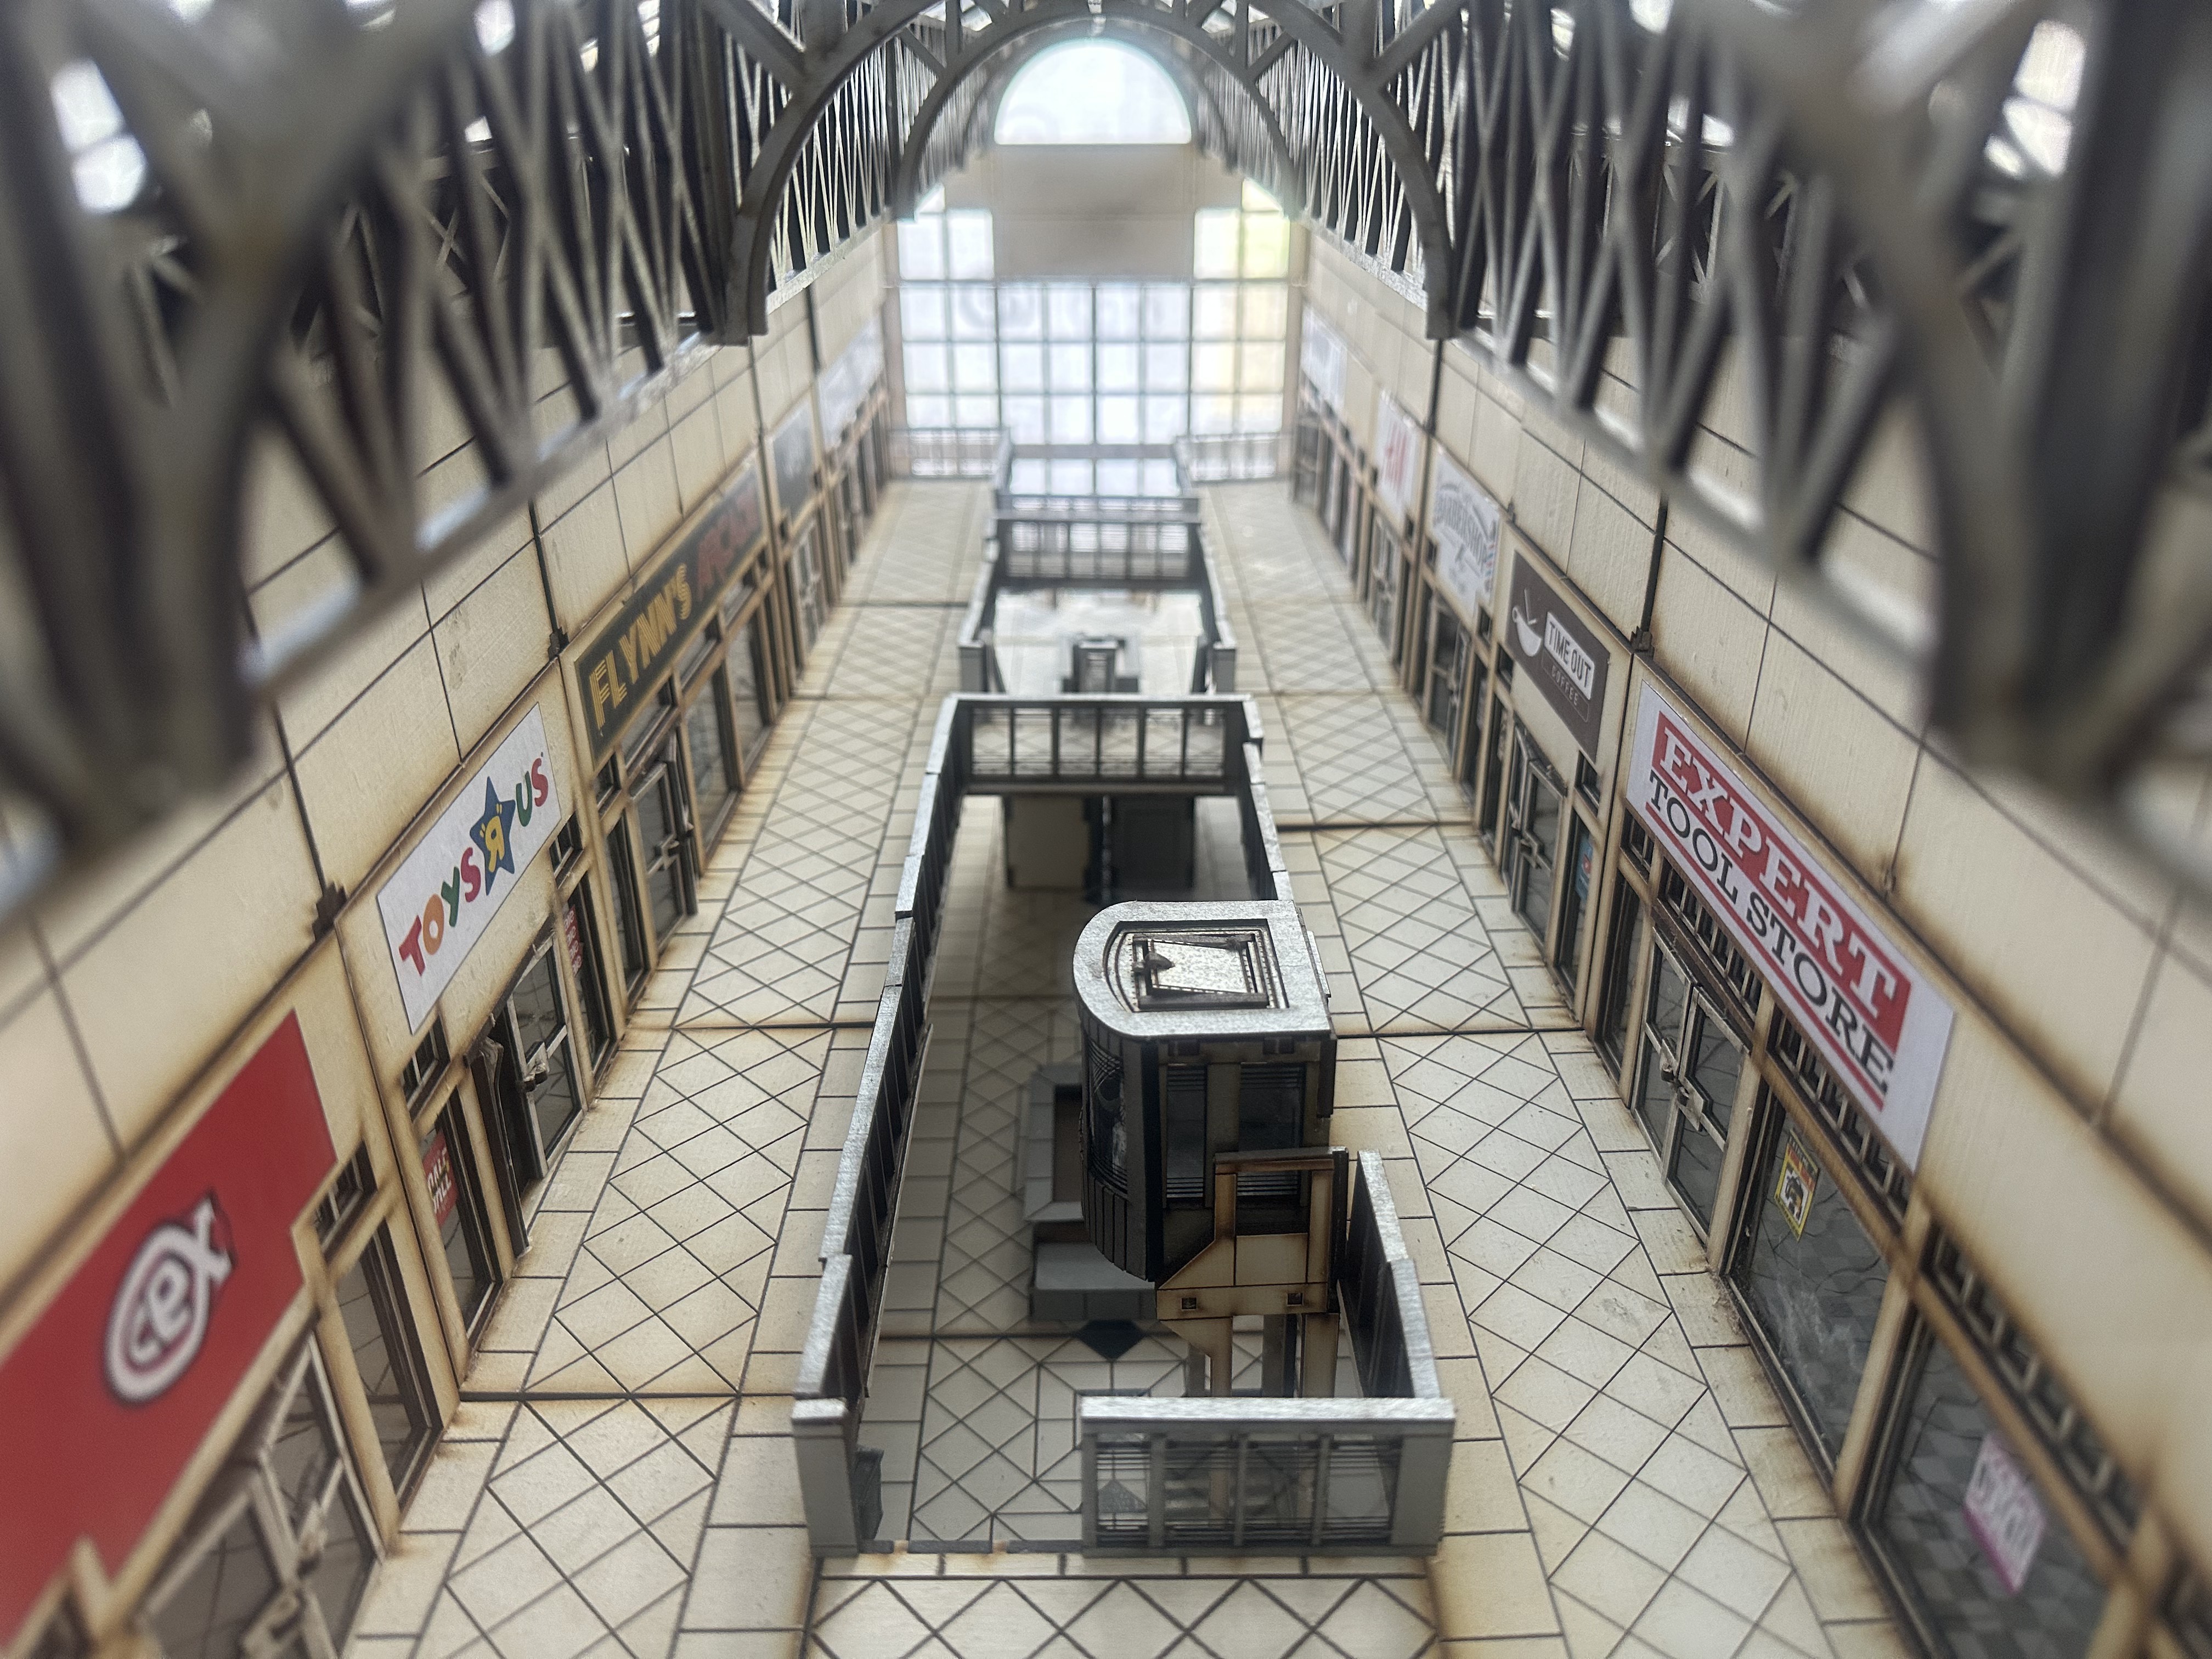
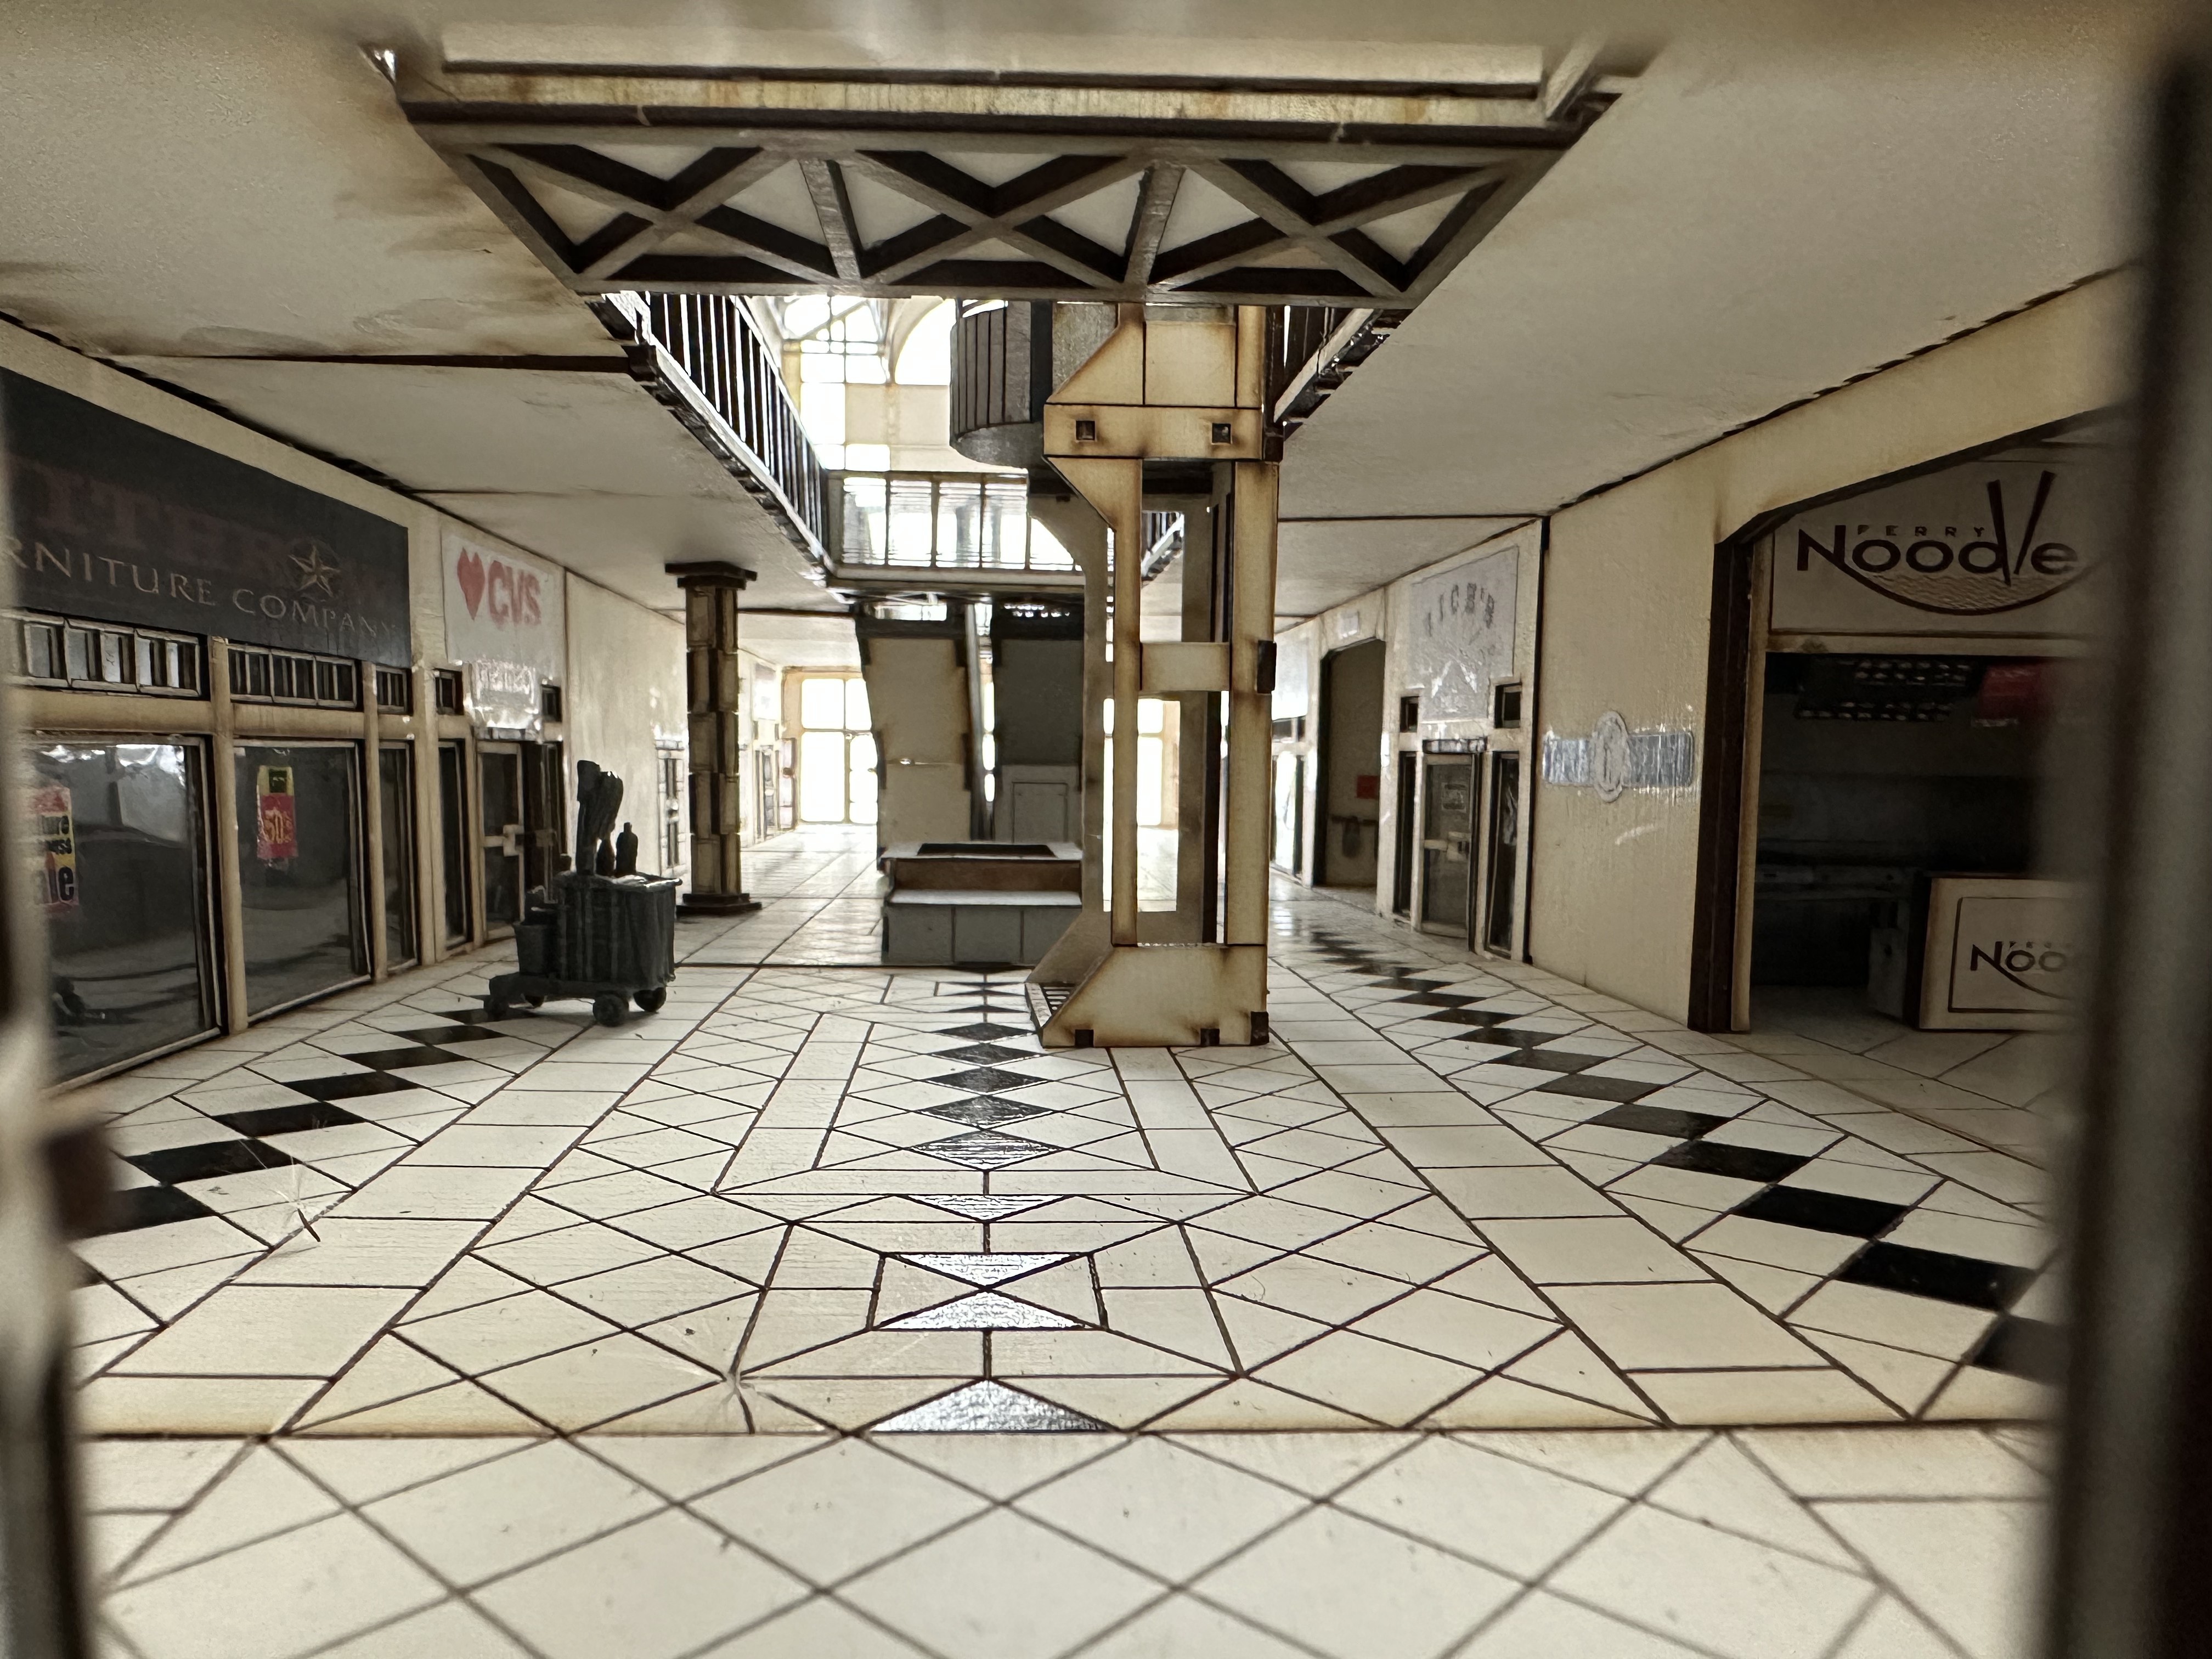
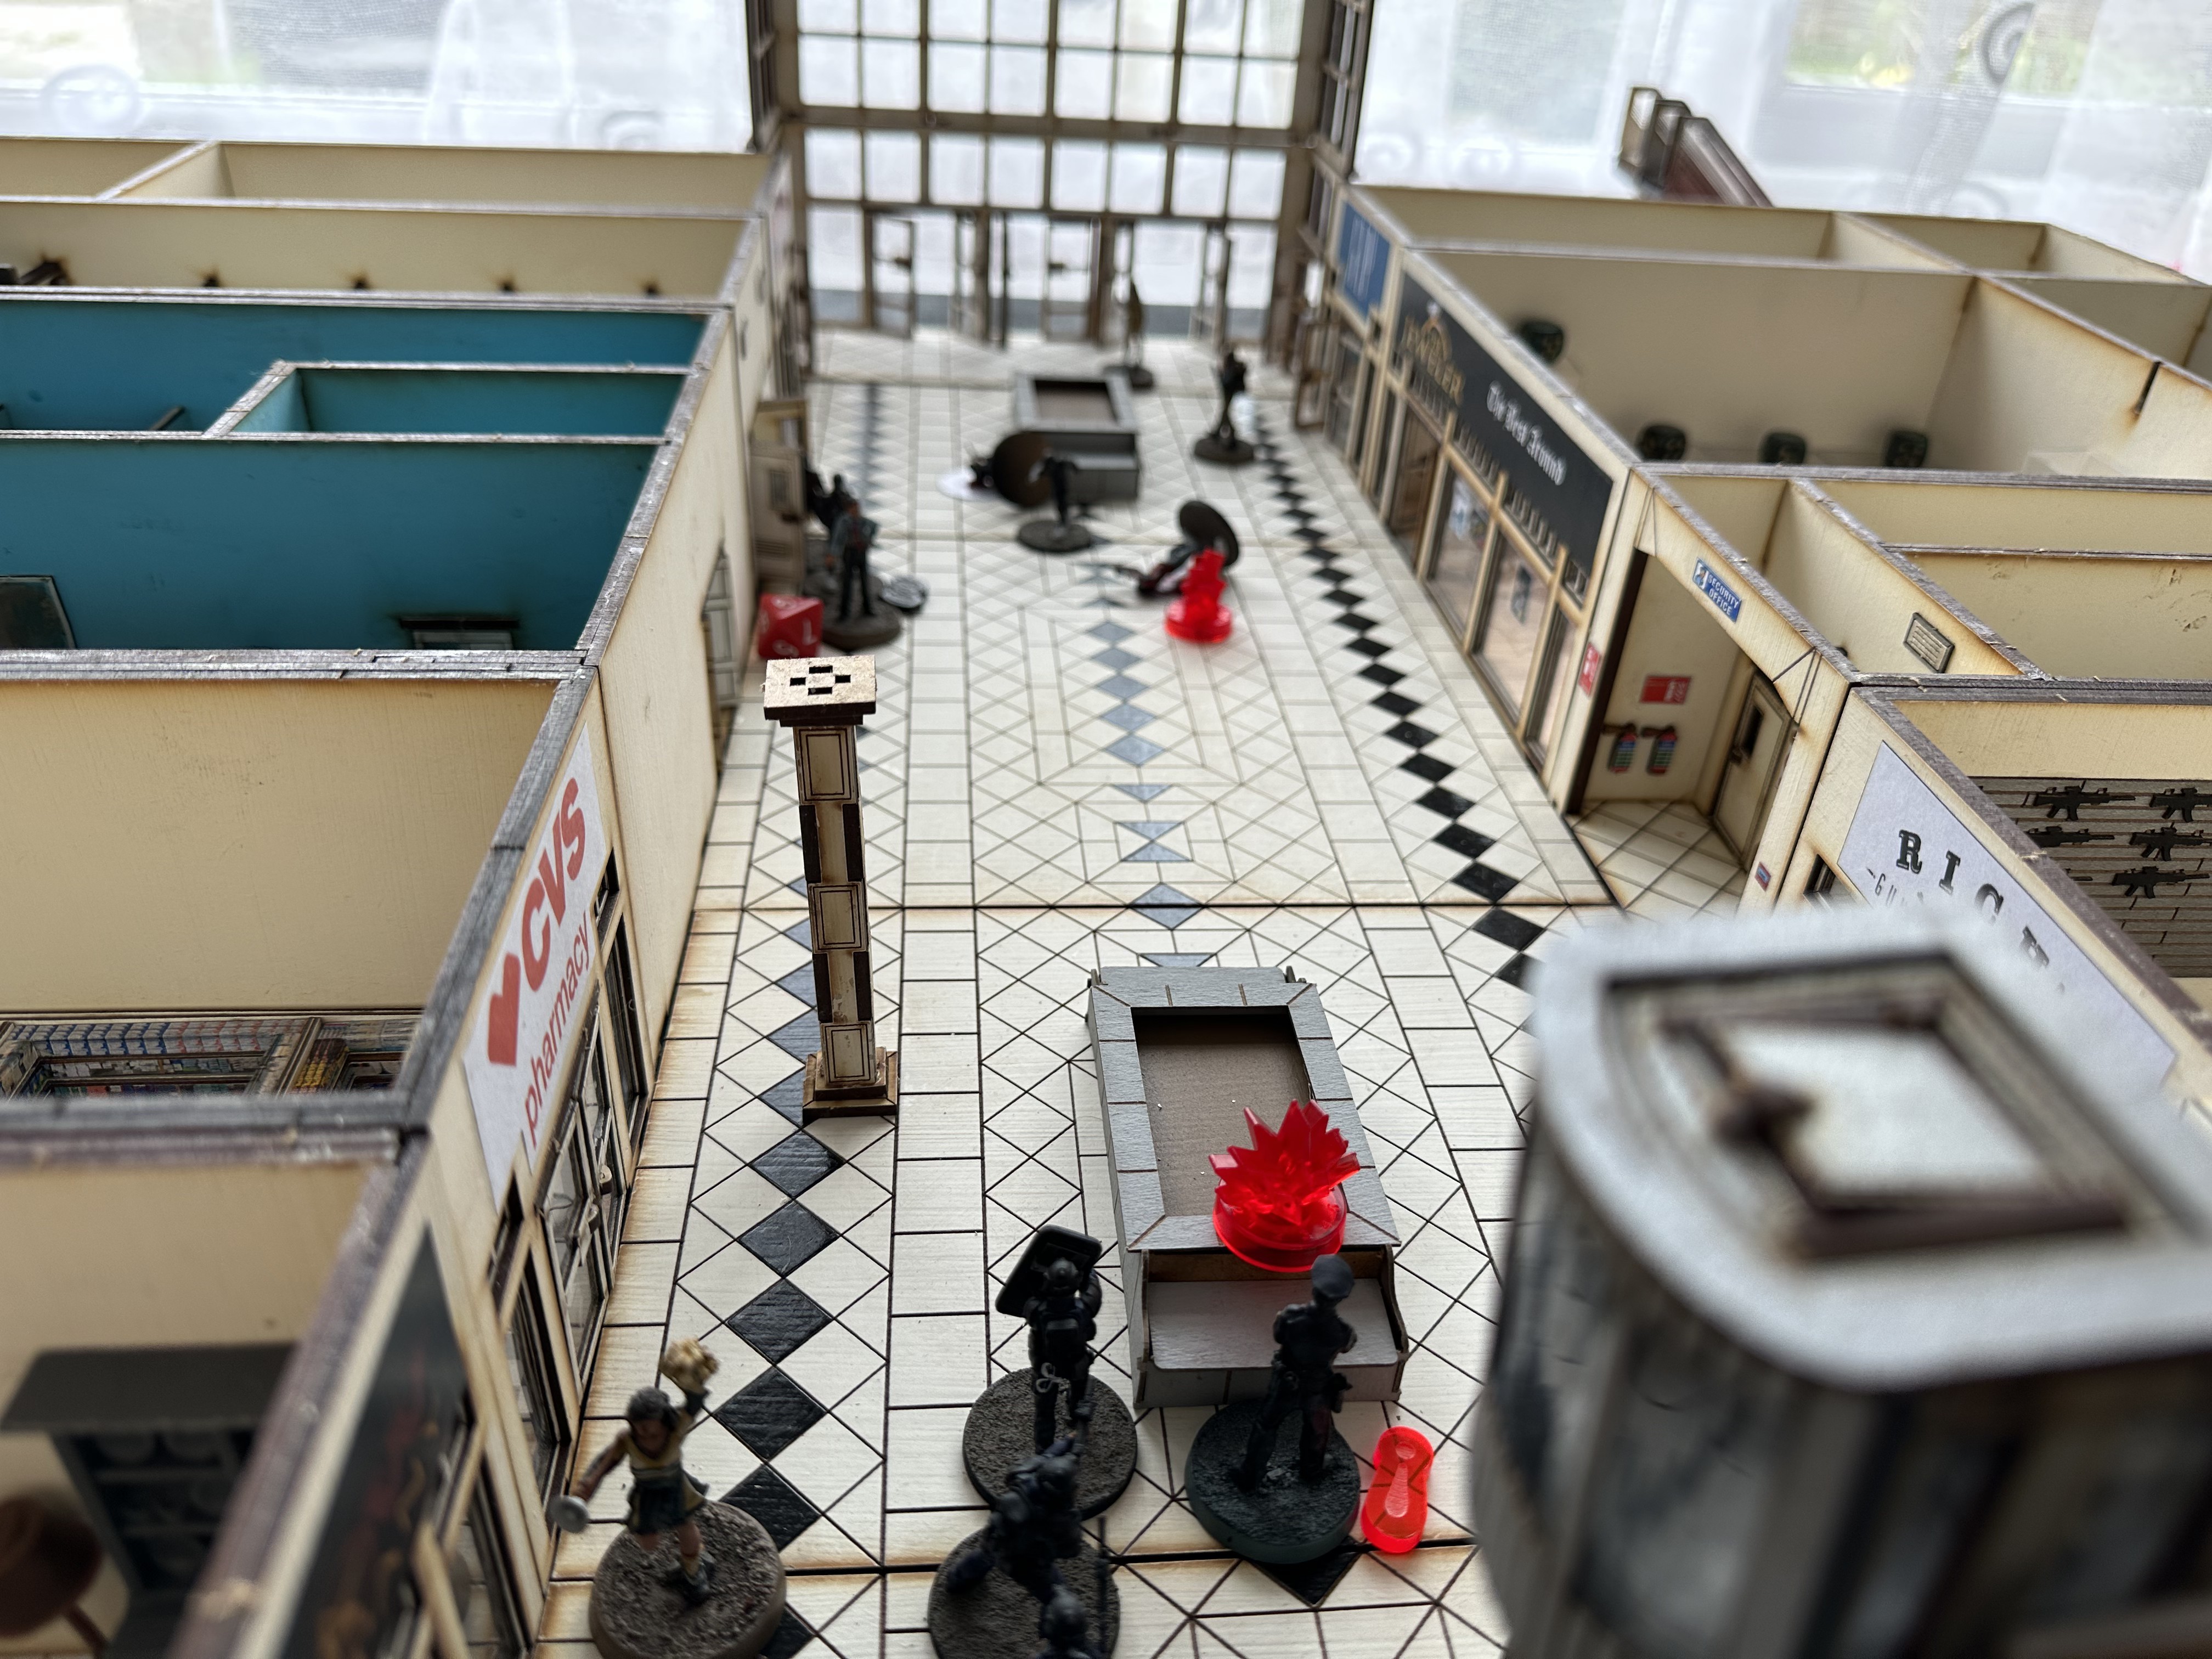
Having now finished all my city tile, I moved onto the shopping mall and getting it all built and put together. As I had gone full on, I made is 8 stores in length and then two floors. It looked great as it is but I wanted it to sit right on the tiles and blend with my city.
I customised some of the shops to suit what I wanted in the Mall. I still had a few bits outstanding but sadly Tymeagain has not responded to any of my emails or web messages about my missing items. Im currently £60 down and need to keep chasing this.
Anyway, I finished the Mall as best I could and then had on order Spectre miniature new stuff.


This encouraged me to finish writing a modern warfare rules set, with my first draft now completed. I really liked the idea of rule generic enough it could be applied to any modern situation, such as cops vs robber or SAS vs insurgents. I was always inspired to write some rules that covers SWAT as initially I wanted to write a dedicate SWAT game for the tabletop based on the old Sierra video games. SWAT lives on as a fond memory of mine.
This evolved into a full ruleset to cover many aspects. I know what I have written is looks like a complicated mess, but when I applied the rules to quickly made up scenario of a diamond heist in the mall, the way it played out narratively was sublime. It gave me hope that I had written a viable game.
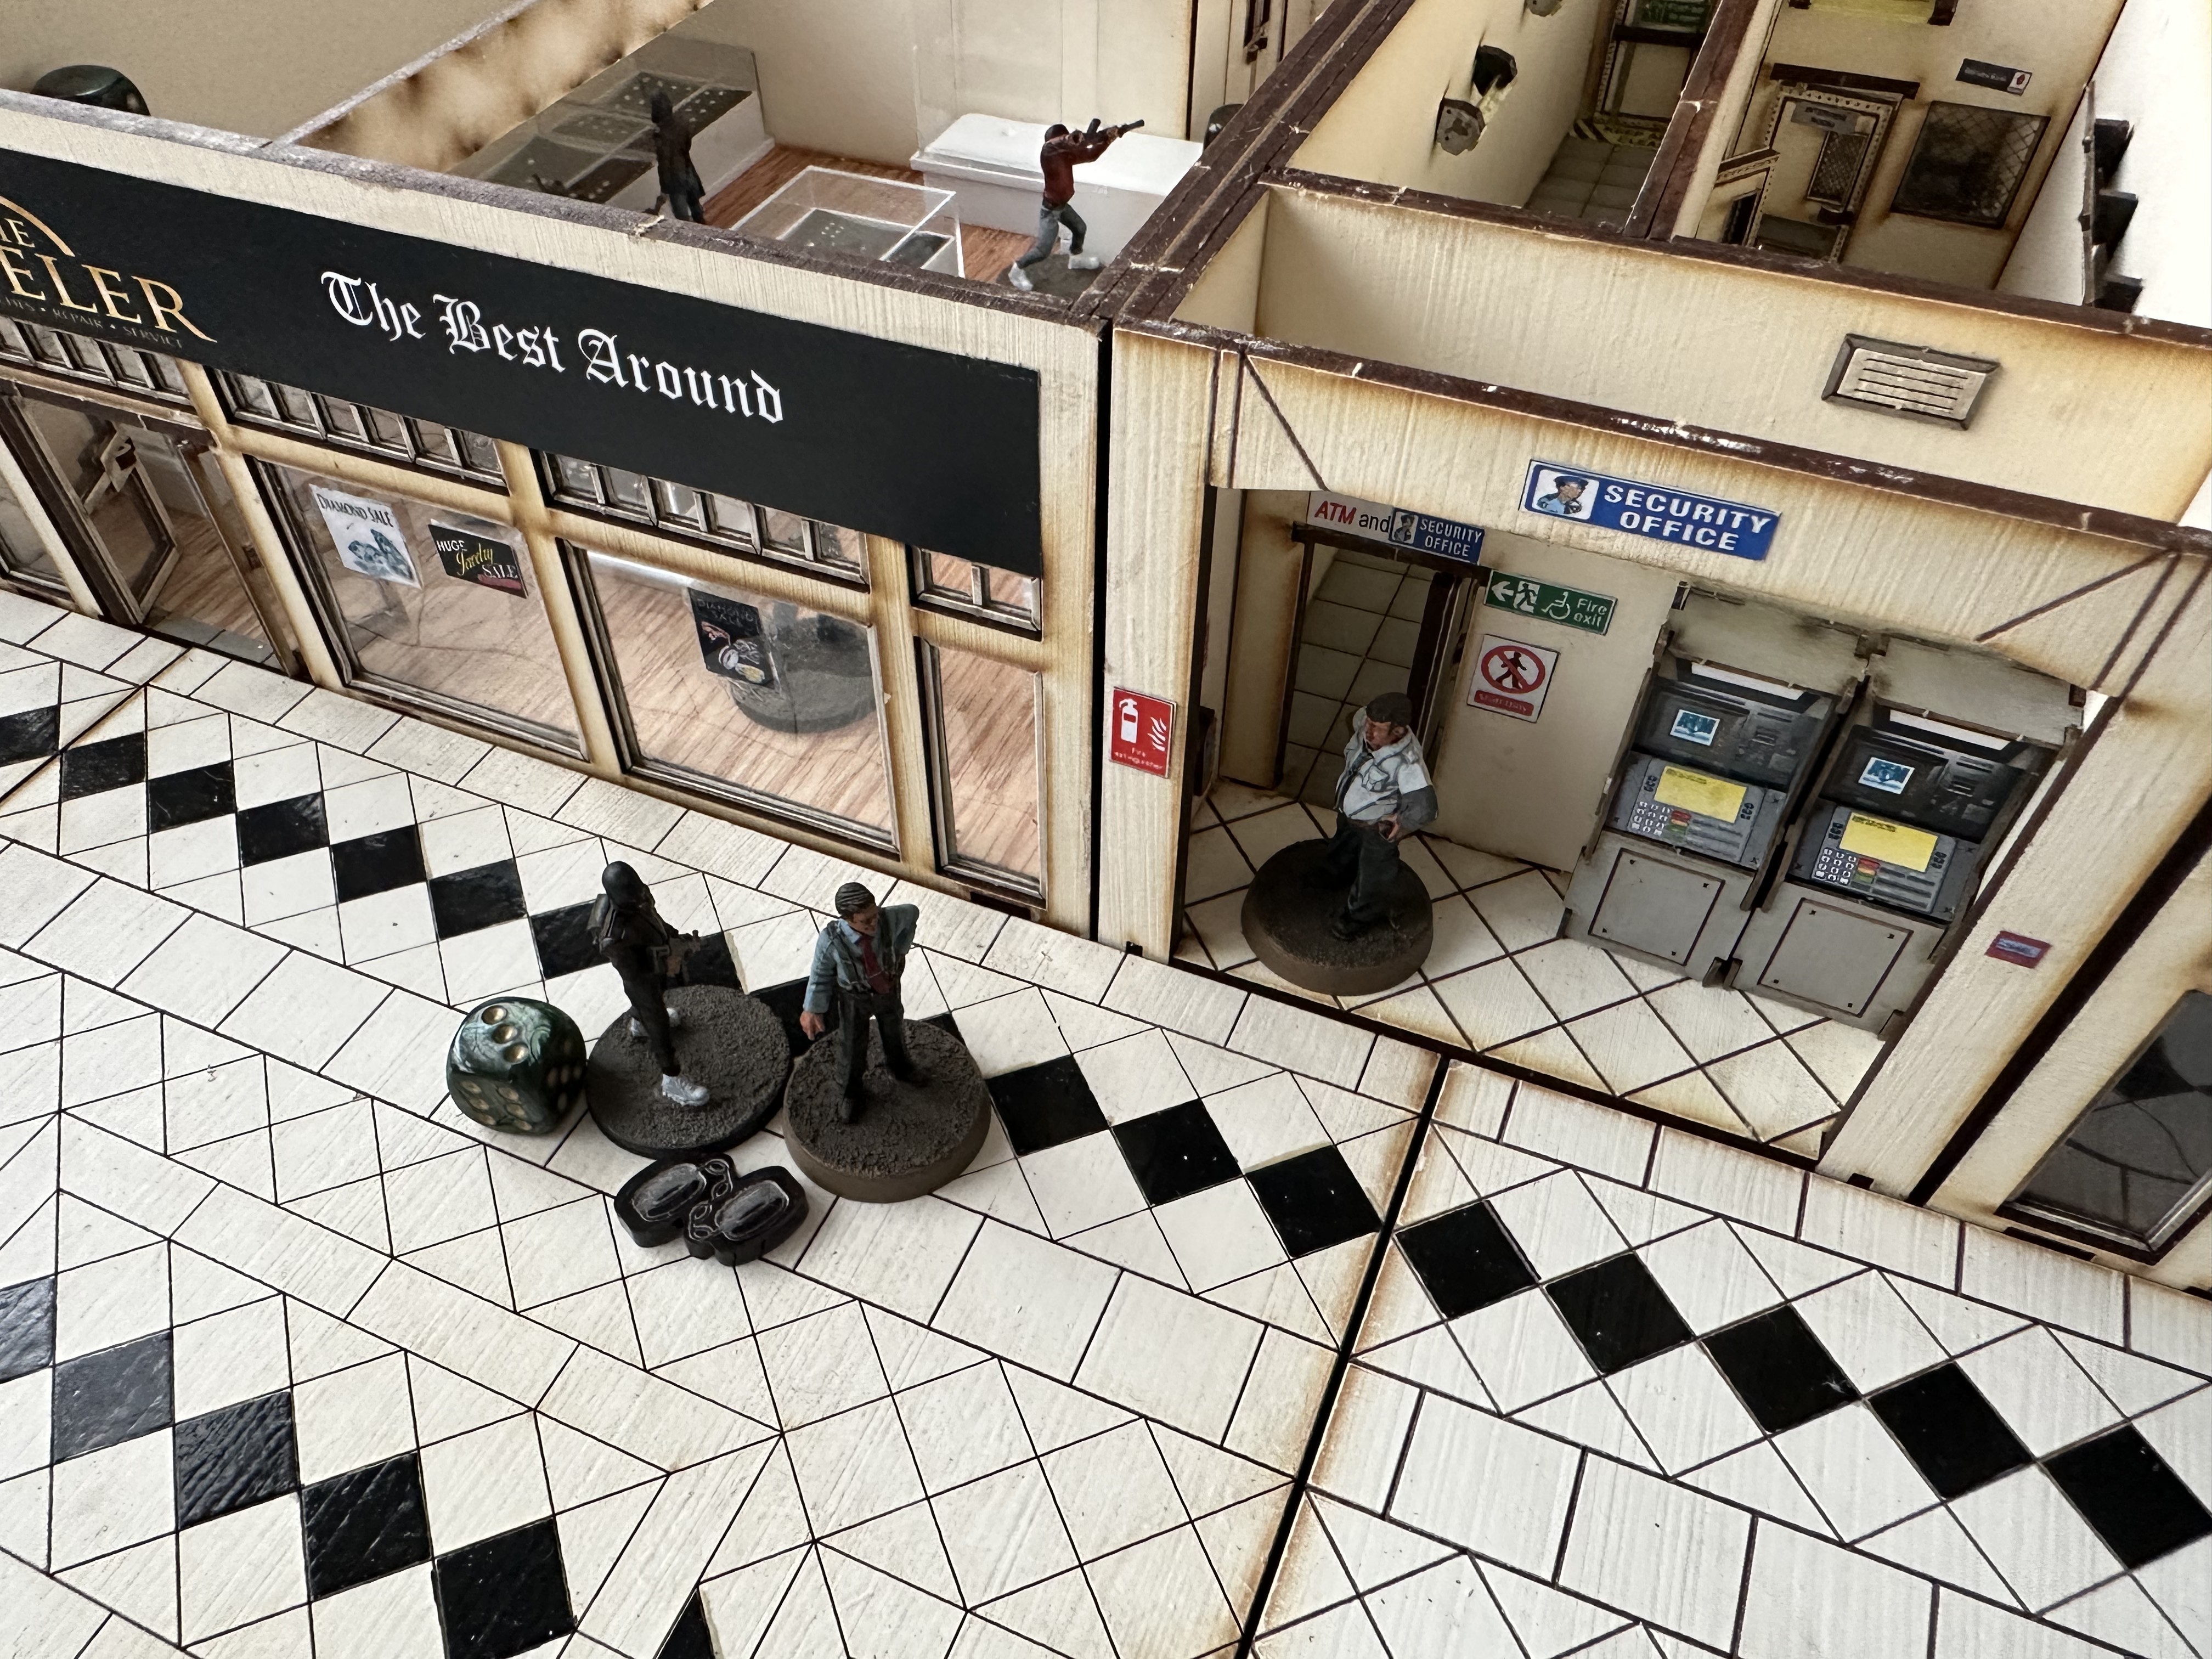
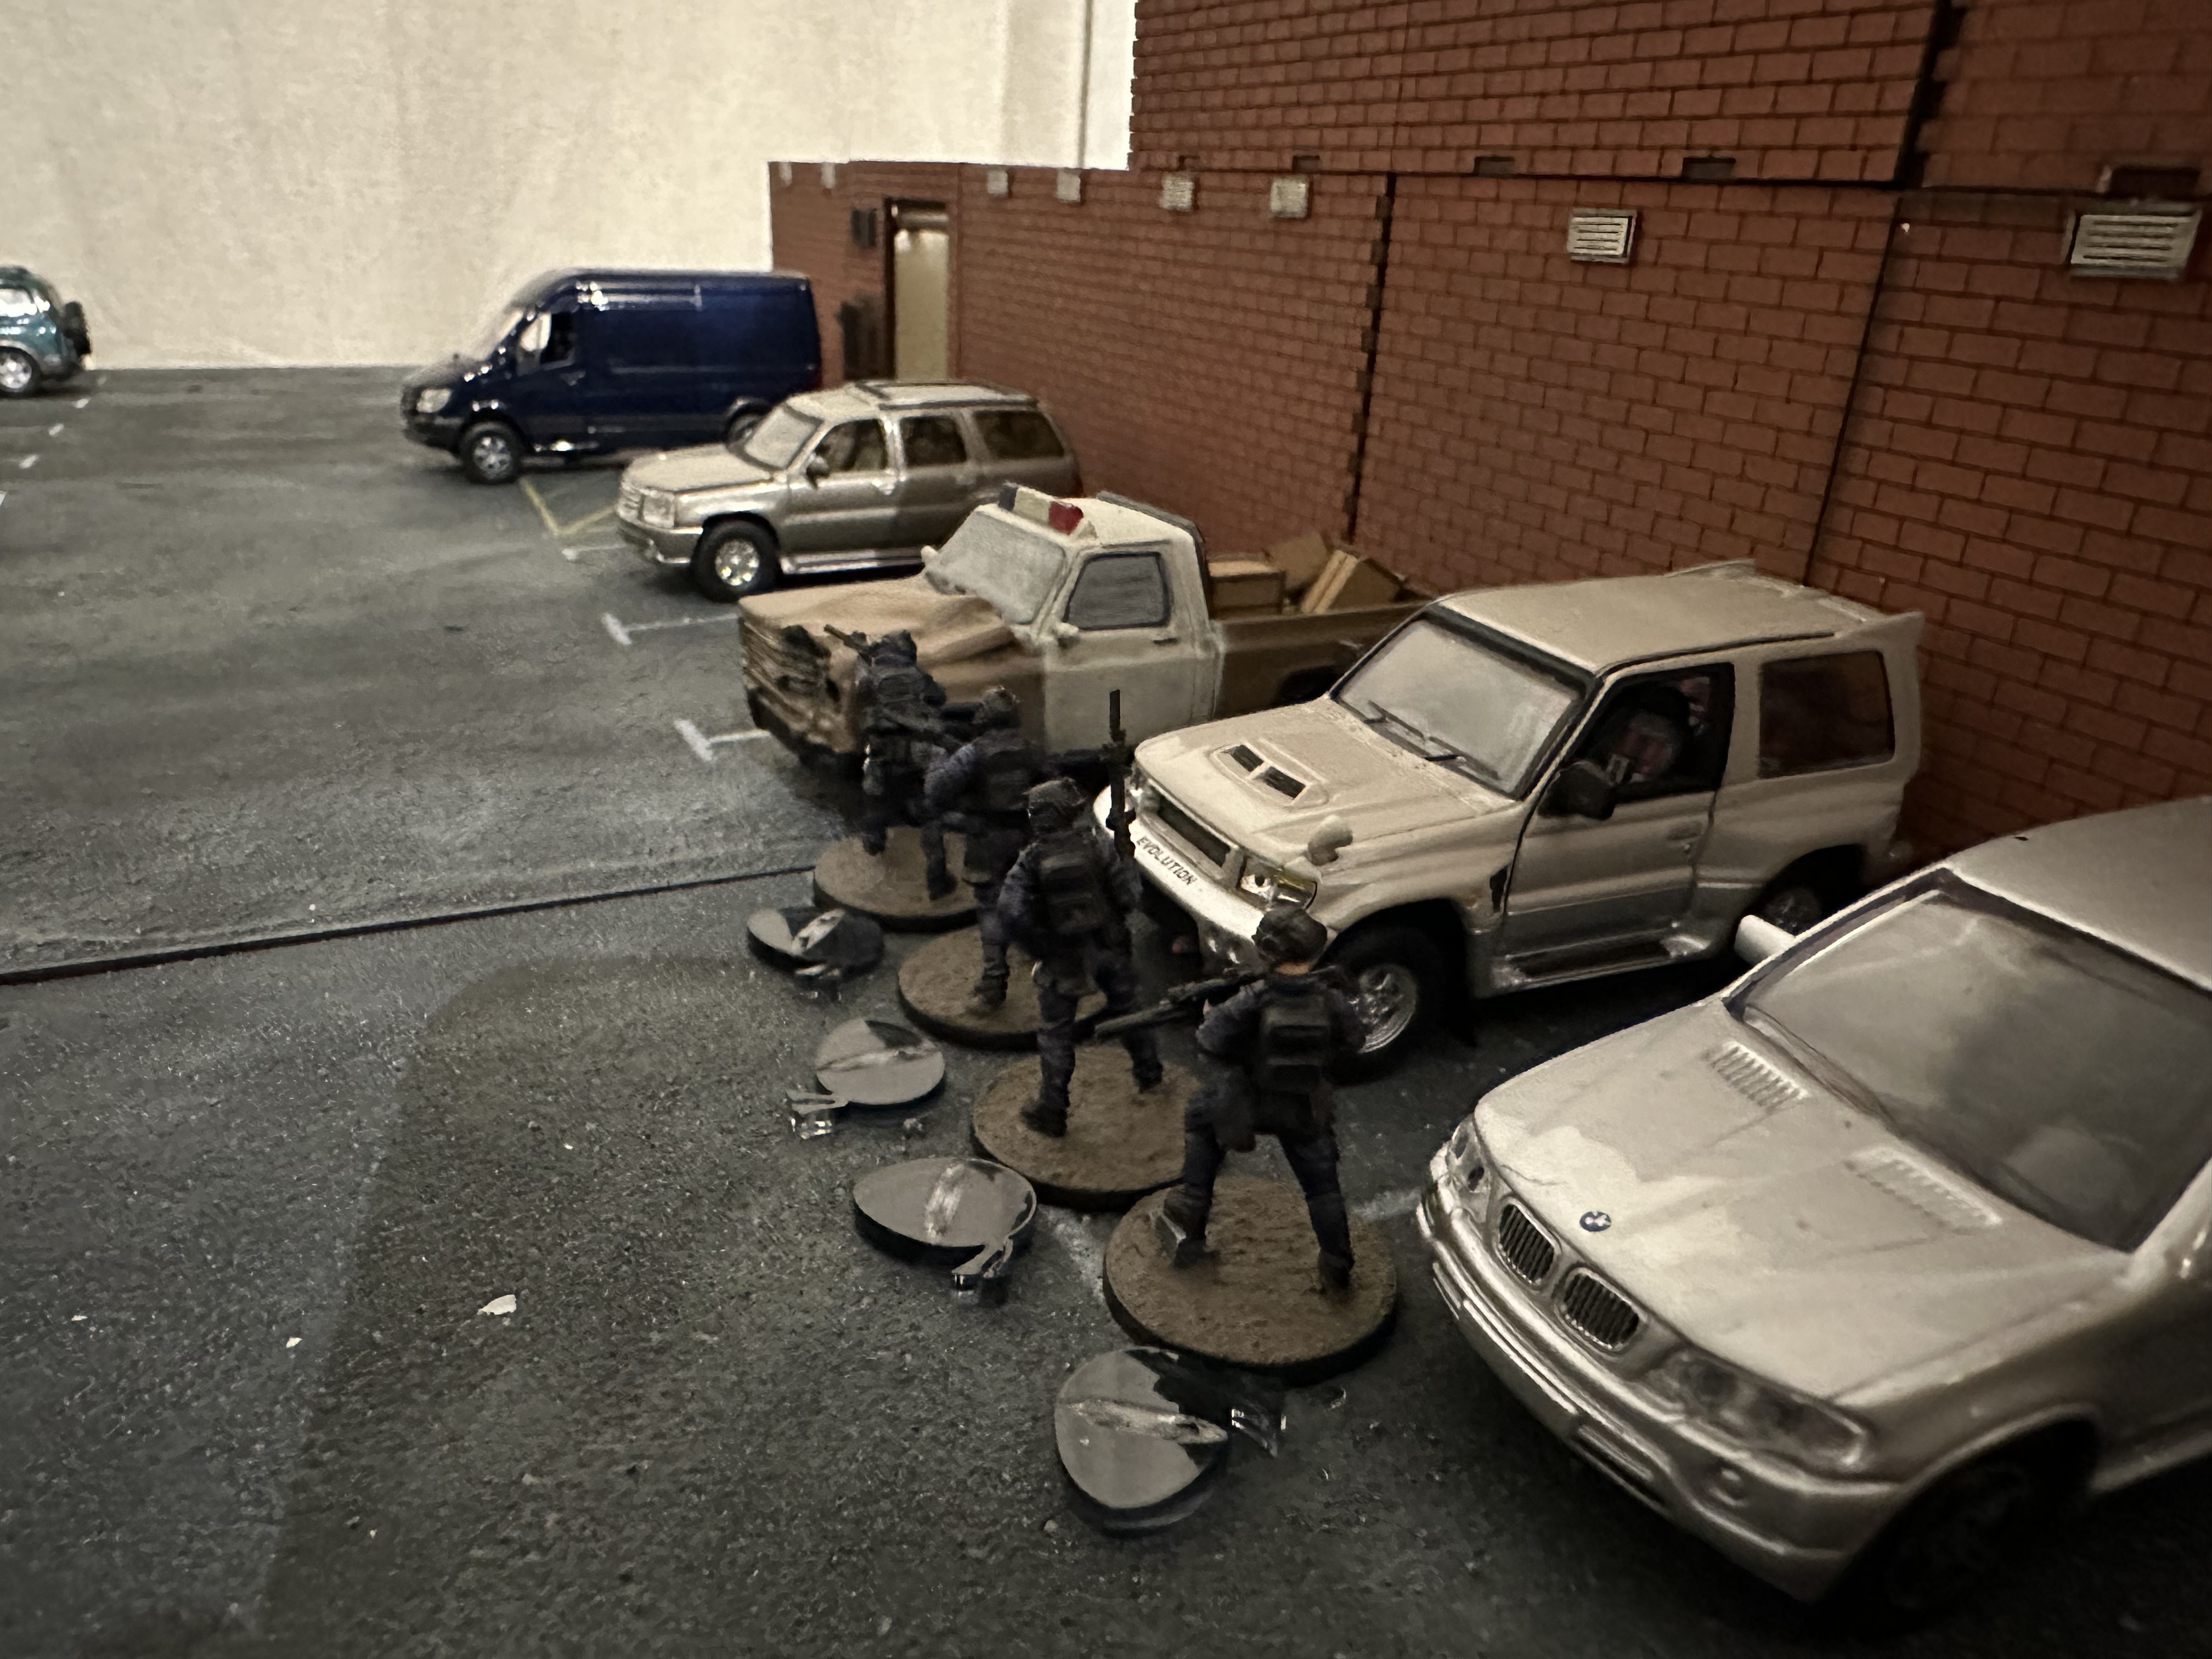
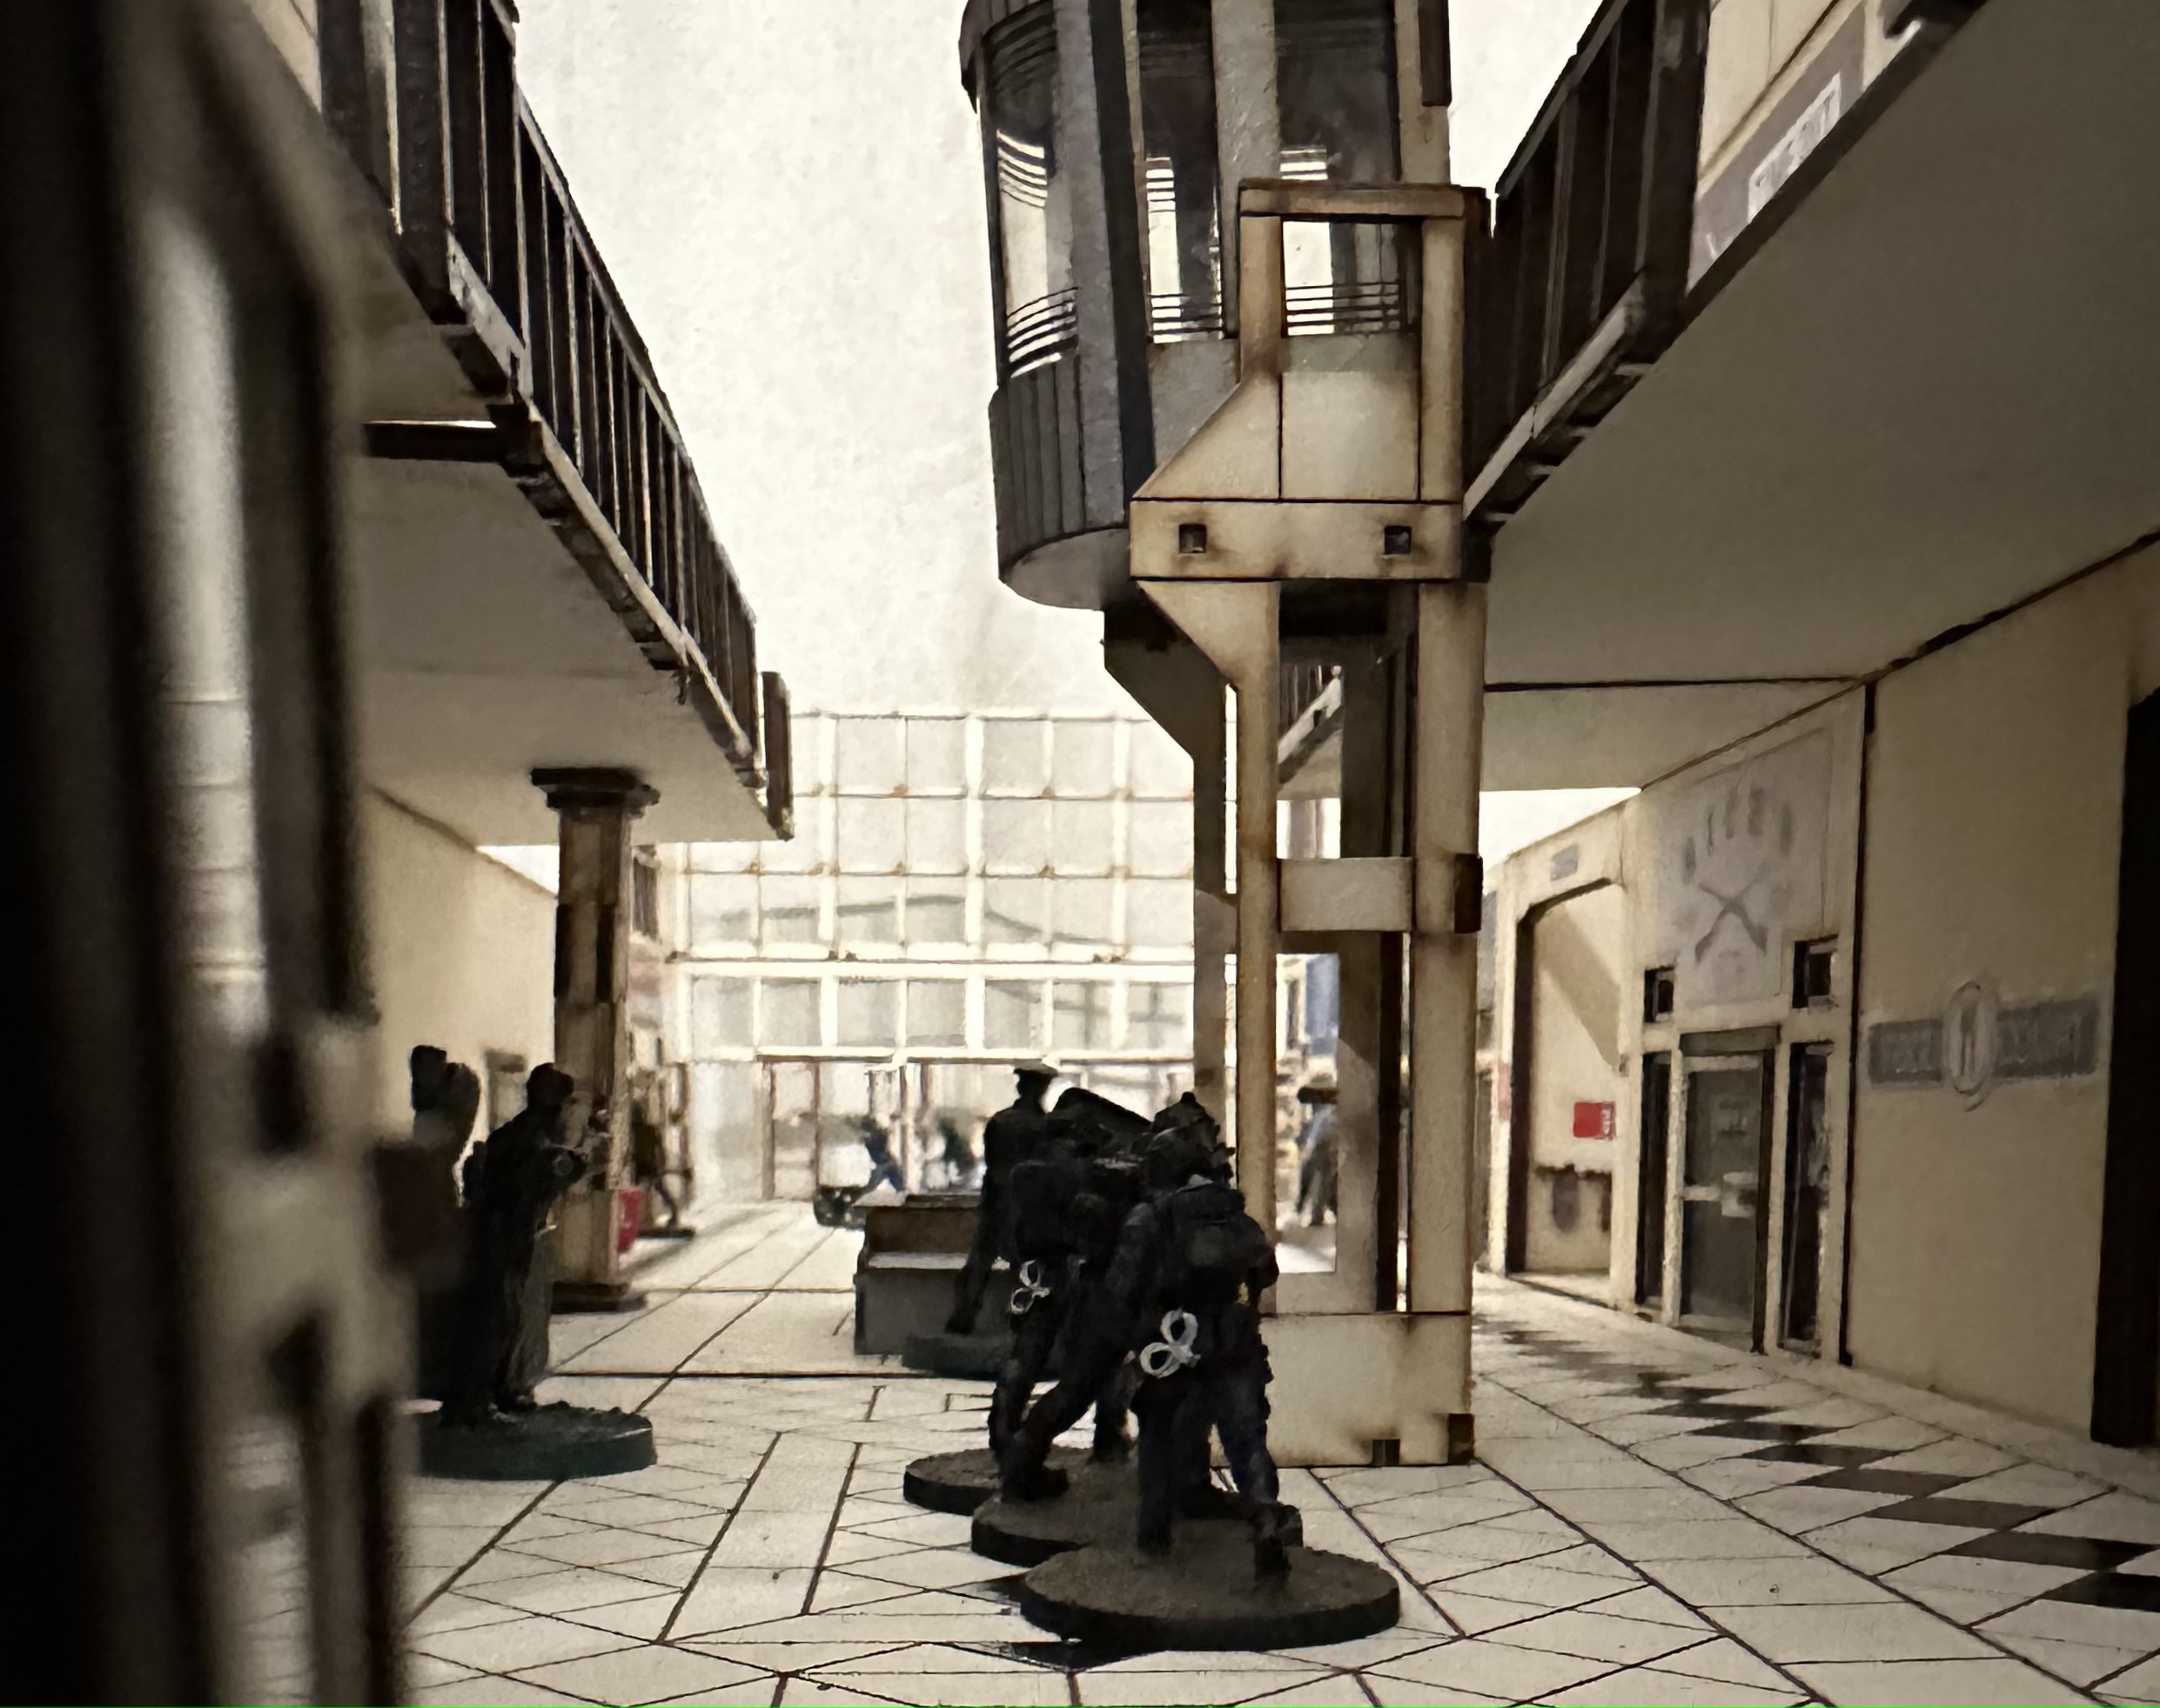
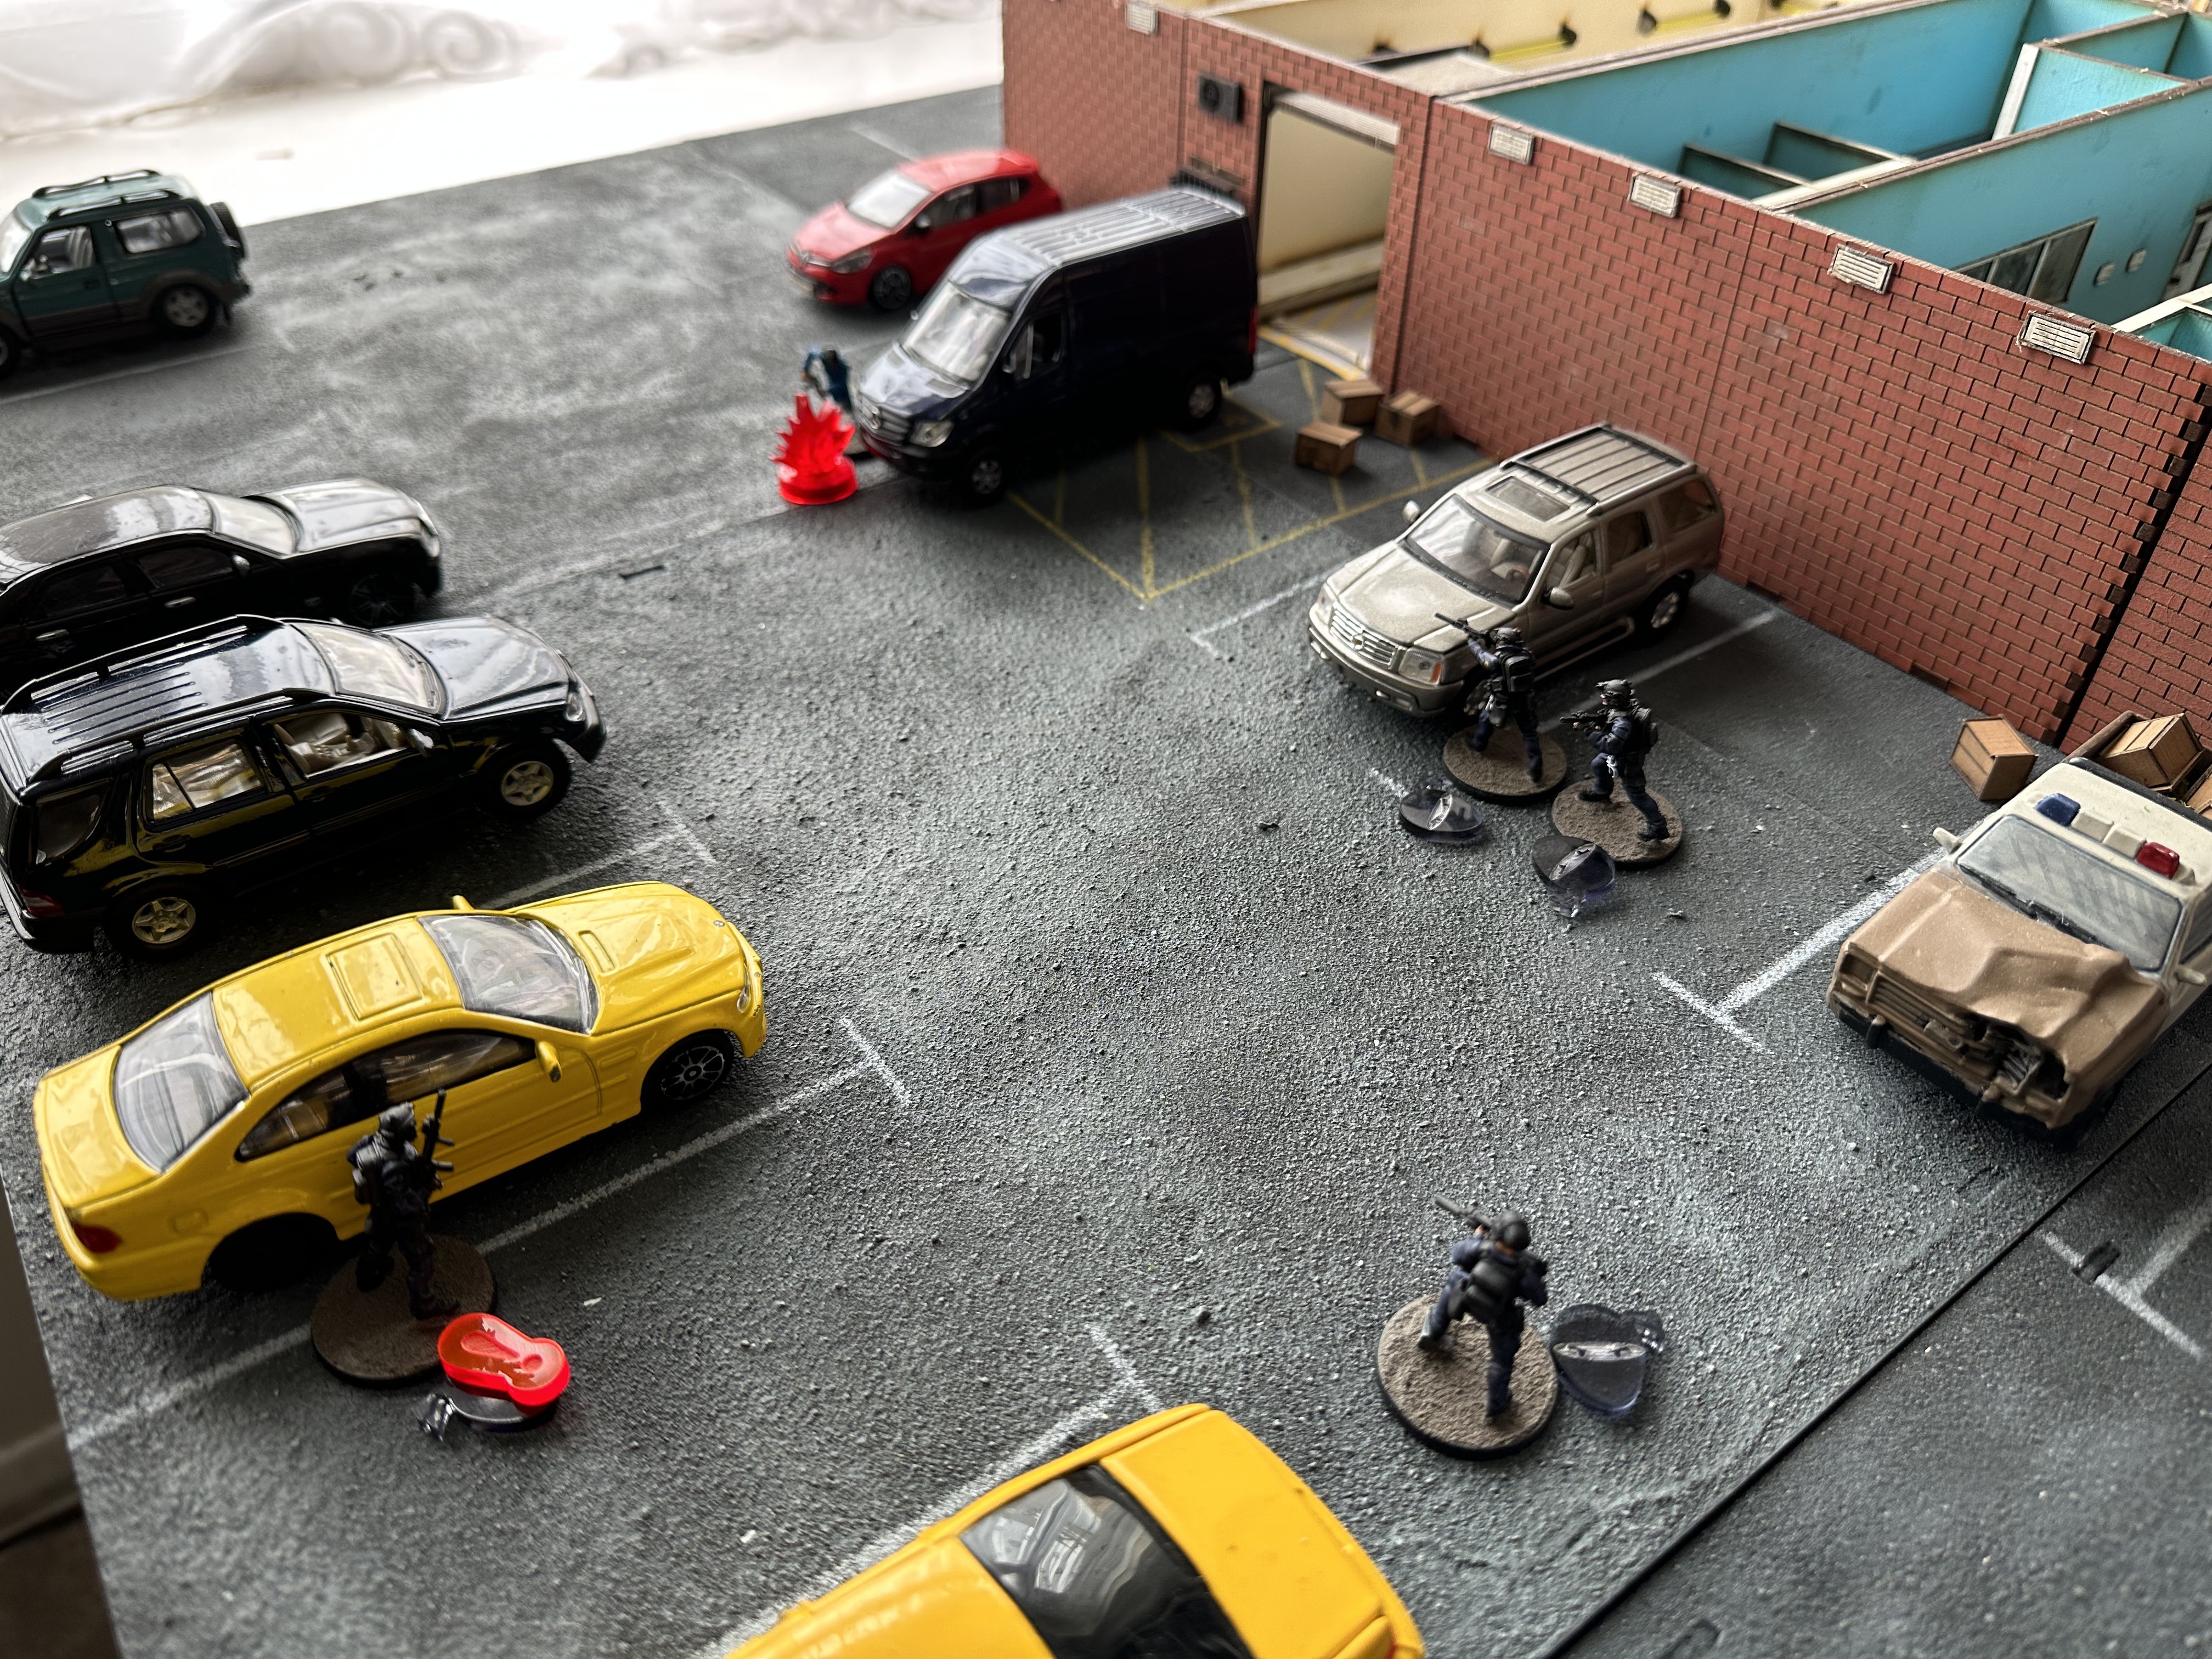
I wont go into it fully here, but here are some screens of the game I played out when testing. The gangs arrived in two vans and breached a loading bay without alerting security.


 I made neat little diamond stands using jewellery boxes for gem stones. I then glued tiny 1mm stones that I think are meant for nails or vajazzles or something. Either way it worked as tiny jewels and looked perfect
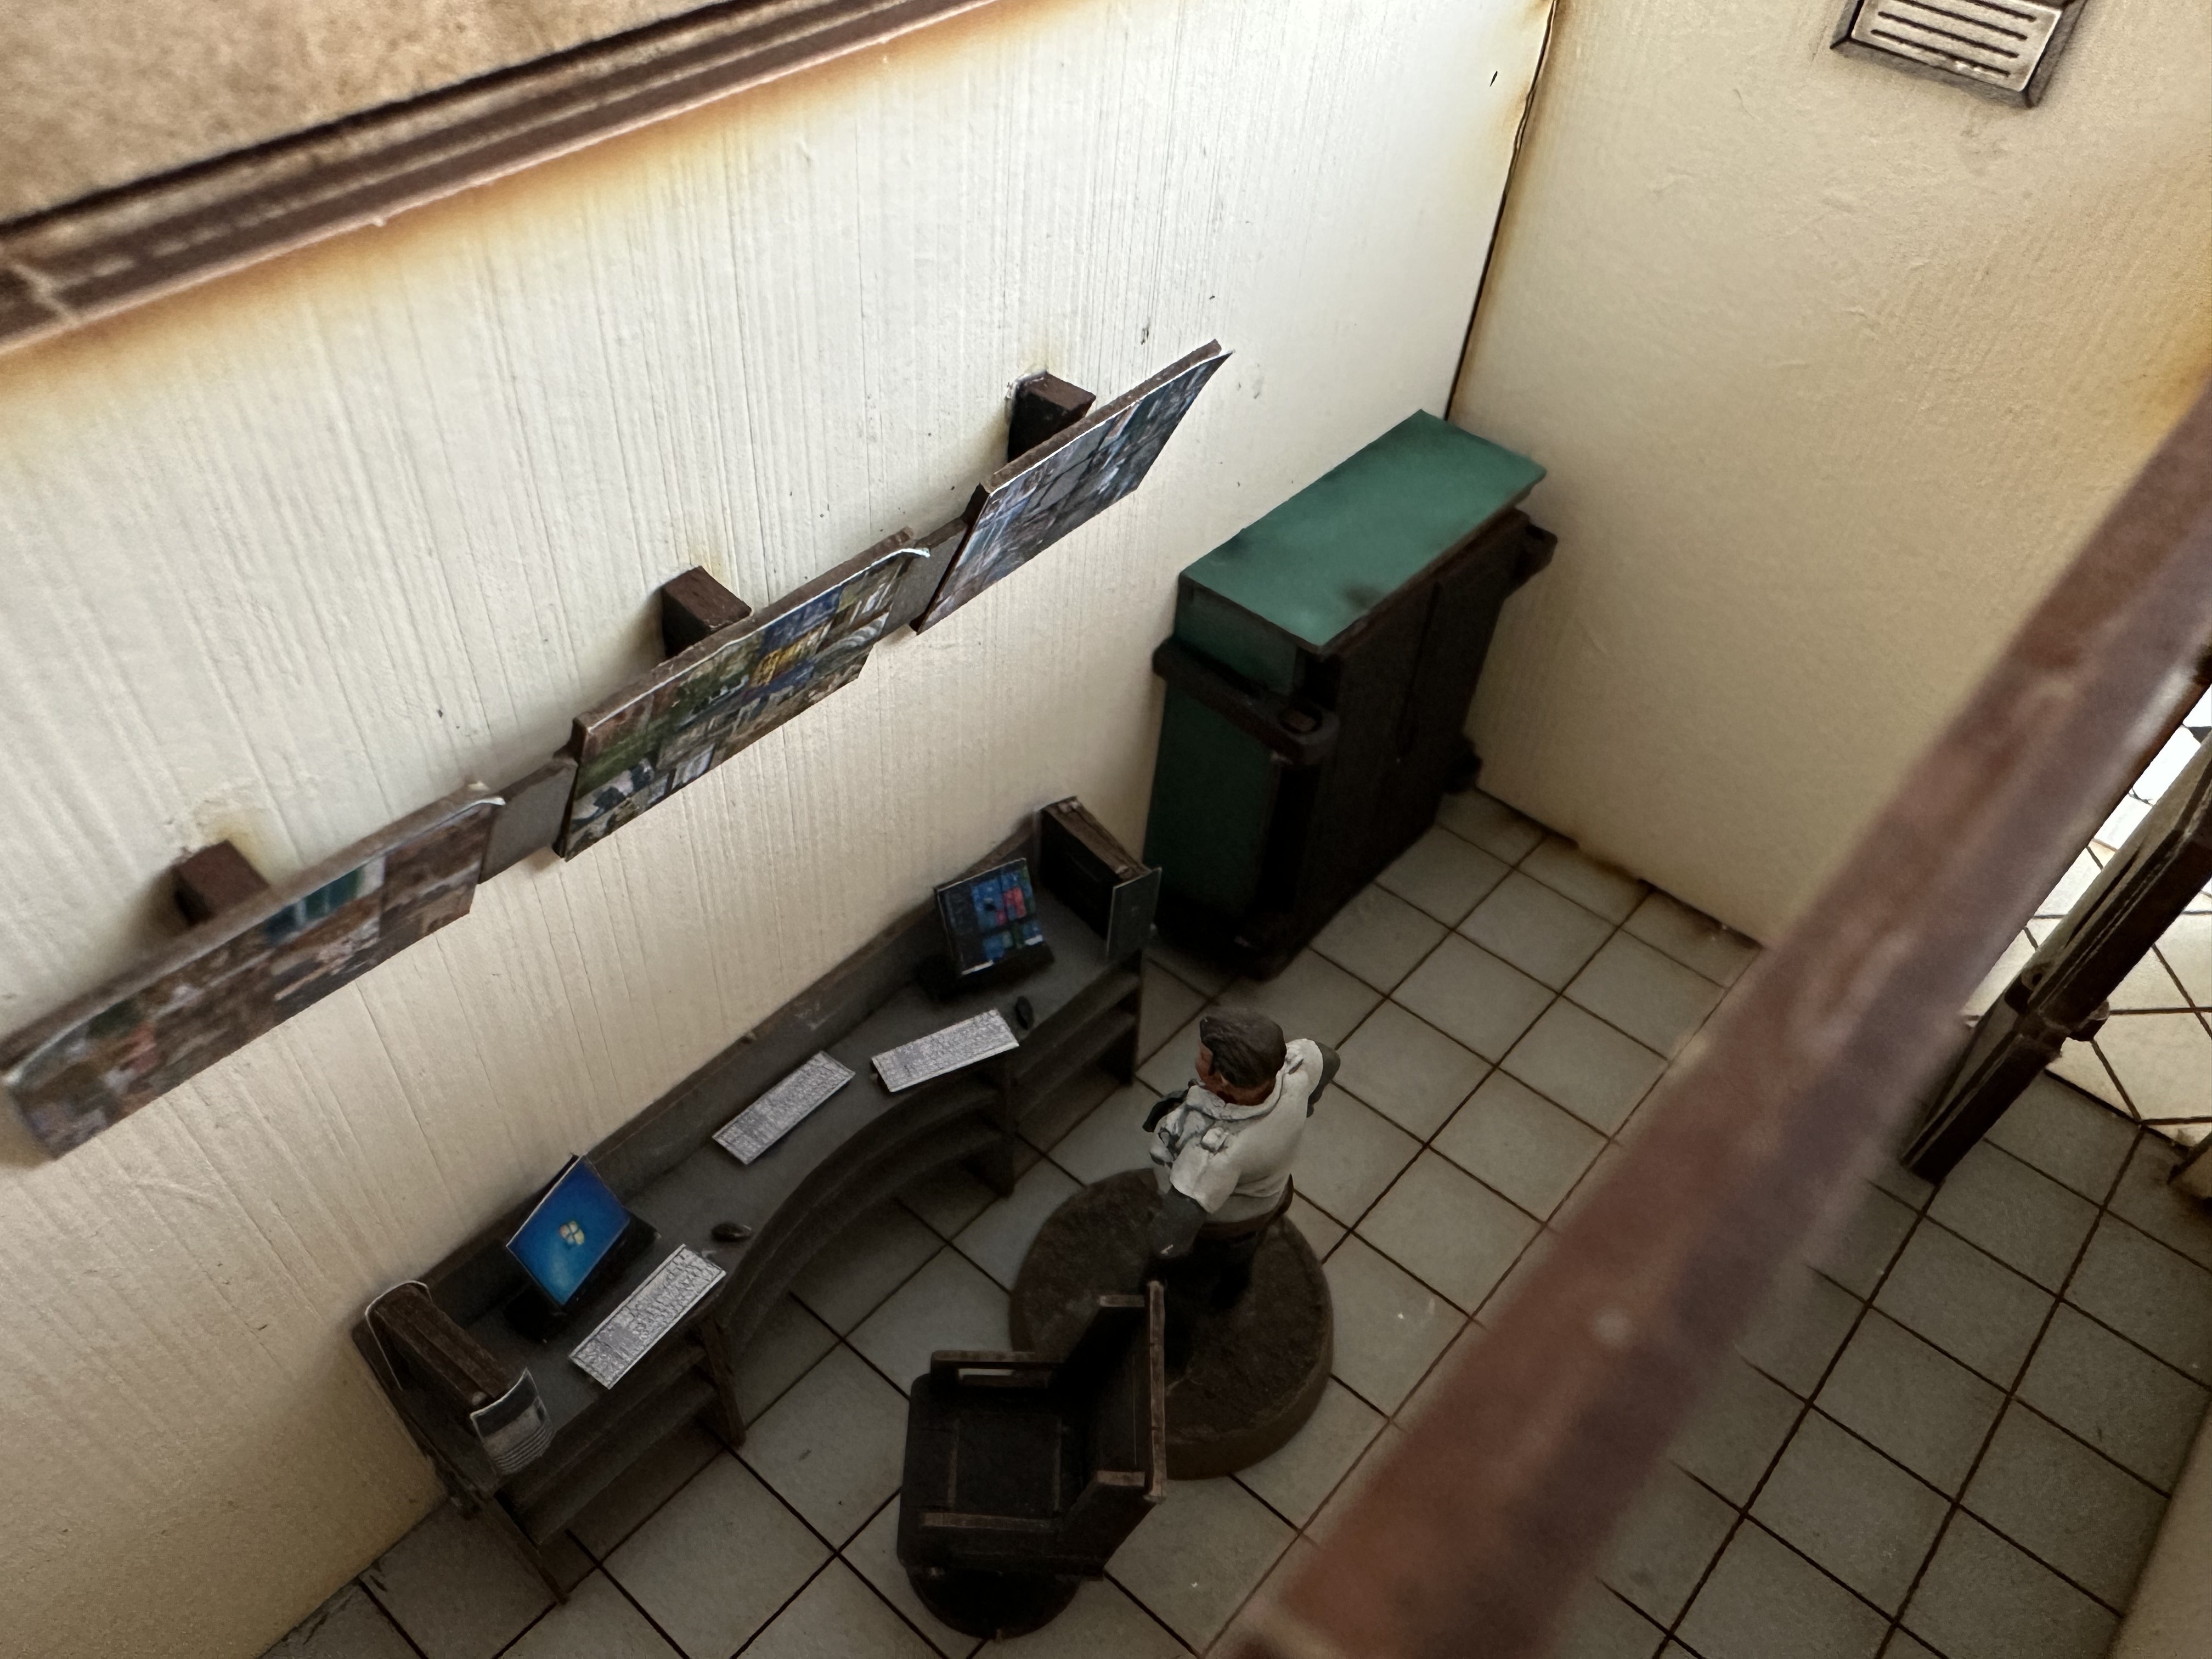
Once in the store the alarm was raised. The security guard remained inside their officer and required roles to contact the Police and make the required test to report what was happening. Two squad cars were dispatched and the beat cops entered the mall just as the gangs were set to head back to their vans.
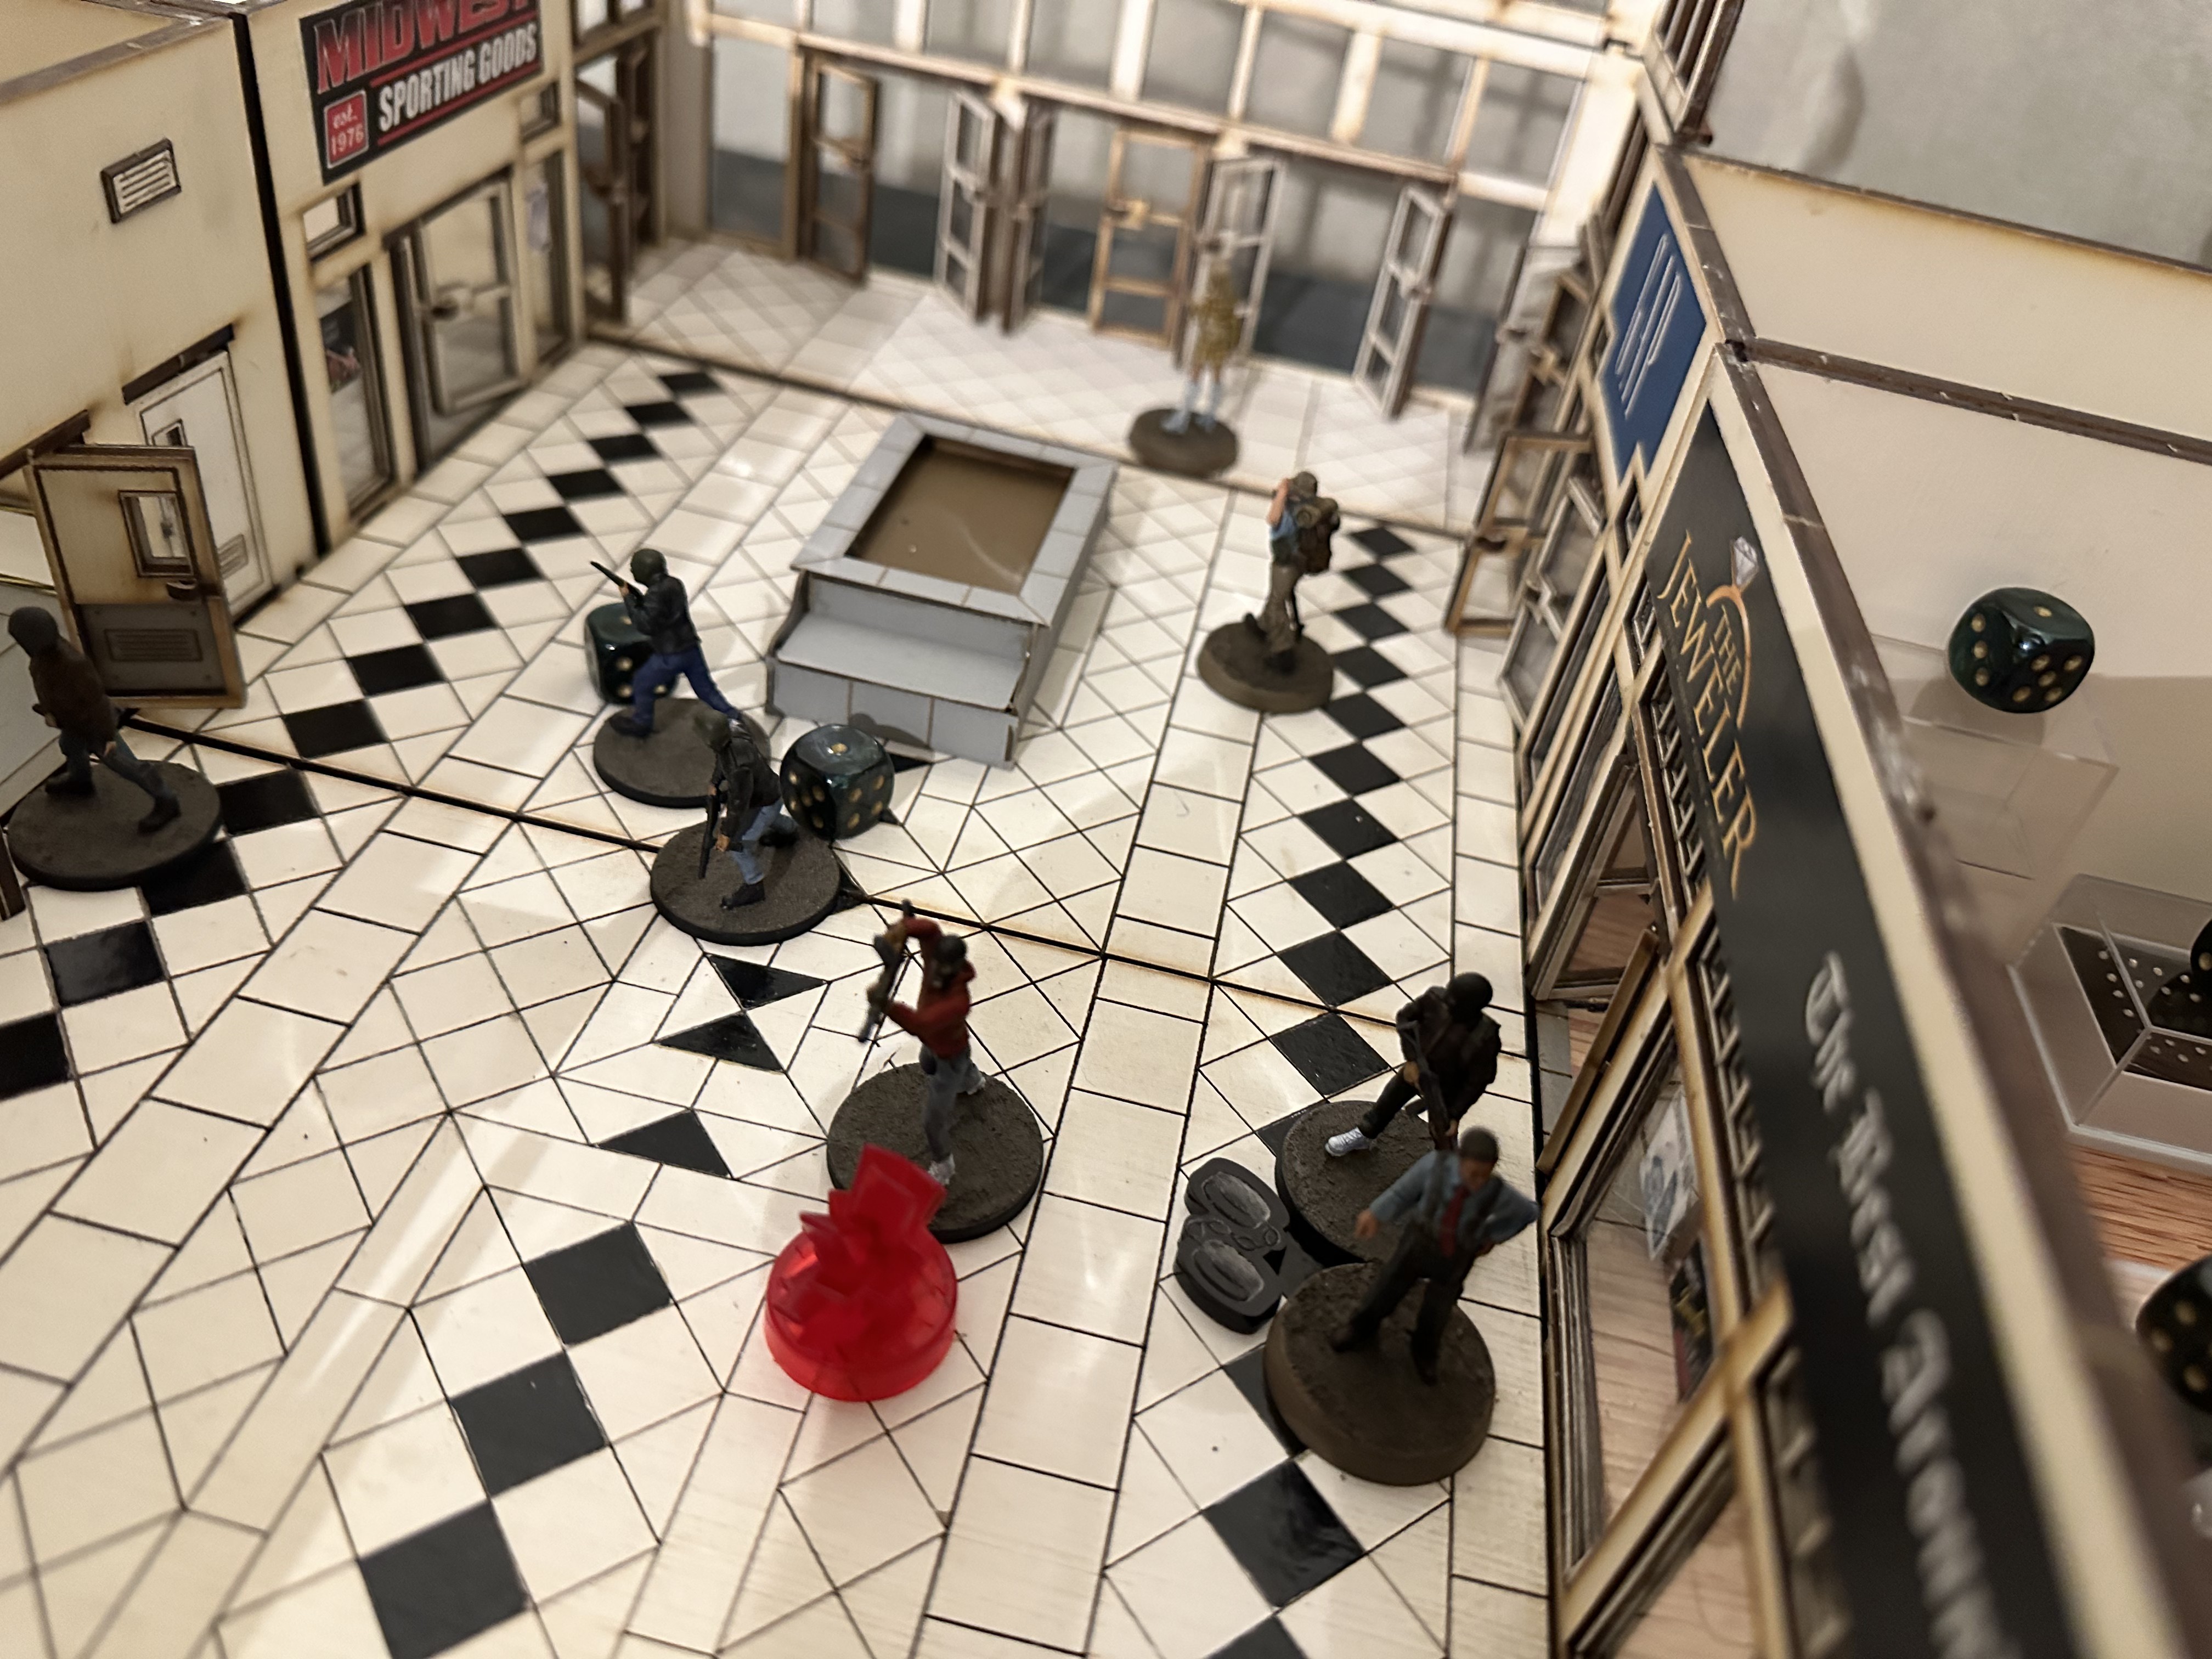
The Police push forward providing constant updates which built toward the need to call in SWAT. After some small exchanged gun fire, the inexperienced gang members pinned the Police and sent civilians running. One civilian was taken hostage in a panic move by the gangs.
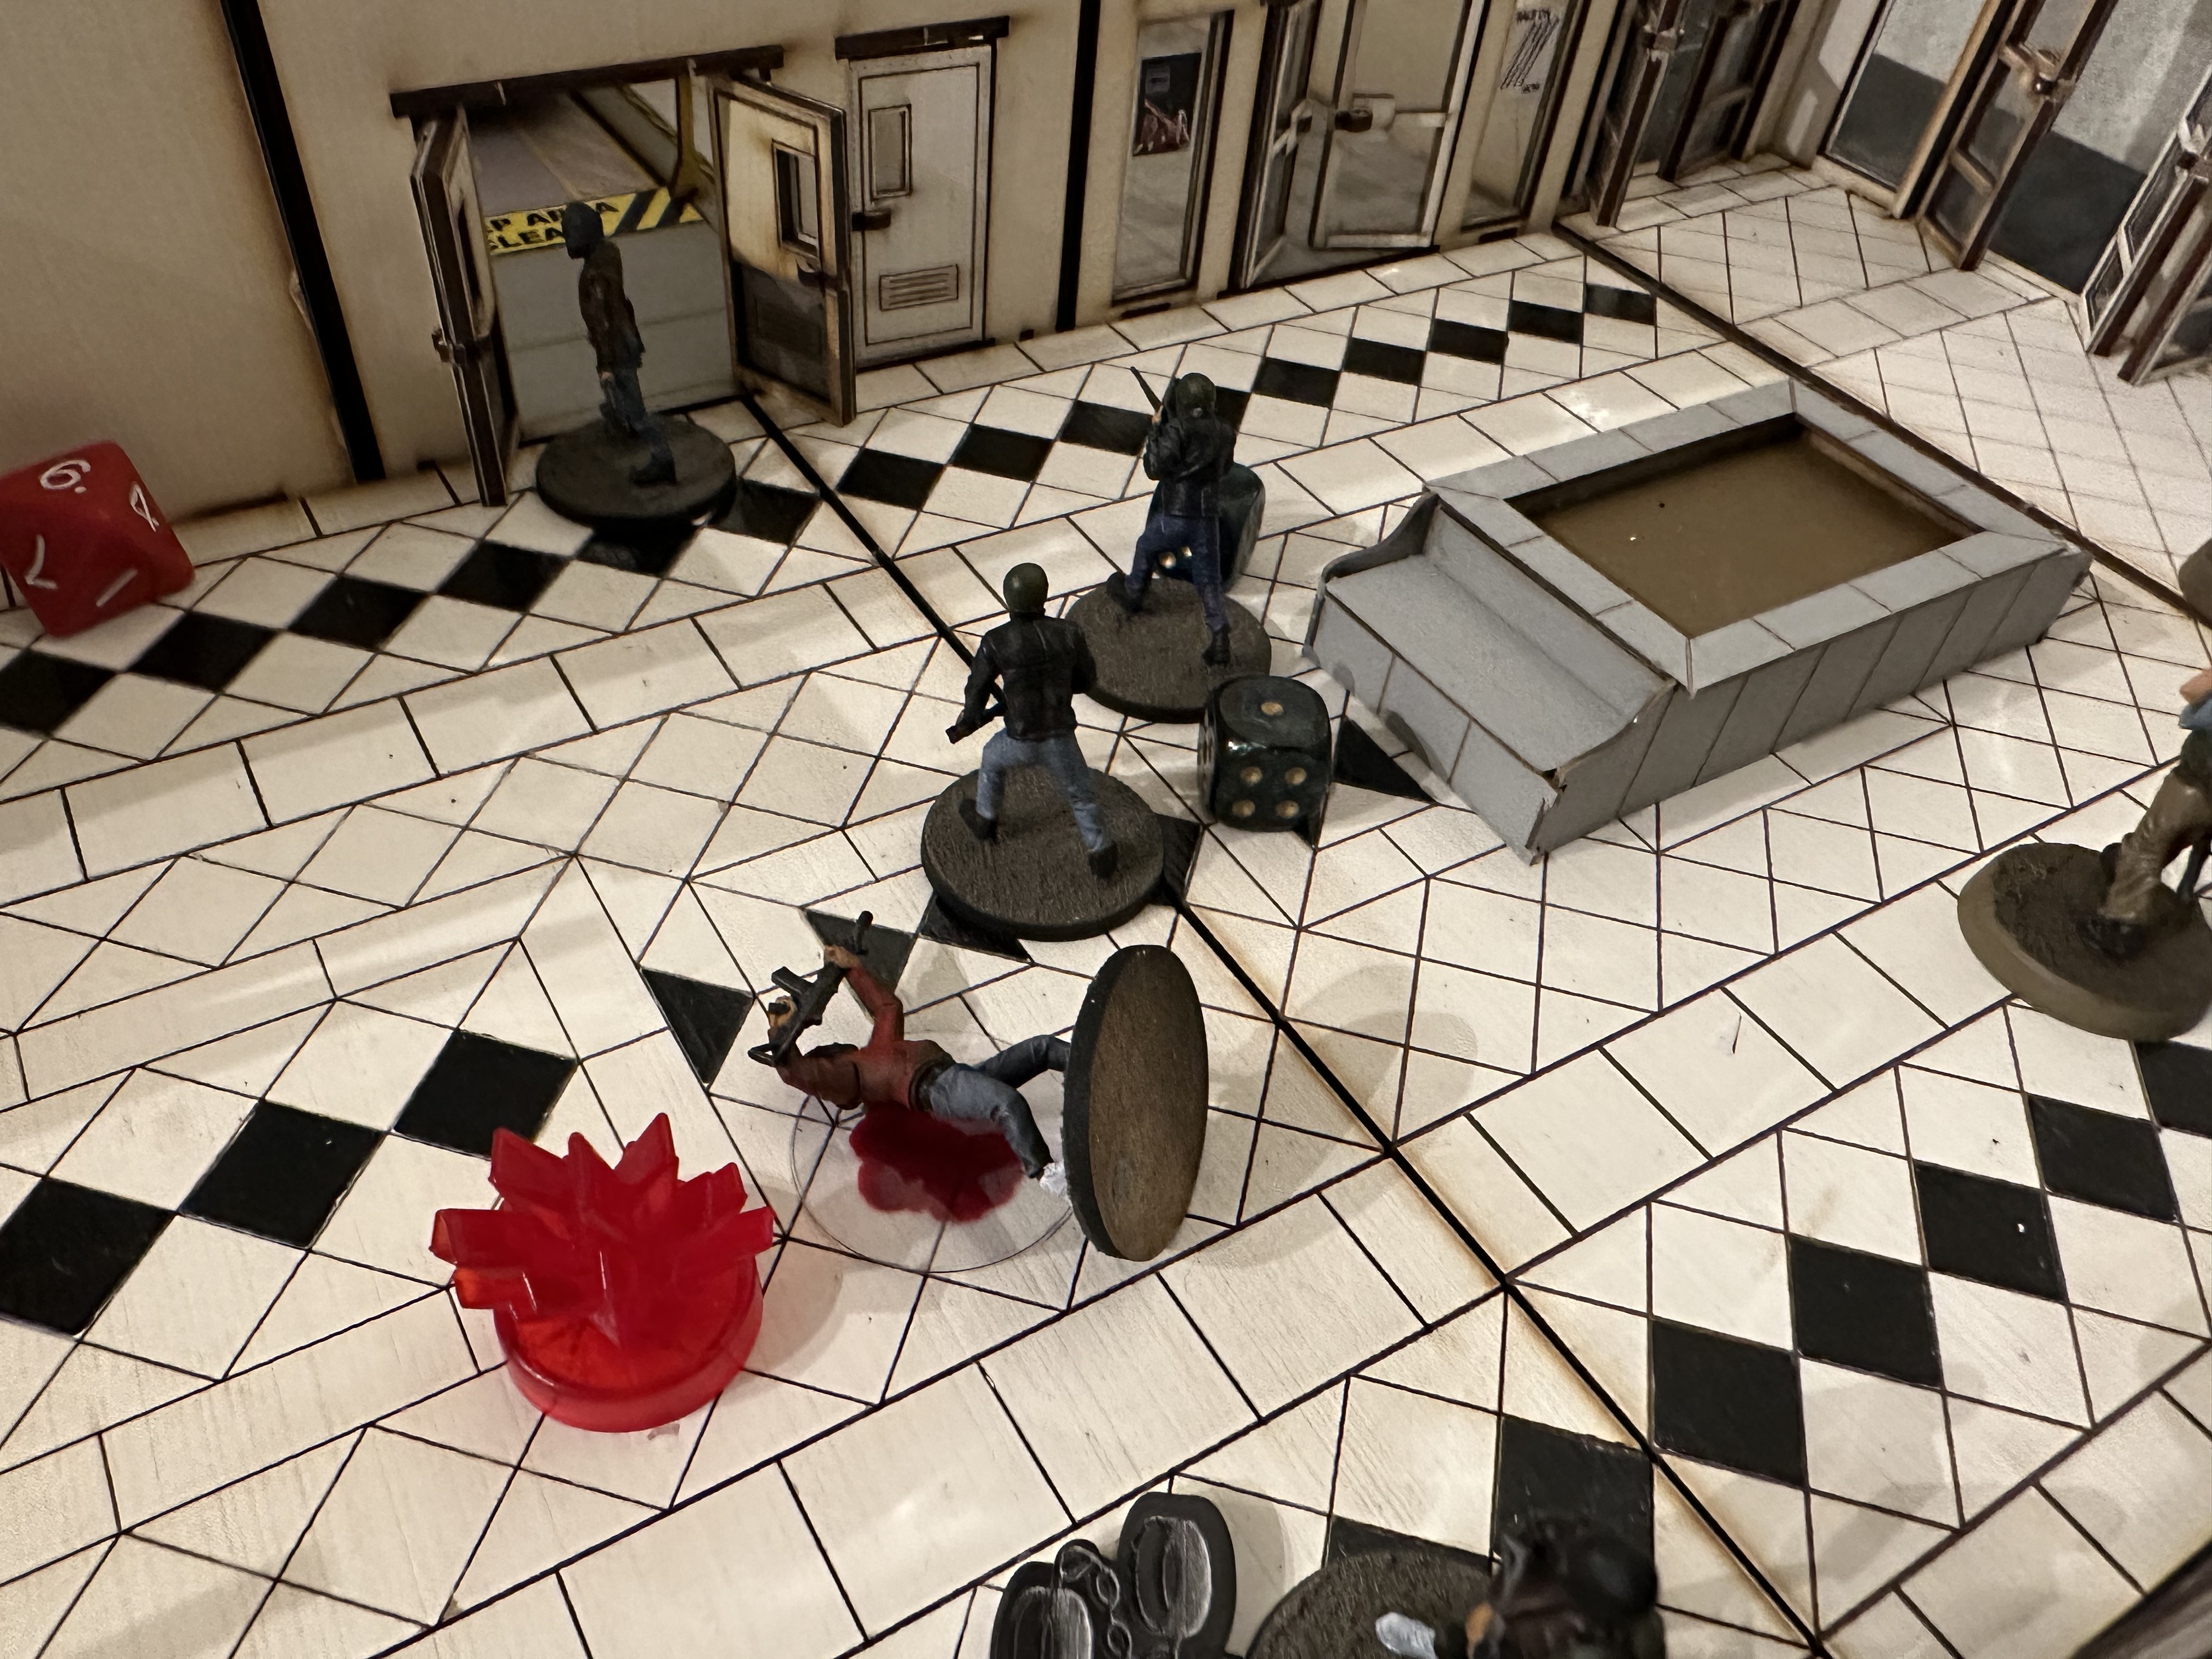
The security guard tried his luck at negotiating, failed miserably and ran back into the office. SWAT were eventually dispatched, whilst the beat cops kept the gang pinned. A few lucky shots took out the suspects, who were playing defensively.
SWAT arrived and split into two team. One cautiously moving up to secure the exit and the other pushing forward hard with a ballistic shield.
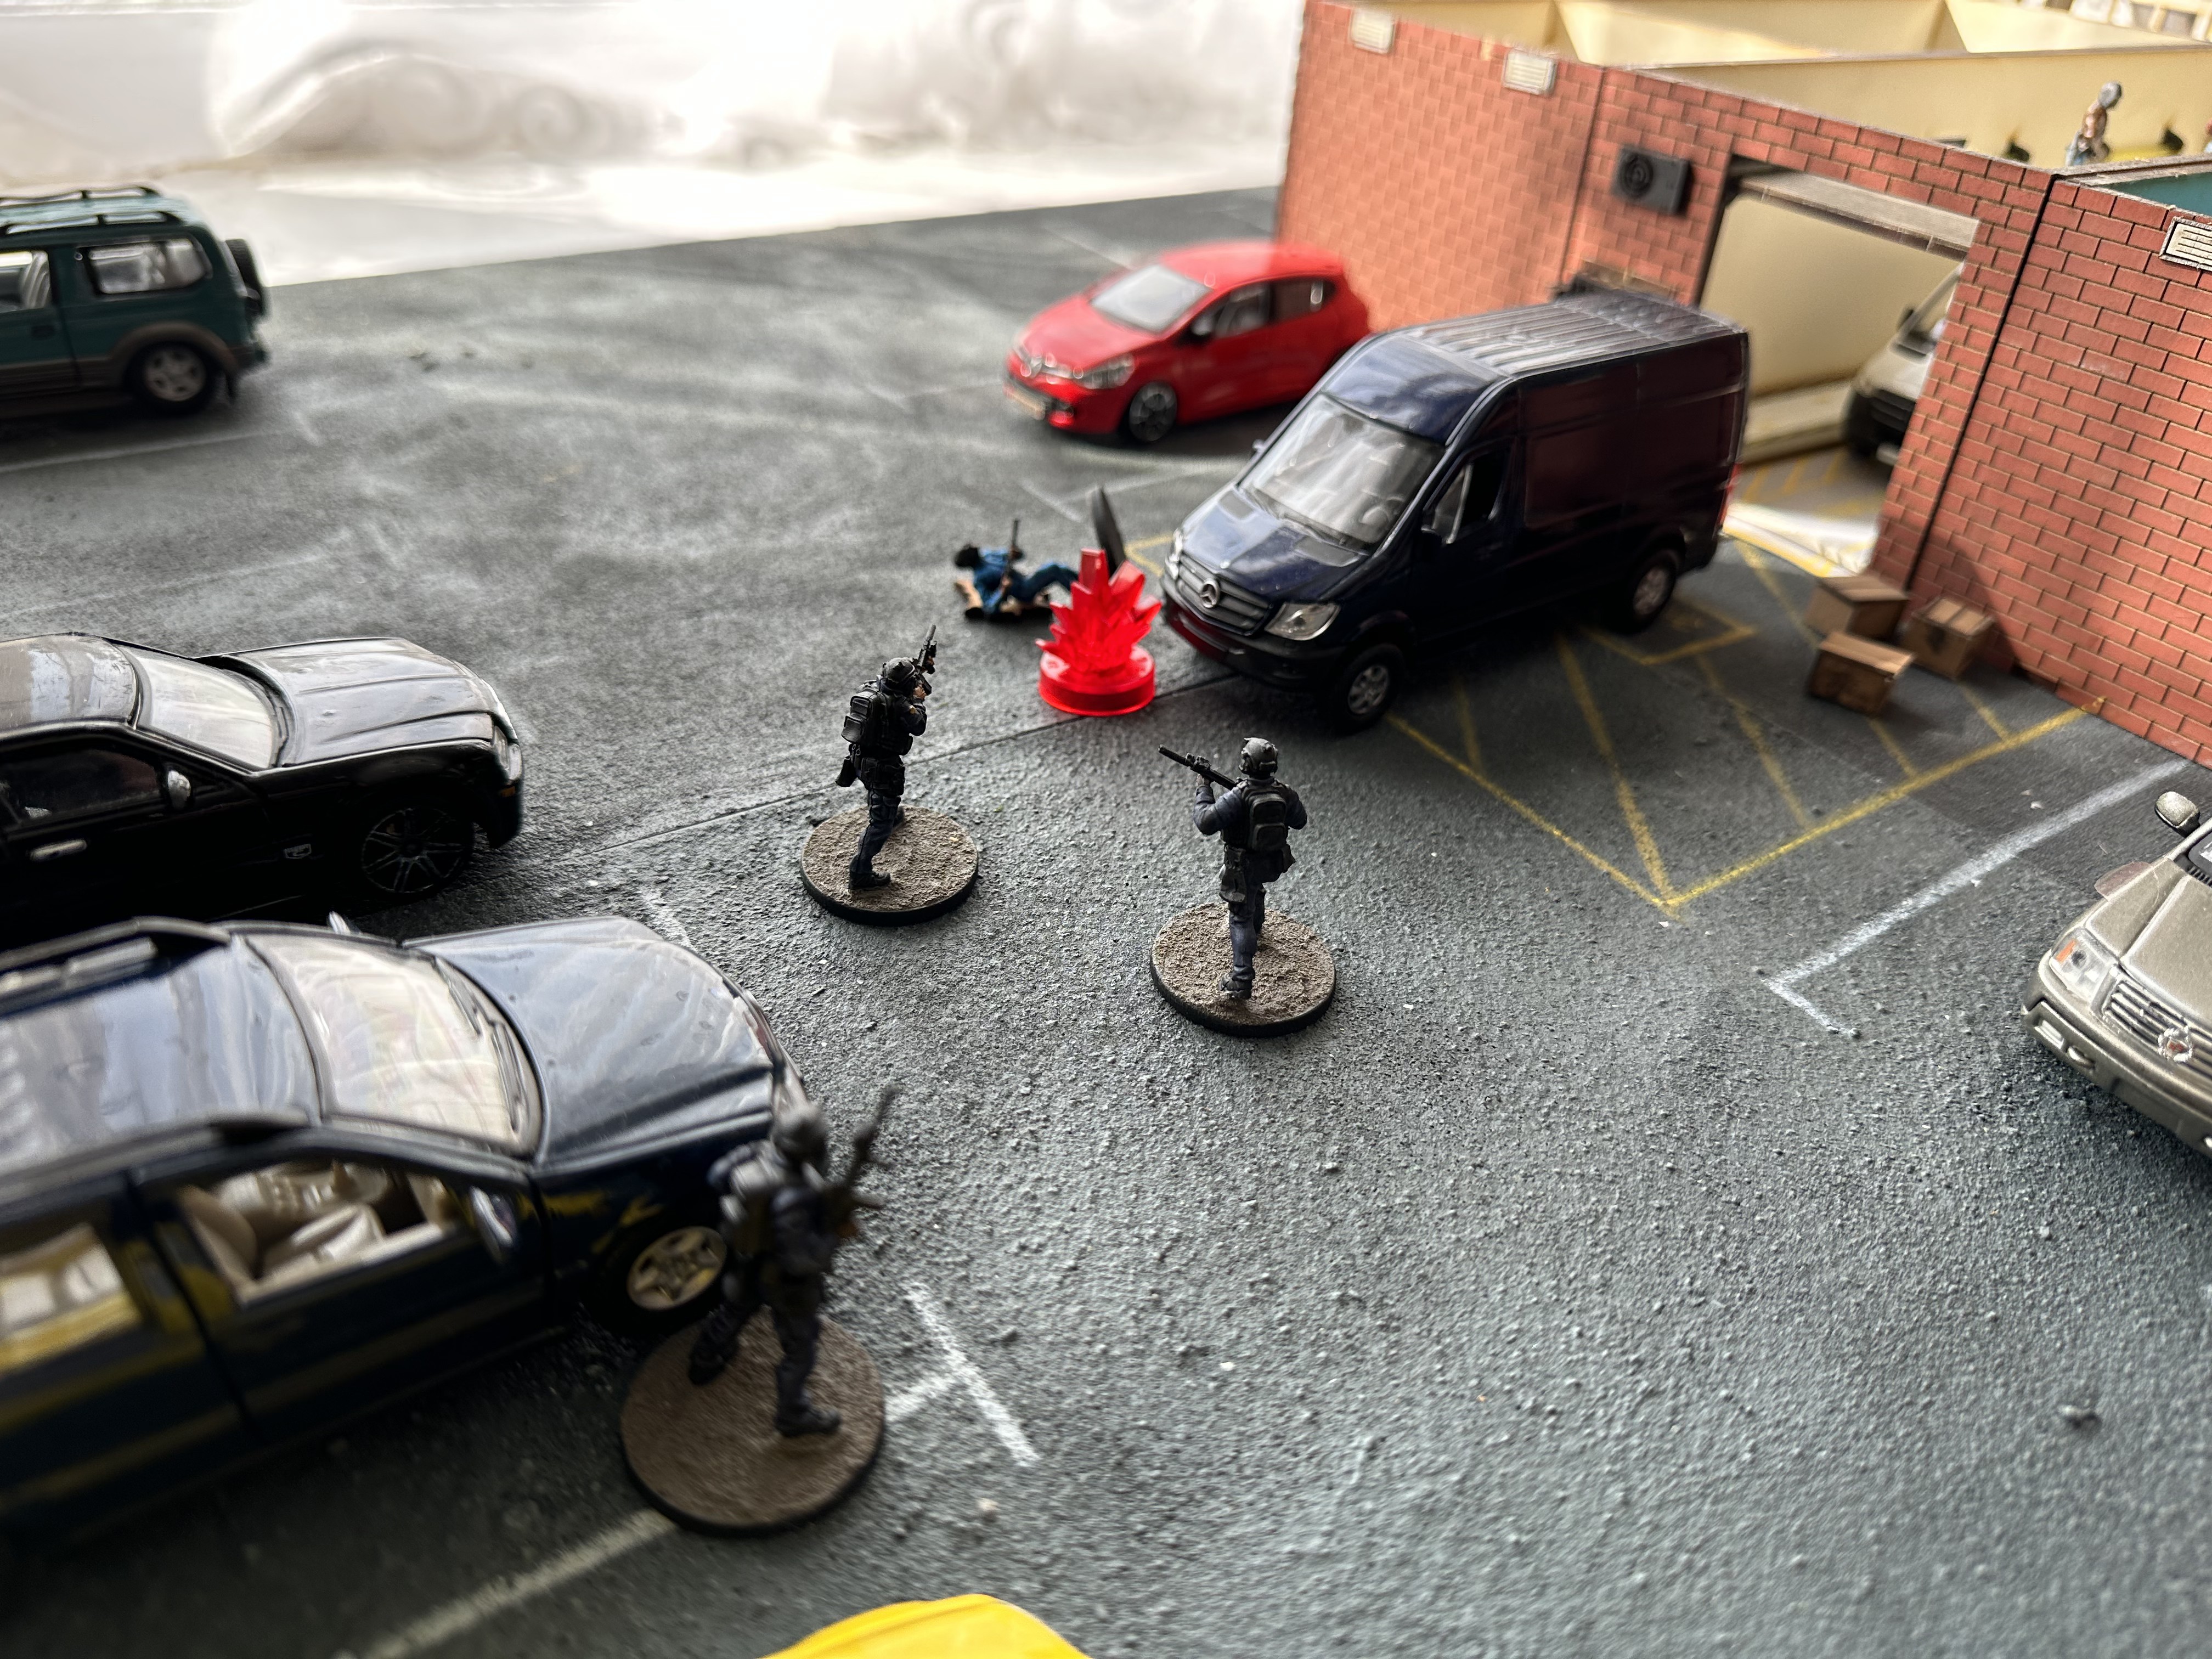
The SWAT team pushed right up to the gang but some fully automatic fire put pressure and stress on the ballistic time. A couple of beat cops were seriously wounded too.


The ballistic team recovered and overwhelmed a suspect causing them to surrender. A further suspect was tasered as they tried to flee and the beat cops secured him. Lots of the gang fled to the vans, but outside the covert team had made progress. A Whiley look out spotted the inbound SWAT and forced them to cover, but was snuck up on and tasered.
The rest of the gang pushed the first van out they way causing the SWAT to pull back and dive to safety. The other SWAT team breached the loading bay with flash bangs injuring the suspects but they still managed to flee. The Sniper team with the covert movers managed to disable the fleeing vehicle by pure luck. Had they not, the van would have easily left on the next move if they won the initiative and the suspects would have escaped. It was a win to SWAT but also a very close one. Had the game moved on from this scene, my rule would have allowed for a highway pursuit which would be fun.
Enjoyed the snaps from this random game.


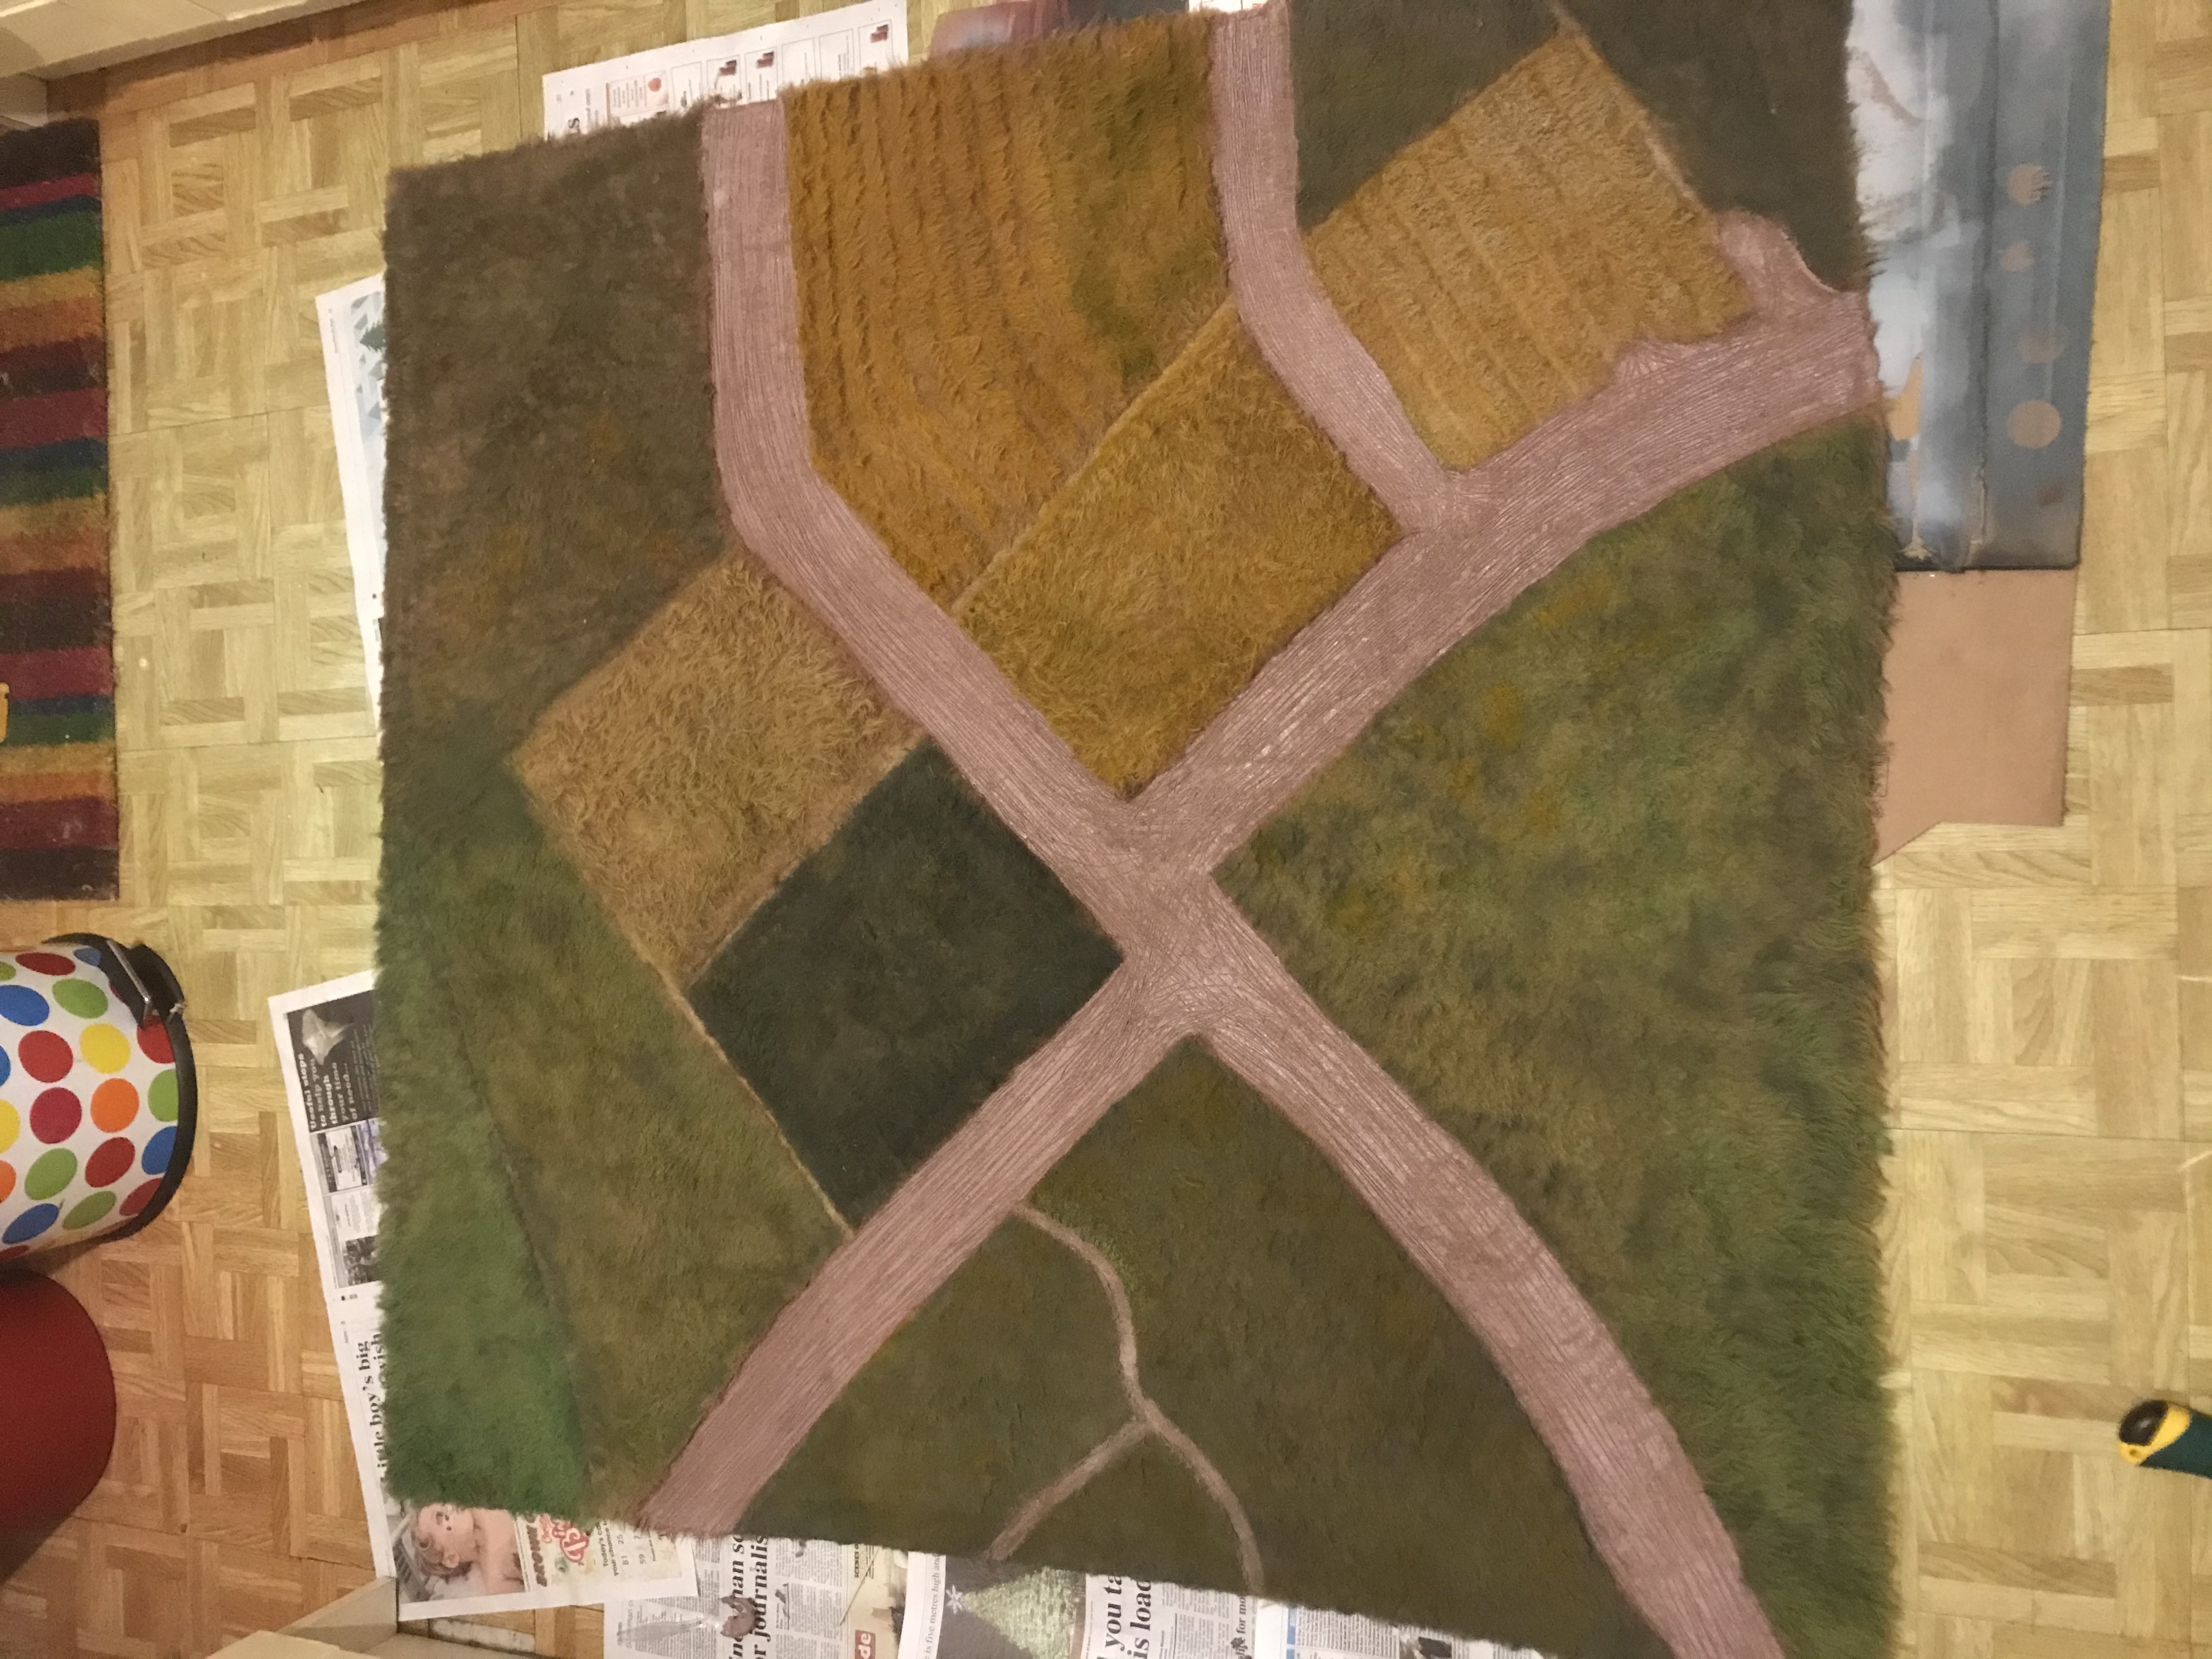
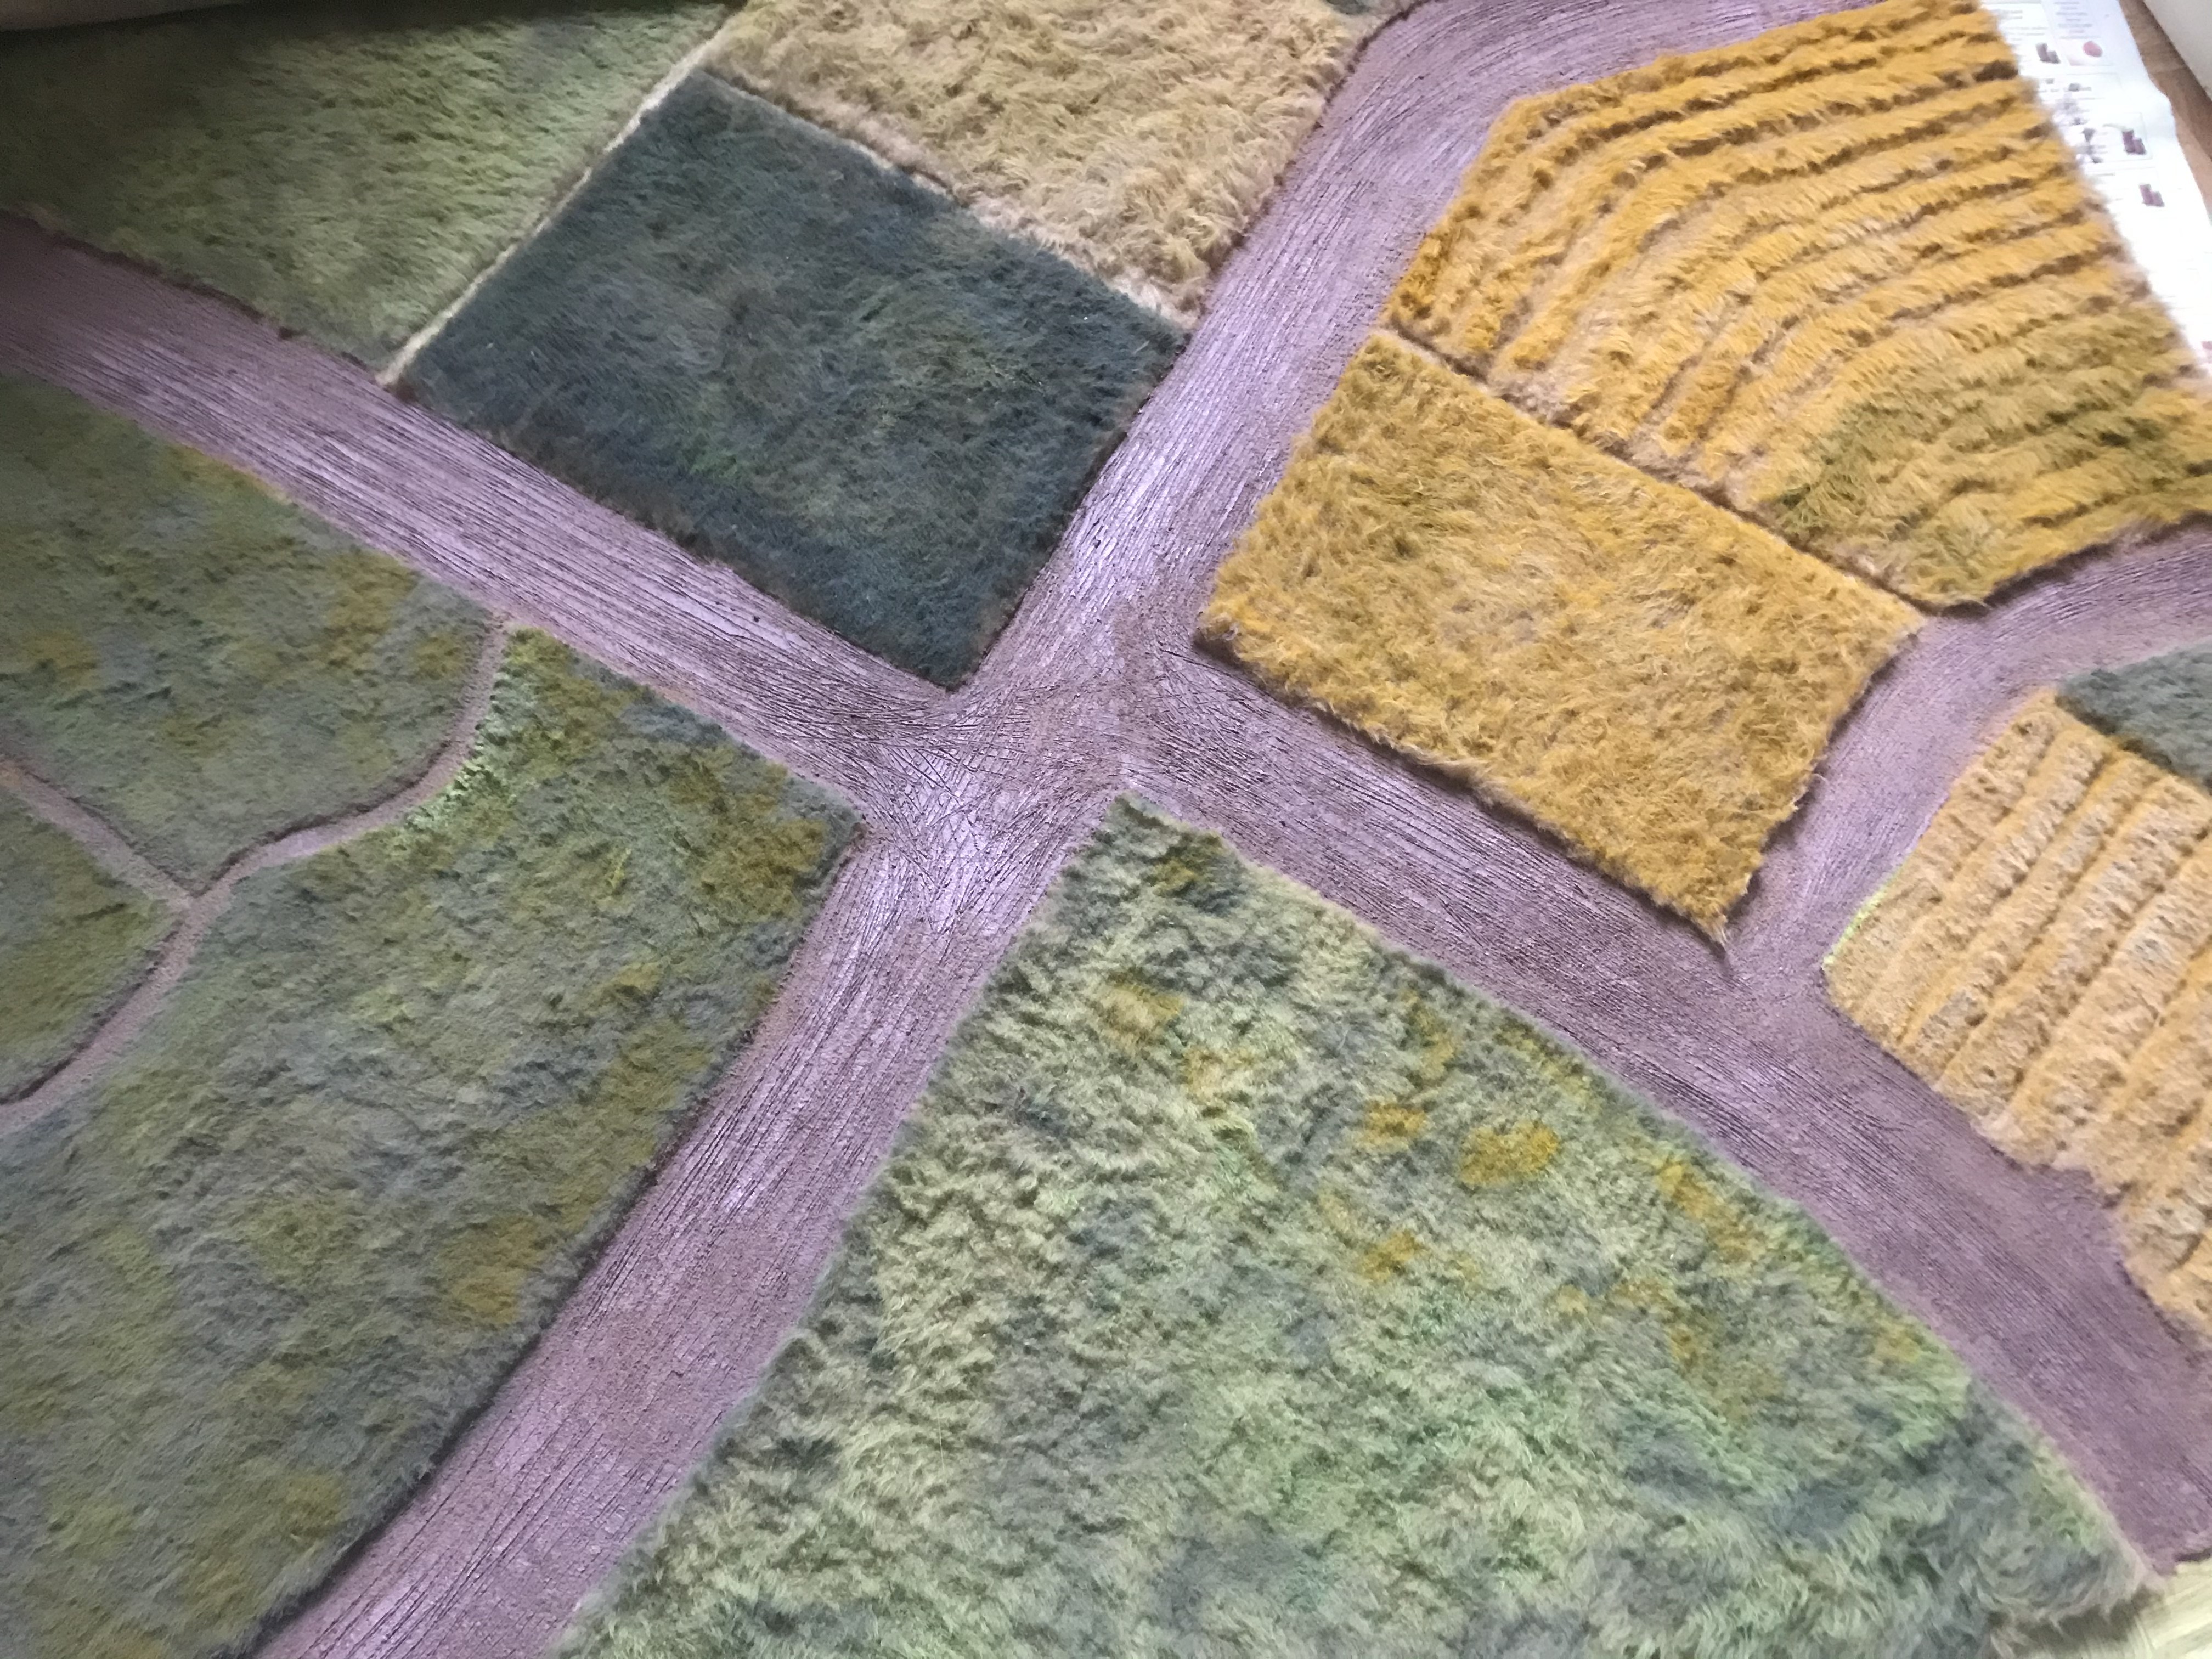
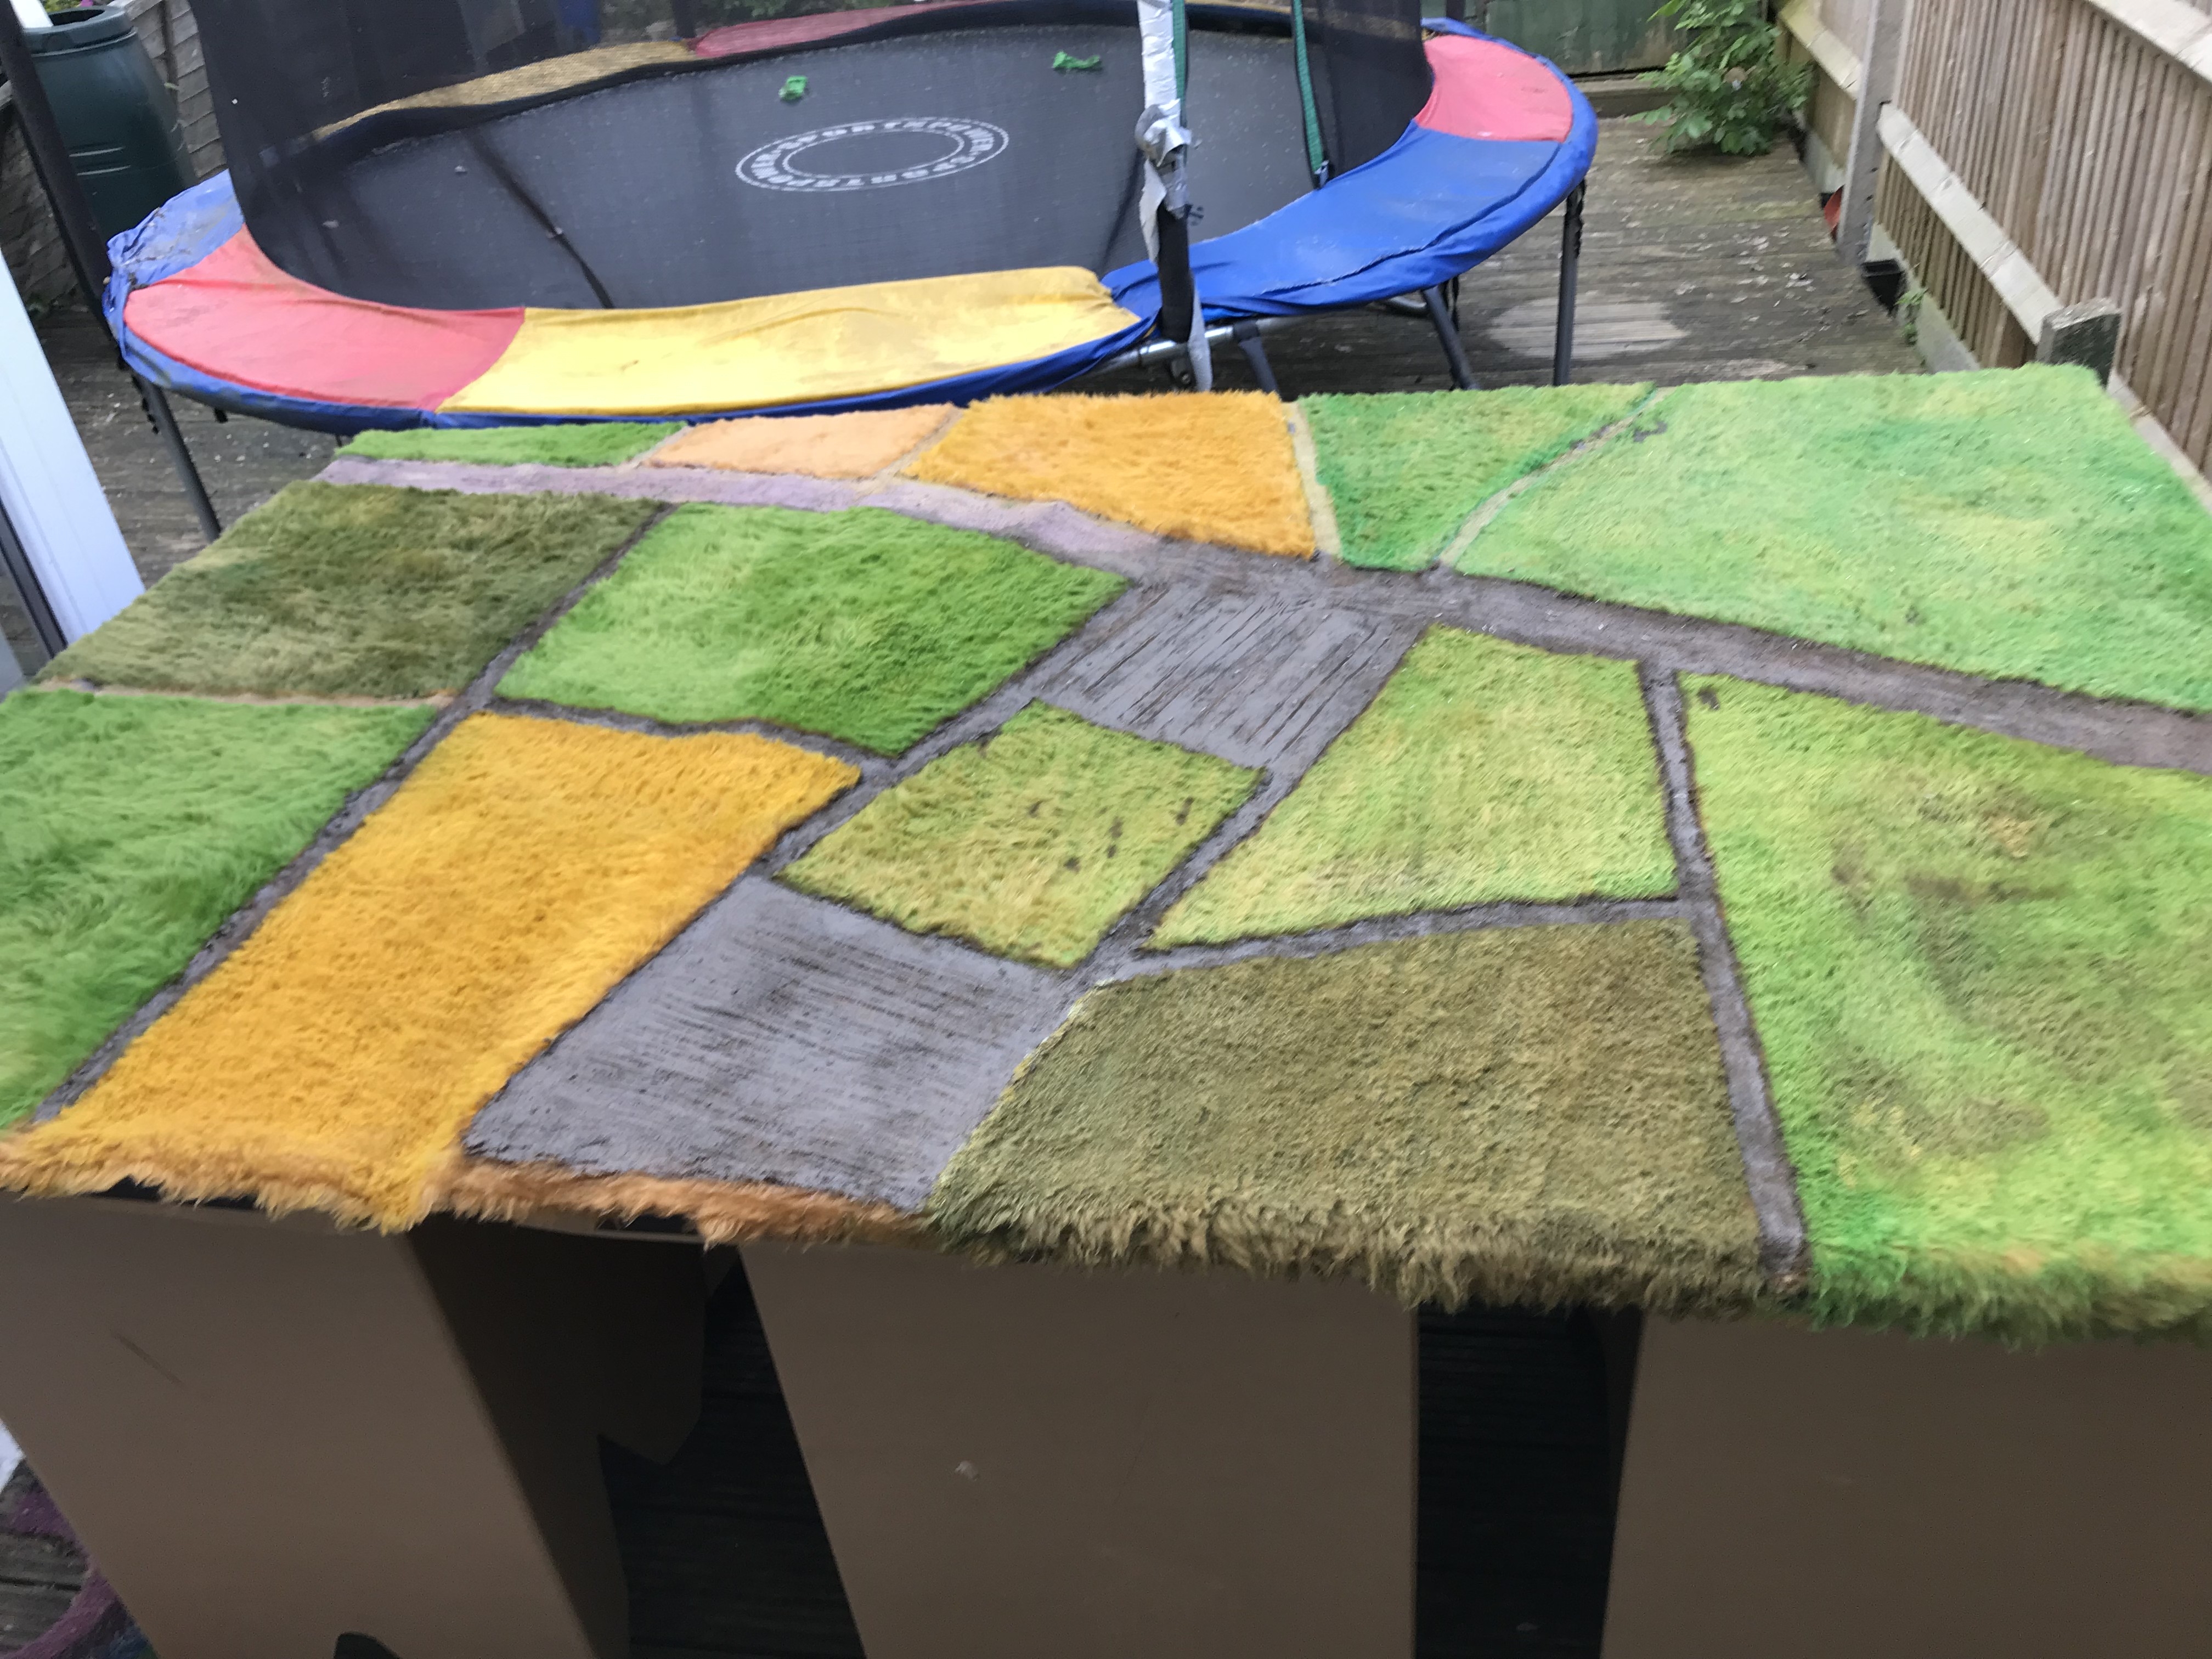
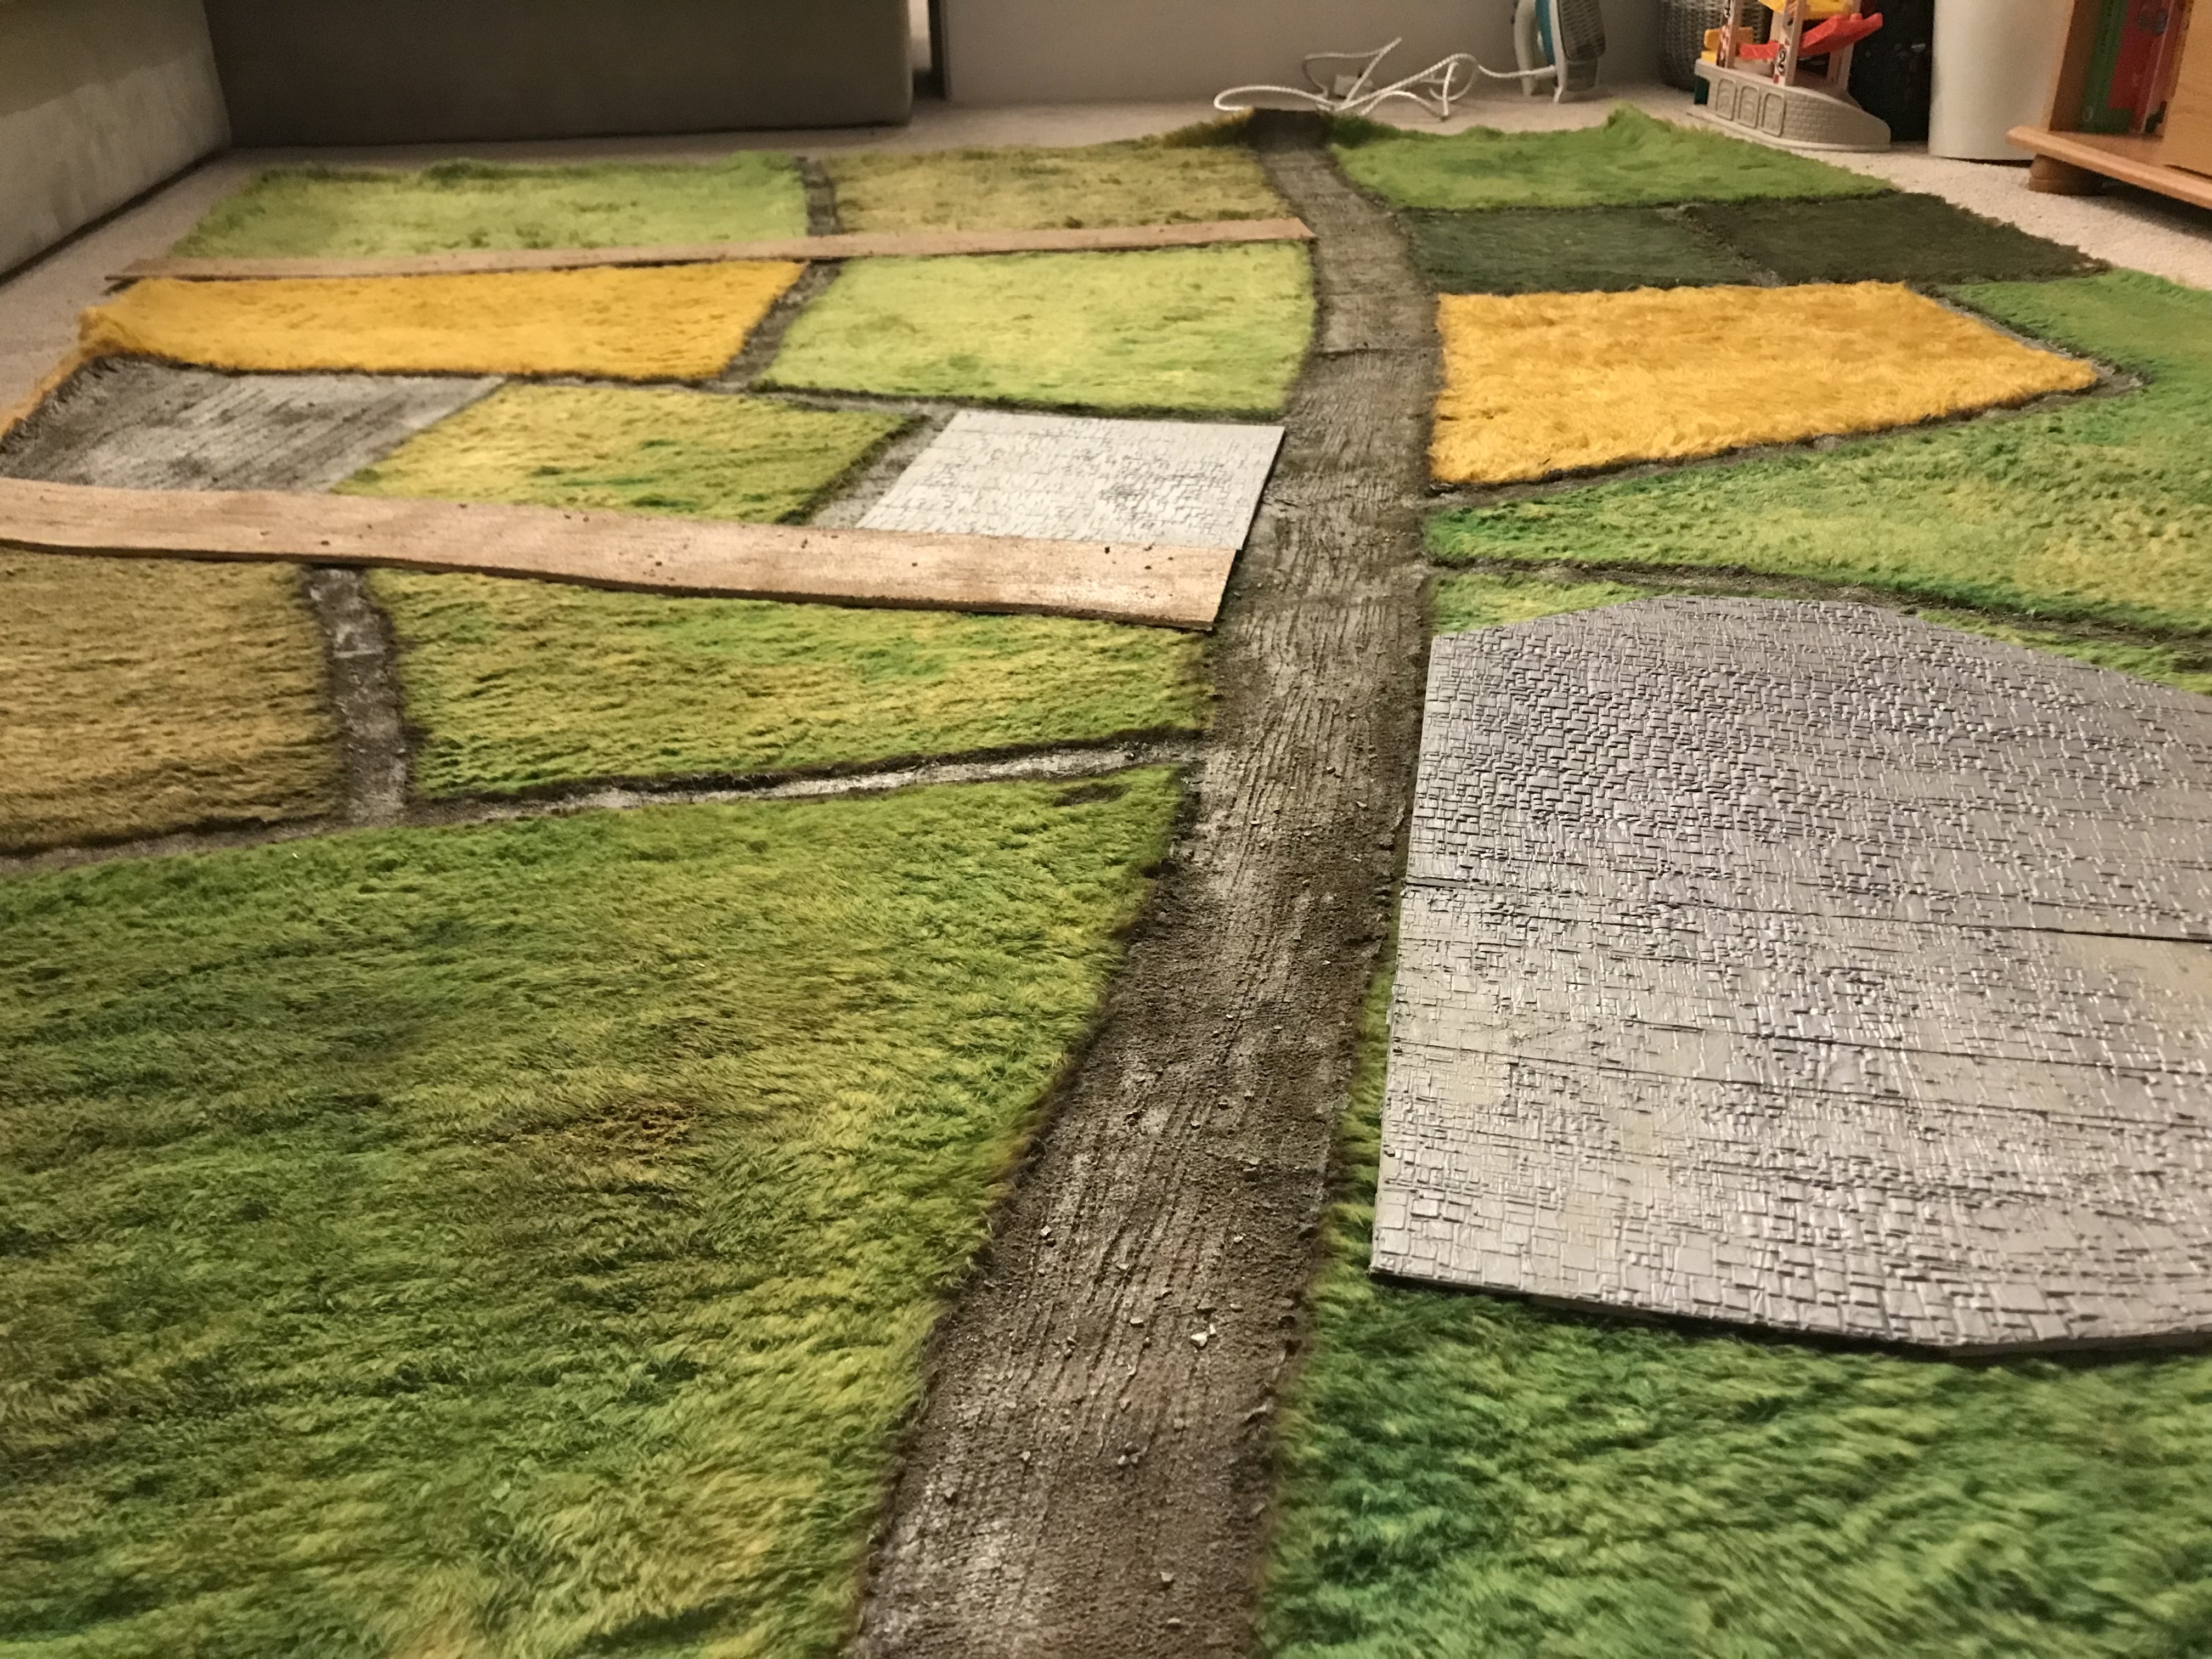
A Field in England.
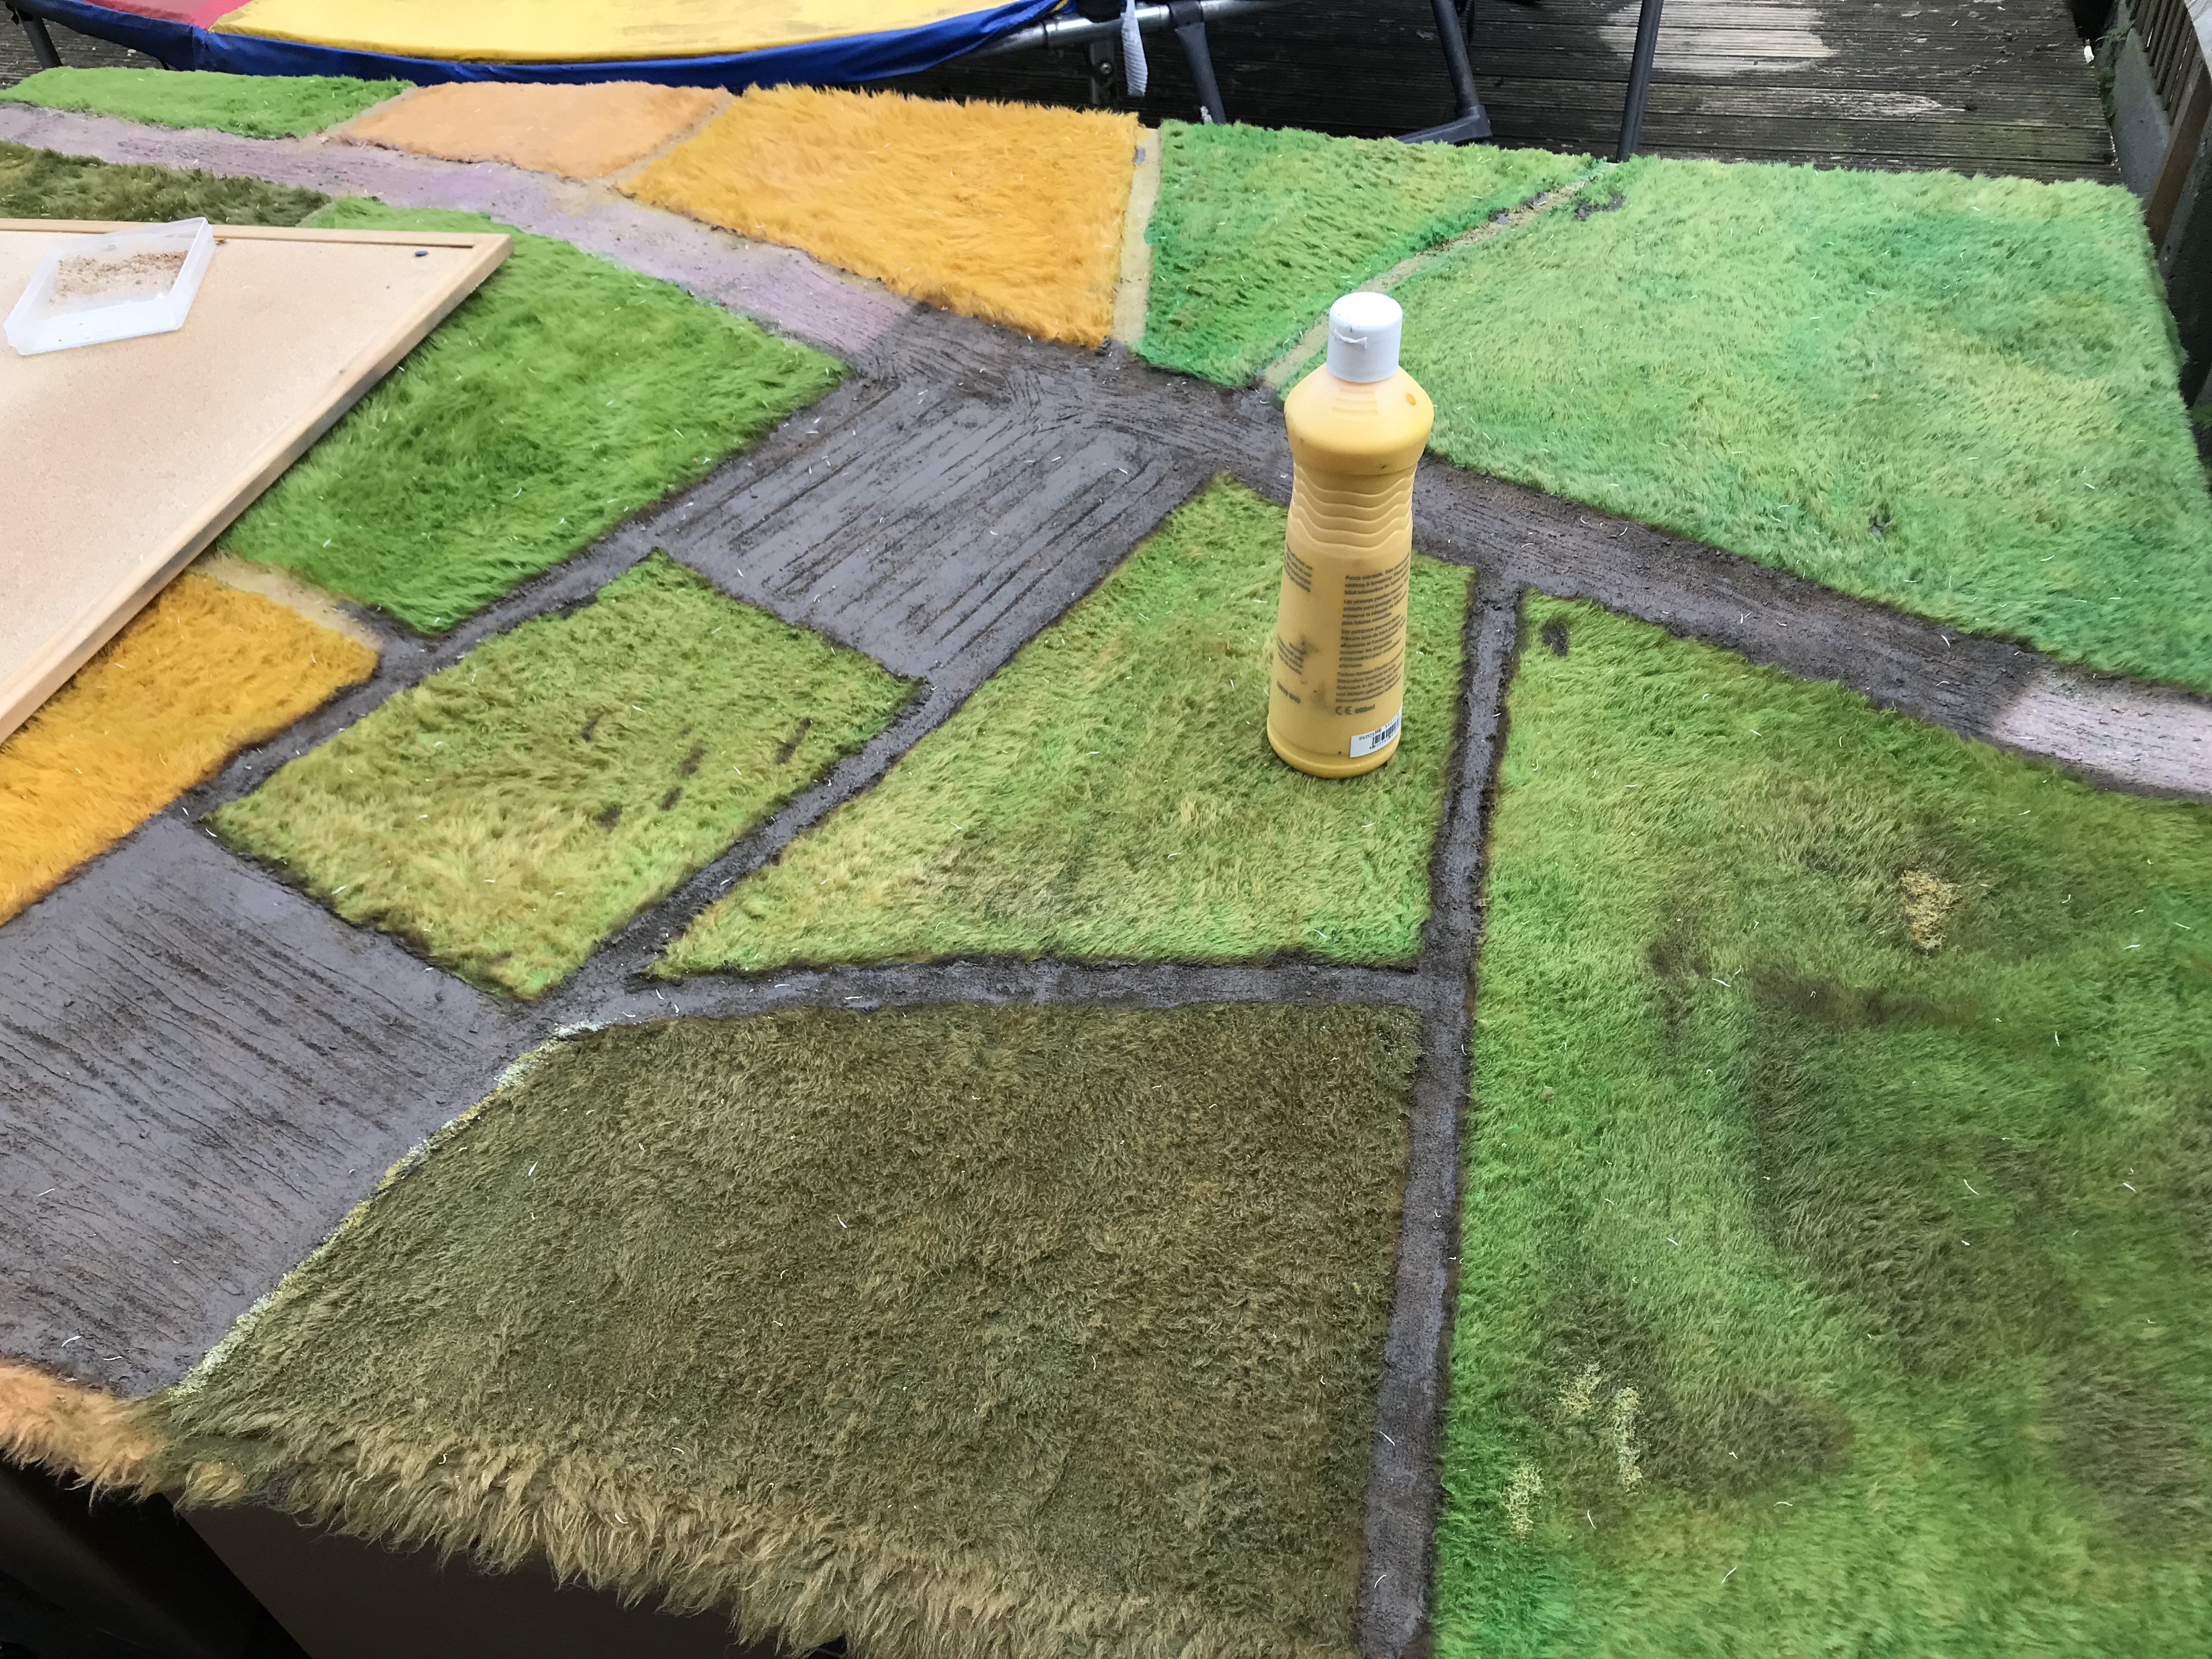
As the days got warmer this year, I found it to be the right time to work on my 6×4 faux fur field mat. I used the same techniques as before and added a little more foliage detail along the paths with flock. The mat was actually 7×5 foot but that made no different to me. The hot weather helped the caulk cure very quickly and having learnt from the previous mat, I chose better caulk that was already brown and it work gorgeously.
The field turned out so much better than I had hoped, but at this stage, I was still only looking at it for 15mm gaming. I haddnt even considered its potential for Project Cornetto.
I stuck with dirt roads as my idea was that they were such a size I could lay anything over the top to give the illusion of more fields or modern roads.
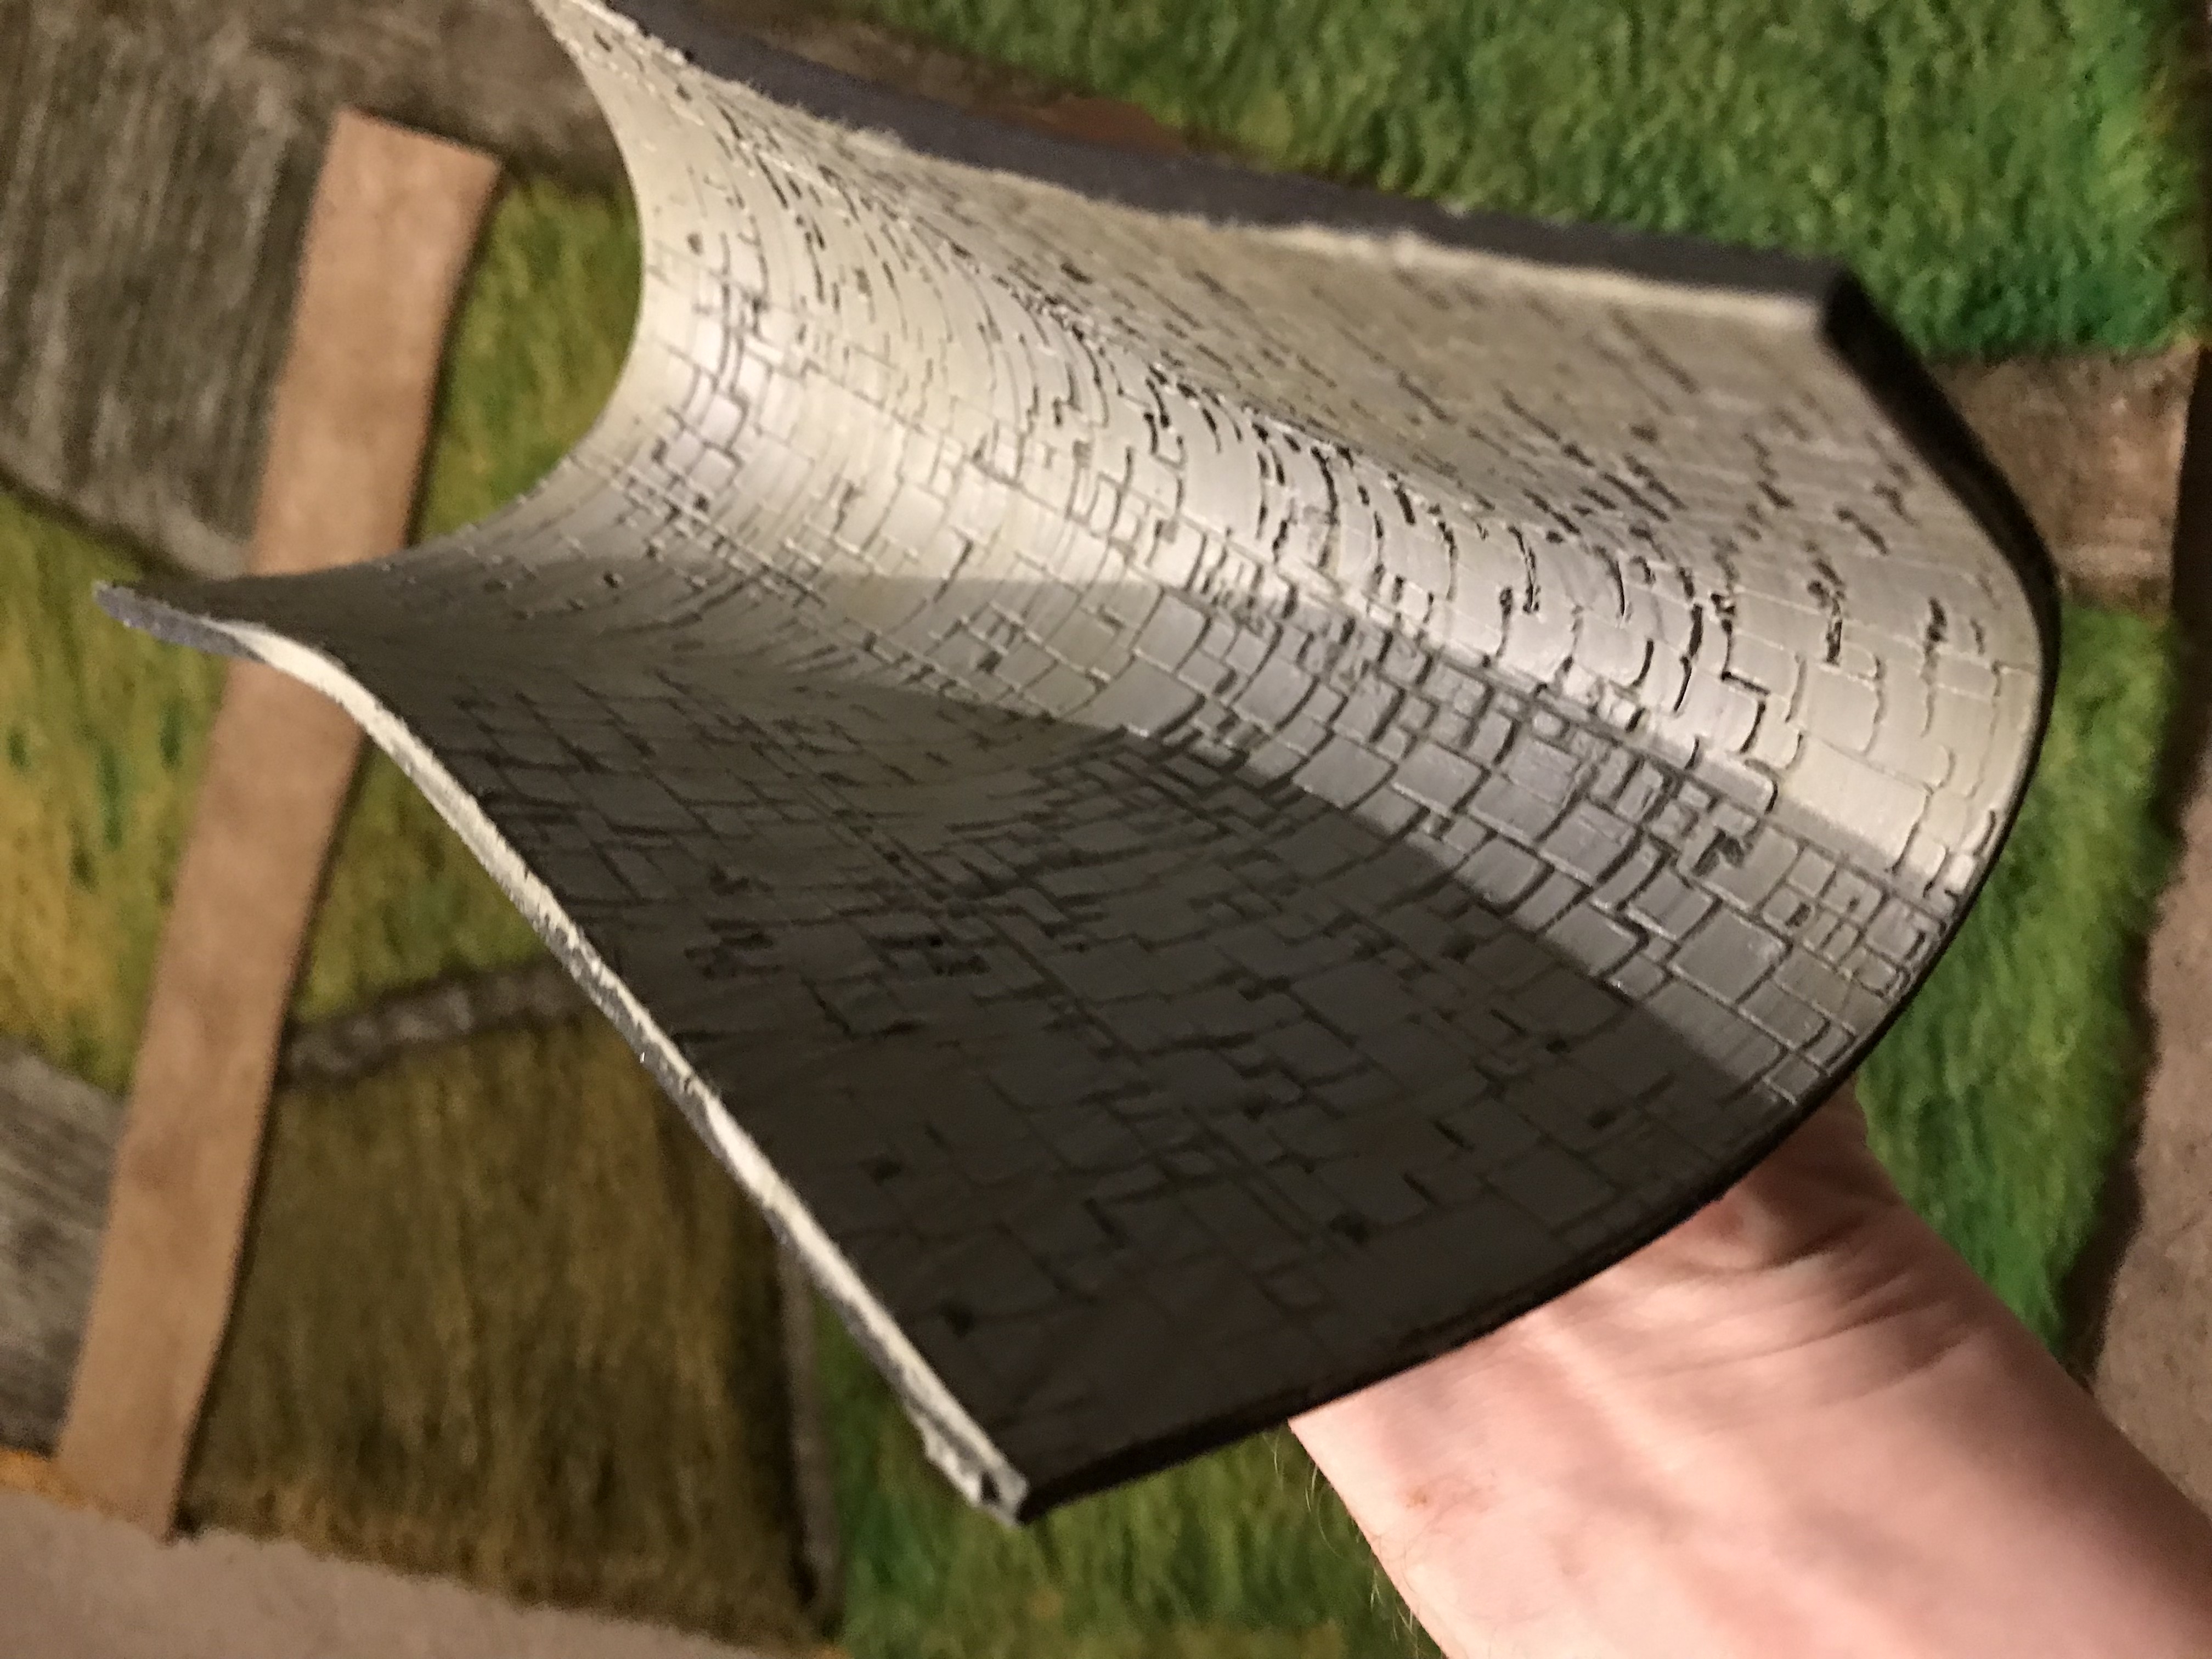
It was around this time, BlackMagicStudios changed the way I look at certain materials. I had been using caulk on fabric to make dirt roads and other things, but in one video it was recommended to use 3mm rubber mats. I picked up a meter mat for £14 on ebay and this was a perfect base for making roads or cobbled areas. I tested a theory of using a cobblestone roller on drying caulk over rubber and I was given perfectly textured durable mats.
This would become the basis for the modern roads I was to make for Cornetto. Flexible, durable and worked with Vallejo Earth Texture paint.


The deadline.
With a field in my back pocket and a city ready to be played on, I was well on my way to fulfilling an idea of a big Walking Dead game.
I had floated the idea many times with my nerdy colleagues, to play a big game of sorts. My original suggestion was a game of Walking Dead All out War set in the Mall. This was cool and I was up for the idea, but I wanted something more.
We rapidly approached December without a solid plan. Other ideas were RPG’s following on from a Warhammer 40k RPG I hosted when we had a social trip with work to GW HQ in Nottingham.
Everyone loved the game even those who had never roleplayed before.
Ideas were banded back and forth and it was suggested that we play a big game on December 9th. I then stupidly suggested, hey why don’t we do something based on what I keep talking about with a Zombie day. I could host and we could do a bit of RPG and a bit of tabletop.
What the hell was I thinking. With less than a month, I had just offered to basically put together a hybrid game of Walking Dead AOW and an RPG. Not only this but host it at my little house and invite 14 others.
Then I made ridicoulas claim that I will put together a Walking Dead table set in the UK. Sure I had a lot done, but it wasn’t ready. I still had so much I wanted to do.
Then I had the stupid idea to take my city a step further an include a rural district with farms and houses.
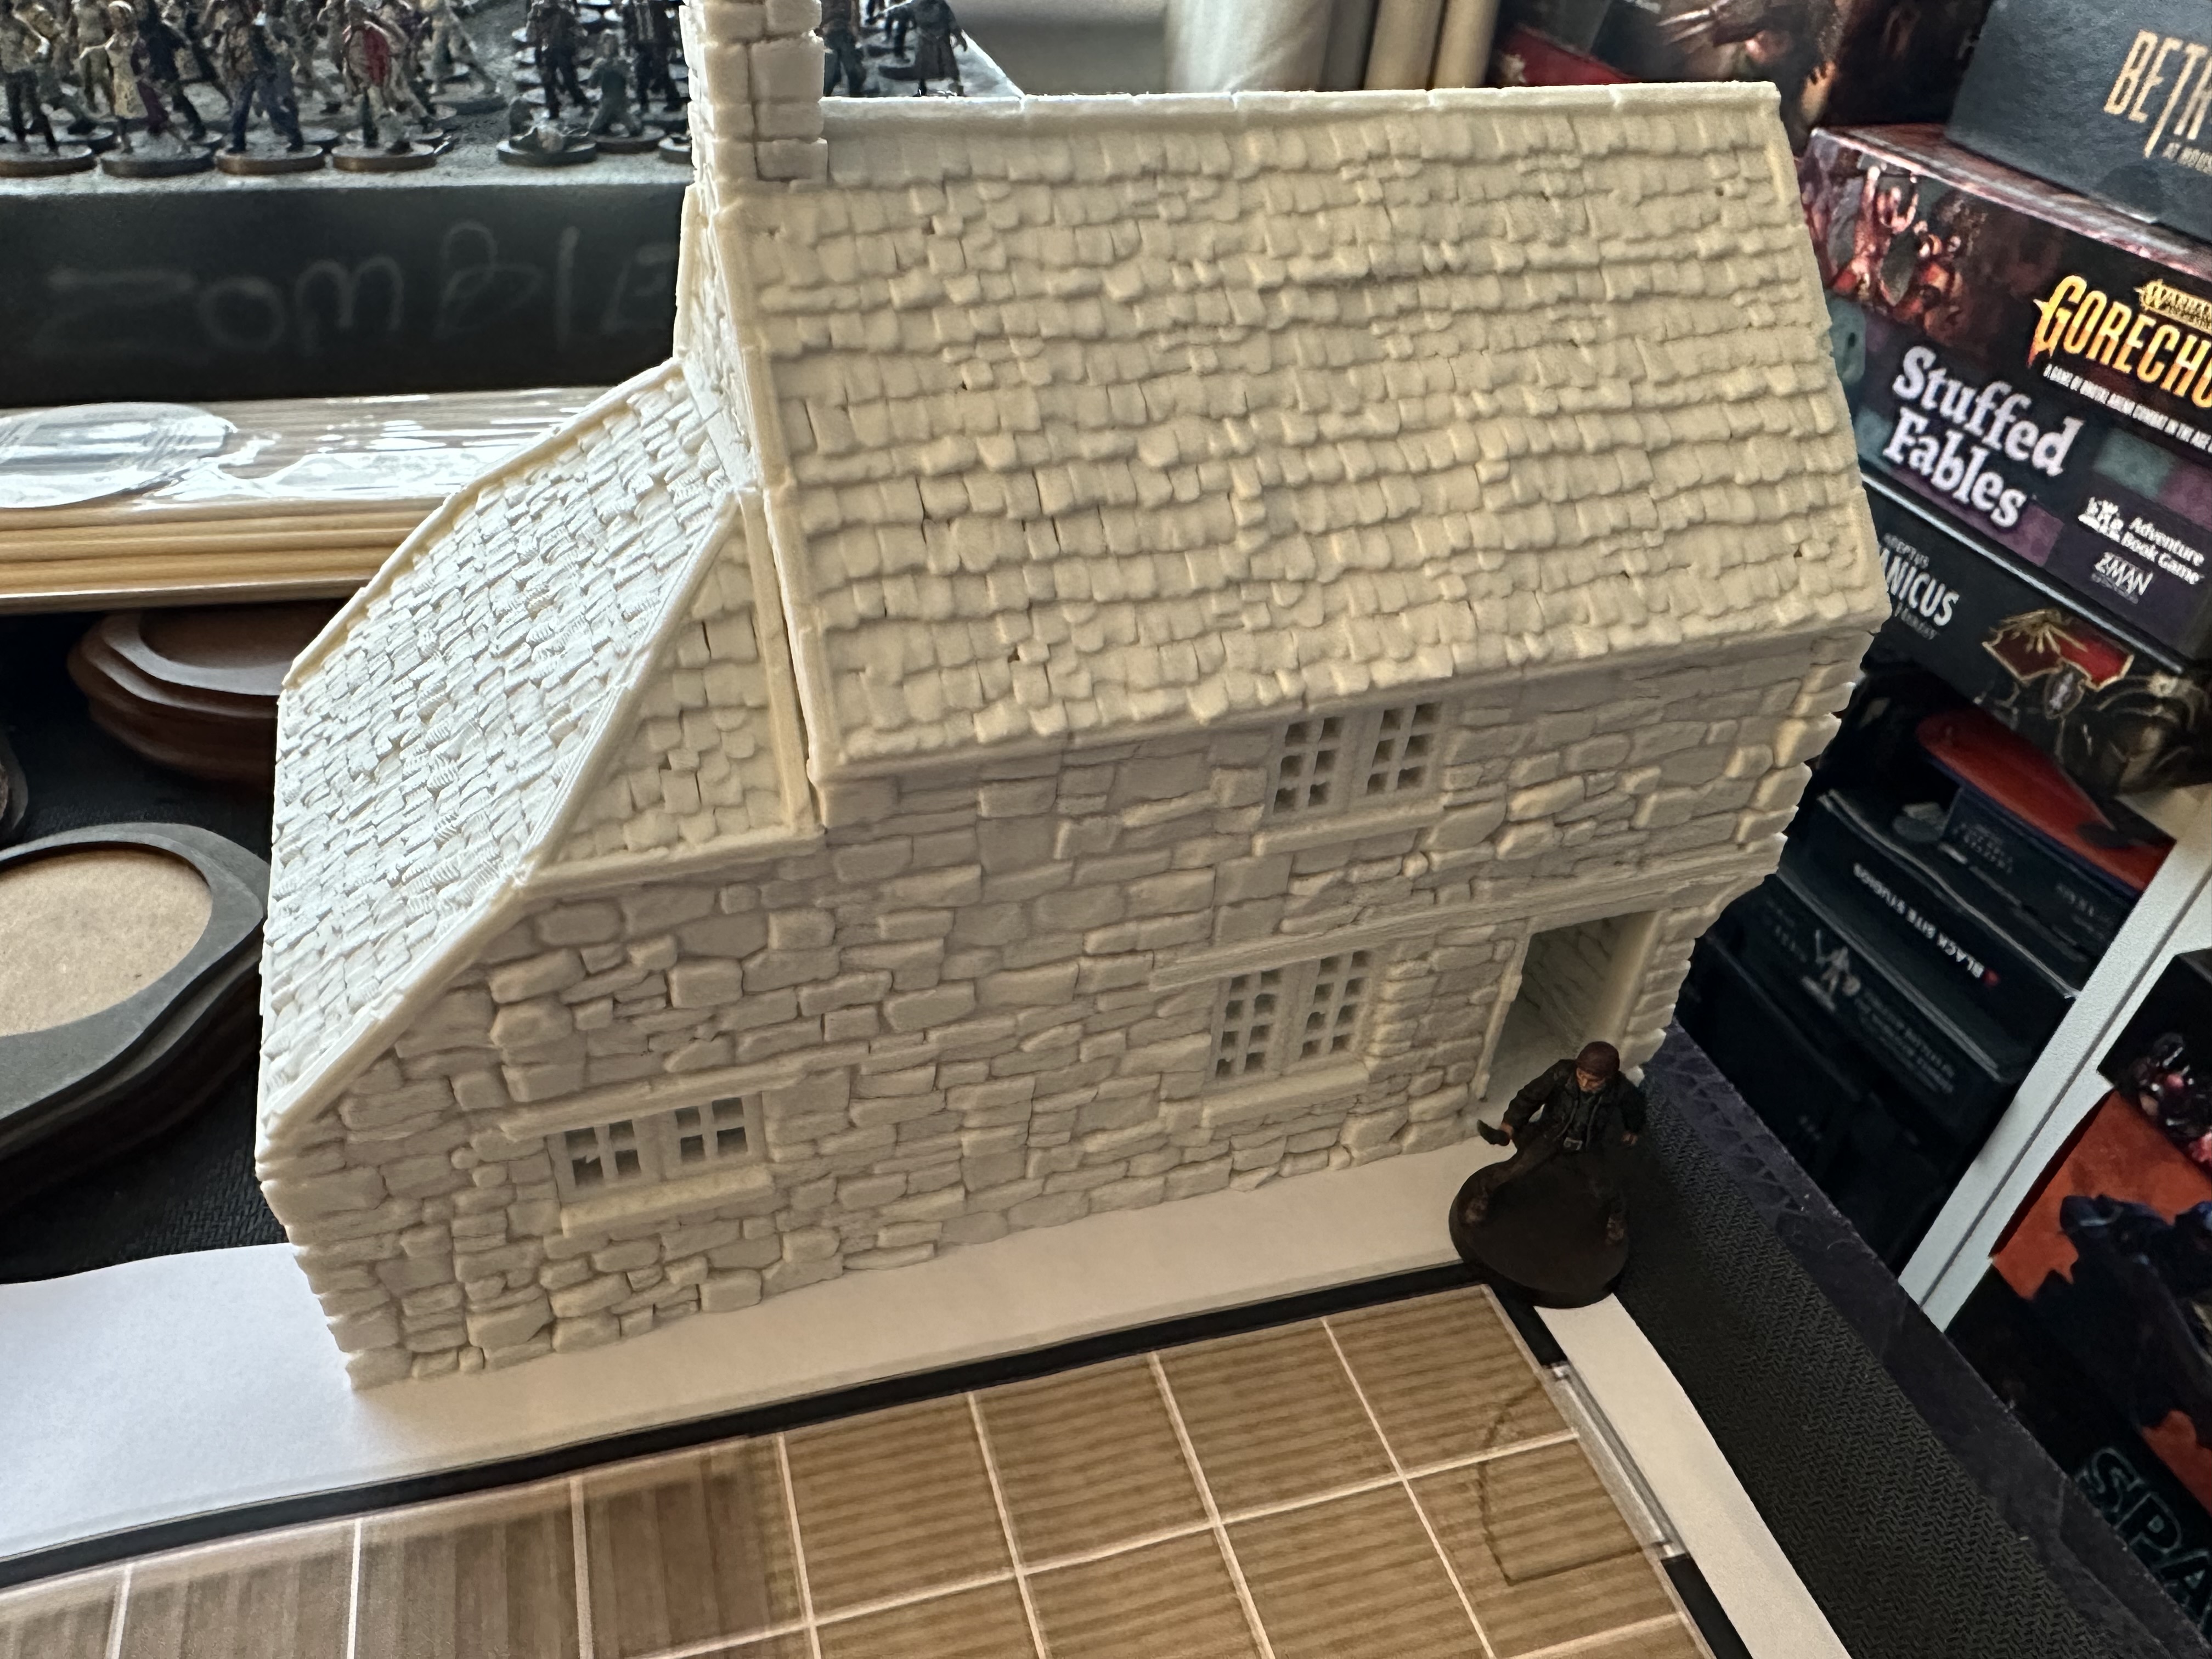
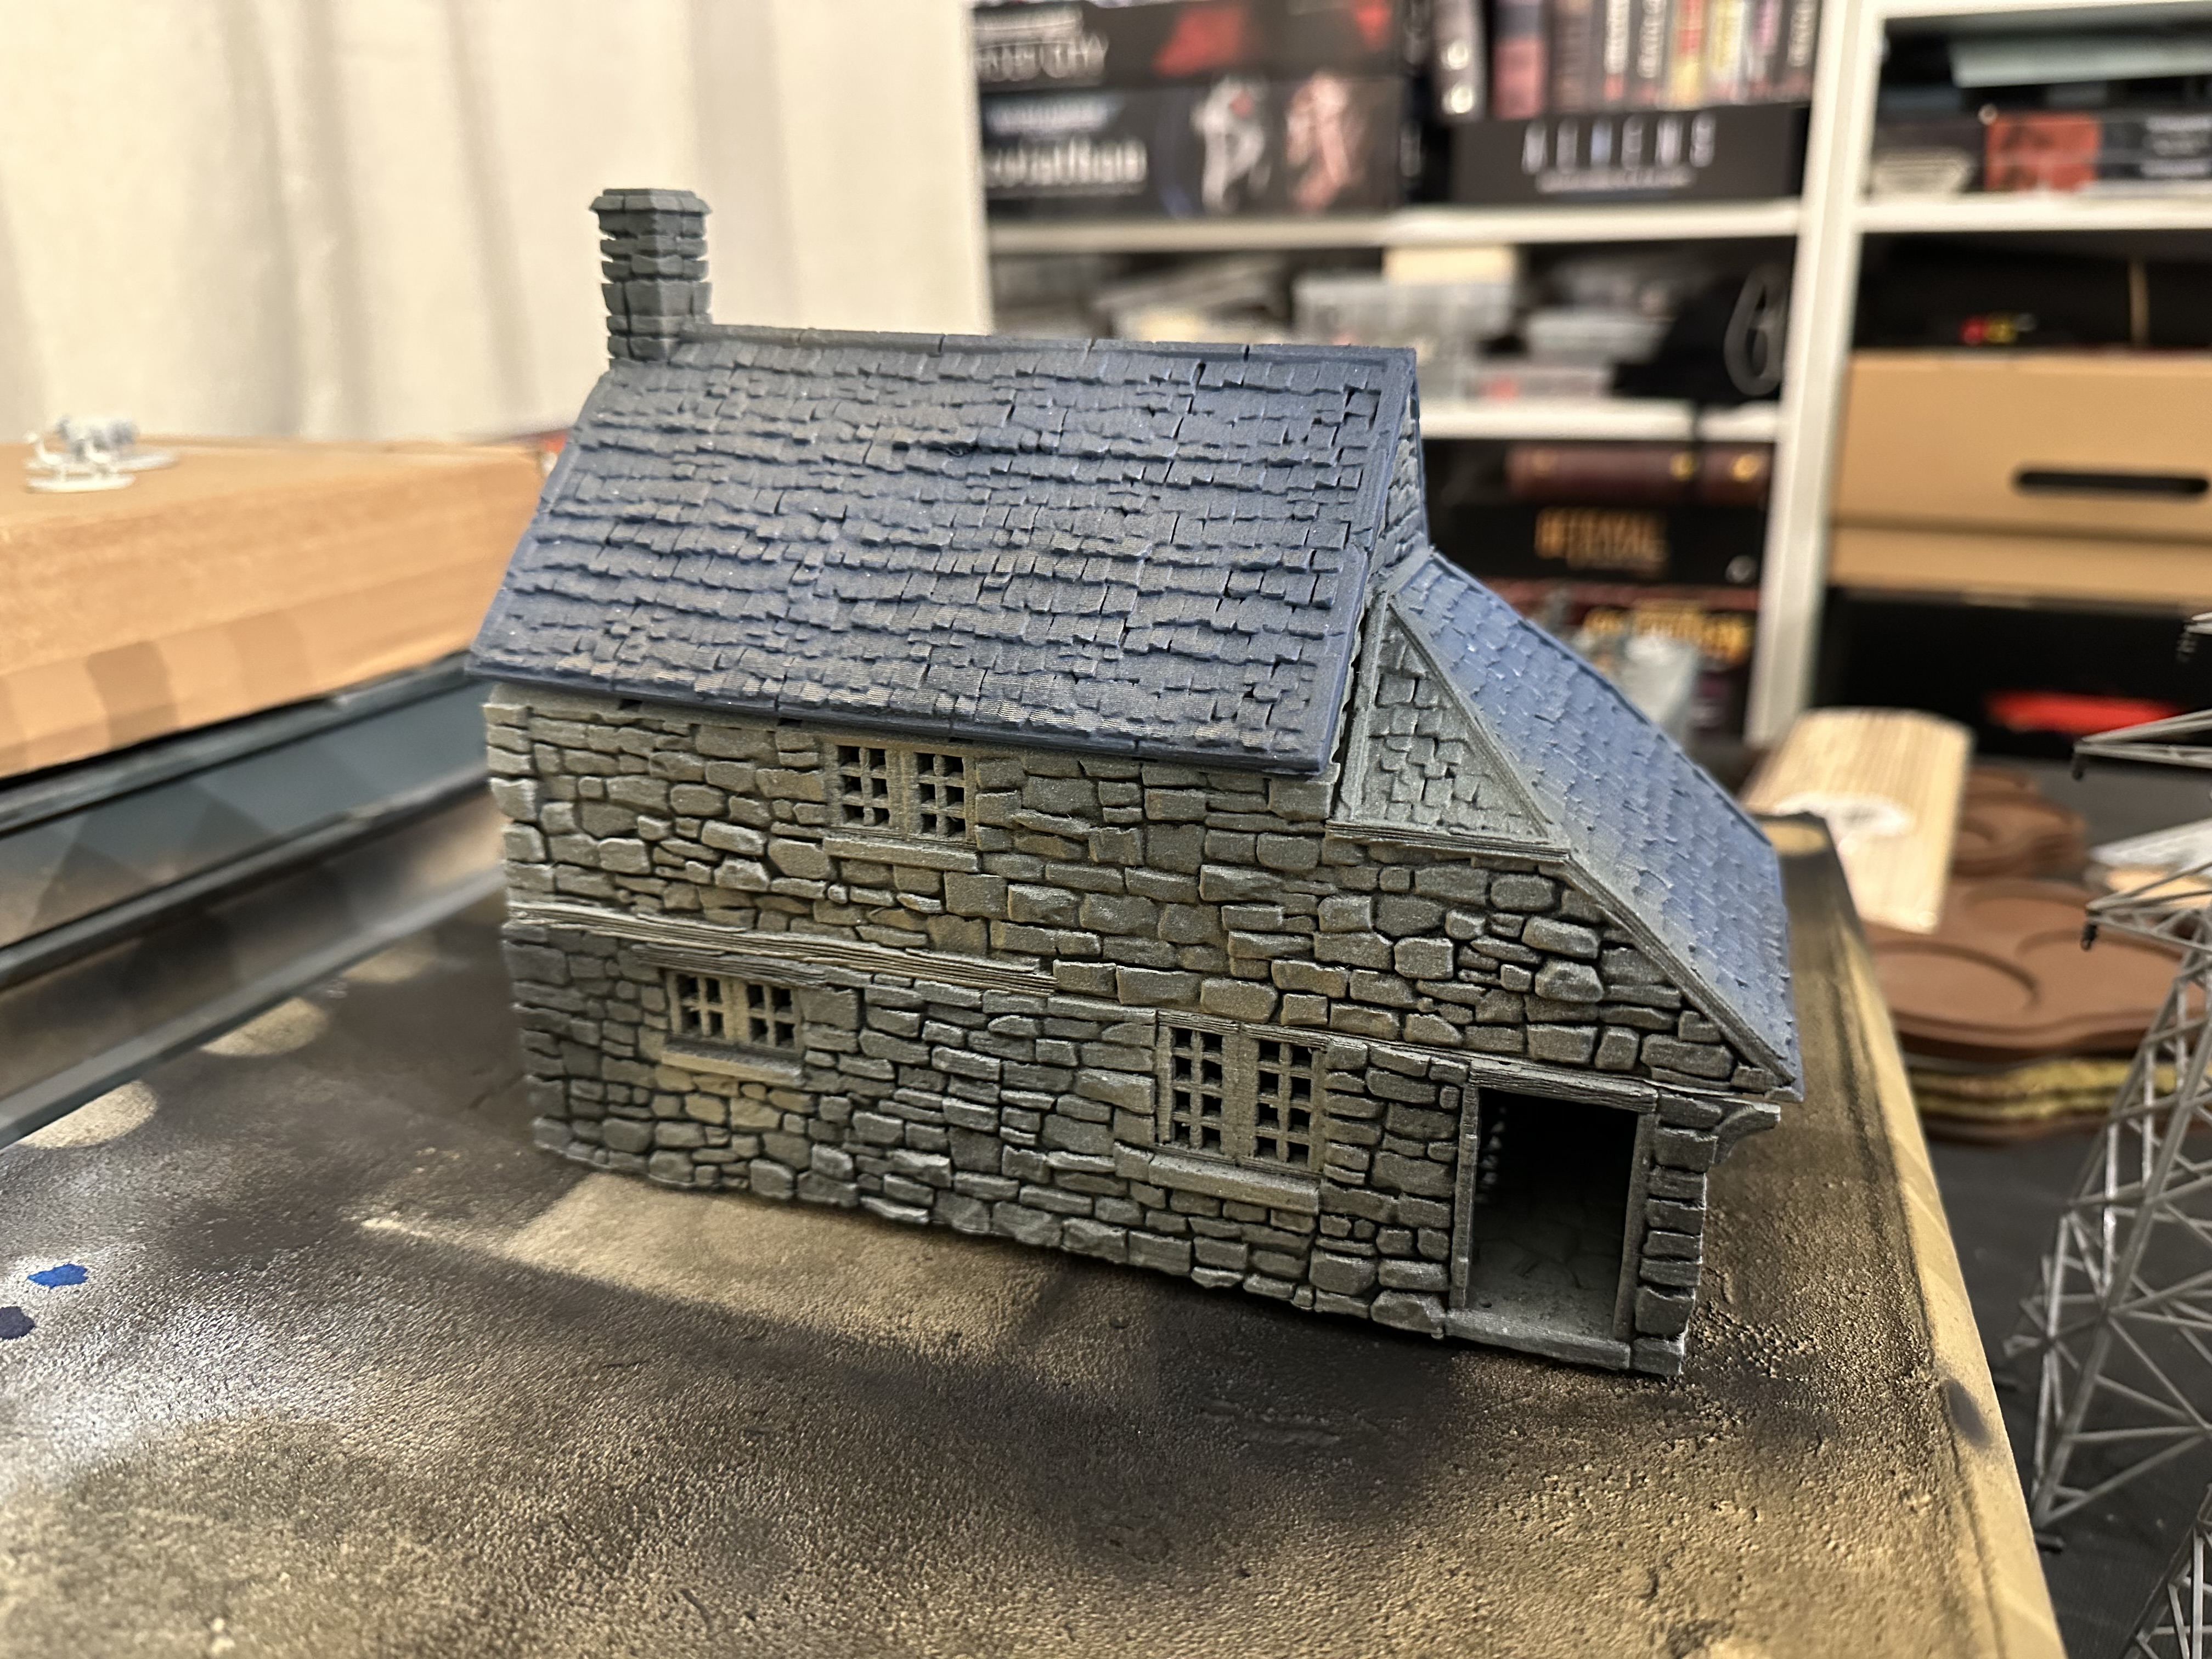
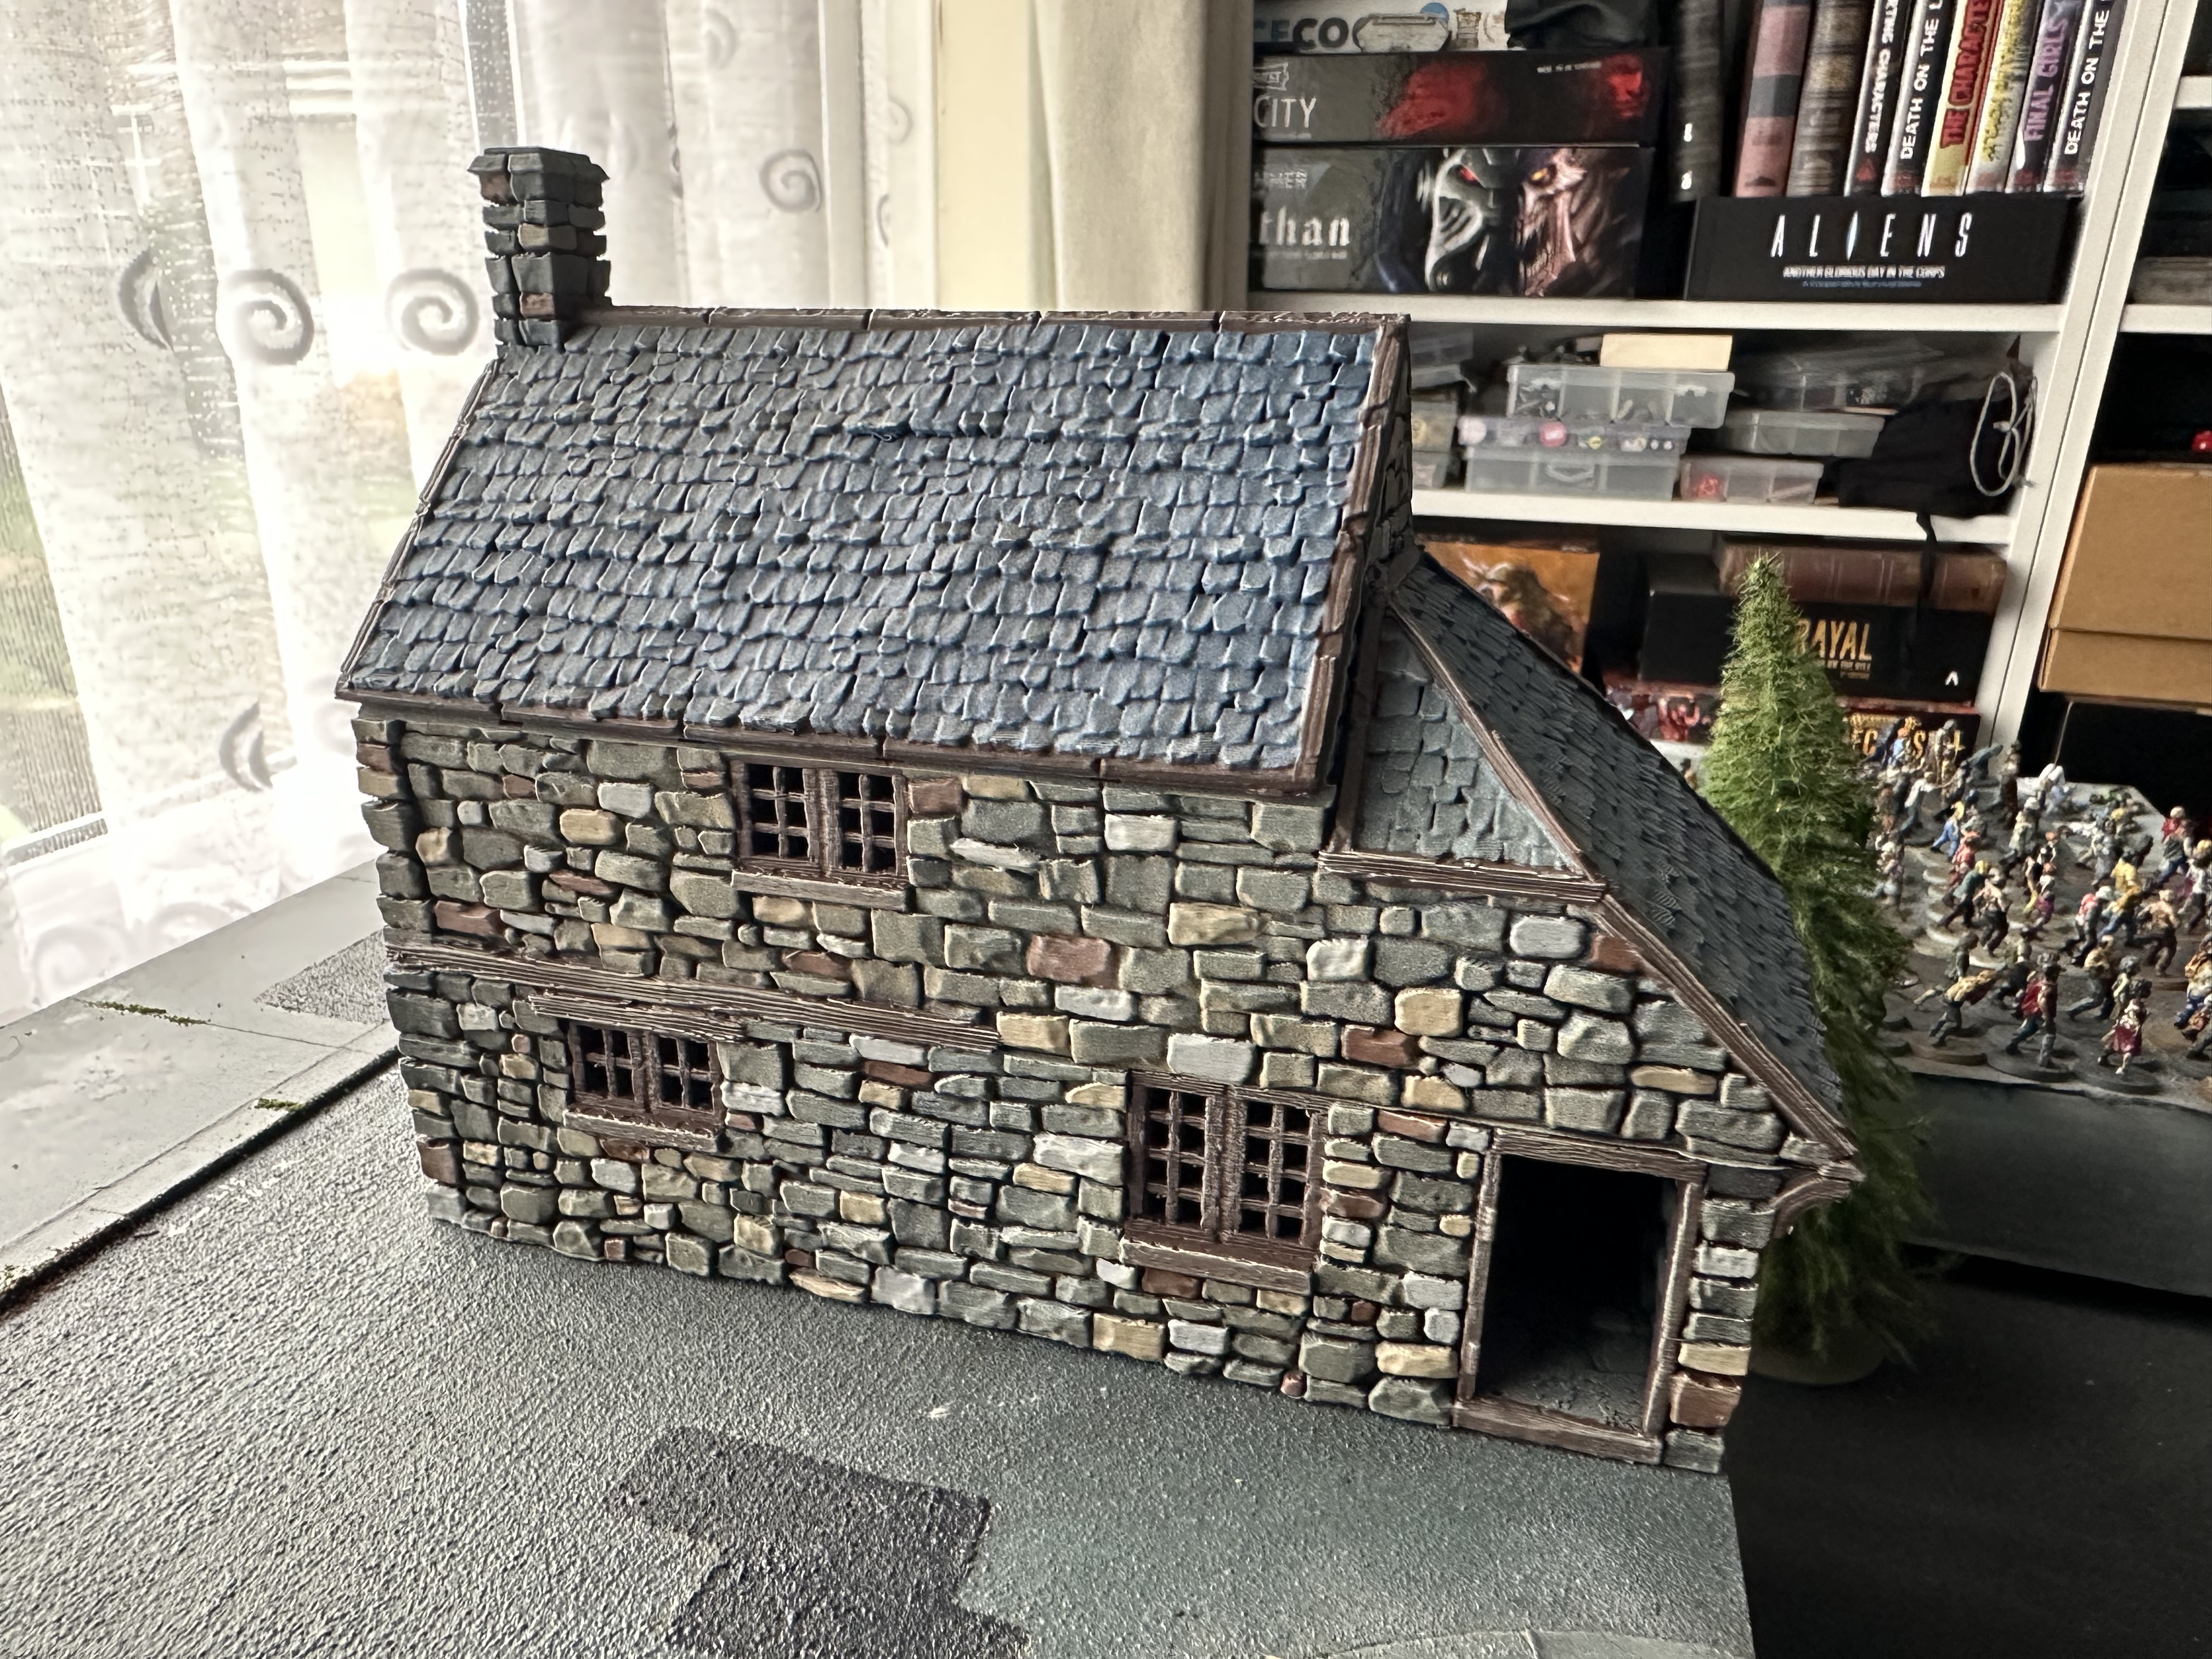


I set the bar high and now had a challenge to be good to my word. So I got straight onto ebay and ordered a bunch of stuff from the King and Country 3D printed range. Bought from Cnc_universe, they arrived quickly and if I am honest, some of the most beautiful 3D pieces I have ever seen. I think with the print lines hidden in the stone work, they are a dream to paint and dry brush.
Painting the stone houses as very time consuming and I had to stock up on colourforge sprays with a few trips to the FLG.
I picked up some more scatter and looked to find more vehicles to fit the theme and would arrive in time.
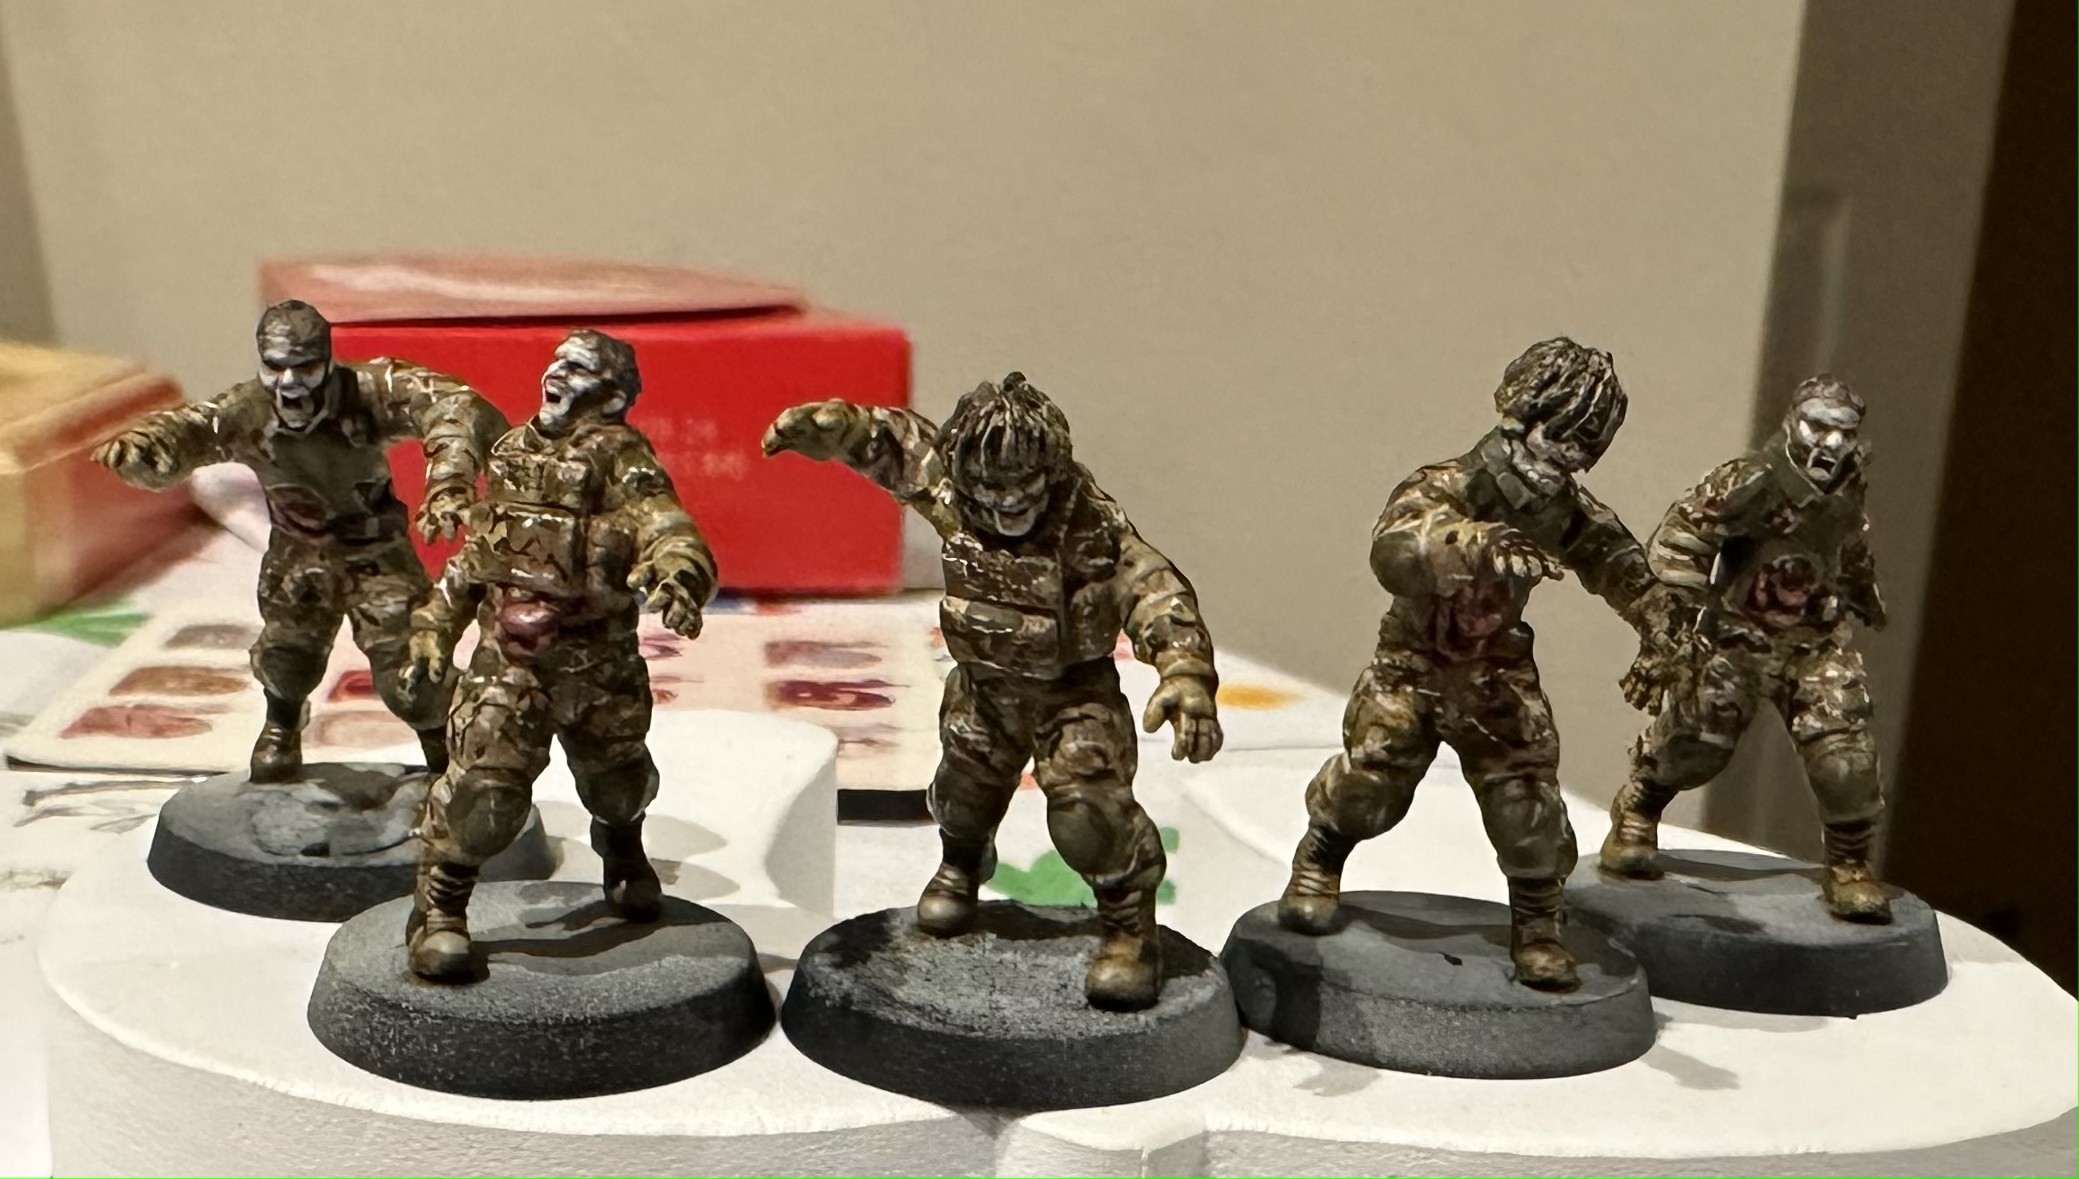
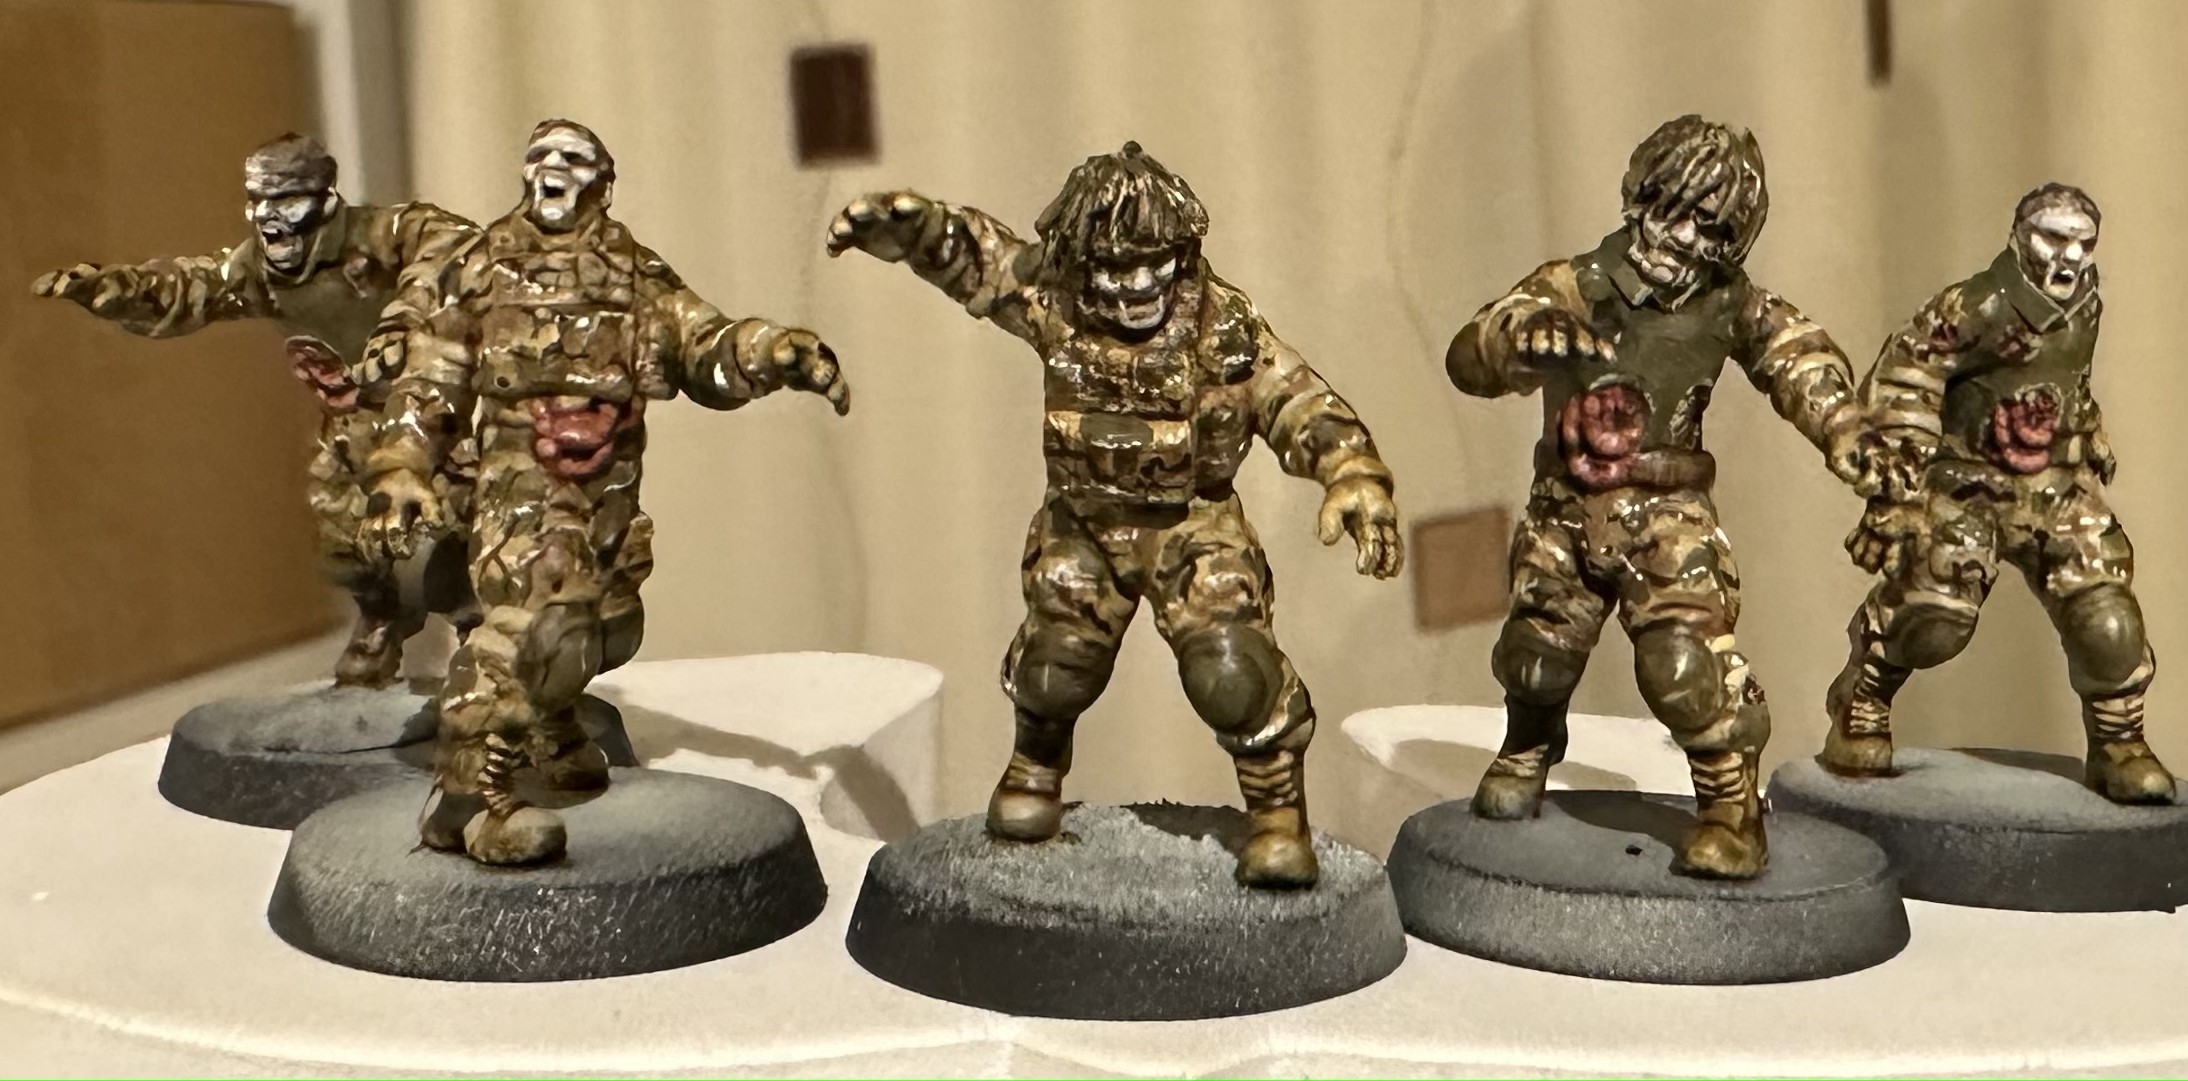
I also wanted some Walkers that looked like soldiers, so I ordered from Patrick Miniatures on Etsy which arrived in time for me to slap paint on.
I dusted off the Walkers sat waiting to paint.
I taught myself how to use Oil washes having never done so before and in the space of a month, I had painted all 150 Walkers, Solider Walkers customised with hand made scrim to represent British soldiers.


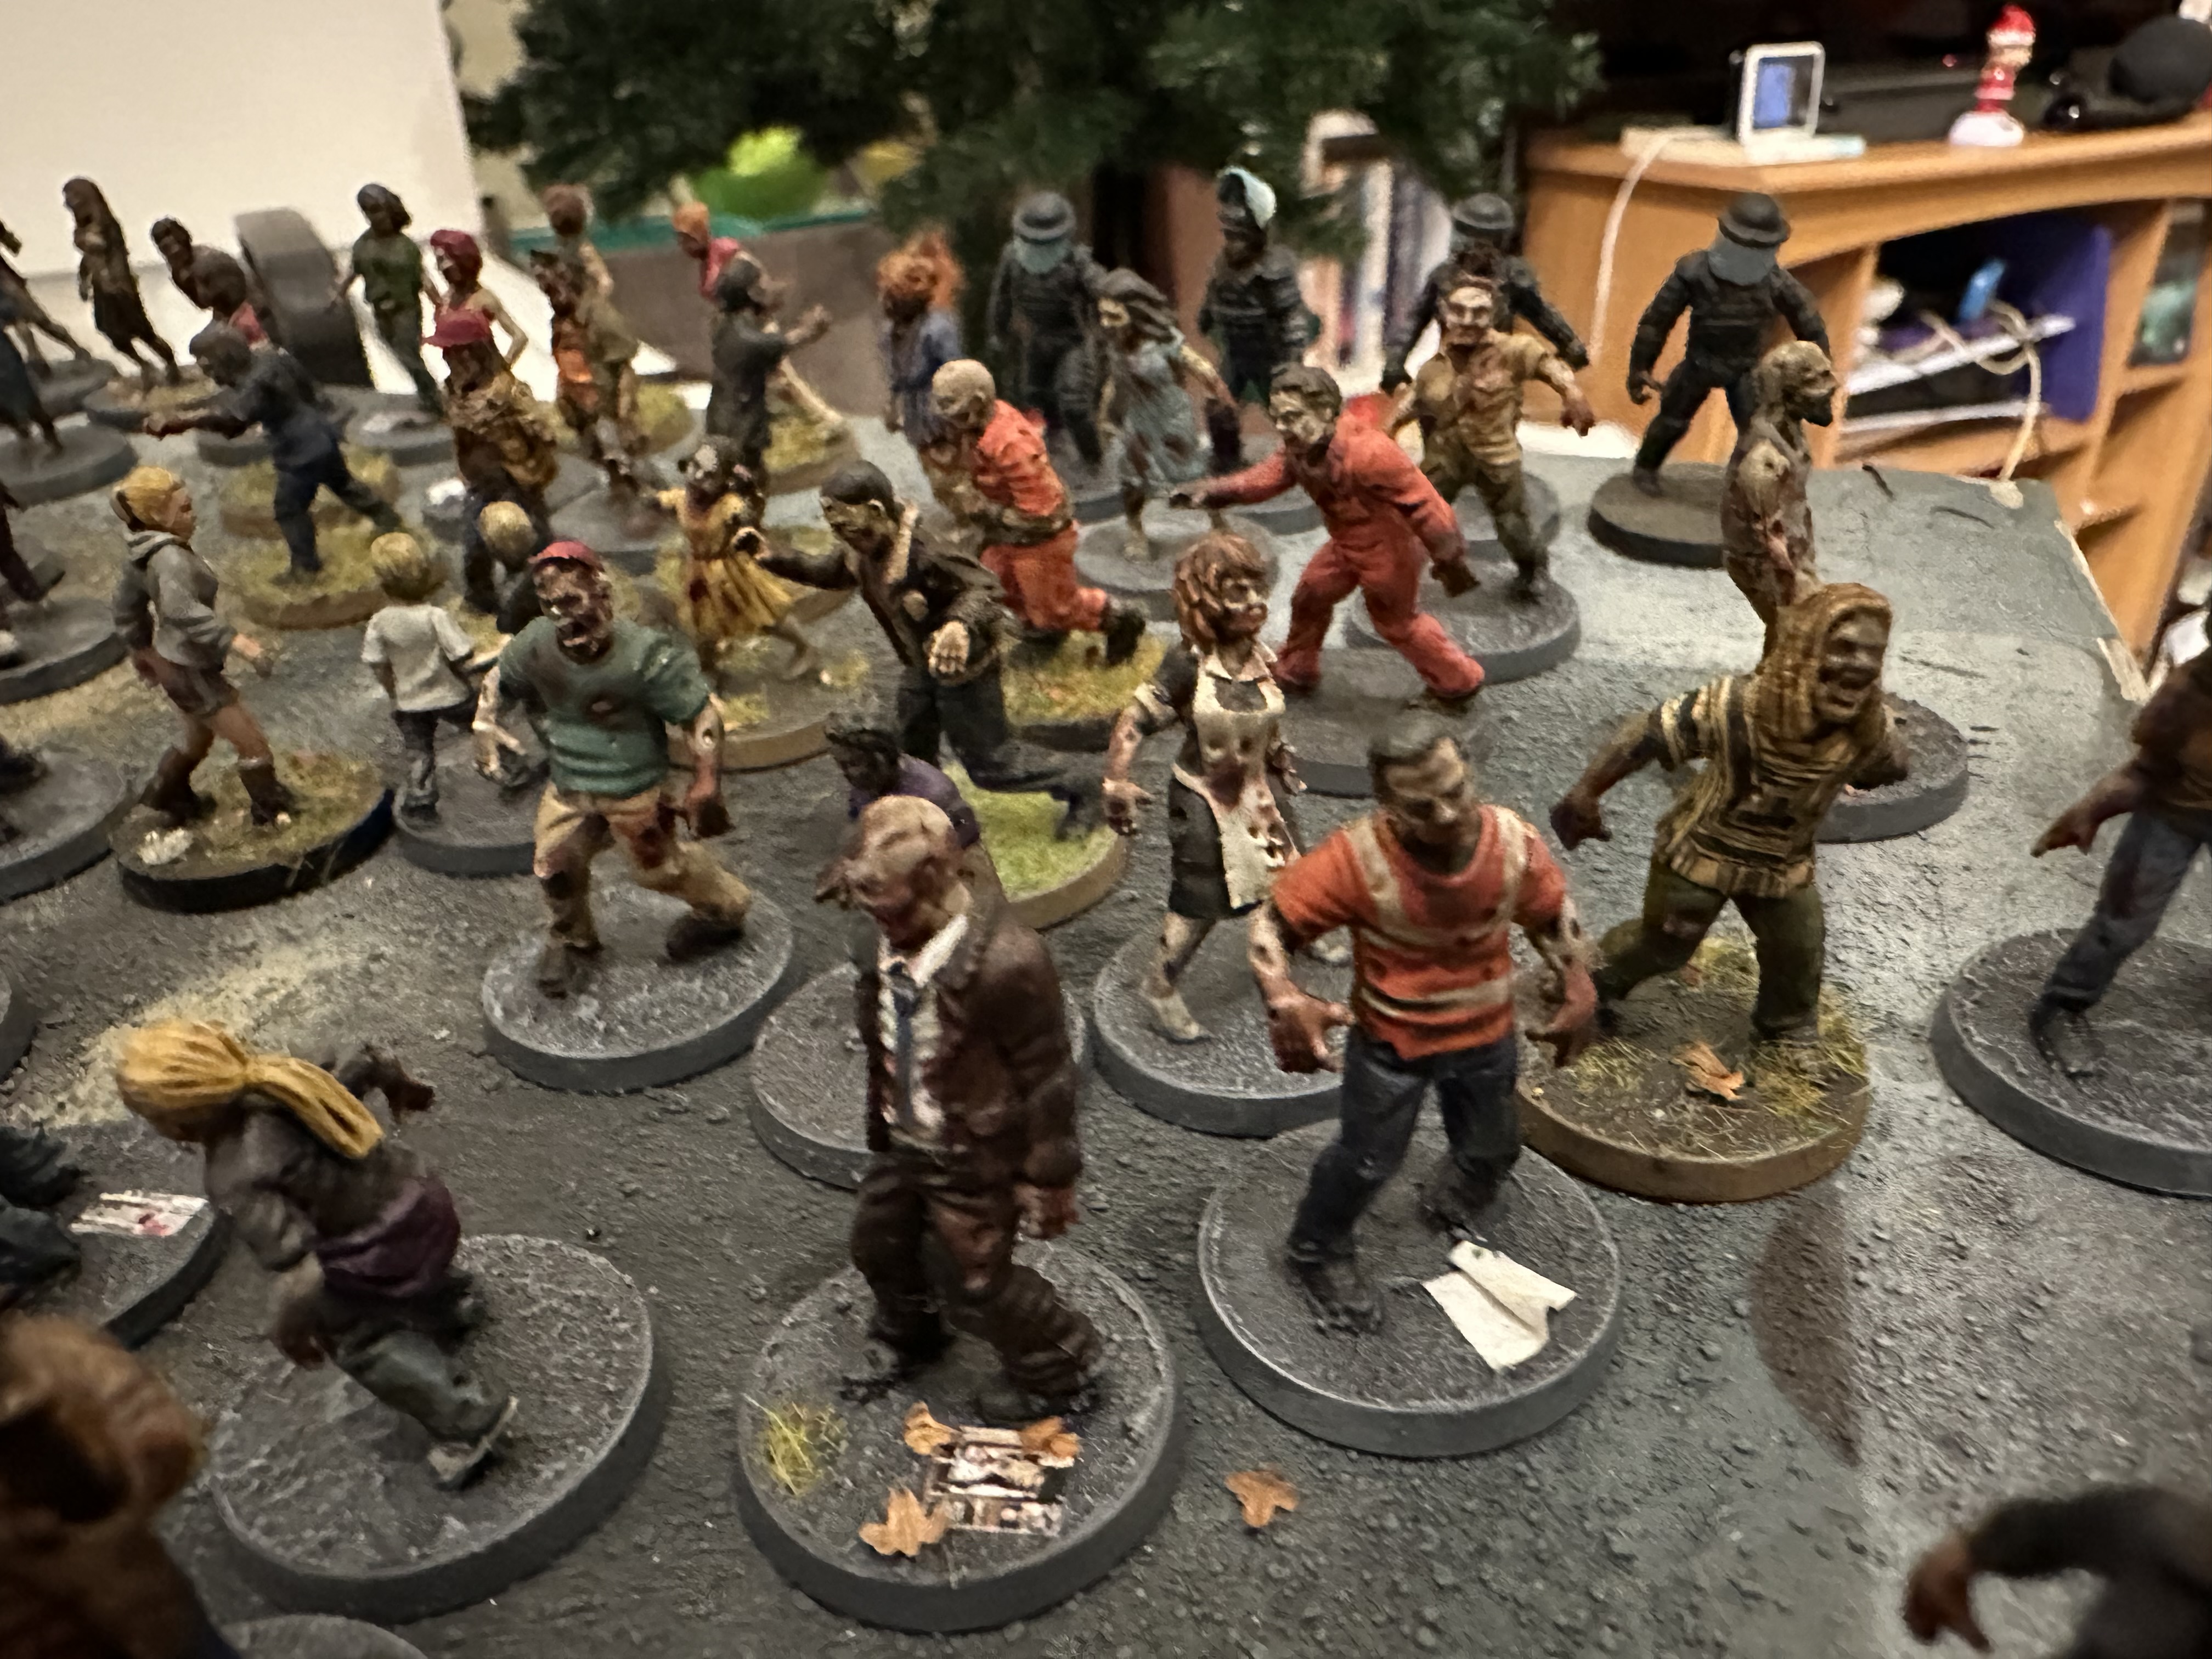

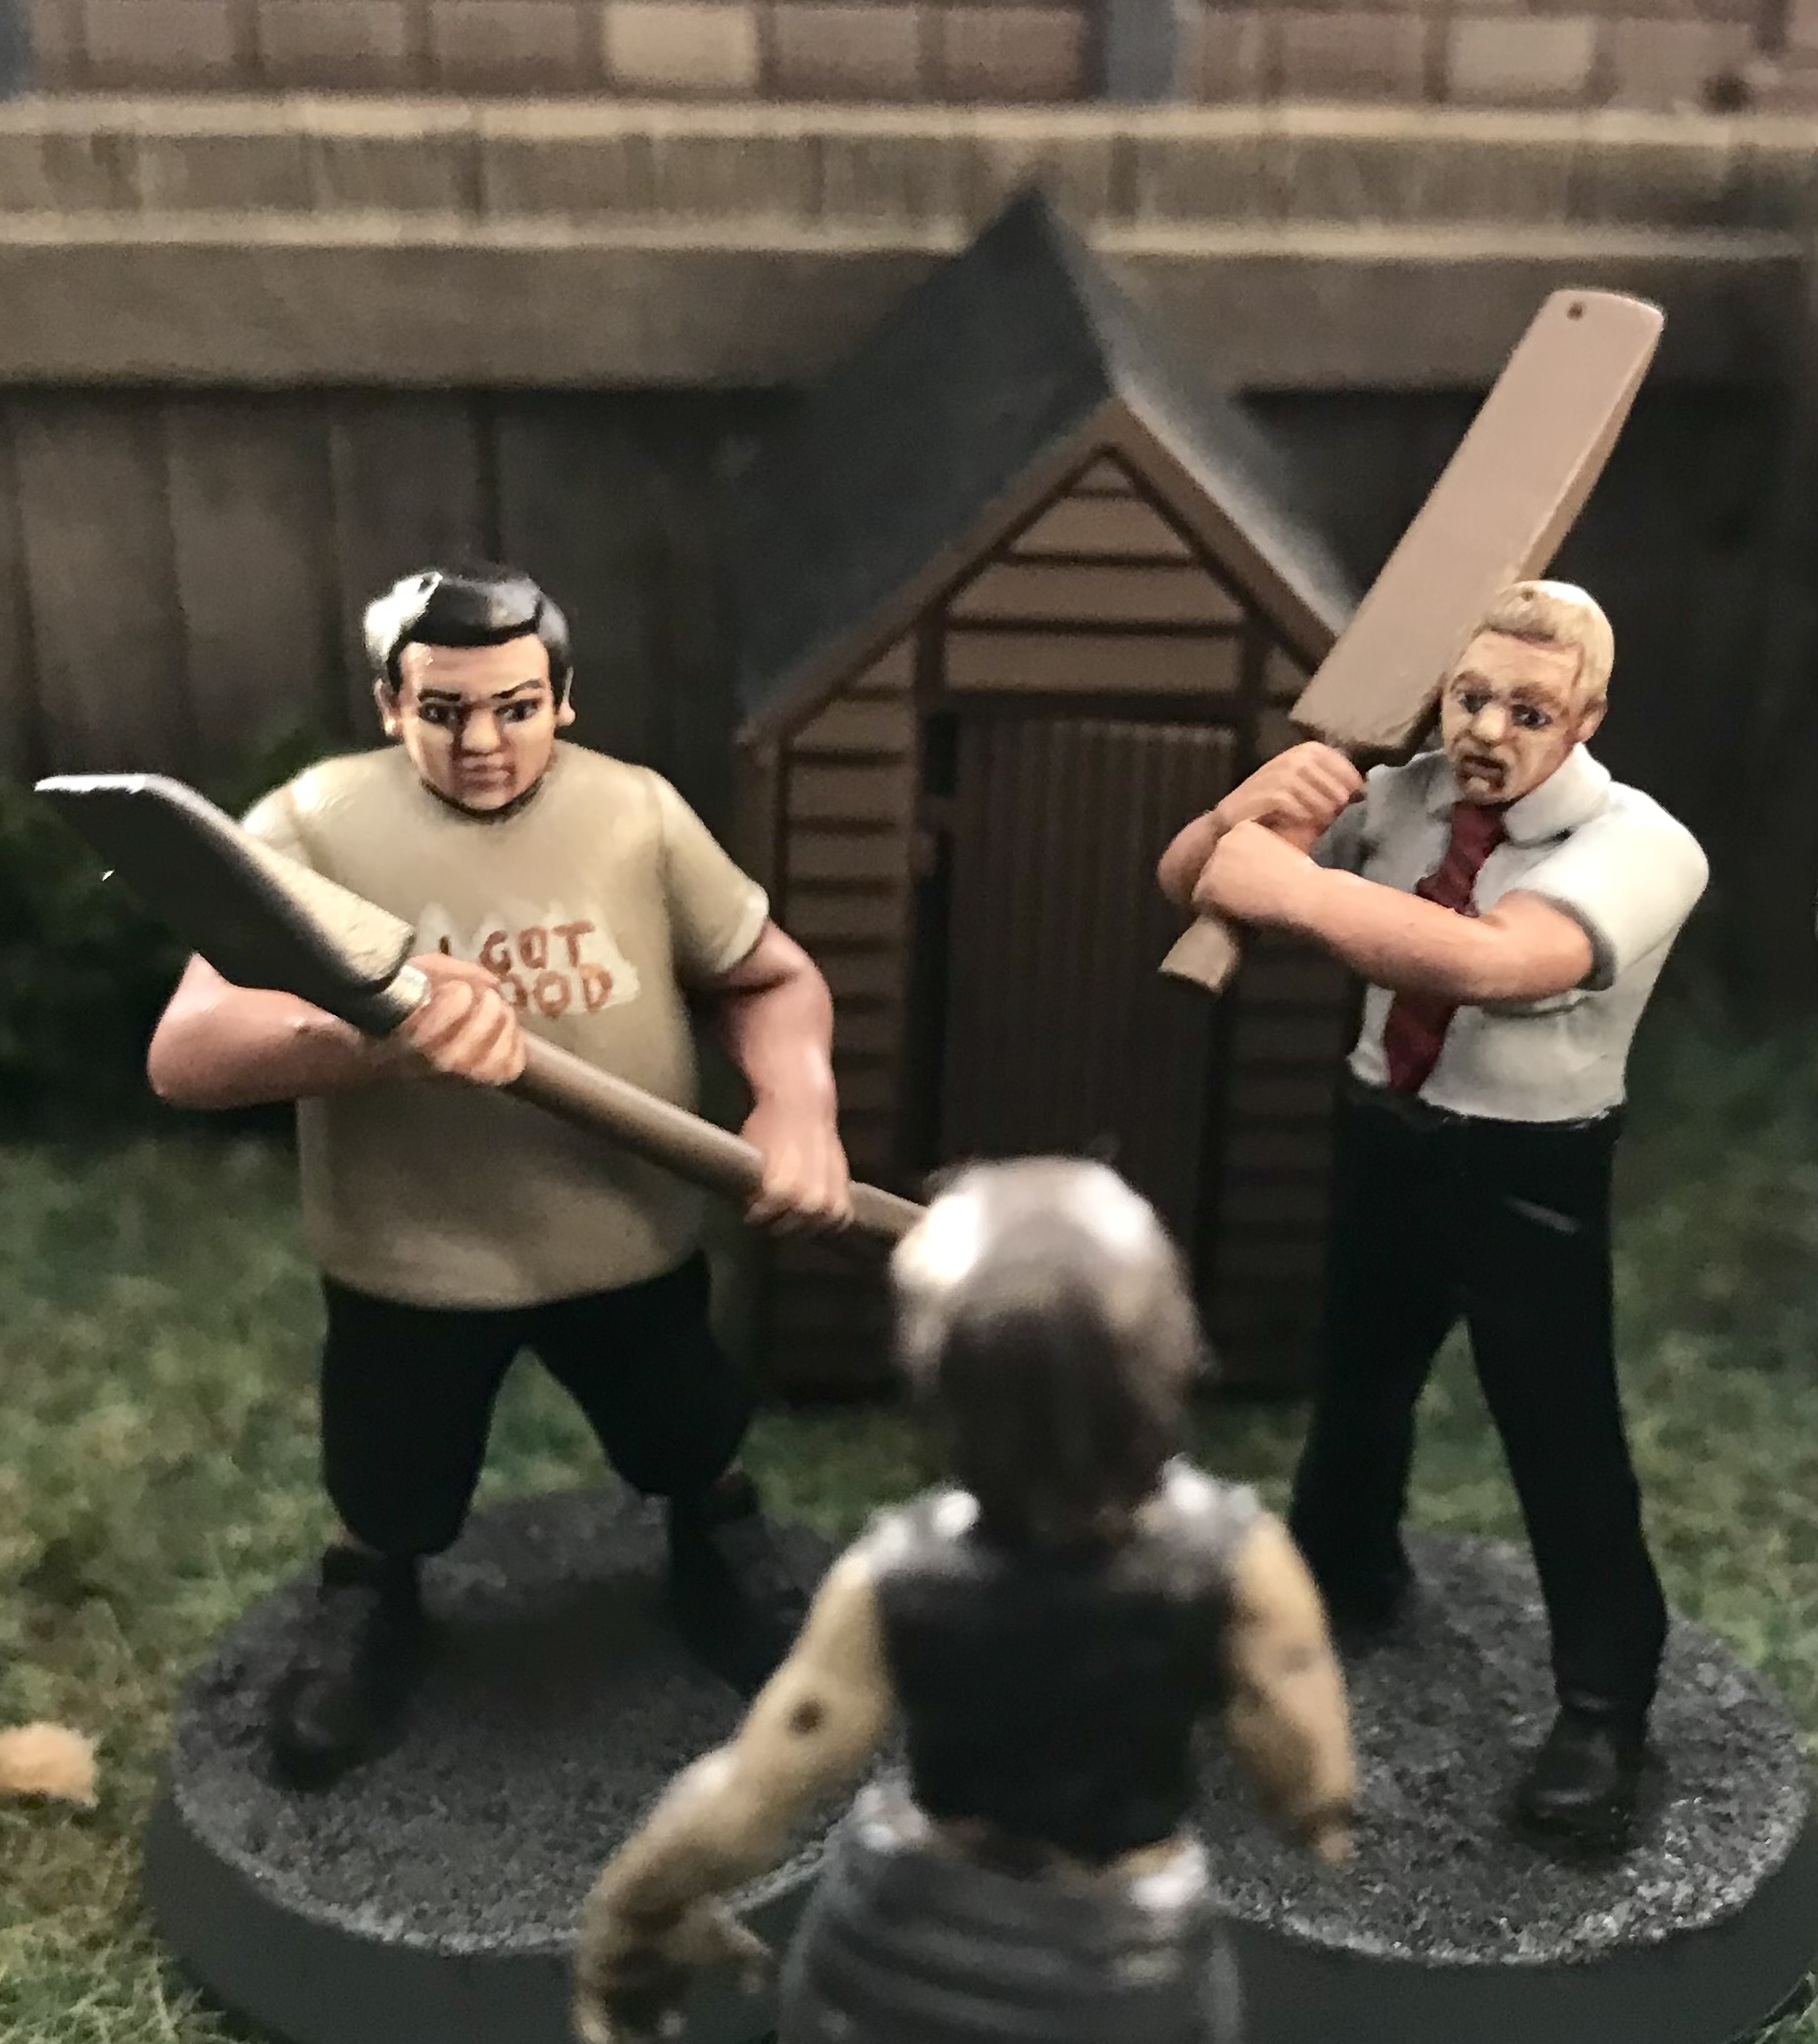
I couldnt help but feel the Walker eating a deer, looked like Shaun with his tie, so I painted him as a Walker Shaun. It works really well.
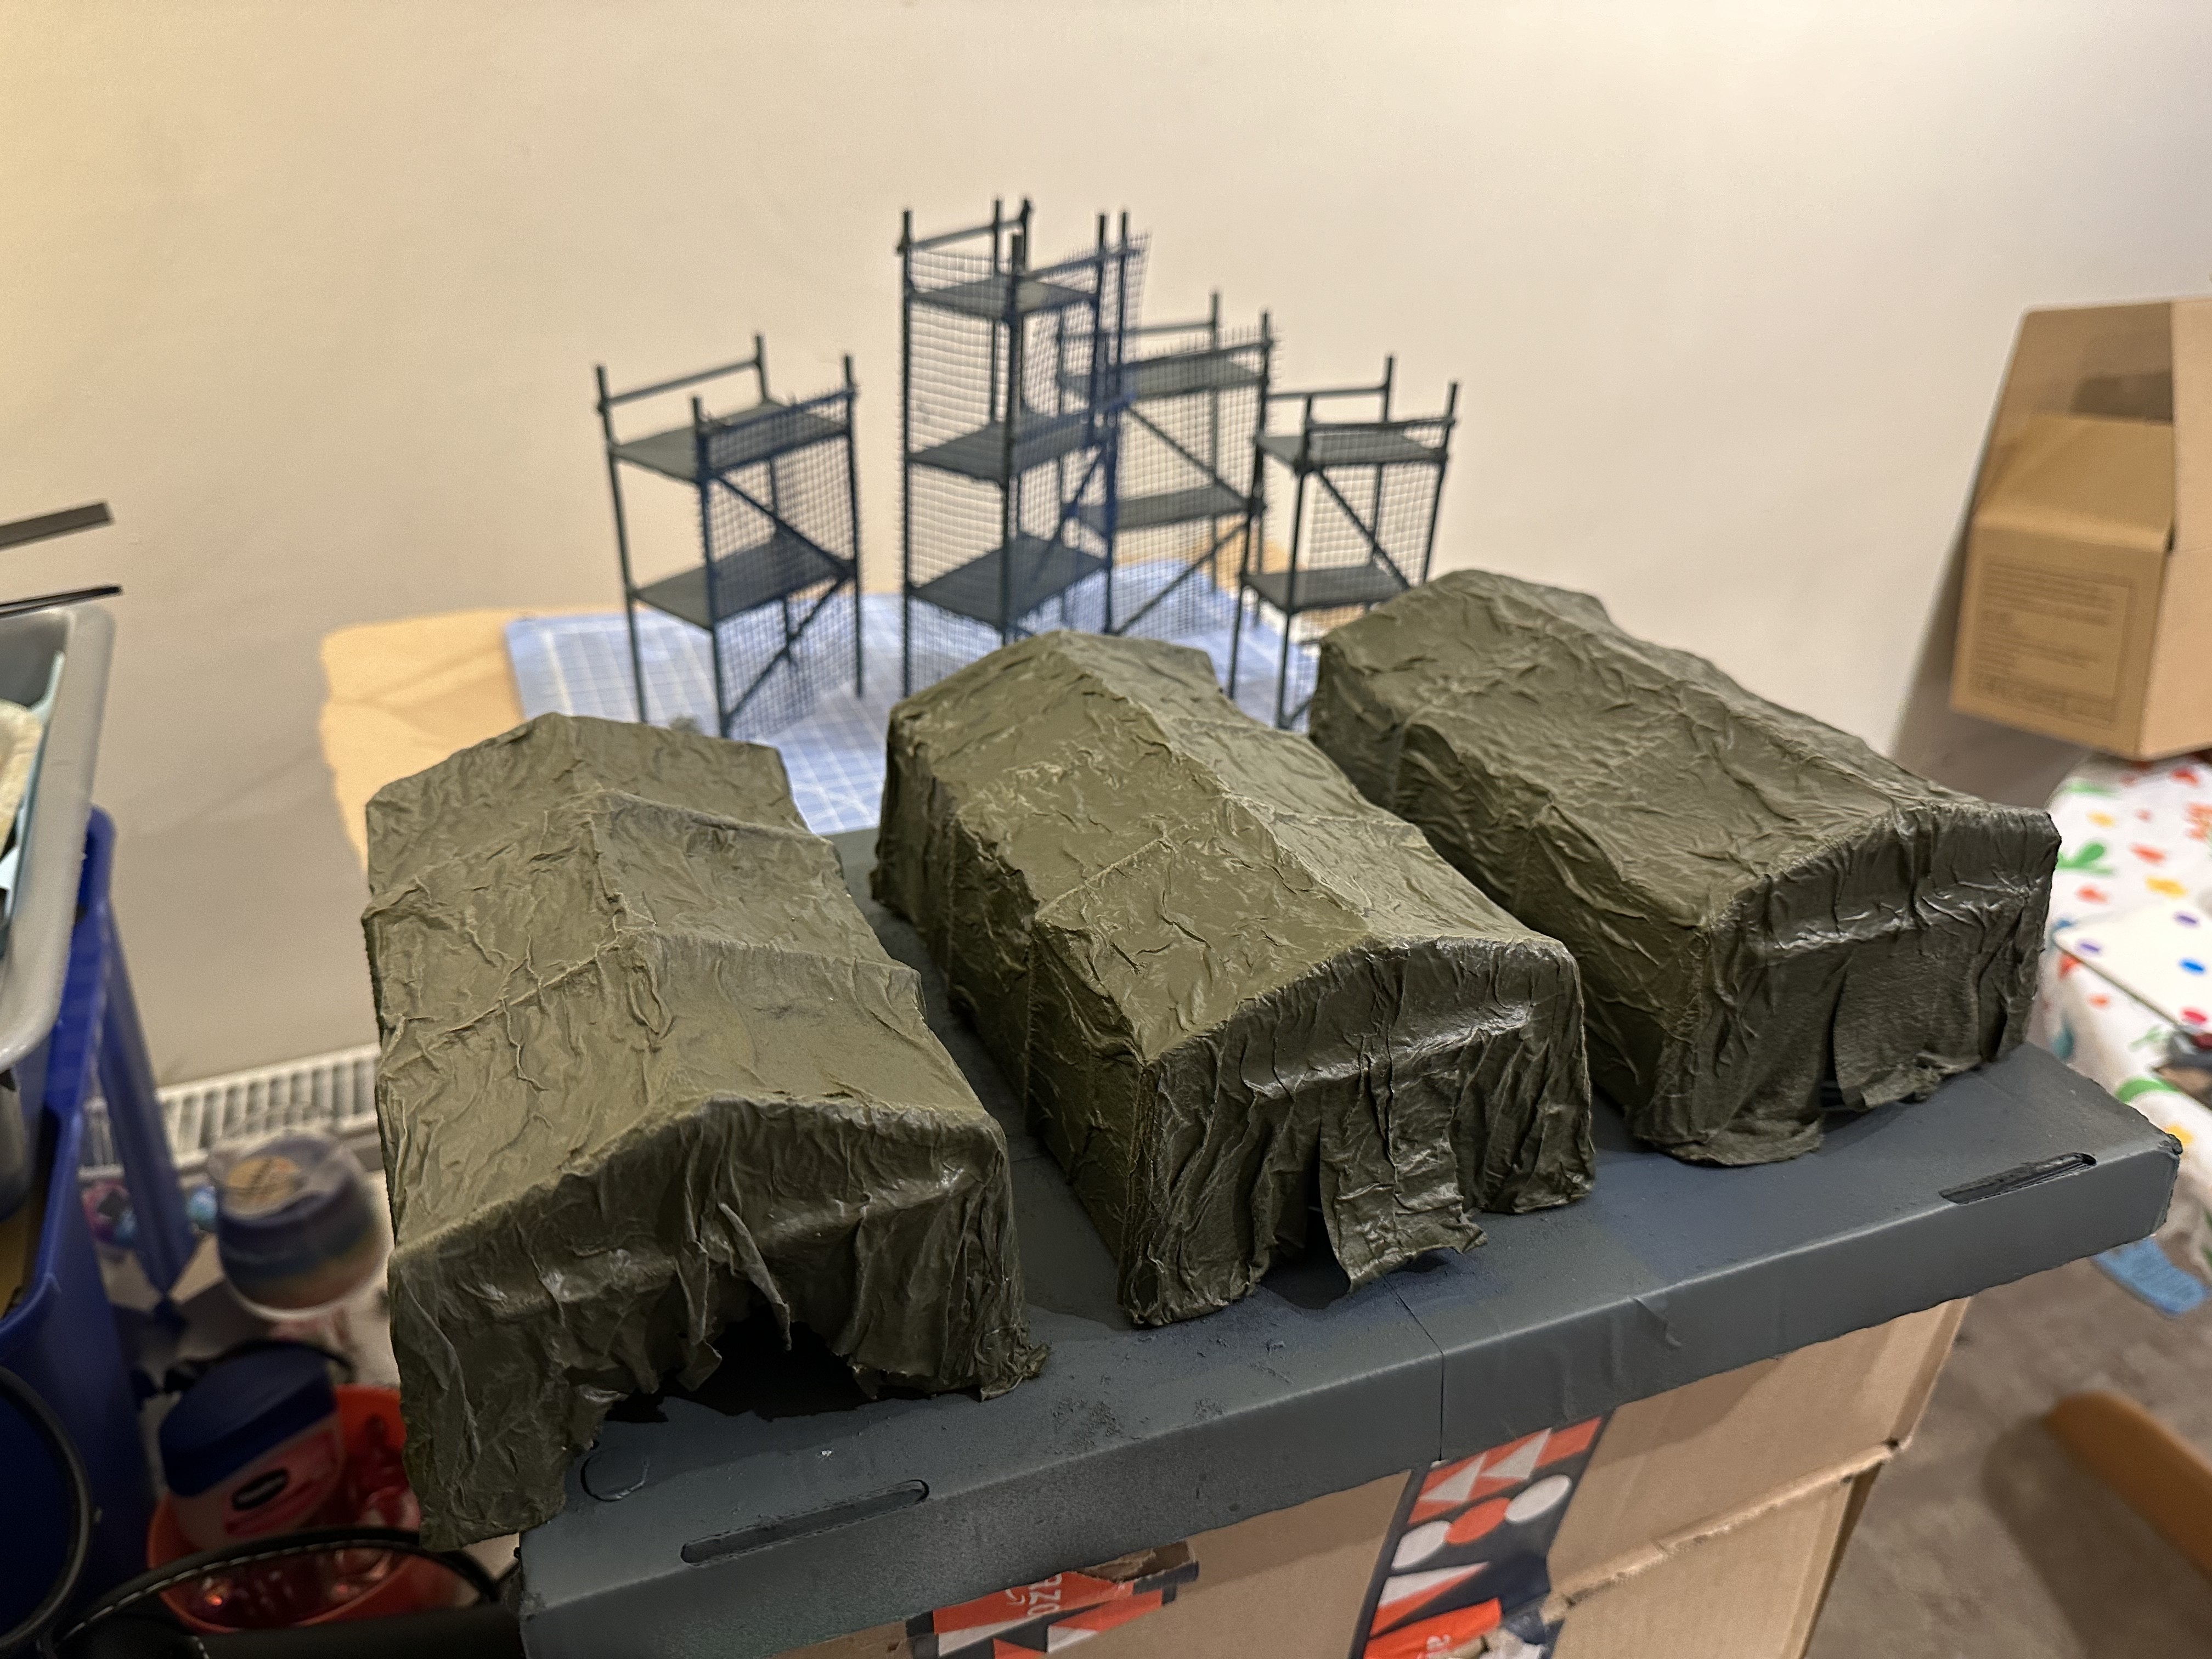
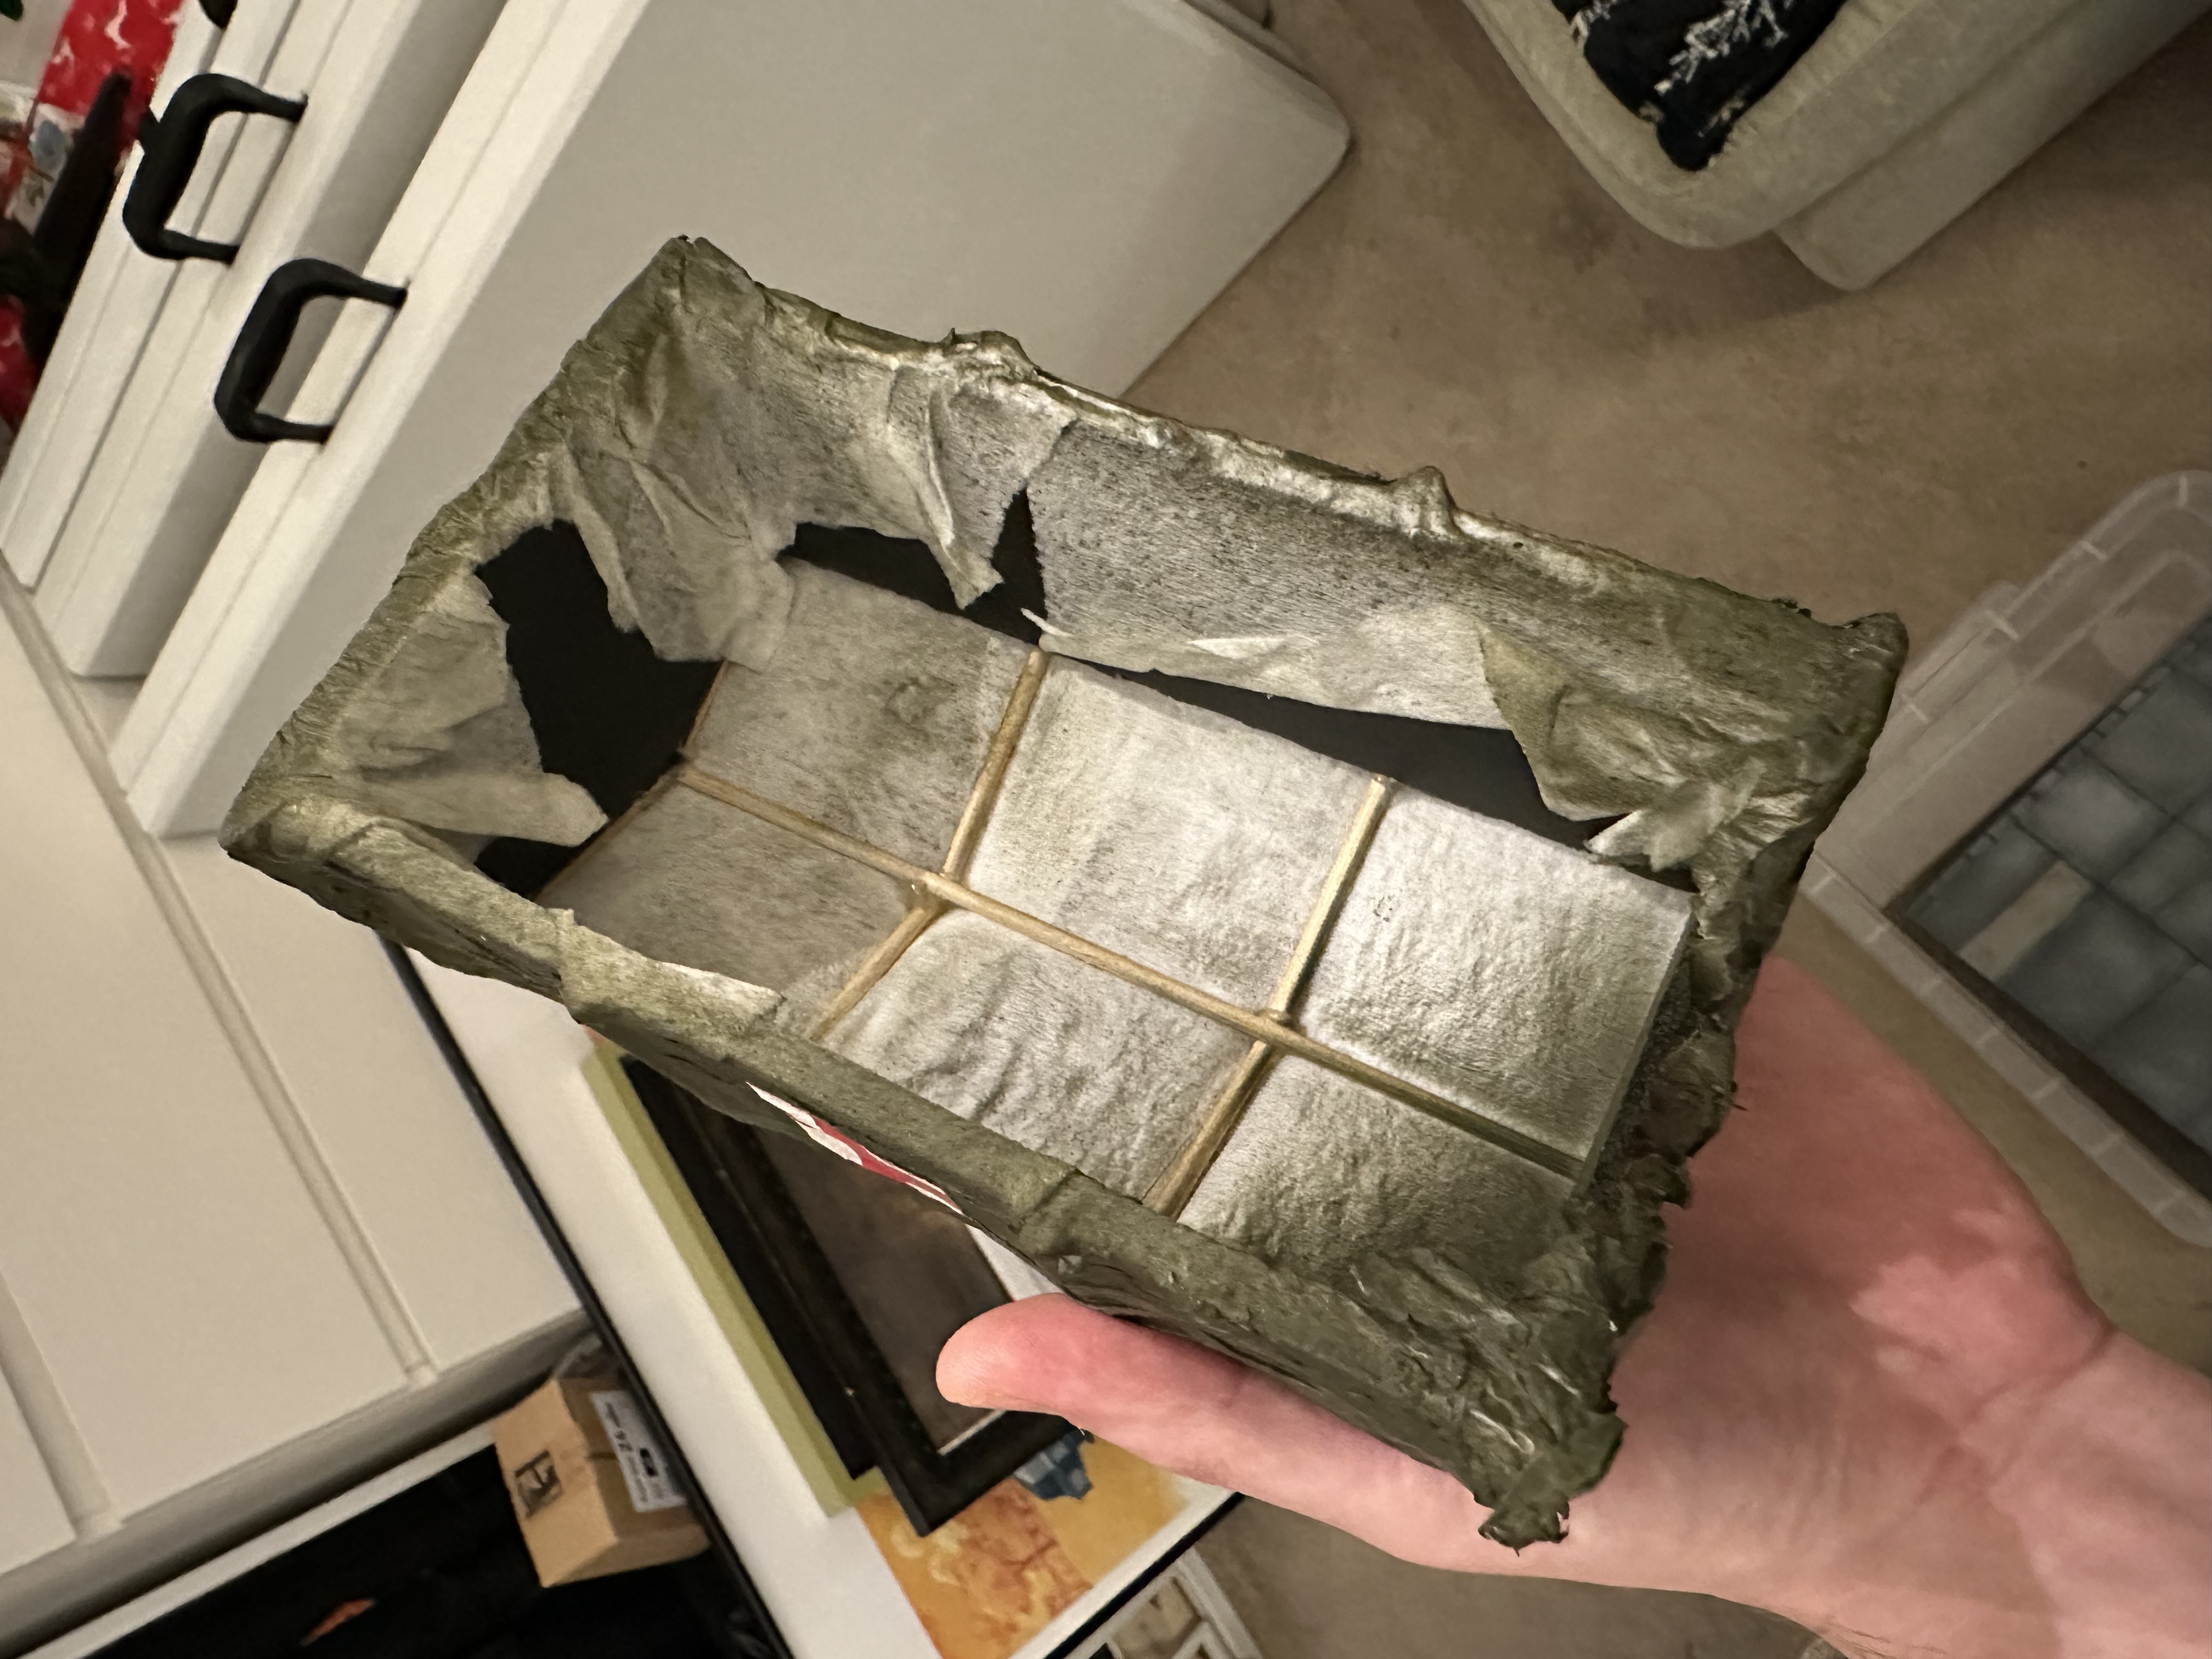
I hand made some military tents using BBQ sticks, foam card for a solid foundation and then wetwipes and hot glue. Sprays and washes did the rest and other than long drying times, easy to make.
I randomly decided to make scaffolding using scotch tape and BBQ stick and they came out really nicely. I like them for what was a 5 minute job.
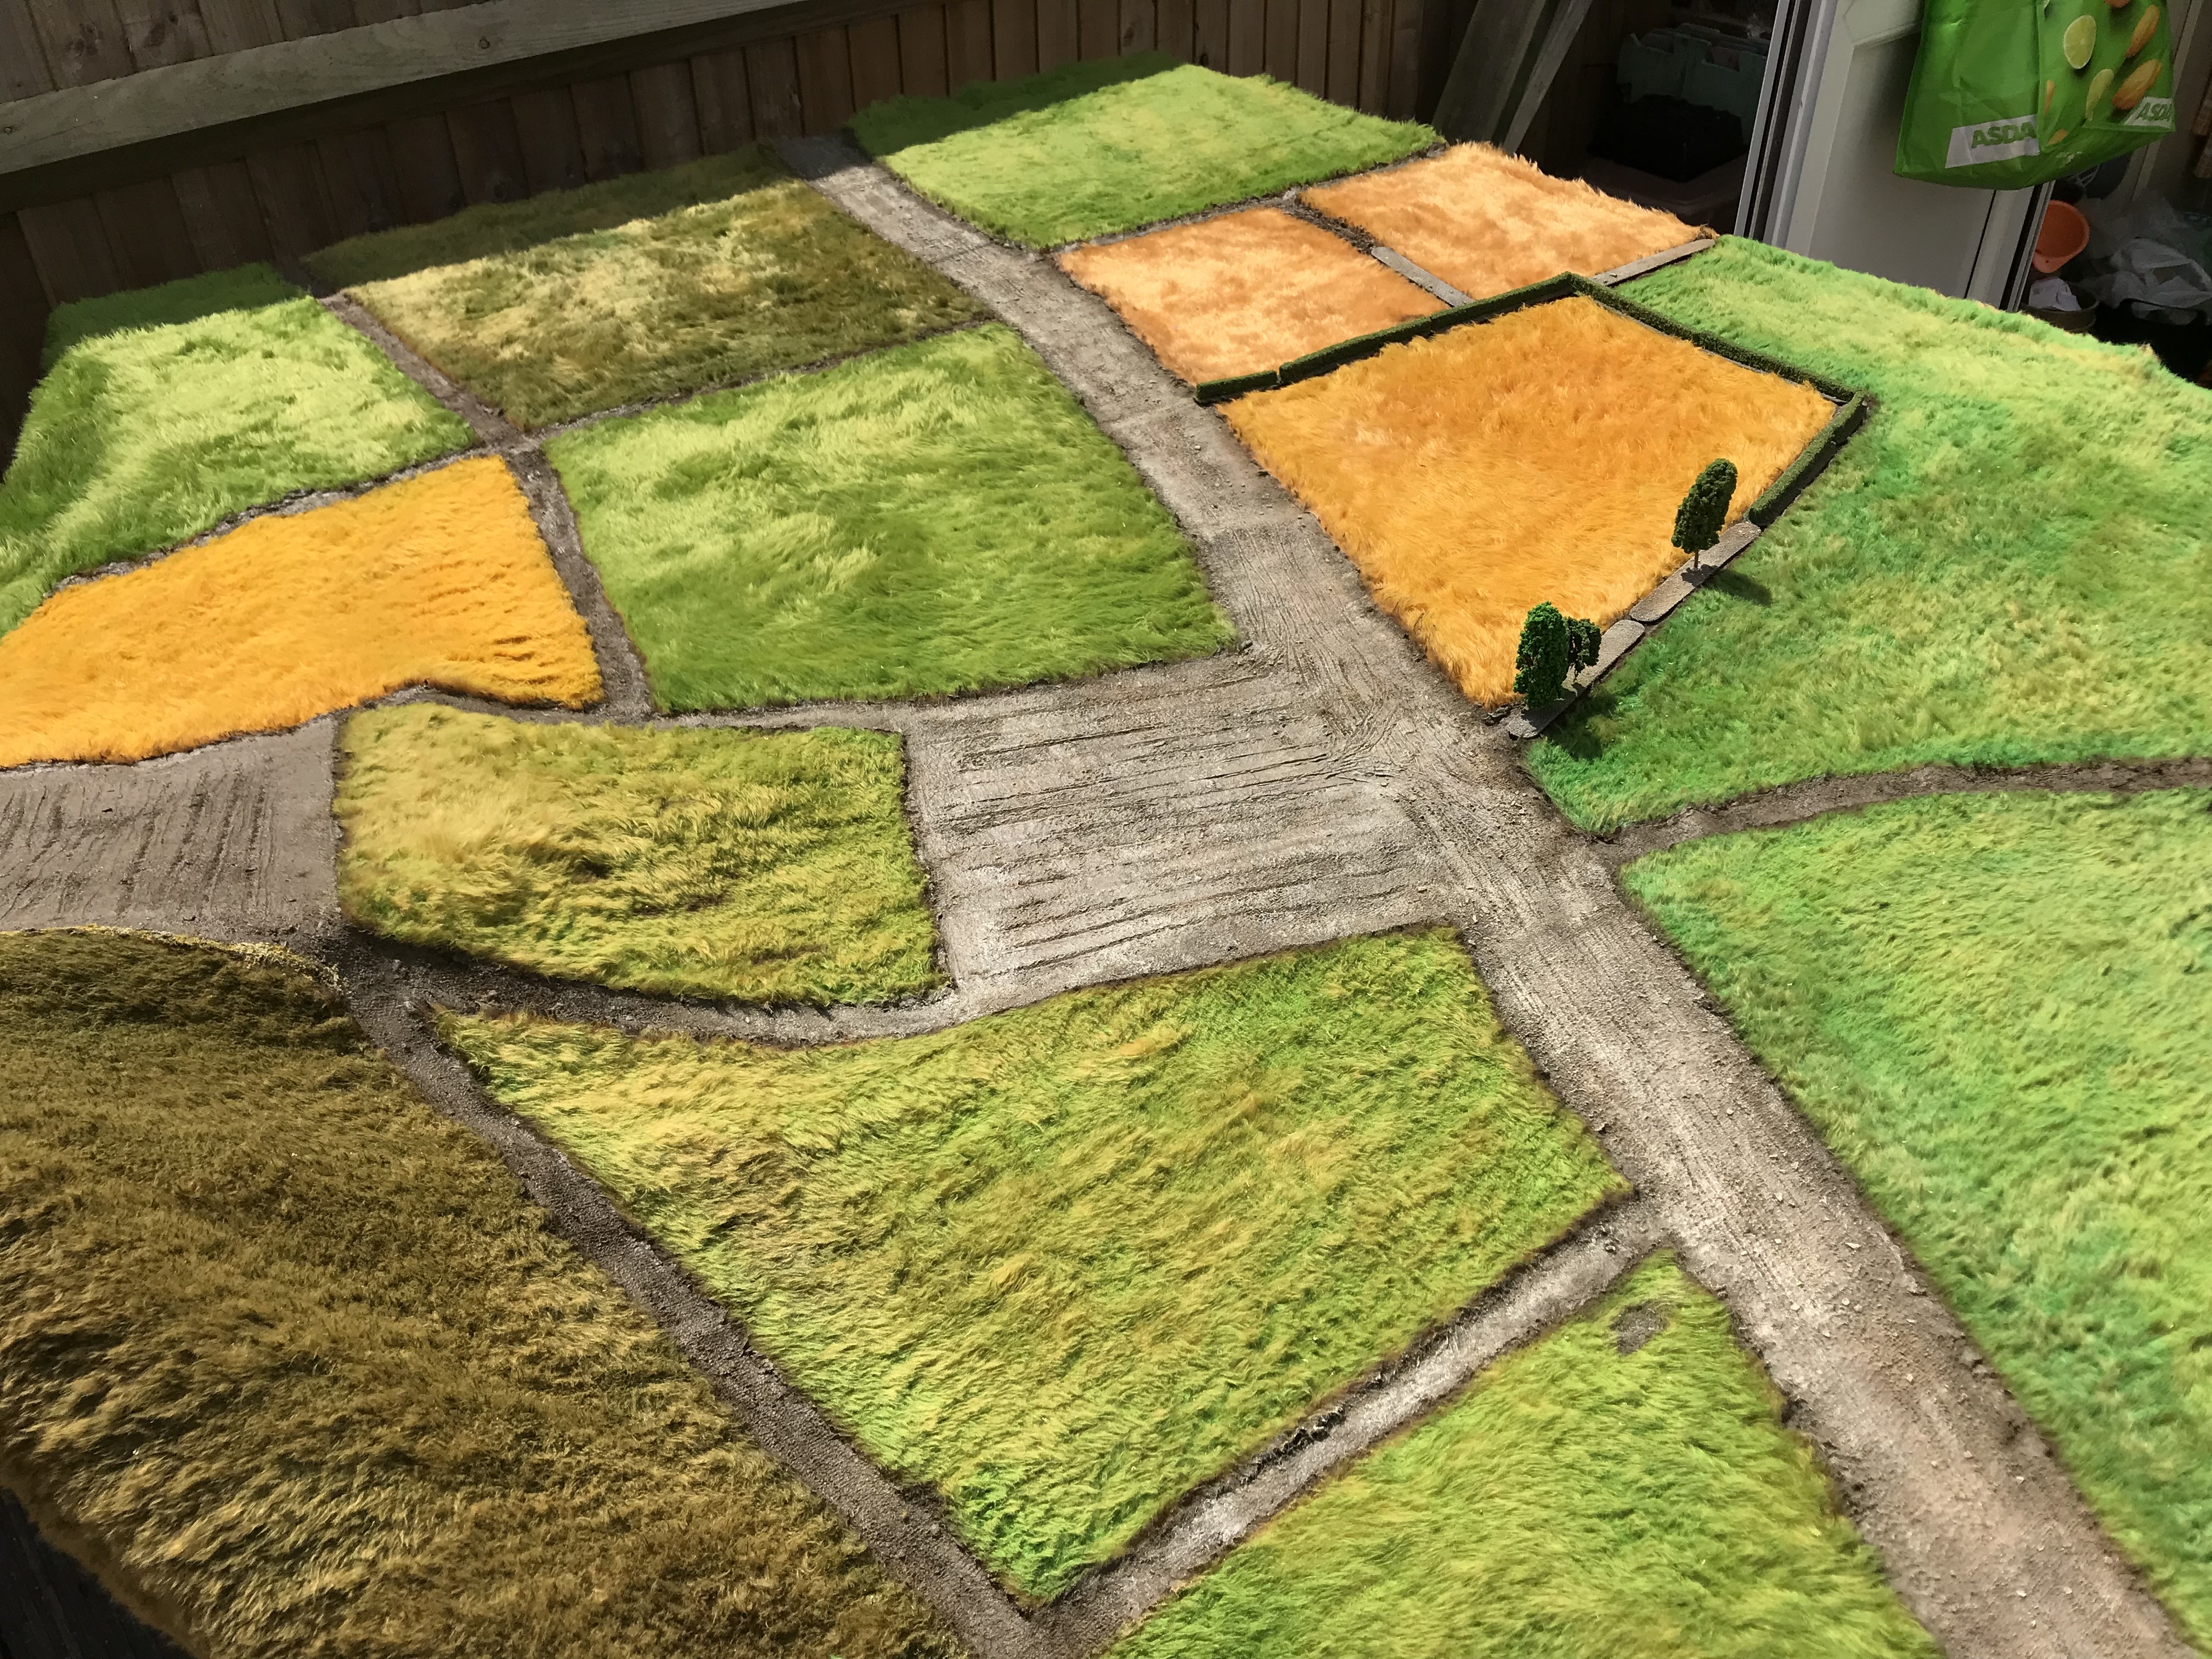
I put together road signs that had hidden messages or jokes for the players arriving. I made custom roads using the 3mm rubber and grey spray. I then made these more British by adding in road markings from a Sarrisa stencil, as I didn’t mind these being unique to a UK setting.
I made checkpoints with hanging Walkers, sandbags from air drying clay and memorial walls using hundreds and hundreds of tiny cut out pictures I put together from internet resources.
I then had an idea to make more street detritus separate from the rubbish bags. I didn’t want to glue leaves everywhere or discarded rubbish/posters, so using the same thick transparent card protected I used to make bases for the scatter, I just smothered them in mod podge and water and chucked leaves, tescos bags, posters, newspapers and other rubbish images shrunk to size. They came out perfectly and really helped blend with the table and make the streets look even more deserted. What a win.
Using the slap chop technique I painted a whole bunch of characters from the Walking Dead Game and they looked great even with minimal work.
I also had friend 3D print me some custom models for the game including my partner and kids. They weren’t to feature in the game, but they wanted minis having got jealous of my model.
A helping delivery came in the form of a backed kickstarter for AMC Walking Dead RPG from Free Leagues. This couldn’t have arrived at a better time and with the early PDFs and then the physical copy. It gave me the chance in what little spare time I had to write a blend of RPG and Walking Dead All out War.

At that point I had 10 confirmed as coming to the event.
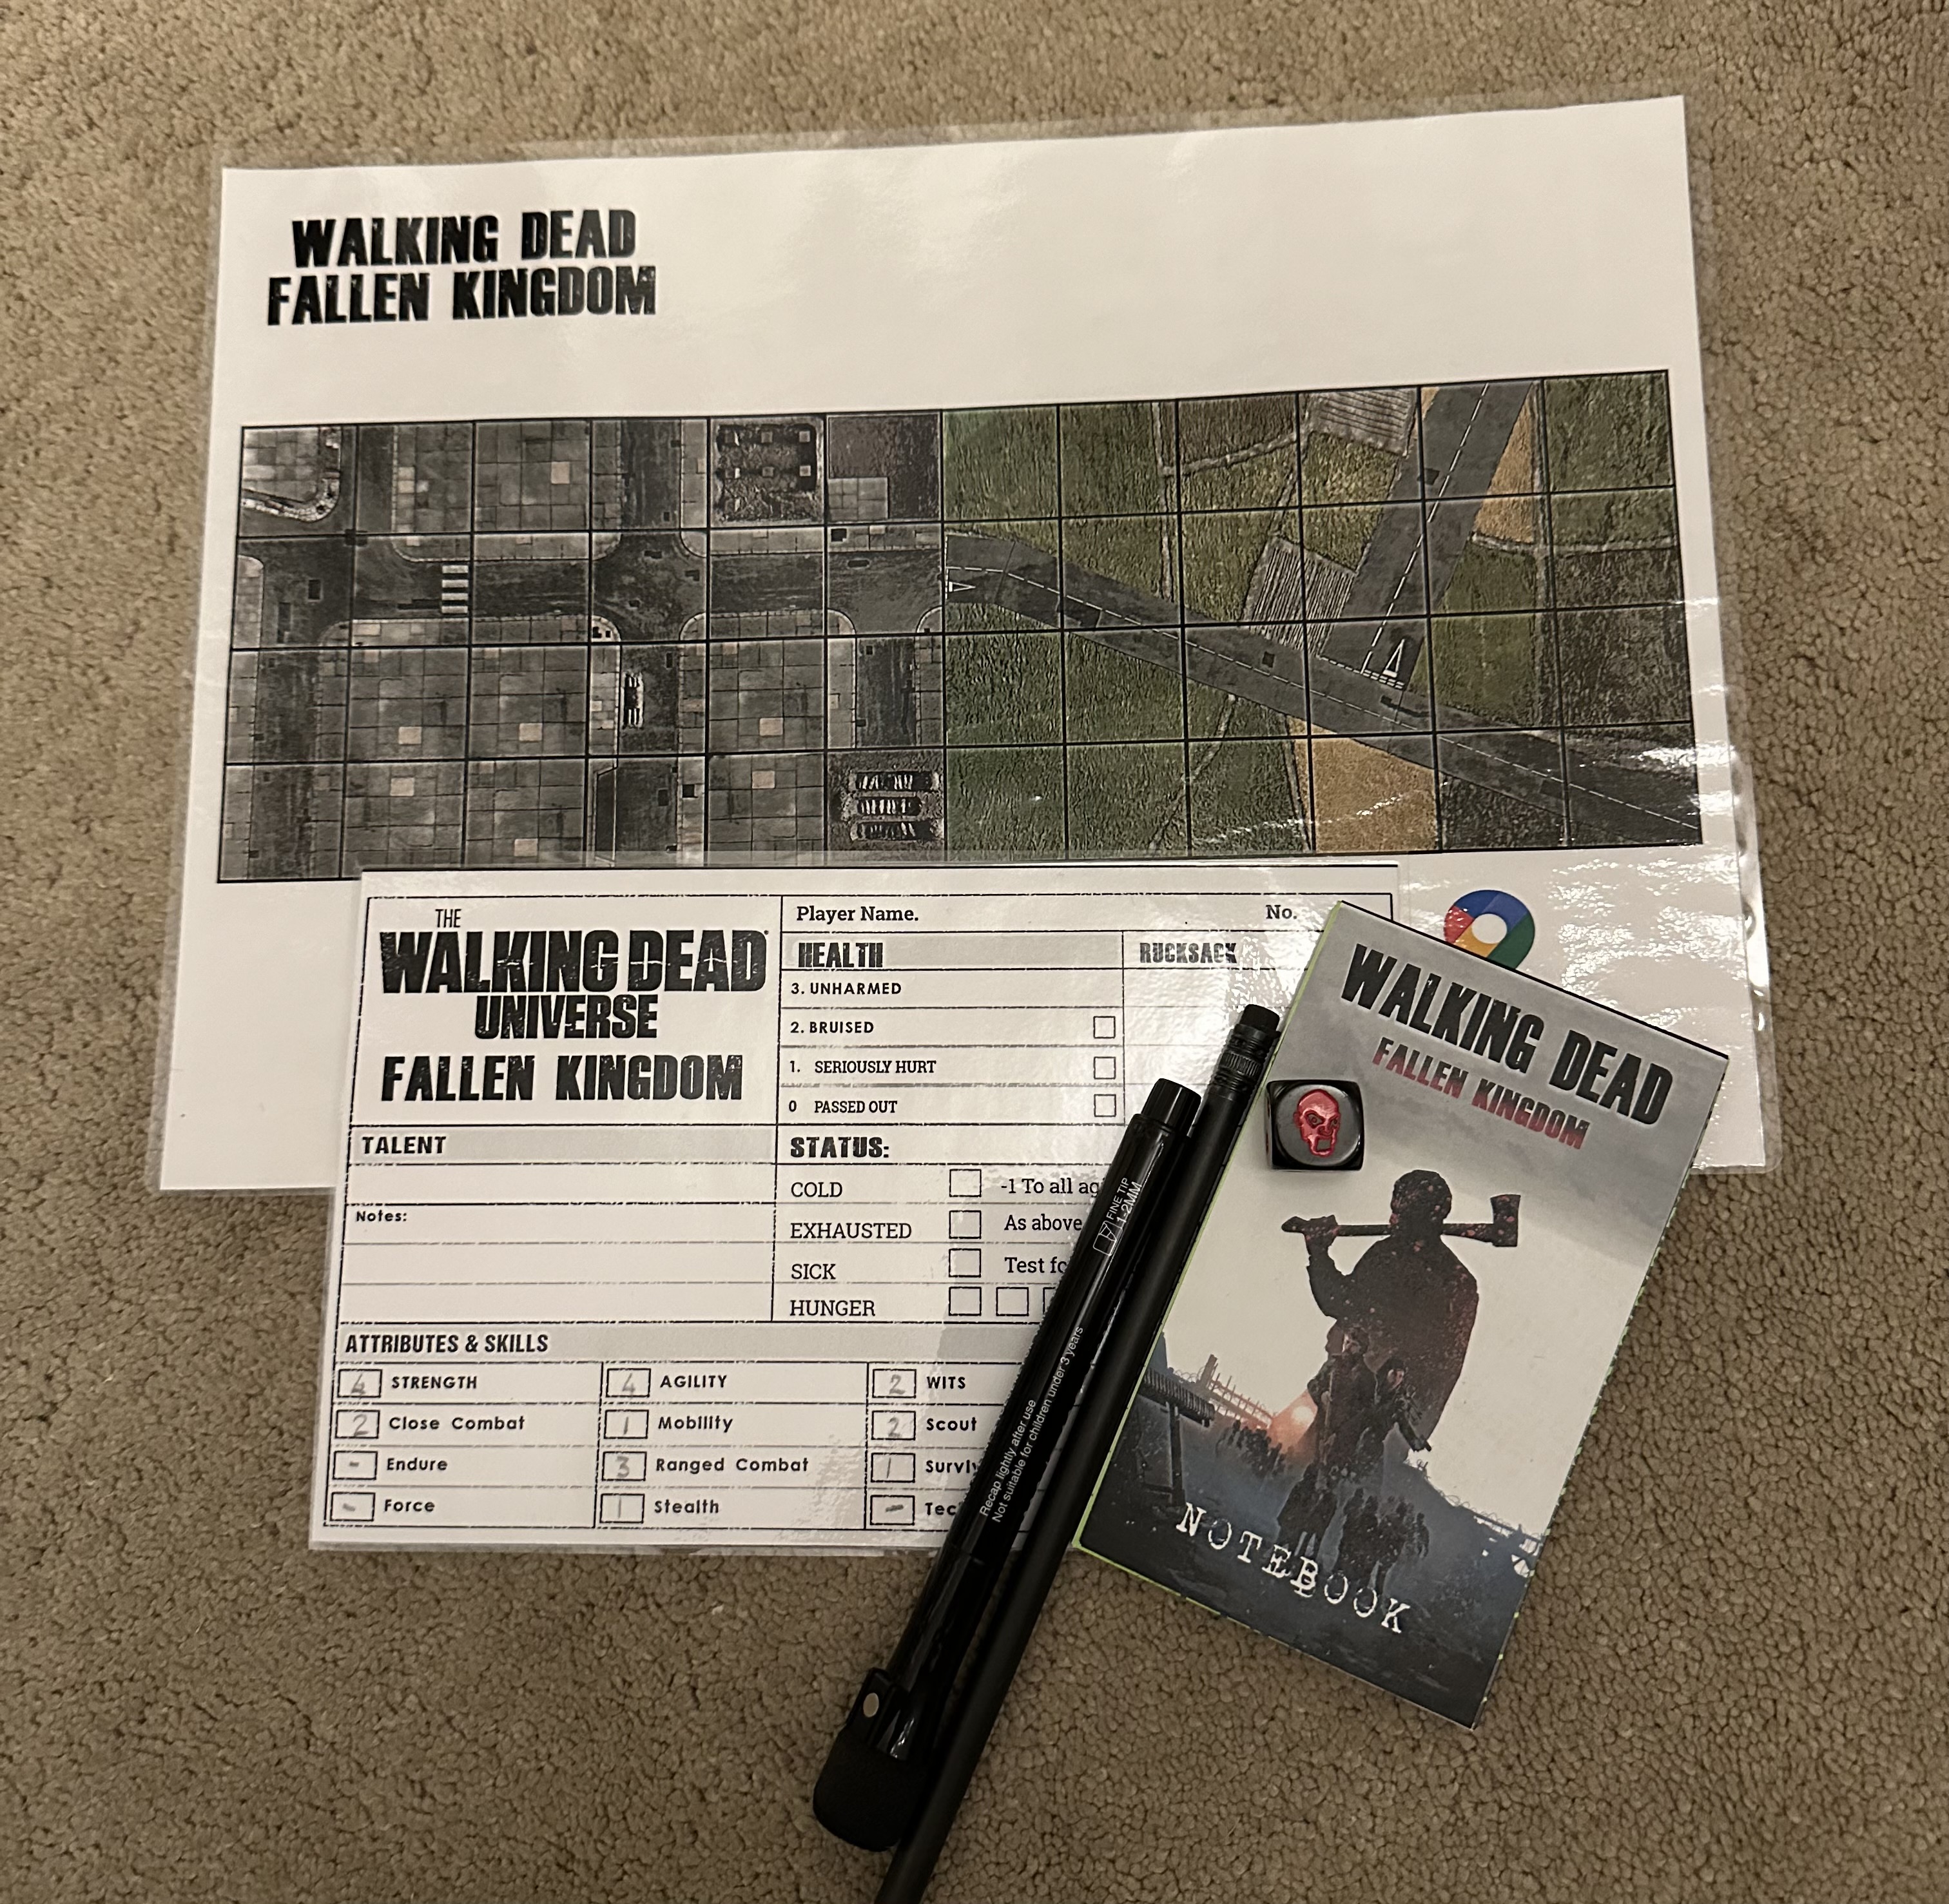
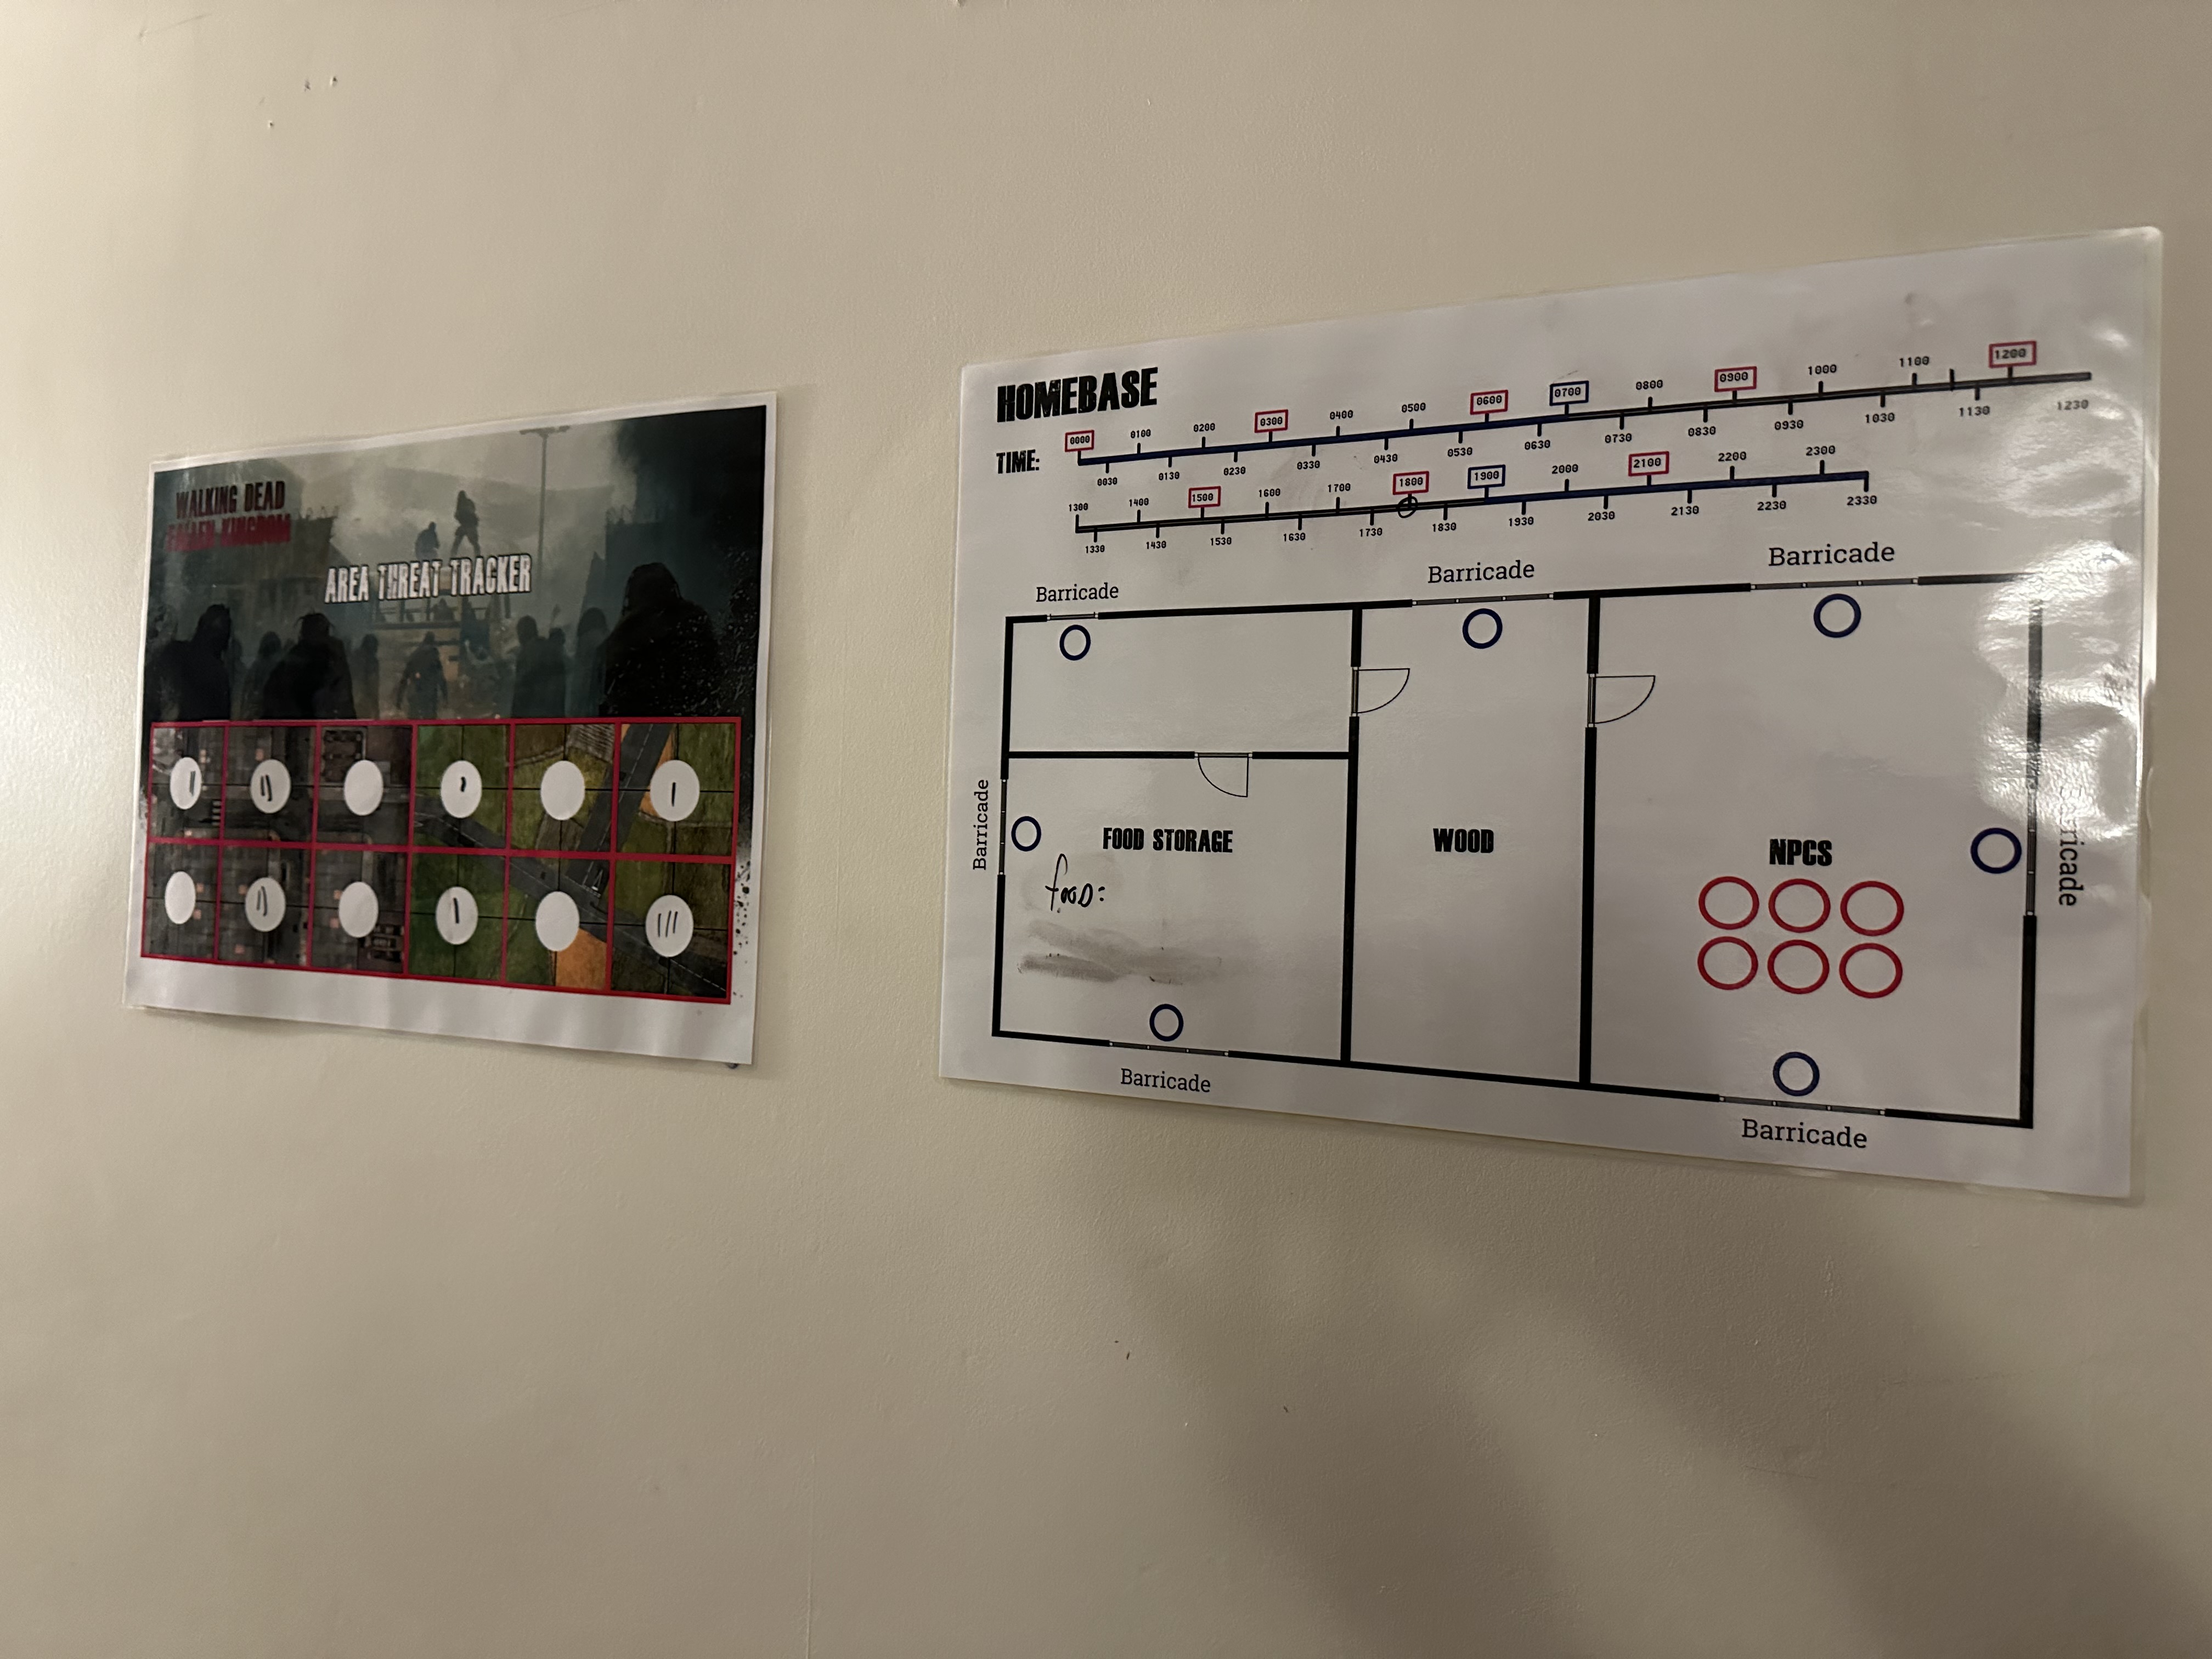
So to make the game my own, I wrote the character cards to represent each of my colleagues. I arranged and sorted all the possible cards from AOW that may be found by the players. I put together note books, maps, custom threat trackers and streamlined table top rule for the game.
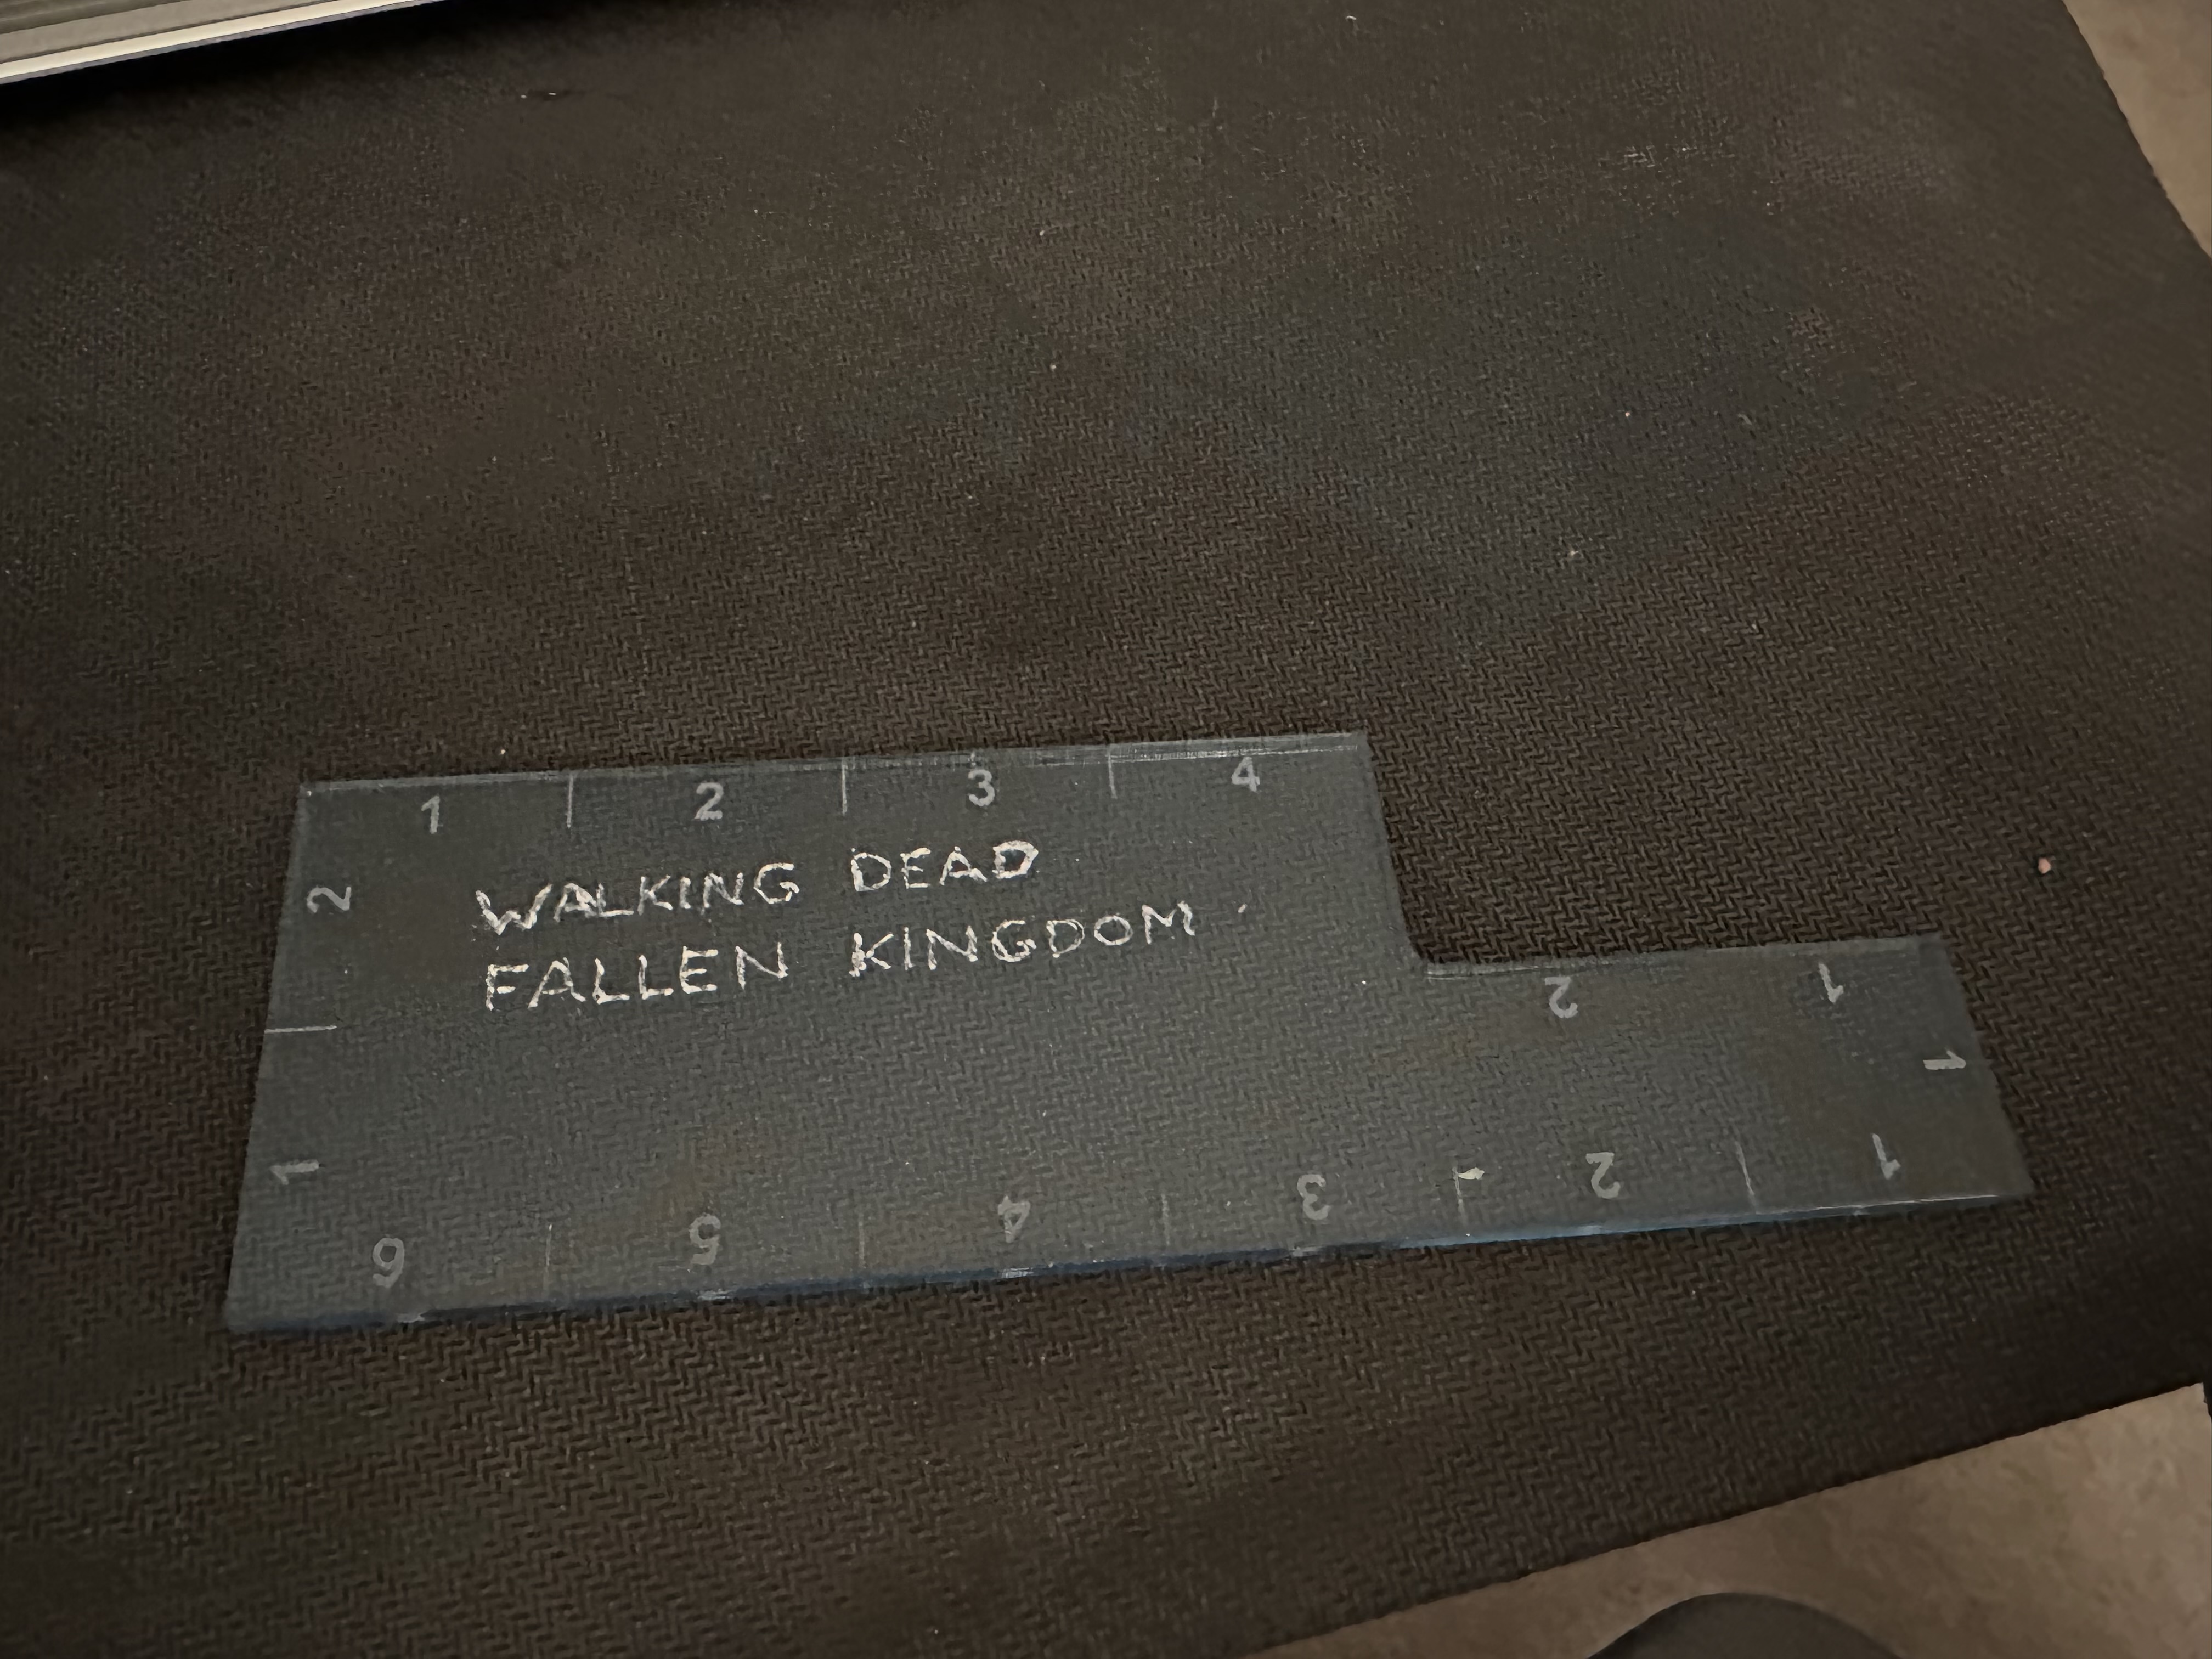
I even went as far as to call the event The Fallen Kingdom as it was to be set in the UK. This included providing the group with welcome packs that included pencils, note books, a zombicide dice for stress and measuring widgets that I engraved with FALLEN KINGDOM. I used art work from the RPG to flesh it out and make it unique to my game. I hand made some player cards and laminated the stats for the players.
I then made some bitten cards, trying to emulate the design of the AOW cards, which was tough but they looked great. It meant players had a chance to survive a successful bite if they fail in AOW combat.
Finally I had the idea to explore interiors on maps rather than physically in game. As many of the interiors were not complete yet and seeing as terrain models are quite small, I wanted players to have the chance to break into houses or shops and then explore whats inside.
So using a free interior designer program, I made colour floorplans, added a 1” grid via photoshop and printed in A3 followed by lamination… boom explorable interiors with a dry wipe surface.
Not to toot my own horn but, toot toot. I thought it was genius.
The idea of the game and gameplay would be for my colleagues to work together as a team to protect a group of civilians months after the outbreak. They were housed in a farm house at one end of the map and would need to explore the land during the winter. They had carry limits, effects from the cold and a time limit to find food and bring it back to the civilians and eat themselves or face becoming exhausted or sick.
I used the stats from the RPG to help with narrative elements and searching. When combat takes place it focuses on the area and turns into a small version of AOW using its dice mechanics and weapon/item cards.
I had written search charts for all the present locations based on a success system, put together story arcs with positive and negative outcome and random encounter tables.
This was stressful and exhausting, but when I finished painting the last model and laminated the last player card, I was done with two days to go.


What a whirlwind. An epic marathon rushed at the last minute. My biggest panic was the Walkers as I follow a blood technique from the Walking Dead AOW FB group, that is the best looking technique for blood and drying blood that I had ever seen. Issue is that it’s a long process involving numerous layering. I didn’t think I would have the time to do it and then matt varnish, but I did and it worker. I didn’t have as much detail as I wanted on all the models, but it matters not as I can go back in with detail over the varnish and just varnish again.
I had added little details like leaves glued to everything to represent the passing of time and abandonment. The last vehicles such as the Royal Mail truck arrived and received a quick wash and leaves.
I was happy to call it all ready.
It then took me two house to set it up the night before, as the tables were bigger than expected, the height difference between the 1” high tiles proved a challenge to meet with the grass mat. I knew it would and I knew using my terrain I made for blood and plunder based on the Beast of War VLOG would act as perfect undulations and hills to go under the flexible faux fur mat. Once done the city and rural area blended together perfectly.
With all the building, cars and scatter in place, I took a step back and marvelled in my creation. My partner even teared up as she was proud of what I had achieved. She wasn’t happy that I had just redesigned our house and was kicking her and the kids out so I could play toy soldiers with other adult man children, but the beauty of the table in all its splendour brough a tear to her eye.
Cornetto and the Fallen Kingdom was done.
Can I truly call it complete. No of course not. The project is done, but it is also never done. I will always want to add more and I want to do more tiles and locations to keep it interchangeable and fresh. More house more shops, more locations. I will likely never stop, so I cant call this complete as I will no doubt add more. However my plan for Cornetto and building a terrain scape ready to represent Shaun of the Dead in the All Out War universe. This was done.
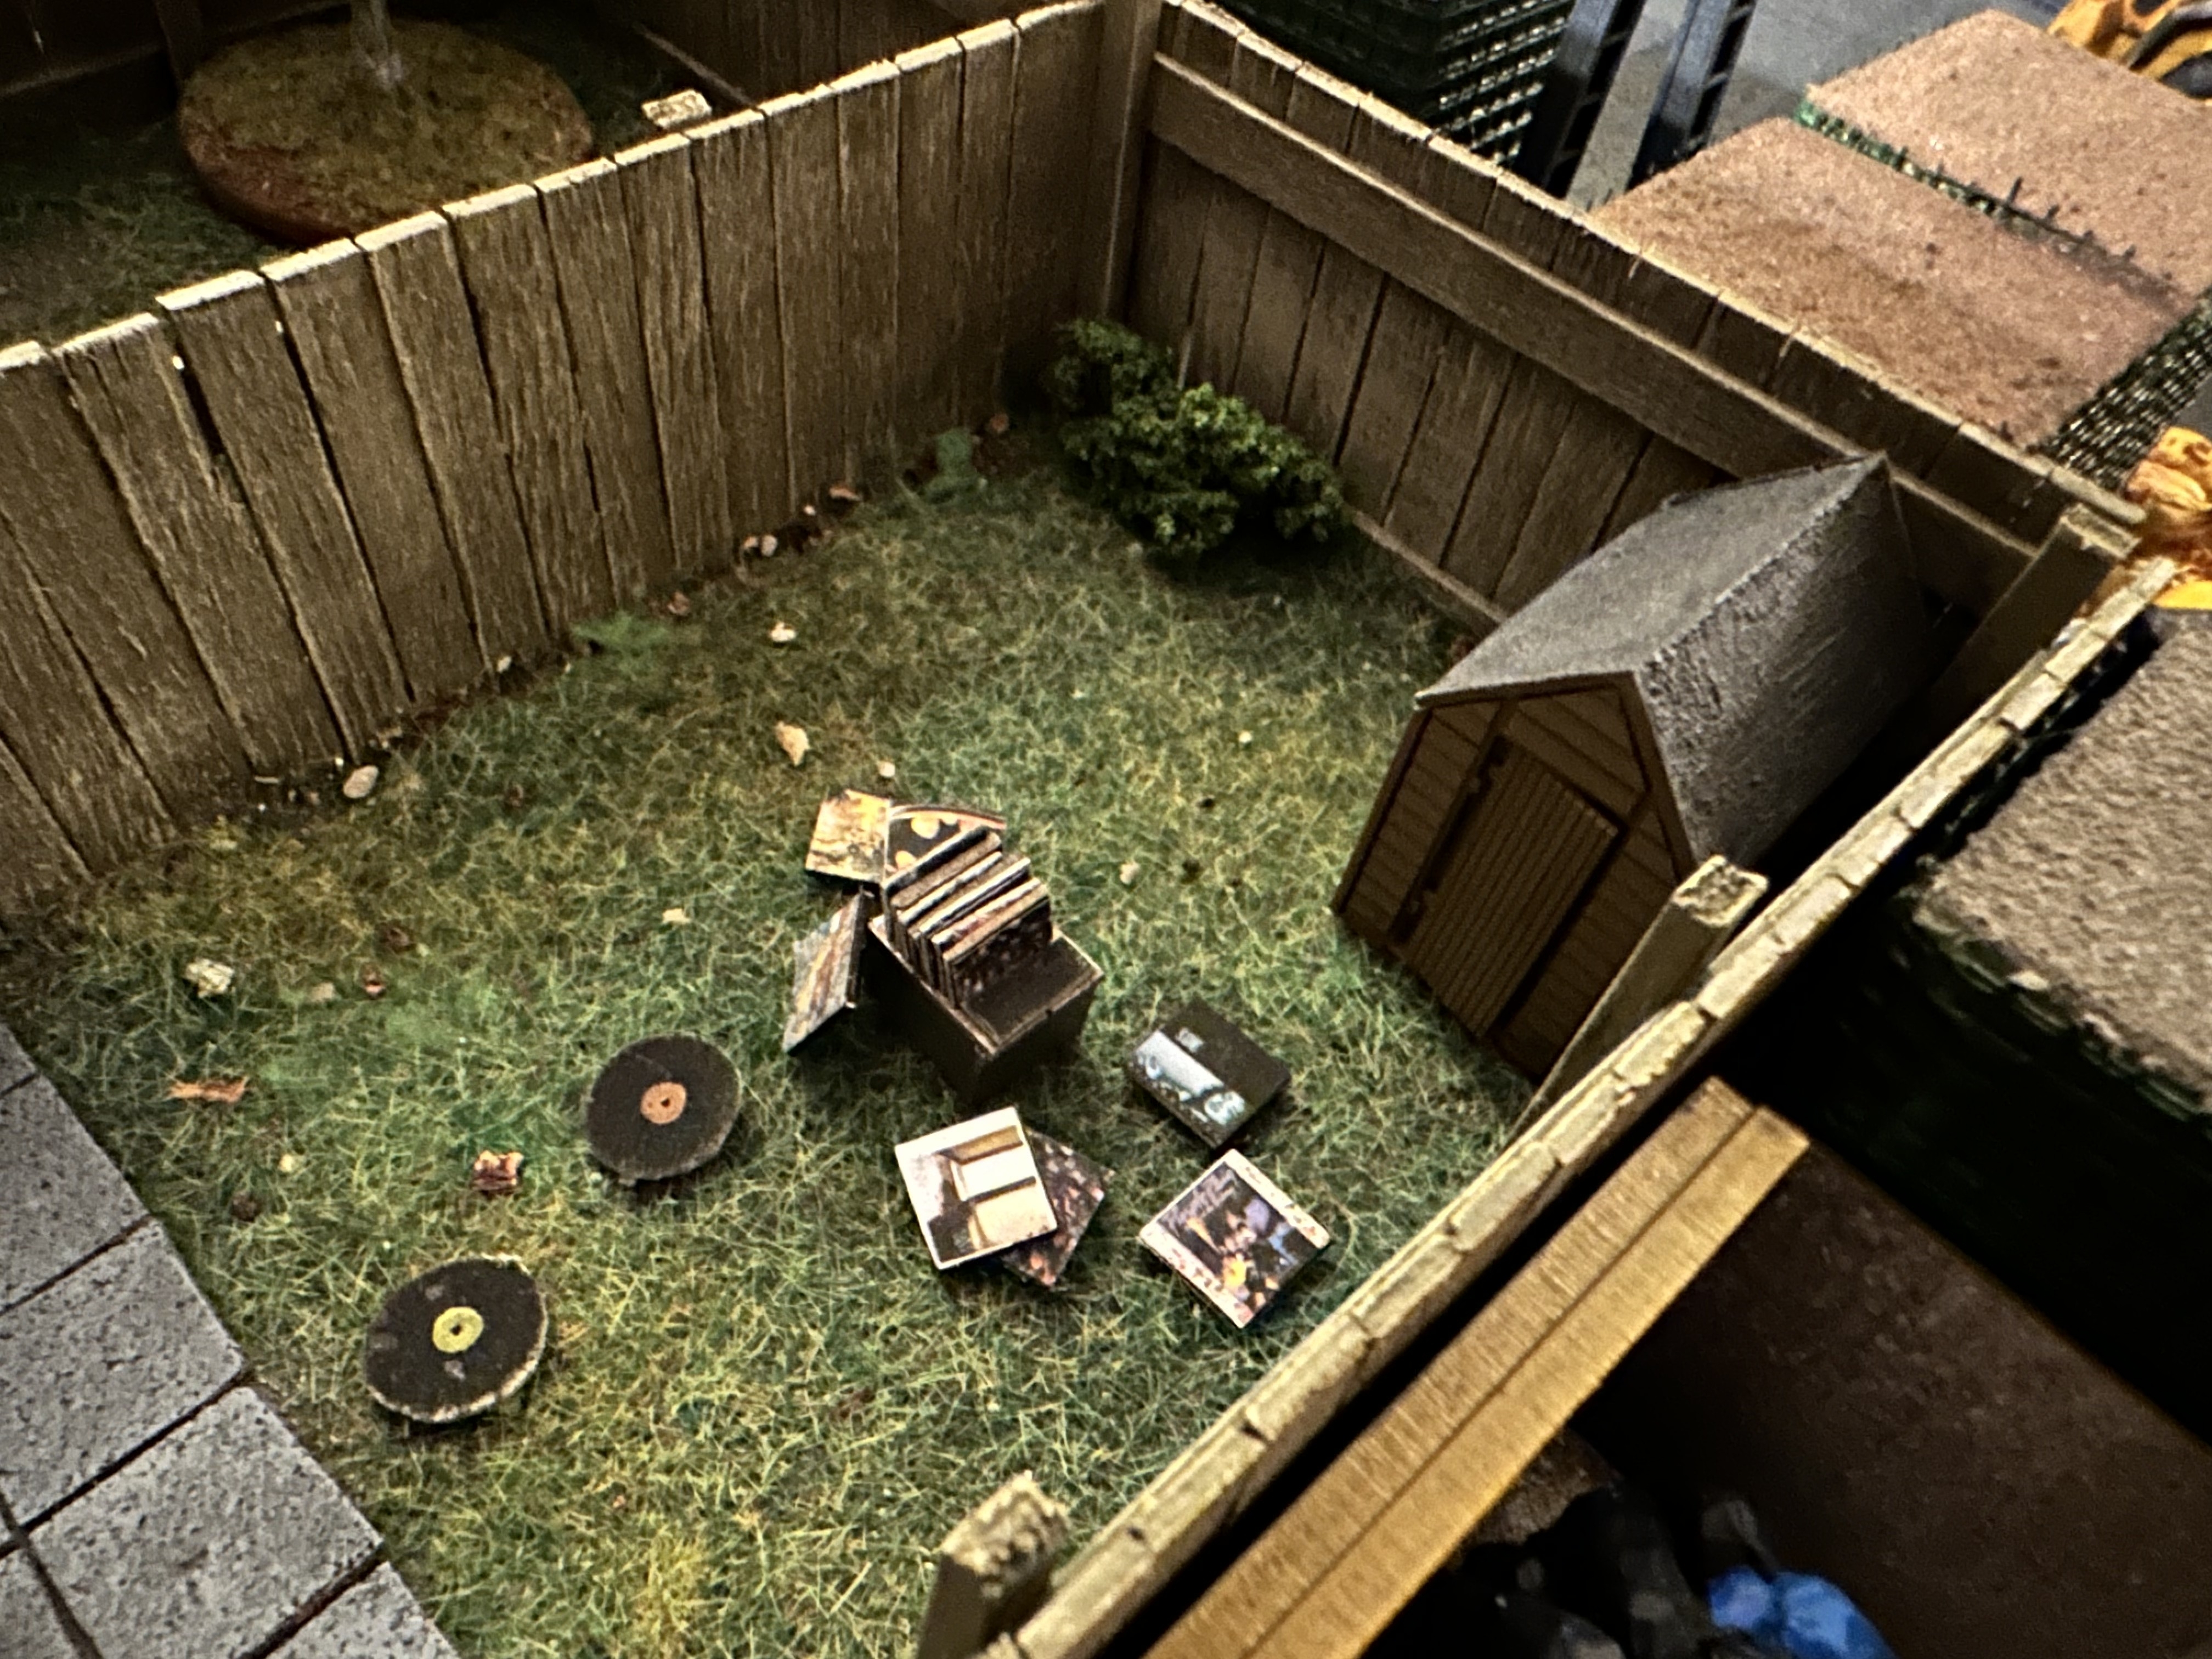
One of my final touches, was to add more to Shauns garden, but finding out what records they threw at the zombies and then scatter the albums and covers around my tiny version of Shauns garden.
Voila.
 "Sade", " Yeah but that's Liz's", "Yeah but she did dump you"

![Games Workshop Kick Off Grot Week For Warhammer 40,000 [Updated]](https://images.beastsofwar.com/2026/04/grot-new-40k-news-cover-600-338.jpg)