


75th Anniversary of the Battle of Monte Cassino and Northern Italy (Gaming The Battles)


Recommendations: 781
About the Project
BEST READ IN REVERSE ORDER! The project charts and recreates the battles of Monte Cassino, fought between January 1944 to May 1944, and the onward Allied push through Northern Italy.
Related Game: Flames of War: The World War II Miniatures Game
Related Company: Battlefront Miniatures
Related Genre: Historical
This Project is Active
Battle Report - Operation Fischfang (Turns 3 and 4)
Best read in reverse order.
Turn 3
FGP fails to unpin and remains face down under the threat of the hidden sniper. The bailed Panzer IV is able to remount but the bailed 1iC Panther fails to remount. All units continue to advance up the board but the 7.5cm gun platoon starts to take a more central position.
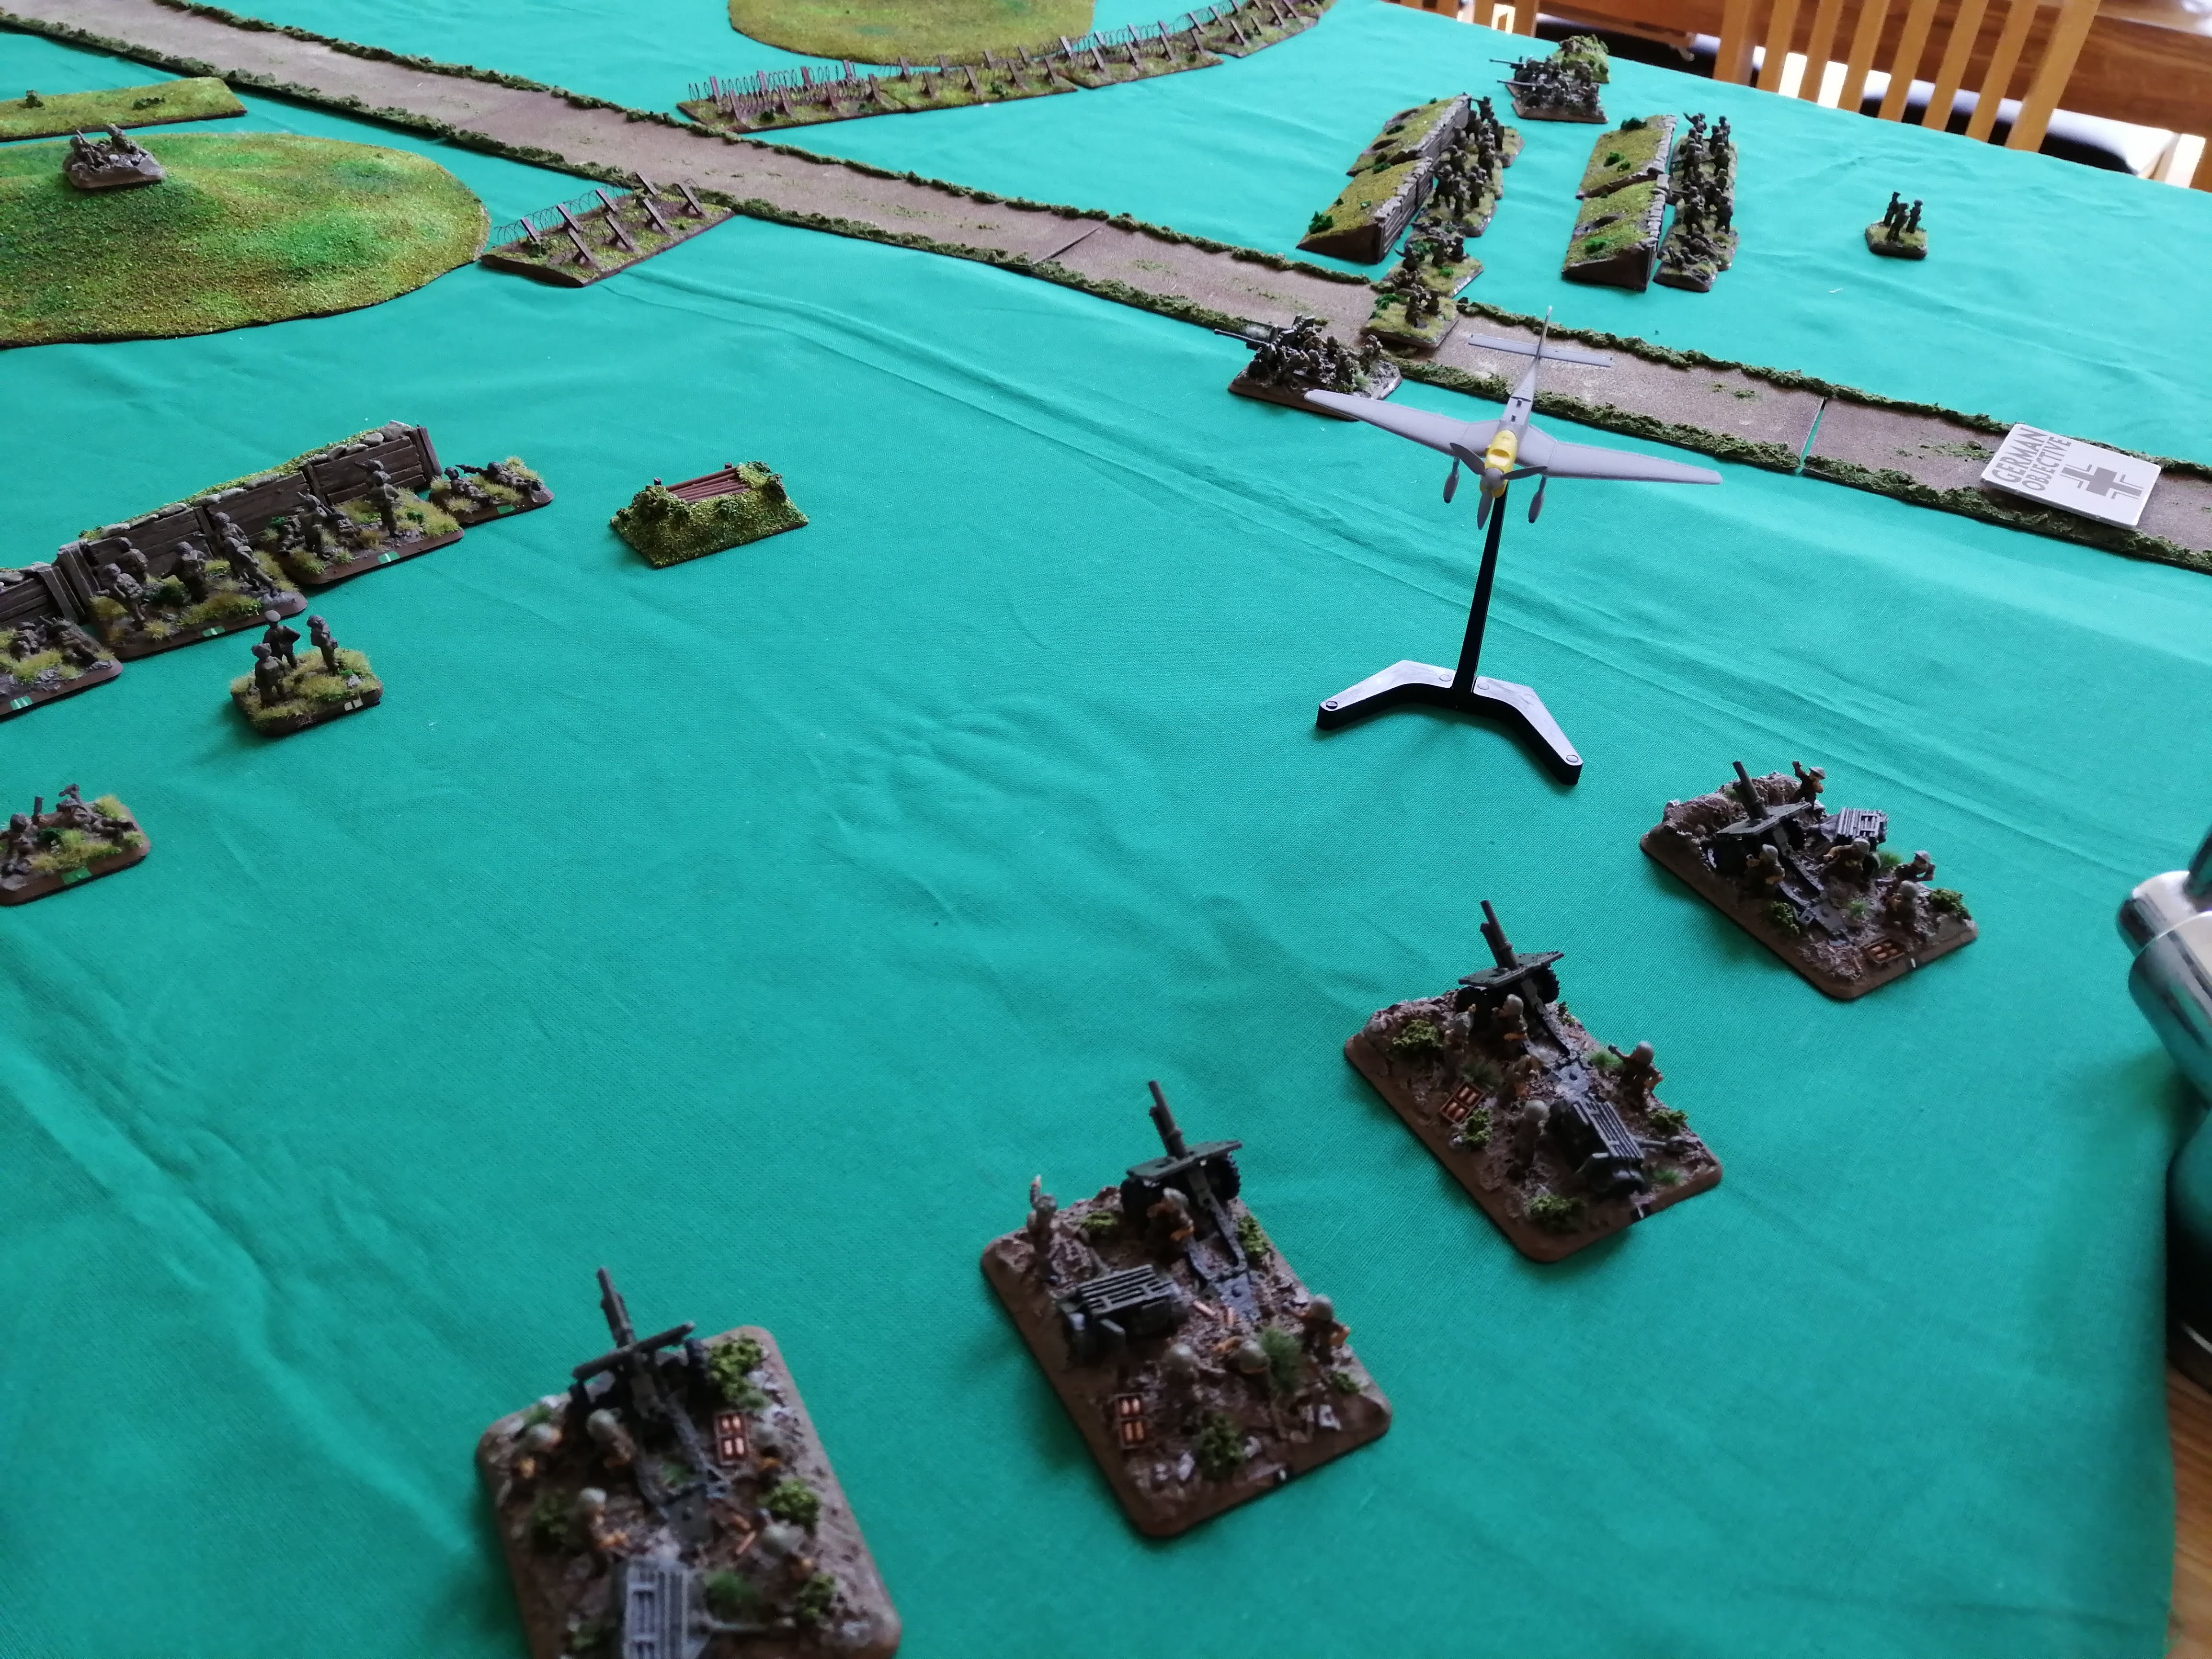
A good roll for the Luftwaffe sees another wave of Stukas arriving this turn. The AA fire from the M10’s fails to hit and the Stukas drop their bombs on the Artillery Battery, destroying one gun and pinning the remaining unit in place.
The Tiger and the Panzer IVs fire upon MG Nest 1 but despite 3 hits, fail to destroy the nest.
At the start of the Allied turn, the artillery battery unpin and are able to launch a new bombardment, this time on a Panther and 4 teams from FBP. The artillery ranges in first time and successfully destroys one team and pins FBP in place.
The Sniper continues to cause FGP probleme#s, hitting again but failing to cause any damage. It does keep FGP pinned in place and held up on the German Right flank.
The lead tanks are now in range of the 6pdr guns just off of the road. With each gun able to fire 3 times, they score 4 hits, 2 on the Tiger and one on each Panzer IV. The shots aren’t enough to worry the Tiger however one of the Panzer IVs bail out.
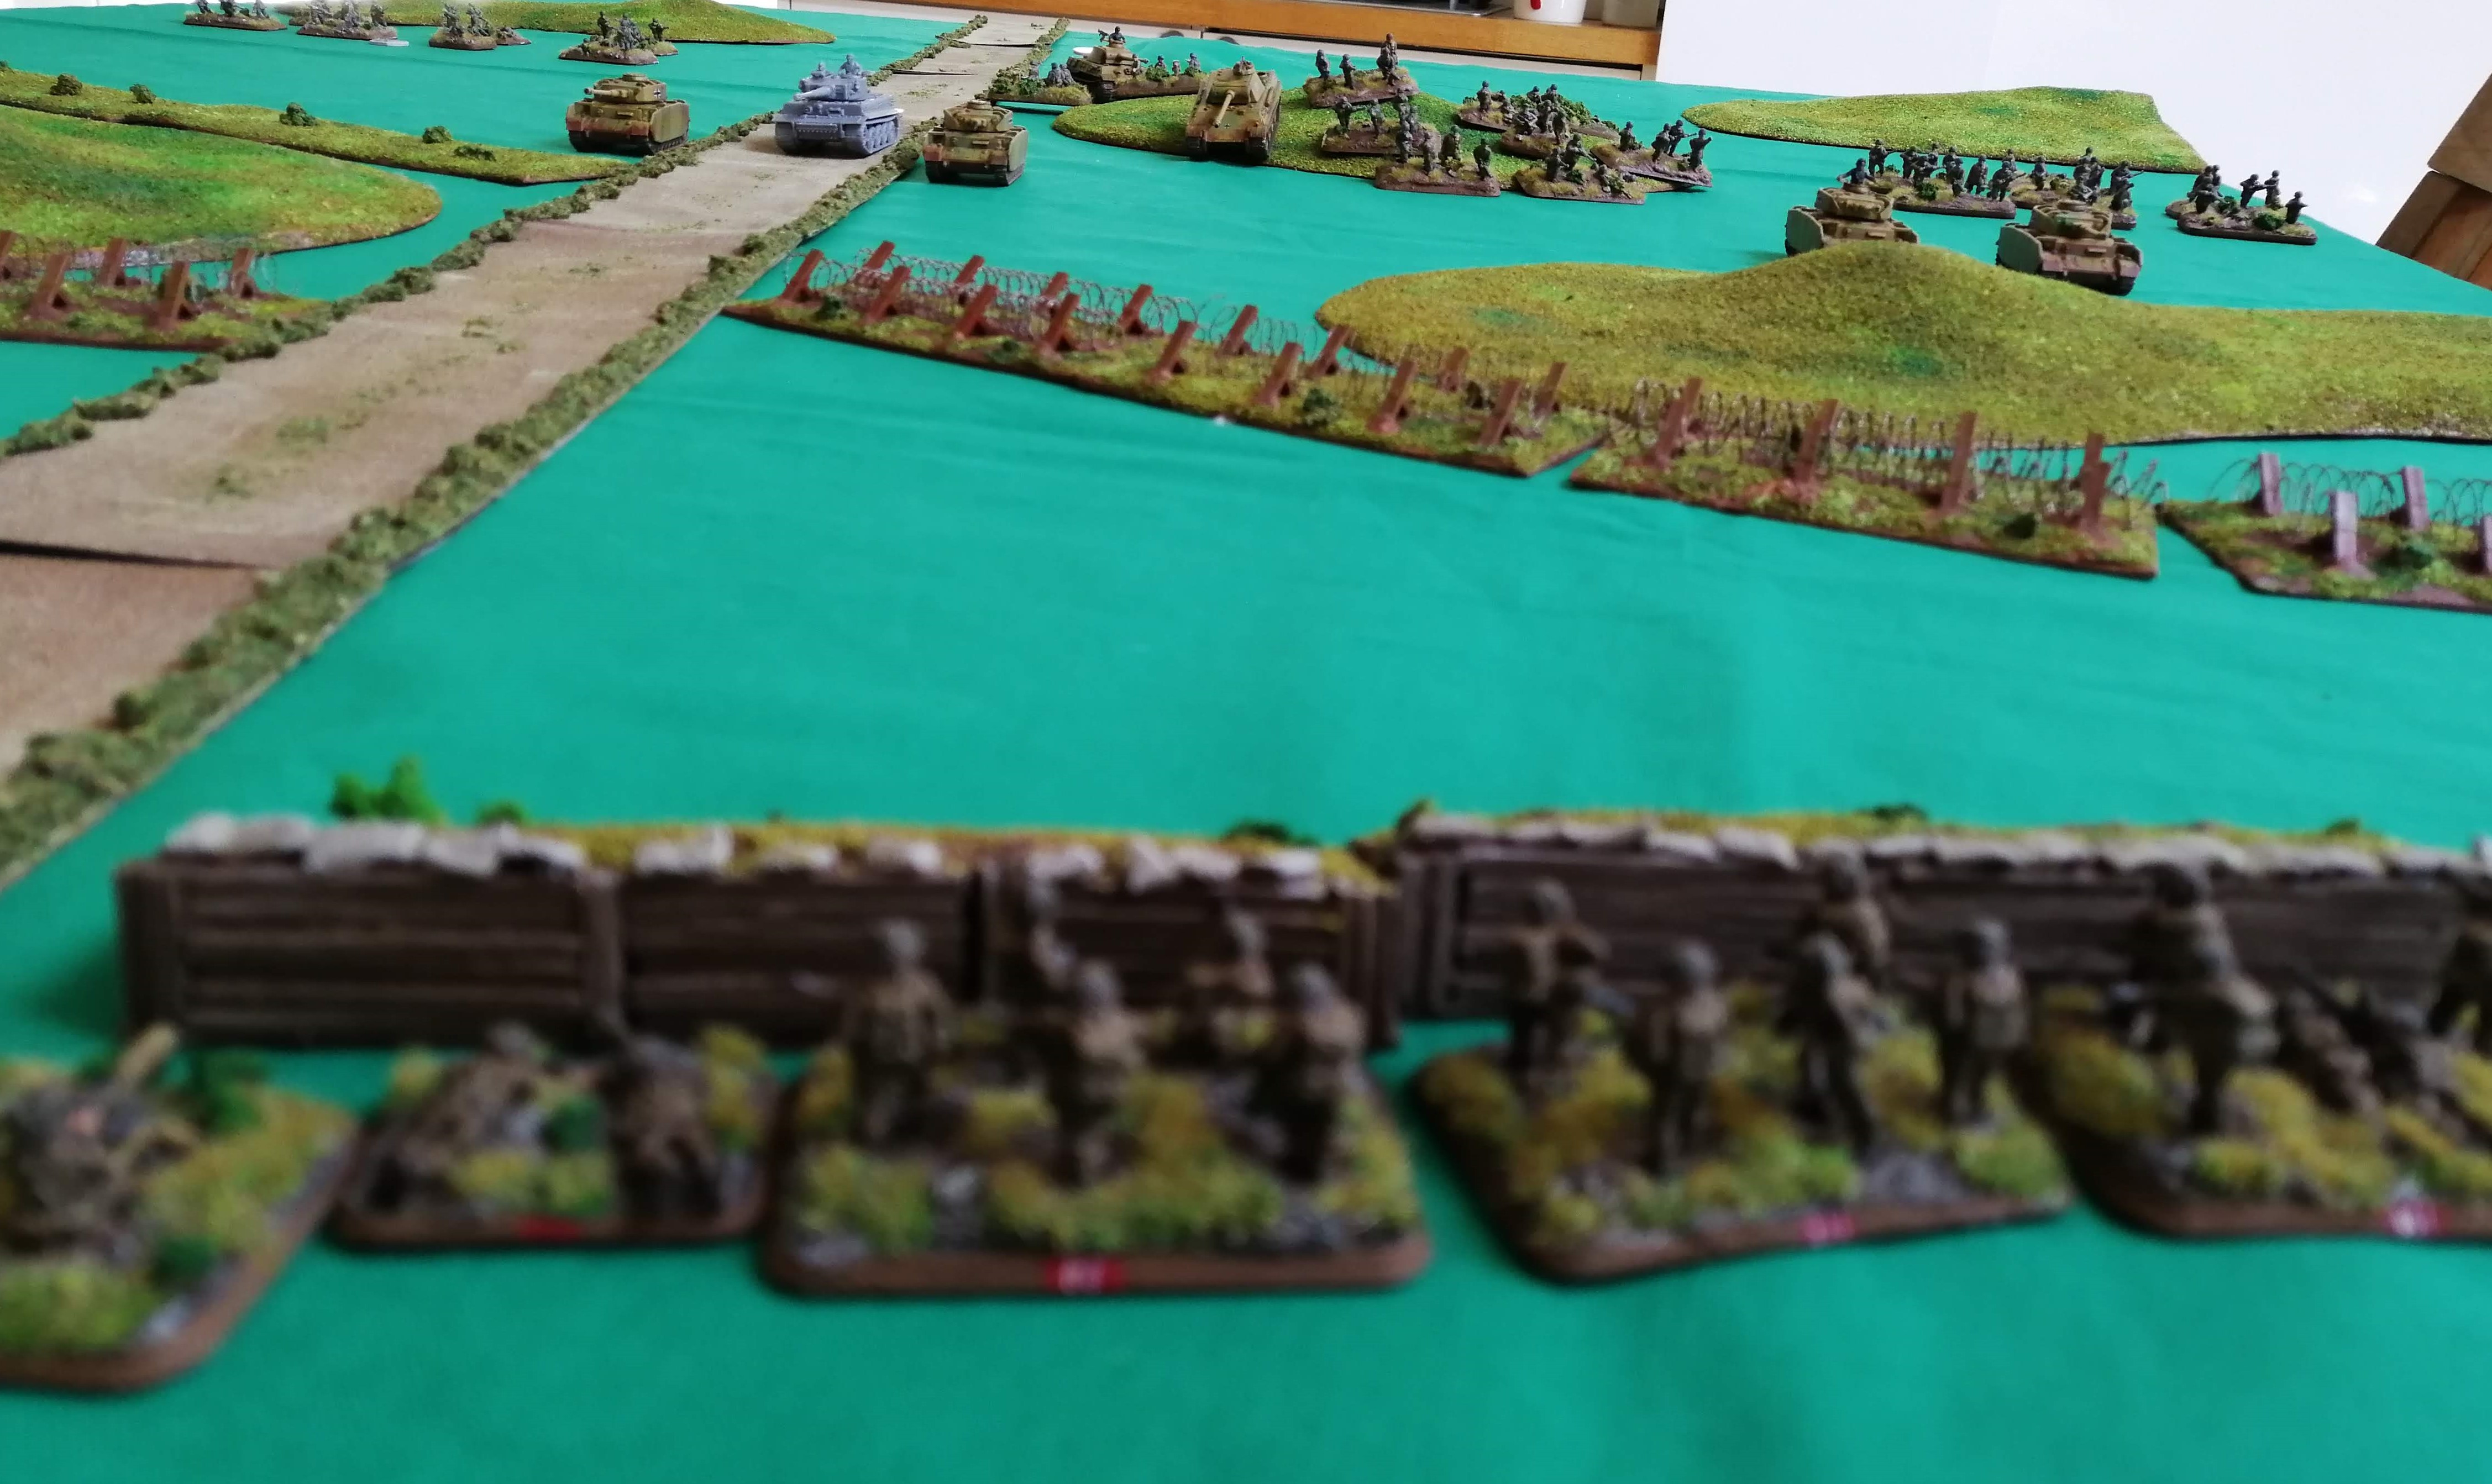
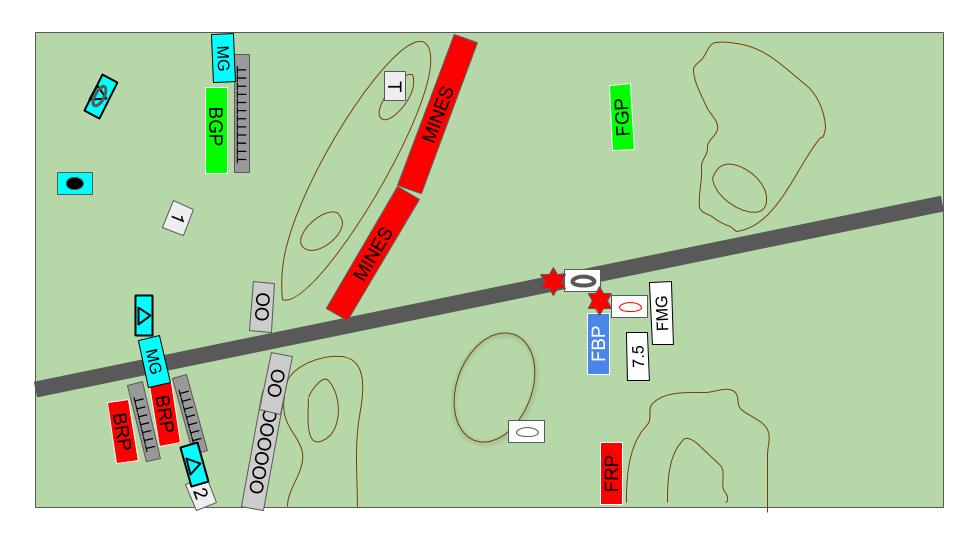
 End of Turn 3
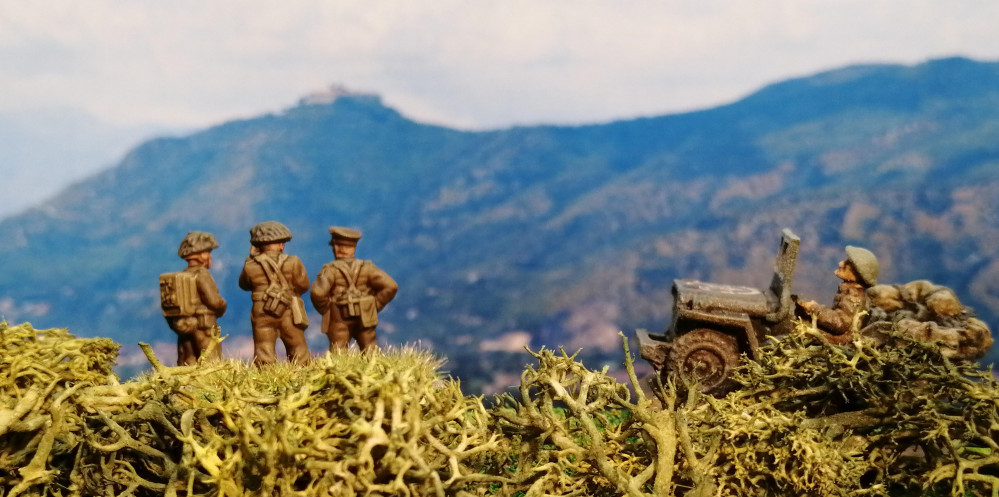
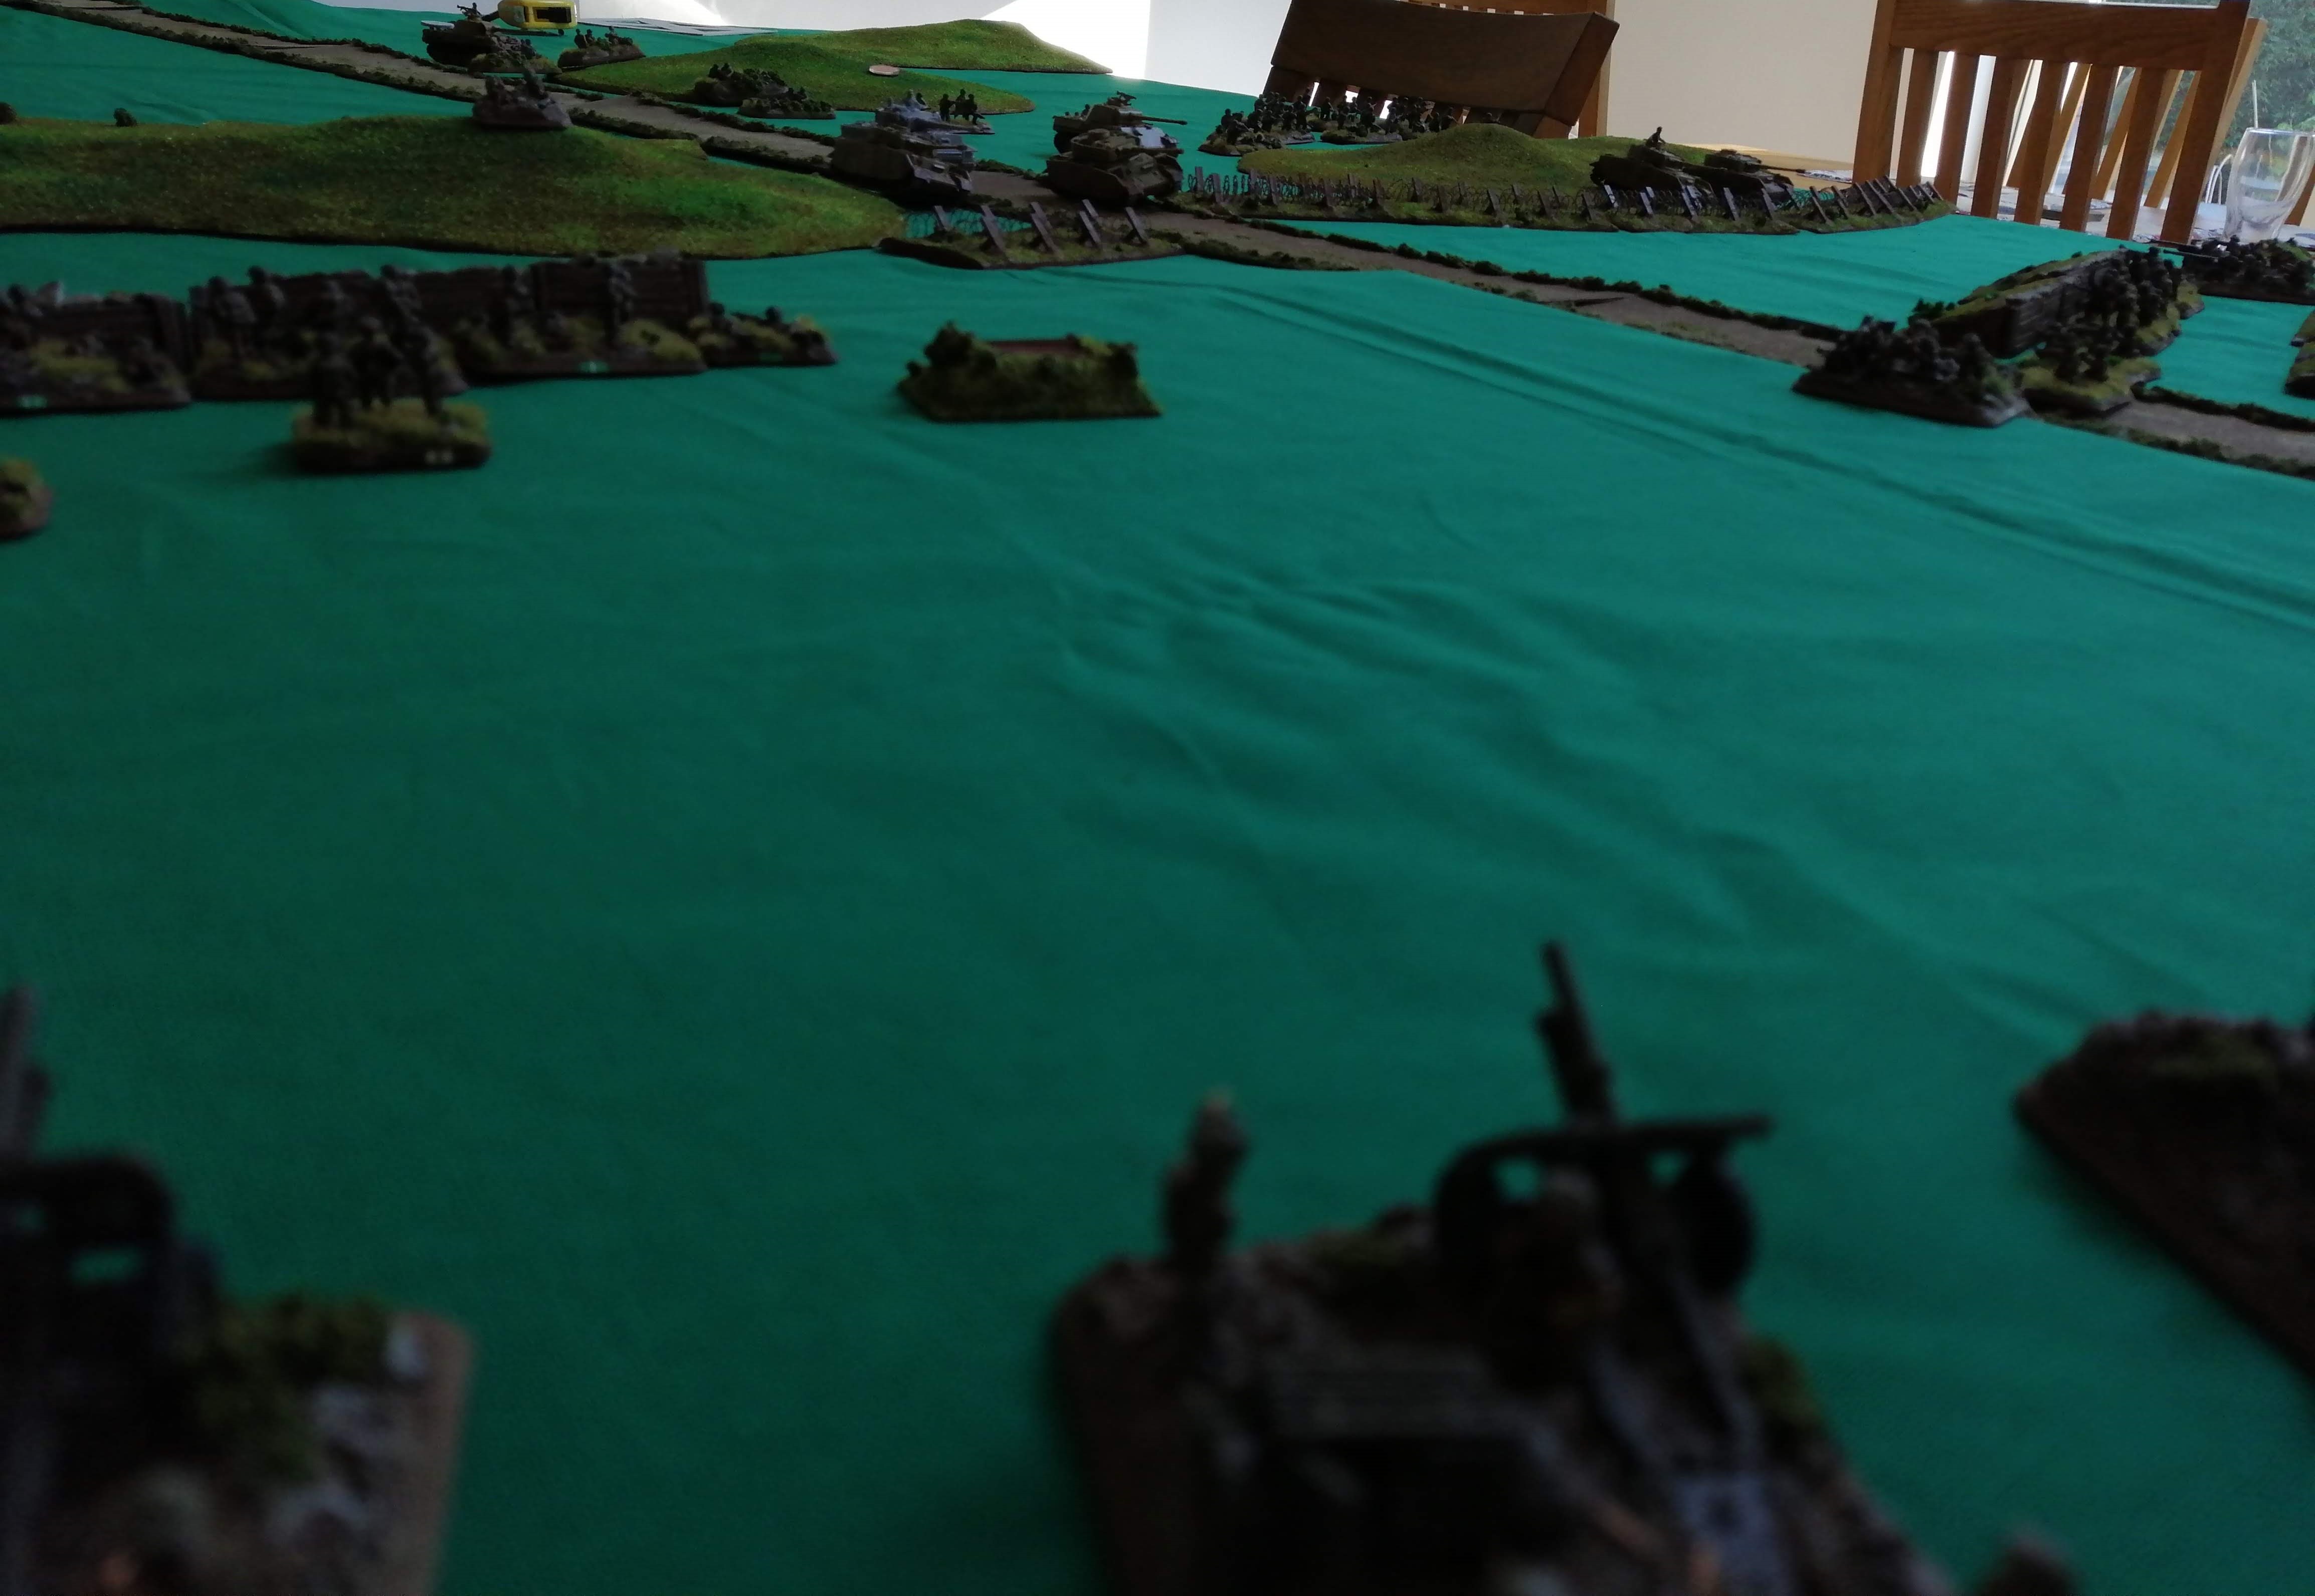
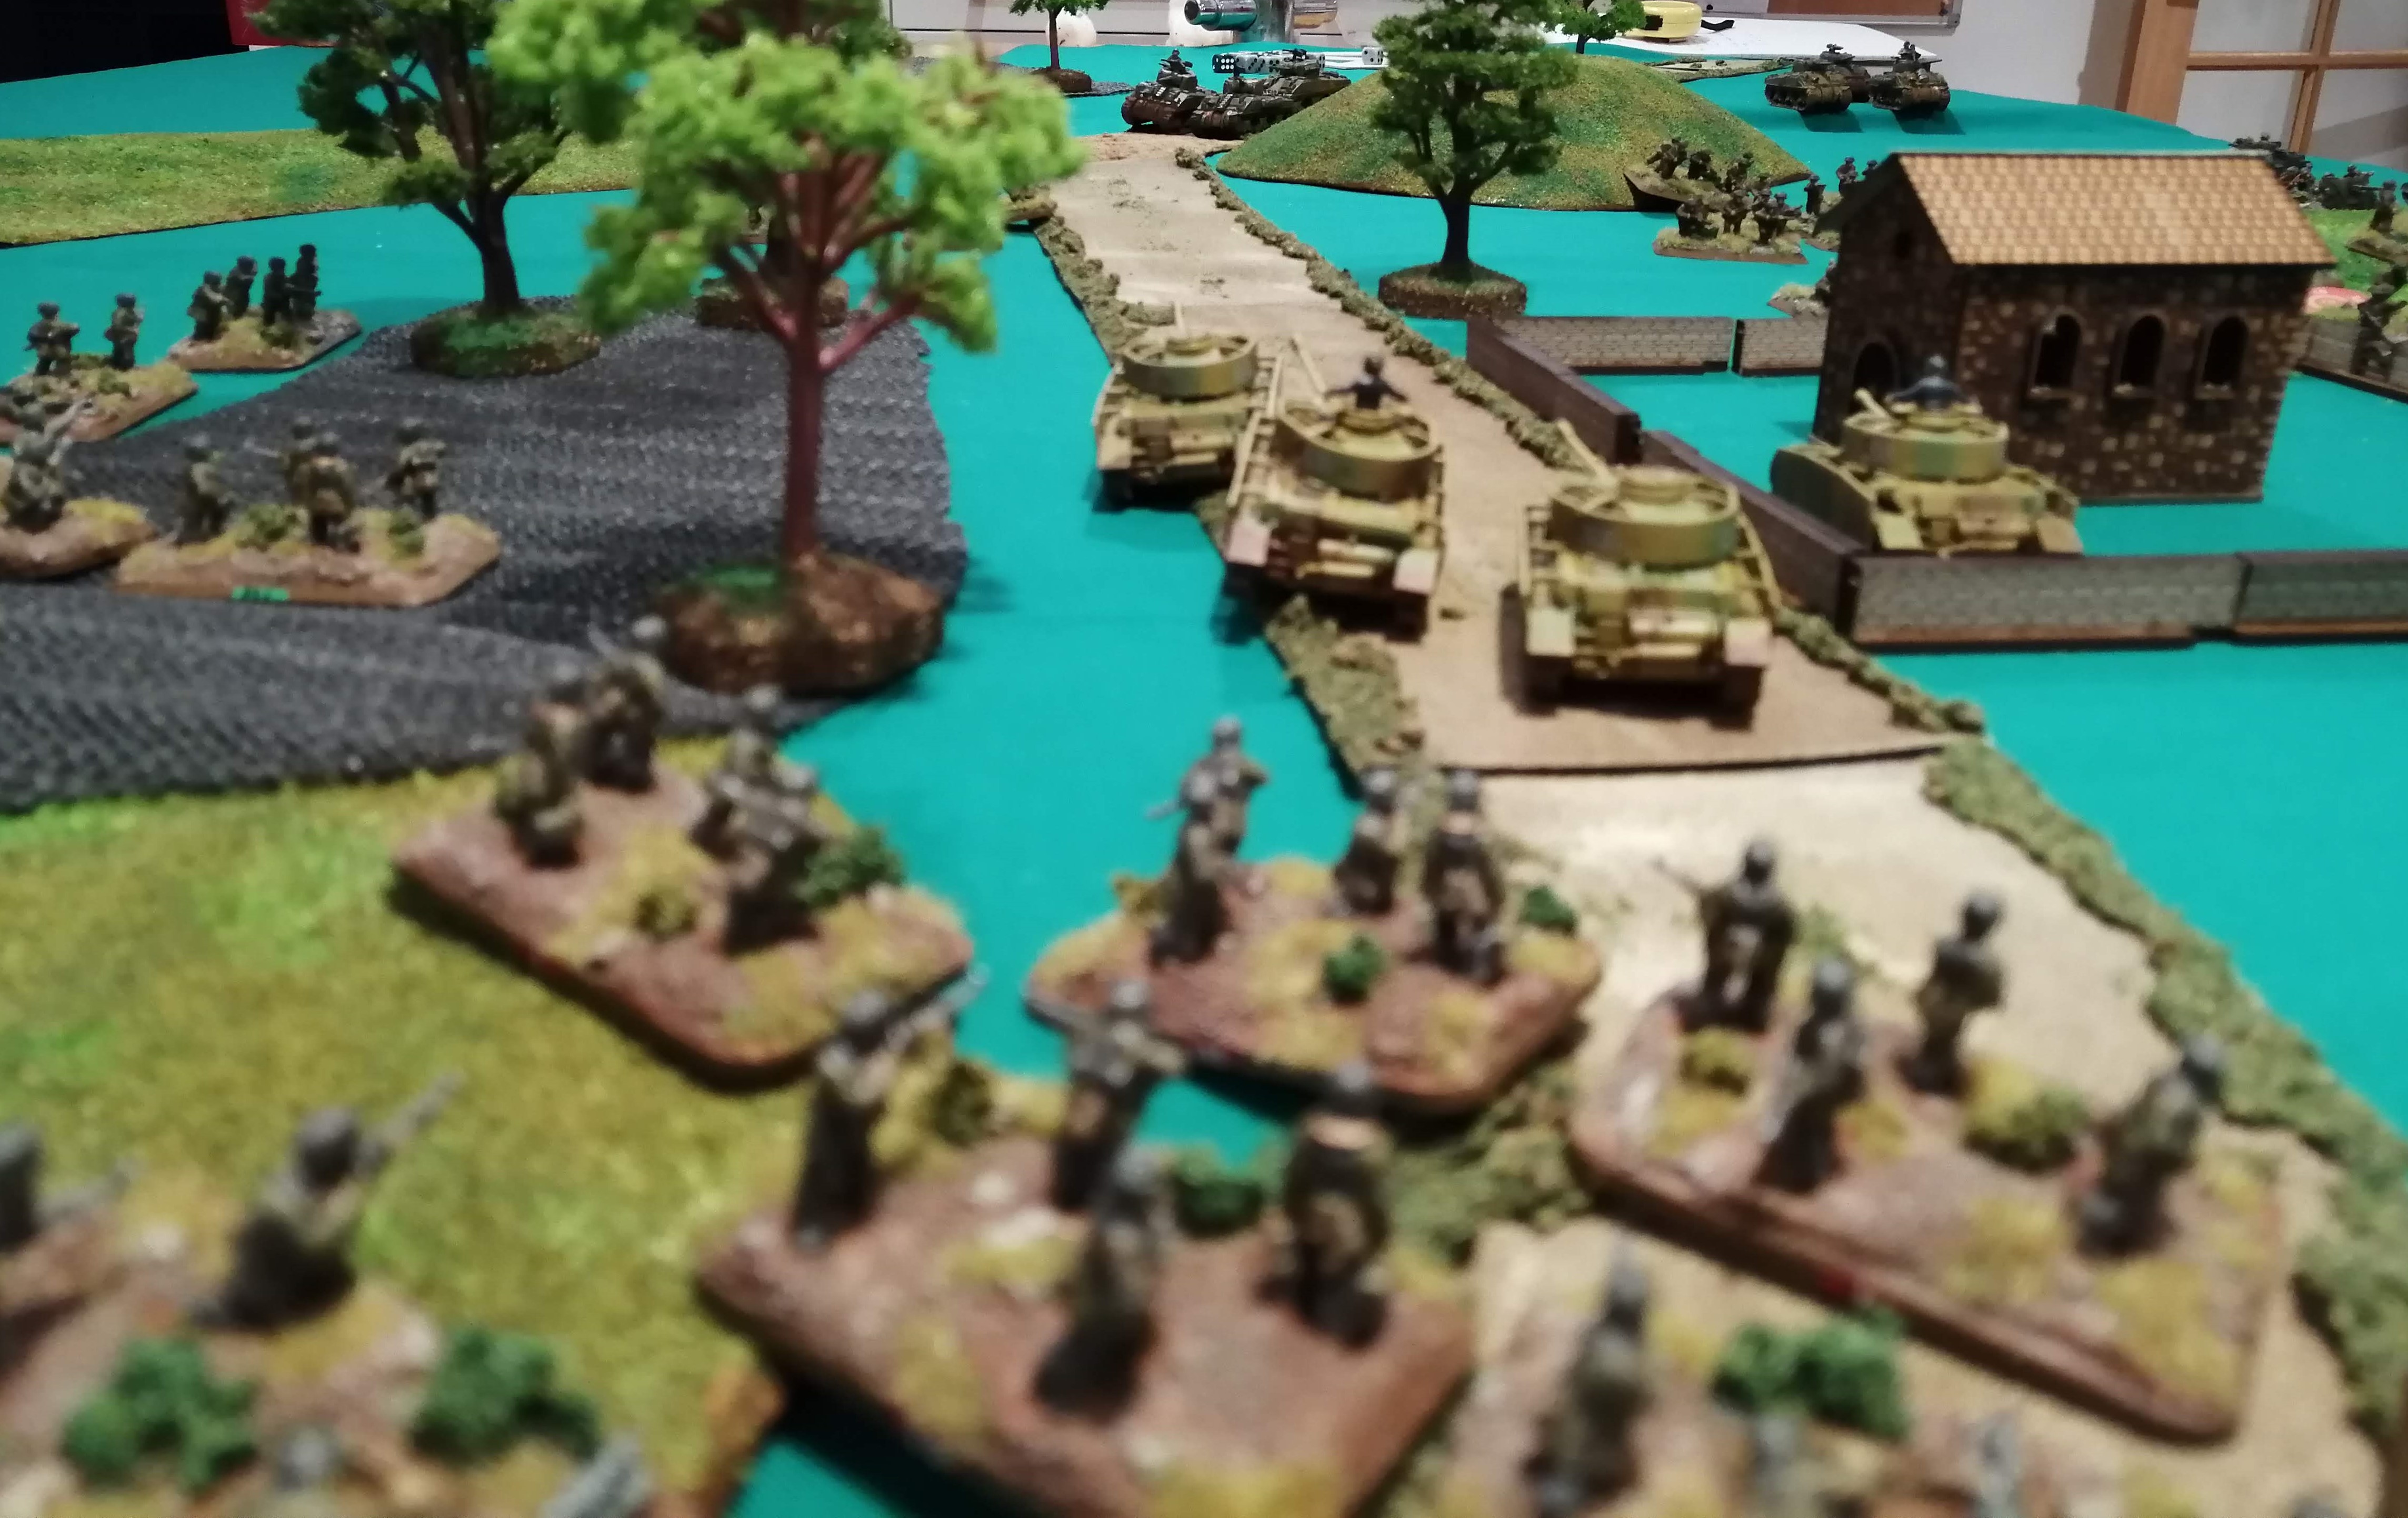
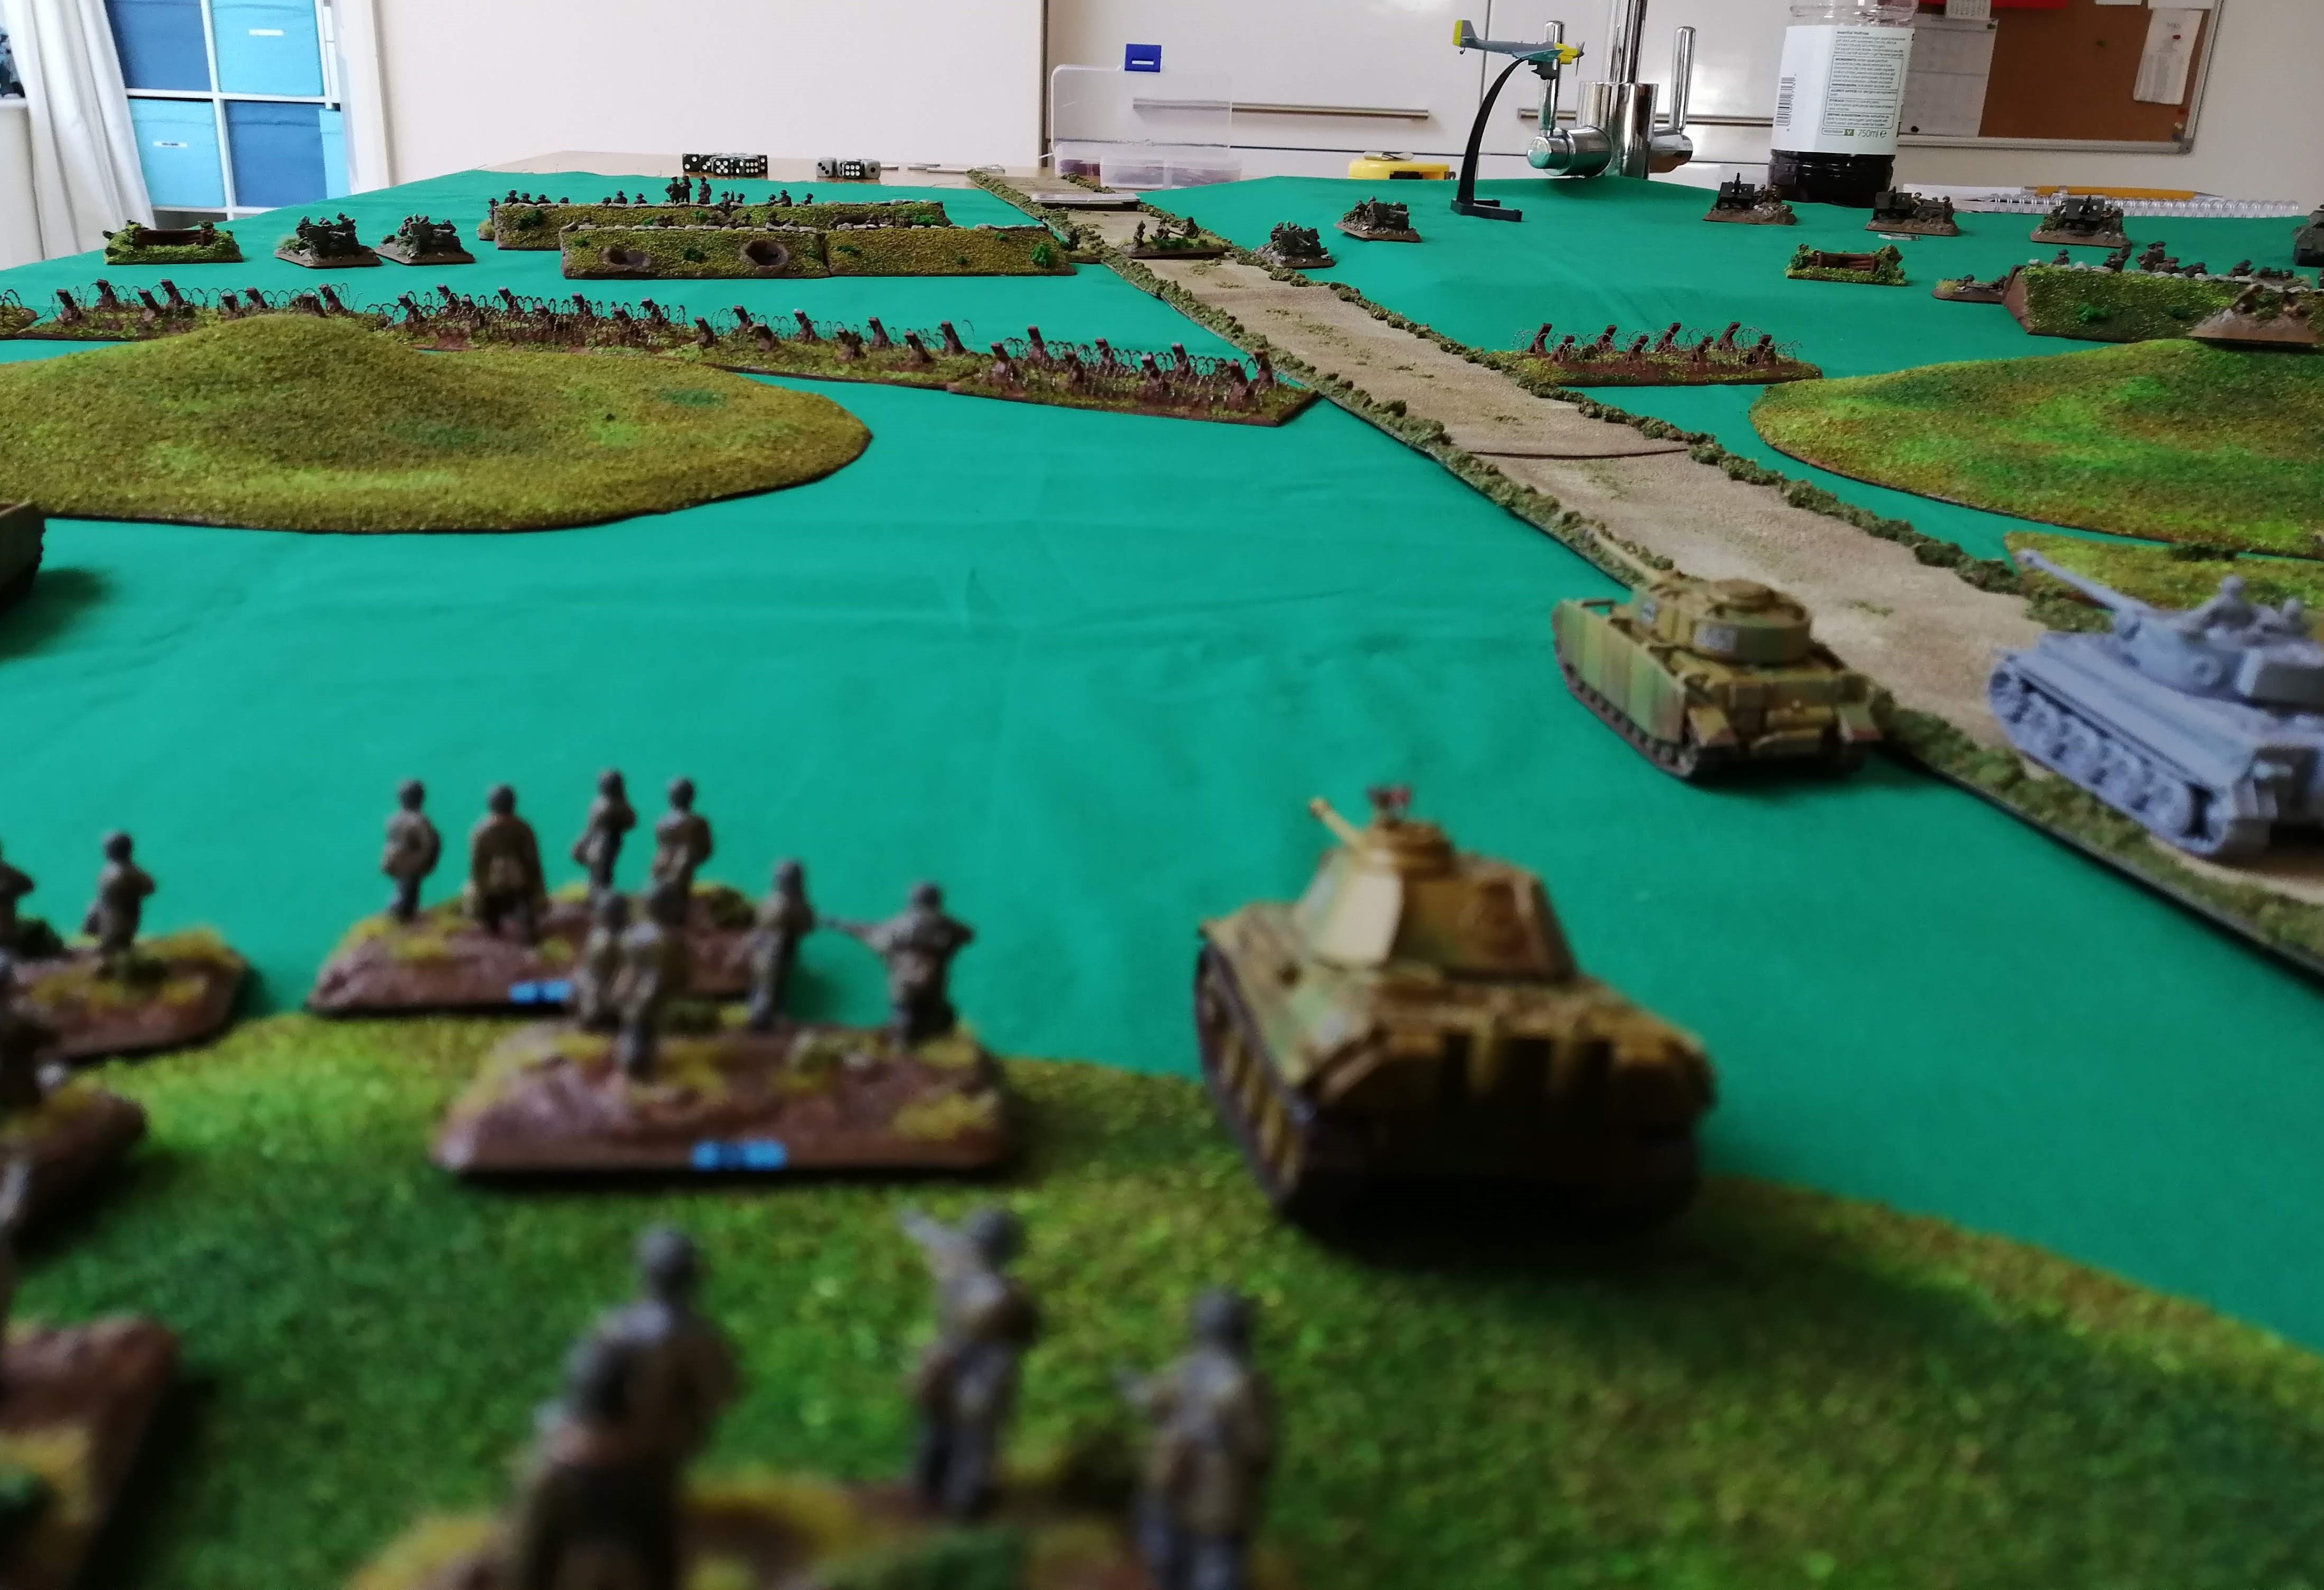 View from behind the Germans as they advance on the British lines
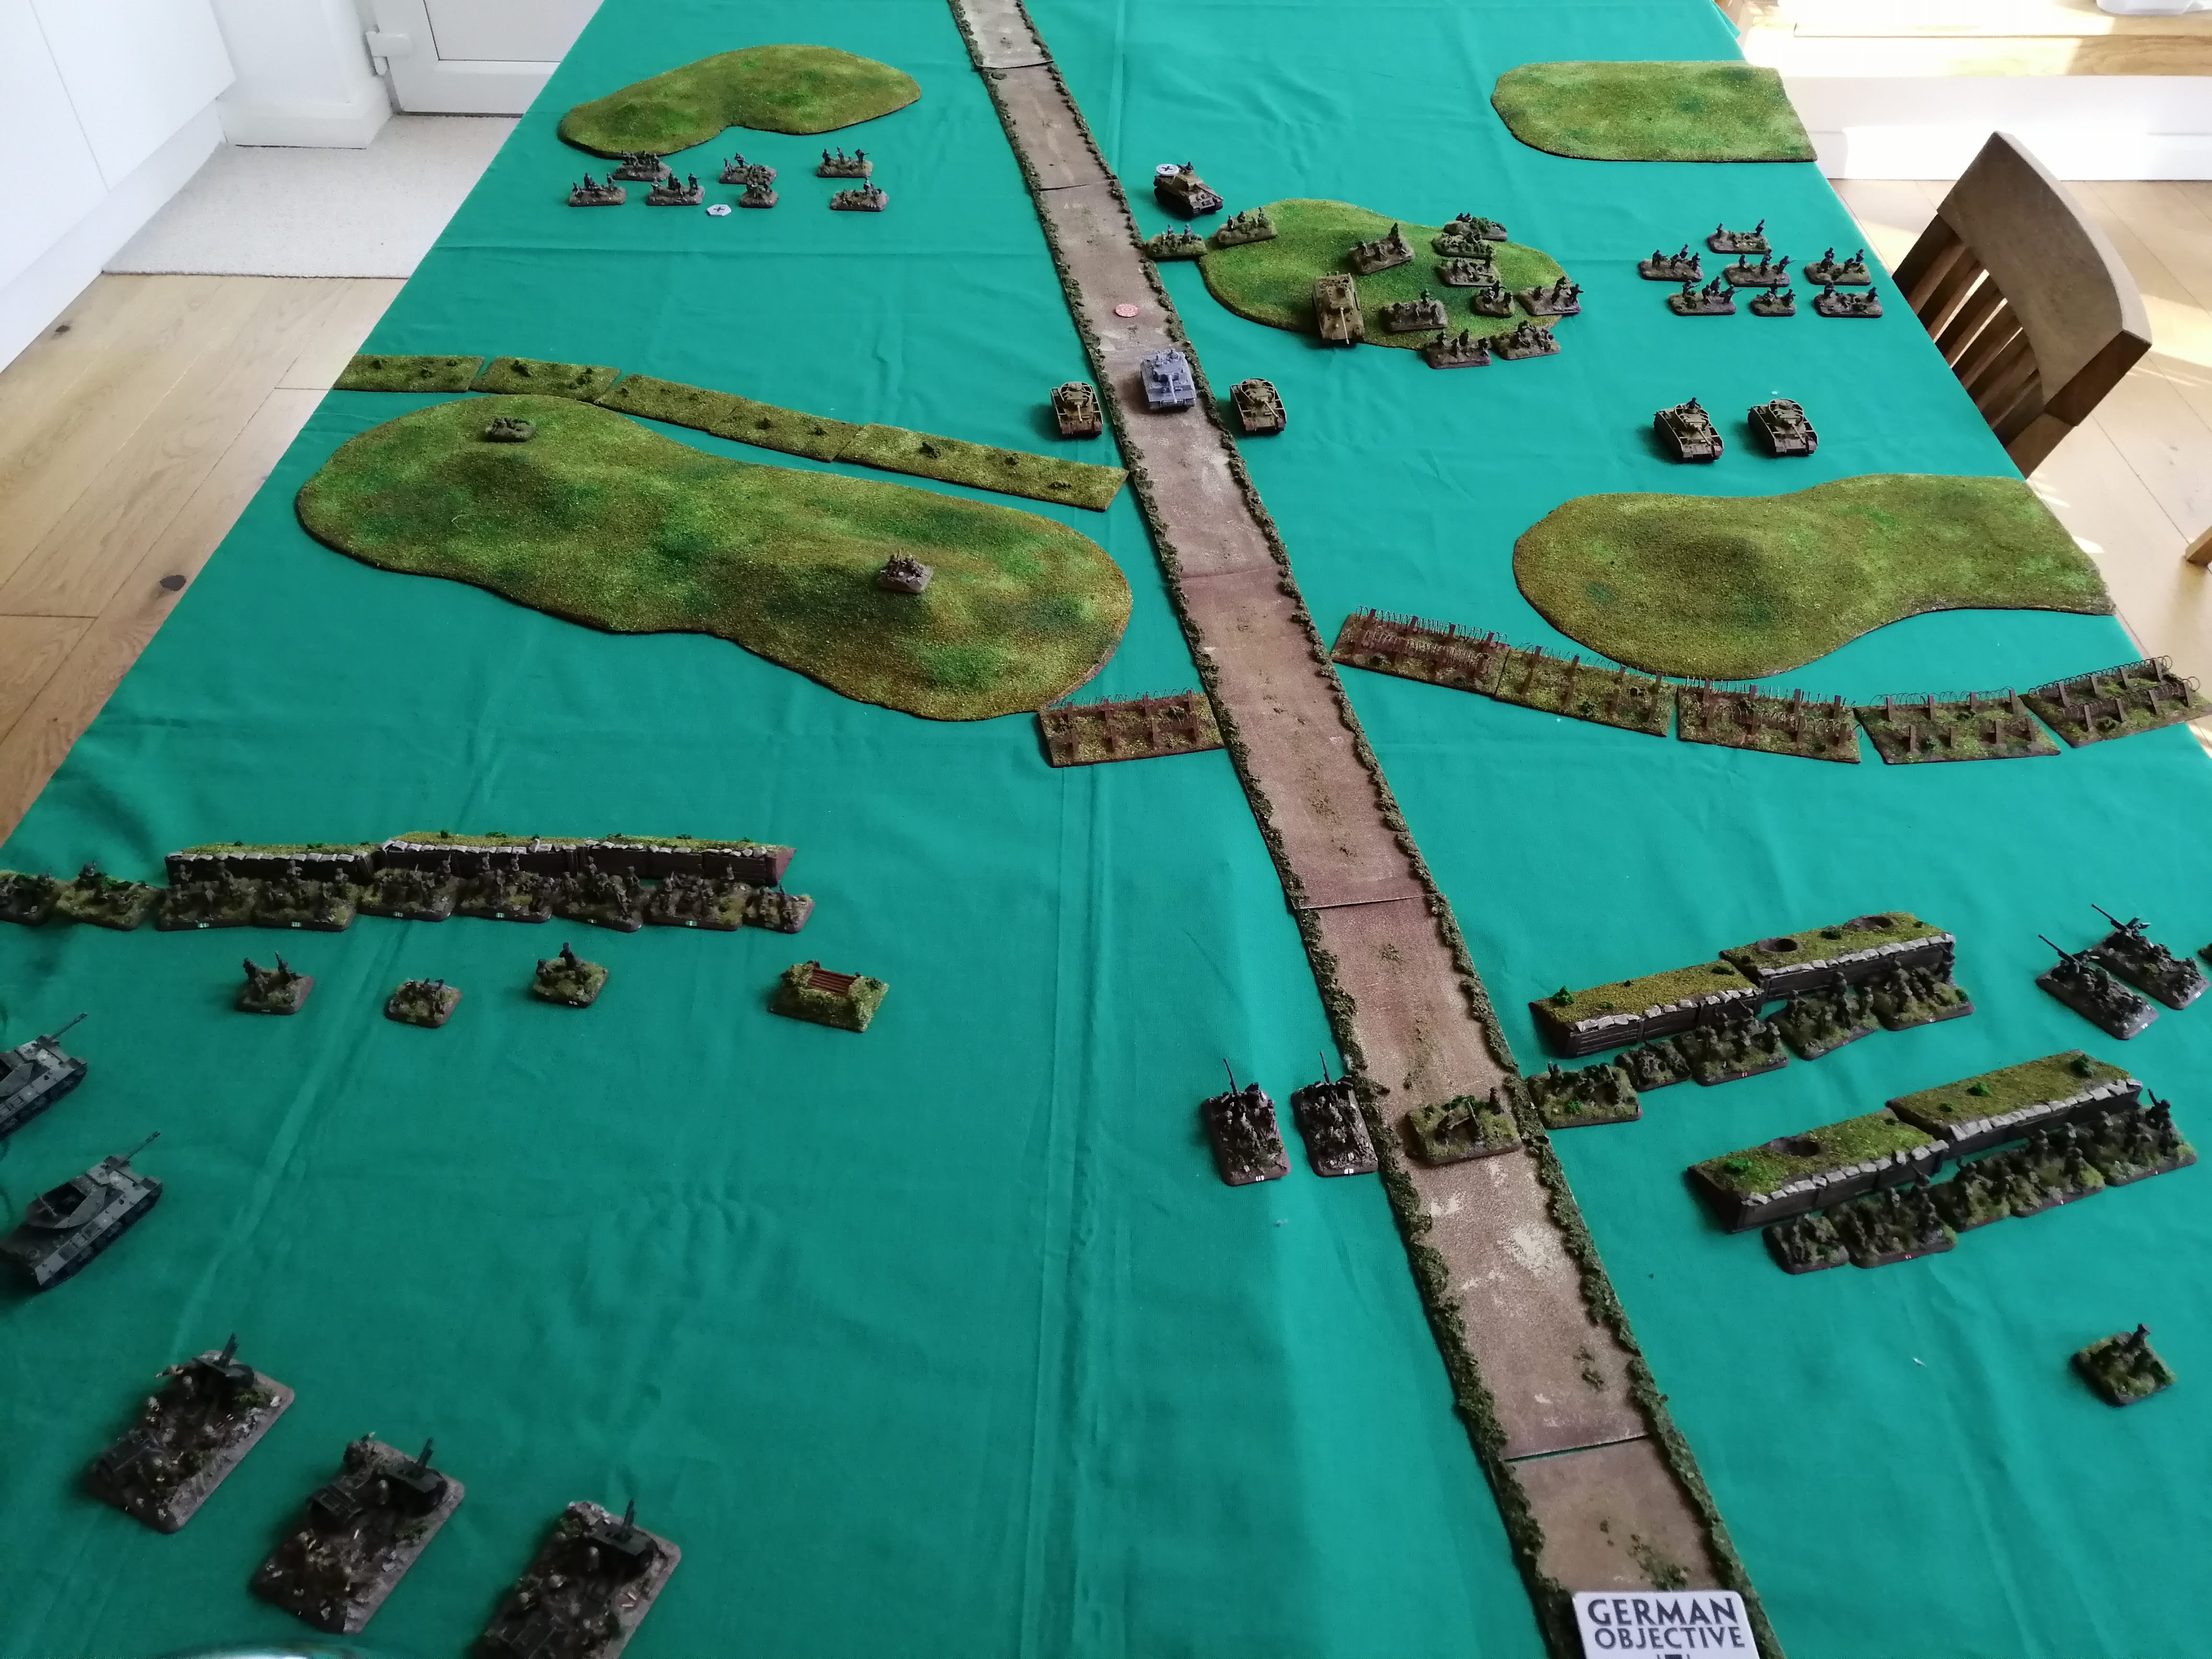
Turn 4
FBP unpins and is able to advance out of the ranged in artillery. FGP fails to unpin and remains trapped in front of the Sniper on the hill. The lone sniper is really pinning down the German right flank.
The bailed Panzer IV remounts however the 1iC Panther fails to remount and remains out of action for another turn.
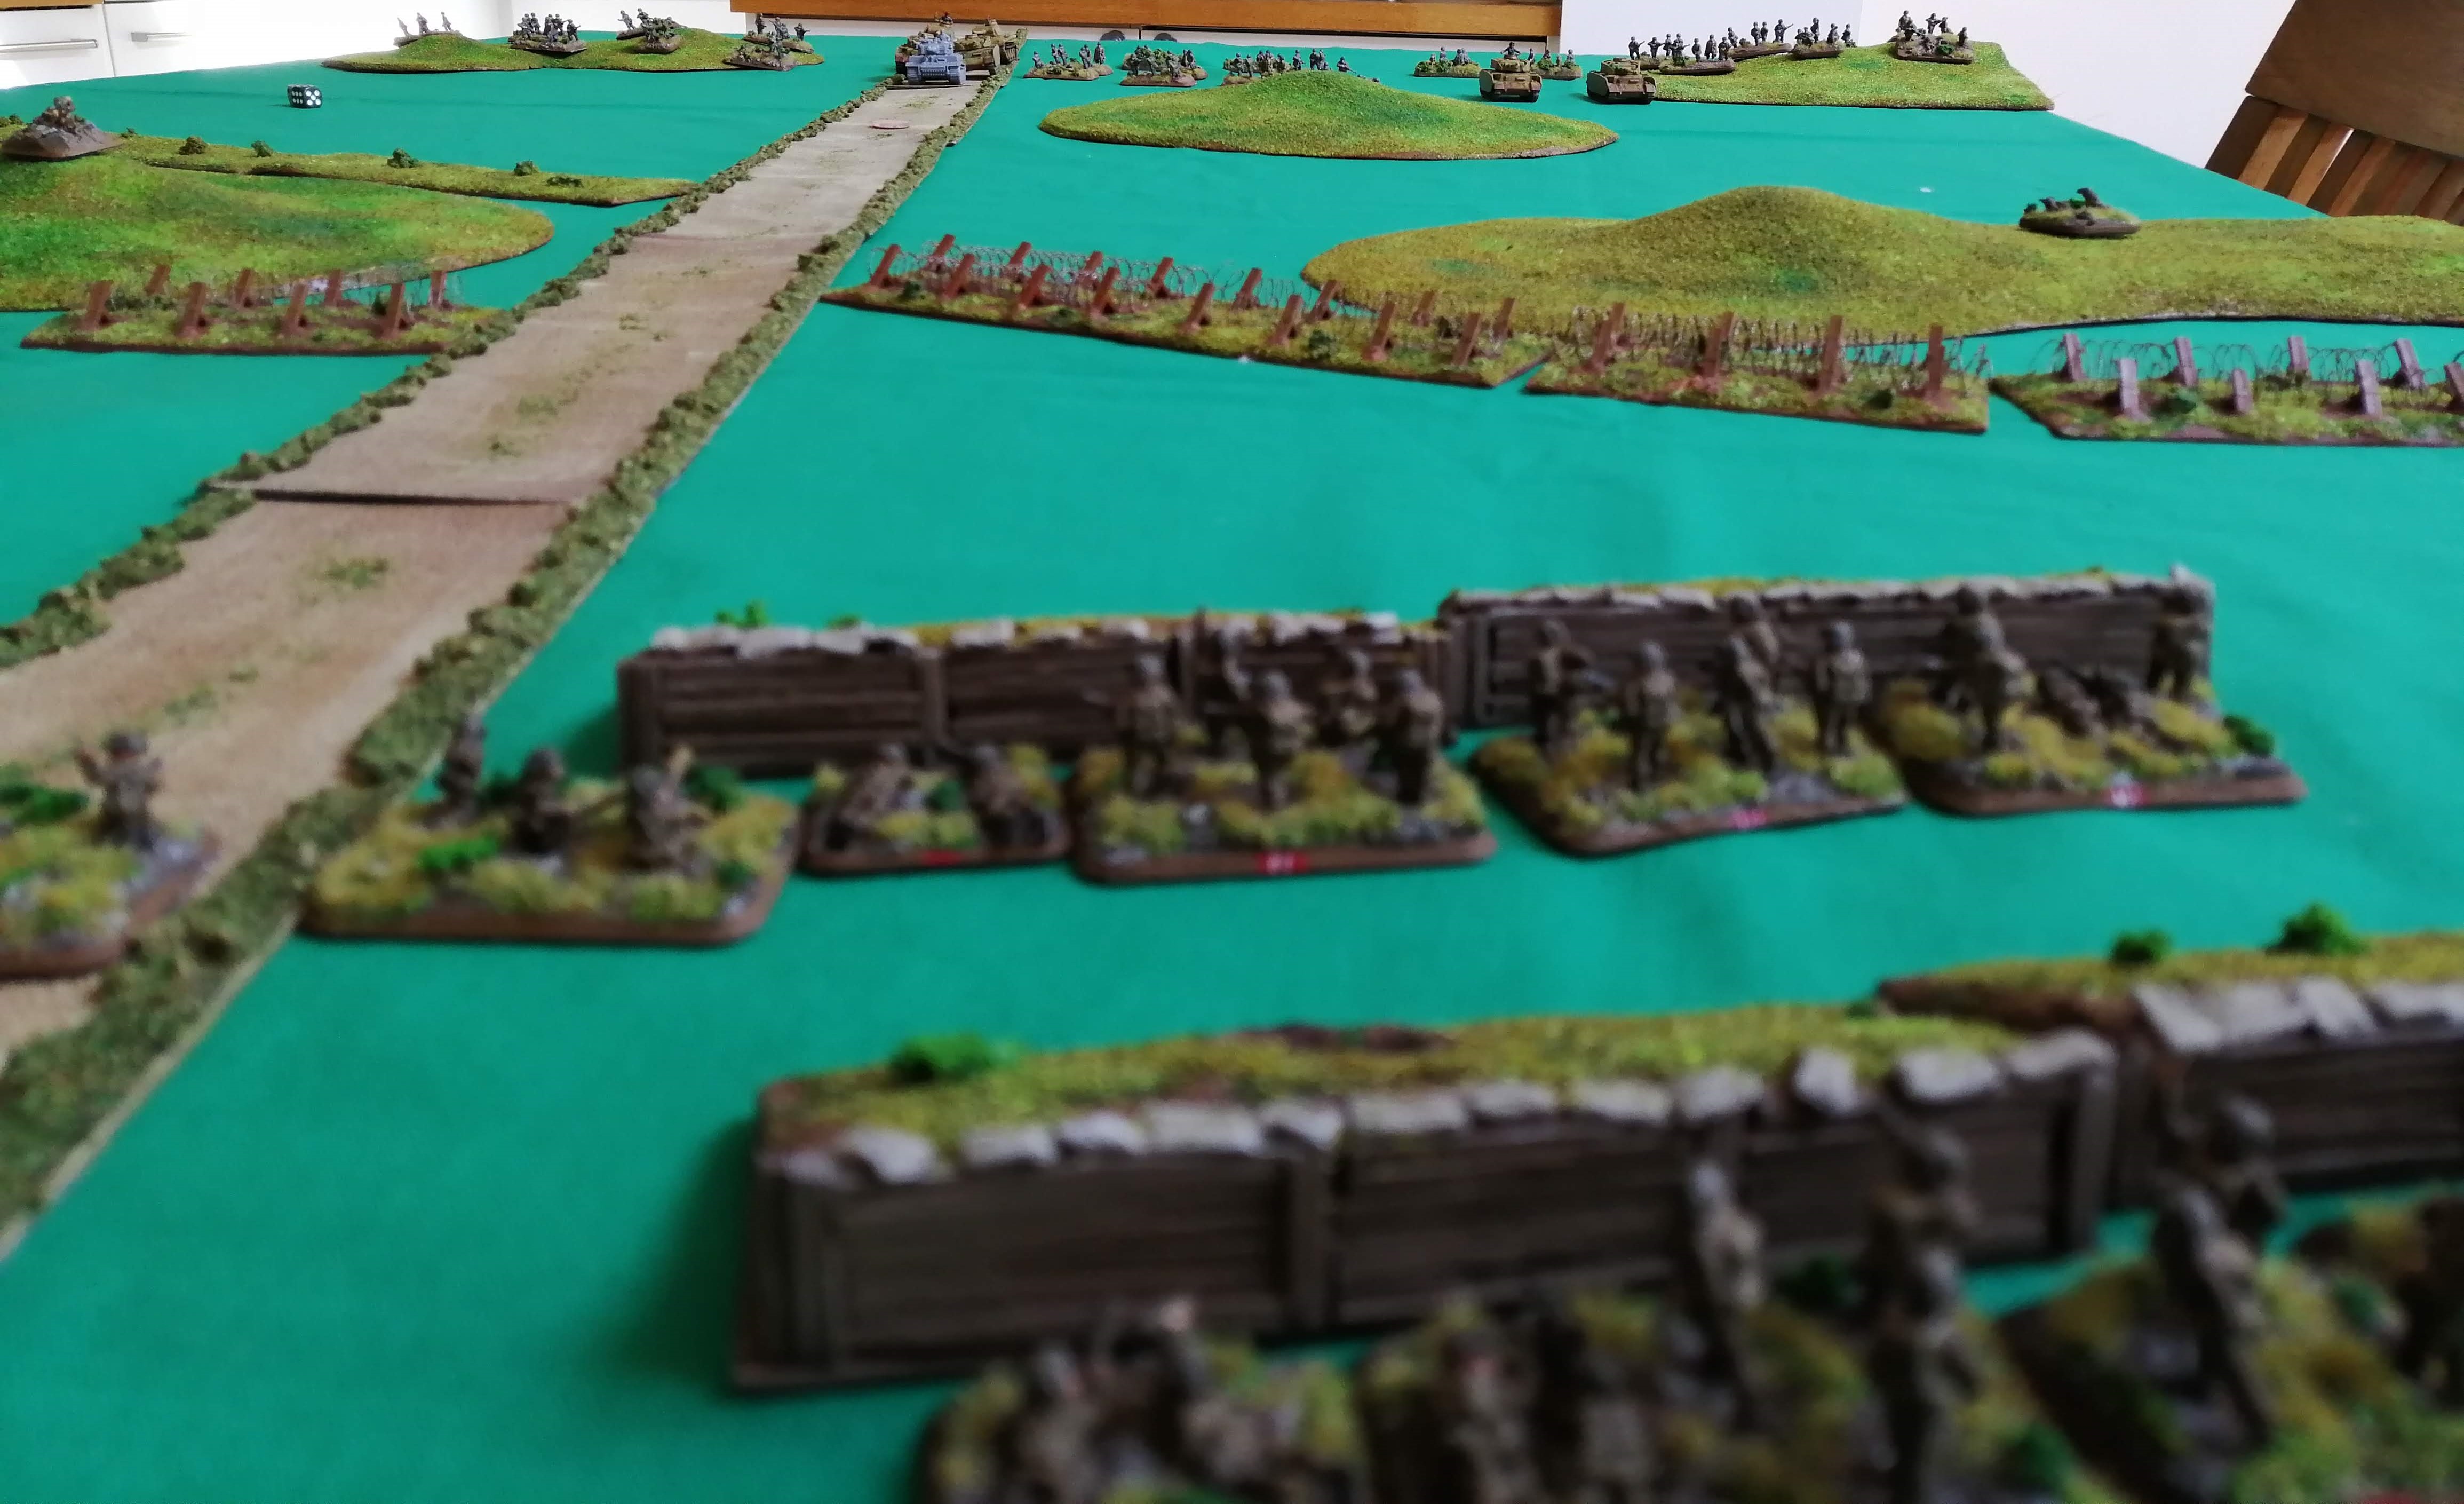
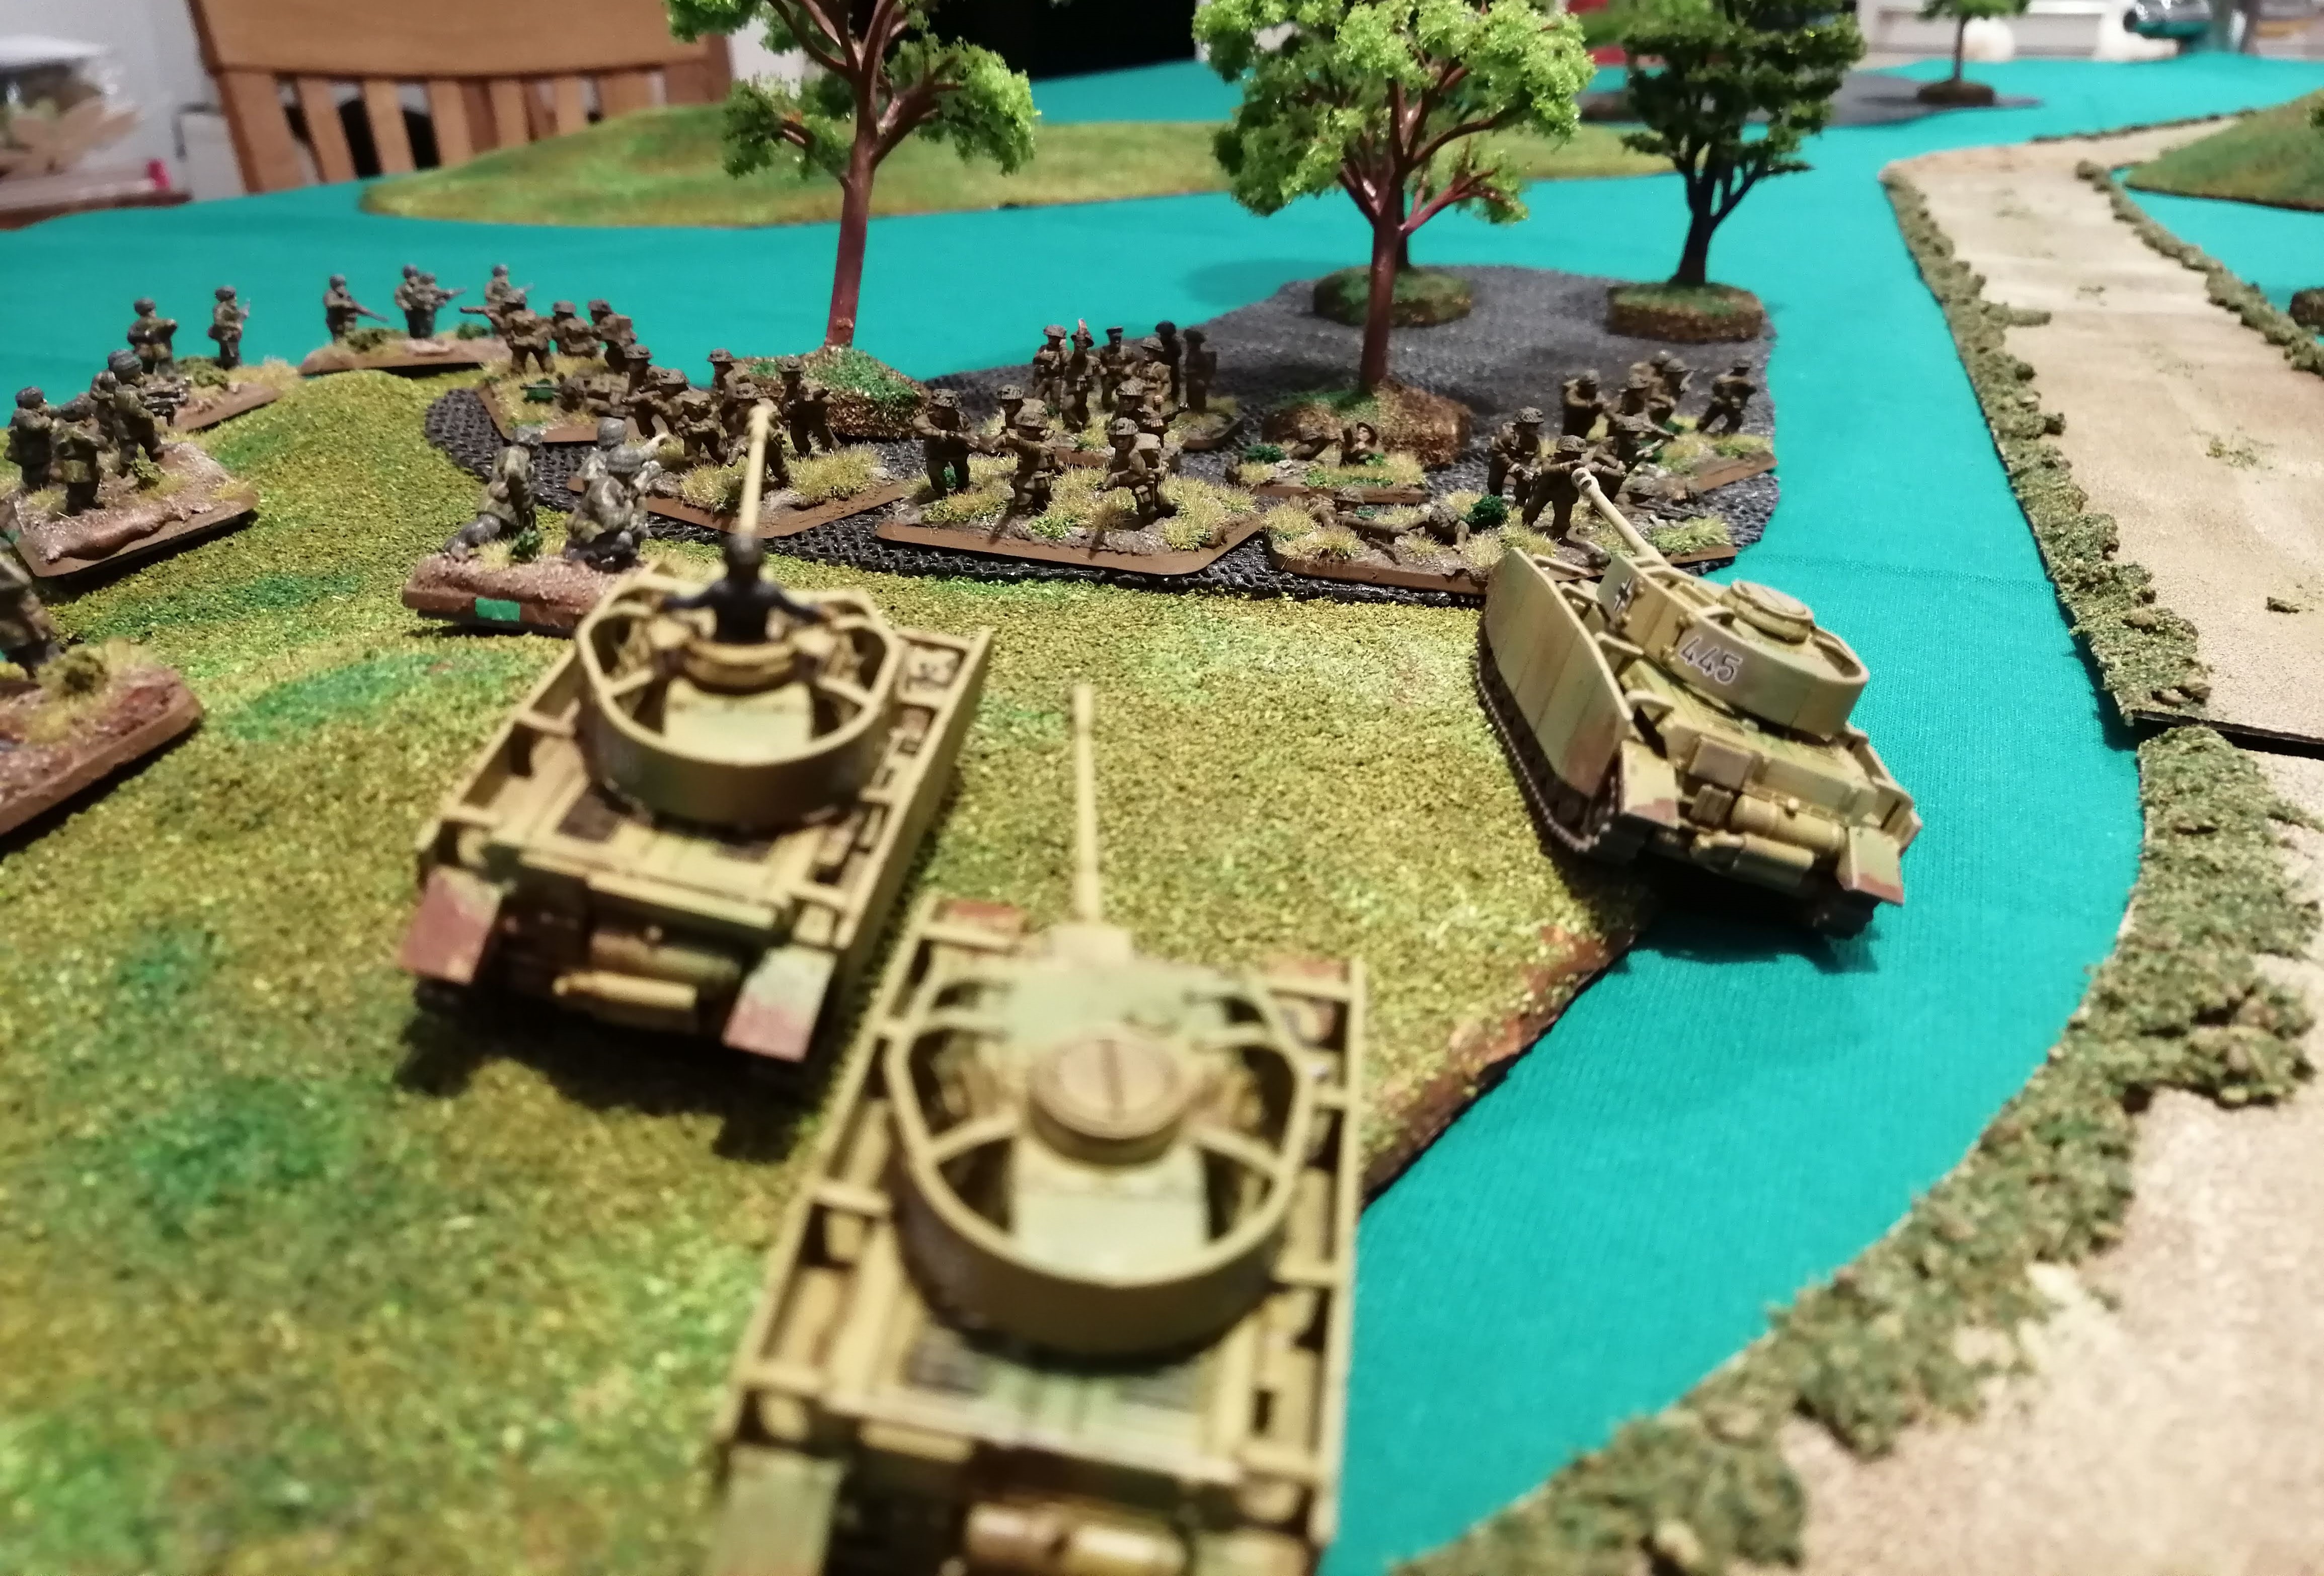
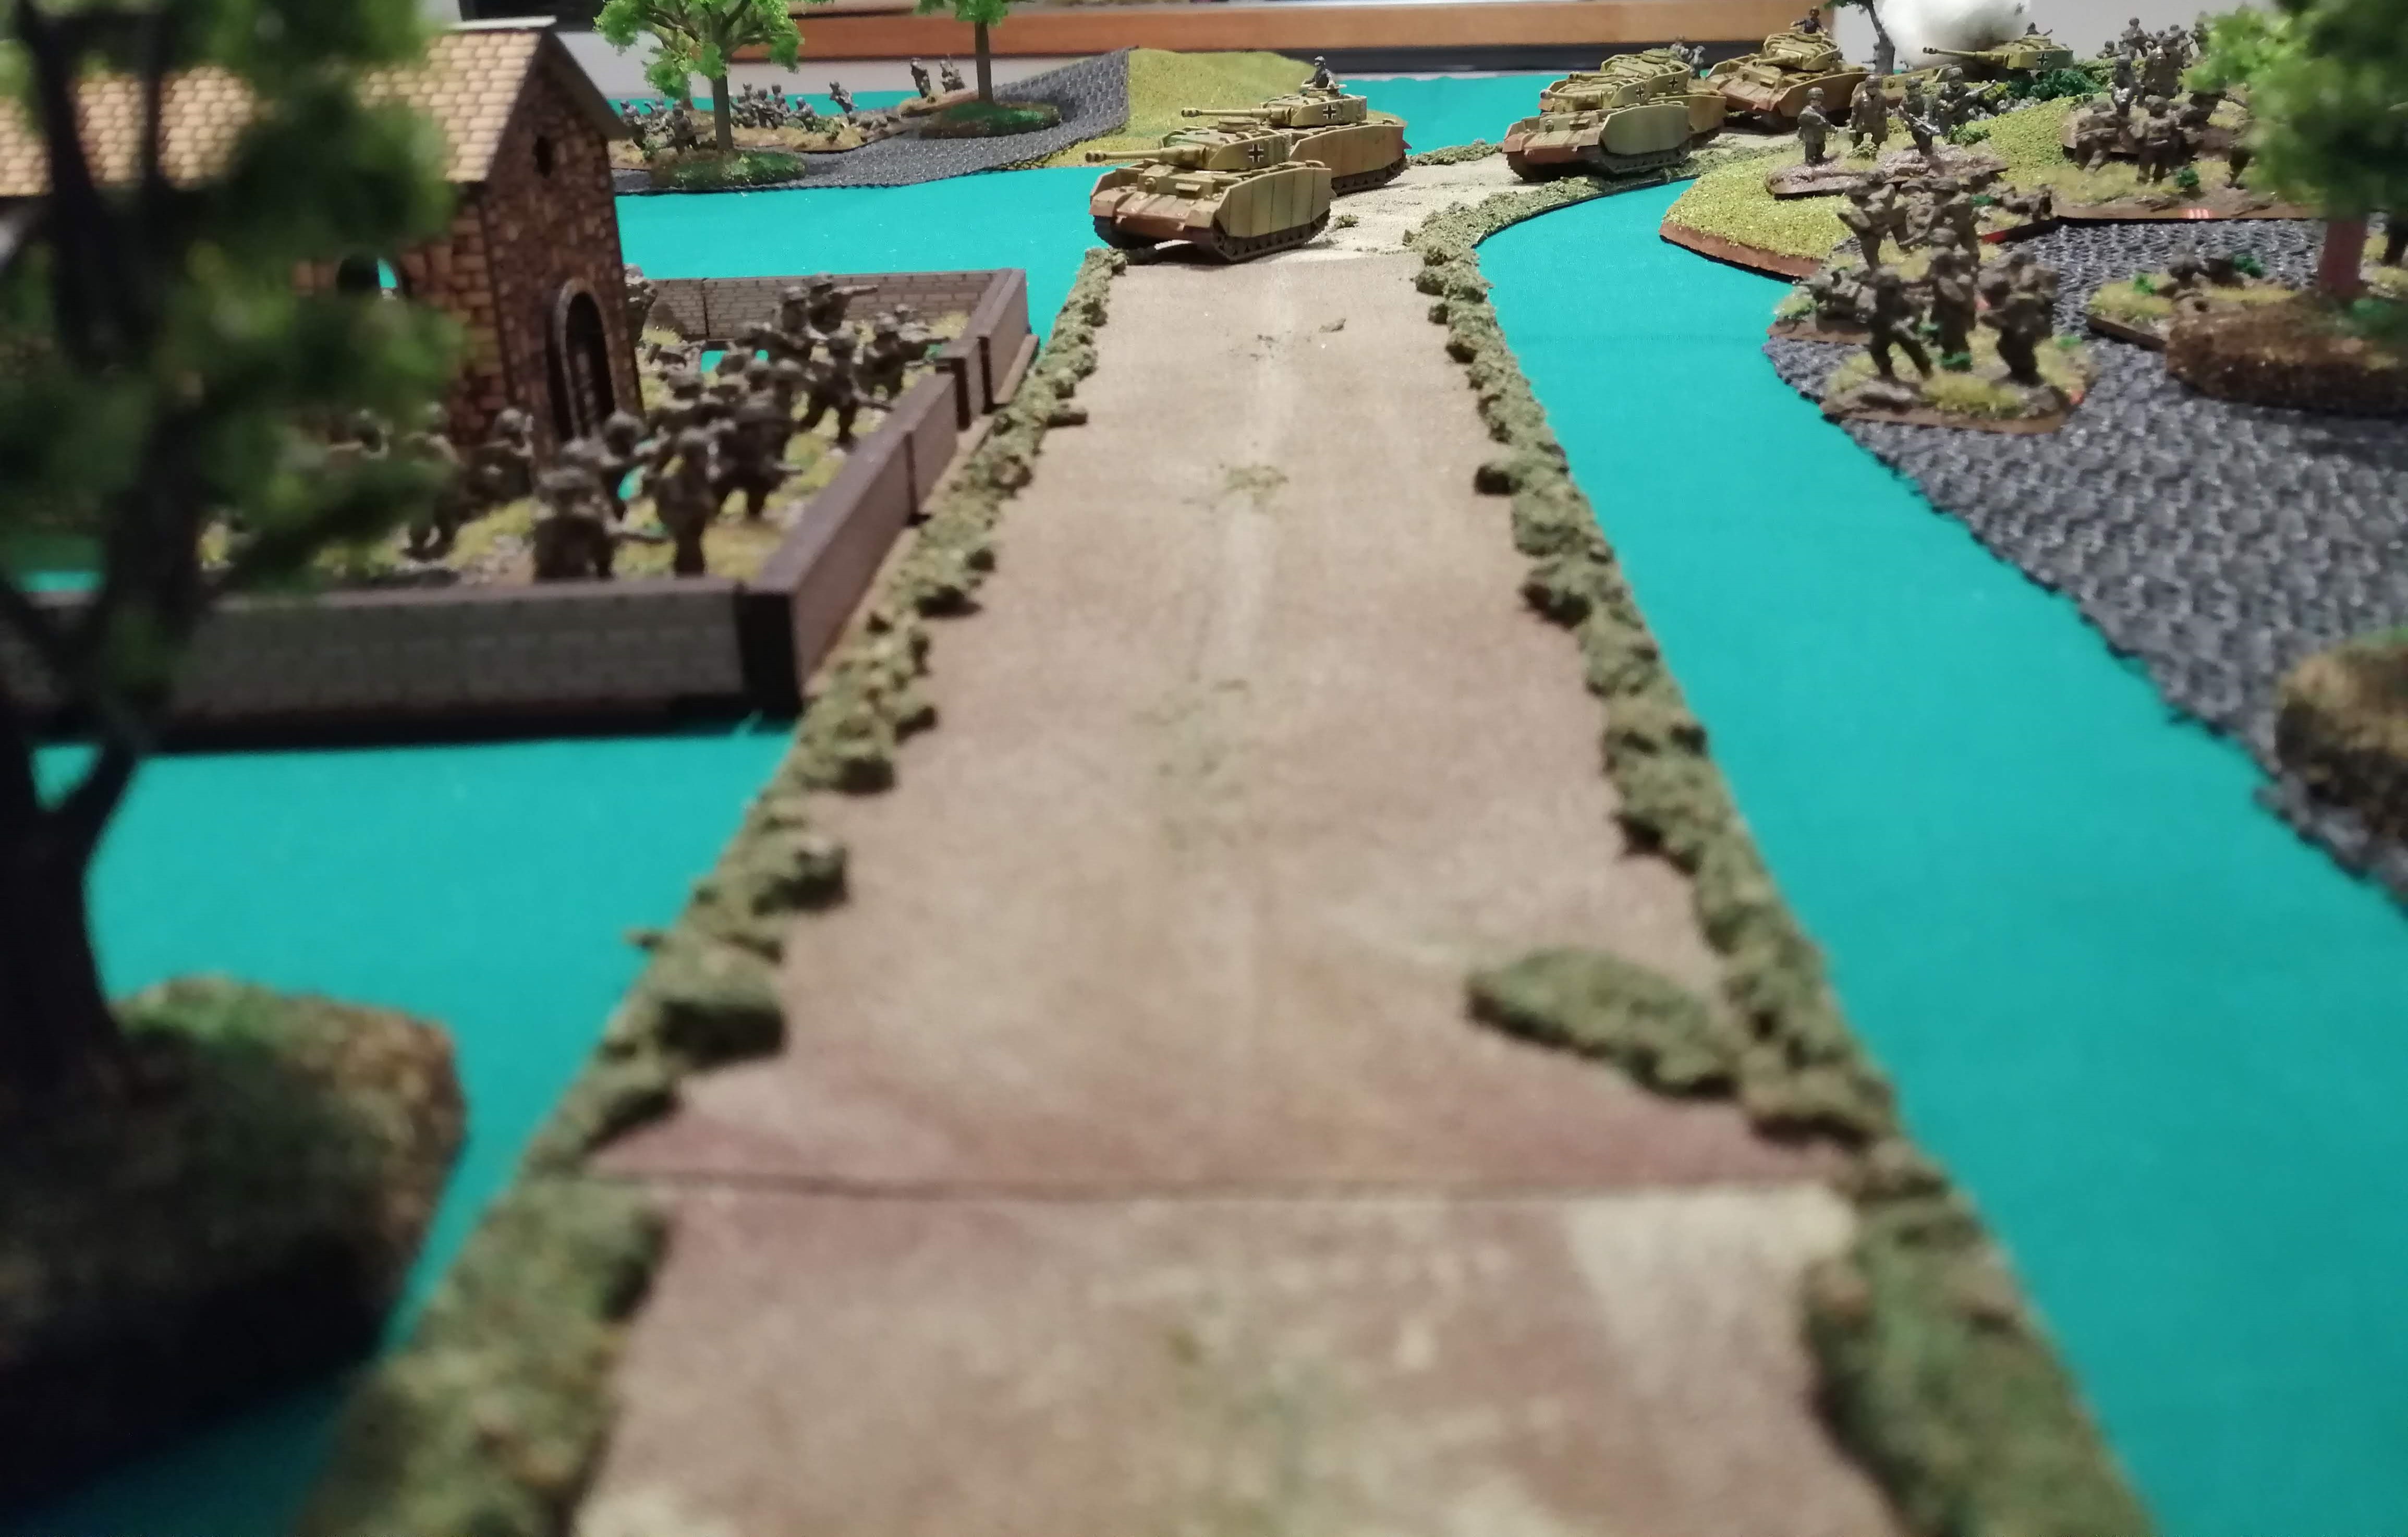
There’s no Stuka this turn however the tanks begin their advance. The Platoon of 2 Panzer IVs draws up to the barbed wire looking to cross it next turn. The 7.5cm guns remain stationary on the hill and prepare to bombard the Allied lines. The remaining infantry advance up.
The Tiger and the Panzer IVs fire on the 6pdr gun teams. The Tiger misses while the Panzer IVs hit but fail to wound thanks to the guns being dug in.
The two 7.5 cm guns bombard the MGs and 6pdr by the road. Despite being just two guns firing, they manage to hit an MG team and pin the MG unit in place.
The British begin their turning by targeting the threat of the two Panzers and the barbed wire. The two 6pdr guns on the right fire upon the Panzer IVs at the barbed wire. They score 3 hits which quickly convert into two destroyed tanks.
The 6pdrs next to the road fire upon the Panzer IVs advancing toward them down the road. They successfully bail one Panzer IV. The M10s can’t see the Tiger as it is behind one of the Panzer IVs but they can shoot at the IVs. They apply their 4 shots effectively, hitting twice and destroying both Panzer IVs.
One of the 5.5” artillery guns can draw a bead on the Tiger and lowers its gun to fire direct. It has just one shot but makes it count, punching straight through the front armour and destroying the Tiger with a single shot! So in just one turn of shooting, the German tank capability has been significantly reduced – great gunning by the British anti tank crews!
The naval gun fire falls well behind the German advance and causes no damage this turn.
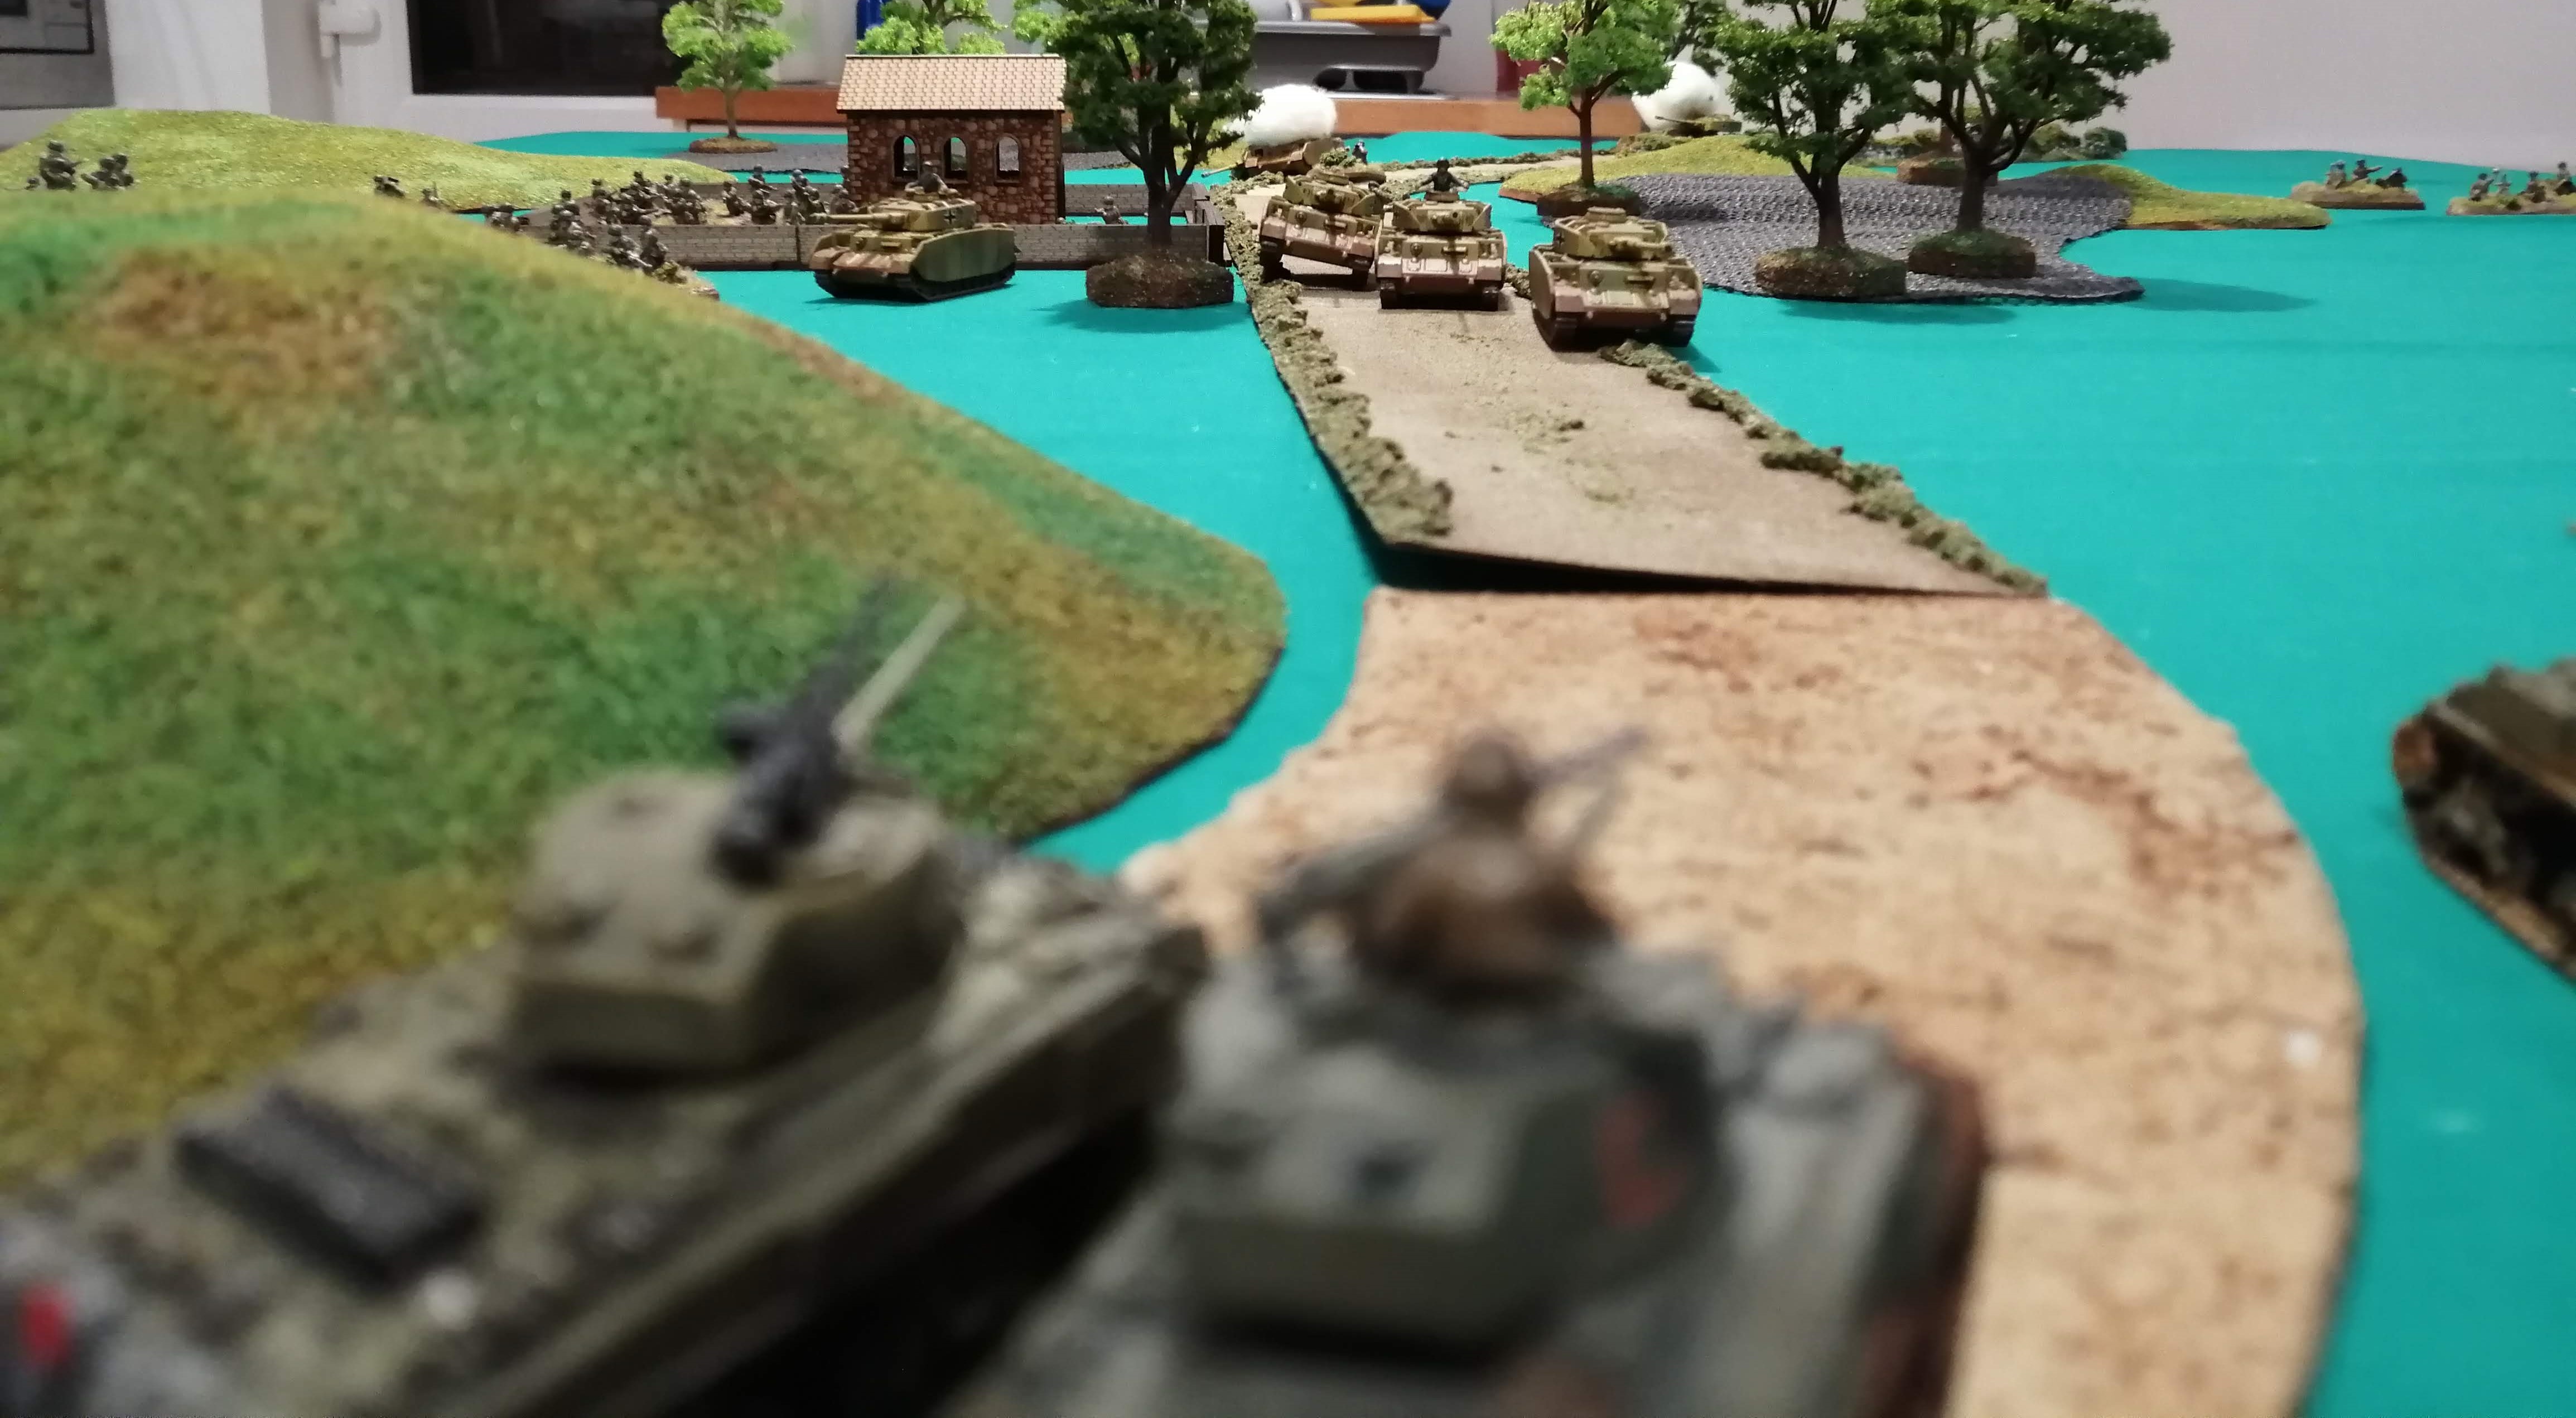
 End of Turn 4
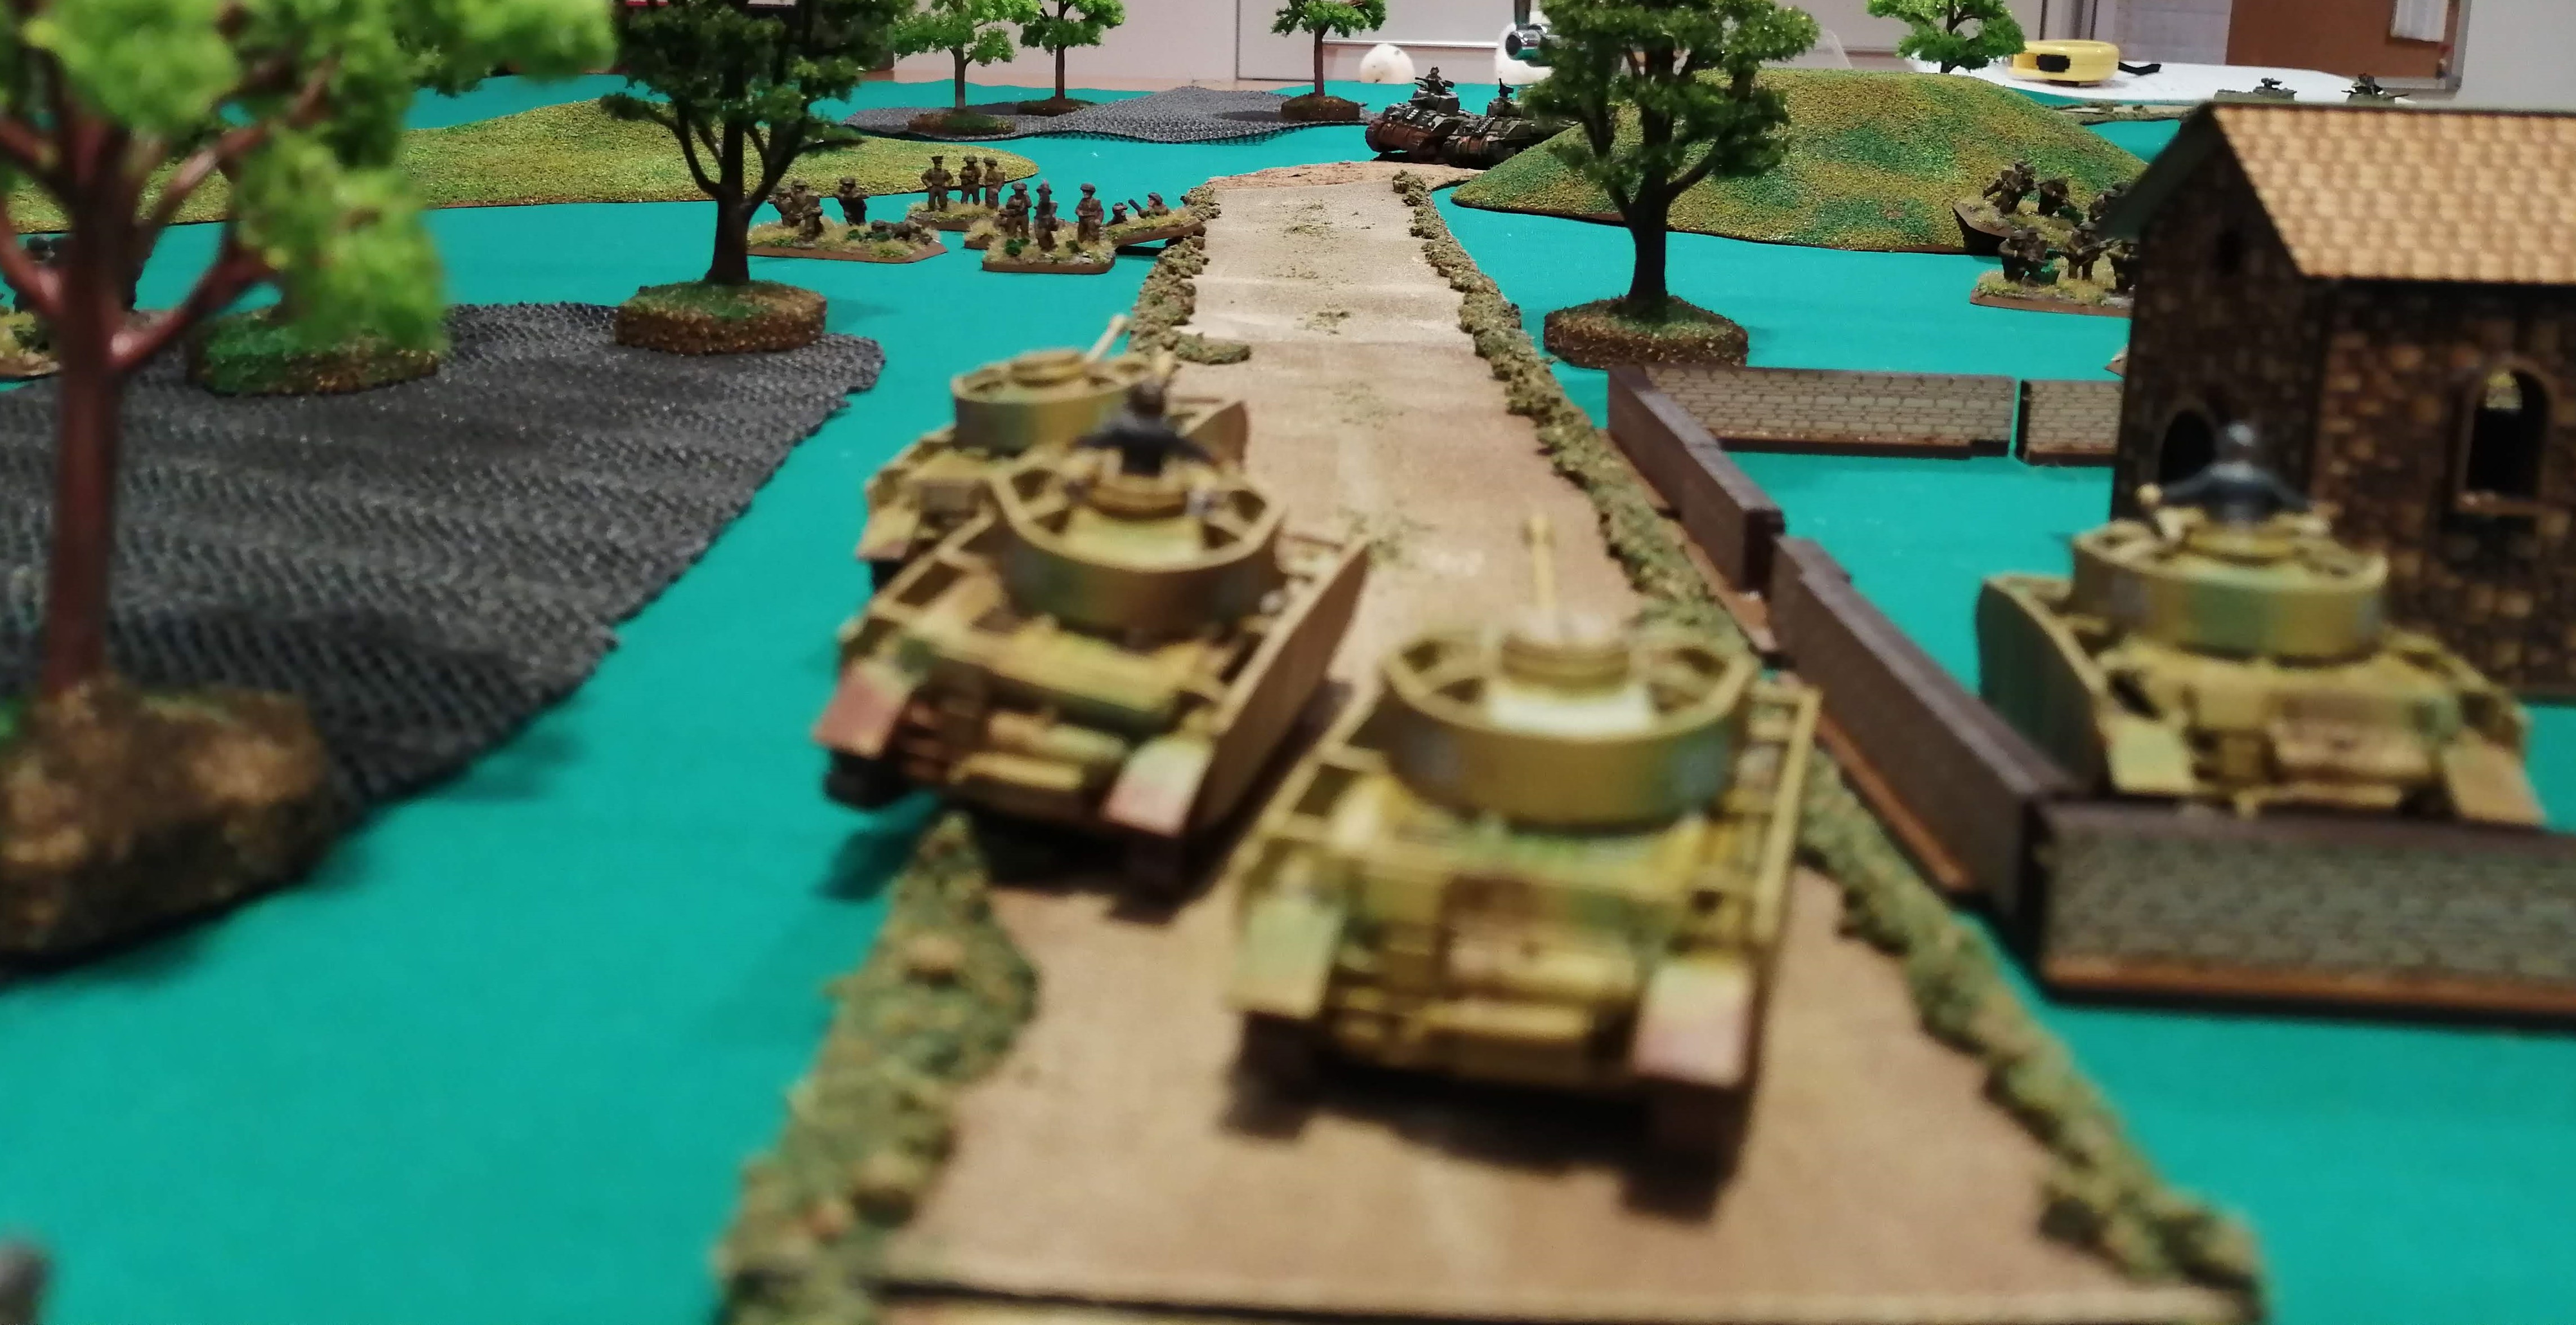
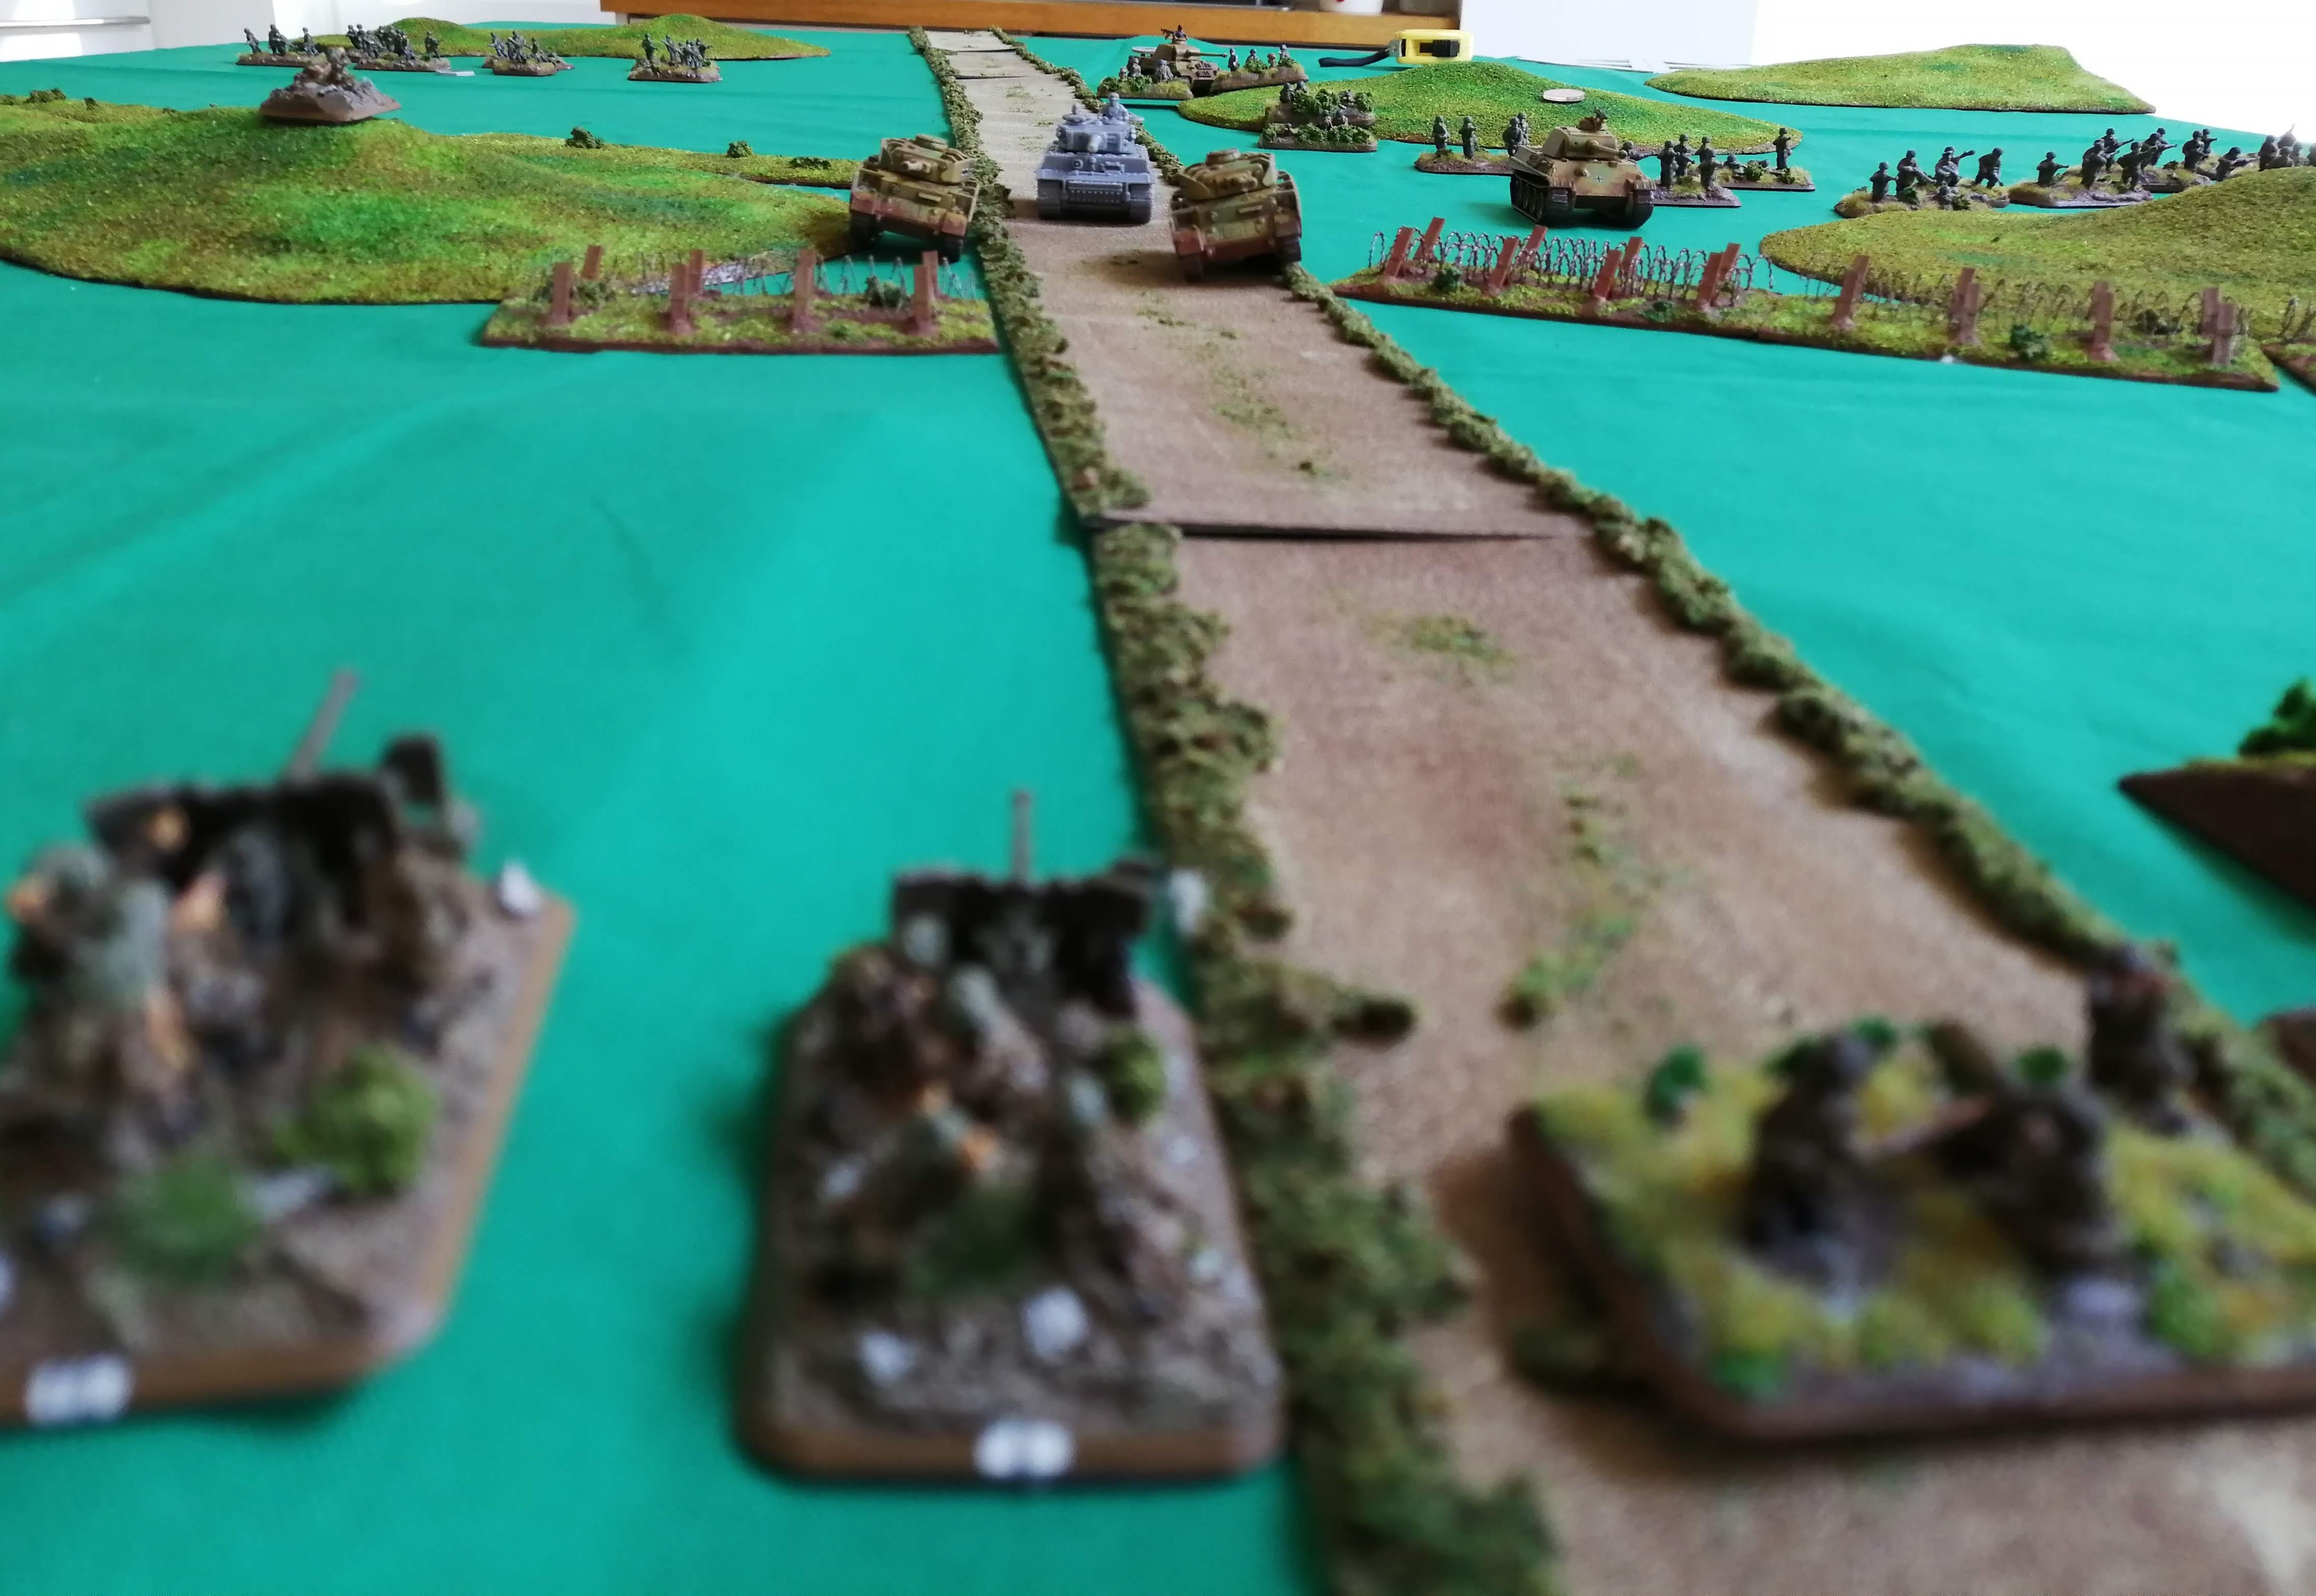 The 6pdr stare down the Via Anziate at the advancing Tiger
 The Panzer IVs at the barbed wire
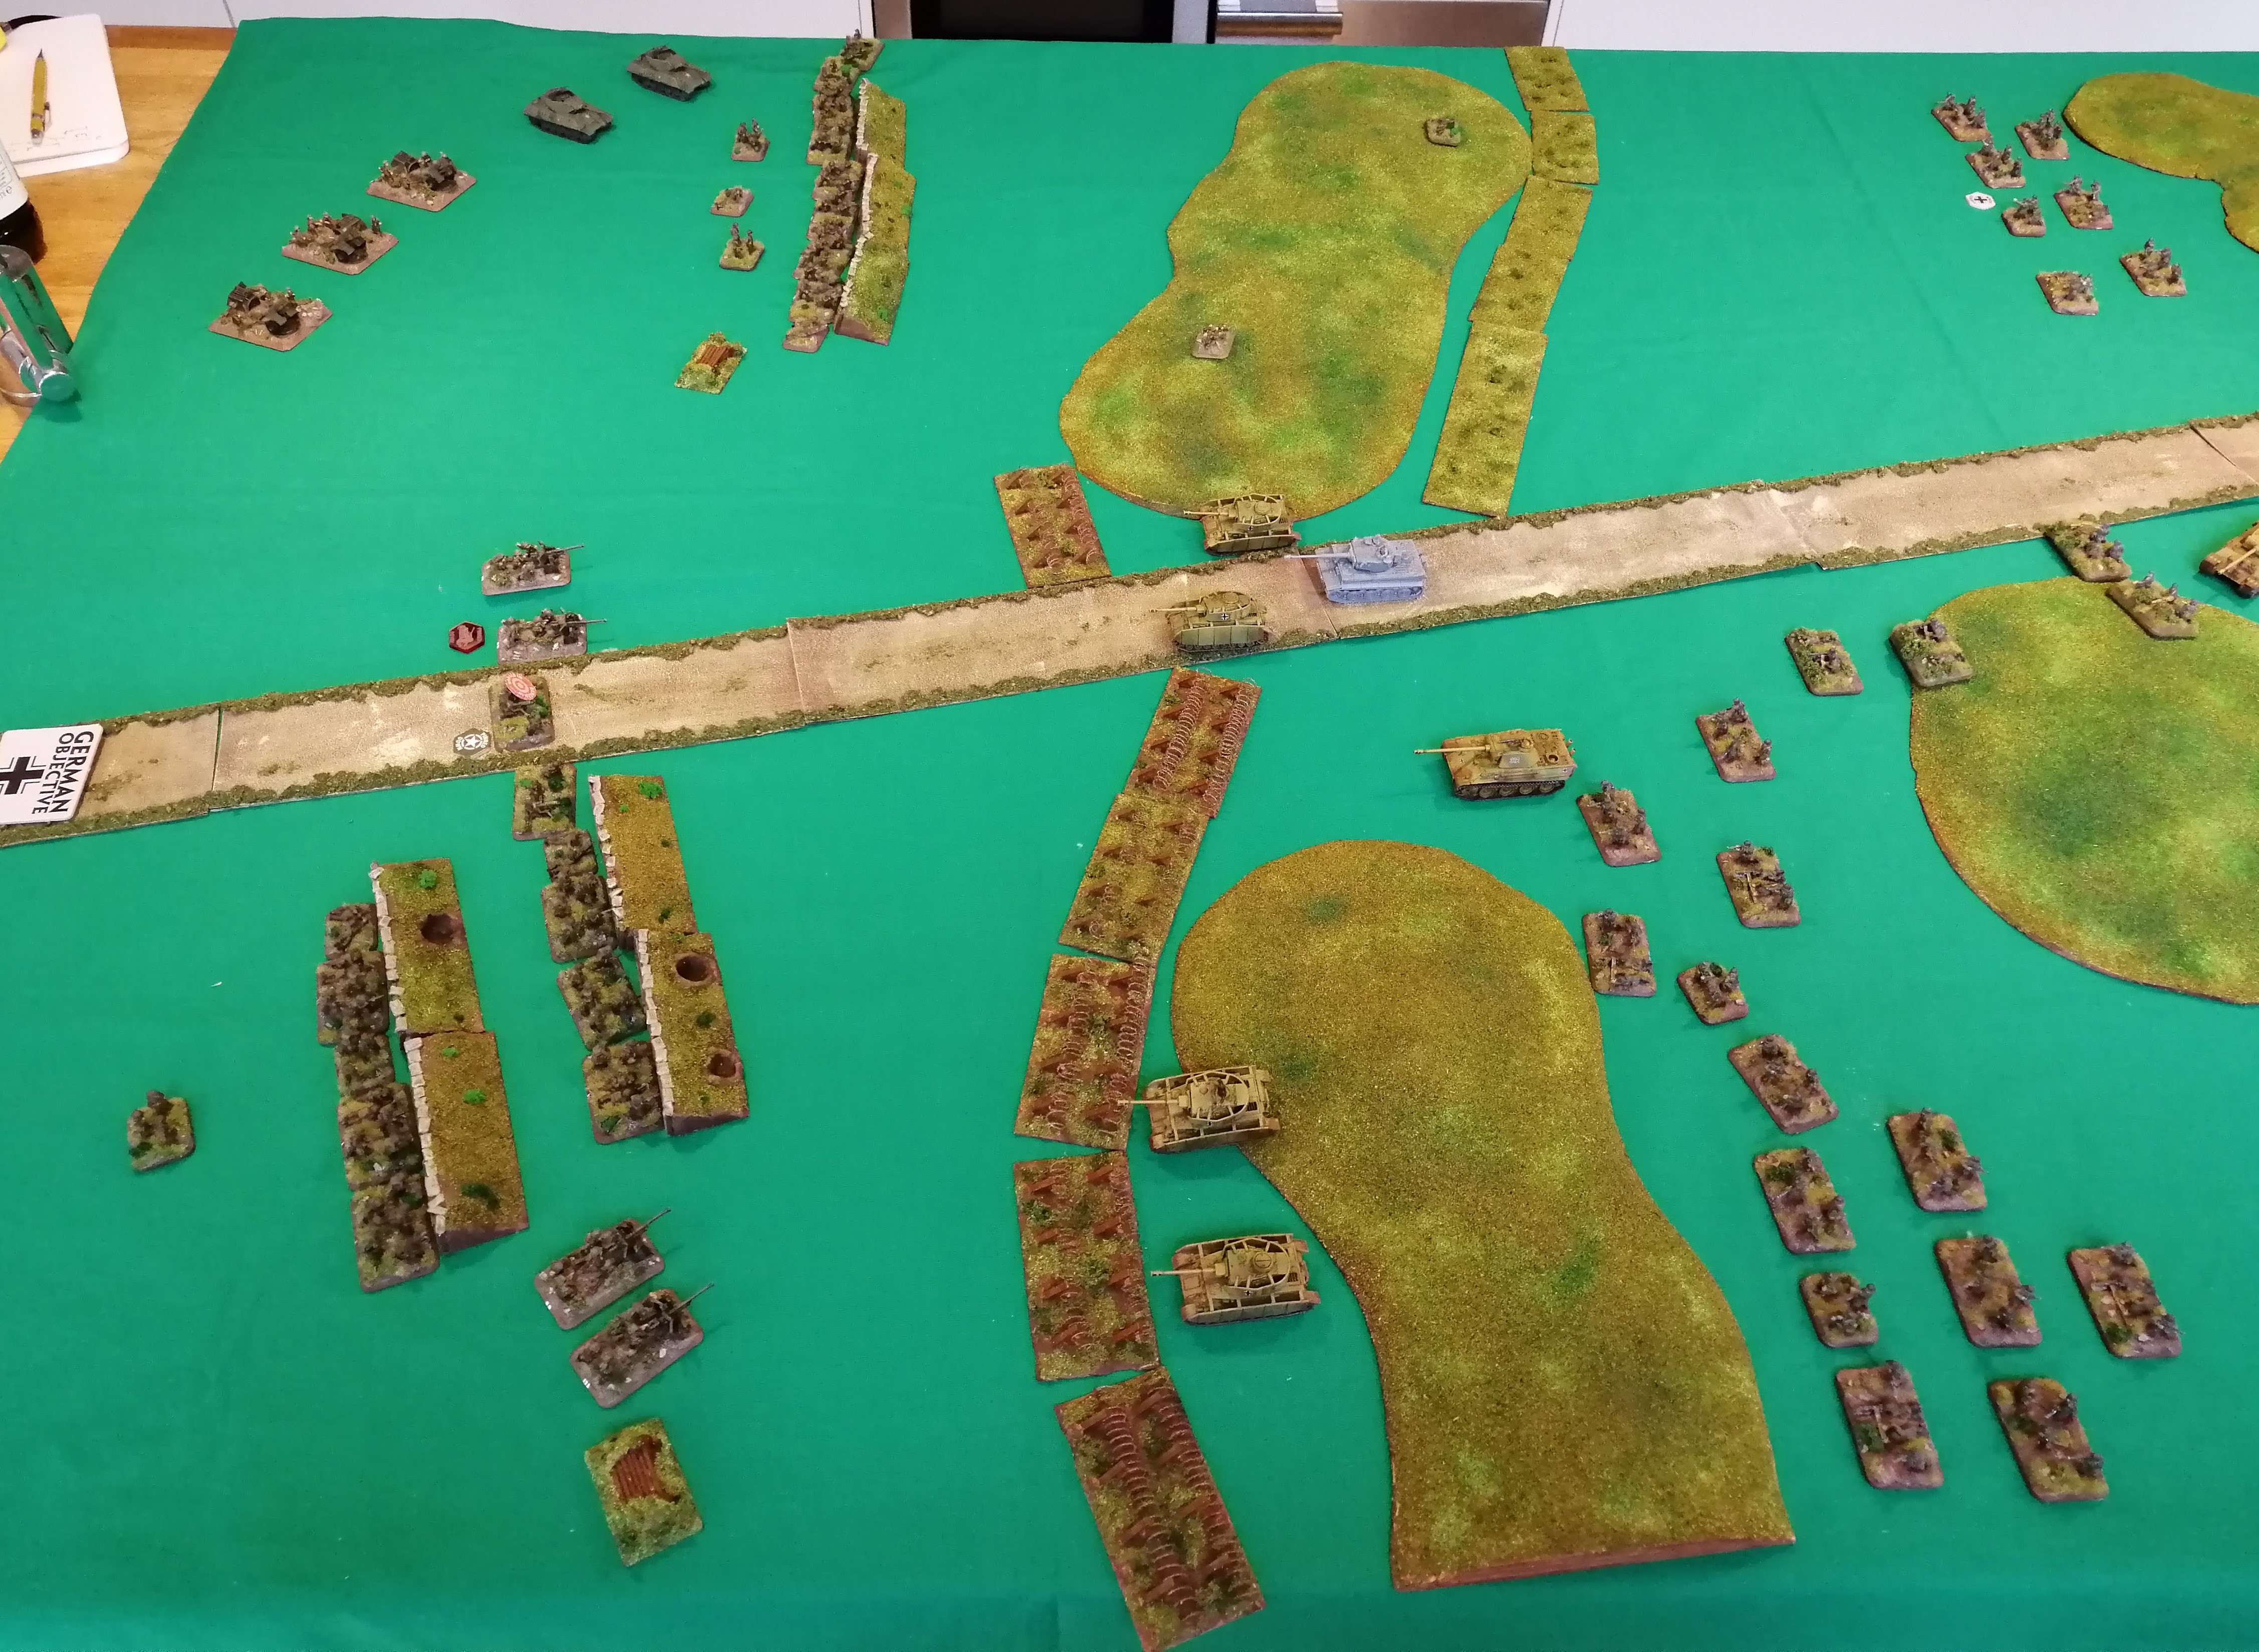

 The two gun teams that took out the Panzer IVs
Battle Report - Operation Fischfang (Turns 1 and 2)
Firstly, apologies for the barely painted Stuka and unpainted Tiger 1. The Stuka is now finished but the Tiger is in the painting queue – I just didn’t have a painted one to use.
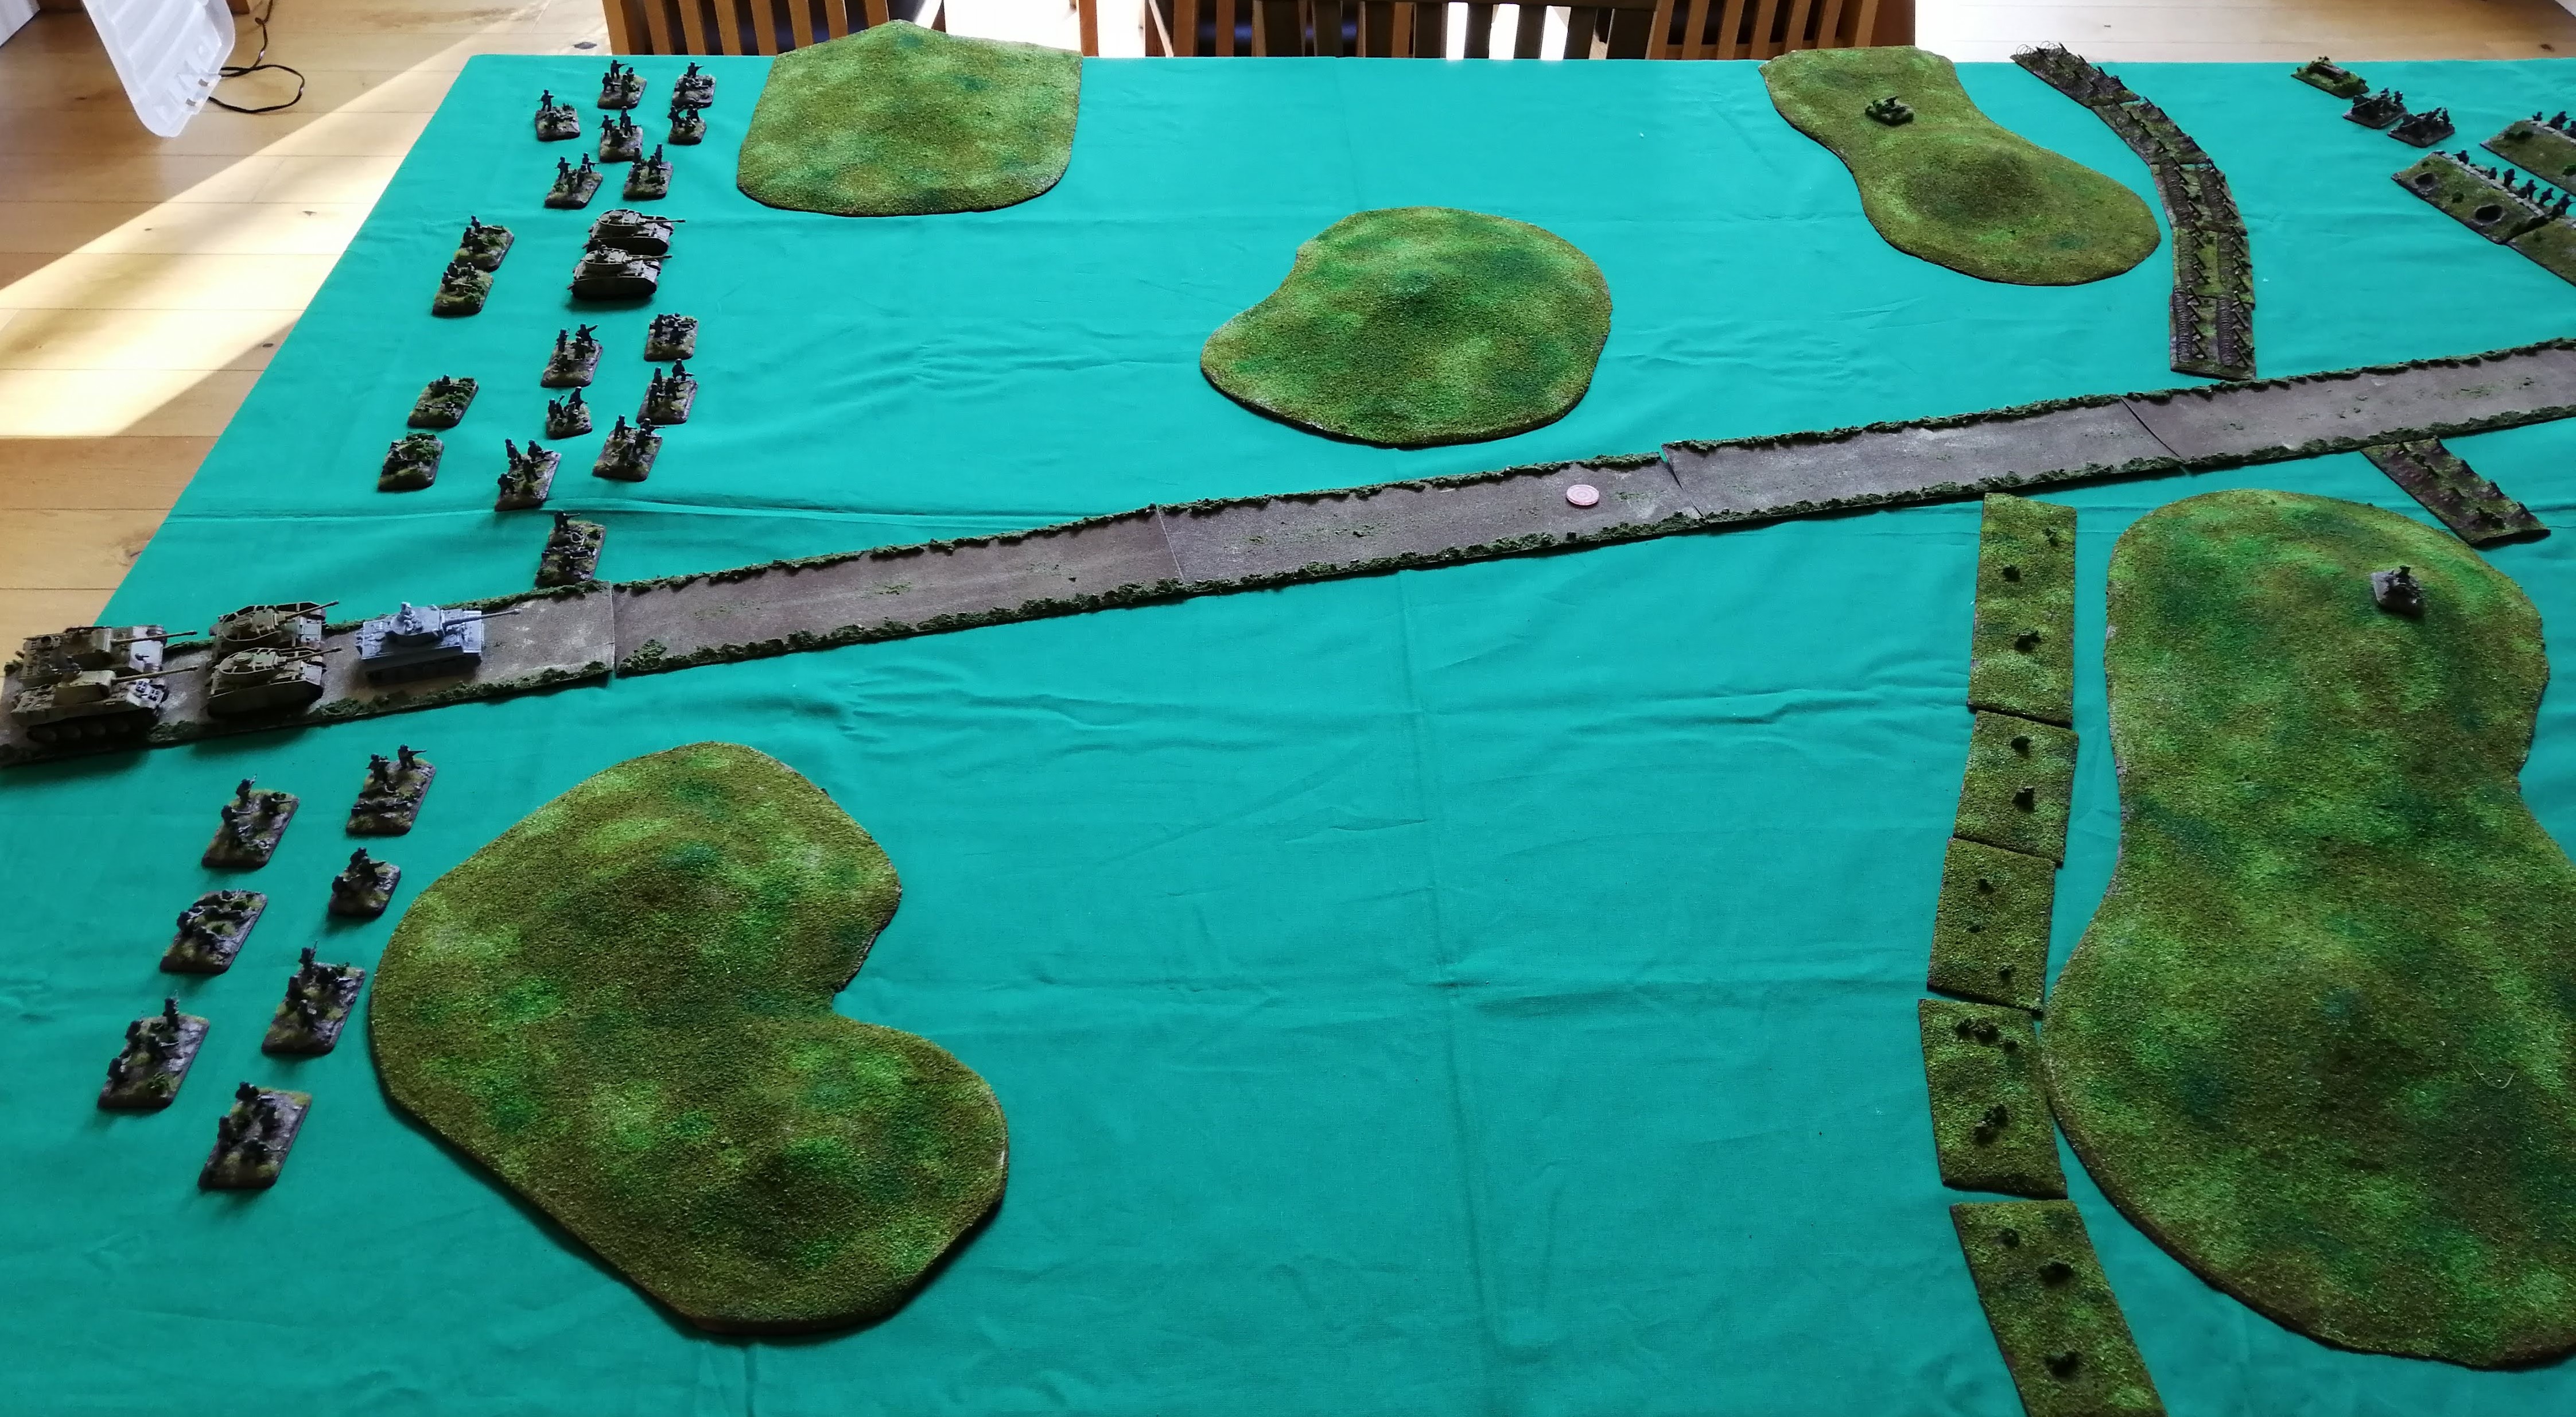
Turn 1
This was a short turn as the Germans just advanced. Where possible, the tanks moved at dahs speed. The Luftwaffe failed to turn up in turn 1 leaving the British unmolested. Everyone was out of range to fire and the British refused to move out of their positions and so no shooting took place.
 Tactical view end of an uneventful turn 1
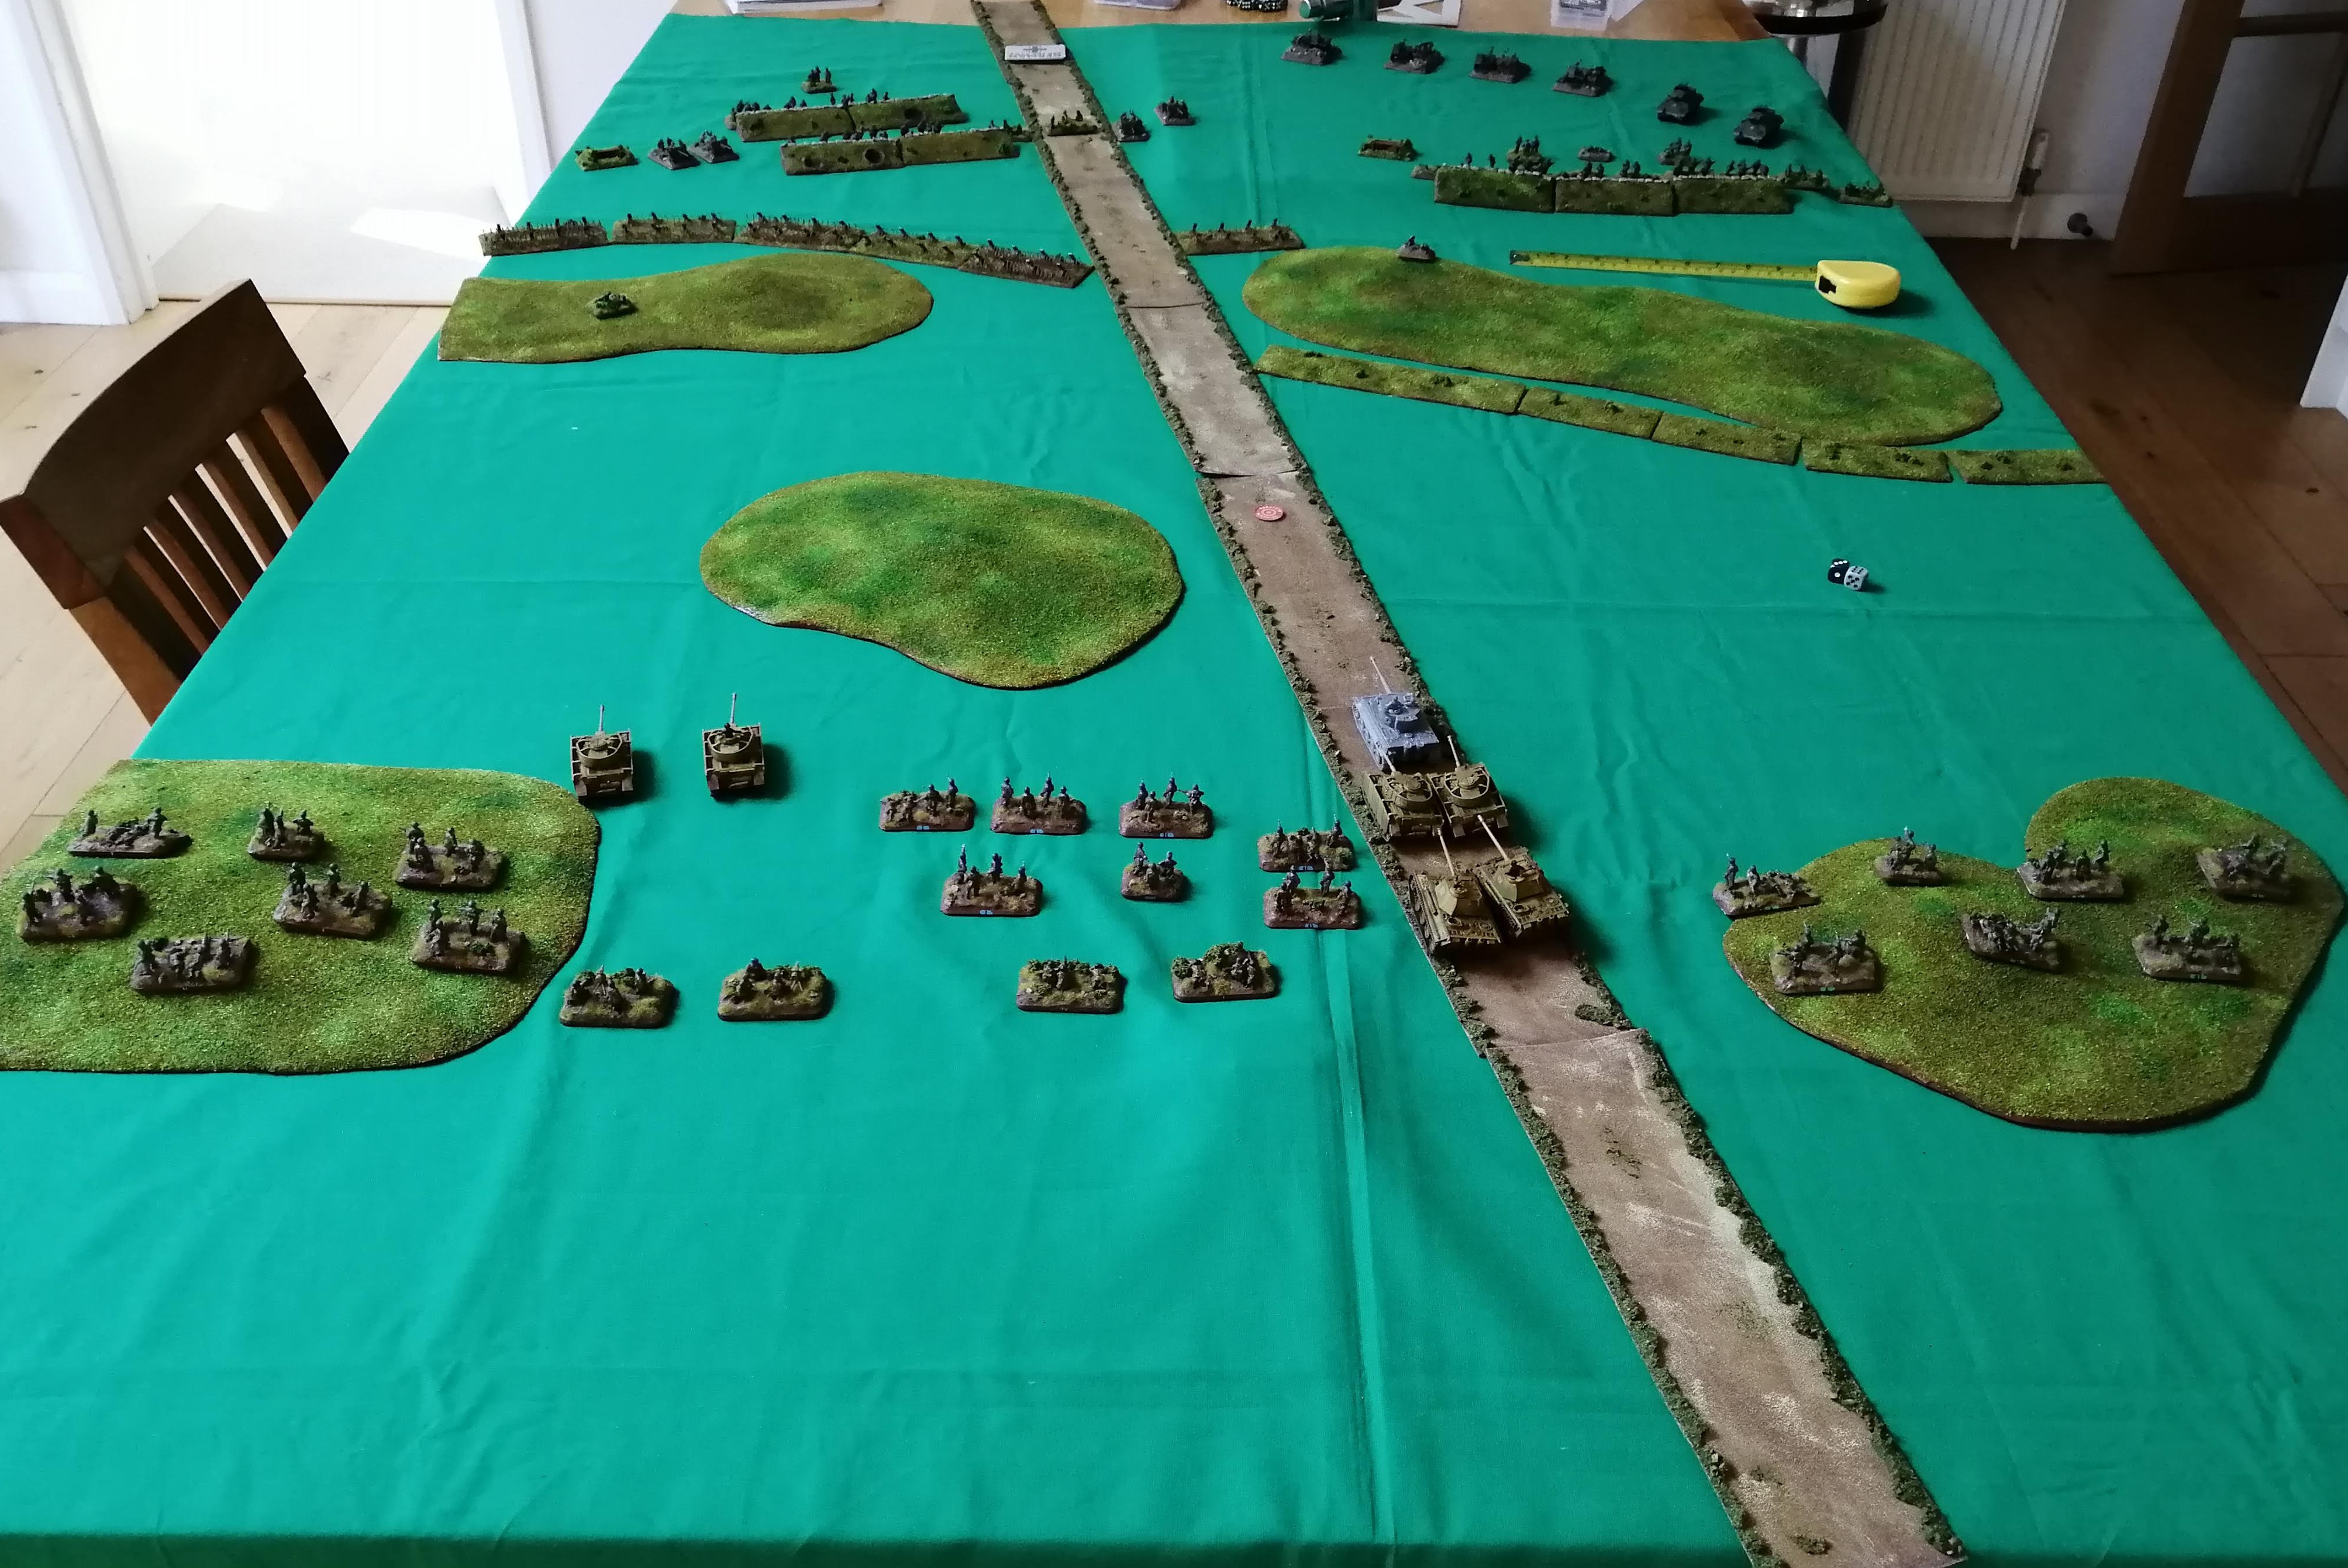 From the German perspective
Turn 2
The Luftwaffe put in an appearance this turn and the Stuka decided to make a run at the British artillery. Otherwise, the entire German line continued its advance up the board. With the British lines drawing in range, the tanks moved at standard speed to apply some fire.
With nothing else to shoot at, the M10’s turned their AA MGs to the skies to shoot at the Stuka bombers. They were able to apply enough fire to deter one bomber from arriving but not enough to stop the other. The Stuka unloaded on the artillery unit hitting one gun team. Being dug in, the gun team was able survive the attack but this does pin the artillery.
The Tiger turns its gun on the HMG nest next to the road and is able to hit the target but the heavy protection of the nest is able to shrug off the hit.
The British don’t move so we go straight to the naval gunfire support. The 8d6 less 8” comes up with a 29” distance from the German table edge. The width comes up with 24”. This lands just behind the Tiger, so great shooting from the Allied naval fleet! The shot hits the 1iC Panther, the Tiger and both Panzer IV’s but thanks to some good armour saves, only succeeds in bailing out the Panther and one of the Panzer IVs.
The Allied big guns aren’t finished yet as the British Artillery unpin and begin to bombard the Tiger. The shots land on target but the Tiger and Panzer IV pass their armour saves.
The British deploy their sniper from ambush on the hill behind the minefields. Fallschrimjager Green Platoon is in range and the sniper takes aim, hitting the leading squad. The squad saves, so no damage done but this is enough to pin FGP in place.
 End of Turn 2. Note the arrival of the sniper on the hill and the points where the artillery landed
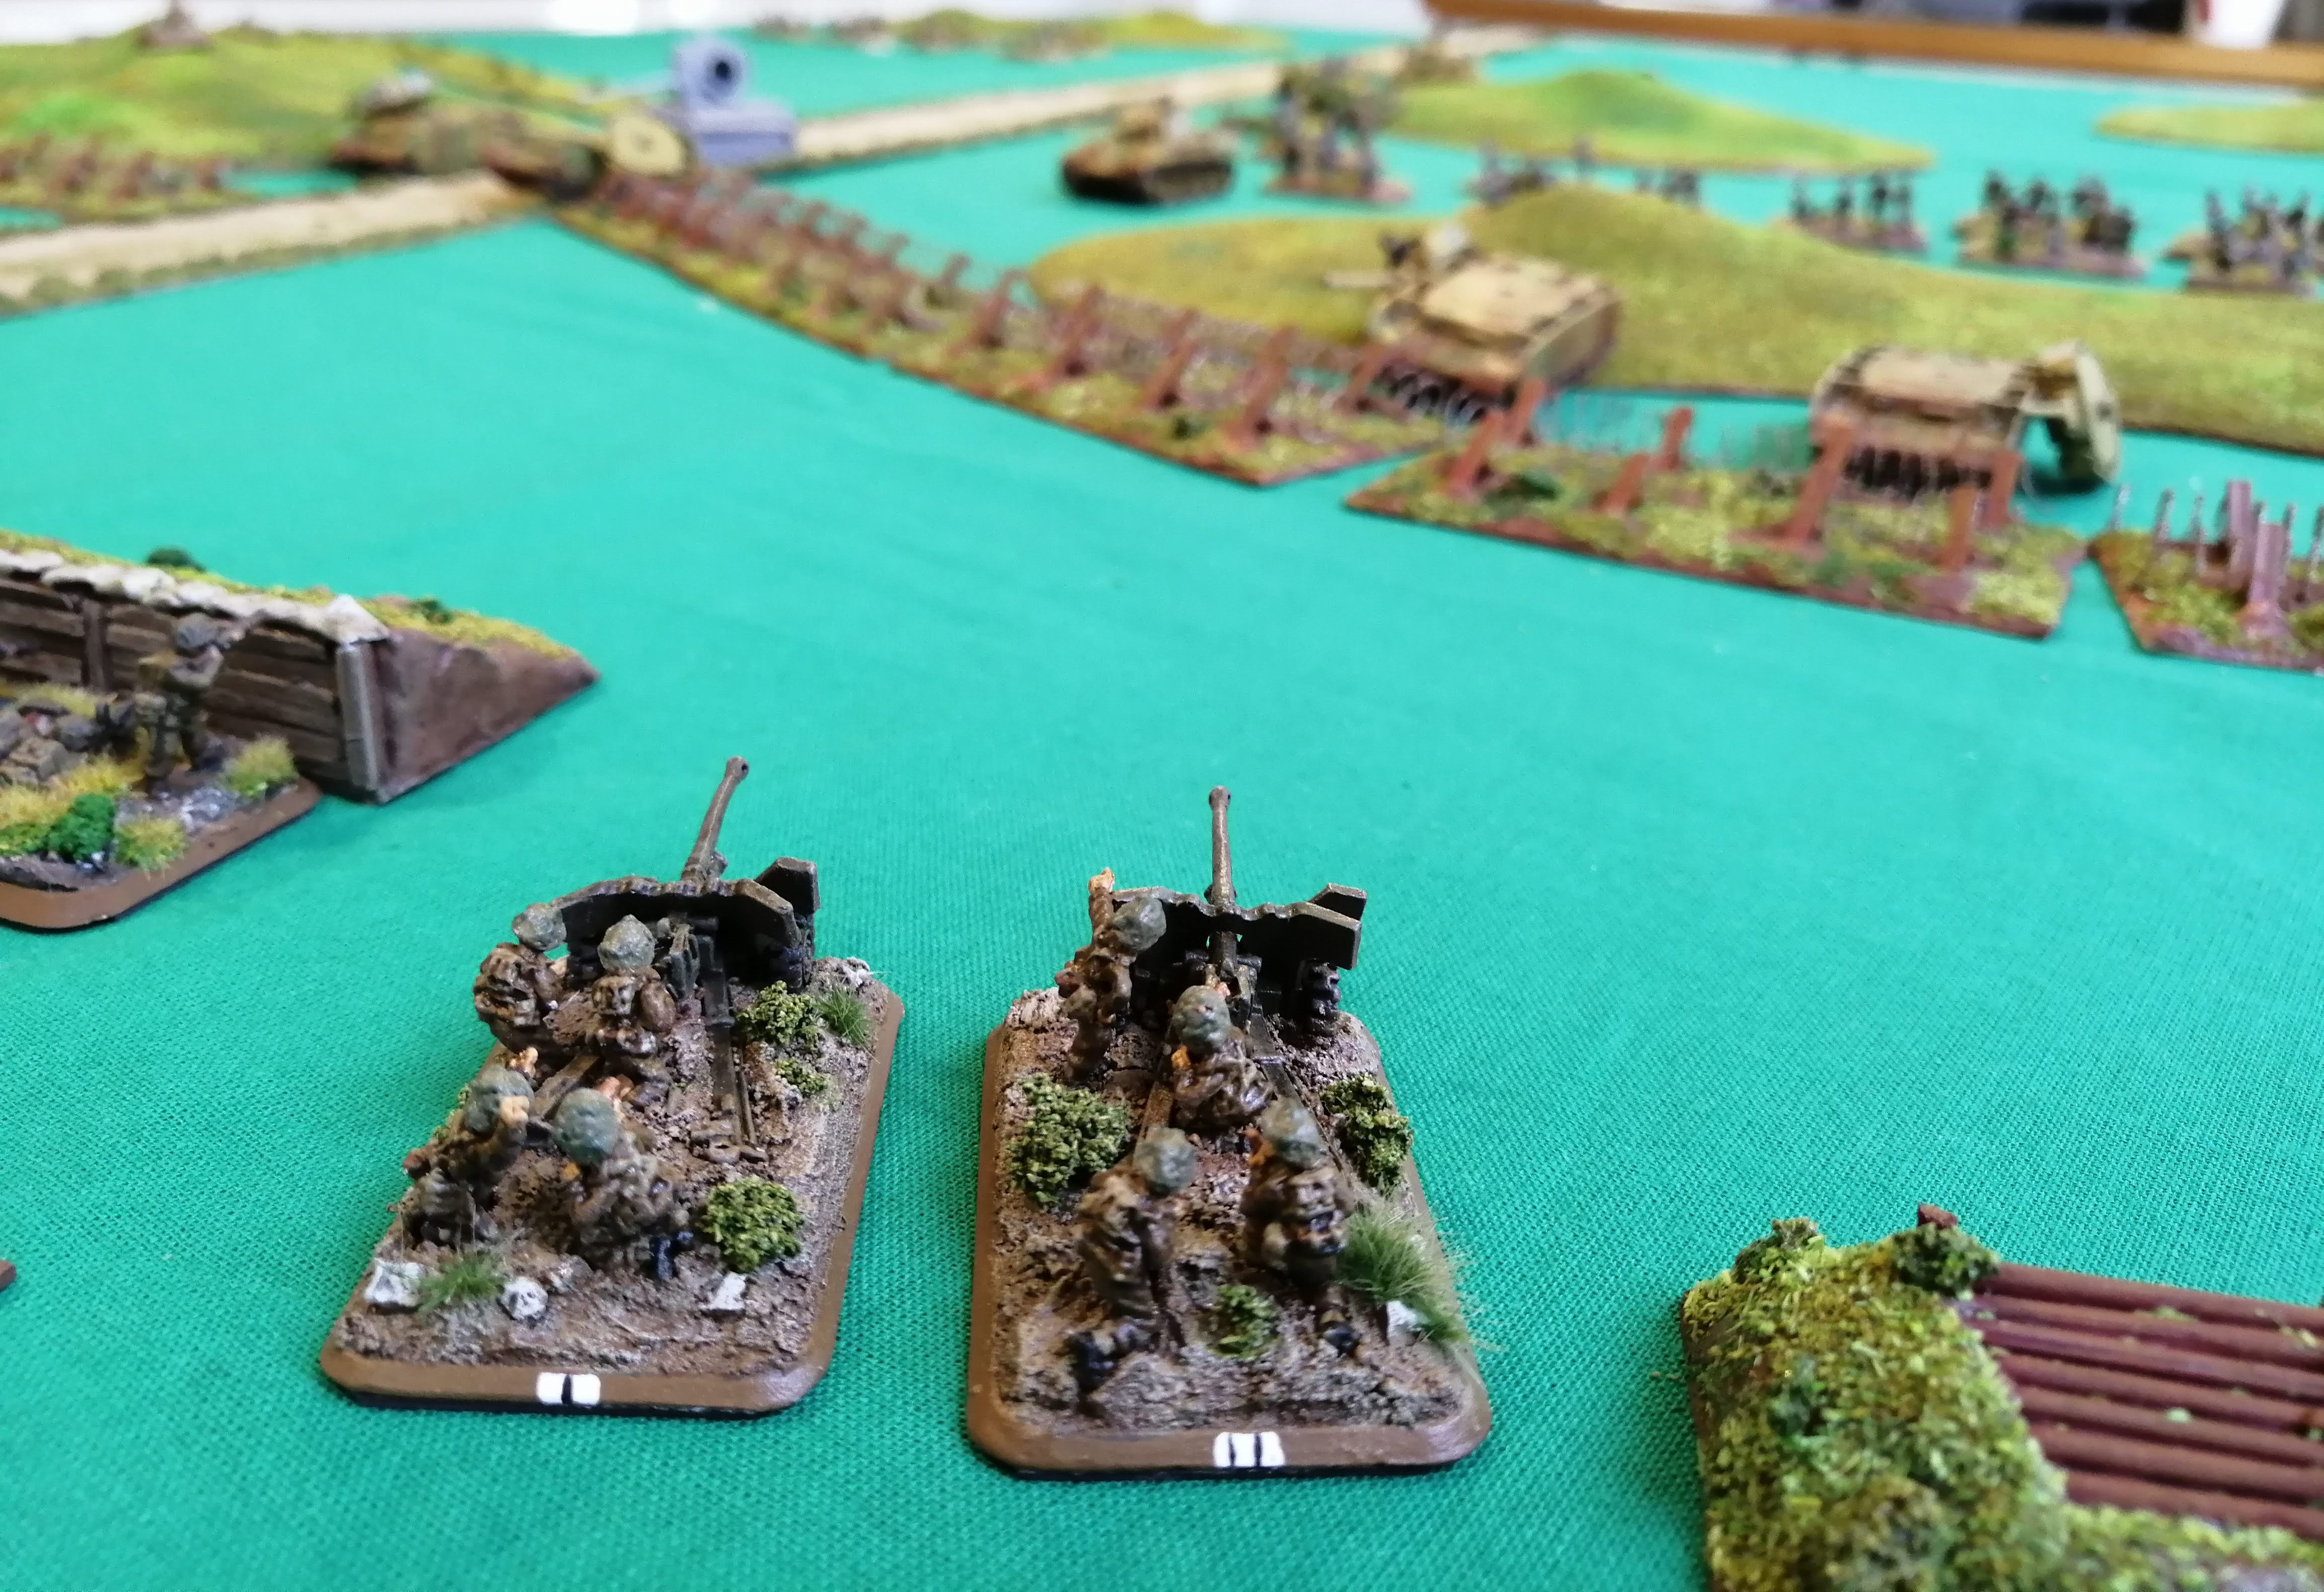
 View from the 6pdr gun teams on the British right flank
 The artillery and naval fire arrives
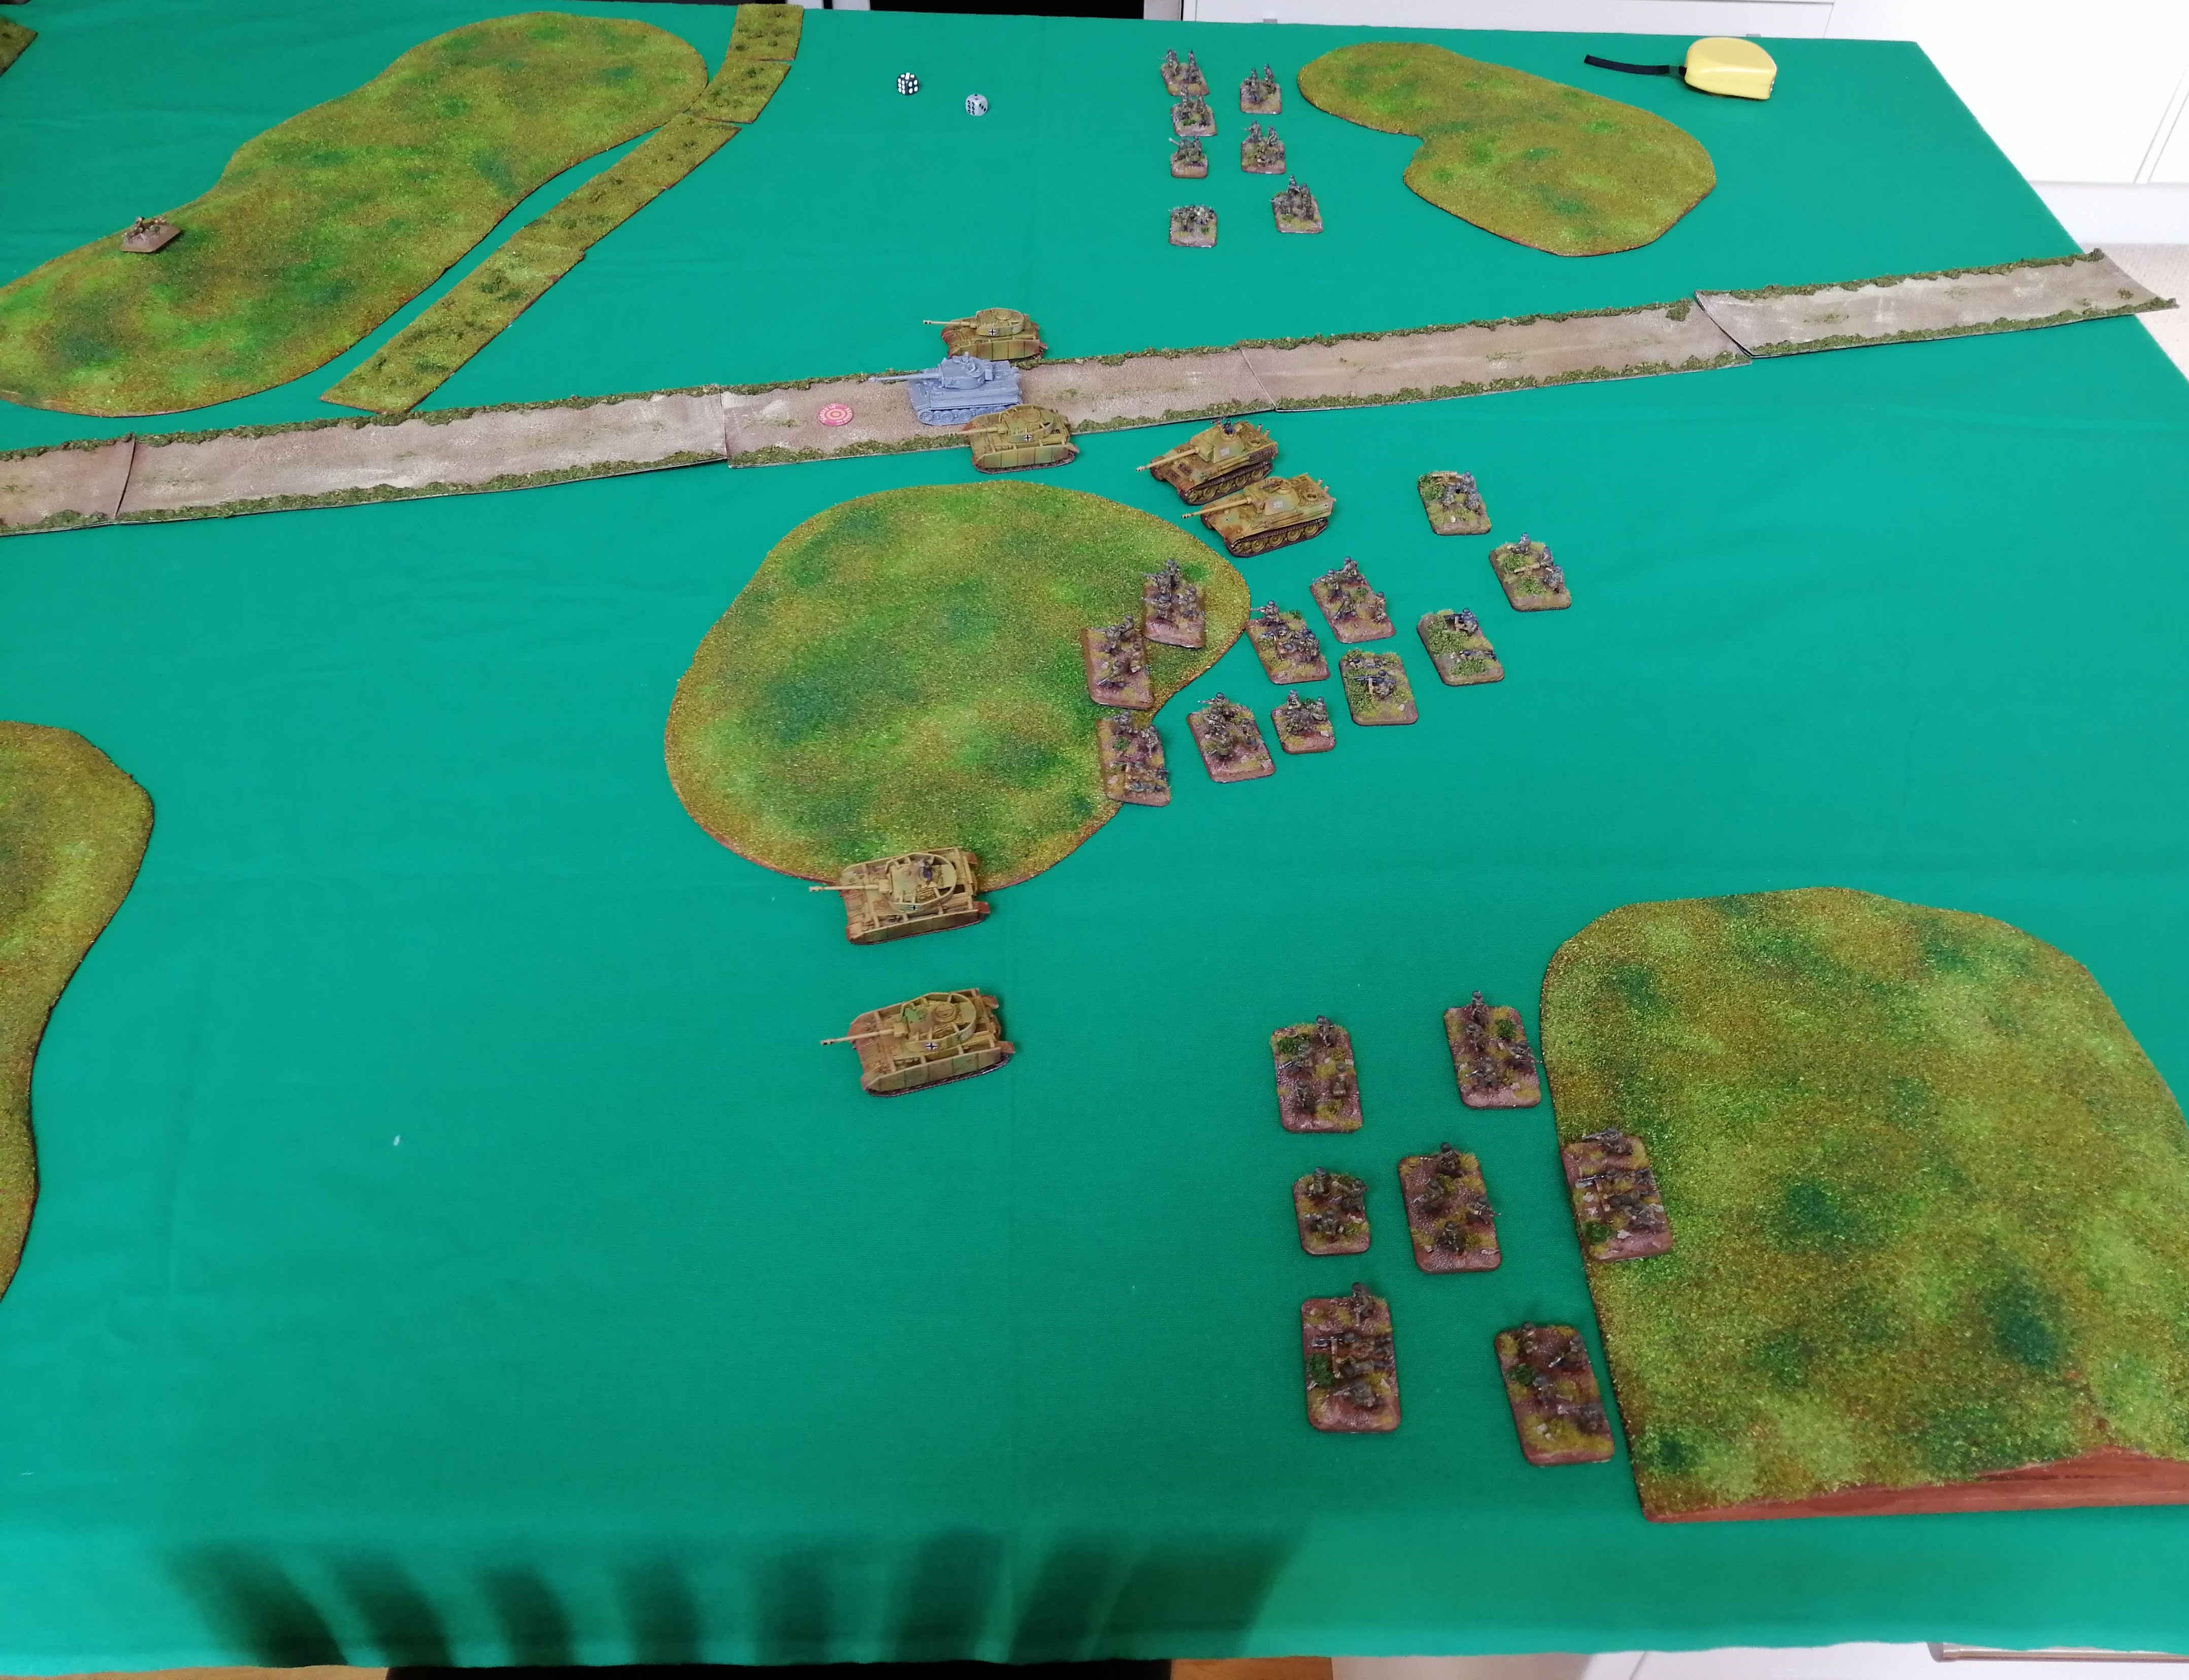
Battle Report - Operation Fischfang, Breaking Through to the Beach
Background
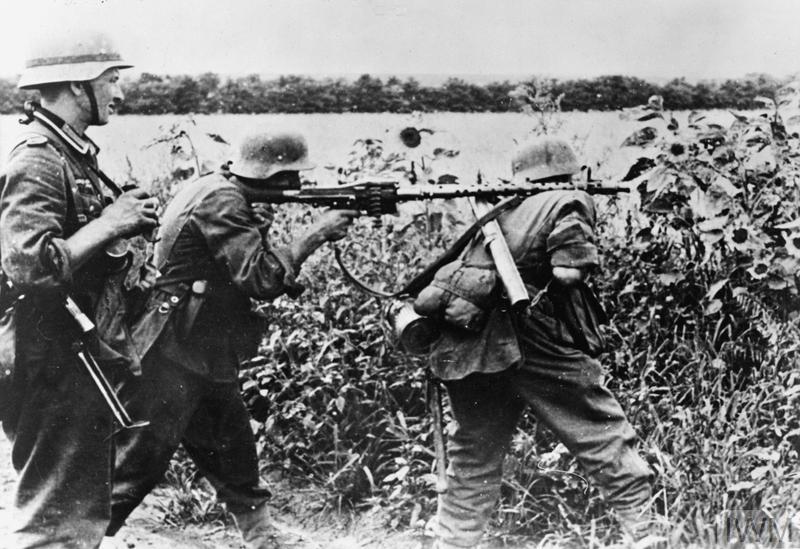
For this battle, we’ll take a semi historical perspective and inject a little ‘beer and pretzels’ gaming. Operation Fischfang was a German Counter Offensive against the Anzio beach landings in February 1944. This battle will focus on the final push as the German 26th Panzer Division came close to pushing the Allies back to the landing beaches. The counter offensive was launched down the Via Anziate, the main road running South from Campoleone and the 26th Panzer were able to include some new Tiger I tanks alongside a battalion of Panthers, so a good opportunity to bring out the big cats! The Luftwaffe also ran near continuous air attacks during the offensive, so this will need to be represented in the game.
The offensive was hugely costly for the Germans and by the time they reached the last Allied line of defence, their casualty rates were running high. To represent this, we will run mixed platoons of tanks and platoons with reduced numbers.
For the Allies, historically it was the naval support coupled with artillery units firing over open sights that actually stopped the offensive. These will need to feature in the battle.
Forces
German Forces (26th Panzer Division Supported by 4th Fallschirmjager):
HQ: 2 Panther G tanks
Panzer Platoon: Tiger I and 2 Panzer IV H
Panzer Platoon: 2 Panzer IV H
Three Fallschirmjager Platoons: HQ and two Squads per platoon (1HQ stand and 6 infantry stands)
Falschirmjager MG platoon (two stands)
Falschirmjager 7.5cm Gun Platoon (2 stands)
2 Stuka JU87 Dive Bombers in support (operating as a single platoon, with both planes arriving together)
Allied Forces (British 1st Infantry Division):
HQ: 1iC and 2iC infantry stands
Two Rifle/MG Infantry Platoons in trenches
6pdr Anti Tank Gun Platoon (4 guns but split and operating separately)
MG Platoon (4 stands, split and operating as two separate platoons)
SP Anti Tank Platoons – 2 M10 armed with the M7 3” AT gun
Medium Battery Royal Artillery – 4 BL5.5” Artillery guns
4 Minefield sections (8” per section)
3 Barbed Wire sections (8” per section)
2 HMG nests
Victory Conditions
For this battle, they will be kept simple. The Germans are looking to break through to the beach and so an objective counter is placed 6” from the Allied table edge on the Via Anziate. If at the start of any player turn a German unit is within 4” and no Allied unit is within 4”, the German player wins.
Scenario Special Rules:
The Stuka appears on a roll of 5+ and is deployed in the movement phase. It cannot attack if there are German forces within 16” of the intended target.
The early spring rains had started and the battlefield was getting turned into a quagmire. Any movement not on the road is in ‘area terrain’ for the purposes of movement rates. Furthermore, tanks and vehicles must roll a 2+ each time they move otherwise they become bogged down for the turn and unable to move.
The heavy rain stops all Movement Orders as defined in the FoW rulebook.
No artillery attacks in round 1.
British Artillery have ranged in on the road prior to the battle. A ranged in marker can be placed anywhere on the road and no spotter is required to fire on this point.
On even numbered turns, at the start of the Allied turn the naval bombardment arrives. This is randomly placed on the table and cannot land in the Allied half of the table. To randomly generate the landing point, 8d6 less 8” are rolled to determine the depth from the German starting edge. 10d6 less 10” is used for the width. Using a standard template, everything under it is automatically hit with a AT5, FP 2+ shot. Infantry saves are taken as normal.
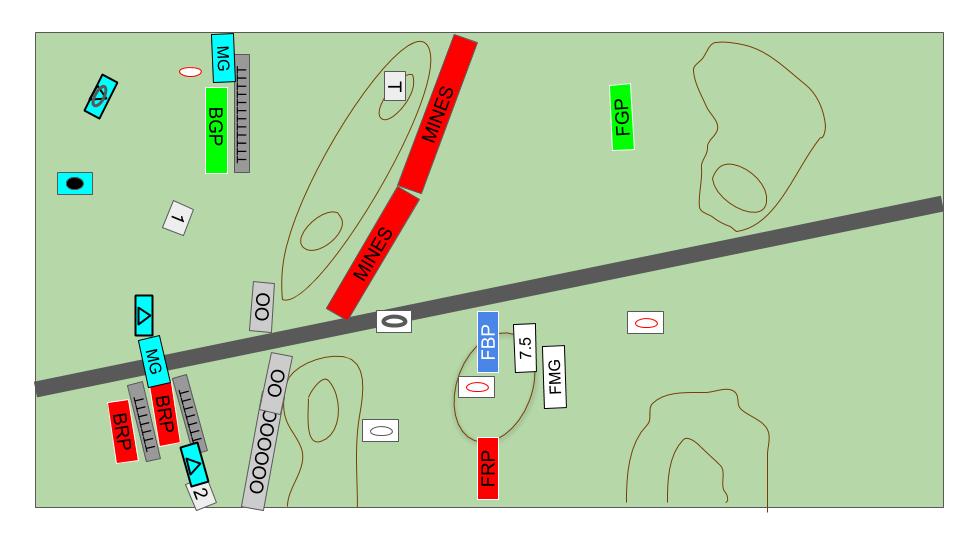
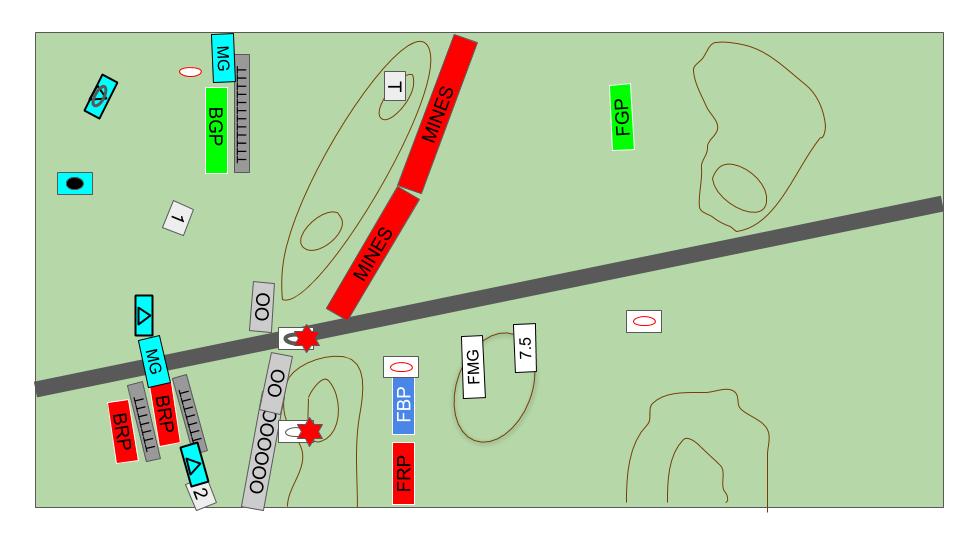
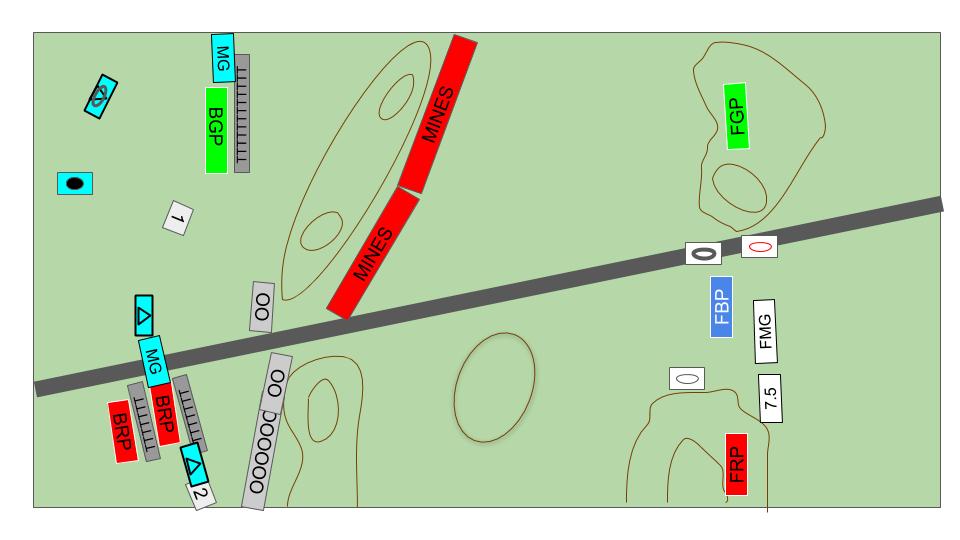
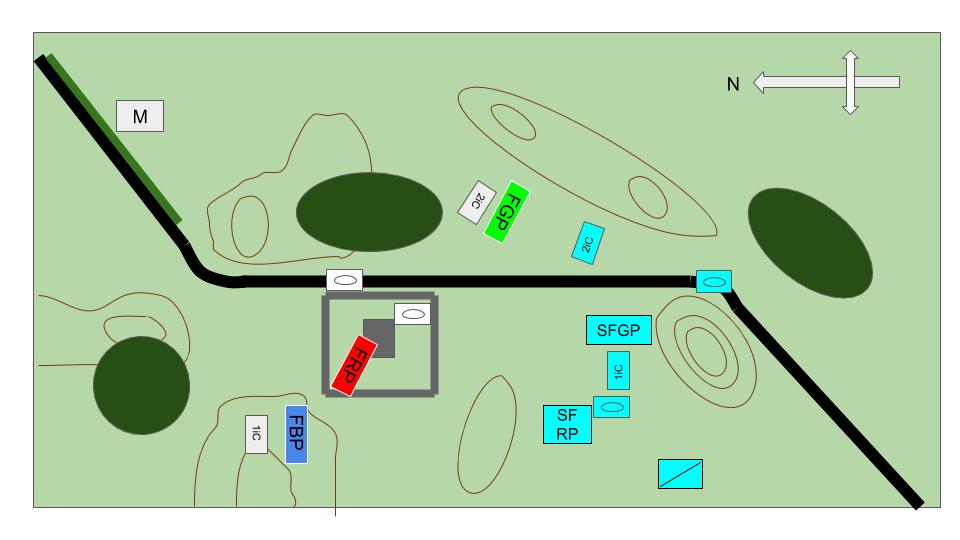
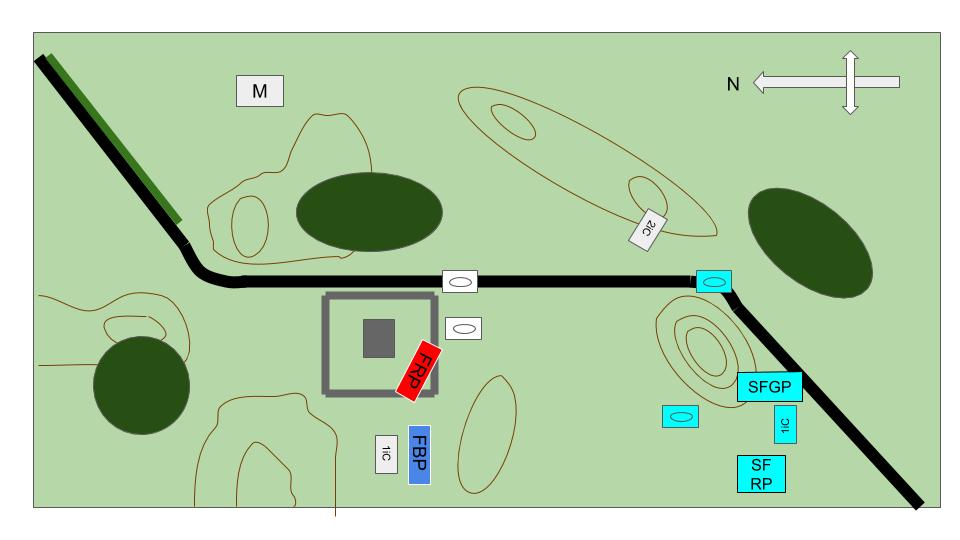
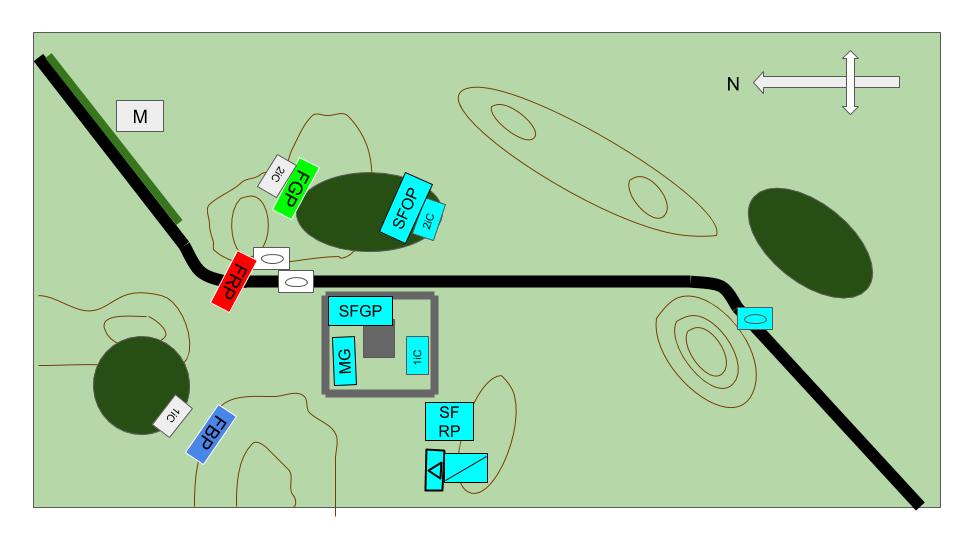
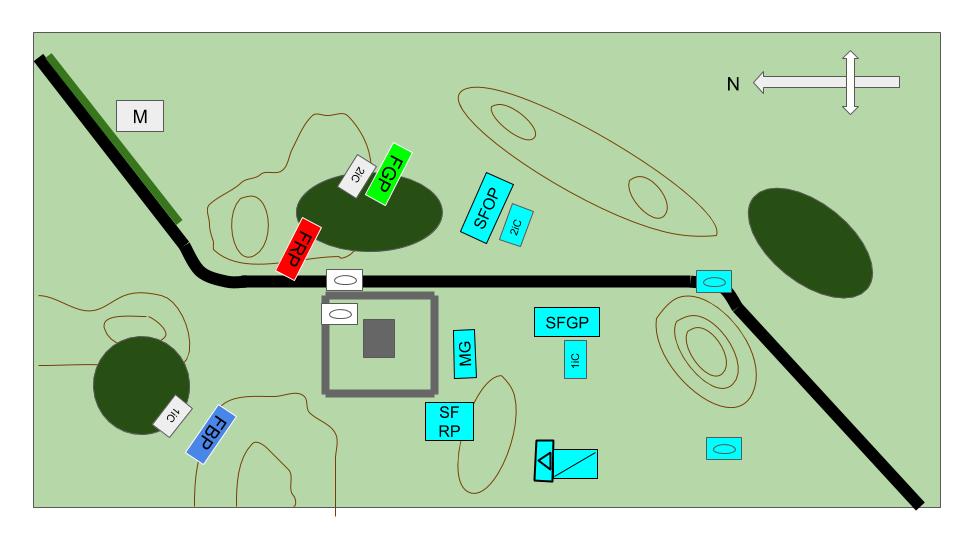
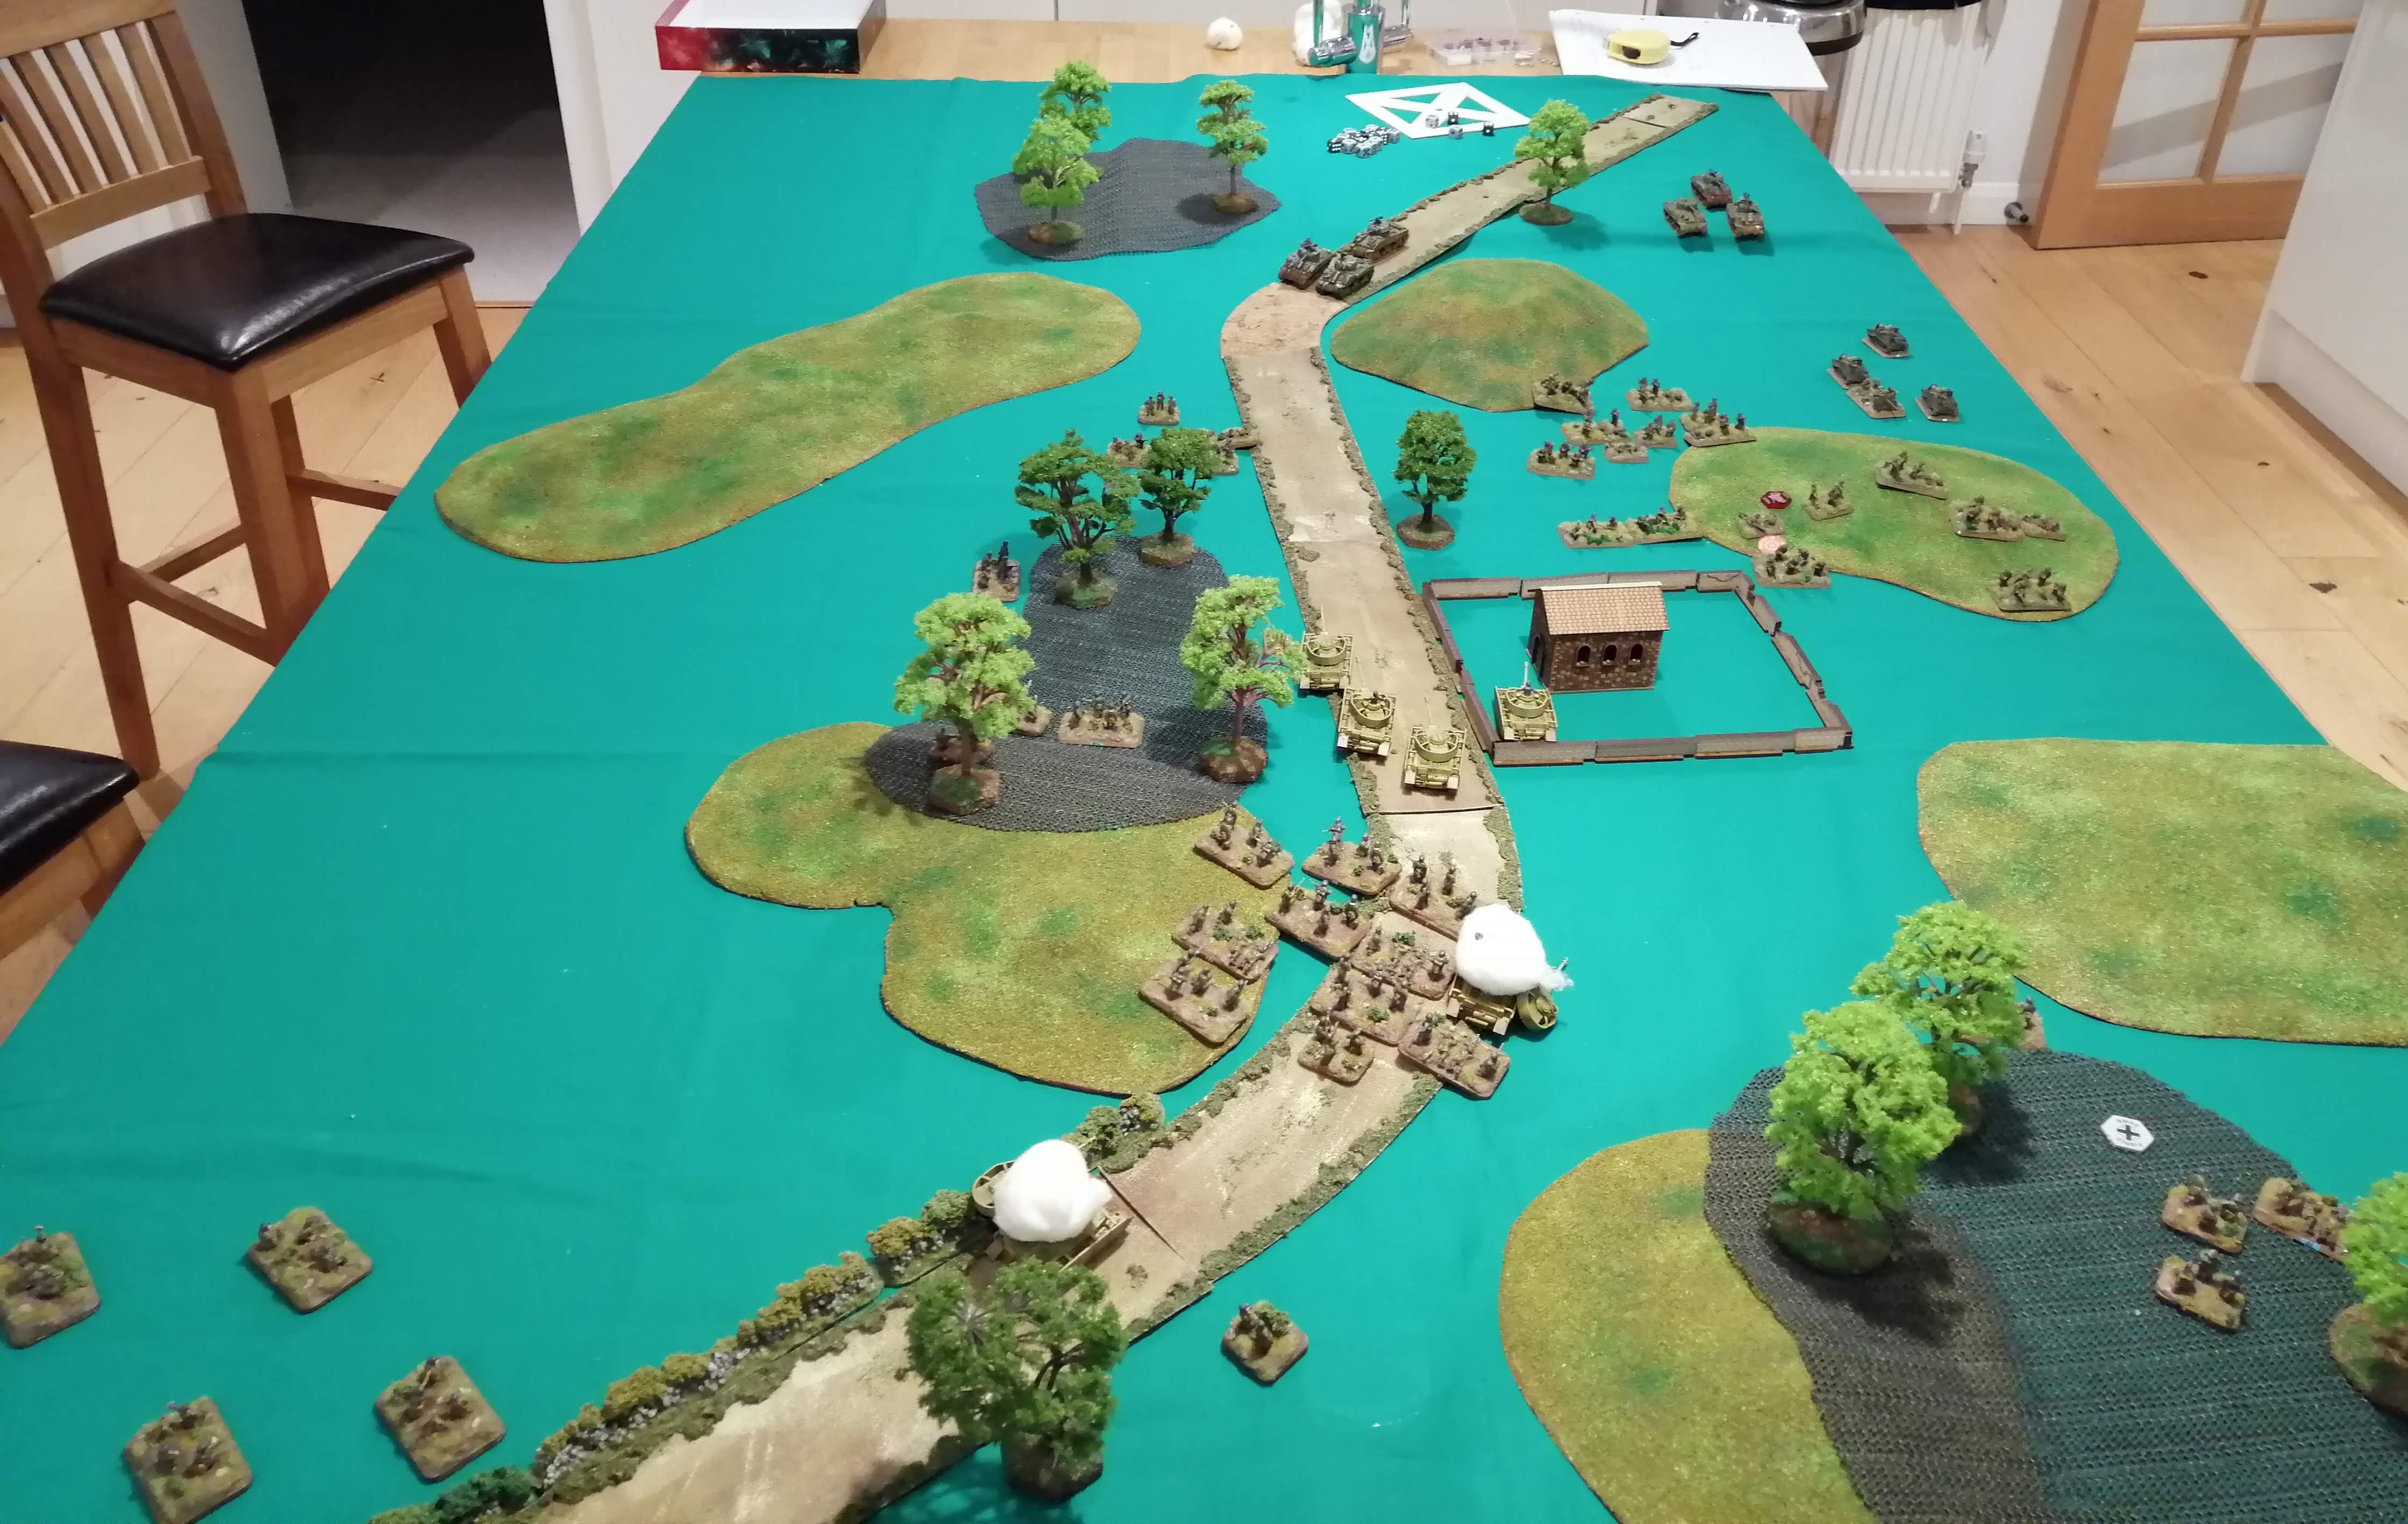
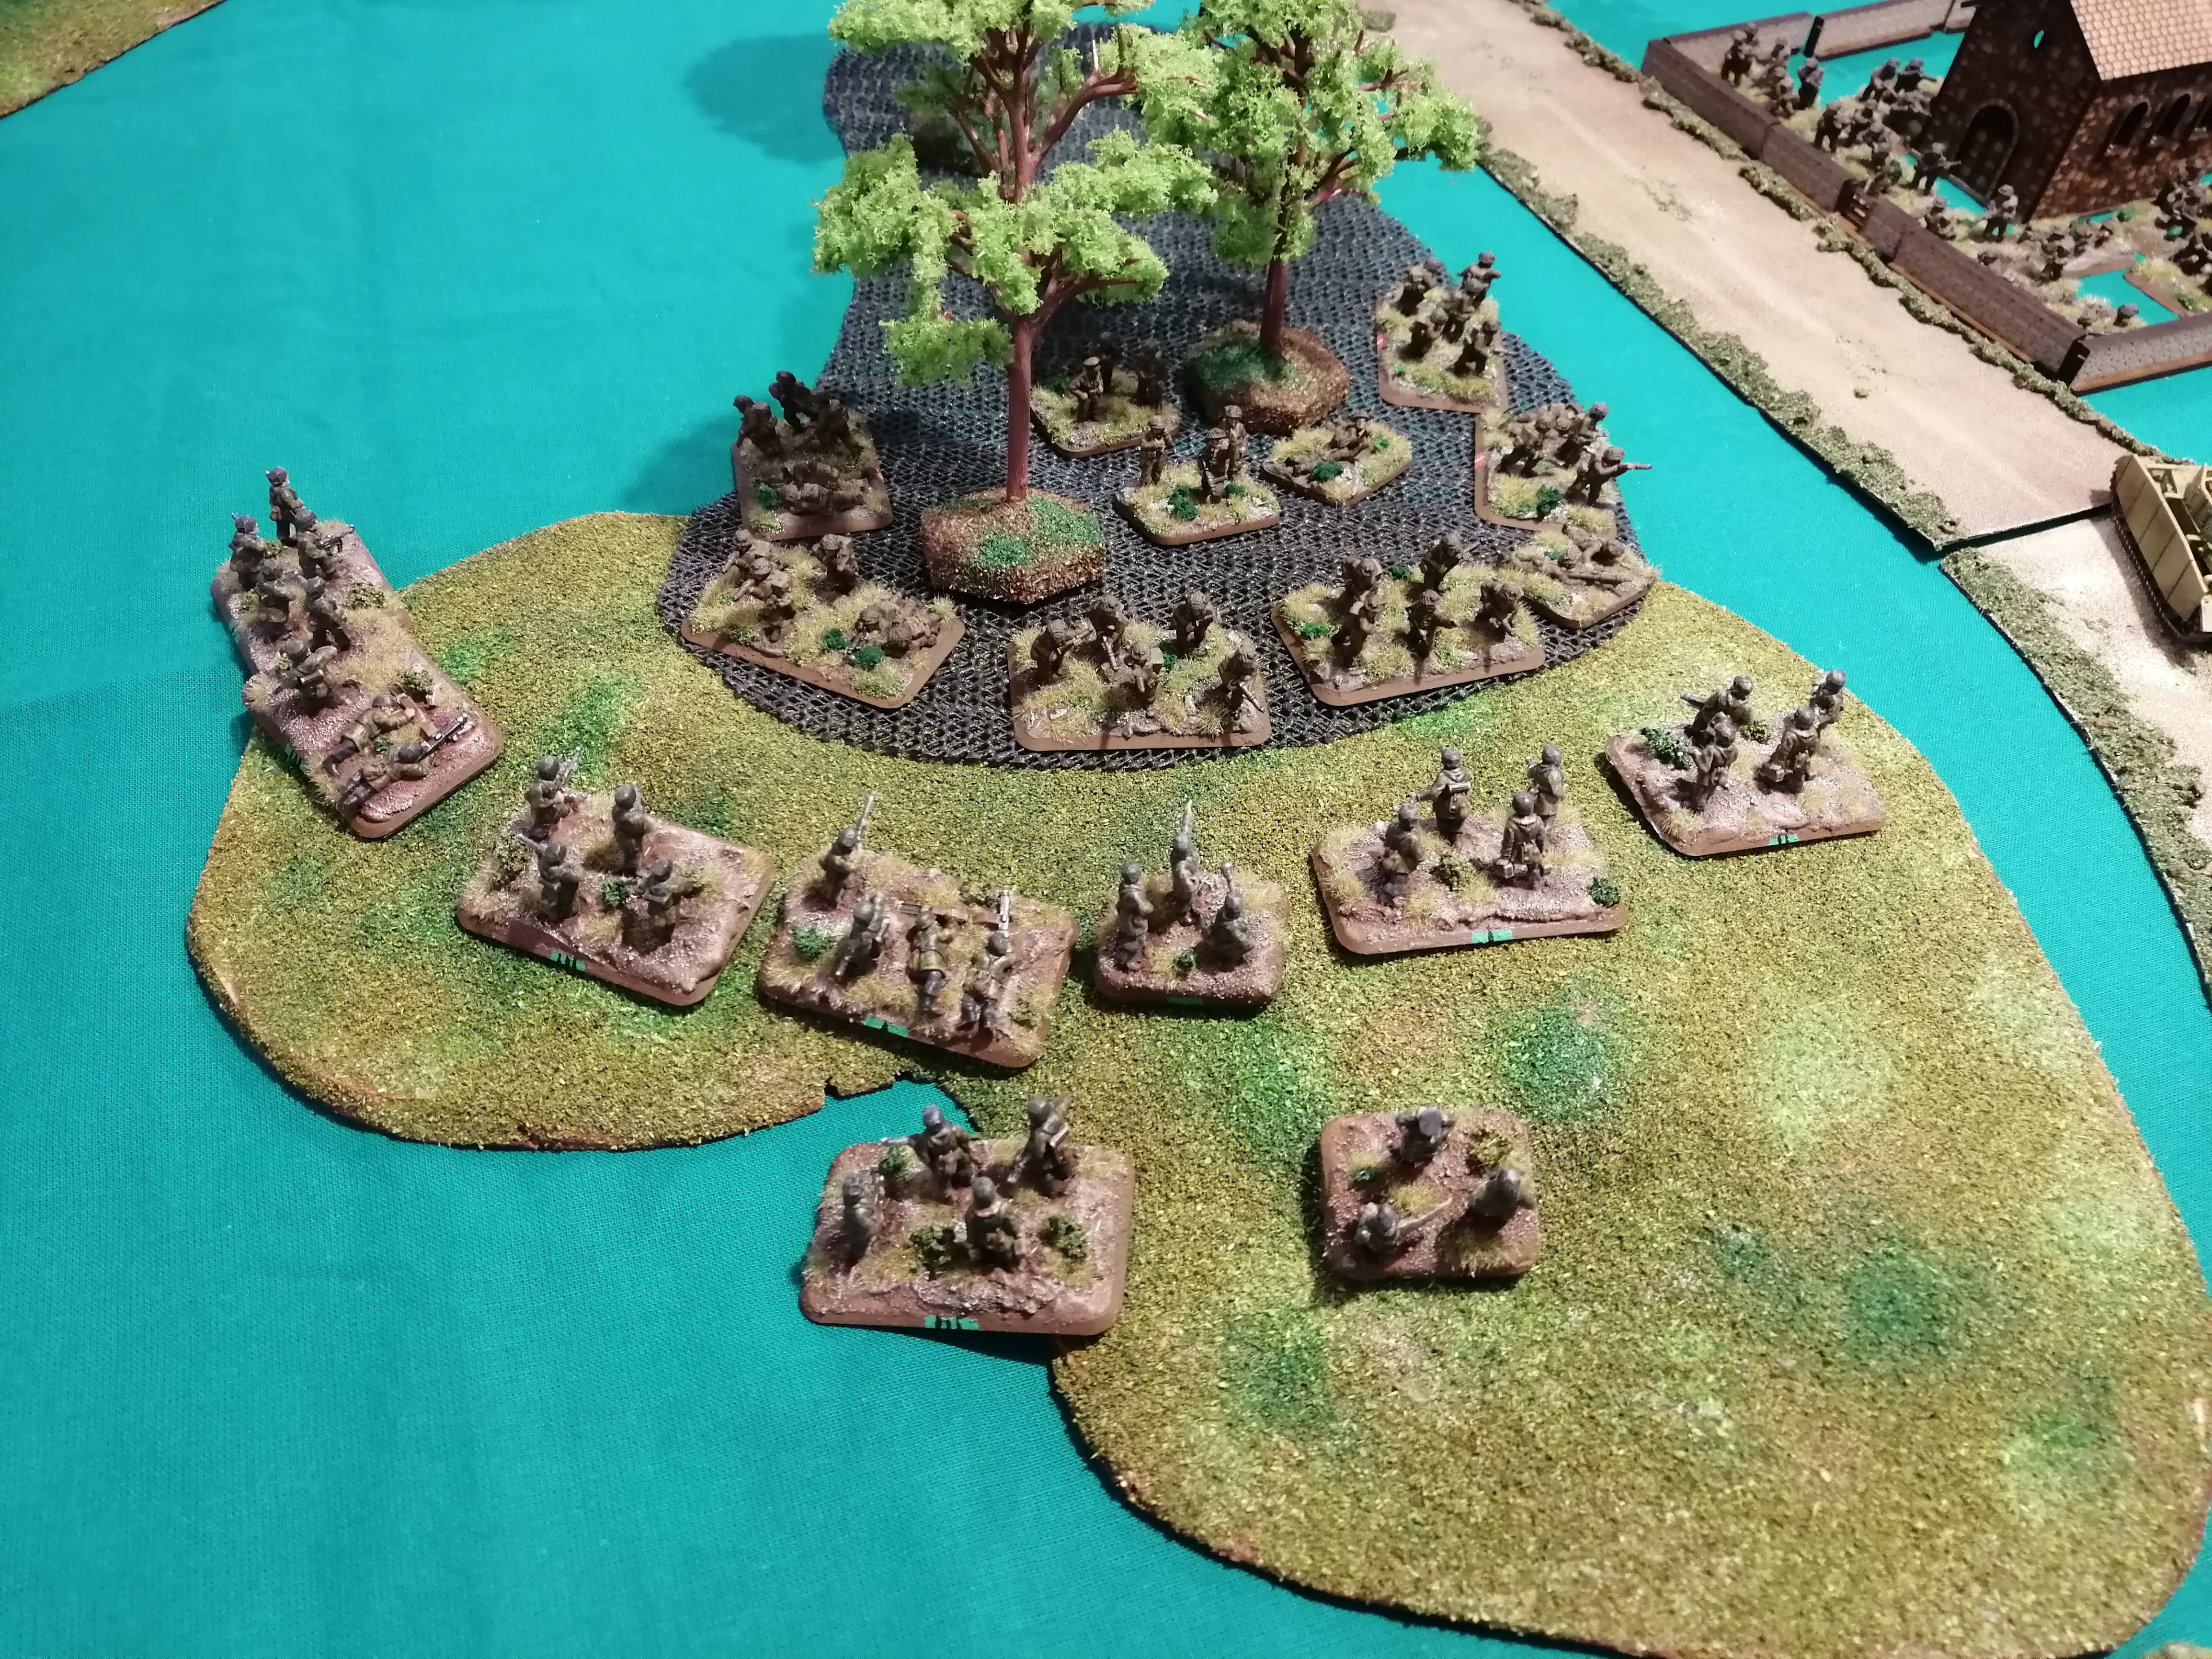
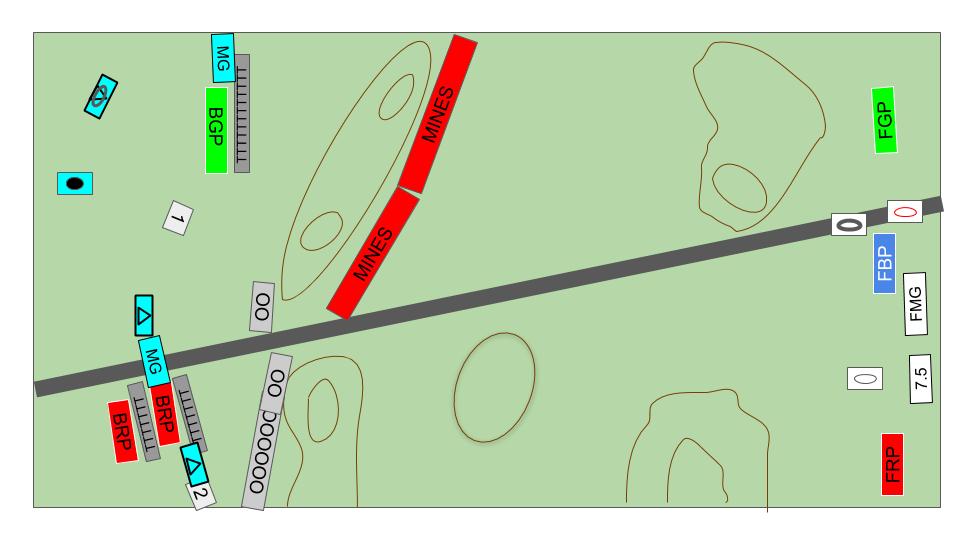 Initial Deployment
Key to the Symbols on the map:
I’ve tried to use the standard NATO symbols where possible.
Infantry platoons are colour coded to the platoon with Fallschirmjager platoons starting F and British 1st Division starting B.
Boxes marked 1 and 2 relate to the MG Nests.
Boxes containing OOO are barbed wire. Boxes containing TTT are trench lines.
White background tank units are German. The one containing the red circle is the 1iC and 2iC Panther tanks. Unit with the heavy circle is the panzer platoon containing the Tiger 1.
Pictures of the initial deployment can be seen below.
 German Deployment
 British Deployment
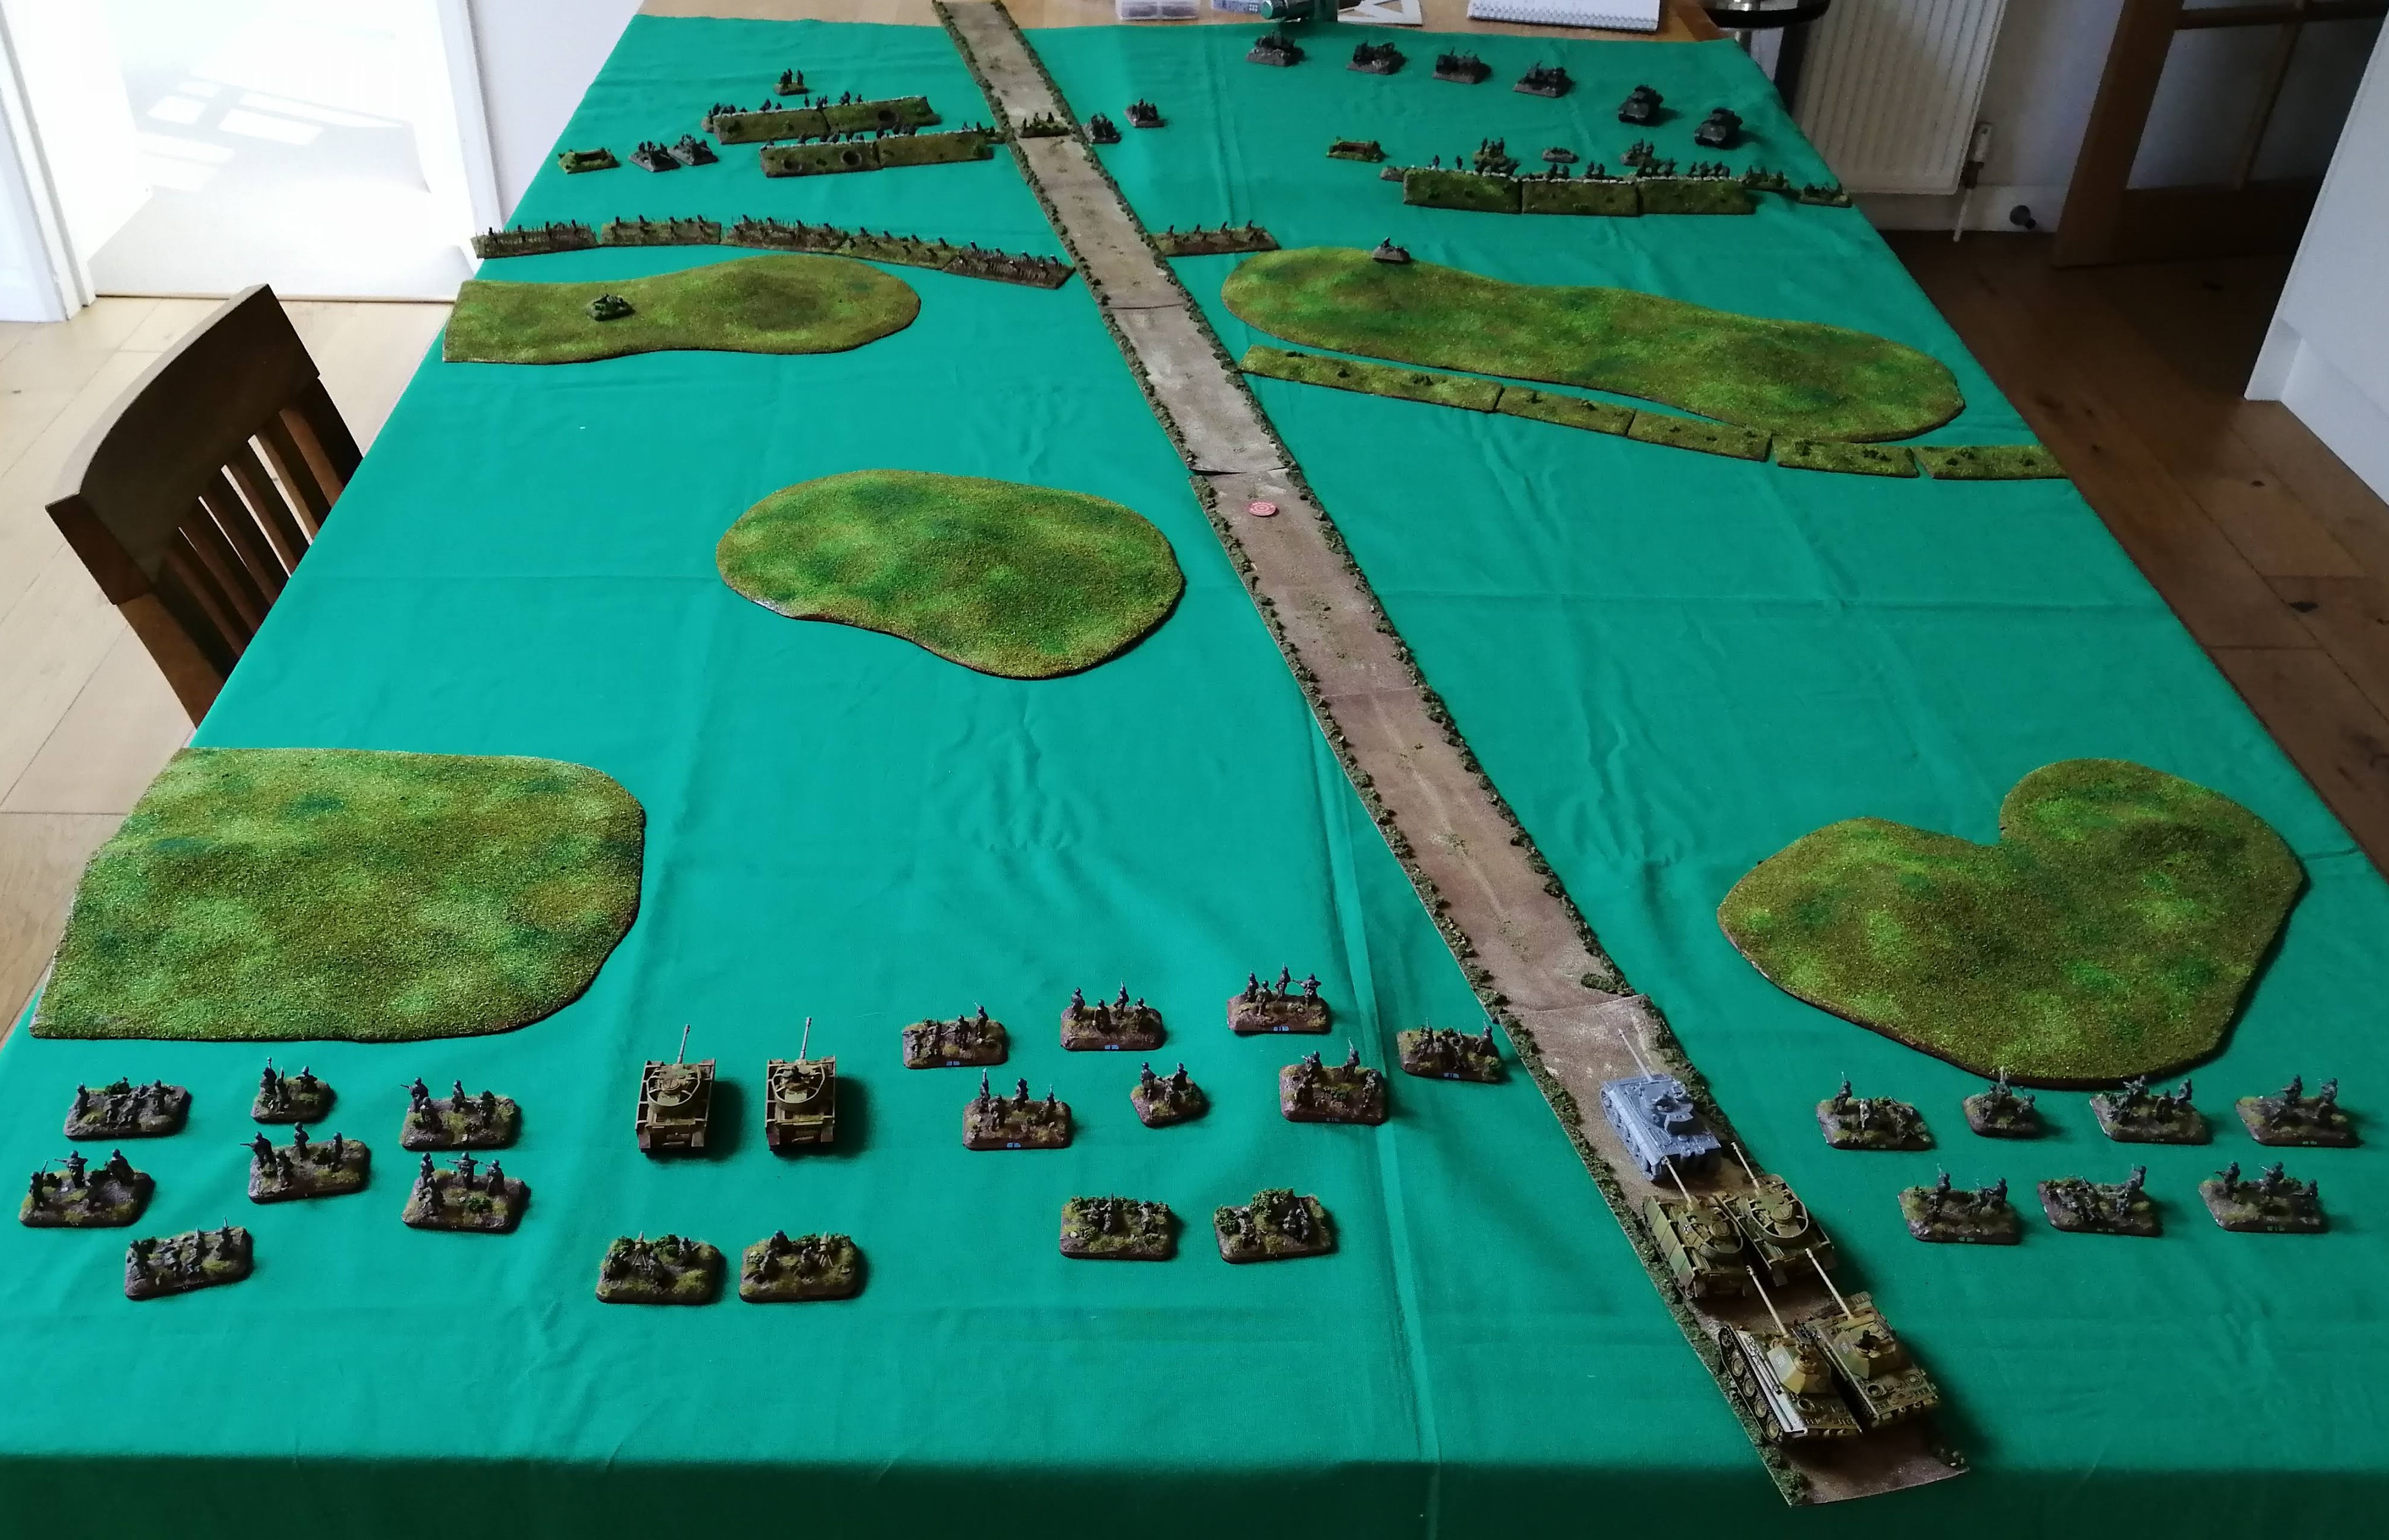 The total Battlefield looking from the German end of the table
2nd Battle Monte Cassino
The US II Corps had taken heavy casualties during the first Battle of Monte Cassino and were withdrawn to allow for reinforcements to arrive and for the two Divisions, (34th and 36th) to take some much needed rest. II Corps was replaced by the New Zealand Corps, transferred from British 8th Army. The New Zealand Corps (NZ Corps) was commanded by Lieutenant-General Sir Bernard Freyburg and consisted of the 2nd New Zealand Division and the 4th British Indian Division. The NZ Corps was however formed in a somewhat ad hoc way and had no formal Corps HQ, with the 2nd NZ Division HQ performing both the Divisional and Corps HQ tasks.
Upon arrival, the NZ Corps were well aware of the difficulty of the task that they faced but were strongly pressed to launch a new offensive as quickly as possible to try to breakthrough to the now severely under pressure beach head at Anzio. This lack of planning was far from ideal however 2nd NZ Division, containing two Infantry and one armoured Brigade, was considered ideally suited for achieving a break through.
Freyburg had originally planned an attack to loop around Cassino from the East and encircle the defenders. The mountainous terrain and lack of easy access required the attackers to rely on mules to carry supplies and this was something not in ready supply. In the end, Freyburg settled for a plan similar to that enacted by the US II Corps just a few weeks earlier. The 4th British Indian Division would attack up the hill to the East of Cassino and then turn West to tackle the Monastery whereas 2nd NZ Division would attack across the plains of the Garigliano and Rapido and assault the town of Cassino directly.
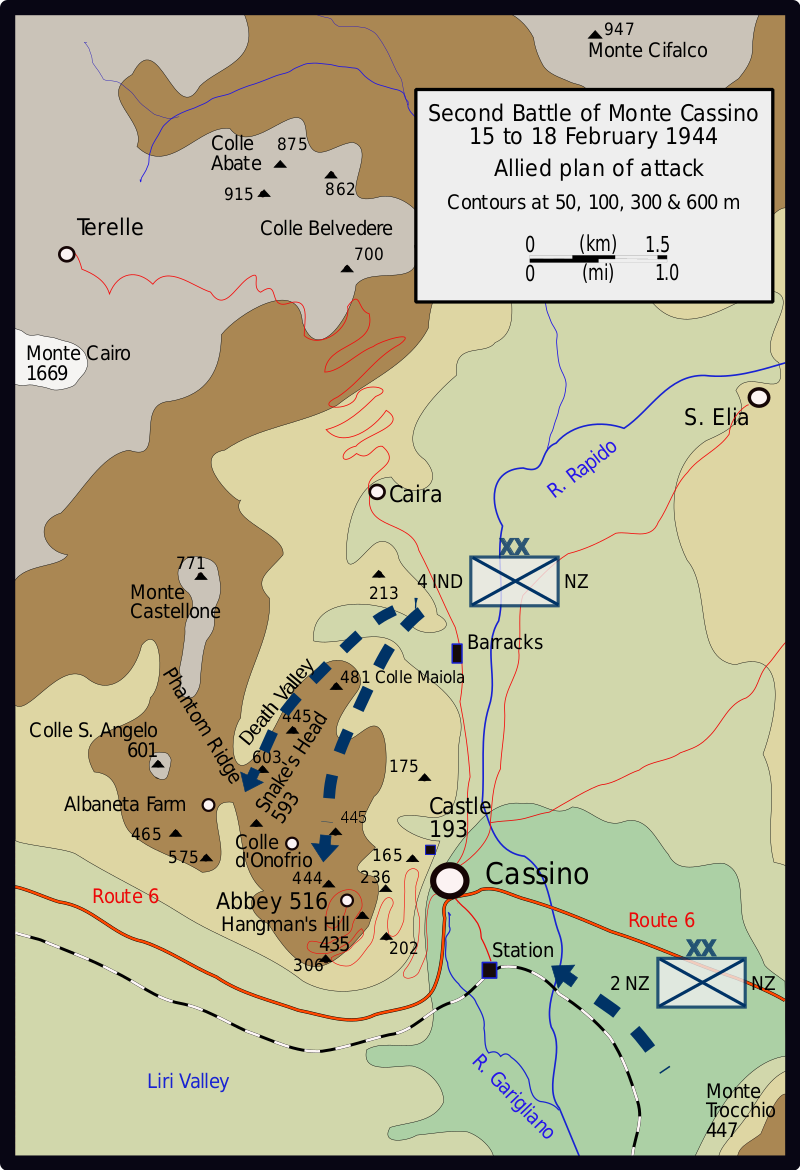 A view of the battle plan
Bombing of the Abbey
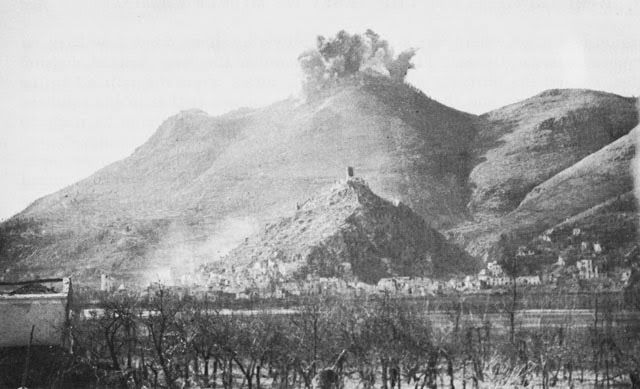
Brigadier Dimoline, acting commander of the 4th BI Division, was sceptical of the plan and insisted that the monastery be bombed before any assault could be undertaken, believing it impossible for a defending army to not be using it for protection. Unbeknown to the Allies, the Germans had agreed not to occupy the monastery and use it as a defensive position. It was General Alexander, the Army Group commander, who eventually agreed to the plan to bomb the monastery and so on the 15th February 1944, in one of the most controversial Allied actions of the Italian campaign, Allied bombers flew over the monastery.
142 B17 Flying Fortresses, 47 B-25 Mitchells and 40 B-26 Marauders flew sorties over the monastery and dropped an estimated 1,150 tonnes of explosives. Between the bombing runs, Allied artillery pounded the hill top relentlessly. The following day, Allied artillery continued the pounding while fighter bombers flew repeated sorties to bomb the hill top. By the end of the second day, the monastery was a smoking ruin, a few shattered walls remained, poking up between the rubble.
Following the bombing, Pope Pius XII remained silent on the matter. However some Cardinals and other members of the Catholic church were less charitable and were scathing in their condemnation of the bombing.
Investigations following the bombing suggest that the only people killed at the monastery were over 200 civilians and monks taking refuge. No evidence has ever emerged that the Germans used the monastery for any military activities prior to the bombing and that all of their defensive positions were outside of the walls and lower down the slopes of Monte Cassino.
Those that survived the bombing fled the ruins and monks led a number of the wounded down the slopes to German first aid posts. From there, the German troops transported the wounded to field hospitals further behind the front line.
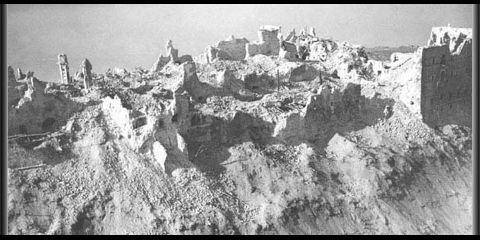 What was left of the monastery
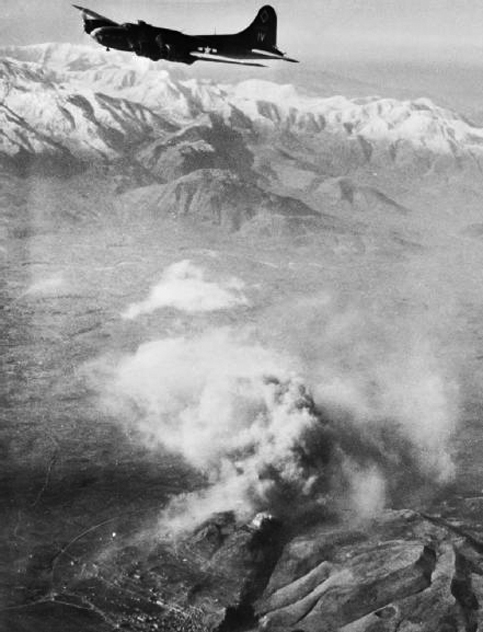
The entire bombing campaign had been planned by the Allied Air Staff and had been viewed as a separate, independent operation. As such, little coordination had taken place with the troops emplaced around Cassino. At the conclusion of the bombing, NZ Corps had only been in place for a few days and were not ready to launch an assault. This complete lack of coordination would prove to be costly for the Allied forces.
With the destruction of the Abbey, the German army no longer felt an obligation to keep their agreement to remain outside of the monastery. Troops from 1st Fallschirmjager quickly moved into the ruins and began turning them into a fortress and observation post. The Allied bombing campaign had only succeeded in handing the Germans a more defensible position and make the taking of Monte Cassino harder.
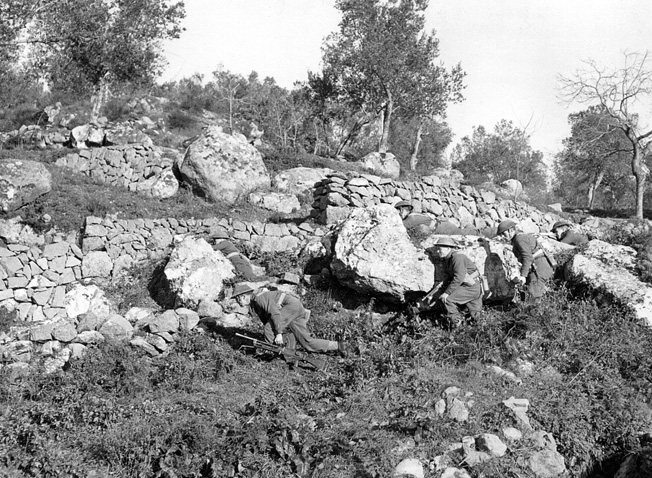
In the days prior to the bombing, the 4th British Indian Division had crossed the Rapido and had been slowly advancing up the slopes to the East of Cassino. They then turned Westward and fought their way along the hill tops toward Monte Cassino, taking almost the same route that the US 34th Division had taken.
By 16th February, the 4th BI had advanced to Snakeshead Ridge and were in sight of a key German defensive position, point 593. Just 70m separated the Allied troops from point 593. As night fell on the 16th, a company of 1st Battalion Royal Sussex Regiment were ordered to attack. Despite the ground being rocky, there was little cover and any sign of movement was fired upon by the defending Germans. Additional defensive points were also able to lend their support to point 593 and the assault ultimately failed, with over 50% casualties.
The Royal Sussex Regiment were ordered to attack again on the night of the 17th. The attack was proceeded by an artillery bombardment but, unfortunately for the 4th BI, to hit the monastery, Allied artillery shells had to fly very low over Snakeshead Ridge, with many shells landing among the British troops trying to advance. Despite this, the Royal Sussex Regiment attacked at midnight and managed to reach point 593. The fighting was brutal, bloody and often hand to hand however the defenders of the 1st Fallschirmjager just managed to cling to their defensive positions, beating back the Royal Sussex Regiment.
The following night, the main attack was launched along the width of the hill top. The Rajputana Rifles took up the assault against point 593 from the Royal Sussex Regiment, the remnants of which were held in reserve. The 9th Gurkha Rifles were ordered to take another main German defensive point while the 2nd Gurkha Rifles were to directly assault the monastery. The terrain was far from ideal for such an assault but it was hoped that the Gurkha’s mountain training would stand them in good stead. The hopes proved faint and despite valiant efforts across the entire front, the 4th British Indian failed to make further ground. The assault was eventually called off with casualty rates running at close to 50%.
 Allied troops advancing up the hill
The second part of Freyburg’s plan was being enacted in the Rapido valley at the same time as the 4th British Indian were struggling in the hills above. 2nd NZ Division attacked across the plains toward the town of Cassino. On the night of the 17th February, two companies from the 28th NZ (Maori) Battalion advanced along the raised railway track into the town. The advance was hard going as German mortar teams had targeted in on the route while every bridge had been removed. Behind the Maori’s, NZ engineers worked relentlessly to rebuild the bridges to allow the armoured brigade to advance and support the infantry.
Despite the odds, the Maori’s fought their way through to the railway station in Cassino but by day break, they found themselves isolated. A near constant smoke and artillery barrage from the Allied artillery allowed the Maori’s to hold their position for much of the day despite constant German counter attacks. Toward the end of the 18th February, the Germans counter attacked with 2 panzers and, with no anti tank guns and with no further likelihood of advancing, the Maori’s were ordered to withdraw. The Maori’s suffered 60% casualties in the assault and had advanced far further than the defenders had imagined possible. Kesselring is recorded to have expressed surprise that their counter attack was able to succeed and the belief on the German side was that Cassino might have to be surrendered.
The second battle of Cassino had come at some cost to Freyburg’s NZ Corps. An estimated 800 casualties had been sustained during the assault. Unknown to the Allies, the German defenders had suffered far worse. By the time Freyburg had called off the assault, the defenders had lost an estimated 4500 men and were in no position to see off another assault. Had the Allies prepared and coordinated better at the outset of the assault, it’s feasible that they could have broken through. Unable to do so, both sides settled back to rebuild and reorganise. Heavy rains and flooding in the Rapido river valley also made further assaults highly problematic for a few weeks.
 Members of the 28th NZ (Maori) Brigade
Operation Fischfang
Operation Fischfang
The initial counter offensive by the Germans against the British 1st Division at Anzio had pushed the British out of their salient and back to the positions held before their break out attempt. This line stabilised for a few days as both sides dug in although continued to test each other’s defences with minor assaults and aggressive patrolling.
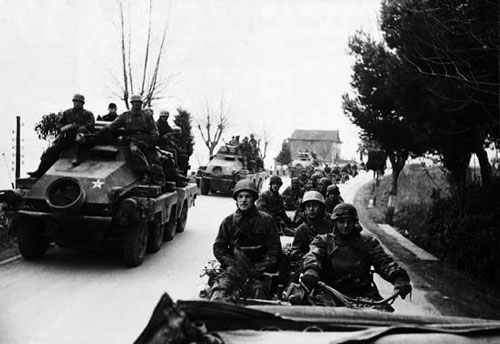
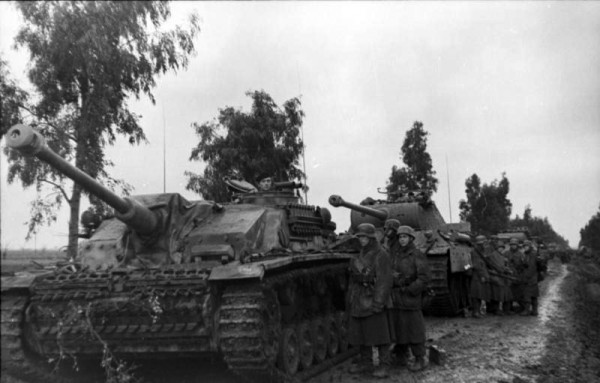
On 16th February, the Germans launched a new offensive codenamed Operation Fischfang. Their assault was once again launched down the Via Anziate and included a number of newly arrived Tiger tanks as well as several platoons of Panthers. The German attack punched through the British 1st Division’s defensive line, causing significant losses to the defenders. The British defensive line continued to crumble as the Germans pushed further South. Two days later, the Germans had almost reached the original Allied beach head and were assaulting the last defensive line.
A number of assaults were launched against the last Allied defensive line between 18th and 20th February and included constant support by the Luftwaffe. The Germans came so close to pushing the Allies back into the sea that Allied artillery ended up firing over open sights at the advancing German tanks. Accurate gunning coupled with the punishing bombardment from the Allied Navy just offshore, eventually halted the German advance.
The German advance had come at some cost, with an estimated 5,500 casualties whereas the Allies had suffered some 3,500 casualties. With the German army exhausted, they began to dig in around the Northern part of the Anzio beach head and rebuild their forces. Hitler however had other ideas and ordered Kesselring to continue the assault. Against both their better judgements, Kesselring and Von Mackensen started another assault on 29th February against the US forces dug in around Cisterna. The US held their ground and rebuffed the Germans who lost a further 2,500 casualties. With both sides now exhausted and with the Spring rains turning much of the battlefield into a quagmire, both sides dug in to wait for late spring.
Lucas is Replaced
Lucas was given scant resources to create a stable beach head and had even less chance of delivering on his objective of going on the offensive and driving toward Rome. This did not however stop Allied commanders from being critical of his role, with Churchill himself being particularly vocal in his disapproval of Lucas’ perceived passivity. General Alexander visited VI Corps HQ on 14th February to impress on Lucas that he should ‘break out as soon as tactically possible’. After his departure, Alexander commented that he felt VI Corps lacked the determination to deliver.
Lucas saw the writing on the wall and commented in his diary on a number of occasions that Operation Shingle was not deliverable. His perception proved accurate as he was replaced on 22nd February by Lucian Truscott.
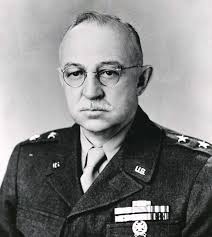 General John P. Lucas
Anzio - Second Table Top Battle Report (Turns 6 and 7)
Read in reverse order
Turn 6
FBP are able to unpin and the last remaining tank from 1st Panzer passes its morale check (again! nerves of steel!) and is able to stay in the fight.
1st Panzer advances through the grounds of the chapel, up to the wall surrounding the grounds but fails to pass its crossing check. 2nd Panzer remains stationary to counter the now visible Shermans. FRP, FGP and FBP all advance up the battlefield, trying to remain in range of the retreating British.
FGP fires upon SFOP causing 5 hits, it fails to cause any wounds but does pin SFOP in place.
The Mortar team repeats its bombardment against SFRP and kills another team, and ensuring that SFRP remain pinned.
The one remaining tank from 1st Panzer Platoon turns its MGs on the British MG team and is able to destroy both teams! That’s the first VP of the game awarded to the Germans for destroying a British platoon.
2nd Panzer, who remained stationary, makes good use of this extra aiming time and causes 3 hits against 1st Sherman Platoon. This cause 2 of the Shermans to bail out, leaving just one operational Sherman in the platoon.
FGP launch an assault against SFOP. FGP loses another stand in the defensive fire but its not enough to stop the assault hitting home and SFOP loses another stand. SFOP counter attacks and is able to destroy two stands from FGP in a truly gritty combat. Undeterred, and overcoming the special British Bulldog rule, FGP are able to continue the assault and destroy a further stand from SFOP. SFOP decide to fall back after this as their casualties are mounting.
Both of the bailed tanks in 1st Sherman are able to remount however the last remaining anti tank gun fails its morale check and is removed from the board giving another VP to the Germans. SFRP are able to unpin and can continue to keep moving.
SFOP, having been reduced in numbers following the assault, fail their morale check and are removed from the battle giving a third VP to the Germans.
The remaining British infantry units continue to fall back. 2nd Sherman Platoon advances to cover the infantry retreat whereas just one Sherman from 1st Platoon moves to draw lie of sight on the Panzers further down the road.
1st Sherman Platoon splits its fire with on tank firing its MGs on FGP but despite 4 hits, fails to cause any damage. The other two Shermans fire on 2nd Panzer, hitting twice but failing to penetrate or even cause the Germans to bail out from their tank.
2nd Sherman Platoon fires upon 1st Panzer and hits, causing the last remaining tank to bail out.
 End of Turn 6
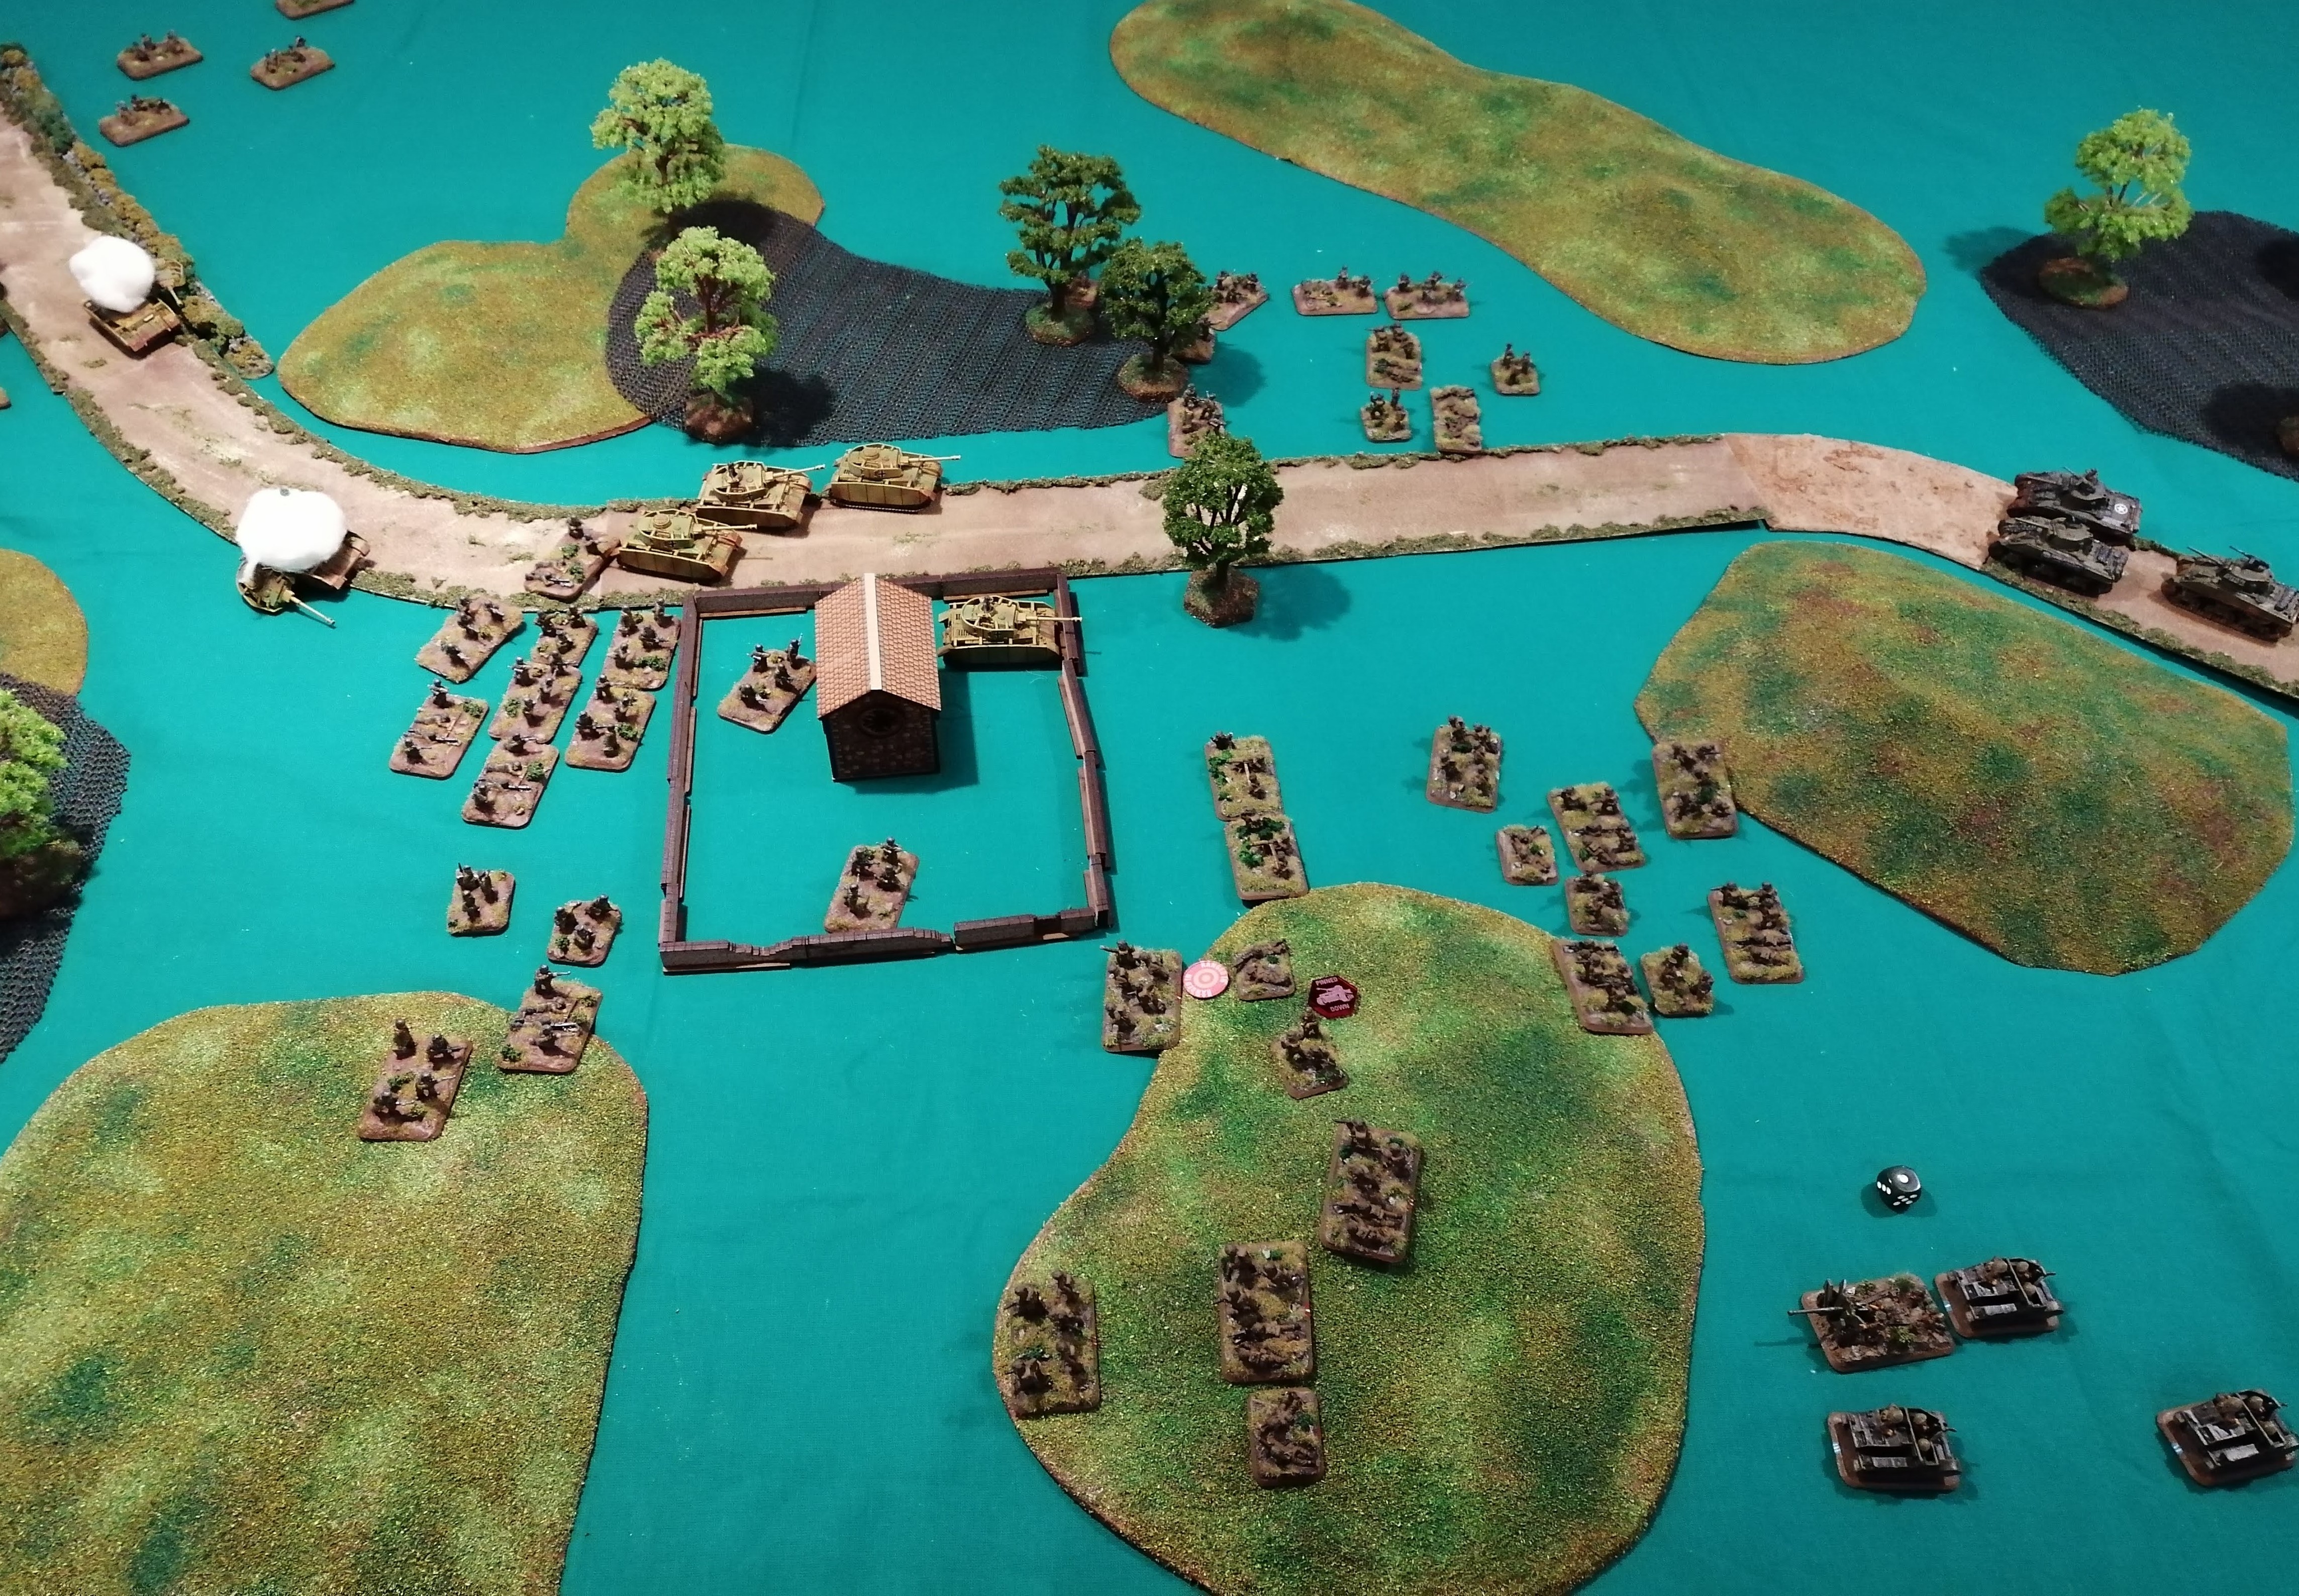
Turn 7
FGP passes its morale check and 1st Panzer remounts and also passes its morale check (yet again – surely some honour will be given to this tank crew?).
1st Panzer launches a blitz move, crossing the wall, whereas 2nd Panzer fails their blitz move but moves forward 10” under a standard tactical move anyway, trying to keep up with the retreating infantry.
The remaining infantry platoons, including the mortar platoon (who are now out of range of anything useful) all advance southward.
1st Panzer fires two shots against 2nd Sherman and causes two tanks to bail out – great gunning from the last remaining tank in 1st Panzer!
2nd Panzer fires against 1st Sherman and scores 1 hit however this hit penetrates and destroys a Sherman.
FGP fires upon the retreating 2iC and kills the 2iC.
FBP fires upon SFRP, hitting twice and destroying one base.
On the British turn, both of the bailed Shermans from 2nd Sherman Platoon fail to remount however the last remaining Sherman passes its morale check to remain in the fight.
All of the British forces able to retreat do so and the Universal Carriers return to the extraction point and are removed from the battle.
1st Sherman are able to kill the remaining teams from FGP with their MGs.
At this point, with the British turn spent and with most of the infantry team close or in the extraction zone, the battle is concluded. The Germans amassed 3 VP whereas the British were able to extract two depleted platoons, giving just 2 VP. So a narrow victory for the Germans and they can continue their squeeze on the salient.
 Final state of play
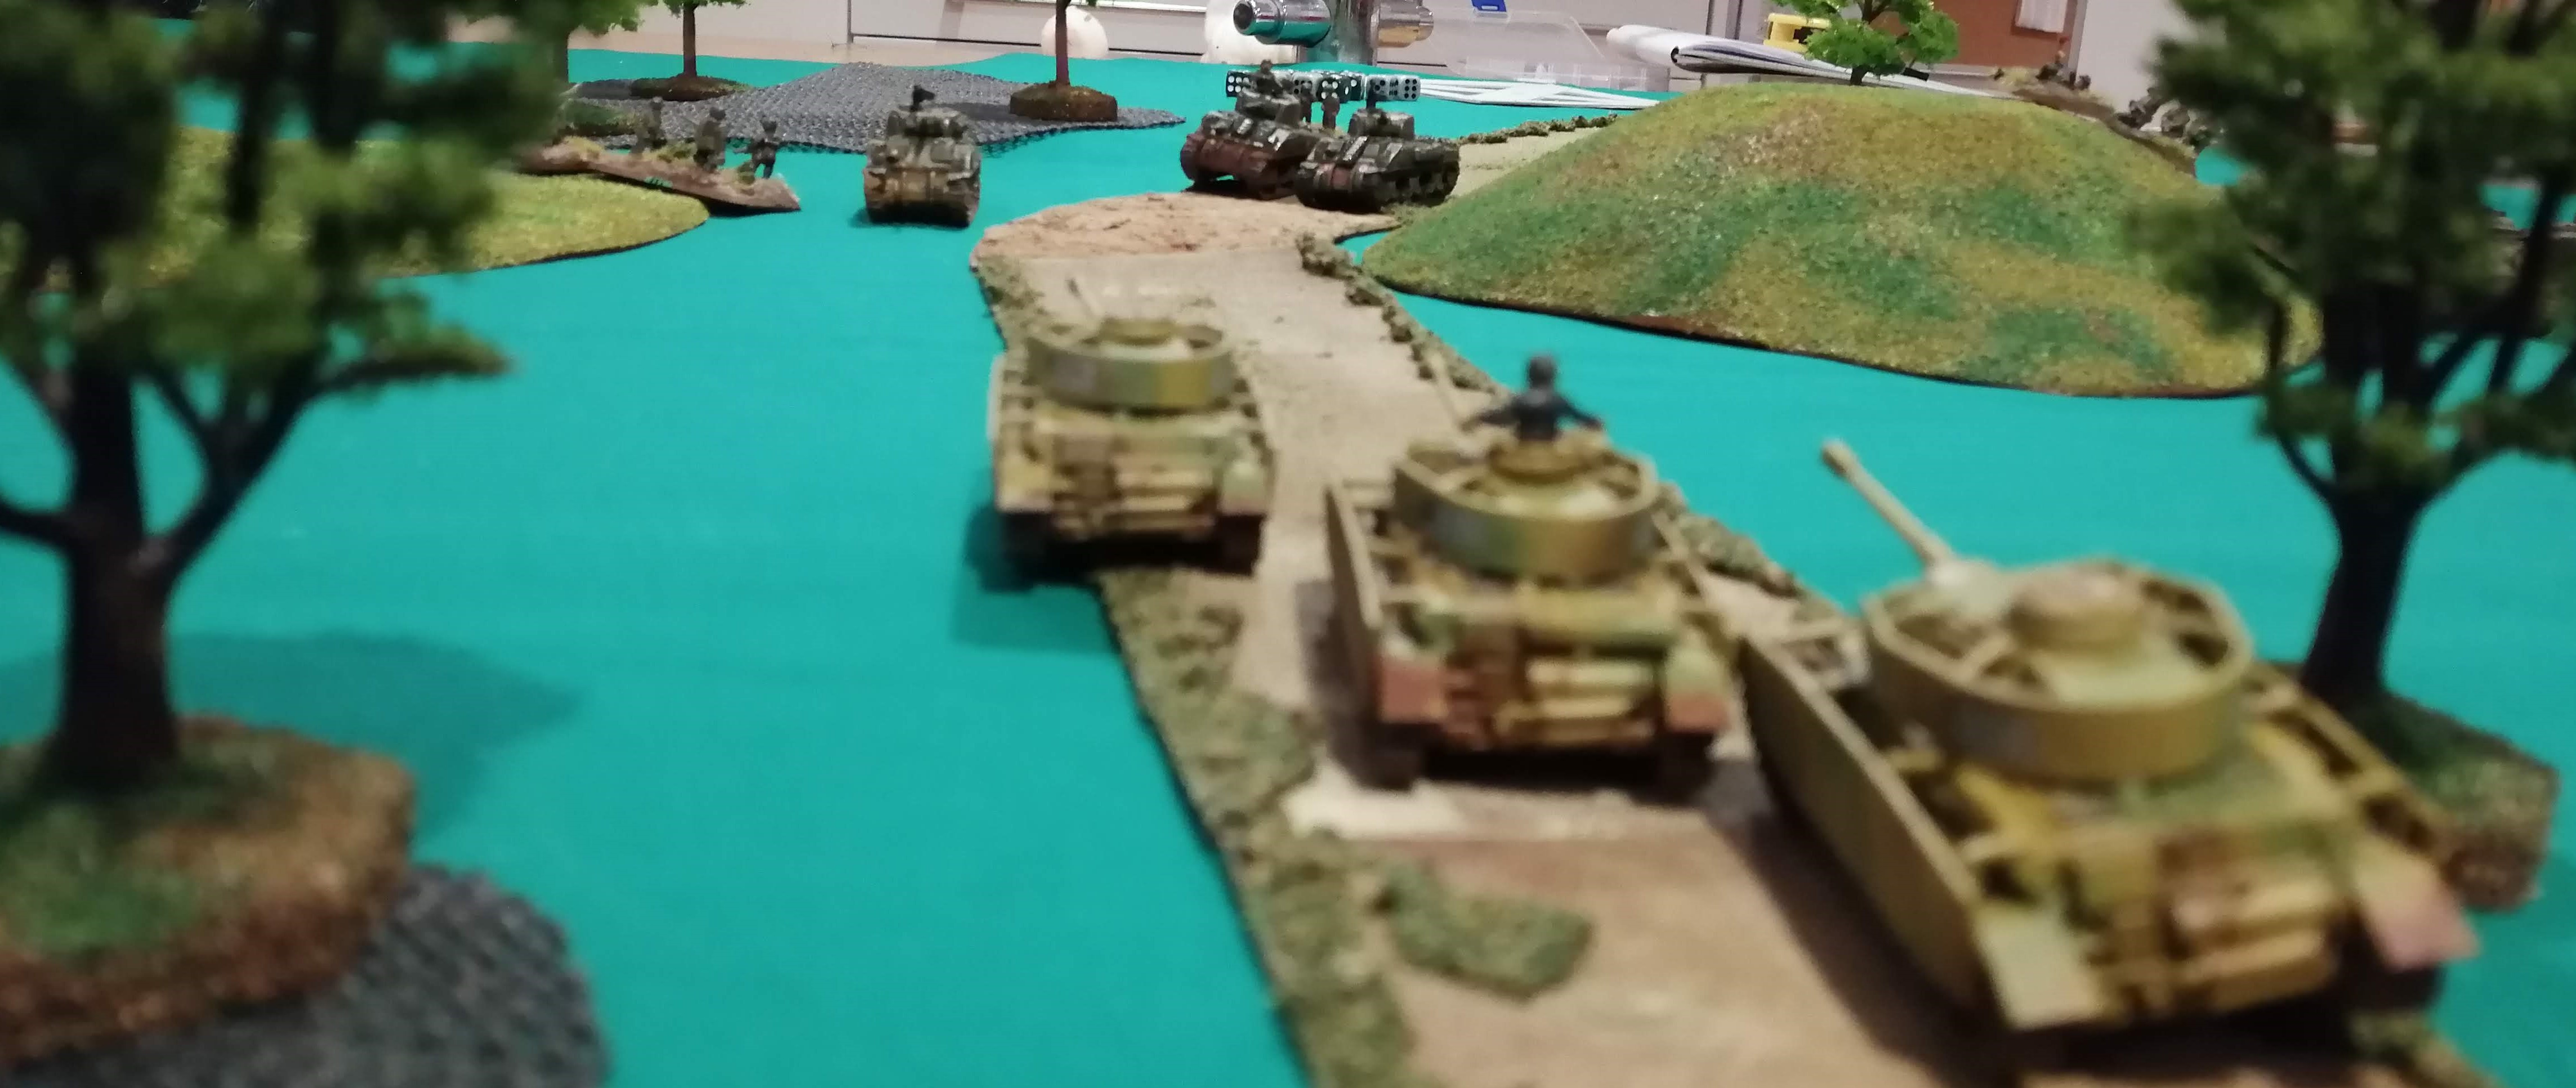 2nd Panzer Platoon advances up the Via Anziate
 British retreating
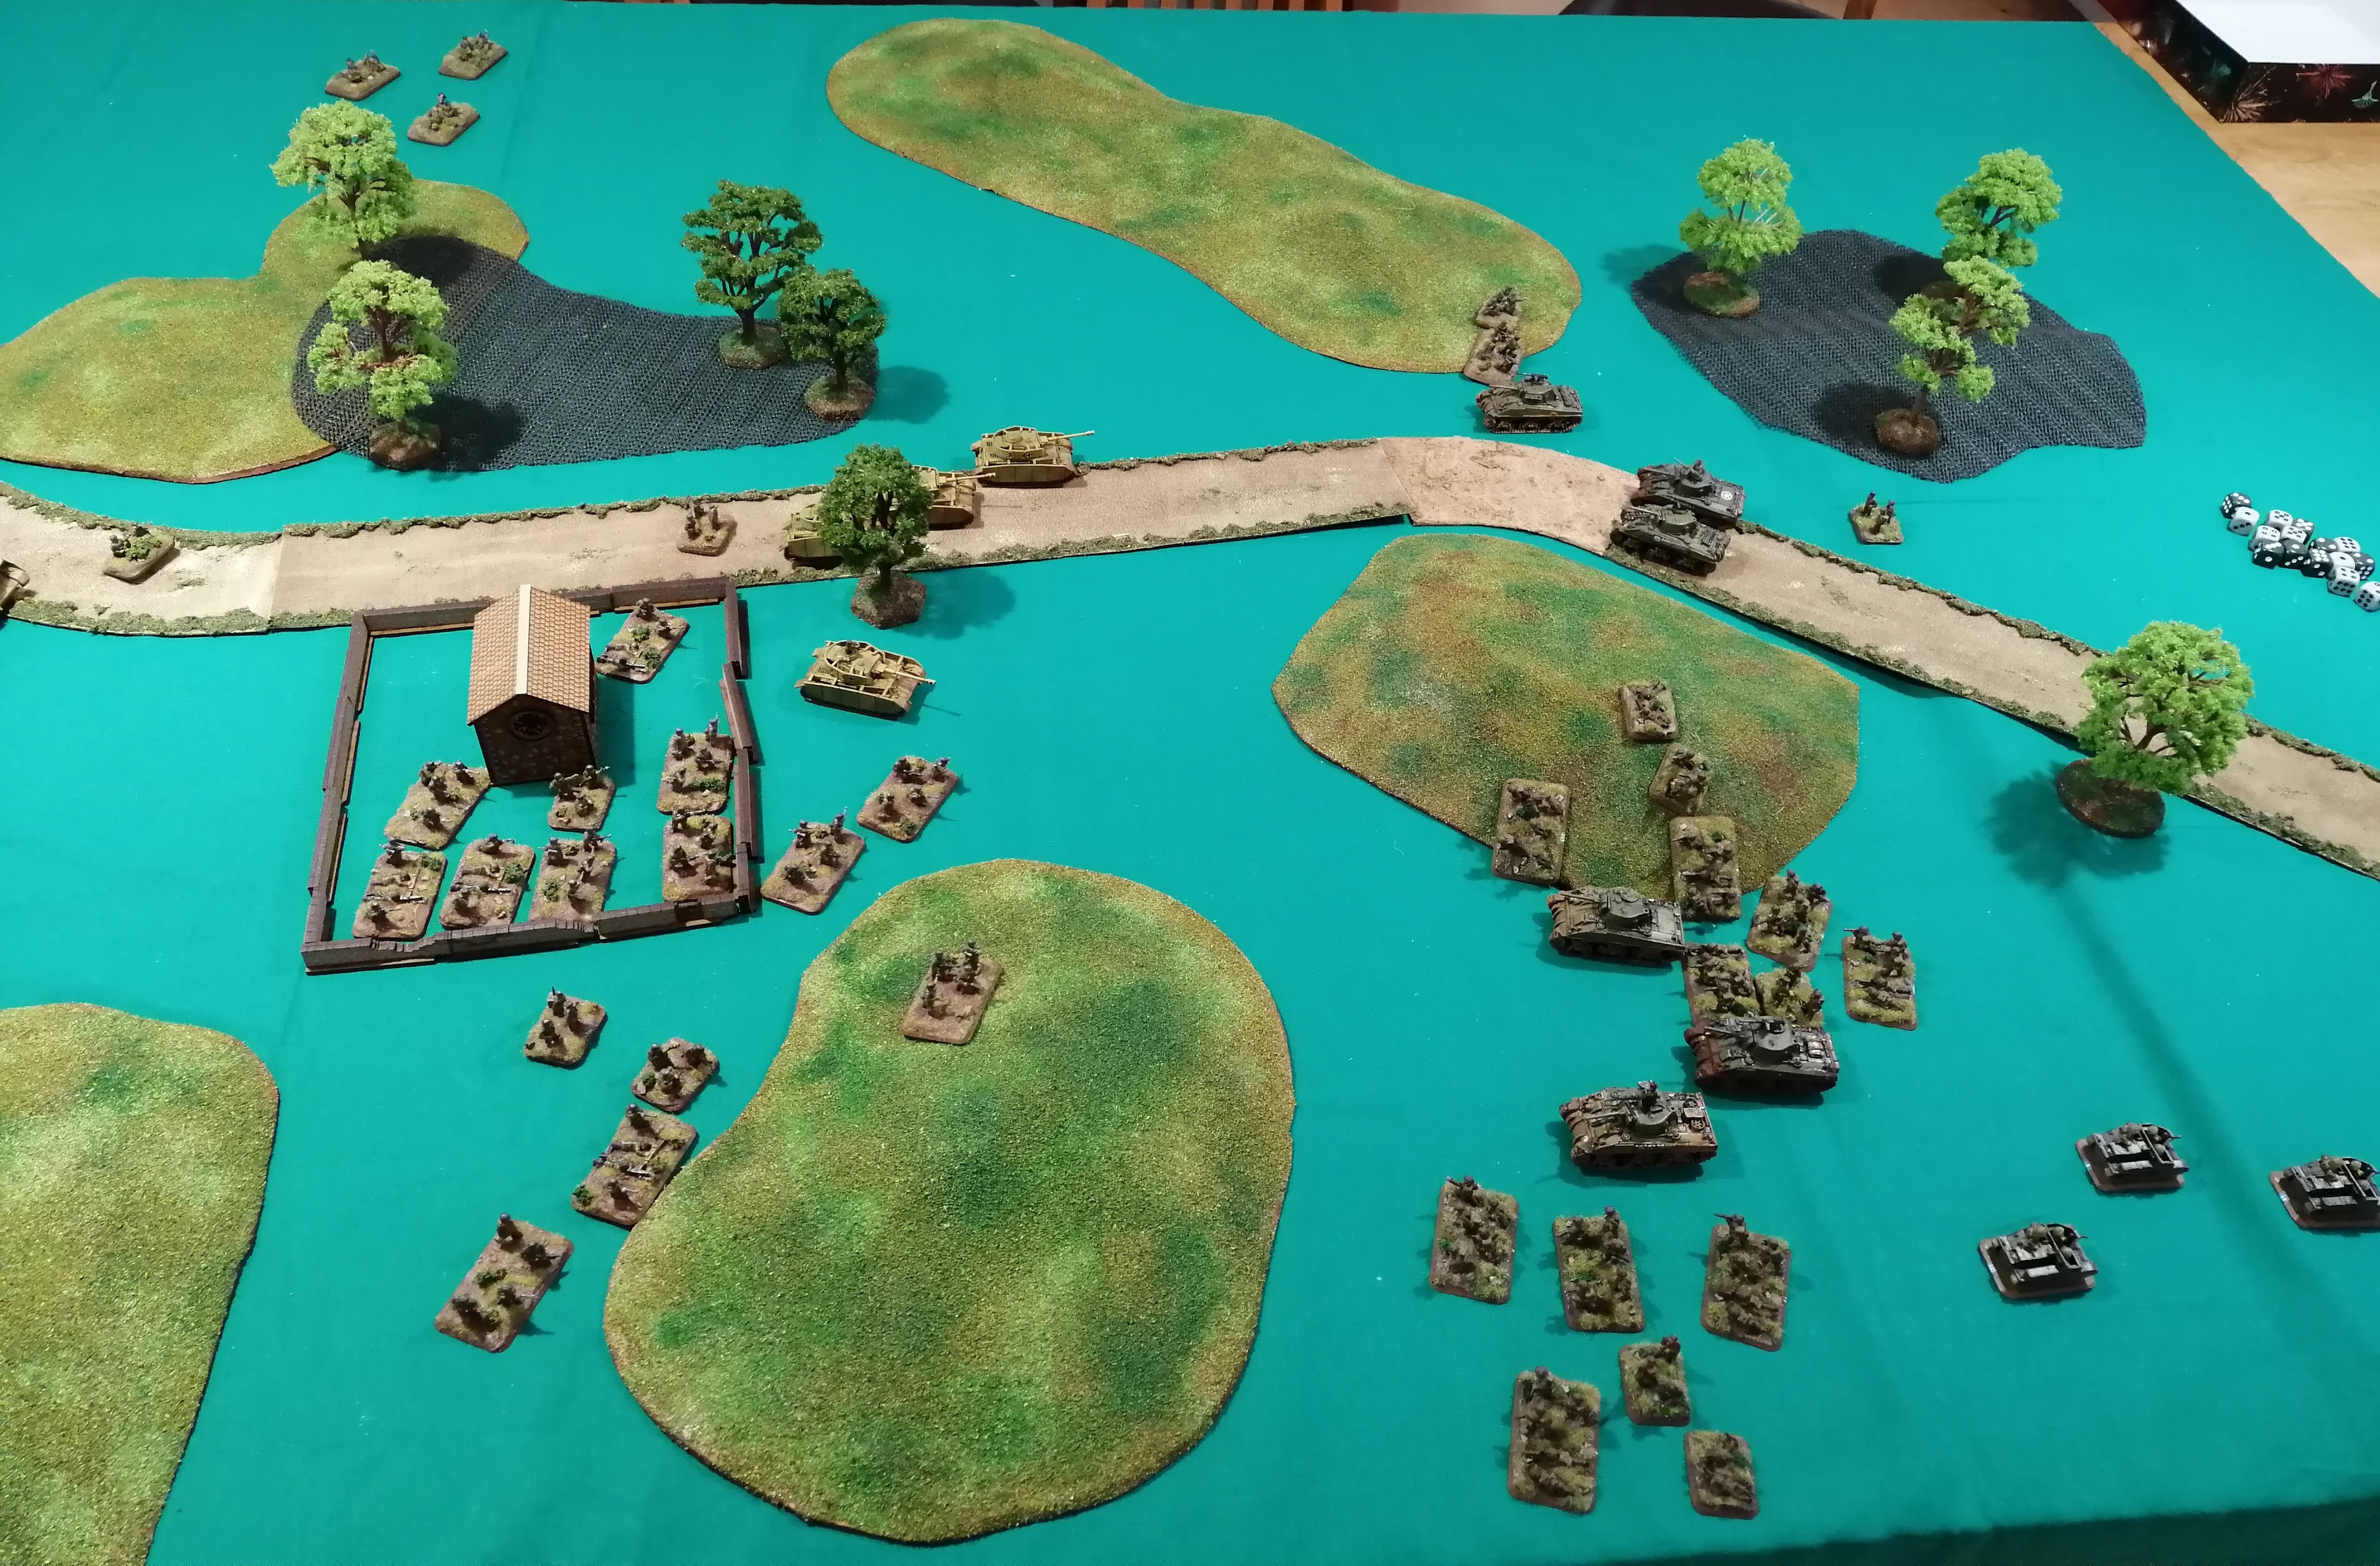
So in conclusion, a close win for the Germans. In hindsight, the Germans could have perhaps used their Panzers more effectively. Fire should have been focused on the Anti Tank guns much earlier to neutralise this threat. It could also have been sensible to split the Panzers with one platoon supporting the assault into the woods to dislodge the British earlier.
From the British perspective, what would have happened had they not retreated? Despite losing a 6pdr, if the remaining gun continued to fire, could they have repelled the Germans?
Anzio - Second Table Top Battle Report (Turns 4 and 5)
Best read in Reverse Order!
Turn 4
The bailed out Panzer is able to remount and passes its Morale check. Both of the pinned Fallschirmjager platoons are able to unpin and get back into the fight. Not surprising given their fearless rating!
FBP continue to advance up to put more units in charge range.
2nd Panzer platoon is able to blitz move off of the road and up to the tree line that SFOP are in. The command tank takes a further move to put the entire platoon in charge range.
FRP decide to move at the double and dash 10” up behind the tanks to get closer to the fight.
2nd Panzer platoon fire their main guns against SFOP with 5 shots. Only 2 hit and the bullet proof cover saves the British from taking any damage.
FGP fire upon SFOP with 12 shots. Despite a lot of hits that pin SFOP, they fail to cause any damage, mainly thanks to the fact that SFOP are dug in with bullet proof cover.
1st Panzer fires back against the anti tank guns on the hill. Two shots manage to hit with one of the shots destroying one of the guns. This puts a big dent into the British’s hopes of taking out the remaining Panzers.
FBP fires upon SFRP but despite a lot of shots, fail to cause enough hits to damage or even pin the plucky defenders. However, the Mortar team launch a repeat bombardment against SFRP and are able to kill one team and pin the rest of the platoon in place.
2nd Panzer launches a tank assault against SFOP. The defensive fire is ineffective and the panzers roll over two teams, killing them. SFOP counter attack but despite causing 5 hits, fail to penetrate the Panzer armour. The Panzers try to continue the assault but, probably due to the grenades exploding against the top hatches, fail to counter attack and fall back. SFOP hold off the panzer assault!
FBP launch their second assault against SFRP. Despite being pinned, SFRP are able to apply 9 shots and hit 4 times, killing one stand from FBP. This isn’t enough to hold off the assault and it hits home. FBP is only able to kill one stand from SFRP. SFRP, given the over whelming numbers they still face, decide to fall back rather than continue the fight.
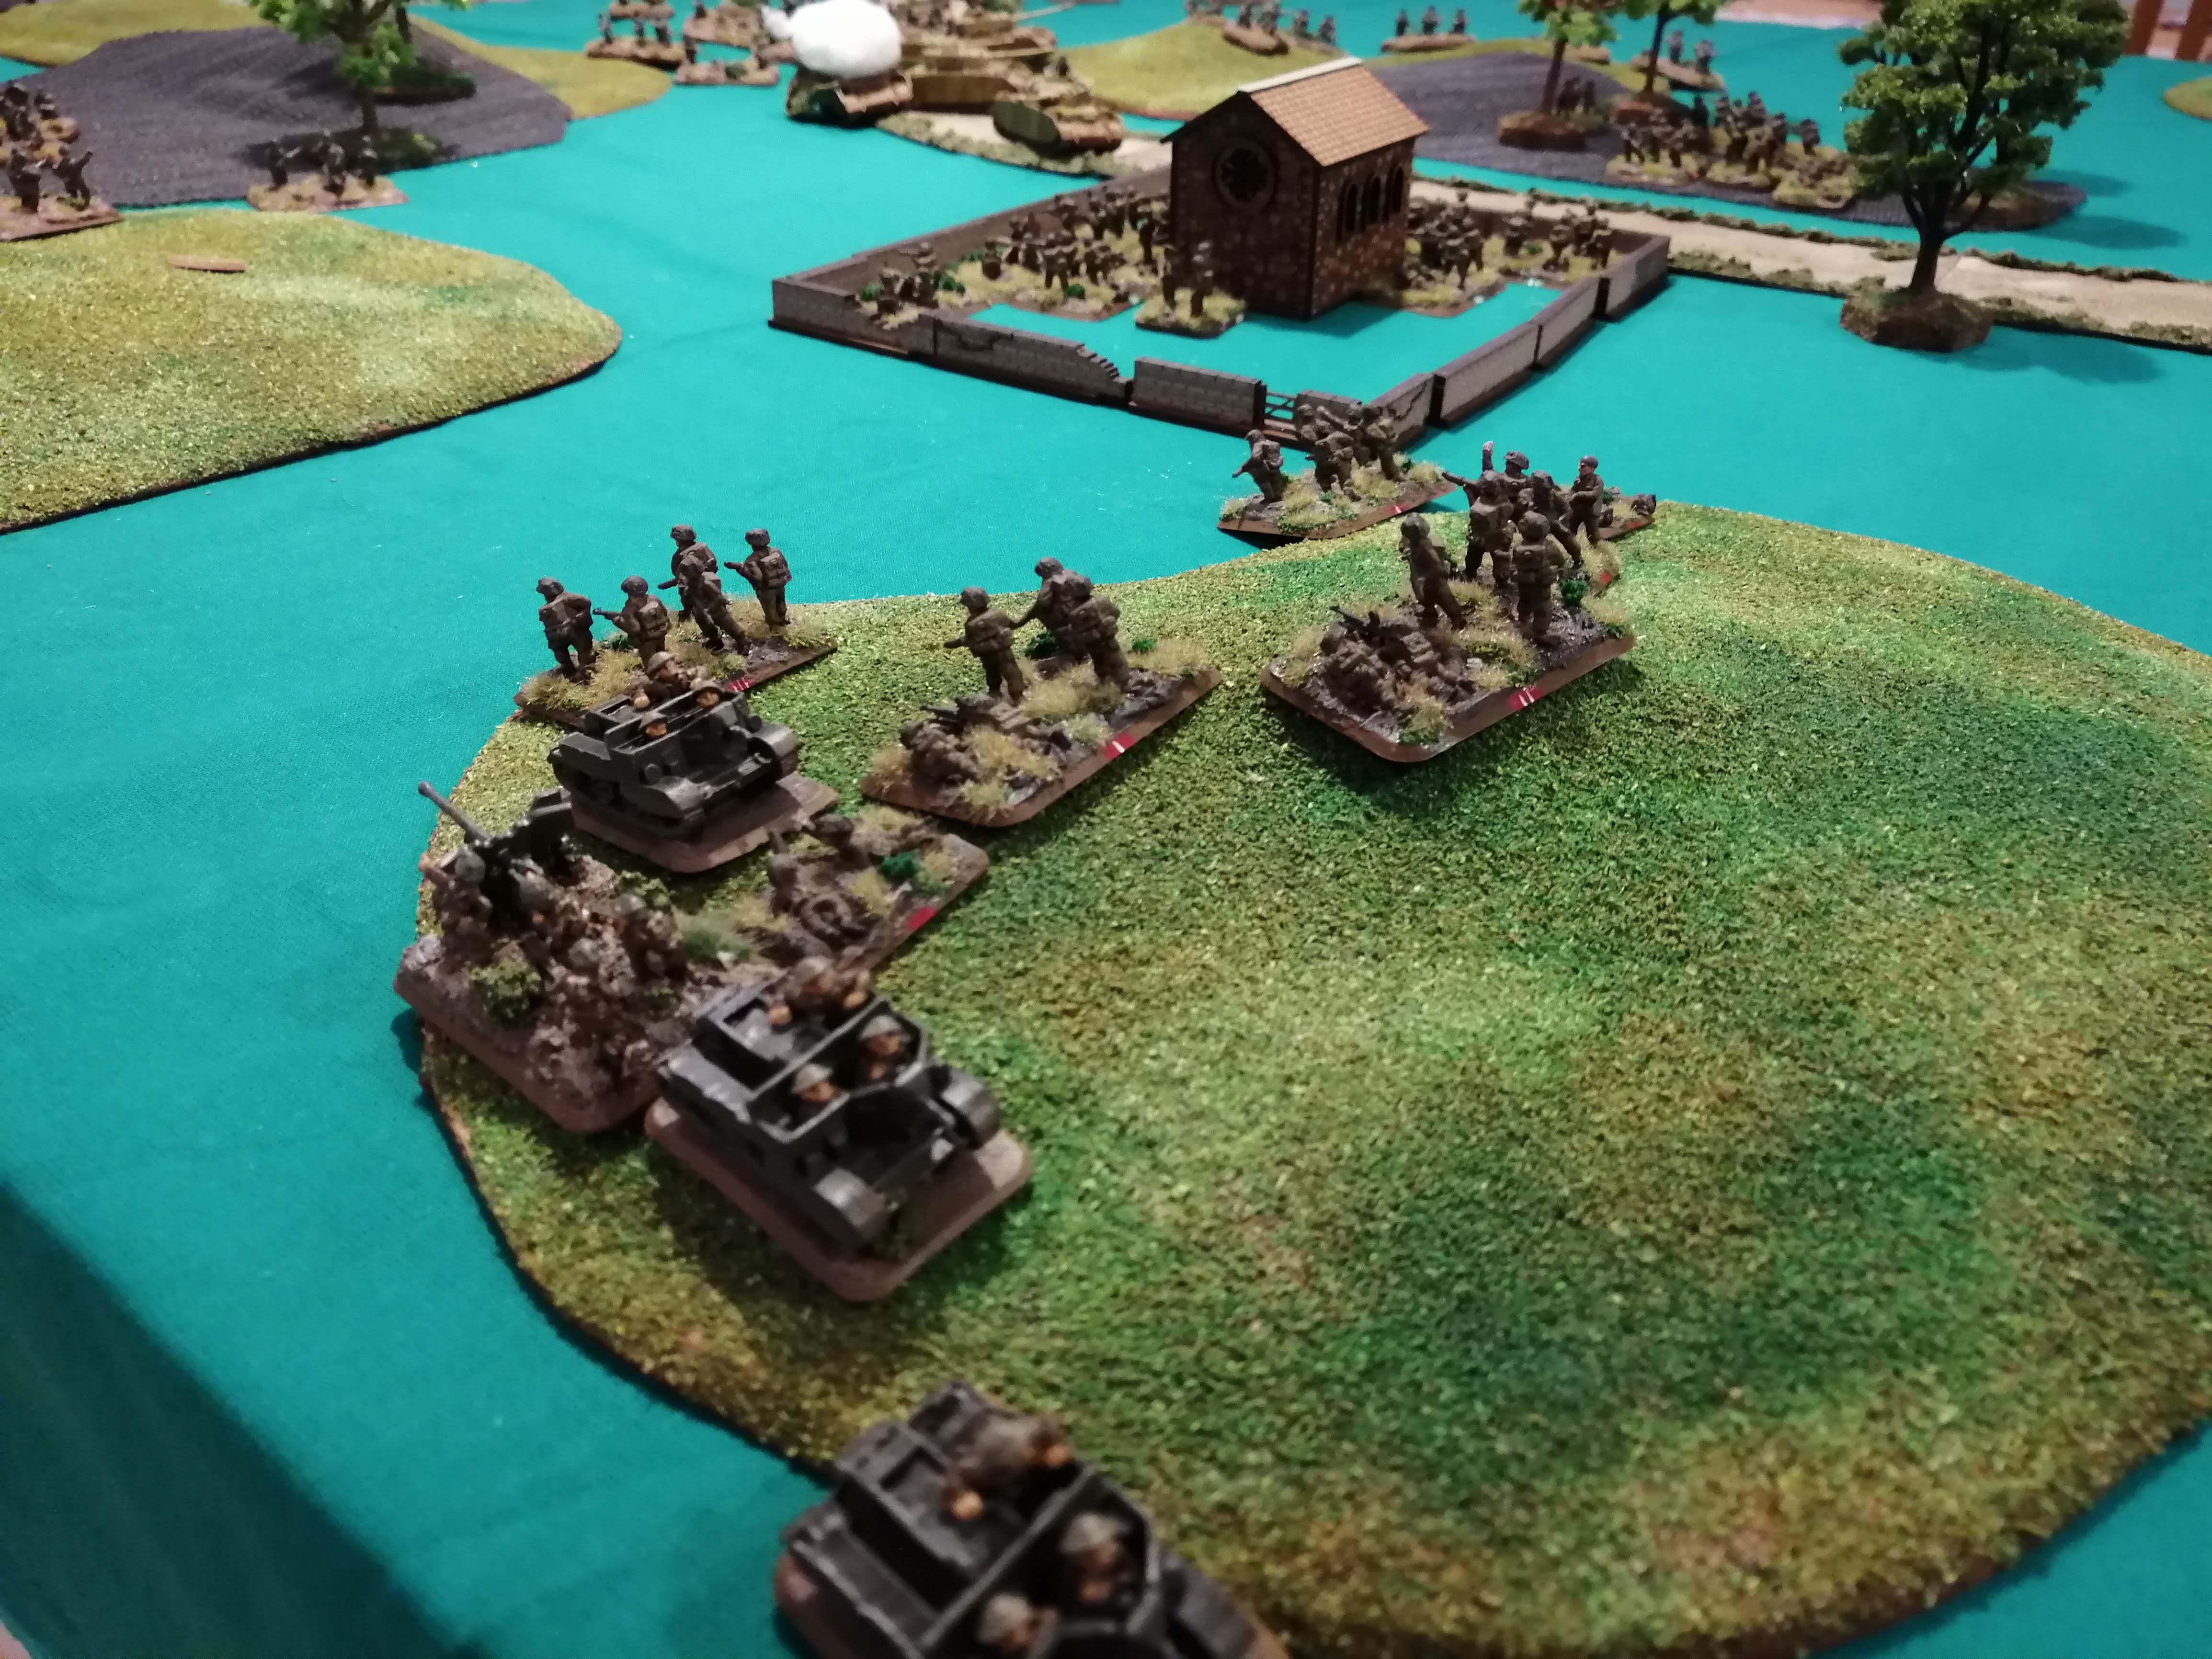
The British now receive help from the lead platoon of Shermans from the 46th Royal Tank Regiment who deploy on the road to the South. They immediately gun their engines and dash up the road to get closer to the fight to assist the beleaguered infantry. They’re able to get almost as far as the first turn in the road and have cover from the hill.
SFOP, with the tanks now threatening them, decide to start falling back, as do SFRP. The remaining anti tank gun passes its morale check and hitches up to the Universal carrier and starts to fallback as well.
The MG teams remain in place to provide some covering fire and open up on FBP causing 7 hits and killing 1 stand. FBP are pinned in place again.
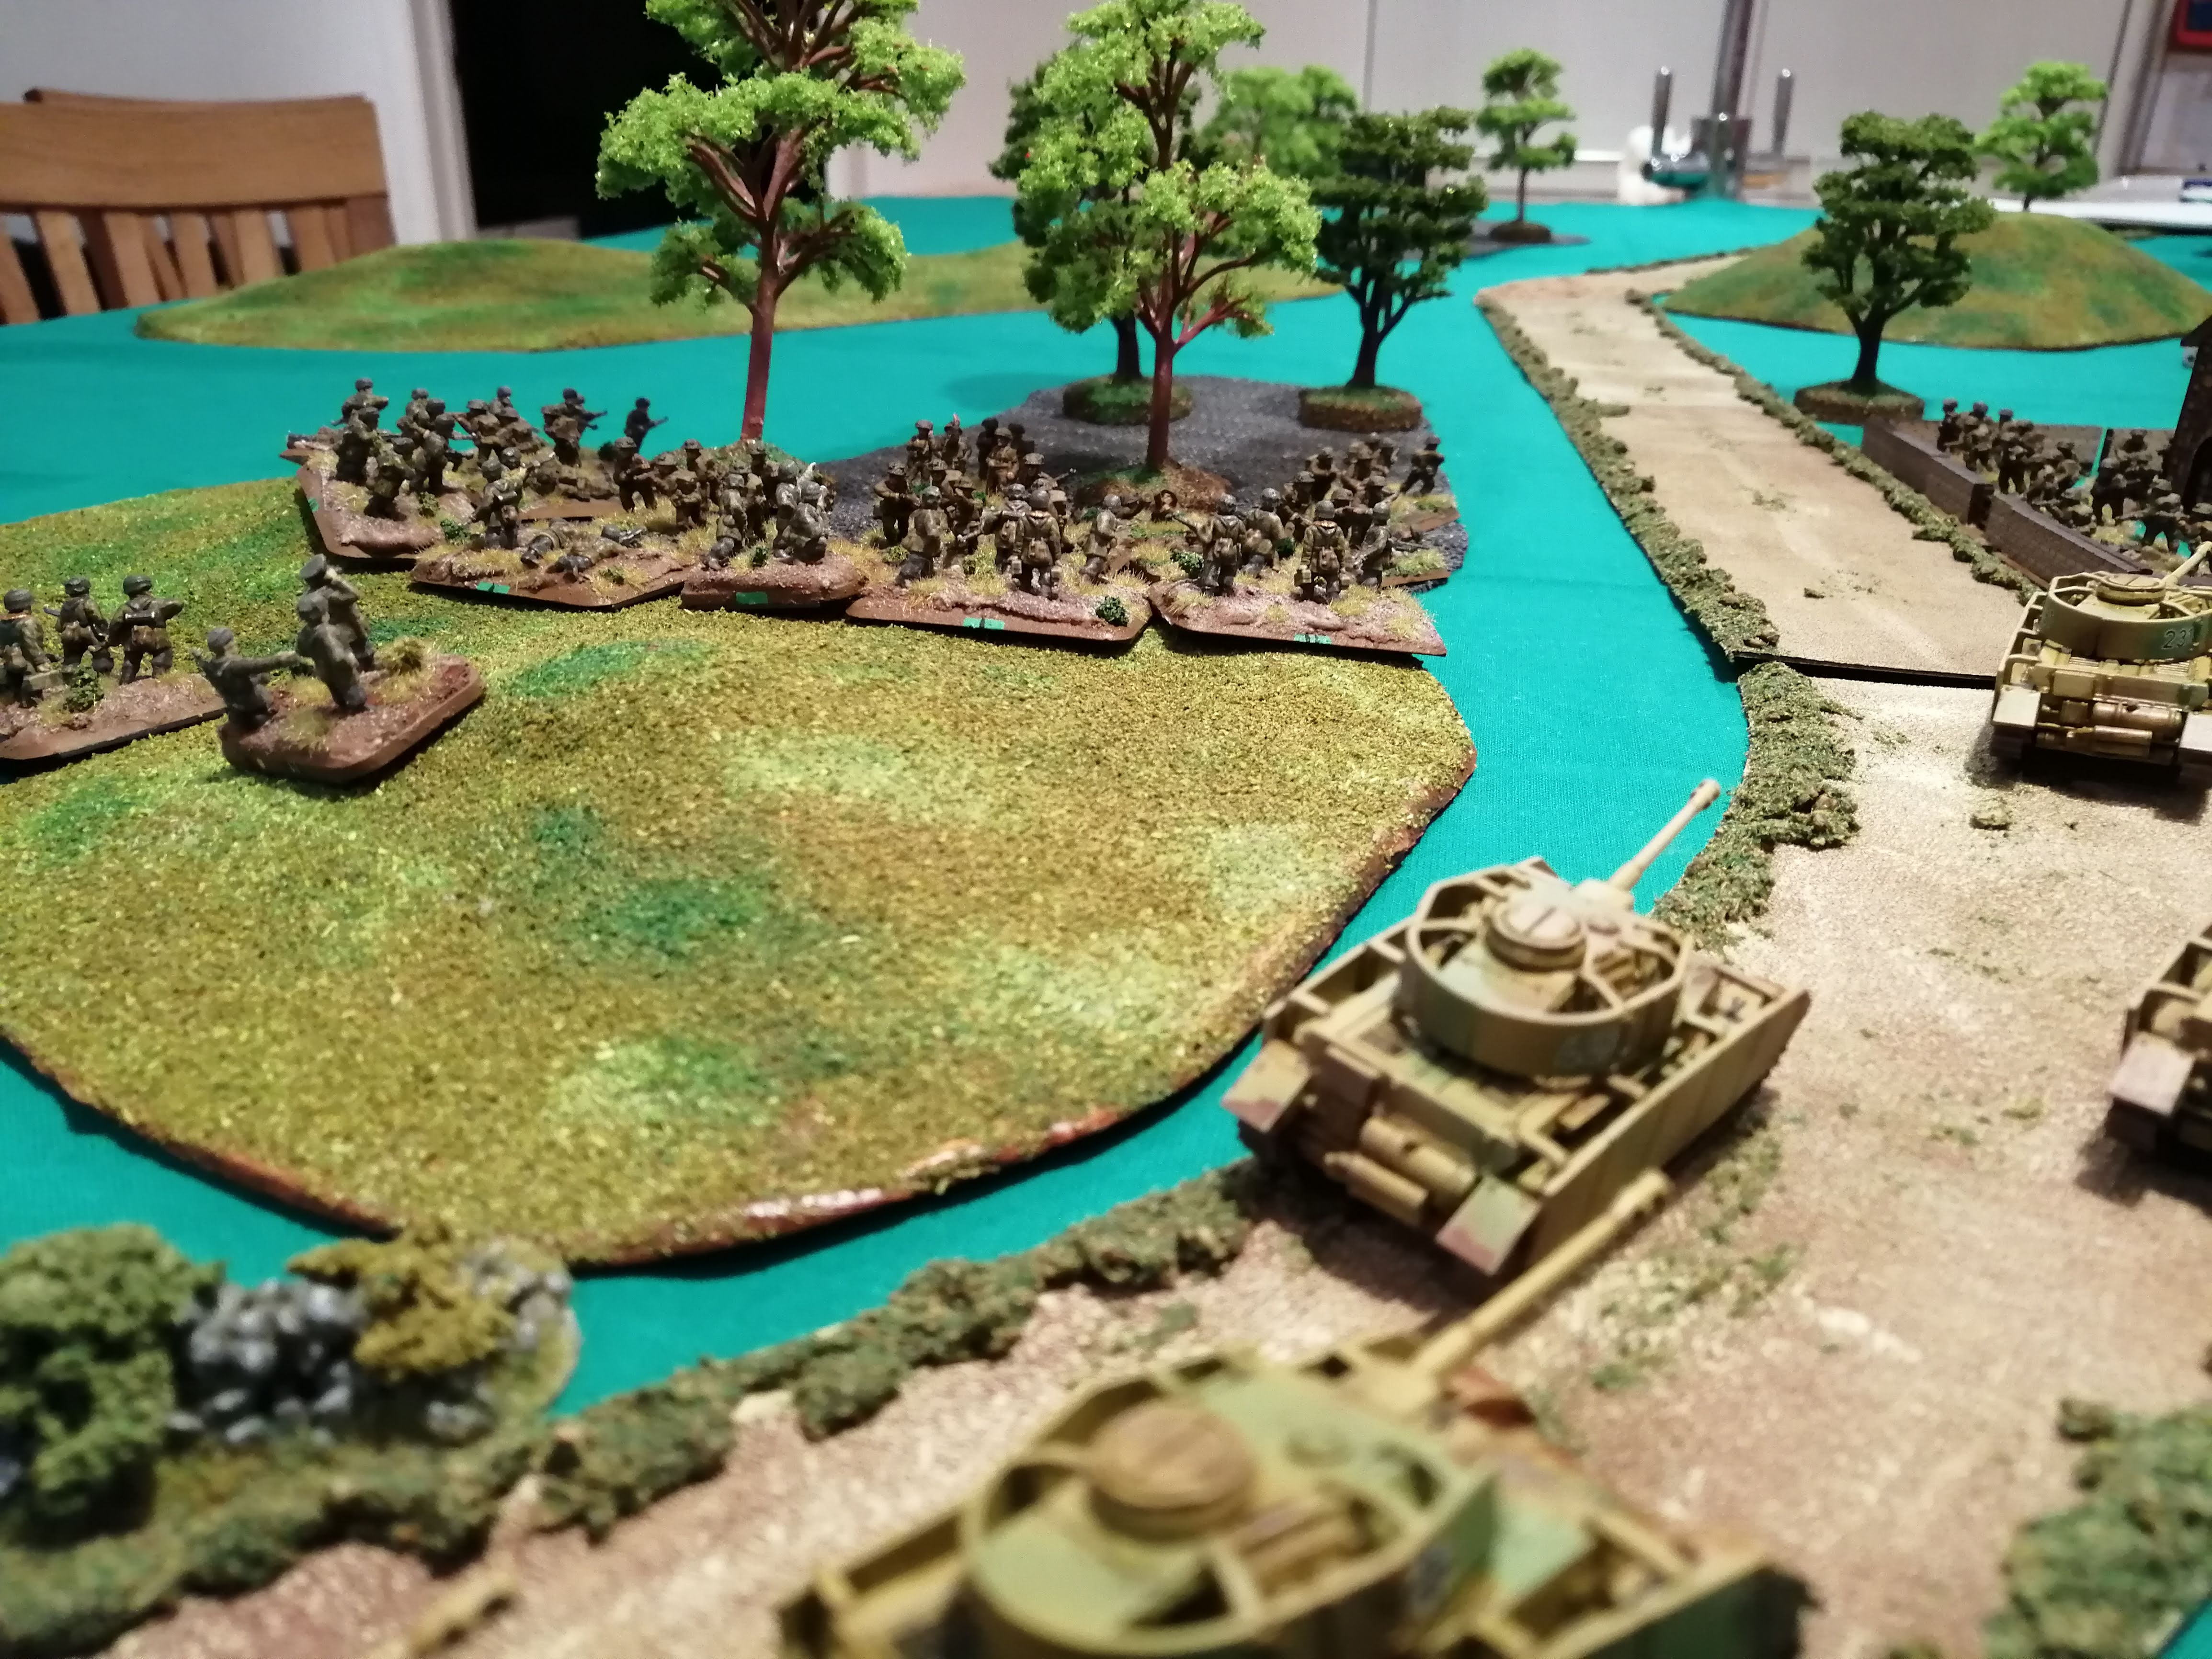
 State of play at the end of Turn 4
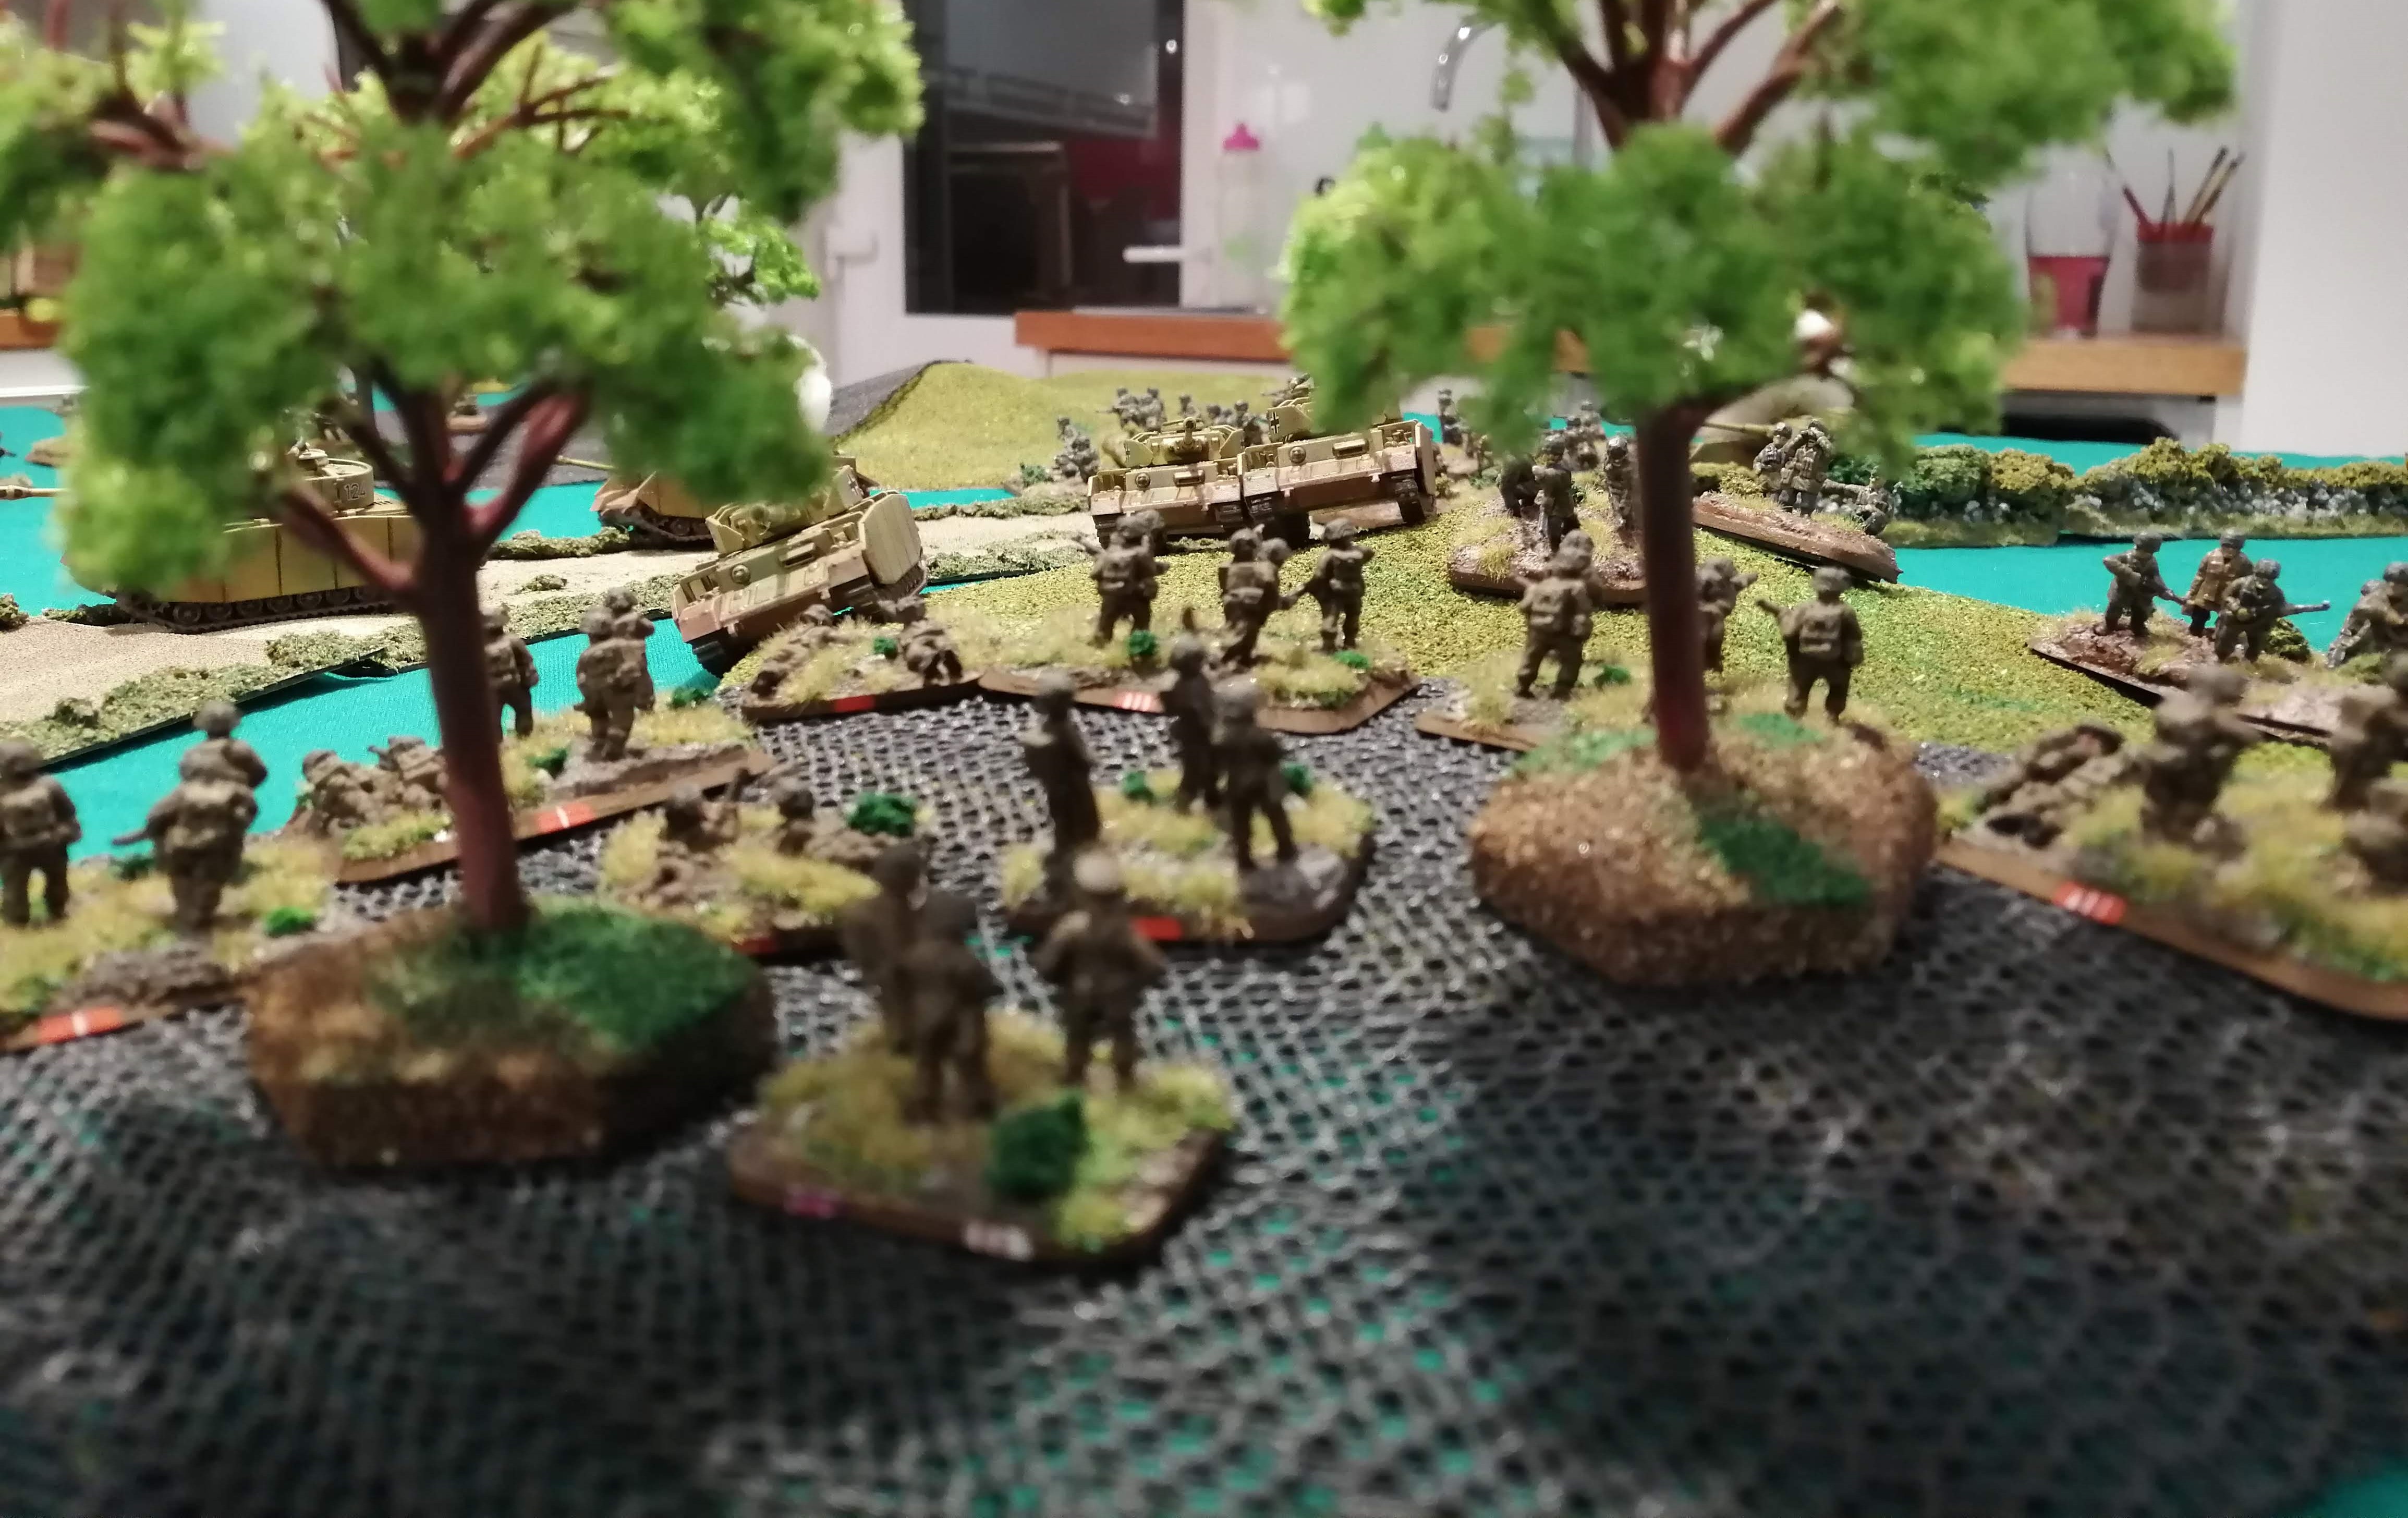 The view from the perspective of the Sherwood Forresters in the trees as the Panzers move up
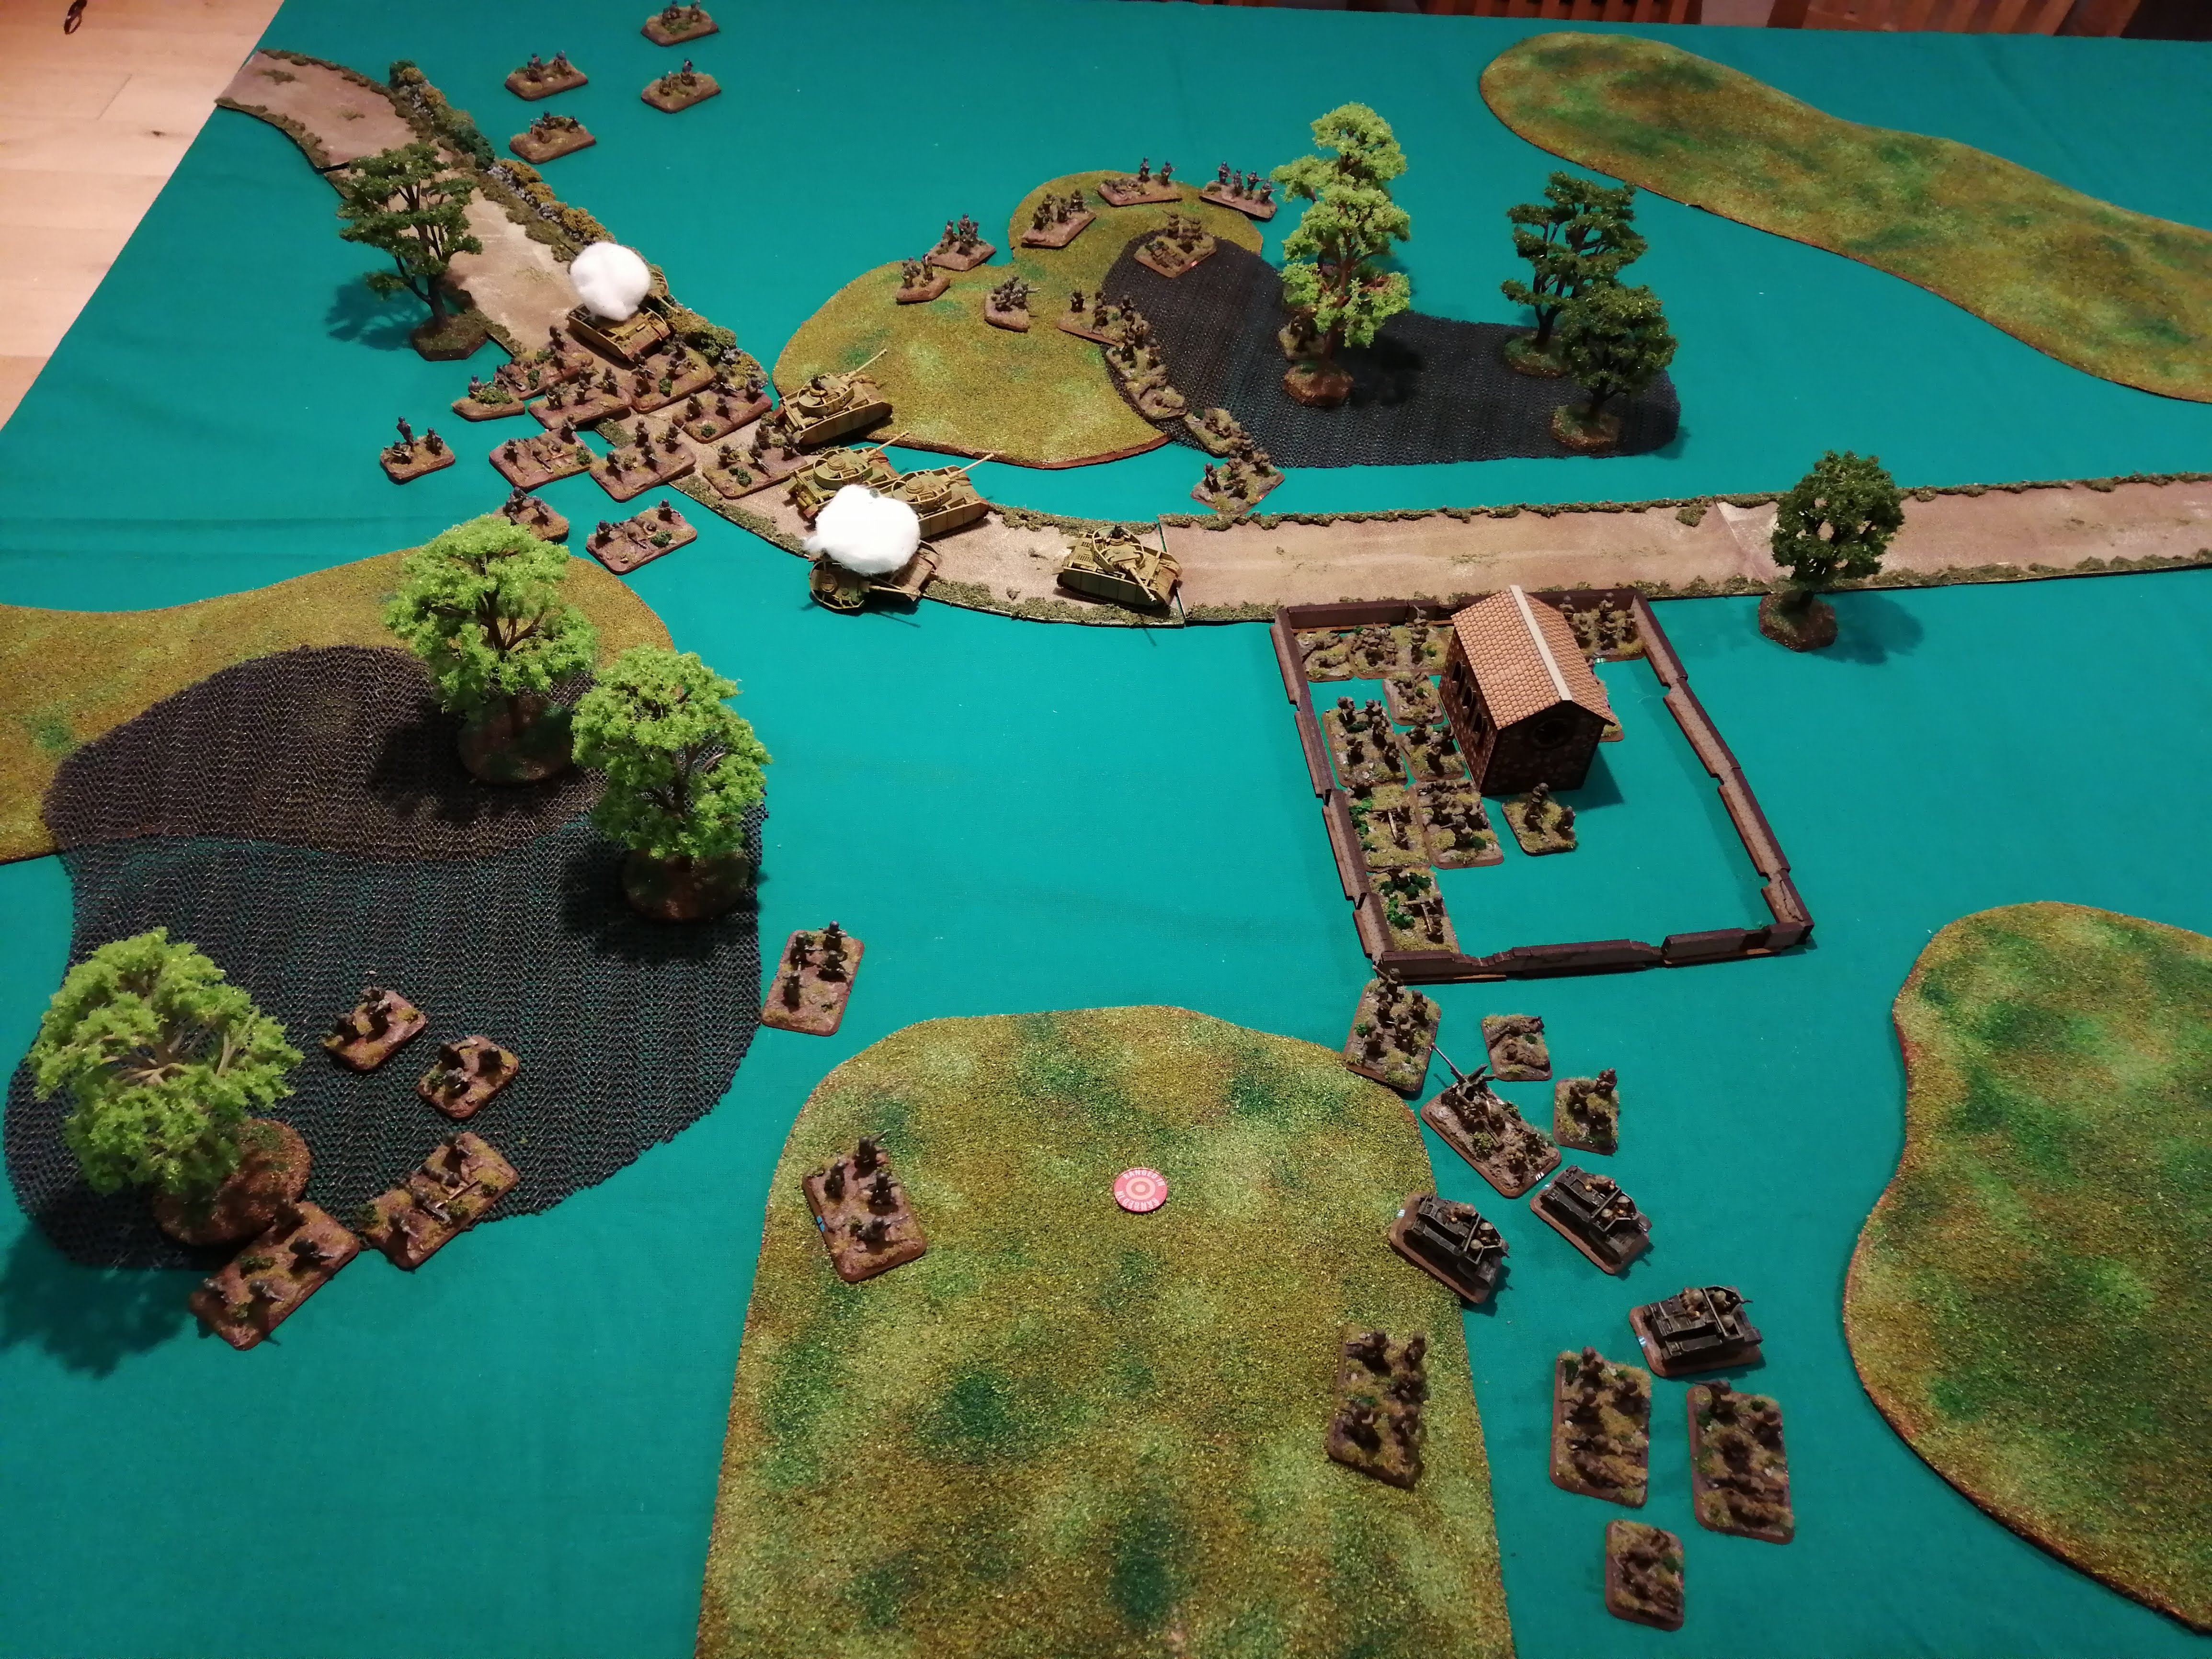 SFOP force the Panzers back (top of picture) while SFRP fall back at the bottom
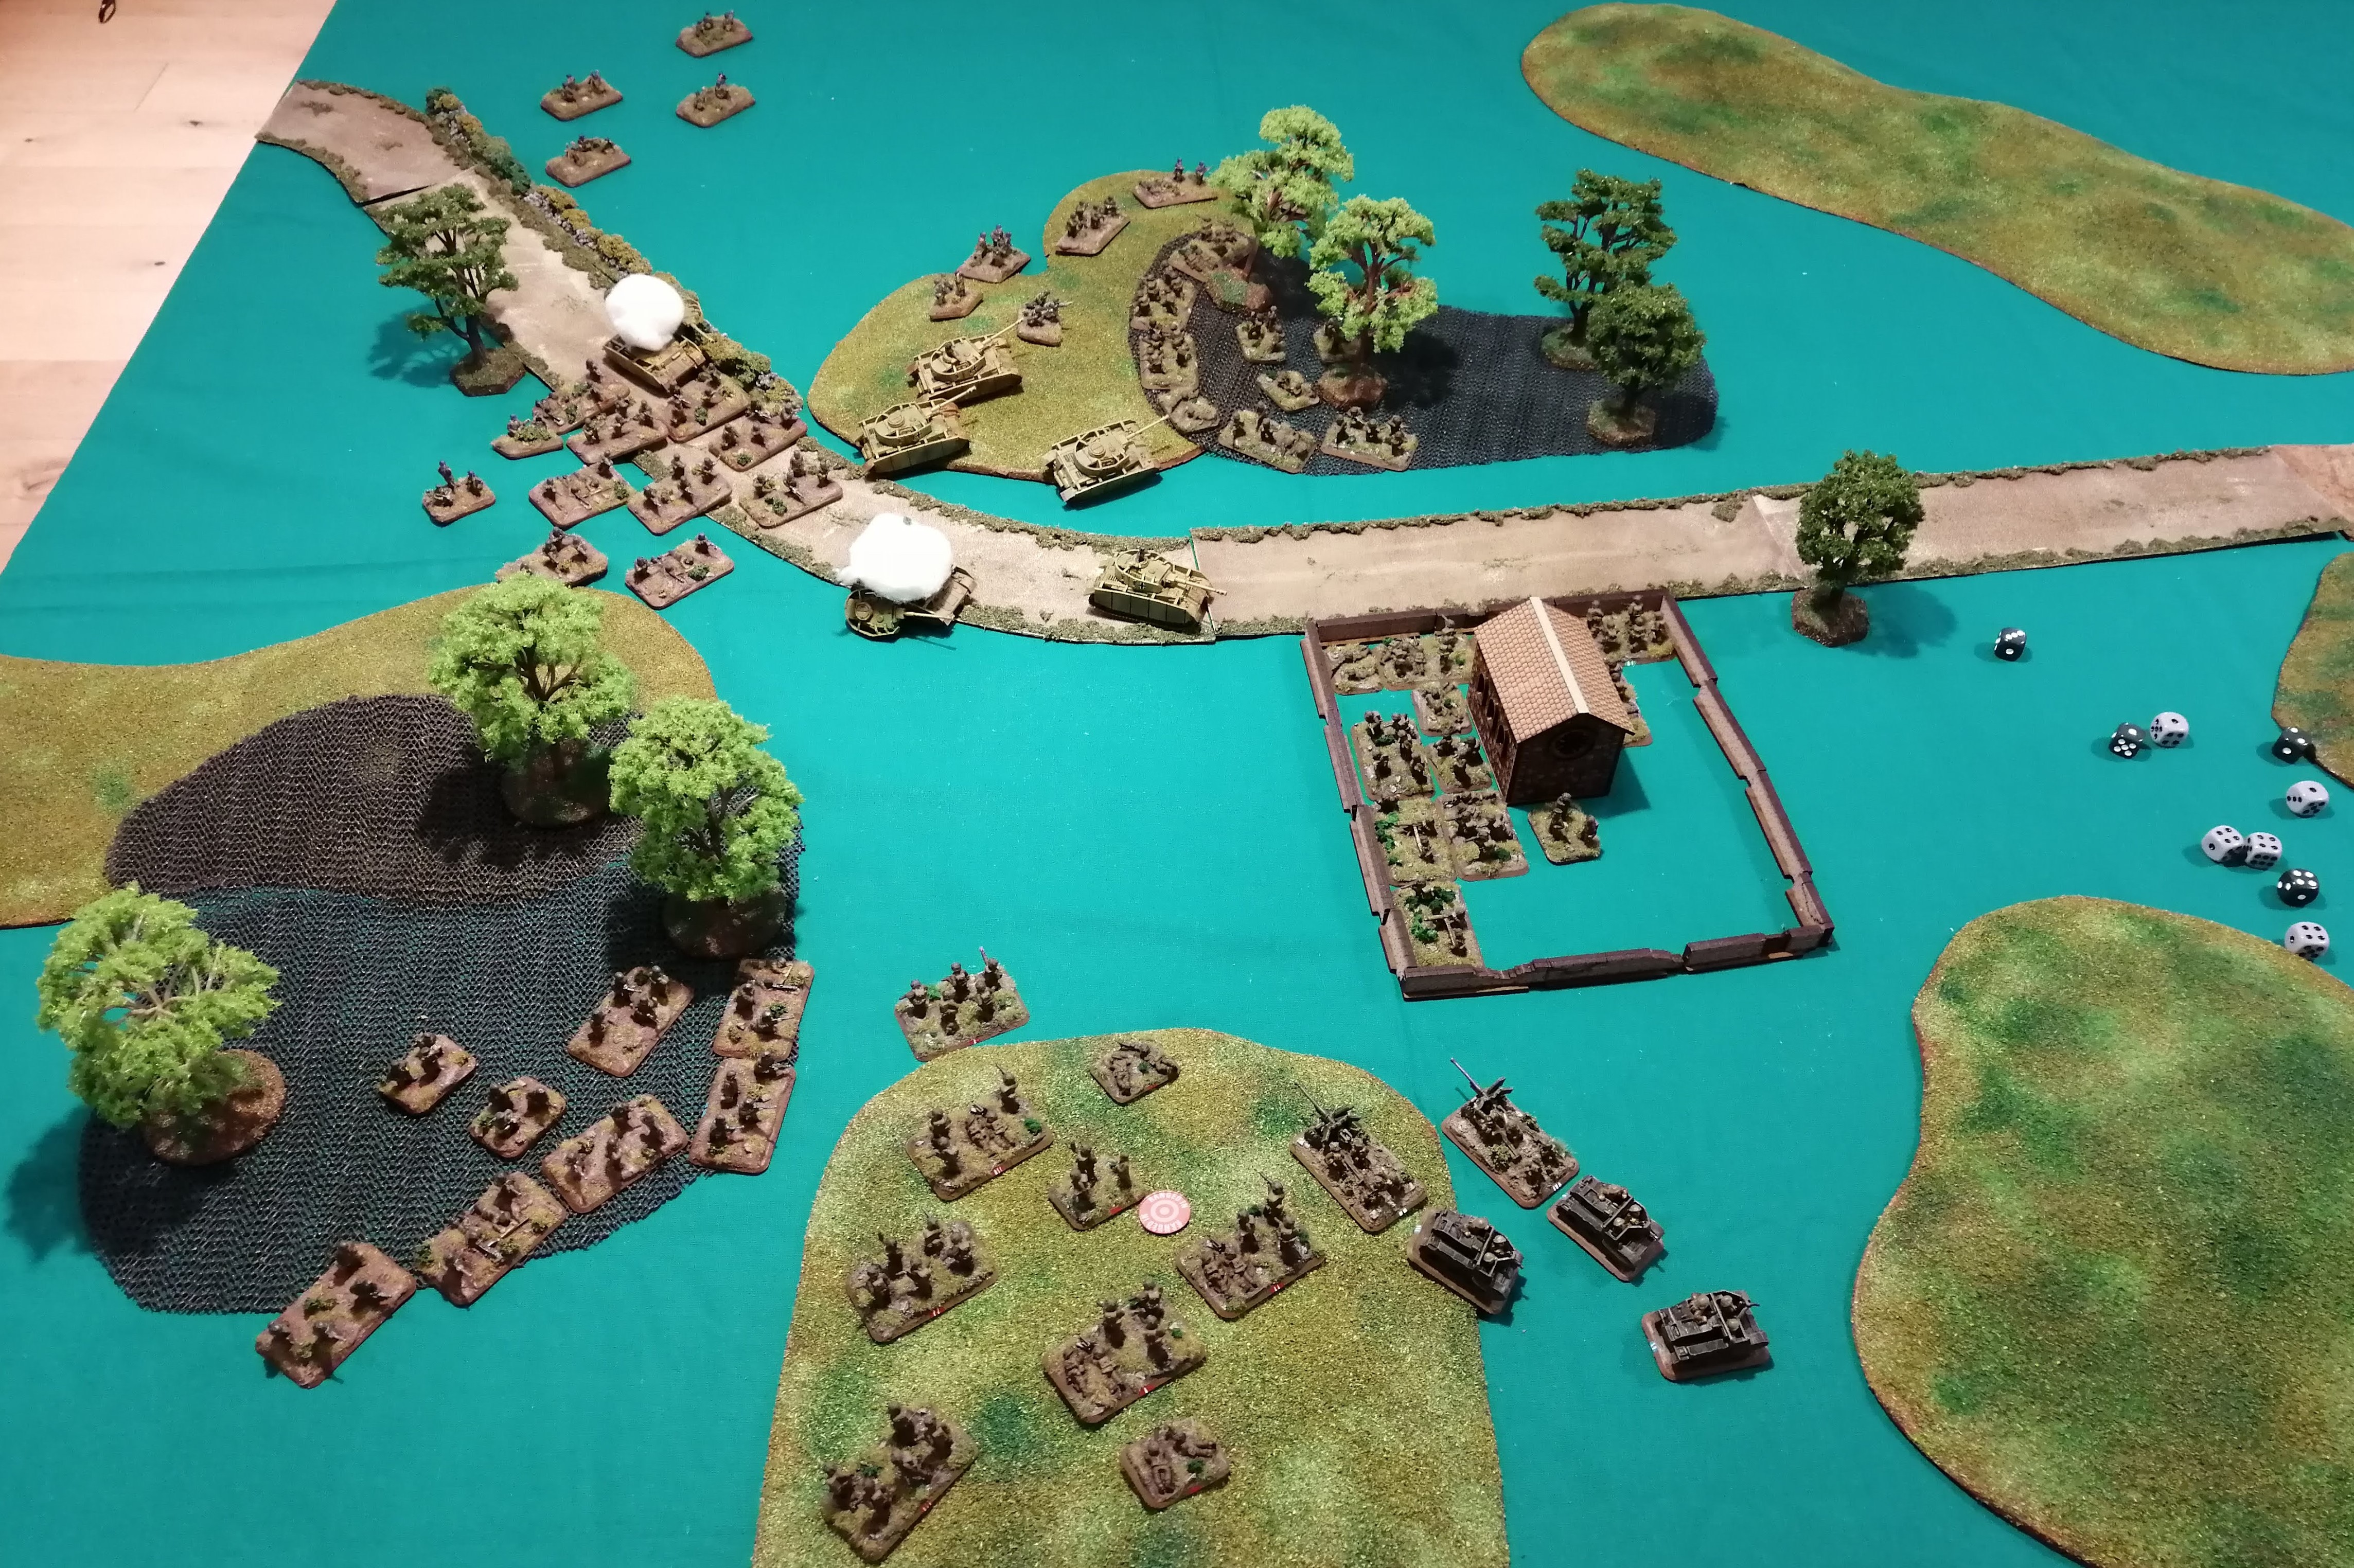


Turn 5
FBP fails to unpin and remain in place. 1st Panzer once again passes its morale check and is able to stay in the battle. It tries a blitz move but fails. 2nd Panzer advances along the road. Both FGP and FRP advance on the now retreating Sherwood Foresters.
FGP fires upon SFOP. With SFOP now out of their dug in positions are a little easier to hit and FGP are able to destroy 2 stands with their shooting but can’t pin the unit in place.
The mortar team decide to change their focus and fire upon SFRP. They range in first time and pin the platoon in place, even if they don’t cause any damage.
2nd Panzer uses its MGs against SFGP. The 12 shots hit 7 times and kill one stand while pinning the rest in place. 1st Panzer fails to score any hits.
1st Panzer launches and assault against SFGP. The defenders fail to beat off the assault with their guns and 1st Panzer destroys the PIAT team in SFGP. SFGP decide not to counter attack and take the opportunity to start falling back along with the rest of the company.
The 2nd Sherman Platoon arrives on the road and heads cross country toward the retreating infantry. SFRP fails to unpin and remain in place within the ranged in mortars as well as in sight of the Panzers!
The remaining anti tank gun passes its morale check and continues its retreat towed by the universal carrier.
The 1st Sherman Platoon successfully makes a blitz move around the hill and is able to draw a bead on the Panzers down the road. SFOP, SFGP and the MG team all fall back toward their extraction point.
Despite the blitz move, the 1st Sherman Platoon is unable to hit their targets, firing wildly wide. The remaining shots from the British all miss as well.
 End of Turn 5
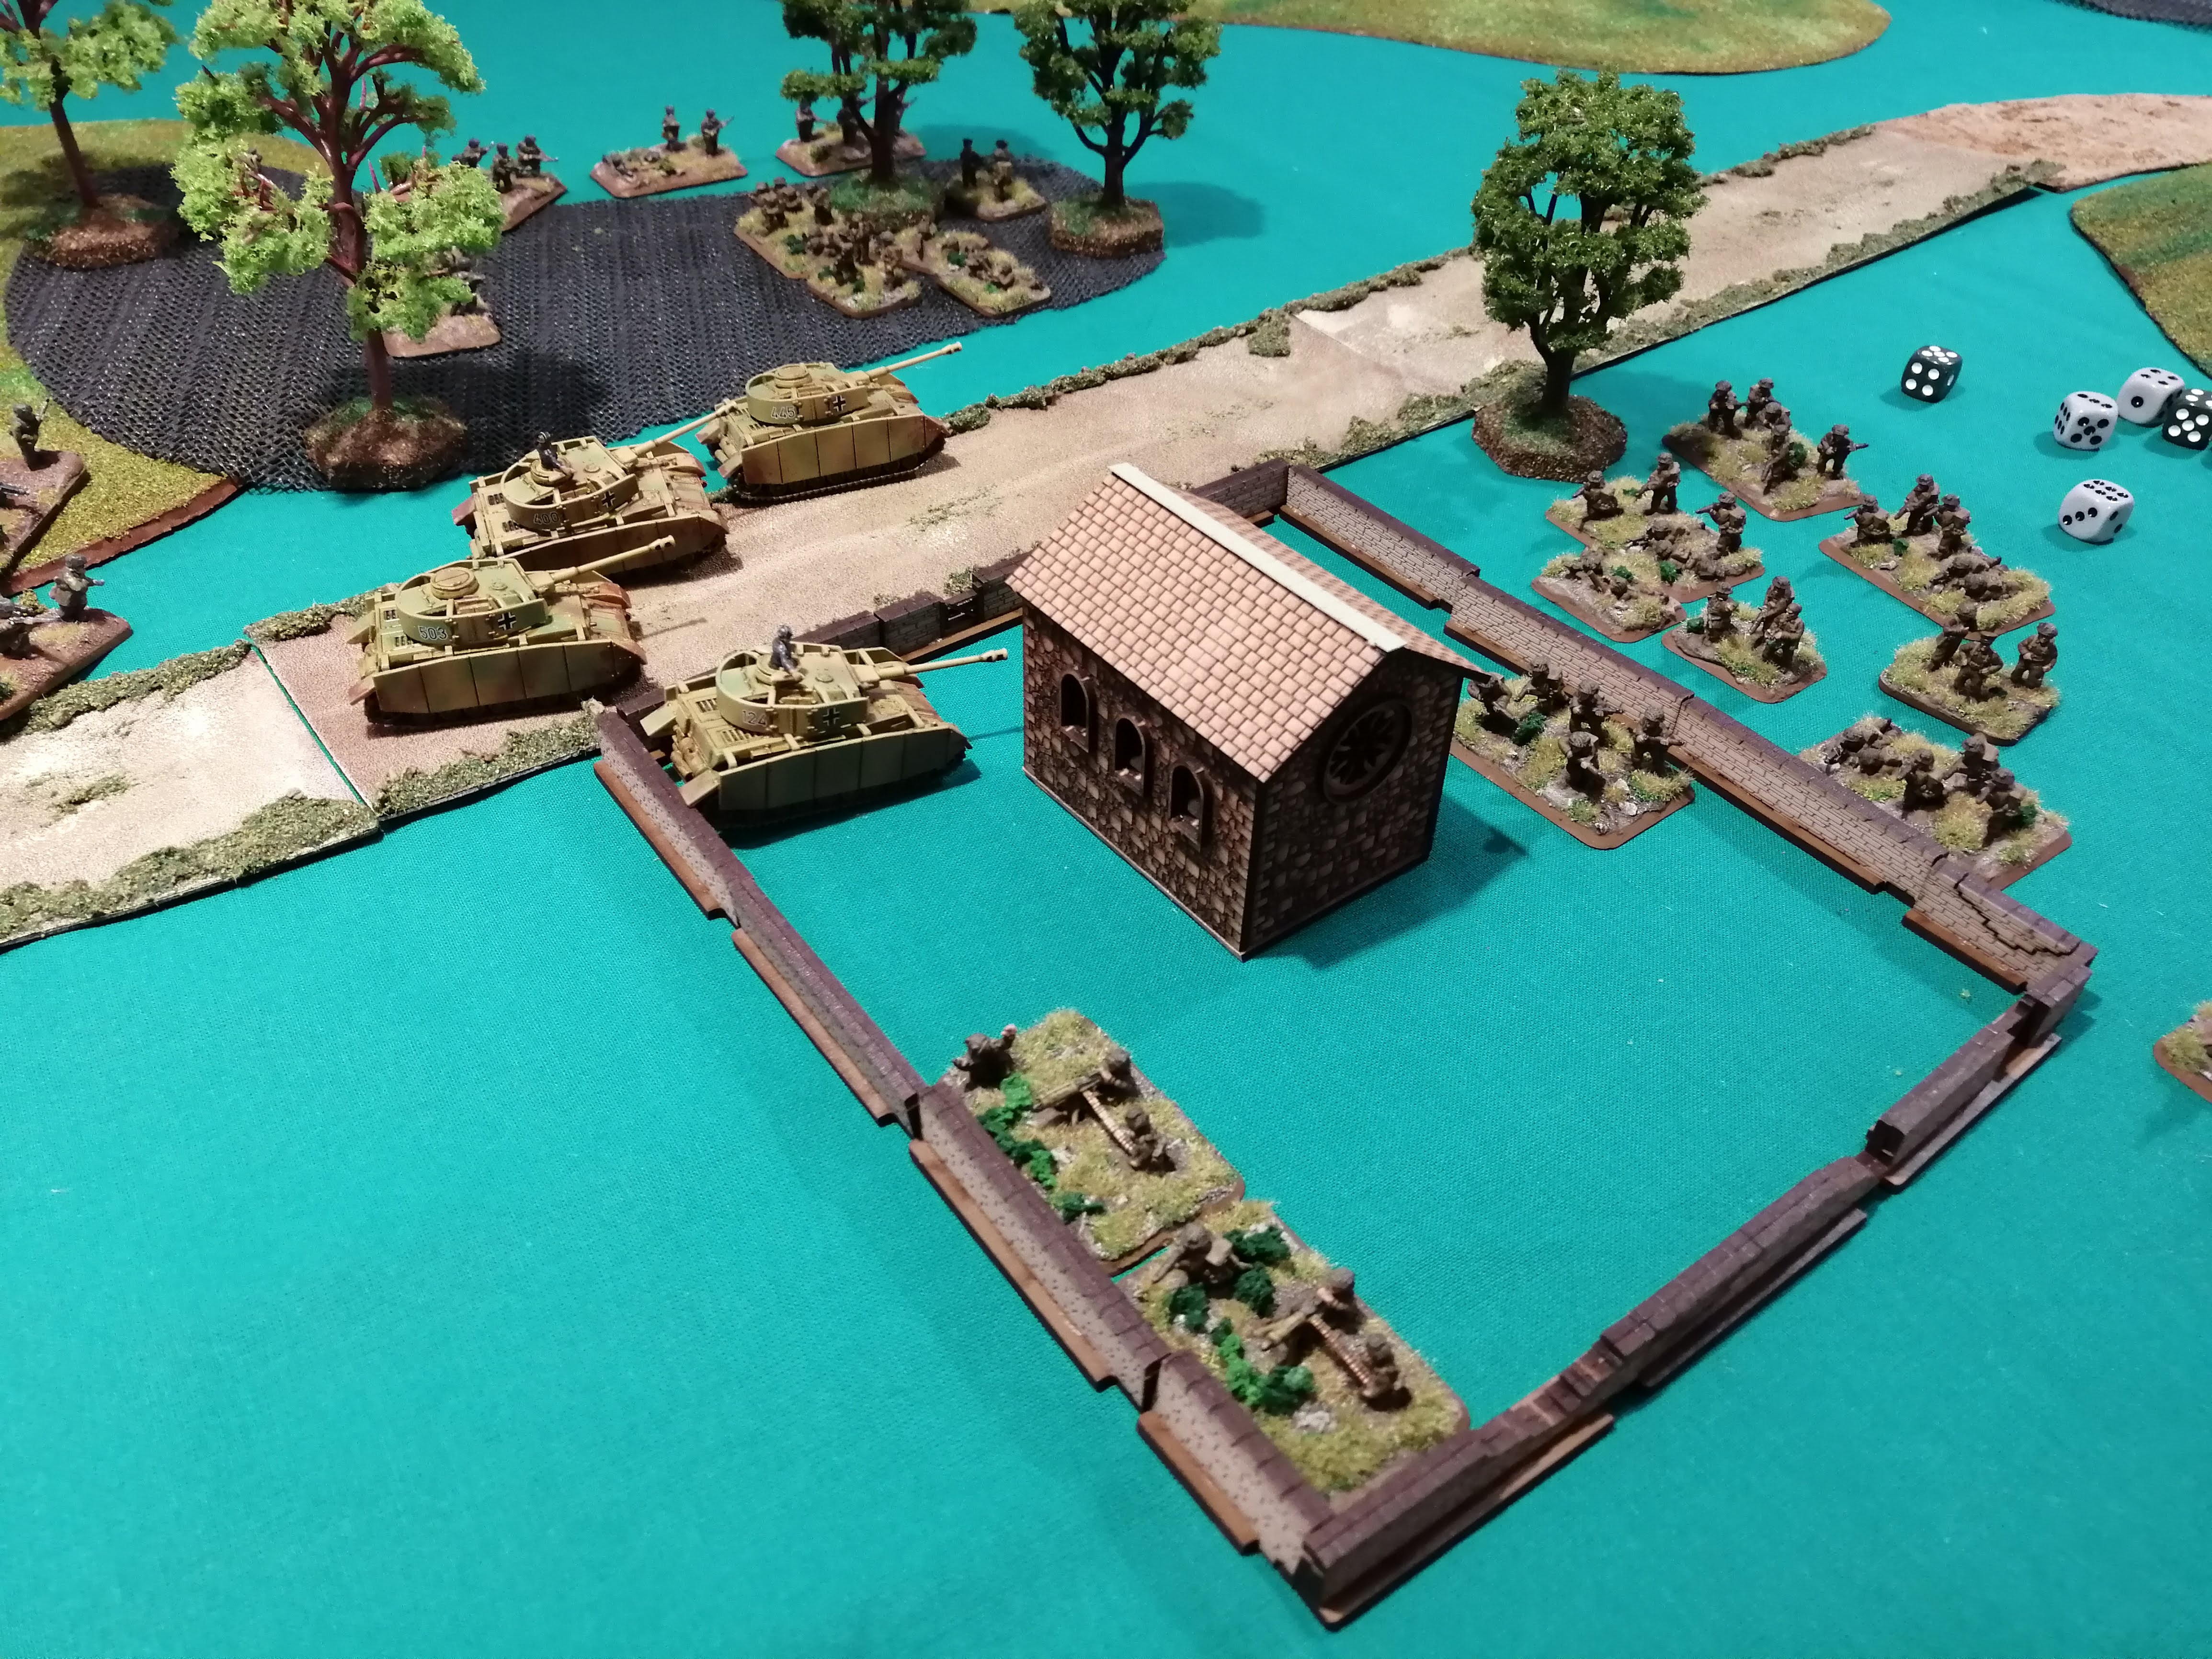 The last remaining Panzer from 1st Platoon assaults over the wall driving off SFGP
 The Shermans 'Blitz' around the hill and try to line up the Panzers
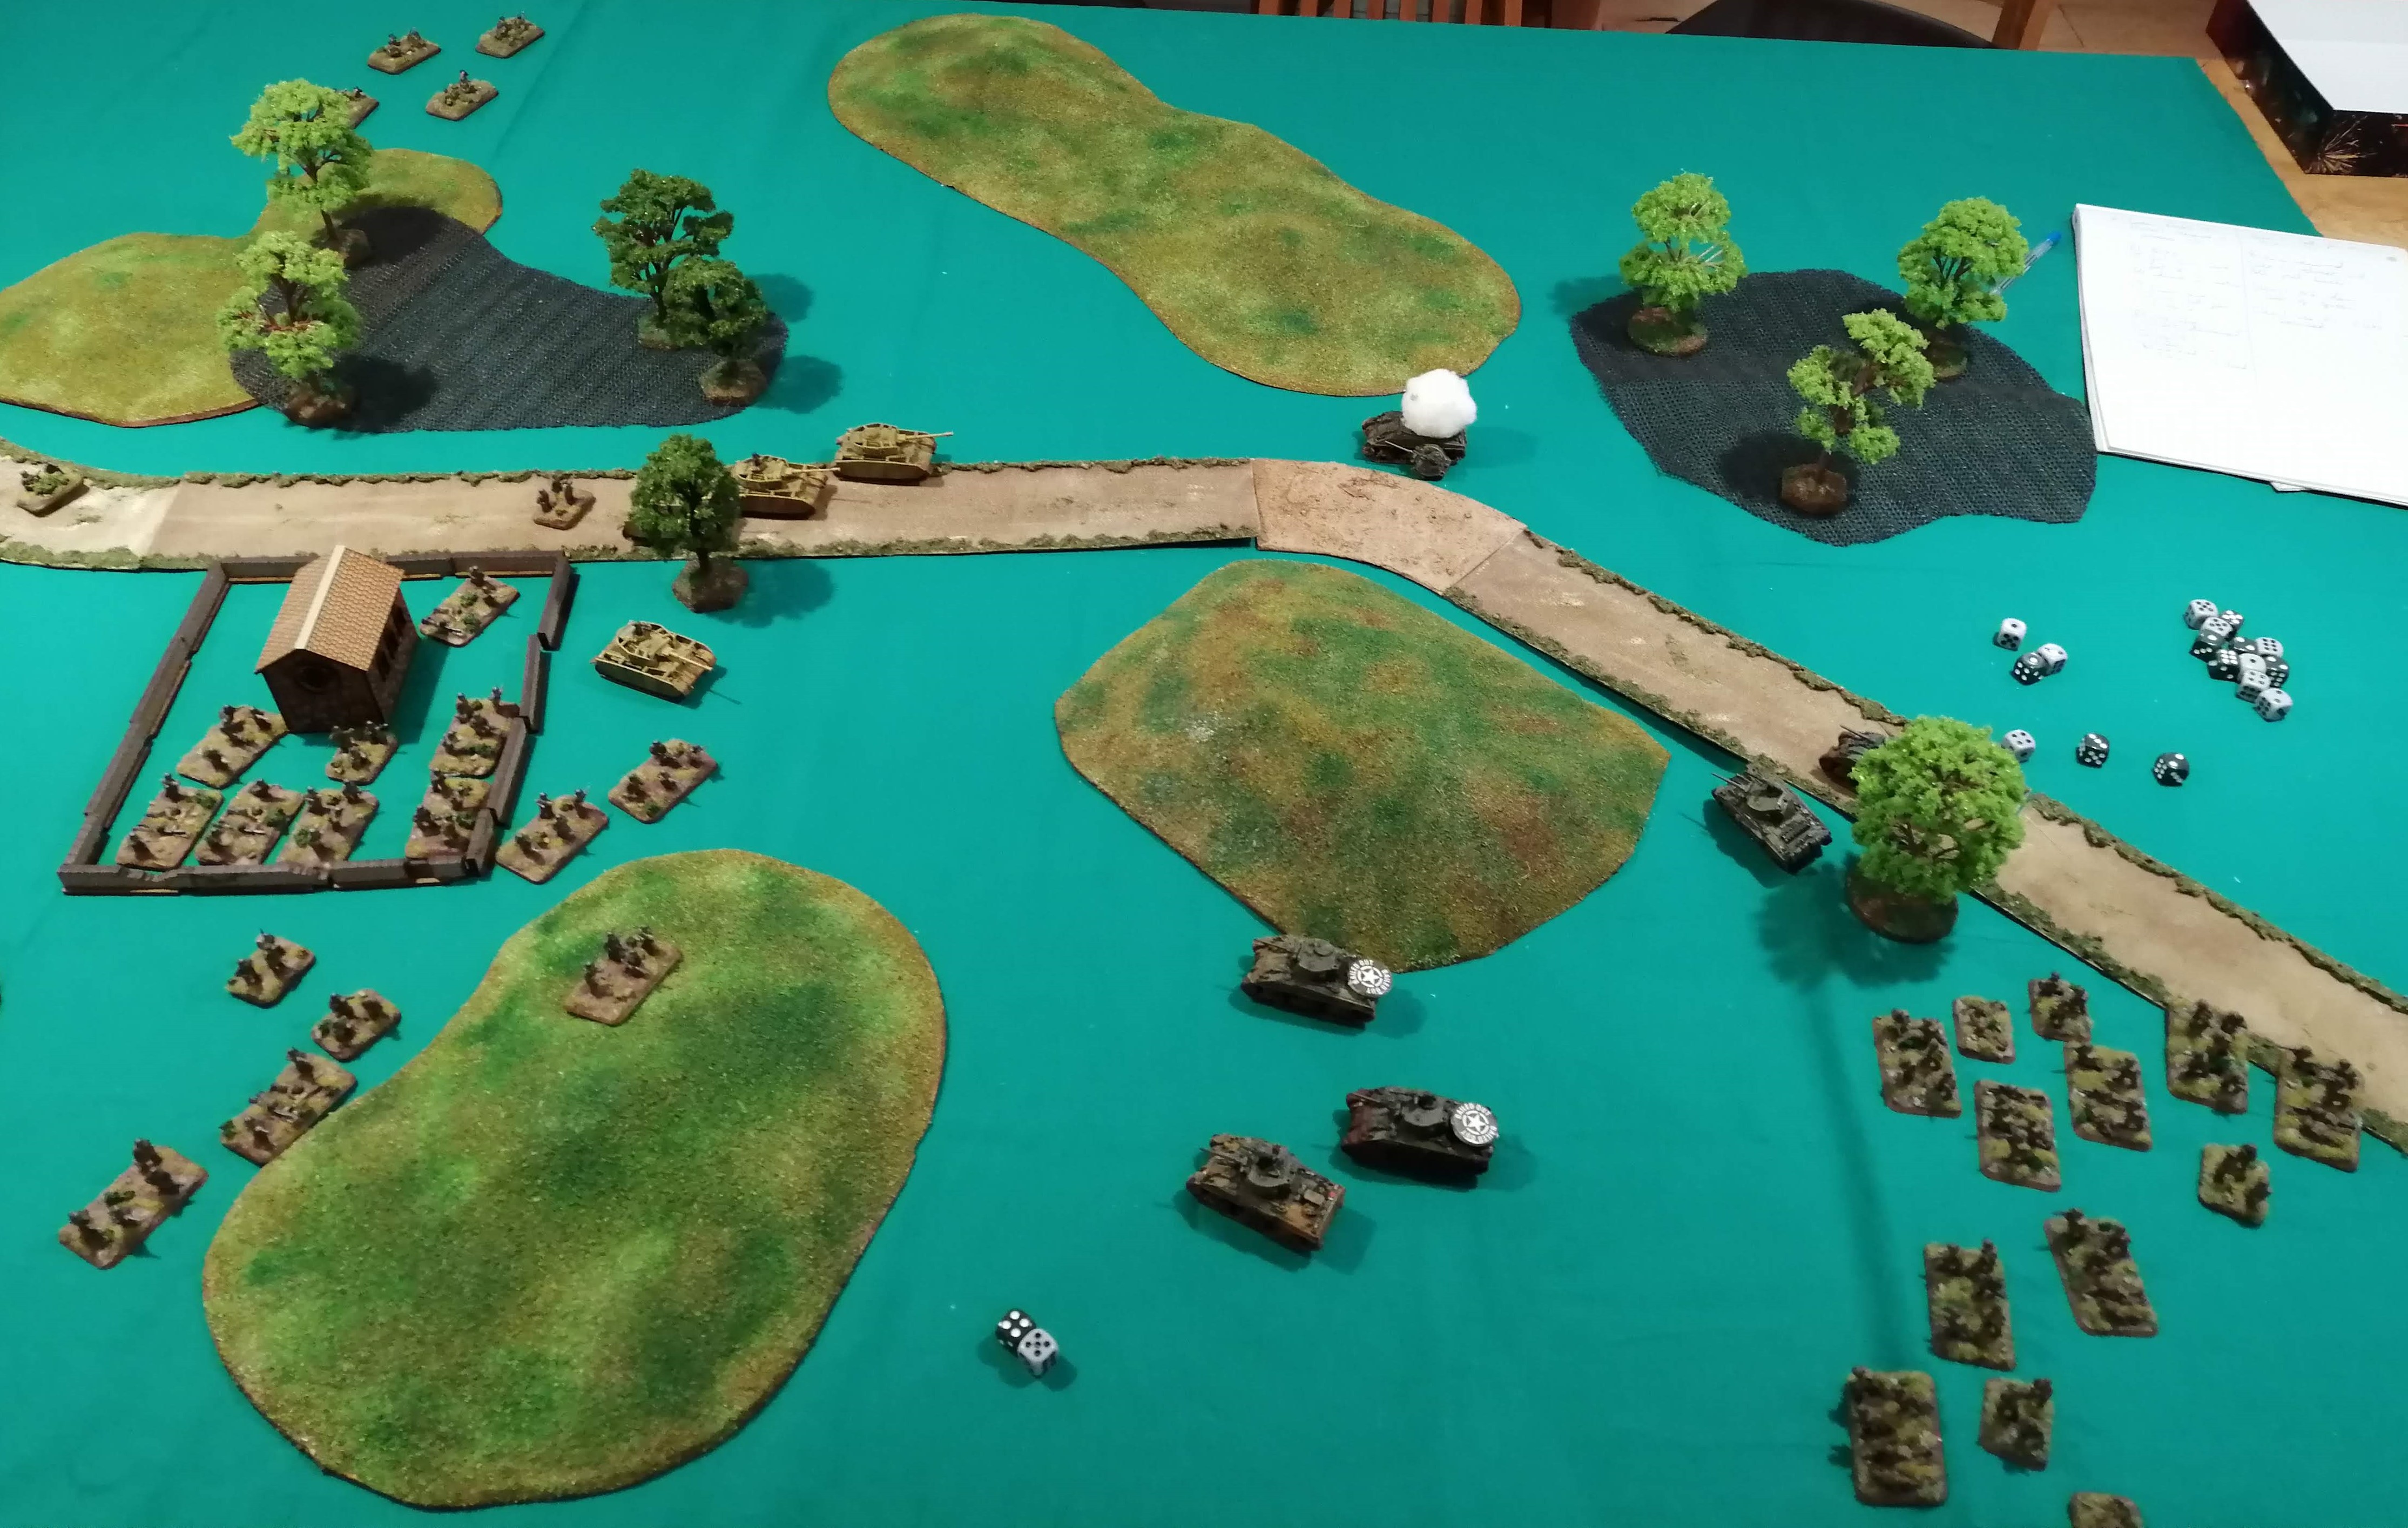
Anzio - Second Table Top Battle Report (Turn 3)
Unless you like to know the end before the beginning, this project is best read in reverse order!
Turn 3
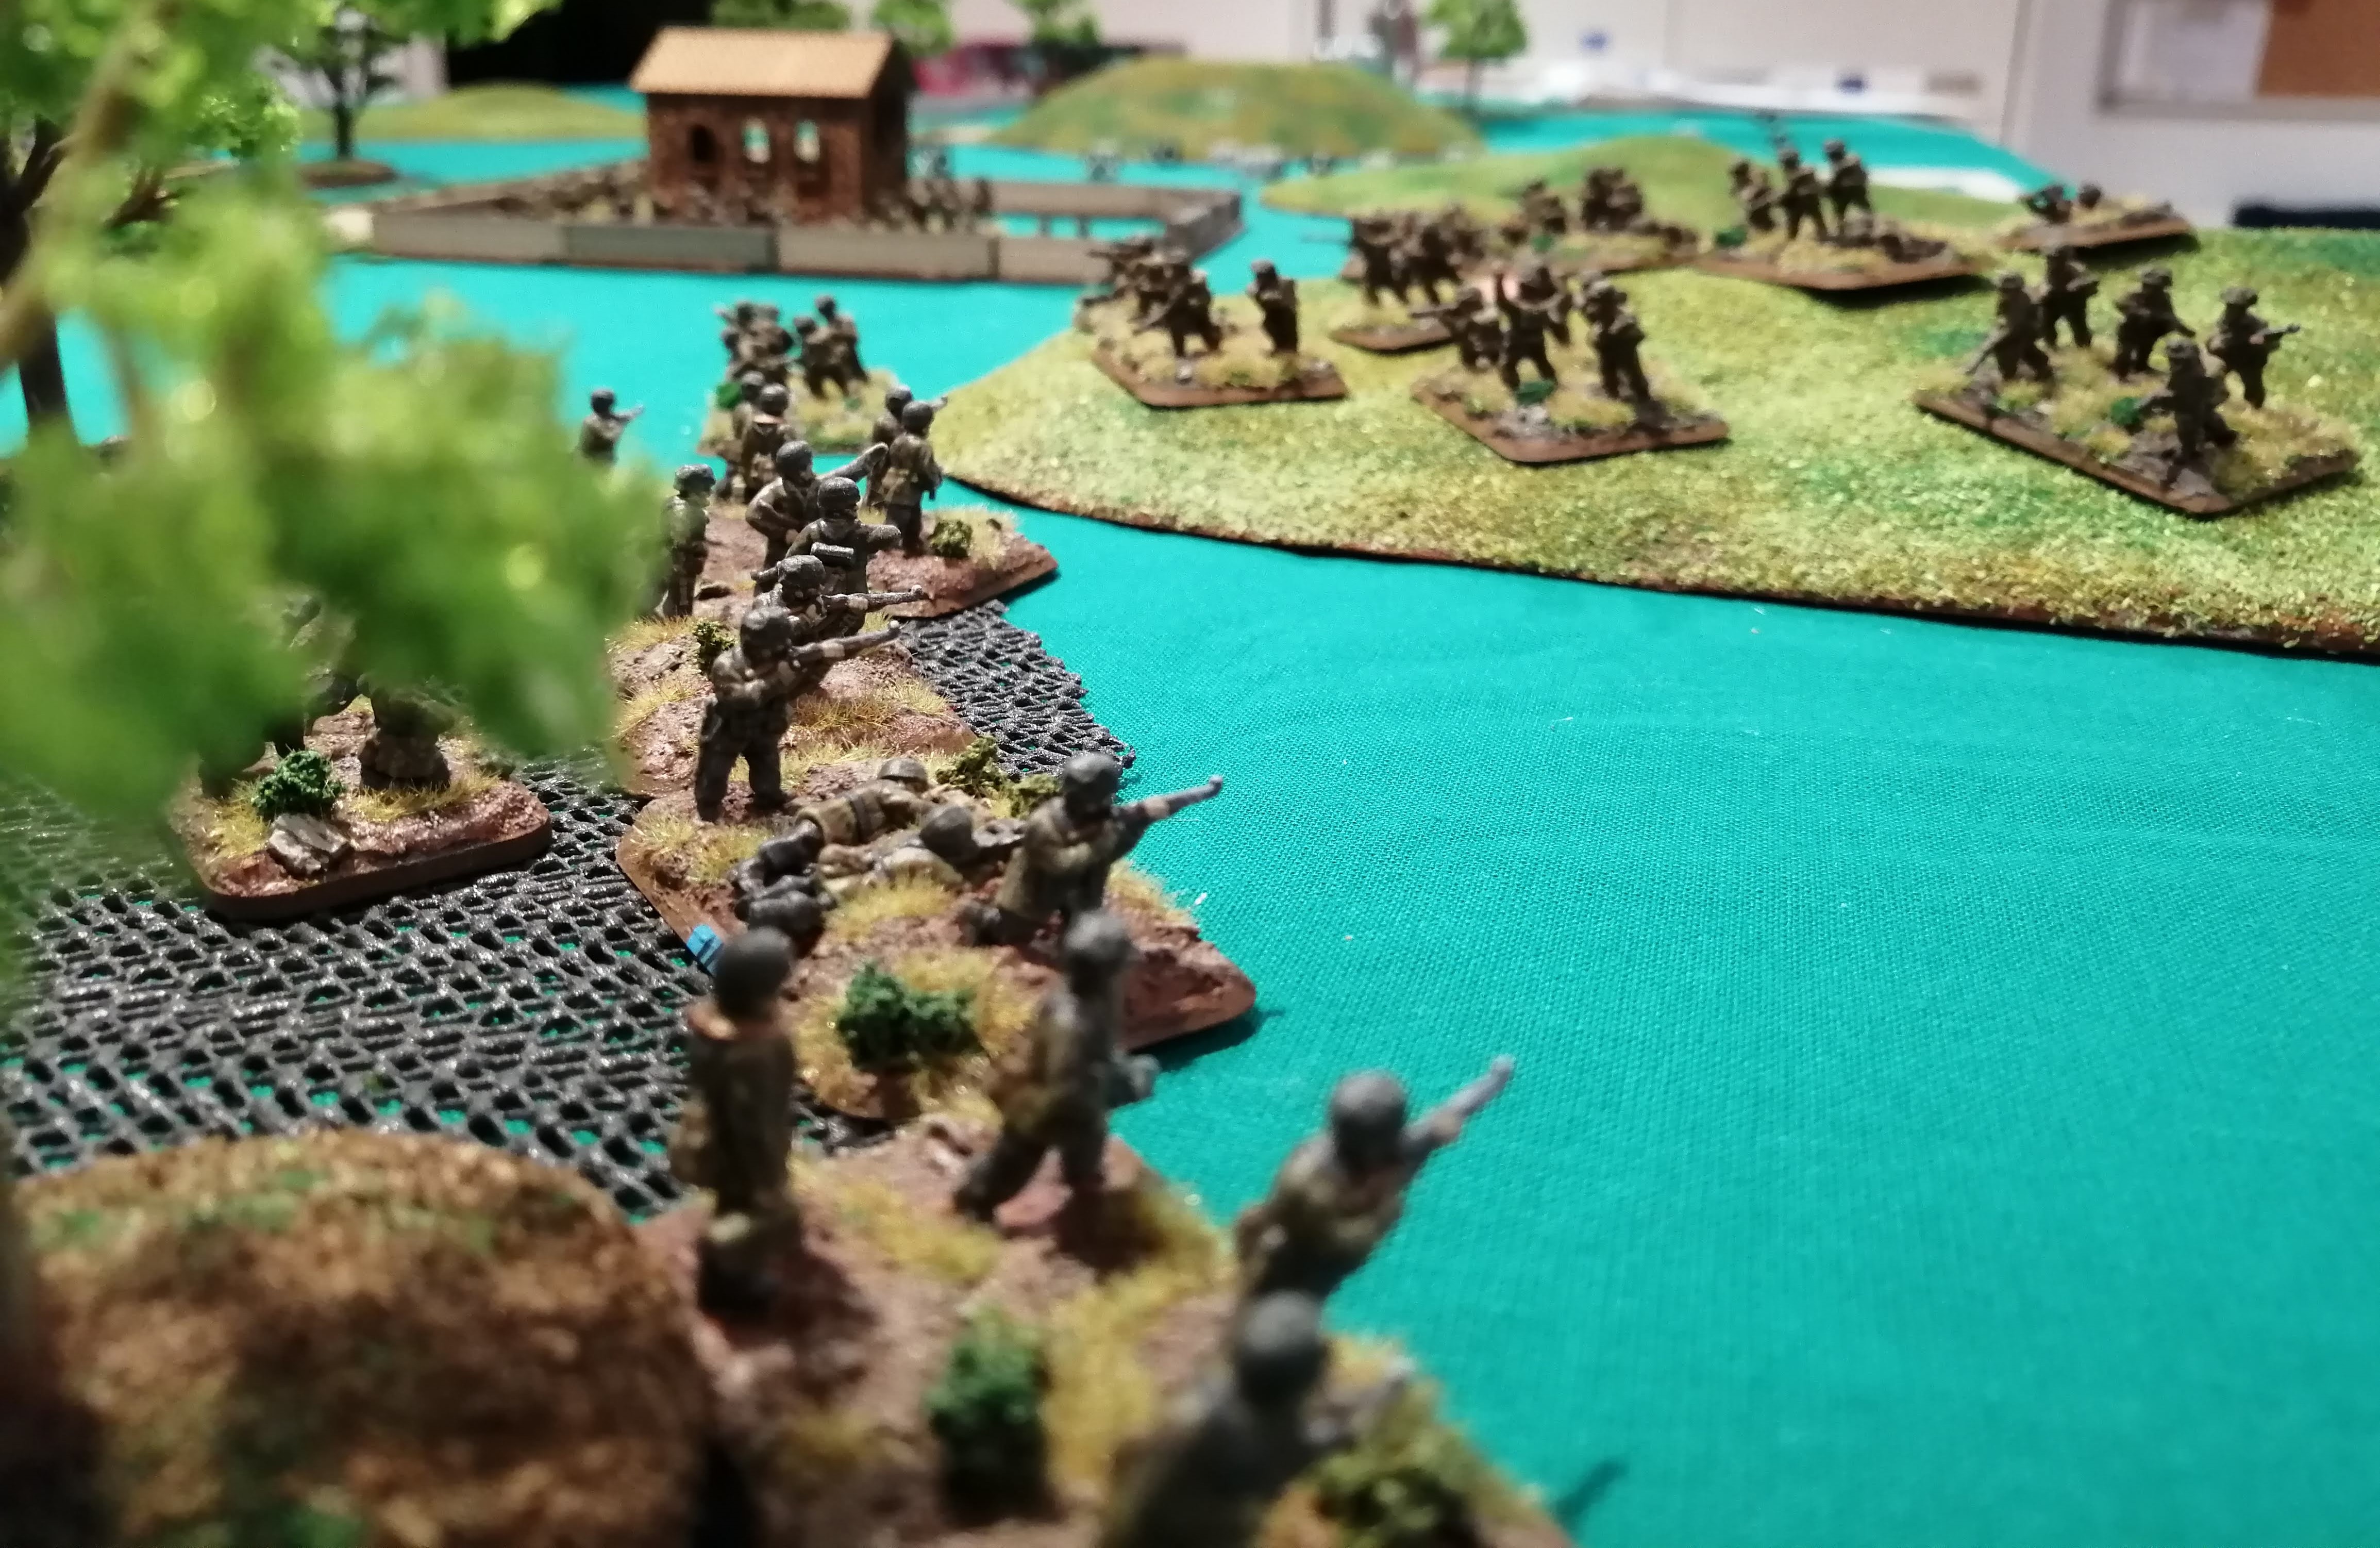
The newly arrived FRP advance their full 8” along the road, looking to get close to the action. By advancing up the middle, they can lend their support to either flank while providing some cover for the Panzers.
FGP Surround the SFOP position in the tree line, ready to get stuck in. FBP, over on the German Right flnk, continue their advance through the trees to move within charge range of SFRP on their small hill.
The lead panzer platoon fails their Blitz move and decide to move their full 10” along the road. The 2nd panzer platoon also fails their blitz move and decides to move up behind the 1st panzer platoon. This is going to impair their ability to fire this turn.
FBP is able to apply some fire to SFRP and hoping to at least pin the British in place ready for an assault. They only manage to hit 4 times and fail to cause any damage to the dug in Englishmen.
On the other side of the road, FGP applies some fire to SFOP. With the 10 shots available, they can only hit 4 times and cause just a single kill. Not enough to pin SFOP which is what they really want to launch an assault.
The 1st Panzer platoon fire on SFGP using their MGs. That’s 8 shots but they fail to cause any wounds or to even pin their targets.
The mortar platoon launches a bombardment against SFRP and the anti tank guns on the hill, ranging in on the first attempt. The bombardment fails to cause any damage but it does pin both SFRP and the AT guns as they dive for cover from the incoming shells.
If the Germans hope to push forward, they need to dislodge the British from their holes and an assault looks like the only real way of achieving this. FBP launches their assault against SFRP. The defenders, despite being pinned, are able to get 9 shots off and manage 6 hits, killing 1 stand from FBP. That’s enough to pin FBP in place and cause the assault to fail!
Across the road, FGP launches an assault against SFOP dug in around the tree line. SFOP is able to fire 16 shots in defence and scores 6 hits with 1 kill. That’s enough to pin the attackers and fend off the assault this round! The British on both sides of the road show their tenacity!
At the start of the British turn, both of the pinned British units are able to unpin. The Universal Carriers continue to advance and get behind the Anti Tank guns, ready to hitch them up and remove them from danger.
SFGP fires its PIAT against the lead 1st Panzer while the rest of SFGP fires their small arms against FGP. All of the shots miss their targets and the British fail to cause any damage.
The 6pdr guns in the anti tank platoon fire against the 1st Panzer platoon and hit twice, both of which penetrate the panzer armour. One tank is destroyed while the second bails out. This leaves the 1st Panzer Platoon with just a solitary tank.
SFRP is able to continue to apply their fire to the now pinned FBP. Their nine shots cause another one stand from FBP to be removed. FBP is also in range of the MG platoon and their guns open up on FBP causing a further 1 stand to be removed. FBP is taking some punishment.
 State of play at the end of Turn 3
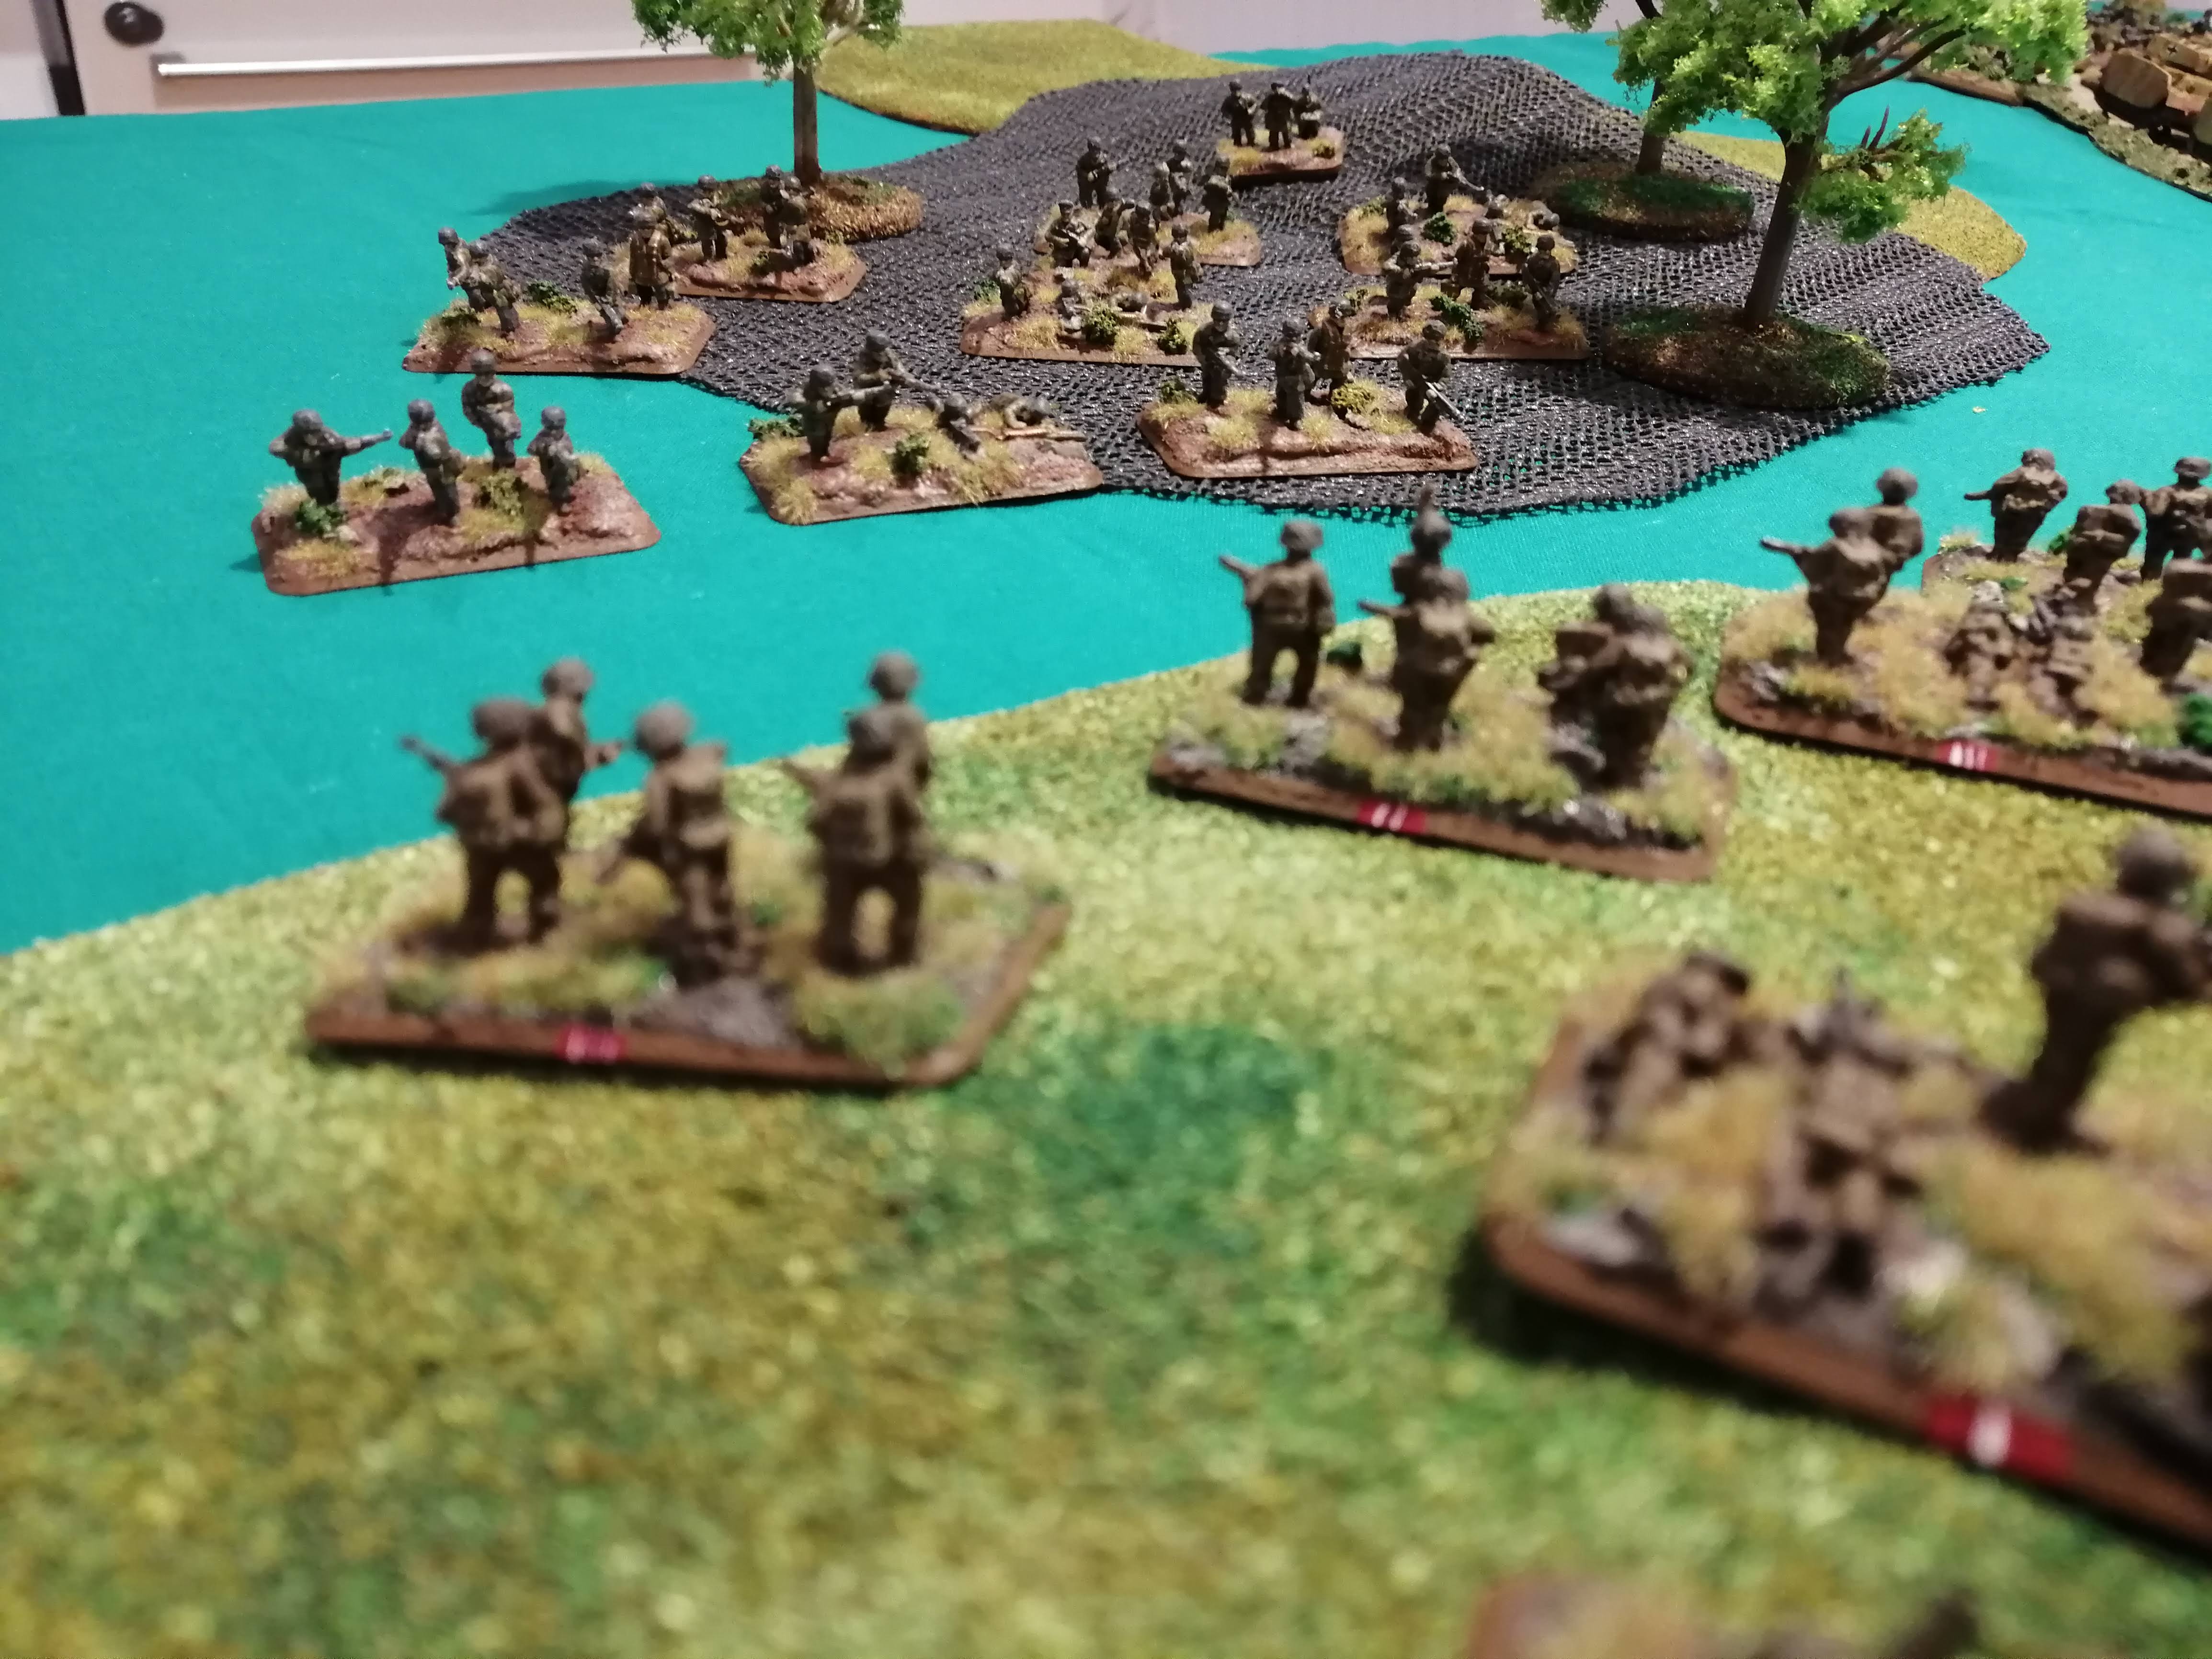 FBP ready to launch their assault out of the tree line
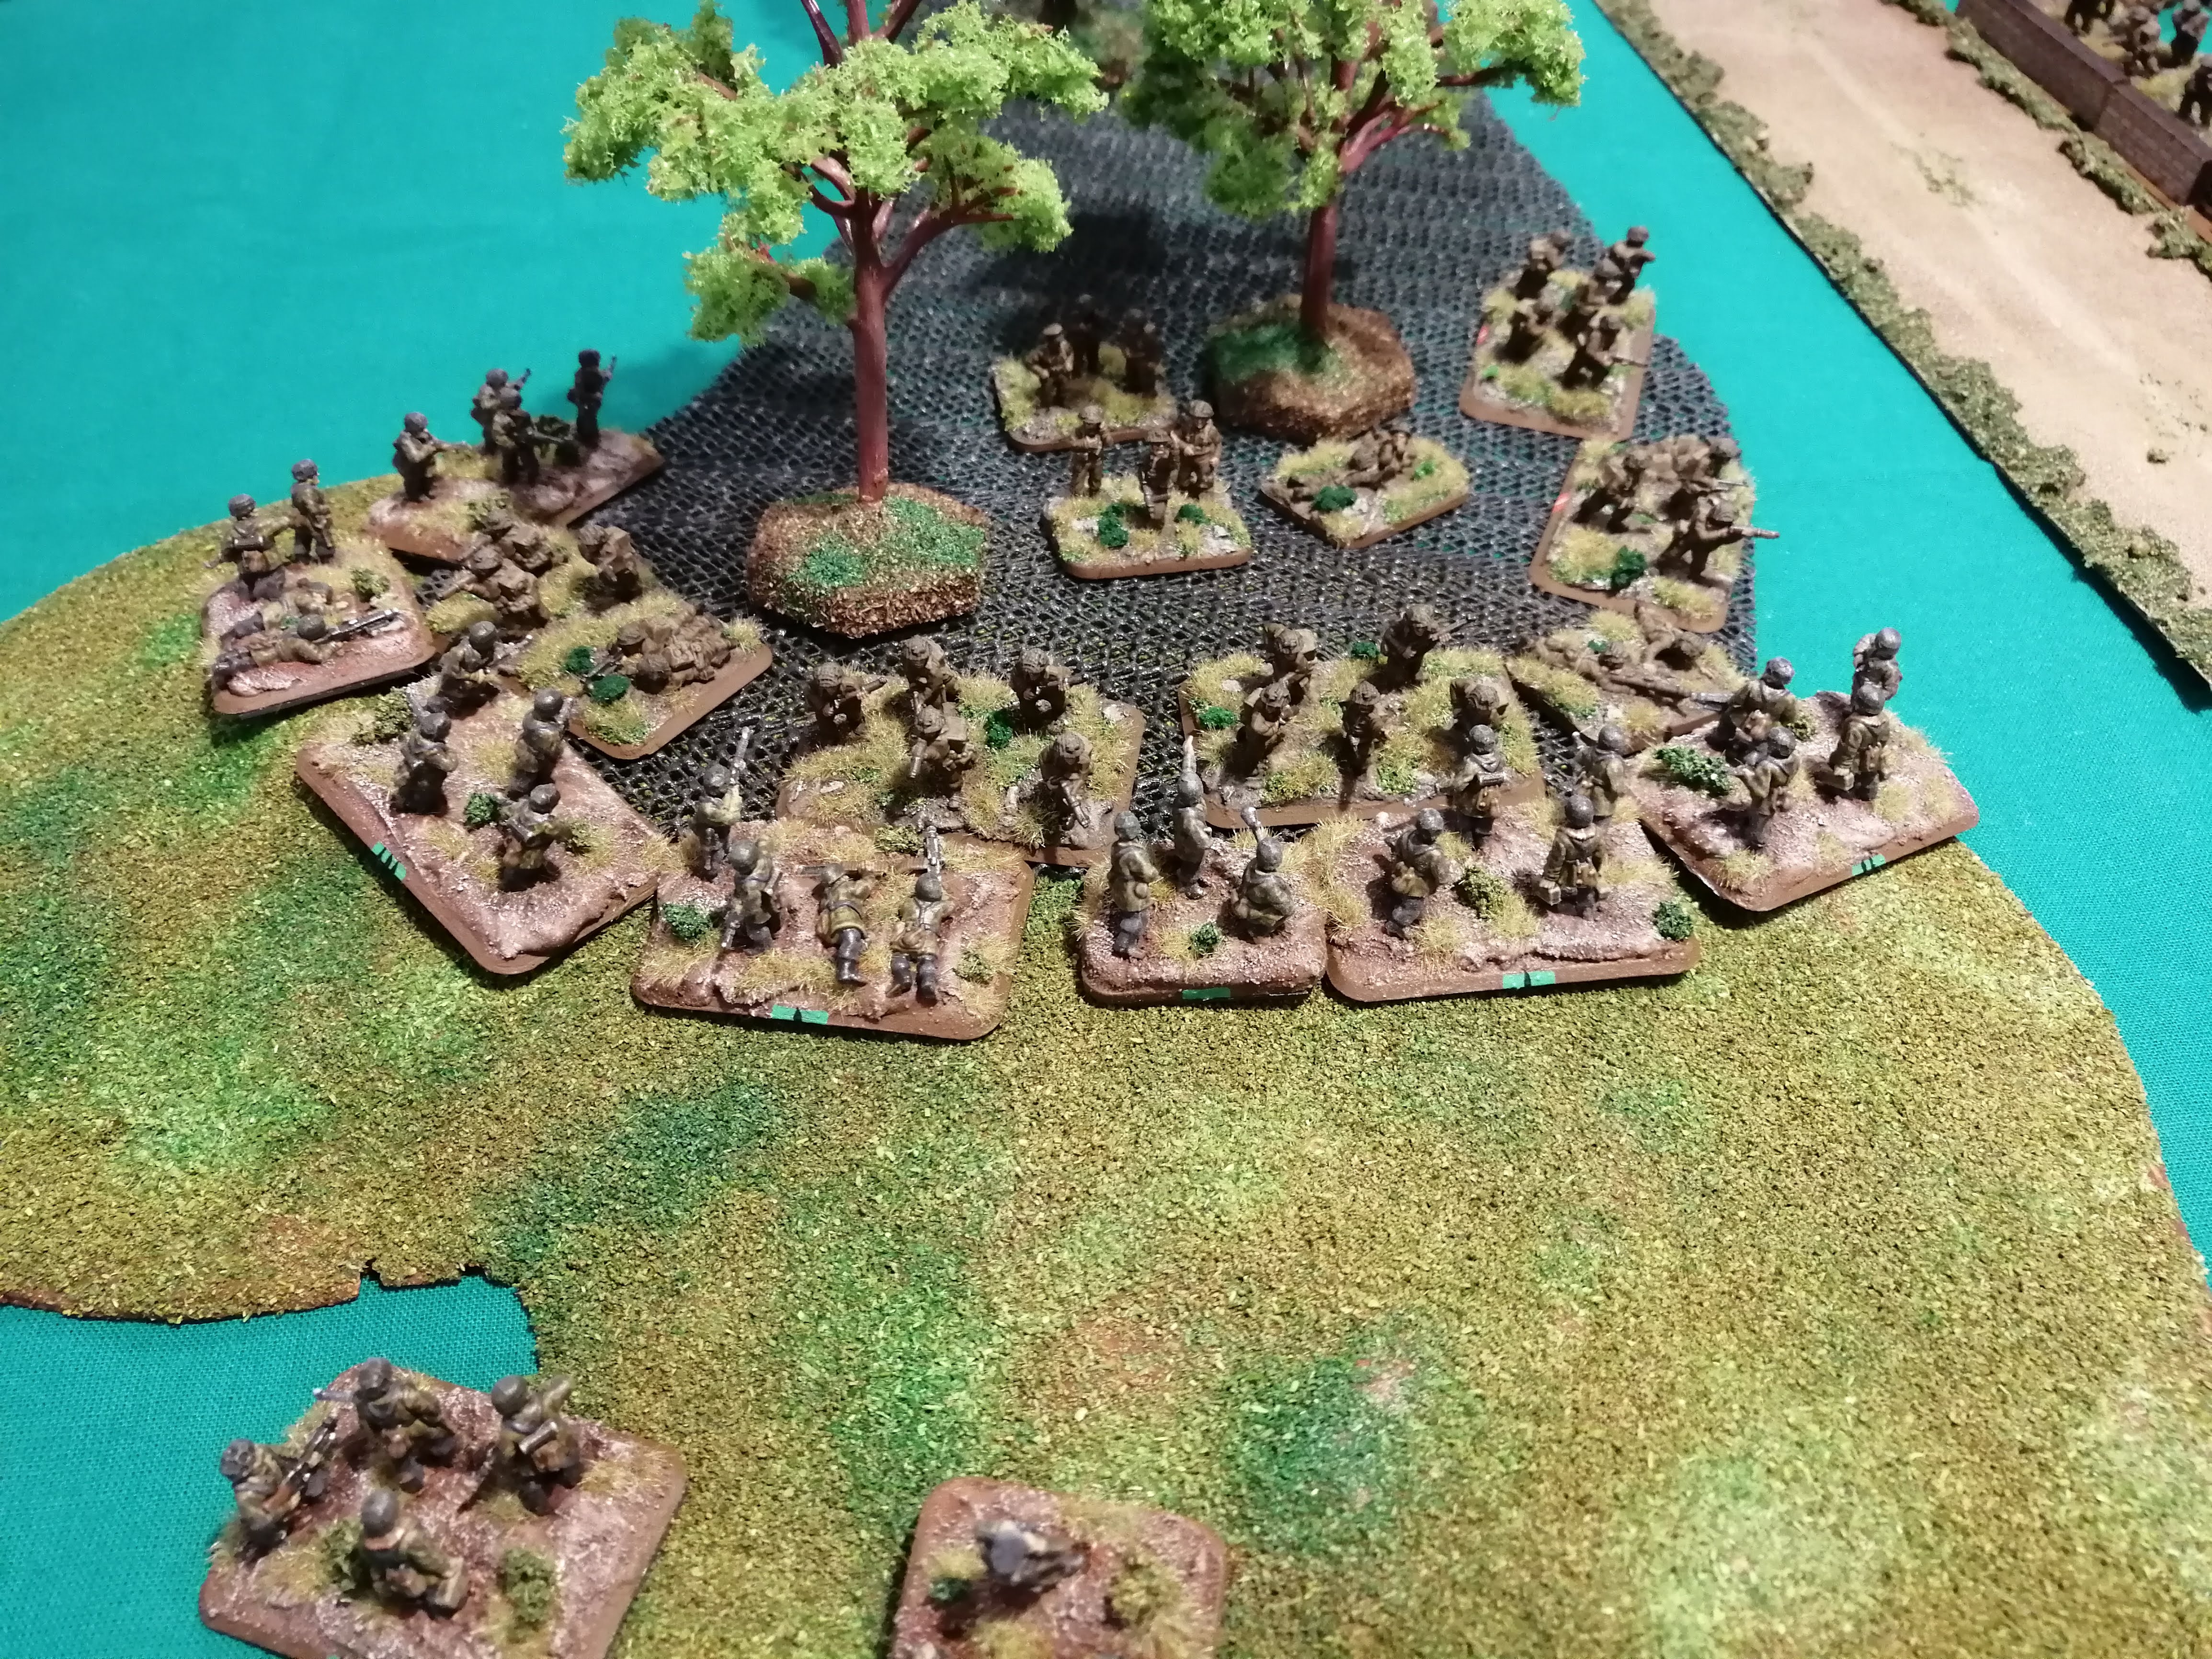 FGP's assault on SFOP in full swing
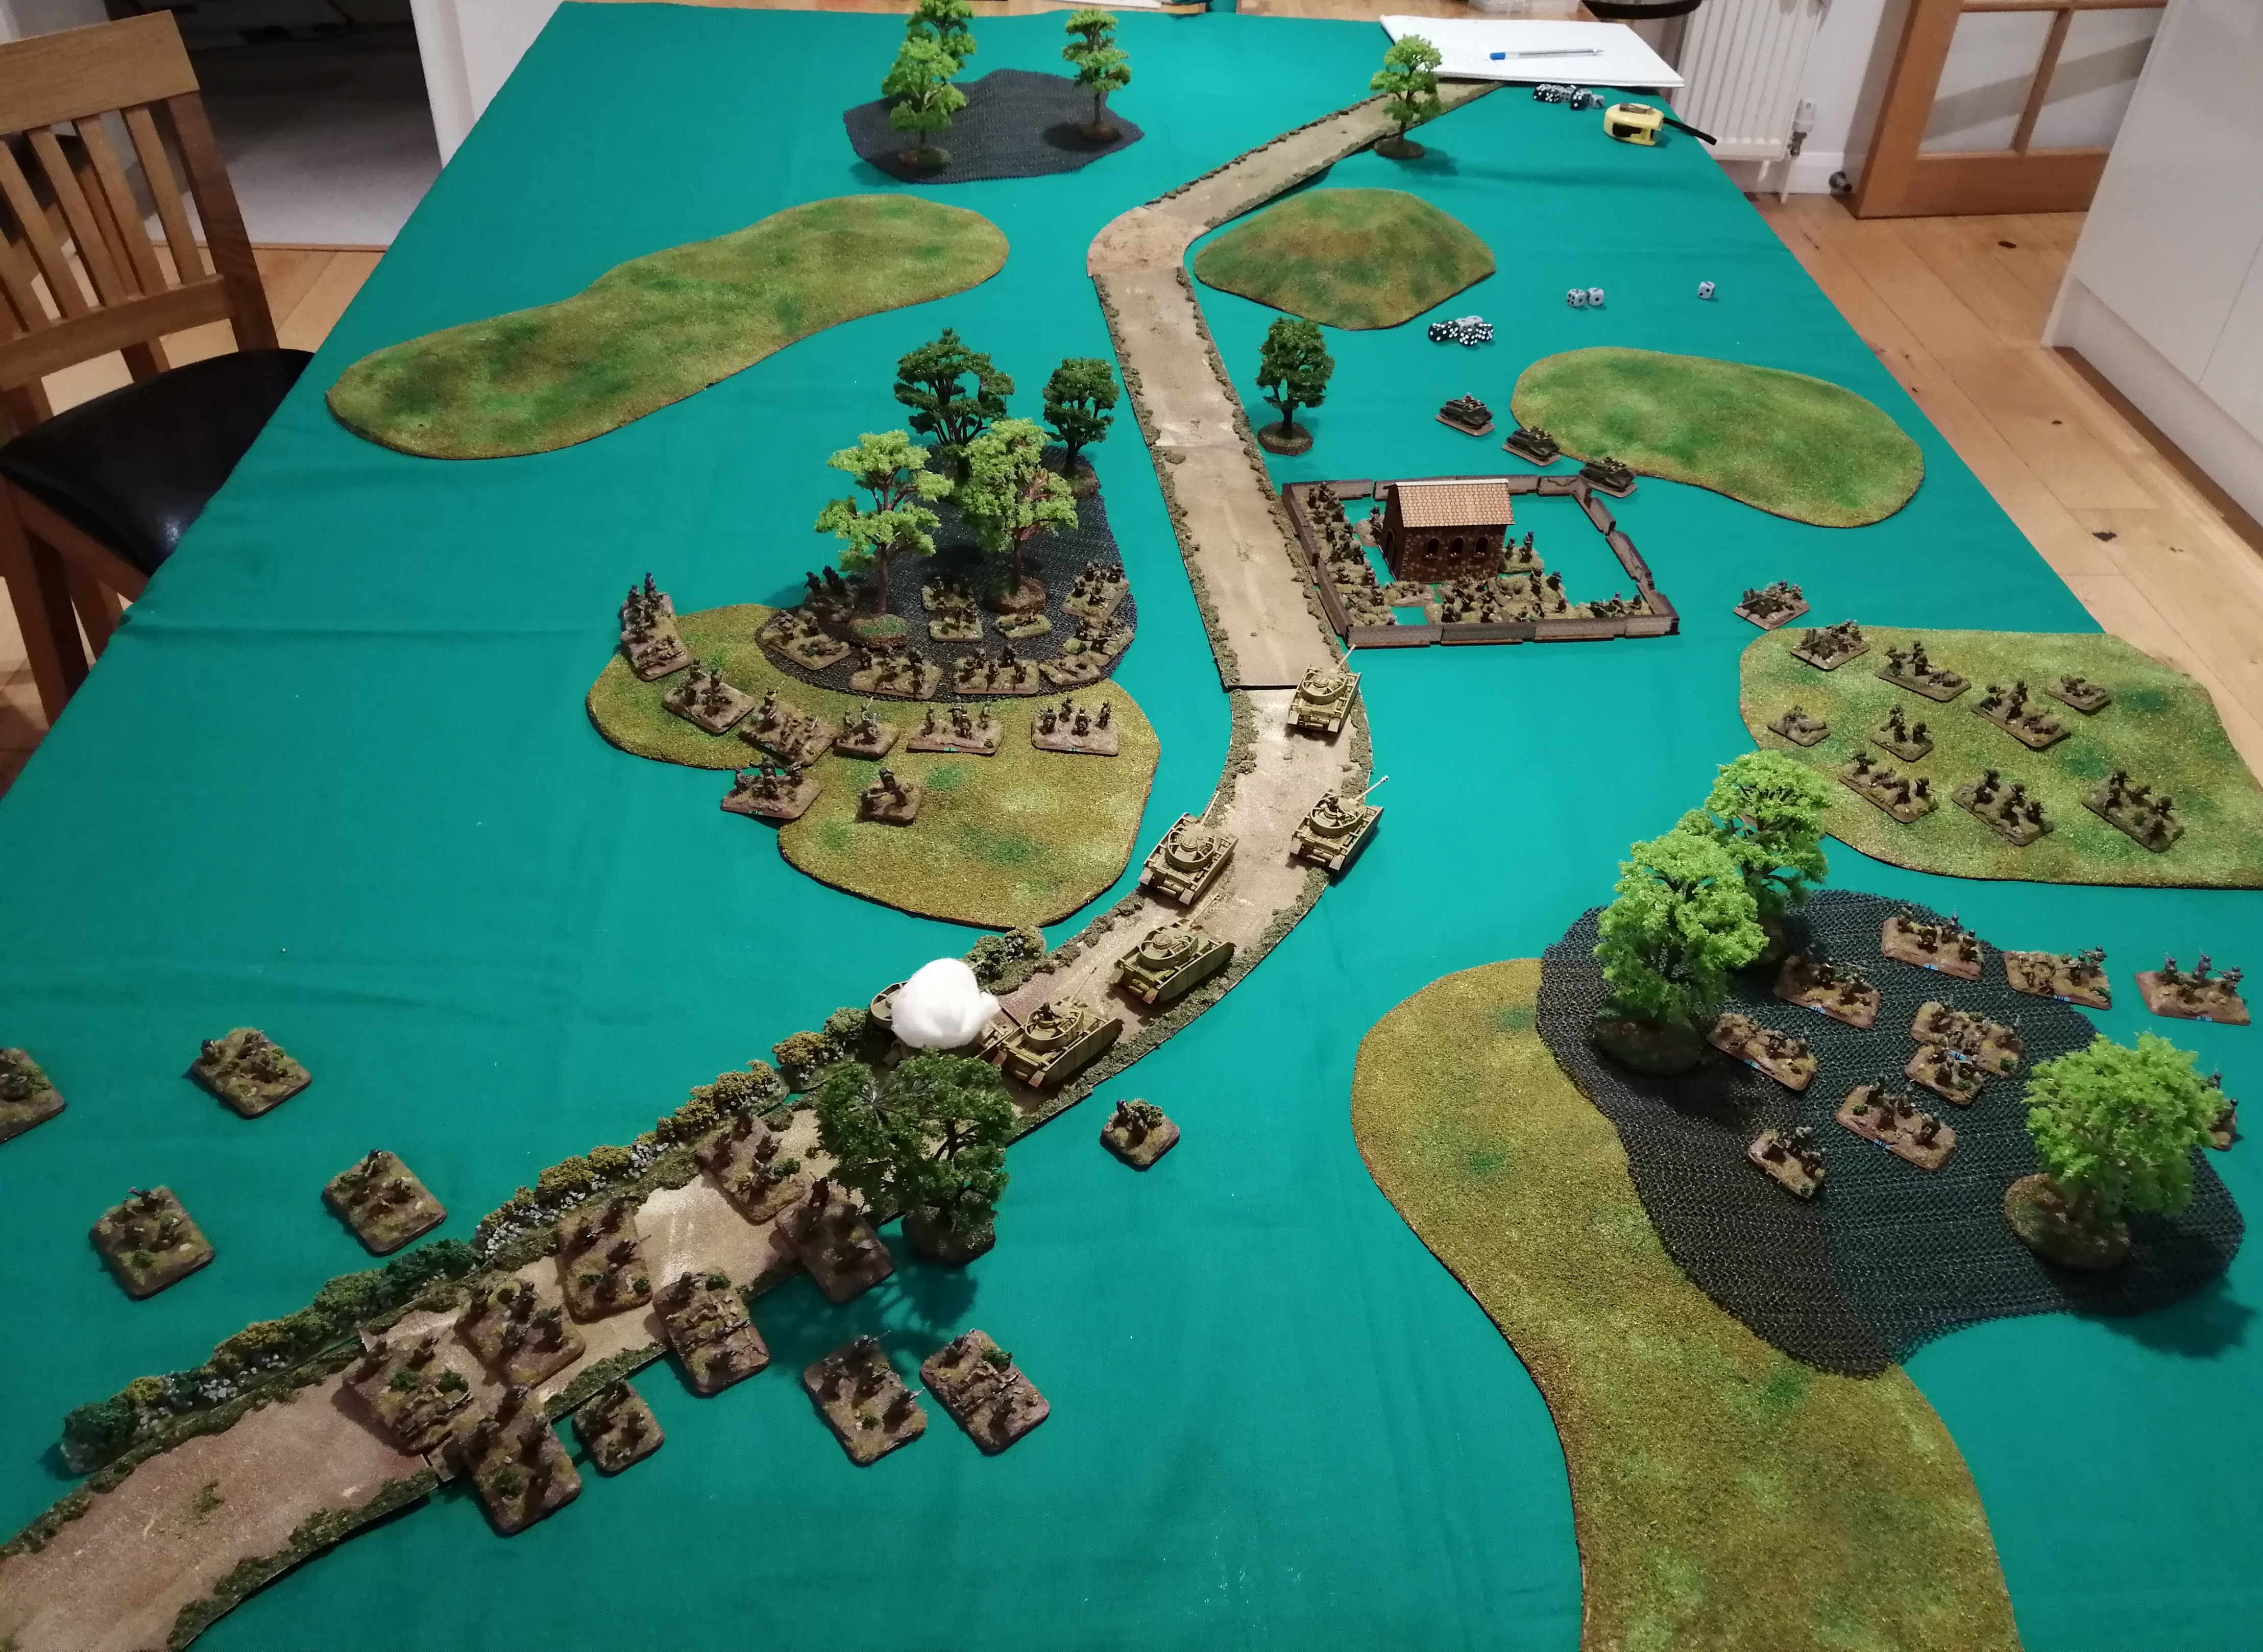


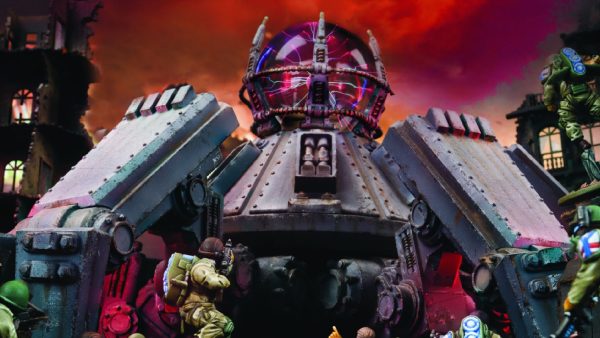
![Games Workshop Kick Off Grot Week For Warhammer 40,000 [Updated]](https://images.beastsofwar.com/2026/04/grot-new-40k-news-cover-600-338.jpg)