


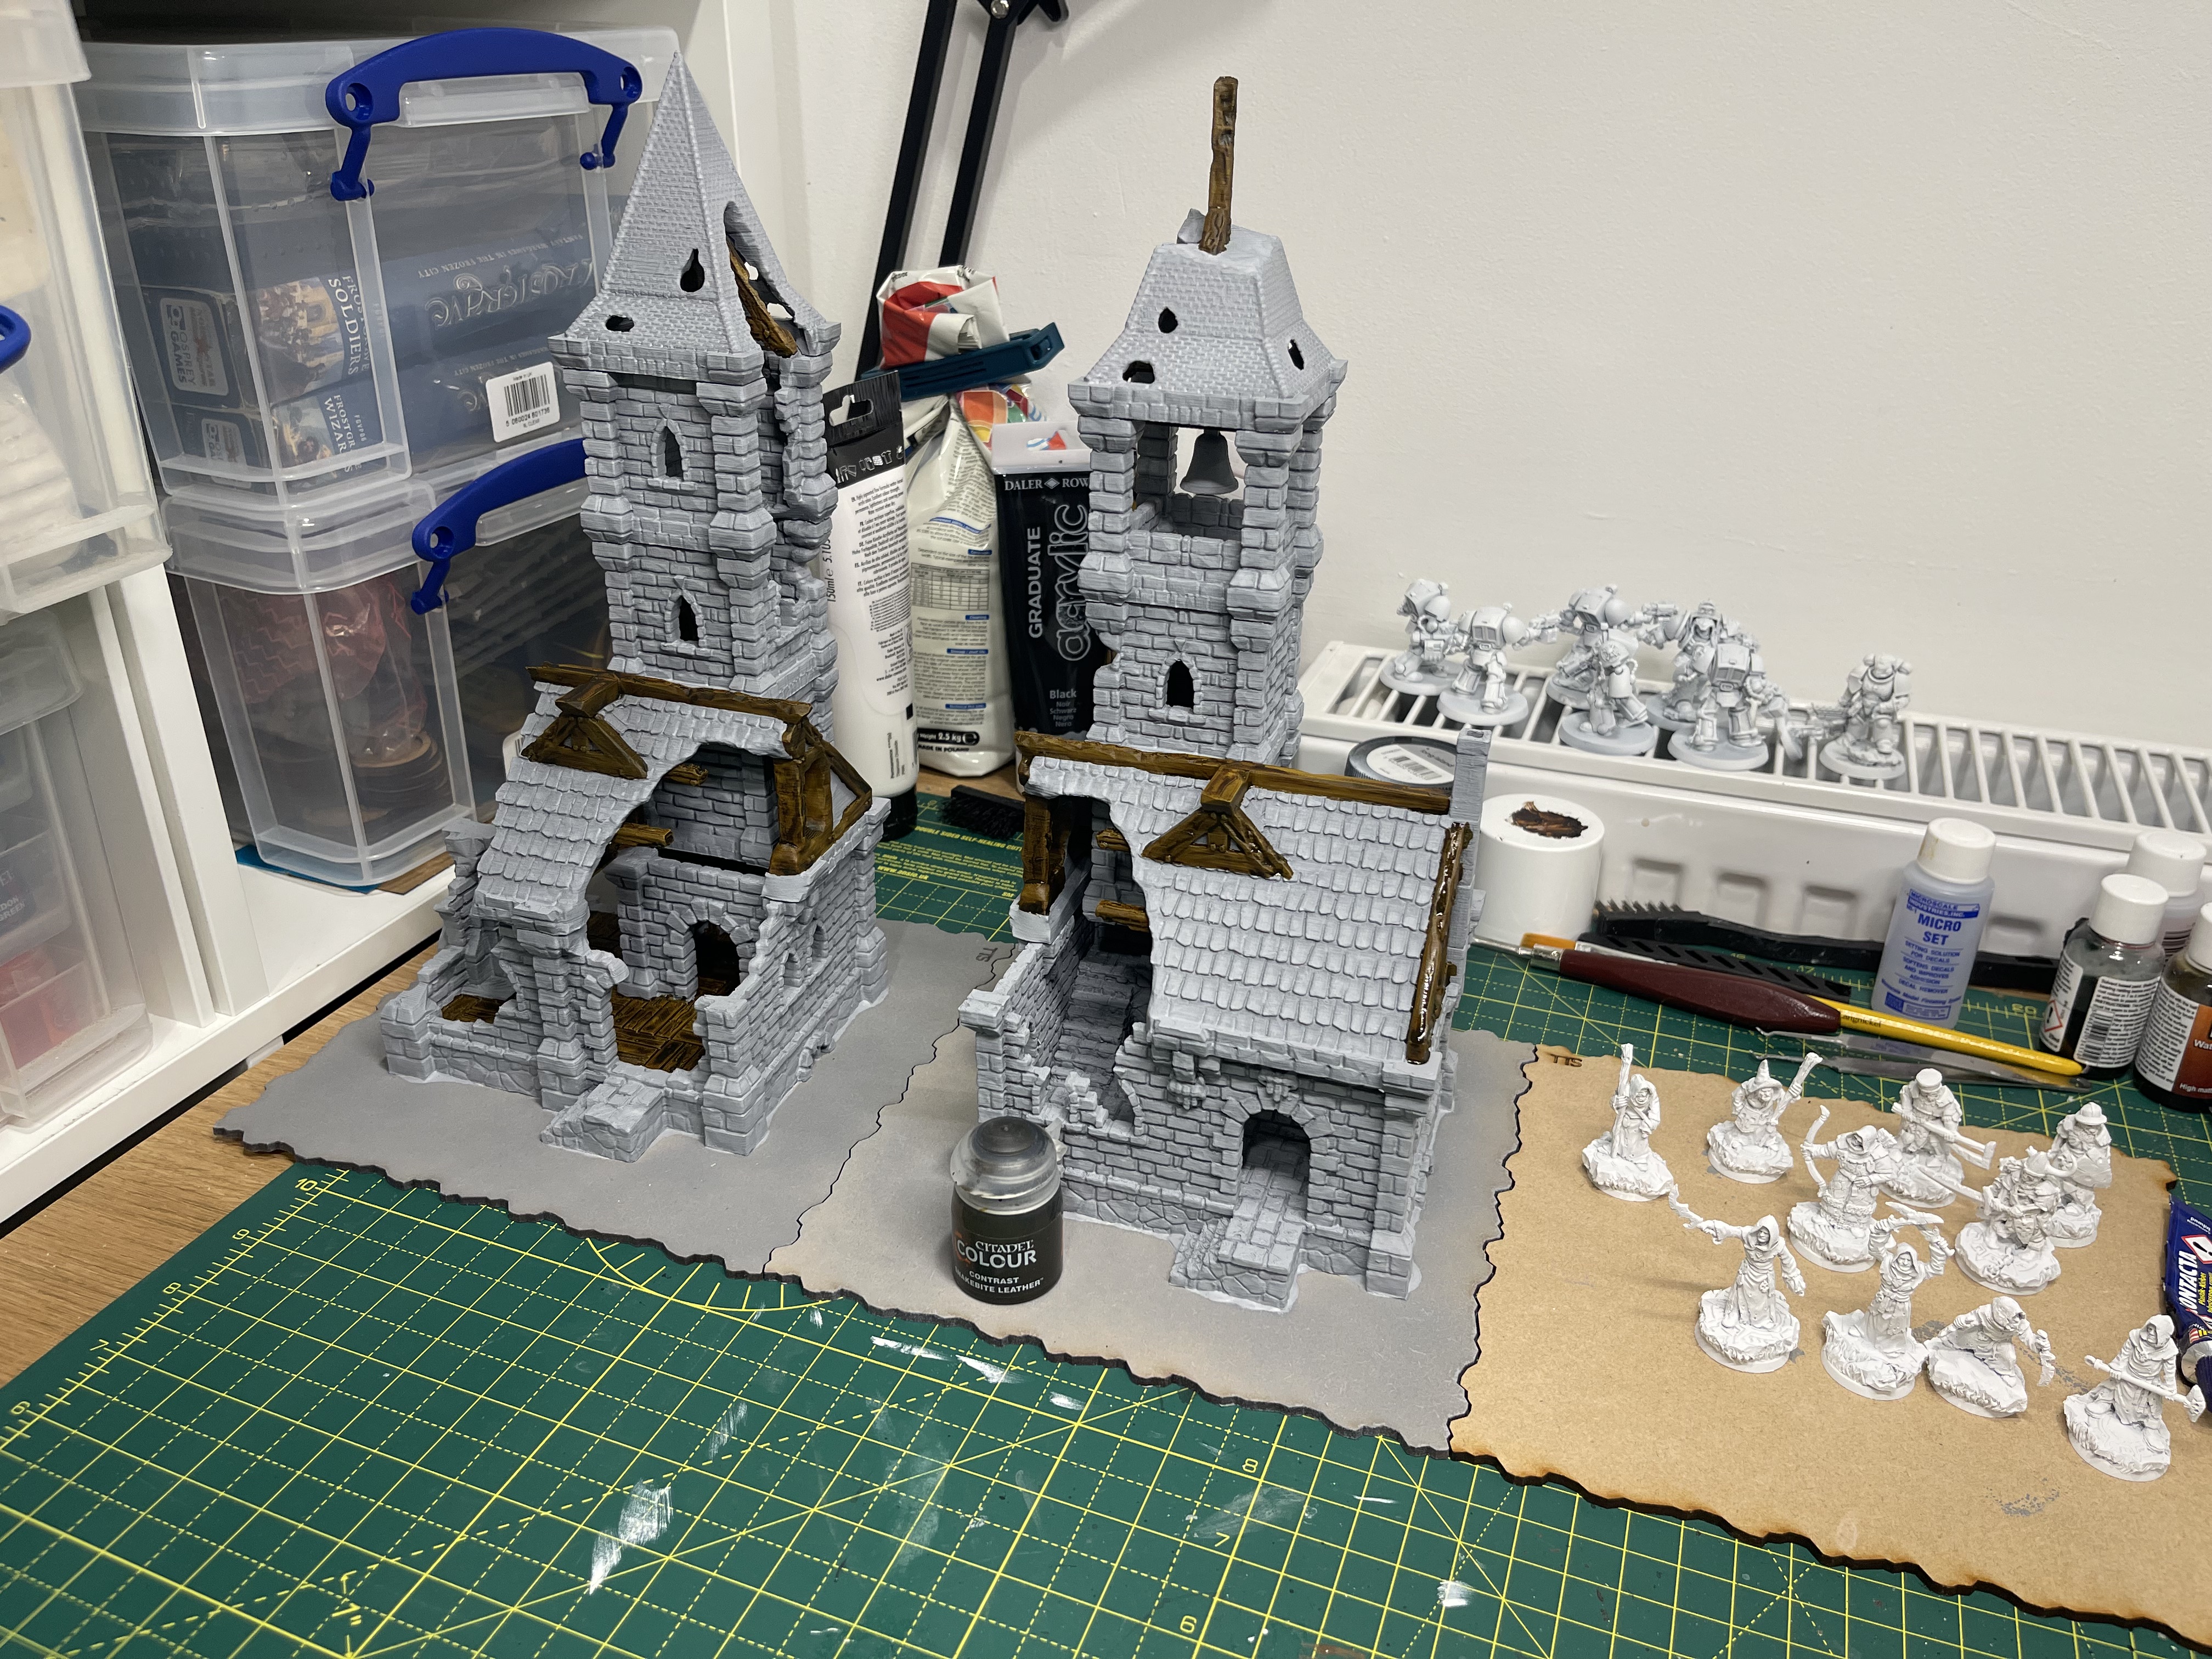
Collins does a Frostgrave board


Recommendations: 337
About the Project
As an entry for the terrainfest 2024 competition (and because of timing where I accidentally bought another game system) I hope to make a 3x3 board for the game of Frostgrave.
Related Game: Frostgrave
Related Company: Osprey Games
Related Genre: Fantasy
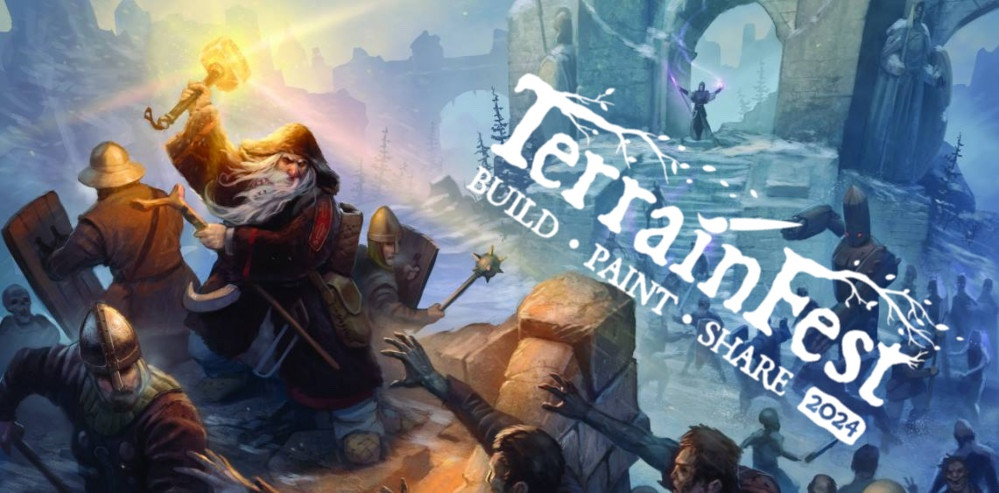
Related Contest: TerrainFest 2024
This Project is Active
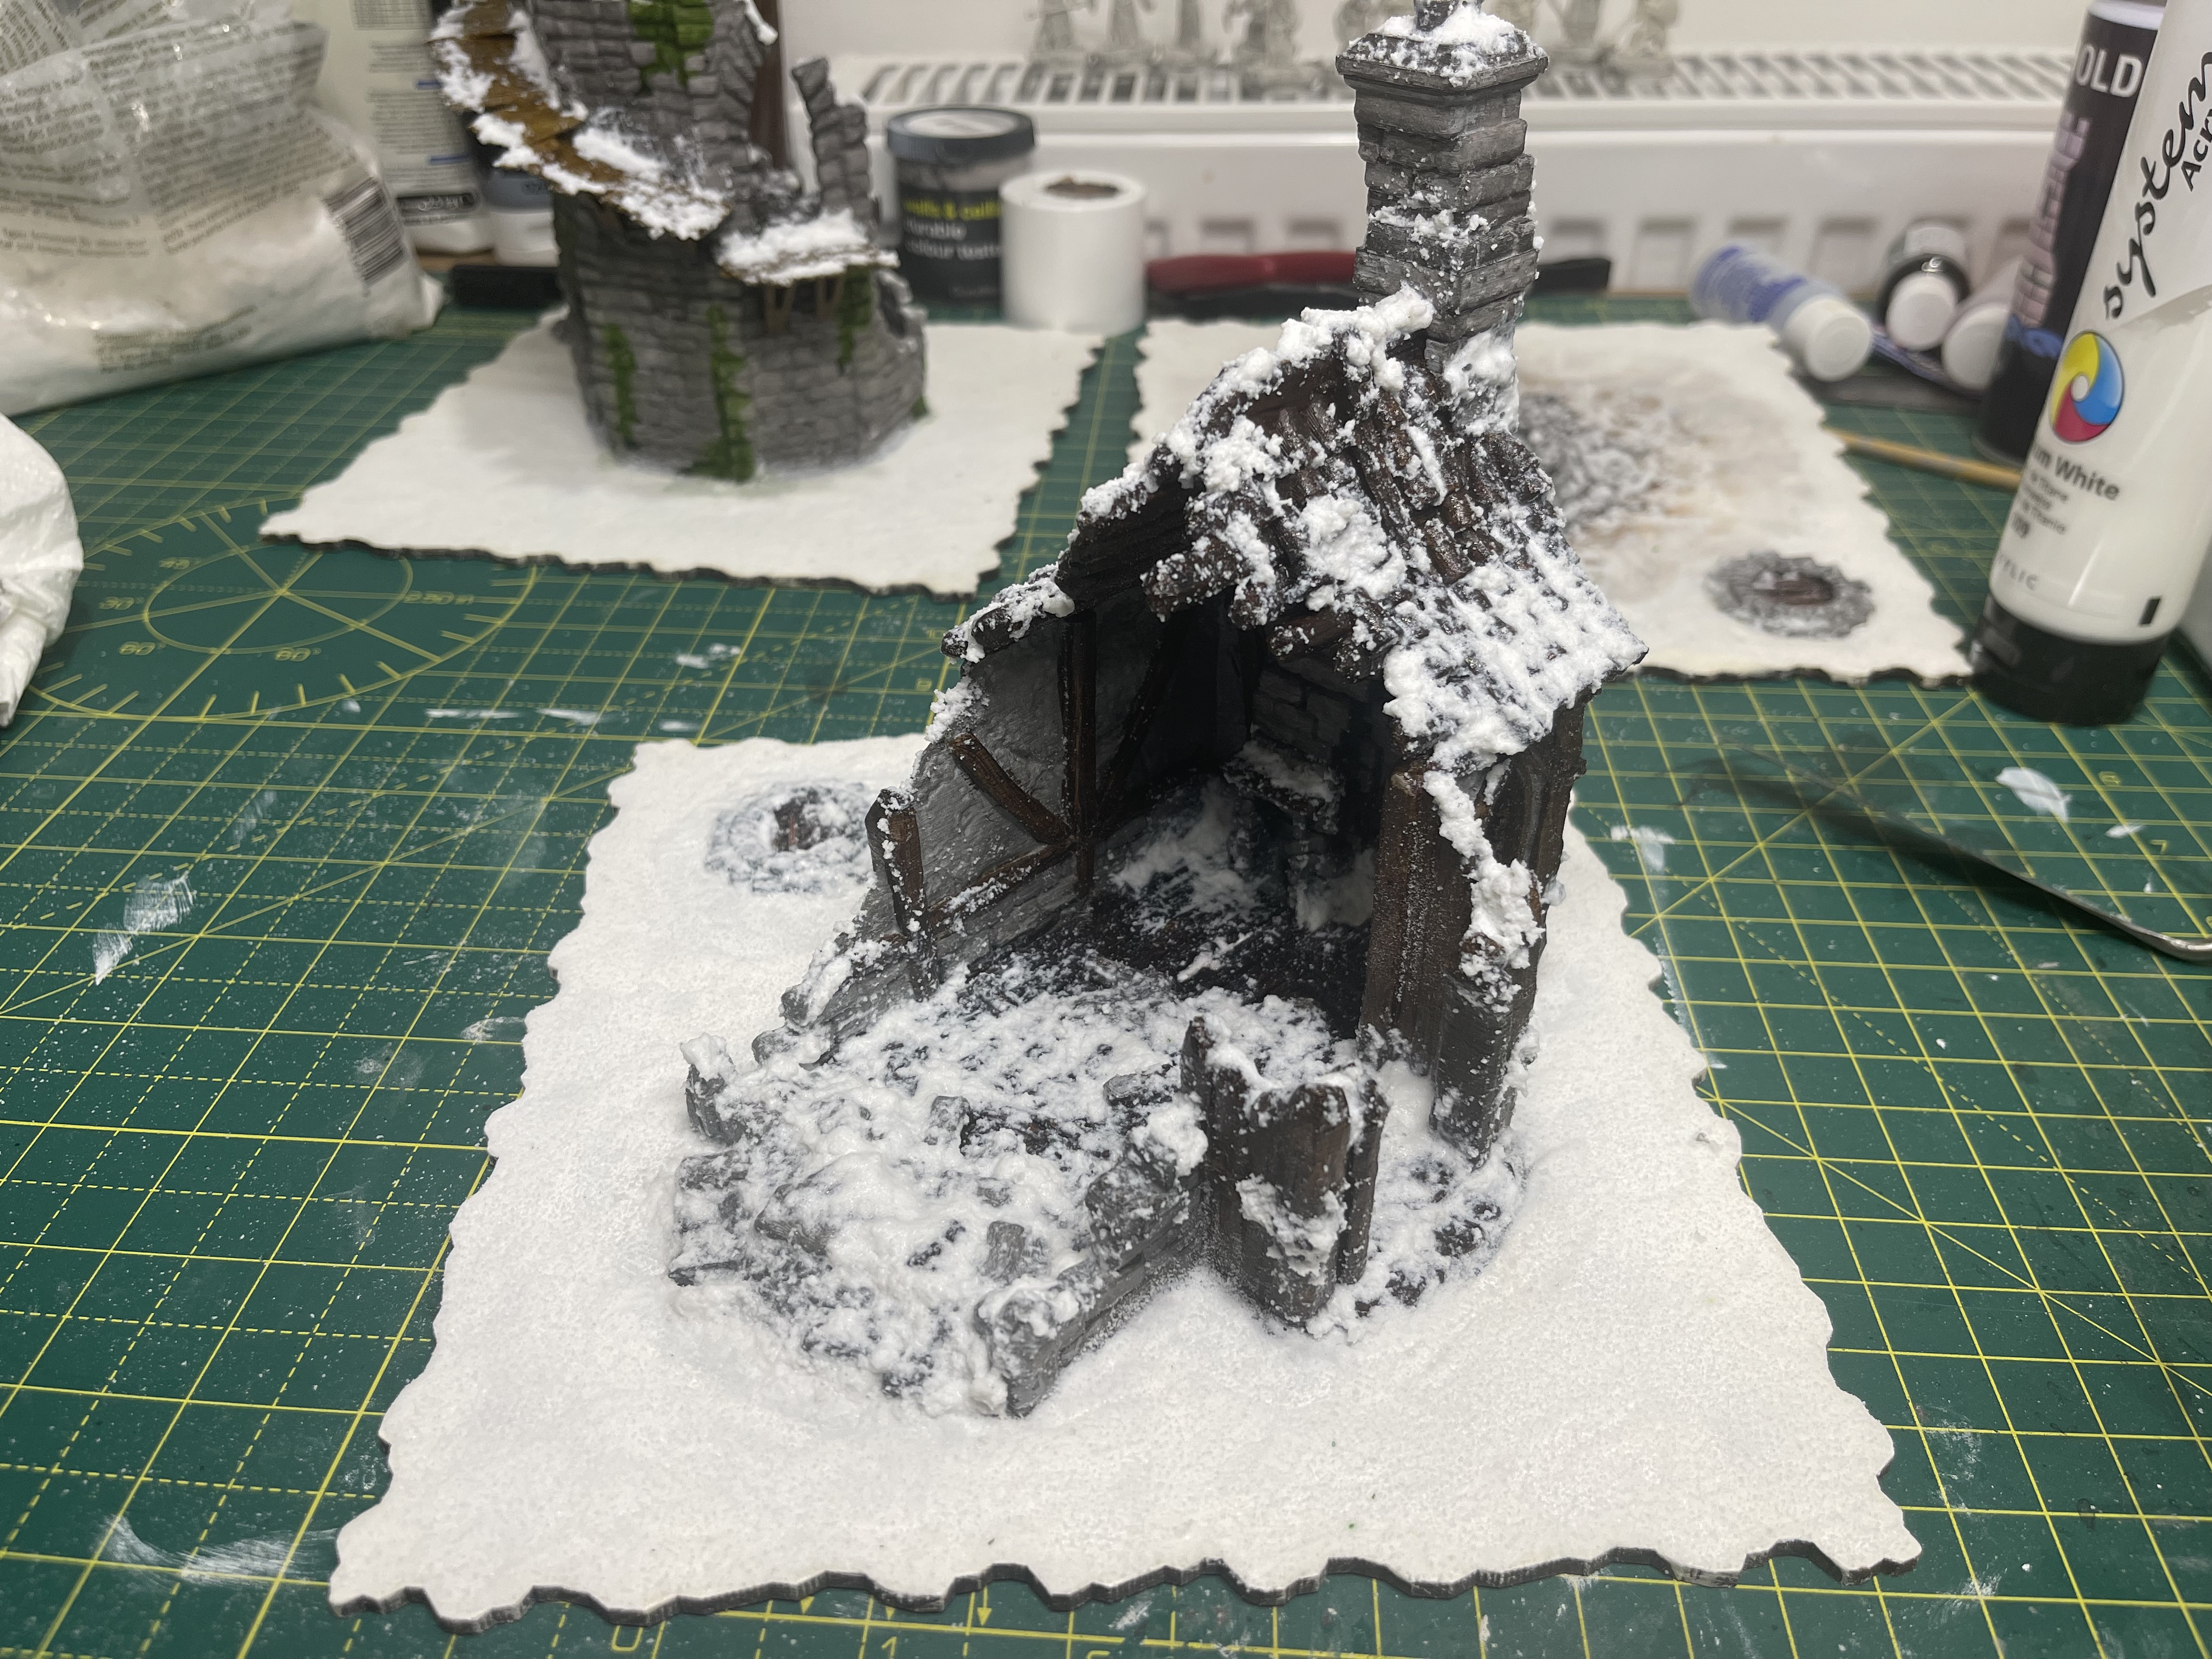
Sloppy snow
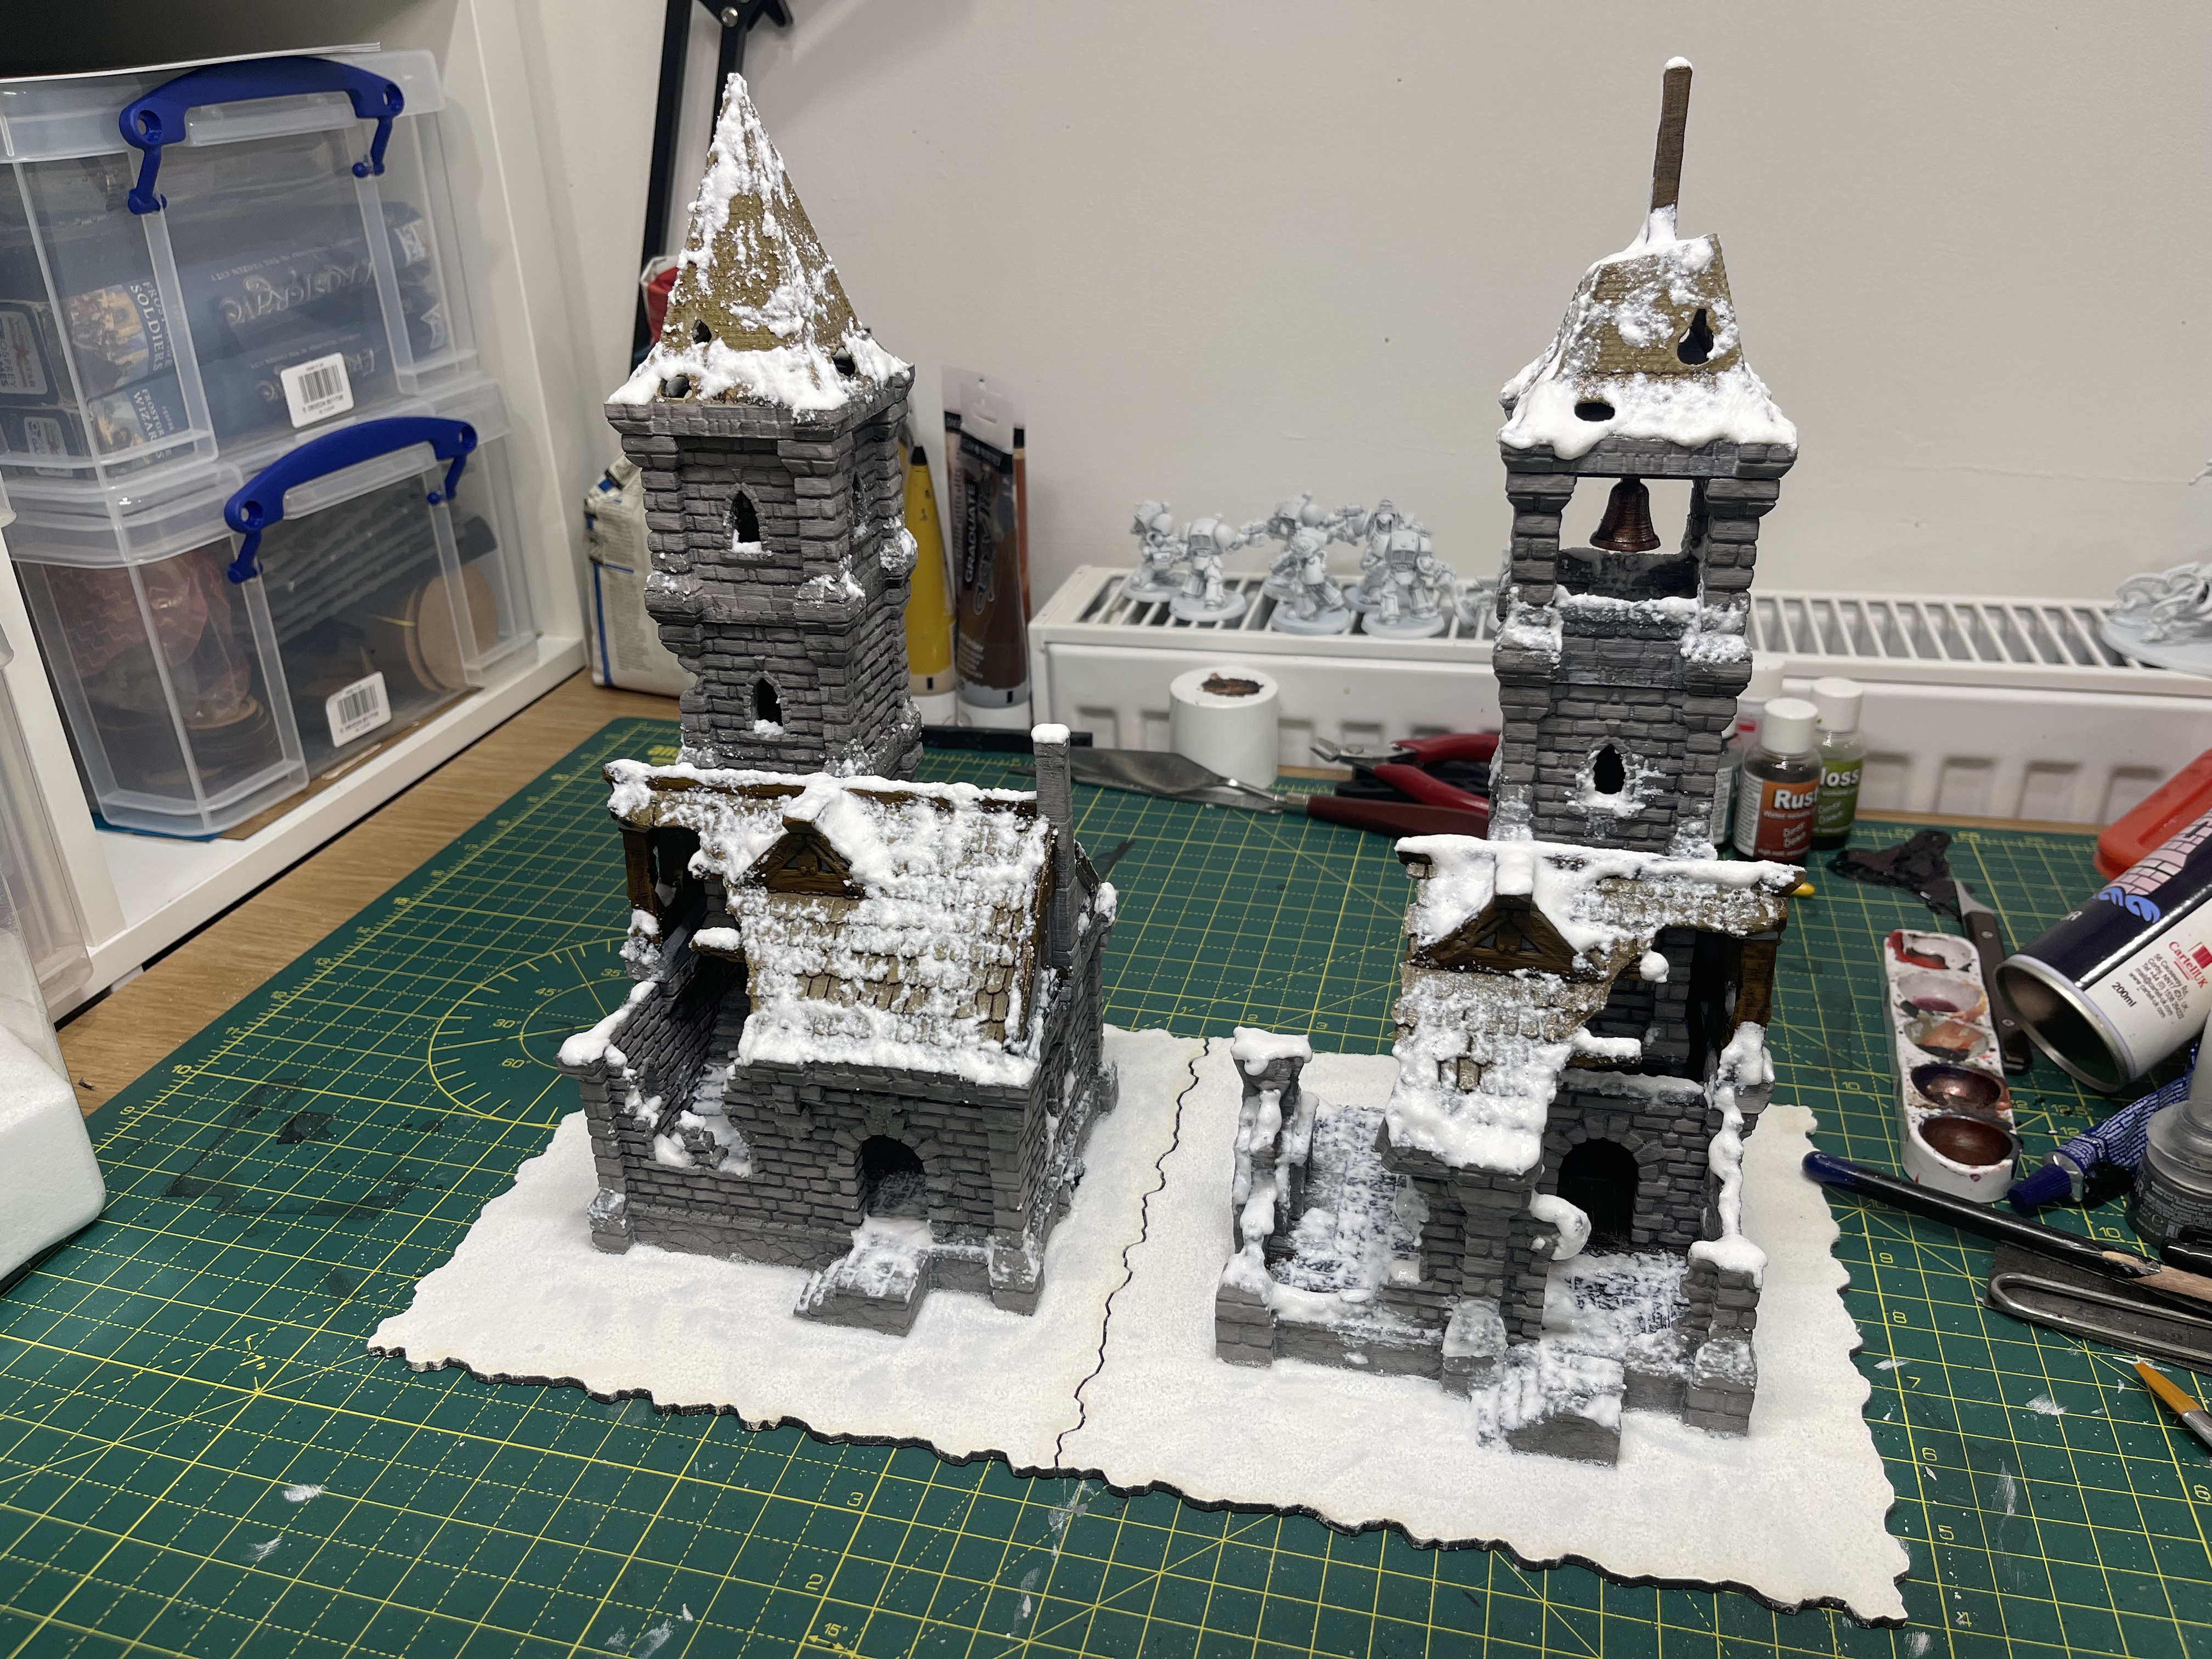
this was snowed up in exactly the same way as all the others… problem being that I made this mixture a bit too wet by using too much glue. this means that it doesn’t hold its form very well and levels out easily.
I will see how it turns out and if I need to fix it I’ll simply add more on top!
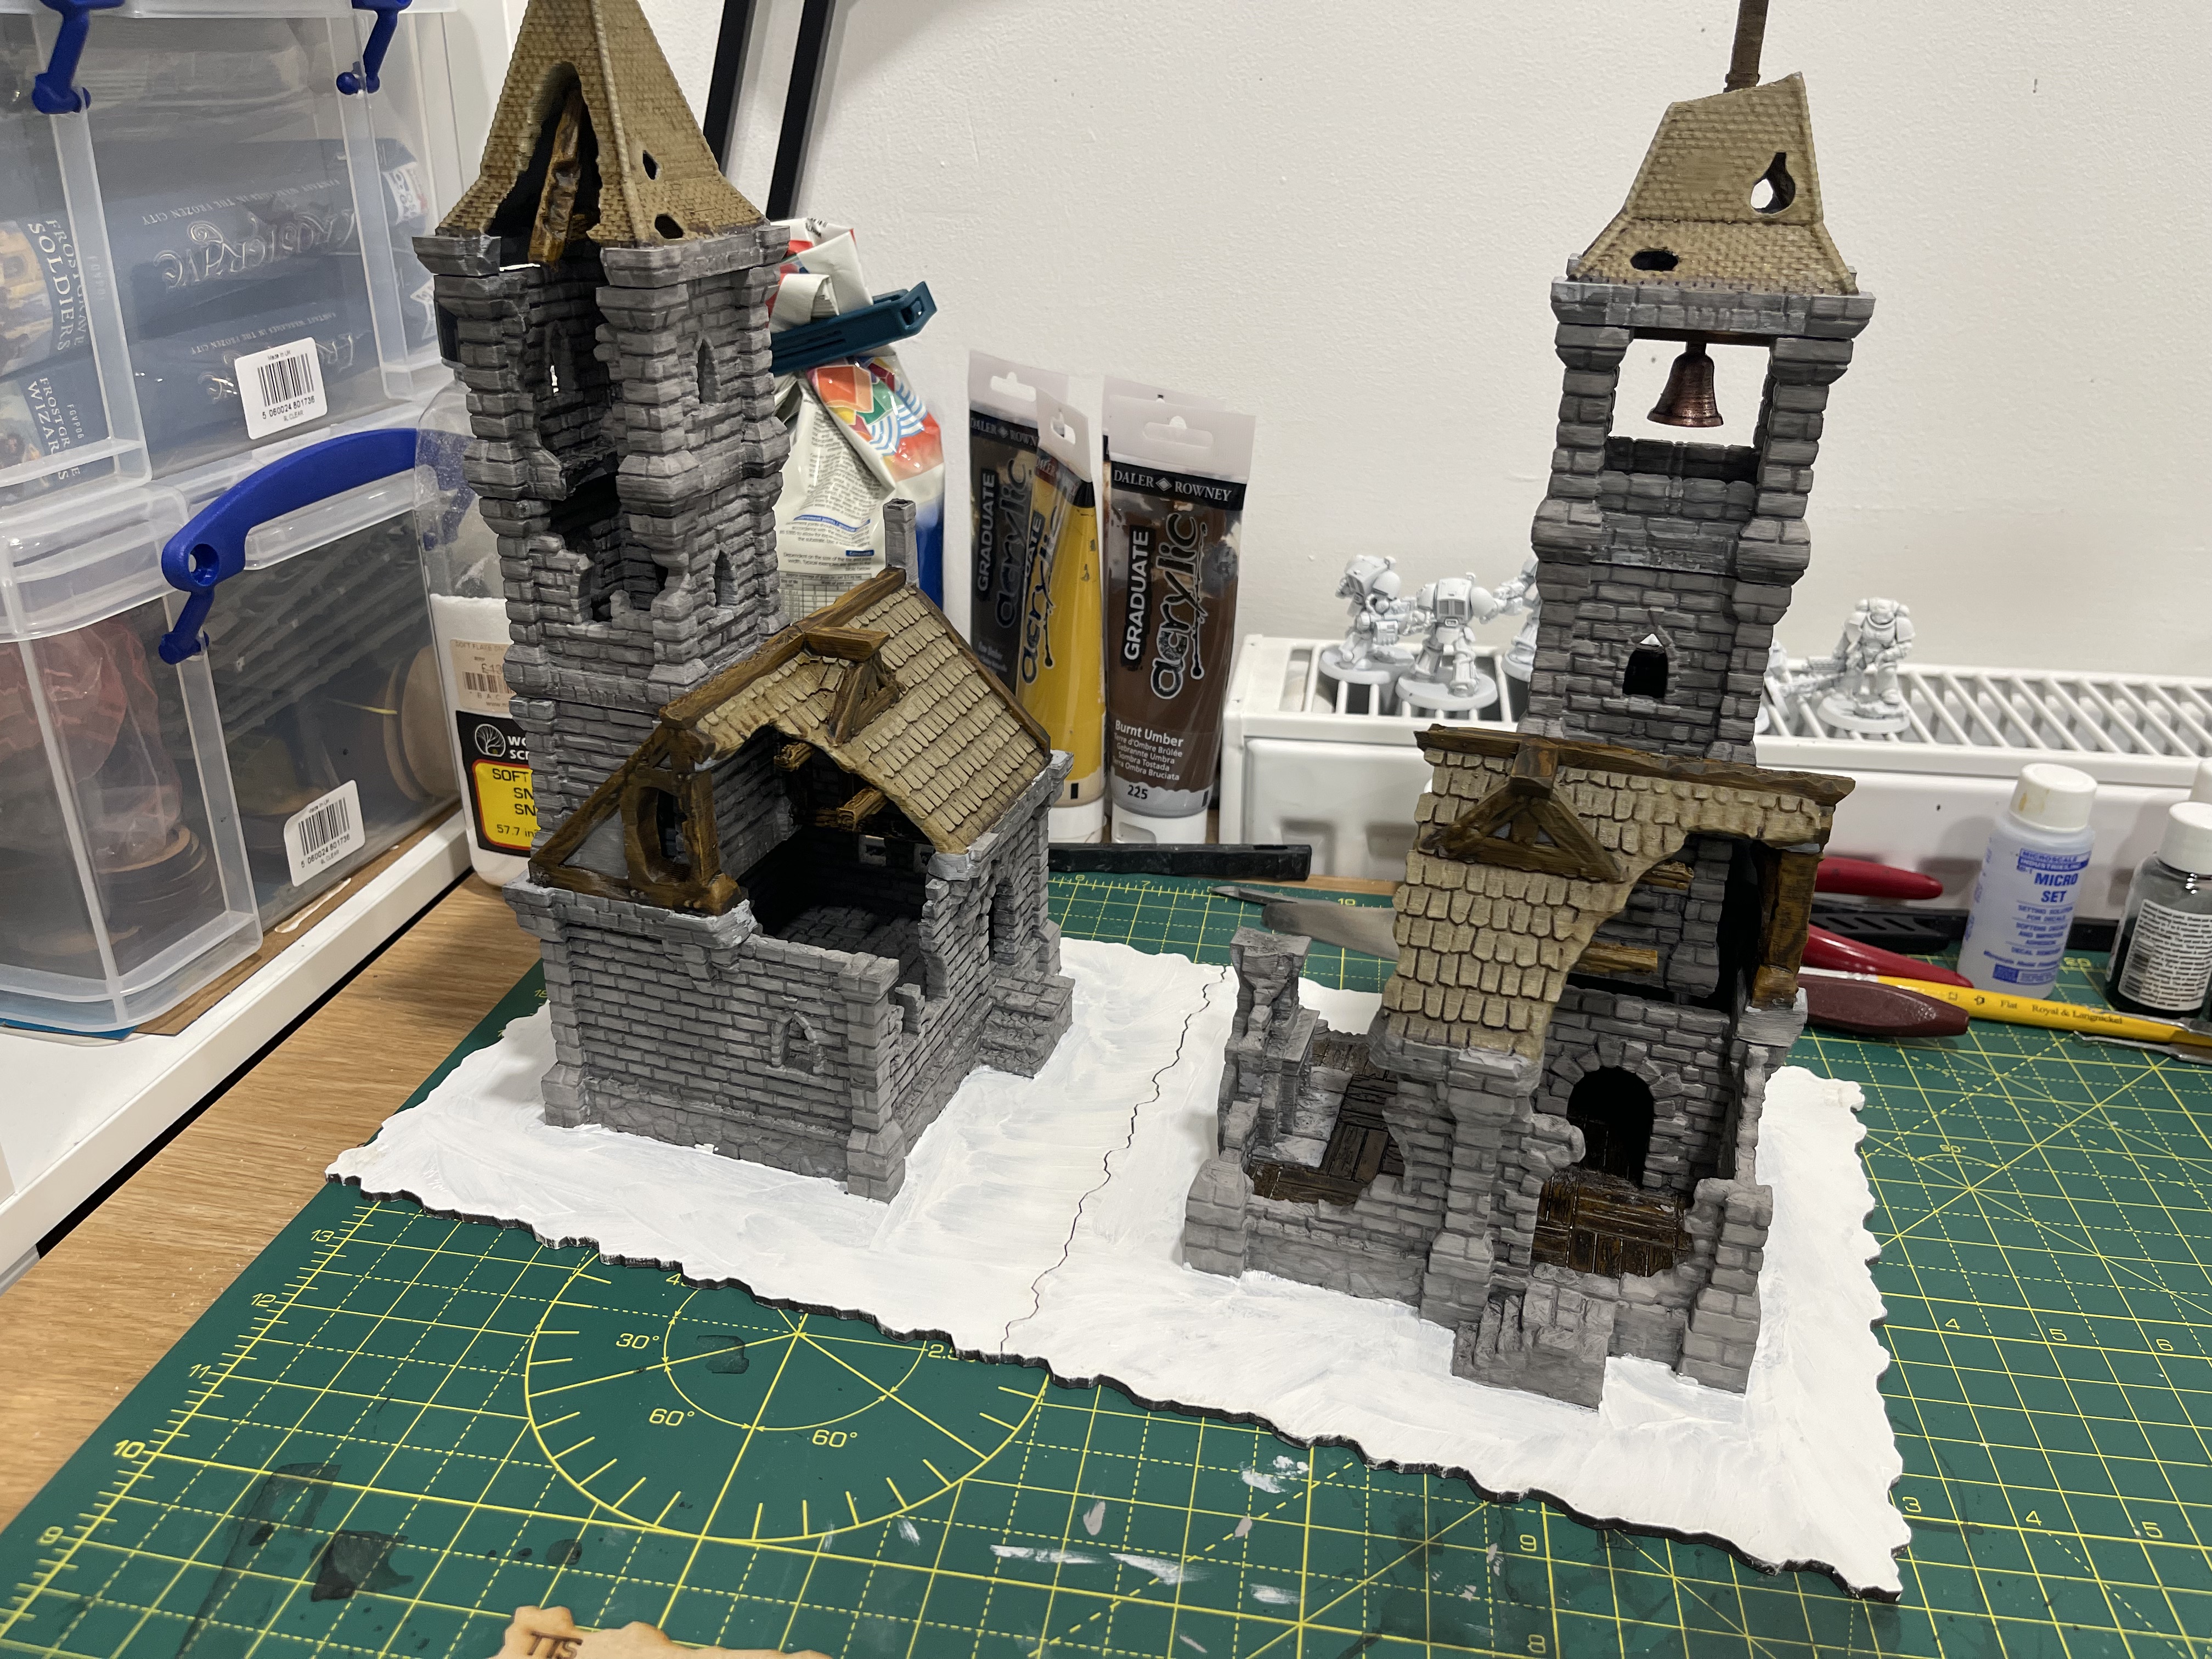
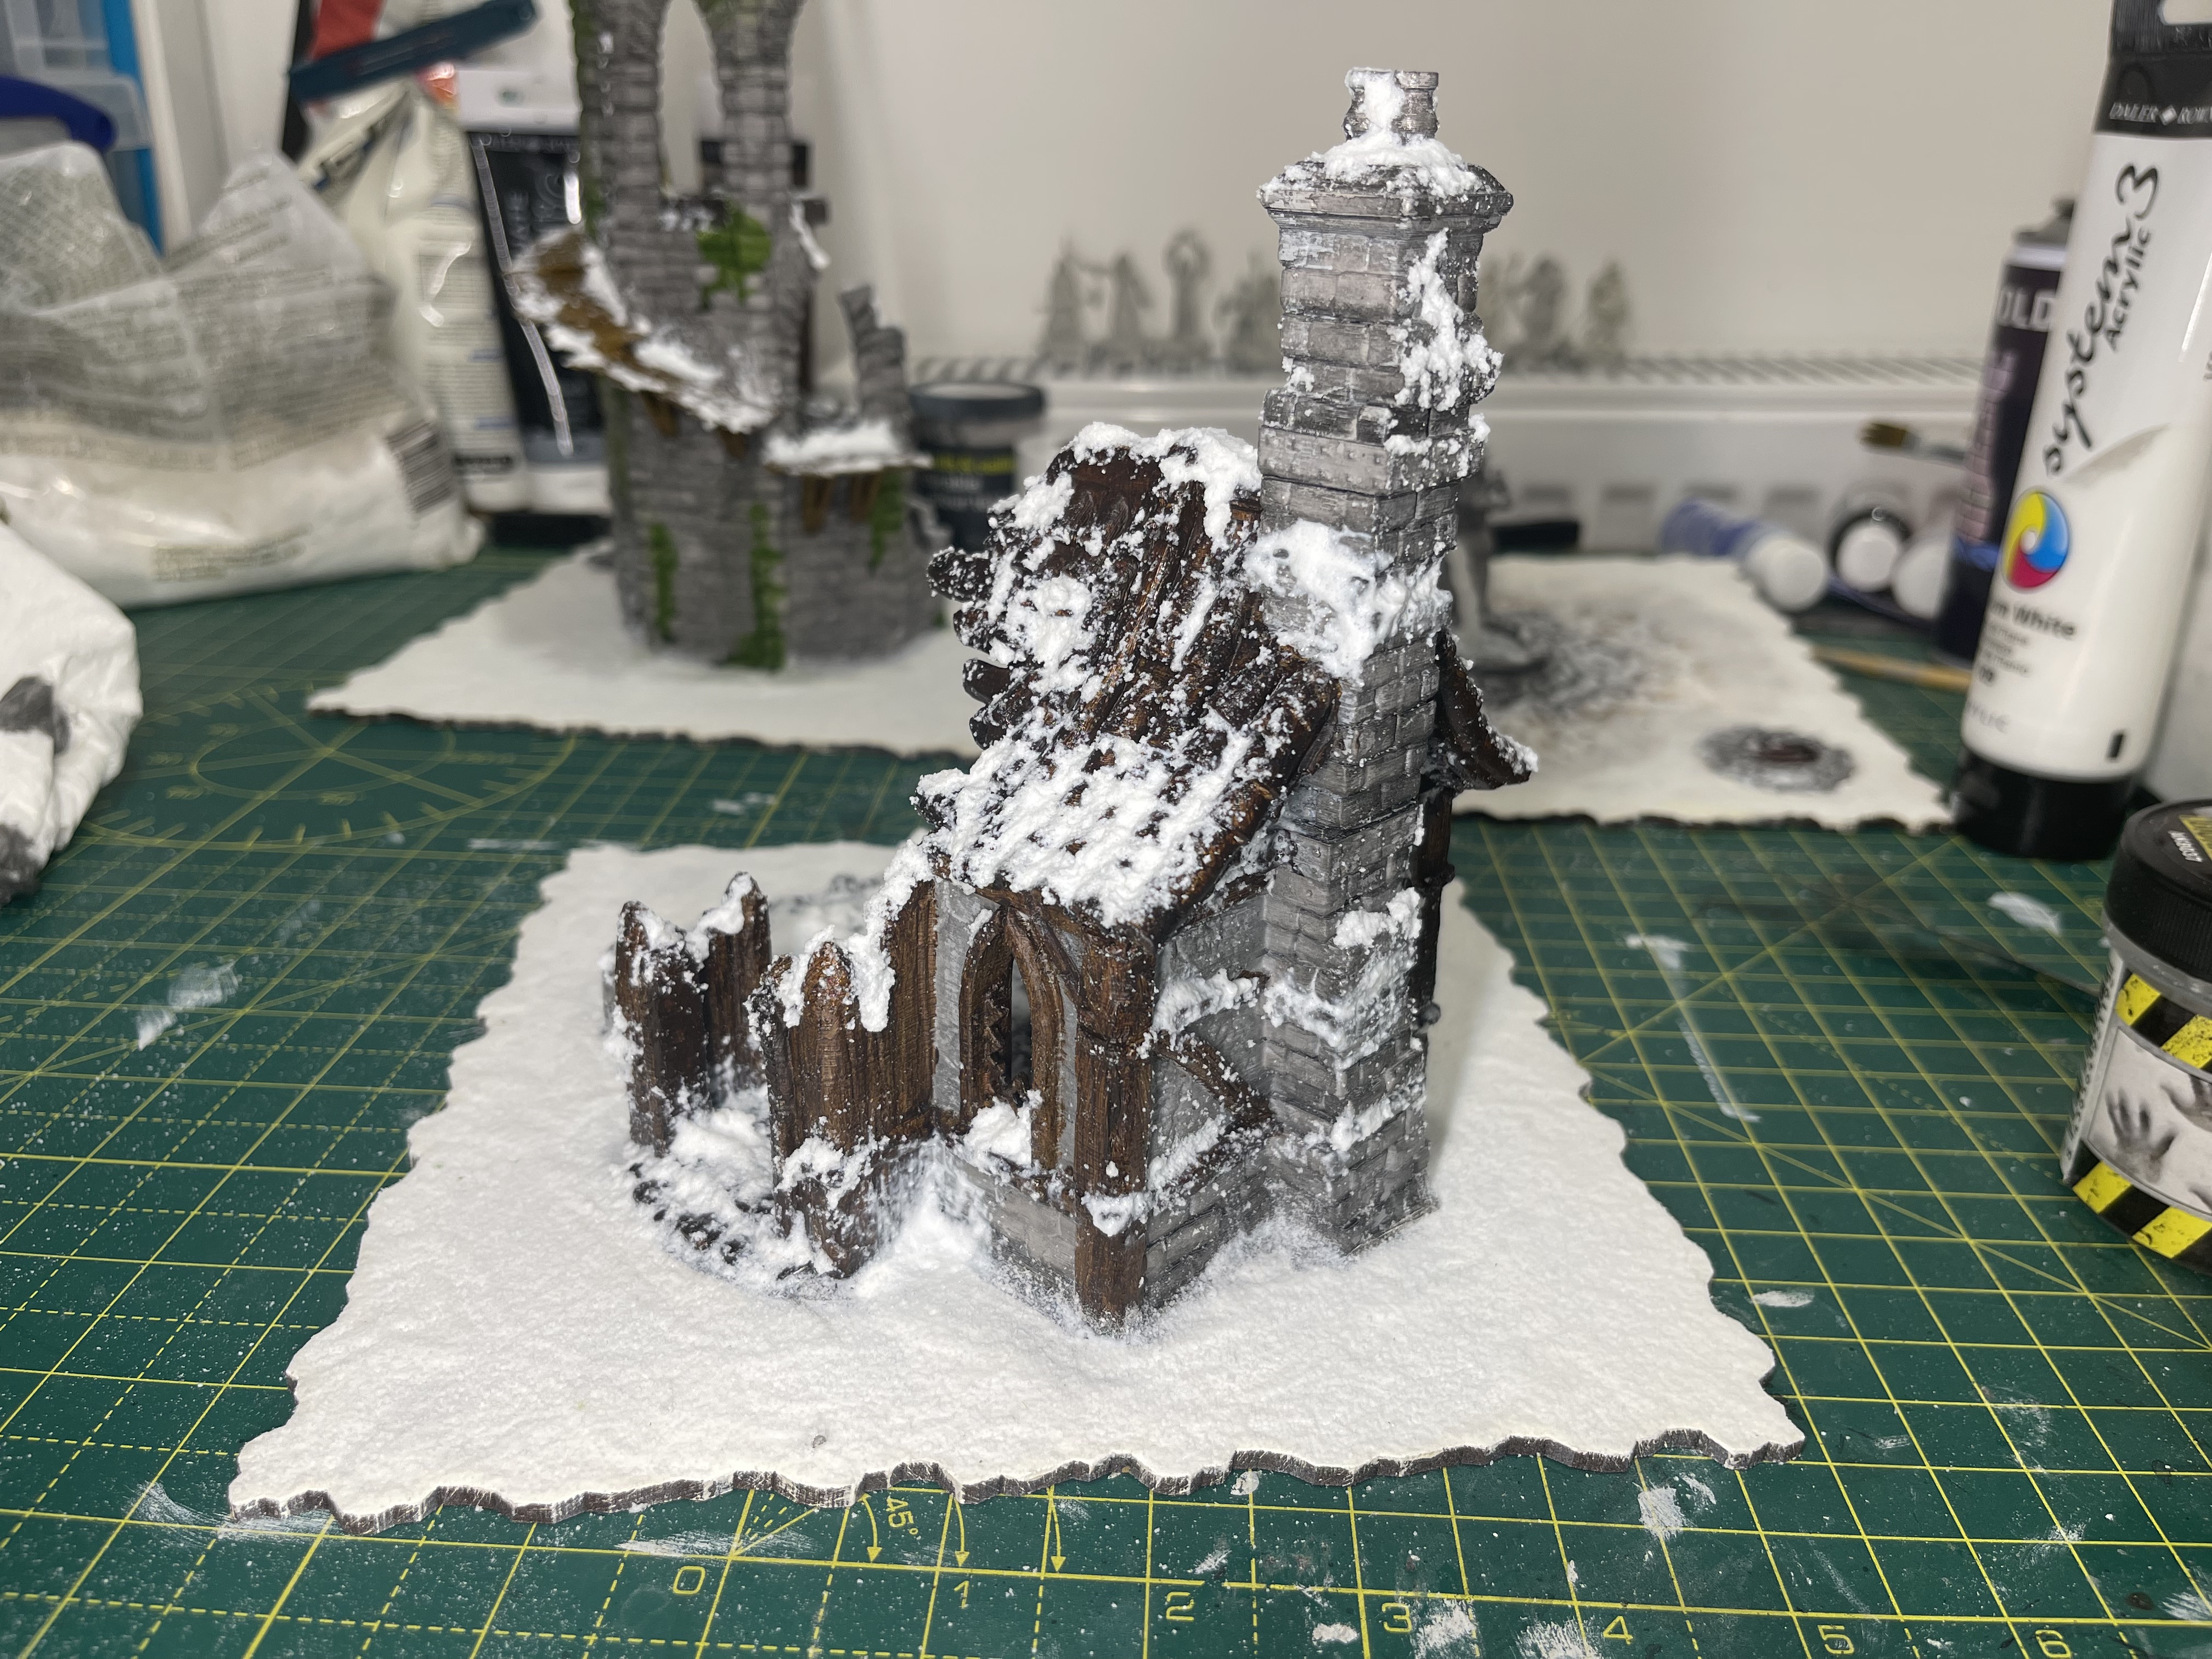
wooden shingle roof
I decided to add a different shade of brown to the roof, you know, to spice it up a little.
The tiles looked remarkably like shingles to me so they got a coating of skeleton horde contrast paint. a lot of the time they start as a lighter wood colour and then silver relatively well. it also makes for an aesthetically pleasing difference between the beams and the tiles.
all just in time to be doused in black wash and snow texture
little time for a little update
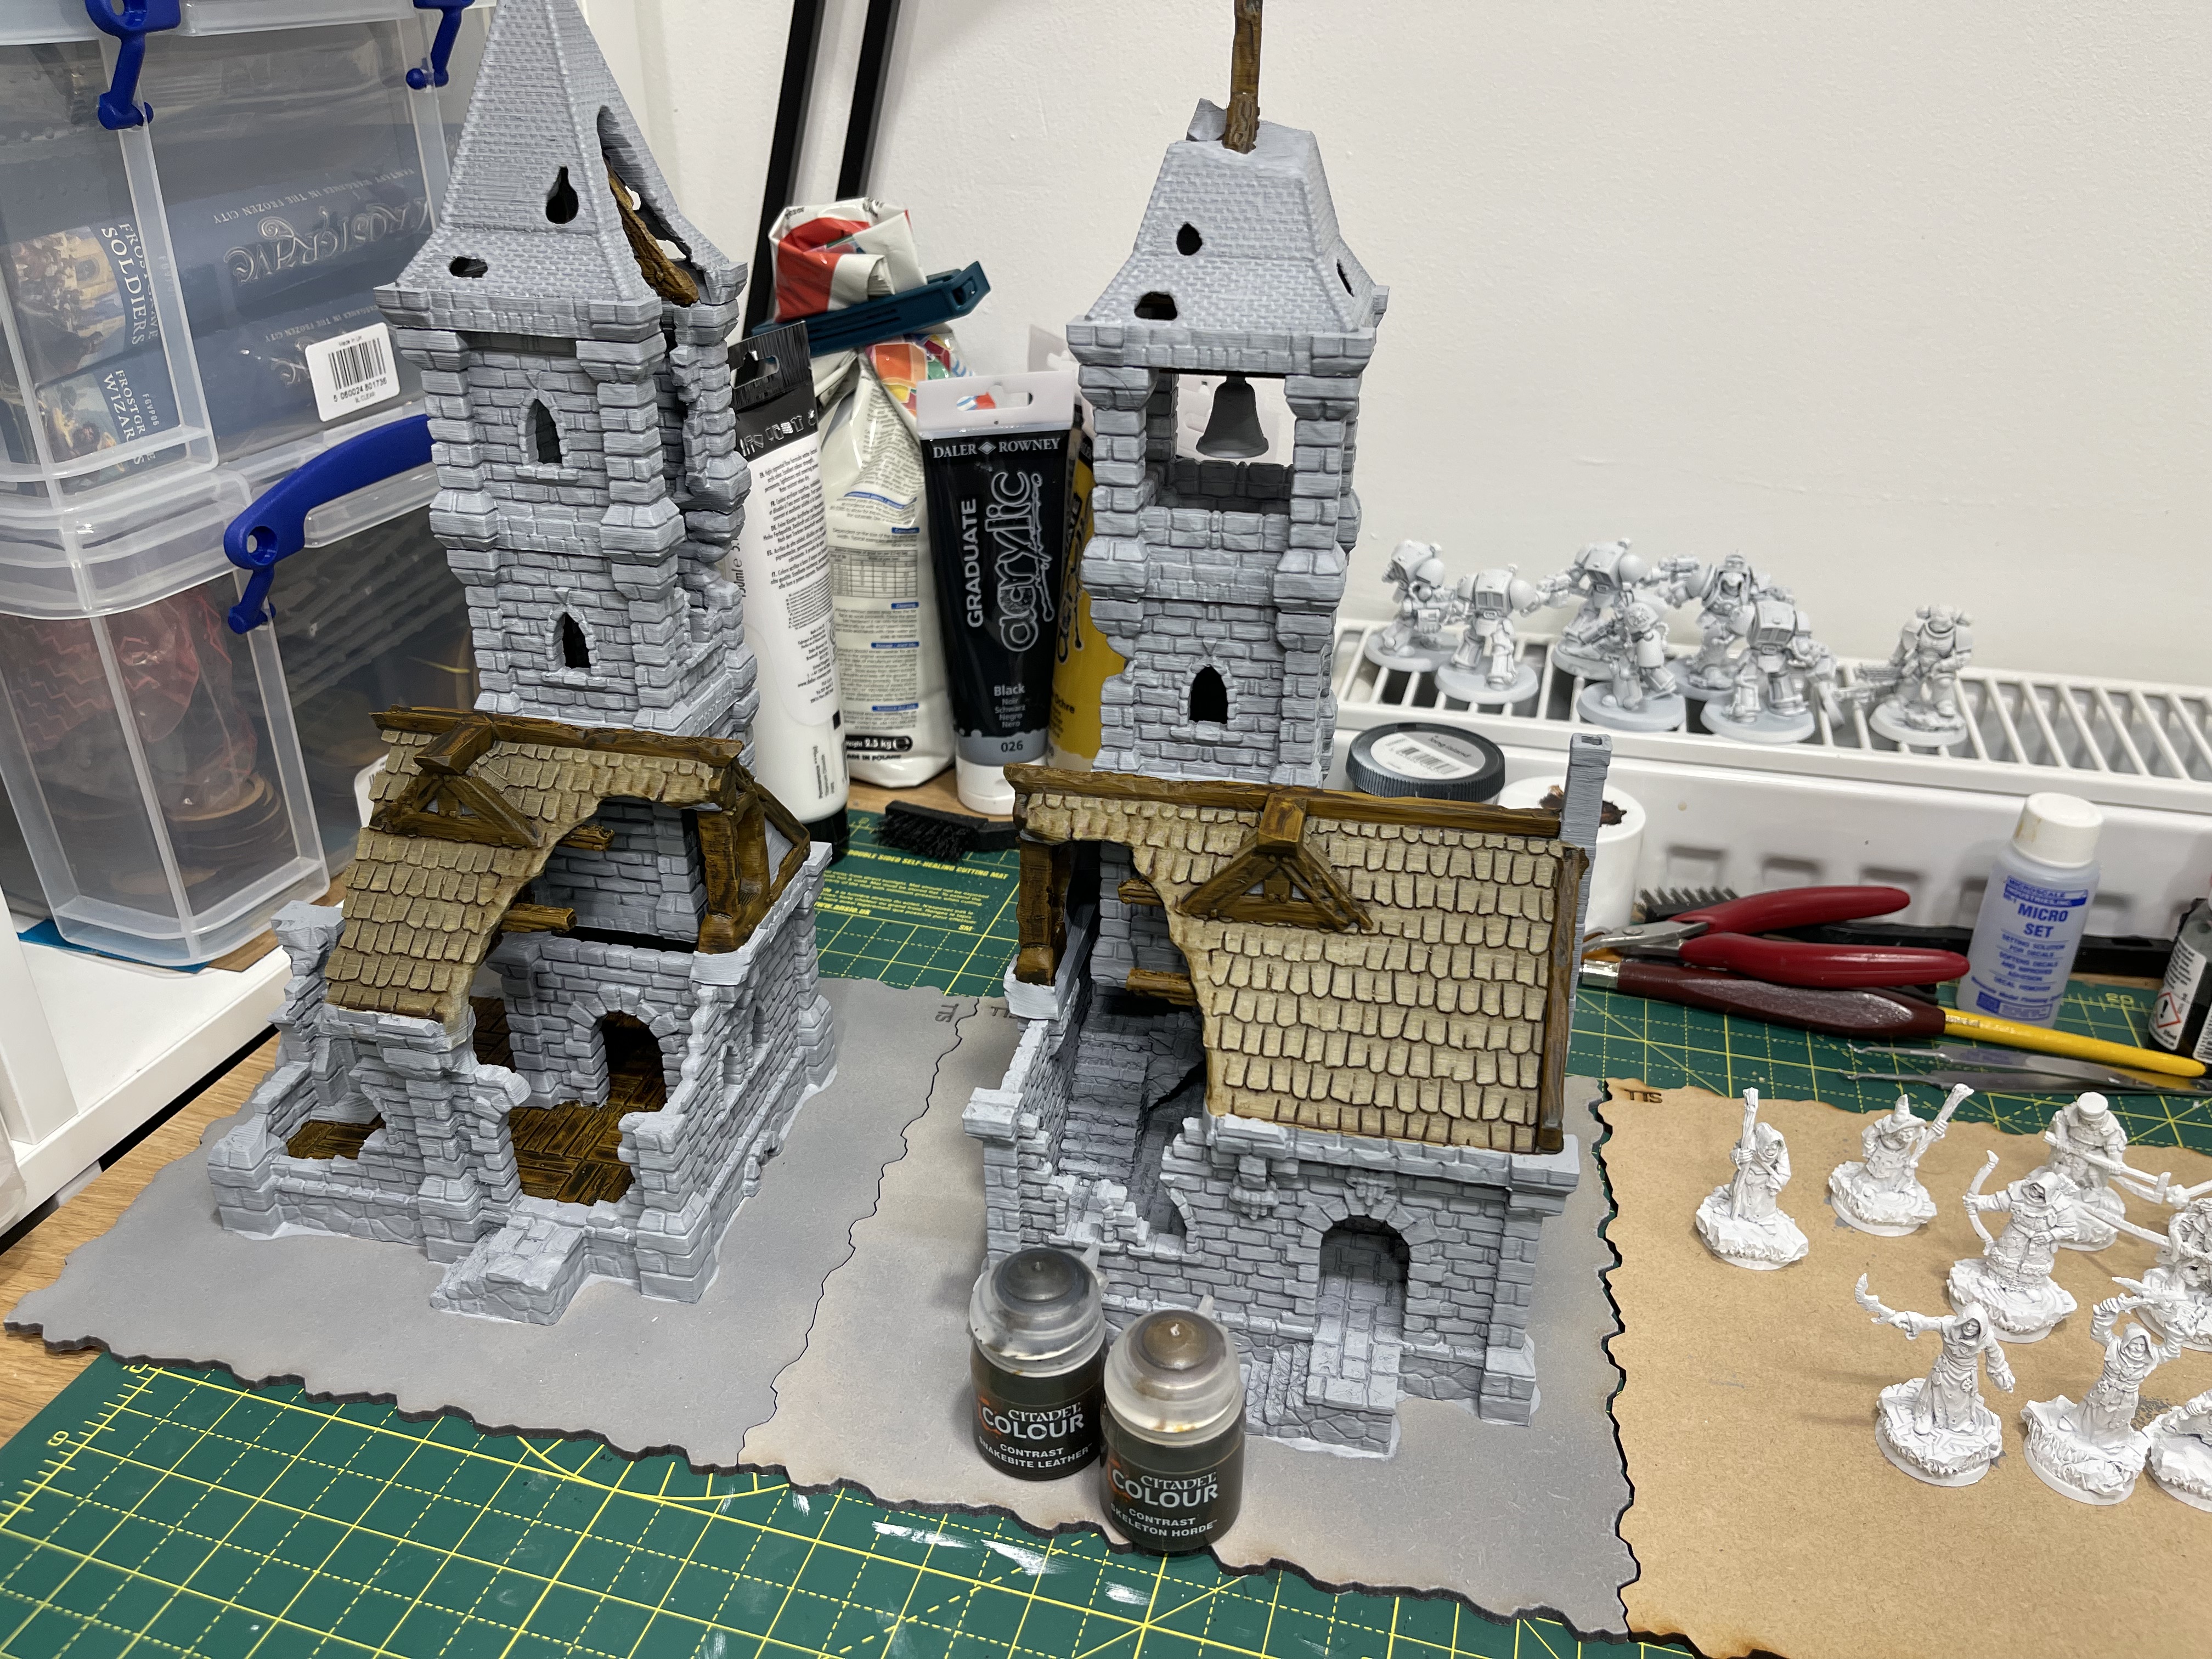
 throw around a bit of contrast paint to get quick wood (gigitty)
as mentioned I am short on time, this evening I found some time to throw a bit of contrast on the last two buildings.
I found it to be easier and better than the craft acrylic and to be honest im not really a fan of the contrast method on models atm so it is a good way to use up the contrast paints.
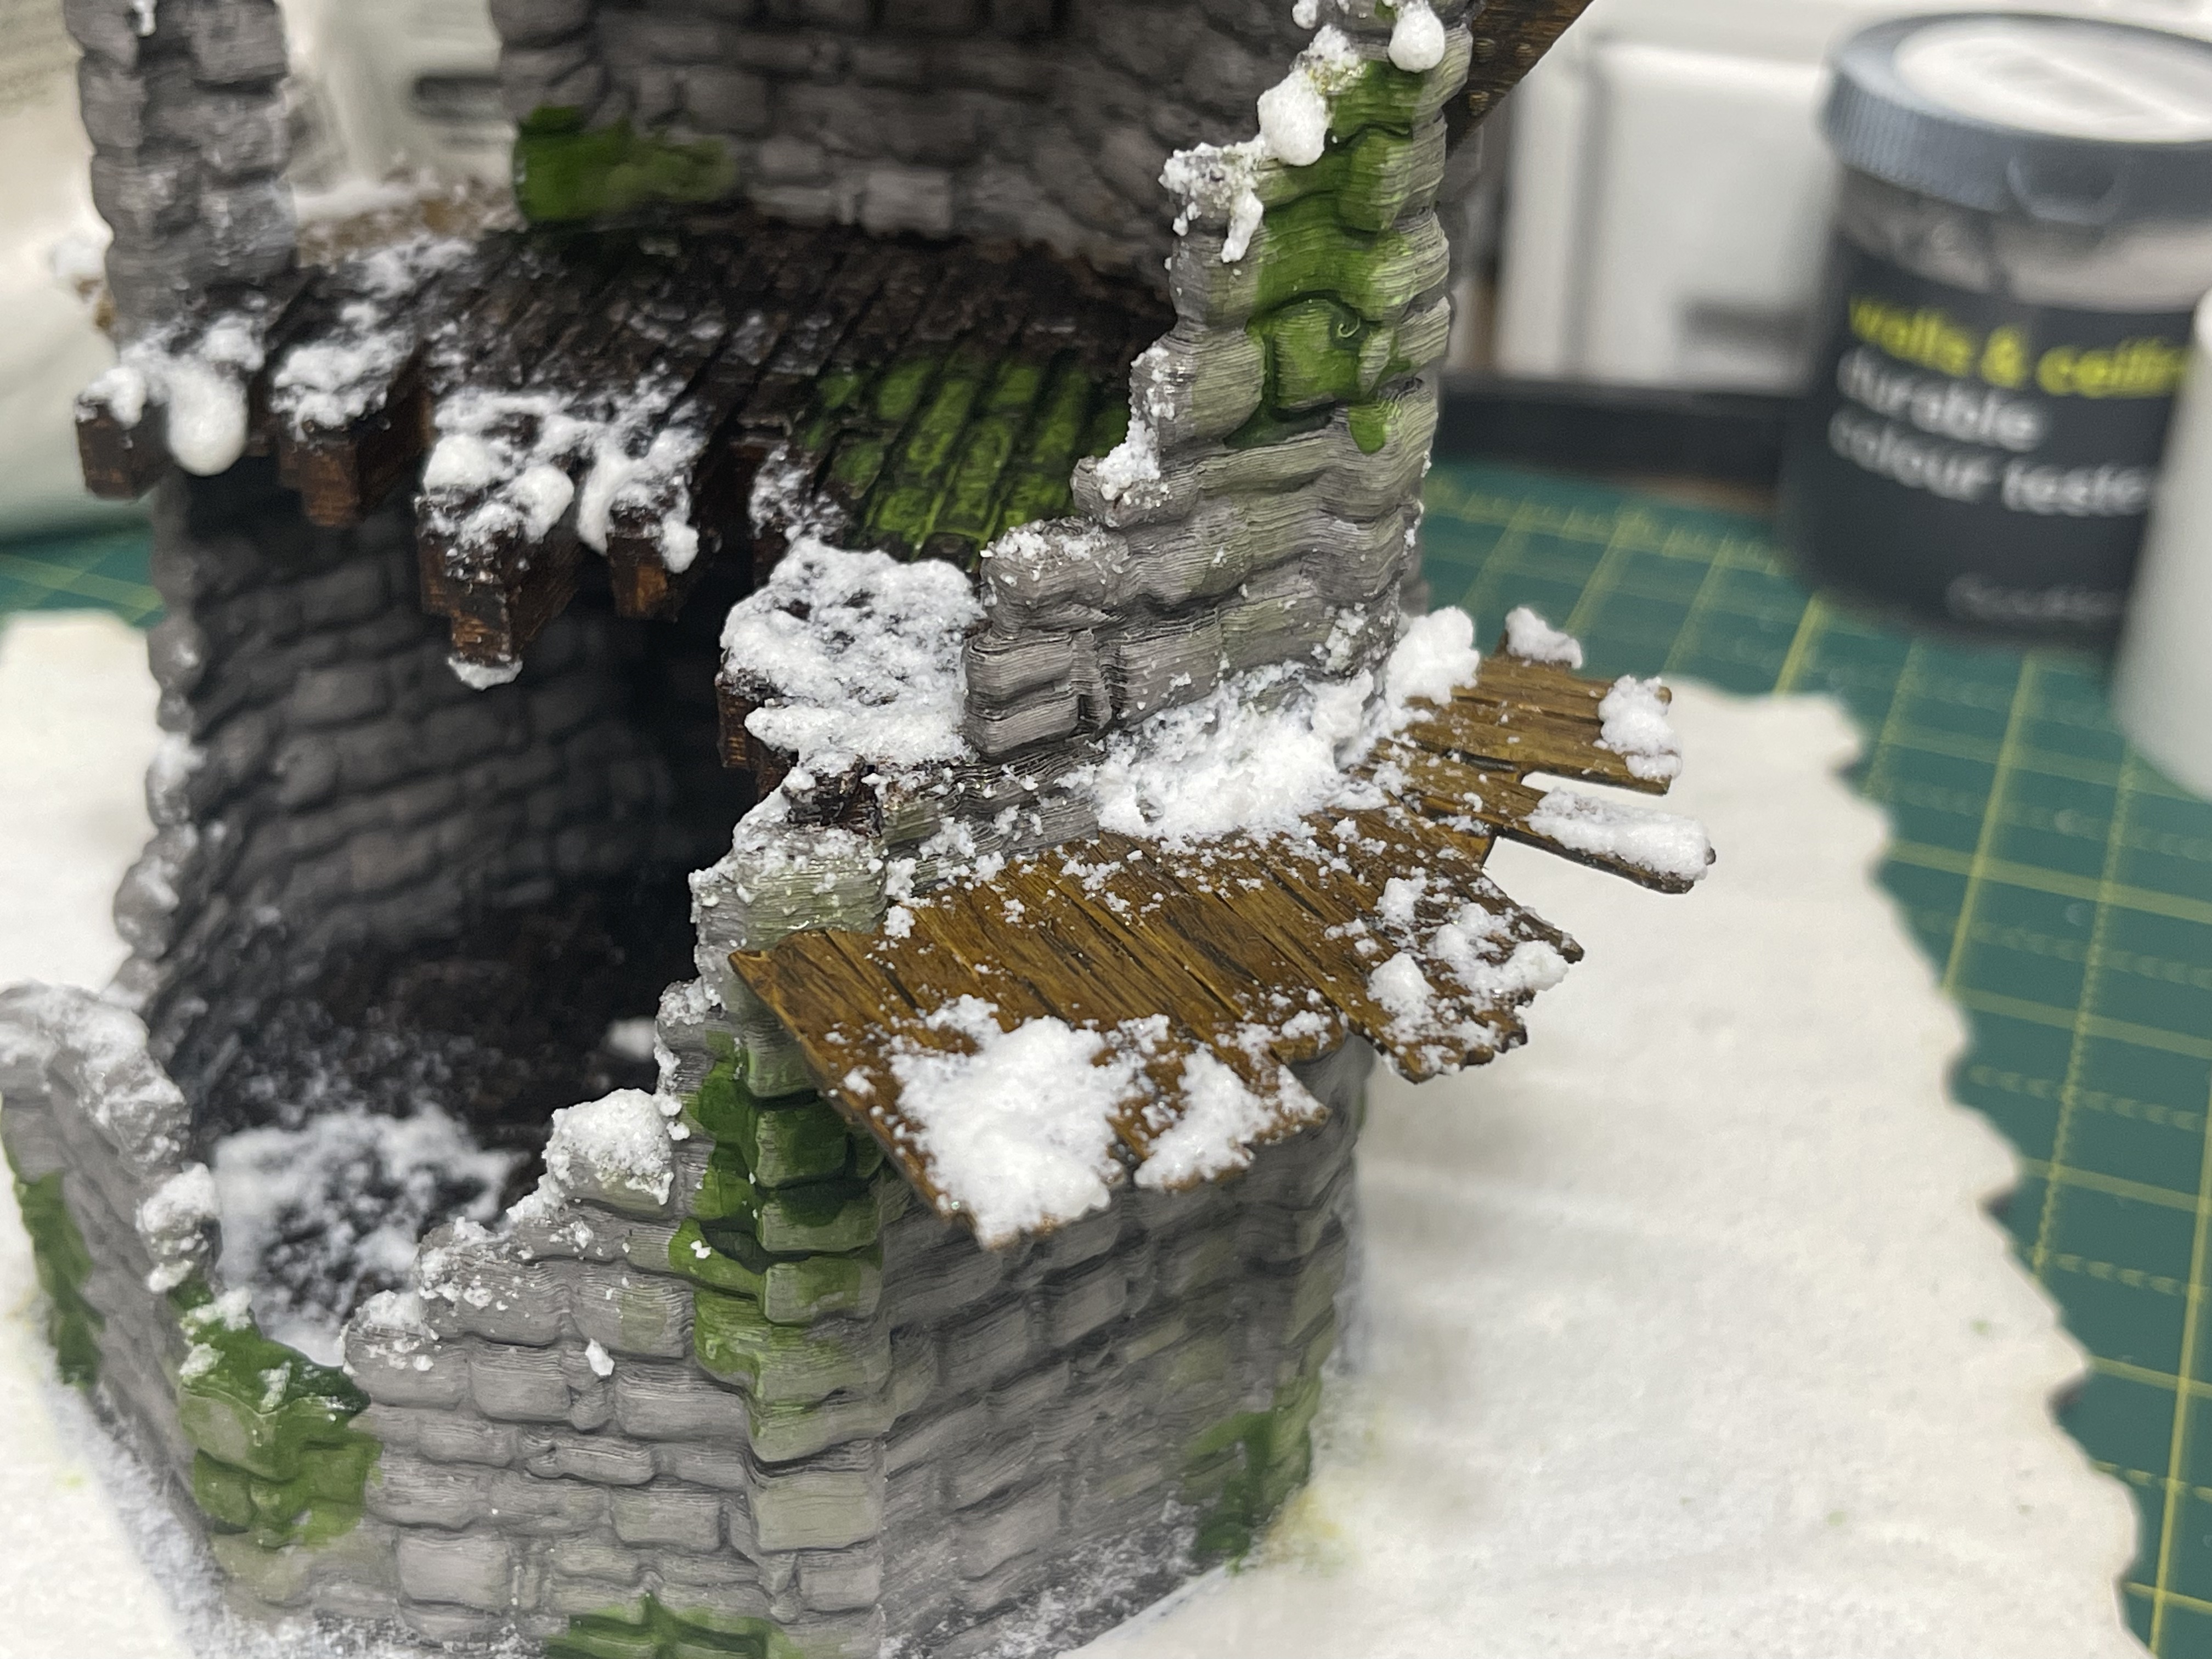
Wattle and daub cottage
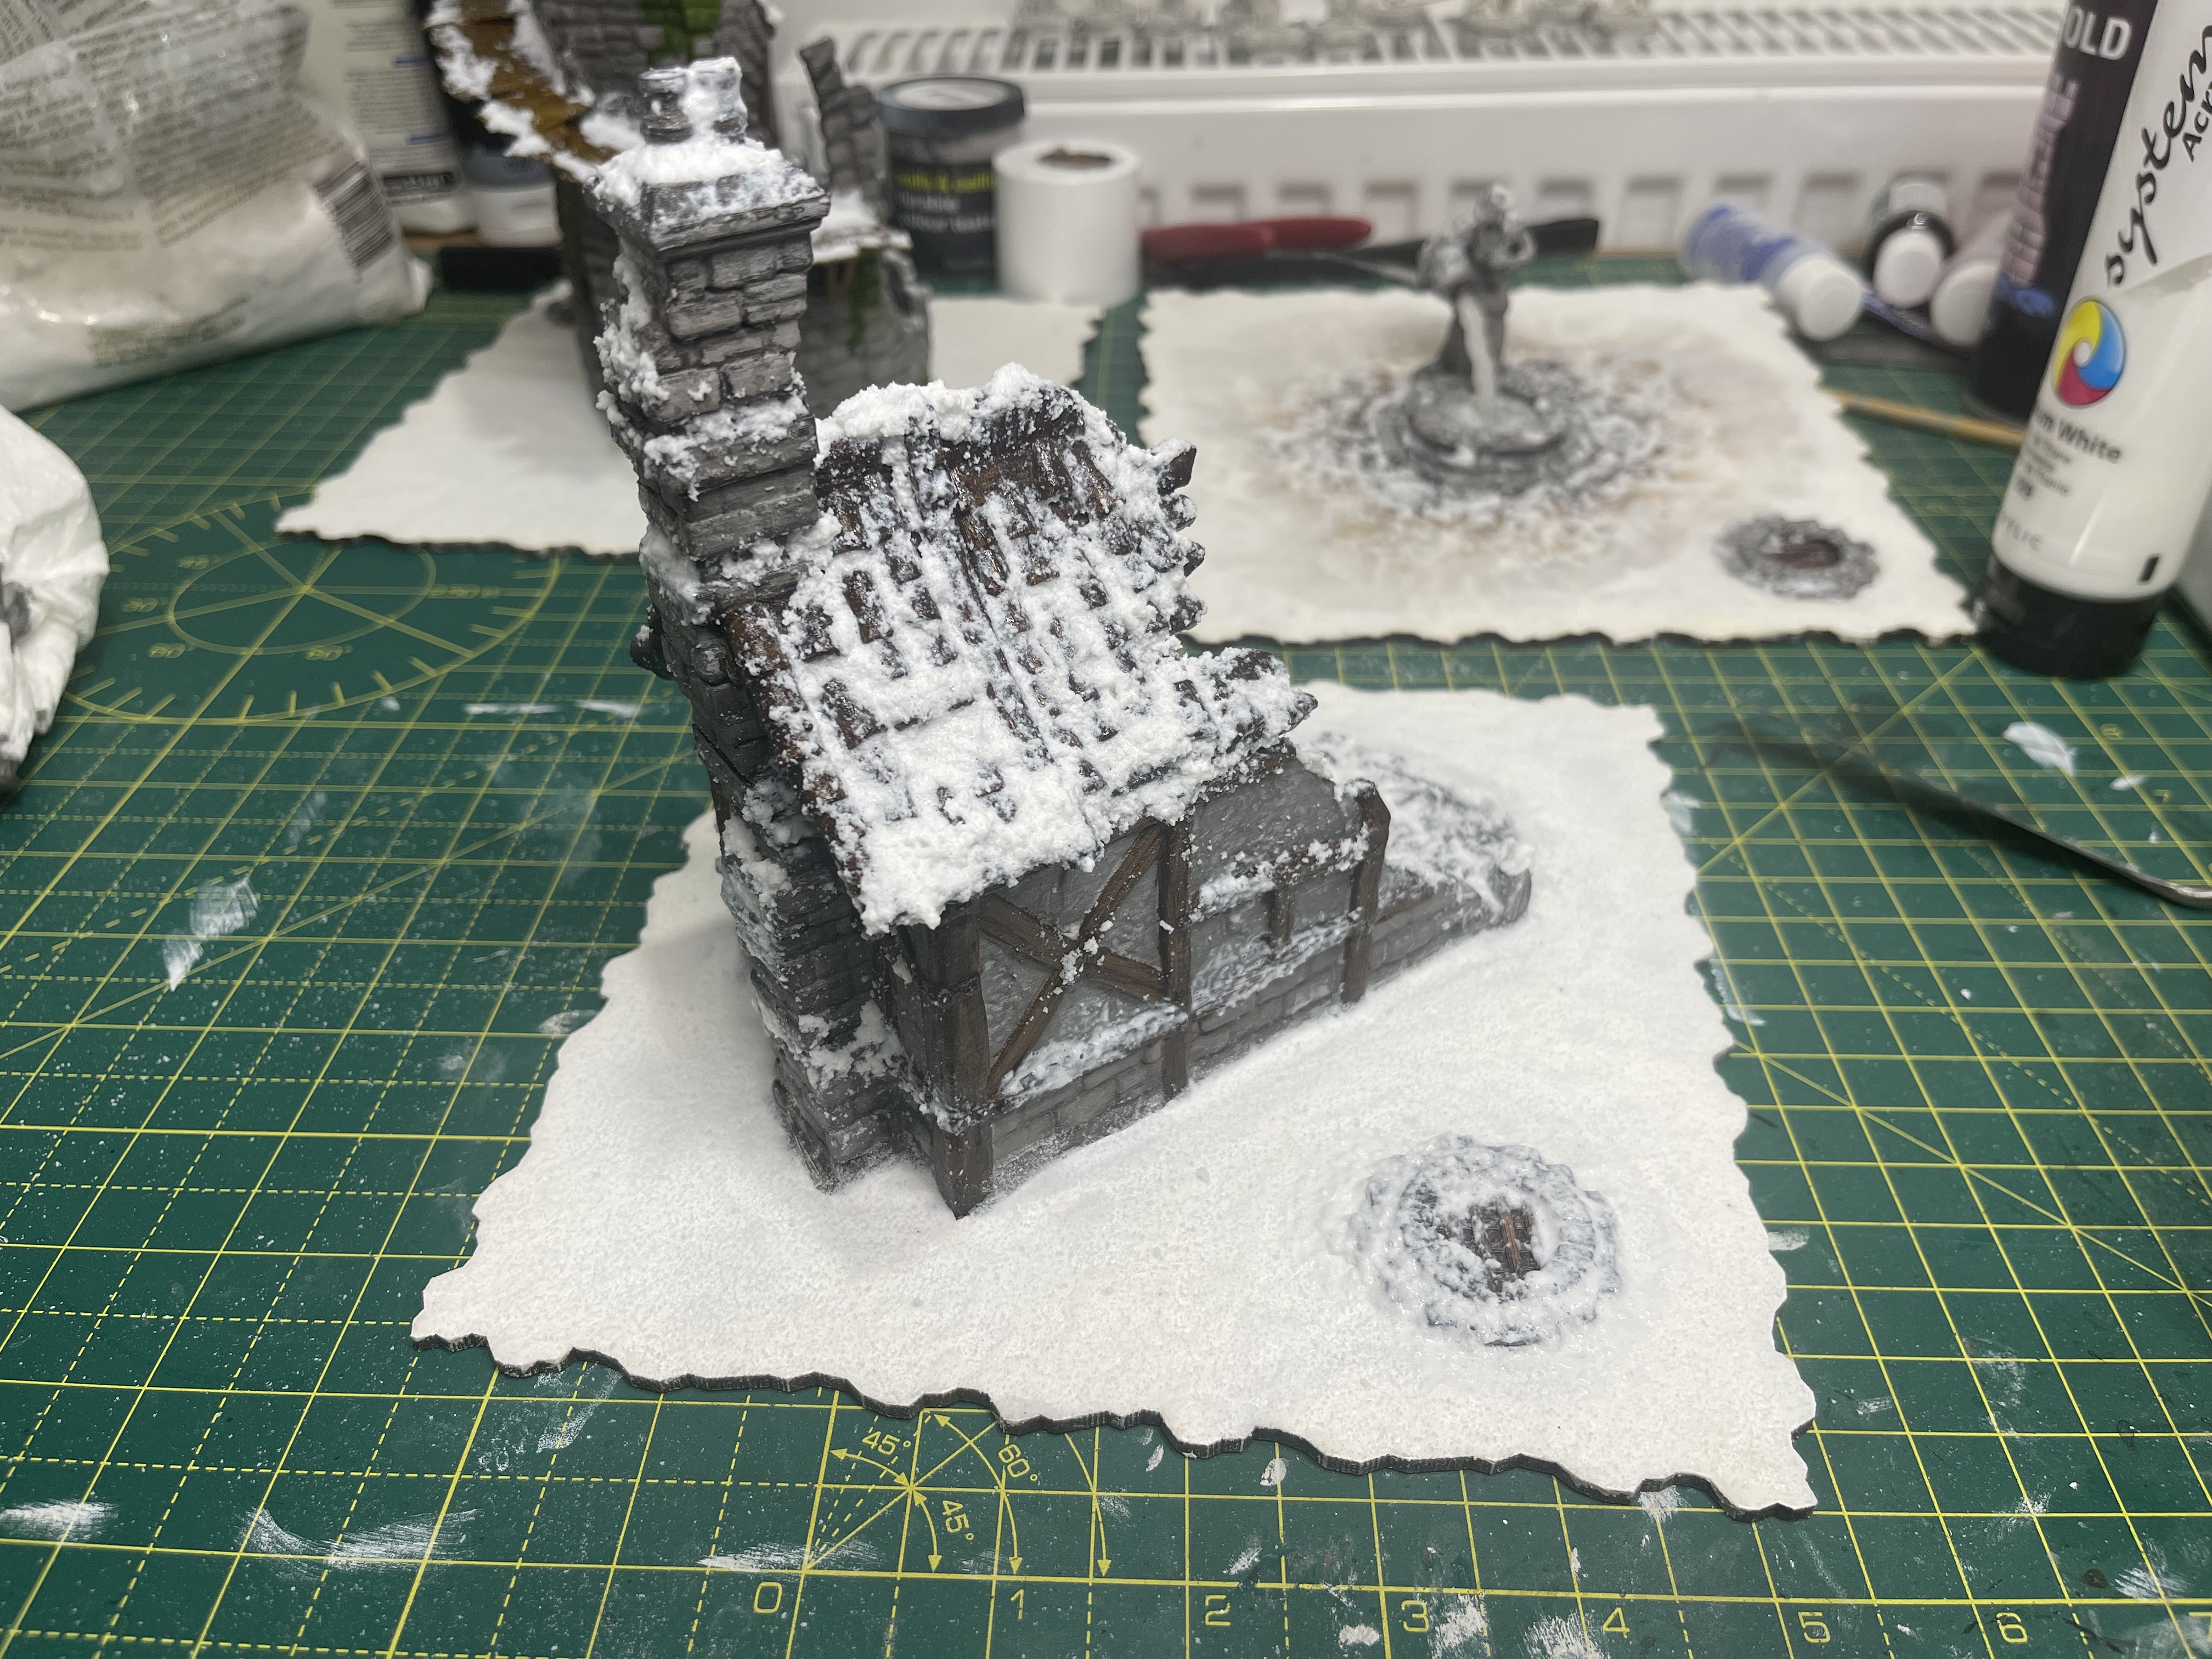
Haven’t shown the steps for this house as it is simply a repeat of the others, just with added wooden beams.
I did go heavier on the snow fall for this one, the roof with the tiles etc lent itself well to deeper snowfall, then I got a bit carried away with putting snow on almost all the surfaces, including the bricks sticking out etc. even put a snow drift build up in the corner of the room as if it was blown into the house and got stuck.
been in a proper blizzard this one.
snowy walkway
Using the normal gloss mod podge and snow flock (x2) mix I added snow to the walkways.
I put it heavy on the outside of the walkway which would not have had any overhead cover and then I also piled it up against the wall swell. This made it look good and somewhat a travelled route… something for the wizards exploring the frozen city to explore in and discover what is going on at the top.
How to do frozen water in less than 5 minutes...
 start with wire in the rough shape you want.
 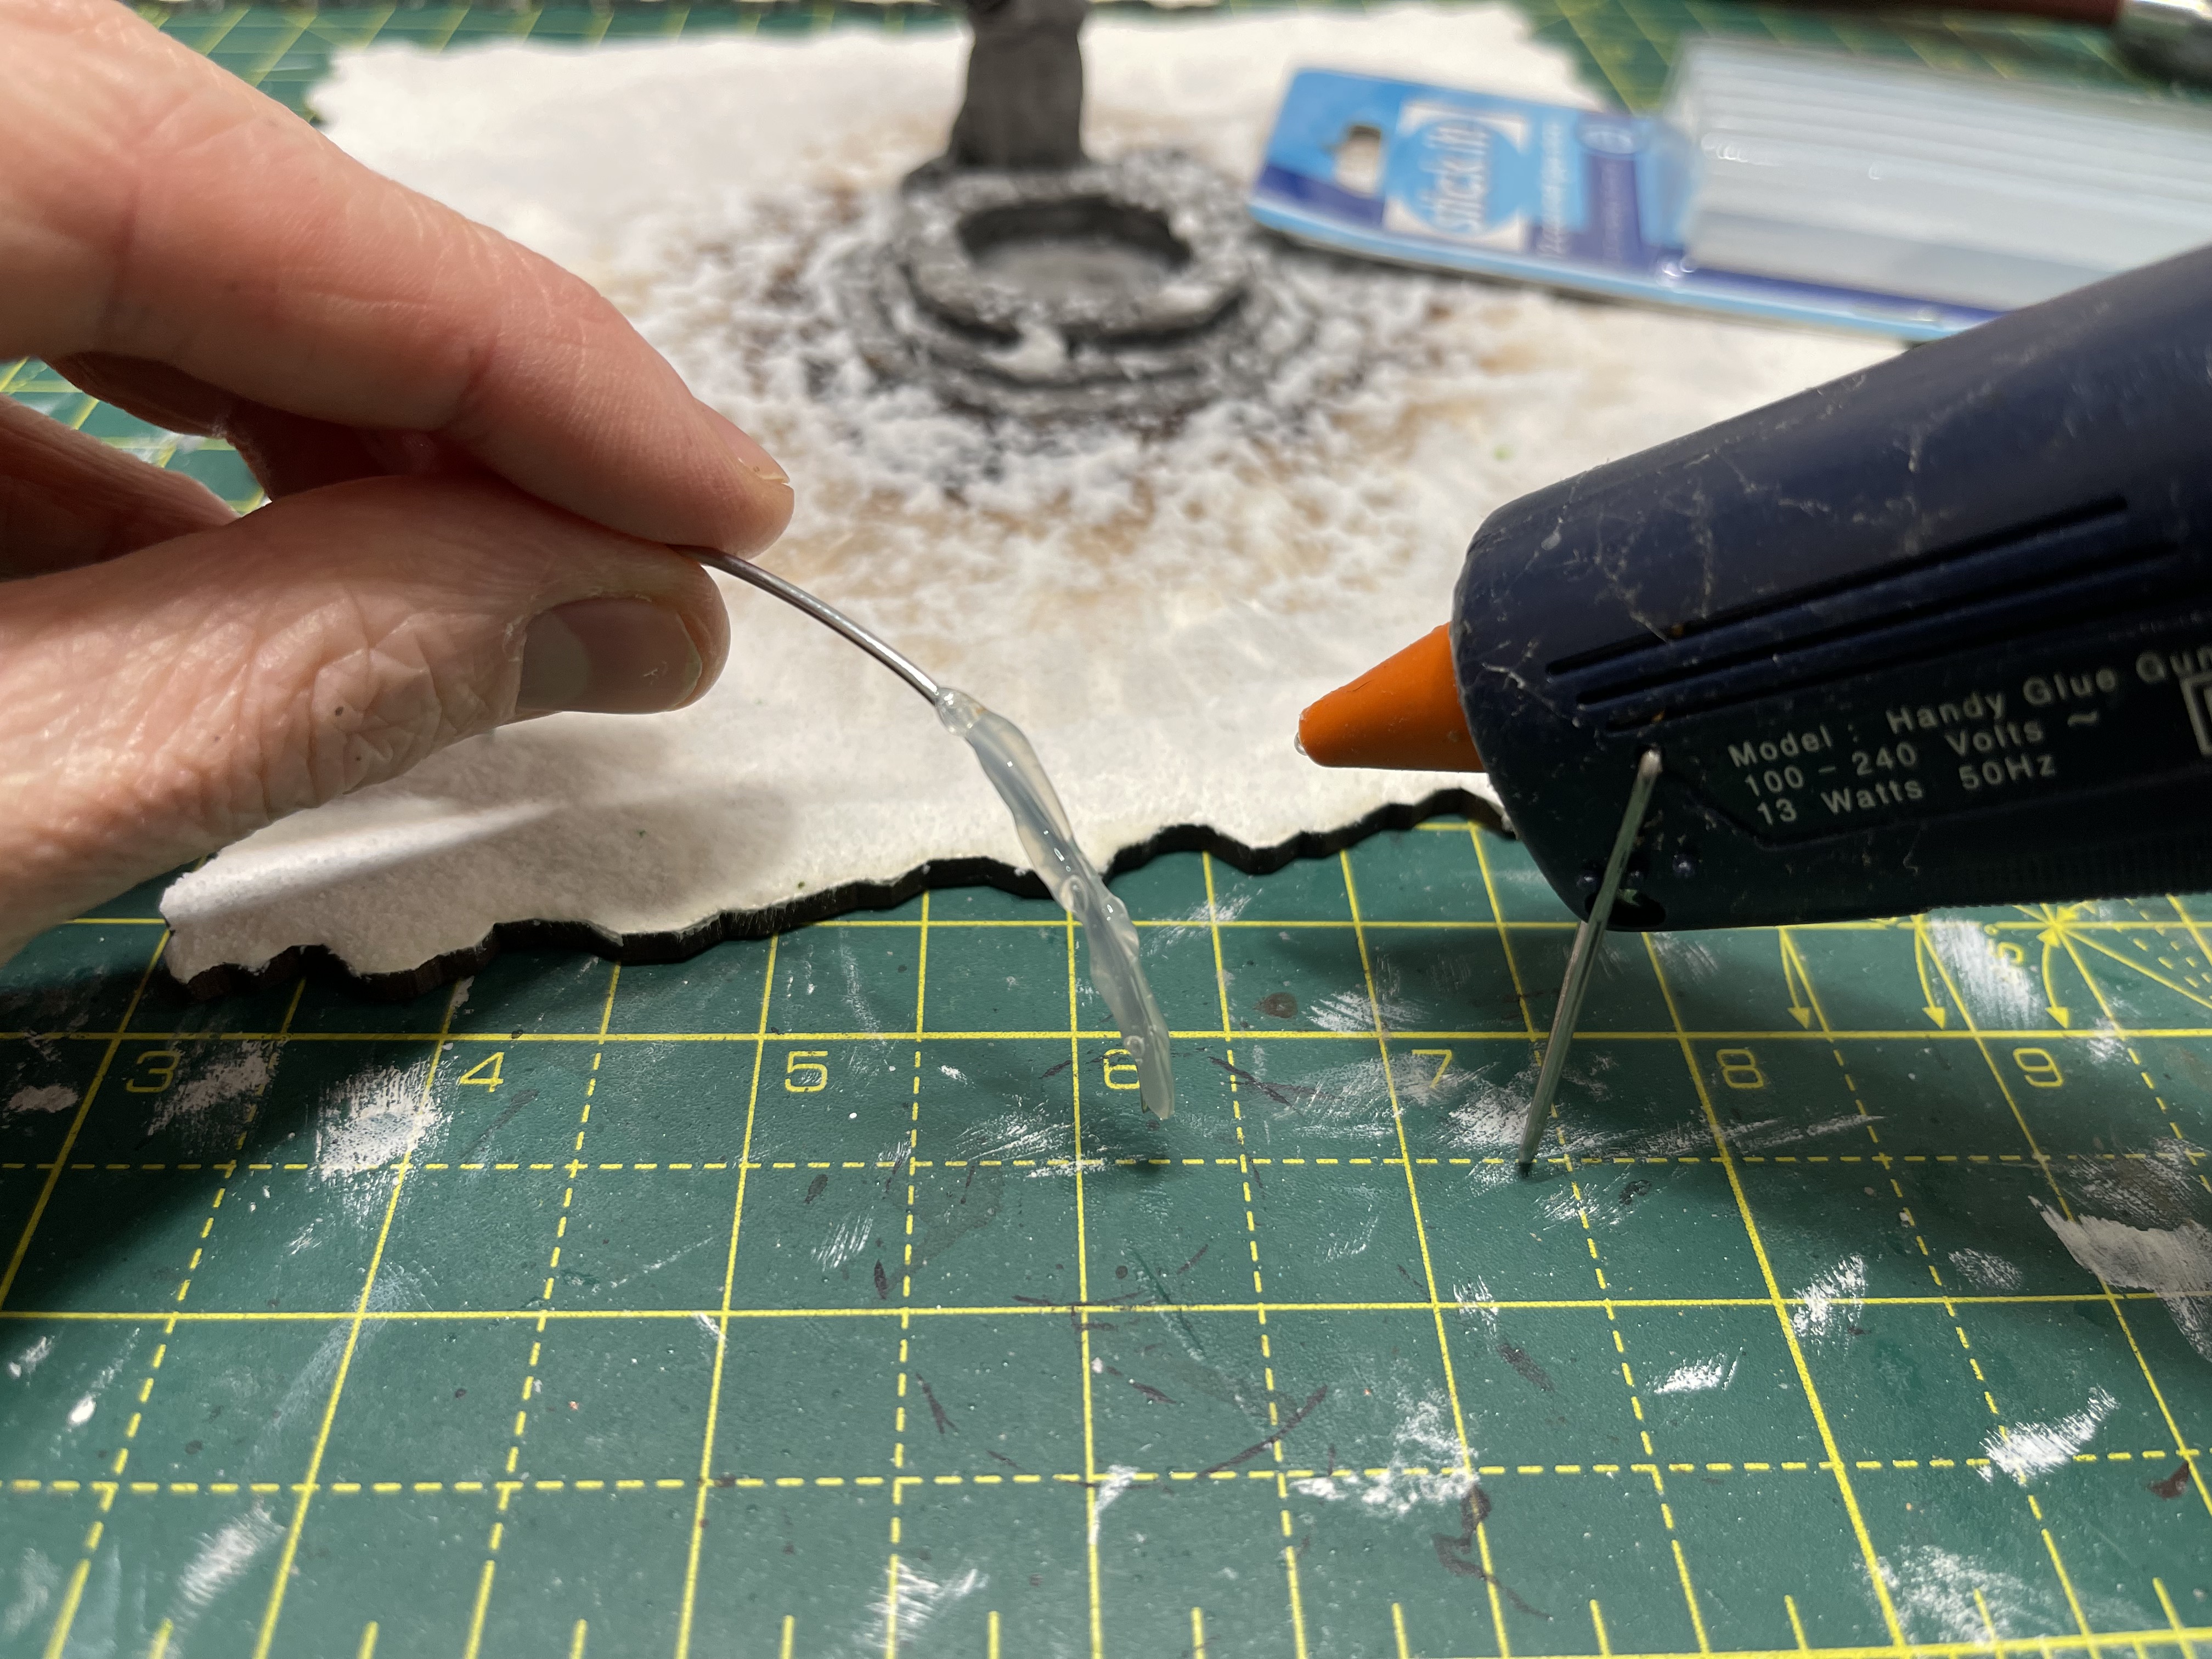 Run a bead of cool melt hot glue over it to the width you like.
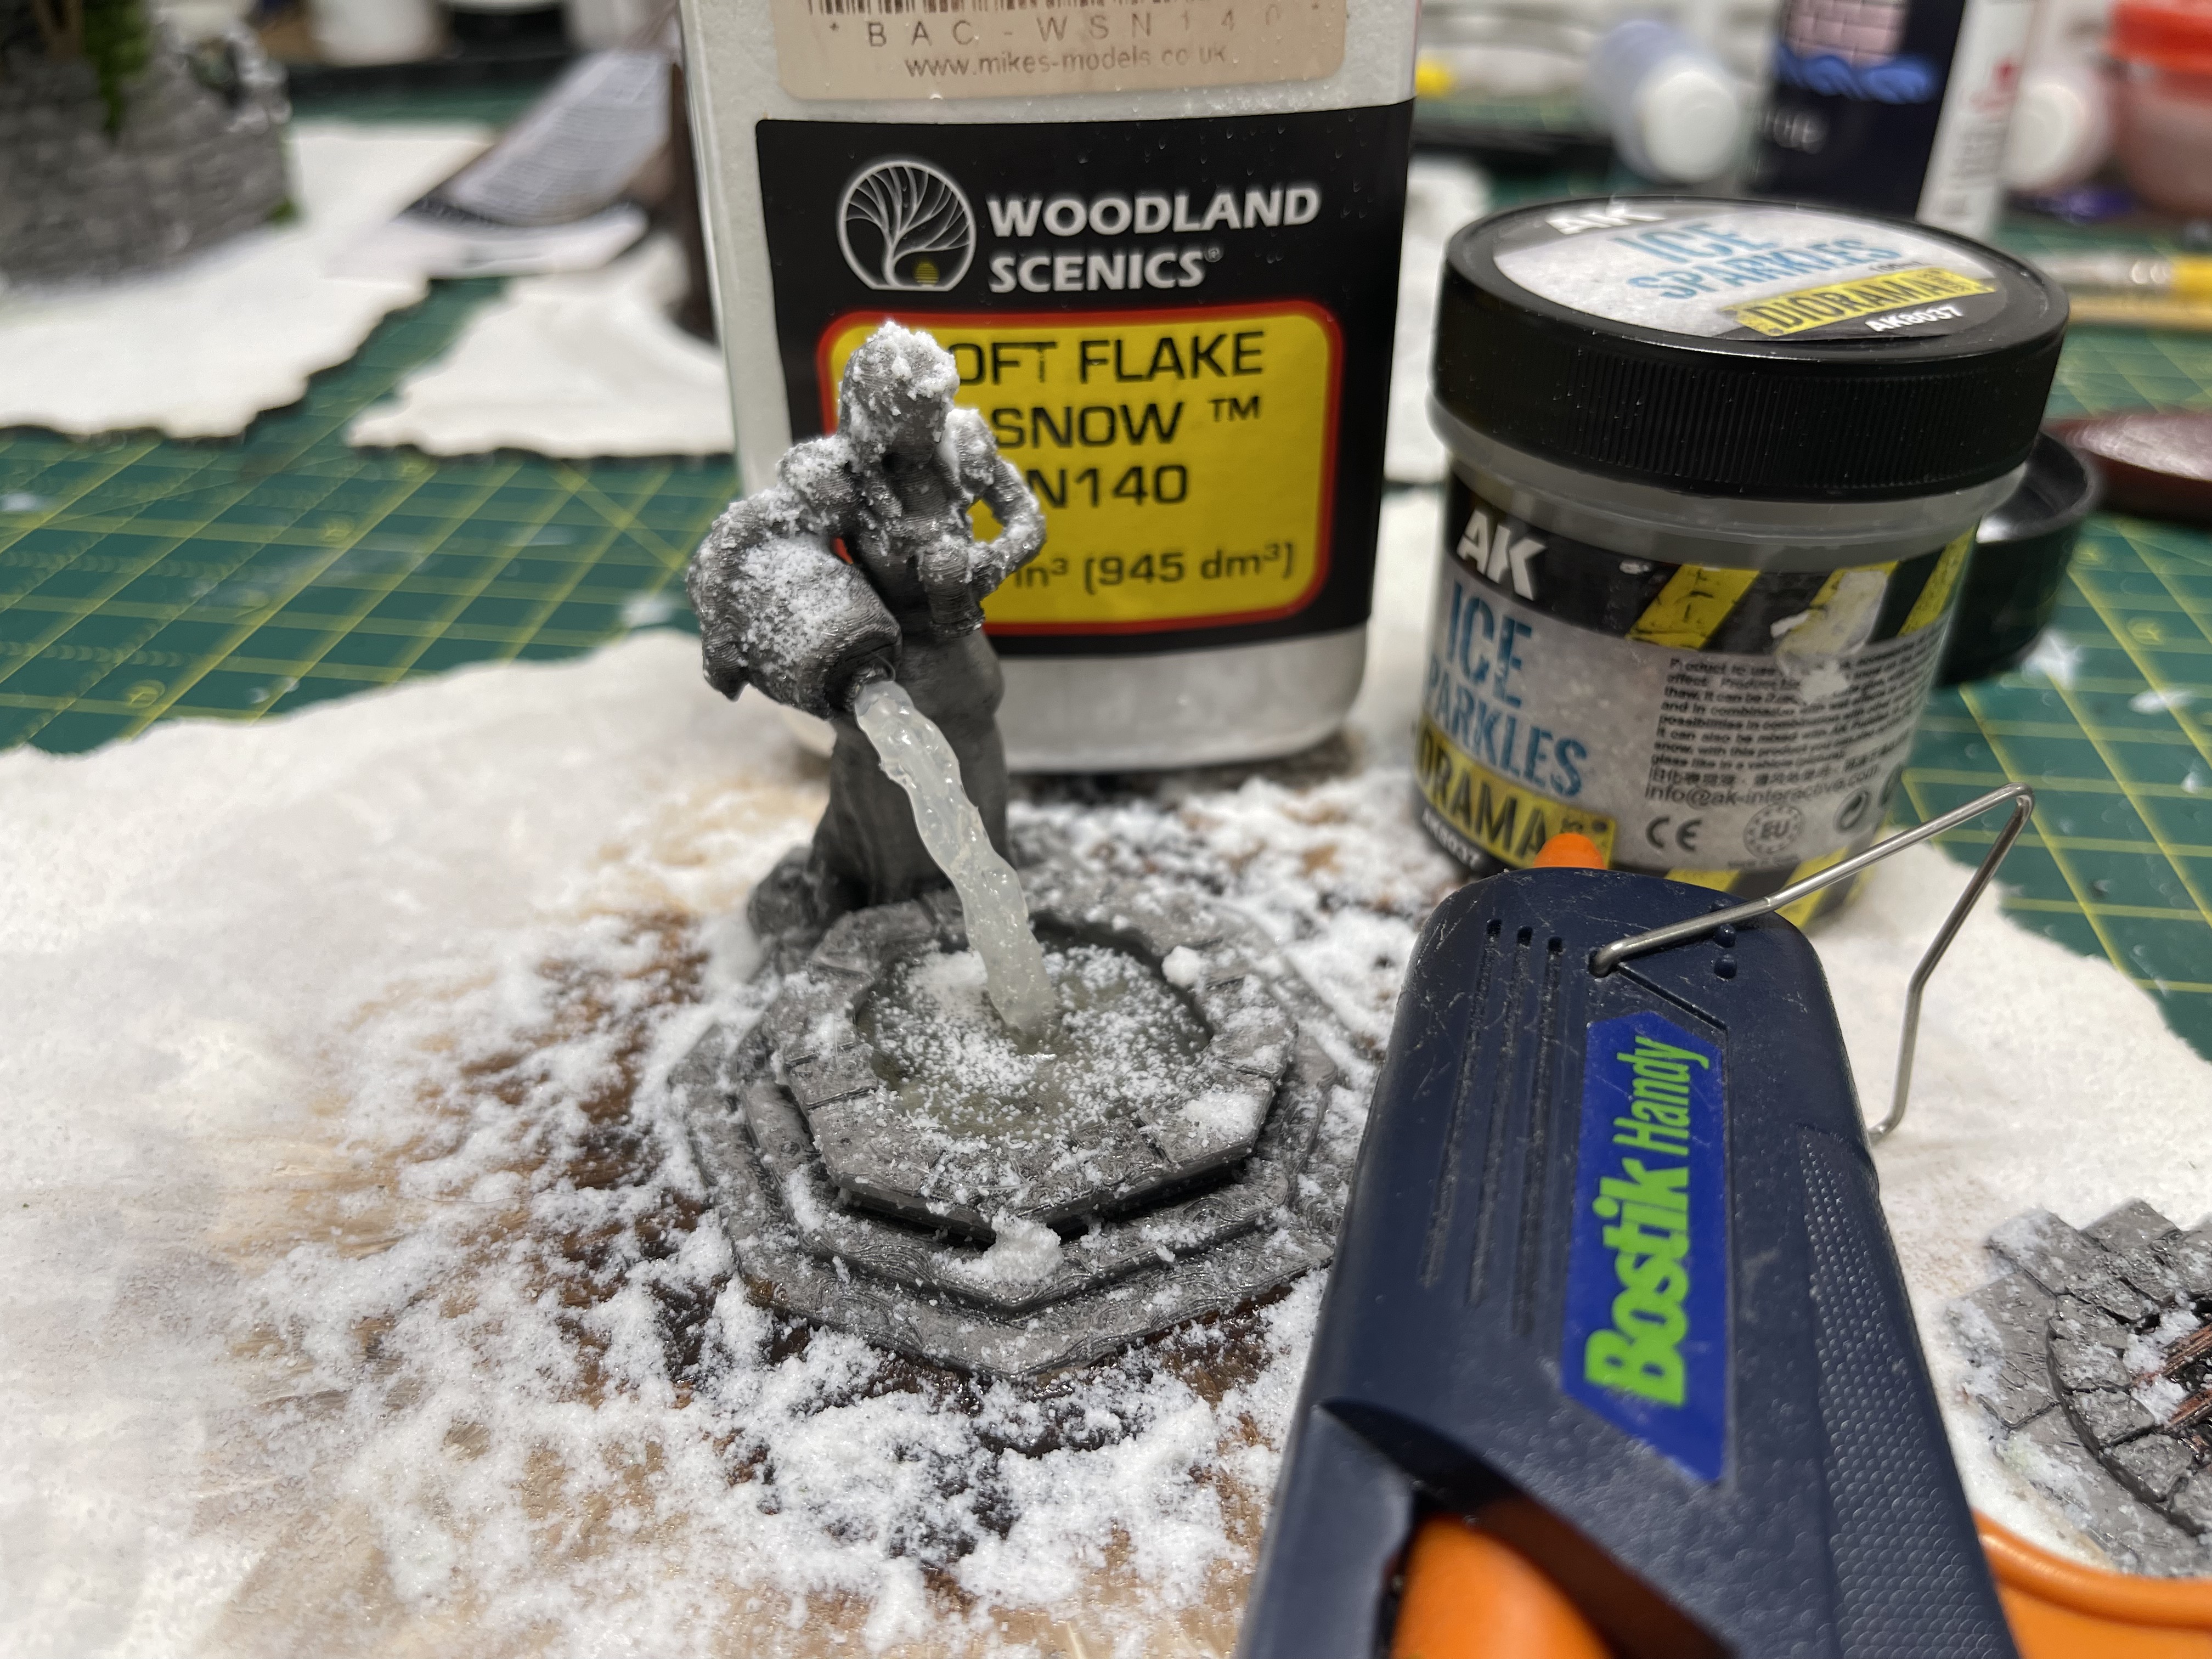 remove from wire and hot glue to your model. dump the rest of the glue stick into the base to look like frozen water
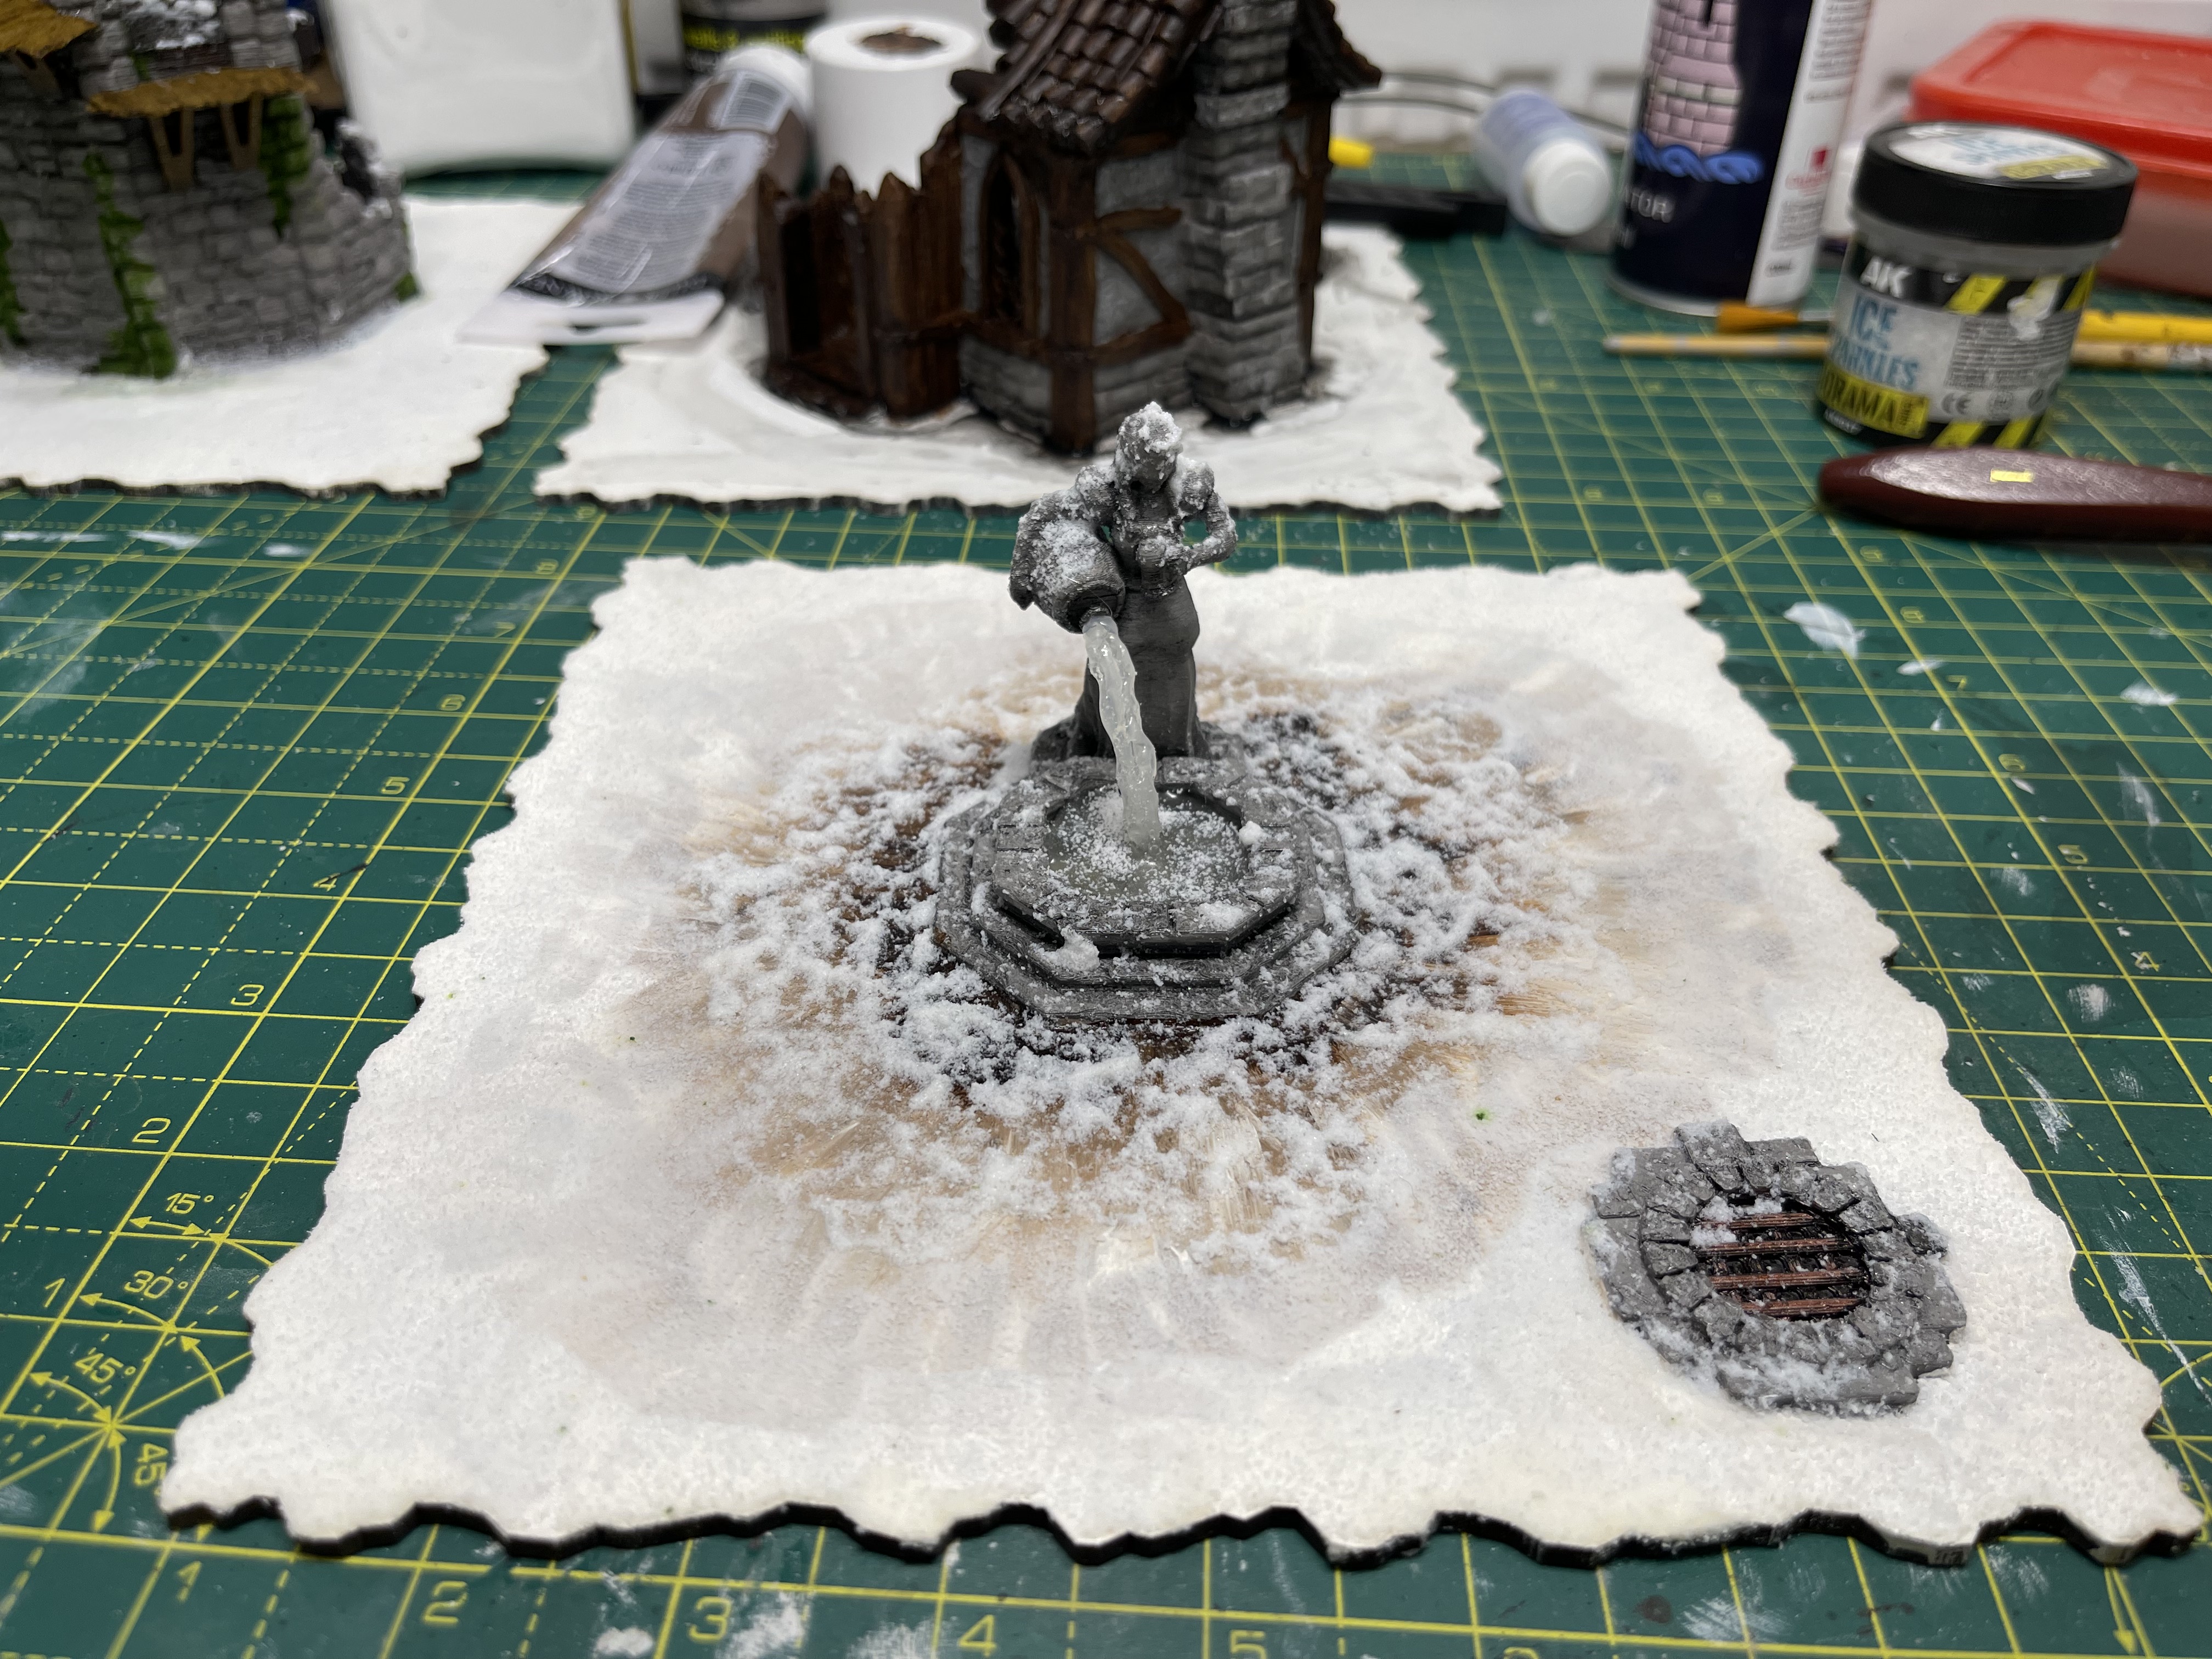 before cooled and set sprinkle flock and glass ball sparkle flock on it
This is so easy you could do it one handed, with it tied behind your back, blindfolded…
all it really needs is confidence just to give it a go.
I firstly bent wire to a shape that was roughly how I would want my water to instantly freeze in the terrifying plunge into the deep cool down of frostgrave.
Then I ran 2 or 3 beads of glue down the wire to pad out to the shape of the water. I was careful not to make it smooth and kinds ‘dabbed’ in places to make it irregular.
When cold I then removed it from the wire using some persuasion and a little bit of scalpel. Chopped the top bit so it would fit in the water spout nicely.
Then, came the bit that all had to happen quickly so didn’t get chance to take many photos (cooling and setting time is short on cool melt glue!)
I put some hot glue in the water spout and on the tub end of the water spout and just rammed it into where I wanted it. I took a split second to make sure it looked ok, then I dumped the rest of the glue stick through the gun and flooded the basin with hot glue to make sure it all bonded as one and looked as if it was one piece of ice now. Finally I took some of the two types of flock I had and sprinkled them onto the hot glue before it cooled in the hope it would stick and hold. It did.
I’m happy with how it worked out, and now I have a frozen fountain of youthful knowledge to use in scenario one of the main rulebook.
Time is running out
Running out of time for this competition and I am working over Christmas too so don’t get any hobby time then either!
Still have 3 buildings to do and I need your input for the last tile which I haven’t figured out what to do with yet!
should I just do a hill to stop Gerry from being upset? take one for the team?
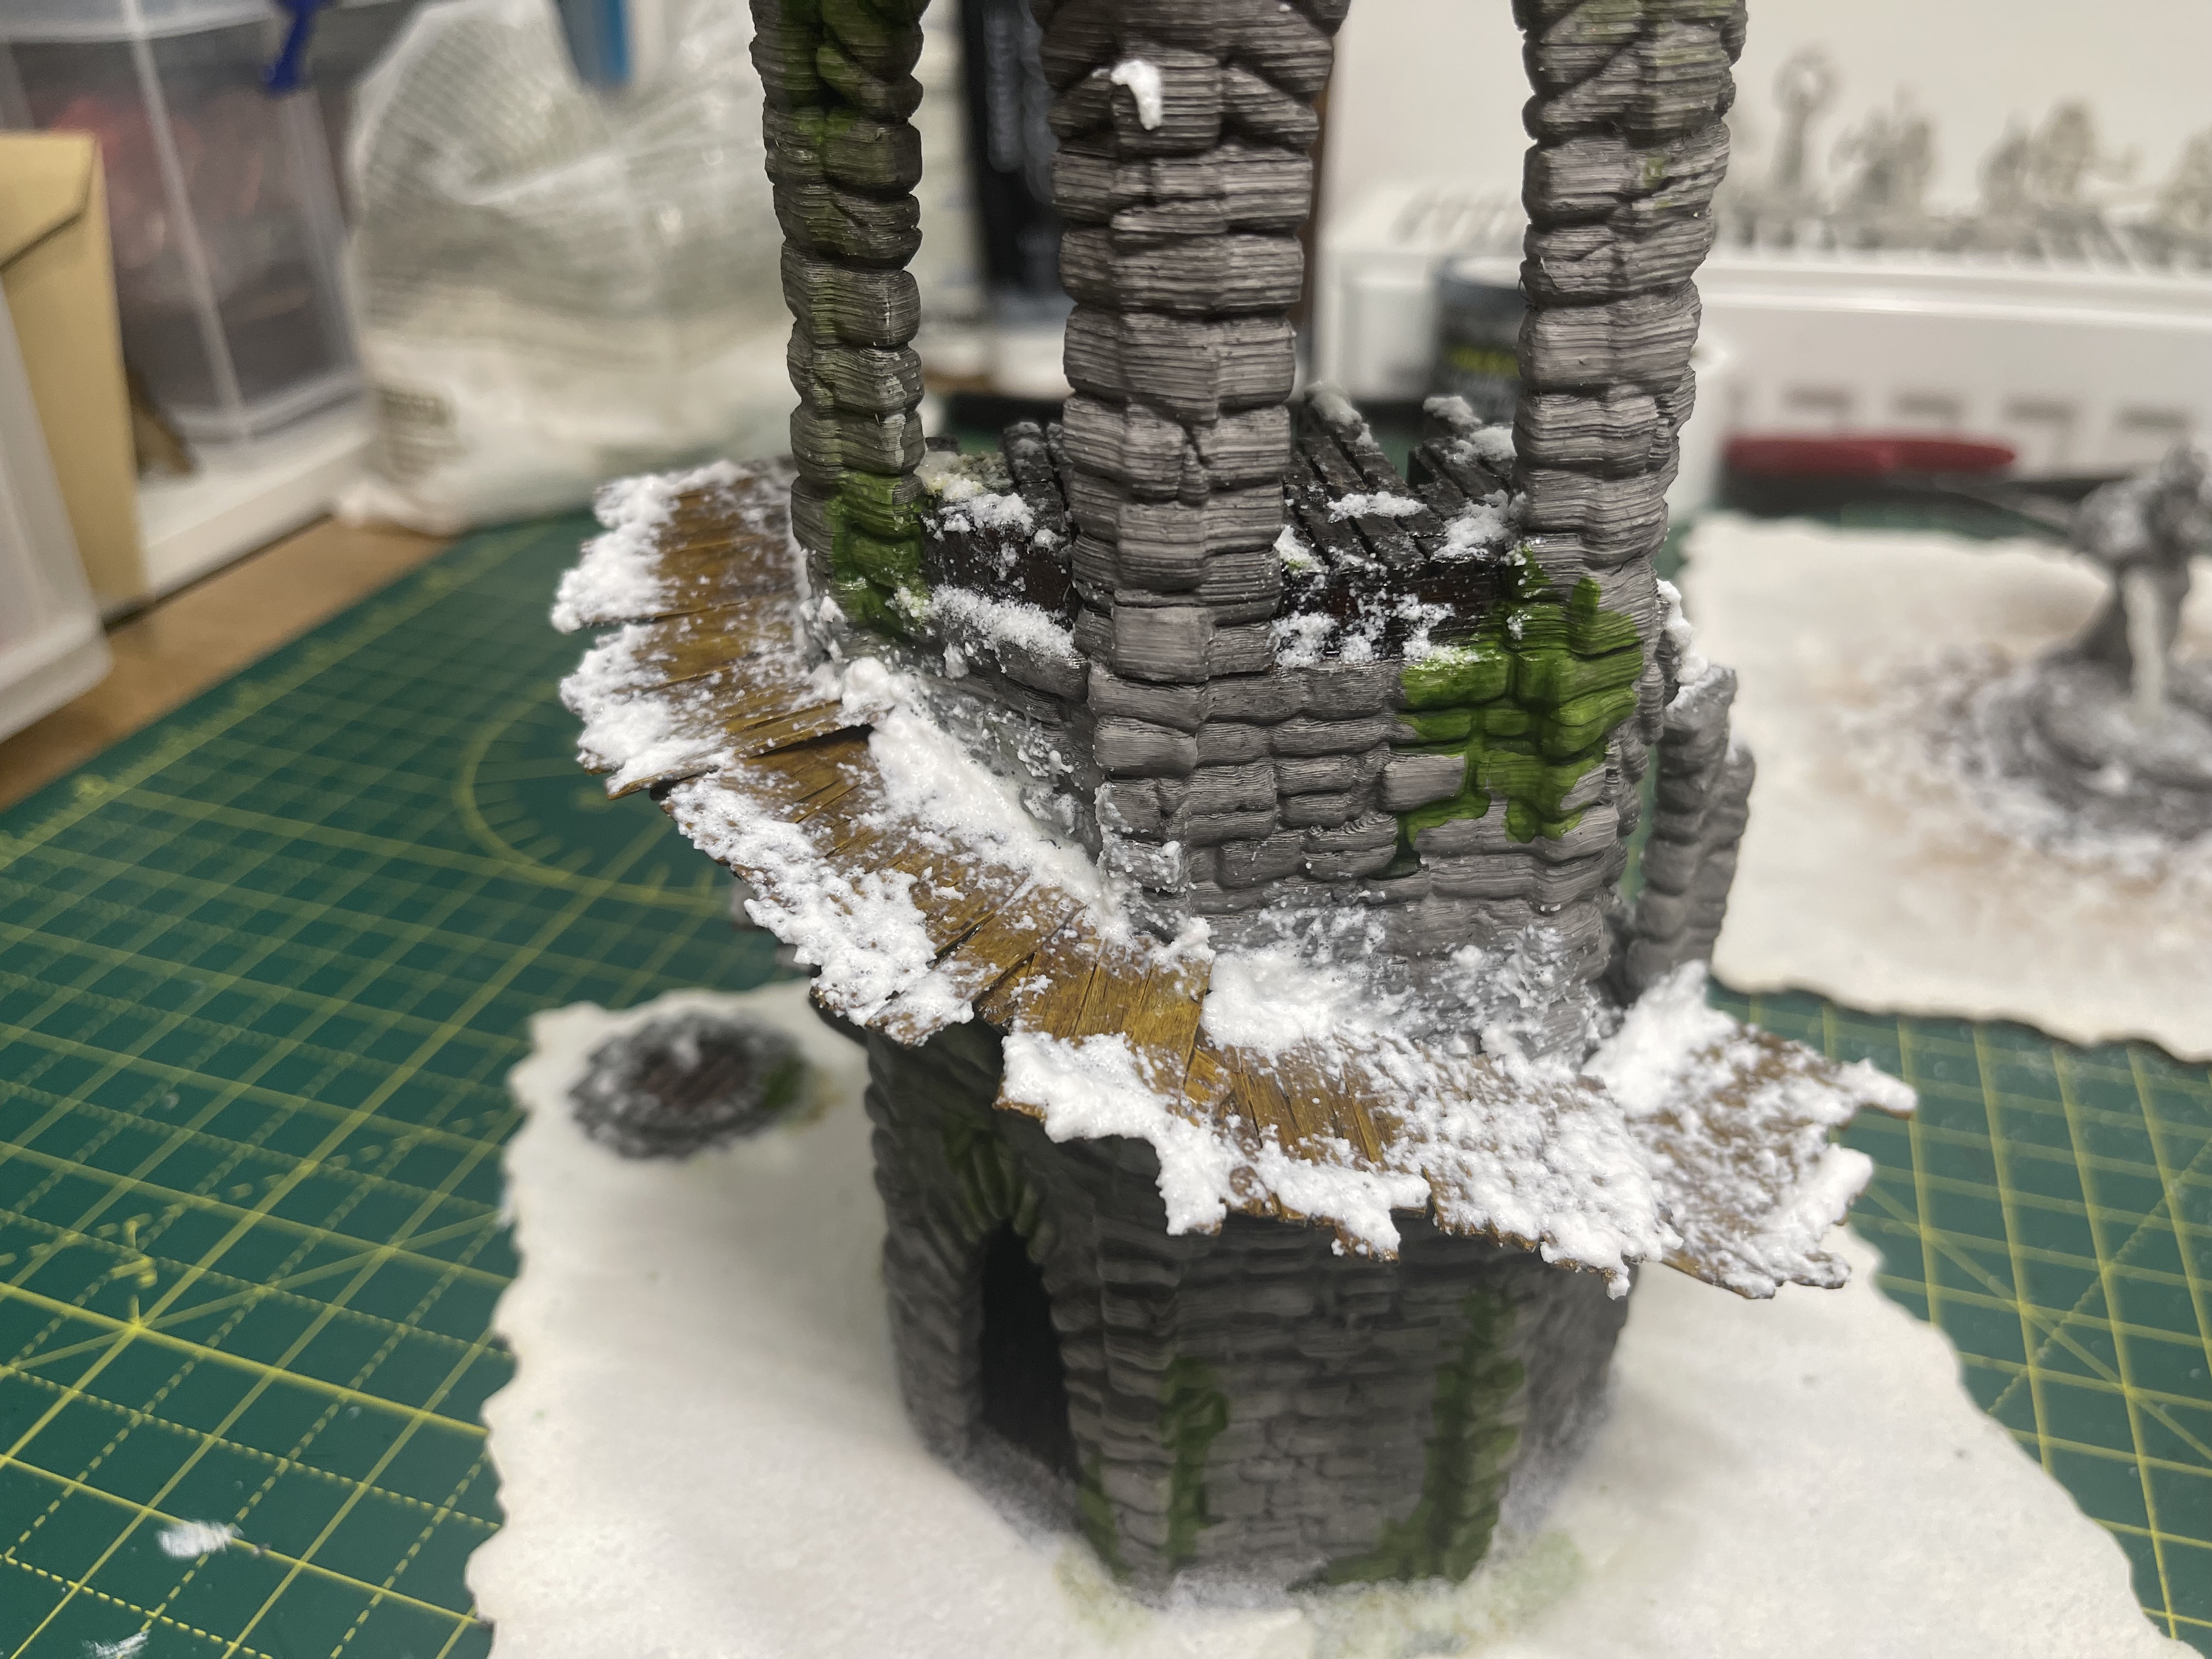
Walkway for Wizard's Tower
 see how silly the walkway looks on the 3d sculpt
When I played my first game of frostgrave my friend had this tower and I thought it was so very super cool with the exception of one thing… the walkway.
As you can see the wooden floors are very thick and the 3d sculpted walk way struts were very thick, not a full wrap around and were more stepping stones from tomb raider or crash bandicoot rather than something out of Skyrim for example.
So they got right in the bin (or rather, environmentally did not get printed)
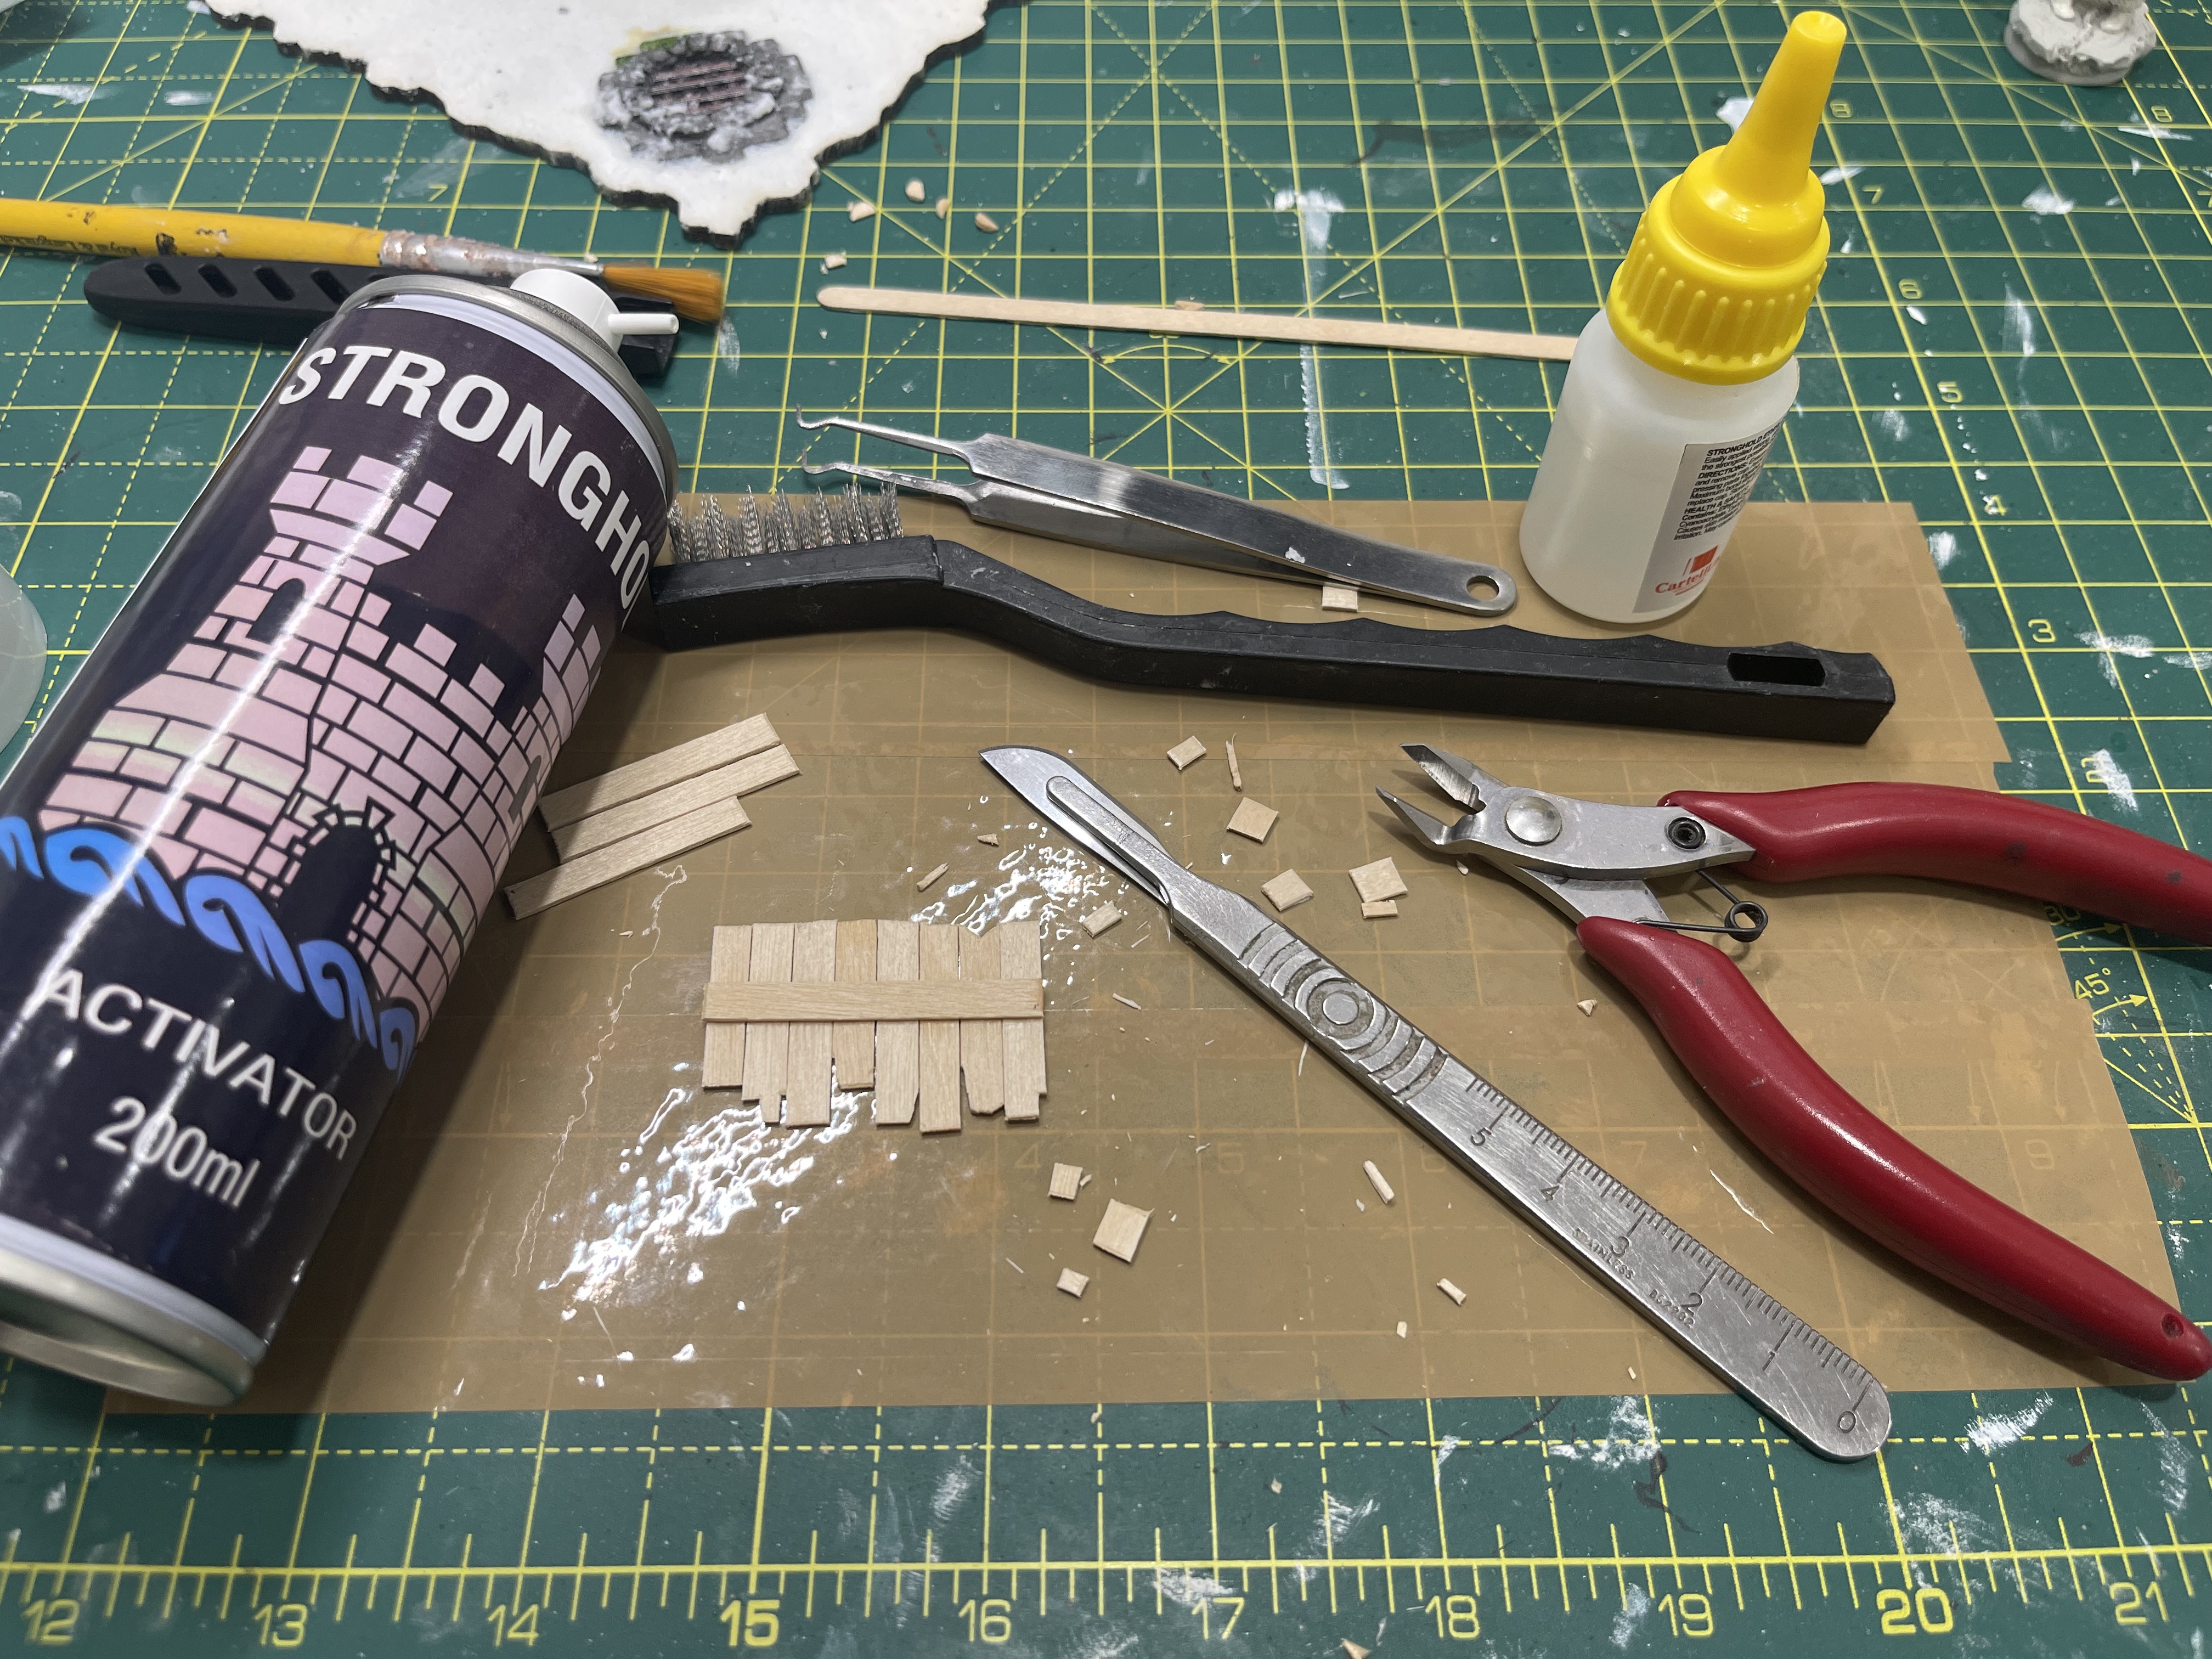 What you'll need to make your own coffee stirrer walkway. dirt cheap superglue from 'The Range' £1 for 50g and £3 for activator
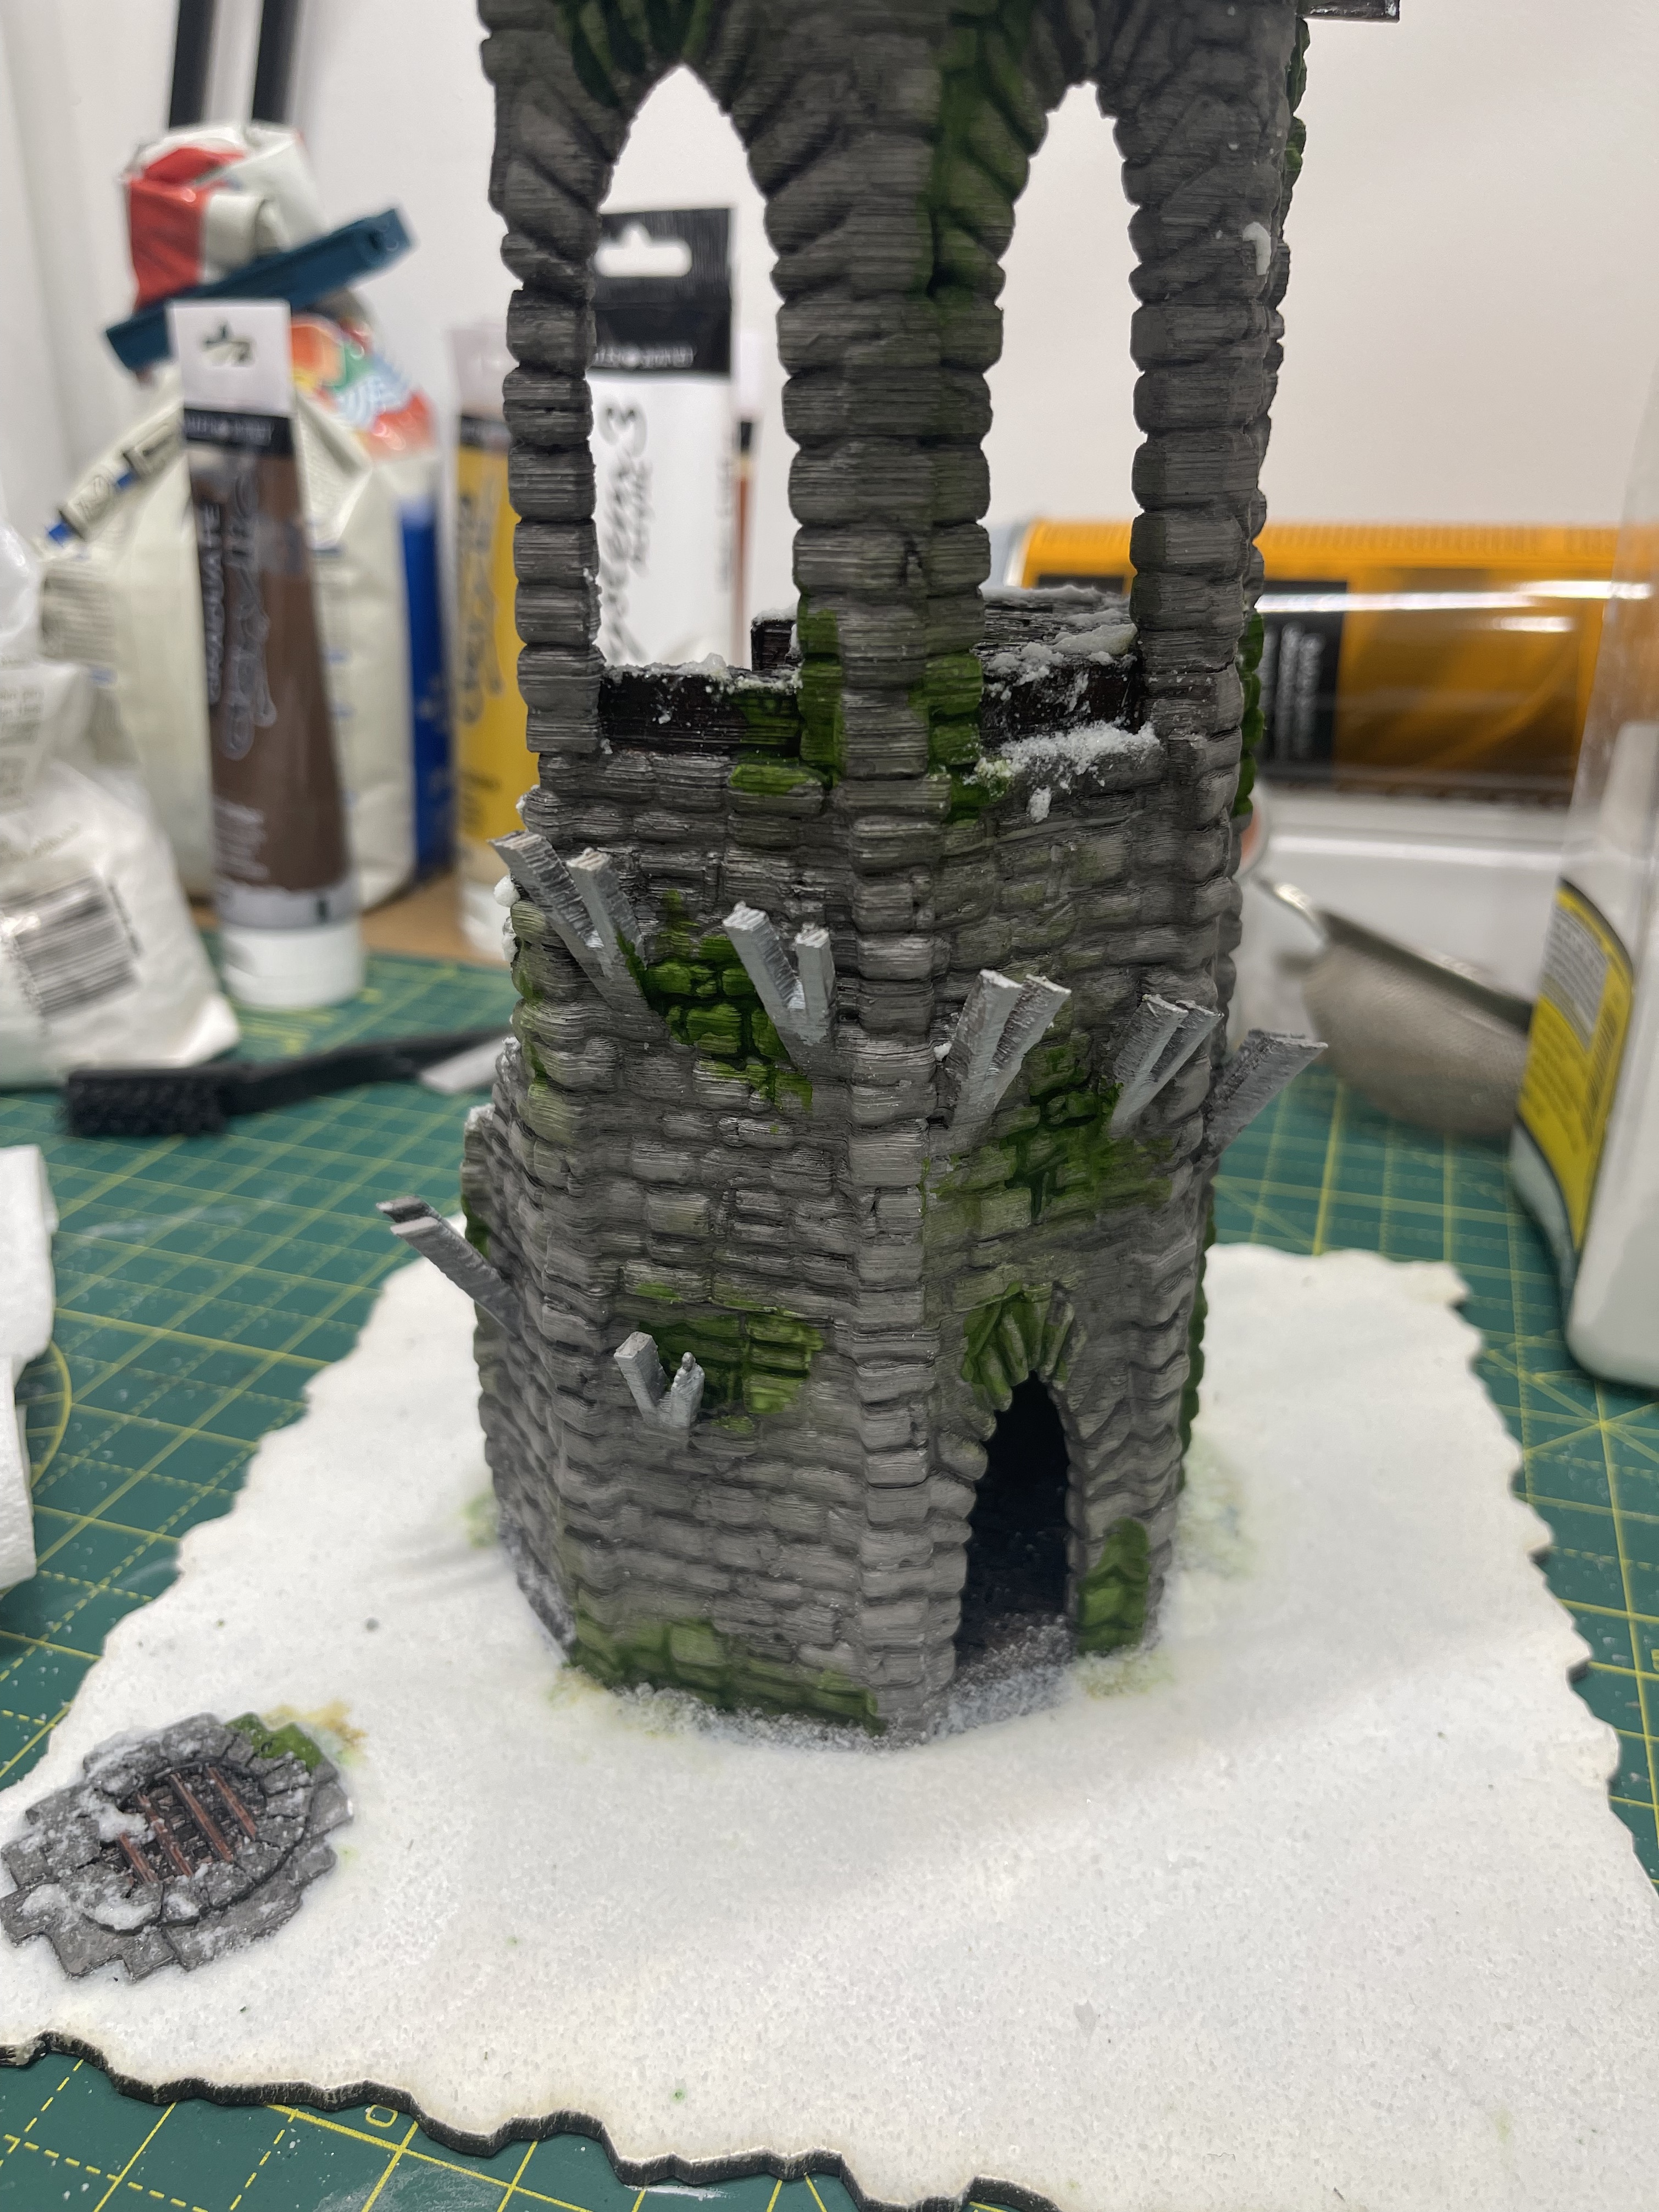 3d print struts where the 3d printed walkway should go
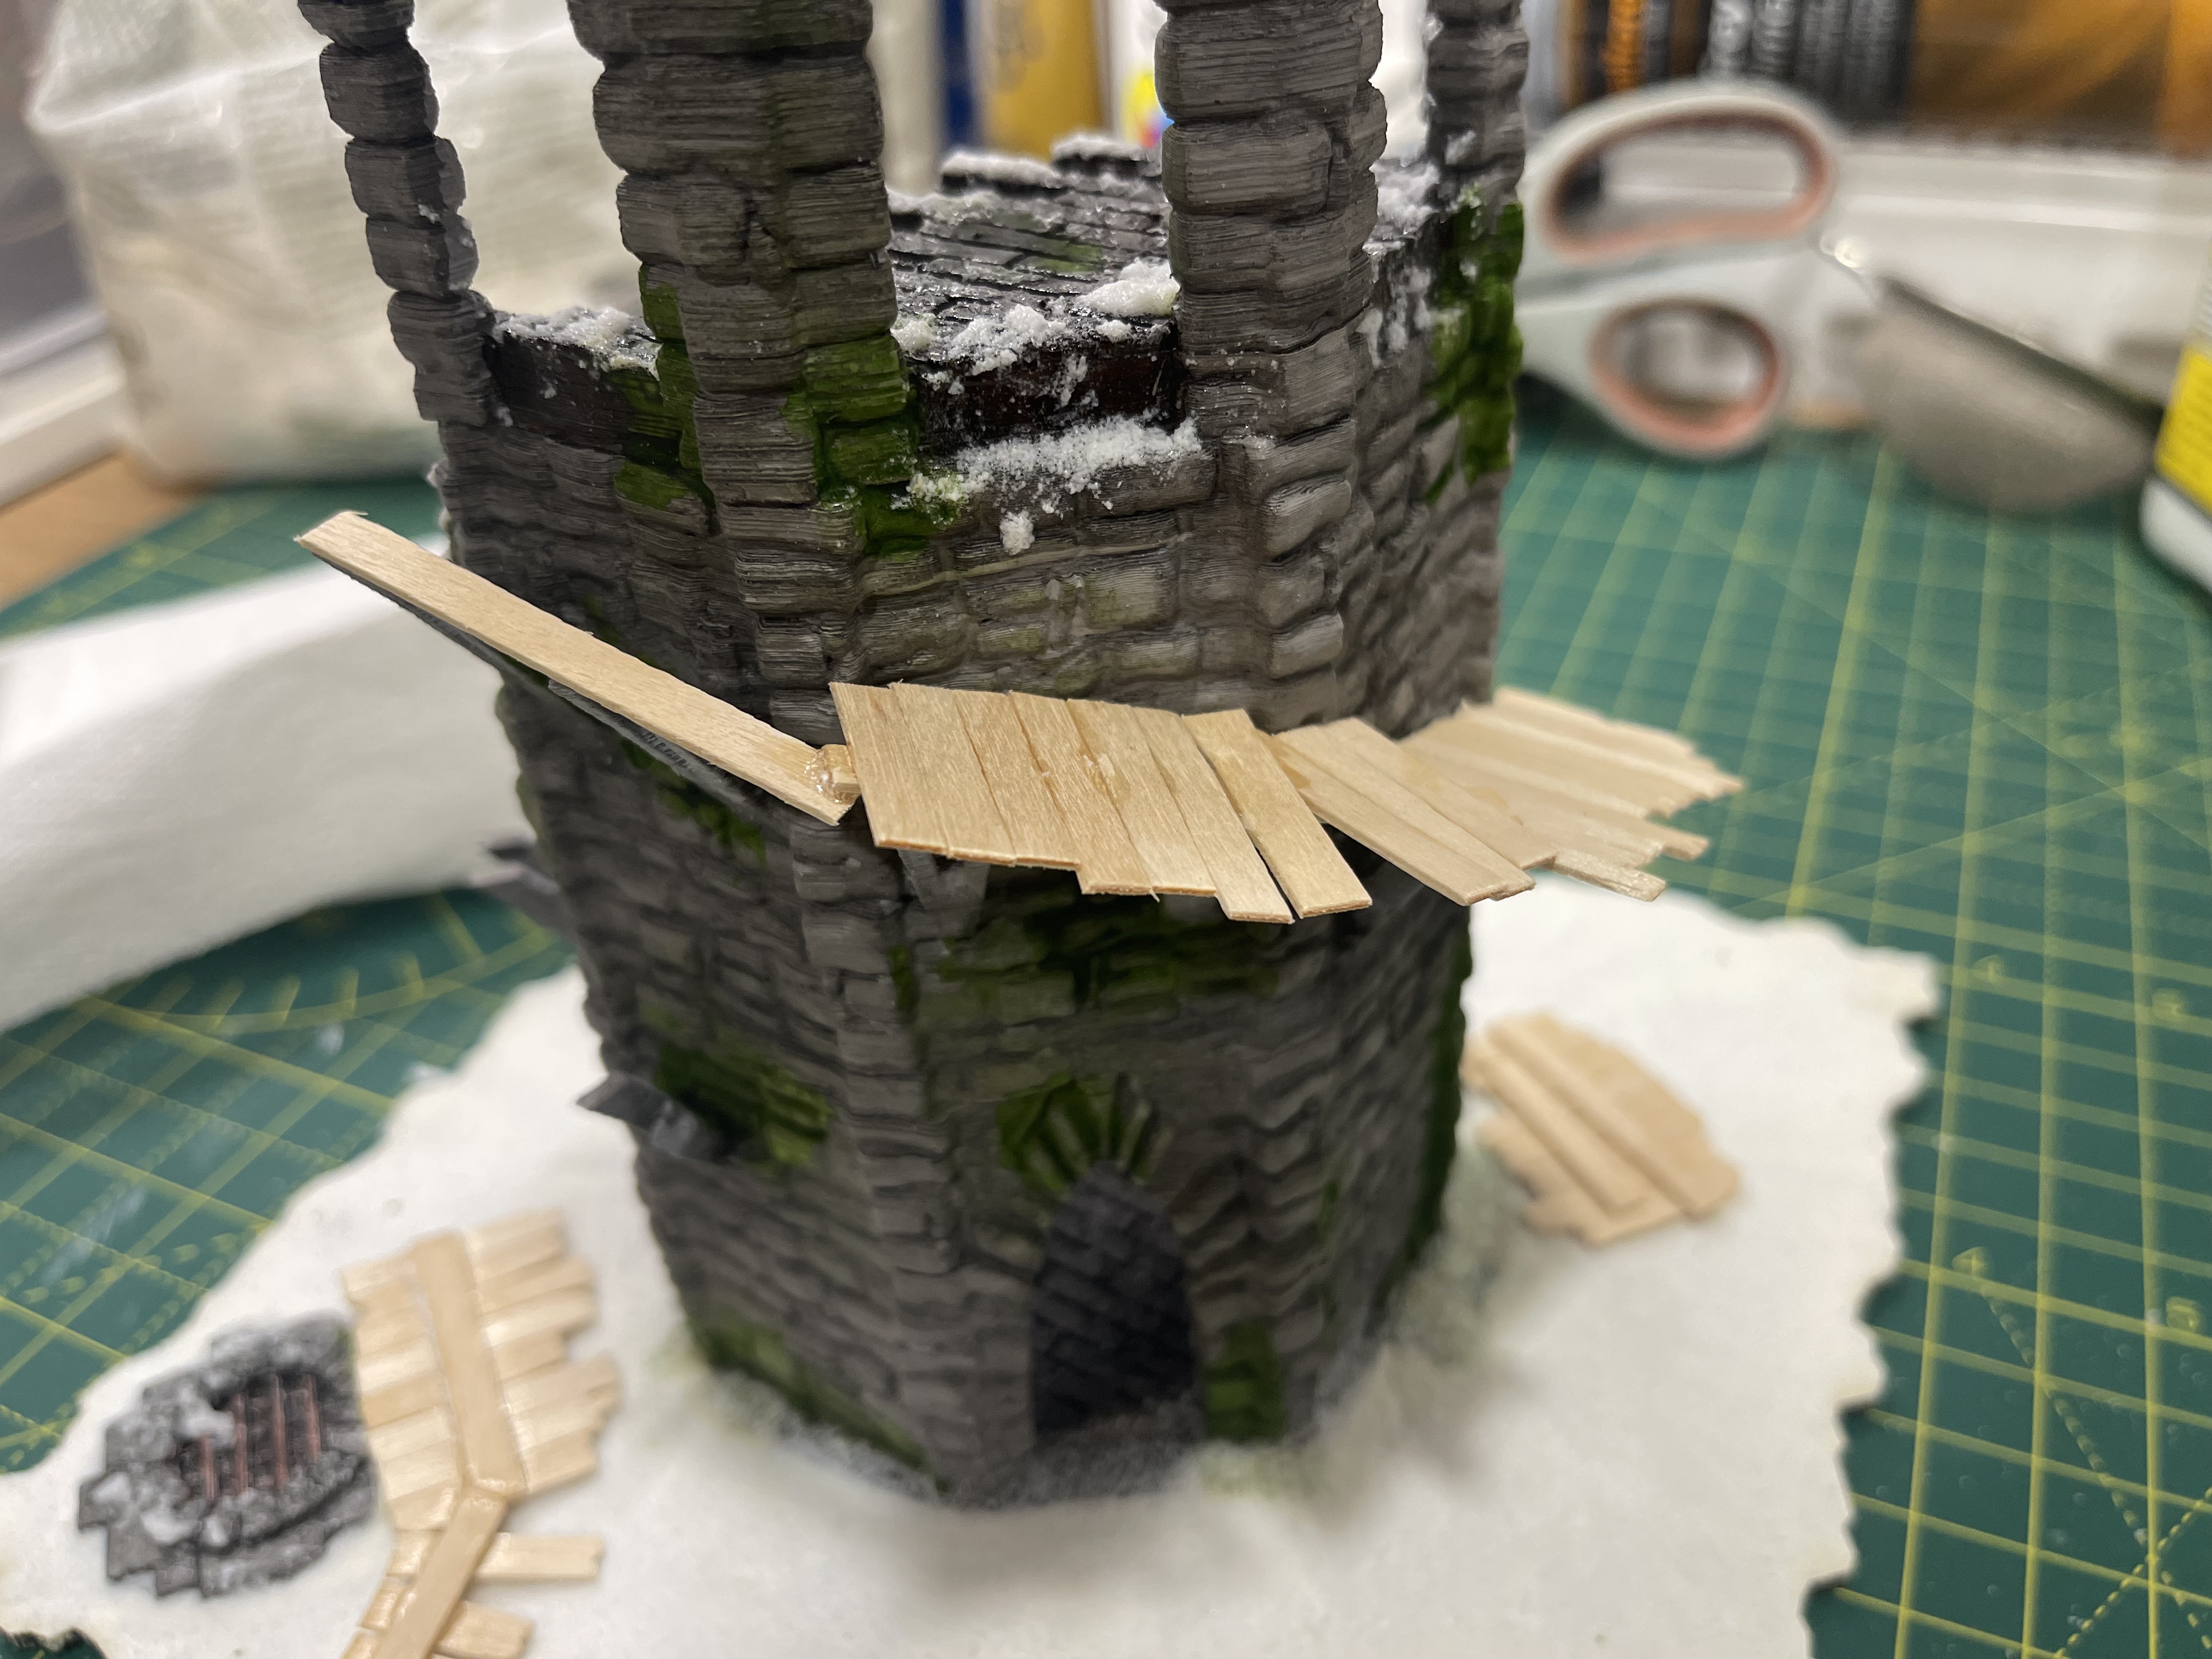 coffee stirrers for the win
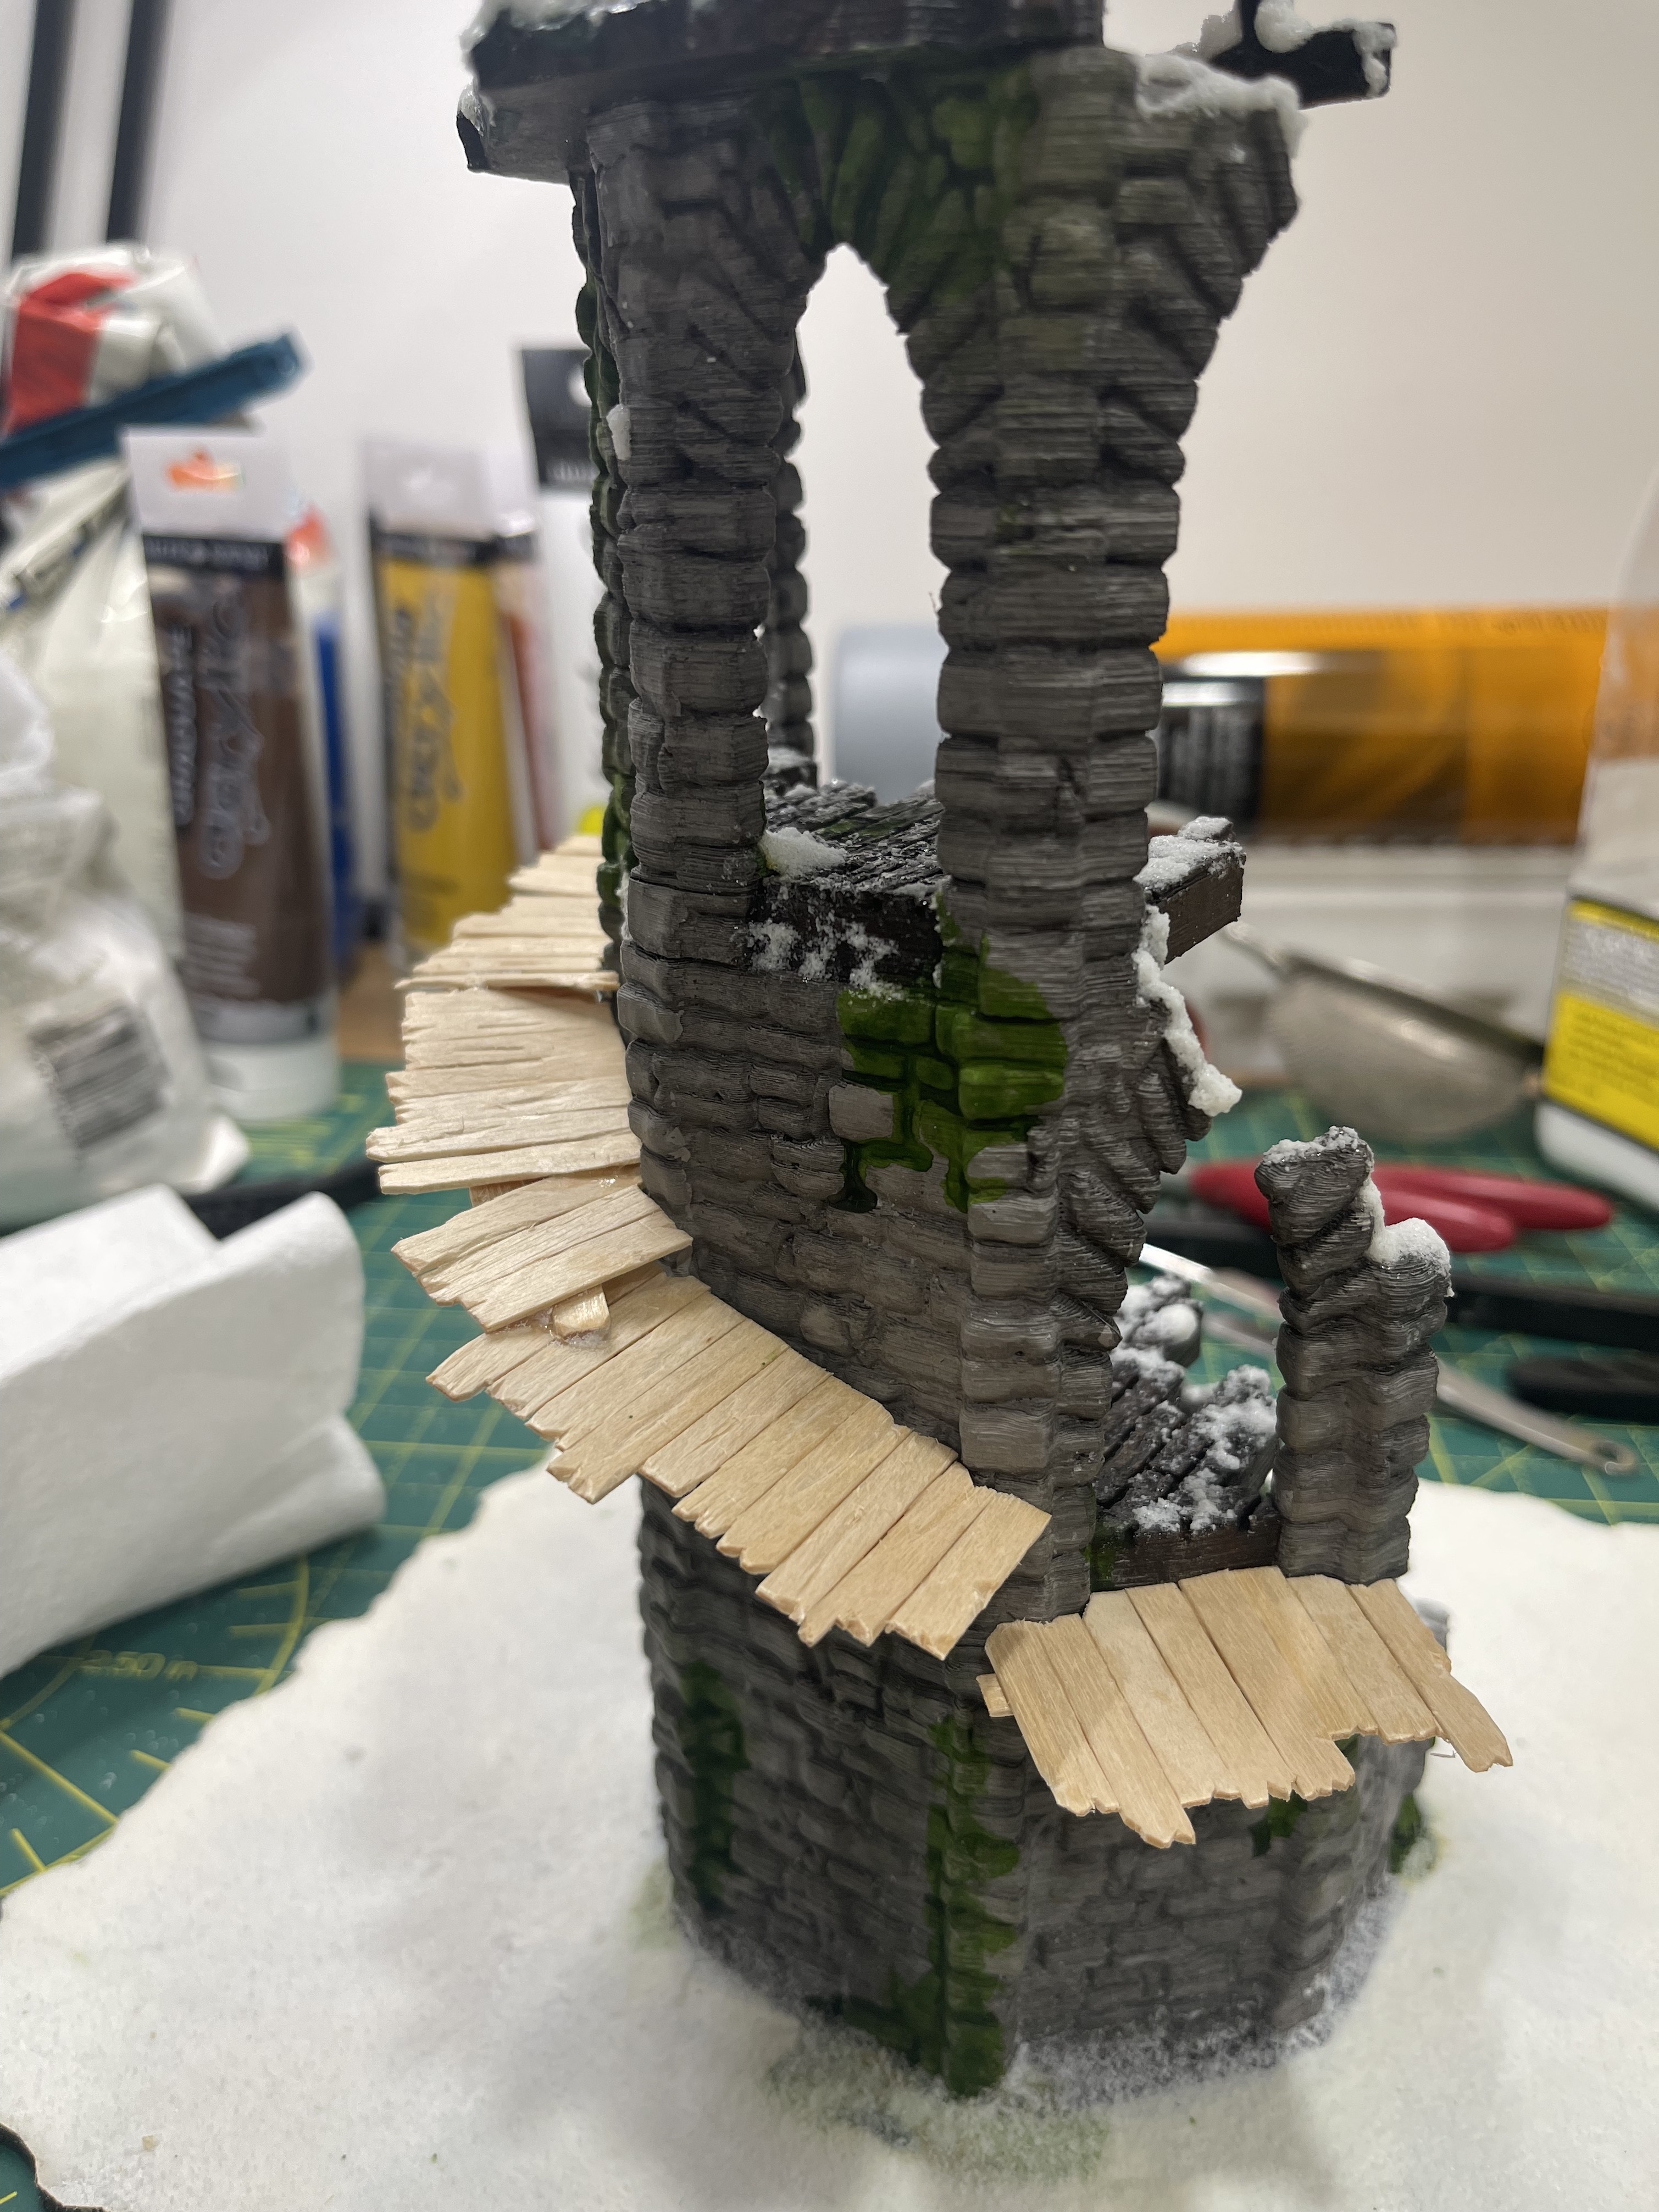 hack and slash with a scalpel and wire brush to add wood texture to the wooden planks
 defaulted to contrast paint given the craft acrylic went super dark when dried out
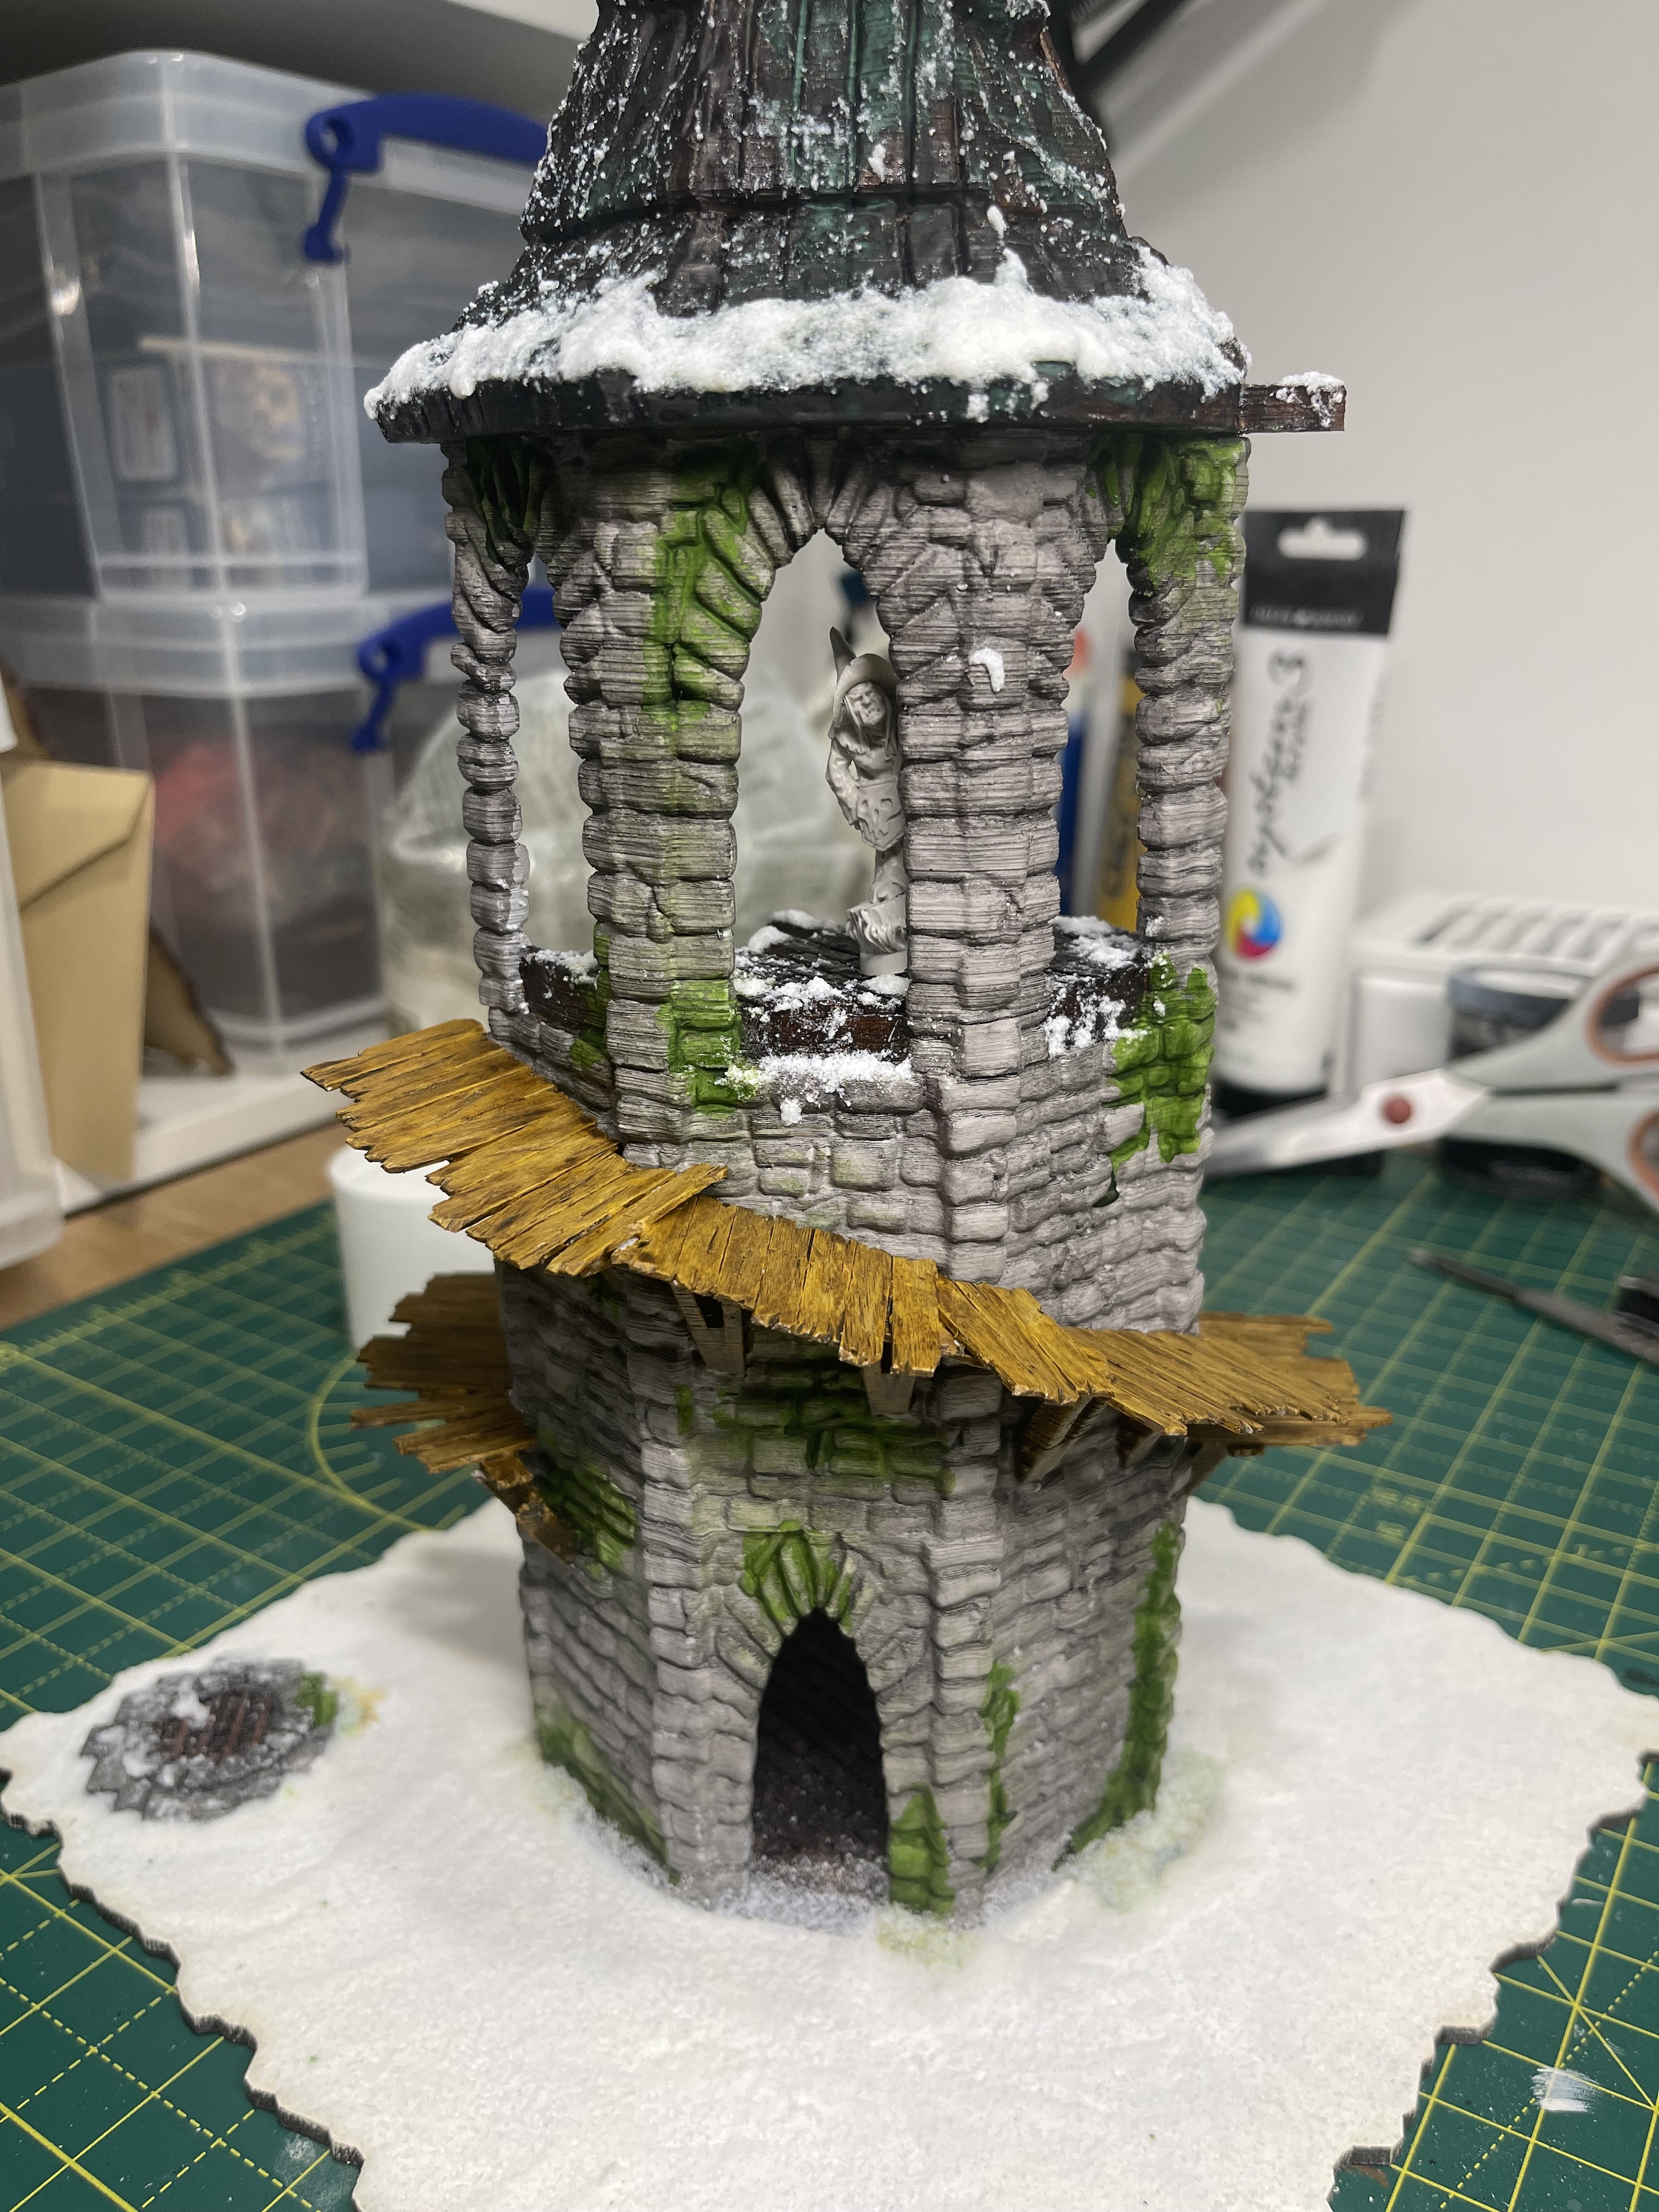 superglue the planking onto the wooden struts. will need to add snow flock to walk way now
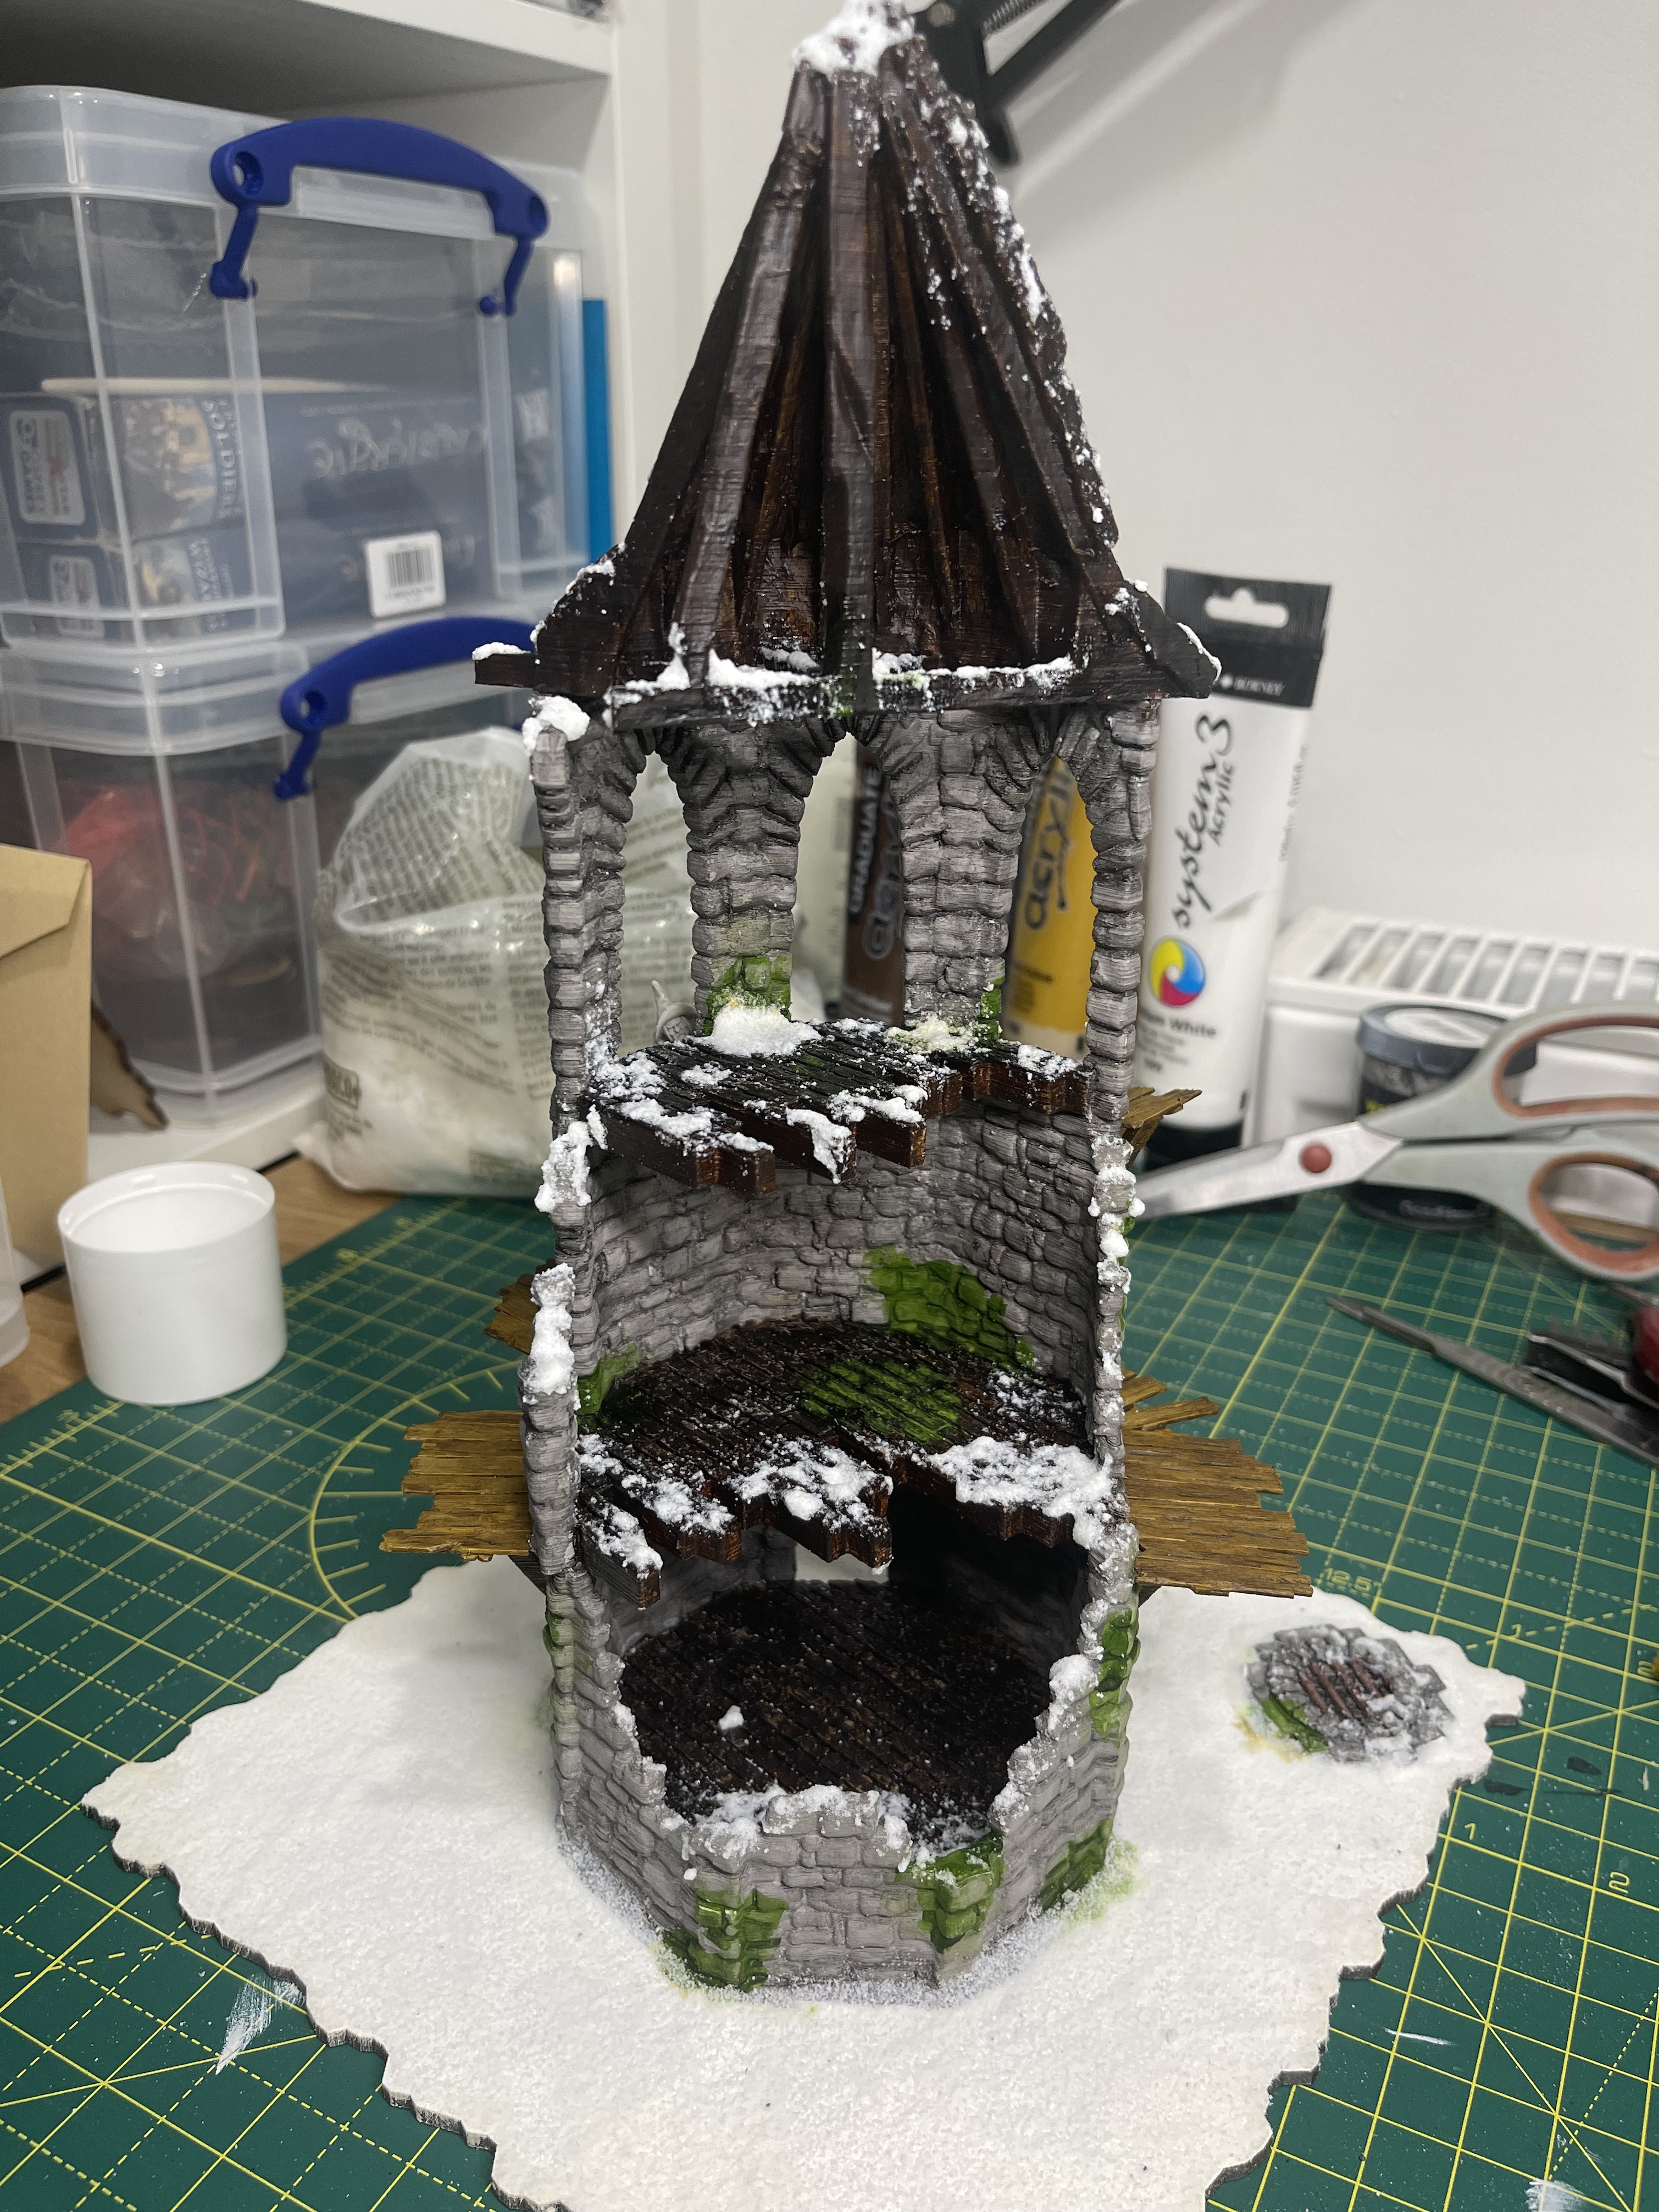
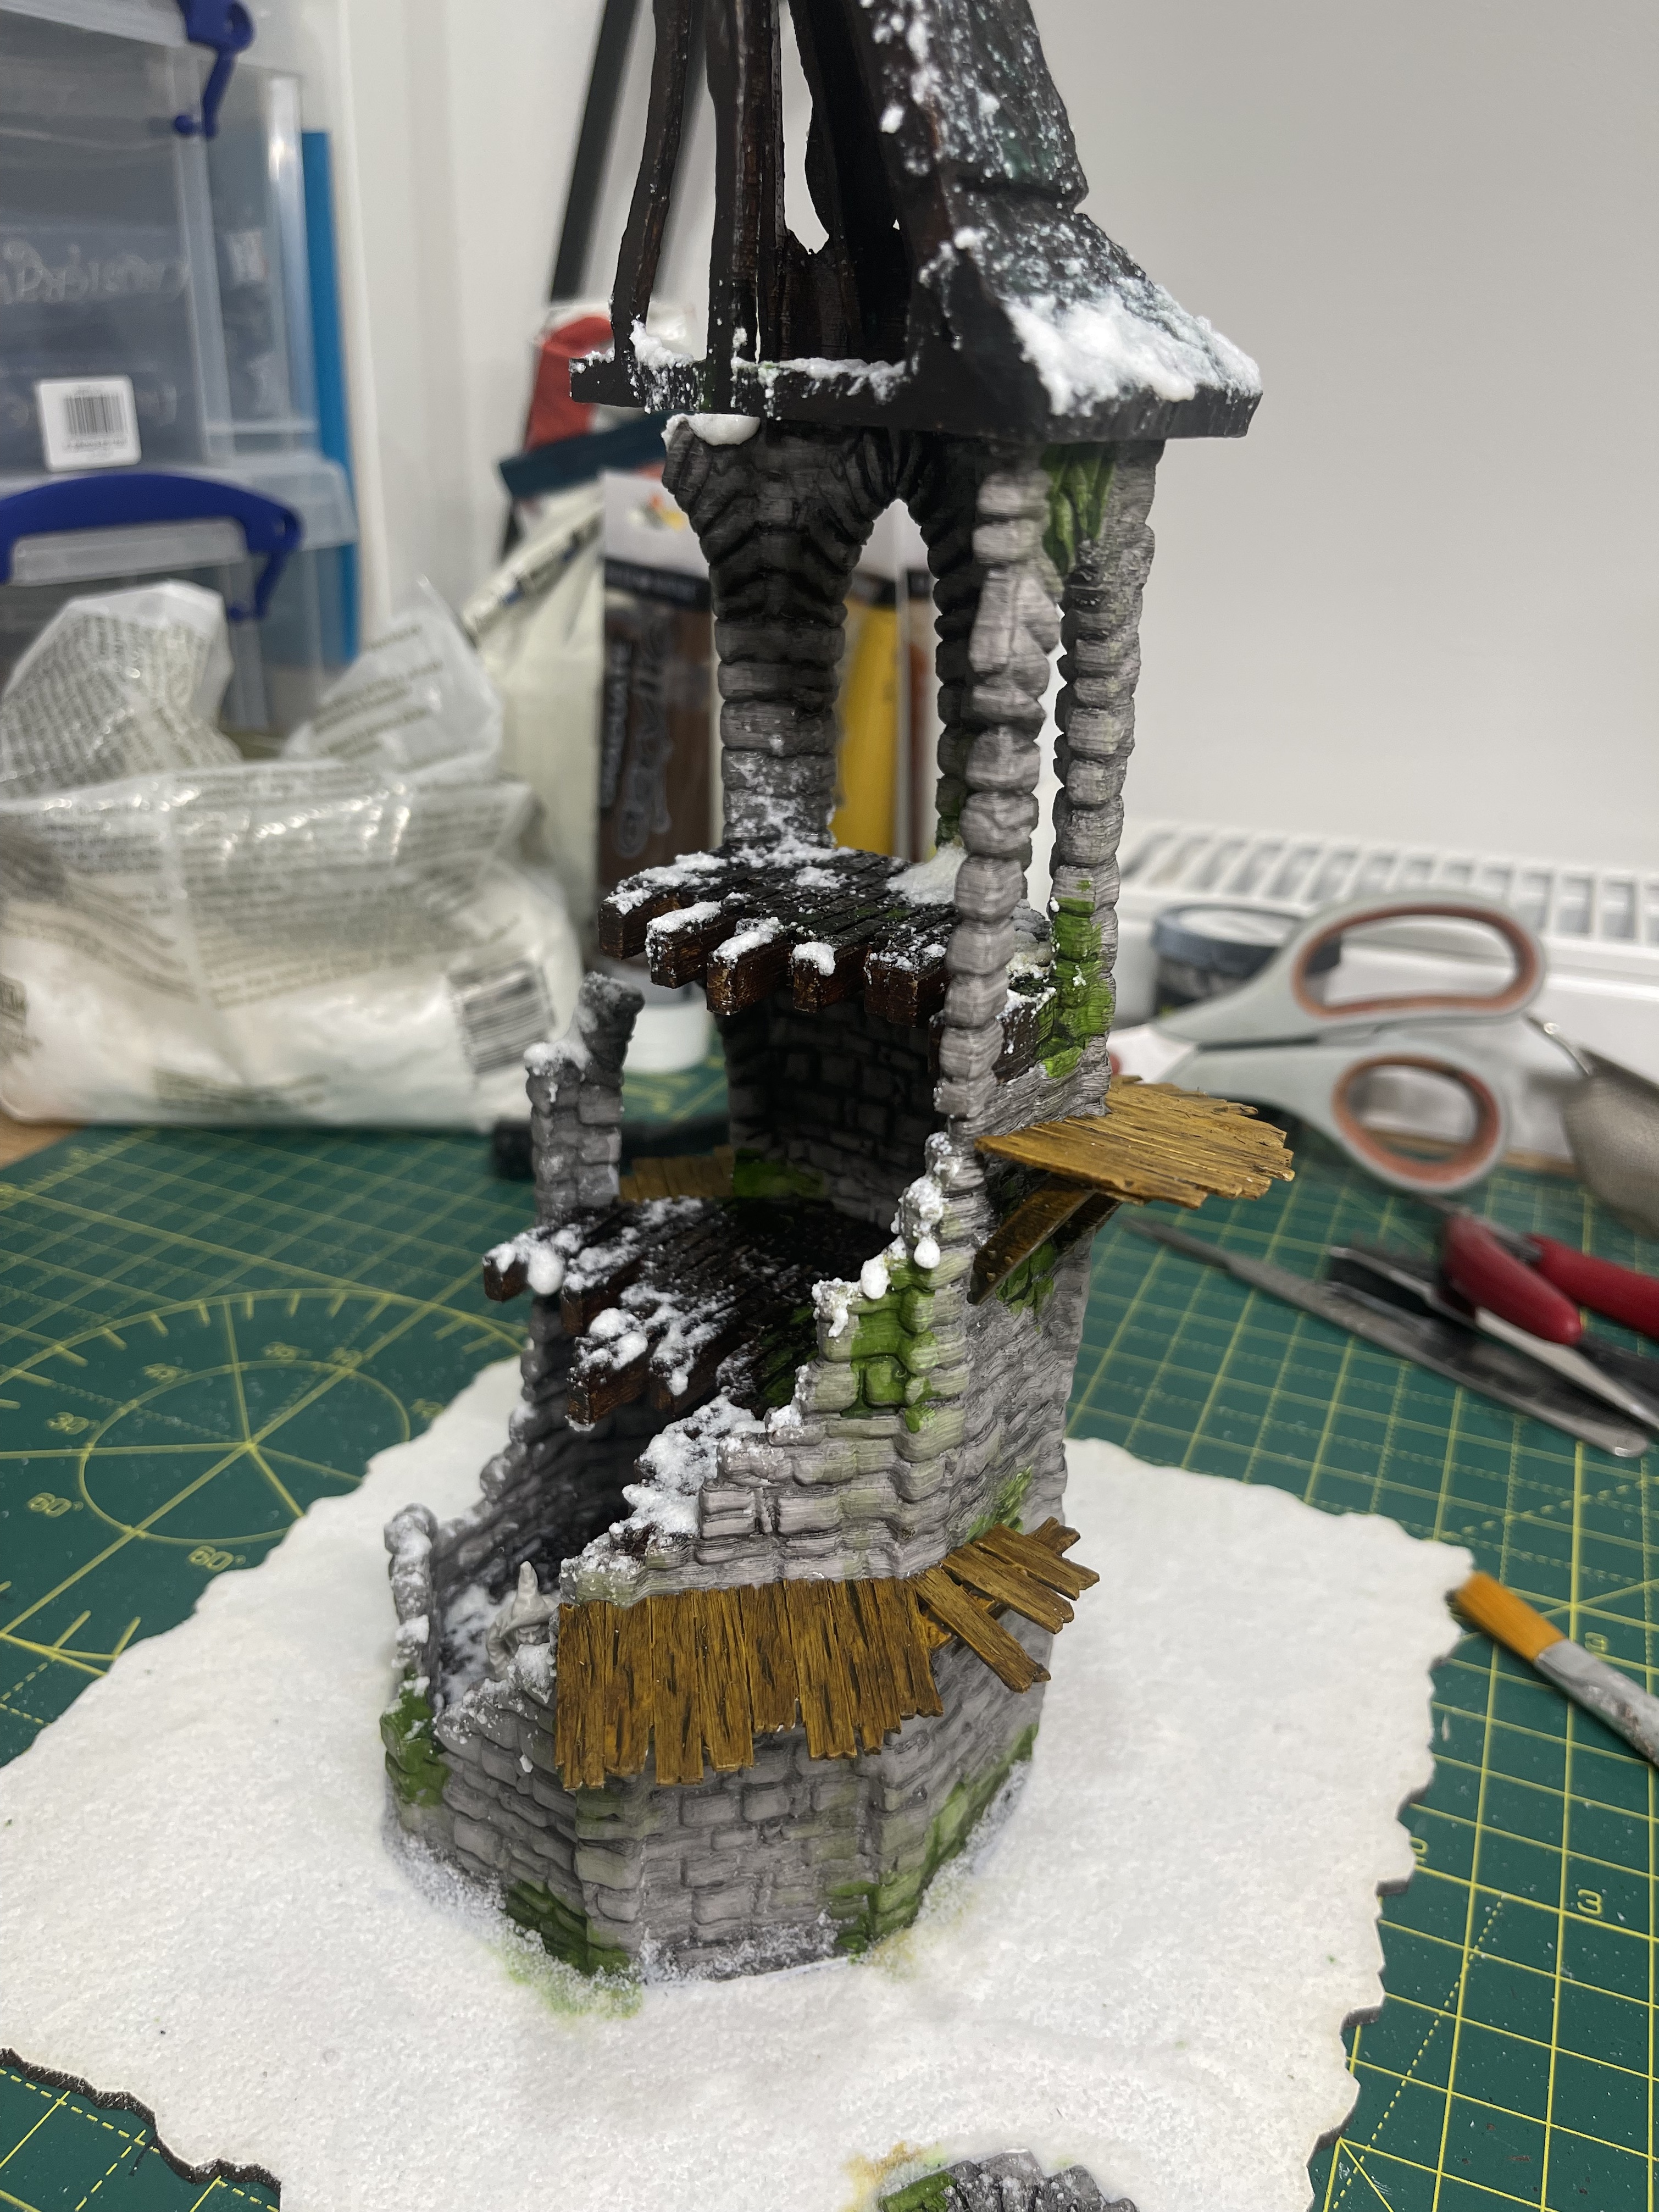
So much better, looks more realistic and allows for better gameplay too including allowing for fights on the way up to the tower.
I will add some snow fall to the edges of this to try and blend it in a bit more when I next mix up a batch. Right now it looks very much like an after thought and a sit on piece so a bit jarring, but still better than what the original designer intended, which I expect was due to the limitations of modelling a pretty complicated wrap around twisting crescent moon shape thing. I certainly wouldn’t be able to model that in 3D.
did anyone see the witch?

![Games Workshop Kick Off Grot Week For Warhammer 40,000 [Updated]](https://images.beastsofwar.com/2026/04/grot-new-40k-news-cover-600-338.jpg)