


DRACONIS DOES….. TERRAINFEST 2025


Recommendations: 154
About the Project
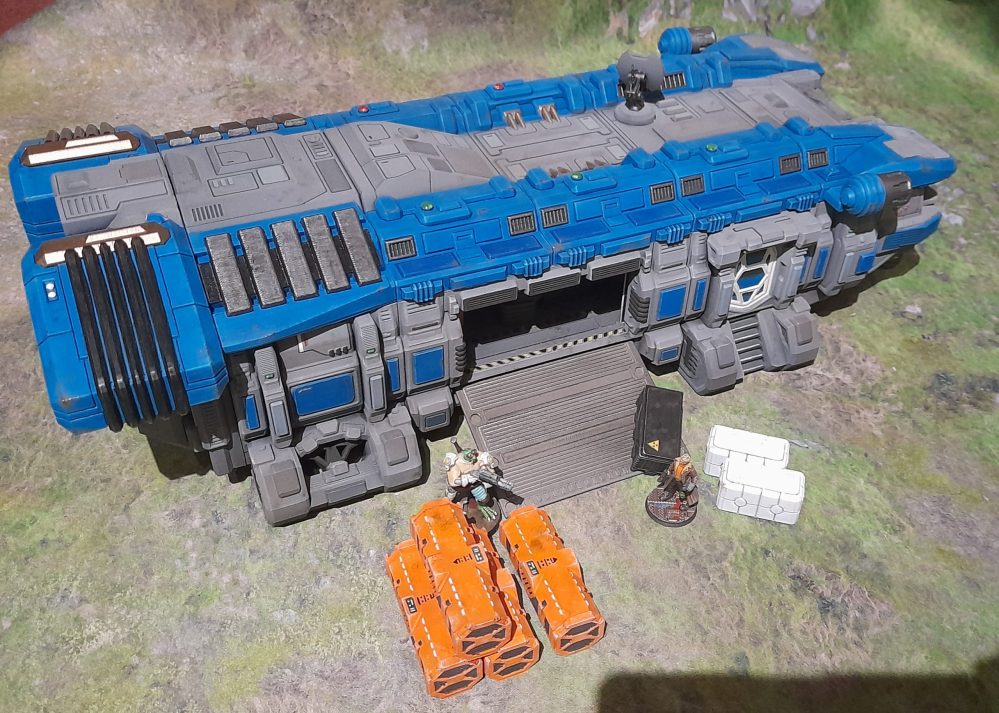
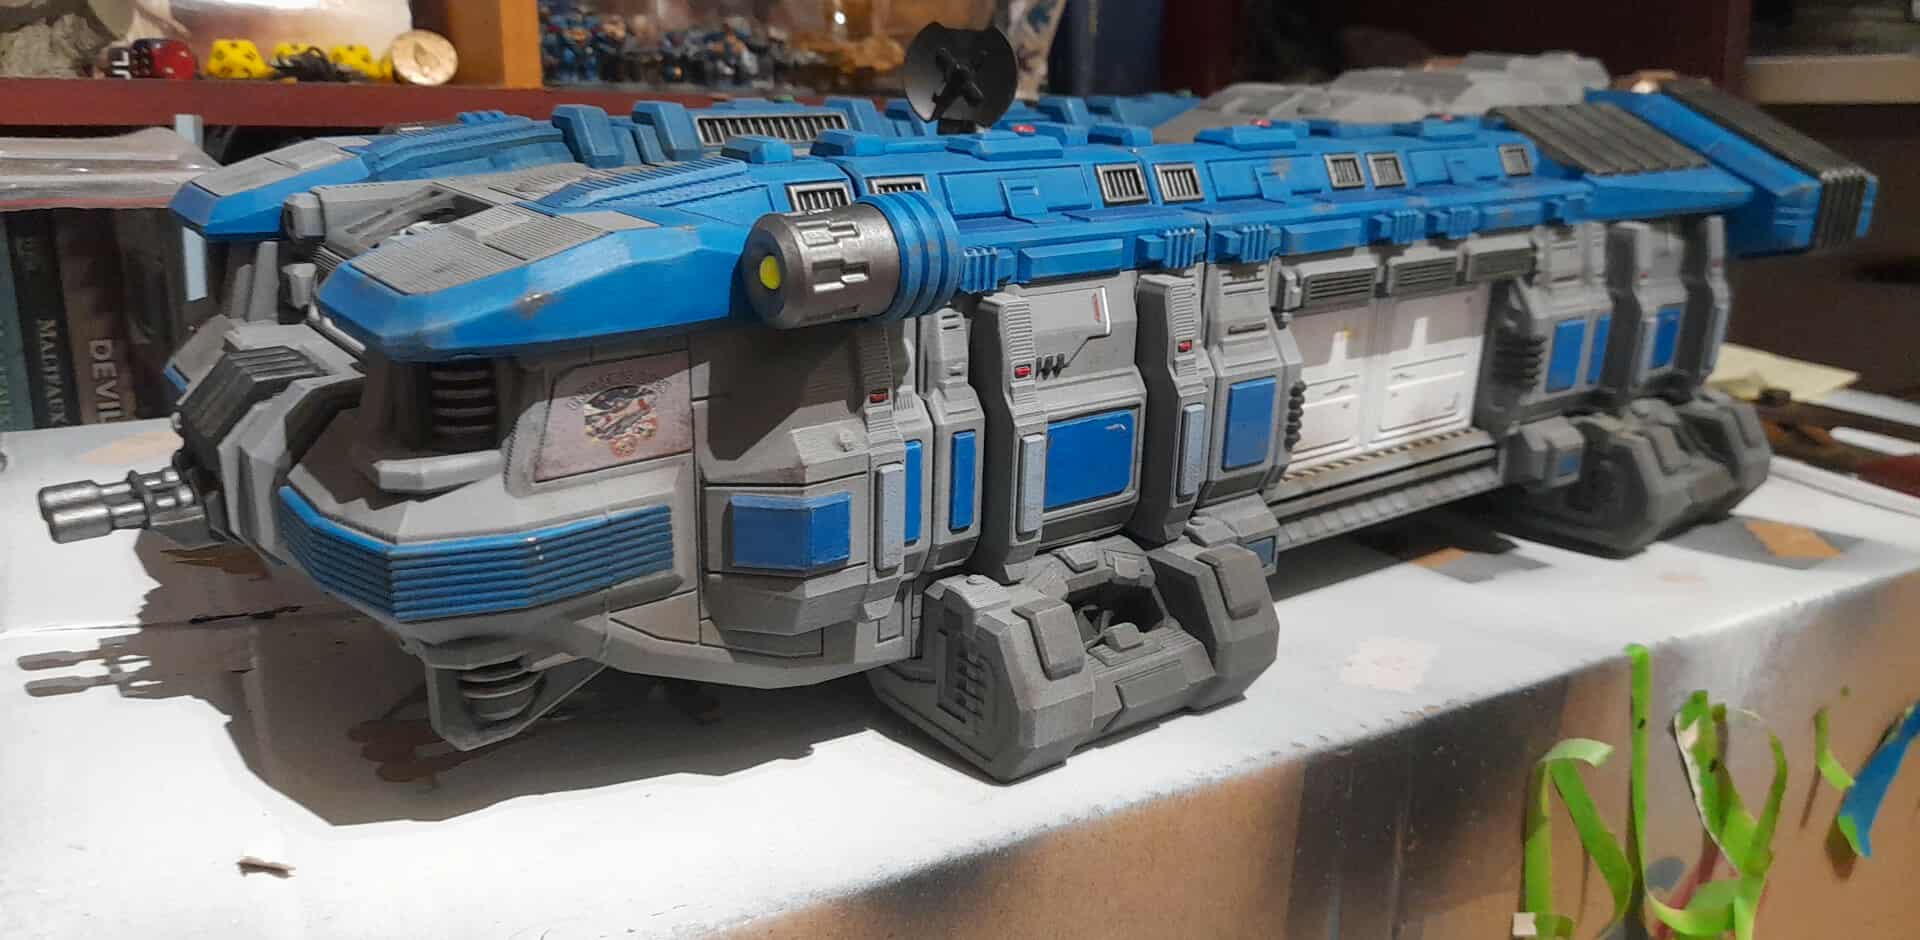
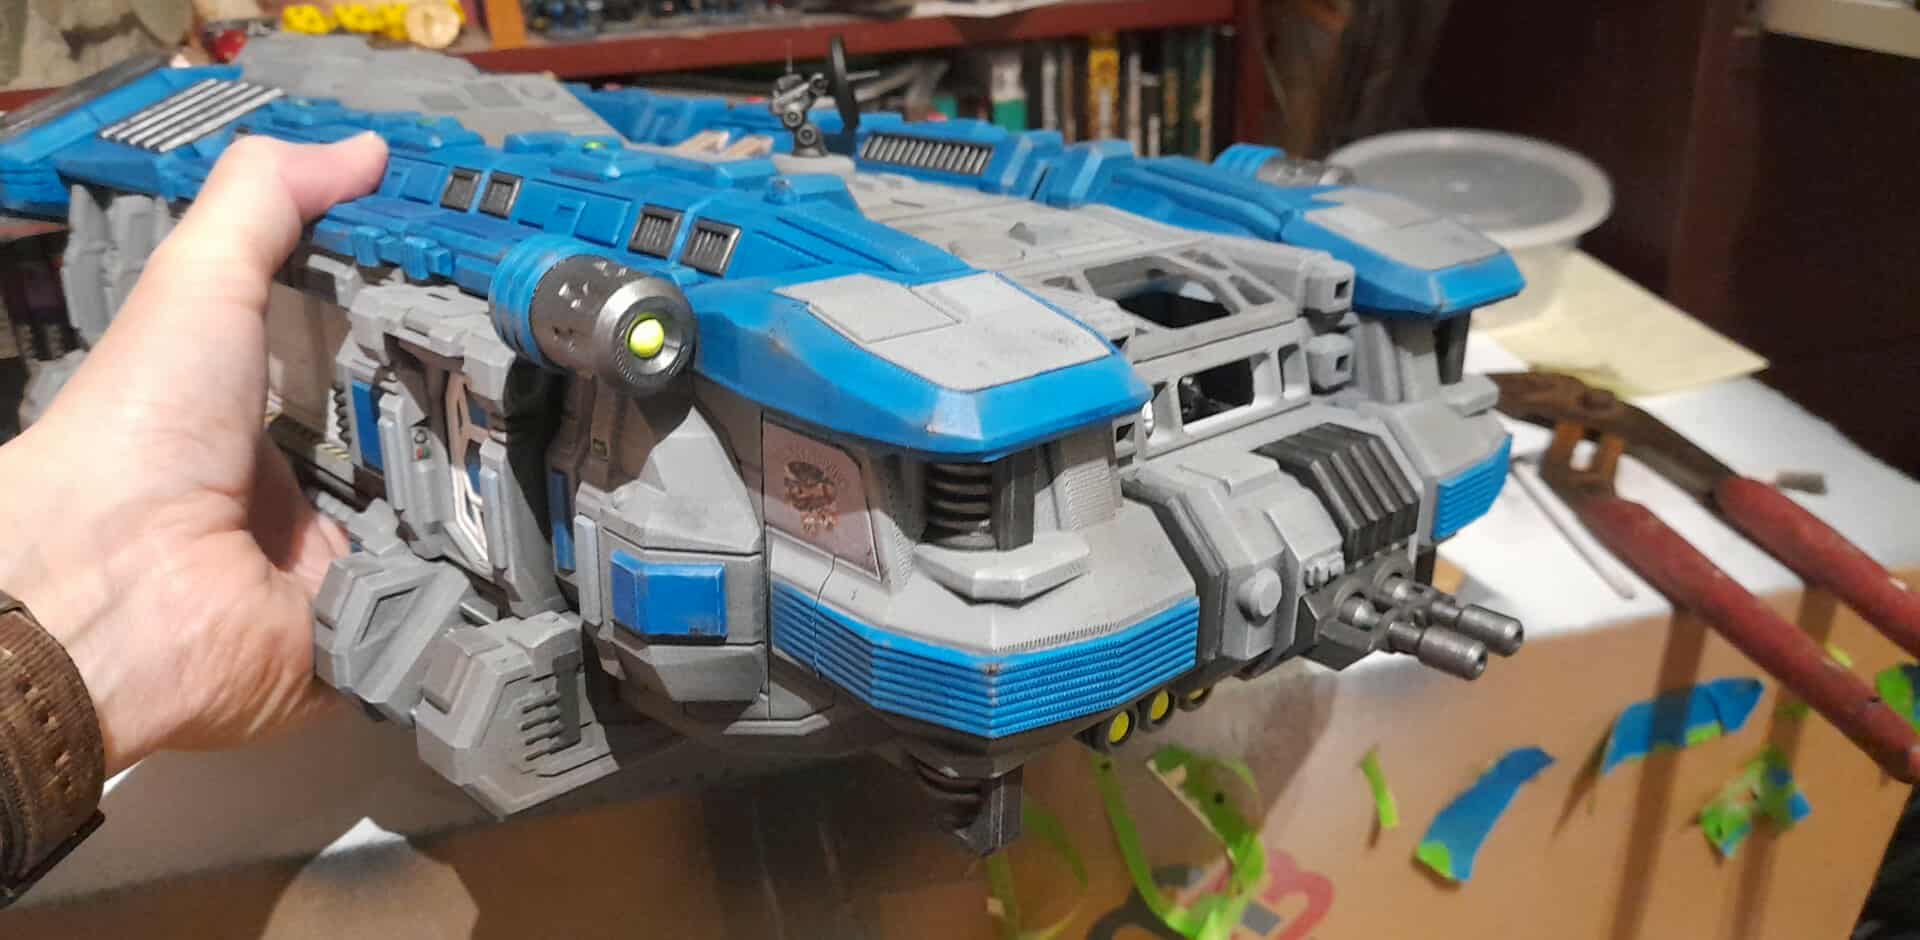
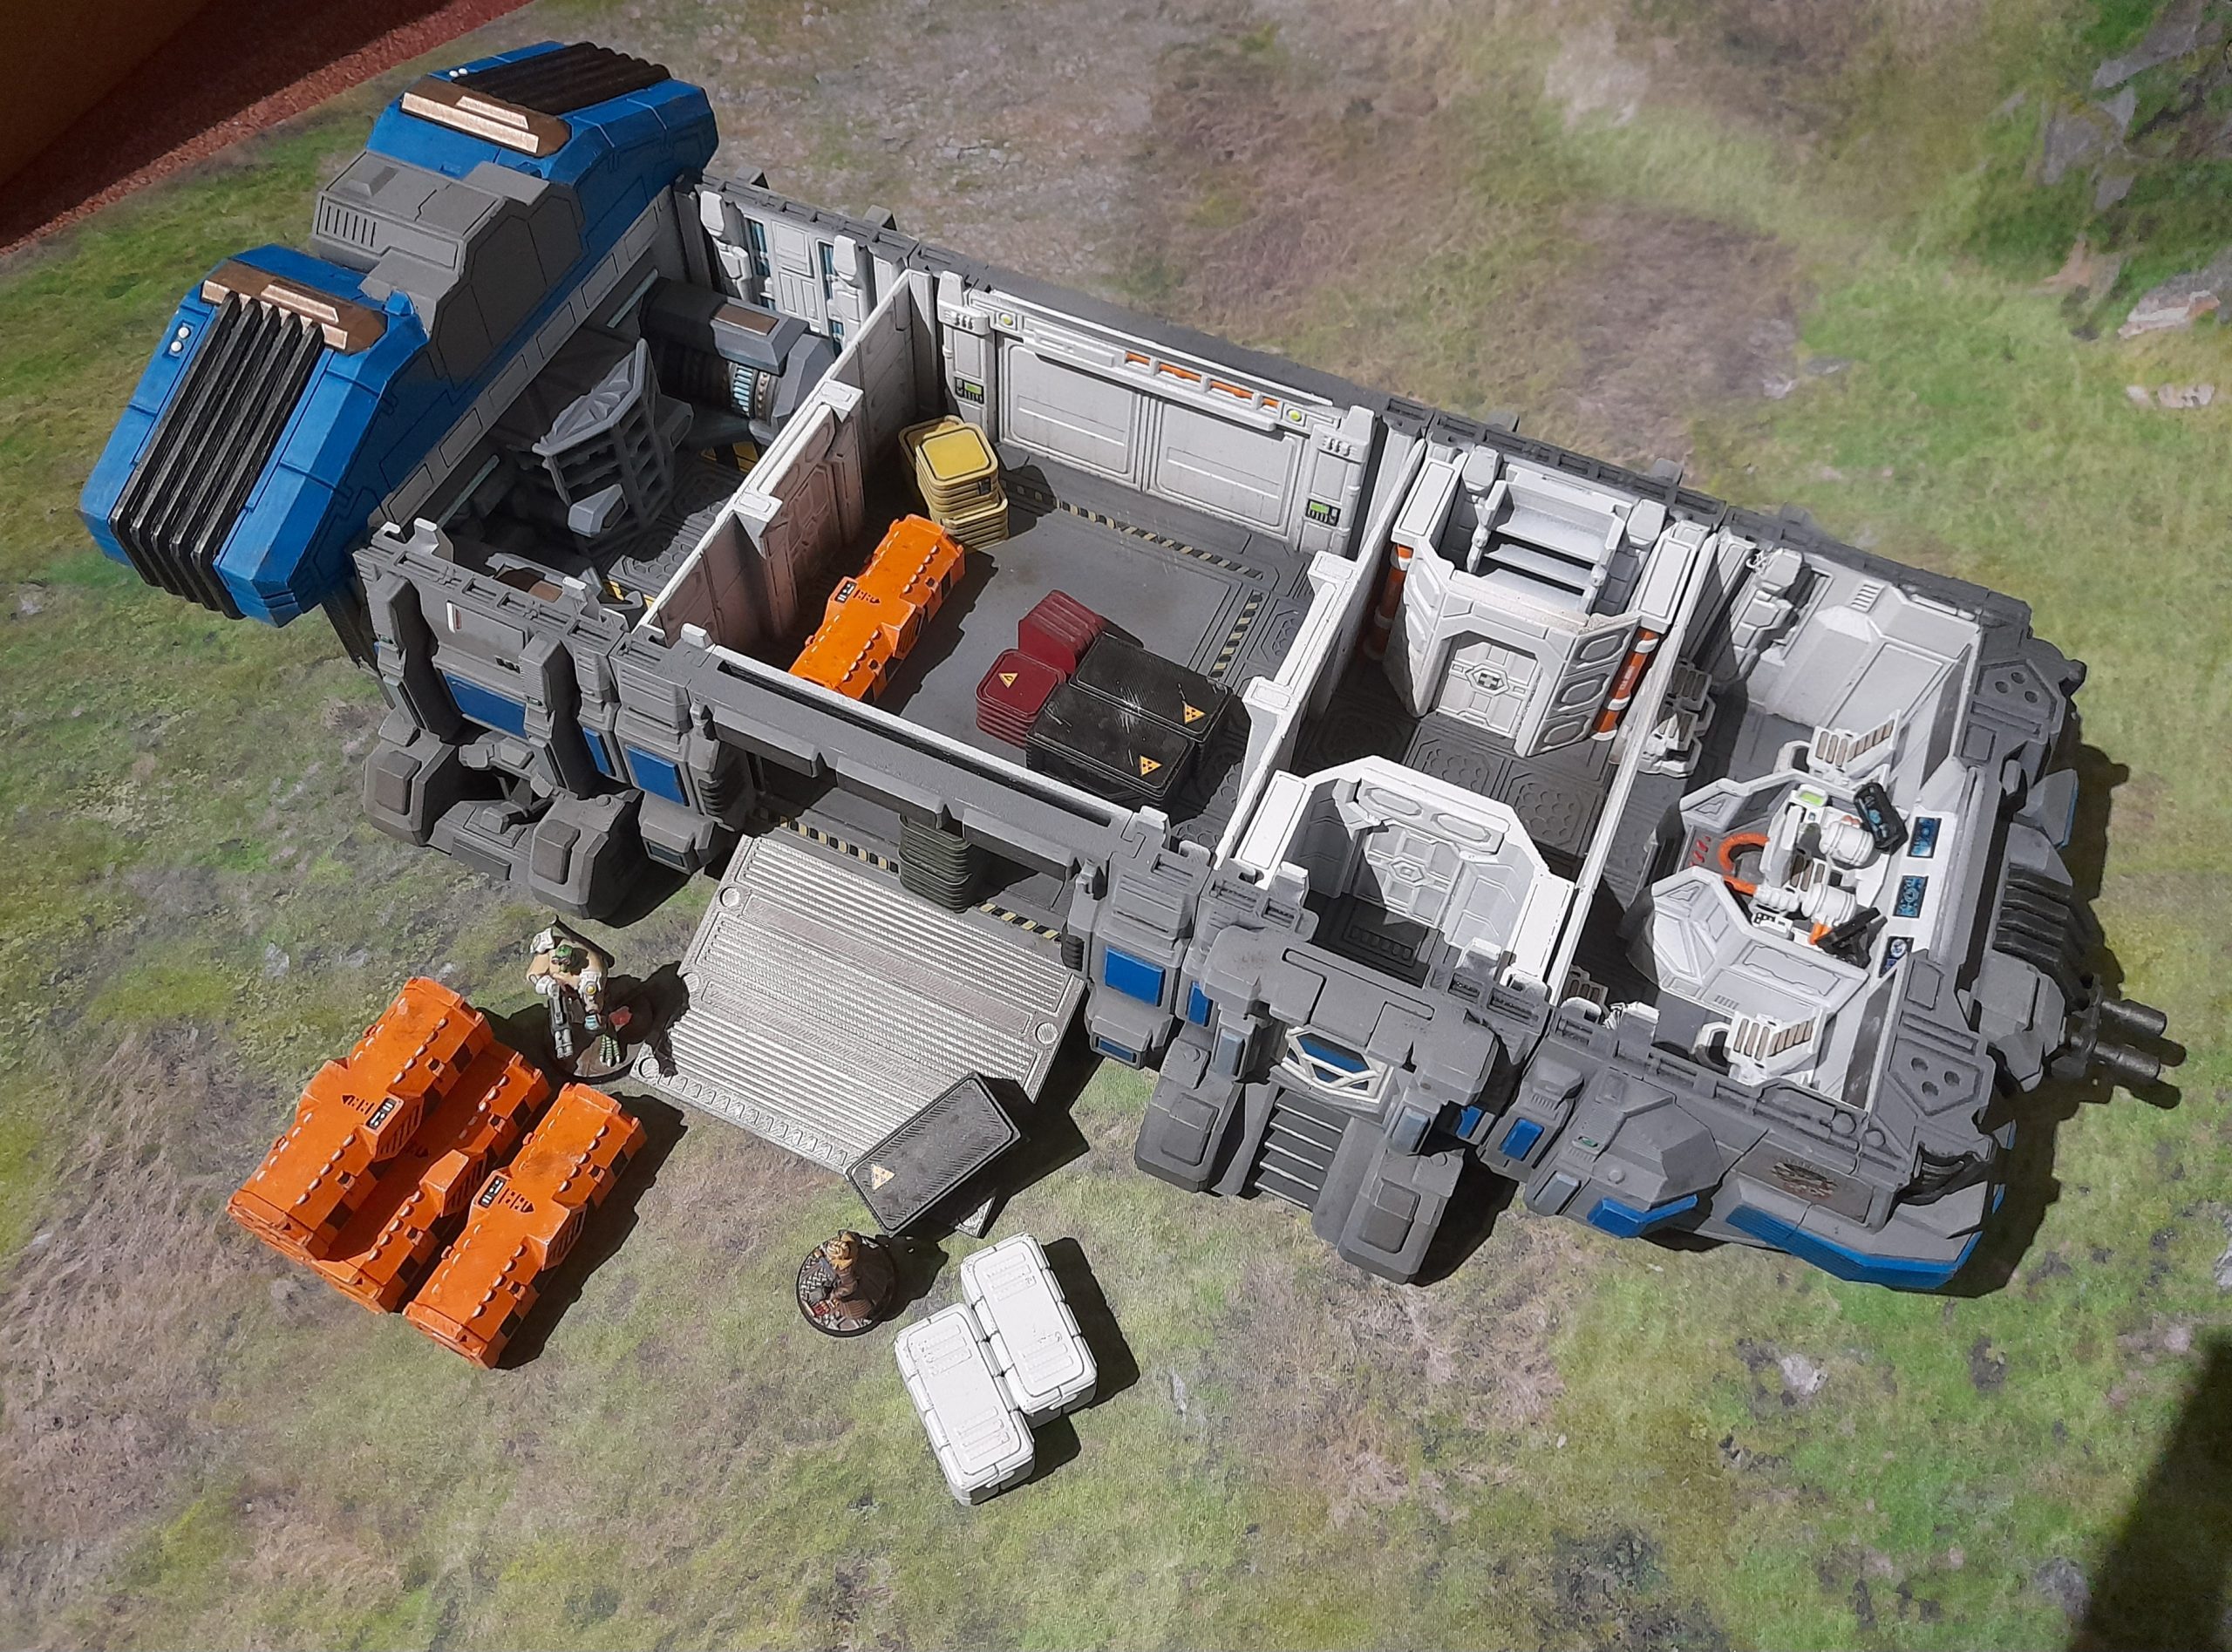
I have a few bits planned for this year’s terrainfest. The main thing is a 3D printed cargo ship that a friend gave me. It’s a hefty beast, and will be used as terrain for my future sci-fi skirmish project (not sure which rules I will use yet). If I finish that in good time then I have some sci-fi terrain from Shatterpoint that I picked up very cheap, and should also work for the same project. Additionally I have a small mausoleum to paint for The Silver Bayonet, and maybe some other buildings if time permits.
Related Genre: General
Related Contest: TerrainFest 2025
This Project is Completed
Weathering
29th December 2025
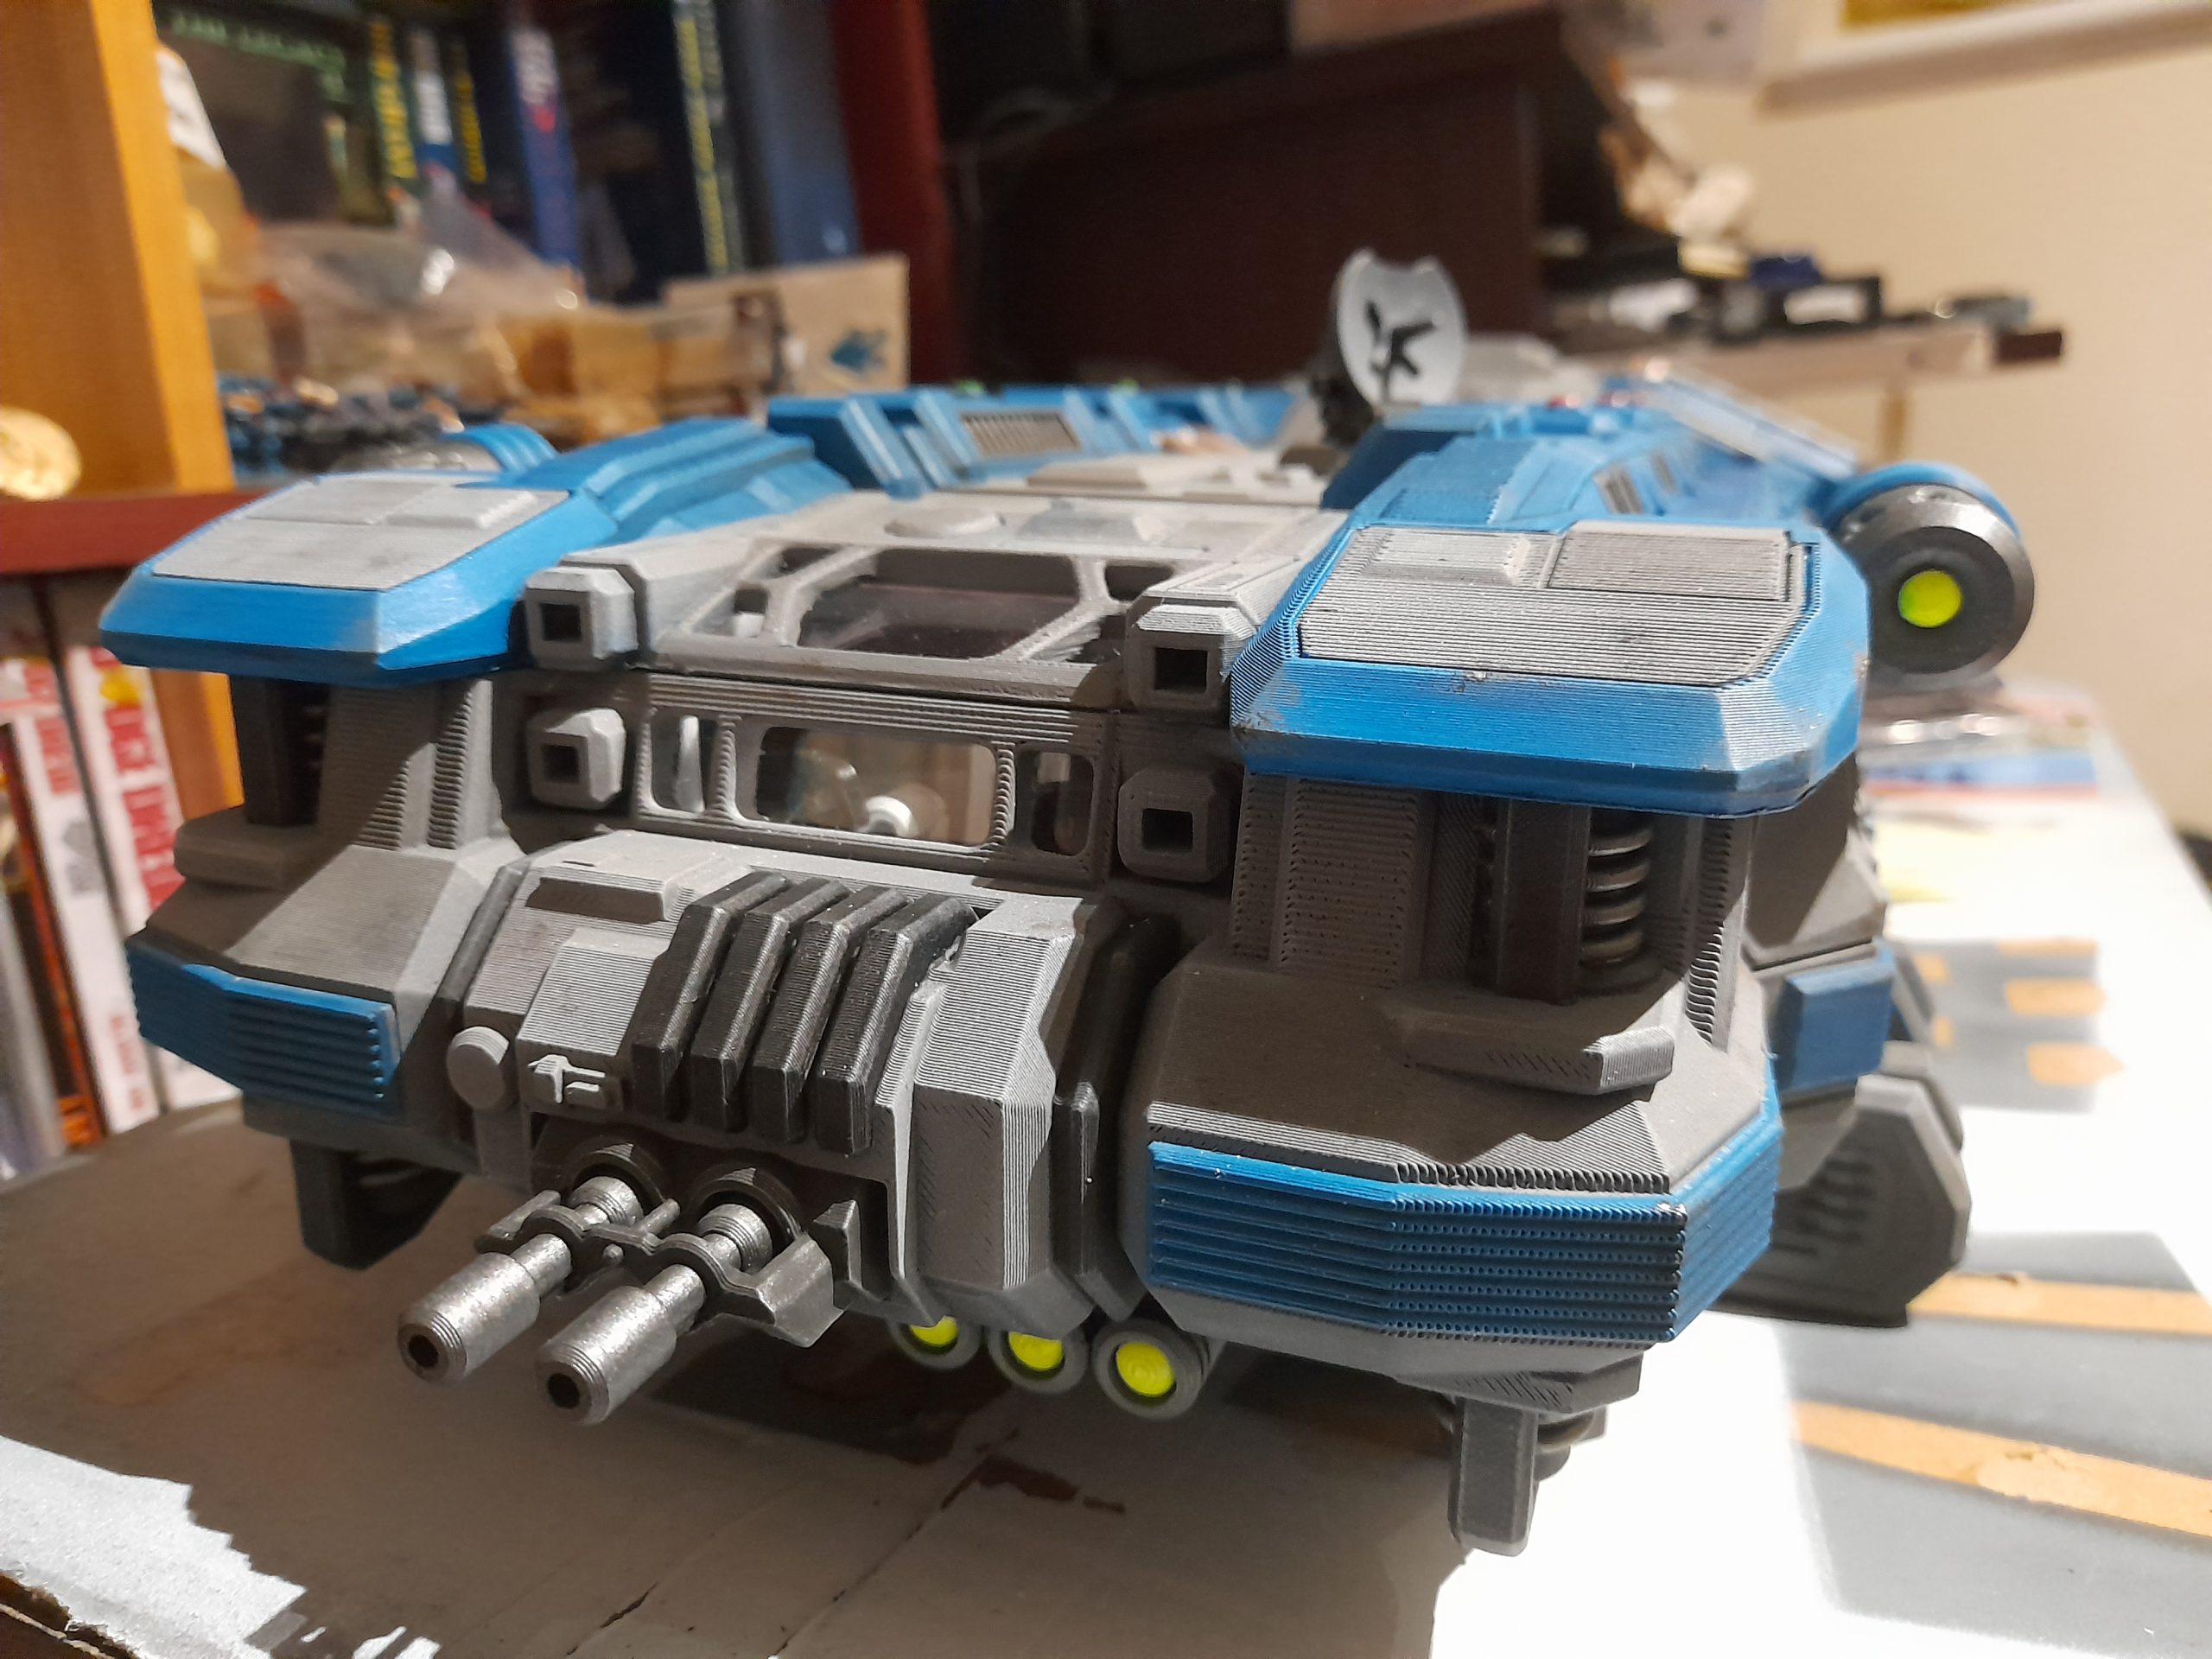
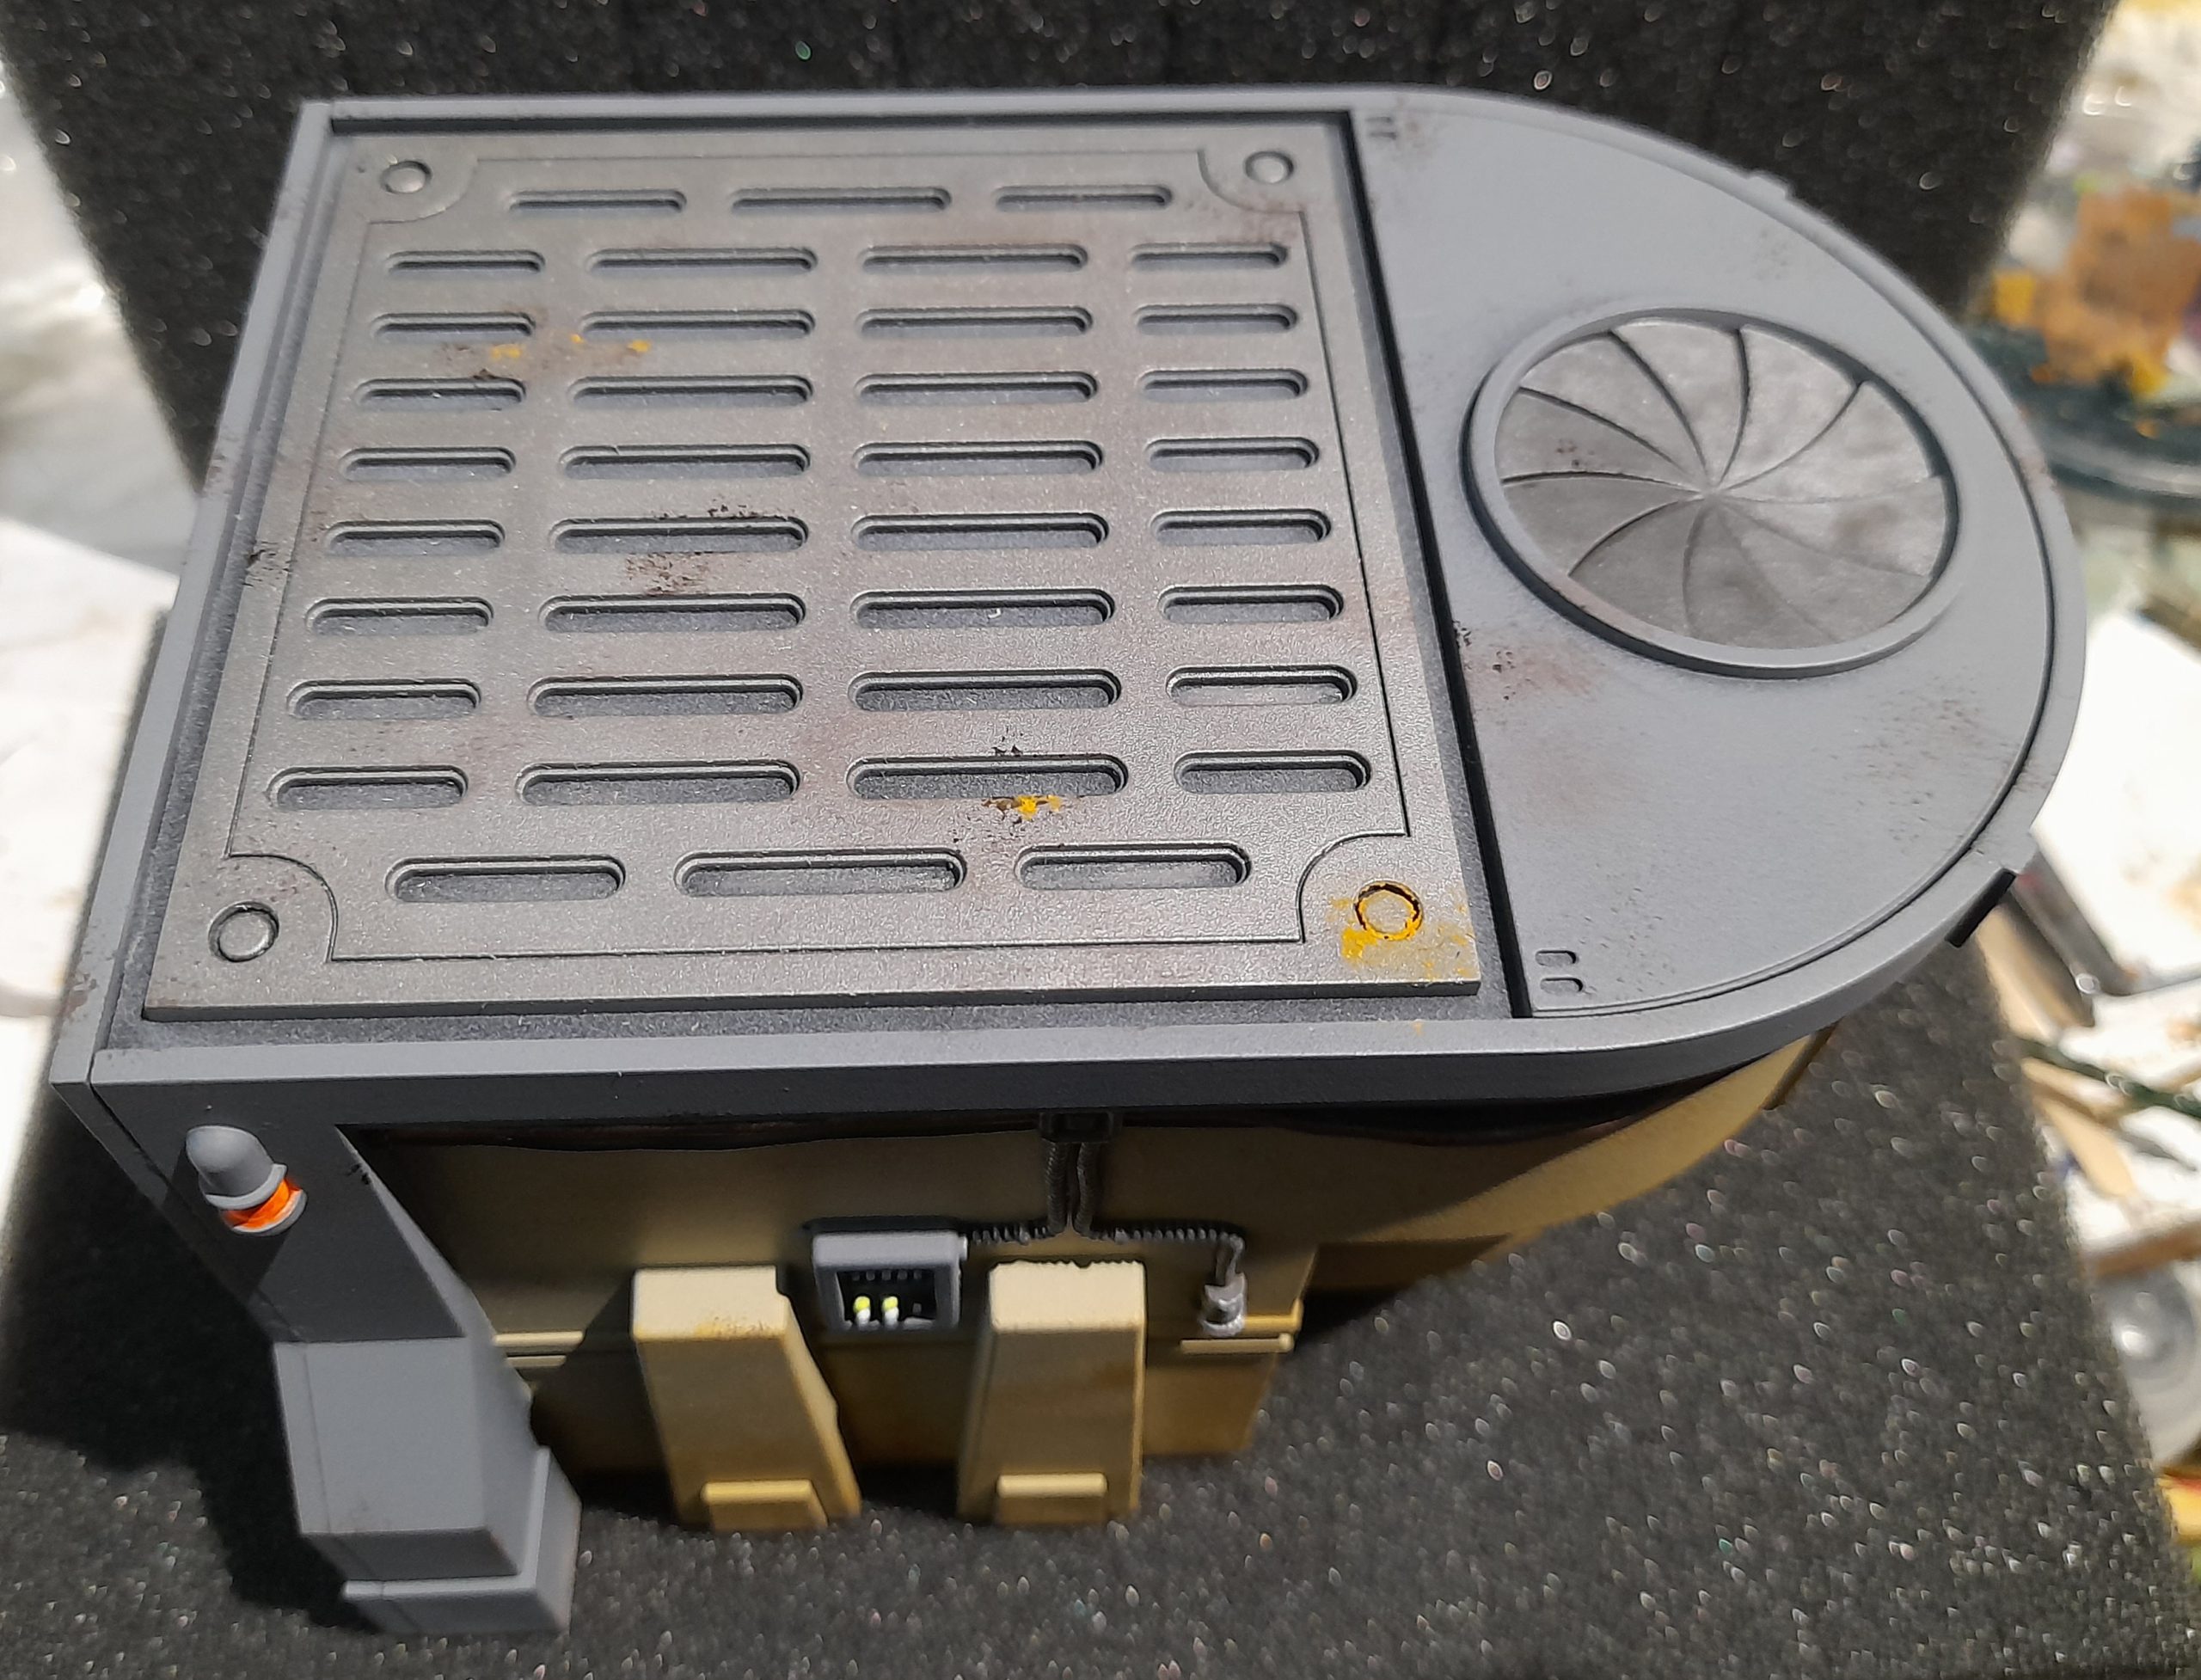
So, now it was on to the weathering stage.
I started out by using some old sponge and sponging on a couple of different greys, wildwood brown and then using silver to dot in on some of the darker areas to suggest paint worn through.
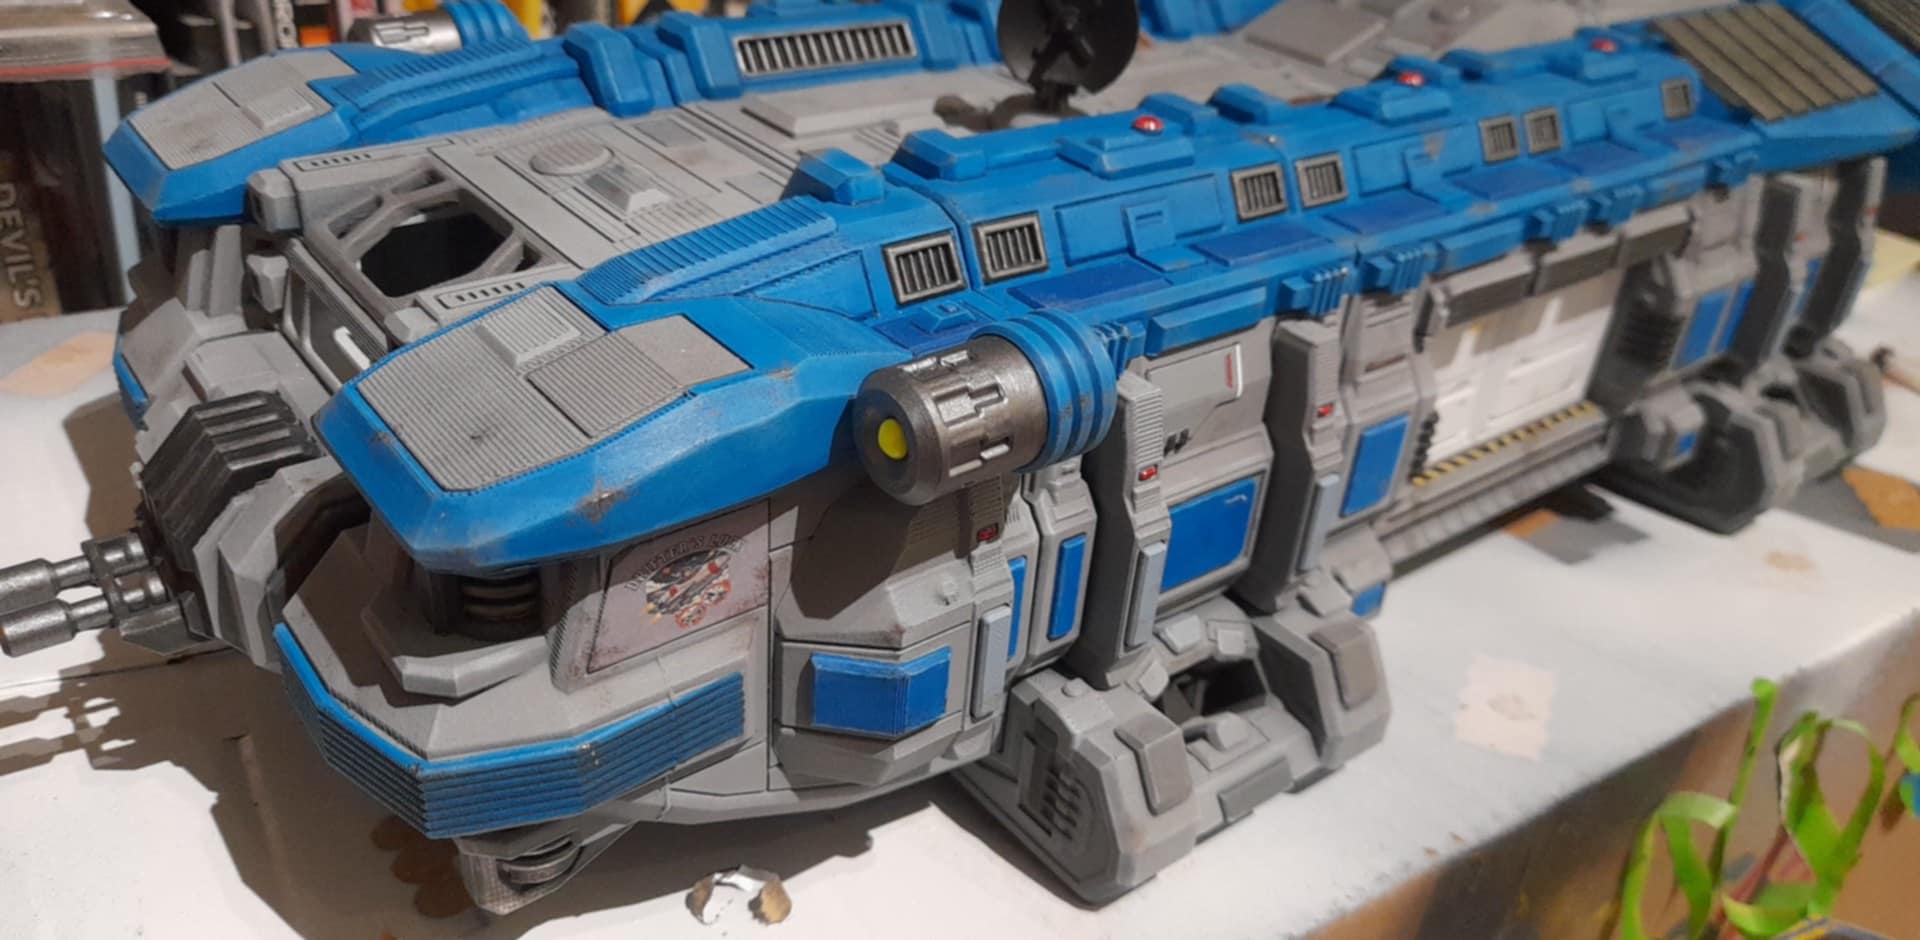
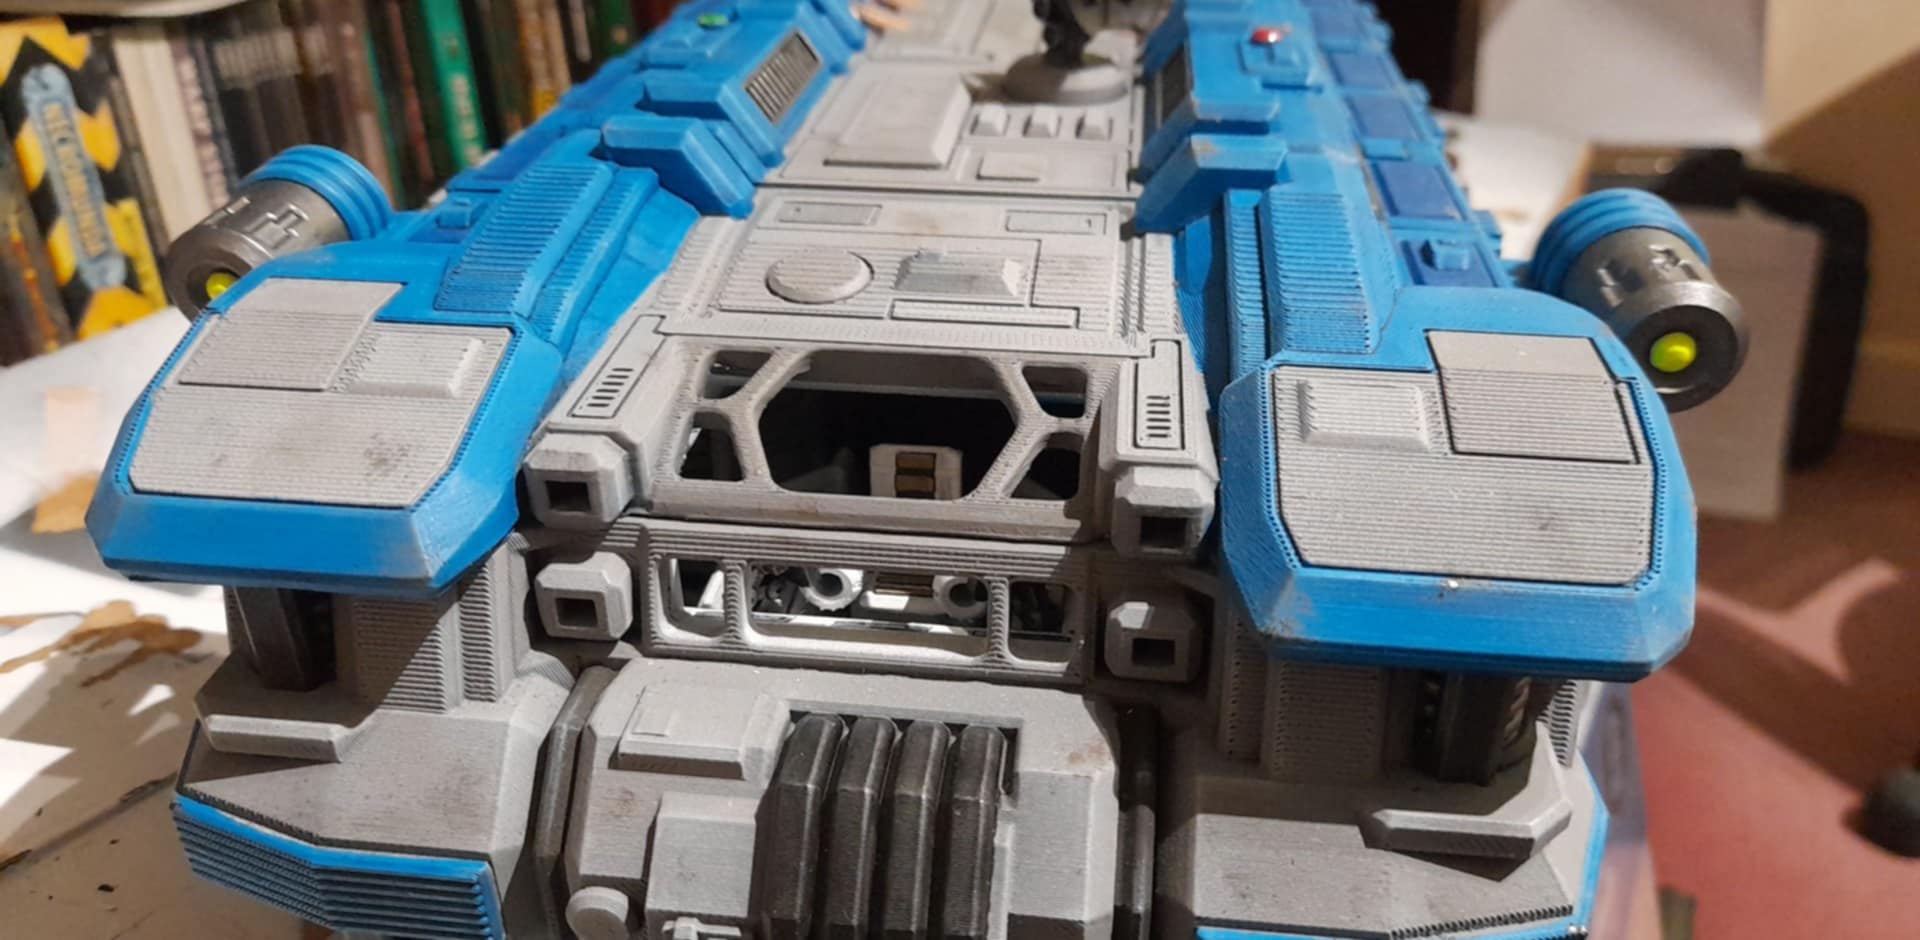

Then I dragged out my airbrush, and used that to spray on some grey, then grey brown, and finally brown. This was applied to the lower section of the outside, a few light areas on the roof, and also for sections of the interior.
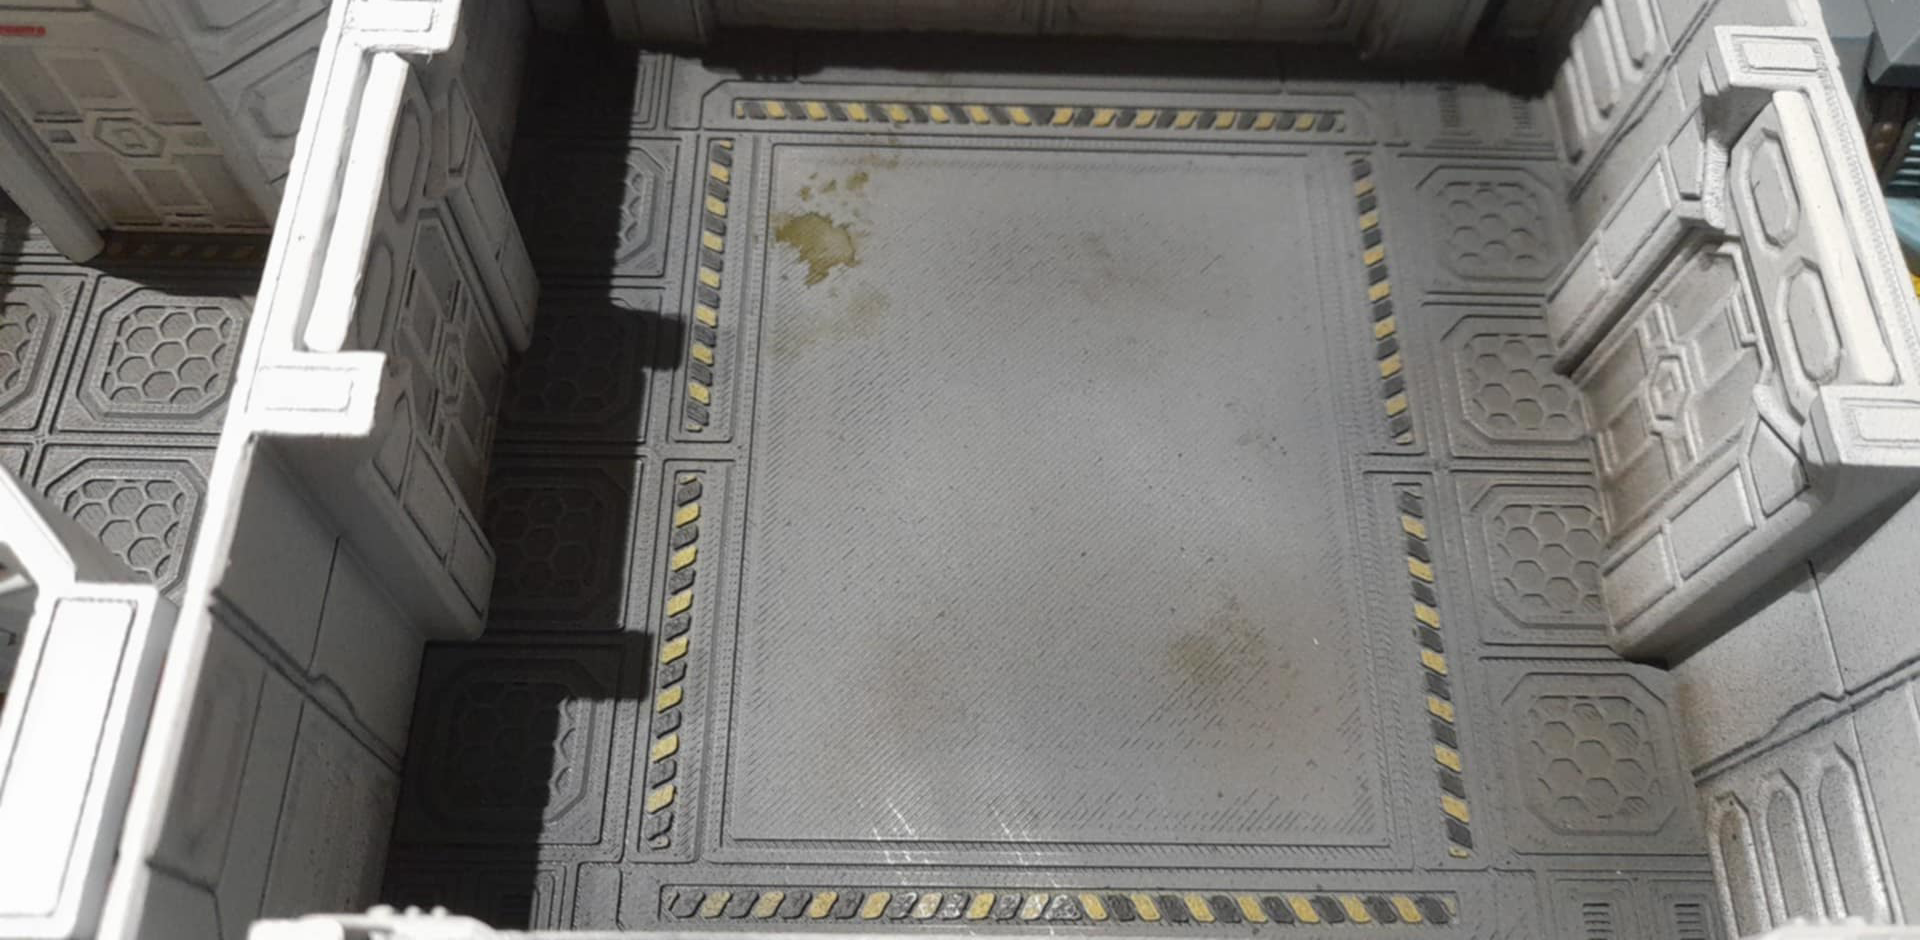
On the interior I added the shading to the area where the walls met the floor, and on the floor of the cargo bay, plus on the floor where the doors are. I mage the weathering heavier on the cargo bay, as I thought that would be most likely to get the dirt and grime.

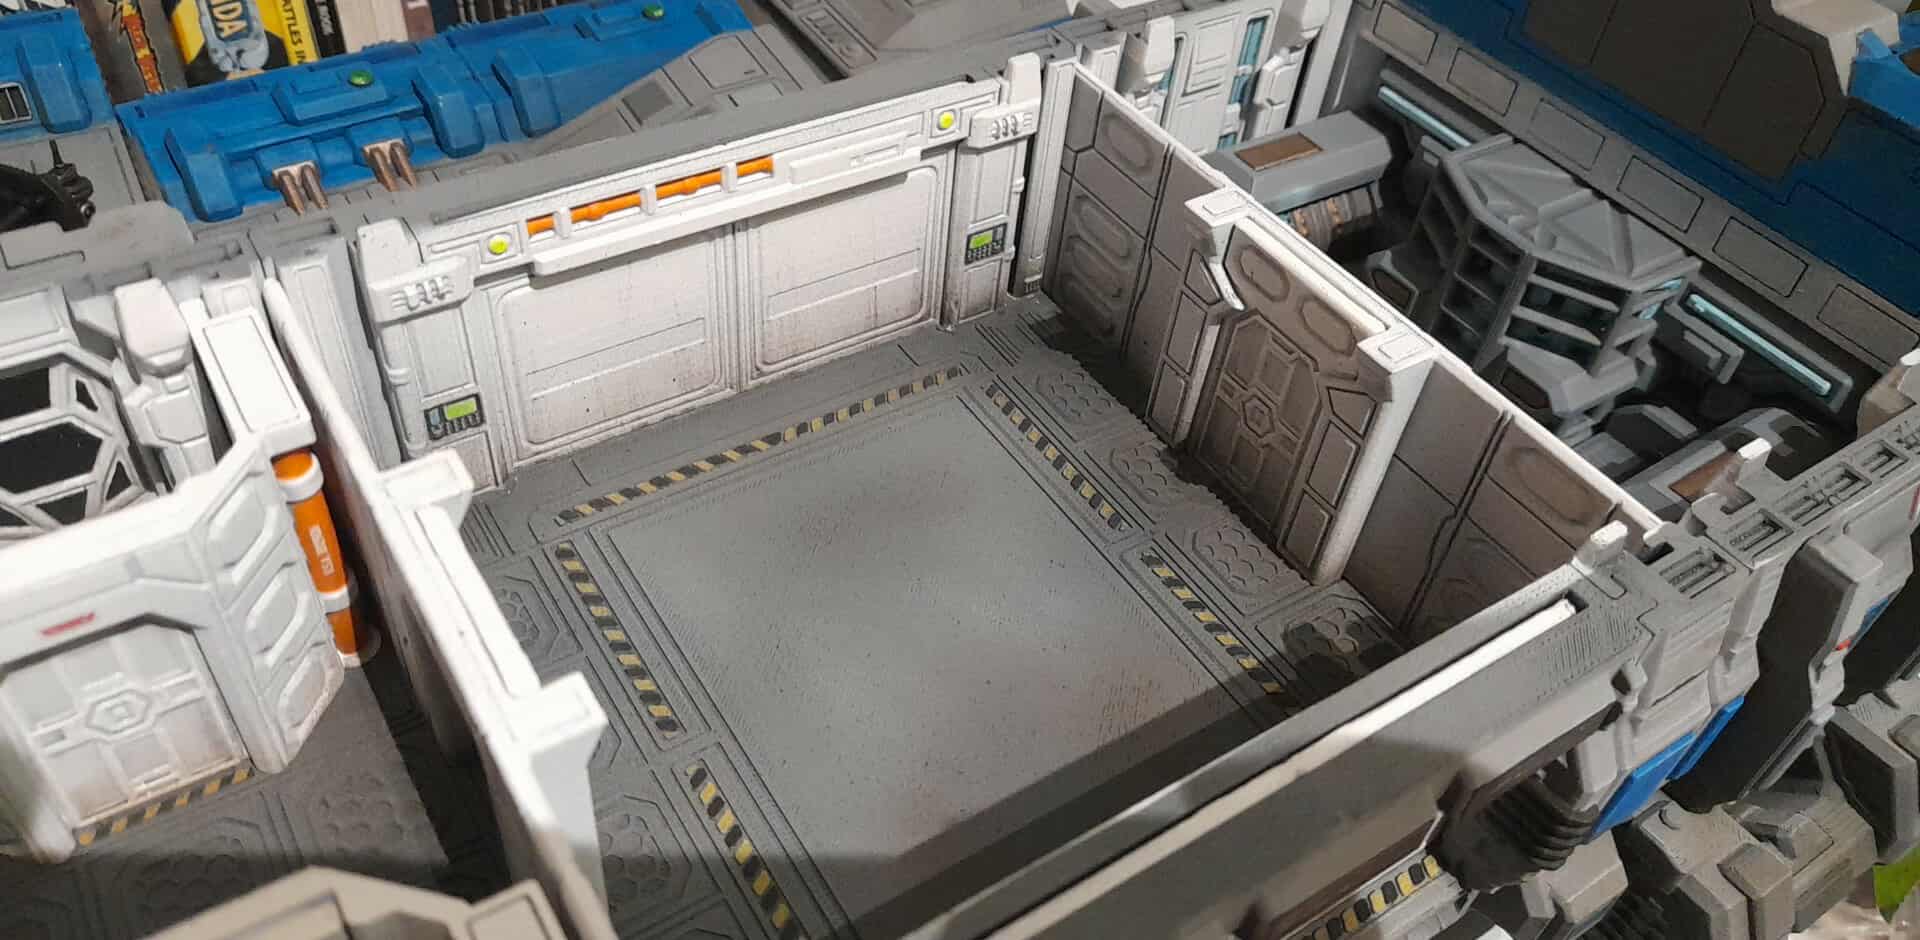
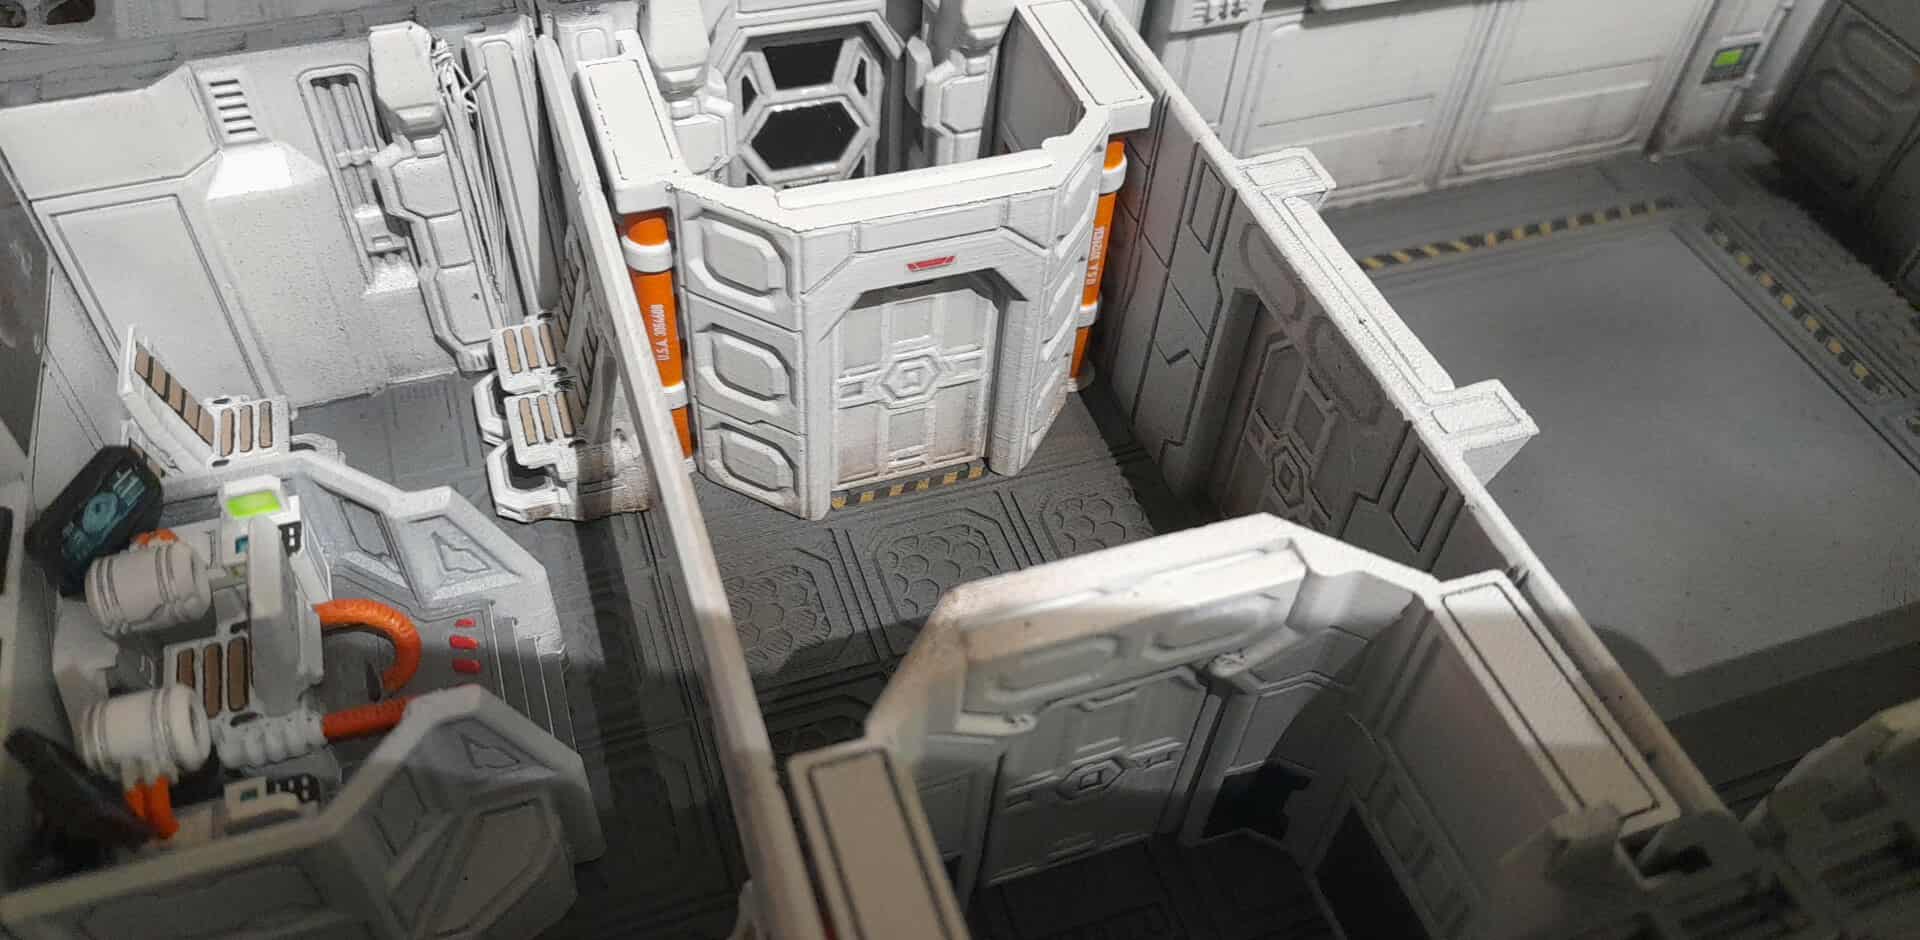
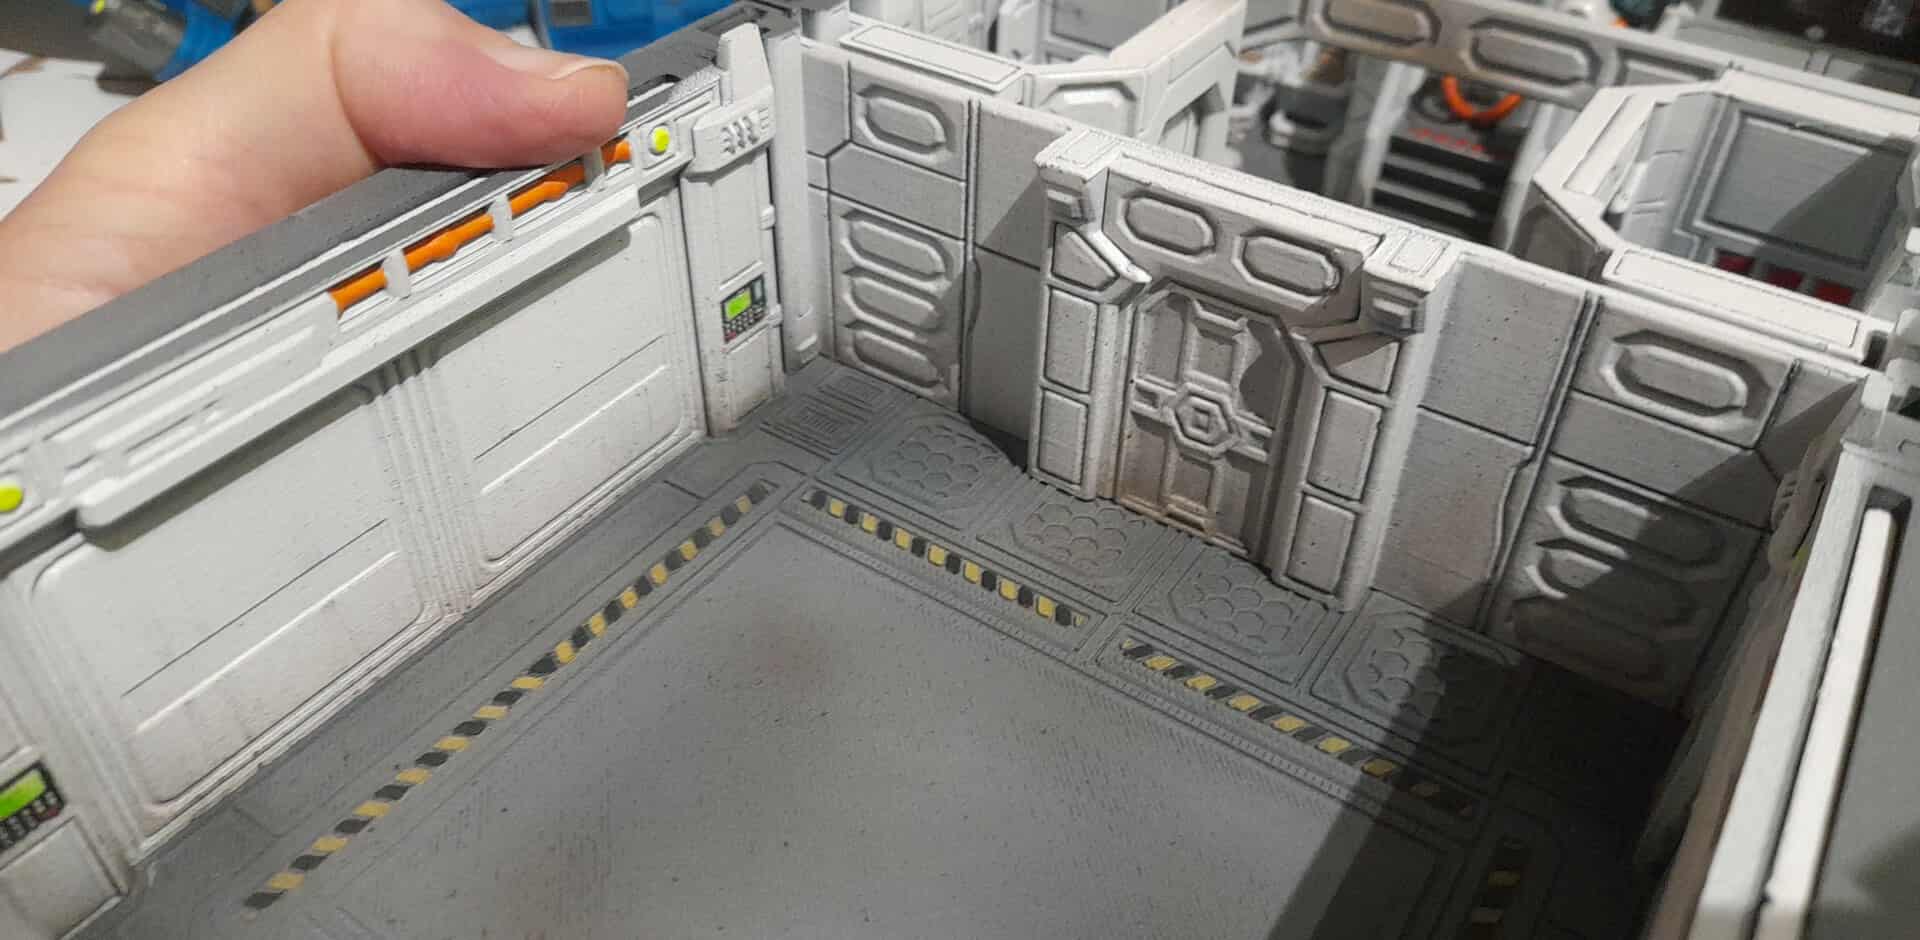
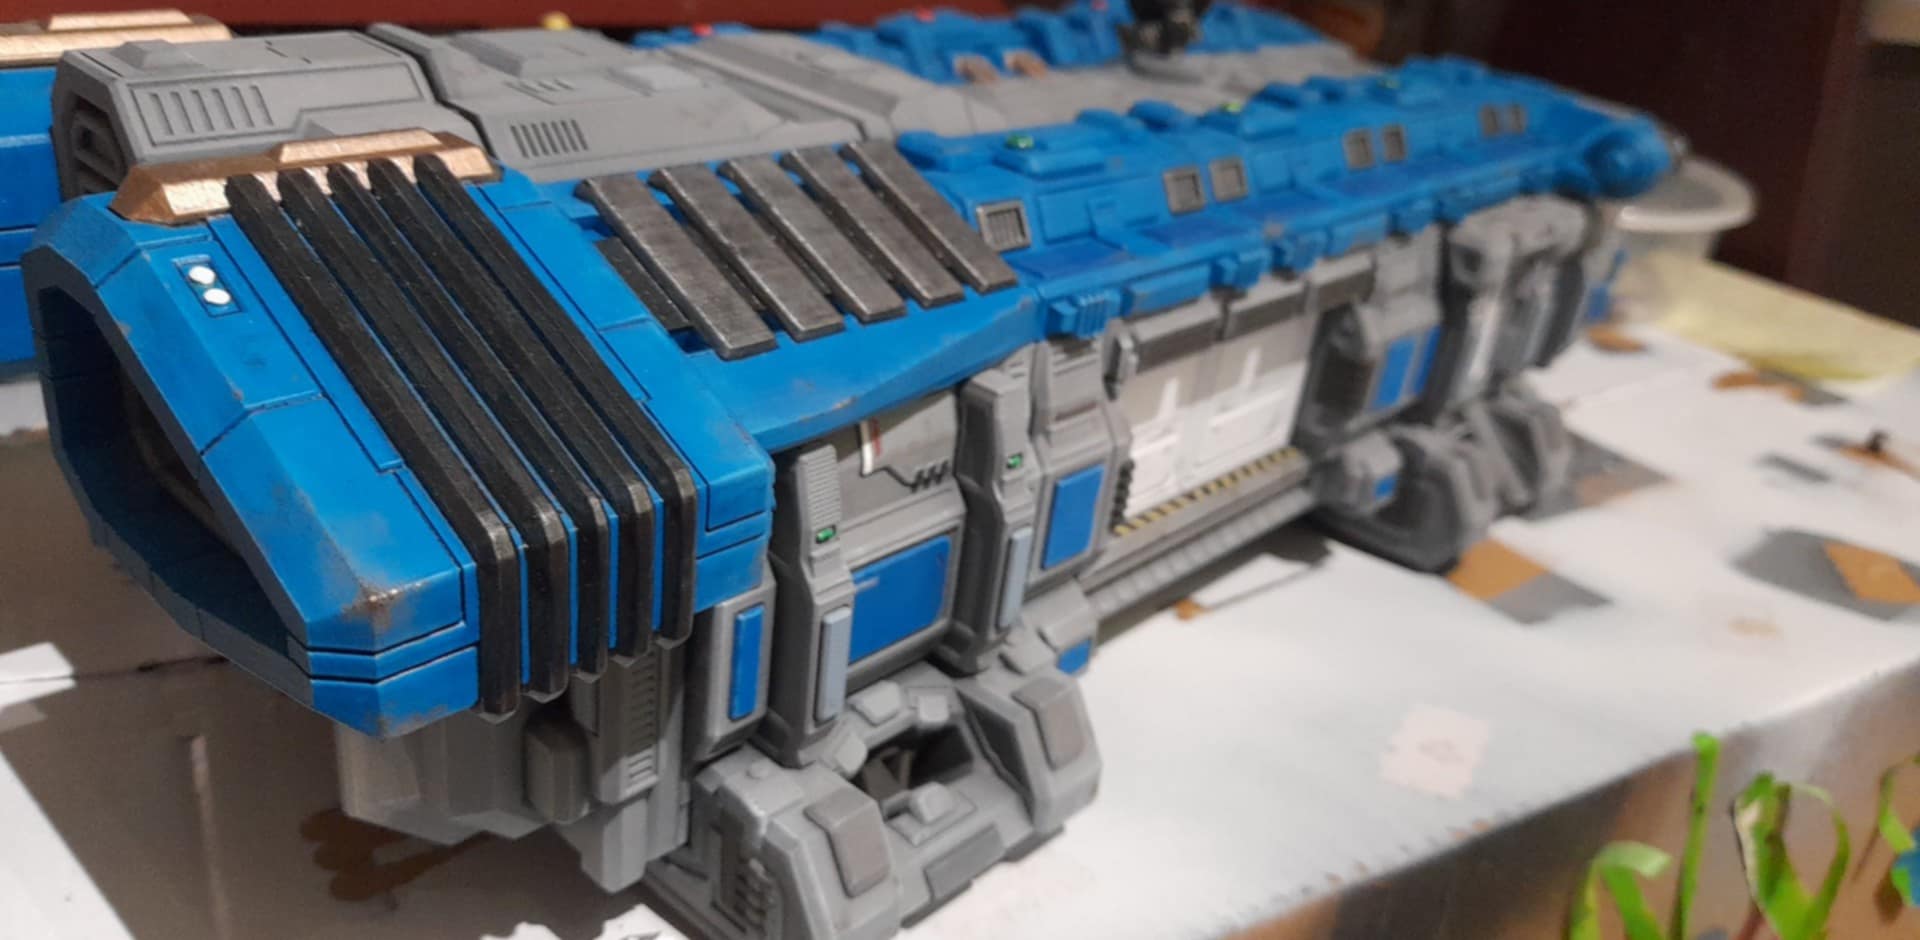
Final fixtures, and crates
5th January 2026
My recent work has been snagging some final bits on the ship.
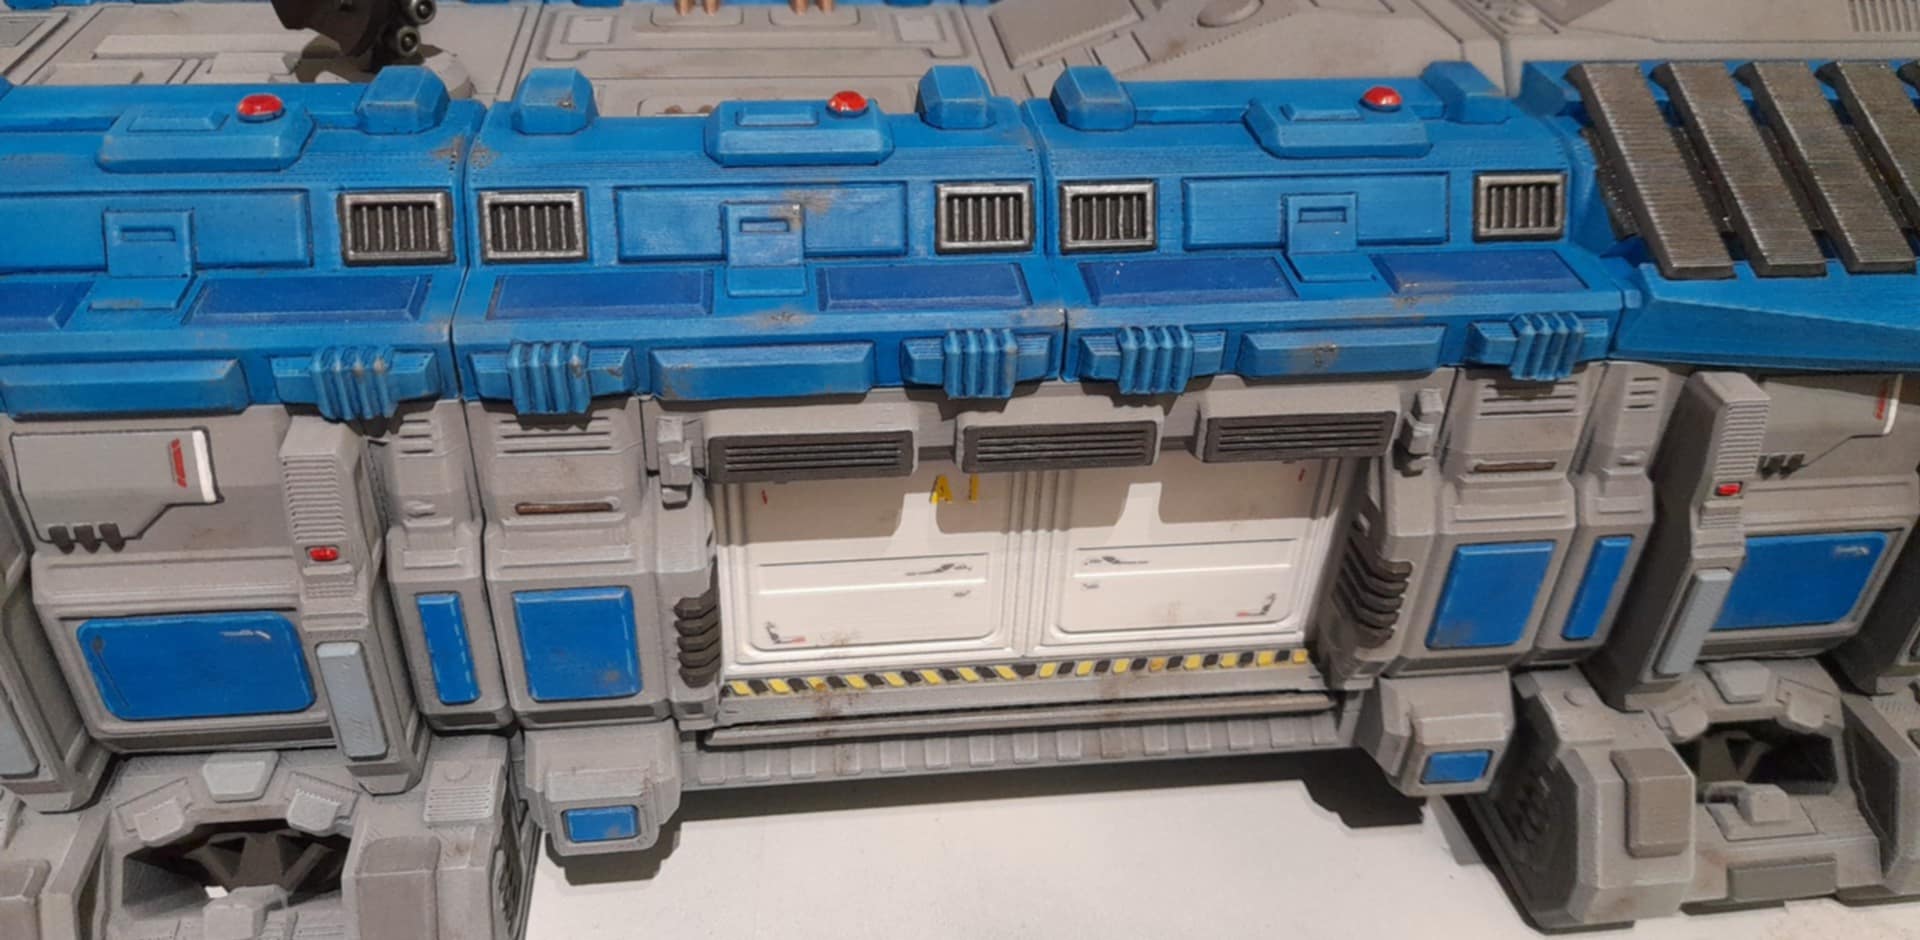
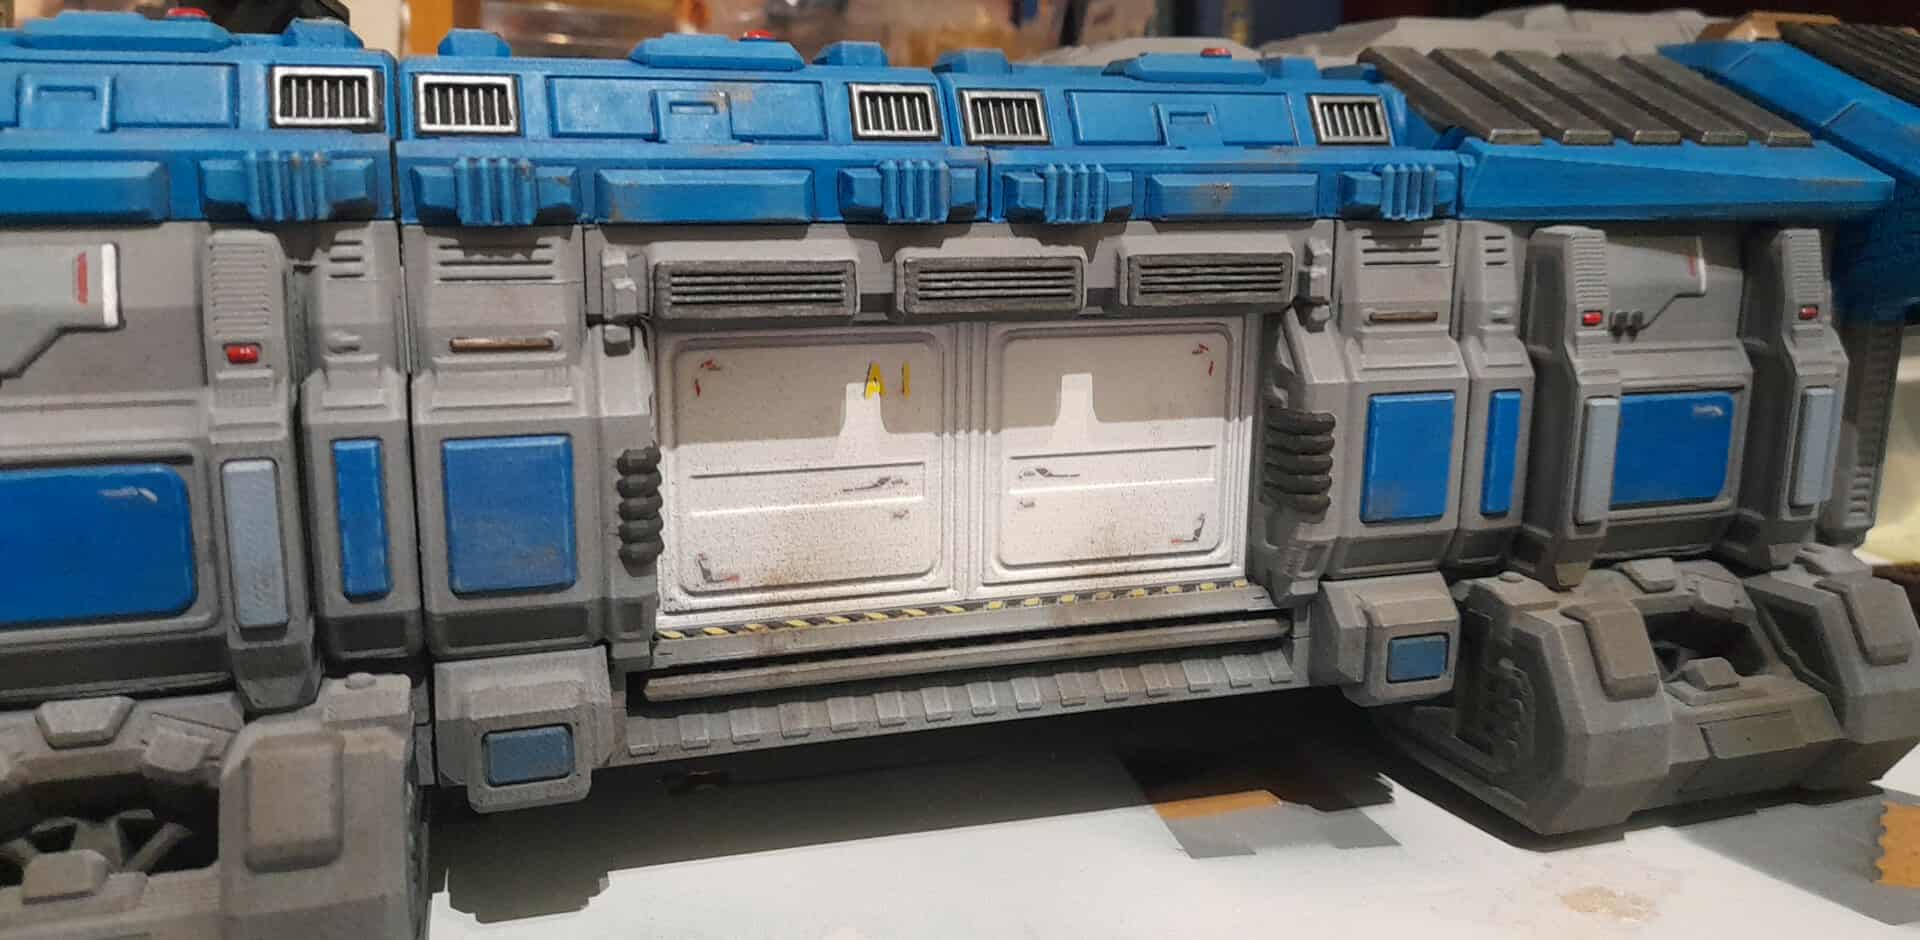
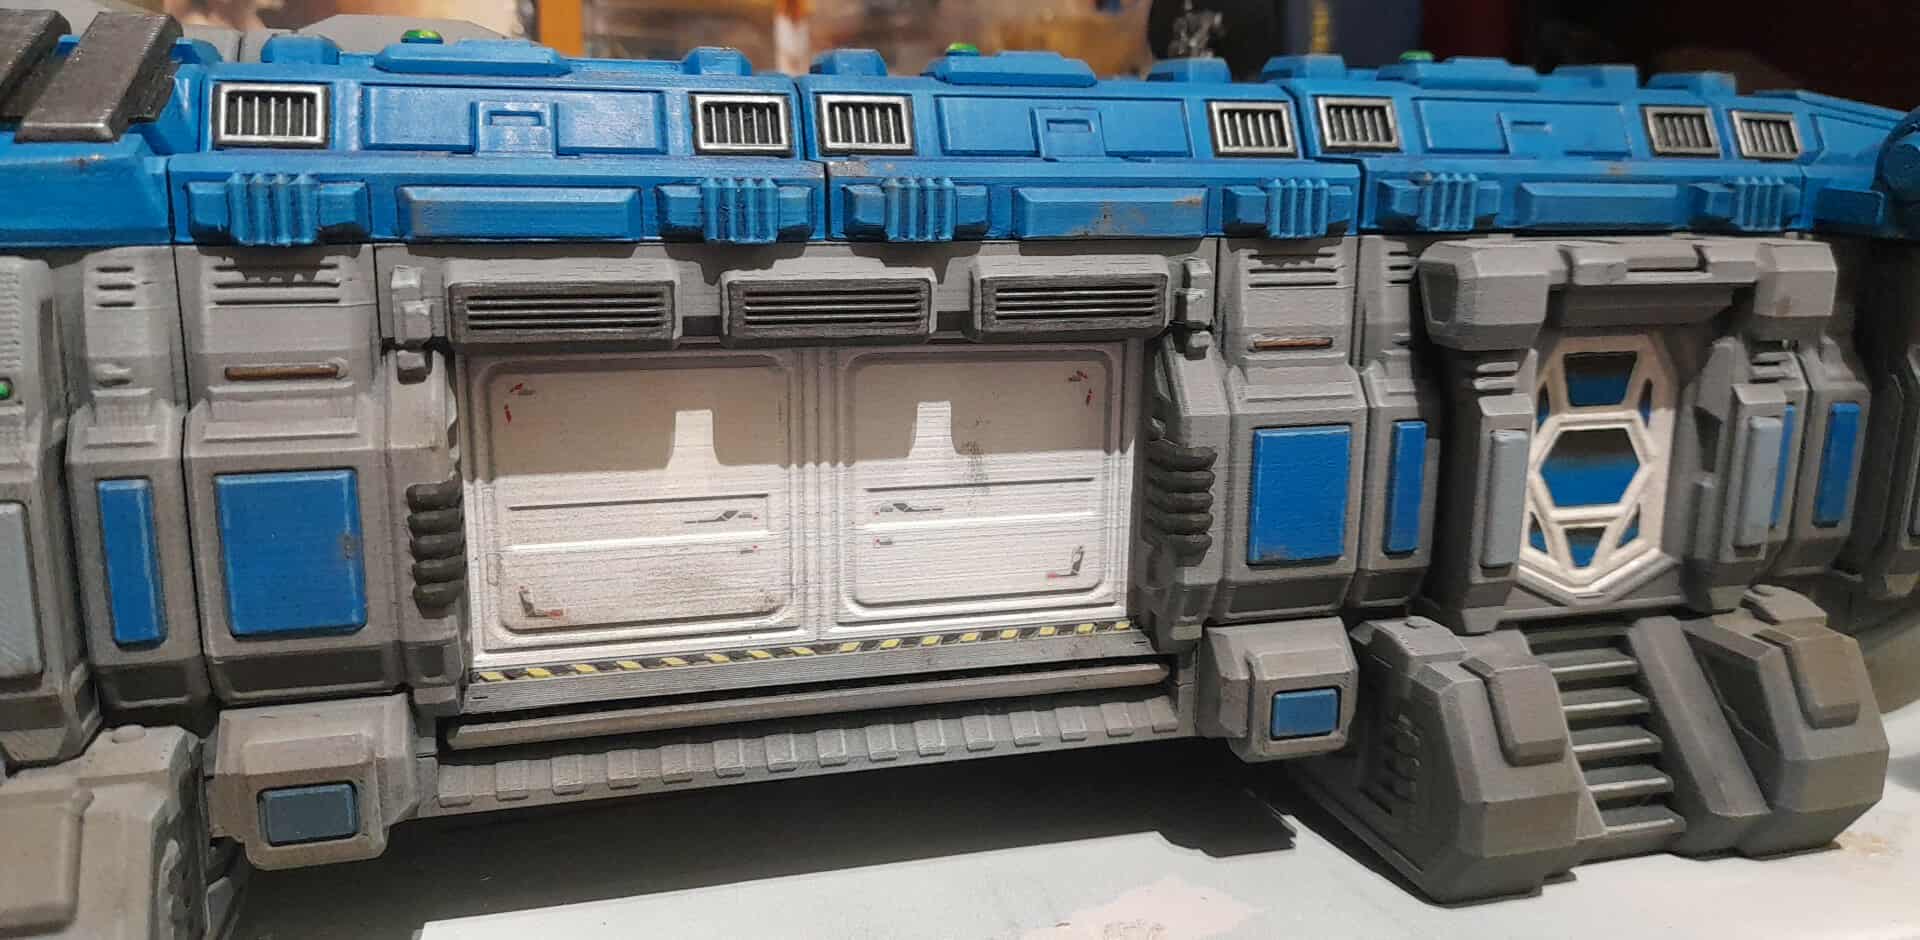
I added some further weathering in places, in particular on the cargo bay floor and areas by the doors. For the cargo bay floor I added some areas of stains using Vallejo streaking grime.
I did consider adding some streaks to walls and the outside, but felt it could make the ship look too run-down (may add some in the future perhaps).
I also added some areas of scraping using a bright silver. On the floors by the doors I added some light areas of wear and scuffing by drybrushing over with Leadbelcher, to represent wear from foot traffic.
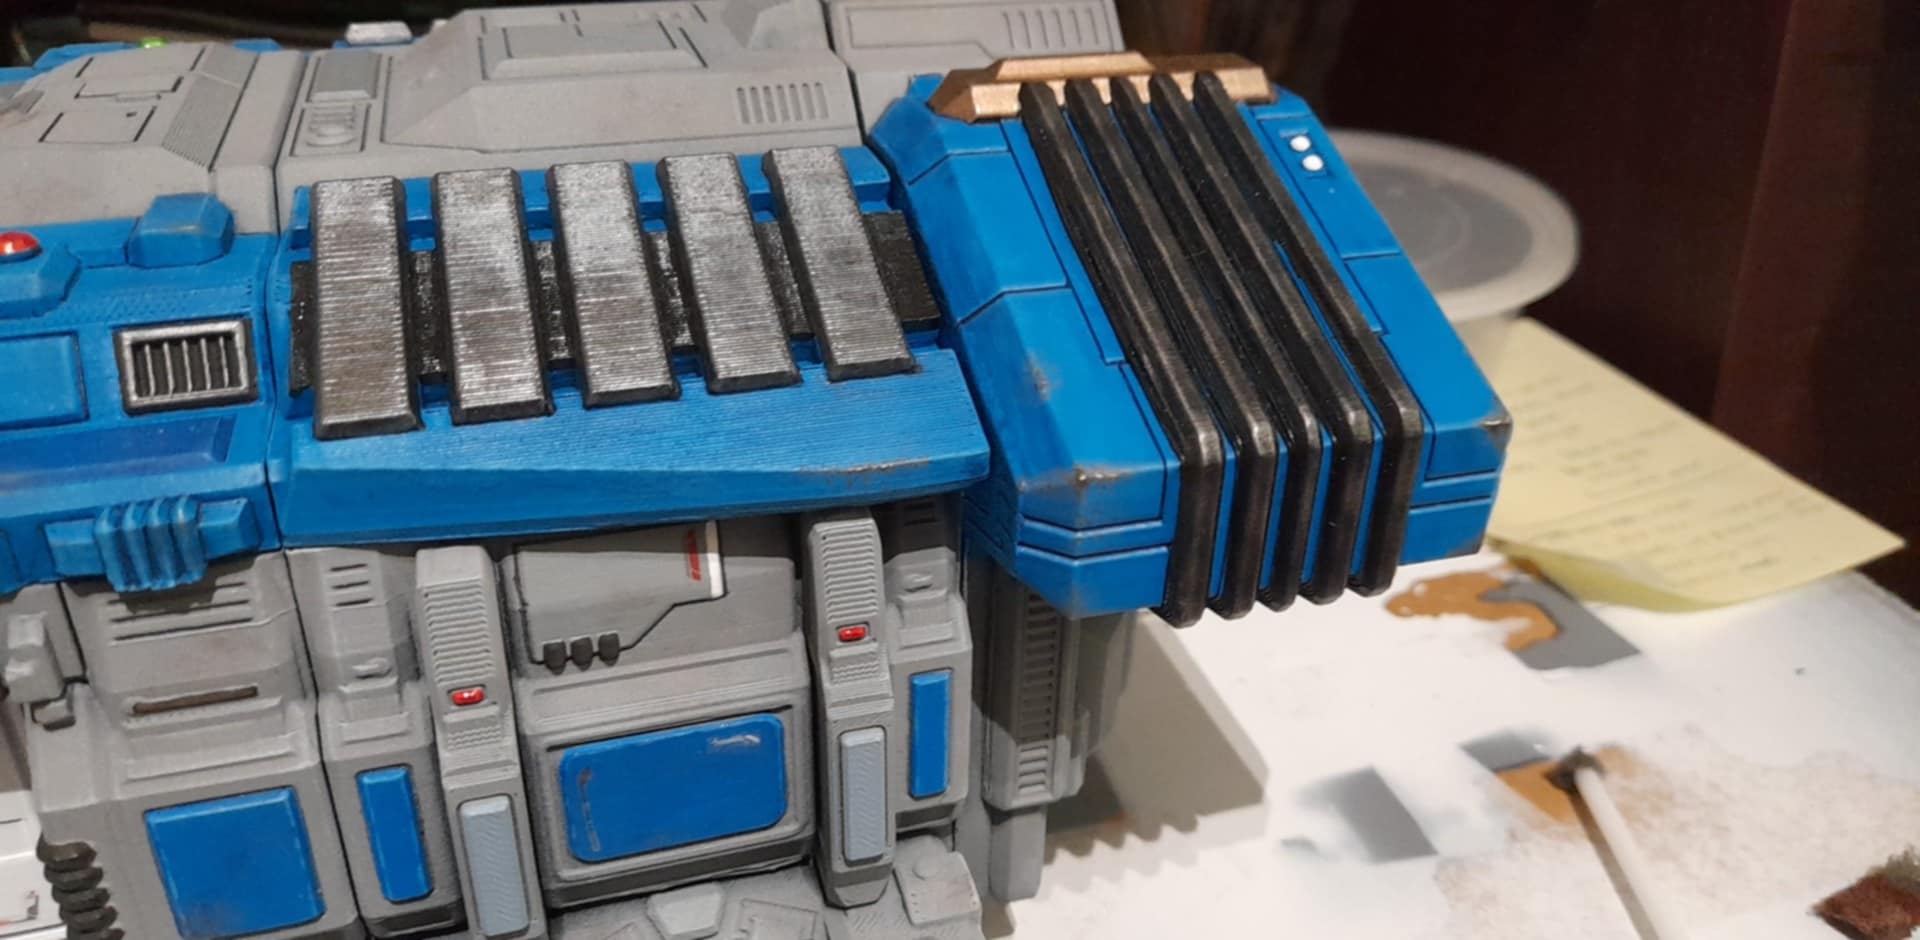
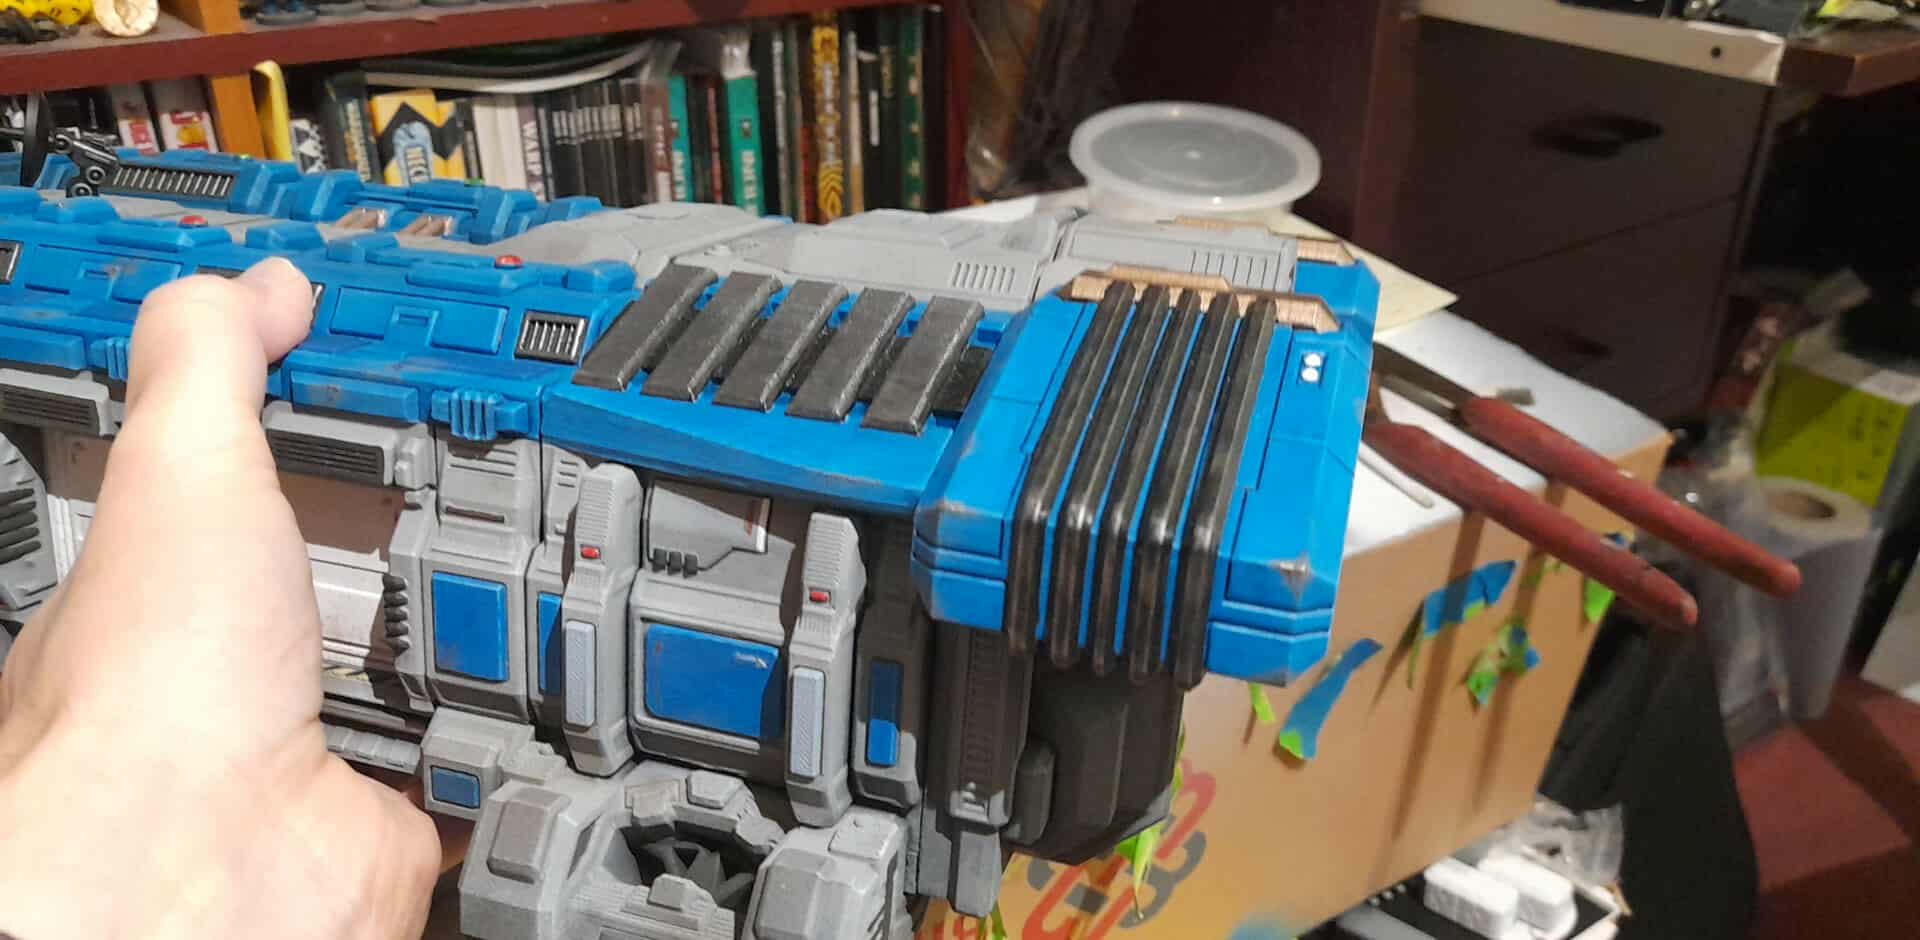
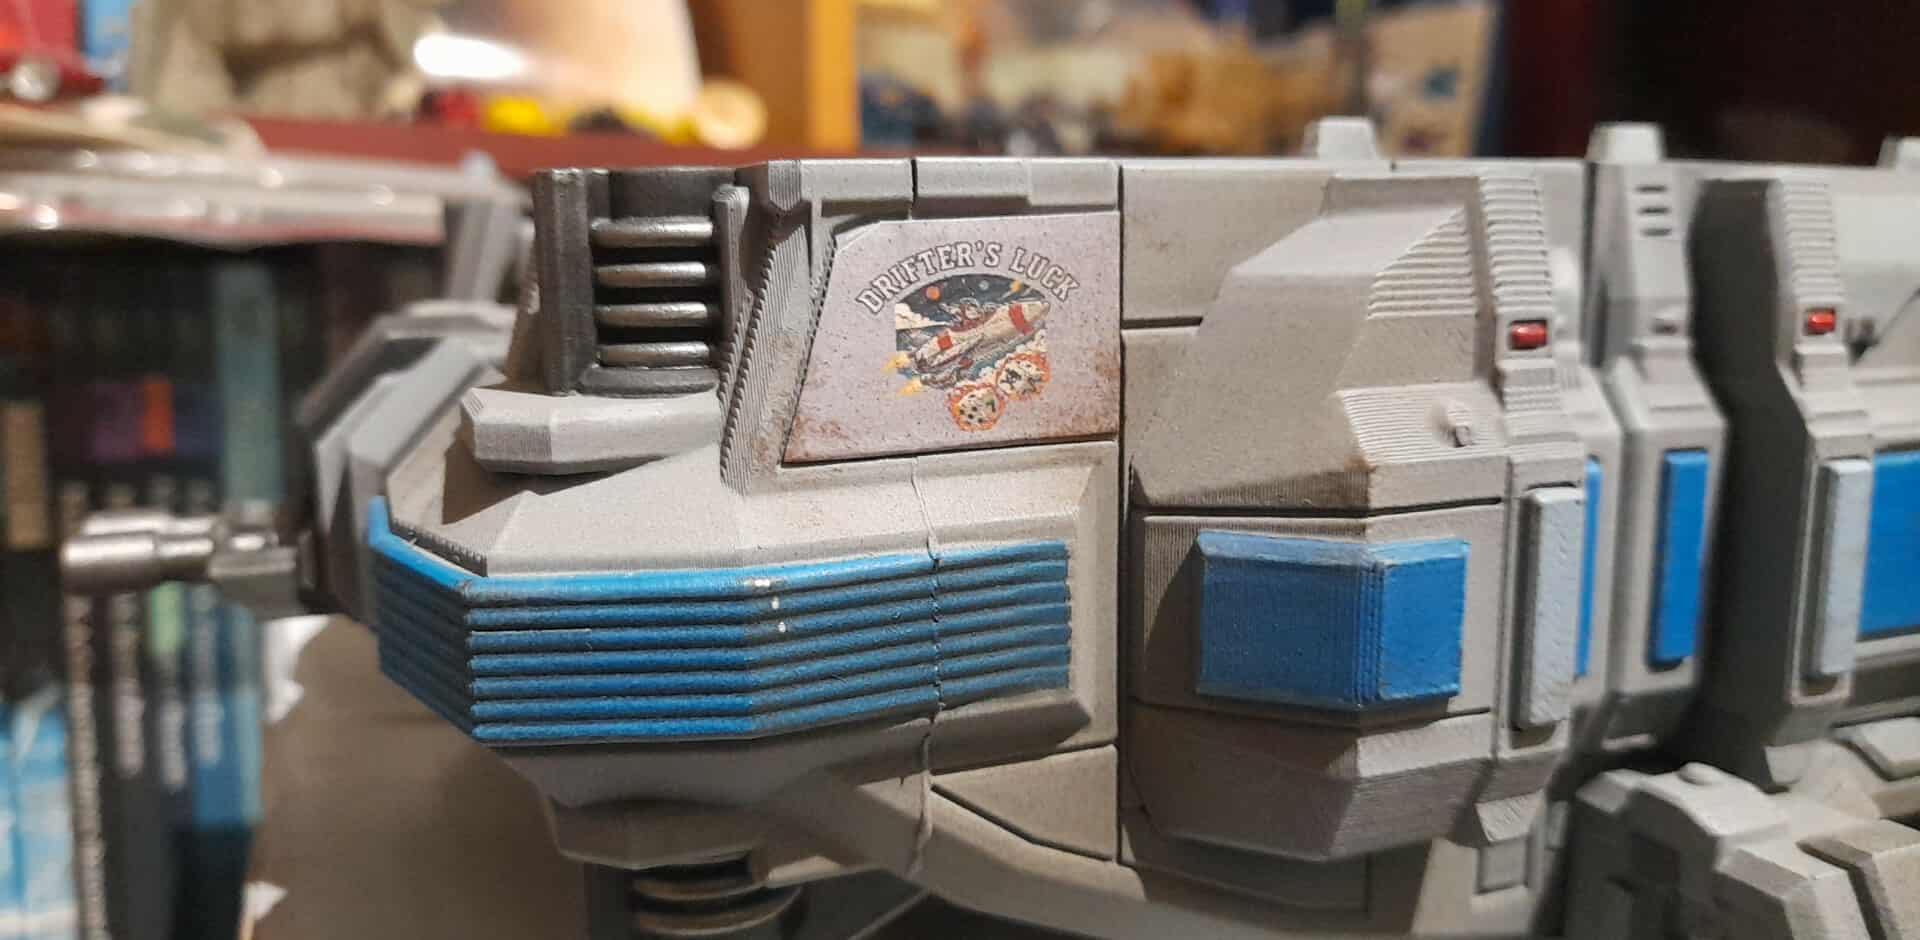
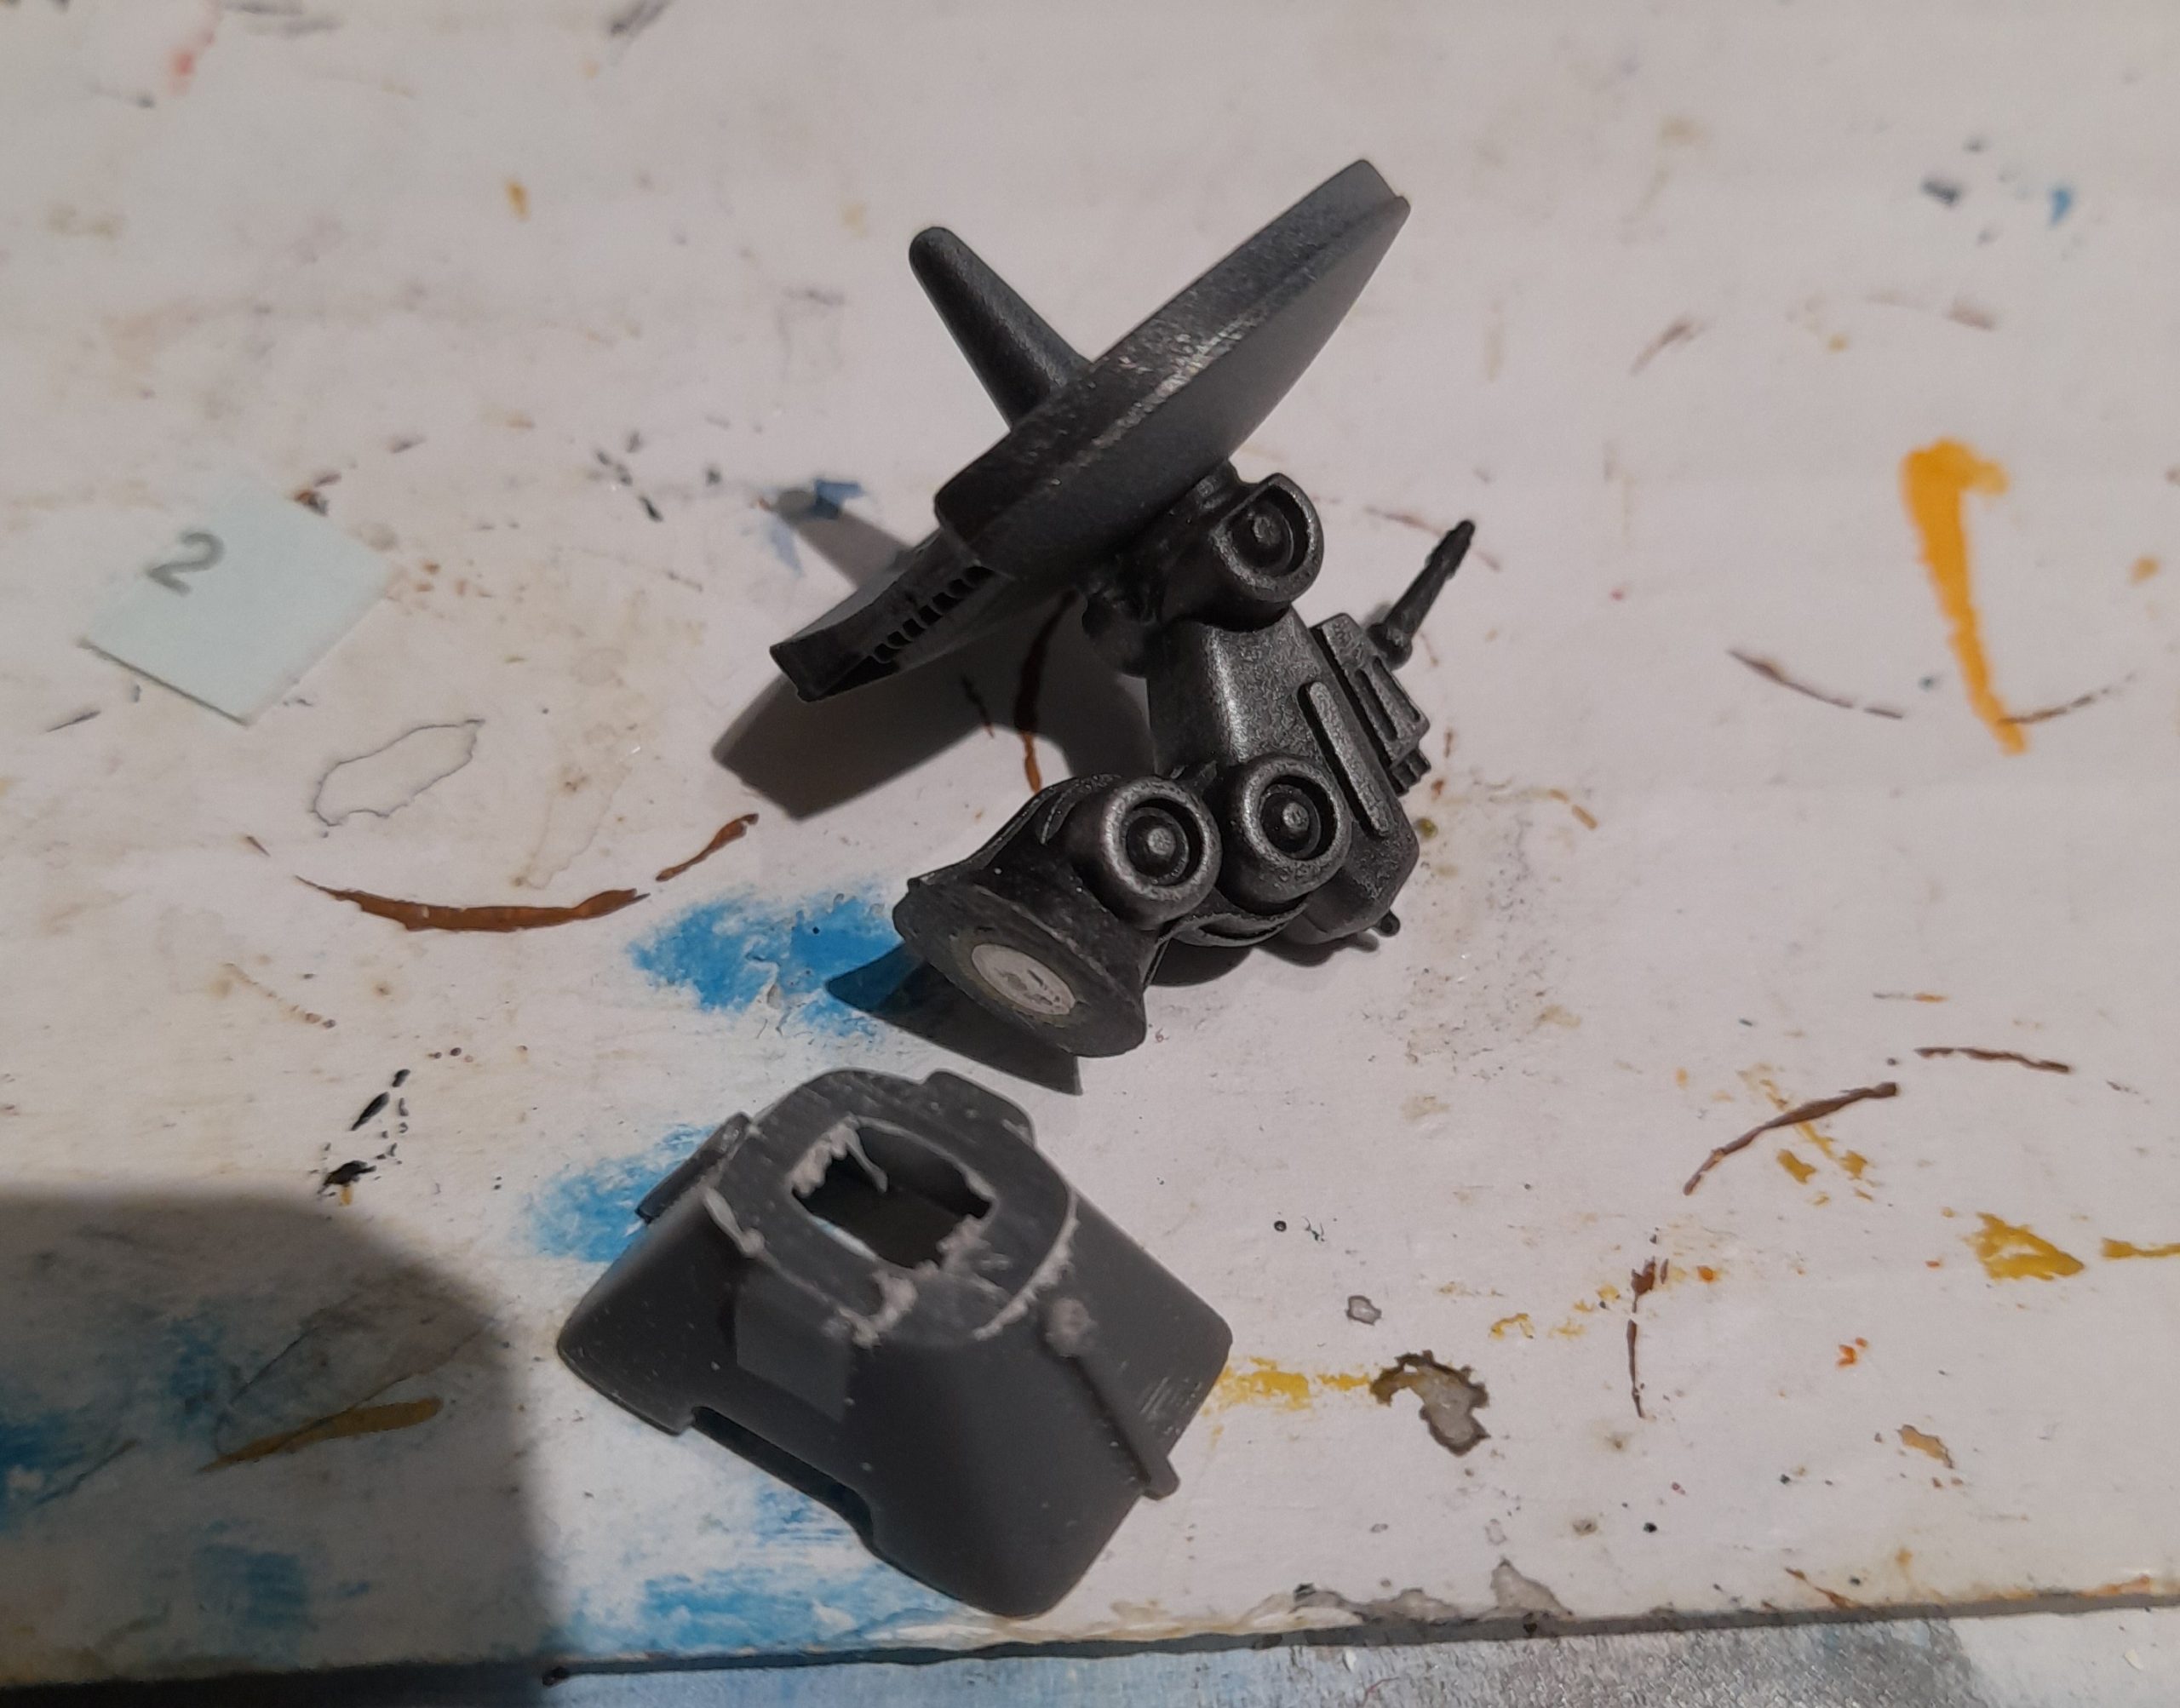
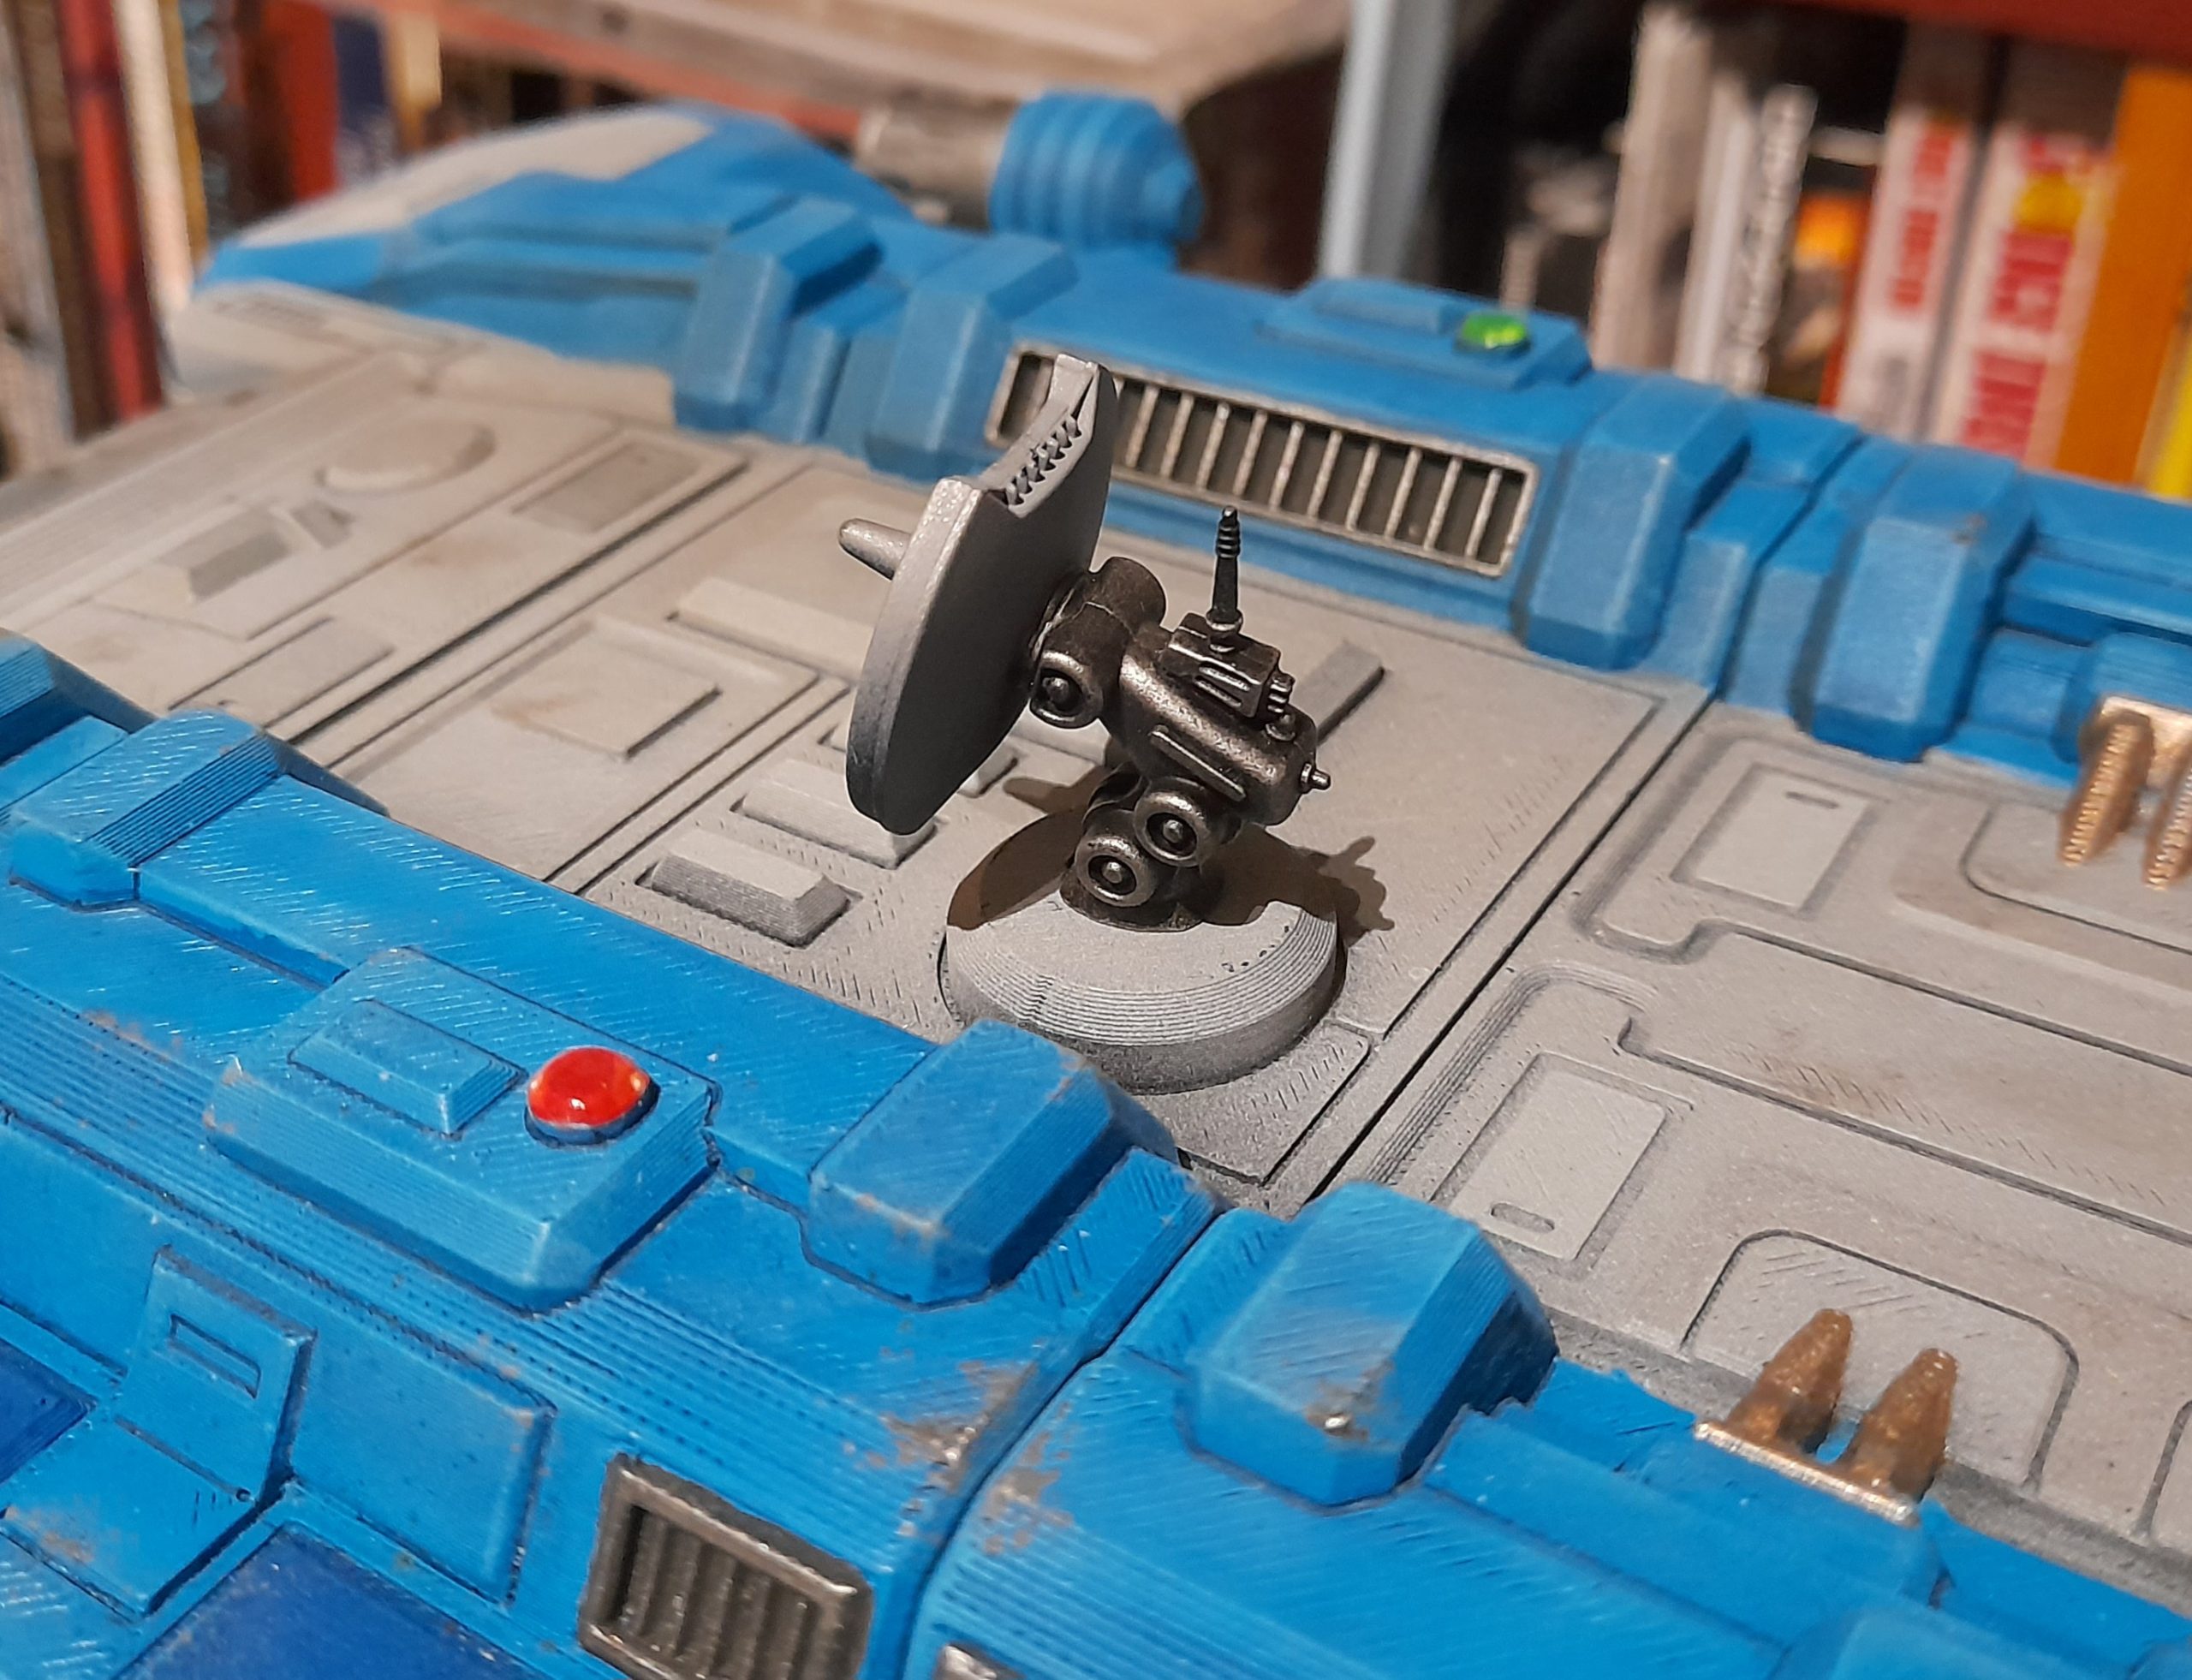
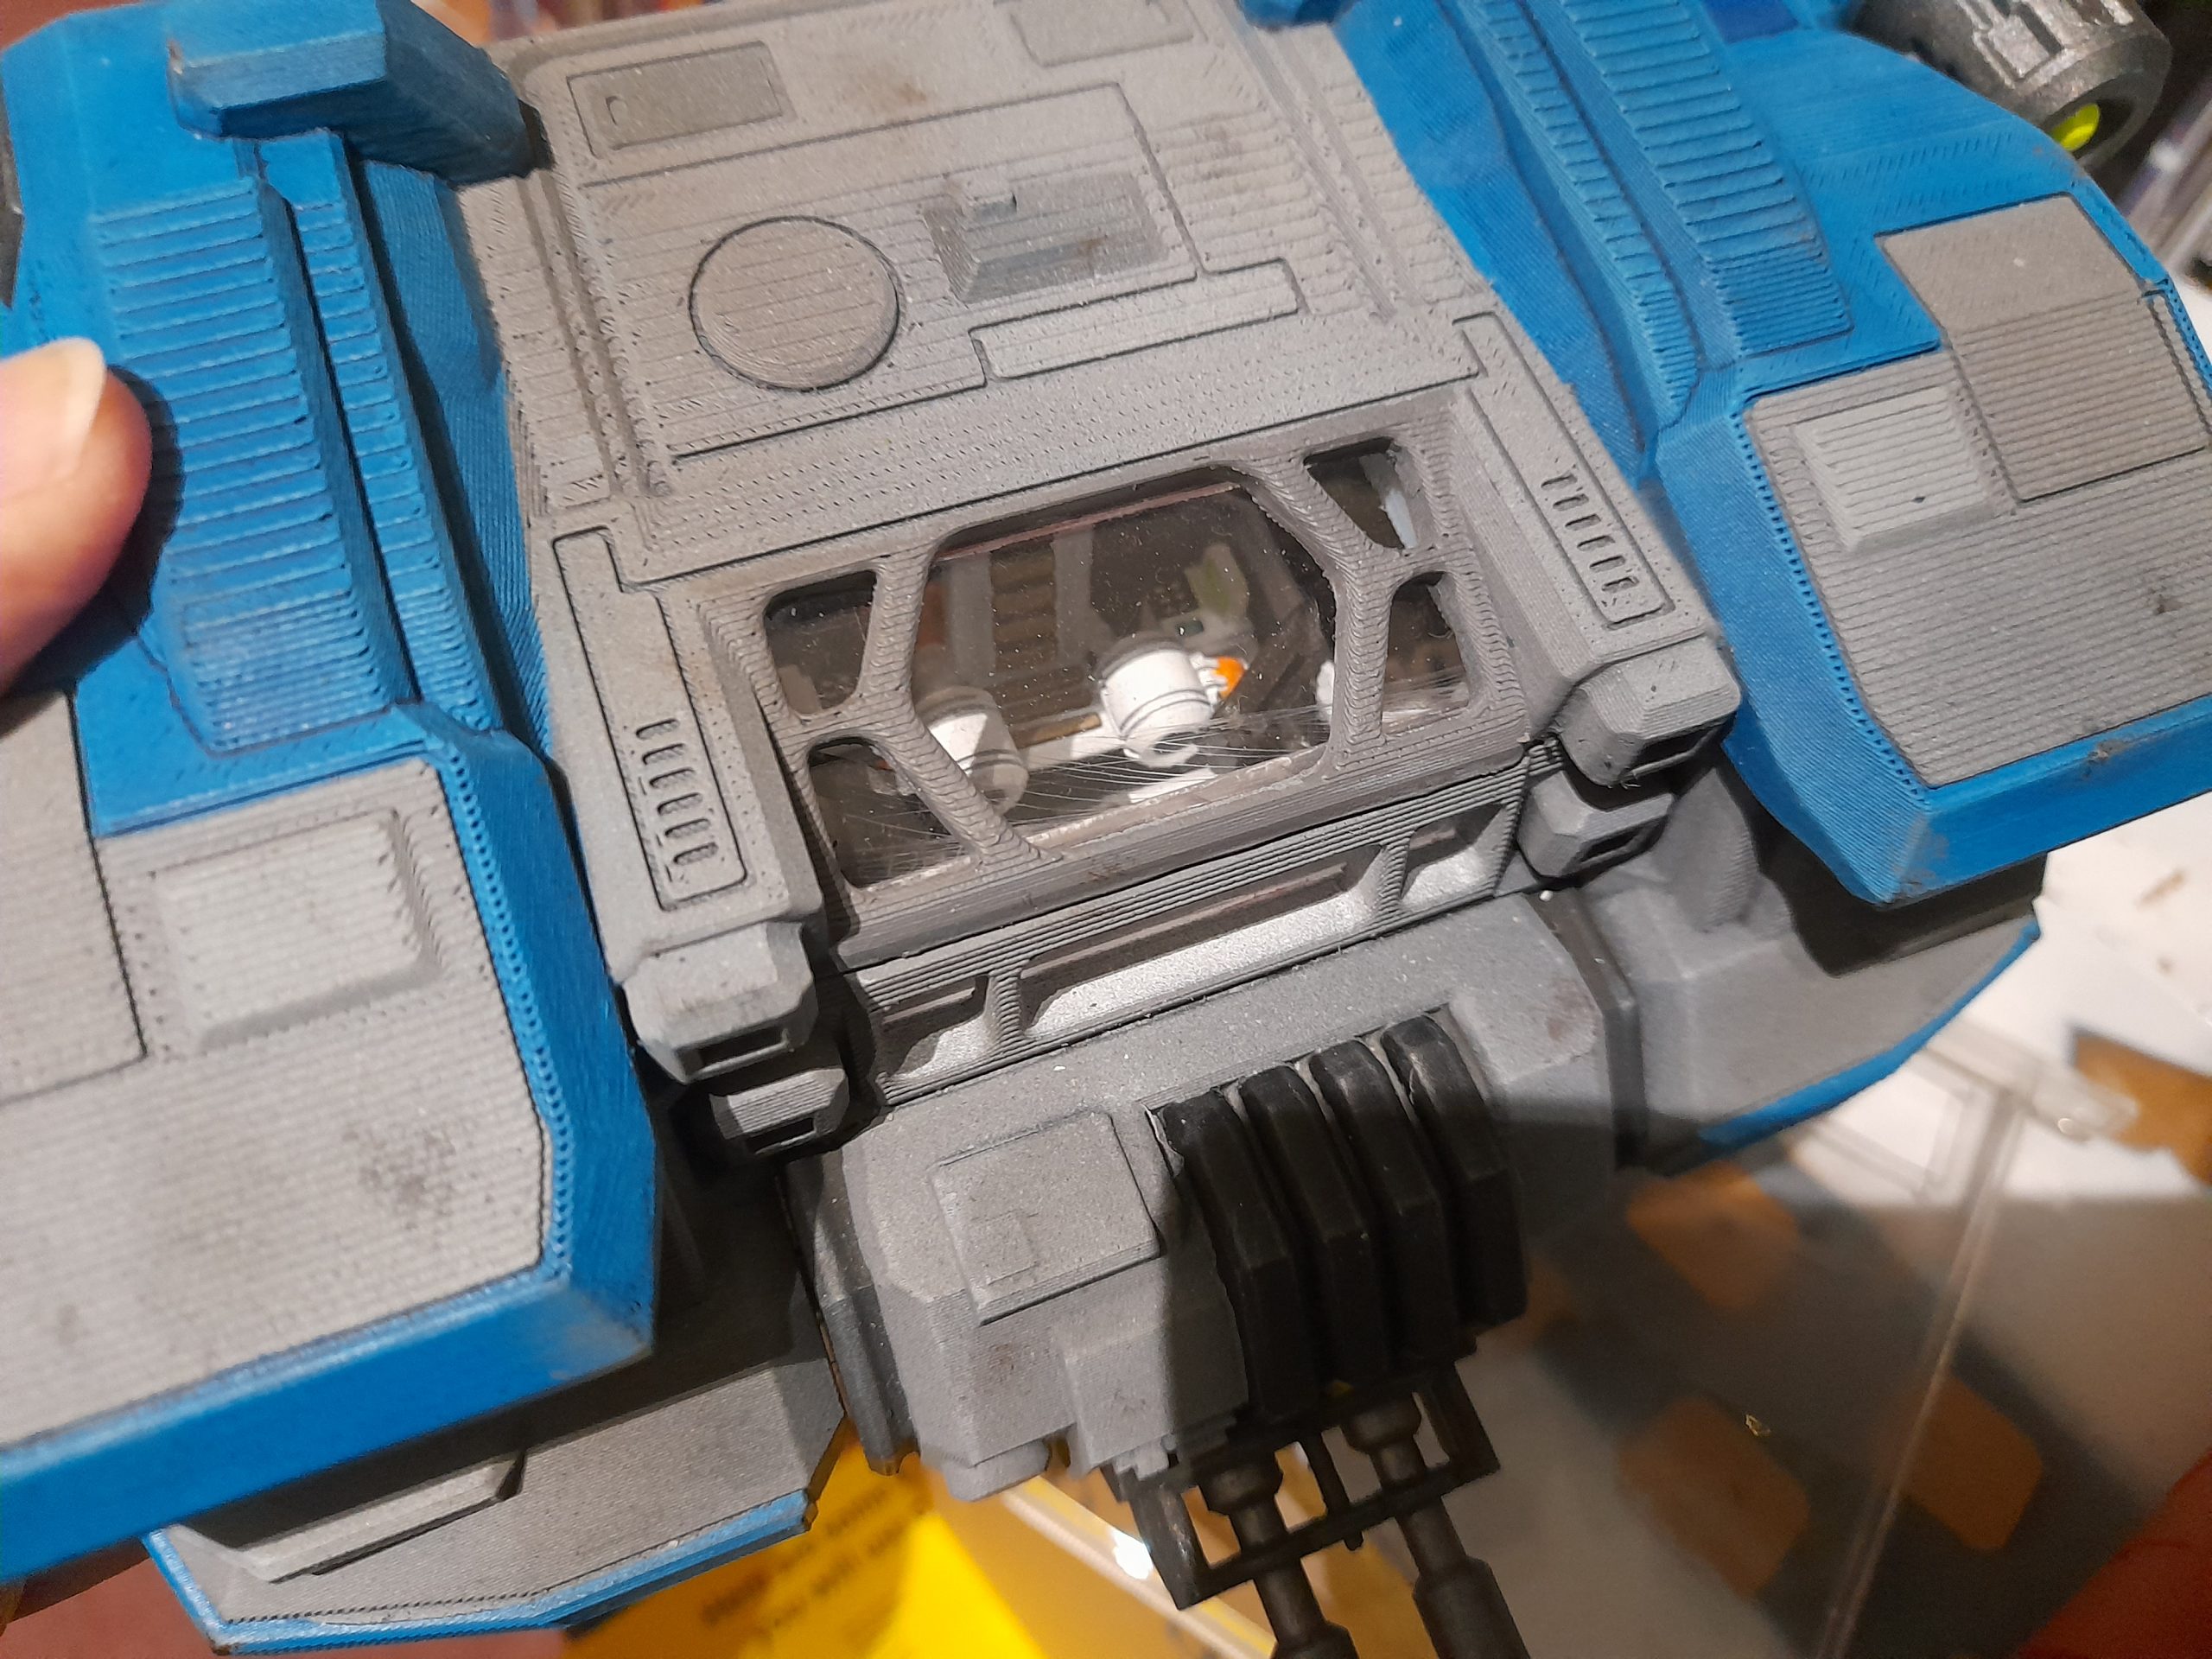
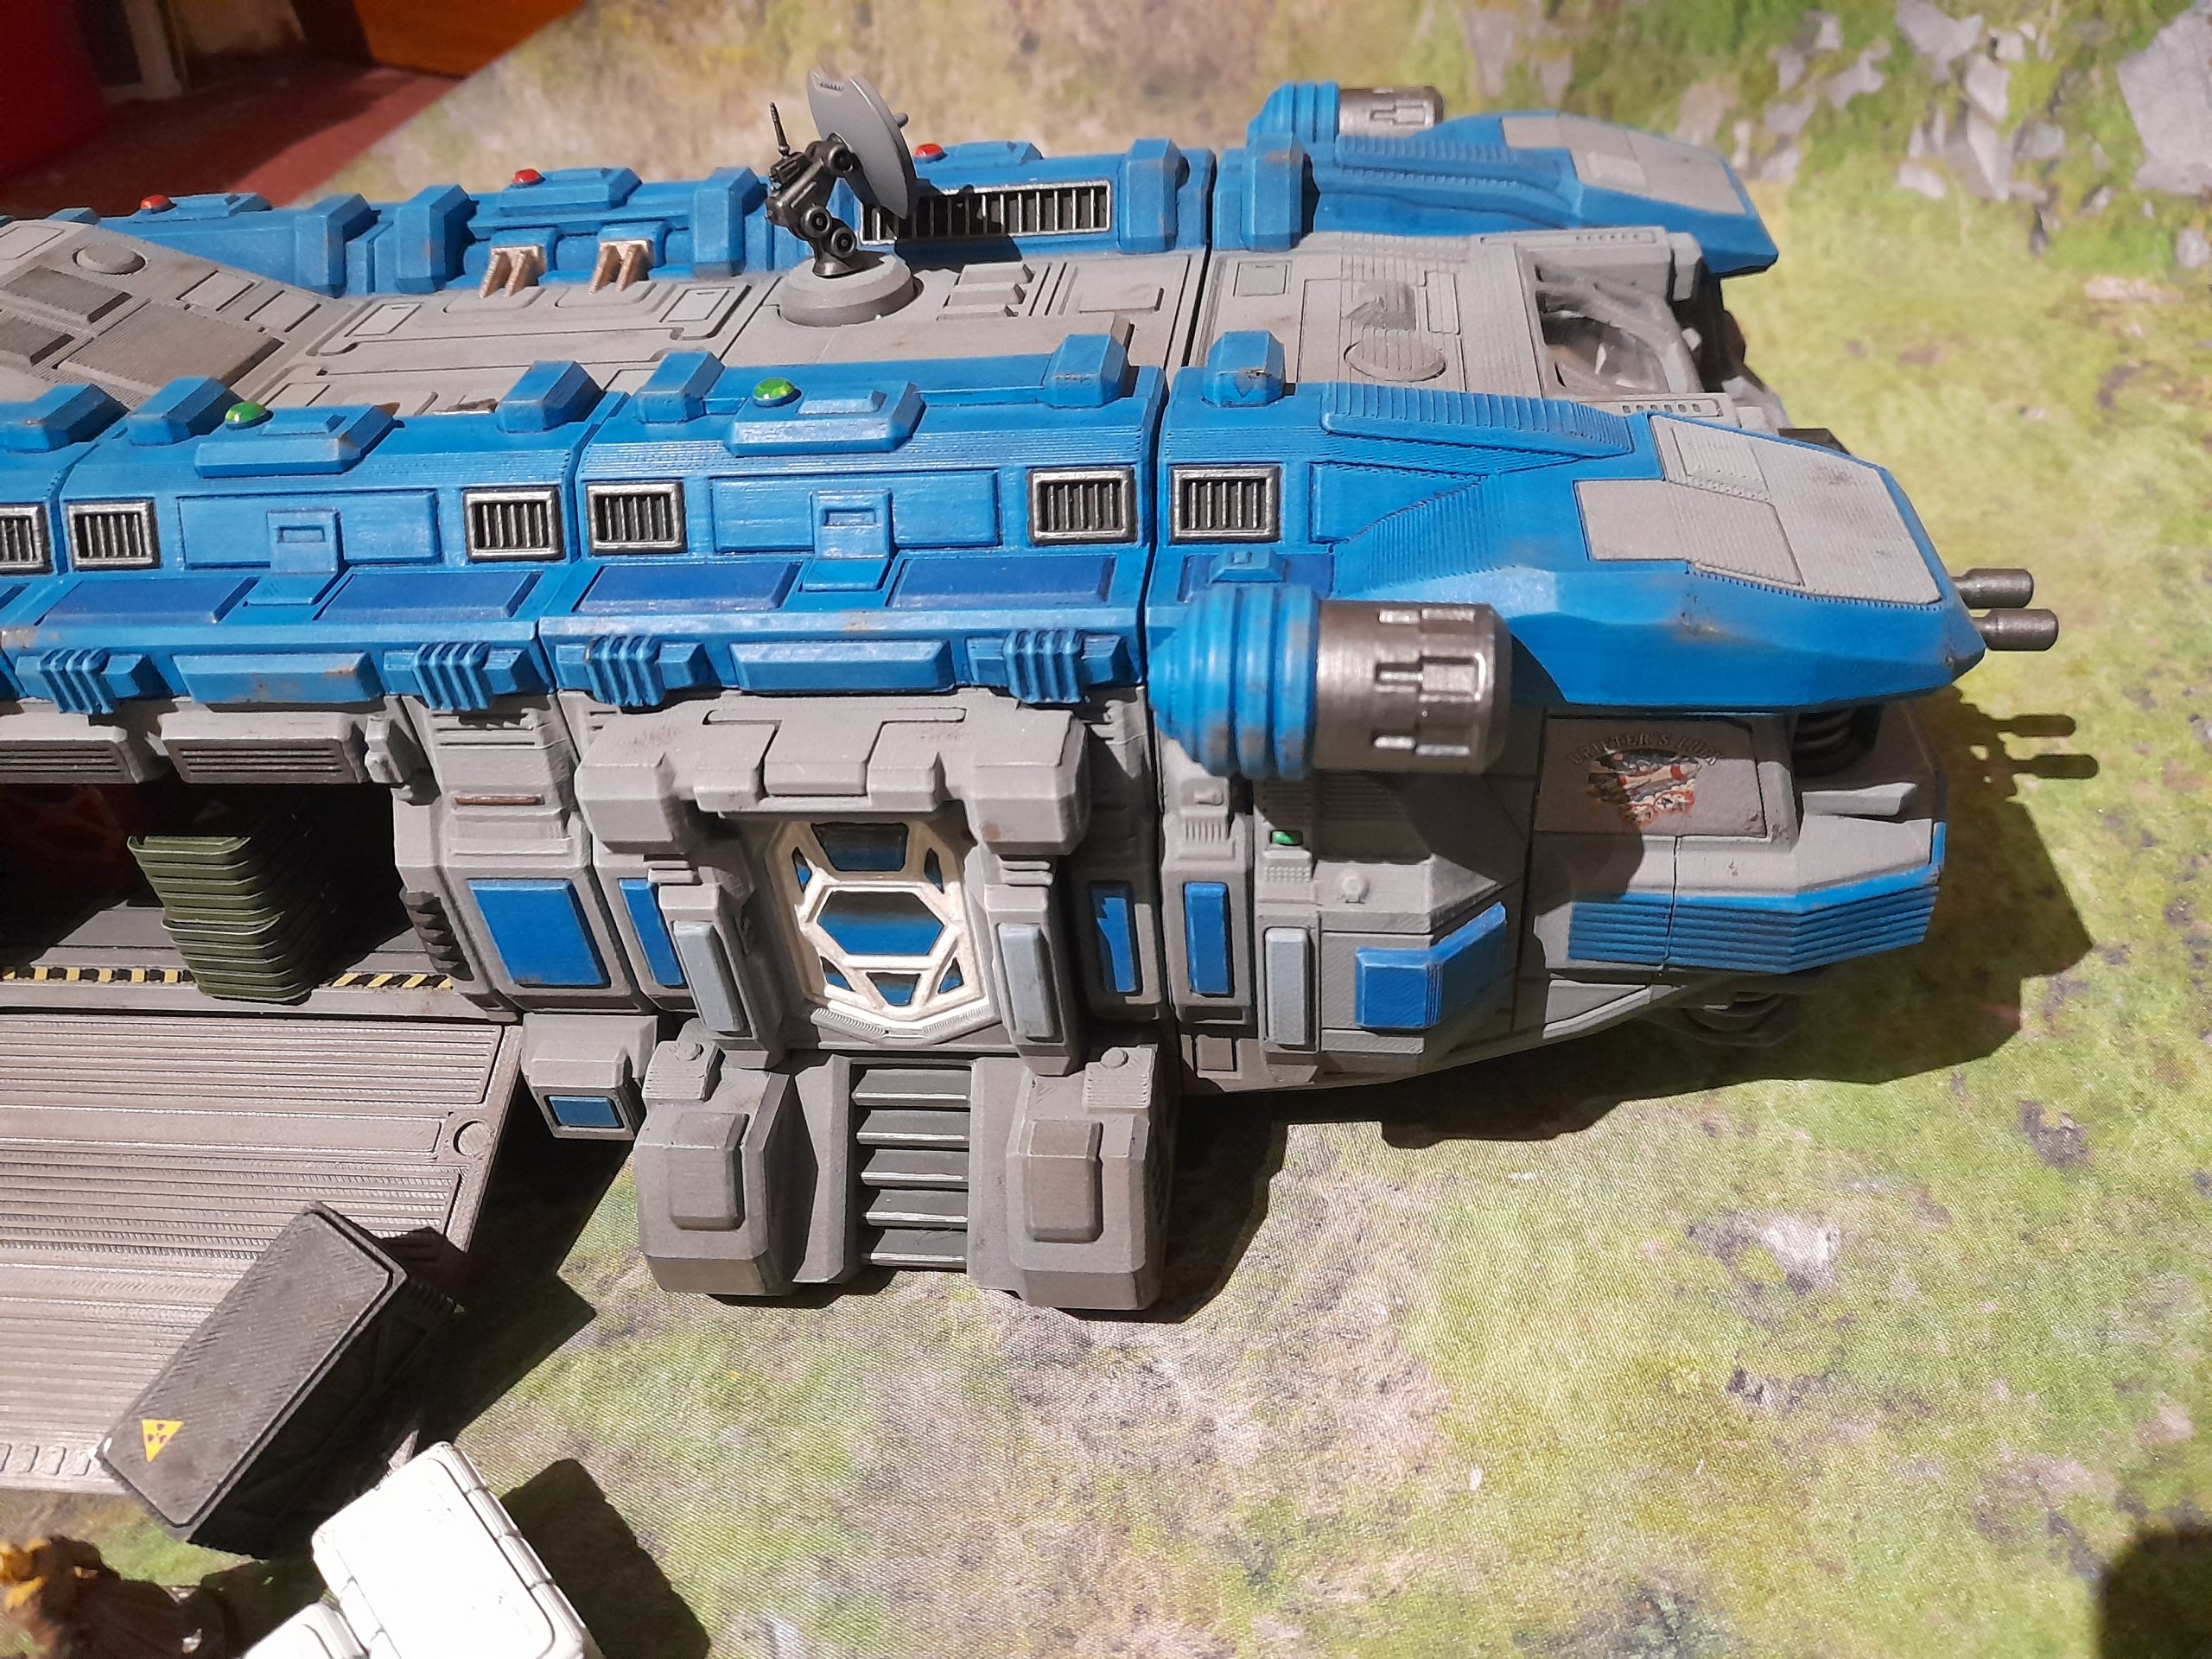
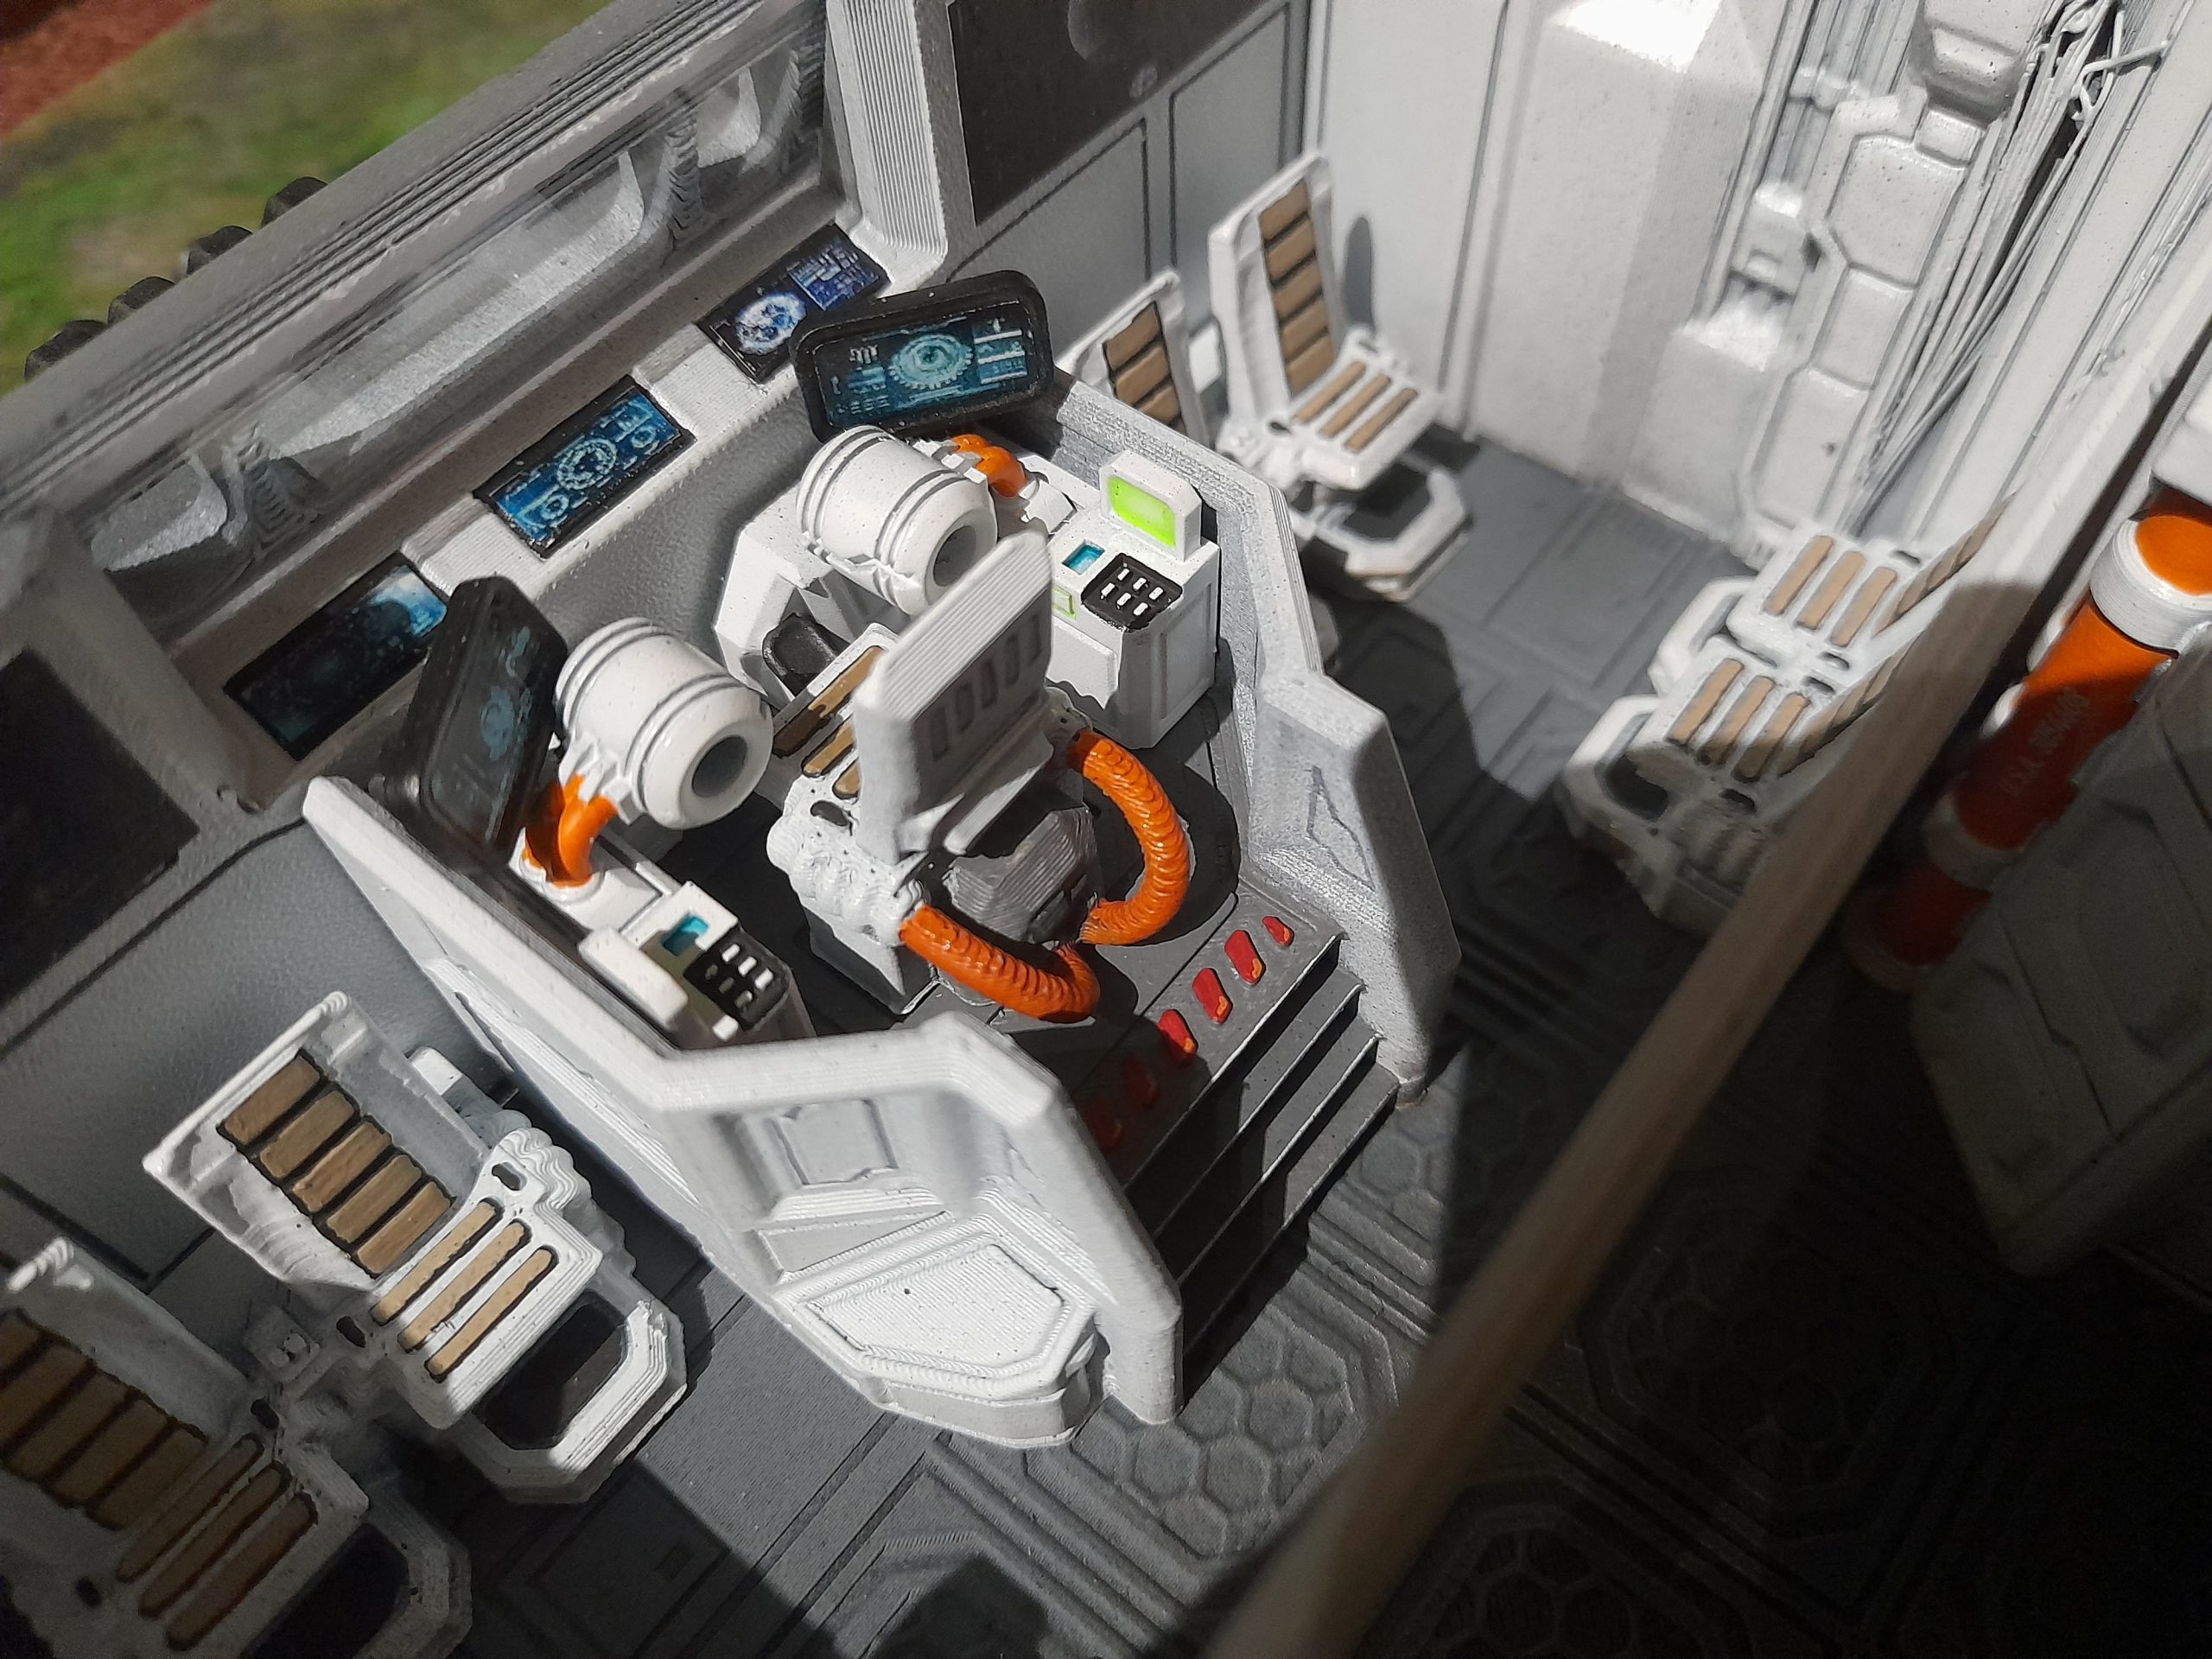
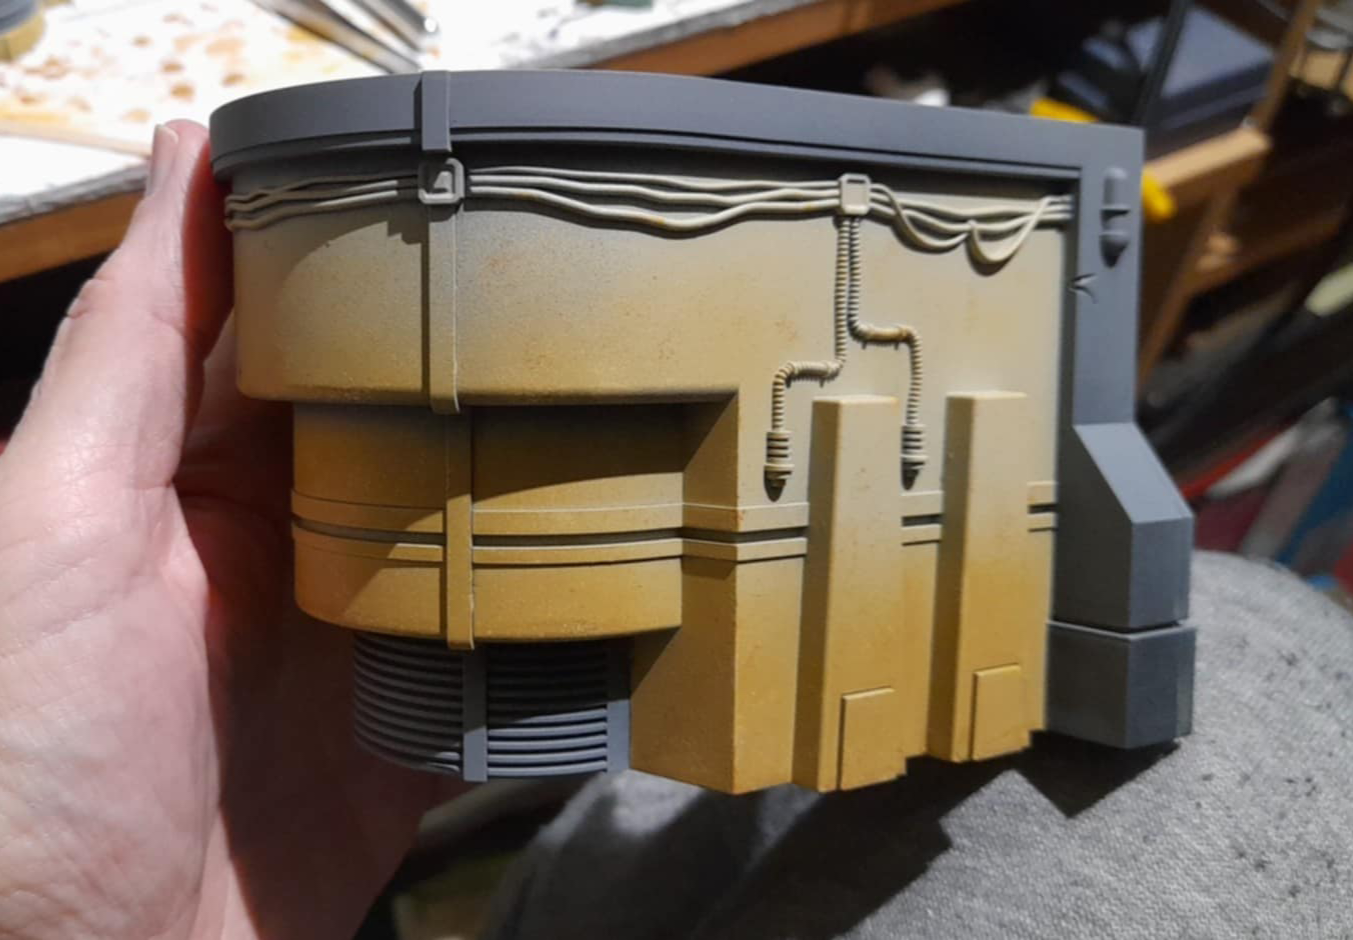
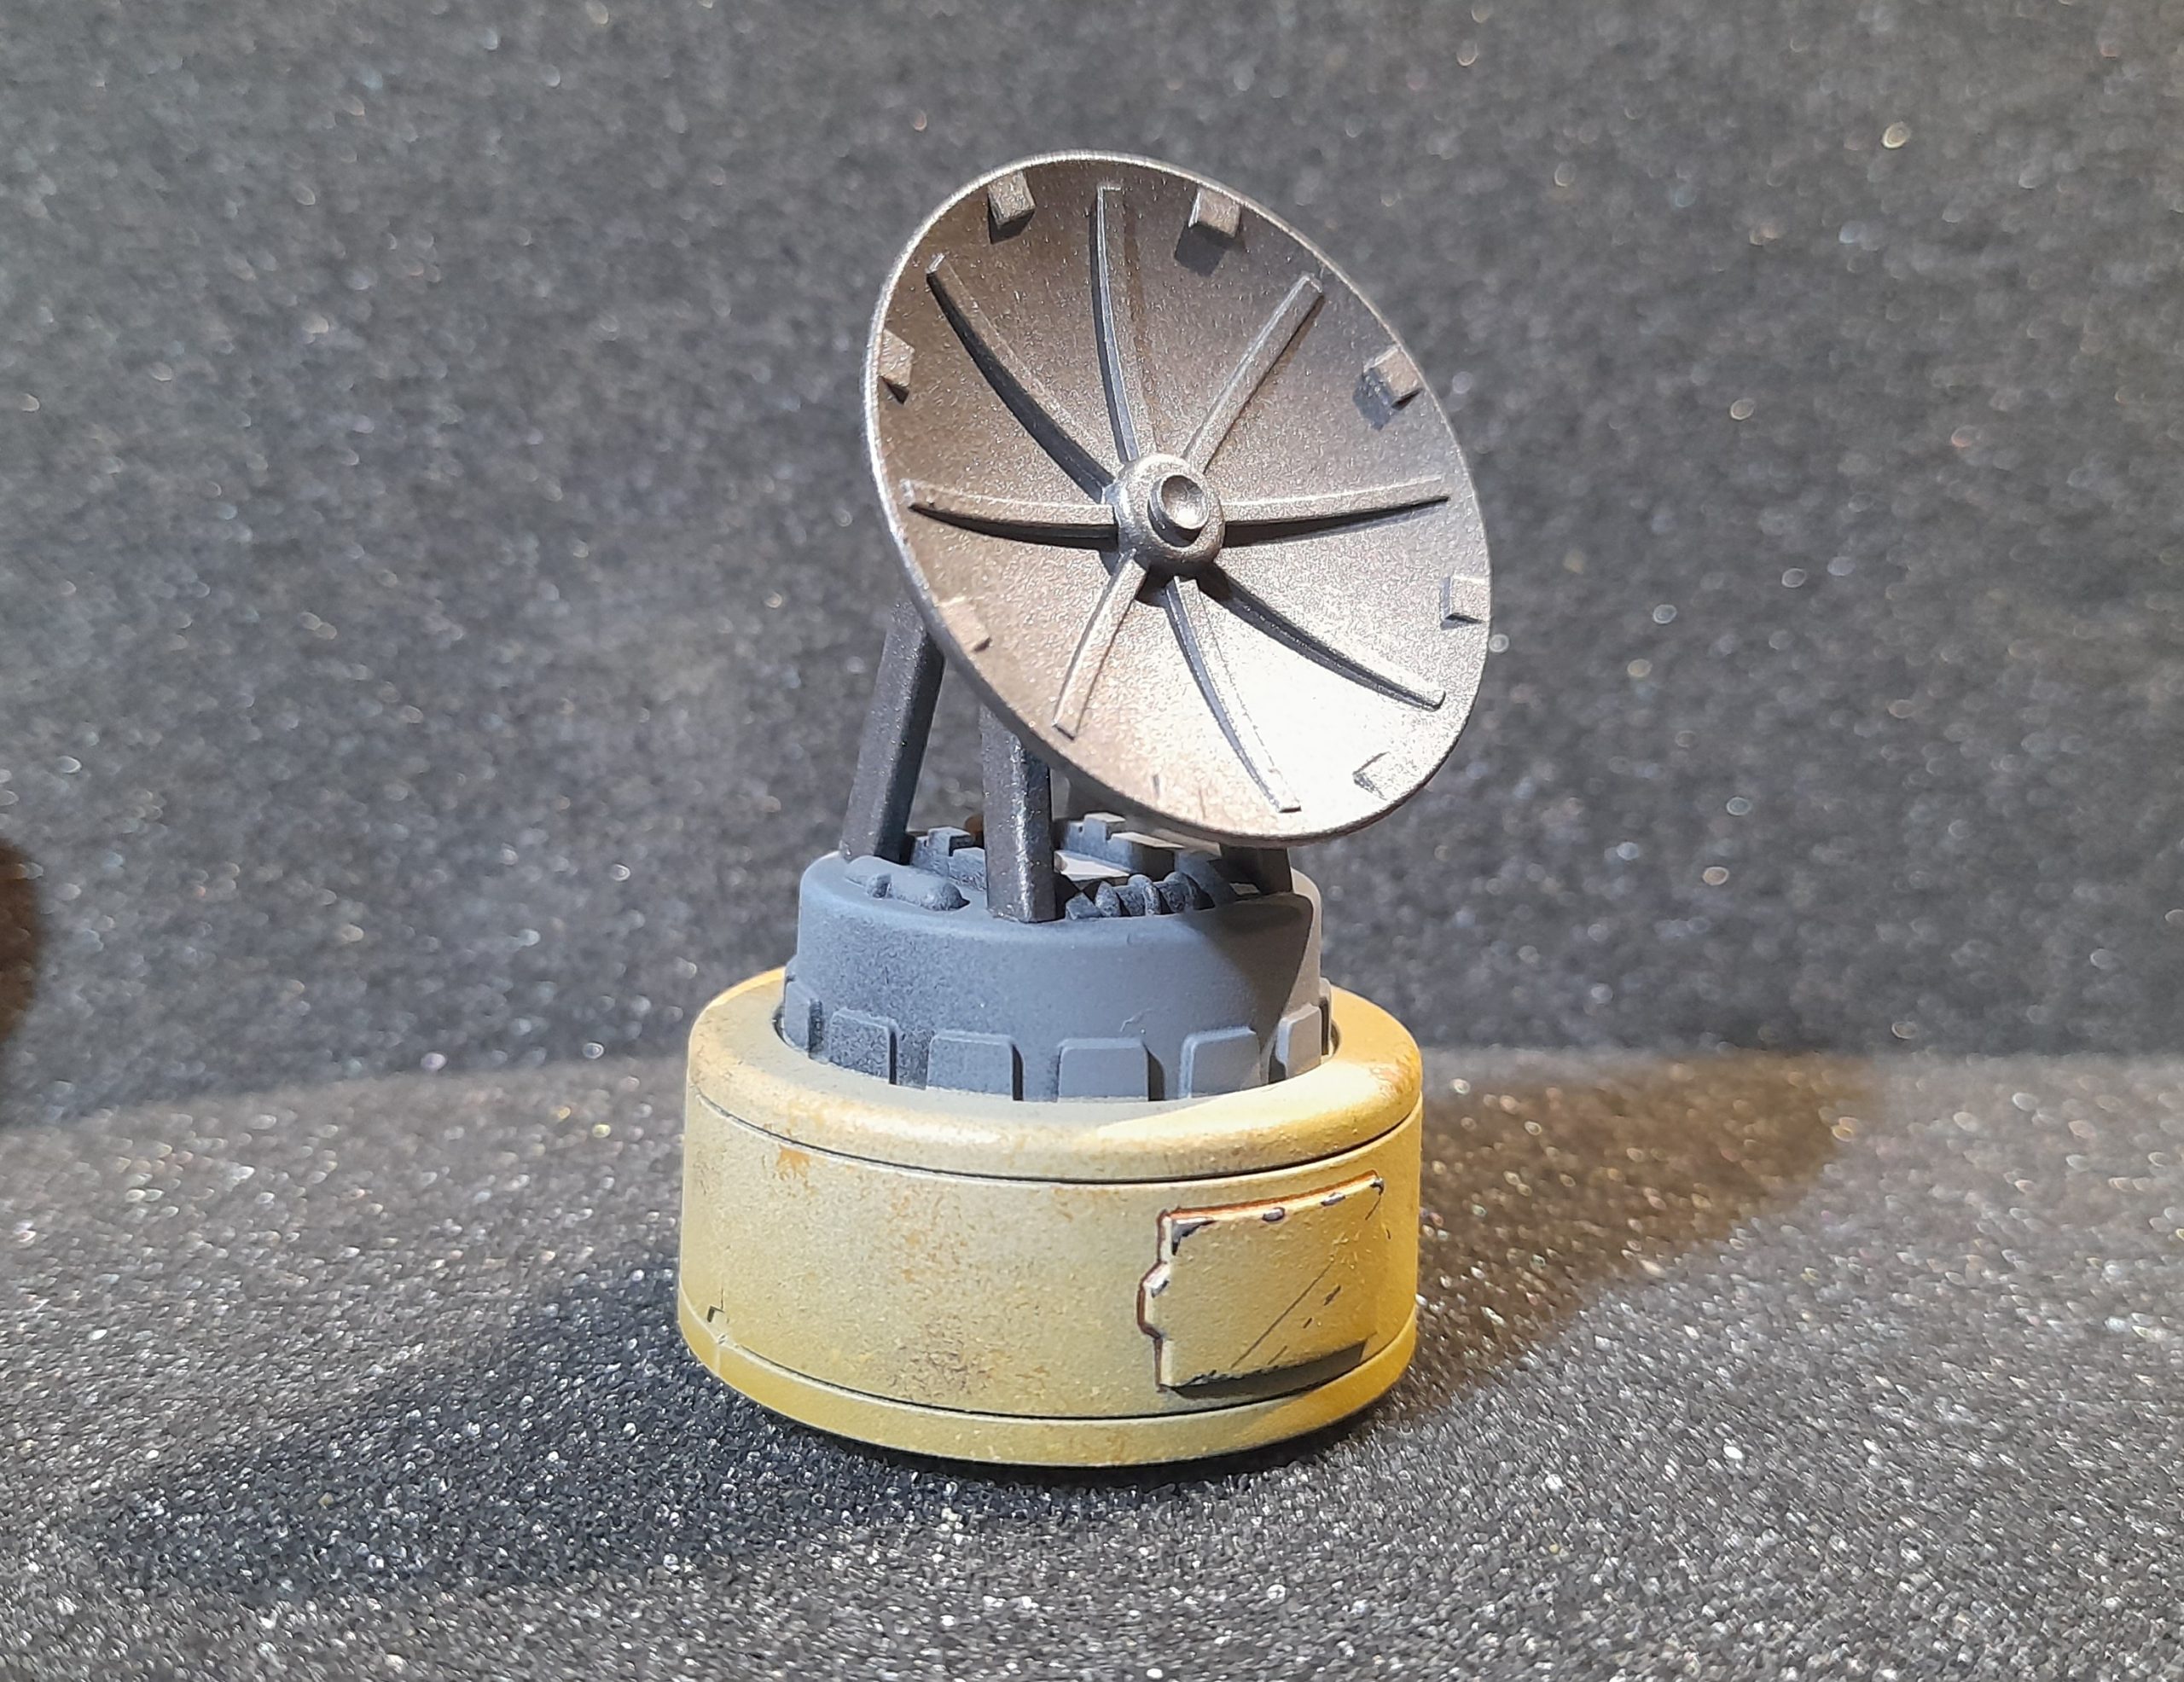
I also added a communications dish to the roof. There was a round flat area on the second section back which seemed ideal.
I took a cooms dish from my Deadzone terrain and sliced off the lower part of the base. I then magnetised that and the hull. The frame was painted black then drybrushed silver, the dish itself was painted in a grey like the hull, with some light silver drybrushing around the edges.
Next up I made some windows for the cockpit. There were some ‘blast shield’ pieces in the print, that slot in behind the two window areas on the cockpit. I used these as templates for cutting out some plastic from an old CD case. After much further trimming and sanding I managed to get them to fit into place. I did scuff one of the windows while sanding, but decided to leave it like that since a window could be scratched up on a ship like this.
Finally it was on to the crates. My friend had printed out crates in four different designs. Some of which happen to be very close to designs used in a certain Sci-fi franchise. For the smaller cube like crates I chose three colours, red, yellow and green. Painted these up with various washes, highlights and weathering stages. For some of them I also printed out small hazard signs and stuck them on to the tops.
There were some rectangular crates, two of which were more sci-fi styled. For these I painted them white, added some shading and then some light weathering by sponging on some Wildwood. The other rectangular crates I painted black, drybrushed silver, added some stippling of a dark grey and further weathering by applying scratch and scrape marks across them. These also had hazard warning signs glued on.
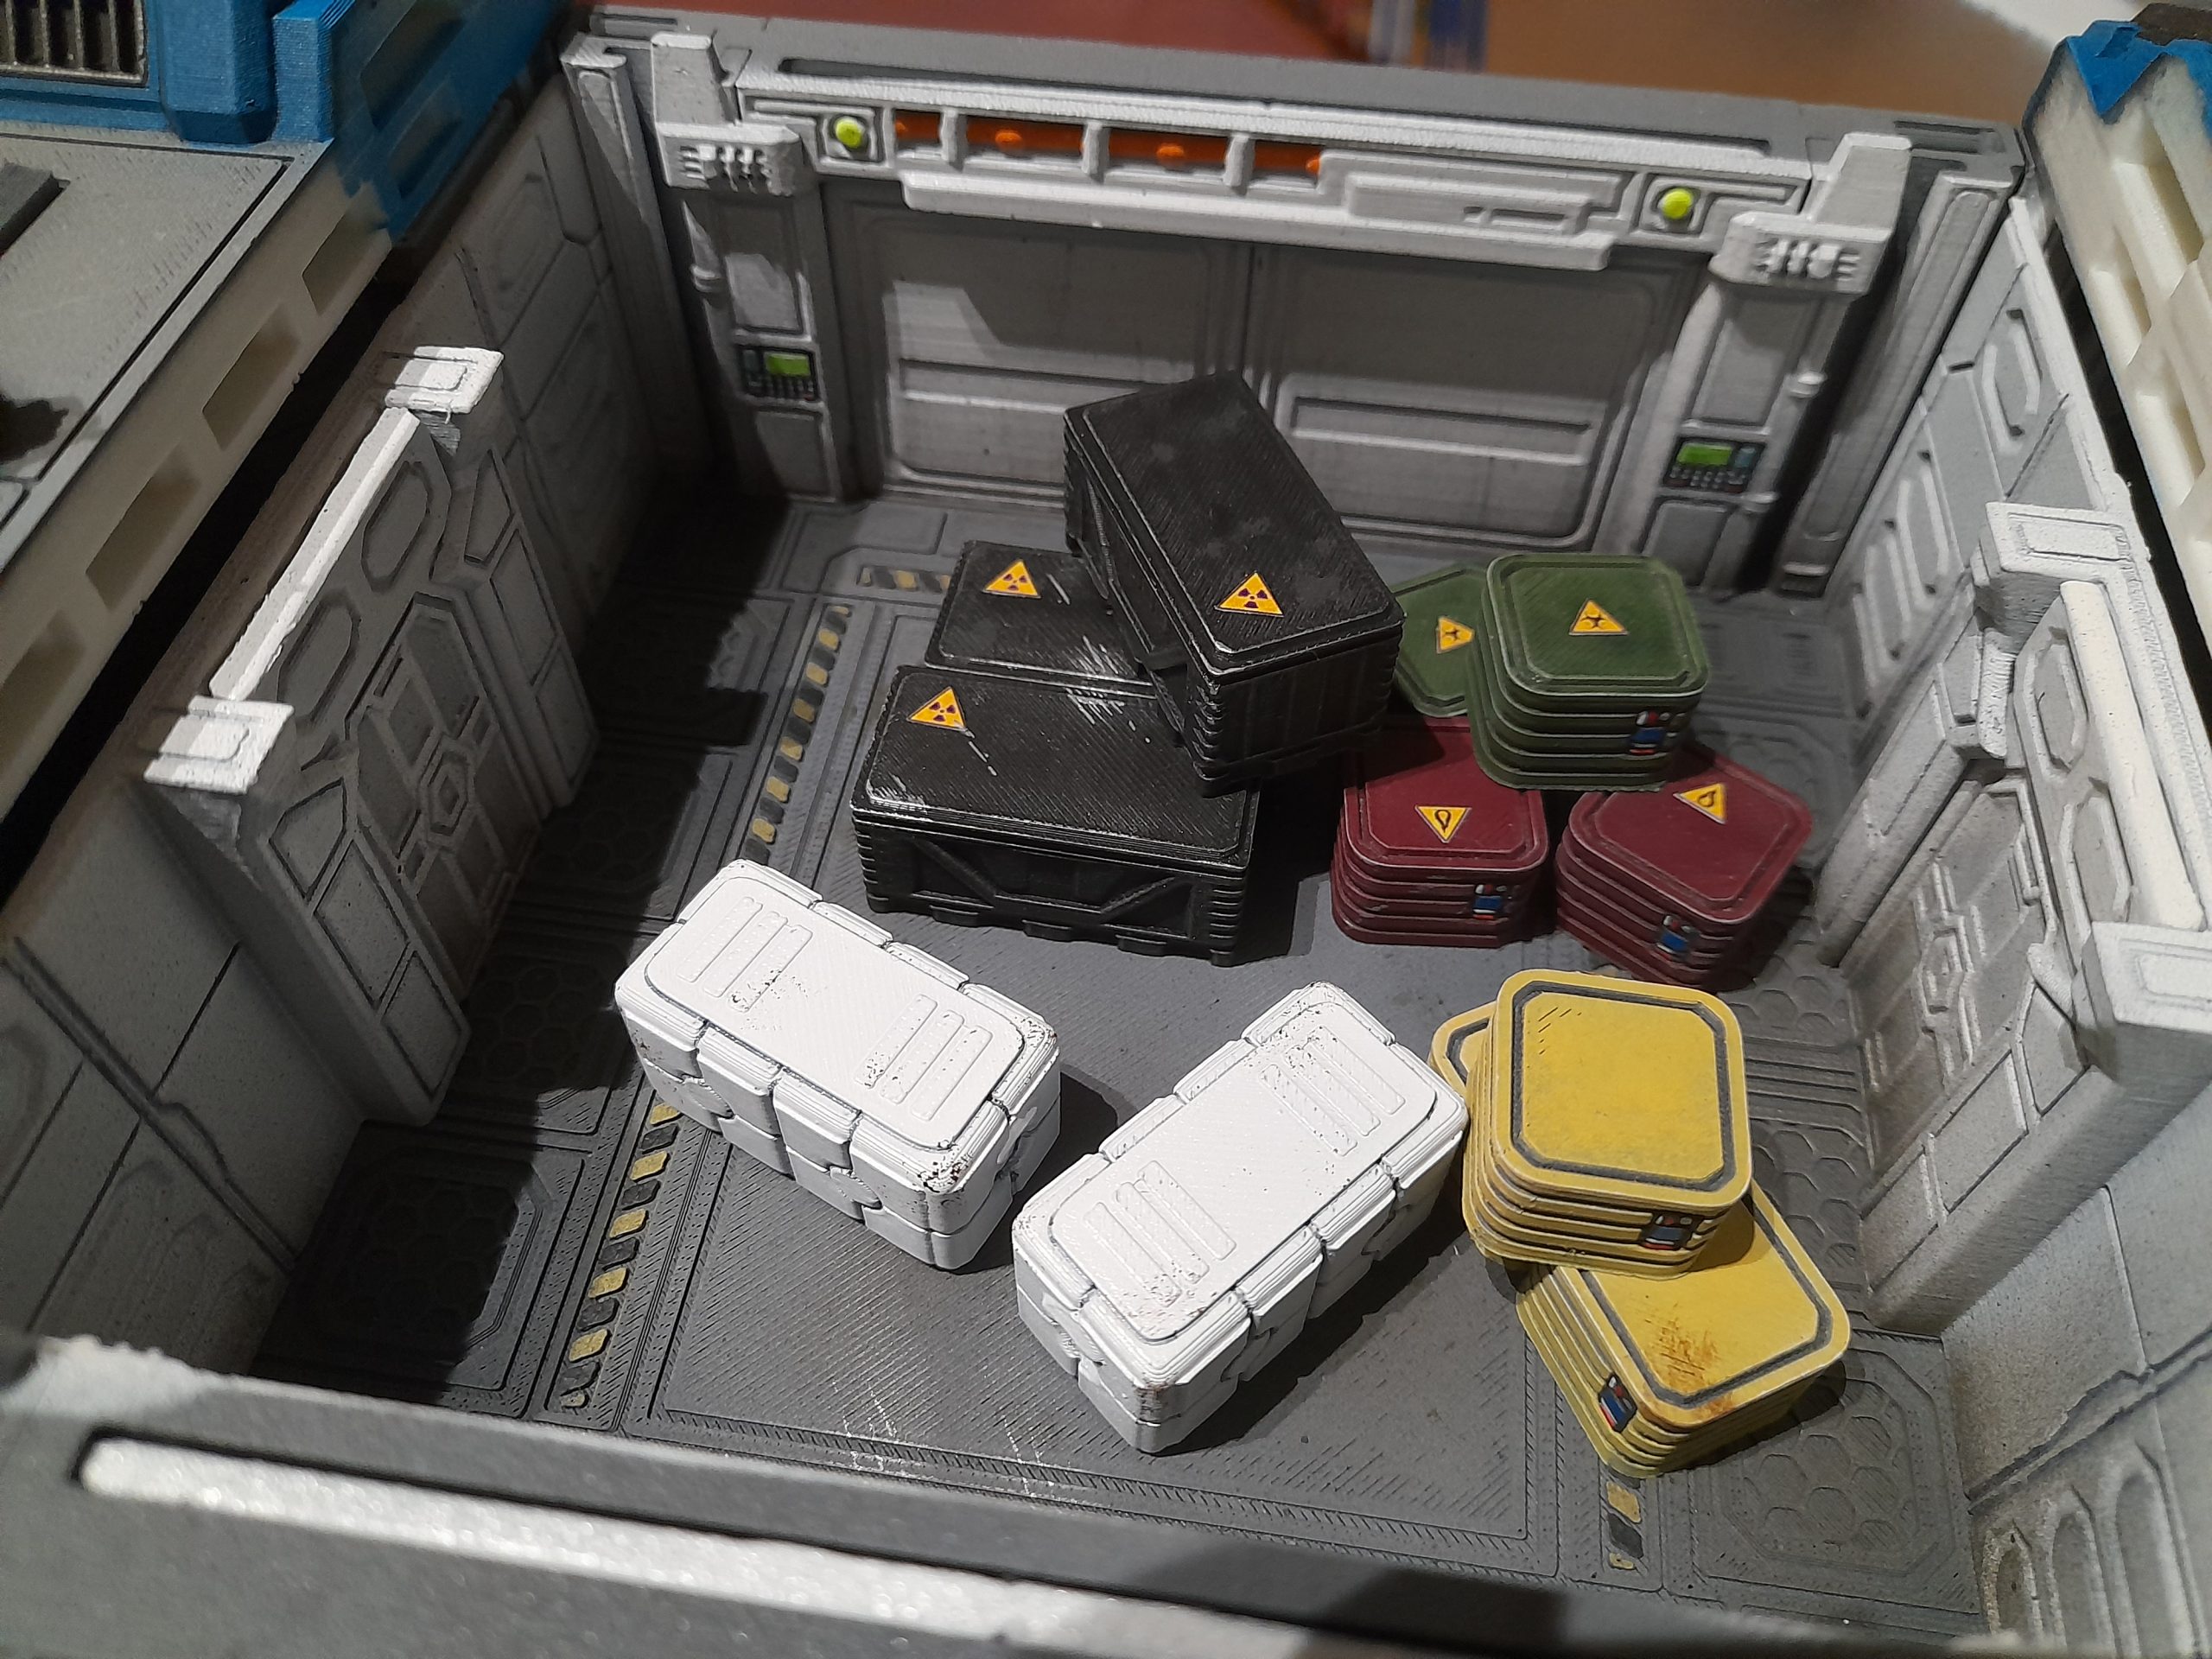
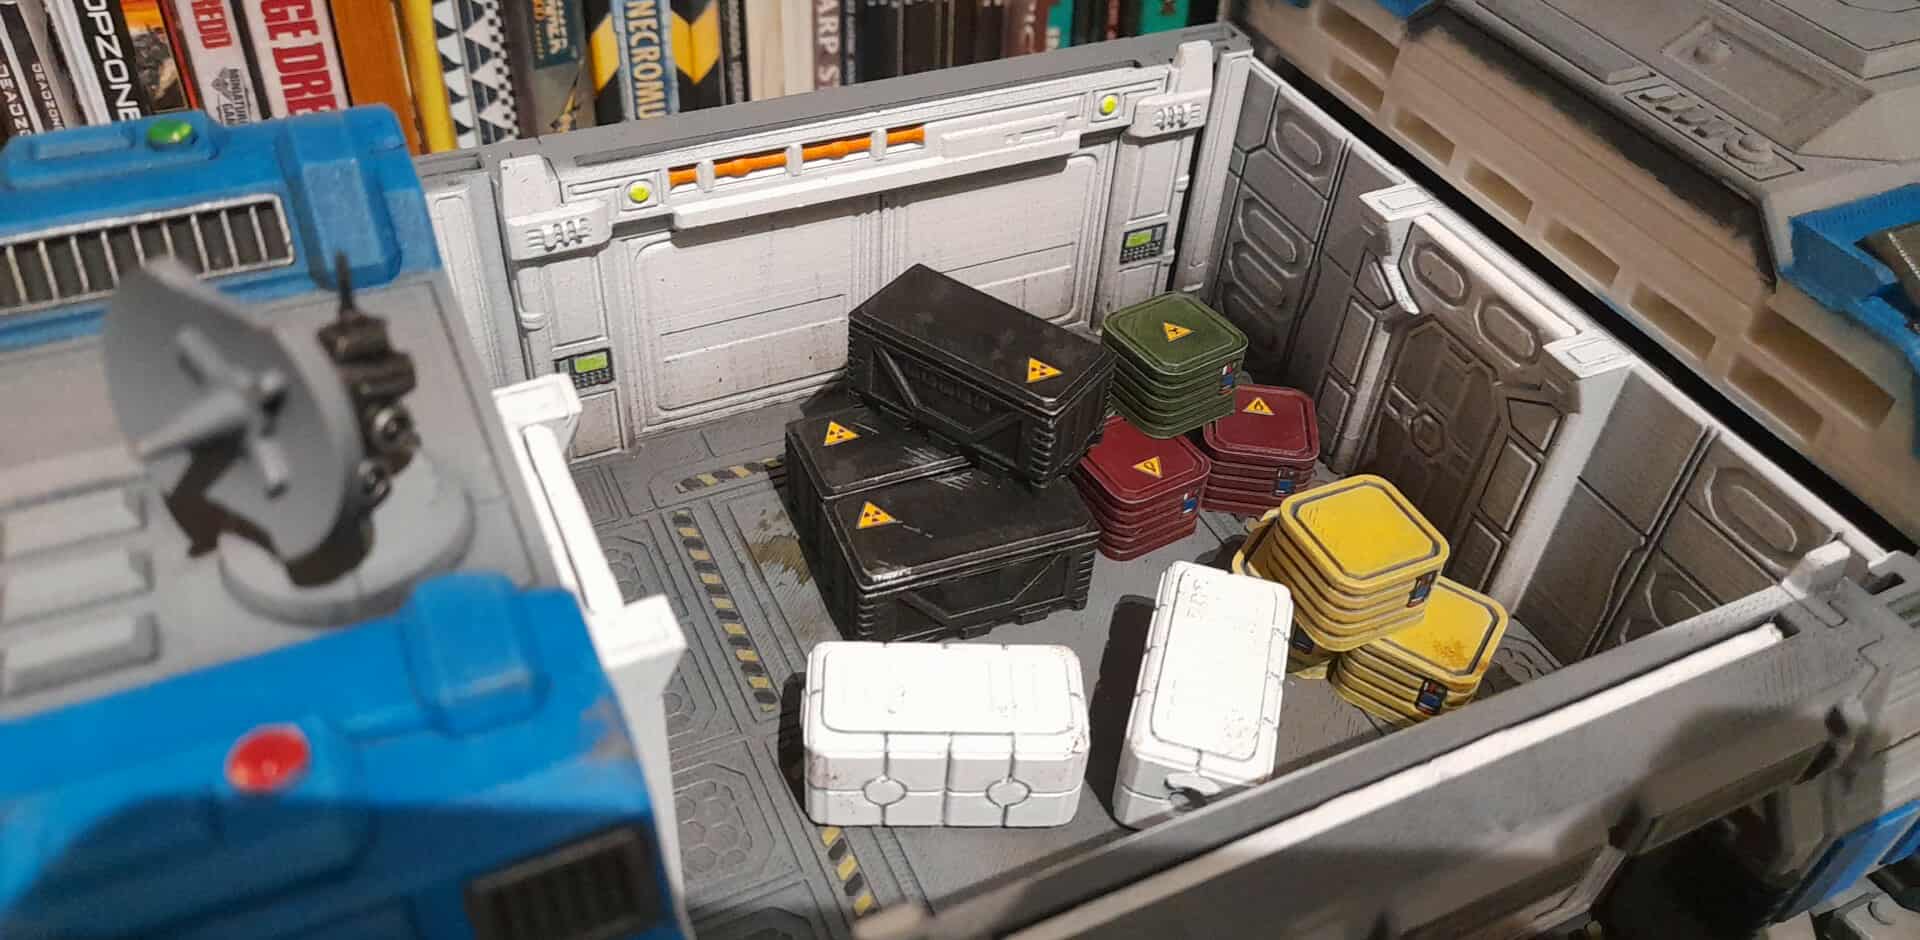
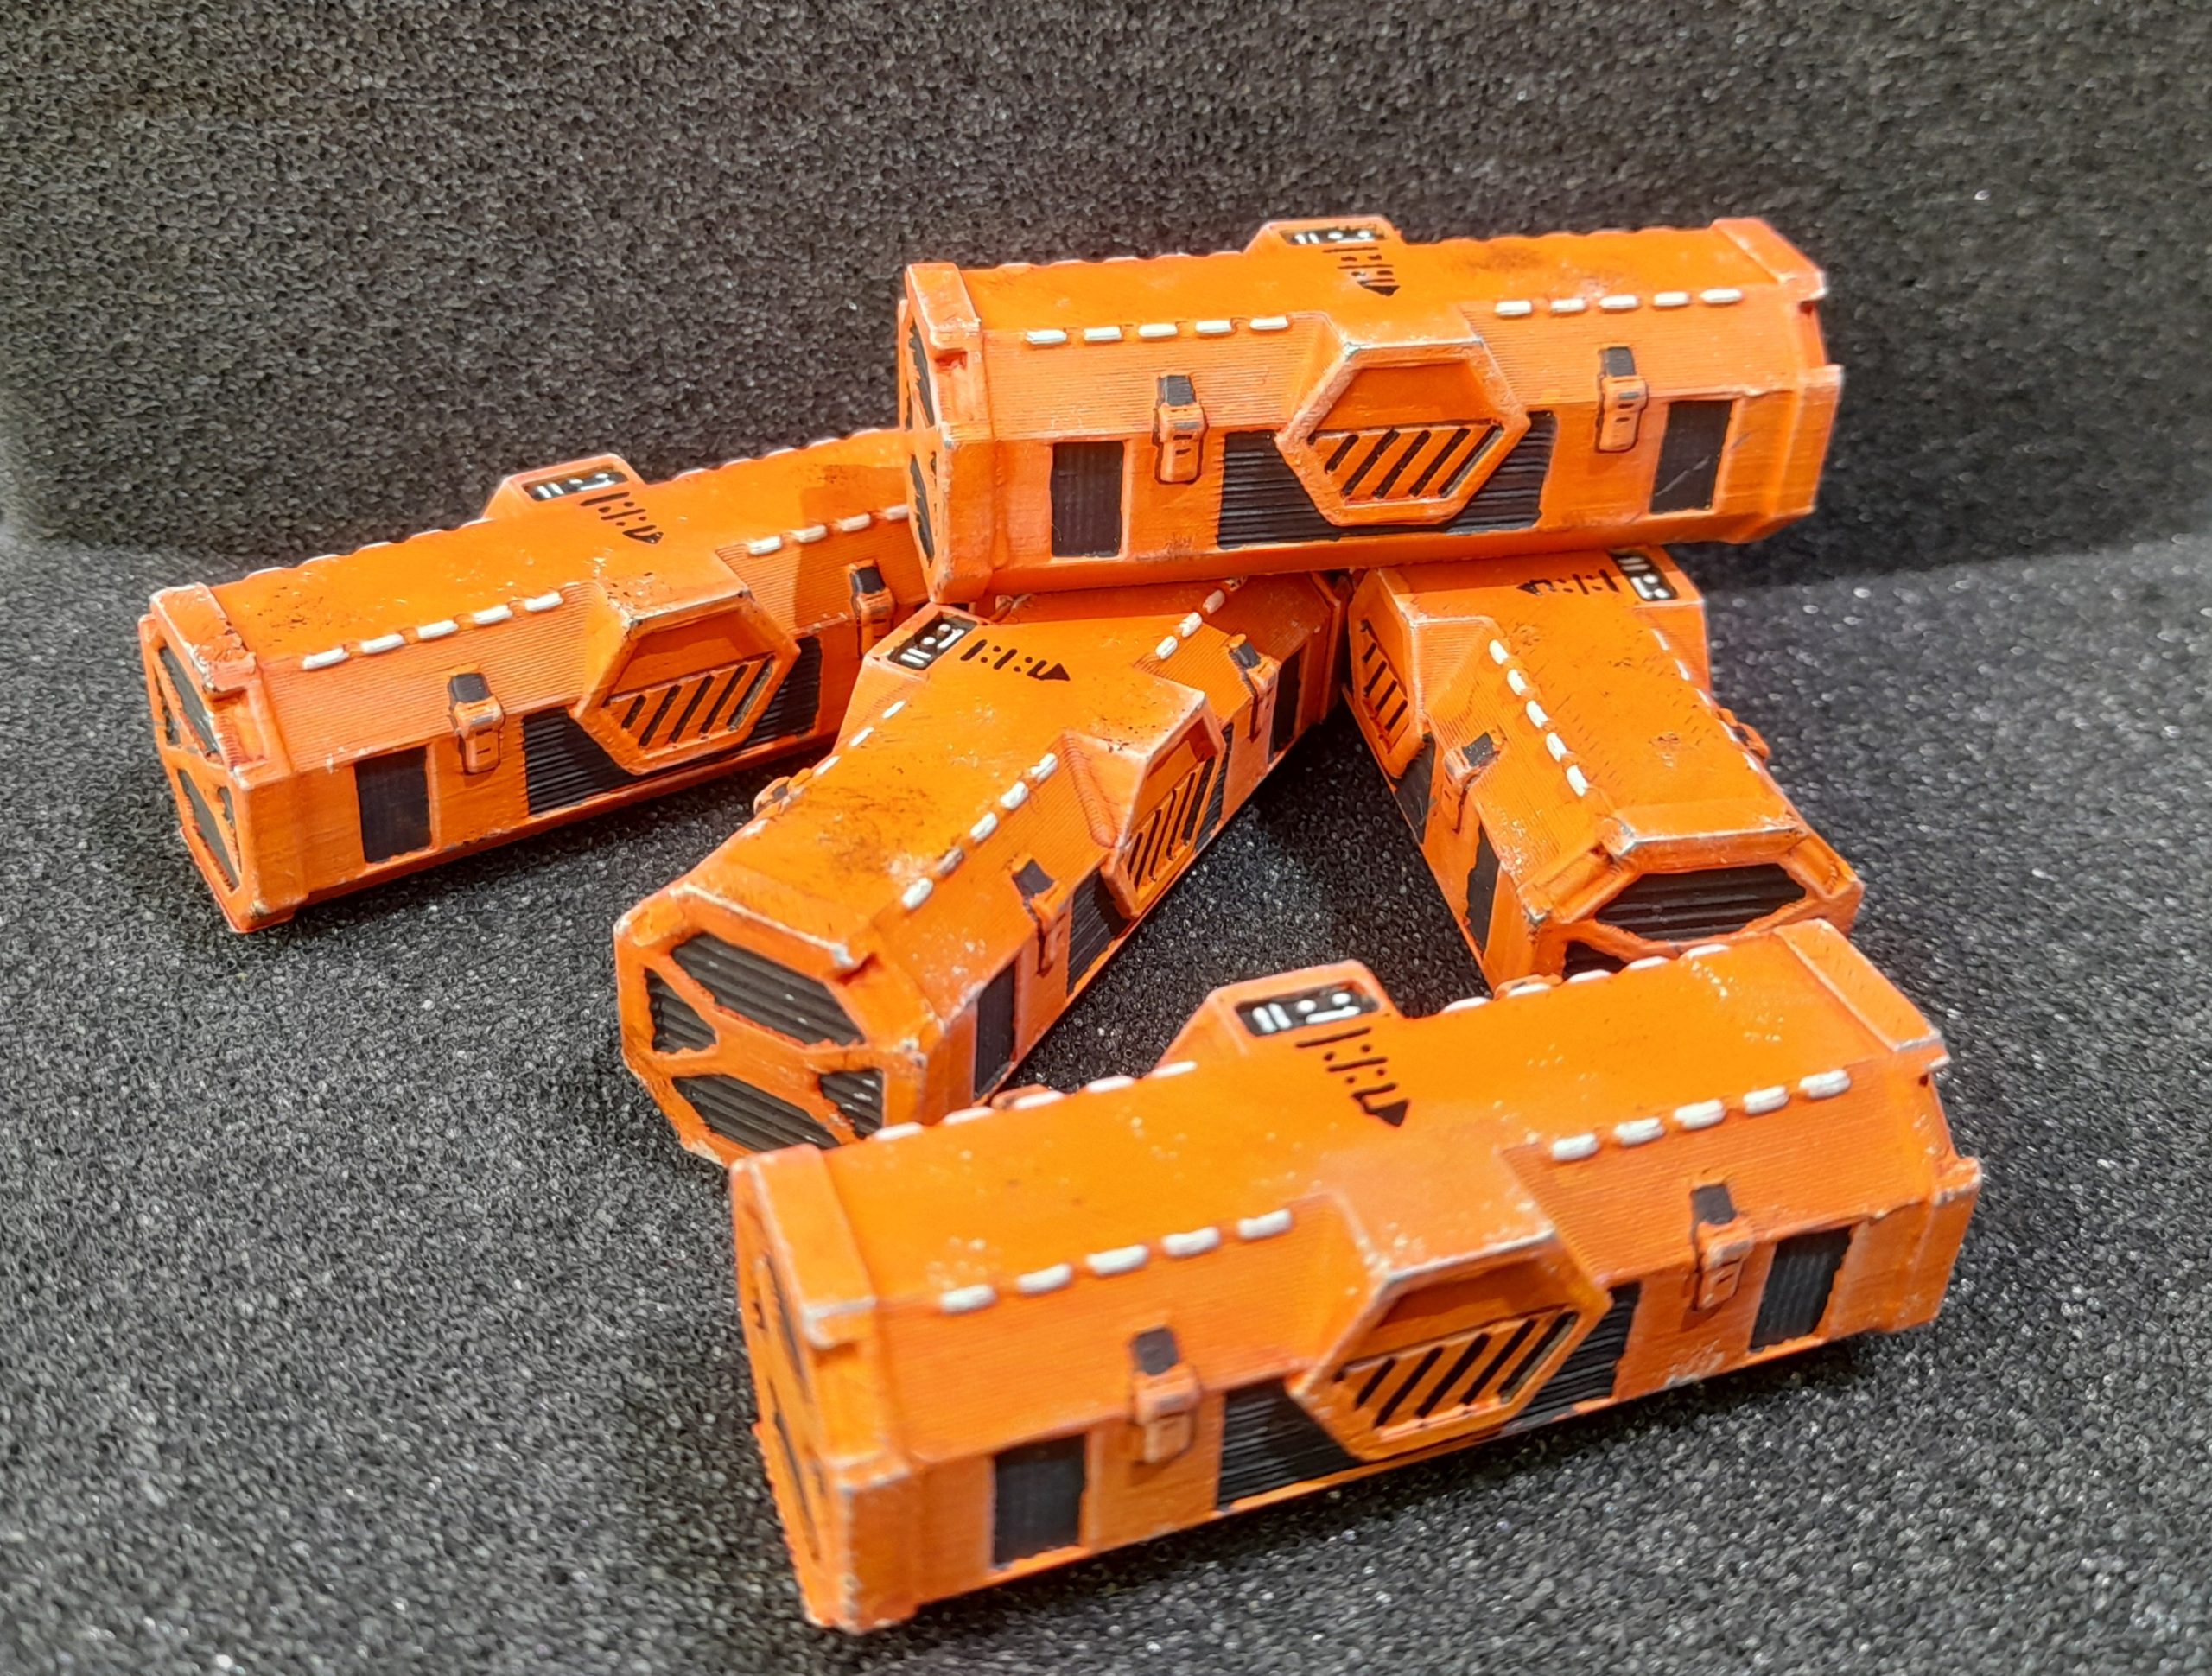
The last crates were styled like those from Rogue one. I found some images online and tried to approximate the look of them. They certainly are orange 😊.
I painted them in Fire Dragon Bright, folwed with a thinned Carroburg Crimson wash. I painted in the various black panels using rubber black. They were then drybrushed with a mix of orange and Pale Sand. This was followed sponge weathering using Pale Sand, and then wildwood. Edges had dabs of silver applied, plus some scrape marks. Picked out the white sections on the tops and added some black marking in the middle based on the images I found online.
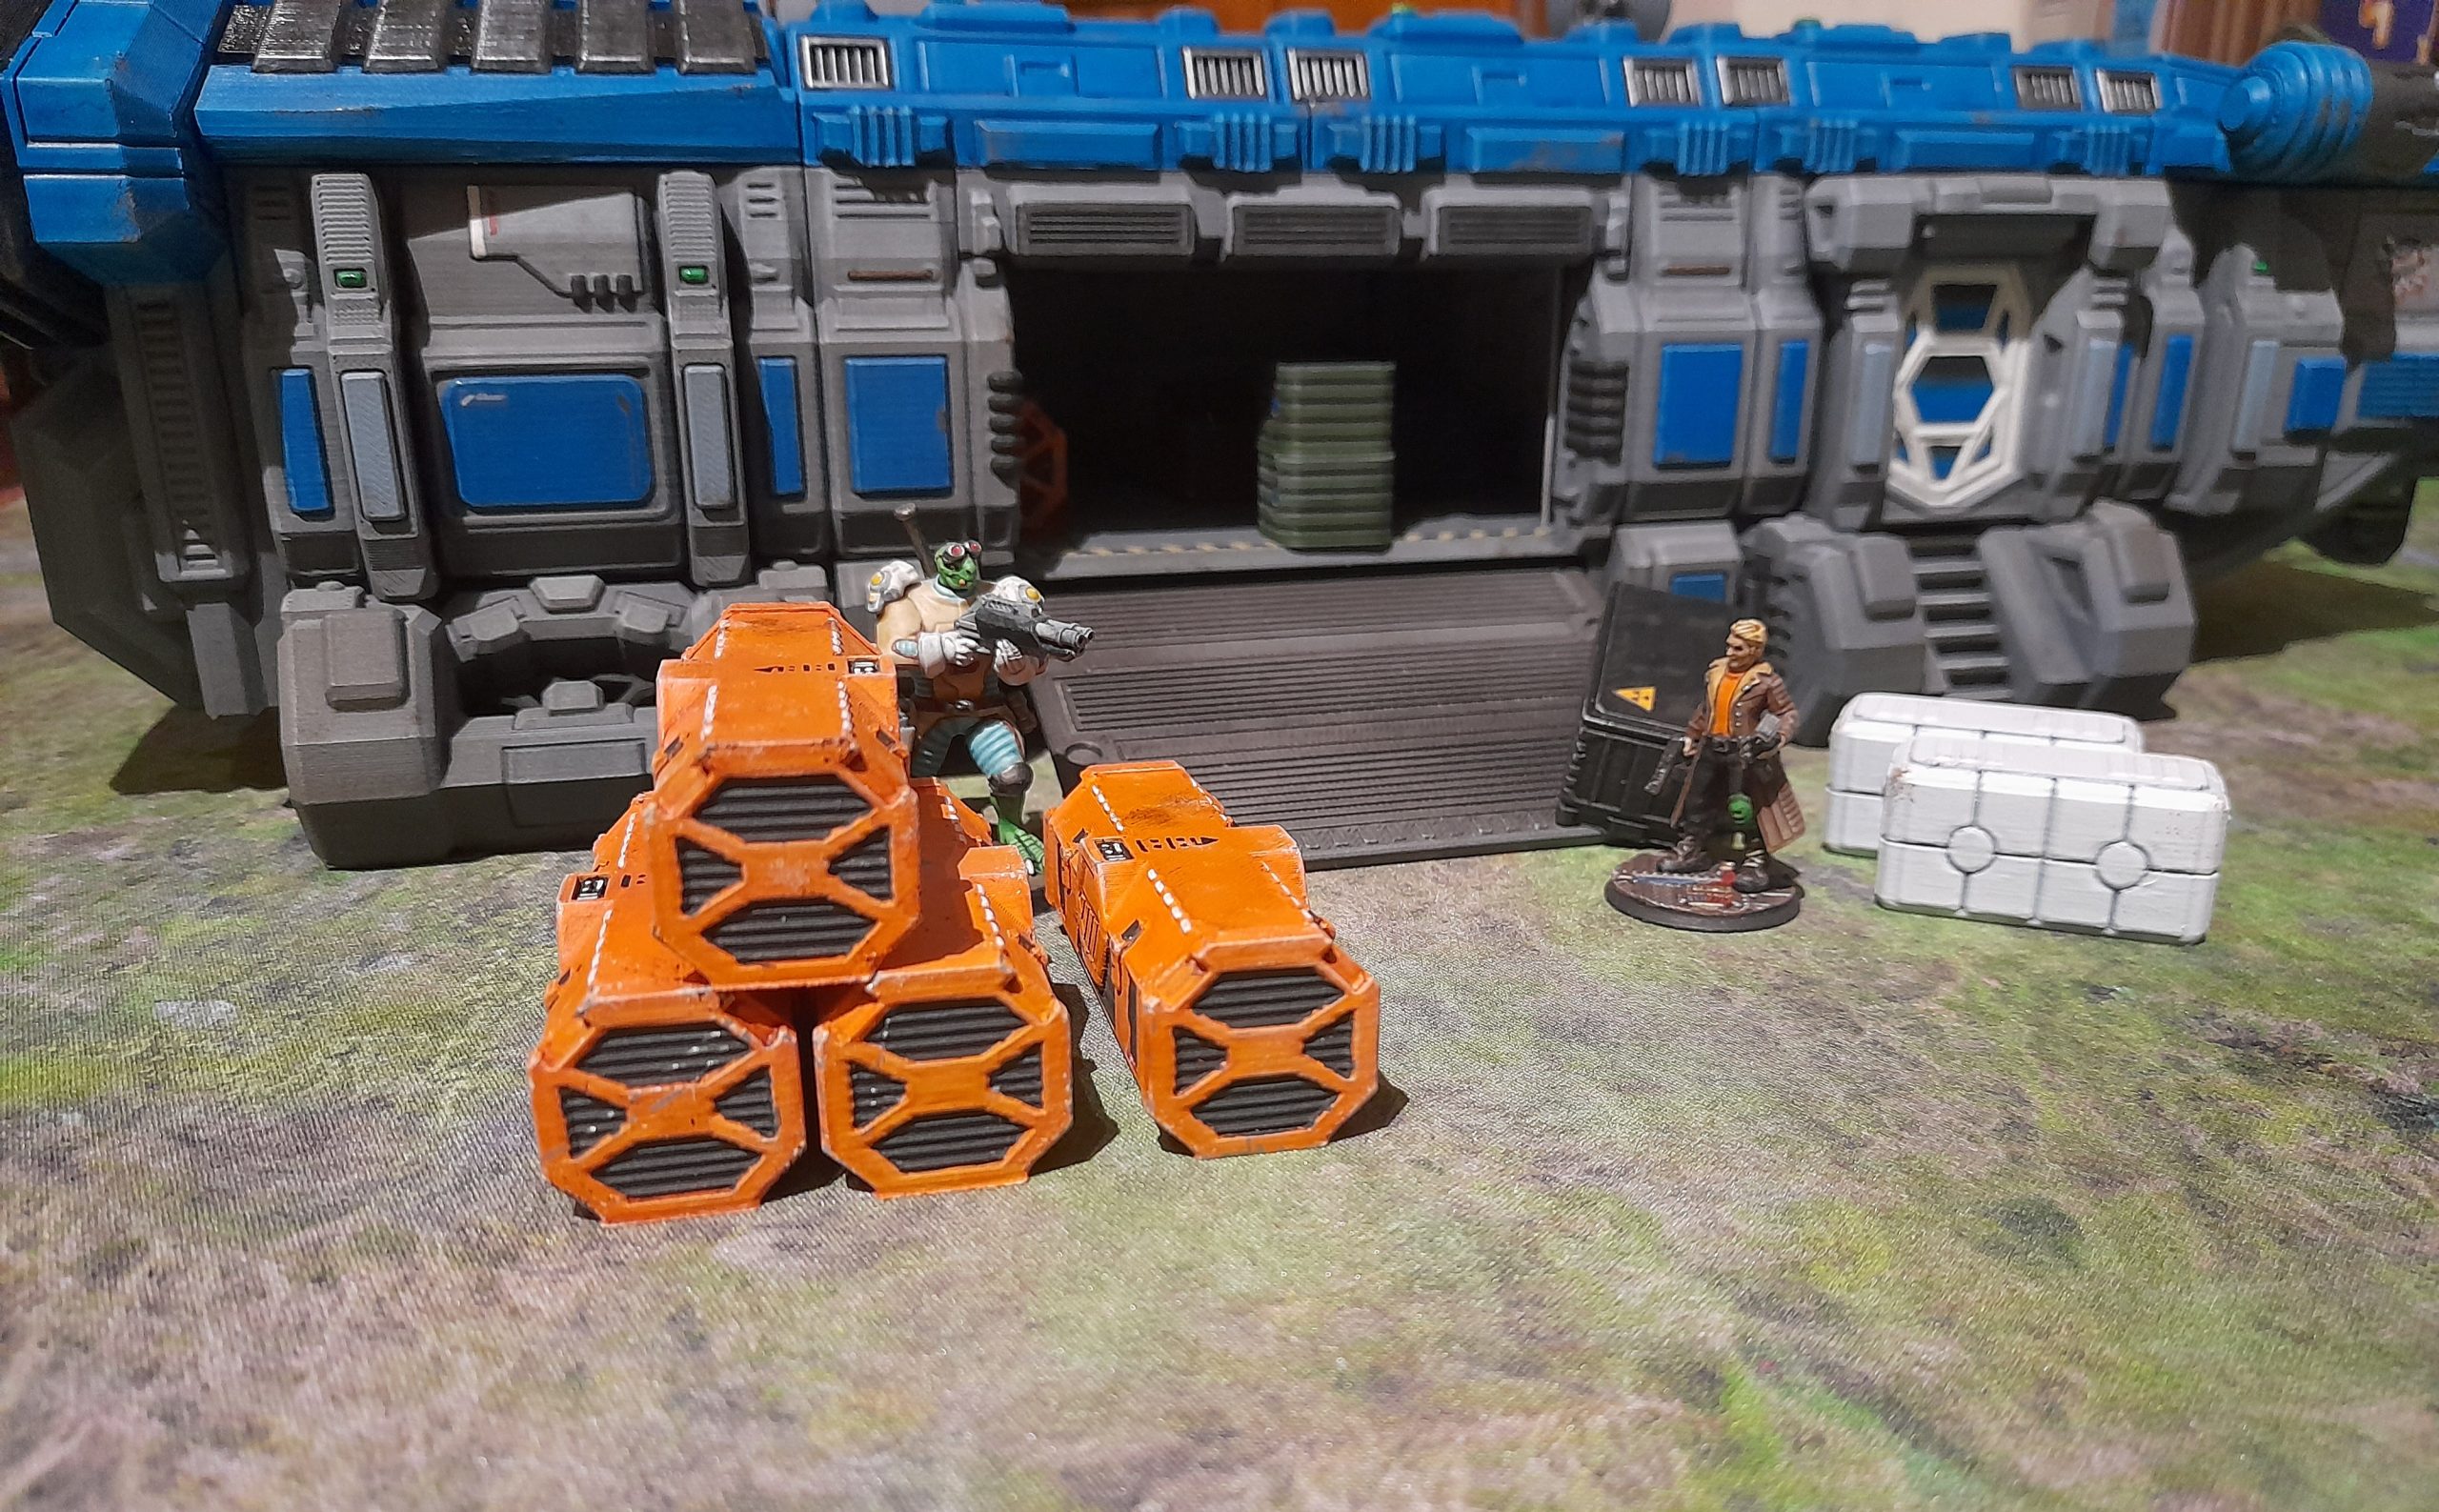
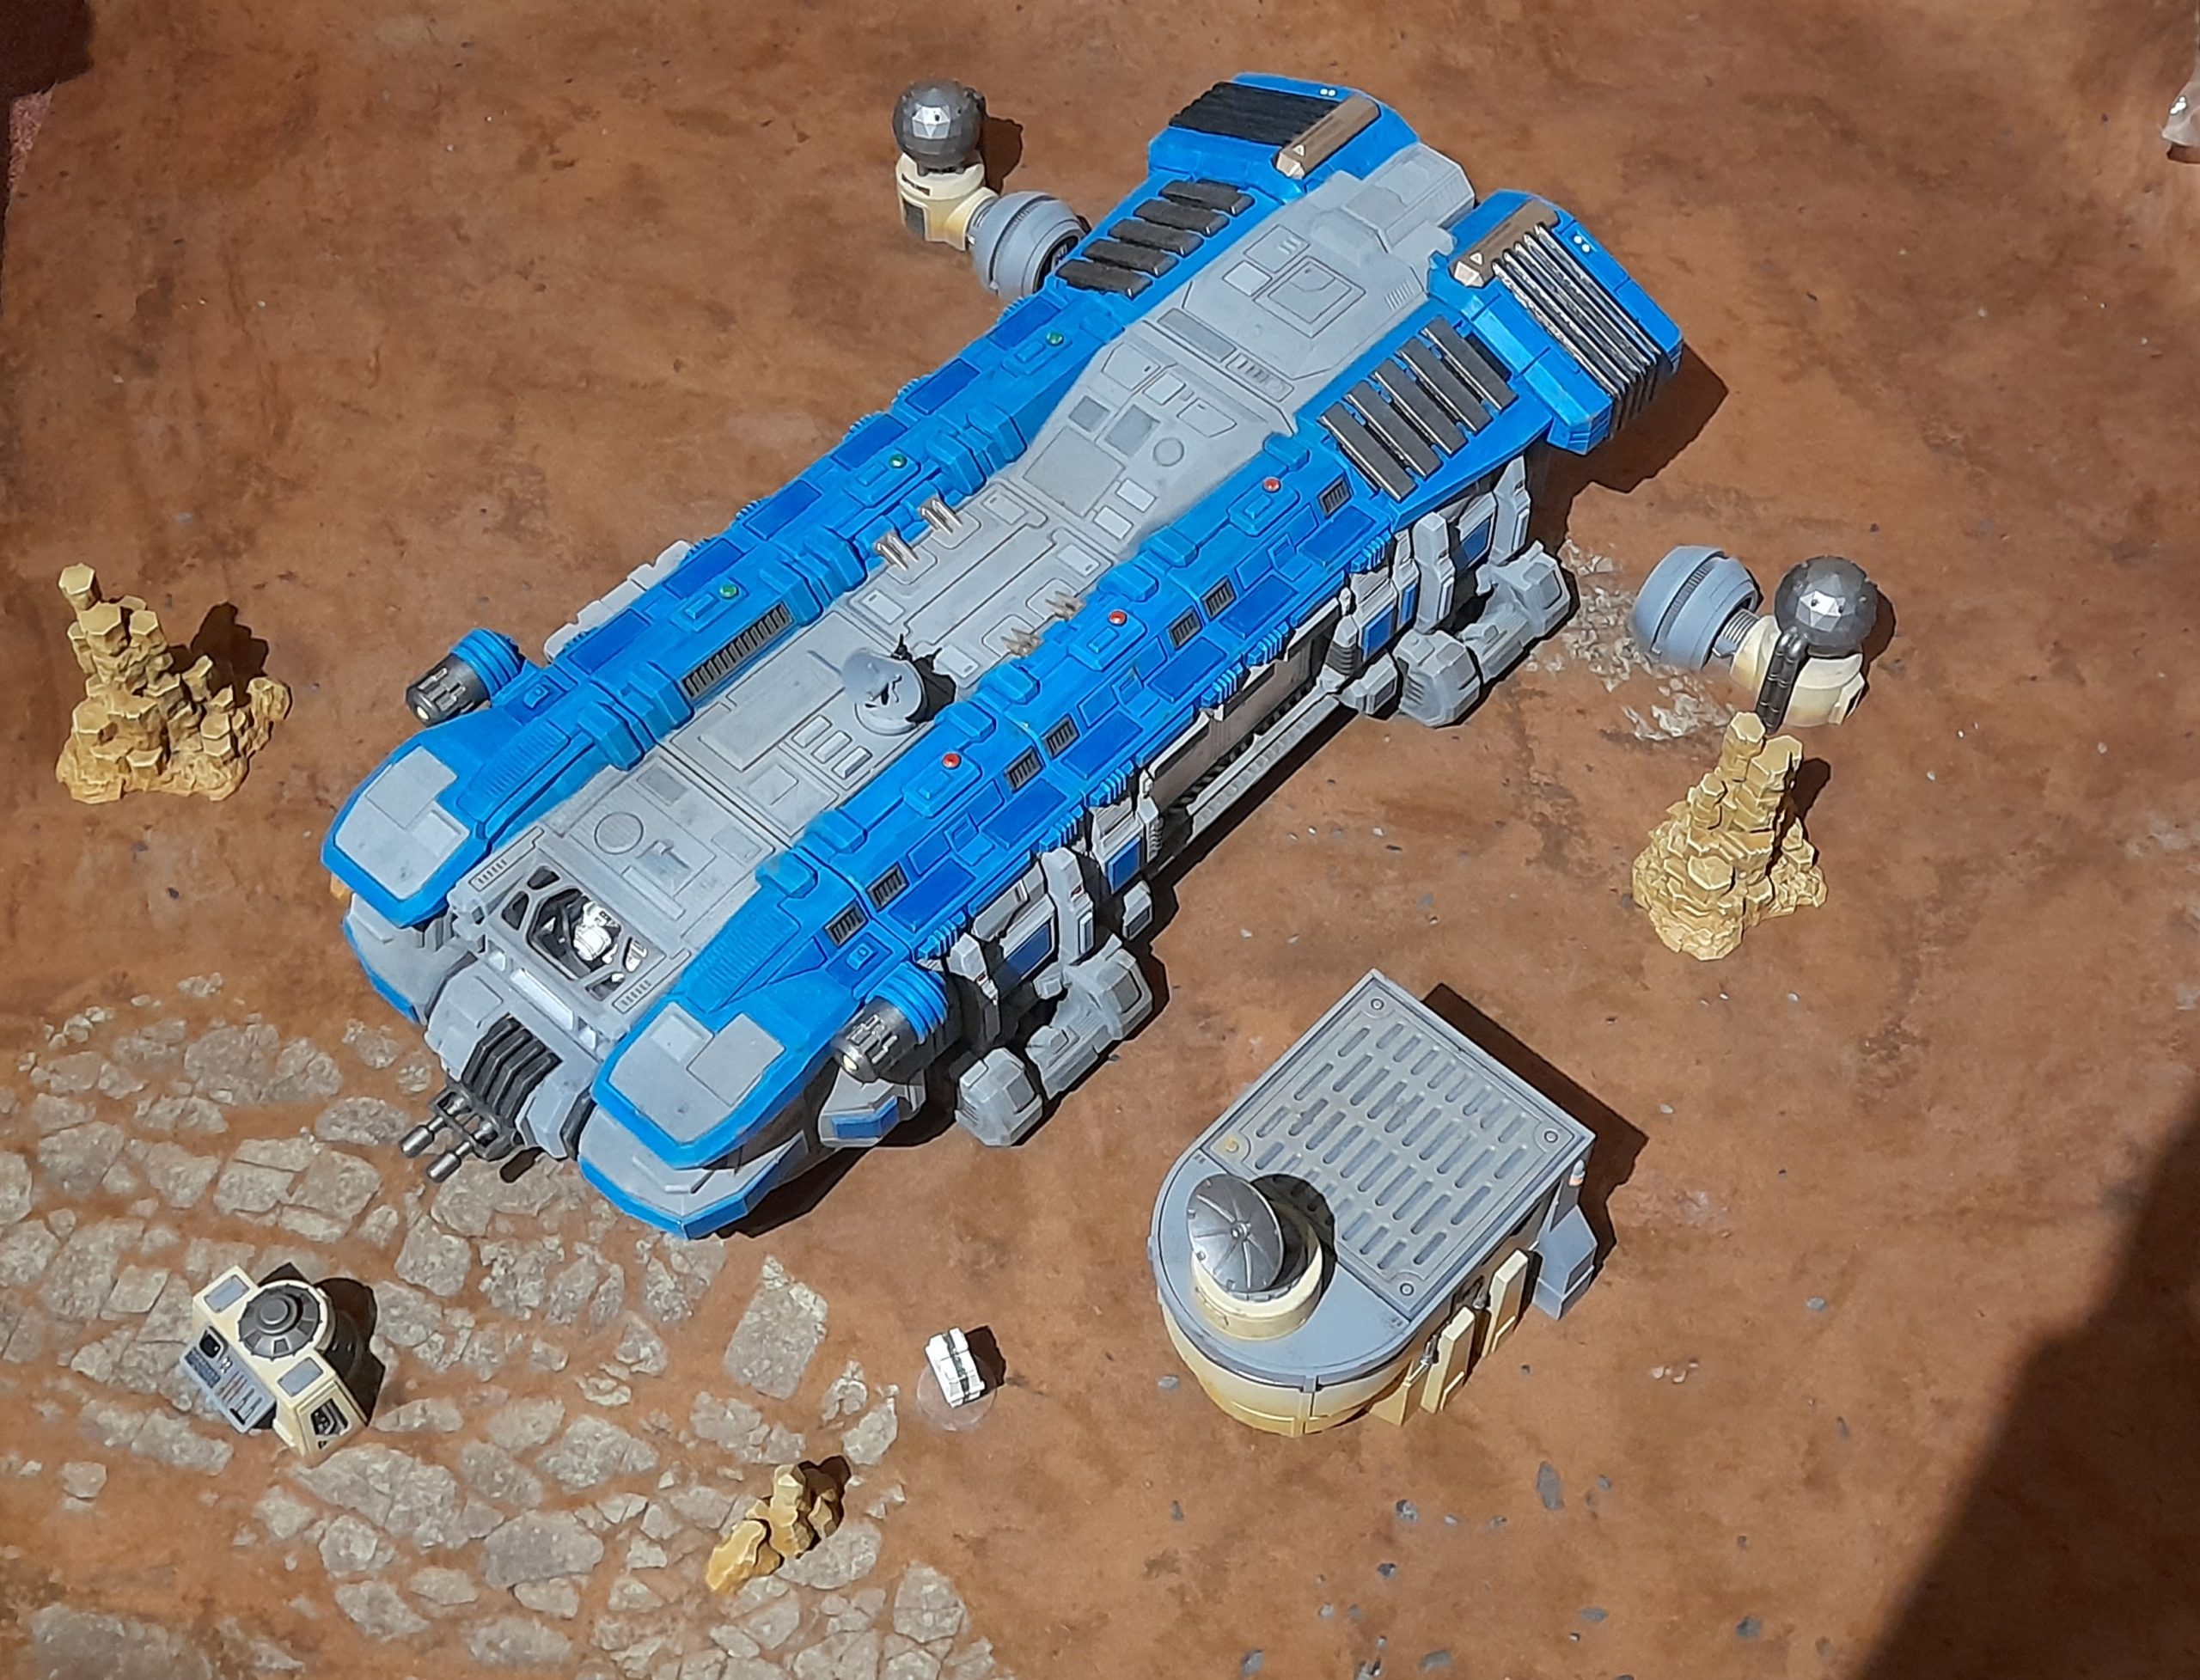
Drifter's Luck - finished
8th January 2025
Just a few ‘action’ pics of the finished star freighter terrain piece.

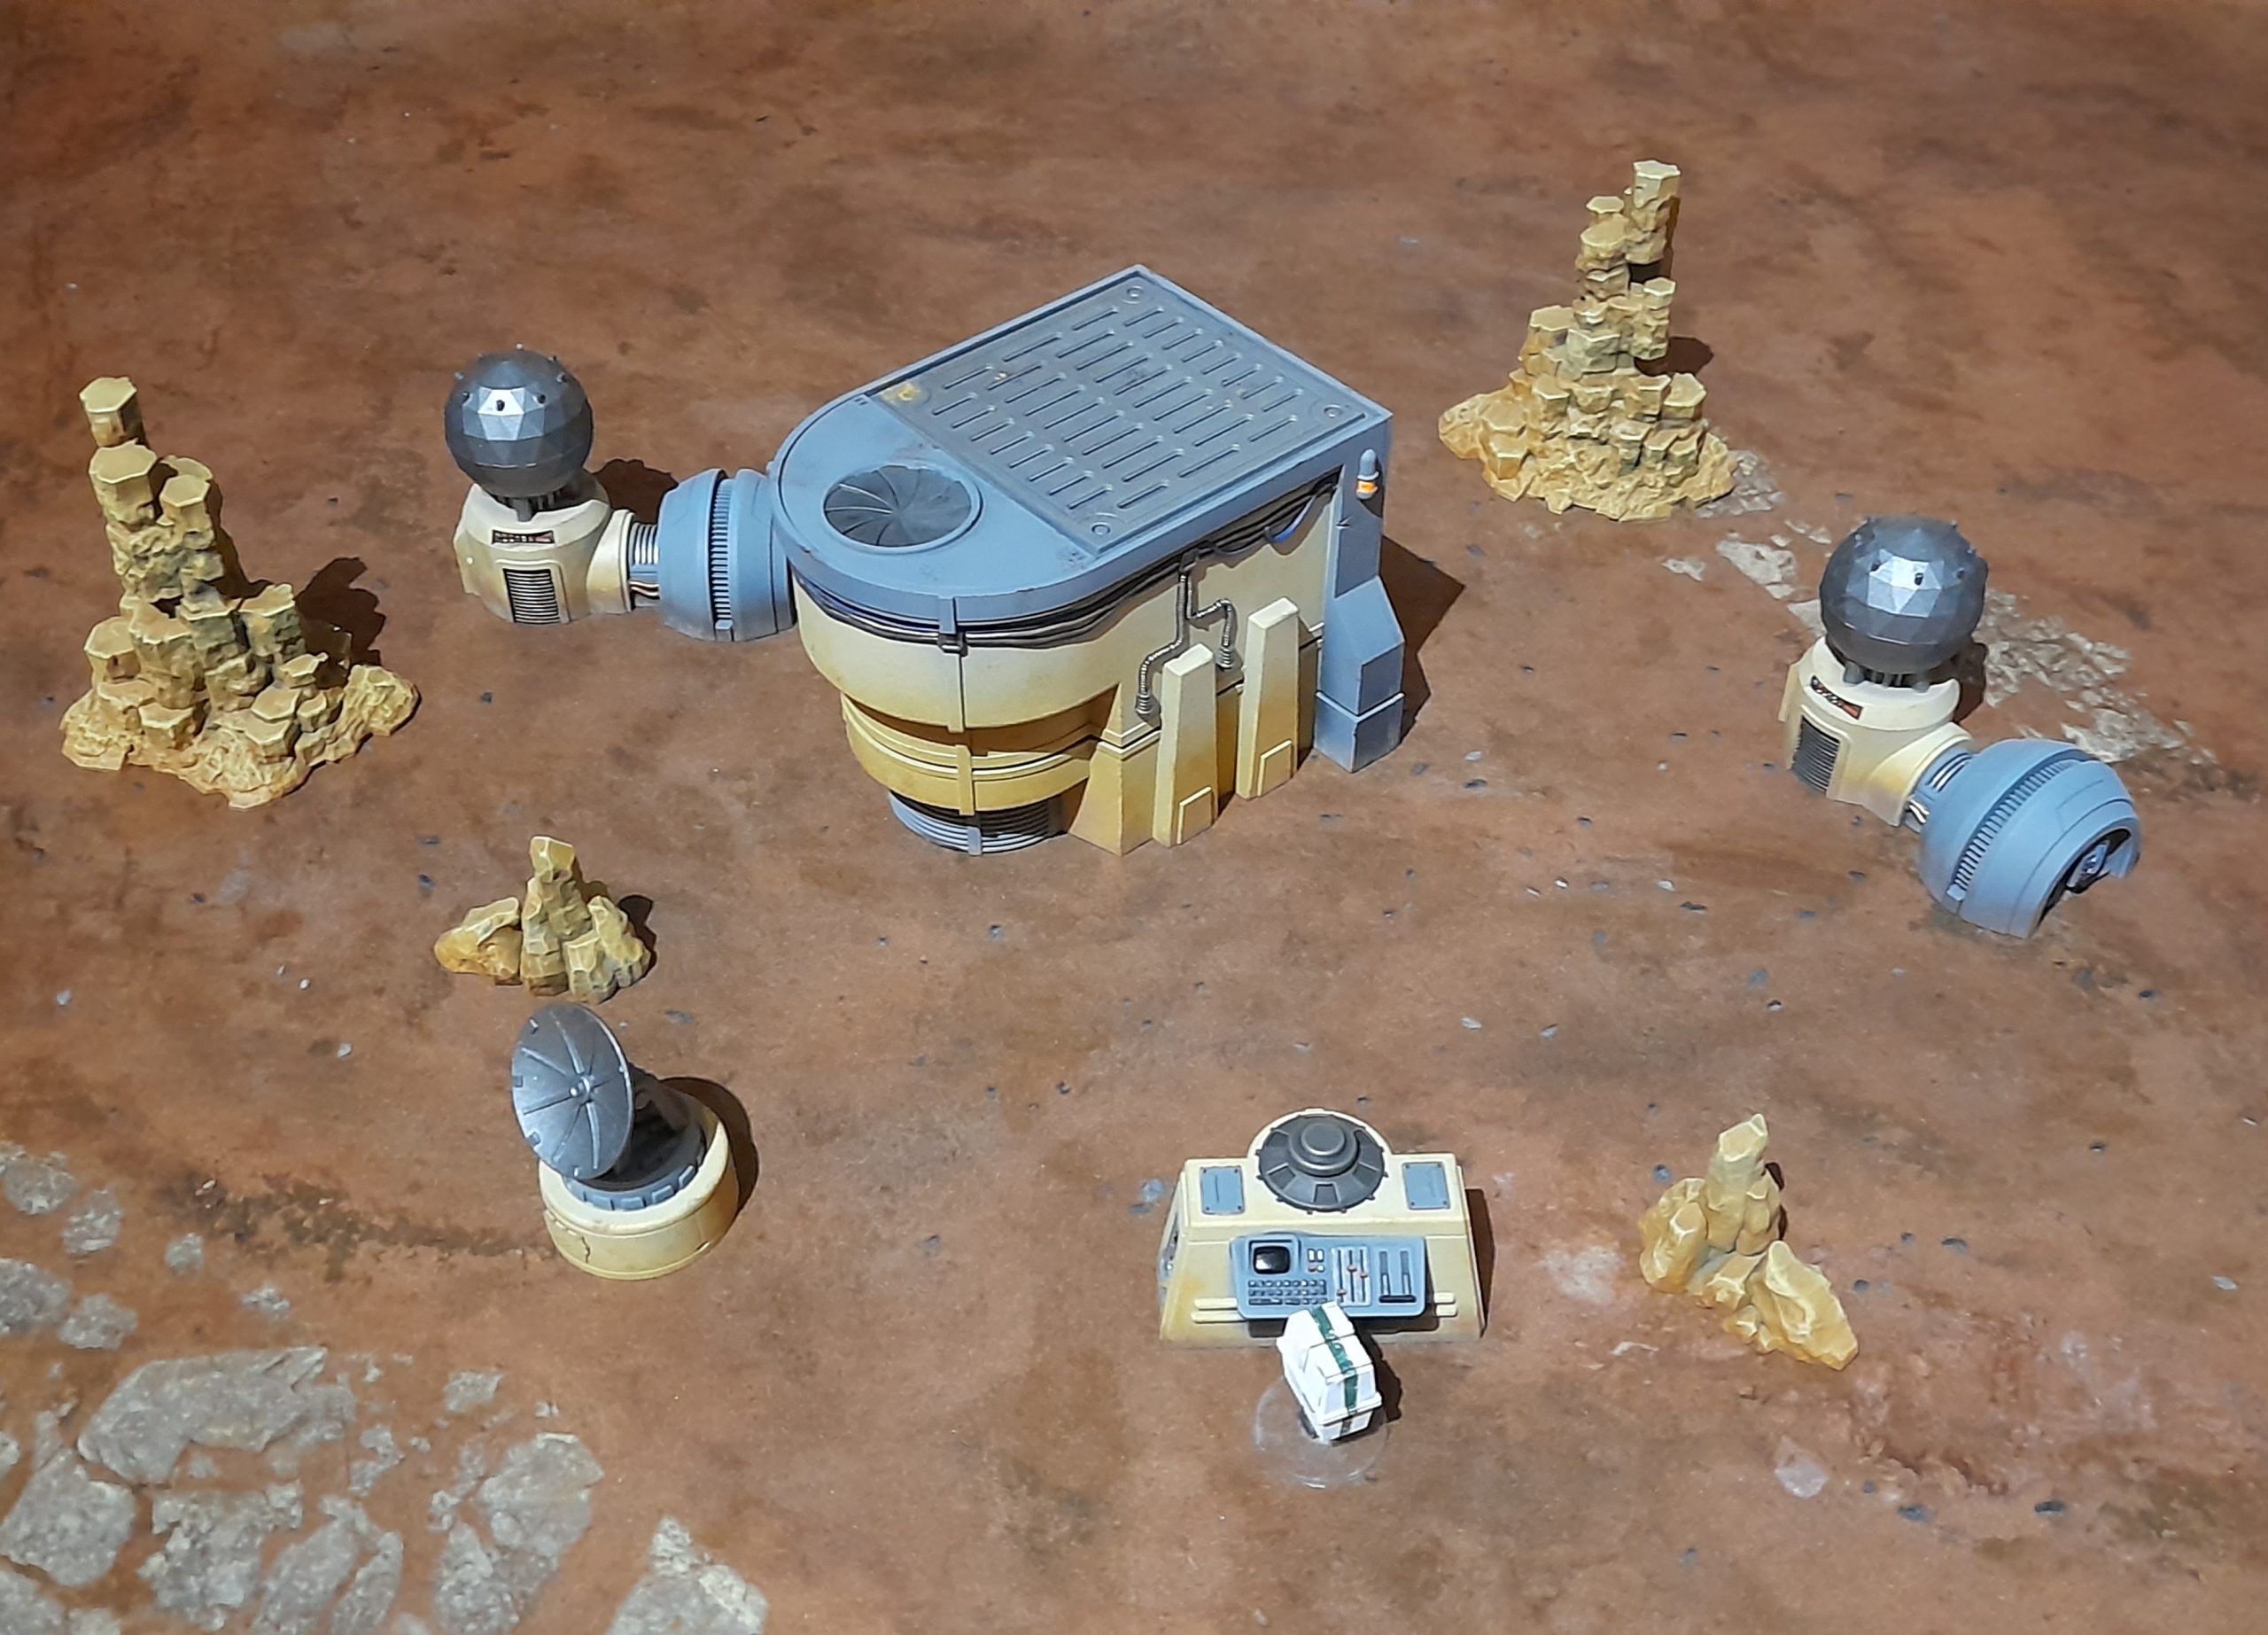
Using some Shatterpoint Terrain for generic sci-fi
19th January 2026
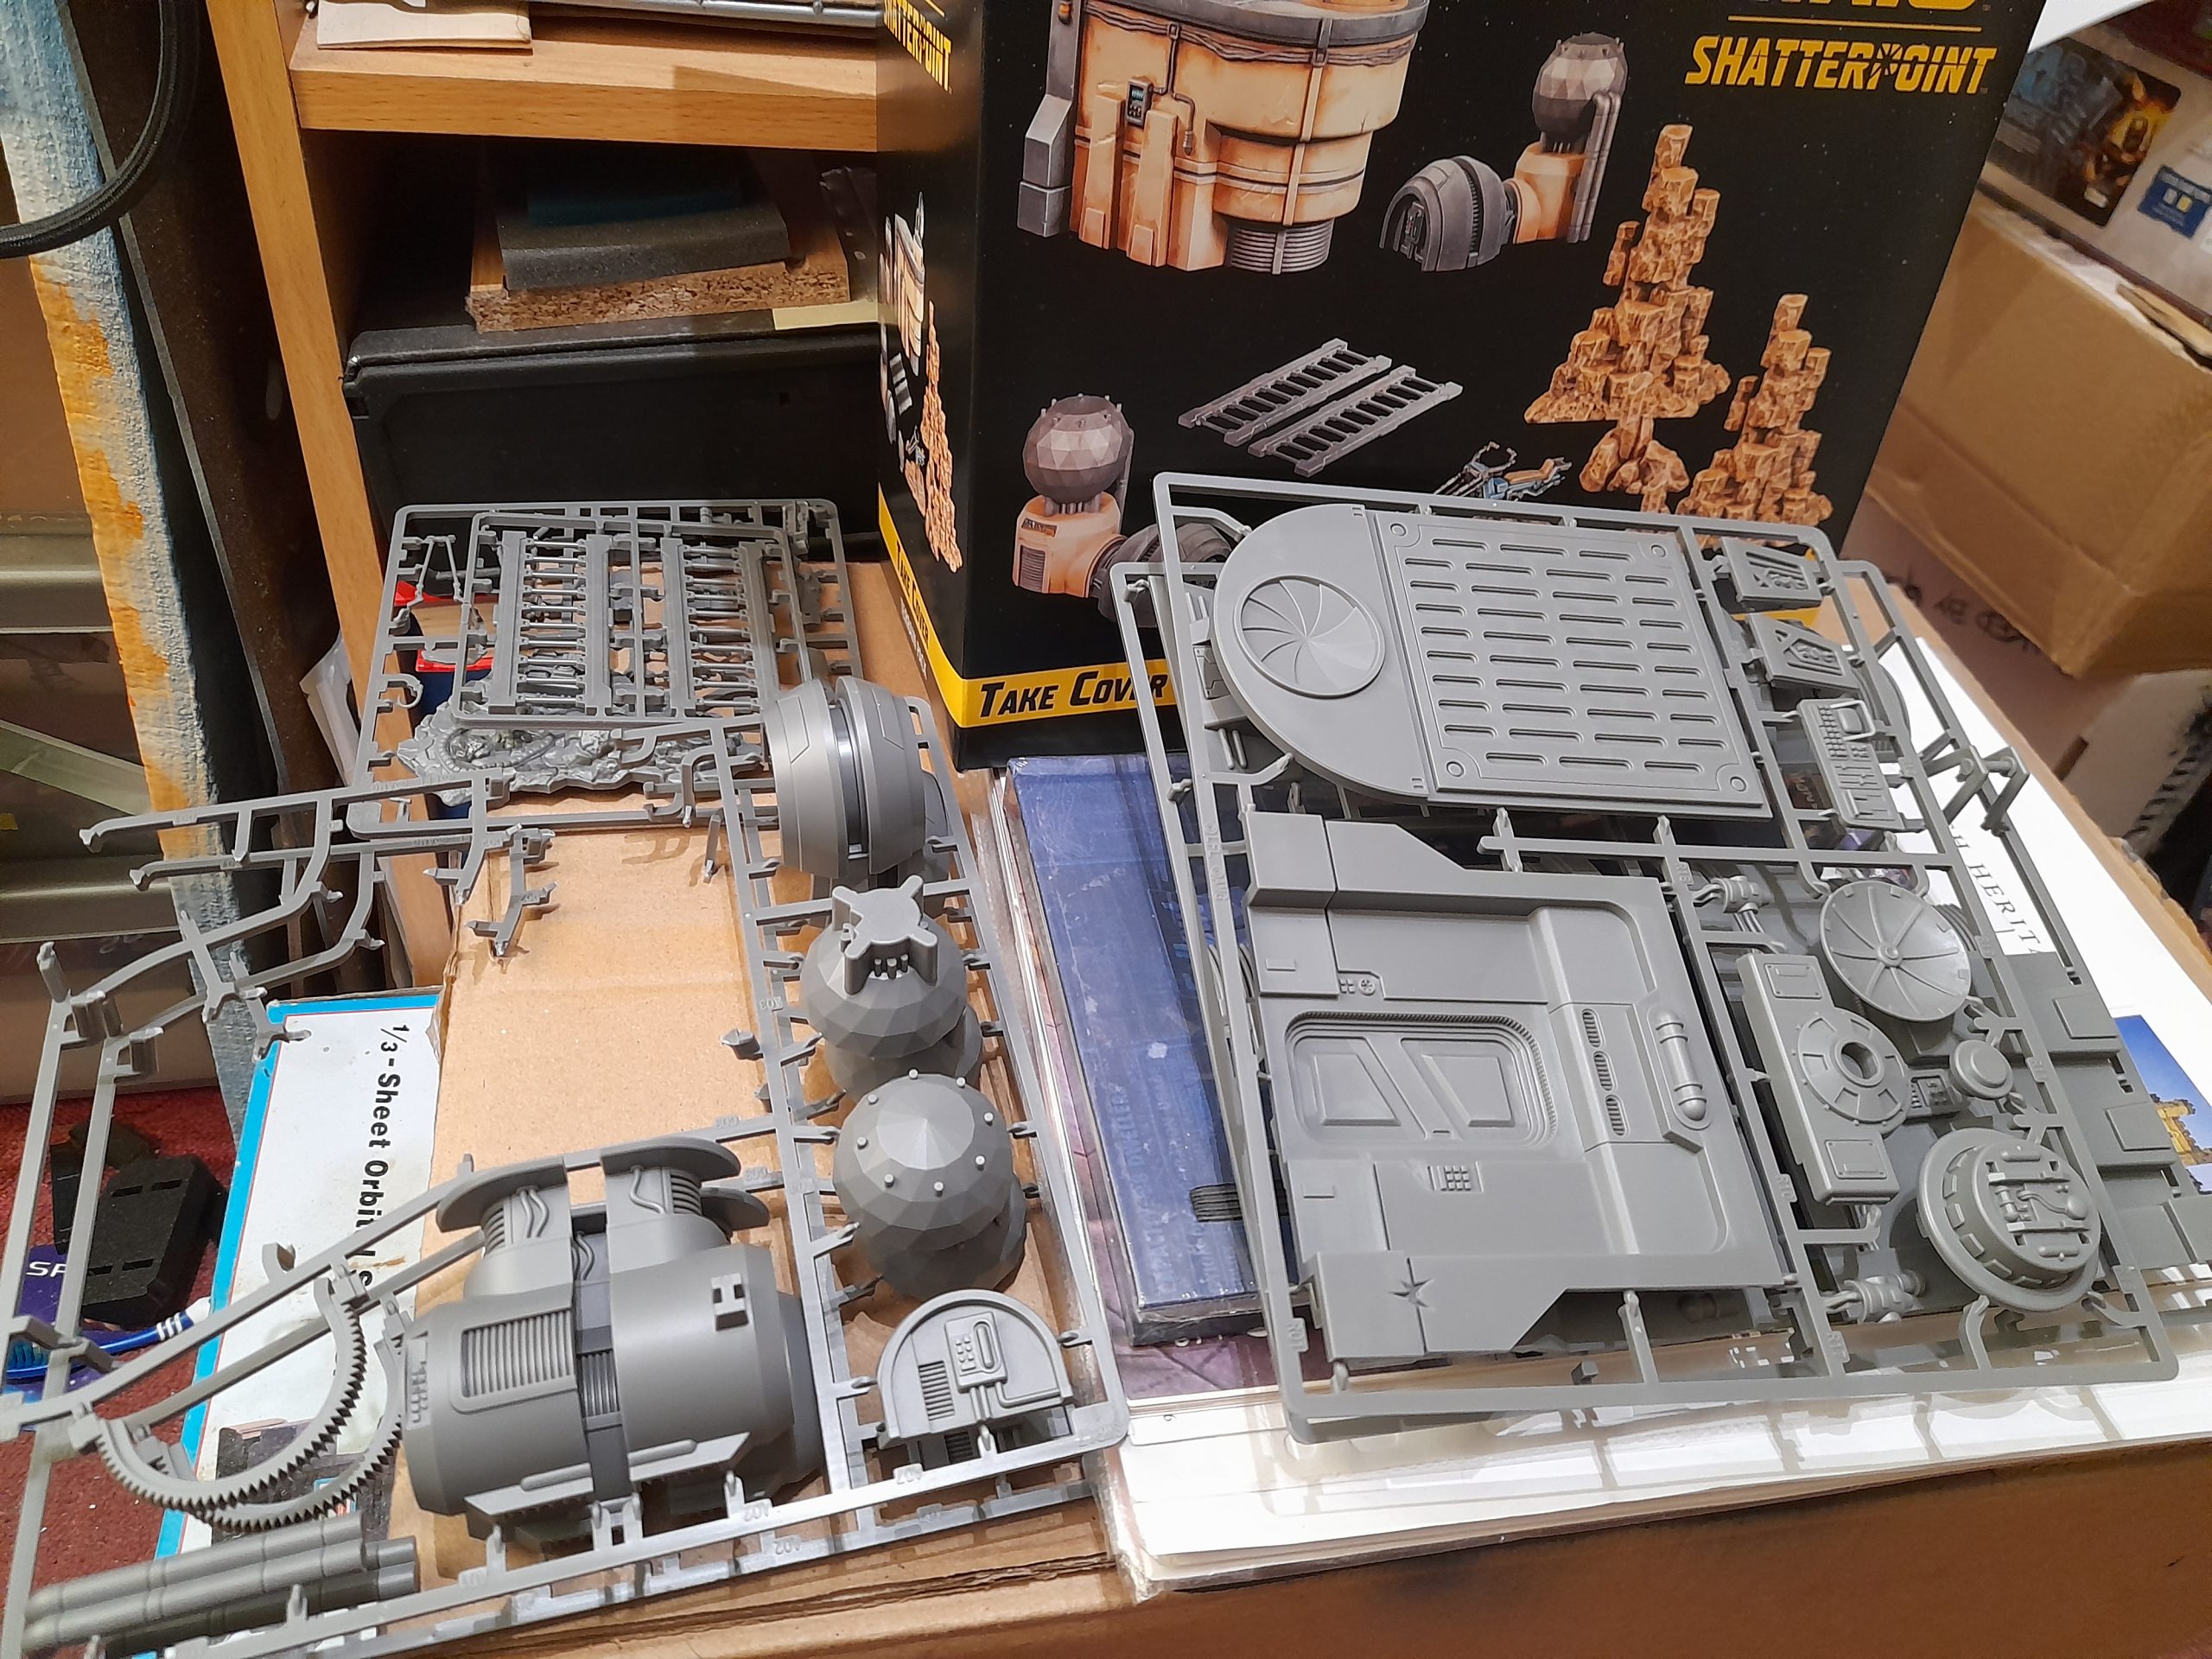
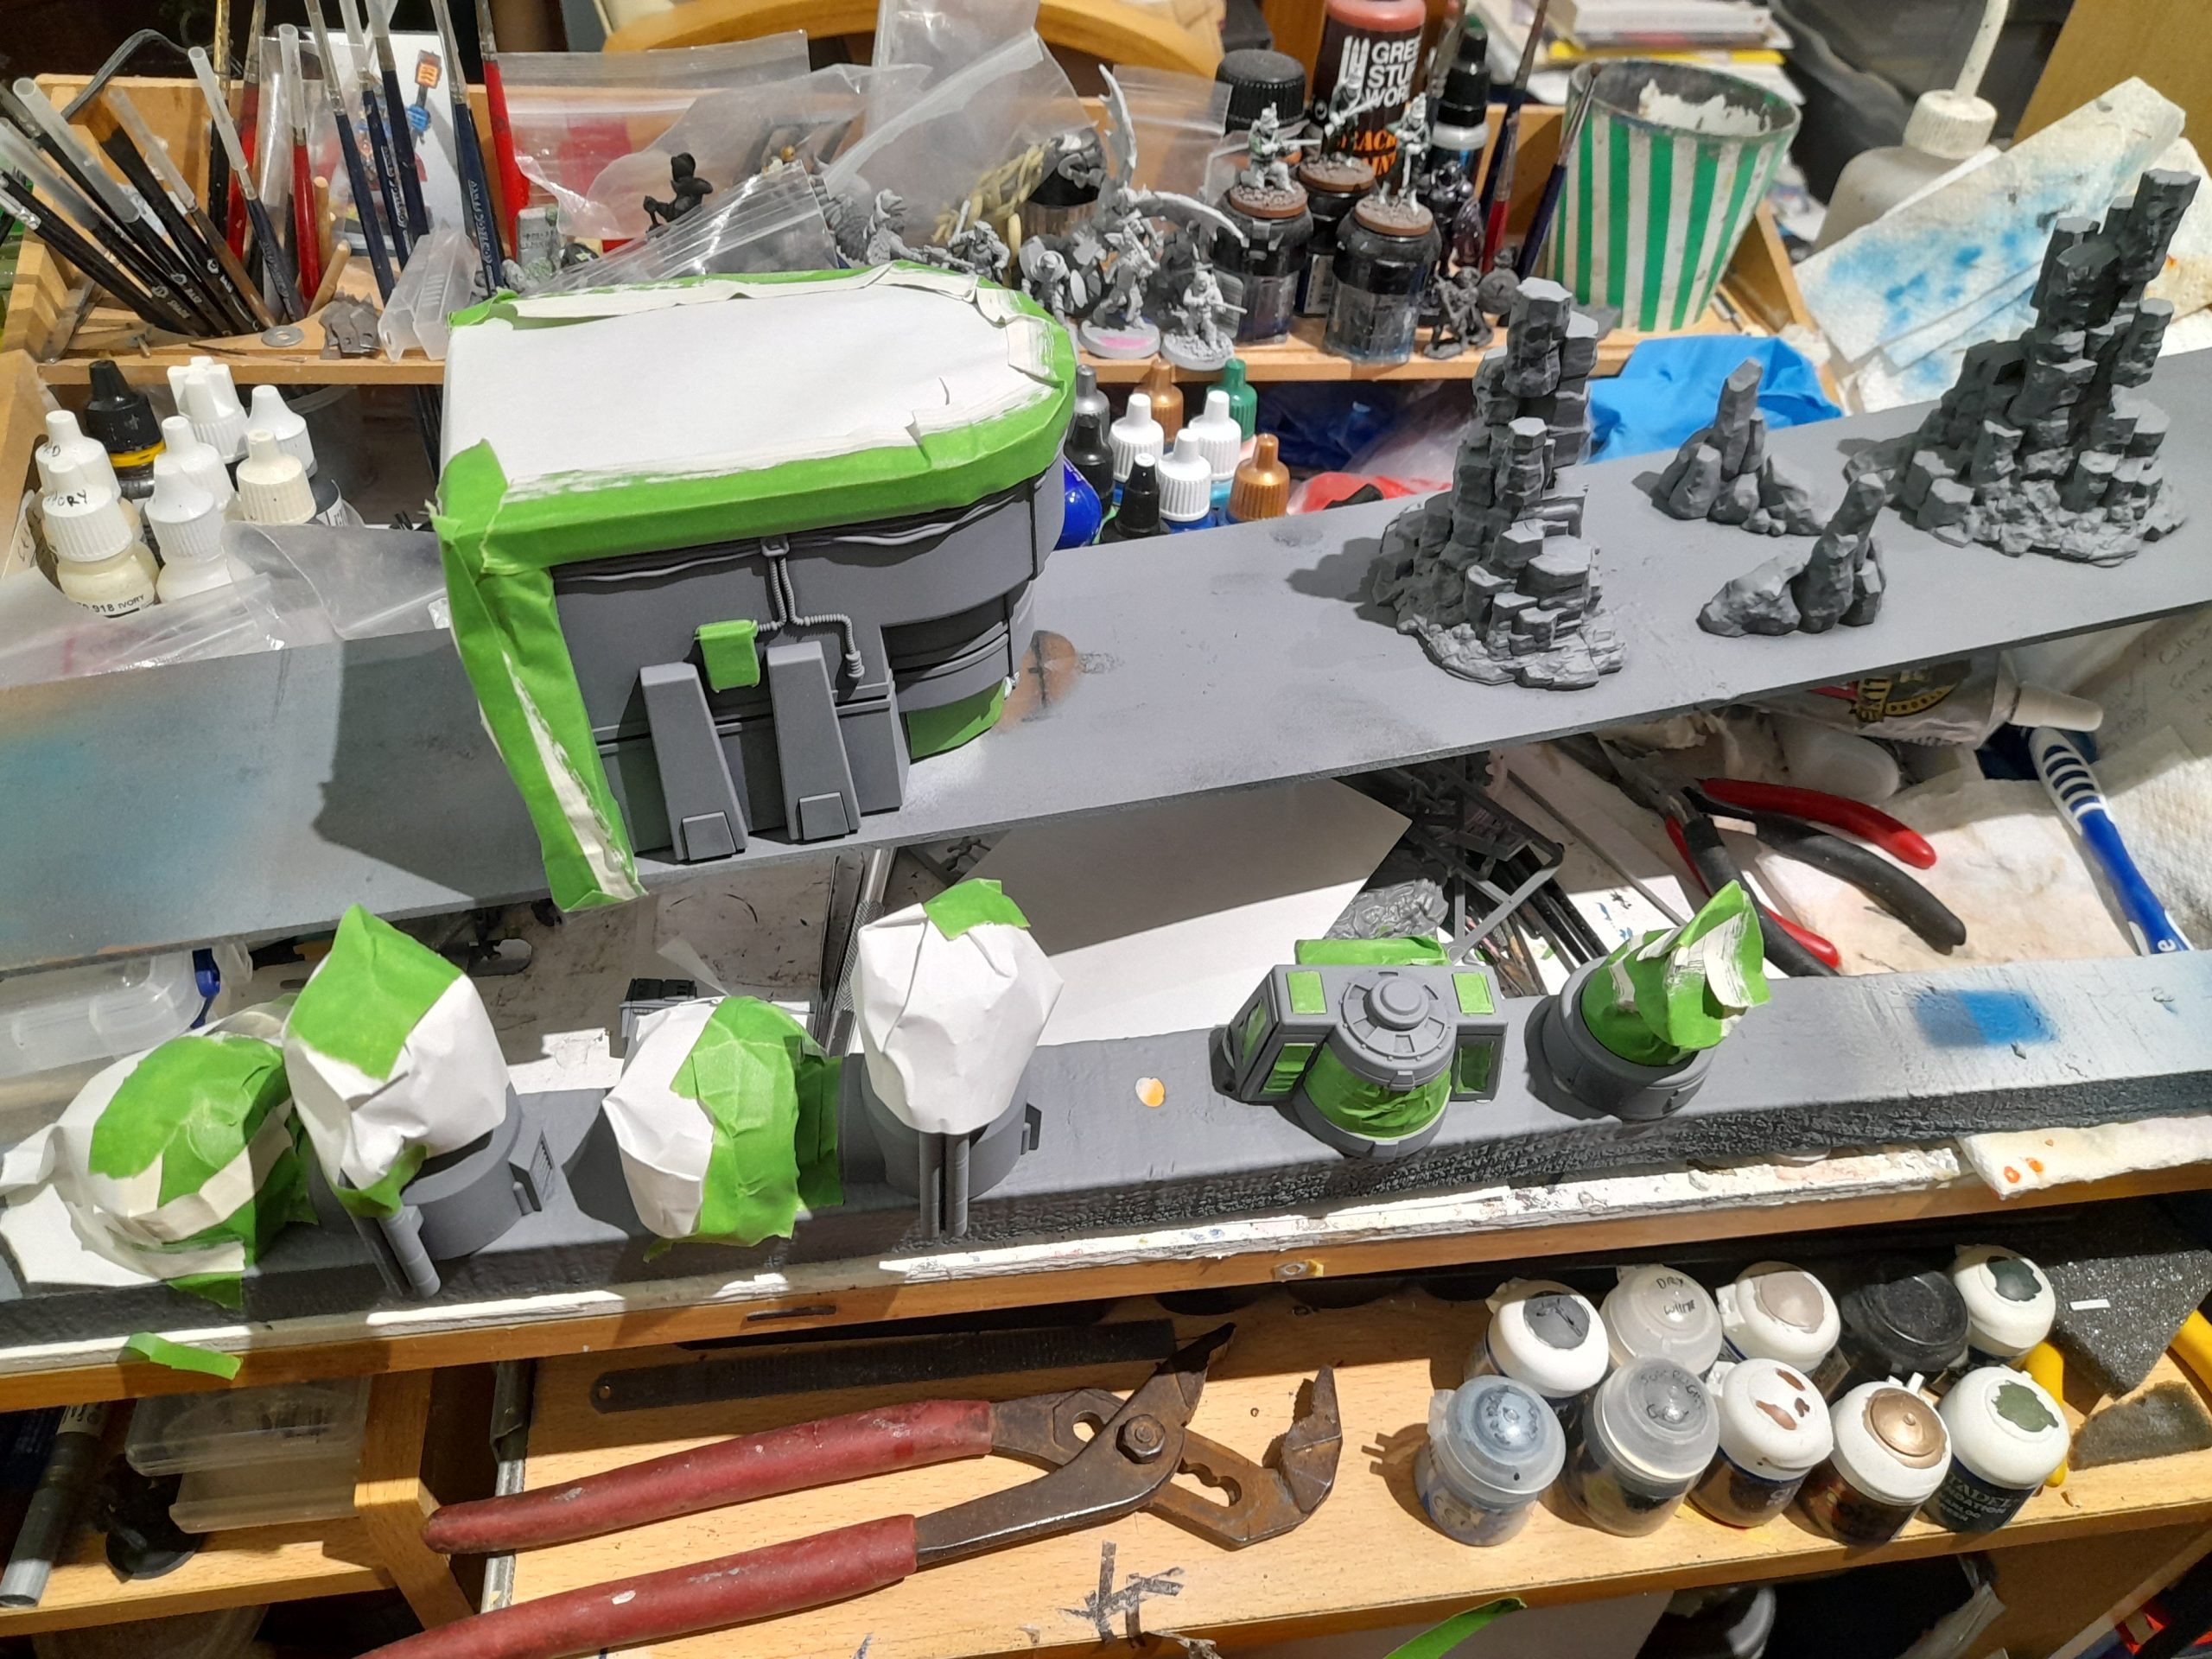
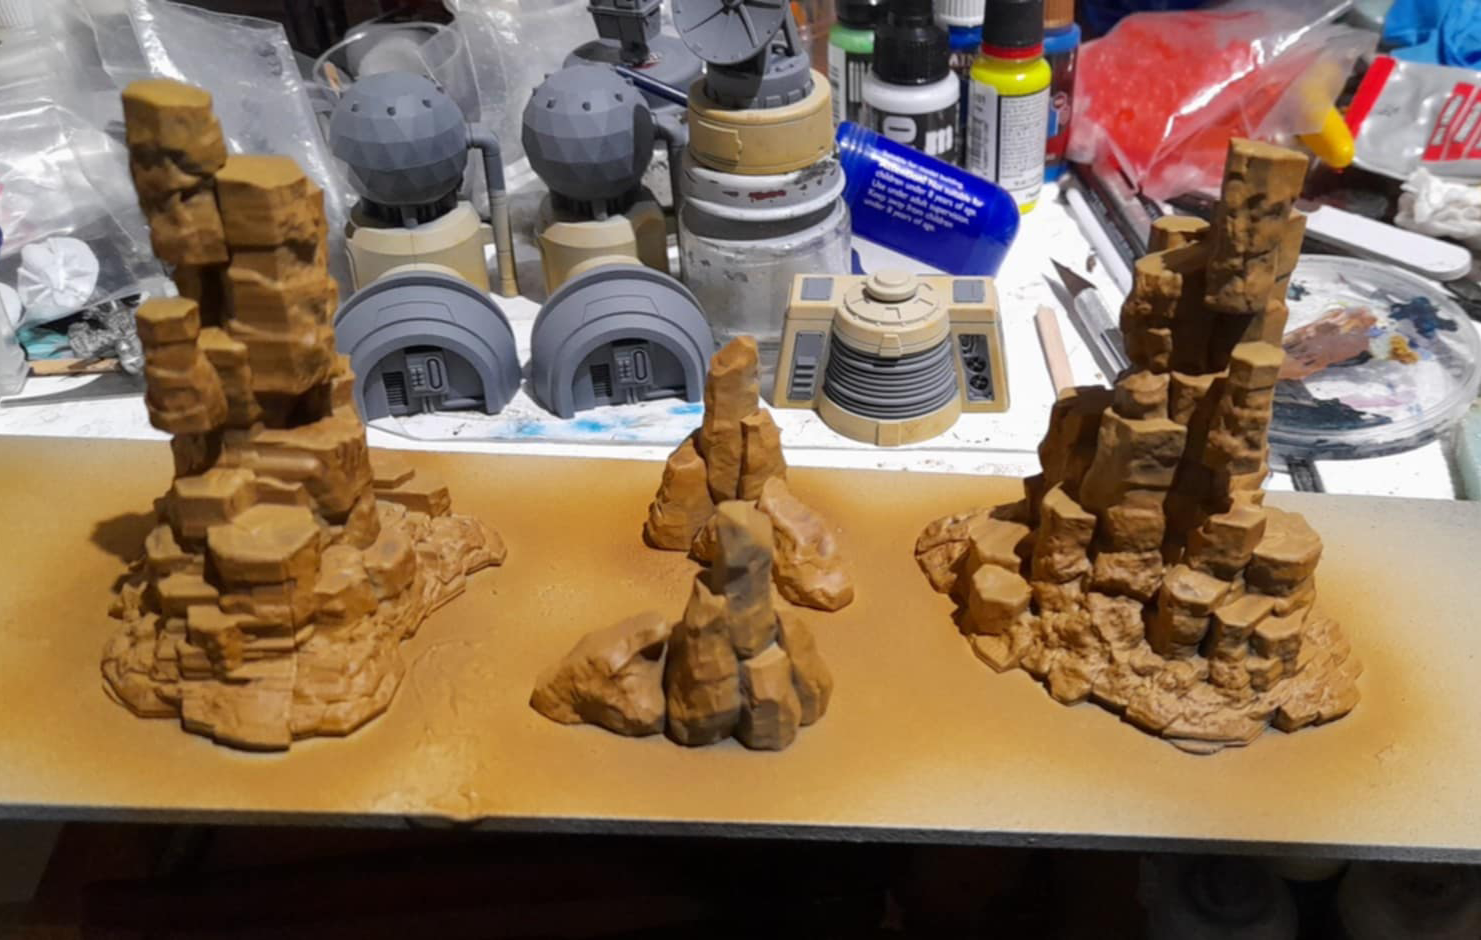
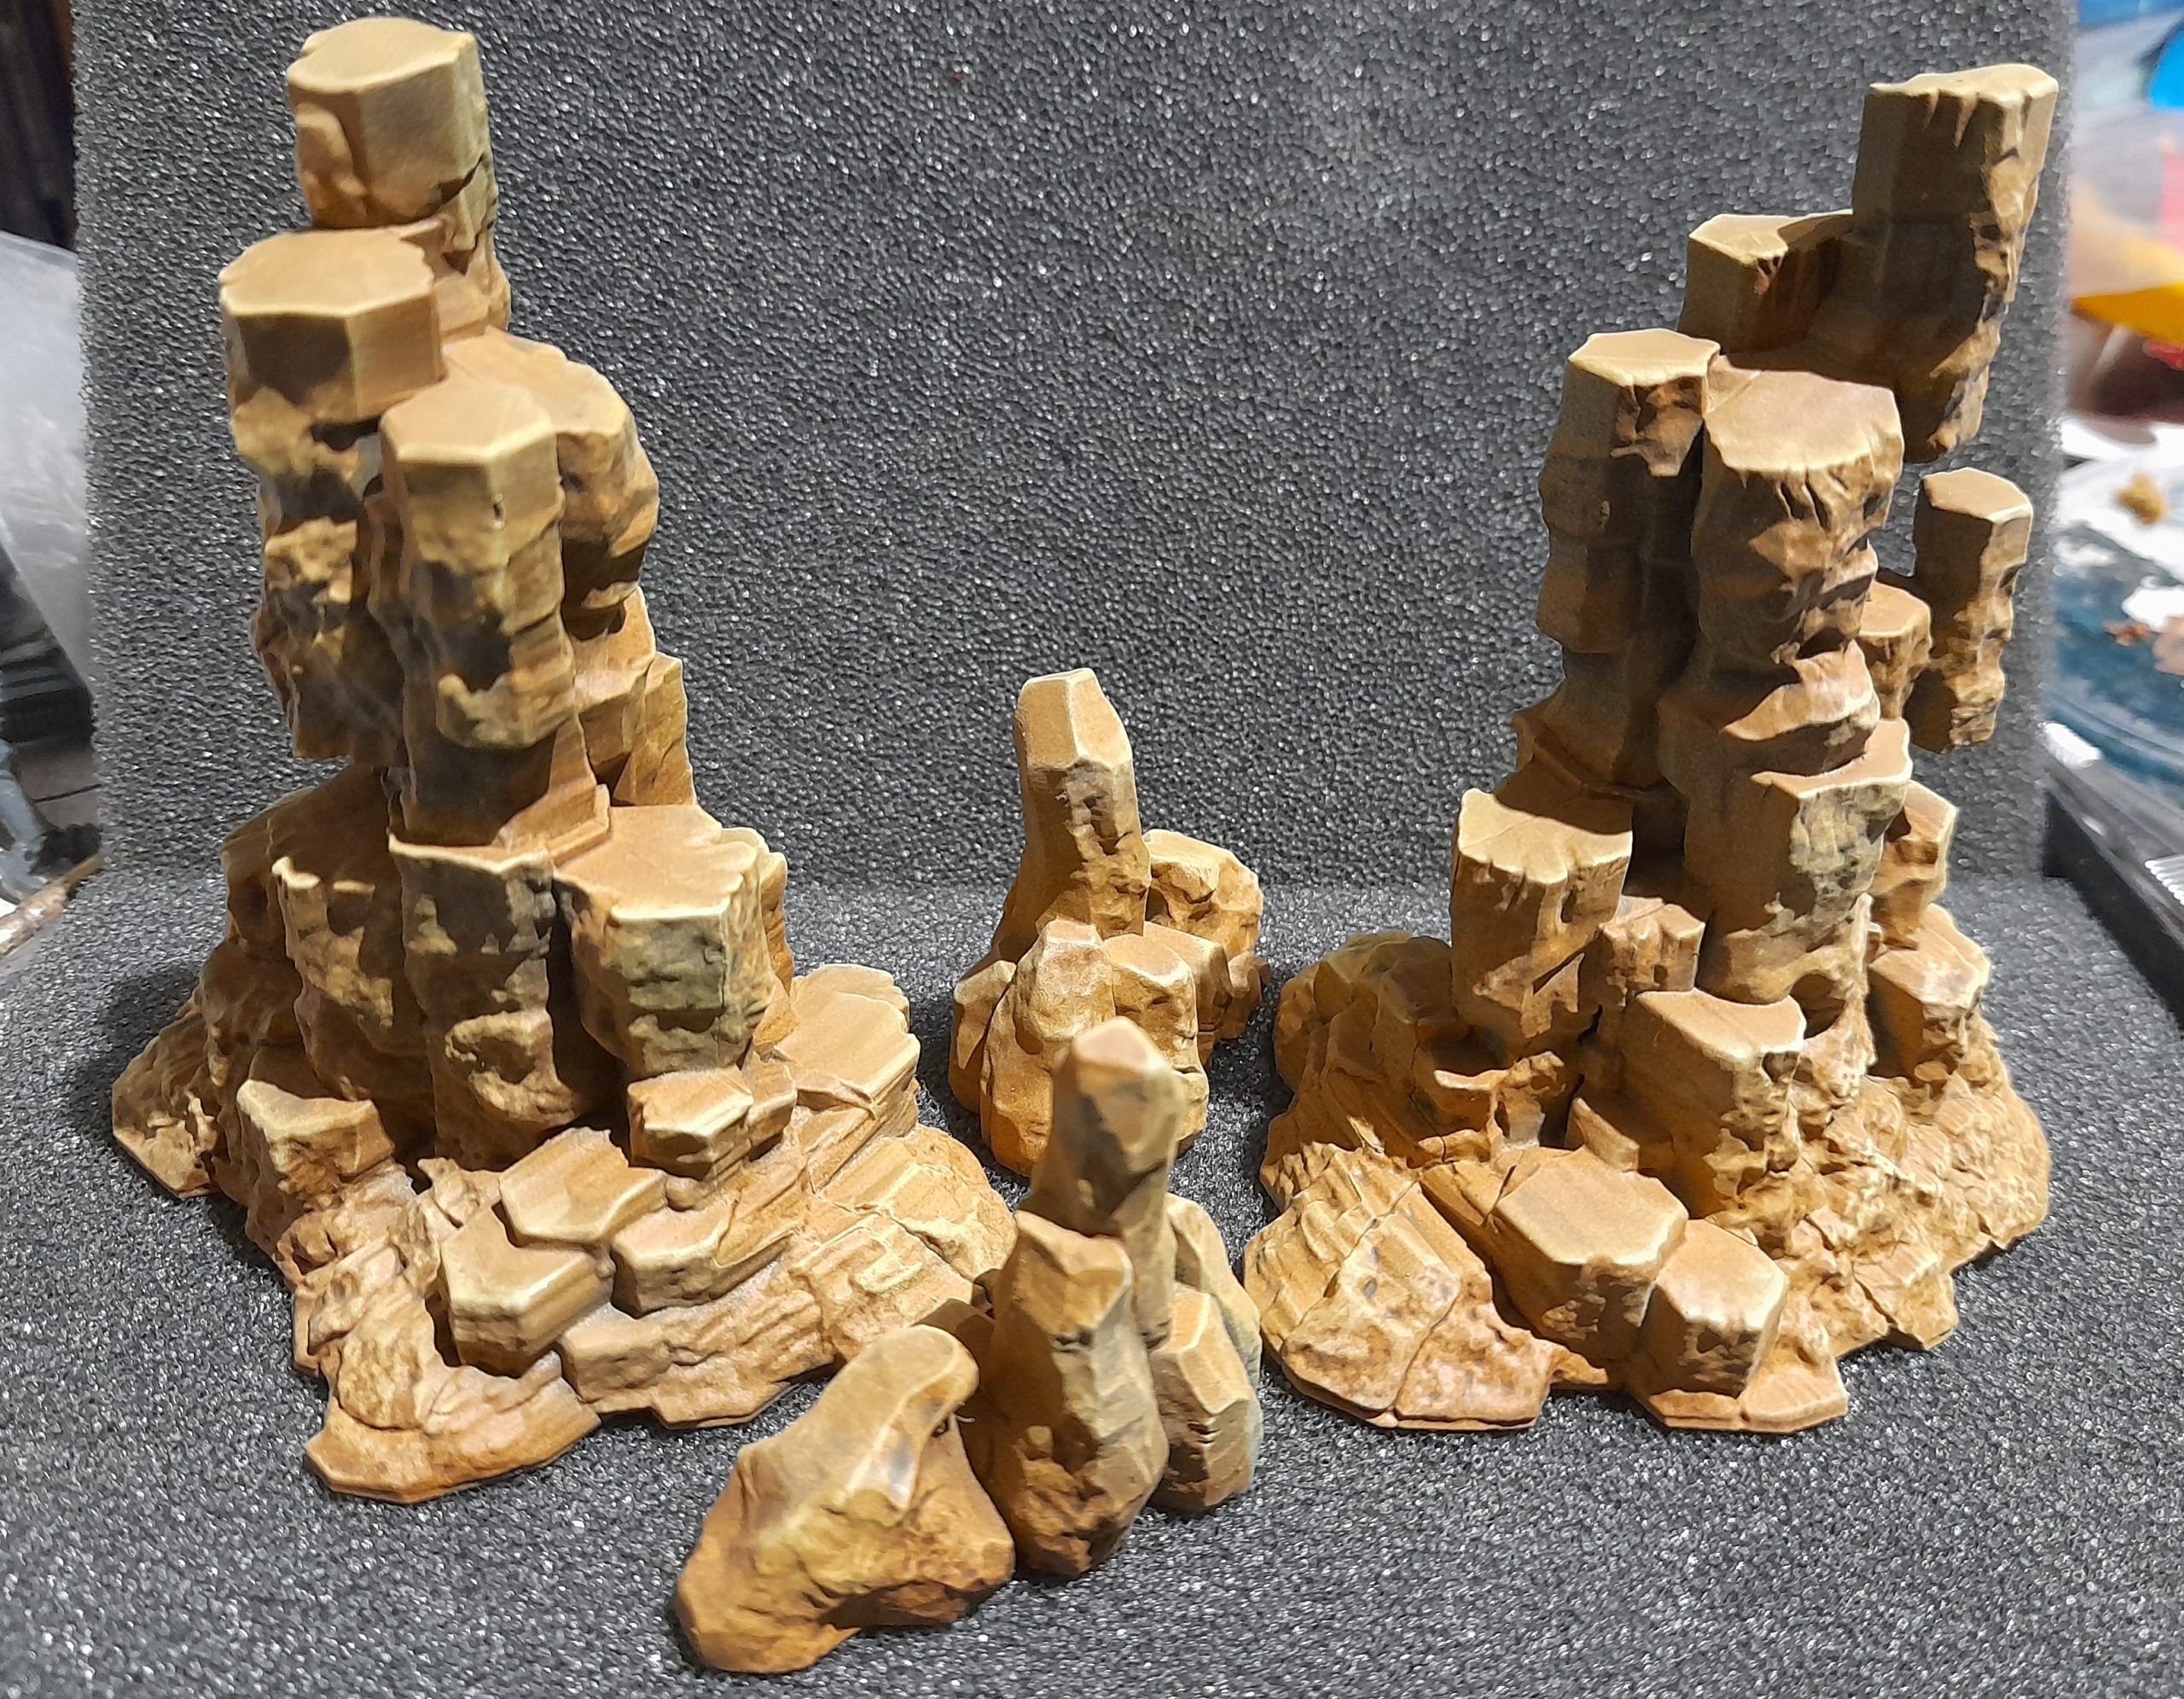
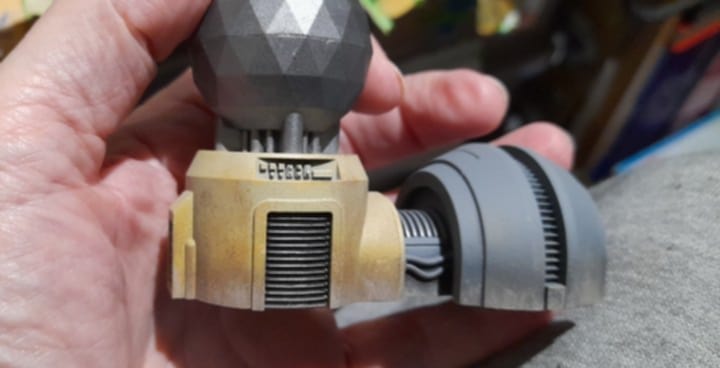
Next up I have been working on some terrain pieces from the Shatterpoint ‘Take Cover’ Terrain Pack. I picked this up for £15, which I think was pretty fair. I would never have paid full price for it though.
I put together the main parts, just leaving out the speeder bike and the ladders, as they were slightly too large. Surprisingly the rock formations were pretty small.

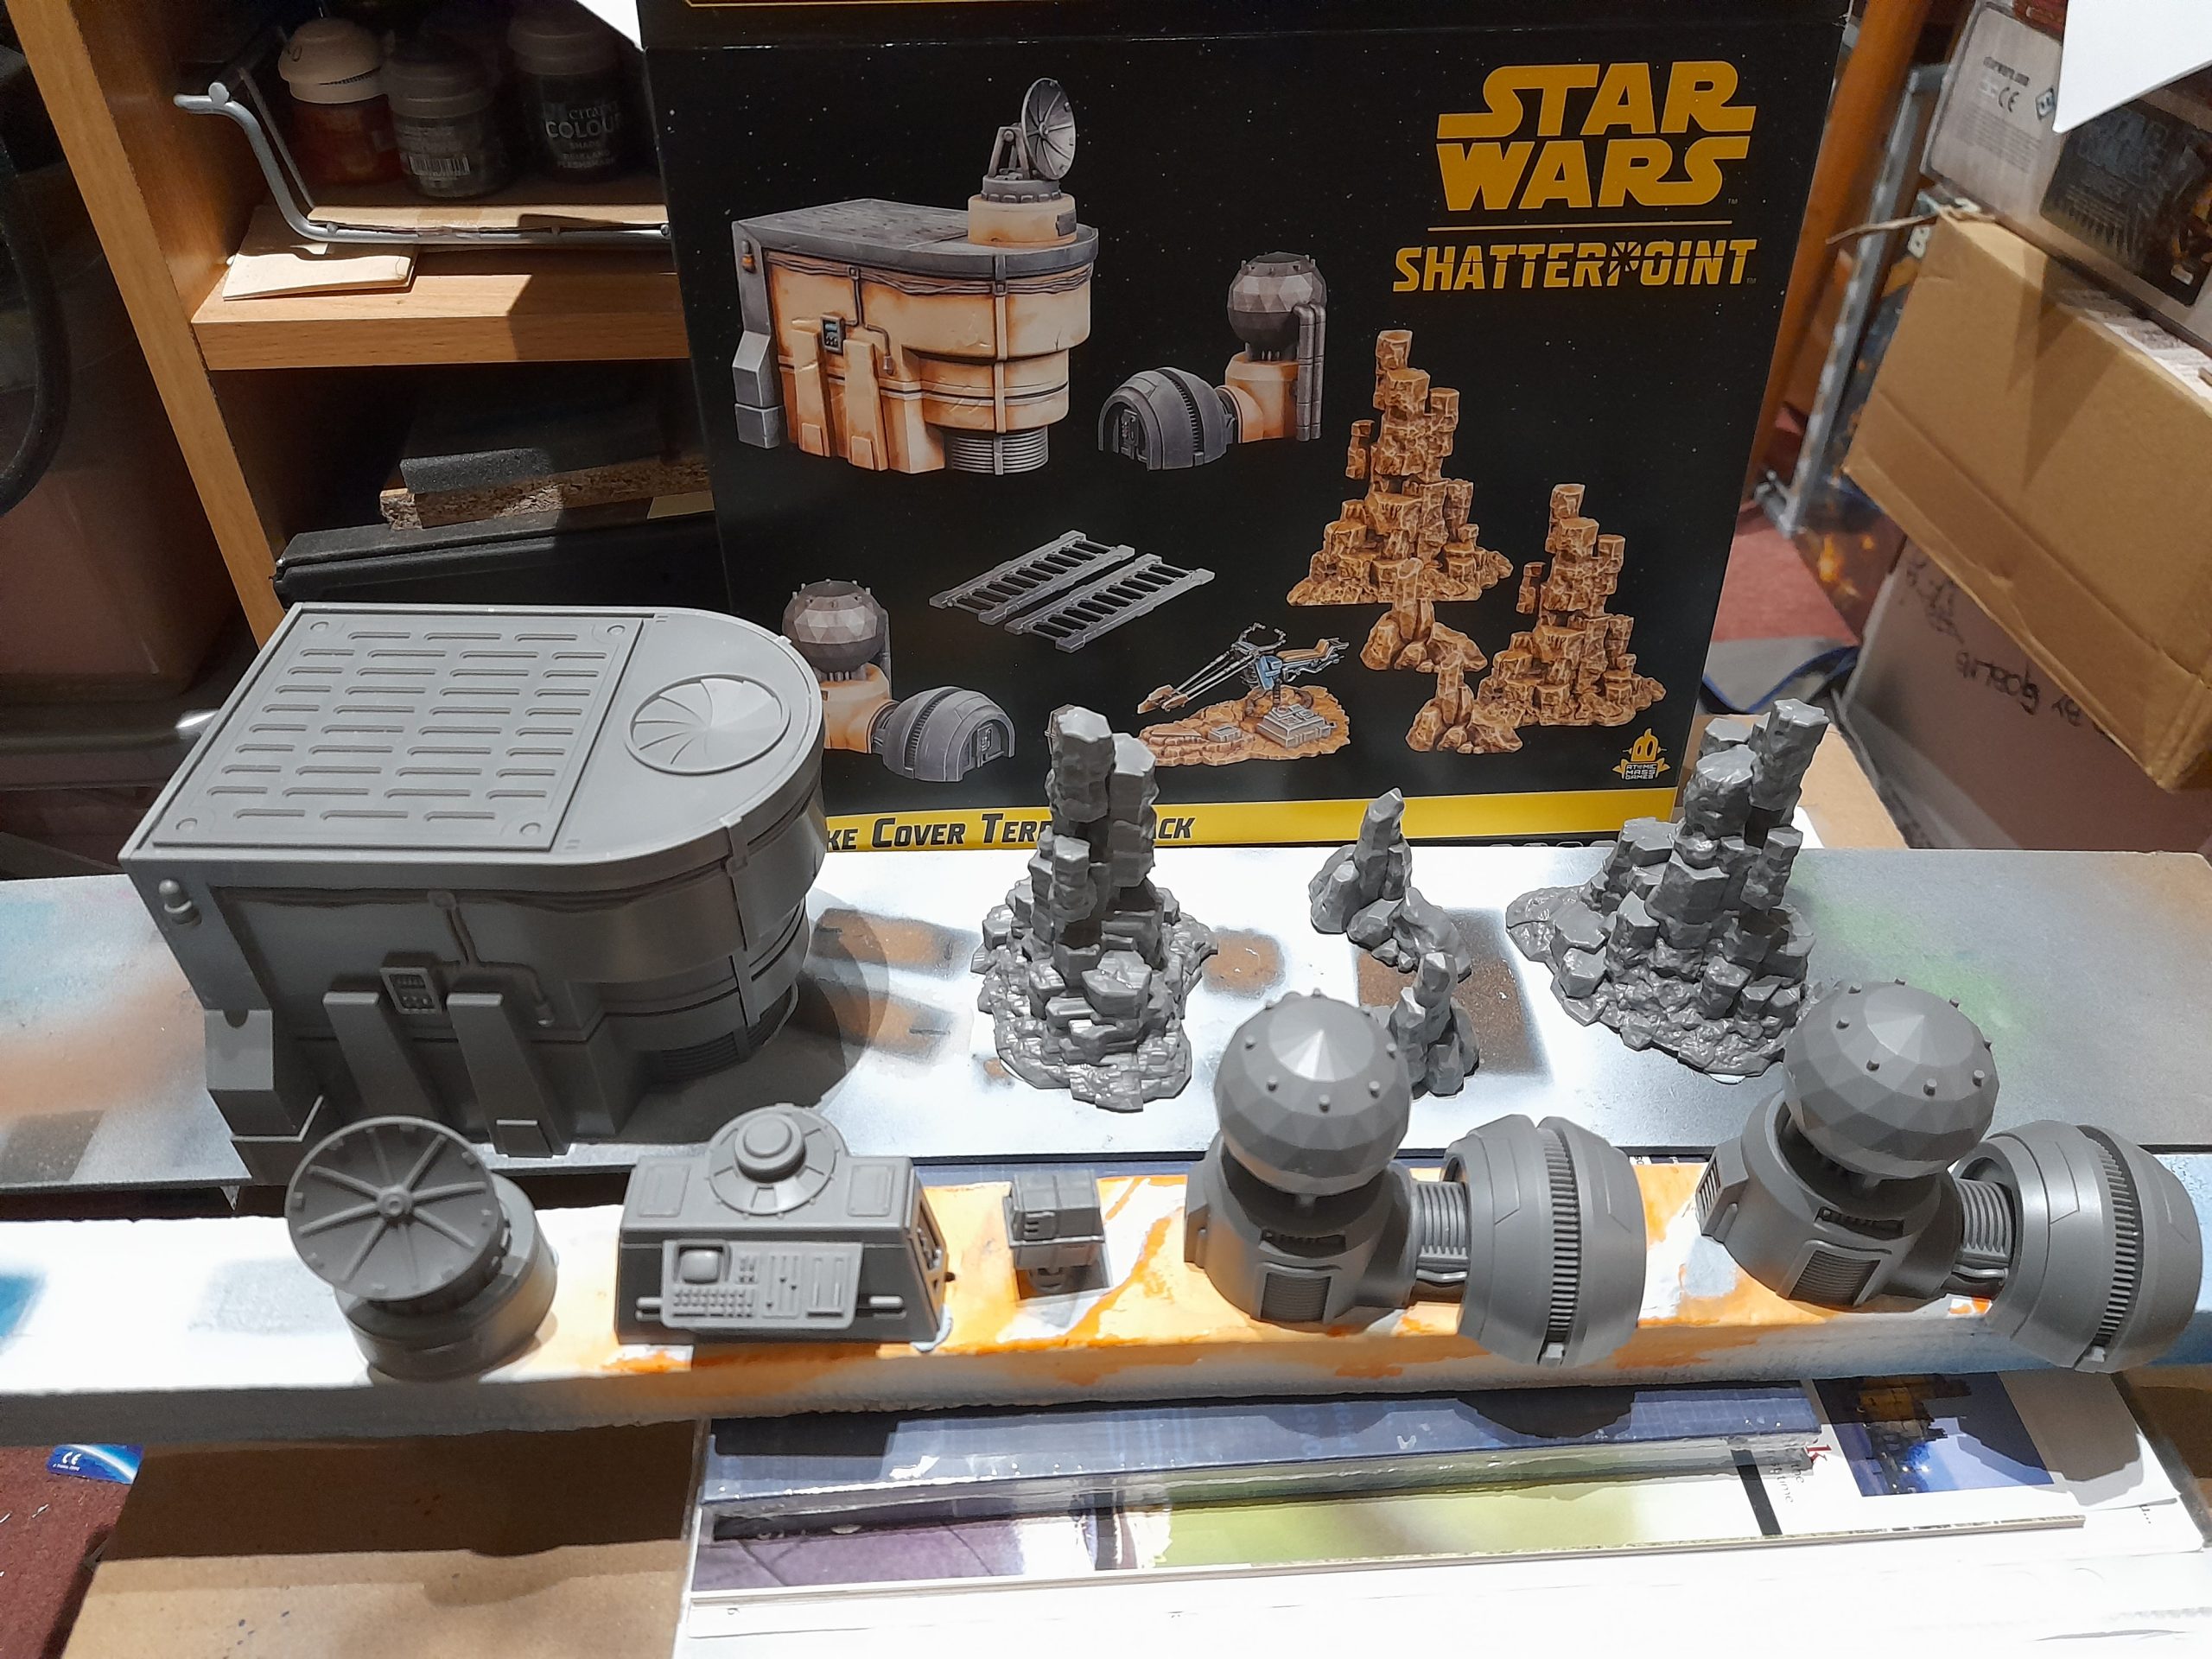

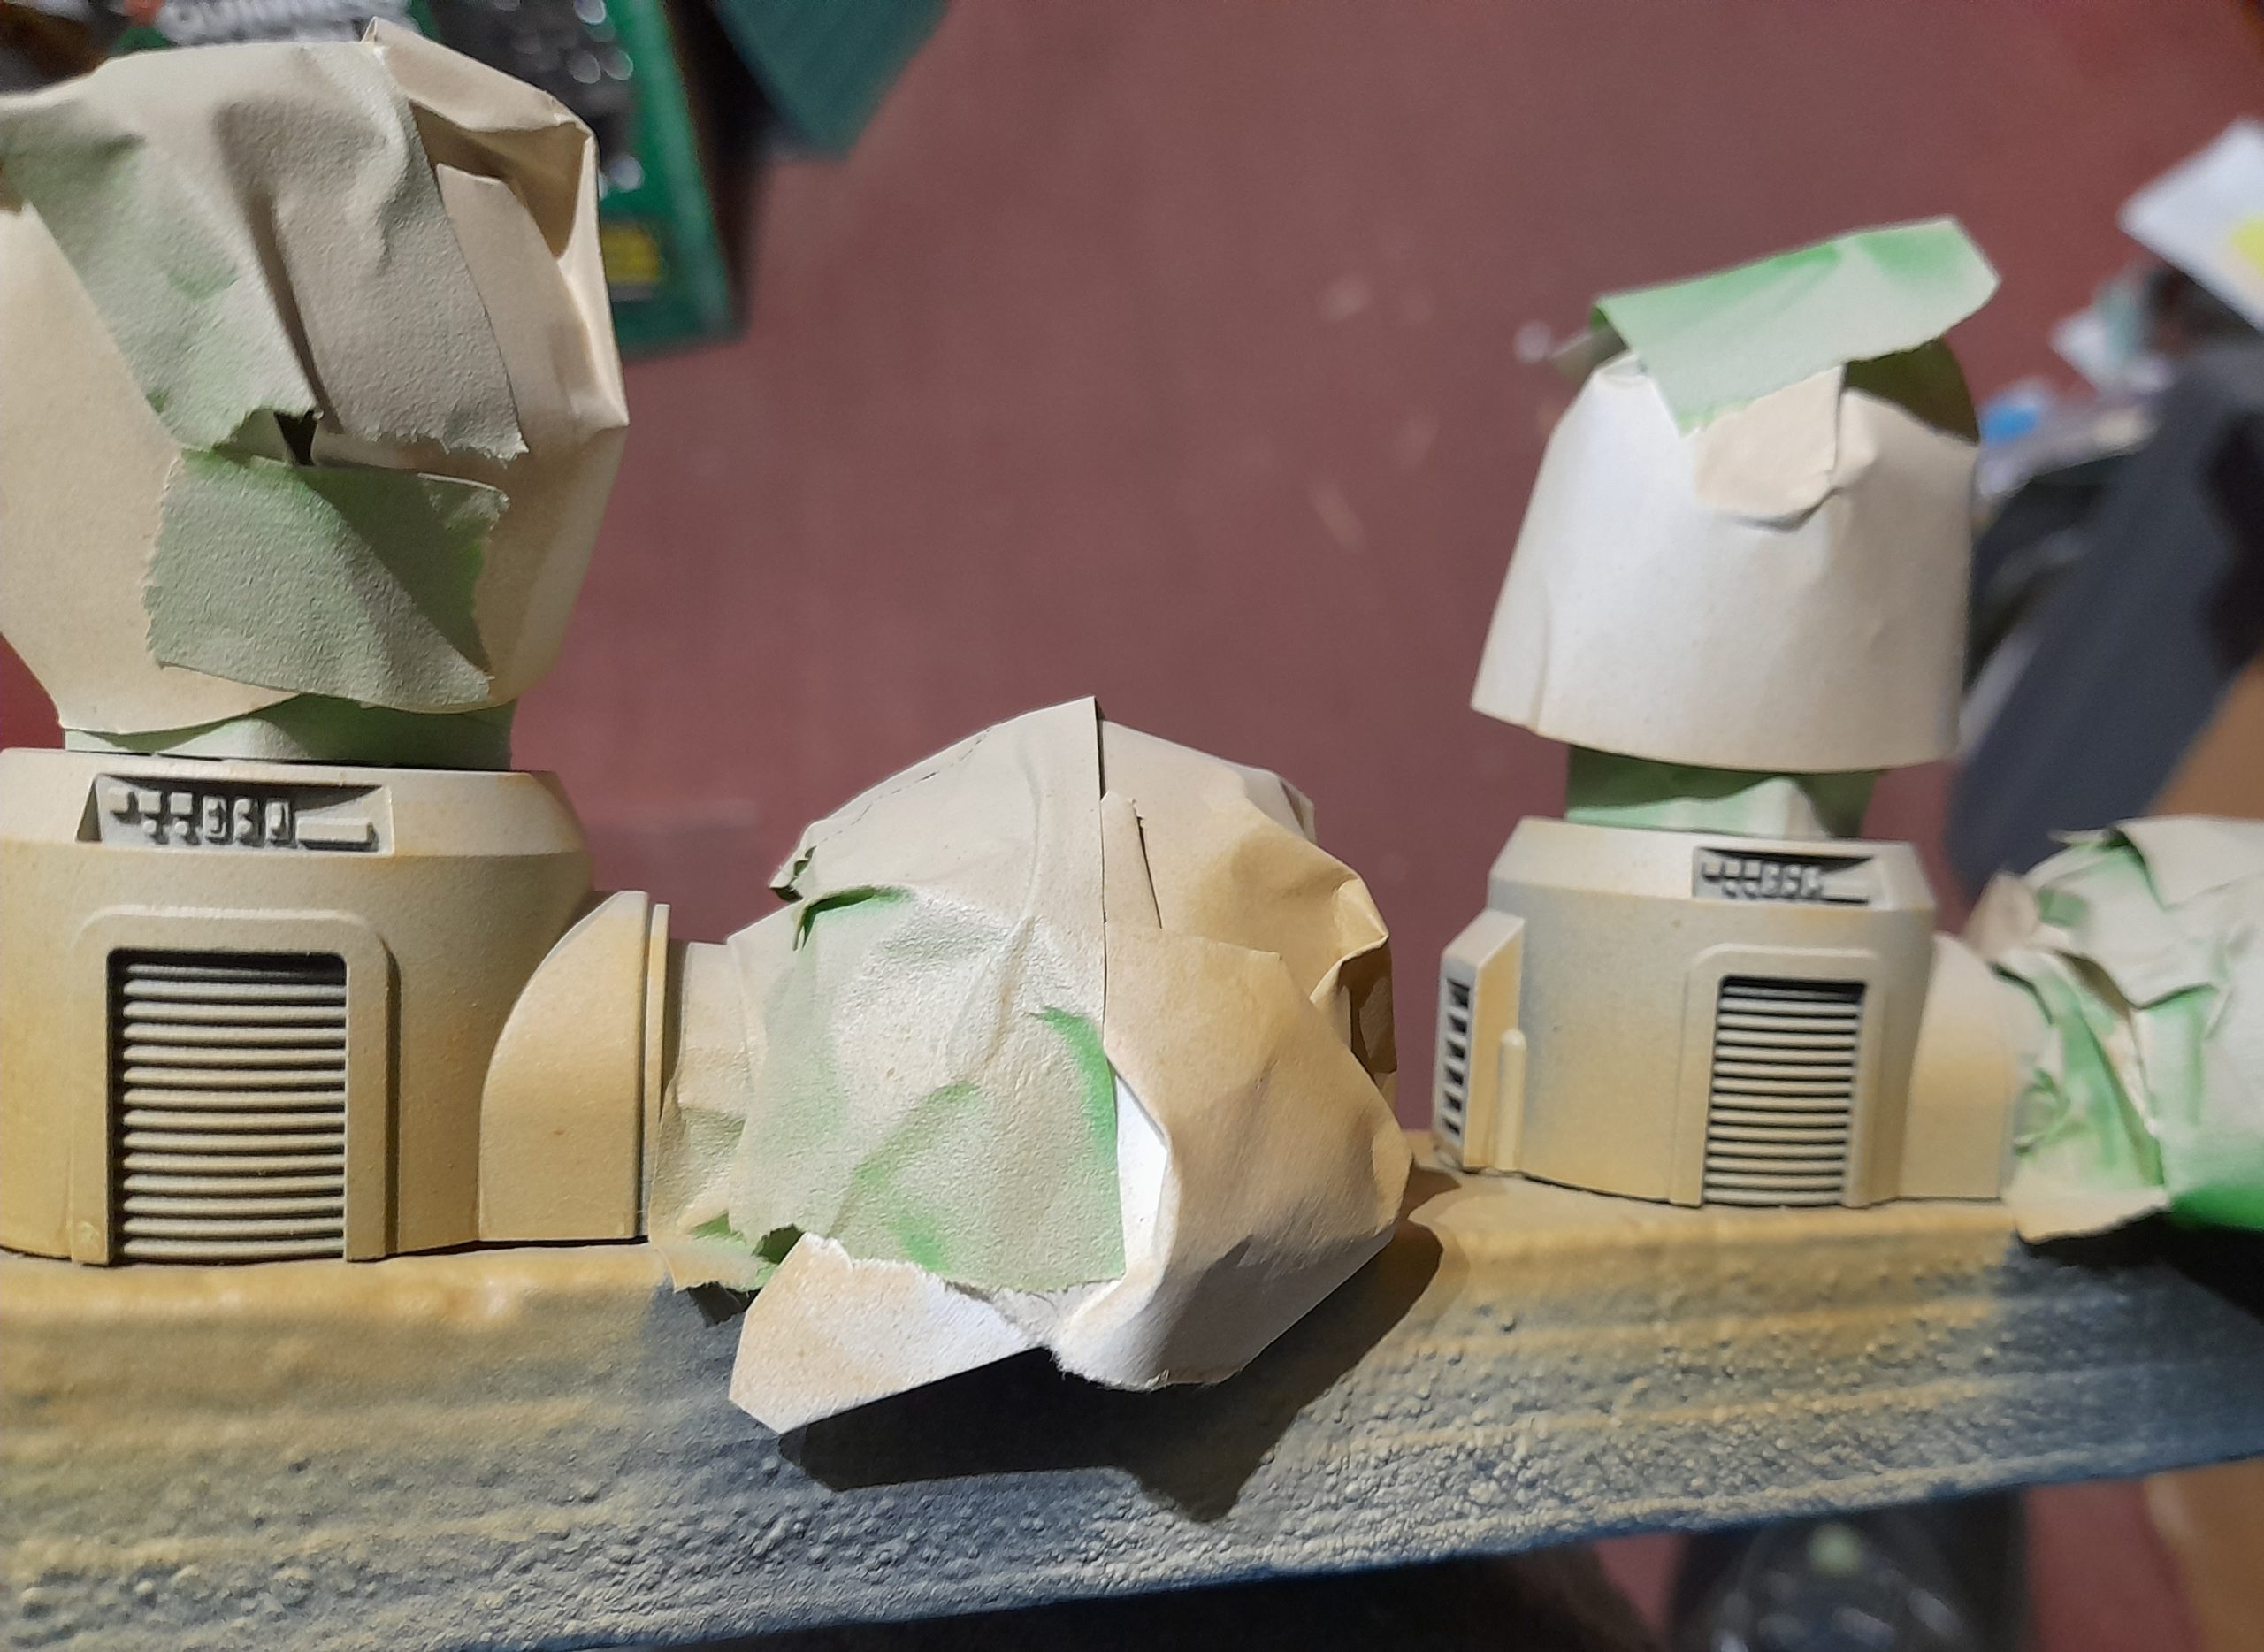
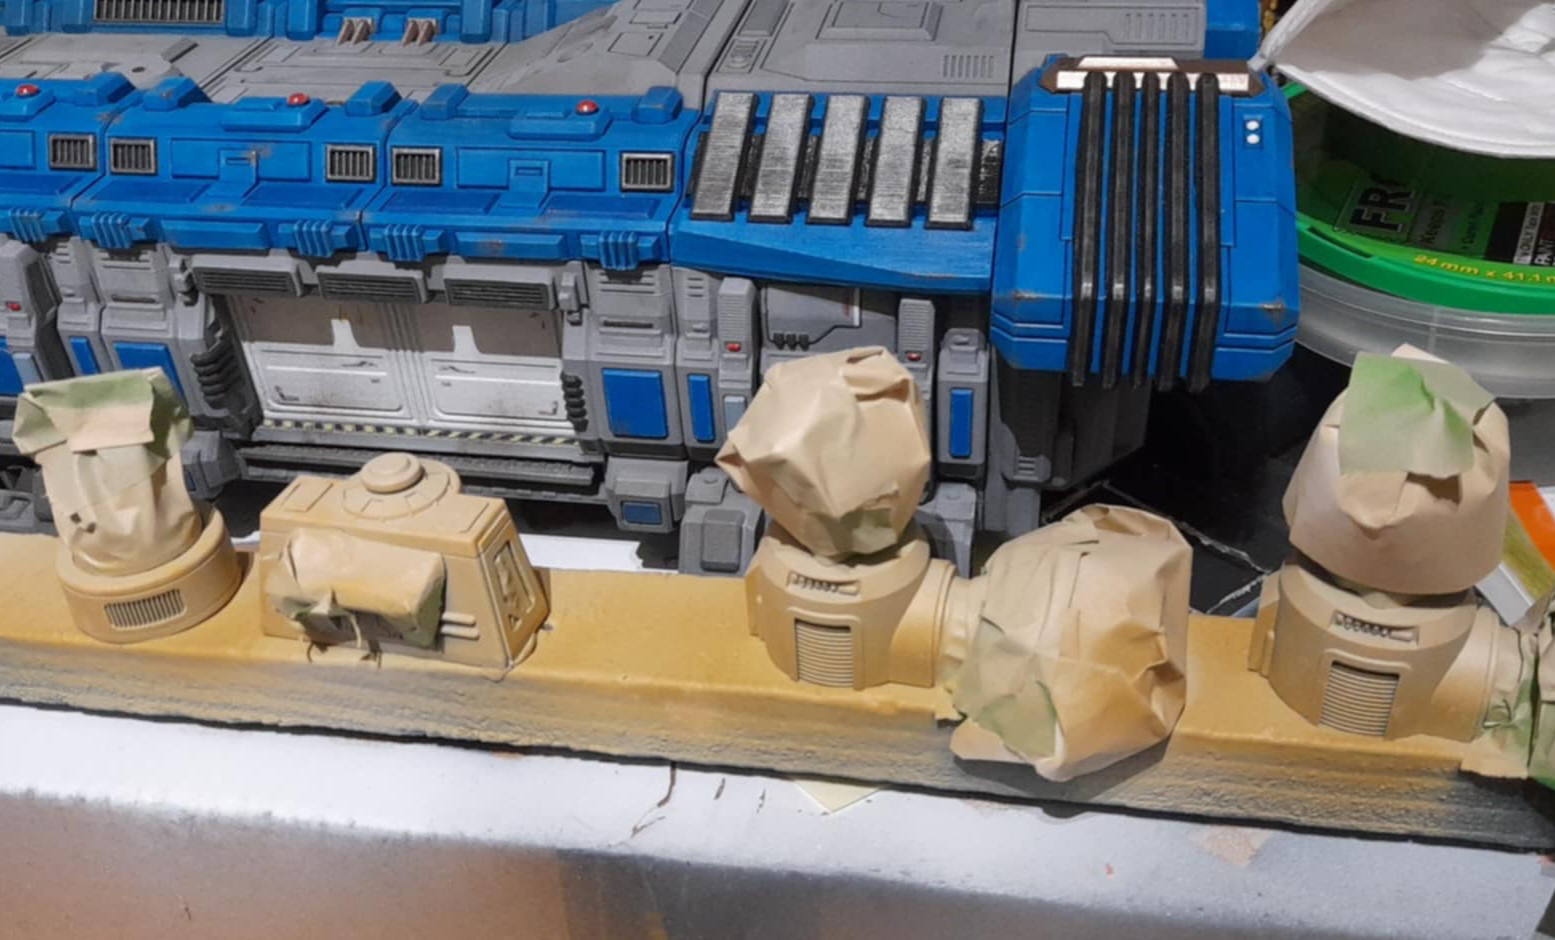
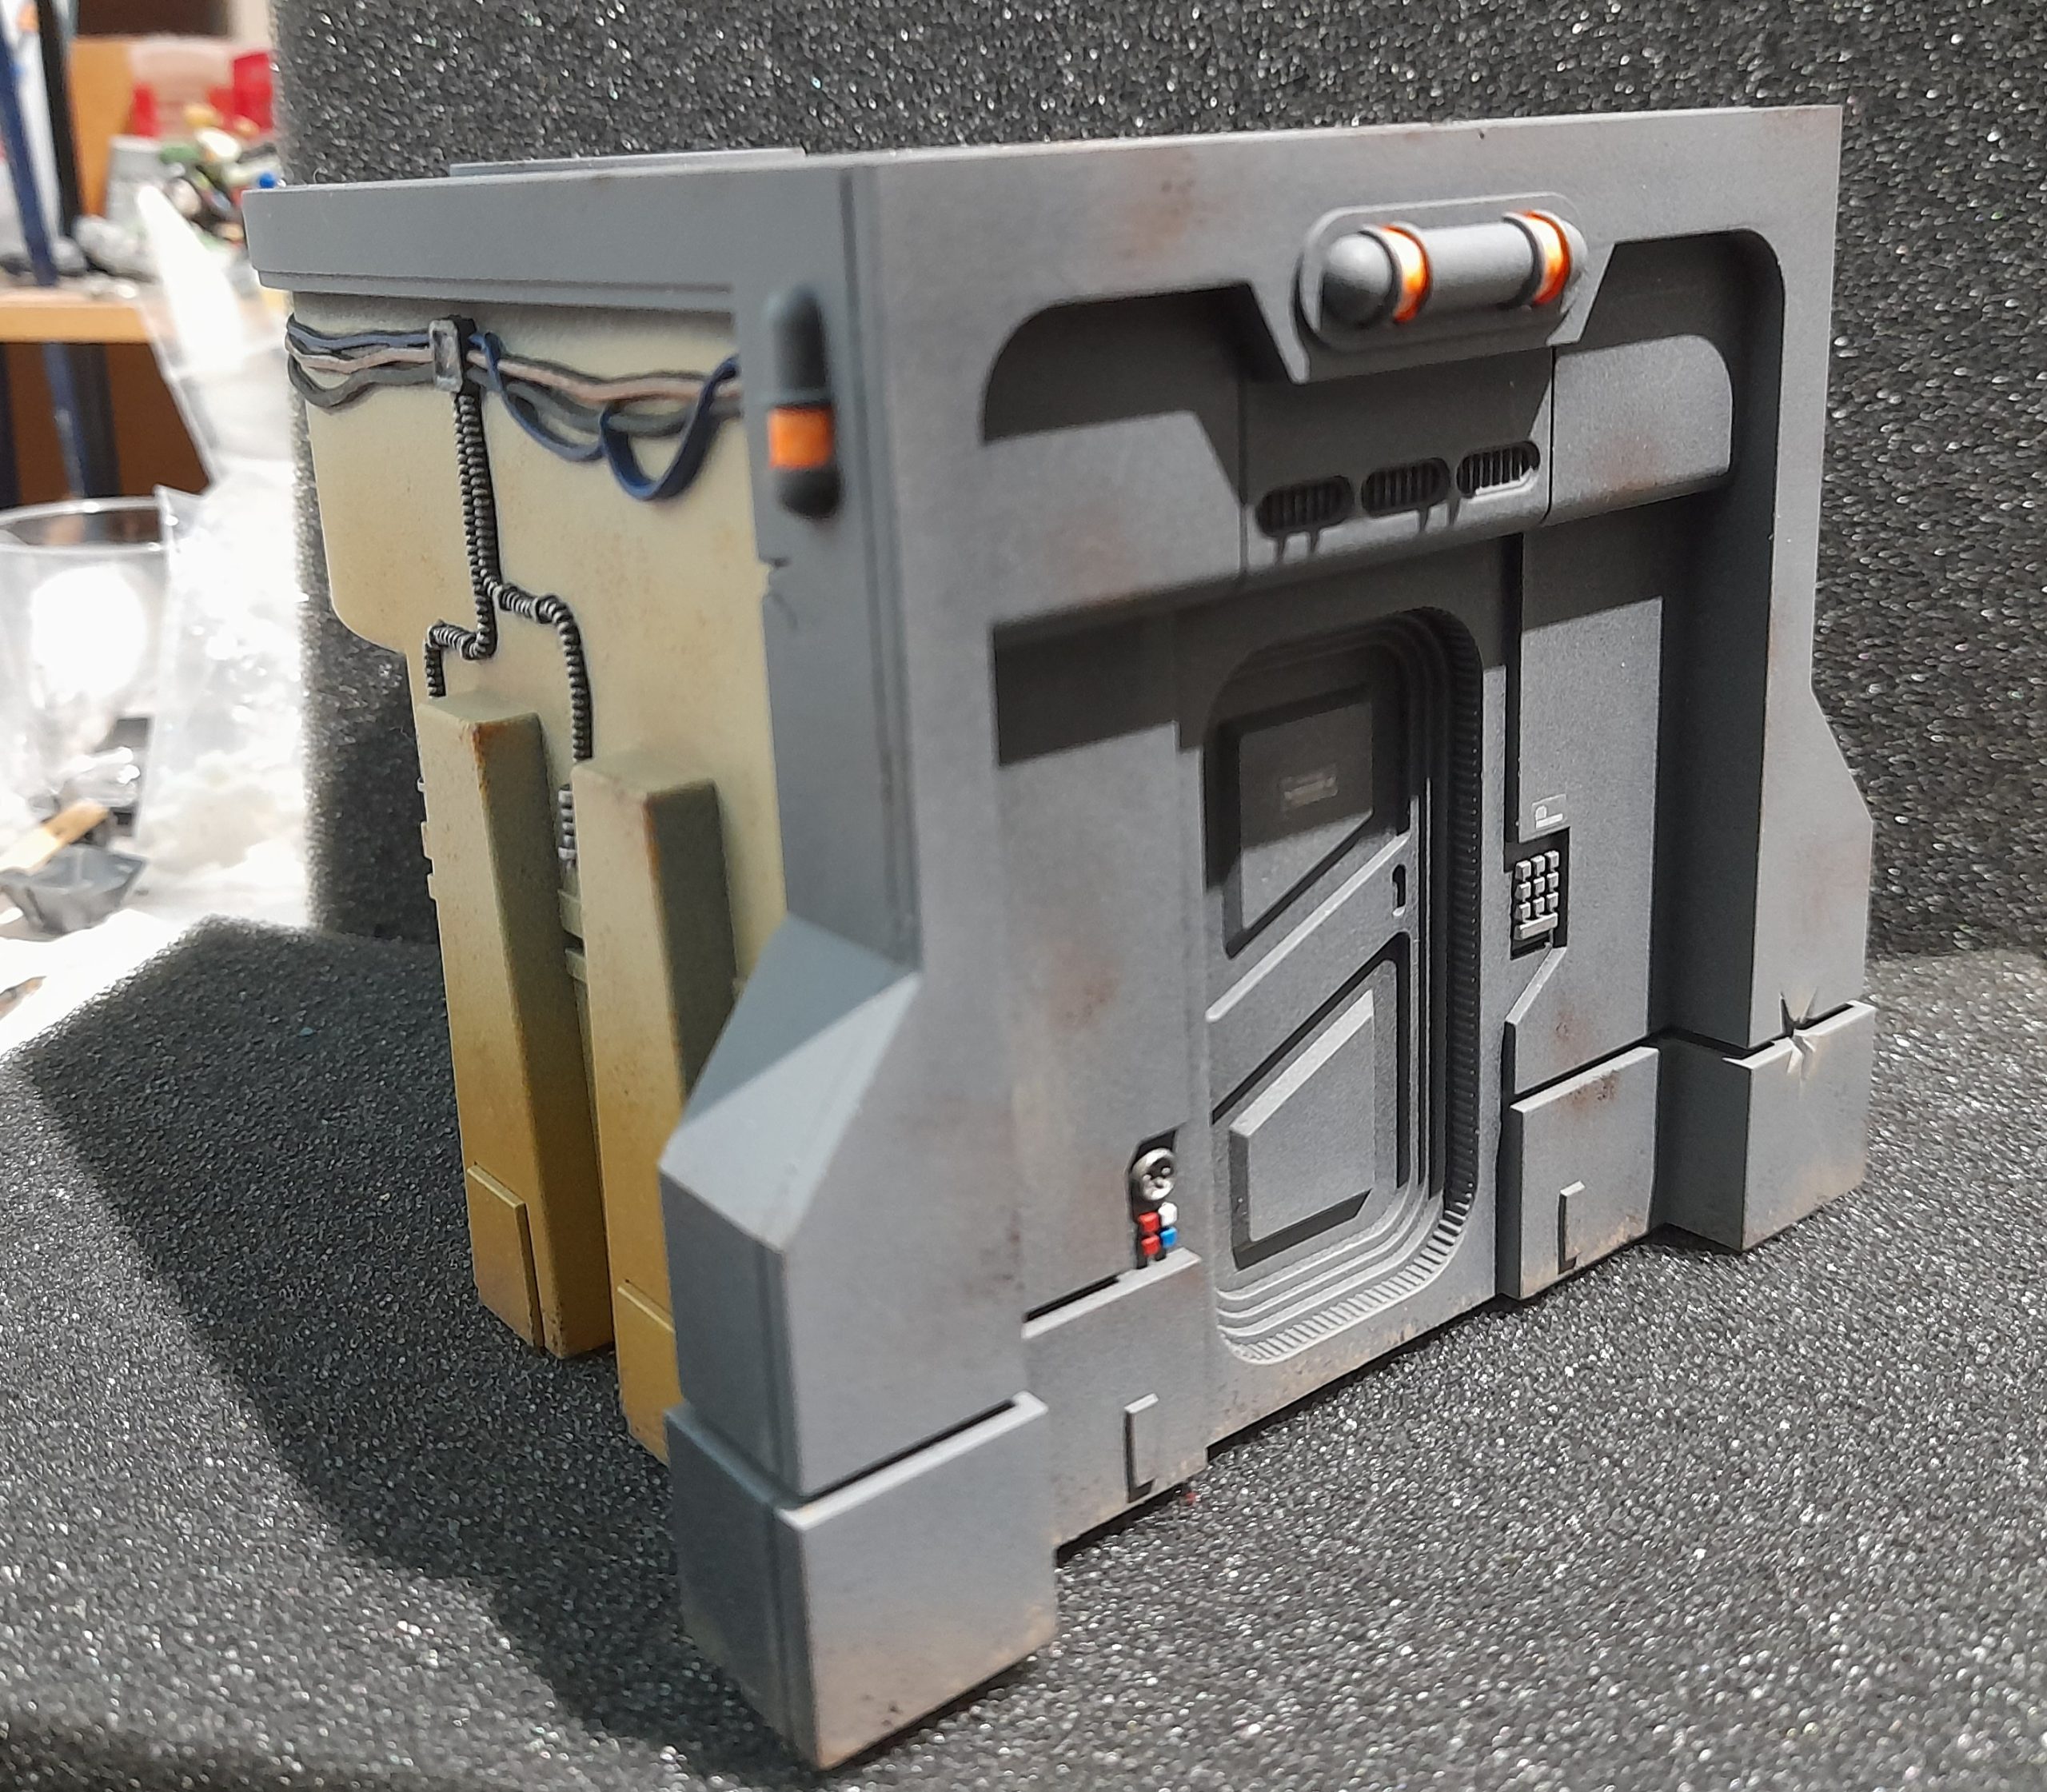
I sprayed everything in grey, then masked the parts up and sprayed them again in army painter bone.
I followed this up by airbrushing over the bottom areas of the buildings with a couple of different browns.
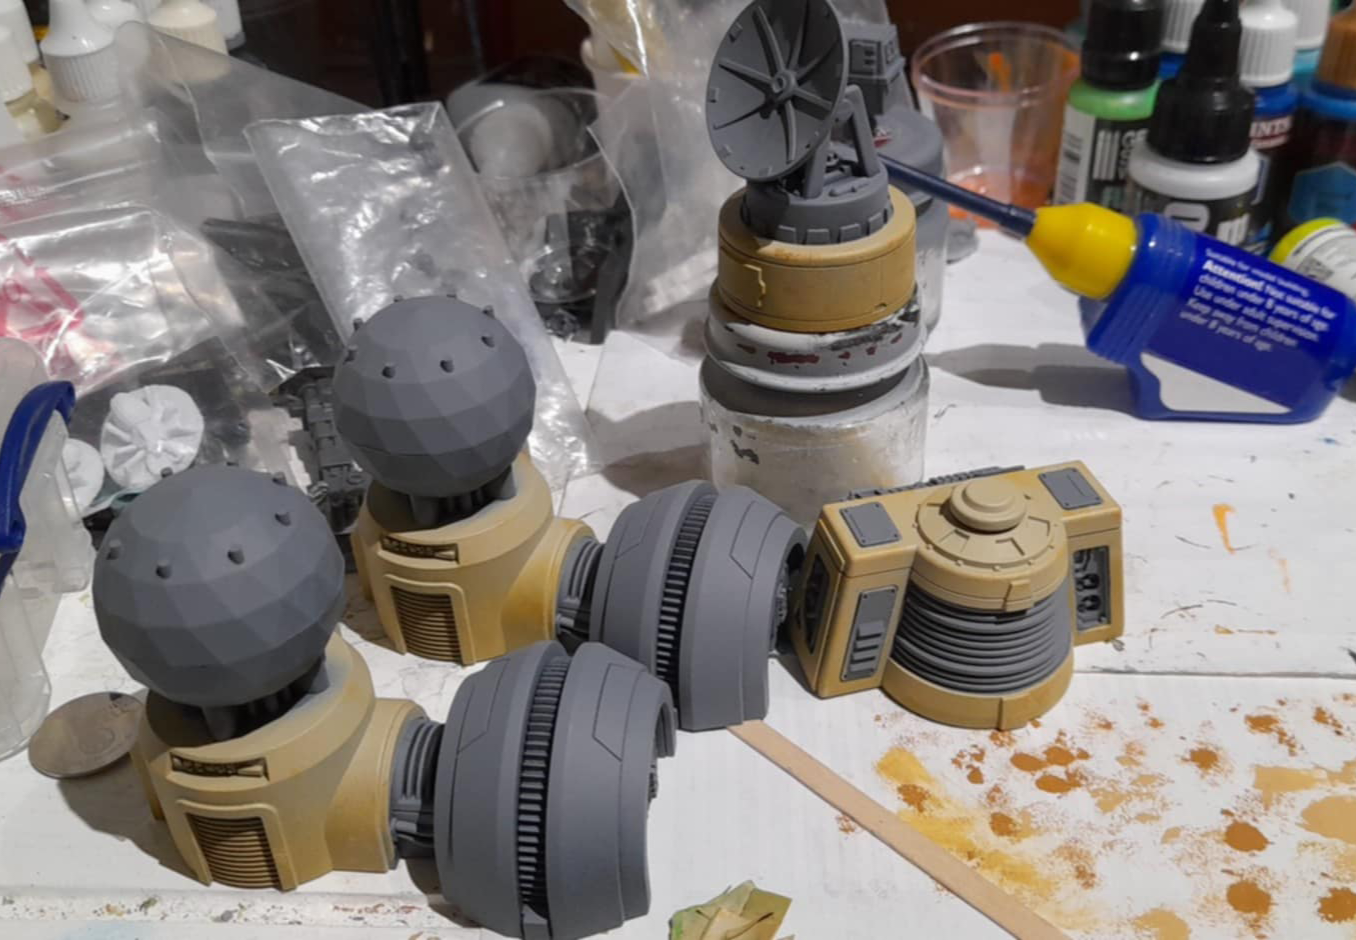
The rocks were airbrushed with some darker browns, then drybrushed several shades of beige. They were quite quick to finish.
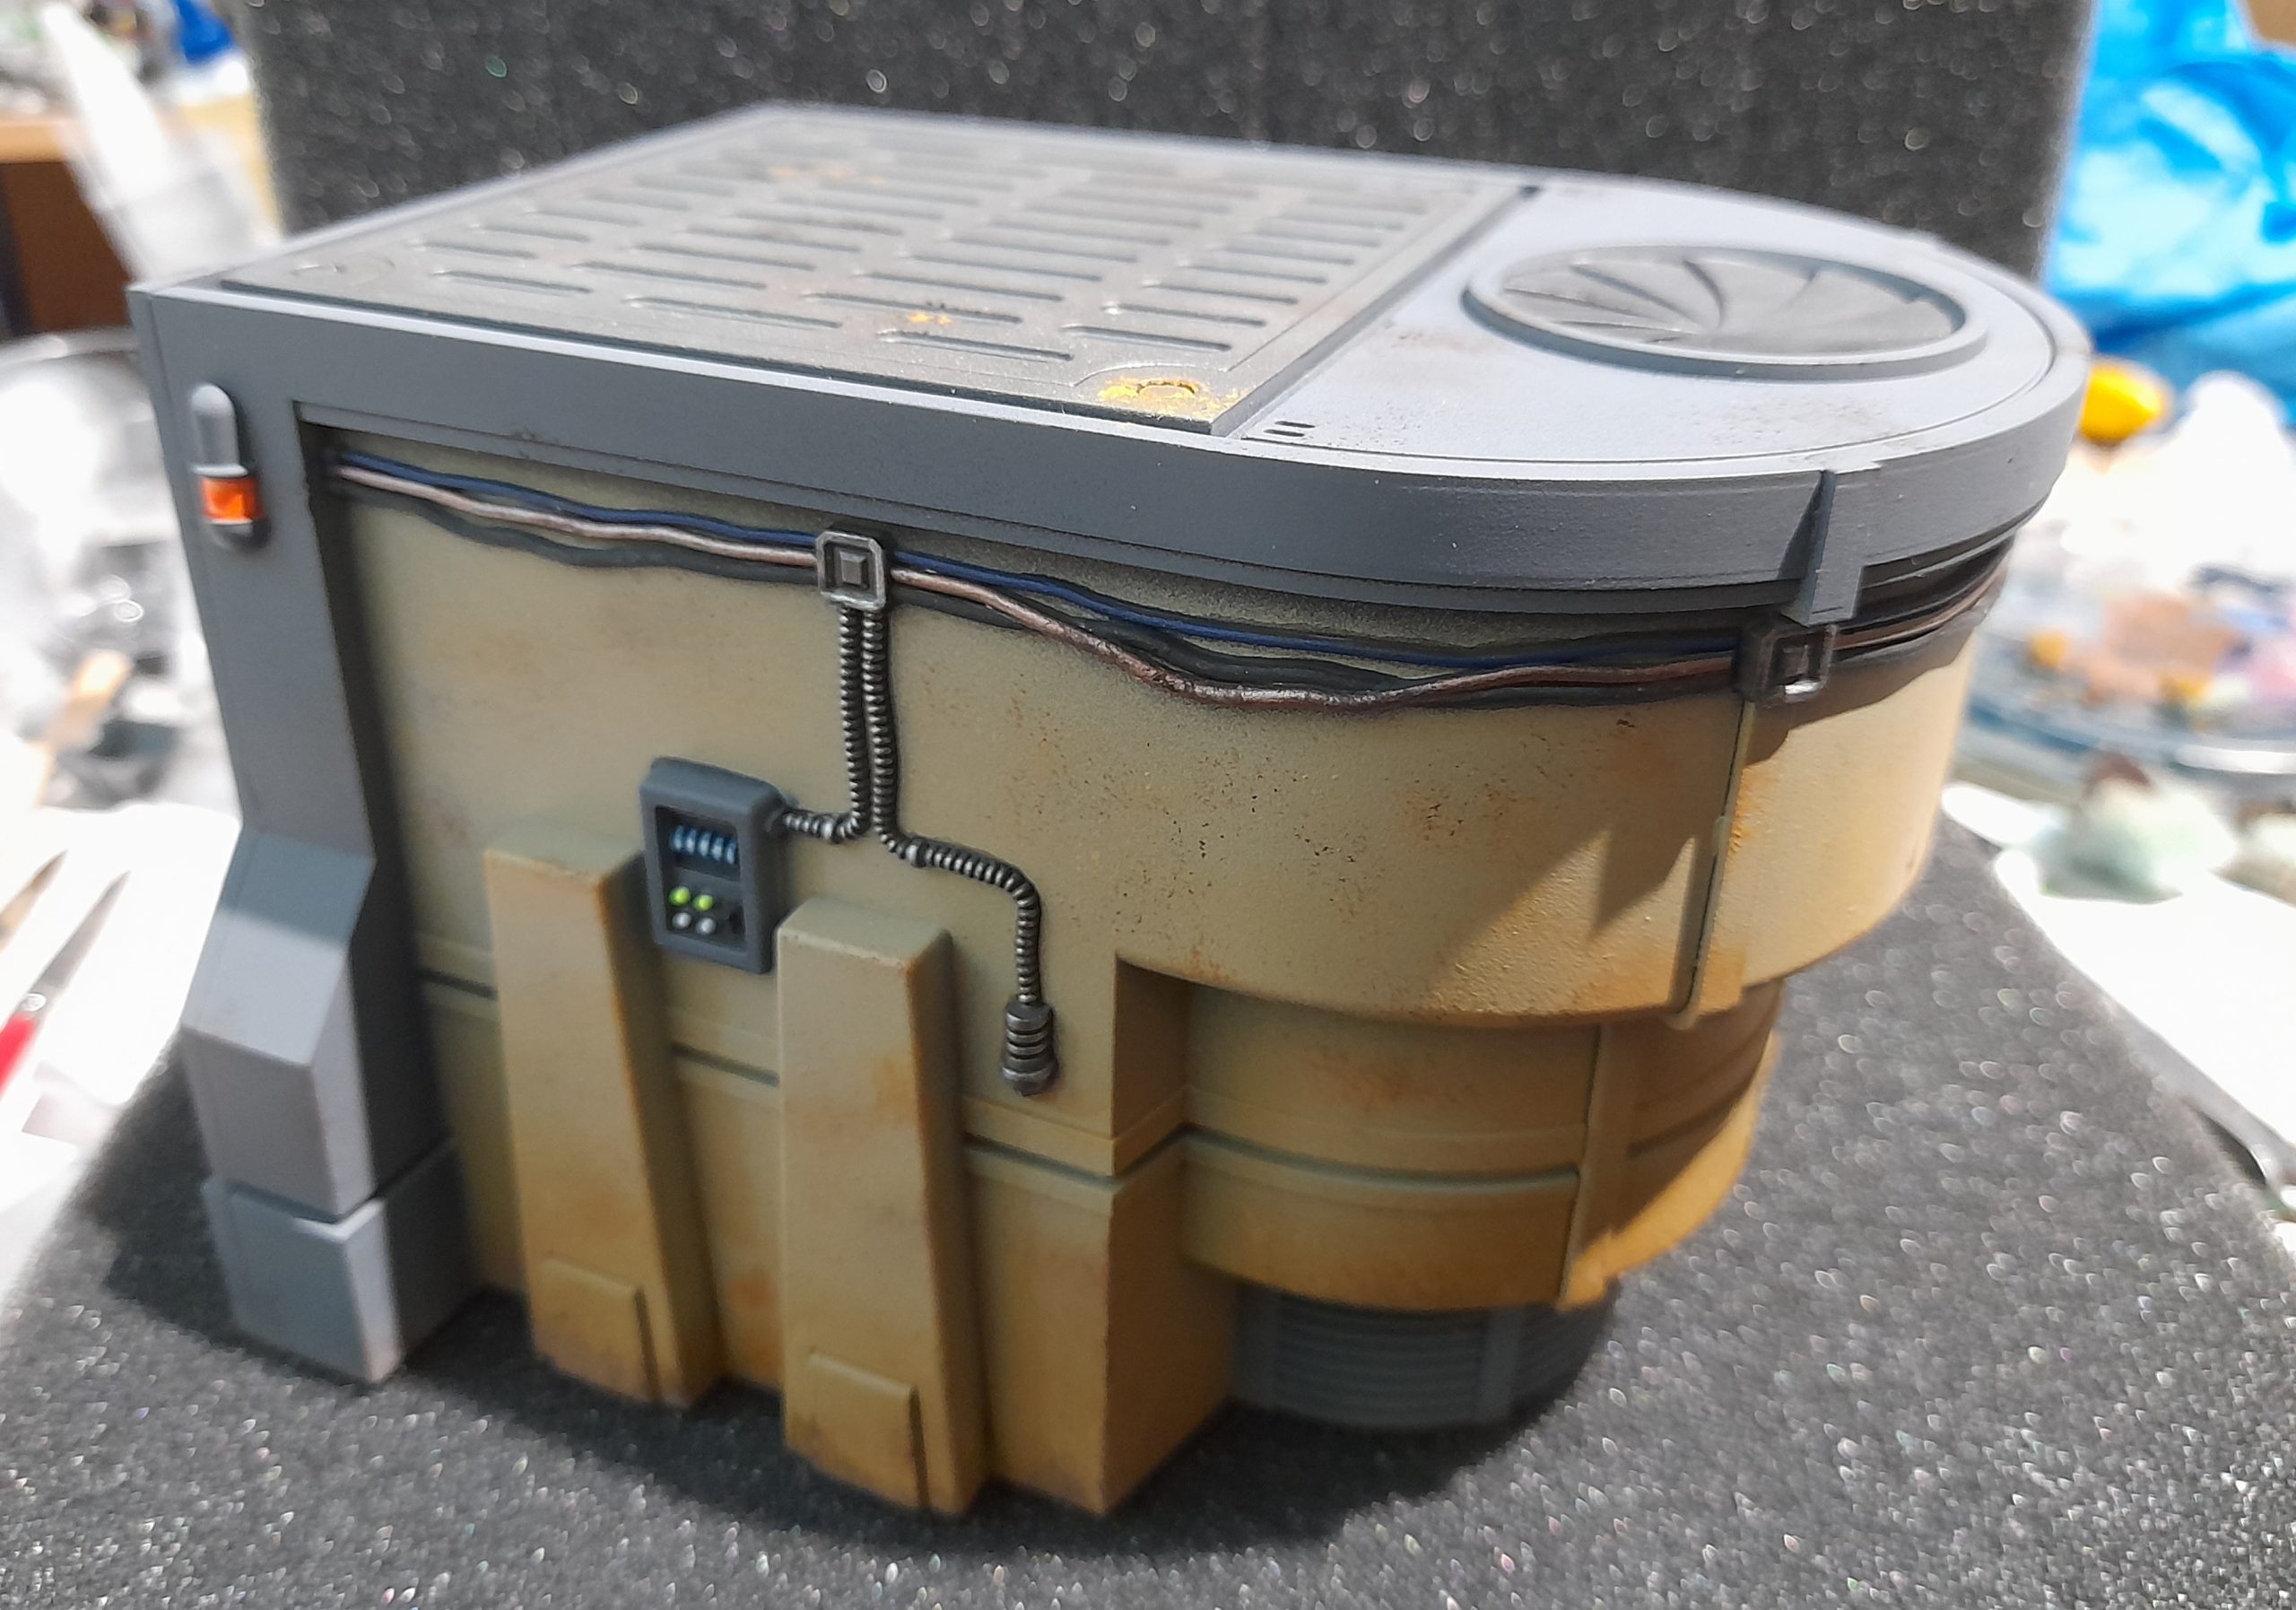
Then I began work on more weathering on the buildings. I sponged on various shades of brown, plus added a dirt/dust layer to the bottom of one of the generators as a test.
Will roll this out to the rest now.
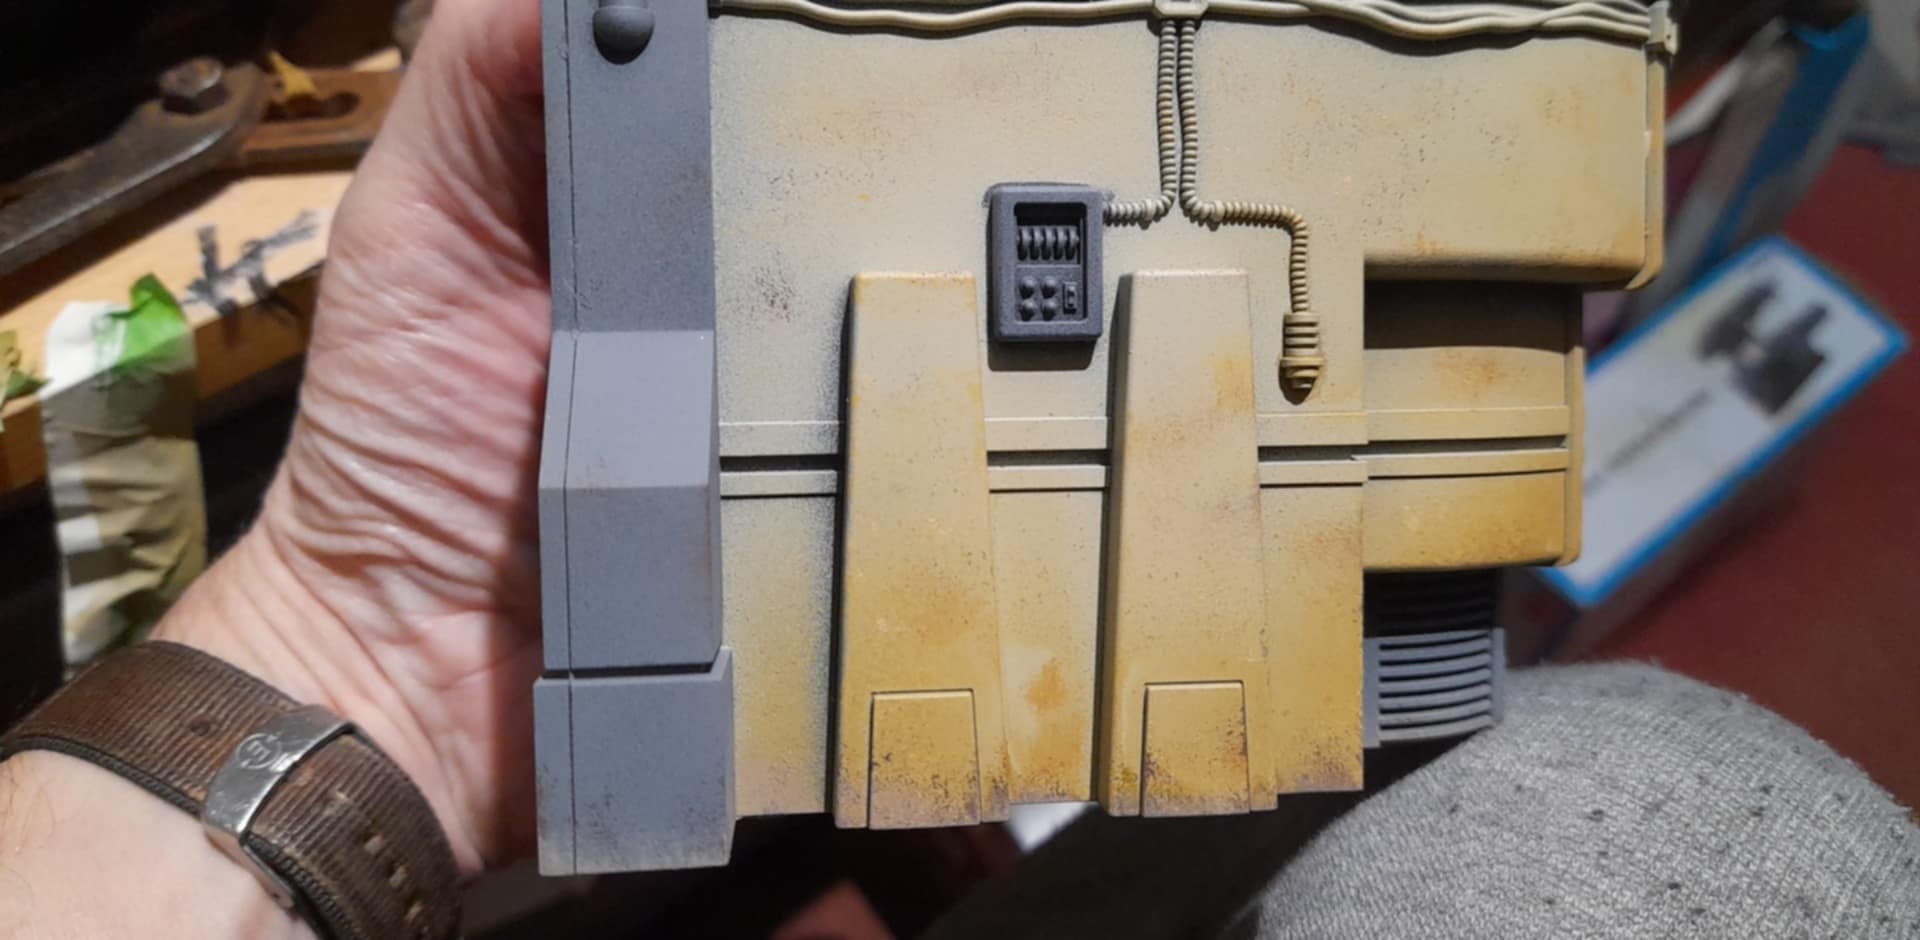
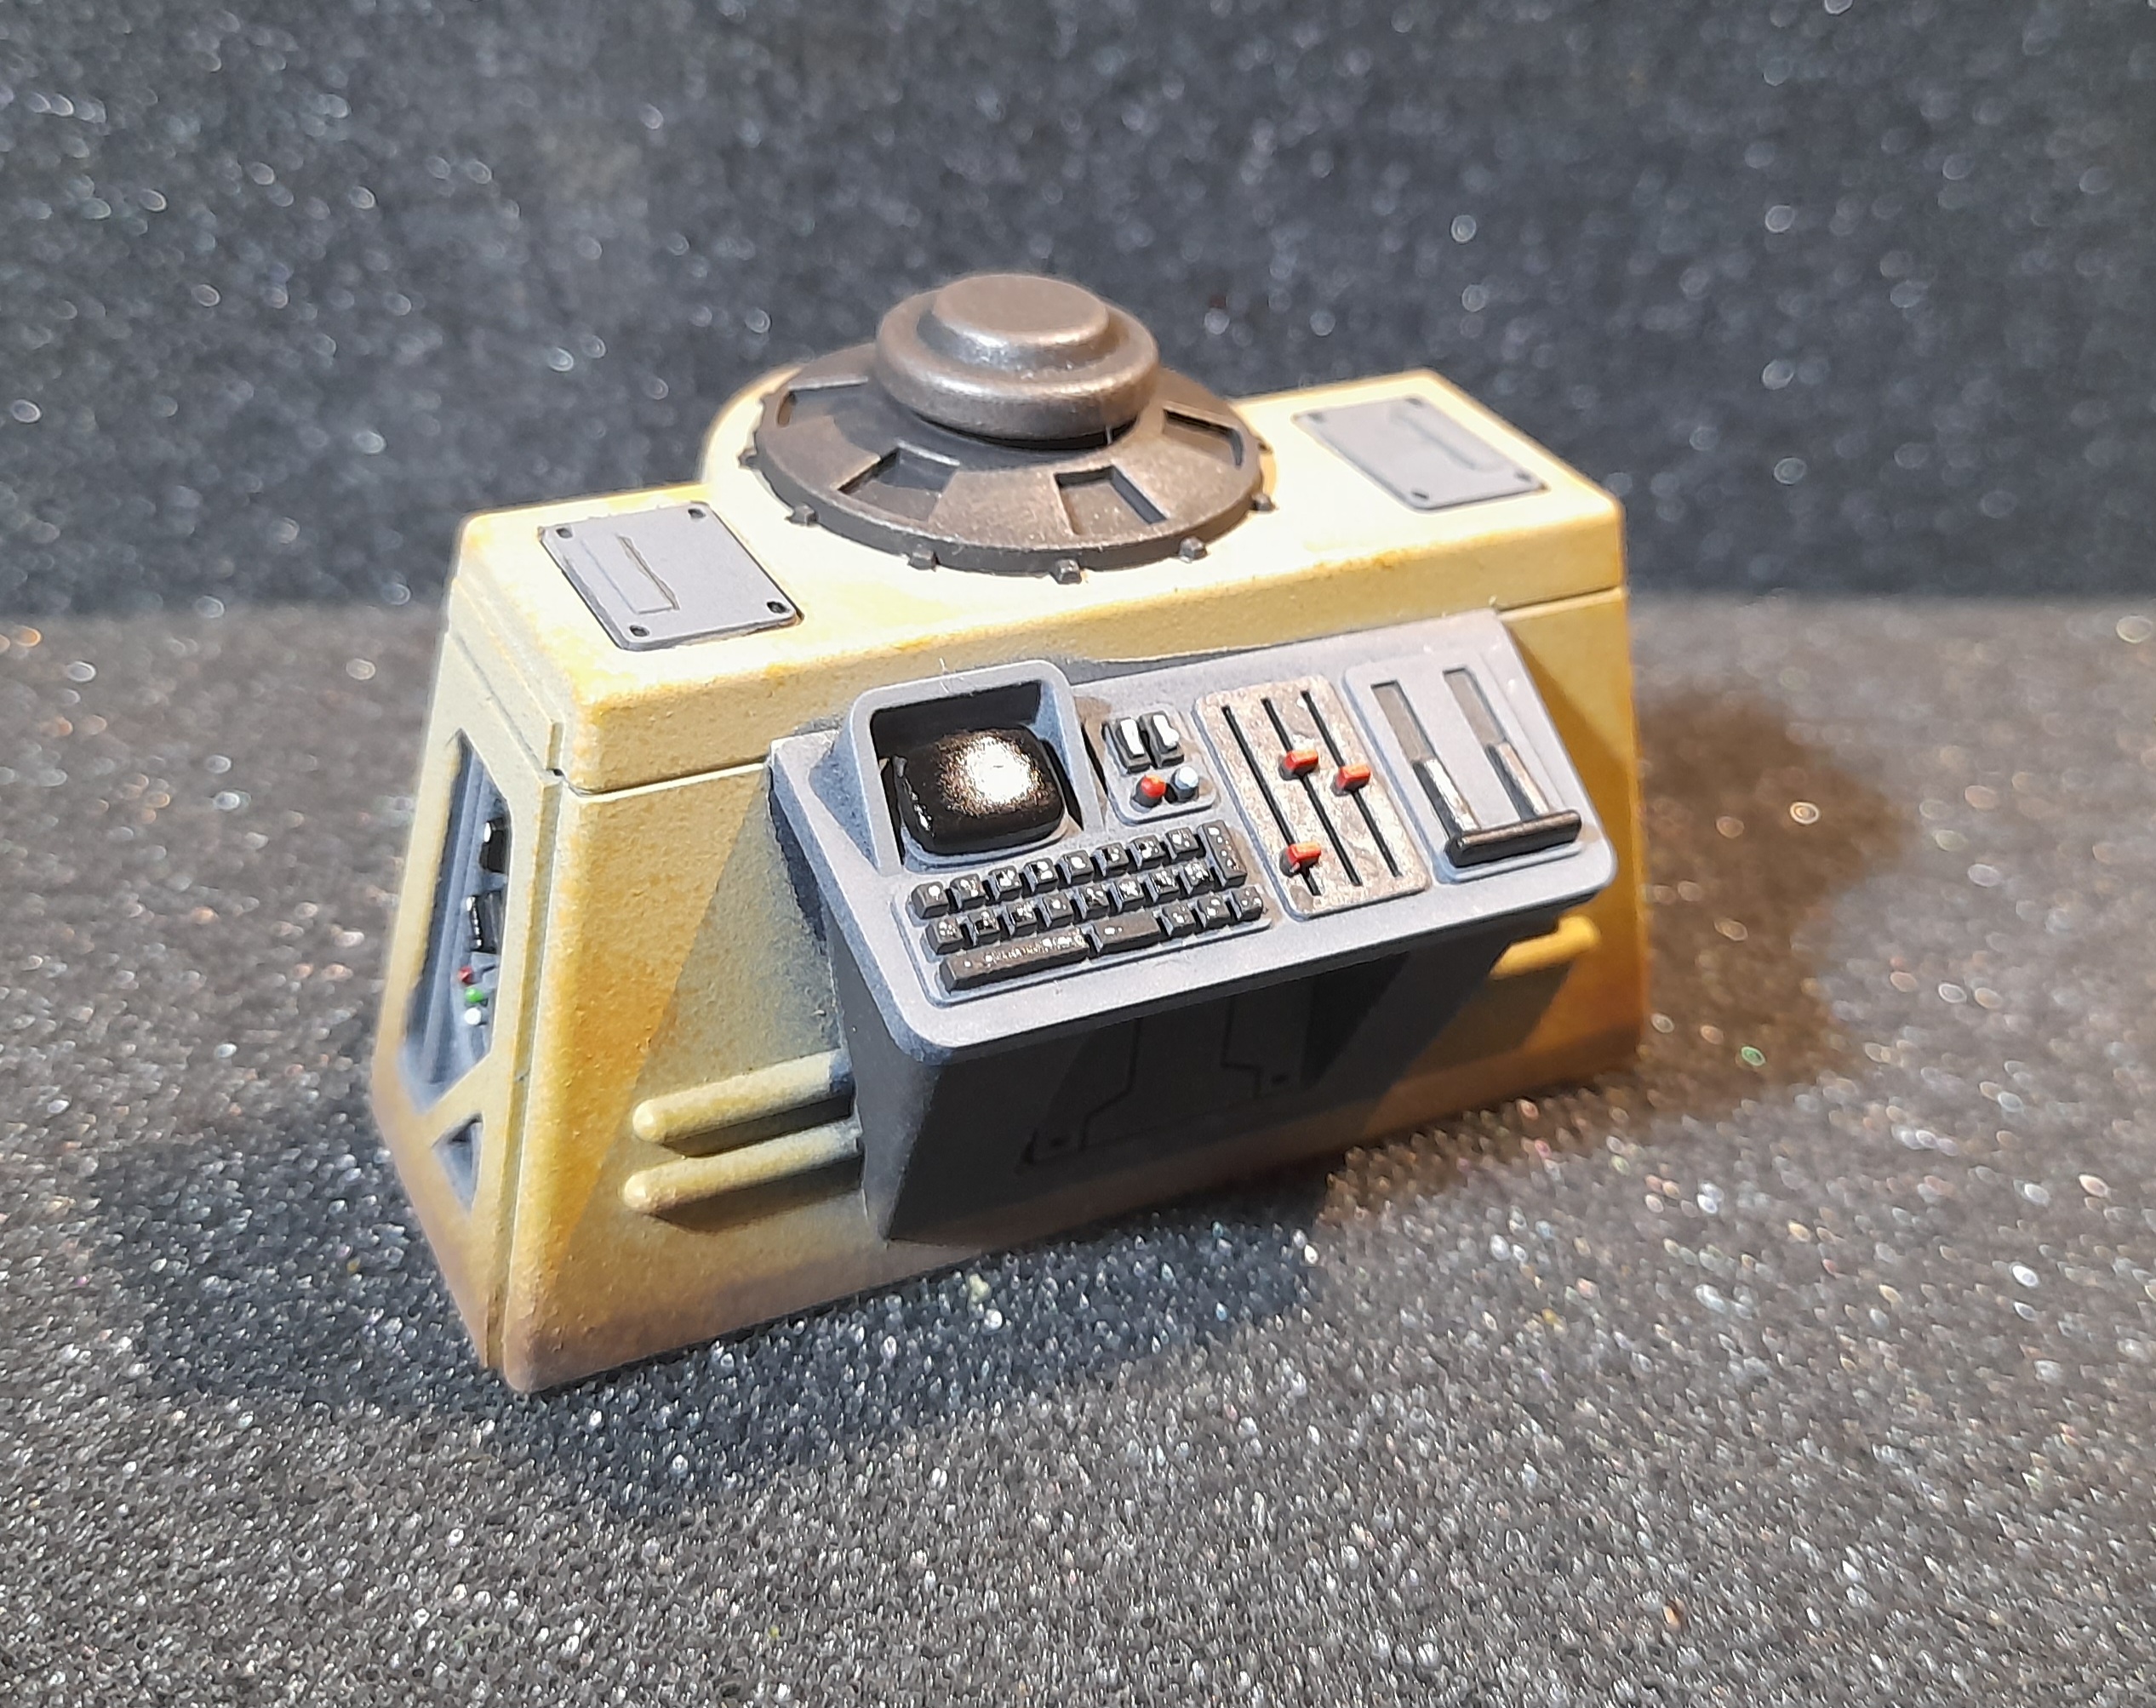
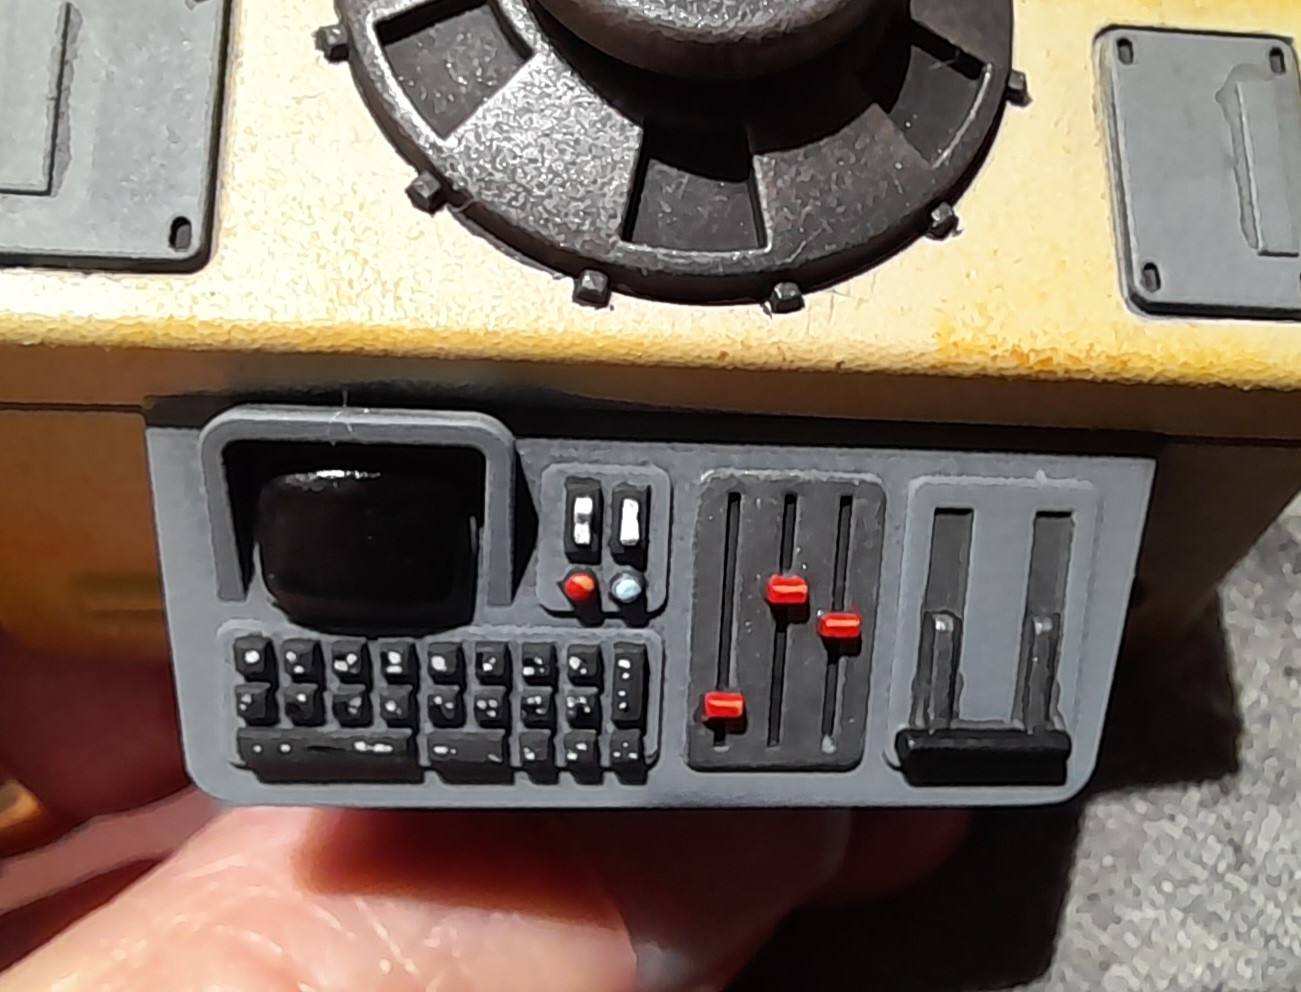
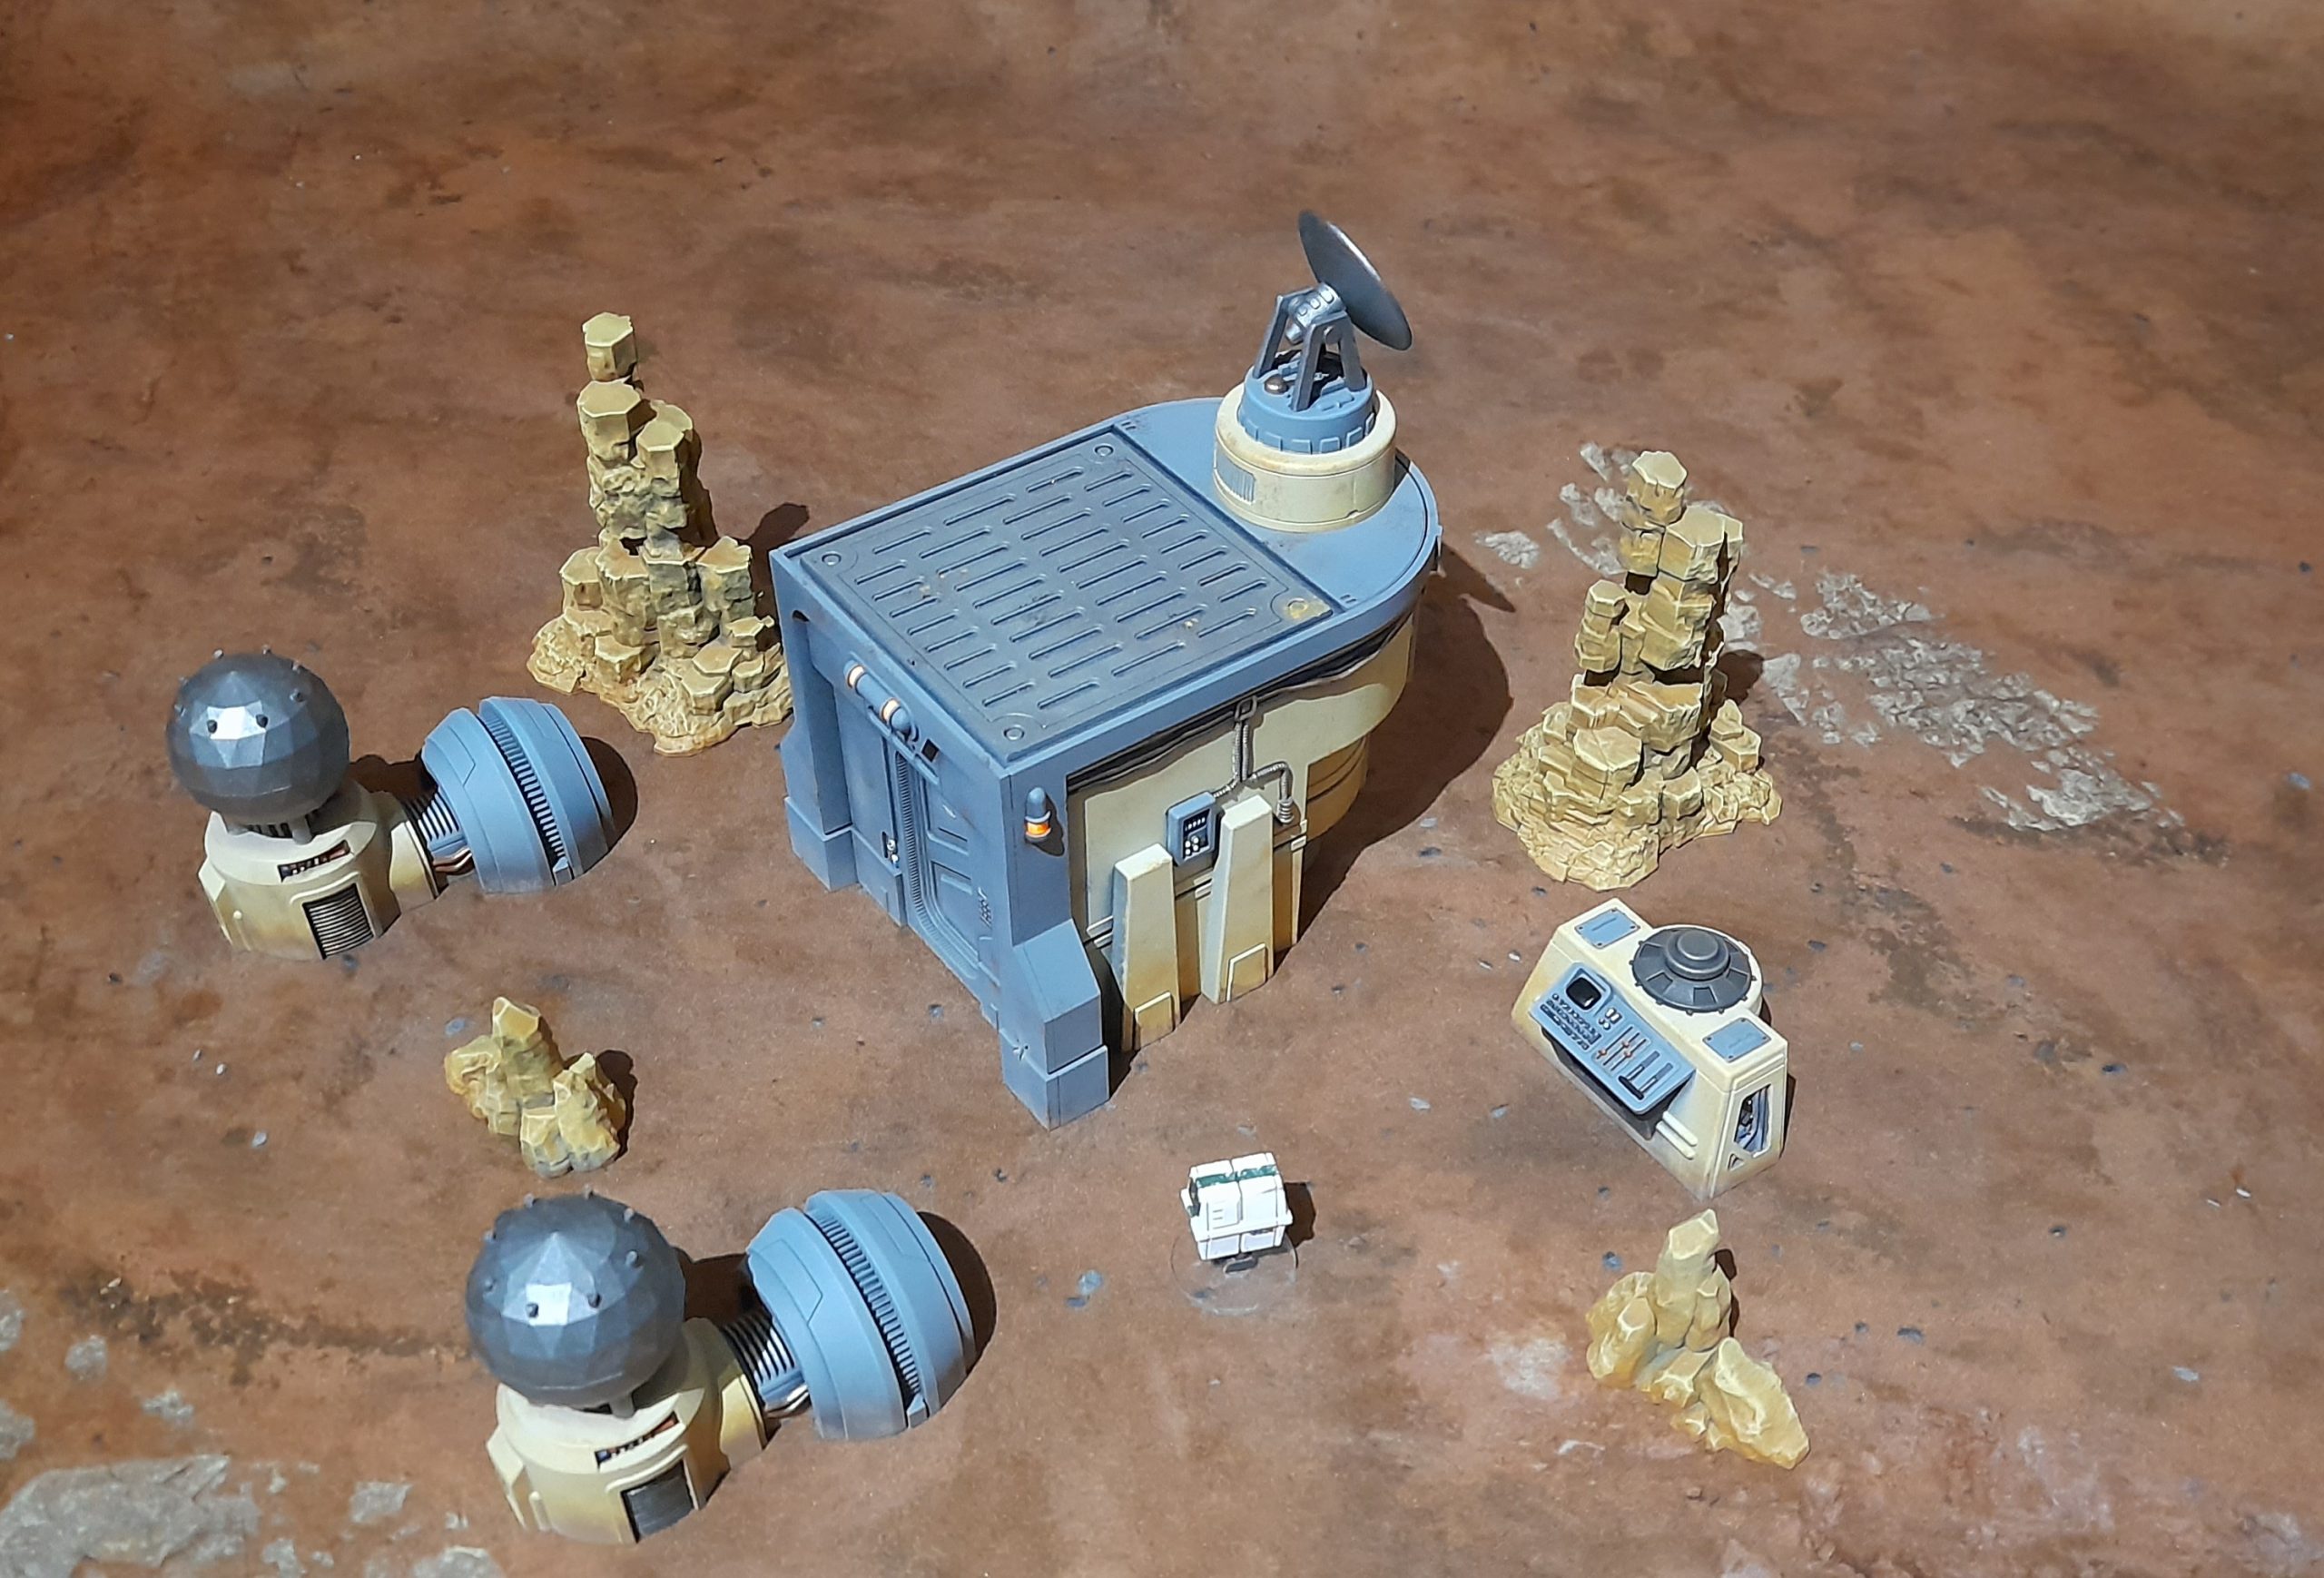
The buildings….. and Gonk
22nd January 2026
So, as planned I rolled out the weathering stages on to the rest of the buildings. Sponging on multiple shades, adding more dirt and dust to the lower sections etc.
Then I picked out the various buttons, controls and suchlike. On the control unit small building I tried to paint some markings on to the keys to represent the keyboard. It sort of works.

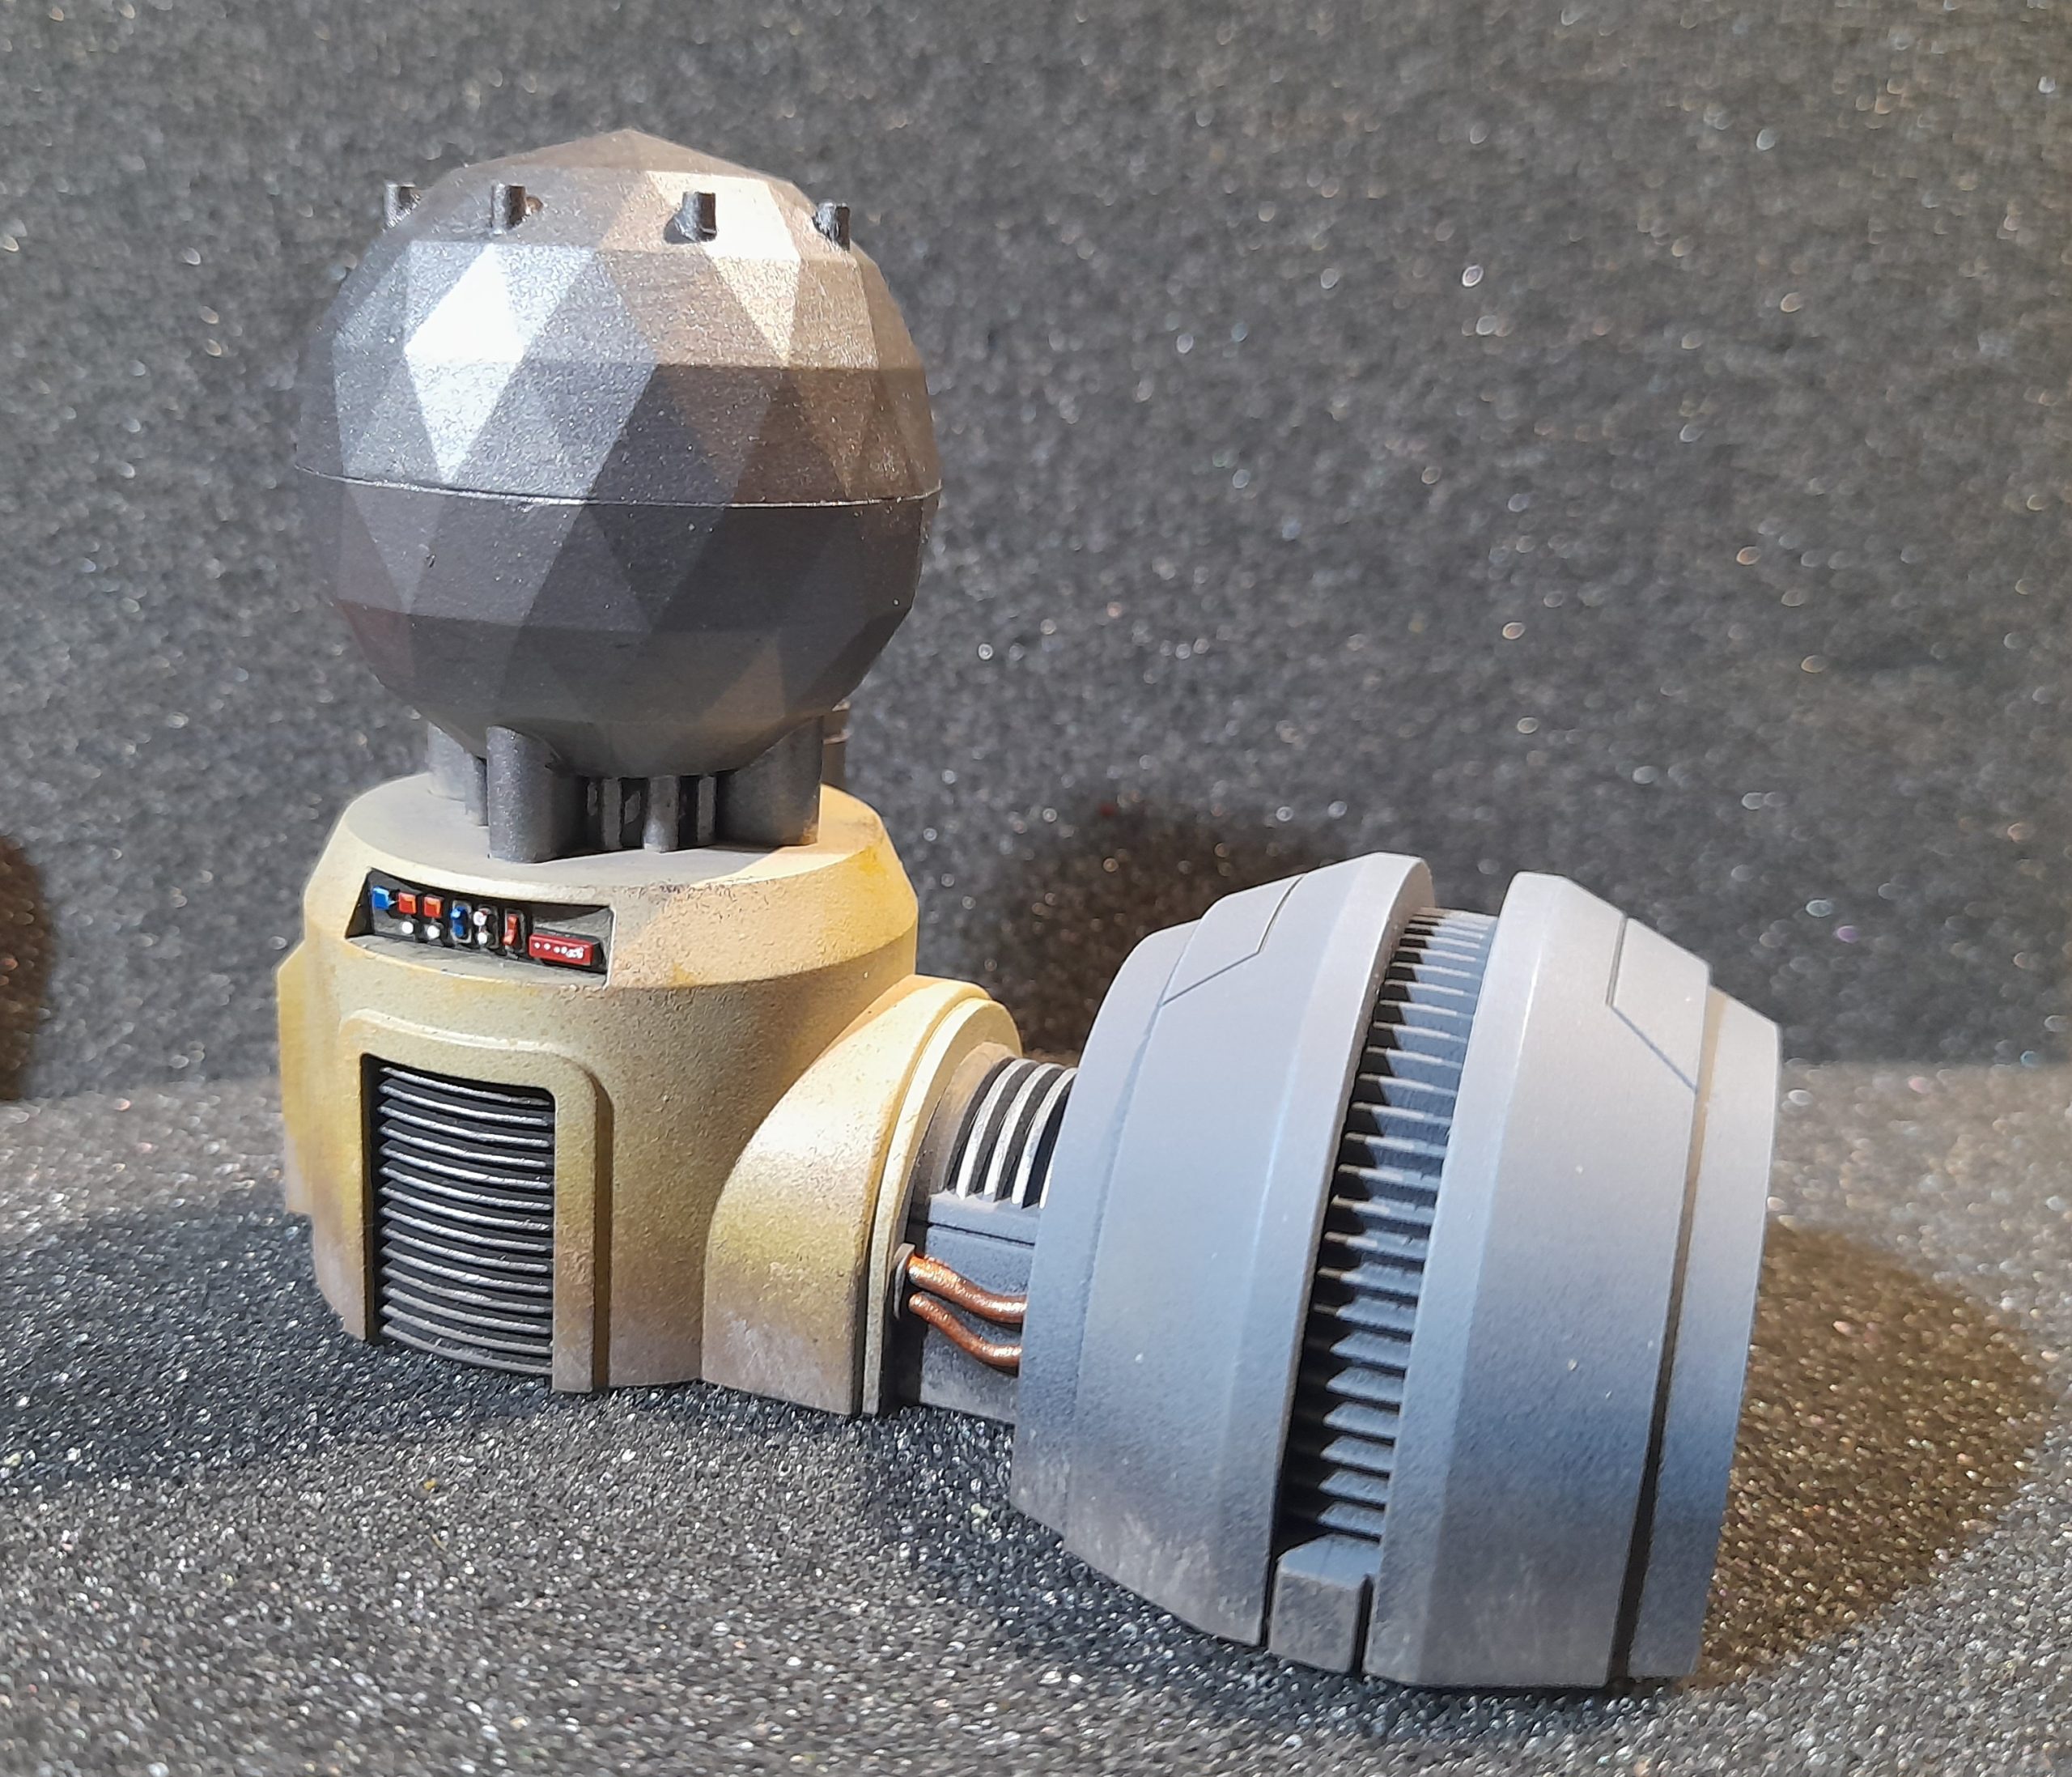
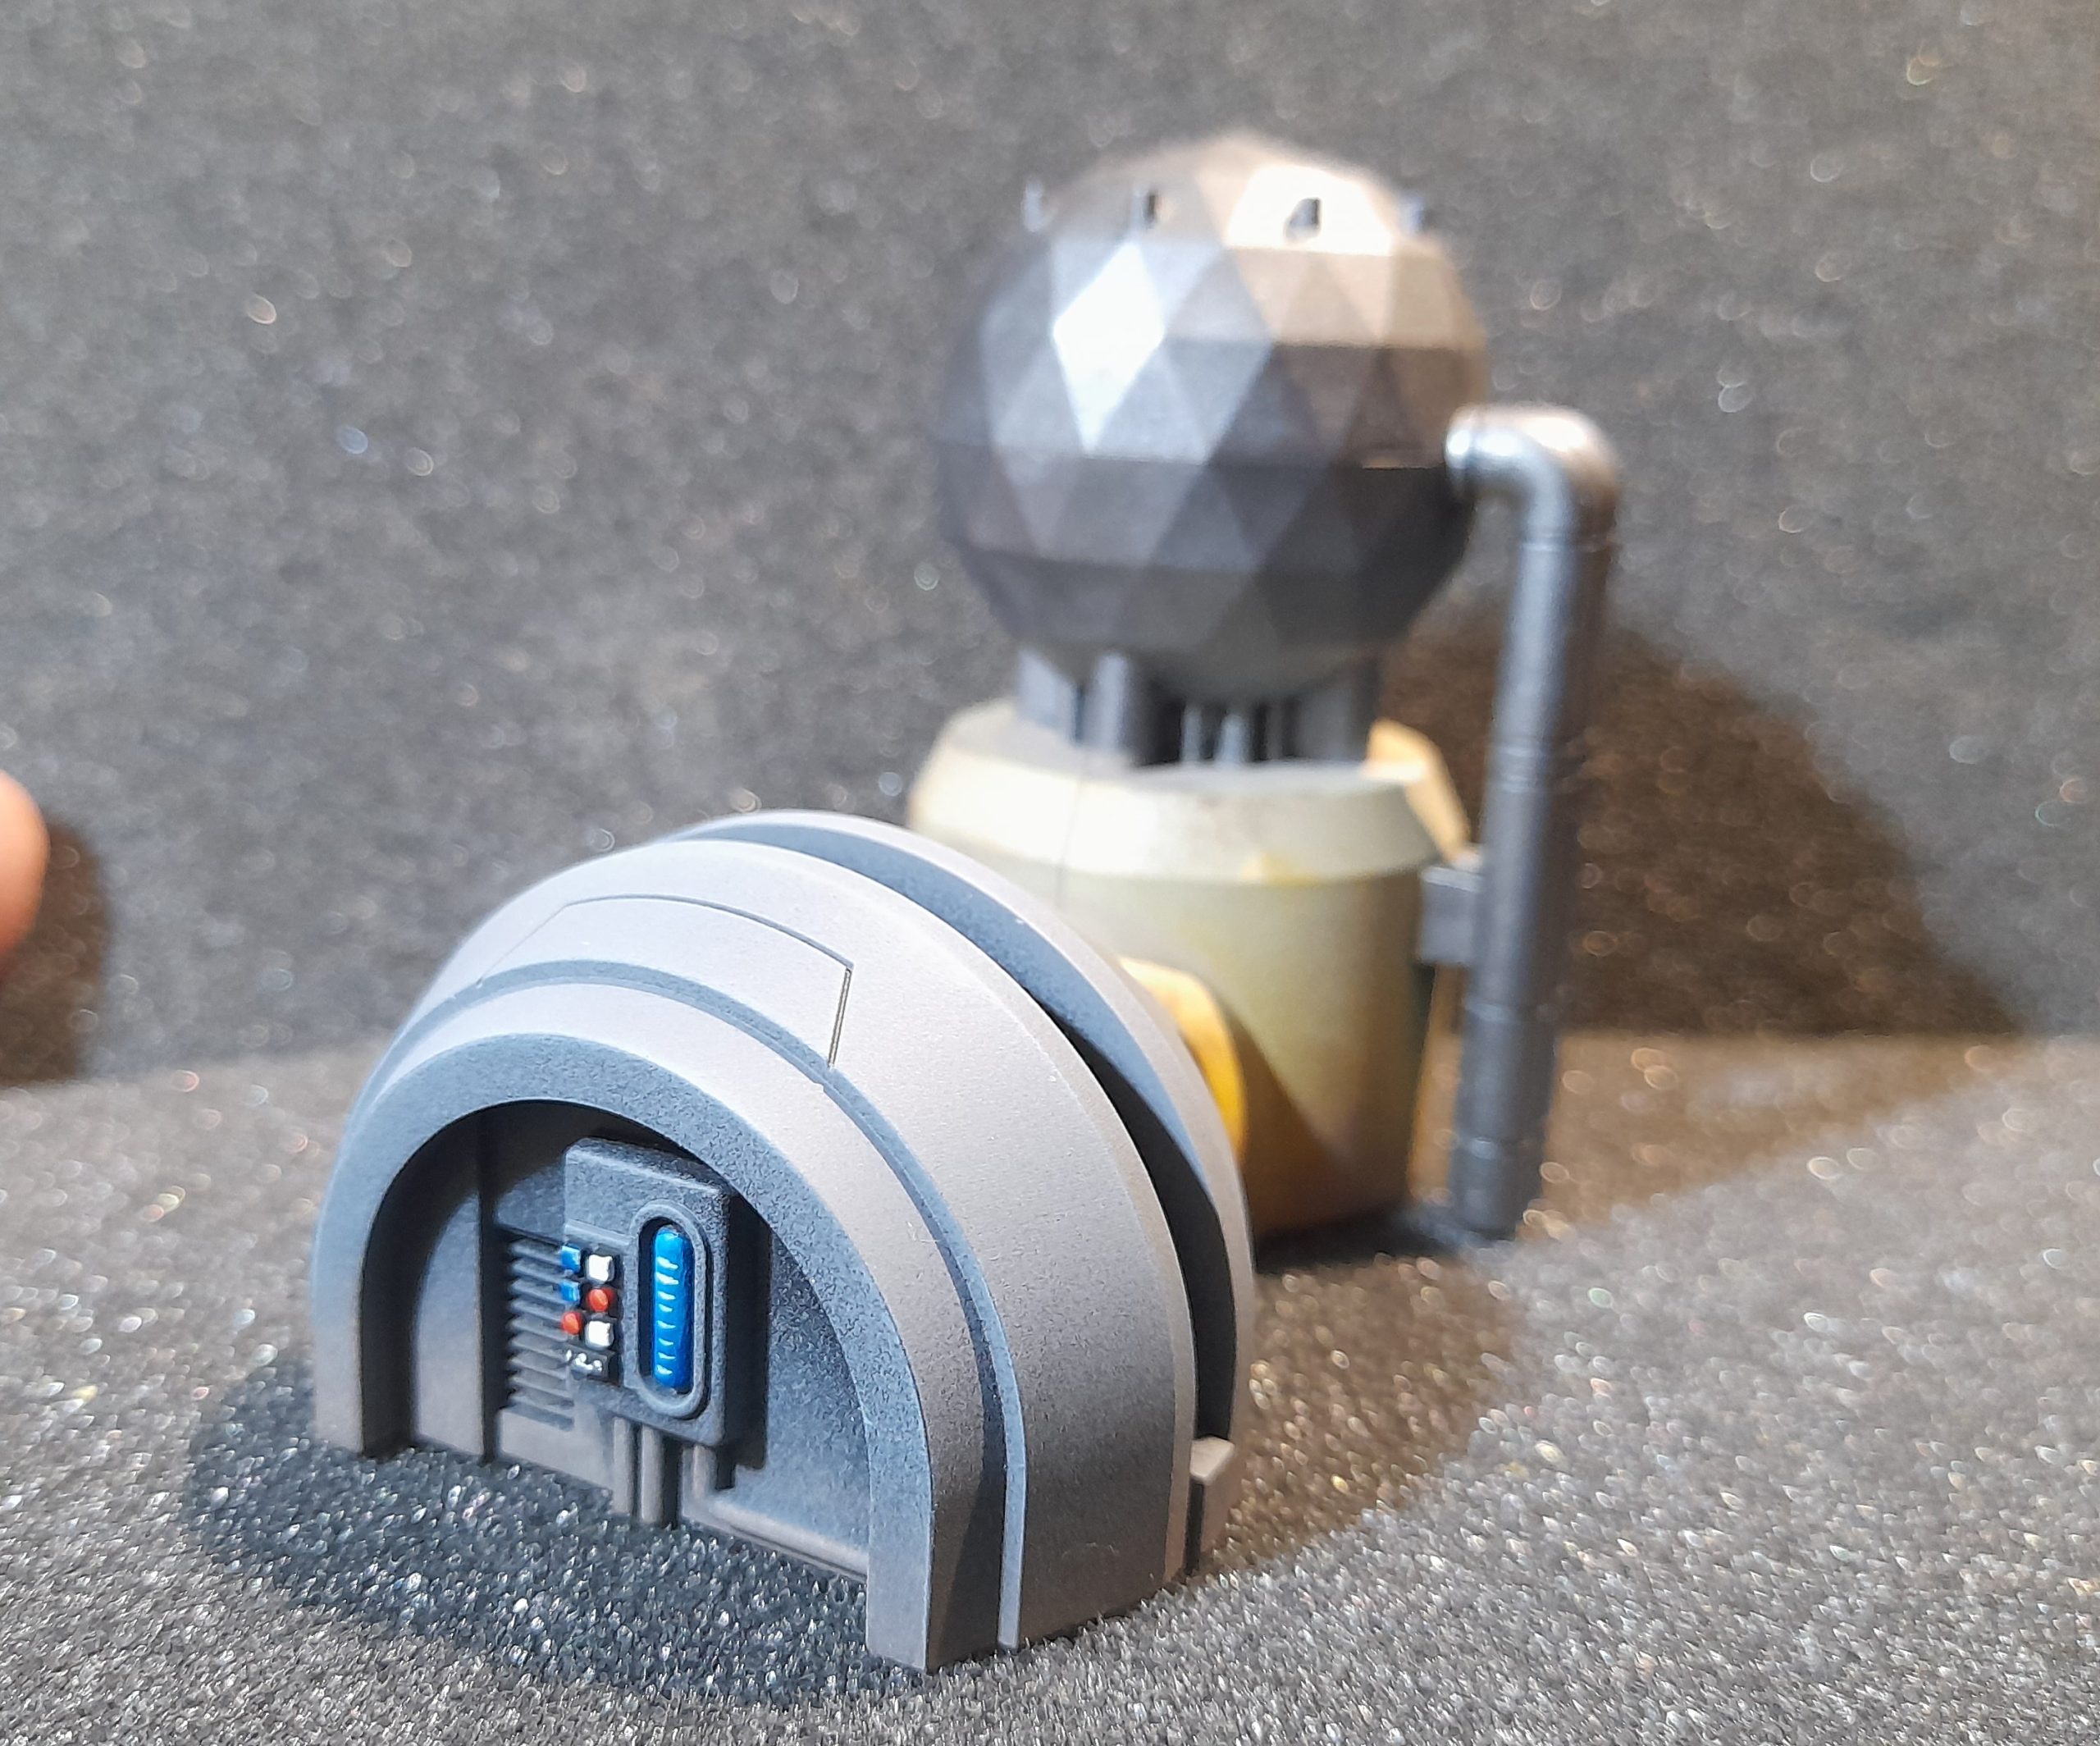
The larger building was treated in much the same way. I added some rust to parts of the top, painted the cables in different colours and added some weathering onto them in some places. The lights were picked out in a fluo orange.
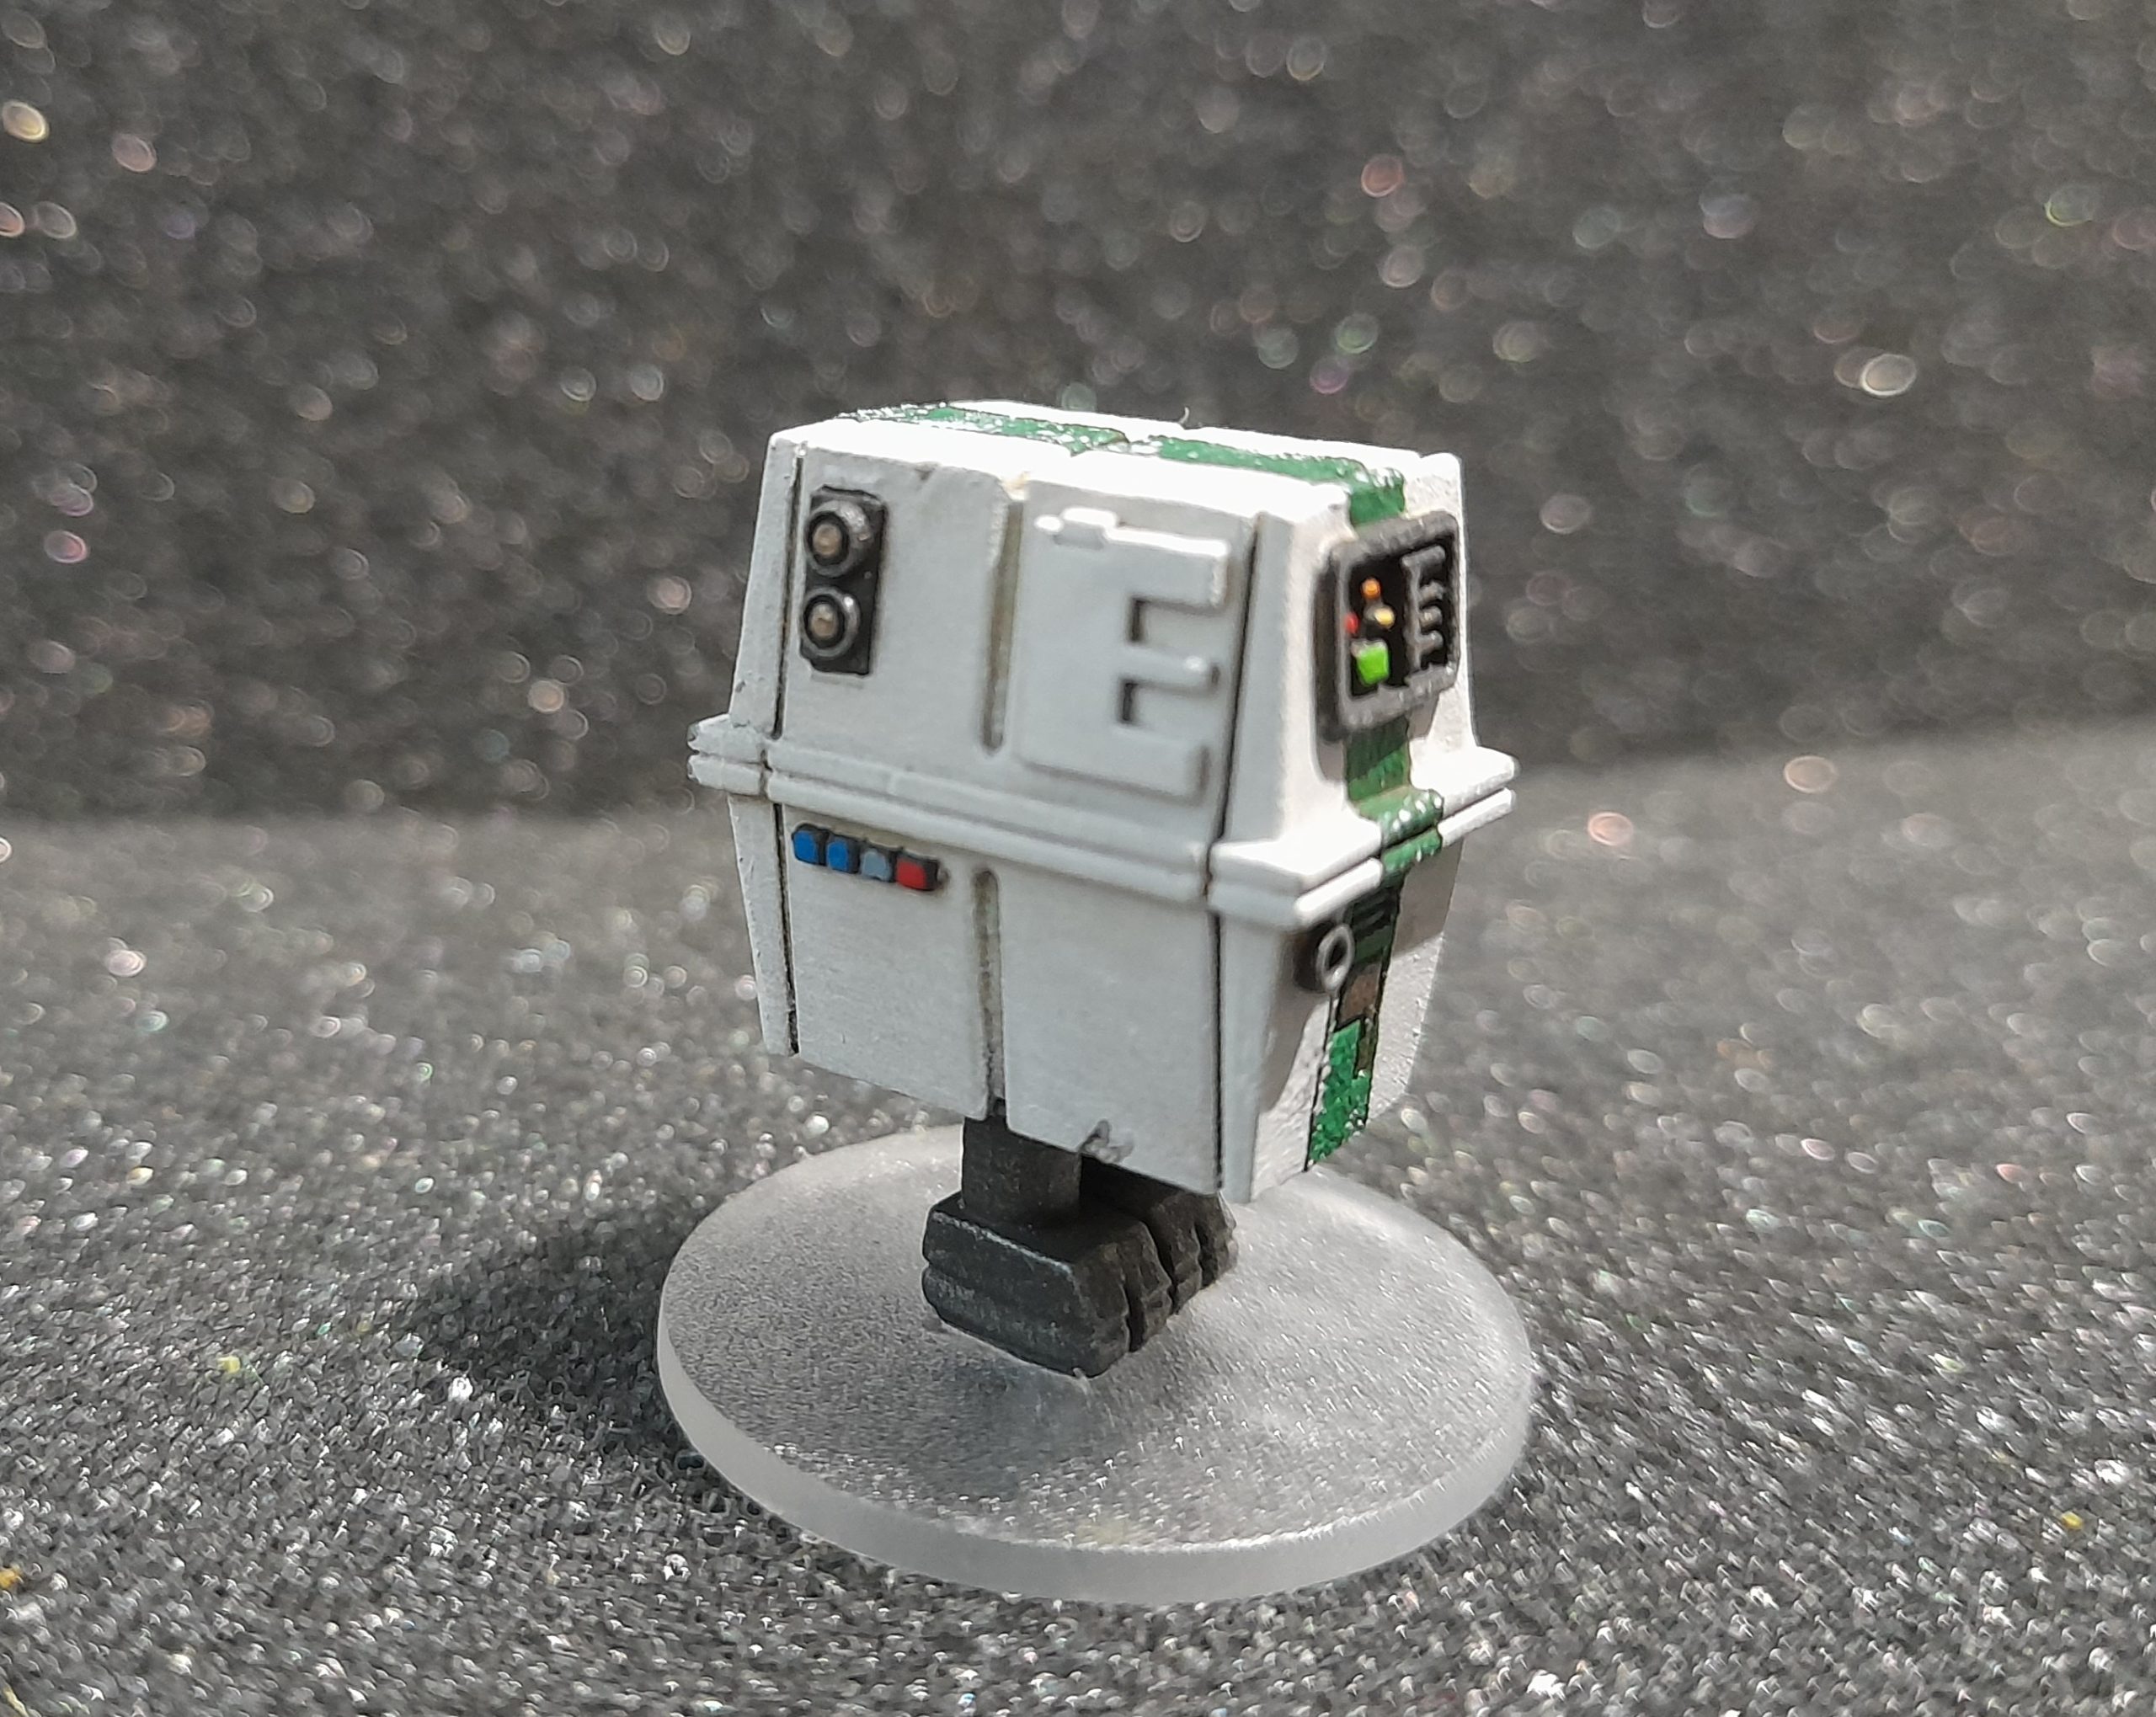
Gonk Droid
Lastly it was the Gonk droid.
This went through several colours, finally ended up going with a white.
I painted a stripe down the middle, then weathered that and various small areas around the casing. Picked out the little buttons etc on the front to give it its ‘face’.
On the side panels there are four small square buttons. They reminded me of the Imperial Officer rank markings. So I did some quick research and decided to paint those as if the droid was a captain in the Imperial Navy Intelligence 😊

Group shots
22nd January 2026
Just some pics of the terrain laid out on a desert mat, plus with the ship as well.
The generators could be refuelling perhaps….
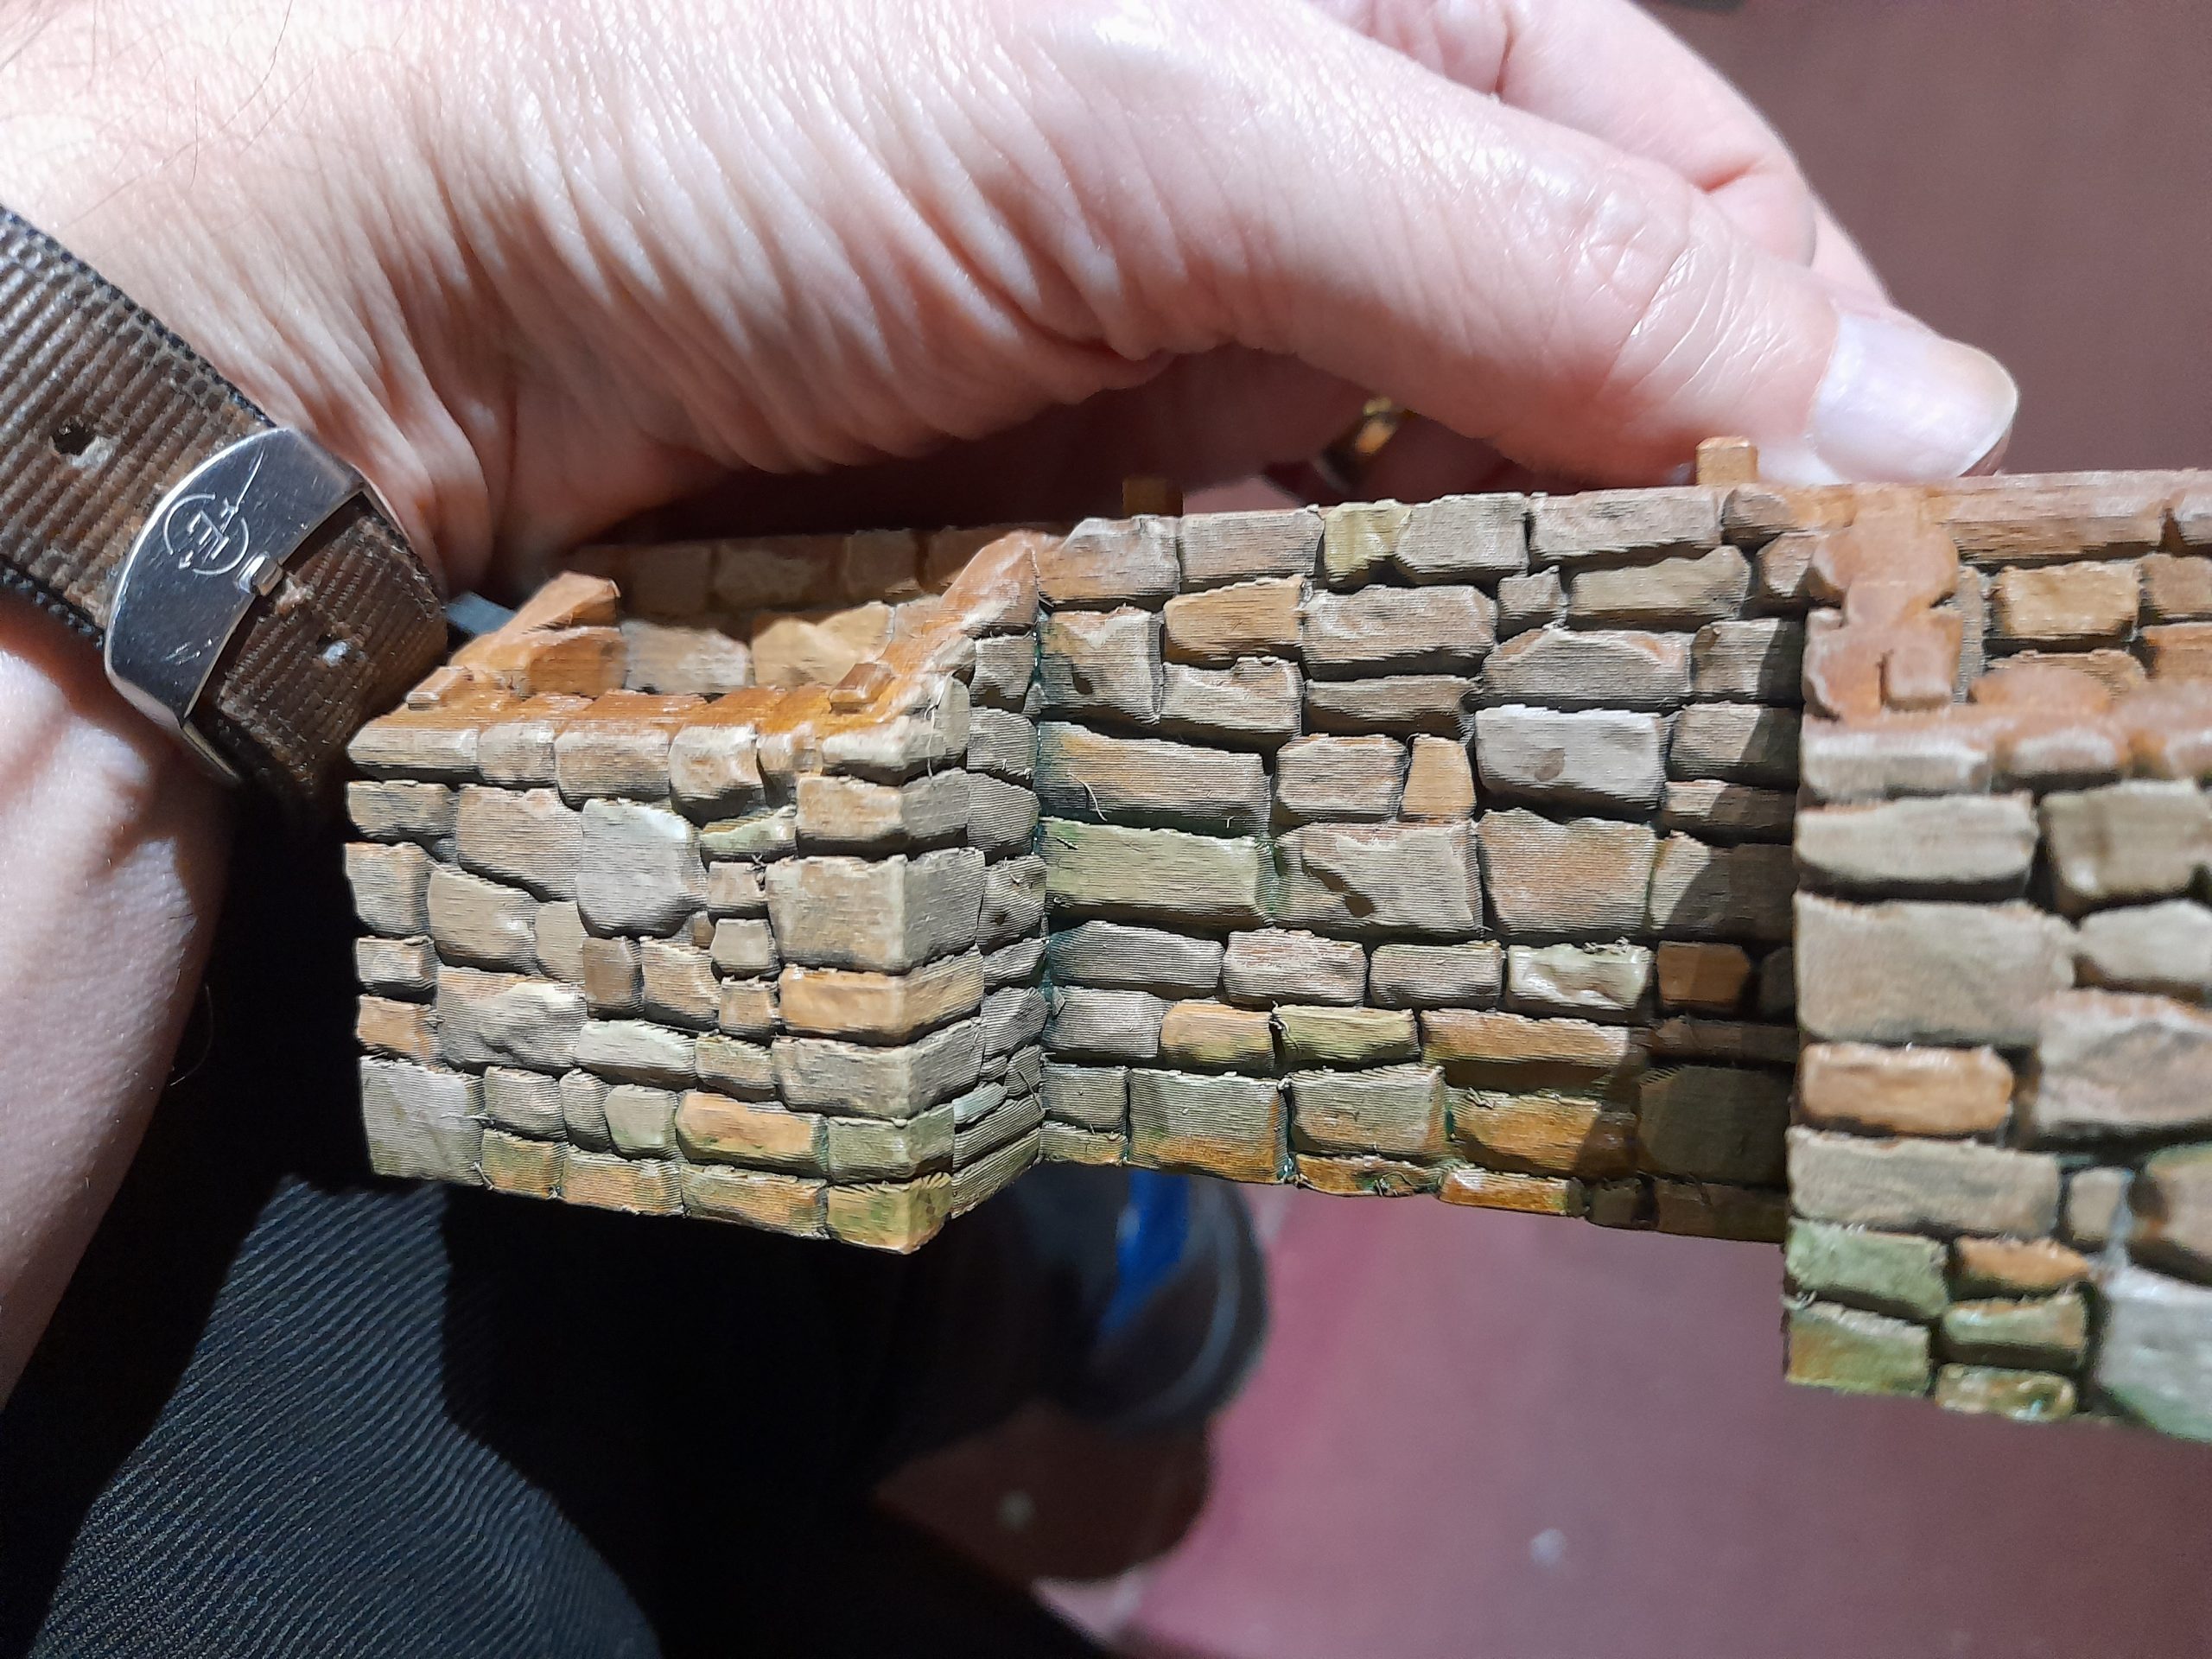
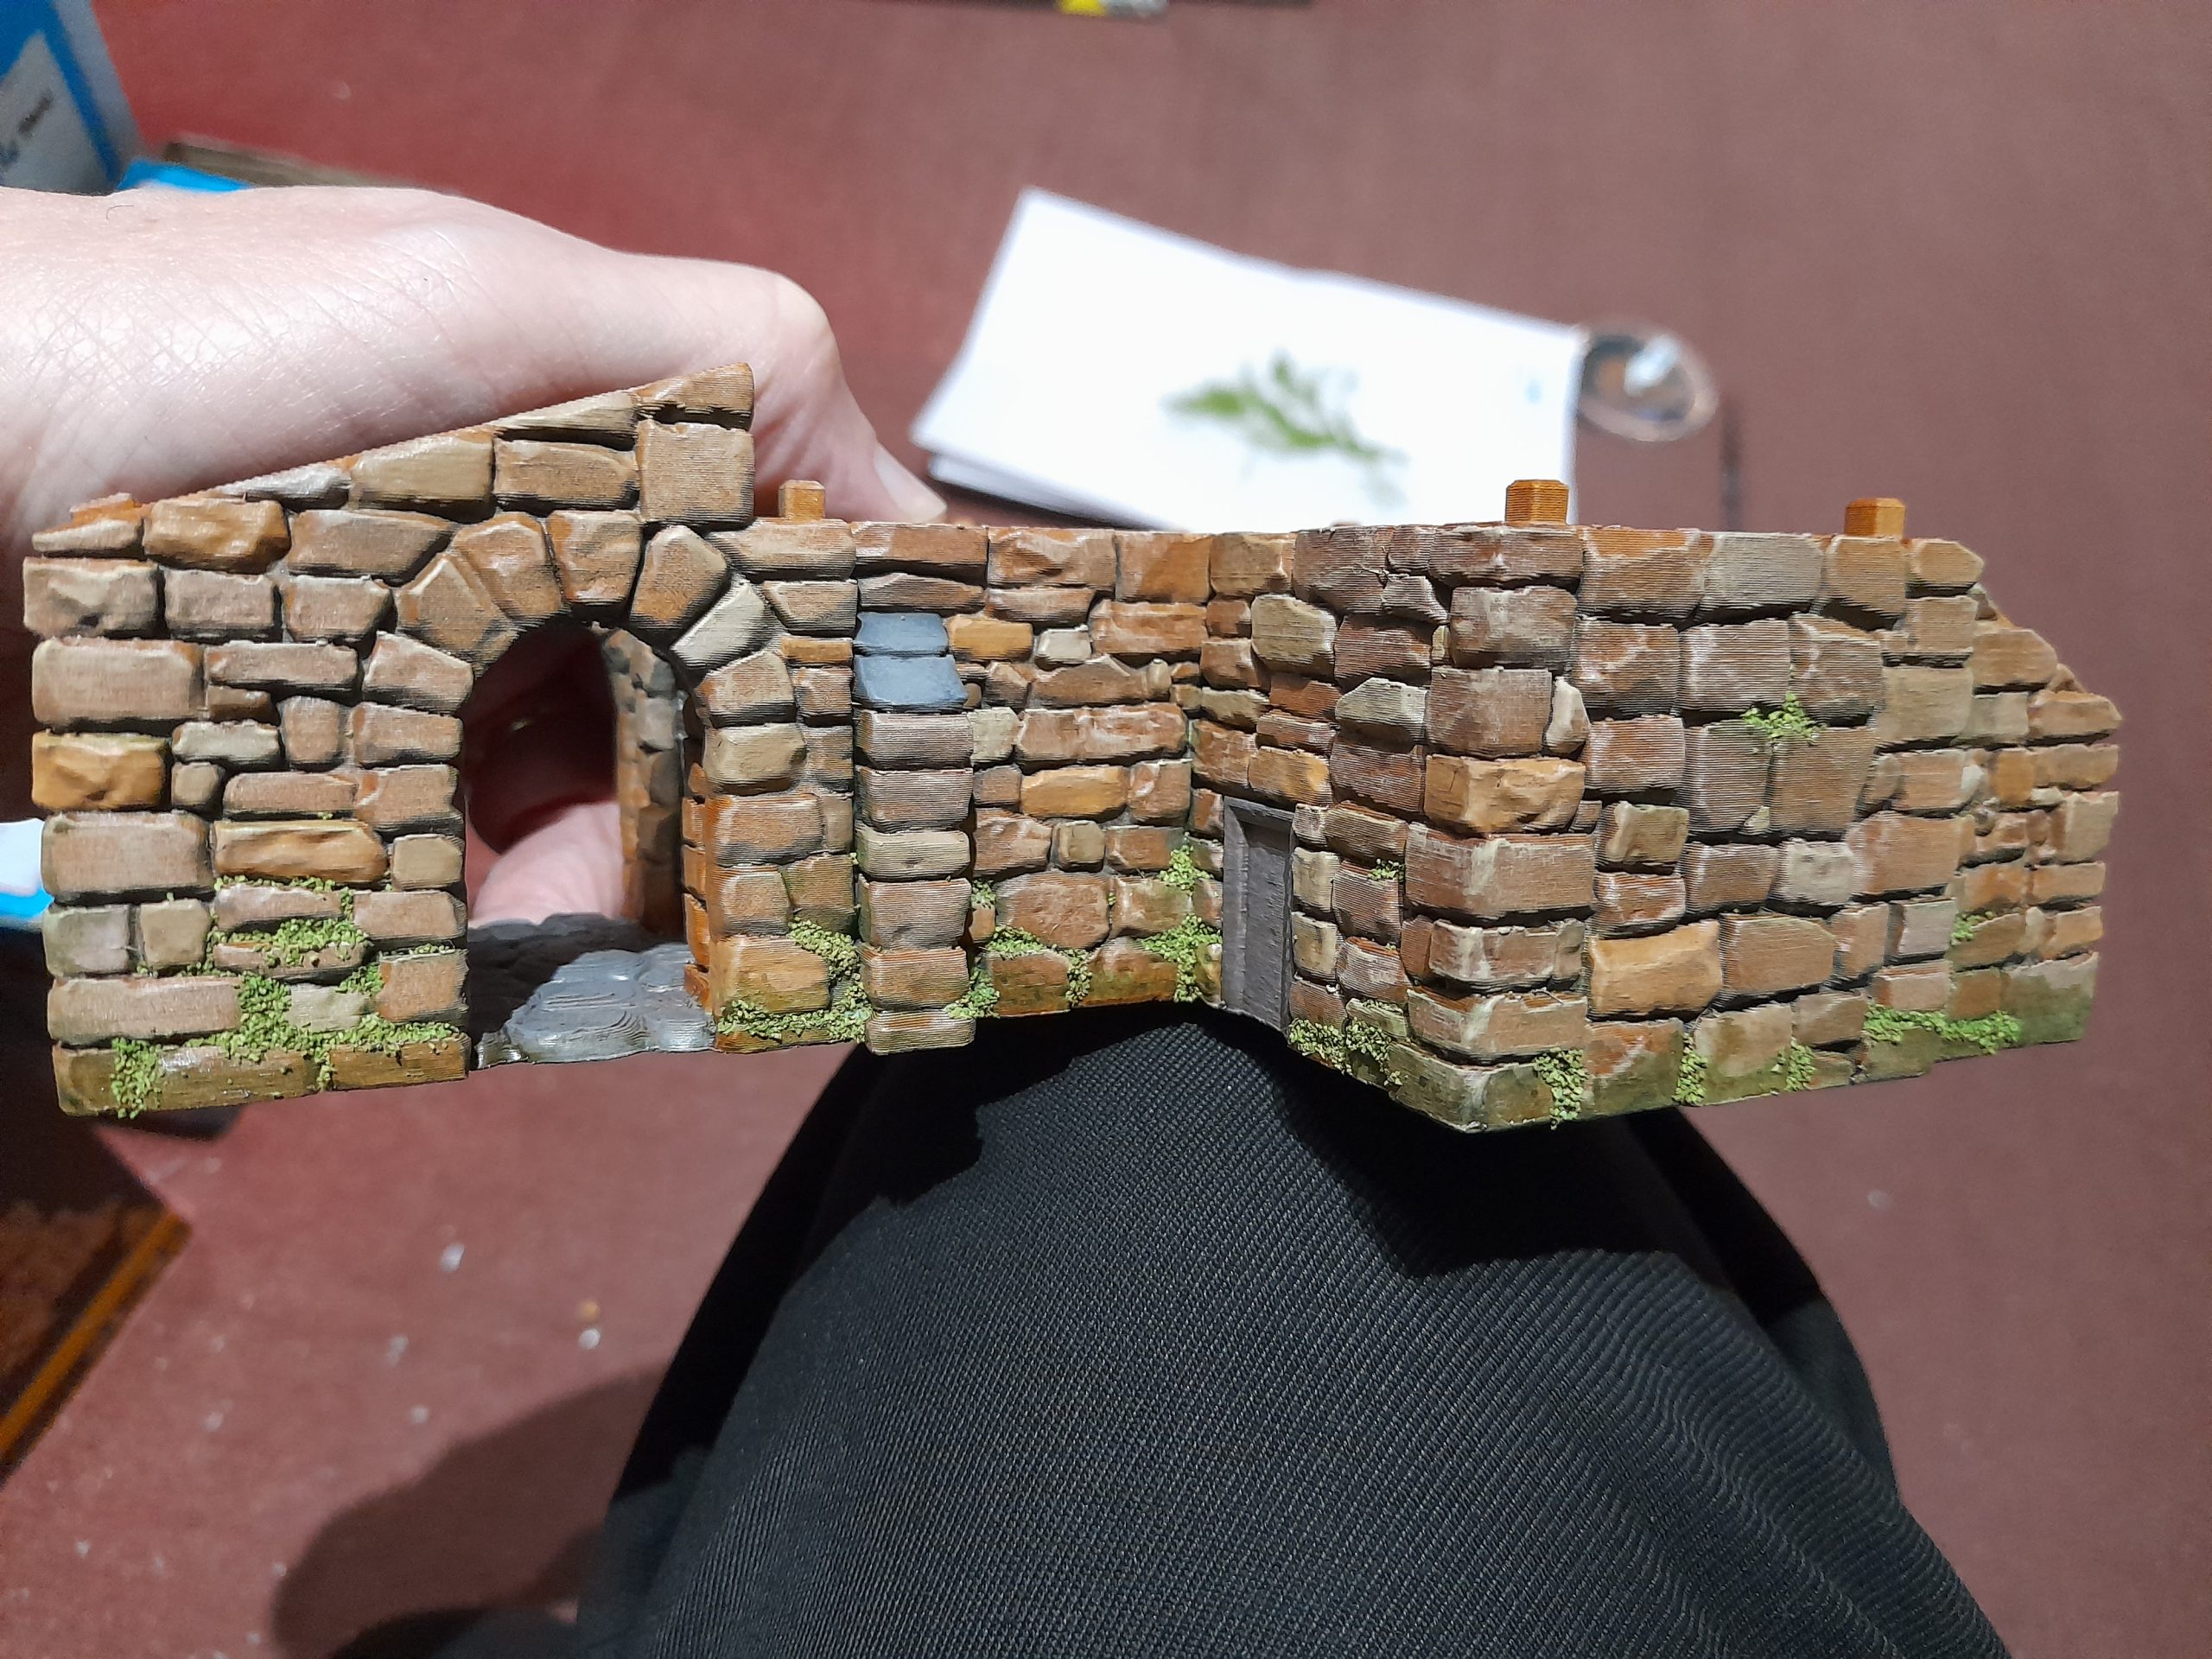
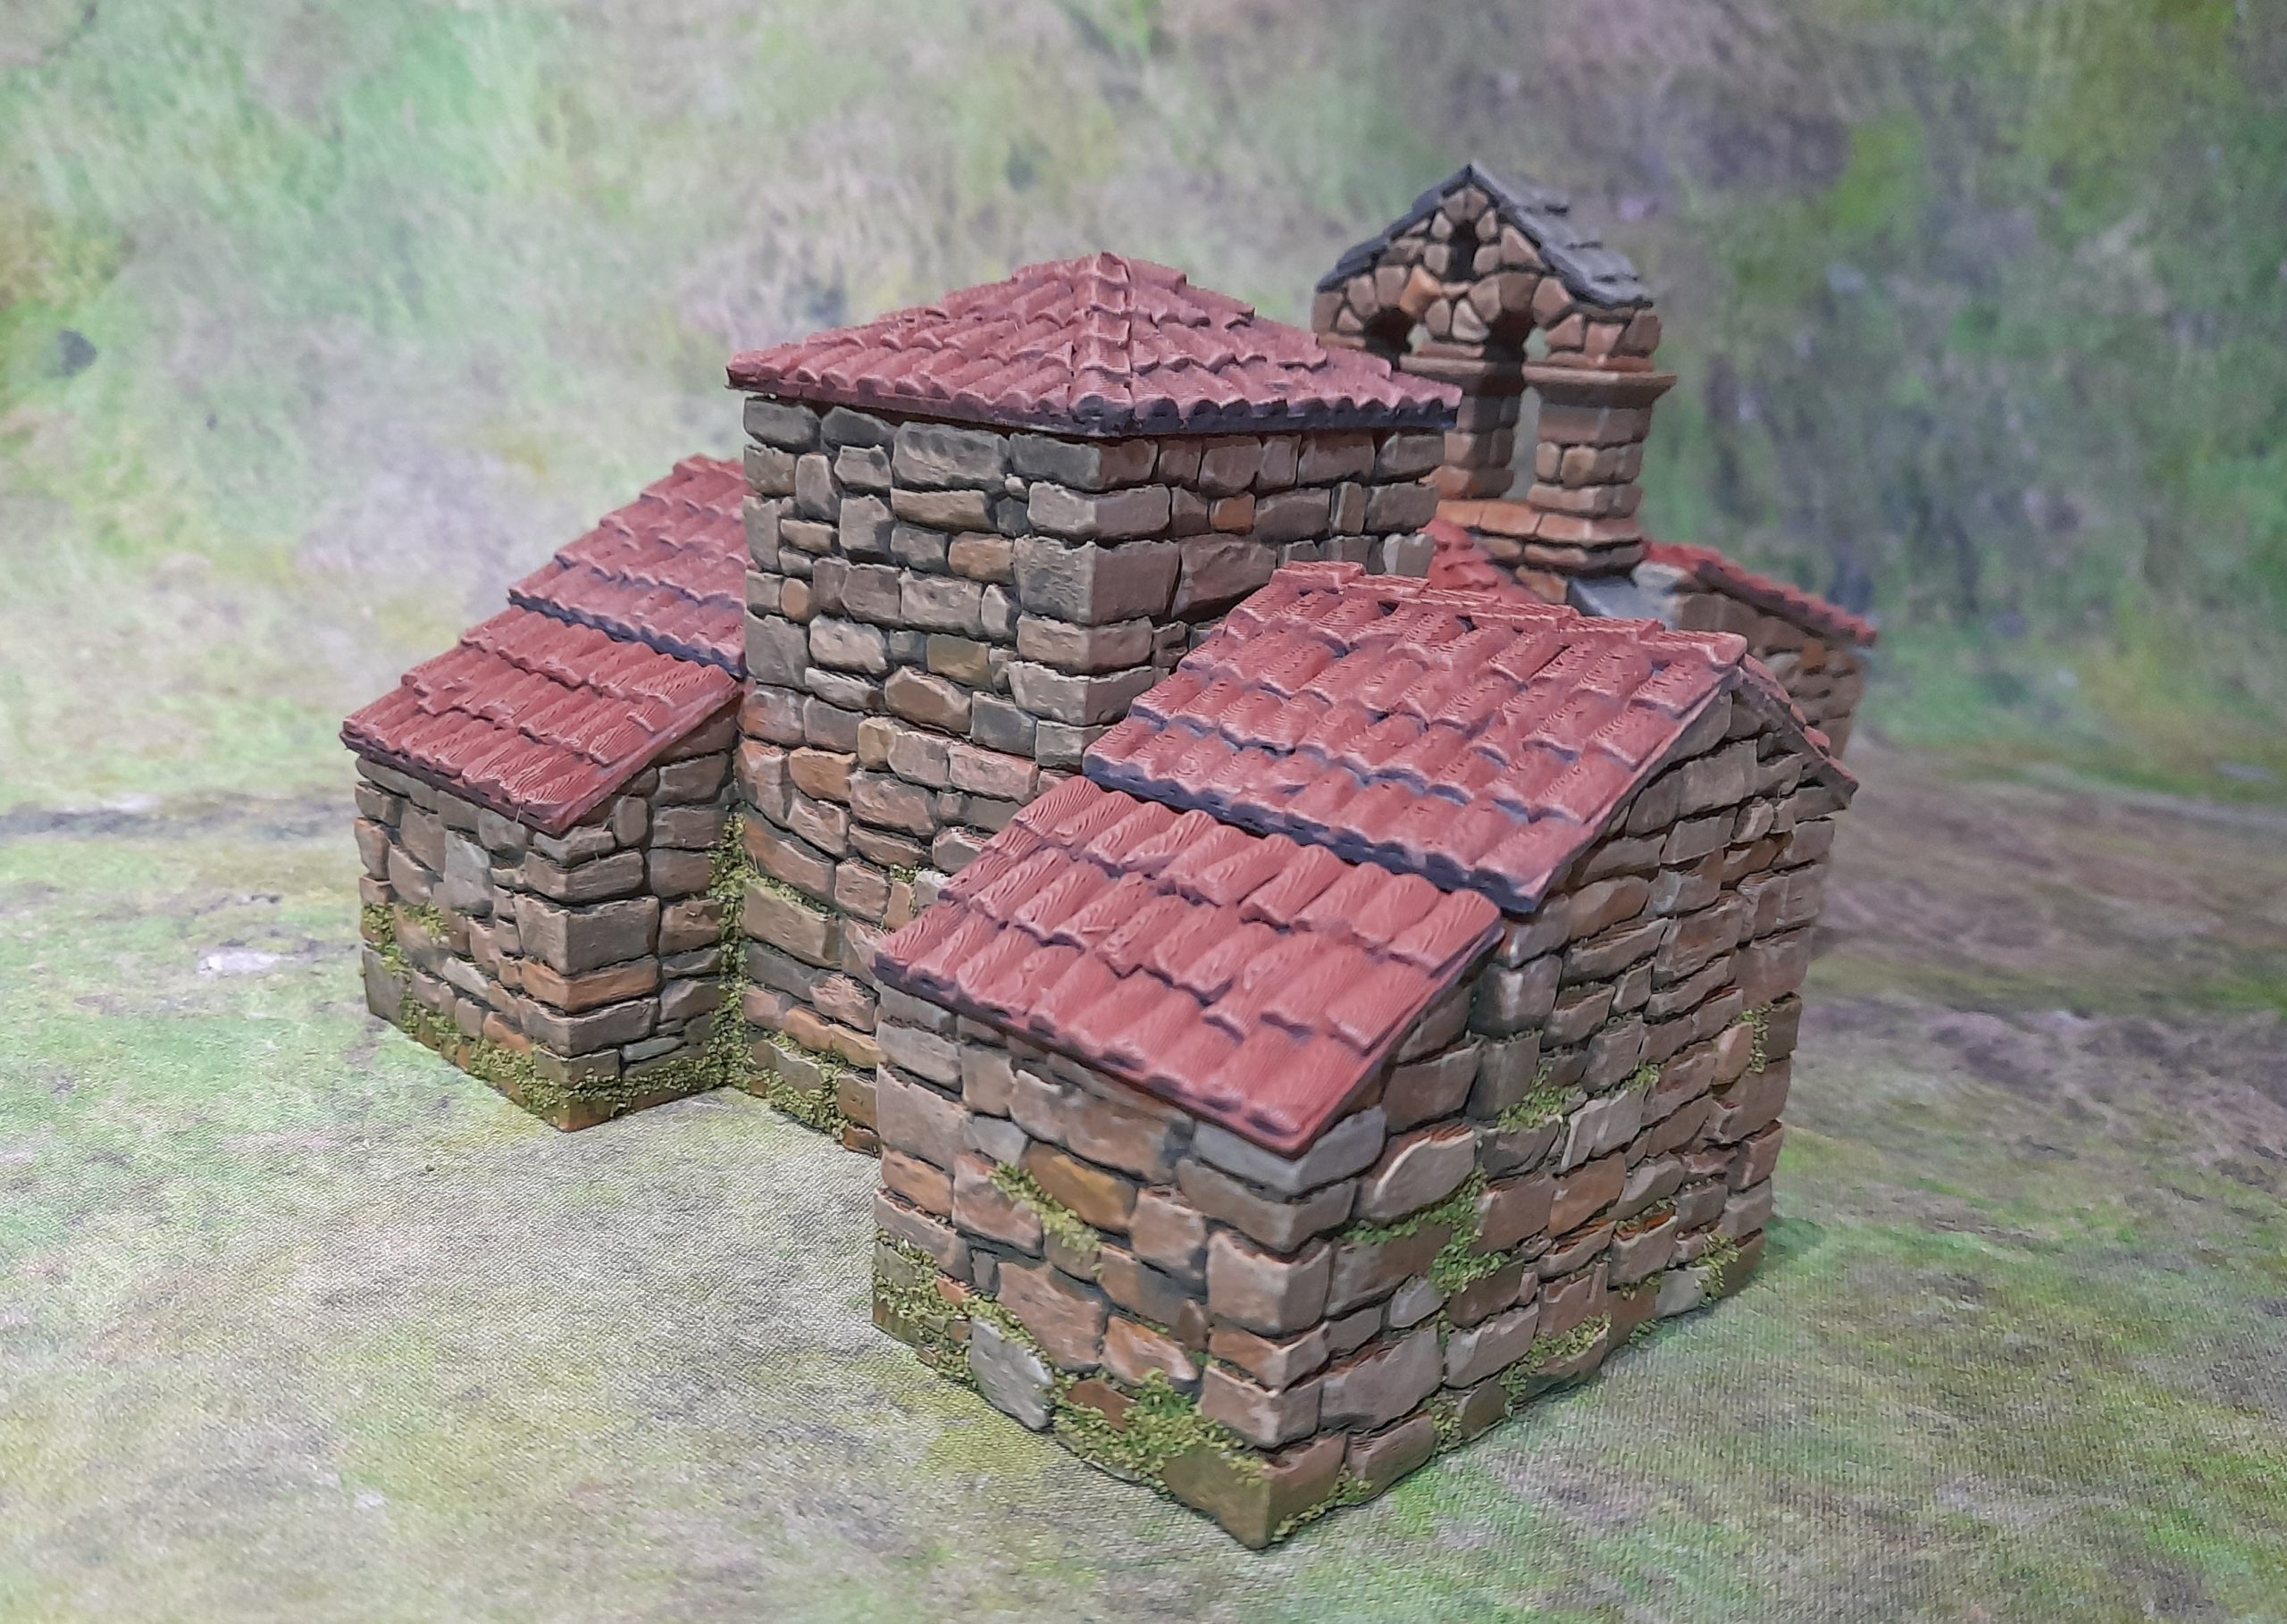
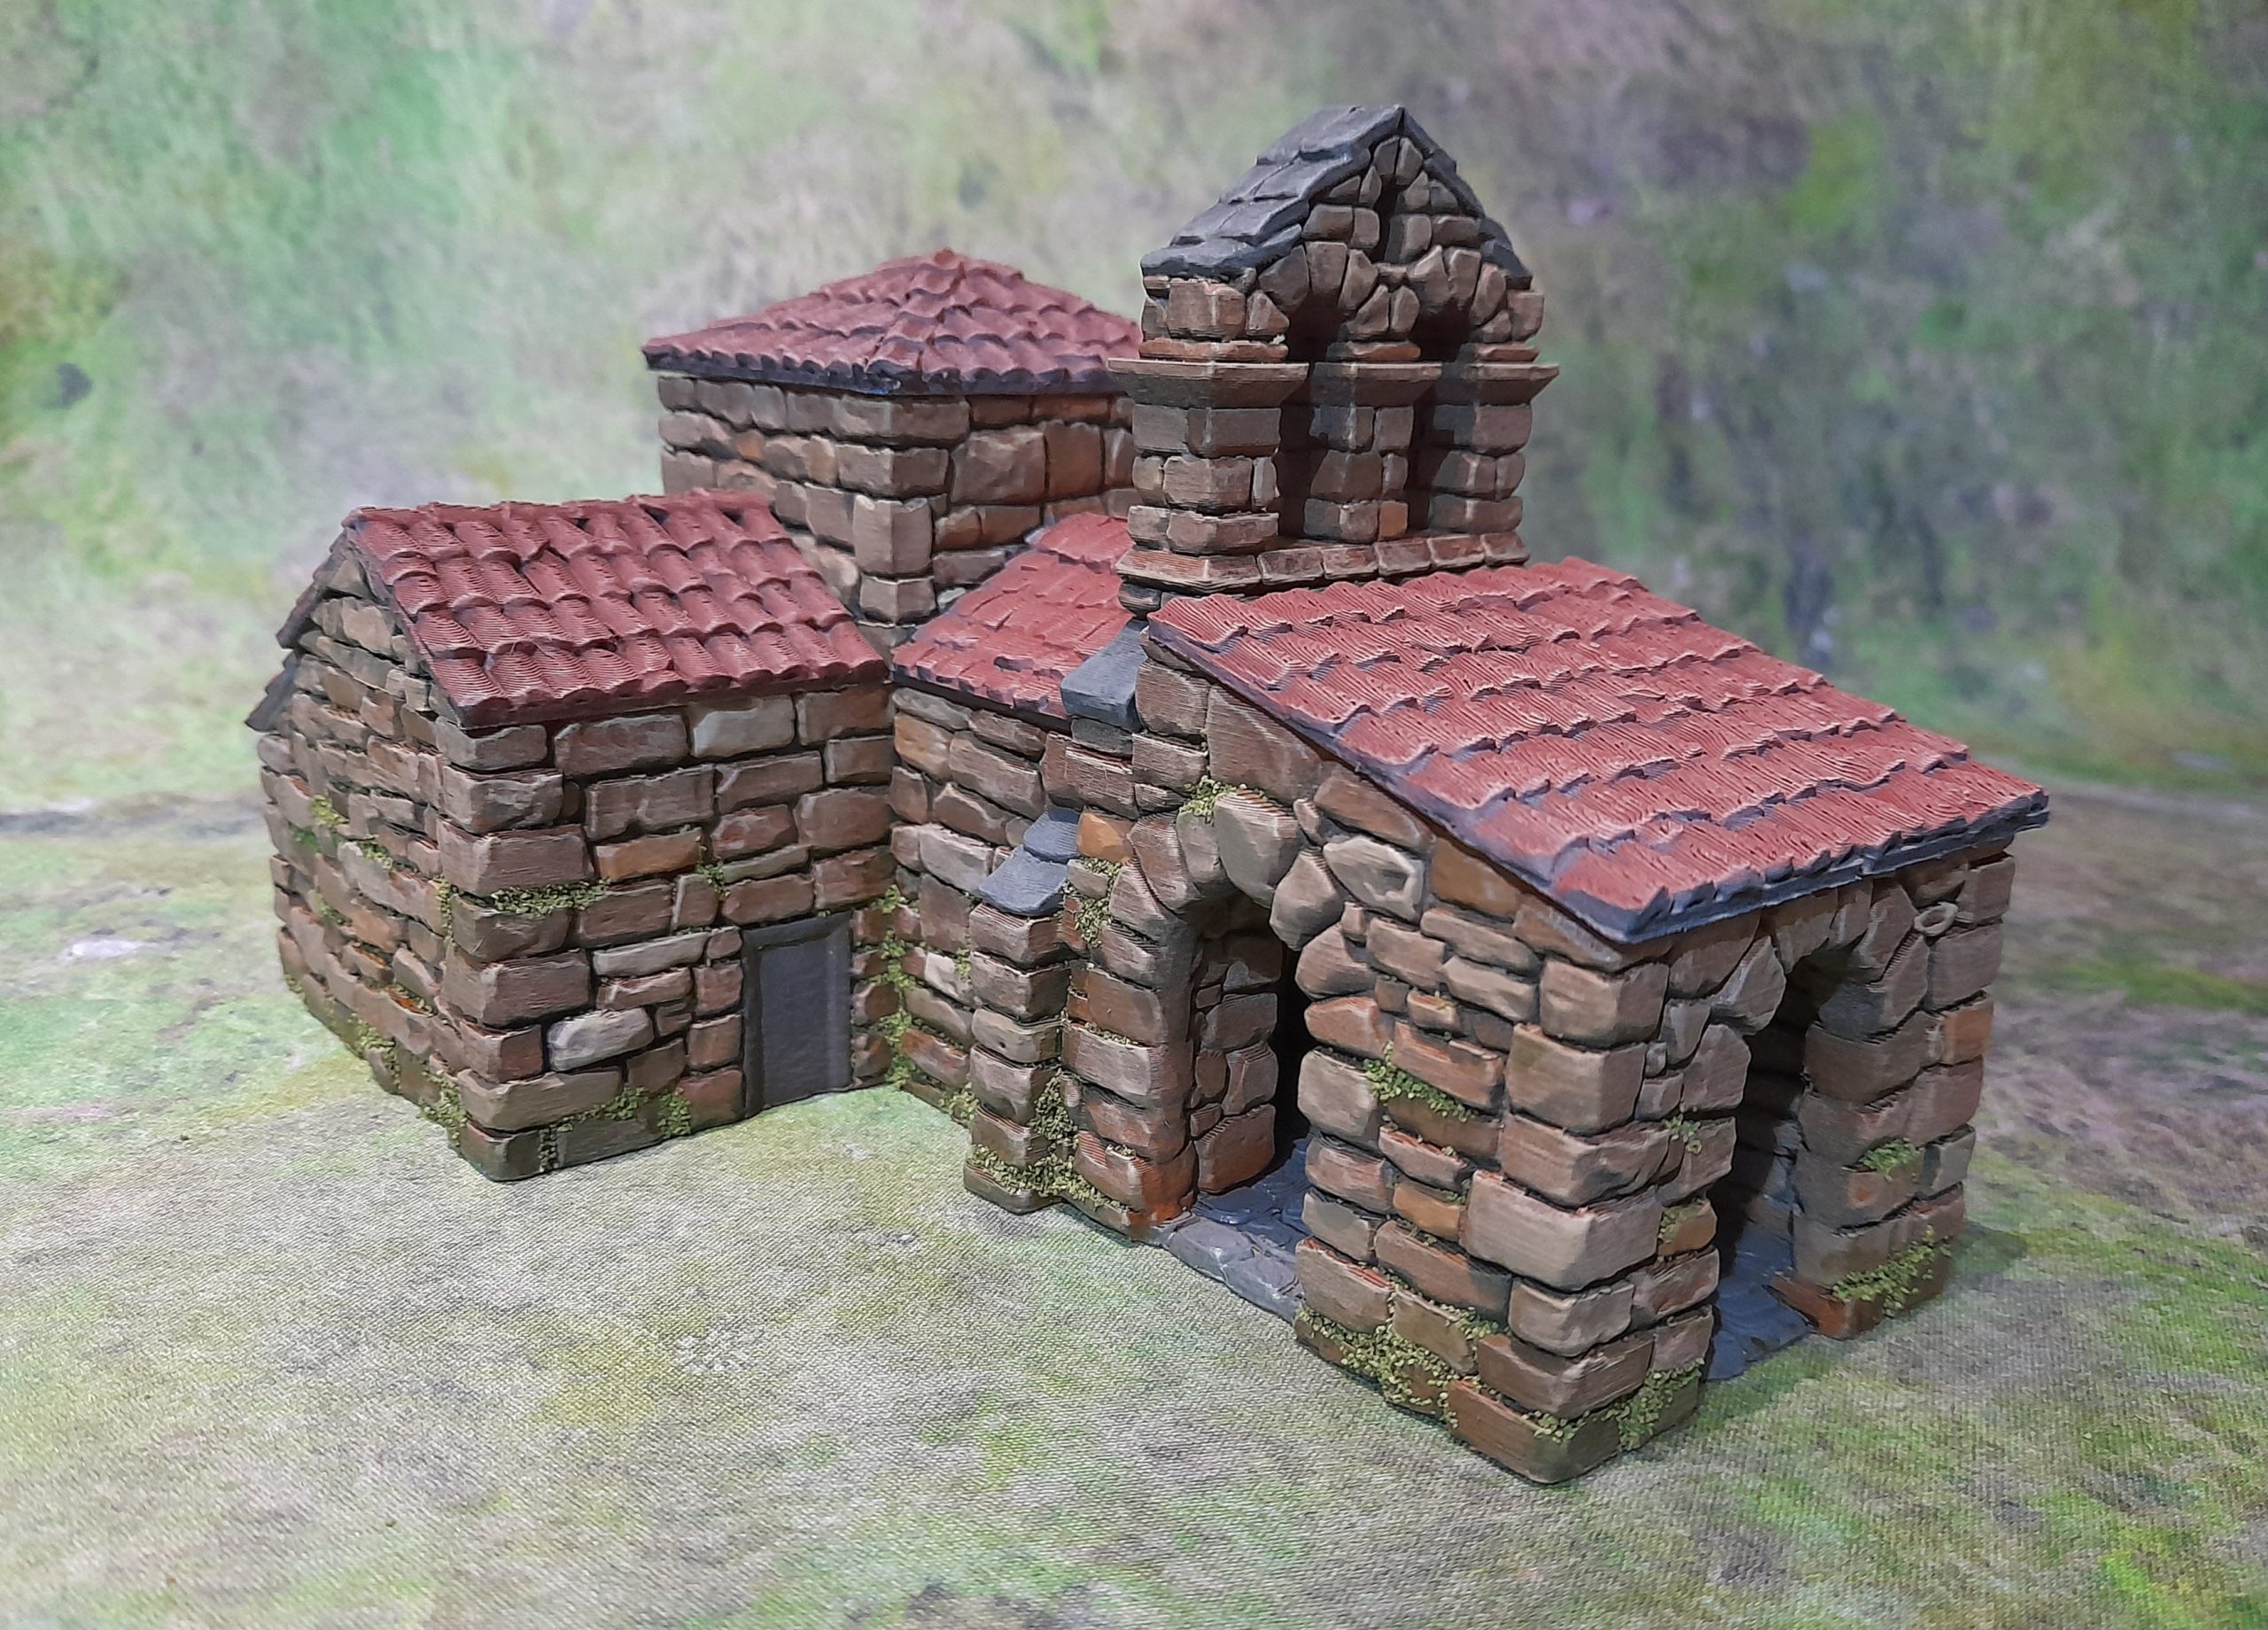
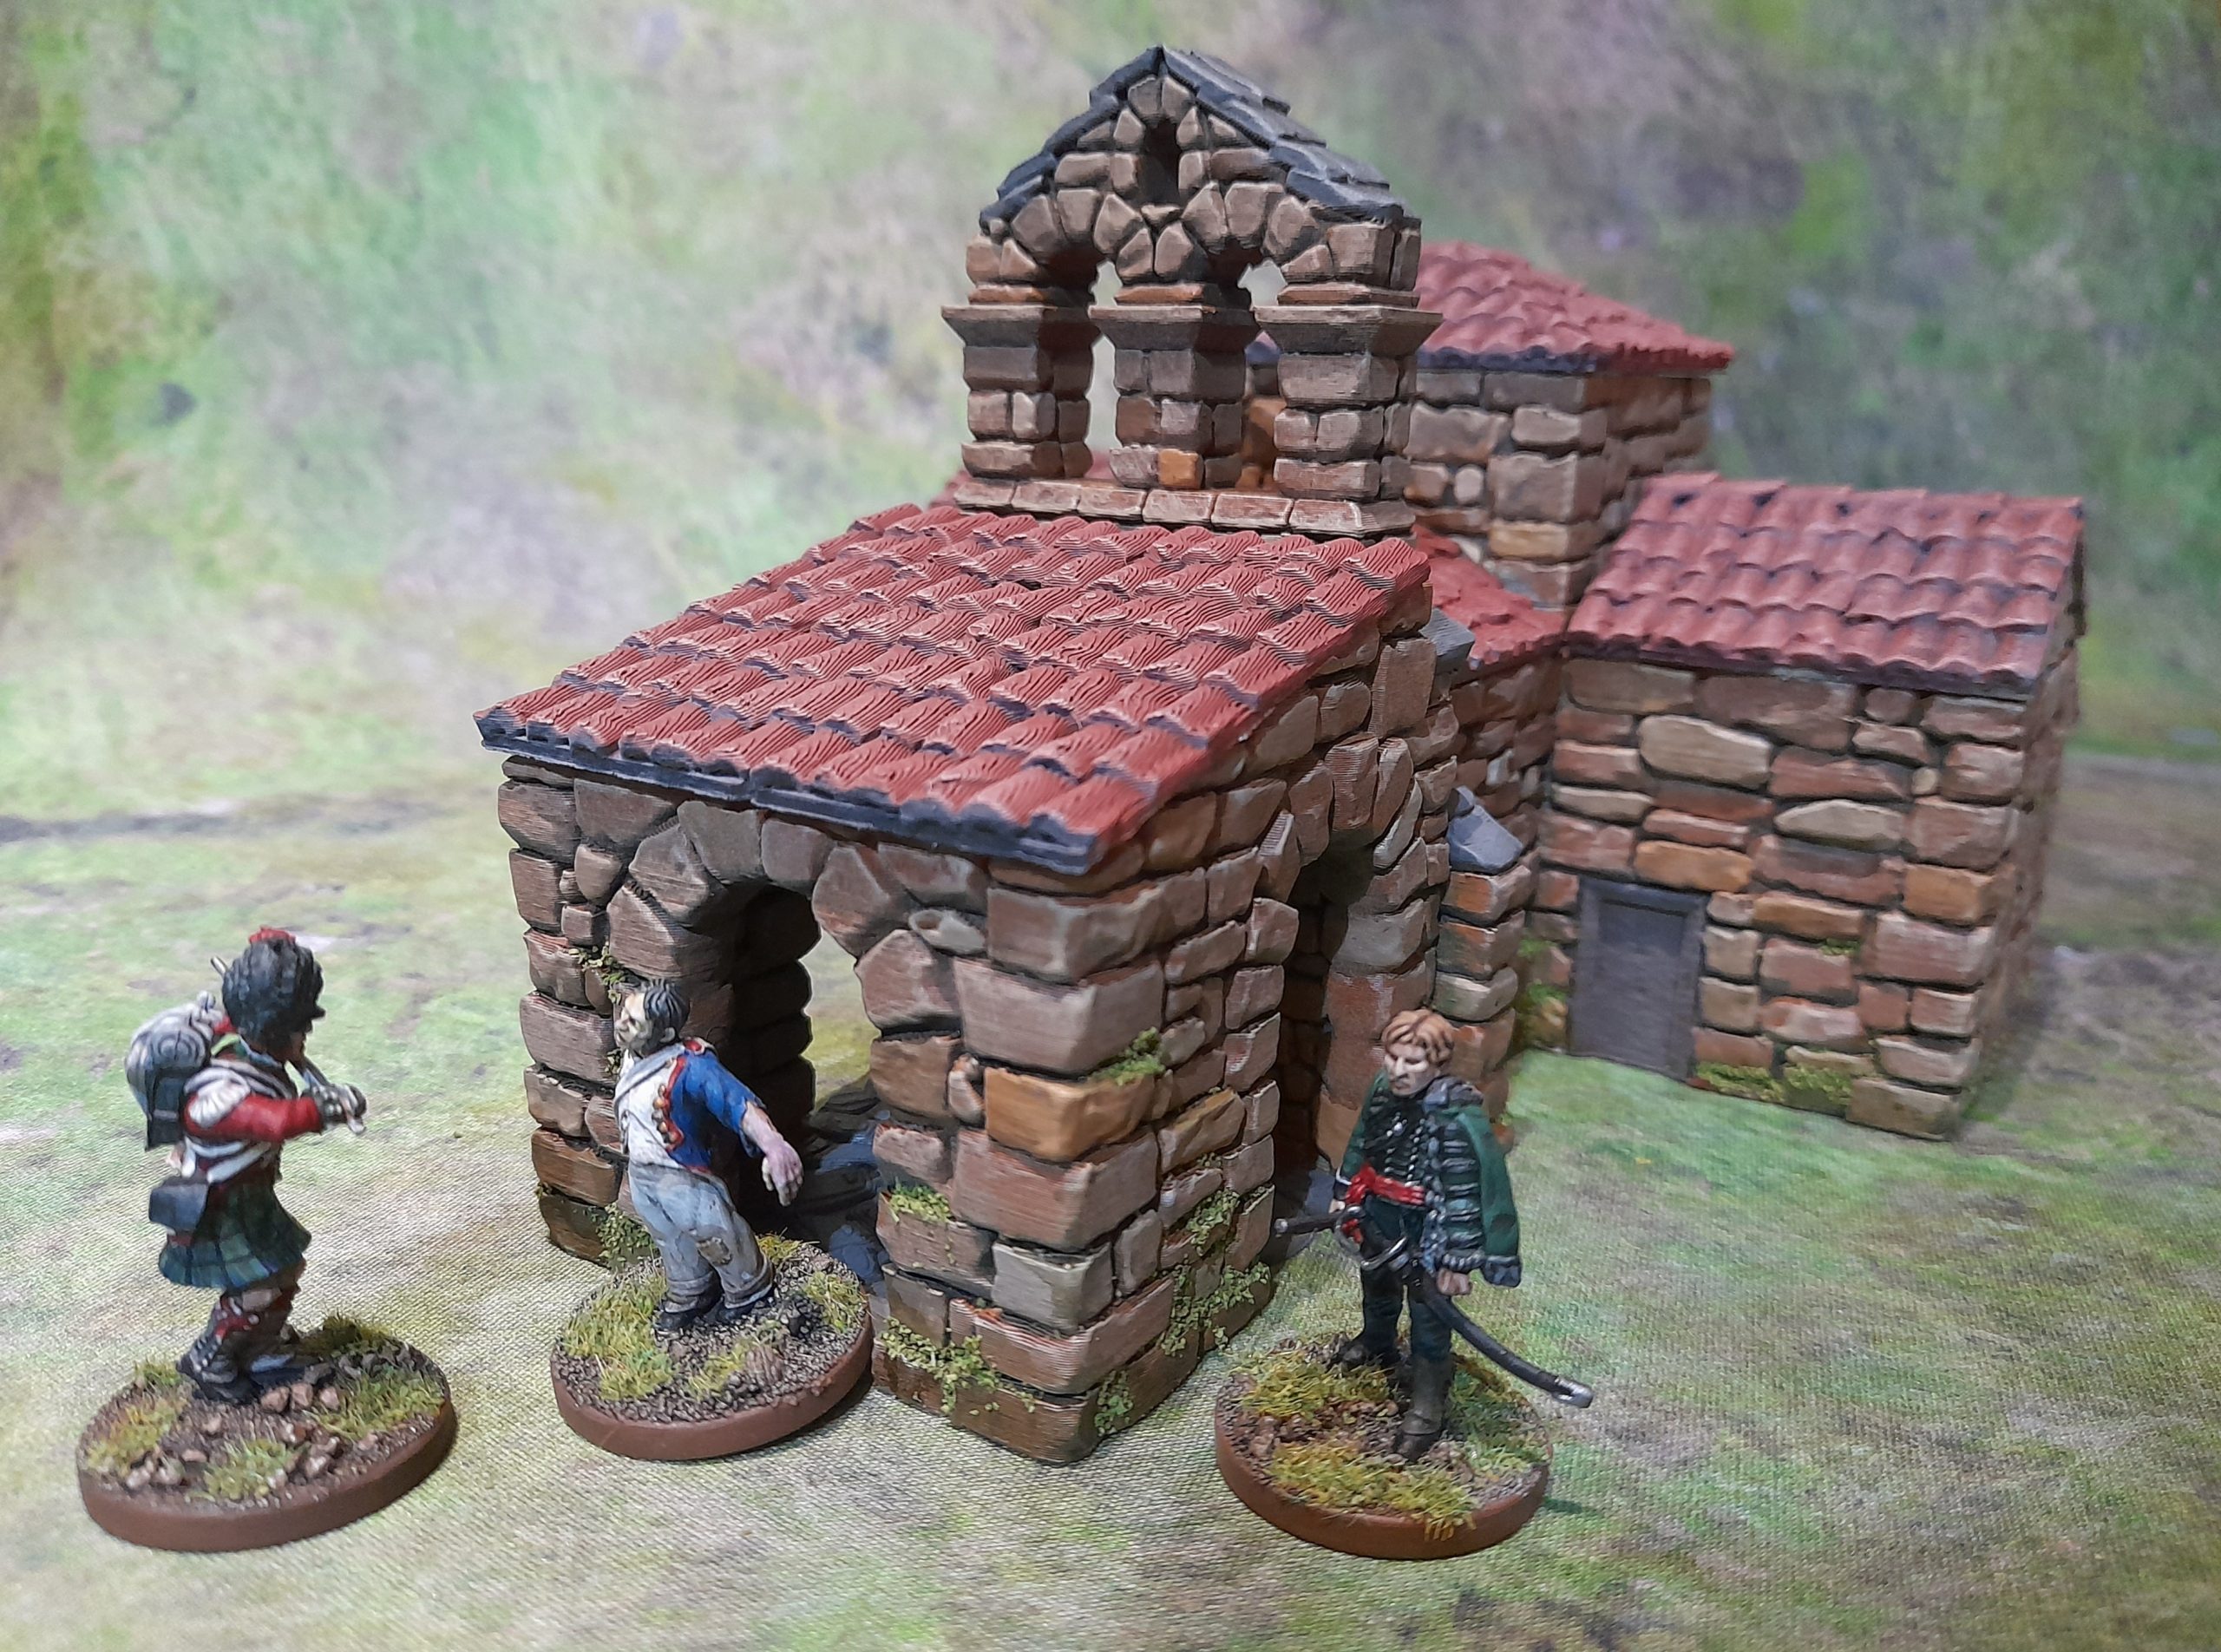
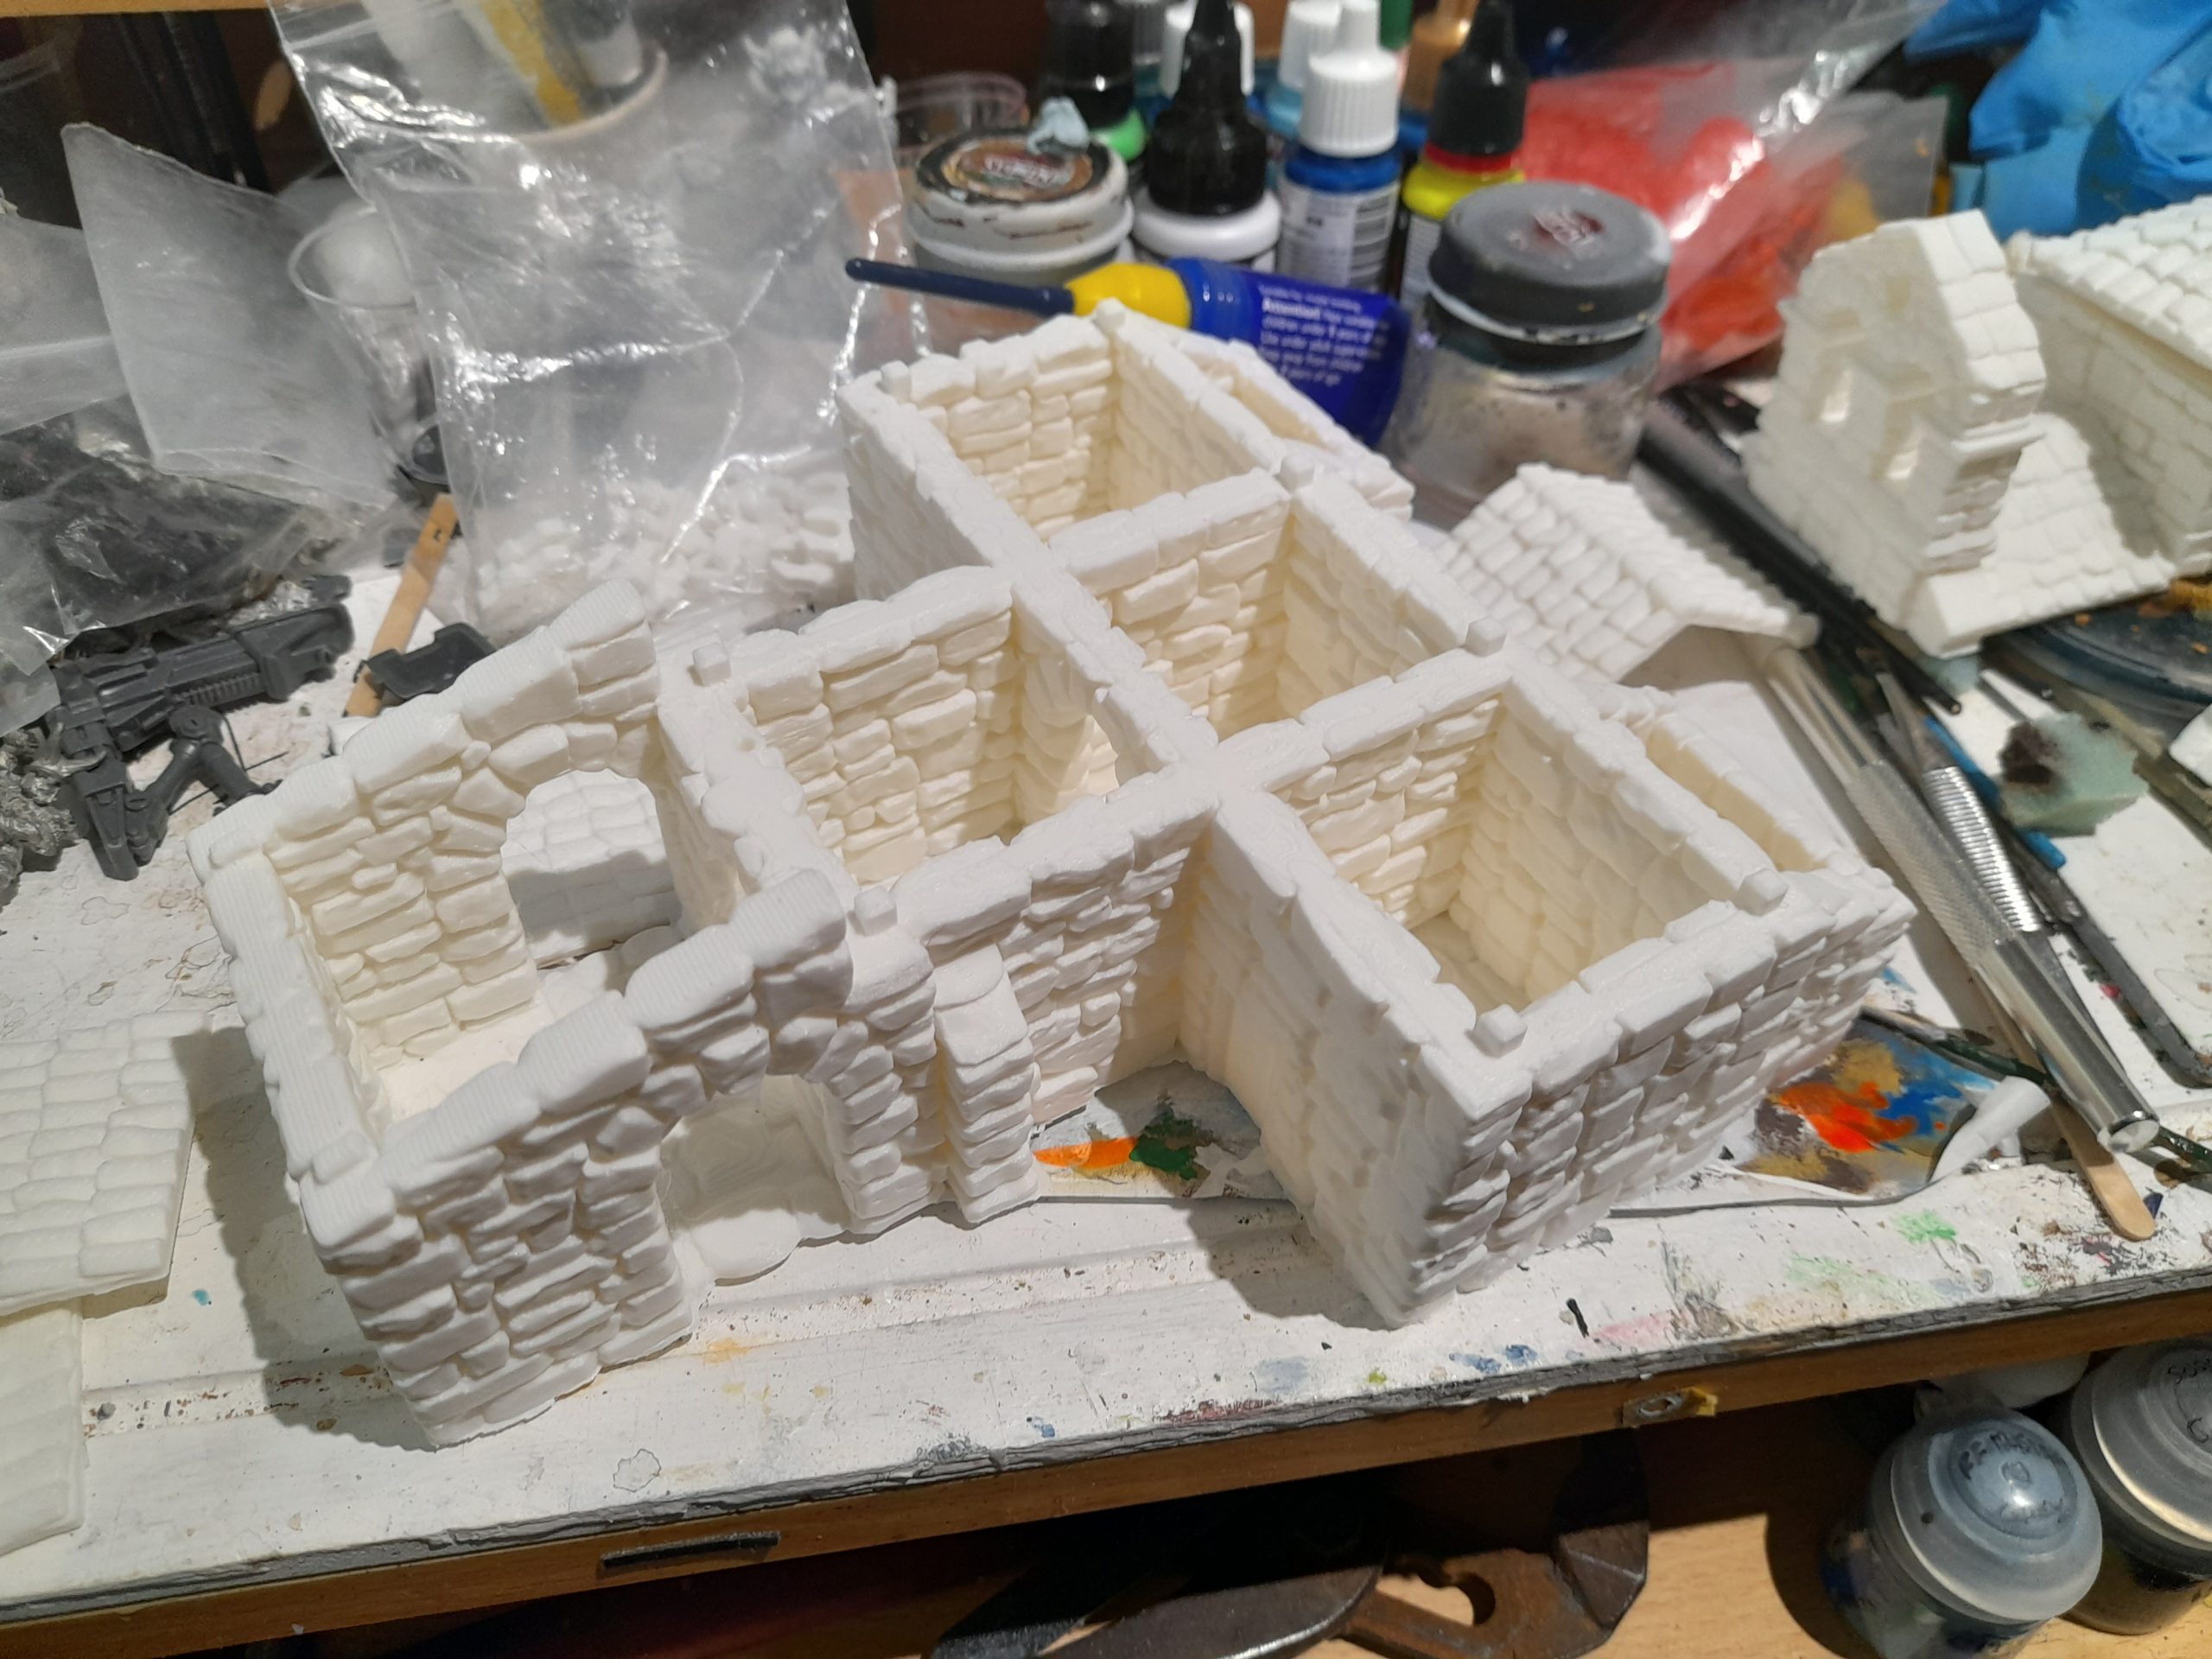
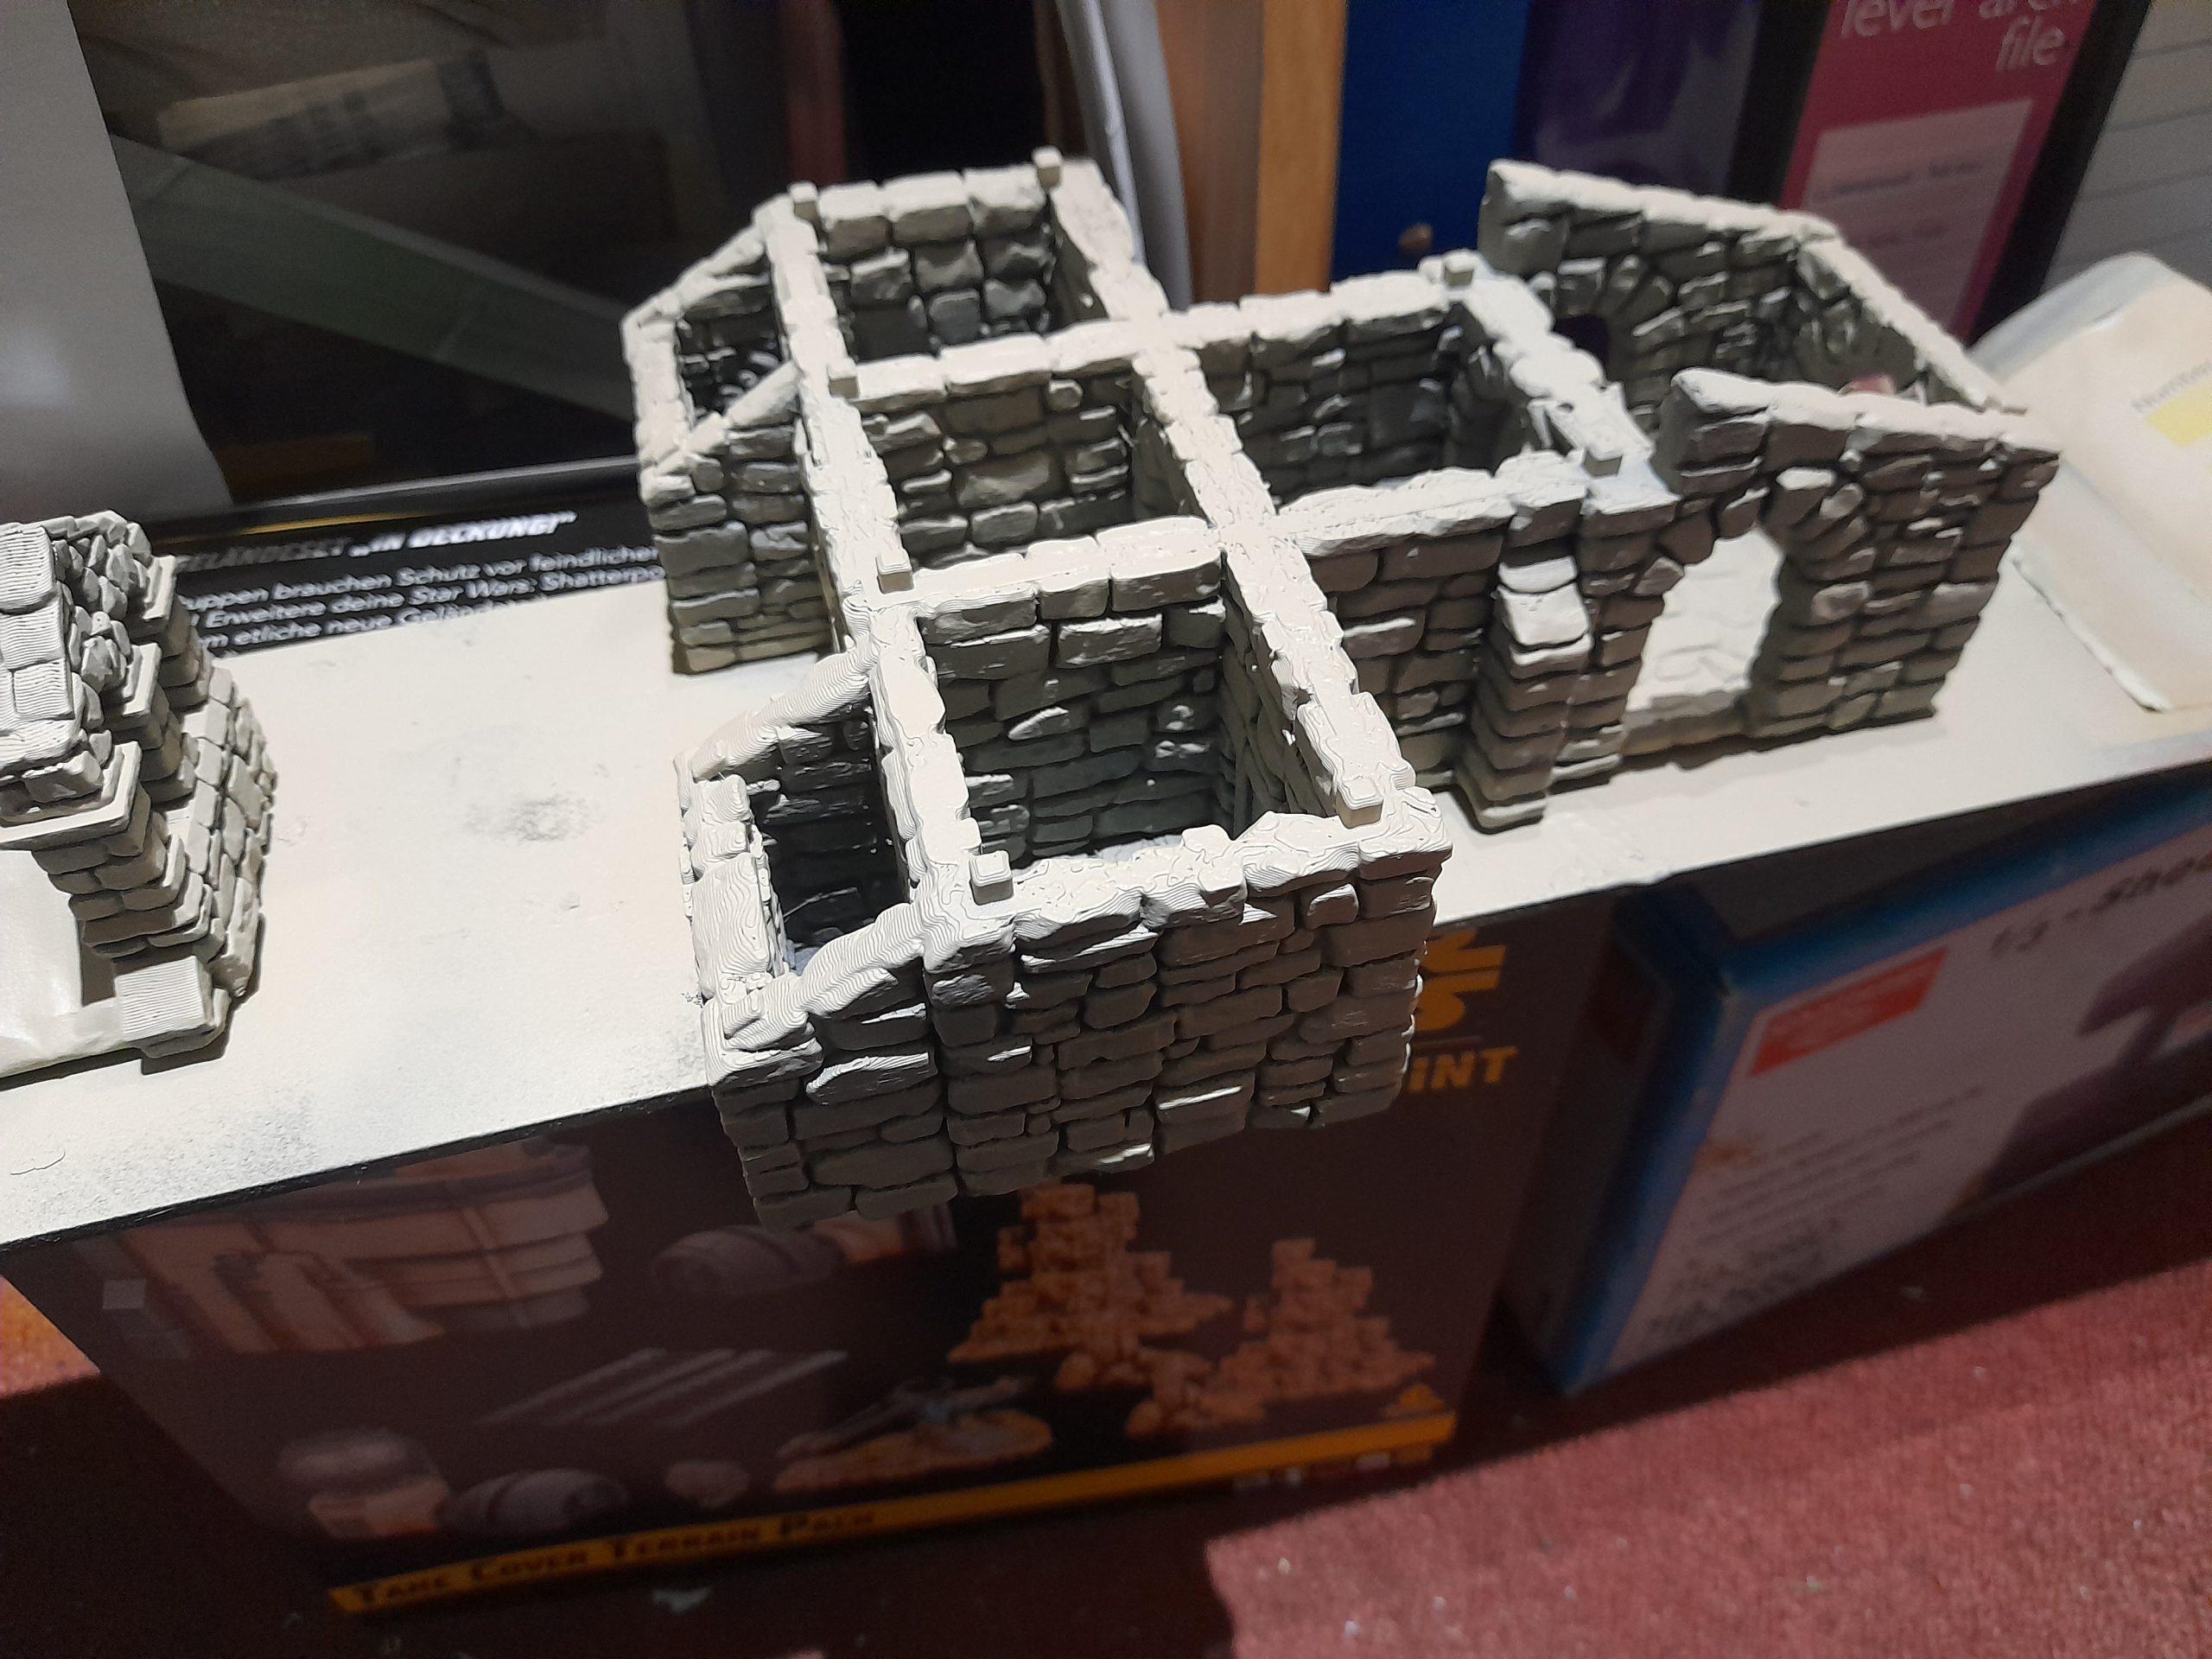
Bonus medieval mausoleum
27th January 2026
There was still a bit of time before the end of Terrainfest, so here is a cheeky little bonus item. It’s not related to the main thrust of my project (Scifi) but it will be used for my Silver Bayonet games.
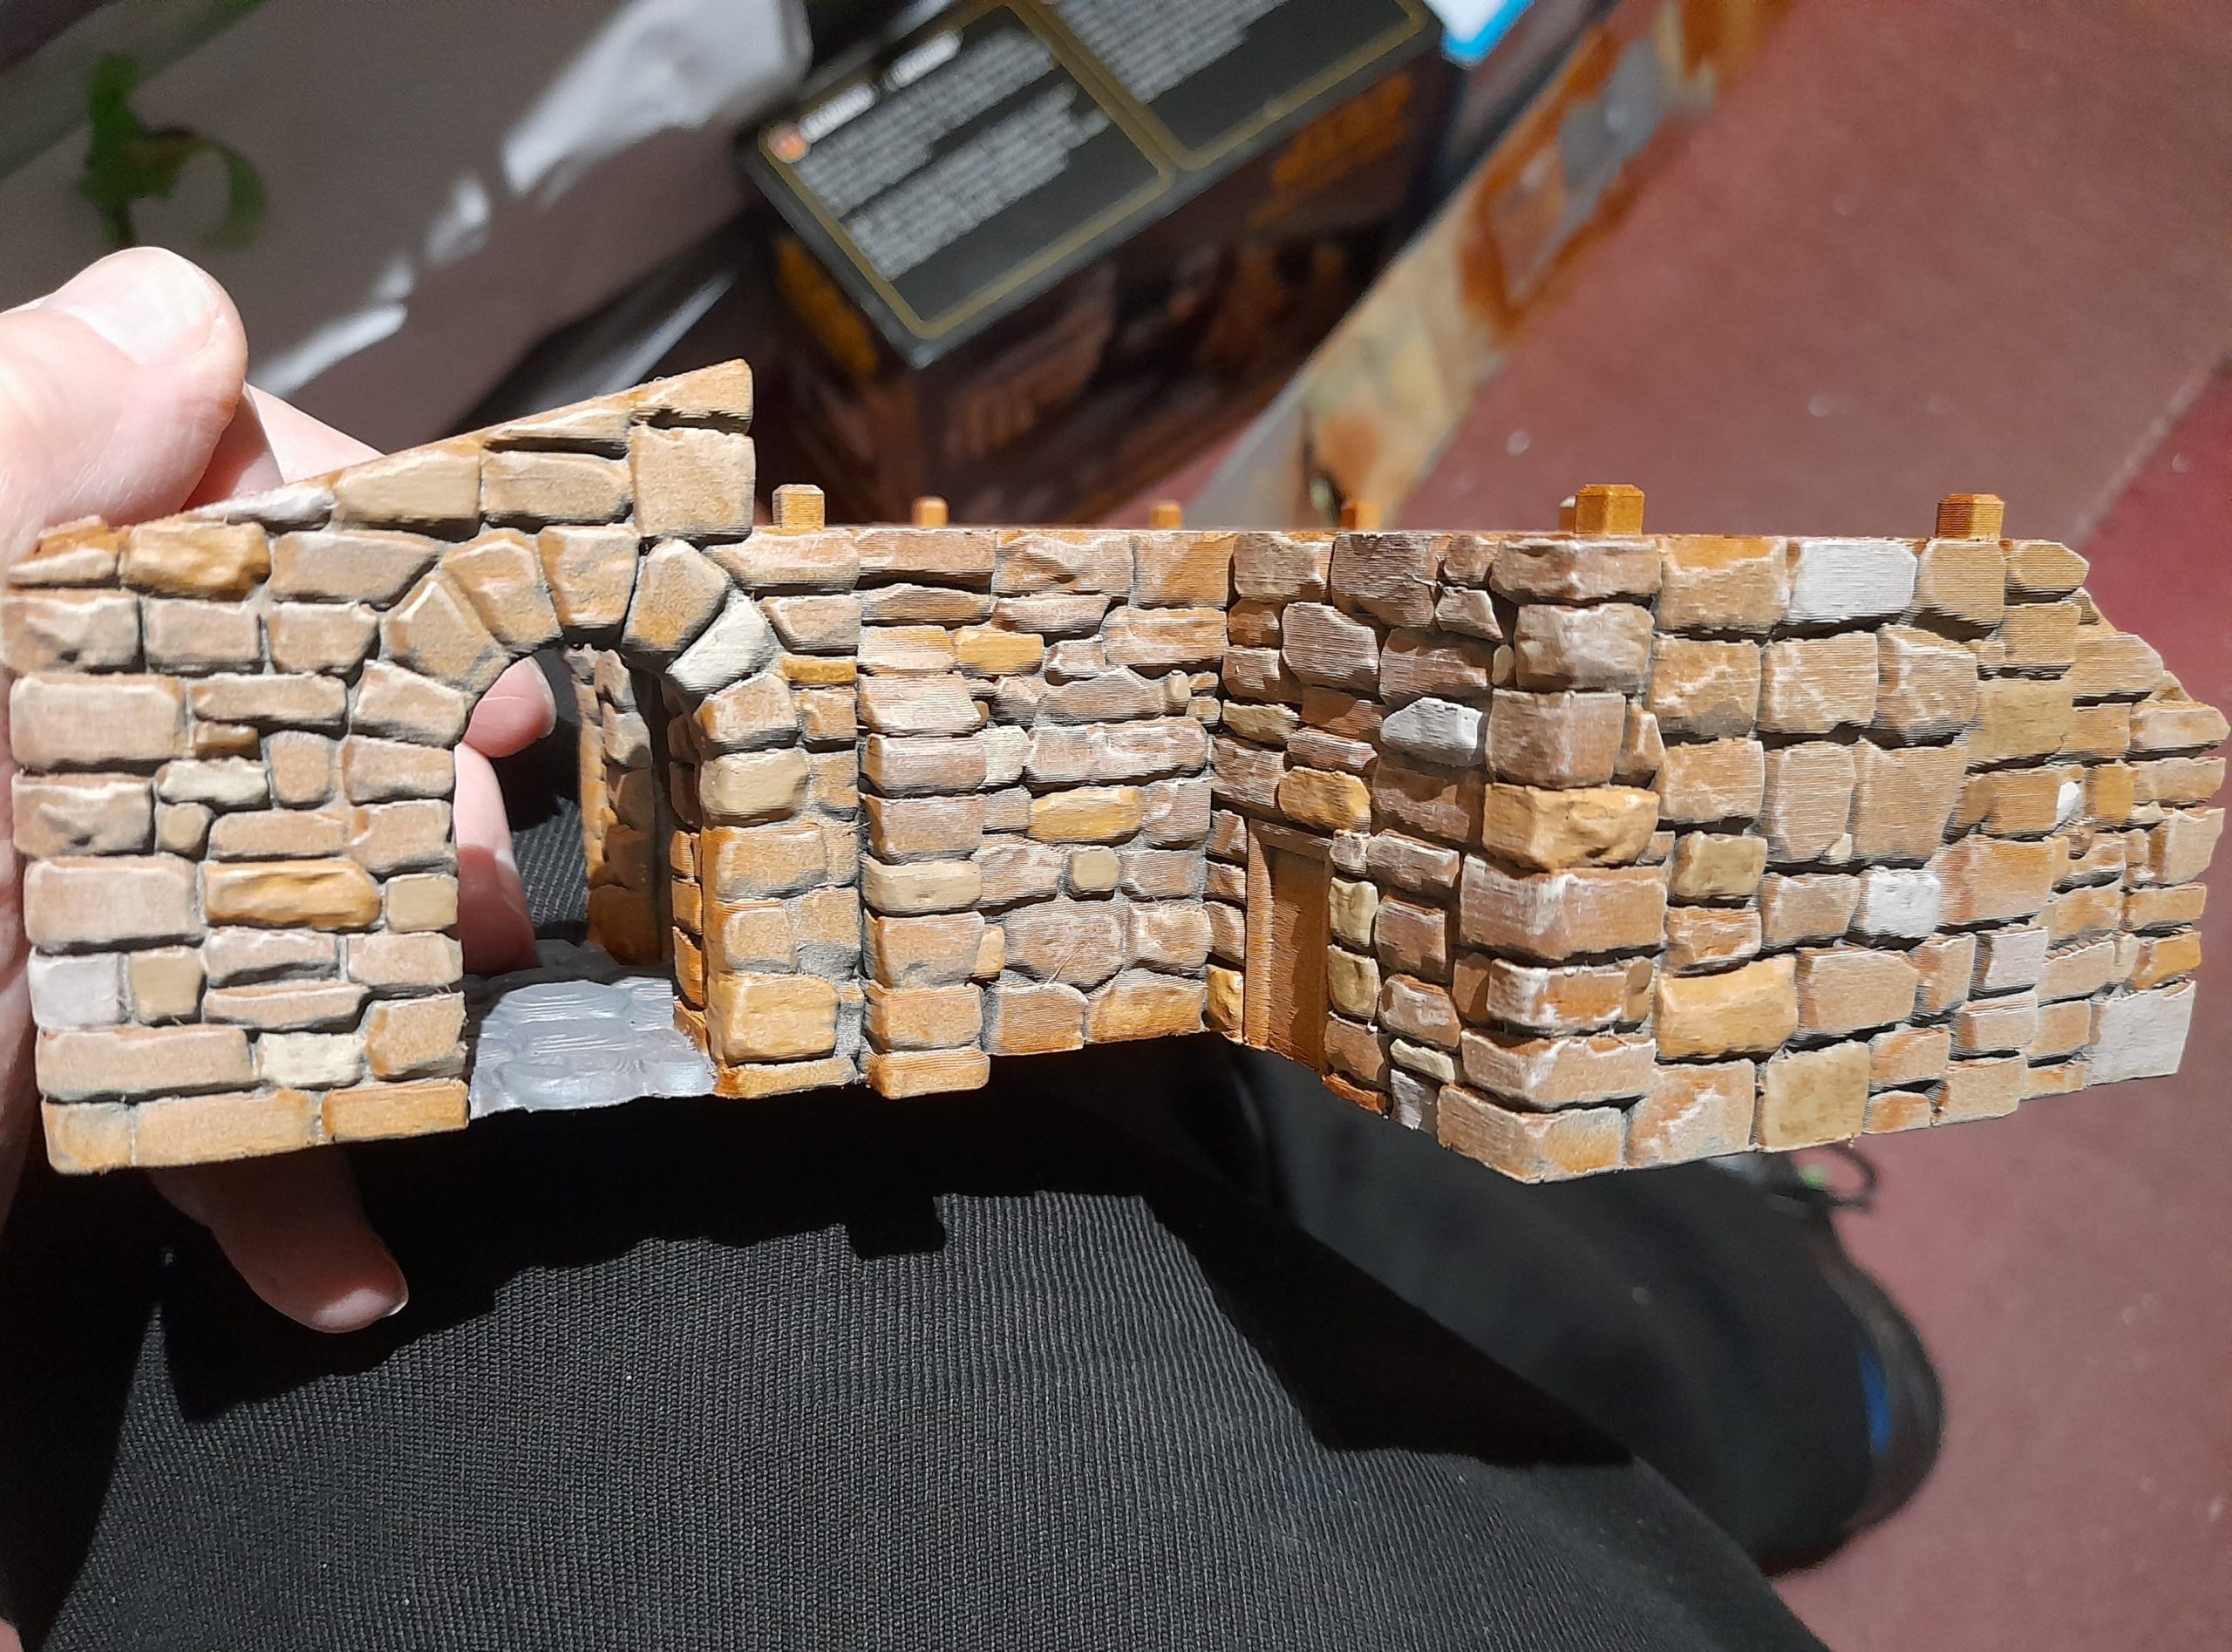
This is another 3D print that a friend produced. As with the others it needed a little bit of a clean up overall, but not too much. The layer lines are visible up close, but I was hoping that the layers of priming would mask the majority.
Once prepped it was sprayed black…. Then grey….. at this point I masked bits off and painted the roof sections in red primer, followed by a tan flesh drybrush.
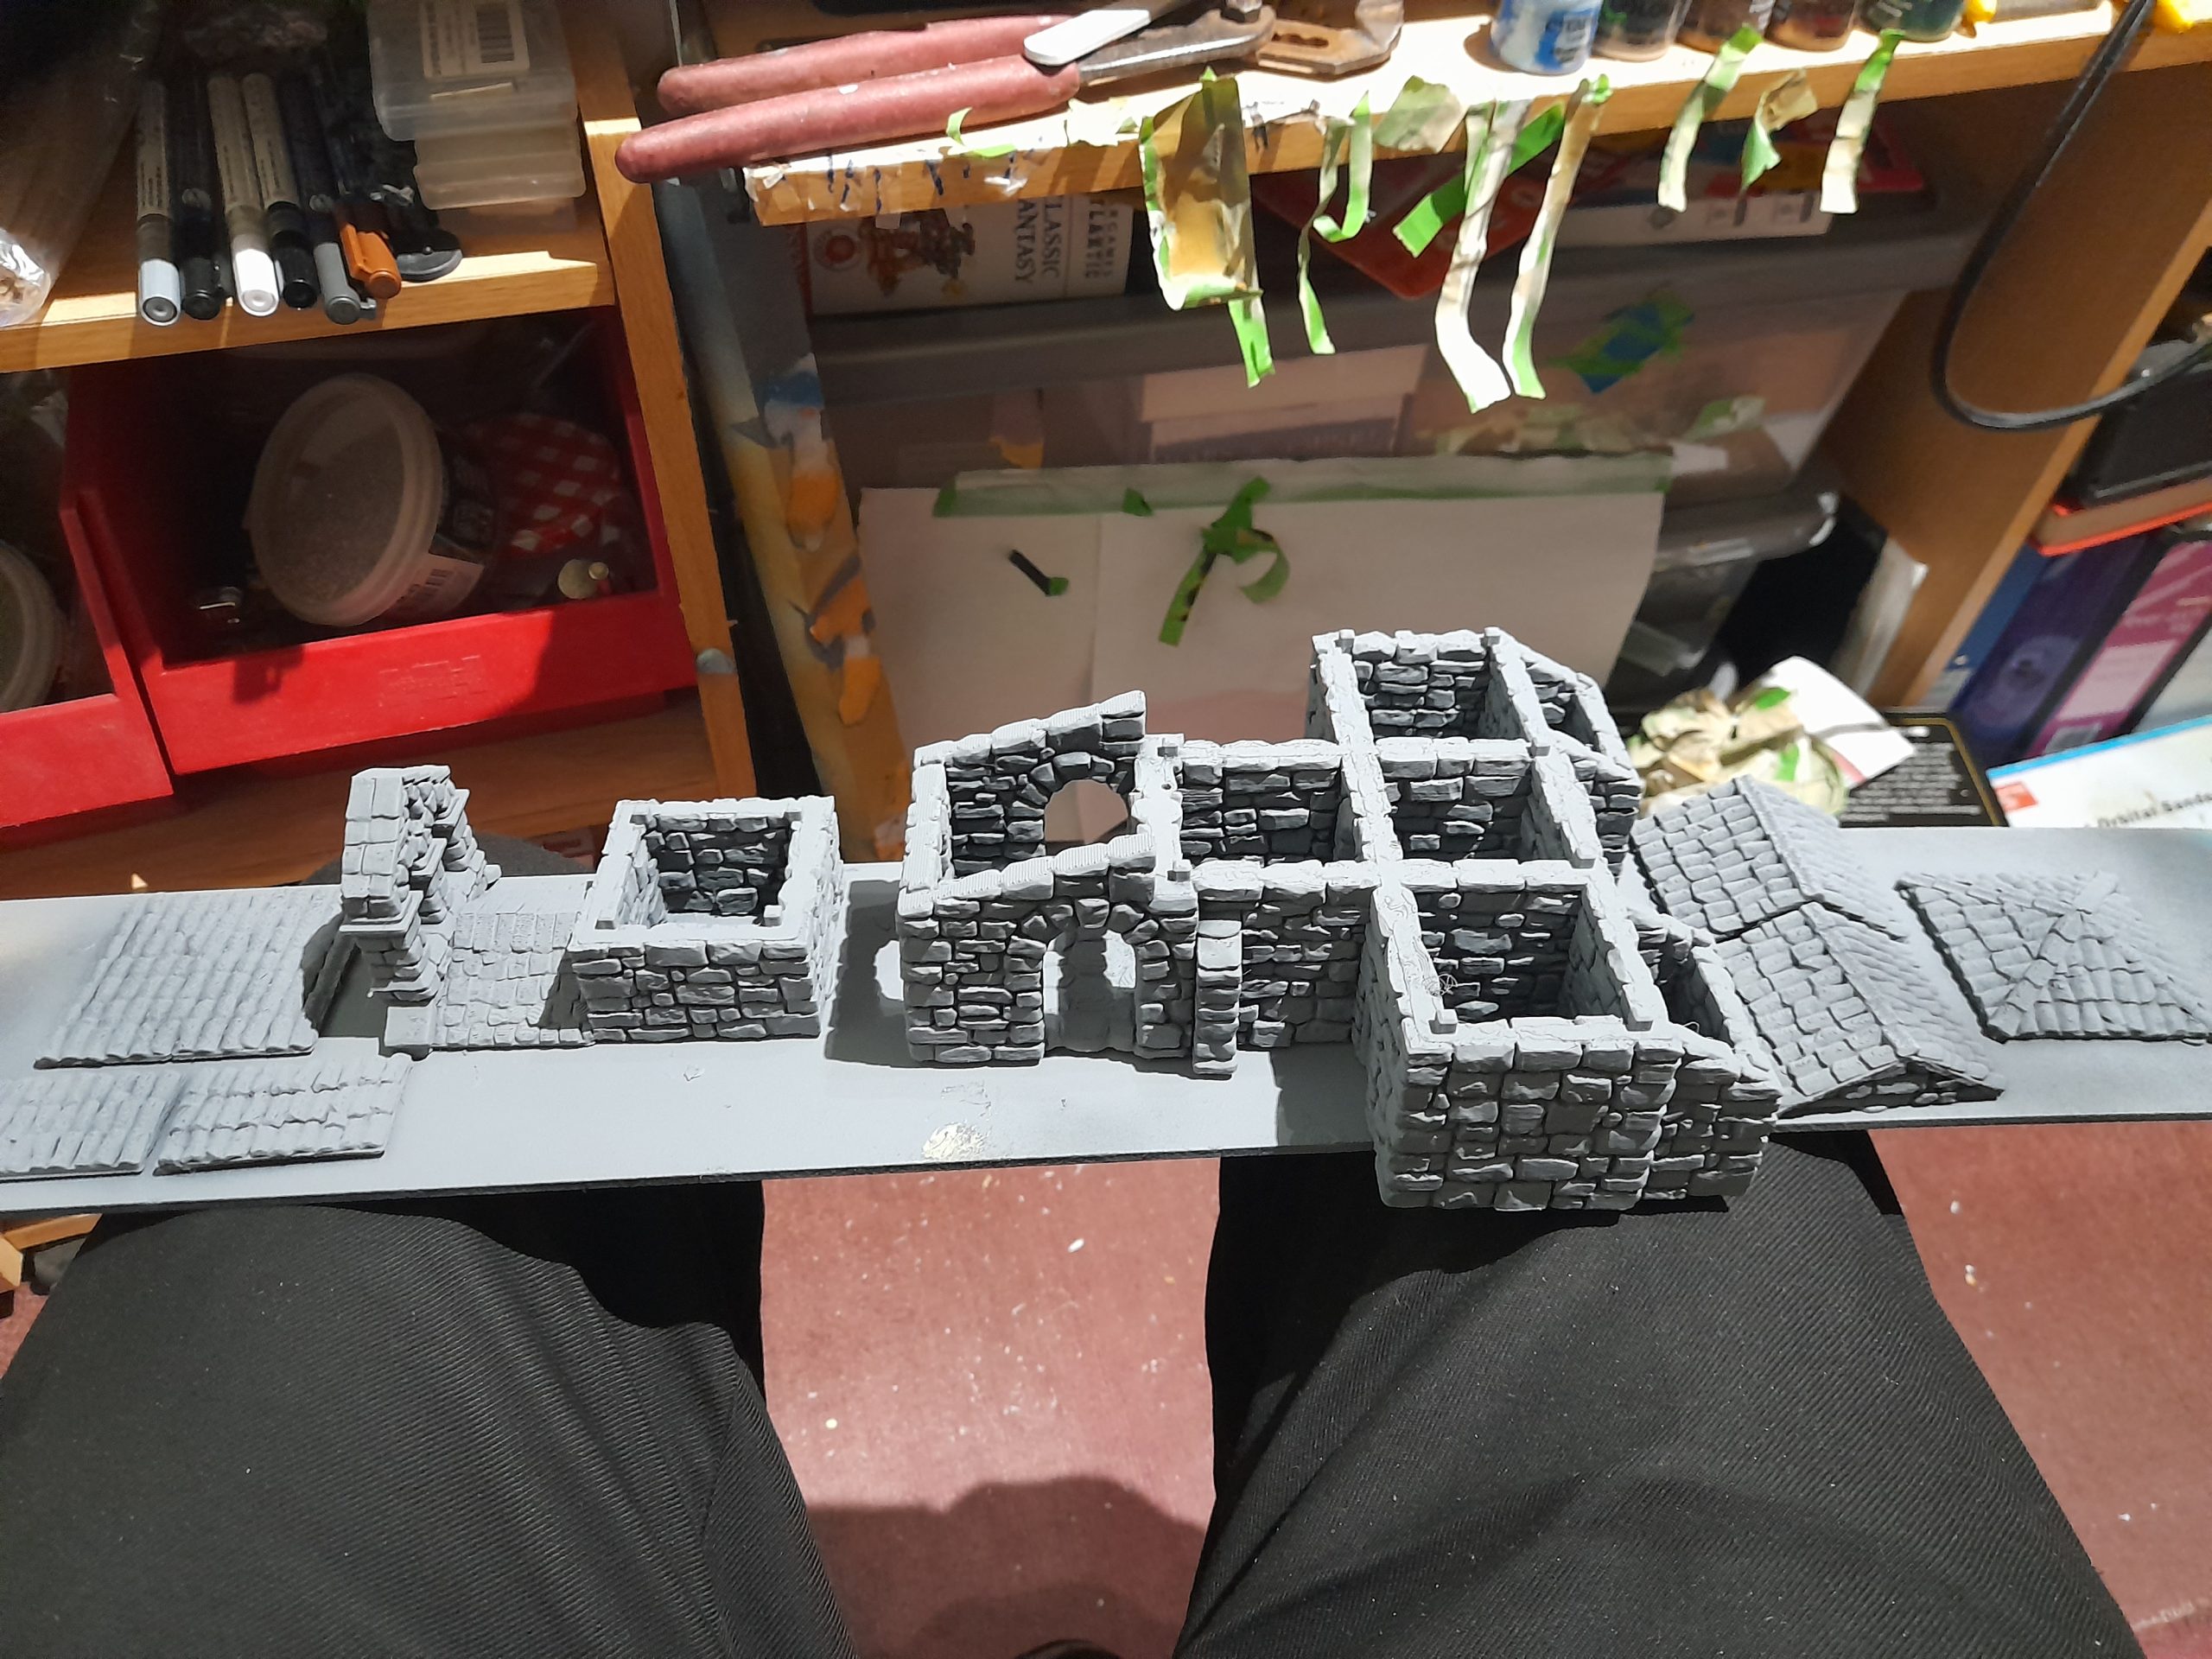
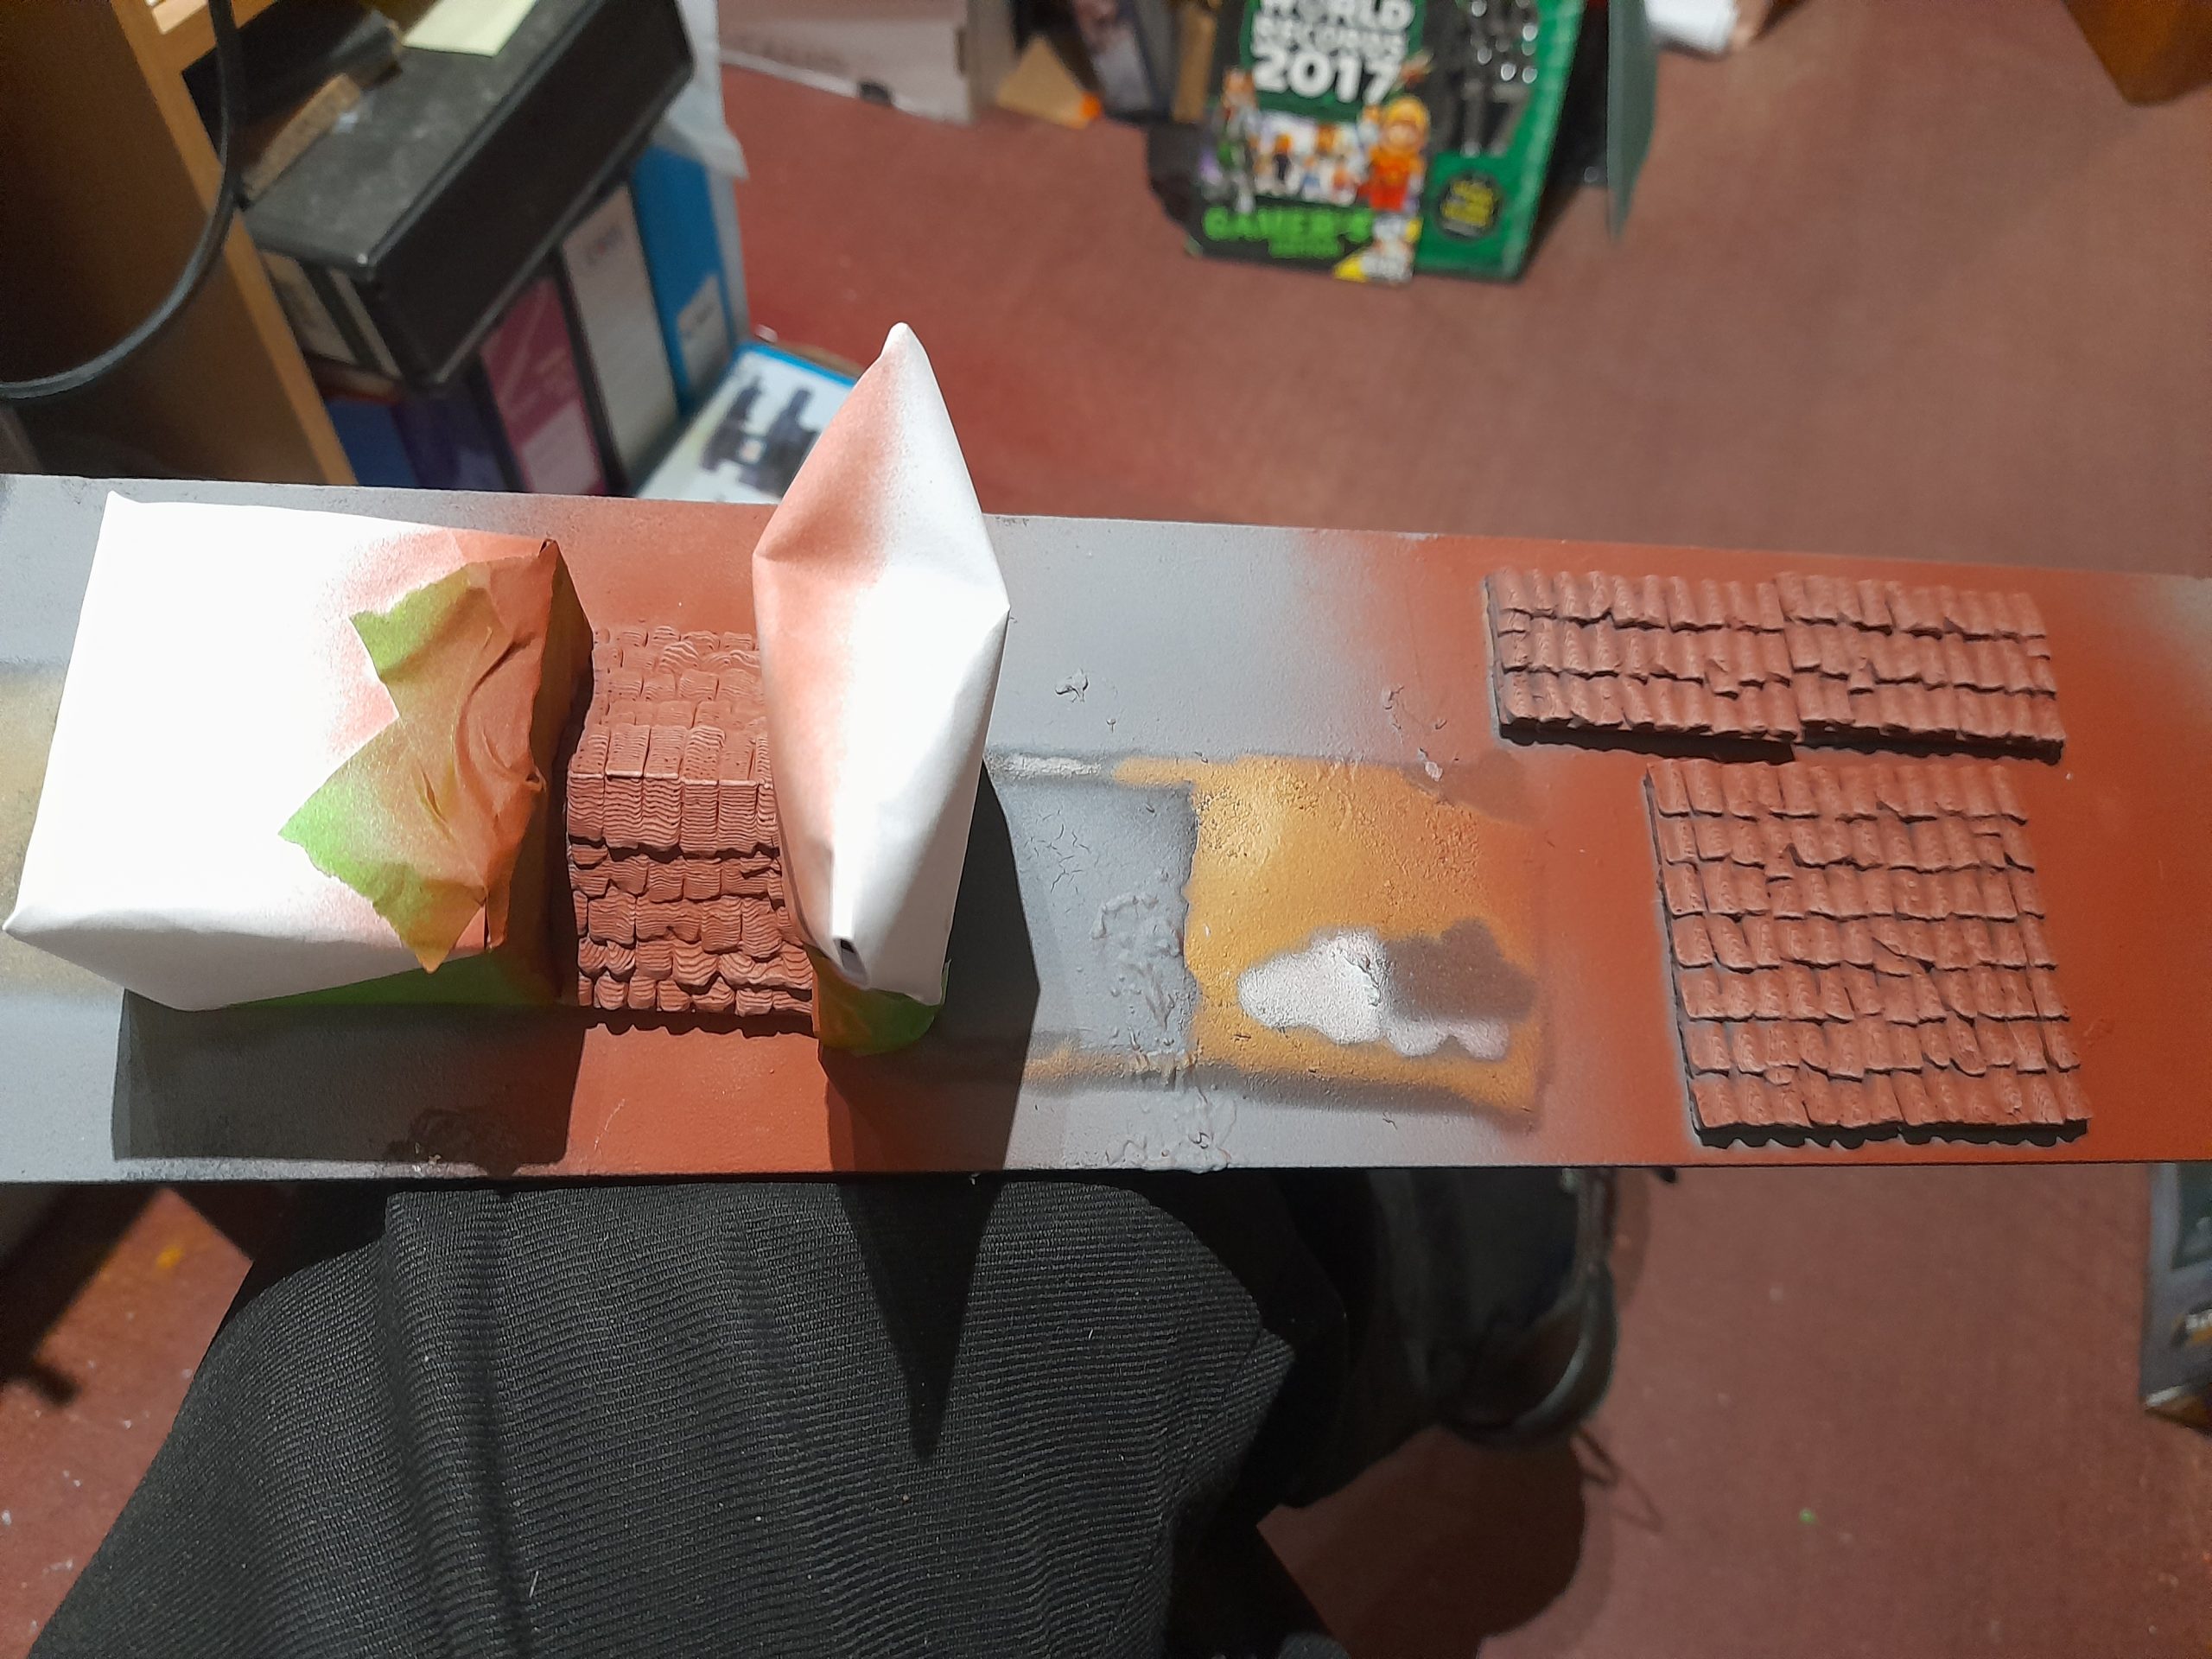
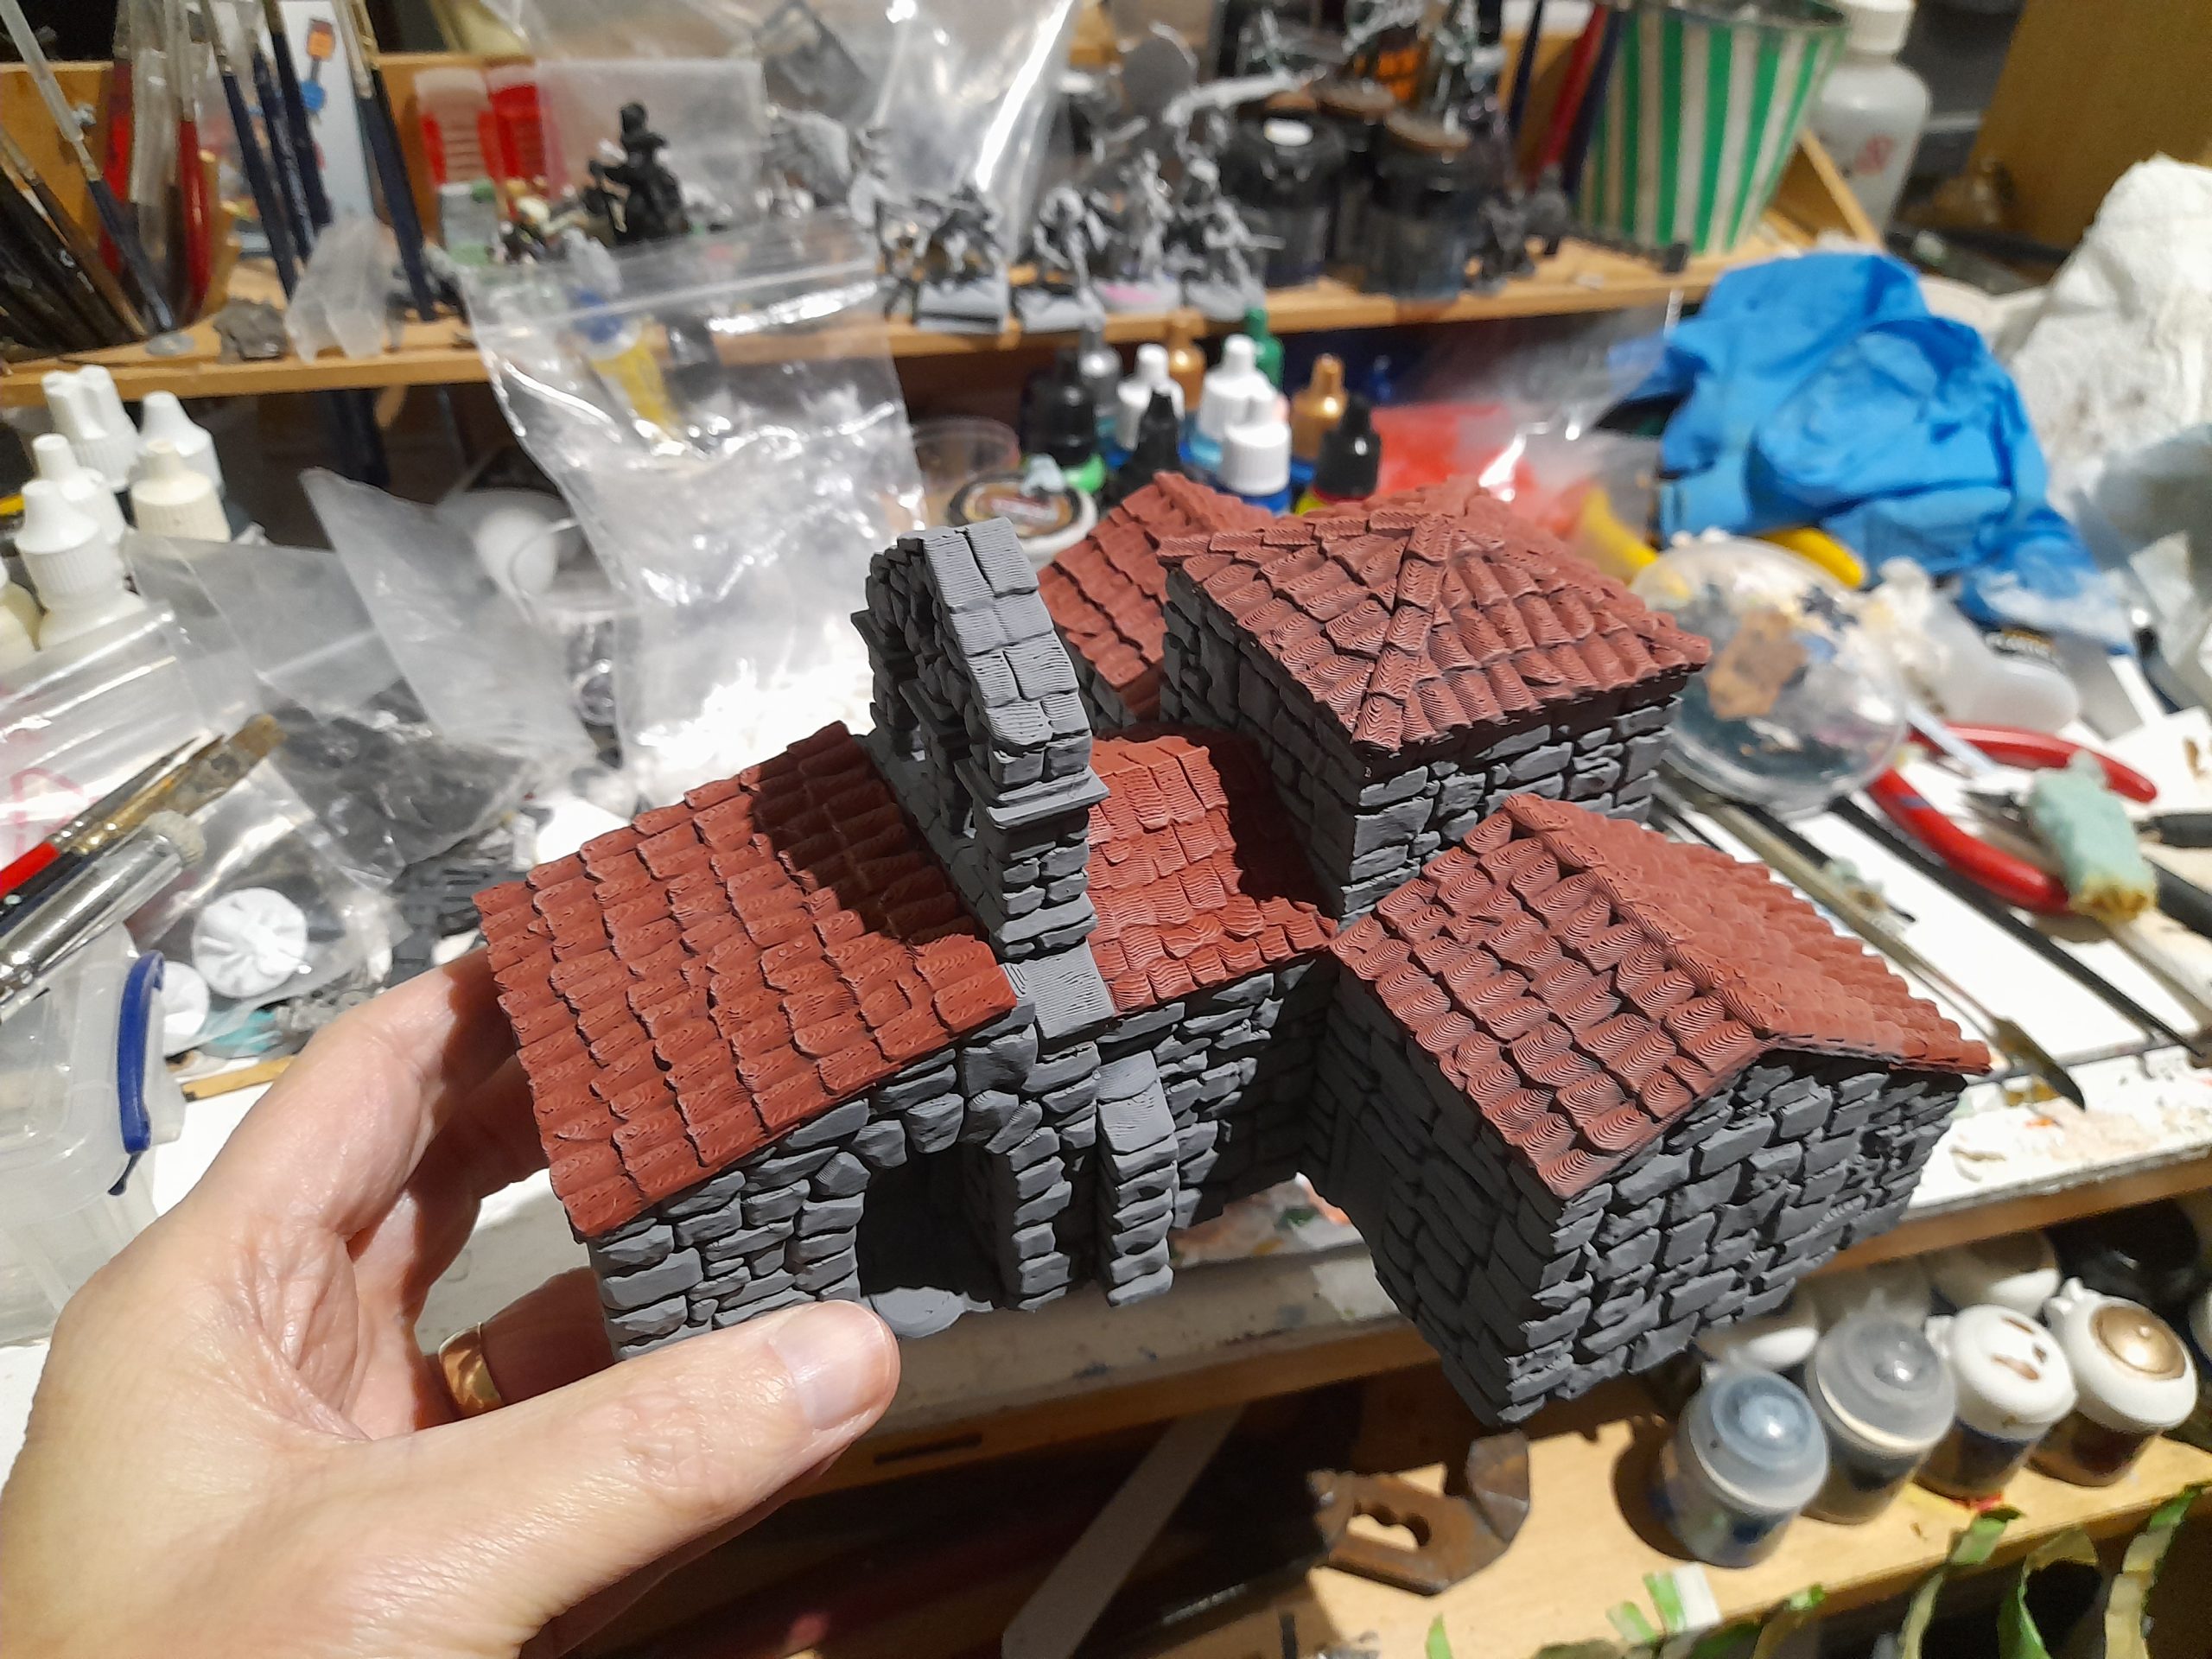
The grey looked ok initially, but I wanted to go down a different route – so I changed my mind and gave it an over spray of bone. This was followed by using my airbrush to spray on a couple of shades of brown and umber. And a quick light drybrush of bone.
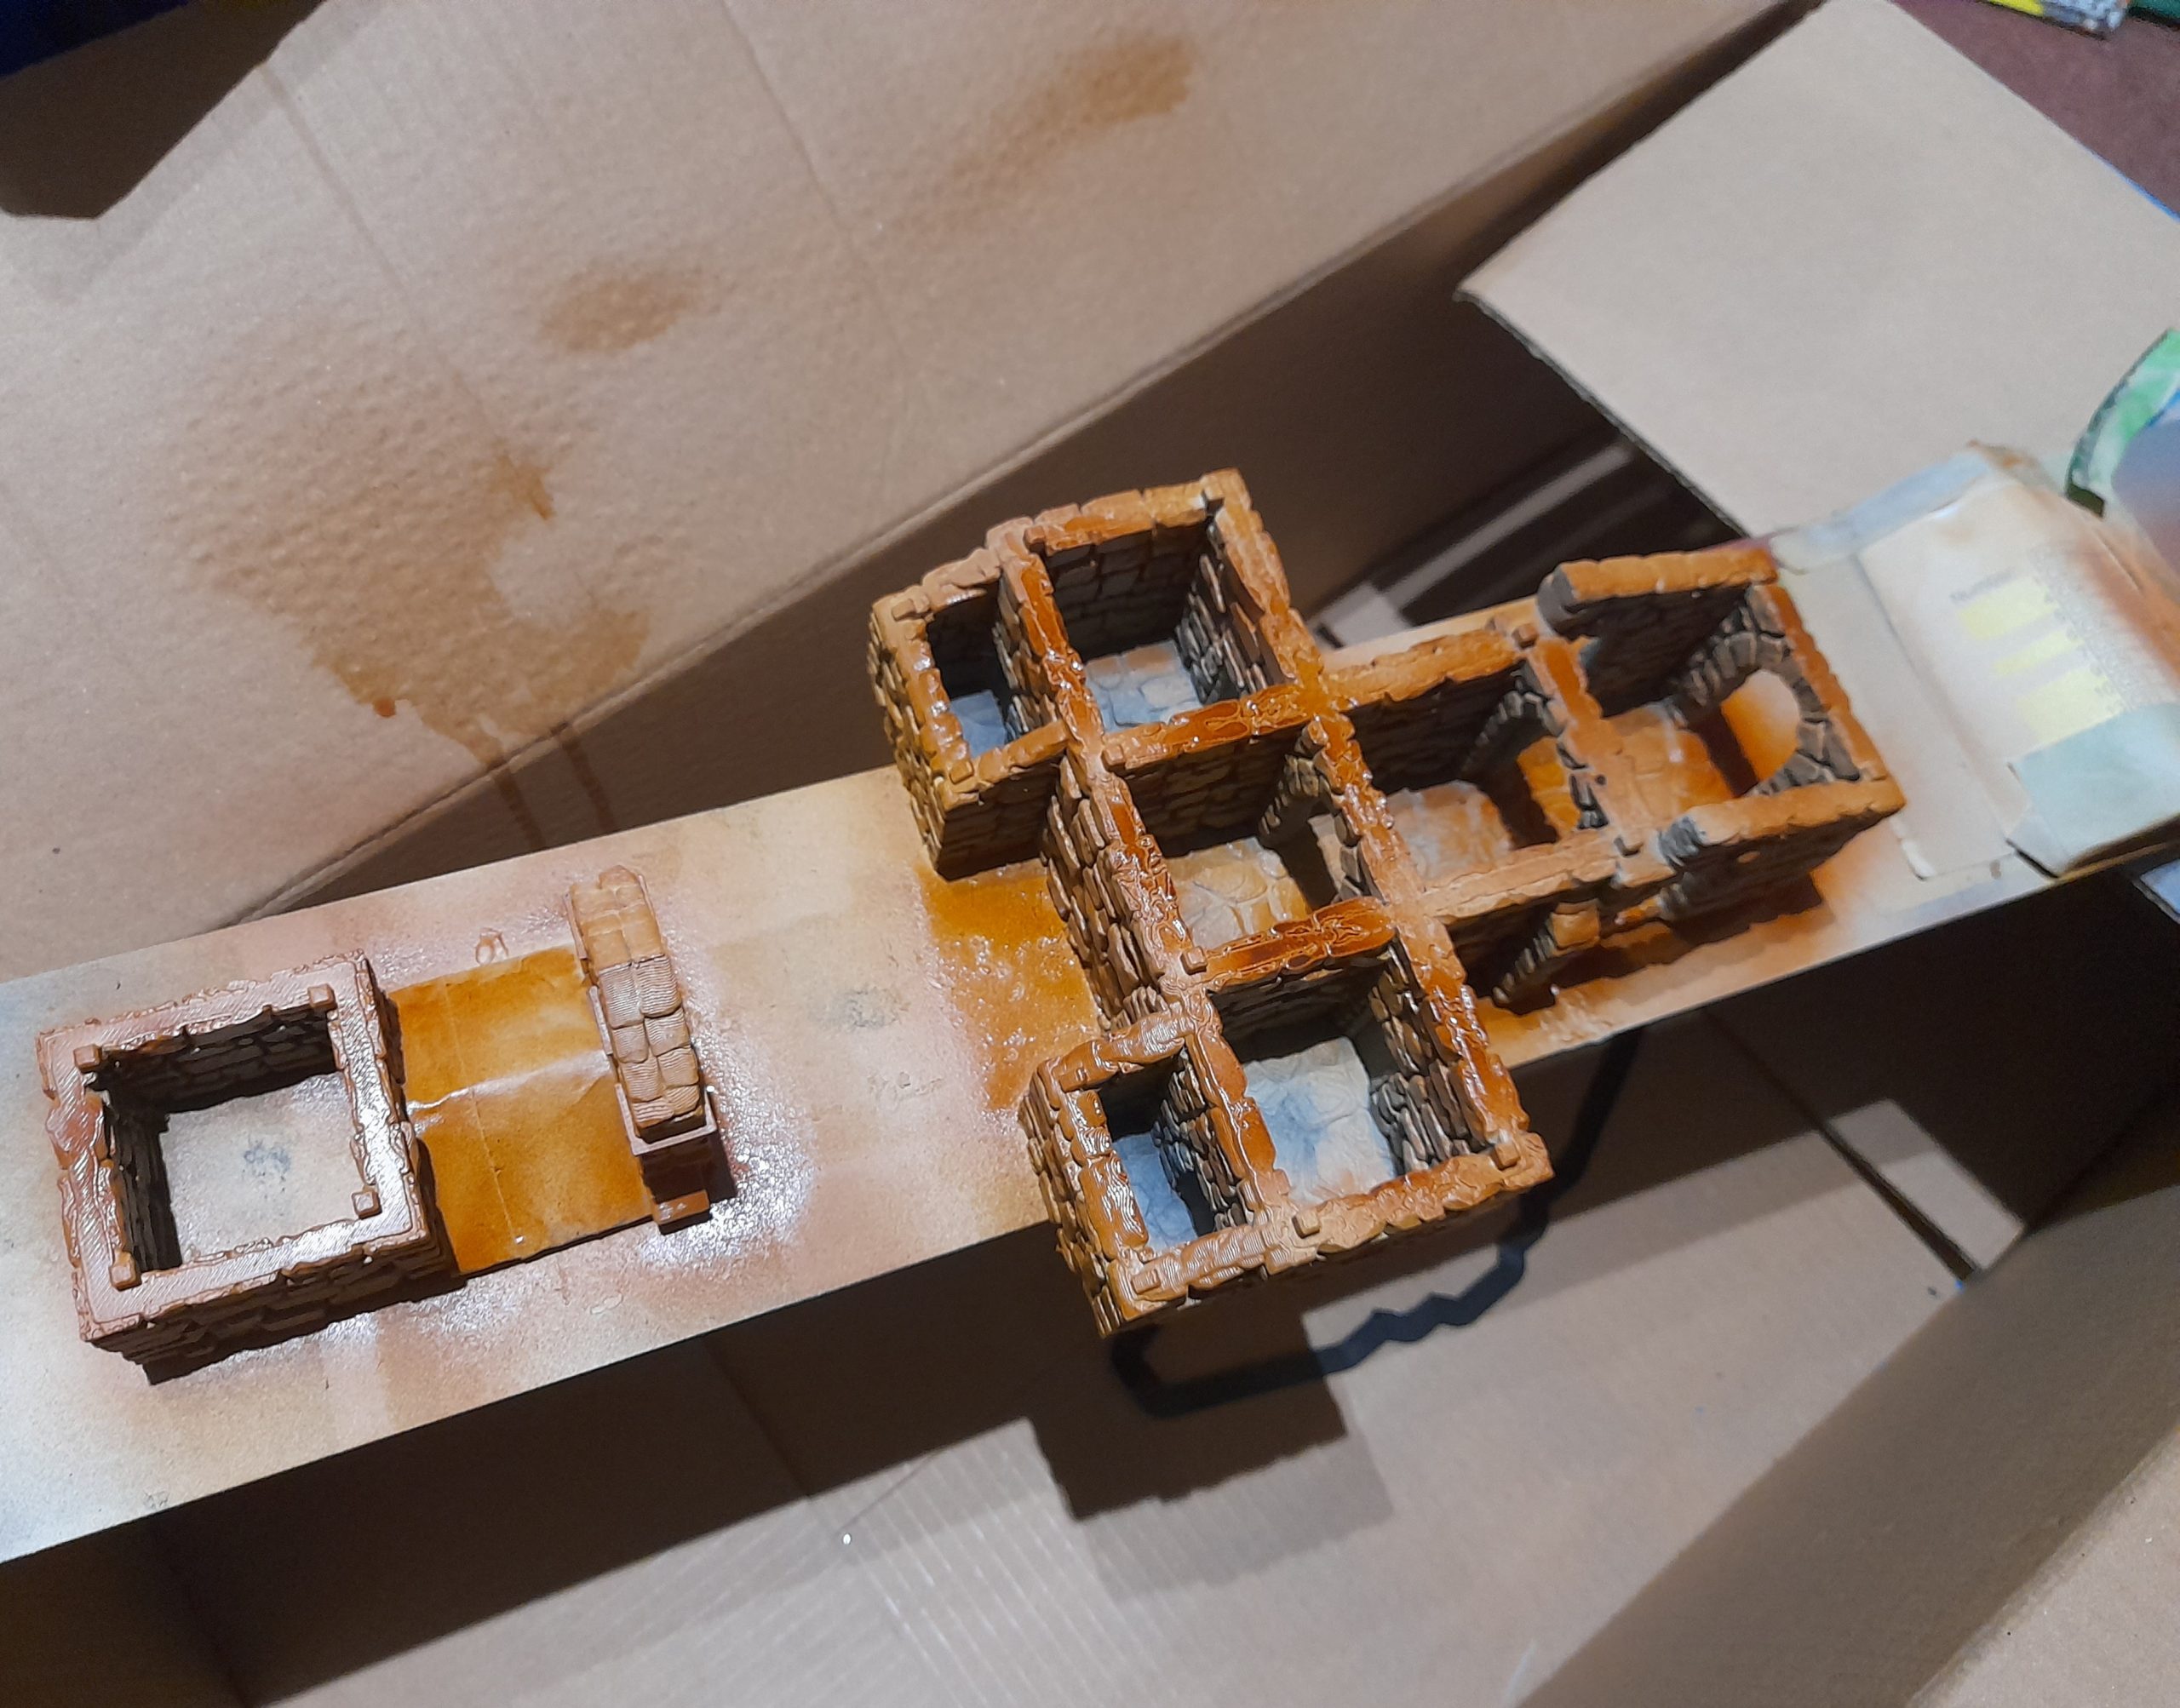
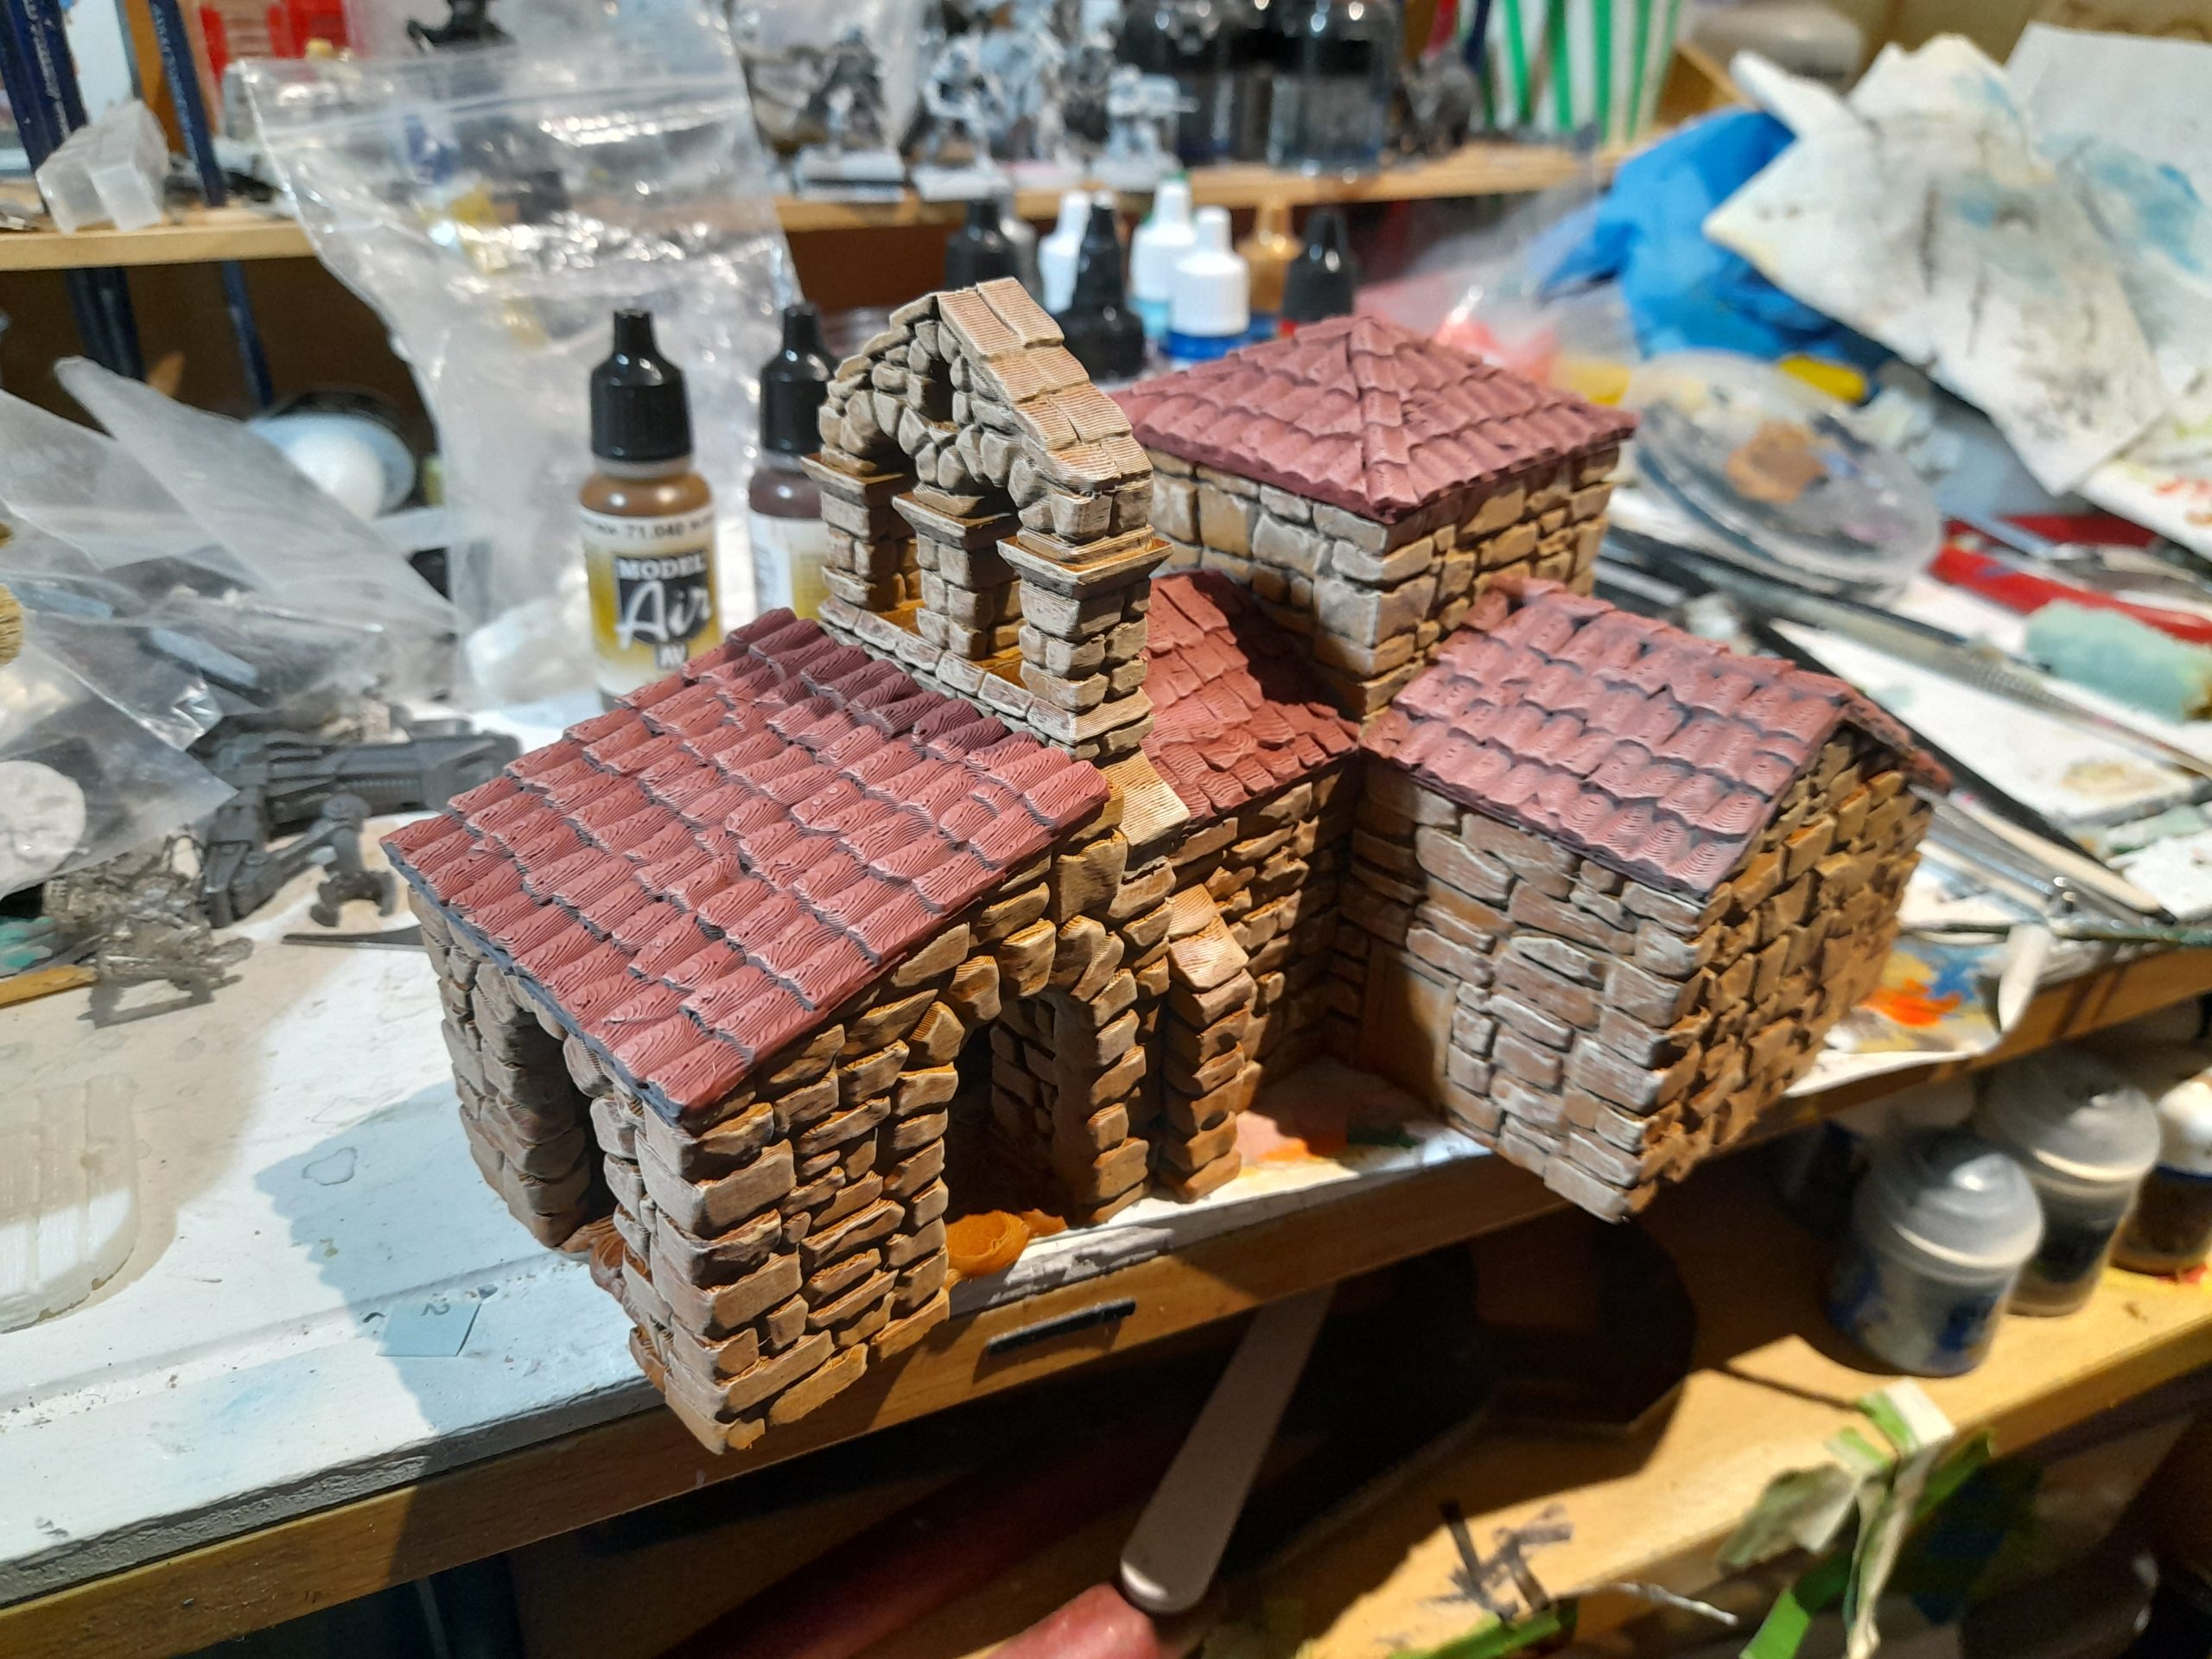
To add some scale realism and break up the brown expanse I decide that I would pick out some of the stones in various other shades of beige. These ranged from Deneb stone, through some rawhides and leathers up to the odd one in a peaty brown. This all then had, at the very end, a thinned wash of army painter strong tone and a light drybrush of pale sand.

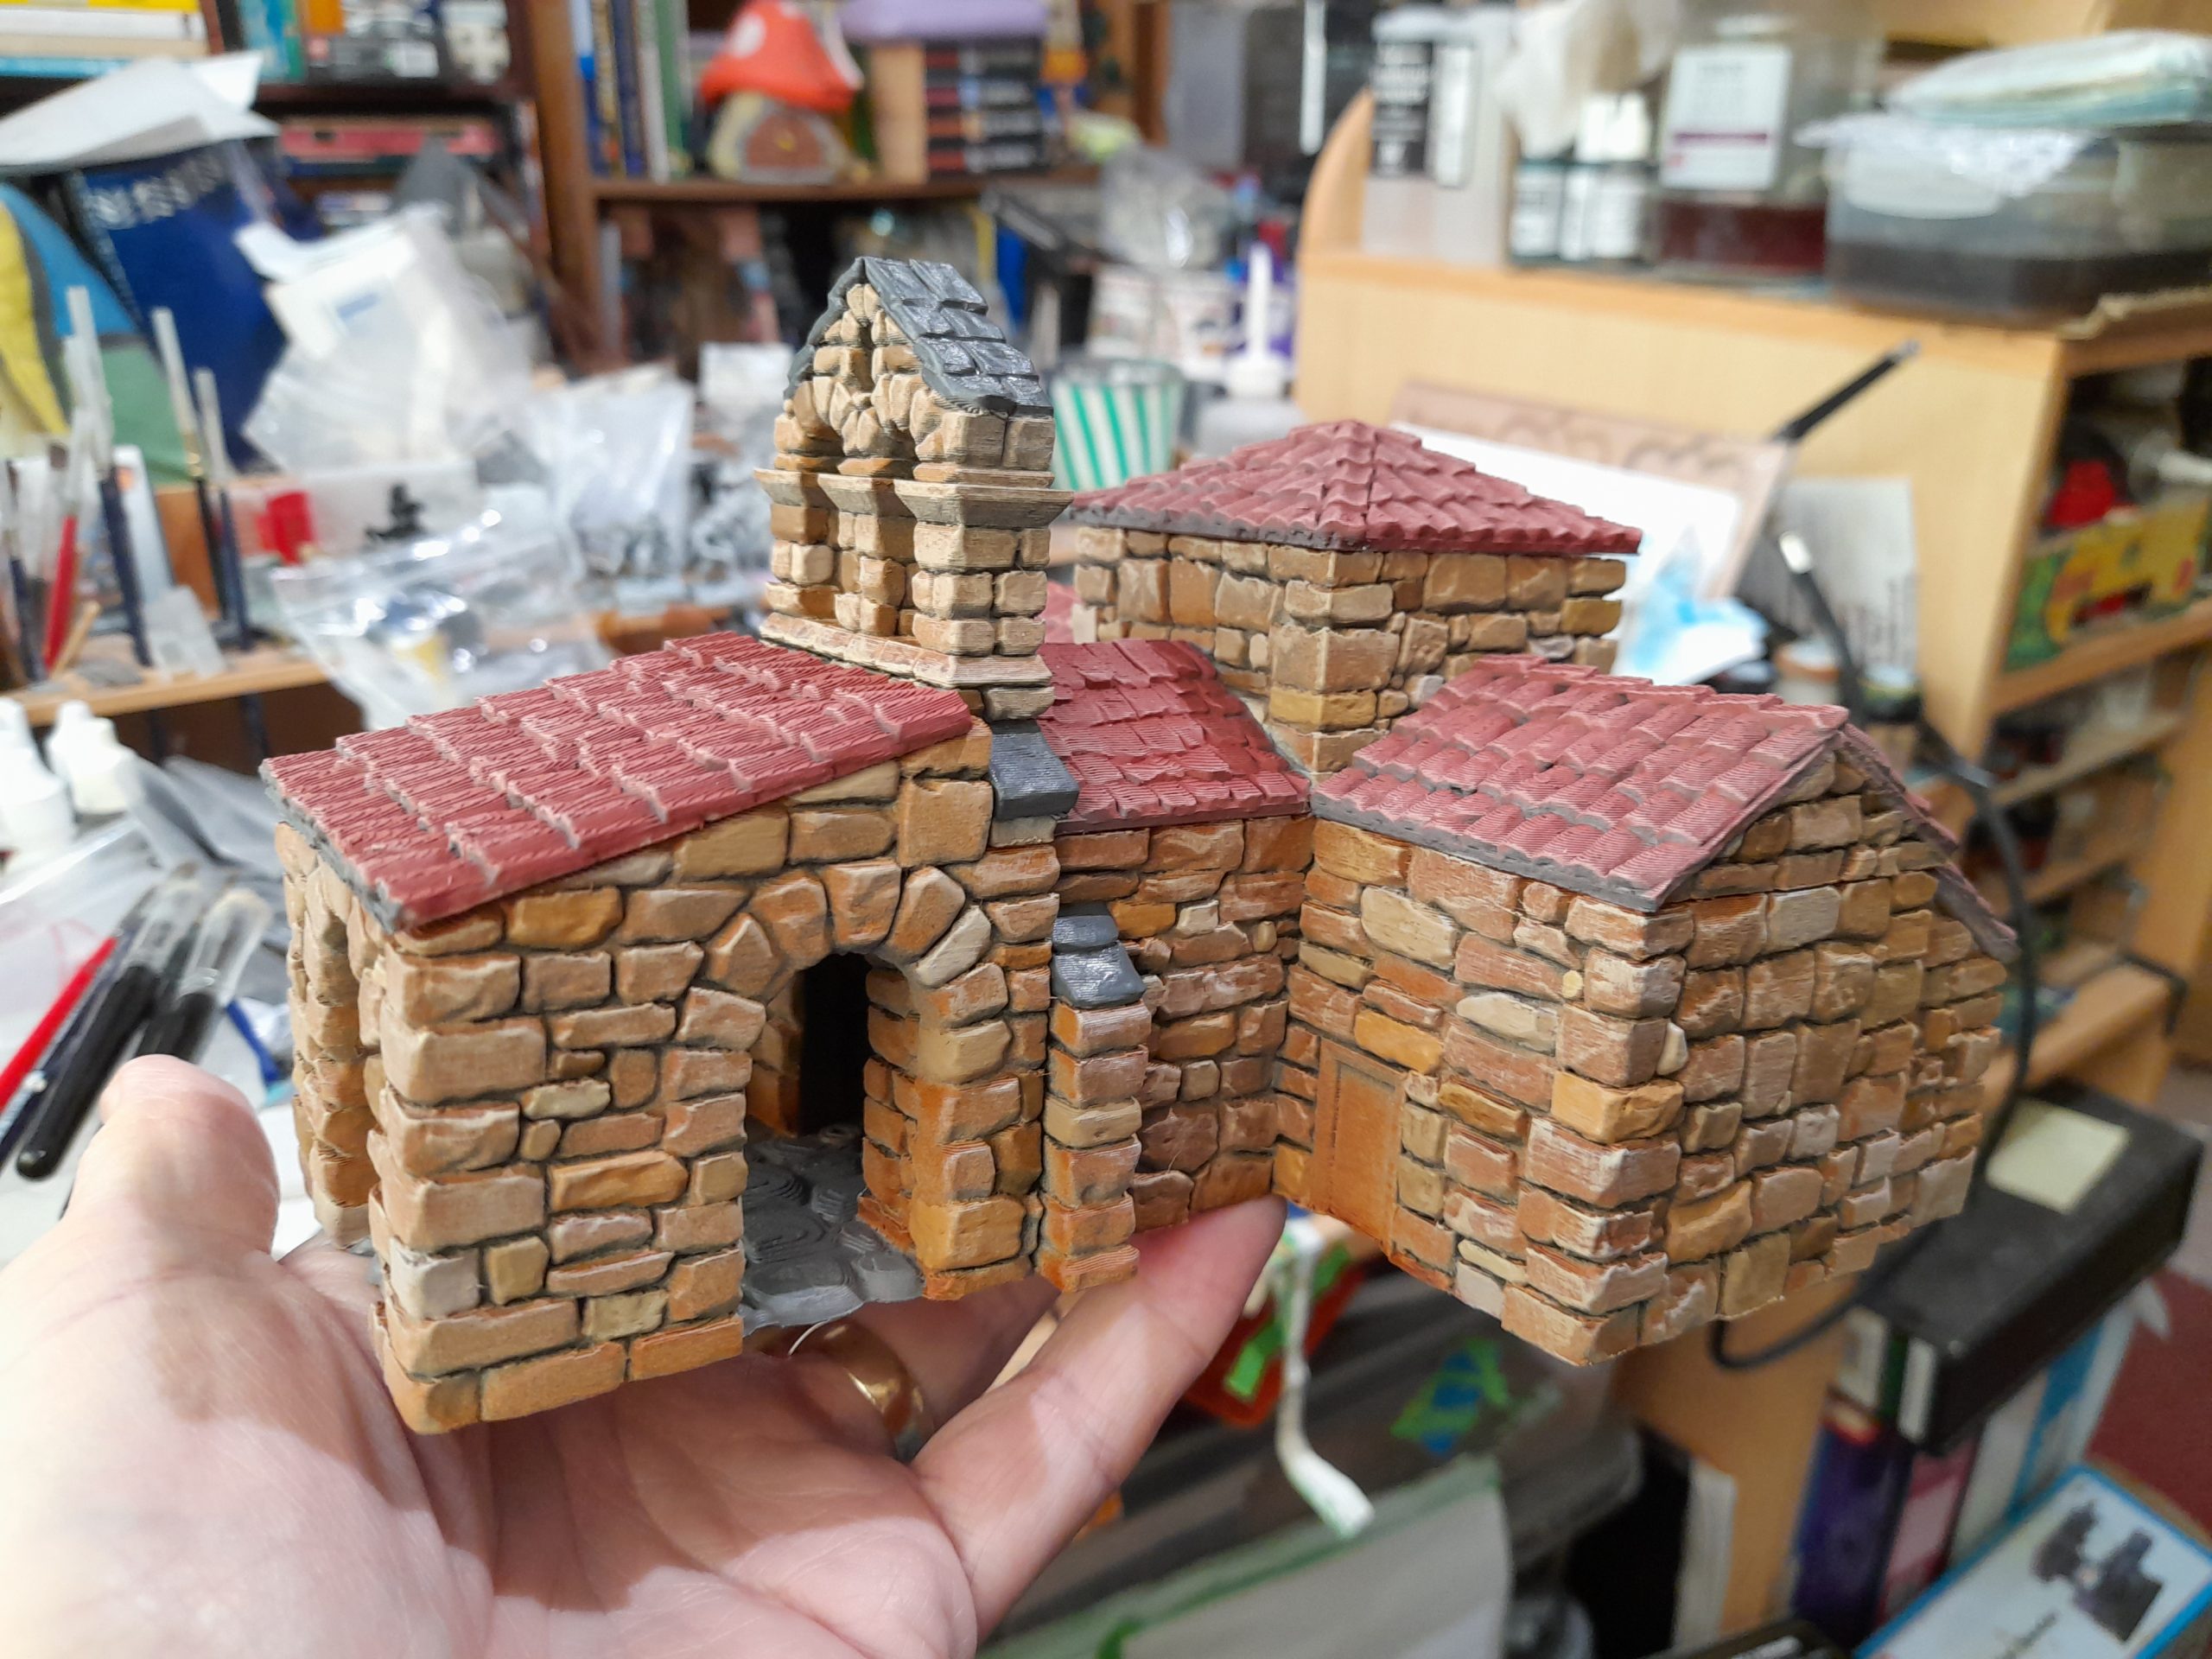
To finish off I added washes of green and streaking grime to the lower stones, and some of the higher crevices. I then added some patches of flock to some of the crevices as well.
The roof sections are all still detachable for game play. Although the spaces are small.