
![11th Edition Warhammer 40K Core Rules Now Available & More [Updated]](https://images.beastsofwar.com/2026/06/orks-new-cover-225-127.jpg)


Cosmic Horror by Spectre Miniatures


Recommendations: 82
About the Project
Some time ago I bought the lovely Spectre Miniatures Cosmic Horror Range along with the rules pamphlets snd Spectre Operation rules book. At the time I could not get my head around cross referencing the two rules books, so everything got put on a shelf and forgotten about. A couple of weeks ago I got the playtest rules for the new complete game. So I thought I had better get my miniatures painted for playtesting, and I NEED SOME SCENERY. Hence this late entry (hopefully) for Terrain competition. I am now extending this project to cover all the mi iatures and future battle reports
Related Game: Cosmic Horror (Spectre Operations)
Related Company: Spectre Miniatures
Related Genre: Horror
Related Contest: TerrainFest 2025
This Project is Active
Terrain board finished and a few Ghouls
I have now completed the terrain board (almost!) amd painted a few more models
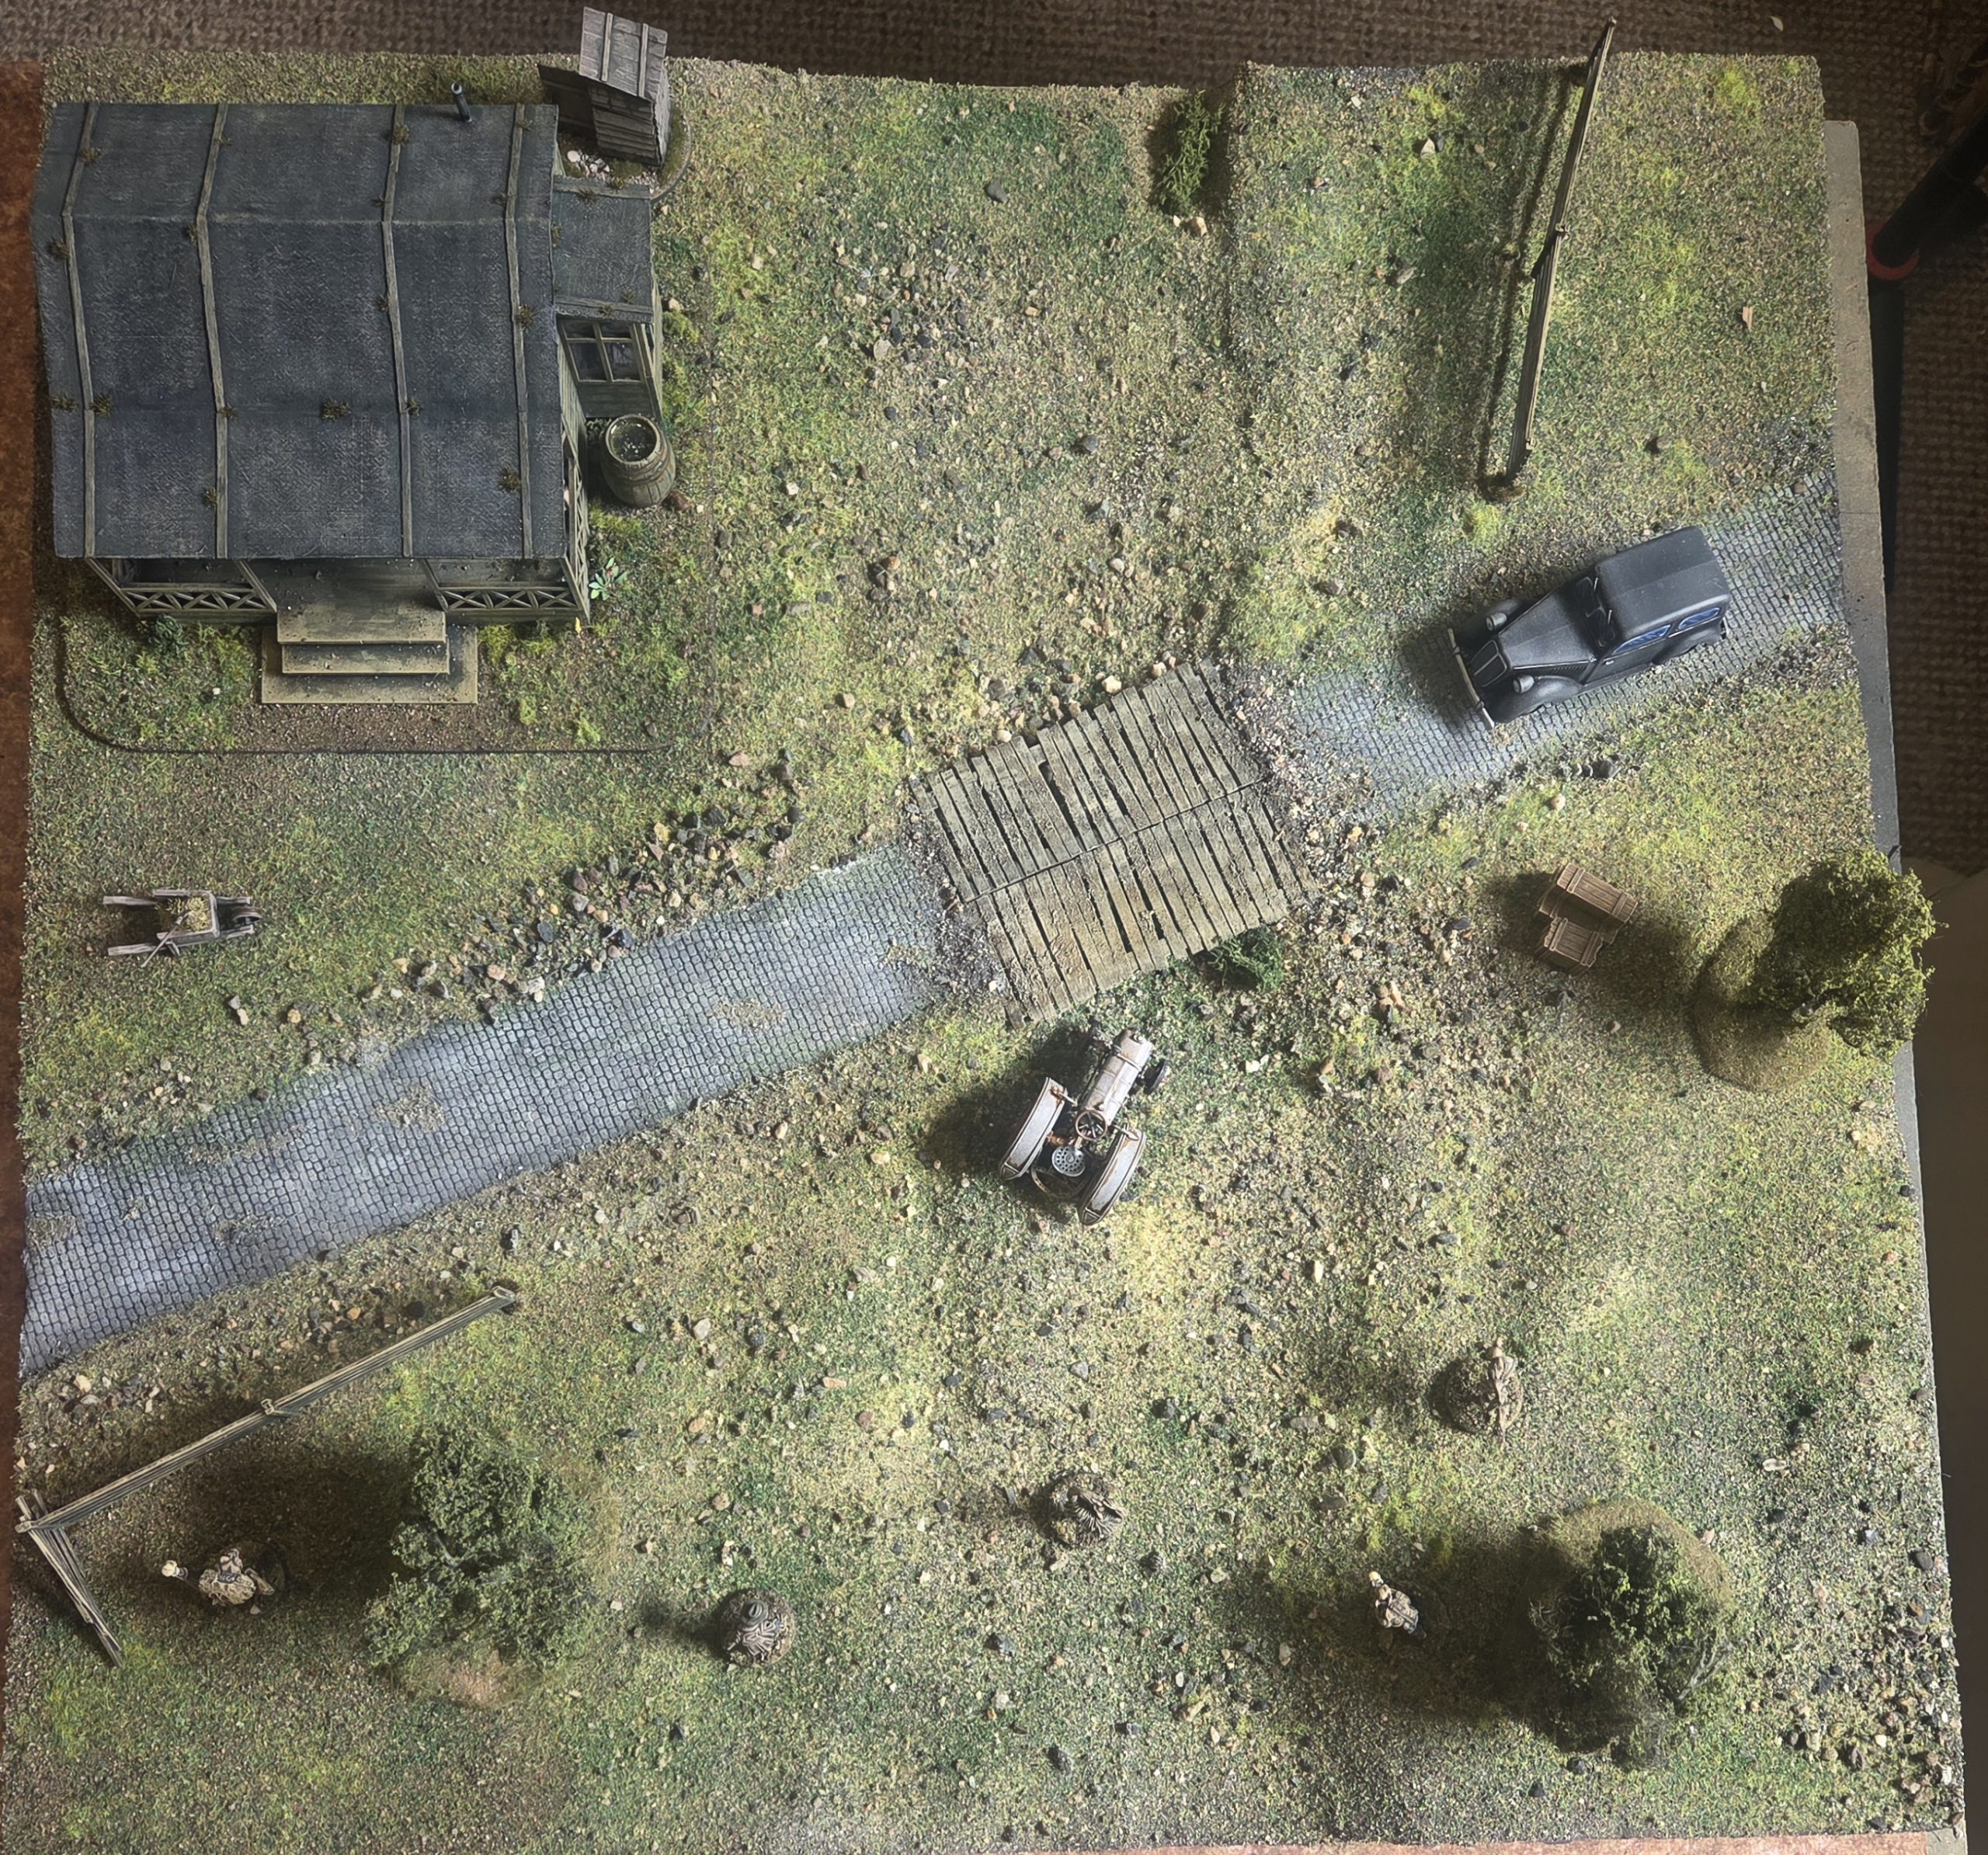 The completed Terrain board, though in the future I want to try out water effects on the stream.
Sorry thete are no step by step photos of this but I was in a hurry to get this finished so I will try to share my process here
Step 1 Having smoothed out all the contours with polyfilla I made a brown mix of poster paints and pva glue and slapped it all over the board.
Step 2 Once dry, I coated the four corner flat areas in PVA glue, and using a sieve I sprinkled on Geeks Gaming Scenics base ready scrublands, this ensured I would be able to place scenic elements on these areas, this was left to dry
Step 3 I covered the rest of the board in PVA glue and then sprinkled on the complete scrub landscape mix all larger pebbles included. I actually run out part way through so I then used a mix of other Geek Gaming Scenics base ready materials inc, city rubble and Mediterranean. This was left to dry.
Step 4 This next element was completely new to me, but I had seen it done on YouTube videos so I thought I would give it a go. I selected a range of different static grasses, and flocks as well as coloured and natural sands and semi randomly lightly sprinkled this on to the board by hand a pinchful at a time, every so often pausing to ascertain what I needed to add. Once I was satisfied with the spread of colours I sealed this layer on with many coats of Matt Varnish.
Step 5 final detailing. I cleaned up and finished pff the road service using dark washes and drybrushes with various tone of grey and brainmatter beige. I glued the wooden bridge in place an blended it into the road with a mix of base ready products. Followed by a final coat of matt varnish.
I am really pleased how this turned out considering I had never tried this before.
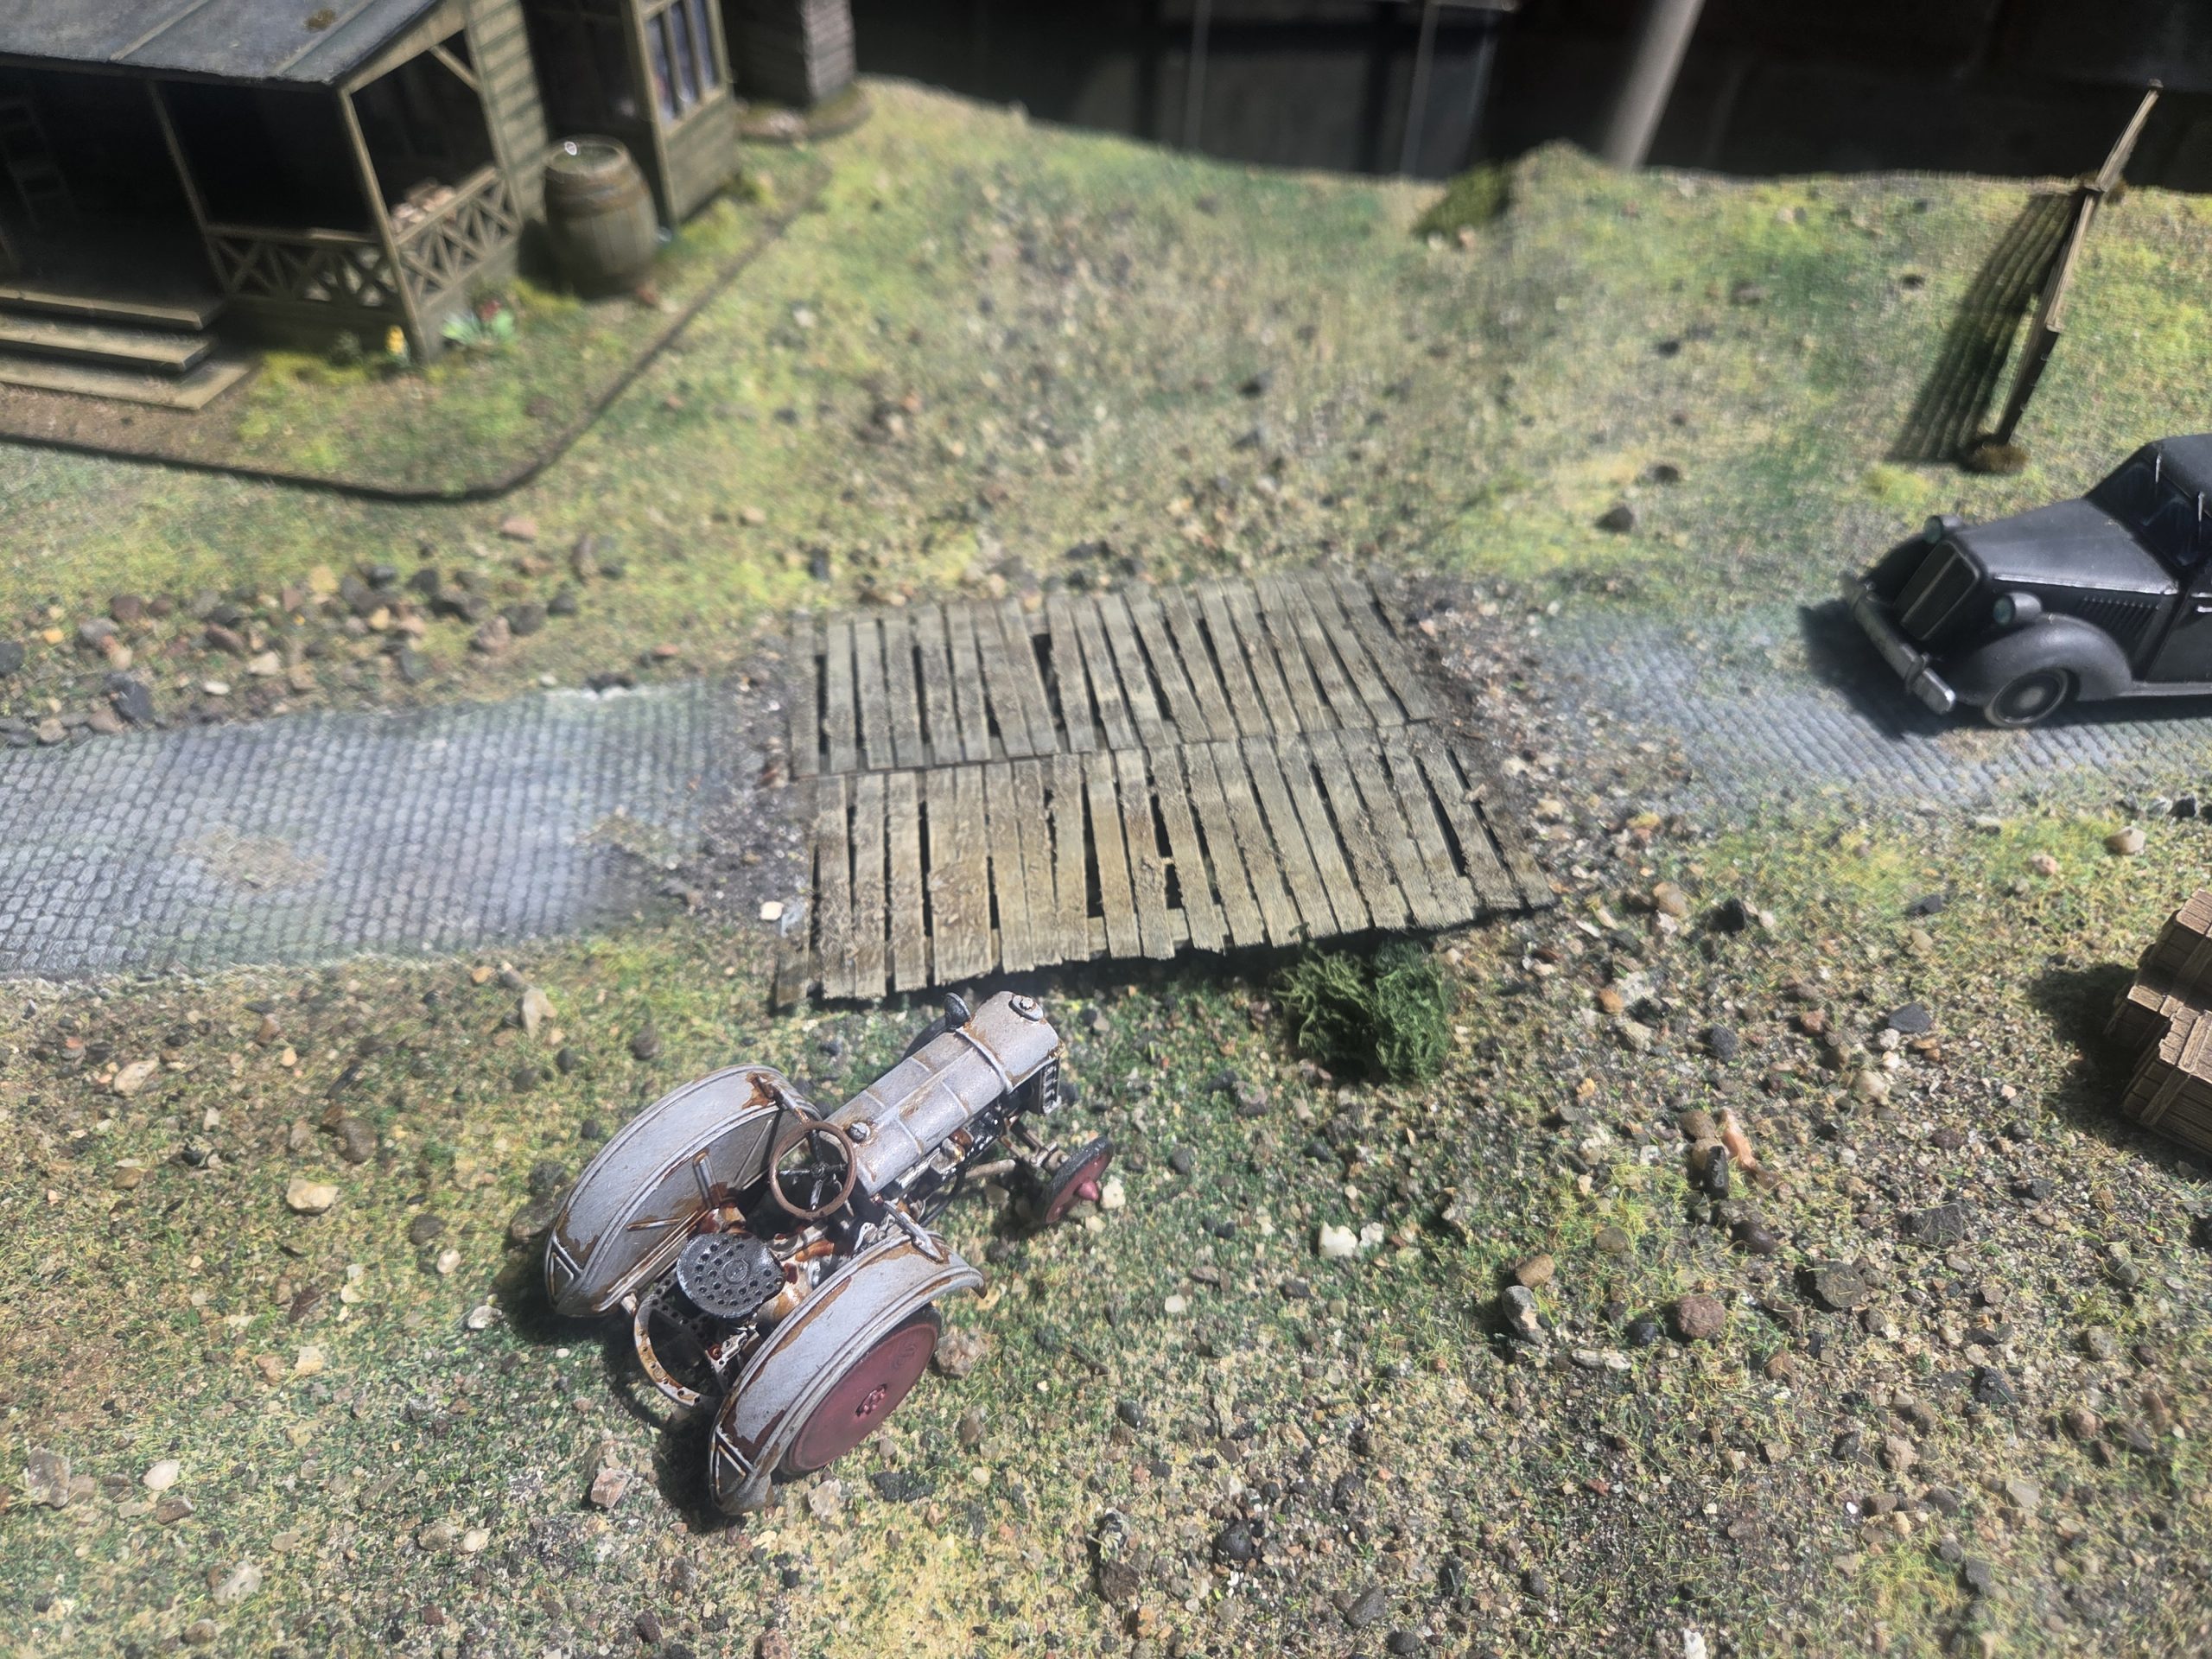 For the bridge, I used a couple of trench walkways from my abandoned Trench Crusade project (made from coffee stirrers and wood strips from Cornwal Model Boat Company
Thrills, Cultists, and not so innocent witness!
More models completed today.
I had started the highlighting yesterday.
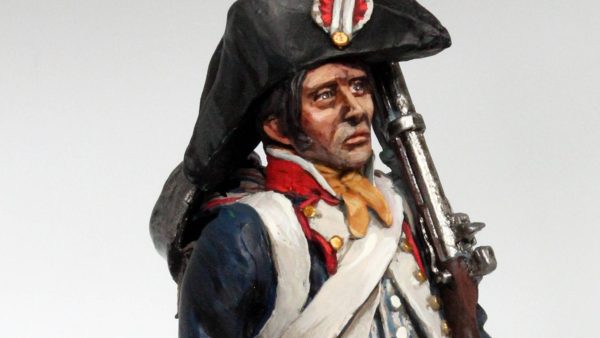
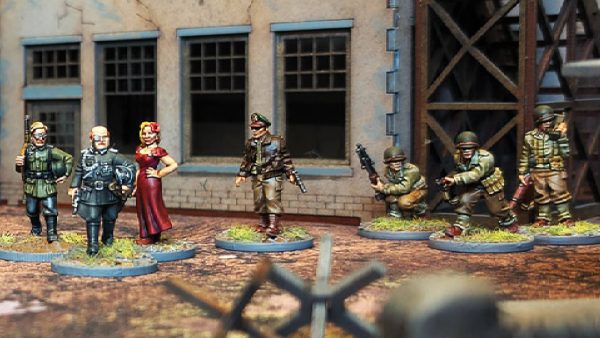
These are really lovely models and as can be seen from this post are fully compatible with most other 28mm ranges seen here with Copplestone figure but I also have Crooked Dice, Reaper, Rafm others, and one painted they all look perfect together.
 Seemed to take forever today, i am really slowing down in my old age, but have now painted half of what I have to paint over two days. So hopefully finished Tuesday.
After finishing what was shown earlier (about 12 figures) I will be waiting for the Kickstarter release for more models to paint. Though I still want to finish the board, and perhaps make some more scenic items.
I will start talking about the game and produce some battle reports in future posts.
First game scheduled for the 8th May.
Husks, an Orb and Fences
Just a quick post. Today I have painted alot of the highlights on the Thralls and Cultists, should finish them off tomorrow.
I also did a few quick wins.
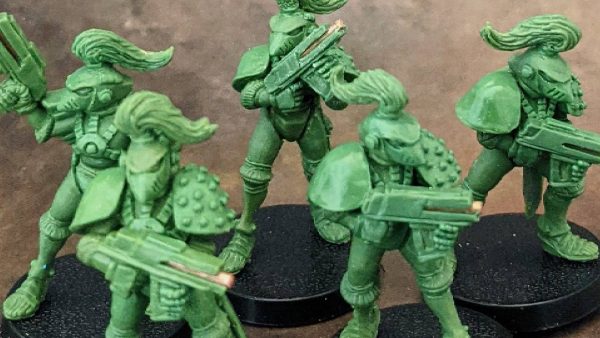
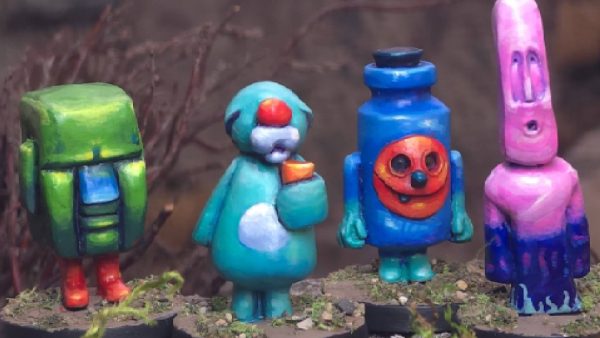
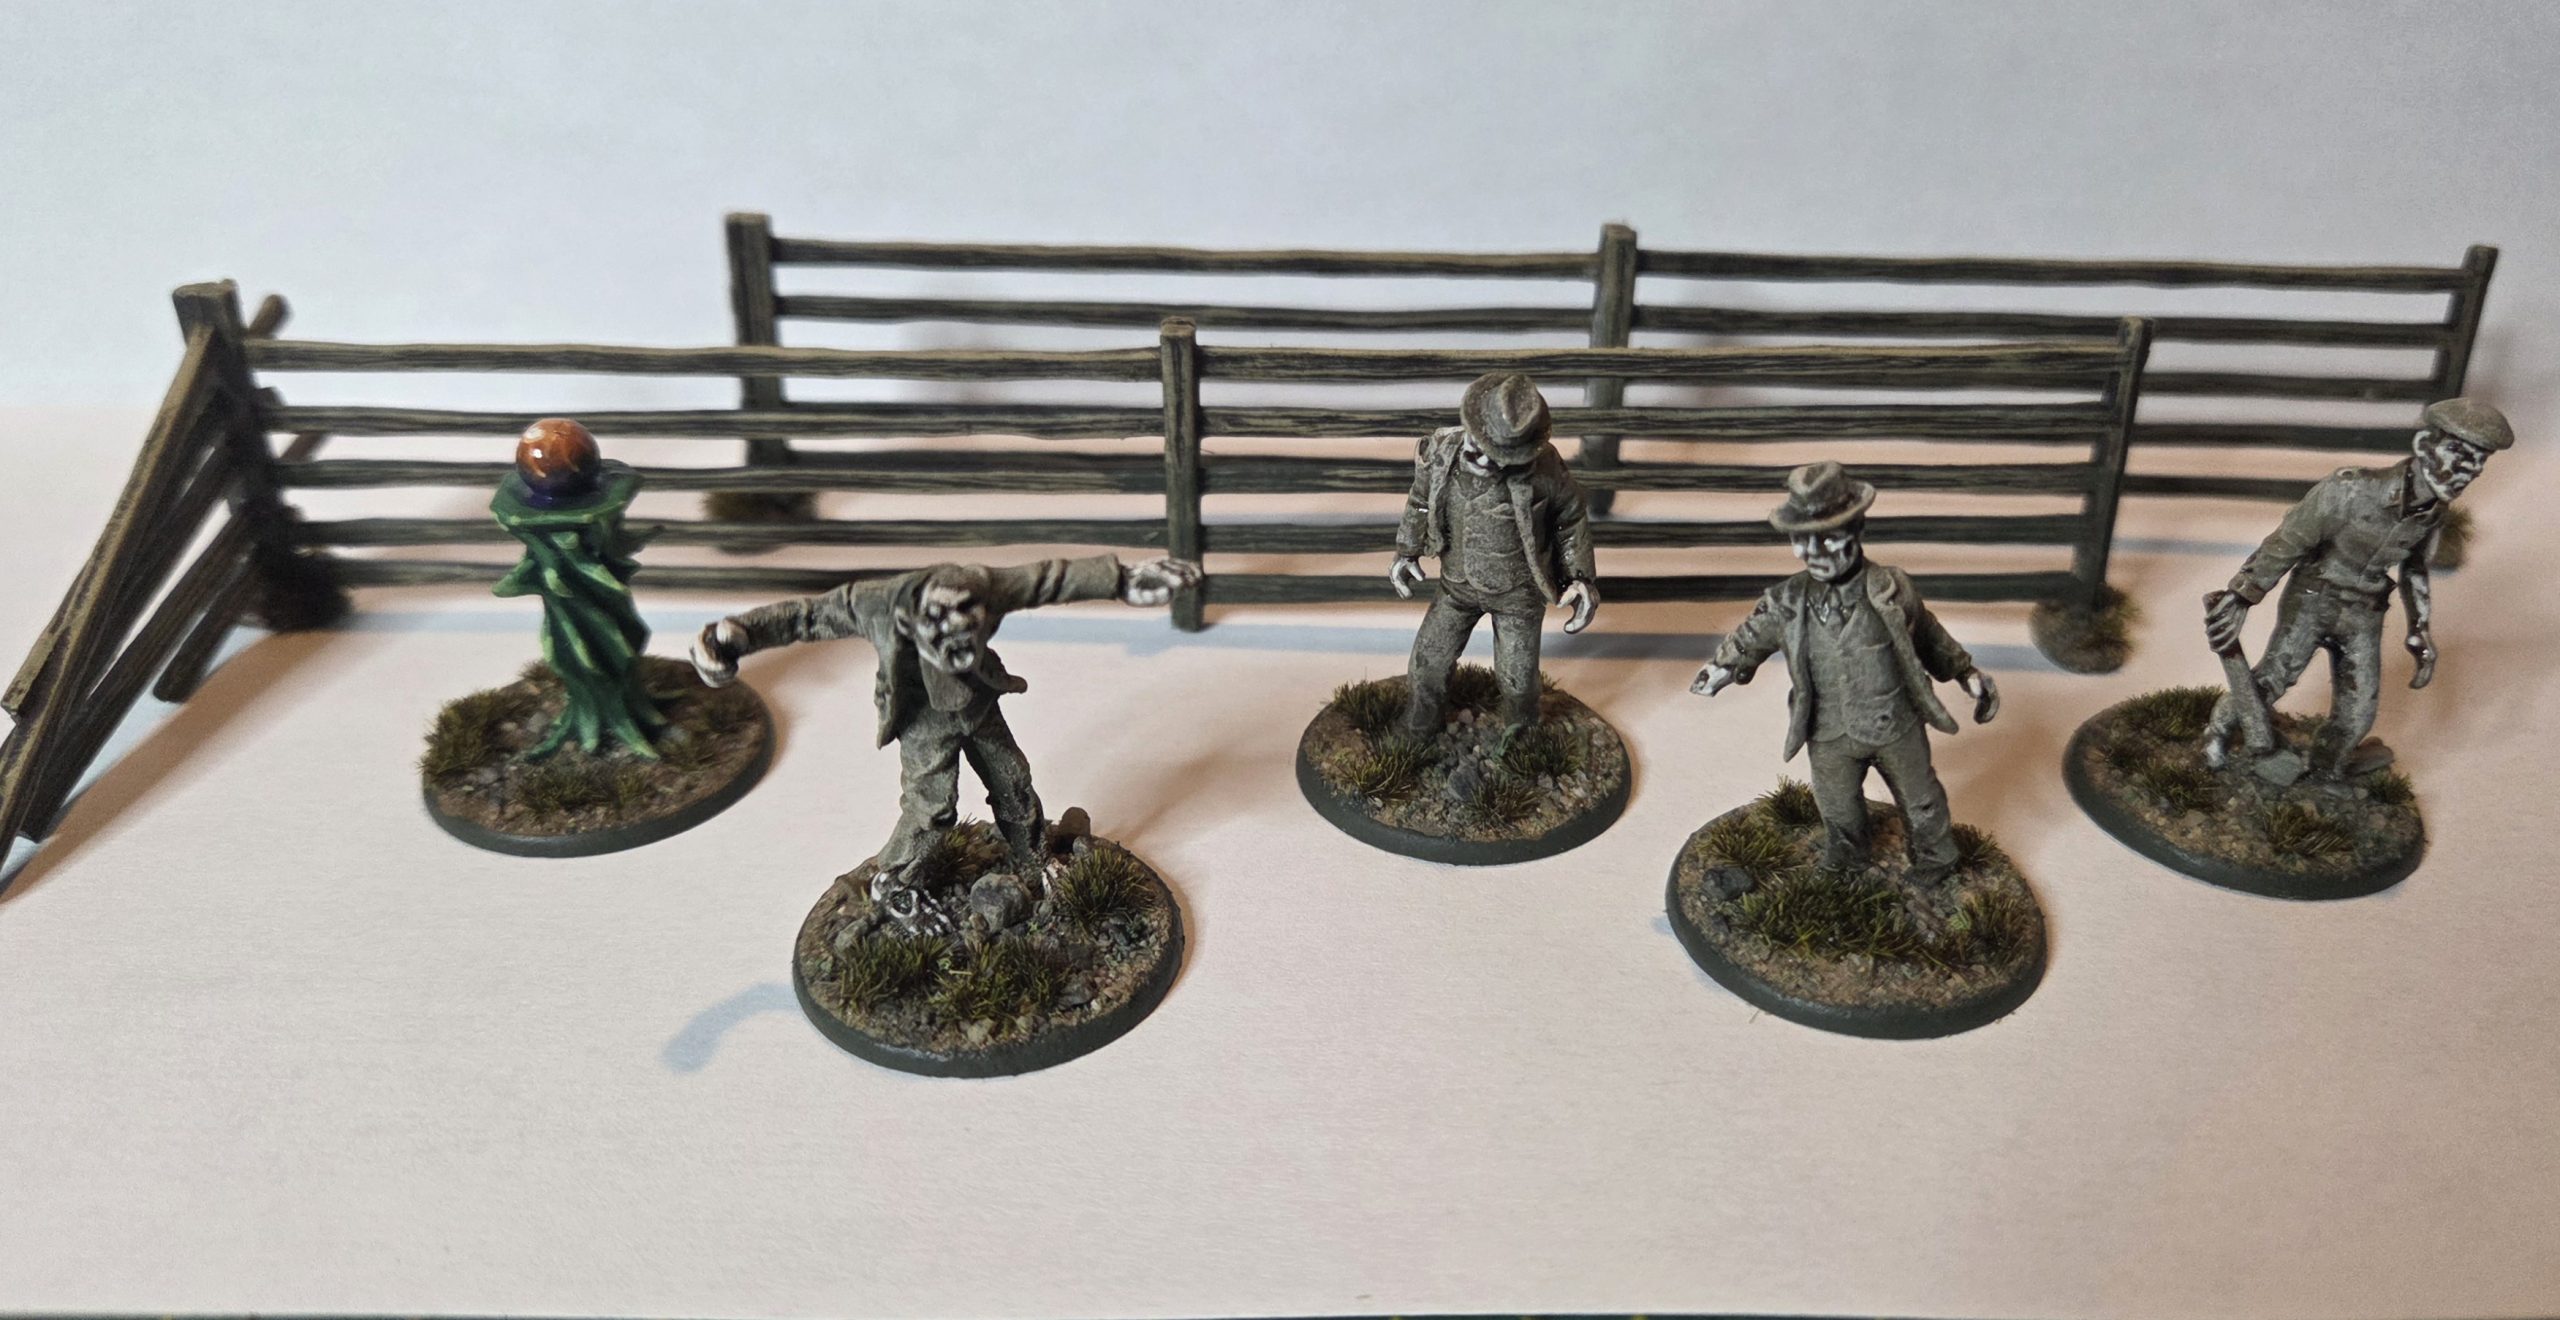 The 4 Husks I had originally drybrushed in the ghostly greeny grey with the intention of speed painting. I had already applied GW Gulliman Flesh Contrast paint to their flesh. Having recently seen the official models, I realised they were more of a spirit creature. So I just highlighted the skin up with pale fleshes tinted with olive green. The separately painted faces and hands gives the figures a nice focus. A quick easy fix. I also painted up a Reaper Bones orb on plinth, the orb was painted TTC Fanatic Orange and then from the bottom up I built up purple blending into turquoise into the orange. I highlighted the orange adding Yellow and while, creating an electric effect. The plinth was painted TTC Emerald Green washed in AP Grim Dark Shadow, highlighted with the Emerald Green, with two further highlights adding yellow and white to the green. Drybrusjed a couple of fences.
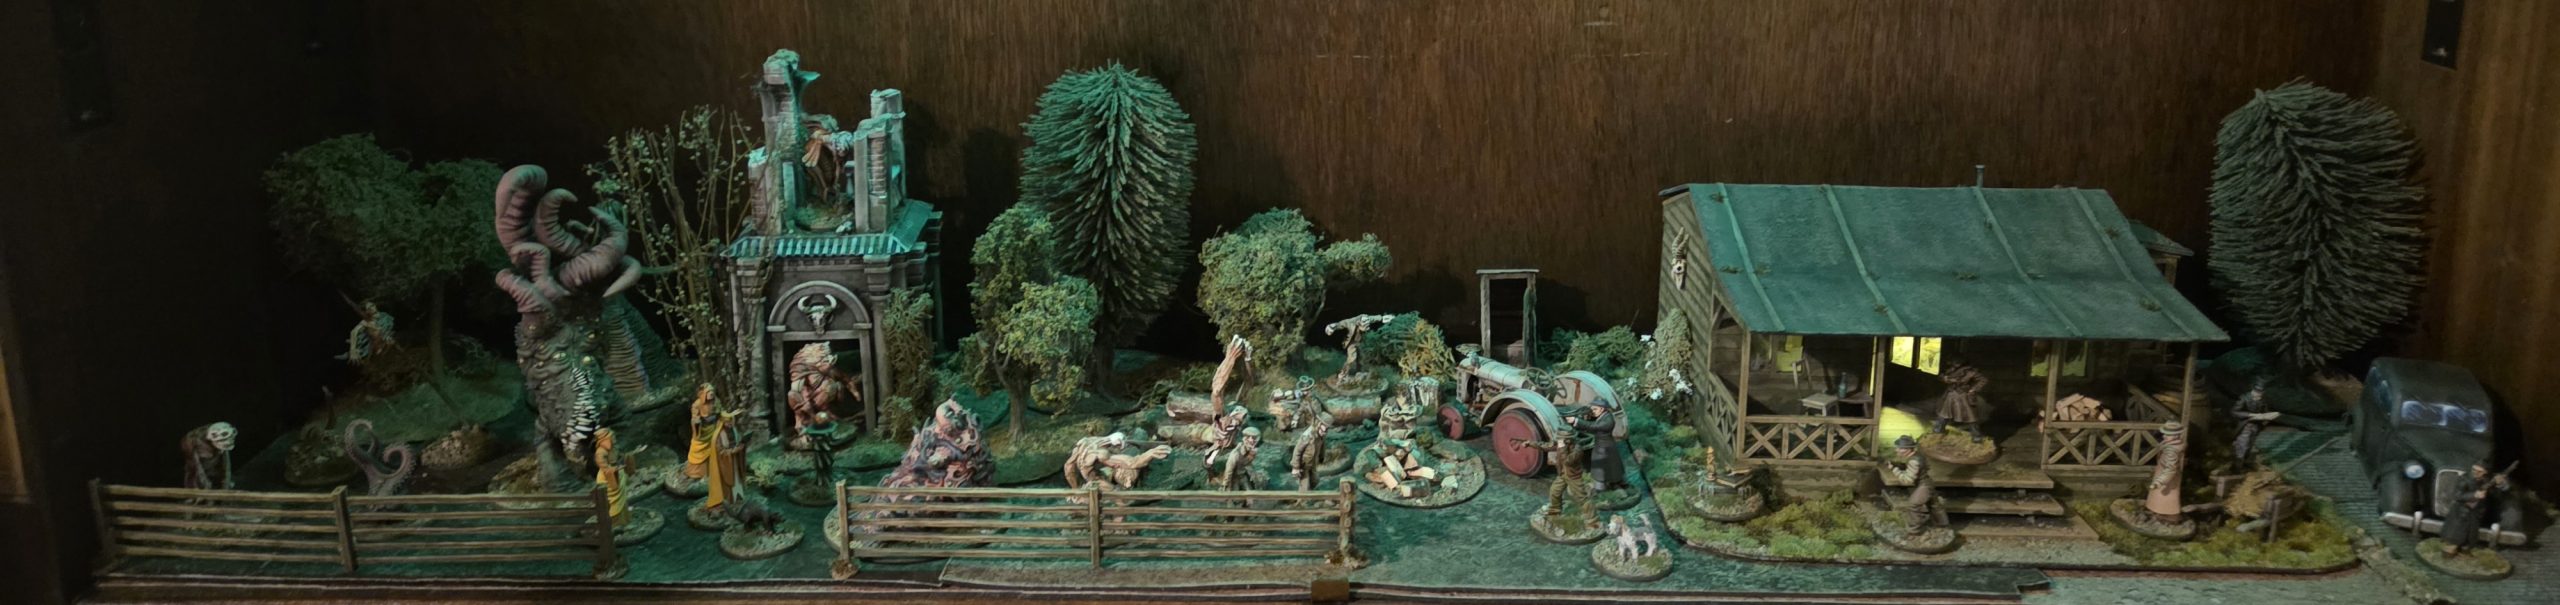 My display shelf is getting rather full. With the next completed models I will have to split the models between two shelves.
Where I am at!
Thought I would share a few photos of what I have so far.
I will do close ups of the miniatures and who and what they are in following posts.
 The Bureau of Esoteric Research approach an incident.
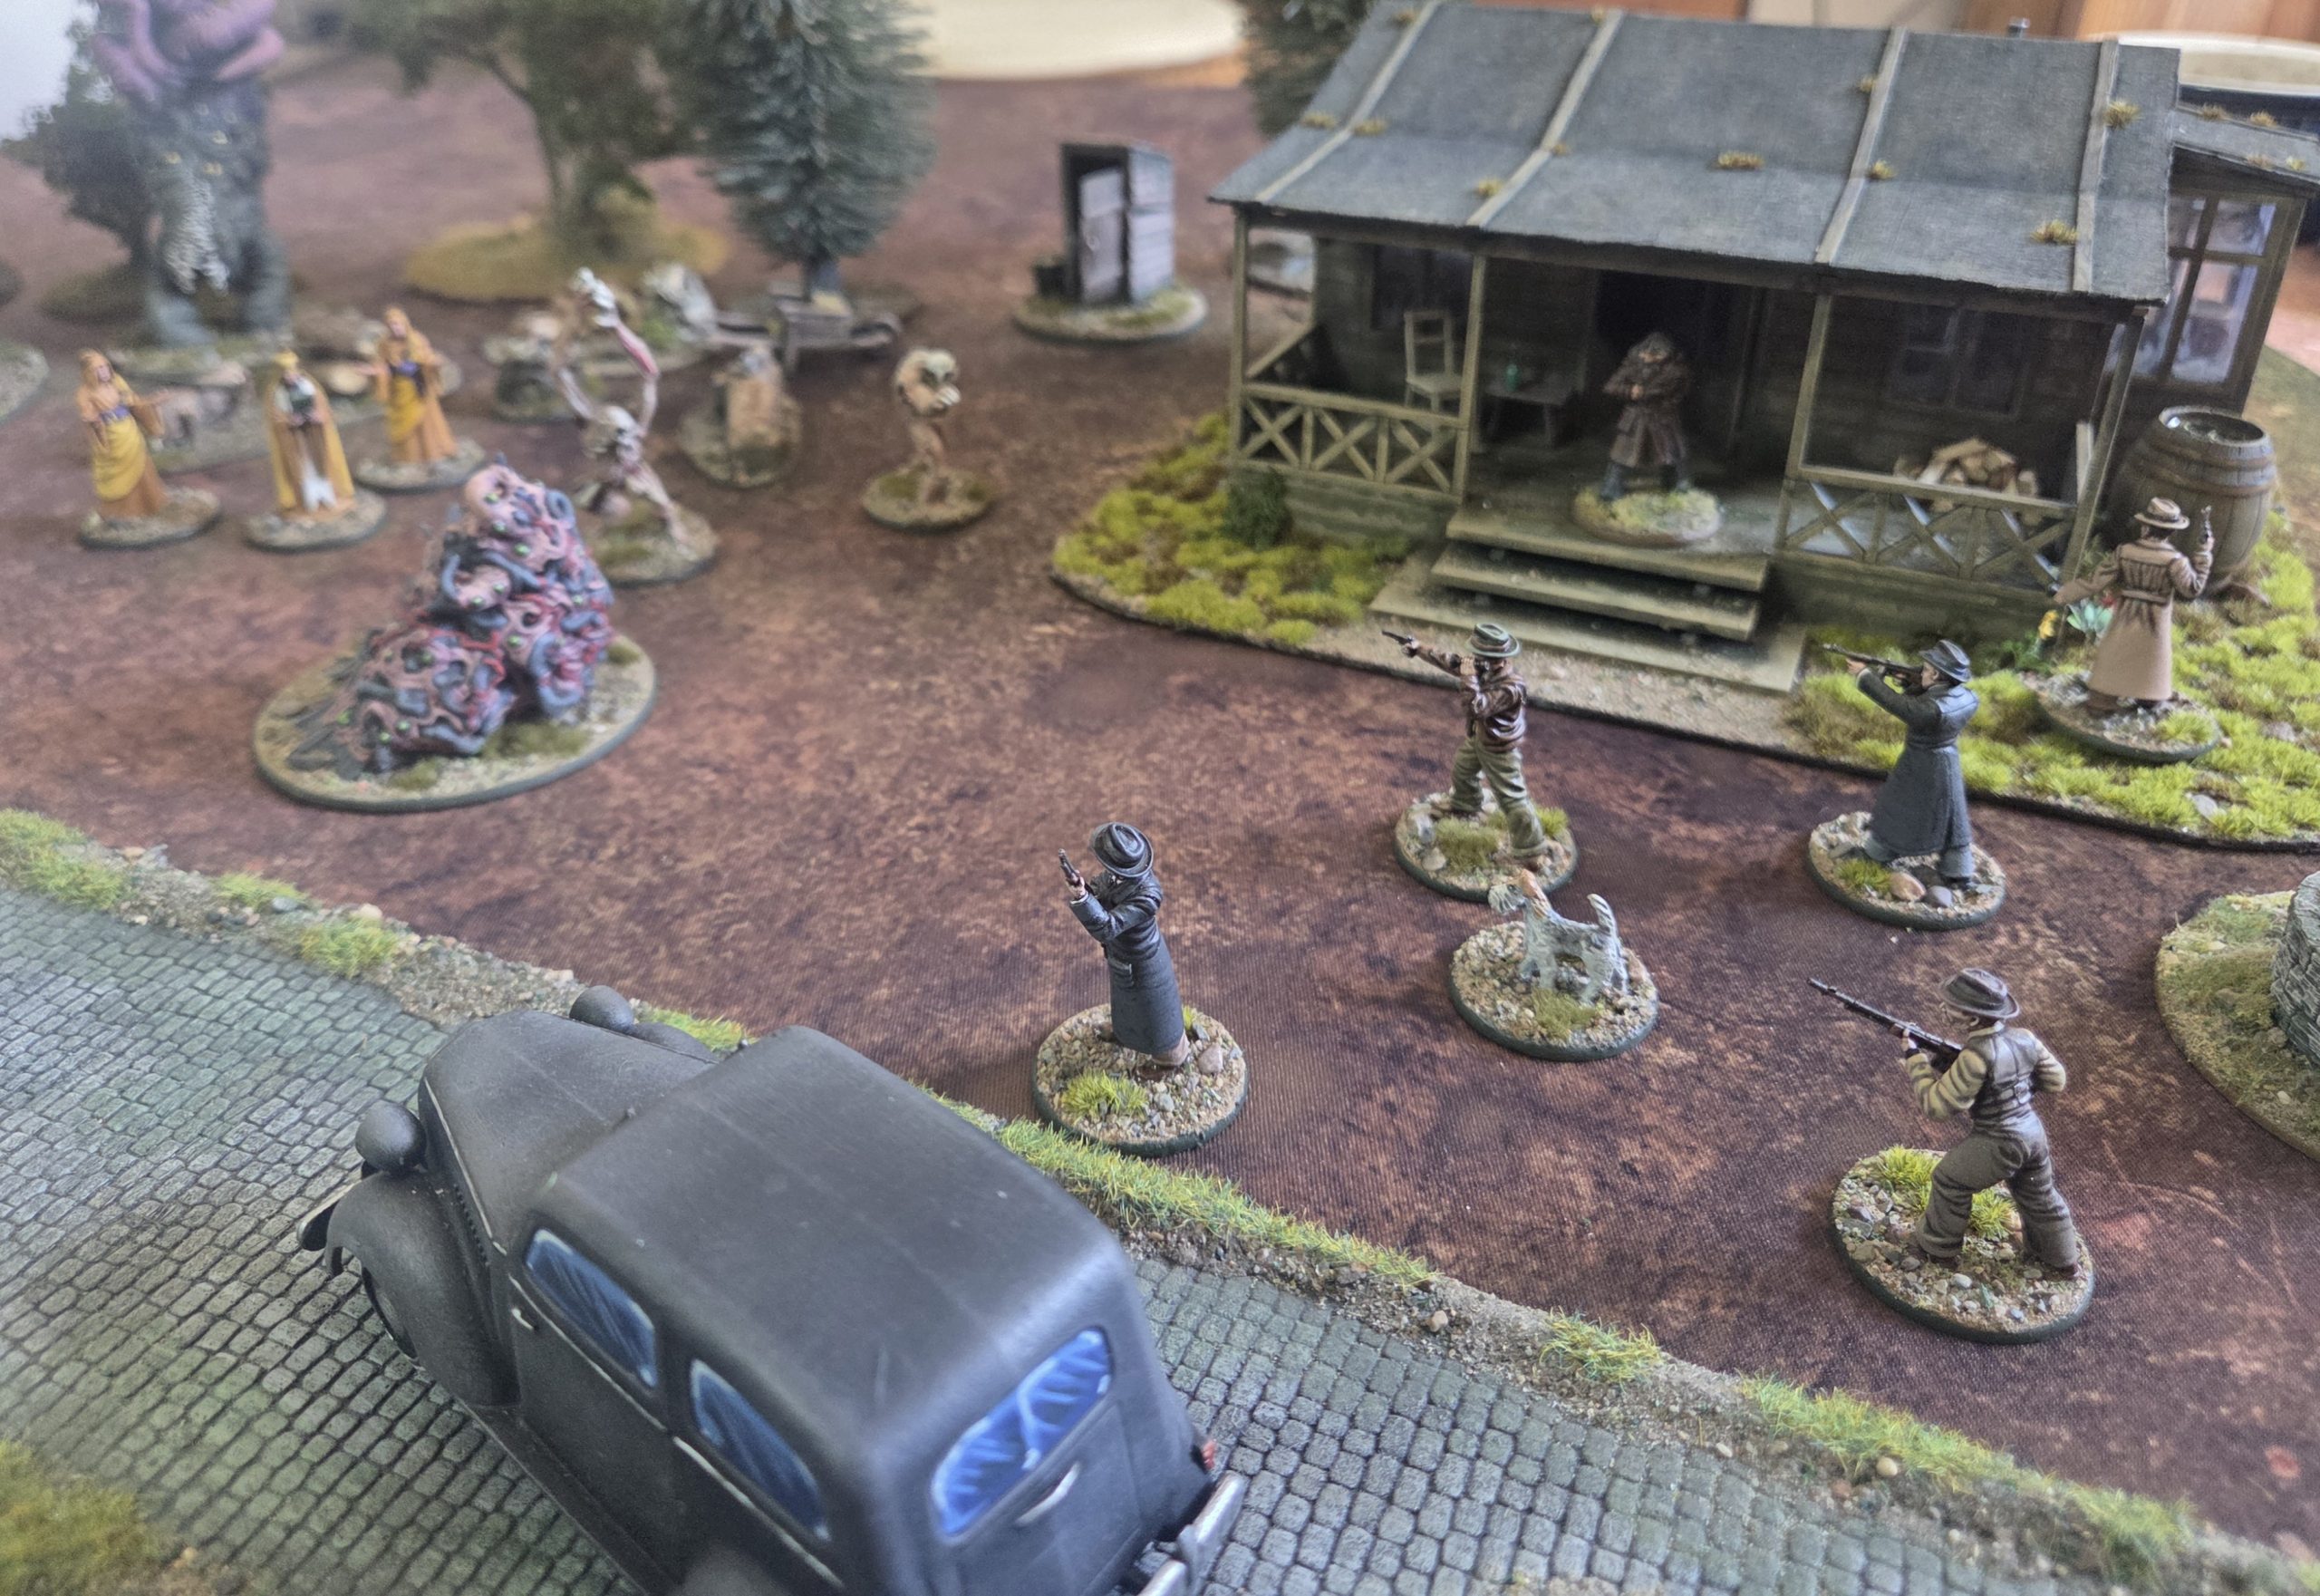 The enemy approach.
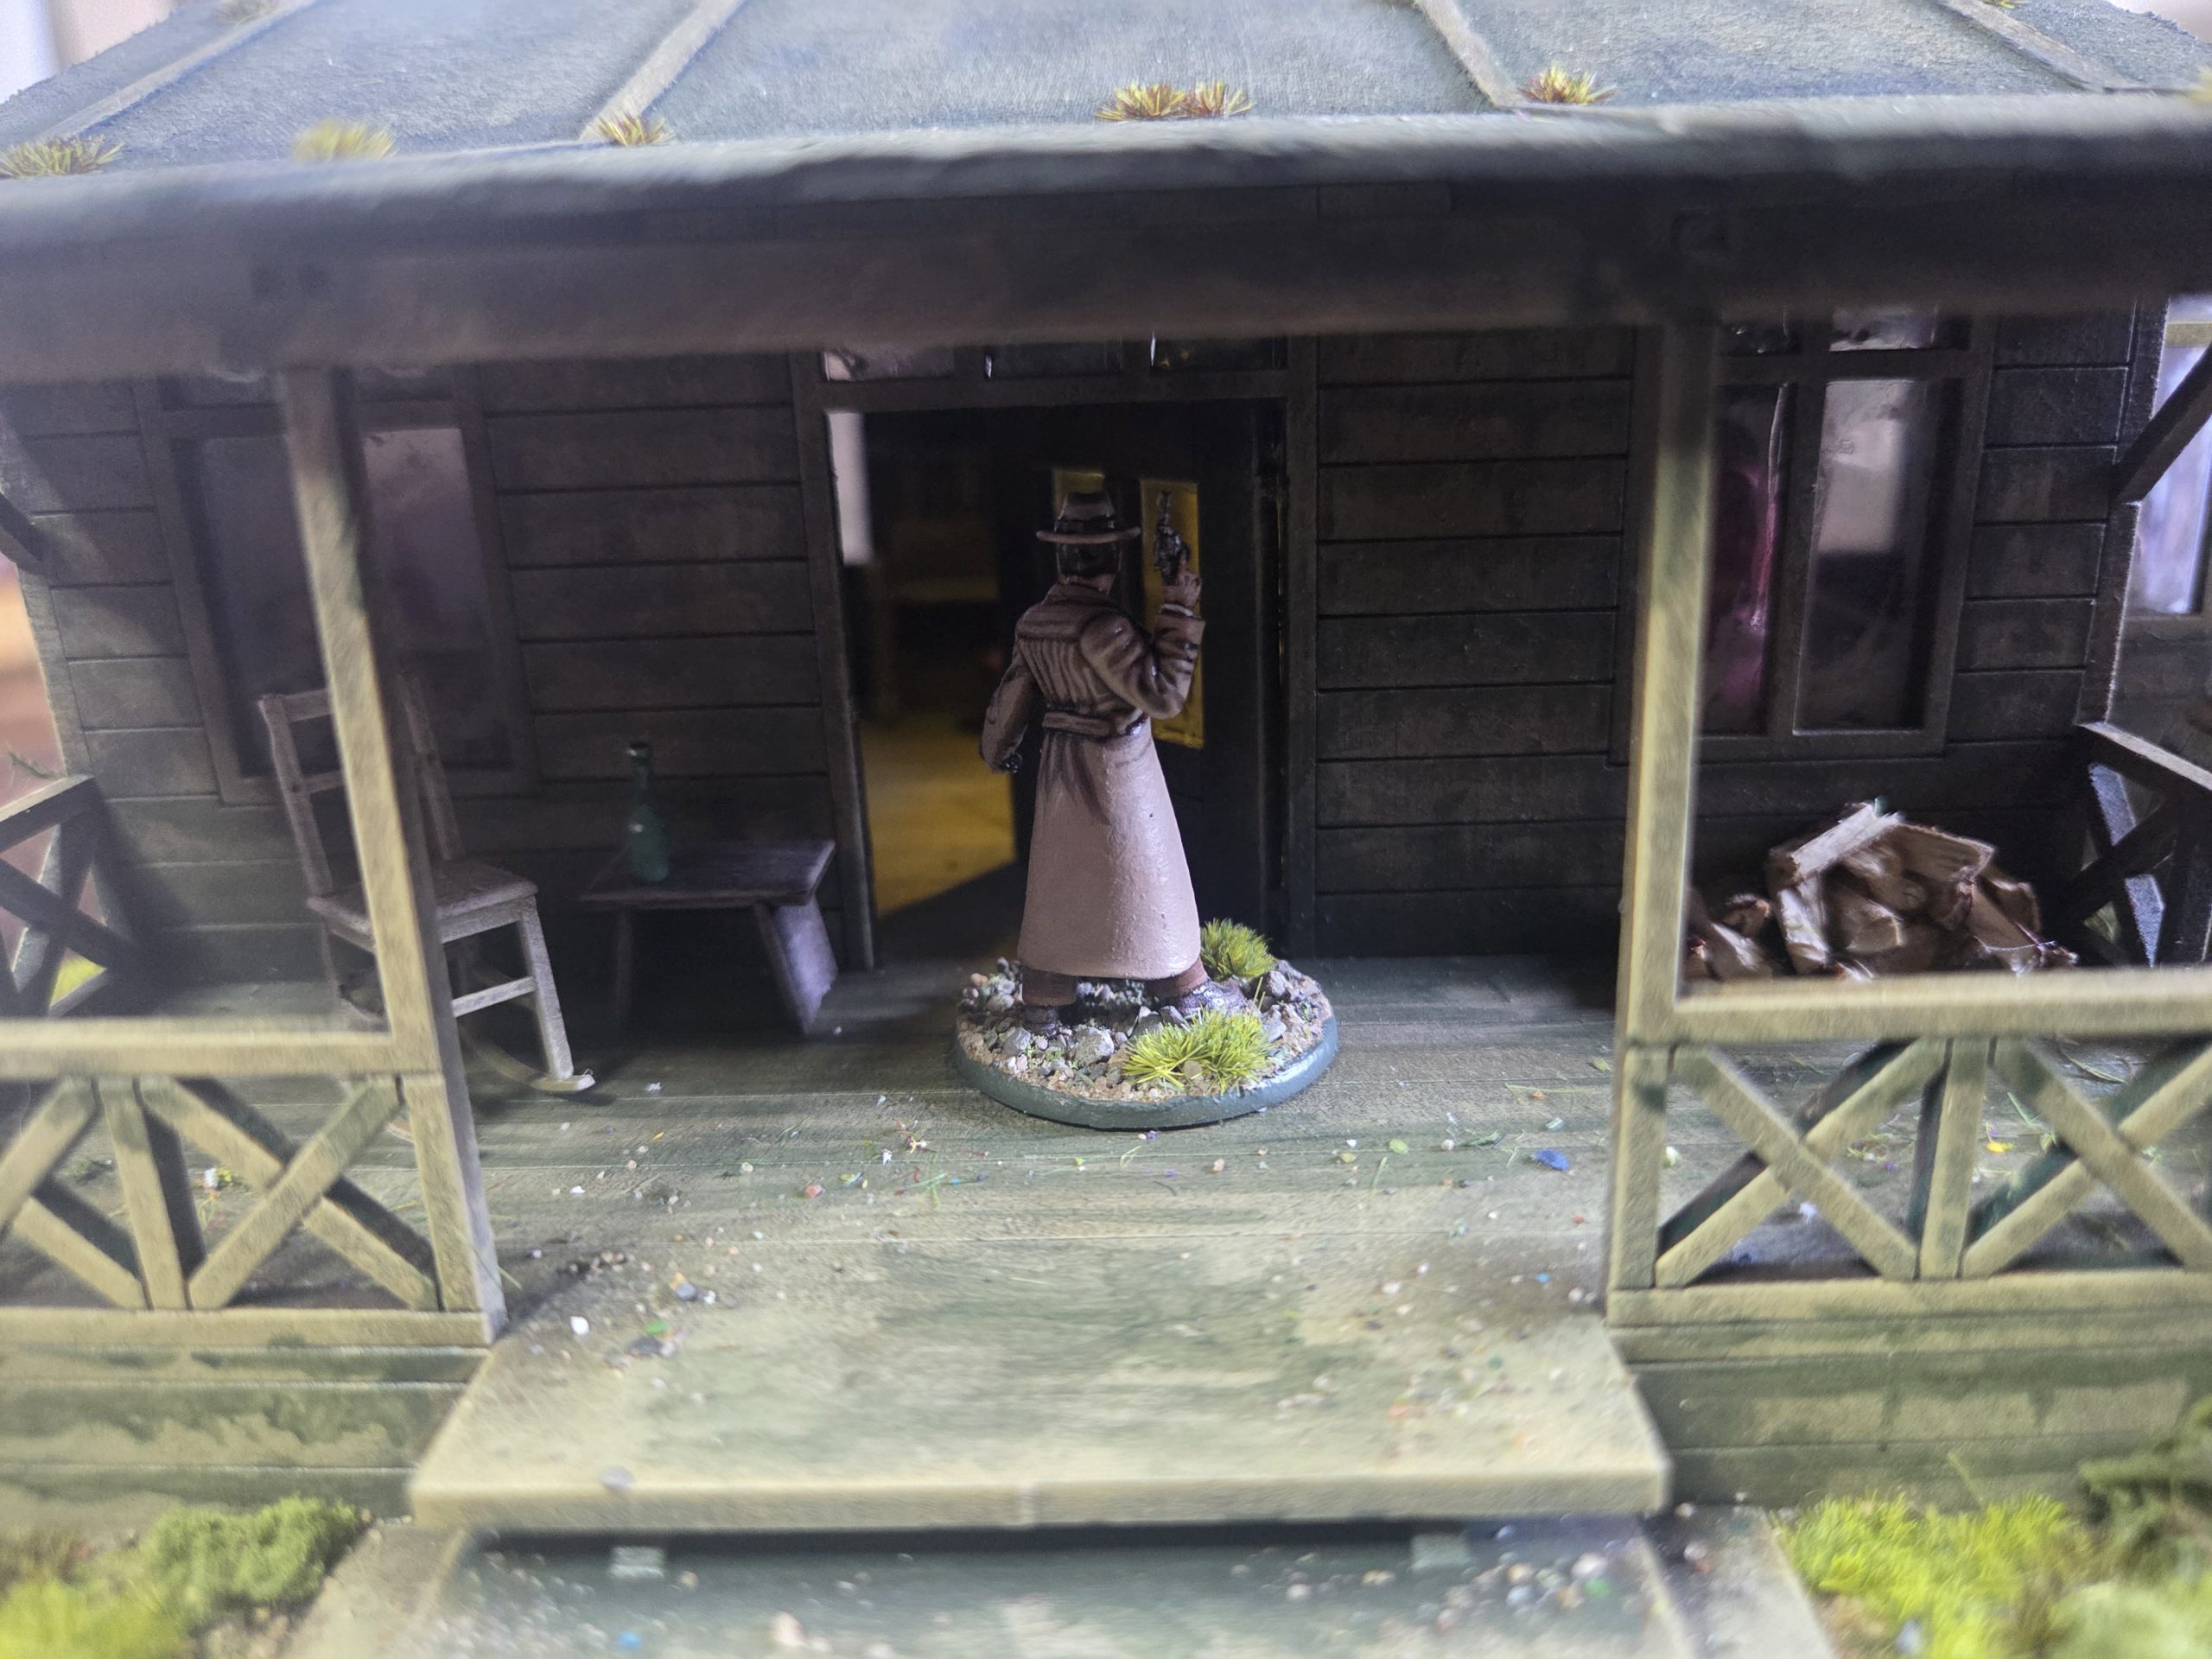 Investigating the shunned House (a Major Mythos Location, more about these later).)
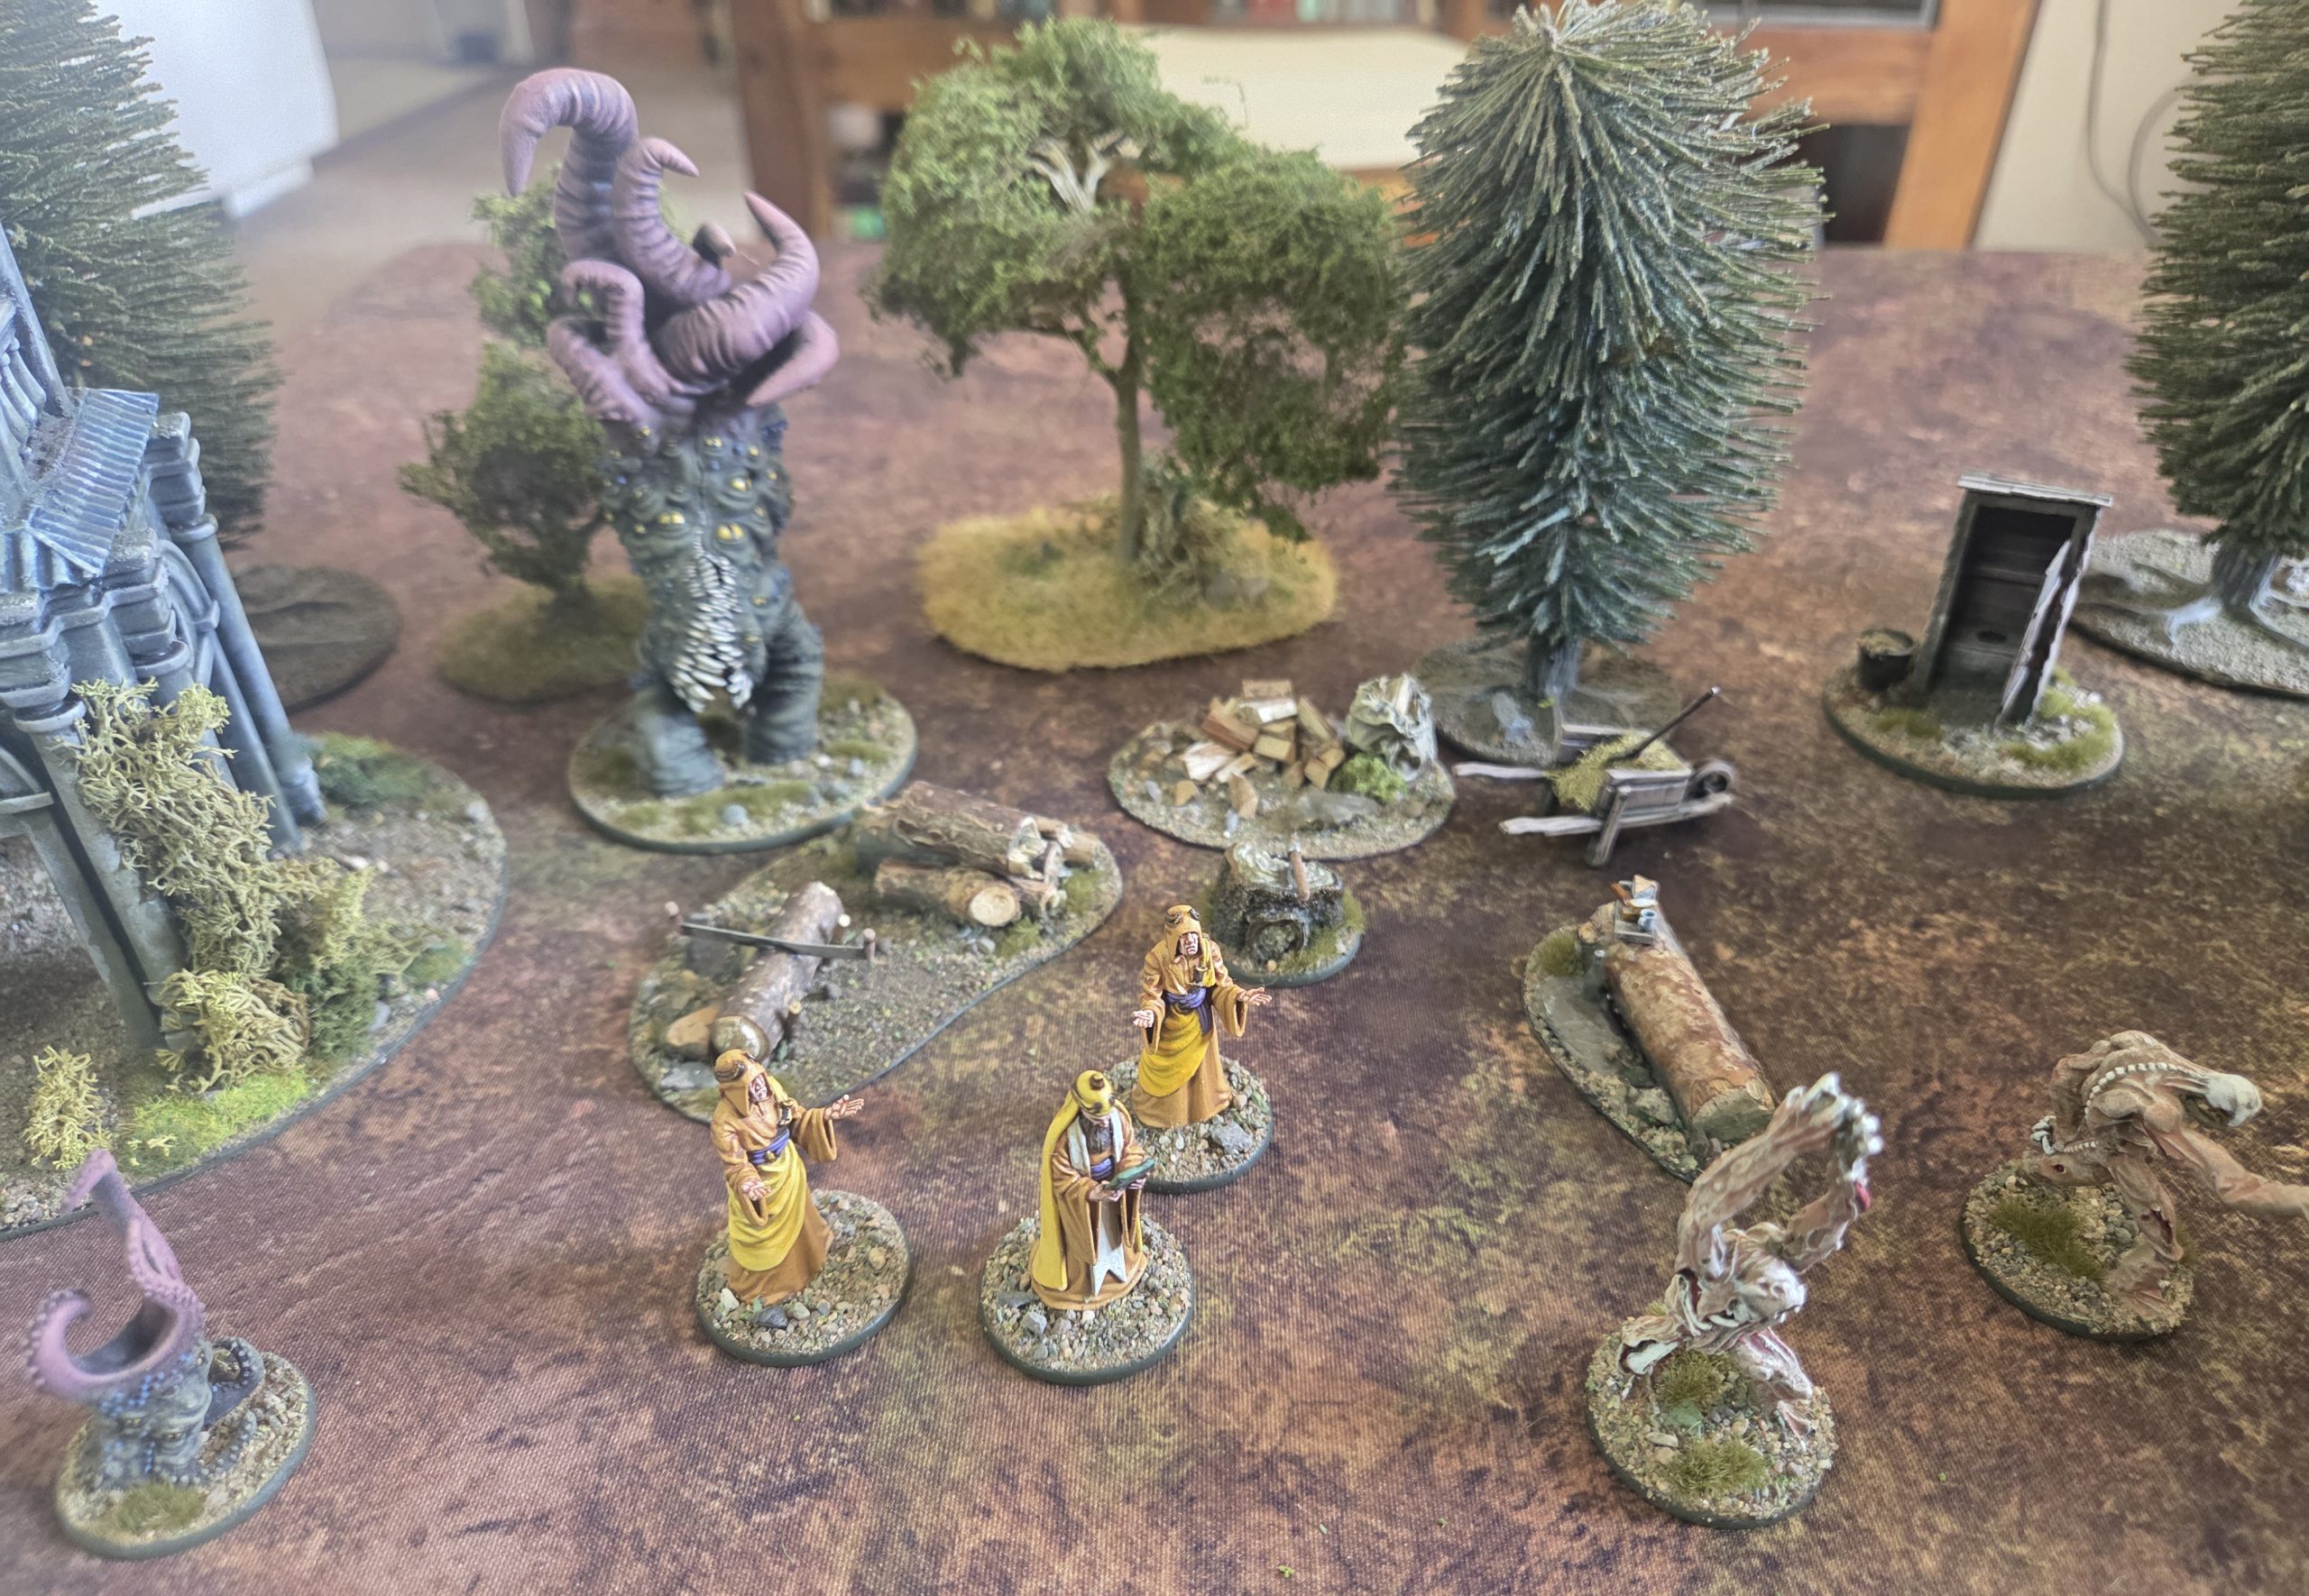 The Order of the Salted Tongue.
 A Major and Minor Horror summoned next to the abandoned folly.
This is what I have left to paint.
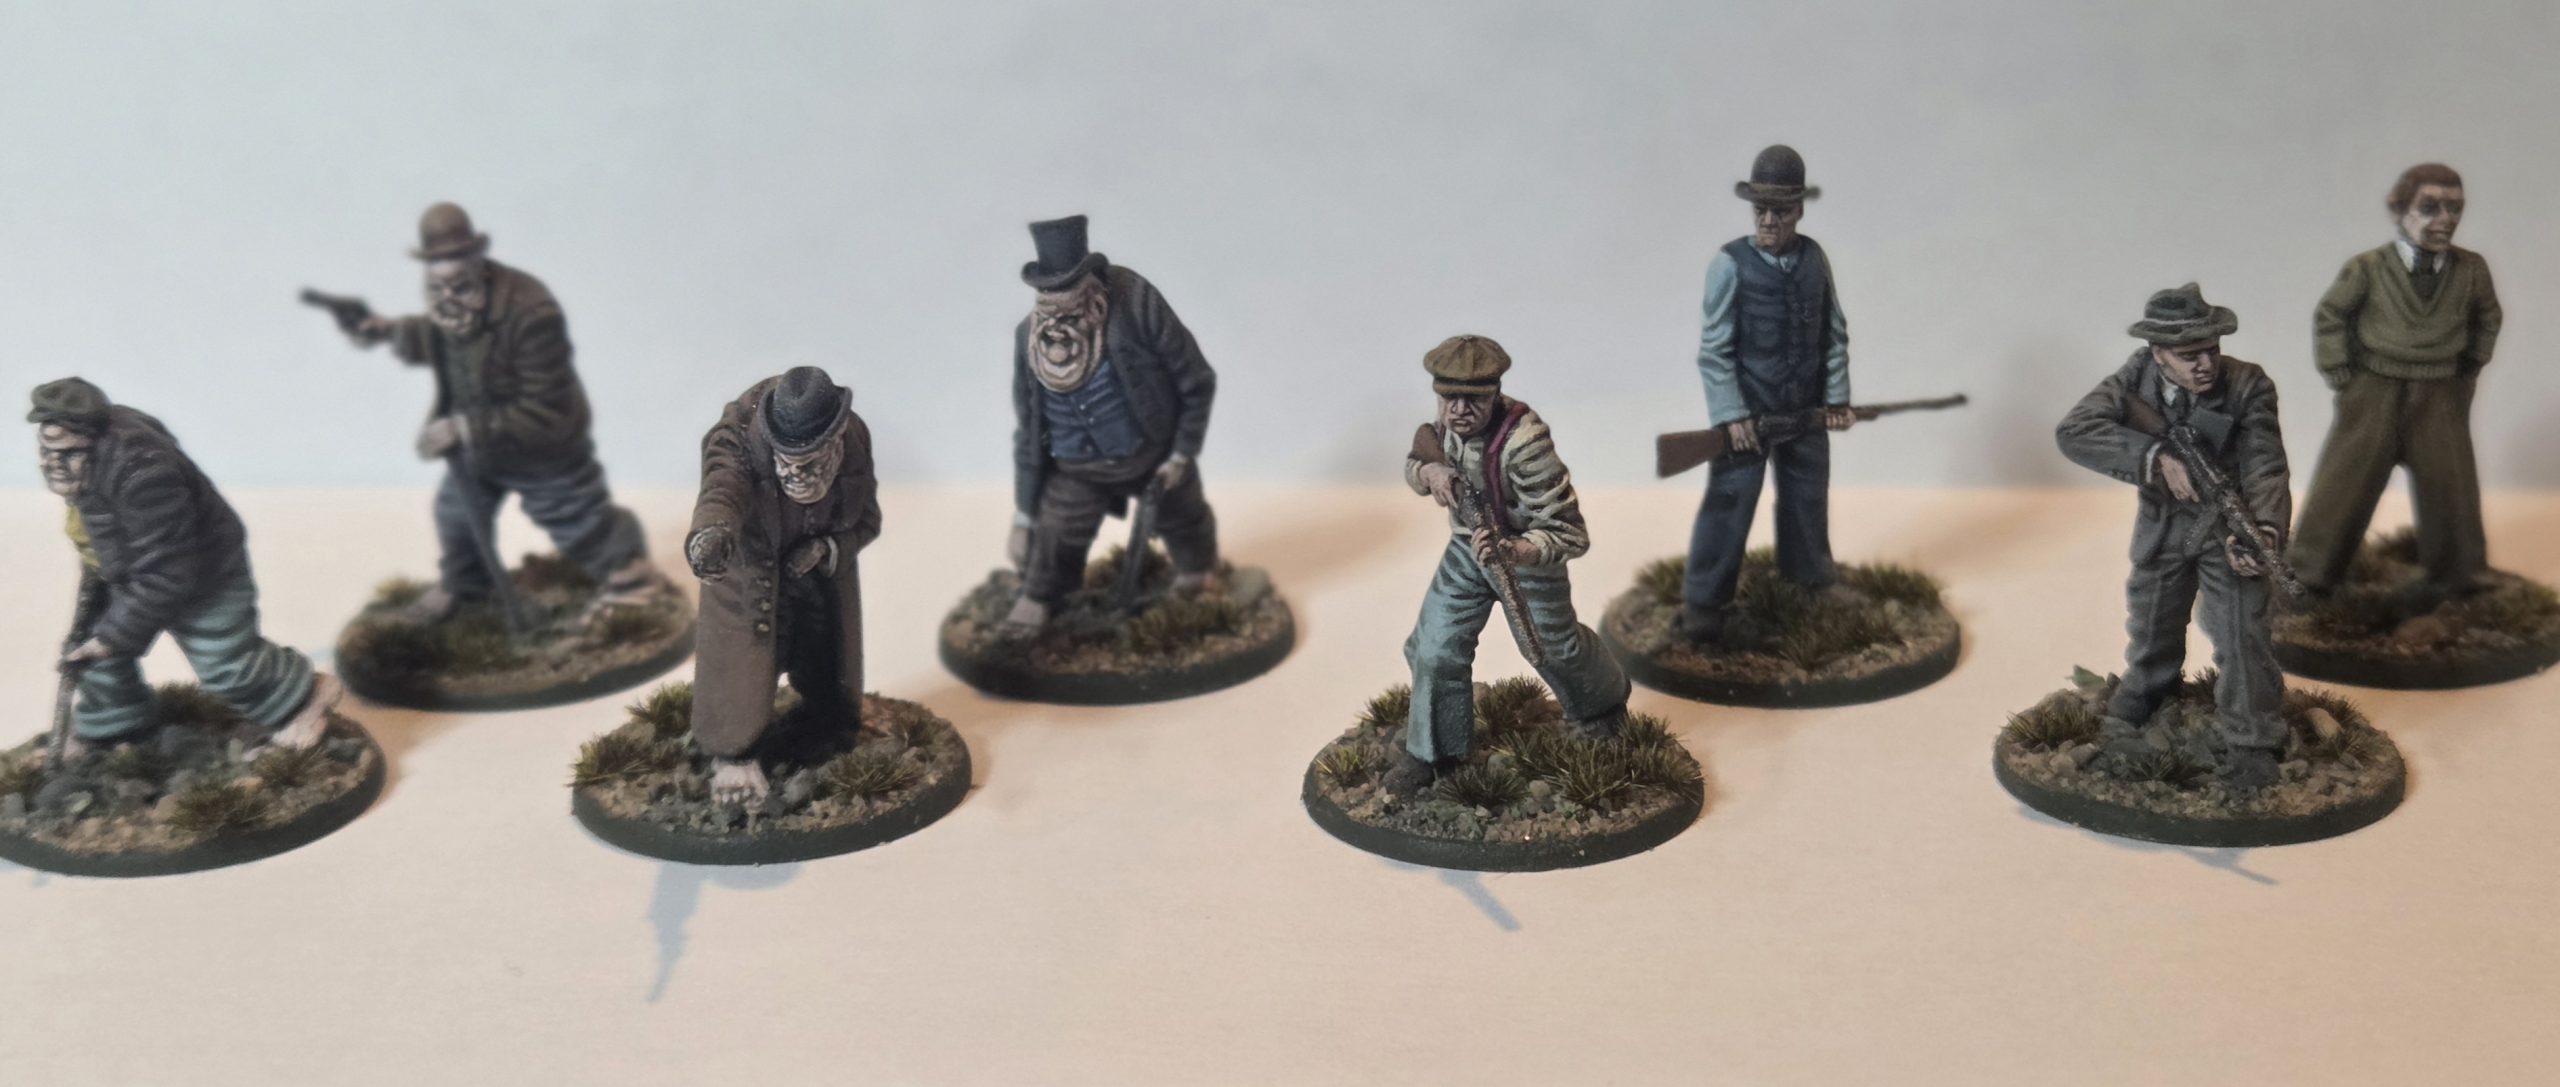
The Spectre Miniatures:
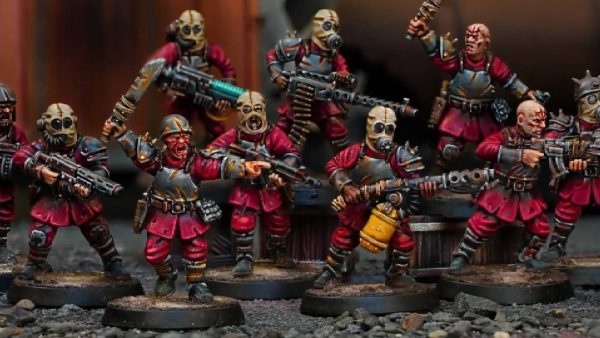
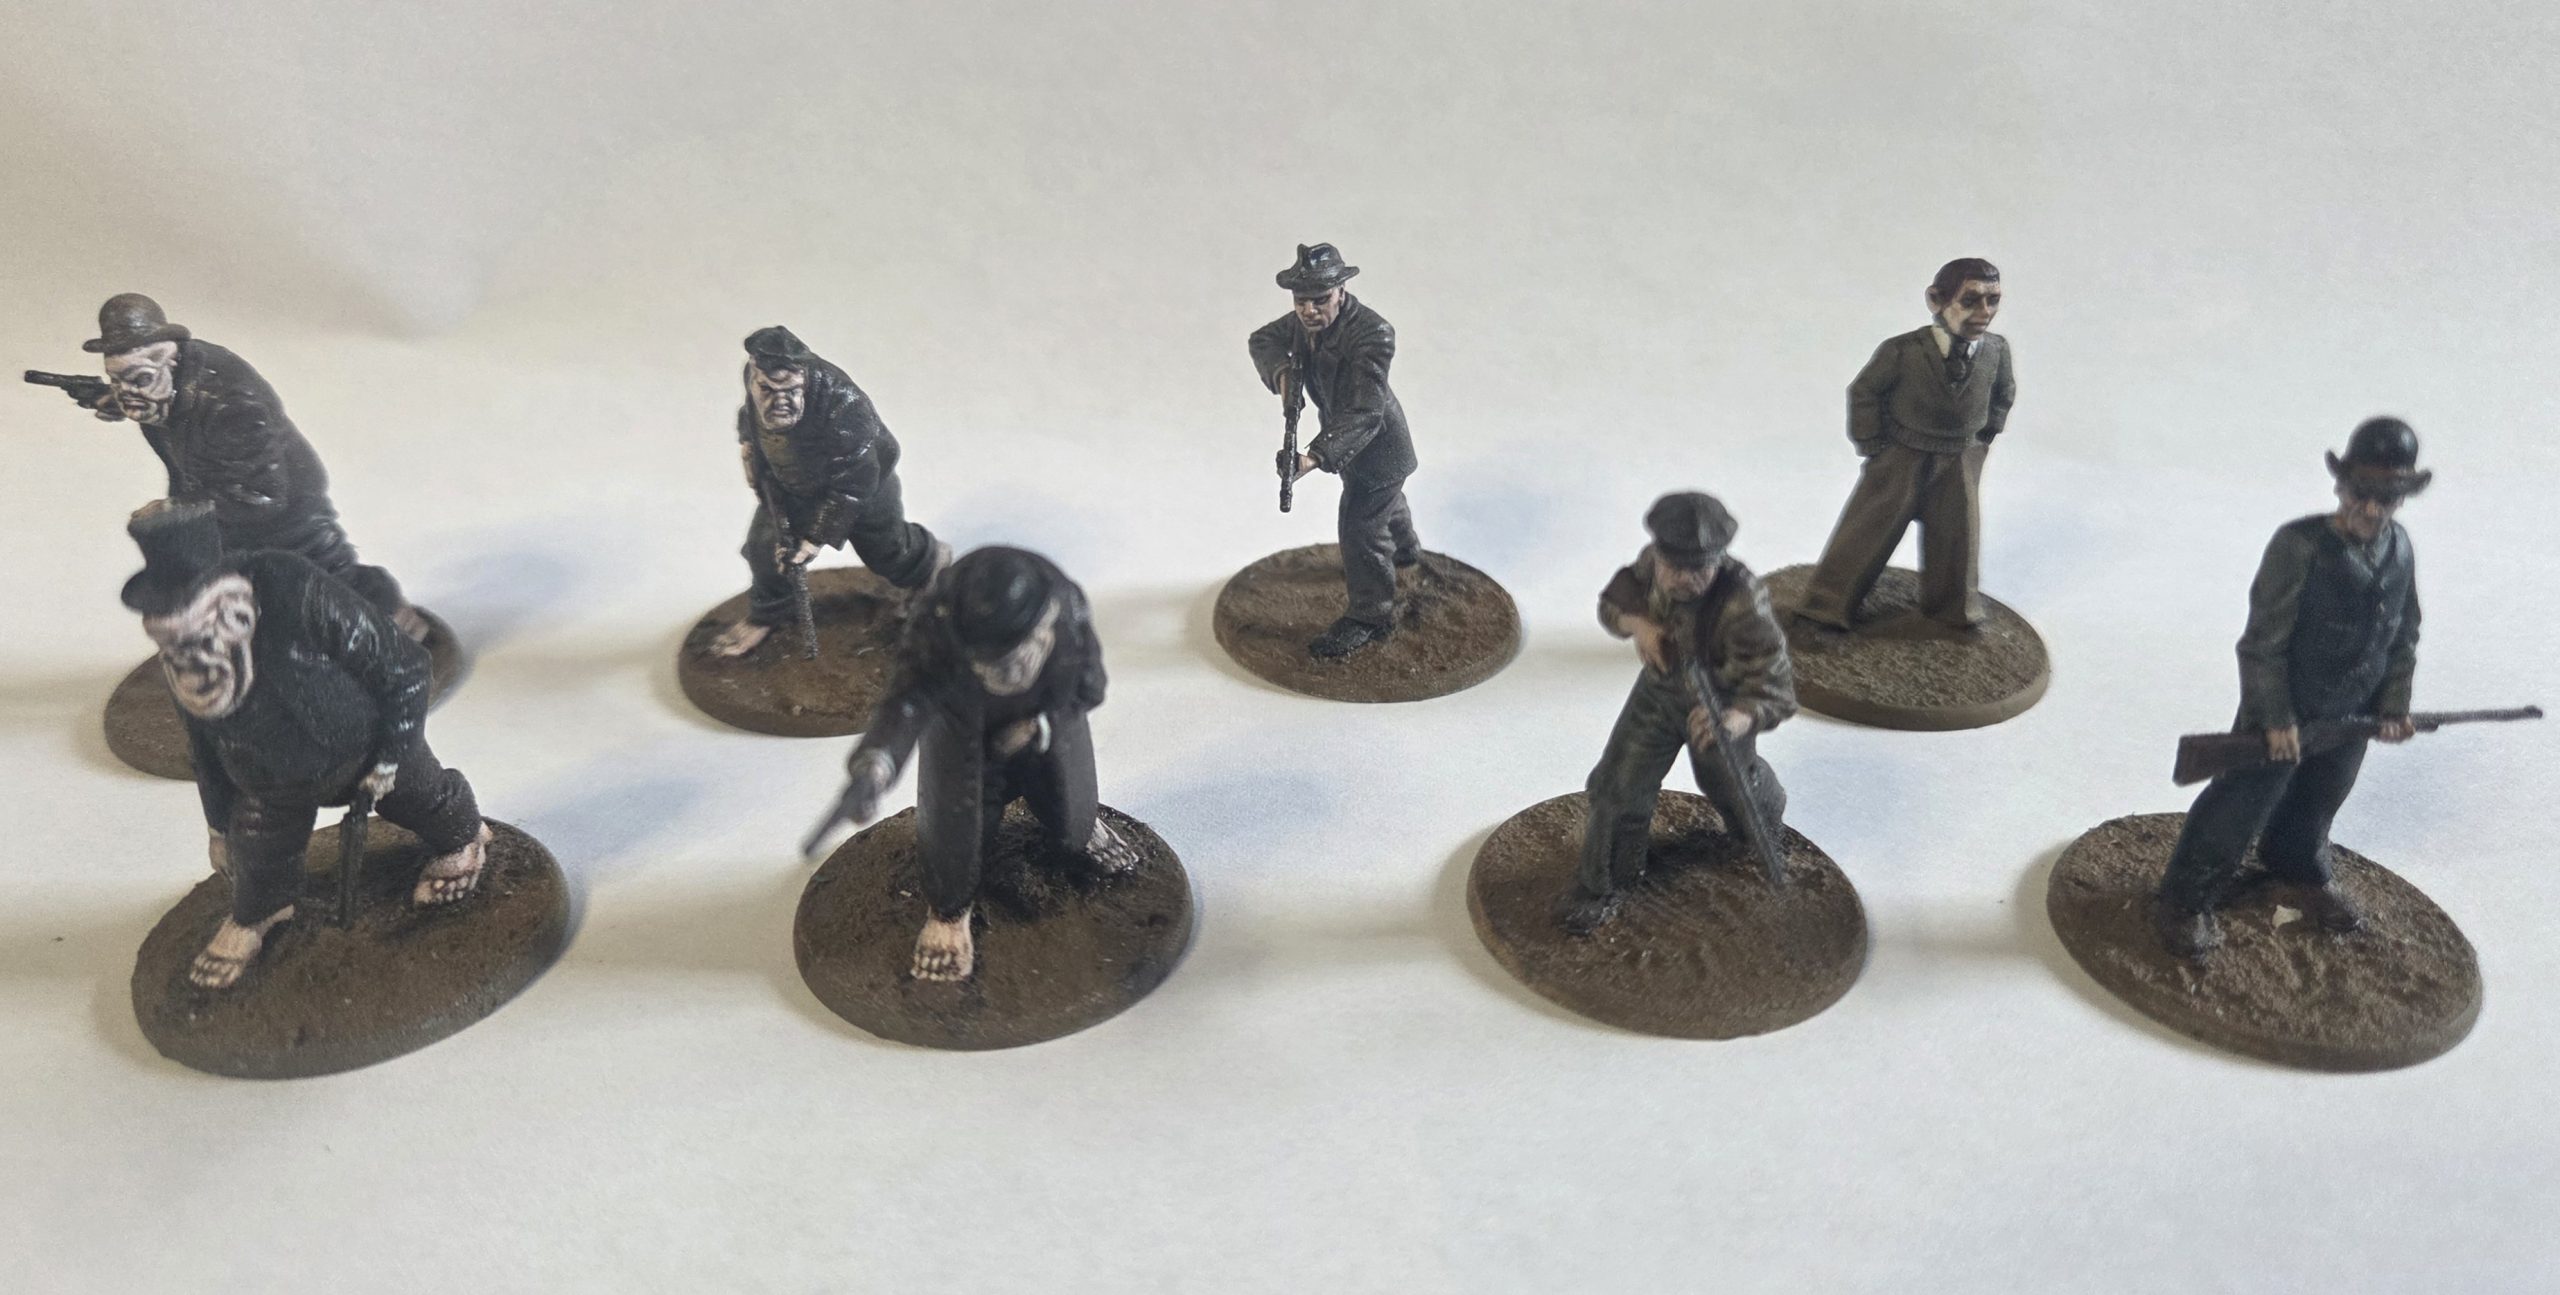 4 Thralls, 3 hired guns/Cultists, and a proxy Copplestone figure to represent a Living Mystery (again more on that later!)
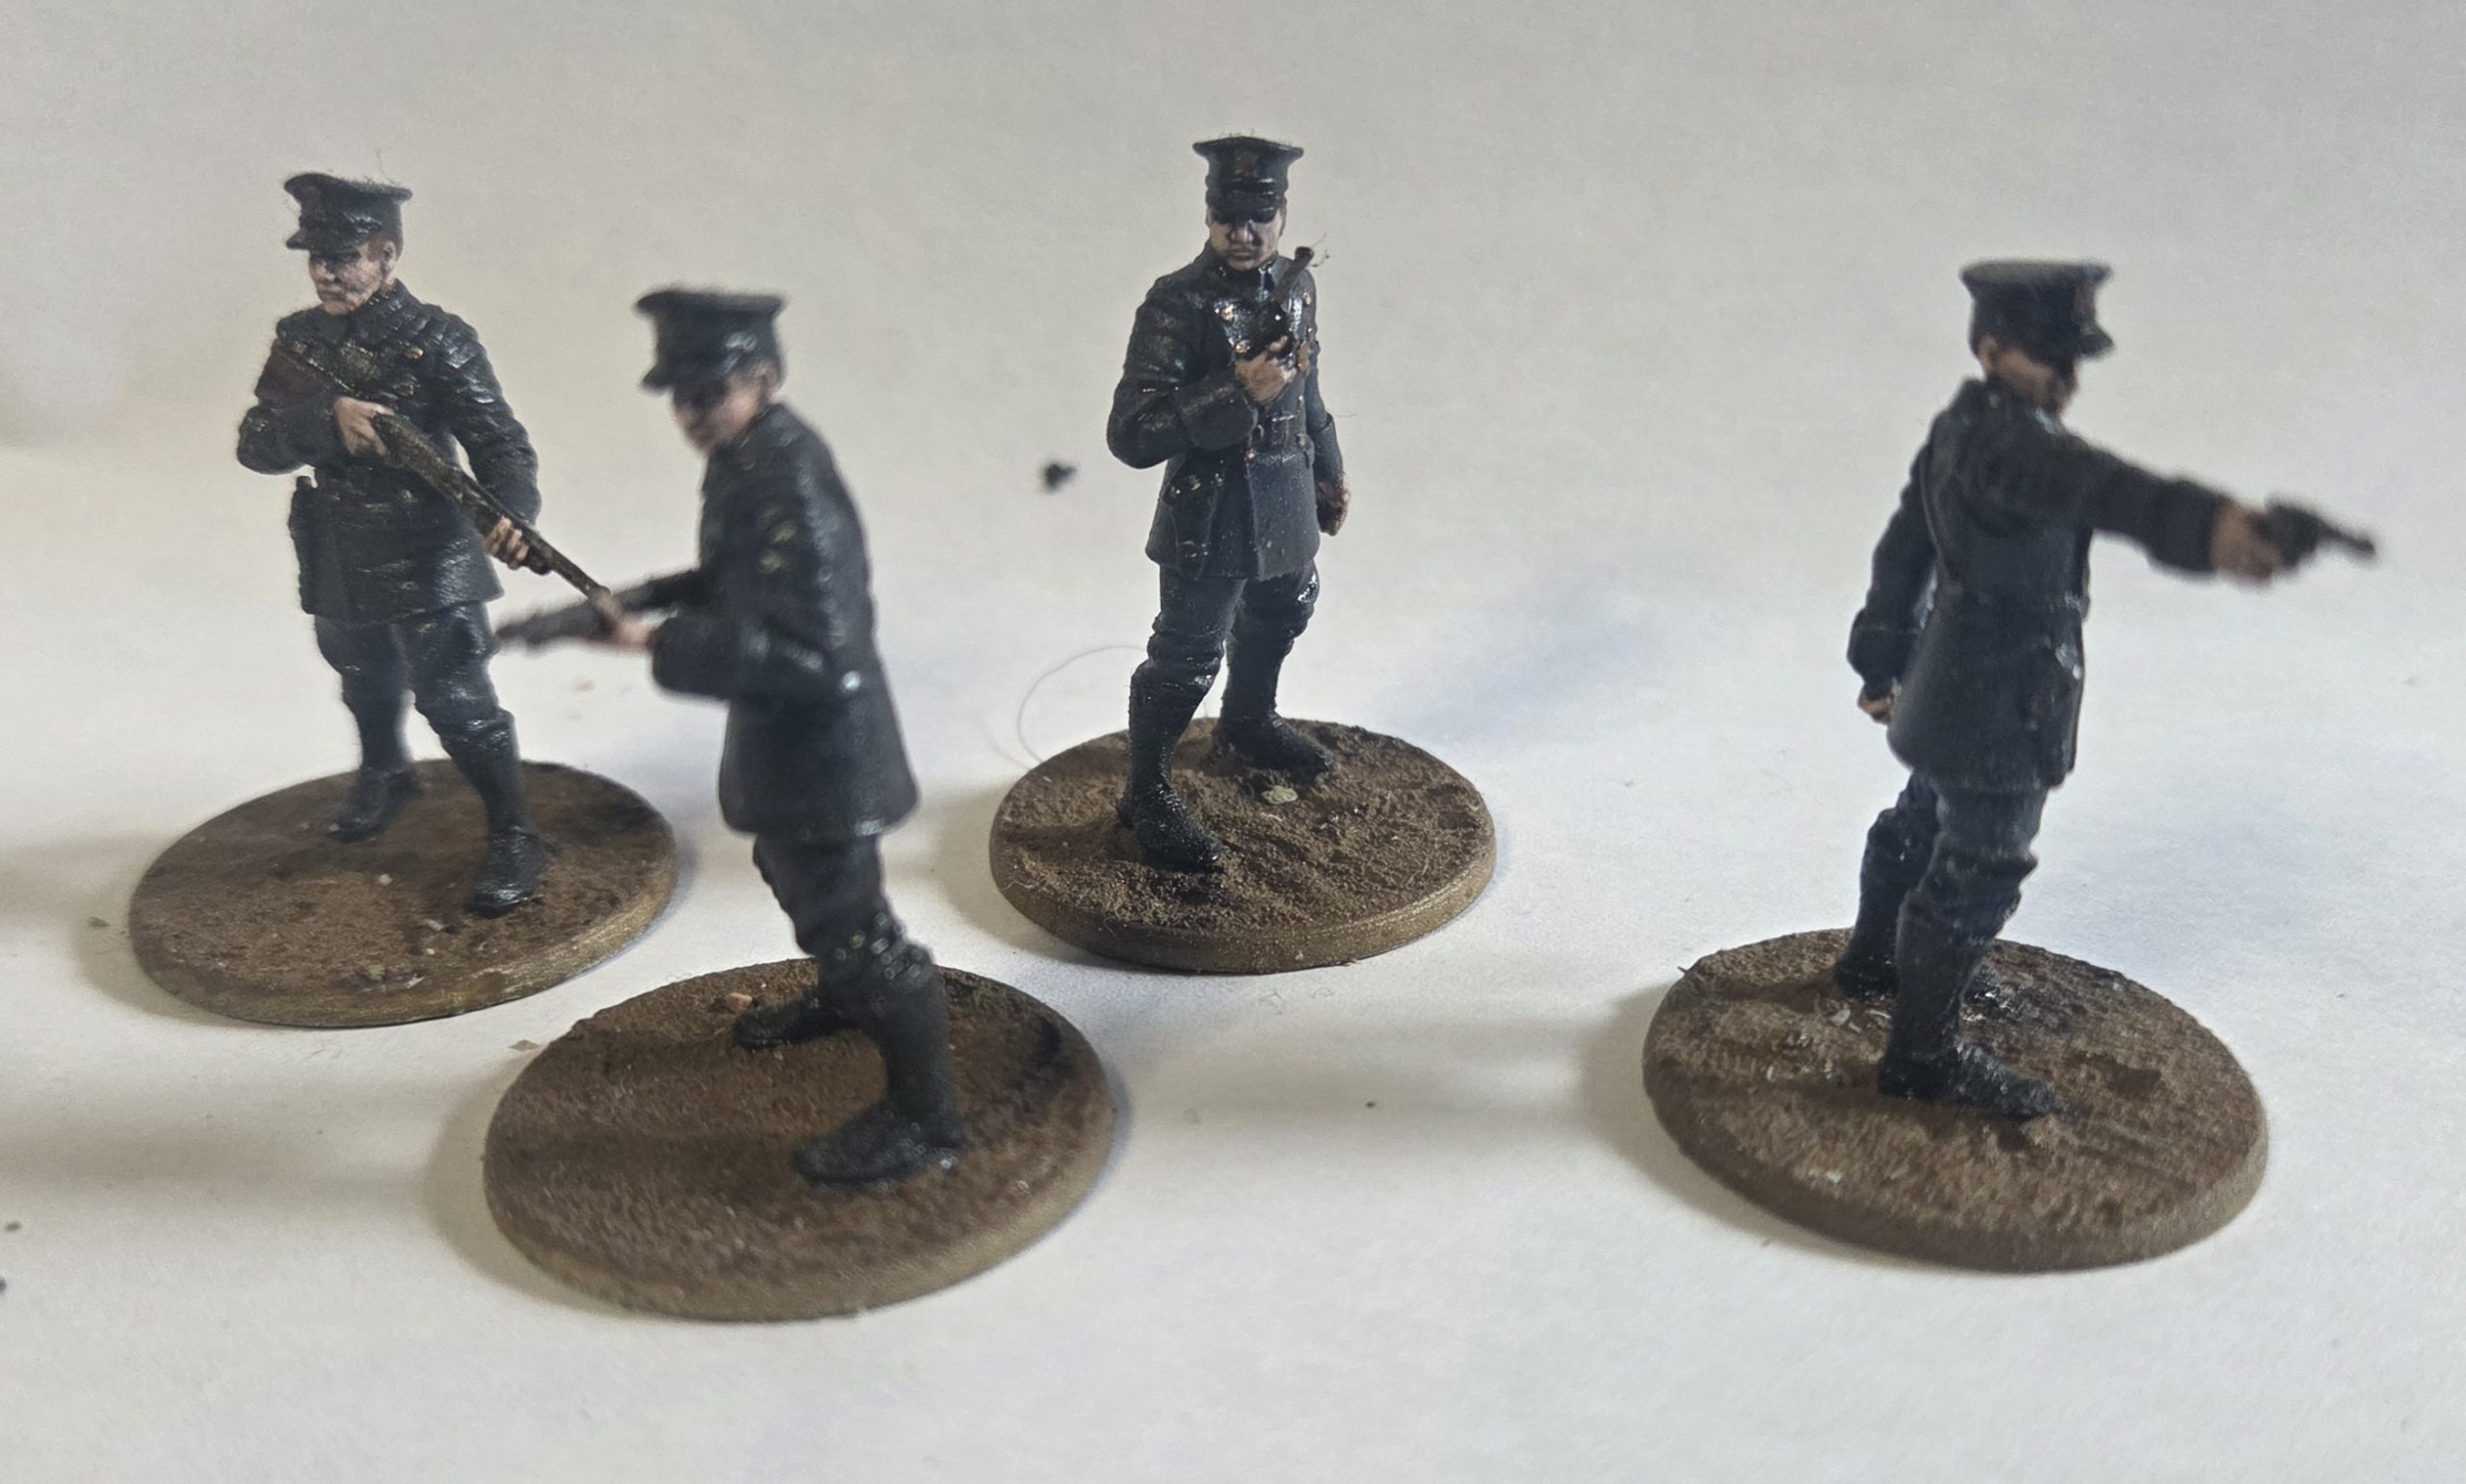 The Police
Proxy models for entities/monsters and other character types:
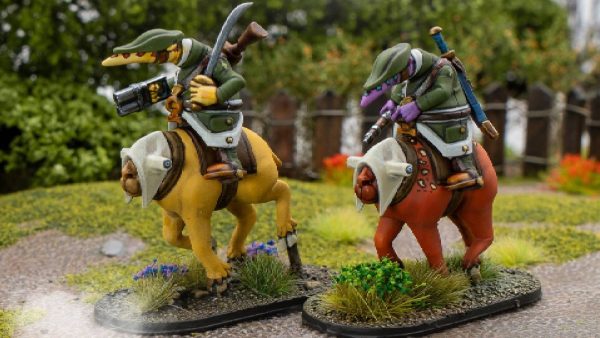
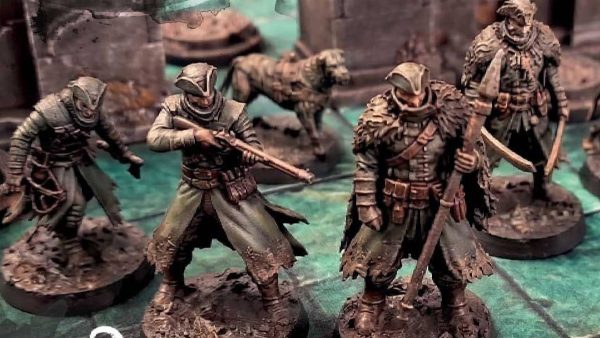
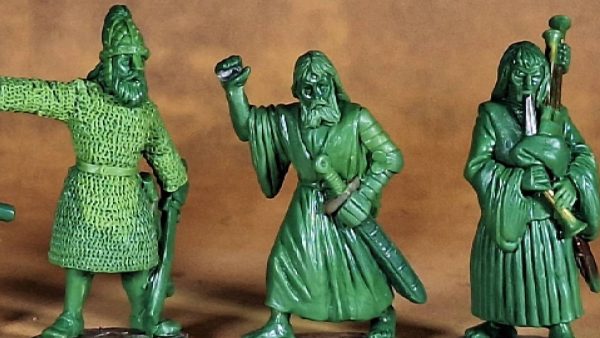
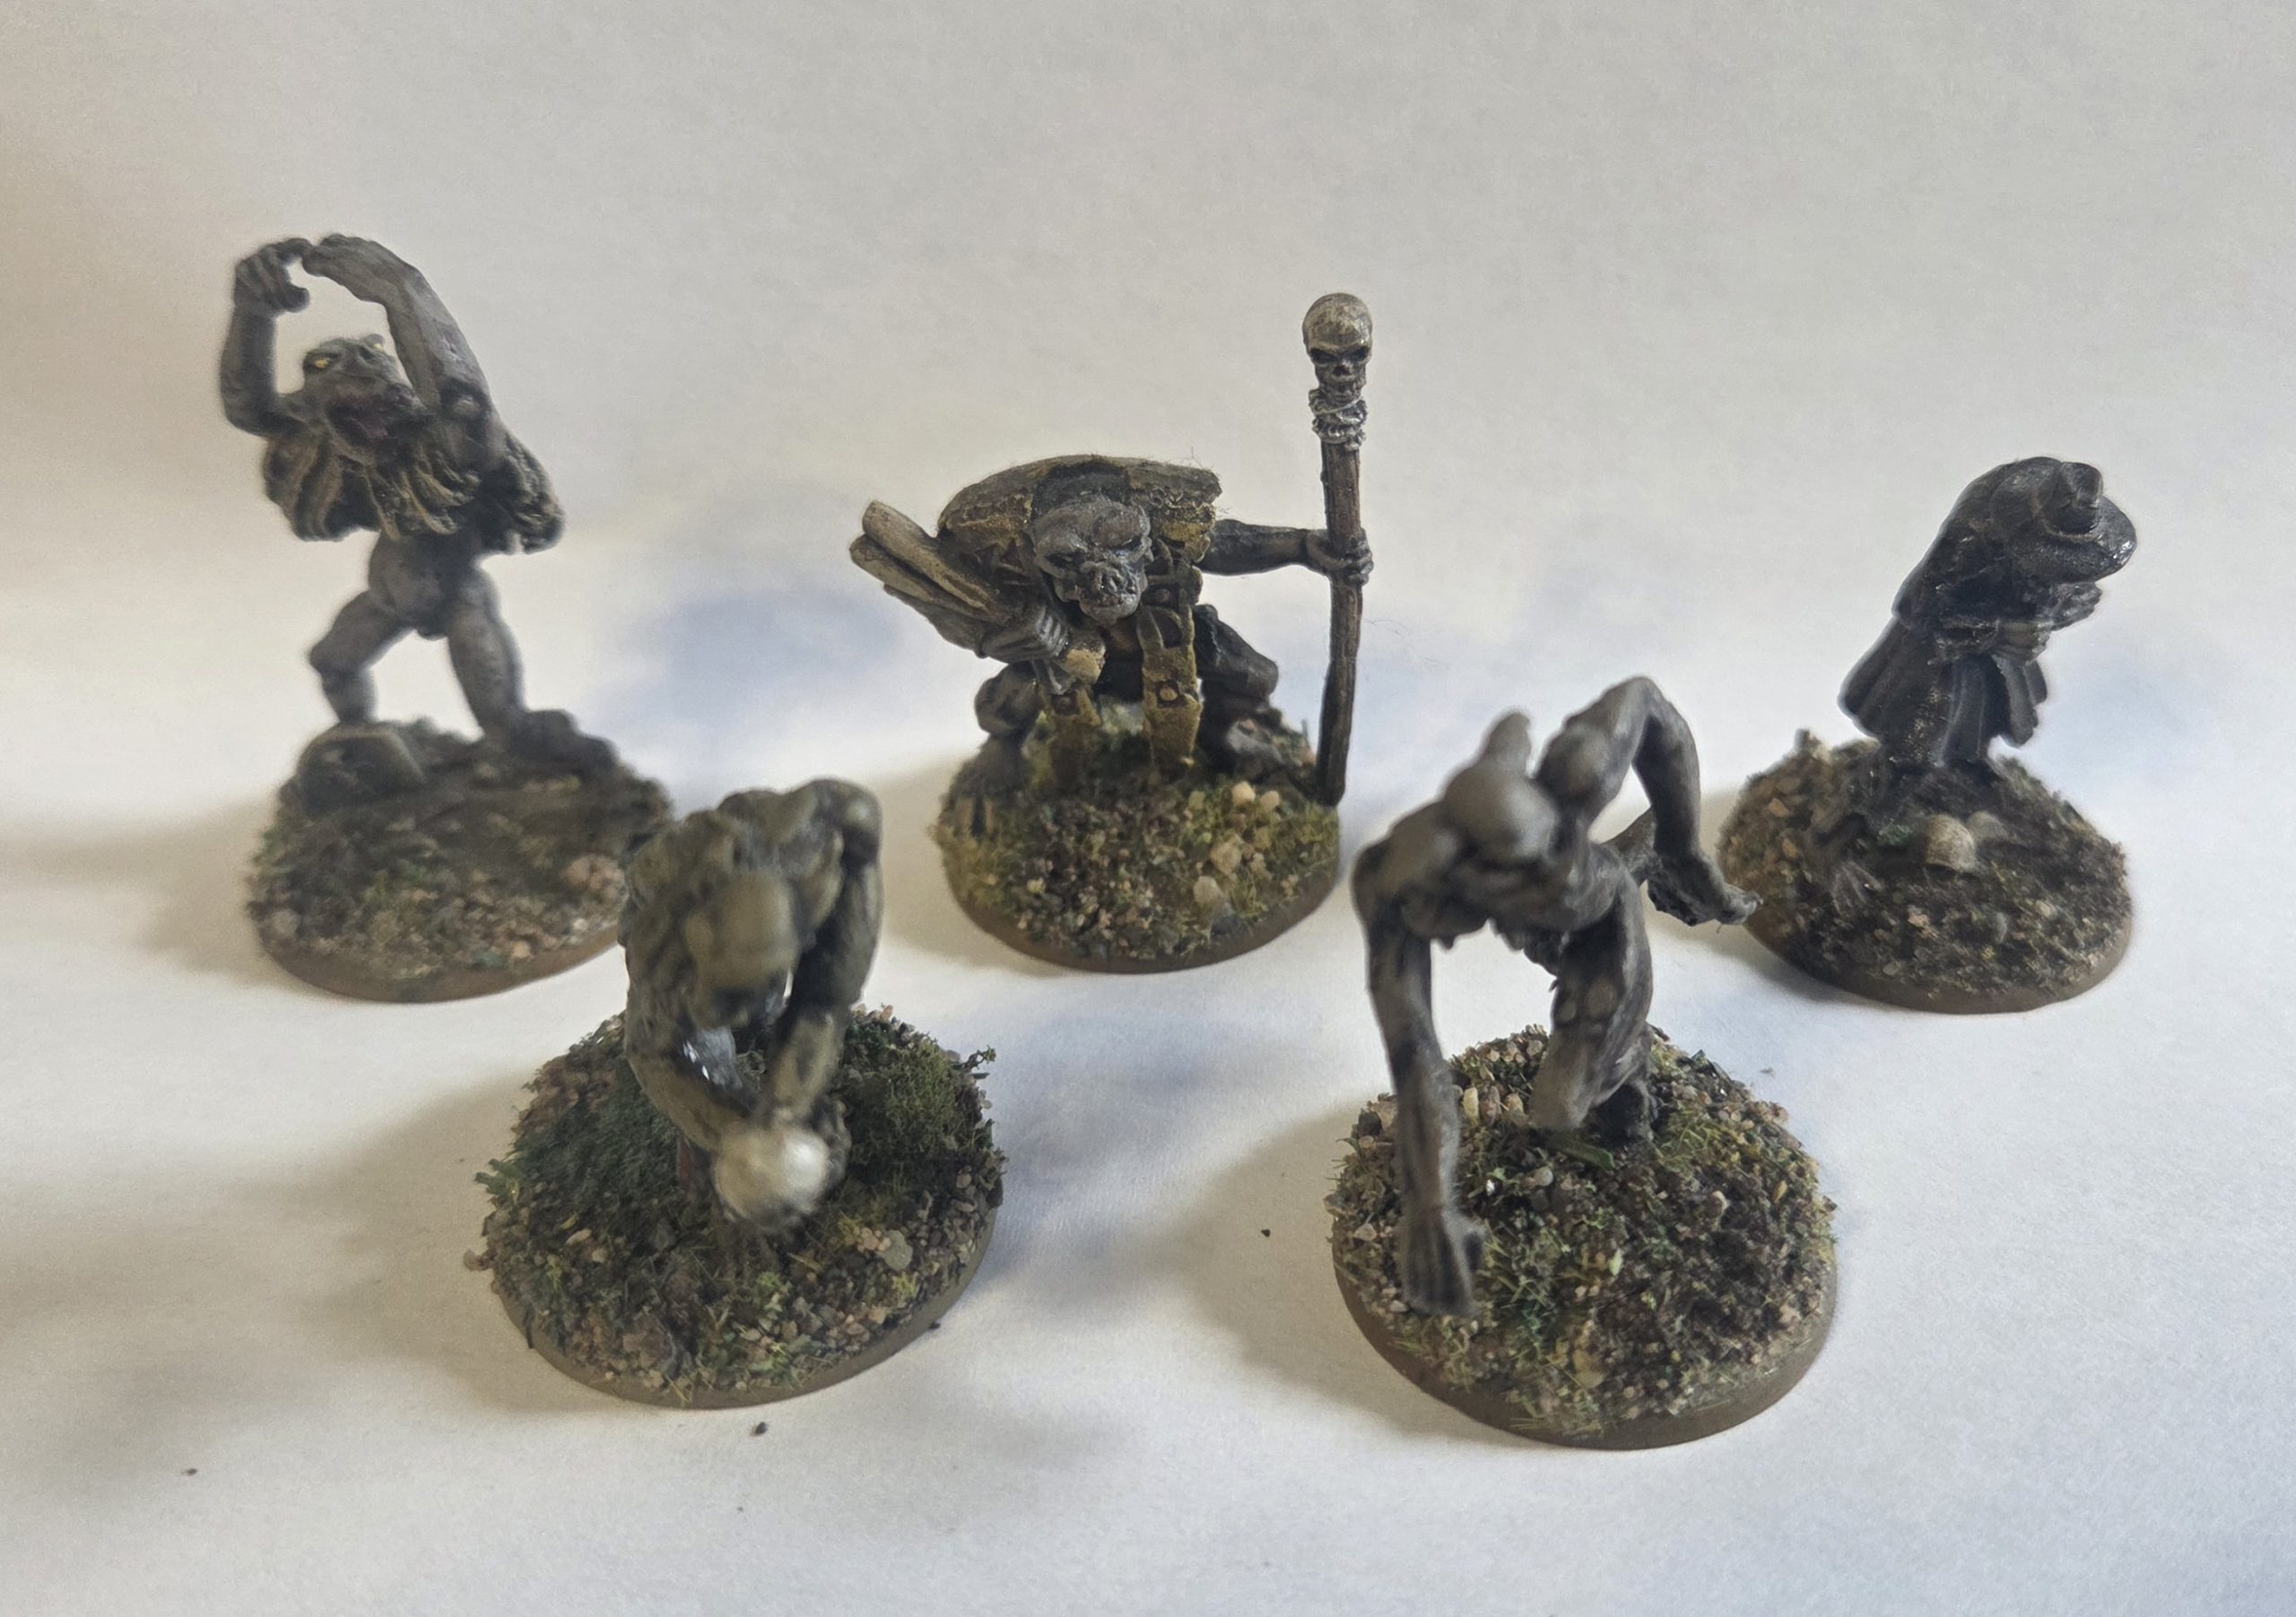 Rafm Ghouls, just need a few additional highlights. Rafm Cthulhu range was one of my first miniature collections, and and in my opinion, up until the Spectre Cosmic Horror, were the best Cthulhu models out there. I still have lots.
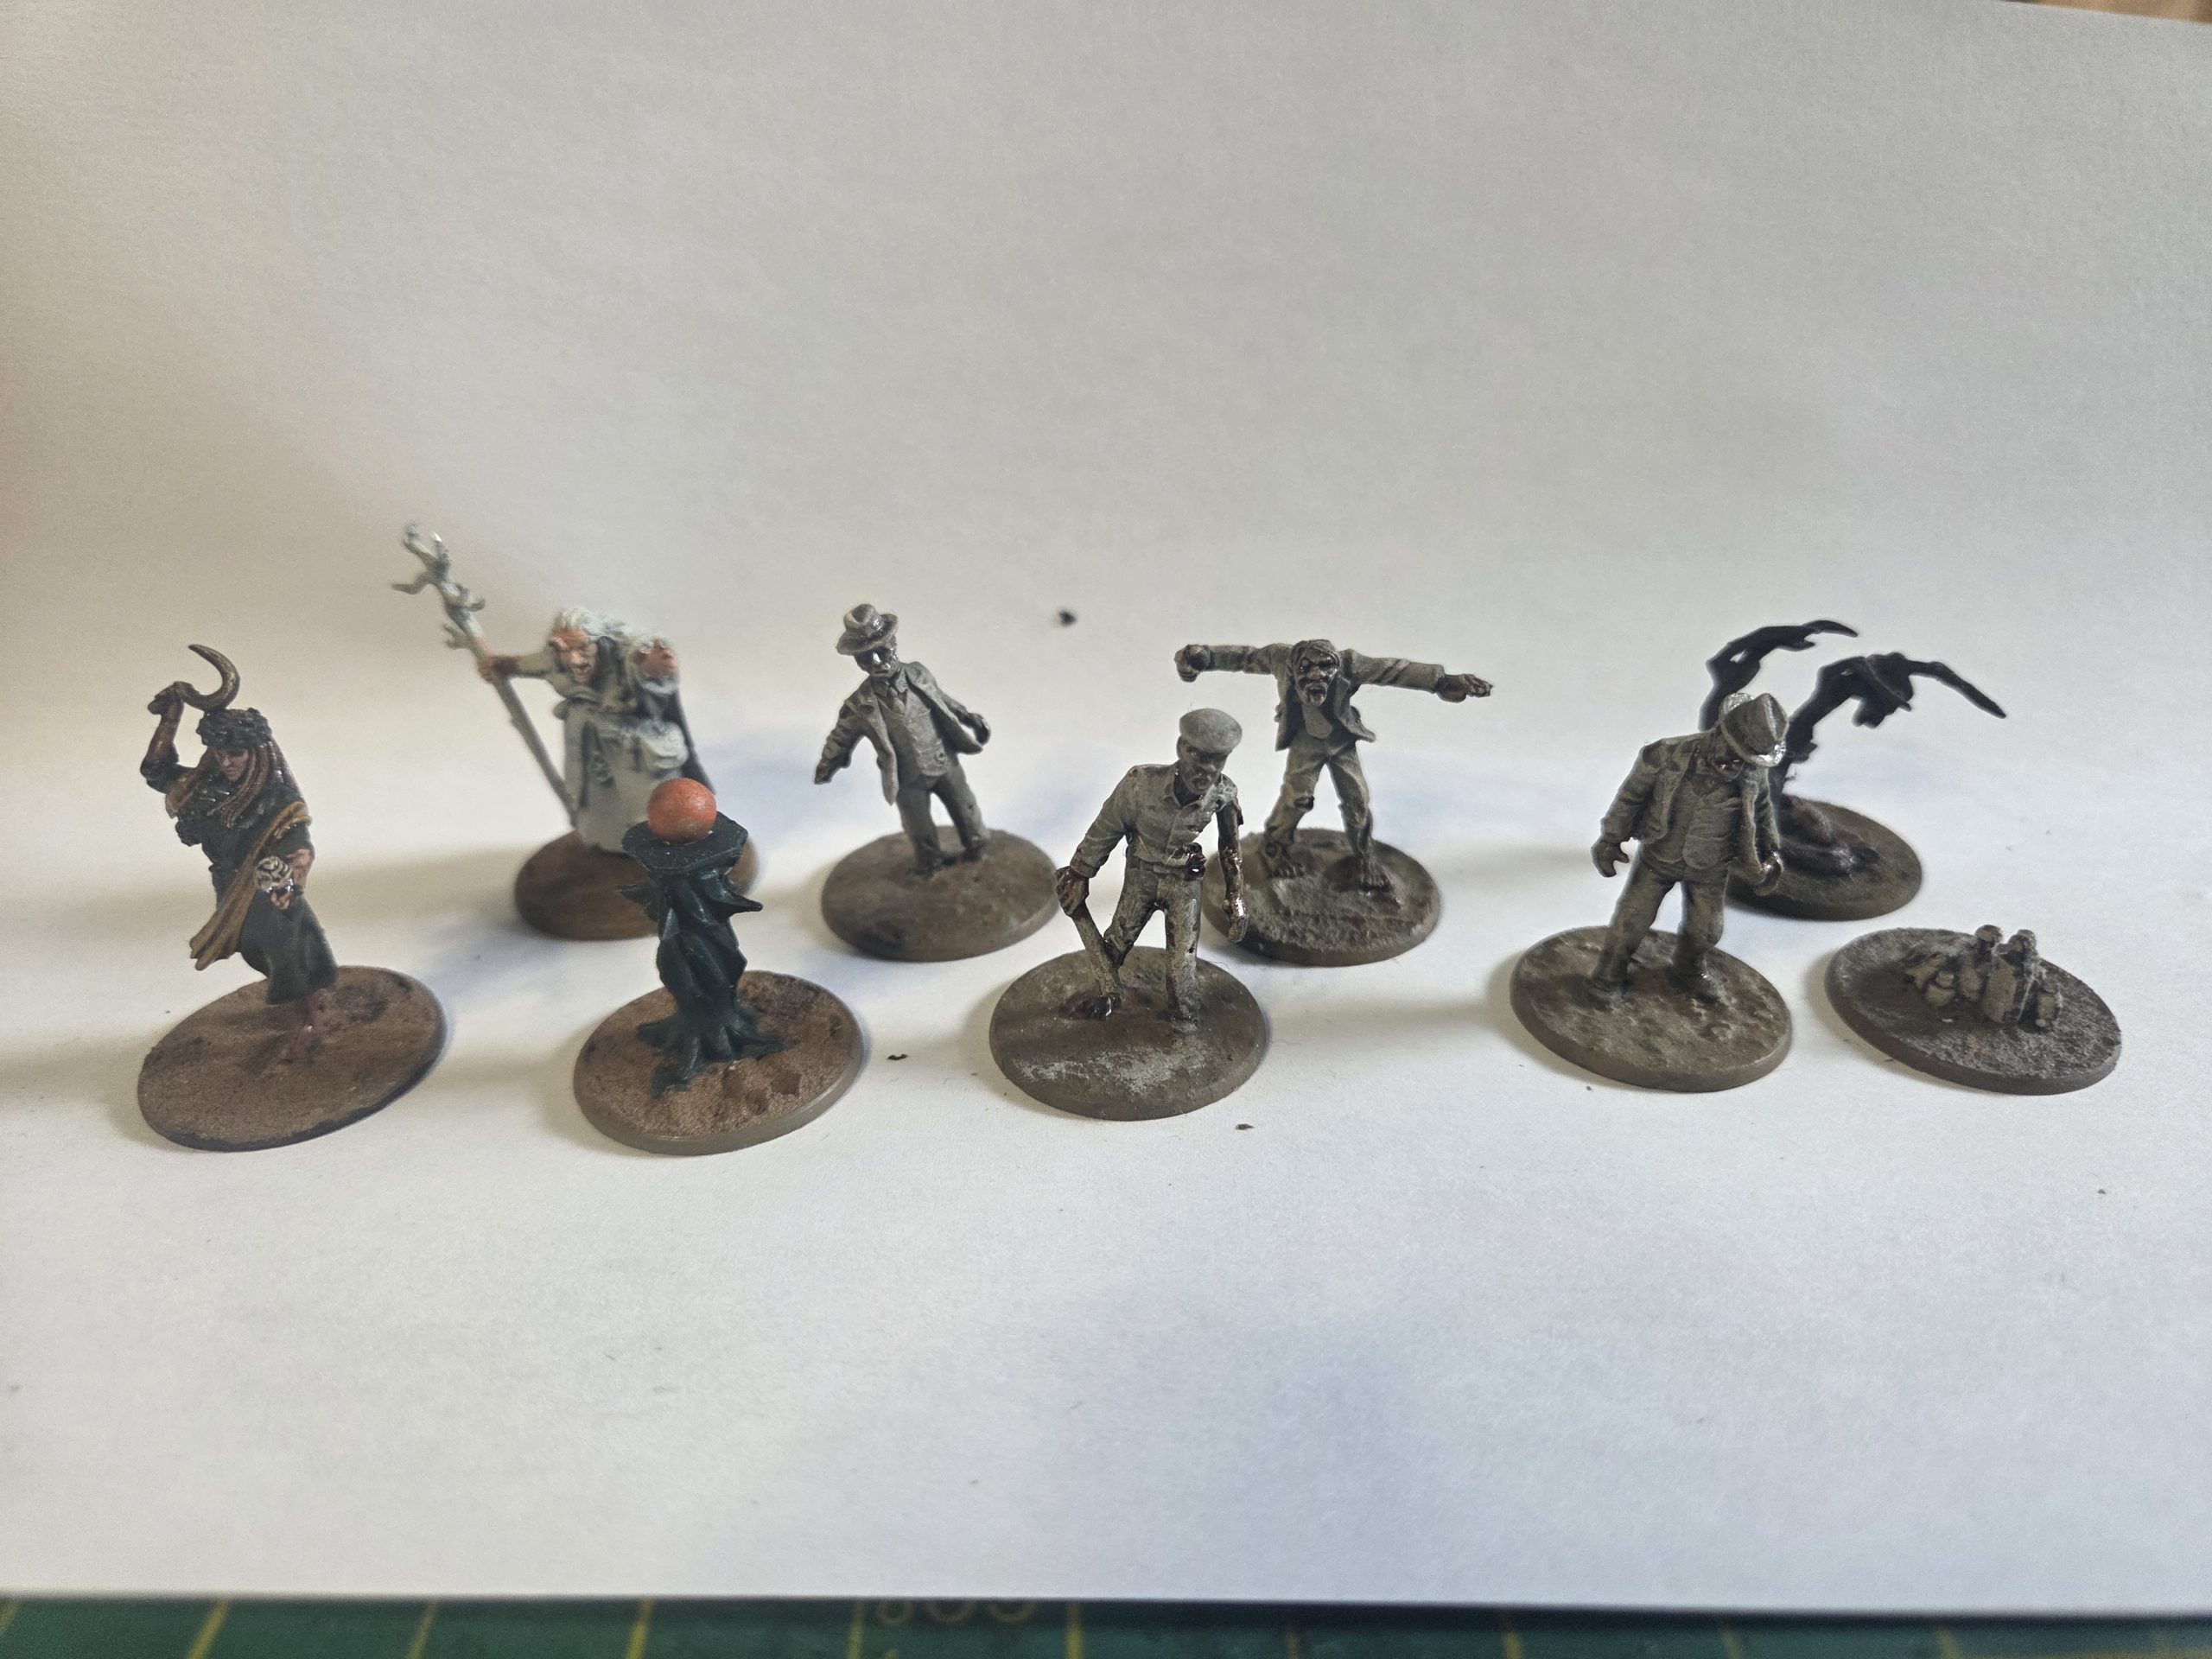 From L to R: a Crooked Dice witch, a Reaper witch, 3 Harwood Hobbies and 1 Copplestone zombie to represent Husks. As well as three tokens that can denote Minor Mythos locations.
The Finished House
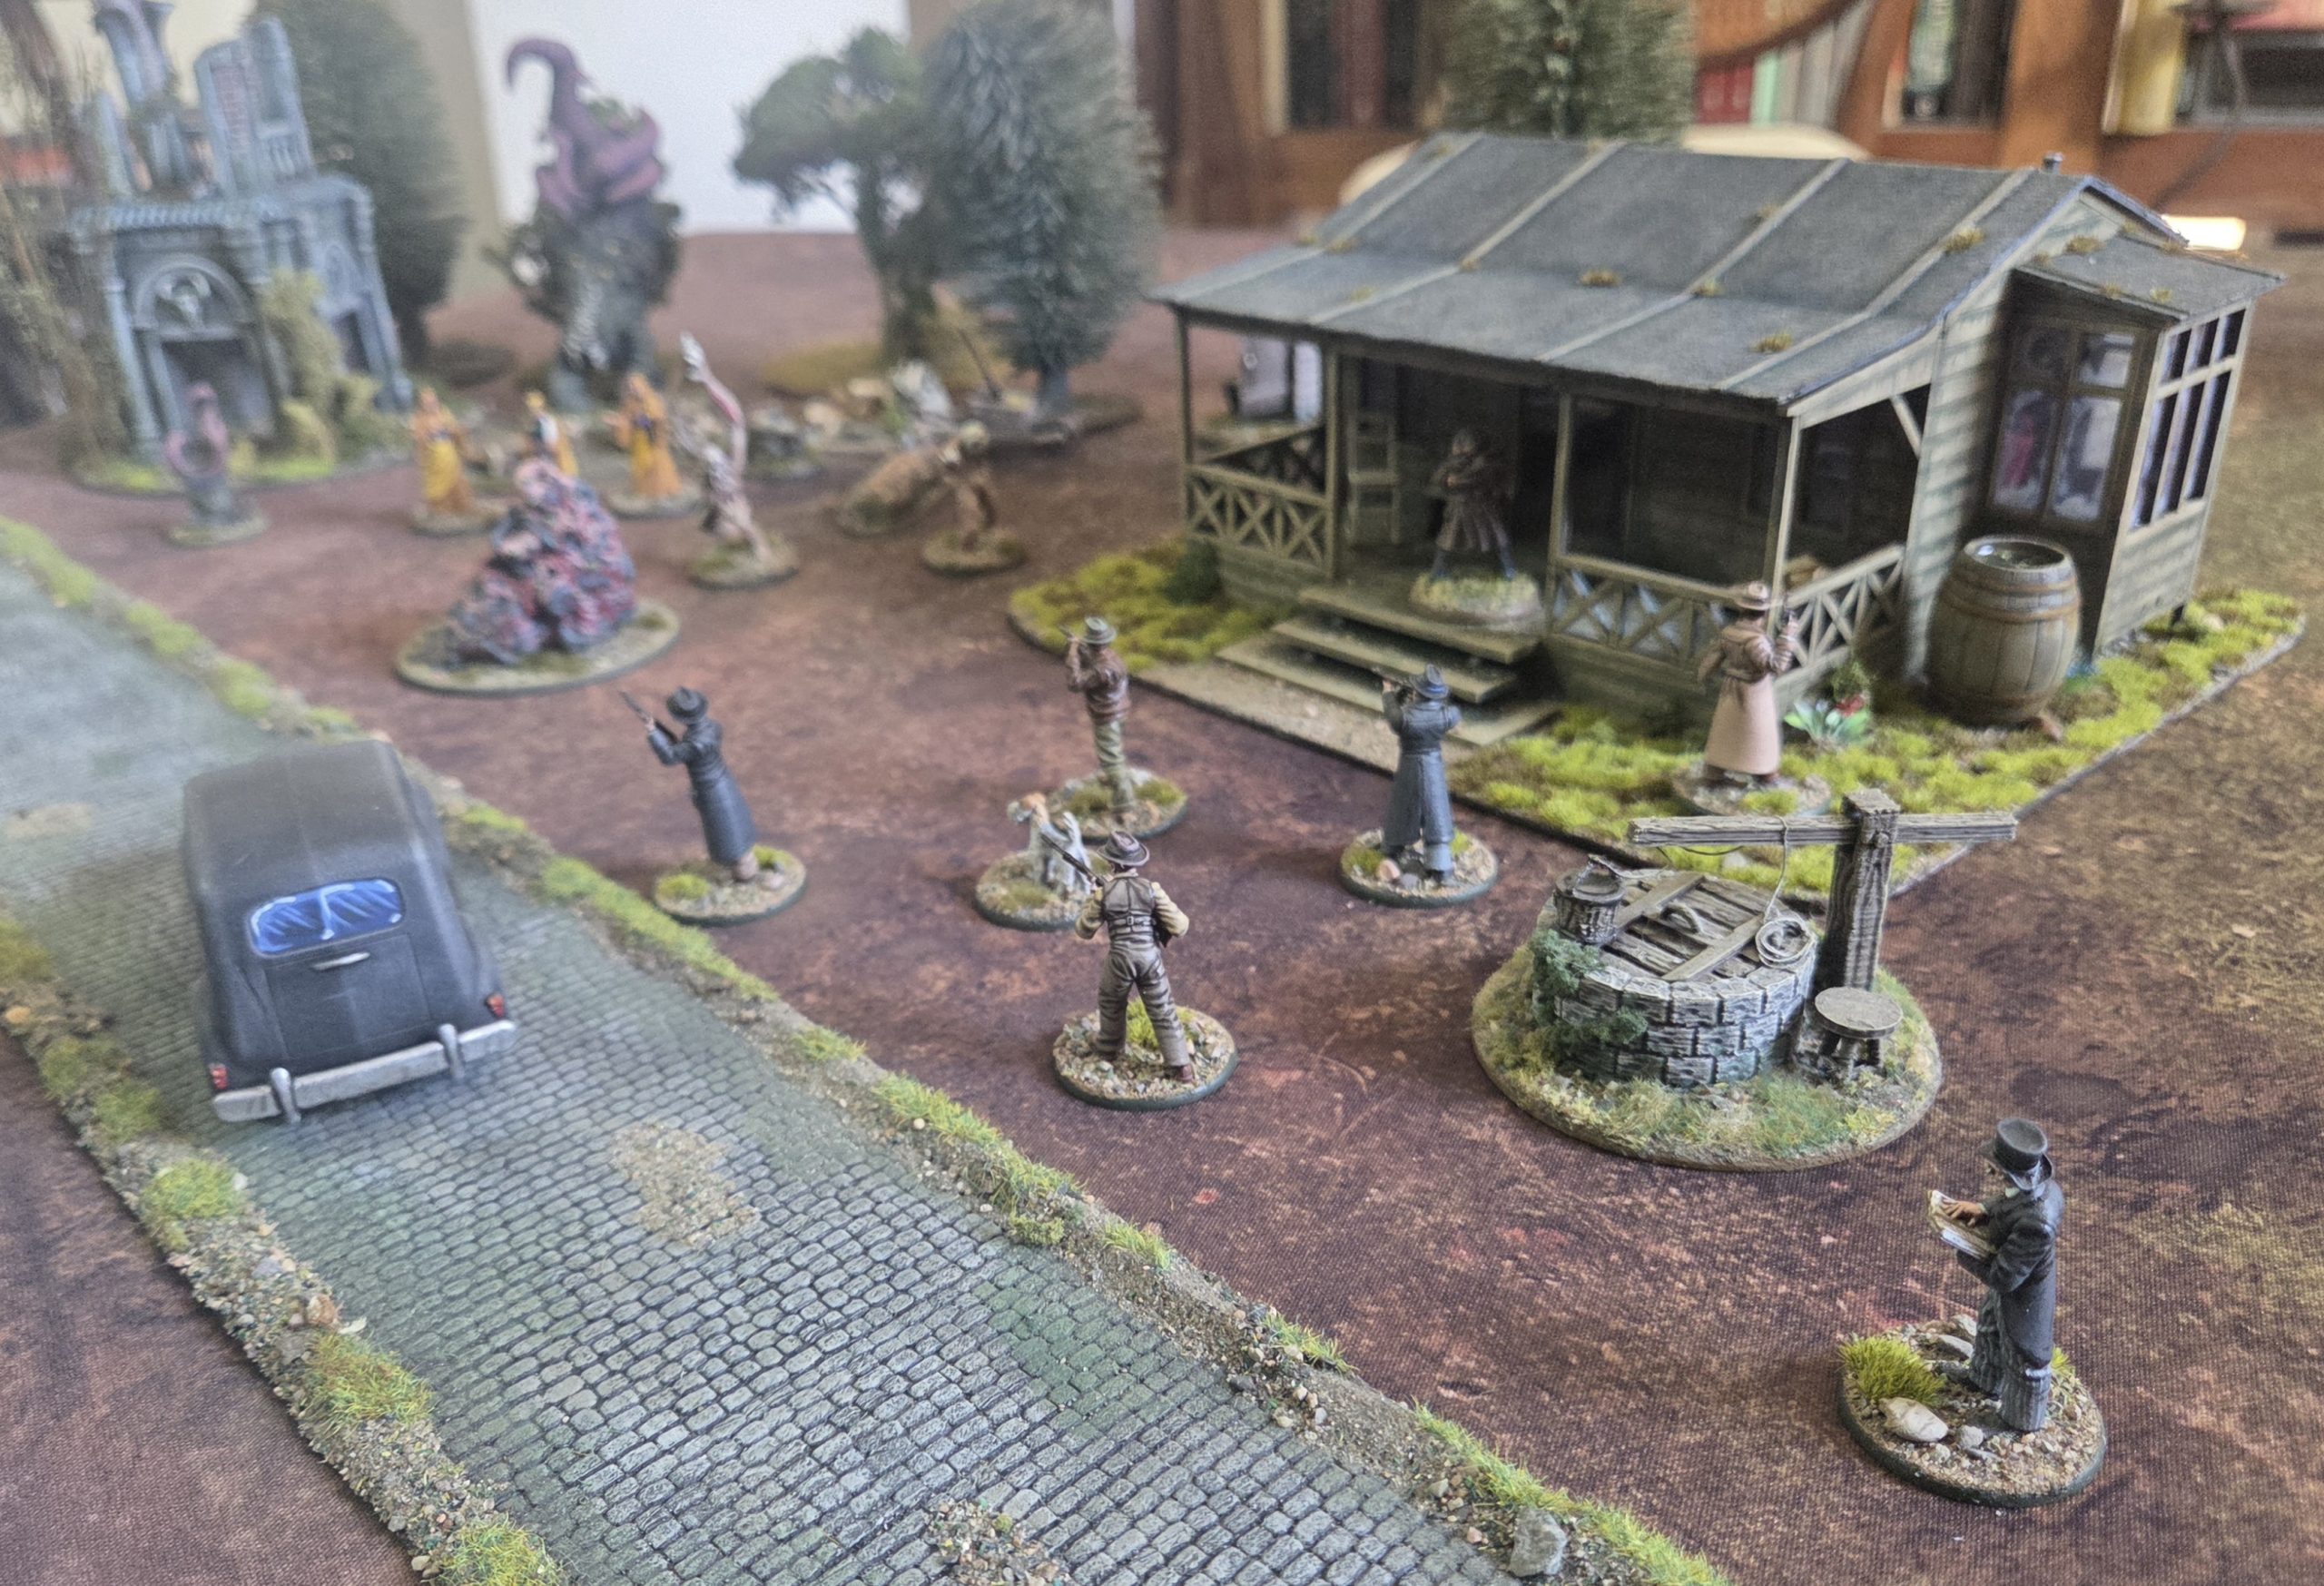
I have now finished the house, this is all the terrain for this project apart from the game board (which I will do when I return from holiday in May).
My next posts will be for the wonderful Spectre Miniatures that I have painted up, I still have a few to finish off. Then I will publish my first ever game report, (after confirming that it is ok with Spectre miniatures).
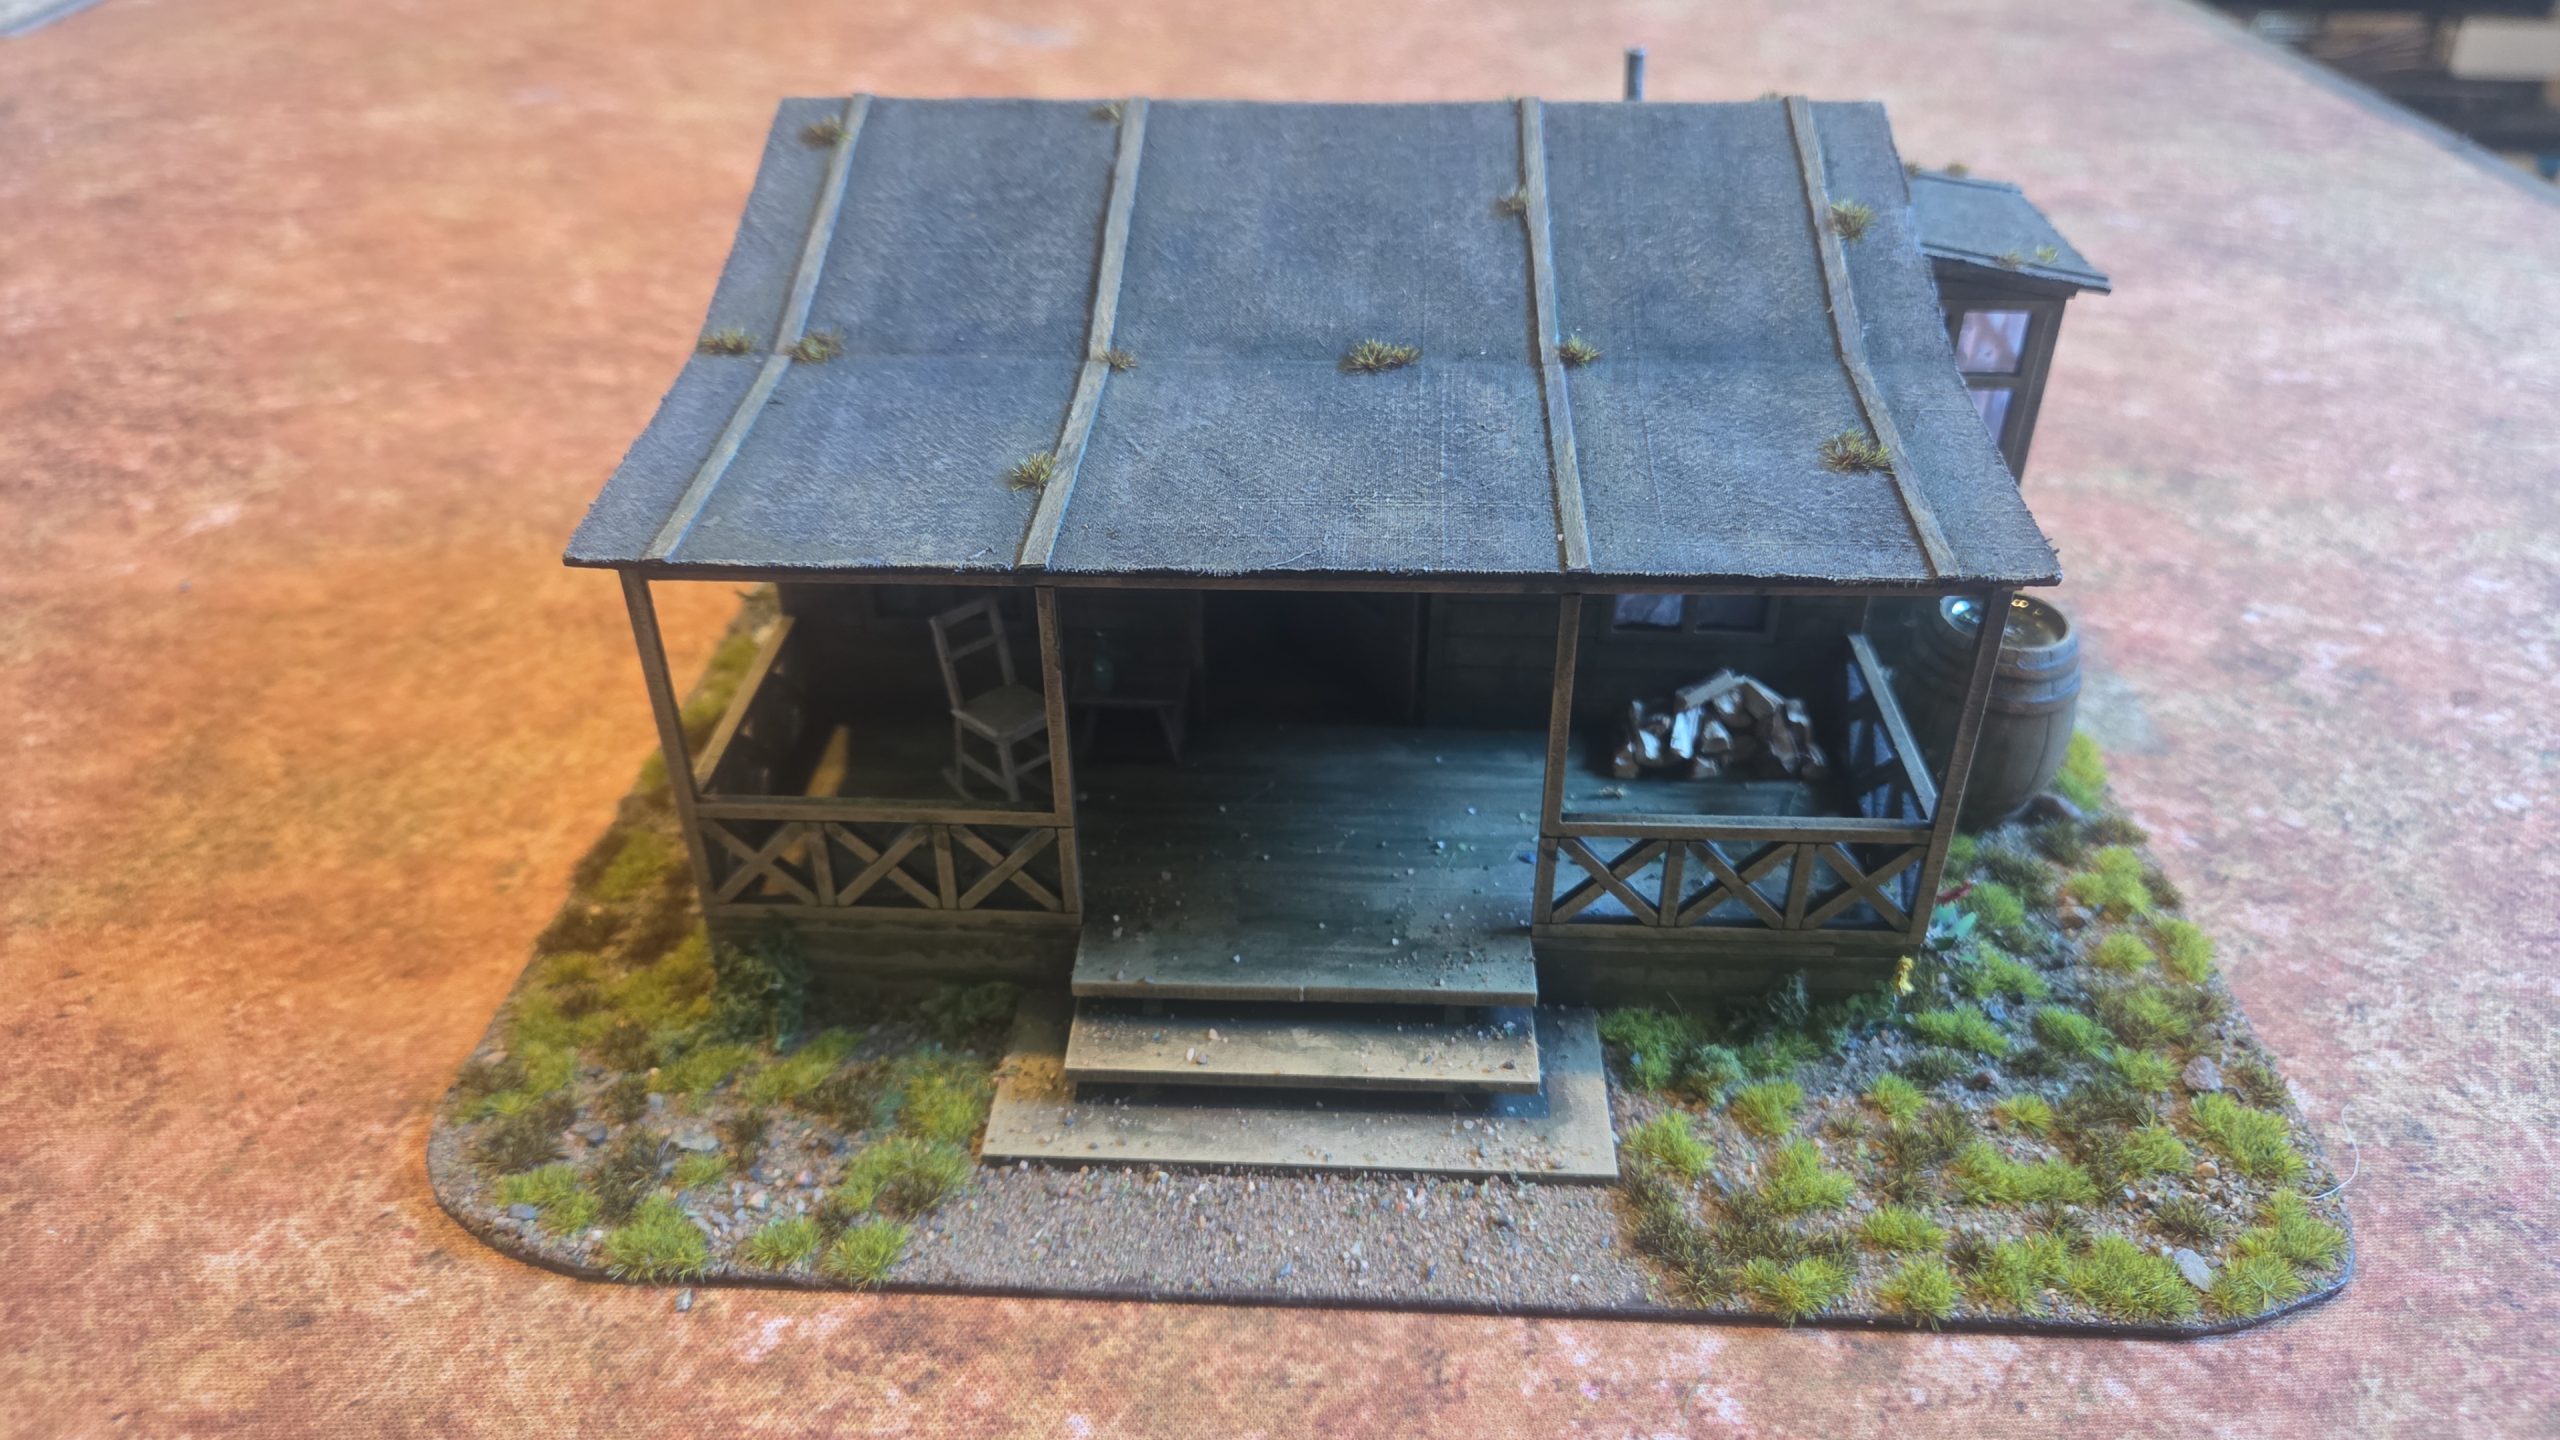 I used odd bits of foilage, lichen, sponge, paper flowers, vines and the lovely Gamers Grass tufts (moss and dark moss).
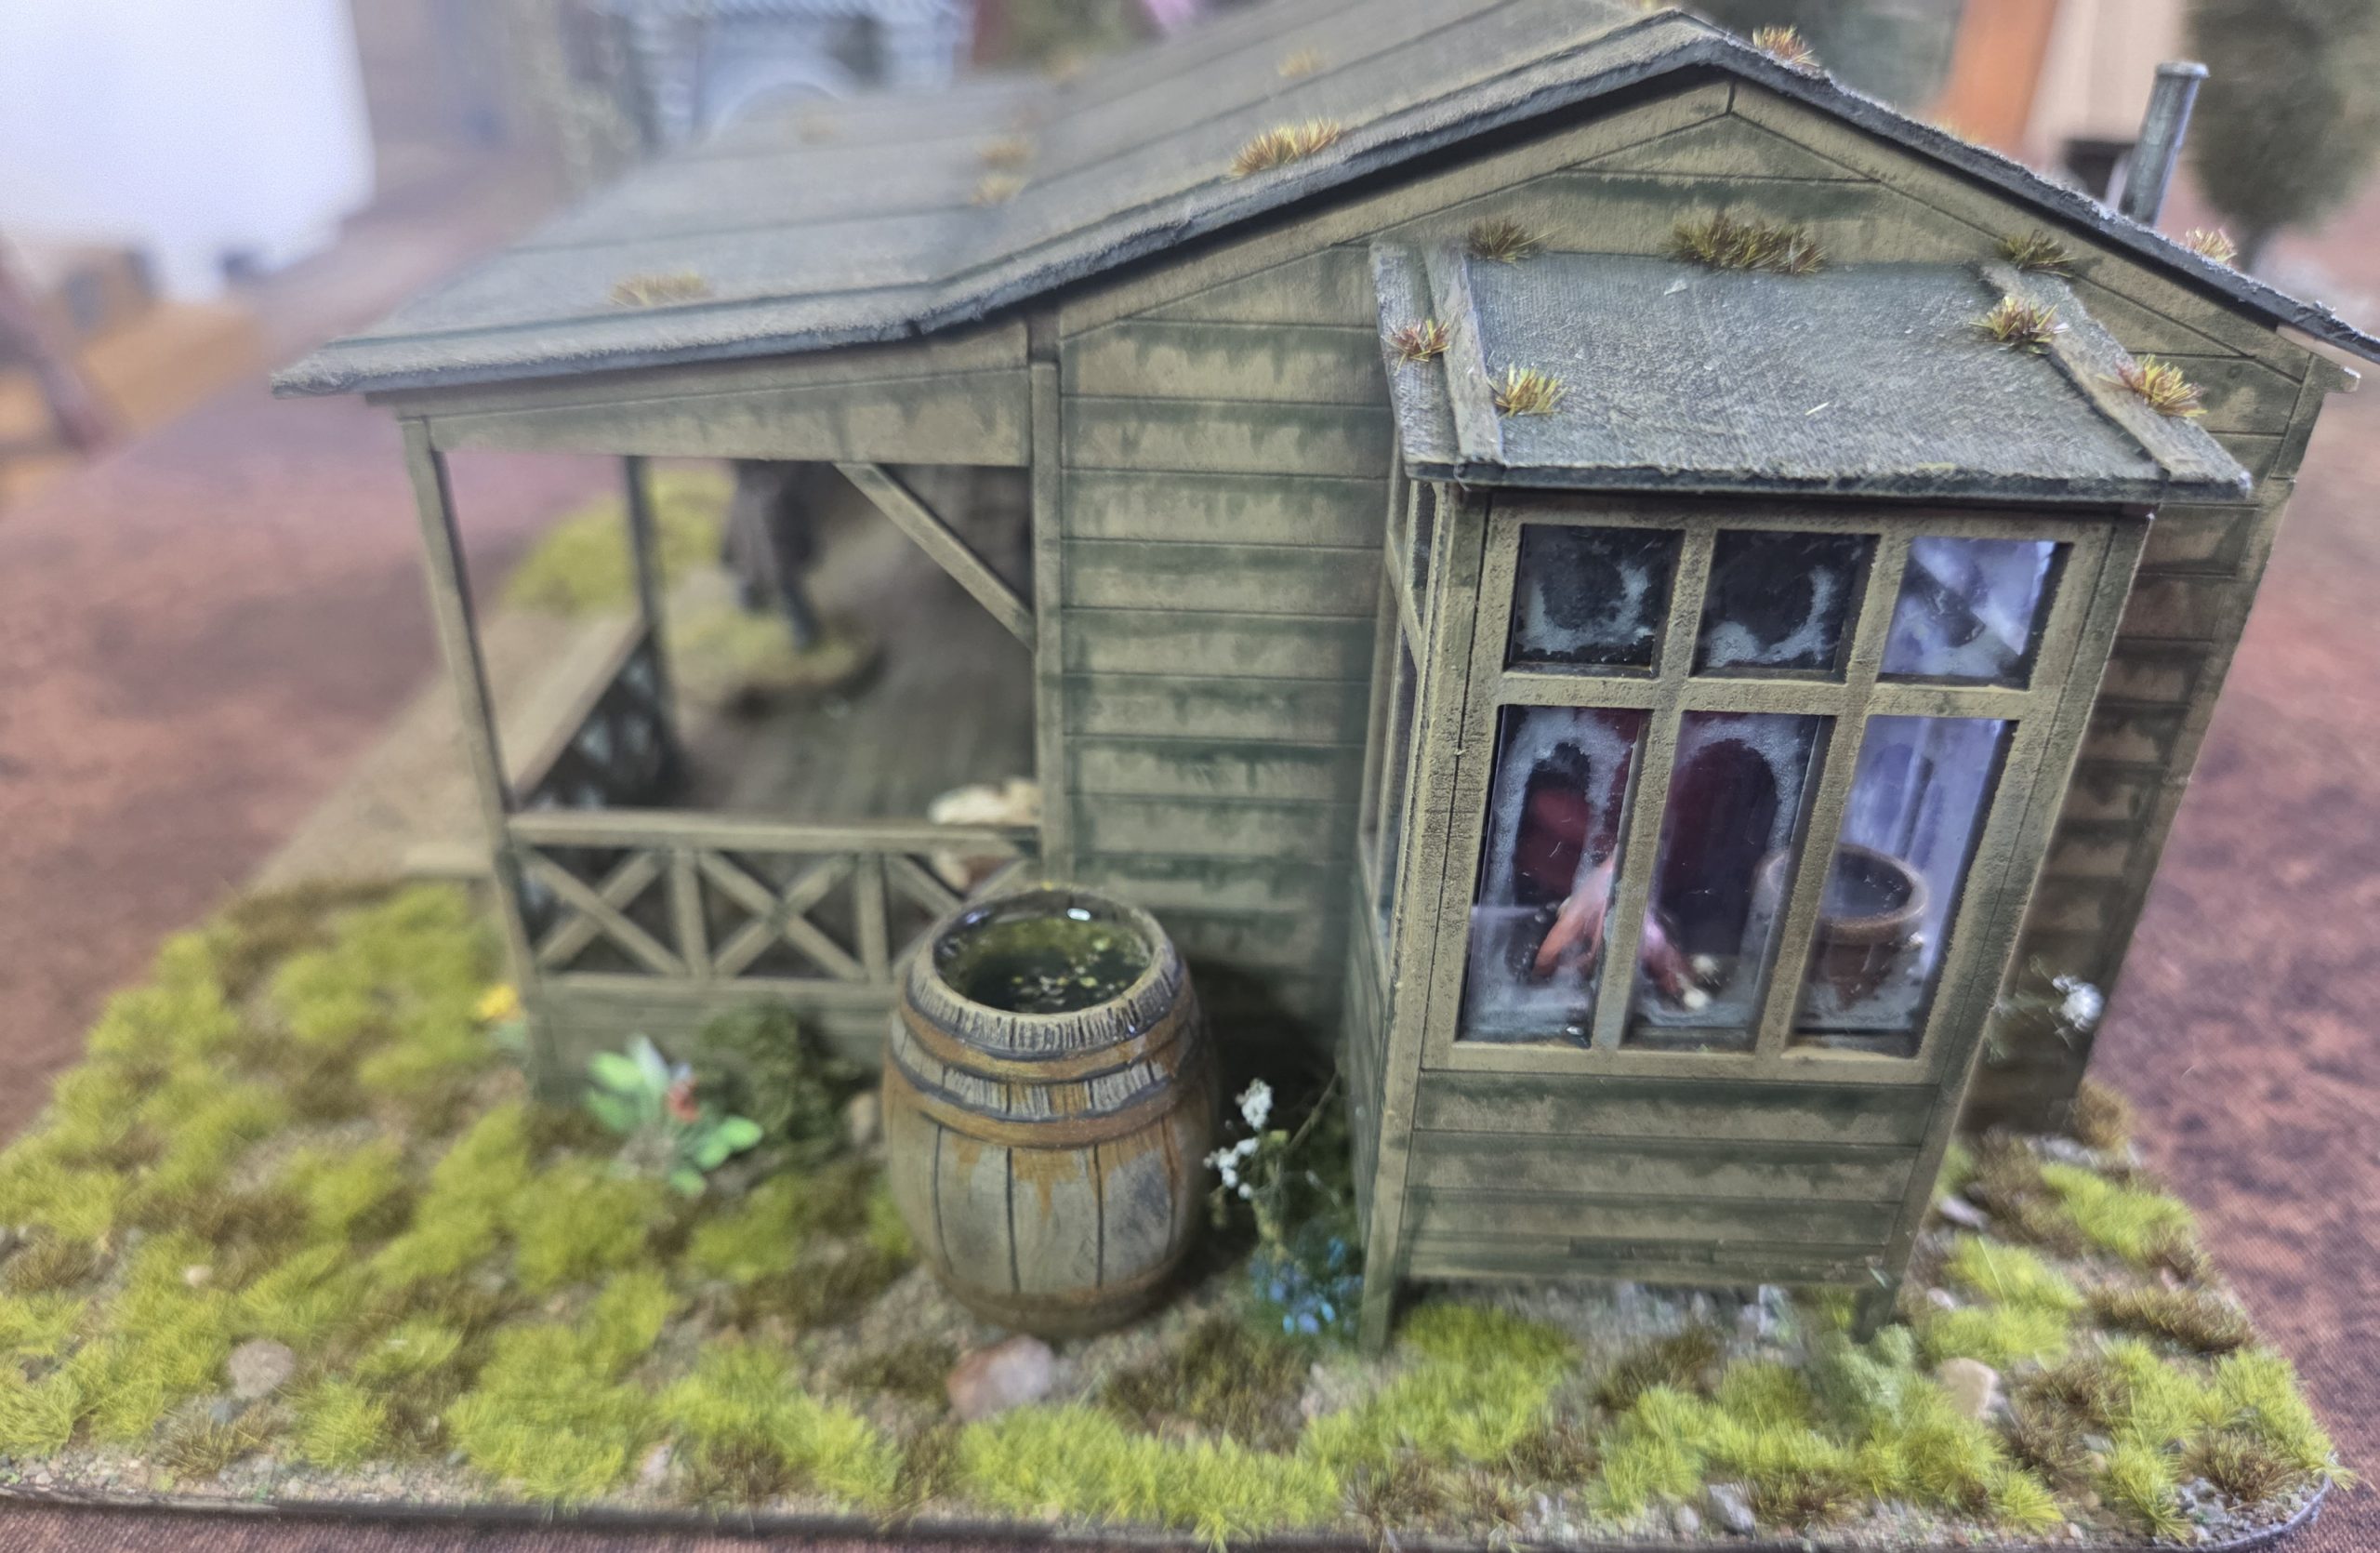 Here you can clearly see the dirtying down of the windows. The barrel had a final thin layer of Gorilla clear glue, when filling a deep cavity the glue shrinks back leaving a concave finish, so you need a thin layer to level off, this also gives me the opportunity to use scatter some leaves on top.
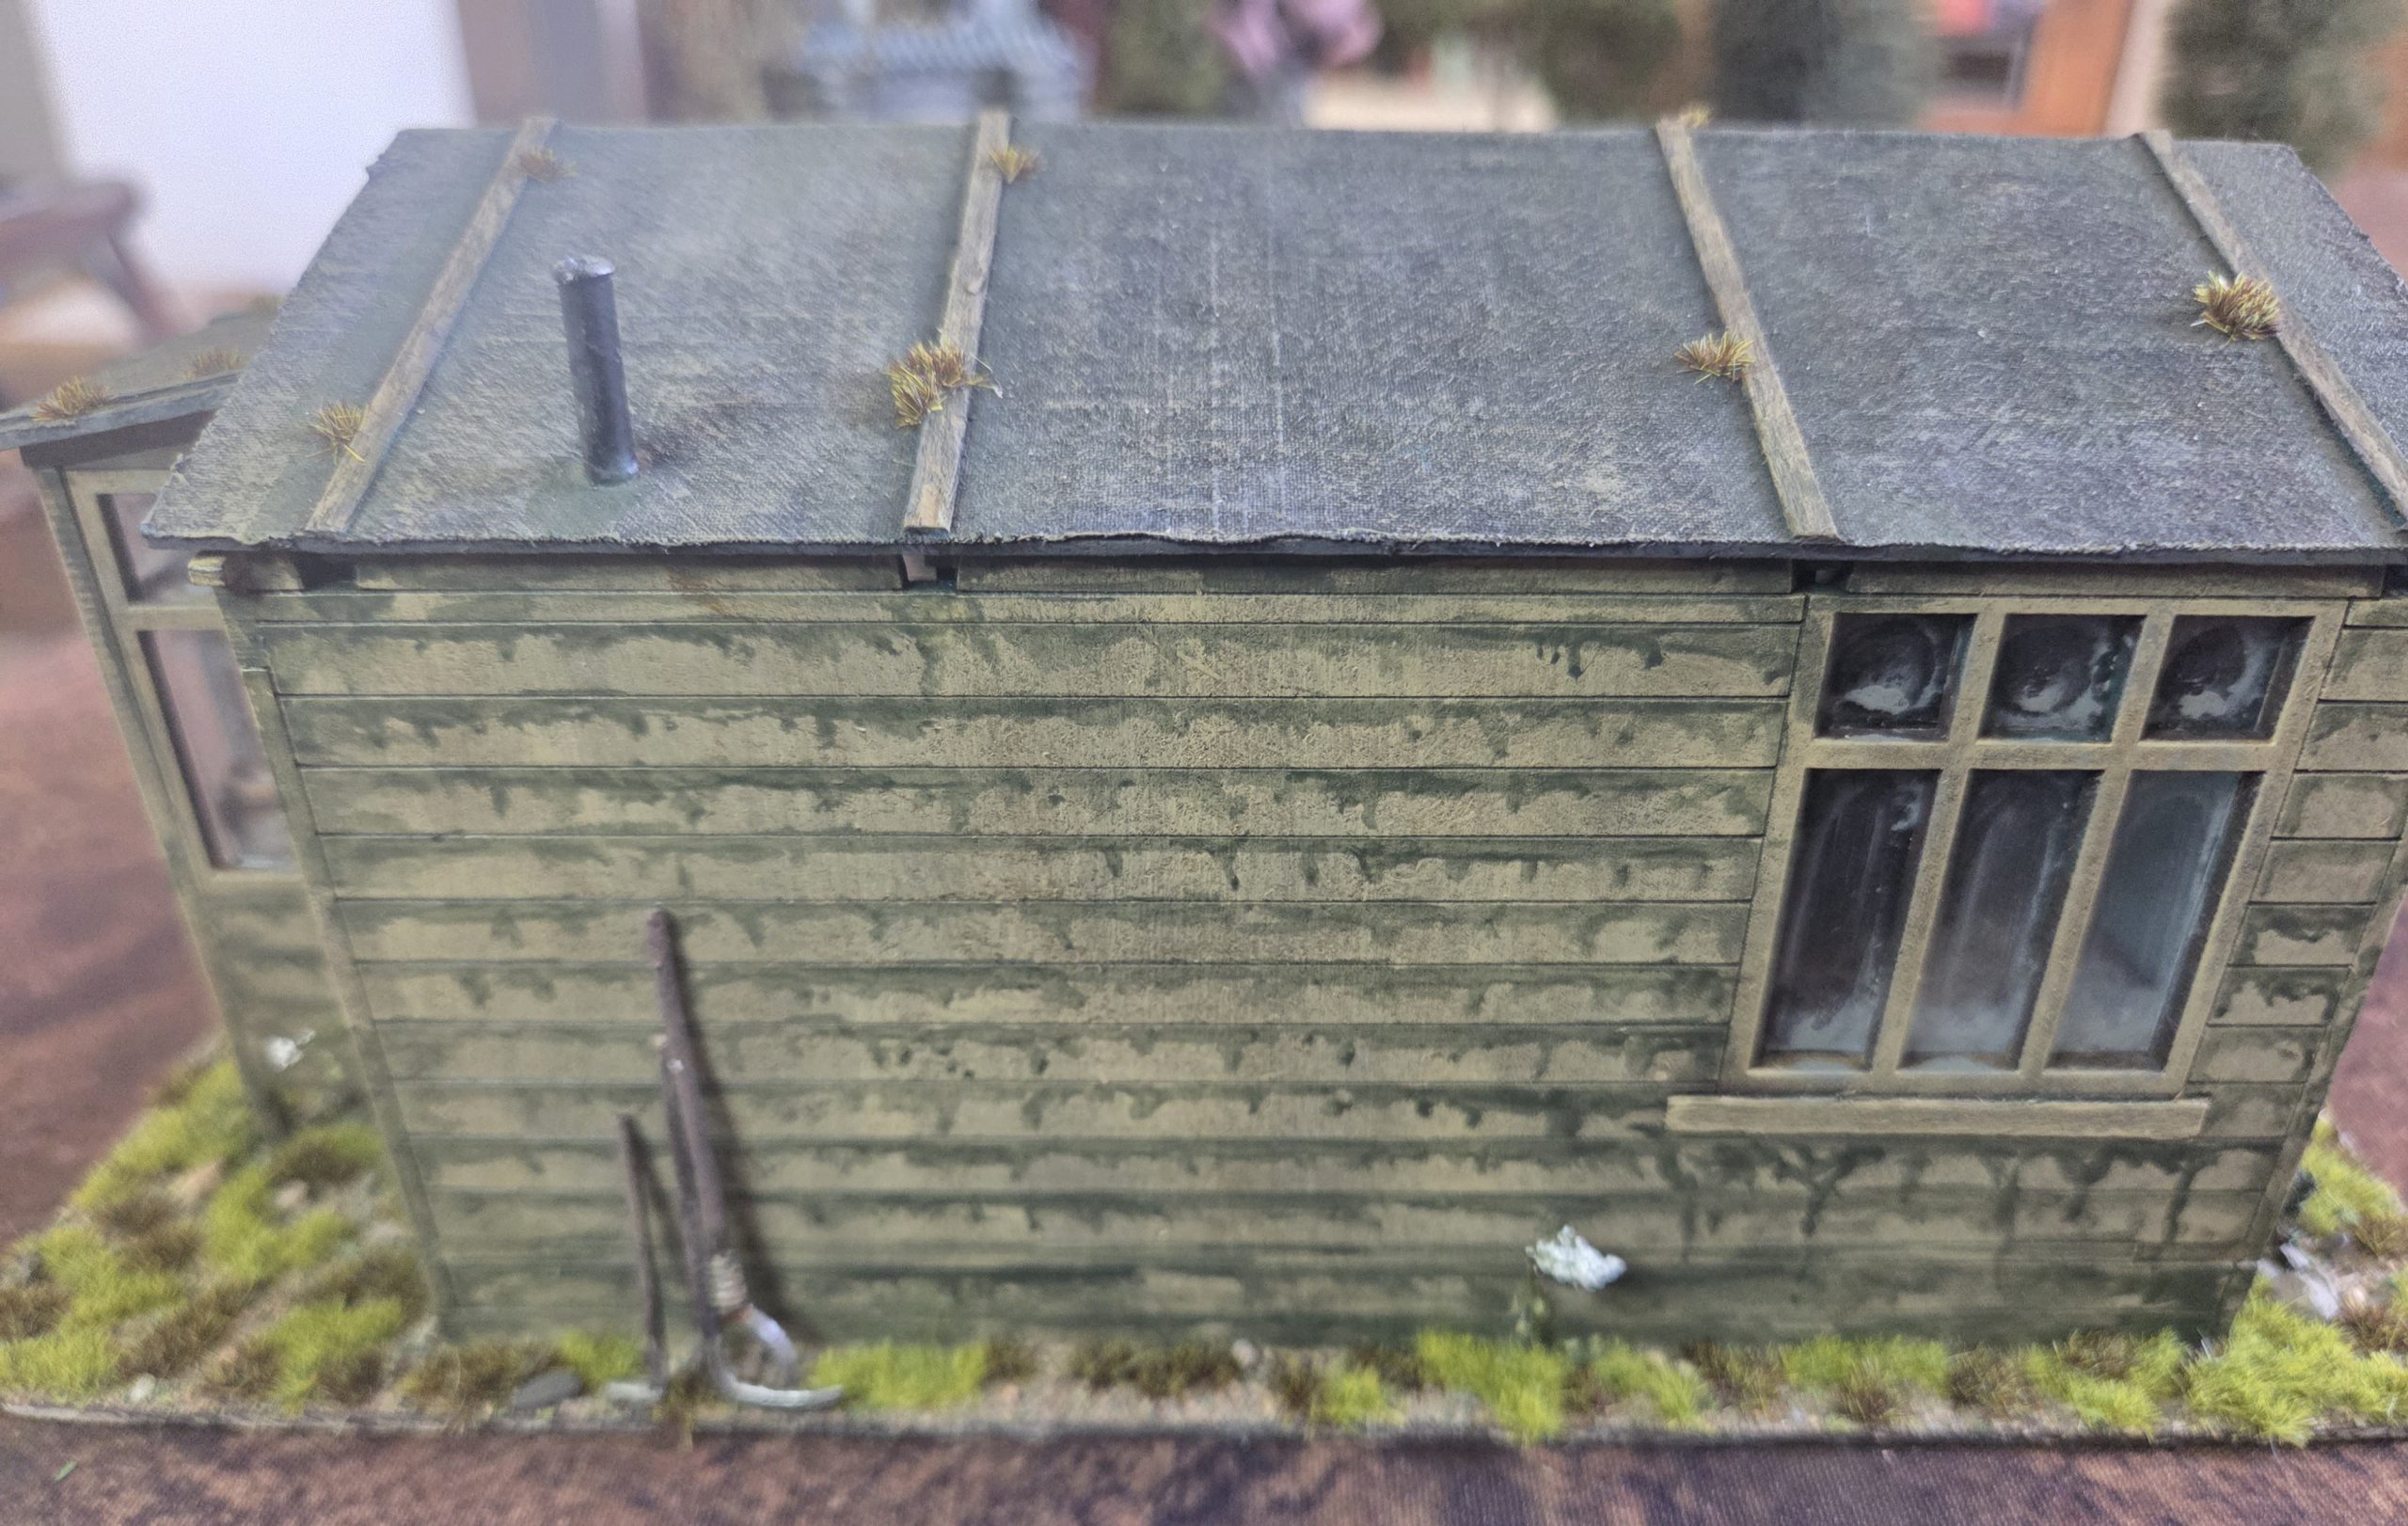 You can see the odd tufts of moss on the roof, and a few tools against the wall.
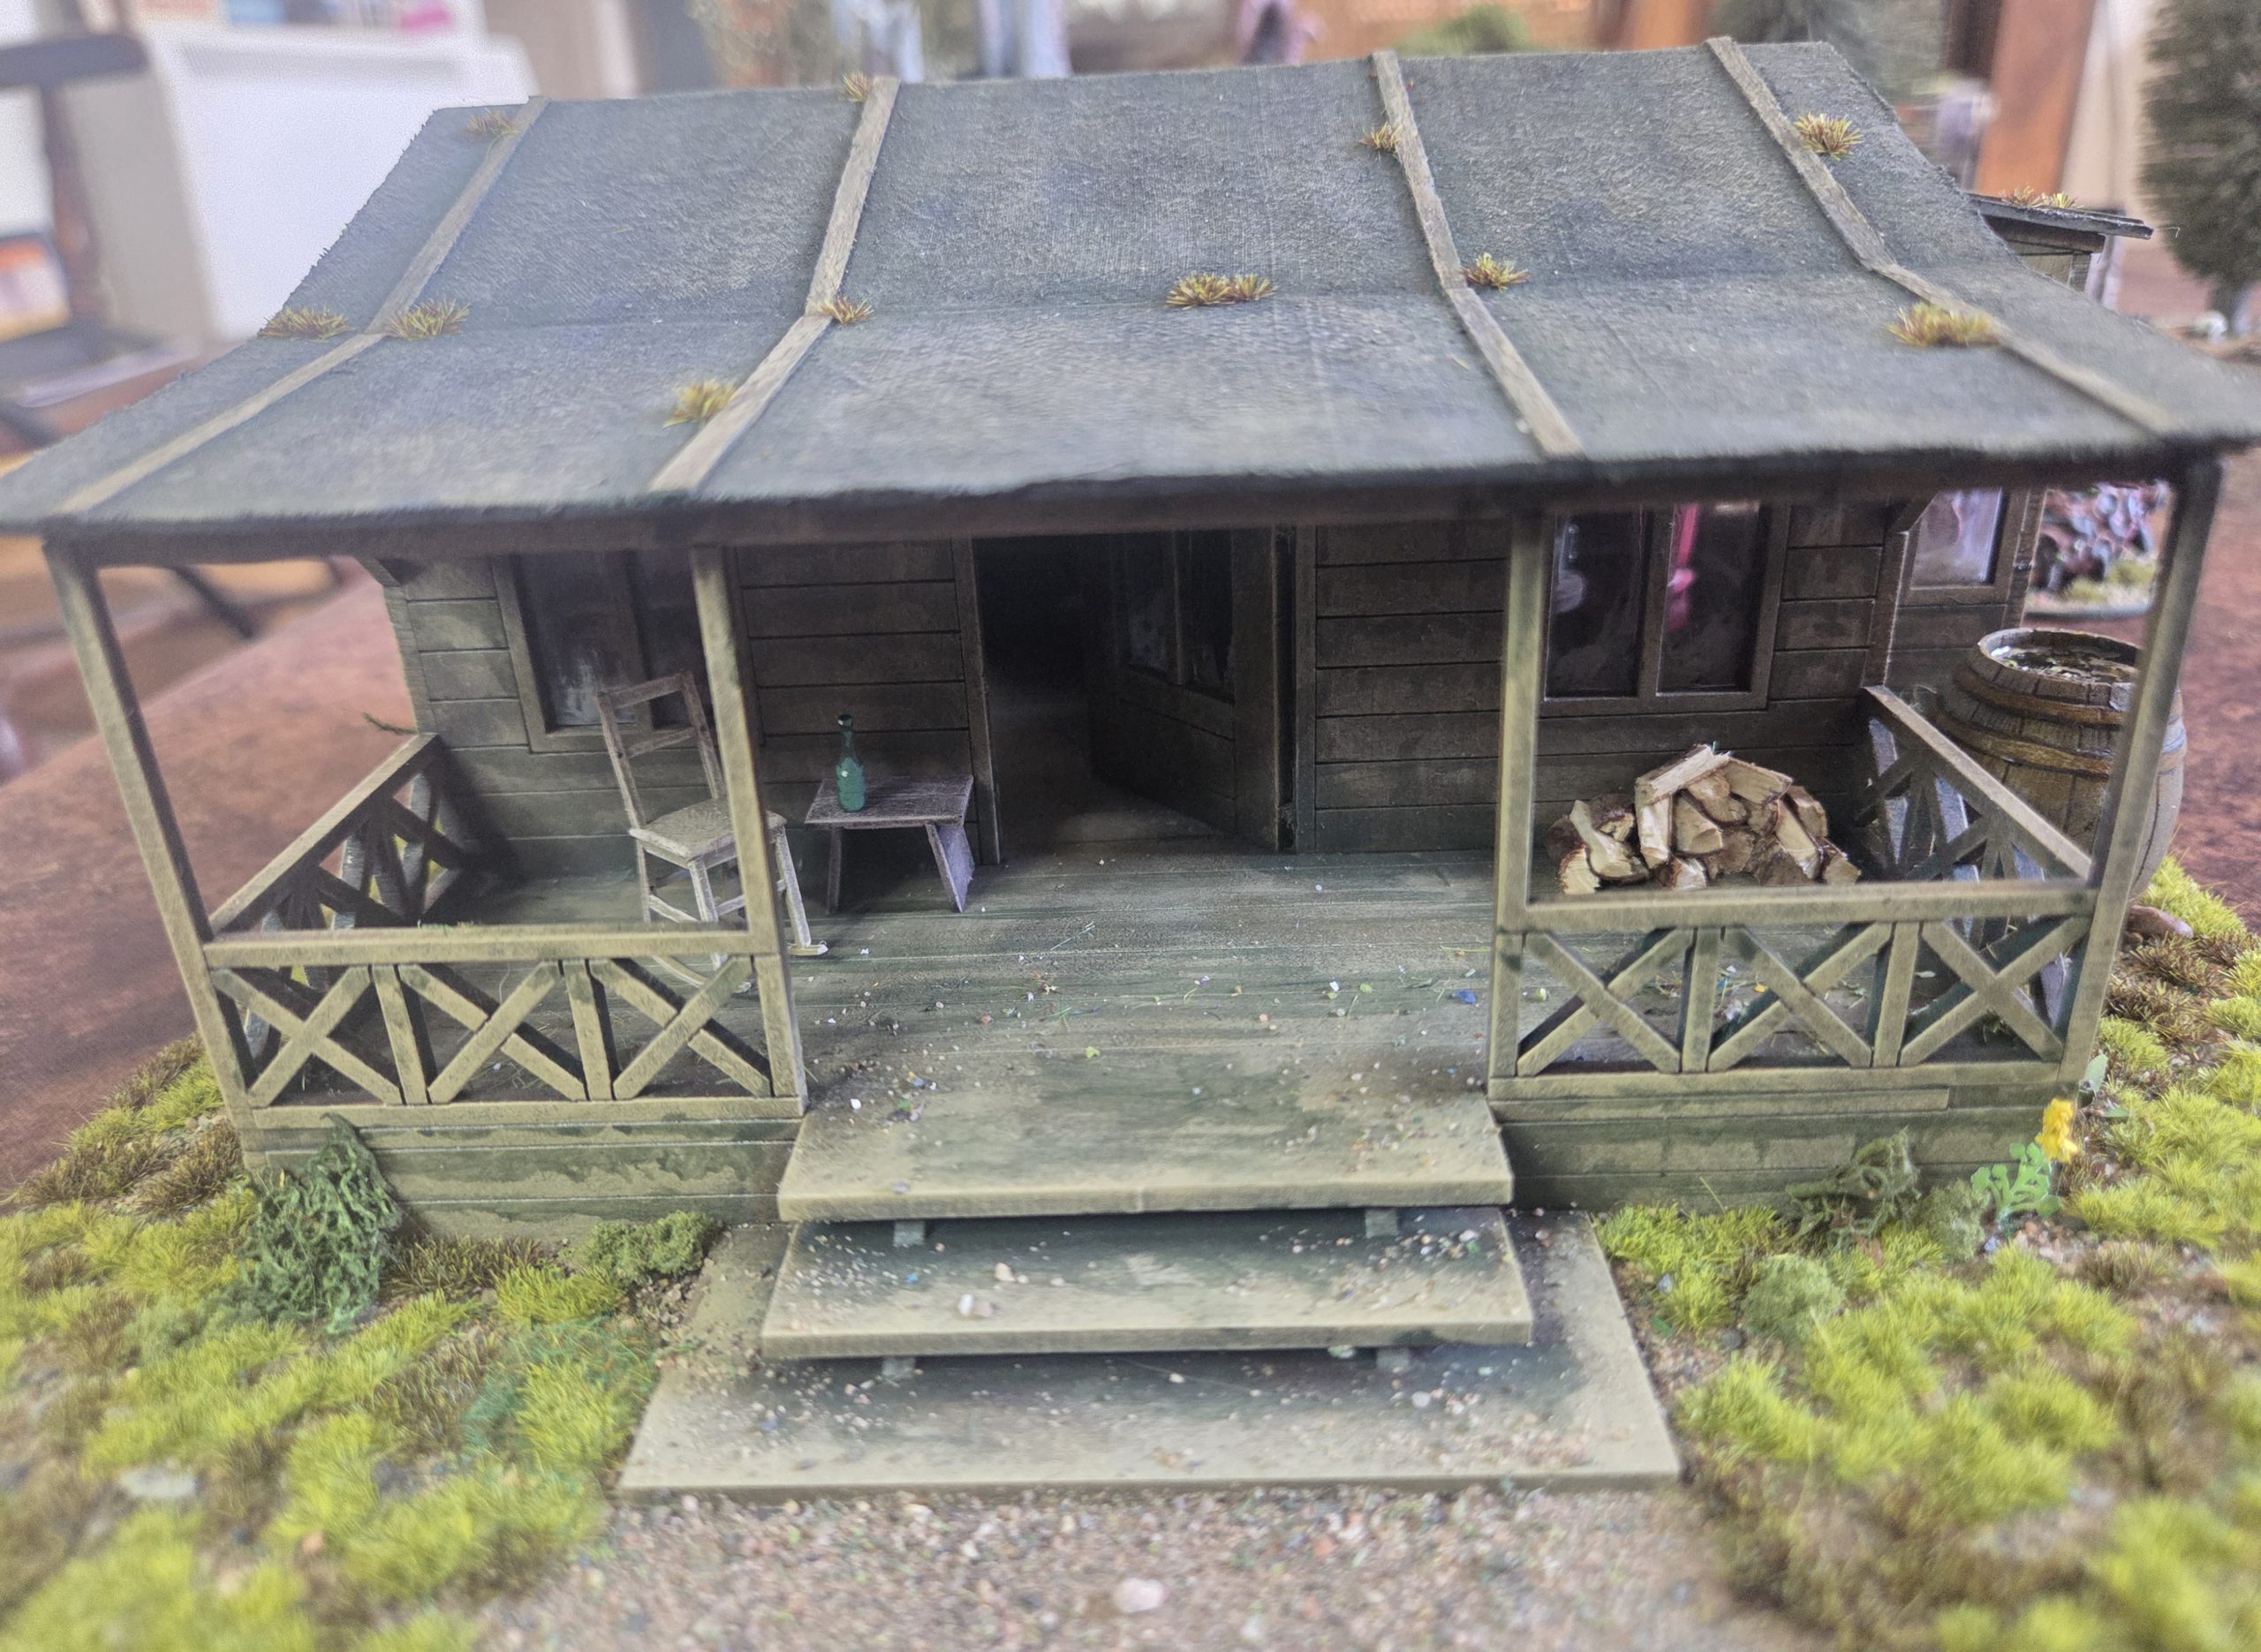 I wanted to add some fine scatter/debris on the steps and porch. To do this I used a peice of paper to mask off the front of house (particularly the windows) spayed the porch and steps with Matt Varnish, finely scattered a mix of leaves and grit leaving the main through way to the front door fairly clear. Once I was happy this was sealed in with another coat of matt varnish.
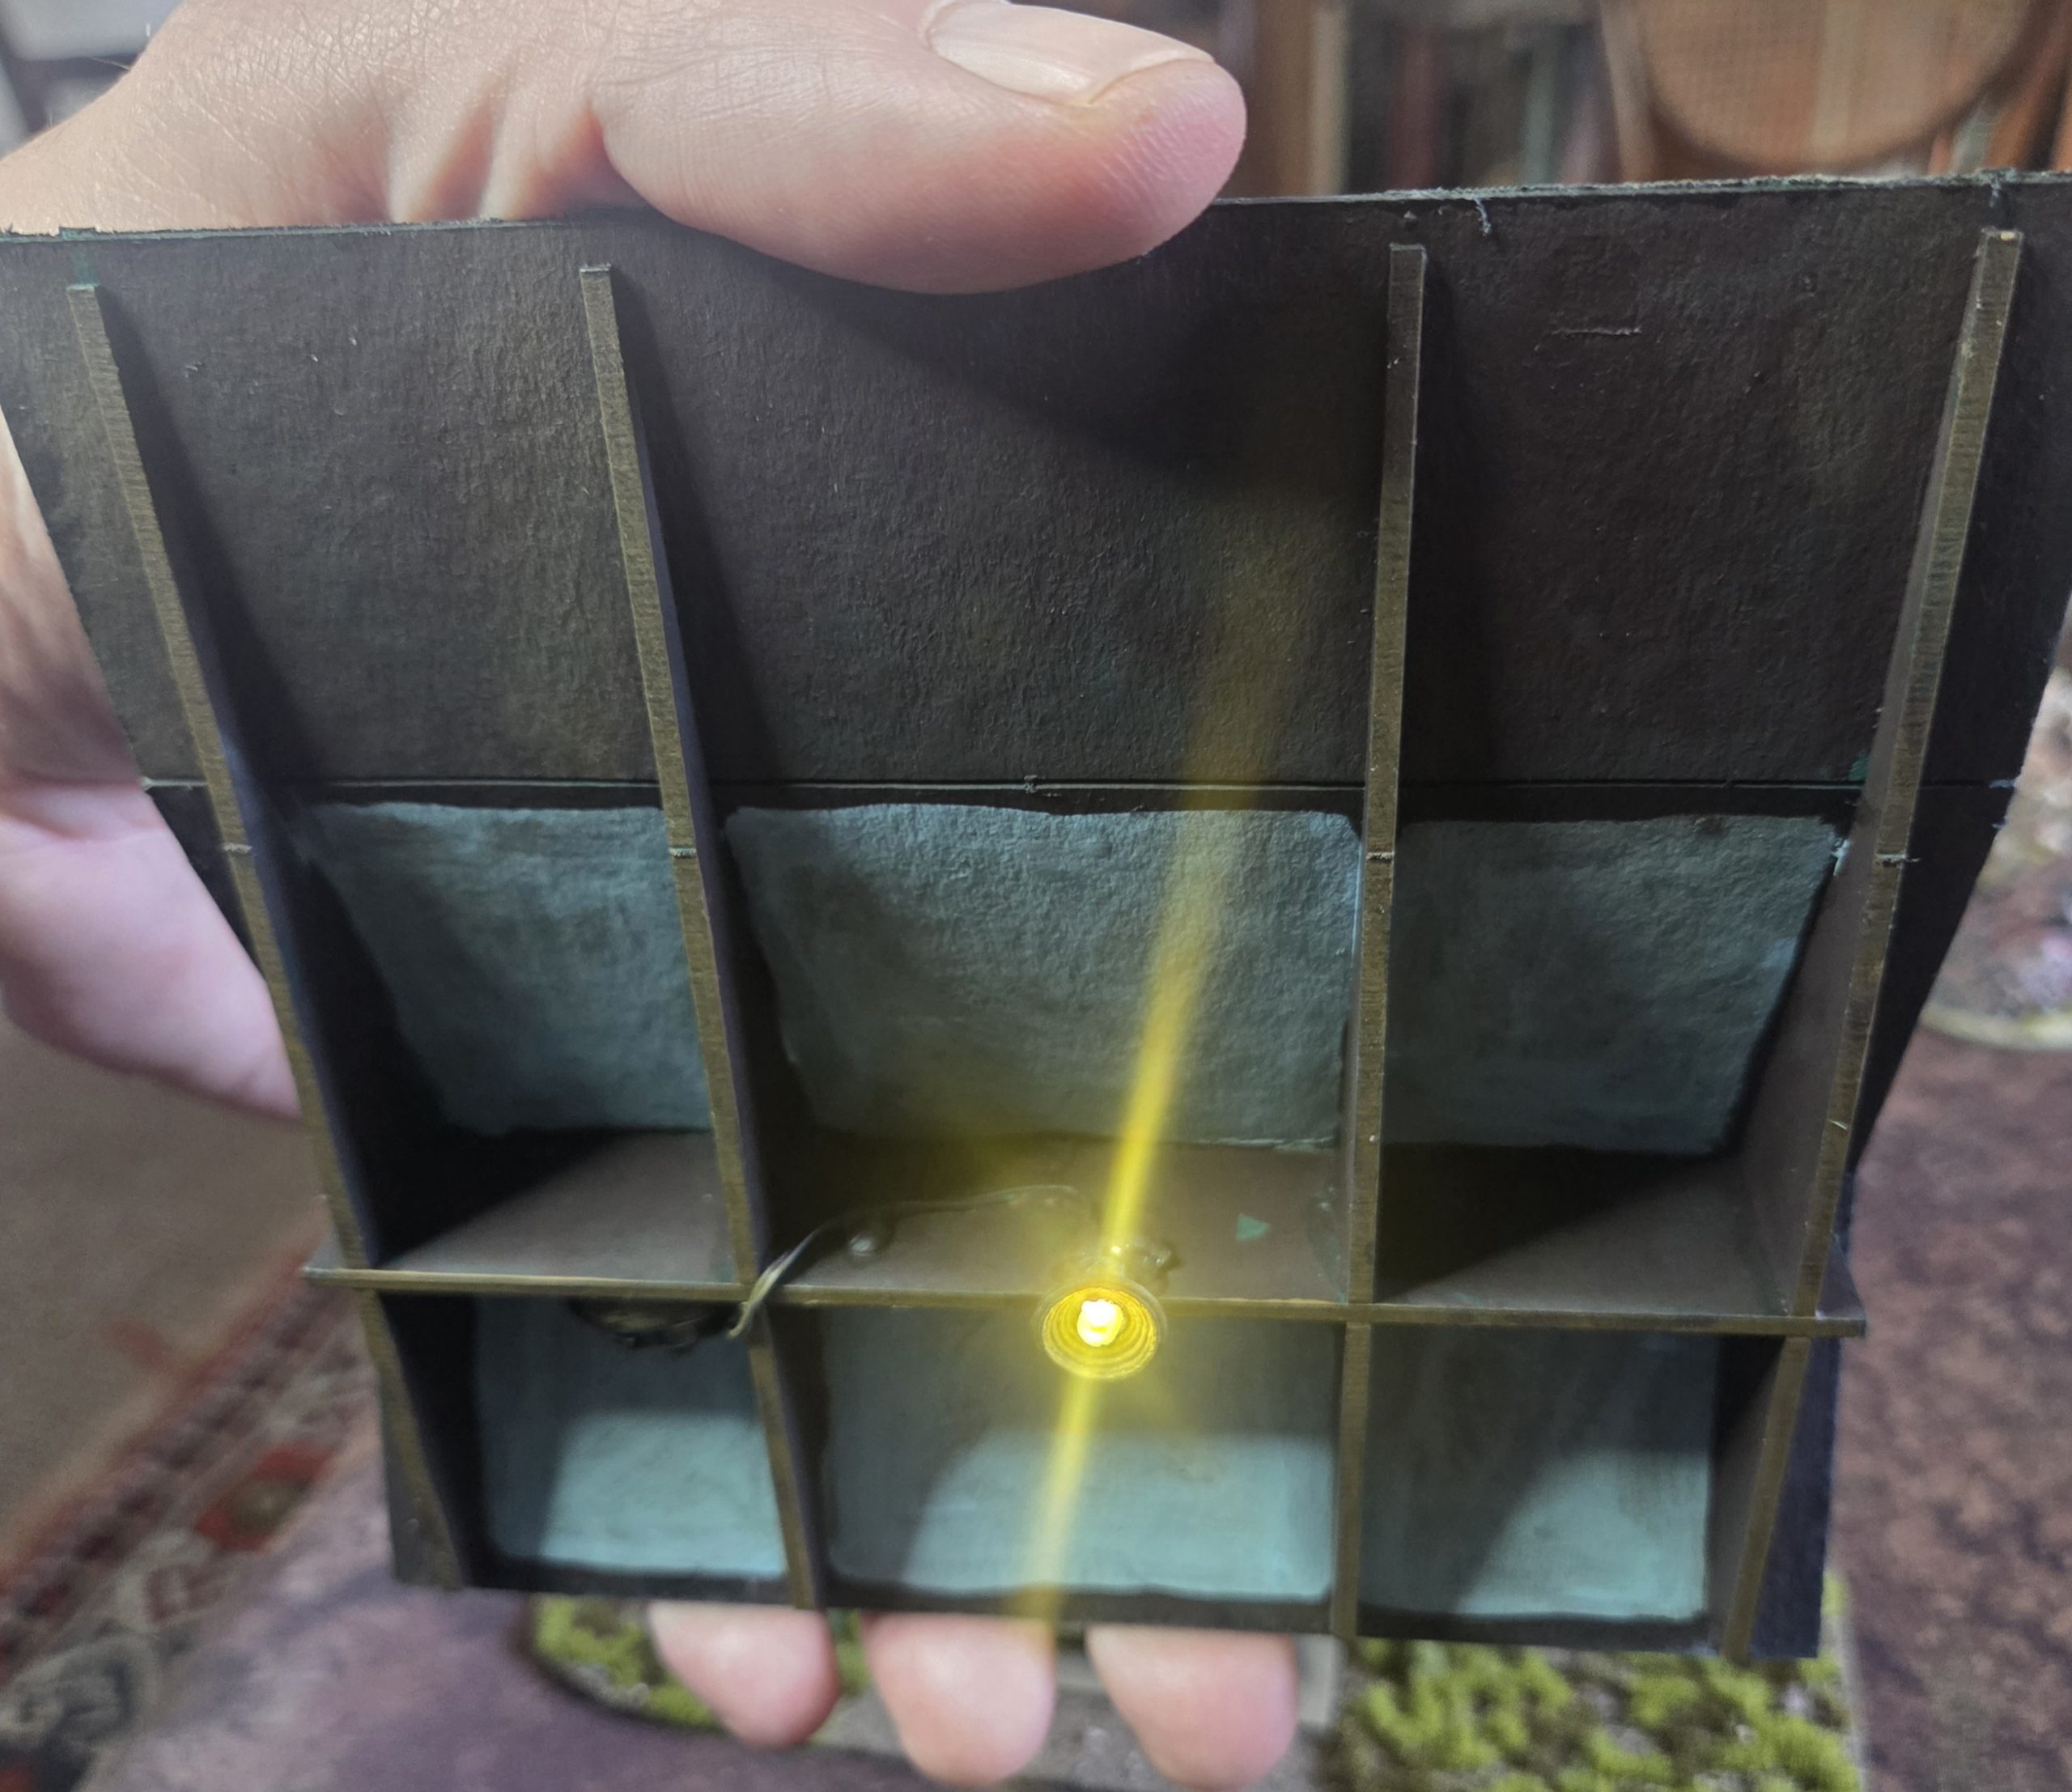 I added an LED light to the roof.
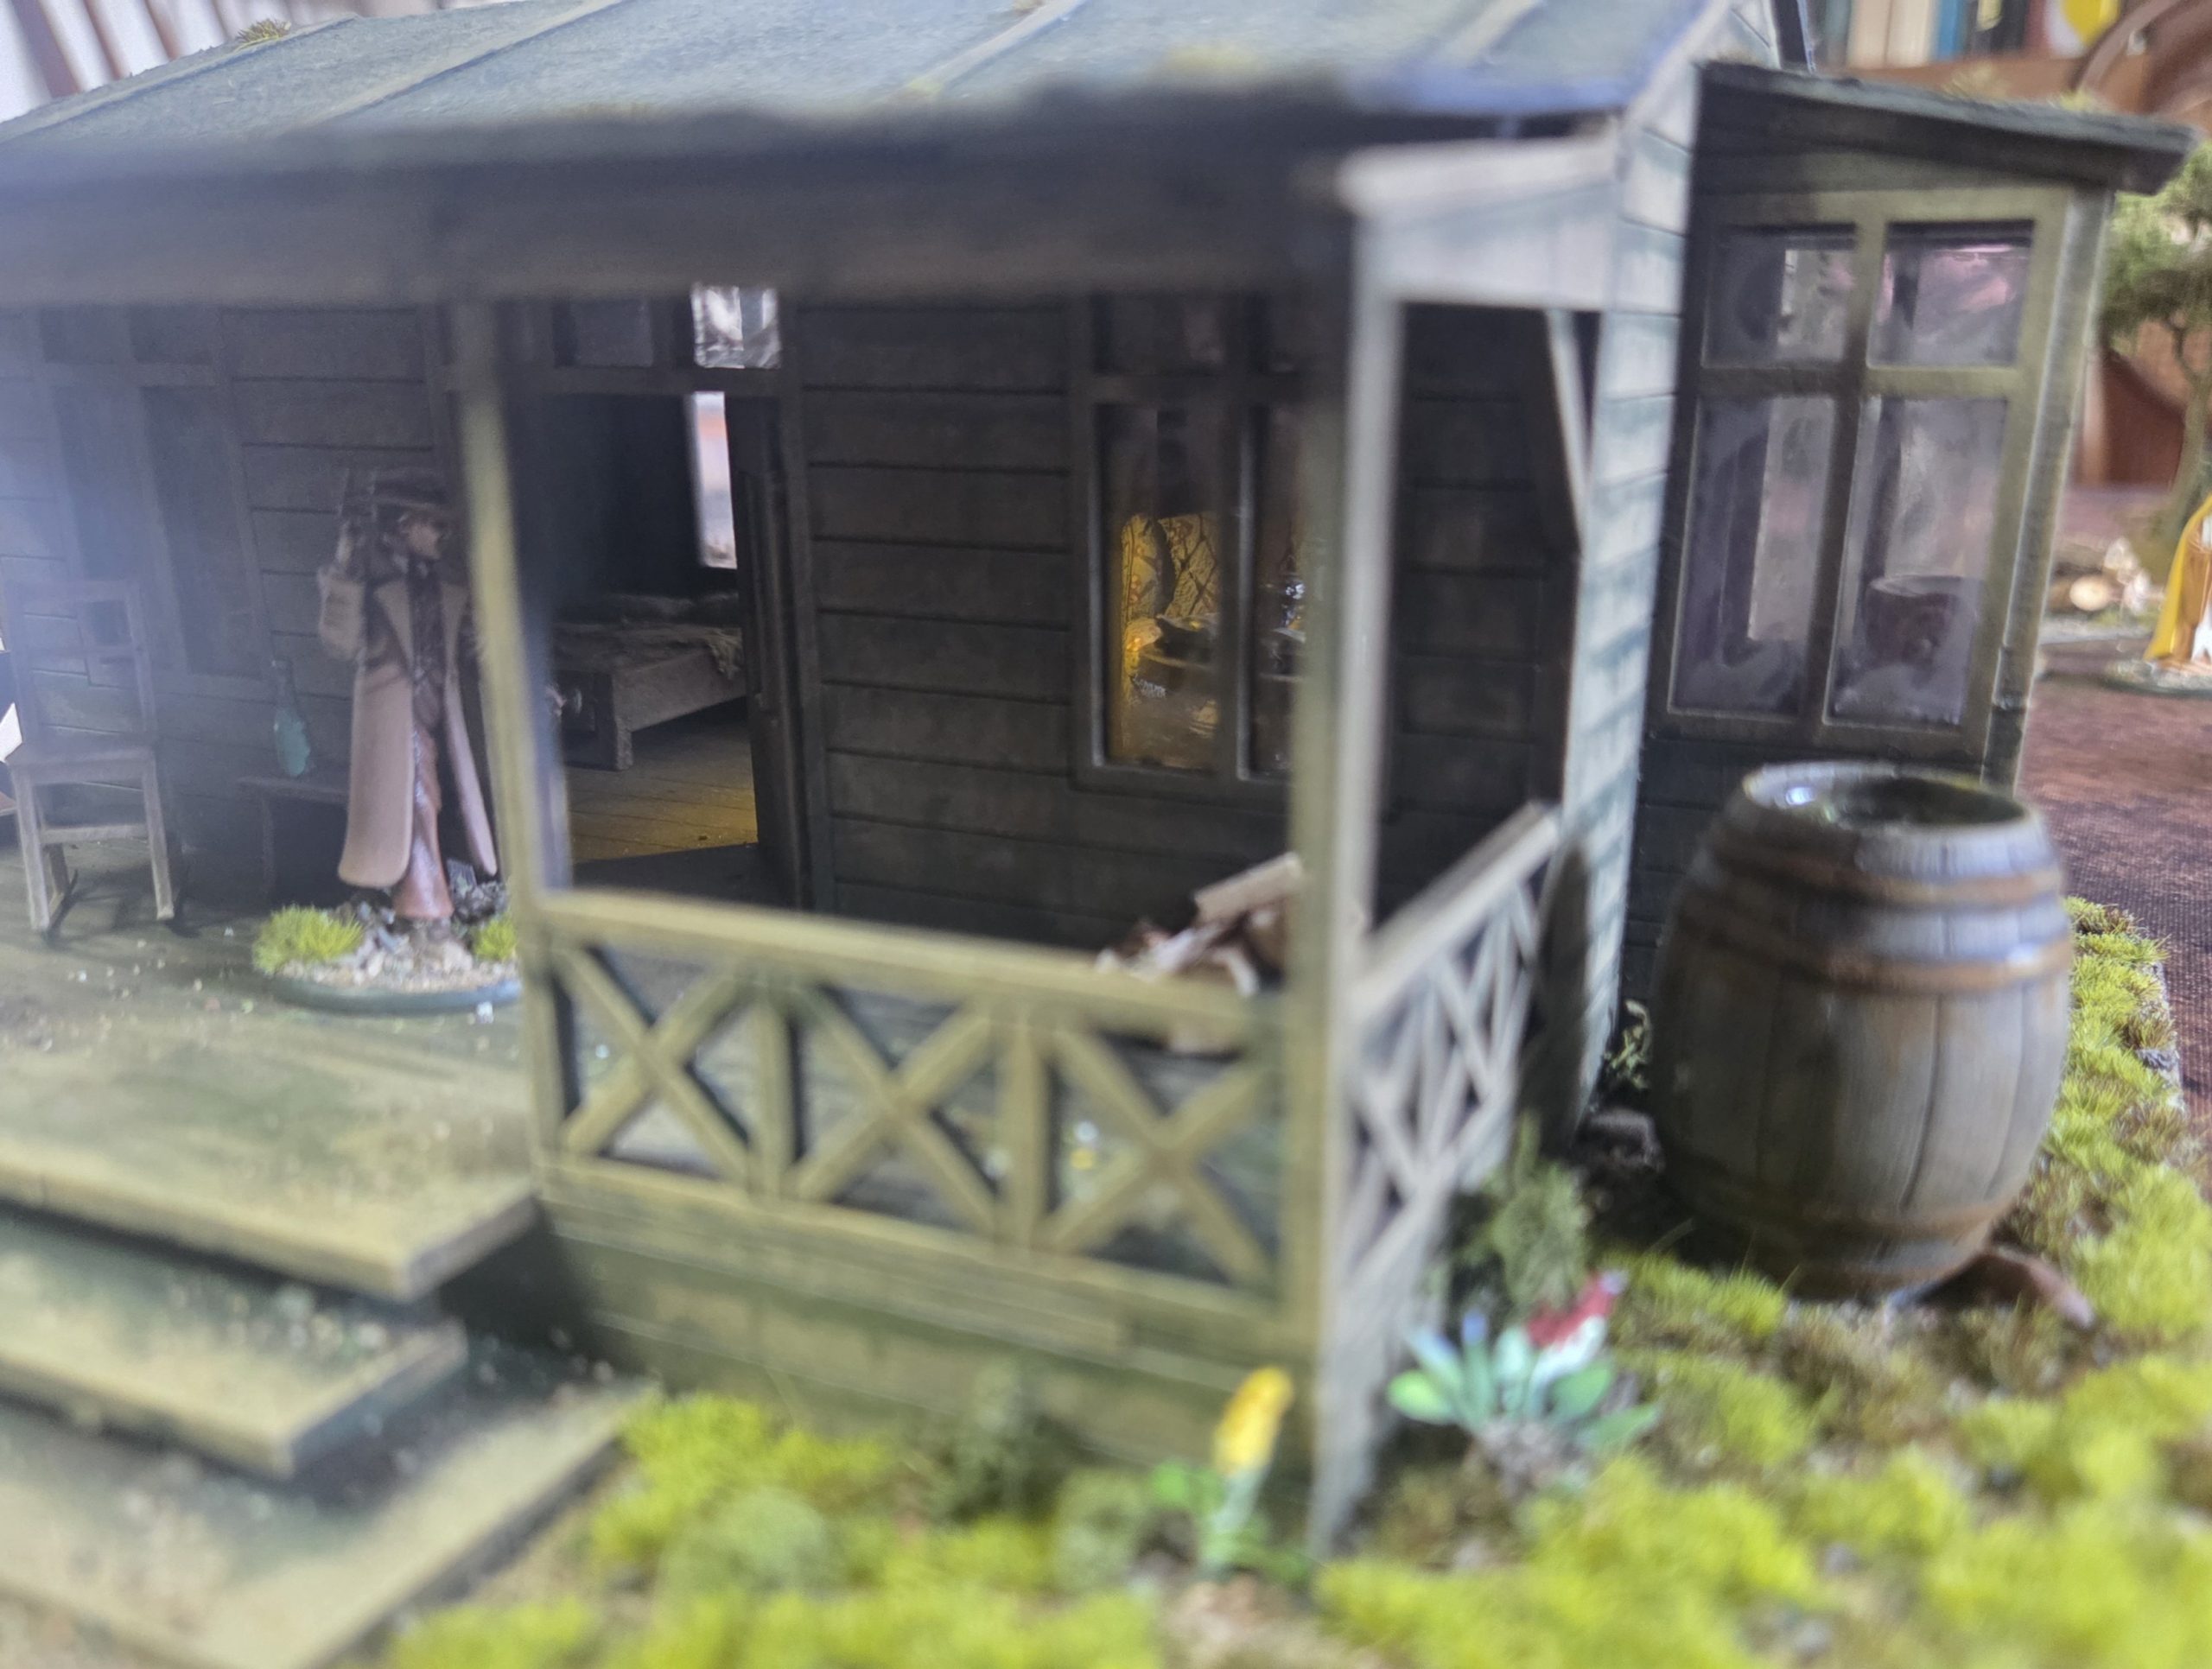 Investigator with Torch
More work on the House
I took a small break, but inspired again by my visit to SALUTE and chatting to Spectre and looking at the gorgeous miniatures in their display cabinet, I returned to this project. I have now completed all the modelling and painting and now just need to add foliage to the base.
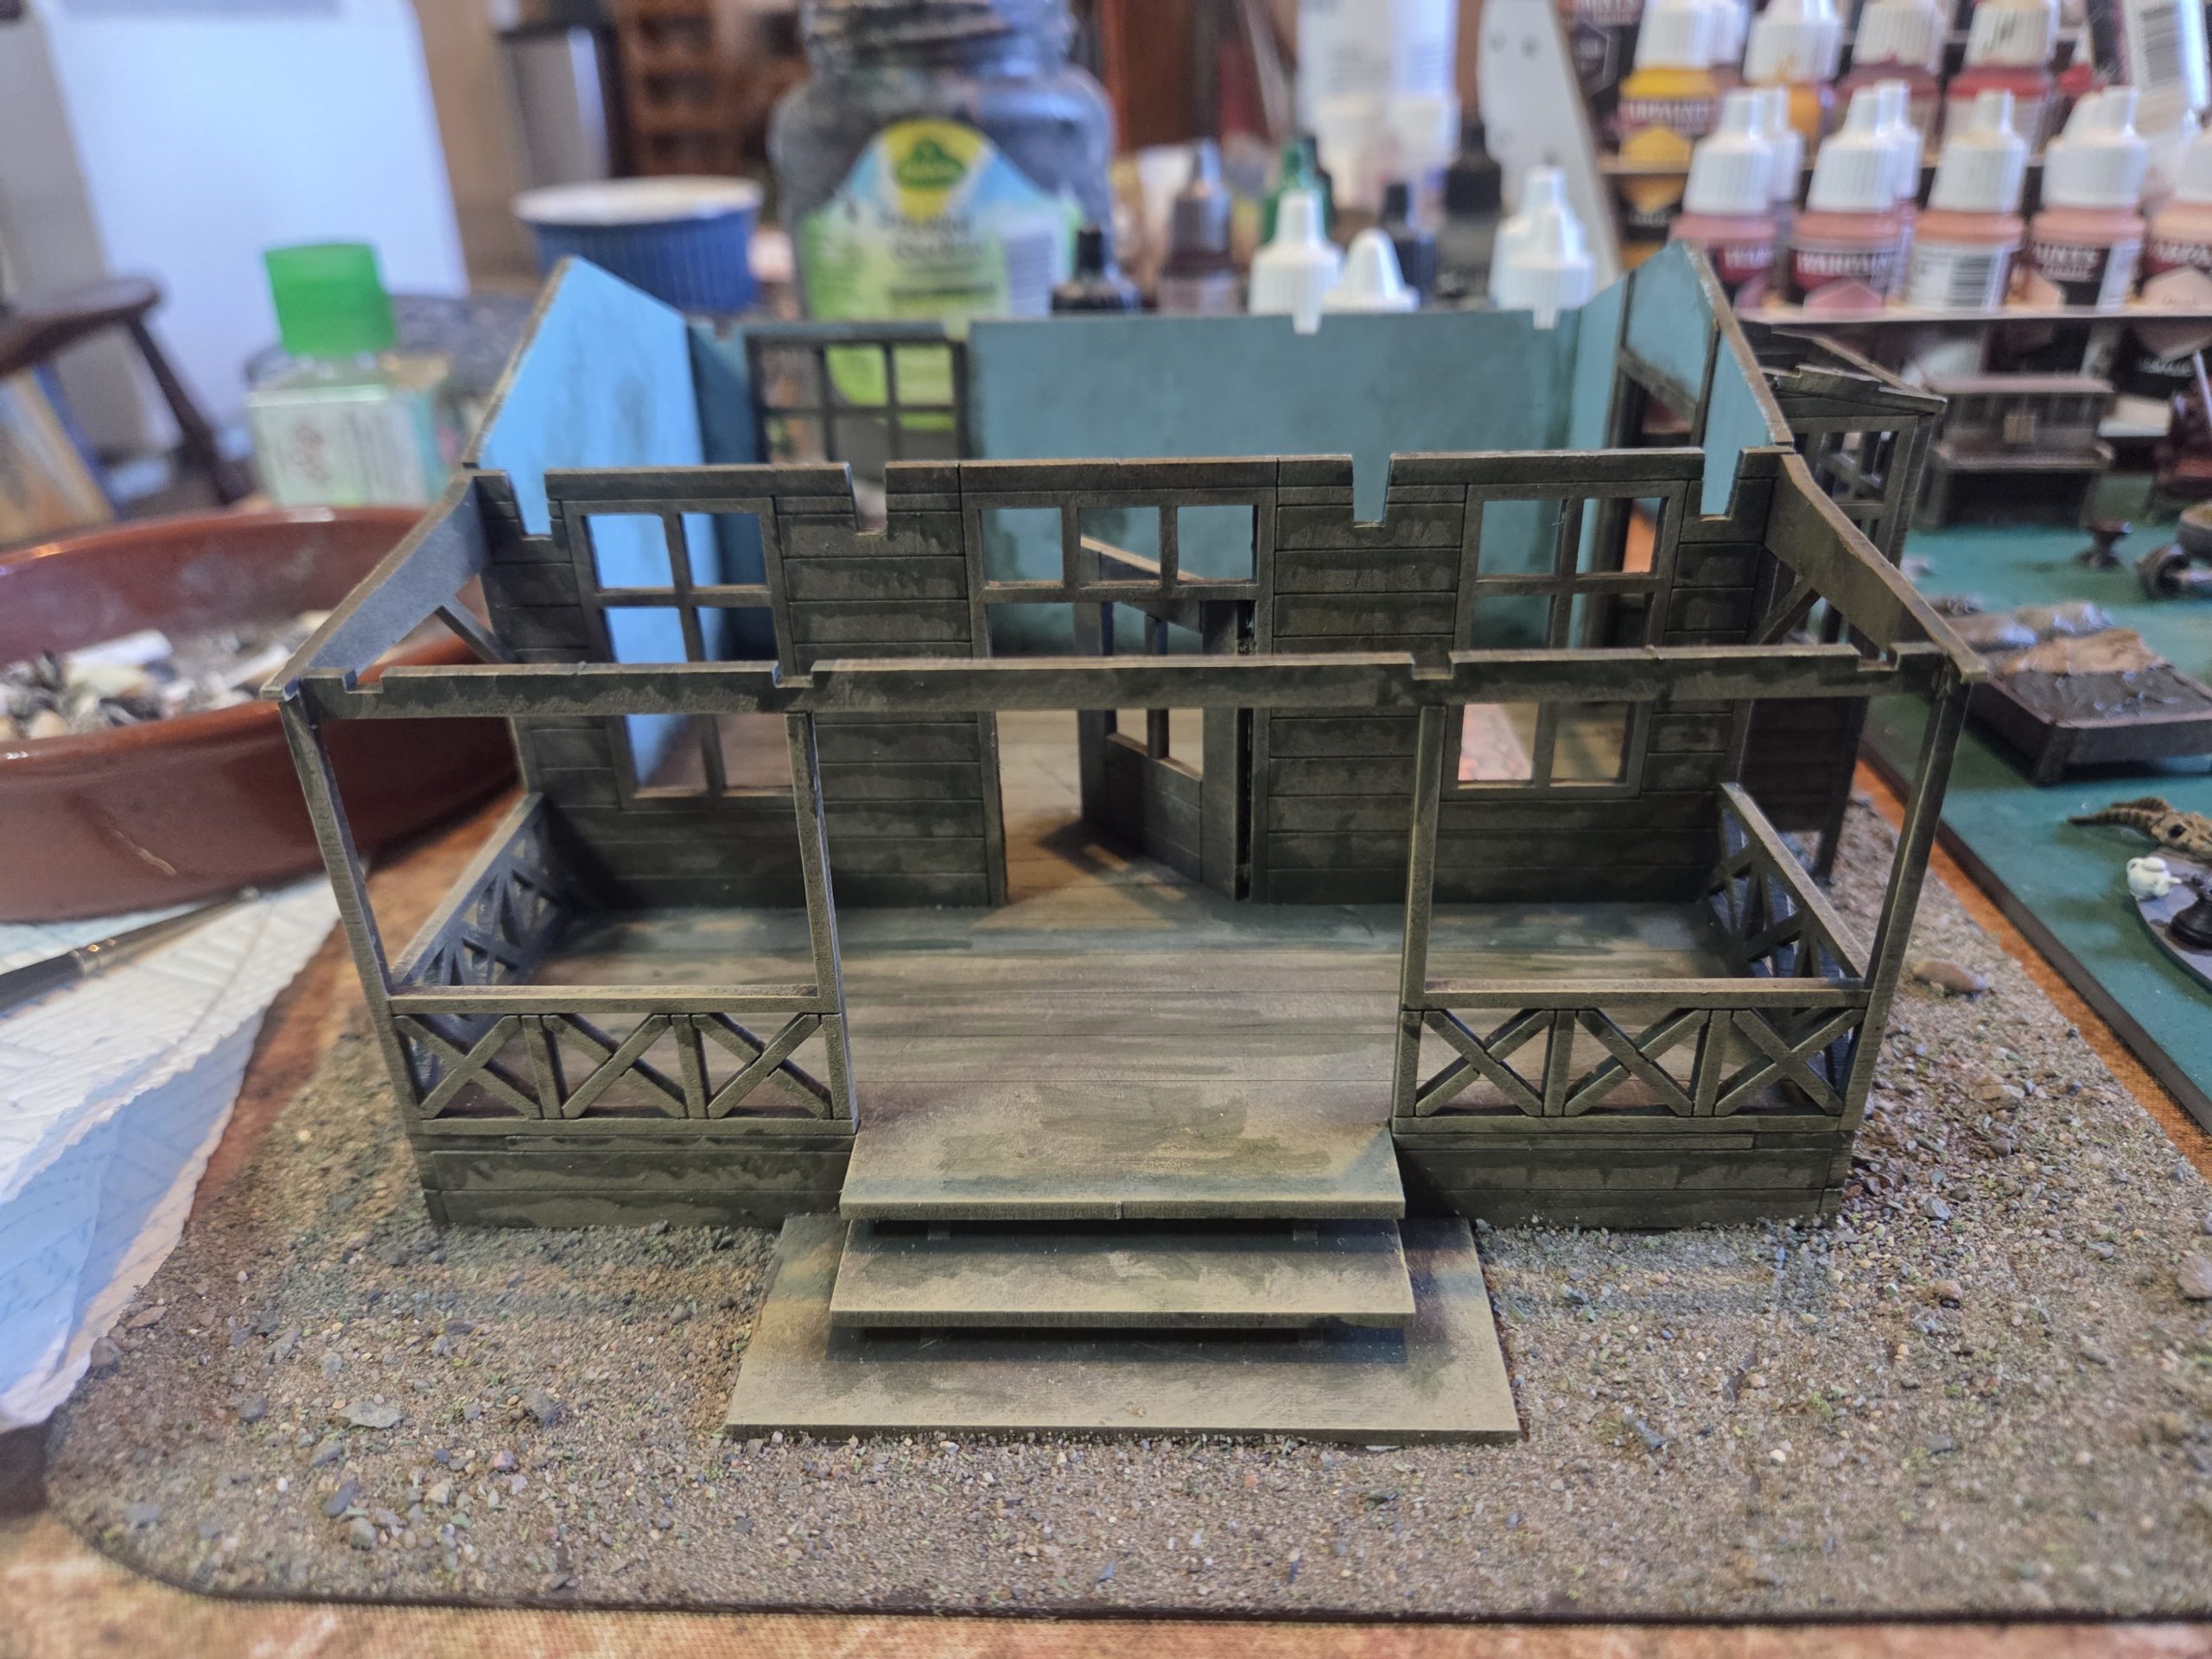 I have drybrushed all internal walls upto a pale blue. On the exterior I have used a green wash to add weathering and delineation of all the planks of wood
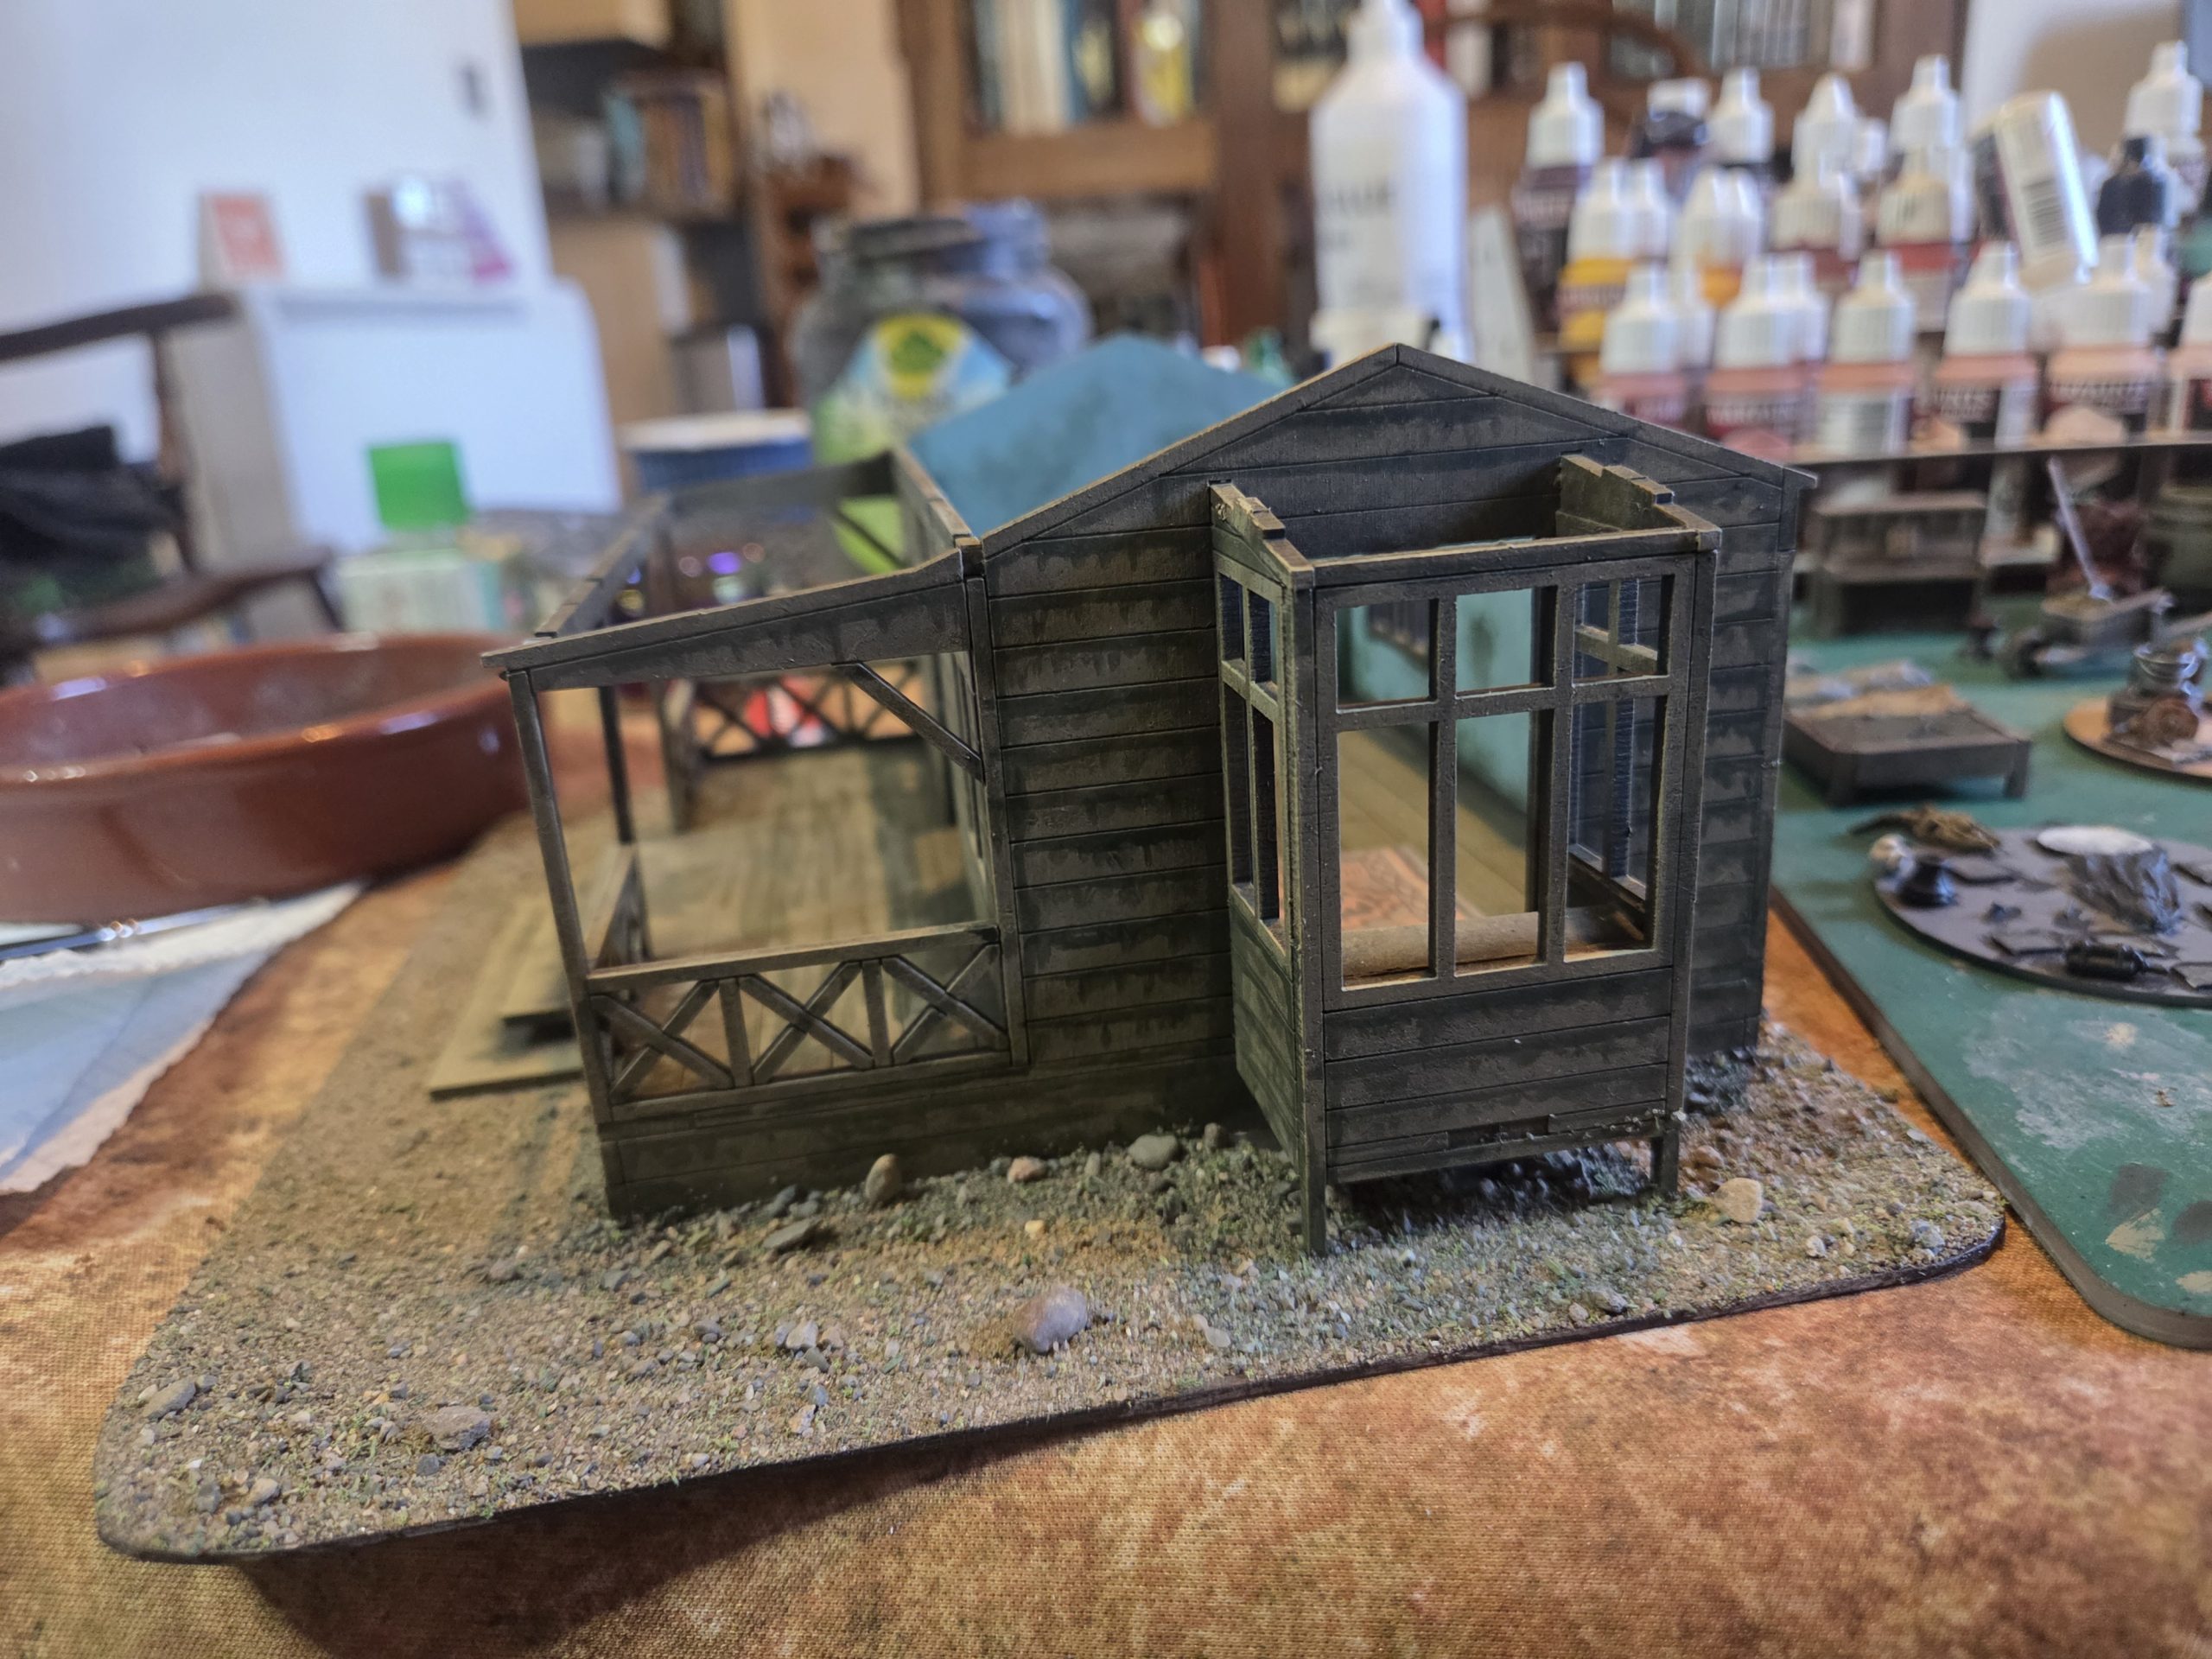 The exterior with the washes applied.
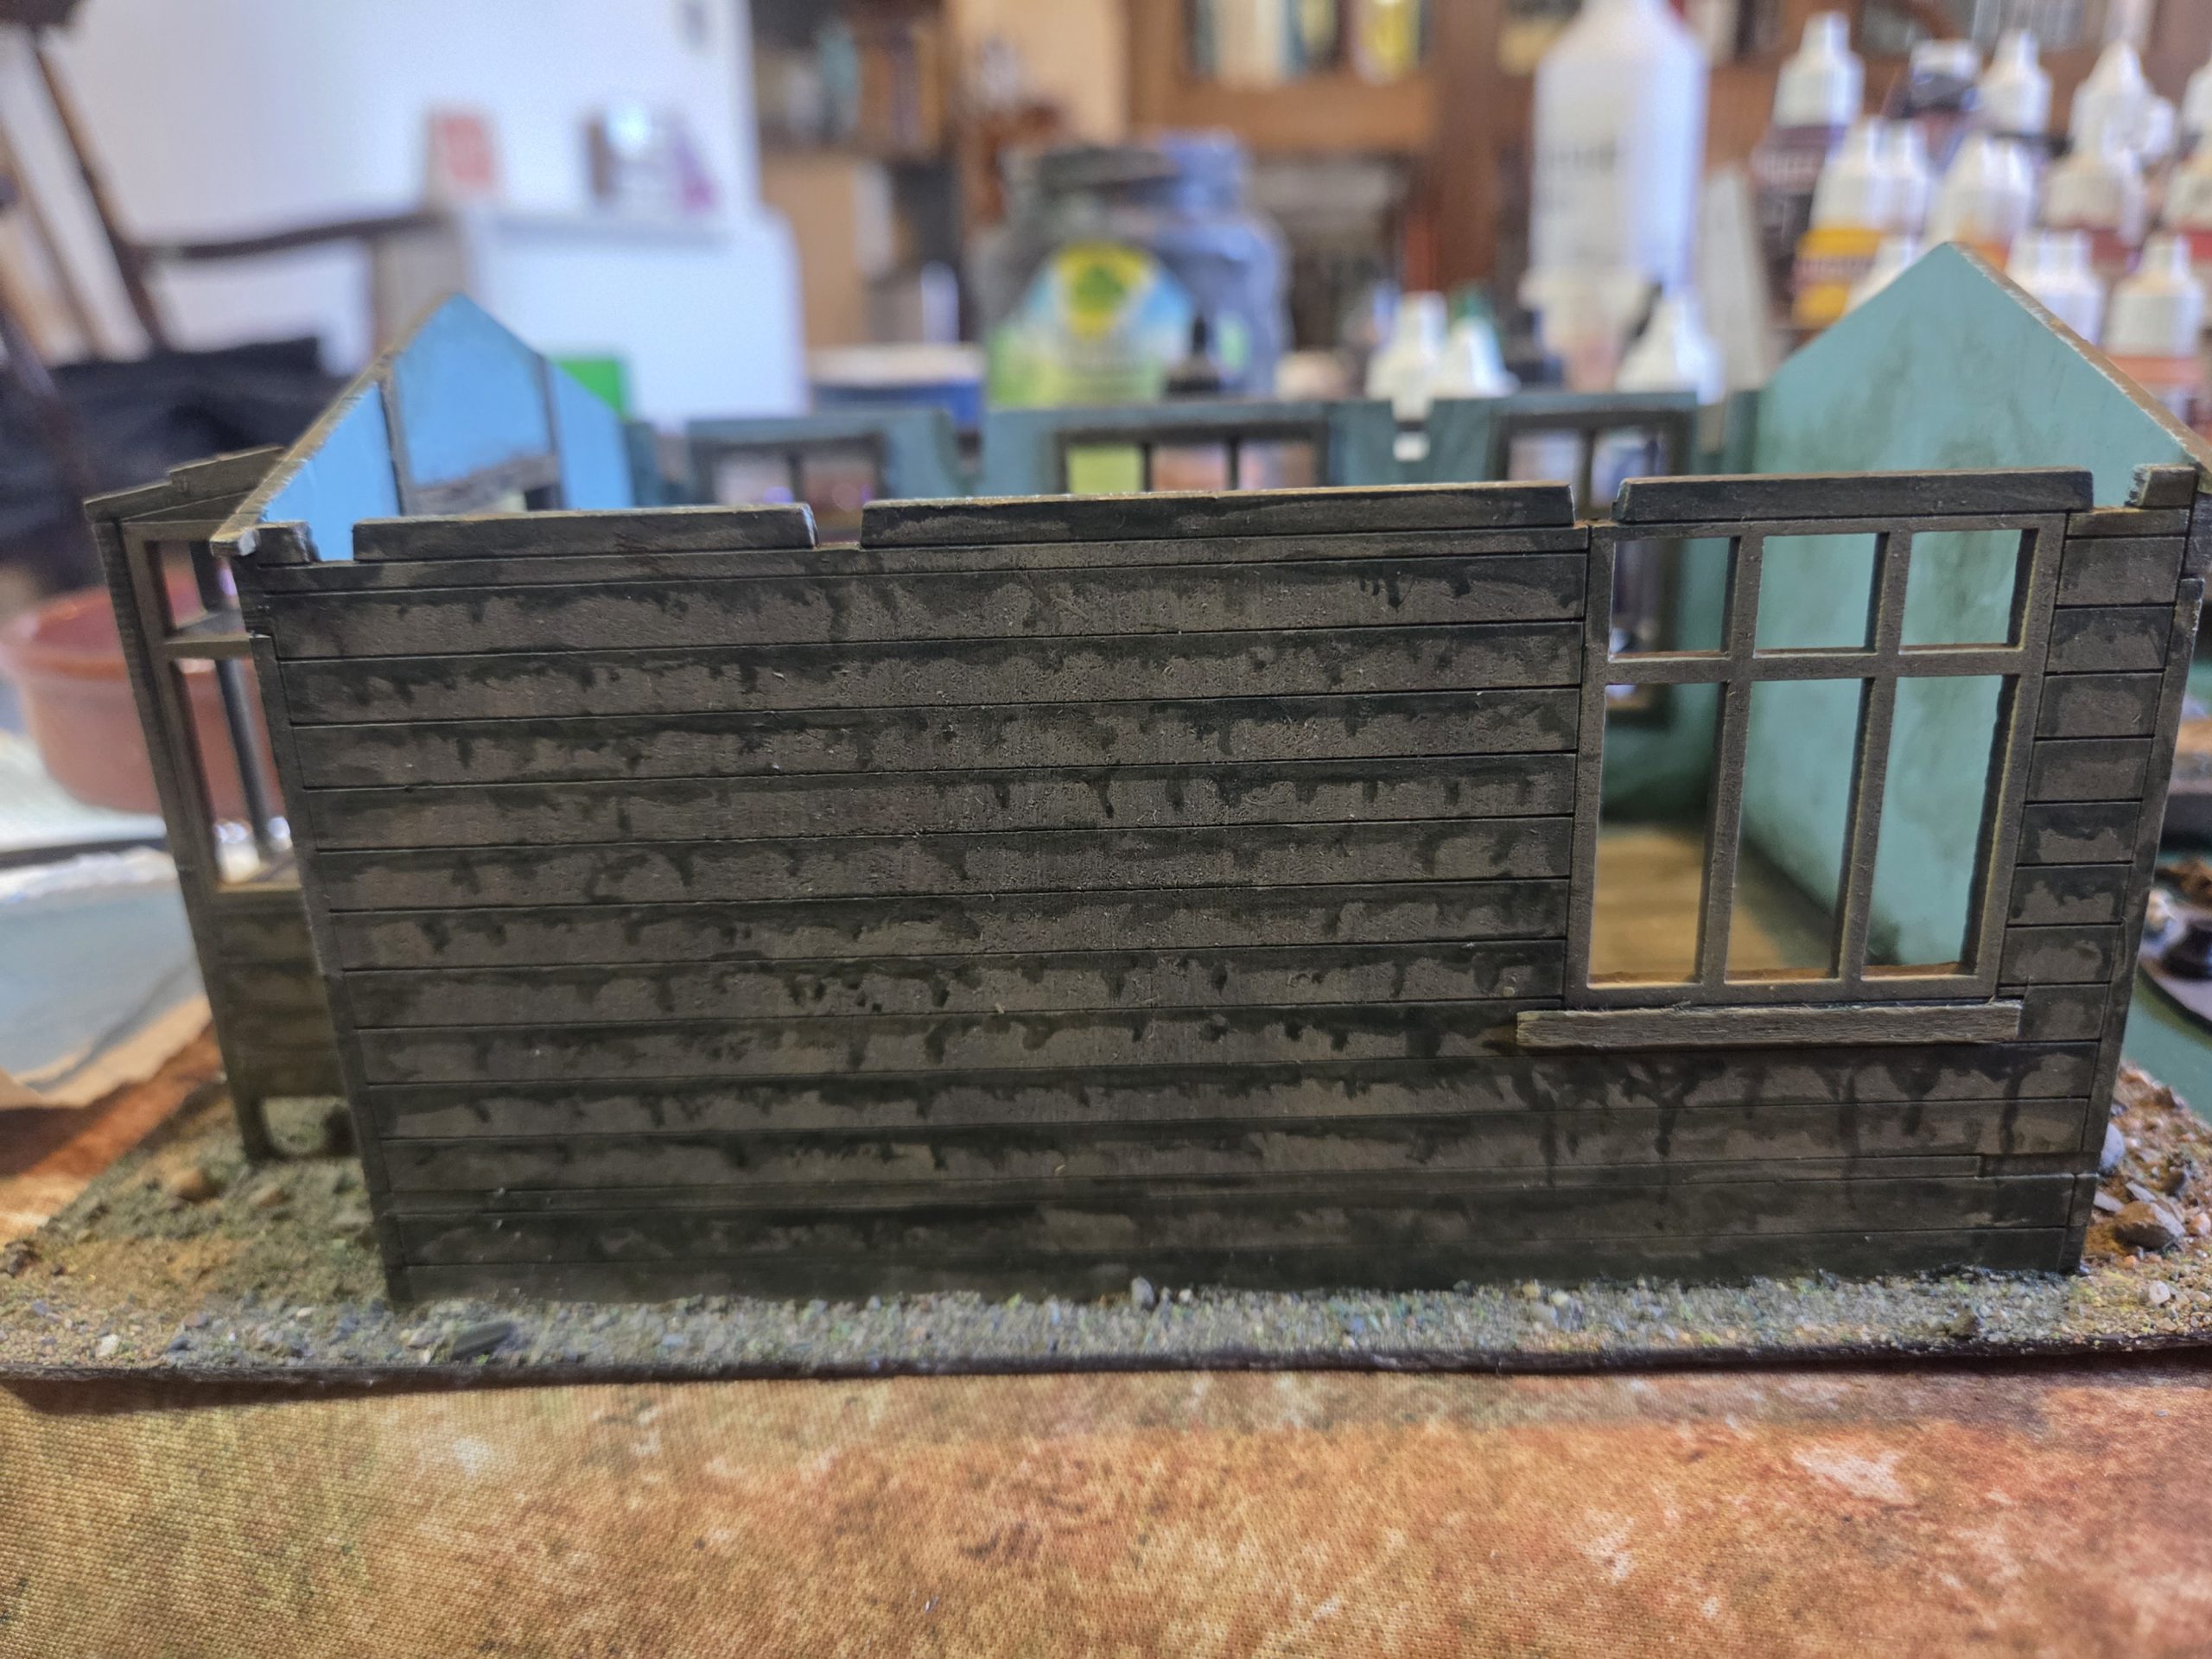 Rear view
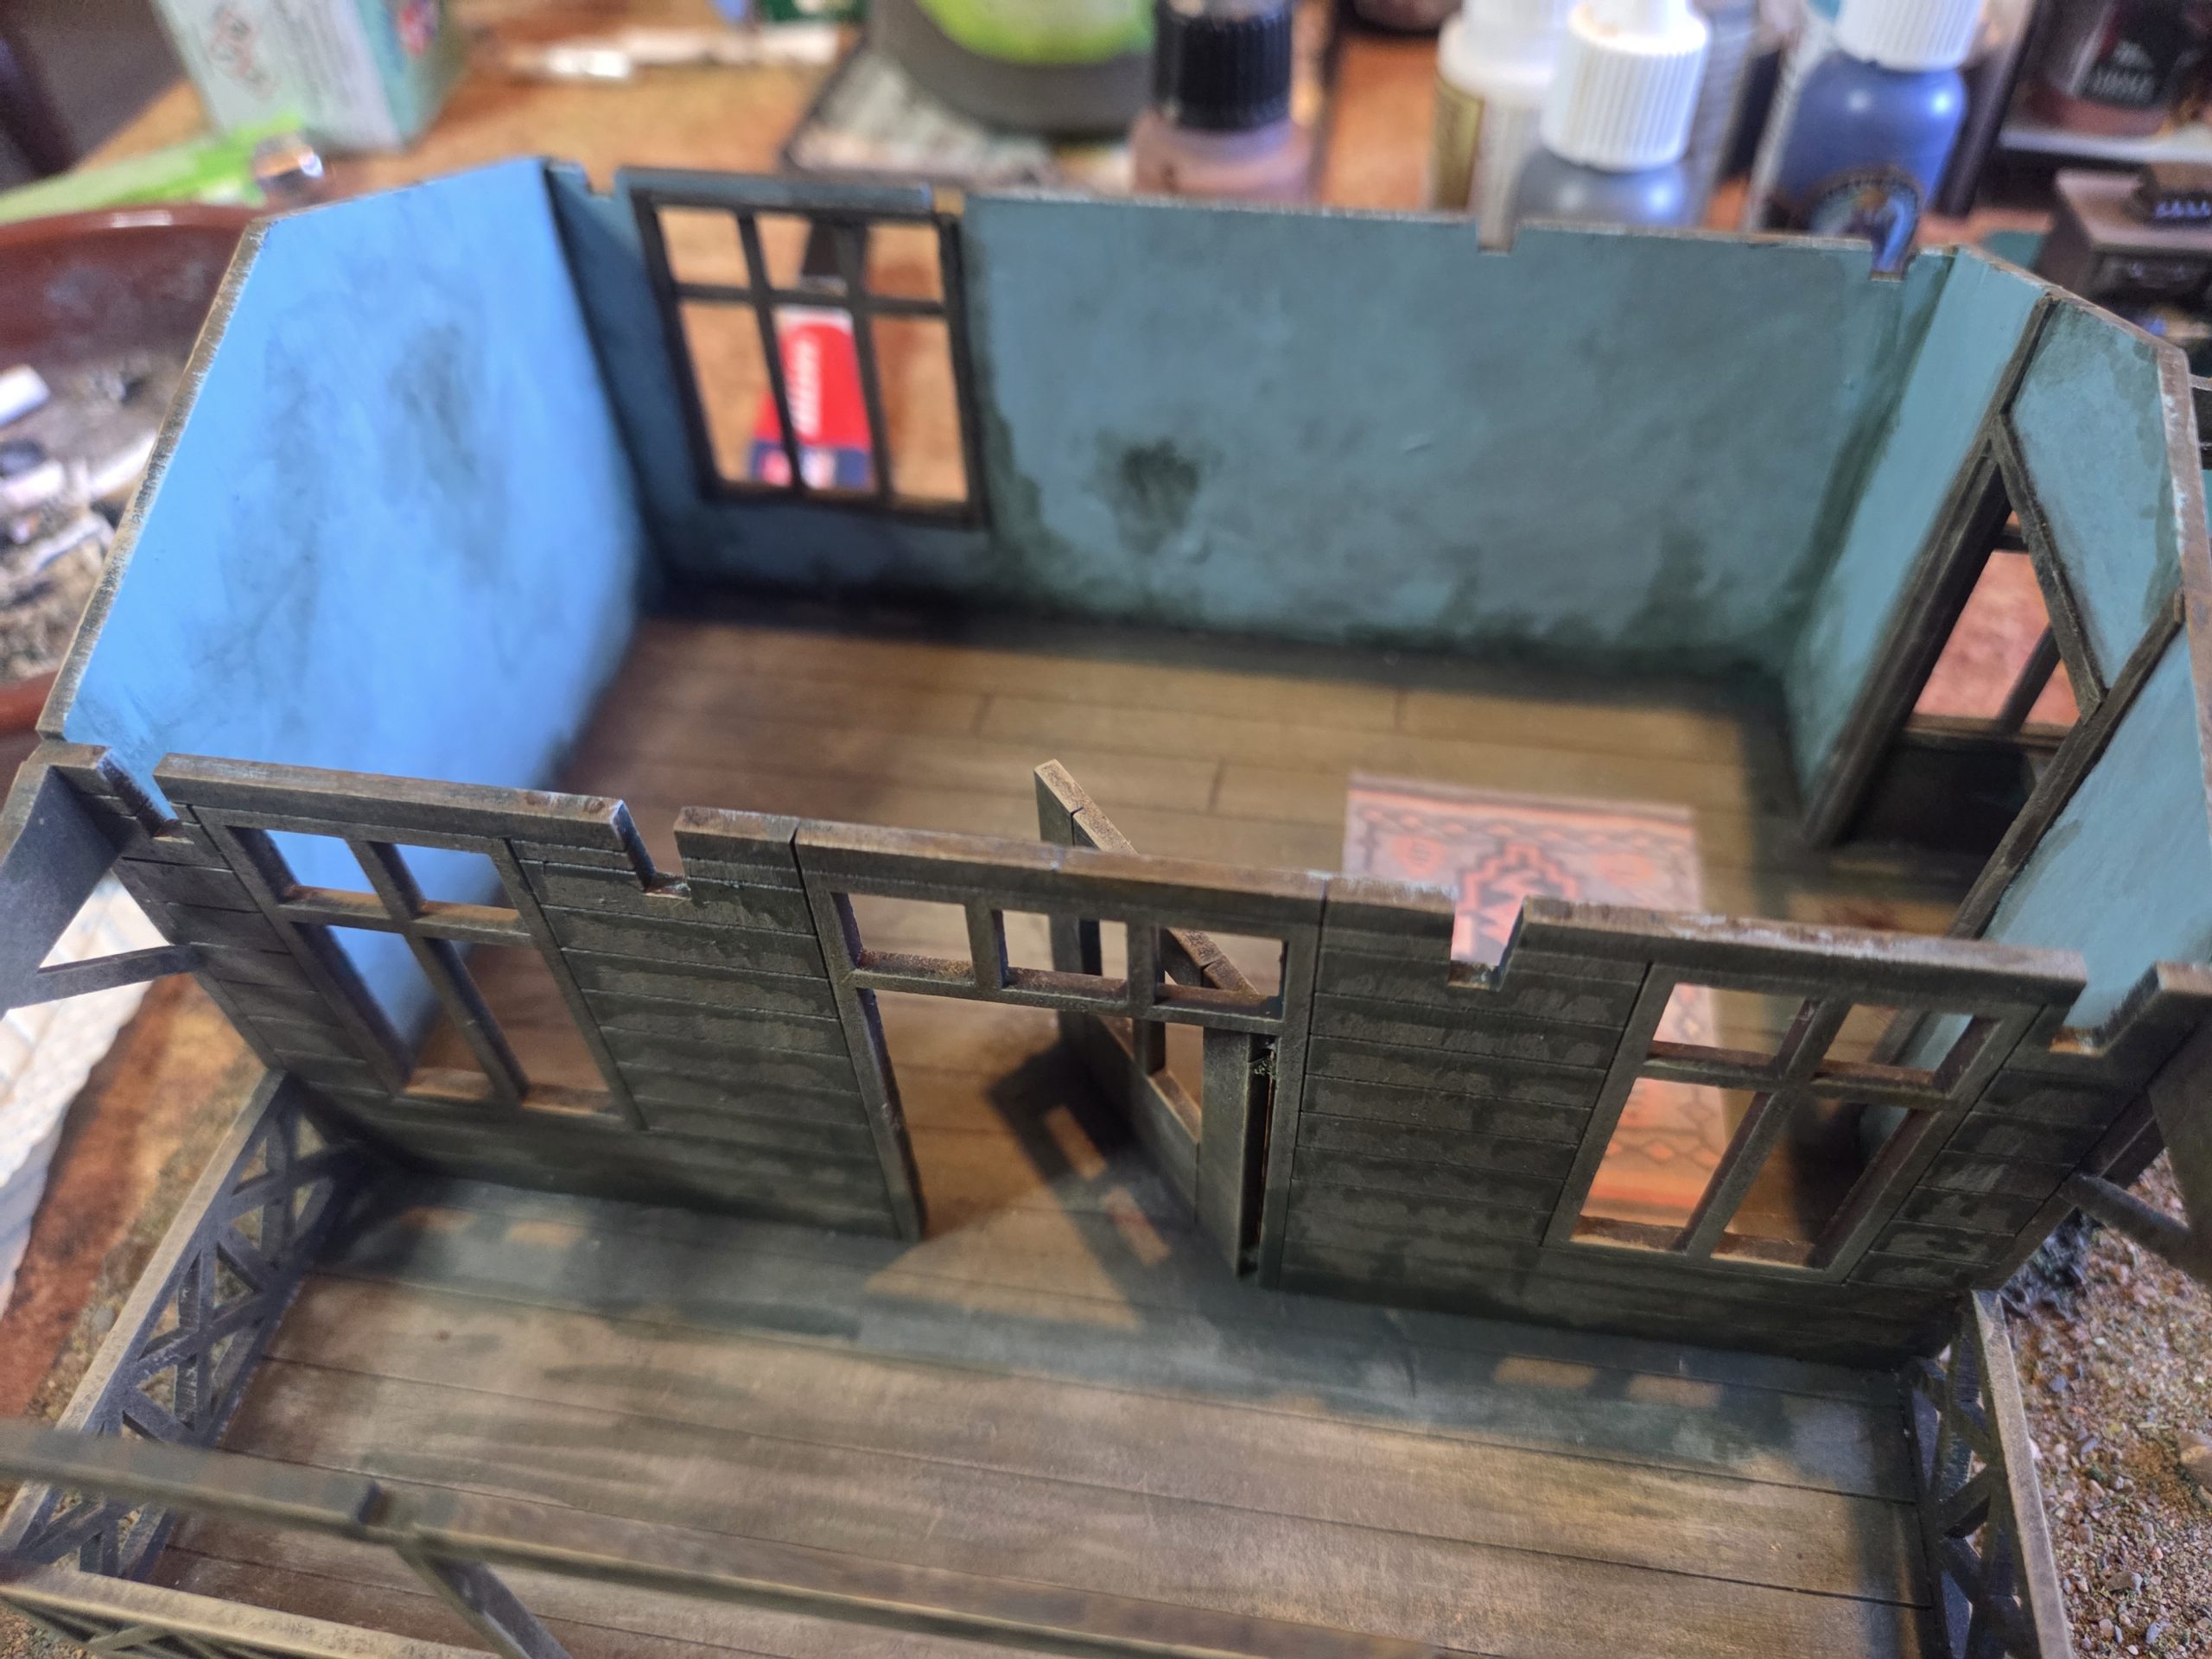 The interior with some wash applied to represent damp patches.
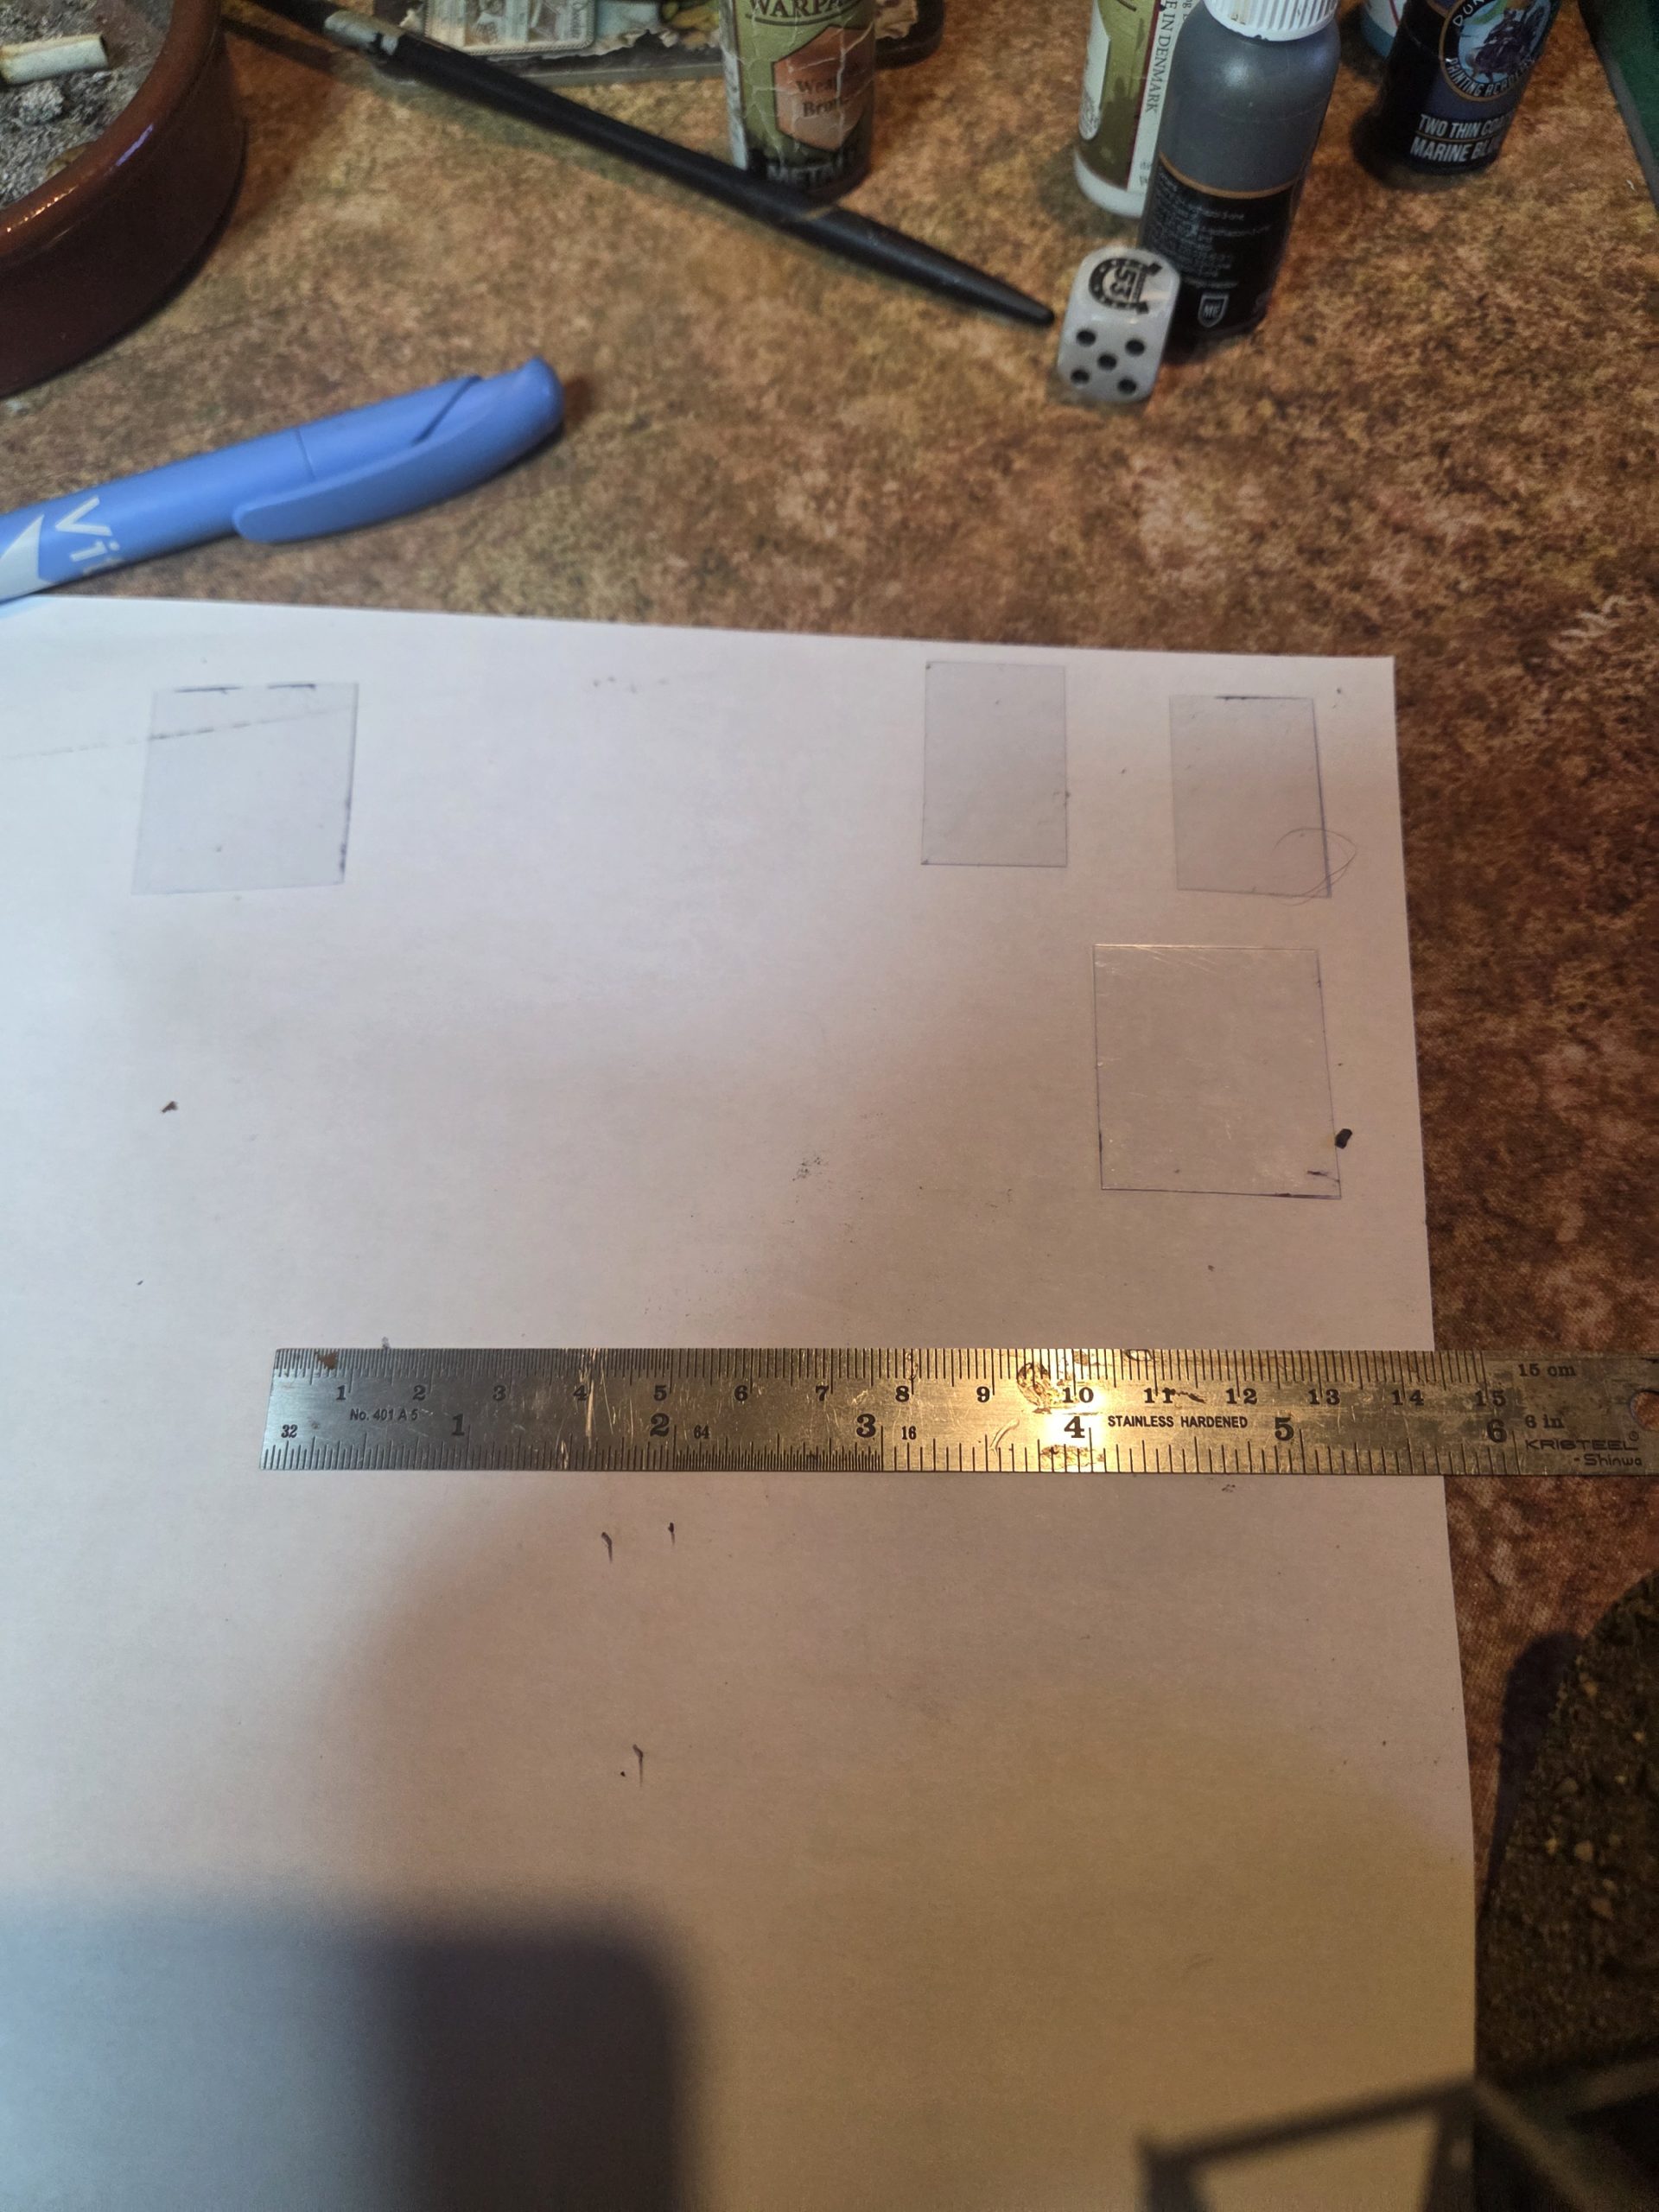 I wanted to add some glazing in the windows, so I used A4 clear plastic book covers ( sold to be used with booklets ring binders), which I measured and cut to size.
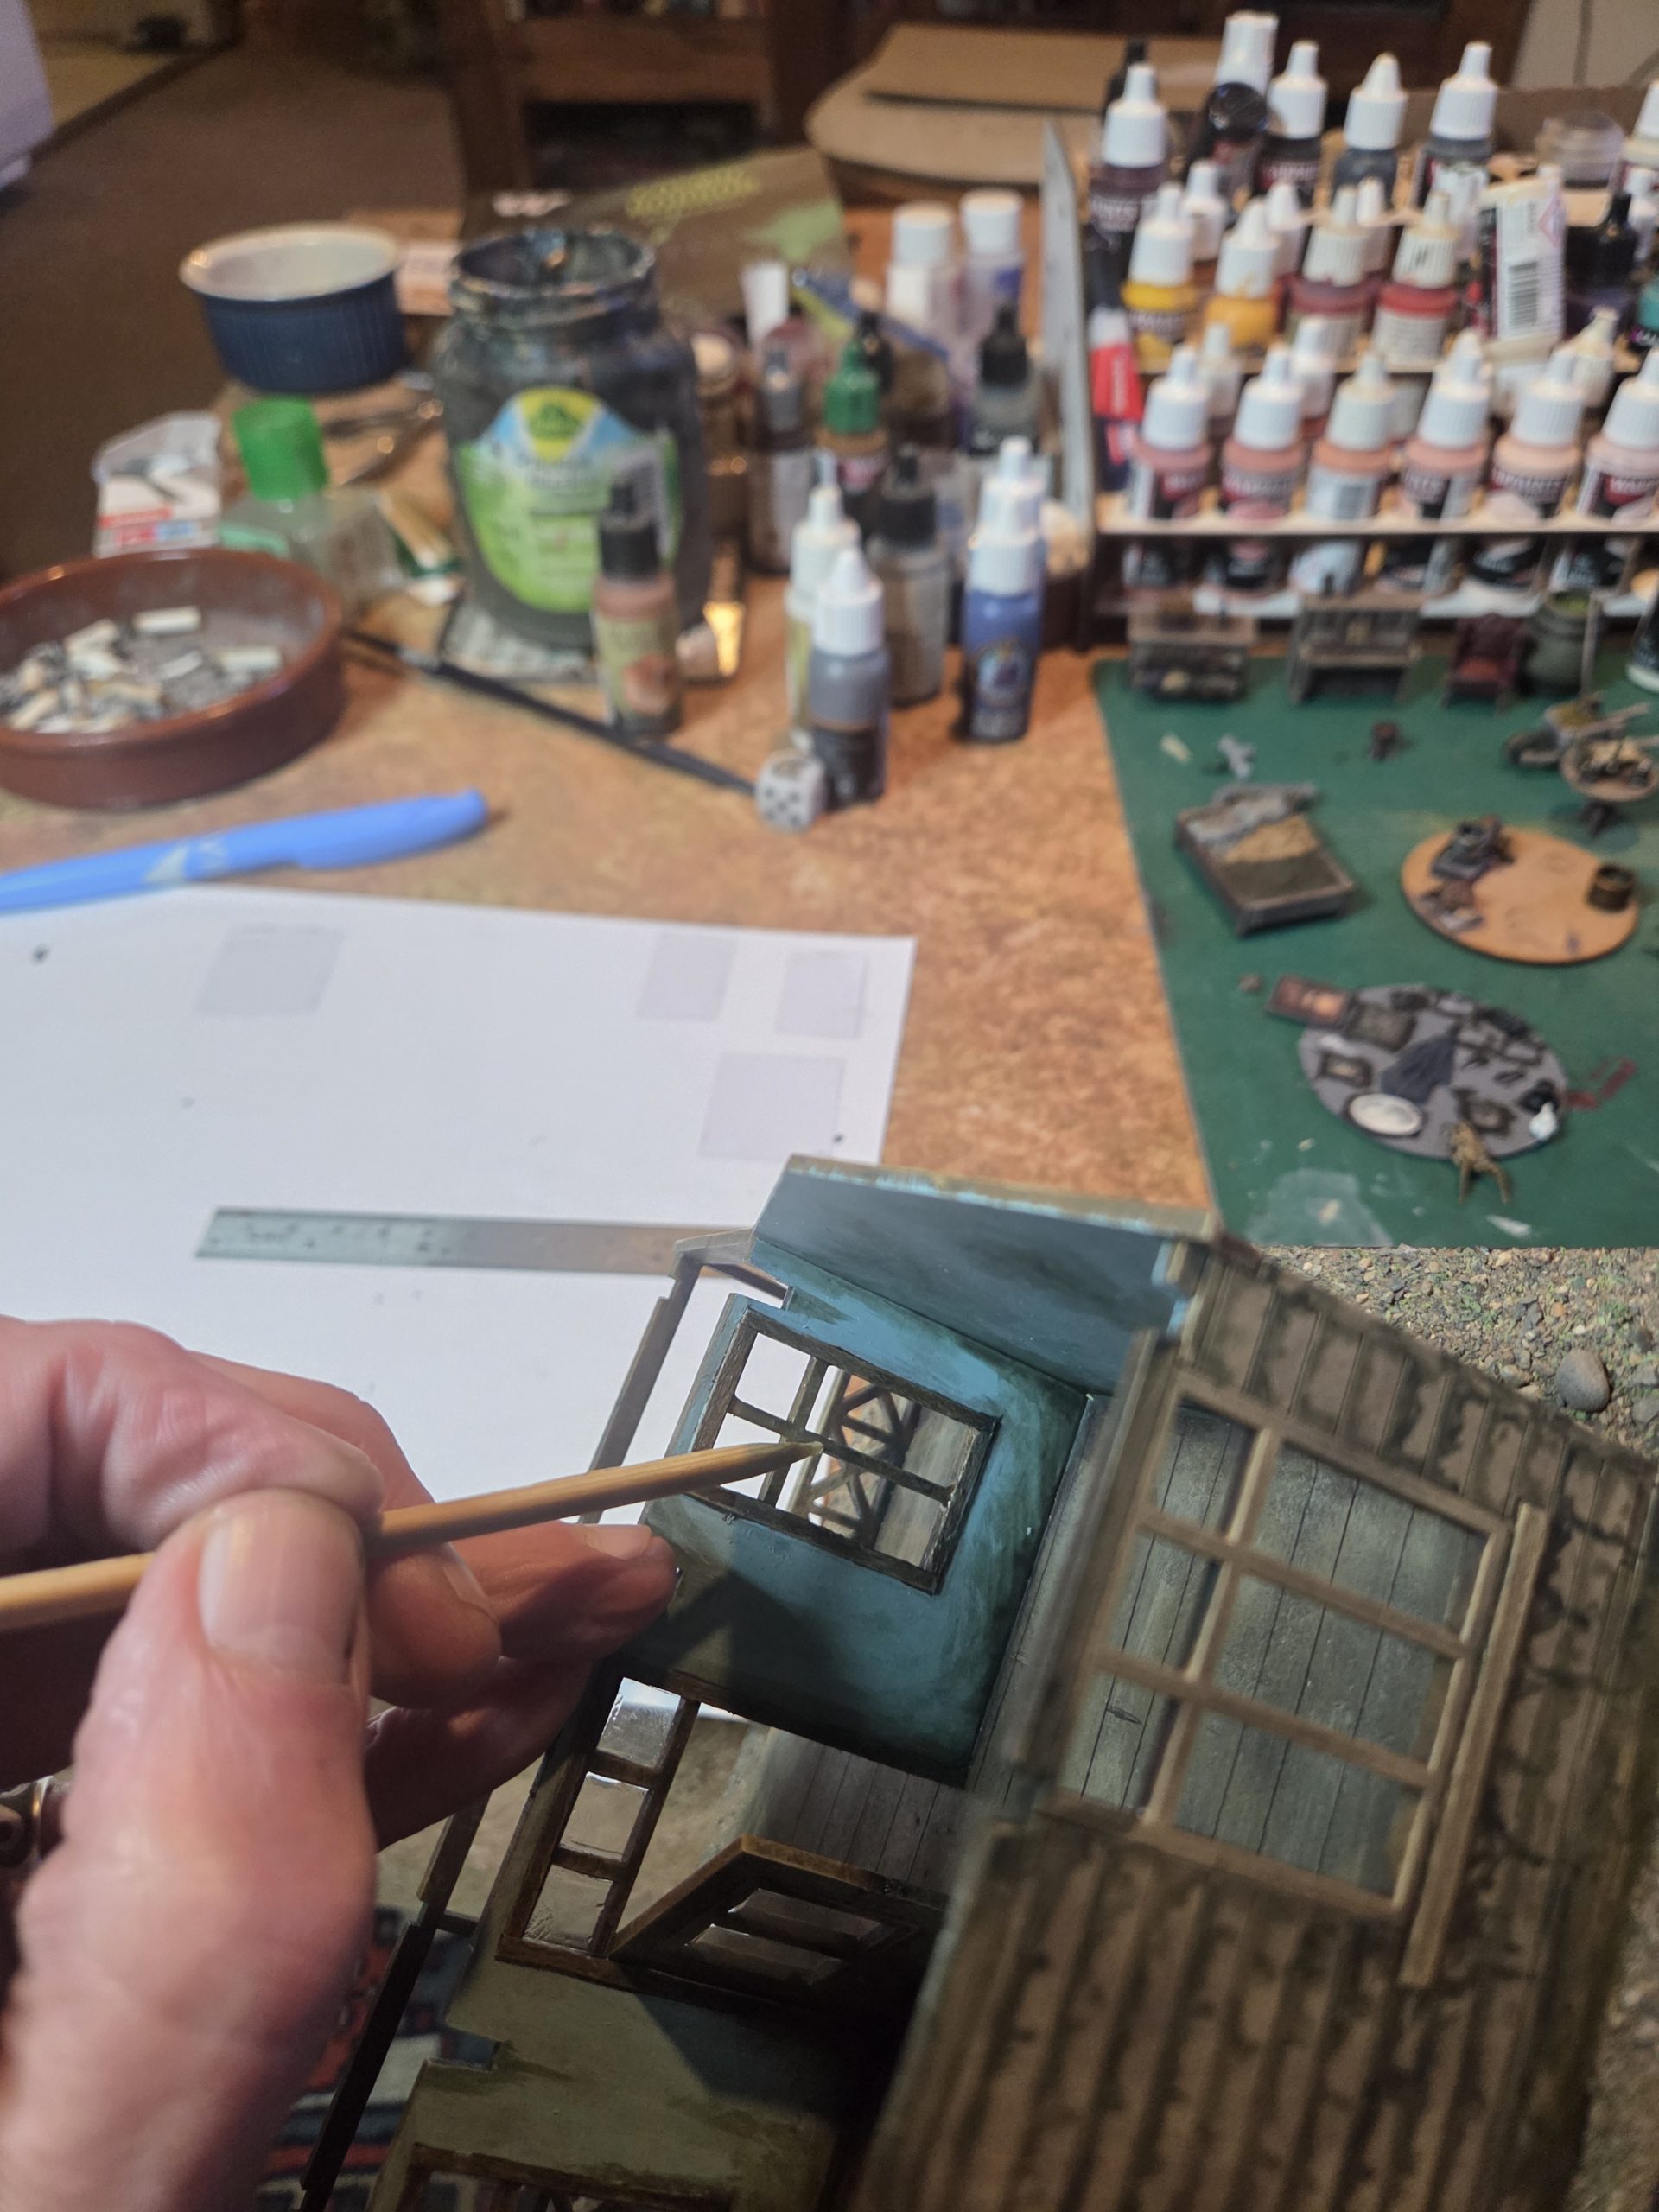 To affix the windows i used Gorrilla clear glue carefully applied with a wooden skewers.
 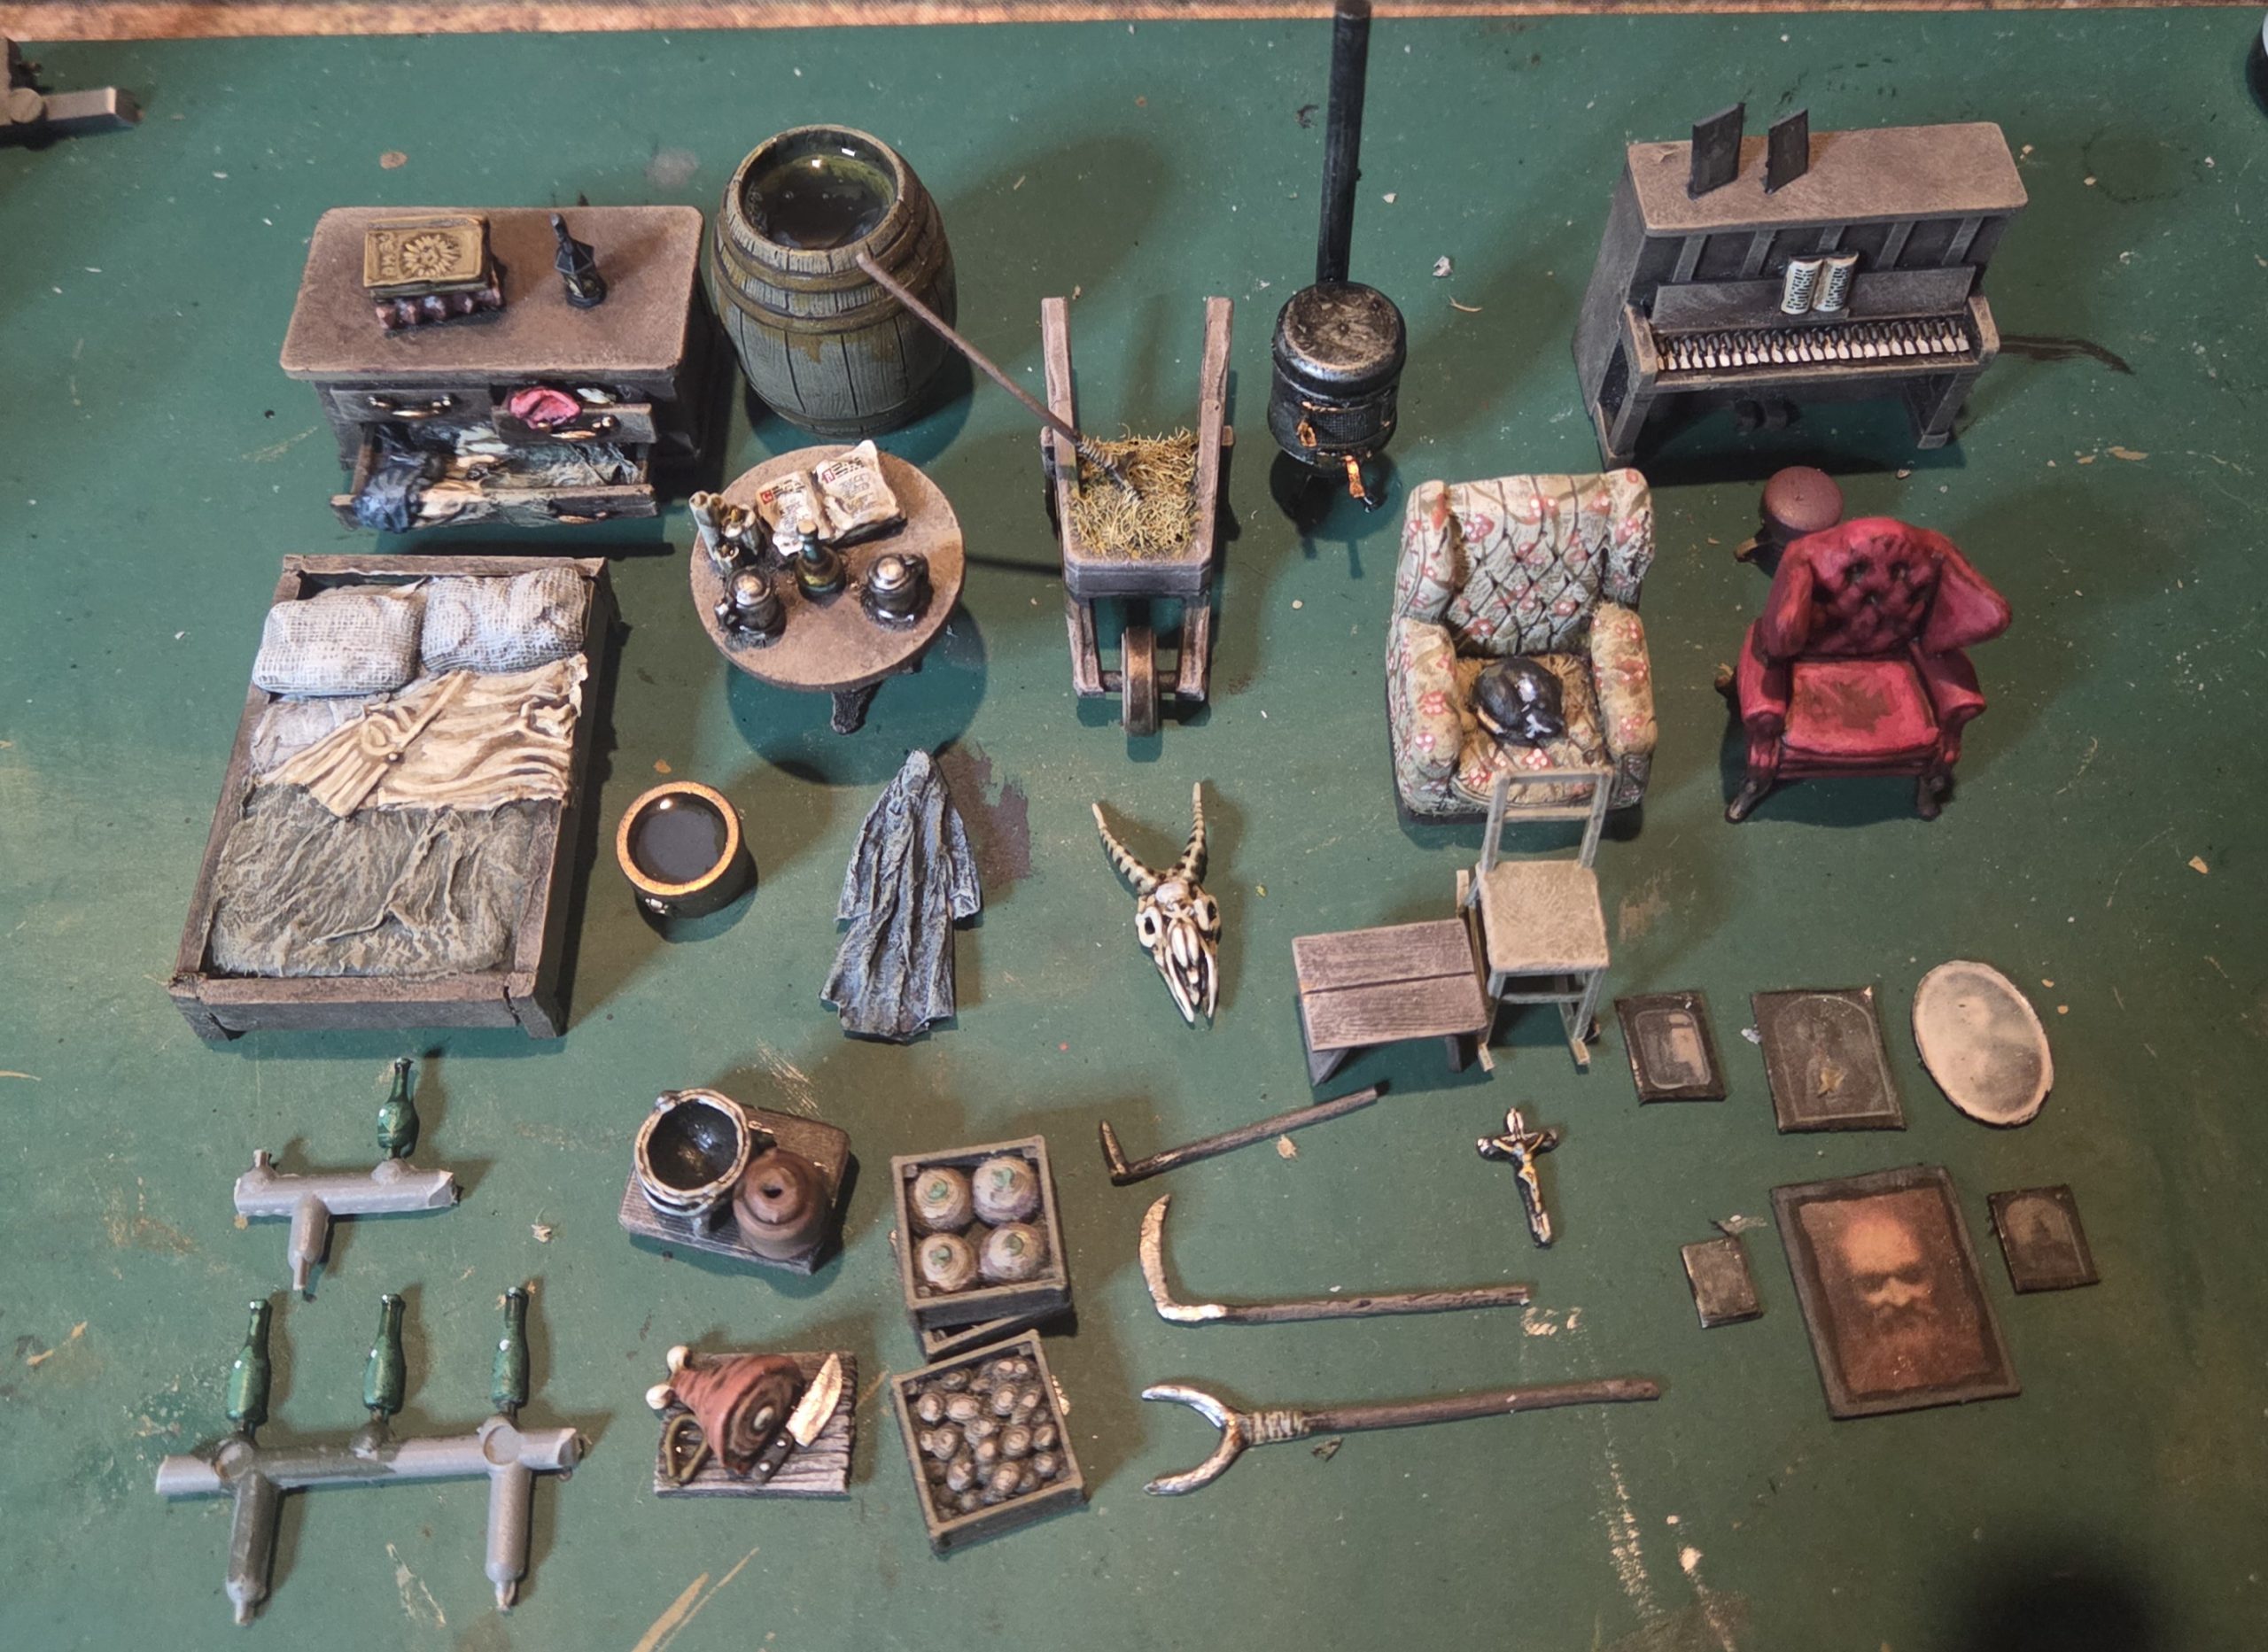 All the interior details fully painted, I was particularly pleased with the pale armchair with flowery pattern on fabric.
 The roof drybrushed up in a mix of khaki and grey, with a green wash around wooden parts to represent dampness.
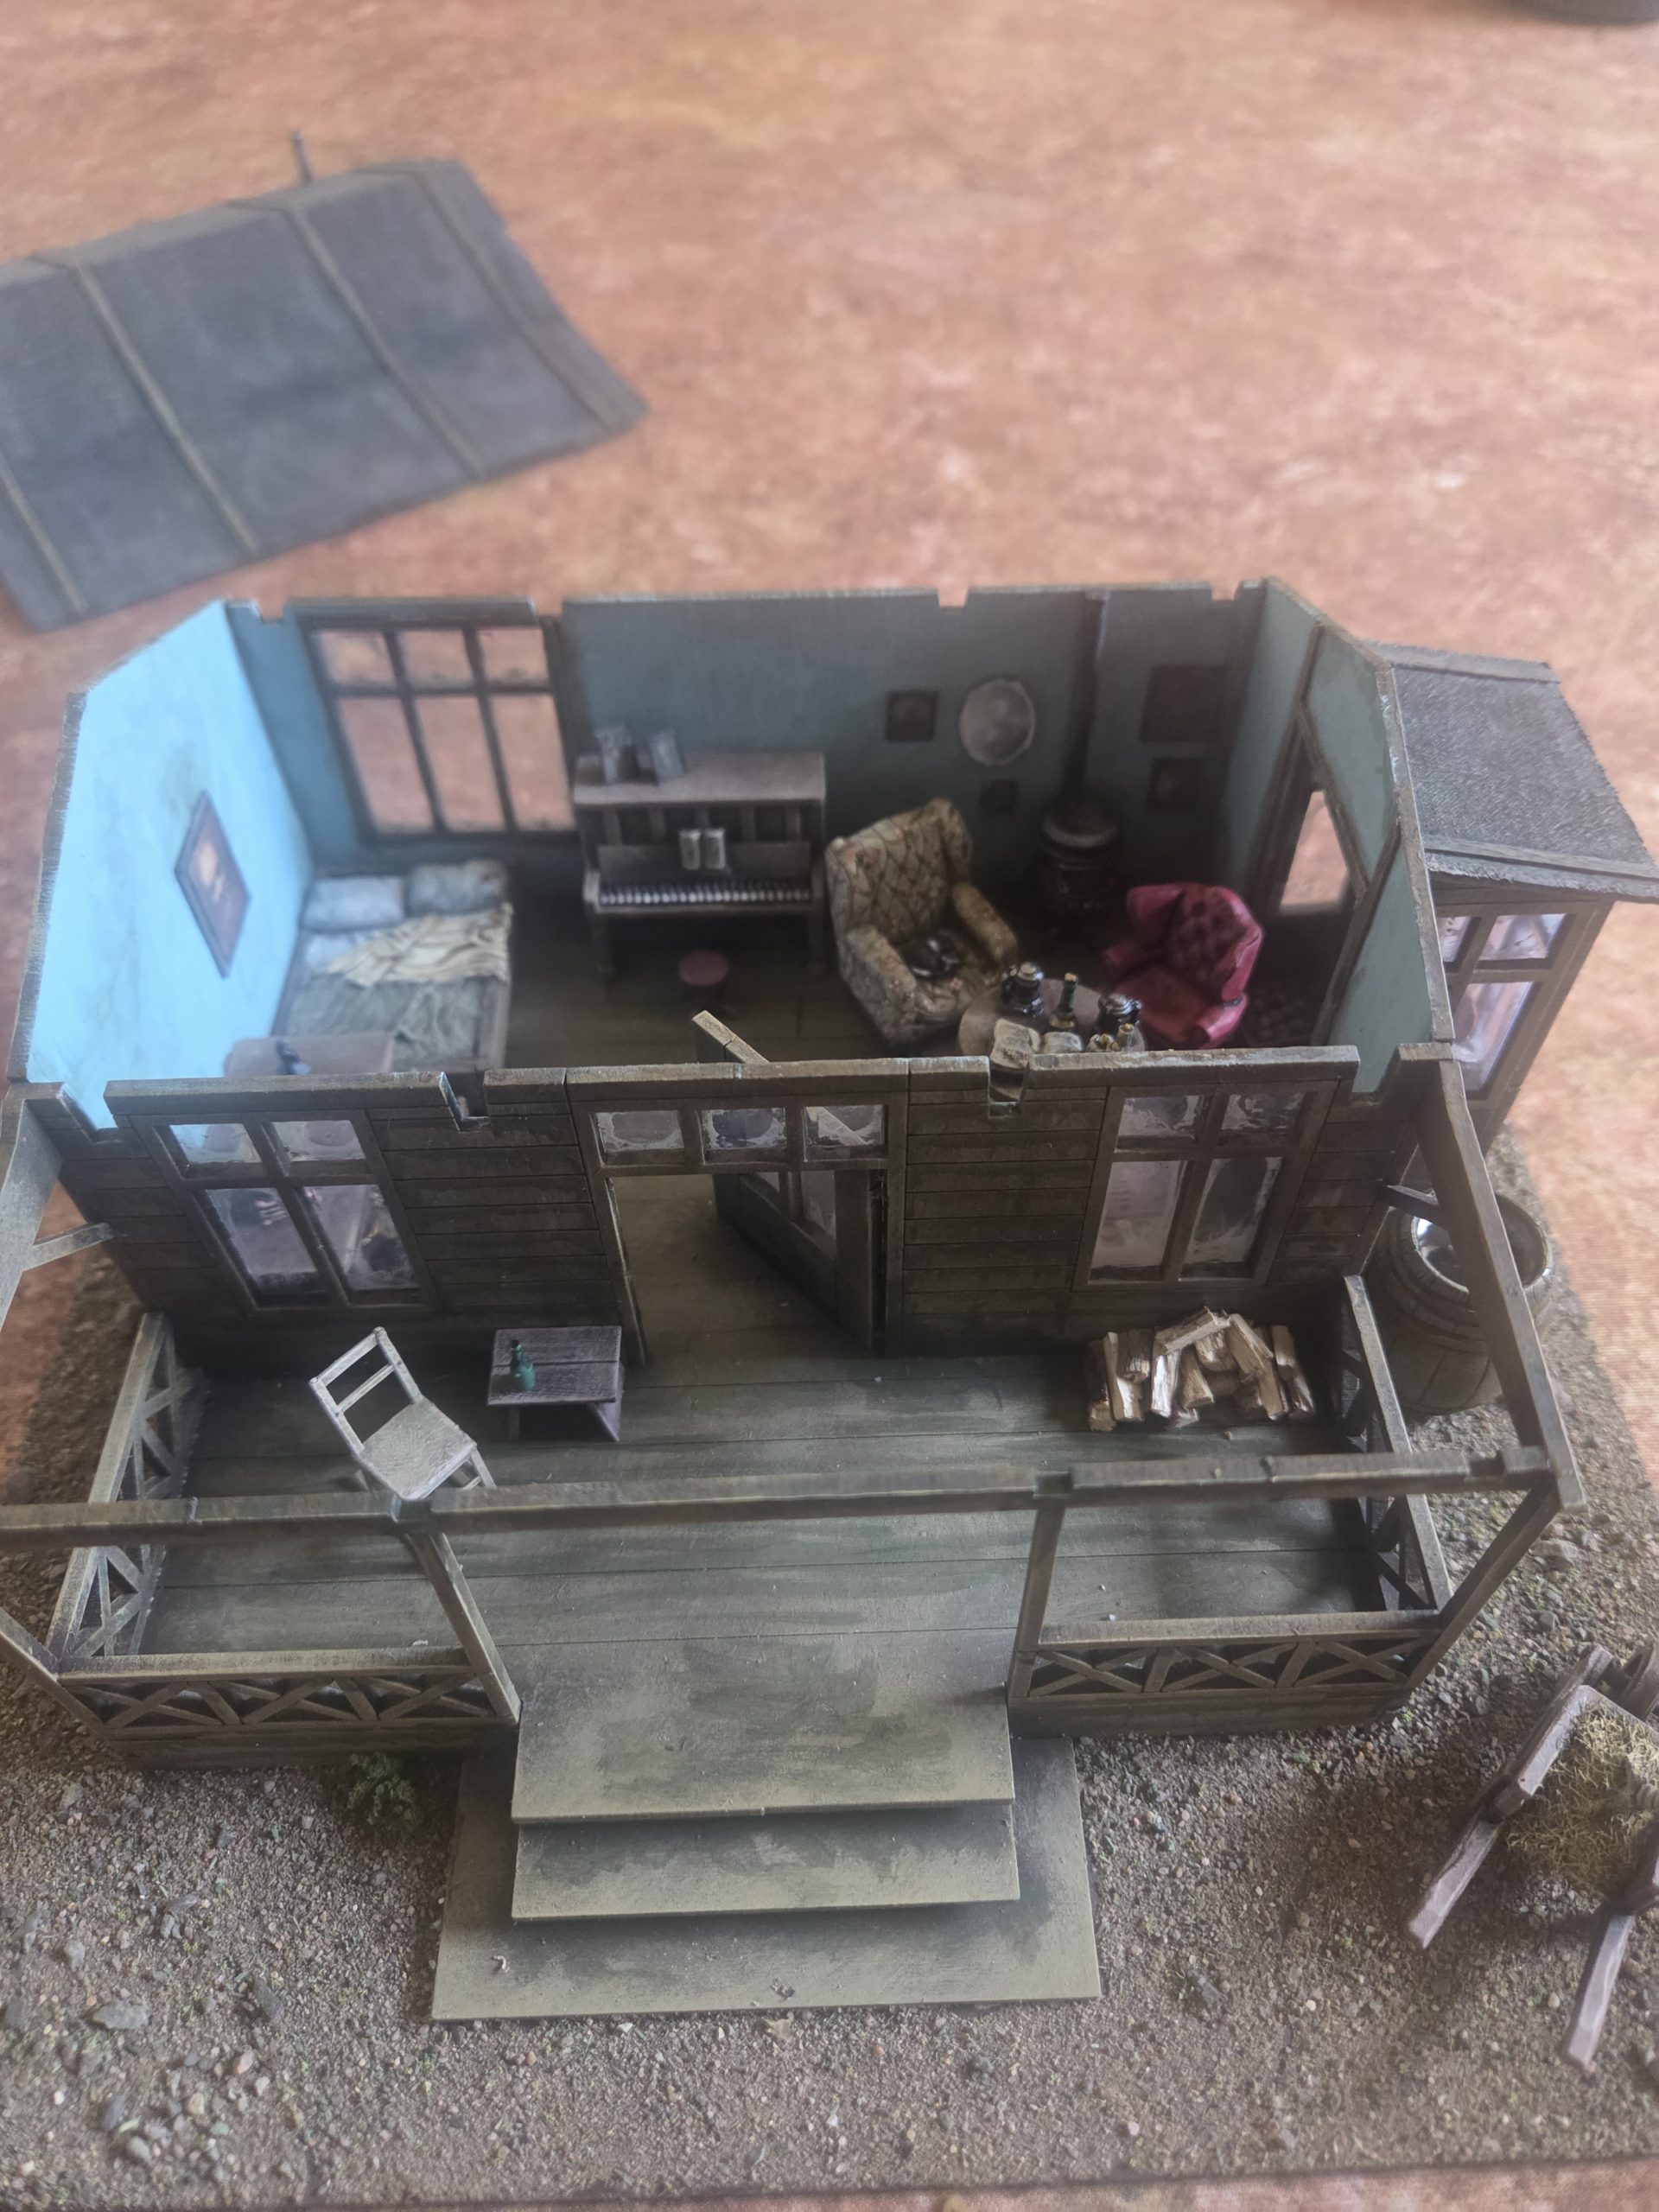 Furniture and accessories added to the interior. You can also see the dusty grey wash I added to the window, after applying i wiped away what i could leaving a dirty edge to all the windows
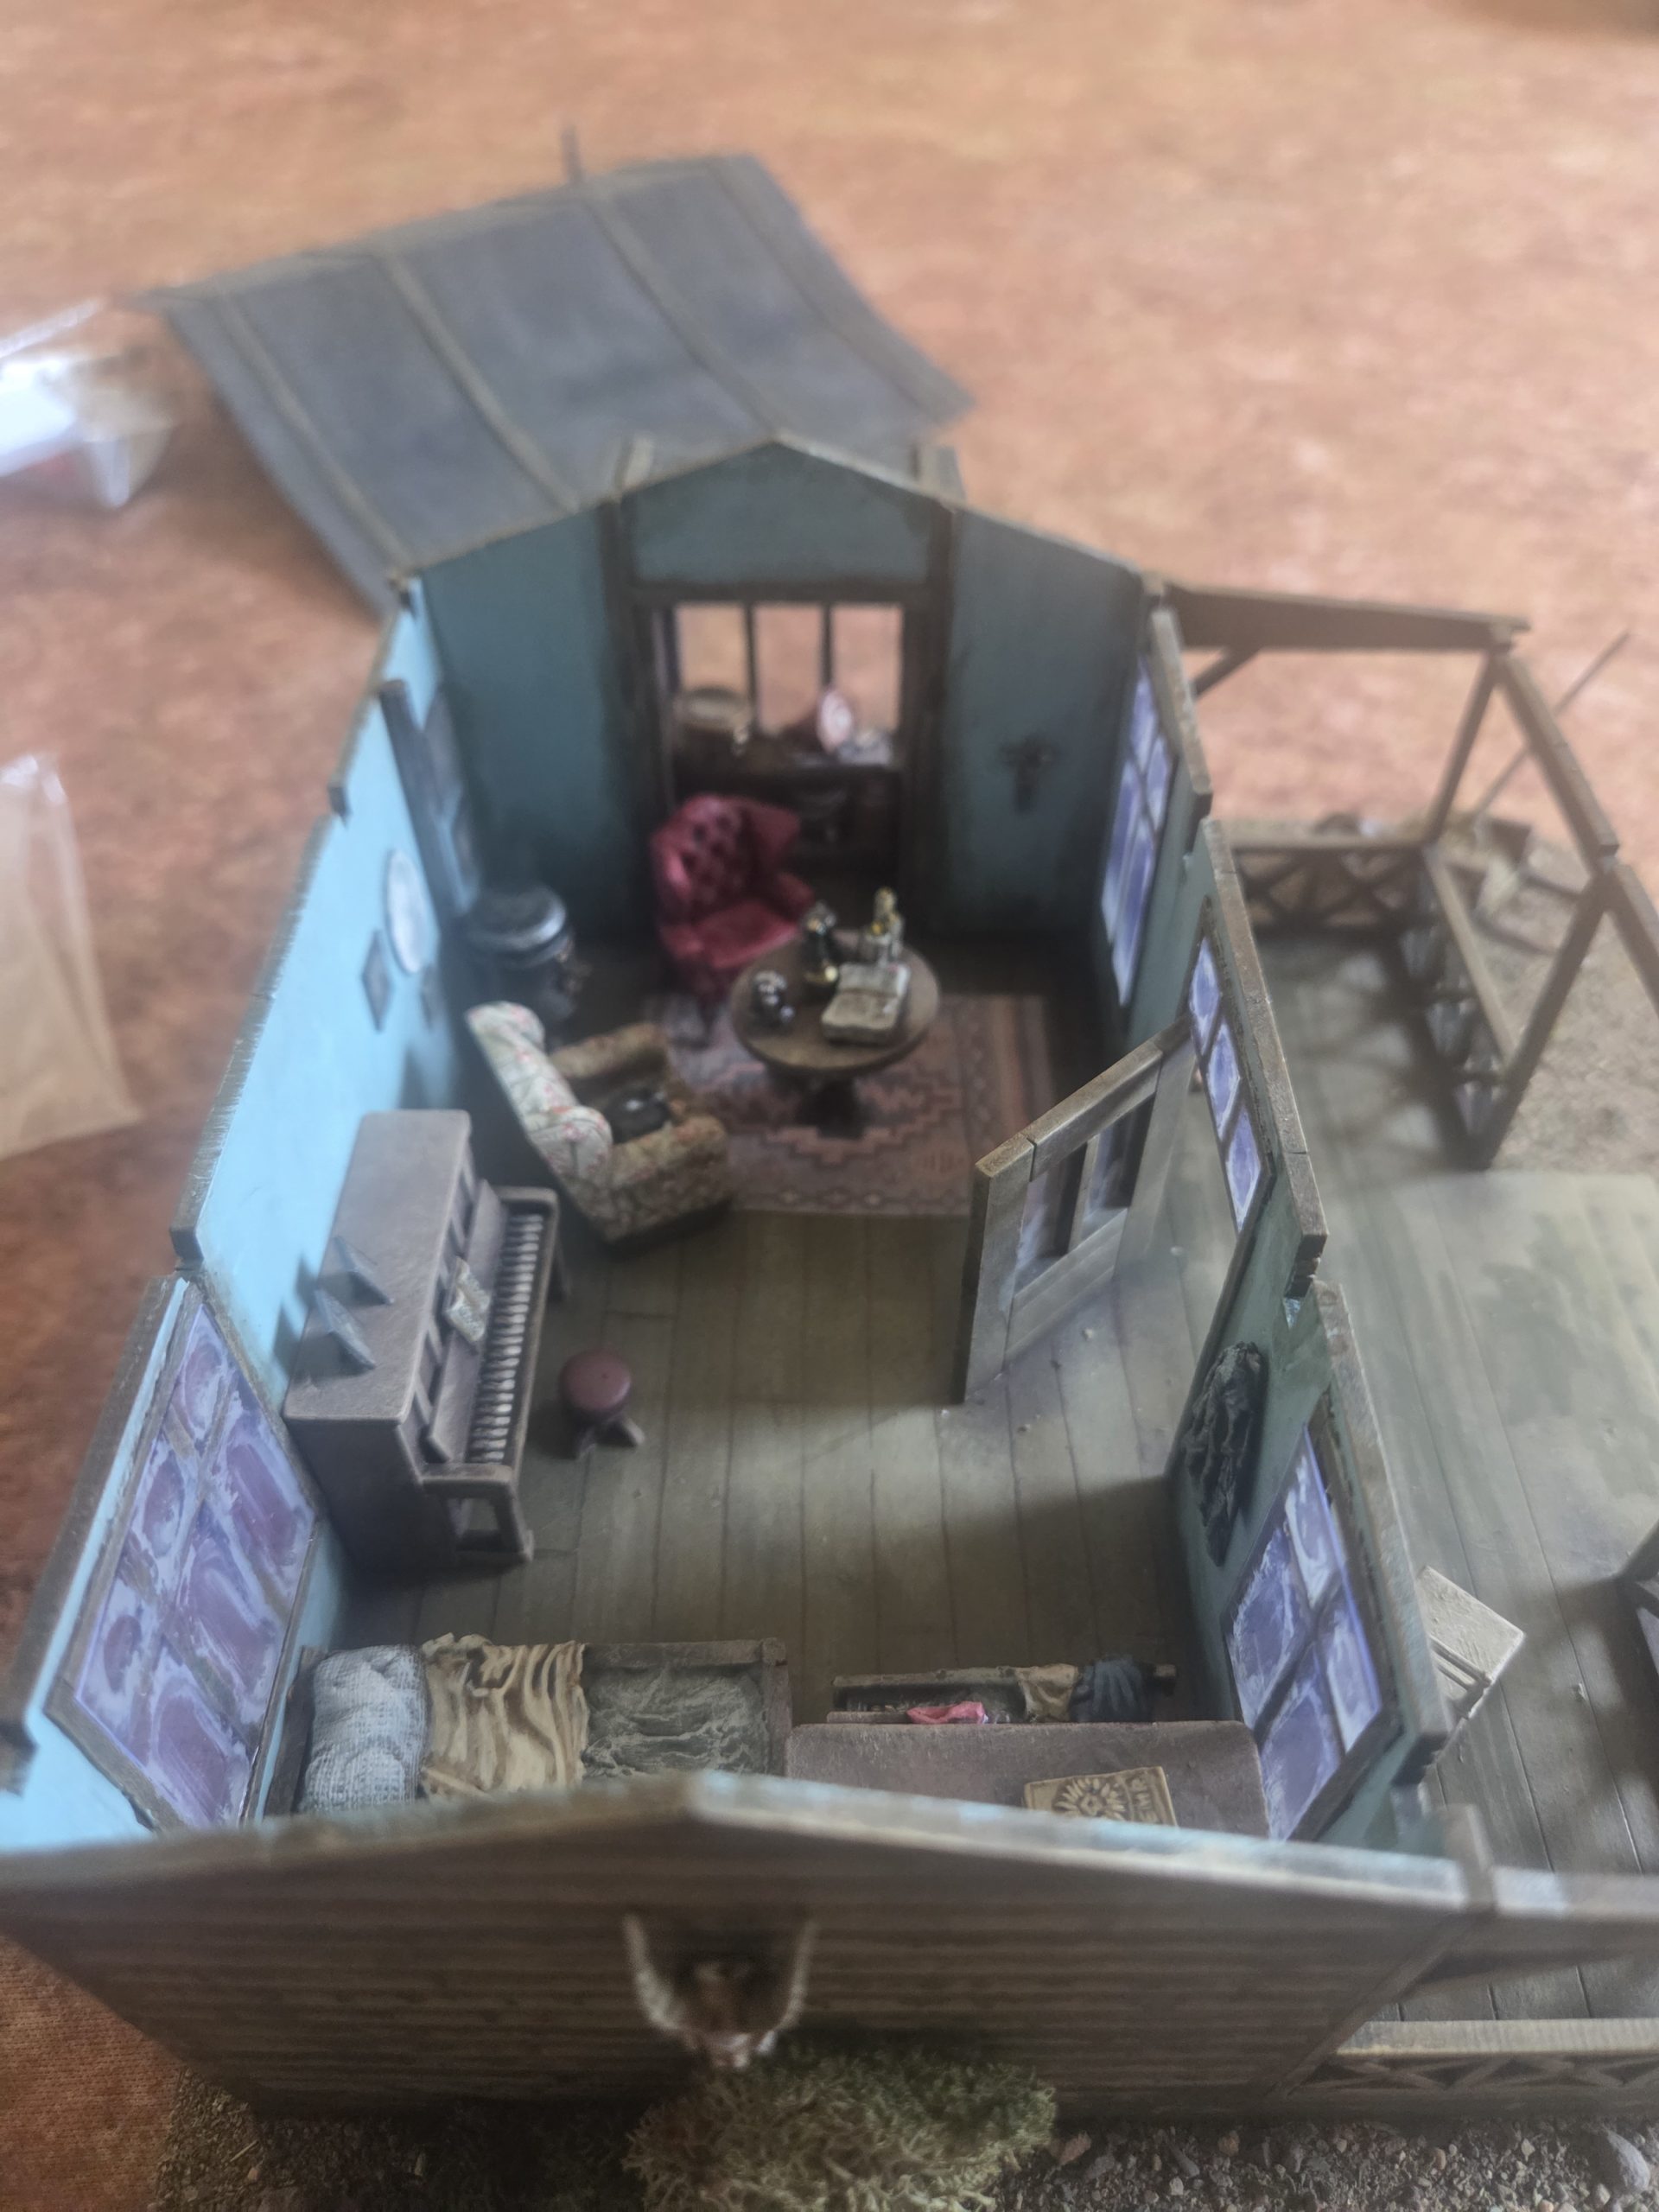 Another view of the interior.
I just need to add grass and foliage to the outside and this model os finished.
Once the terrain fest competition is announced I will expand this project out and add all the models I have painted from the initial release from Spectre Miniatures along with other older models that I have redone to act as proxies until kickstarter is fulfilled.
And a game board! You must be bloody mad
When I was thinking about what I had that I could use I remembered that I had an unfinished 2×2 coastal board. Smallest size games I play fit this board and again if I am careful can also be used in Cohors Cthulhu.
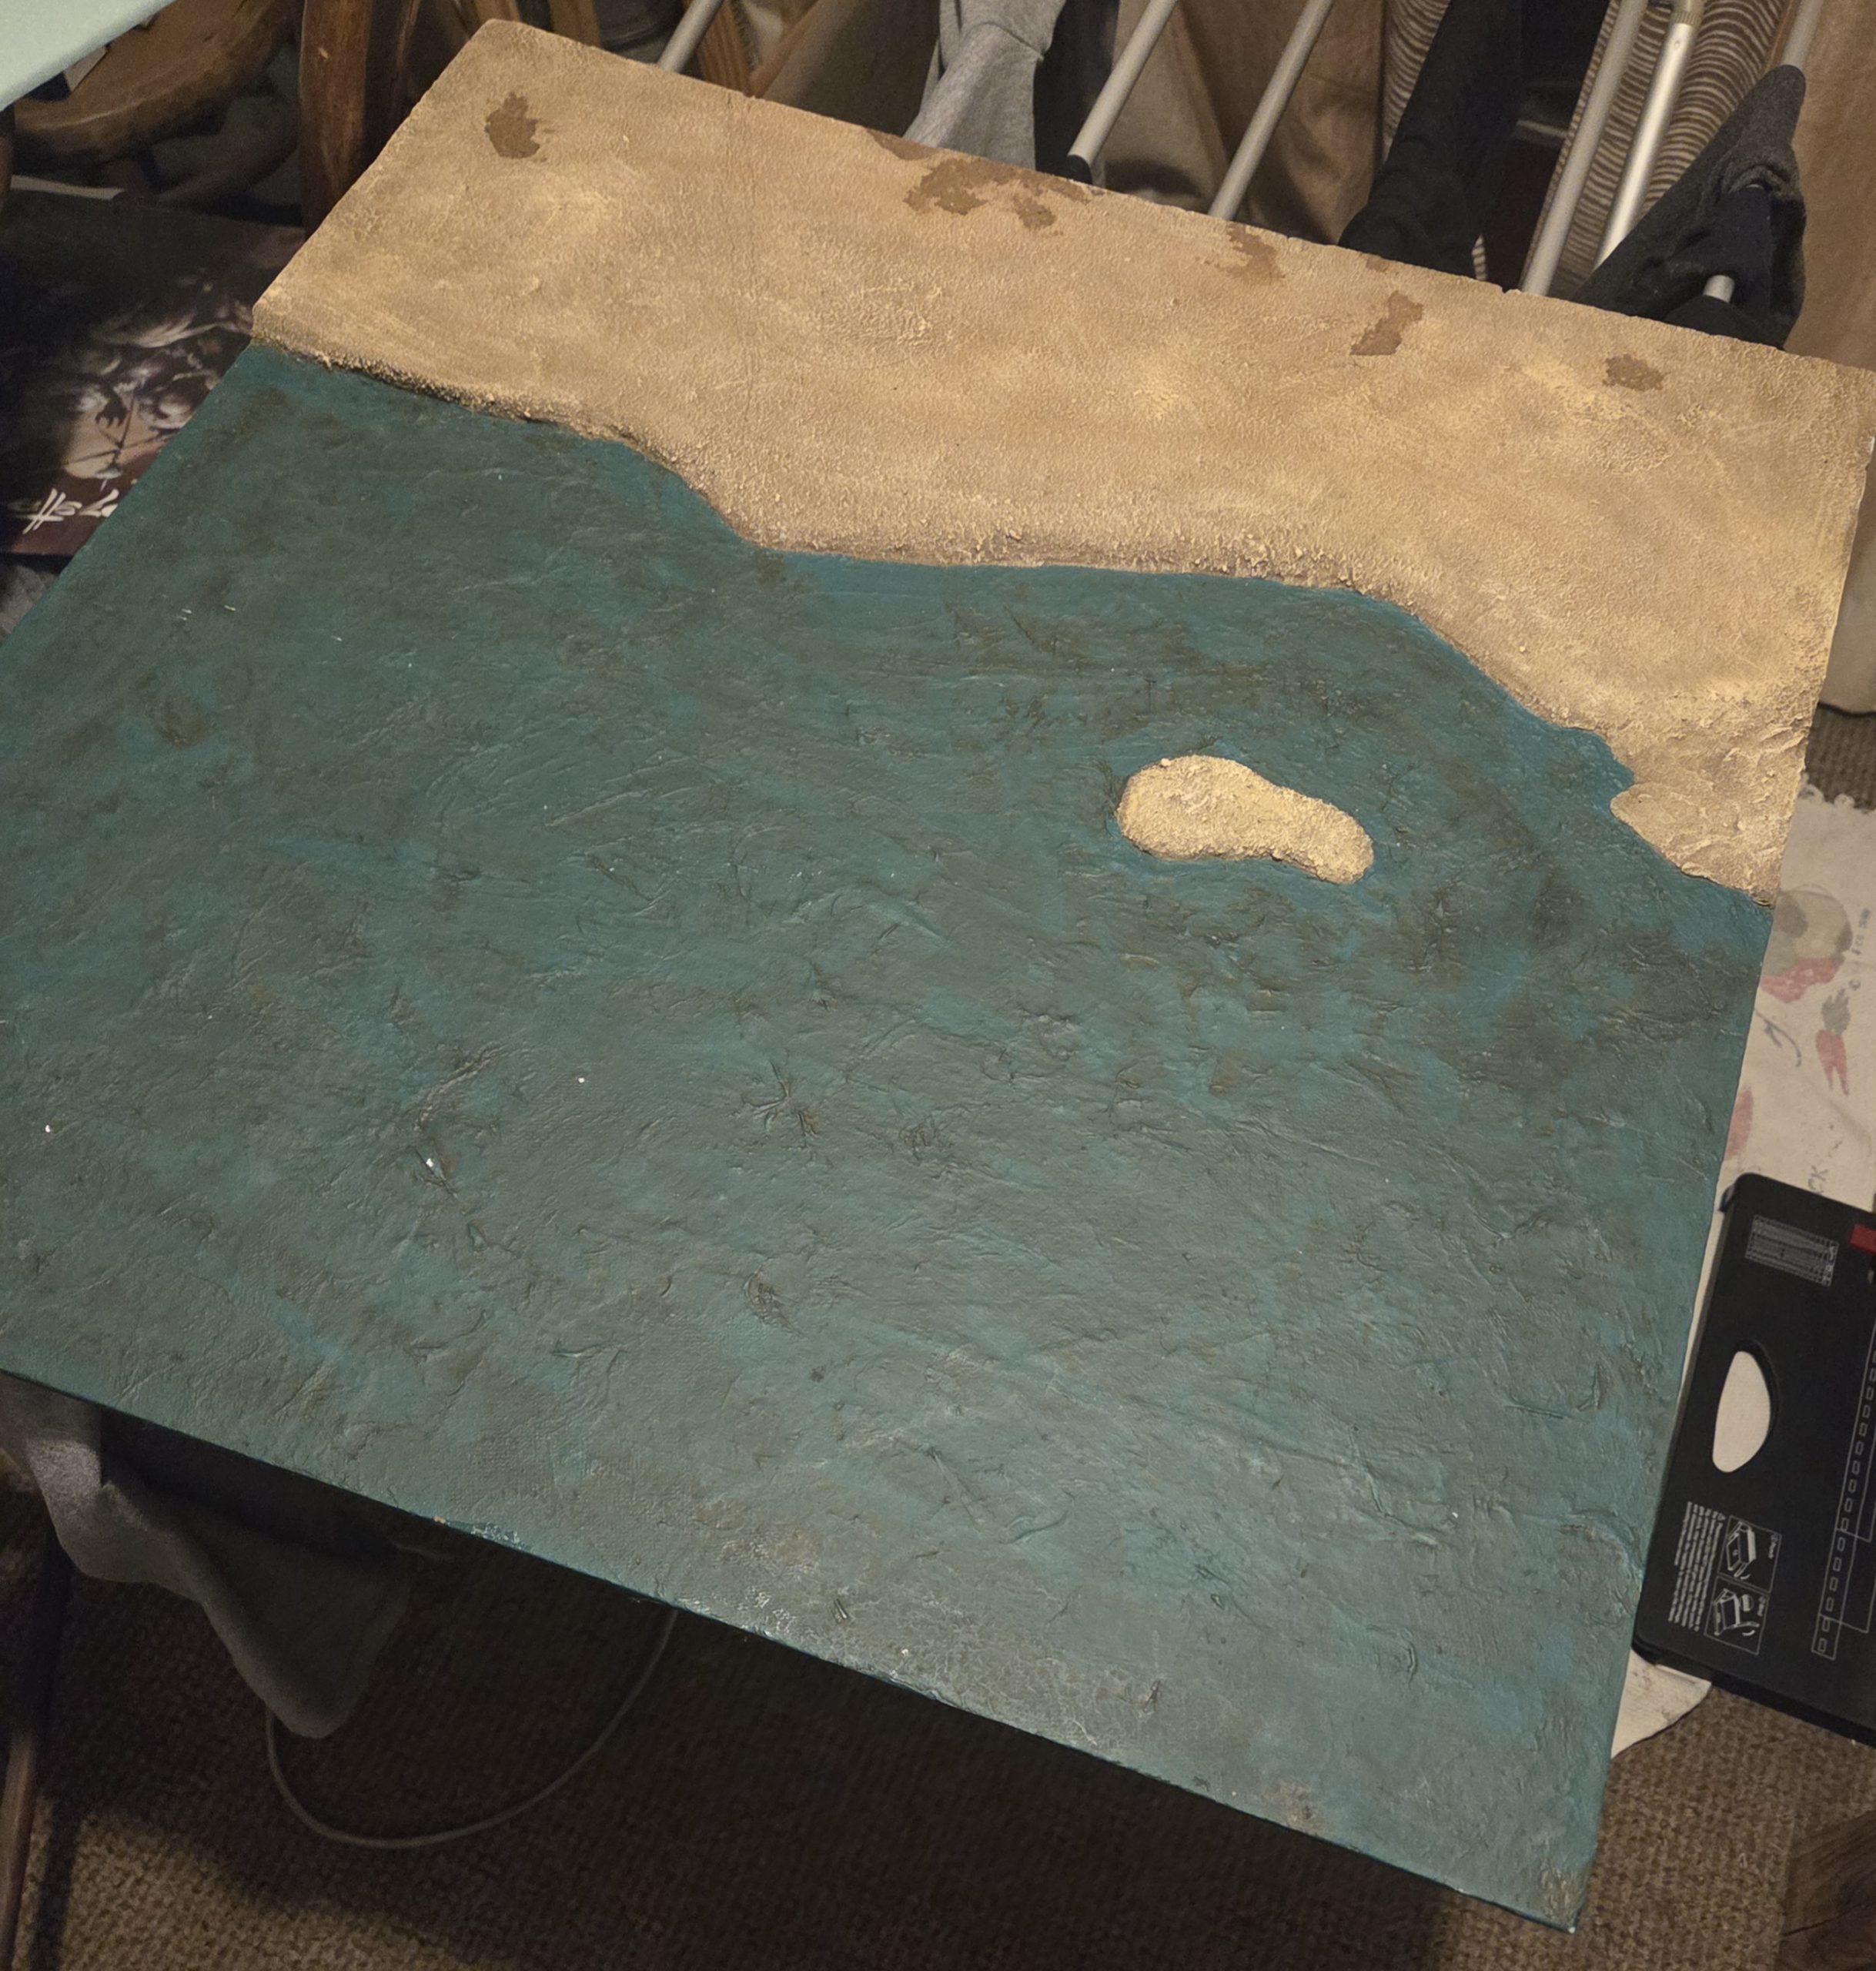 The board as was.
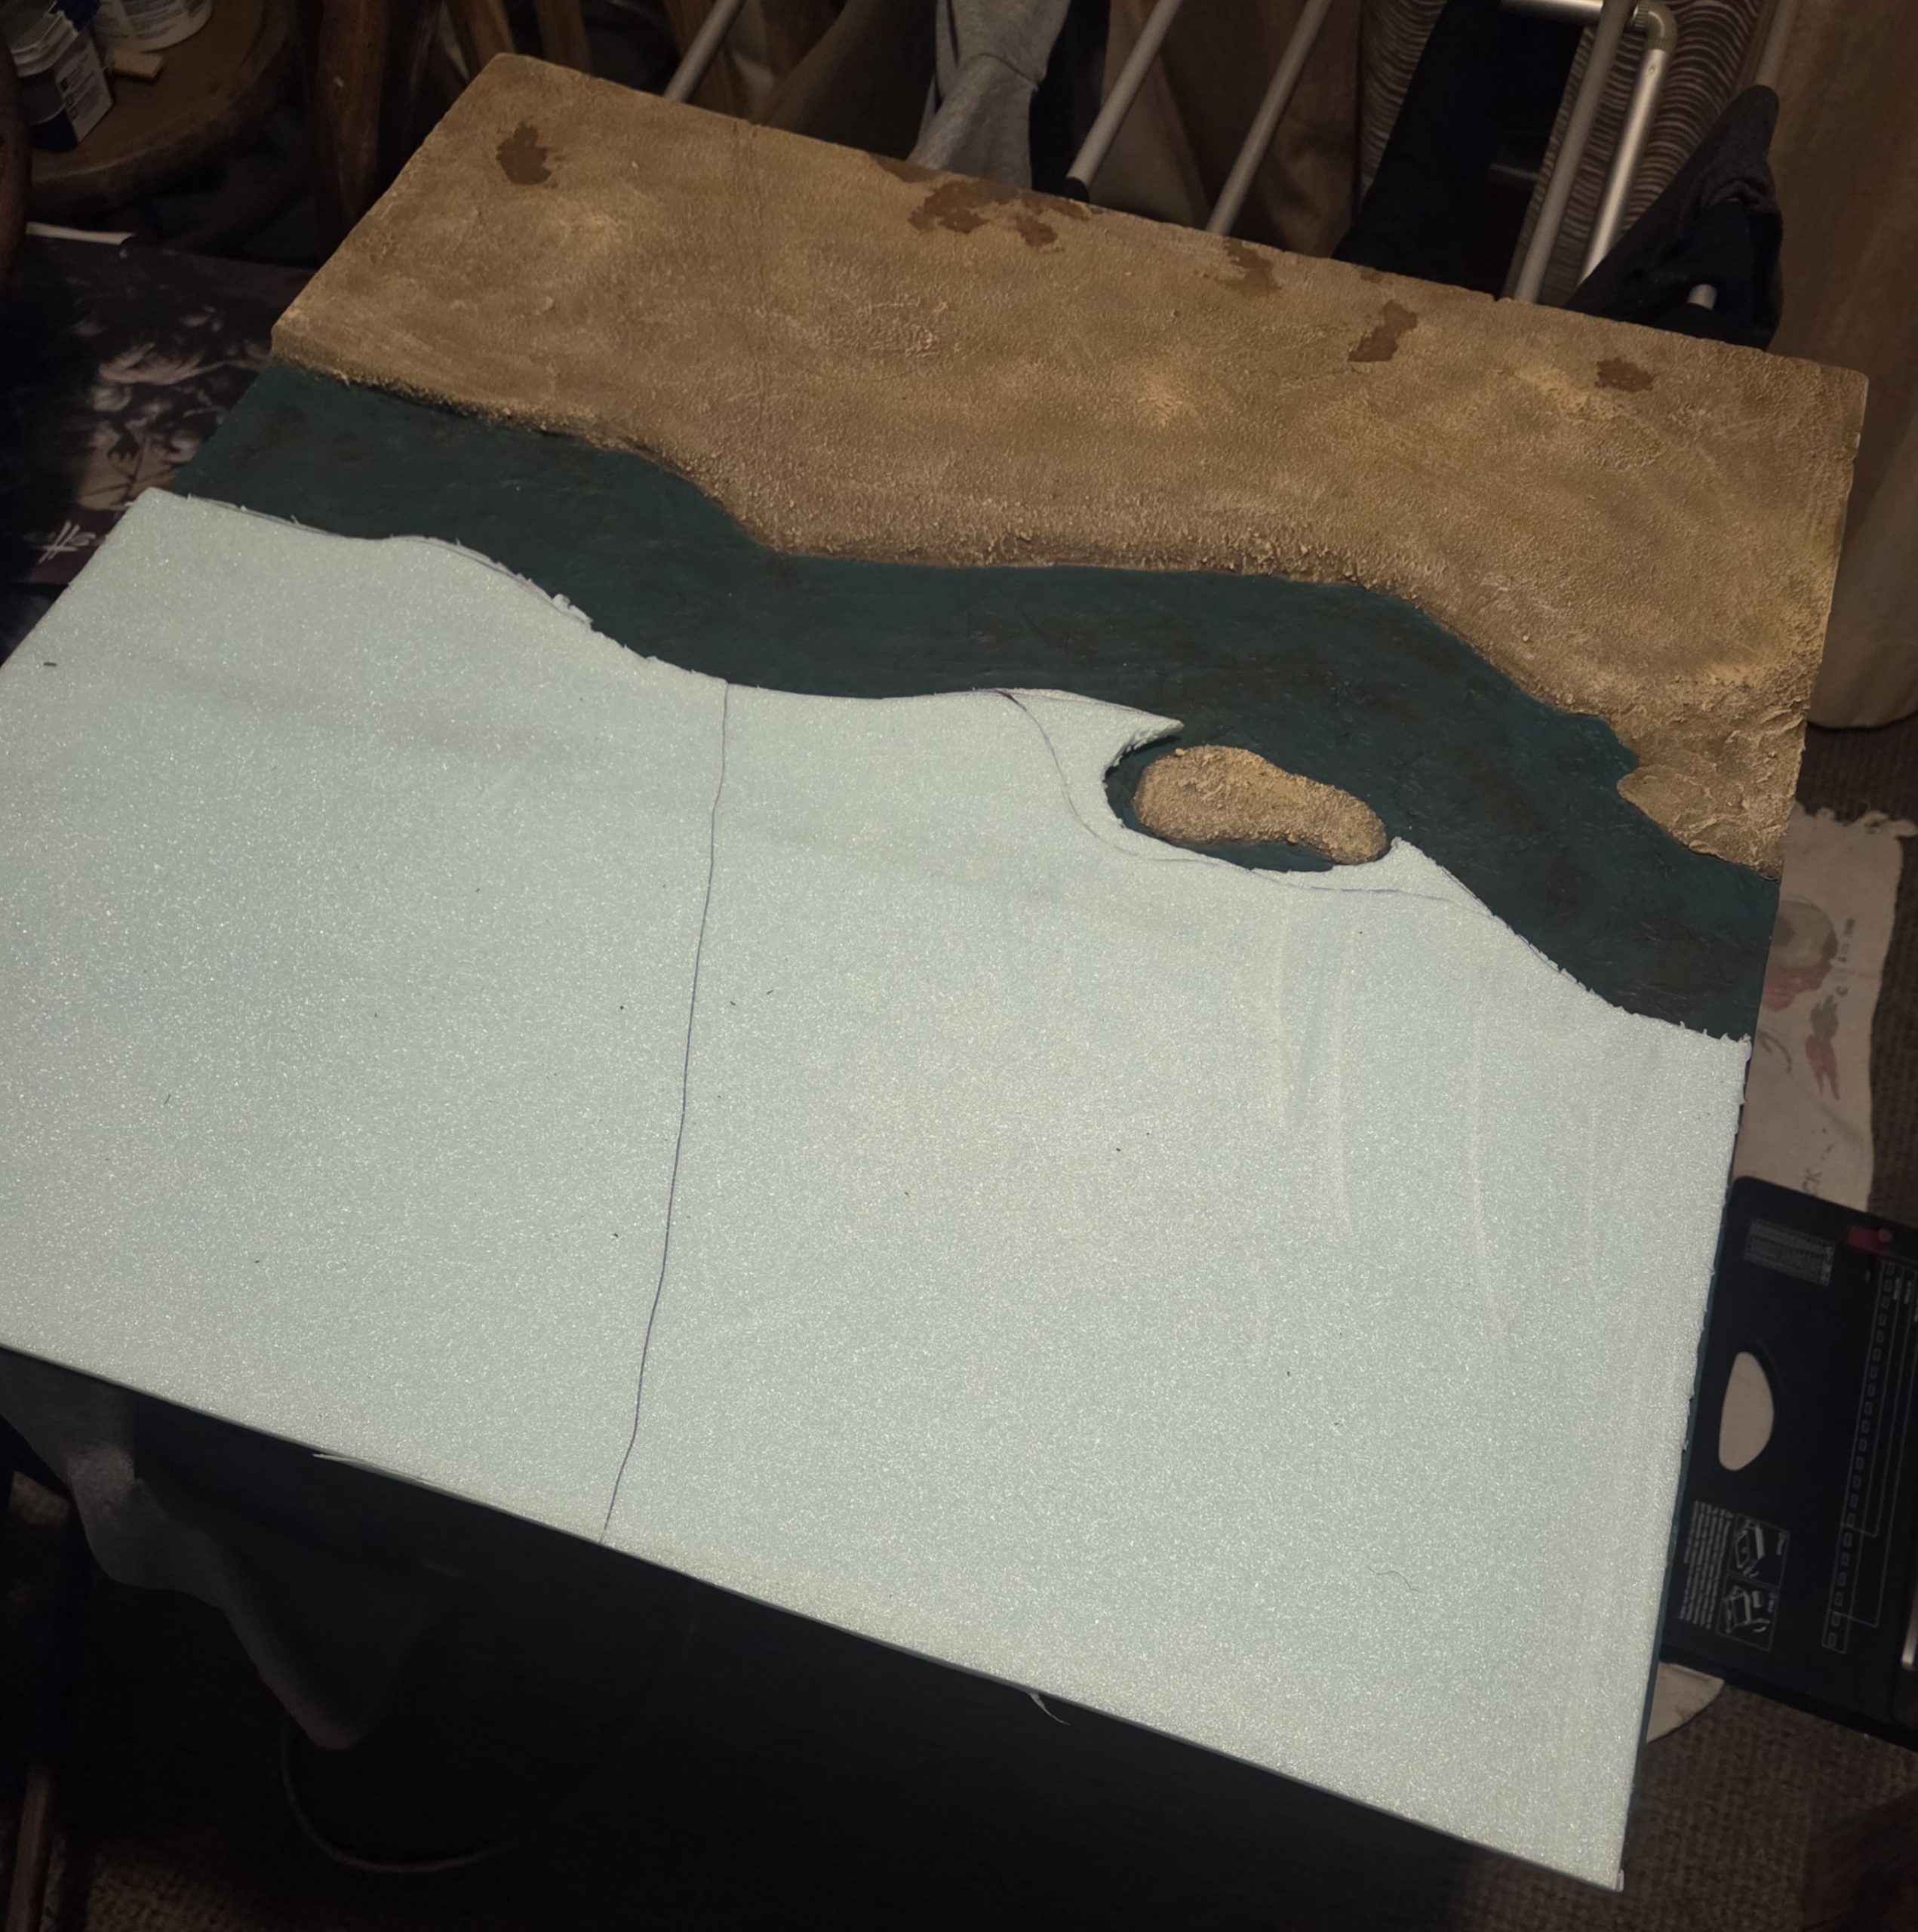 Fitting the first bit of polystyrene.
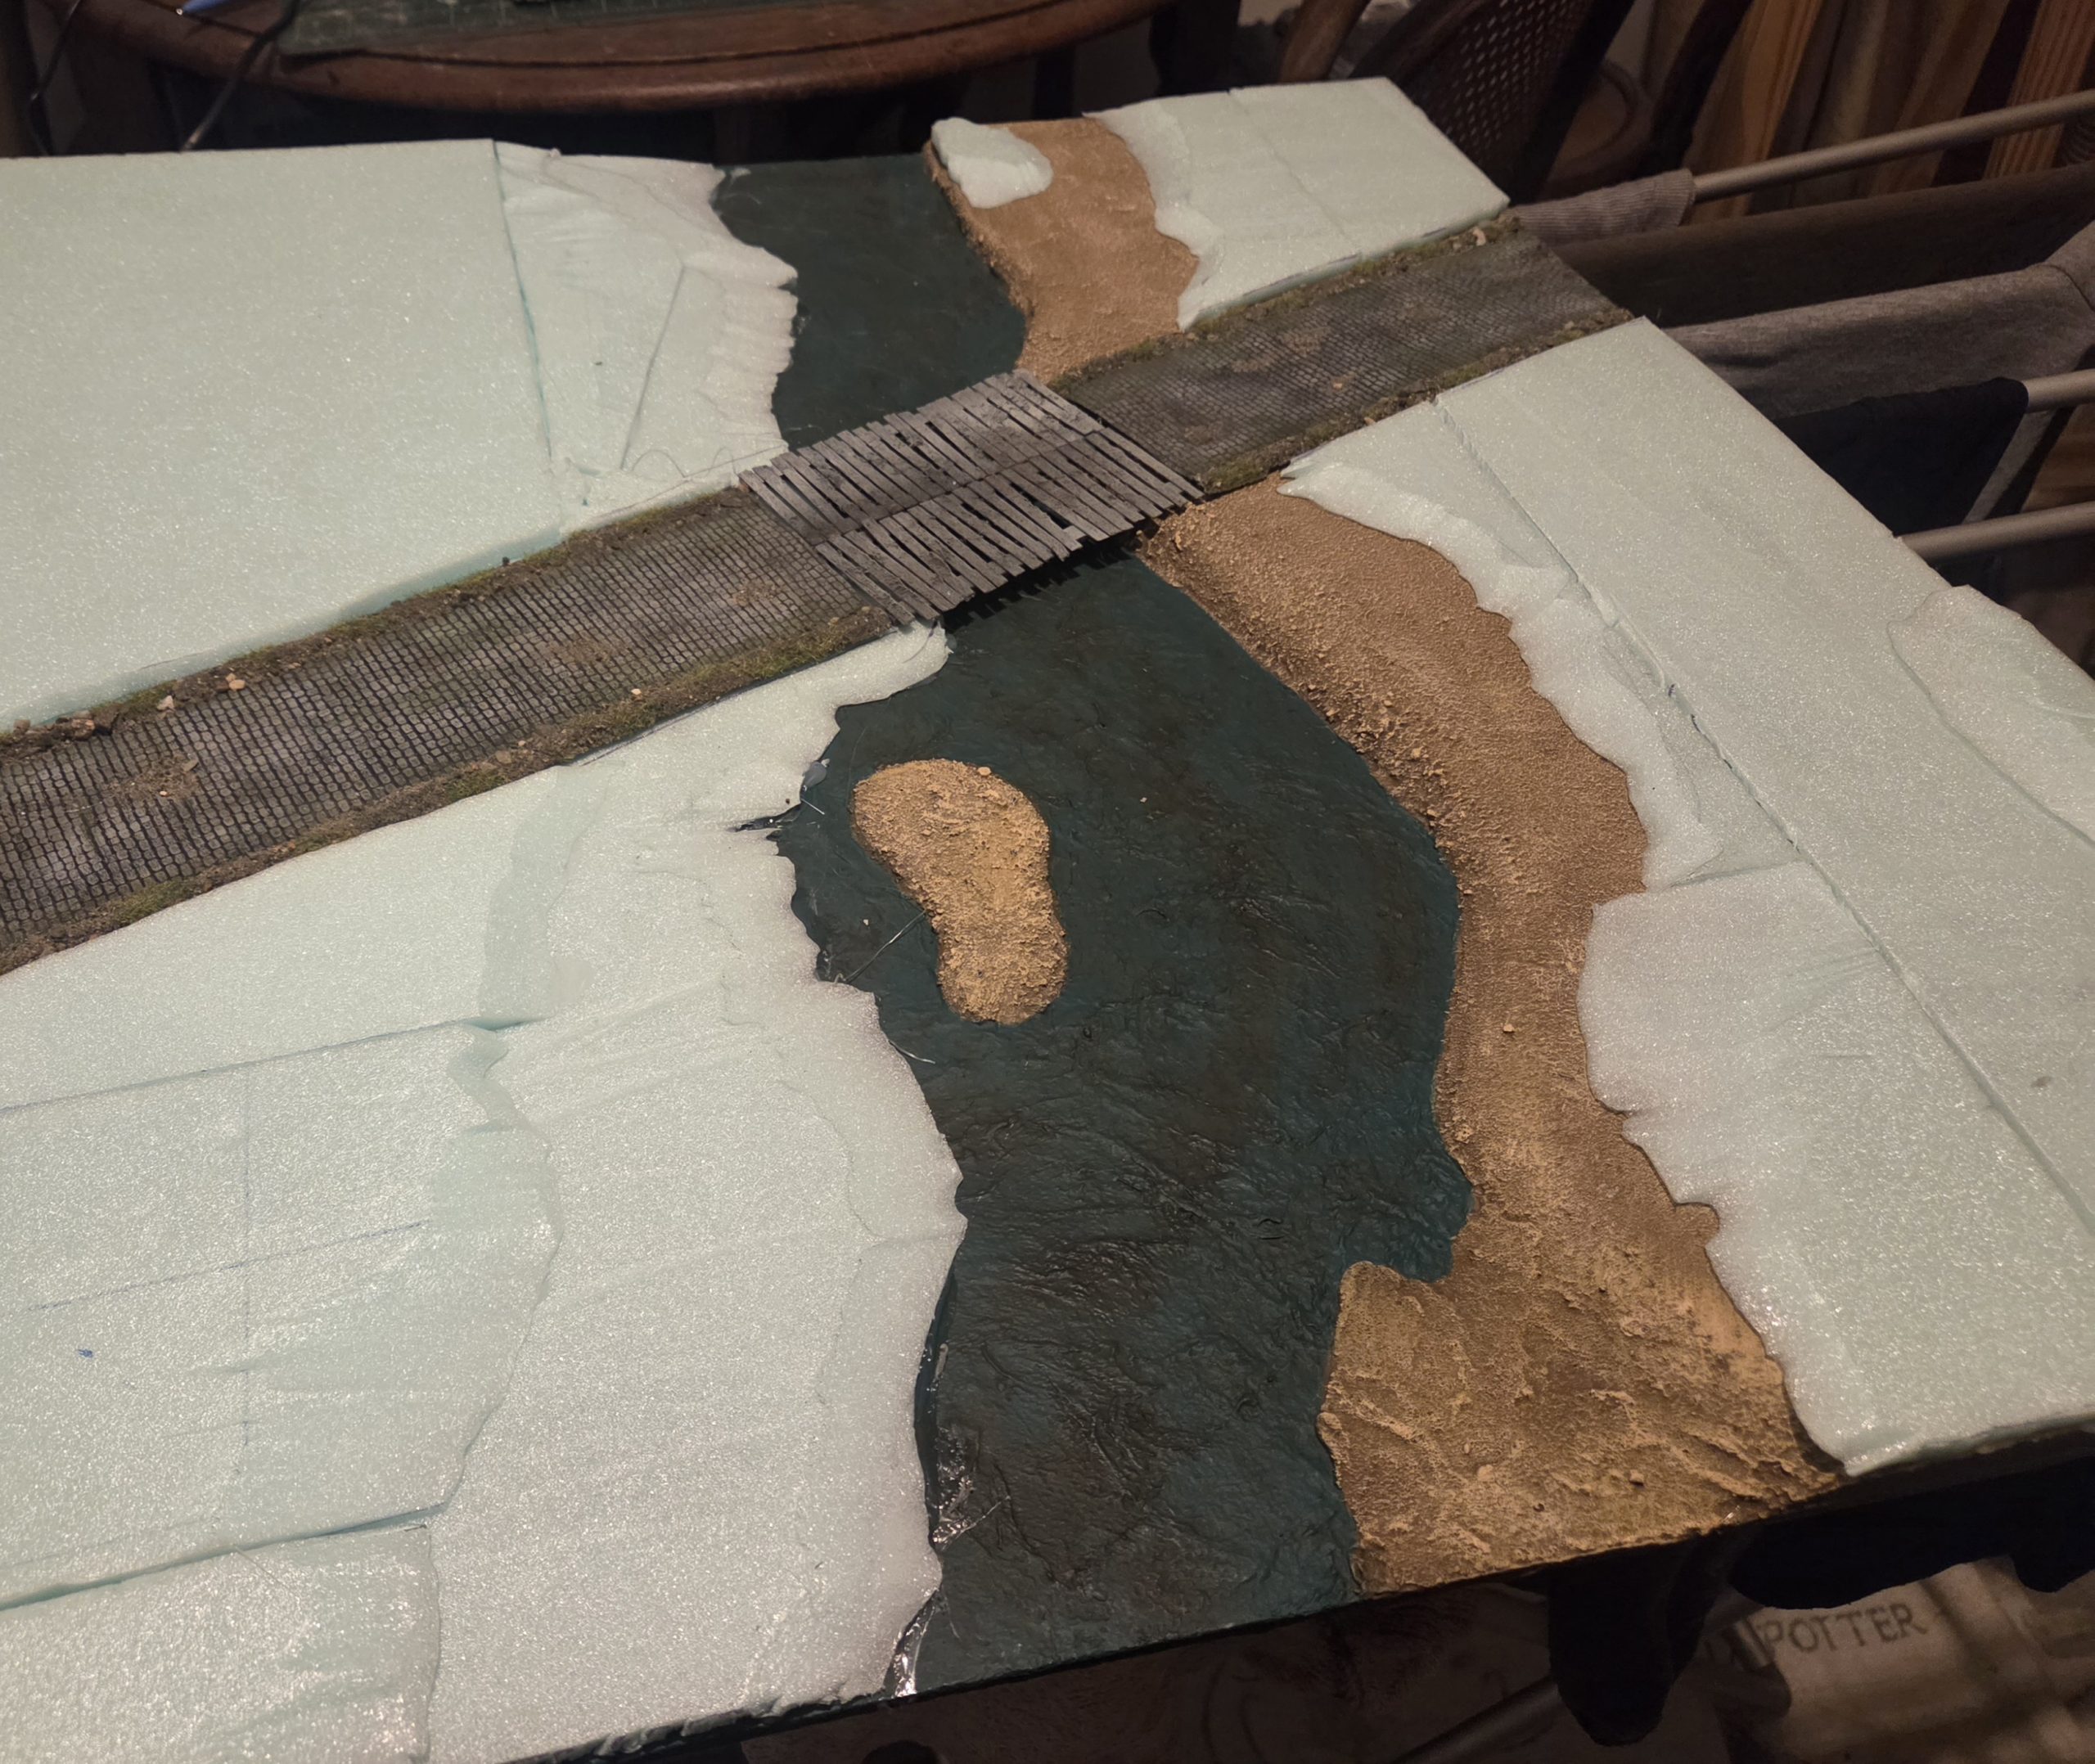 Added,another layer of polystyrene, inser the roads ( these are the nicely loaded rubber ones which you have to paint, I can't remember who makes them. The bridge is two of my trench walkways ( no longer required) butted side by side
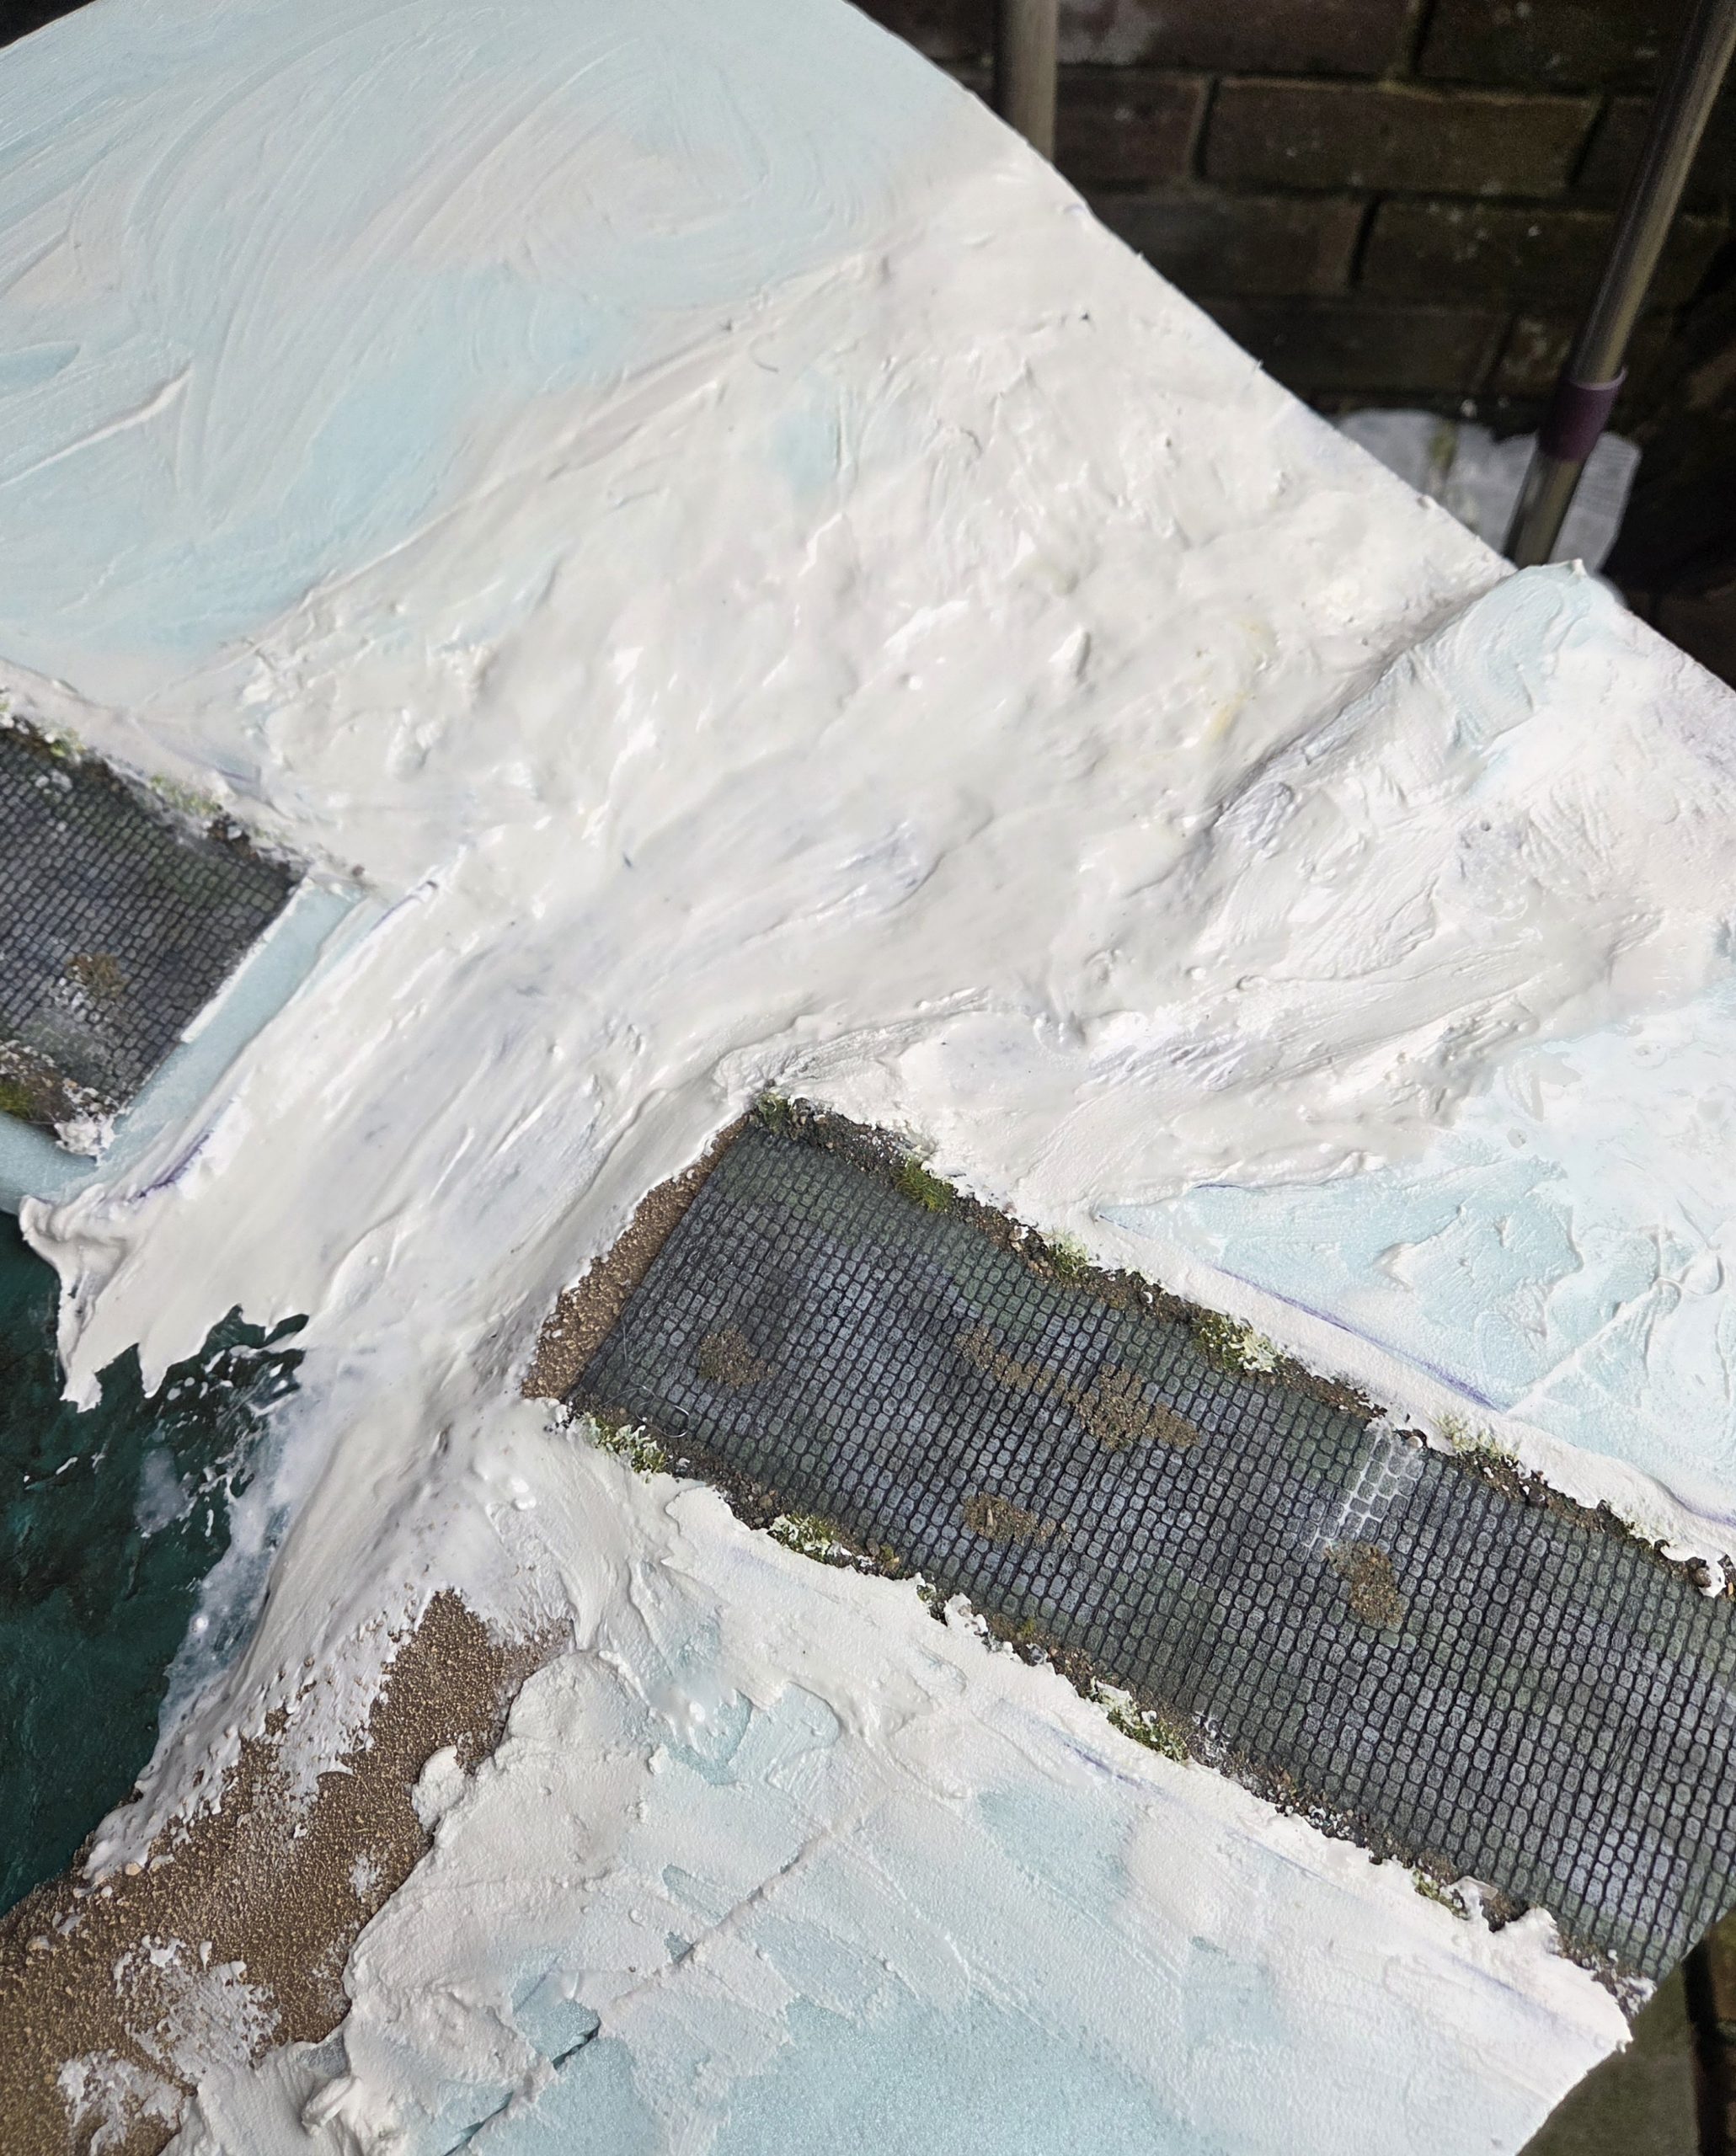 I ha e started to apply yhe polyfilla. Because I dont want the table to be restrictive am modelling two fordable places at either end of the river, now I can declare 1, 3 or all fordable.
The Folly in the Woods
One of the pieces of terrain I repurposed was a bell/church tower I had built for Trench Crusade.
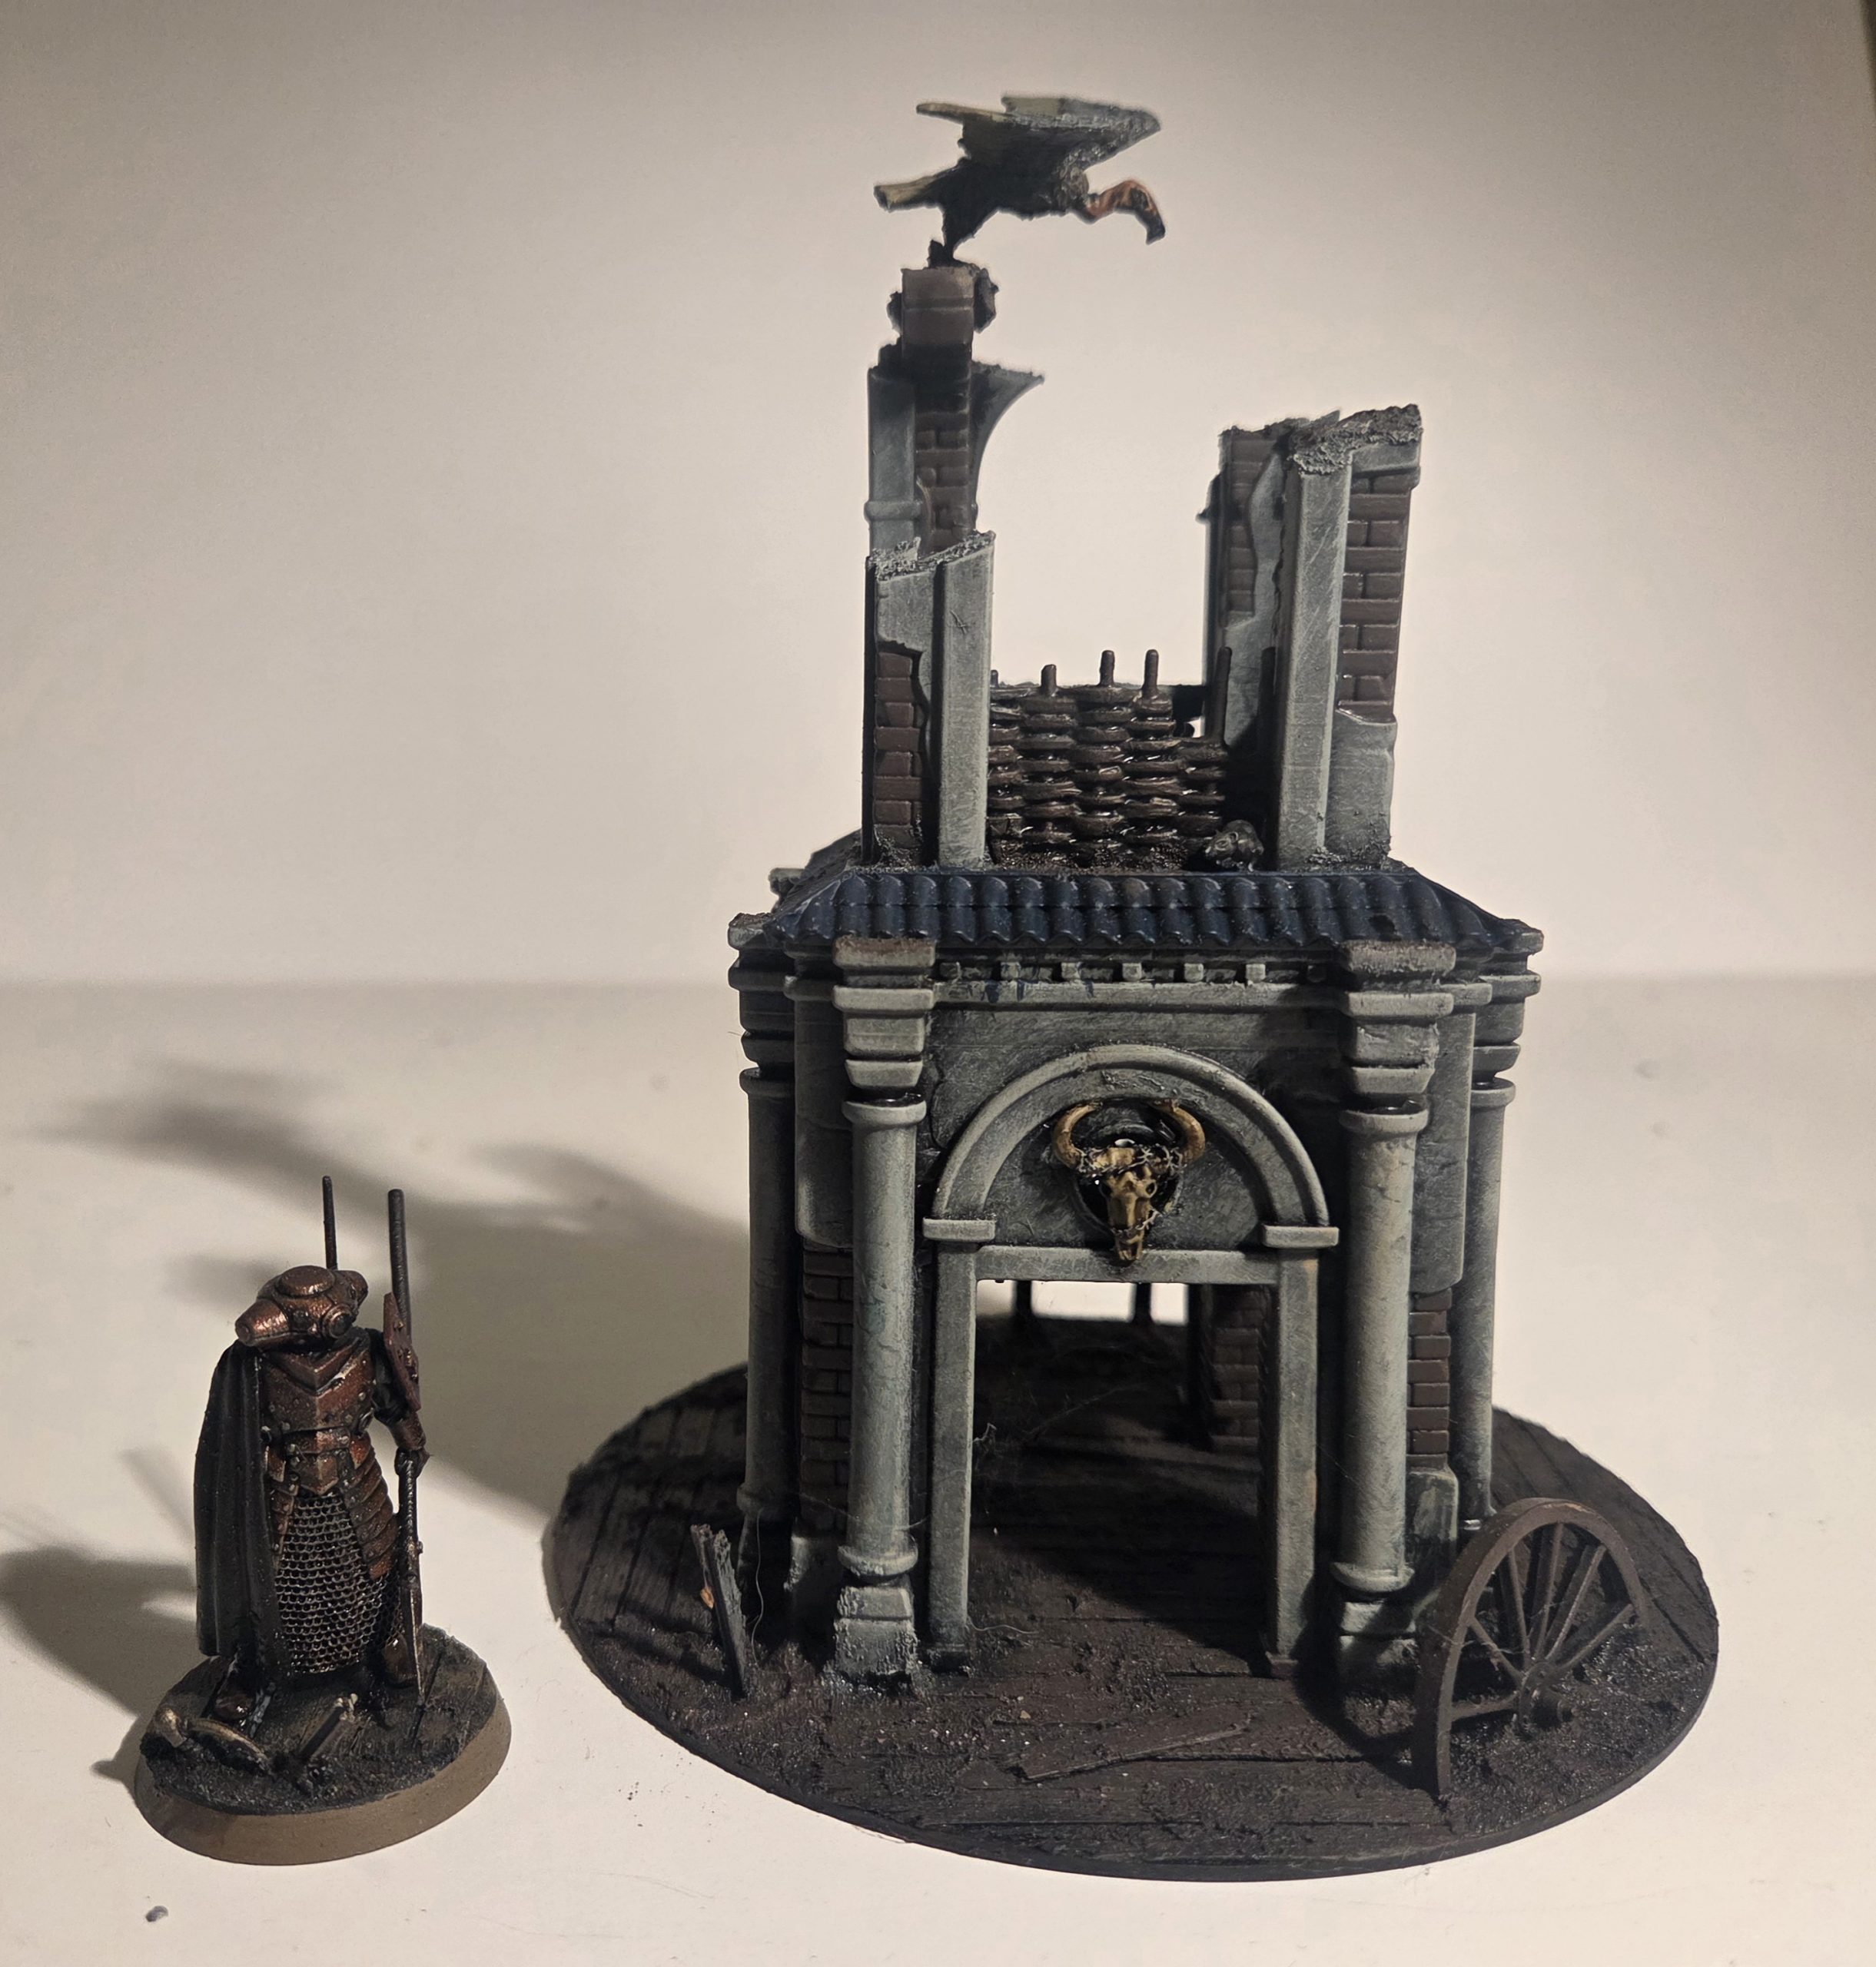
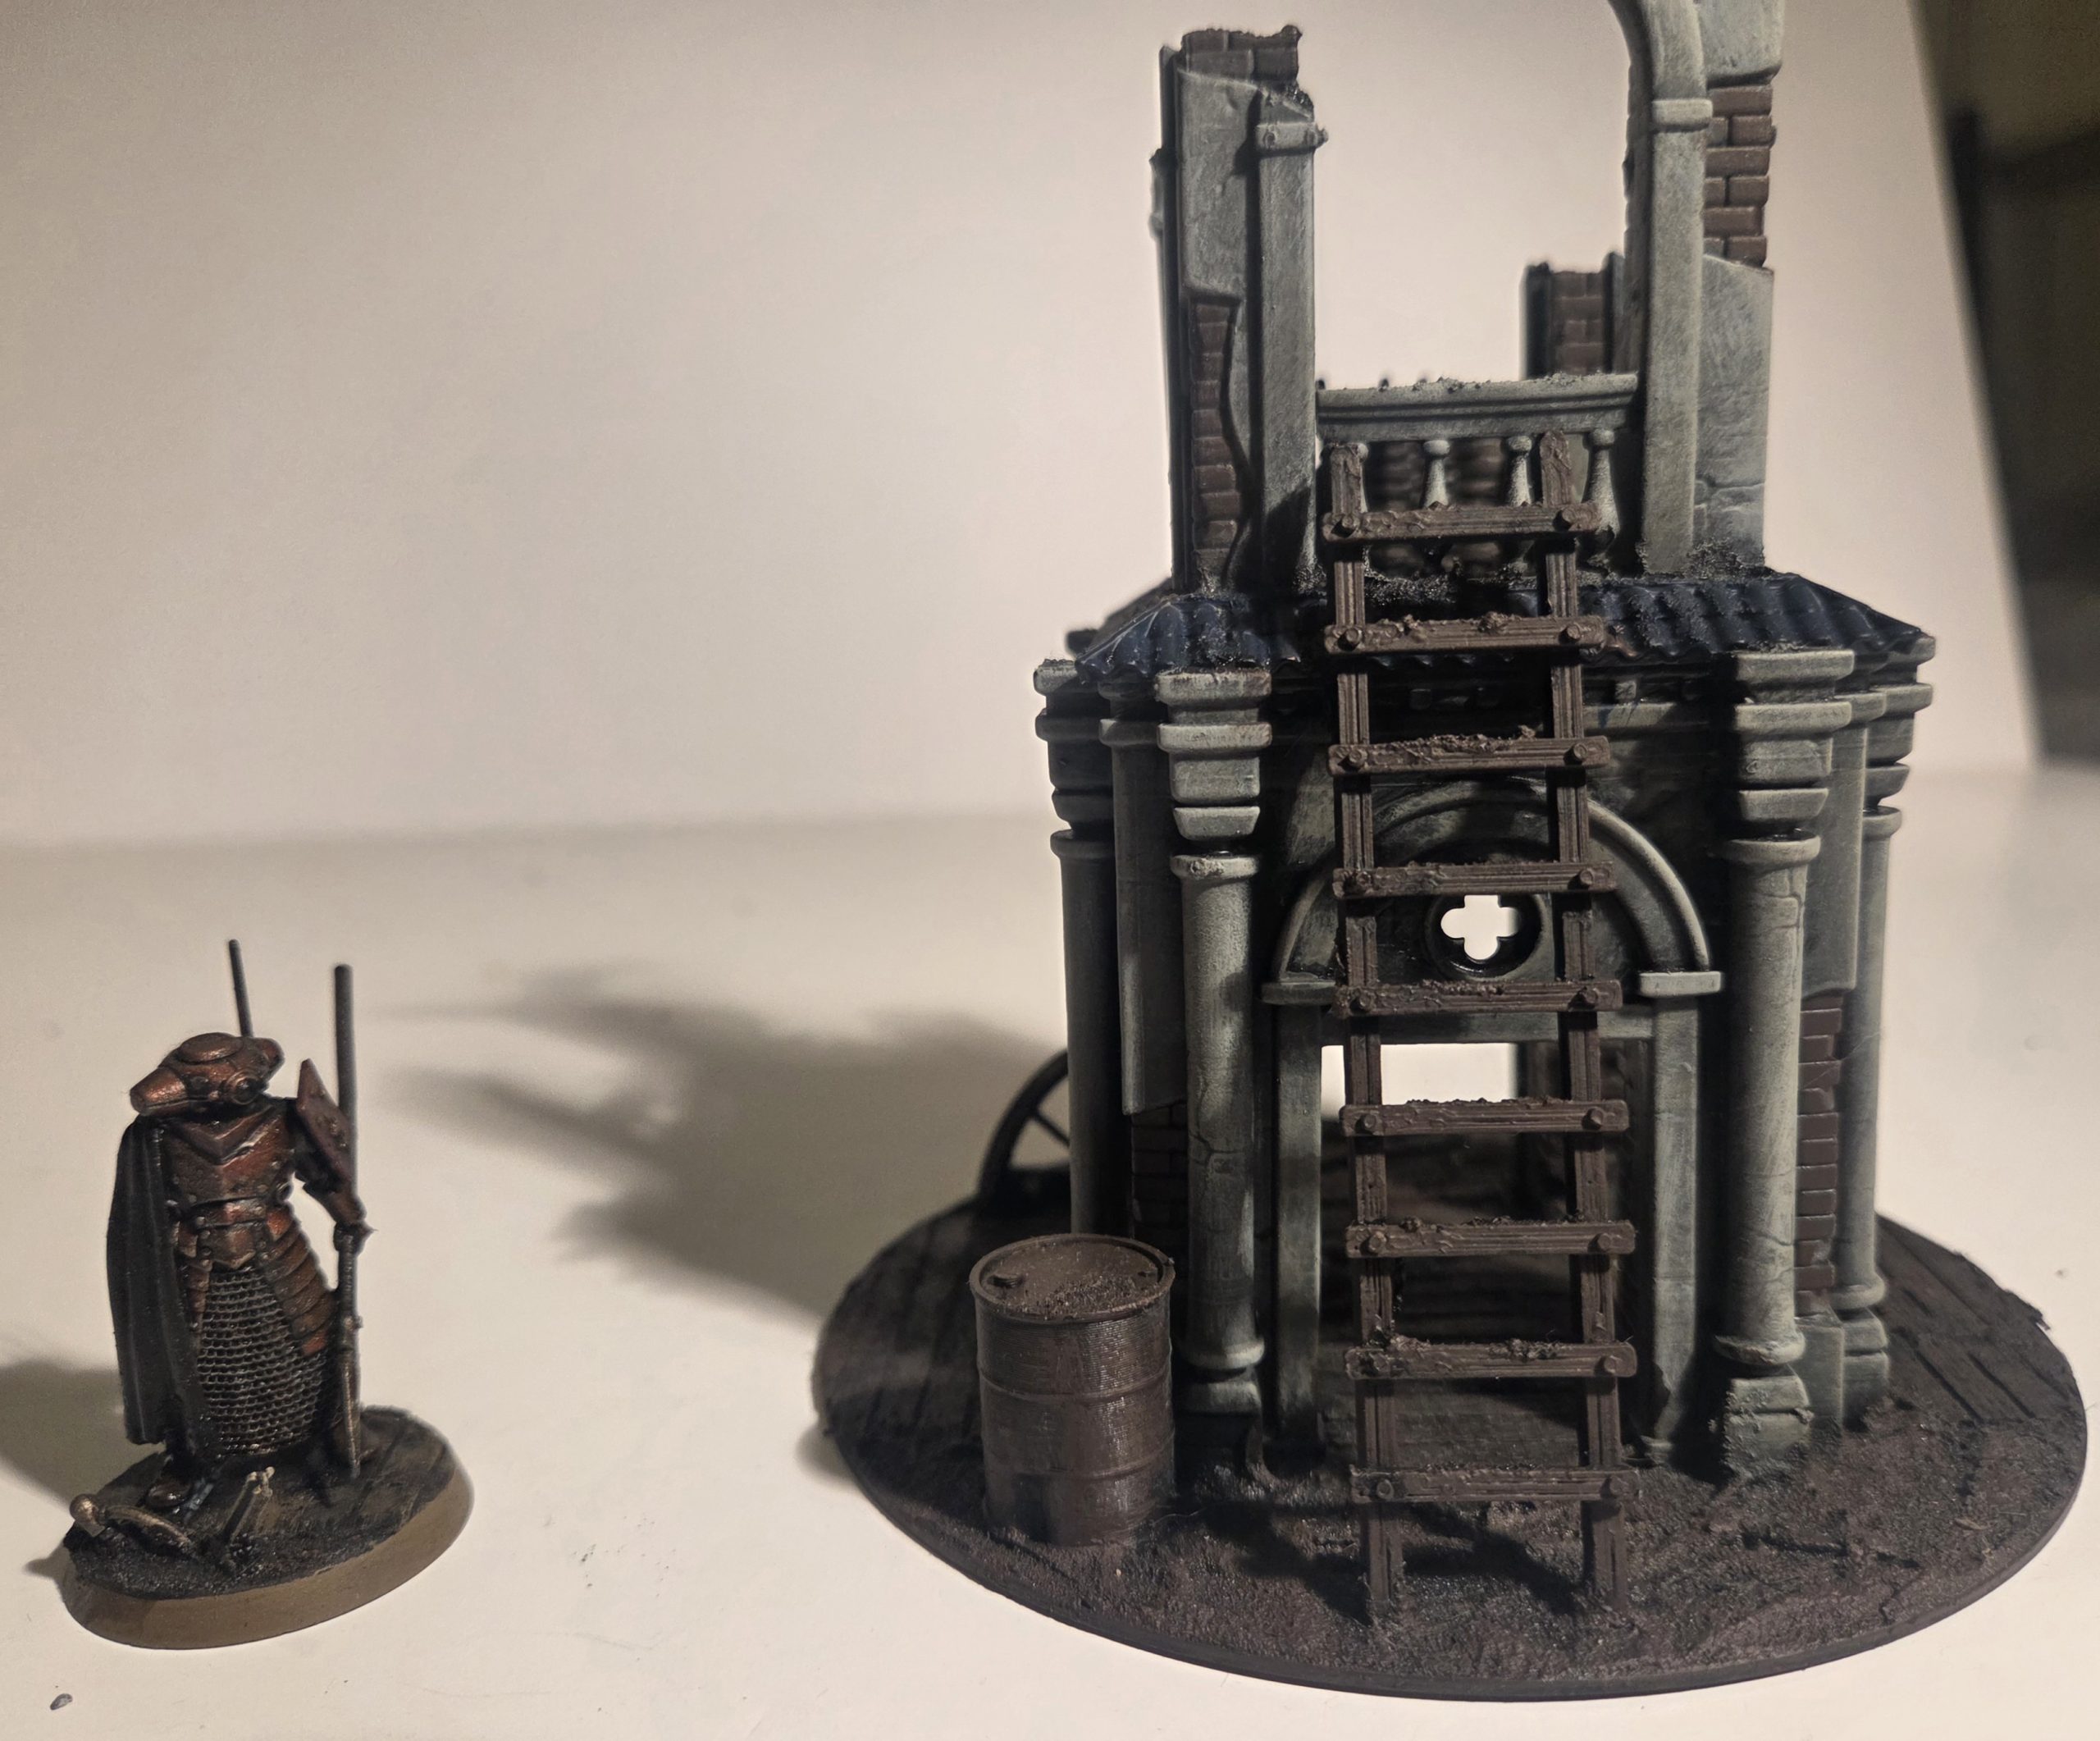
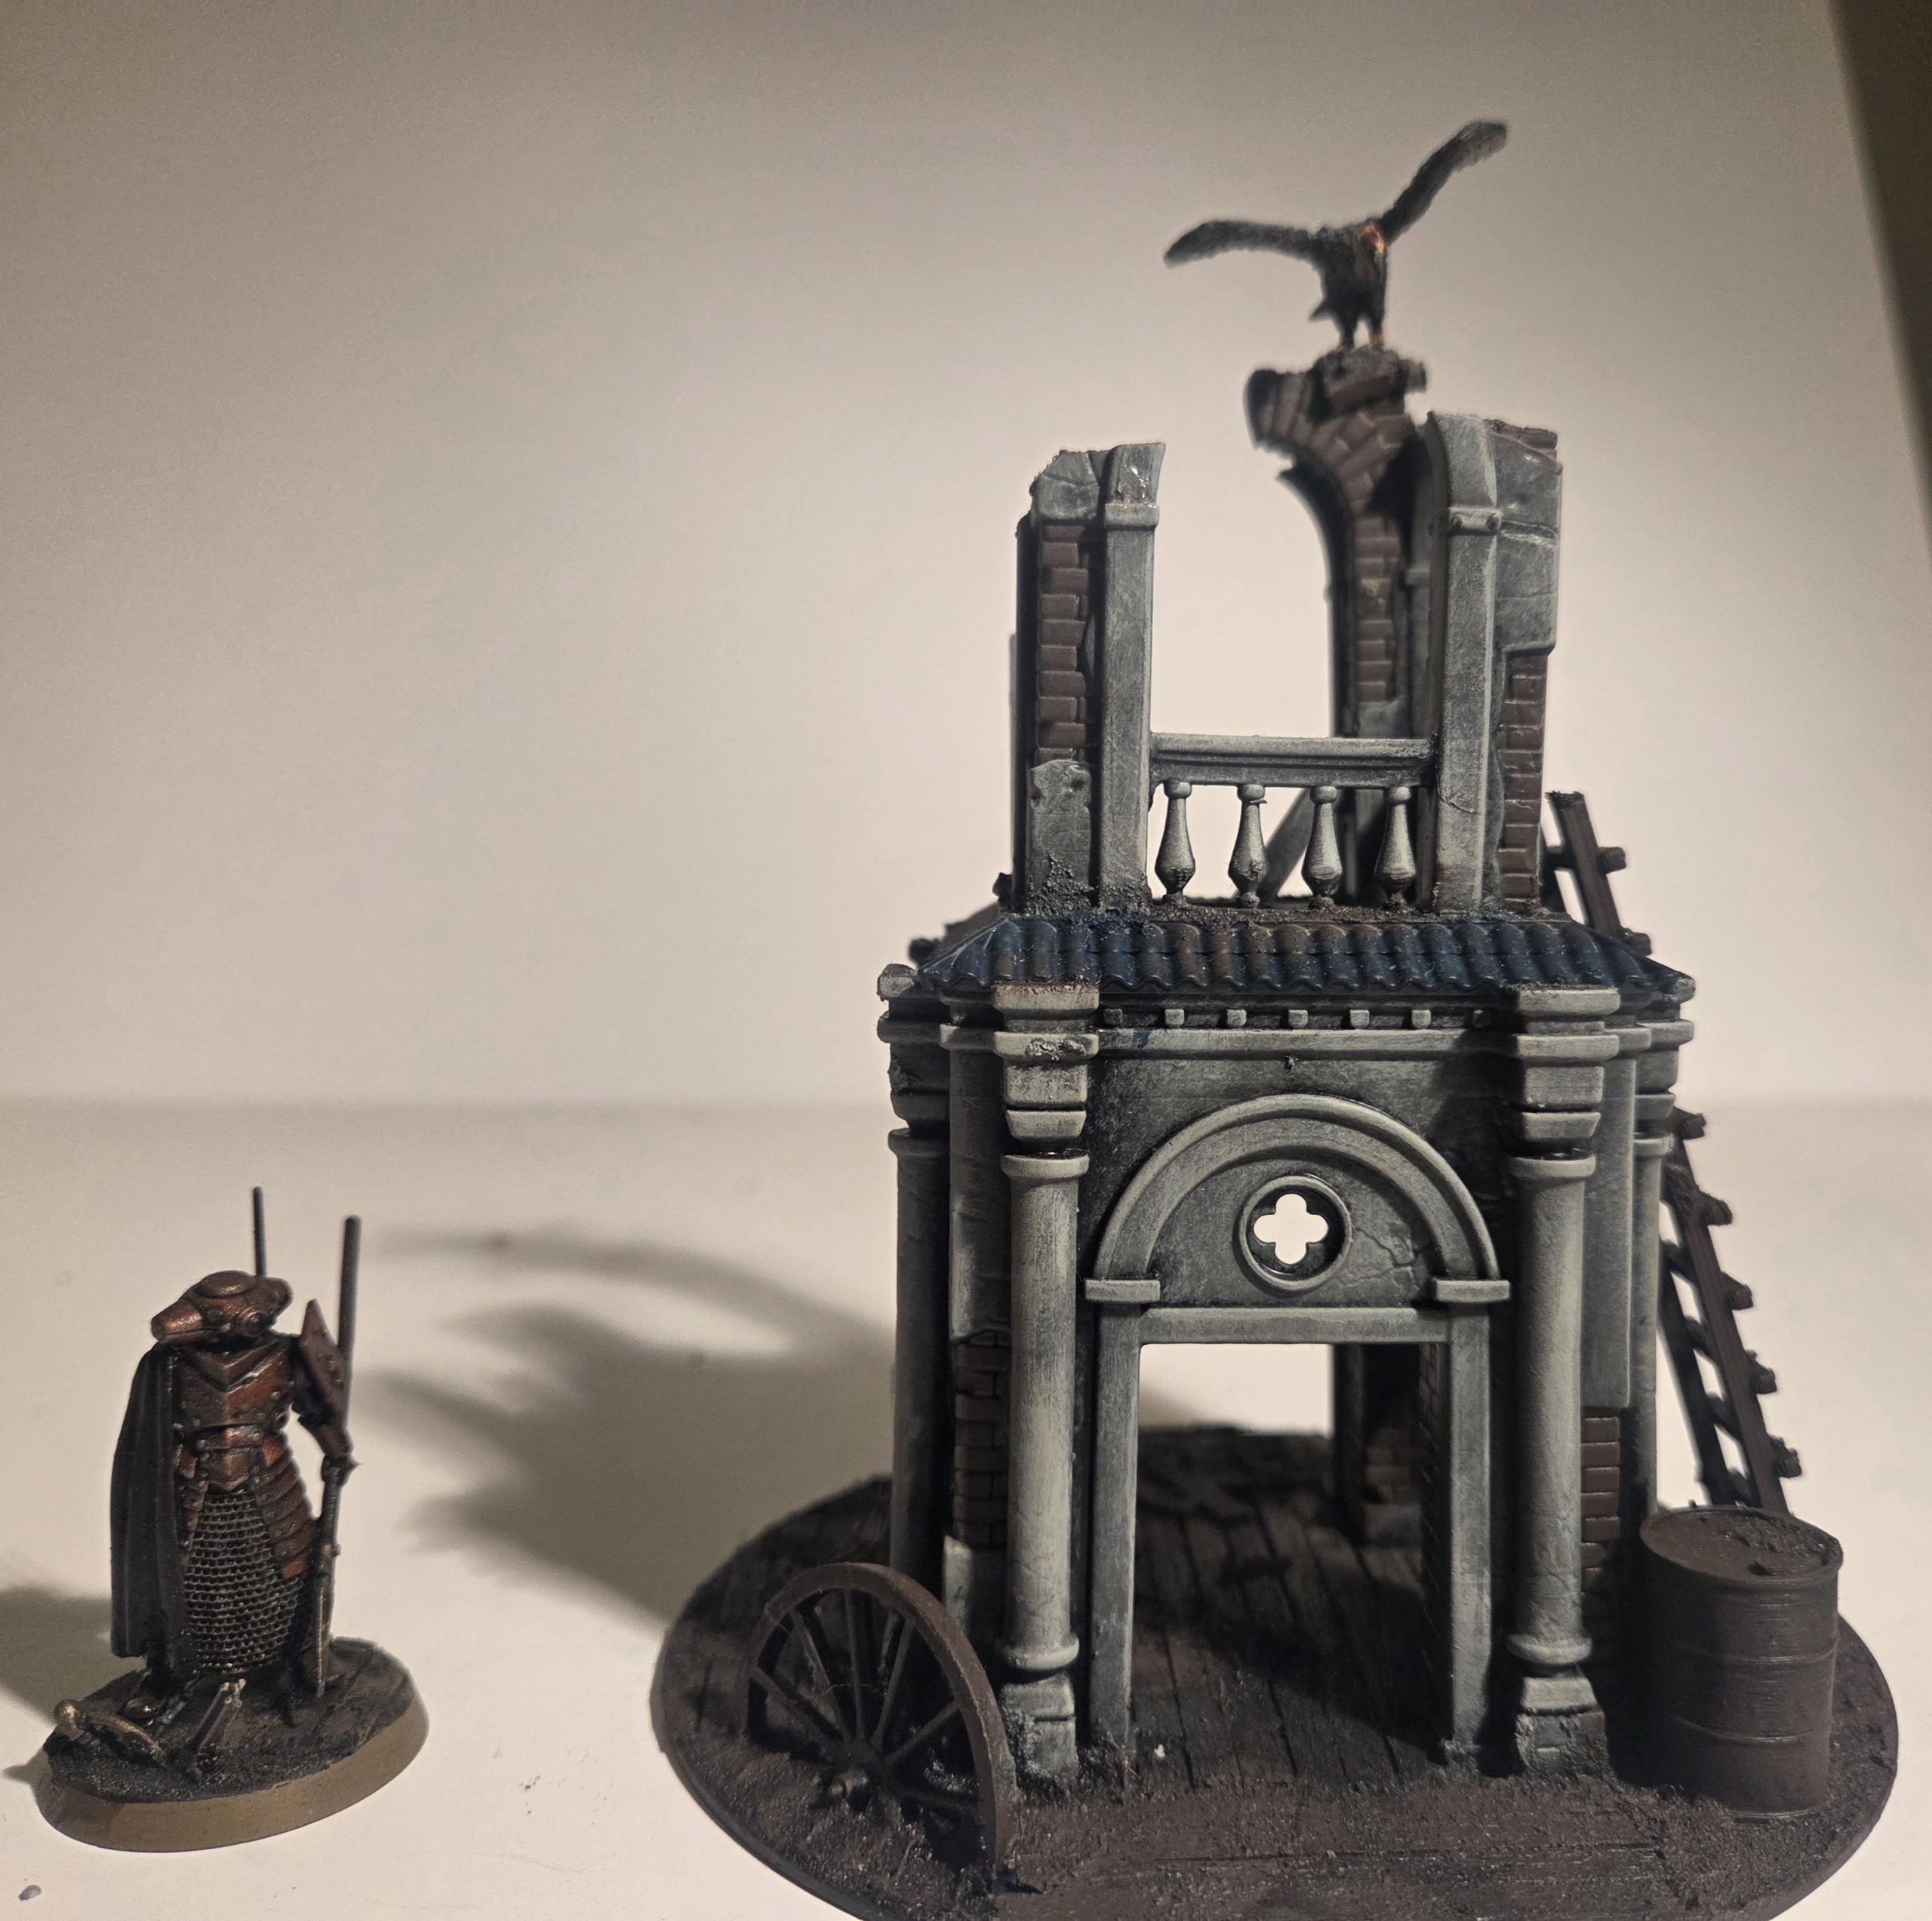
The first thing I did was rip off all the trench crusade bits; the vulture, the wicker fence, the ladder, the oil drum, the wheel…..
I then drybrushed the roof blue, painted the brick work, dry brushed dark terracotta upto an orange, this was then given a very thin glaze of pale sand.
The while model was then given a drybrush of Brianmater Beige, and the base covered in first a placed scattering of Geek Gaming Scenics Base Ready Rugged Field, with the rest being filled in with GGS Base Ready Scrublands.
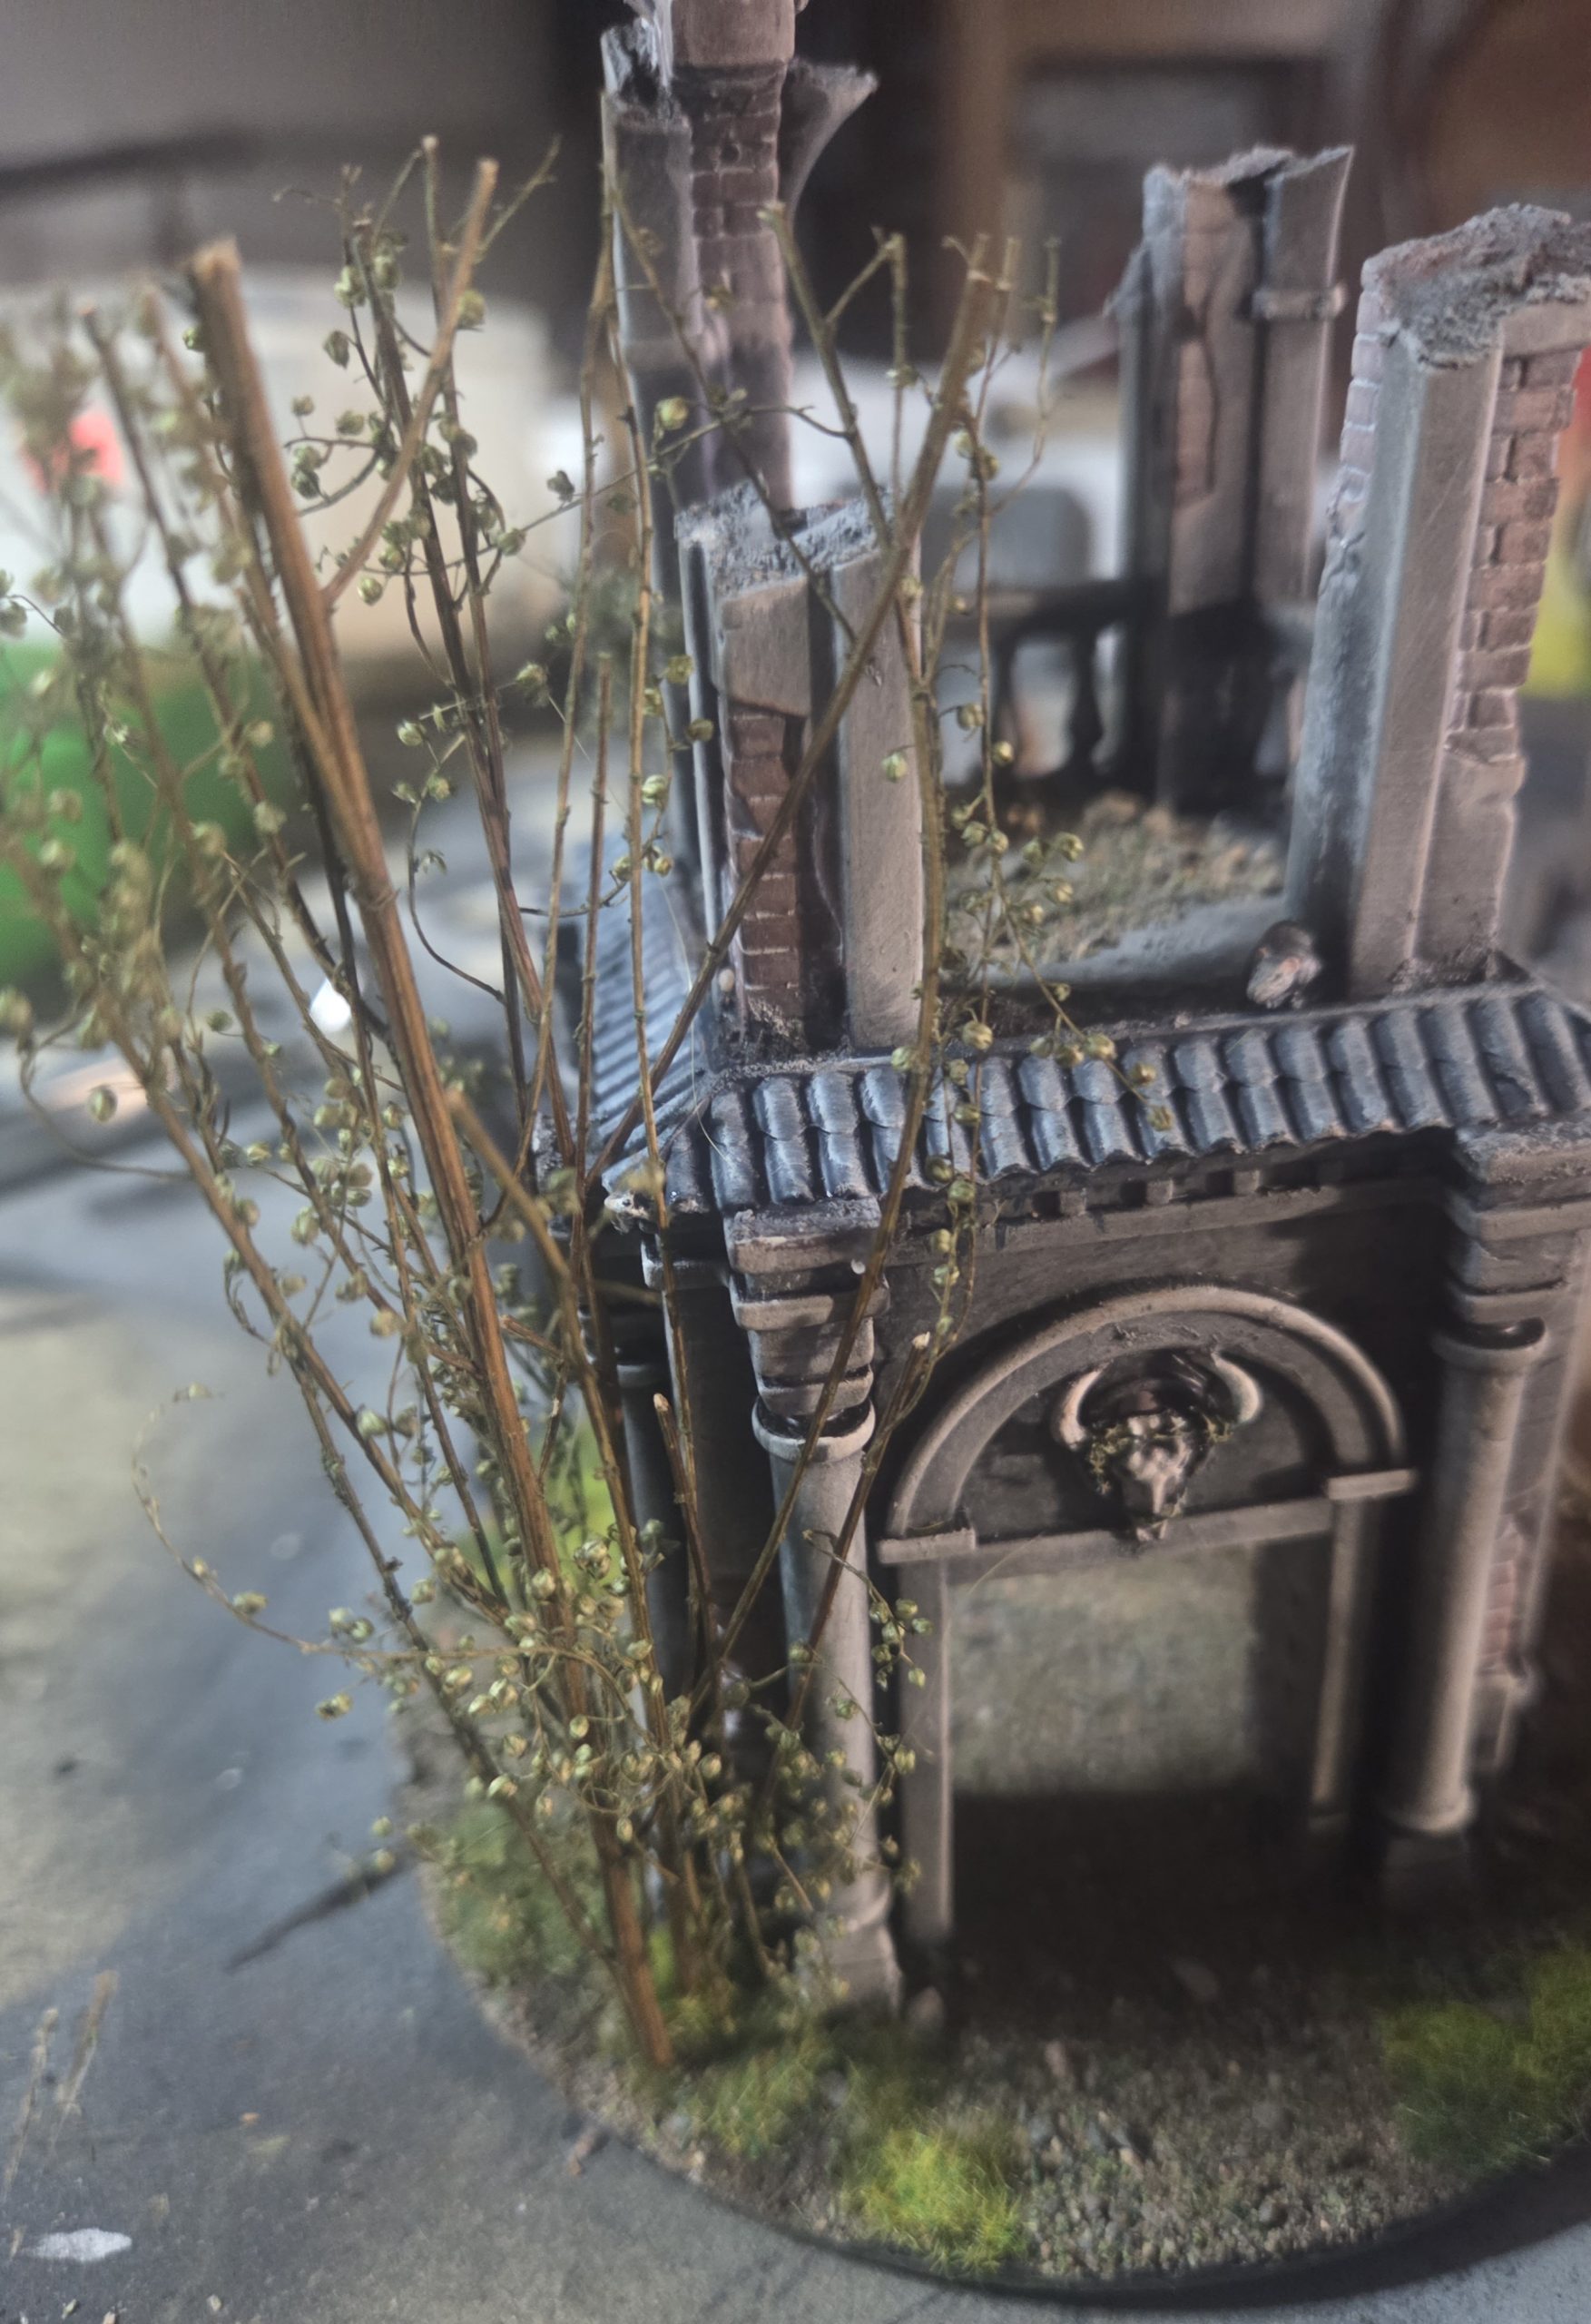 I wanted this shrine/folly to look returned to nature and desecrated. The skull was fastened on to windows with barbed wire, so I just painted as thorns. I also added these cool twigs, about 10 of them in this patch. These are a recent discovery of mine, I cannot remember what they are called, but I love them. I used super glue, applying lots on bottom where twig connected with base, and then selecting contact points against building to further secure. Once I have given a healthy coat of matt varnish will be quite robust.
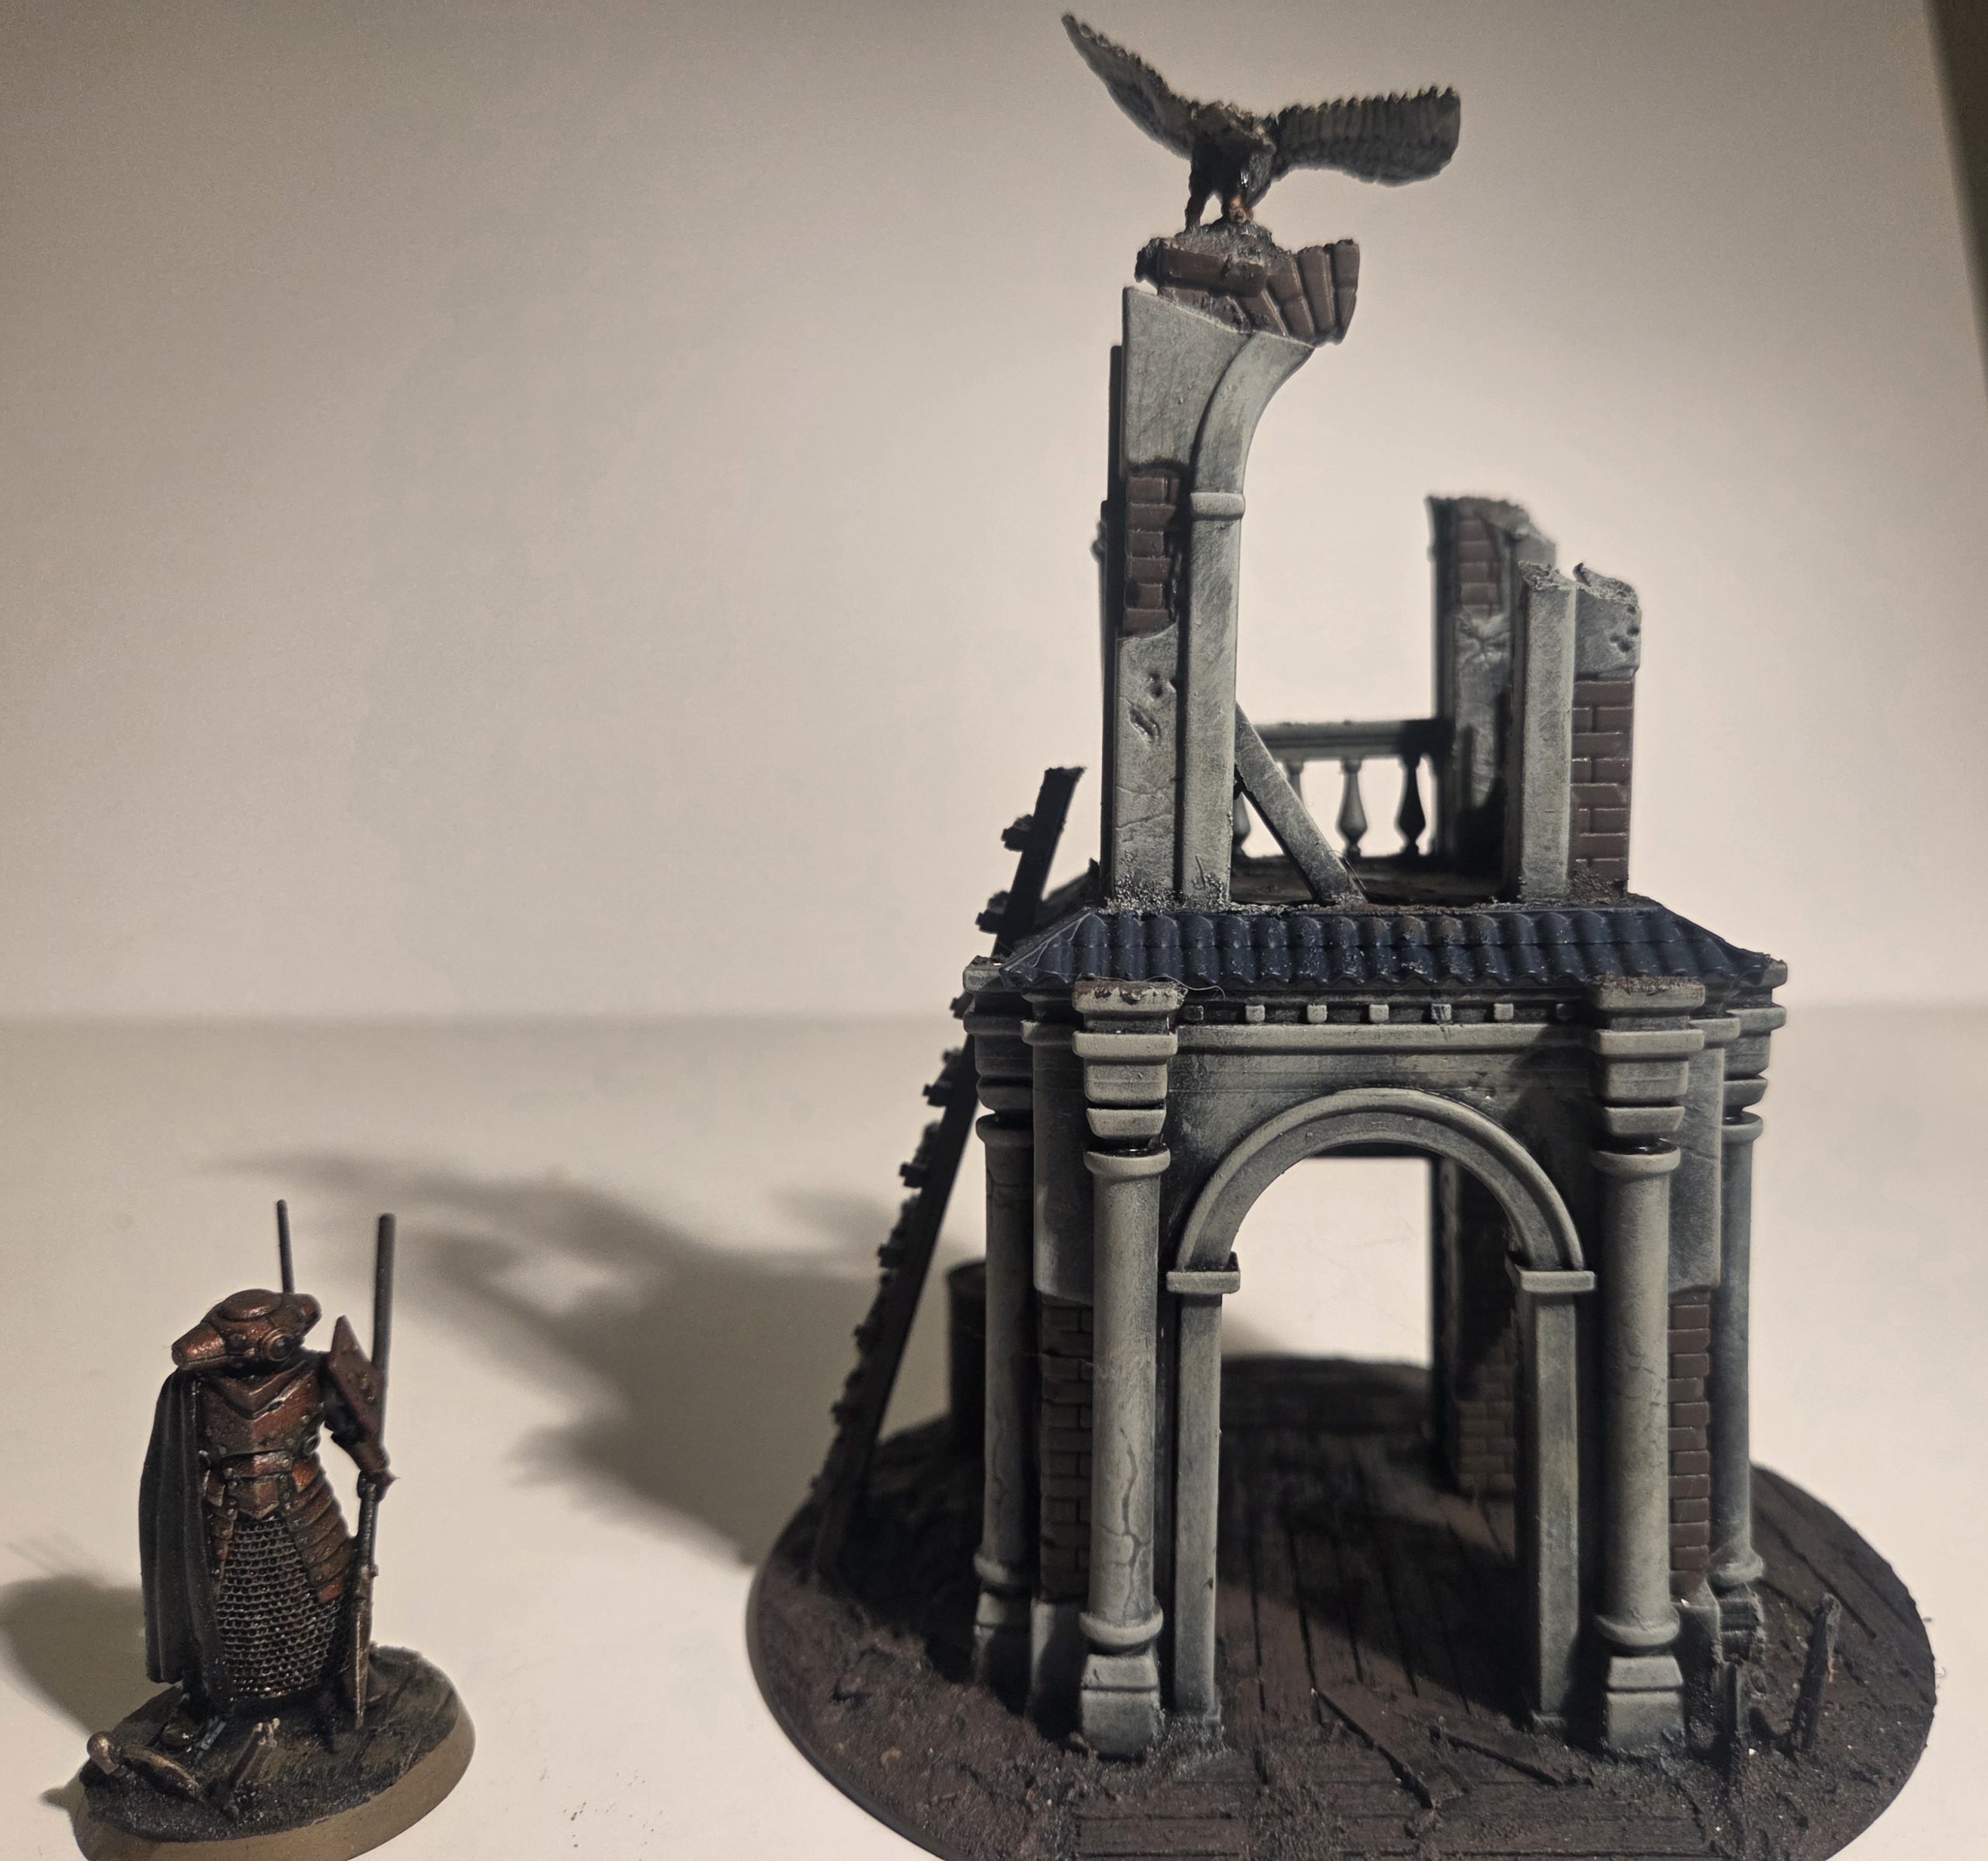
 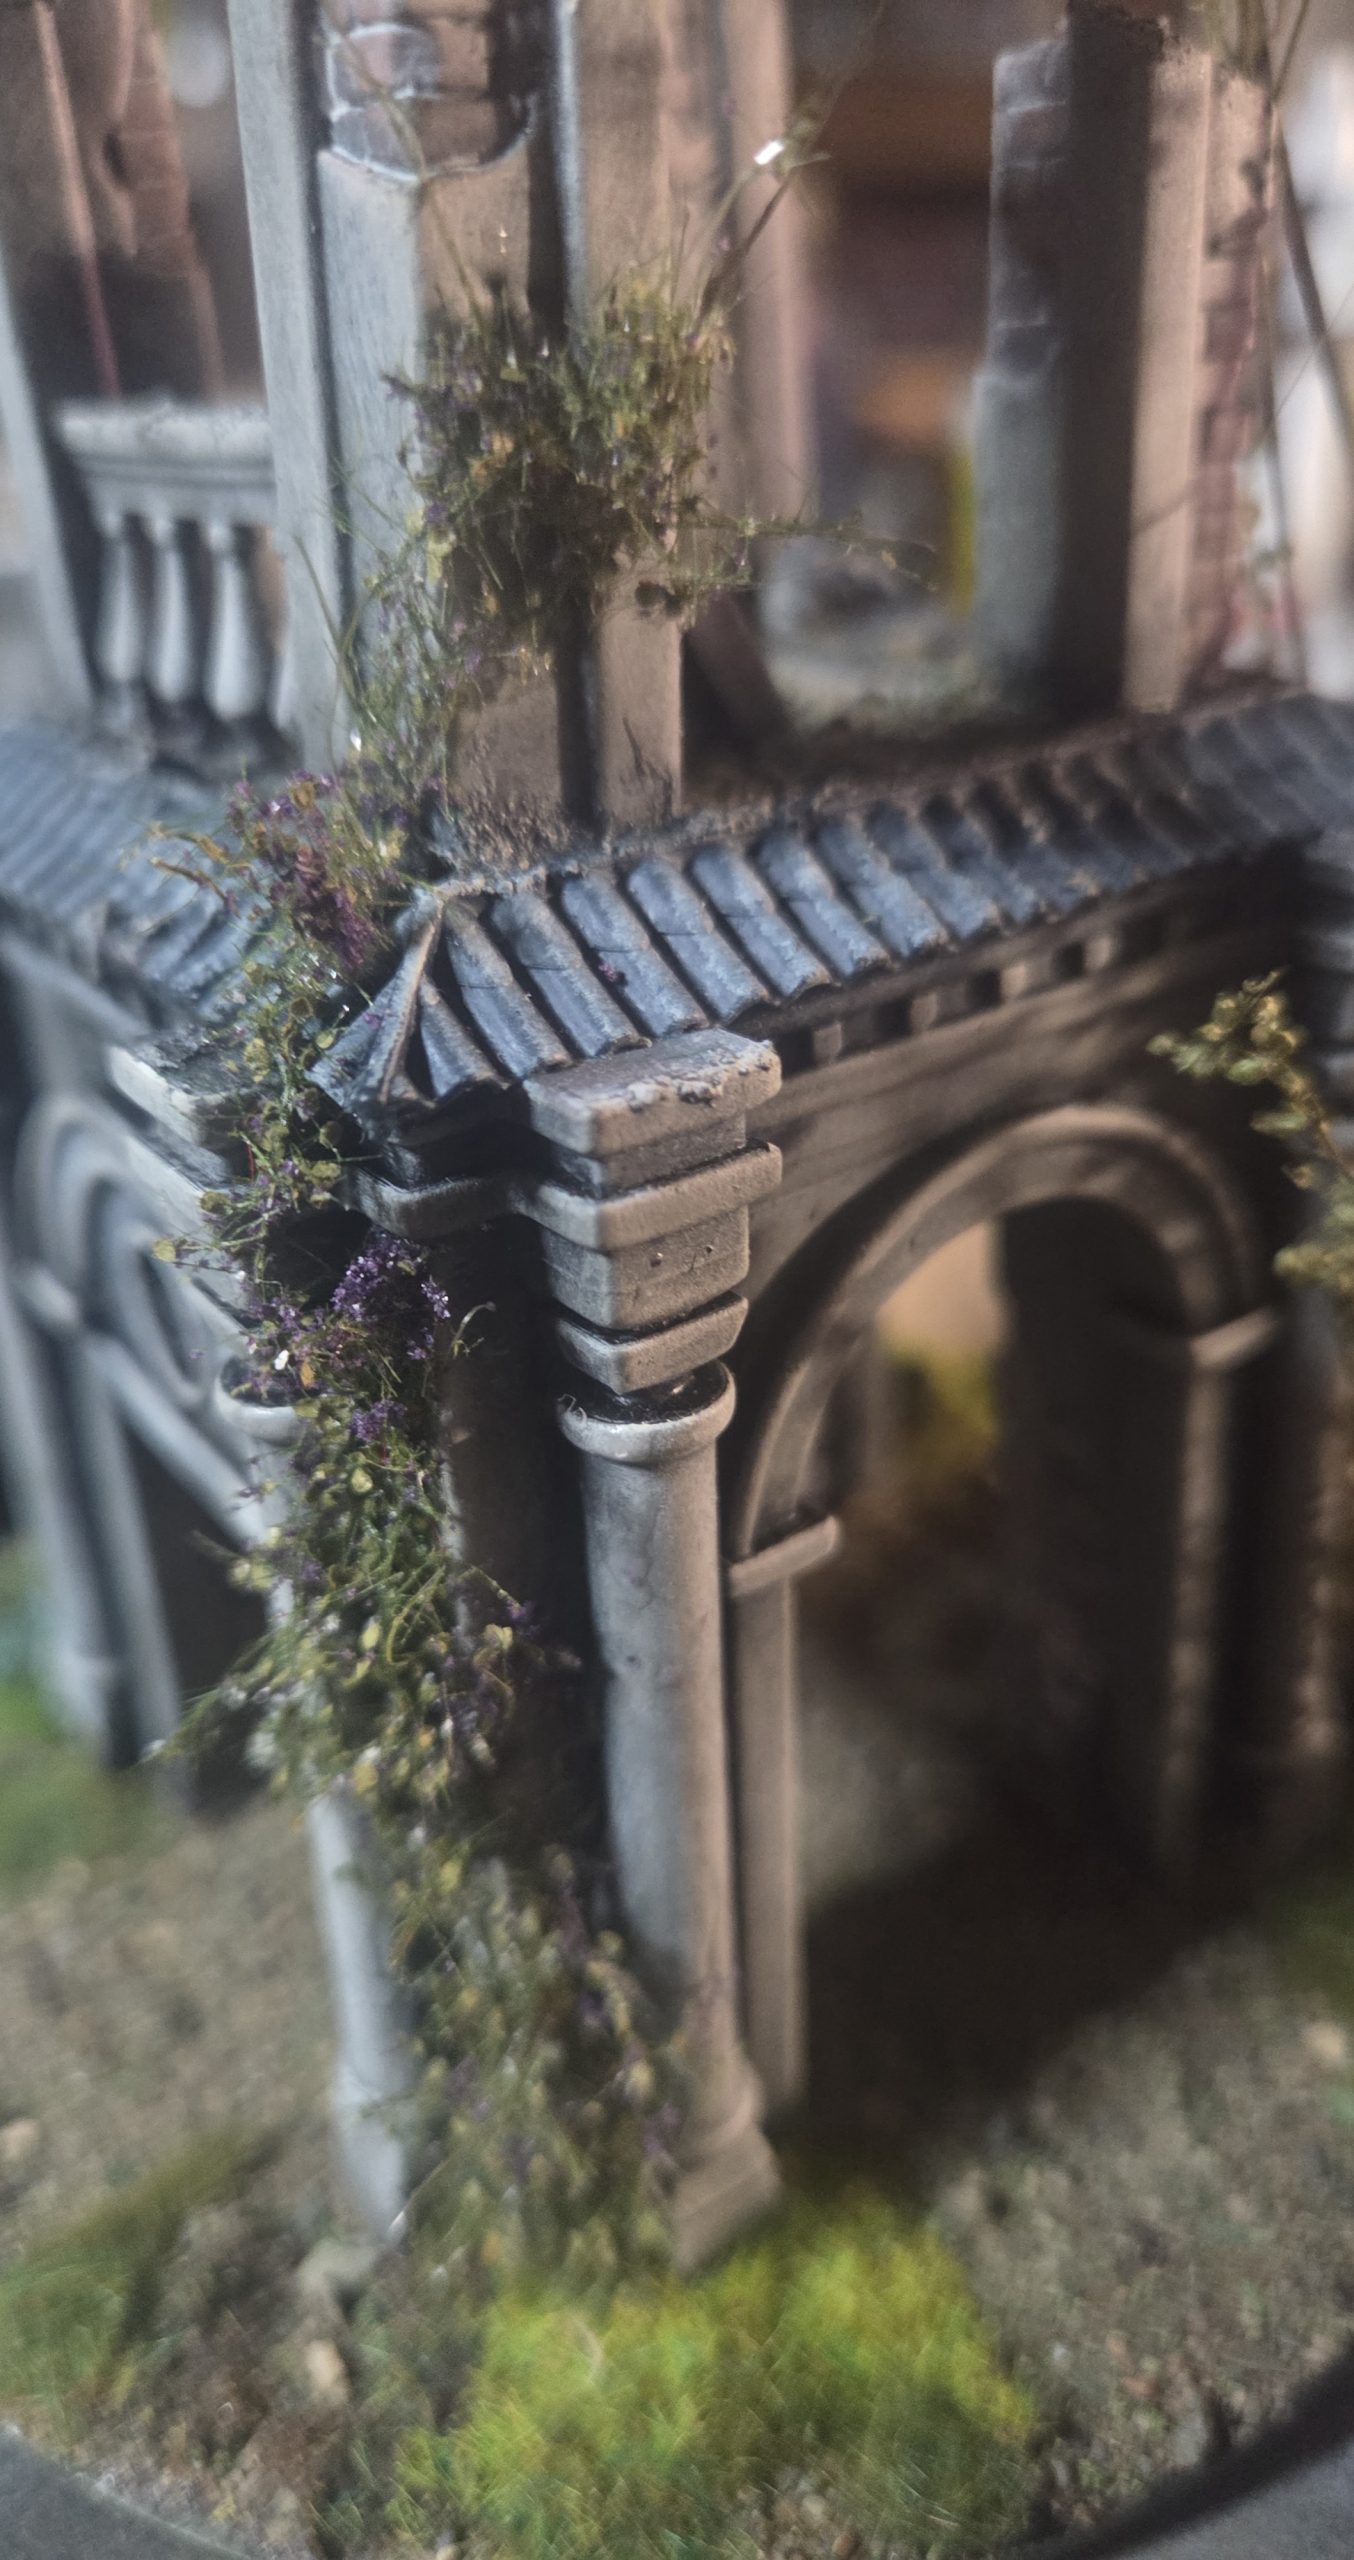 On another corner I added ivy, tearing apart a long stem purple flowered shrub, removing most of the purple.Then with a puddle of superglue, pick each piece with tweezers, gently squish on side of stem in puddle the apply to building, working from ground upwards. Pictures of completed model to follow. On another corner I used lichen on a similar way only in larger chunks.
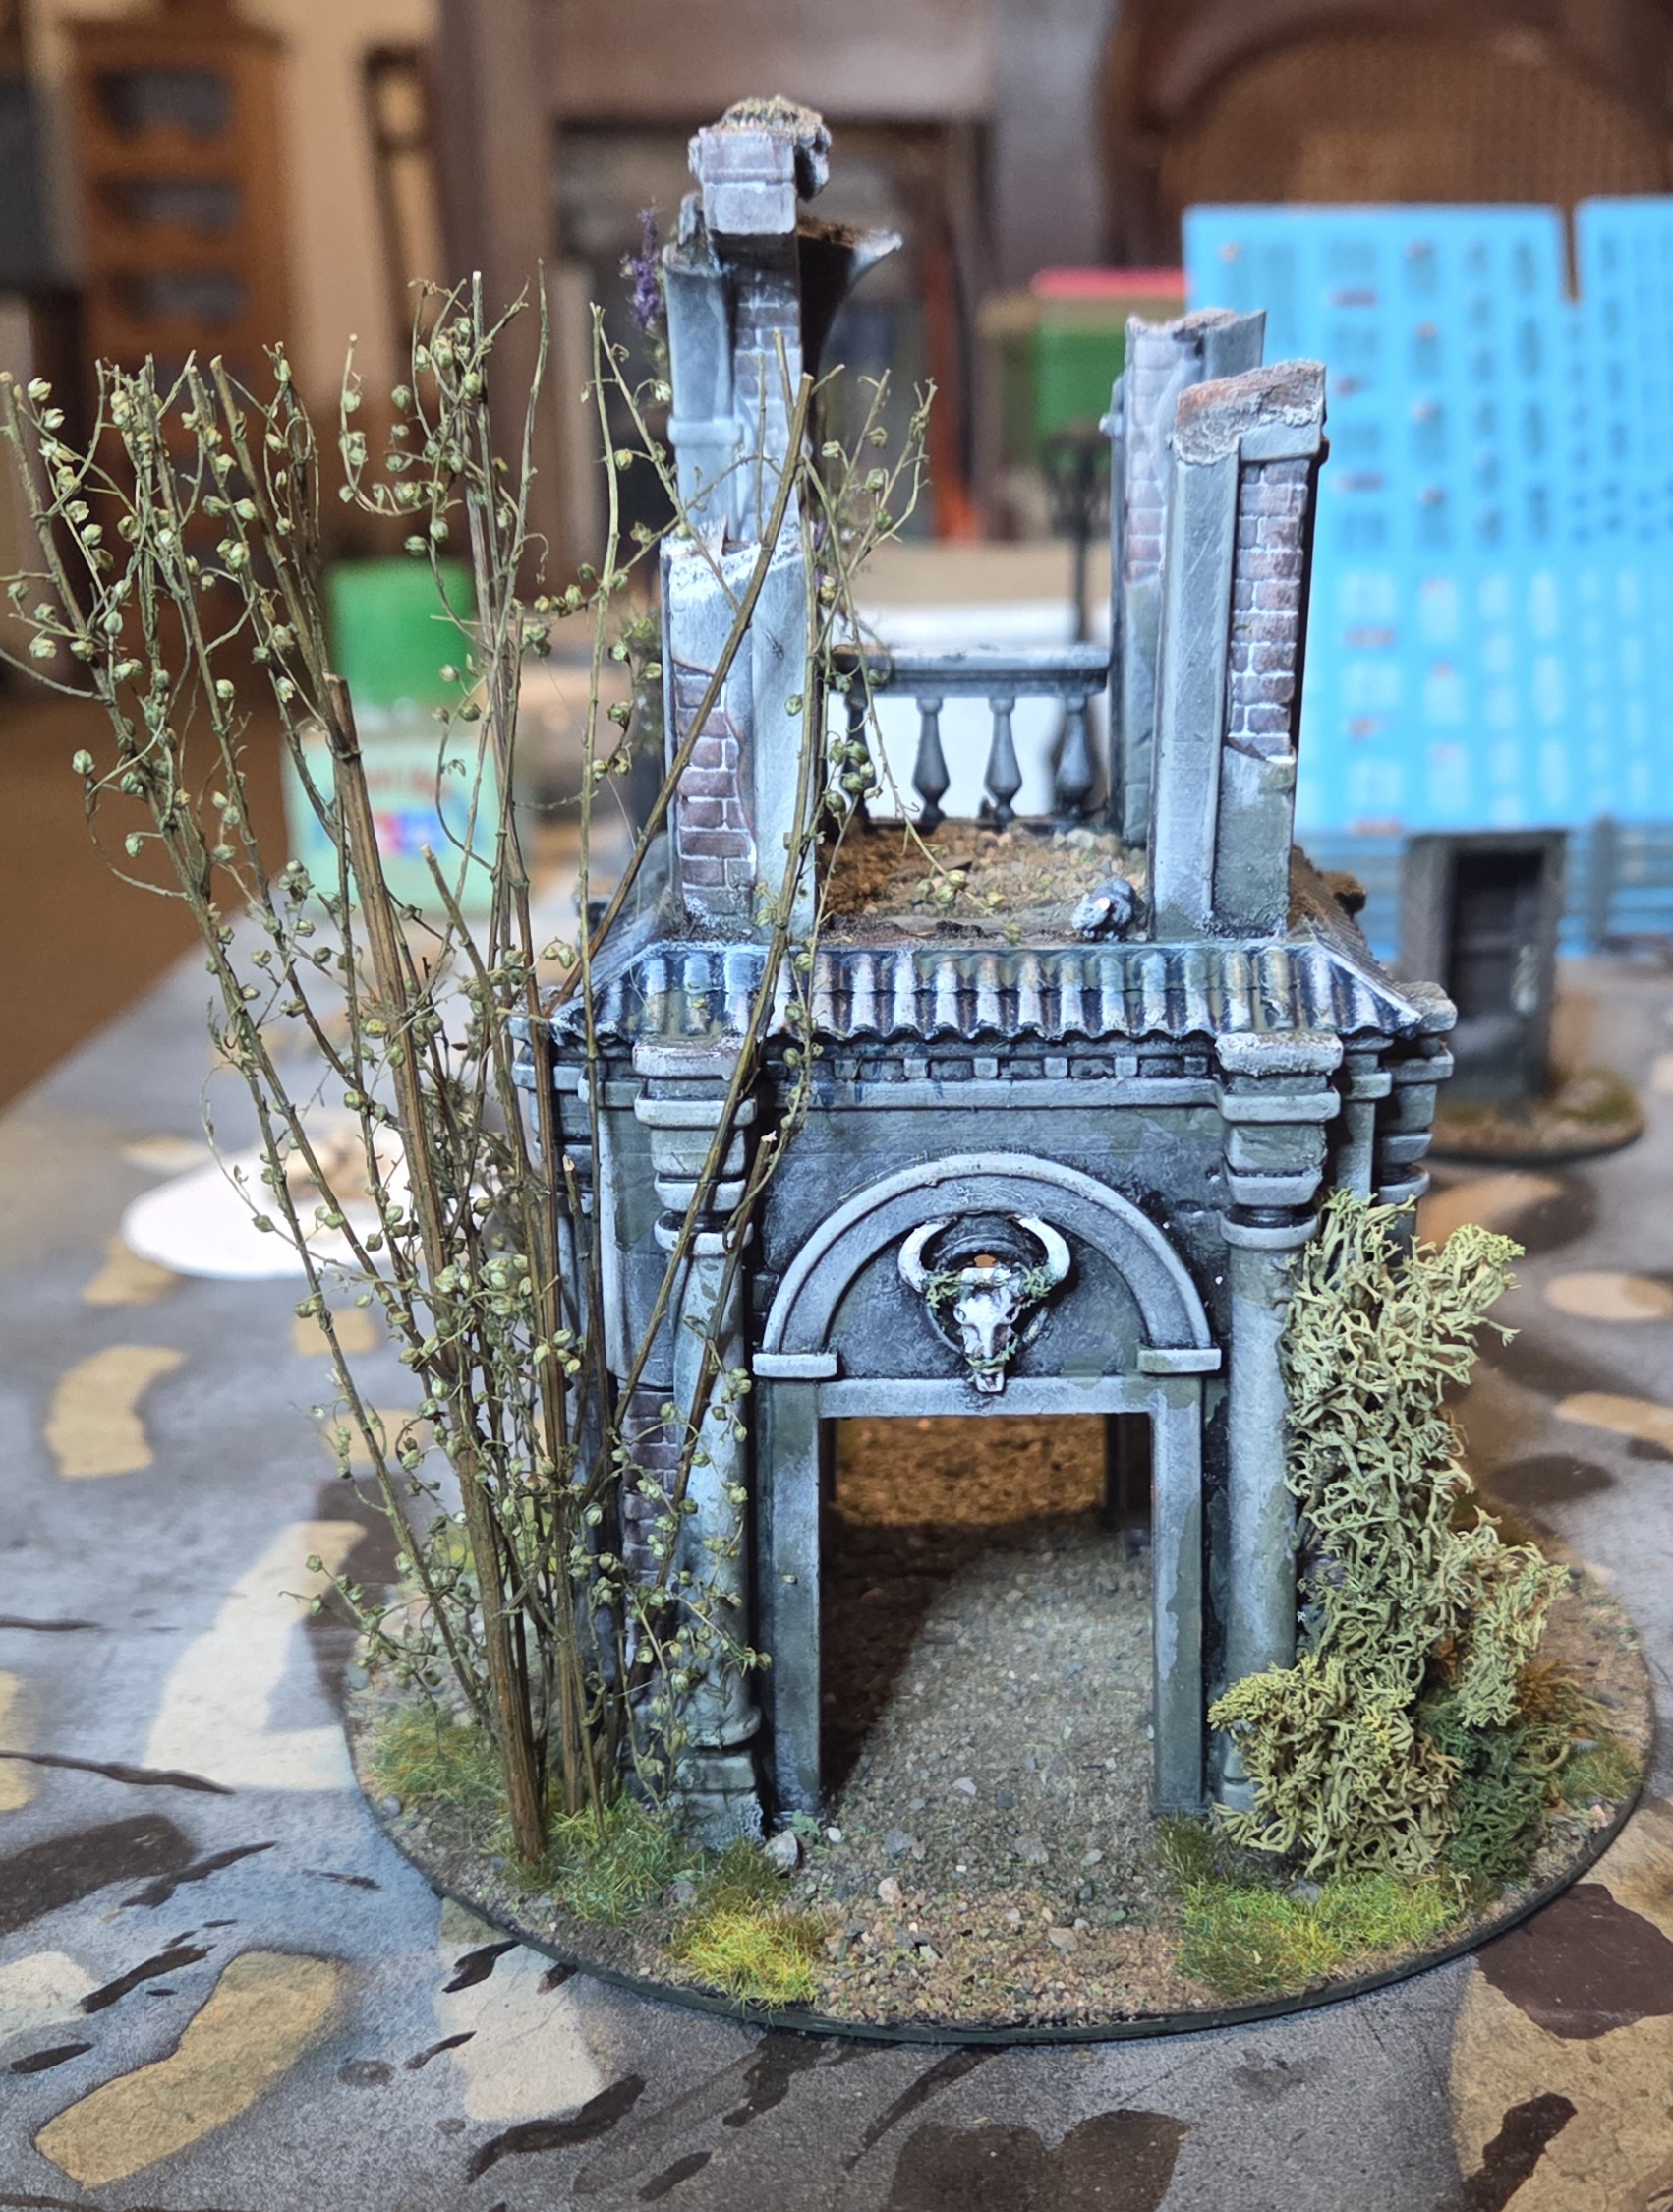 All completed inc. Green washes for dampness. Just needs a matt varnish.
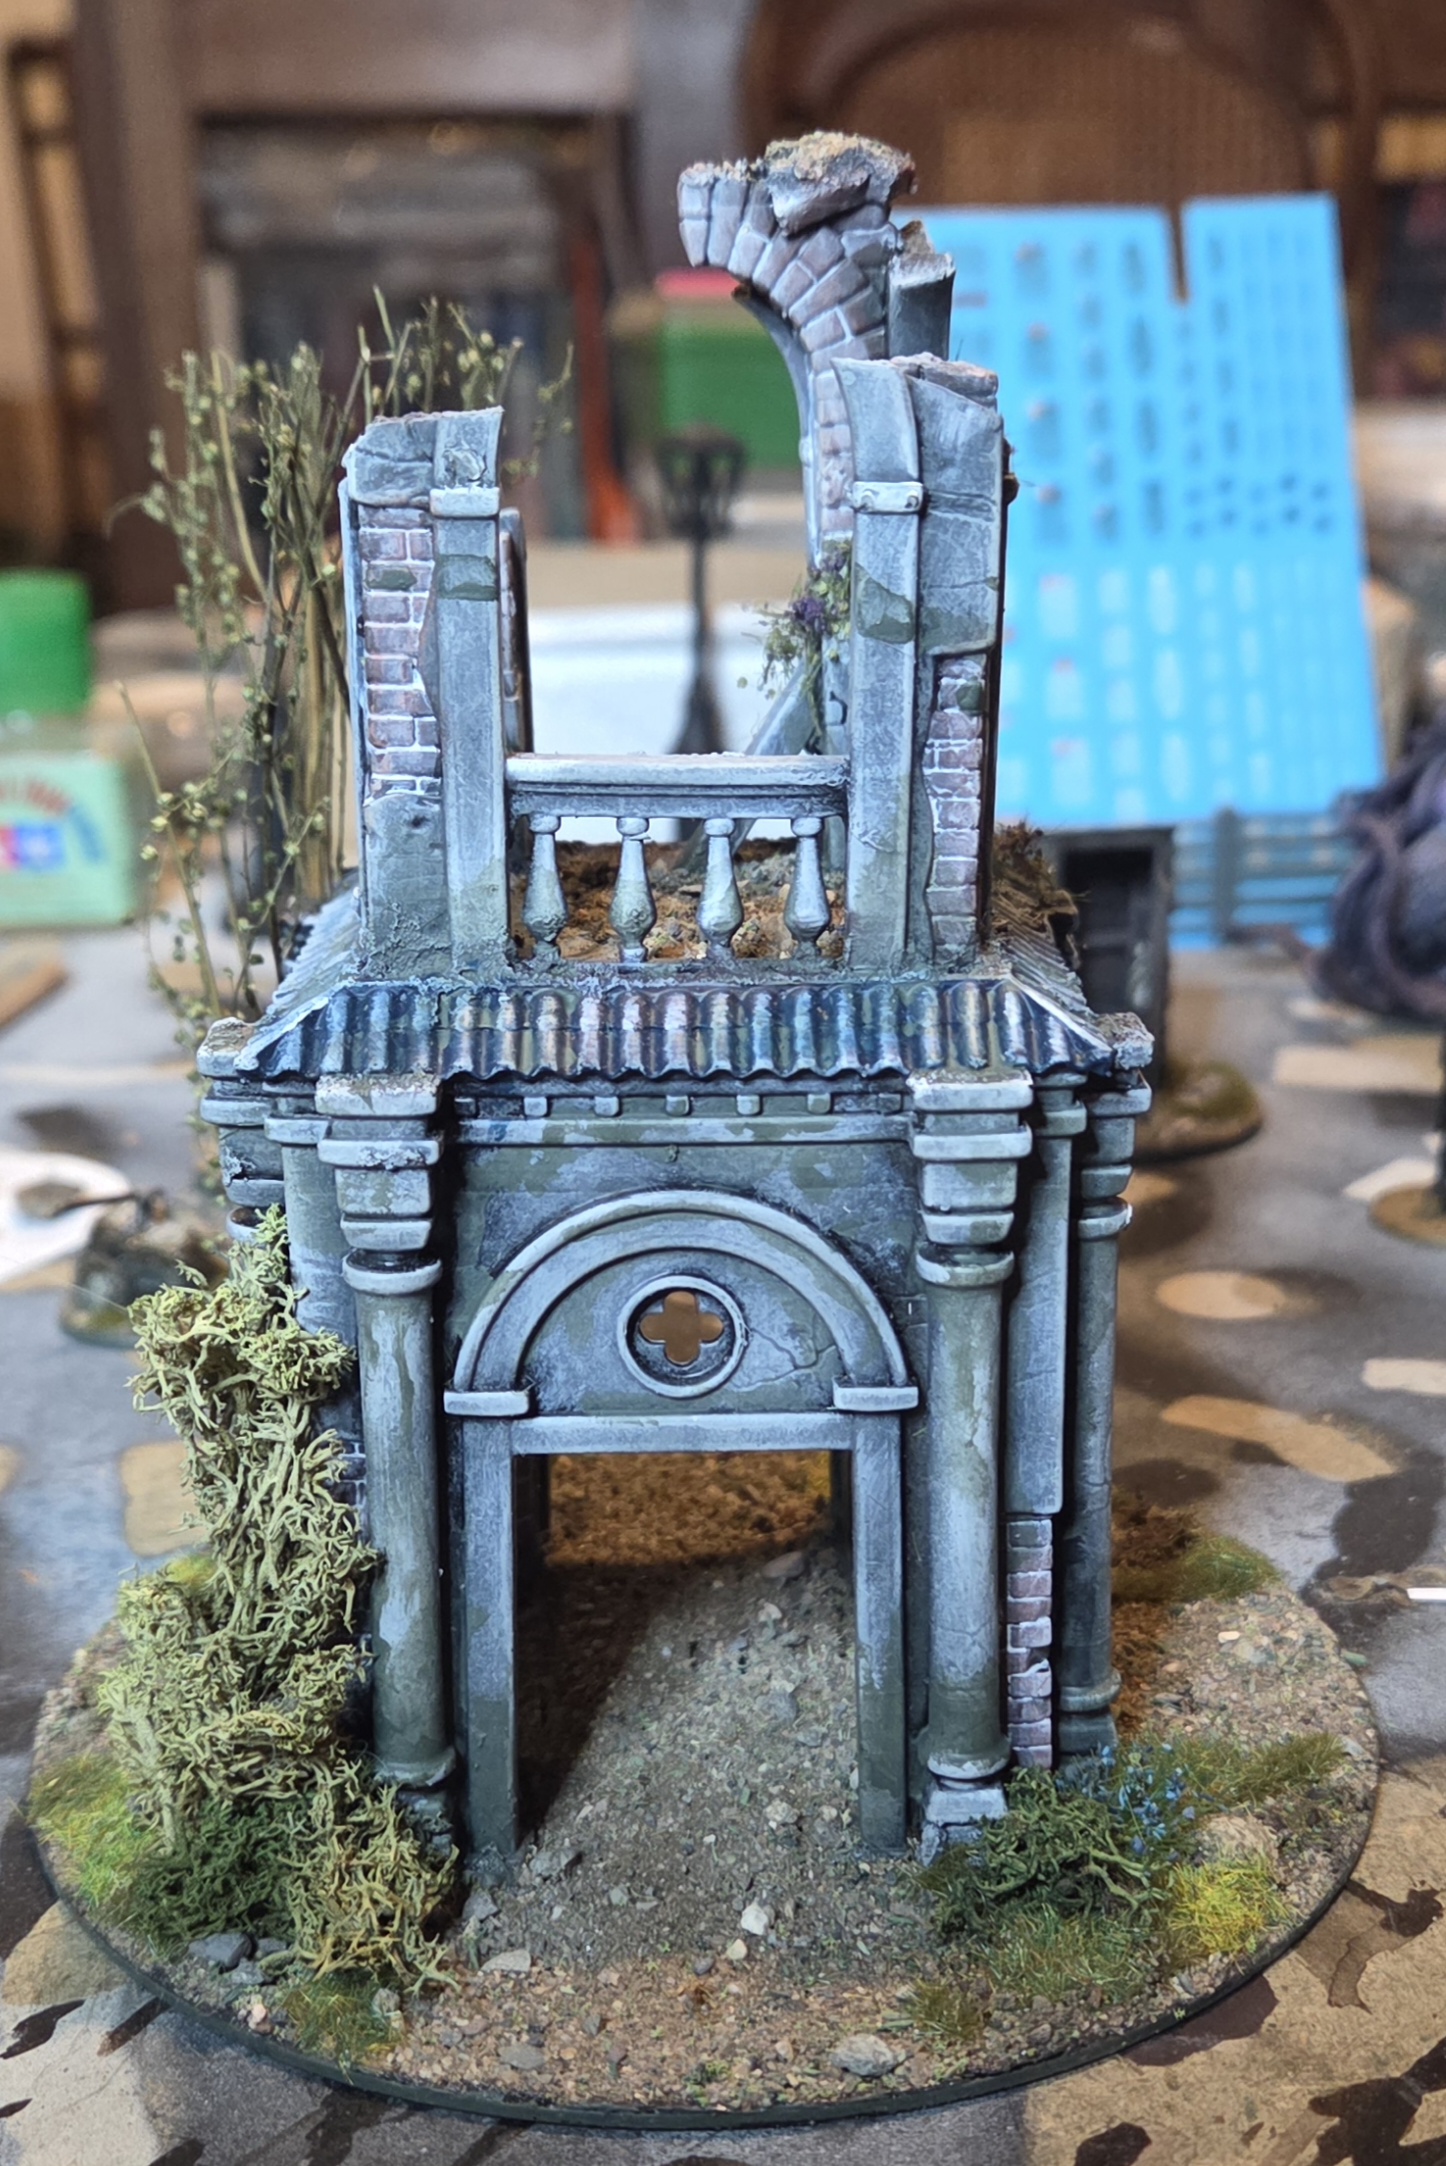 This model now also works well for my Cohors Cthulhu project which will be resetected for part of this year's Spring Clean Challenge.
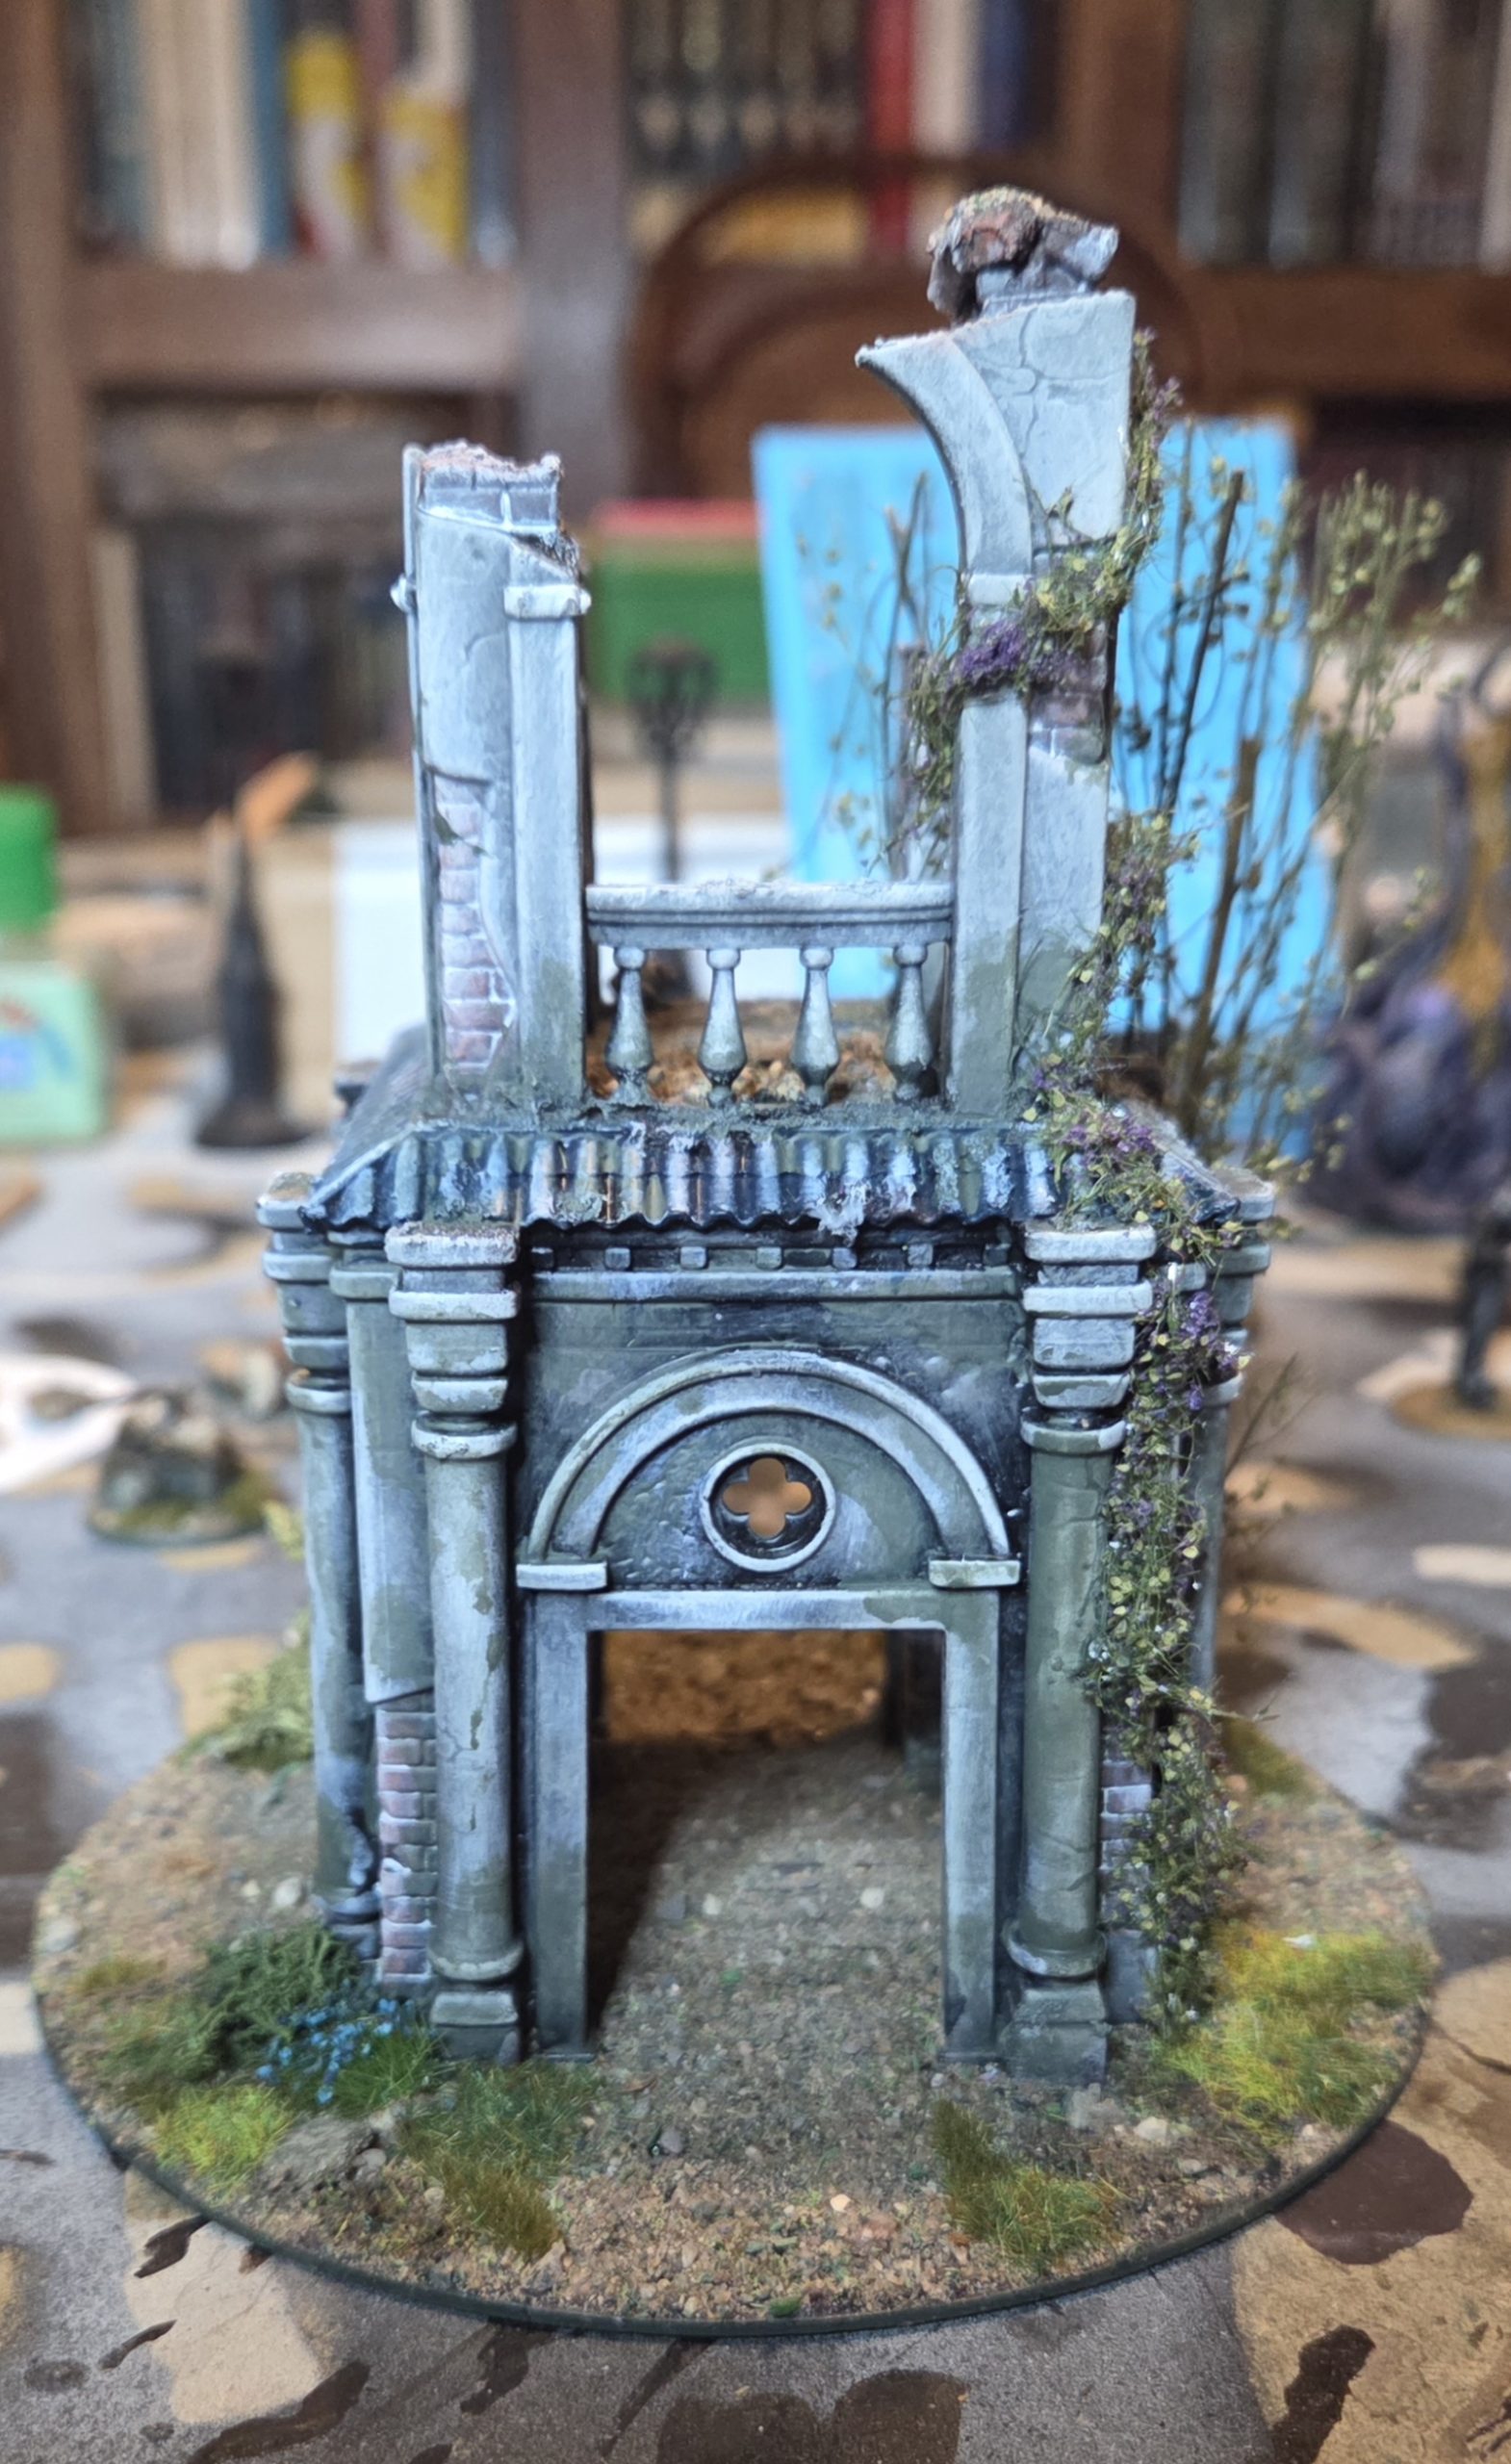 A good view of the ivy.
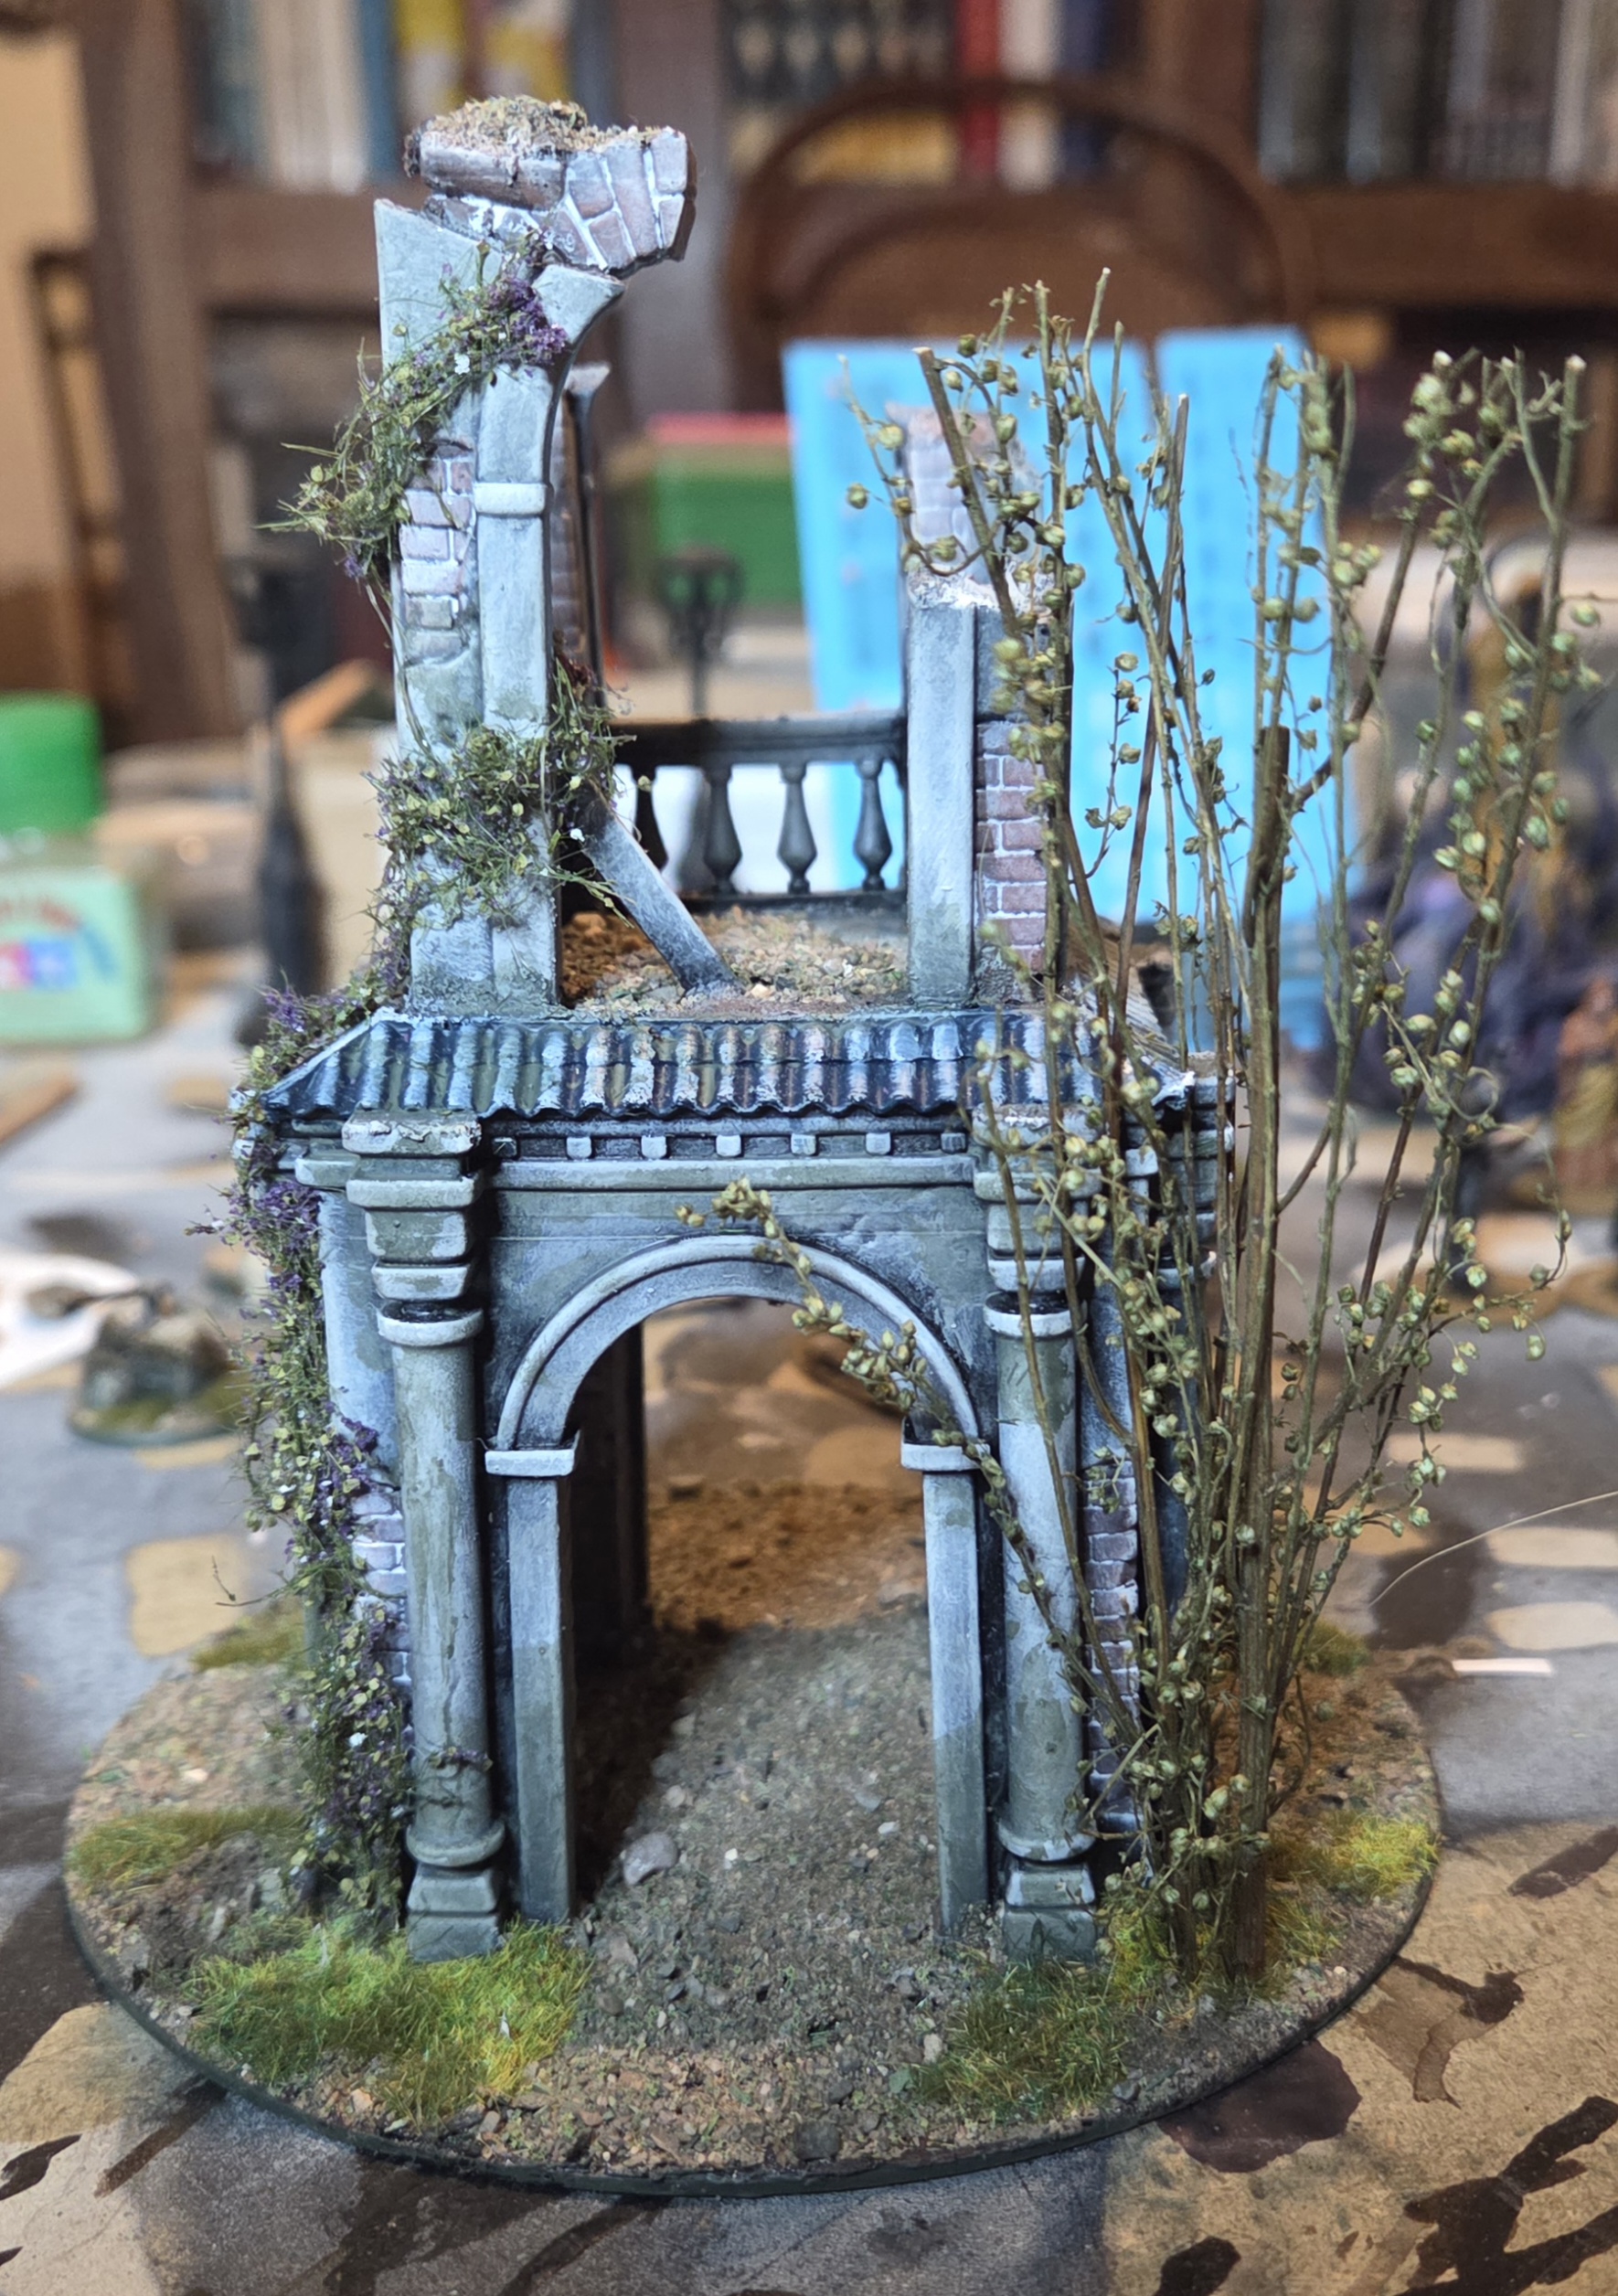 My favourite bits yhr ivy snd the shrub.
![11th Edition Warhammer 40K Core Rules Now Available & More [Updated]](https://images.beastsofwar.com/2026/06/orks-new-cover-600-338.jpg)