


Appartmant Street ‘Terrain Challenge’


Recommendations: 643
About the Project
Due to a life getting in the way i never have time to enter any of the Terrain Challenges or even get involver in the forums as much as i like, and still don't have the time. so i thought for my Terrain Challenge why not let it build itself!! about two years ago i backed a Kickstarter by Z1Design whom had designed a modular modern day, 3D printable Buildings. I've only just got my 3D printer going and why not whits I'm at work have it build my Terrain Challenge for me HA HA HA. i hope to keep you all updater on my progress, troubles and successes as my work horse of a 3D printer churns through the filament and i can show what can be made. keeping it on topic. i will be making a tourist of American city style apartments t use in my games off Walking Dead, DC Universe and Fallout. the major thing i will need to contend with is time, for me to have time to keep up with the project and the time it takes to print everything to build this project. hope you all keep with me on my first ever Project, Terrain Challenge and first major forum posts.
Related Game: The Walking Dead: All Out War
Related Genre: Post-Apocalyptic
This Project is Active
OK Guys and Gals i need your opinions.....!
I have two decisions to make on my projects and i hope to get some opinions on what i should do.
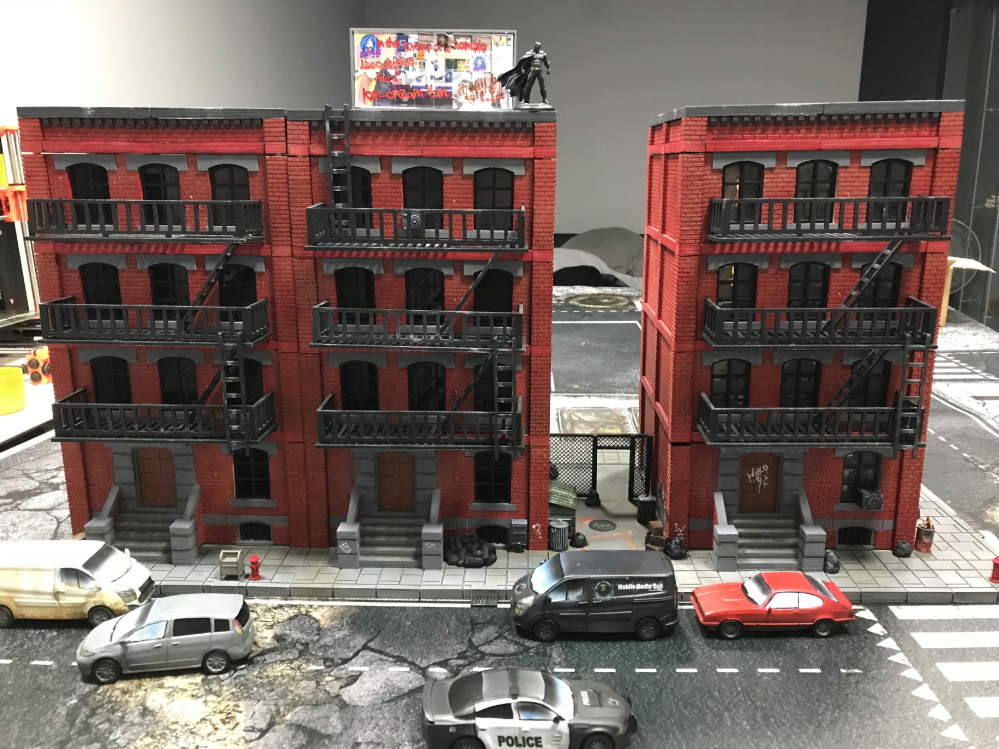
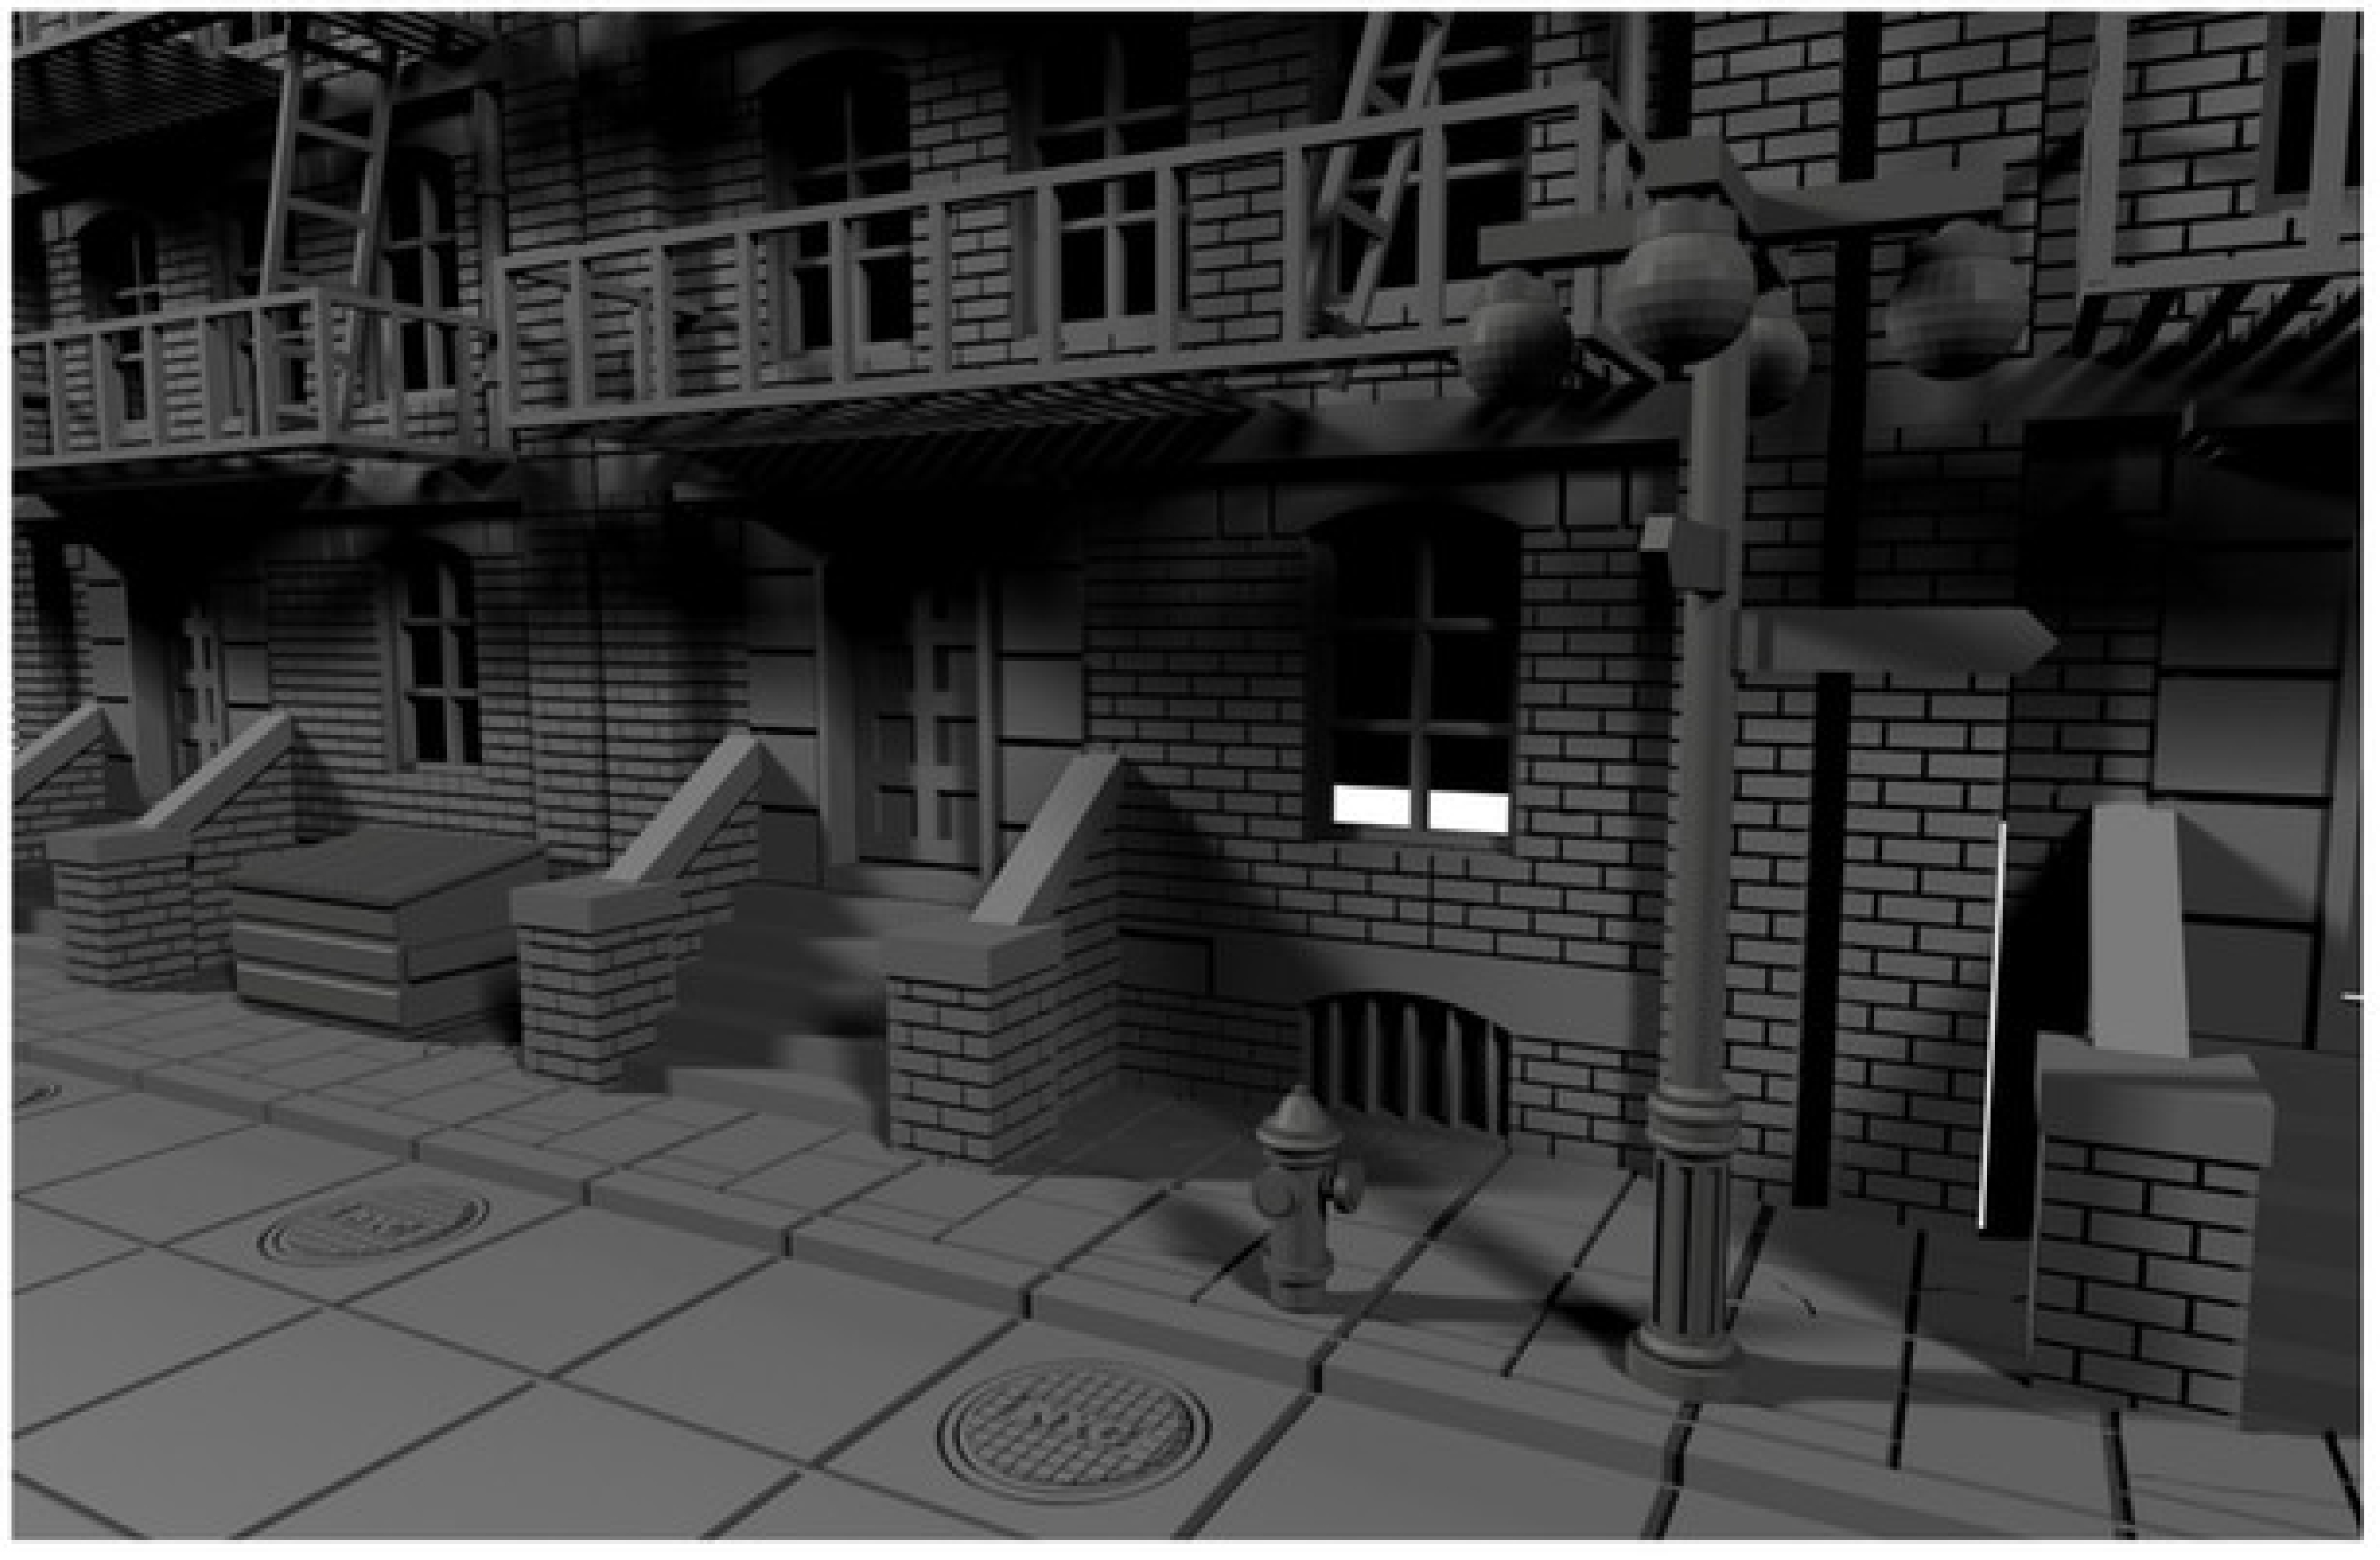
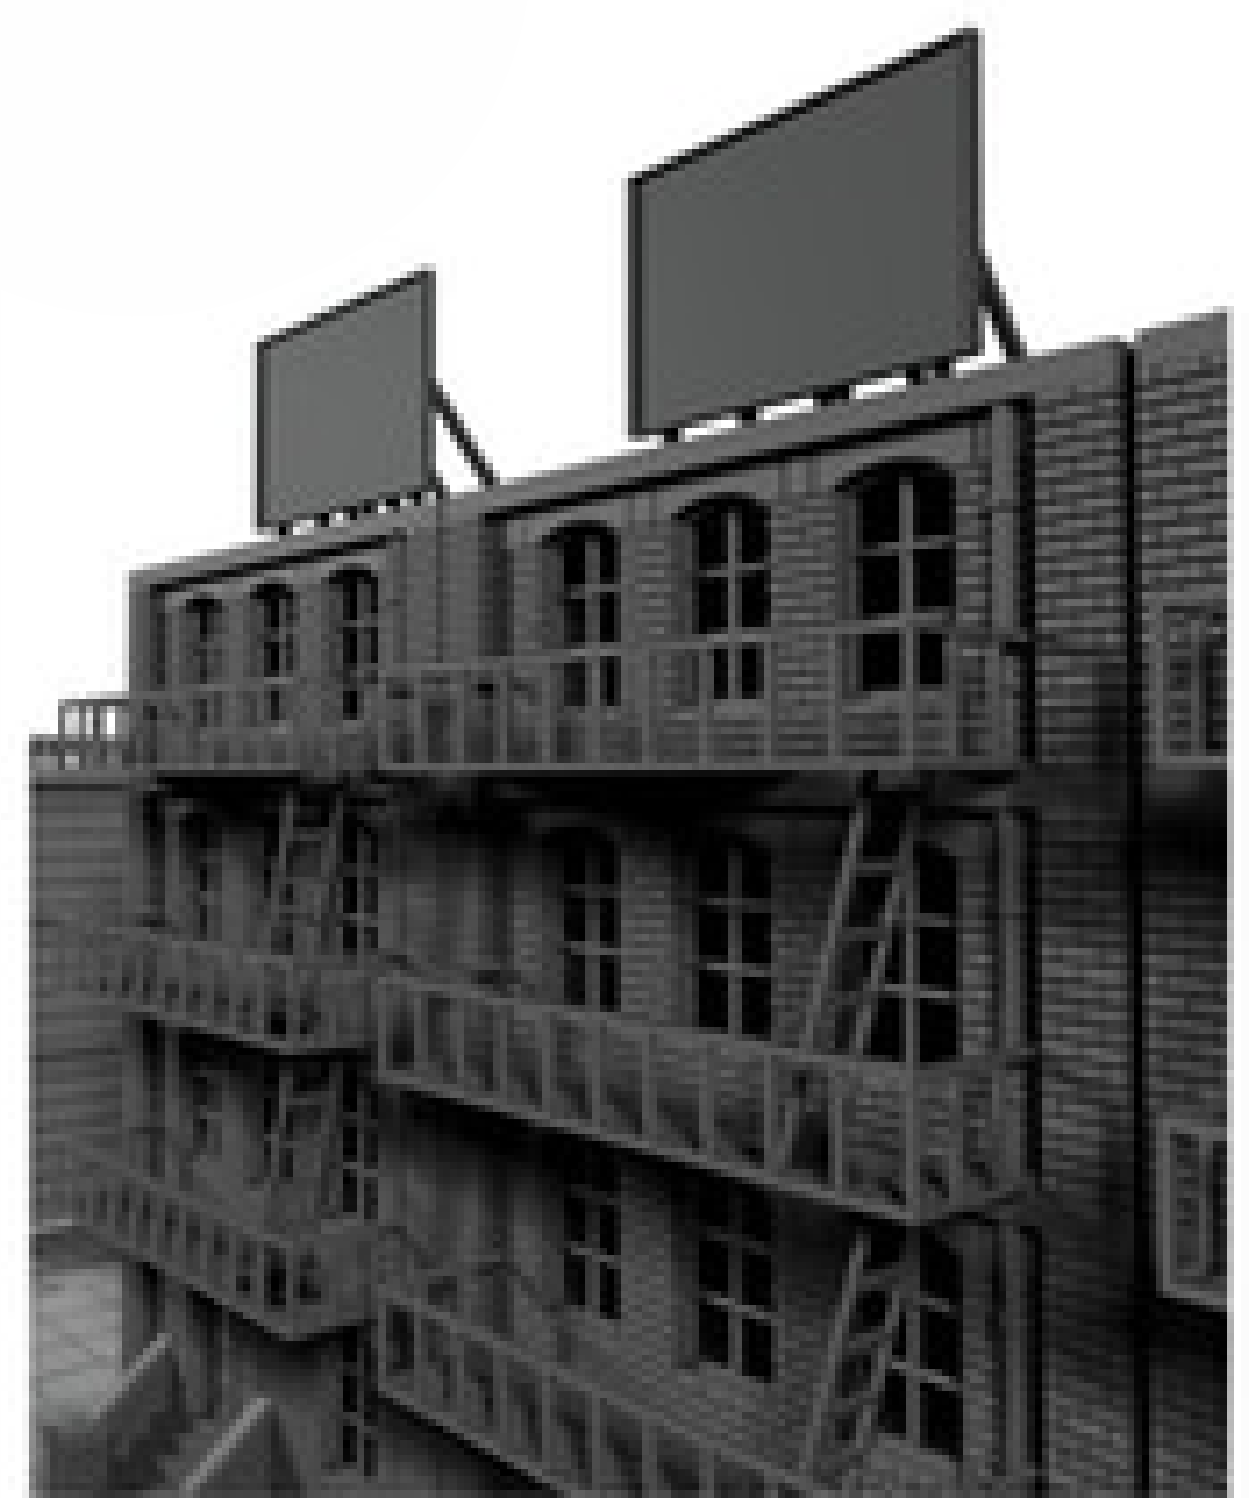
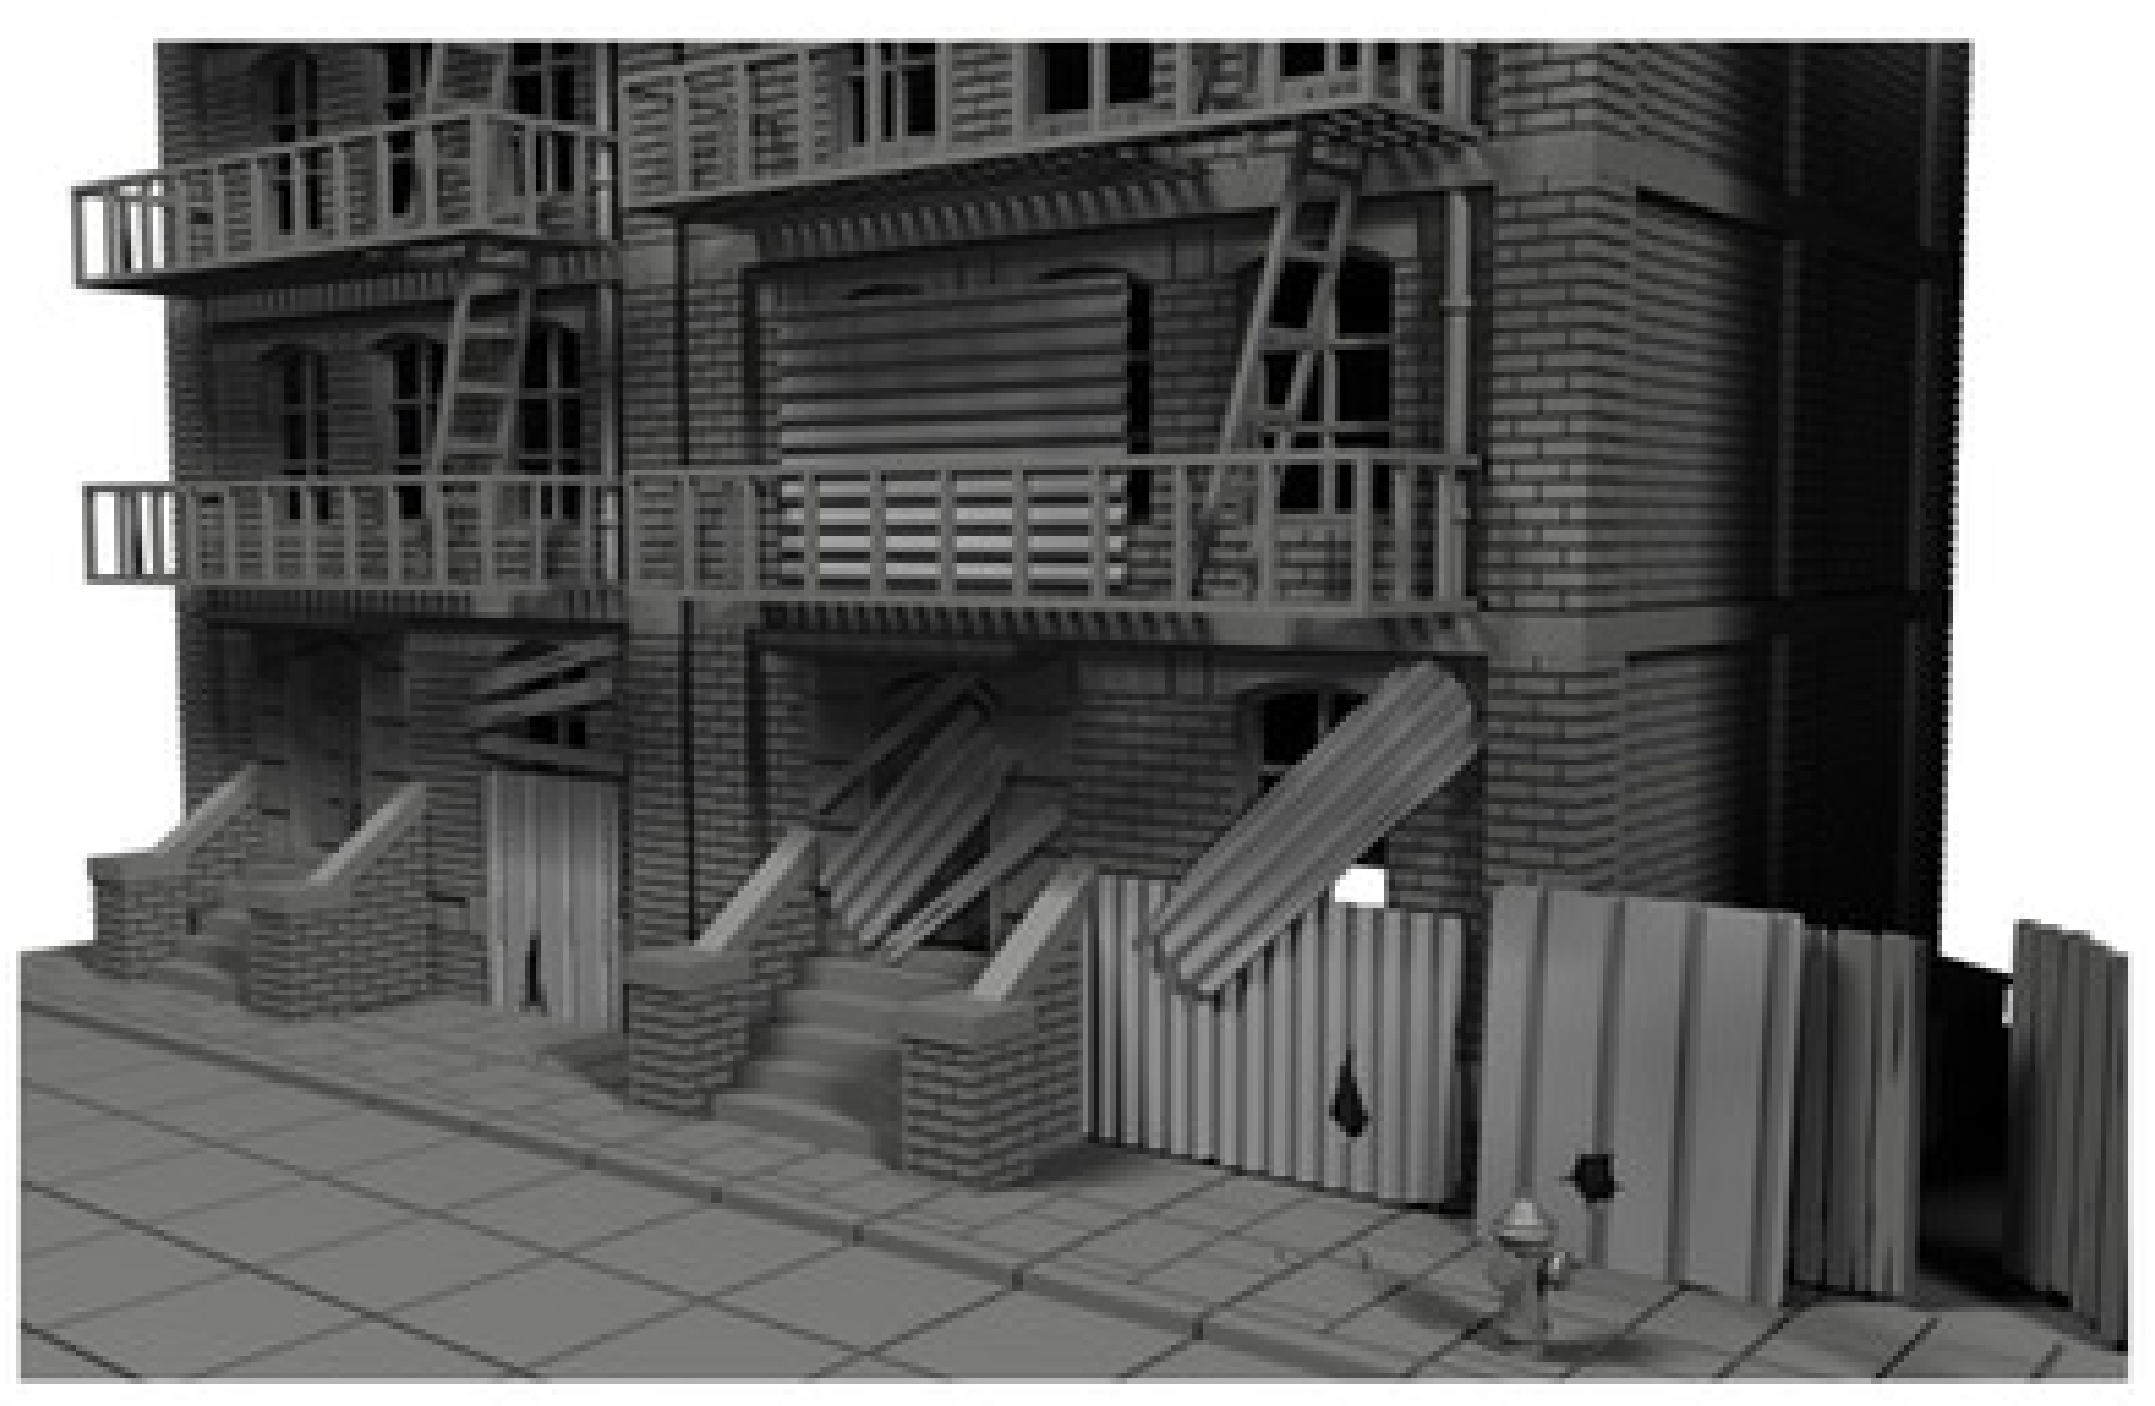
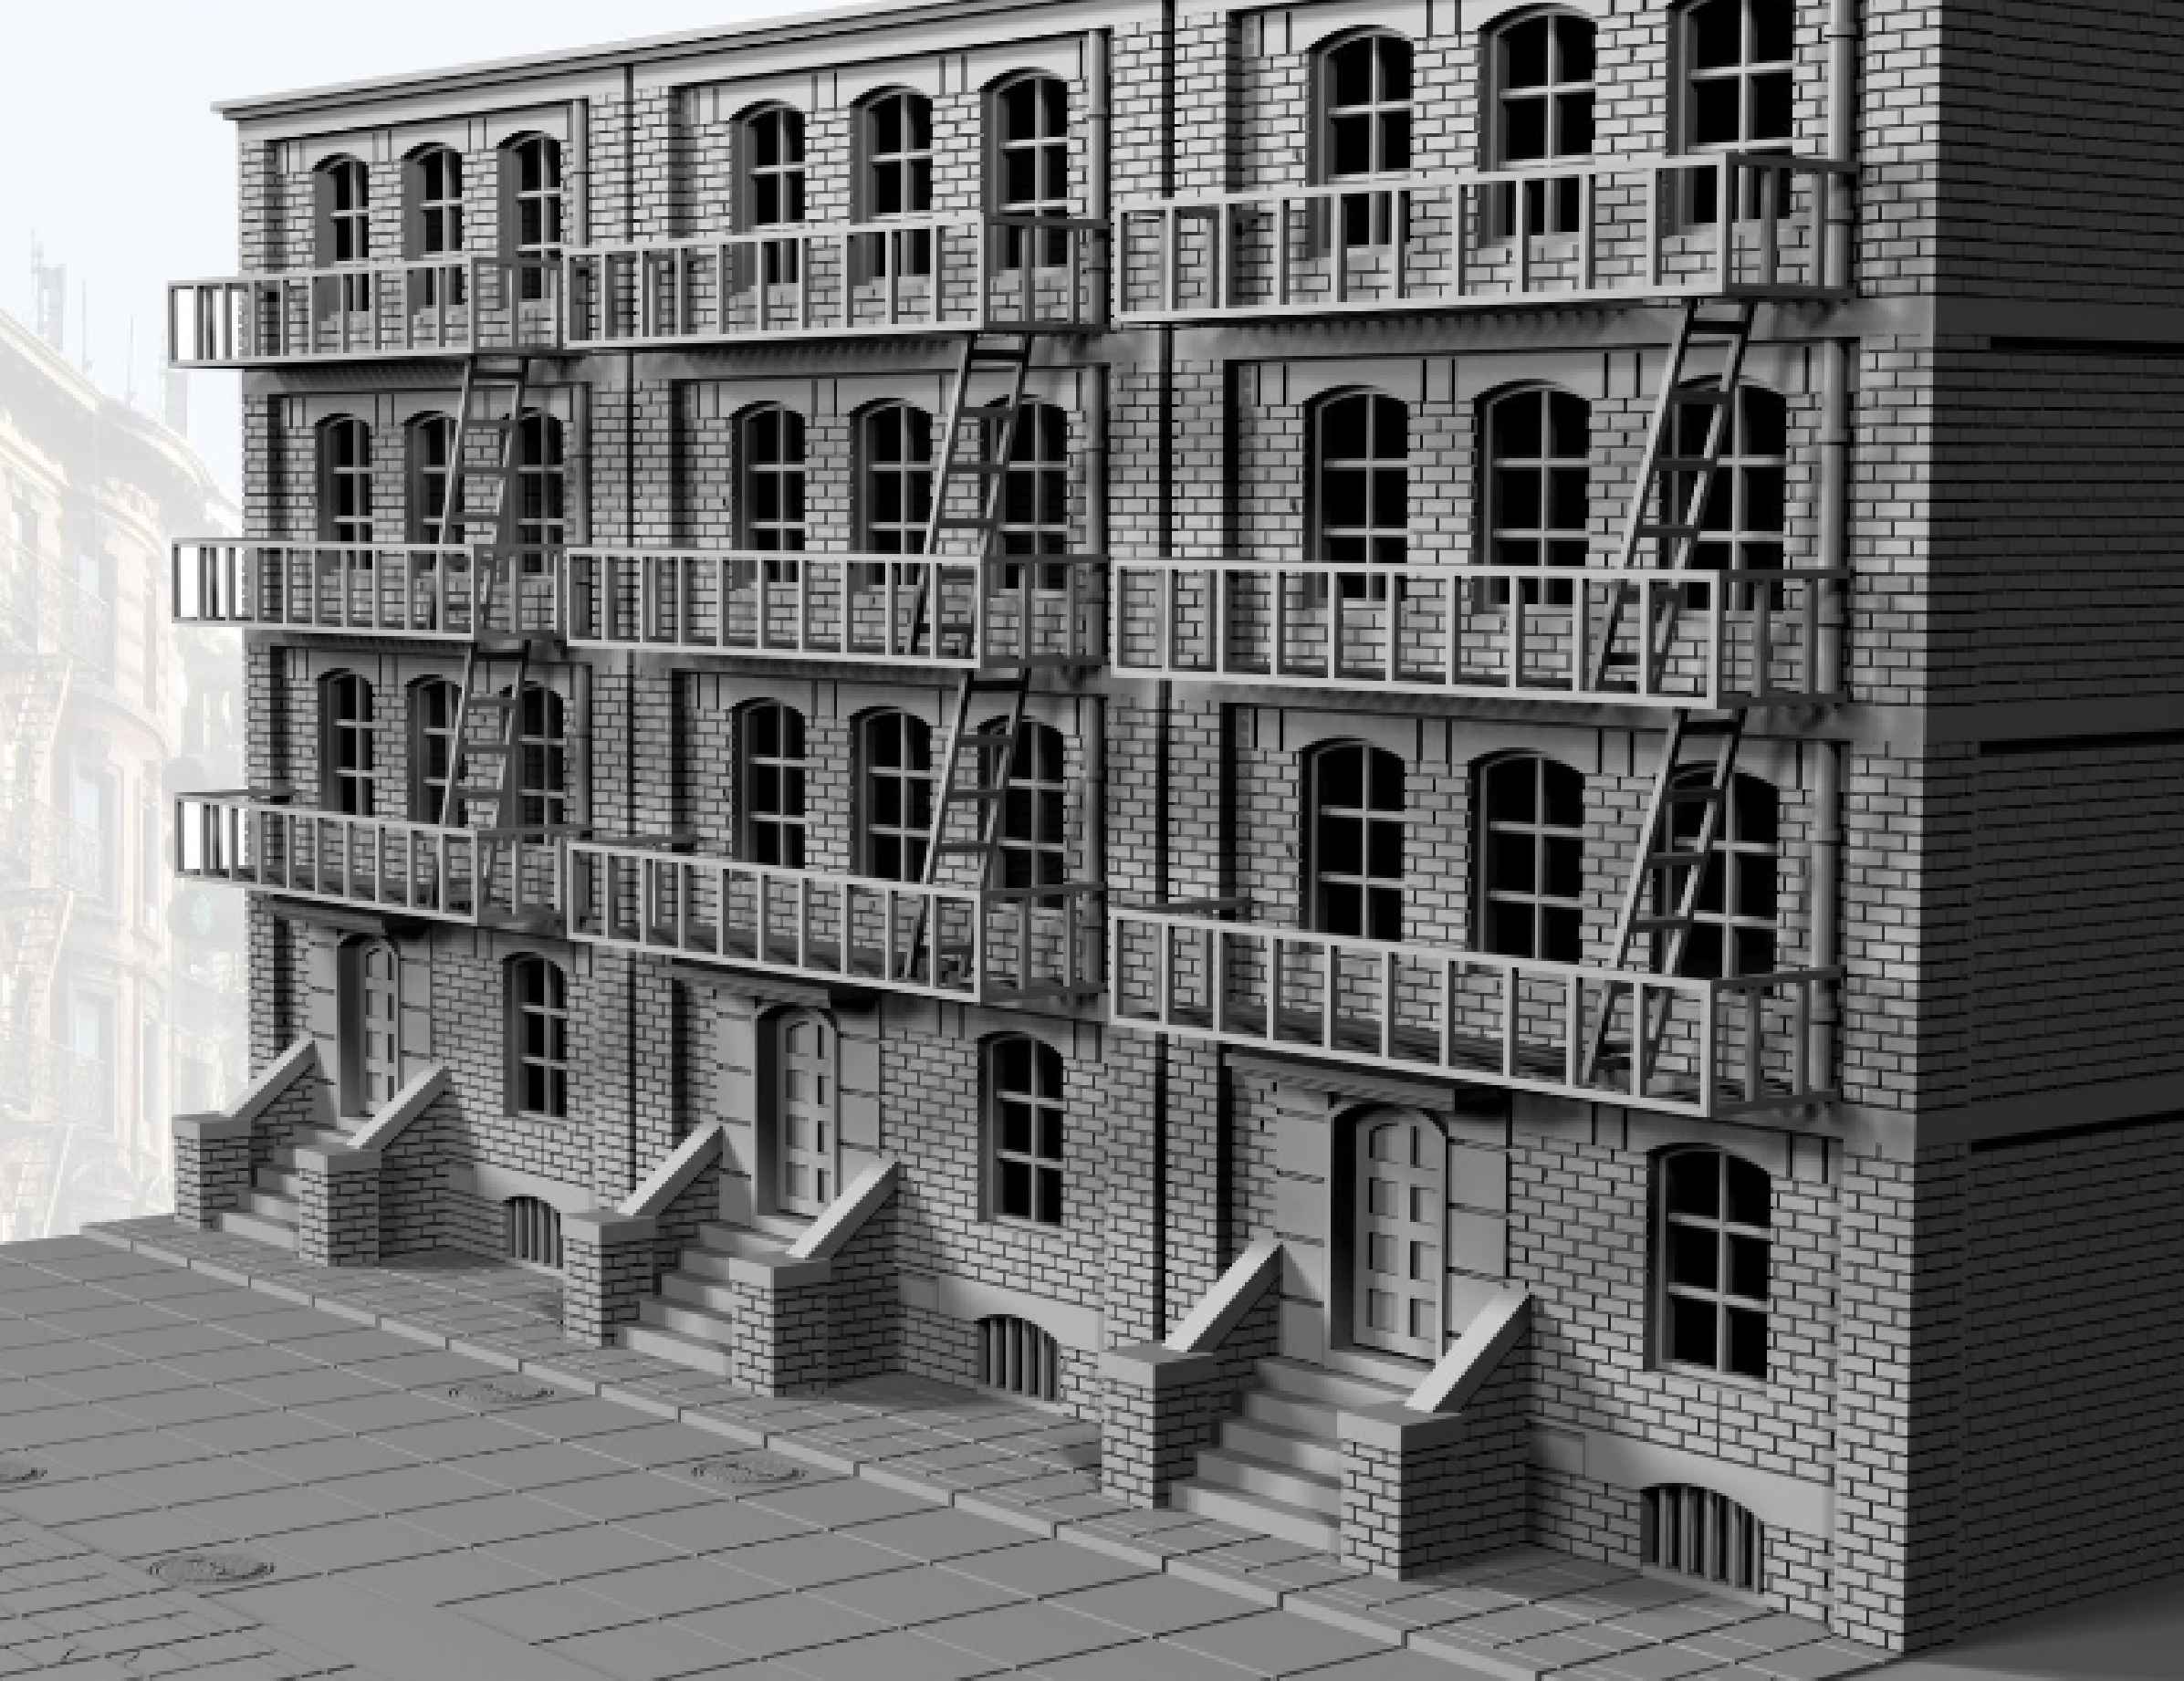
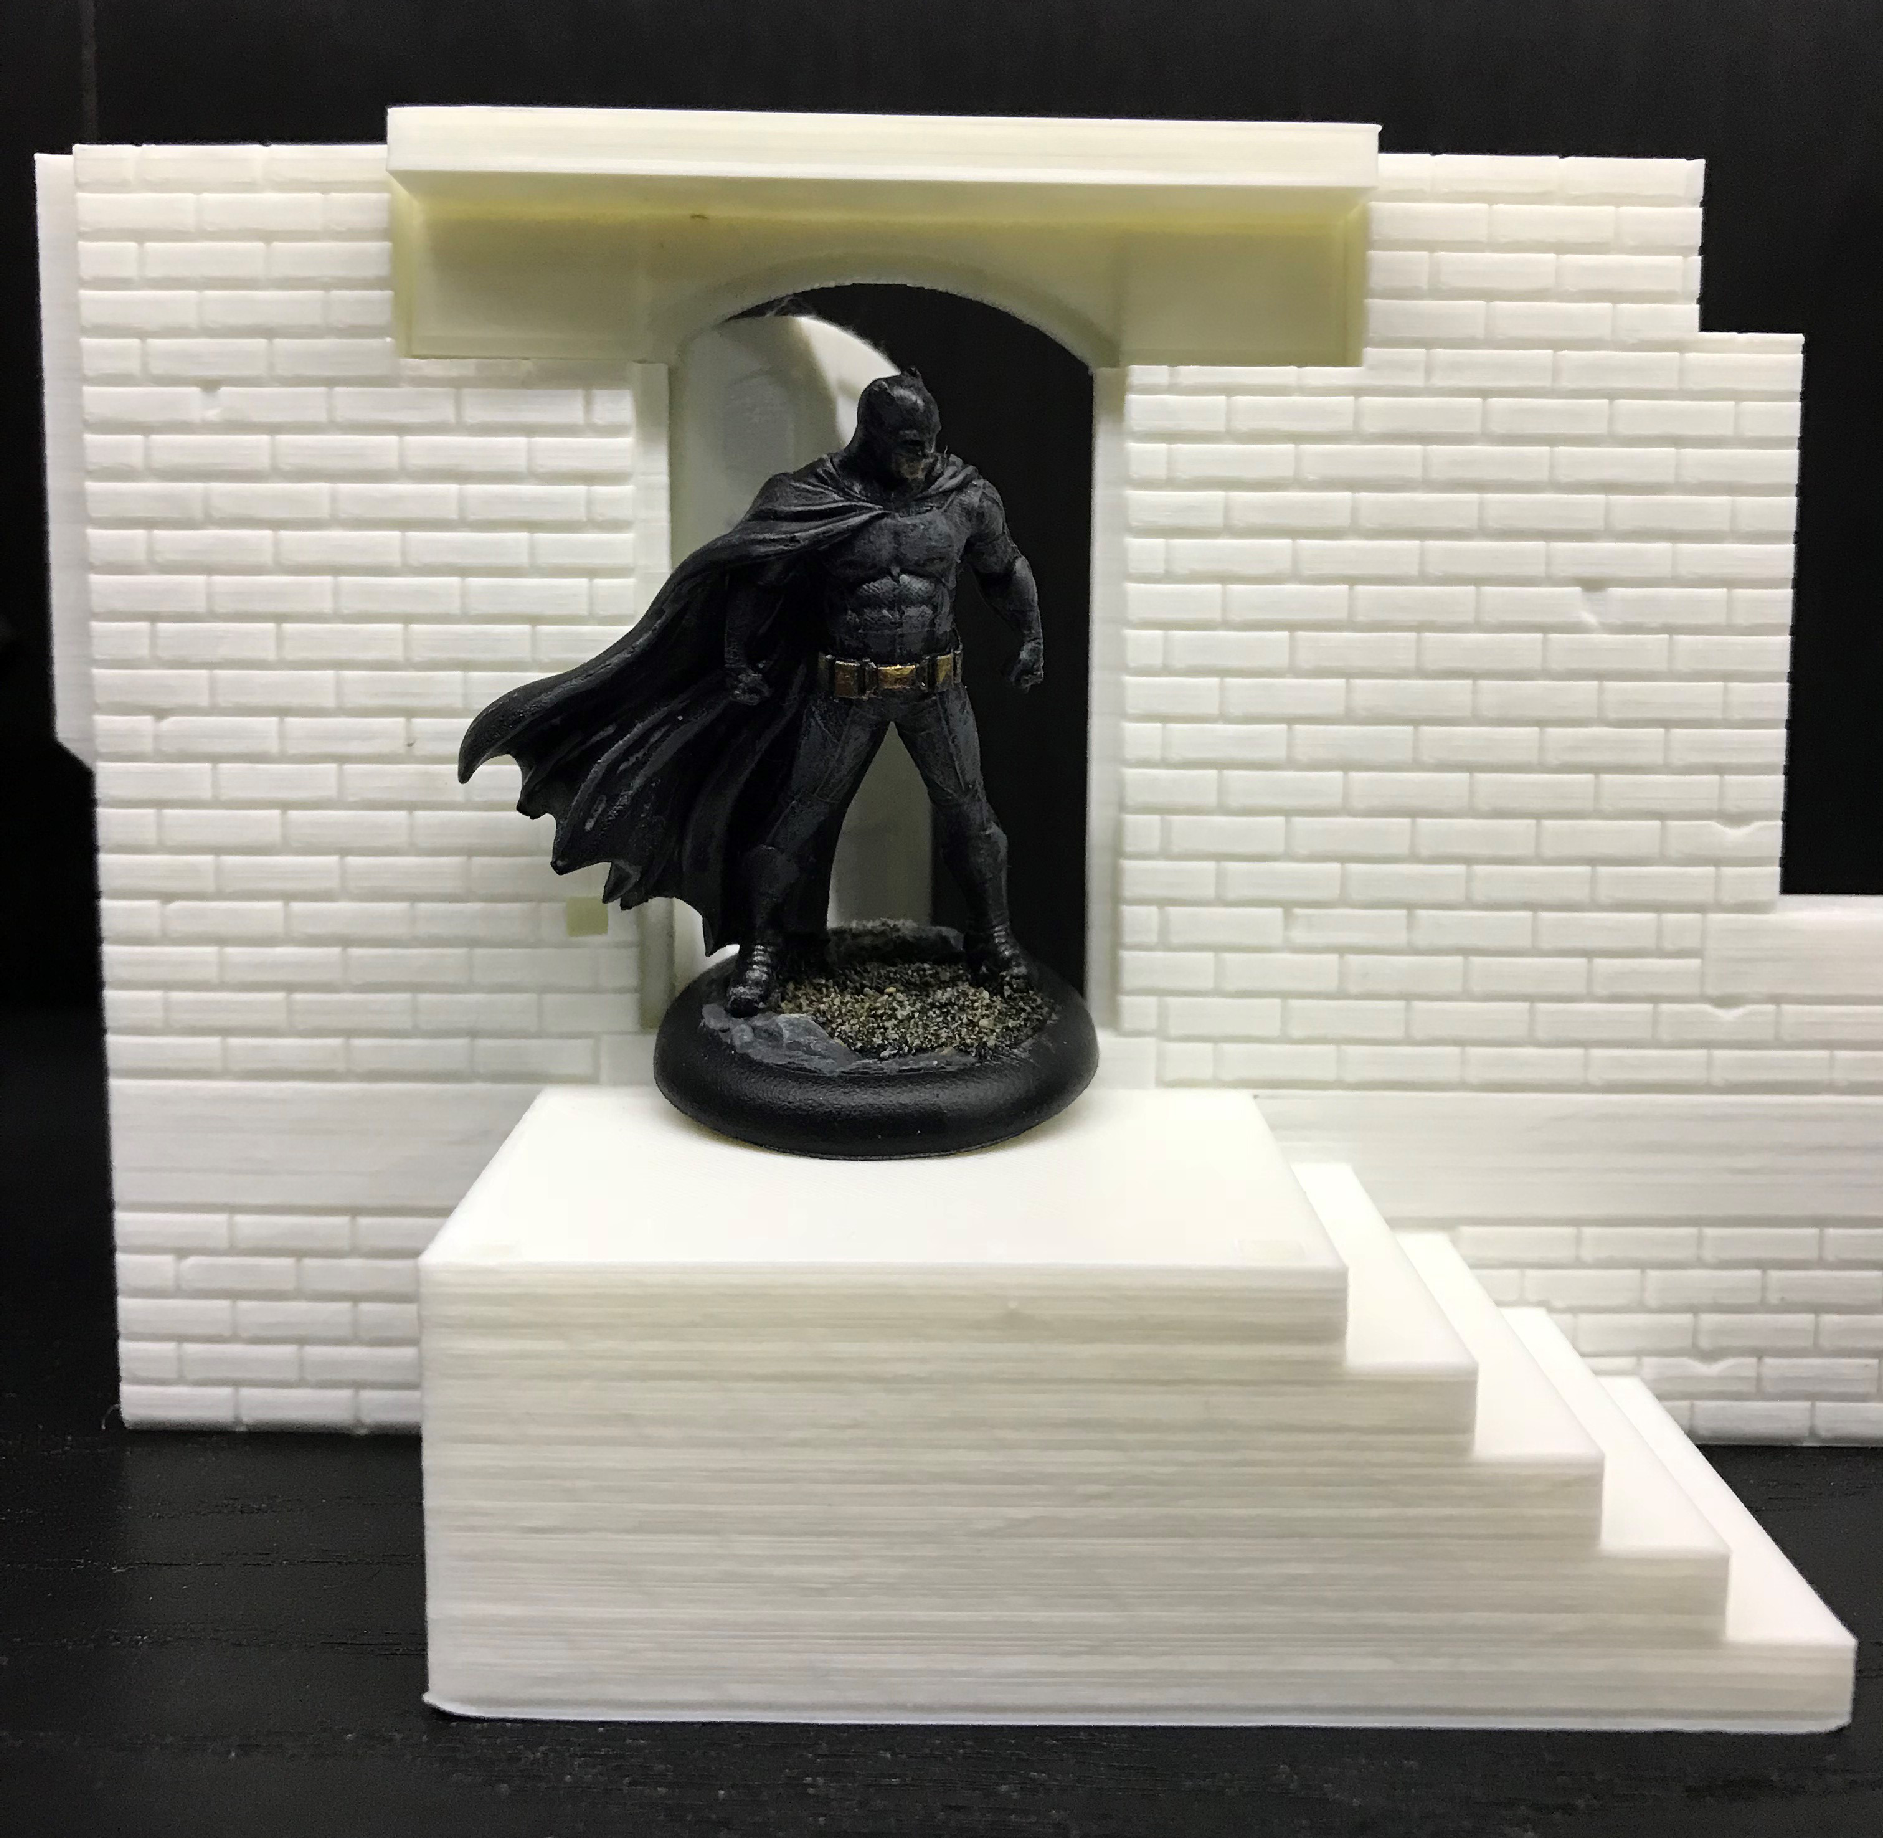
first one is the fire escapes. on all the reference images i have there set to the front of the buildings that look really good and give caricature, in addition give a good surface for game play for minis to sit on. BUT my mine is that don’t in the use in this style of buildings wouldn’t the fire escapes be to the back of the buildings in like the back alleys… let me know what you think would be best
Secondly is the road sections work in 3 different ways, i can print the side walk with curbs to the roads but i can have grided roads, move roads or no road at all just side walk and curbs. like the idea of having roads because i can have details like the manhole covers and drains. don’t see why i should have a grided road as i won’t be using any games that need a grid system but there will be a grid anyway as each road section will be a tile that will be connected and its impossible to eradicate the connections completely. I can alyways use a mat with roads that can give me the ability to move buildings about if needed and not to fixed. need some other opinions to help me decide whats the best thing to do
I will attache images below to show some of the references of what they could look like.
Thanks again guys
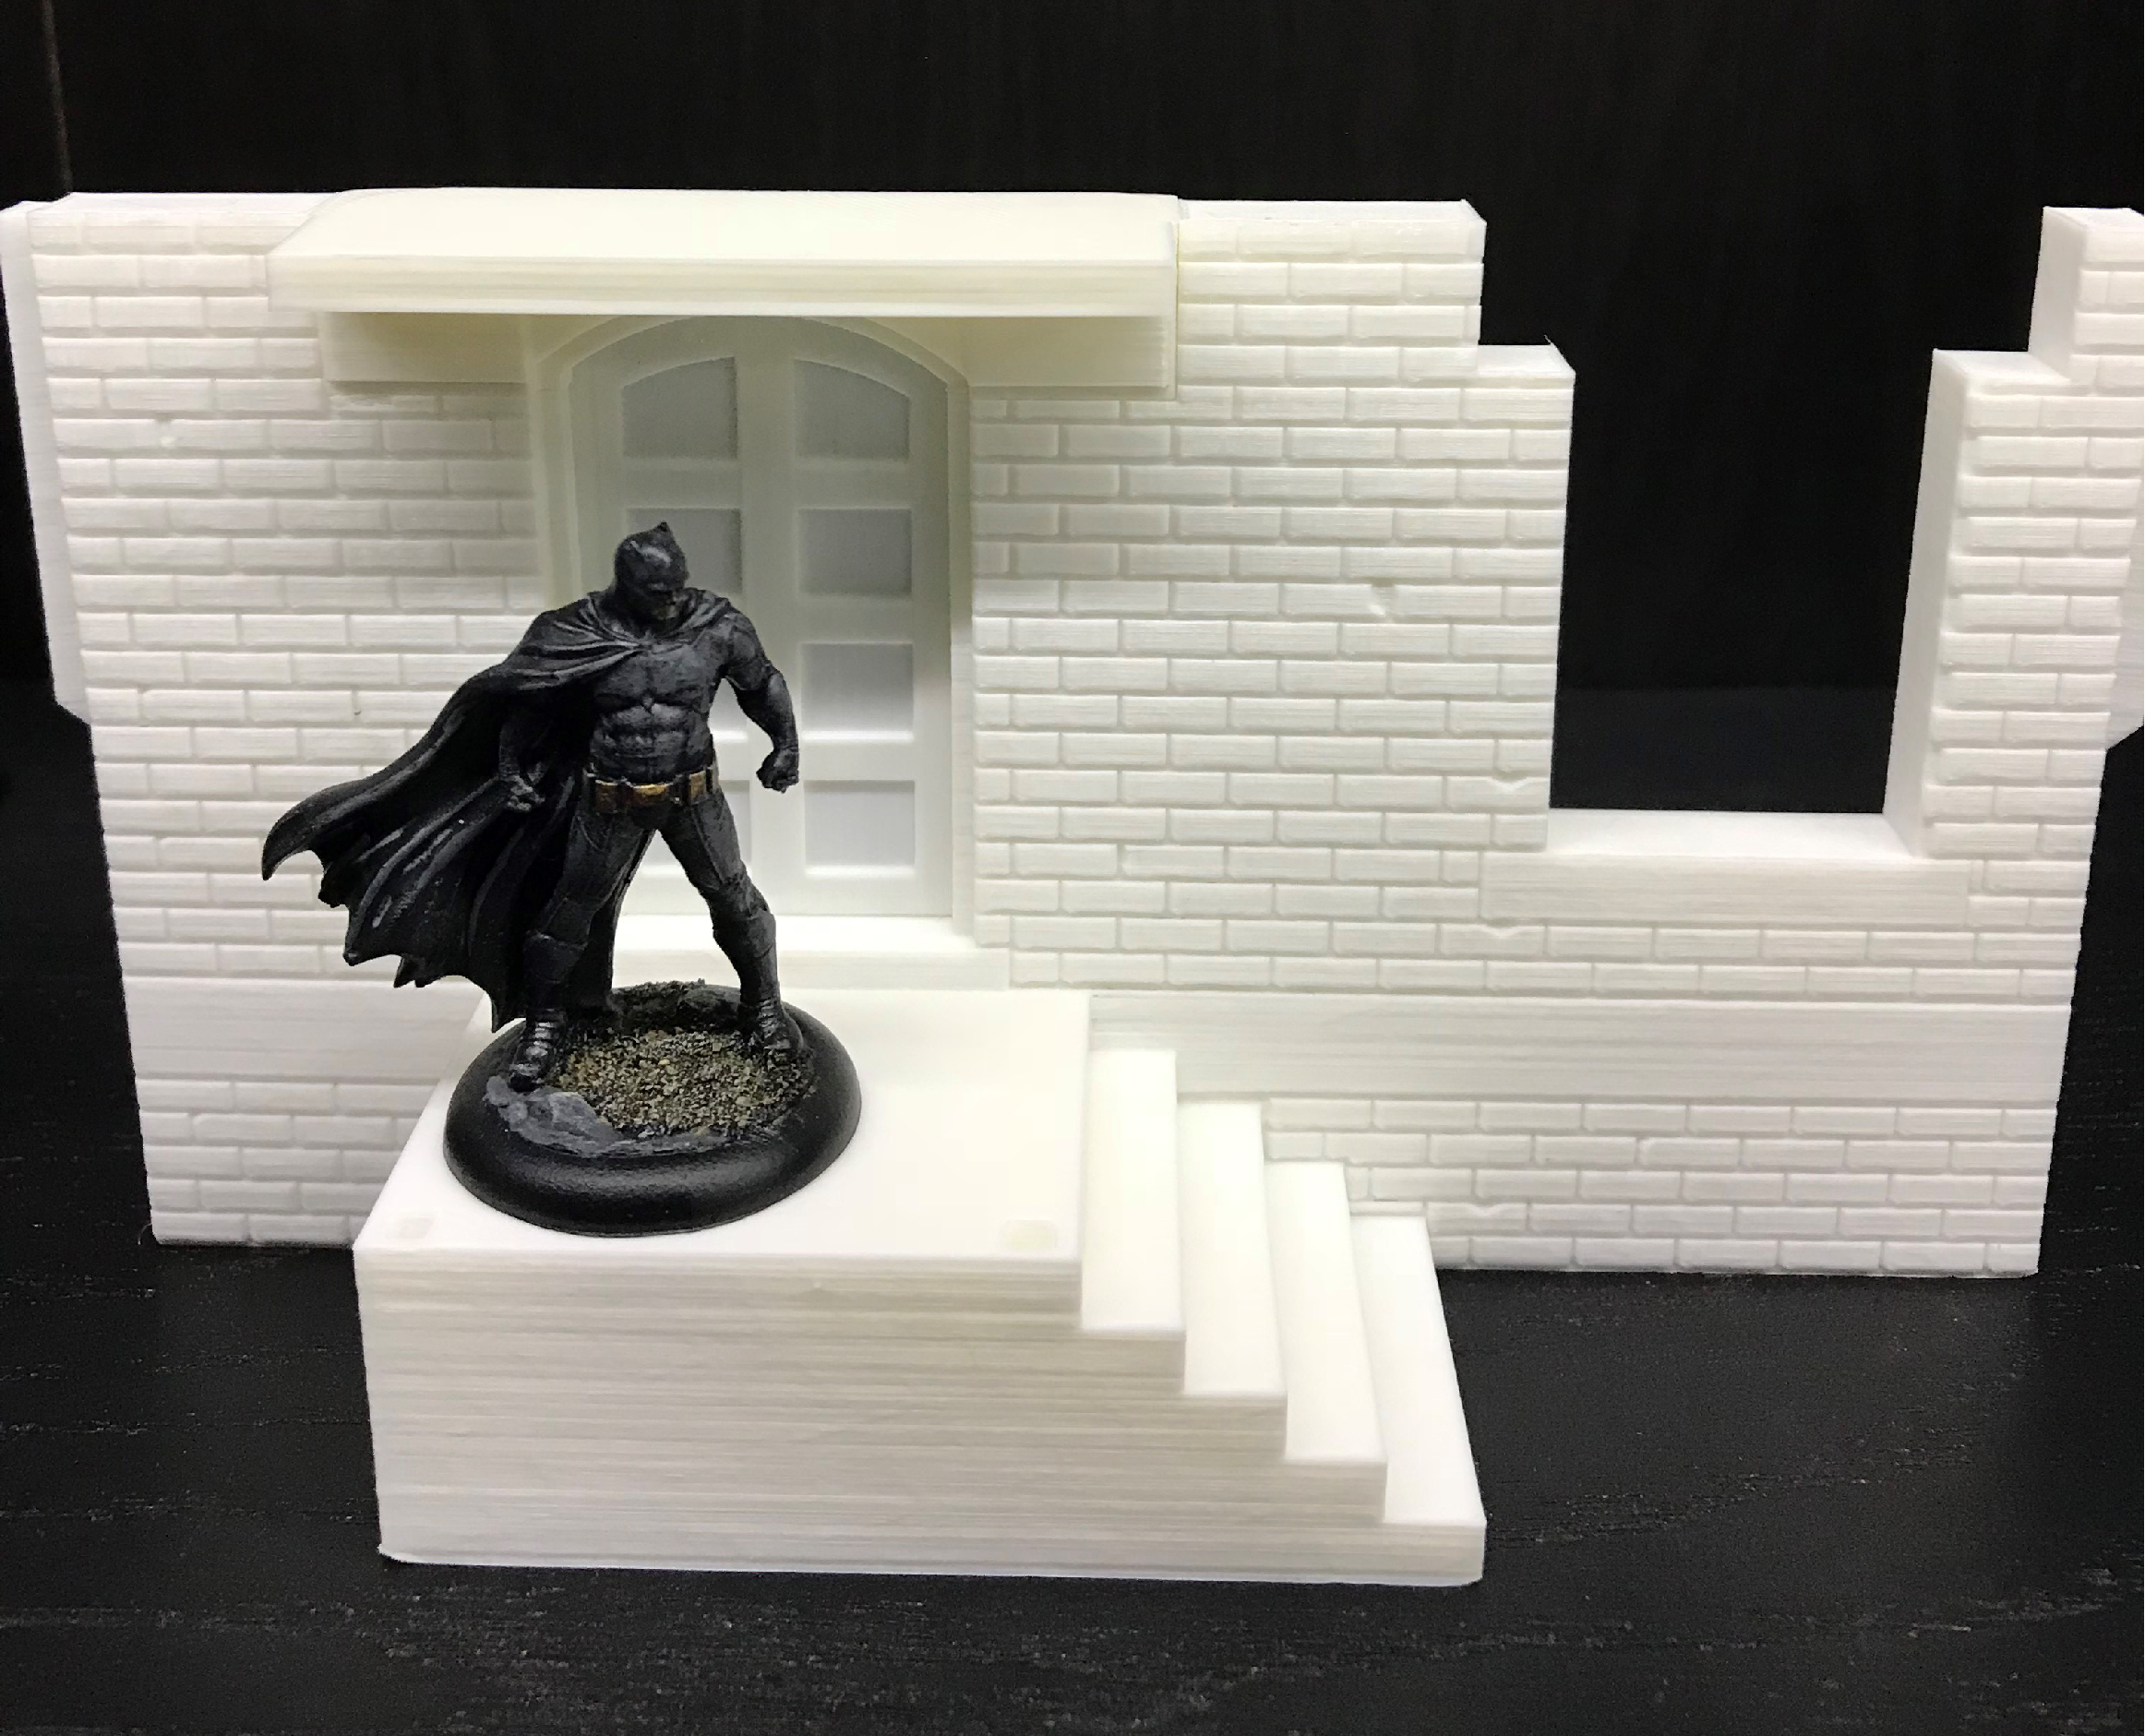
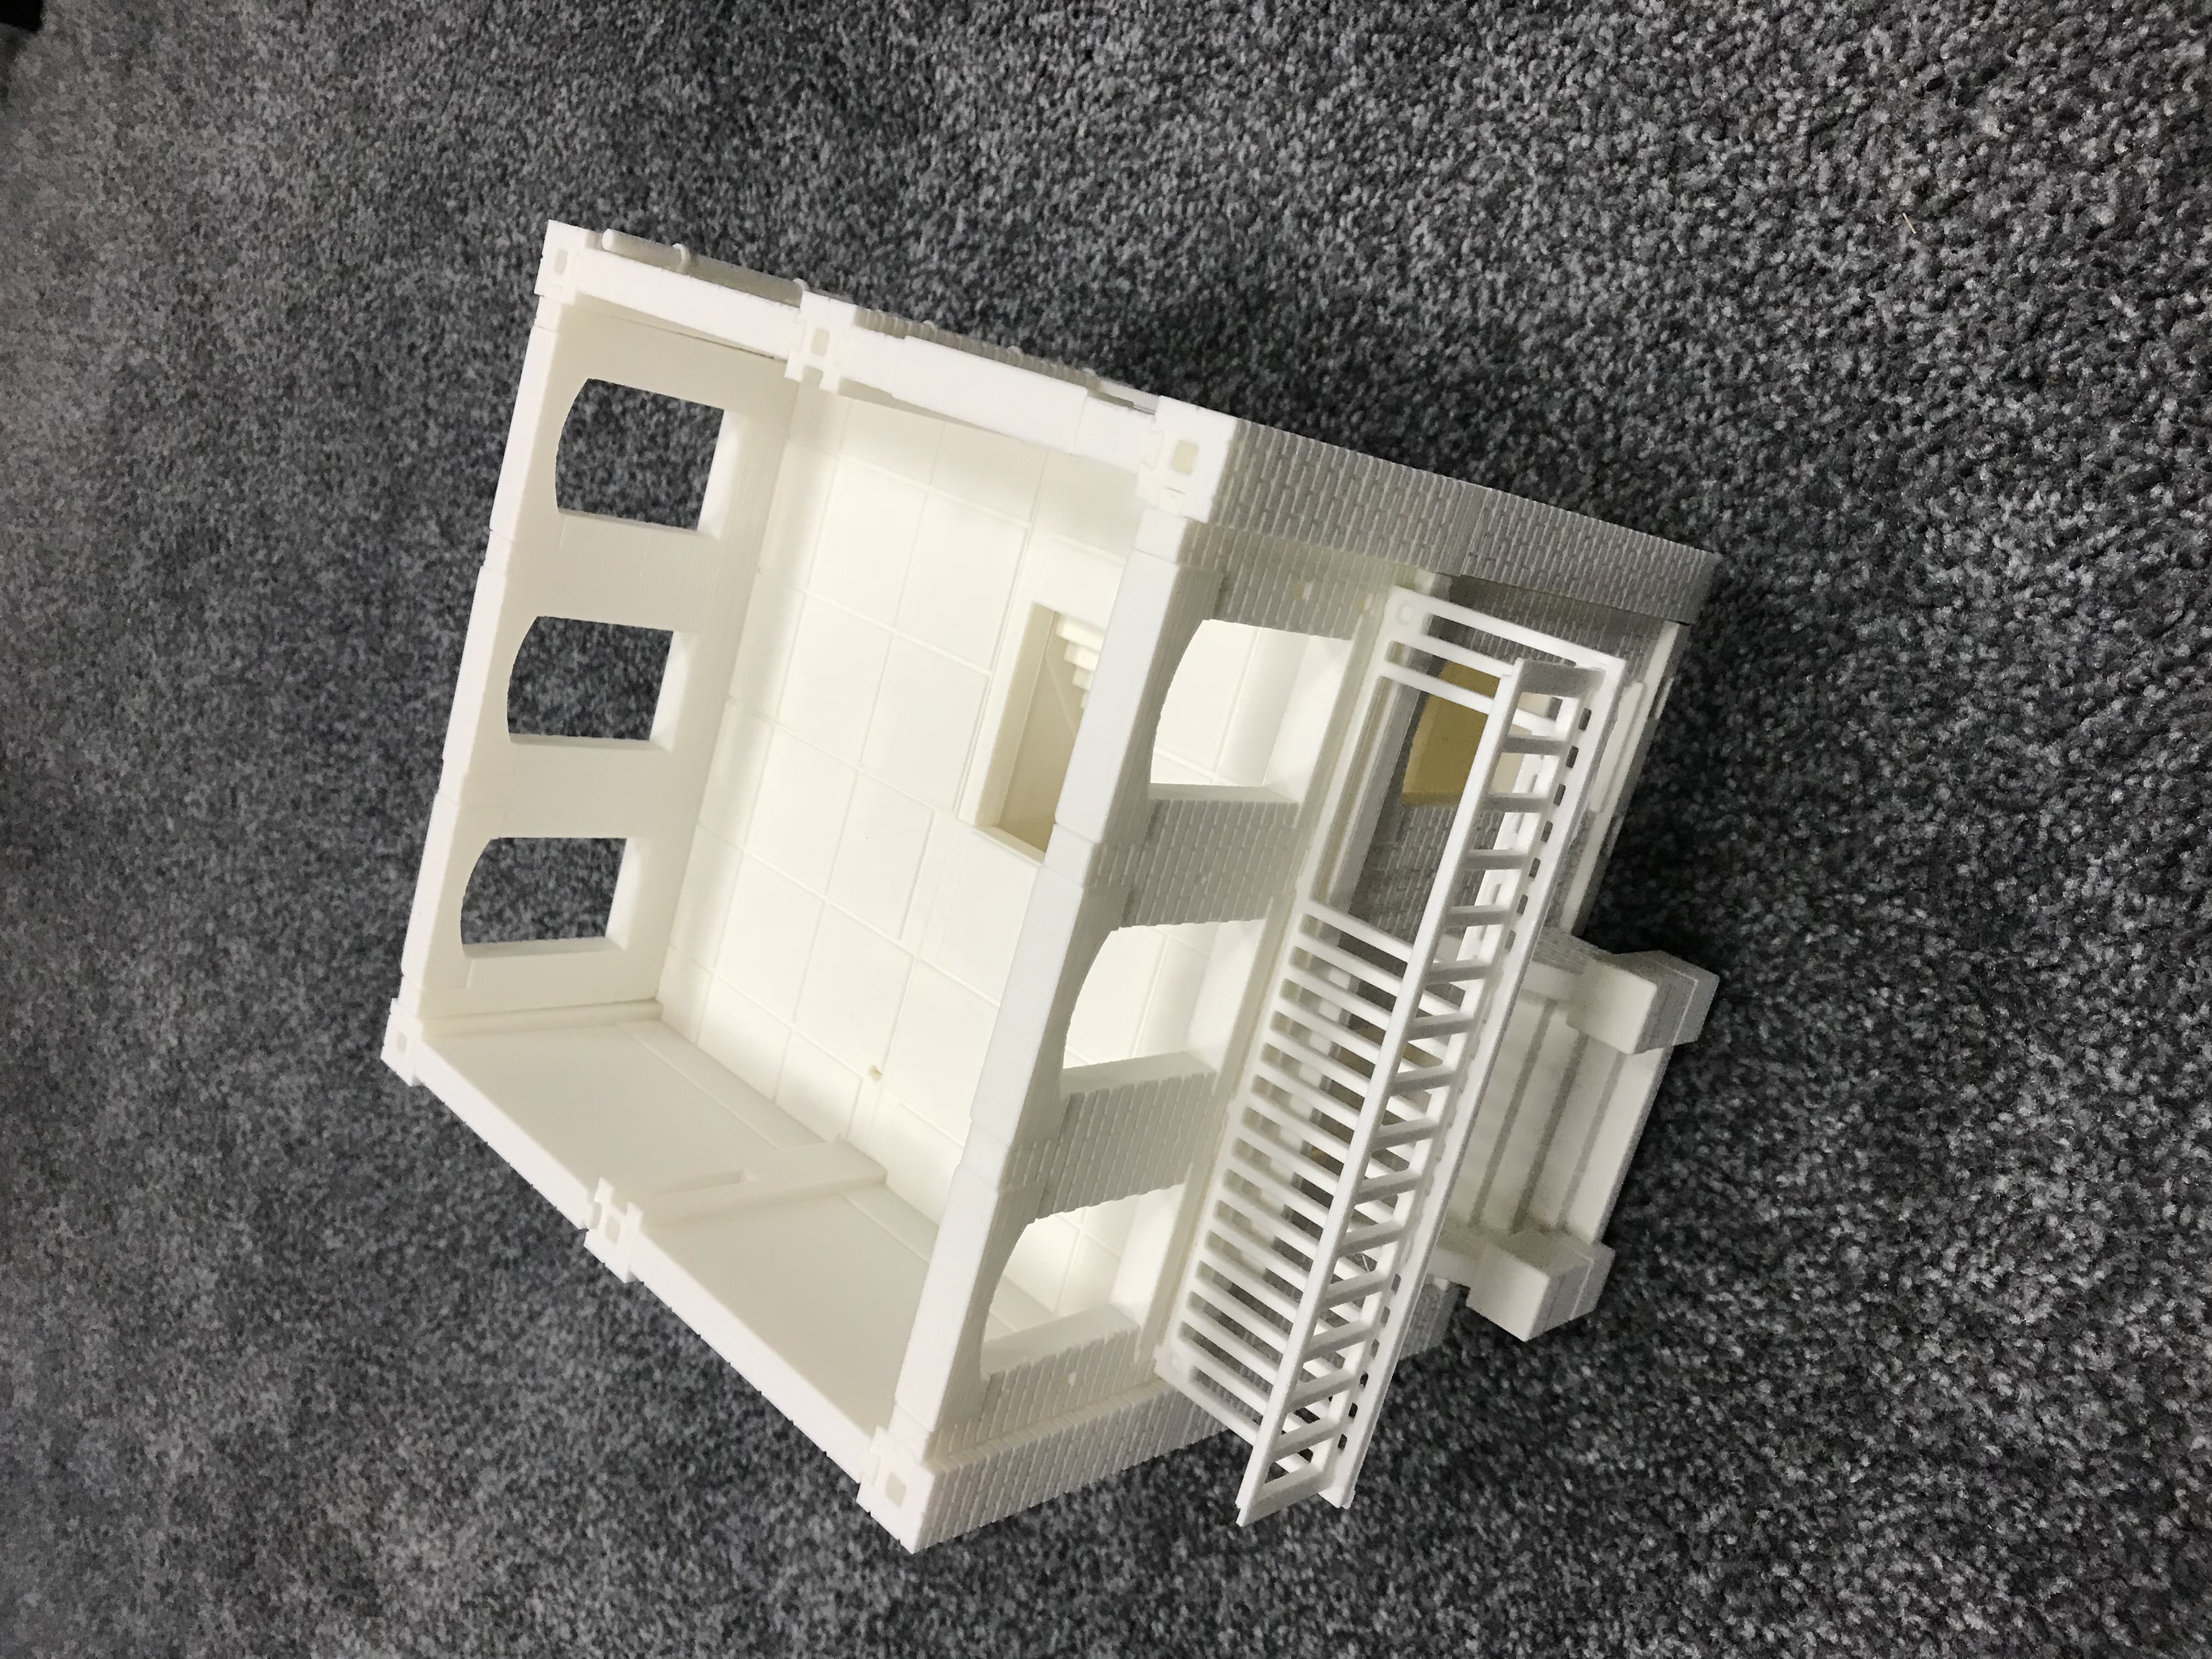
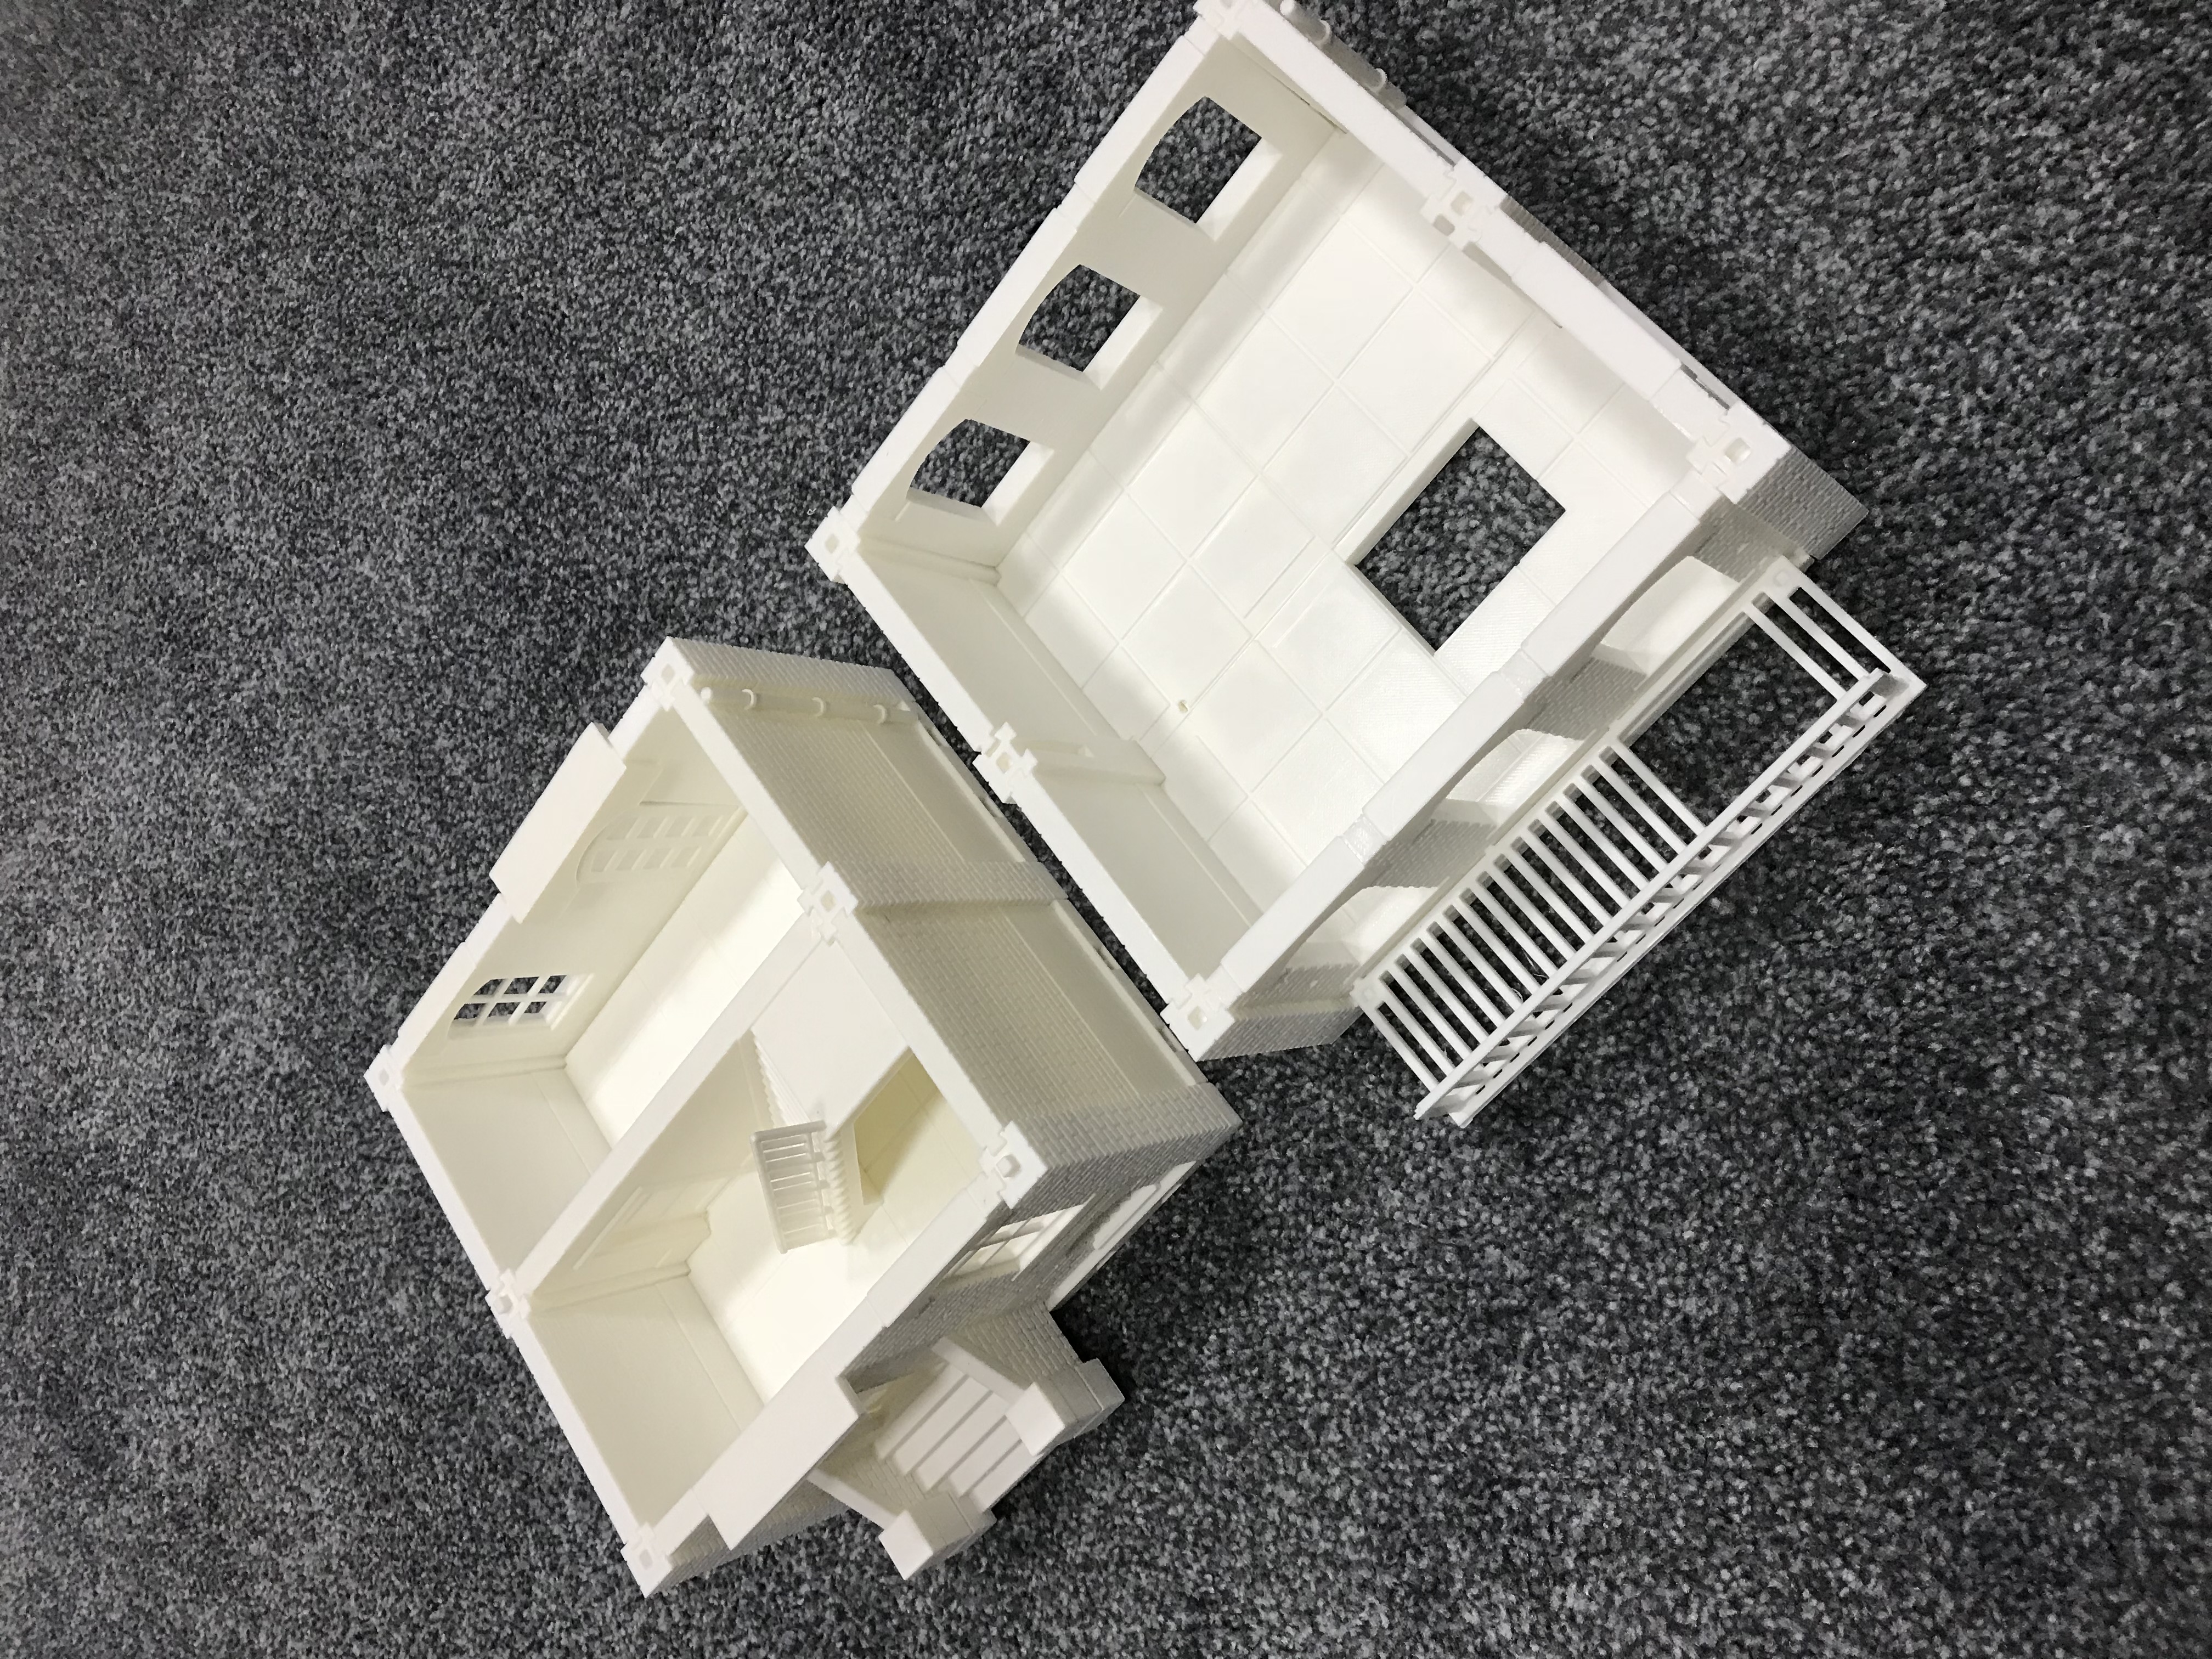
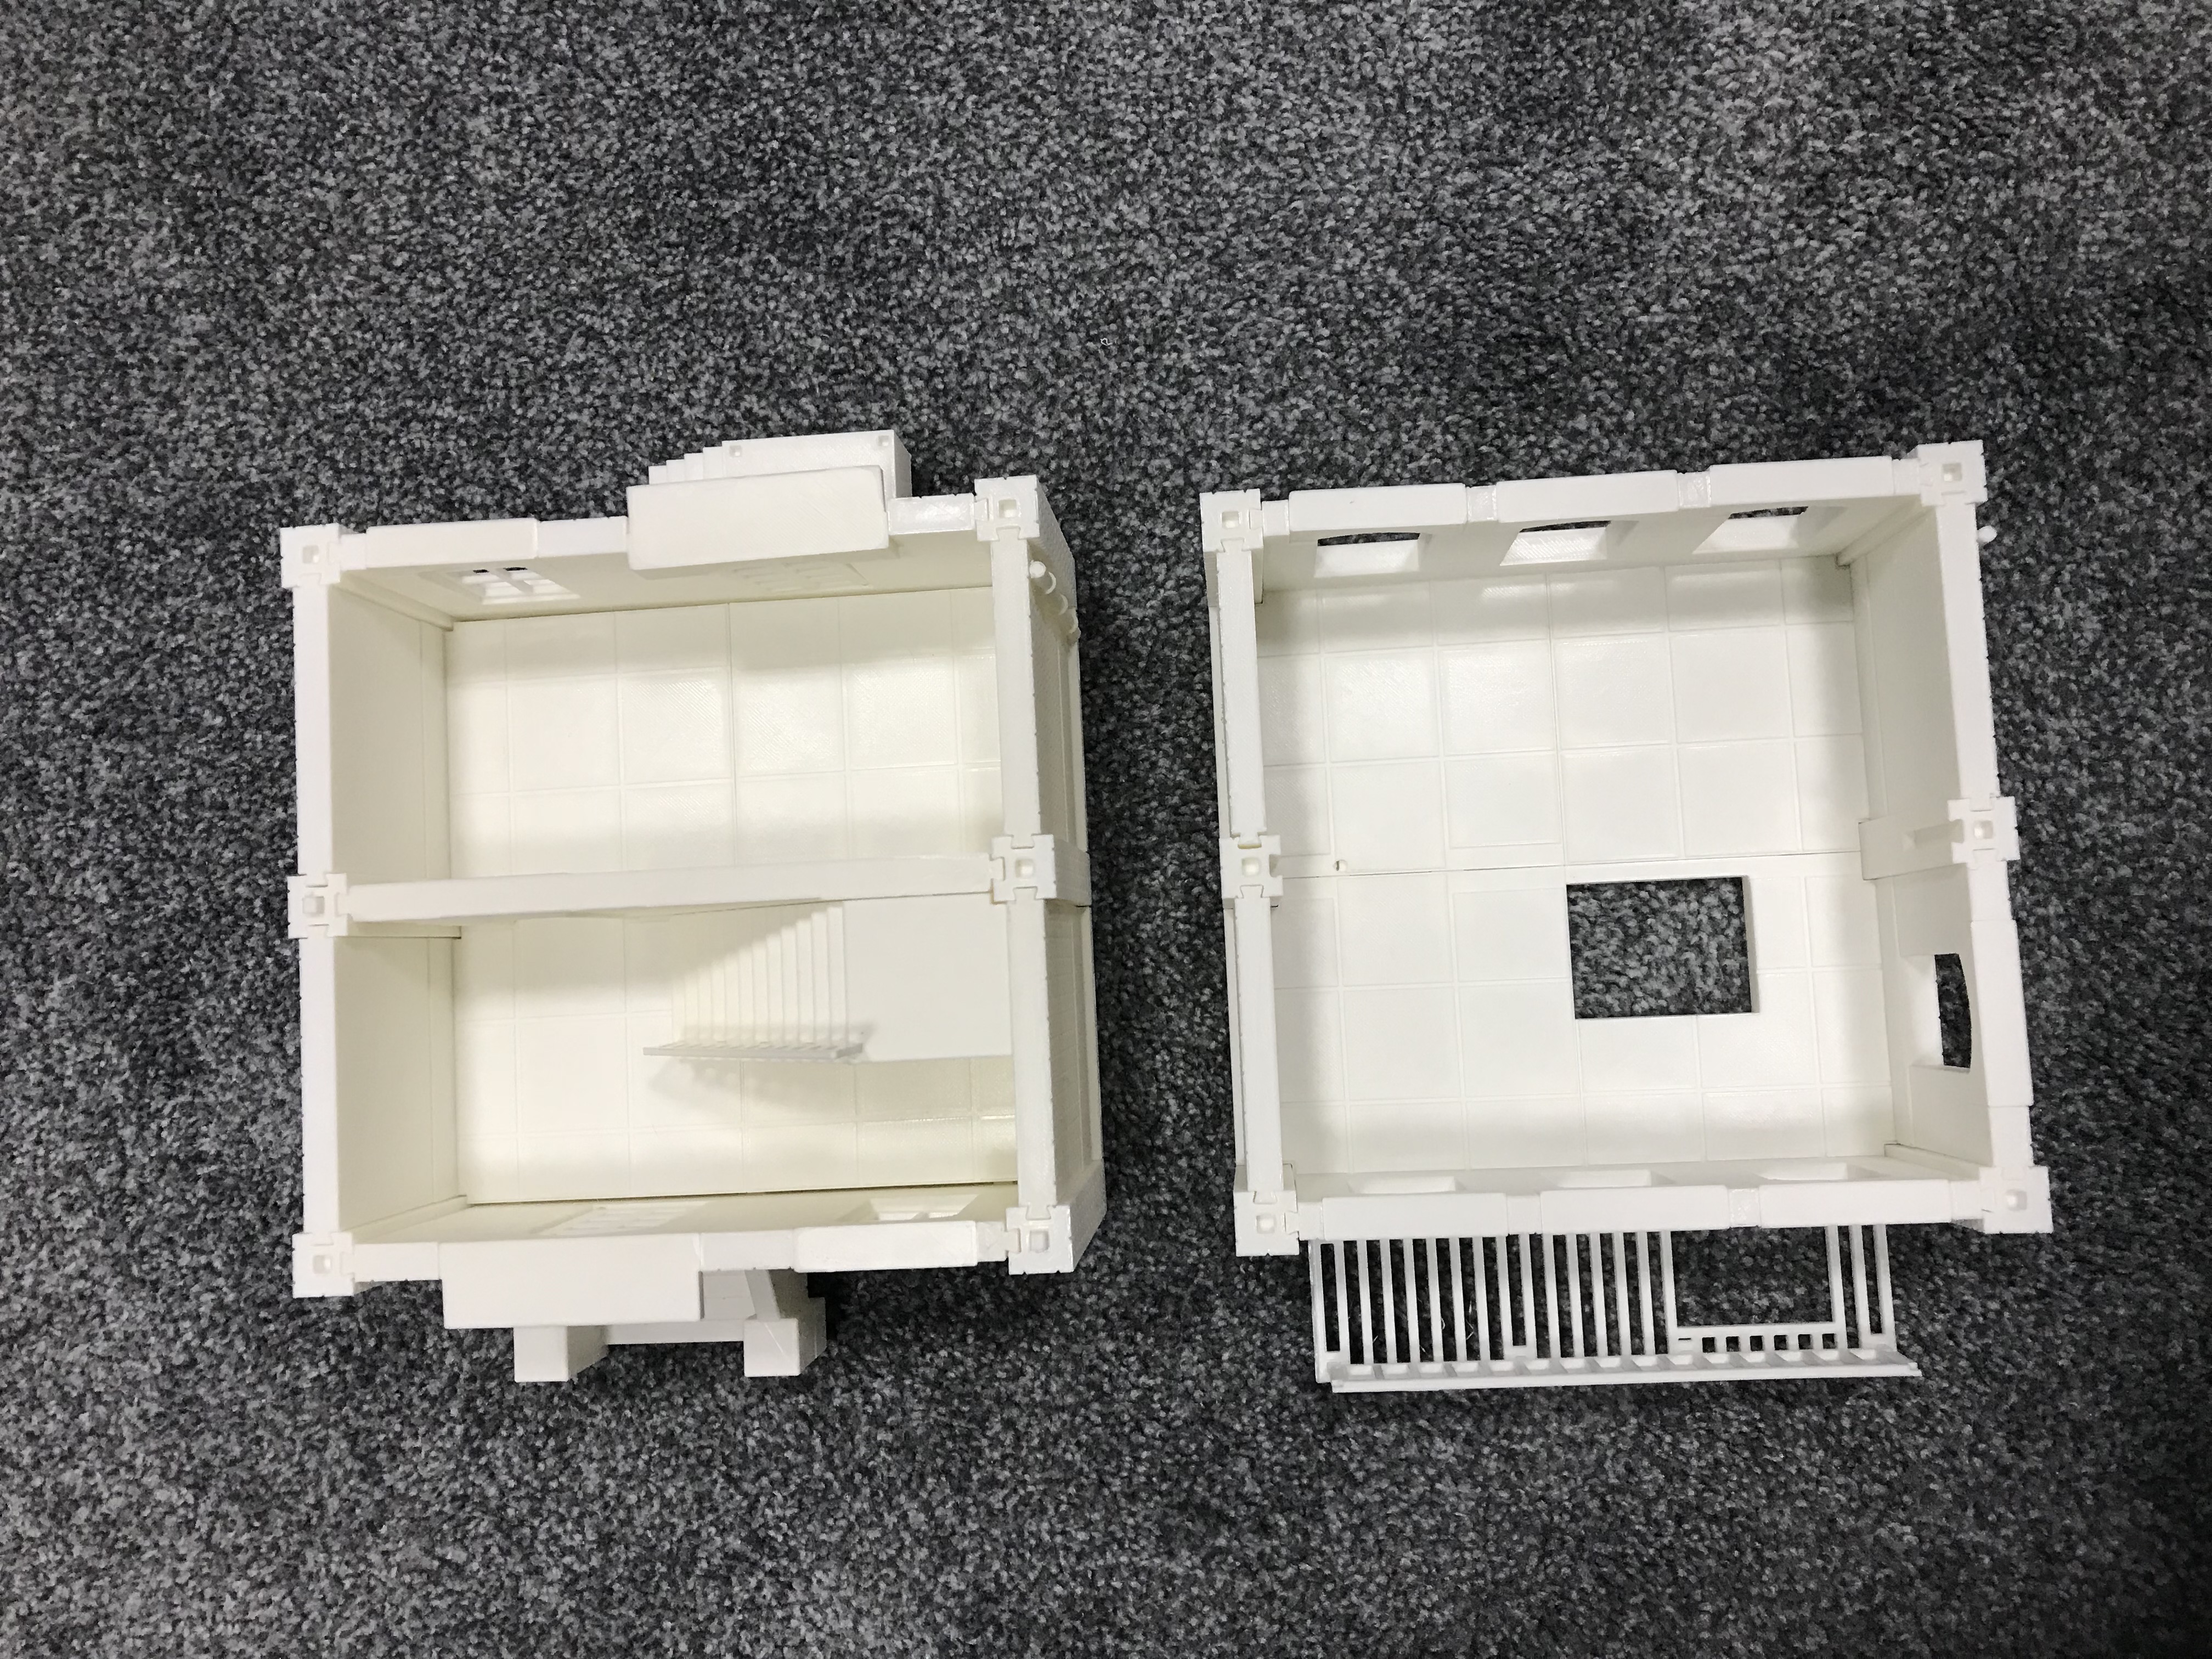
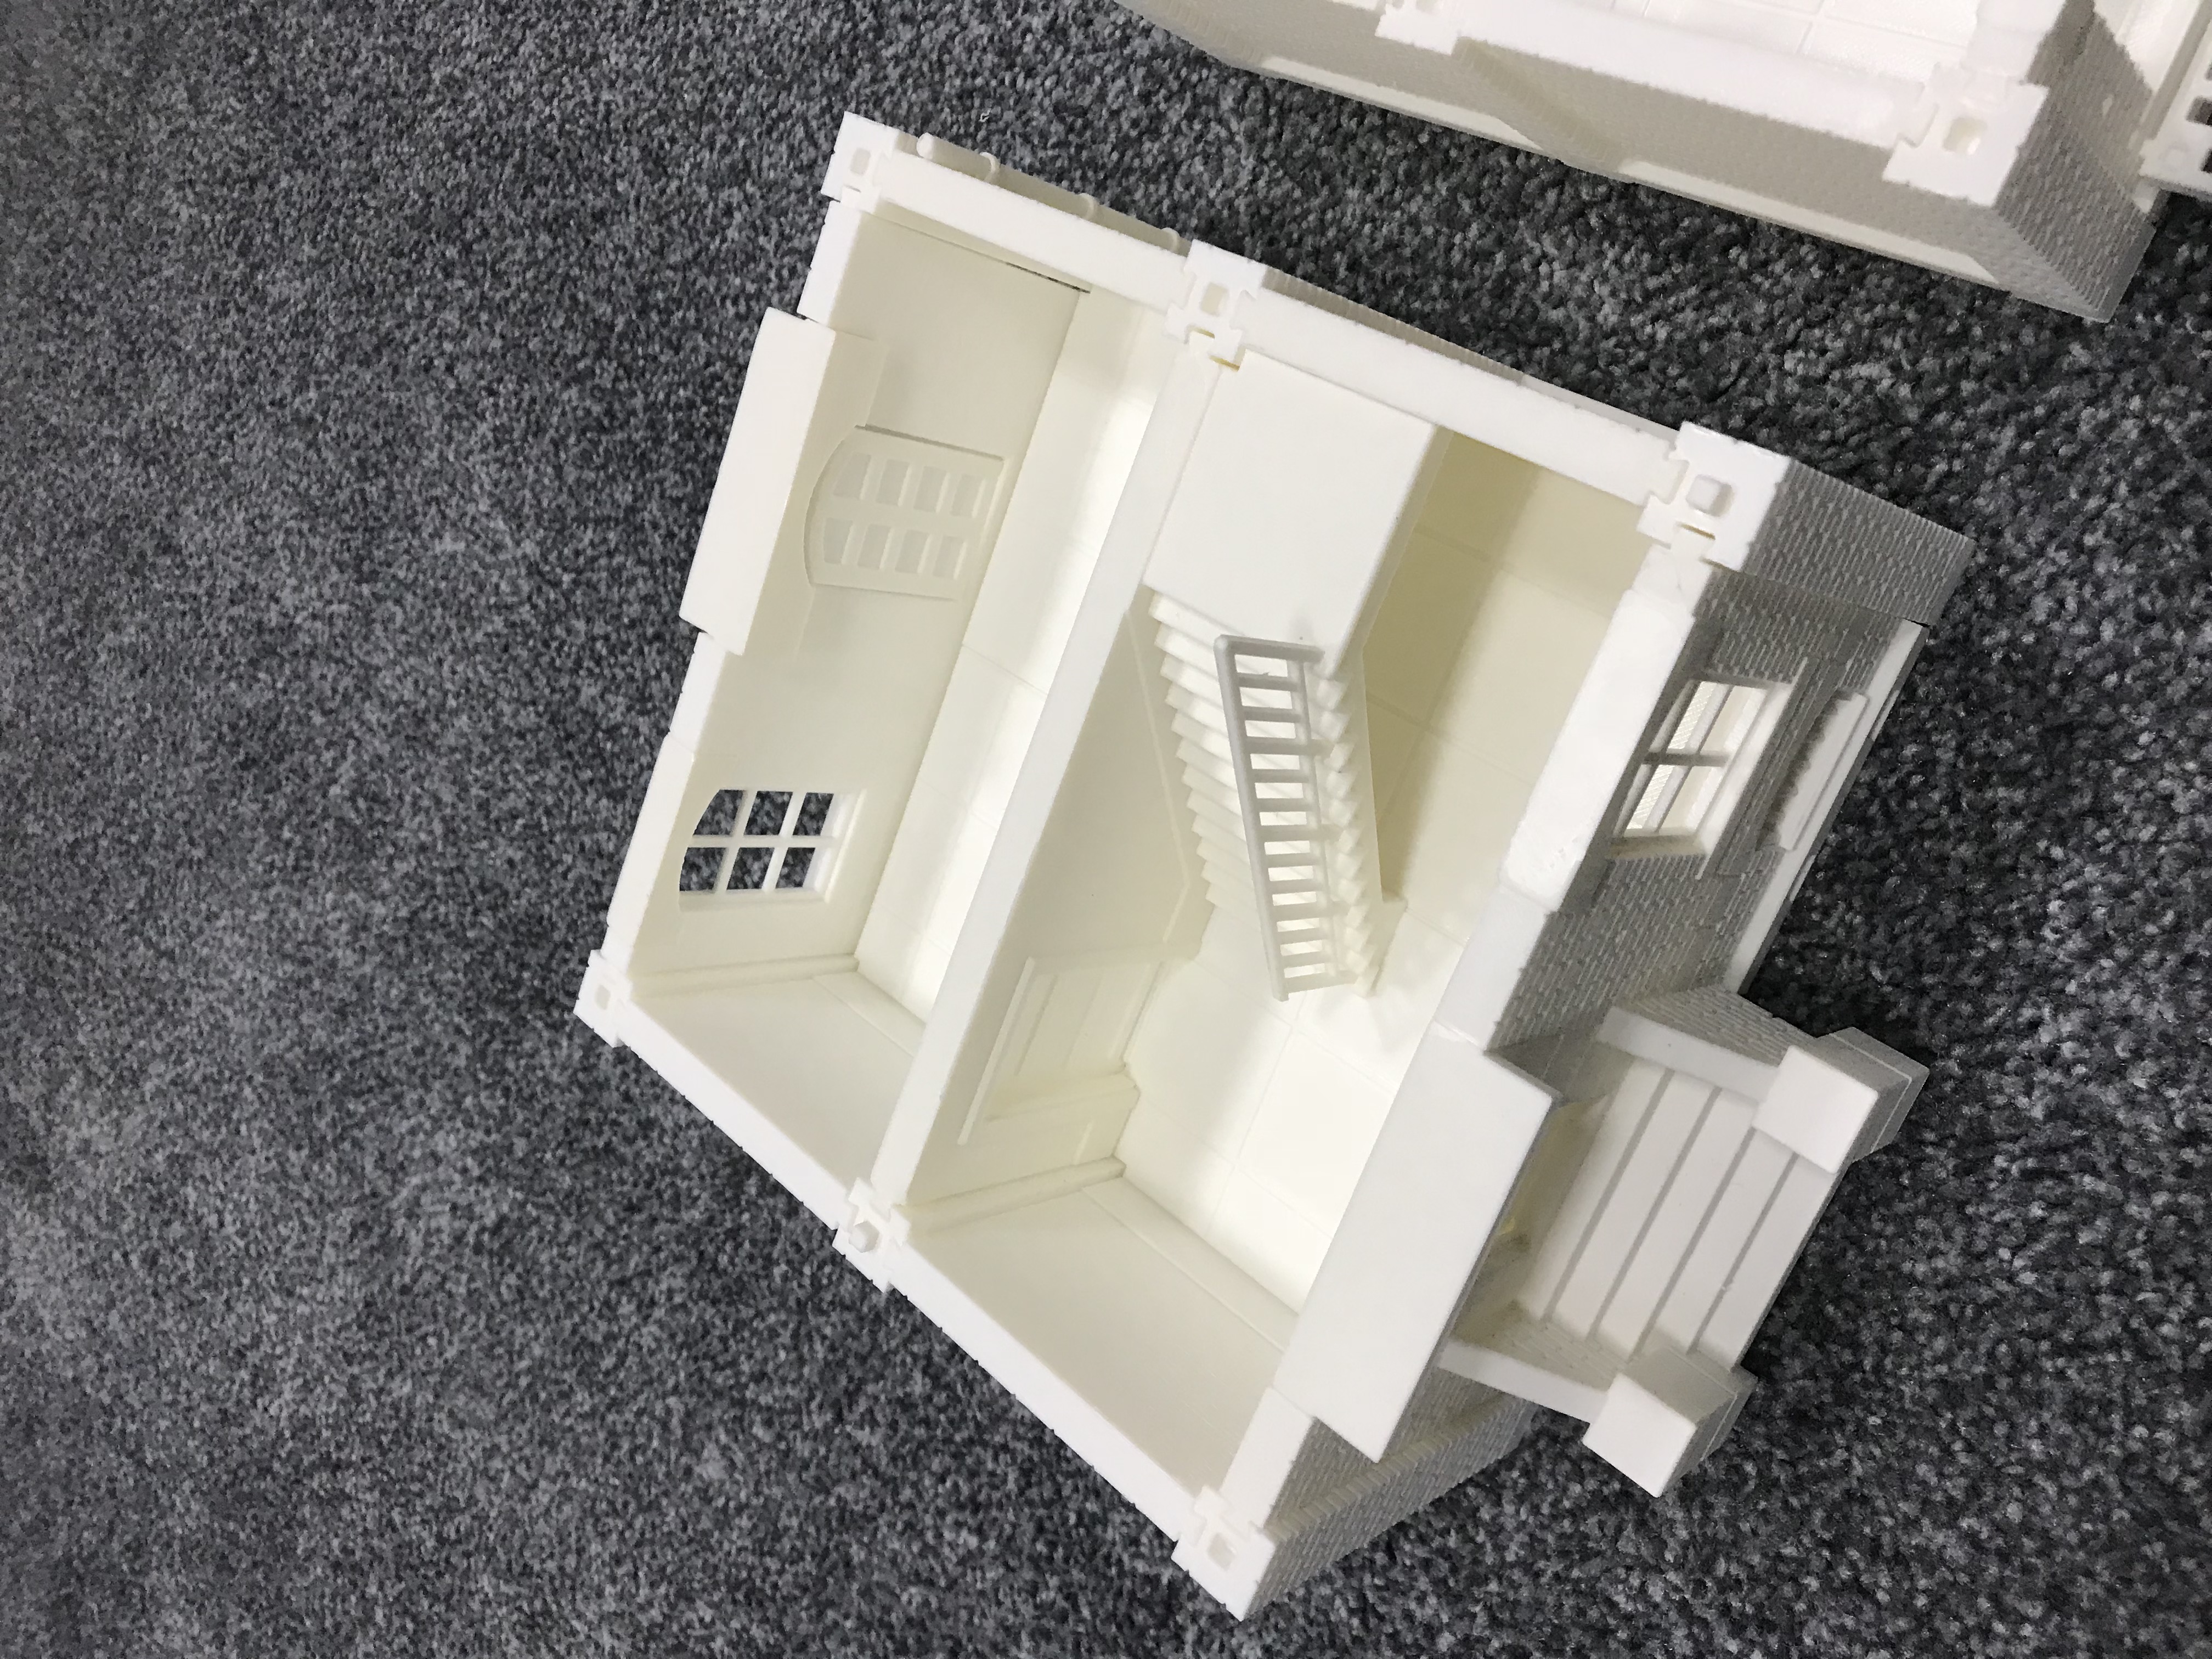
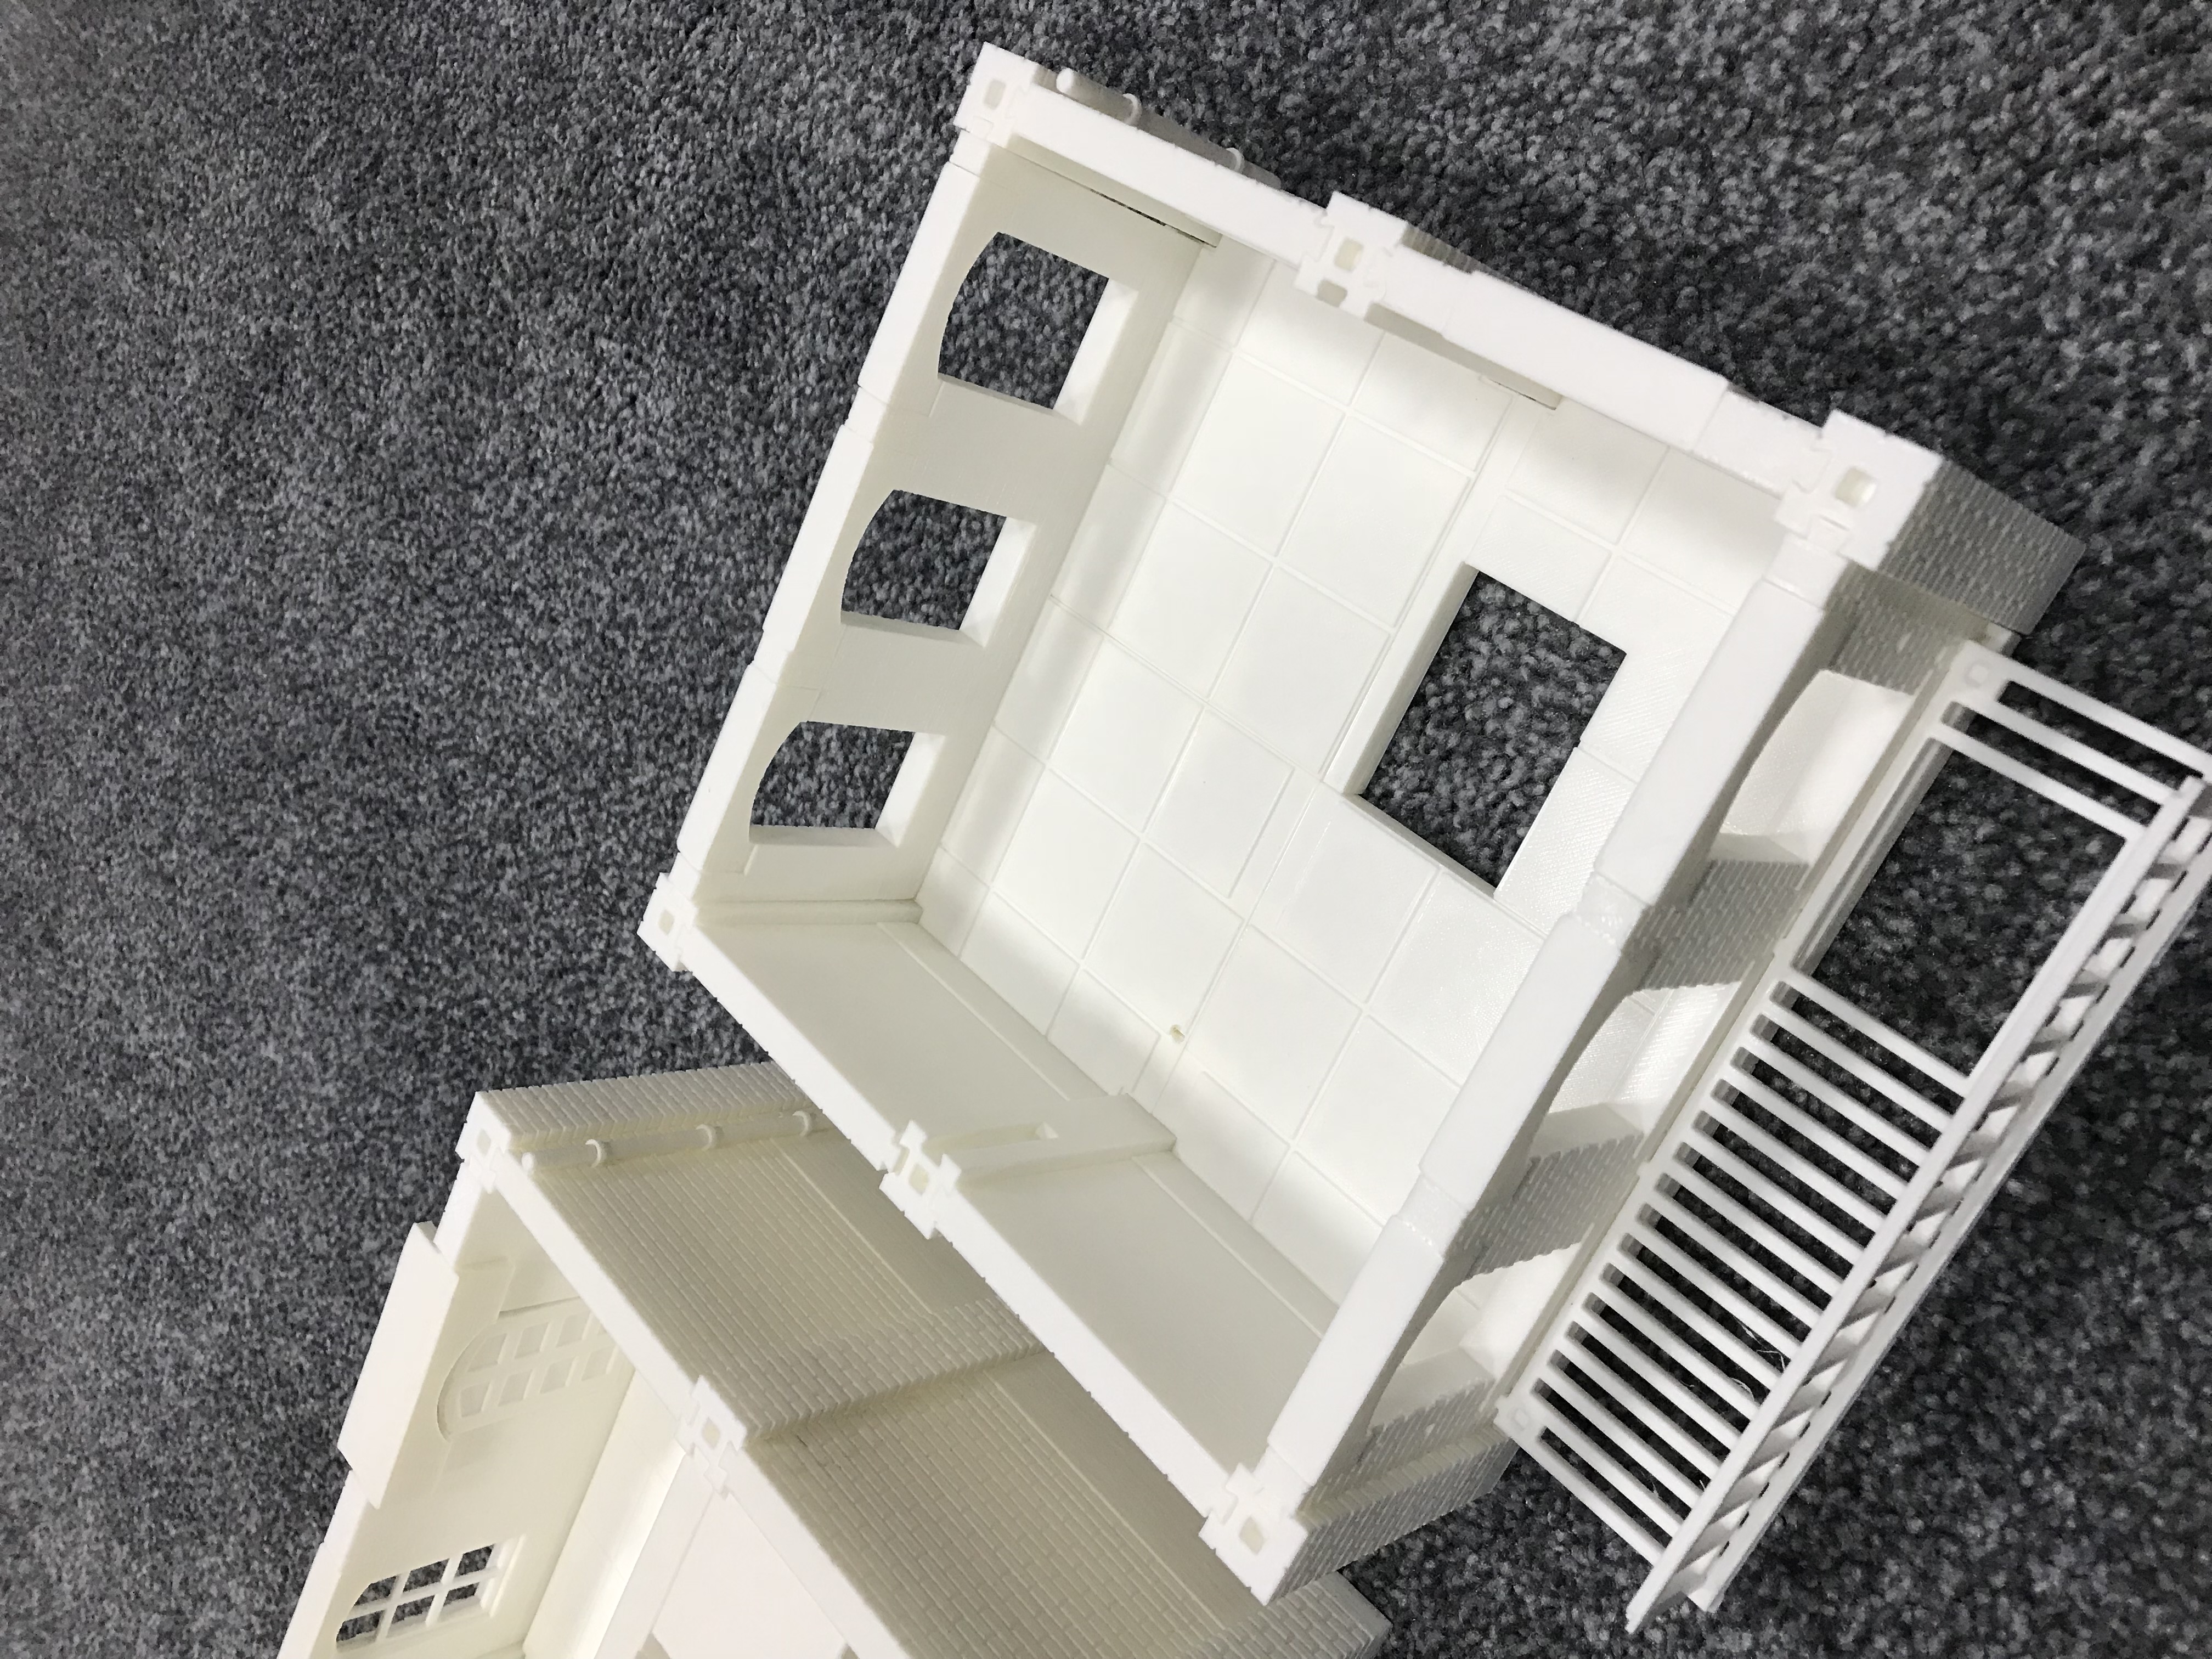
Days 8-12 Progress Report.
Ok after a log weekend I’ve almost got all the parts for Apartment 1 finished.
Unfortunately i have burnt my way through 2kg of filament and had to order more. I ordered more online with the shortest delivery time as every day with no printing counts. aster two days and no delivery i had to go to my back up plan that i didn’t really want to do, i had to go a different colour PLA Filament. i was hoping to keep the entire project in white filament to keep the risk of a slice colour change to a minimum when coming to paint. i had a roll of silver i hadn’t opened and as two days have past with no printing I’ve had to open it. i have decided to print the floors and stairs with it so no part of the main walls would be different and i can change the colour of floors as will without it looking to odd.
So back to a full Printing when i hope and once the white filament is here i can get back to printing more walls.
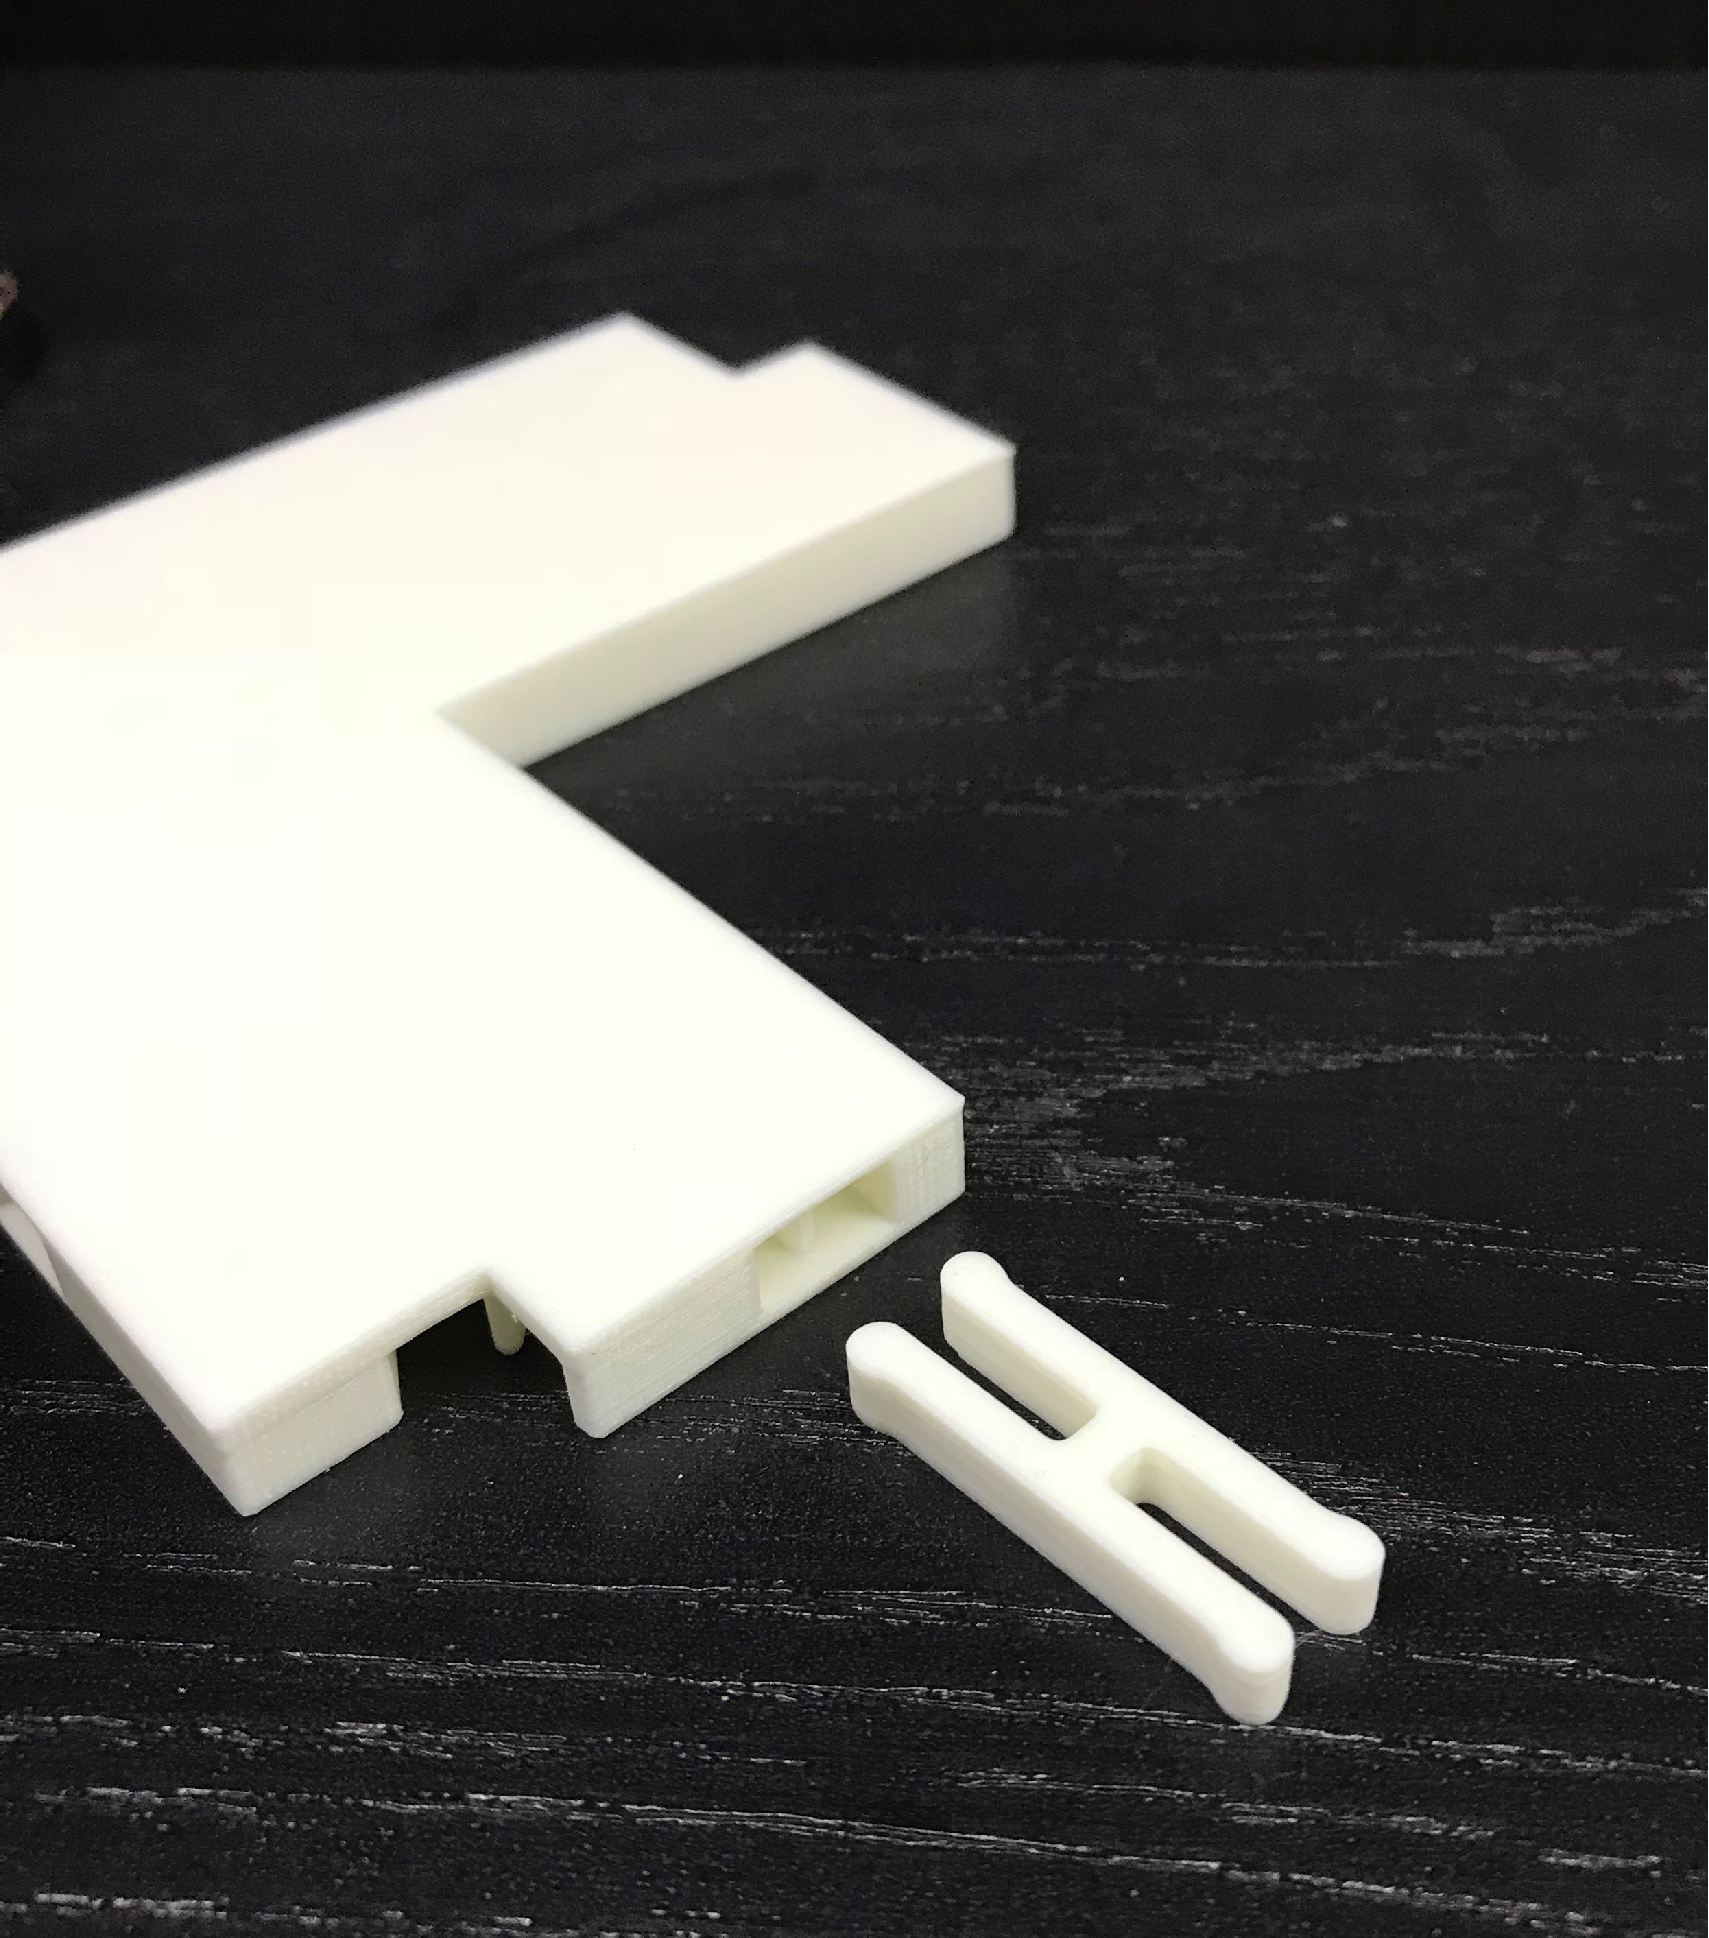
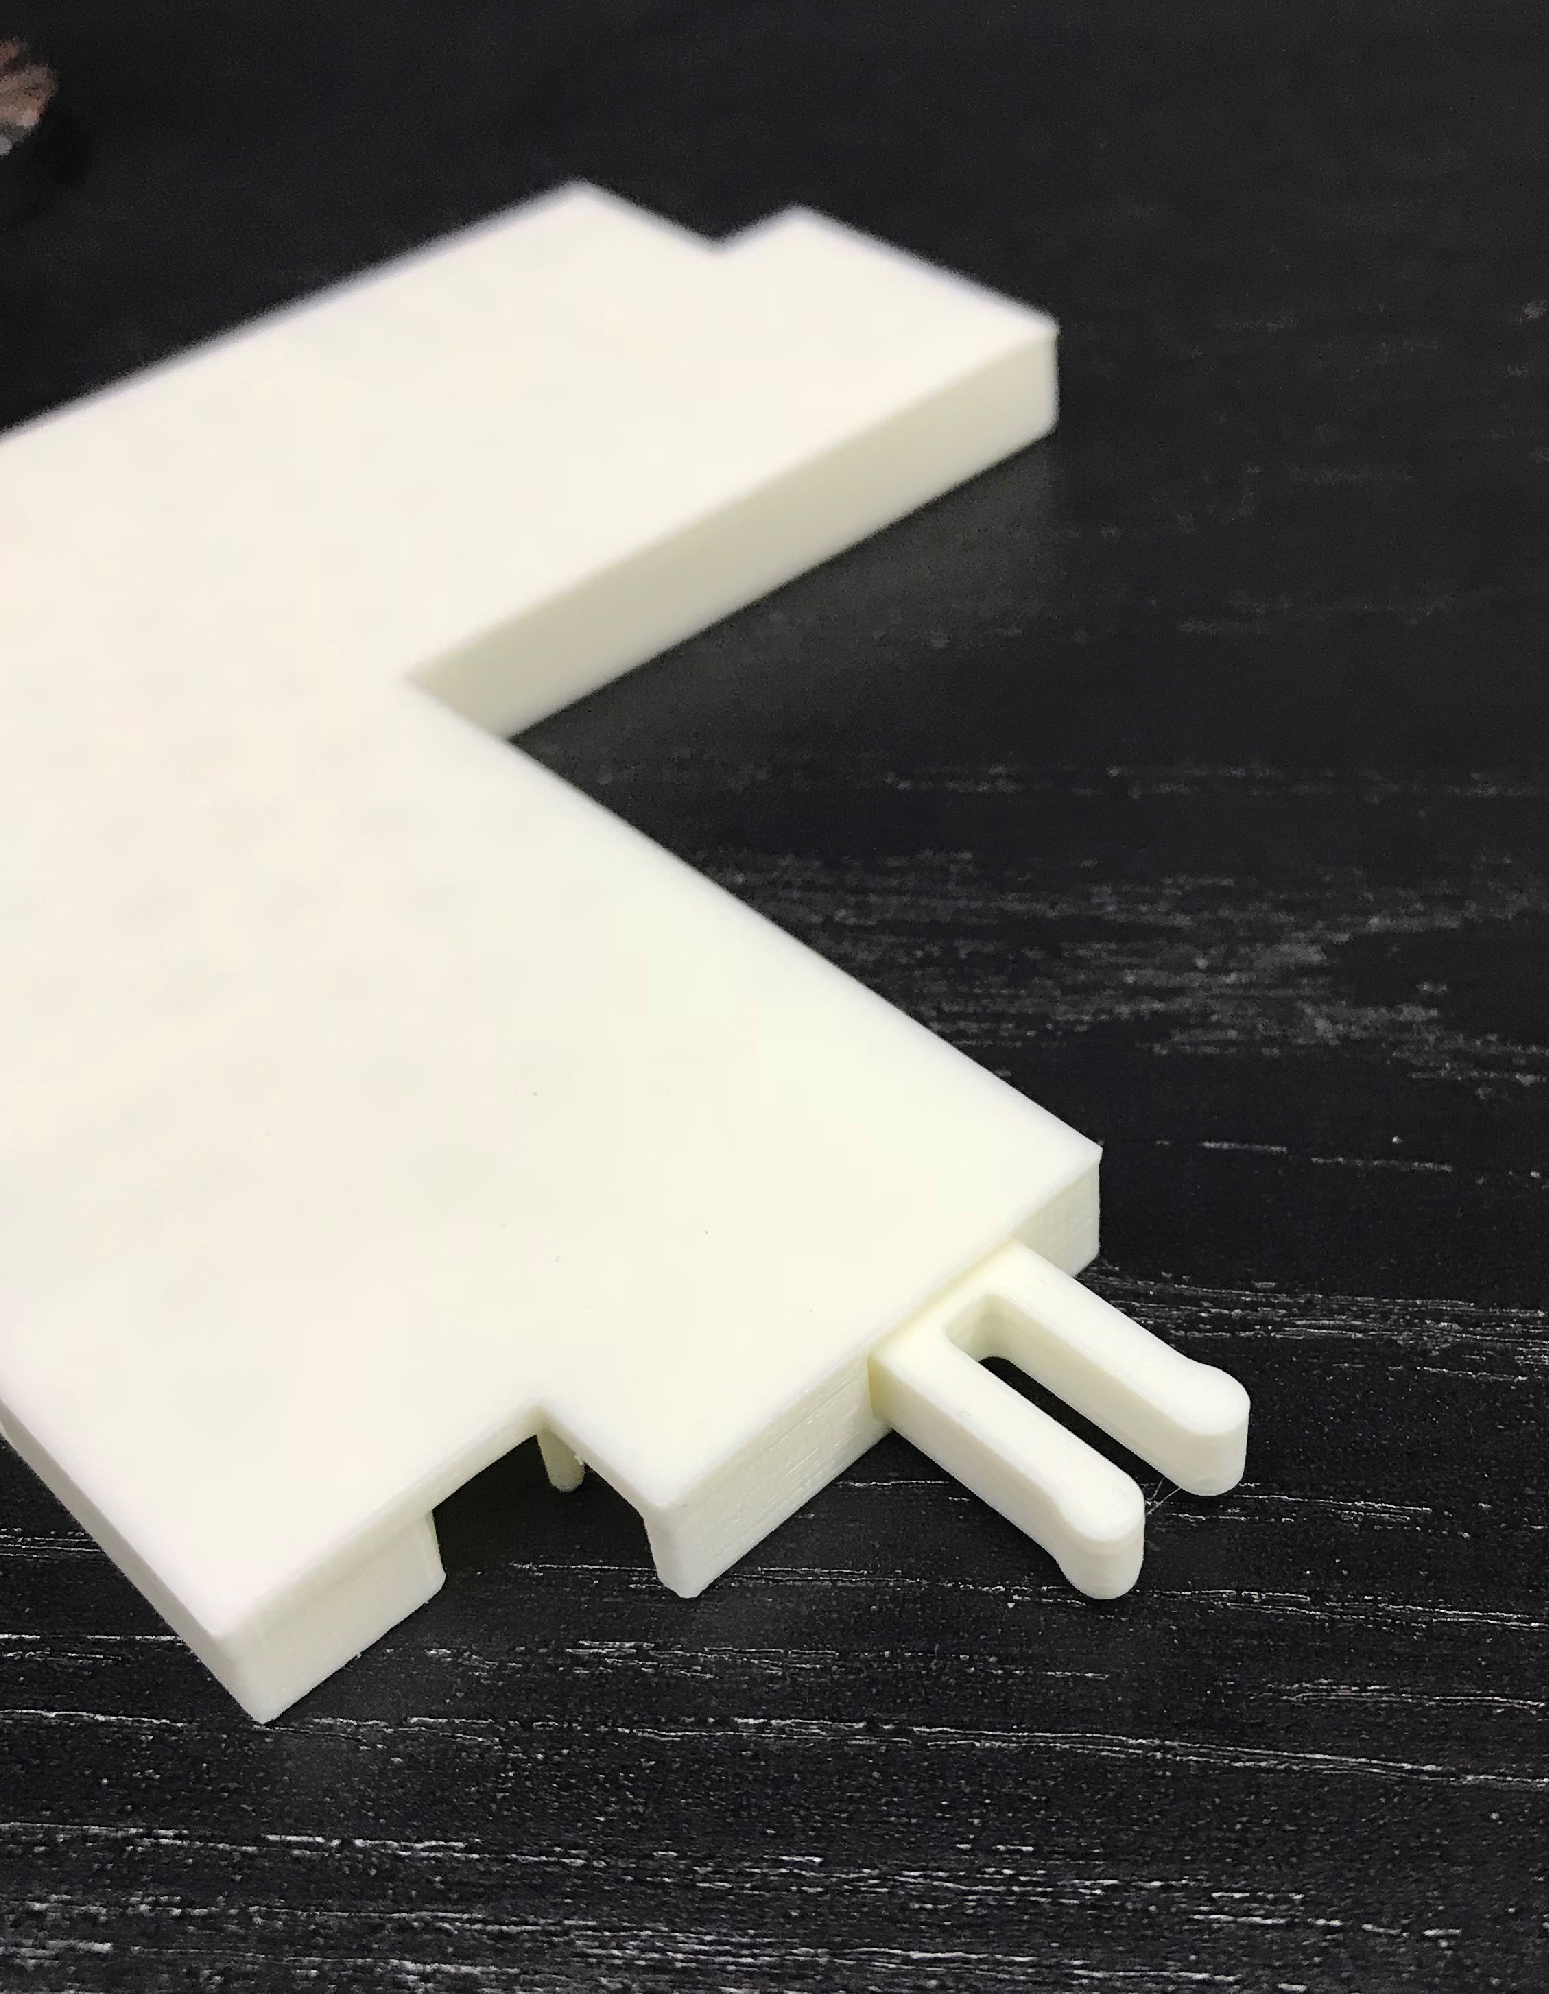
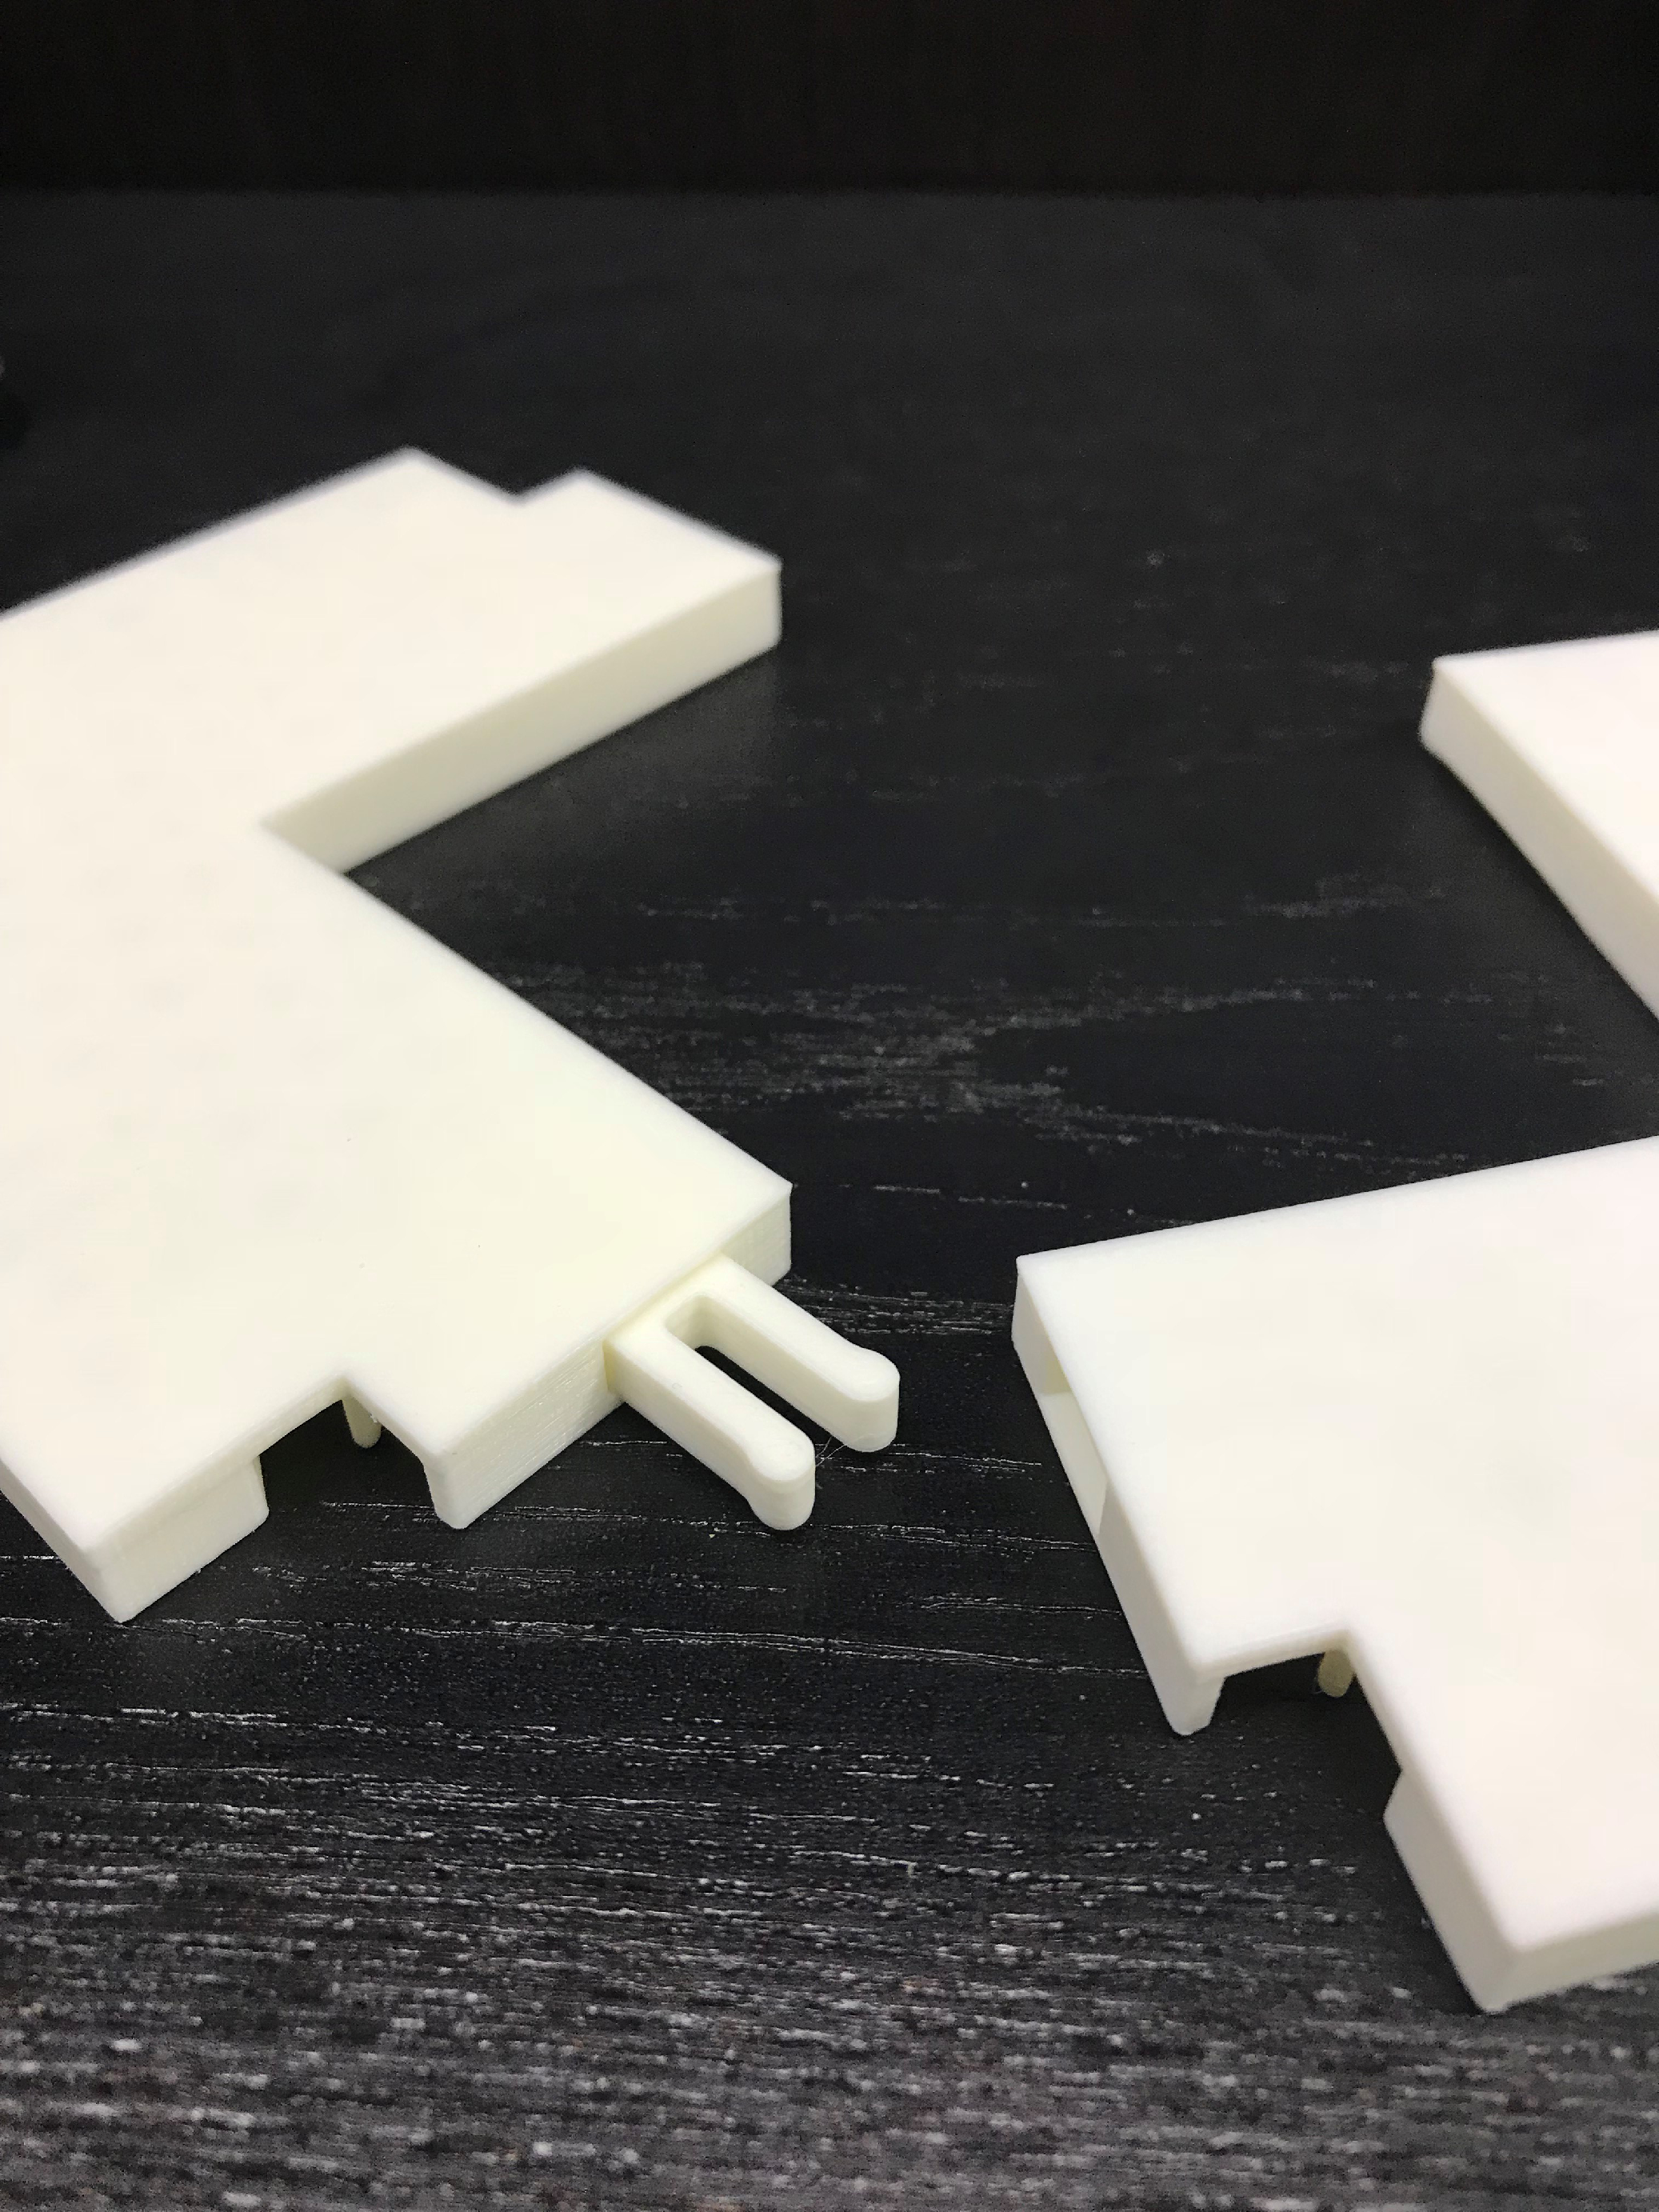
The Z1 clip system
I thought i should show the Z1 Design clip system used in my project as it is a key part that literally keeps it together. it is a simple and surpassingly strong fixing that also disconnects smoothly and cleanly. no surprise that i have had to print a lot of them, any time i have a spare hour i print another batch.


Adhesion is Key!
Adhesion is key to a good print. One thing i do every morning when setting up my printer to run for the day is watch the entire first layer being printed. yes this can take some time and can be a bour but it guarantees i can go away knowing that the adhesion of the first layer is good and i can come home to a good print and not a mess and a waist of filament.
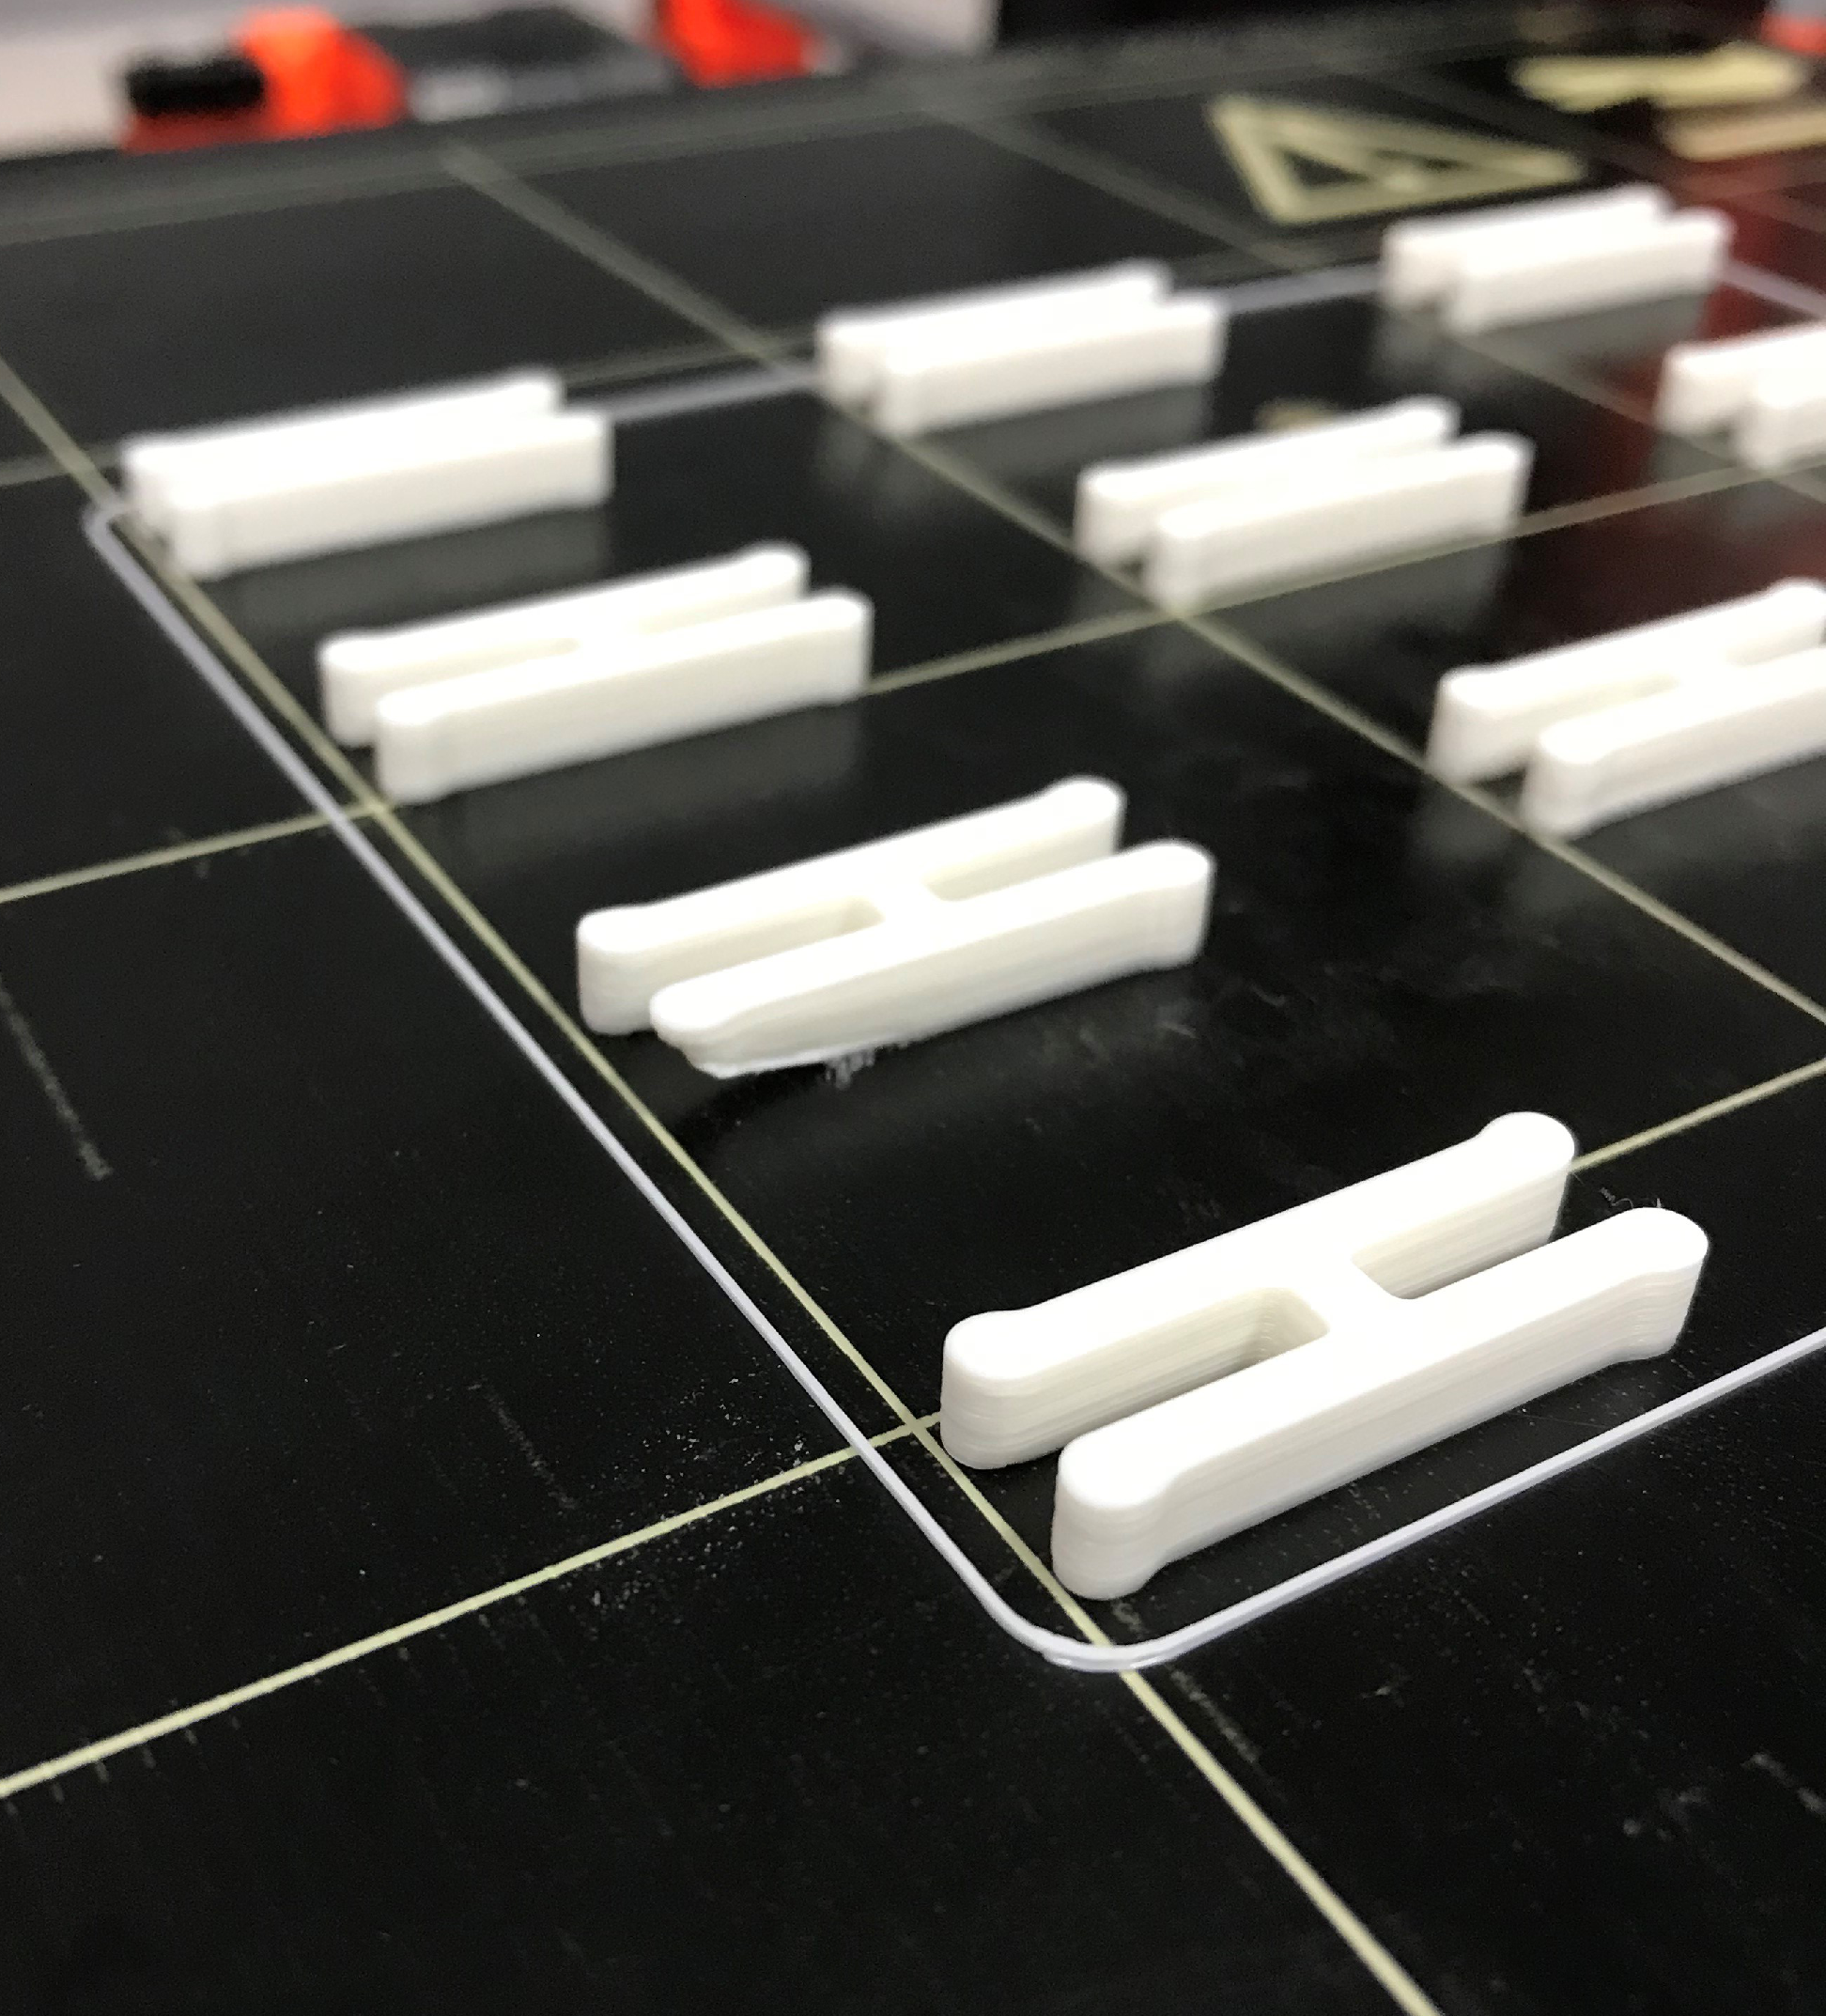
Sometimes if a small area doesn’t stick to the bed perfect it can lift and effect the final print.
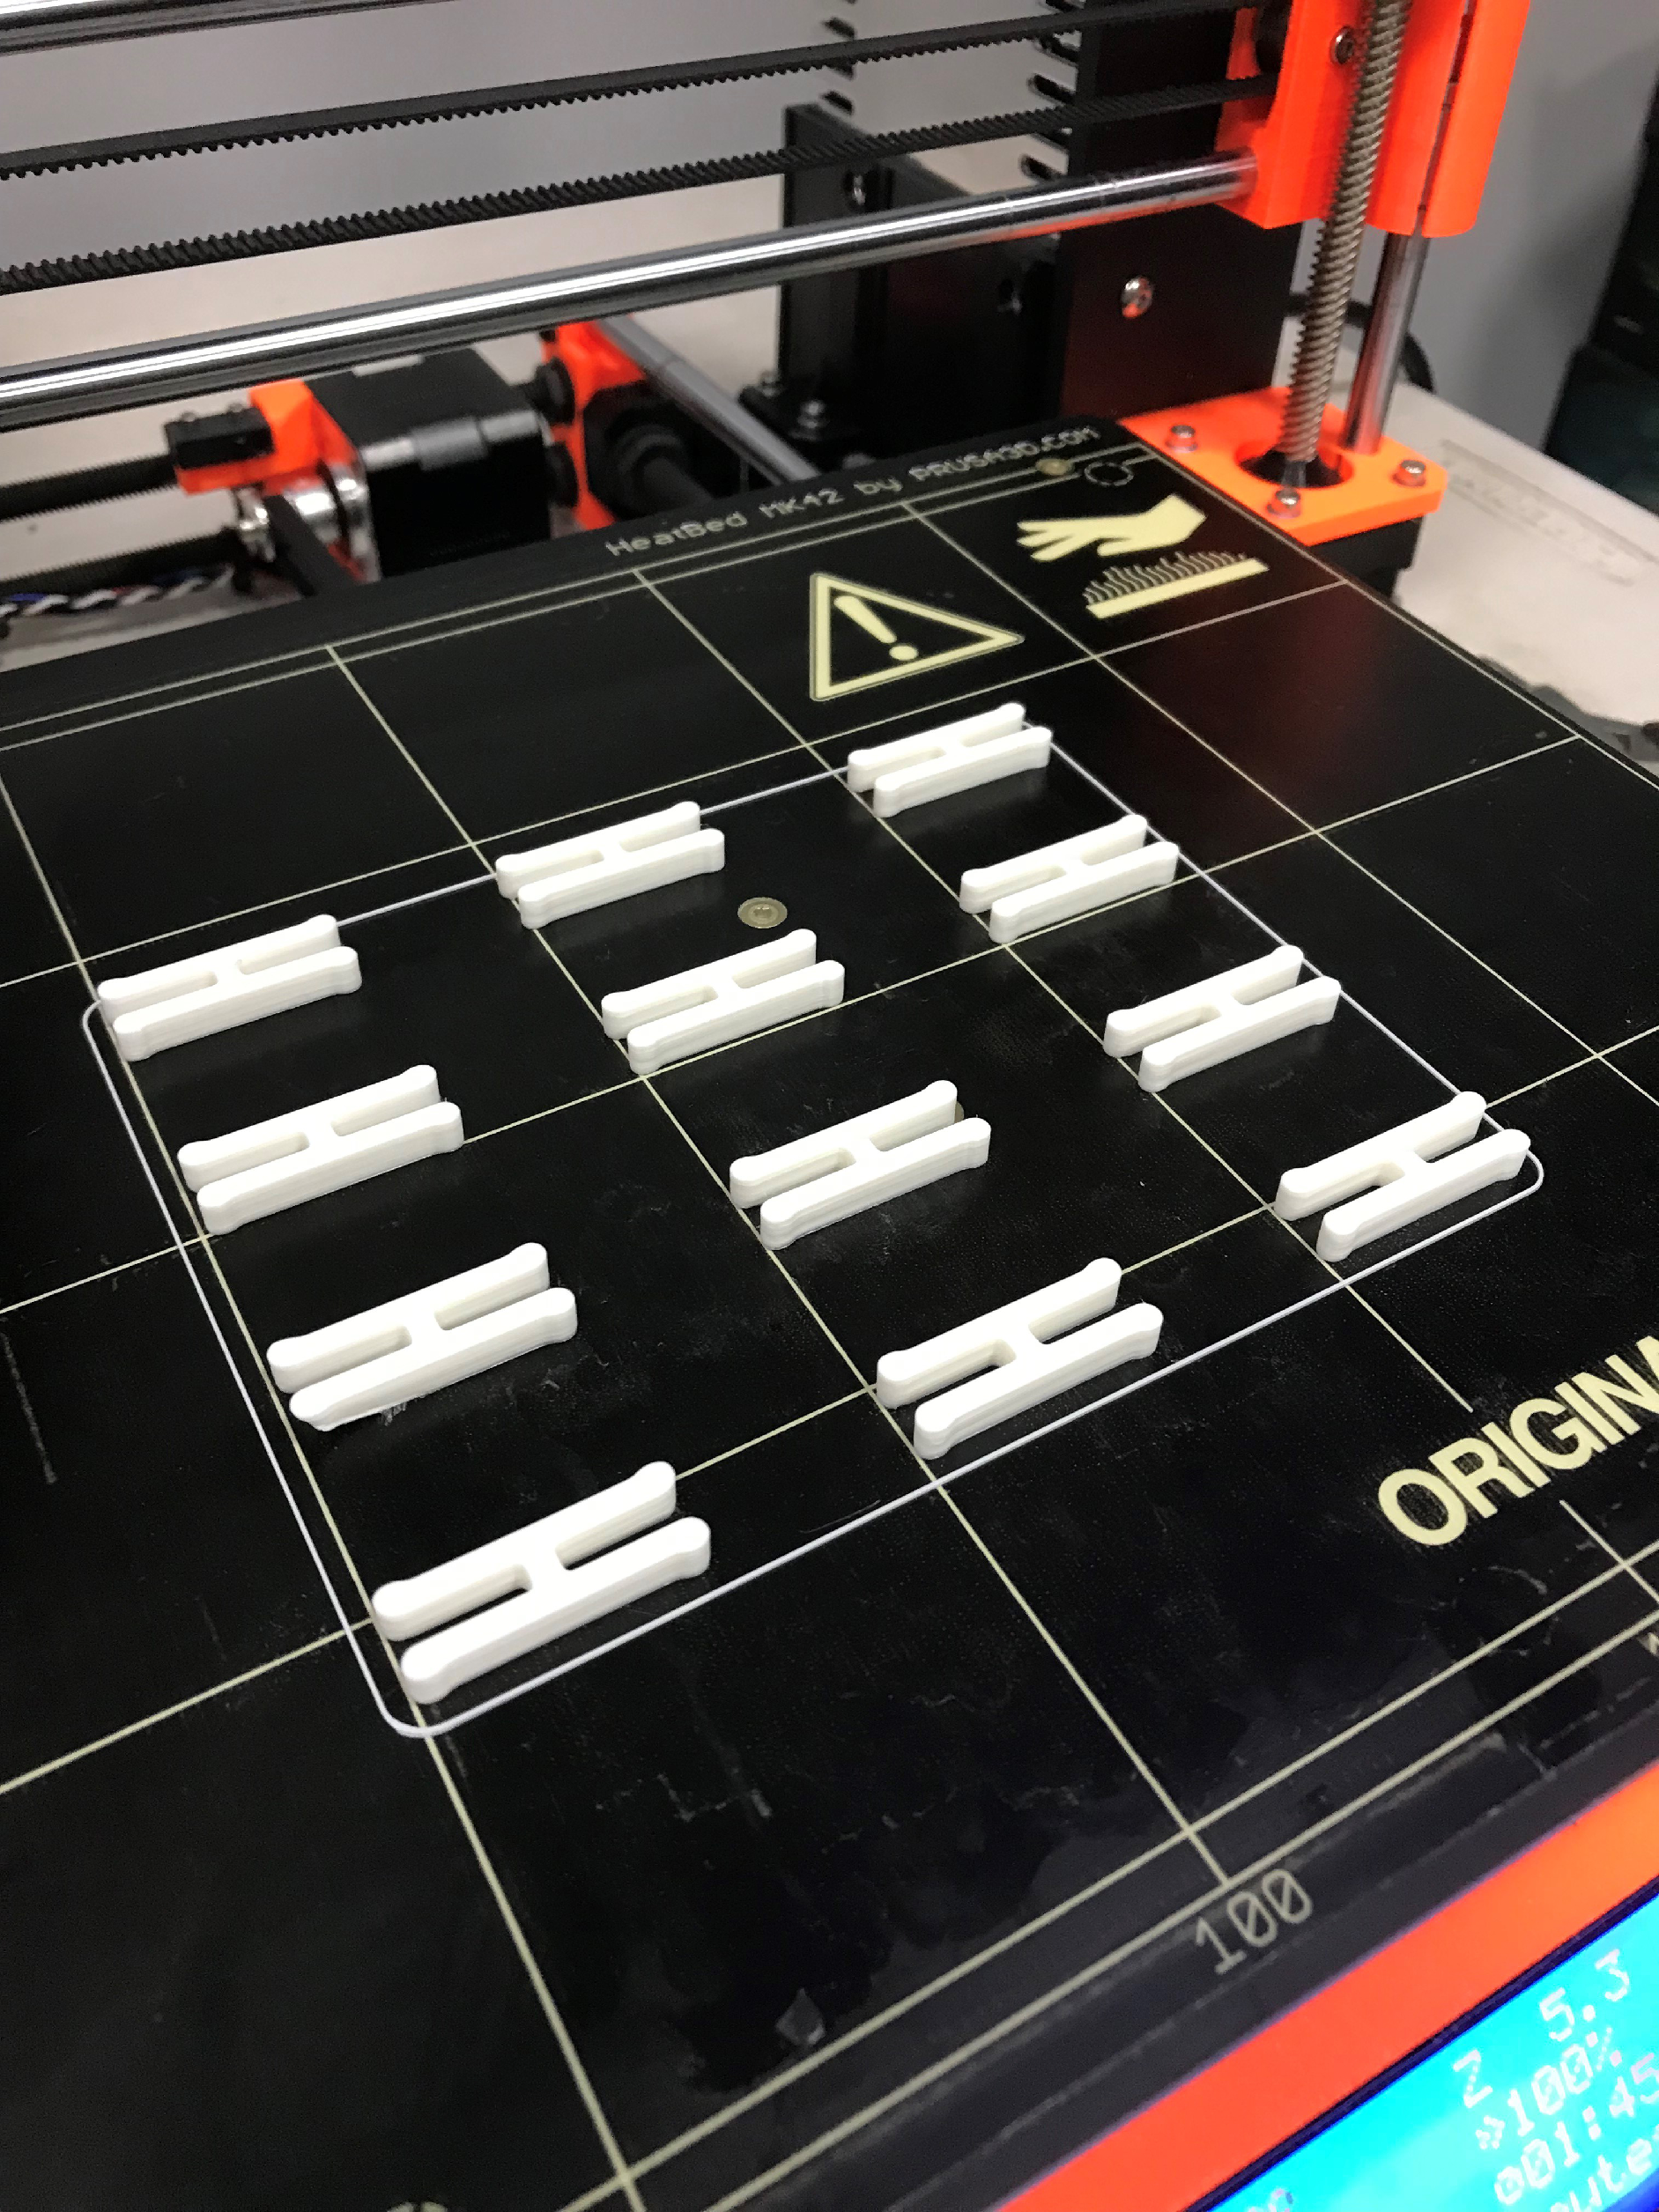
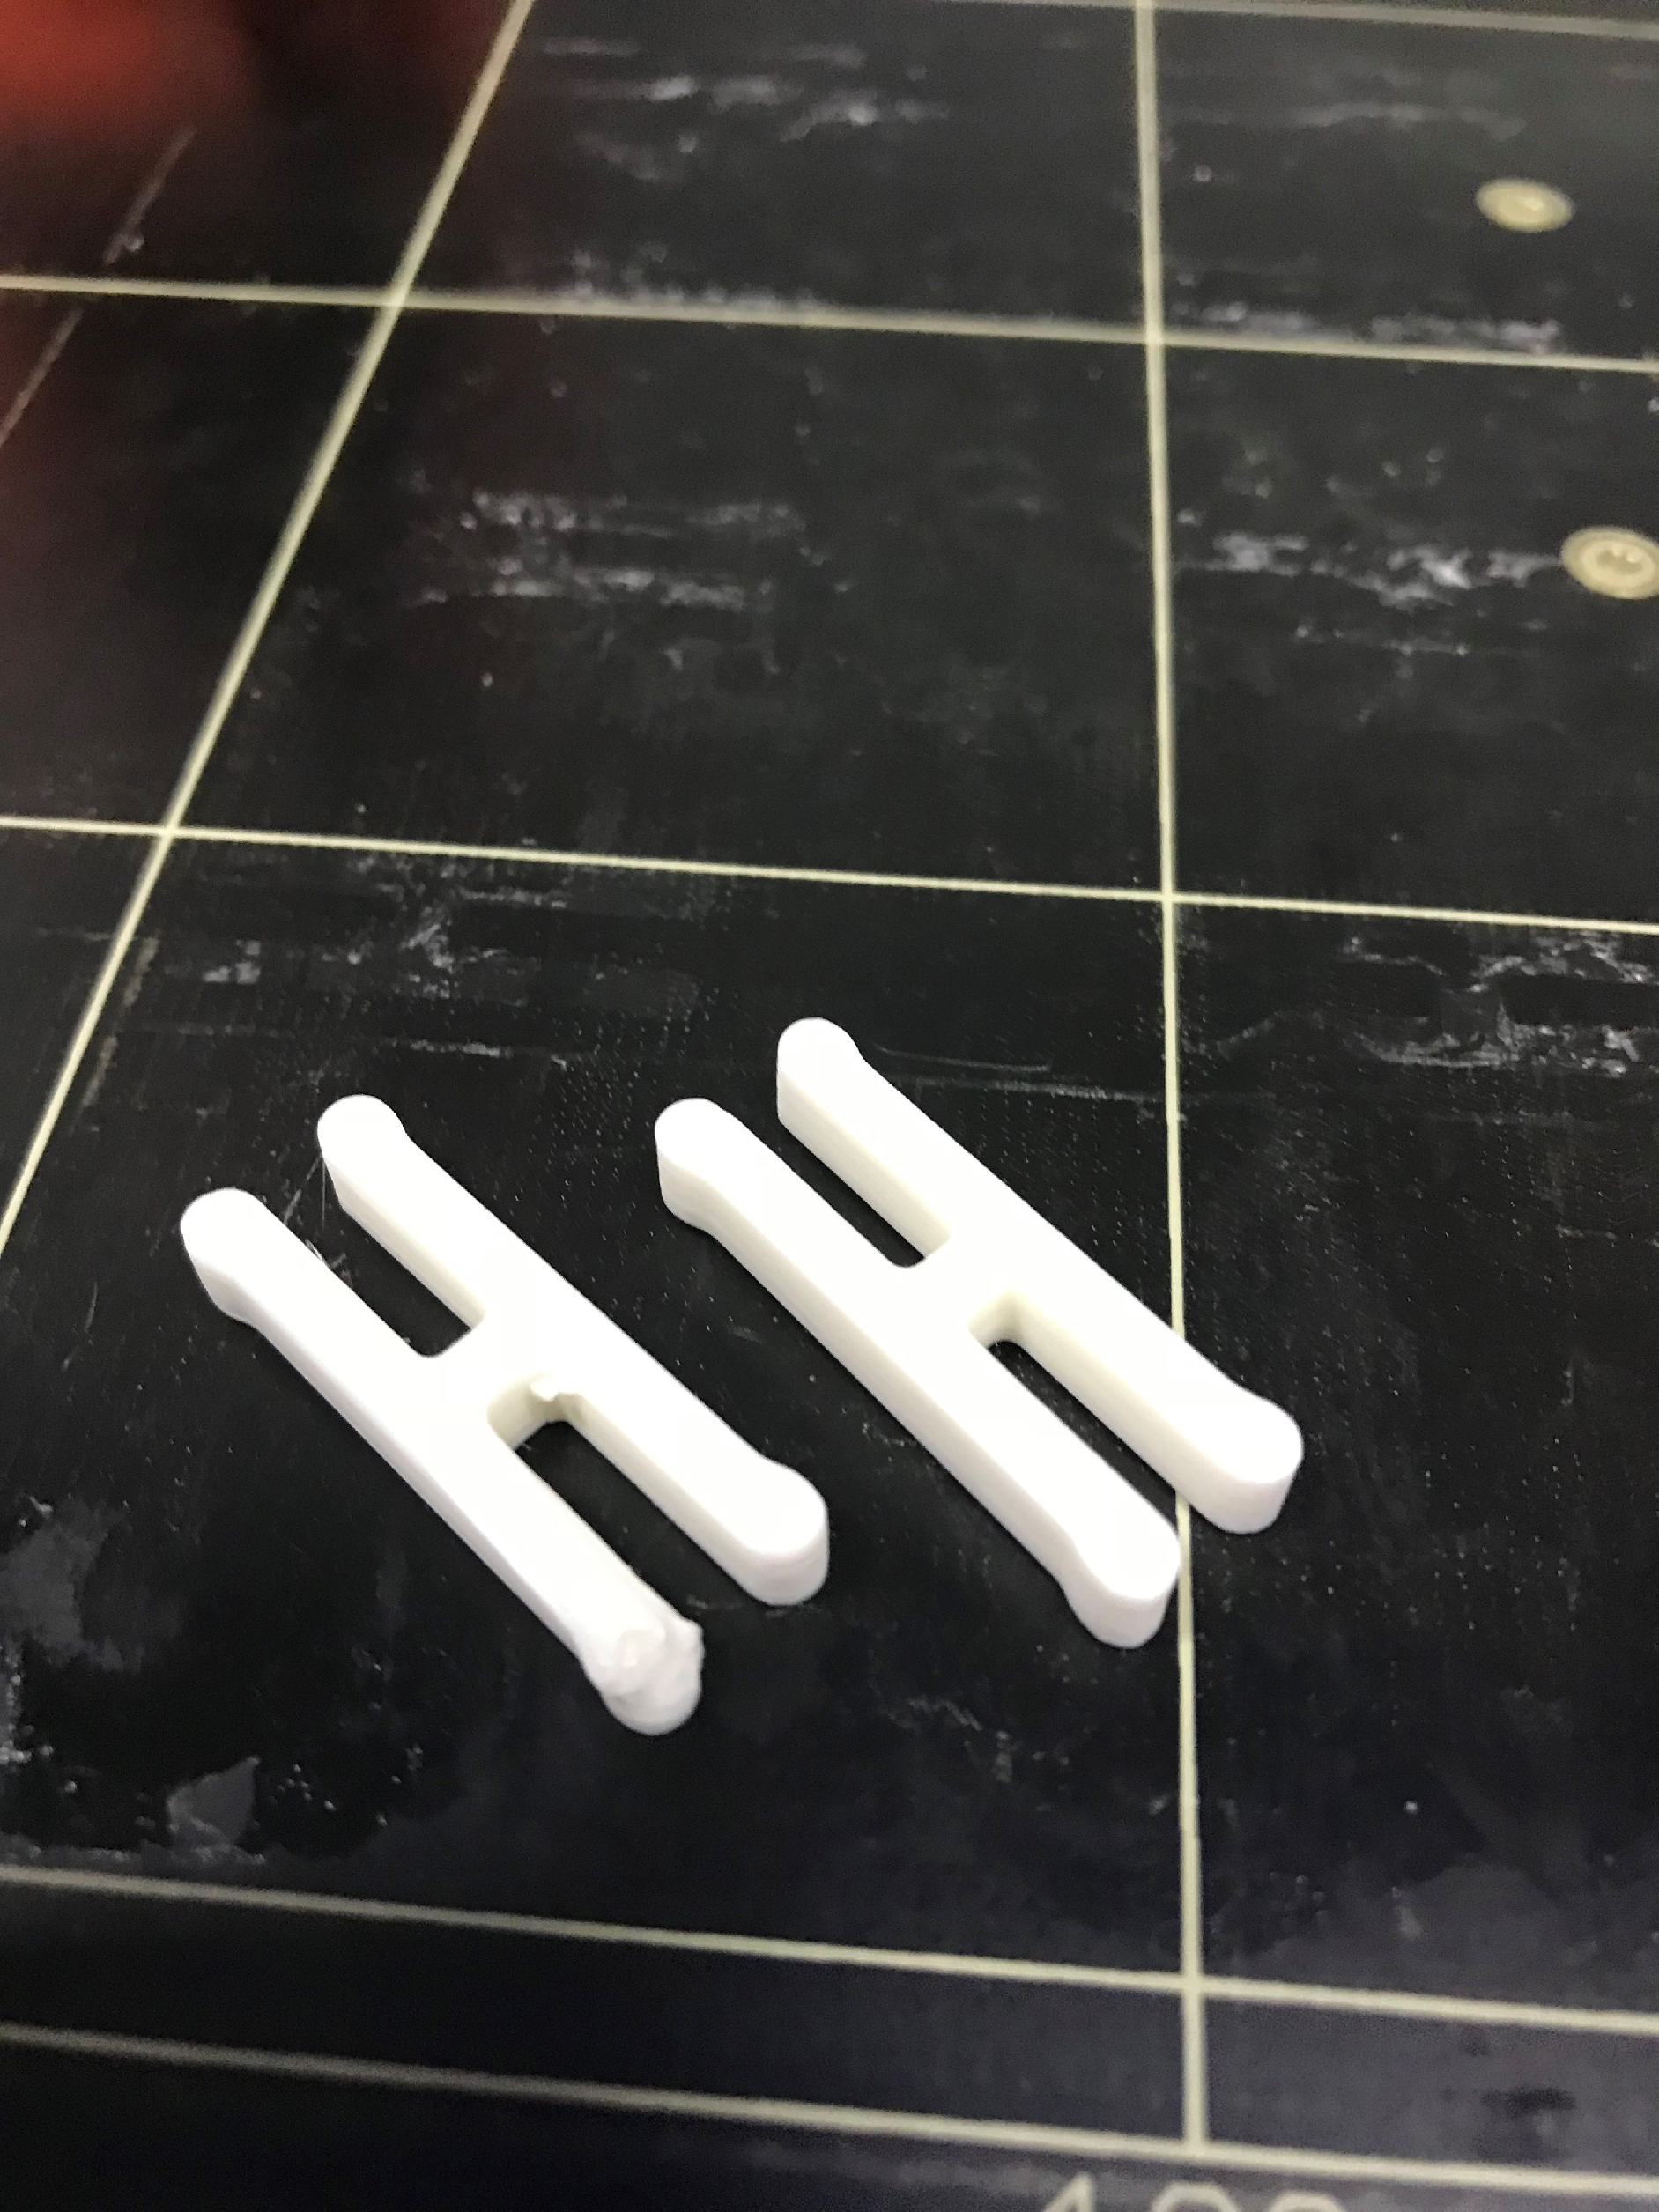
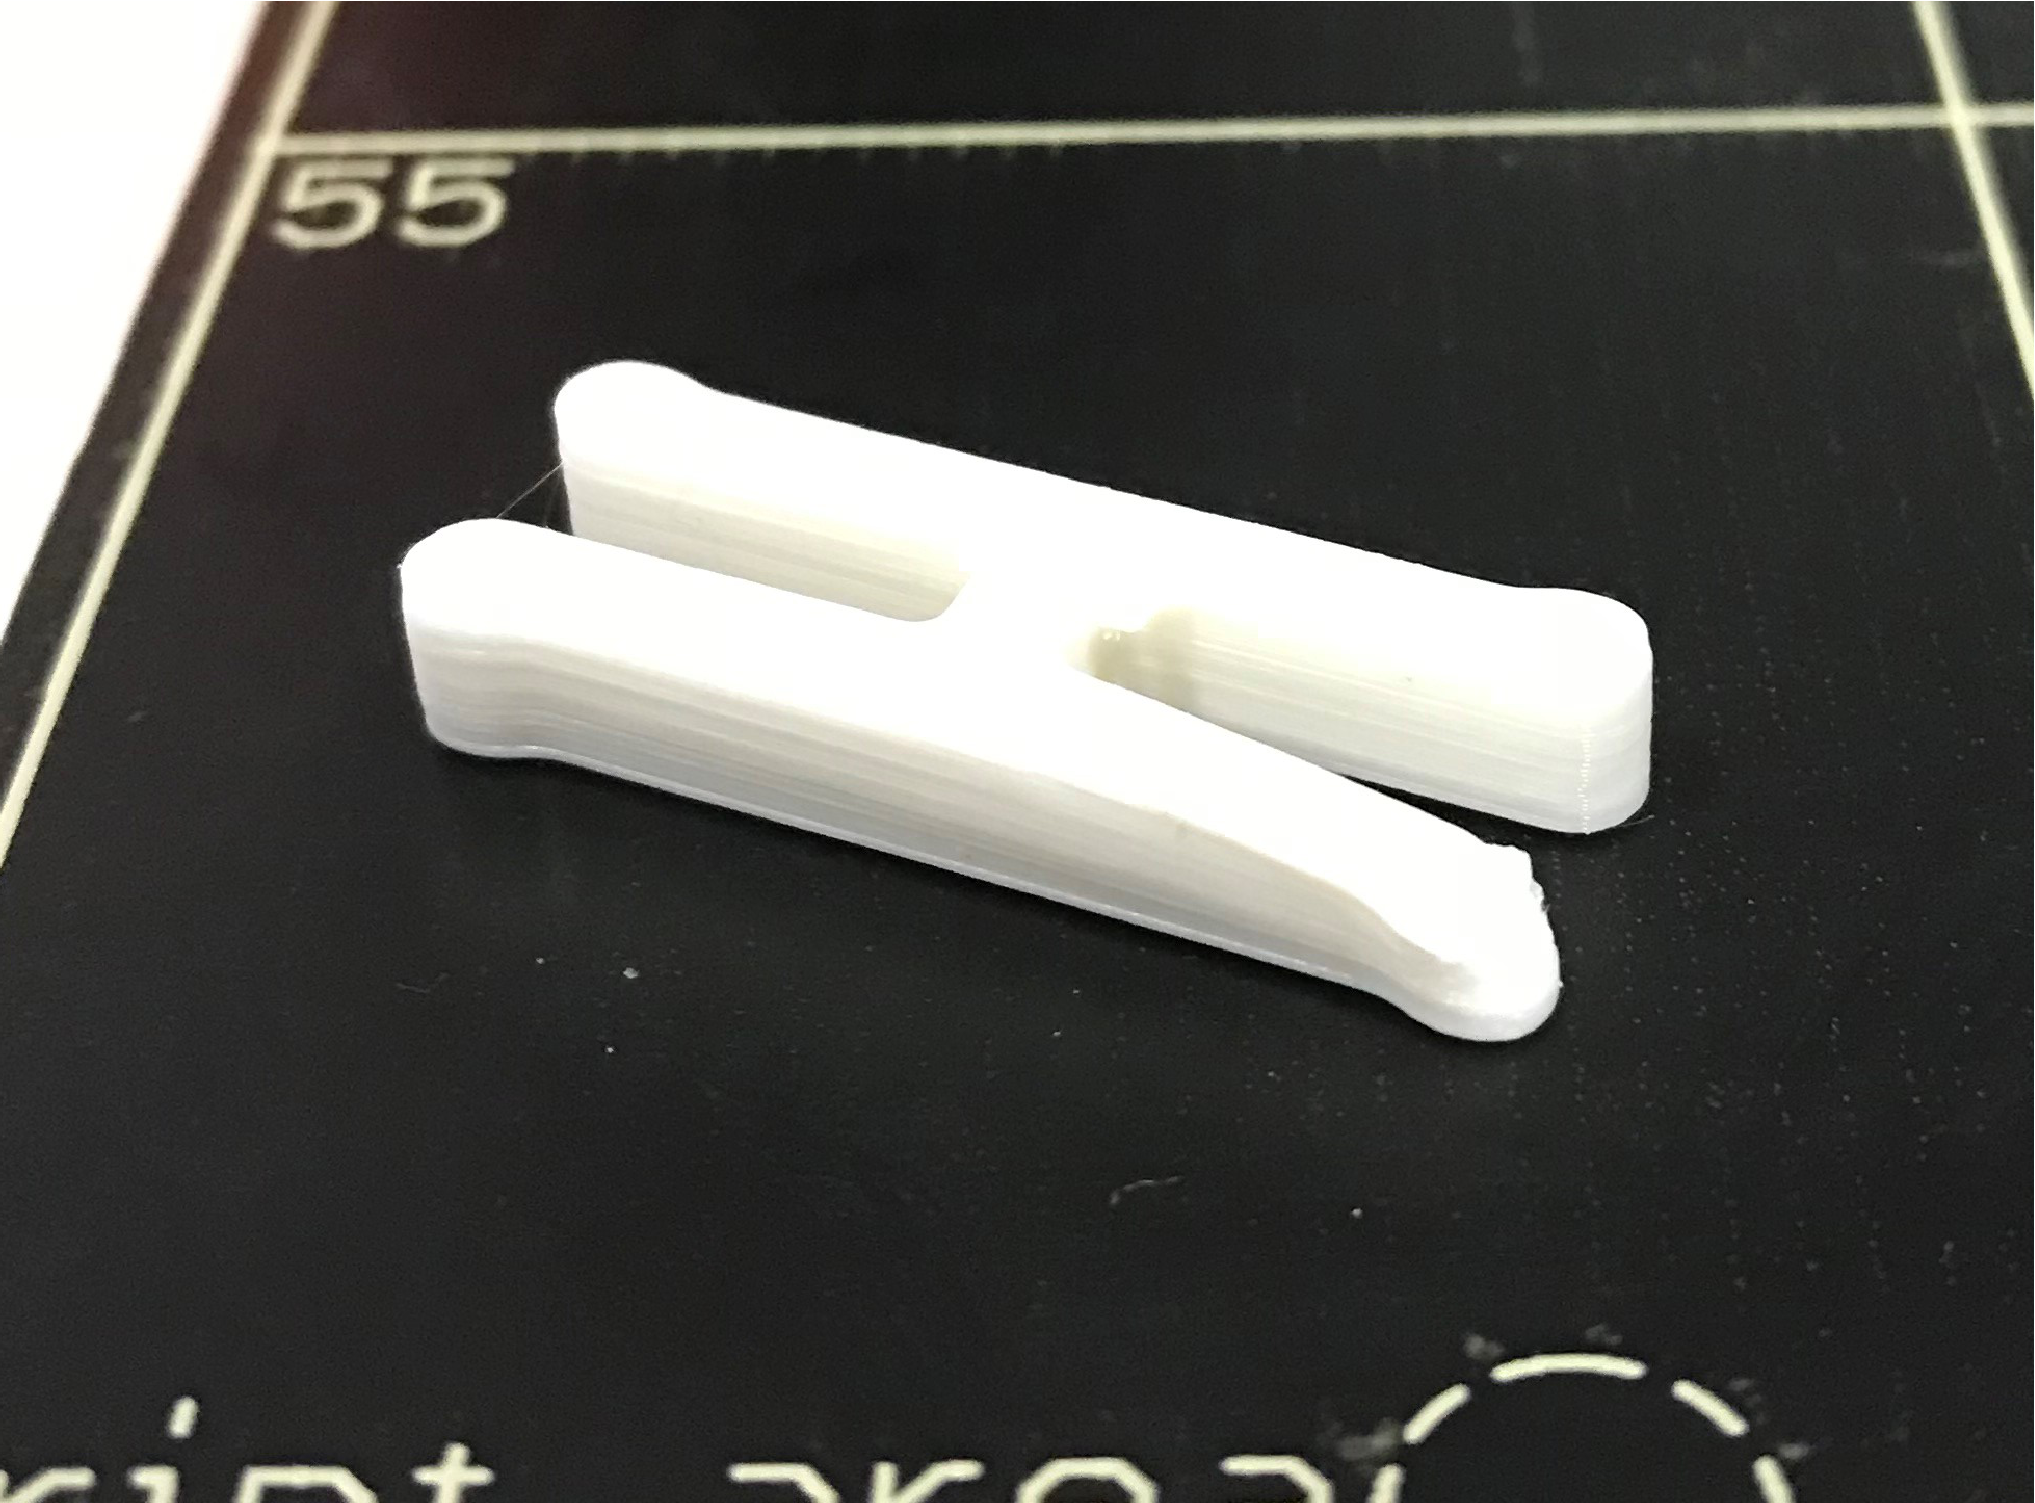
In some cases where the component is unseen like a sport or in this case a clip it being misshapen is ant an issue as it wont be seen but to avoid this happening i use a heat head adhesive and for the first layer slow the print bed speed to 50% so the filament has more time to bond with the bed and not just be pulled about.
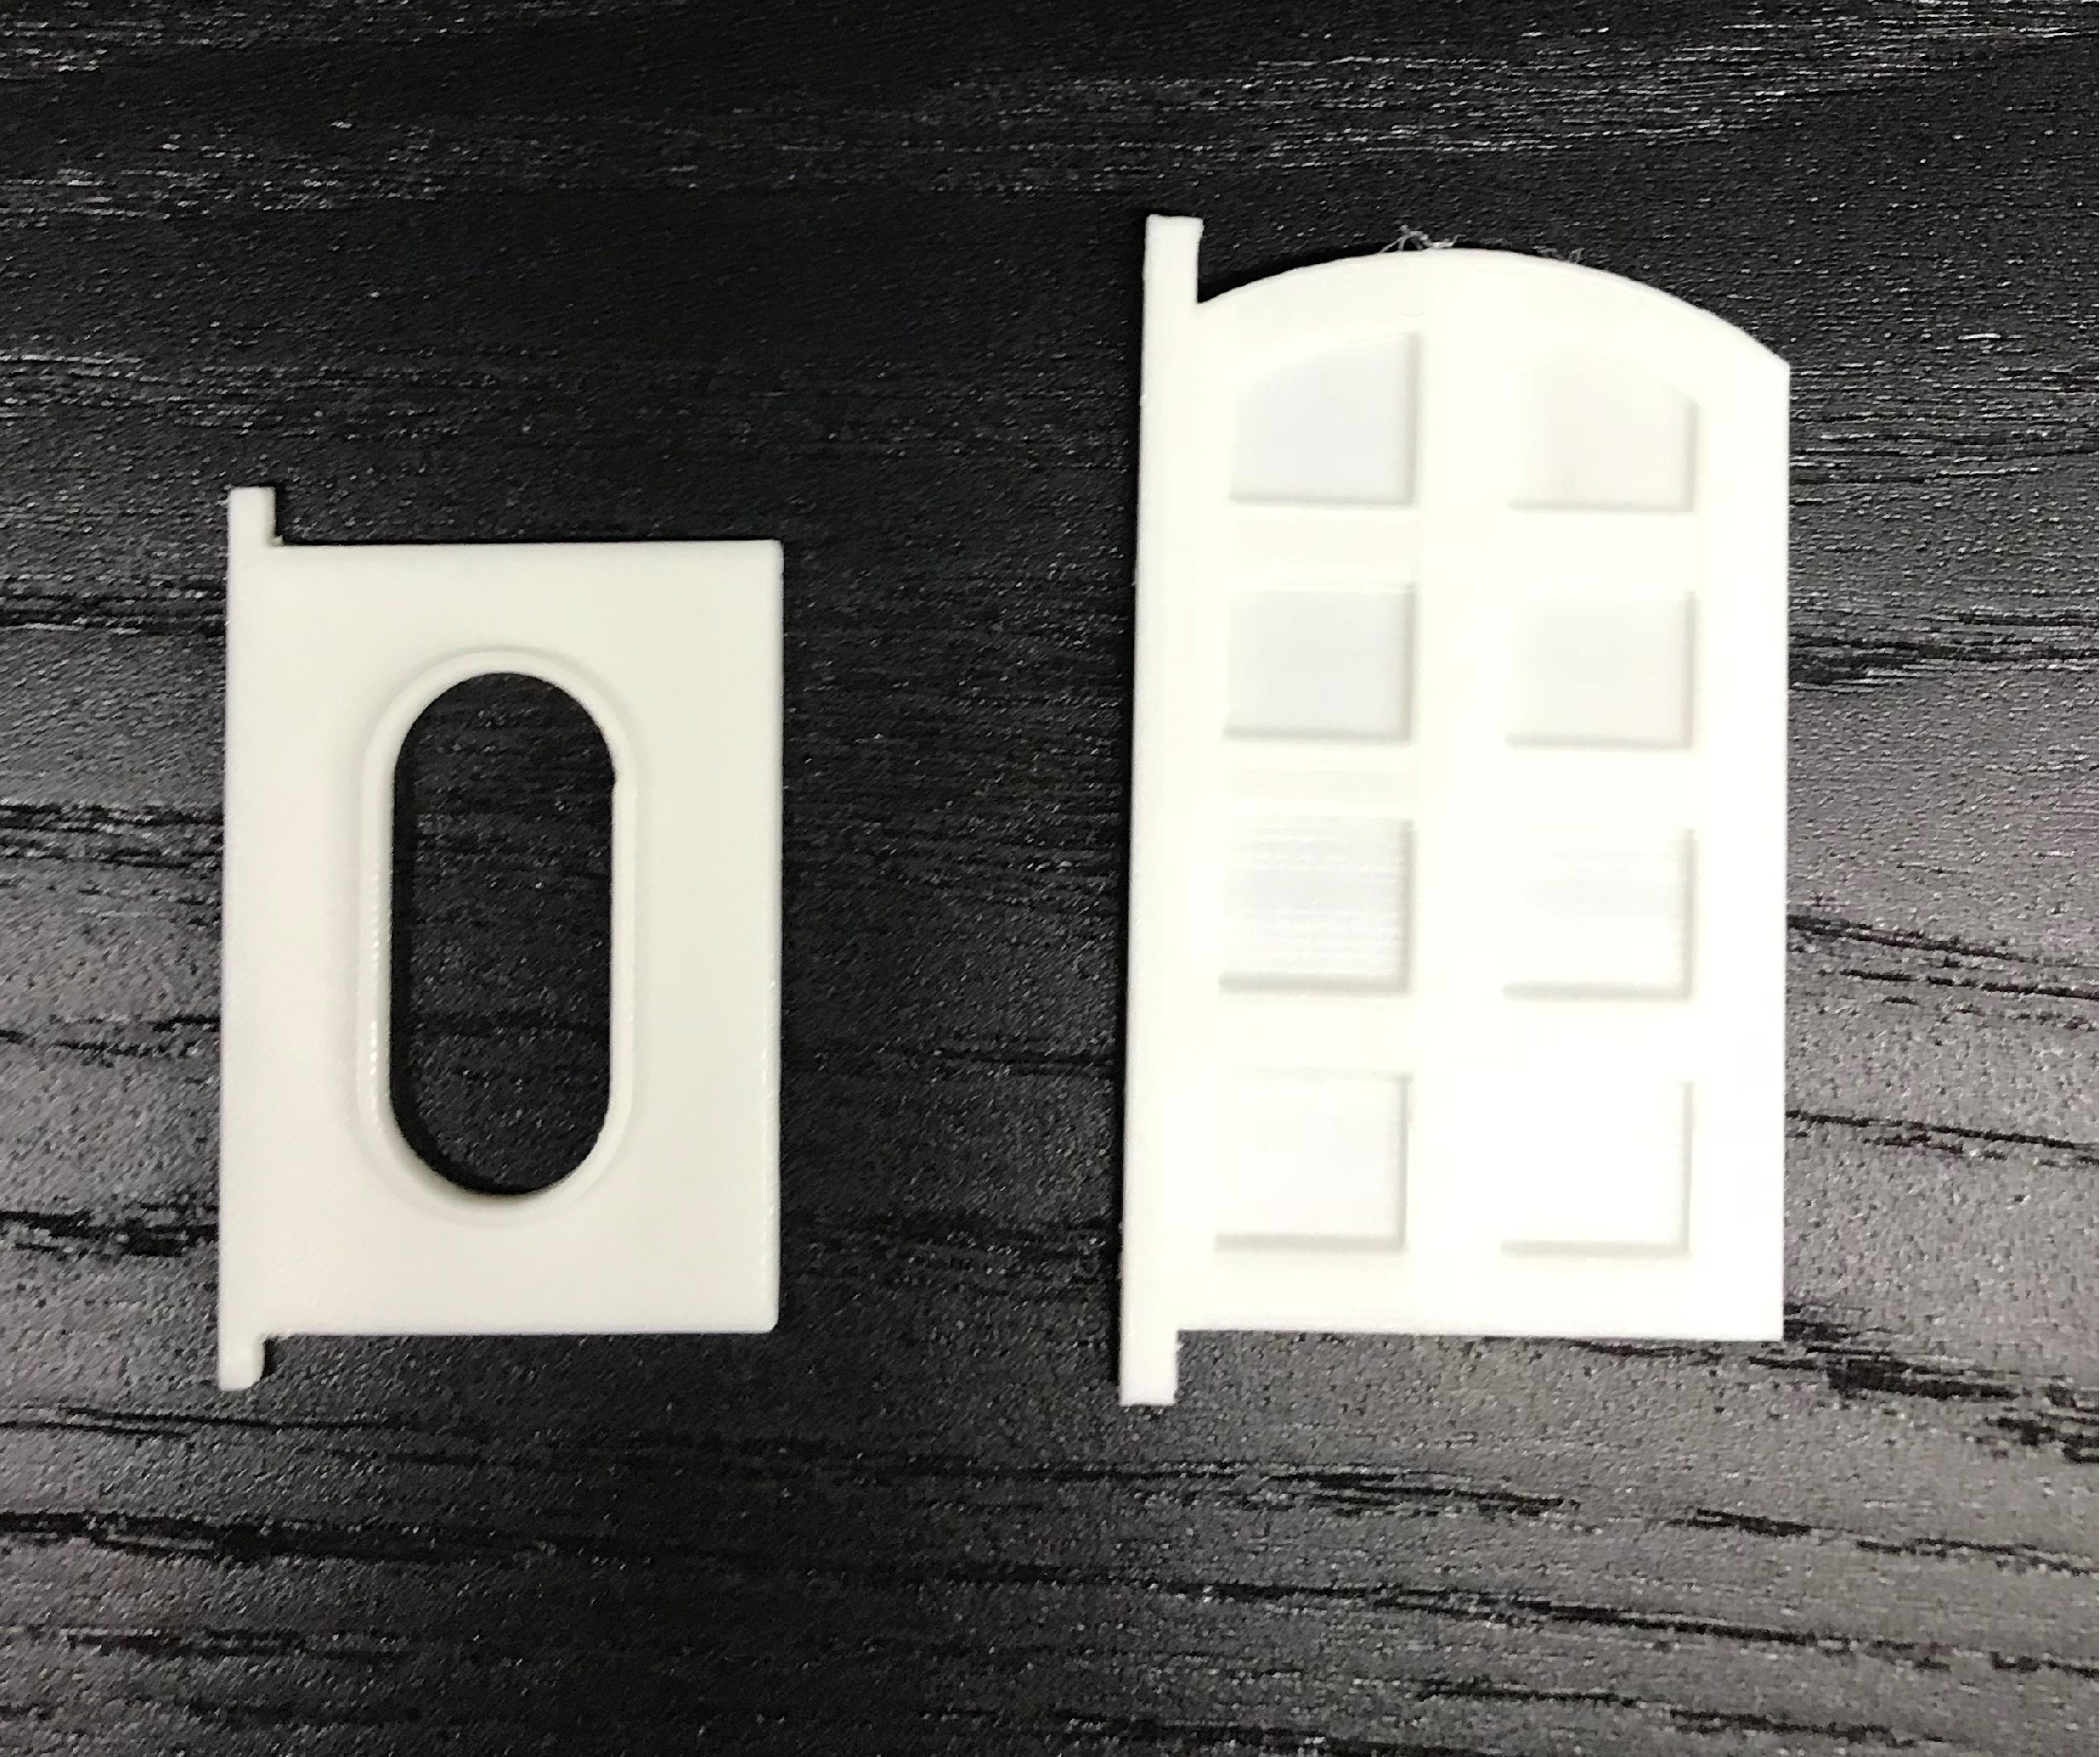
Scale or not to Scale...
During my first test prints i found that the 28mm scale of the building print files were just not big enough to give the accessibility for the playability that i want with this terrain. as the games are more like a 32mm scale or heroic scale i felt it was needed to increase the scale size to accommodate this.
I increased the file sizes by 25%. this gave a grander feel to the scale and gave the room to play inside the buildings without making them feel unplayable.
I have shown below the size difference between 100% print of the files and 125% of the print file and how they still look the part with the miniatures.

The STL Files...
Wanted to talk about the files I’m using to print and some of matireals I’m useing to create my buildings.
As i have said in a later post I’m using the Appartmant building files from Z1 Designs Precinct 187 Kickstarter range that i backed in 2016.
The files consist of individual parts such as floor tiles, wall tiles and pilers that have a simple clip together and fit very well without could almost say the hole think can be push fit.
Im using PLA filament to build the project, easy to use and produces more detail than ABS. I wanted to use white filament as i think it will take the primer better as well as this i want to try to avoid using a range of colour fillaments so when primed for example on to white and black plastic there wont be a colour different to the parts once primed.
I also intend to use other STL Files that i have collected form other Kickstarters but ill talk more about that when i get to the stage of printing them.
One more thing worth mentioning is the software I’m using to set up the STL Files for my Prusa i3 MK2s. I’m currently using Cura as it gives a full range of features to help the print to come out the best it can first time. Other software i have used is Prusa Control made specially for the Prusa prints, its good for a beginner to print there first prints but when you move to fill a print bed so you can live it all day you need a more in depth bit of softwear like Cura or Slic3r.
Hope to keep you all up to date on my progress in using the printer and softwear and any issues i may encounter.
what i have Printed in the last 7 days!
When i get up i set up Barry (my 3D Printer) so he can work as had as i am during the day. when i come home i find he has made me lovely things.
In the last 7 days I’ve manage to be able to print the ground floor and first floor of the first apartment building.

Hoping to get my camera out to get better pics that my phone.
hope to keep this space updated as much as i can.


![Games Workshop Kick Off Grot Week For Warhammer 40,000 [Updated]](https://images.beastsofwar.com/2026/04/grot-new-40k-news-cover-600-338.jpg)