


The Millennium Falcon


Recommendations: 276
About the Project
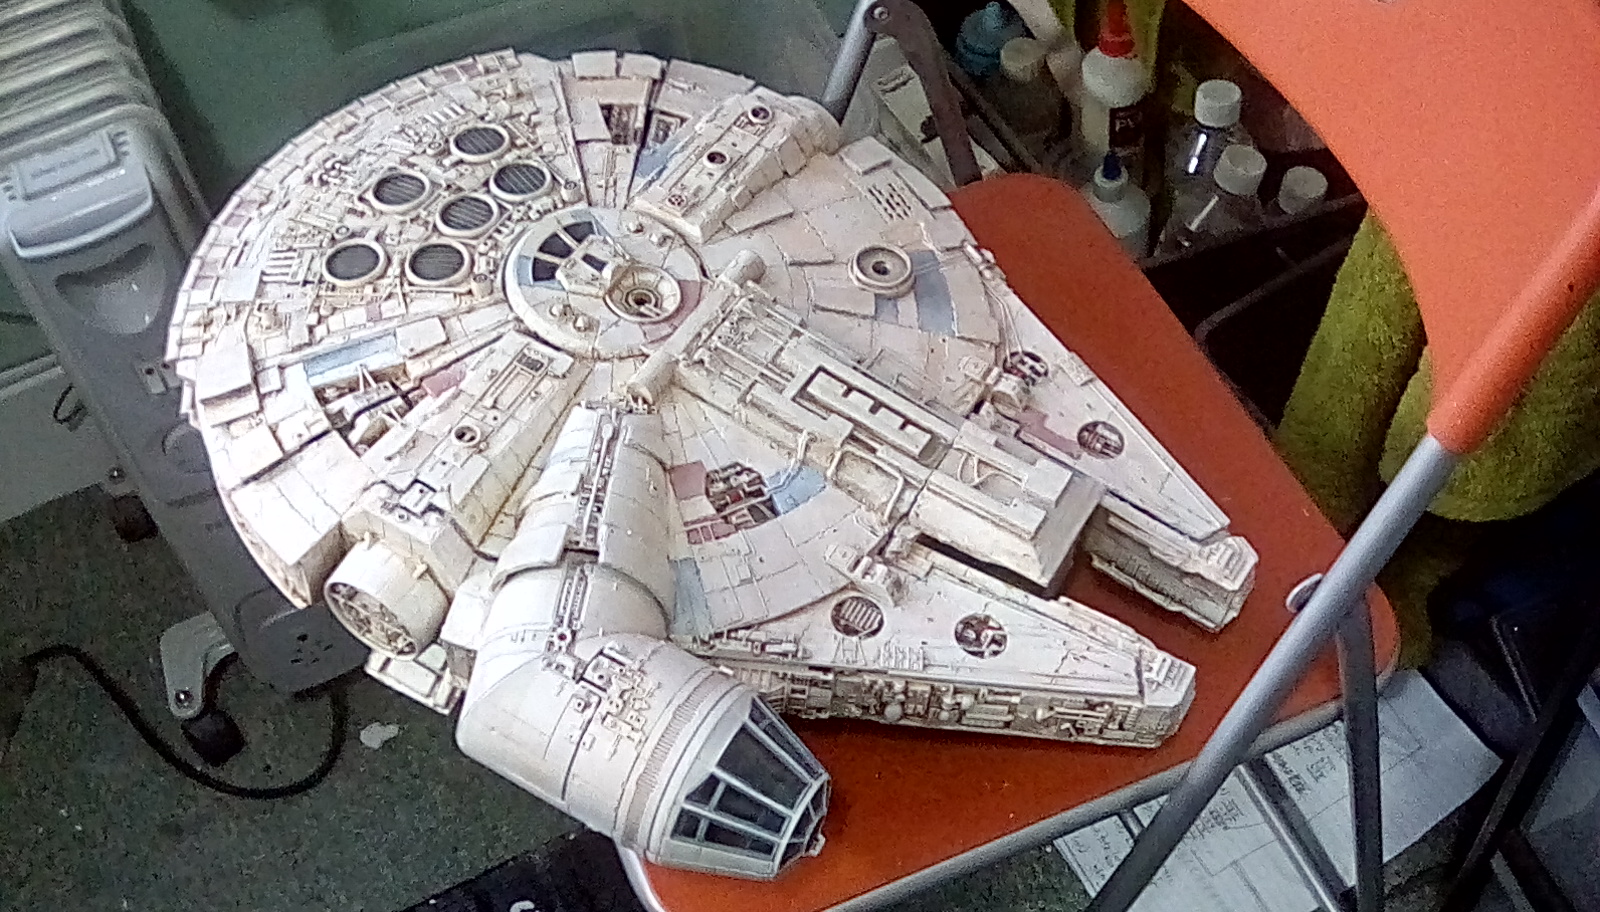
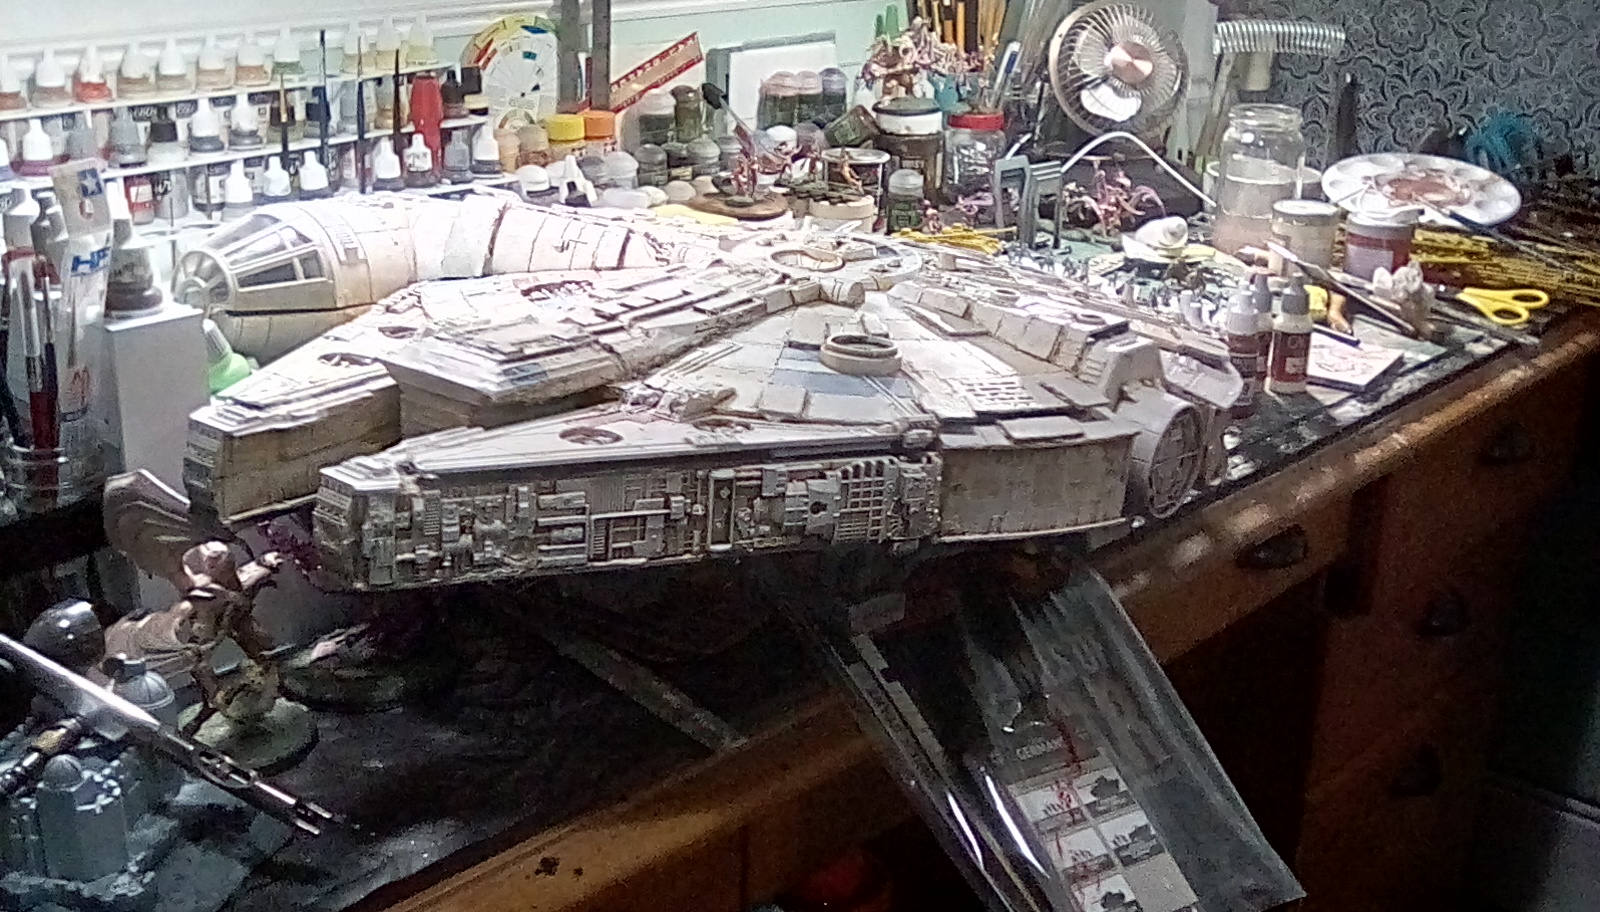
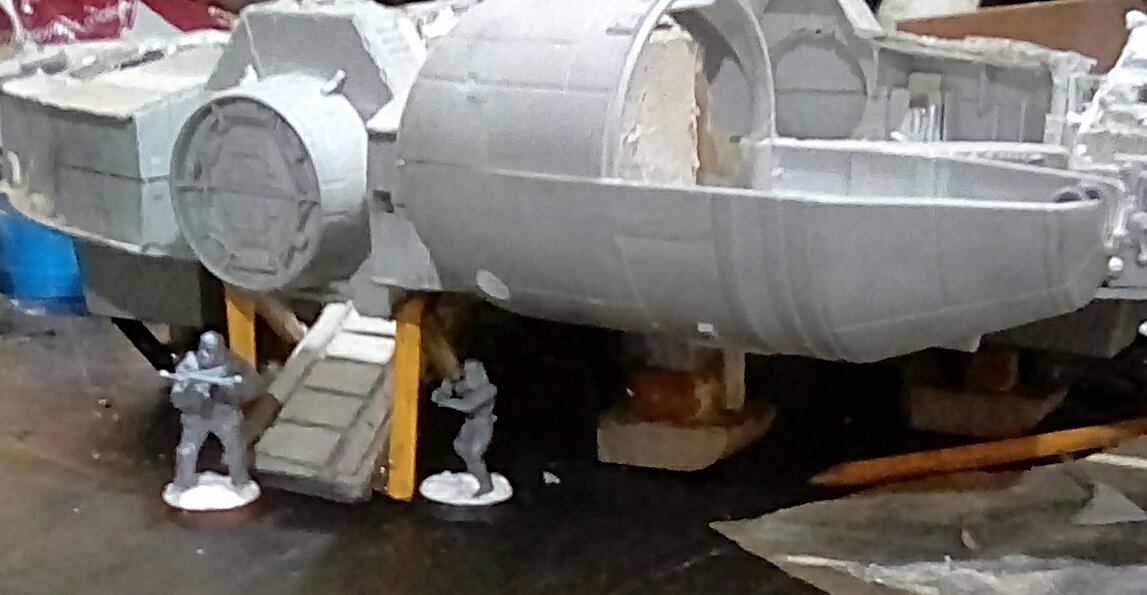
I am going to make a Millennium Falcon scenery set to use with Star Wars Legion figures, that includes internal rooms and corridors. I aim to show that with a bit of imagination and skill great results can be gotten on a limited budget.
Related Game: Star Wars: Legion
Related Company: Fantasy Flight Games
Related Genre: Science Fiction
Related Contest: Star Wars Hobby Weekend
This Project is On Hold
Straws and toys
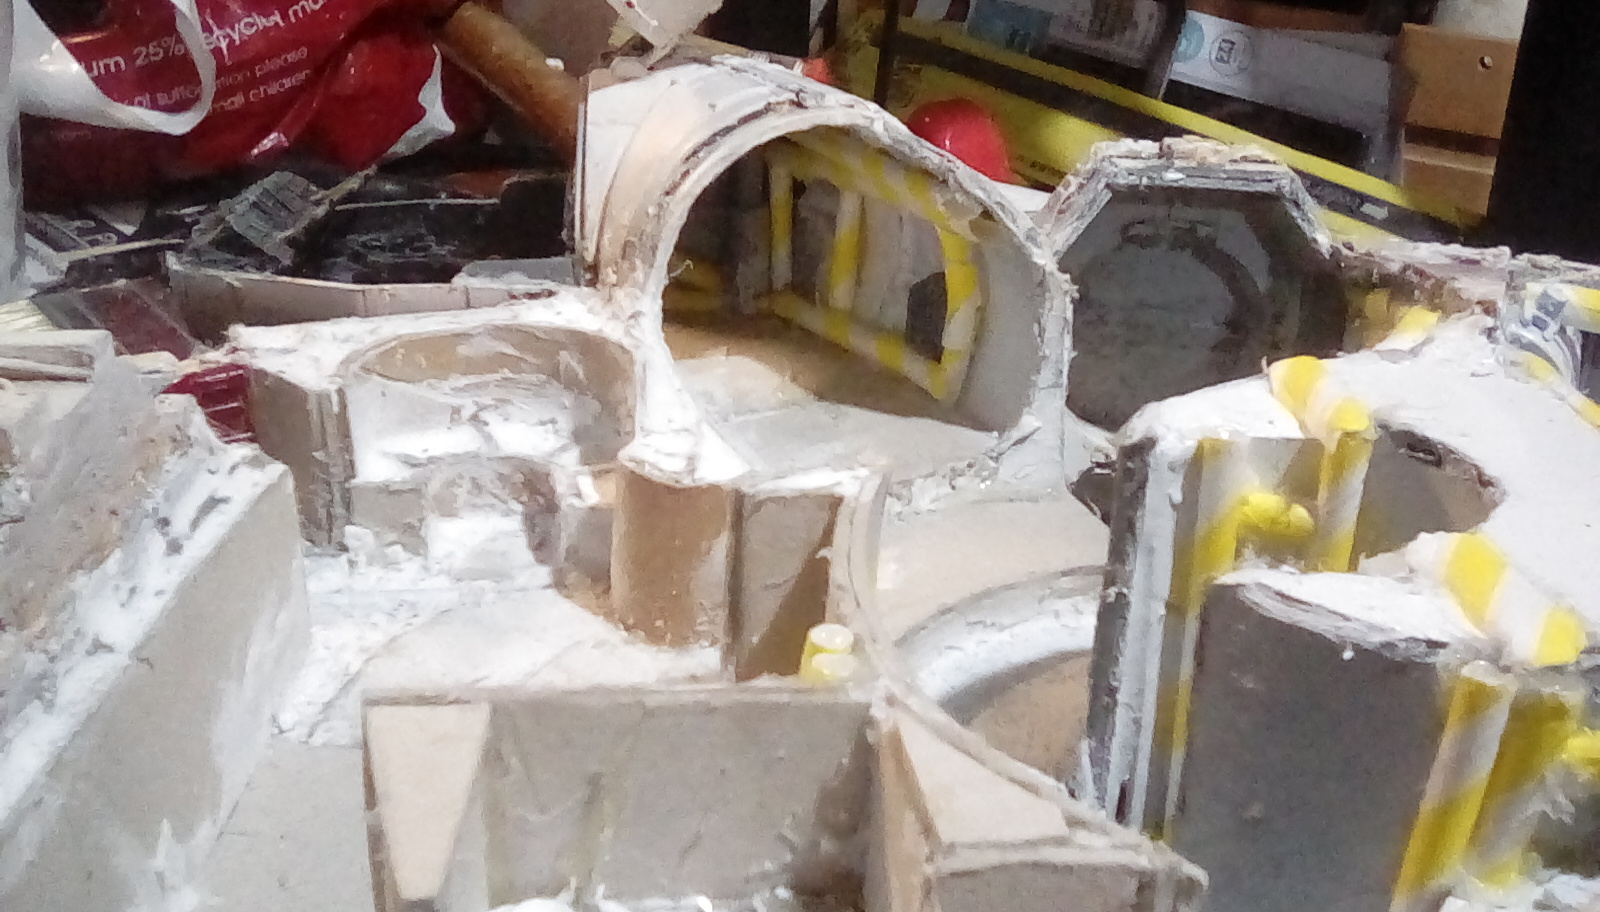
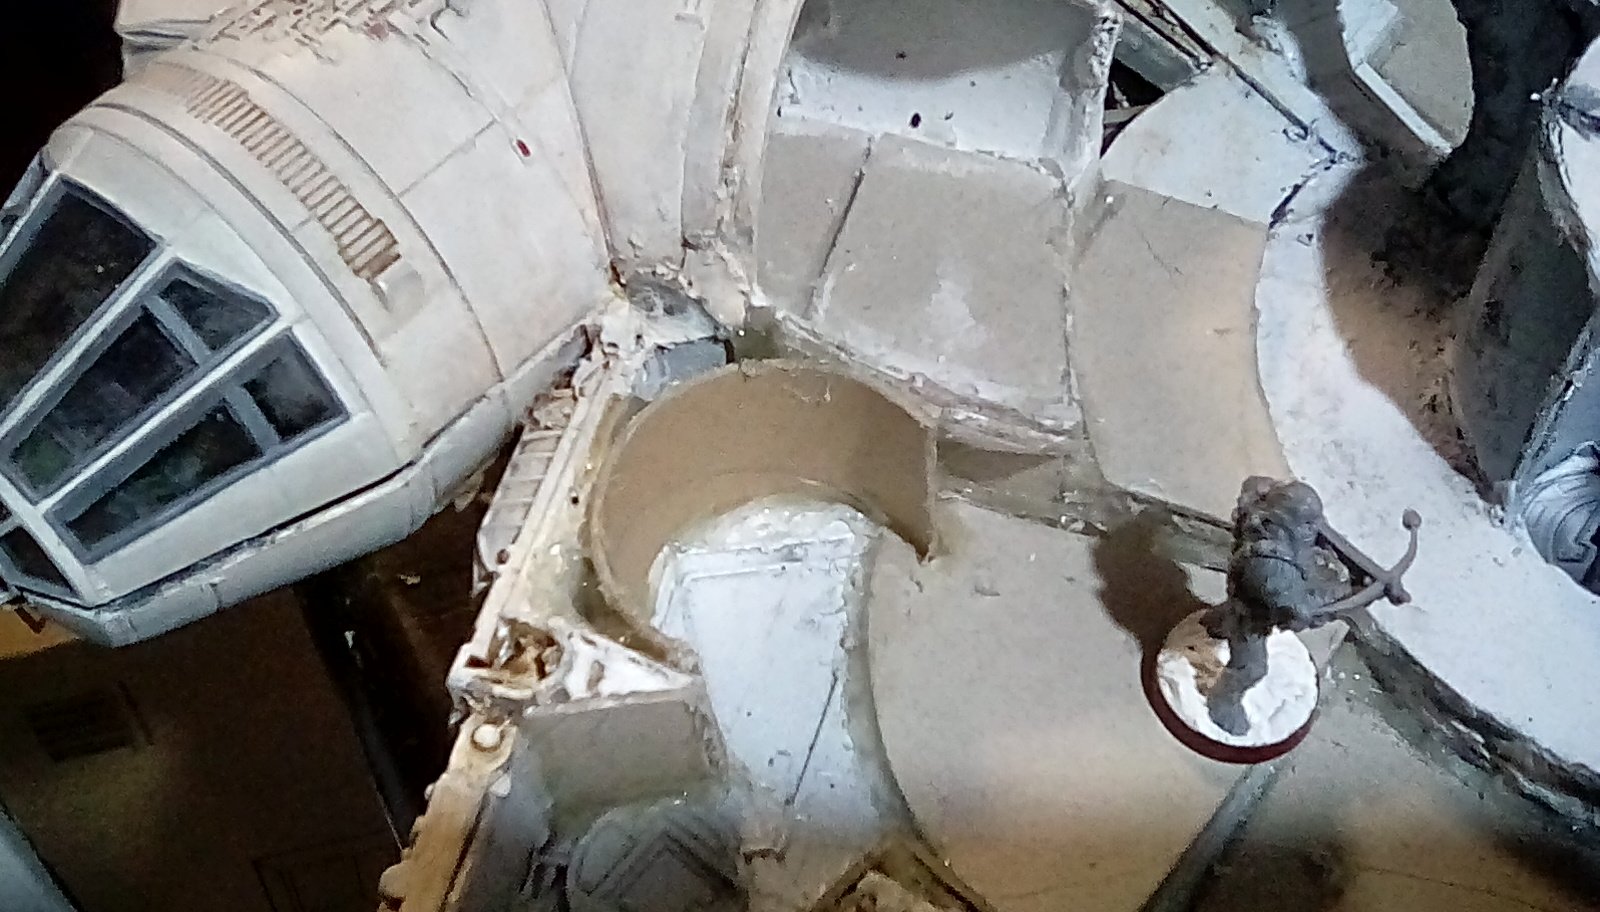
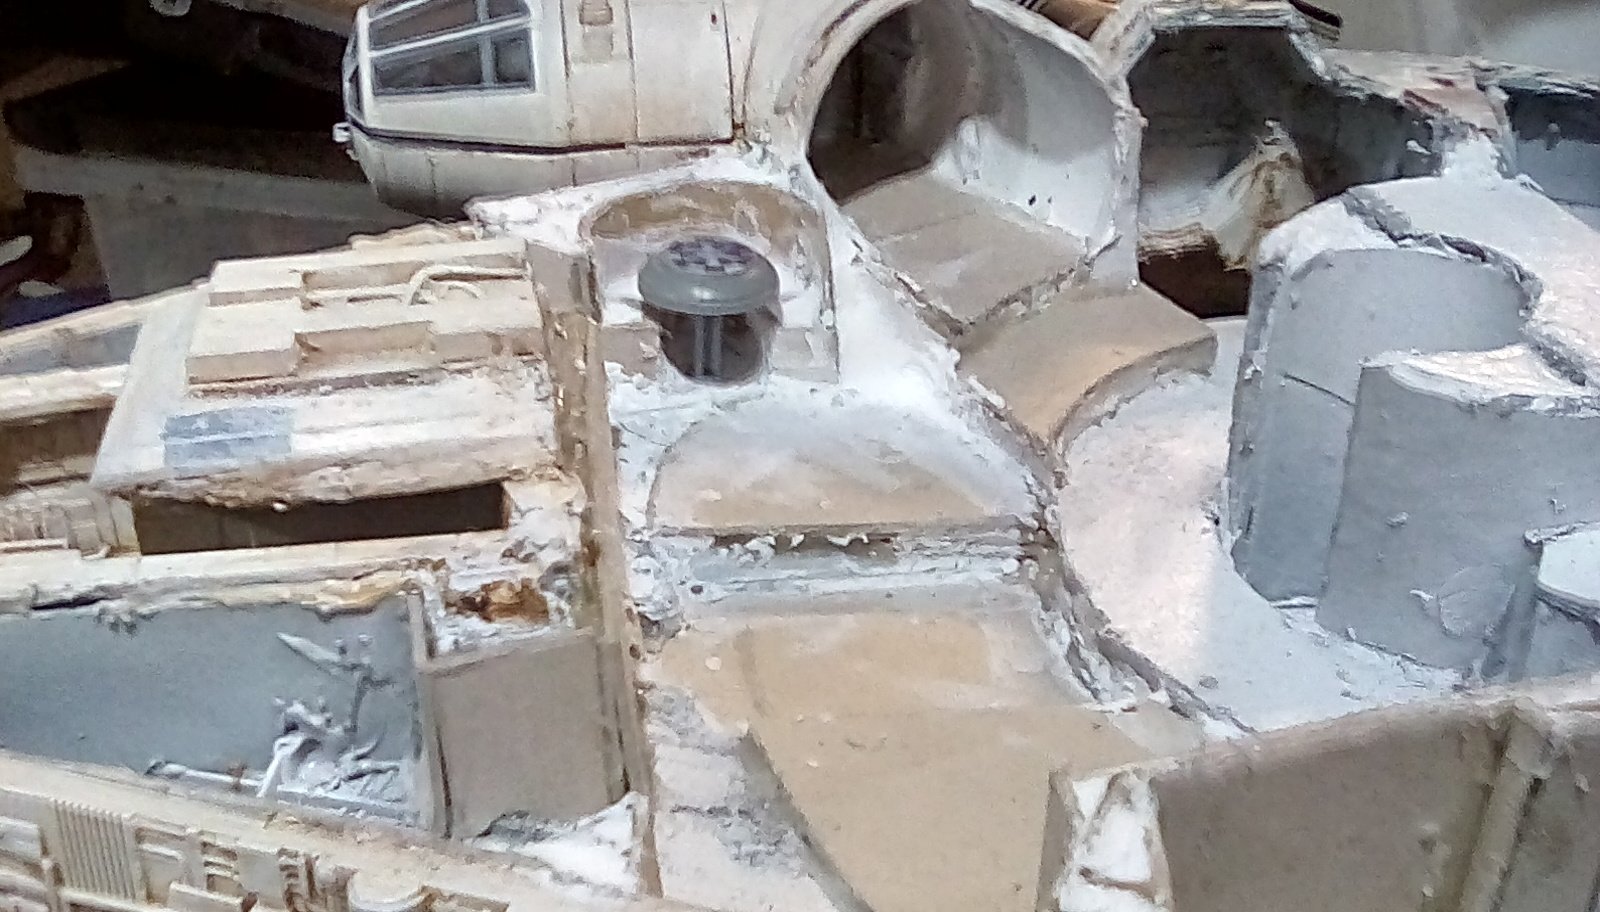
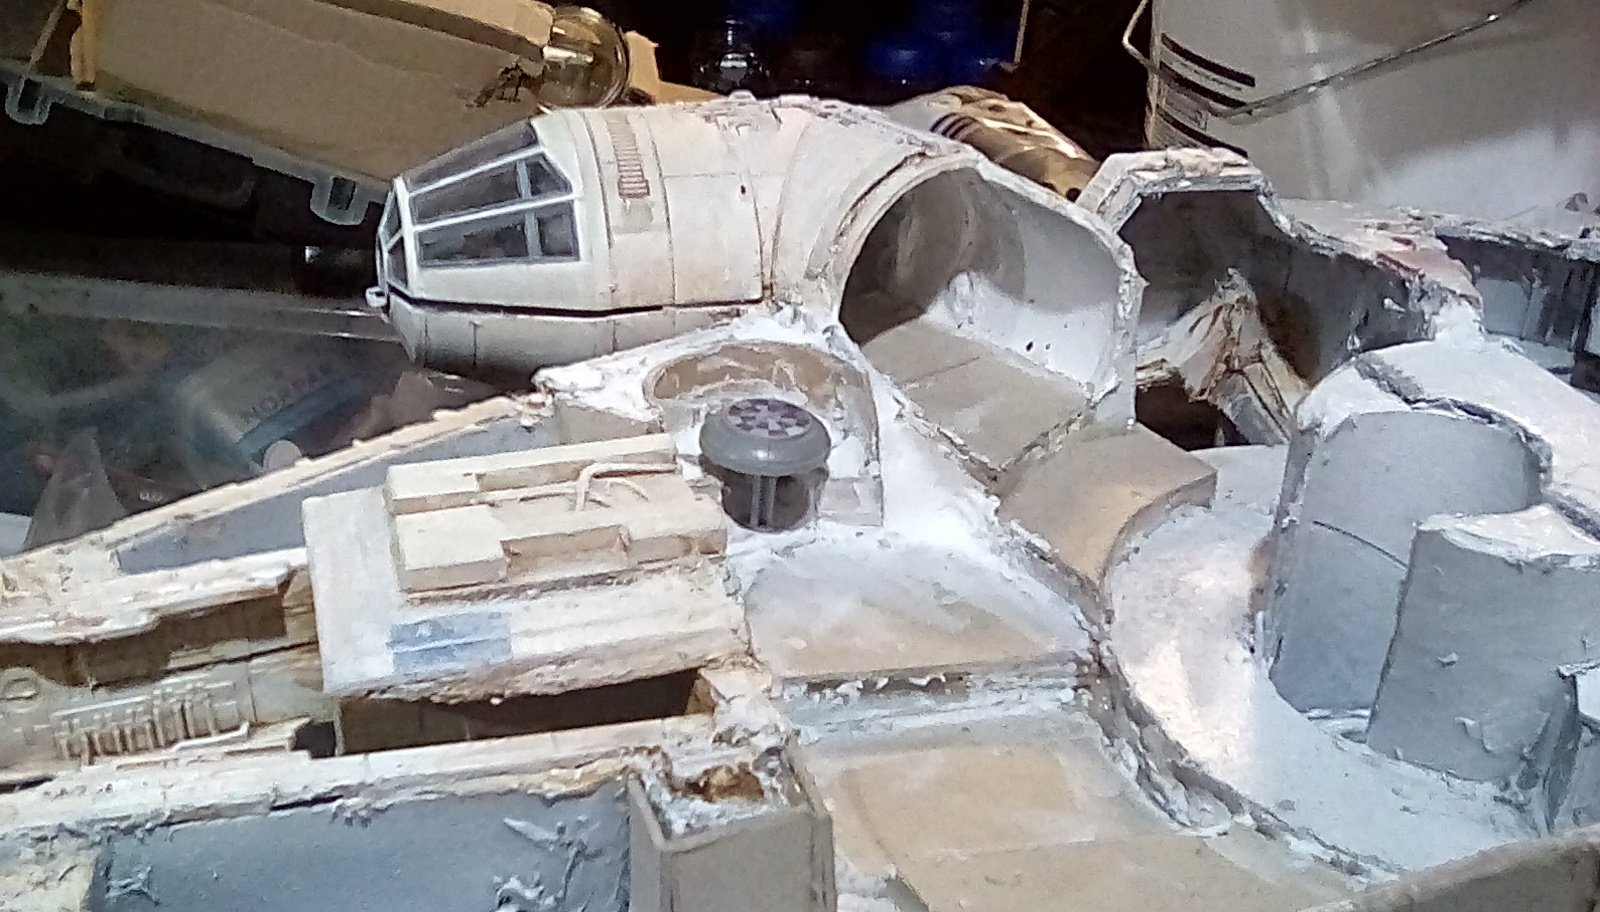
As the Millenium Falcon has many jury rigged repairs heaped on top of heath Robinson lash ups, it shouldn’t look too neat and tidy. I also don’t want too much unstructured cardboard left before painting, as it won’t look very realistic.
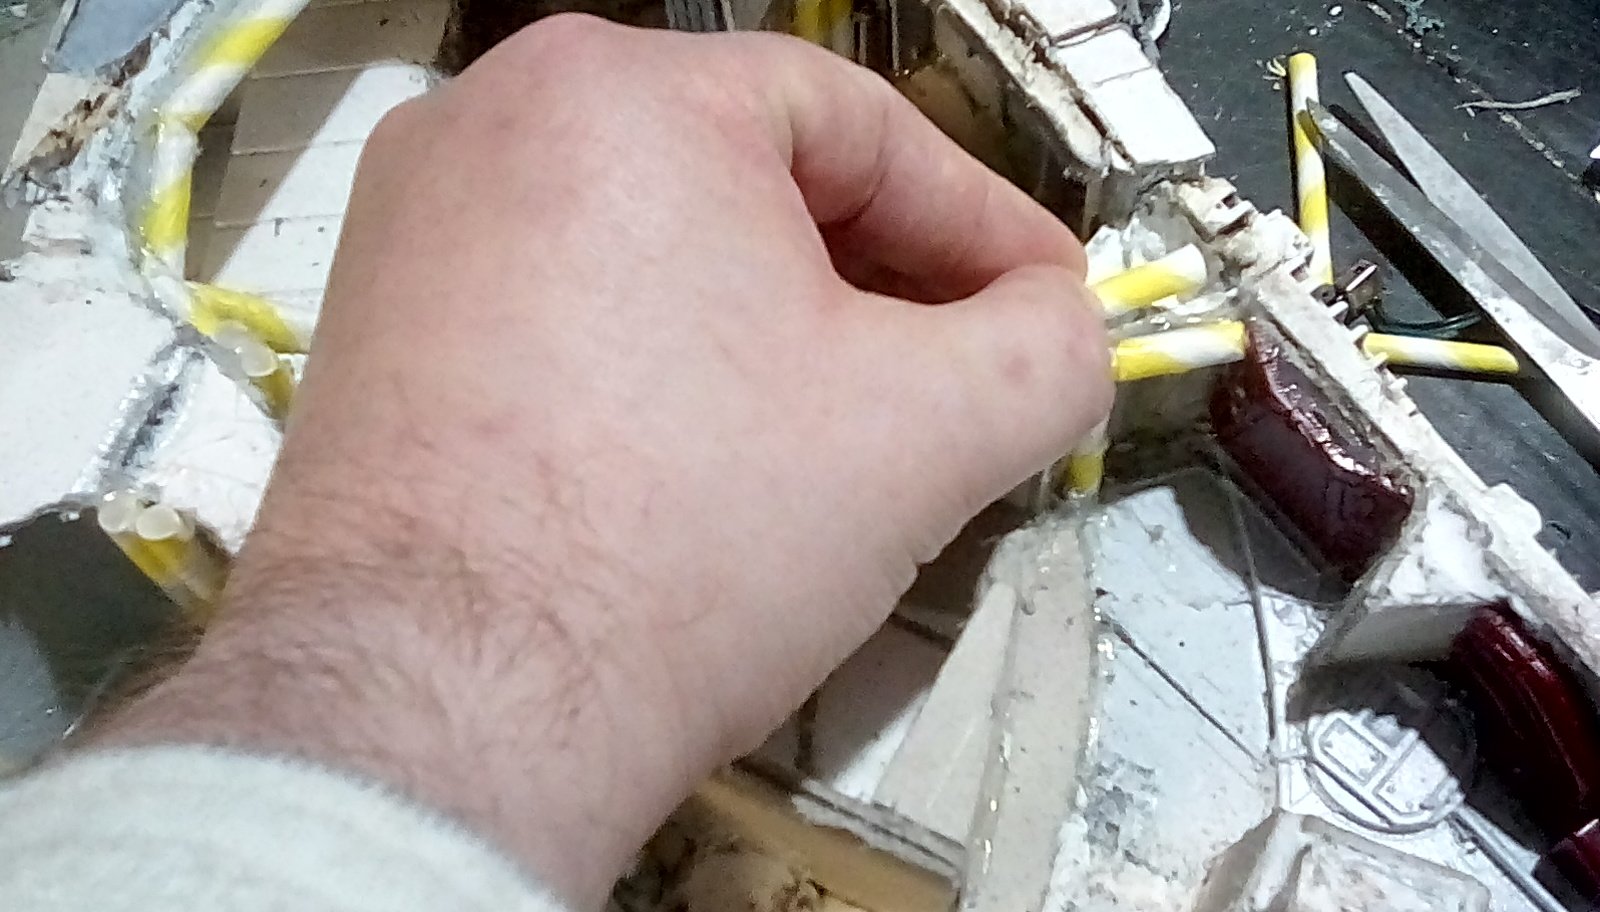
To simulate the ship’s many power conduits I use paper straws. But surely, draws are too fragile and easily crushed you are probably thinking….. Not when they are filled with hot glu e and allowed to set. I promise you, this project was not sponsored by a bit glue manufacturer – but when you are looking for a solution, and happen to have a bit glue gun in your hand….
A word of caution though. Hot glue is, well, very hot, and it needs to be very hot to run down into a straw. If doing this don’t let the glue run straightening through the straw and out onto your tender skin, as it will cause blisters, welts or worse. It can be advisable to use tweezers to hold the straws!
It is best to mitre the joints sure the straws meet as closely as posible. Any gaps can be covered by making a sleeve – just cut a straw lengthwise, but it to shape, then glue it over the original straws. It should just pop on, like miniature pipe lagging.

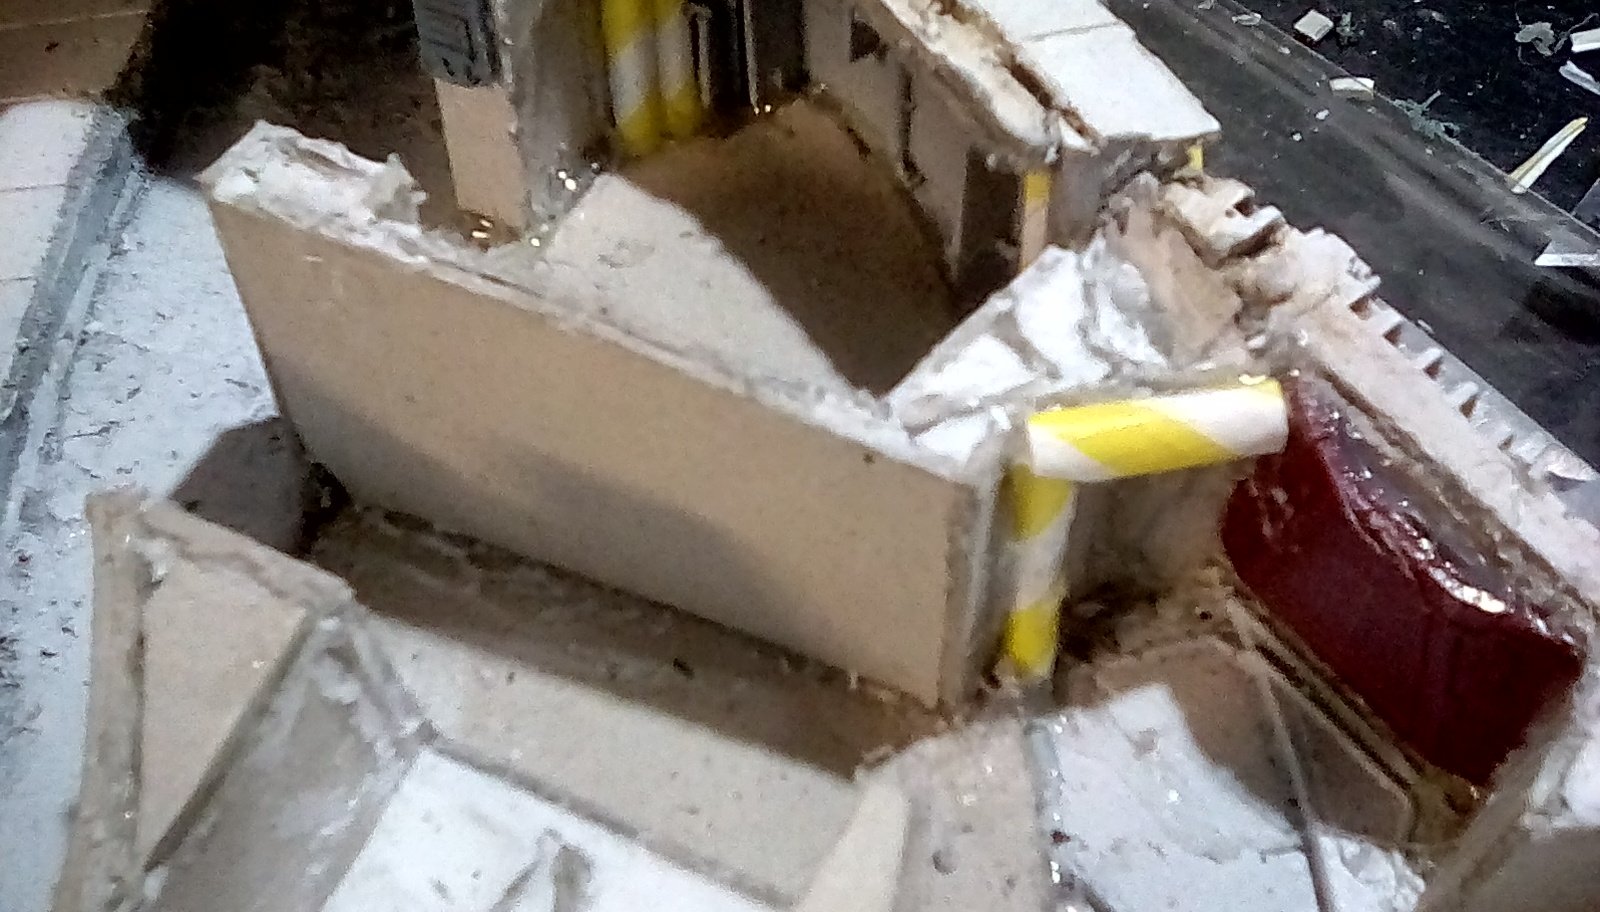
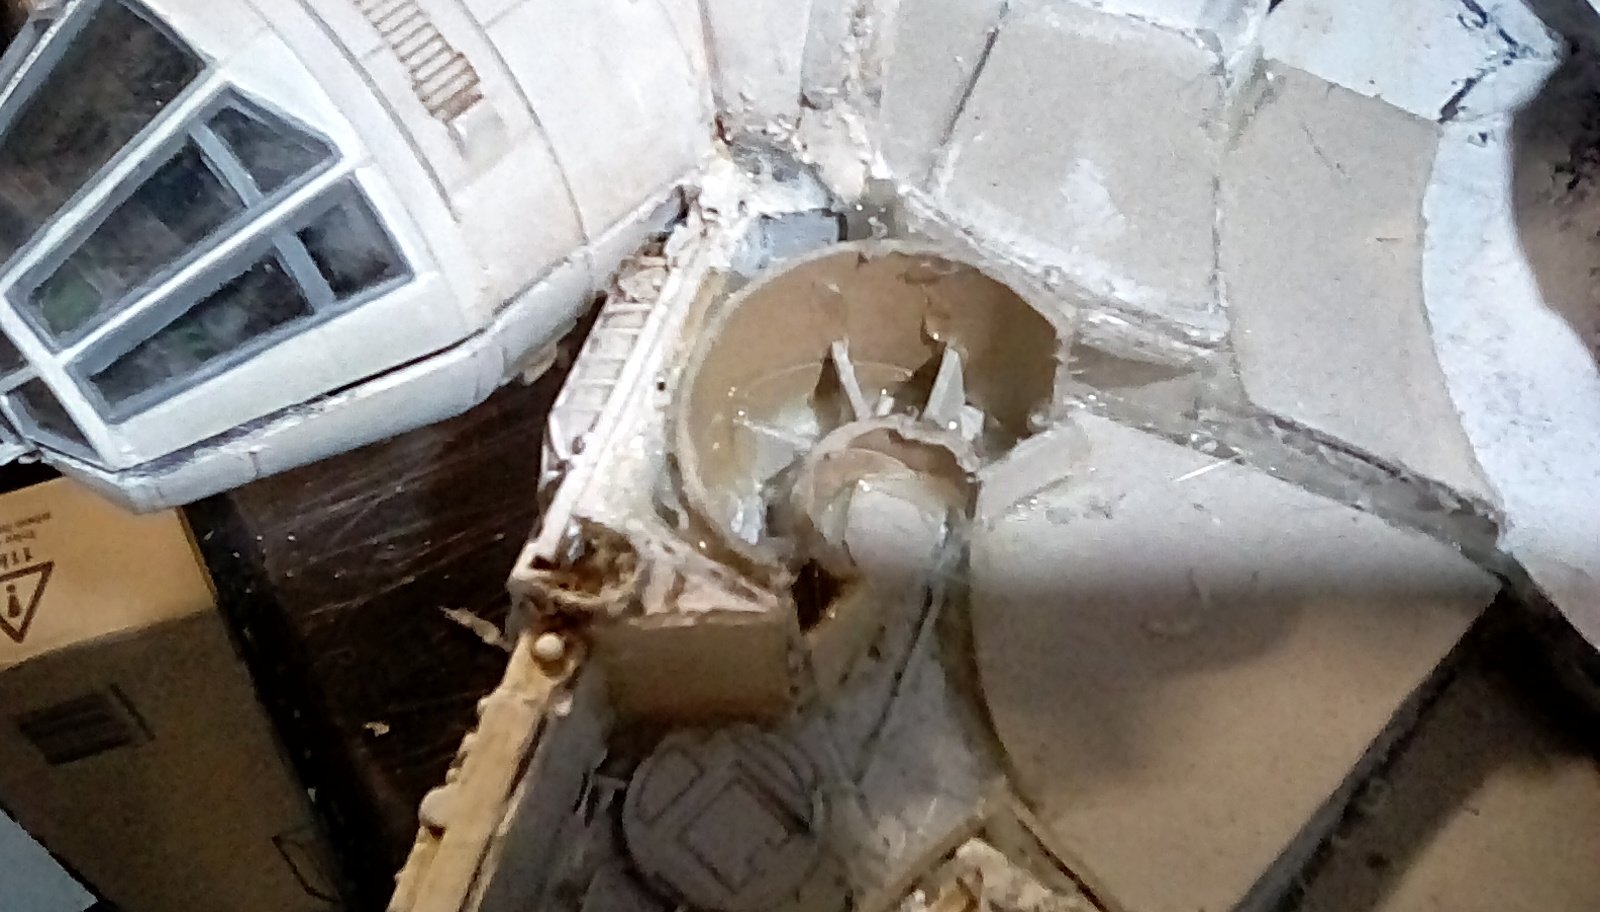
I continue adding straws, as well as s some parts cut from cheap plastic toys bought from a pound store for this purpose. Also left over bits from the original toy spaceship are repurposed and stuck in place to add details. I have to careful to not block any walkways, while trying to make the ship look as cluttered and messy as possible. So, lots of straws in corners where they won’t interfere with miniatures on circular bases, but none where they would narrow corrridors too much.
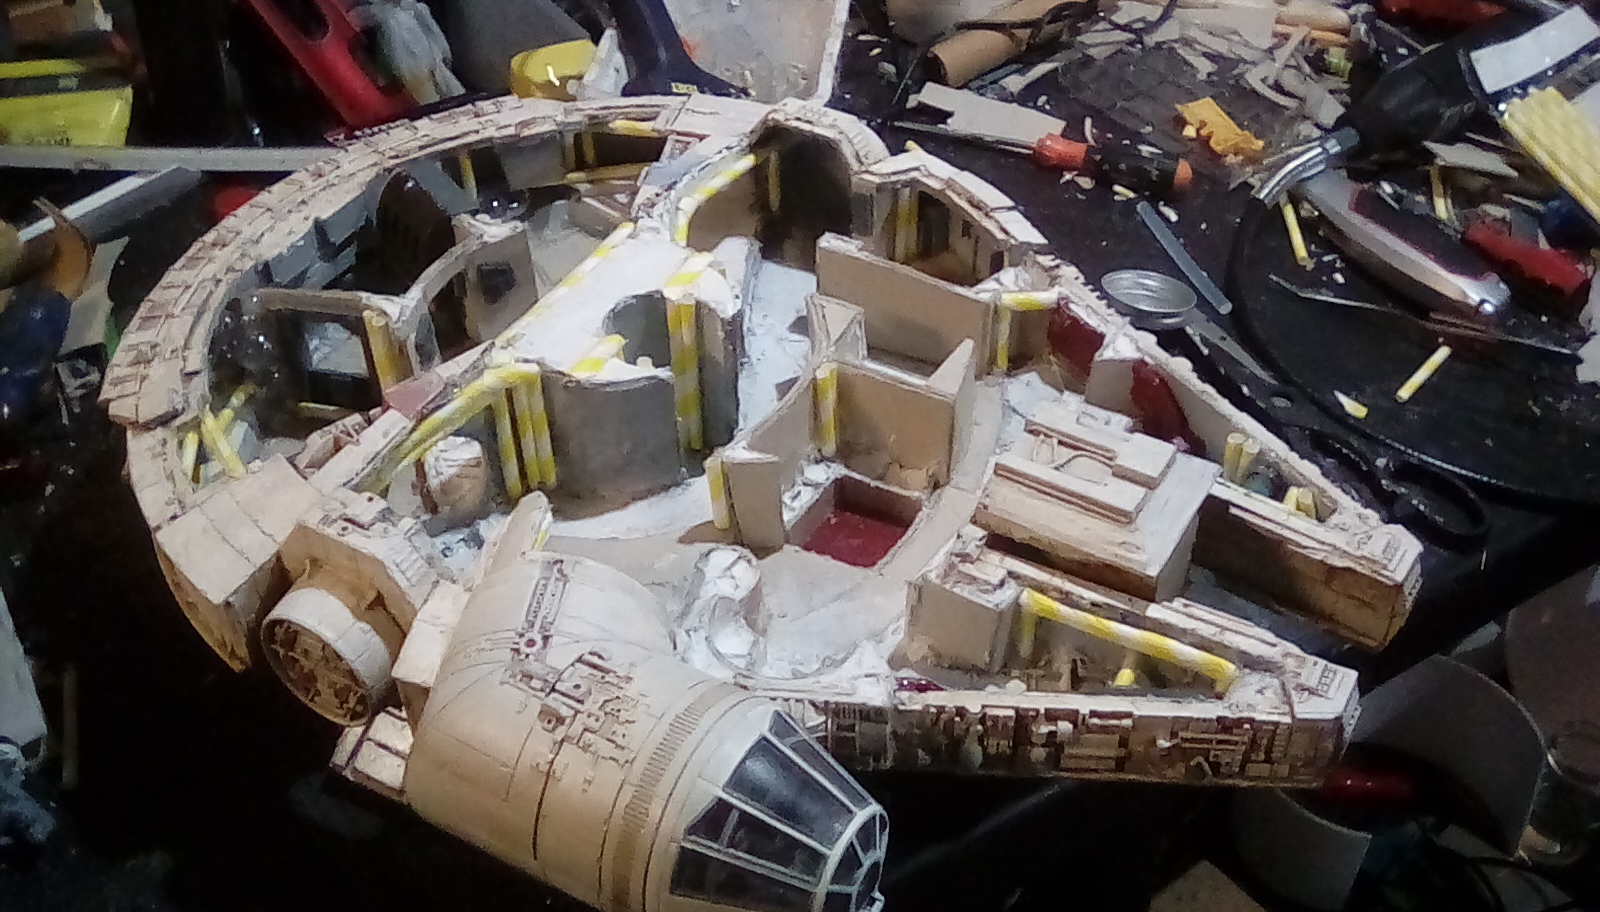

All this adds details and texture to the surfaces that should make my painting and drybrushing look much better – Grey card is a great building material, but it doesn’t look particularly great painted so it has to be covered with other texture before priming.
Some of the horizontal straws are placed to give added support to the roof in places where it was just floating without support previously. It was only when I started adding these that realised how important they would be to make the roof nice and firm when on top of the ship.
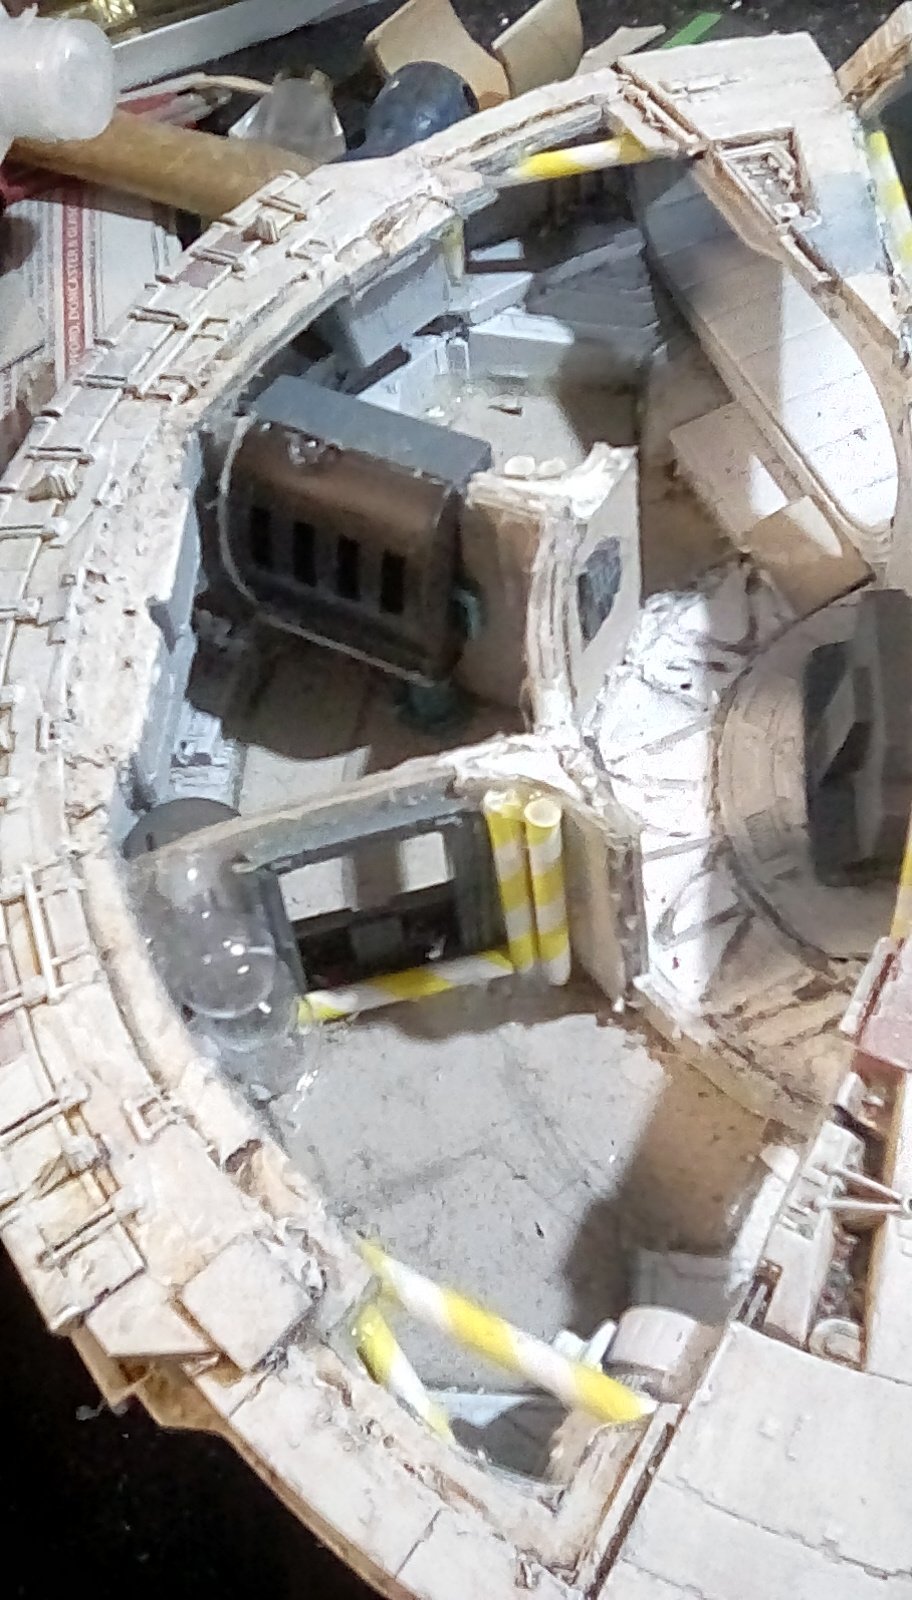
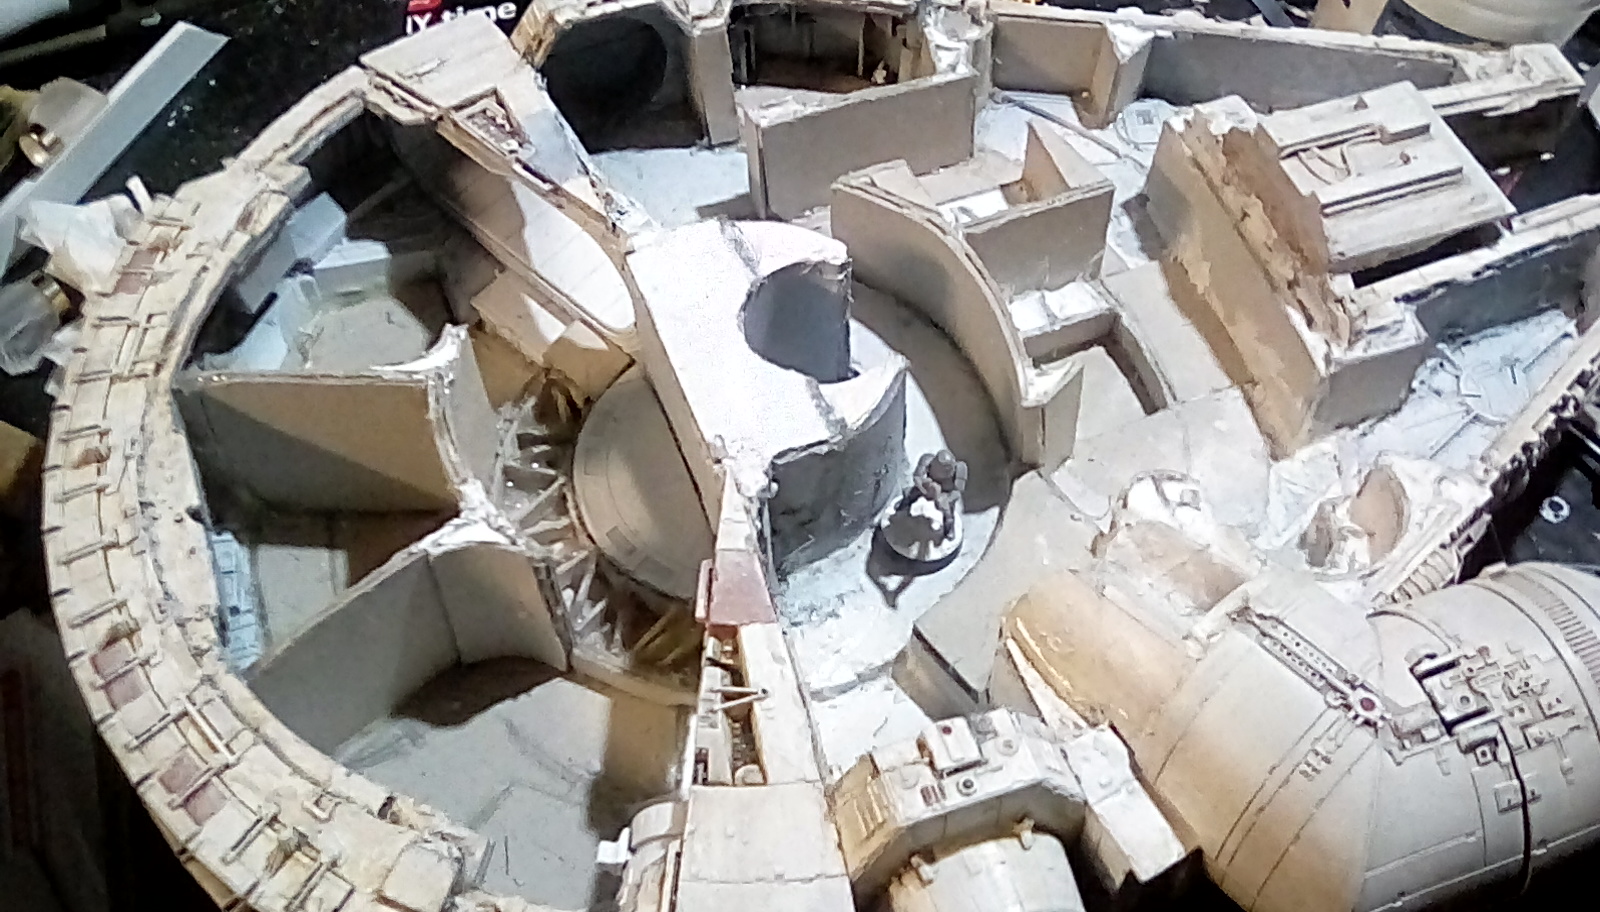
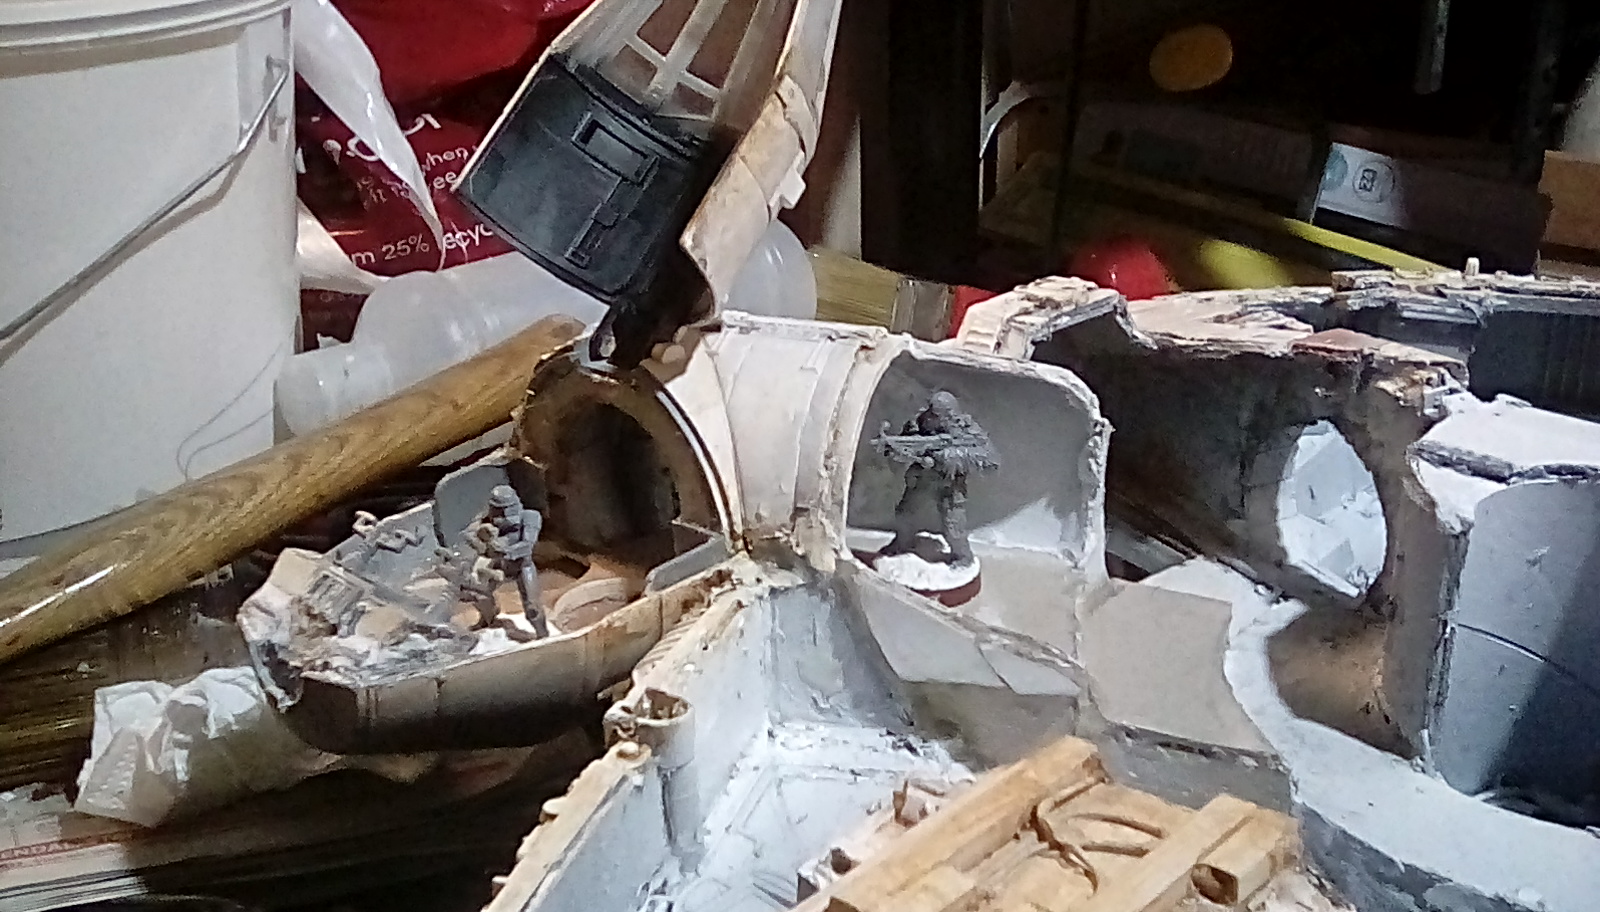
Starting on the internal rooms
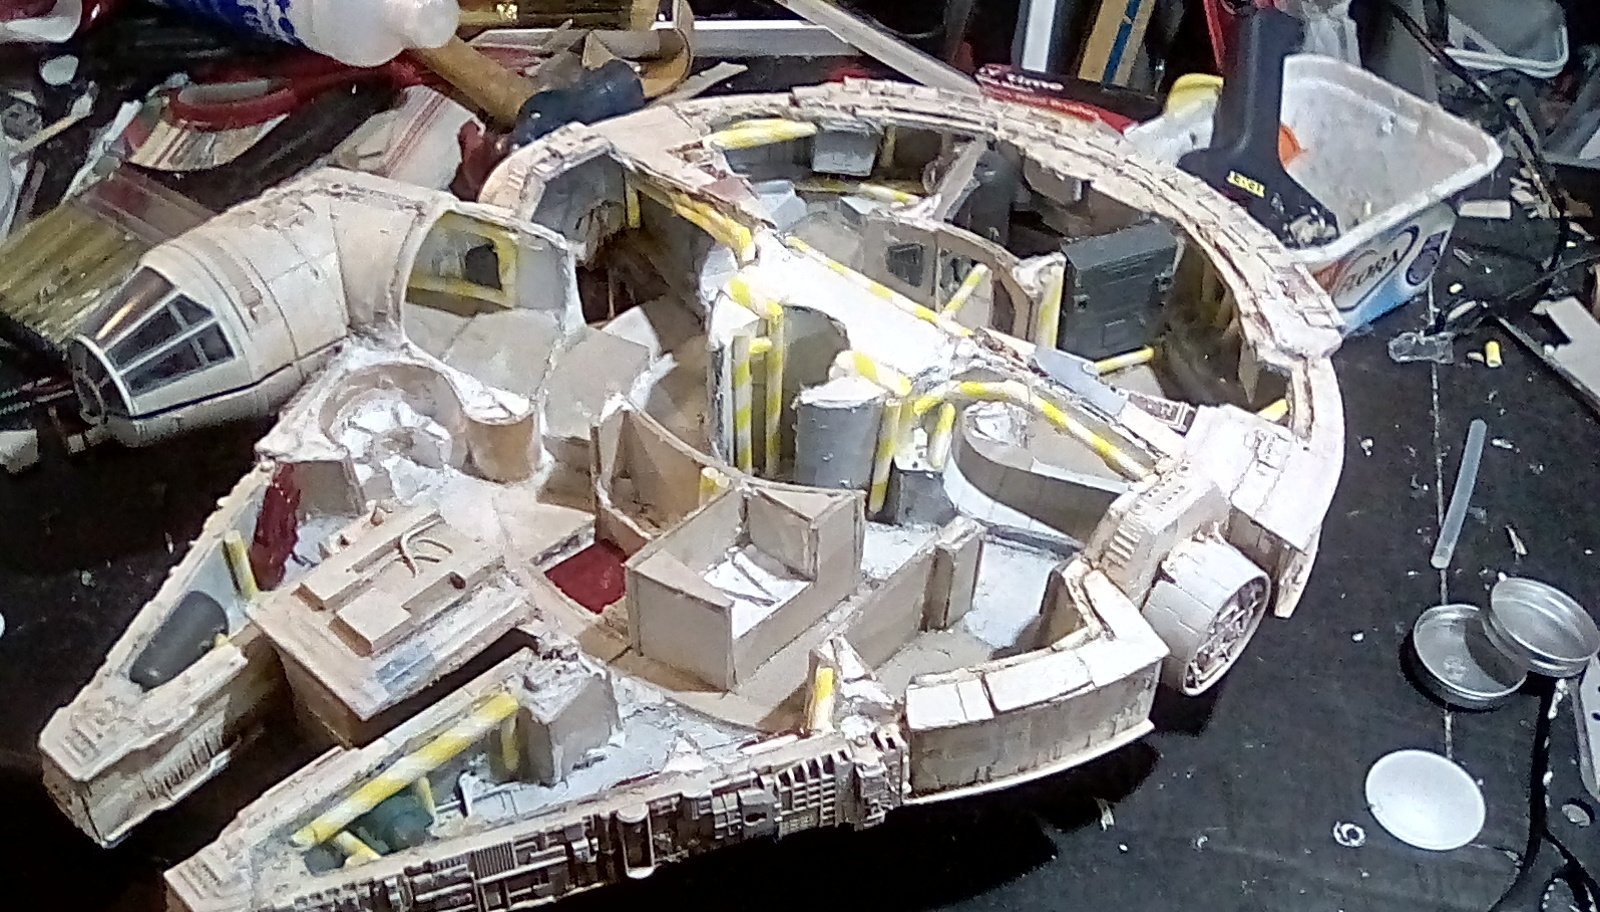
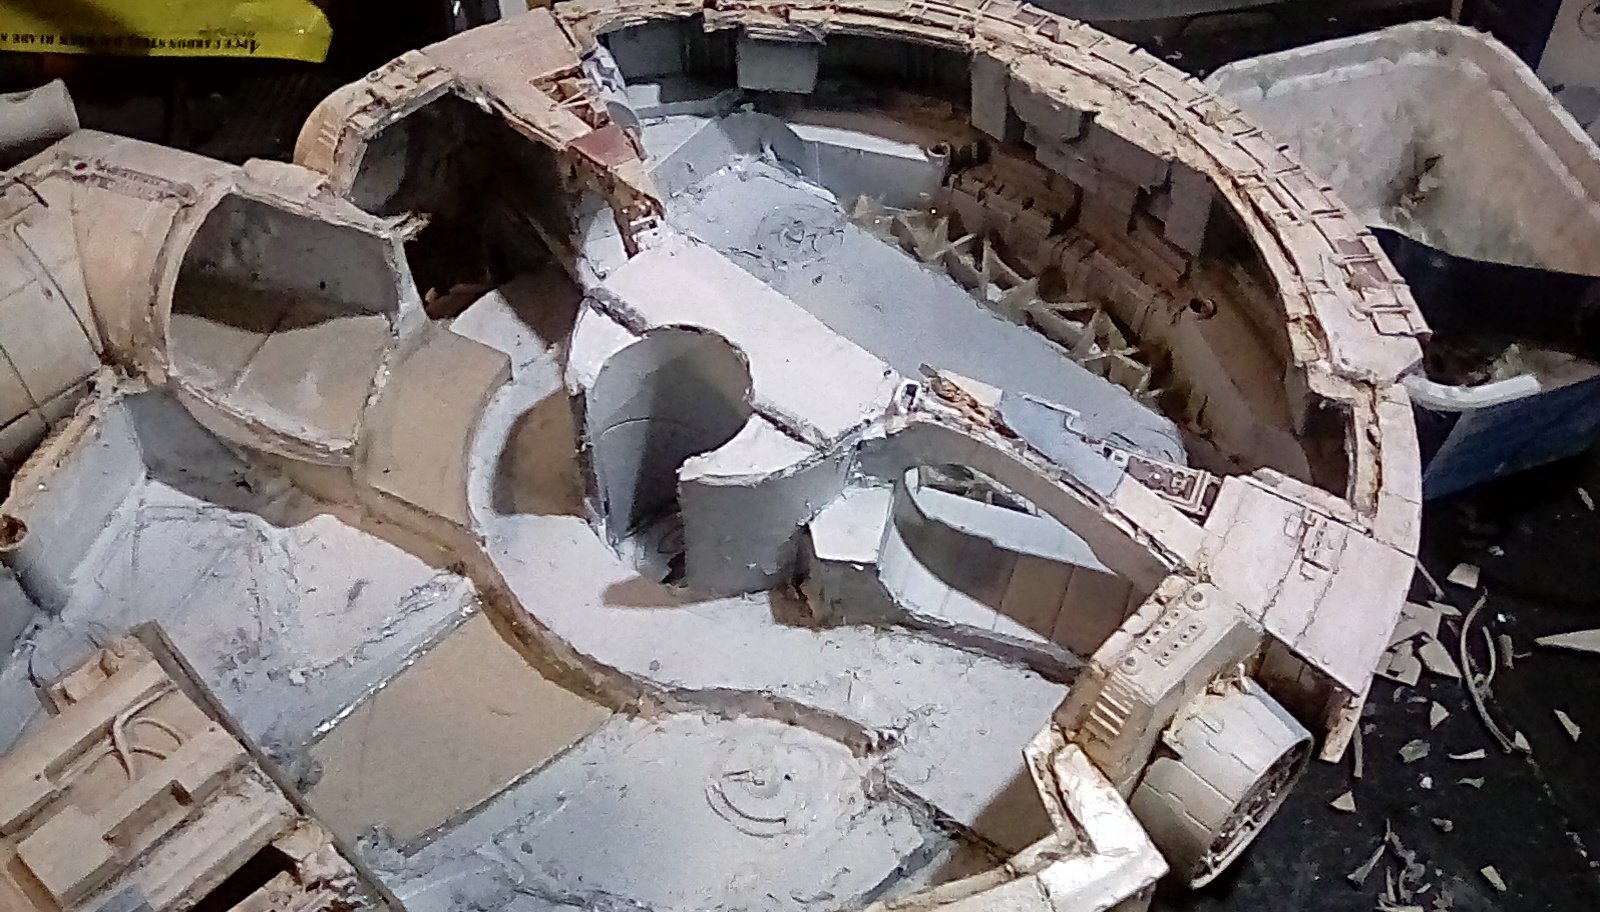
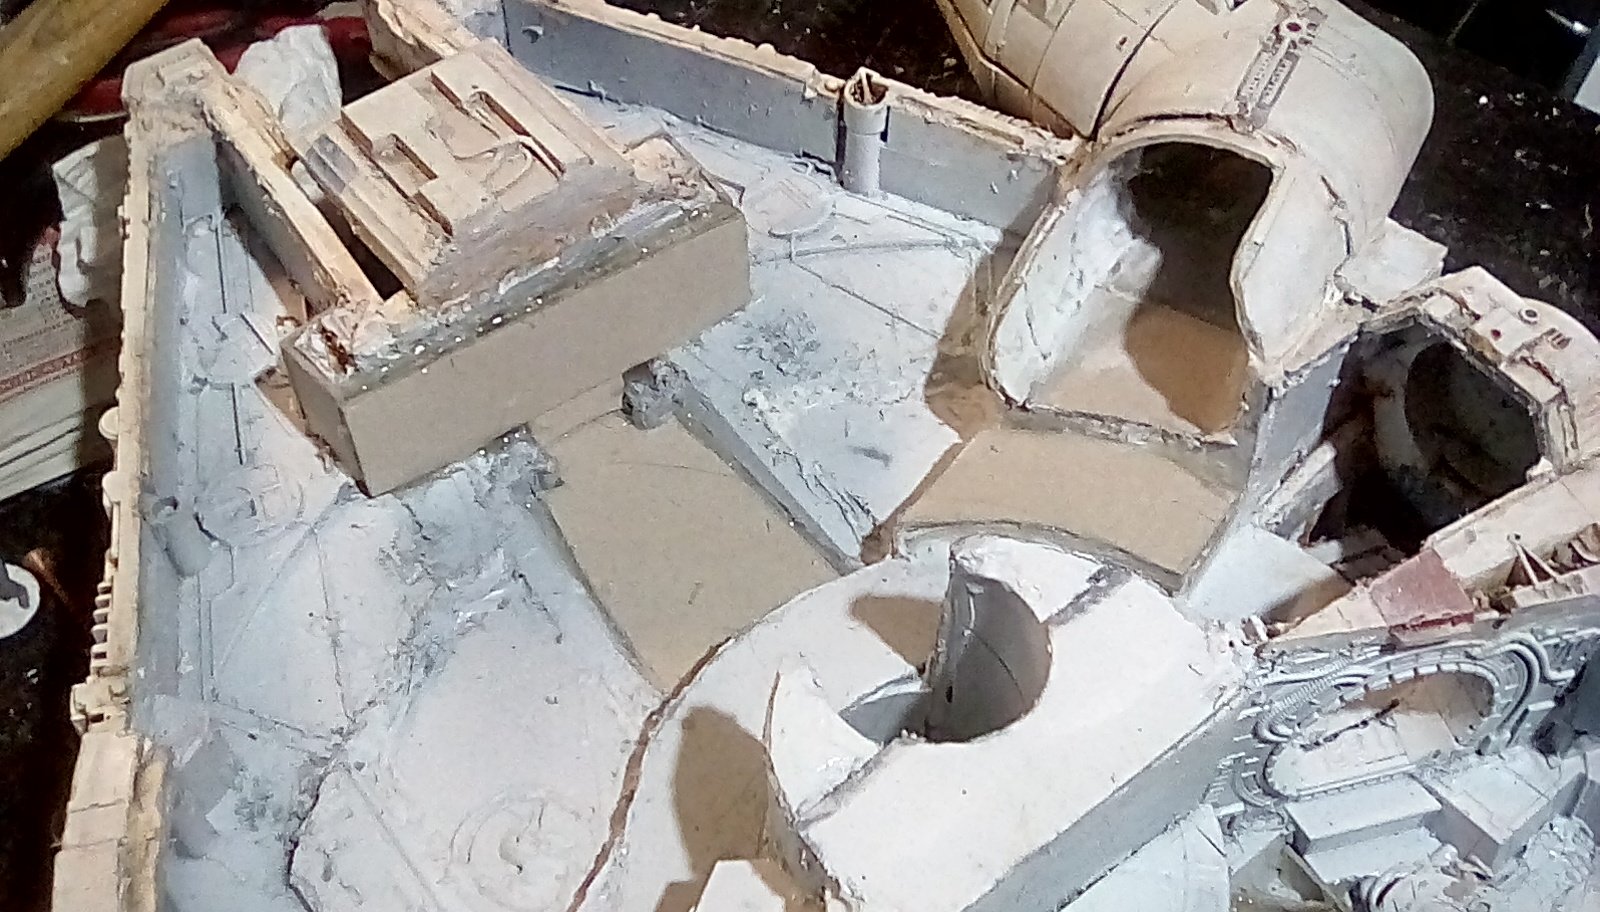
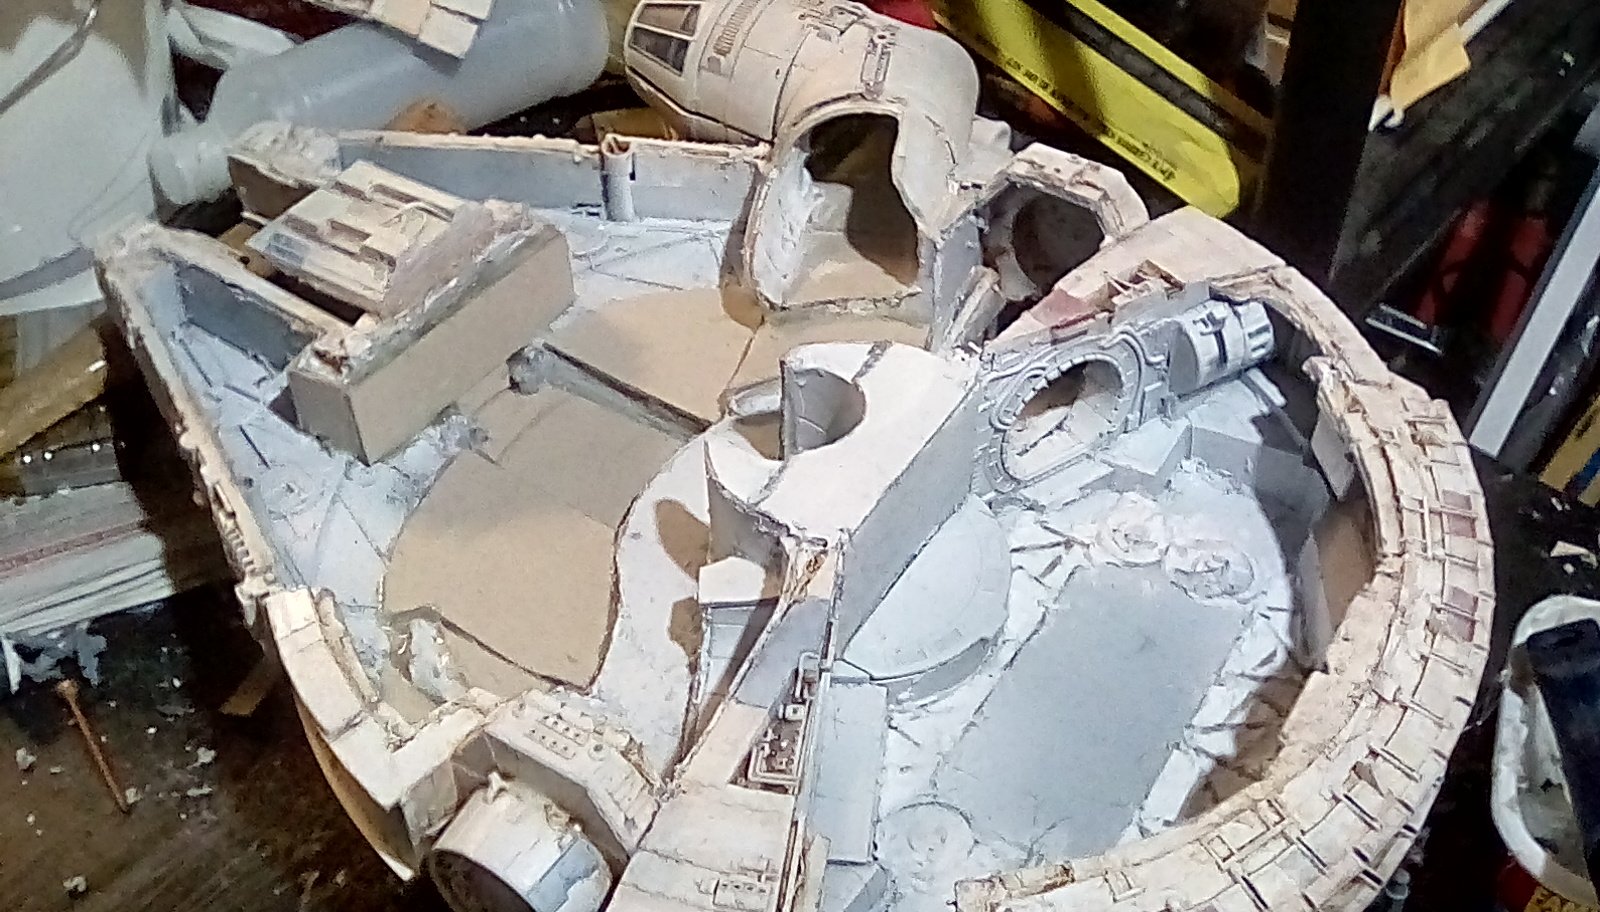
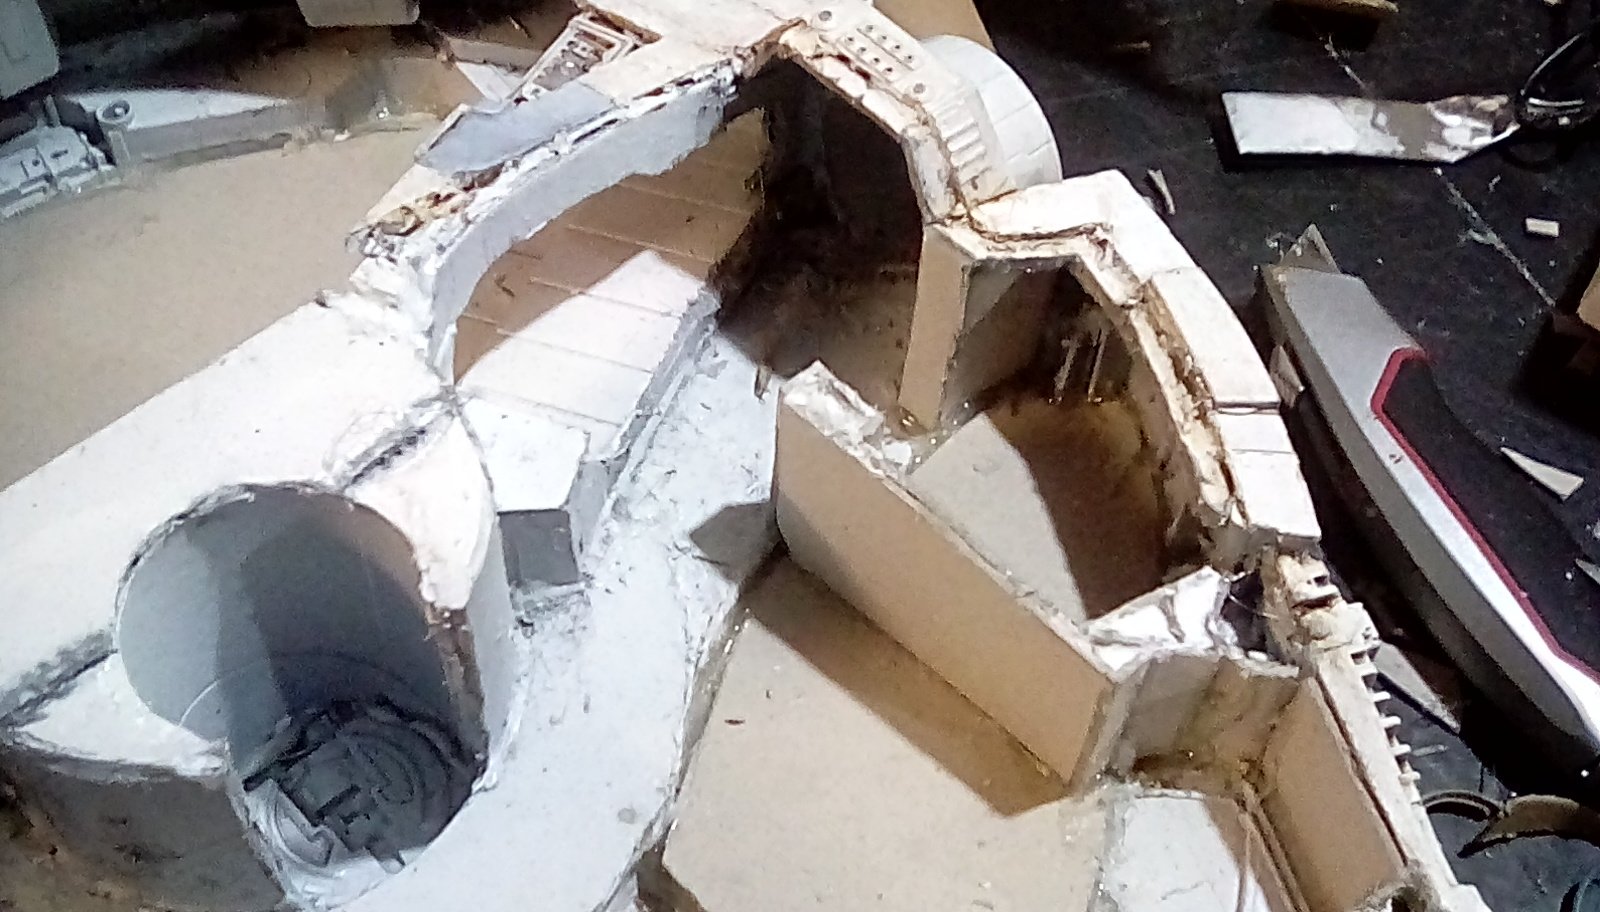
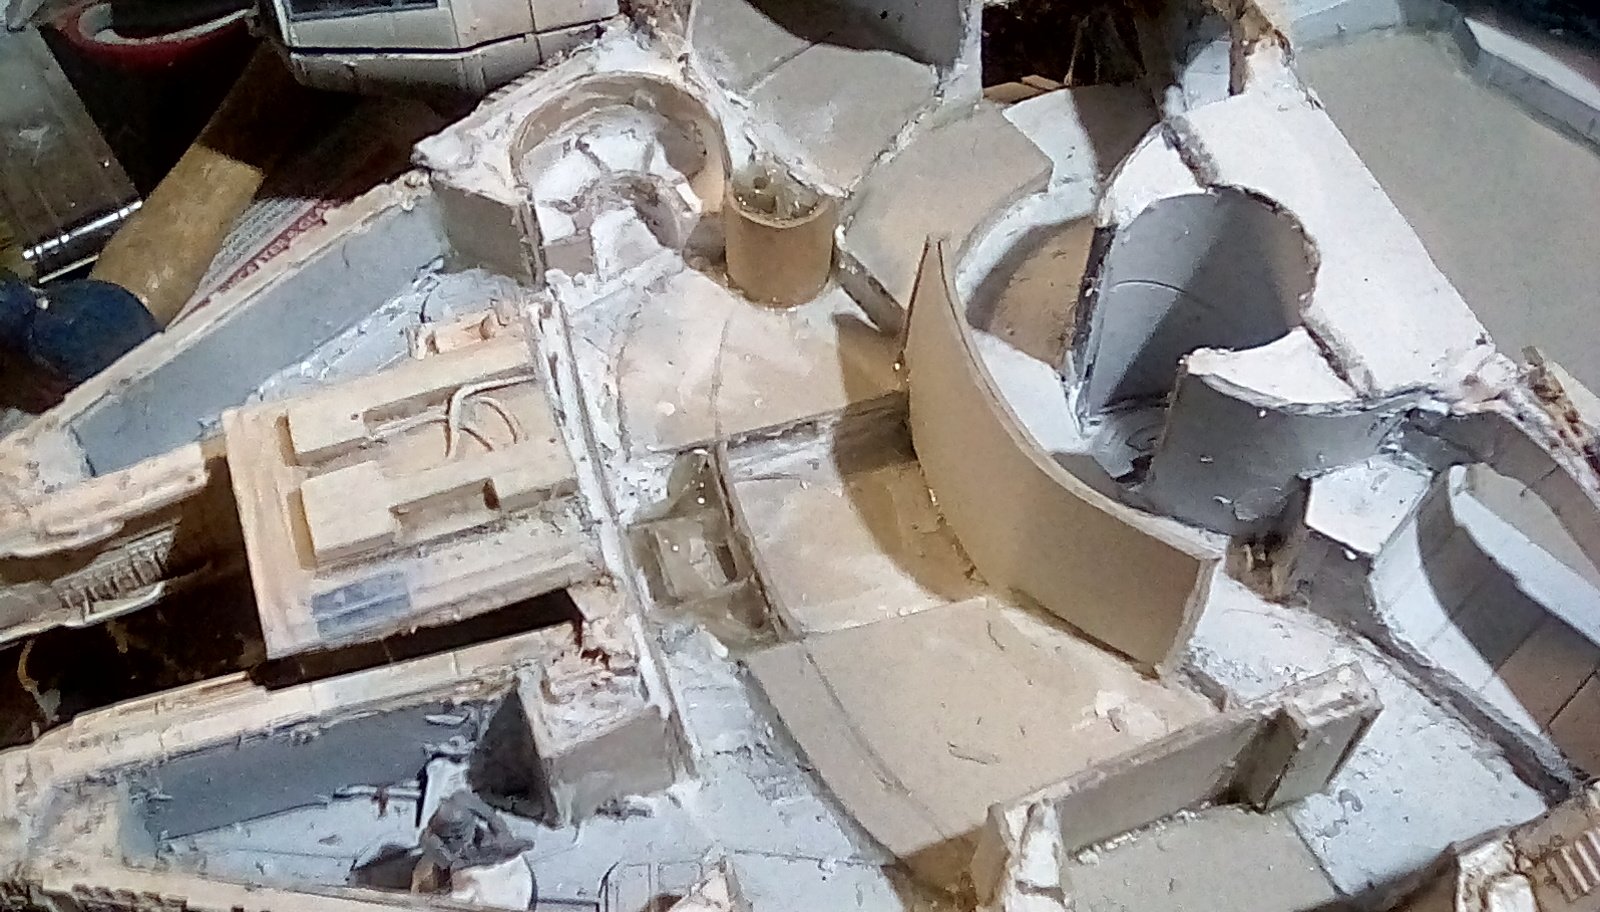
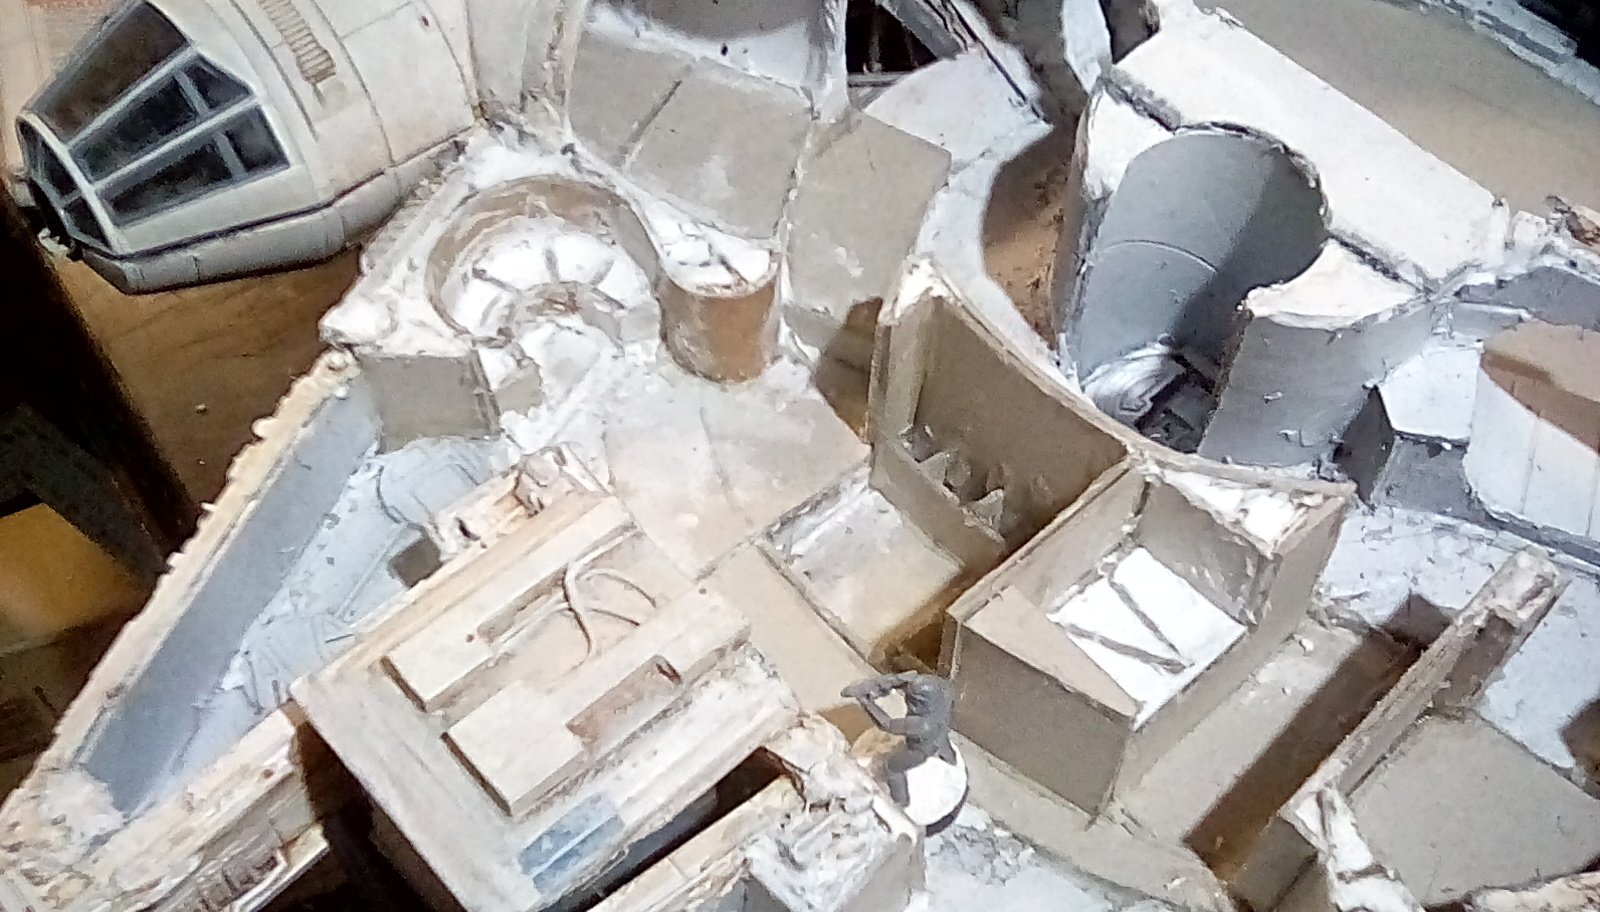
Now I start on the most important part of this build for wargaming – building the internal rooms. If the ship is too open-planned there is no interest in the terrain – without cover it is just mini’s shooting at each other. I’m envisioning cat and mouse games of infantry miniatures sneaking around the ship and taking shots when they can, so I need rooms that aren’t just dead ends with different ways in and out. And on top of that, I want it to contain the elements I remember from watching star wars as a kid.
It is impossible to make the actual layout of the Millenium Falcon – the outside hull props and internal sets were built for the films were different sizes – the rooms literally are too big to fit inside the smaller hull.
I build the rooms walls using a similar method to how I levelled the floors – a card framework covered in grey card and filled with lightweight filler.


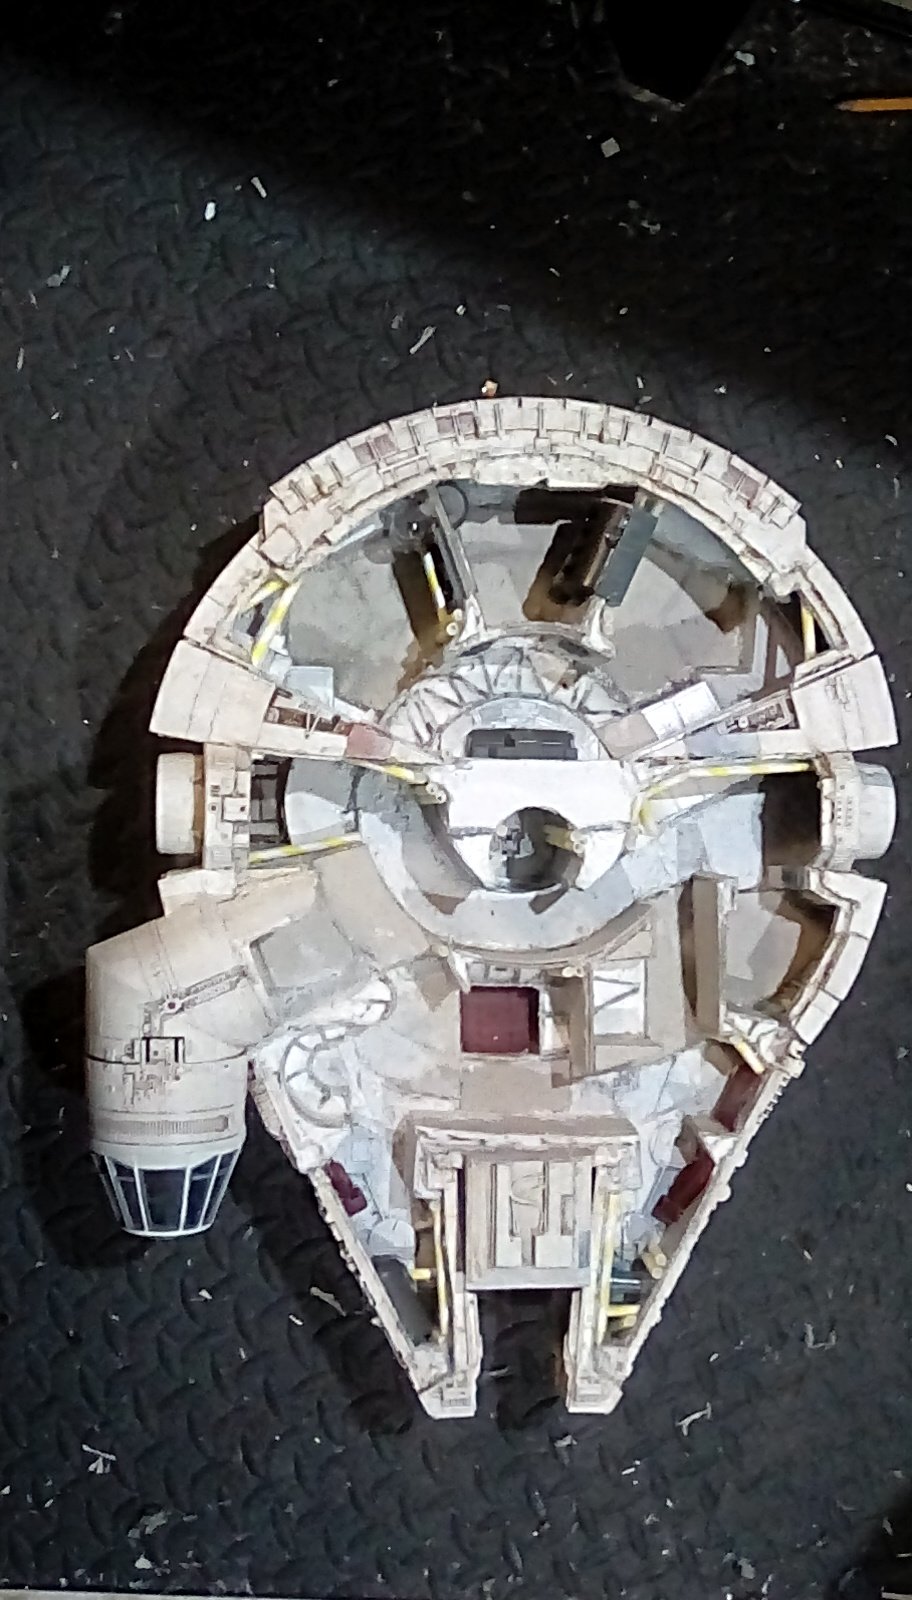
Revisiting the rebuilt hull
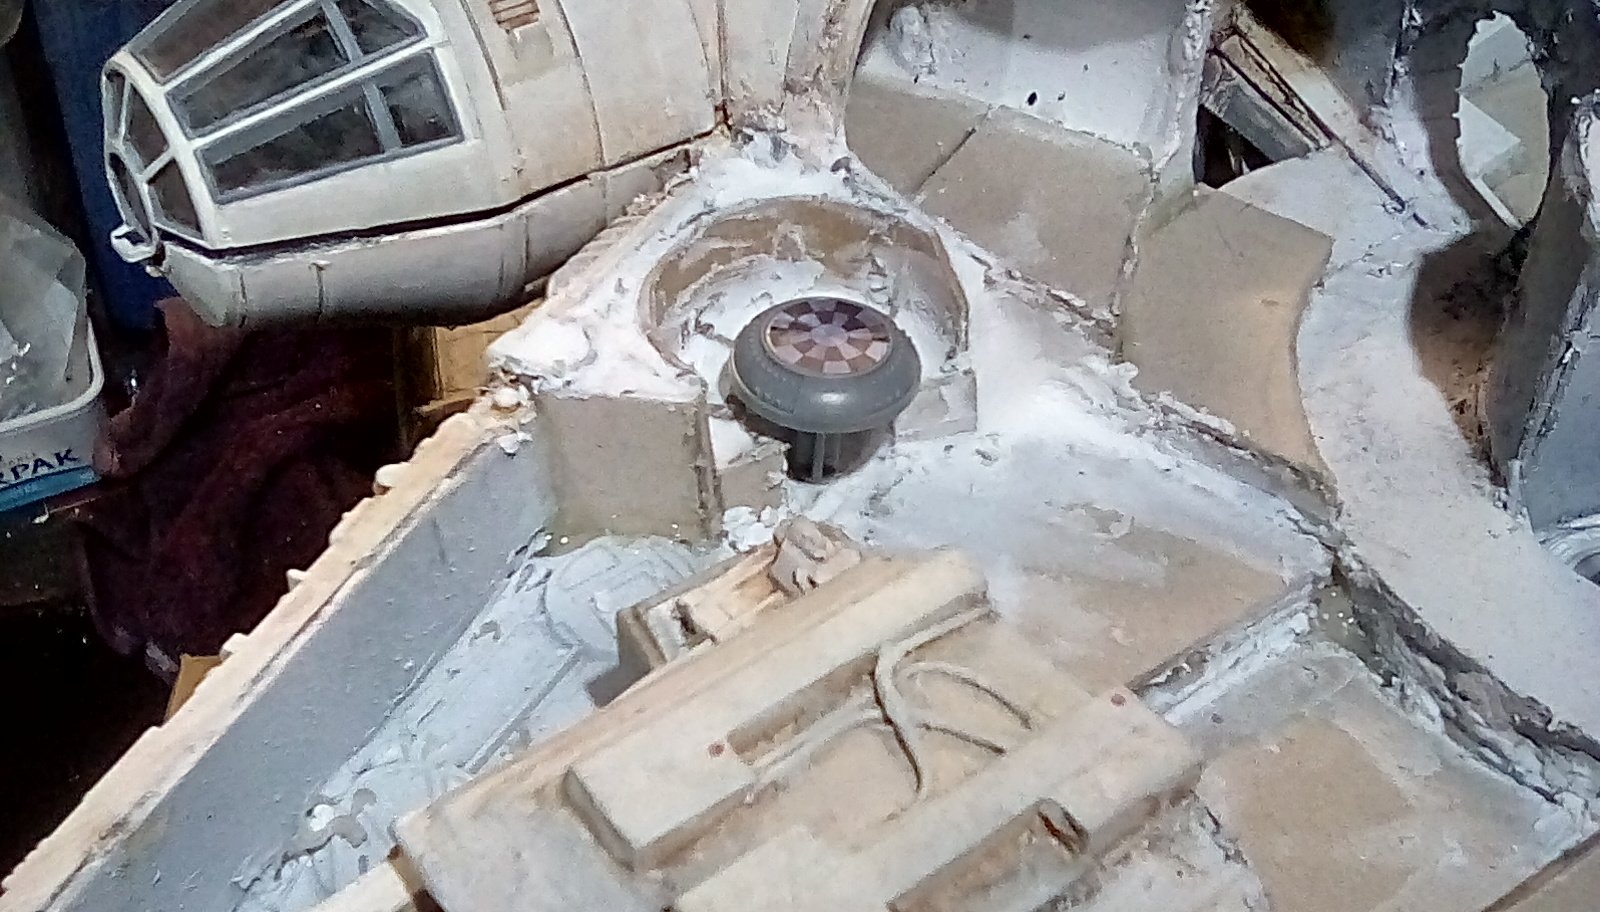
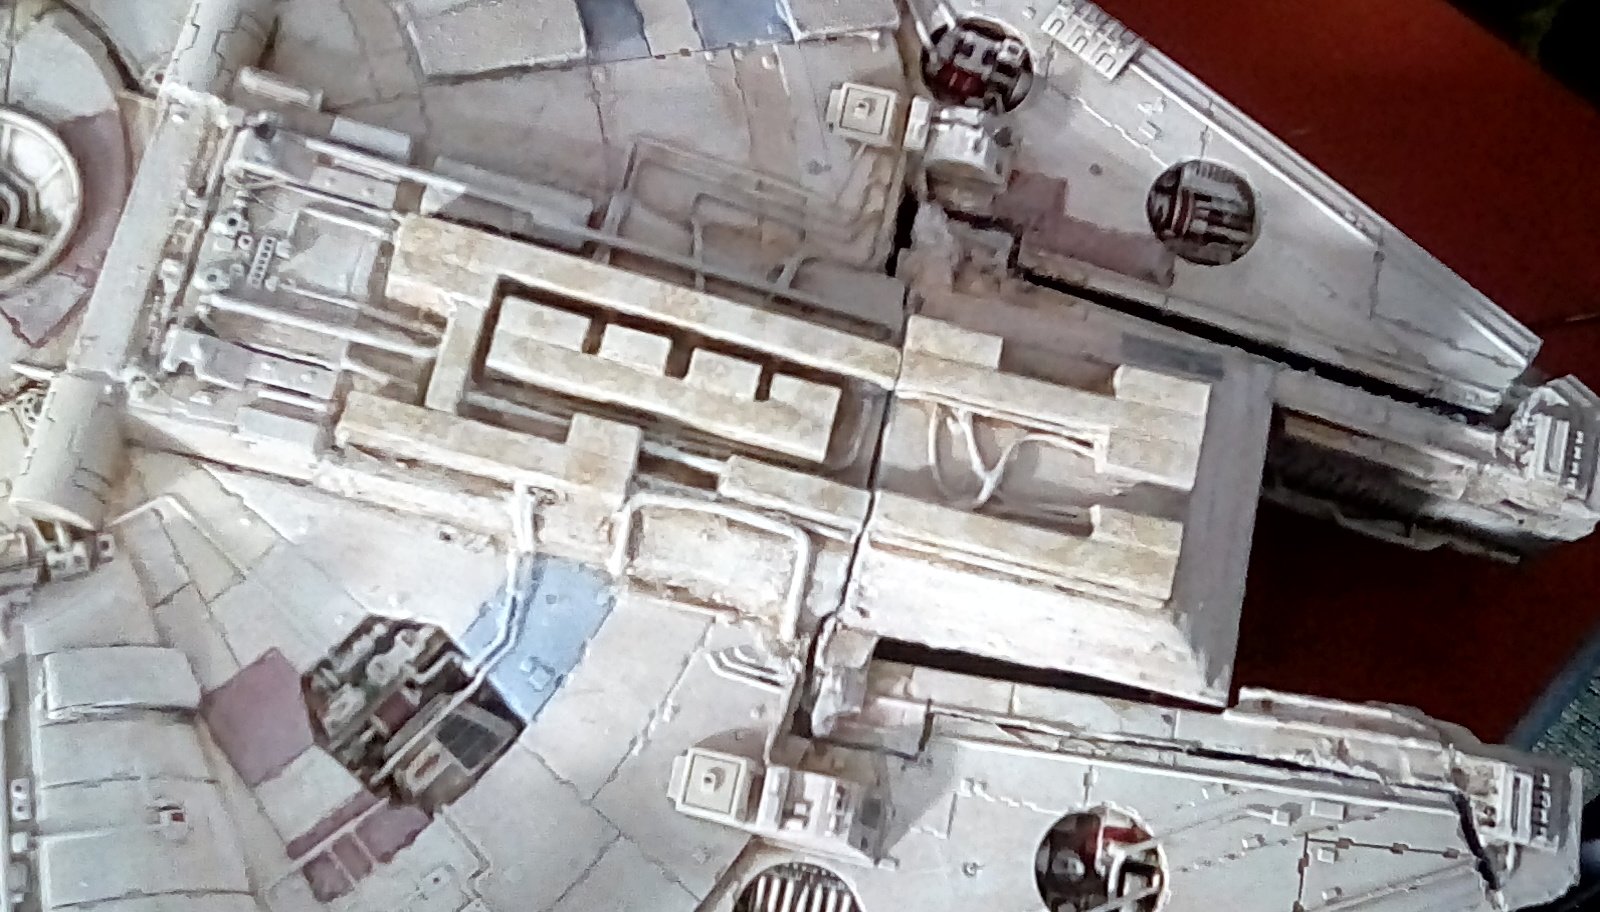
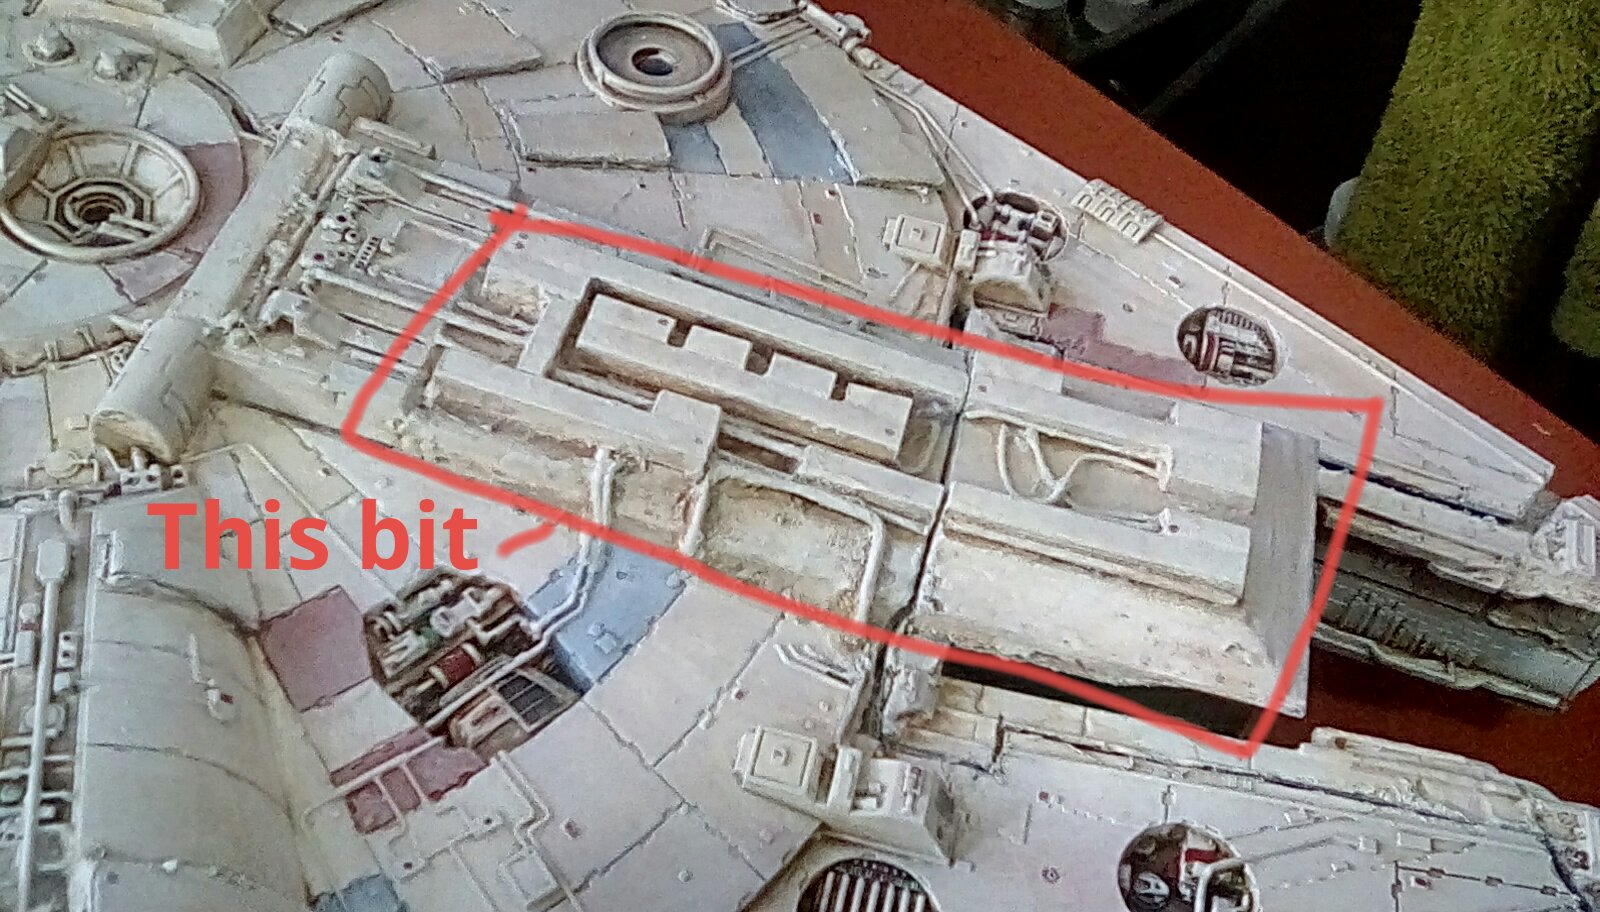
I wasn’t happy with how the re-built hull (where the nerf gun used to be in the ship) tuned out. I picked up some styrene stips from my local model shop (I can’t call them tubes as they ‘re rectangular in cross section – but you get the idea) and glued these on, removing any excess grey card with a sharp knife. Note I used superglue – not glue would have just melted the styrene. I glued on some metal wire, making sure these joined up with some of the “wiring” moulded into the rest of the plastic hull, to pull the two areas together.


Painting this rebuilt area to match the rest of the ship proved problematic. I painted the new wife and styrene with white primer, then repeated the stages I had used previously to paint rest of the ship. The wire blended in ok, but the styrene was too flat and smooth for drybrushing to work well in it – in the end I stippled on sepia shade and then once this was dry stippled on the lighter colours instead of drybushing. It’s Not a perfect match for the previous colours, but no doubt I will be tweaking that but of painting as I go on to try to make the match close hit
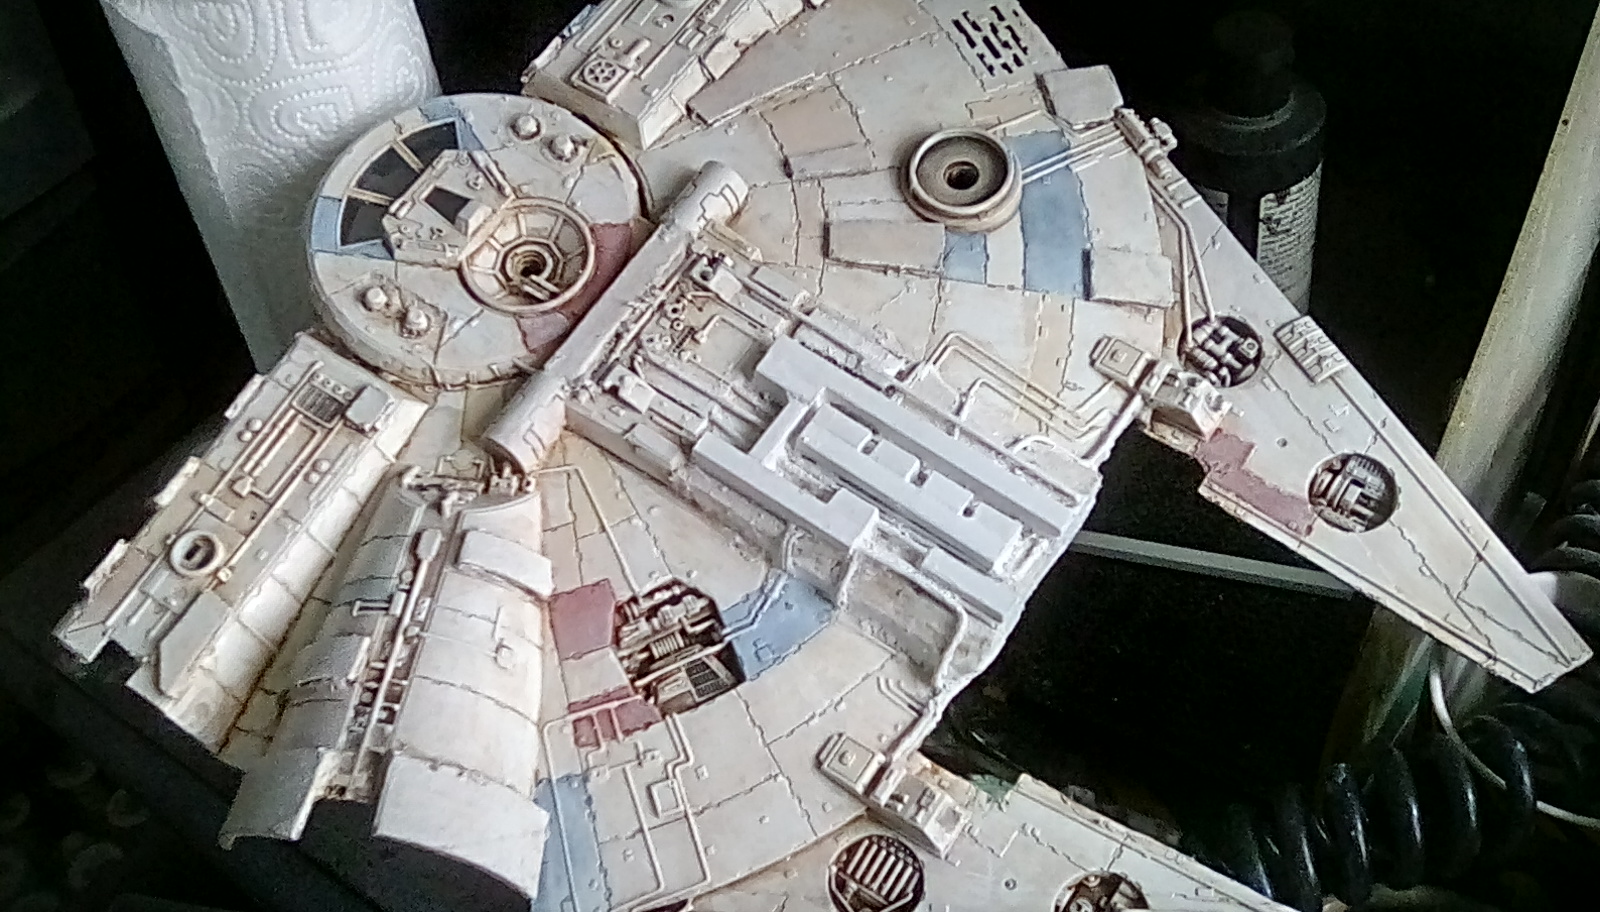
I hit some panels of the hull with light grey, to lower the intensity of some of the Sepia shade and appease any star-wars-grognars who think the ship should be grey (I think the falcon is really white and just discoloured by whatever dirt and grime is costing it currently- I’ve been aiming for a dirty off white).


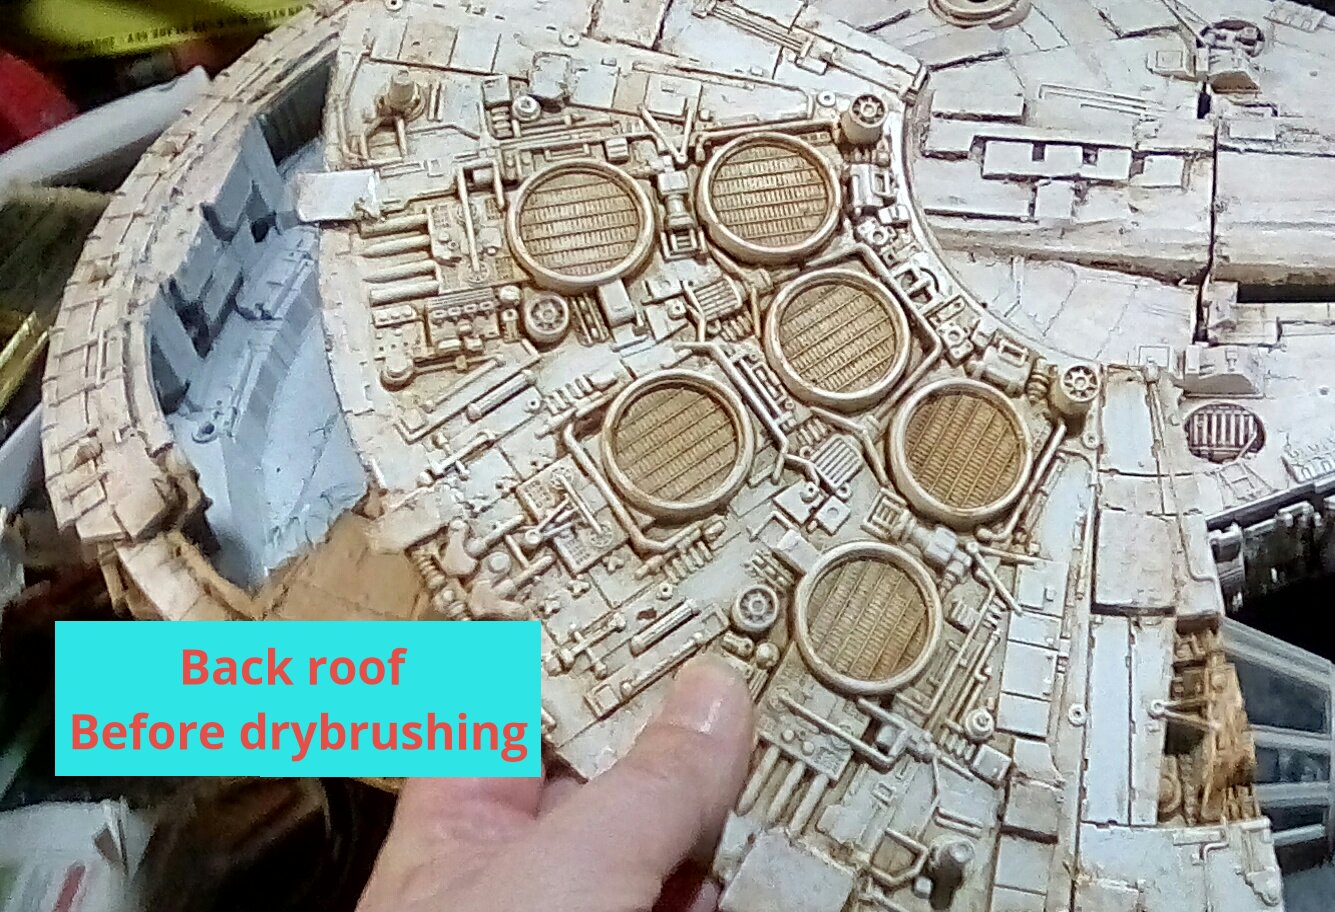
 Subtly Drybrushed and blended with white grey, to knock back the Sepia tone on the top hull slightly.

Finally, I add soot trails behind the circular heat vents using my airbrush. I’m not sure why soot would not just blow out into the vacuum of space, but it’s part of the iconic look of Han’s ship. That’s the first time I’ve used an airbrush on this model.
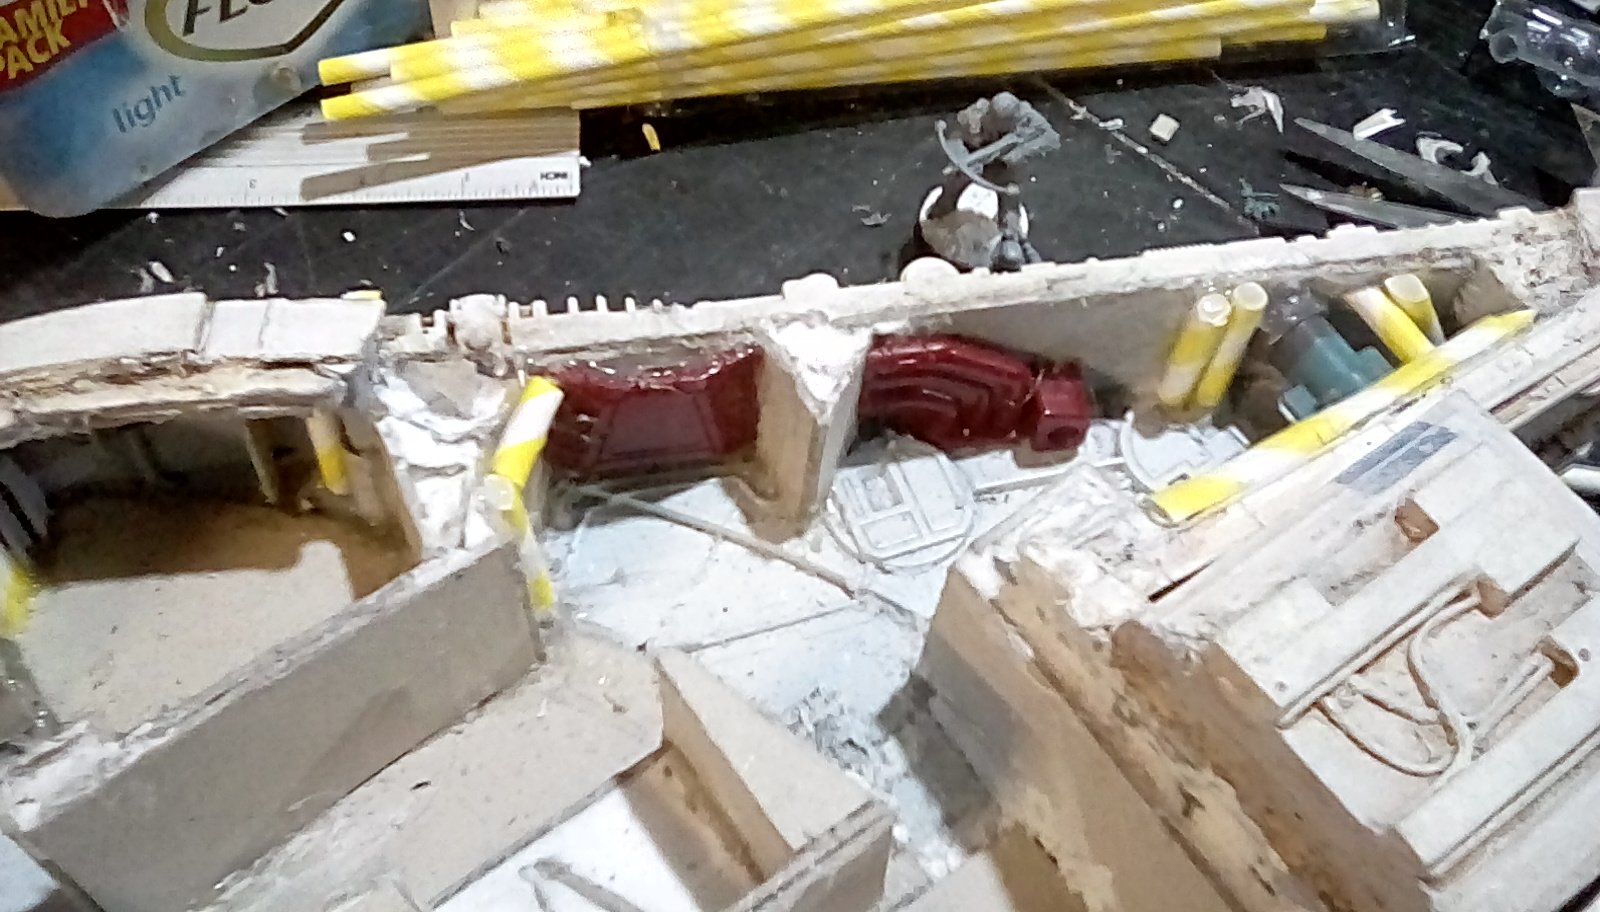
The Cockpit
If I was making a diorama, then I would sculpt chairs for the cockpit, and reposition some minis so they were sitting in them. But I am making wargame terrain,for upright minis on 27mm bases. I envision scenarios where the falcon can only take off once 2 figures are in the cockpit to fly the ship. So essentially I am going to make a movement tray to fit in the cockpit.
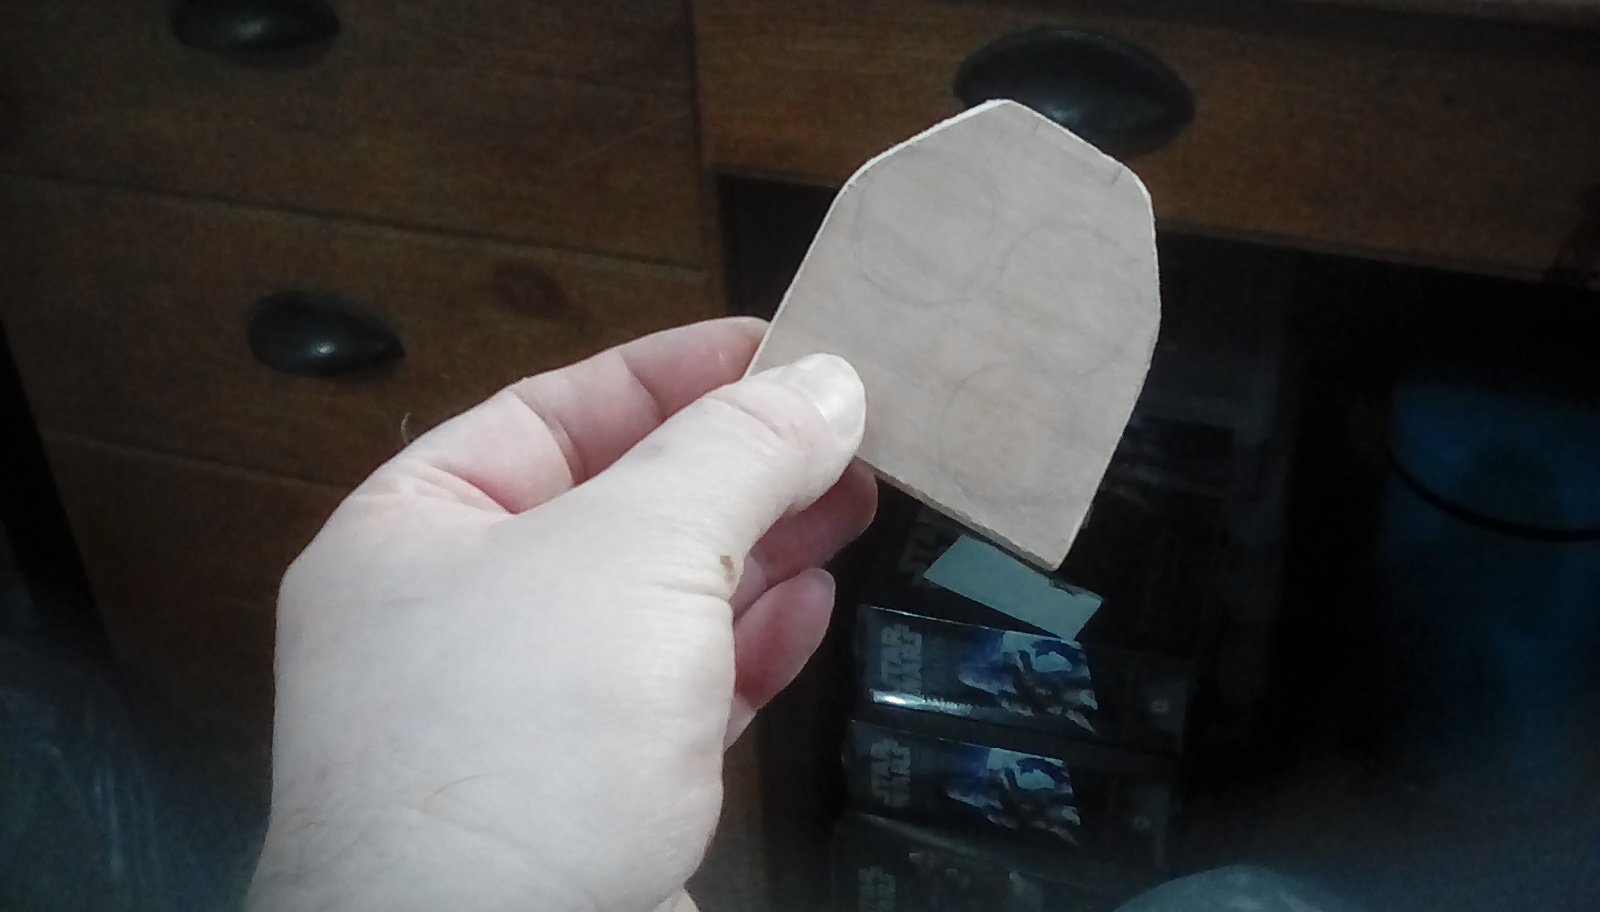 The new floor of the cockpit is cut out of hardboard.
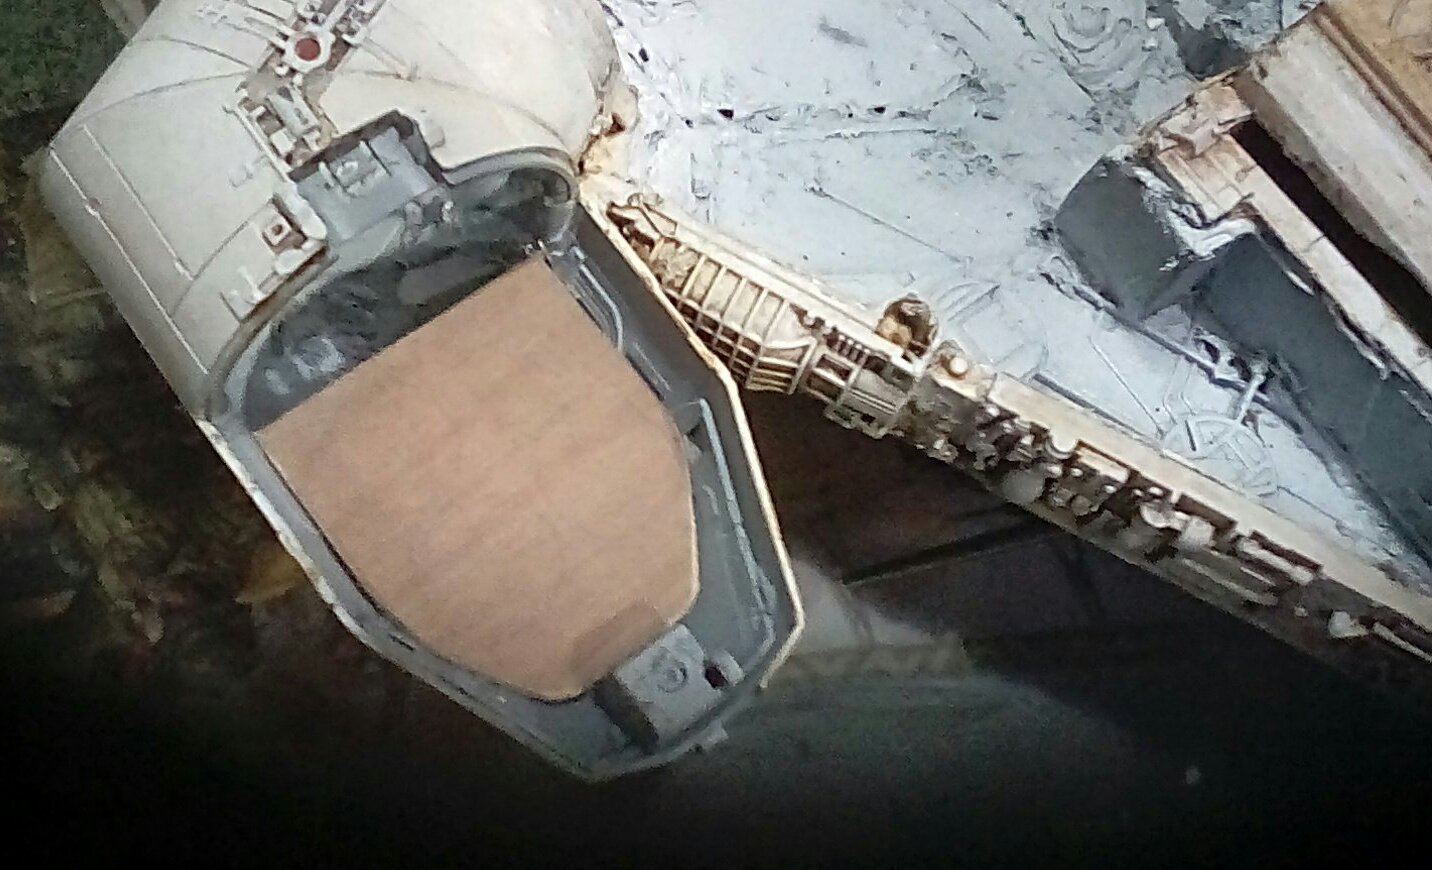 Shaped to fit...
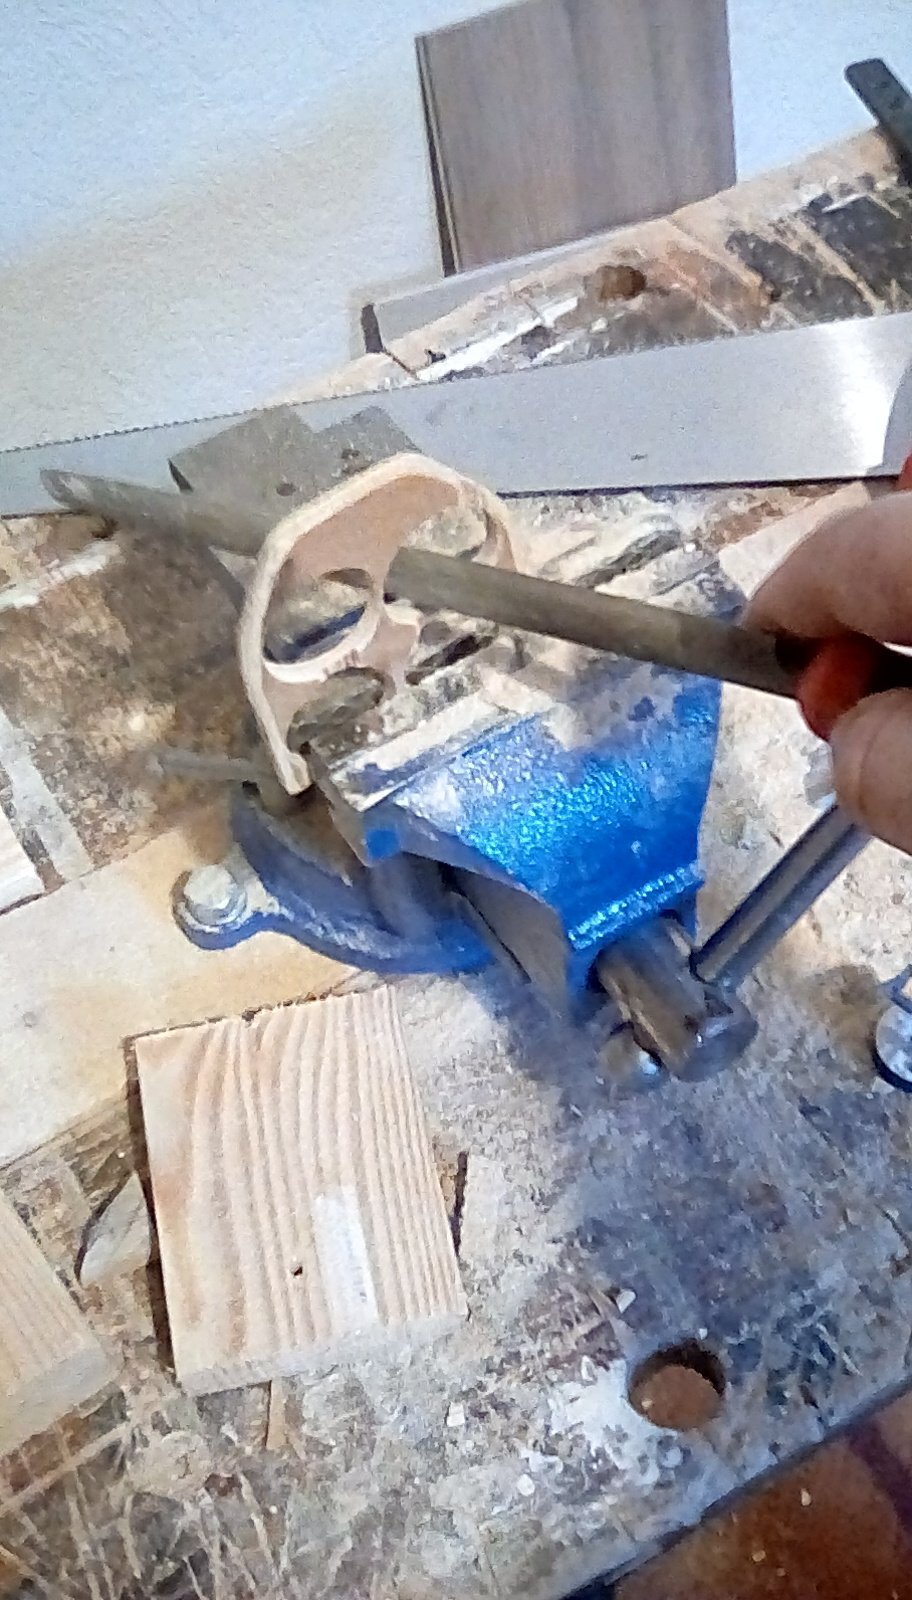 Holes for the miniatures based are drilled out with a 25mm drill. Unfortunately Legion infantry bases are 27mm, so I have to make the holes bigger with a half round wood file.
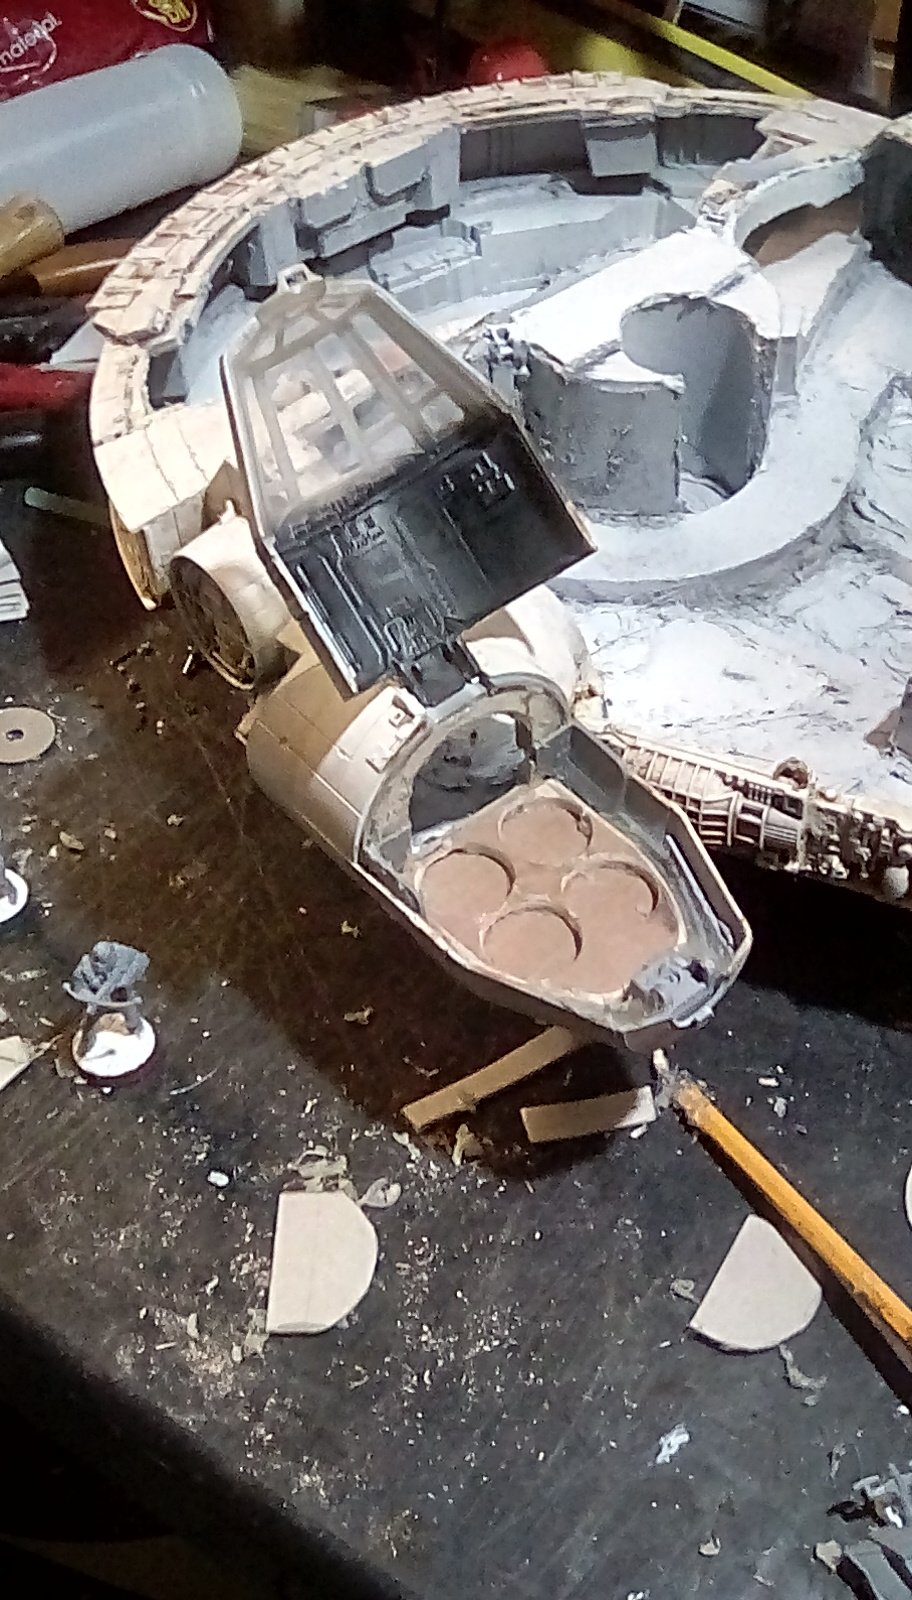
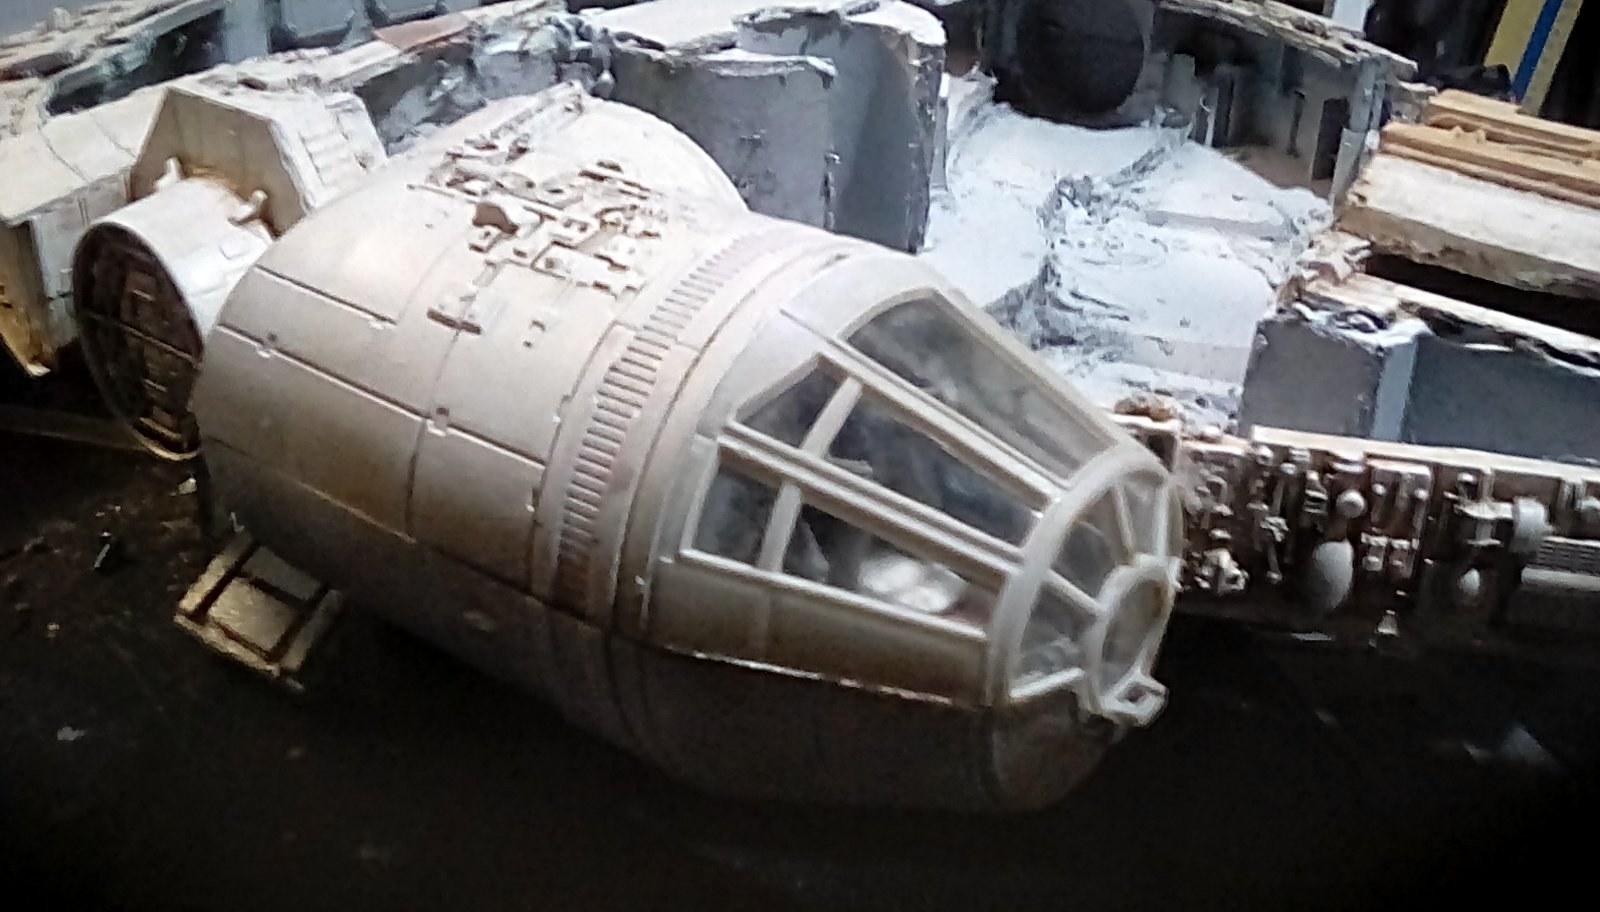
 The original toy's dashboard is now way too big...
 ...so has to be cut down in size, making sure the top of the cockpit will still close.
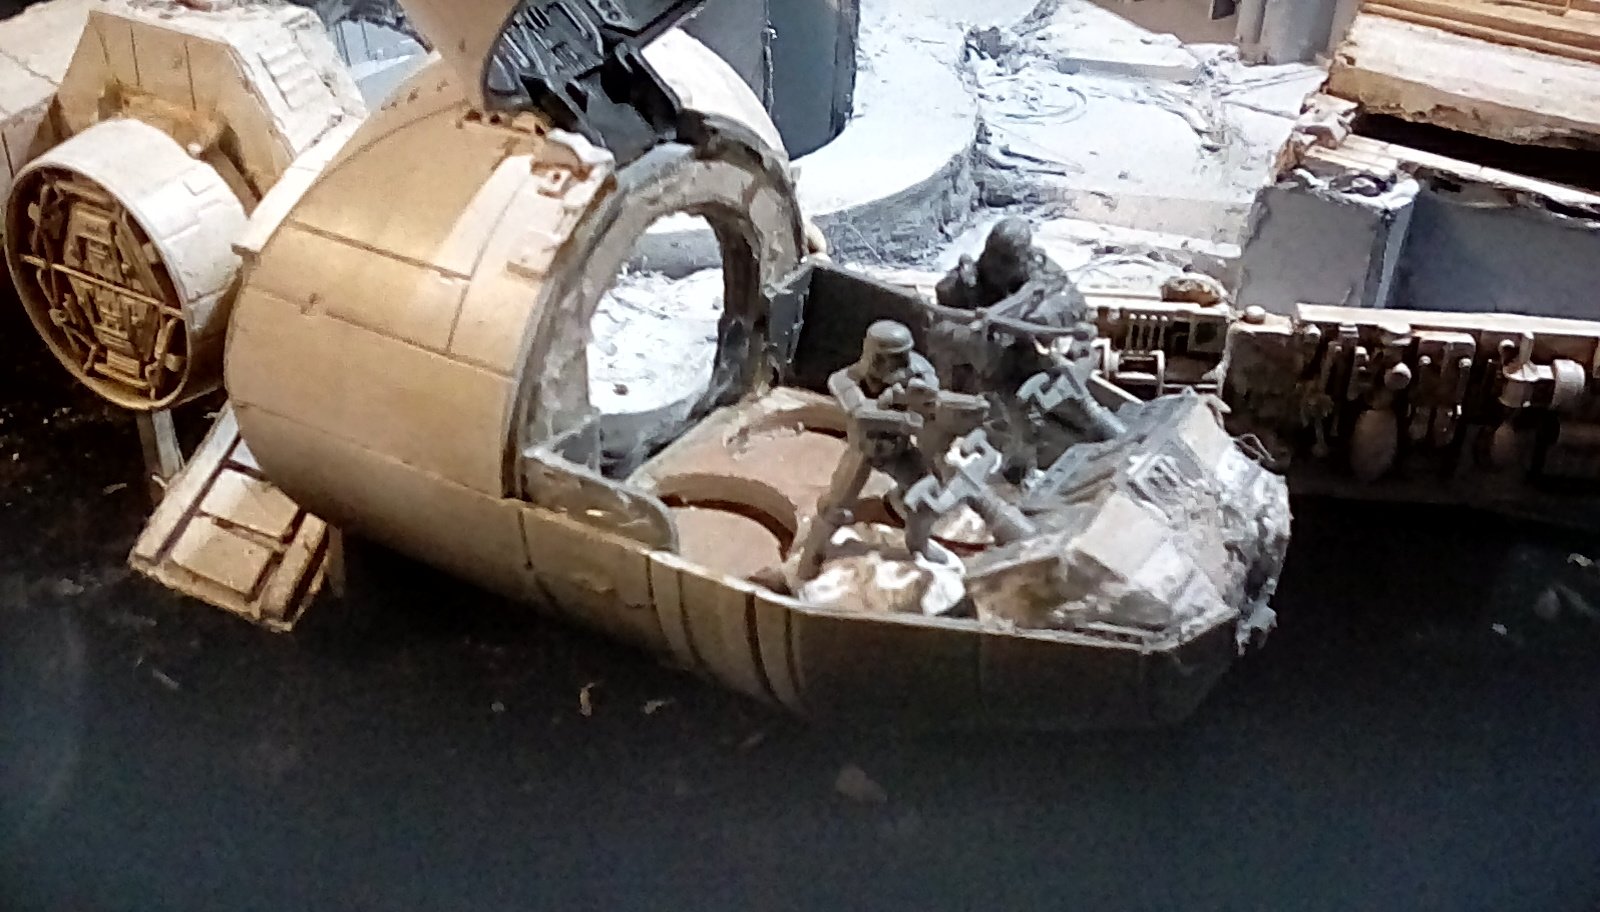 Pretty happy with this so far. An arch made from 3 layers of greyboard is glued in at the back, to make the doorway into the cockpit.
Using the same technique I used earlier, I create a flat floor for the corridor to the cockpit and a step down to get to the central corridor. A frame made of grey card is glued in place, filled with lightweight filler, then topped with more Grey card.


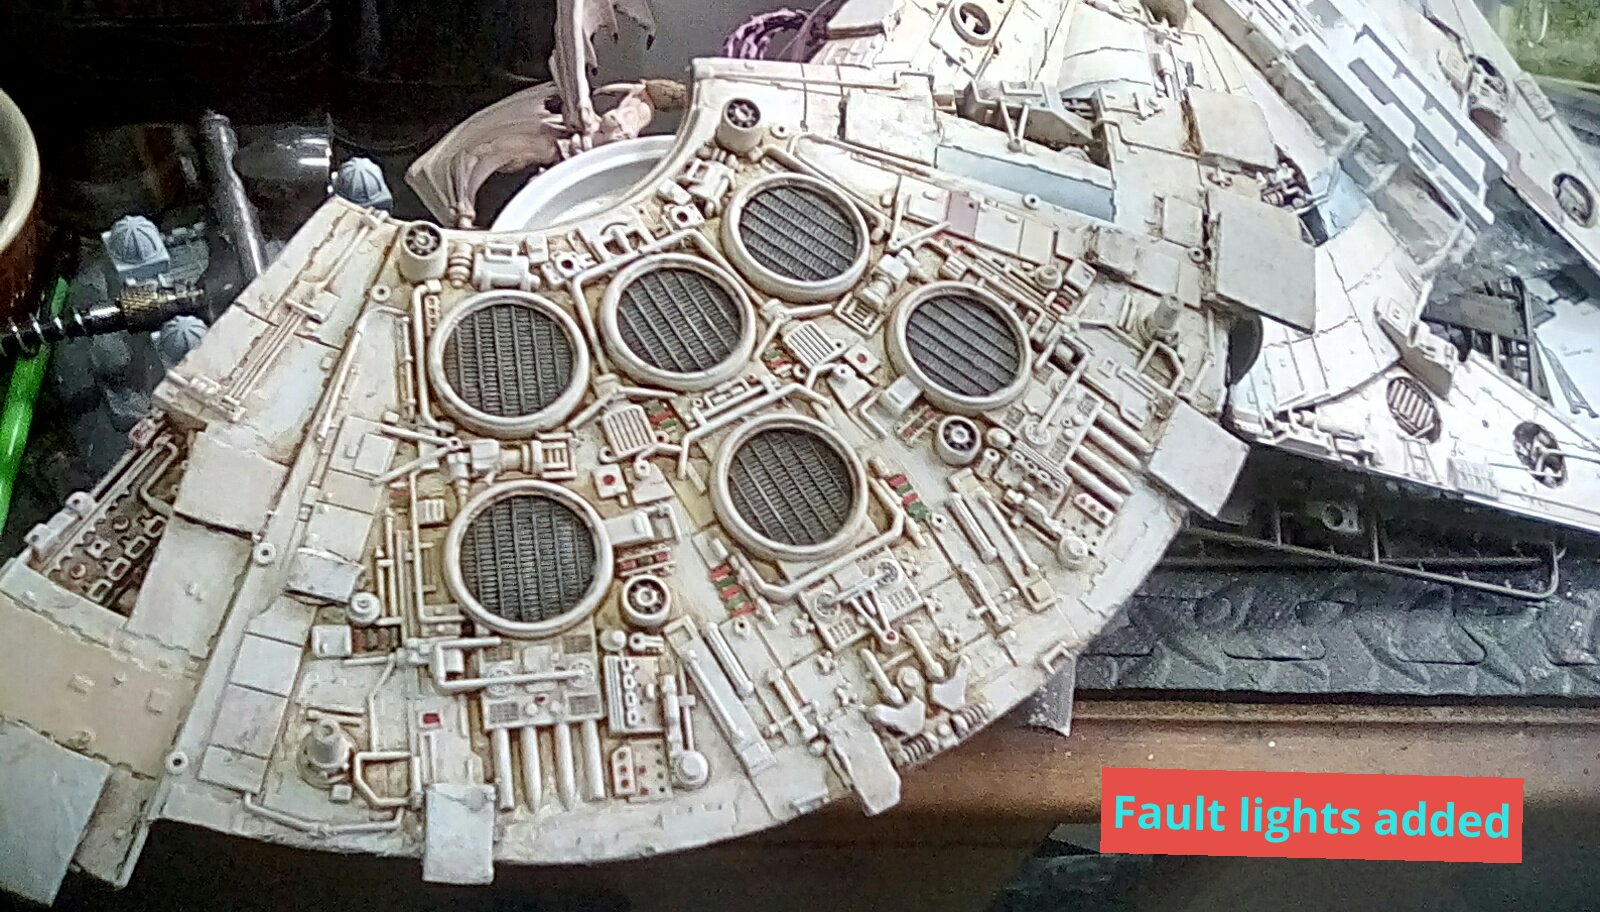
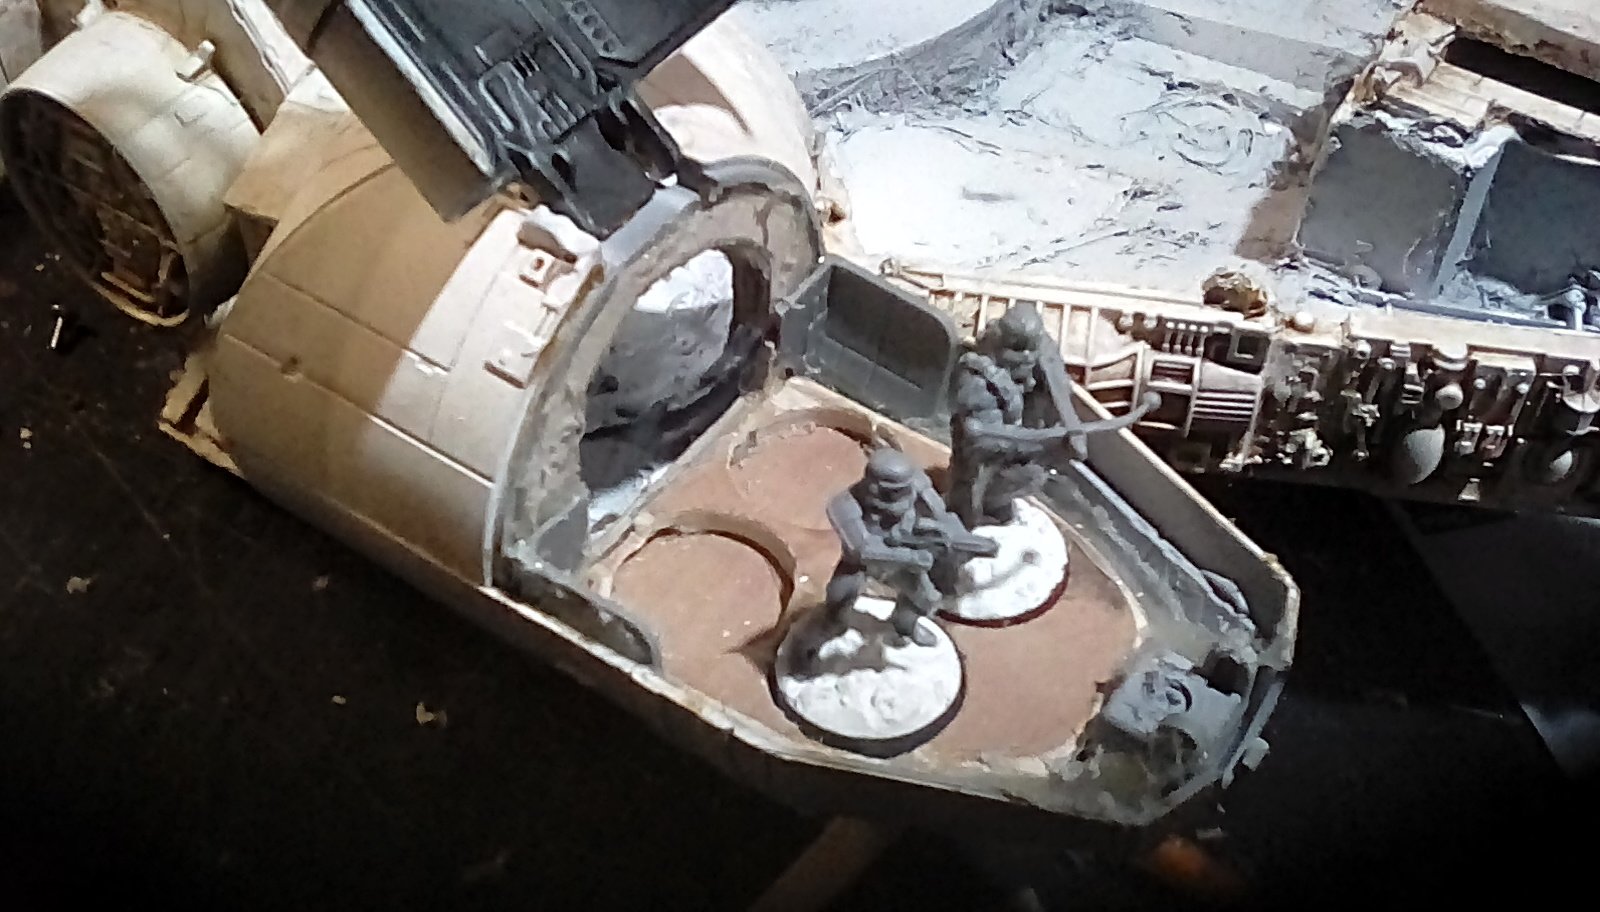
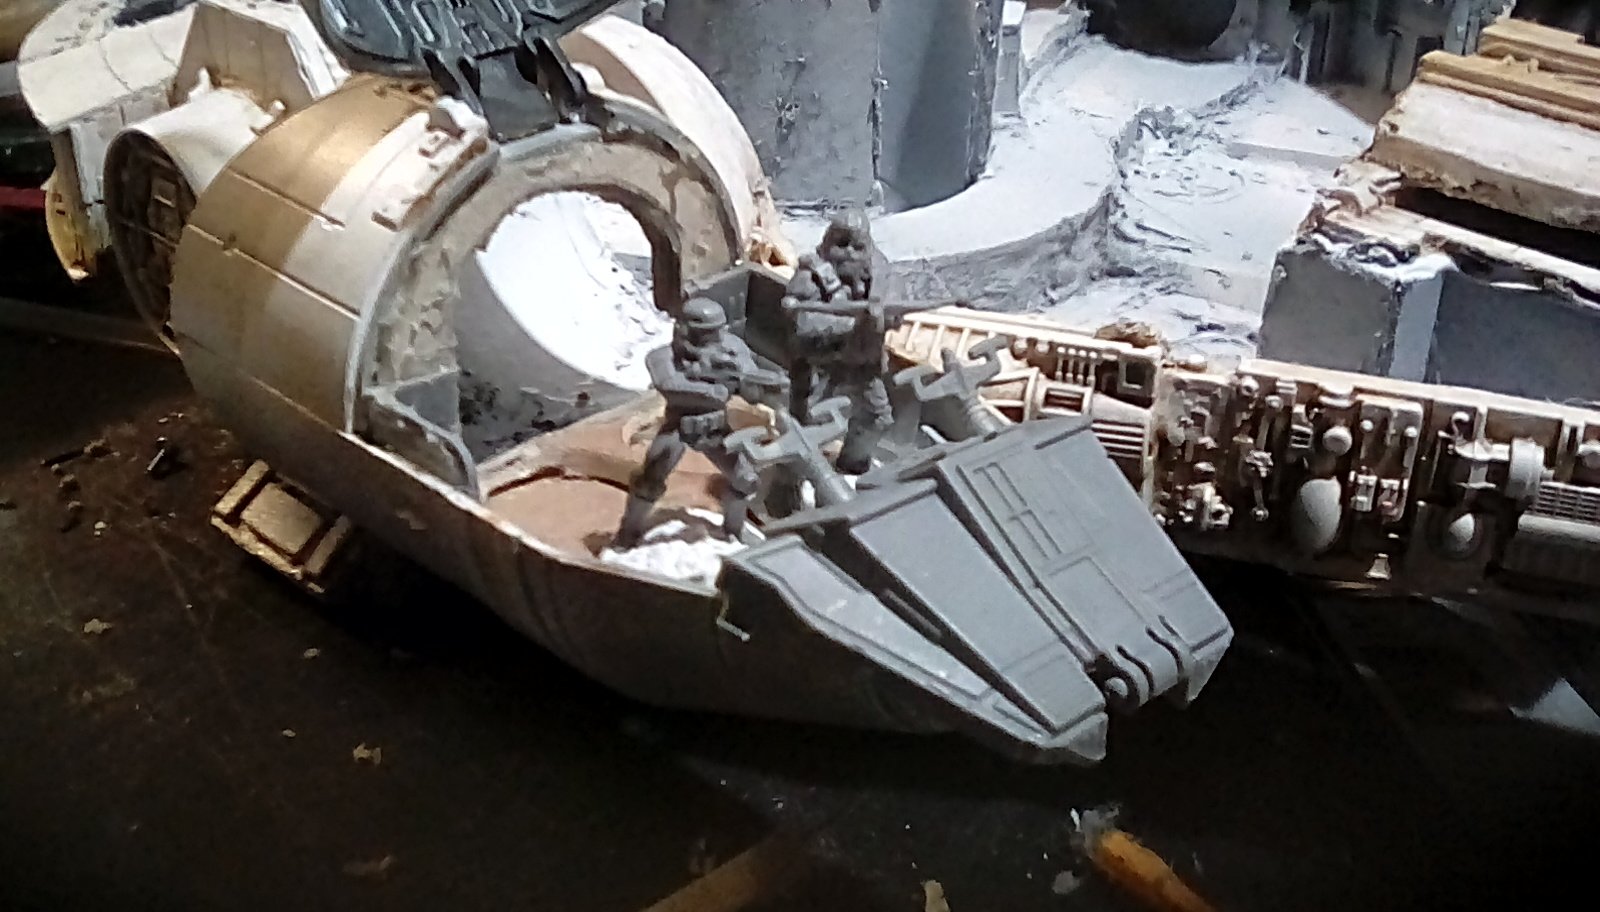
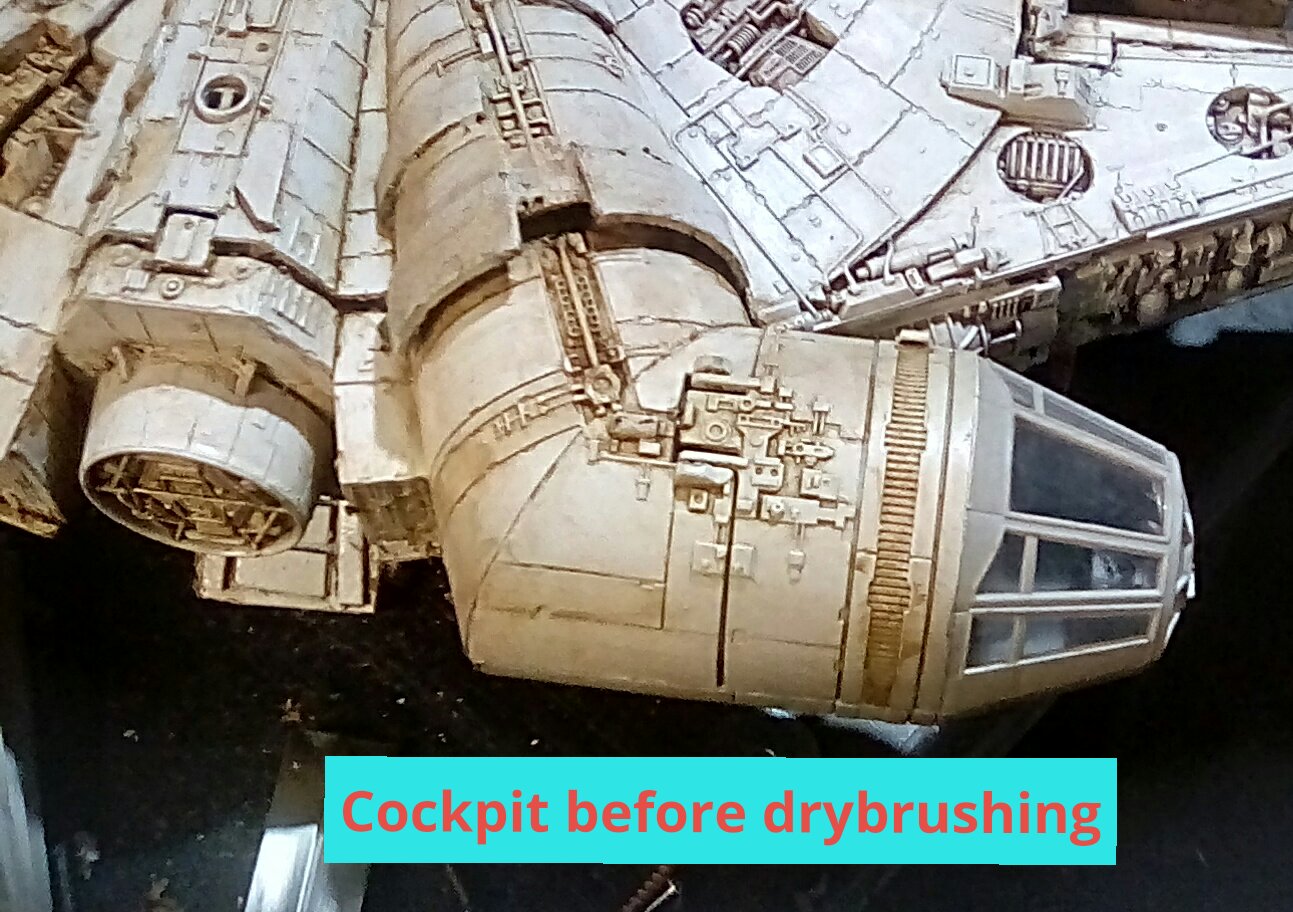
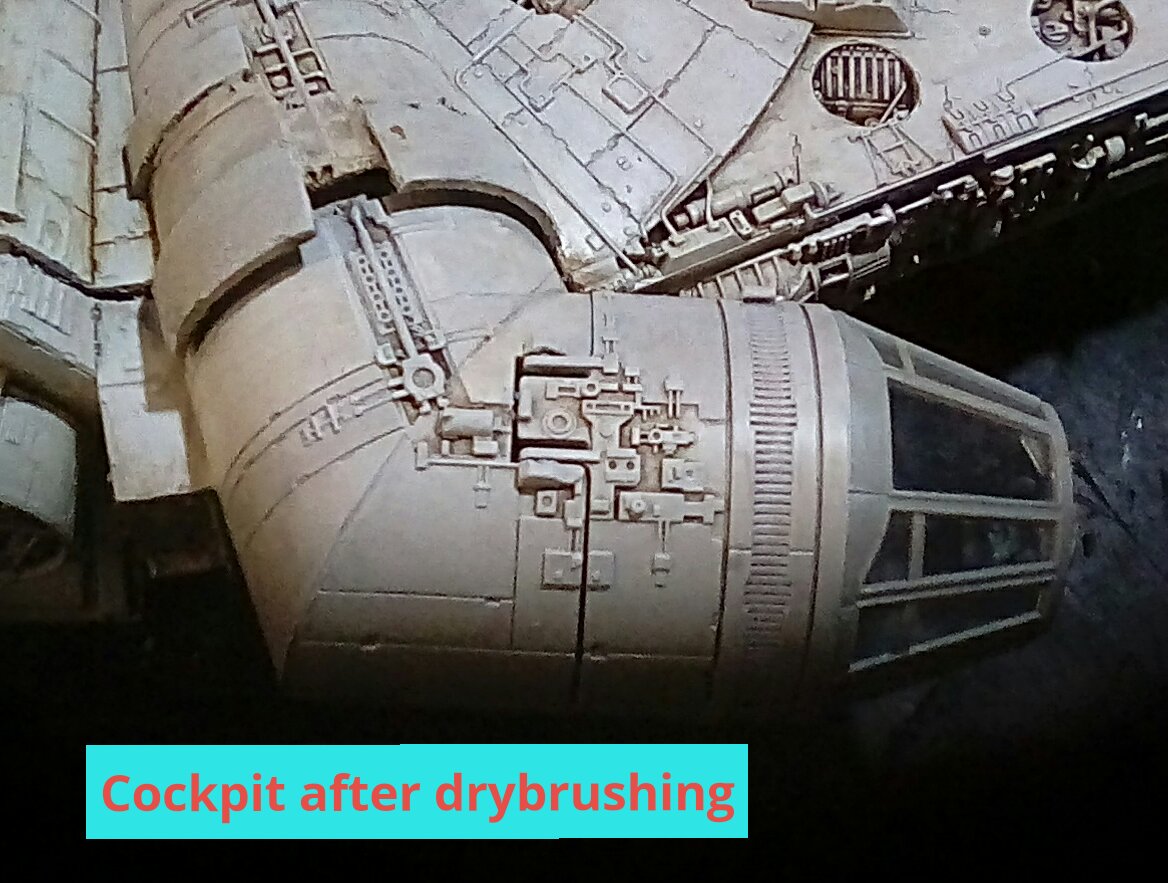
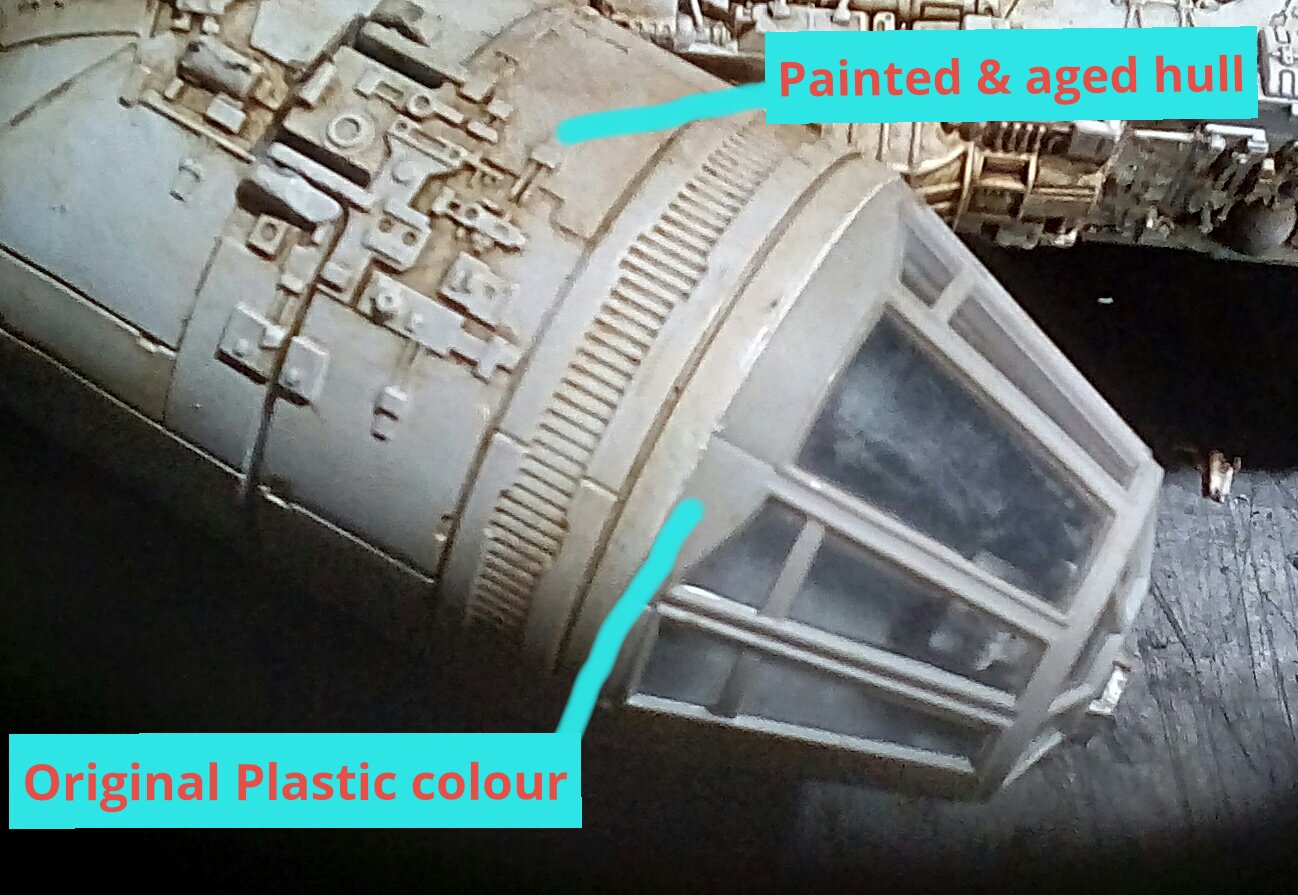
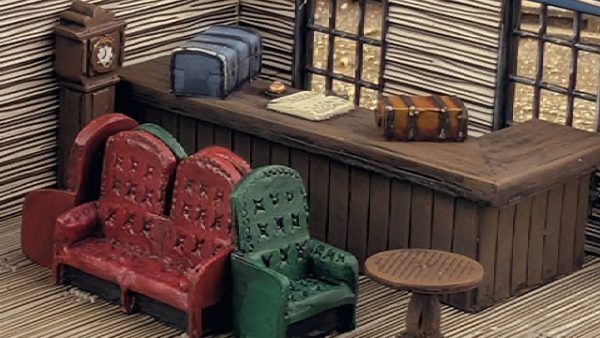
The inside of the cockpit is primed blavk, Drybrushed mid-grey, then a few quick details added – a brown steering wheel, red and green indicators on The dashboard. The detailing is nowhere near finished, but I’ve got the structure of the cockpit in place. A bit more painting is done on the cockpit cannopy – bare plastic was left where I had to protect the clear perspex with masking tape when priming the rest of the hull.
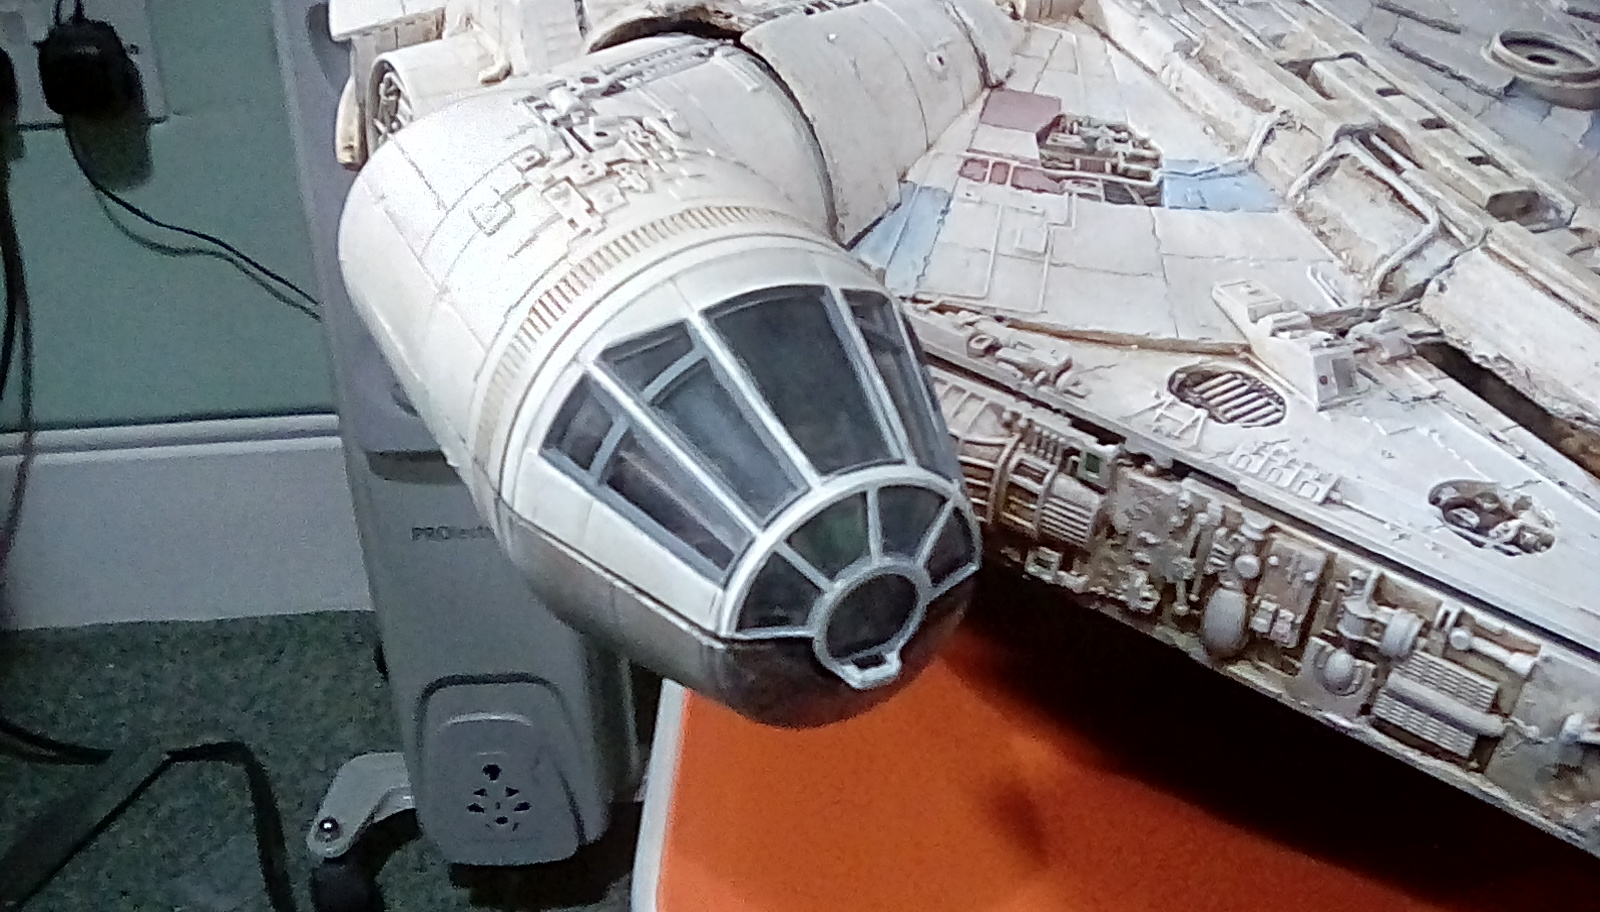
Finishing the hull painting
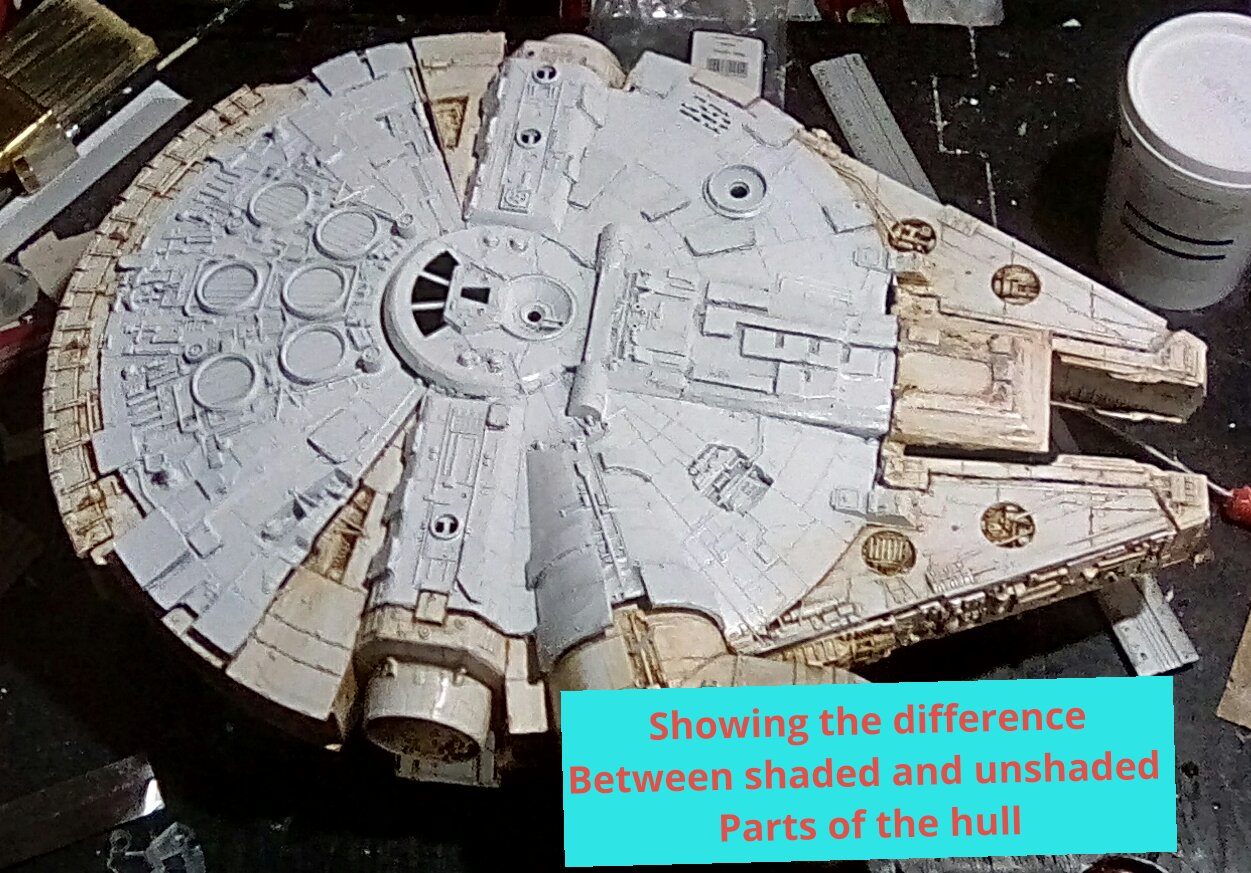
Yesterday I weathered the hull with Sepia shade to give the ship a dirty and old look.
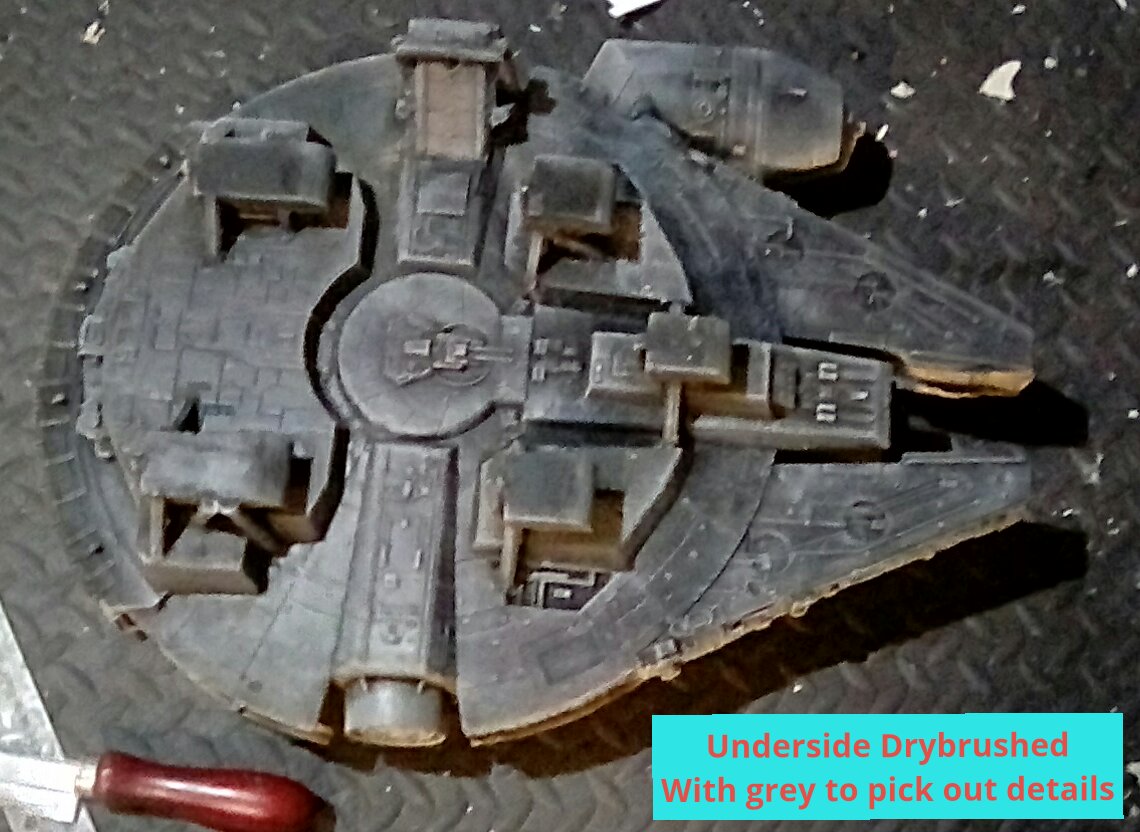
Today I Drybrushed the hull to knock back the brown of the Sepia shade and to add a bit of detail to the underside.
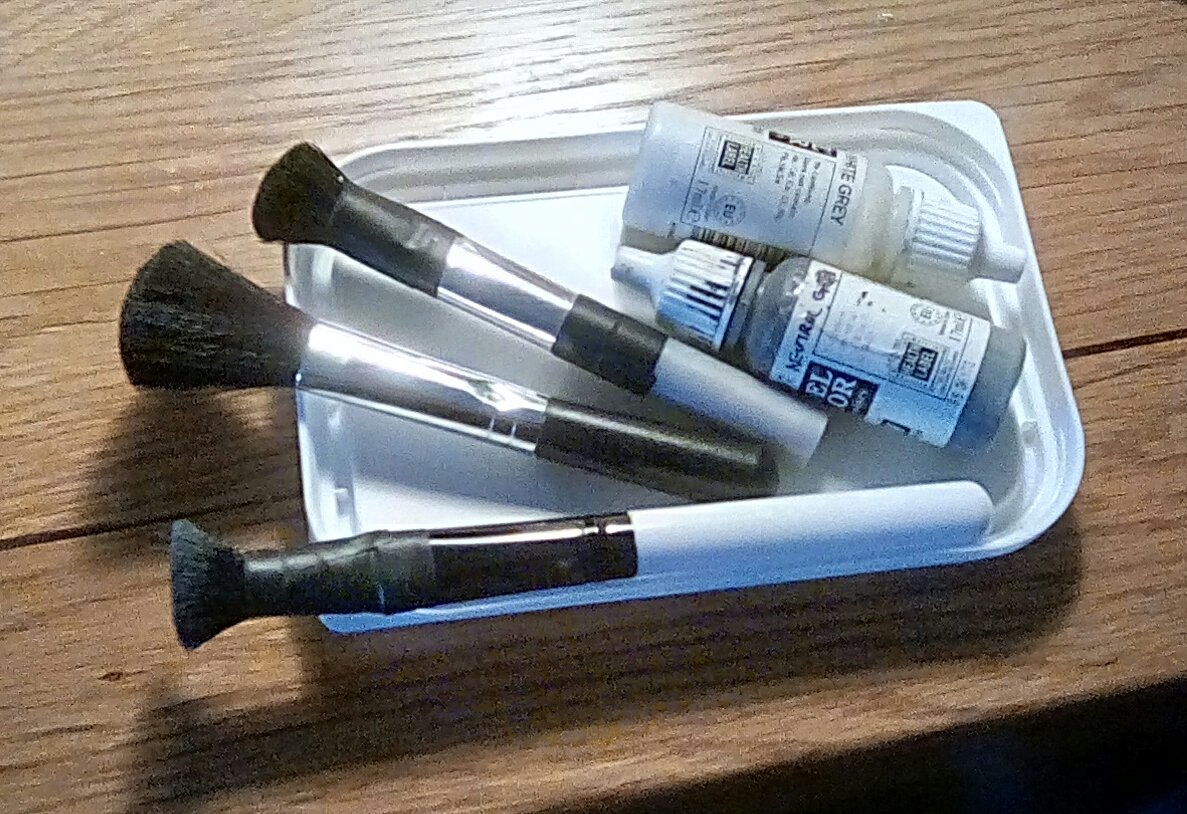 My weapons of choice for today's drybrushing. Make-up brushes are perfect for drybrushing larger items, and the margarine lies are used as pallets - I use the time to remove excess paint from the brushes.
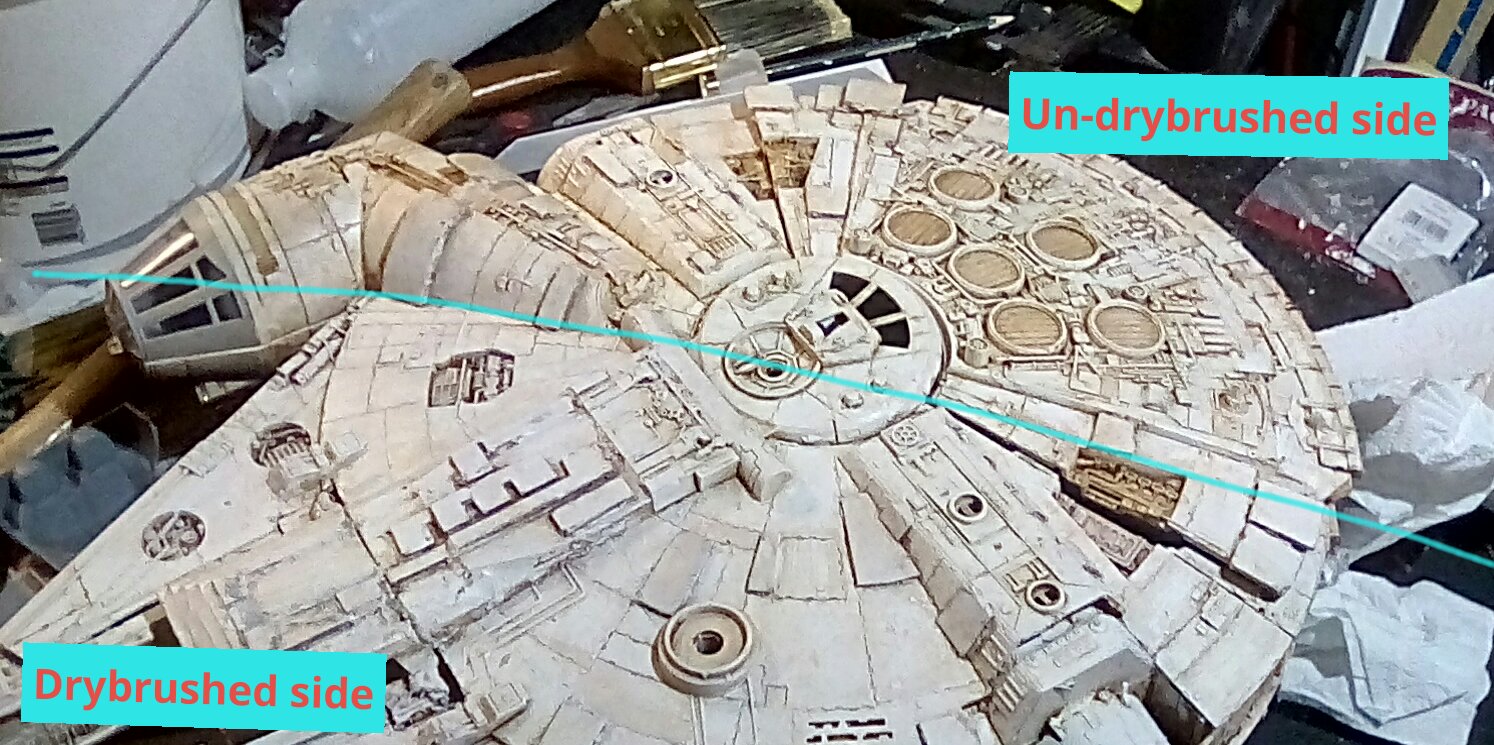

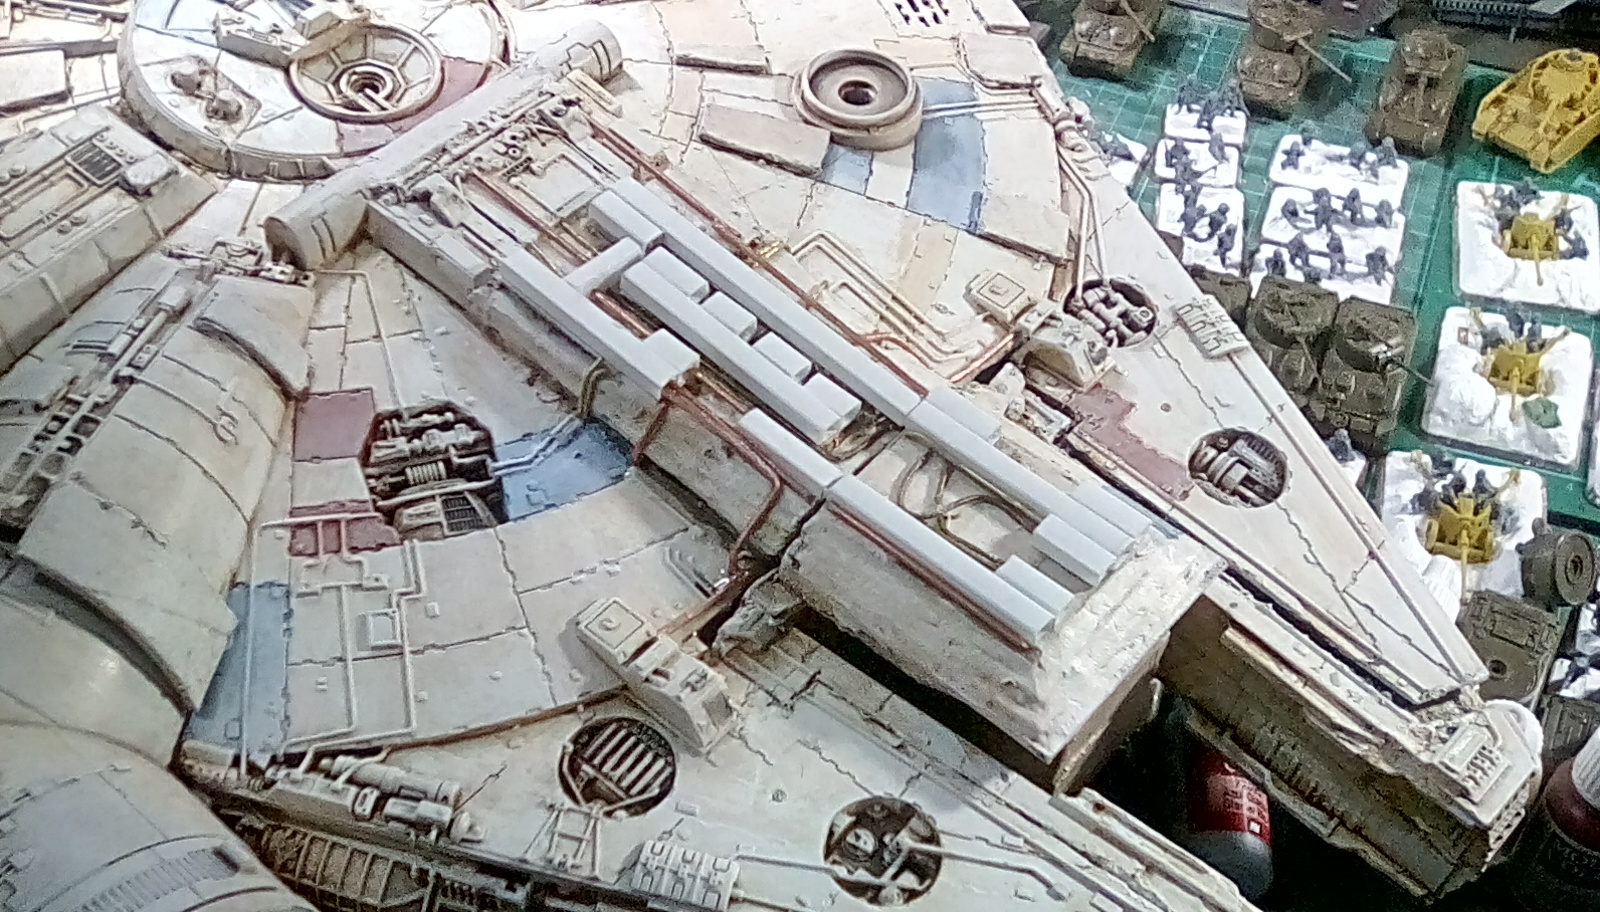
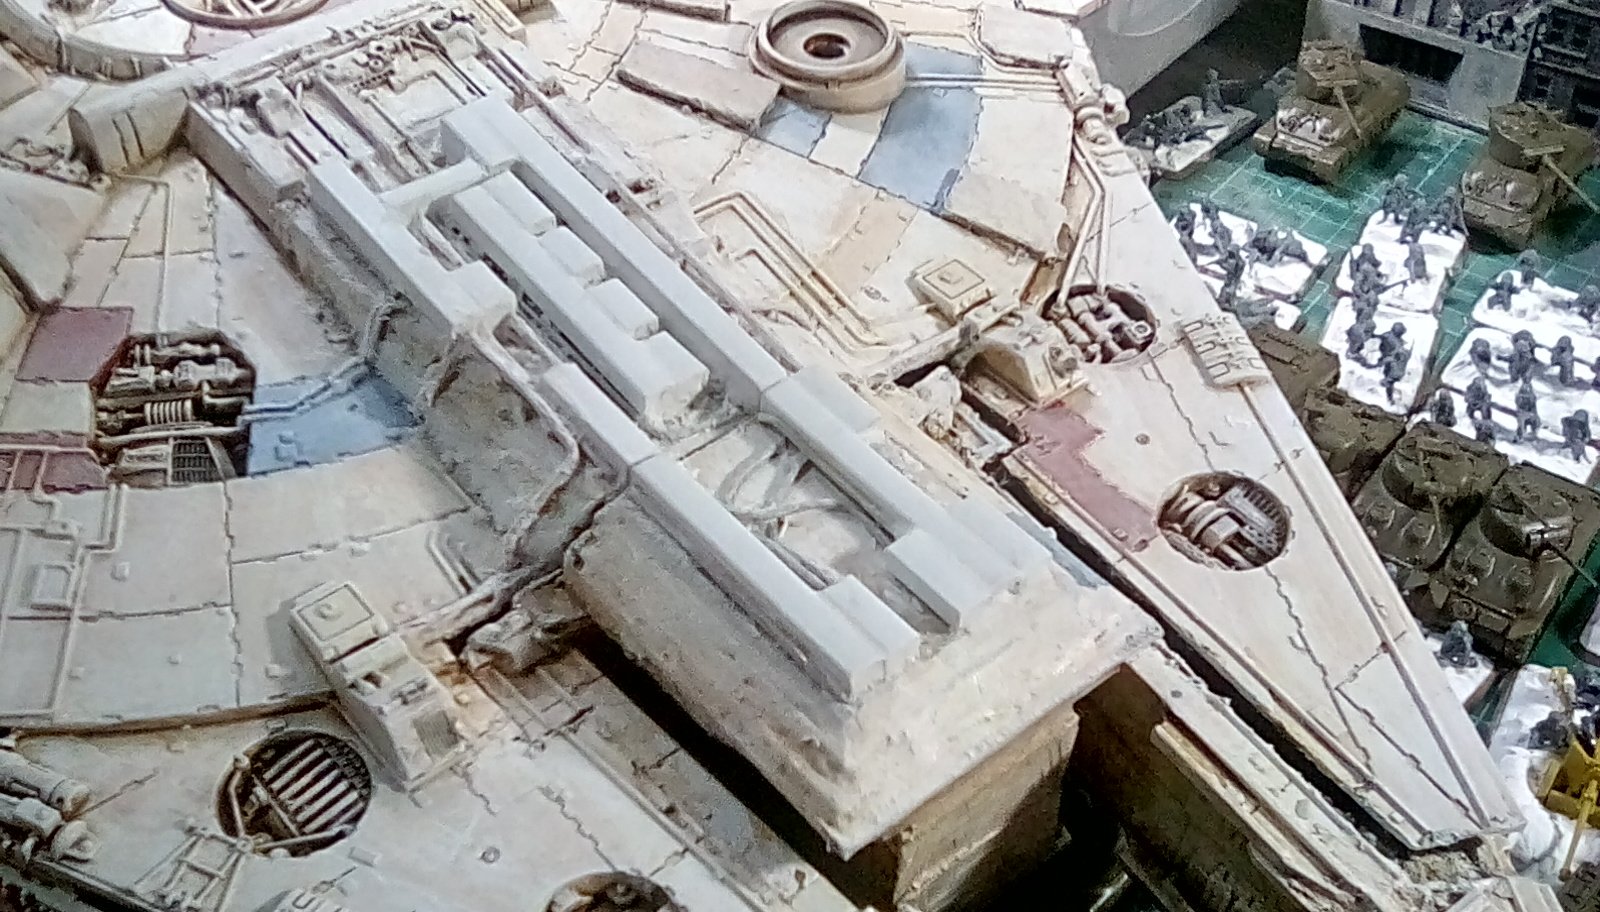
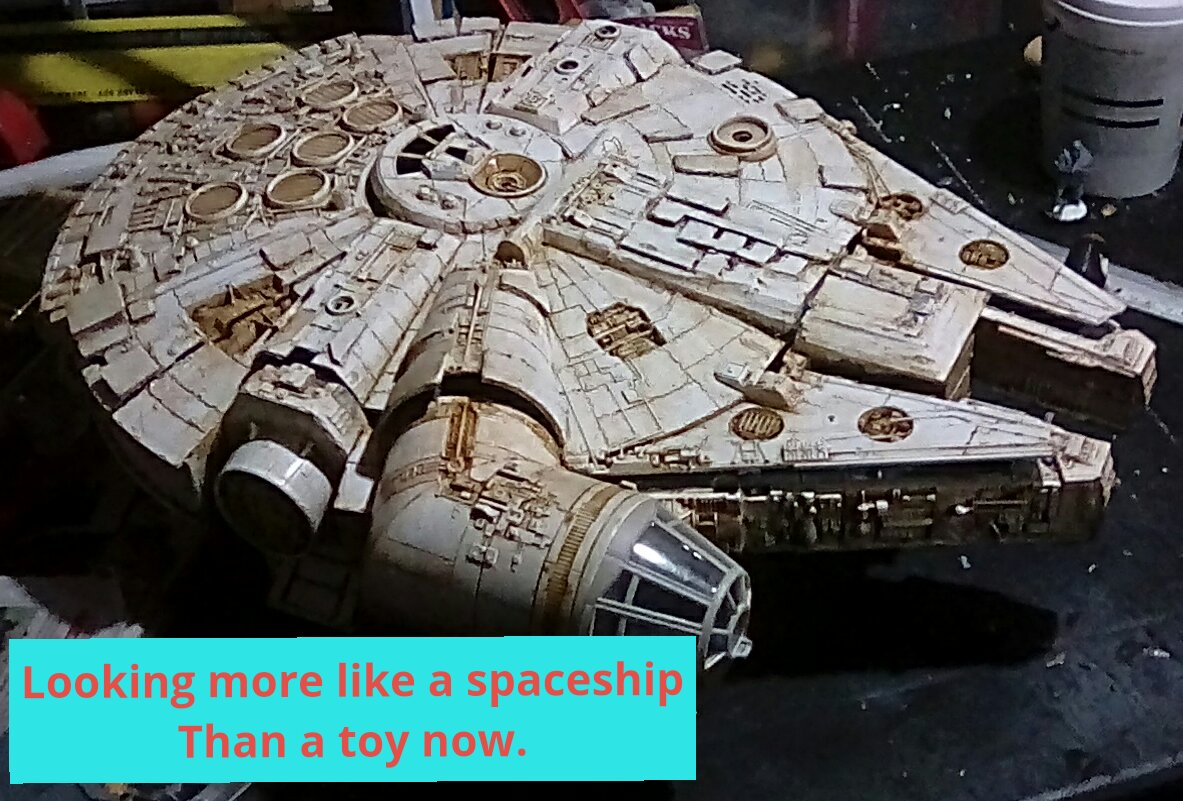
Now I add coloured panels to the top hull to break up the base colour – 5 minutes on the internet gives you 100 versions of how the authentic Falcon was painted – so these inform my placing of the panels and their colours, but I use some artistic license to paint it now I think it will look best.
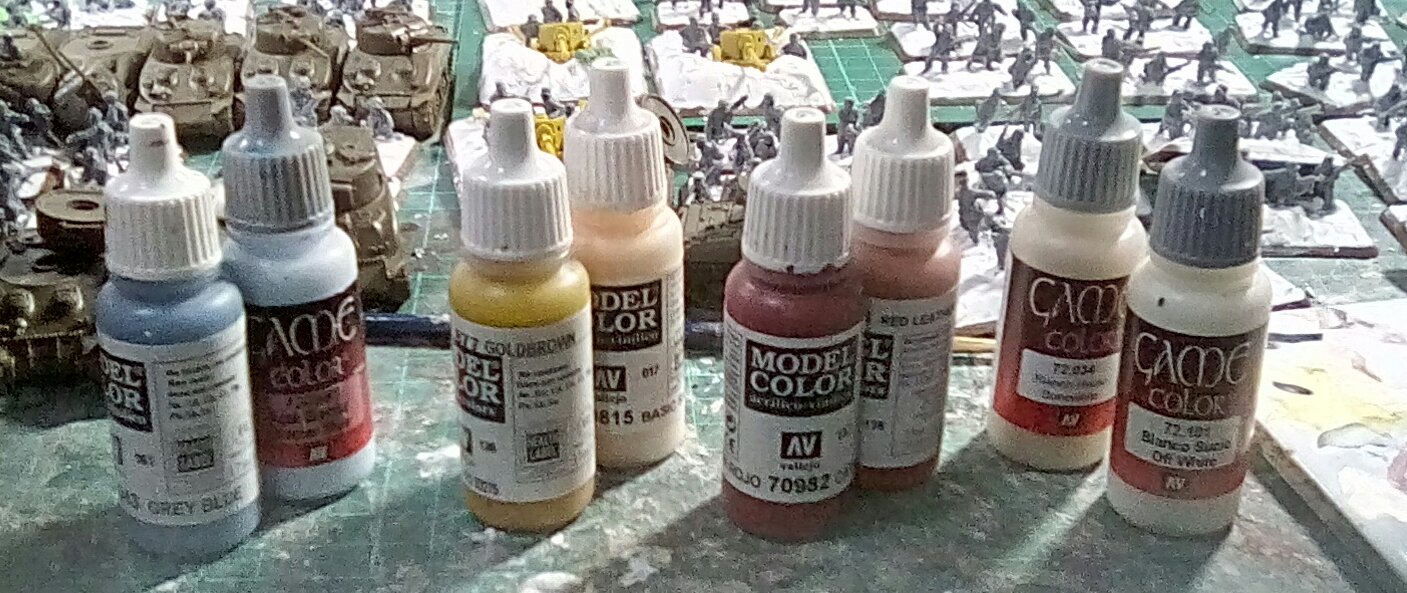 The paints I used to paint the coloured panels. 2 thin costs of the watered down darker base colour, then overpainted with the lighter shade letting the darker shade show at the edges. Then firebrand aged with the 2 off-white shades.
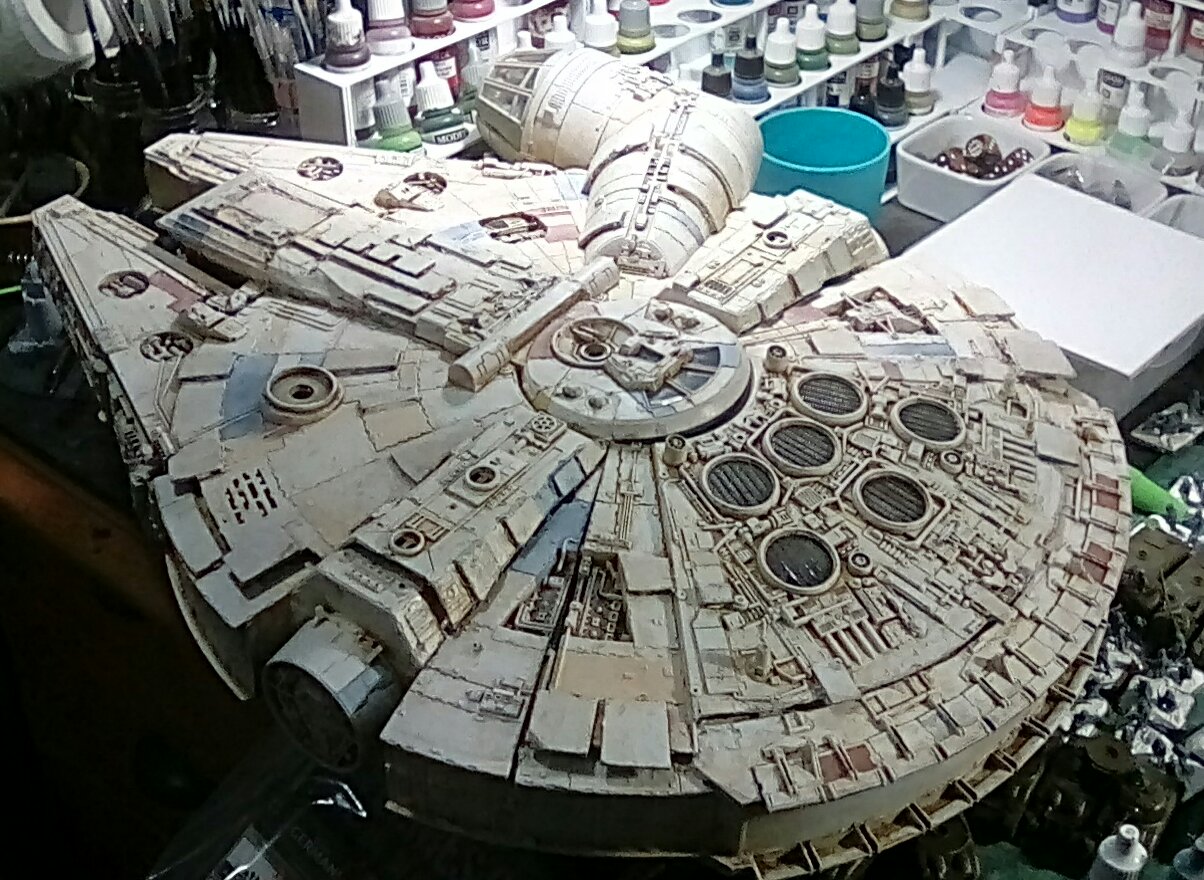
 The circular heat vents and the deeper recesses are shaded with GW nulin oil to take their colours towards black.
Painting the Hull
There are one of two things I would have liked to get finished first, but as we are going through a spell of unseasonally warm dry weather, I decided to take advantage of this while I can and paint the hull using aerosol paint before the winter rain or snow returns. Primer from a can always seems to bond better to plastic toys than primer applied with an airbrush indoors, so I think it was worth doing this while the weather allows even though I will have to repaint a few things later.
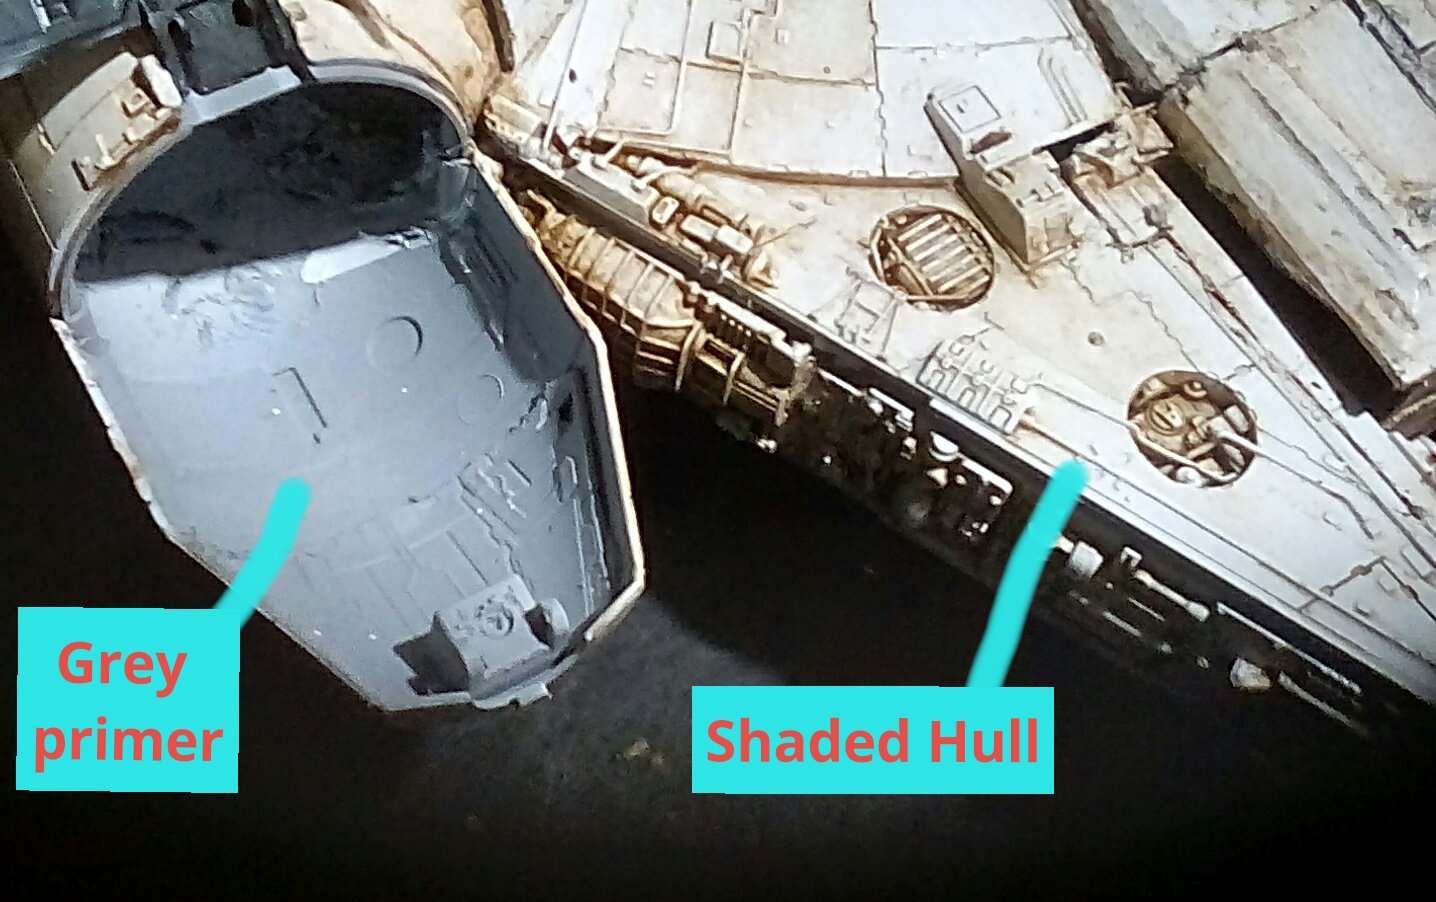
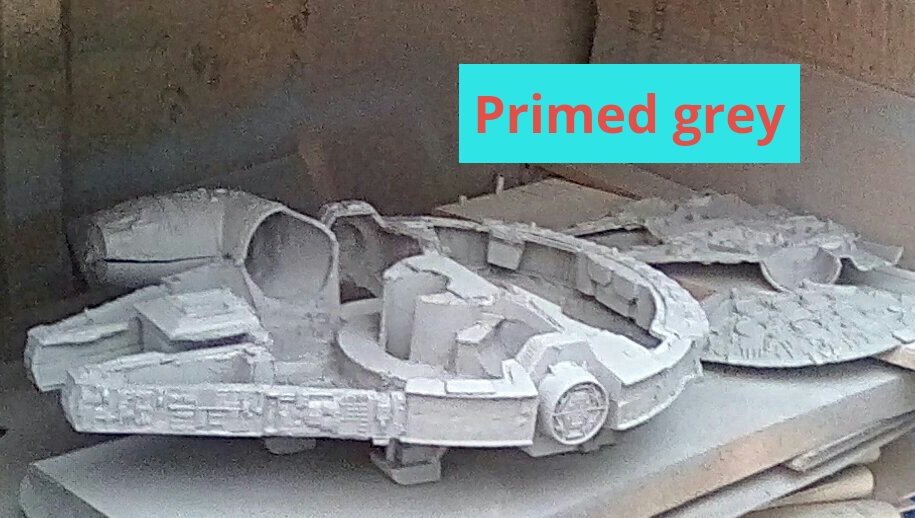 All the bare plastic is primed with a Matt grey primer.
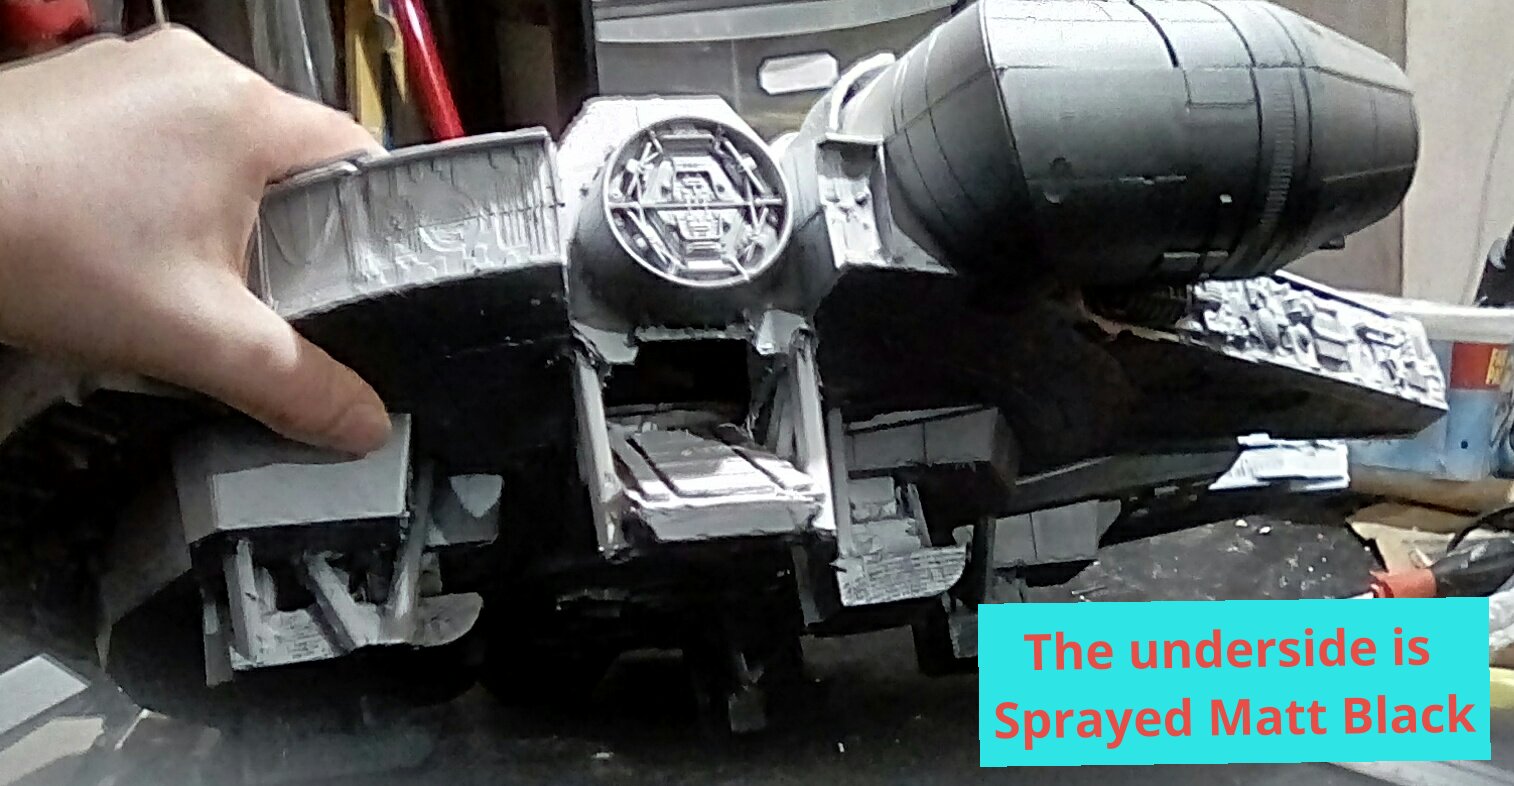
1- all bare plastic is primed with a grey plastic primer. This will give a good key for subsequent layers of paint to adhere to.
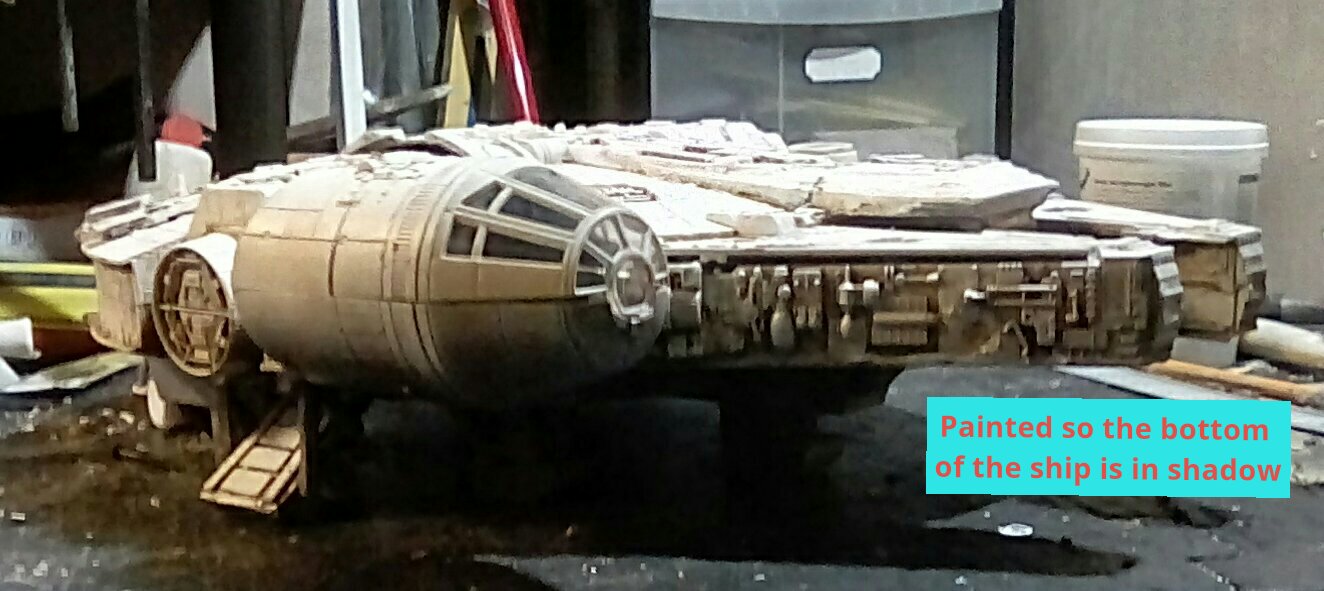
2- the underside is sprayed black. As I am intending this to be shadow, I used a Matt black instead of gloss.
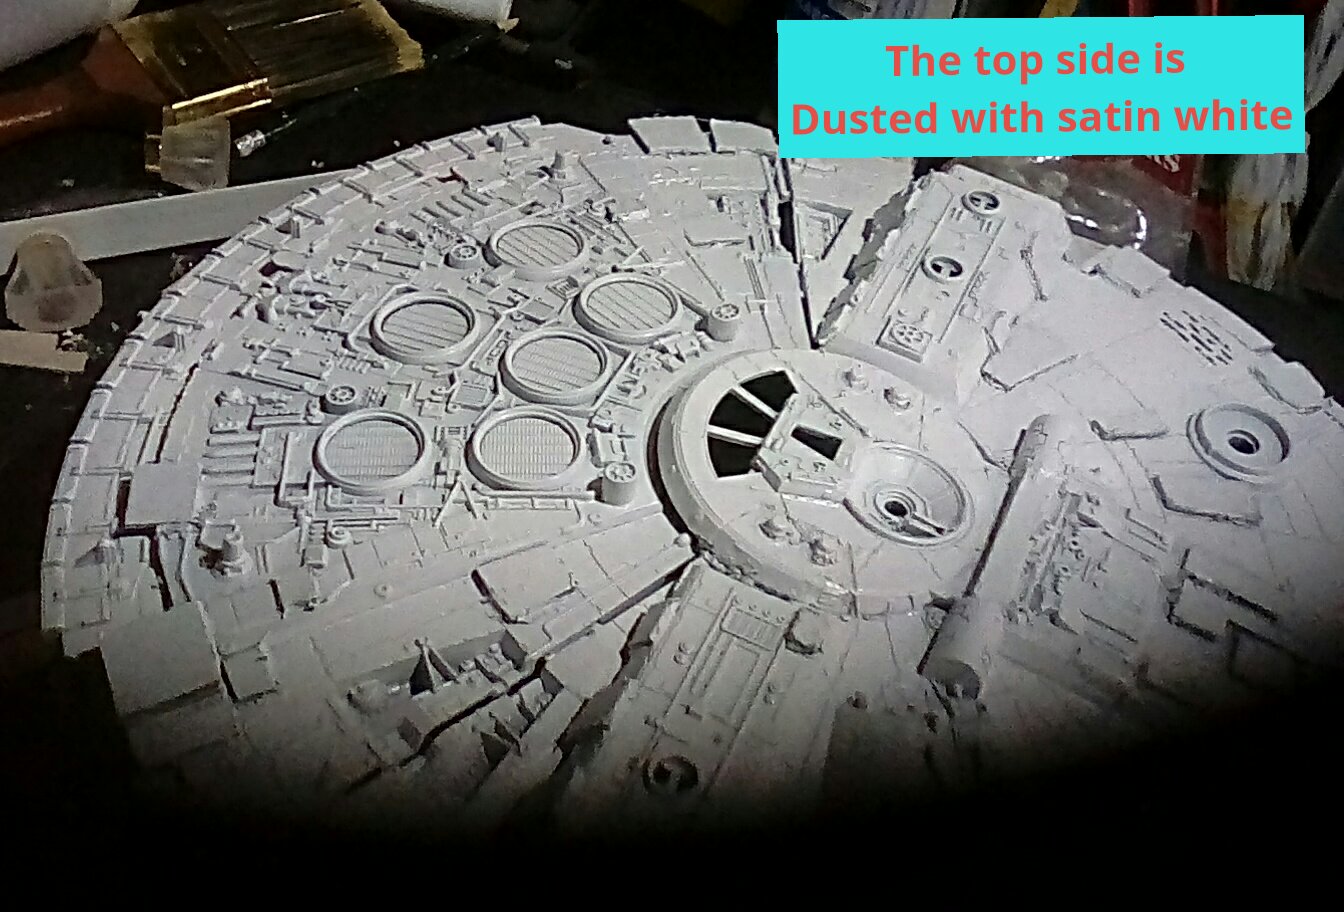
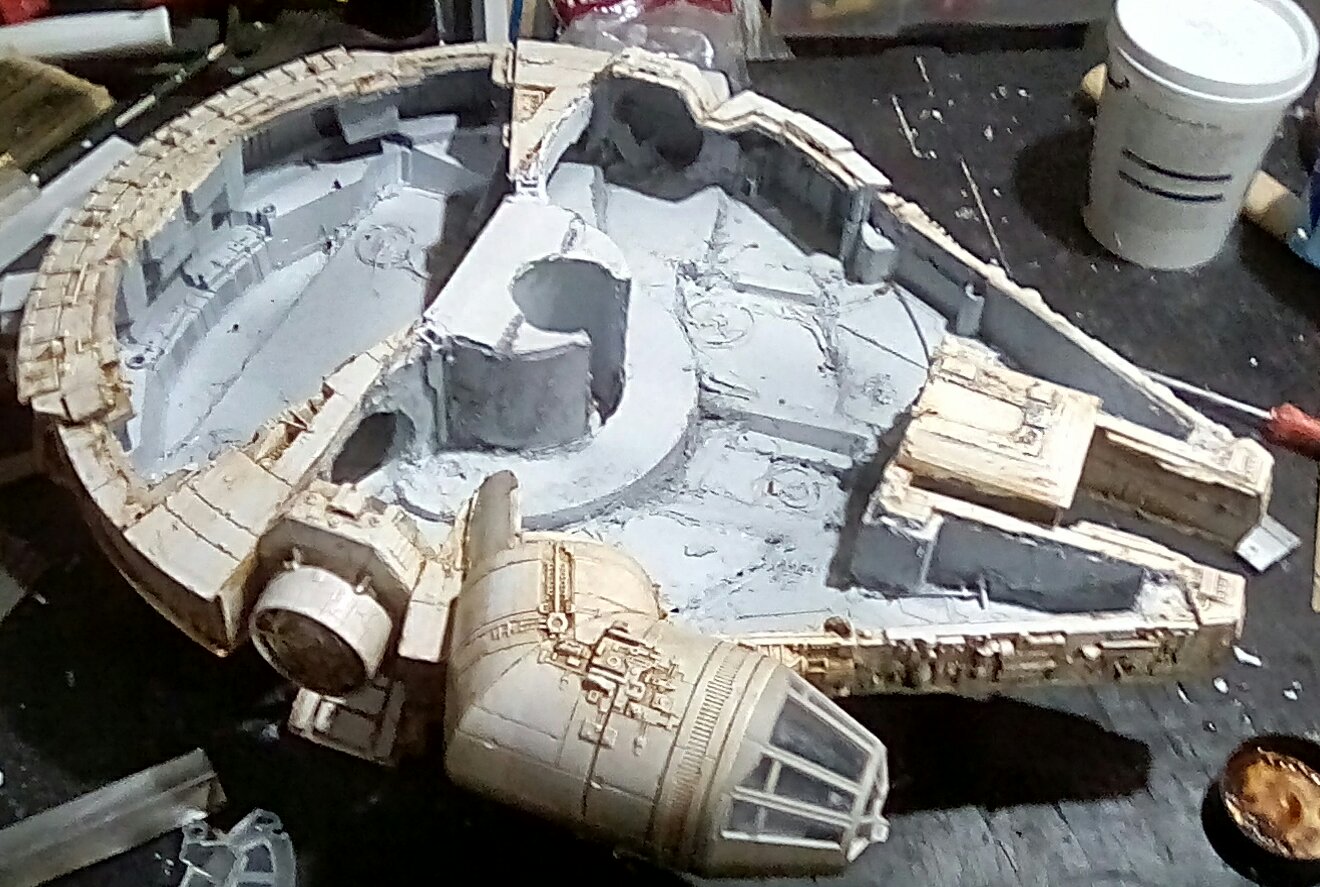
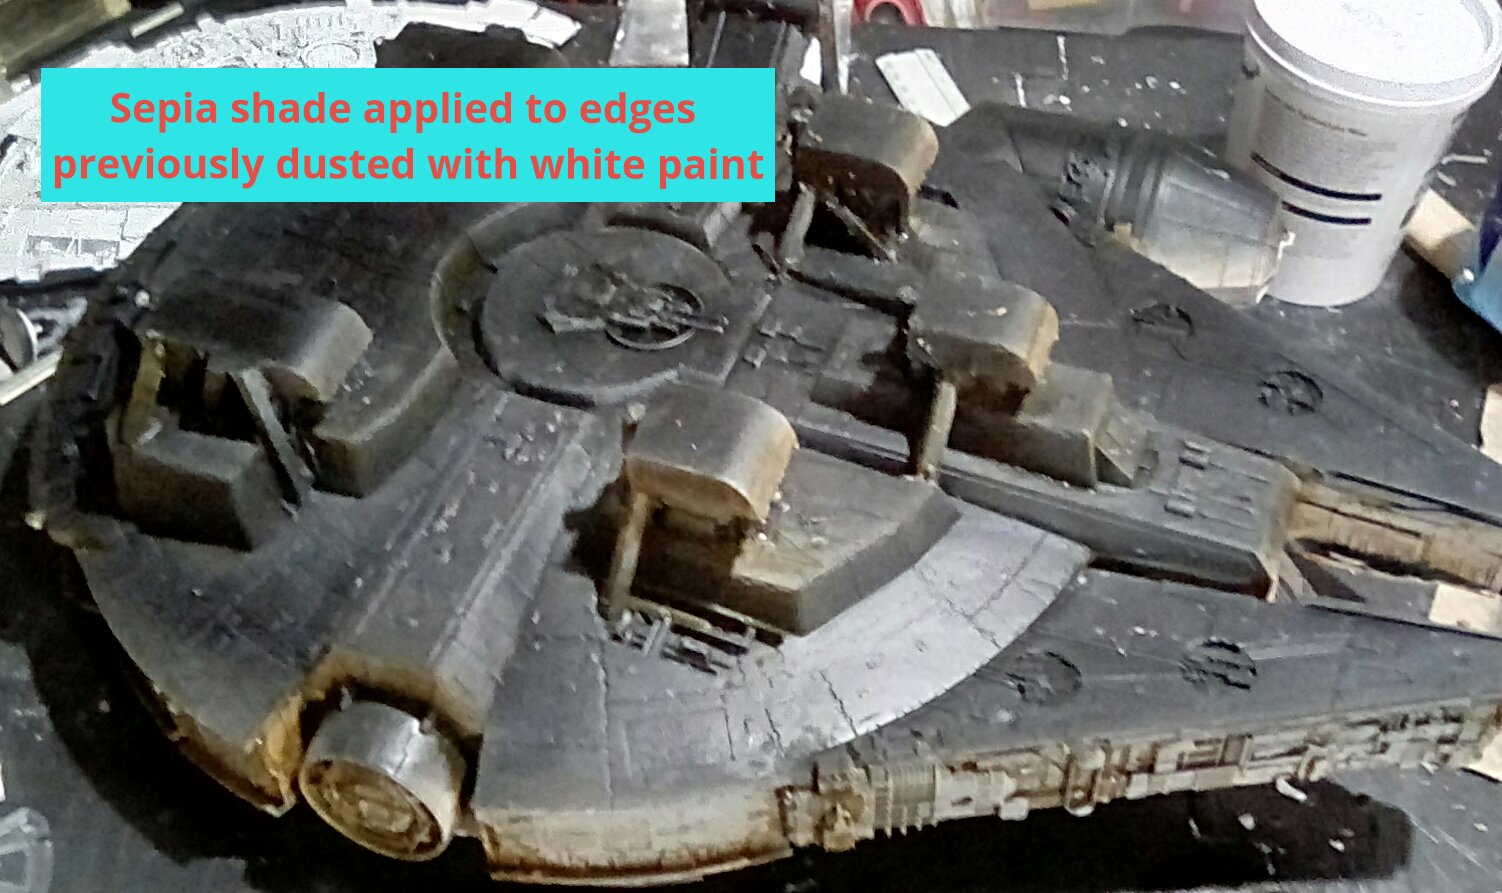
3- the top hull and any edges that would catch the light are dusted with a satin white paint.
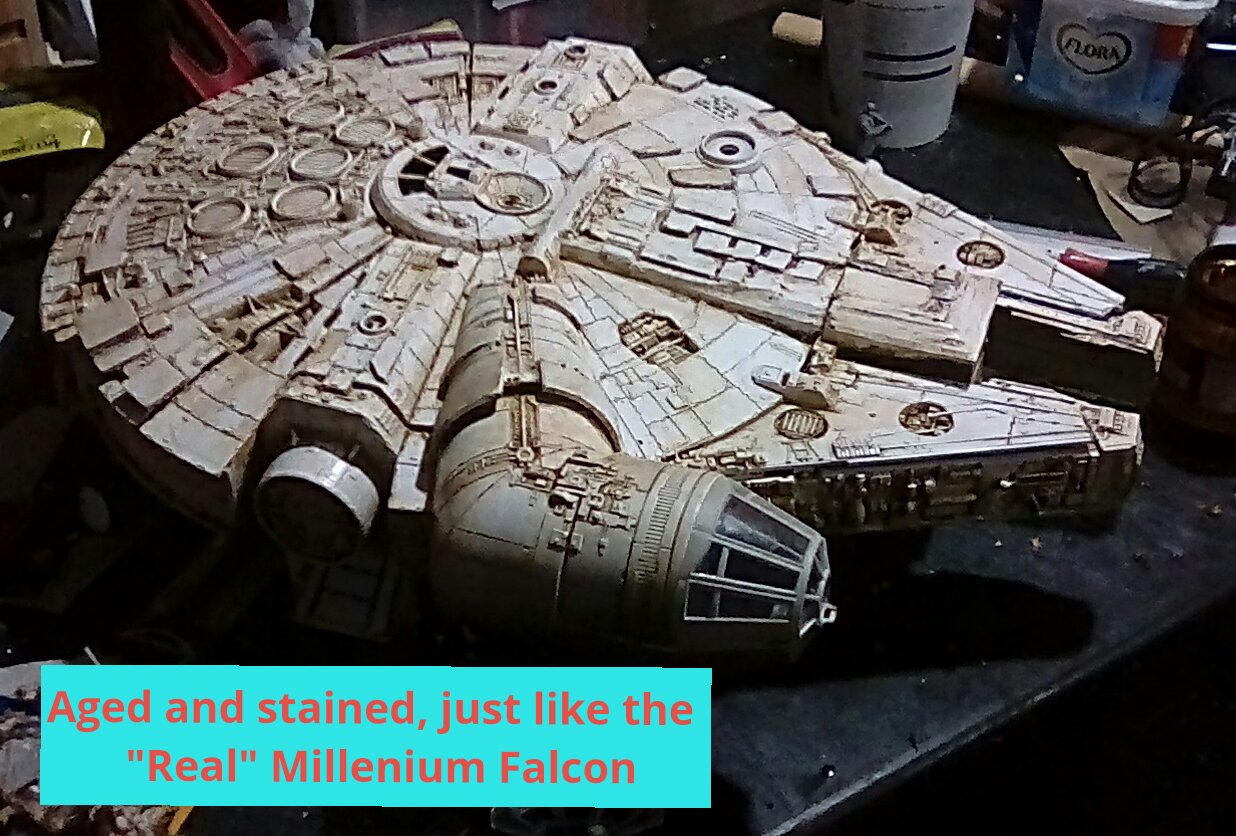
Once everything is dry the next day I set about making the ship look less pristine and white – the Millenium Falcon is supposed to look like a heap of junk. A crisp white finish just looks wrong.
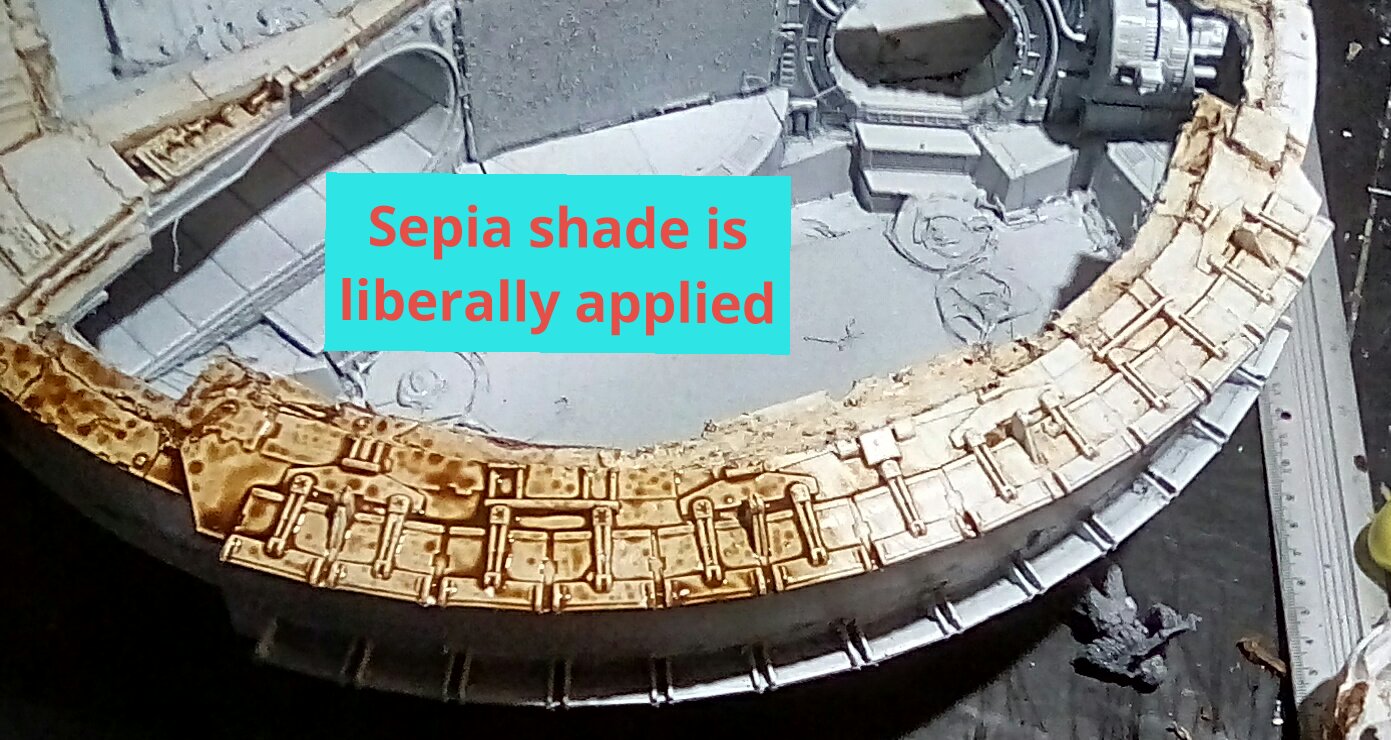
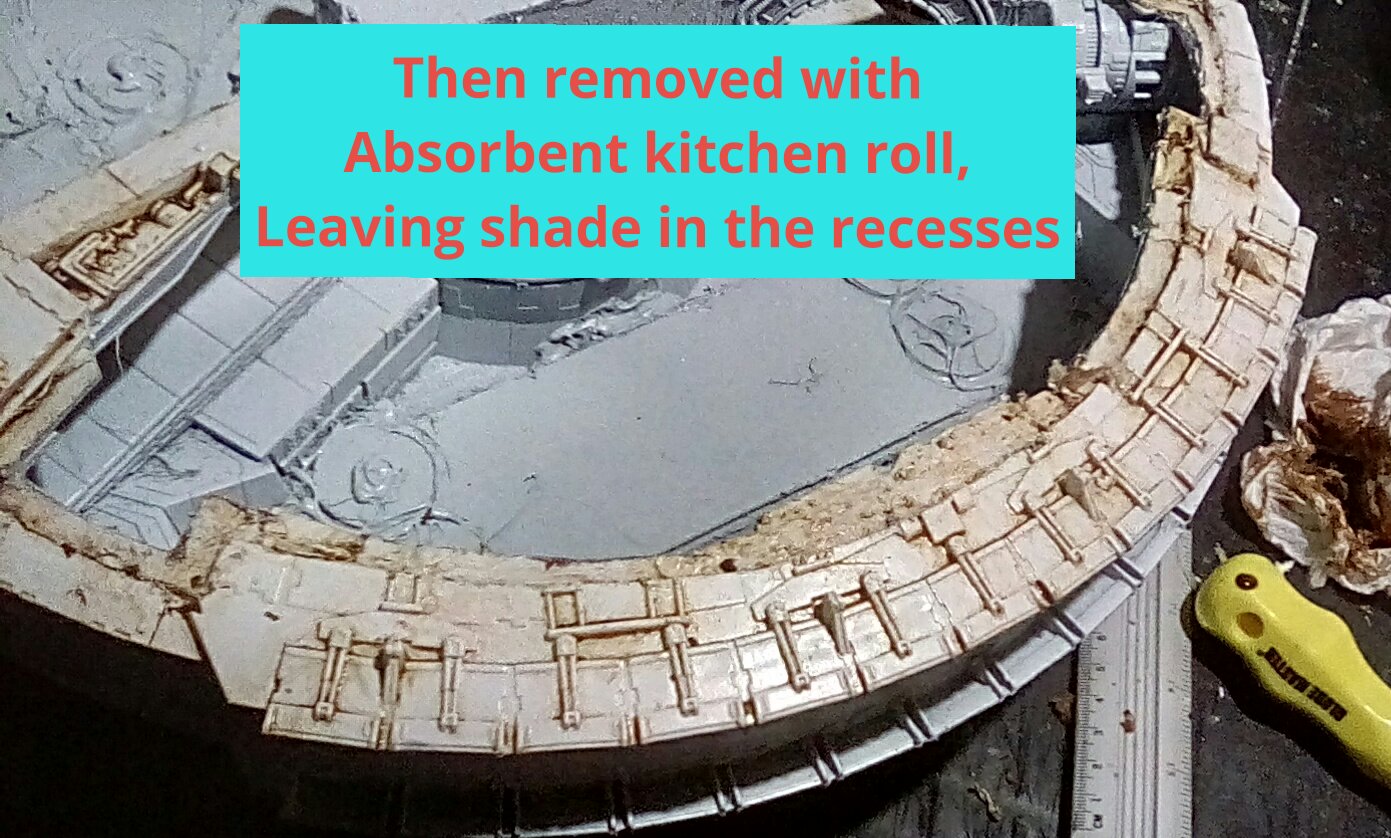
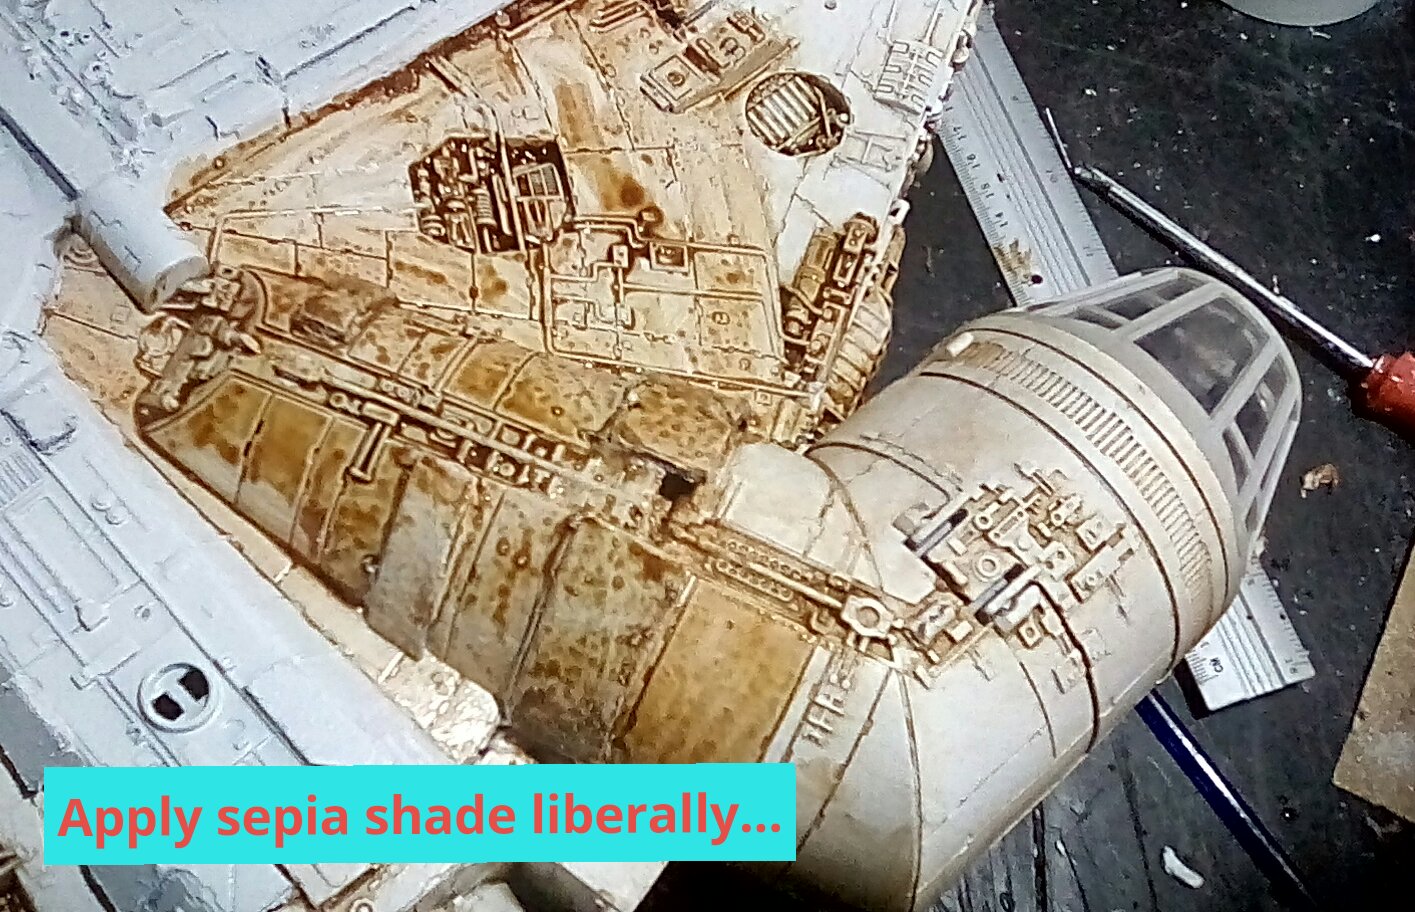
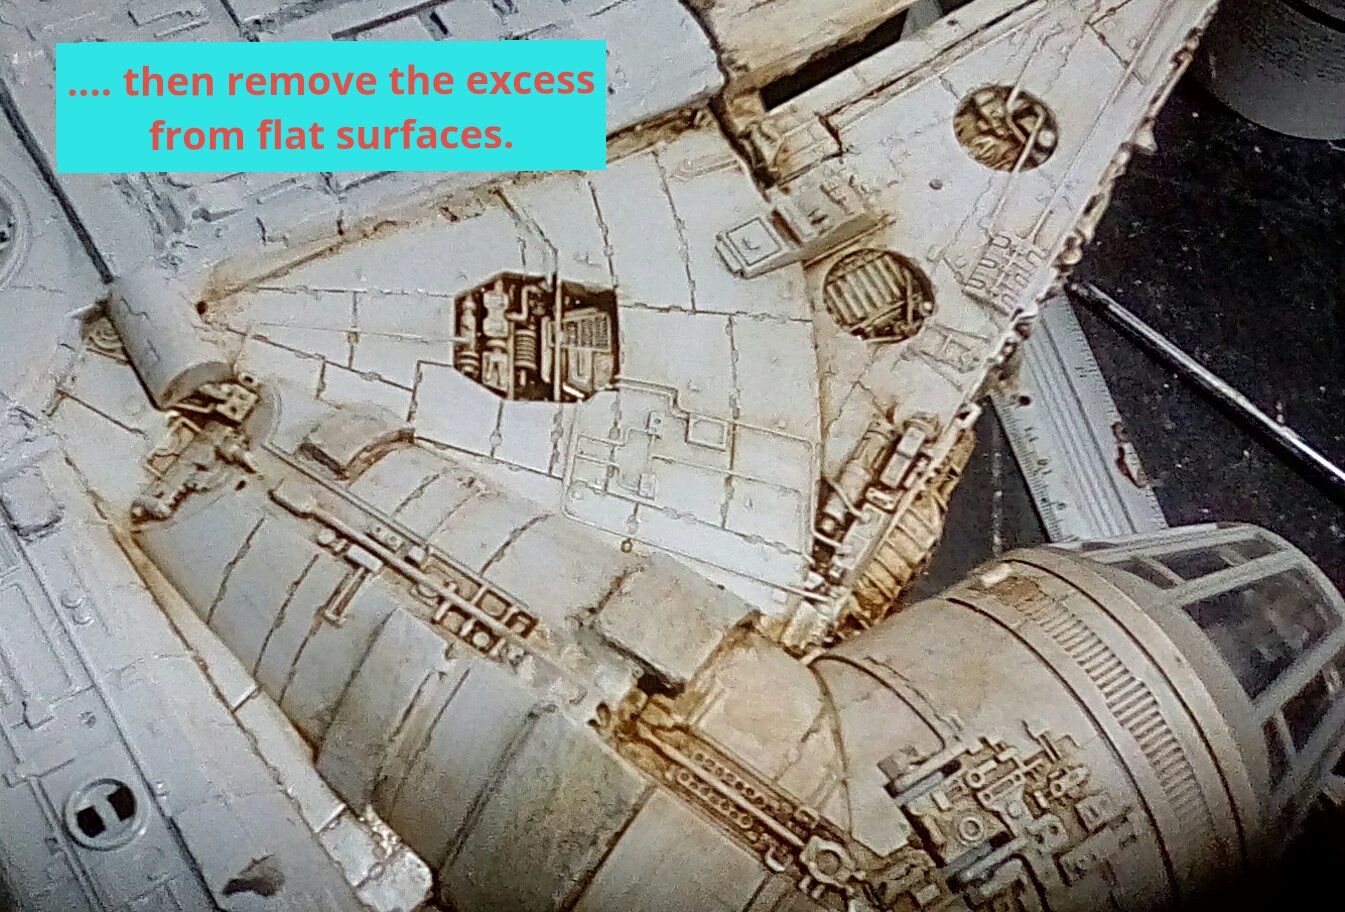
I use vallejo sepia shade to age and weather the hull. I literally apply the shade to sections of the hull, then leave it for a minute or so before removing the excess with an absorbent kitchen towel. This leaves the shade in the recesses and pockets where dirt would accumulate on a smugglers spaceship, and tints the white paint sepia. As I used satin white paint the shade can be wiped off while there being enough grip the stain the flat area of white. Gloss paint wouldn’t have been tinted enough by the shade, and Matt paint would have held too much of the shade.
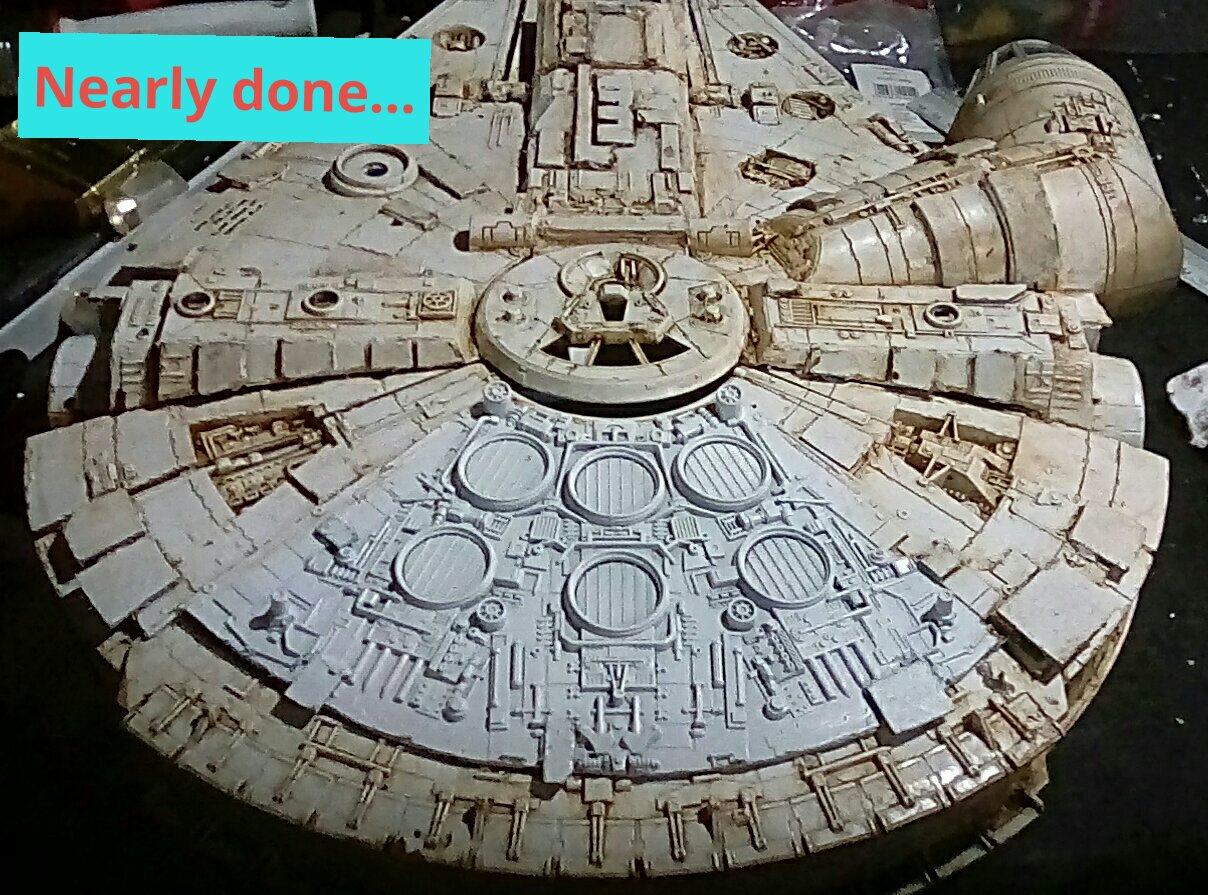
Later, I will tidy up the hull and pick out some details by drybrushing the top hull with white paint, and the underside with a dark grey, but at the moment I am pretty happy with how the ship is progressing.
Finishing the legs and ramp
A friend of mine pointed out that the original Millenium Falcon model made for the films was made from wood with bits of old tiger tank kits glued to it, so I’m feeling a little better about having decided to make the legs out of wood.
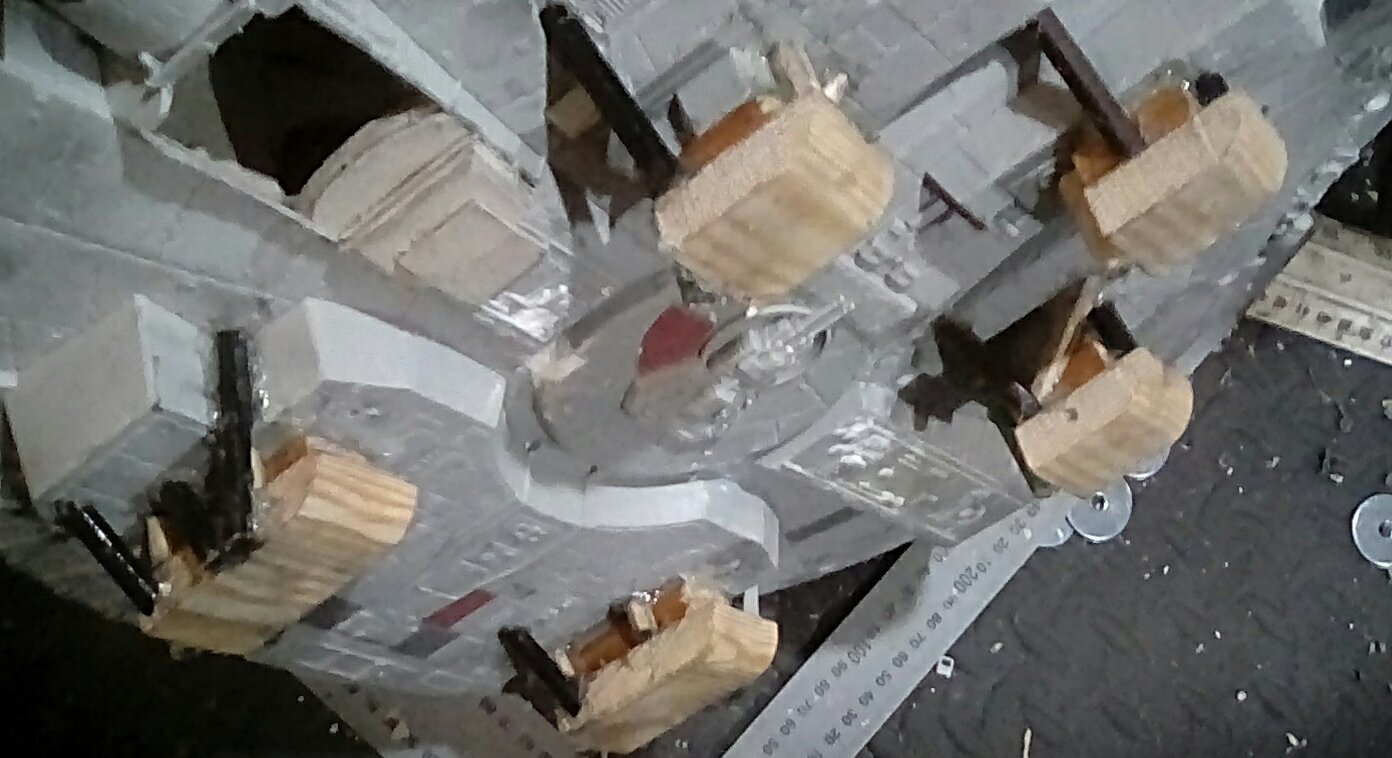
The sled bottoms of the legs are made by using wood glue to fix 2 cut prices of wood together, and reinforcing this with veneeer pins – anything thicker might cause the wood to split. Care has to be taken to make sure no pins are where the wood will need drilling.
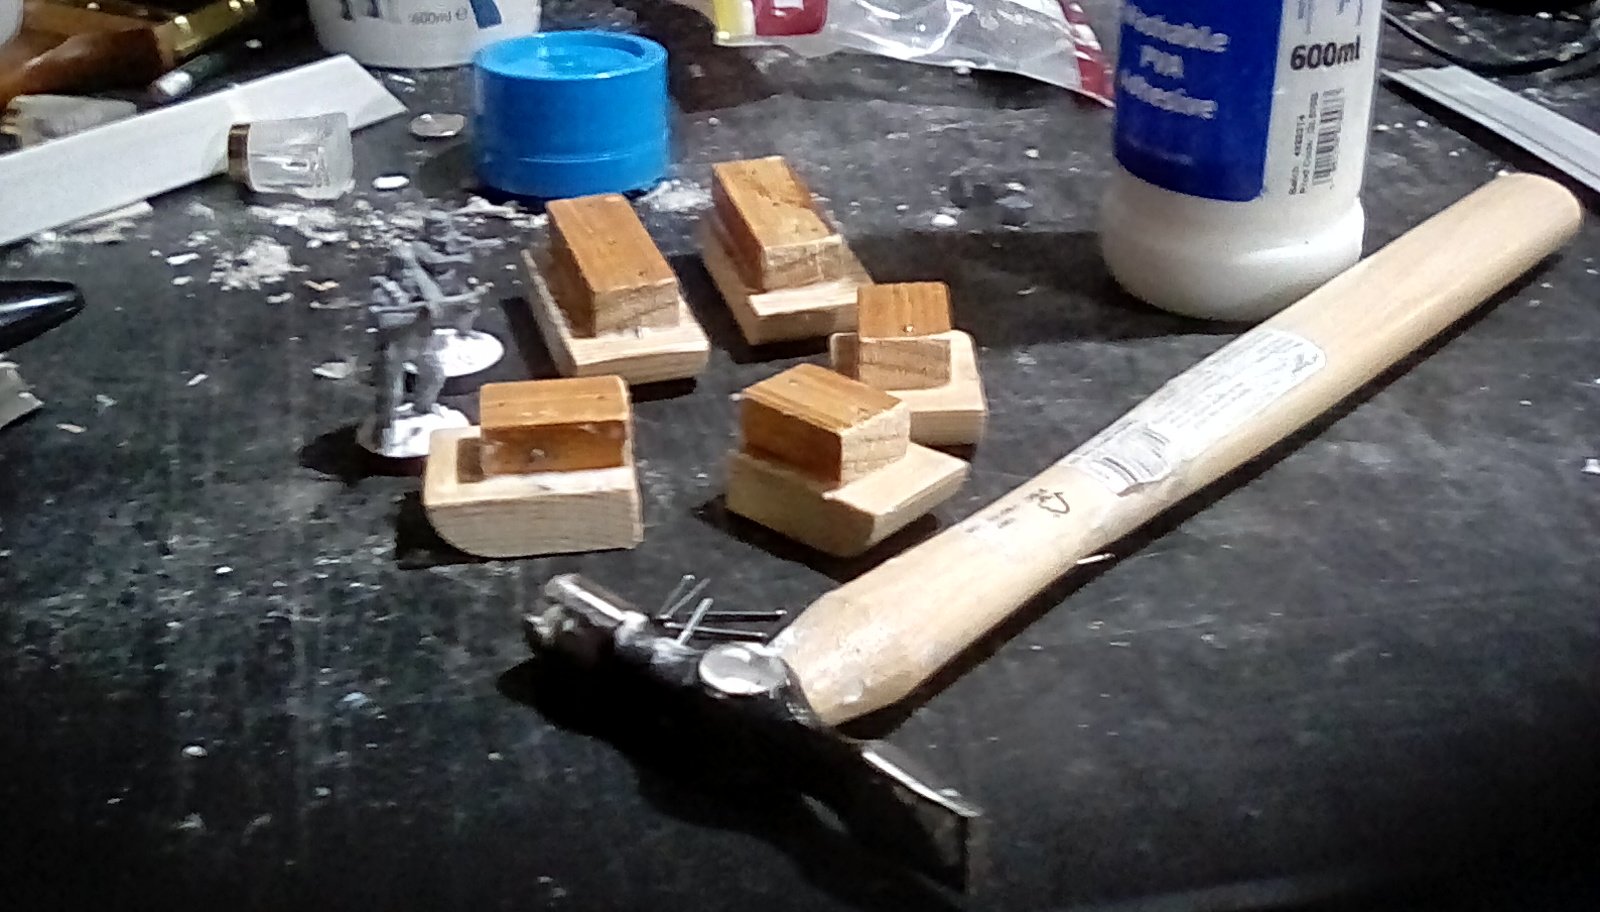
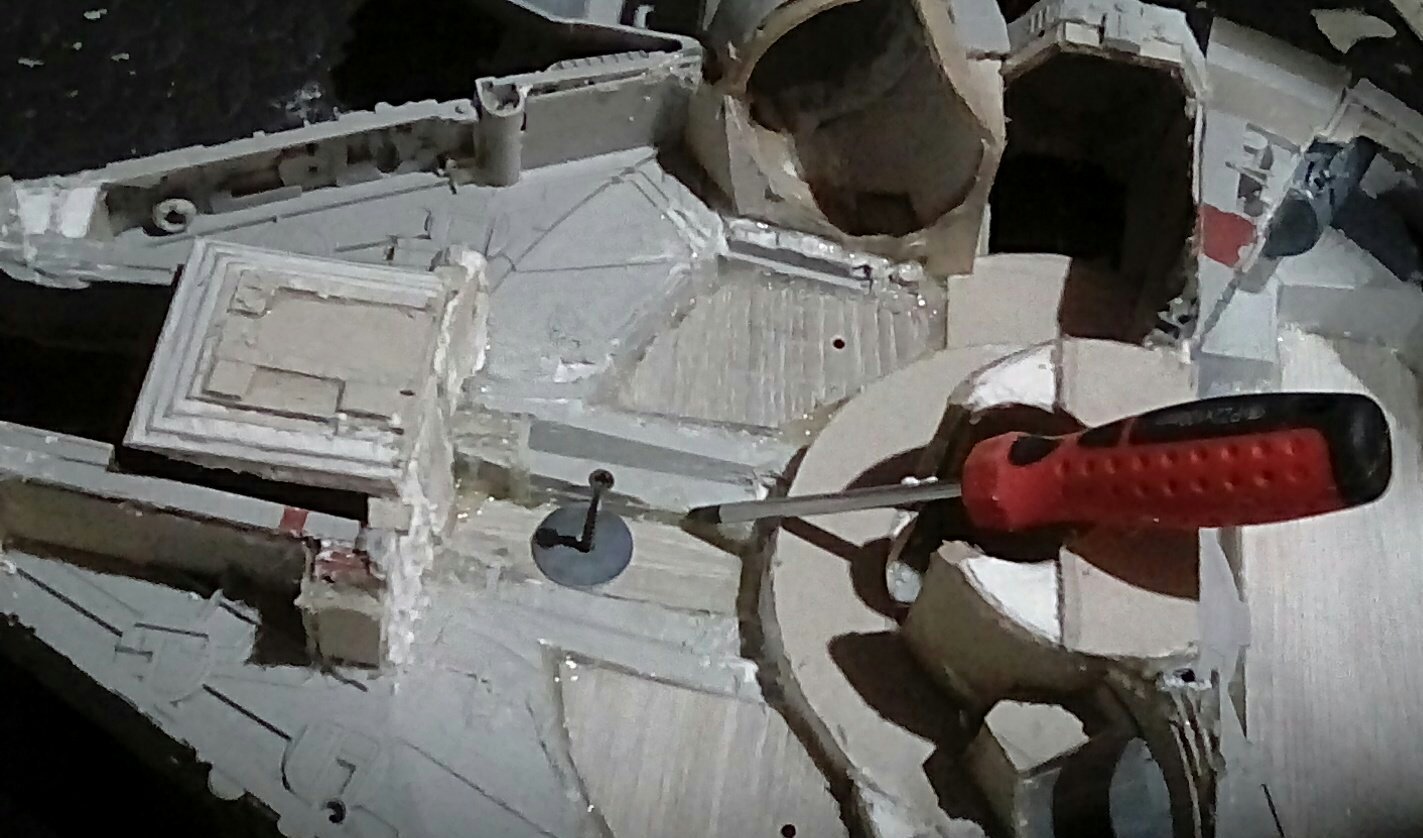
Screws of the right length are selected, and I’m using the biggest washers that will fit in the space to make sure the screw head cannot pull through the laminate. I use the actual points of the screws to mark where the wooden legs need drilling. That way things should line up exactly. I use the hot glue gun again to fix the legs in place, and a screwdriver to tighten the screws in place – it’s best not to use a powered screwdriver for this as it is easy to over tighten the screws and split the wood.
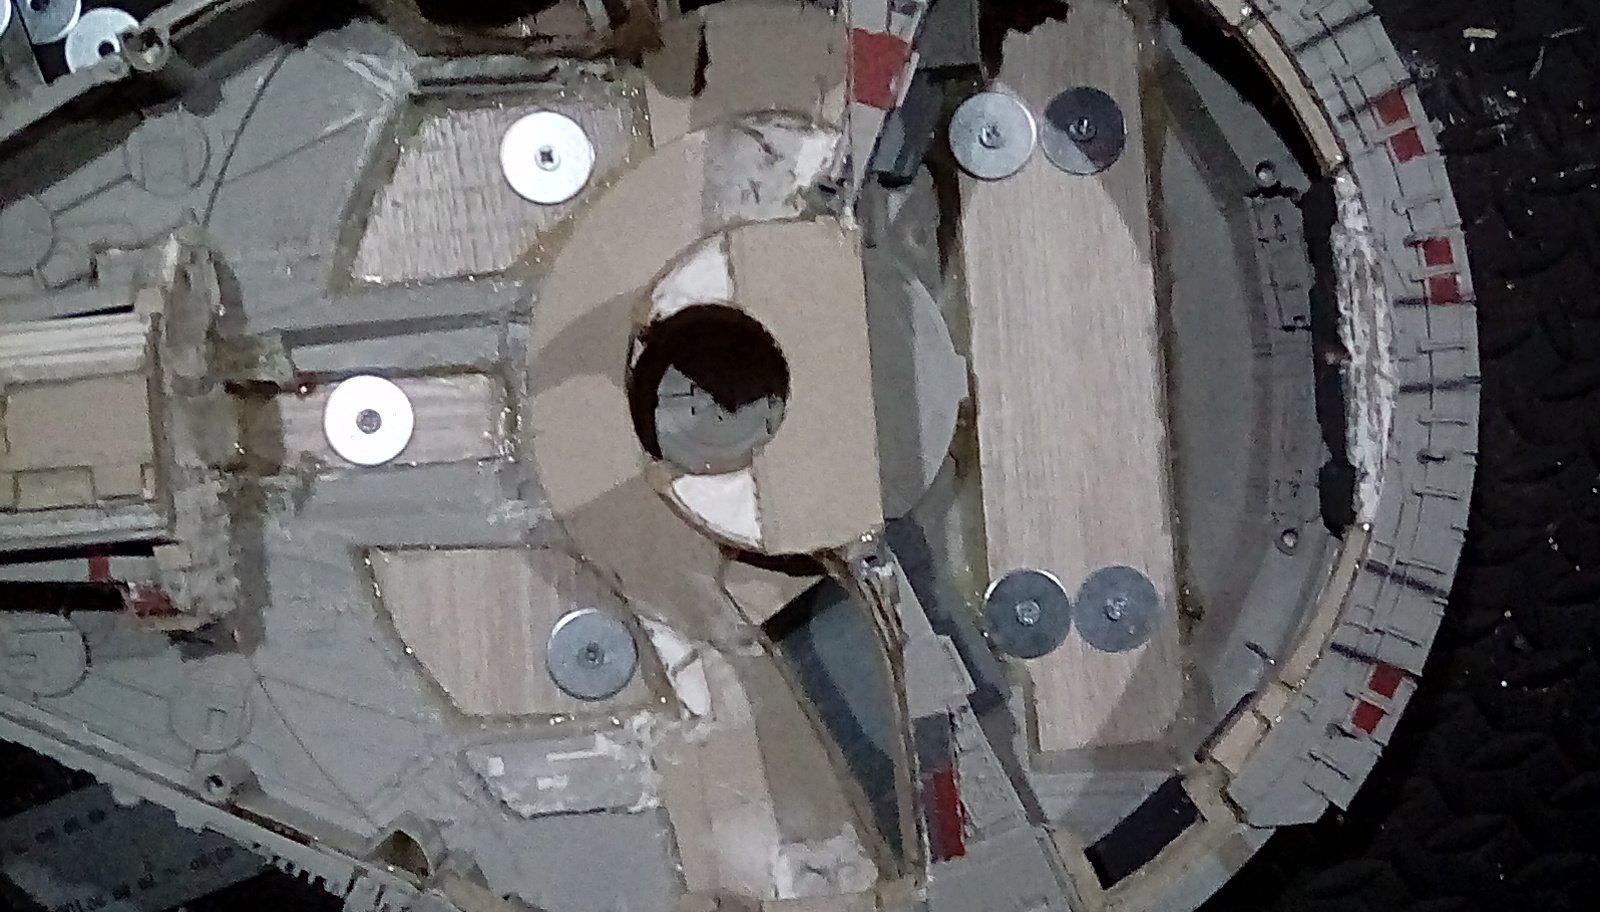
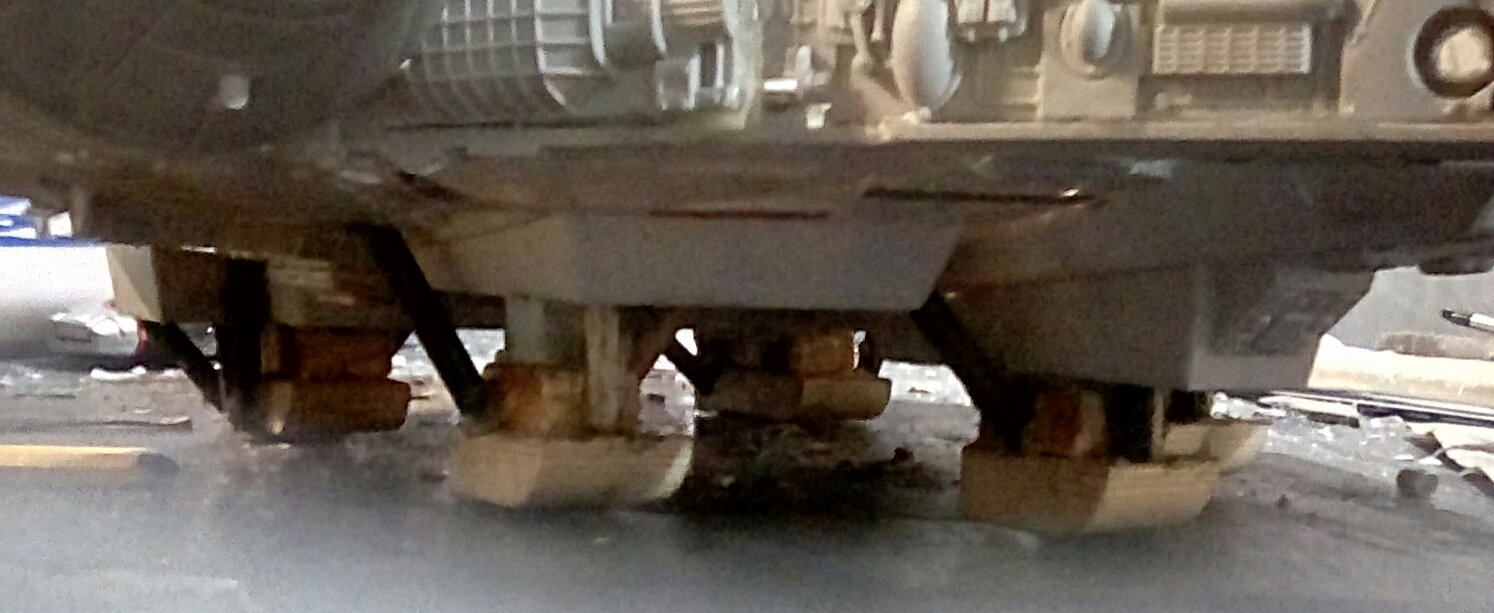
After checking I am.happy with the height of the legs and the clearance left for the ramp, I decided to add struts to make the legs less “blocky”. These also help to reinforce the legs and ensure they don’t move – the back legs have 2screws each so are pretty much set in place, but the front legs have only one screw each and they could rotate on this like a spindle if the glue ever fails.
For these struts I used pencils cut to size with a razor saw. Pencils have 2 but advantages over dowling for jobs like this.
1- they are a lot cheaper. A big bag of cheap drawing pencils from your local pound shop will be fine, but dowel is very expensive and can only be bought in long lengths.
2-if you use hexagonal pencils you get a nice flat edge that makes gluing then to things much easier.
Their disadvantage is that you get powdered graphite powder when you cut them, which can cause a mess if you don’t clear it is as you go.
I’m happy with how the struts add to the silhouette of the legs, and will look good once painted.
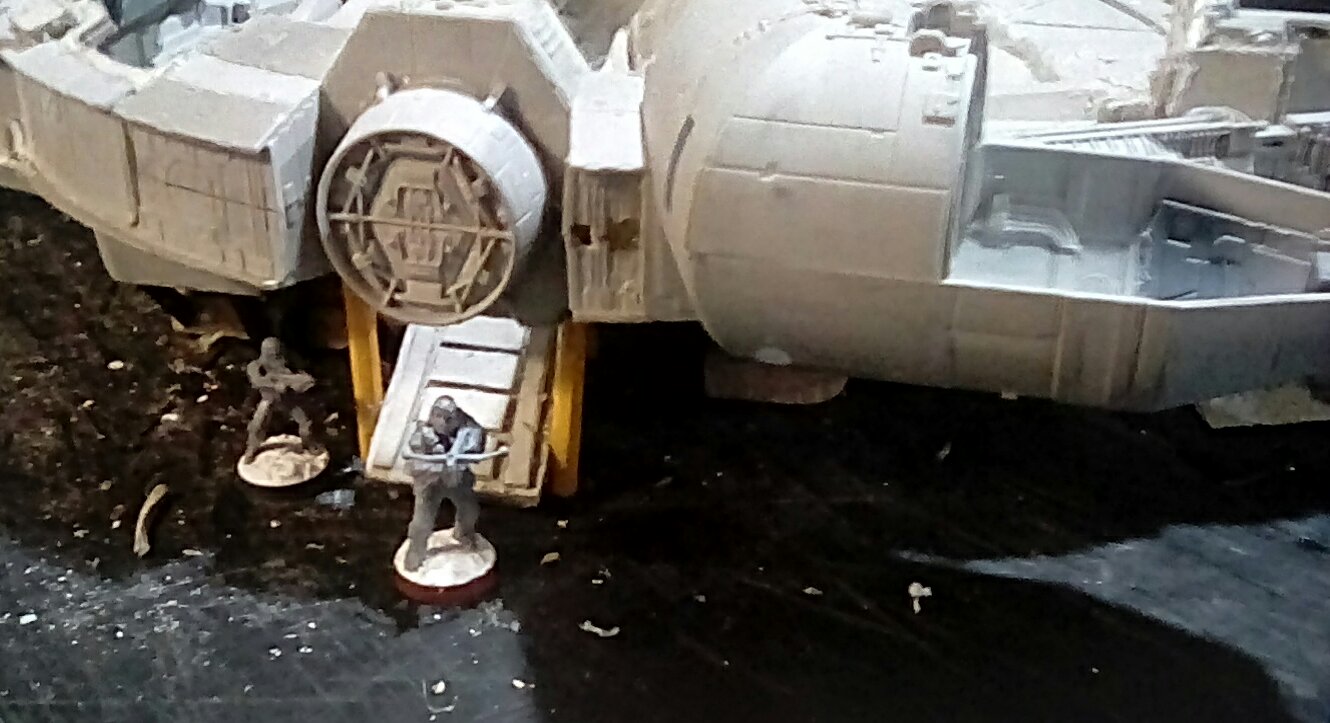
Finally today I finish the ramp. I had initially planned something more complicated, and had wanted to be able to have figures placed on the ramp. But I realised that to have the angle of the ramp shallow enough to allow this I would have to vastly extend the length of the ramp so it stuck out beyond the edge of the ship, and that just wouldn’t look like the falcon’s ramp.
I take the price of the lower hull it out and saved previously, and reinforce it with 3 layers of grey card. This will strengthen everything, and also mean I have a much larger surface area to glue to the ship.

Once the ramp is glued to the ship and angled to meet the floor, I use pencils again to form the hydraulic supports on each side of the ramp. A few pieces of card finish things off to add a bit of texture that can be picked out later with a bit of drybrushing.
Decisions about Falcon legs....
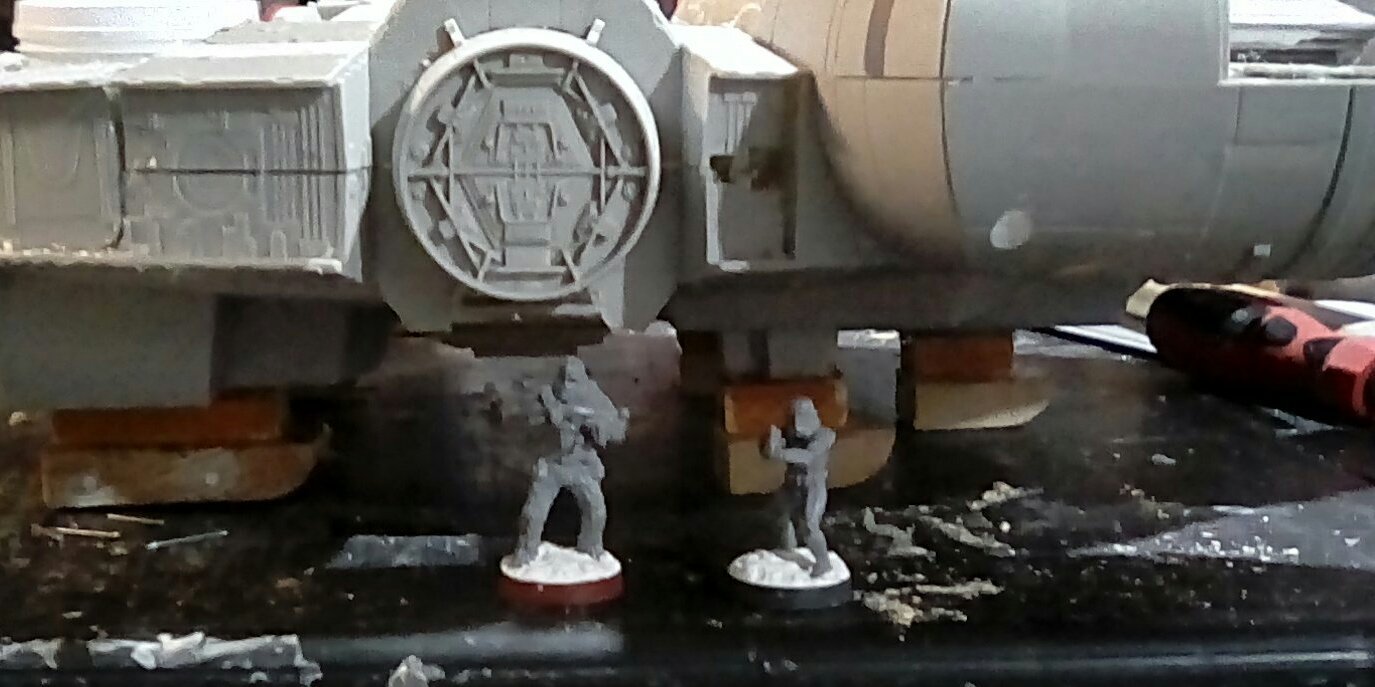
I need to decide on The height of the new legs. They need to be tall enough to let The ramp open, and let people place figures on the ramp when playing a wargame. And if we are to be accurate to the films, short enough so a wookie has to duck down when walking up the ramp.
 The ship as it is is too low to let a ramp open properly.
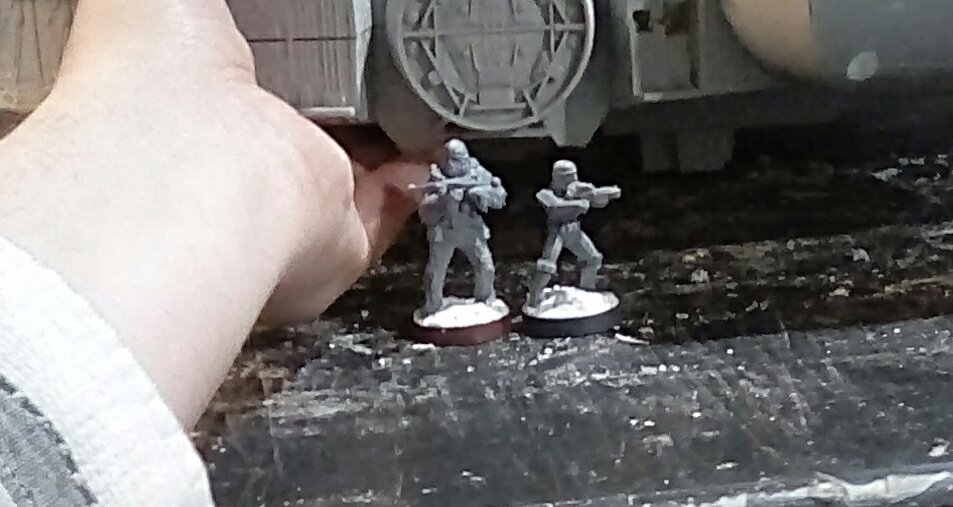 This height should be around right - adding about 3cm to the bottom of the existing legs moulded into the bottom hull.
Now, given I am only extending the existing stump legs by around 3cm, I have to decide how they should look. I remember how the legs on the kenner Millenium Falcon looked when I was a kid, with pipework and hydraulics. I even priced some up on ebay, but decided they were too expensive, especially as I will have to weaken them by cutting them down to size.
Another option would have been to 3d print something, but I don’t have access to that technology yet and I am not sure how strong 3d printed legs would be. Some 3d printed items seem to be made in “layers” rather than one solid piece, and those layers sometimes come apart from each other. 3d printing is probably the future of wargaming minis, but not something I know enough about yet to really pass on any knowledgeable opinions.
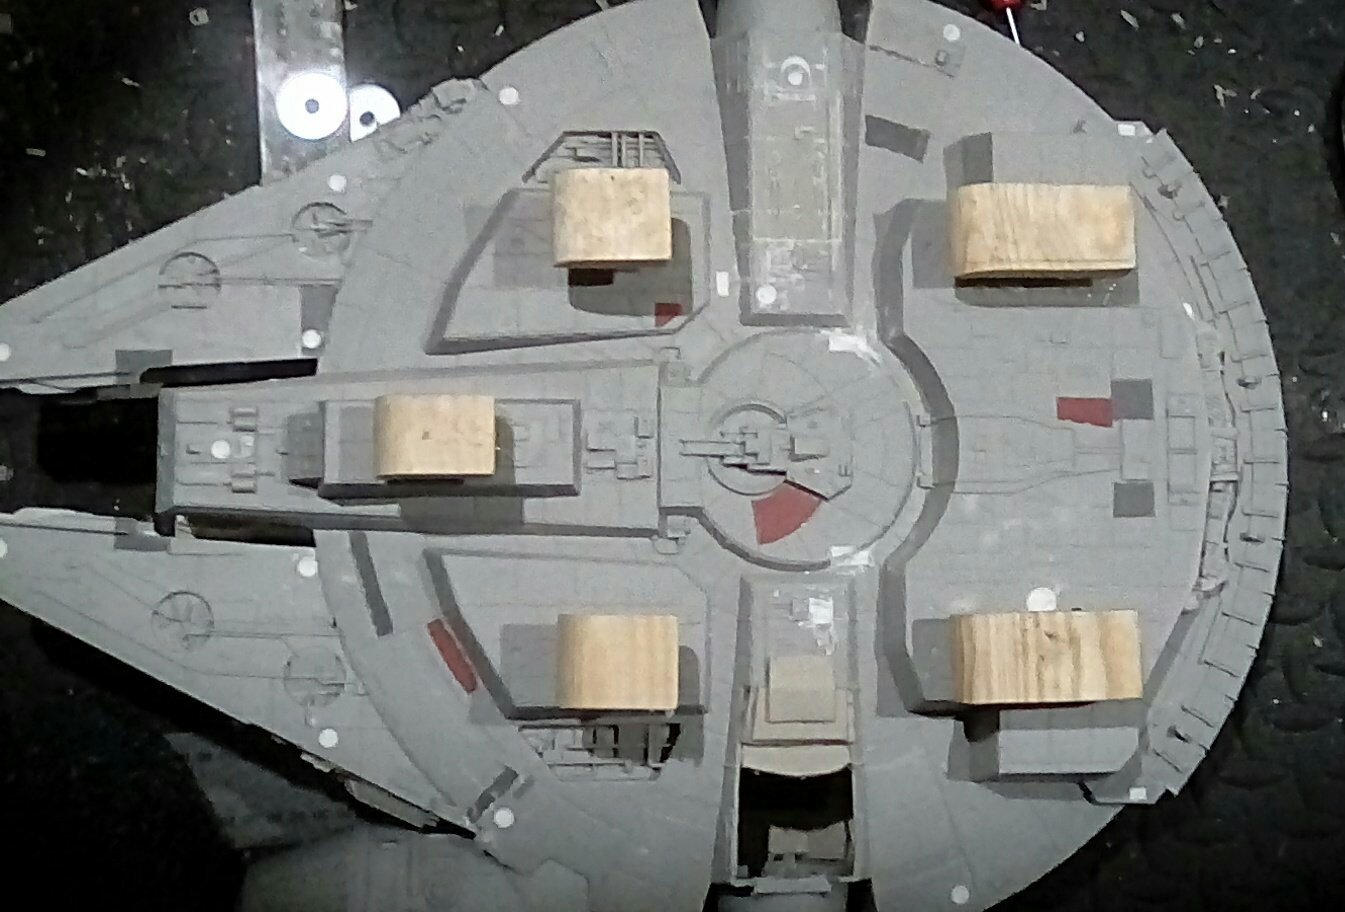
Given that the new legs will only be about 3cm tall, they are going to be mostly hidden the shadow of the ship, I think I might get away with just using some solid wooden shapes that I can screw into the flooring laminate I have added to the hull. This should be strong, and I can always add some surface details later to make them look more like the hydraulic legs of my kenner childhood Falcon. I briefly toyed with the idea of making thin shapes out of dowling glued together, but I need a core block of wood that is wide enough that I can attach it to the hull with a wood screw and washer.

![Games Workshop Kick Off Grot Week For Warhammer 40,000 [Updated]](https://images.beastsofwar.com/2026/04/grot-new-40k-news-cover-600-338.jpg)