


Marvel Crisis Protocol by Lawnor


Recommendations: 166
About the Project
I've got a bunch of naked MCP stuff, and it's time to get it table ready. My friends are getting in to it so I need a squad ready to go ASAP.
Related Game: Marvel Crisis Protocol Miniatures Game
Related Company: Atomic Mass Games
Related Genre: Pulp
Related Contest: Spring Clean Hobby Challenge 2023
This Project is Completed
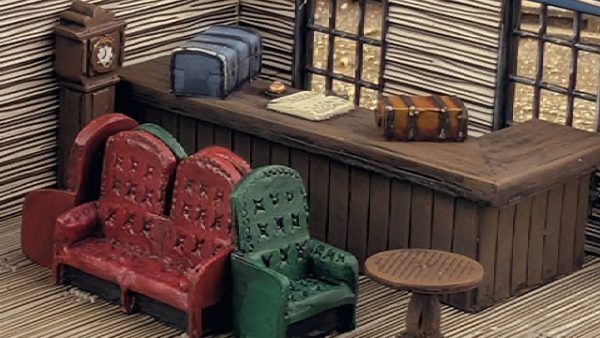
NYC Terrain Set and Extras
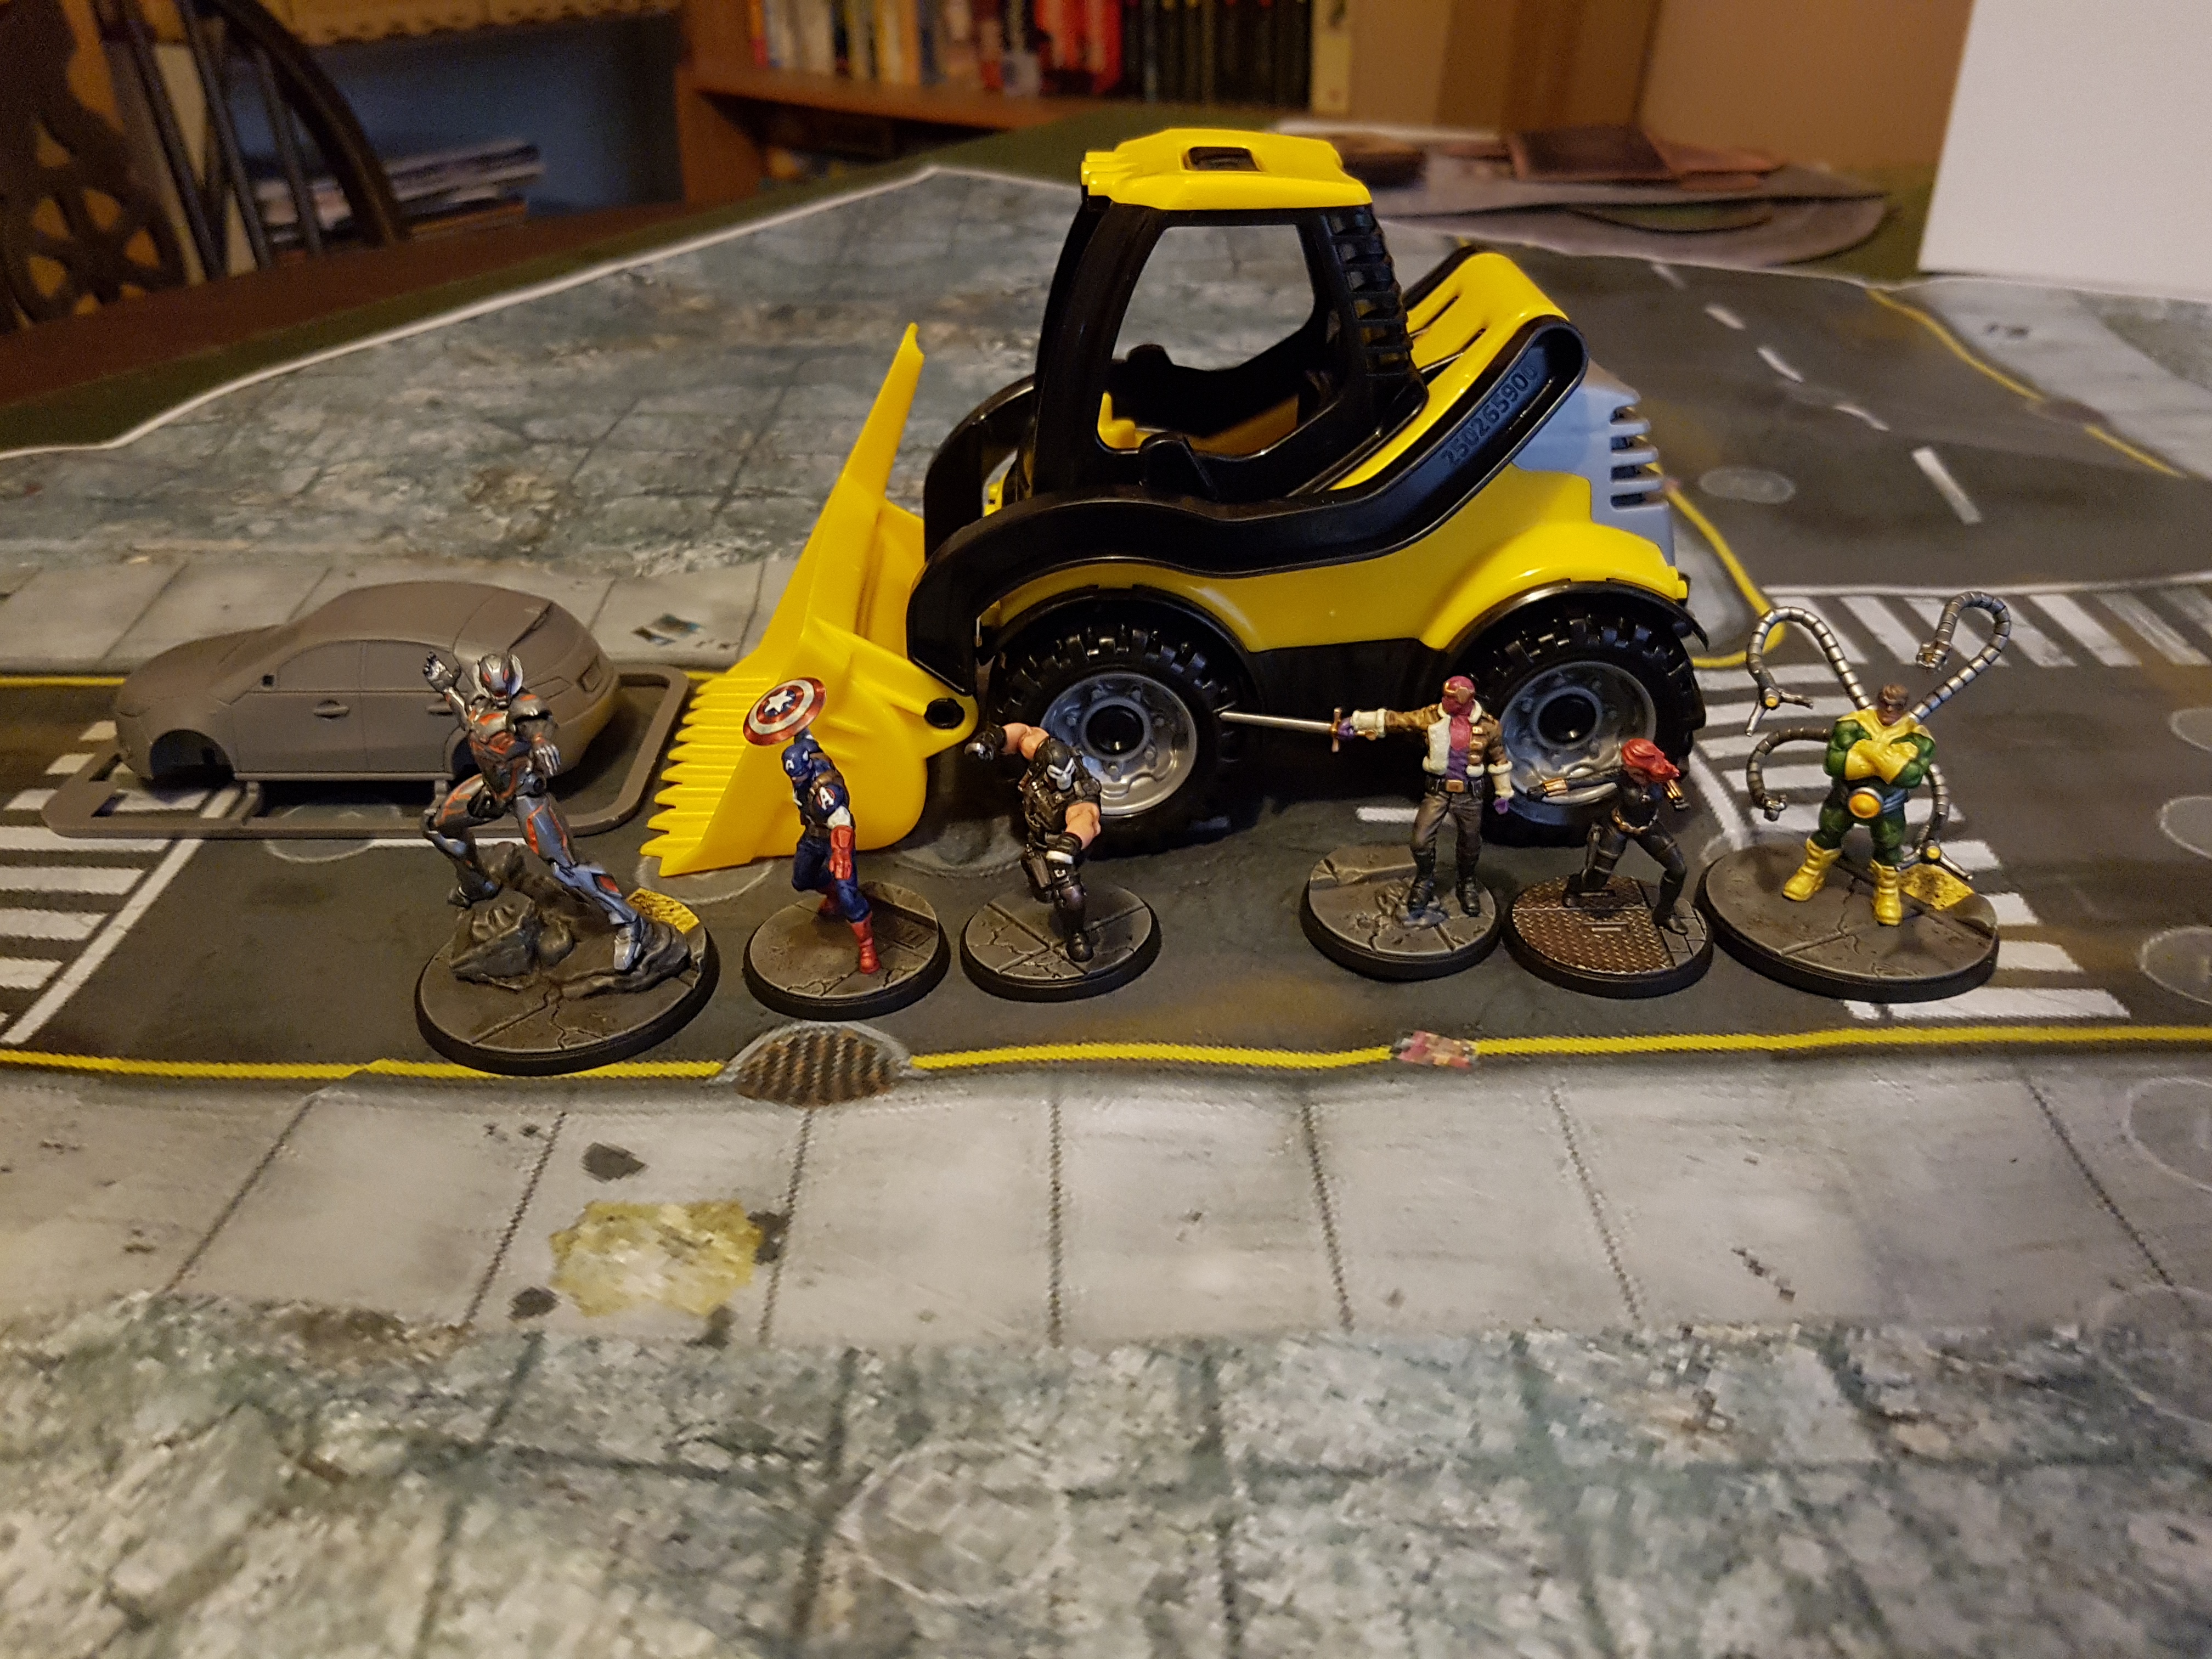
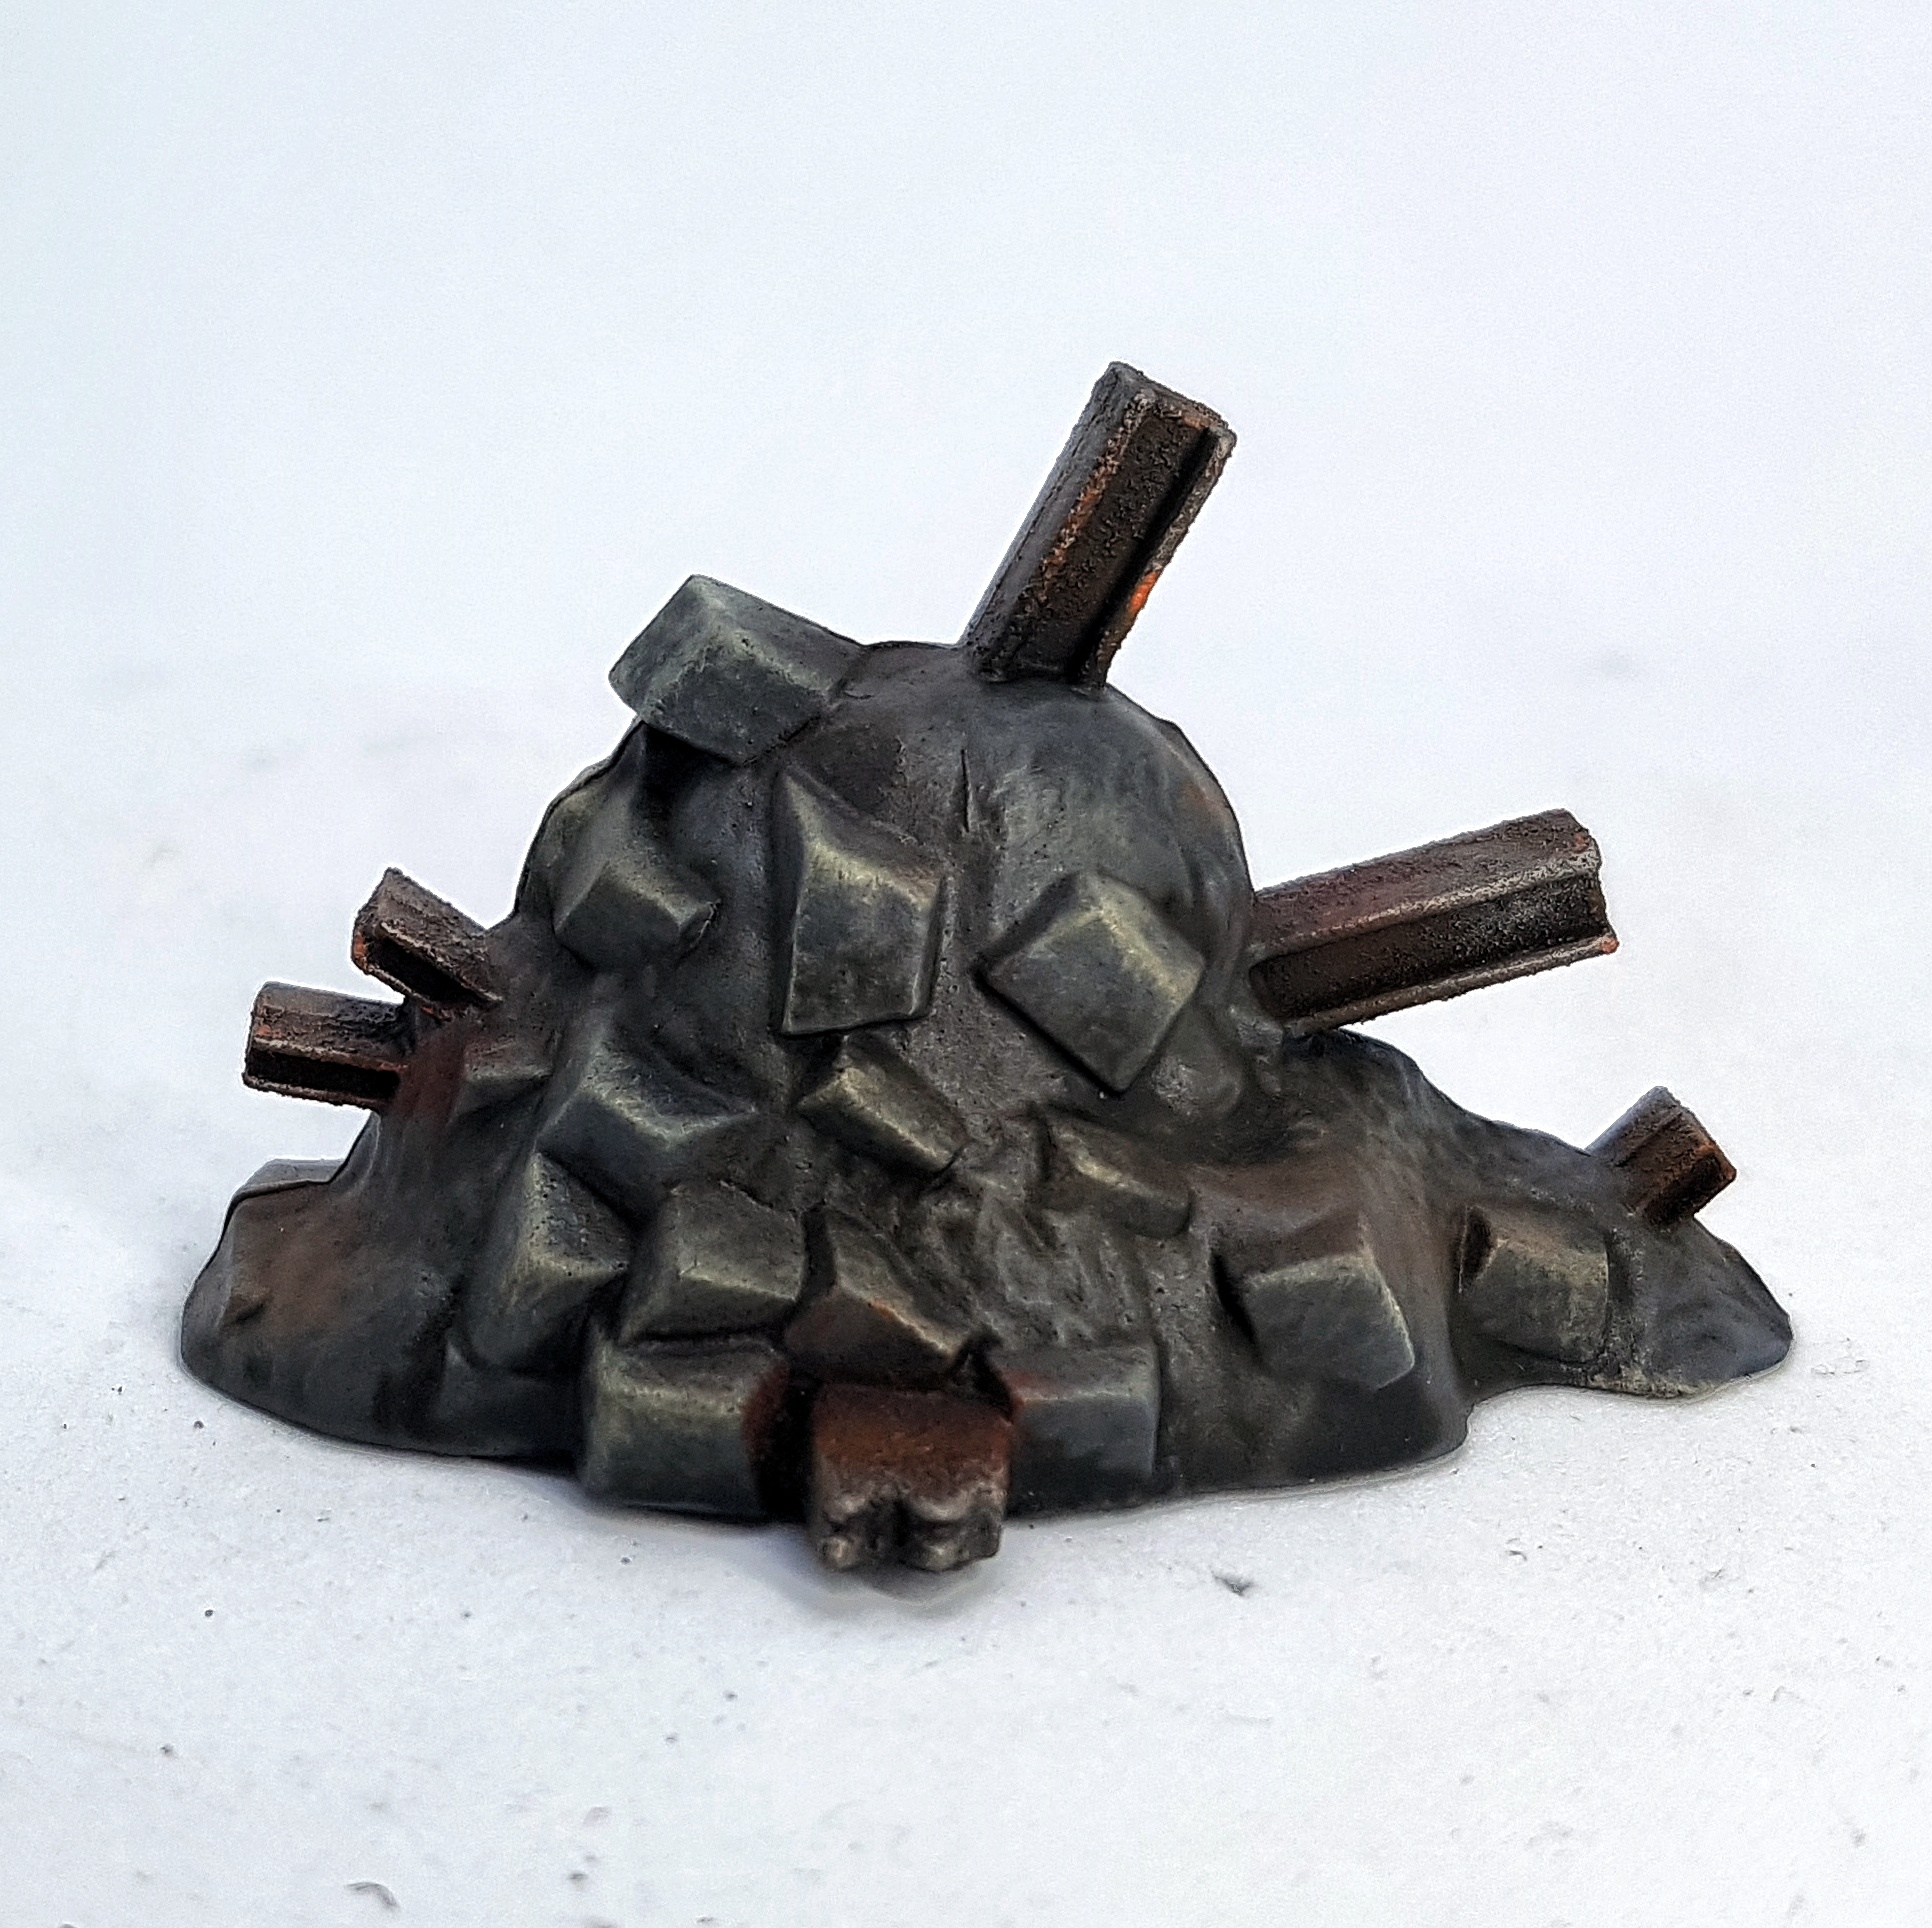
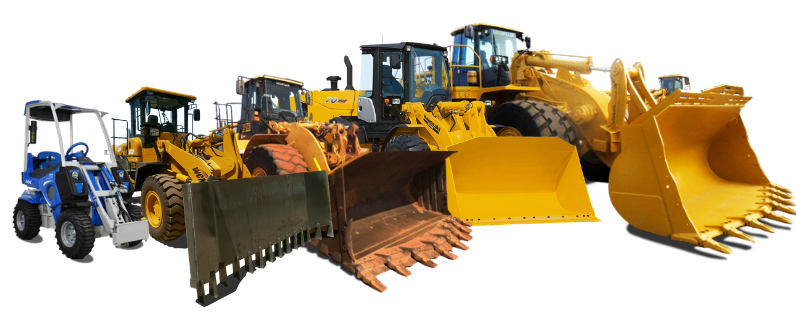
I’ve just had a week of work and one of my missions was to plough through as much of the terrain as I could. I have the core box set terrain, the NYC terrain set, 4 piles of rubble I found in my Deadzone spare pieces box, and a toy Loader I found in Tescos recently. The scale on it is wrong, but they do come pretty big and the only thing tying it to a scale is the chair. I’ve tried to make the chair smaller by raising it up and modding it with green stuff. I don’t think I went far enough though.
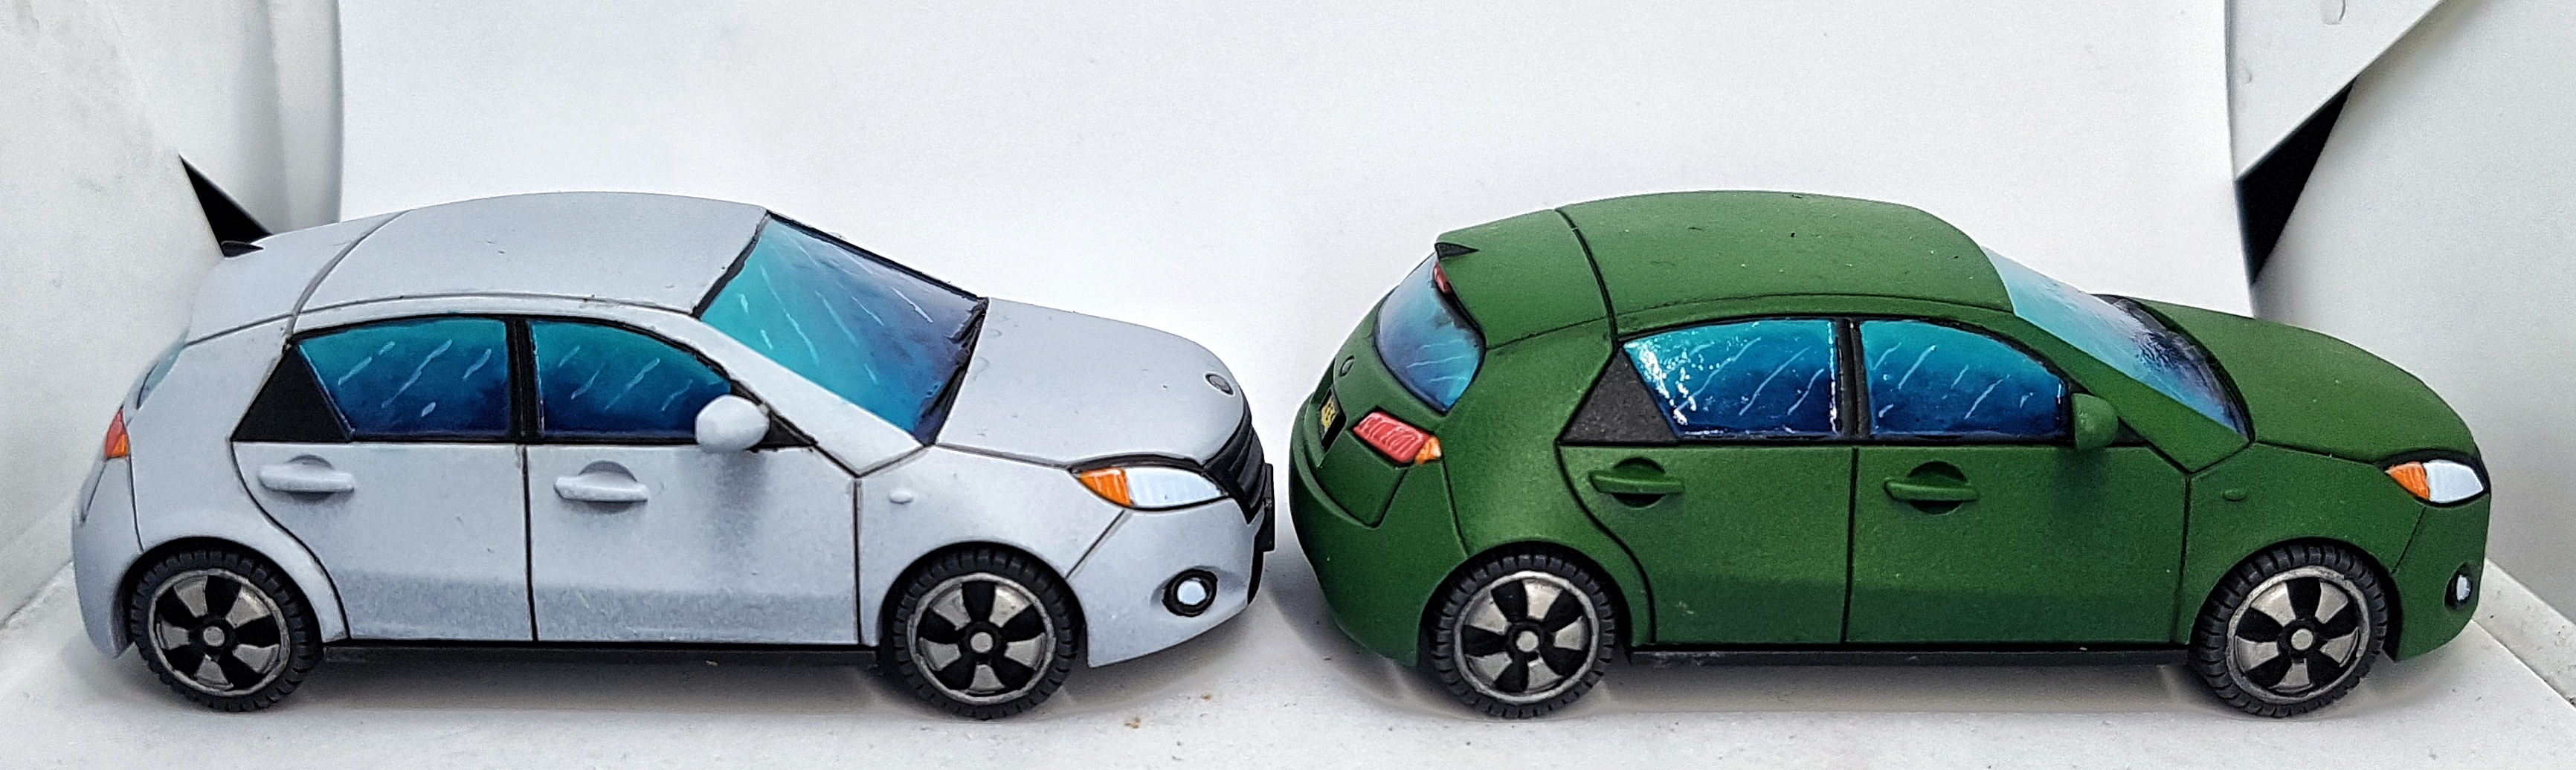
I followed Ghool’s video guides for the official terrain, making a change here or there’s as I felt appropriate. I had no idea how to handle the car windows otherwise.
Cars Video
Dumpsters and Lights Video
Everything was primed in one sitting and left overnight to dry.
EDIT: 12/05/2023
It appears that Ghools channel and videos are down. I have no idea if they’re coming back up and if these links will ever work again. I have made notes in a later post on how I think I did those windows.
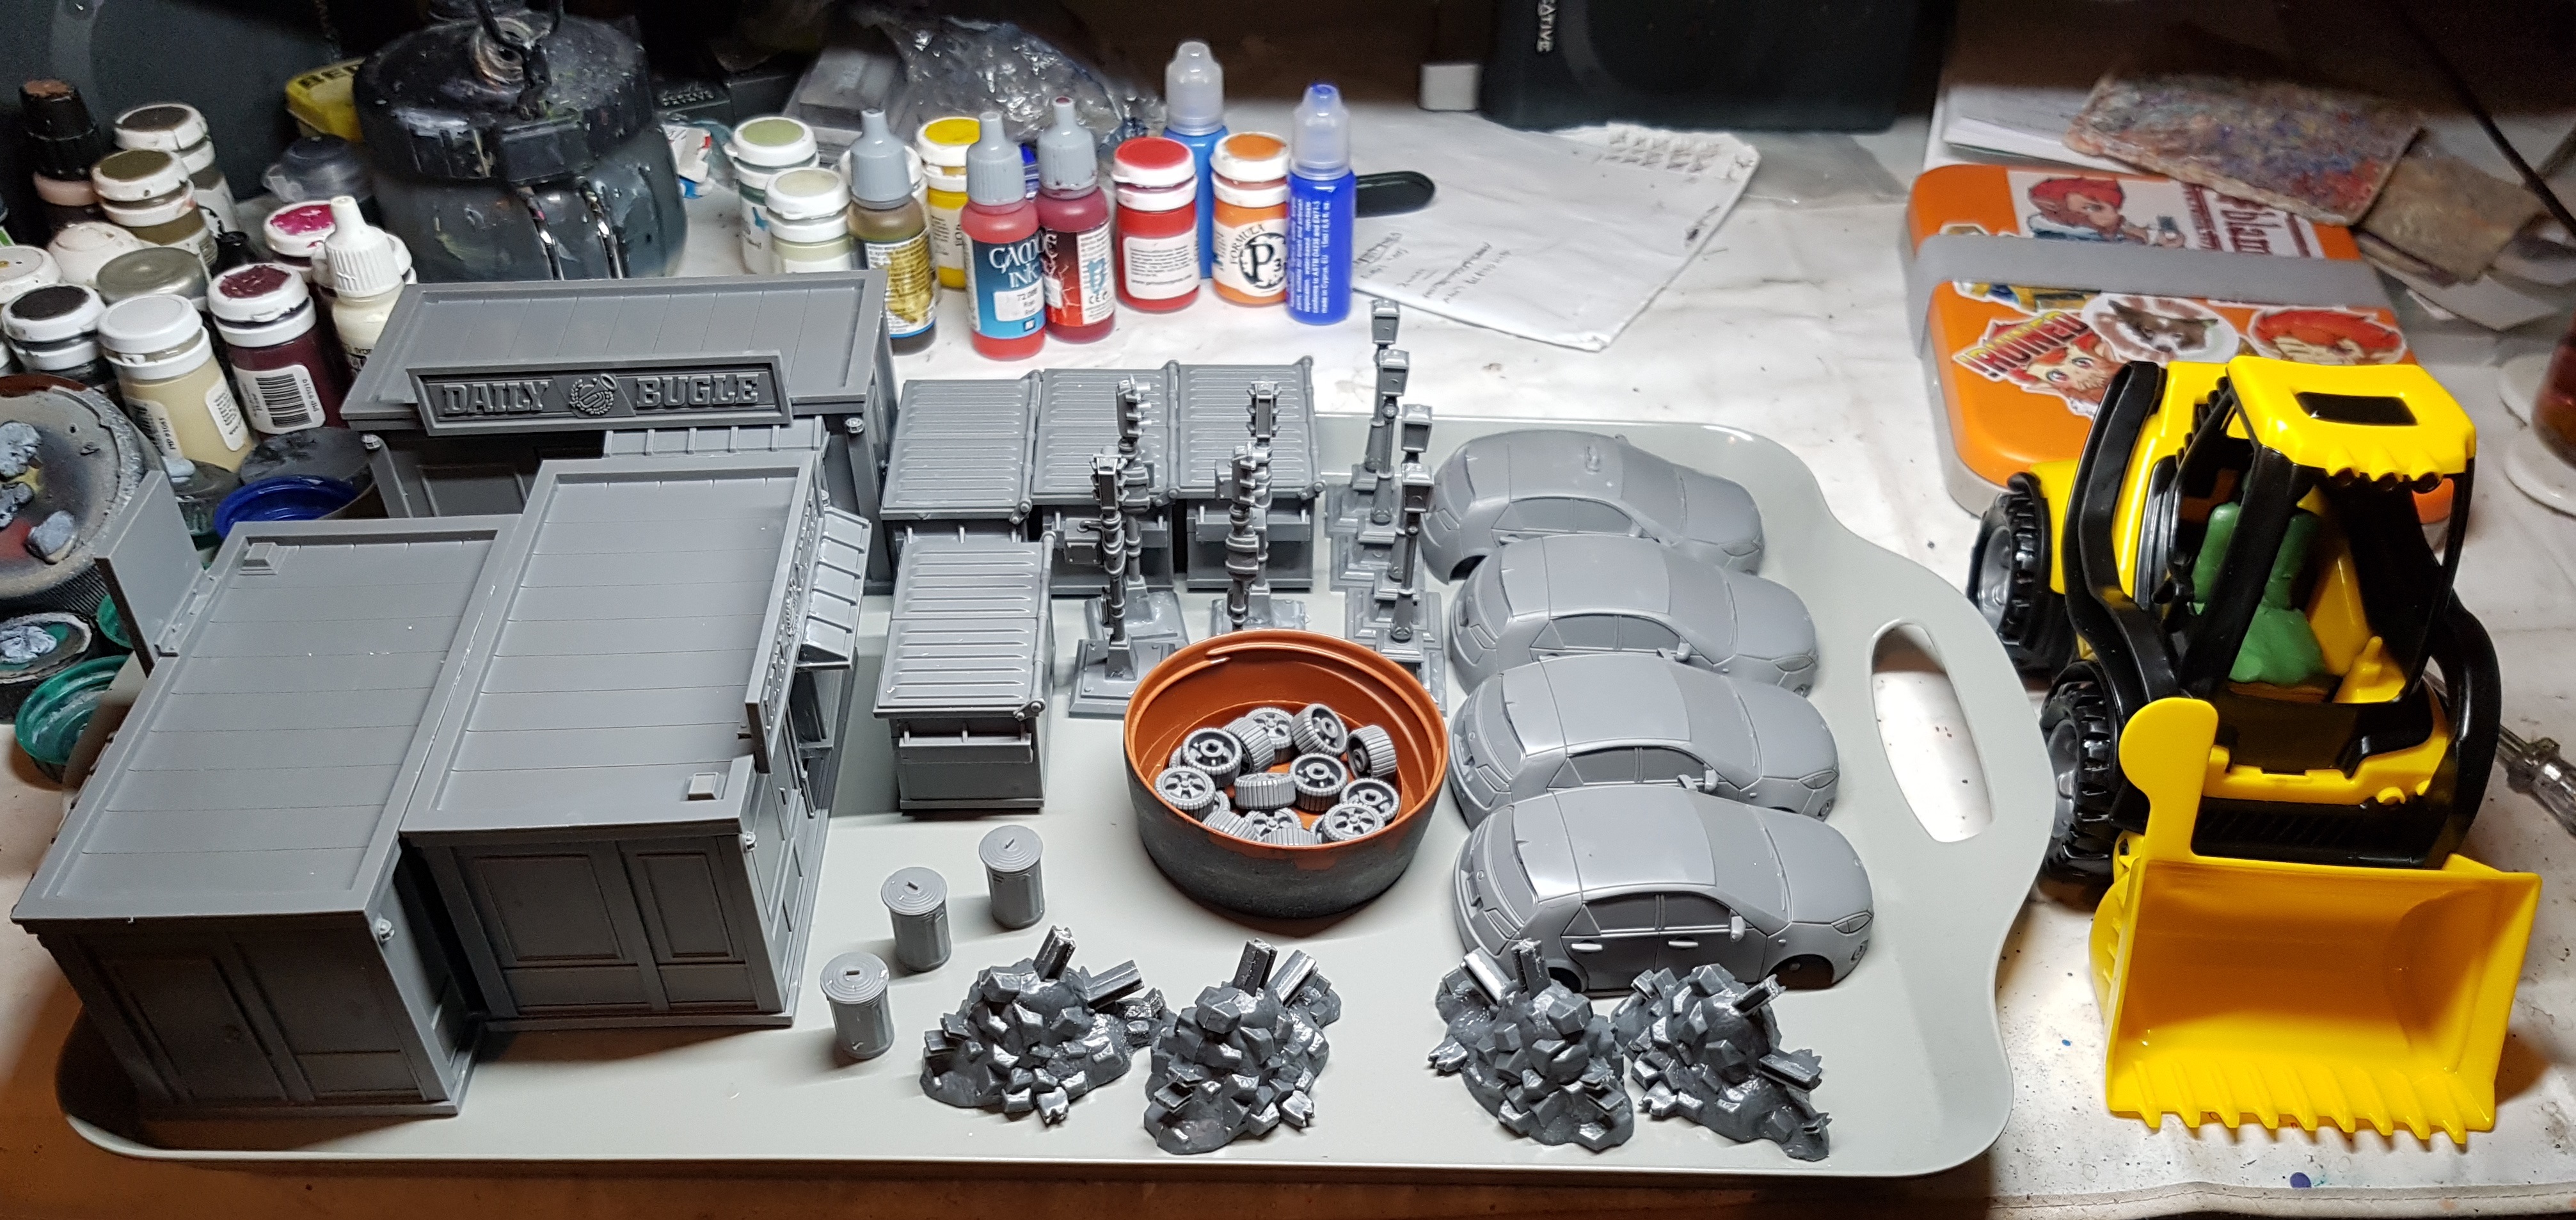

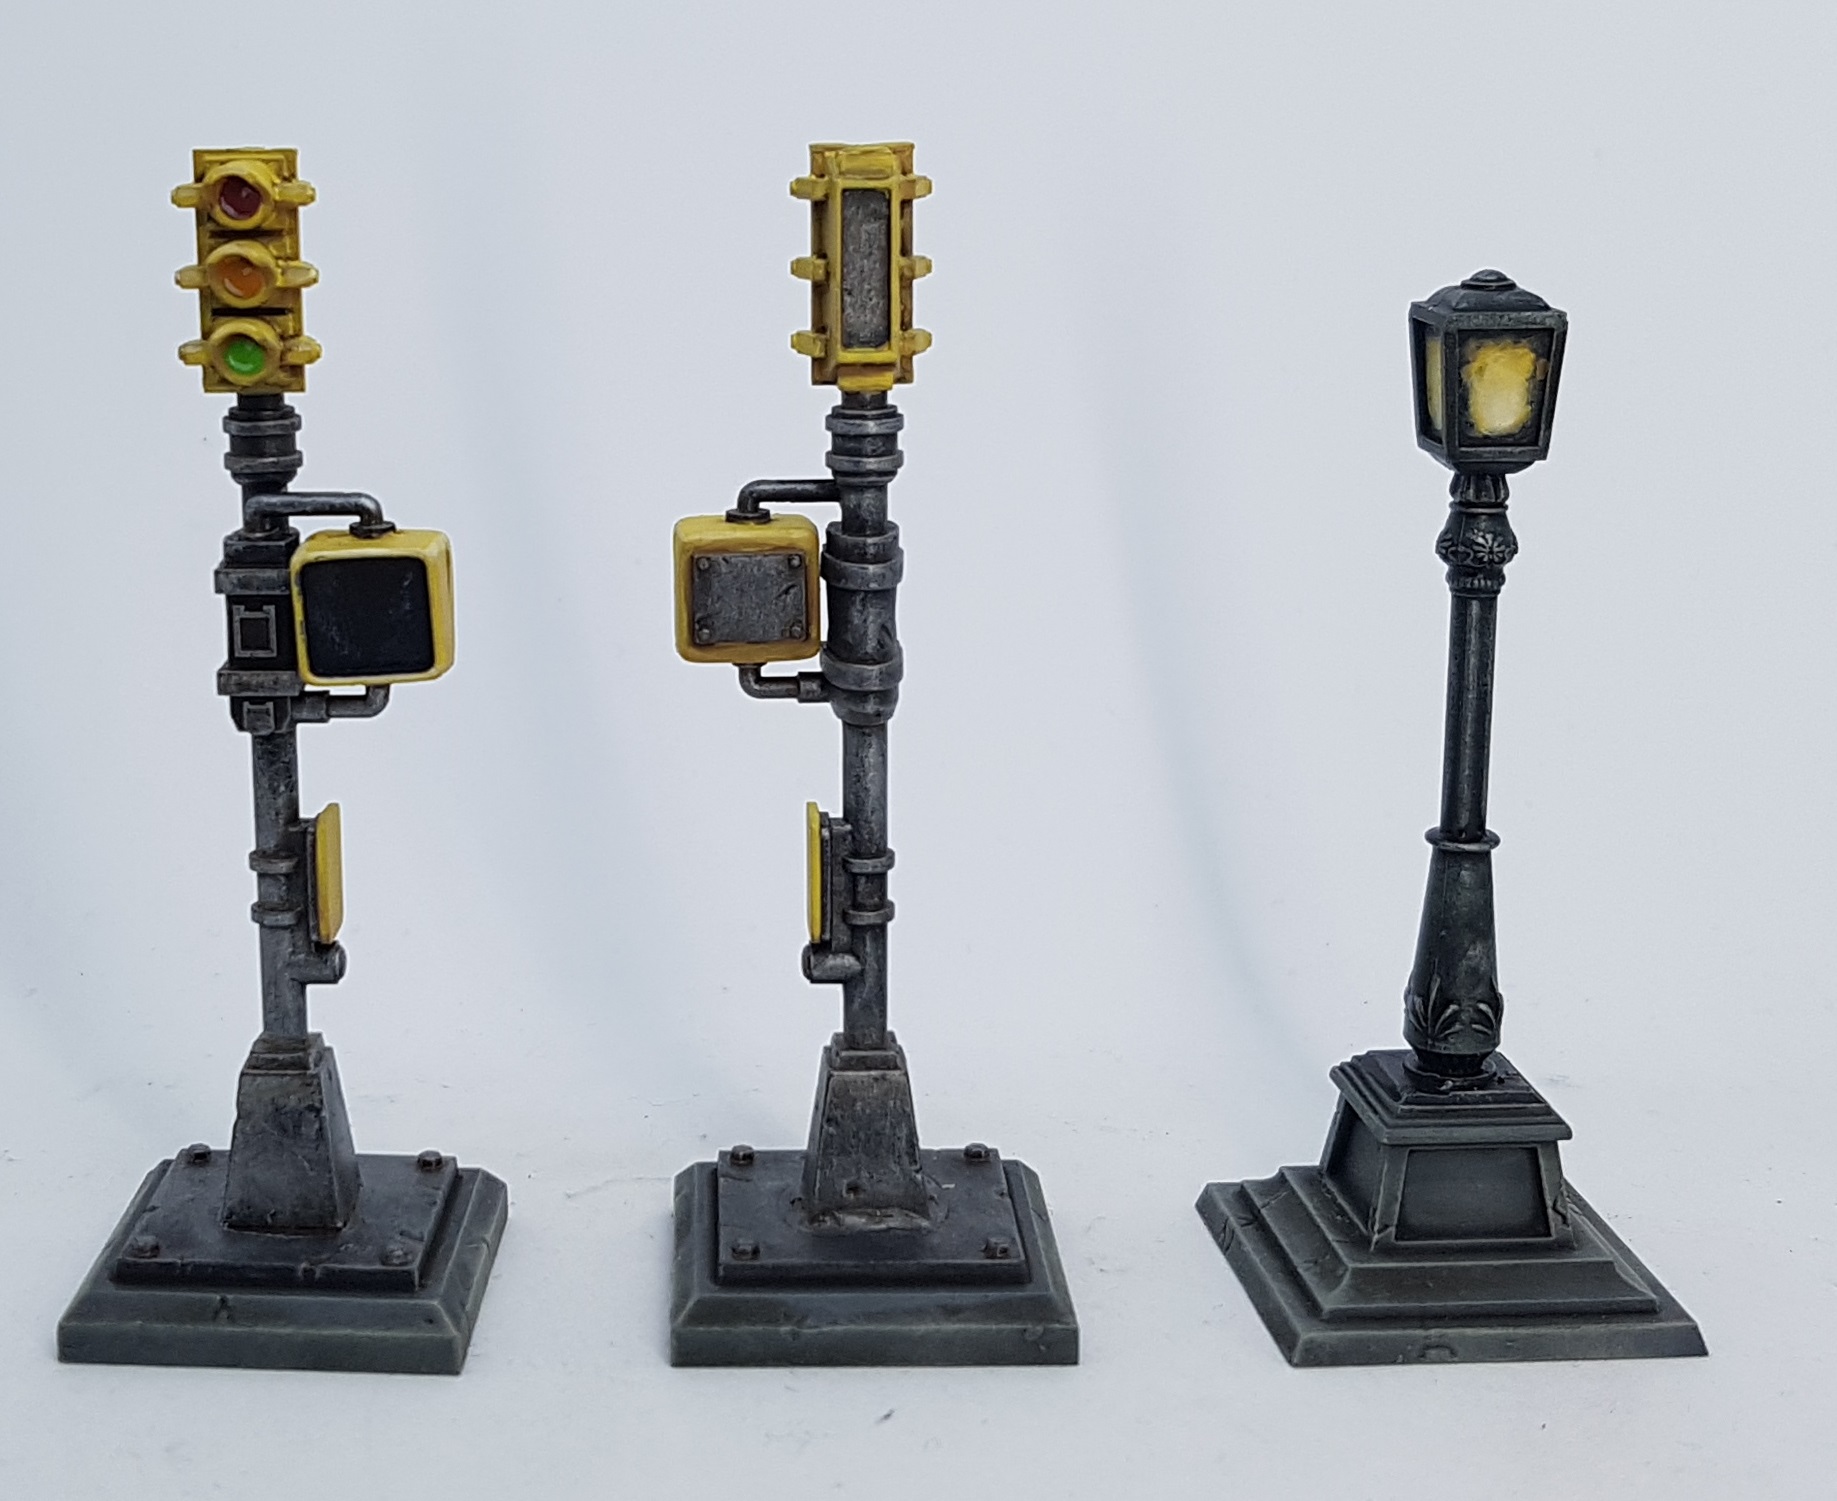
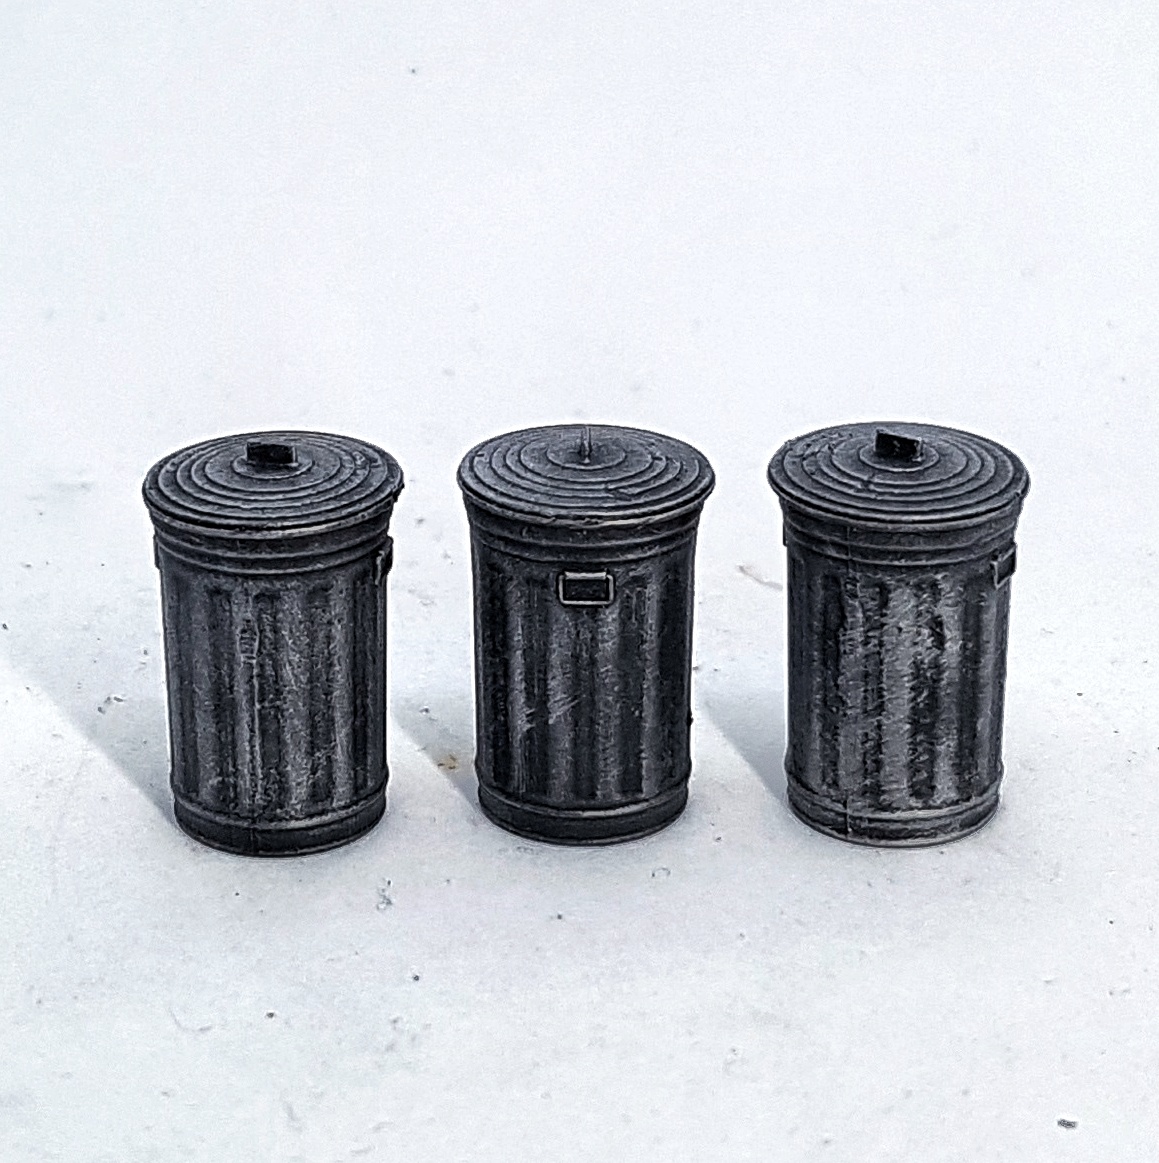
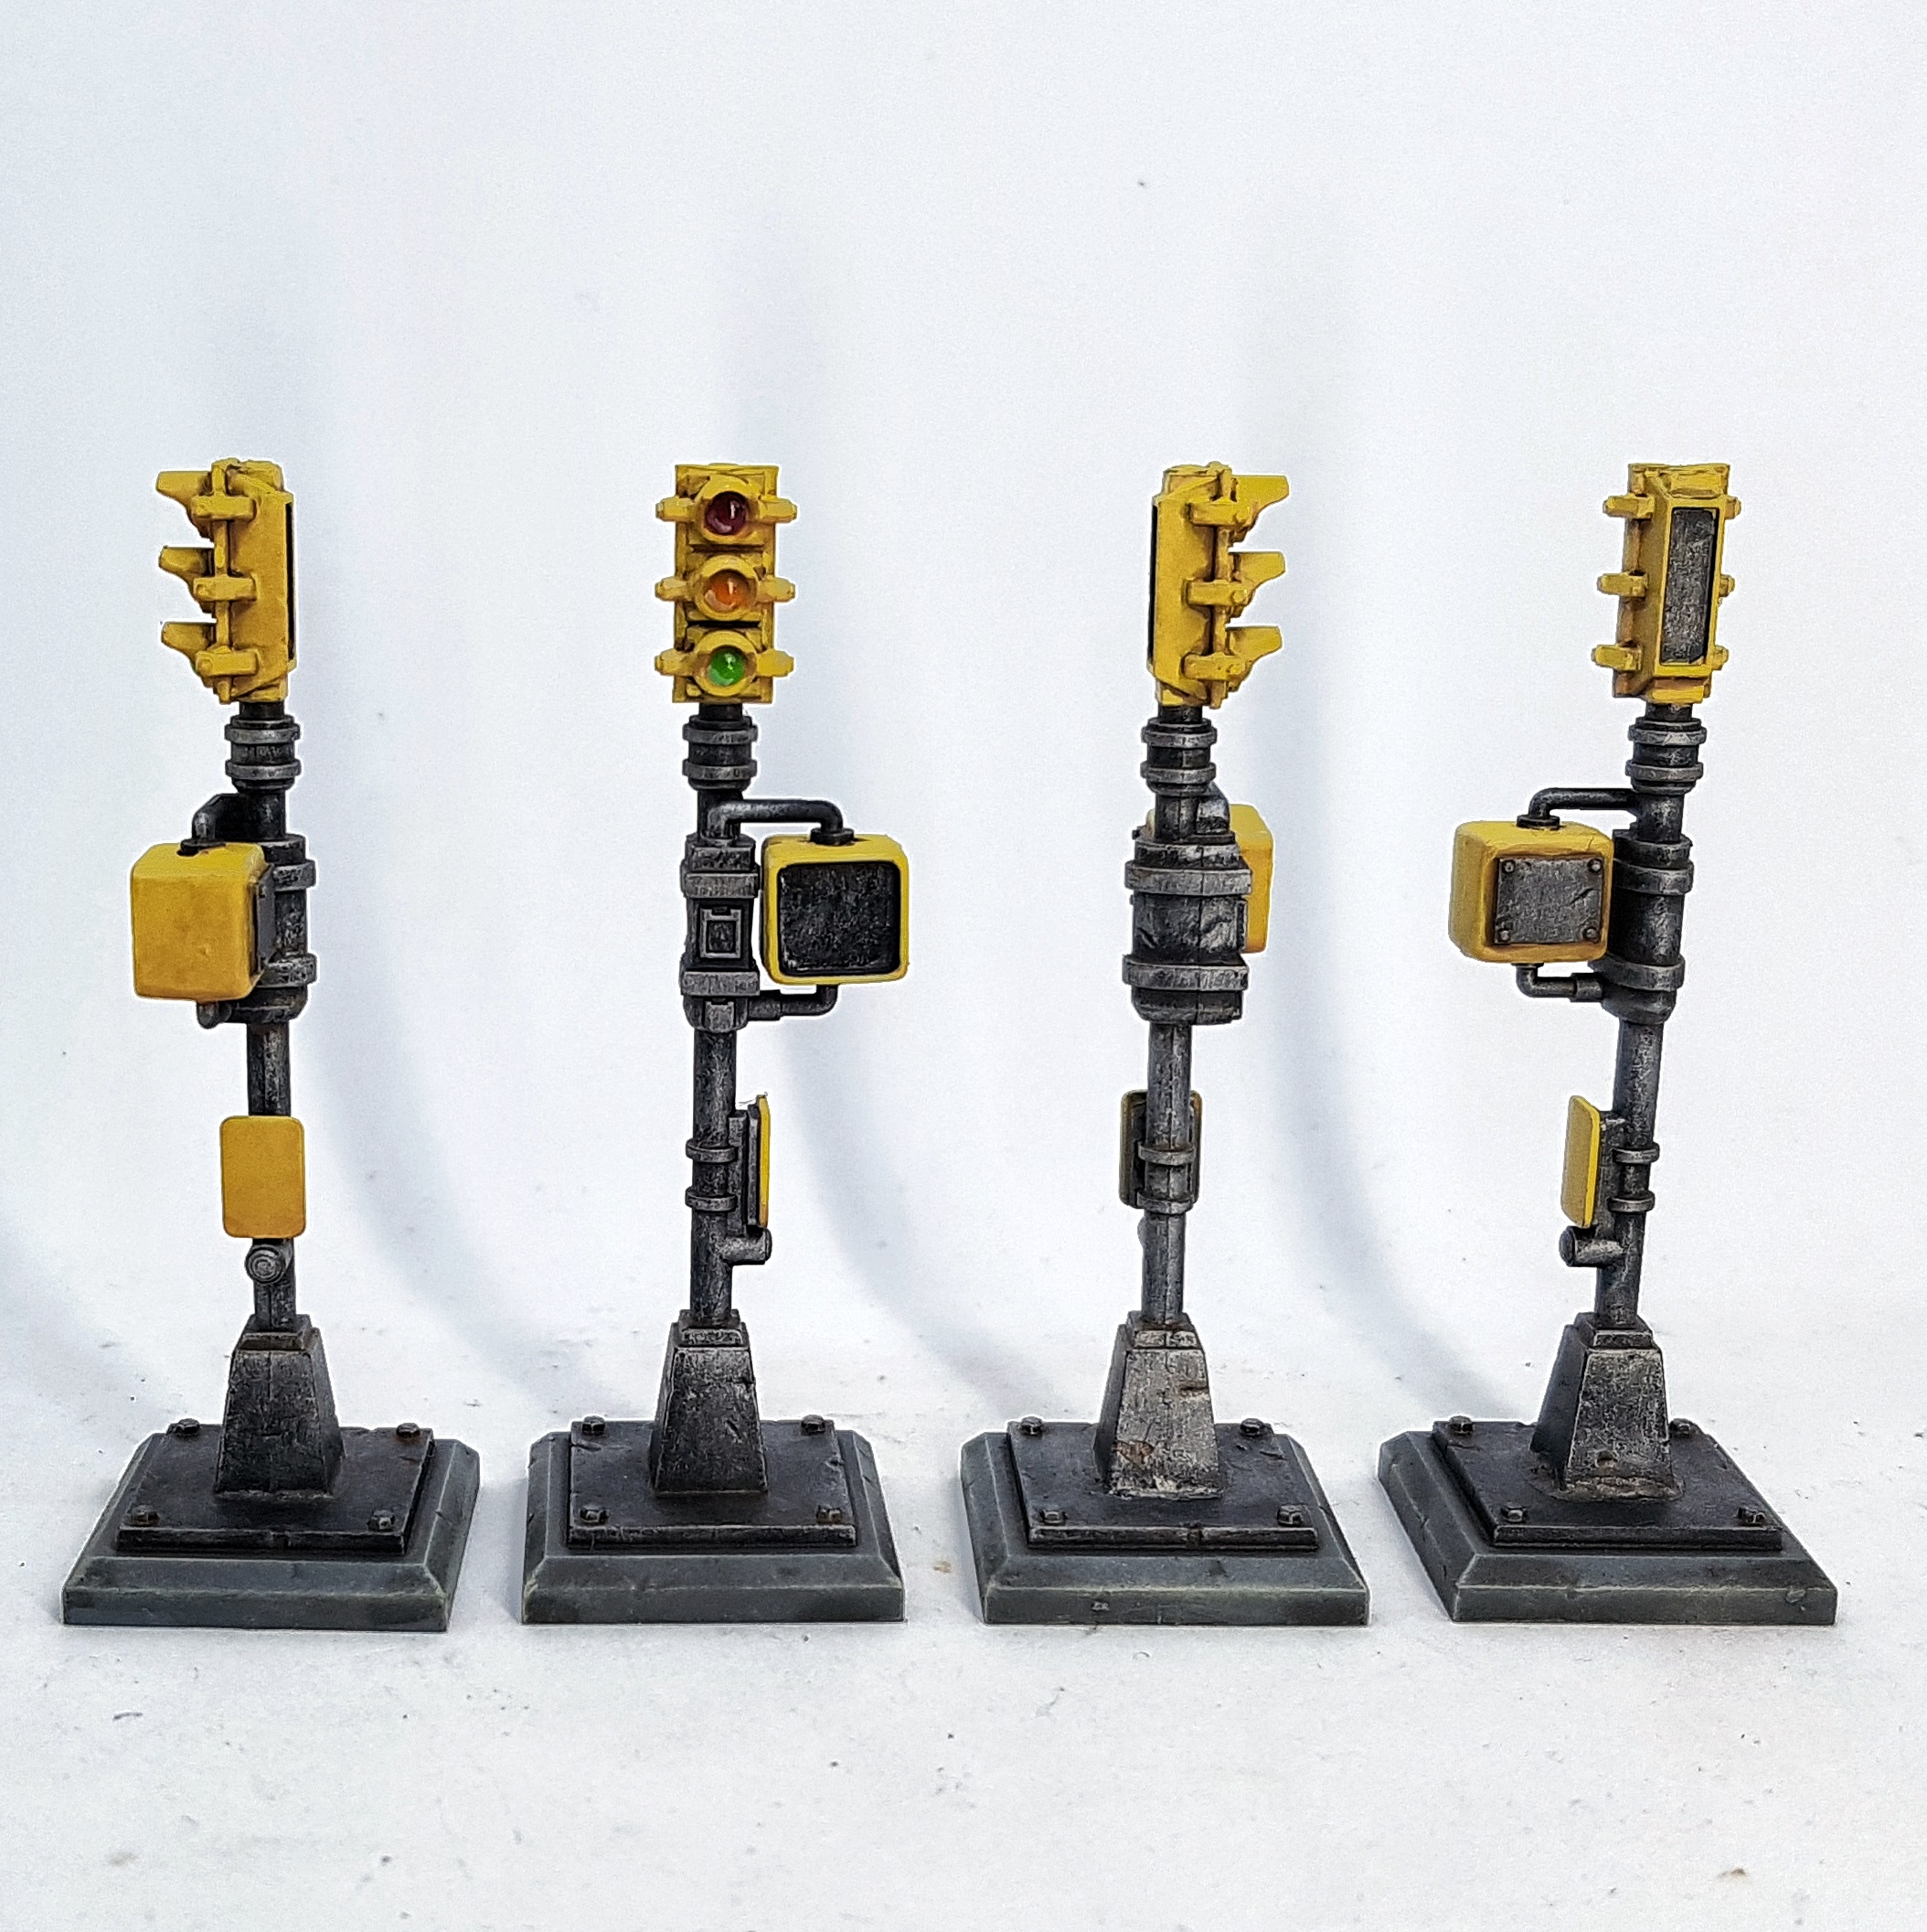
The next day I base coated everything, except for the three buildings. I’ll deal with them when everything else is done. I then went on to paint the bins, traffic lights and street lamps, as they didn’t need any airbrush work. They were painted following the videos pretty much exactly. I used the same paving scheme as I used for my bases. It’s good to tie everything together. I didn’t get them finished this day though.
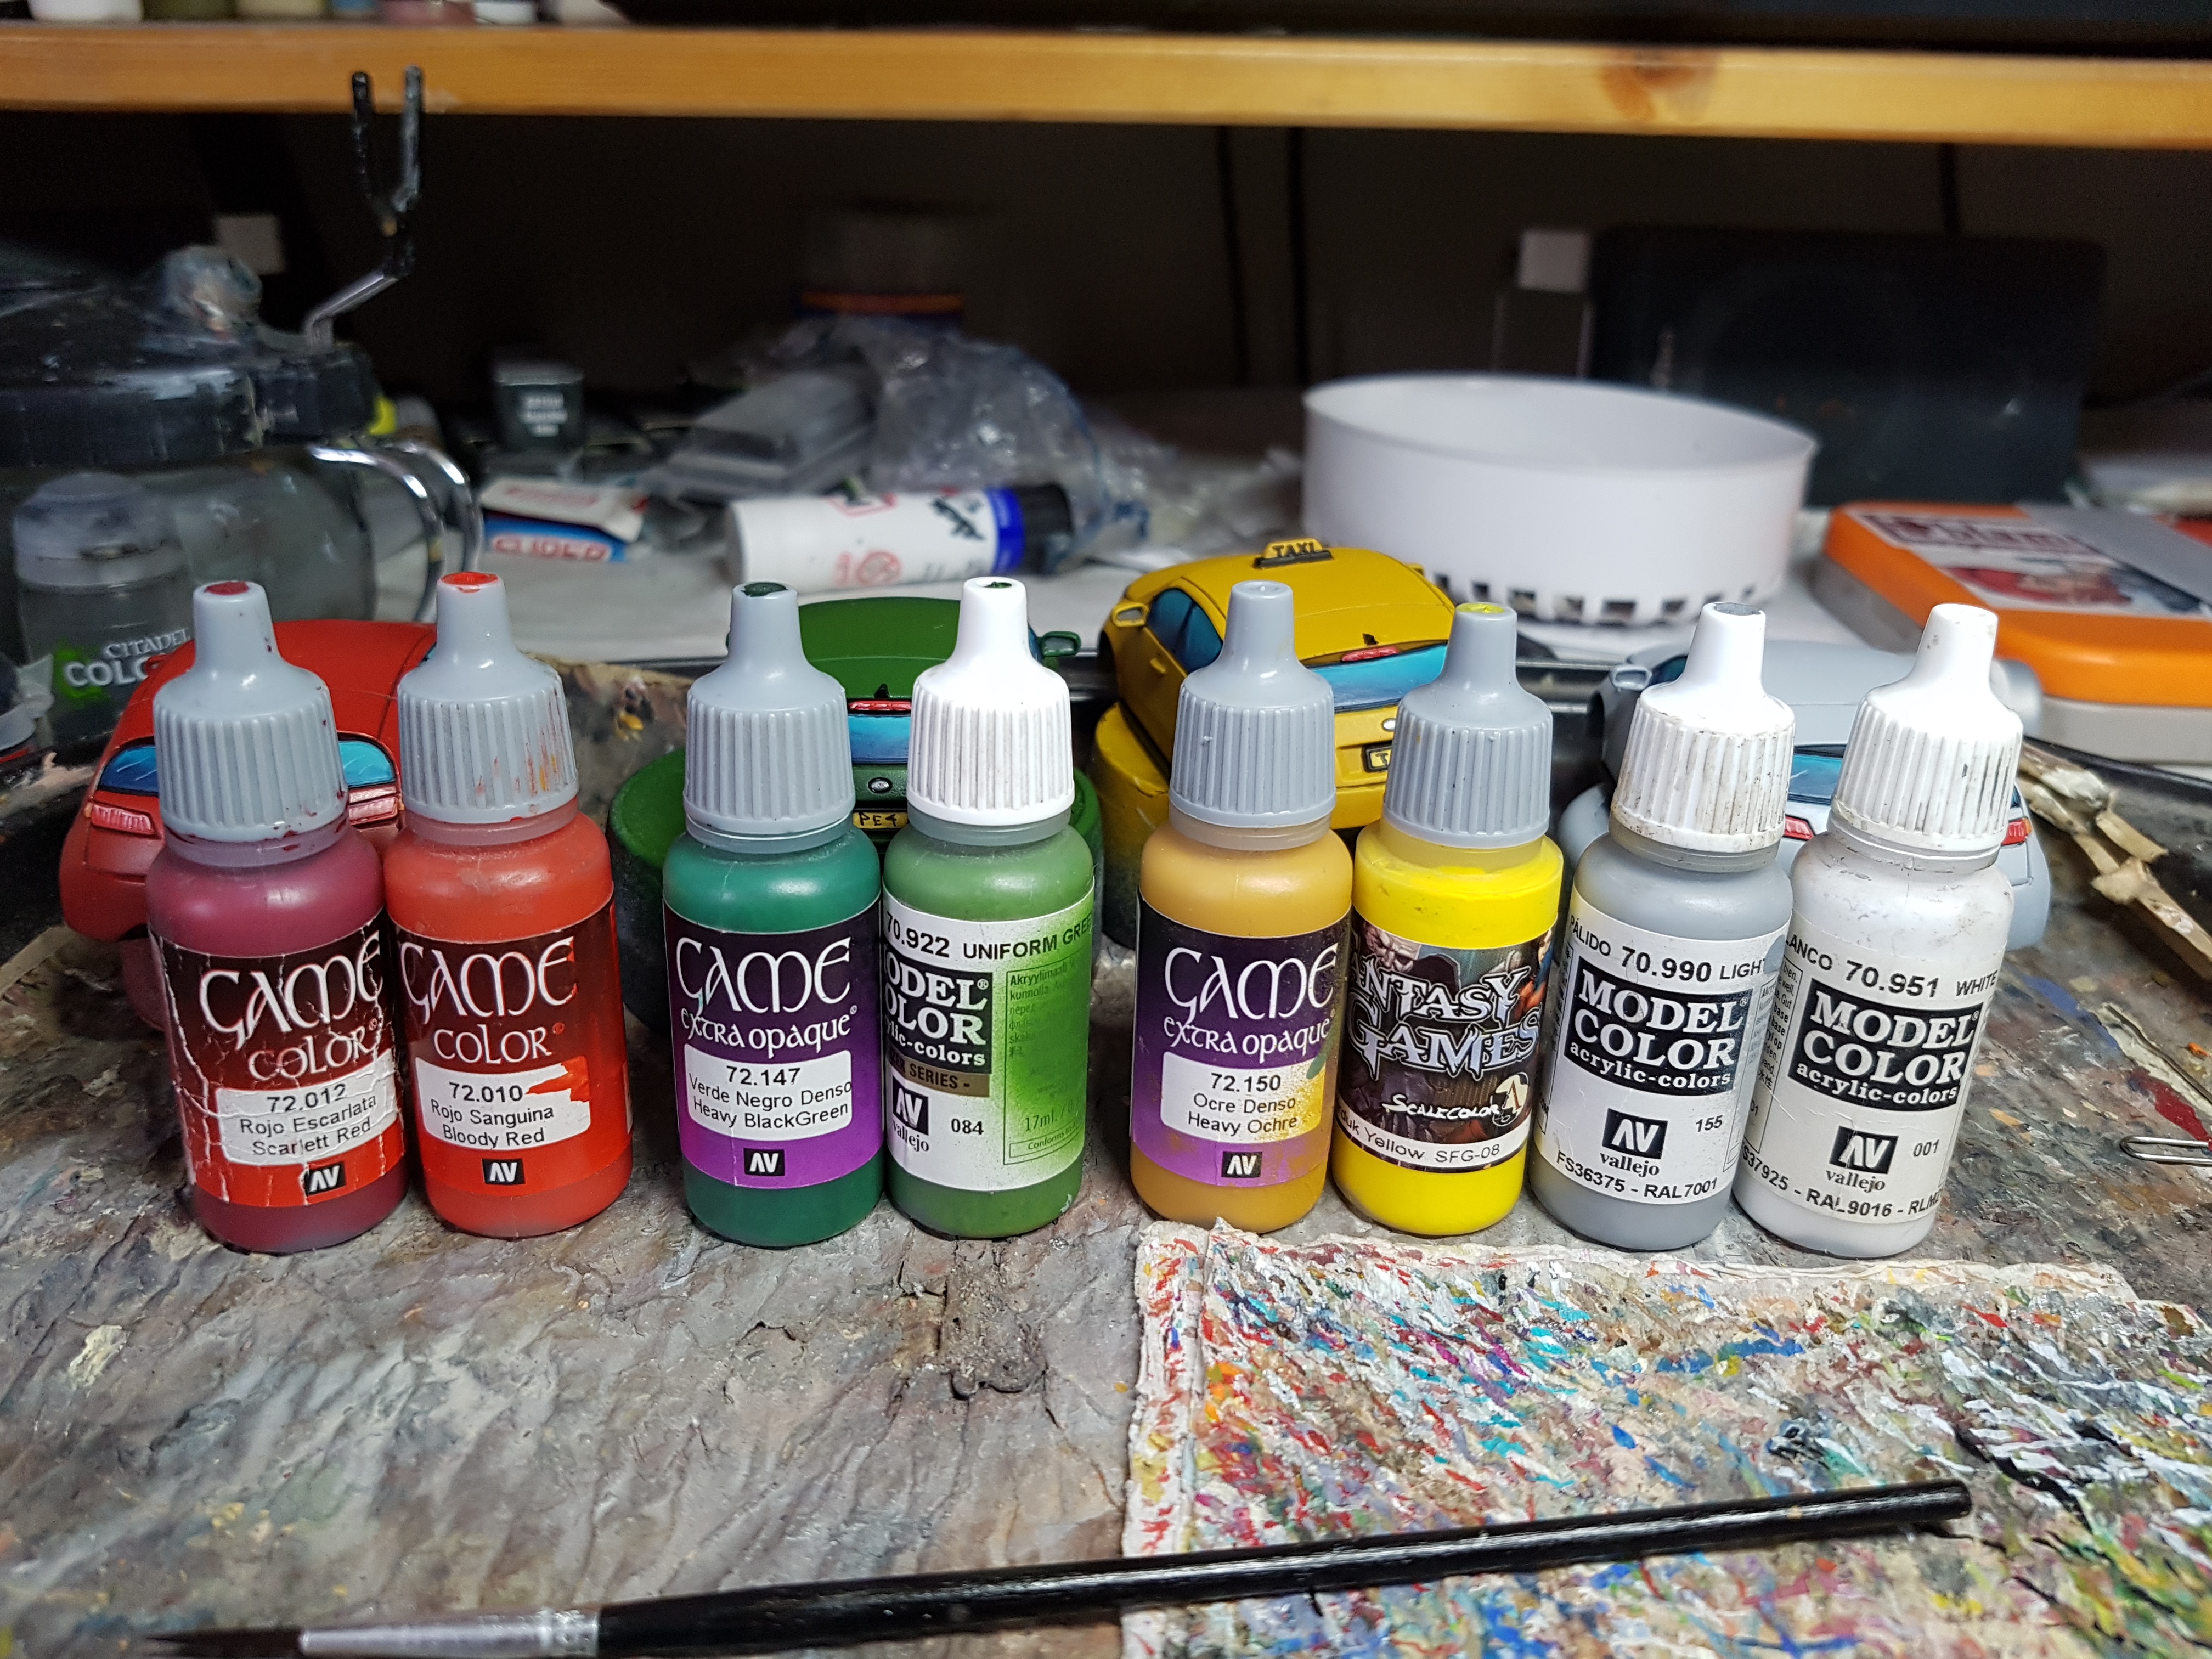
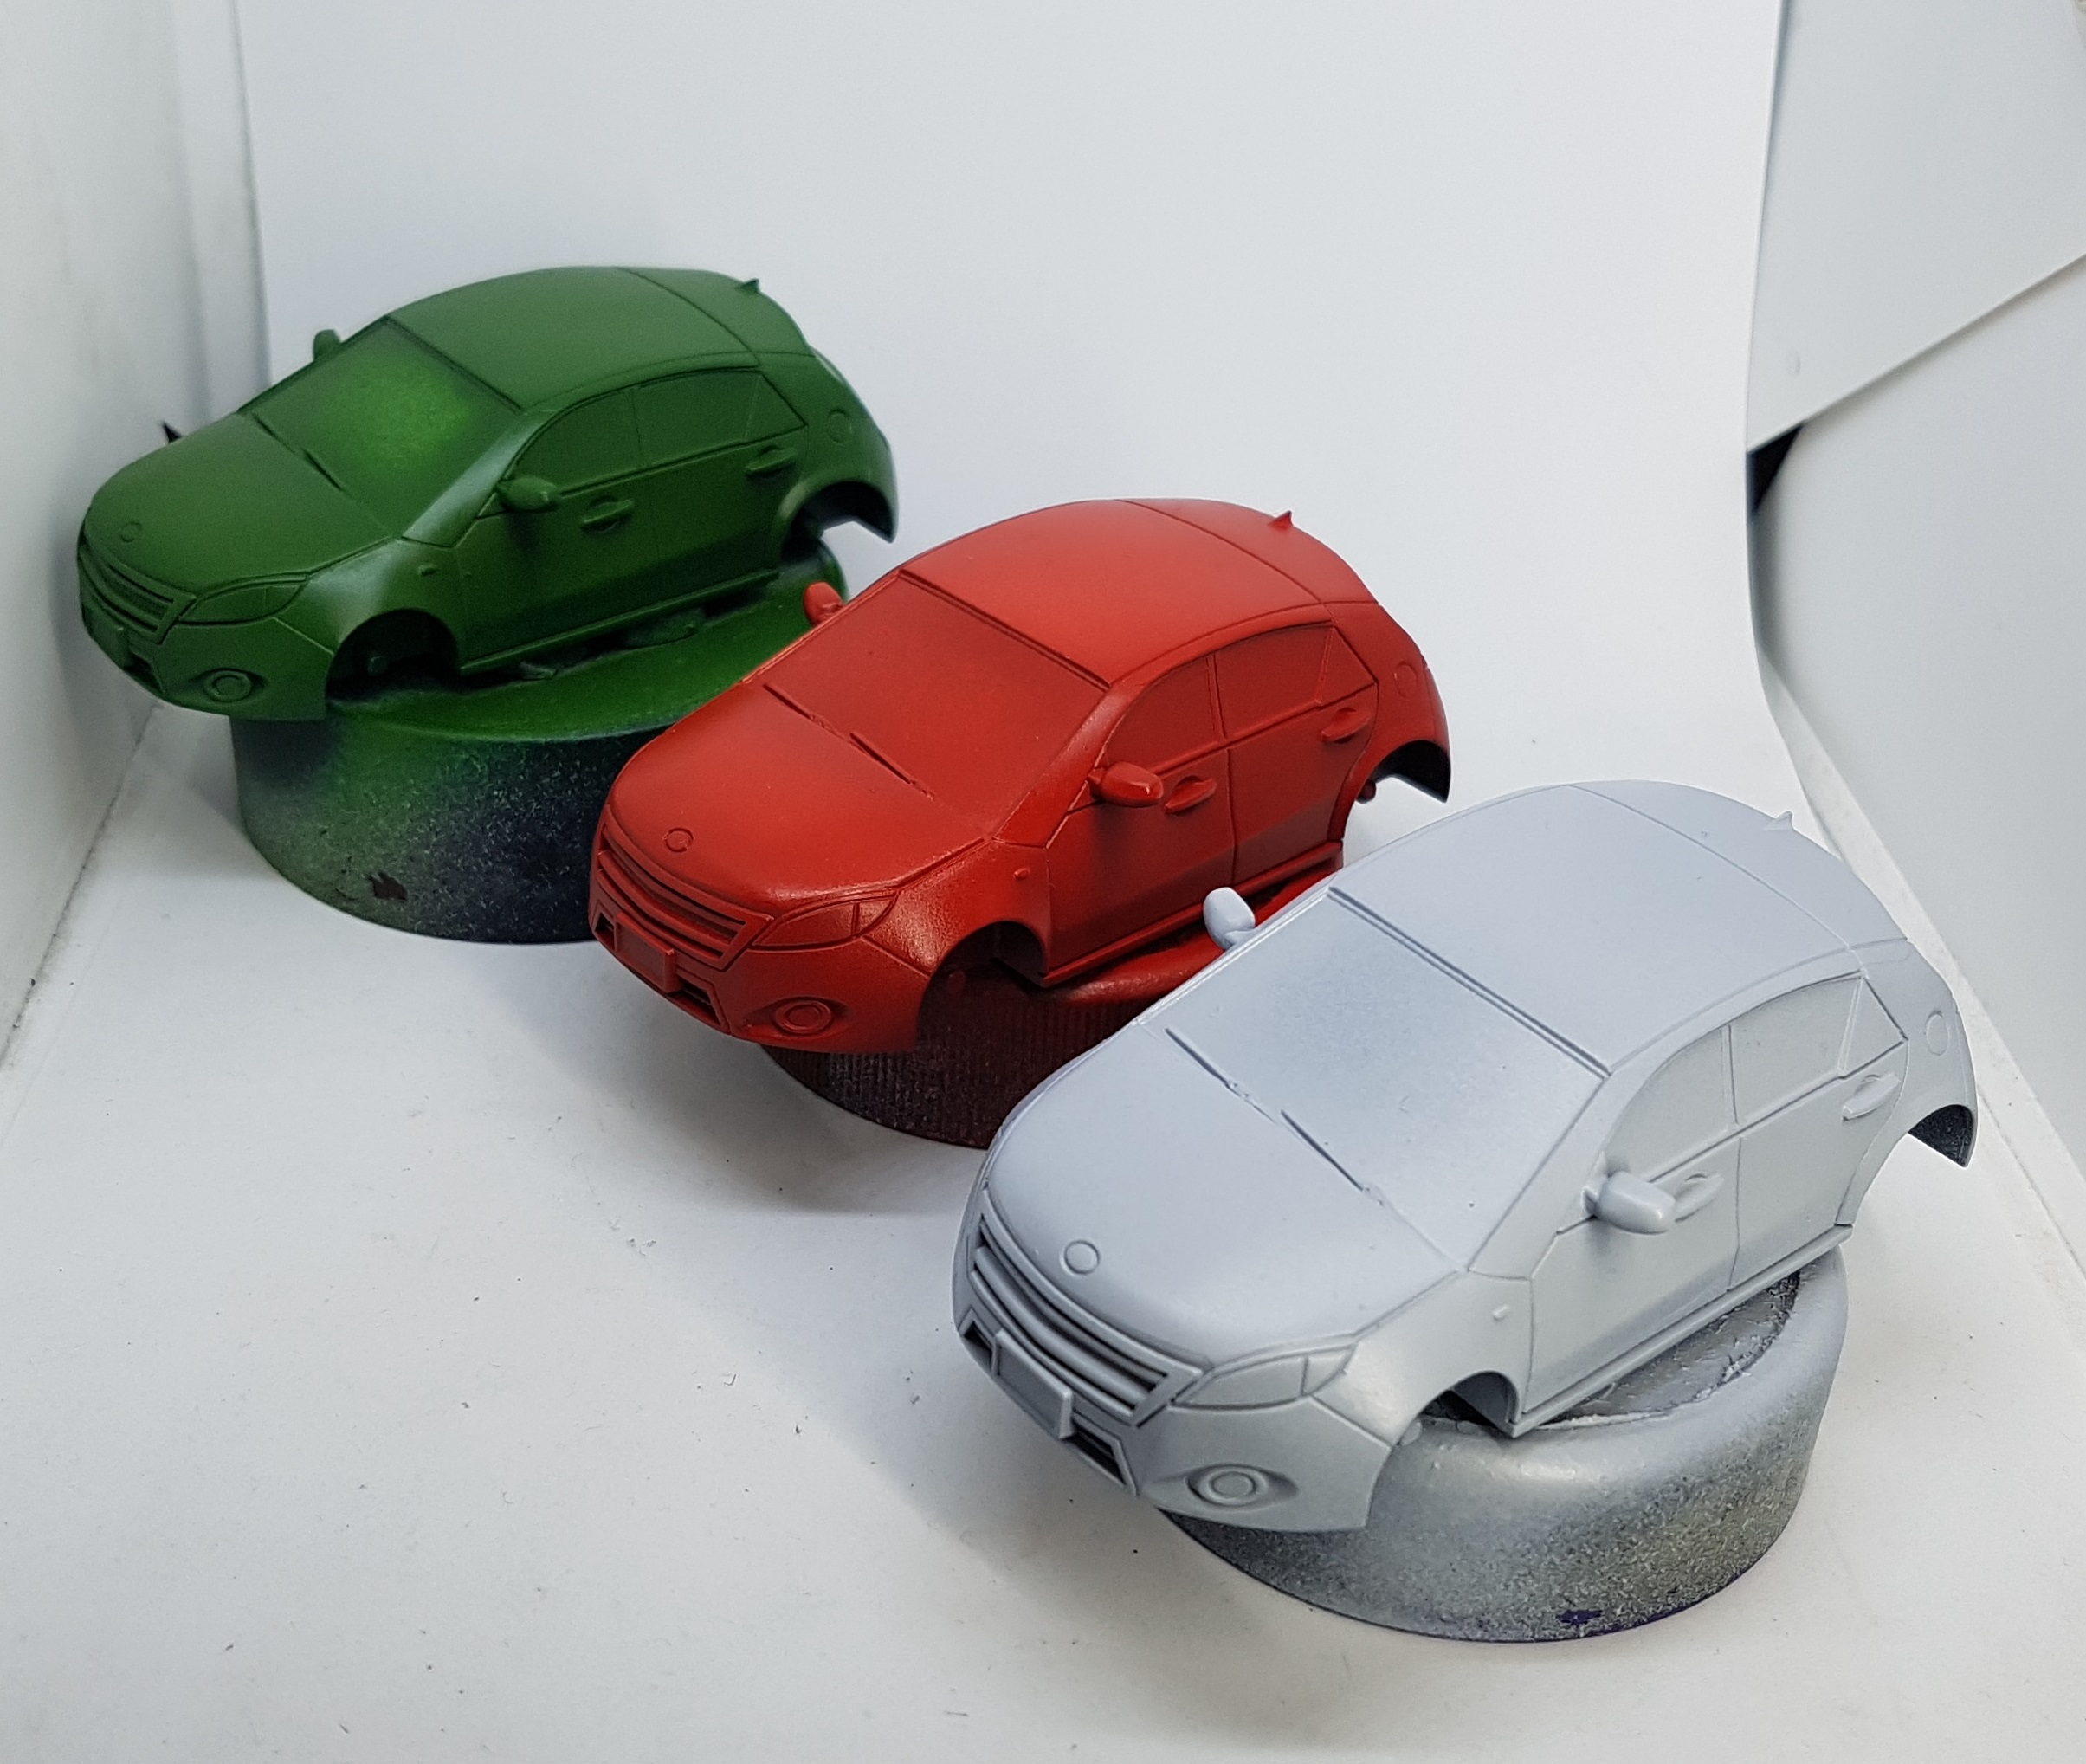
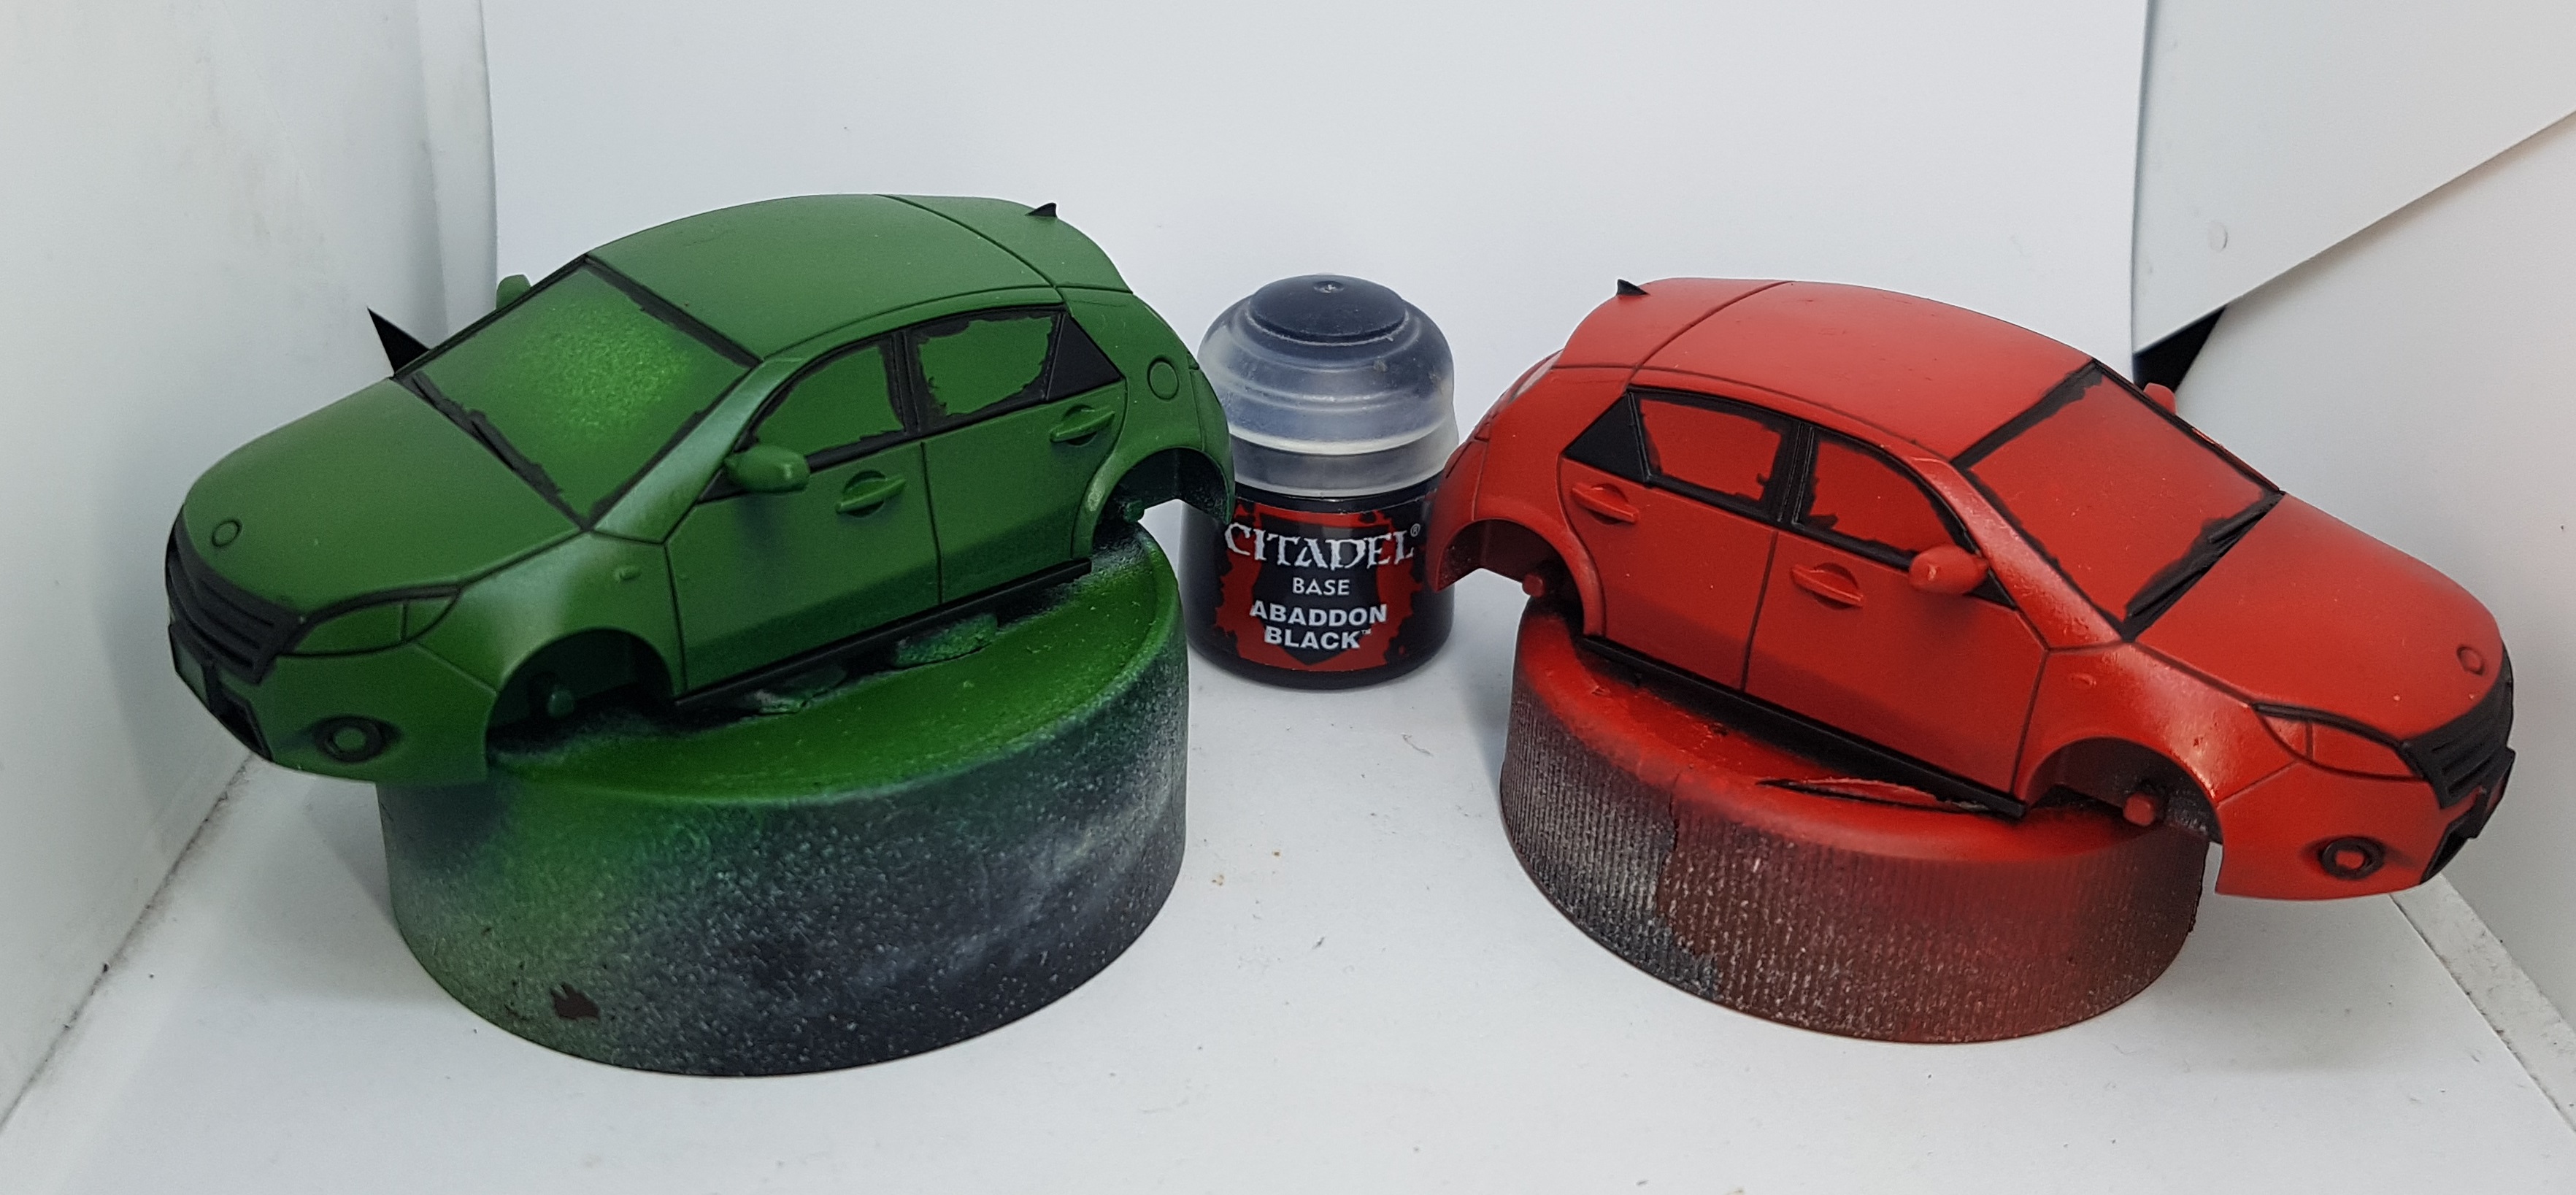
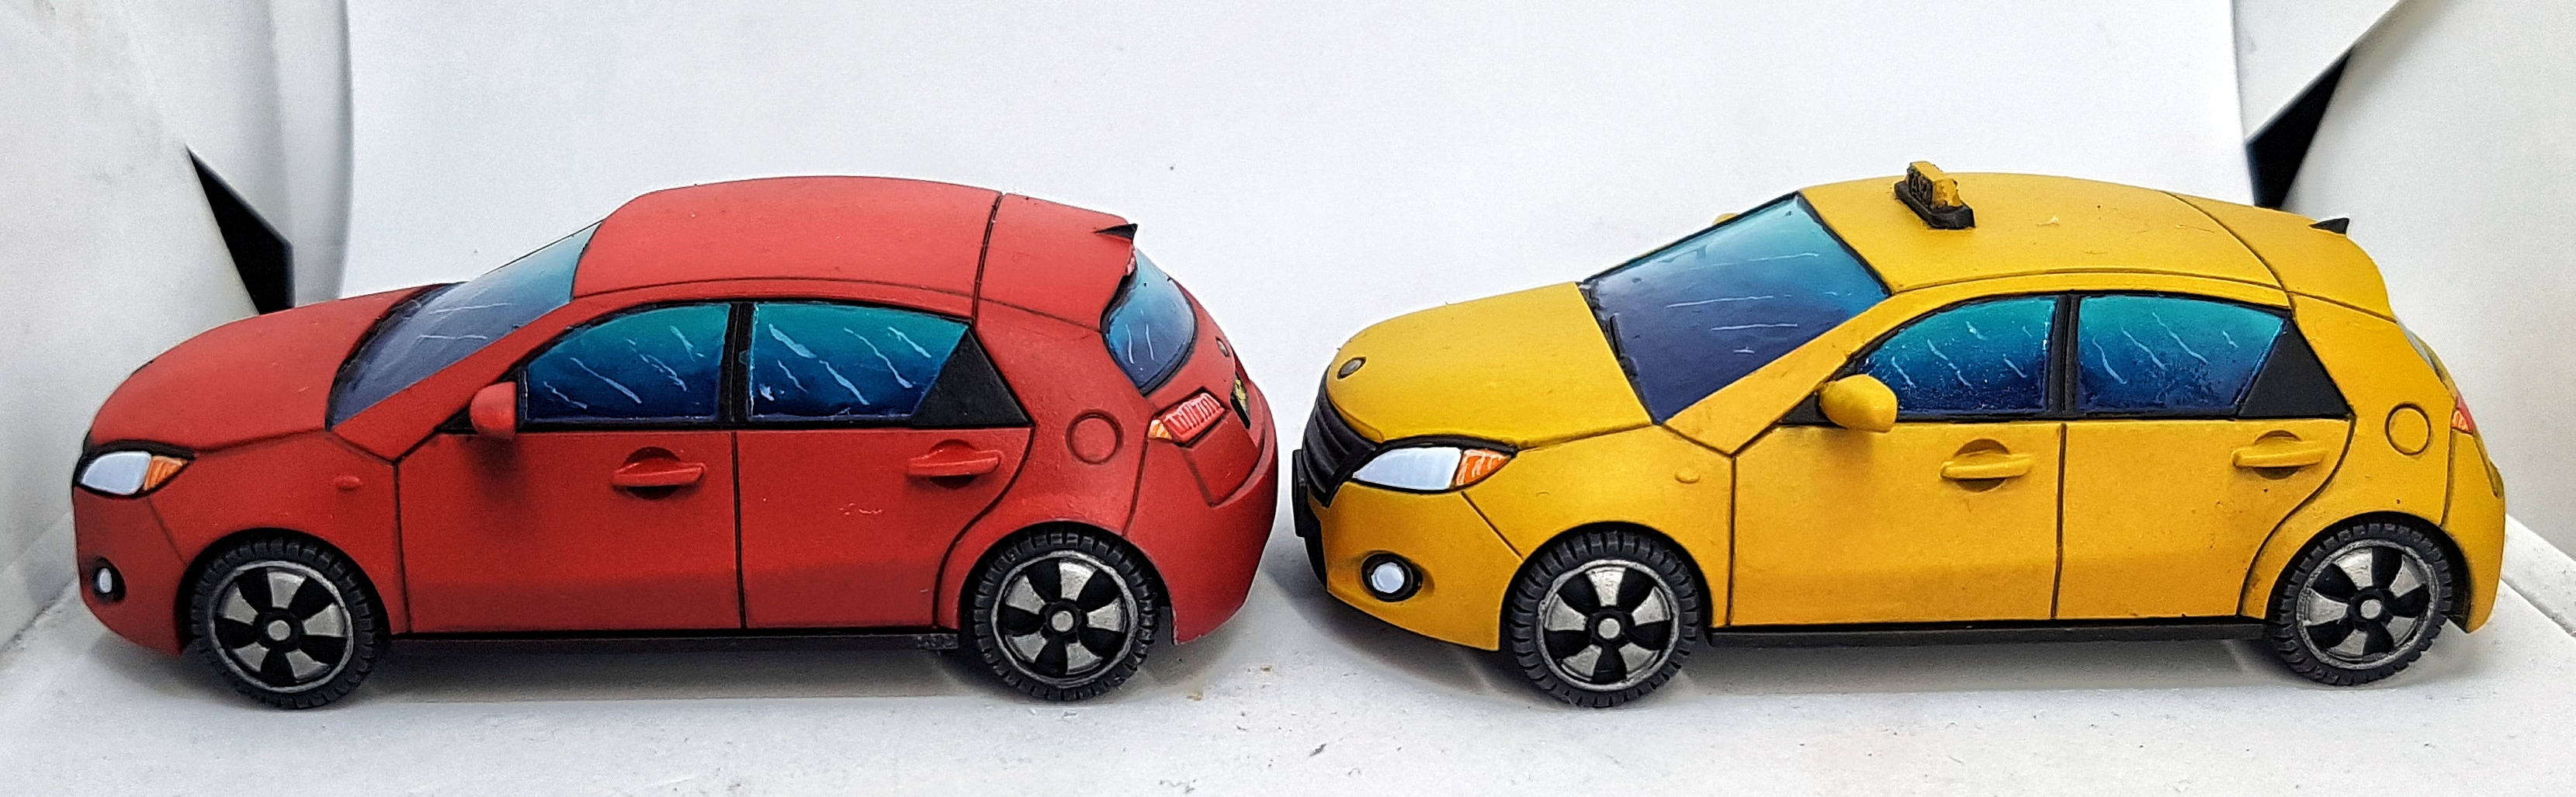
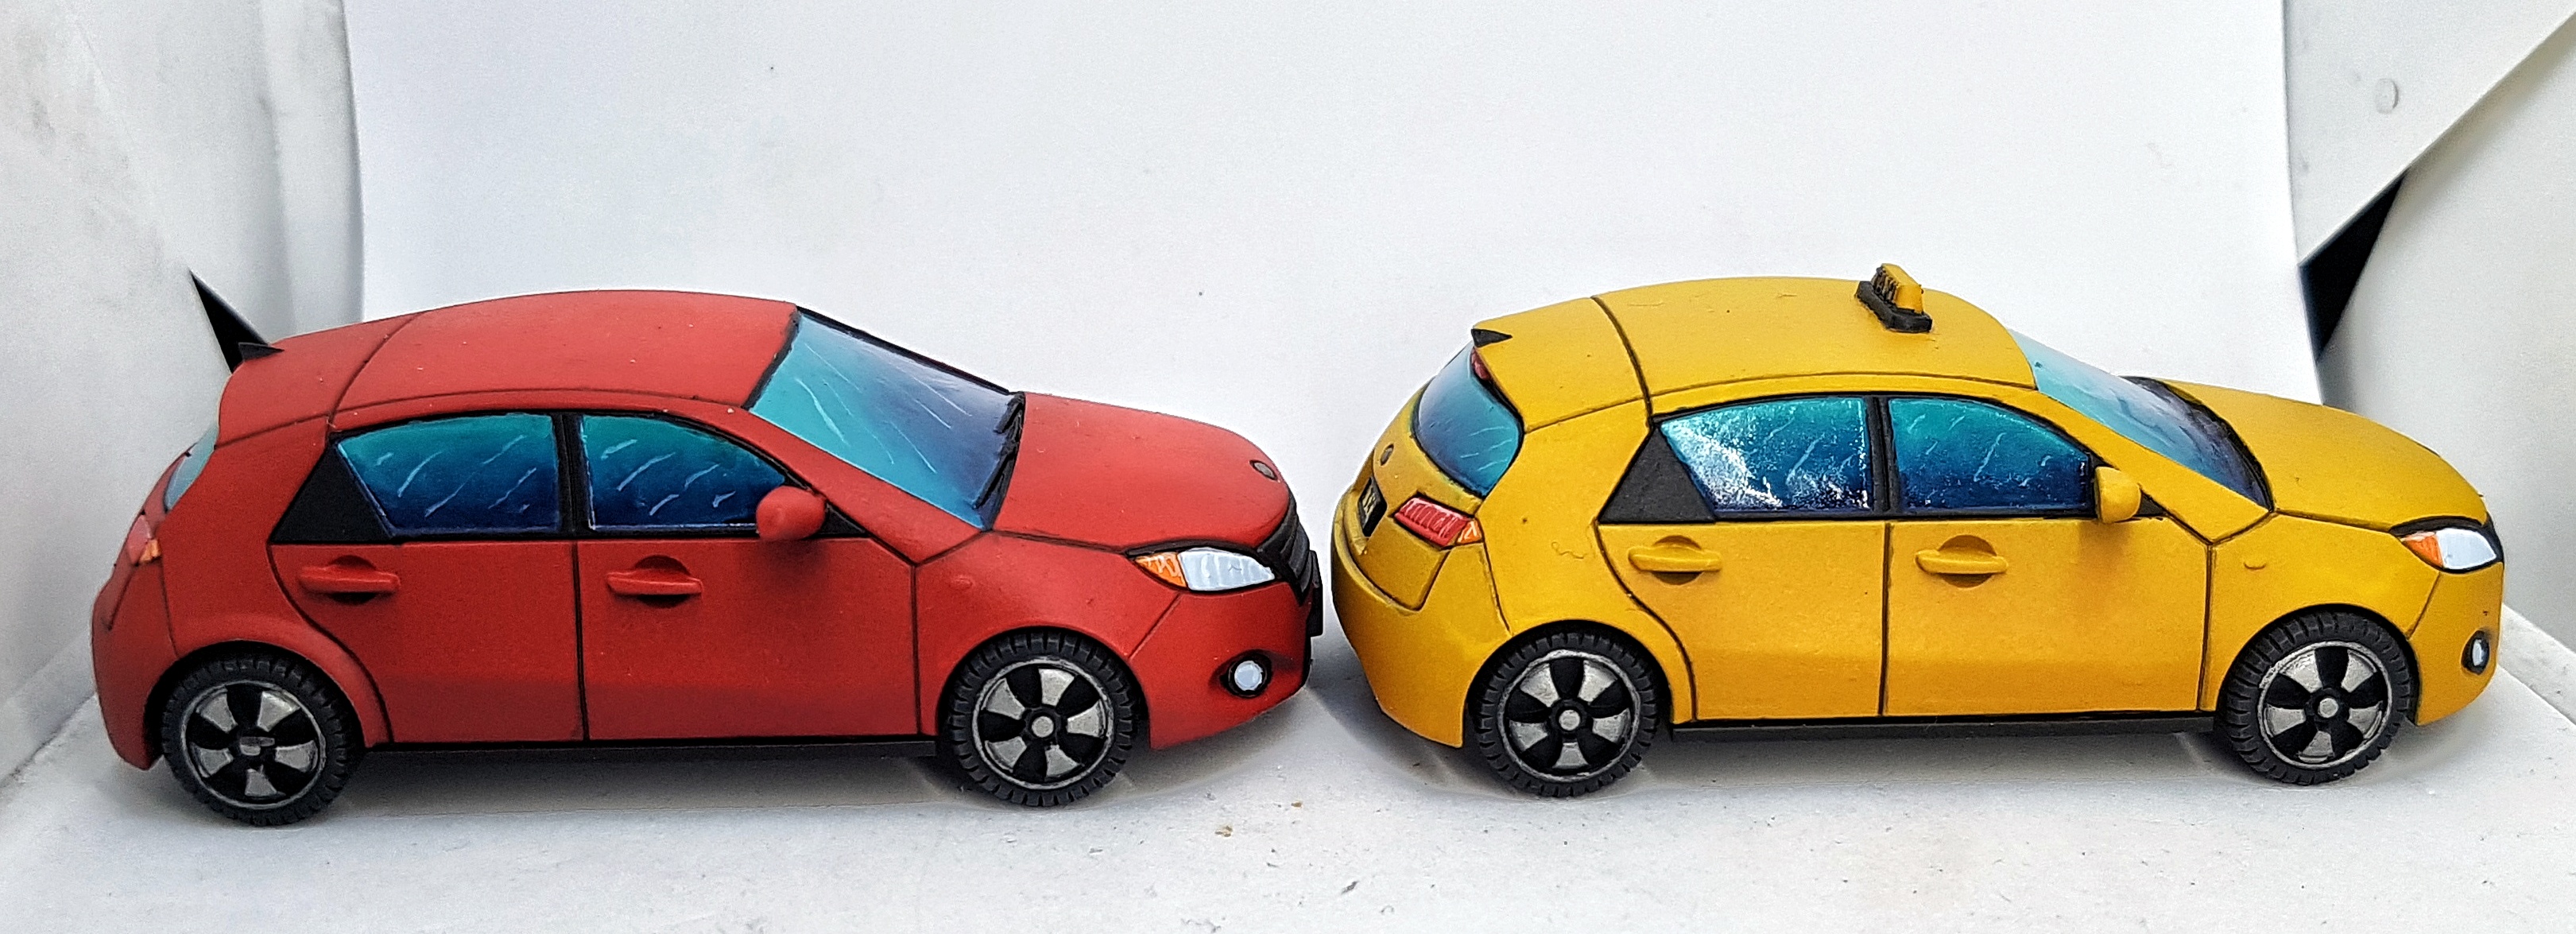
Red Car
Undercoat VGC 72.012 Scarlett Red
Zenithal Highlight VGC 72.010 Bloody Red
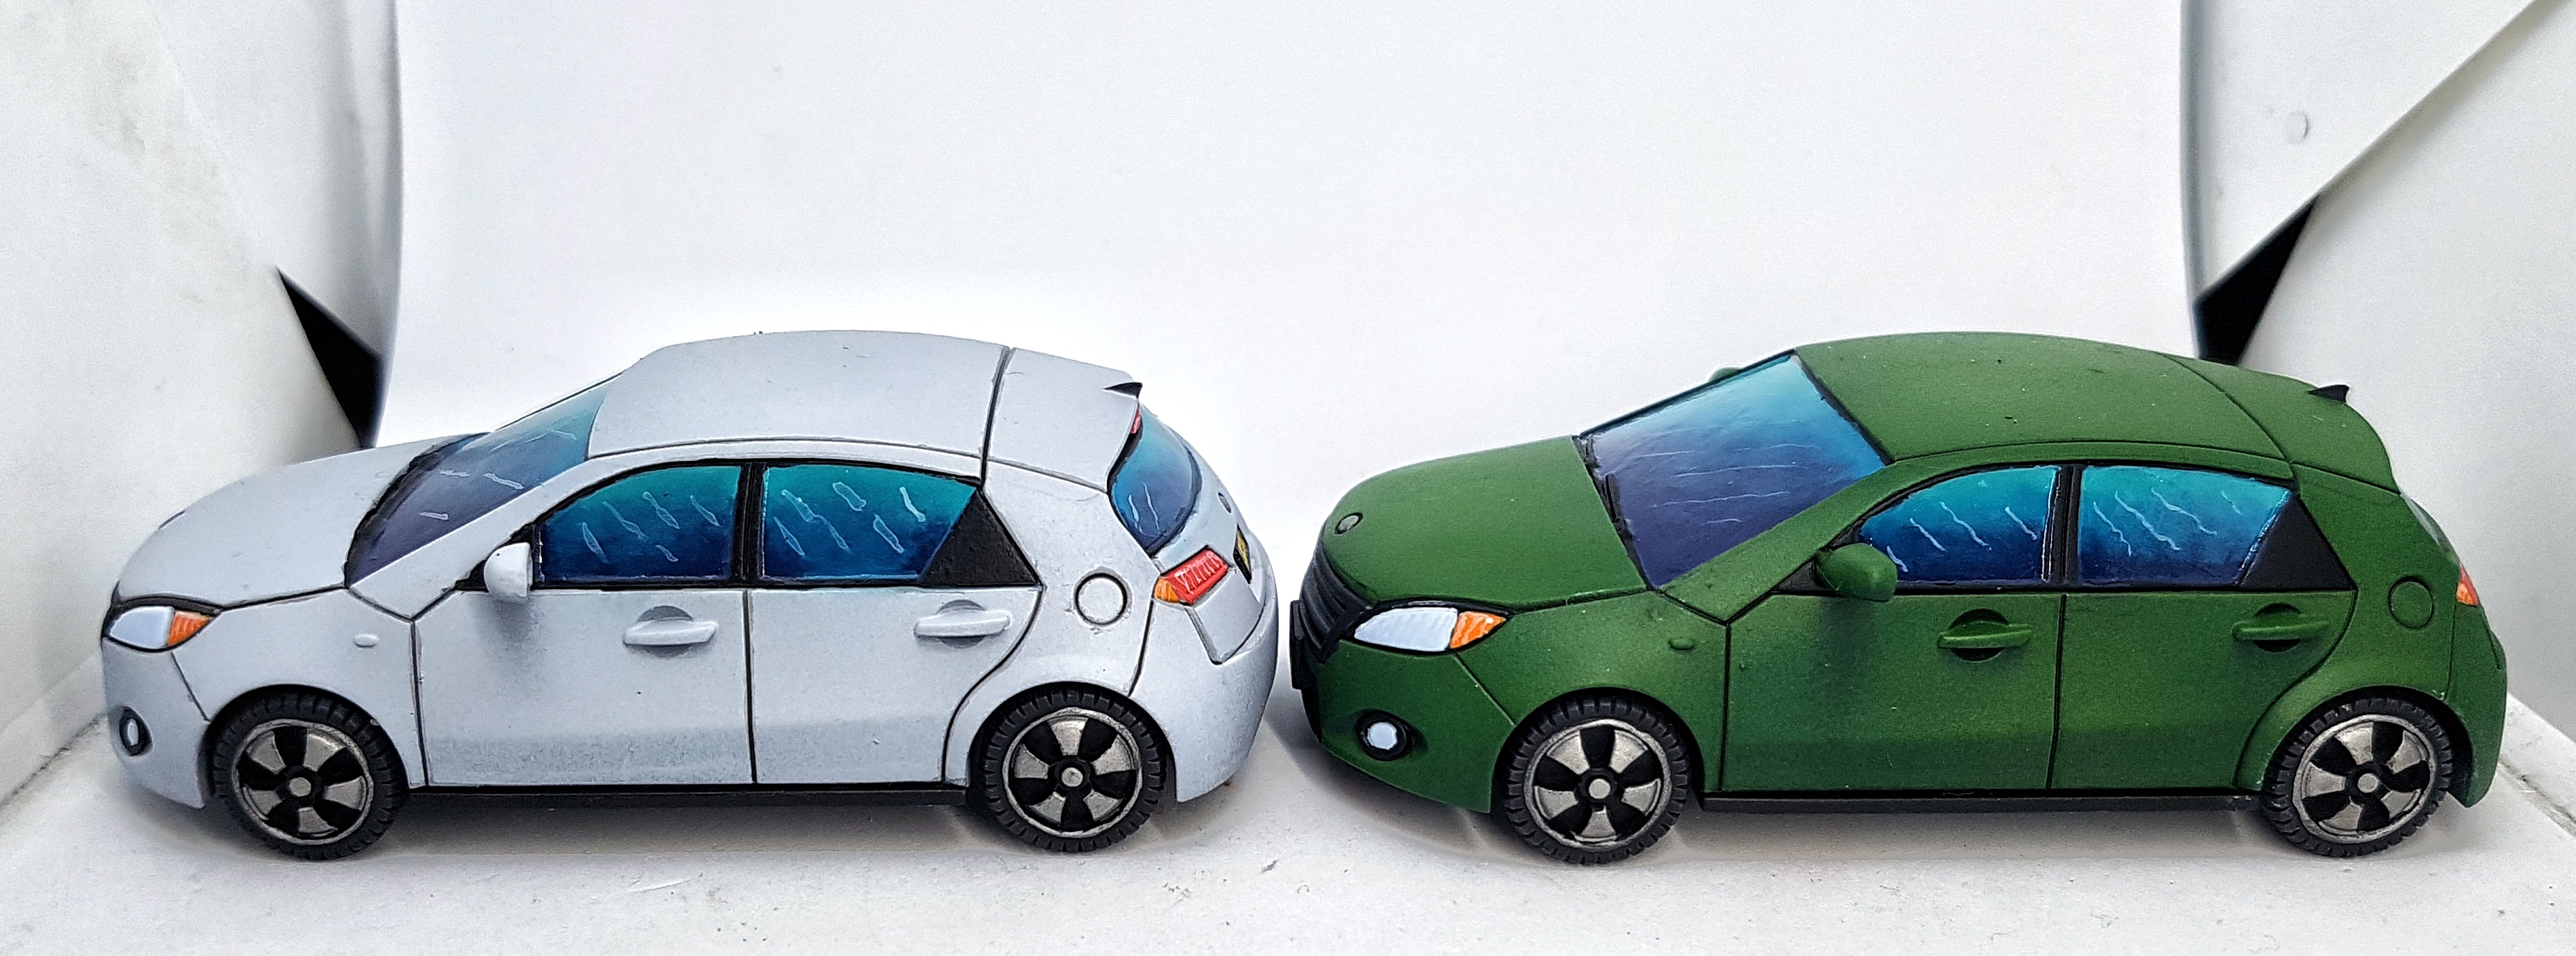
Green Car
Undercoat VGC 72.147 Heavy Black Green
Zenithal Highlight VMC 70.922 Uniform Green
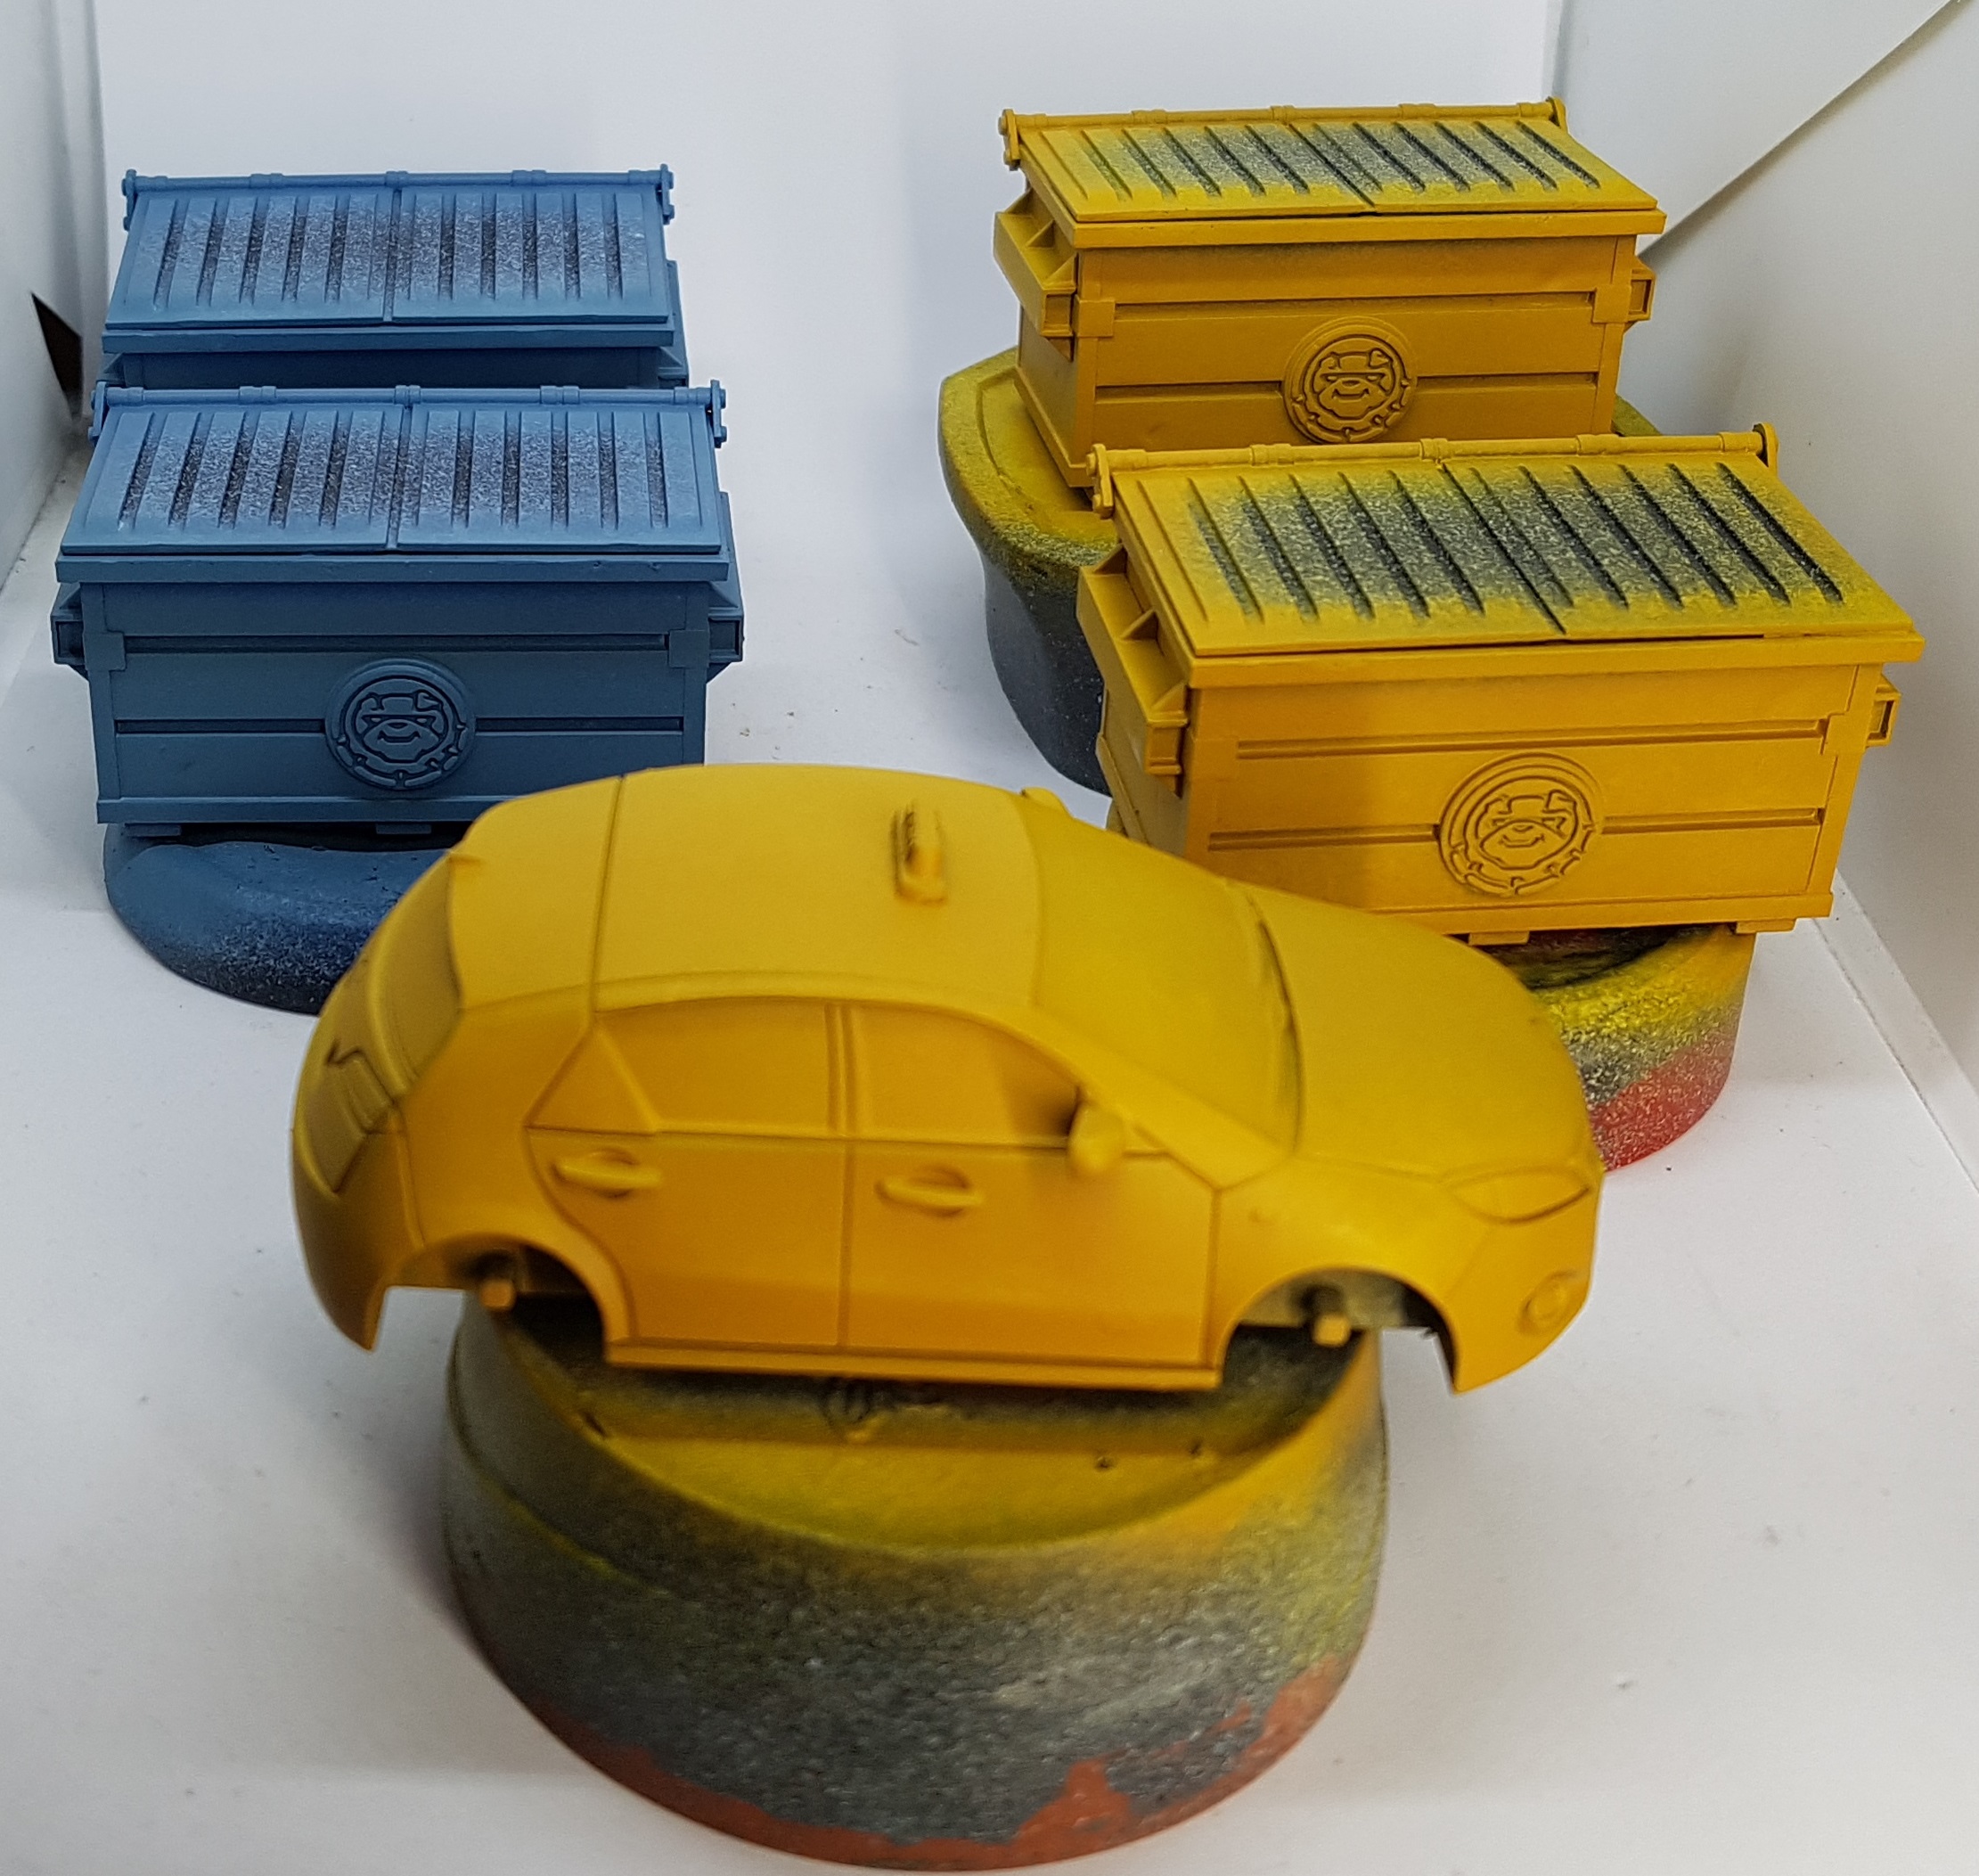
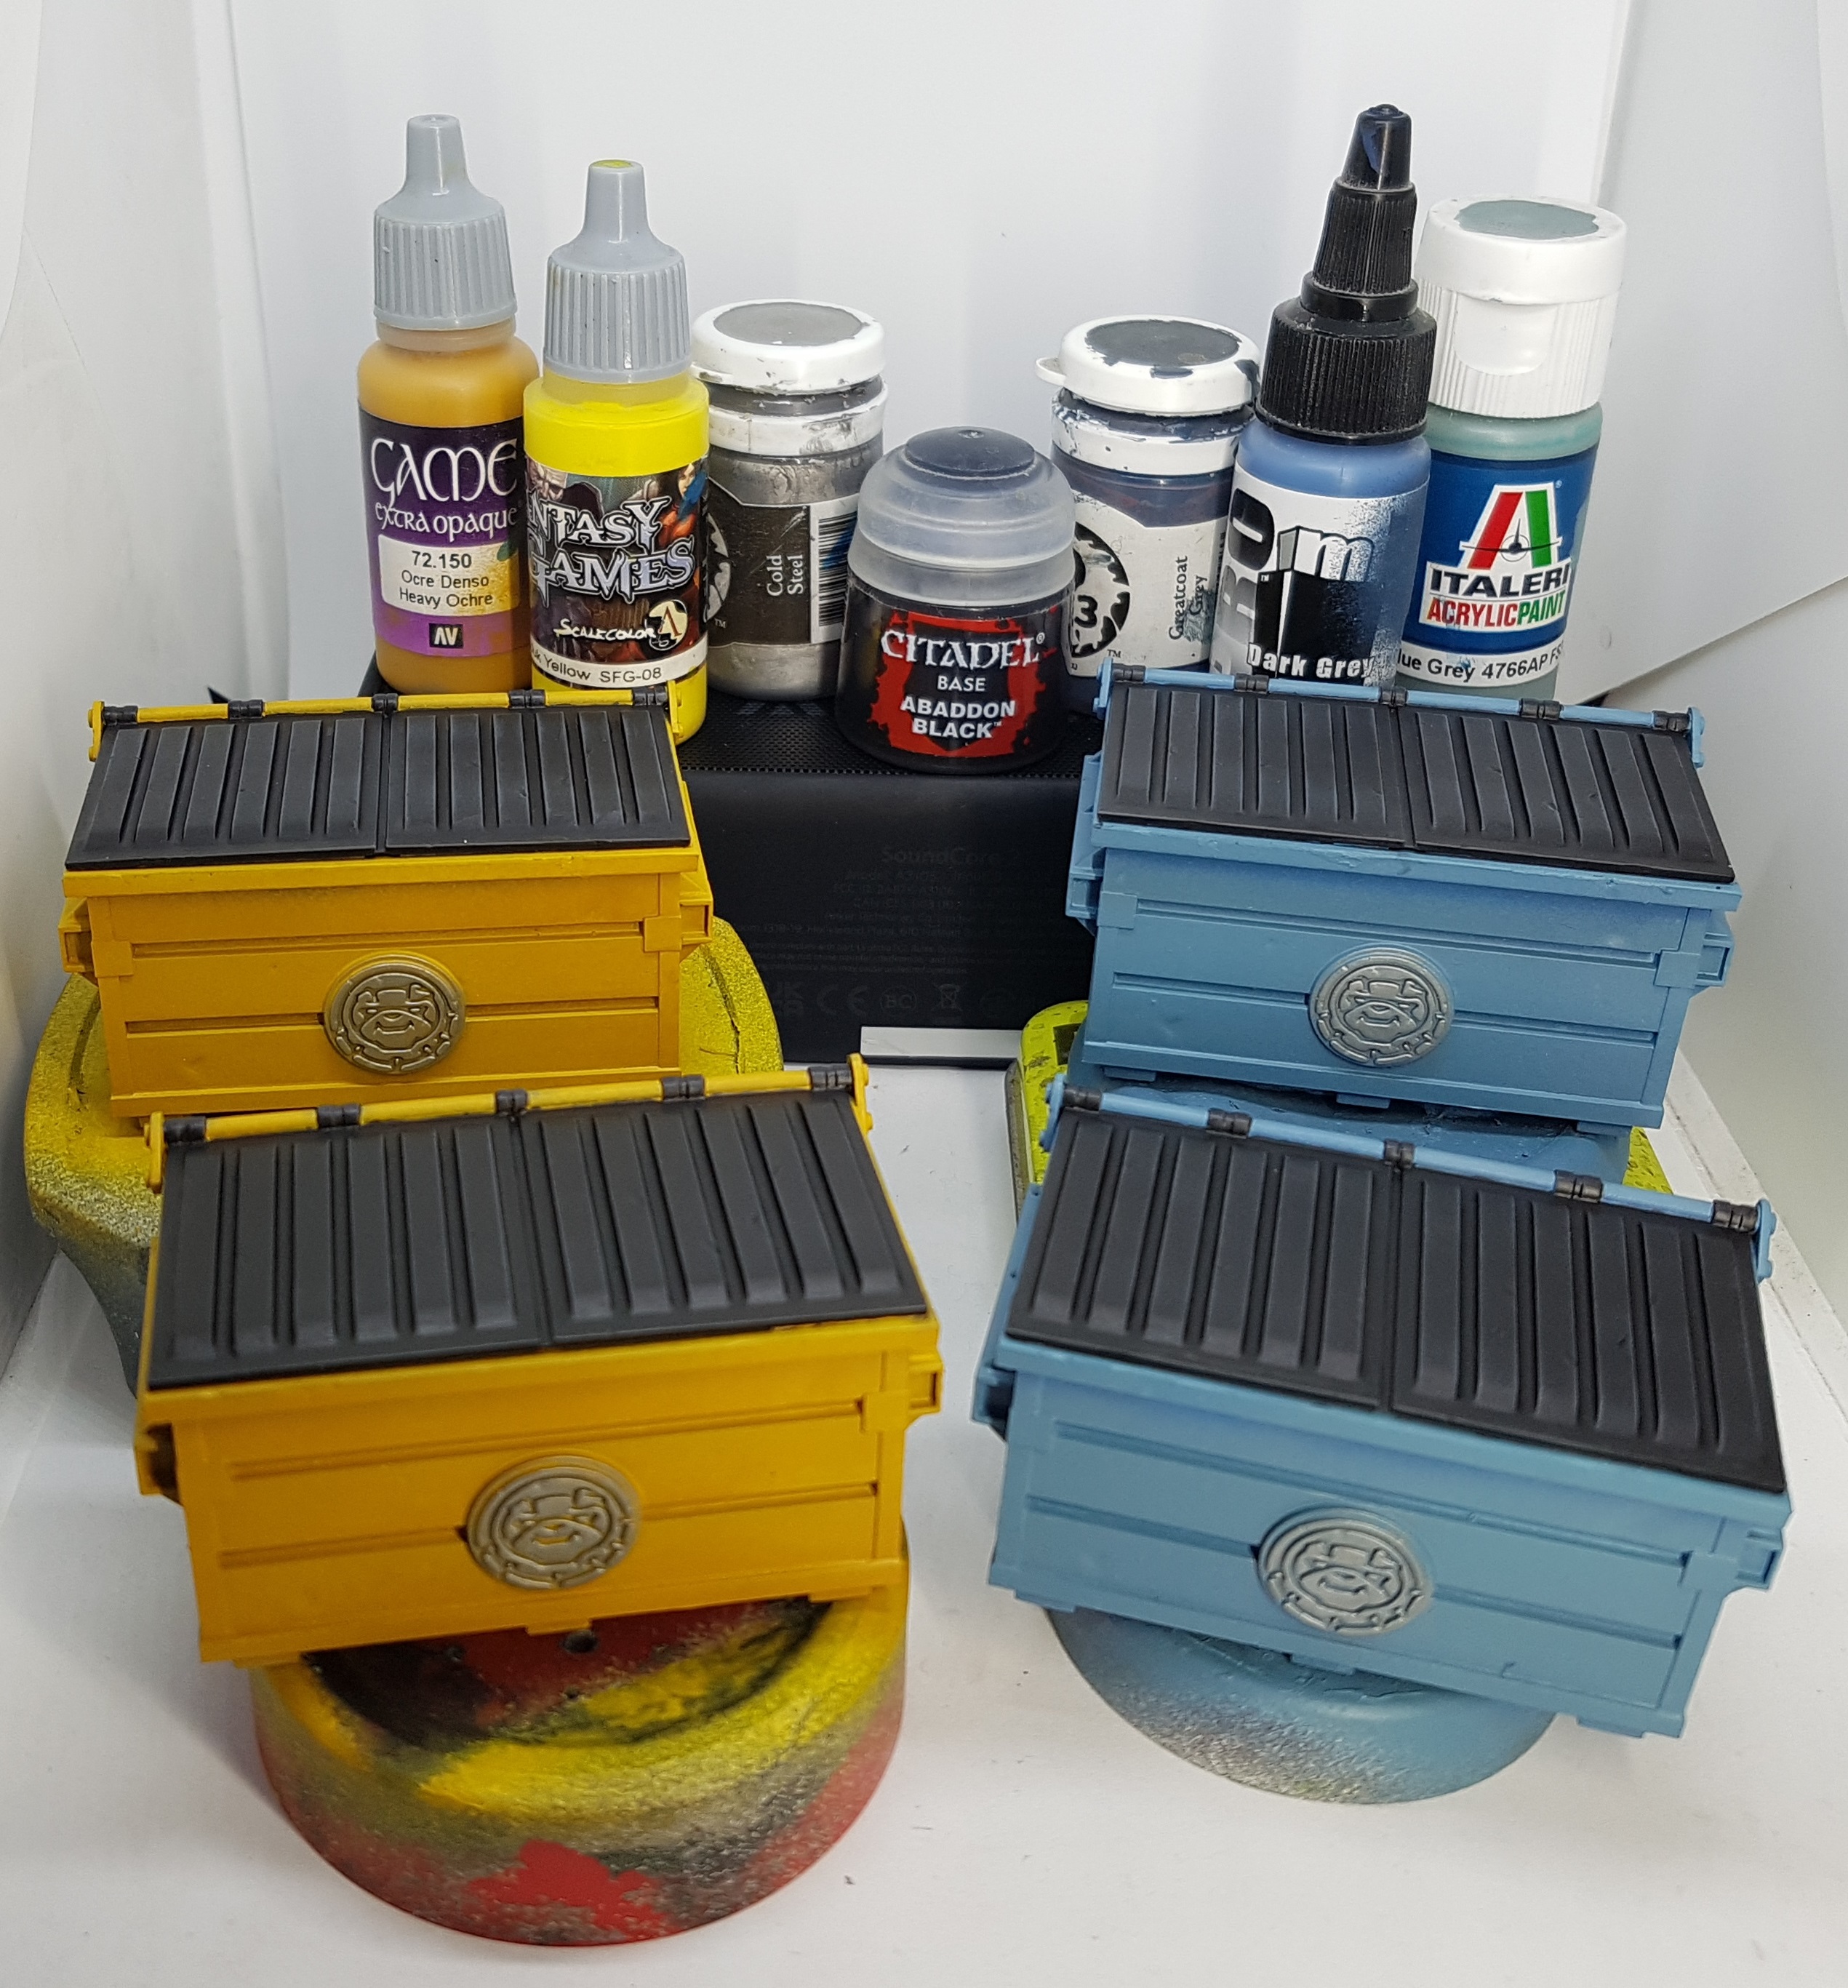
Yellow Stuff
Undercoat VGC 72.150 Heavy Ochre
Zenithal Highlight Scalecolour SFG-08 Marduk Yellow
White Car
Undercoat VMC 70.990 Light Grey mixed with enough VMC 70.951 White to make it a “dark white” more than the grey it was before
Zenithal Highlight with more of the above with a lot more white added. Never go pure white, but get close.
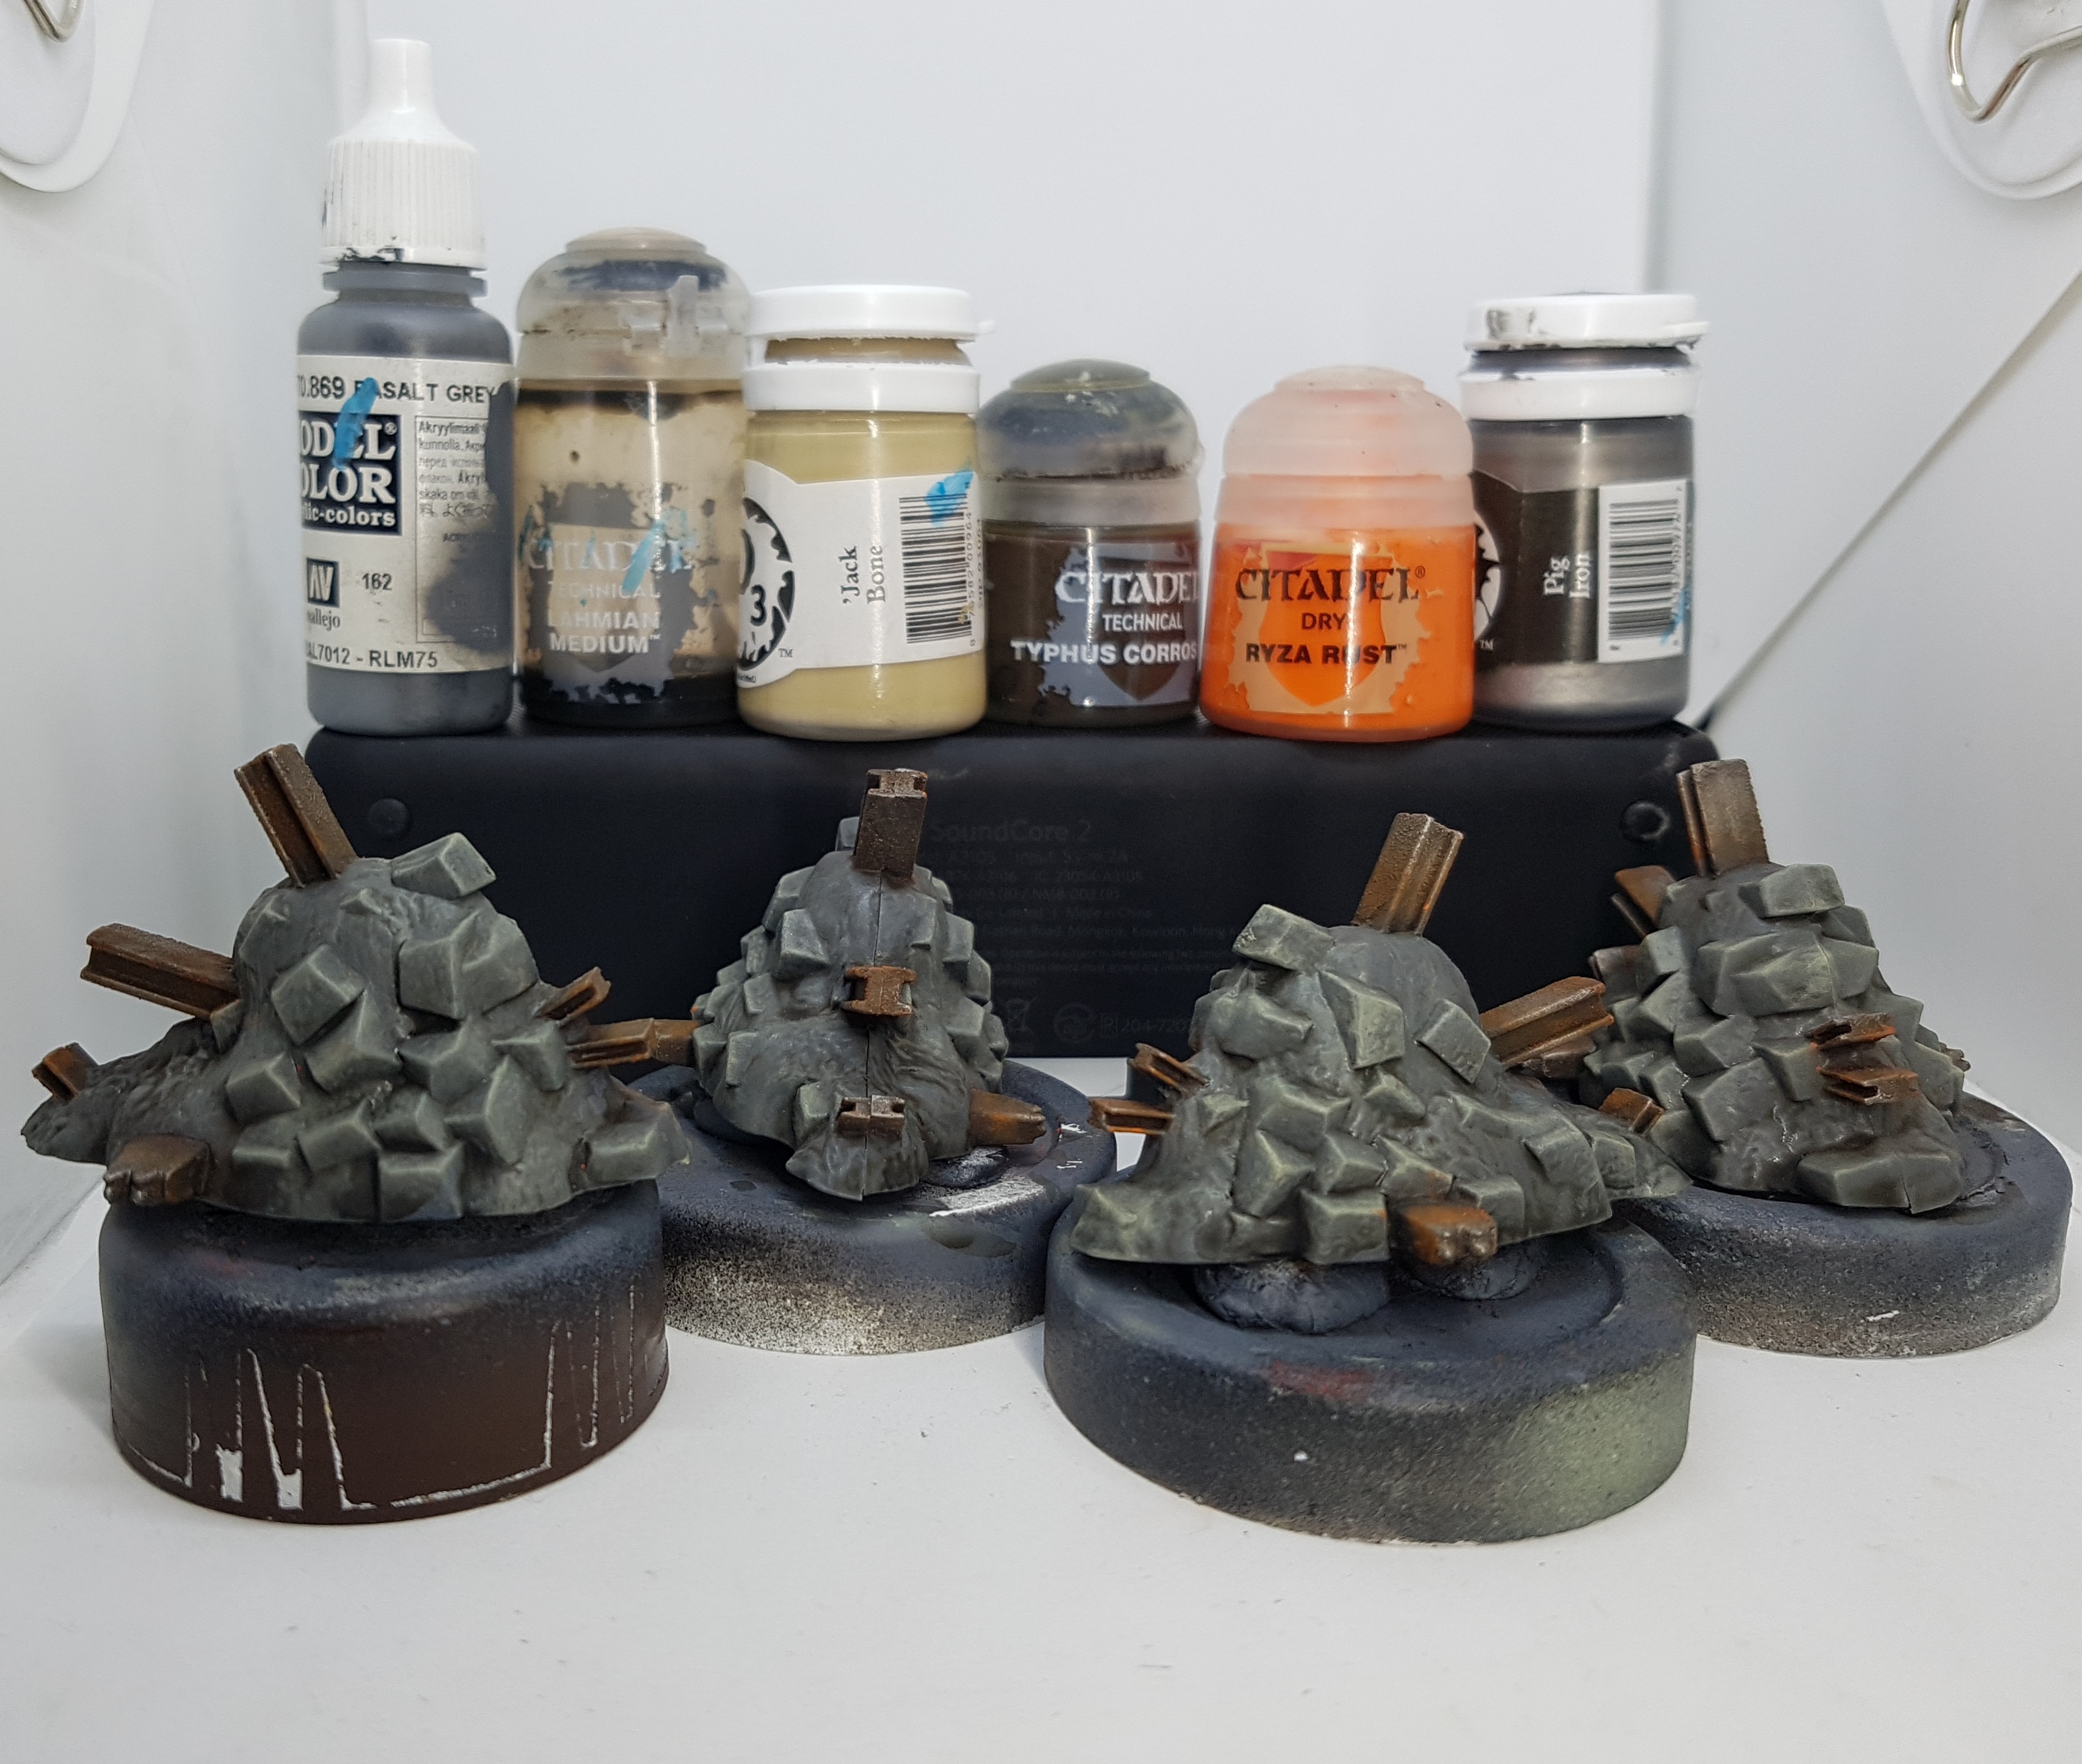
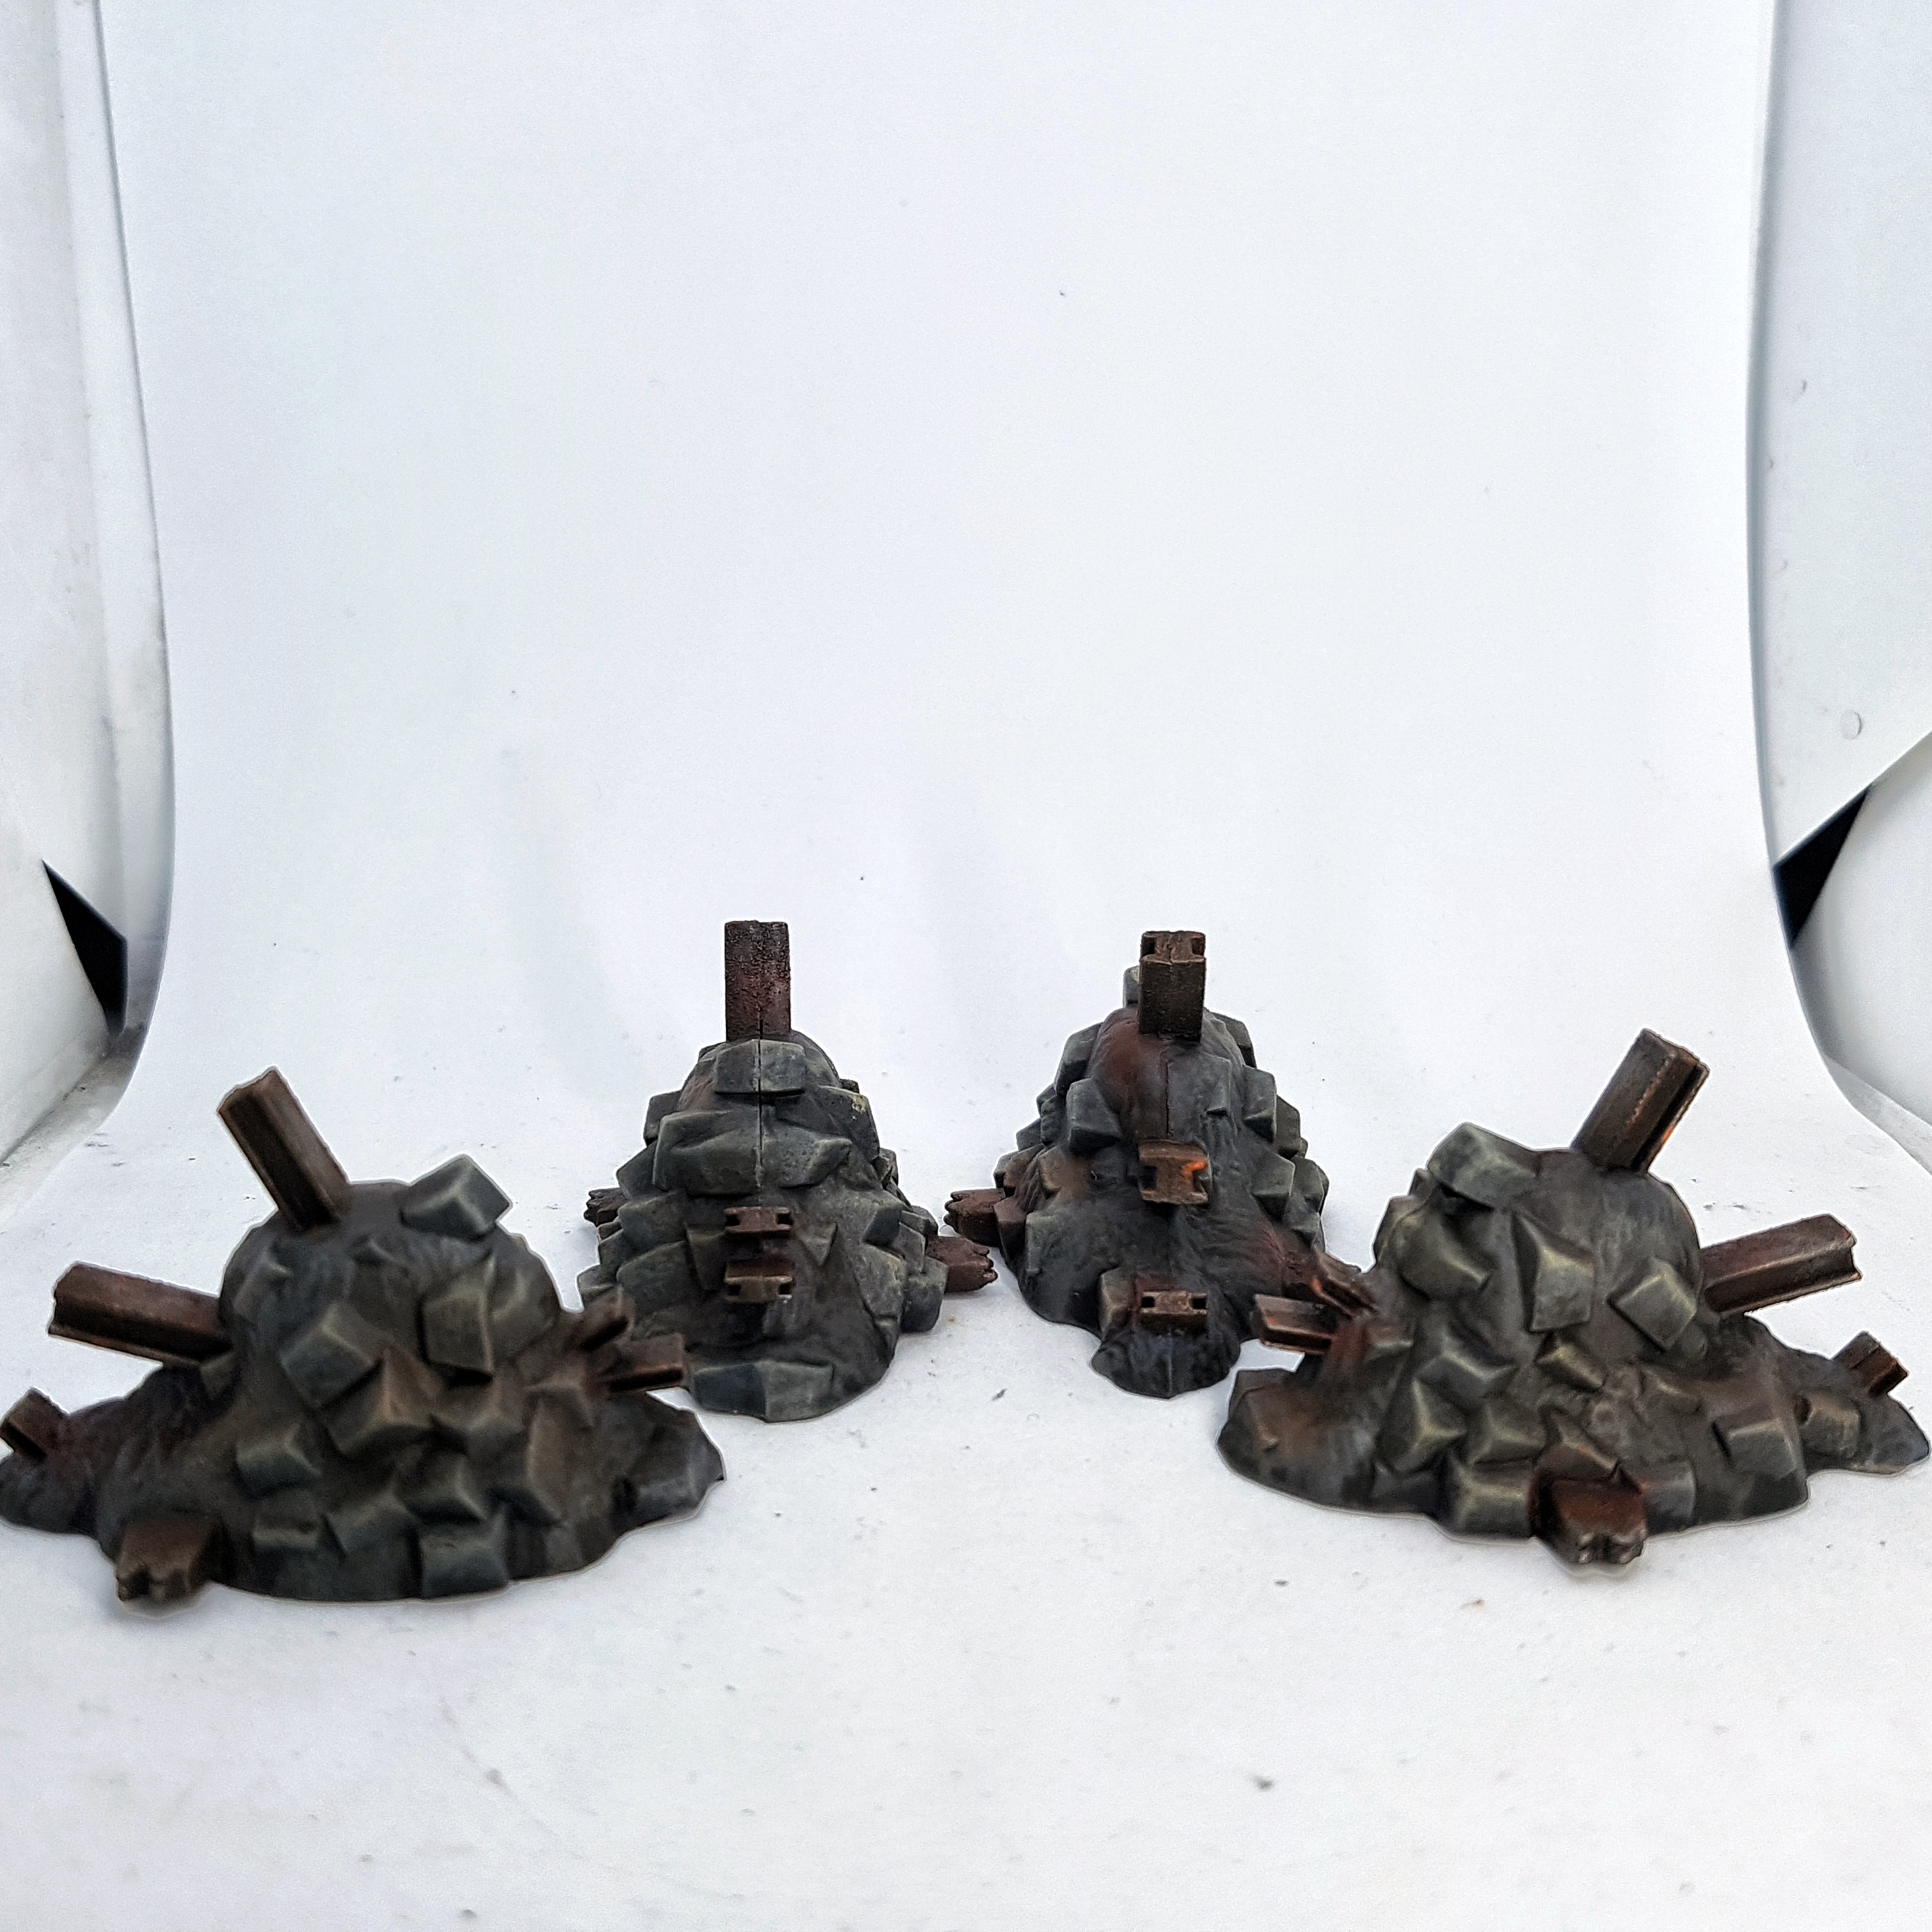
Rubble
Base with VMC 70.869 basalt Grey
EDIT 12/05/23: The next few recipes were written down from memory and one photo of a pile of paints a few weeks after the fact and could be wrong. This is in response to Ghools videos vanishing.
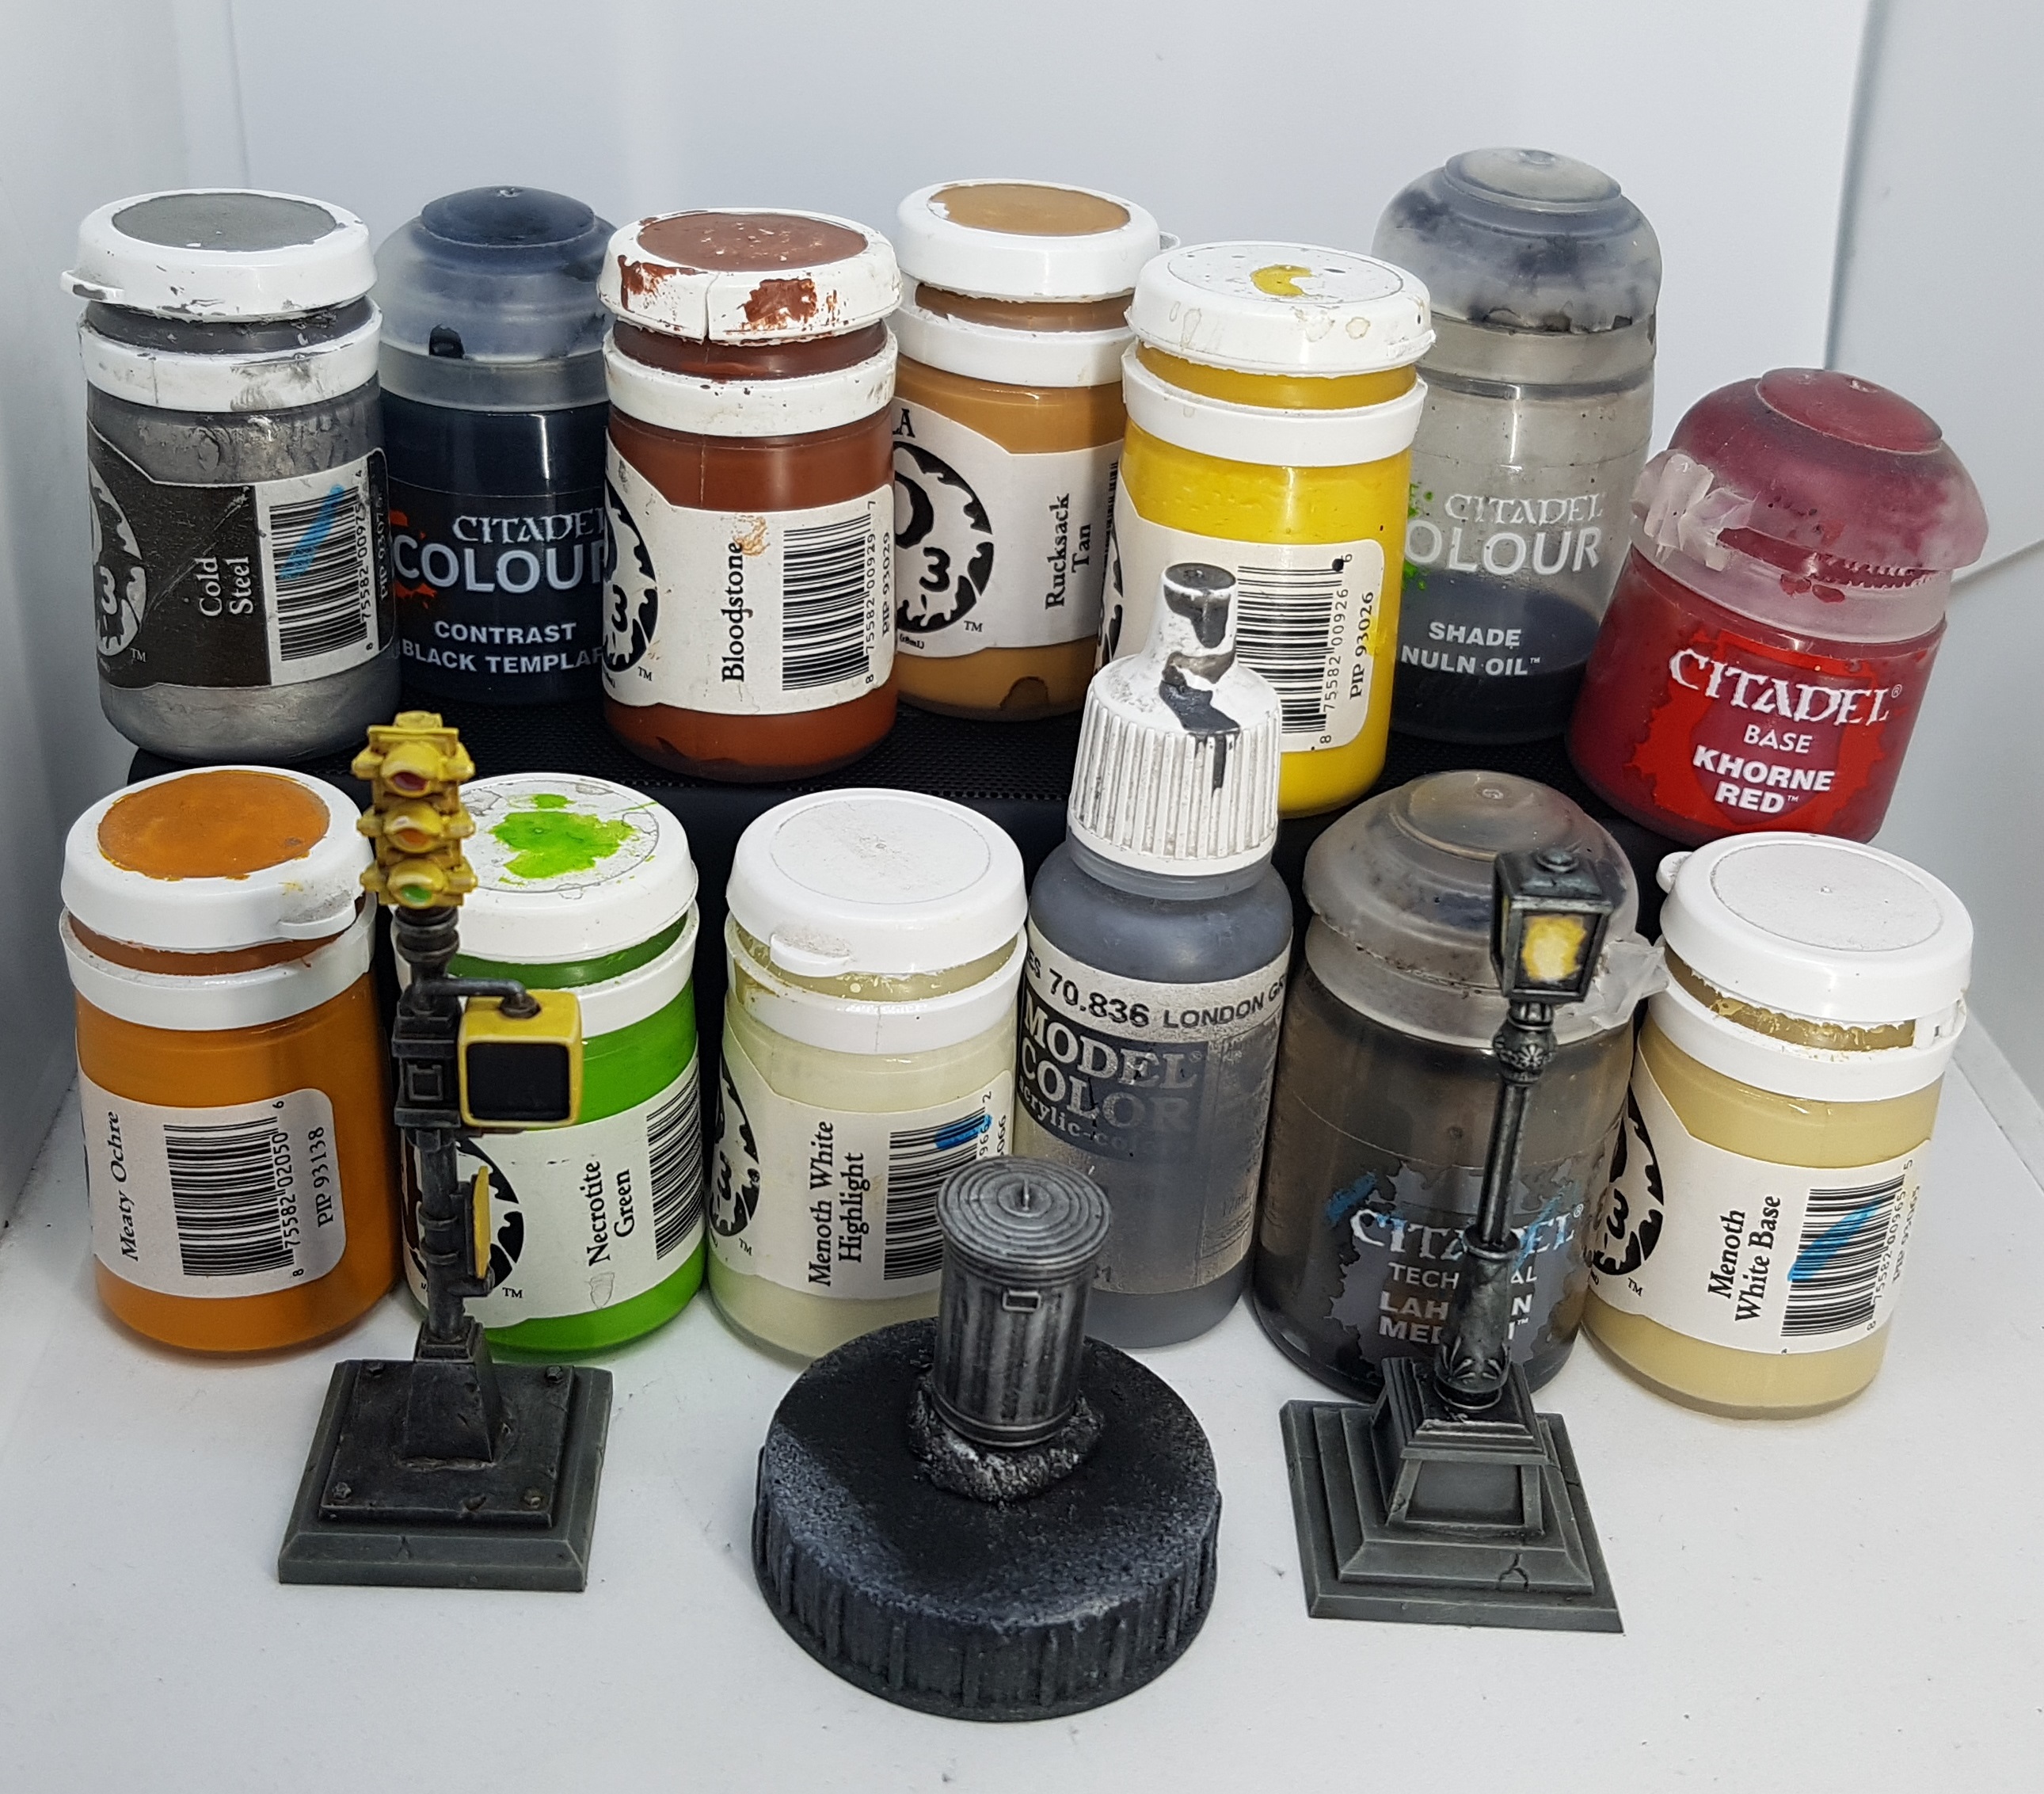
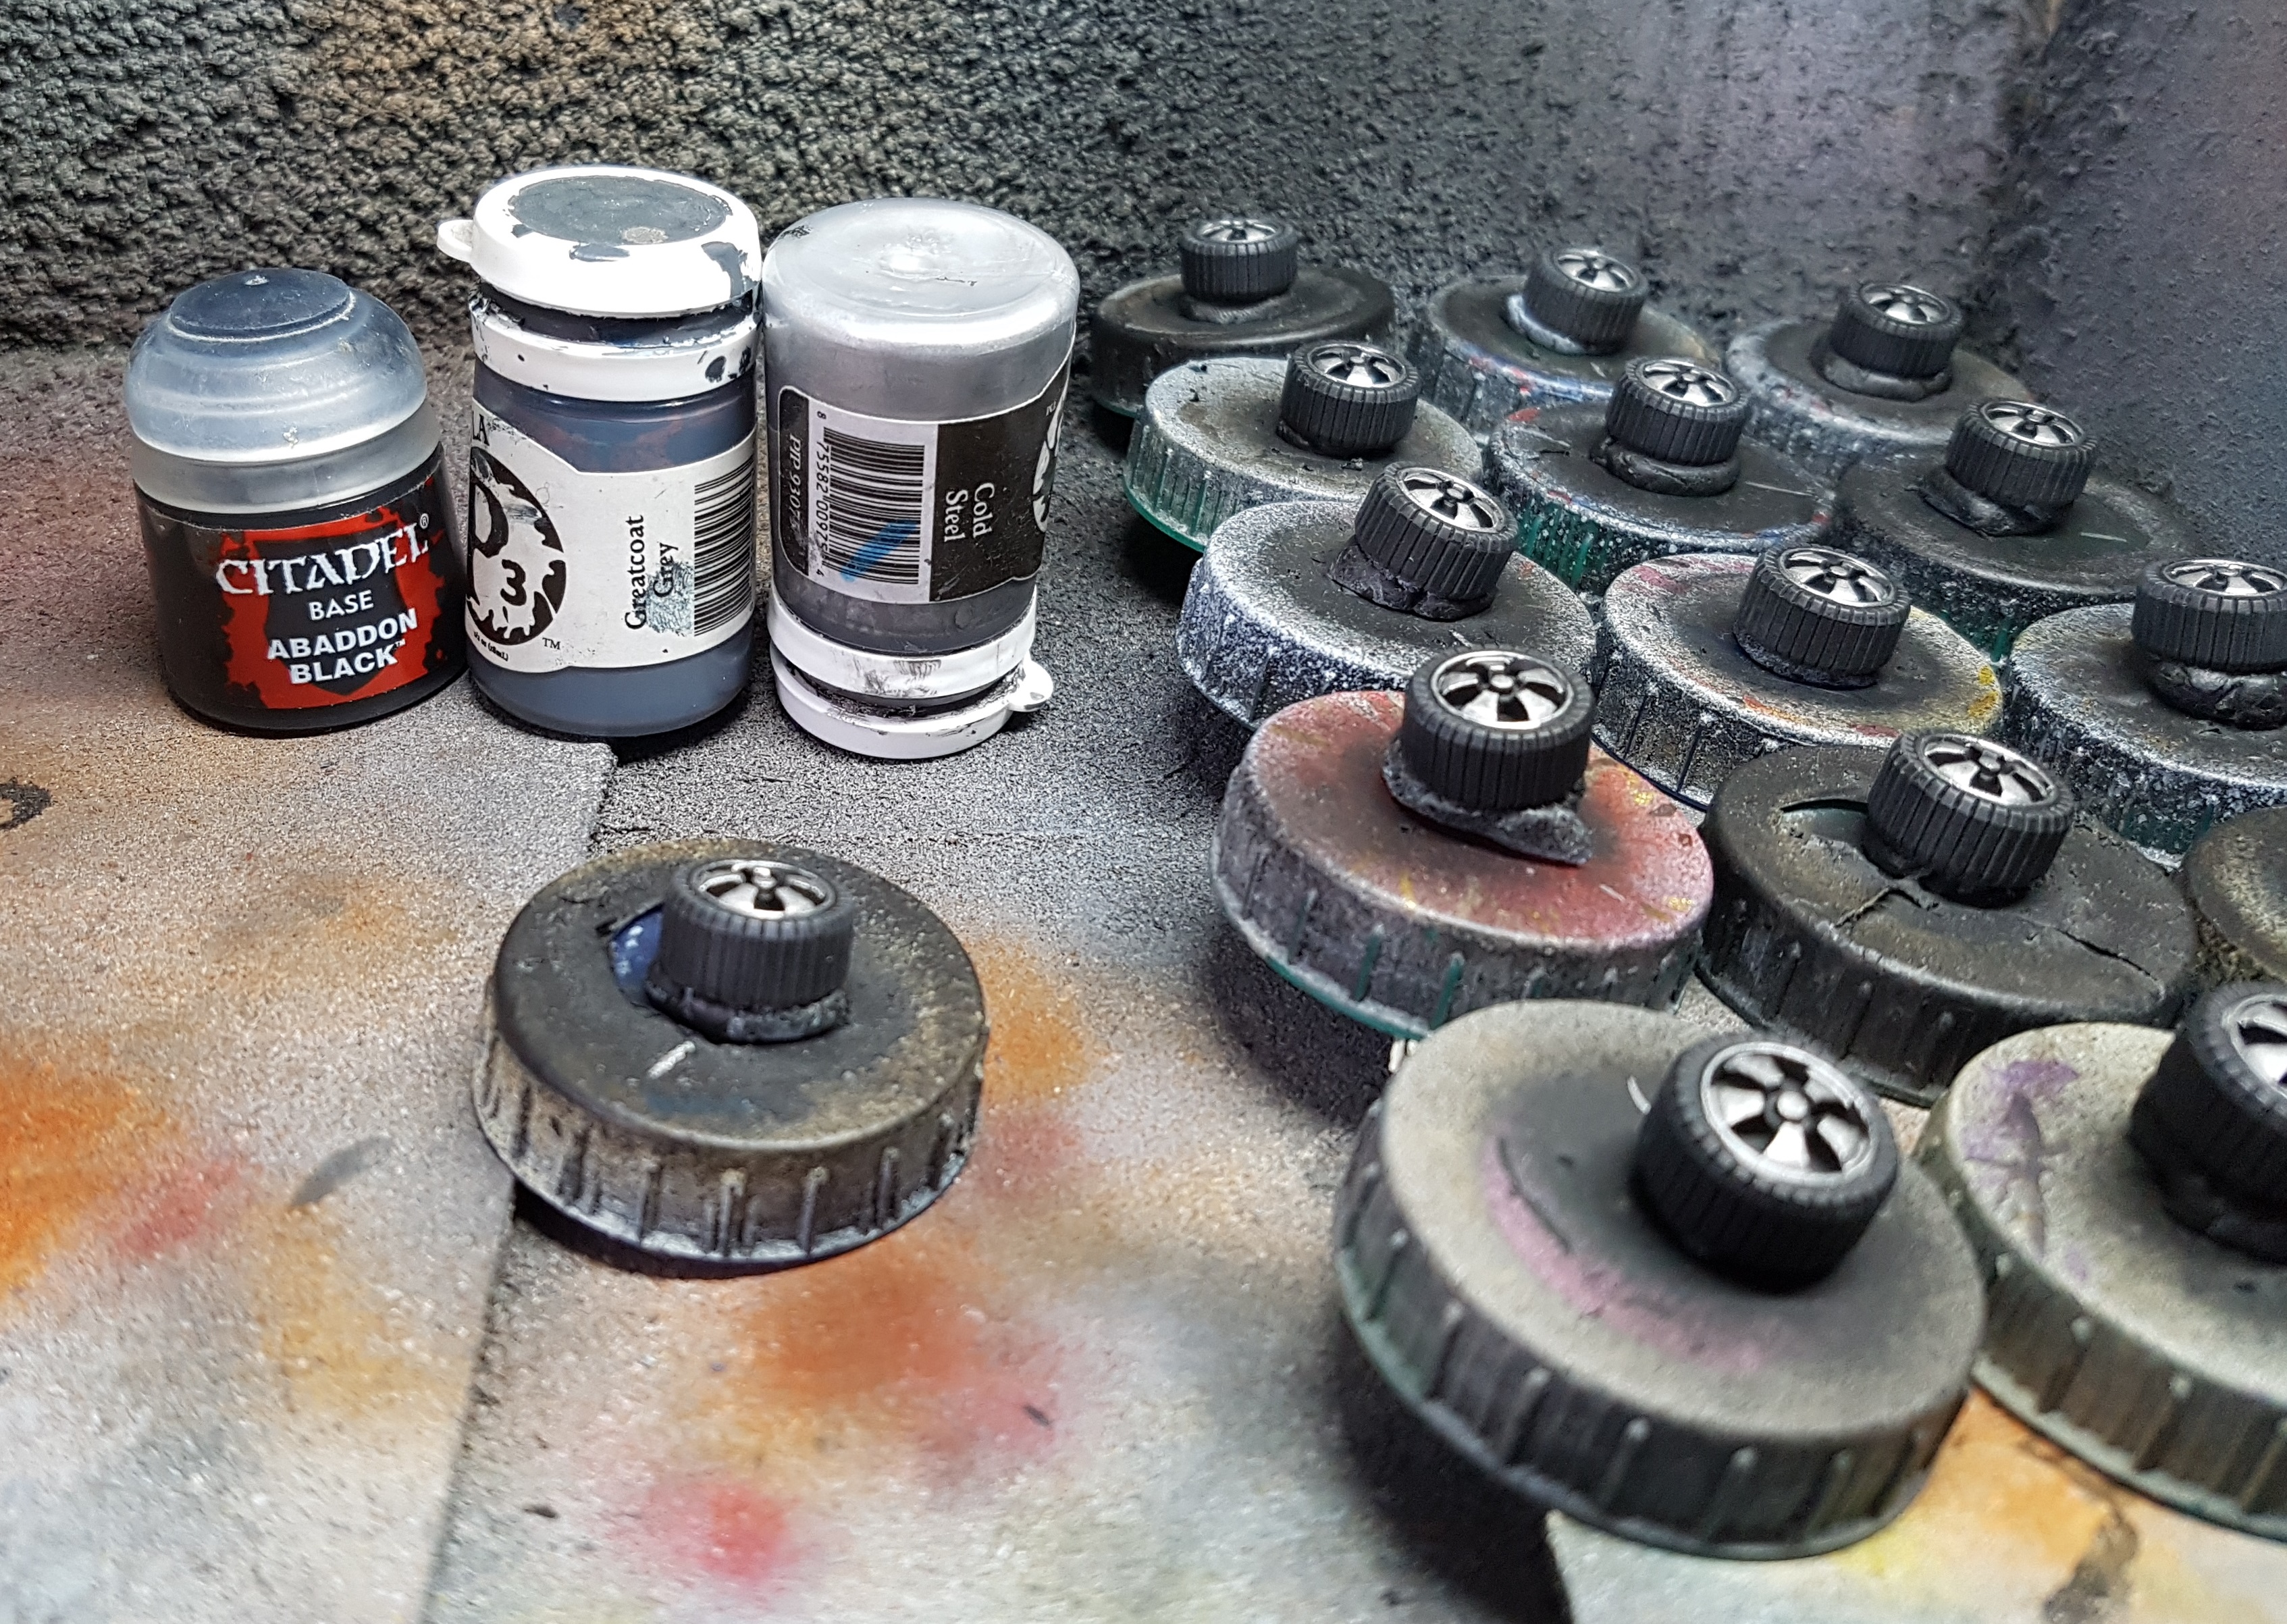
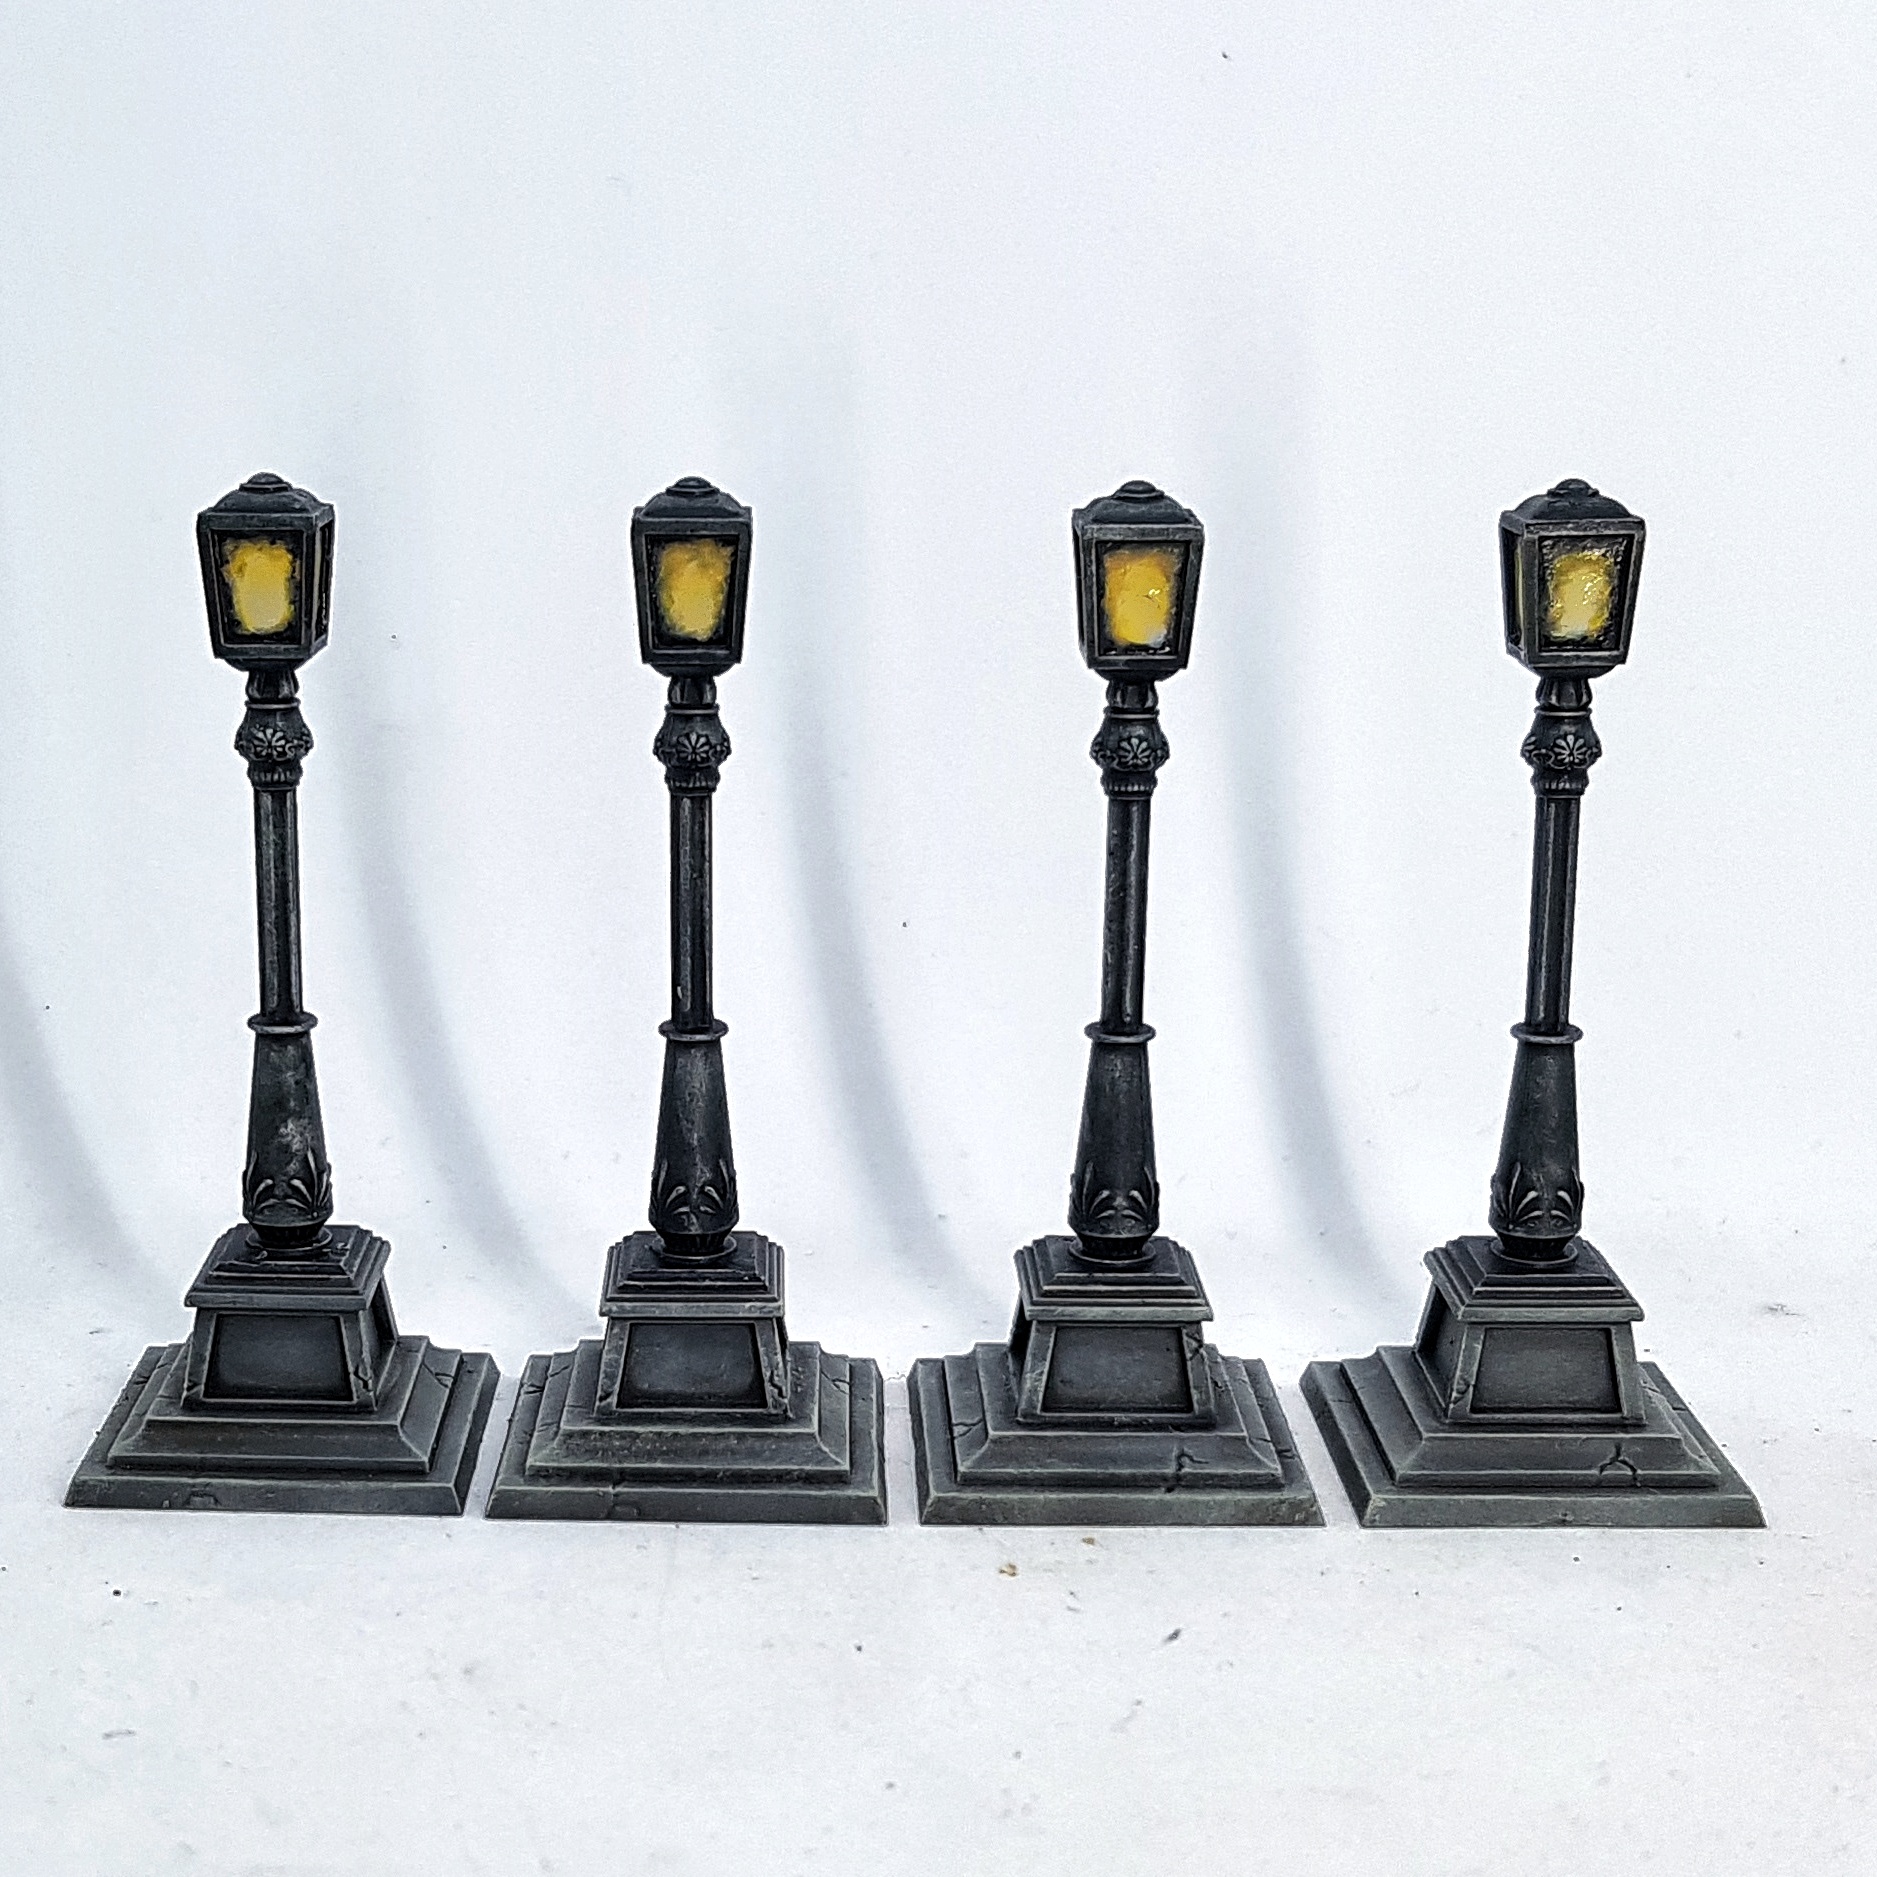
Steel
Undercoat Black
Drybrush P3 Pig Iron
Wash: GW Nuln Oil
Thin down some GW Contrast Black Templar and use this to give the lamps a black metal
Drybrush Highlight with Cold Steel where appropriate.
Yellow Crossing Light Plates
Shade P3 Rucksack Tan (I think?)
Pin wash P3 Bloodstone
Paint most non-shade surfaces with P3 Sulfuric Yellow
Highlight Sulfuric Yellow mixed with P3 Menoth White Base
Edge Highlight: Menoth White base
red Light: GW Khorne Red
Amber Light: P3 Meaty ochre
Green Light: P3 Necrotite Green
Glint Highlight: P3 Menoth White Highlight
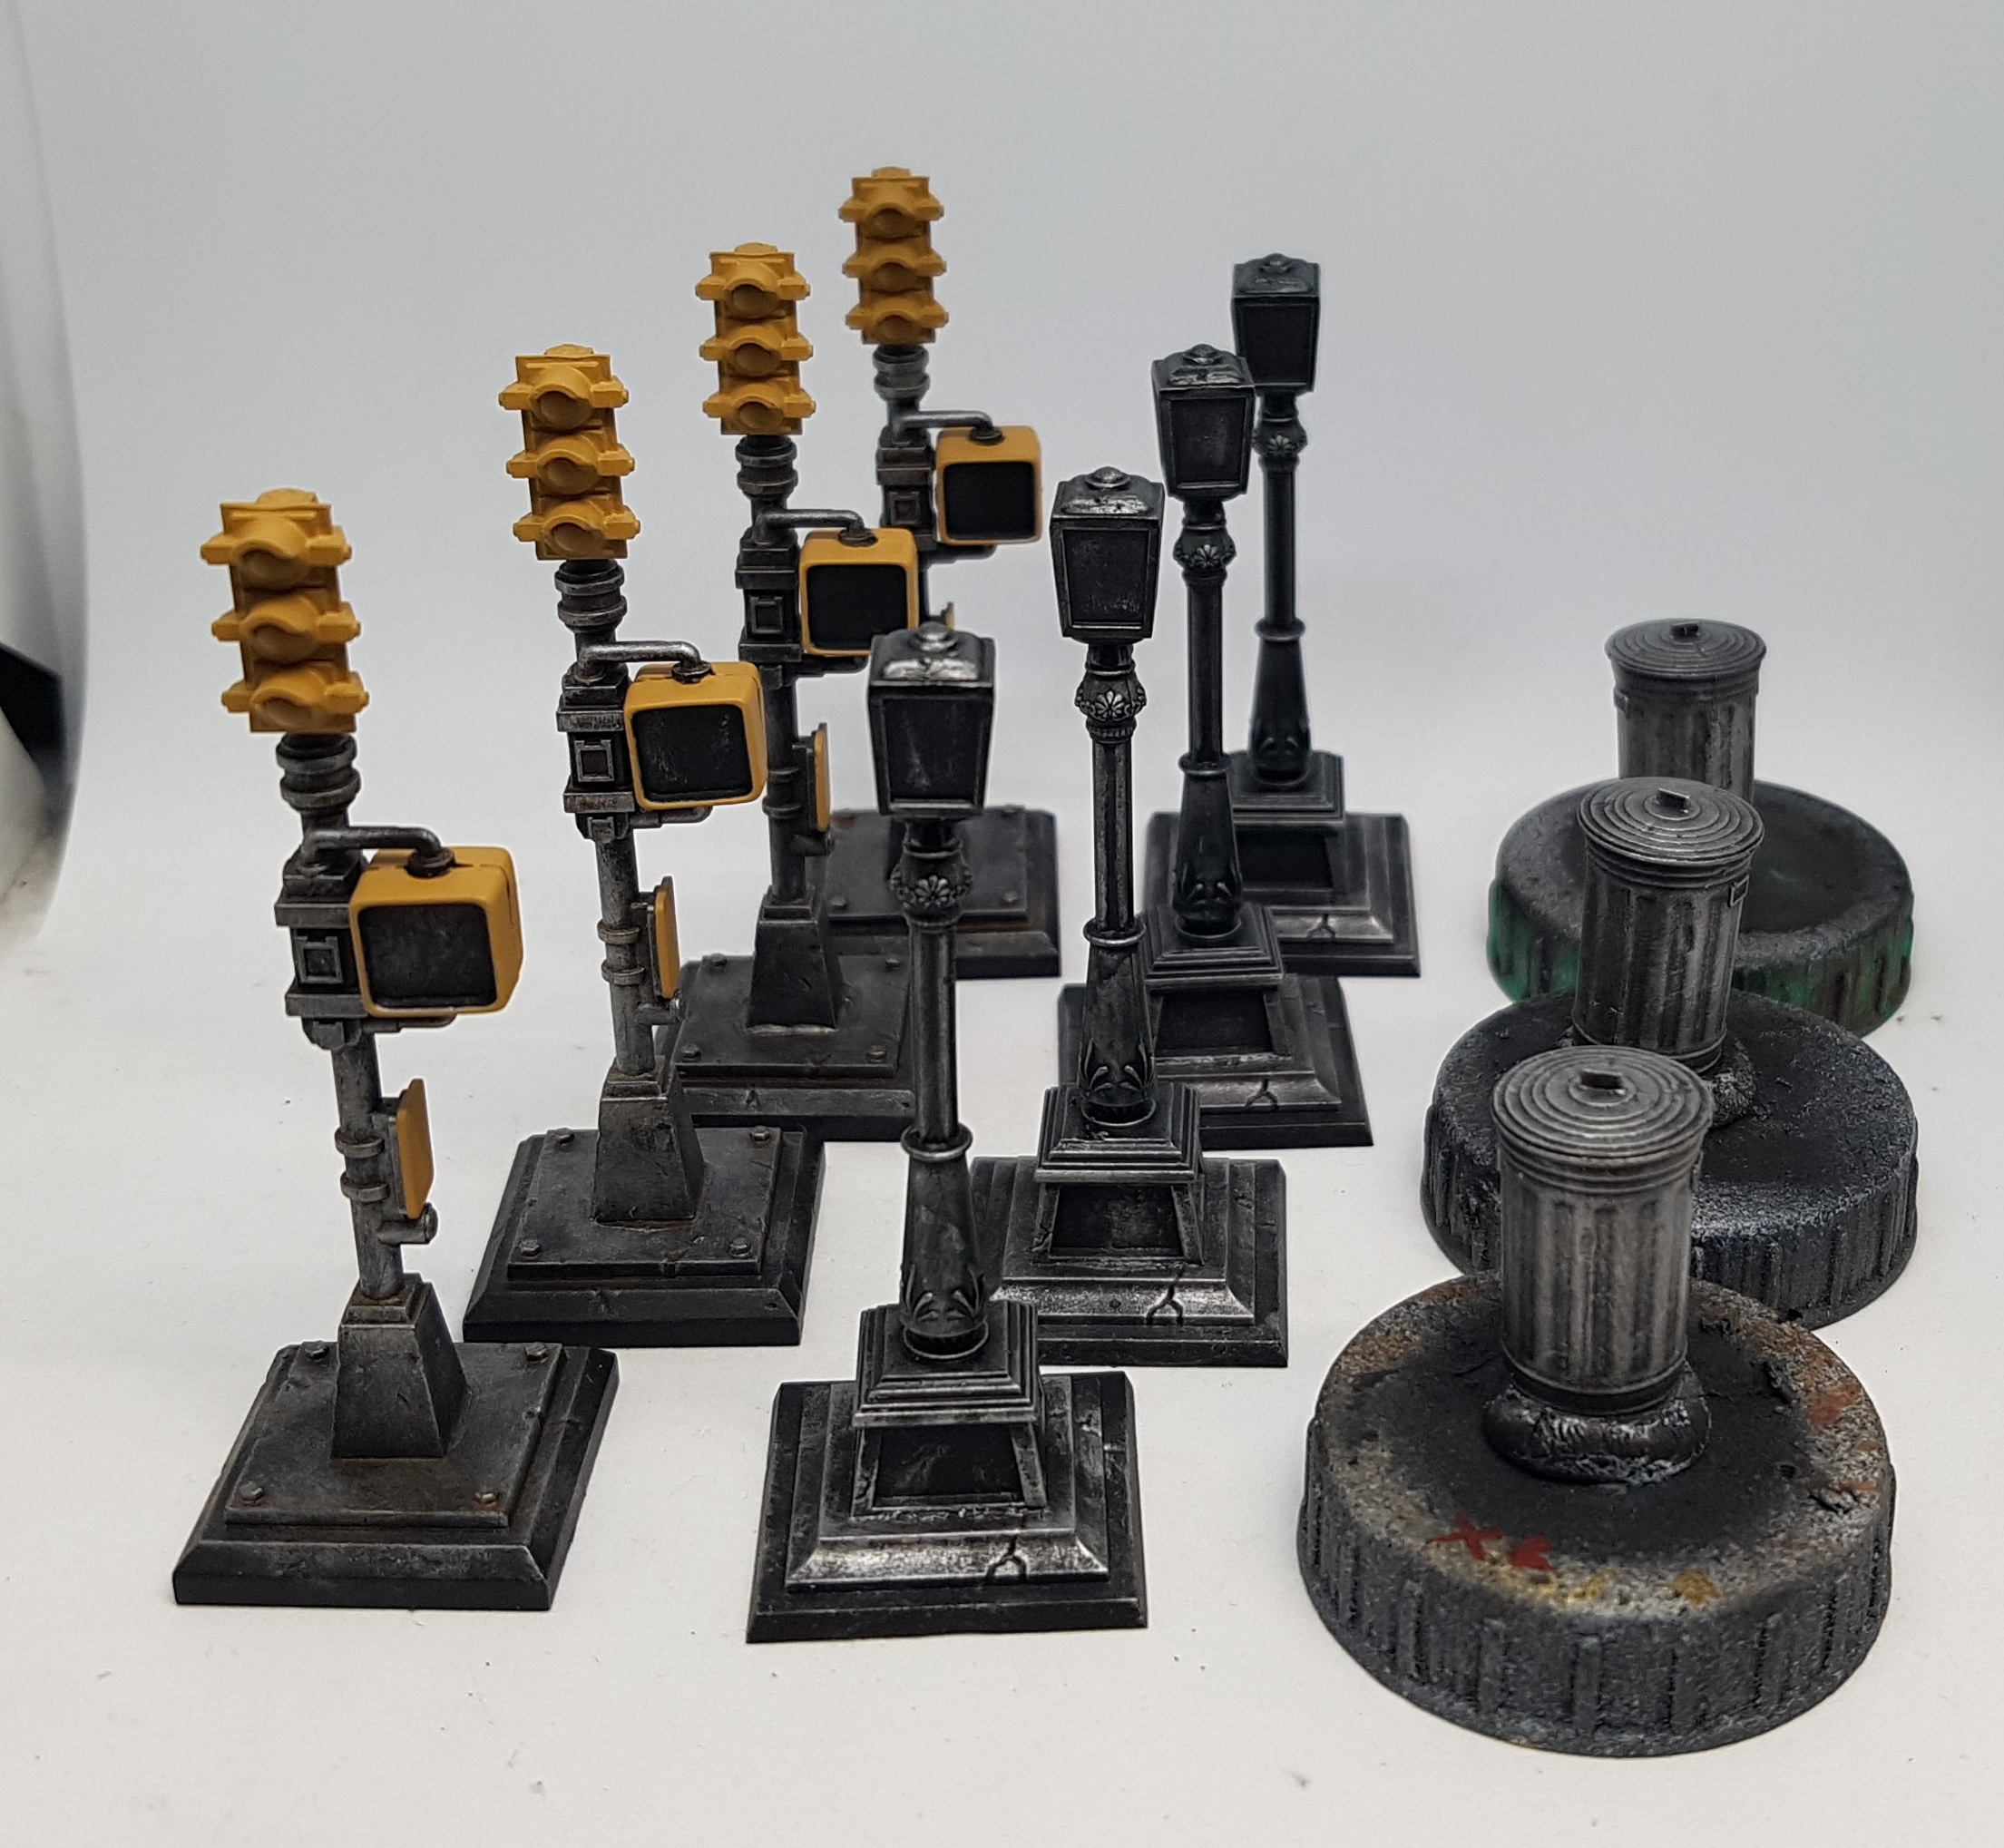
The next day I finished off the lights. Highlighting that yellow took a while. I wasn’t crazy enough to paint the screens or the sign on the crossing lights. They look good enough without it, and terrain shouldn’t steal the show from the minis. I want this lot done fast, and done good enough to play, not slow and good enough to be a centrepiece. They should fade in to the background.
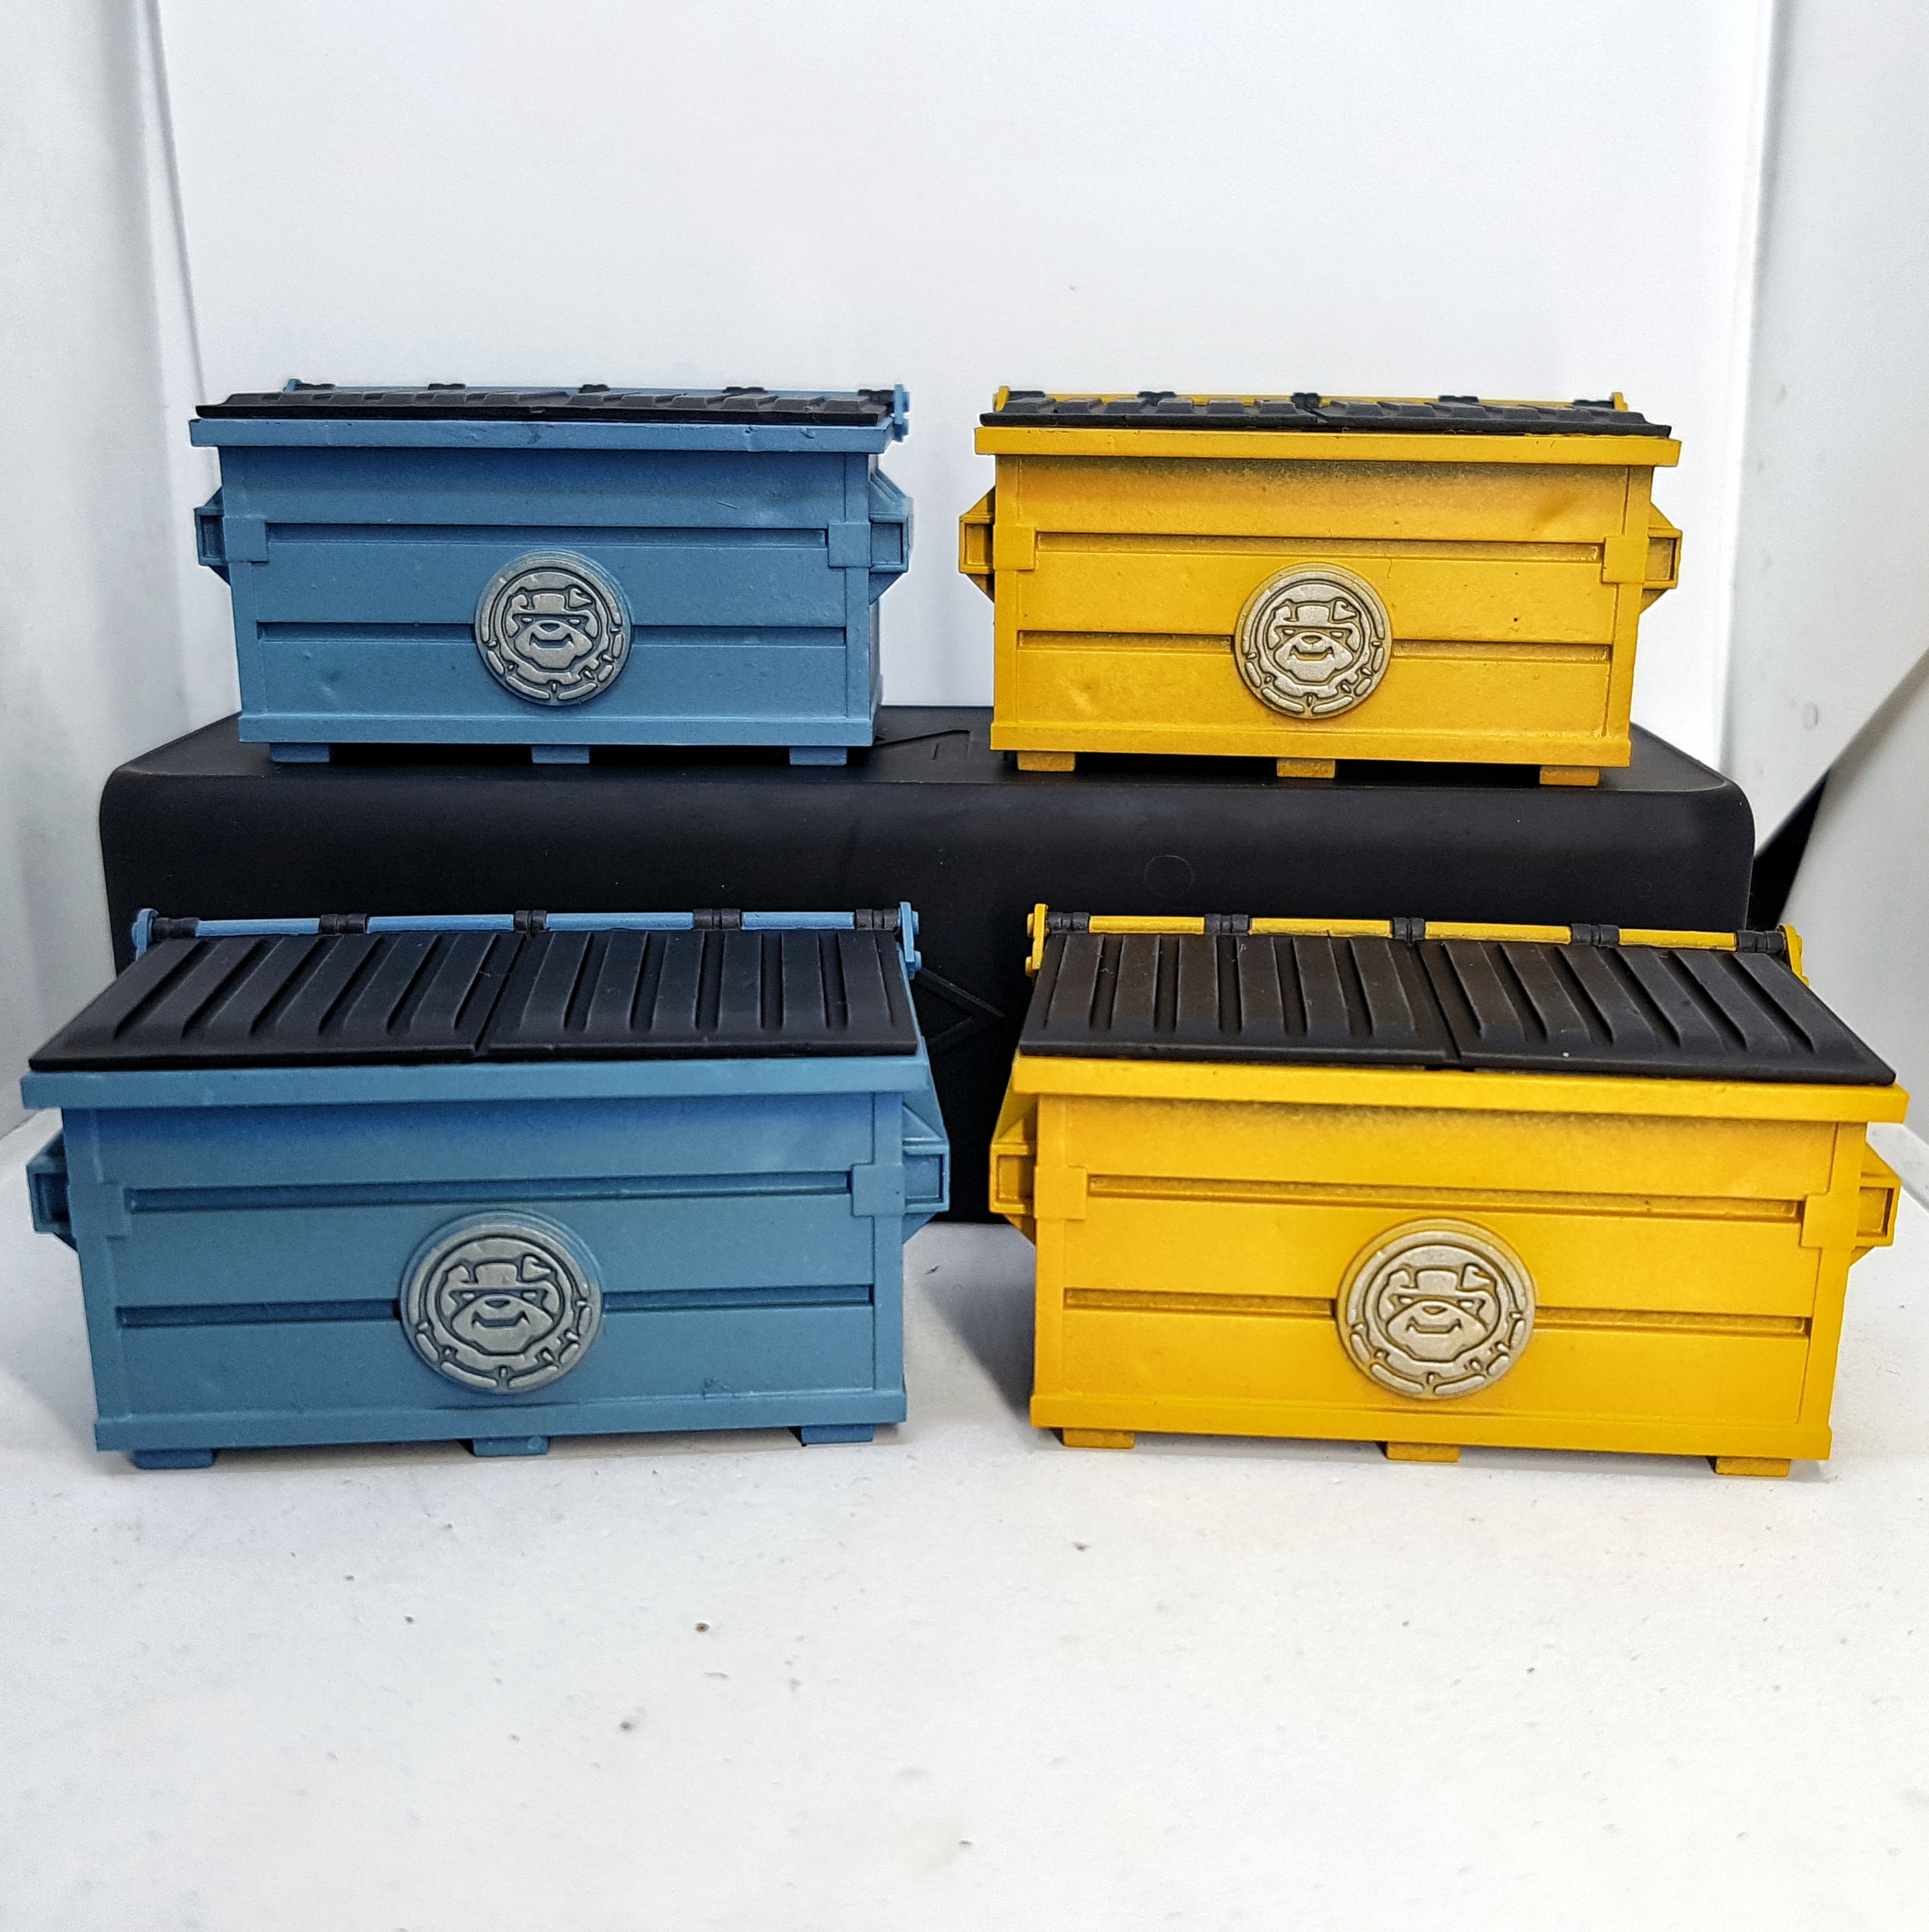
I then moved on to the dumpsters. The main body was done so I just painted the lids black and drybrushed with P3 Greatcoat Grey. I’d primed the car tyres separate to their cars so I drybrushed them while I was at it. You would think painting black over yellow would be quick and take only a coat or two. You would be wrong. That yellow is stubborn! The dumpster logos got drybrushed/overbrushed with P3 Cold Steel, as per the videos. I chose not to grime anything up. I want this done fast. I can always come back later and grime stuff up when I have time to spare if I want to.
I then pin washed the thin recesses on the cars with GW Nuln Oil, and picked out some details with black paint.
EDIT 12/05/23: Lantern Light (From memory a few weeks later)
Starting from a black undercoat
Splodge on P3 Rucksack Tan
Splodge on either P3 Sulfuric yellow
Splodge on some P3 Menoth White base, perhaps mixed with Sulfuric yellow?
Maybe Splodge on Some Menoth White Base. maybe push in to Menoth White Highlight. Maybe with was MW Highlight all along?
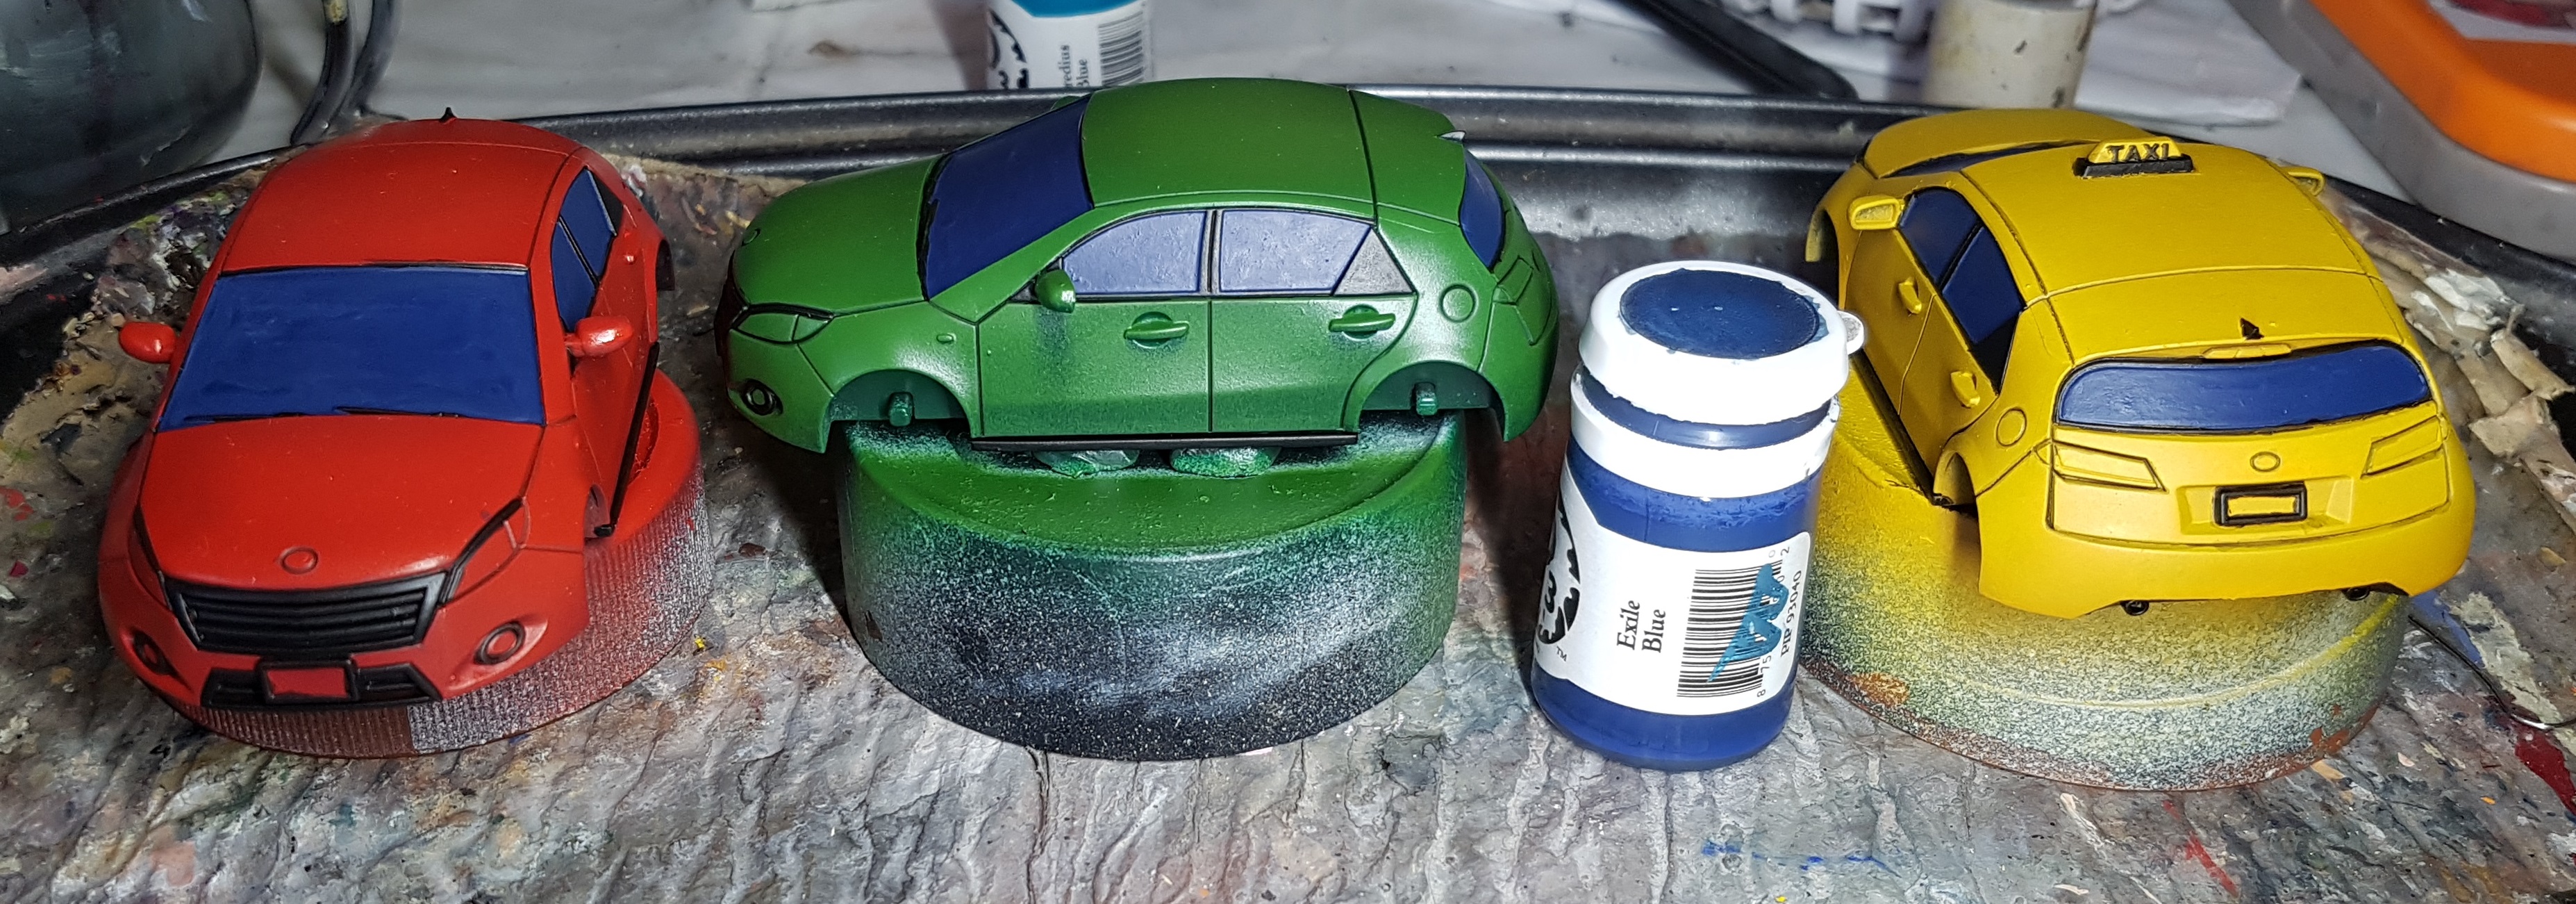
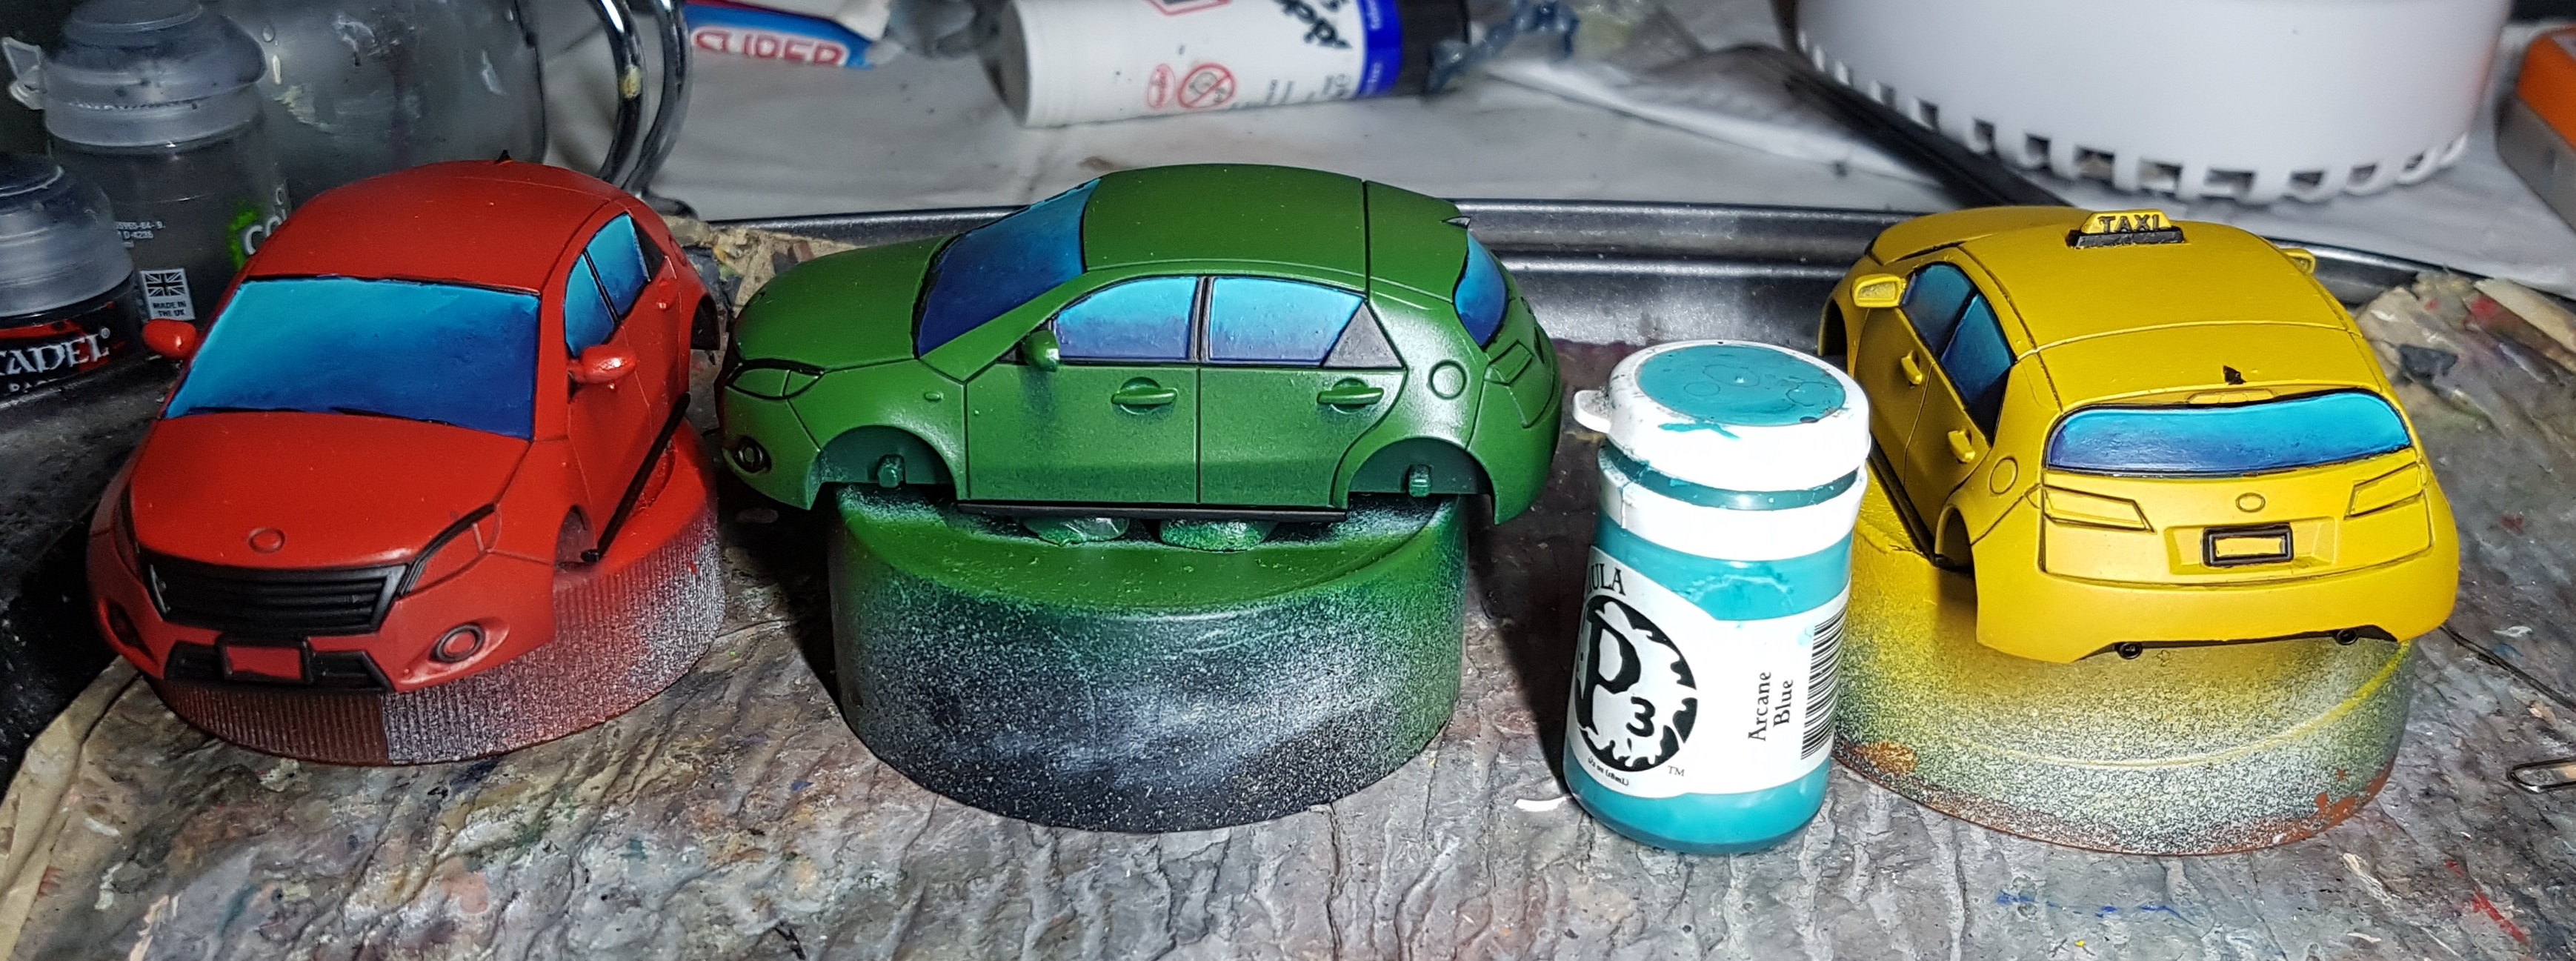
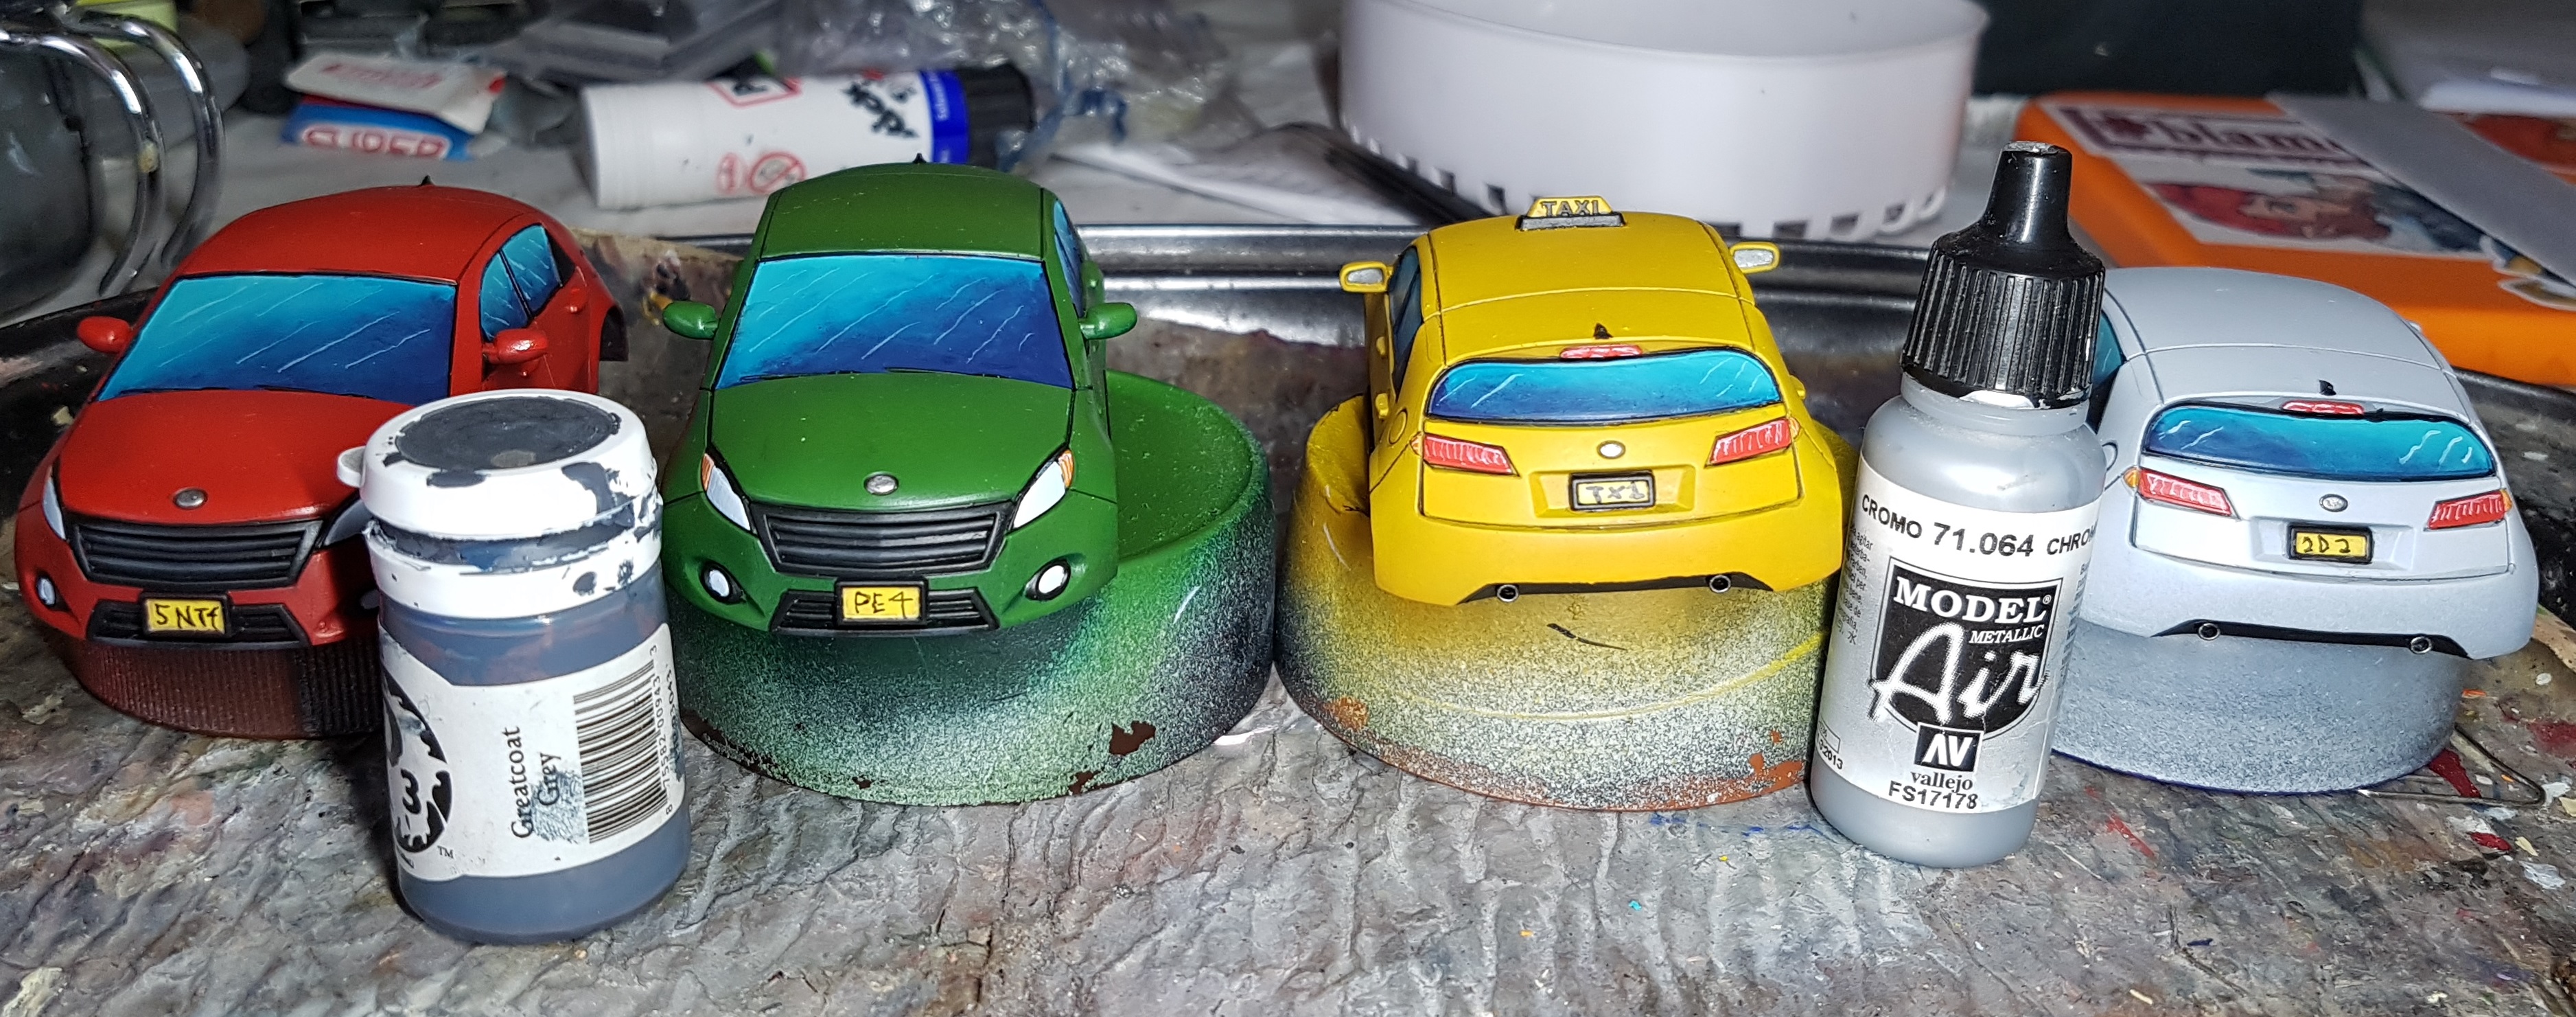
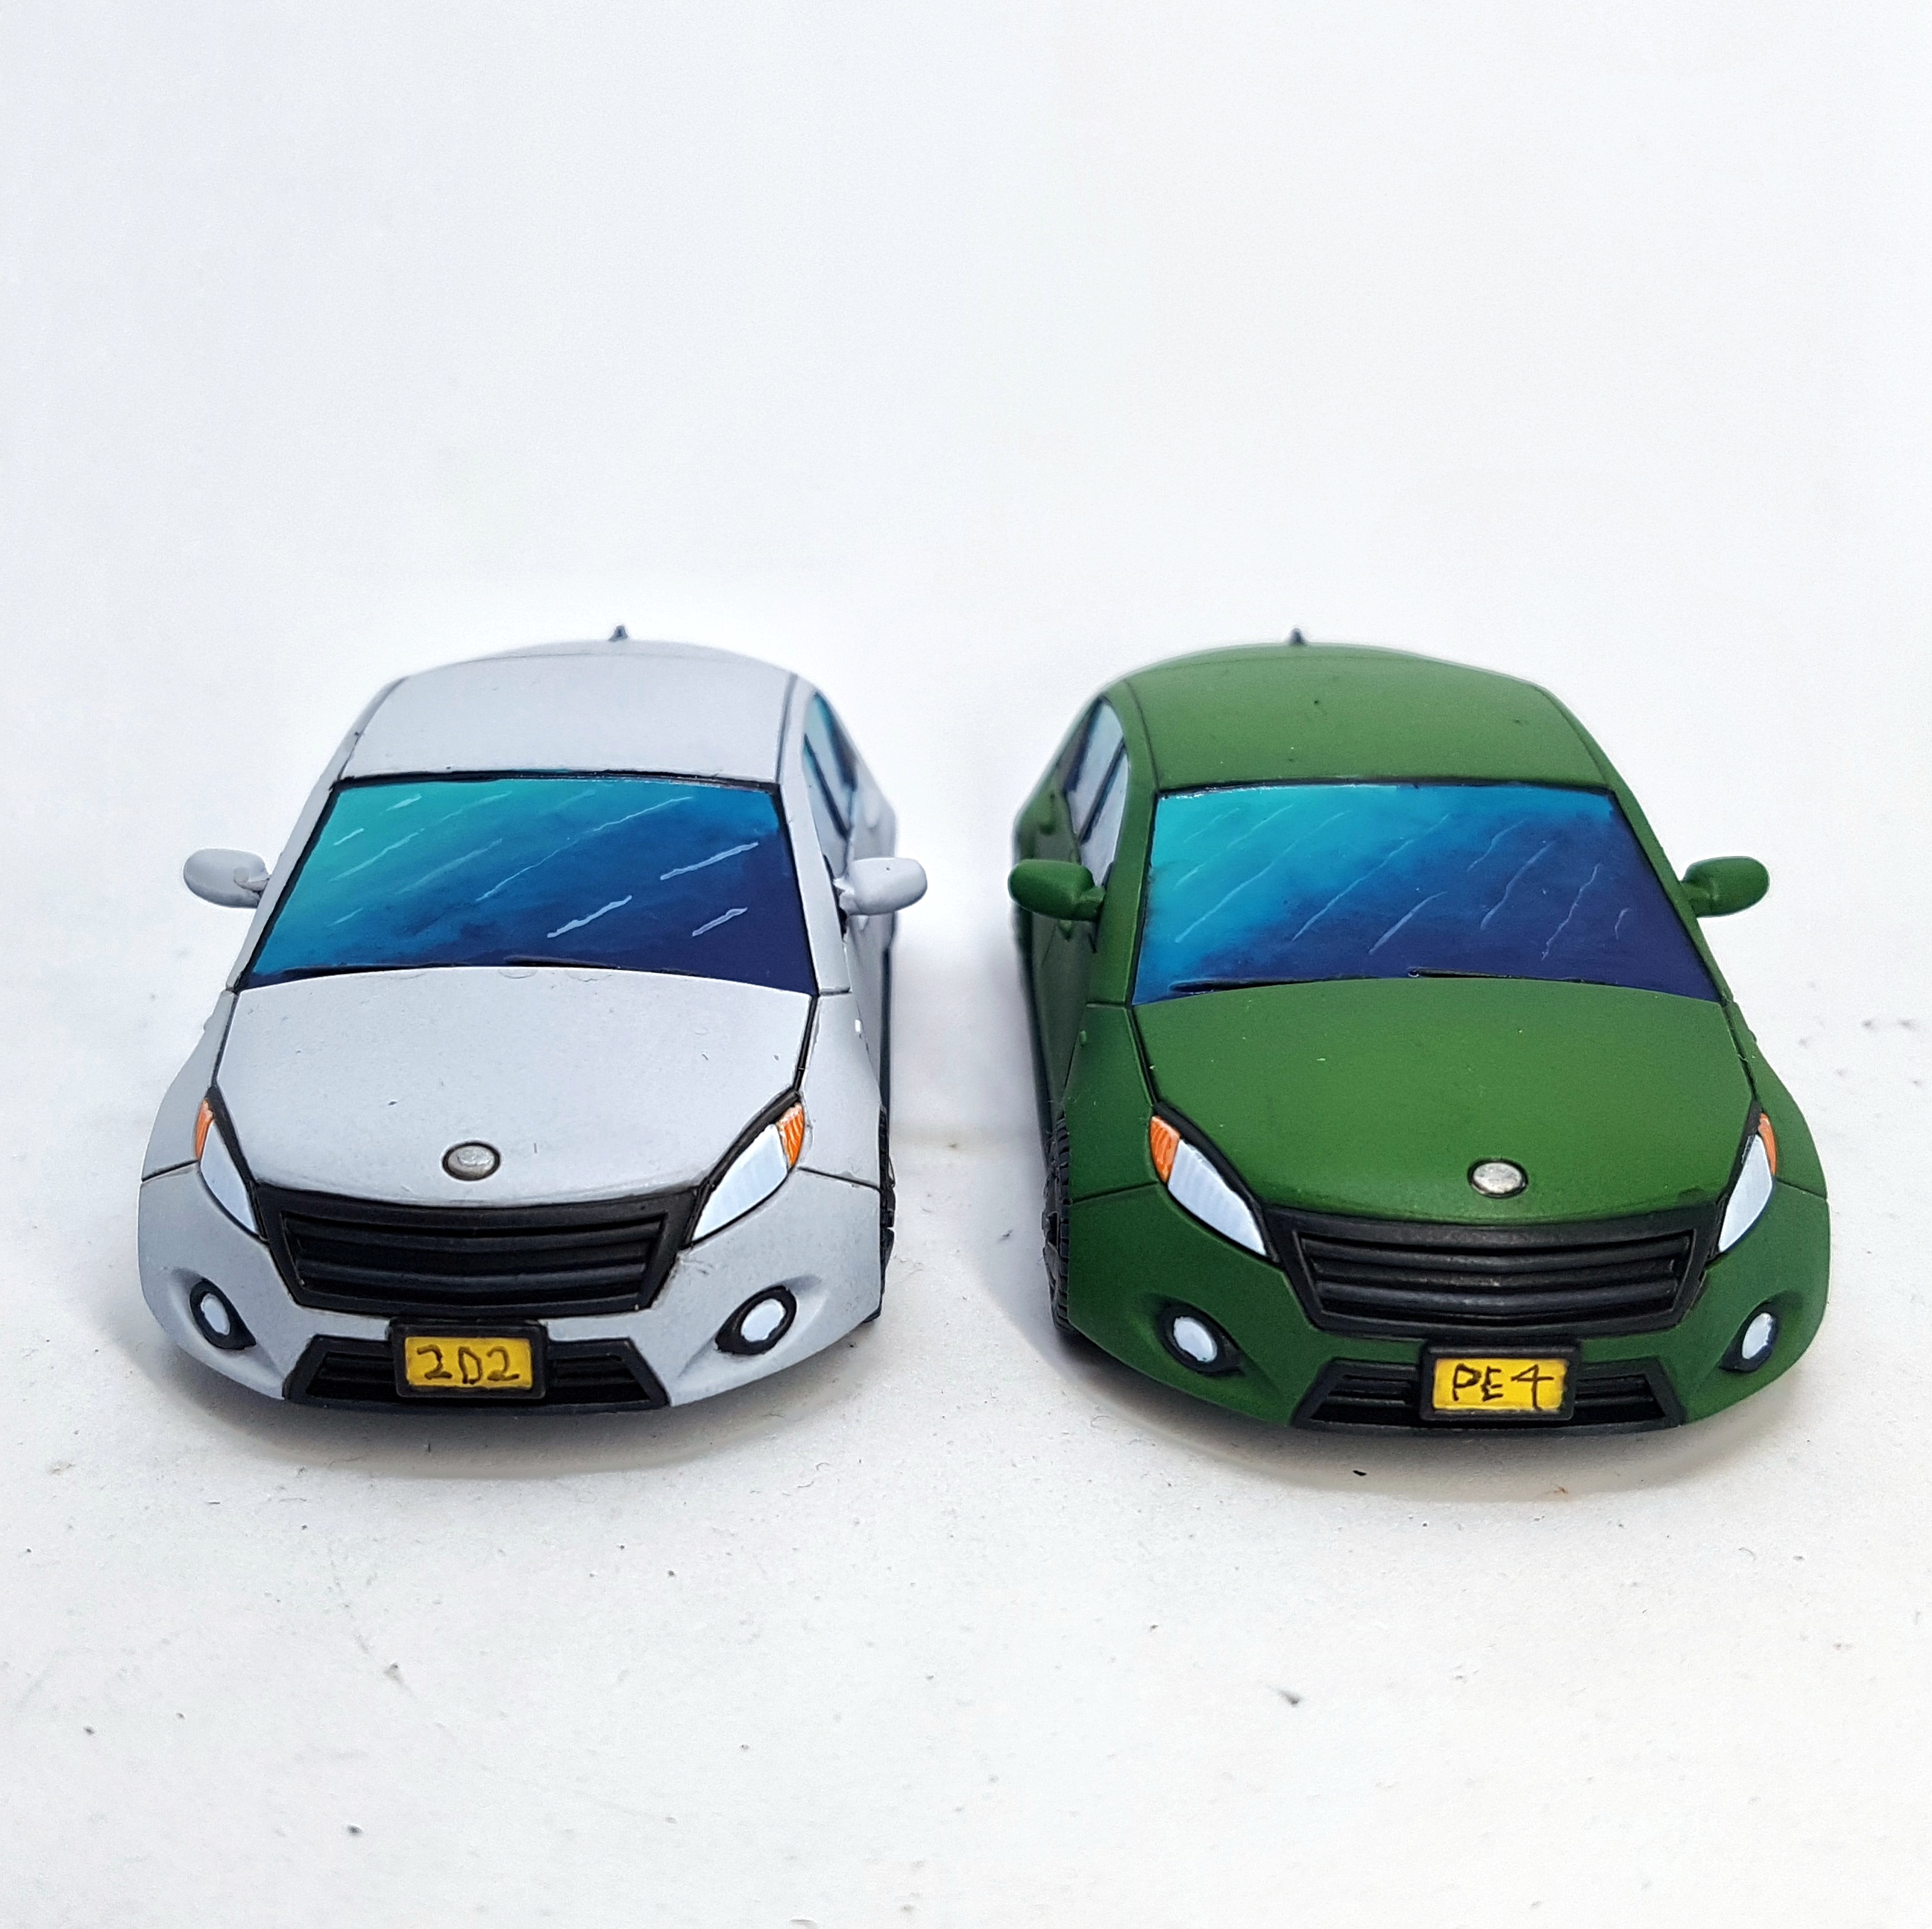
Next, the cars had their windows blocked out with P3 Exile Blue. The next two stages involved a lot of back and forth so there wasn’t any pause for photos to be taken. I followed the video, blending P3 Meridious Blue and P3 Arcane Blue across the model. I’ve never really done anything like this so I was learning and experimenting as I went. I definitely started to understand and improve buy the time I was done, and could probably do a better job now, but I’m happy with what I did. the end results speak for themselves.
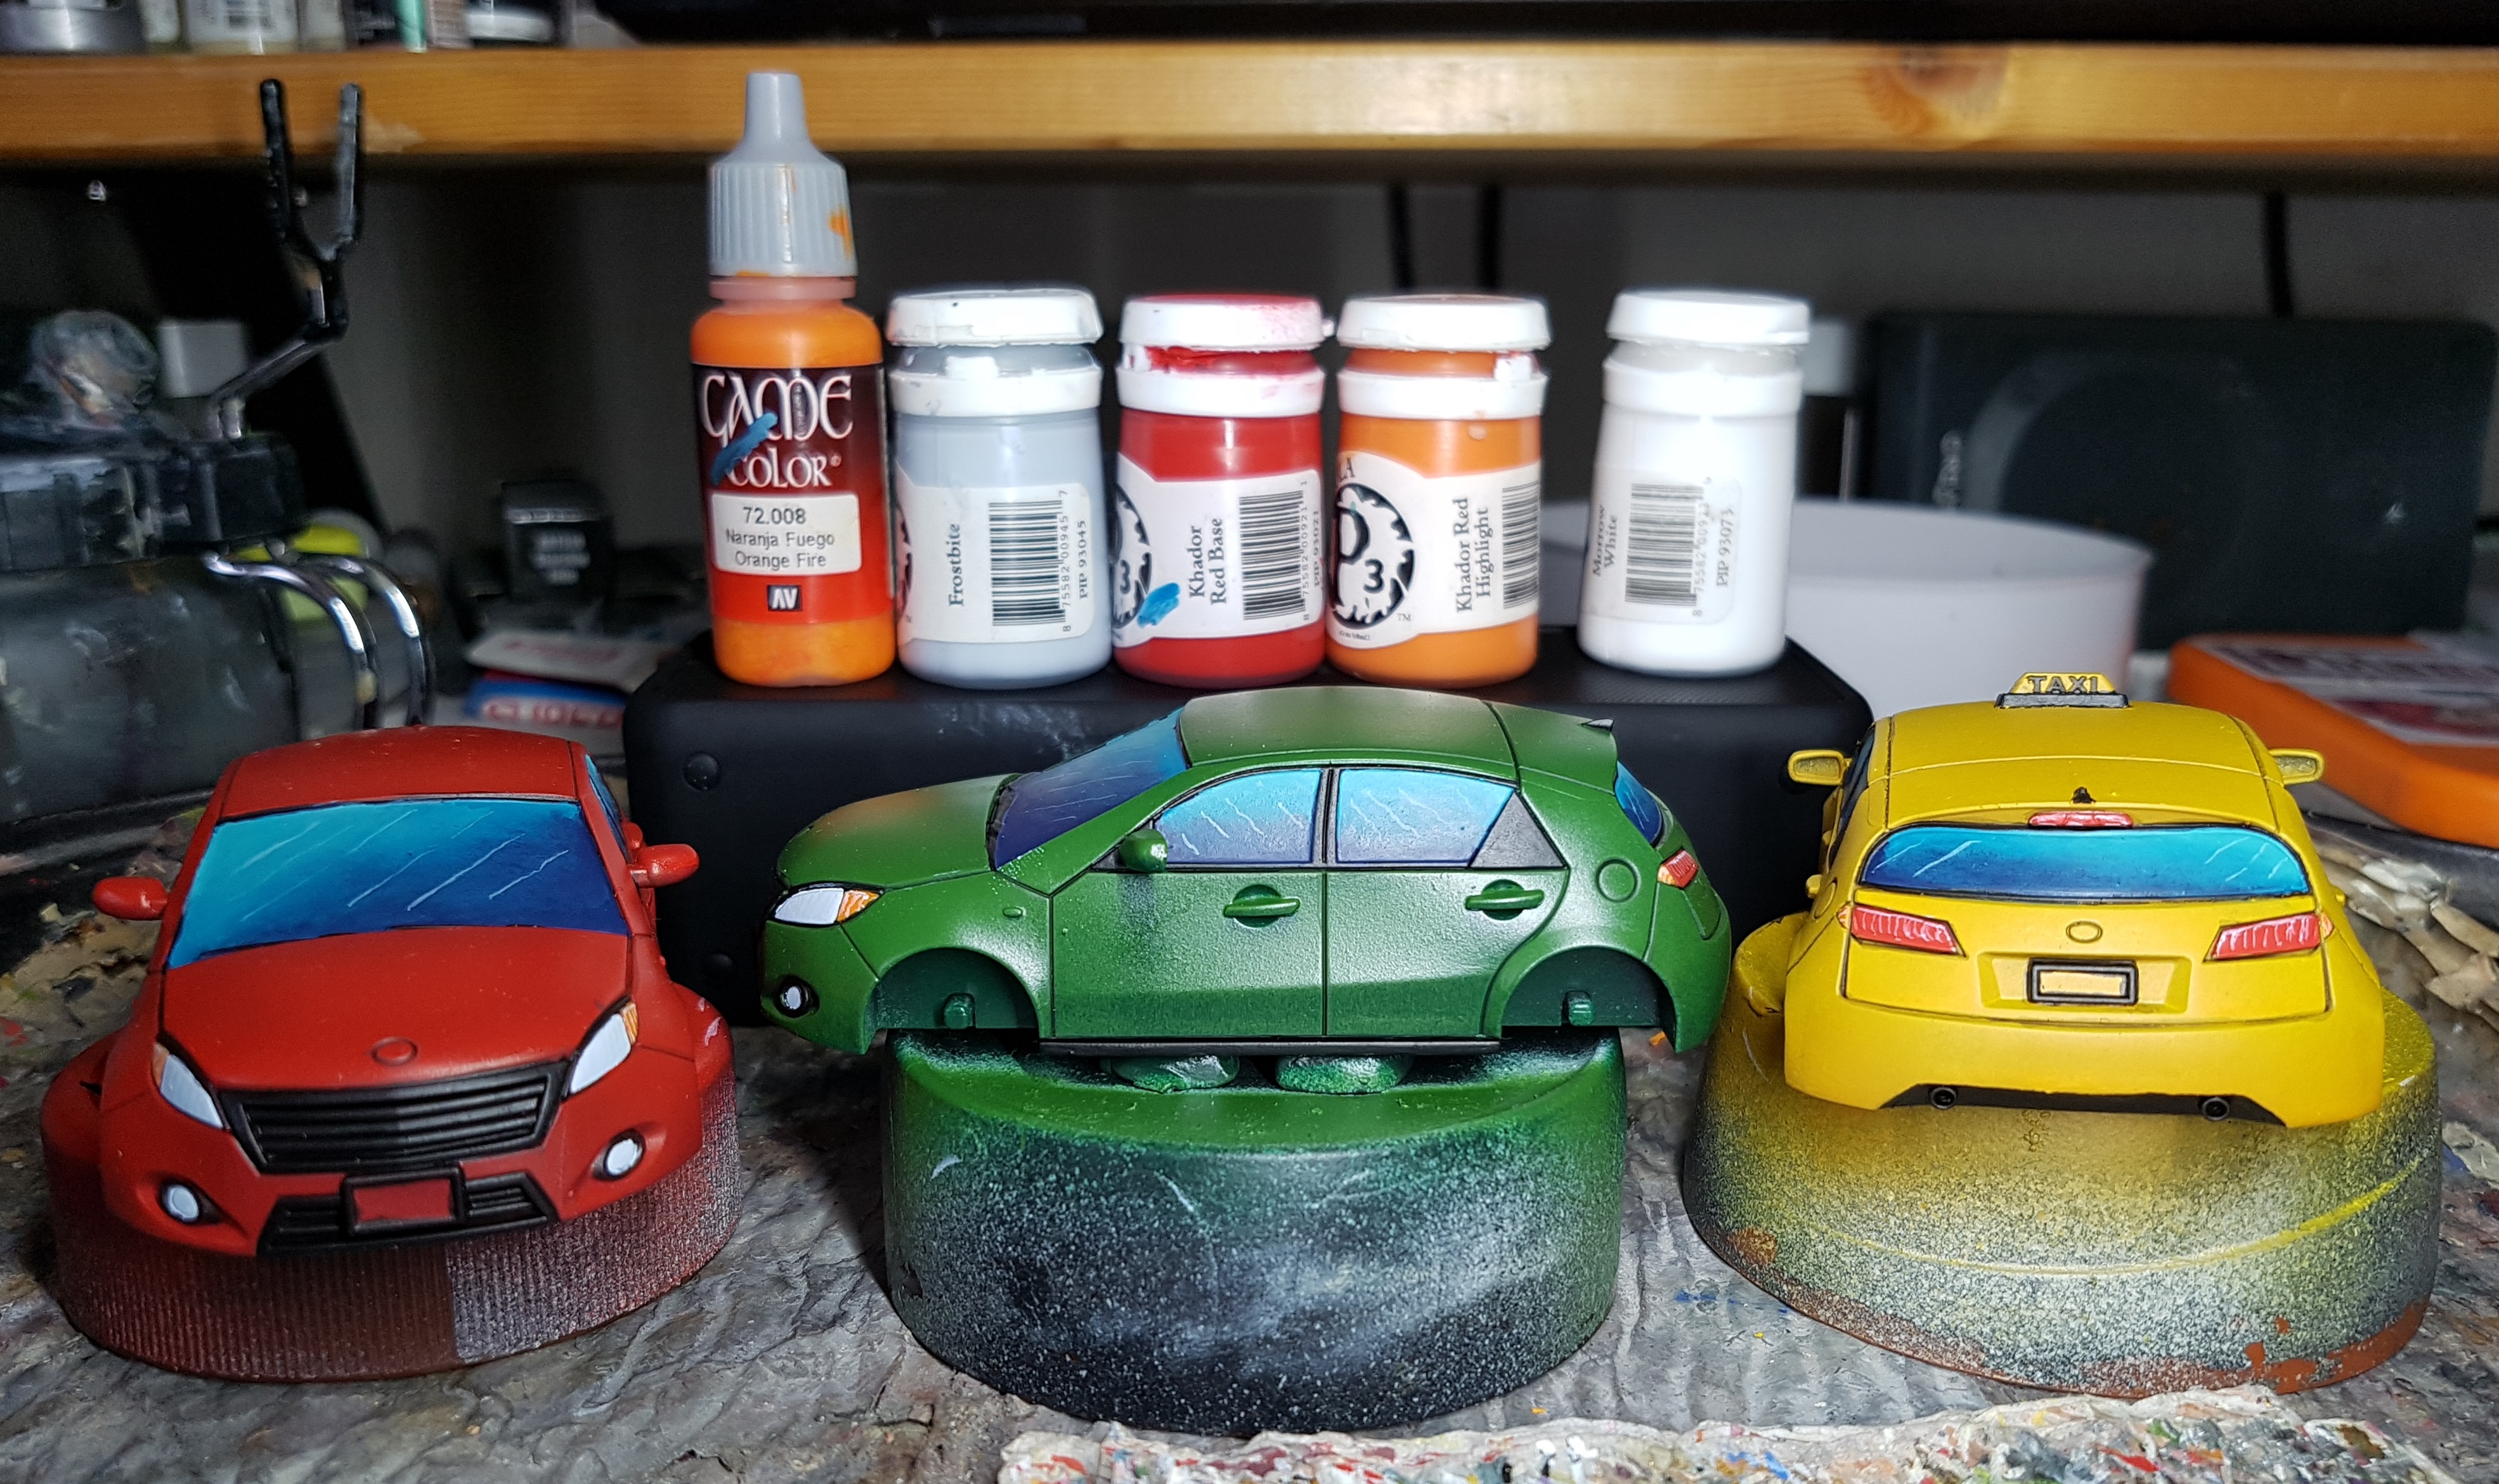
I painted the lights before painting the white lines on the window so I could do them all at the same time.
Orange Side Lights: VGC 72.008 Orange Fire
White headlights: P3 Frostbite (I tried adding white at first, but it was always too white. Even solid Frostbite looked like just white, until some white is painted over it
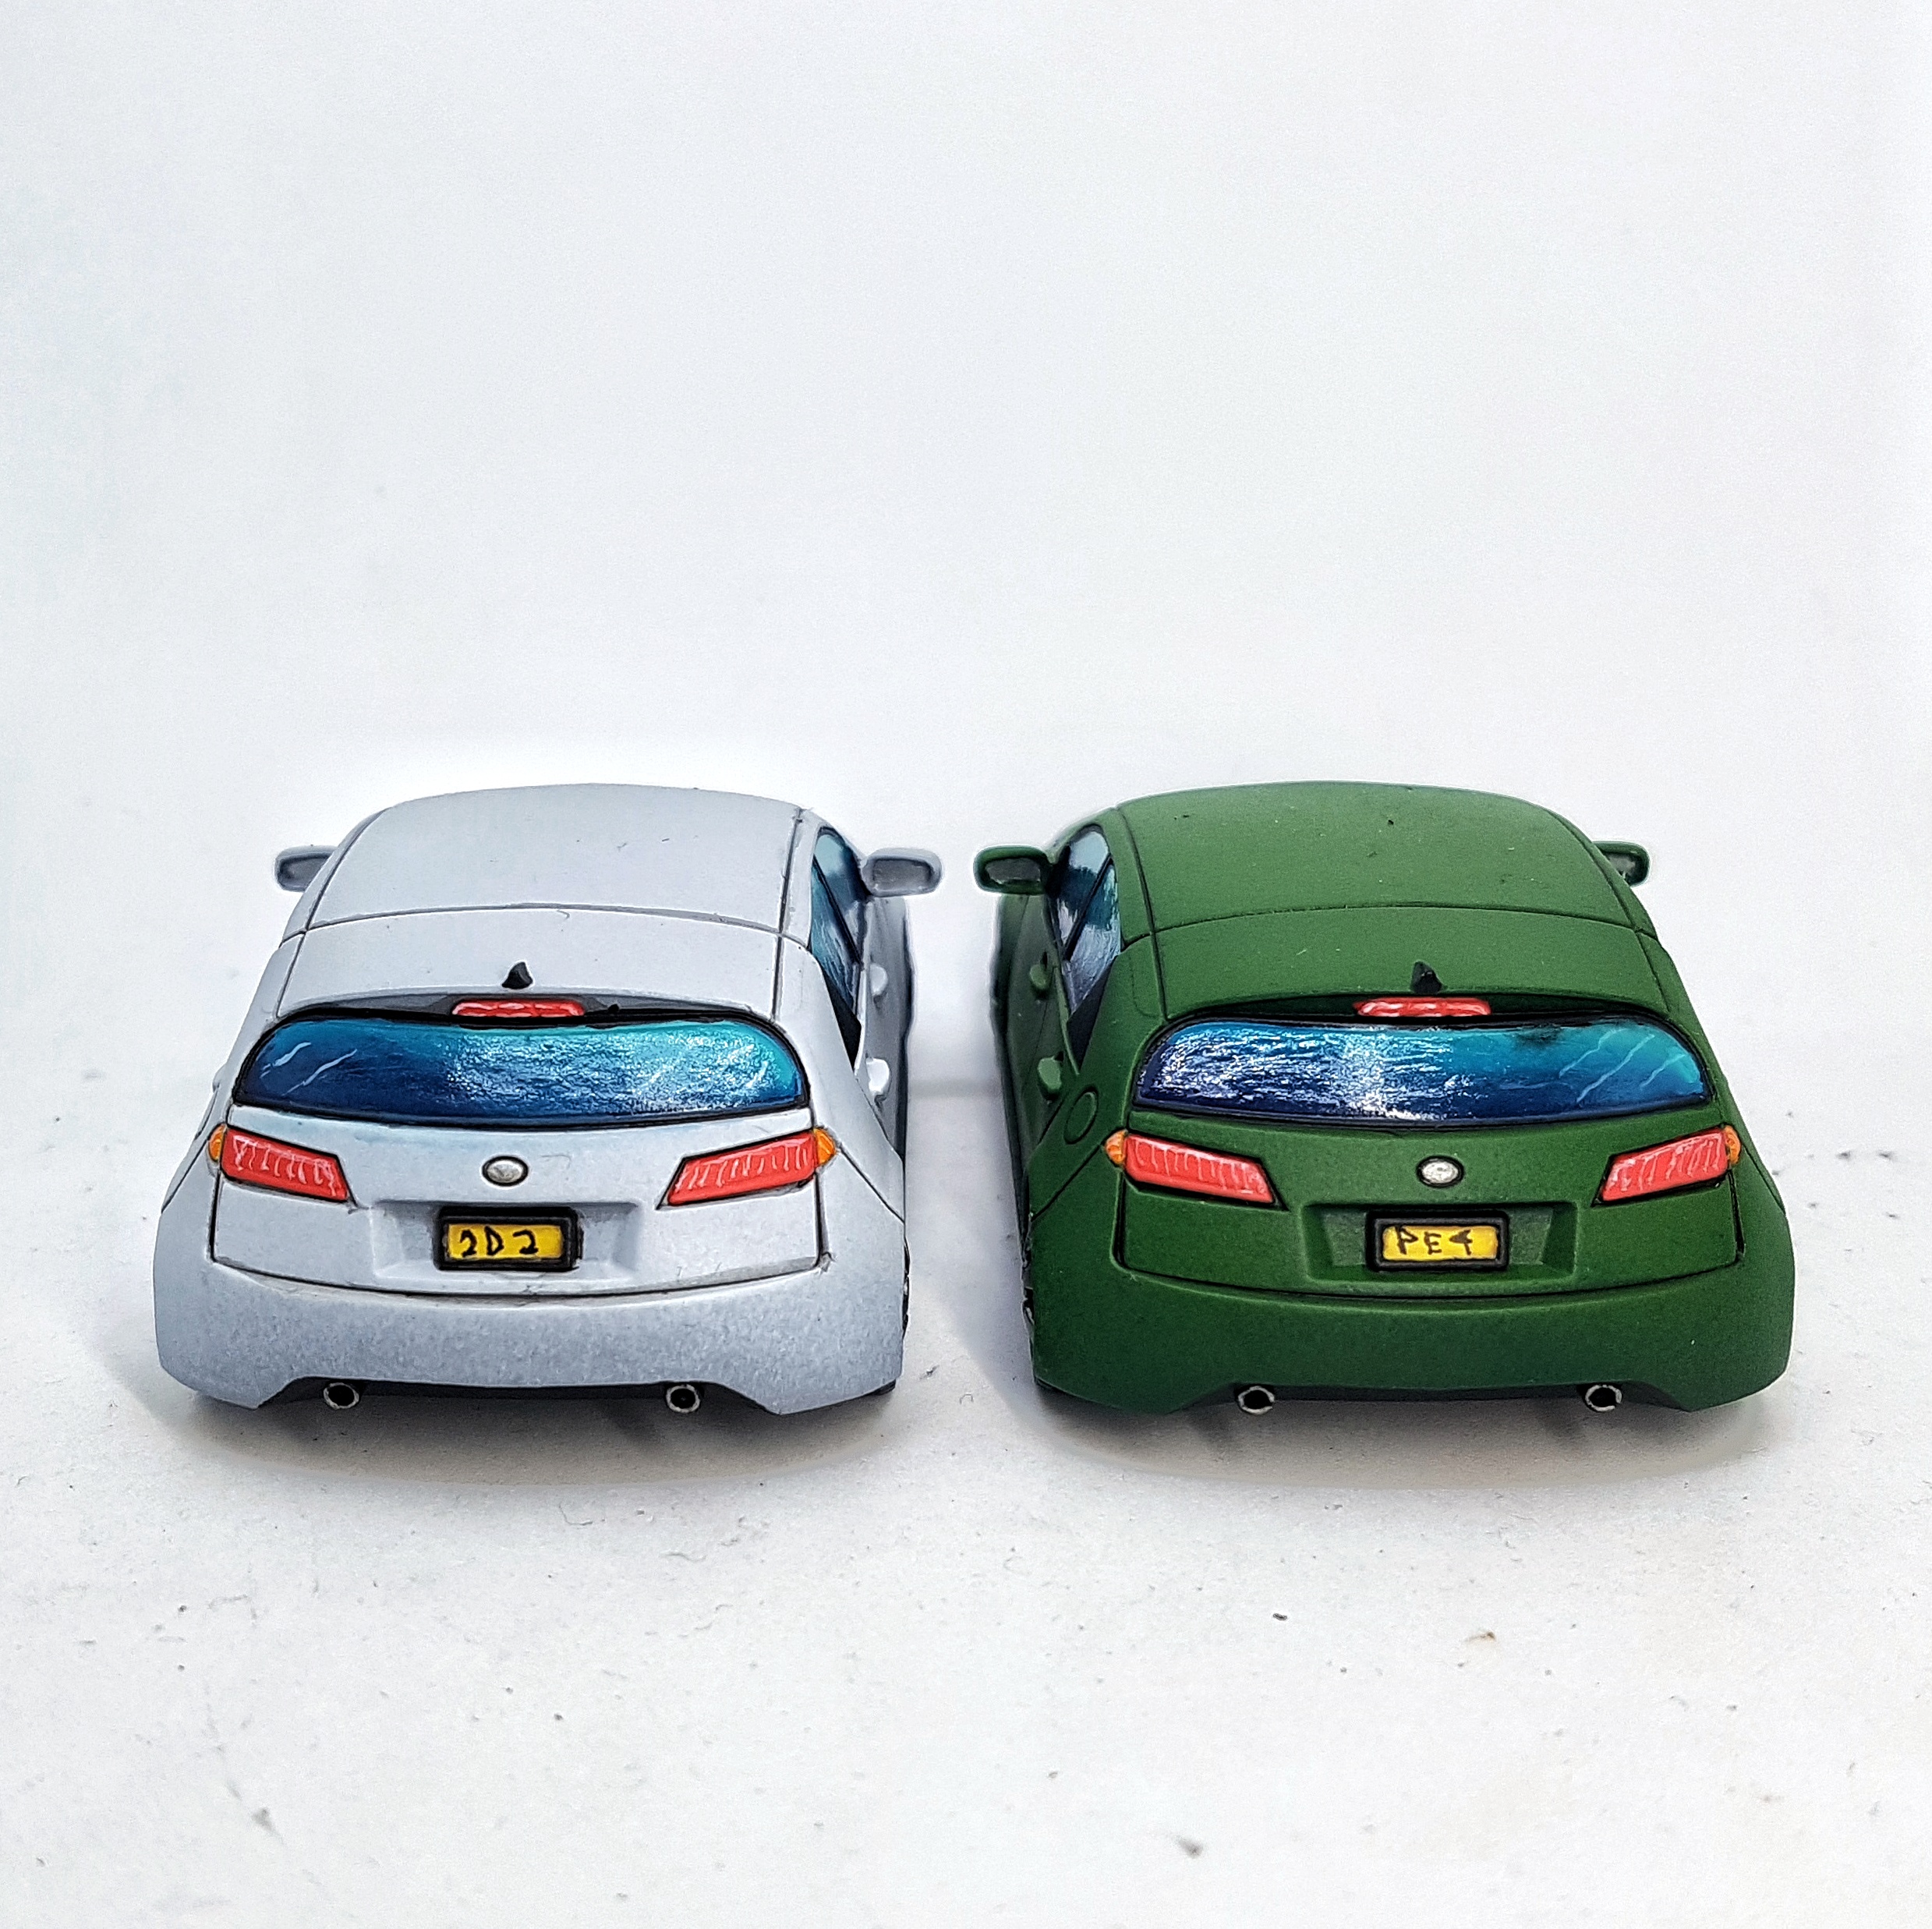
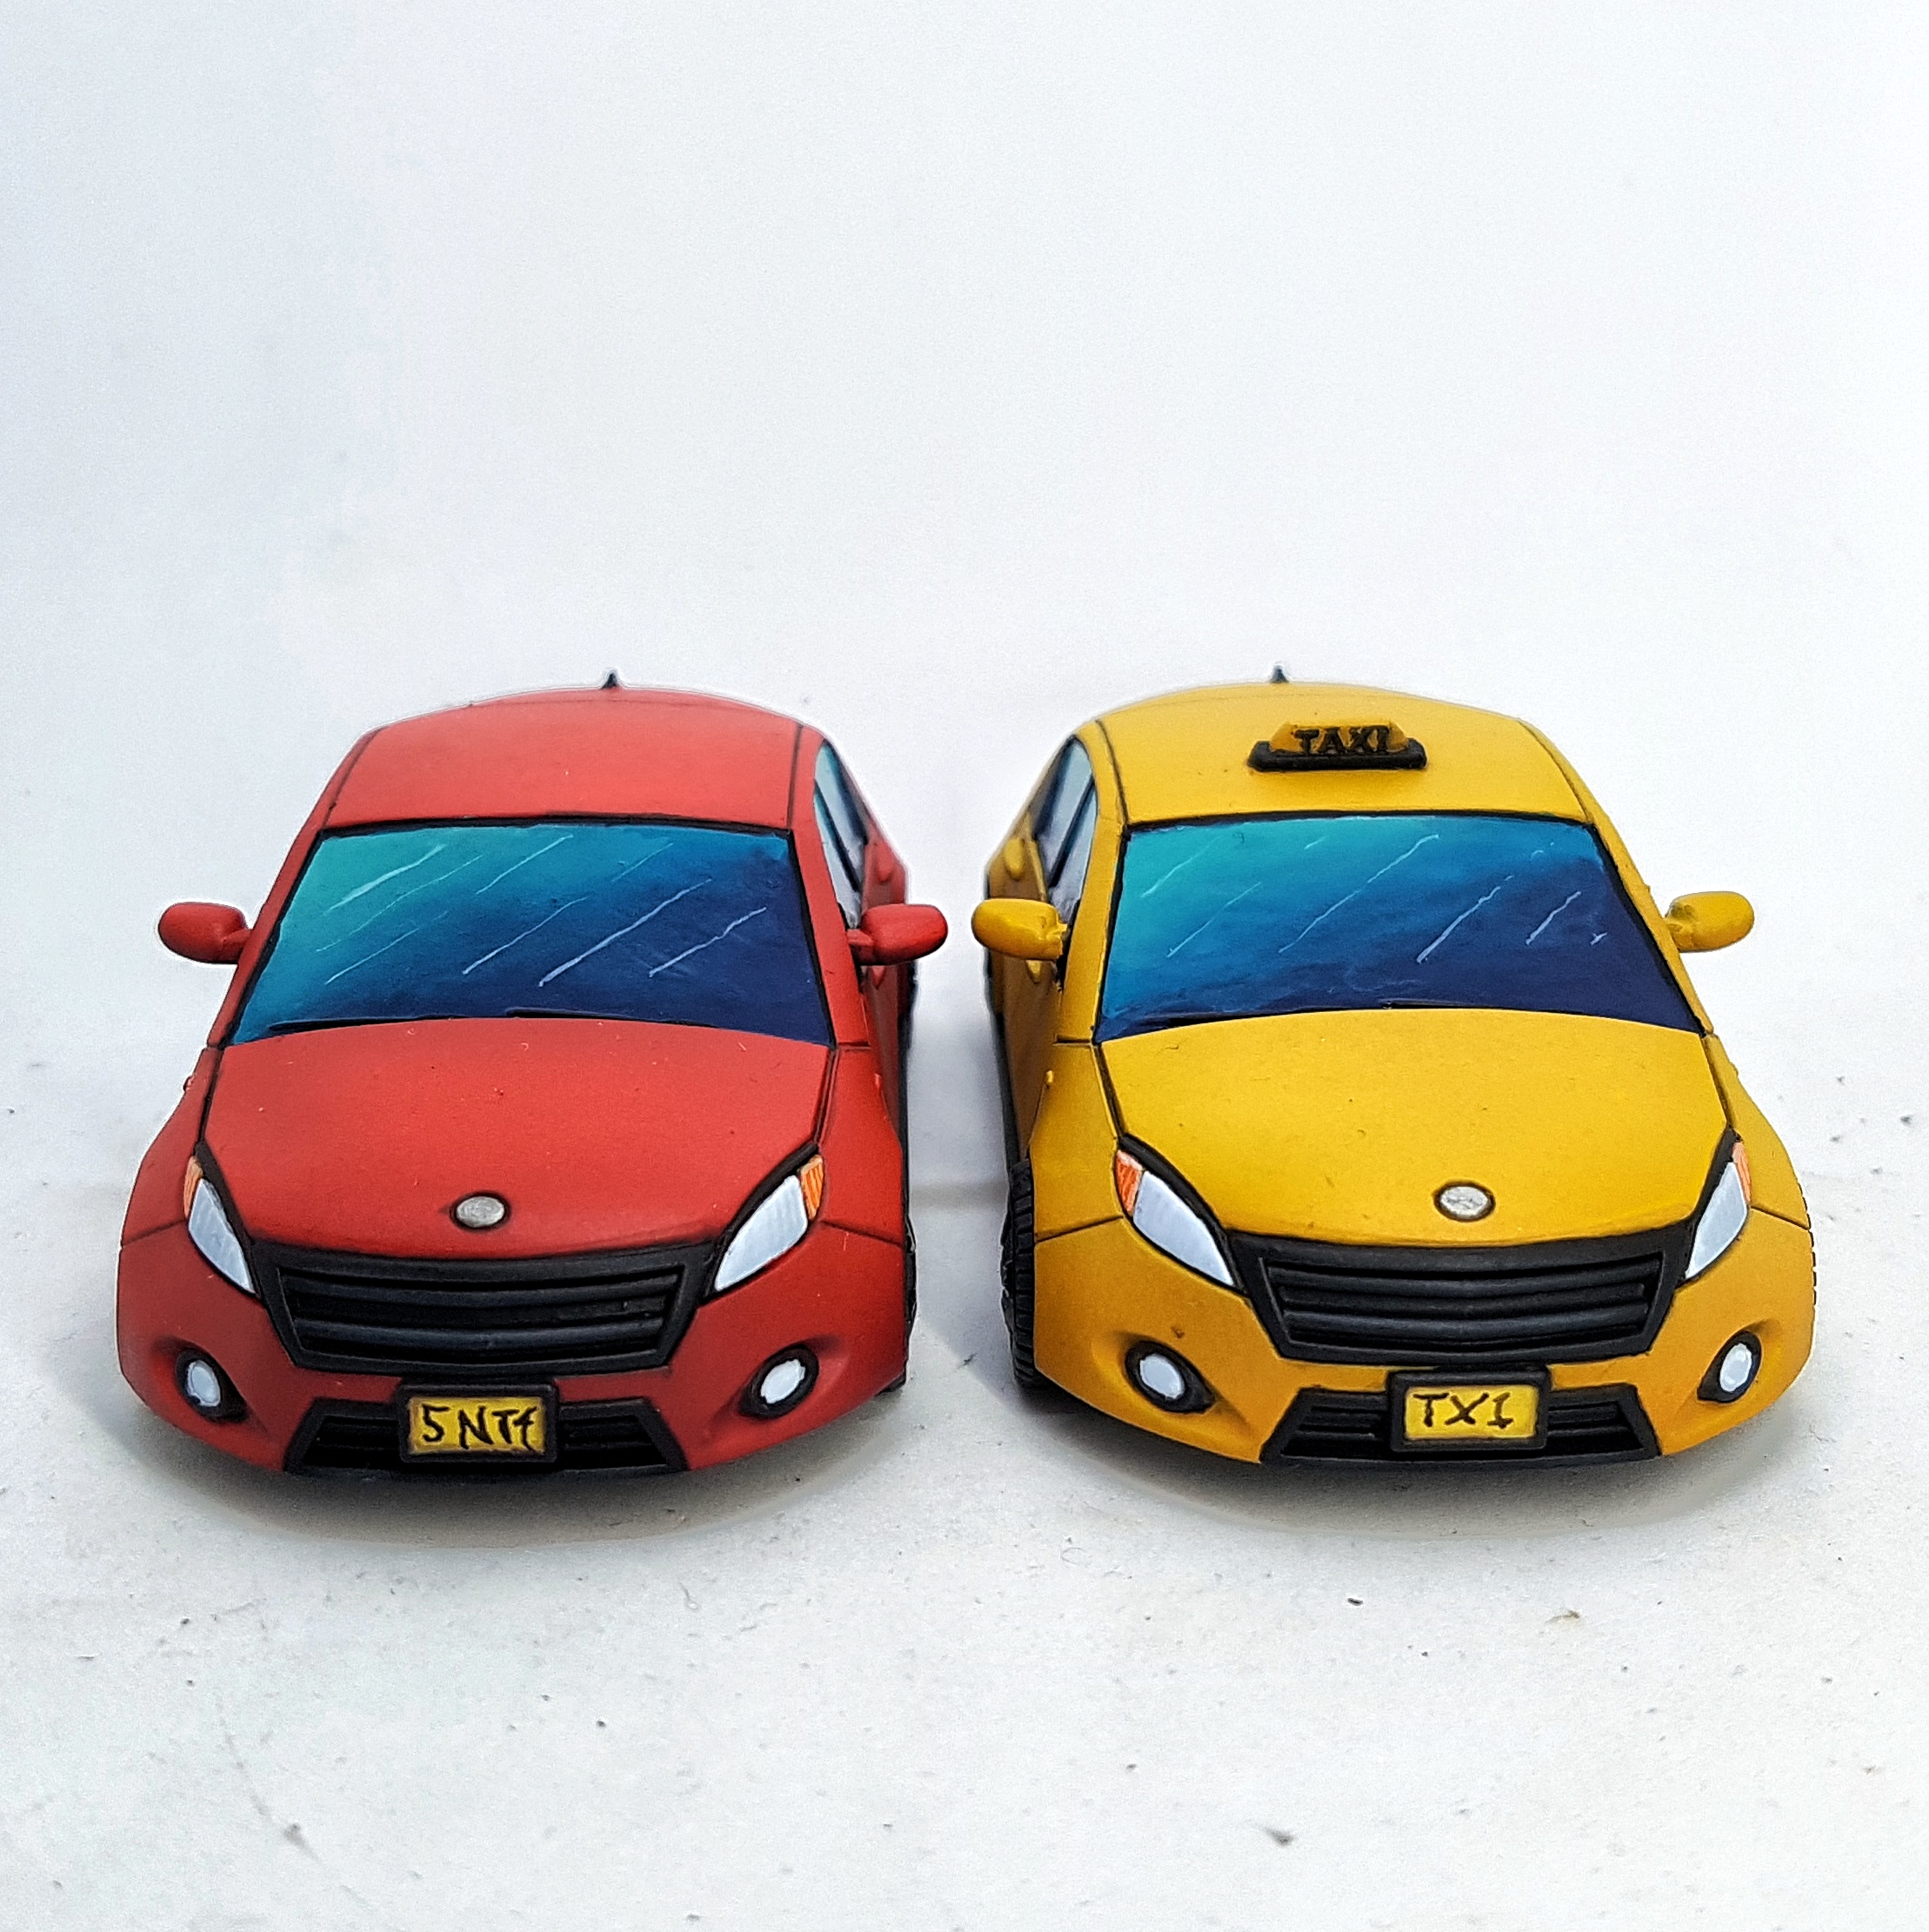
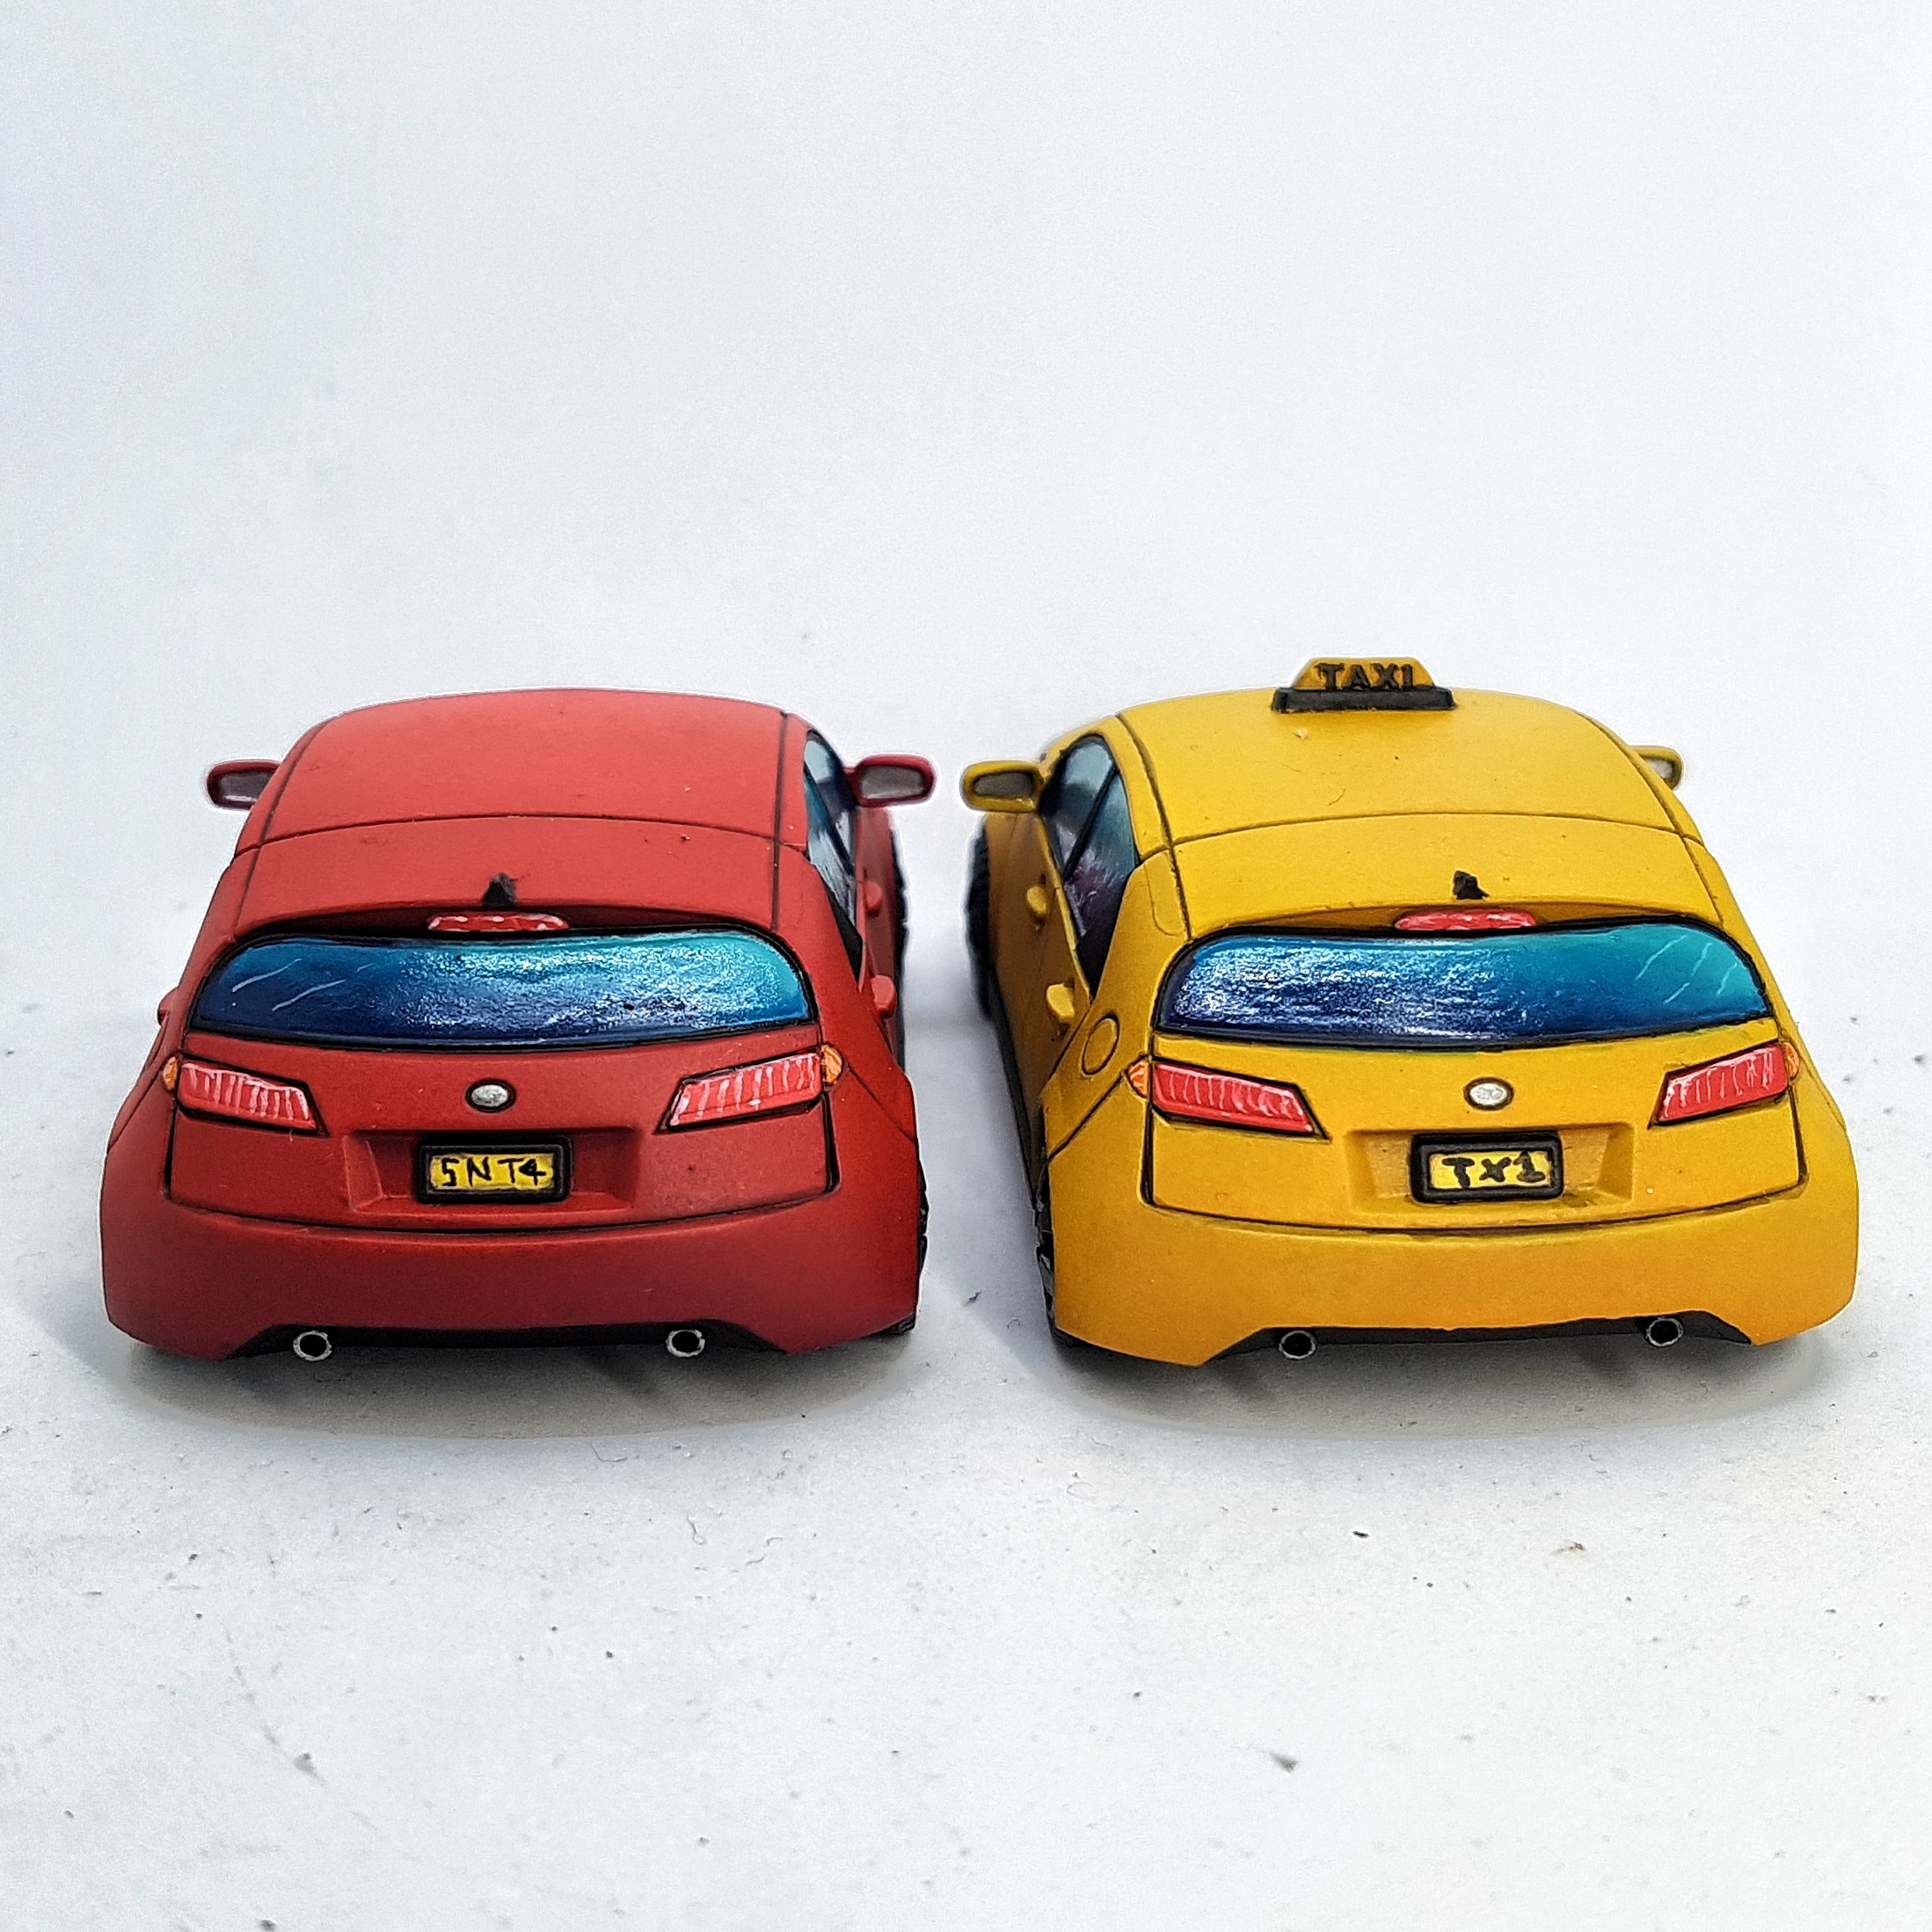
Red break lights: P3 Khador Red base with a little P3 Khador Red Highlight. We definitely want it to look different and lighter than the red car’s paint job.
Once that was all done I went in with some white and painted the lines over it all.
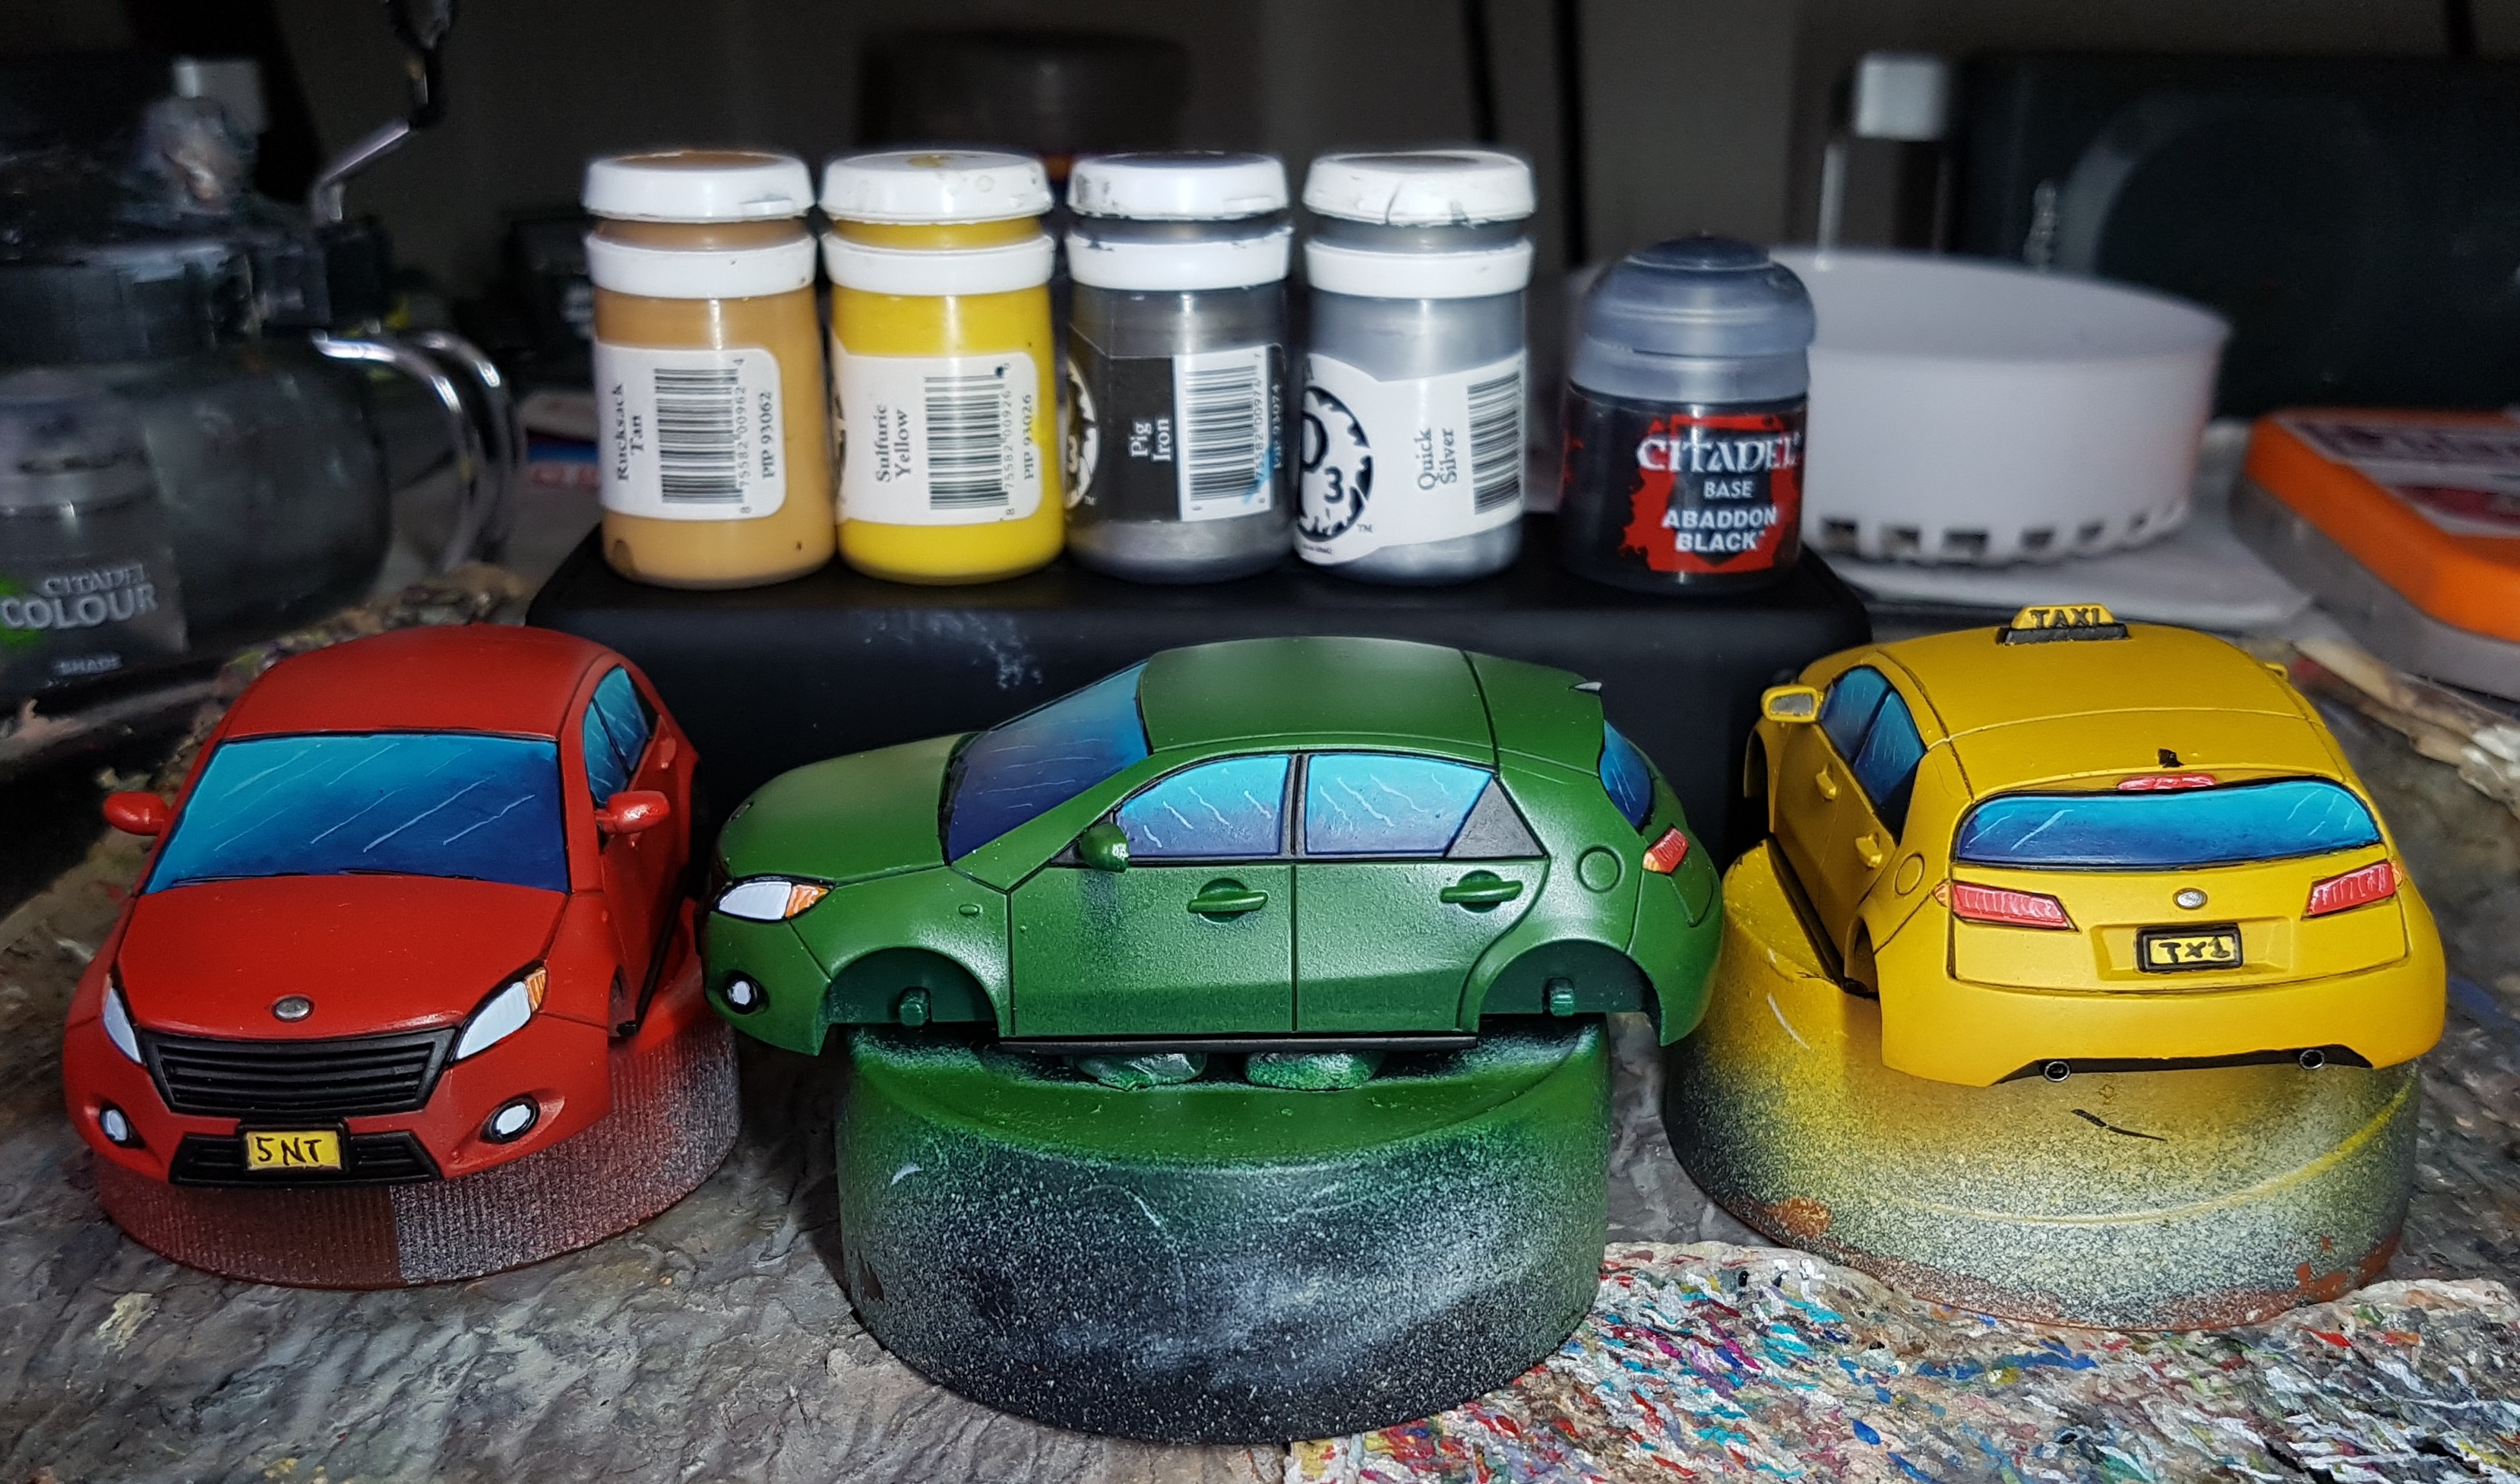
The number plates were painted the same as the crossing lights. undercoated with P3 Rucksack Tan, and based/highlighted with P3 Sulfuric Yellow. i then hamfistedly painted on some letter with Black. Please bear in mind I can’t really write any better with a pen and paper. I should have been a doctor.
I picked out the badges and exhausts with p3 Pig Iron and while that was wet I added a blob of P3 Quick Silver to run in to it as a highlight. Some P3 Cold Steel was used to paint the hub caps. The black car radiator grilles were gently drybrushed with P3 Greatcoat Grey, and the wing mirrors were painted with the shiniest metal paint I know of: VGA 71.064 Chrome. The wheels were glues on and the cars were done and ready for varnishing.
Once the base coat had dried over night, the rubble was washed with Jan’s Magimix (6-8 Parts GW Nuln Oil, 6-8 Parts GW Agrax Earthshade, 5-6 Parts Lahmium Medium, 2 parts Athonian Camoshade. Thanks, Januinevision),and then drybrushed with P3 Jack Bone. The girders were base coated with GW Typhus Corrosion, and drybrushed with GW Ryza Rust and P3 pig iron wherever I felt like it. They were then put on one side until 5 minutes before varnishing began.
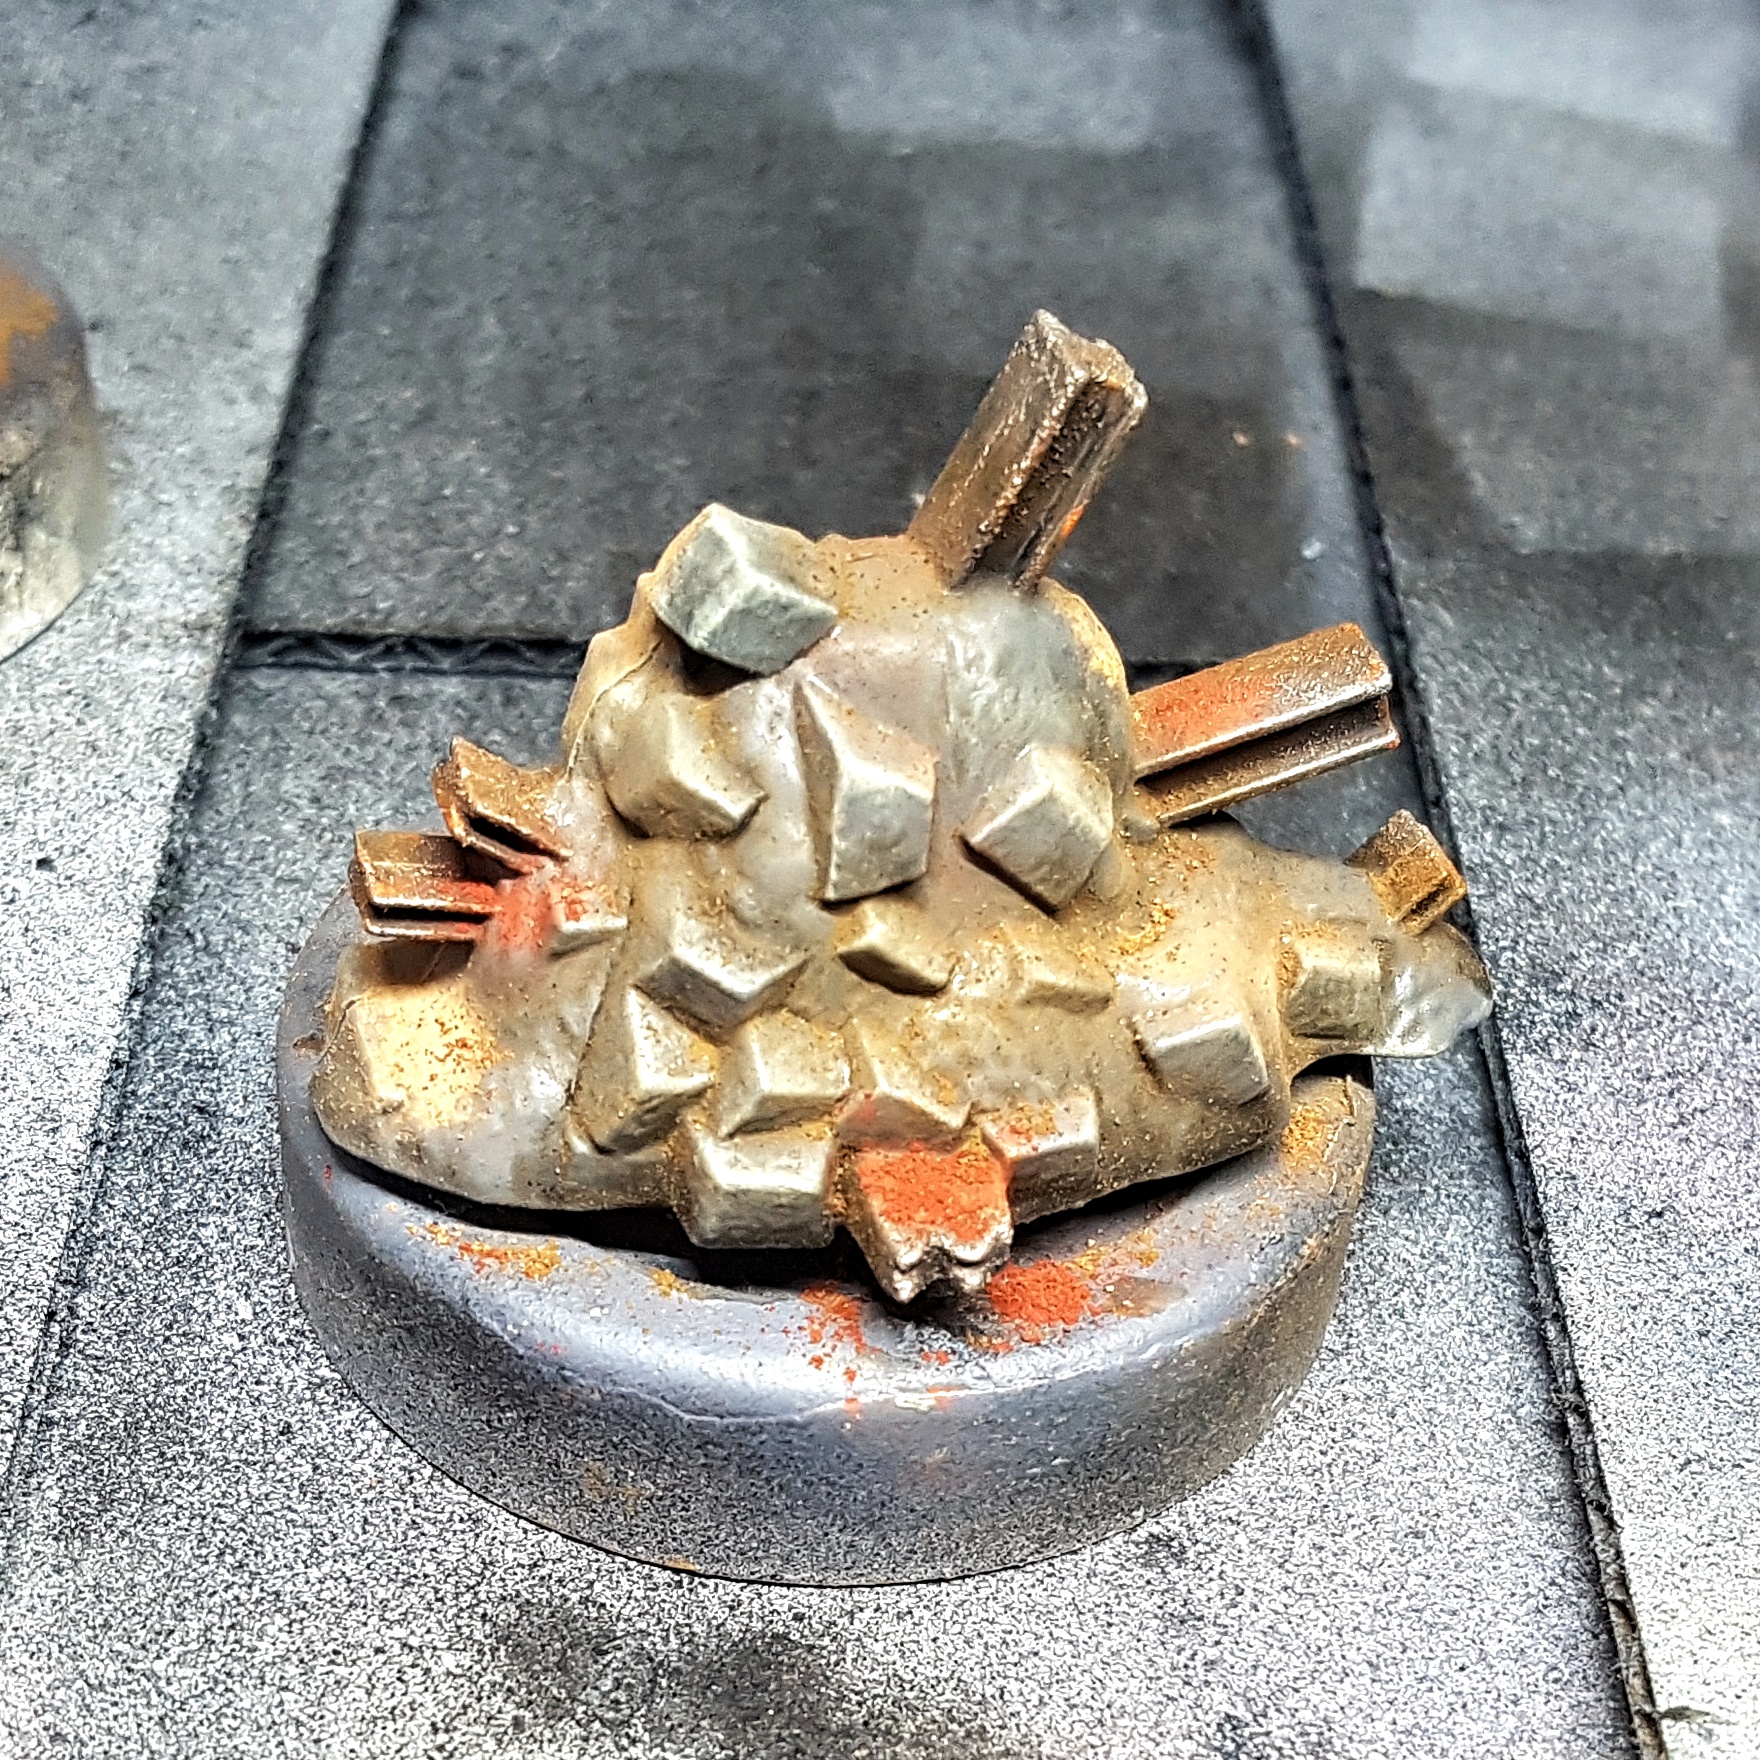
When I was ready to varnish I put on my dust mask (To stop my breathing from blowing pigments about) and applied 3 different pigments wherever I felt like across the rubble. Vallejo 73.109 Natural Umber as mud, Vallejo 73.208 Brown iron oxide as patches of rust on but the girders and stone, and Spot-On Pigments 02 EU Brown Earth Zero as a lighter fresher dirt. These were both rubbed in with an old drybrush, and dropped on by tapping a loaded drybrush held over the piece. The area was tided up and then they were gently sprayed with gloss varnish, doing my best to stop the airbrush from blowing the pigments about. You can see pics below of before pigments, and with pigments both before and after the varnish. If I were to do this again I’d consider going in for a second pass of the pigments, and perhaps adding more colours/tones when I do that.
Pretty sure I don’t have enough space here for all the finished pics, so I’ll see you in the next entry.
First Wave of Terrain Finished
Here are my final results. 23 finished pieces of terrain in one week, while doing other time consuming things. I’m very happy, and I really like those cars. The windows got a final coat of gloss once all the matt varnishing was done. This does mean that in some of these pics they are really reflecting the light, making them look like they have white blobs on them. I’m not too happy about that, but they’re great in person and that’s what matters.
Once I have everything done I’ll be back here with some pics of everything on a table.
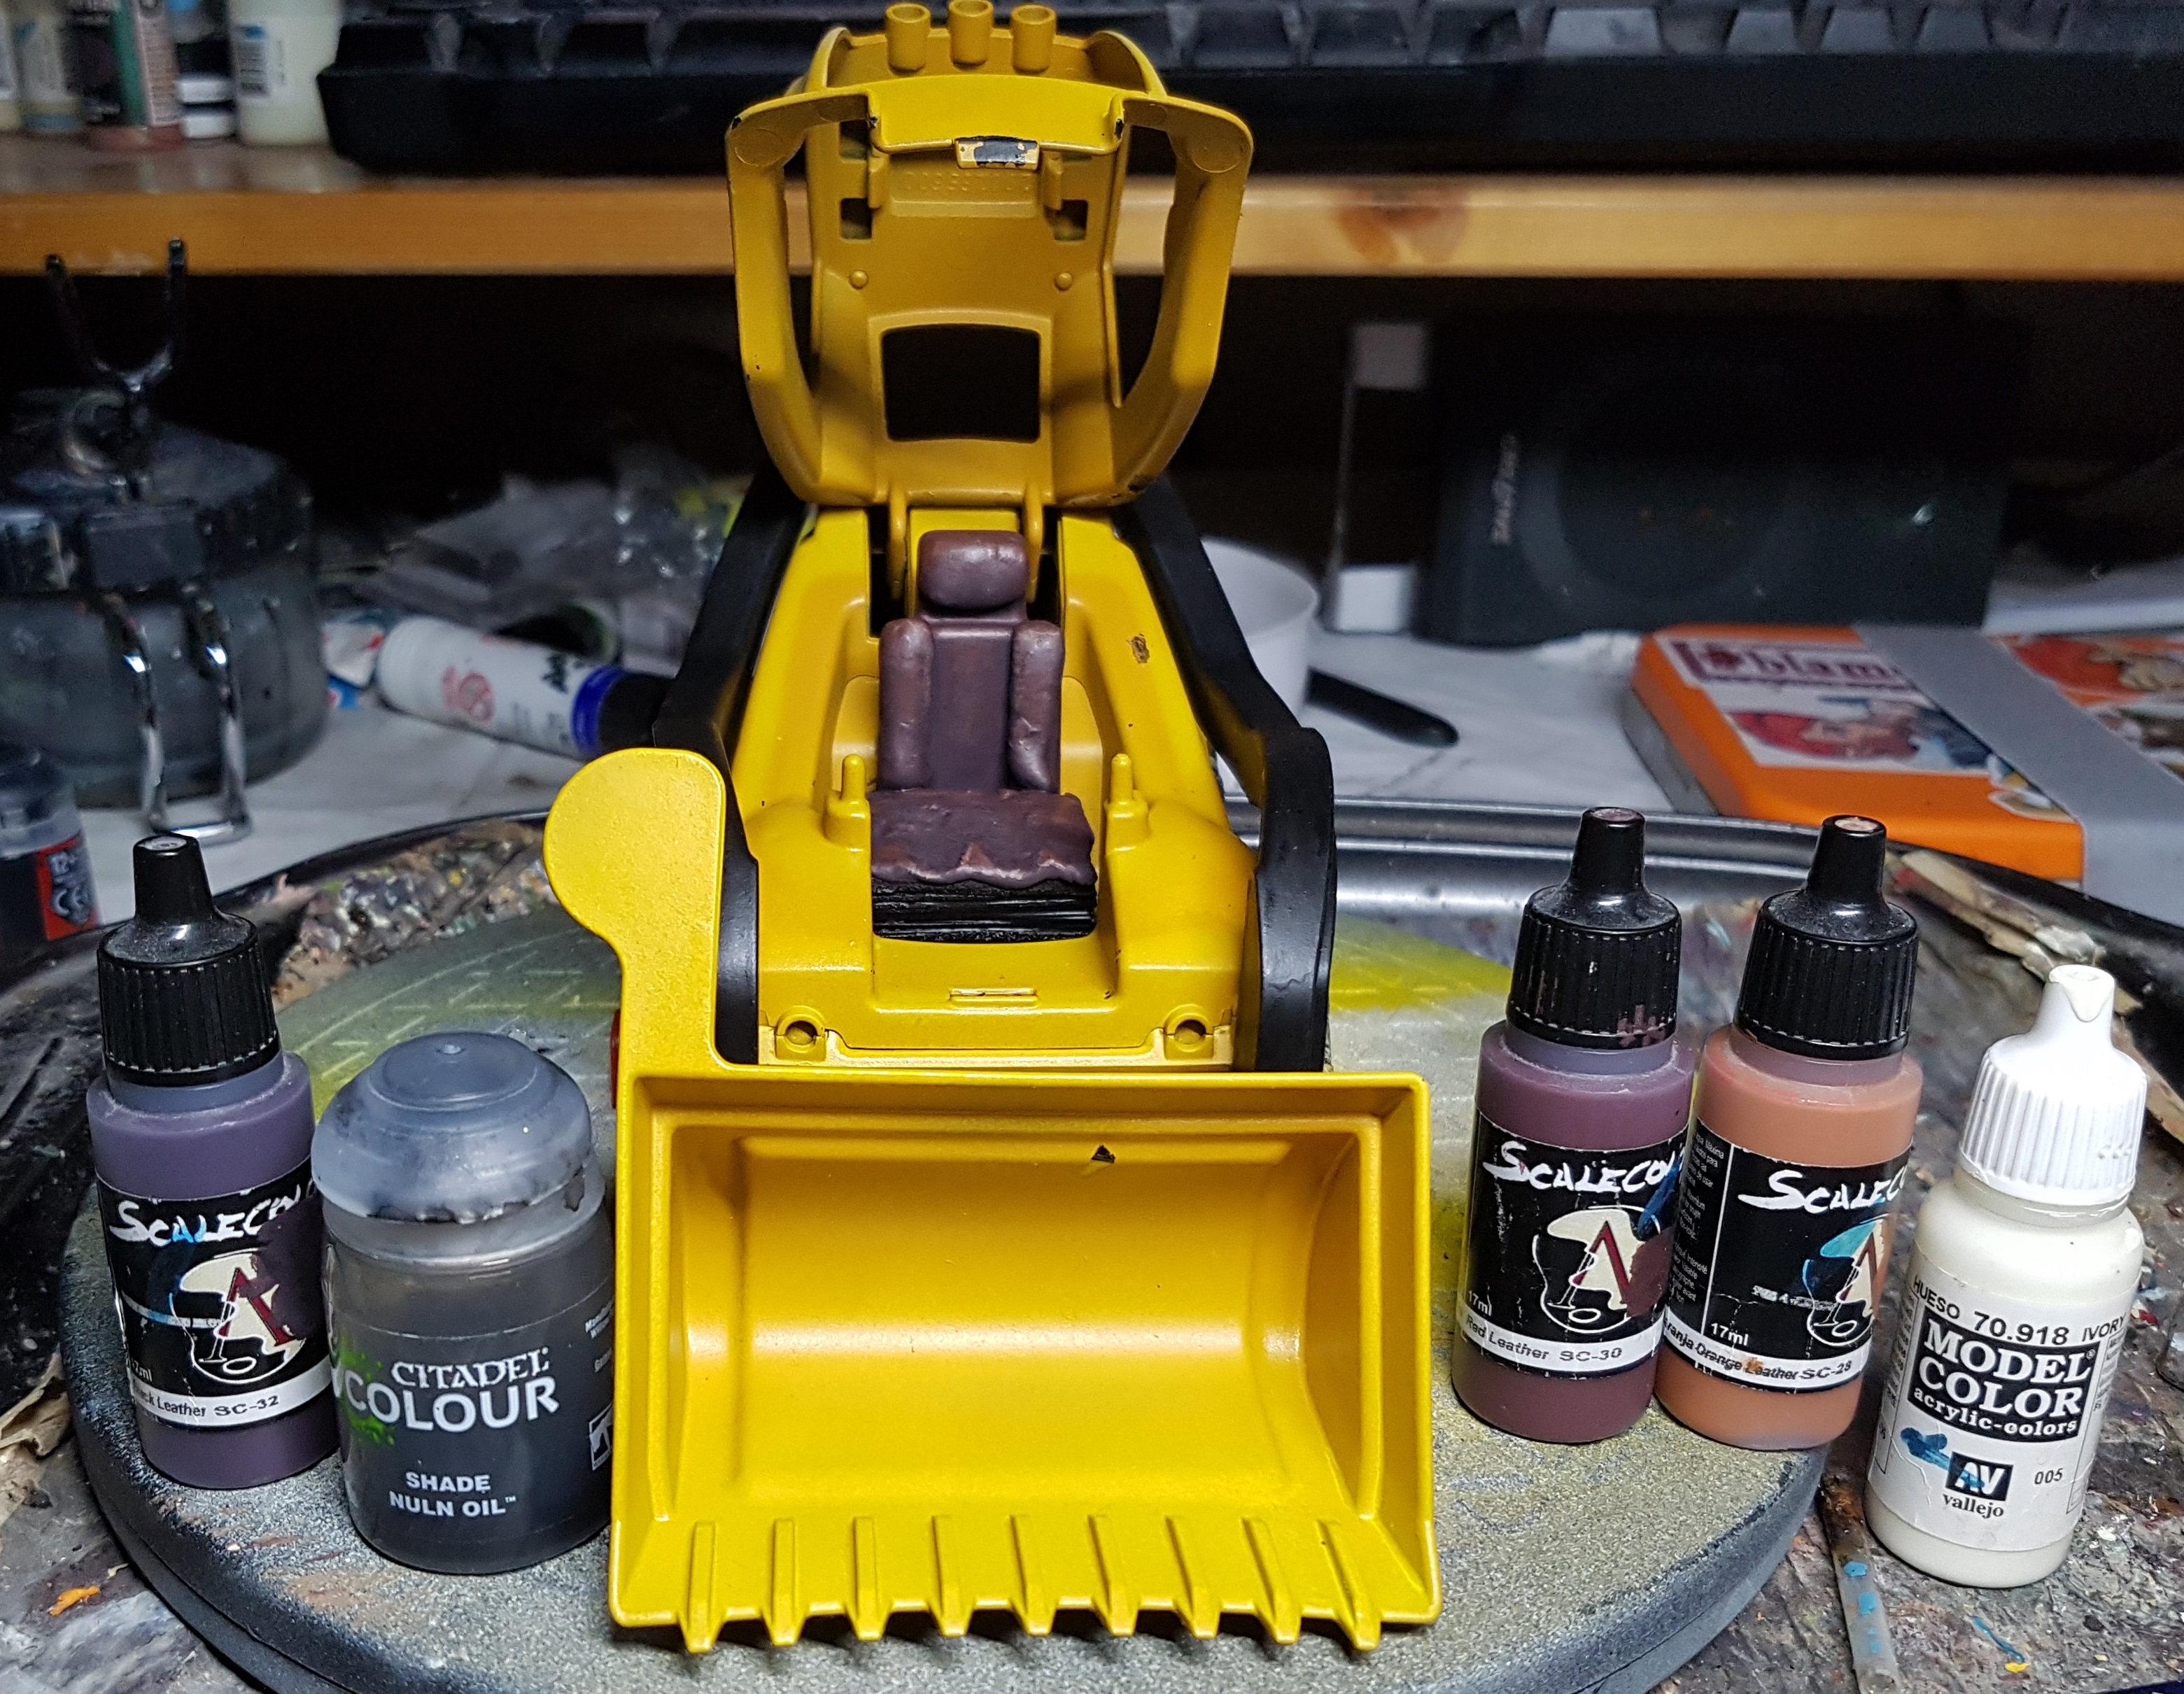
I’m back at work now so I don’t have much free time anymore. I’m currently working on that Loader. I’ve got to pick some areas out in black, paint the chair leathery, and do something with the hub caps. It wouldn’t be much, except it’s such a large surface area. I also need to varnish every coat because it keeps chipping off due to the moving parts bumping together, and from my handling. it’s too big to handle sensibly. No way it’ll fit on a hobby holder.
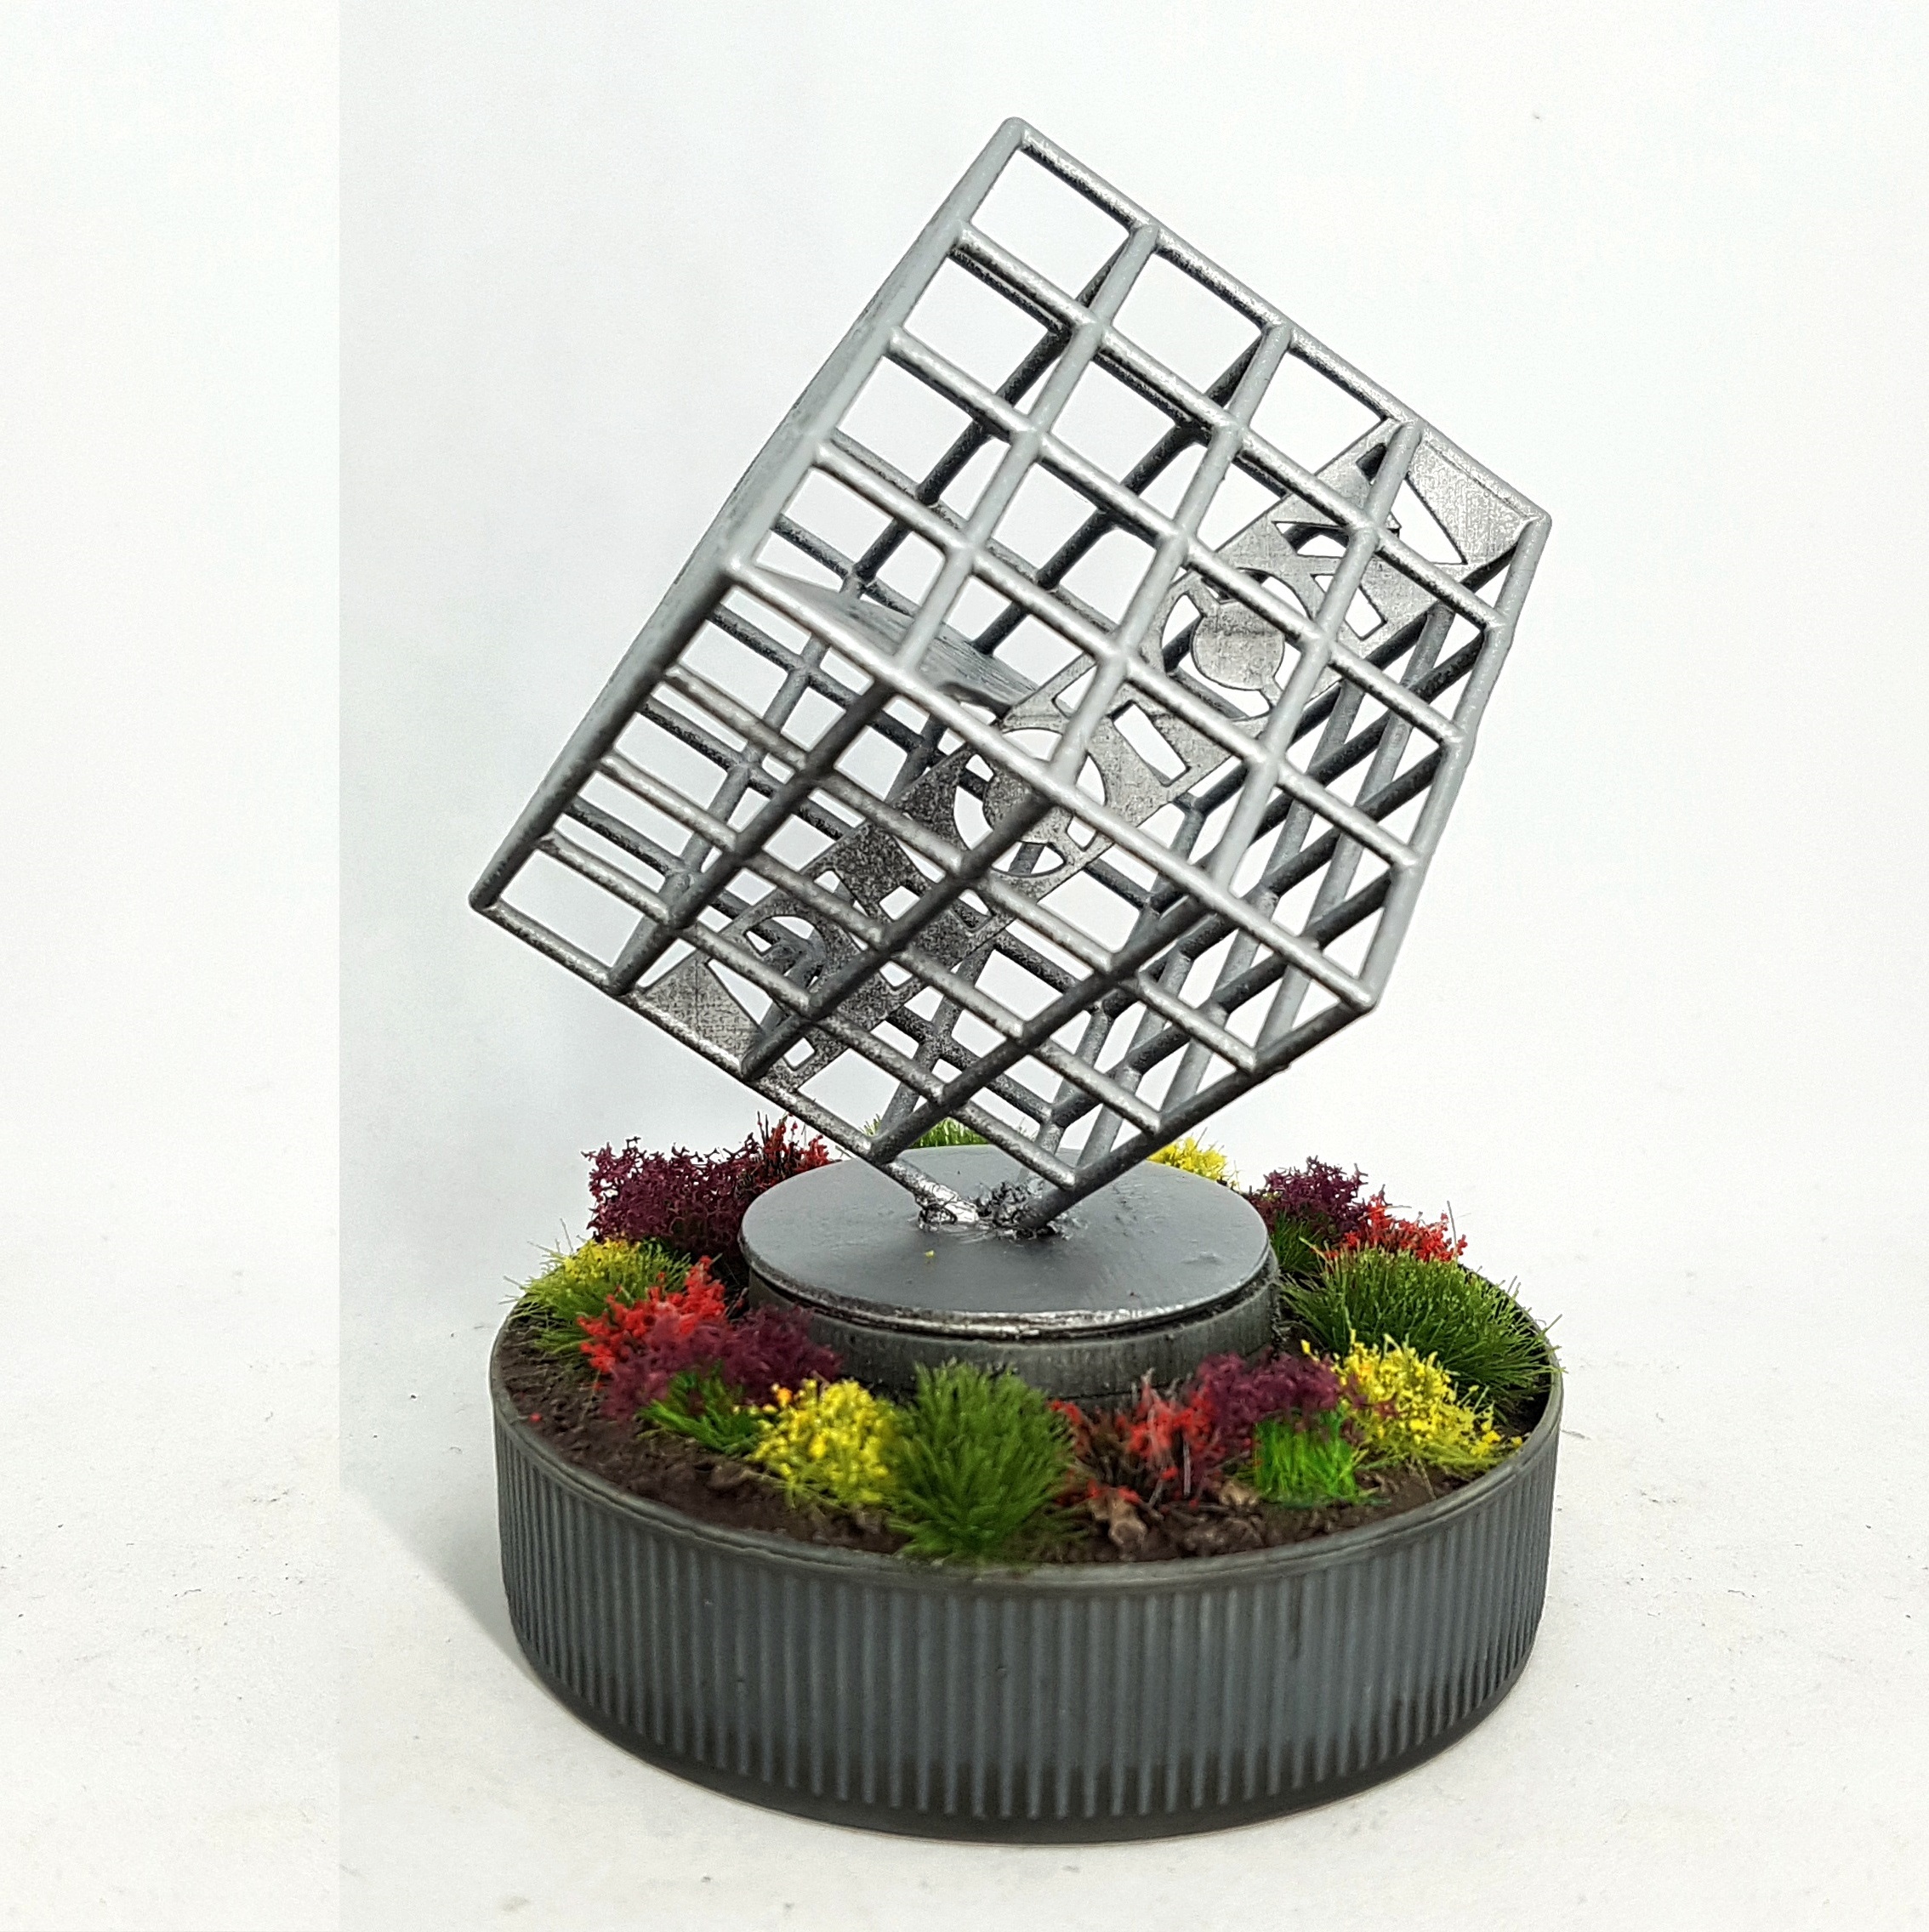
I’ve also had another idea for a piece of terrain. My first 3D print was the Anycubic test piece and it’s been sat untouched on a shelf for years now. I’ve always thought it looked like a corporate sculpture, so why not mount it on something and paint it chrome? I figure I get an old round coffee jar lid, turn it up side down and put a plinth for this in the middle. I then surround the plinth in sand and paint it as mud. Add some flowers and we have a large planter with a sculpture in the middle. Should be a good size 2 terrain piece.
Toy Loader from Tescos by Lena Truckies Painted
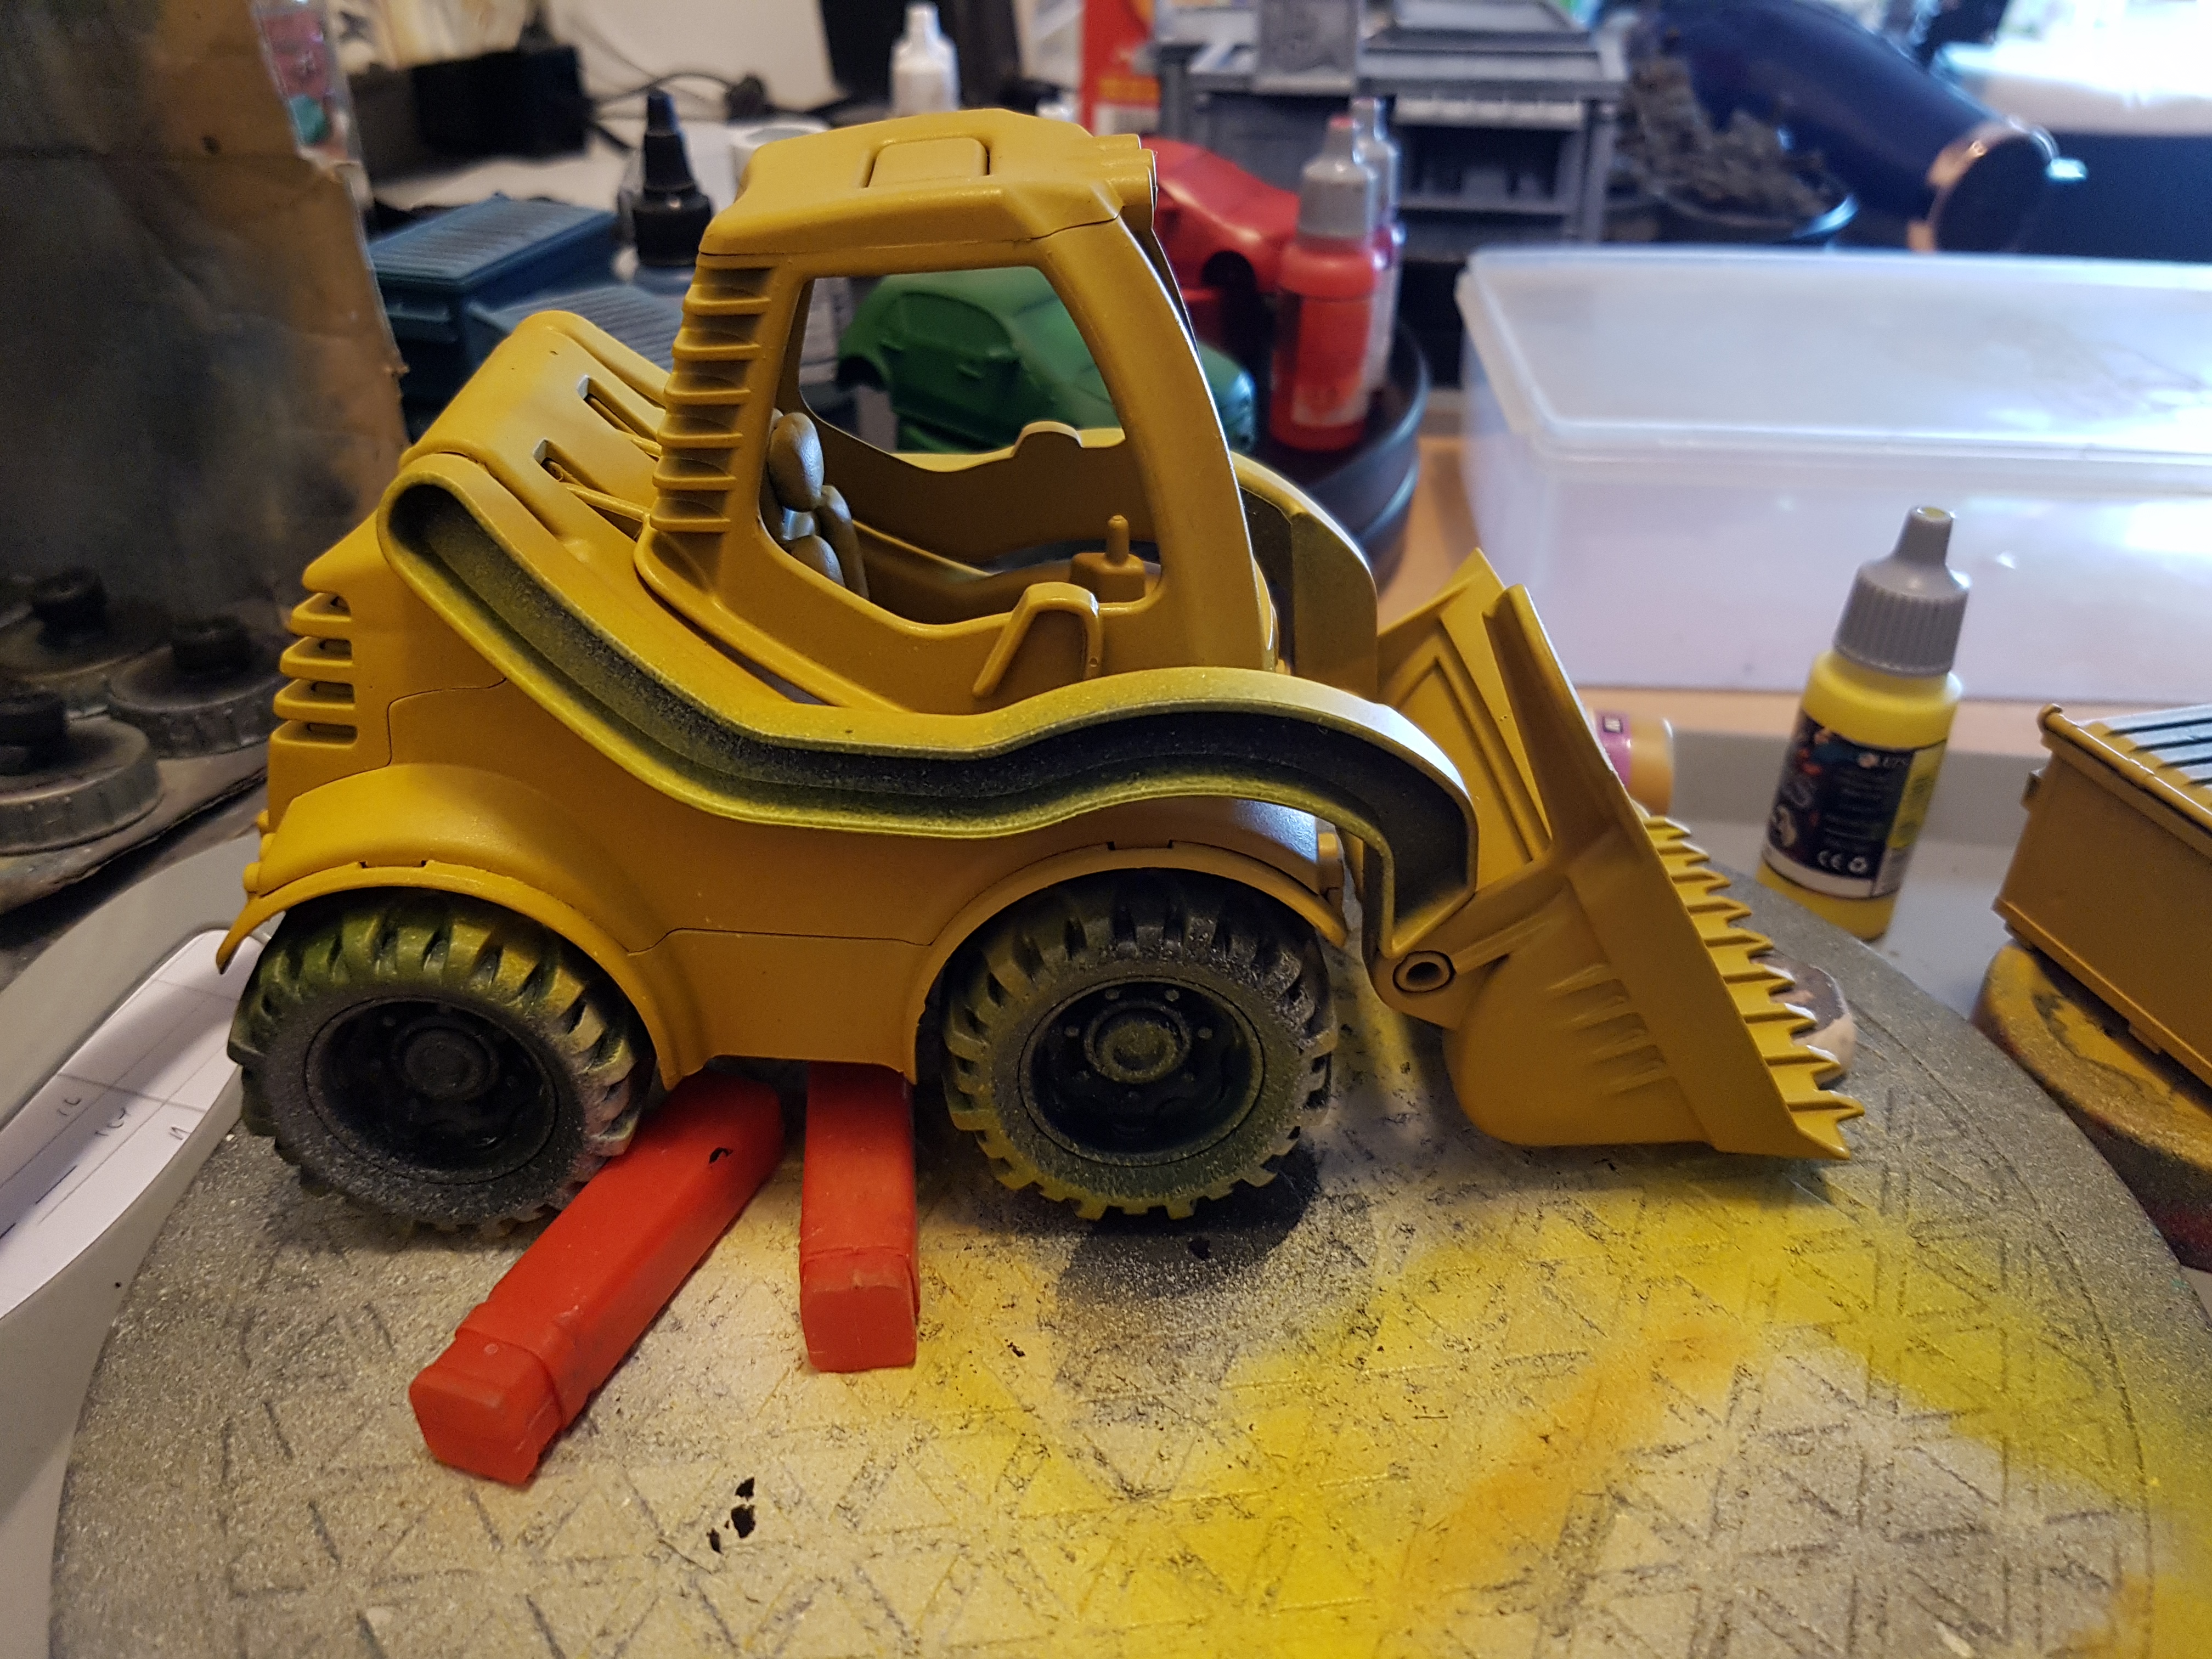
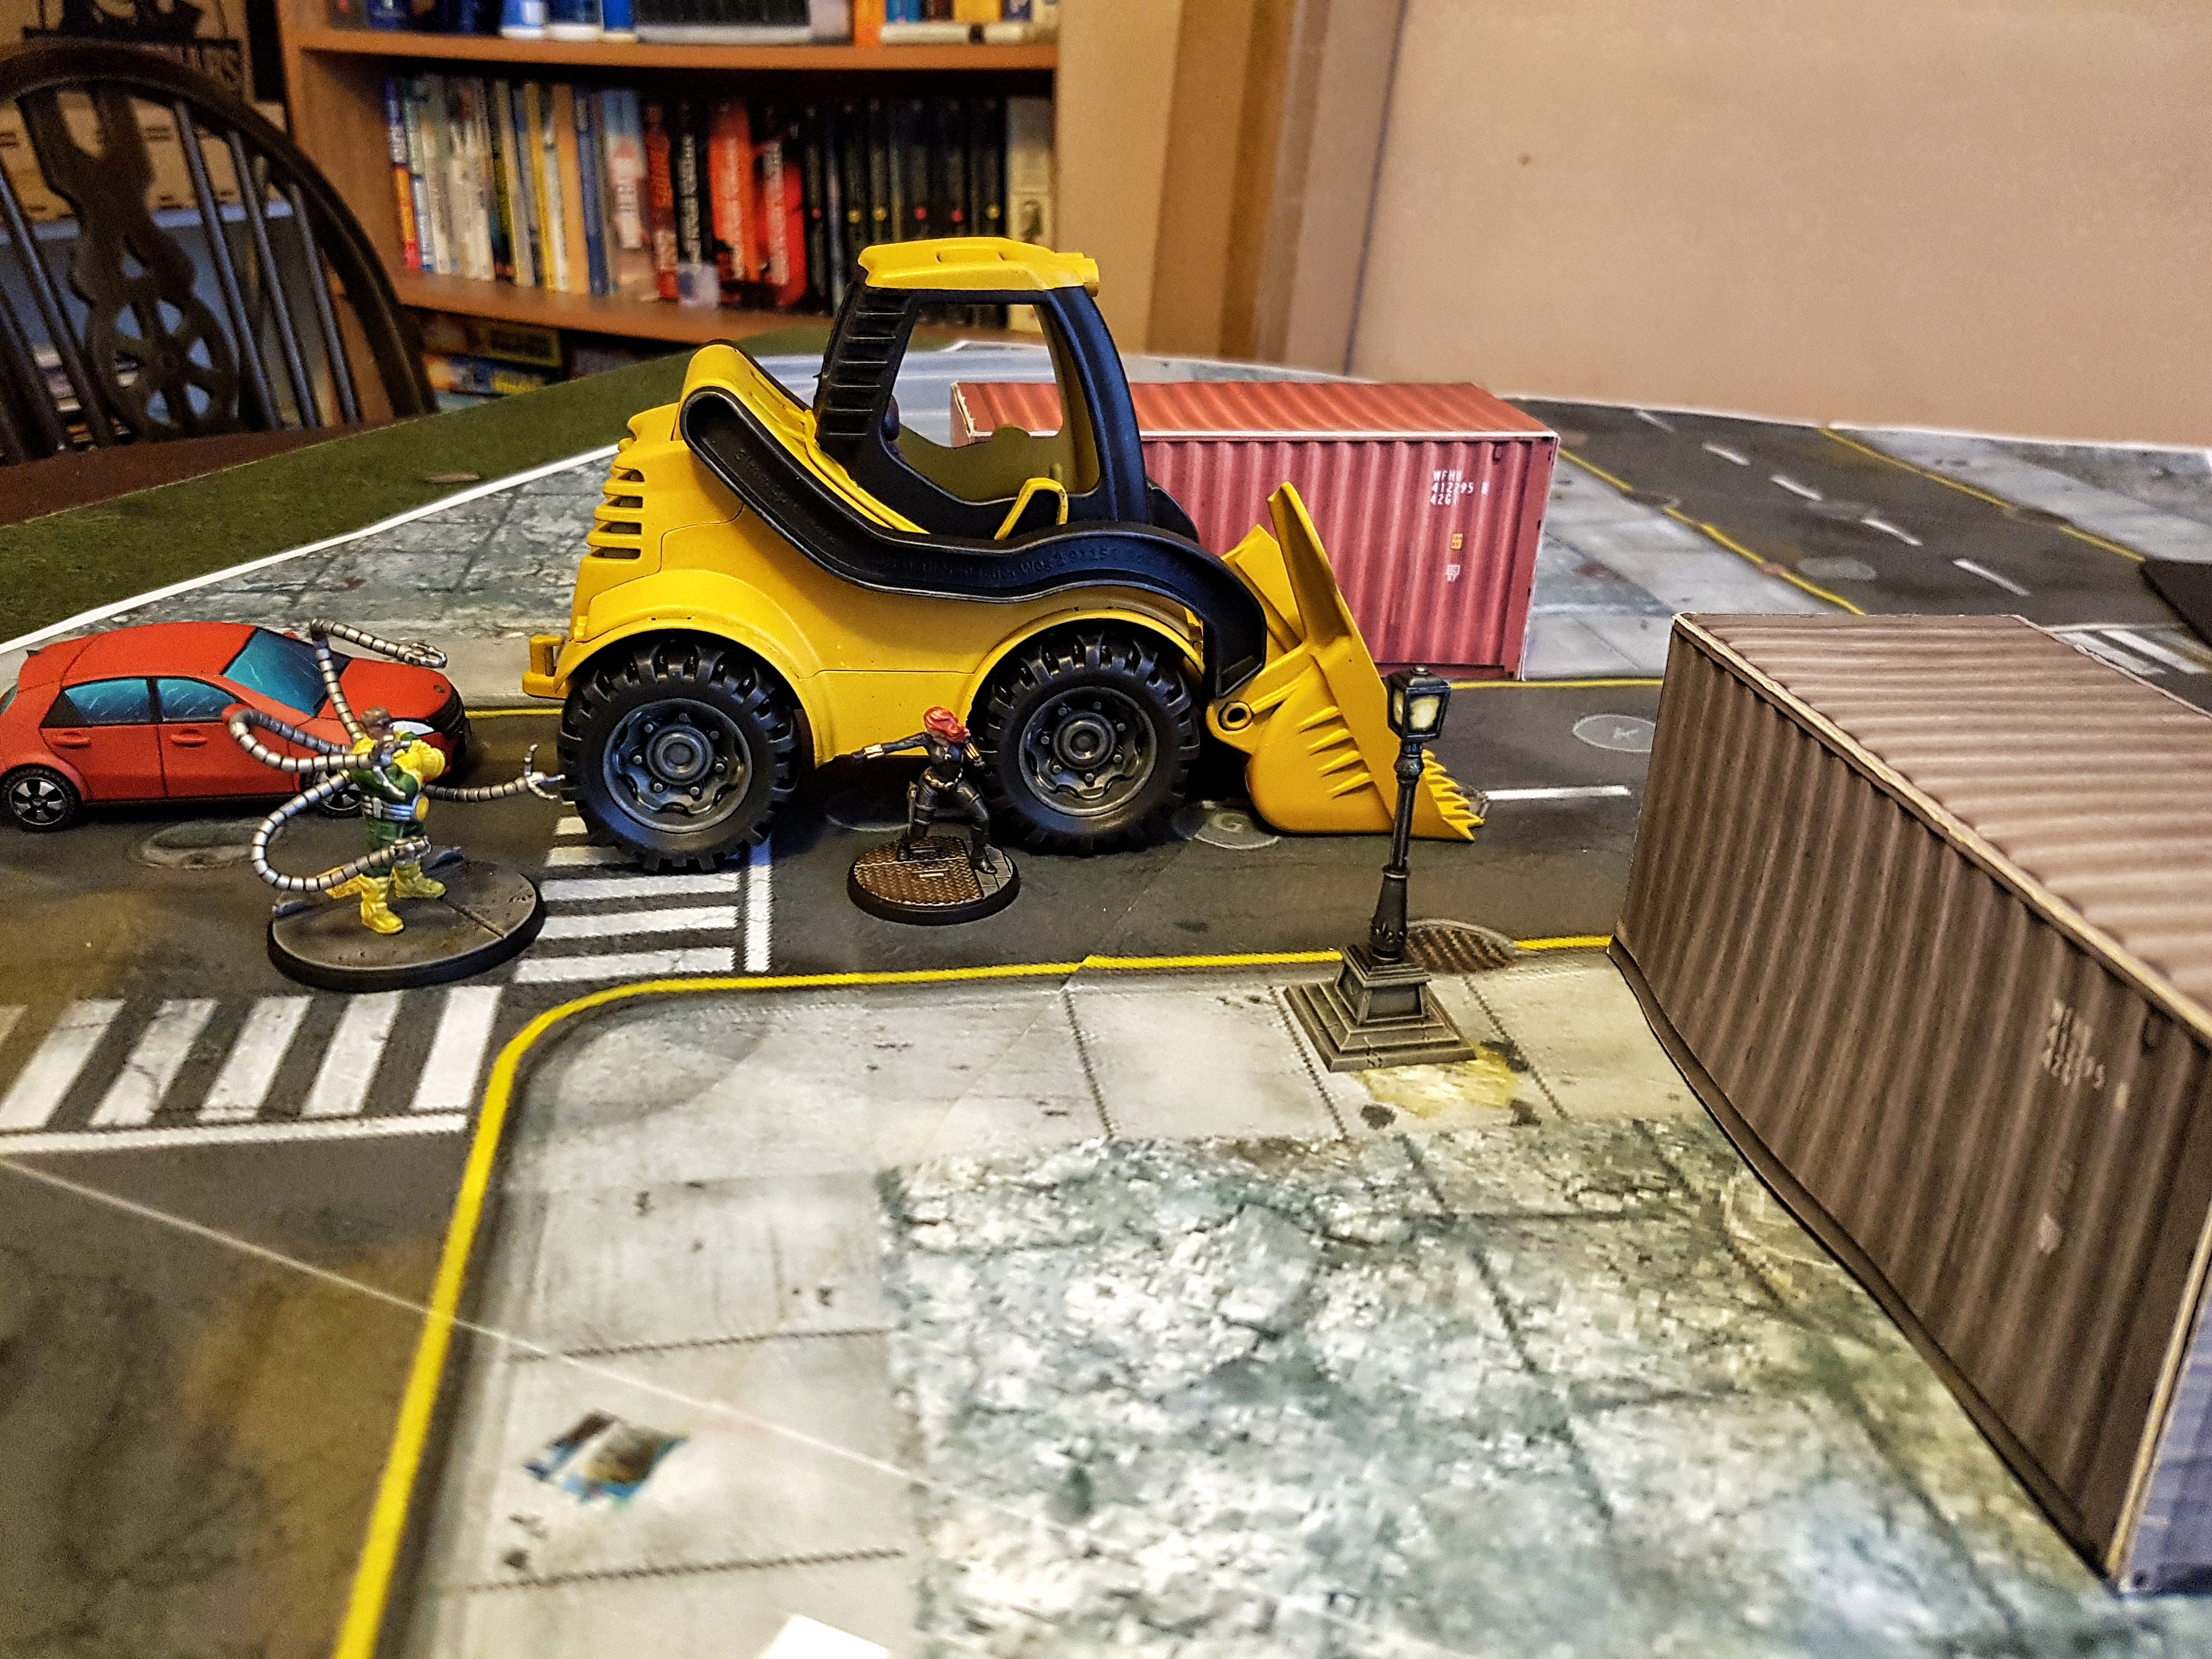
I was in Tescos a few weeks back and I saw a cheap plastic toy Loader for sale I thought might possibly be plausible in scale for MCP, even if it was a little big. They can be large in real life, and I could always mod the chair to make it look like a large vehicle scaled for small humans. Here are my before and after shots.
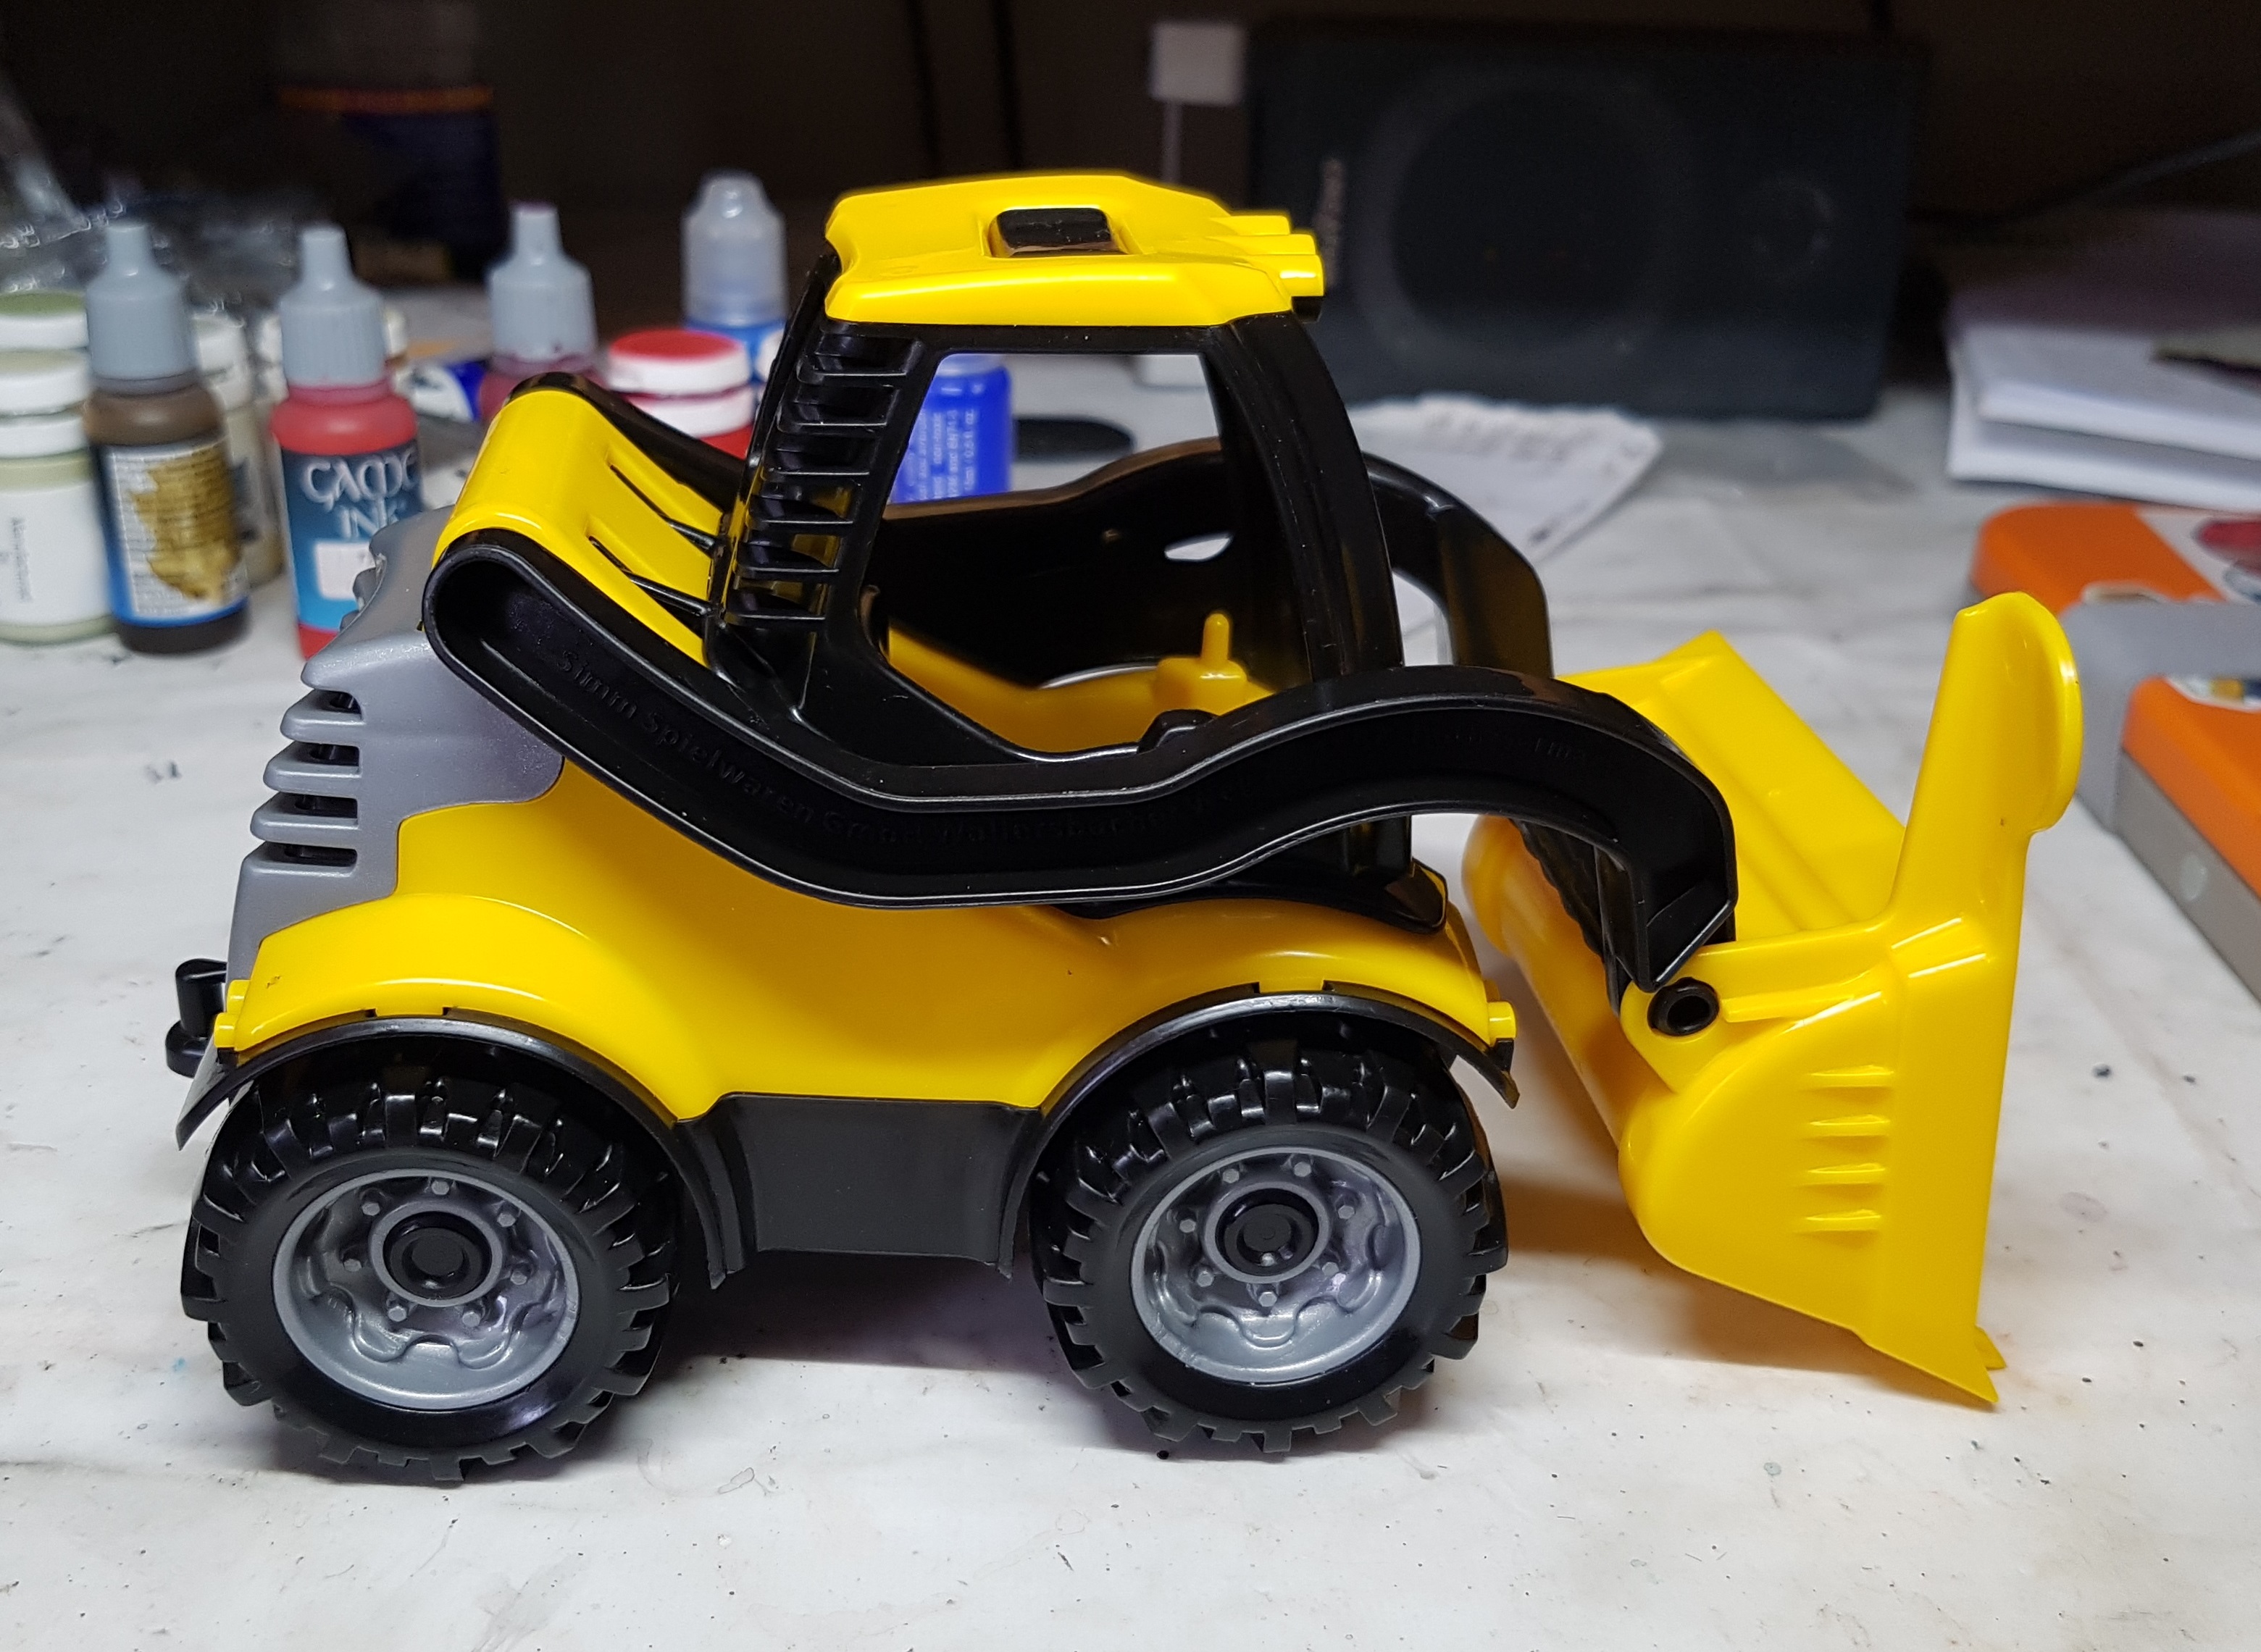 Fresh from the store (Tescos, £4.75). The pic does it a kindness. It was a lot shinier an plasticy than this photo shows.
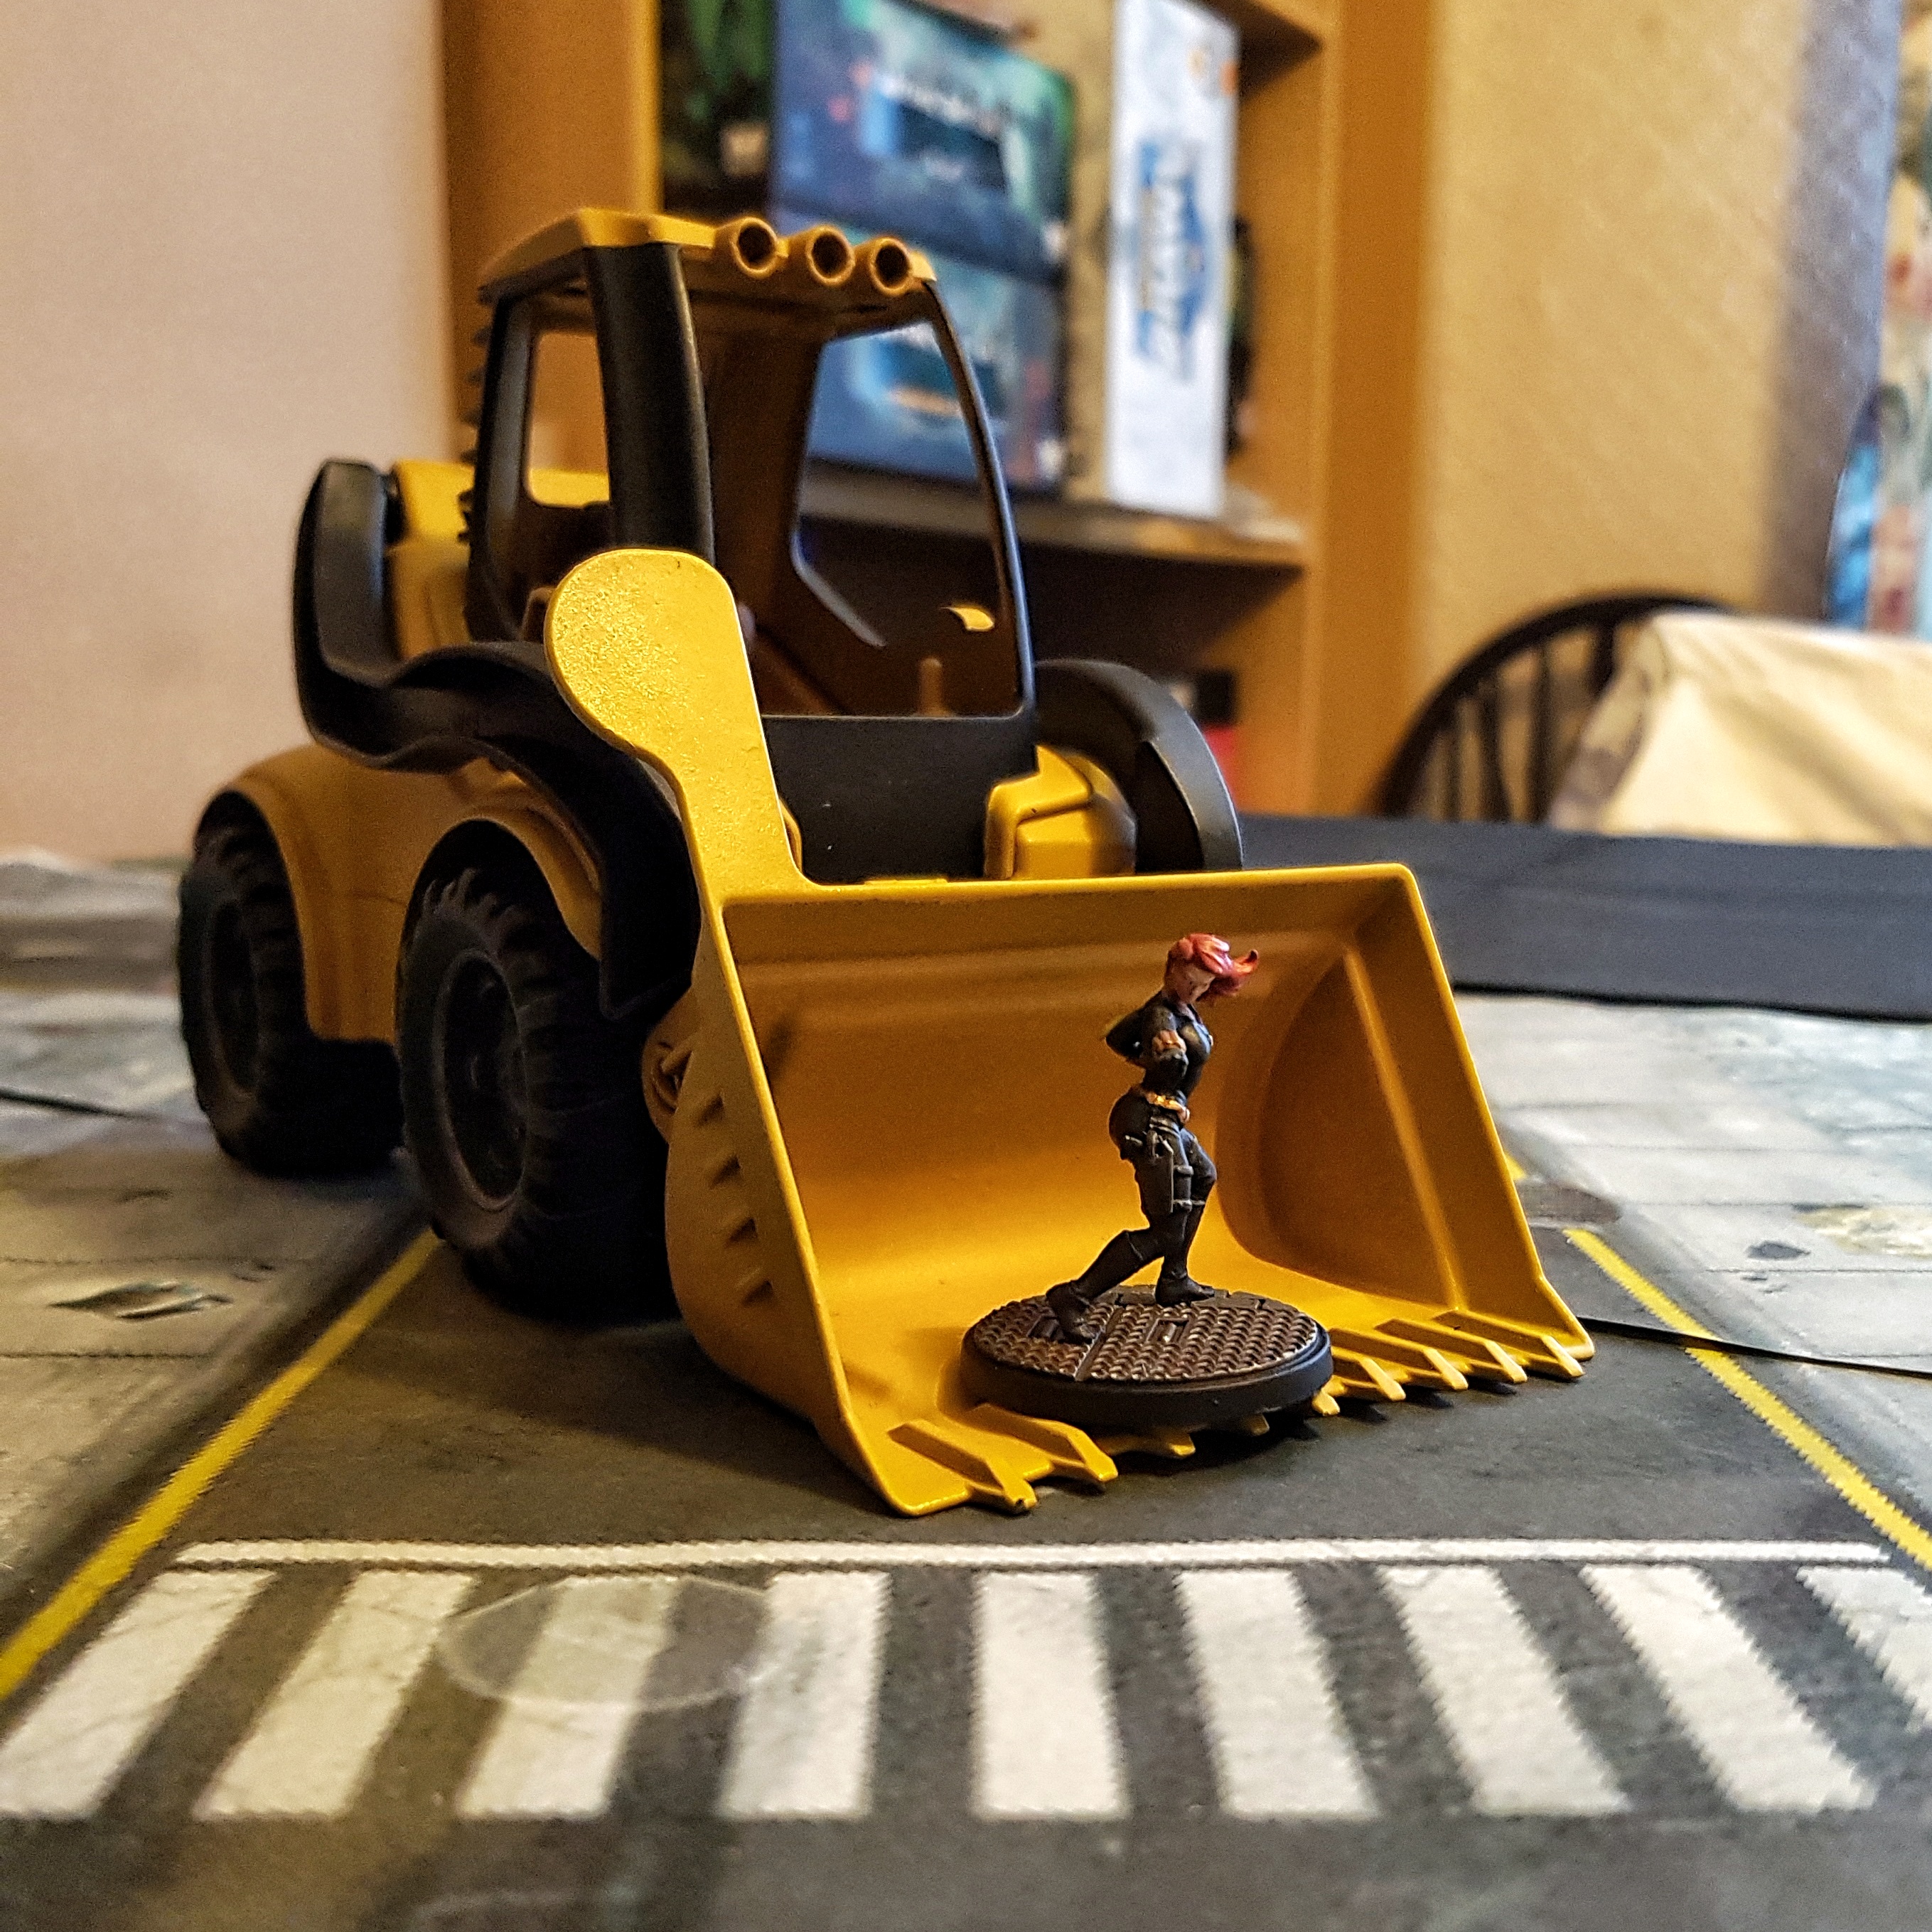
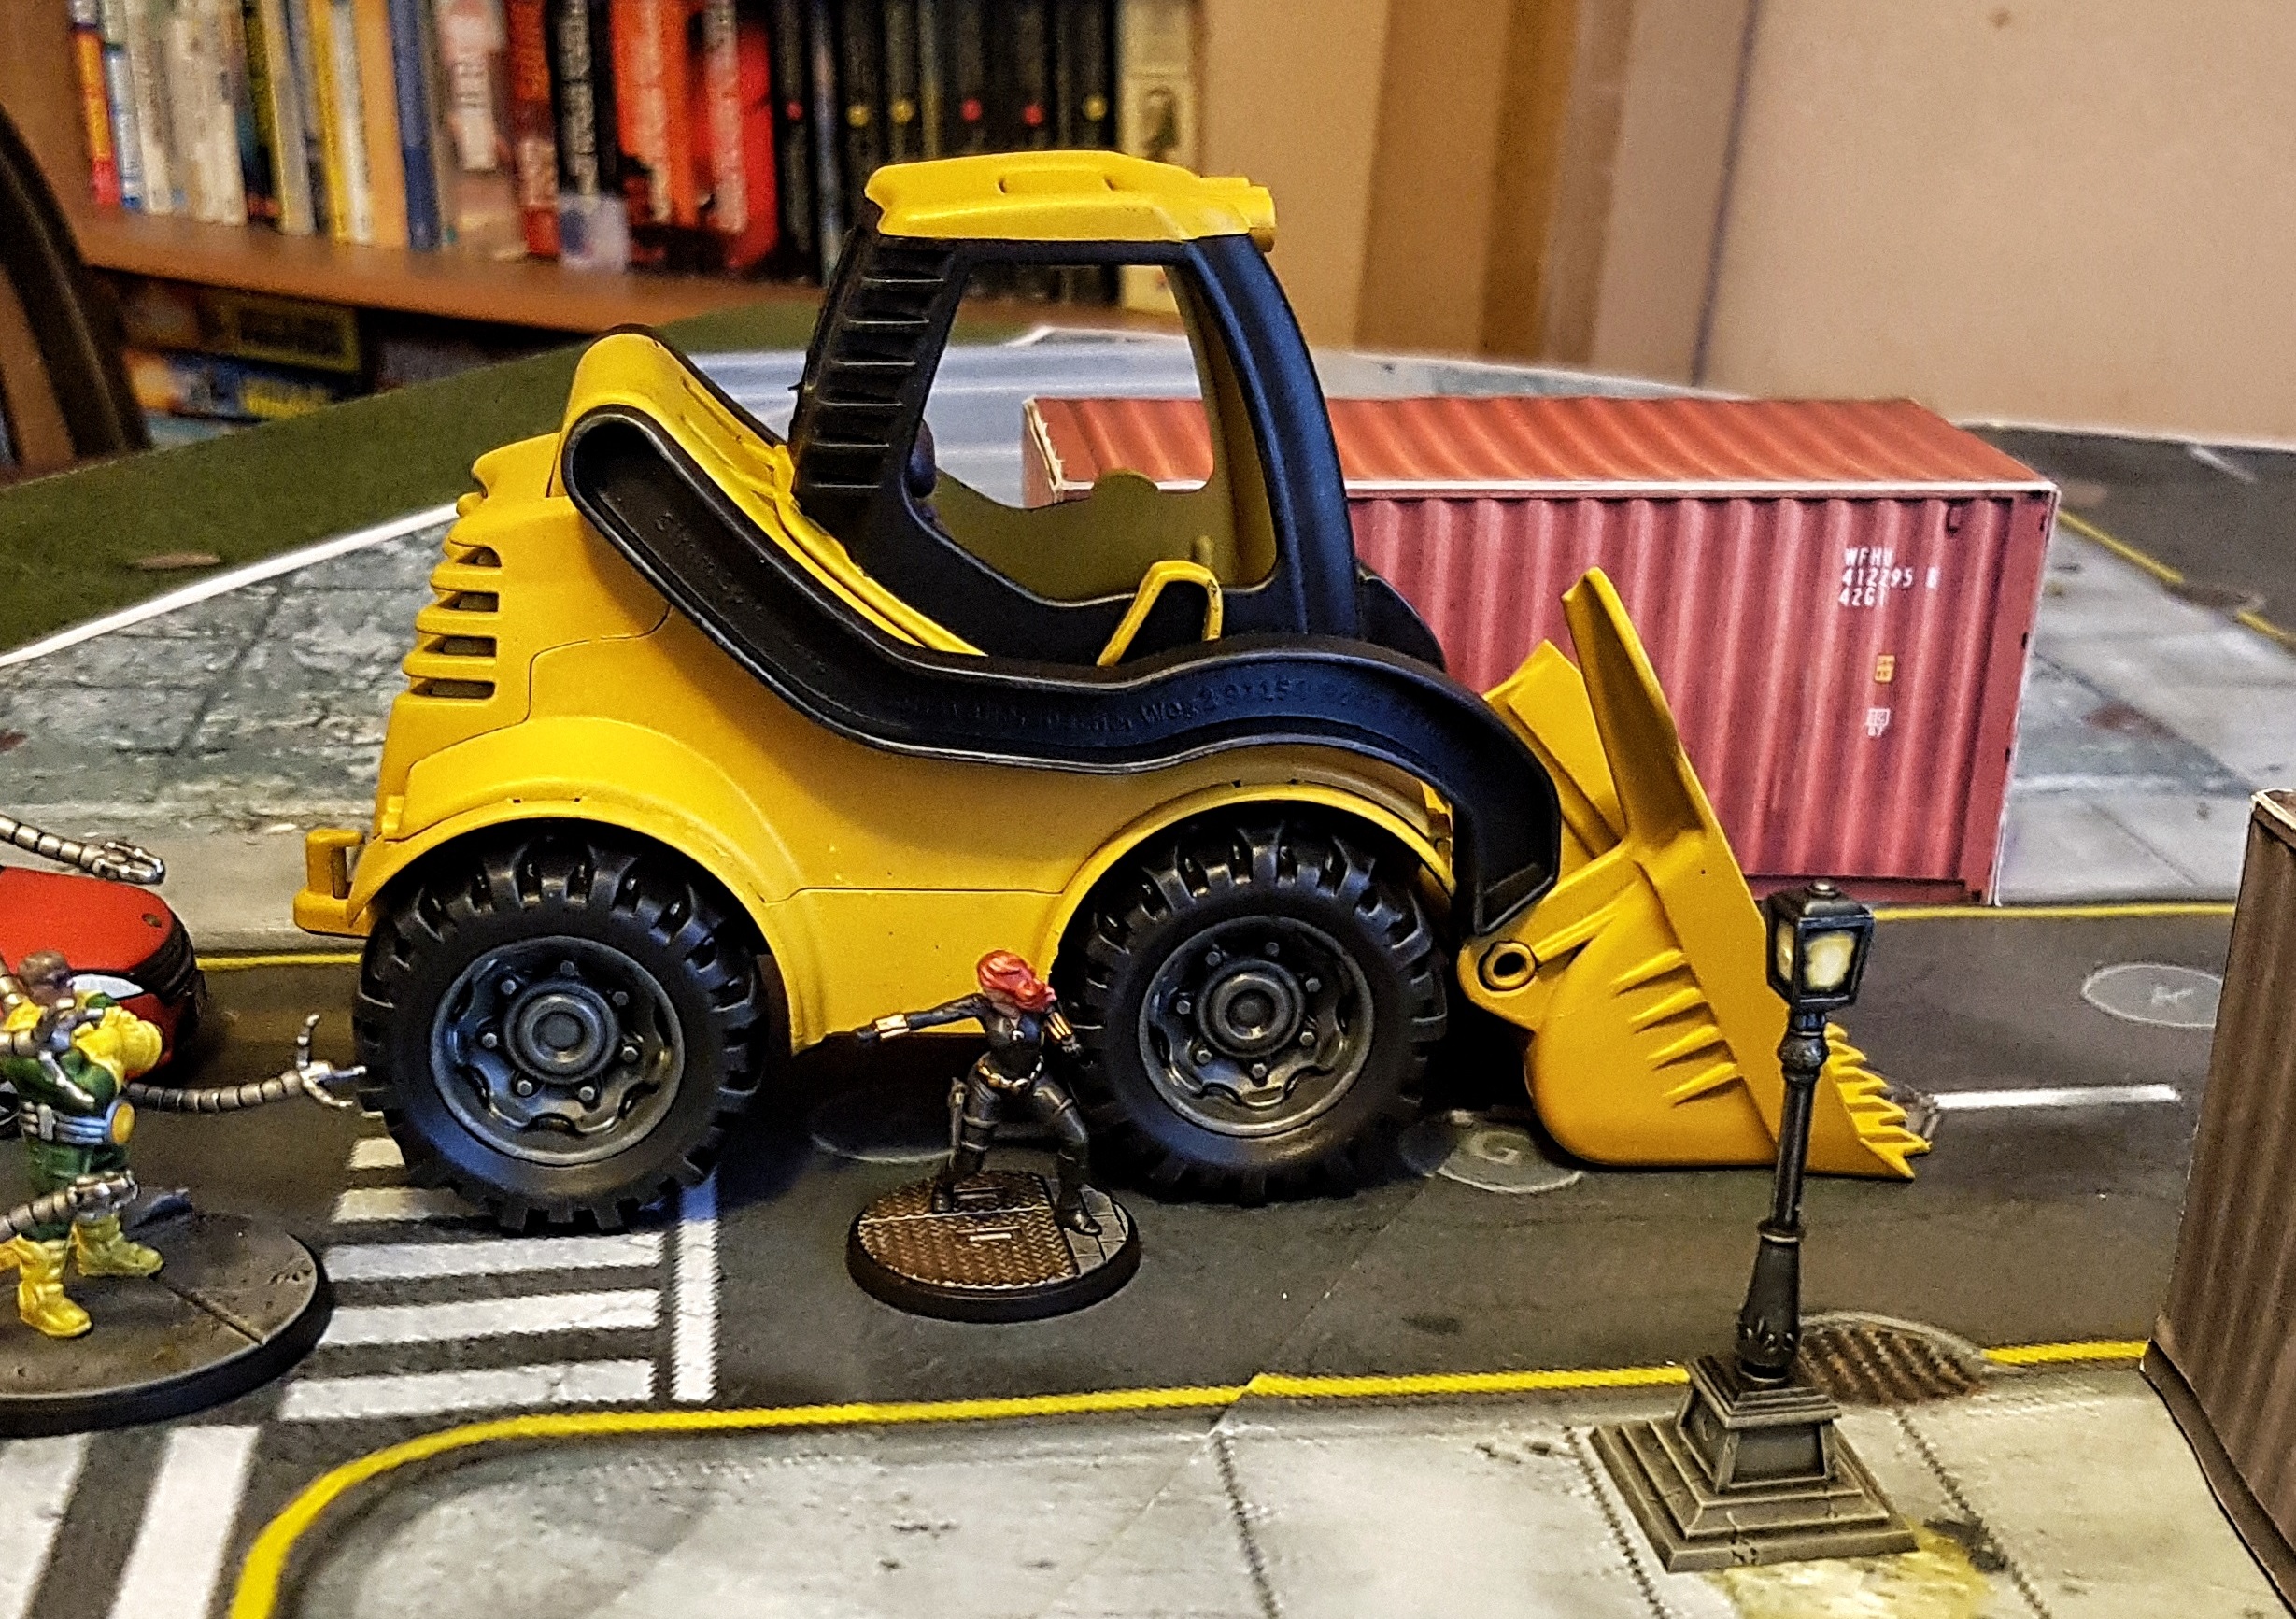 After I've painted it up
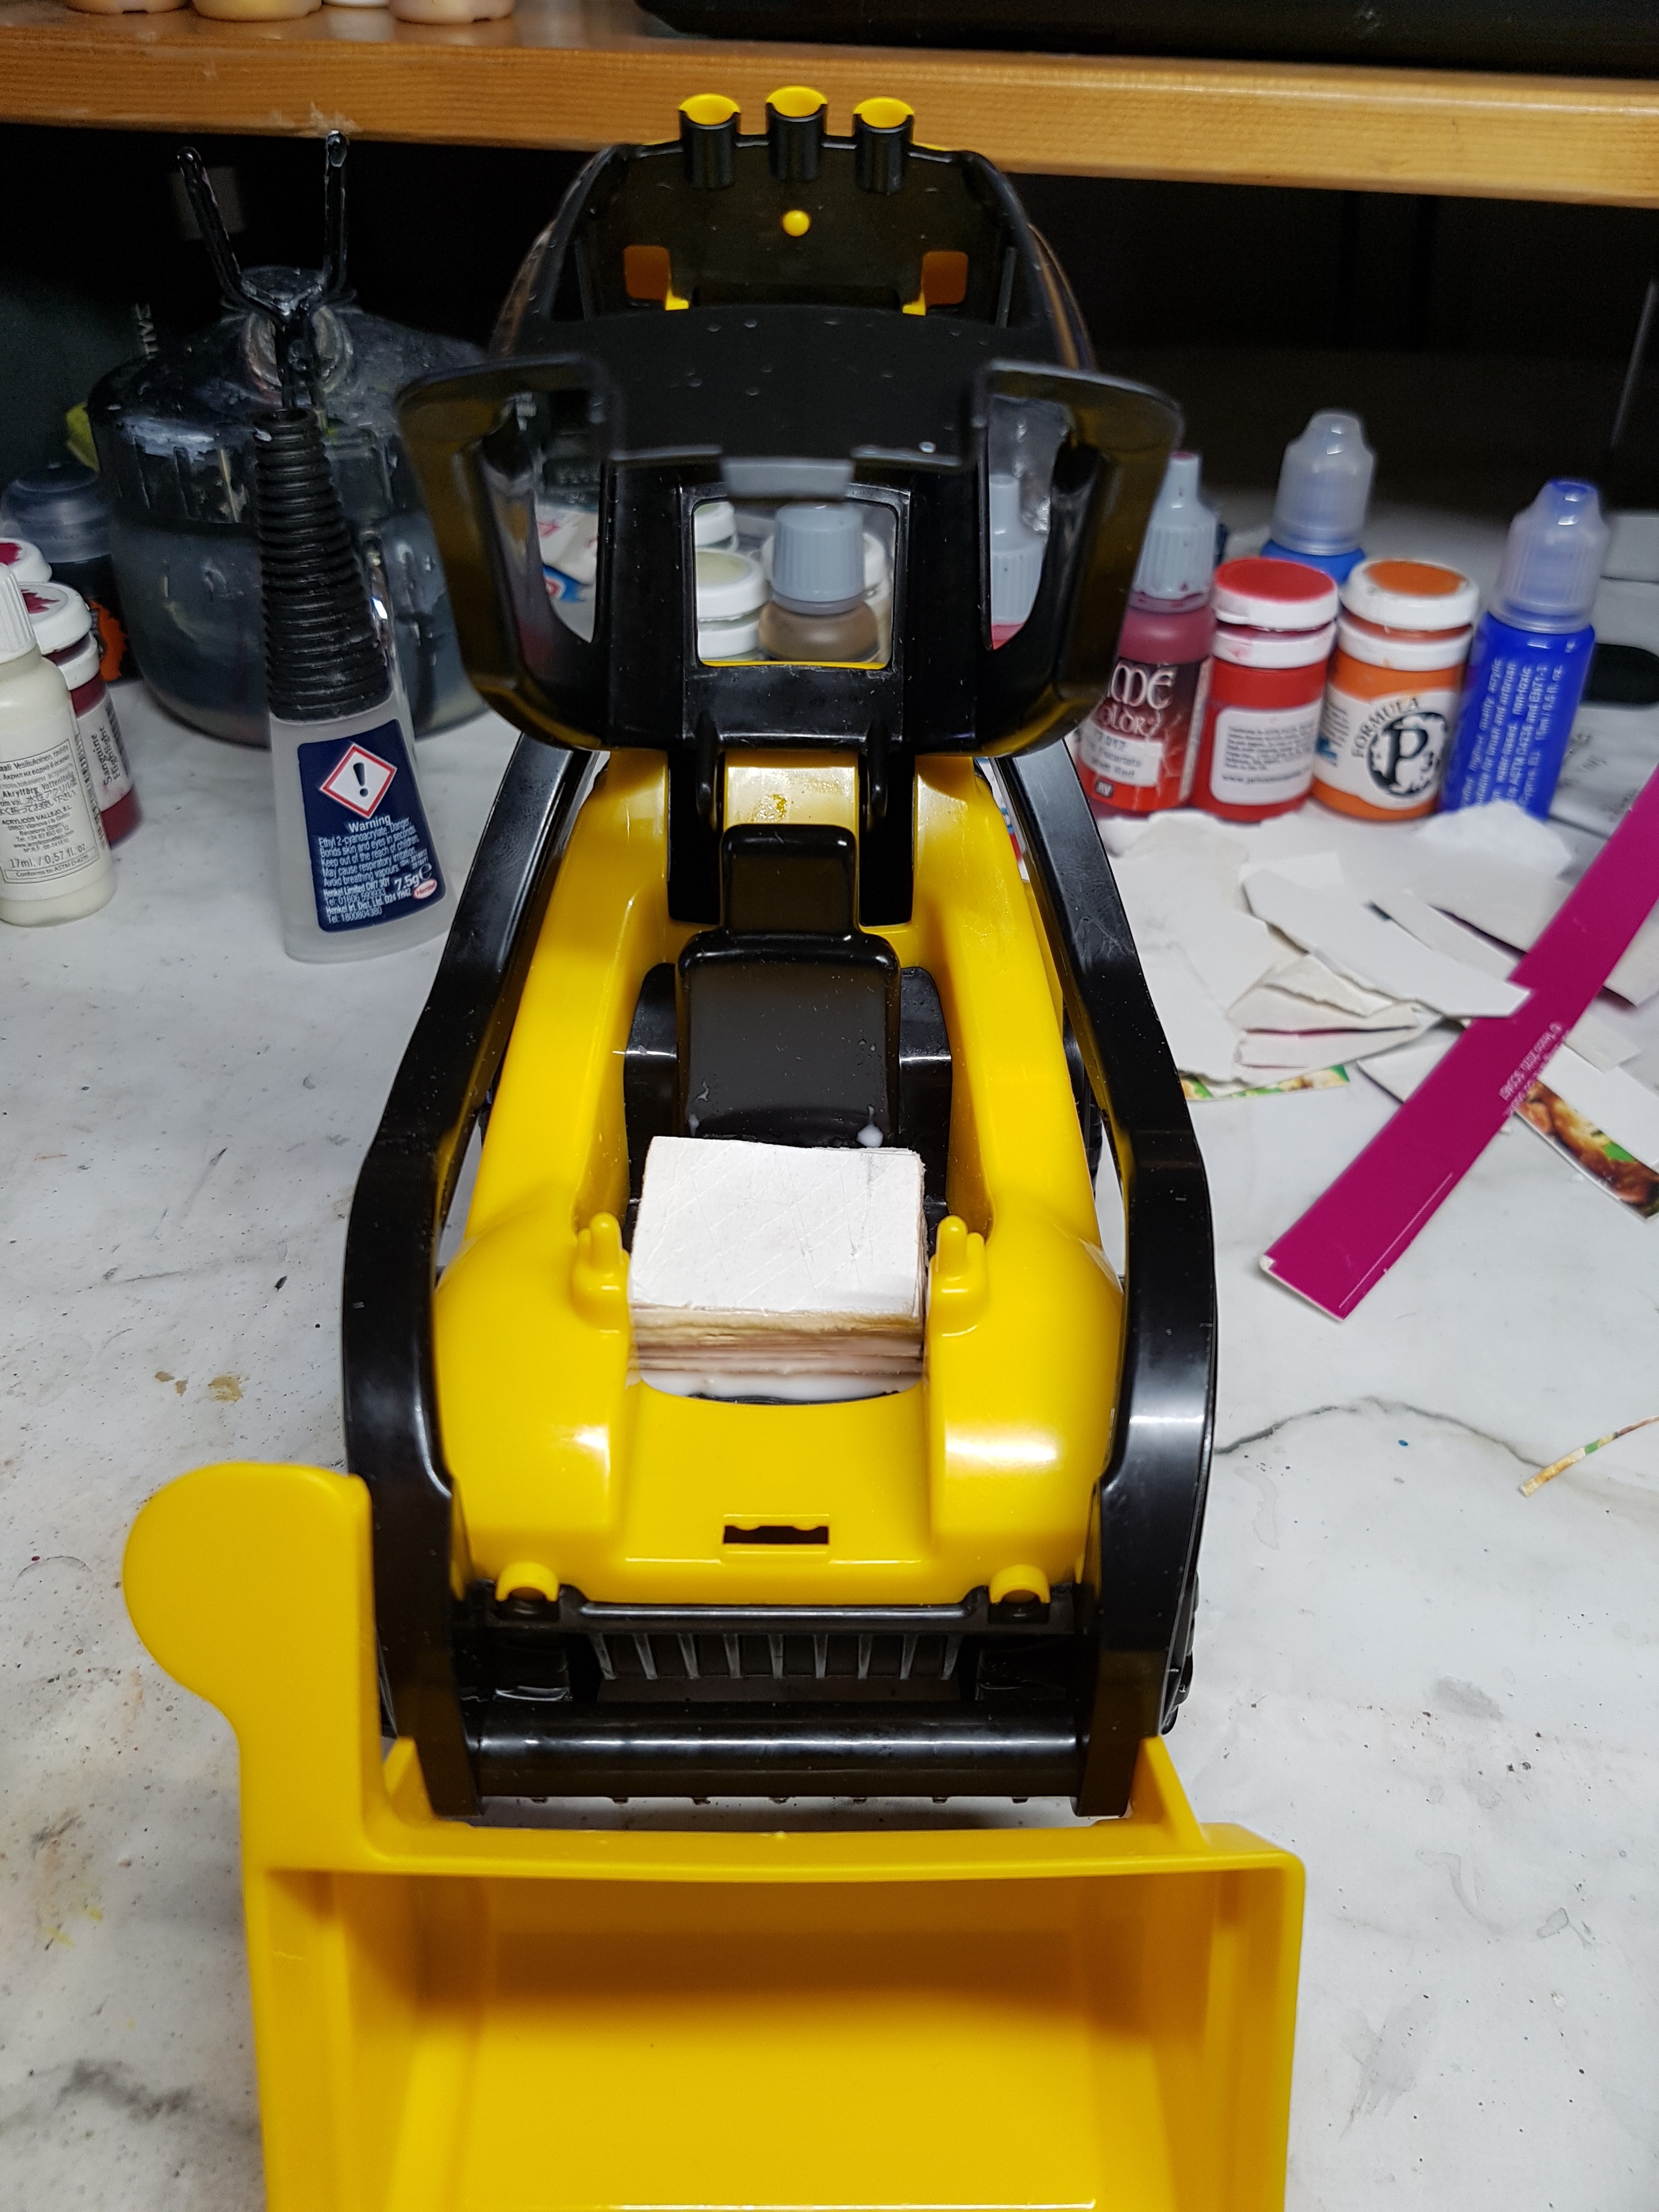
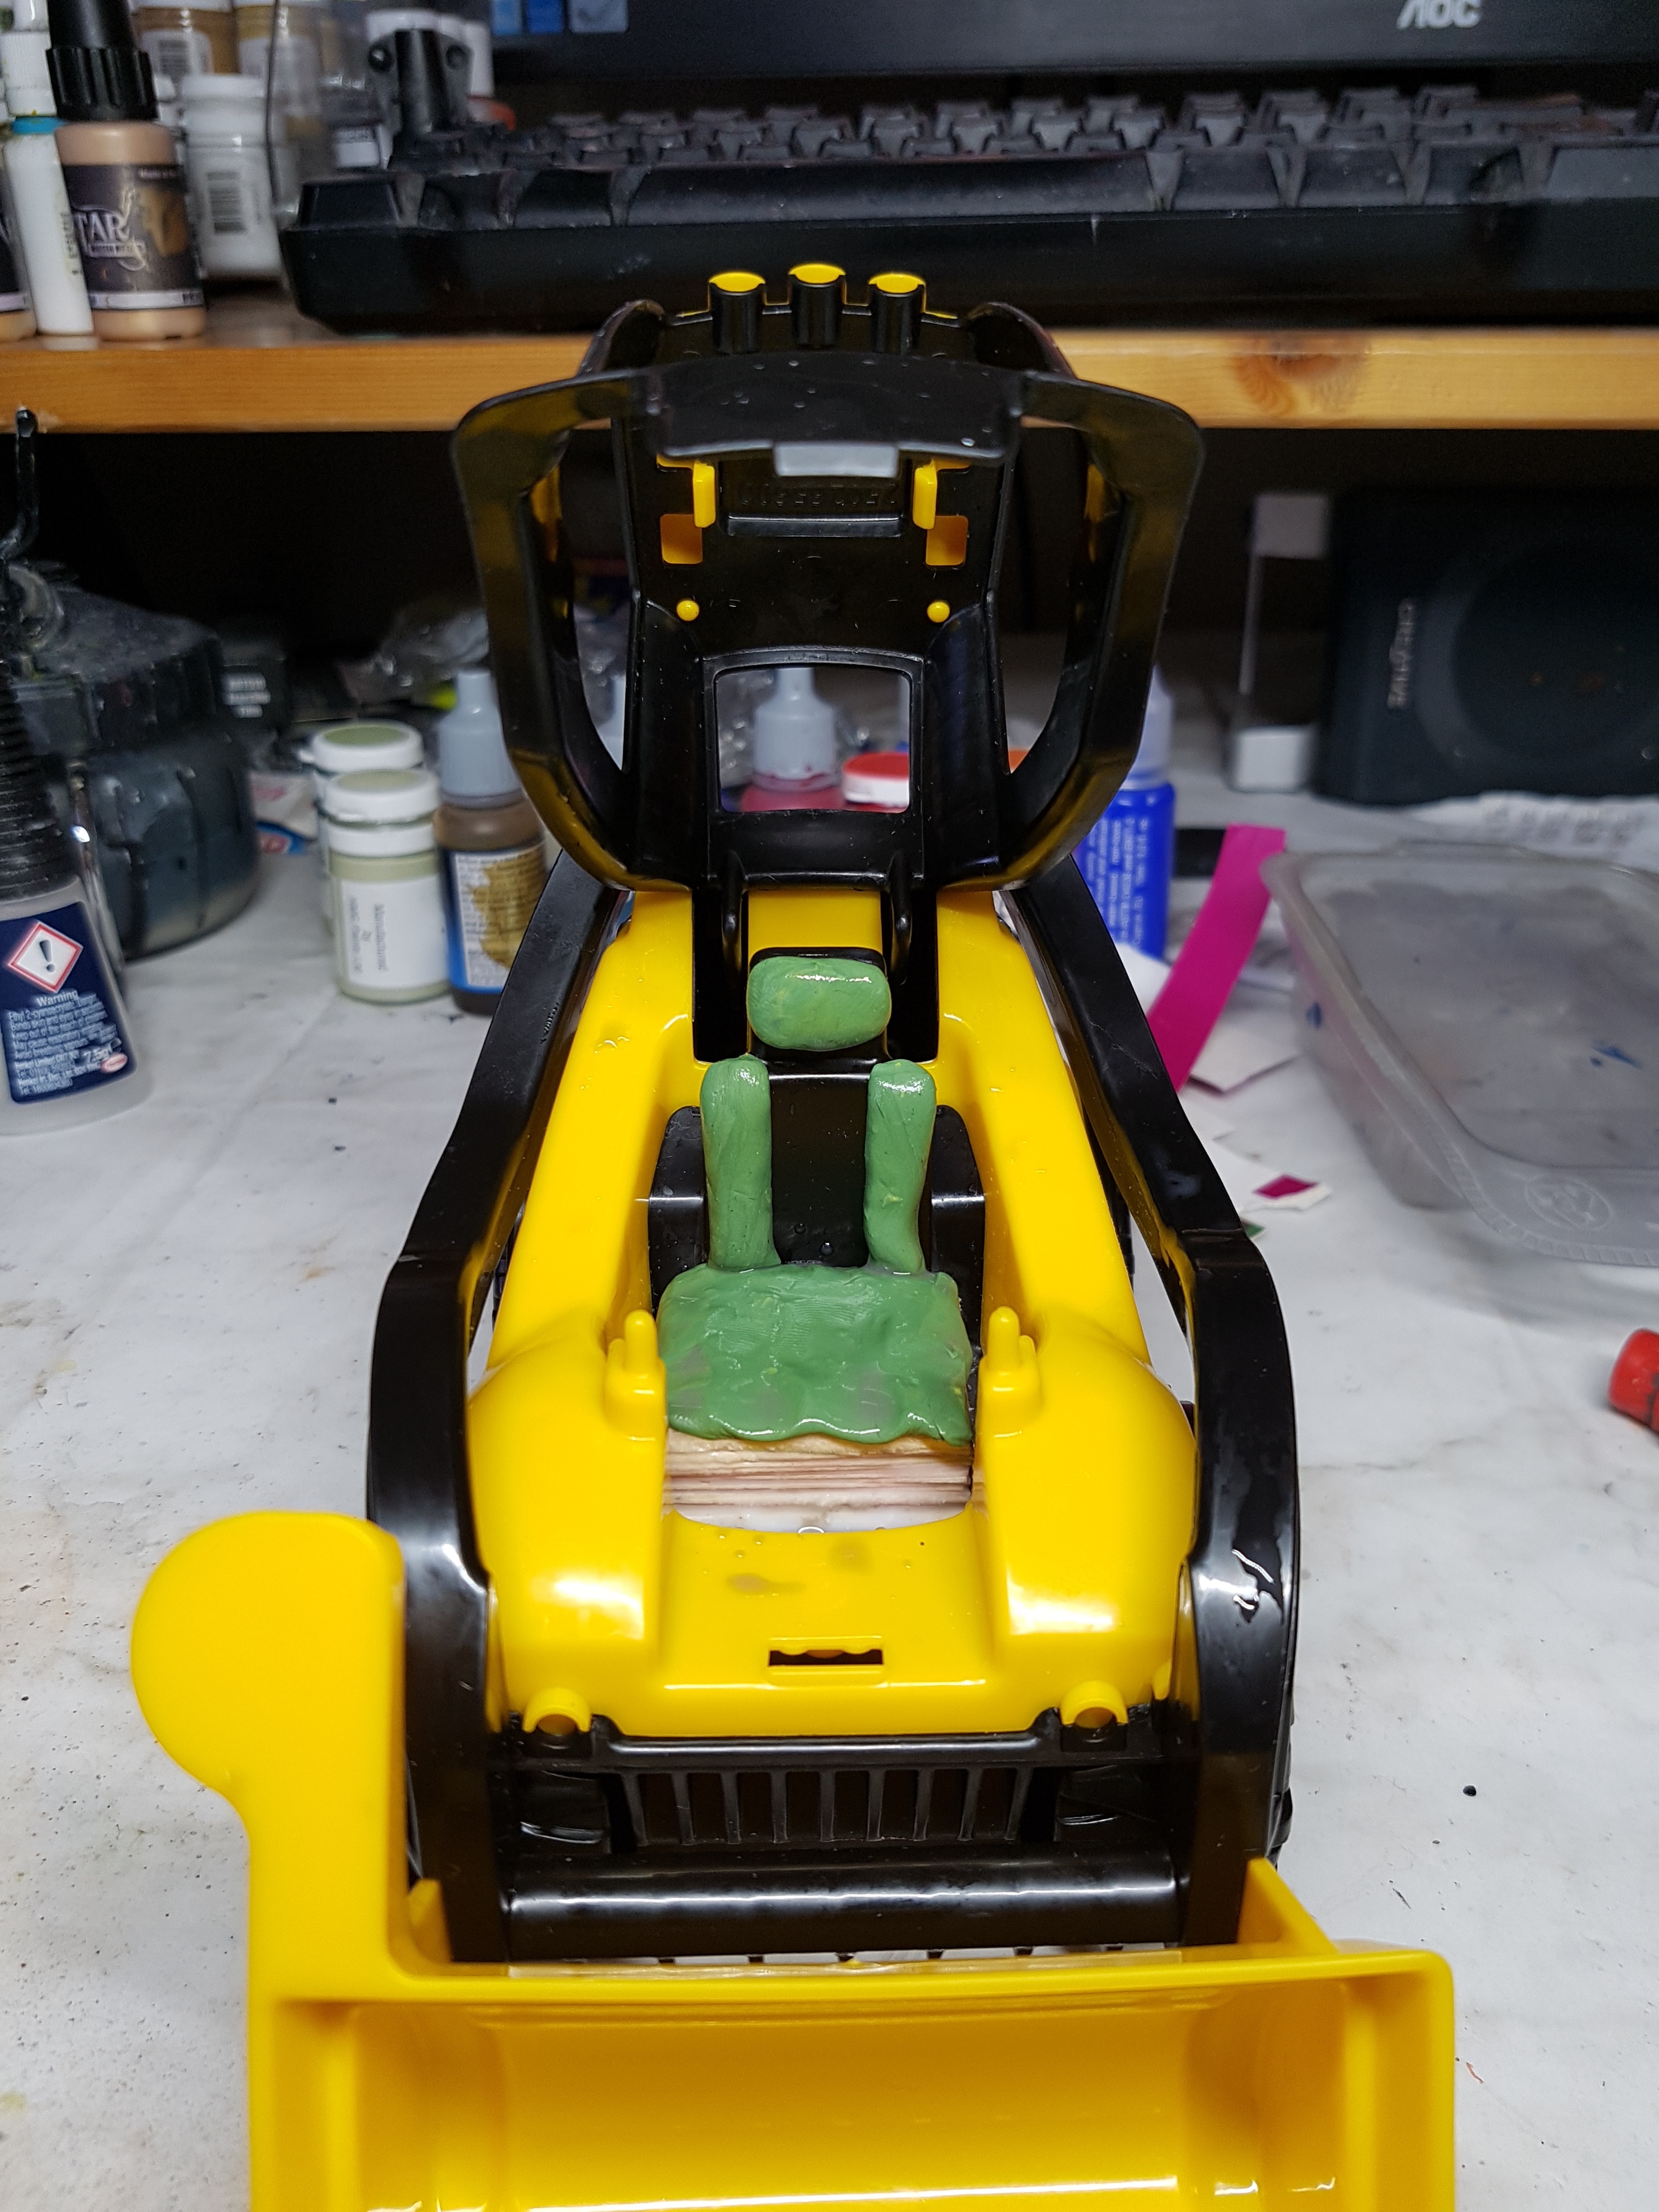
I had a go at rescaling it by building up the chair. I cut out a bunch of cardboard squares and raised up the height of the seat. i then padded it out with green stuff, pushing finger marks in to the cushion where the bum and legs would leave lasting indents. I’m definitely no sculptor, but I gave it a go. It works well enough, but I didn’t go far enough., The chair is still at too large a scale.
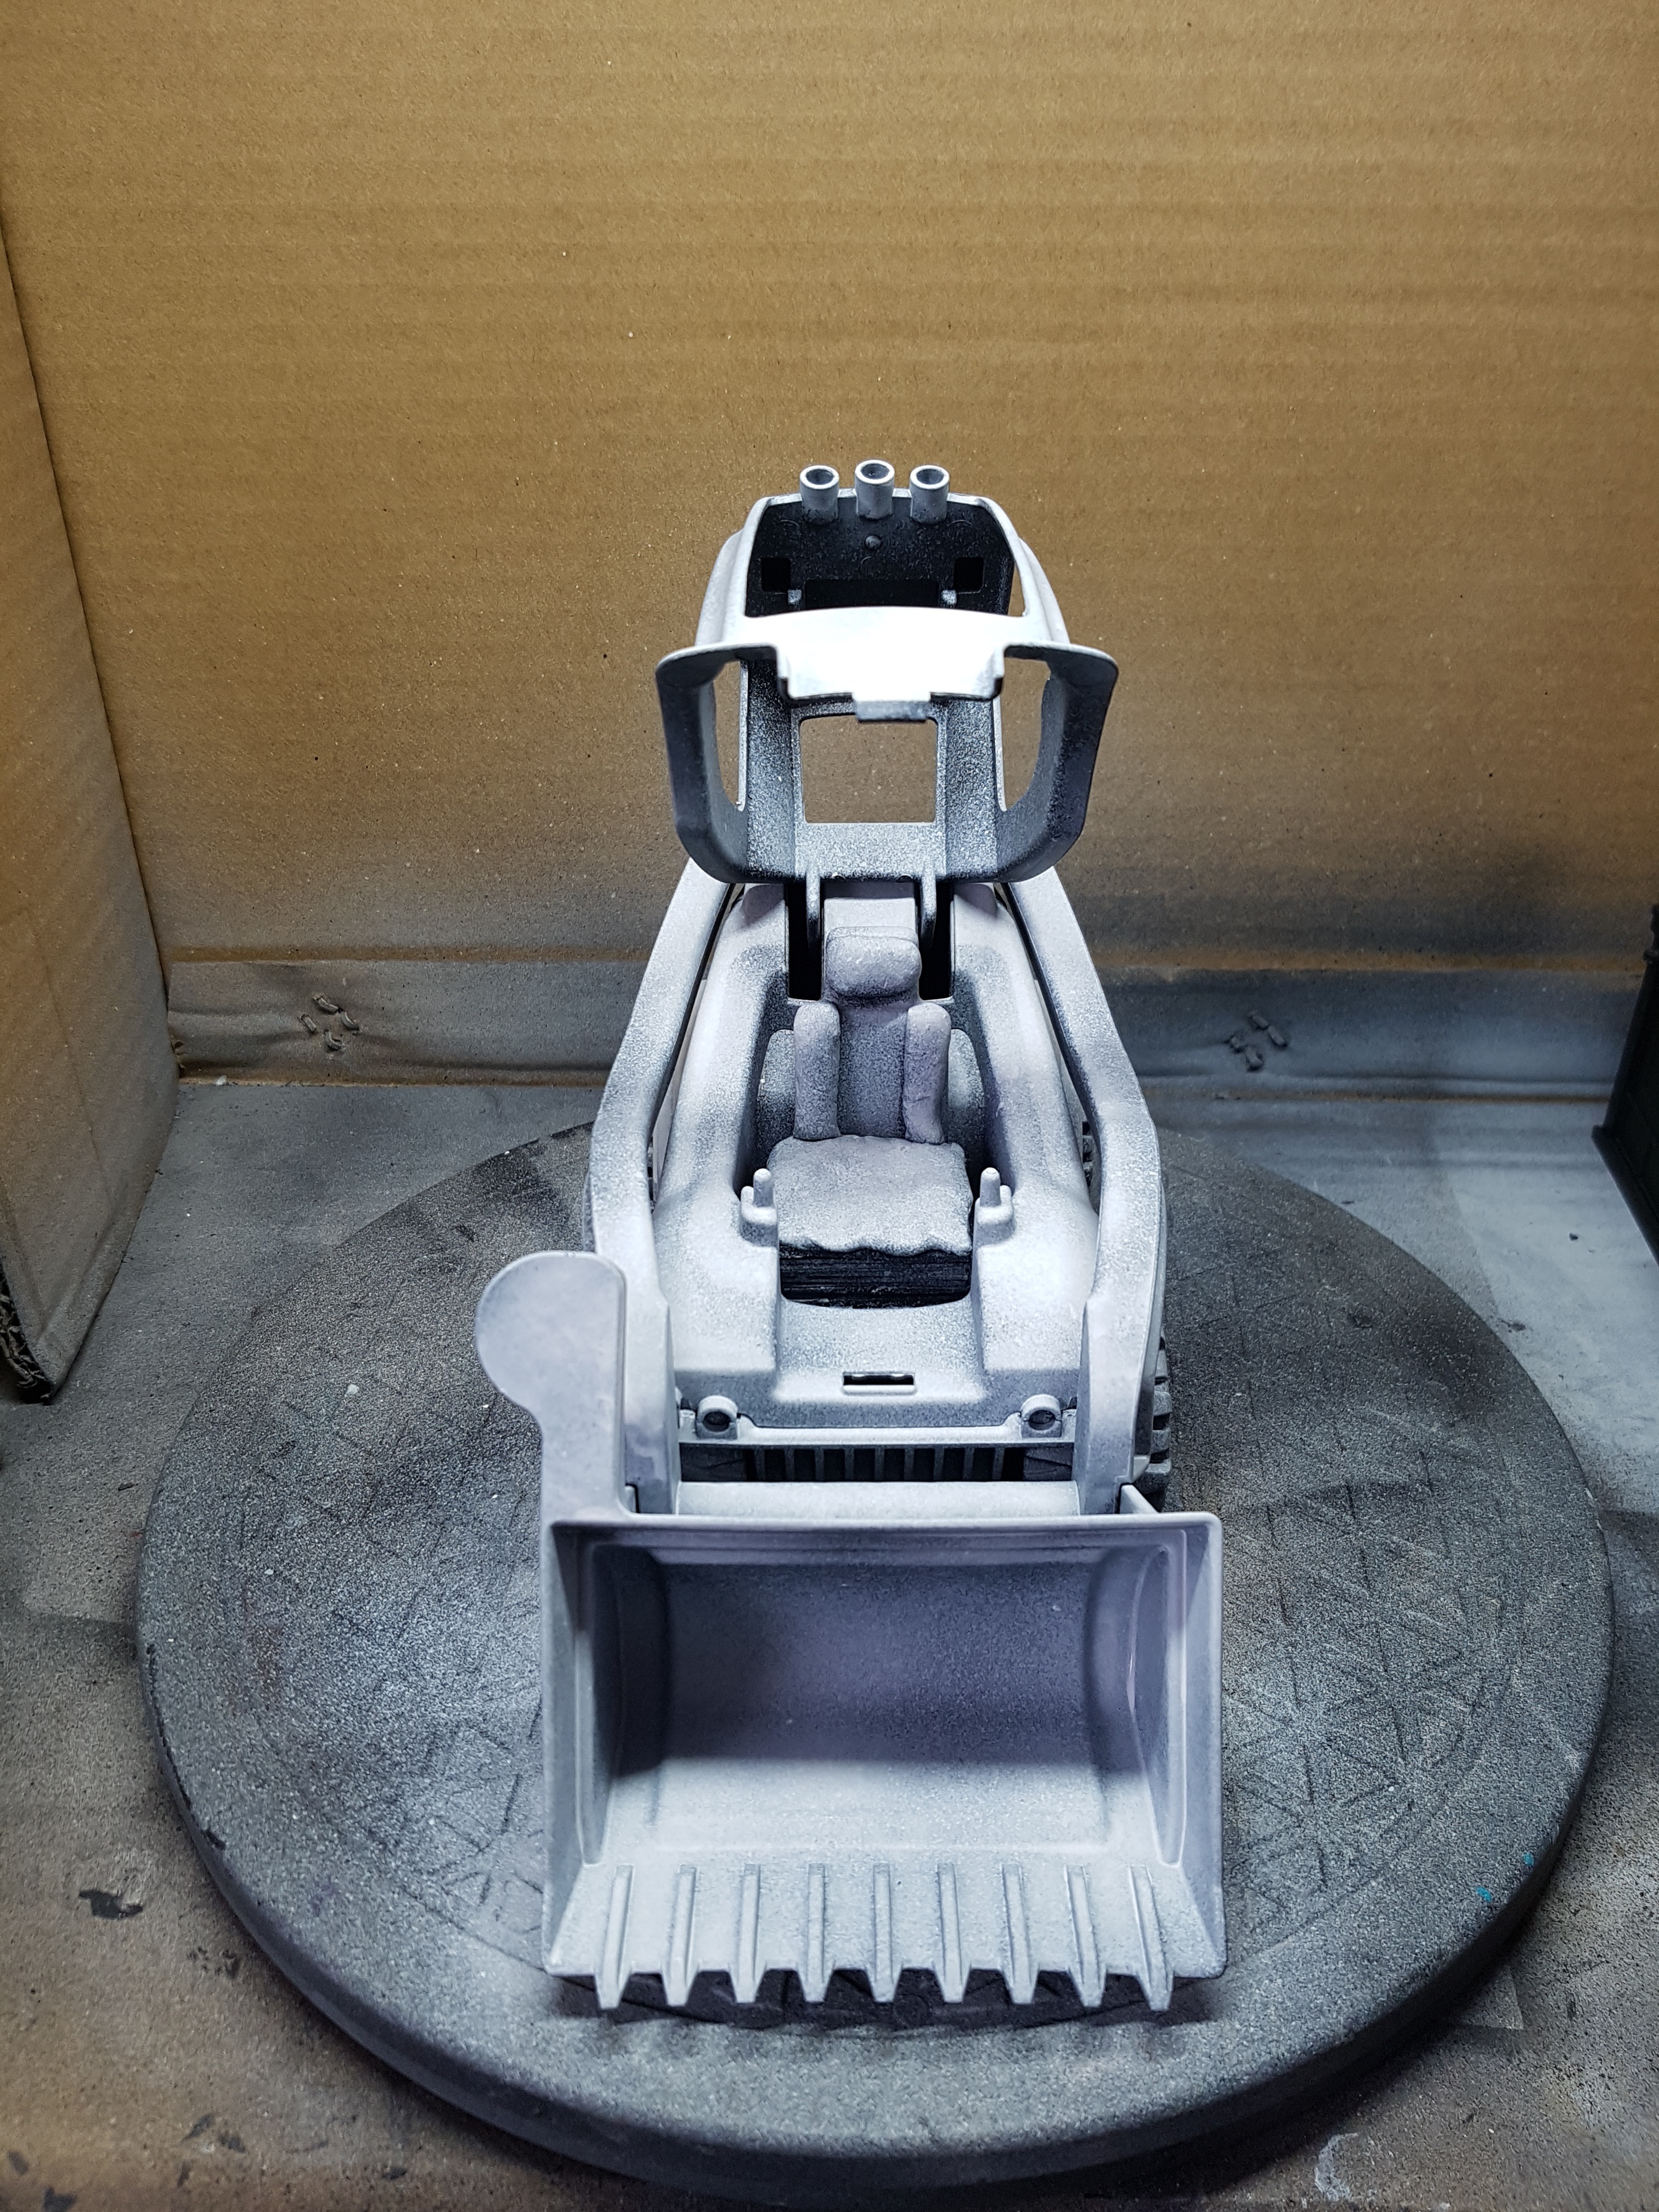
Once it was primed it was also varnished. Every time I painted any part of it, it got varnished with gloss and then matted down. it was too big to mount on a hobby holder and had too many moving parts. It was going to take lots of chipping and handling wear damage. The gloss protects, but repels paint. The matt allows paint to stick. It still chipped, but I took the best care I could.
The whole thing was airbushed yellow first, then I picked out the hub caps. The base of the chair was blacked out before painting its leather padding. Finally the black of the body, and lastly the tyres were painted.
Yellow
Undercoat VGC 72.150 Heavy Ochre
Zenithal Highlight Scalecolour SFG-08 Marduk Yellow
Hub Caps
Base P3 Ironhull Grey
Wash Jan’s Magimix (6-8 Parts GW Nuln Oil, 6-8 Parts GW Agrax Earthshade, 5-6 Parts Lahmium Medium, 2 parts Athonian Camoshade. Thanks, Januinevision)
Drybrush lightly with P3 Pig Iron
Leather
Base Scalecolour SC-32 Black leather
Pinwash GW Nuln Oil for deep shade
Highlight Black Leather mixed with Scalecolour SC-30 Red Leather
Highlight Red leather
Highlight Red leather mixed with Scalecolour SC-28 Orange Leather
Highlight Orange Leather mixed with VMC 70.918 Ivory carefully (I took almost all of the paint off the brush, and even then ended up wiping the paint off with my finger afterwards to leave just a pale trace behind)
Highlight Orange Leather mixed with more ivory Ivory carefully
Black Body
Base Black
Drybrush/sponge dab with P3 Pig Iron selectively
Tyres
Base Black
Drybrush P3 Greatcoat Grey
So am I happy? Yes and no.
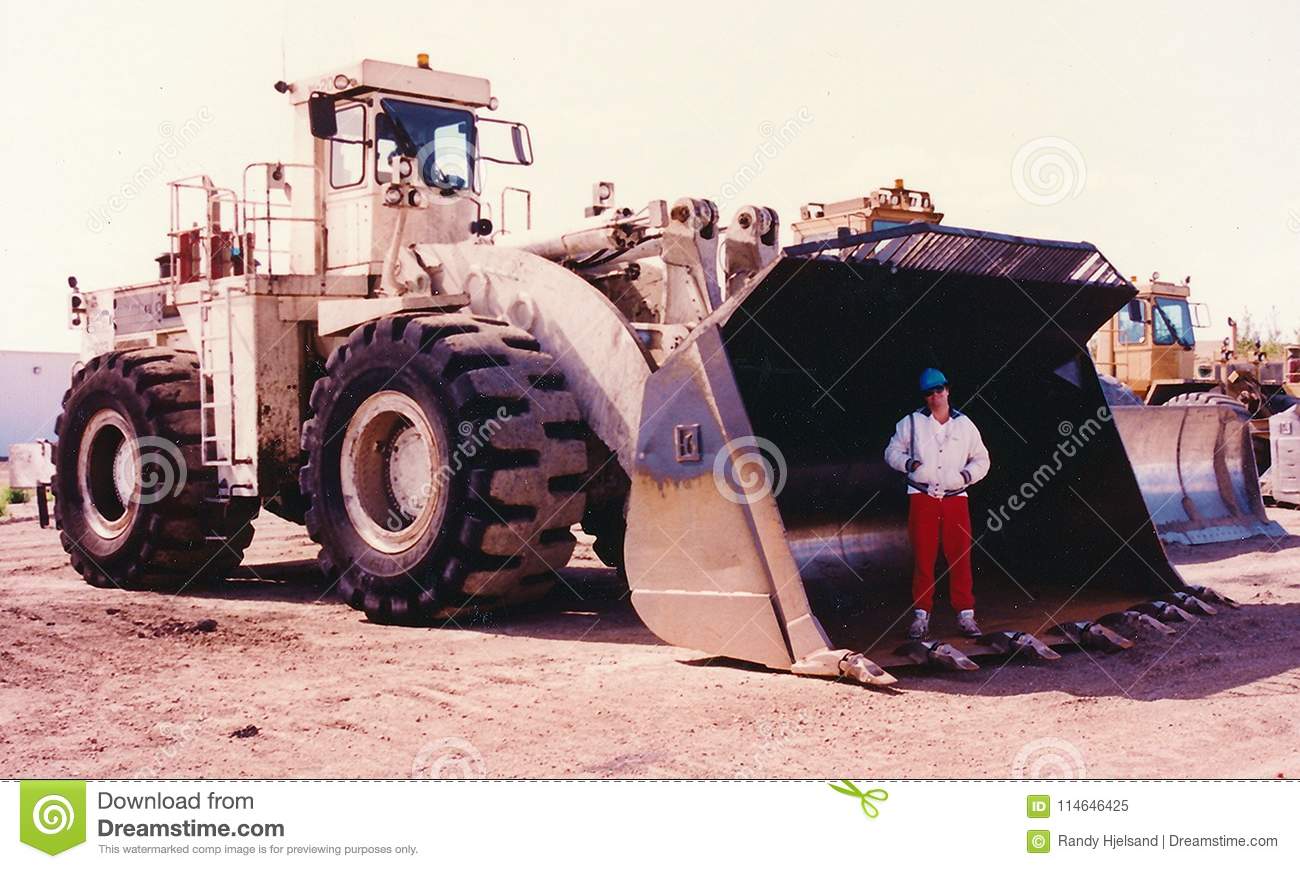
Lets start with the no, and work in to the yes. The scale doesn’t really work. Nothing about this makes it feel like a huge machine for tiny people. It still feels like it’s for much bigger humans. I’ve spent a week on this and it’s not really fit for purpose, without some greater suspension of disbelief than usual. It is plausible though. They come in a variety of sizes, and even larger ones definitely exist. If I need to point that out though, then it doesn’t work.
The model was too large to work with safely, creating issues with with handling wear and chipping. Some of this could have been resolved if I had dismantled this and worked with the parts. It would also have meant I could have airbrushed different sections different colours. I didn’t think I could undo the clips without breaking it, or hurting myself. I should have taken some clippers to them and relied on glue to reassemble it. I’ve done this with Matchbox scale cars for Gaslands before. I wimped out here though, and made life harder for myself.
Given that I knew it wasn’t going to work, and that every time I handled it I risked chipping my work I decided against weather this piece. A bit of dirt, and some natural chipping effects could really bring this piece to life. Mine looks factory fresh.
We’re getting in to the yes now.
The pics don’t really show this, but in person the store fresh piece was clearly cheap shiny plastic that stood out as very wrong on the table. The finished piece has a matt finish, and smooth natural colour gradients which make it look more real. It’s painted with the same finish as the minis which makes it feel more like part of the same world as them.
As a proof of concept I am happy with this. If it had been half the size I’d be buying more of this range right now, and have taken the time to weather this one a bit more. This particular piece can go sit on a shelf, but I’ll be eyeing the toy section in Tescos with a greater understanding and more confidence going forwards.
Corporate Art
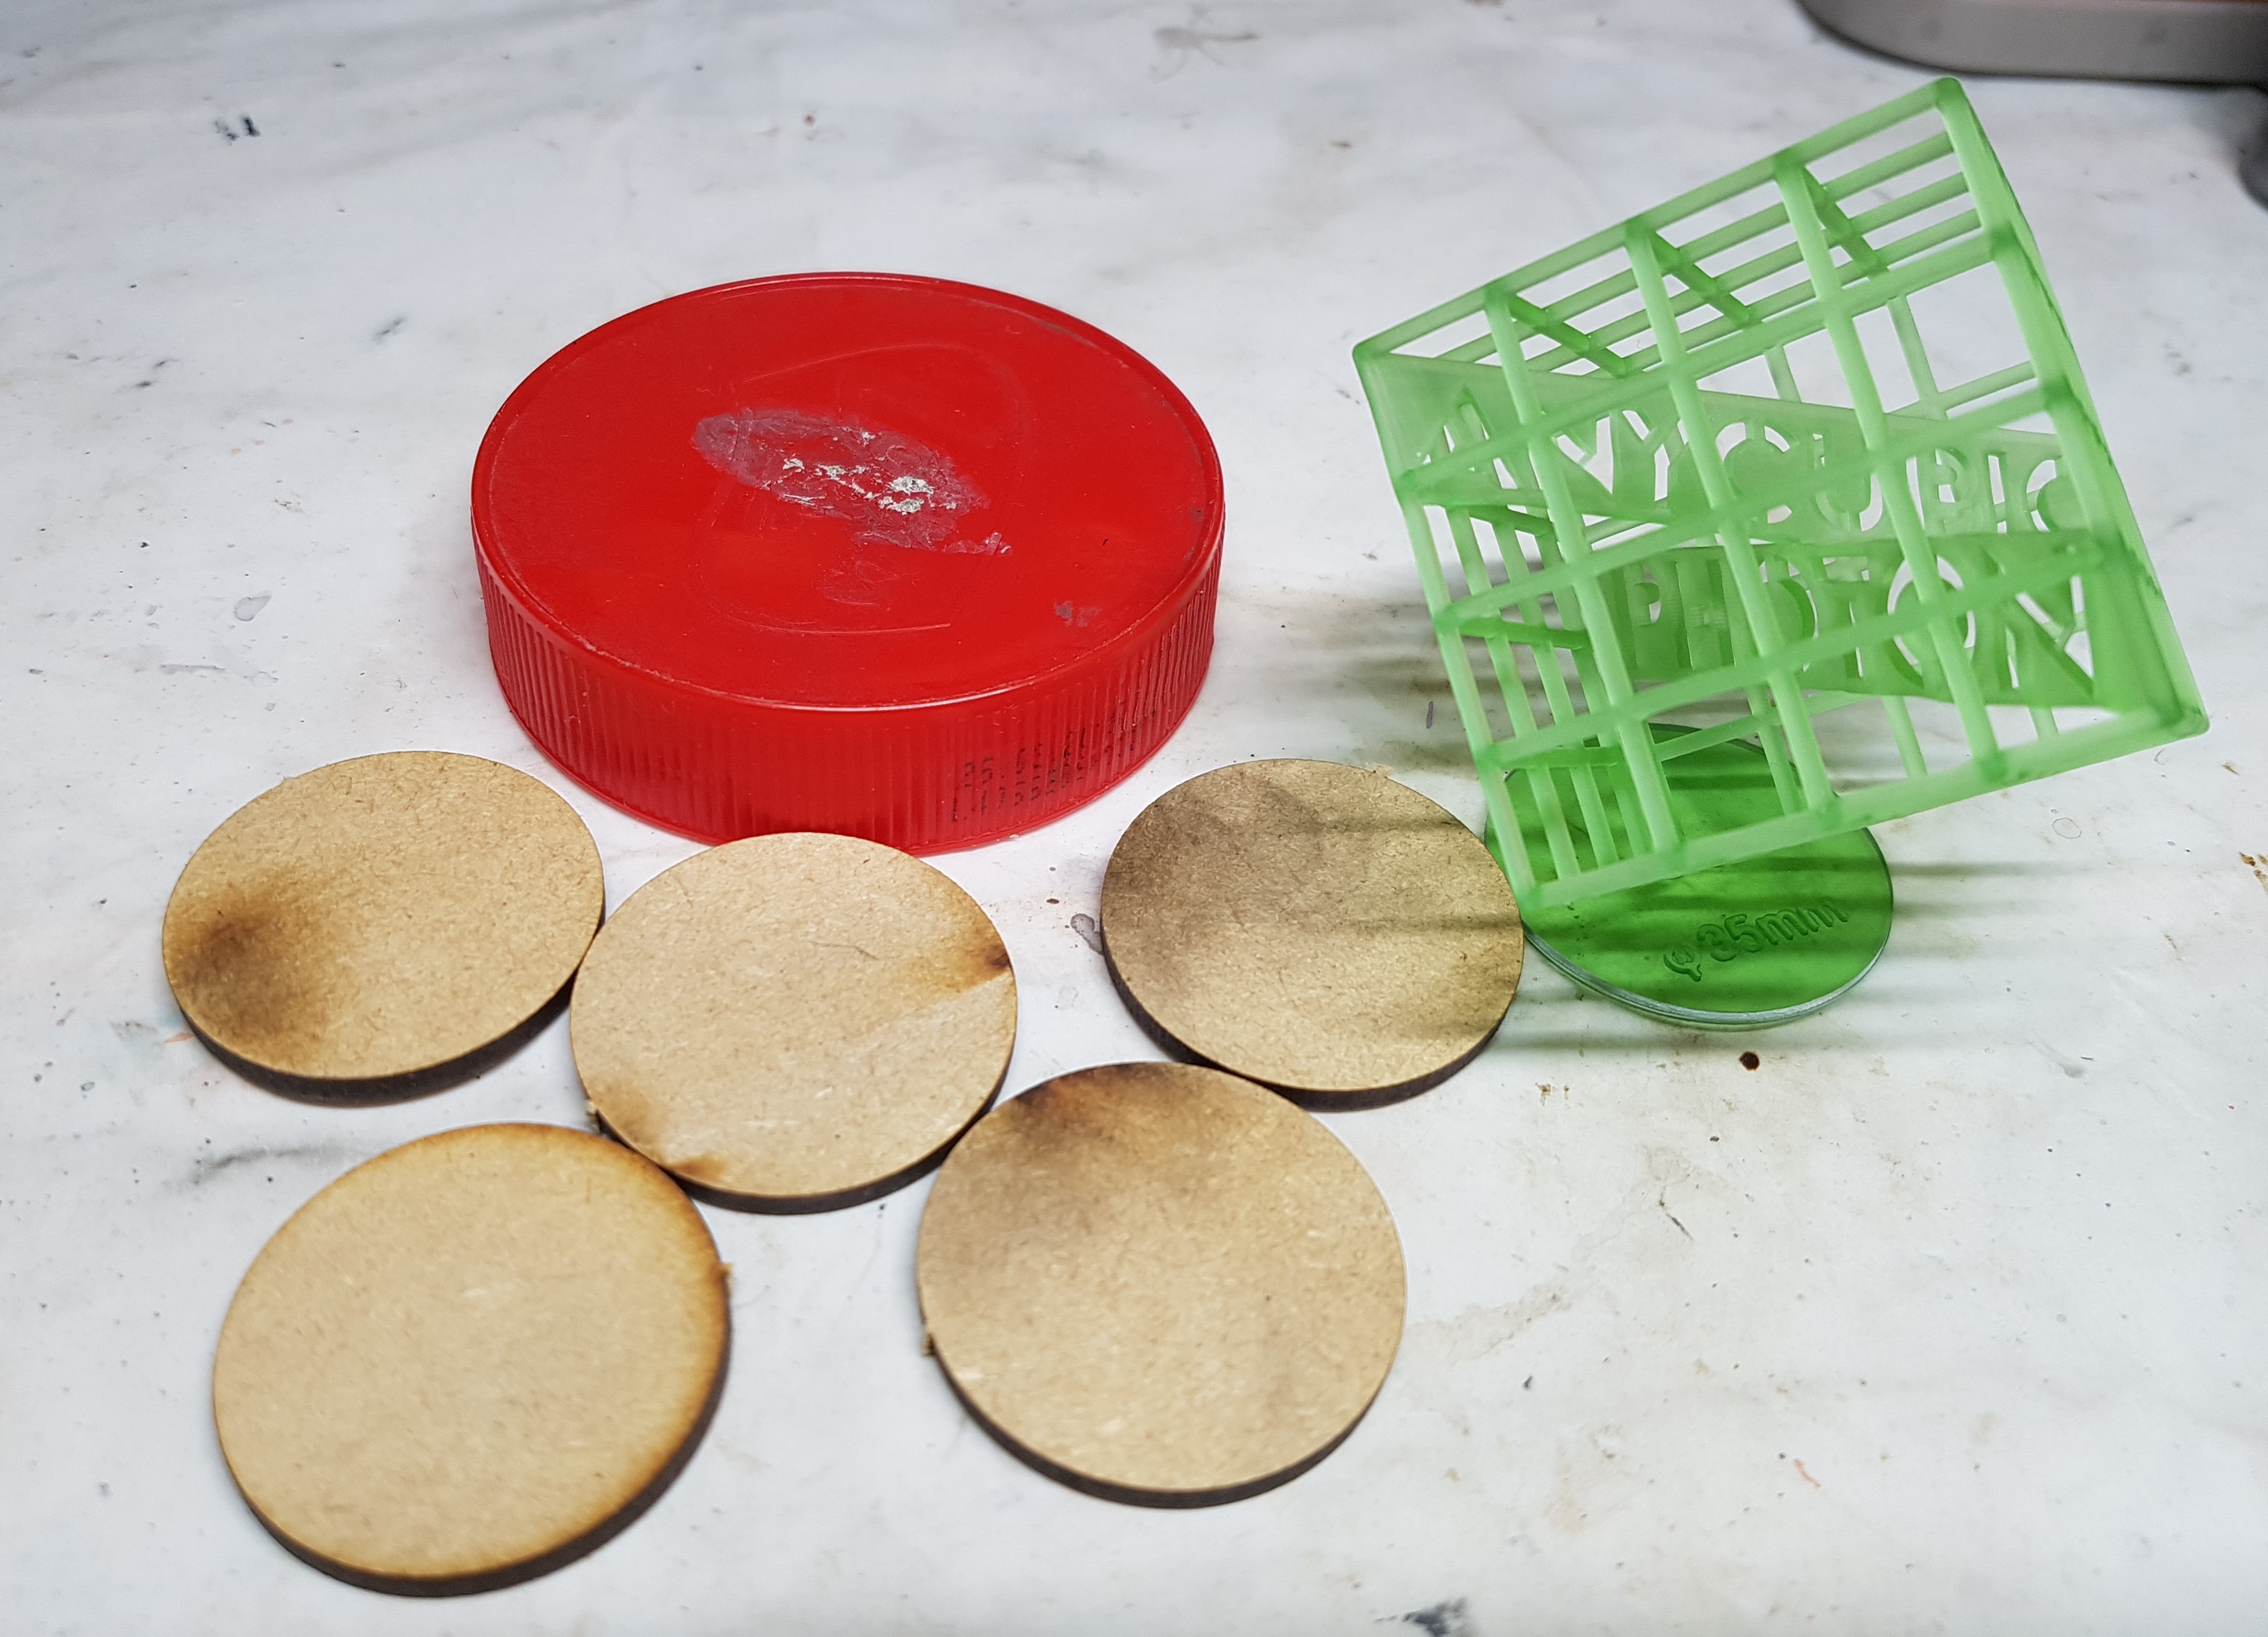
Work has begun on the Corporate sculpture idea. Here’s my parts. I had a variety of jar lids already saved up. I use them as hobby holders. I worked out which one to use by scaling them up against the minis. This one means the planter will be about bottom height, making it perfect for leaning against or sitting on. Not too high for people to comfortably look at the flowers on, and not so low people would casually walk all over it.
The lid comes from a jar of Biscoff spread (Try some. It’s delicious. Don’t bother with a sandwich. All you want is the jar and a spoon).
The discs are not bases. They’re “doughnut holes” from a paint rack. They’re about 36mm across, so too big for most bases, but not far off. I saved a load a few years back, figuring they’d be useful for something.
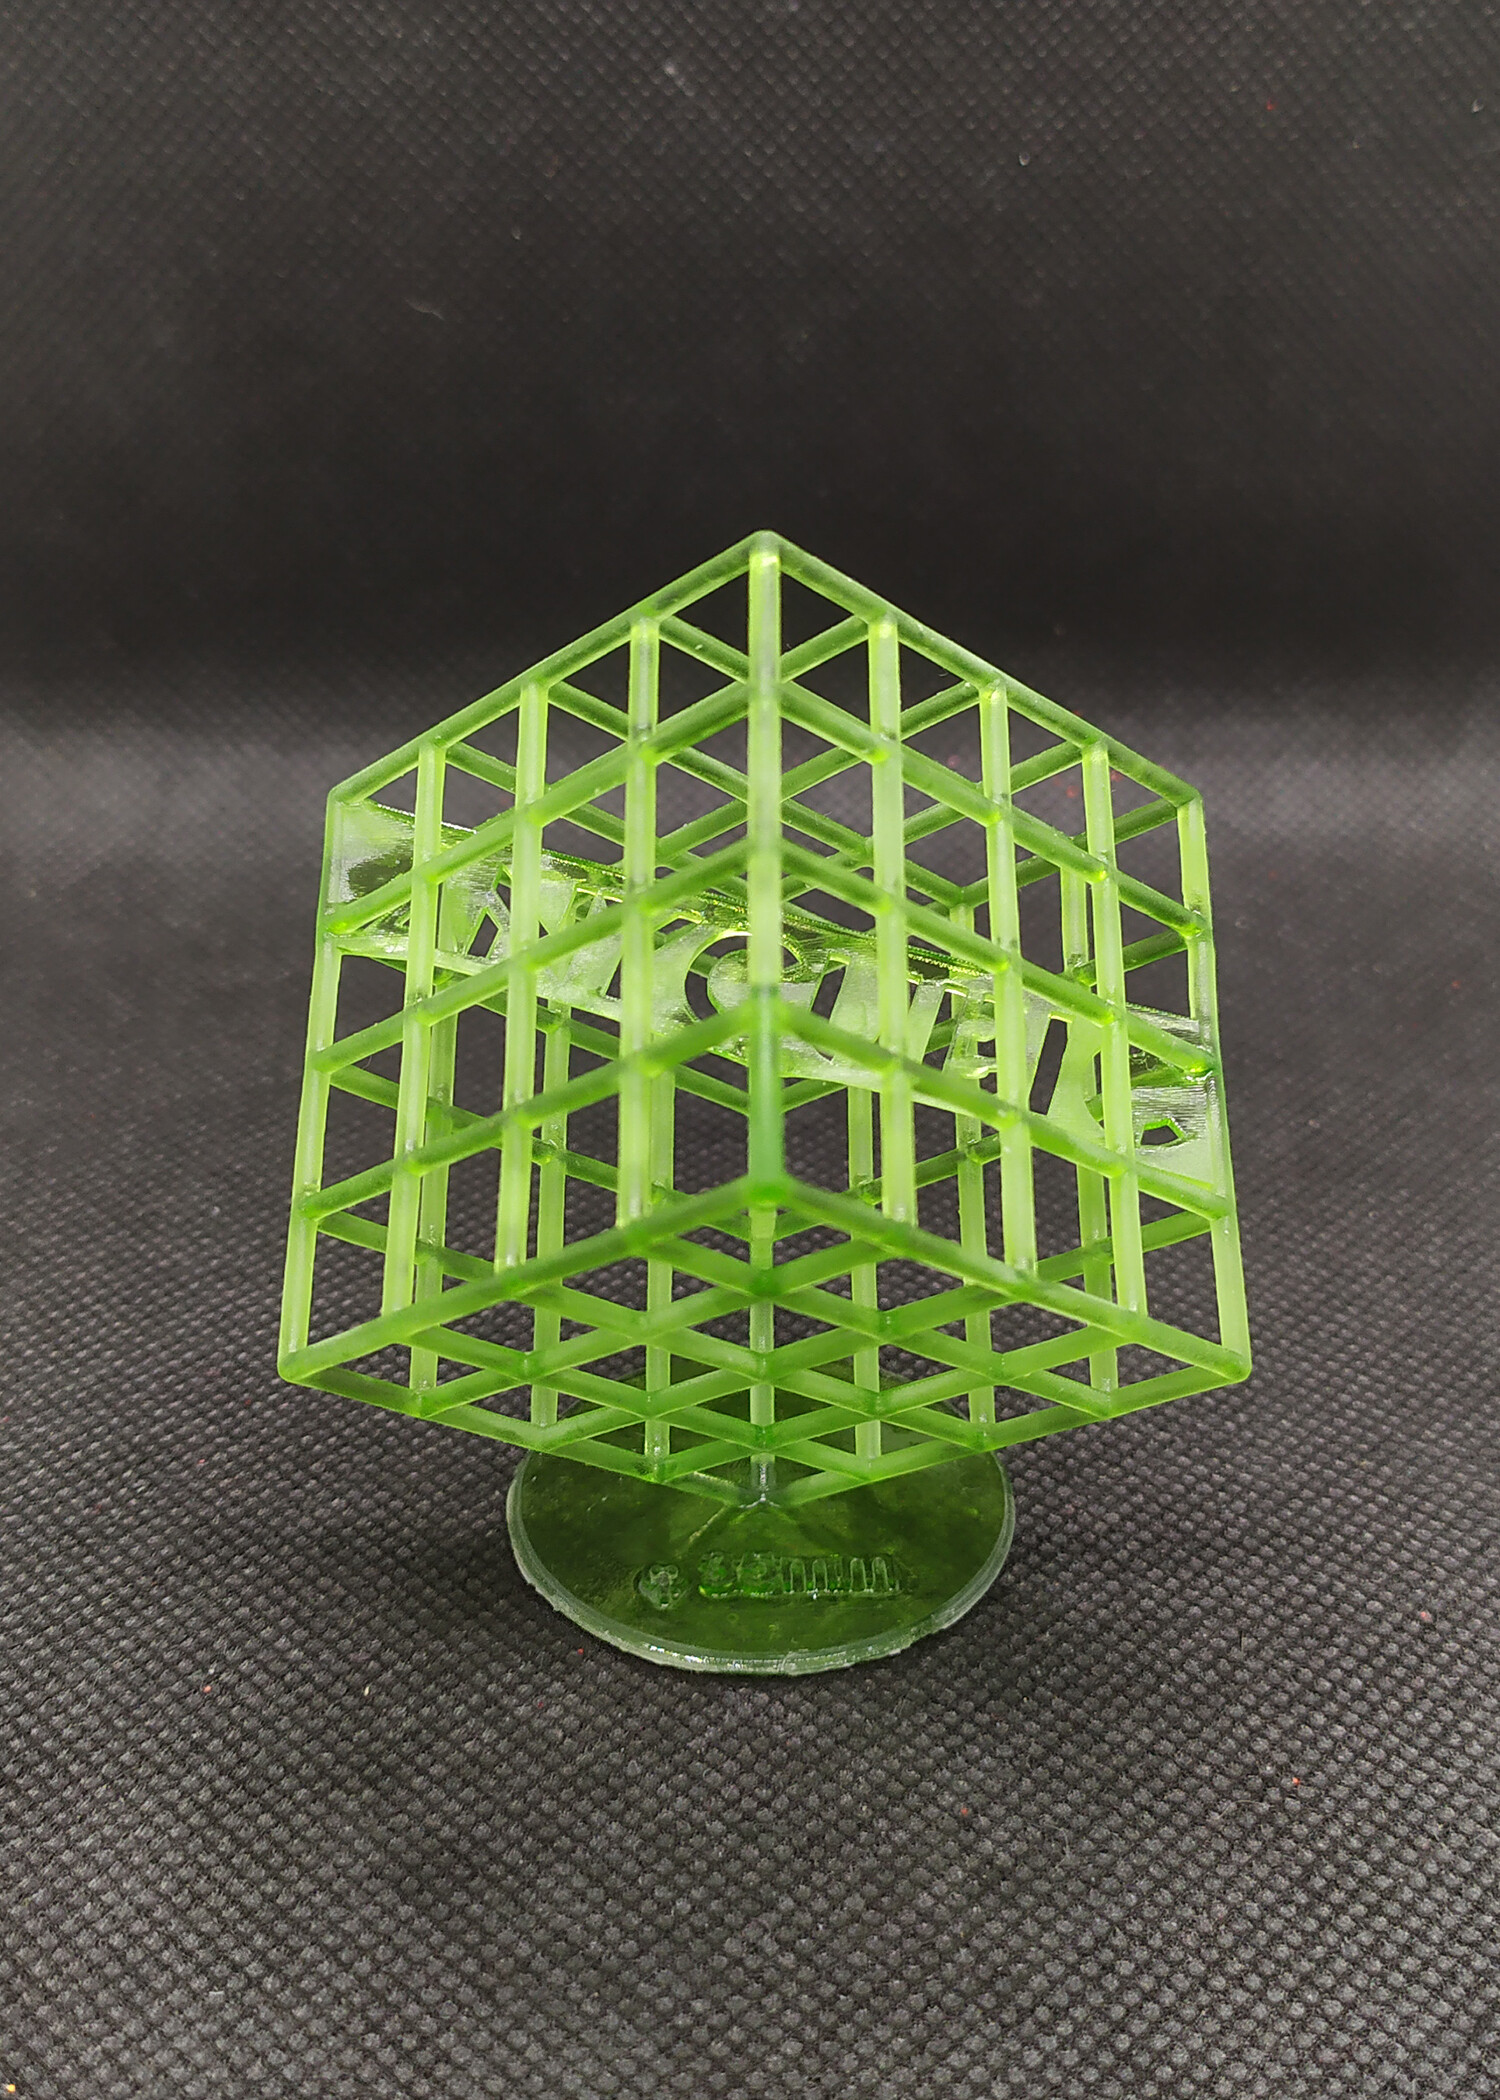
The sculpture itself is the default test print that came with my Anycubic Photon 3D printer. It had 35mm sculpted on it’s base, but I filed that down very carefully. The piece itself is fragile at it’s join. I broke a beam, but it’s been reinforced with superglue. Any resultant bumpiness can be treated as welds that would very likely be there in real life for the same reason.
The discs were scratched, and then glued together with superglue. The middle of the lid had a bump on it so I didn’t feel superglue would be thick enough to hold it in place. I put a healthy amount of PVA on the bottom of the disc stack and glued it to the inside of the cap. I then put a ring of PVA around that to help hold it in place. A sprinkling of dirt was added to this to help it dry in shape.
I thought about how to fill the cap up and decided to fill it with dry clean kitty litter. I keep a large pot as a source of rocks. Once I had a good depth of it I mixed up a cup of PVA and water and poured it over the rocks and let it soak through them, and left it overnight to dry.
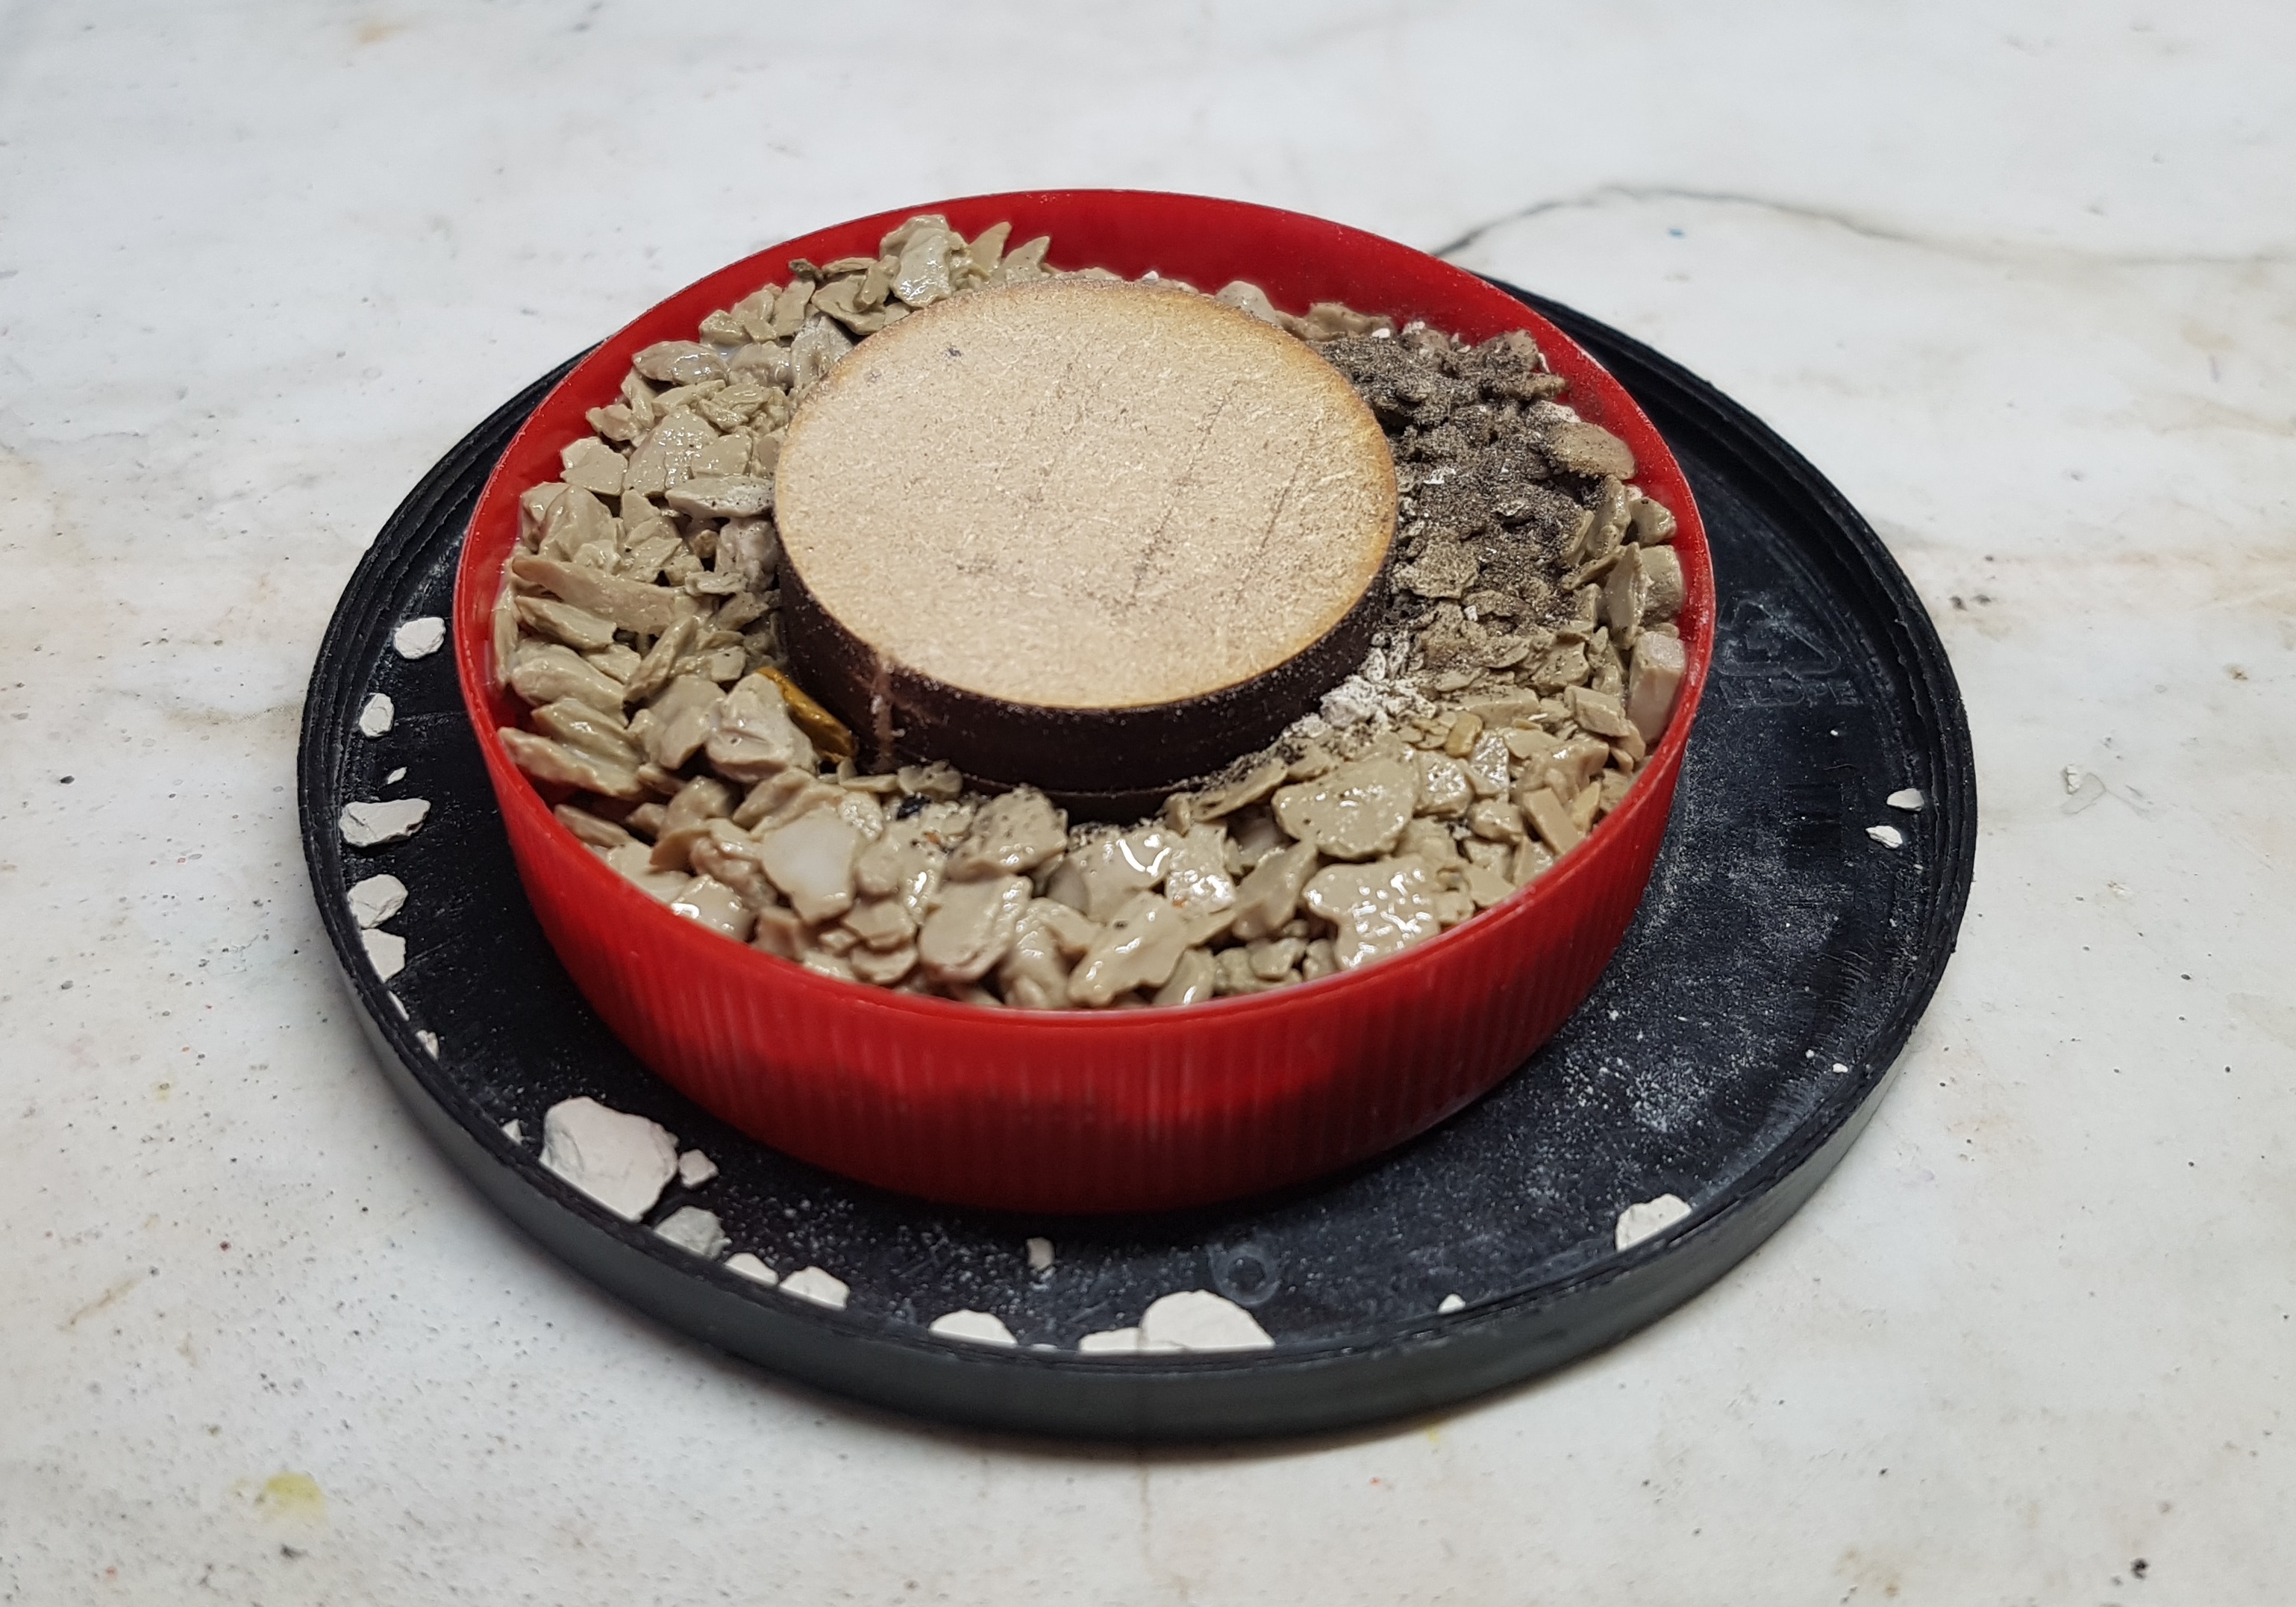 This will be a large planter with a plinth in the middle. At least, in theory
The next morning I applied another layer of PVA and water, but a little thicker this time. I then sprinkled some dirt over it and left it to dry. It was dry by the afternoon, but the whole thing is spongy. Maybe it always will be? I’m leaving it another day, and then I’ll apply another coat of glue and dirt to help level it off and fill the gaps that have appeared. Once I’m happy with the appearance I’ll seal it all in with another coat of dilute PVA. Hopefully it’ll be more solid by then. Once good thing about it’s currently flexibility is that it allowed be to level the plinth. It was slightly wonky.
If PVA drying times cooperate, I imagine I’ll have this piece finished this weekend as a side project around what I’m really working on.
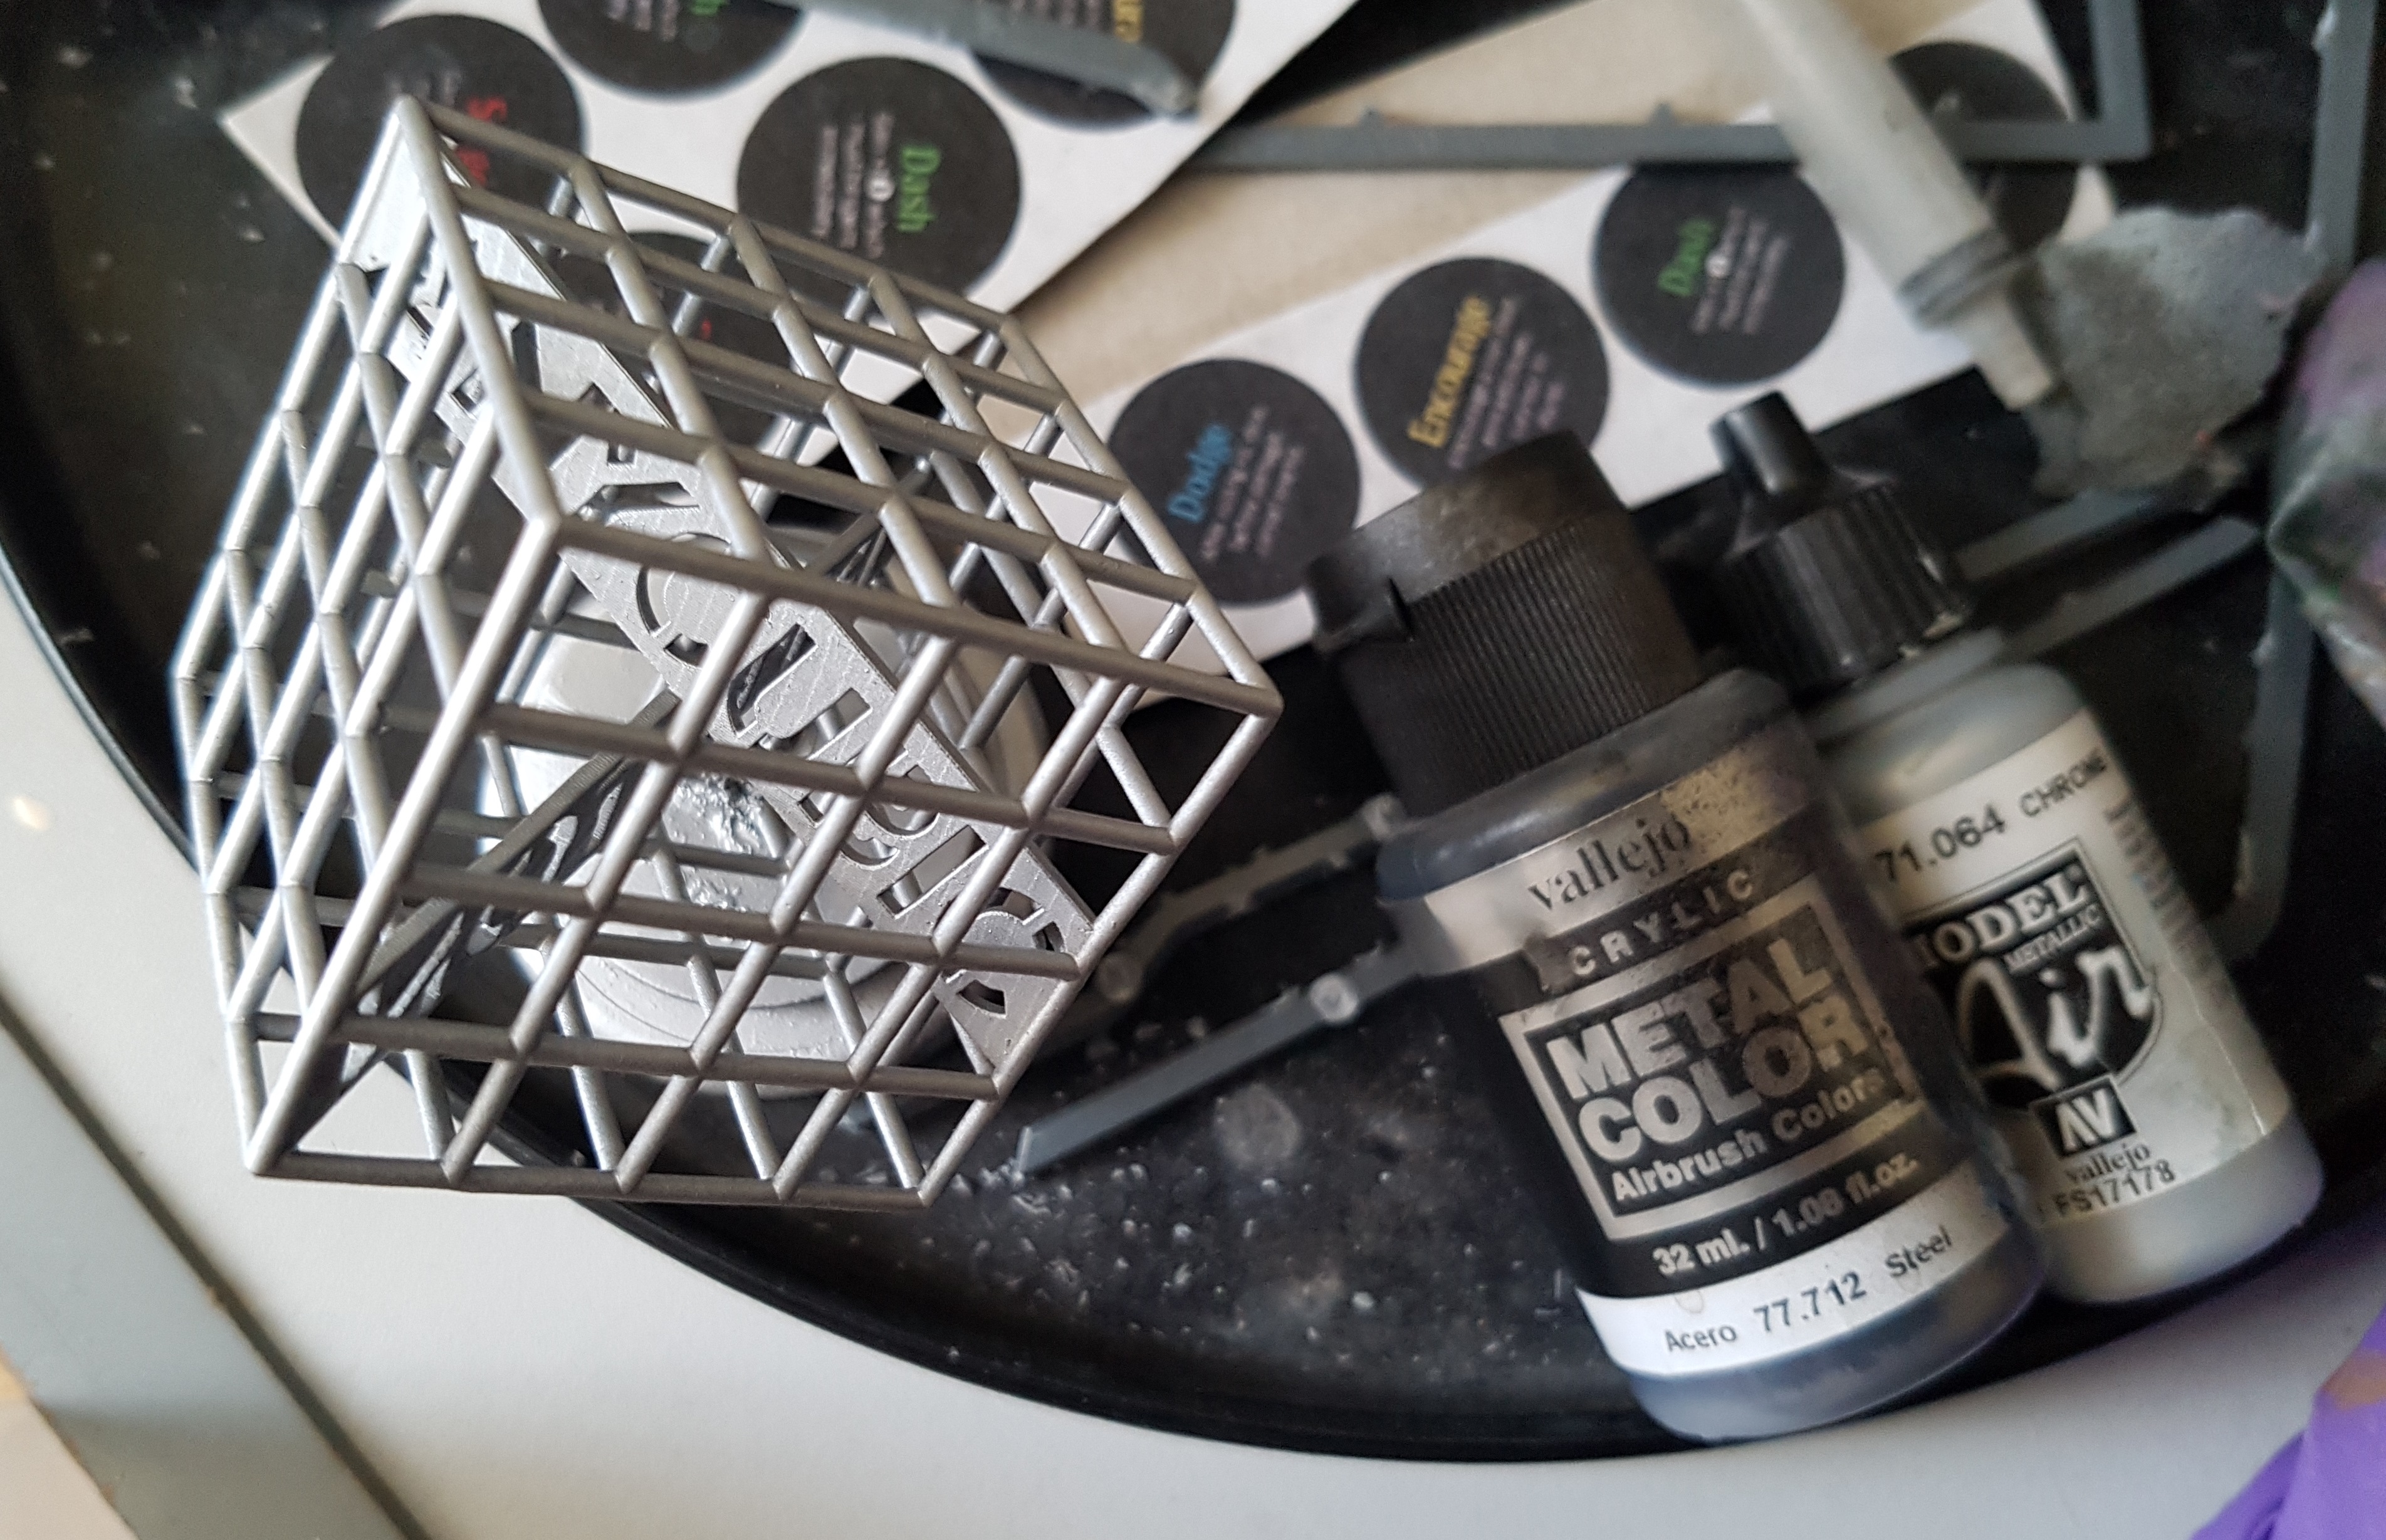
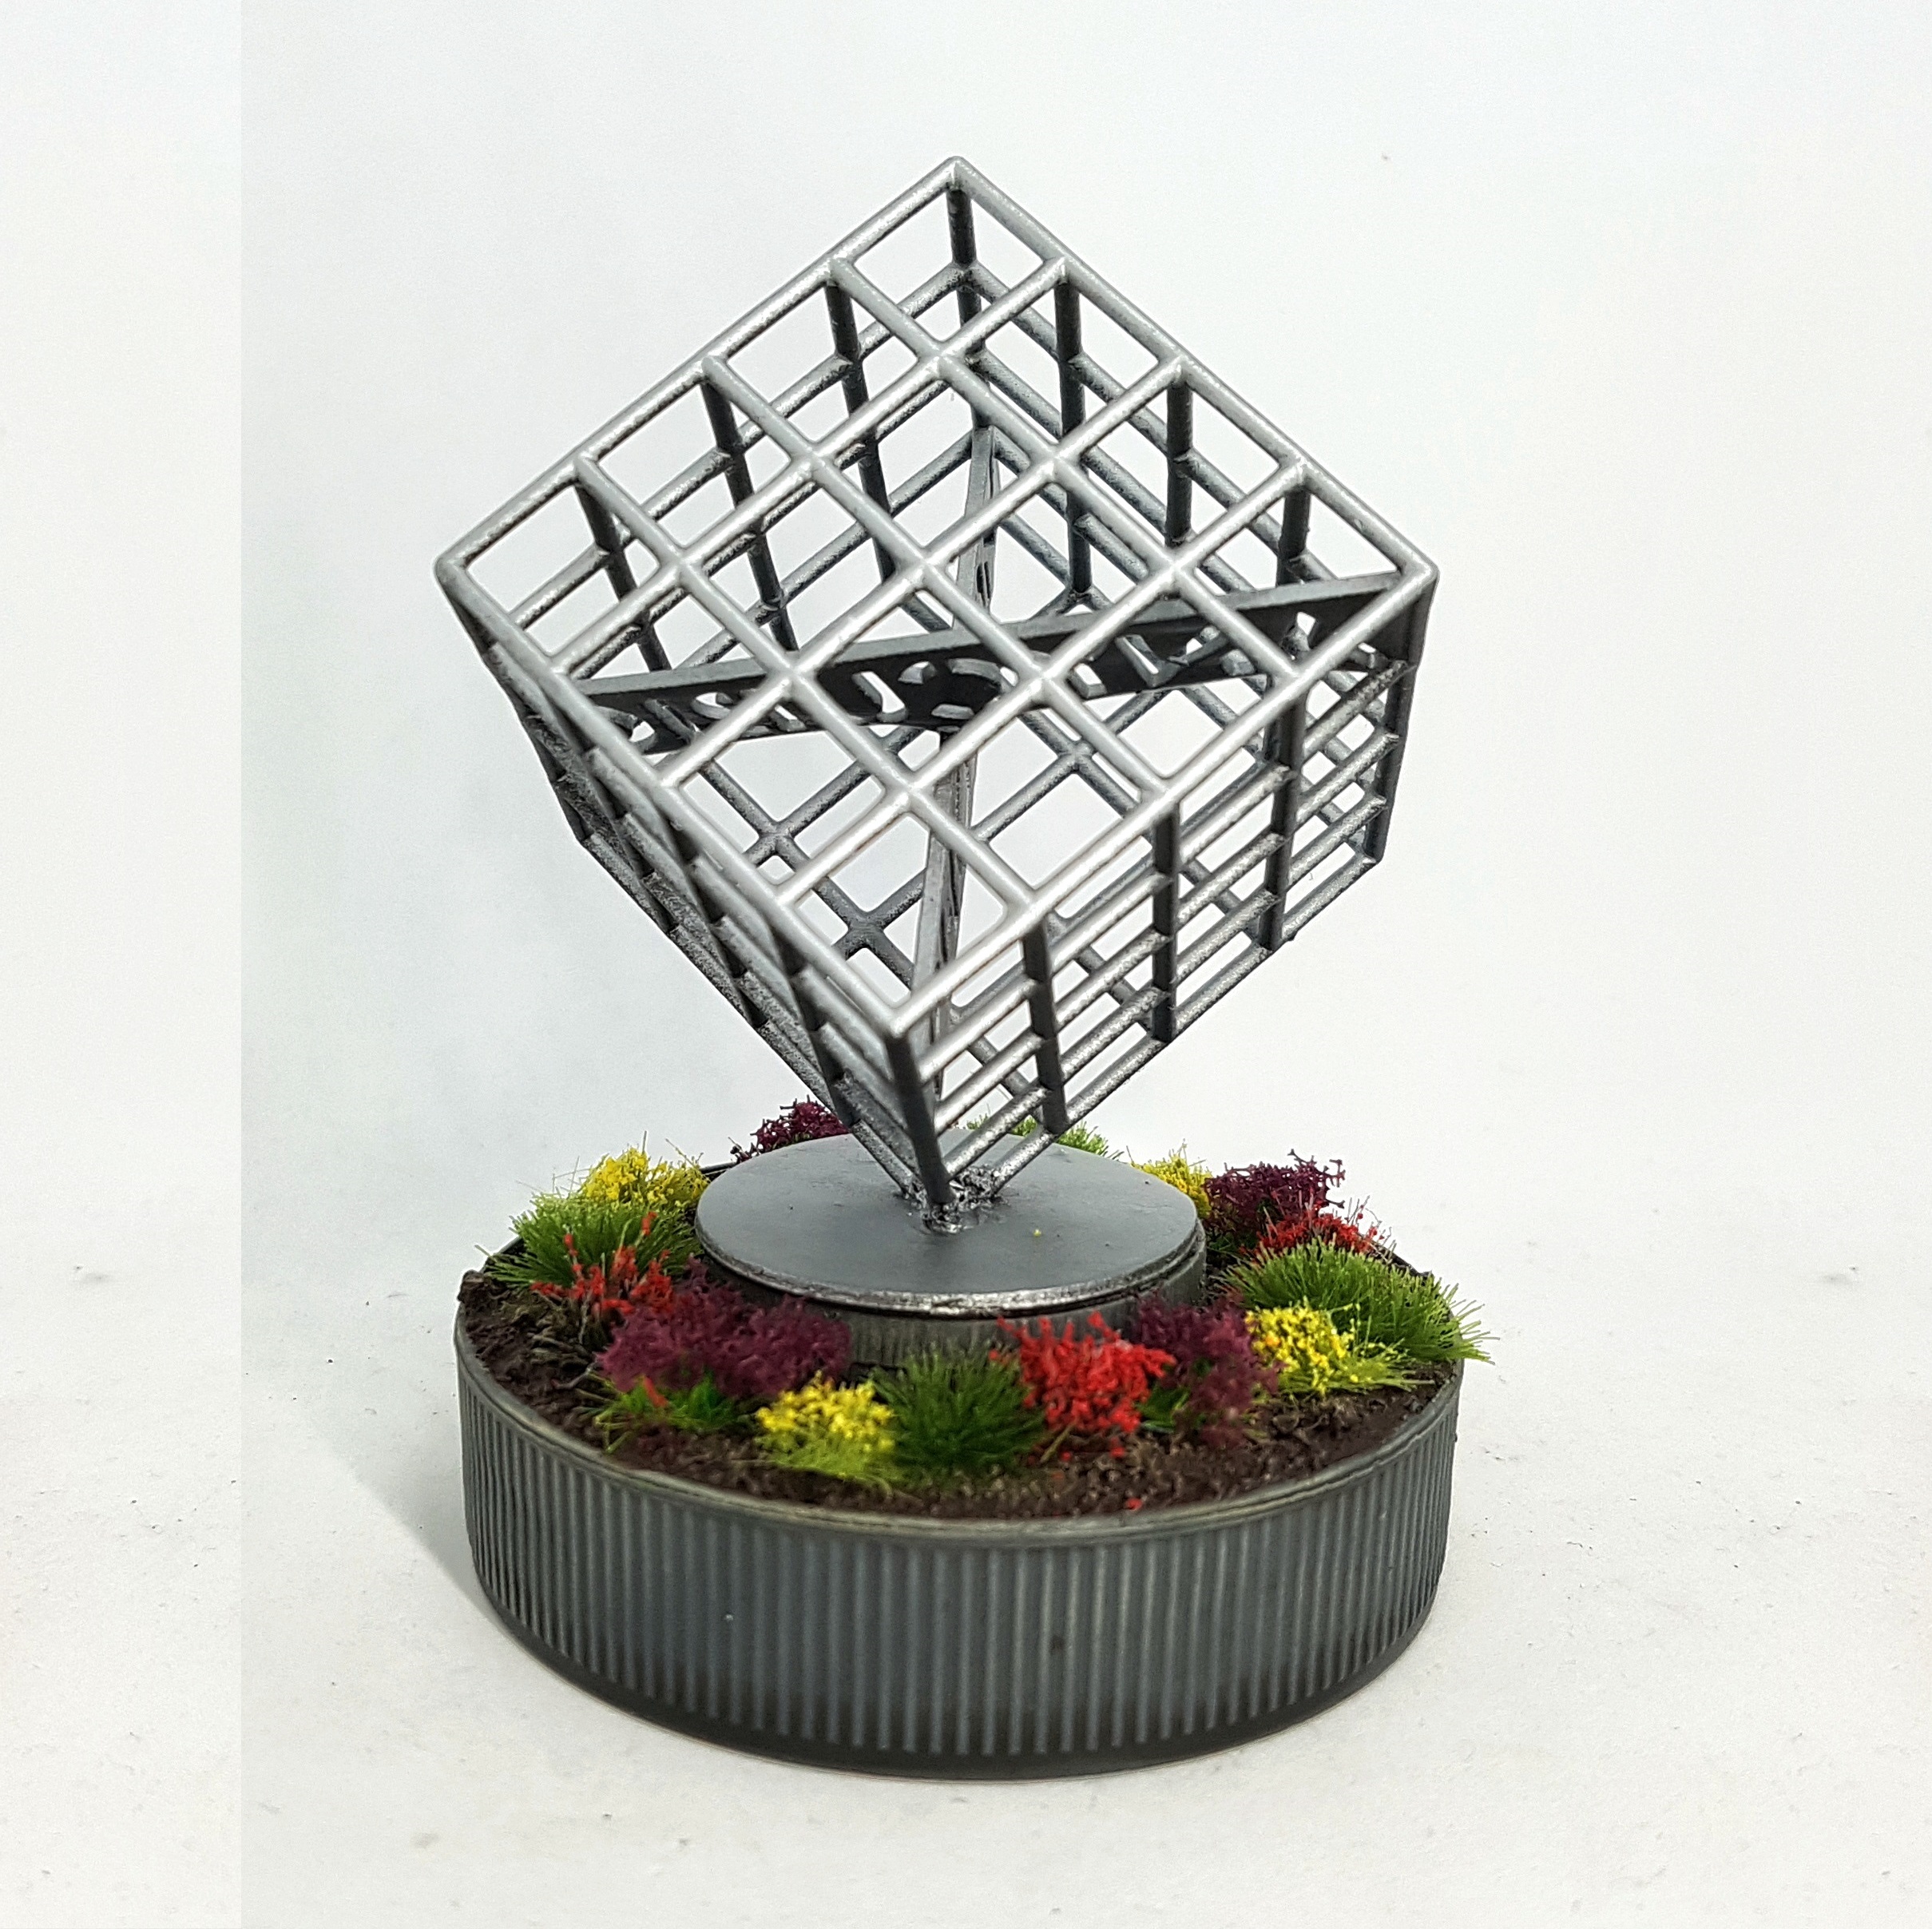
I had the airbrush out so I primed and painted the cube. It was primed black, and then base coated with Vallejo 77.712 Steel, and then zenithally highlighted with VMA 71.064 Chrome. I think my pot is showing its age. This stuff is usually the brightest shiniest metal I know of. It’s come out a little flat here. Oh well. This is meant to be a quick and dirty low effort piece of terrain so I’ll go with it. Maybe it’ll get a gloss or satin finish and that might help? Why haven’t they invented metallic finish varnish yet?
It’s getting no further painting than this. I really don’t want to even think about painting inside that cube. Maybe I’ll weather the base part a smidge?
Work Begins on the Shacks
The shacks were primed with everything else a couple of weeks ago. I’m starting with the walls as this is by far the biggest colour, so that’s what I want to airbrush.
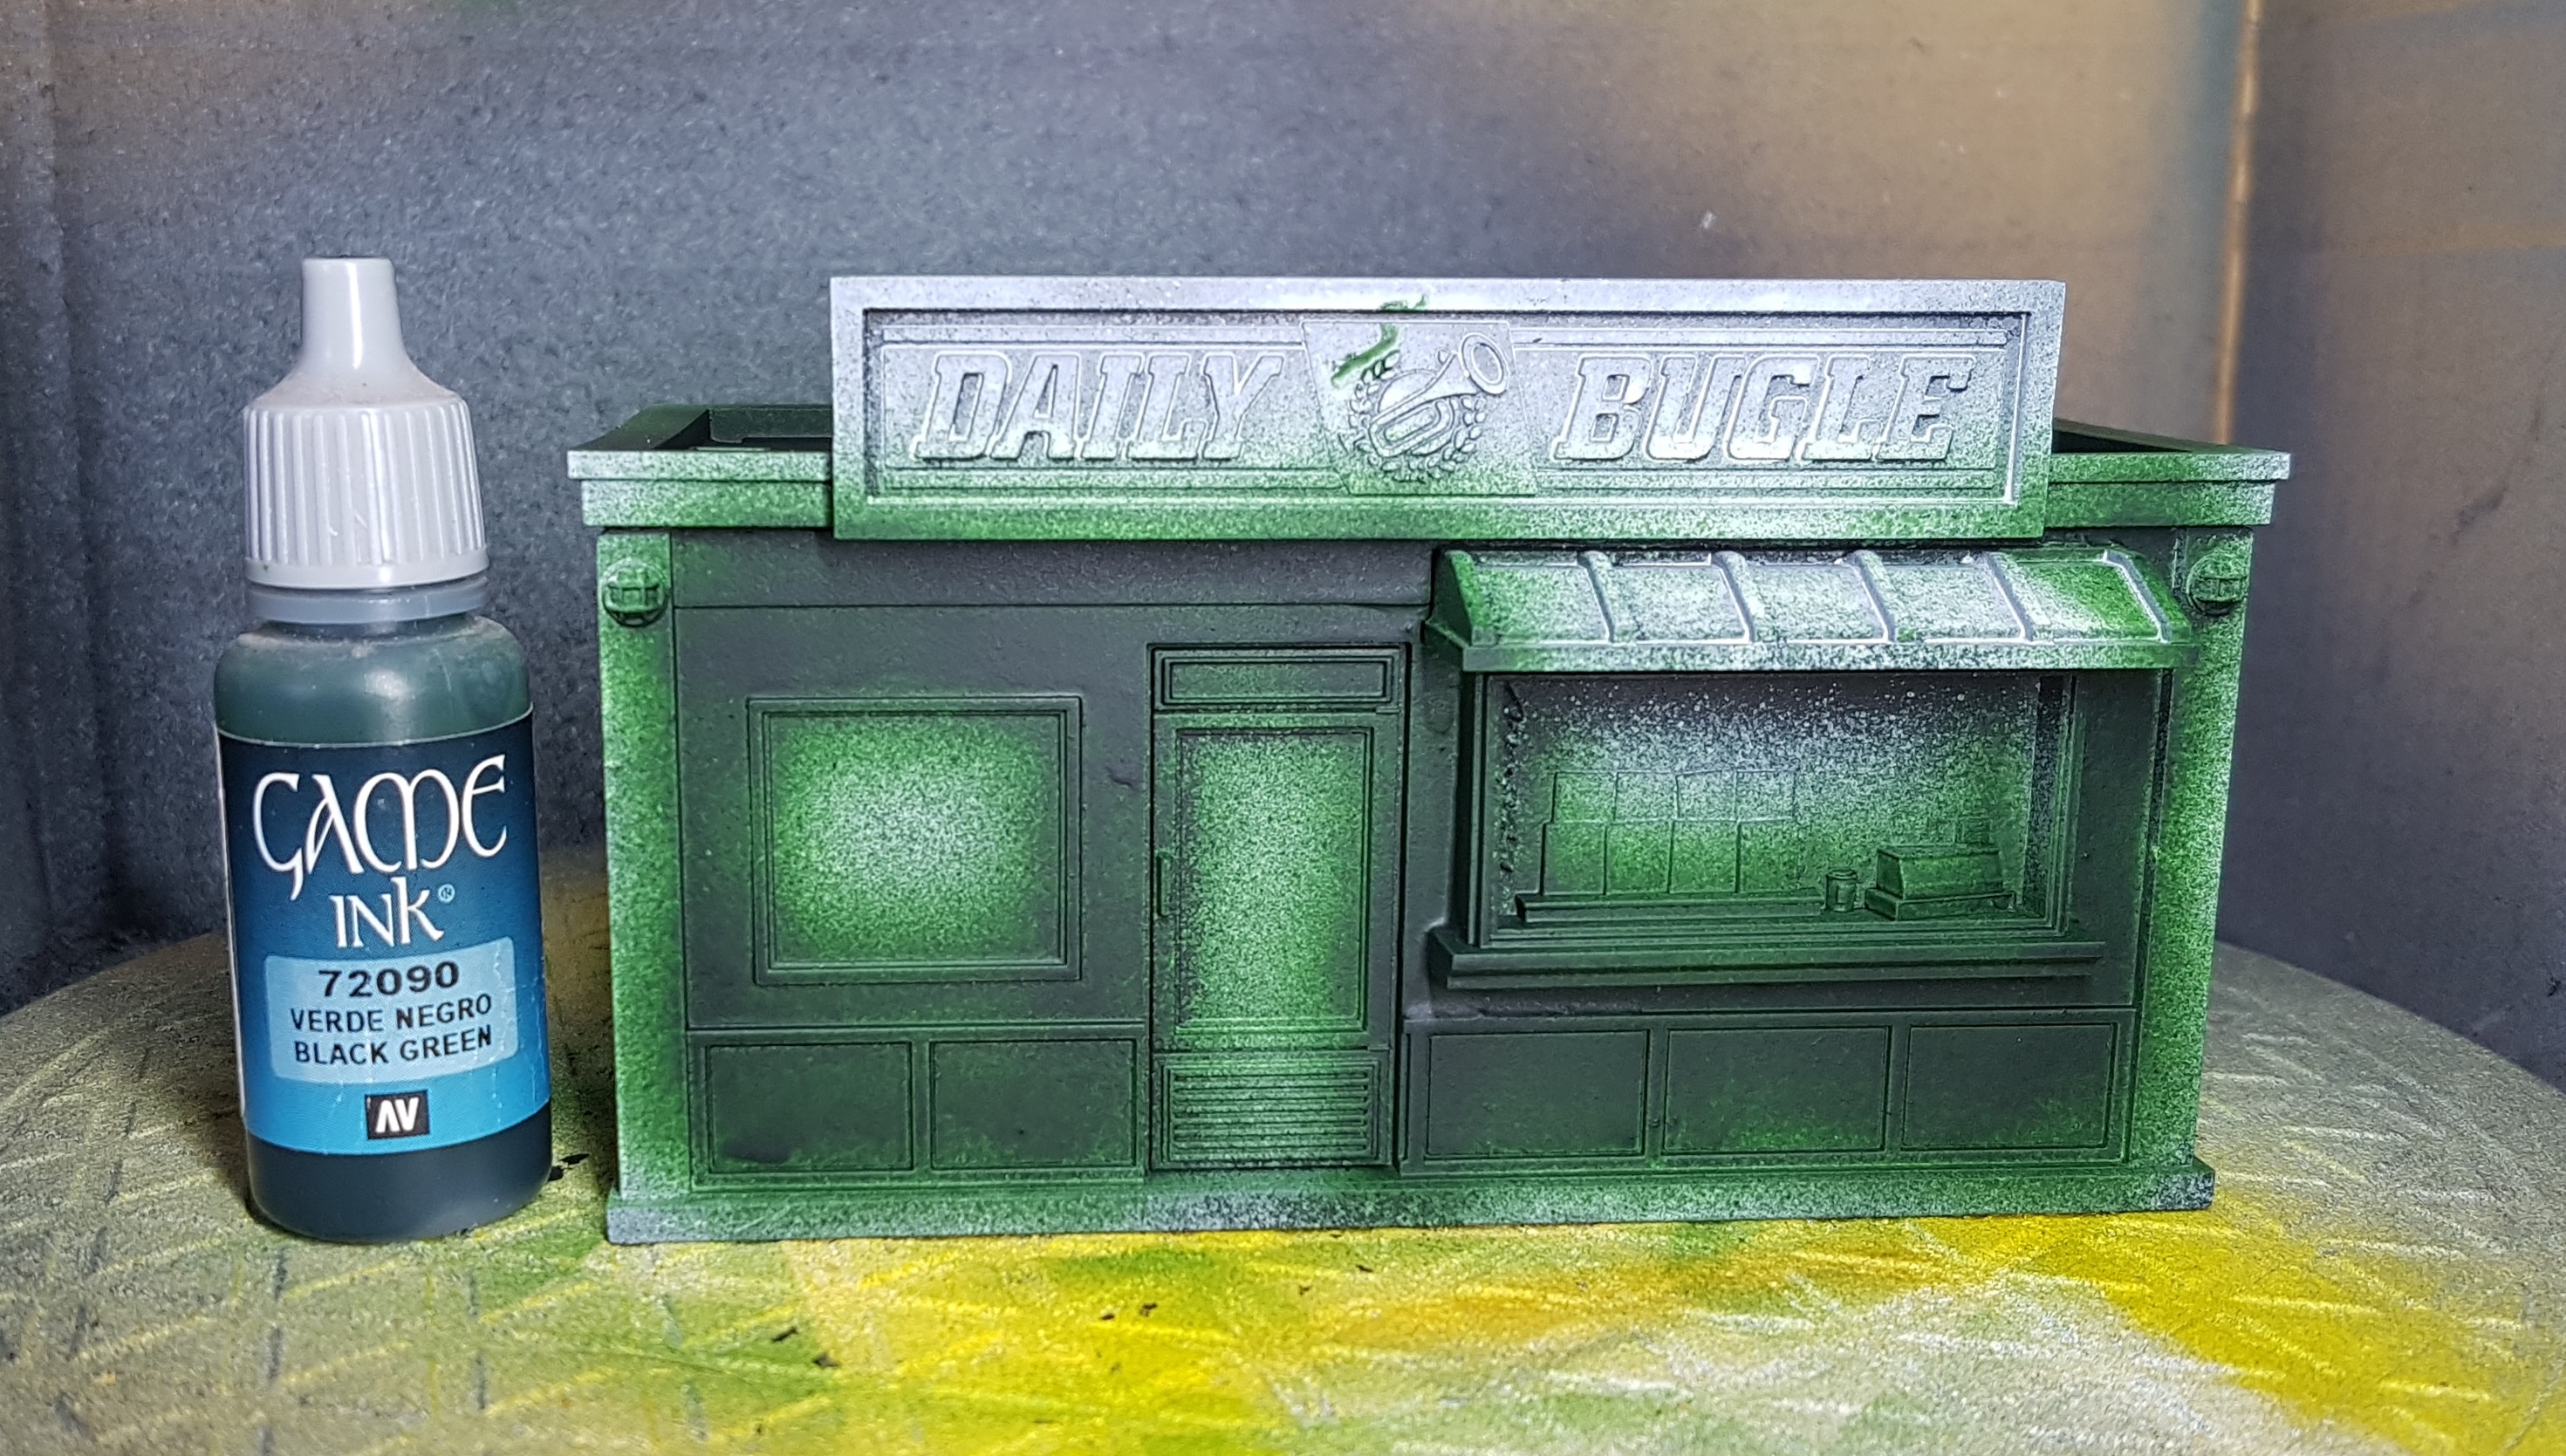
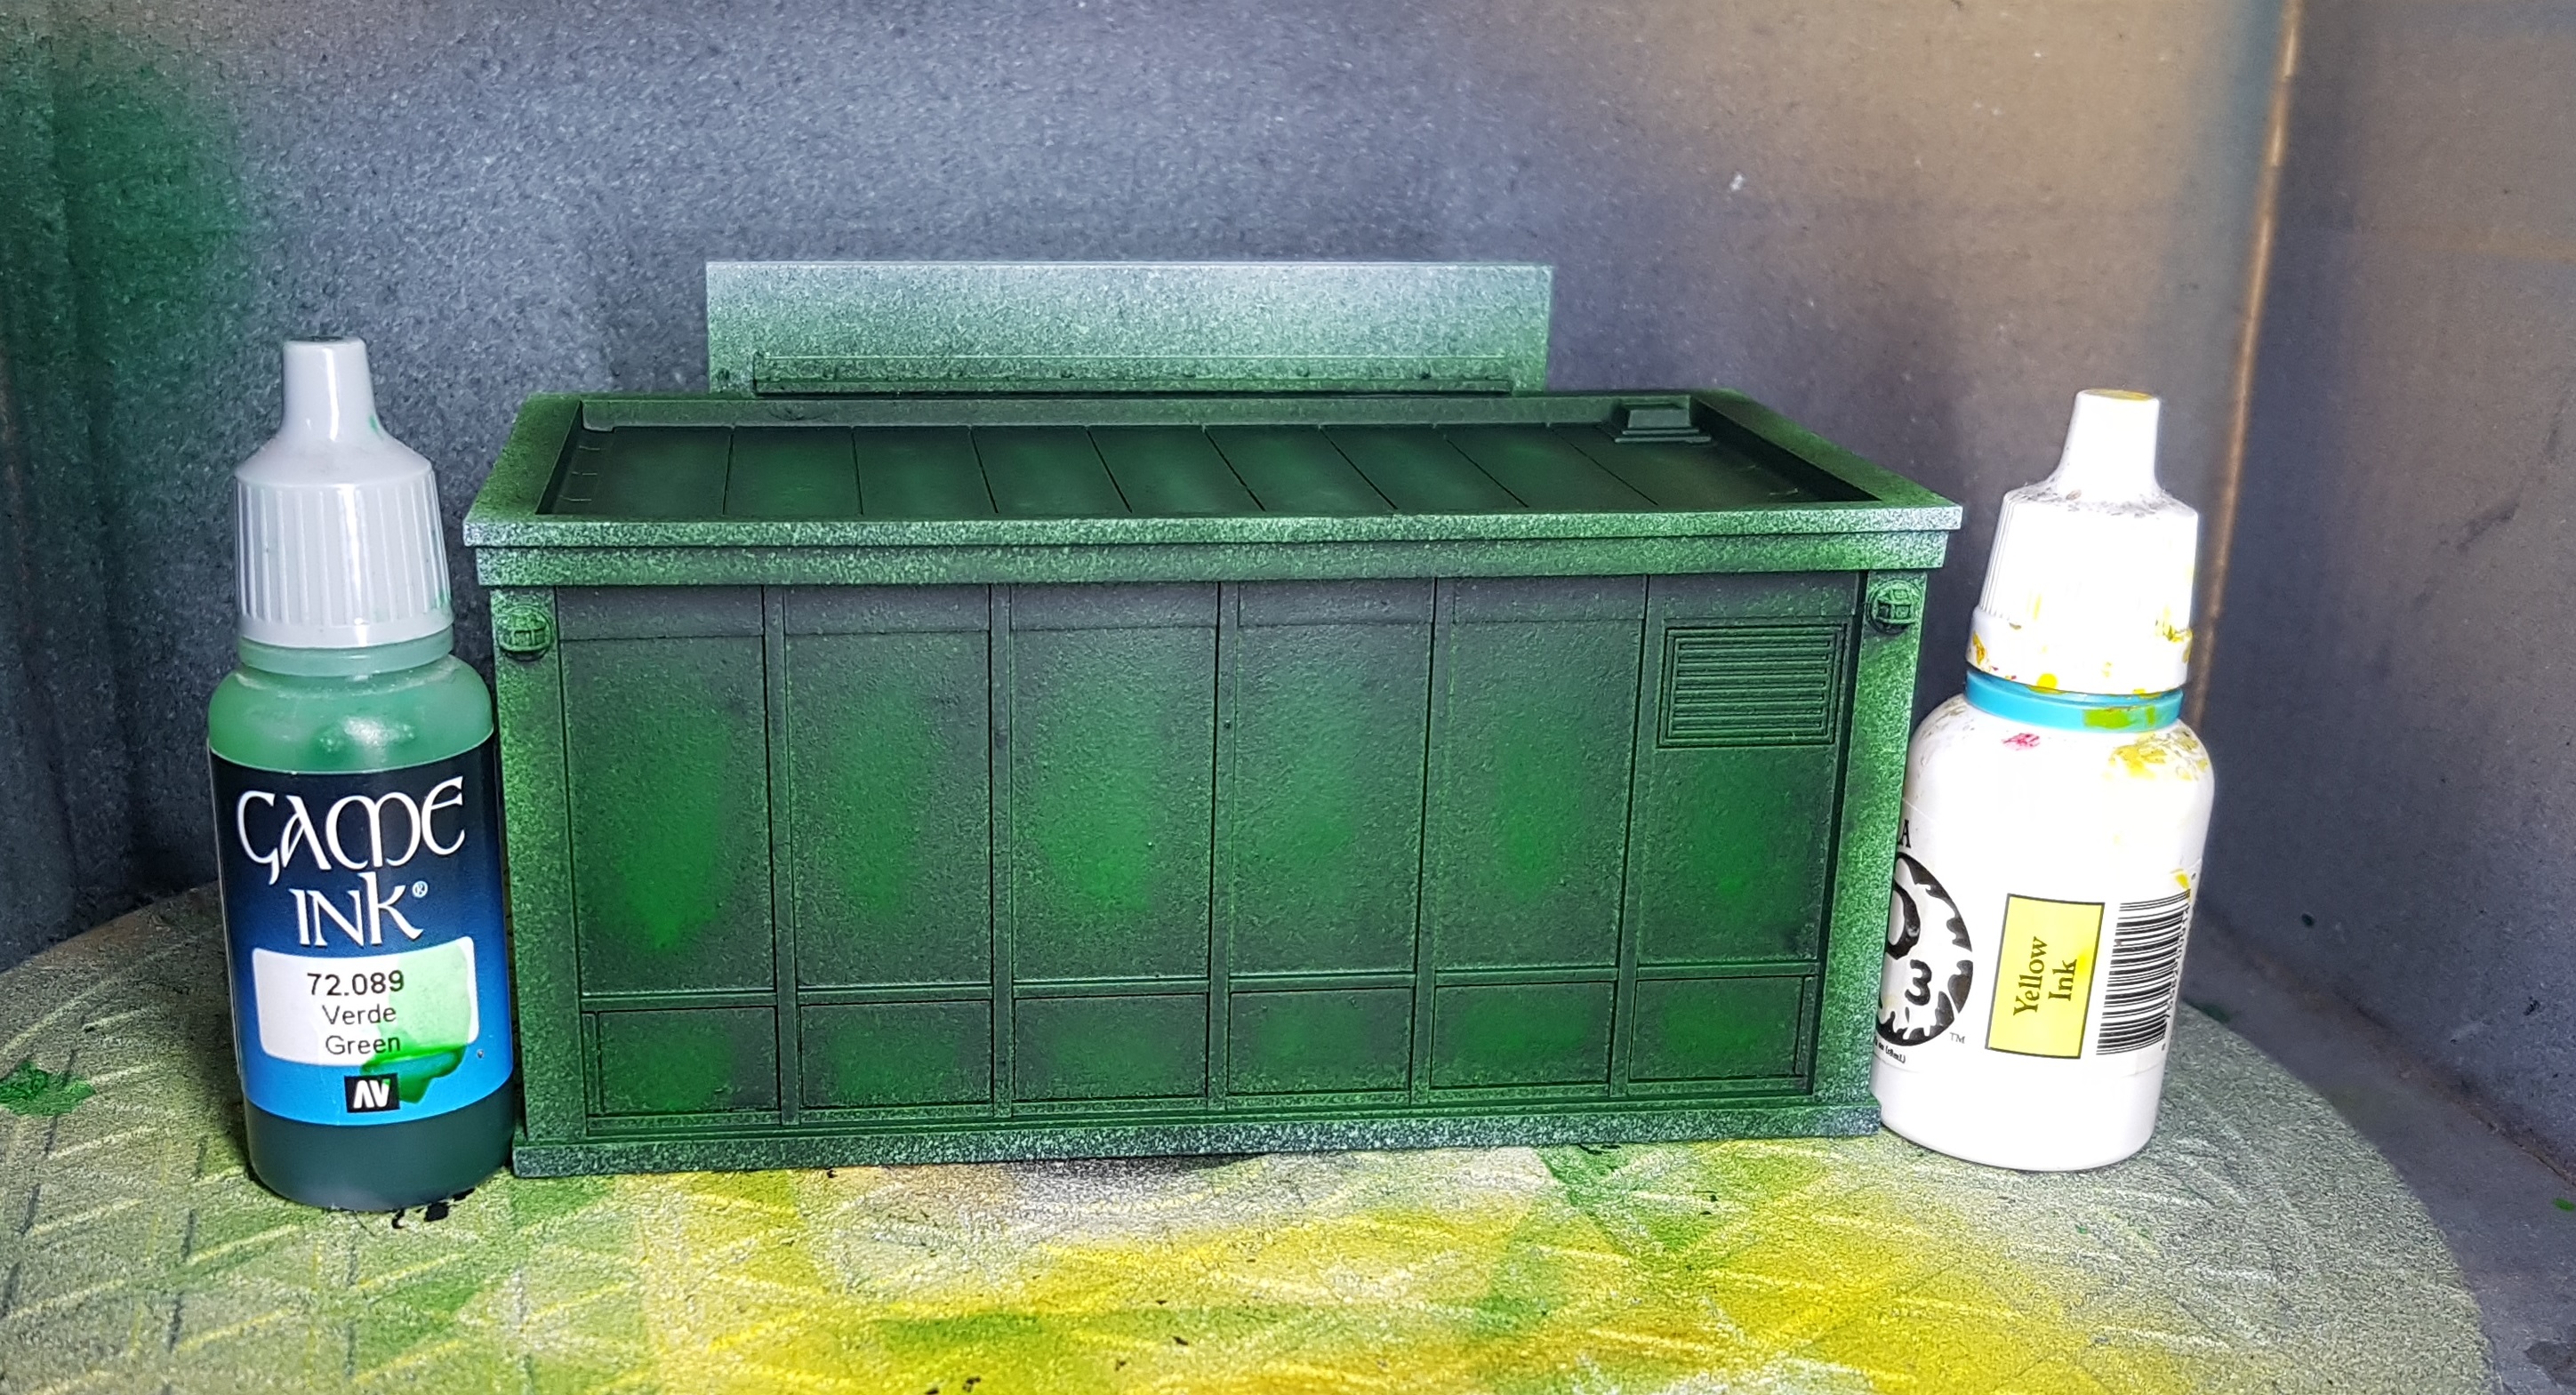
The Greens were base coated with VGC 72.090 Black Green Ink. I then tried highlighting them with VGC 72.089 Green ink, but it wasn’t light enough so I added a drop of P3 Yellow Ink. I think it was about 6:1 green:yellow, but it might have been 8:1. That yellow really overpowers the green and makes it a little radioactive glow-ish. All highlights were applied by roughly painting just the middle area of each panel.
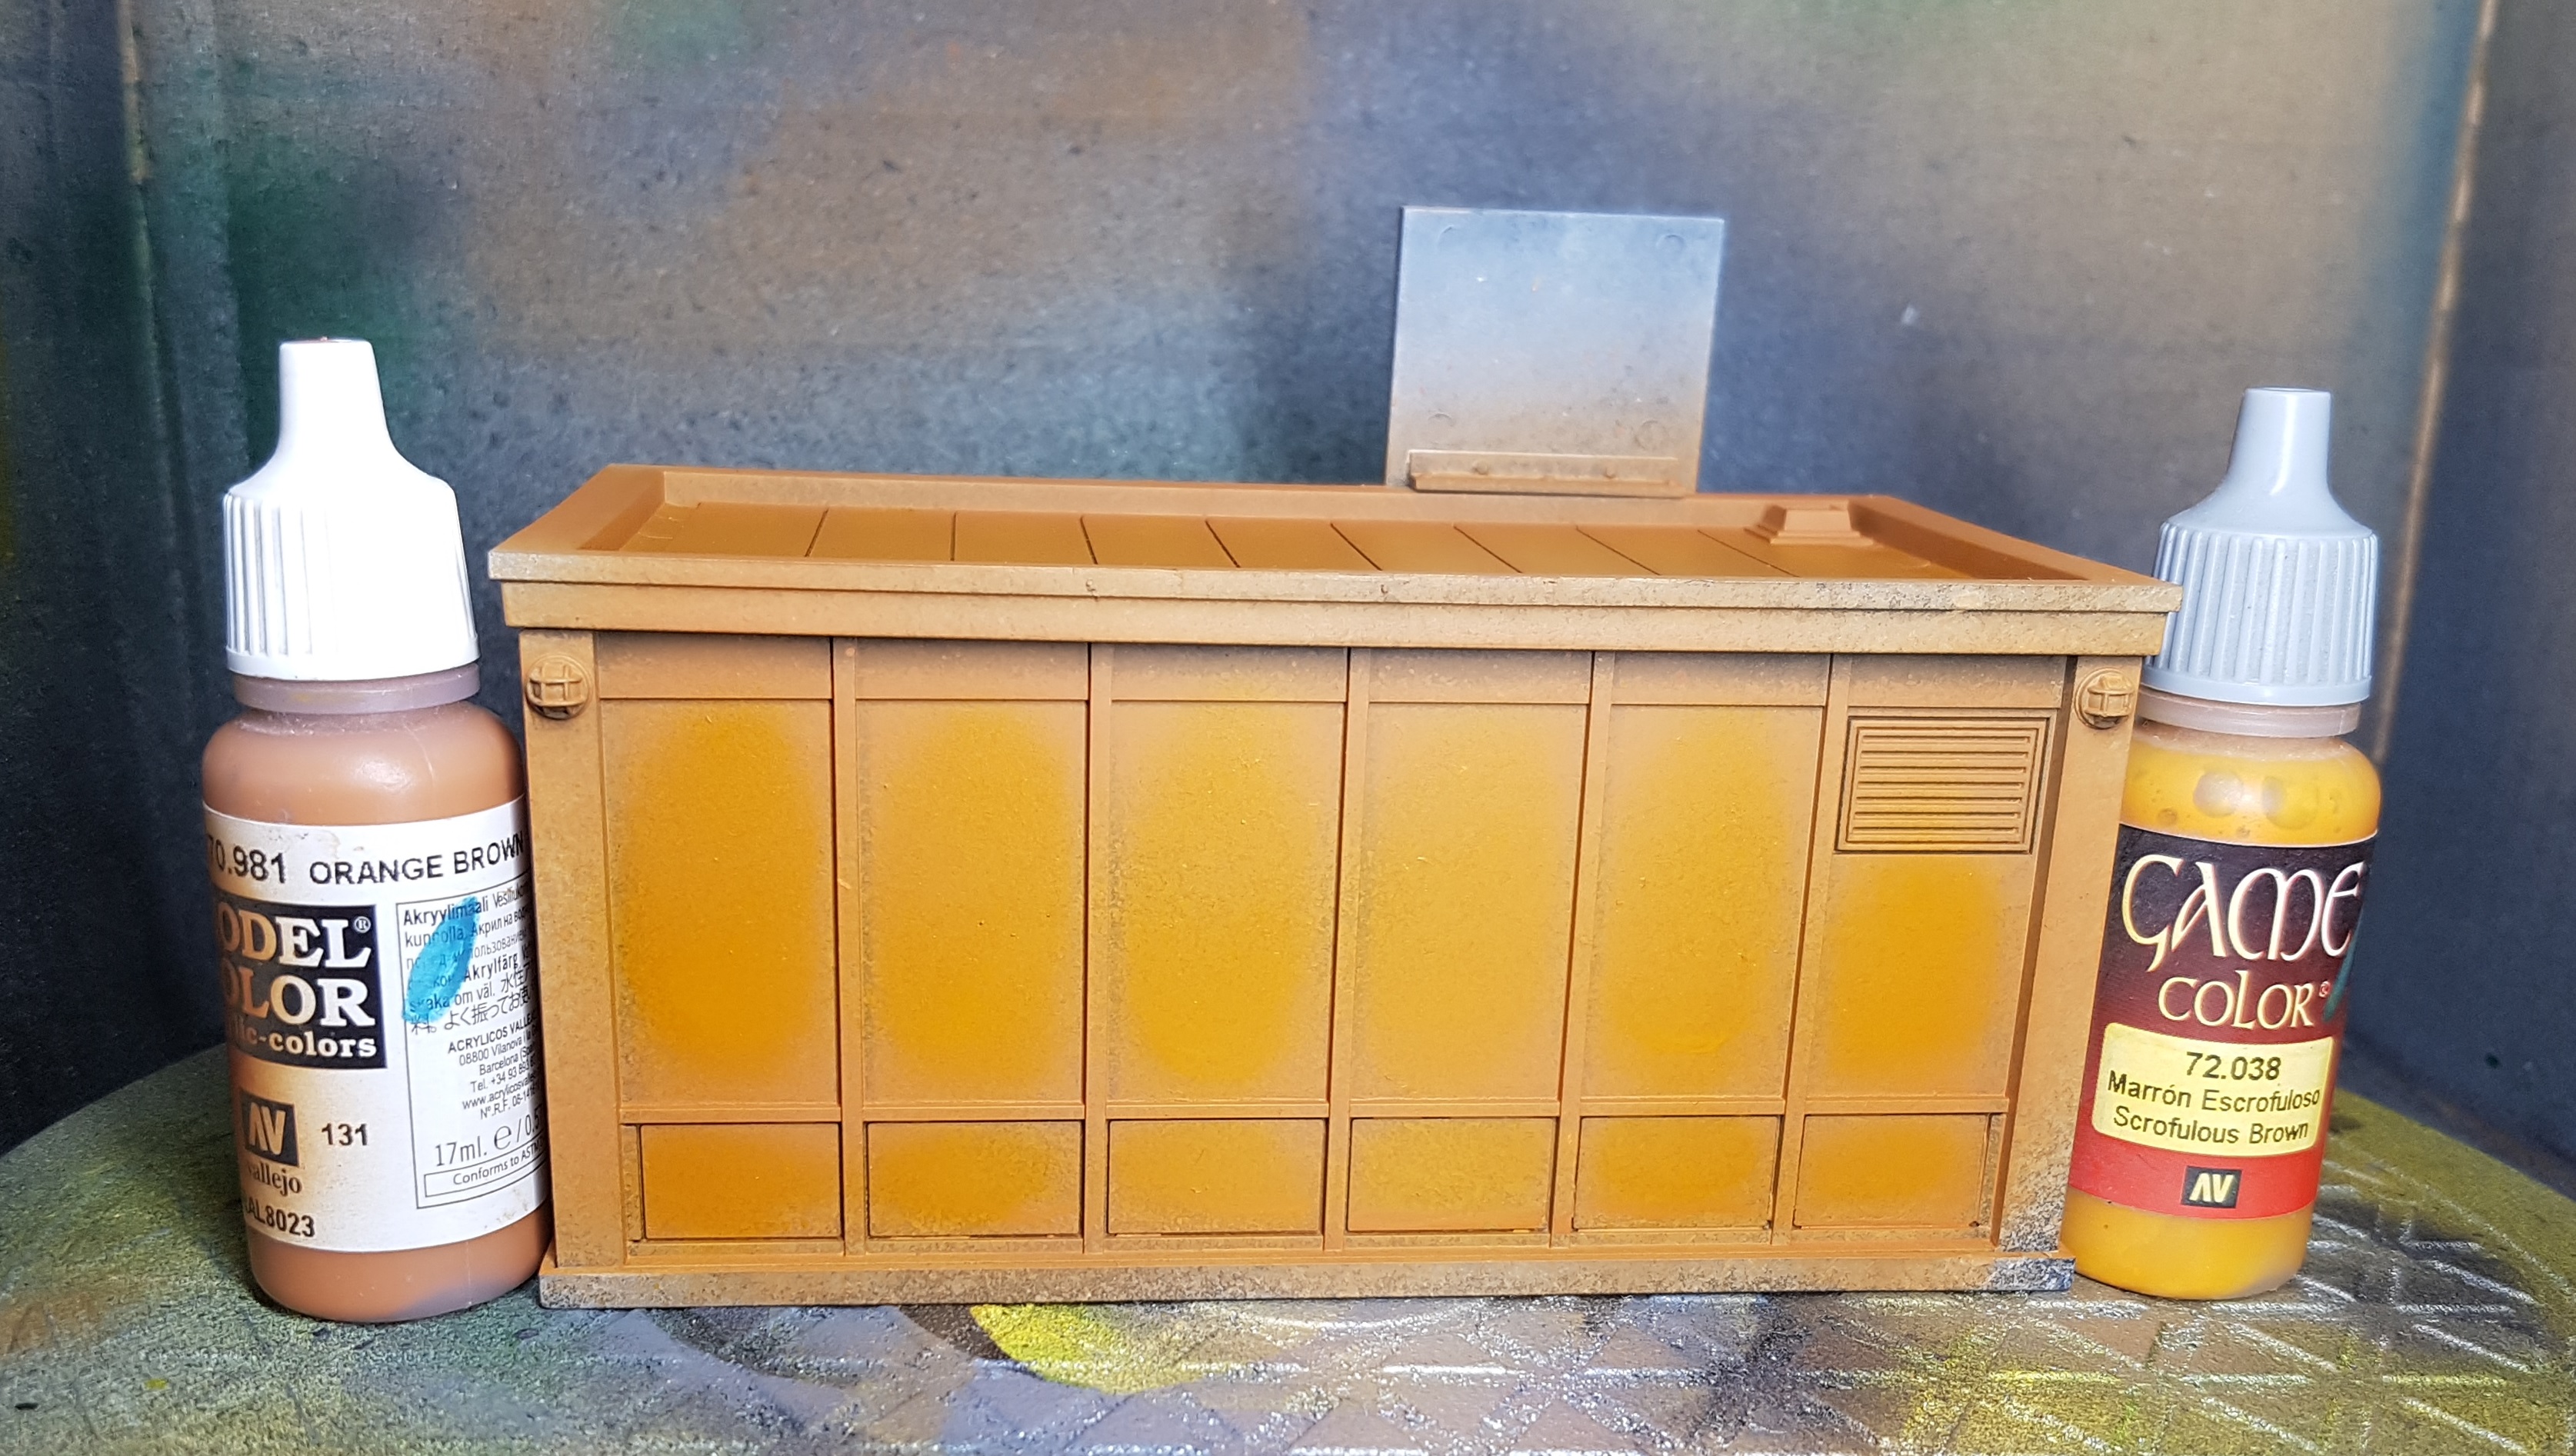
The same approach was taken on the orange shacks. I based with VMC 70.981 Orange Brown and highlighted with VGC 72.038 Scrofulous Brown.
The voids were painted with a very dark grey. I didn’t have one to hand so I added a little VMC 70.869 Basalt Grey to GW Abaddon Black. It took a lot of black to keep it dark. I thought the black would be the dominant colour in the mix, but I was very wrong. We want a near black, but not actual black.
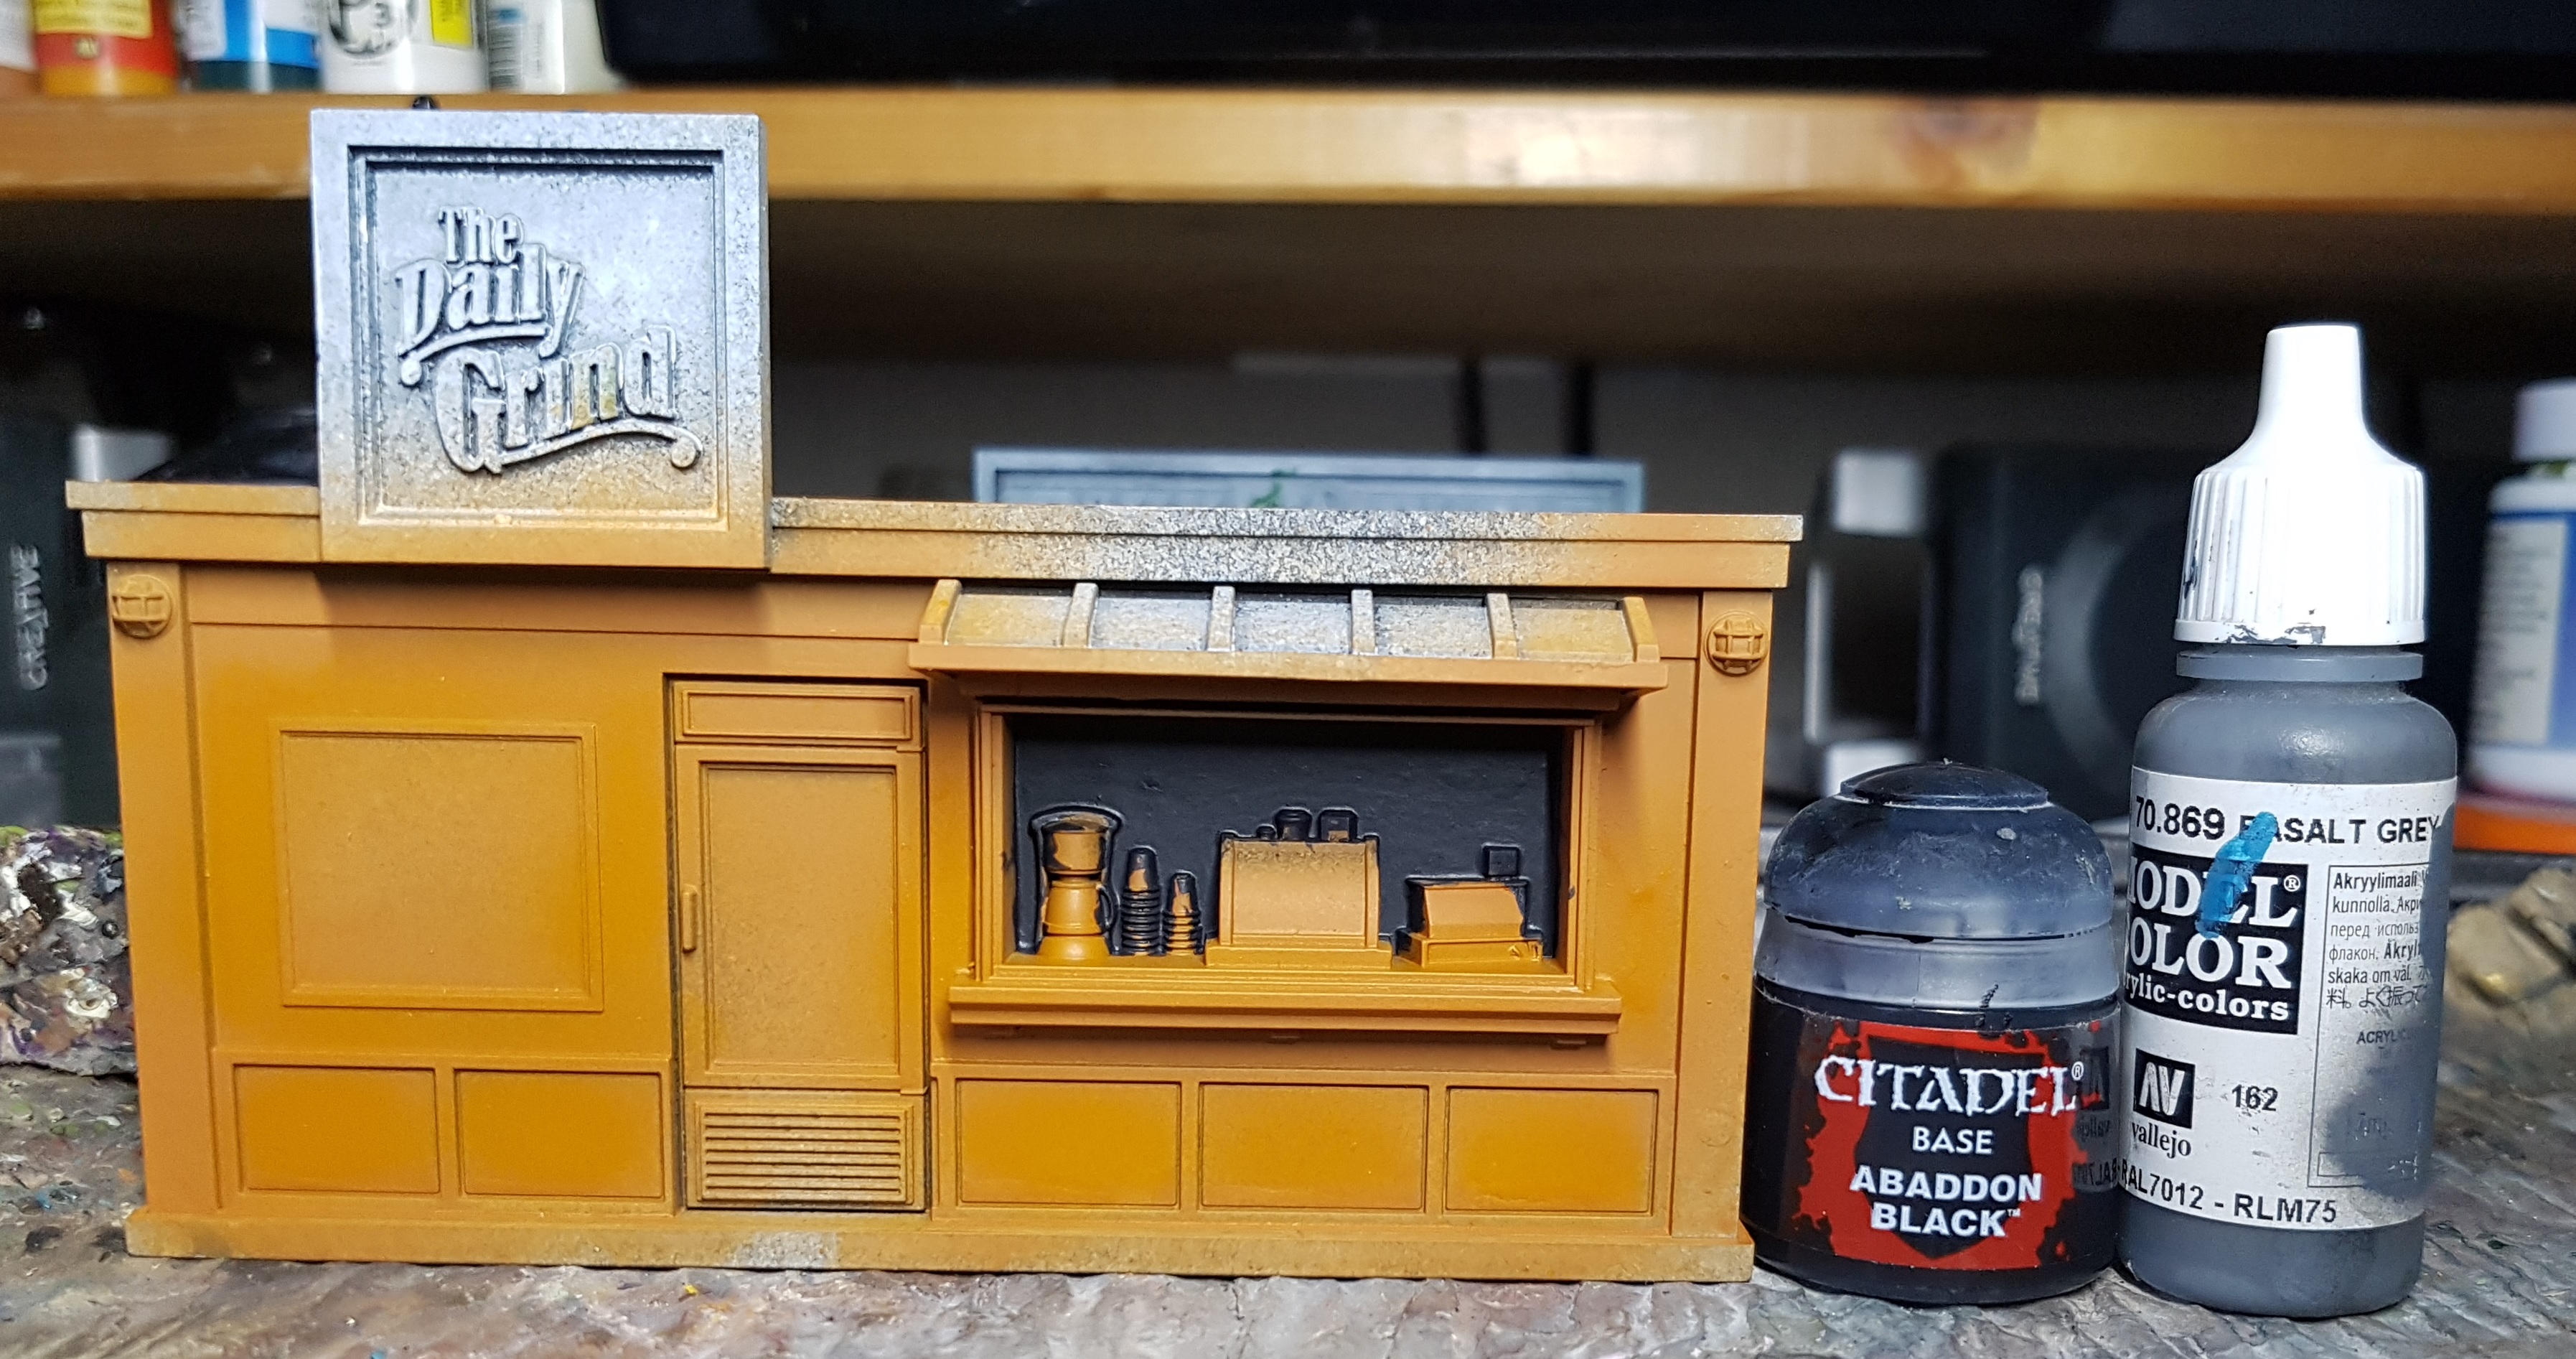
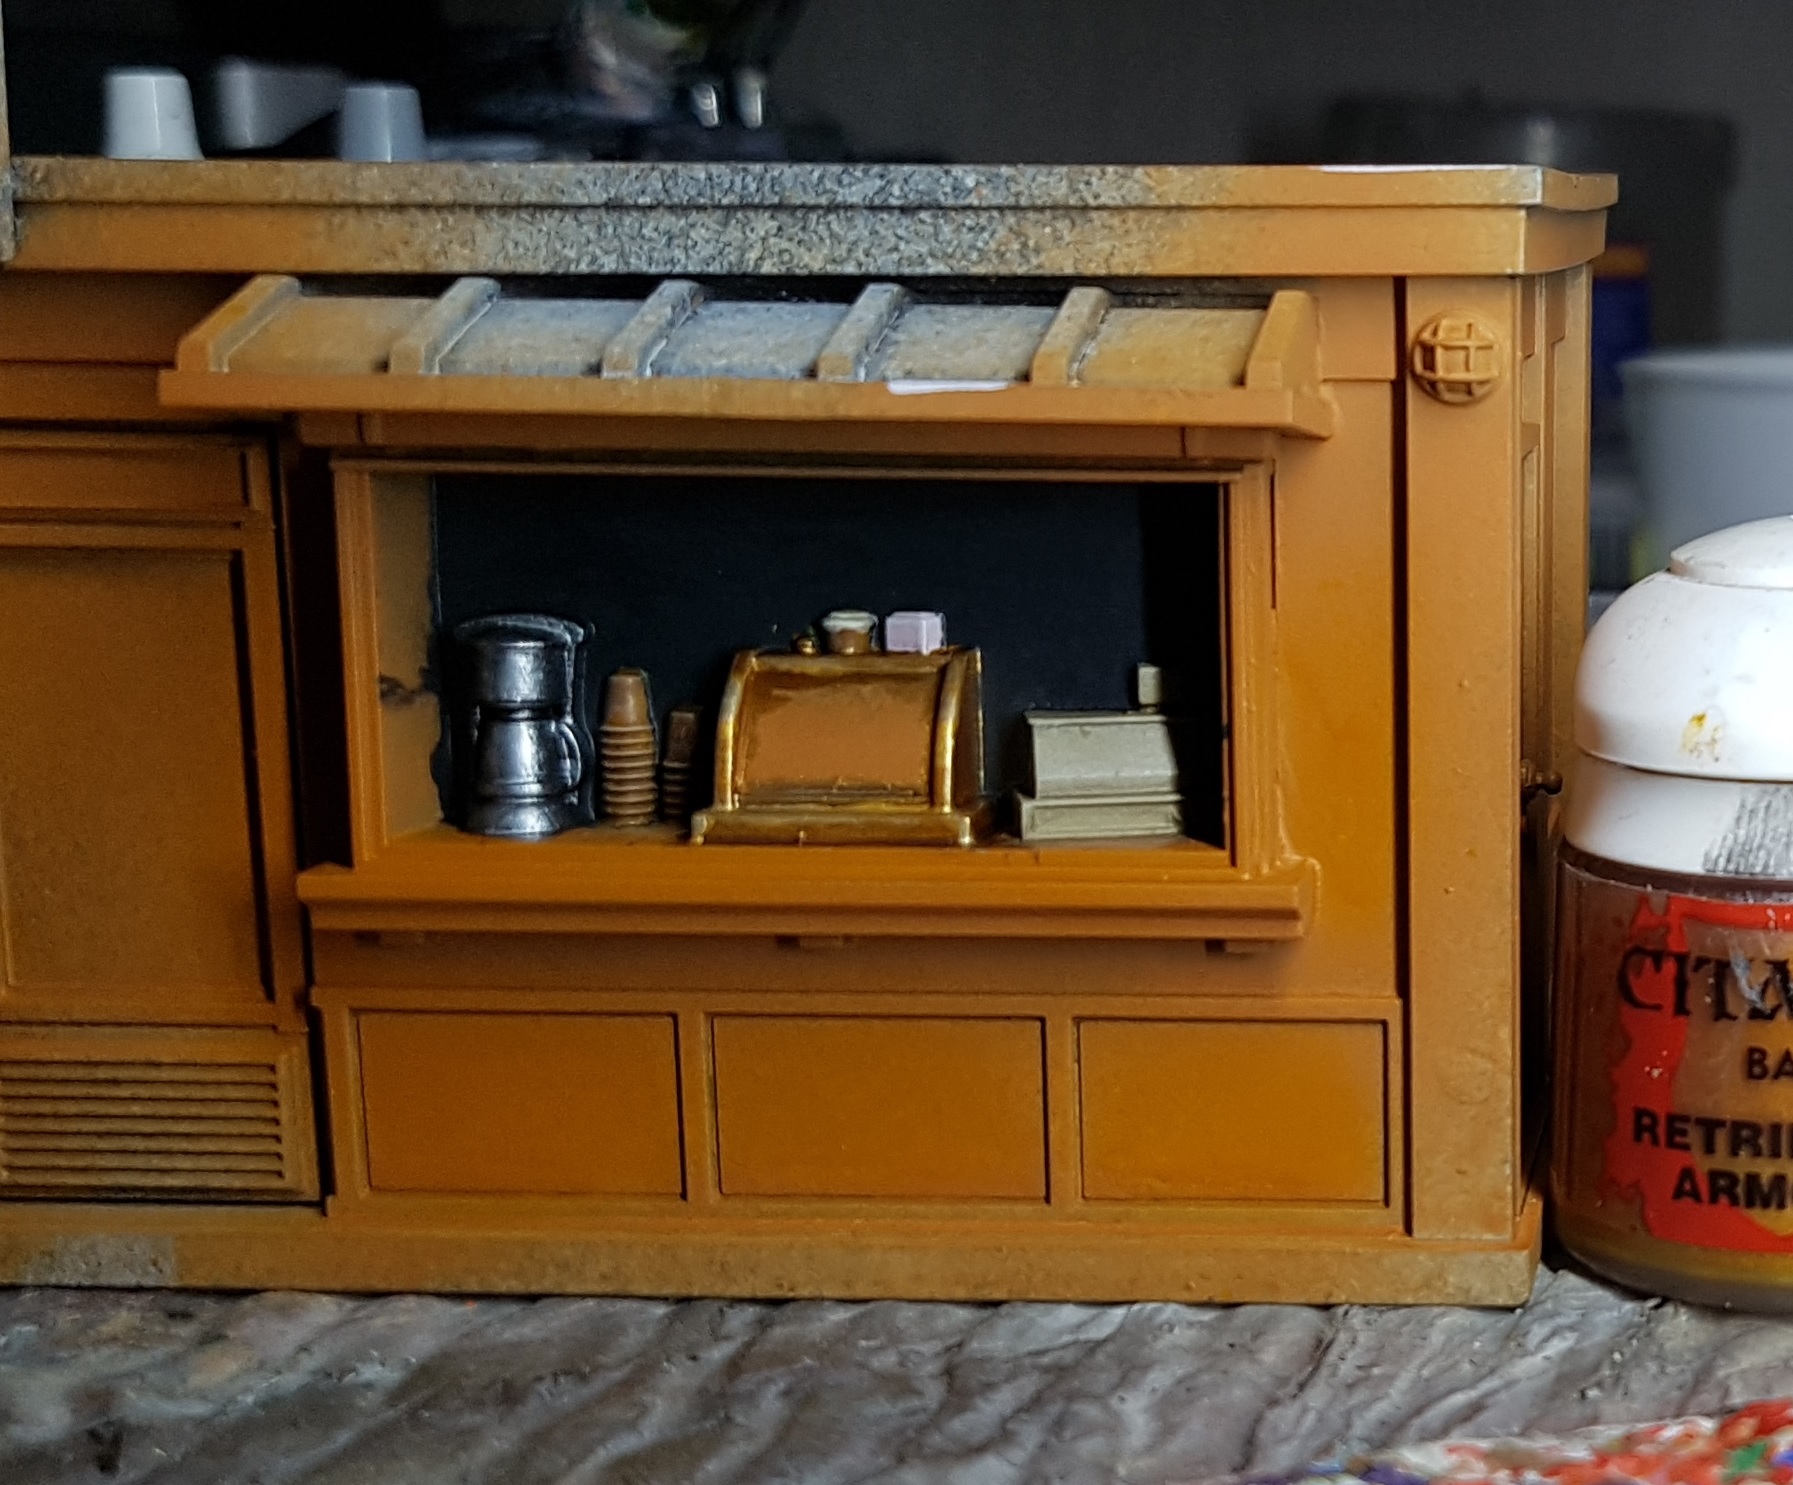
All three shacks have cash registers so lets get them done next. Colour choices on these windows is going to be a pain. I can’t use blacks/dark greys. Blues will create problems with the windows later. I don’t want colours to similar to the walls. To make things worse some idiot keeps putting clear glass items in and expects us to paint them!
Cash Registers
Base VMC 70.988 Khaki
Pinwash GW Agrax Earthshade
Careful Drybrush P3 Menoth White Base
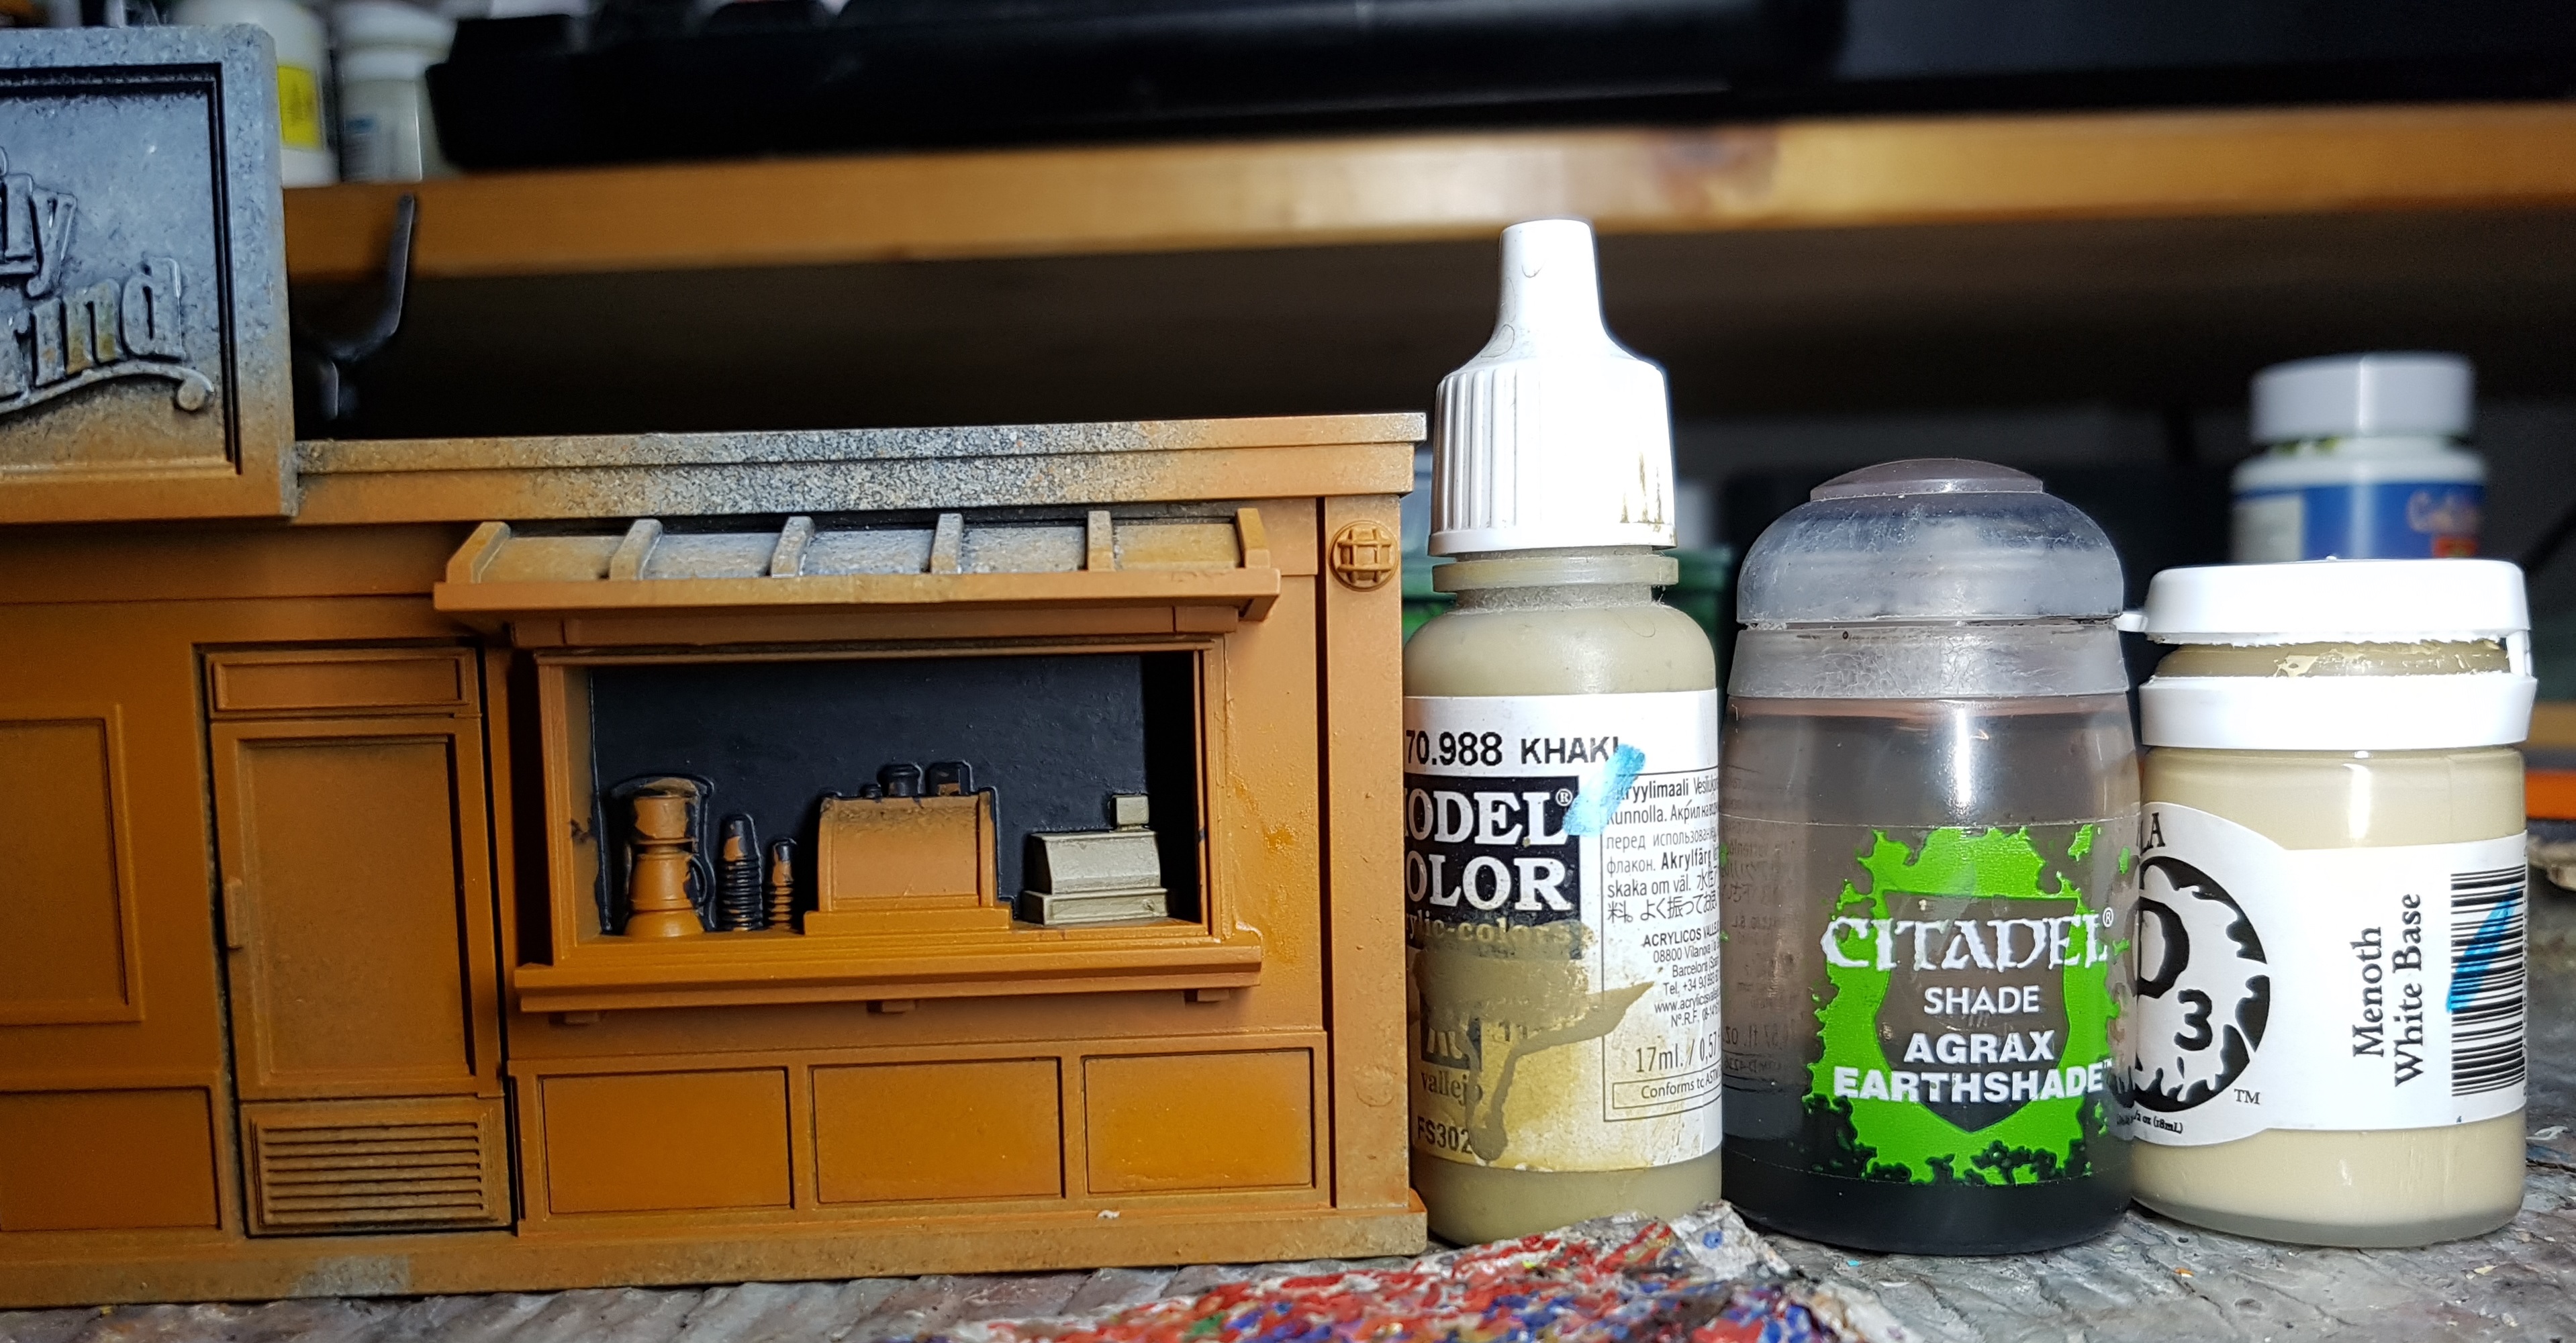
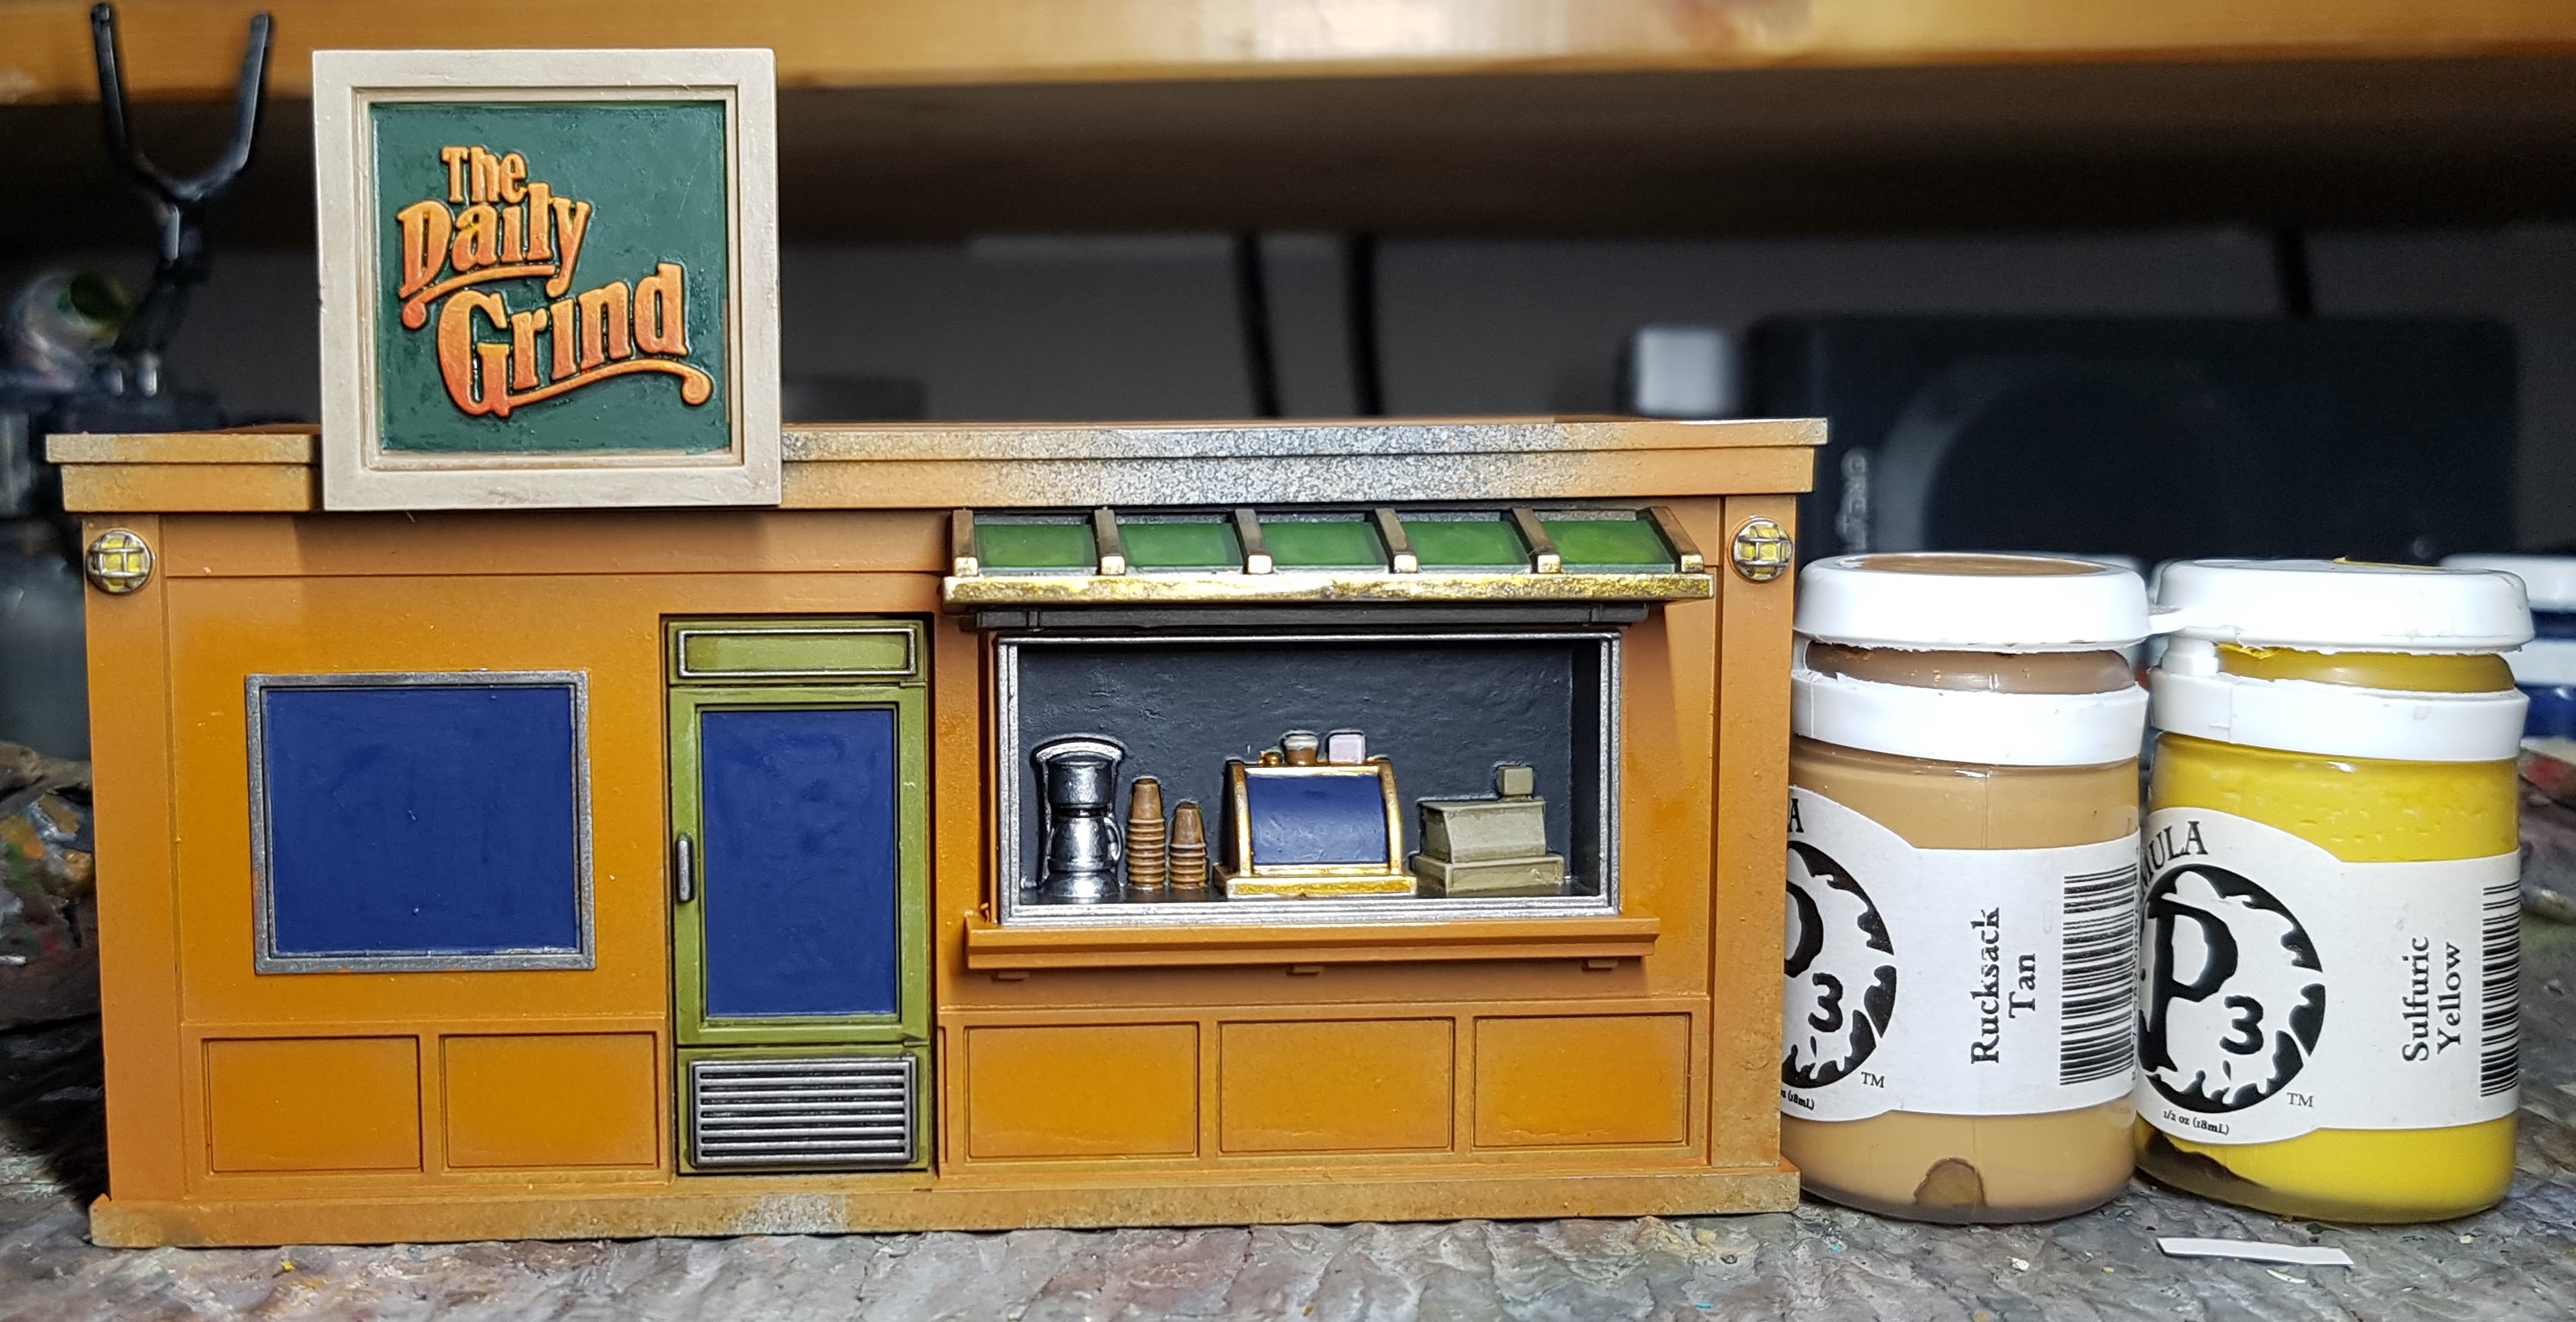
The cups were up next. Another beige-ish colour in a small space. I fear this is going to be an issue with these things. I’ll do what I can
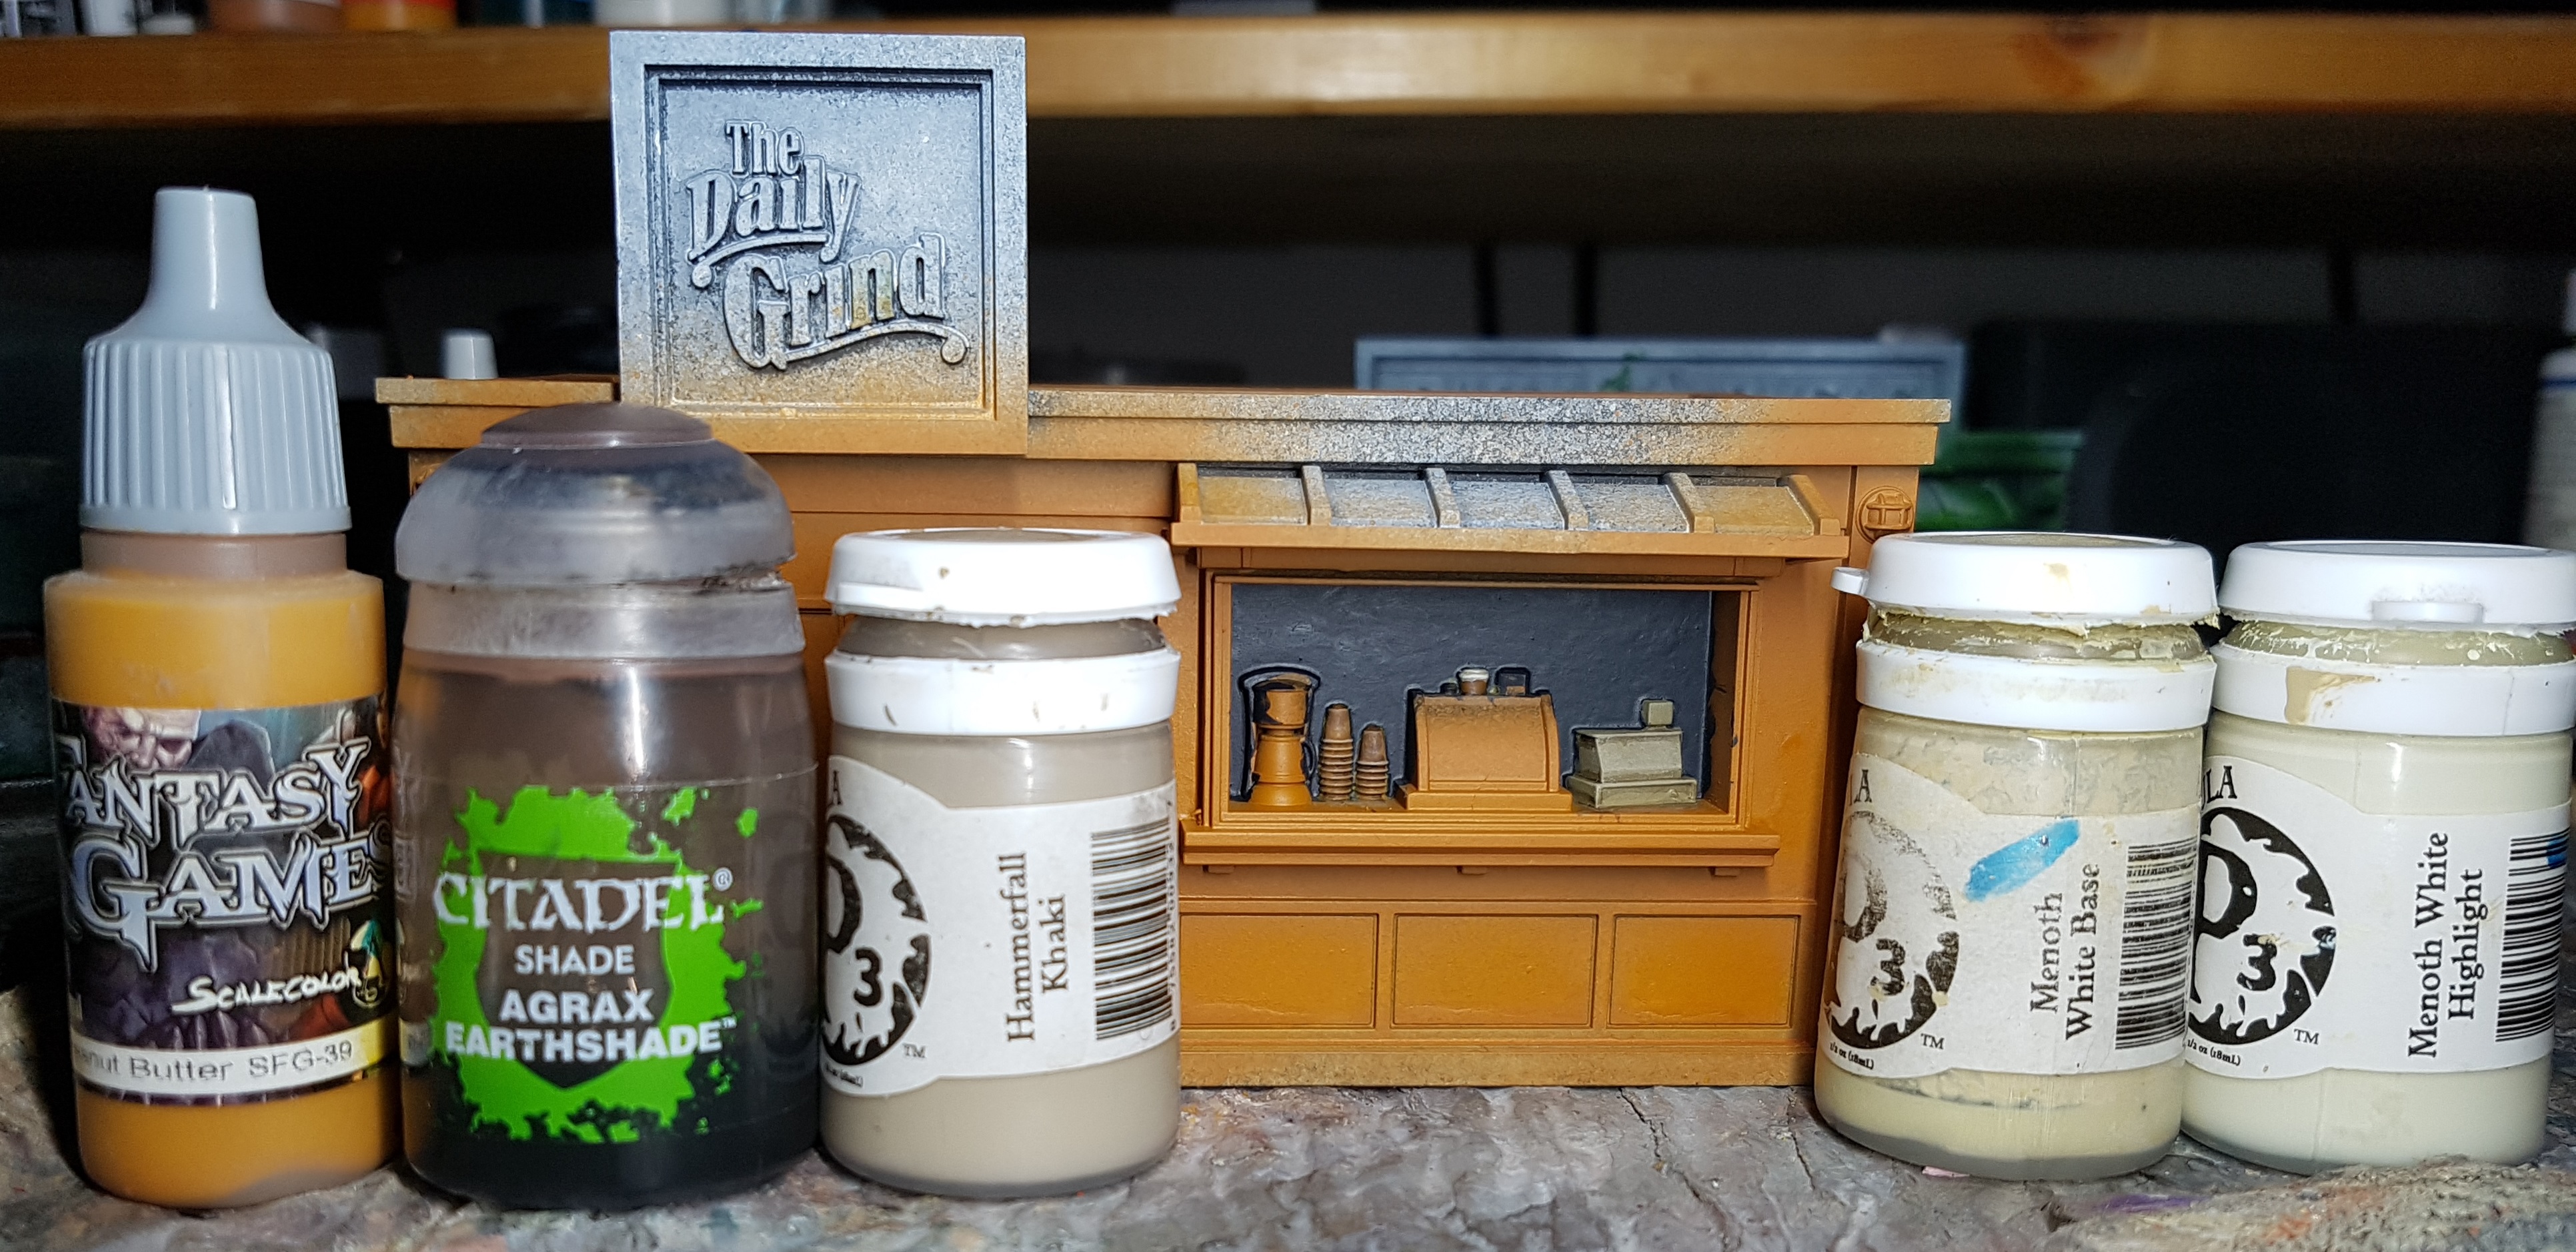
Paper Cups
Base Scalecolour SFG-39 peanut Butter
Wash GW Agrax Earthshade
Drybrush P3 Hammerfall Khaki
The cup on top of that cake display box has a beigy-white lid
Plastic Lid
Base P3 Menoth White Base
Highlight P3 Menoth White Highlight
Corporate Art Finished
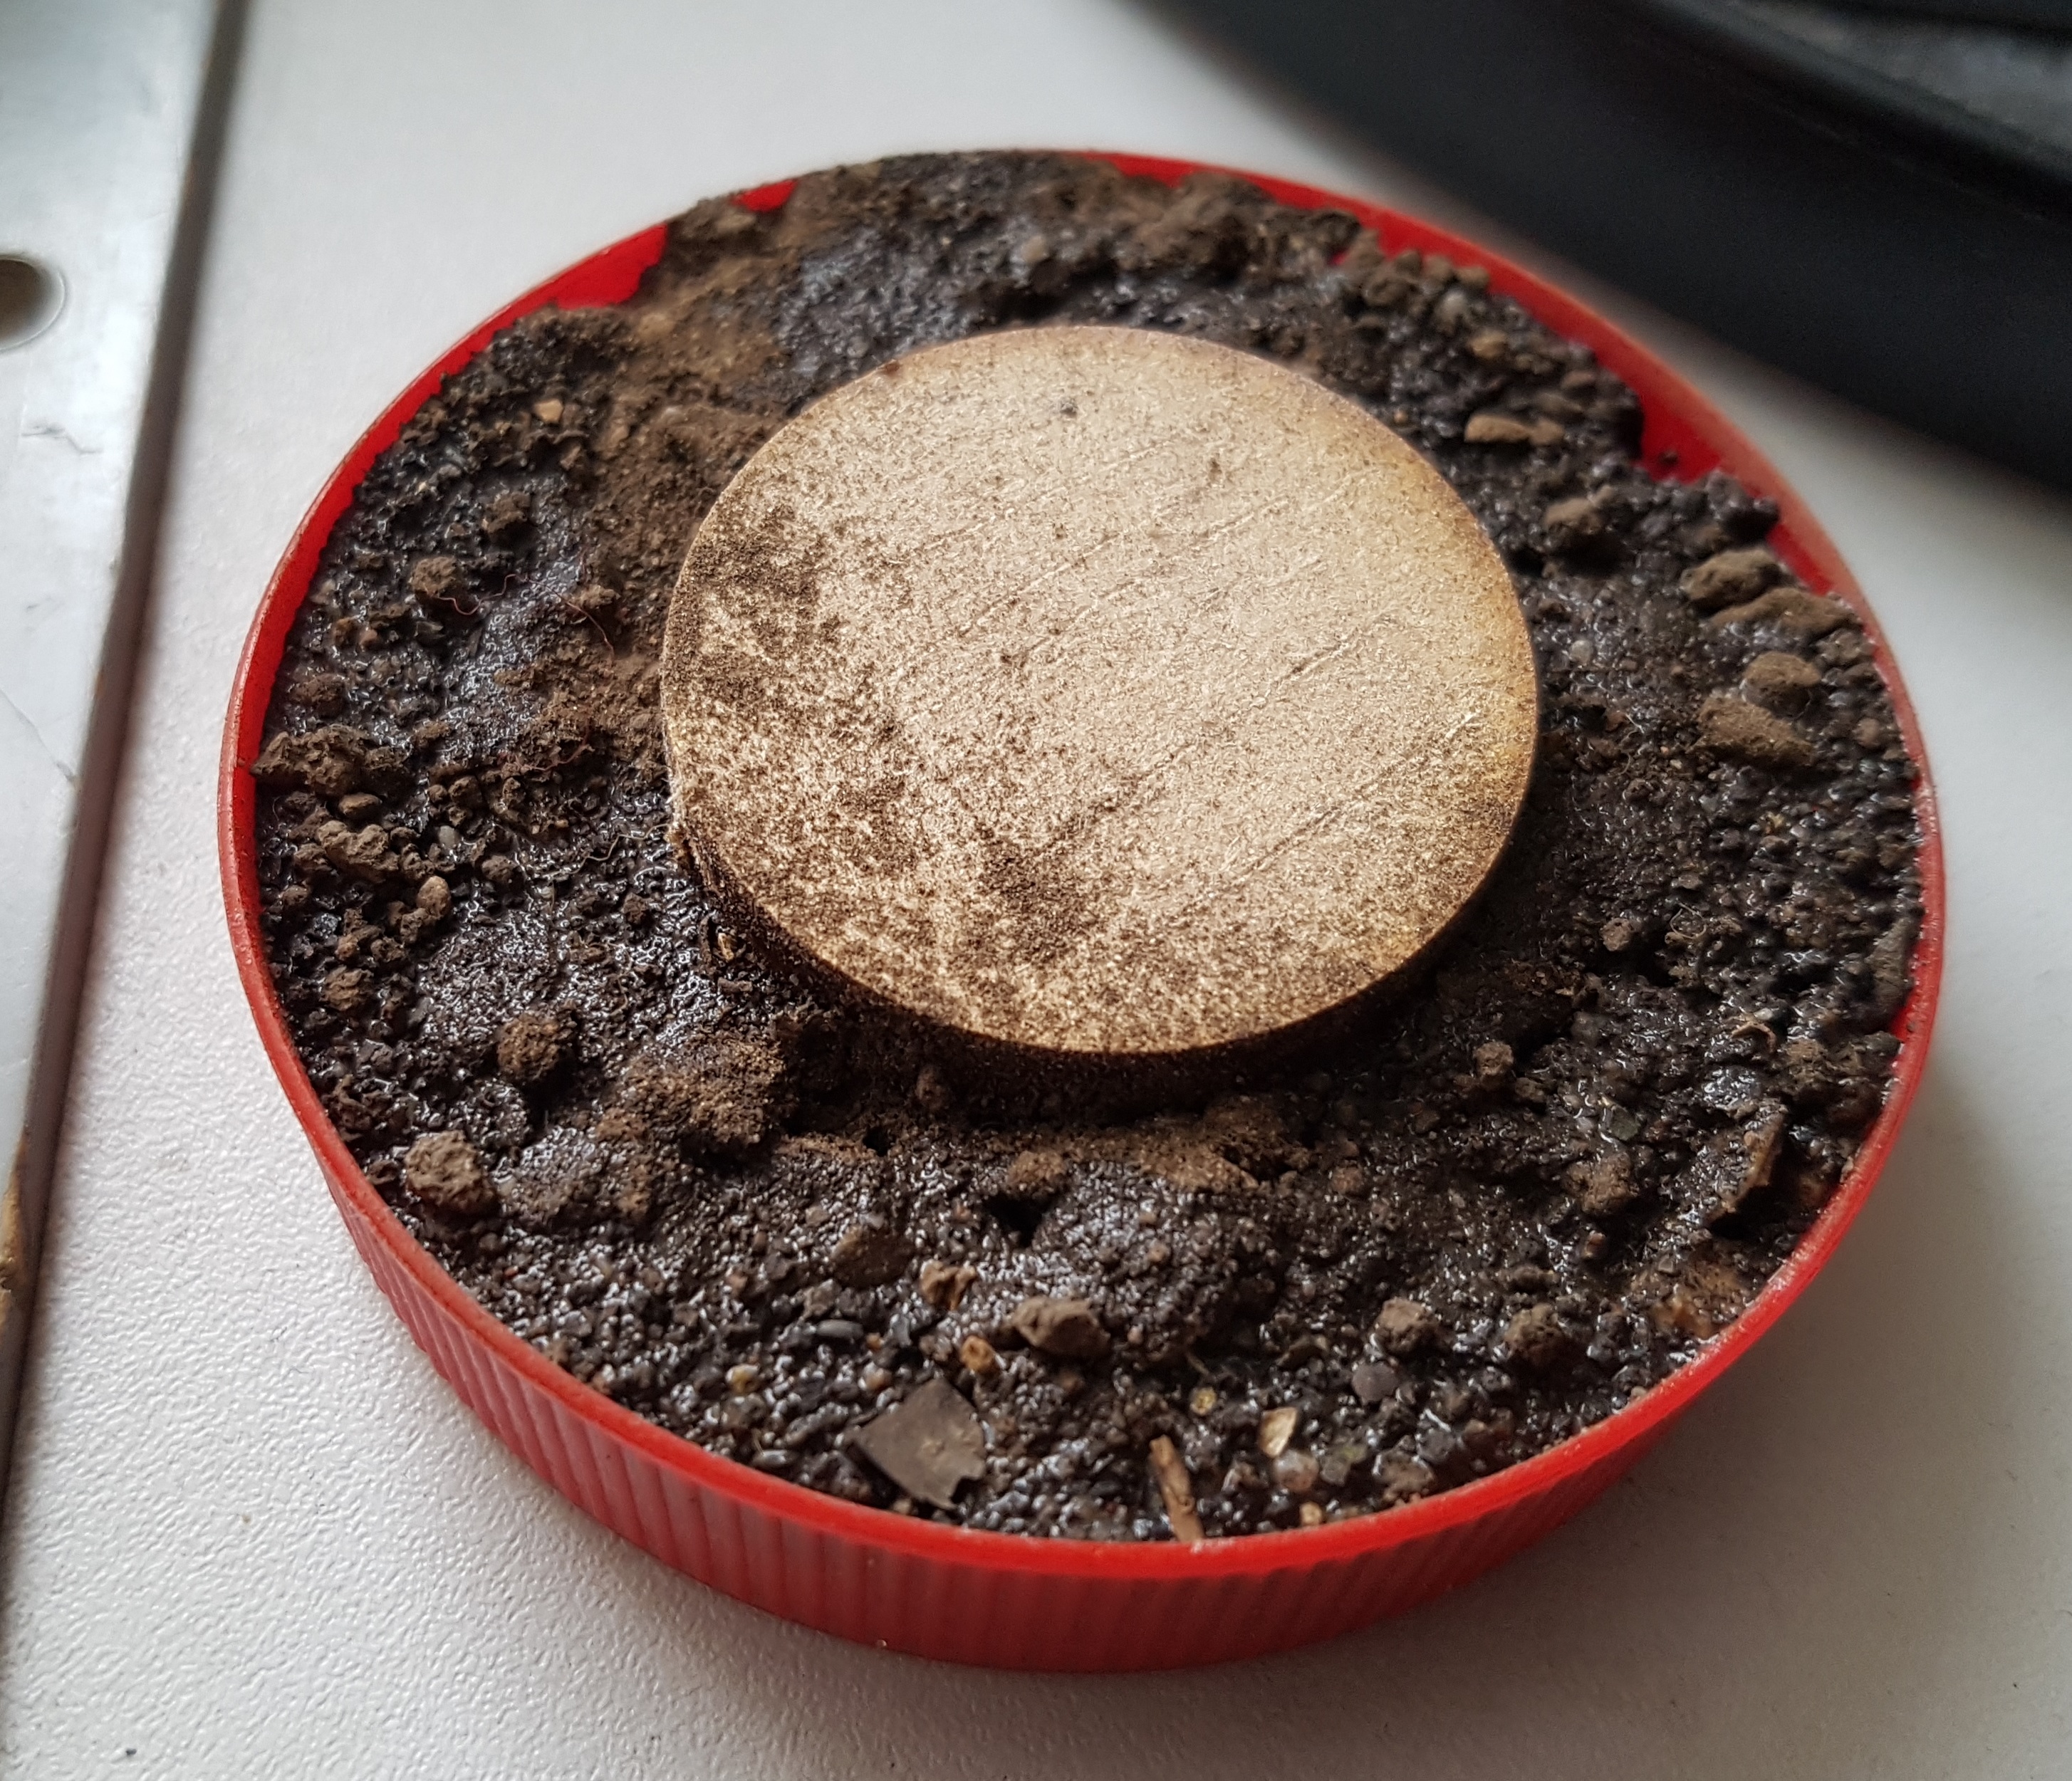
I ended up soaking it with thinned PVA one more time, but it was still springy. I glued some more dirt over the top to level it off, then sealed that with a final coat of thinned PVA. The planter itself was painted the same as the paving on the bases. The mud itself was based with P3 Umbral Umber mixed with PVA Brown Ink. It was drybrushed with P3 Rucksack Tan and then P3 Jack Bone. I then glued down flowery tufts in a symmetrical pattern, as if it is a fresh, planned, and maintained flower bed. Once I was done I glued on the sculpture.
What do you think? I’ll have to get a pic of it in situ later. Imagine this with a couple of park benches backed up to it, and someone sat on one eating a sandwich and some pigeons trying to get the crumbs.


I’ve almost finished the shacks. I just need another couple of hours. It’s just the windows to go. Not only did I run out of time, but Ghools Youtube channel appears to have vanished and I can’t entirely remember how I did the car windows and I want them to match. Anyone know why his channel has gone down, or know a way I can get to that video again? I can try and repeat my efforts from memory but I’m afraid or ruining the last 2 weeks worth of work.
Daily Bugle & Daily Grind WIP Part 2
Back to the shacks.
The percolator, and some other details annoy me here. Whoever sculpted these did a good job, but clearly didn’t think about painting them. Google percolators. They’re all a mix of chrome, black and glass. I can’t use black against that black background. I don’t want to paint the jug as glass because it’ll be half brown coffee and half black background, or reflect the sky. I don’t like either in this location. In the studio scheme the shelf/window frame its sat on is steel, so chrome won’t differentiate too well, built feels like my best awkward option.
Percolator
Base: Reaper 89556 Adamantine
Layer: VGC 72.053 Chainmail
Layer: Chainmail mixed with VMA 71.064 Chrome
There’s a box or something on top of that cake stand. Lets assume its a takeaway cake box and paint it pink.
Small Cake Box
Base: P3 Carnal Pink
Edge Highlight: Carnal Pink mixed with White
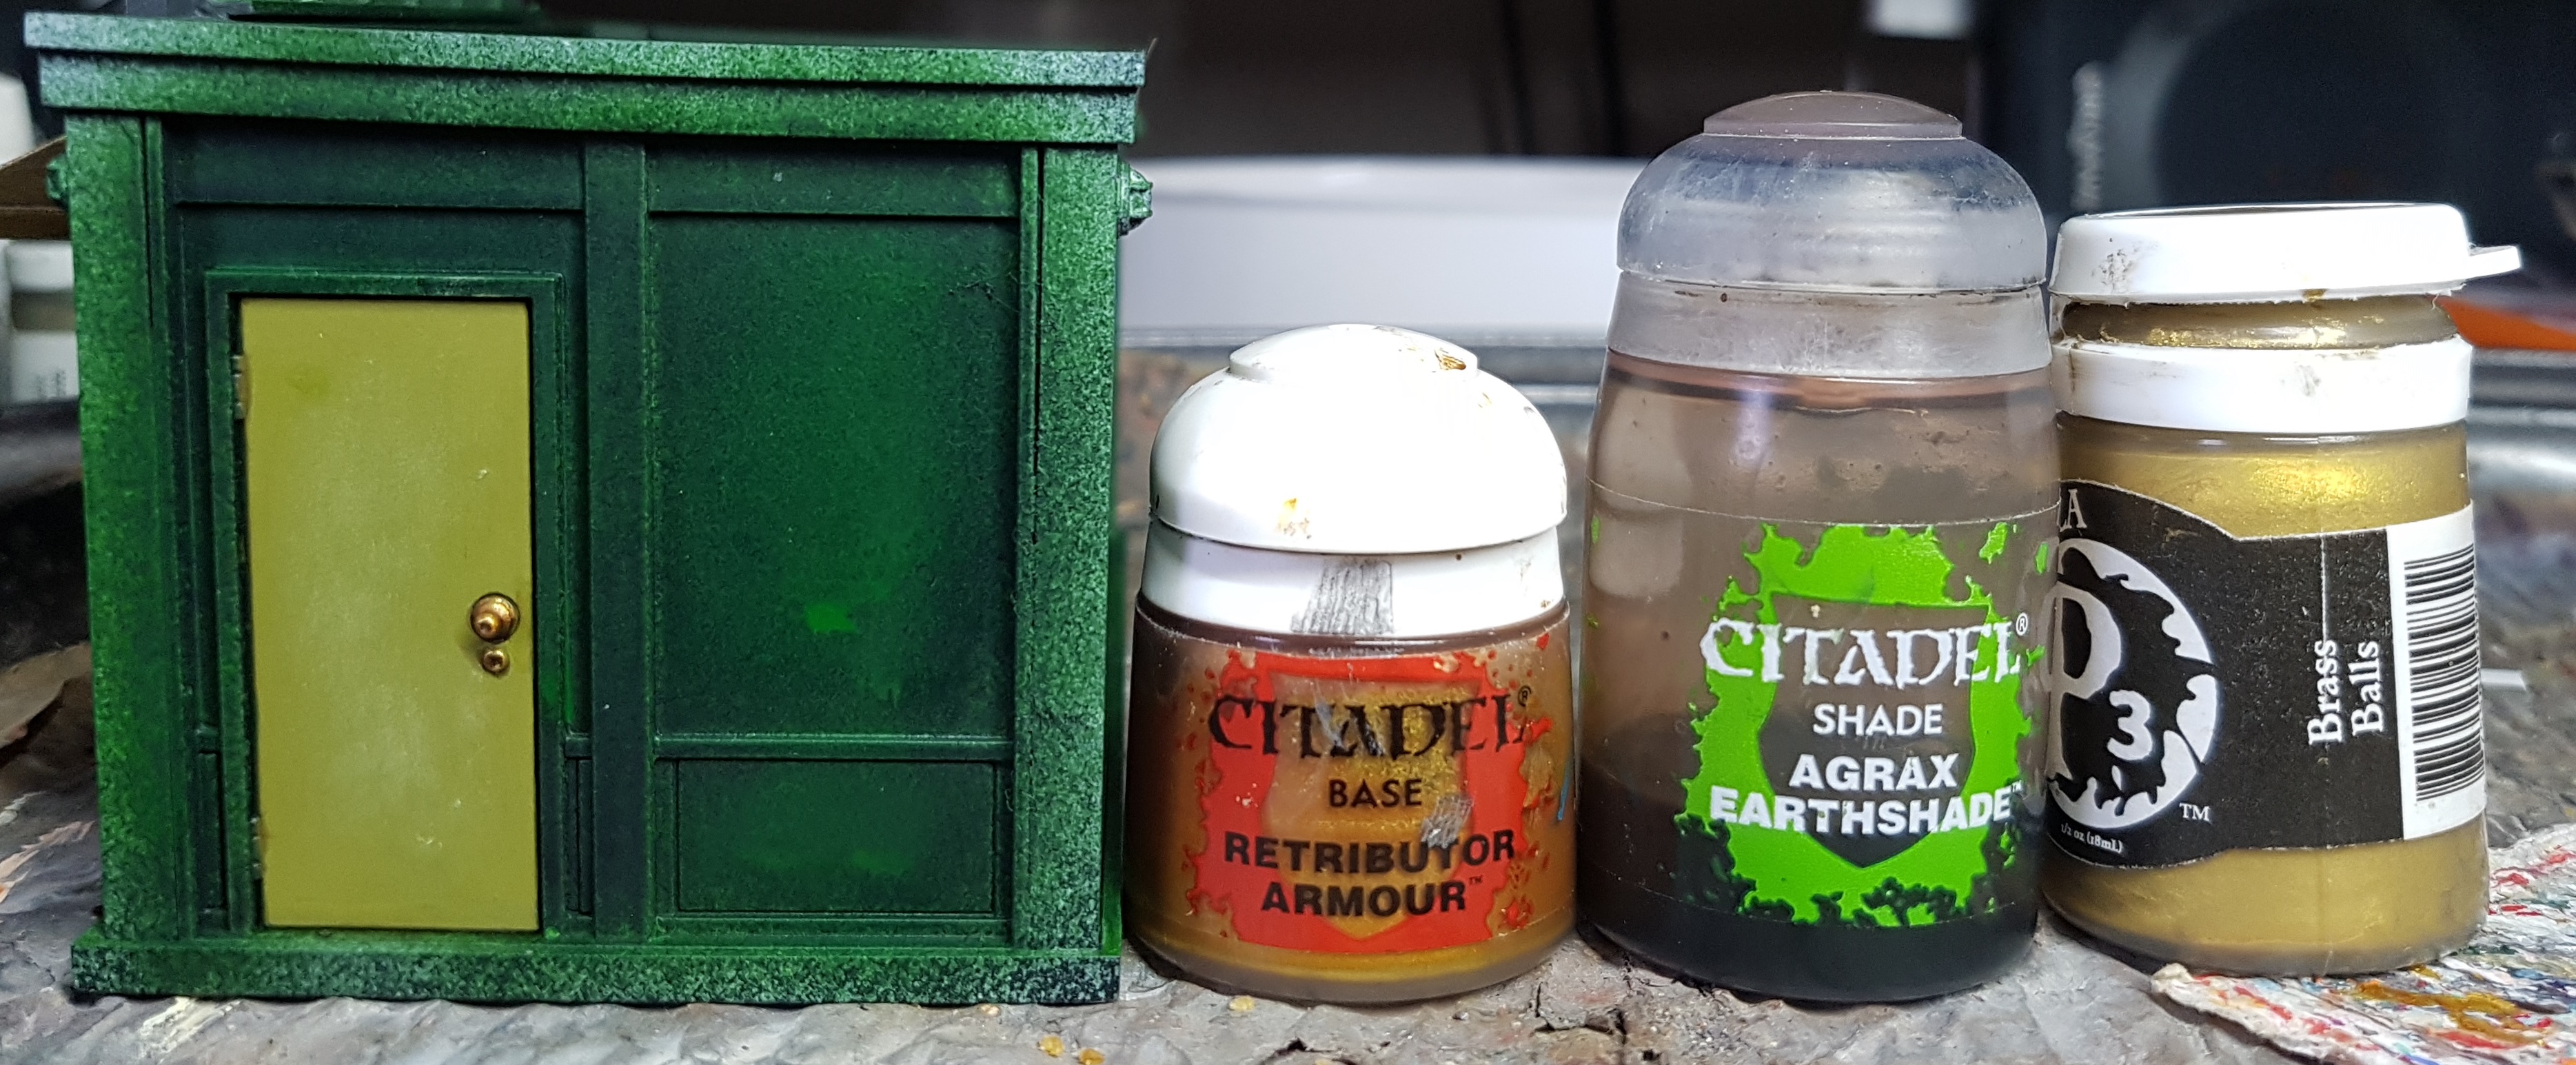
That cake stand is annoying. What sort of monster puts a clear glass box there which clearly should have cakes visible through it? Screw it. I’m treating it the same as the windows, which will match the cars I did earlier. Still, I need to paint it’s gold frame first. I’ll do all the glass last.
Cake Stand Frame
Base: GW Retributor Gold
Wash: GW Agrax Earthshade
Highlight: Retributor Gold
Highlight: Retributor Gold mixed with P3 Solid Gold
Highlight: P3 Solid Gold
Highlight: P3 Solid Gold mixed with P3 Radiant Platinum
Layer: Chrome
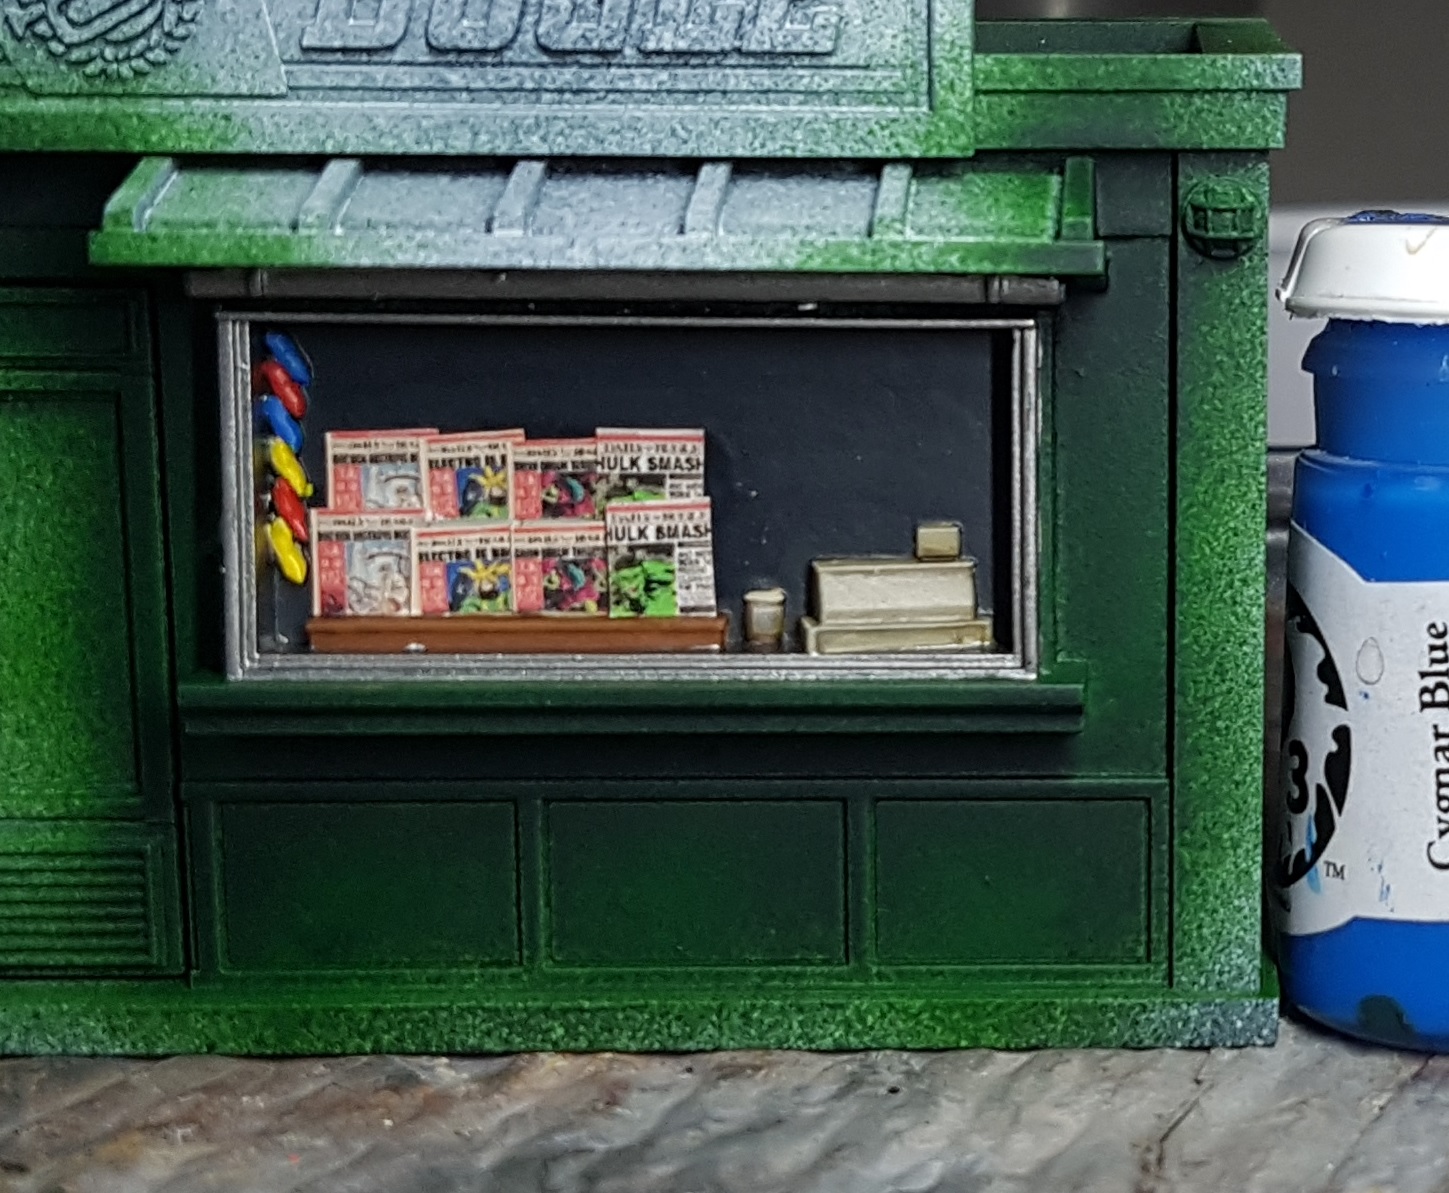
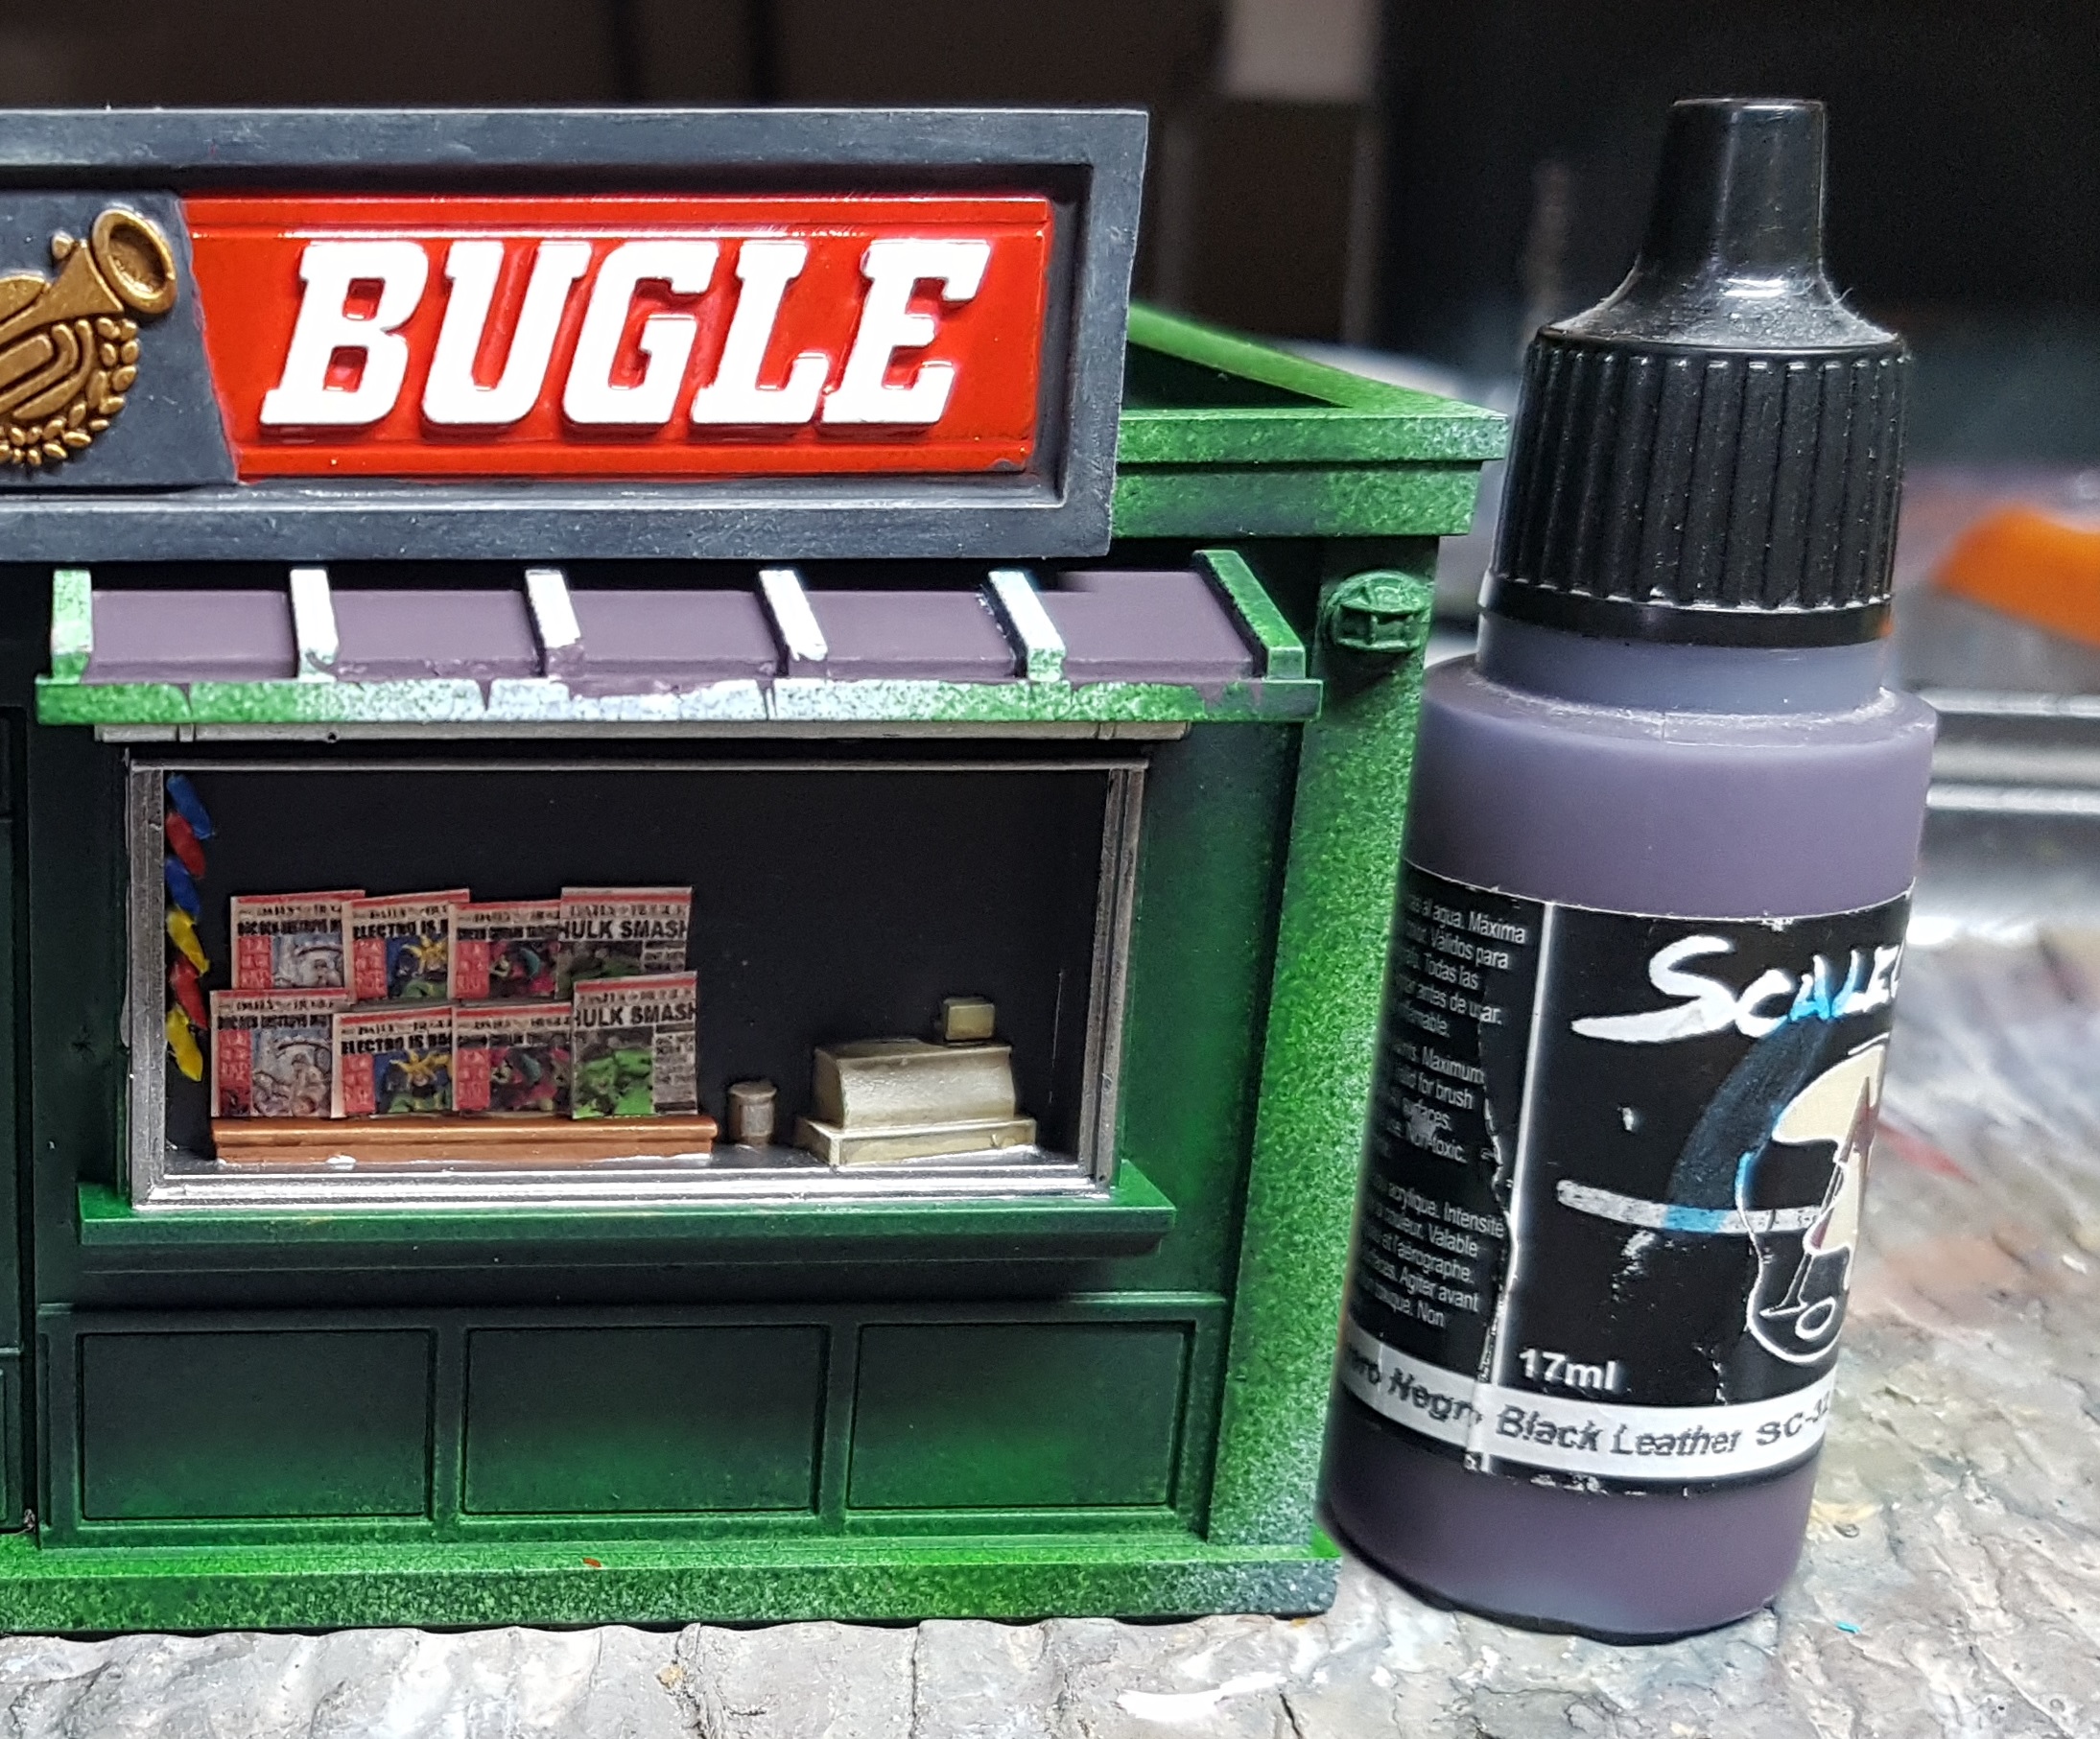
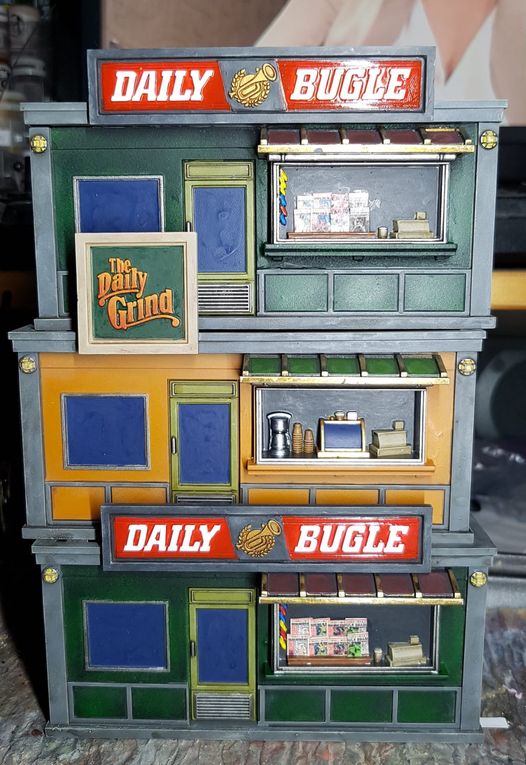
Back to the Daily Bugles.
Here’s my next gripe. They thought it was a good idea to expect people to freehand paint 8 newspapers on this terrain piece in the starter set! Hell no! I’ve been painting for 10+ years and I still can’t do that. I found some printable newspapers online for use as base decorations. Pretty sure I can glue them here instead. I’ll want an off-white undercoat first to cover any gaps that show through, and to reinforce the white paper than sticks over them. I’d hate to find out too late that the glue makes them semi transparent and the black or green bleeds through.
Newspaper racks
Undercoat newspapers with Reaper 09149 Mouldy Skin
Basecoat wood stand: P3 Bloodstone
Drybrush/Edge Highight: P3 Bogrin Brown
Pinwash: GW Agrax Earthshade
Sorastro linked some marvel themed newspapers, magazines and posters that are ready to print. I tiled it 3 times on a sheet of A4 and printed it actual size. That made them a little too big for this so I cut them down. Try reducing the size by 10-20%? I cut them out and dry fit them to confirm their size. I then glued them on with a little PVA. Once they’d had a few hours to dry I thinned a little PVA and applied this over the top to seal them in. I did this again a day later.
Lastly, it’s the bags of crisps. Do designs if you want. I wanted quick and simple. They’re small and basic.
Crisps
Blue: P3 Cygnar Blue Highlight
Red: P3 Khador Red Base
Yellow: Undercoat P3 Mouldy Ochre then base with P3 Sulfuric yellow
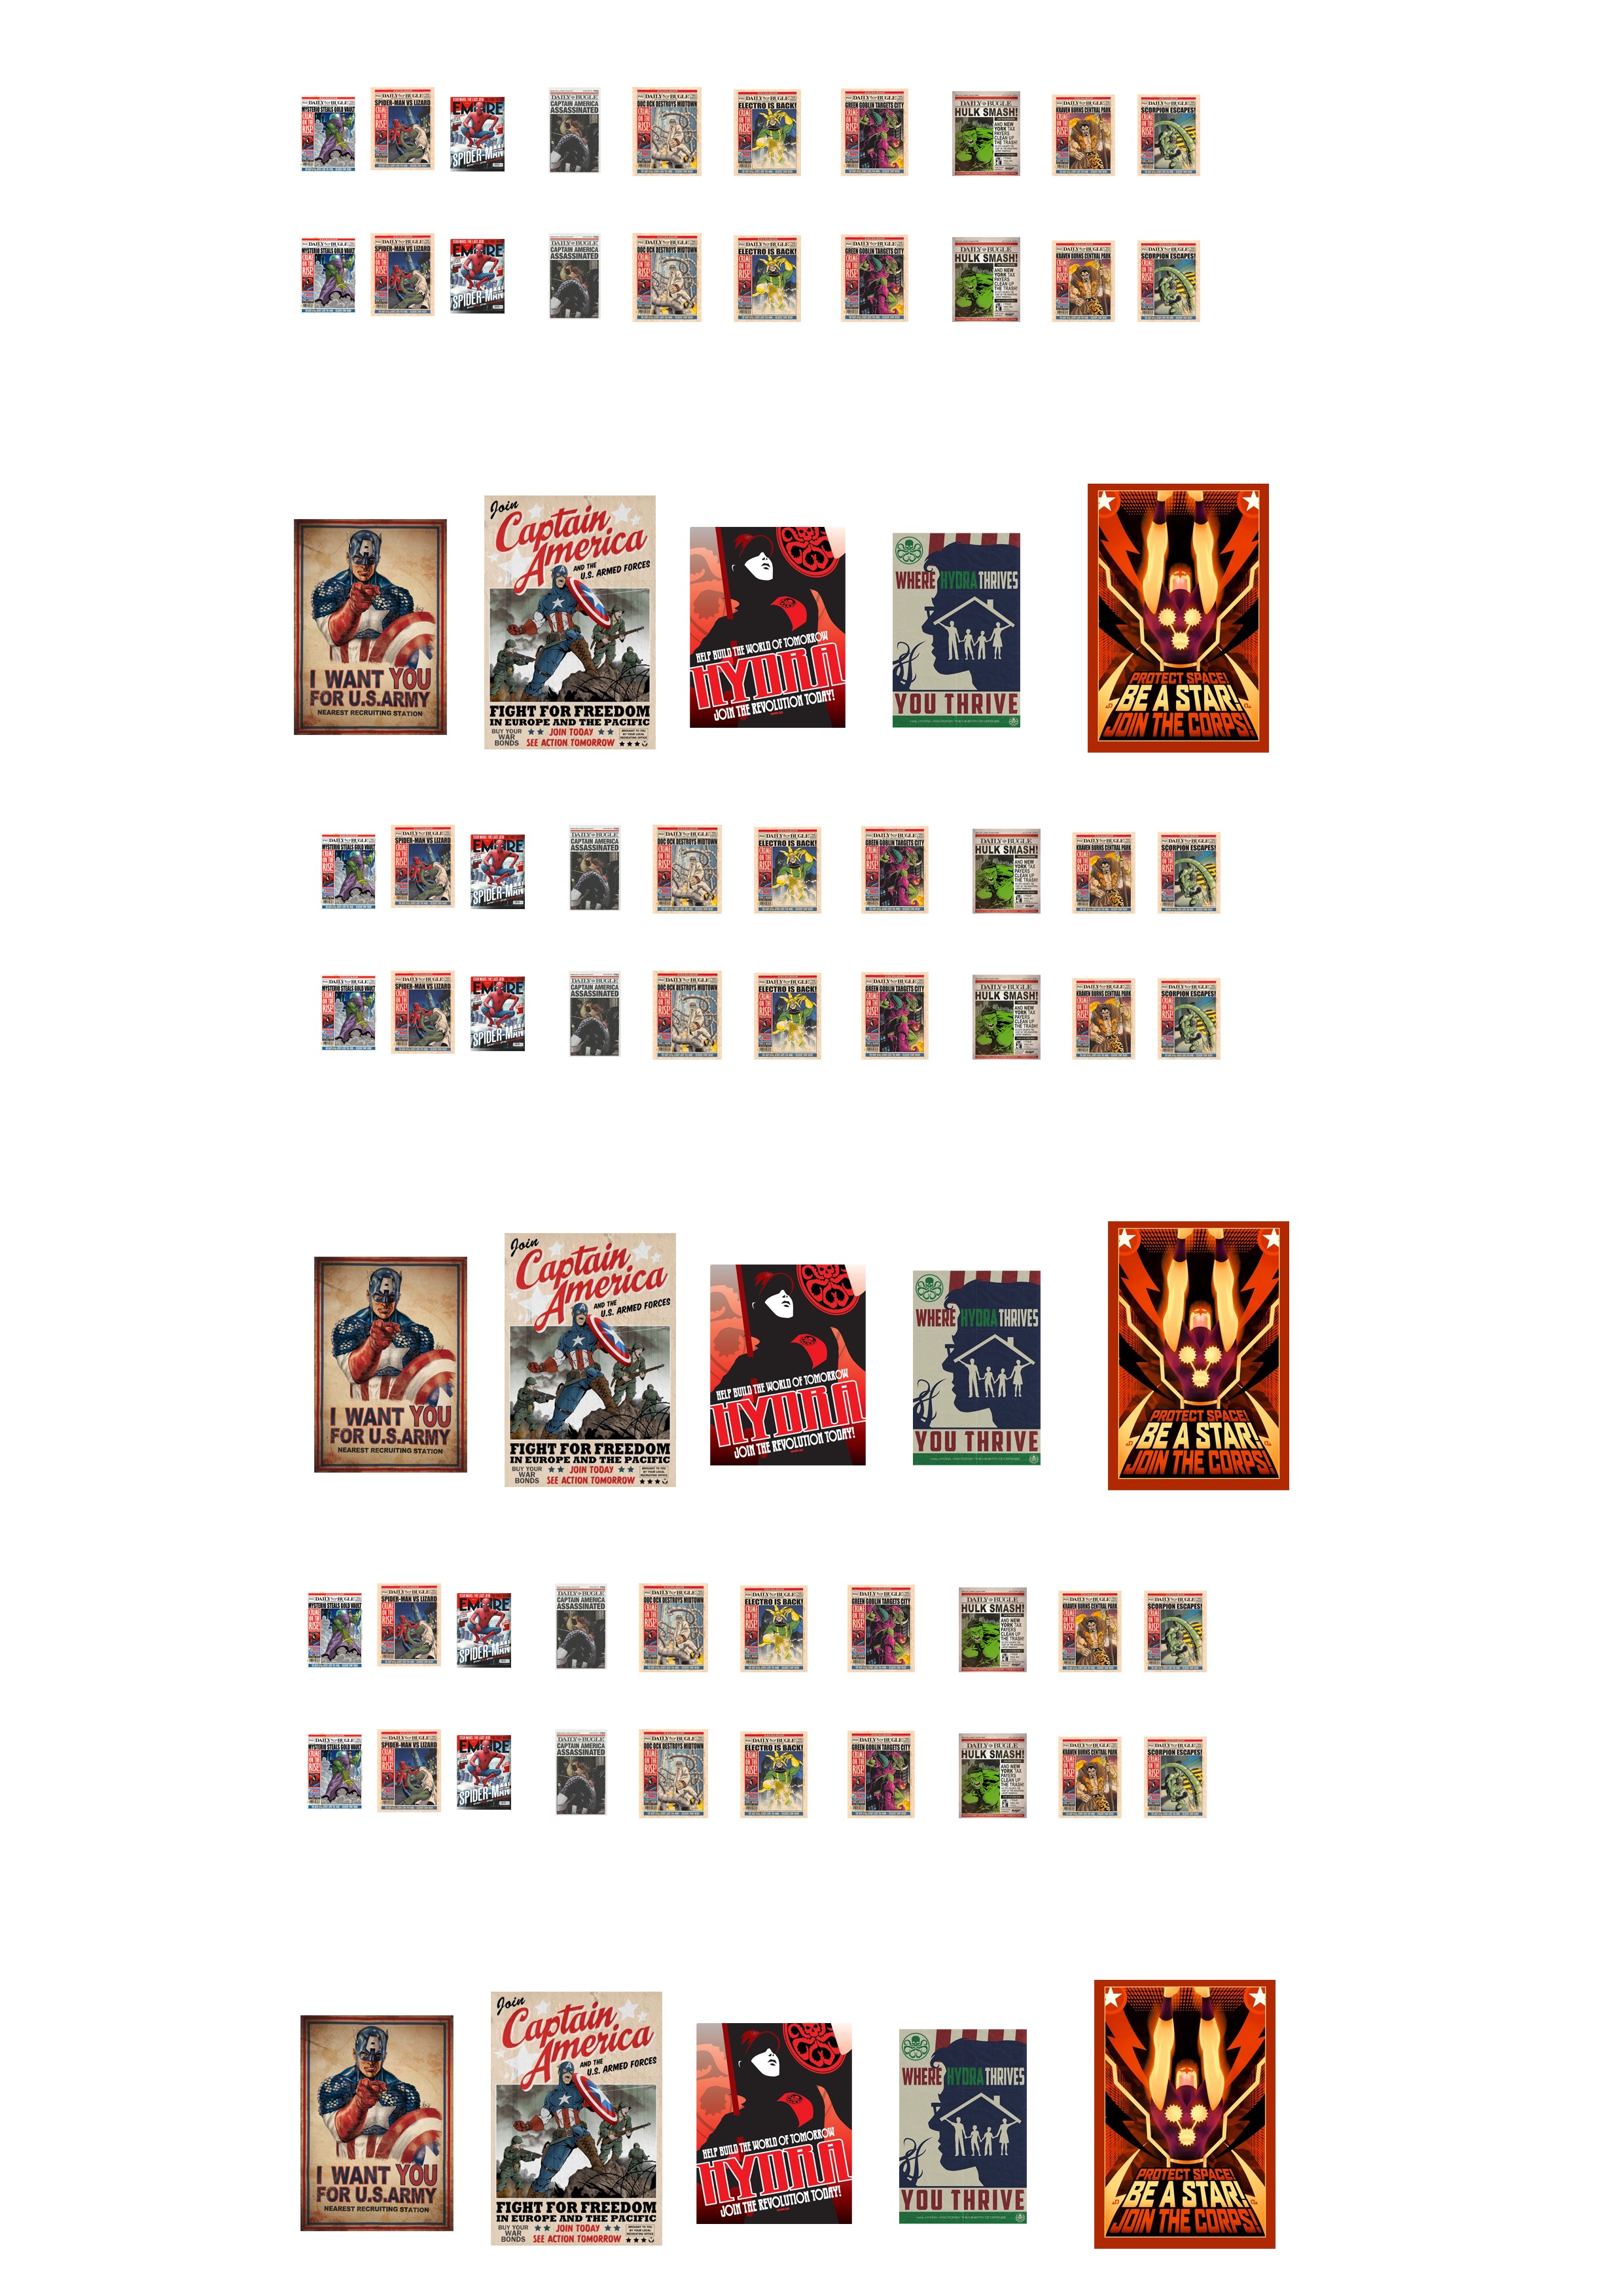 Sorastros work, not mine
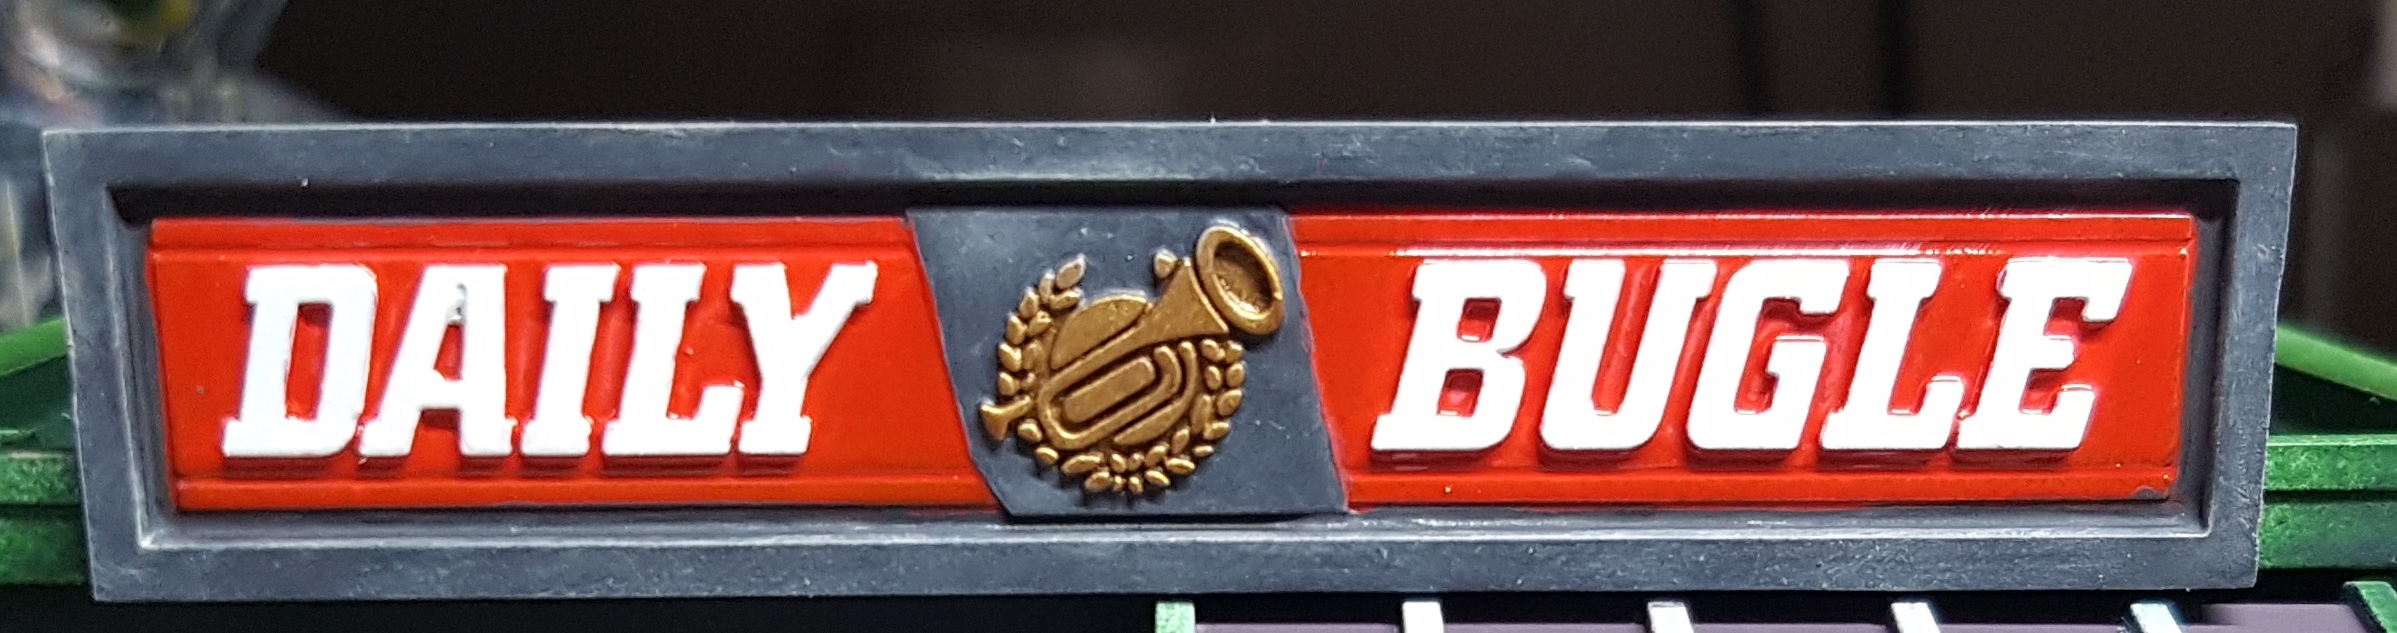
That’s the serveries done so let’s do the signs next, starting with the Daily Bugles. it would have been nice if they’d included an alternate sign in the NYC Terrain pack so it could be different to the core set version if you wanted. If I’d been good with tools and modding I might have sliced it up so it spelled “Daily Bulge” and make it sell adult magazines instead. I’d have just made a mess though.
White Letters
Base: Reaper 09150 Bloodless Skin
Drybrush: P3 Morrow White
Once the rest of the sign is finished and the red has bled on to the white I went back with a mix of Bloodless Skin and Morrow White and fixed everything. Pretty sure I painted a lot more of the letter fronts with this mix than I needed to.
Red Background
Base: VGI 72.086 Red Ink
That’s all I used. I trusted the mess underneath to provide some tonal variation. I wish I had not glued on either sign so I could have painted them separately. I should have gone back with the airbrush before starting the sign and smoothed out the darker tones as they took a lot to cover with ink. Oh well. Lesson learned.
Bugle Emblem
Base: Overbrush with P3 Molten Bronze
Wash: GW Agrax Earthshade
Drybrush: Molten Bronze
Drybrush: P3 Rhulic Gold
Dark Grey Frame
Base: VMA 71.054 Dark Grey Blue
Drybrush: P3 Hammerfall Khaki
Wash: GW Nuln Oil
I then went back and fixed any contamination.
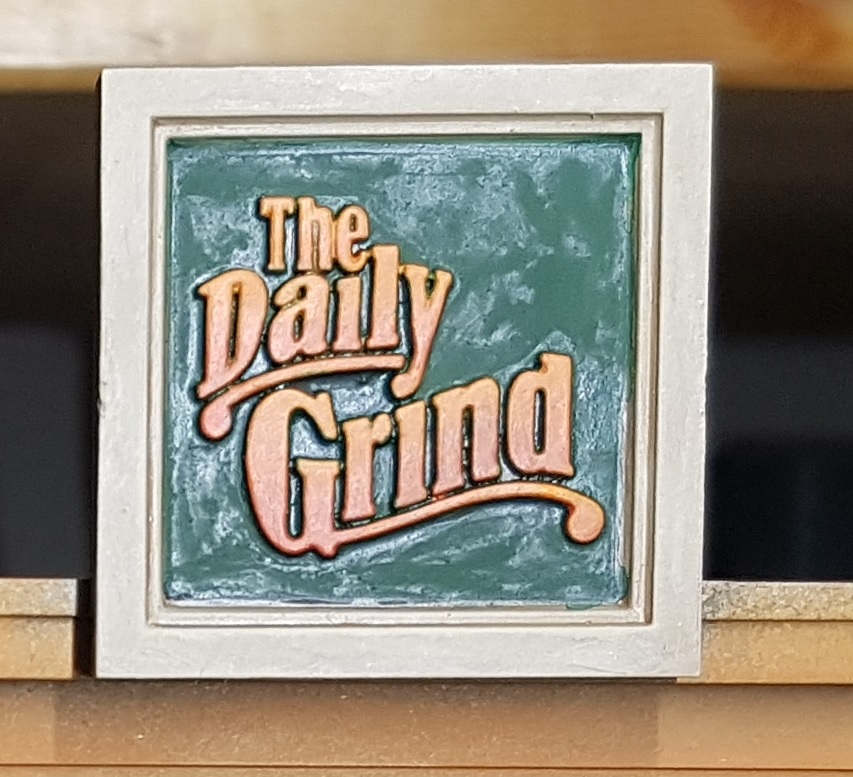
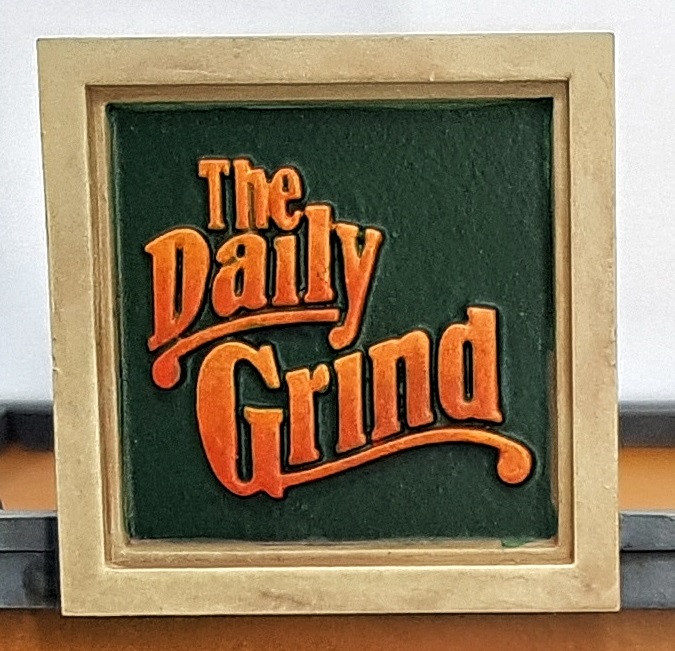
Over to The Daily Grind sign. In the studio scheme the letters have this nice Cheers-esque transition to them. I decided I wasn’t going to be able to do that, at least without putting in a lot more time and effort than I was willing to do for these pieces. Then I did it really quickly and easily by accident and was super happy so went with it.
Letters
Base: VGA 72.709 Hot Orange
Overbrush/Drybrush VGC 72.008 Orange Fire. Brush from the top down but stop half way. I’ve no idea if I’ll ever be able to repeat this, but it just happened by accident and it looked great and natural.
Drybrush: P3 Mouldy ochre to just the tops of each edge
Background
Base VGC 72.147 Heavy BlackGreen. This looked patchy as hell as some of it kept drying a little glossy while most of it didn’t. I had to trust varnish would fix this later.
Pinwash: GW Nuln Oil
Frame
Base: P3 Hammerfall Khaki
Wash: P3 Gun Corps Brown
Drybrush: Hammerfall Khaki
Drybrush: P3 Menoth White Base
Here we see it before and after getting it’s final varnish. Sometimes you just have to have faith and go with it.
On to the canopies. I wasn’t sure whether to paint the metal frames or the cloth parts first. There was a good argument for both. In the end I decided to base coat the cloth, then paint the metal, then fix and paint the cloth
Canopy Cloth
Base Daily Grind: VMC 70.823 Luftwaffe Cam. Green
Base Daily Bugle: Scalecolor SC-32 Black leather
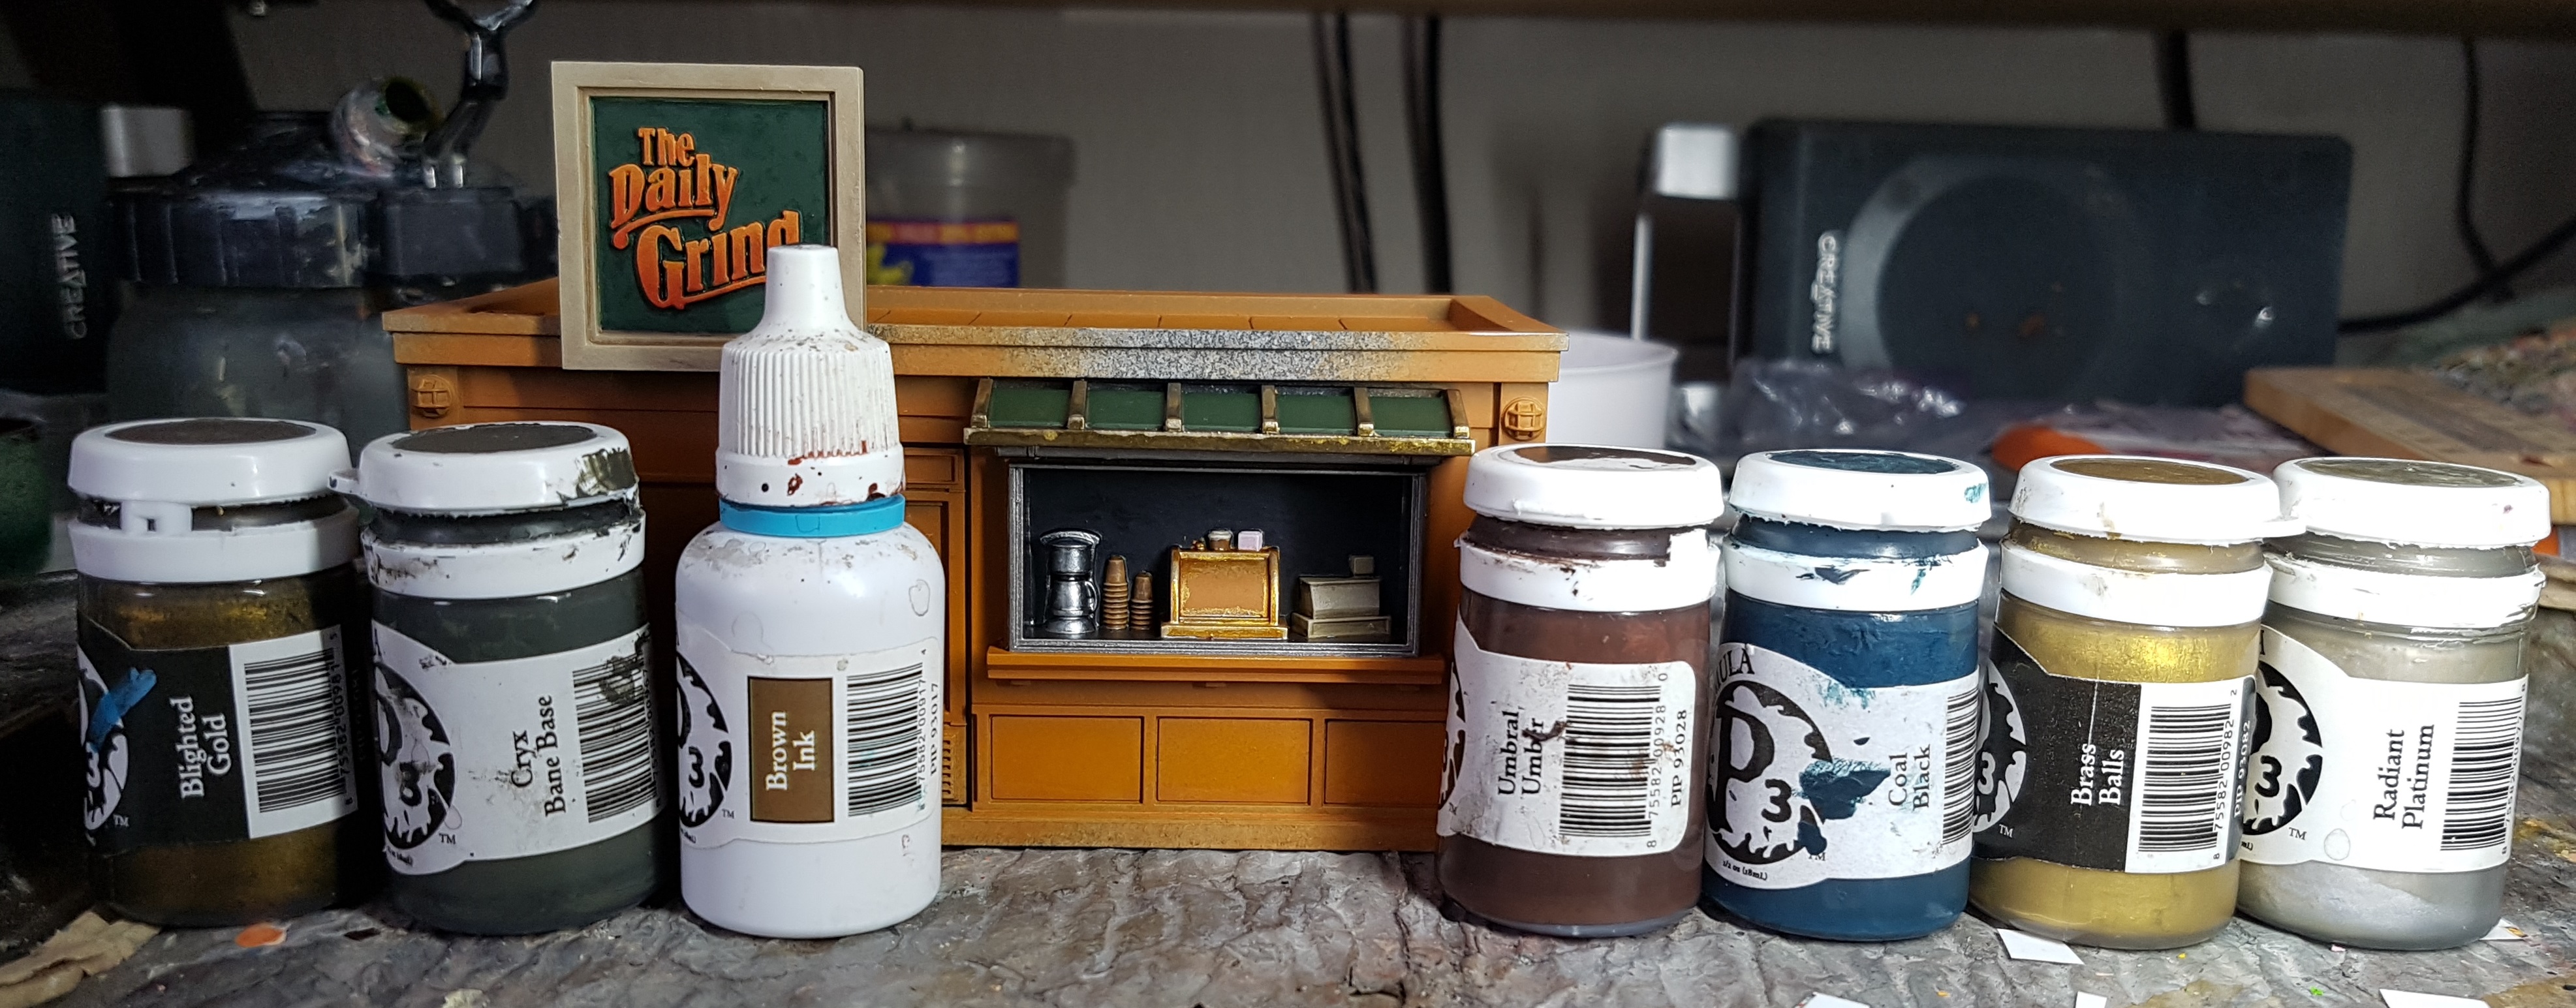
Brass Frame
Base: P3 Blighted Gold
Wash: P3 Cryx Bane base mixed with P3 Brown Ink
Targeted Wash: P3 Umbral Umber mixed with P3 Coal Black
Layer Highlight: P3 Brass Balls
Edge Highlight: P3 Brass Balls mixed with P3 Radiant Platinum
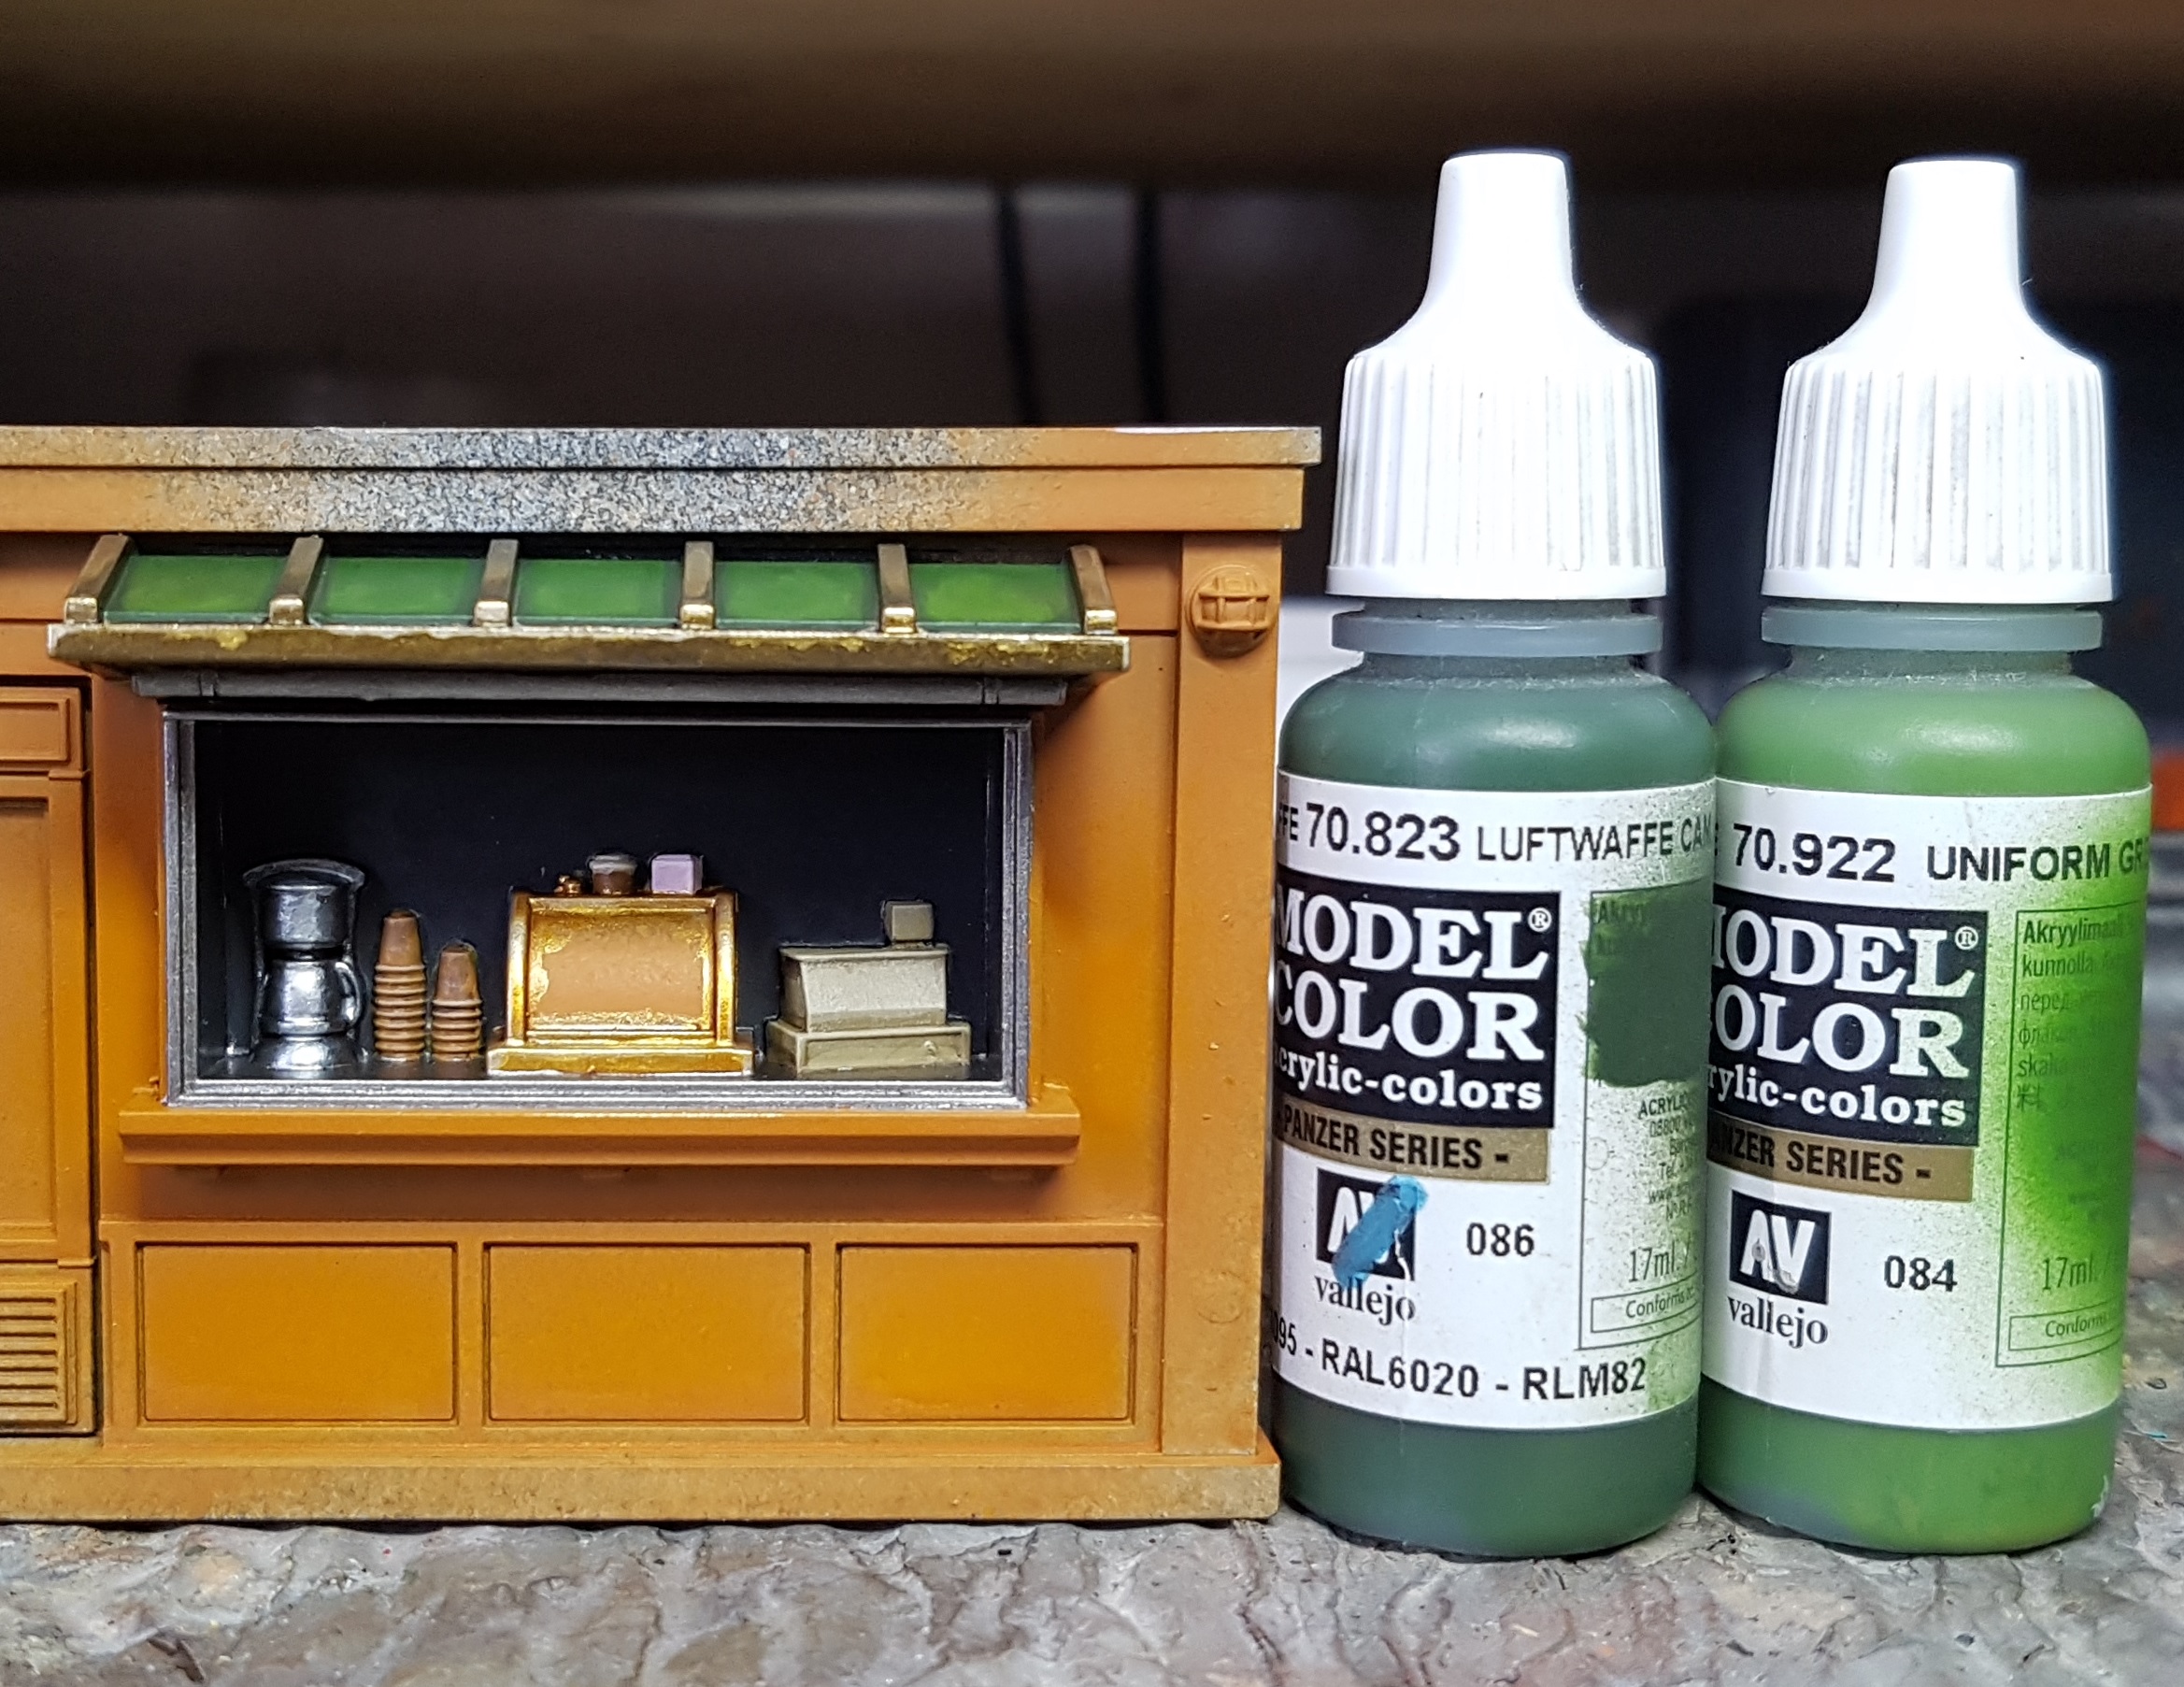
Green Canopy
Repair Base: VMC 70.823 Luftwaffe Cam. Green
Layer Highlight: VMC 70.922 Uniform Green
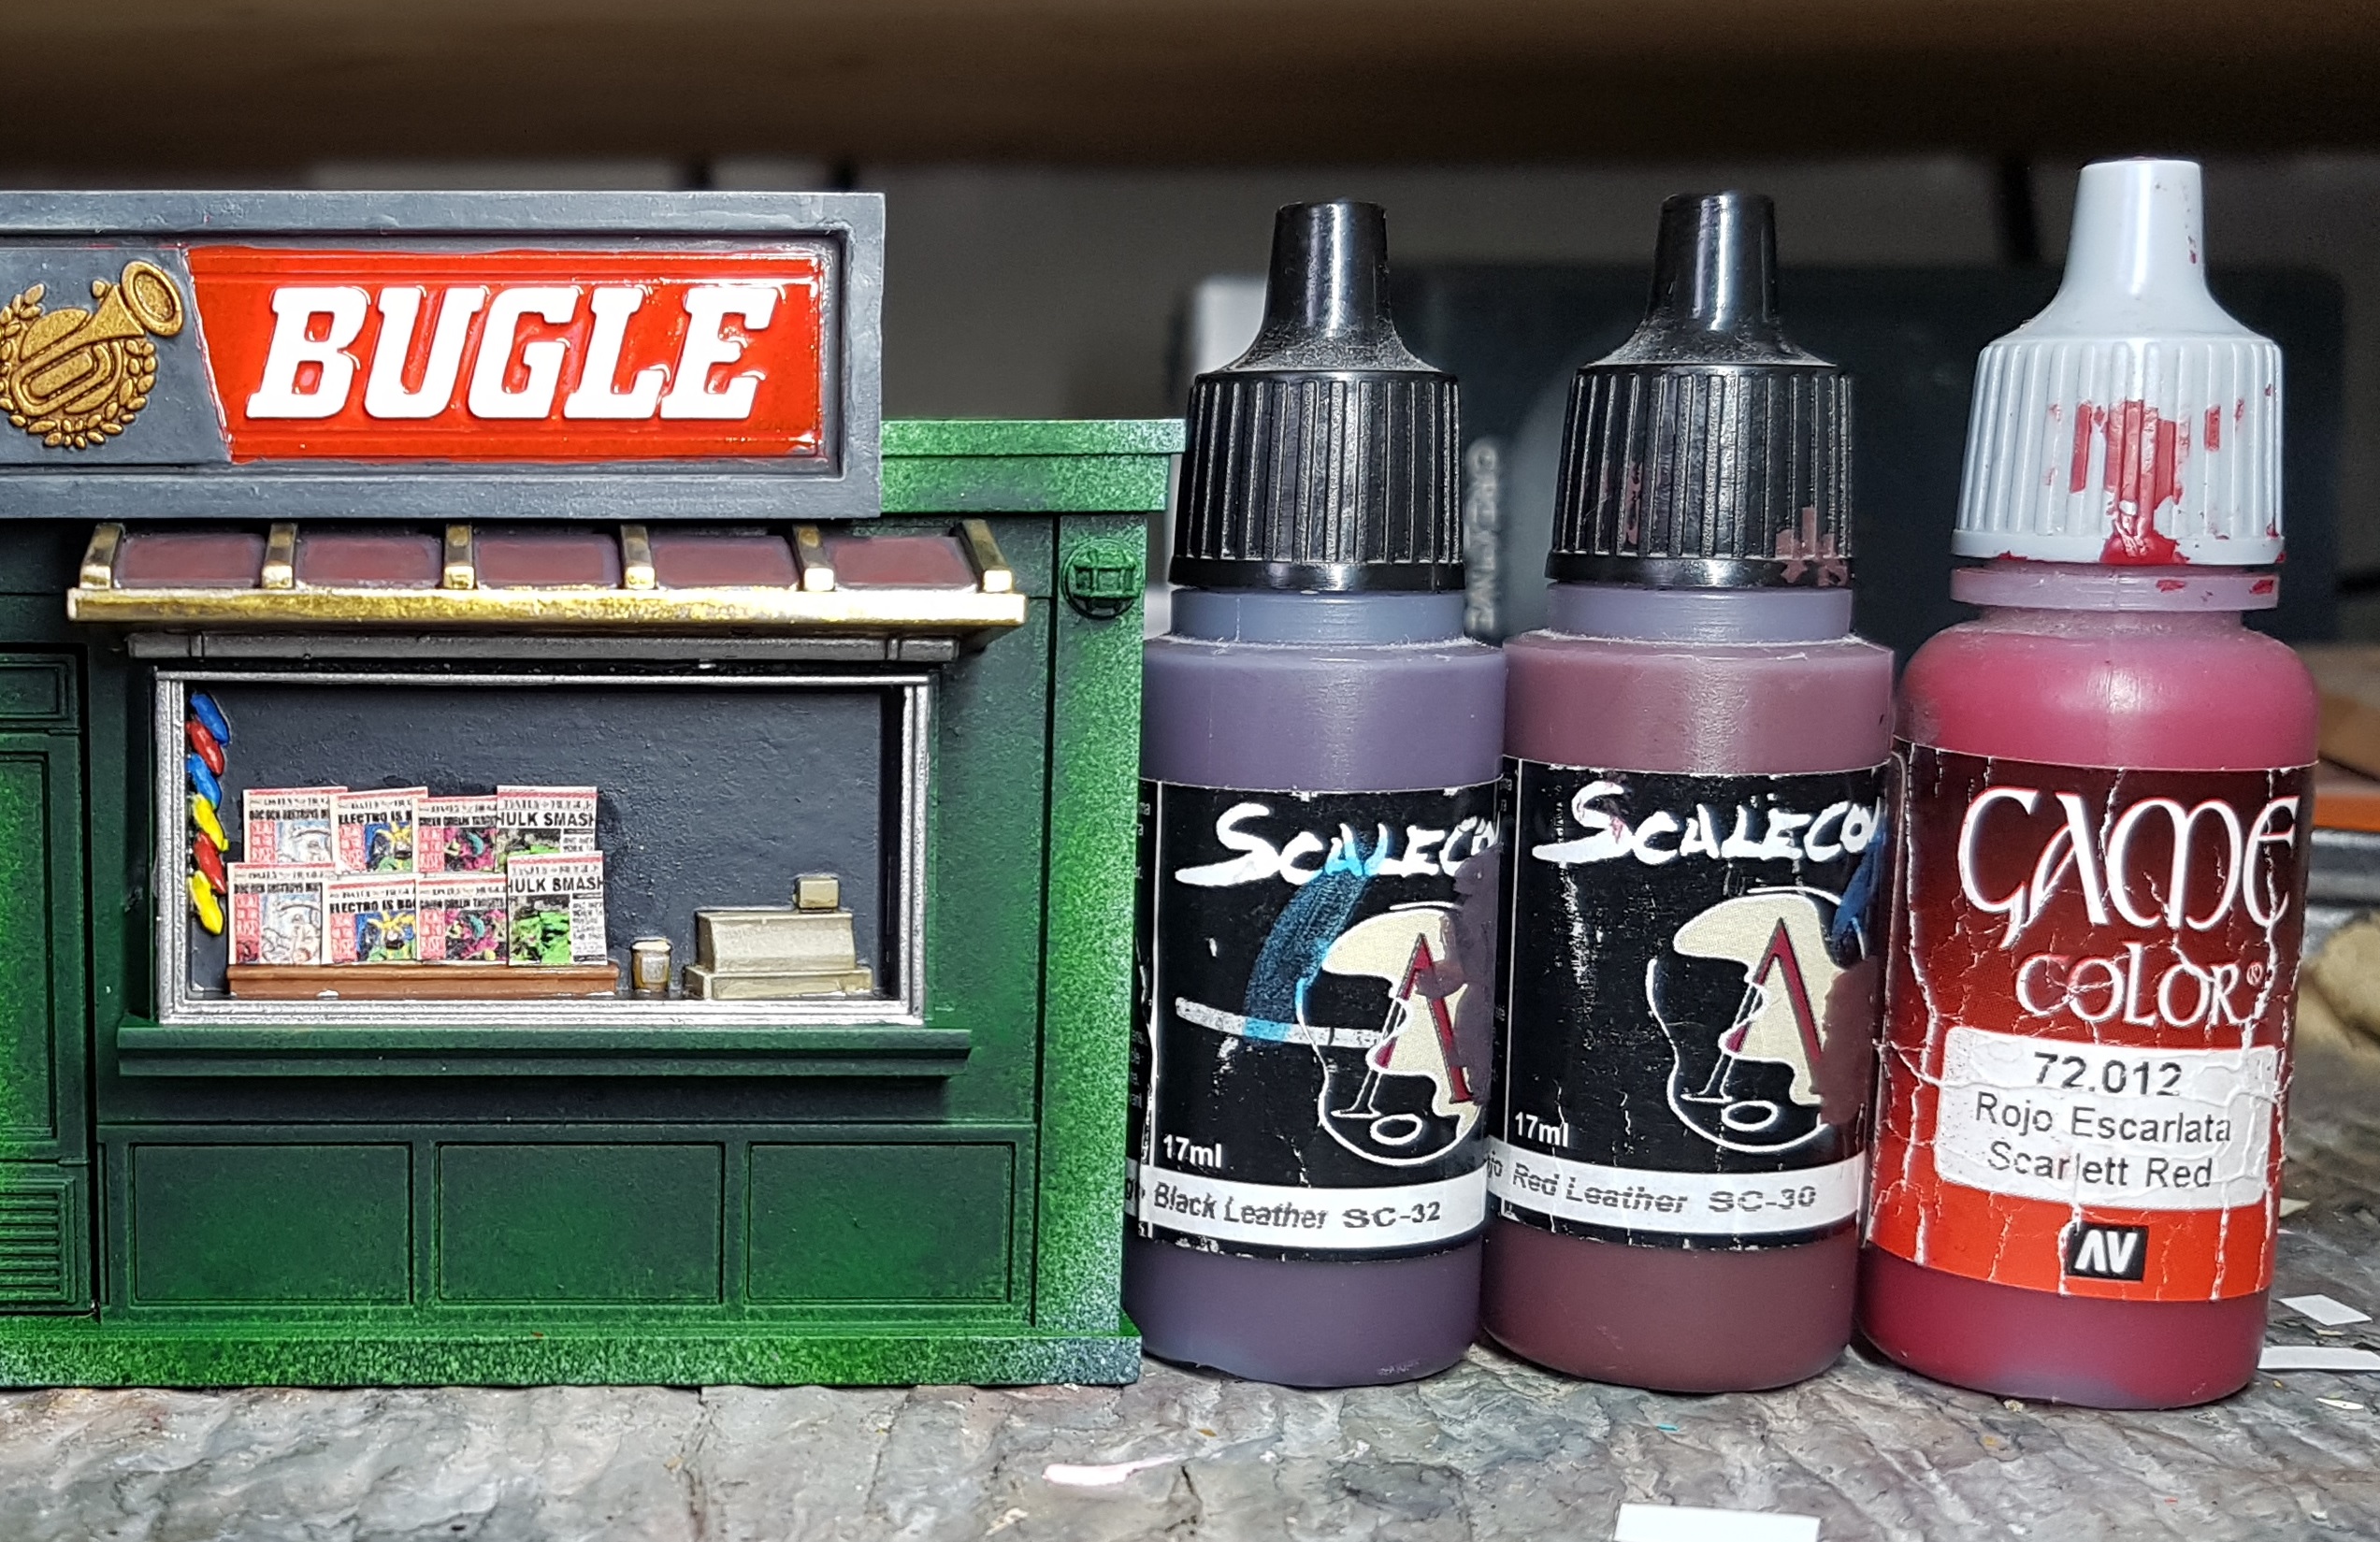
Red/Brown Canopy
Repair Base: Scalecolor SC-32 Black leather
Layer Highlight: SC-30 Red Leather
Layer Highlight: VGC 72.012 Scarlett Red
I think I tried blending the canopy colours together here. Not my best work, but done is done and no one should be focusing on the terrain when playing.

Daily Bugle & Daily Grind WIP Part 3
Doors and door handles next.
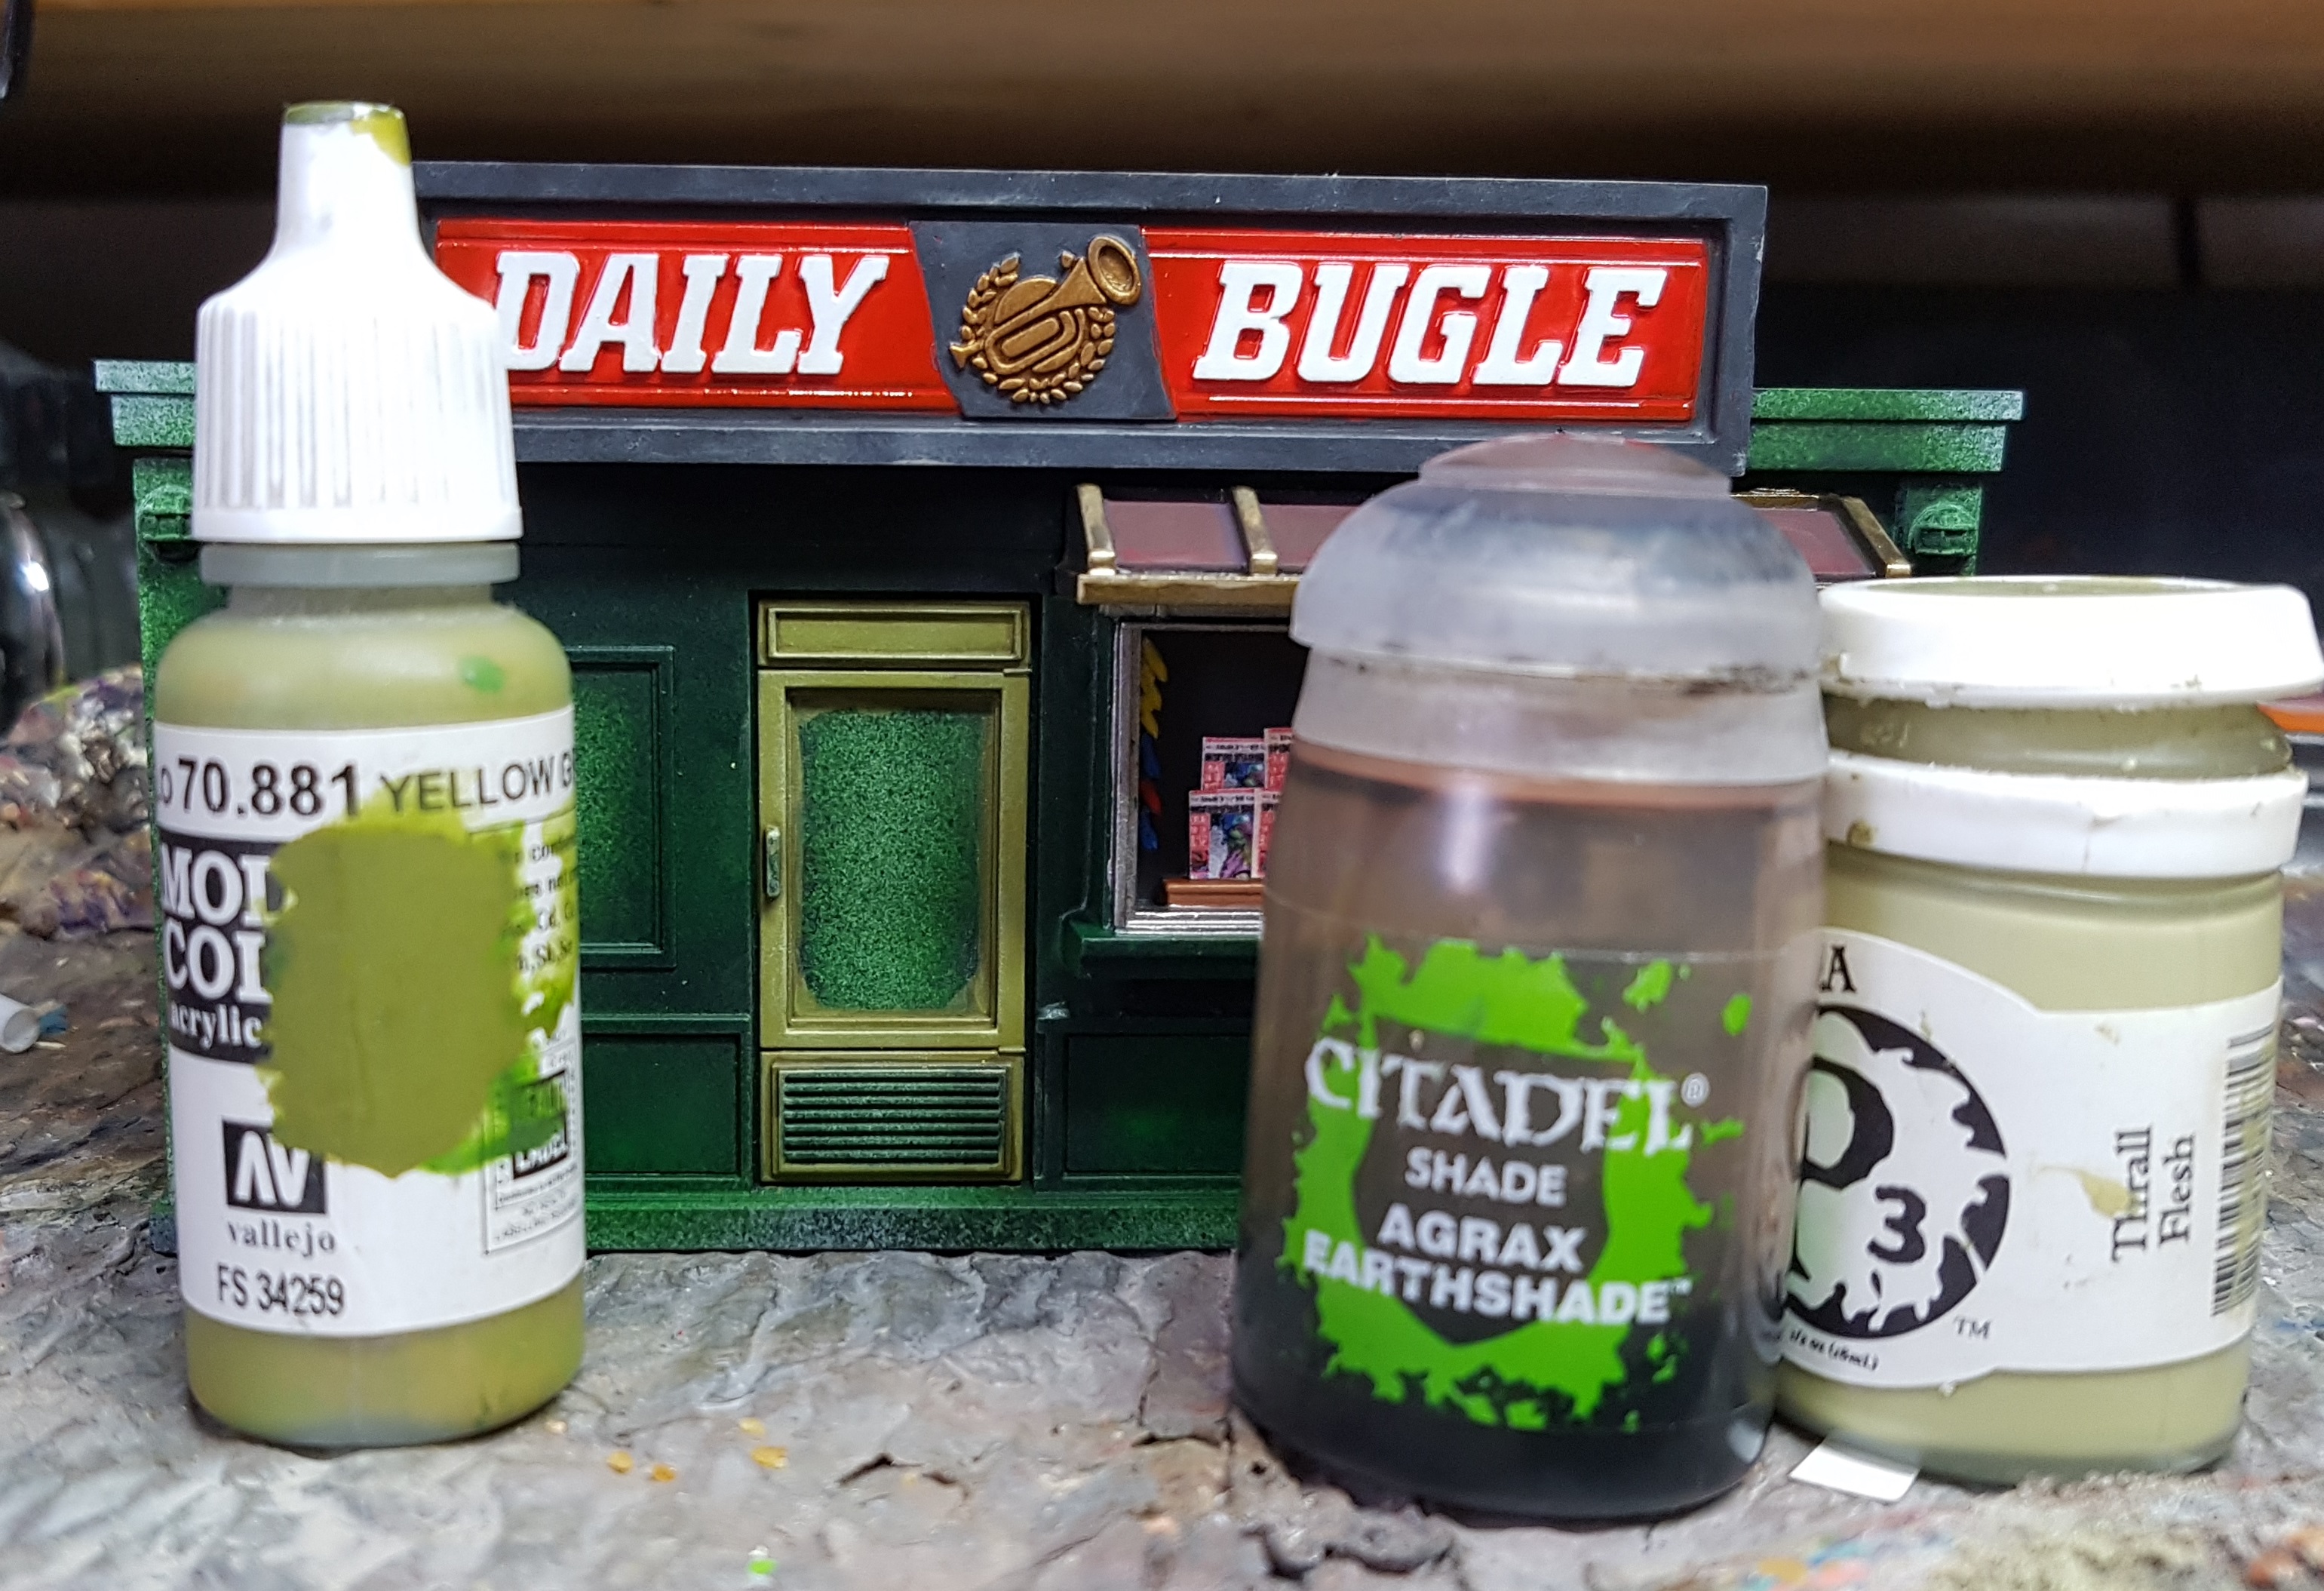
Doors
Base: VMC 70.881 Yellow Green
Wash: GW Agrax Earthshade
Drybrush: P3 Thrall Flesh. Not just the edges. Swirl it about a bit to simulate wear, but not too hard
Door Handles and Locks
Base: GW Retributor Gold
Wash: GW Agrax Earthshade
Layer Highlight: P3 Brass Balls
Window Frames, Grilles, Lights etc
Base: P3 Pig Iron
Wash: GW Nuln Oil
Drybrush: P3 Cold Steel

I base coated the windows (P3 Exile Blue) and then remembered I’d forgotten the lights so went back and did them the same as the street lights from earlier
Lights
Base: P3 Rucksack Tan
Highlight: P3 Sulfuric Yellow
The concrete sections were painted the same as the paving on my bases. This took forever. Another example of there the sculptor clearly wasn’t going to have to paint a tables worth of these themselves!
Concrete
Base: VMC 70.836 London Grey
Wash: Jan’s Magimix (6-8 Parts GW Nuln Oil, 6-8 Parts GW Agrax Earthshade, 5-6 Parts Lahmium Medium, 2 parts Athonian Camoshade. Thanks, Januinevision)
Drybrush: P3 Menoth White Base and a nice puffy makeup brush

![Games Workshop Kick Off Grot Week For Warhammer 40,000 [Updated]](https://images.beastsofwar.com/2026/04/grot-new-40k-news-cover-600-338.jpg)
