





Redvers and Son Get Into Bushido




Recommendations: 1291
About the Project
My son and I were looking for a new game to get into. Something that was low on models, fun and reasonably quick to play. We decided on Bushido.
Related Game: Bushido
Related Genre: Fantasy
This Project is Active
Kami
Kami in Bushido (and Japan) are natural spirits that can be employed on the battlefield. The minor kami (of which these are) are useless enough to not expend any game resources removing from play but irritating enough to create a problem if you don’t try to remove them. All of the various flavours of minor kami either provide your force with a buff or the enemy with a debuff but none of them can interact with scenario objectives to win the game for you.
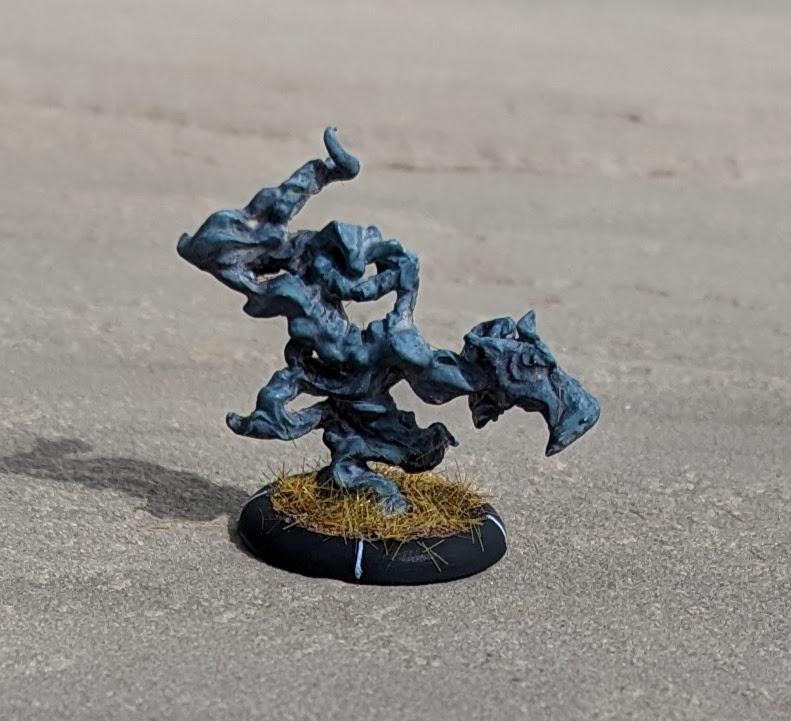
First up, we have the Kami of Choking Fog. This creates a mobile smoke cloud that creates cover. The kami can also stun one enemy model per turn or destroy itself and blind 1 enemy model. It also has a short ranged attack that, if successful, stuns the victim. Finally, anyone attacking the kami gets stunned on a successful hit.
I wanted to paint this one up quickly, so after a grey primer, I slapped a couple of very light washes over it – one black and the other purple. I then dry brushed the hell out of it with various greys, blues and purple until I got the effect I wanted. Usual basing with an acrylic earth and static grass. I think an evening’s work in total.
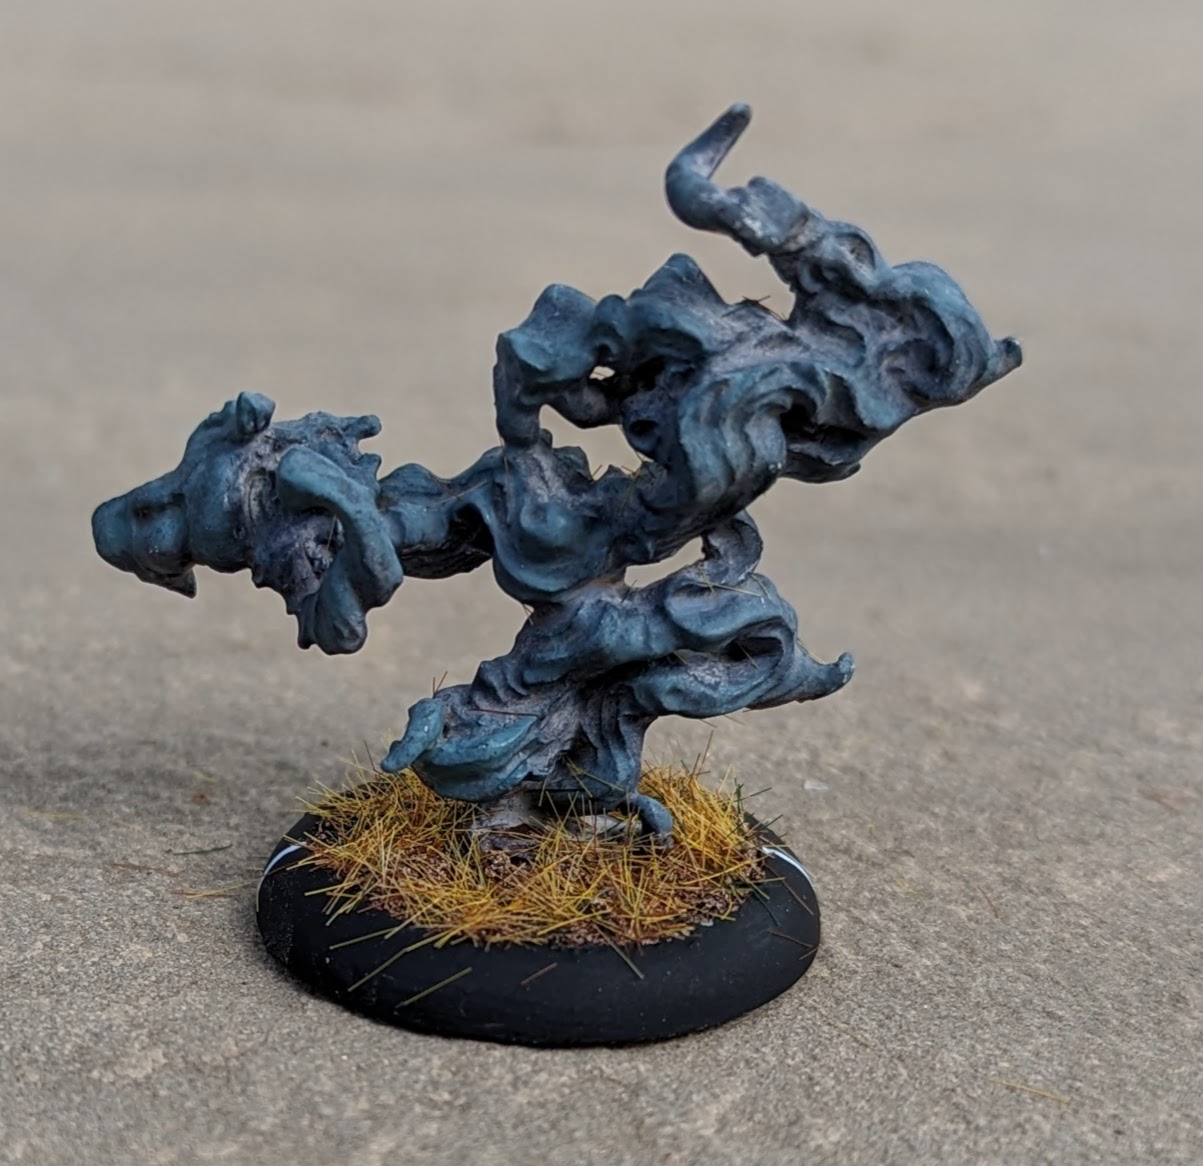
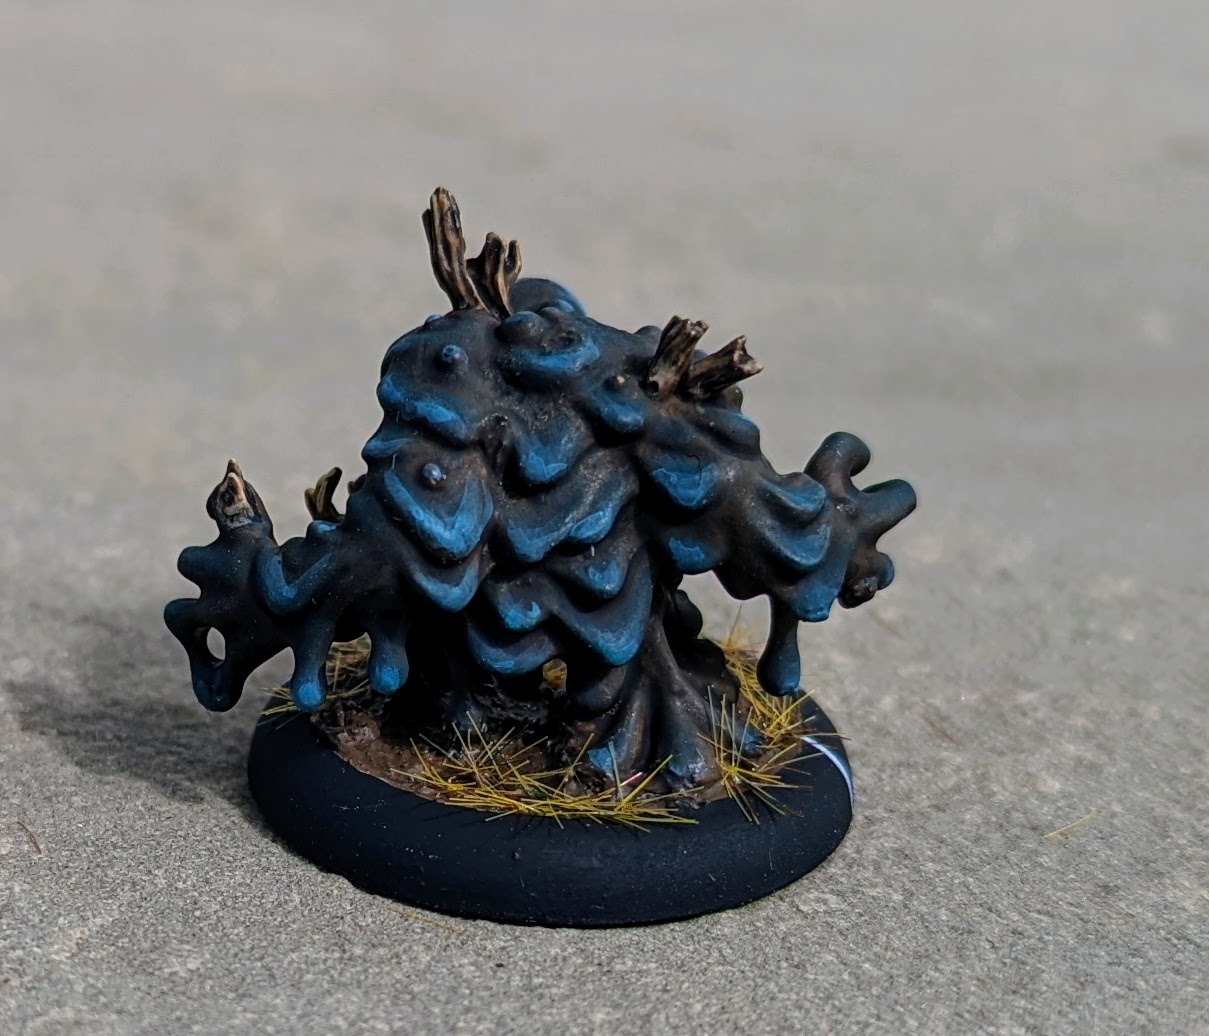
The kami of Sappping Silt is slow but can target an enemy model in 2″ to reduce its movement by 2″. Or it can destroy itself to remove an activation from an enemy model. In combat, if it hits, it immobilises the target. Reduced movement and loss of activation in Bushido is a big deal.
This model got a base coat of German Black Brown and a couple of washes of black. I then gradually applied a glaze to the raised areas of electric blue. The tree stumps were flat earth with a brown wash. I’ve then highlighted with Iraqi sand. Then I’ve opted for a wet mud acrylic base material.
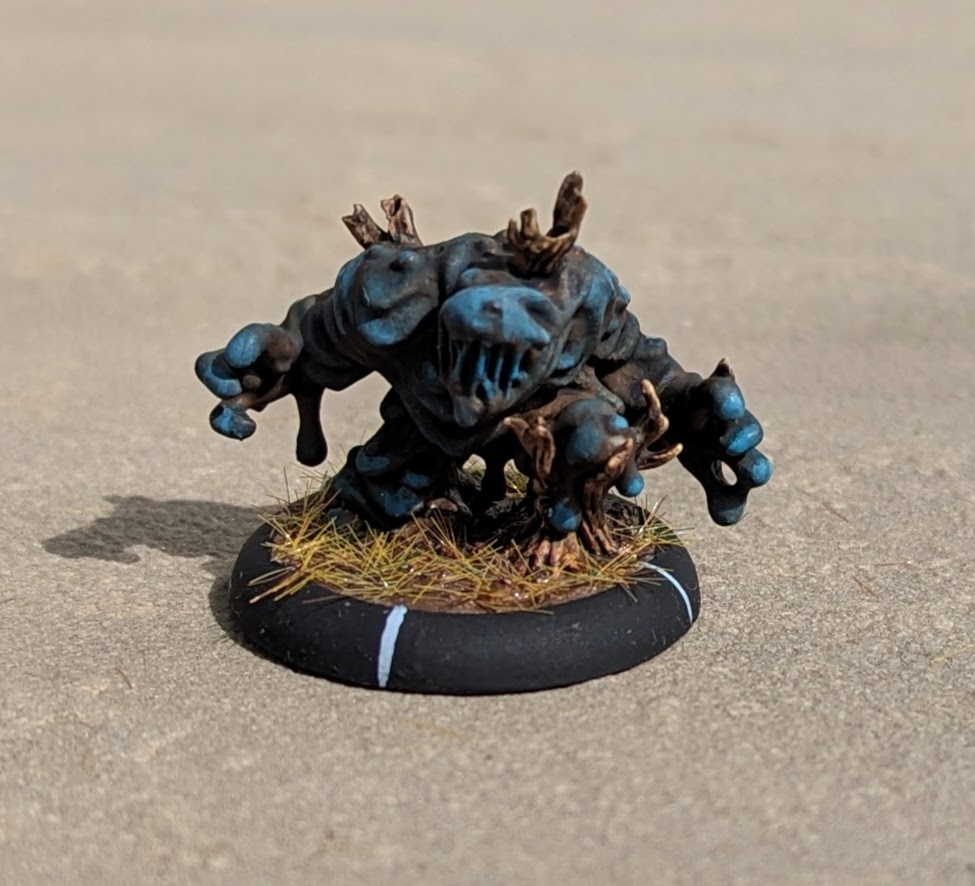
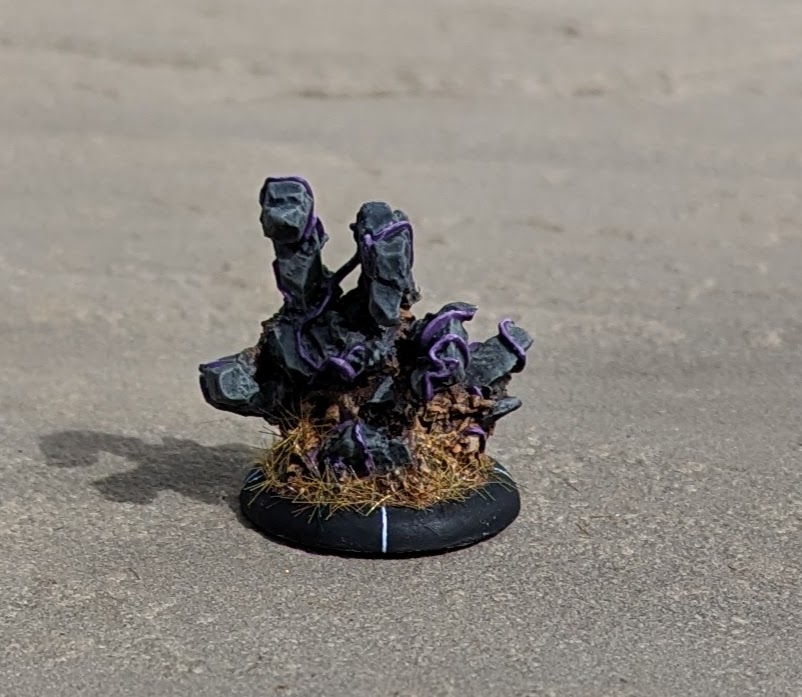
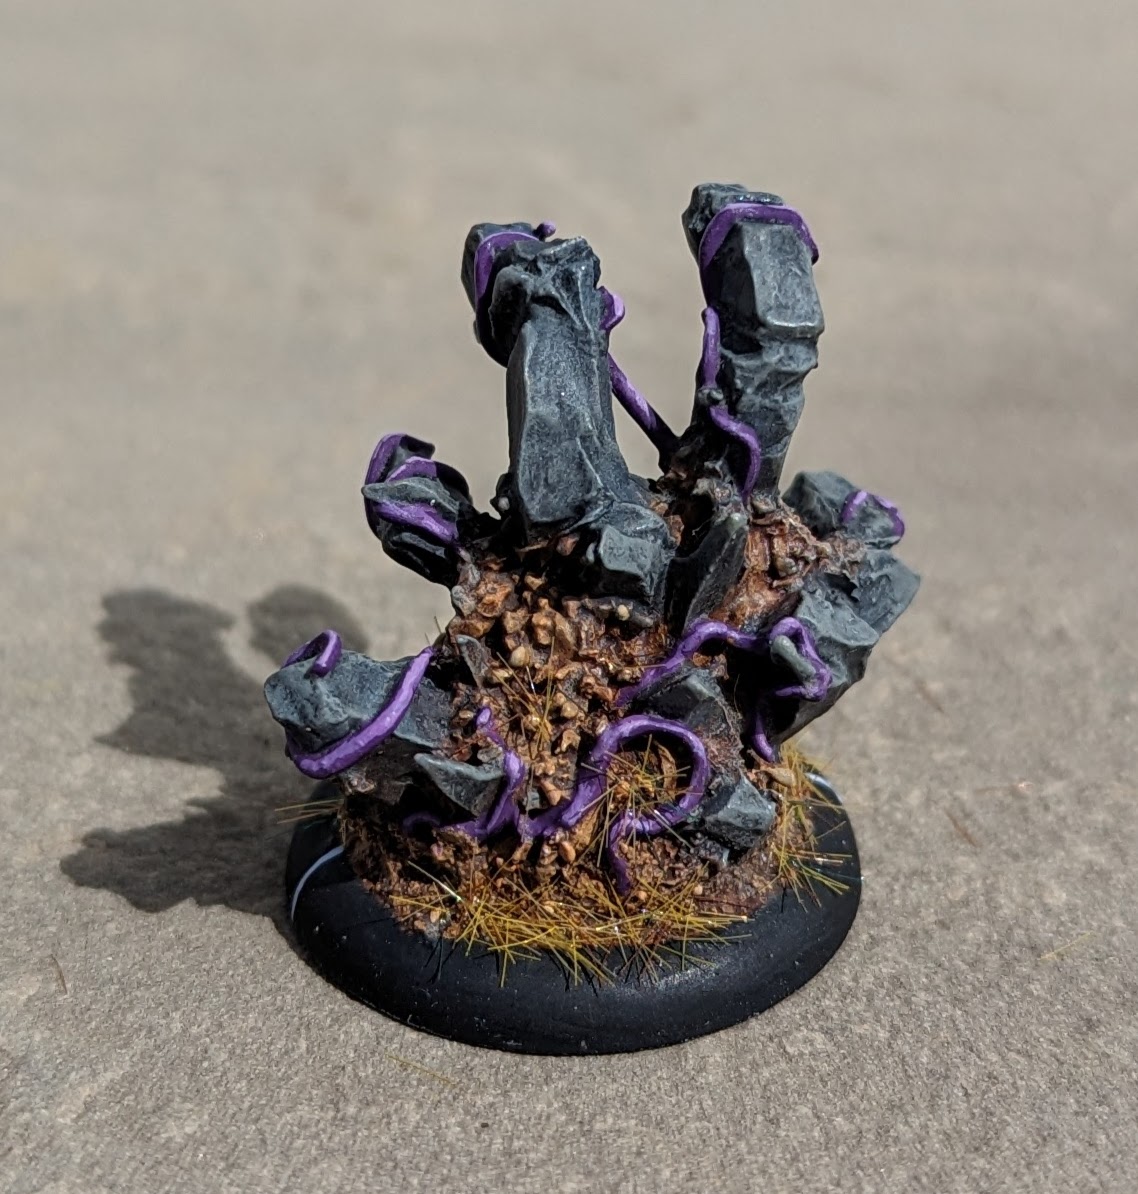
Last up, we have the kami of Blighted Earth. Slow around the battlefield, it is effectively a mobile ‘difficult terrain’ piece – but only for enemy models who lose half their movement when moving within 2″ of this model. It also causes enemy models within 4″ to spend an extra Ki on any of their Ki feats, which is very handy. Basically, you push this out in front of your warband to slow the enemy down, very useful if the game involved objectives or zones of control.
Painting wise, this was a mix of various greys for the rock. It received a brown wash and then a black wash before some dry brushing with a light grey. The vines/roots I picked out in imperial purple with the highlight being purple/off white mix. To make the model look like it is bursting from the ground, I used the acrylic dry earth paste on the base and up the model and then added some cork, sand and other bits to look like stones. Once dry, this got washed down to a darker brown before I picked out the stones using deck tan, light brown, iraqi sand.
Battle Report No. 7
Game 7
This was the first game that we played since getting our Christmas stuff. Unfortunately, work and family issues have gotten in the way and gaming has taken a back seat. I didn’t fancy wrestling with the Project System either. So, a much belated battle report…..
Both my son and I were lucky enough to receive some new Bushido stuff from Santa and my son was very keen to get this to the table to demonstrate just how potent the Temple of RoKan can be. My son asked for the Kitsune boxed set for Christmas which provides a very different perspective for the Temple of RoKan. A lot of the characters have two forms, a quick but fragile fox form and a slow but heavier hitting human form. It’s a very different play style but the models, all resin, are absolutely stunning. As he had these new models, he was desperate to get them to the table, so this formed the entirety of his new force. They weren’t painted, some of them weren’t even stuck together but it’s about playing the game (with some good terrain) that’s important!
For this game, we opted for a zone control scenario. This requires 3 zones to be deployed along the centre line with each zone being 4” in diameter. The zones are deployed every 6” across the central line and I’ve cut three 4” circles of rubber for this purpose (with a future aim of making this suitable terrain rather than just black rubber!). The game will be played over 6 turns with 1VP available at the end of the 2nd, 4th and 6th round. The side with the highest number of VPs at the end of the game wins.
VPs can be earnt using event cards and other faction specific aspects but the main focus is control of the three zones. A warband gains a scenario point for controlling a zone. This is done by having more models fully in the zone than the opposing warband AND the total points cost of those models being higher than the opposing warband. Given the three zones, this creates an interesting dynamic over how many zones will you compete for. And which models will compete for each zone. The most scenario points at the end of turns 2, 4 and 6 gains a VP. Scenario points are wiped at the start of turns 2, 4 and 6. Sounds confusing but it isn’t.
This scenario also really brings into play the Bushido rules around Zones of Control (ZoC). Most models have a ZoC (some don’t and all don’t if they are prone or subject to other effects) and this extends 1” around the base in the forward 180 degree arc. Most models cannot enter an opposing models ZoC without declaring a Melee actions (and entering B2B). This then creates the option to block models and limit opposing models lines of movement (more on this later!)
Cult of Yurei Warband
I decided to mix things up a little bit and add some grunt to my warband as well as include some of my new models. This is what I ran with,
Eldest Brother – A Ronin Oni who comes with a lot of wounds (something lacking in the Cult models) and a lot of attacking grunt to hand out some damage (again, something lacking in the cult)
Kami of Blighted Earth – Kami’s are cheap and can’t directly affect the game but they do provide either a buff or debuff and, as a consequence, are annoying but perhaps not important enough to spend resources on removing. In the case of this Kami, he creates a 4” area of difficult ground that enemy models have to move through. I can use this to ‘block’ lines of attack as difficult ground doubles movement.
Ikiryo (with Arashi’s Fan Enhancement) – Glass hammer time. She’s pathetic in combat but comes with a 8” laser eye Ki ability which, if successful, is a straight up Level 4 wound role, which is might powerful. I’ve given her Arashi’s Fan which gives her a +2 against ranged attacks. I hope to keep her out of melee, so her pathetic combat abilities won’t be a problem.
Yama Uba – I’ve run her before. Has the ability to ‘copy’ any other trait on a model she is in BtB with, so a great option to turn the enemy’s abilities against themselves. Or double down on your own abilities.
Mo Ises – Cheap and has the Control ability giving me the option to take control of enemy models
Umeka (with Ijimyo’s Masks) – Cheapish and able to skulk around waiting for an opportunity to shank someone in the back with her scissors. I’ve given her Ijimyo’s mask to provide some protection from a melee attack – this gives her Fear 6, which is the highest in the game and tough for some attacking models to get past.
Hotai’s coin. The attached model can reroll 1’s once per test. If a second roll is a 1, you lose the card.
Dharmic Path – Played during the deployment phase of the game (i.e. right at the start). I get 1 Scenario Point for each Event played by my opponent. Basically a blocker to my son trying his annoying event card tricks!
Drain Spirit – Played after the Ki generation step at the start of the turn, I can transfer 2 Ki from an enemy model to a friendly model in 3”
Pre-Ordain – I roll 2d6 at the start of the game and at any time, I can replace any dice roll made by either player, with one of the dice on the card. The dice does get discarded after use otherwise this would be an auto take card!
 Team Photo (although the Kami was still in the changing room when this was taken). From l-r Eldest Brother, Ikiryo. Yama Uba, Mo Ises and Umeka
Temple of RoKan forces
Followers of Inari Theme – Basically the Kitsune theme allowing all of the foxes. The theme provides an auto win on turn 9 (my son thinks this is great but I did point out that if the game is still going by turn 9, we’re doing something wrong!). It also allows a re-roll for all models on Ki and Size tests for one turn of the game. And when I use a Pass token, I must select one of his models that has taken wounds to heal 1 wound.
Kami of the Evening Flame. Kami are cheap and annoying. They aren’t really worth destroying as they take a bit of resource to do and they can’t really win scenario points. But, they either buff your own models or debuff the opposing models. In the case of this one, it can shoot small fireballs which cause a bit of damage and set the target alight (causing more damage). They can also ‘self destruct’ which removes them from the board but also causes an AoE
The White Faced Fox – Has a bow for long range damage and comes with a lot of skills that makes it hard to hit. Can shift into Fox form
Takeru – Has a Glaive which provides the very useful Combo Attack in melee. Also has bonus abilities against Soulless models (which is a lot of the Yurei list!) and can shift into a fox.
Kuoto – Provides some control/decision Ki feats that force the opponent to choose between certain events (most of which rob you of movement). Also has some handy combat abilities to deal out some melee damage. Can transform into a Fox for added movement.
The Nine Tailed Fox – Provides a dice re-roll buff to all friendly models and can reroll a lot of its own dice
Juko (with Prayer Beads) – Has a short ranged attack and a handy combo melee attack. Has skills that makes him hard to hit and can re-summon Kami that are destroyed. The Prayer Beads gives this model an extra 1 Ki each turn
Tengoko – Has a ranged attack and, if it hits, a damage dealing sword. Has some powerful debuff Ki feats
Test of the Fox Event. An opposing model must make a move challenge test. If they fail, they lose an activation (losing an activation is a big deal!)
Test of the Path Event. Opposing model must make a Melee challenge test and if they fail, they gain a control maker (effectively allowing the Temple of RoKan to control the model for one activation)
Test of the Man Event. Opposing model takes a size challenge test and if it fails it gains an impetuous marker (meaning that the model has to activate first which is a pain if there is a plan in place or the model was required to hold back later in the turn to provide it’s support)
Test of Inari Event. Opposing model take a Ki Challenge test and if it fails, it gains a Spirit Block Marker (this means that the model will not gain Ki in the following phase and Ki is used for special abilities, so this can really hamper the ‘big moves’ that can swing the game for you)
Gorinto – This is my son’s favourite terrain card and allows a friendly model to generate an extra Ki token if they are within range
Turn 1:
My son wins the Strategic test and takes the initiative. He doesn’t hand around with his Test of the Path and plays this straight away on Eldest Brother who fails his test and is controlled. My son wastes no time in getting Eldest Brother to attack his nearest model which is Umeka who is no match for an angry Oni and she takes 4 wounds. This was lucky as she just survived and it could have been a lot worse!
Most of my son’s models start in Fox form and move forward quickly. The White Faced Fox advances a long way, changes to Human form and fires its bow at Yama Uba, thankfully hitting but doing no damage. It does however put a Ki Block on Yama Uba, meaning she can’t generate Ki at the start of the next turn.
Takeru has advanced on my son’s left flank. He’s definitely looking to get round the side and into my back line where Ikyiro is. I’m having none of that and so Ikyiro takes aim with her Look into the Void Ki feat and hits, dealing 2 wounds.
Otherwise, the rest of the models spend the turn moving into position.
The pictures below are, my deployment, Temple of RoKan deployment, Eldest Brother smashing Umeka in the face, and two pictures of the state of play at the end of the turn.


Turn 2:
I win the strategic roll this turn and instantly activate Ikyiro. It’s a same as last turn Look into the Void blast on Takeru which succeeds and does enough damage to kill! Happy blasting from the little lady.
Kuto uses its Final Verdict ki feat on my kami, which fails its test and gains a death marker. This marker can be removed by spending ki (which the kami doesn’t have) and while the kami has a death marker, it makes them easier to hit in melee – so a big debuff. But I’m ok with this as the kami is somewhat expendable.
I advance Umeka into the the scoring zone on my left and my son uses the 9 tailed fox to attack Umeka. The 9 tailed fox gets to roll a lot of dice due to various buffs and debuffs and Umeka is not able to withstand the onslaught and is killed. This gives the 9 tailed fox control of the left hand scoring zone.
I move my kami and Eldest Brother into the central scoring zone, giving me control there.
Otherwise, there were some unsuccessful shooting attacks, Mo Ises tried to use his control Ki feat and failed and Juko failed to wound Mo Ises in melee. At the end of the 2nd turn, we both control a scoring zone each and therefore no VPs are awarded.
 Spider cam gives the view at the end of the 2nd turn
Turn 3:
My son plays Test of the Fox event (due to my Dharmic Path card, I’ve limited my son to playing his event’s in turns where there is no scoring so I don’t get a scenario point this turn). With this event, he nominates Ikiryo who fails her test and loses an Activation, which is a big deal.
Even with the loss of an activation, I feel Ikiryo is fairly safe at the back of the board and I spend her only activation to get blasting with her Look into the Void attack against Juko, who is also sneaking up on my right flank.Juko fails their test and gets a couple of points of damage for their trouble.
The White Tailed Fox charges Yama Uba but before combat starts, Yama Uba uses her Morph Ki feat to take Parry from WTF to aid her defence. Parry provides a straight up +1 to your defence, which is very handy. In the melee, my son puts a lot of dice into attack to compensate for Yama Uba’s newly found parry skill but he rolls very poorly and fails to get past her defence. Yama Uba only rolls one attack dice but rolls a six, easily beating WTF and rolls well on damage killing WTF outright.
It’s now just Yama Uba and the 9 Tailed Fox in the left scoring zone and I want to push the 9 TF out to get control, so I use Yama Uba’s second activation to enter melee. I hit but I’m not able to do any damage, so the scoring zone is still contested.
Juko is still in BtB with Mo Ises and continues to press the attack, Mo Ises isn’t great in combat and, despite rolling all defence dice, Juko is able to deliver 4 damage, almost killing Mo Ises.
I use Eldest Brother to attack Juko from behind and, with Mo Ises also in BtB, that’s two debuffs. Eldest Brother is able to use his Slam Attack special ability which delivers a wound and leaves Juko prone. This also removes Juko’s last activation and so Juko is now exhausted.
With Juko prone, exhausted and outnumbered (that’s -3 dice for Juko) I attack with Mo Ises. Despite being poor in combat, against a -3 dice debuff, Mo Ises is a lot better and rolls well. Well enough to kill Juko.
Tengoko, who has spent most of the game shooting and either missing or failing to damage moves into melee with my kami who is controlling the central scoring zone. Tengoko is able to hit but, due to the kami having Durable (which all kami do) the damage is limited to 1. Because I know that the kami can only take 1 damage and therefore not be killed this attack, I roll all of my dice into attack, giving me a massive success level, which, when I roll for damage, is a big number. Big enough to not even bother adding up as it kills Tengoko instantly.
Finally, Kuoto moves into the right hand scoring zone to control it and casts Final Verdict against Ikiryo but this fails this time.
 End of turn 3
 Yama Uba against the Nine Tailed Fox
Turn 4:
The 9 TF attacks Yama Uba twice and both times fails to do any damage, thanks mainly to Yama Uba’s Parry skill that she ‘borrowed’ from the White Tailed Fox.
Kyoto tries to use its Ki feat Dharma against Eldest Brother. If successful, the next time I Activate Eldest Brother, my son decides what action the model will take and I have to carry this out. I really want Eldest Brother to hand out some damage this turn, so I’m relieved when I pass the test.
Mo Ises moves into melee with the 9 TF from behind. This gives Mo Ises surprise and the 9TF is also exhausted and outnumbered as Yama Uba is still in BtB. This more than levels the playing field and Mo Ises is able to cause 6 wounds. Unfortunately, the 9TF has 9 wounds, so while a hefty amount of damage, it’s not enough. The 9TF is able to kill Mo Ises in return.
Ikiryo has been quiet and biding her time at the back of the board until now. With the middle scoring zone secure and the left one disputed by the 9TF, there’s really only one target for her Look into the Void Ki feat. The 9TF has a low defence against this attack, rolling 1 dice against Ikiryo’s 4, and Ikiryo is able to succeed and kills the 9TF.
This gives me control of two zones and, with my son only having Kuoto left, he decides he’s had enough and shakes hands.
Wrap Up.
Ikiryo is now my son’s most hated model. He thinks she’s grossly over powered and should be banned. She does deal some hefty damage but as I mentioned to him, she’s weak in combat and will take damage from shooting, so will go down quickly if targeted.
The Kitsune are also new models for my son and come with a very different play style to the monks he has been using. We chatted about possible synergies and how to adapt his play style. He also charged his models unsupported up the flanks which allowed me to pick them off.
From my side, obviously Ikiryo was a game changer, giving me some much needed range attack. And Eldest Brother added some real punch into the line which is something that the Cult of Yurei really lacks.
The Arms Race Begins - Ikiryo
I’m very behind on keeping this project up to date at the moment. But before Christmas, my son had purchased some reinforcements to his Temple of RoKan warband and these proved to be quite handy (see some previous battle reports). I also need some reinforcements so added some more models to my collection. First up to be painted is Ikiryo.
In game, Ikiryo is a glass cannon. She’s not cheap and gets to roll a single die in melee, so you really want to keep her out of BtB as, with only 4 wounds, she’s going to get minced pretty quickly. But you don’t take her for her combat abilities.
She does come with the Fear special rule with the highest challenge rating. To add to this, she also comes with Terror (anyone succeeding their Fear roll has to re-roll it) and Dread (anyone taking a Fear test does so with one less dice). So there’s a pretty good chance that anyone trying to enter BtB is going to end up with the Frightened state (which applies a bunch of de-buffs). So she has some defence if she does find herself in combat.
Her main abilities are the two Ki feats that she has. First up, is the Touch the Void ability. If she activates this before a damage roll is made, for each Ki point spent, 1 wound is cancelled. In addition, the attacker takes 1 wound. Handy.
Her other main ability is Look into the Void. For 3 Ki points, she can target anyone who has line of sight to her and within 8″. The target must take a Ki Challenge test against Ikiryo and if they fail, they take a damage roll. Basically, she has laser eyes to blast away at the enemy from behind the front line models.
The model itself is a simple two piece, with the parasol being a separate cast piece. This was easy enough to attach to the model but I did paint it up first. For the paint job, I wanted to aim for a Geisha look and aim for an ornate kimono. Basically, very different to the rest of my warband.
The kimono is a base of deep sea blue and I’ve shaded with a nightshade wash. I’ve then highlighted up using deep sea blue and increasing amounts of ice blue. The edging and belt (called an Obi I think) is purple with off white/purple mix for highlights.
I’ve opted for a pale skin with a light brown mixed in for shading. Once completed, I’ve painted over the face with a thin off white glaze before applying a red lipstick and makeup.
The parasol is a crimson red, highlighted with a mid red. Off white for the rest of the parasol.
I wanted some Japanese influenced design on the kimono. I would like to claim that my free handing skills are good enough to paint this on, but they aren’t. Kimono transfers aren’t really found in the wargaming world, so I turned to the world of nail transfers and, after a lot of searching, found some flower based transfers that looked close to a cherry blossom look. These were carefully applied to the sleeves and the rear of the kimono.
Basing was once again an acryllic dry earth given a brown wash. Then flocked with a dead grass.


Quick Fire Kami
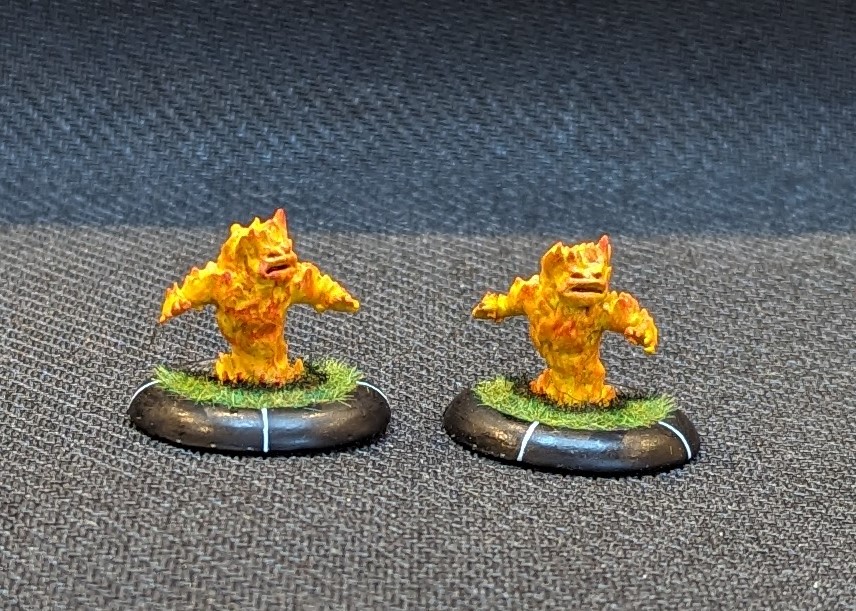
My son wanted to use some Fire kami in his warband list and we didn’t have any models. This was easily rectified through the medium of Thingiverse and a 3d printer and the search term ‘fire elemental’. A quick resizing of the stl and 2 hours in the printer and we had a couple of fire kamis ready to paint.
In game, all kami (of which there are quite a few) are cheap and cannot interact with objectives. They also tend to be weak in a fight and low health. However, they all have the Durable special rule meaning they can only ever take a maximum of 1 damage per combat, so they take a little bit of effort to remove. They all have an annoying ability which either buffs your own troops, or debuffs the enemy. In the case of the fire kami, it can shoot small fire balls which causes damage and a flame attack. So in conclusion, they are annoying enough to want to kill but insignificant enough to really make you question whether you should be wasting your time on doing so. They really create a dilemma for the opposition.
Painting wise, this was a really basic and quick paint job. I watered down a yellow, orange and red and then based the entire model in yellow. While the paint was still wet, I’ve picked out the higher areas in orange and then red. This was all slopped on and I’ve allowed to the paint to mix on the model. Finally, once dry, I gave everything a yellow glaze (or two) to tie it all together. It all took a couple of hours.
Not perfect or going to win any awards, but quick and good enough for the table top.
 Flaming front
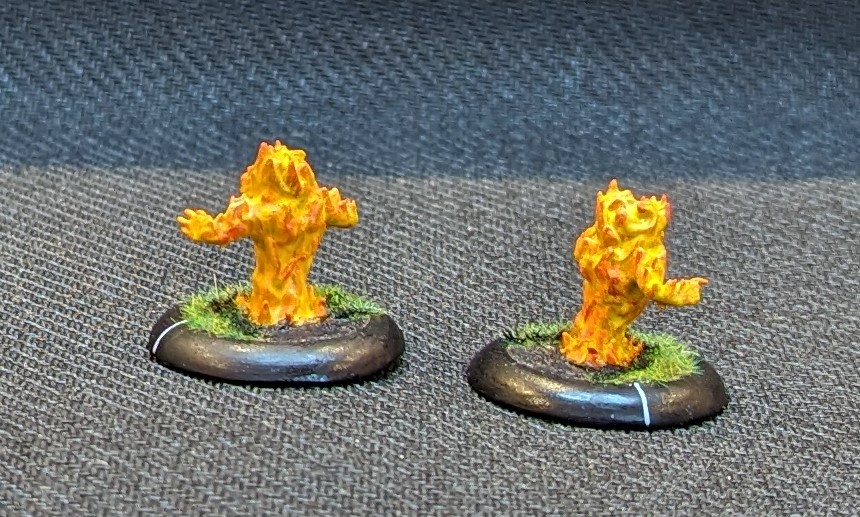 Flaming arse view
Battle Report No.6
We played this game before Christmas but it has taken me this long to summon up the courage to tackle the project system to upload it! This was a quick game, so I’ll keep the report brief (at least for me!) but hopefully this will keep the usual suspects who like these battle reports happy.
Firstly, the mission. Having played a few games now, I definitely see that the game is designed for scenario play. Some factions and builds are not meant for a straight up fight and can win a scenario without killing a single enemy model. With this in mind, we opted for the simple 3 idol scenario with a game length of 6 turns. Scoring takes place at the end of turn 4, turn 5 and turn 6 with the side with the most scenario points gaining 1VP at the end of each of the listed turns. You gain one scenario point for each ‘friendly’ idol. Idols start the game neutral and can be turned friendly if a model in BtB spends an activation to interact with it. The idols are deployed along the centre line at 6” intervals.
My son opted for his Temple of RoKan and wanted to use his new models he picked up early December. His force was,
Master Po – This is a master monk who despite looking like a fat bloke who like a cuddle, is a combat monster. Hard to hit but he hits back twice as hard
The Grey Pilgrim – A ronin who is handy in combat but comes with a very useful lightening bolt ranged attack that can be buffed with Ki to make a second attack within 3” of the first target
Riku – a monk who has an affinity with water and includes a Tsunami Ki ability that effectively washes everyone backward across the board – useful for moving enemy models off of the objectives
Tsutsumi – a monk who has a sonic blast ranged attack that leaves targets prone (and therefore vulnerable to combat monks!)
He also took a Gorinto terrain piece to generate an extra Ki point per turn
I ditched my Cult of Yurei and opted for the Kiyozumi family that we got in the original start set that we picked up. Just for something a bit different. This allowed be to play the Kiyozumi Theme list giving me the bonus of turning one objective friendly from the start (I picked the middle objective) and during one turn, I get to win all tie breaks. Useful! In my list was,
Kiyozumi Kicho – Handy in combat and has some sneaky Ki feats
Kenmeina – an Ashigaru who can handle herself in combat and has some durability with her armour
Kiyozumi Sadaka – a Samurai and I’ve equipped with a card providing some defence against opposing Ki attacks
Kiyozumi Haiboku – a Samurai with a bow for handy long ranged attacks
Kiyozumi Hinadori – a healer who I’ve also given a golden sword in case she gets into combat
Turn 1
I moved my models up behind the fence to get a bit of protection and use some of my ranged attacks to soften the enemy up. My son was aggressive and ran forward to the idols, really wanting to get into position to get into combat. I was able to get Sadaka to use her ranged Ki ability to drain the Grey Pilgrim of some Ki which will limit here ability to launch lightening bolts
 End of Turn 1. My son has really pushed on beyond the centre line already
 A nice close up, where at least some of the models are in focus. The rest are running.
Turn 2
My son kicked off turn two by activating the Grey Pilgrim. The pilgrim used her Ki feat of Rajins Rage which allows any successful lightening bolt hit to leap to any model within 3” for a second attack. She proceeded to zap Kicho for a point of damage and then managed another point against Sadaka. I got off lightly on that attack as it could have been a lot worse!
Haiboku used his Dai Kyu long bow against the Grey Pilgrim as retribution for her lightening attack. This went very well, and he was able to skewer her for 4 points of damage. I was feeling pleased with this….
Riku, the water monk, charged into Kenmeira. During the rolling of the melee dice pool, I managed to roll all 1s. My son, who has an uncanny ability to roll good dice, rolled very highly resulting in a massive success level in attack. He managed 8 damage, which is a huge amount in one turn, especially given that Kenmeira has armour that reduces the damage roll. Kenmeira is not able to withstand such an attack, and dies.
Master Po then gets in on the action and attacks Sadaka. Fortunately, Haiboku is close by and activates his Bodyguard ability, switching places with Sadaka. Having fought Po before and knowing how good he is in combat, I went full defensive and used Haiboku’s push defence ability. This works, as Po’s attacks fail to get through and Haiboku can then push Po back 1” out of BtB and combat. A lucky escape!
Looking to overload Po, I get Kicho to attack him and she is able to land 1 damage, but this is annoyingly cancelled by Po’s tough ability, so the combat ends without damage.
My son, looking to take out Kicho, uses The Grey Pilgrim’s Lightening Bolt attack against Kicho. But, as she is in BtB with Po, he has to roll off to see if he hits Po. Amusingly for me, he does, and Po gets zapped for 1 damage. I laughed, my son didn’t.
With Po exhausted (out of activations), I got Kicho to press the attack. Being exhausted automatically removes a dice from your melee pool, so this makes an attack on the mighty Po slightly easier. You allocate your melee dice pool secretly and also select any available special attacks/defences secretly as well. My son put all of his dice into defence and opted for the Counter Strike Defence special defence. In this case, if Po’s defence dice pool beats Kicho’s attack pool by 2 or greater, then Po gets to make a damage roll. And this is exactly what happens and Kicho takes a point of damage.
 End of Turn 2
Turn 3
My son gets the initiative and wastes no time in activating Po who is still locked in combat against Kicho. Kicho is grossly out matched and despite me putting all of my dice into defence, Po used his Crushing Wave Strike Ki feat (which means I must remove my highest defence dice), it wasn’t enough. Po was able to deliver a blow that killed Kicho.
With two models removed from my faction and I’m nowhere near any of the objectives, I’m in deep trouble. I try to strike back with Haiboku’s long bow but manage to miss everything. Riku then uses his tsunami Ki feat, which requires all enemy models to take tests to avoid being pushed backward 8” (or up against any immovable terrain). I fail most of the tests and my warband is now scattered and further away from the objectives.
The Grey Pilgrim is now able to get into combat with Sadaka and does so. Sadaka does her best but takes 2 wounds. My attacks are just not getting through and causing damage.
Po continues his rampage and moves into combat with Haiboku. Haiboku rolls a lot of defence dice but is not enough to avoid taking another point of damage.
Finally Tsutsumi gets into the action and attacks Hinadori in the rear which gives him a lot of bonus dice to his attack. It’s too much for Hinadori who takes a massive 8 damage, which would be enough to kill off most of the models in the game and Hinadori is no exception.
 End of Turn 3
Turn 4
This is a scoring turn (at the end) and despite losing over half of my warband, I’m actually still in the lead! But in reality, it is all over quickly as the Grey Pilgrim quickly despatches Sadaka and Po takes out Haiboku. Overall, it’s a very one sided game and my warband is completely crushed.
 It's all over...
Conclusion
My son was very aggressive and Master Po is certainly worth his points value, providing a lot of consistent melee output. I was overwhelmed from the start and never got into the fight.
Interestingly, had we been playing a tournament game, tabling your opponent doesn’t automatically give you a win. The game automatically stops when an opponent is completely defeated and as this happened in during turn 4, there was never a scoring event and the game would therefore have finished in a draw. Had I survived to the 5th turn and still had the one objective scoring for me, I would have taken a victory point at the end of the 4th turn and then won the game. There will be many out there that would disagree with this, as tabling your opponent surely means that you win, but this does create an interesting dynamic to the game. Even in list building, you need to think about which of your models will handle the scenario objectives and which will be providing another role.
Lanterns
 These are nice, I need some of these
While doing research for the project, I stumbled across the above picture. These look lovely and should be on my gaming board to help with the immersion. So off to Thingiverse I went and found me some lovely stl files. A few hours later and my 3d printer spat out the resin models.
I’m a big believer in immersive terrain that looks good but not spending hours and hours on it. After all, the focus is on the models and not the backdrop. The lanterns were given an airbrushed red while the tiles were painted with a cheap green. I thought about dry brushing and shading the red but couldn’t be bothered – I’m not sure it will elevate the models much. I did however attempt some OSL. I’m not very convinced by the effect though. I applied a dark green ink to the tiles and then dry brushed with a lighter green. A bit of black and gold completed the paint job. Simple but quite effective.

As I was working on lanterns, I finished the mdf lanterns that I got with the buildings that we bought right back at the start of this project. Again, not much effort expended on these.

A number of the scenarios in the game require some objectives. These need a facing as they can be interacted with for scenario points. I had been using some resin blobs that look a bit like large chess pawns but these detracted from the immersion, especially given that they were painted a metallic blue.
Back to Thingiverse and after a quick search, I found some small shrines which suit the job. These got the same red as the lanterns, black for the roof and a grey for the stone base. A quick black wash and dry brush to bring them up. I again attempted some OSL on them to provide some indication as to the ‘front’. Not convincing, but a lot better than the metallic blue pawns!

Building our Christmas presents
Both I and my son wanted to add to our factions and so both asked for Bushido stuff for Christmas. For me, I opted for the Yuta or Yurei boxed set which is a themed box around 4 witches (or Shugenja). They were all given an offer of power by Yurei with the catch that all four sisters had to agree. Three did, one didn’t, so the box contains the three living witches, each with their own powers and the fourth witch who is now a kairai (or zombie). It also contains a couple of skeleton warriors. The witches can synergise with a skeleton build, a kairai build or some of the other servants of Yurei, so gives plenty of options.
My son wanted to expand his Temple of RoKan force with the new Kitsune models. These play differently to the monks that he currently has, being fast around the battlefield but a little more fragile. He also wanted the Ashinaga Tenaga model, which also fits into his faction. This model is based up a Japanese myth around two men, one with long legs and one with long arms, who worked together to catch fish. In game, the model provides a useful harpoon and net which allows Ashinaga Tenaga to move opposing models around the battlefield. Very handy for getting the enemy out of position
 More shiny stuff
I’ve spent the week building my son’s models. This ranged from easy to downright nightmarish. The Kitsune went together very well with only minimal clean up. They are quite fragile though, so we’ll have to see how long they last….
Ashinaga Tenaga took me the best part of two hours to get together. It only came in four parts – the metal net base, the chap with the long legs (Ashinaga), the torso of the long armed chap (Tenaga) and the harpoon. The problem is that everything never quite lined up and it all needed to be pinned. This was hard given that all of the bits were often thinner than my usual pinning wire I use, requiring the use of 0.5mm and 0.3mm wire.
 Mostly built Kitsune
 Bloody Ashinaga Tenaga (who still needs some gaps to be filled)
These, coupled with some one off purchase made back in November by both of use, means that the arms race has well and truly started!
More terrain
In the last update, there was a desecrated grave with a grave stone that came from Oshiro Models. This was part of a set of grave stones and it seemed a shame to not paint up the rest and make a bigger terrain piece. While I was buying the graves from Oshiro, a cooking station and a hand wash also fell into the shopping cart.
For the grave stones, these were exactly the same paint job as the desecrated grave (luftwaffe grey, nuln oil and then a dry brush). These were all mounted on a plasticard base and then smeared with acrylic mud. Once dry, it all got covered in static grass.
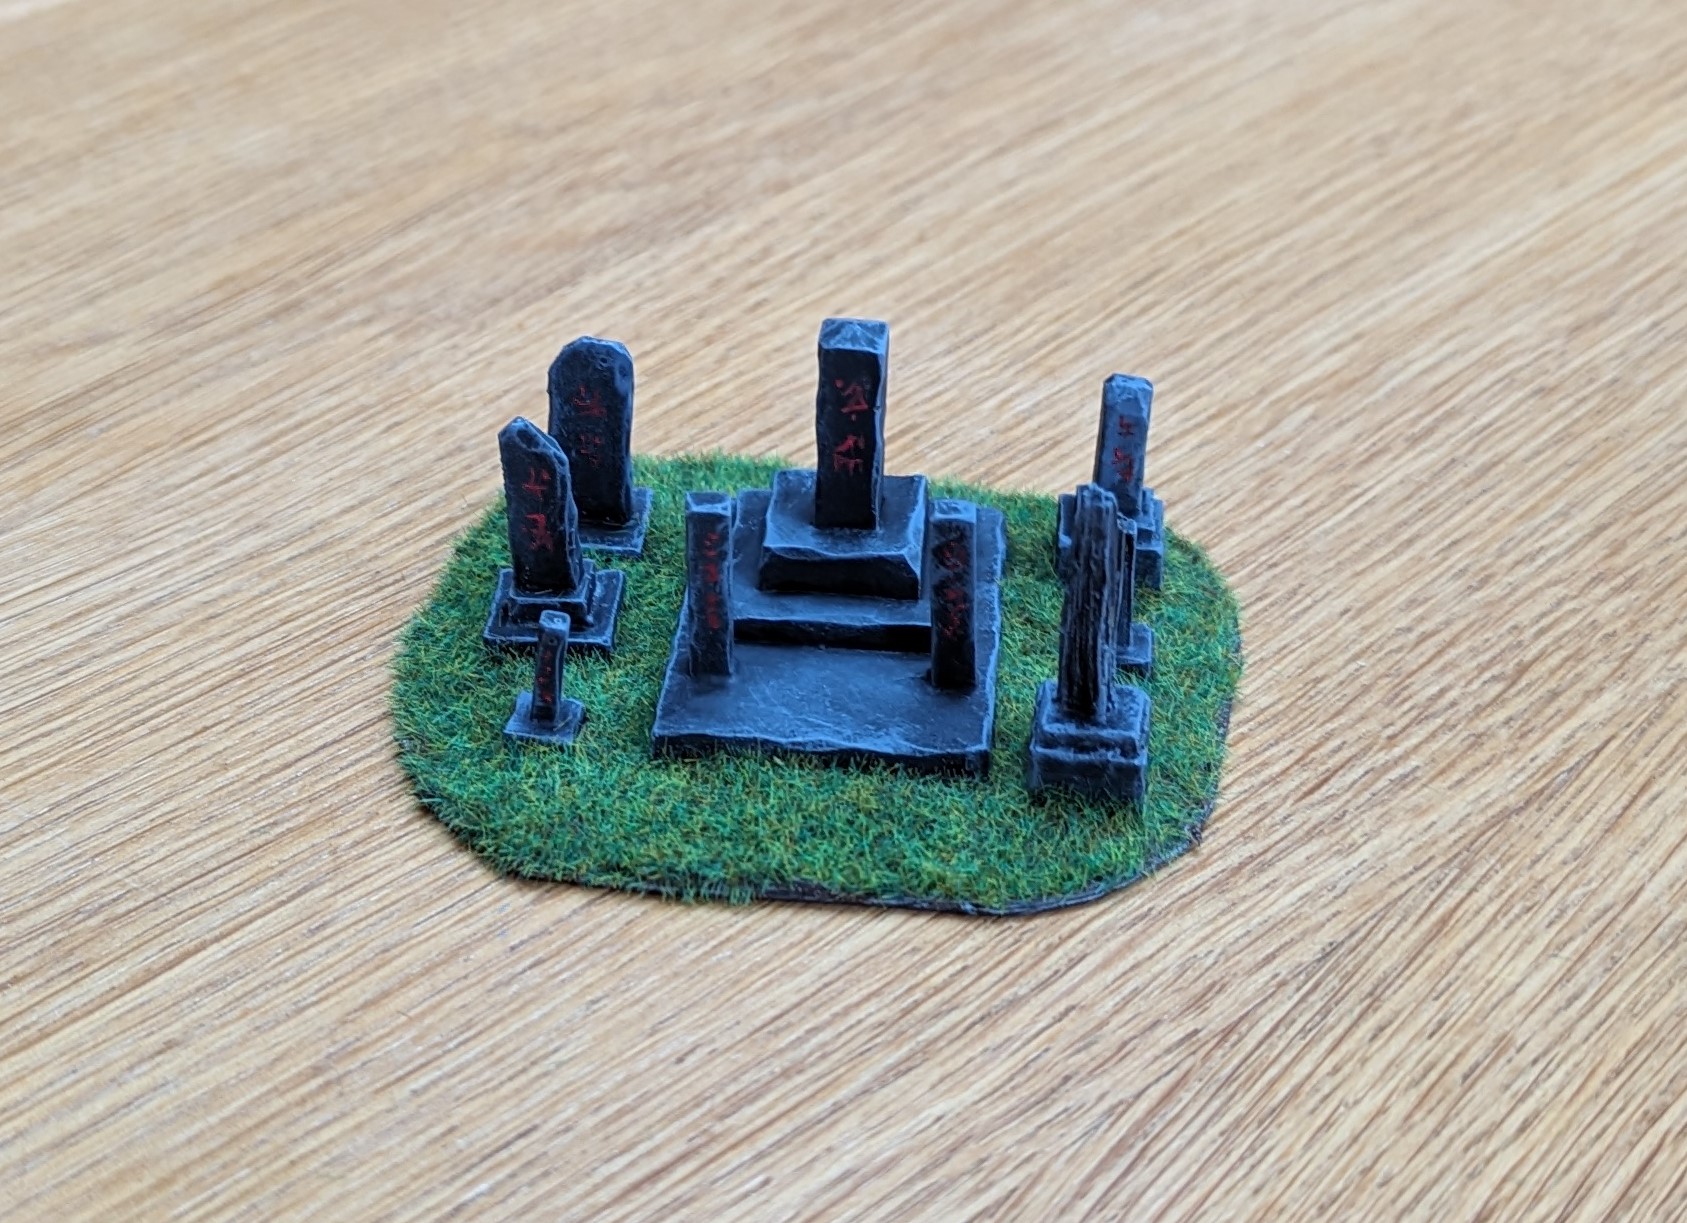
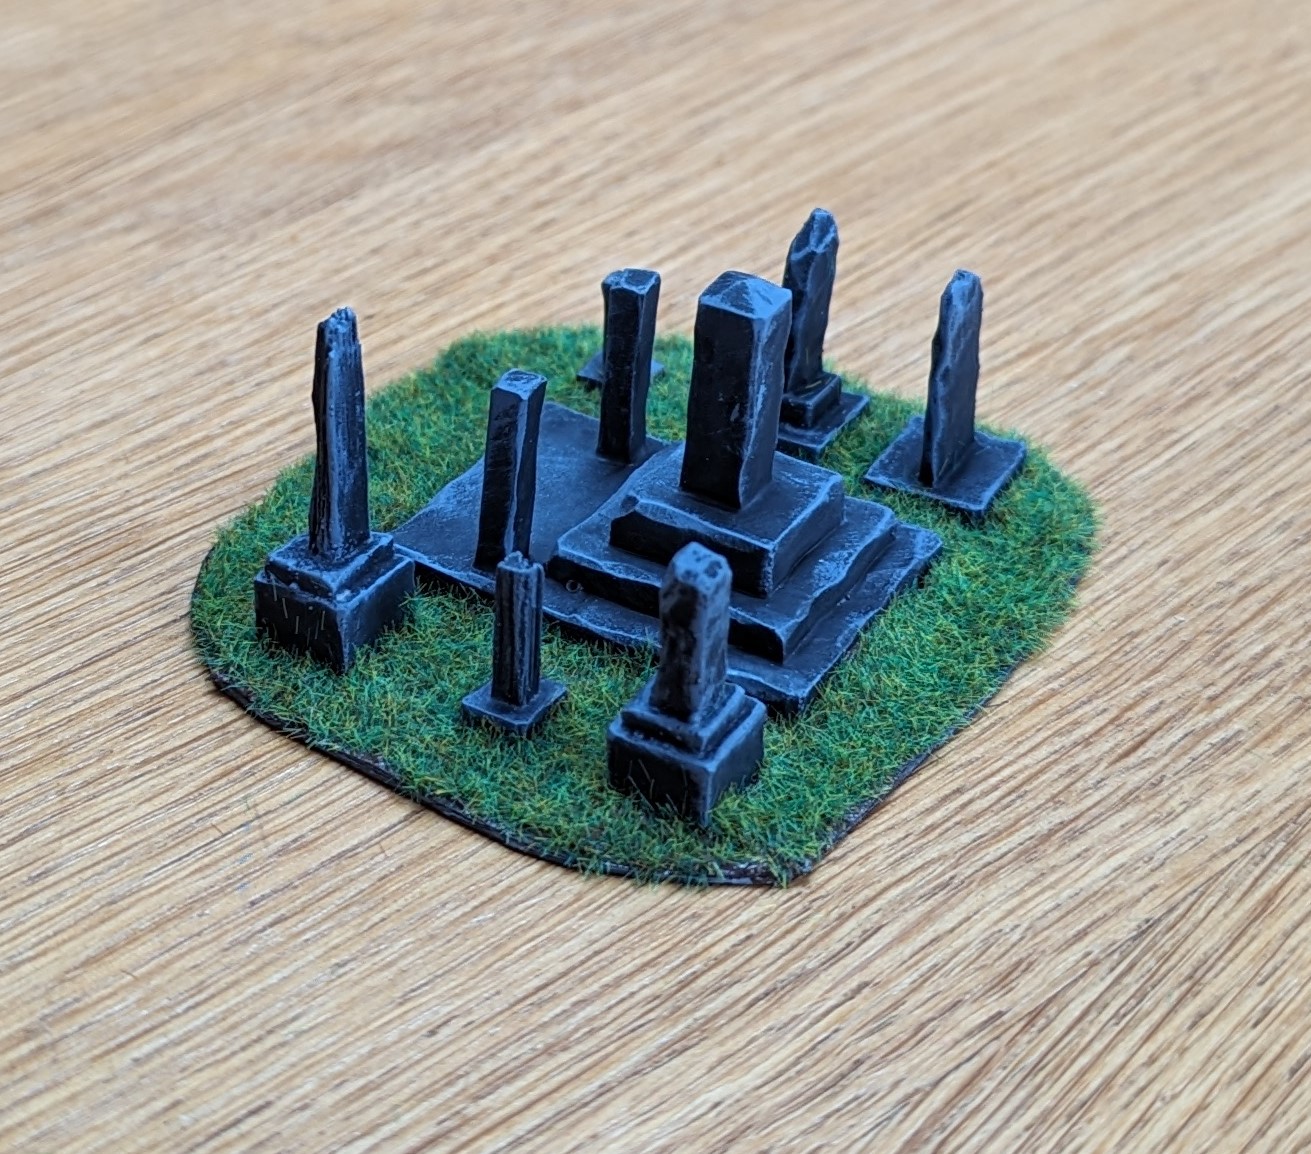
The cooking station is a simple little set of 4 resin pieces and will add that ‘lived in’ feel to the table top. This is all mounted on plasticard as the graves above.
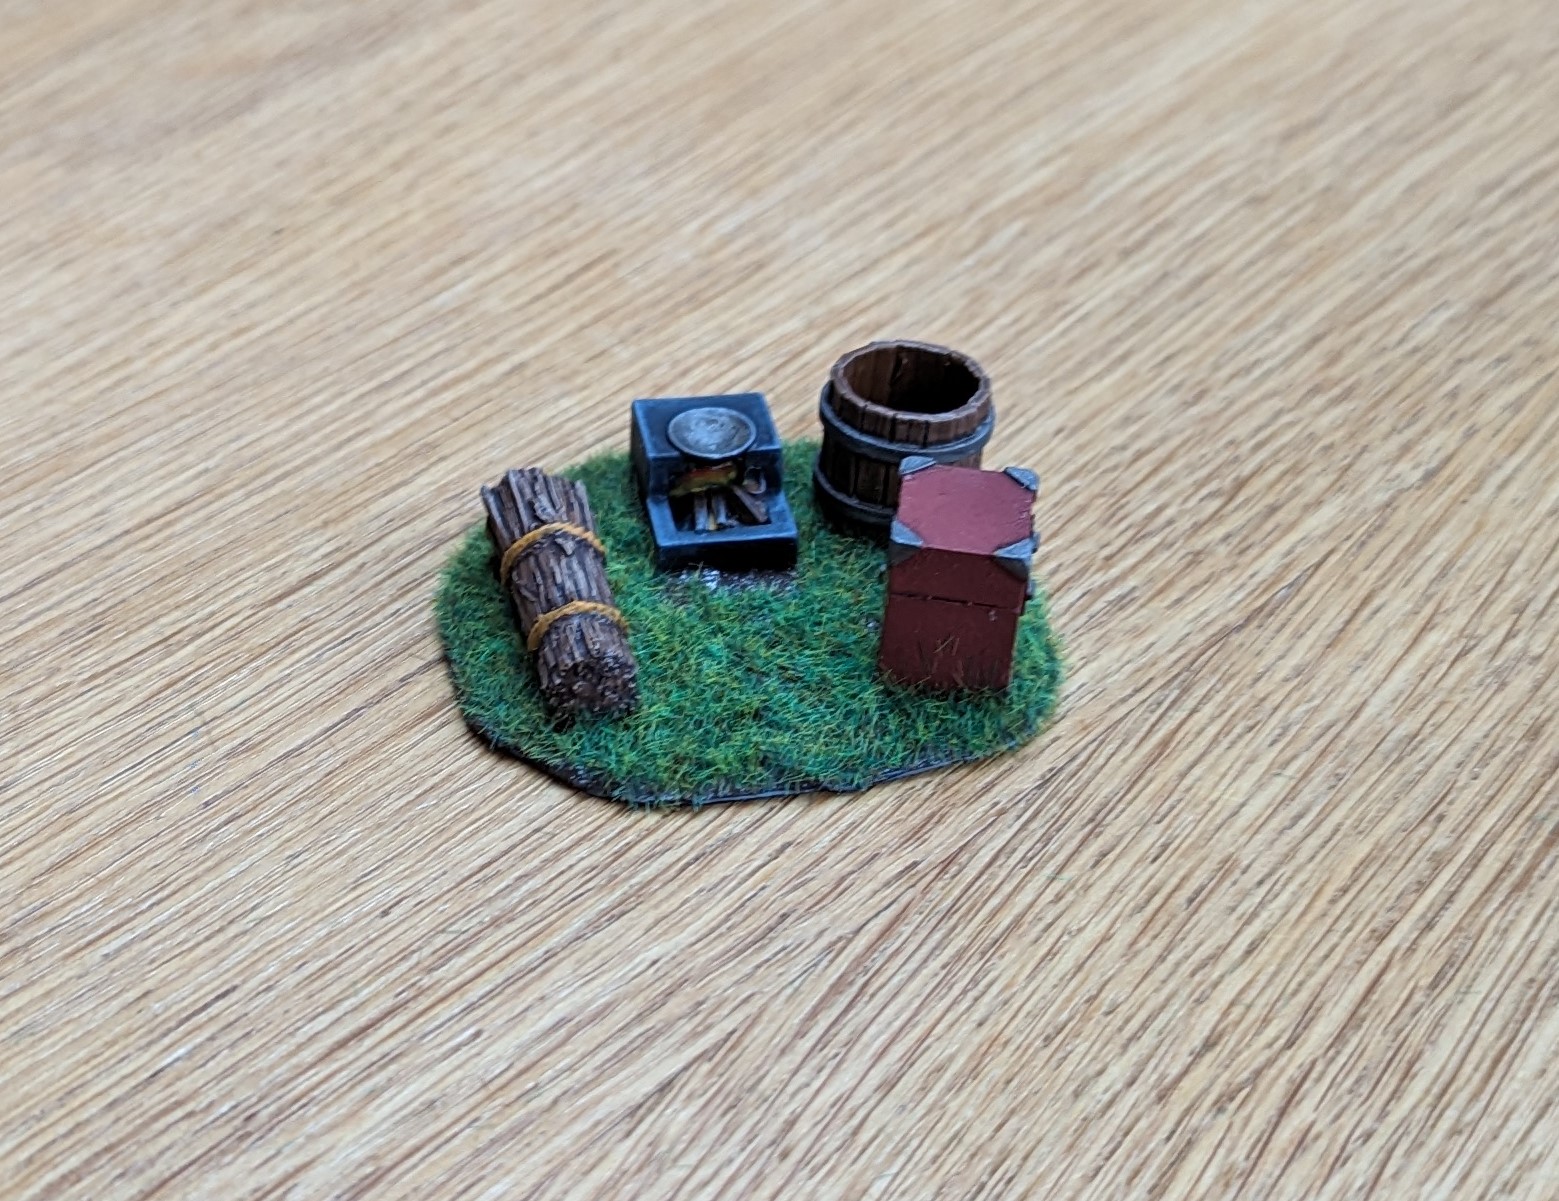
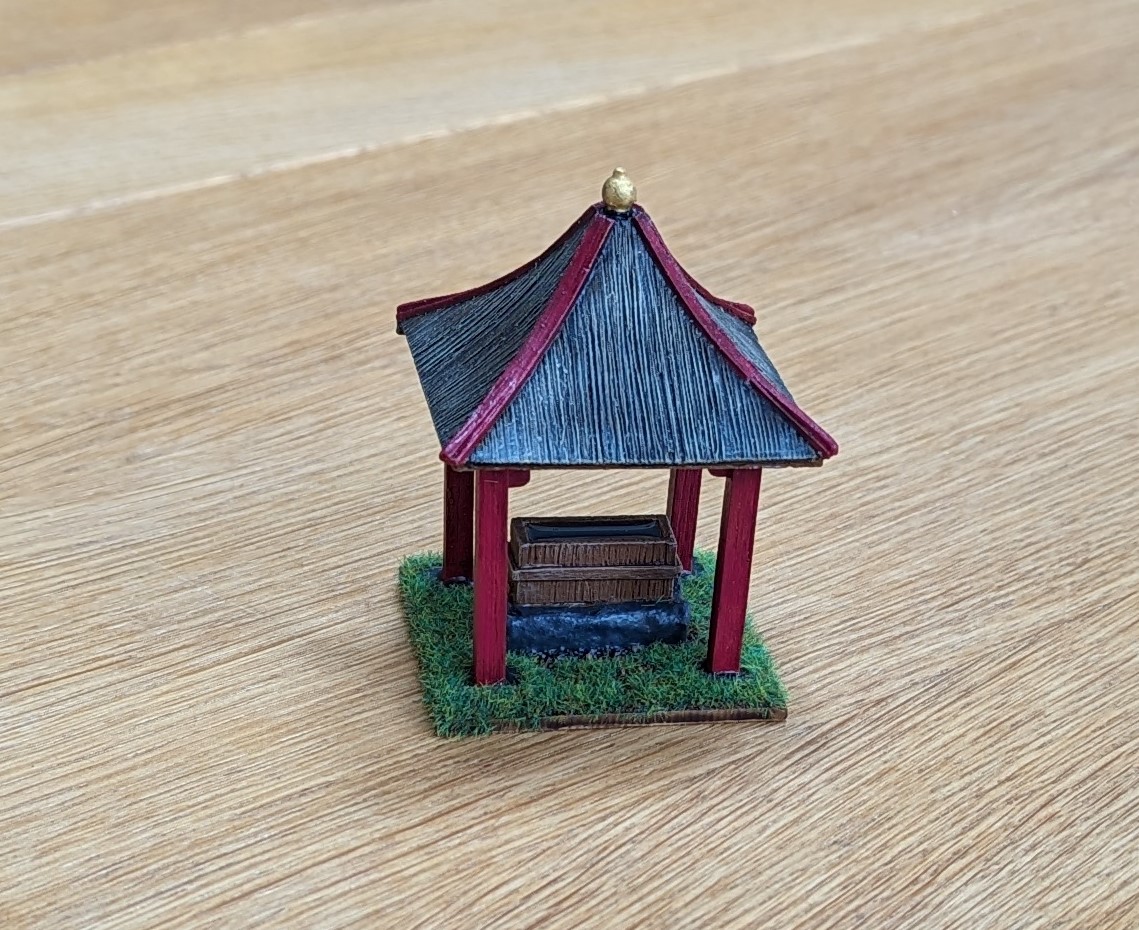
The hand washing station is a 6 piece resin set and I had ‘fun’ pinning the supports to the roof and then to the base. I’ve opted for a grey with black wash for the reed roof as this will tie in with the rice huts that I built early in this project. I’ve also opted for the same red as used in the other terrain pieces to again tie this all together. In the water trough, I’ve poured some of the resin water that I used for the pond, just because I could.


![Gripping Beast Announce They Are Closing Their Doors [Updated]](https://images.beastsofwar.com/2026/09/gripping-beast-announcement-cover-600-338.jpg)