


Redvers and Son Get Into Bushido


Recommendations: 1267
About the Project
My son and I were looking for a new game to get into. Something that was low on models, fun and reasonably quick to play. We decided on Bushido.
Related Game: Bushido
Related Genre: Fantasy
This Project is Active
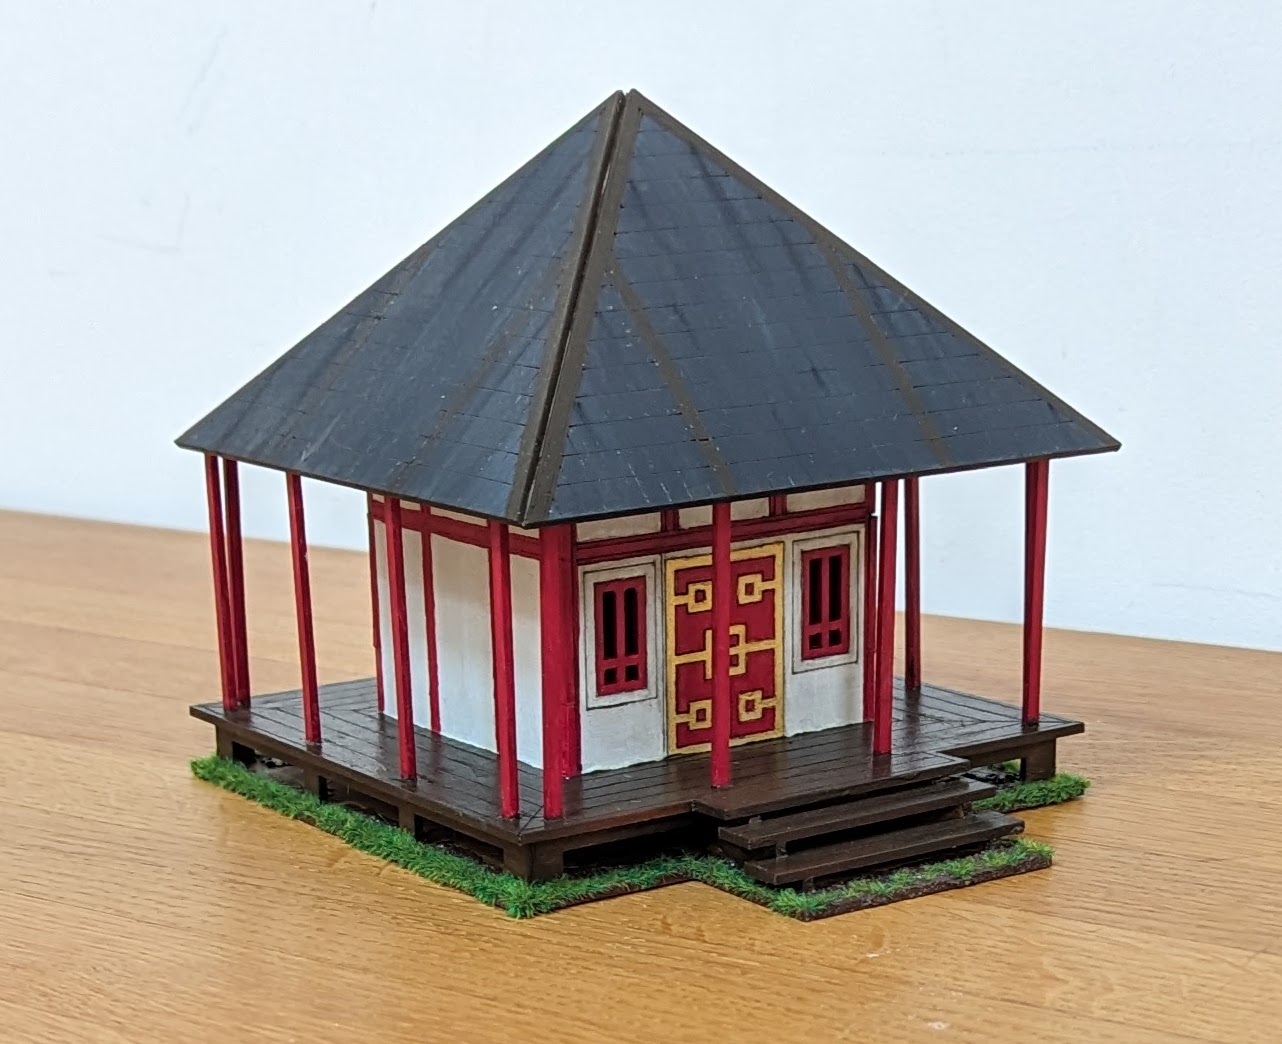
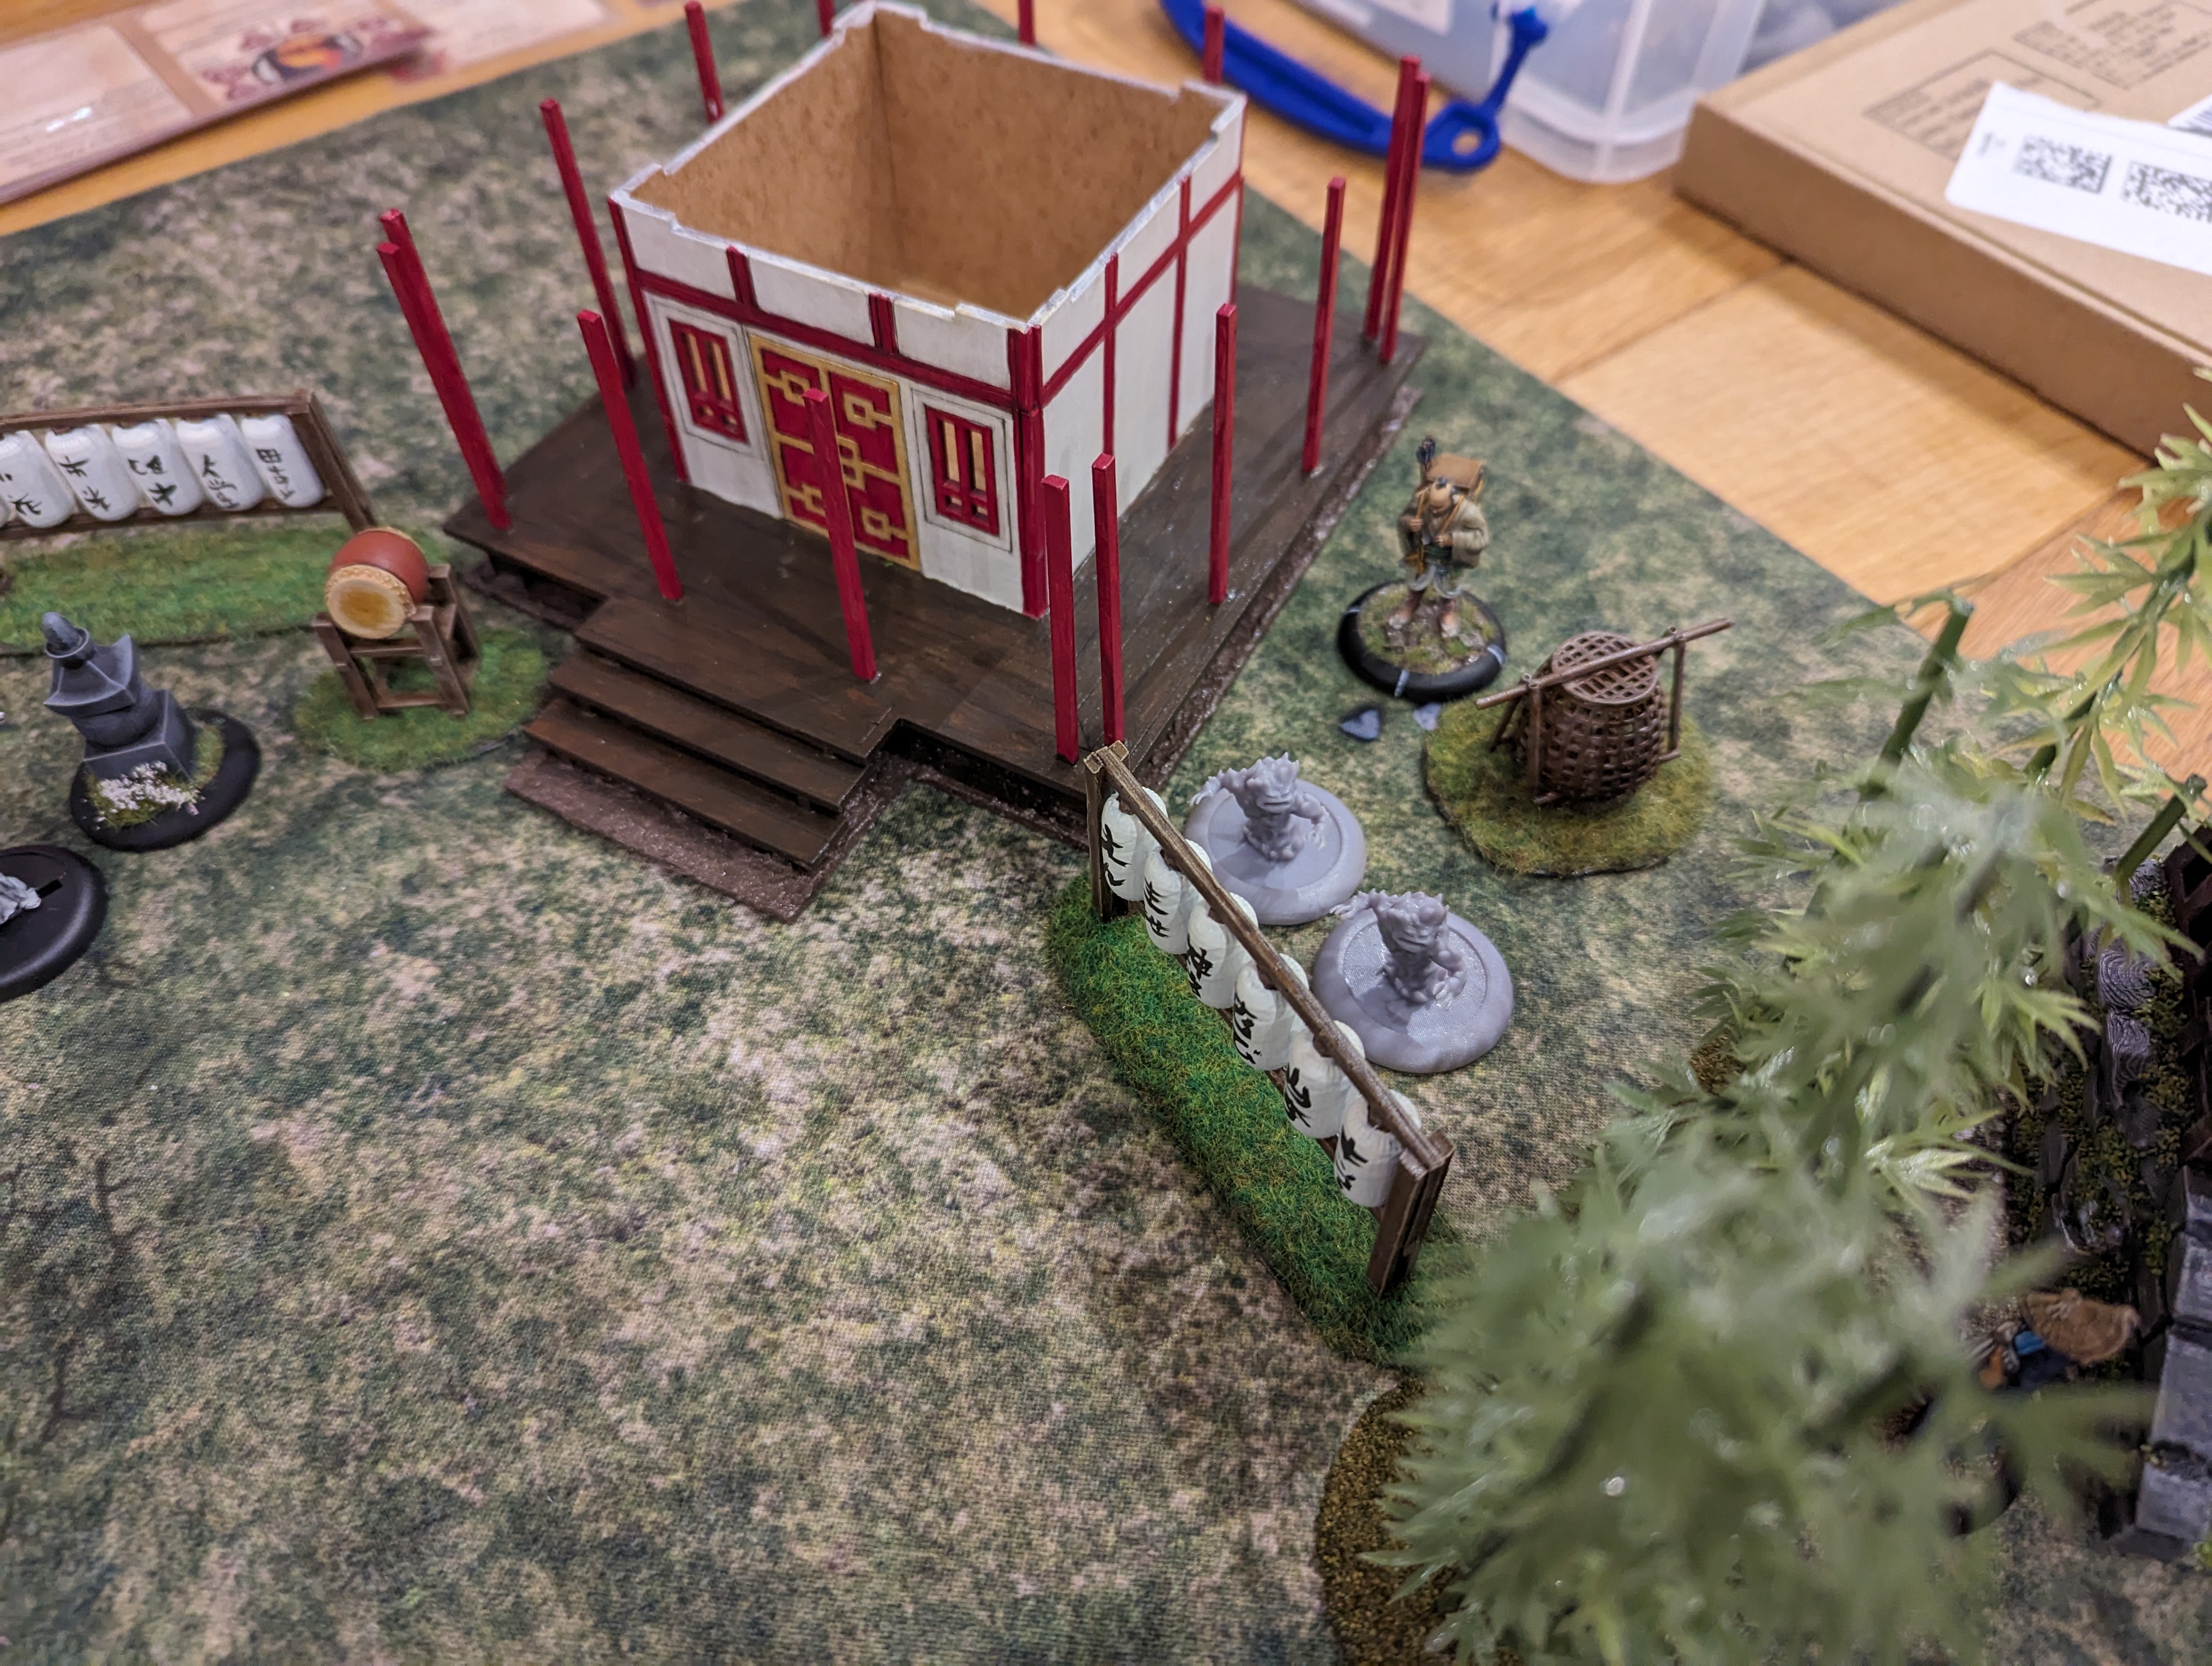
Temple
Way back at the beginning of this project, I bought some MDF terrain buildings. I completed the small rice stores but still have the temple, dojo and house to get painted up. I find painting MDF a chore, especially when there are plenty of lovely models to paint instead. But, you can’t put these things off forever, so time to finish off the temple at least.
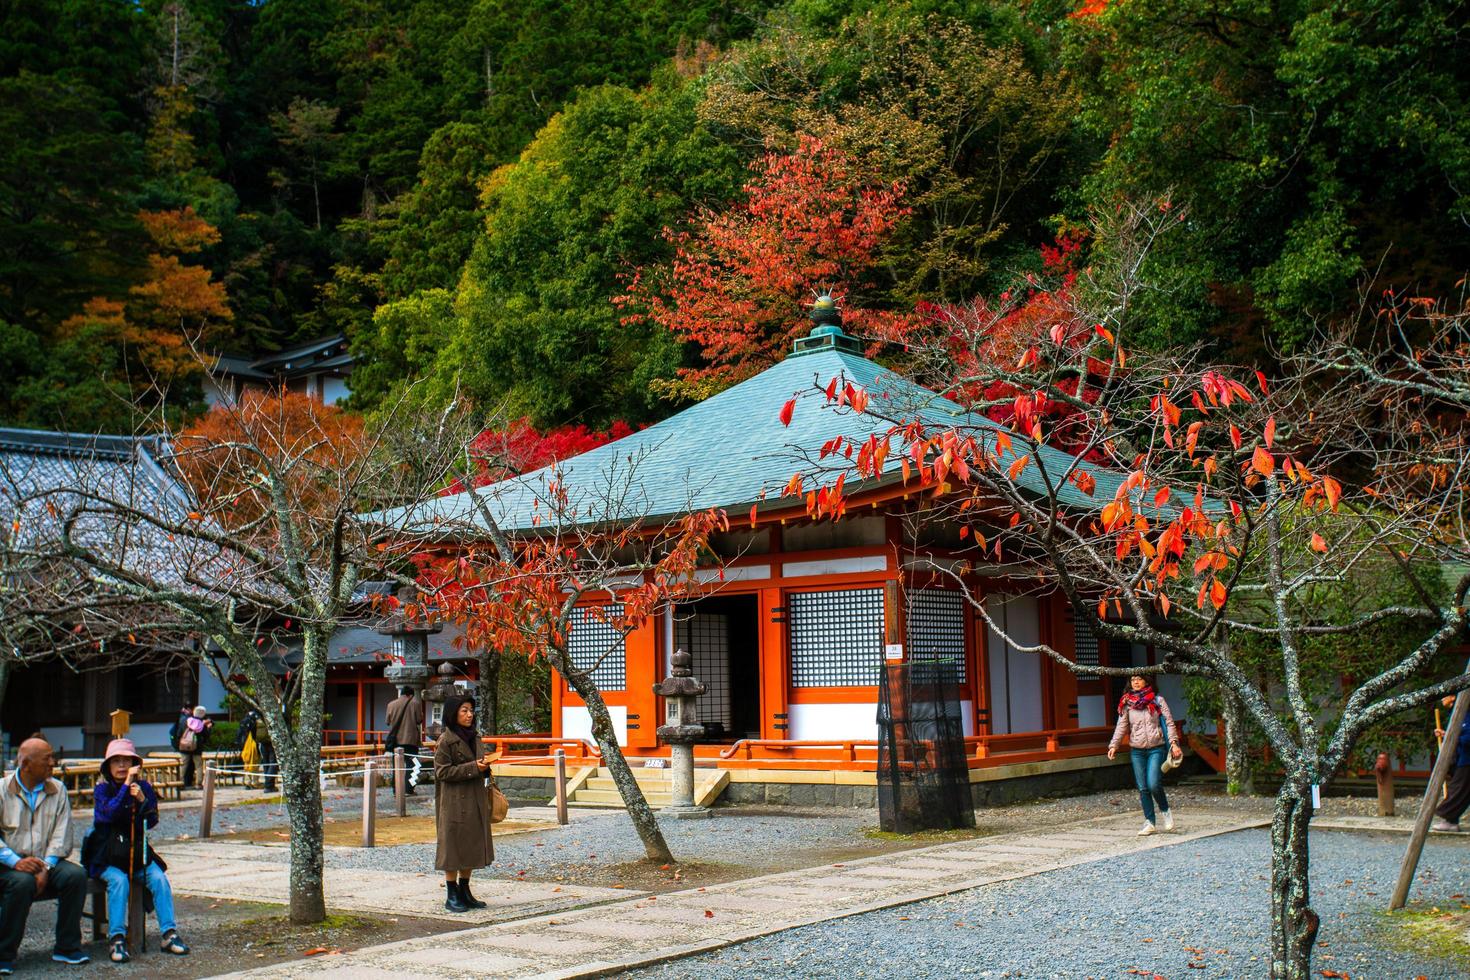
Firstly, I had a look at some reference material. There’s plenty of pictures of Shinto shrines on the web, here’s an example of what I’m aiming for.
After sealing the shrine with an MDF sealer, I dug out my cheap acrylic paints and got to work. On the one hand, cheap acrylic paint is cheap and therefore cost effective for this size of model. But on the other hand, it goes on poorly, streaks and takes several coats, especially white
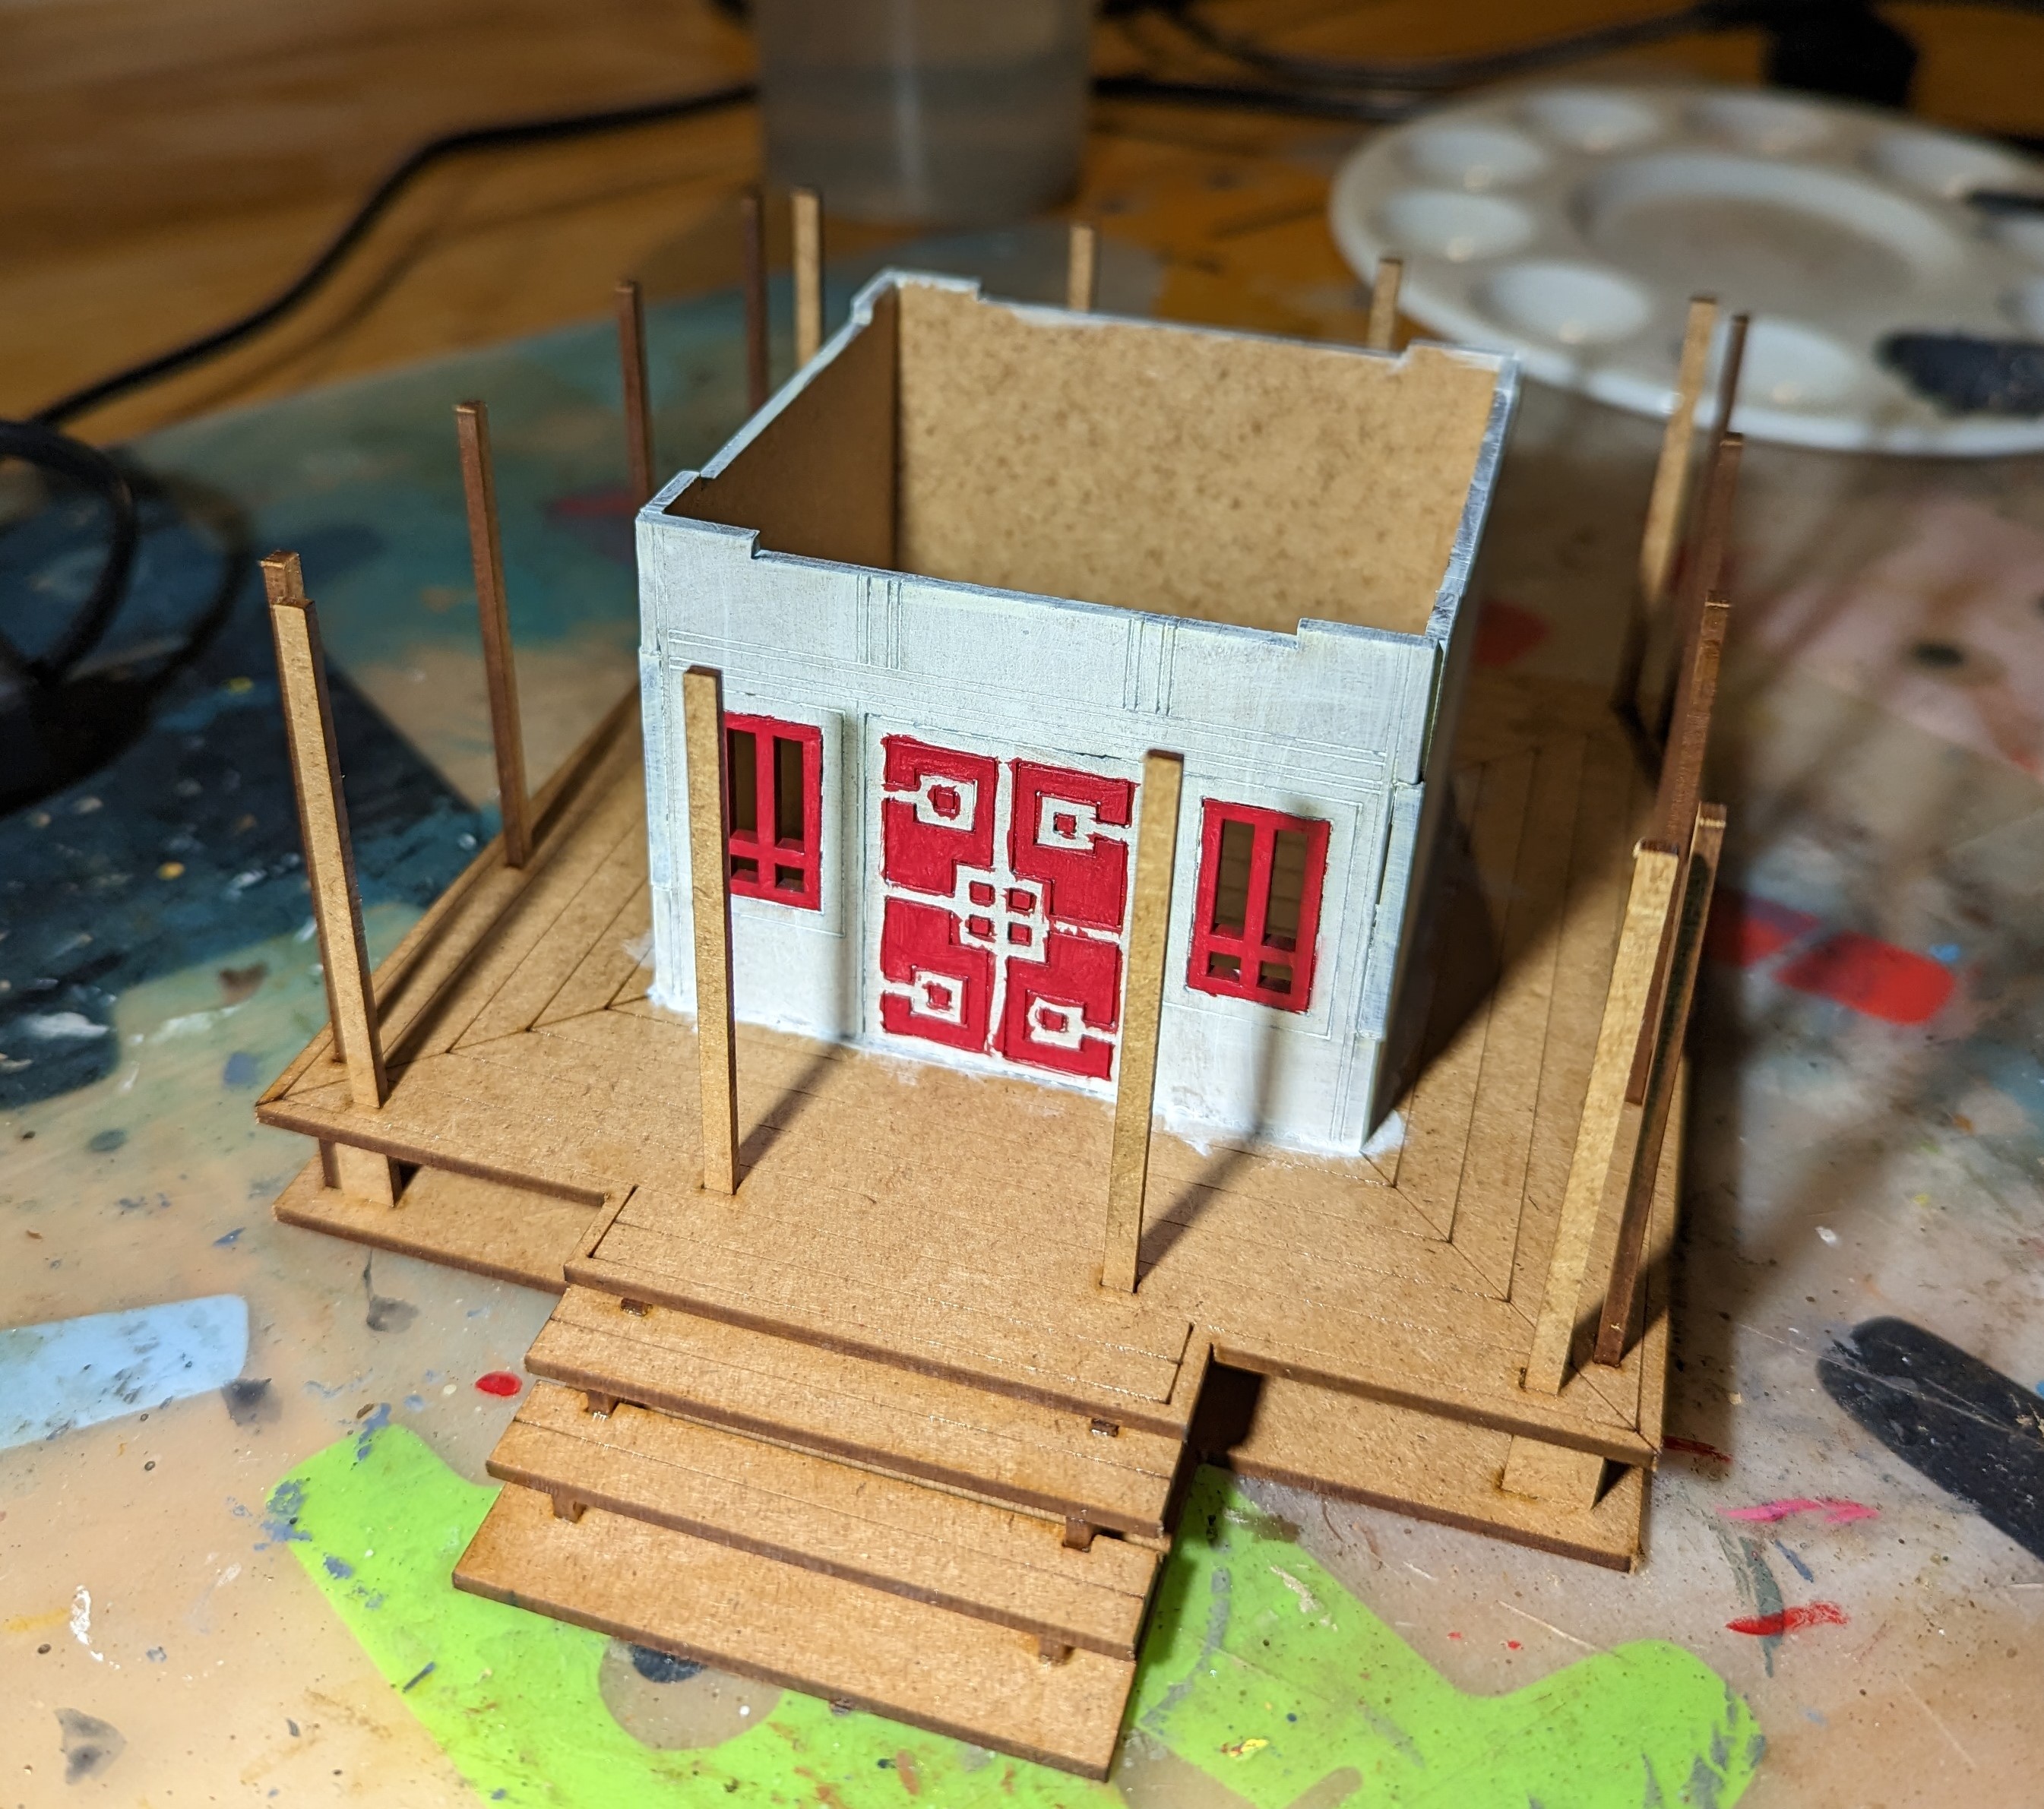
One positive from the streaking was that I quite liked the look it gave the wooden planking outside – it looked a bit more ‘wood’ like.
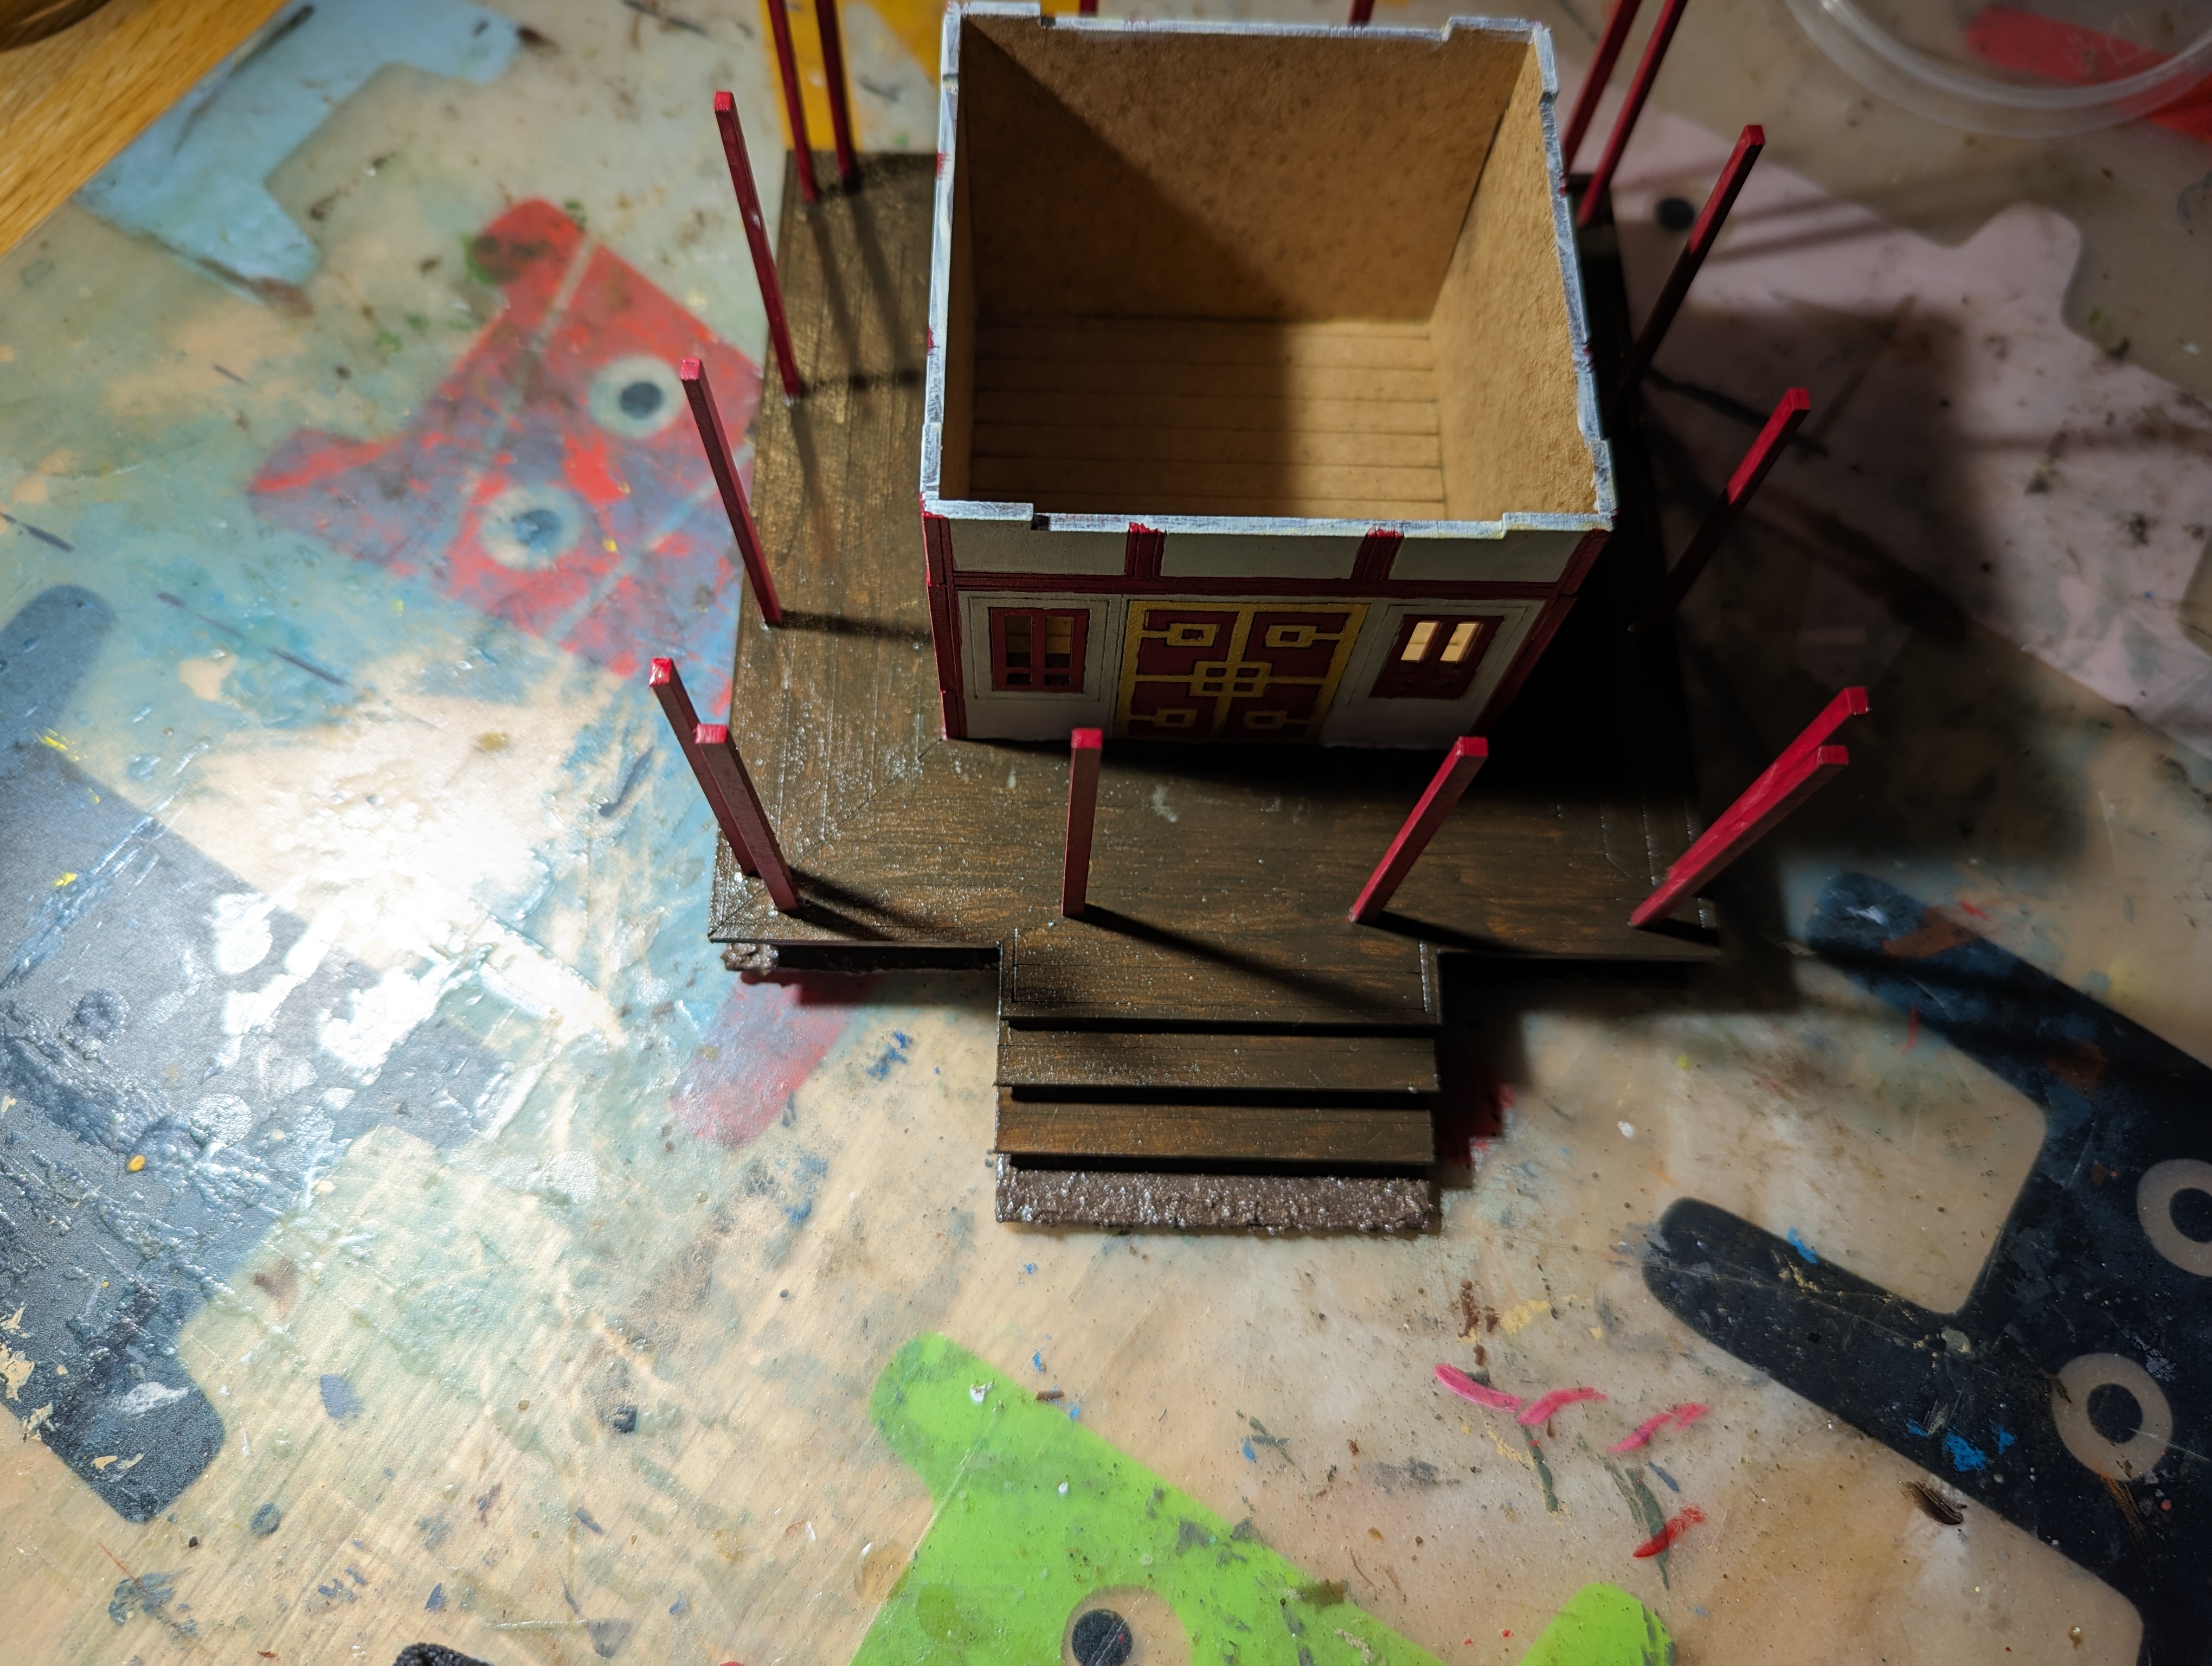
After the base colours of white, red and brown, I went in with some gold to pick out the door. This was tricky given the angles and the pillars. I used an enamel wash on the planking to try to pick out the boards and the recesses on the front wall. This had varying results….
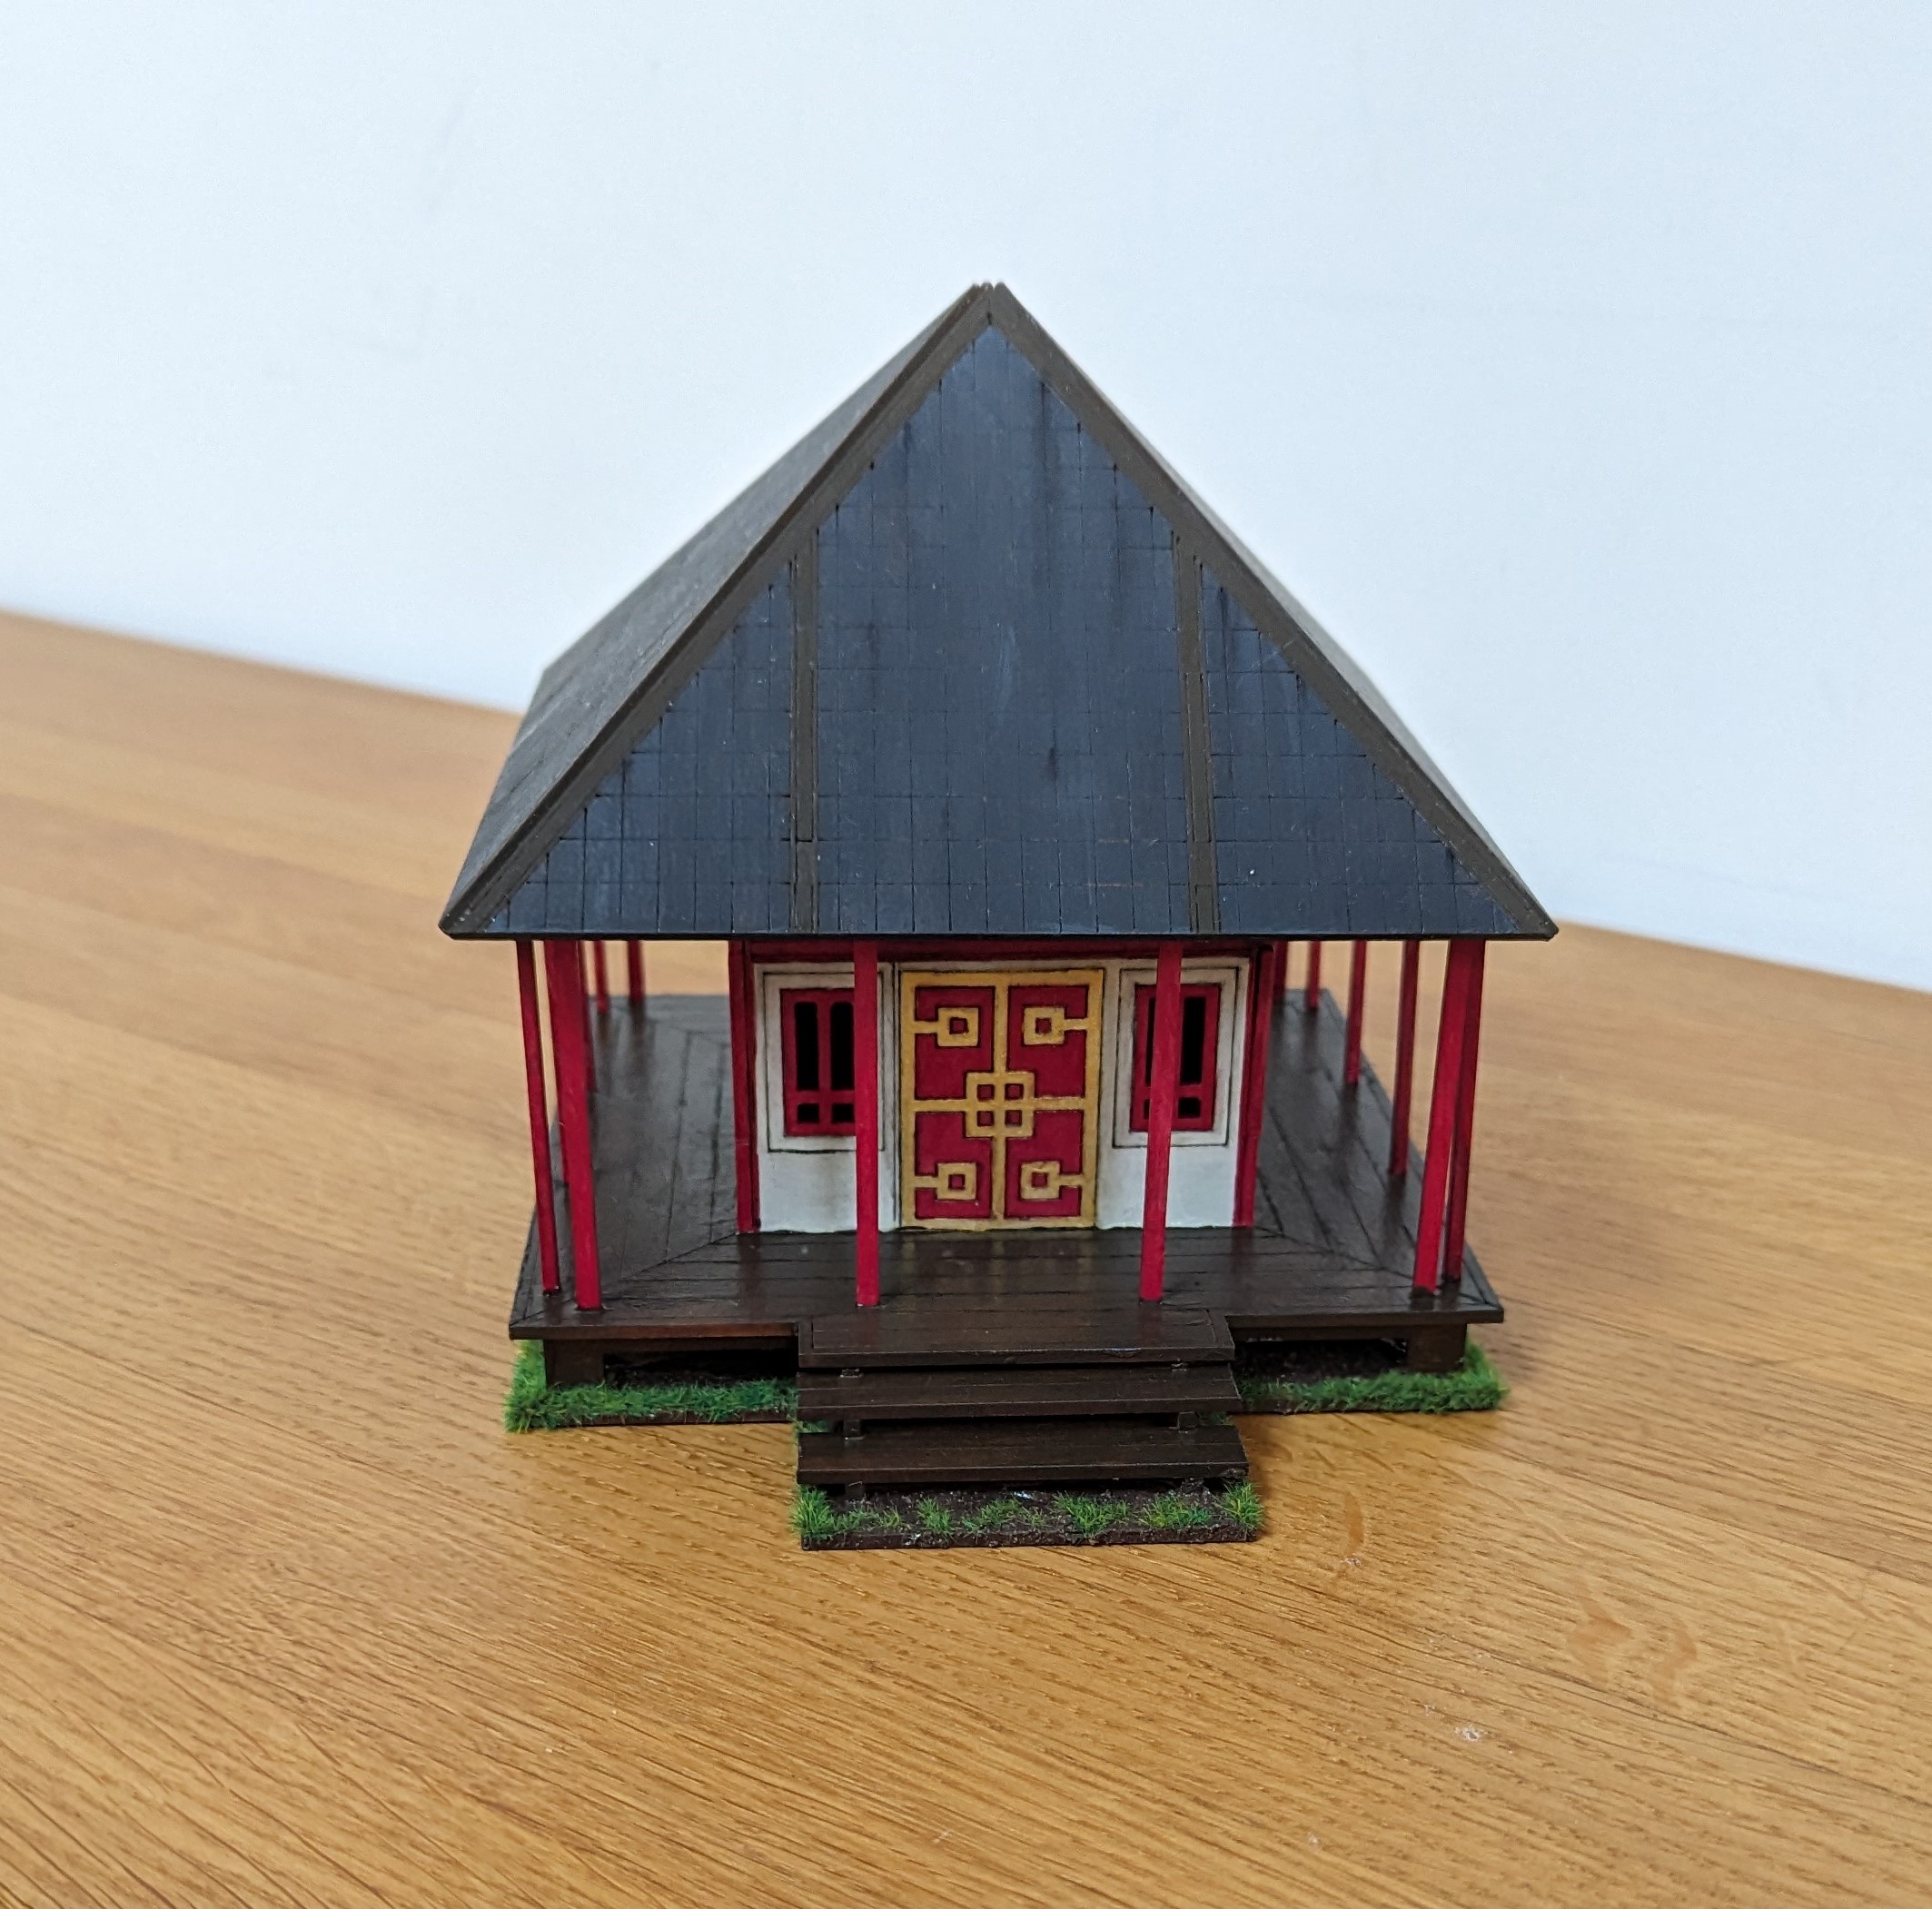
For the roof, I went with a simple grey. I’ve applied some streaking with some thinned down enamels which provides a bit of variation.
I’ve varnished everything with a matt varnish except the wooden planking. I’ve left this as a gloss to try to replicate the highly lacquered flooring that you sometimes see in Japan and China.
Finally, some acrylic mud effect around the edges and a bit of static grass to hide the mdf base it is on and job done.
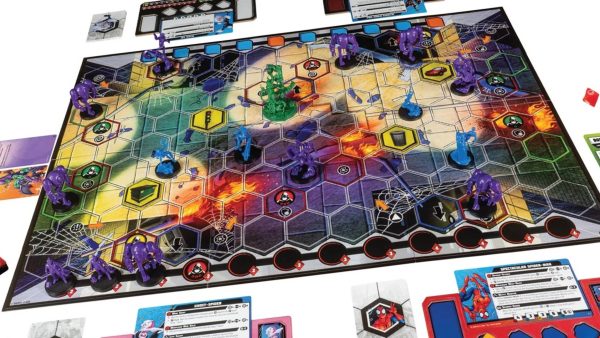
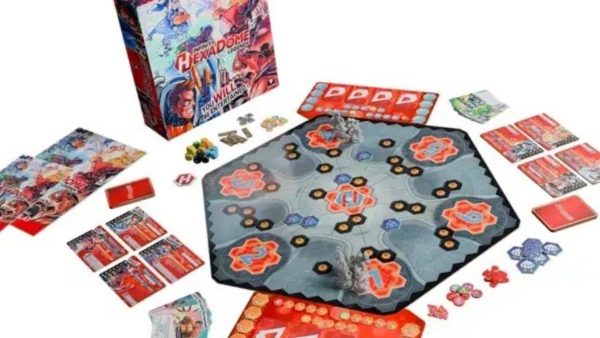
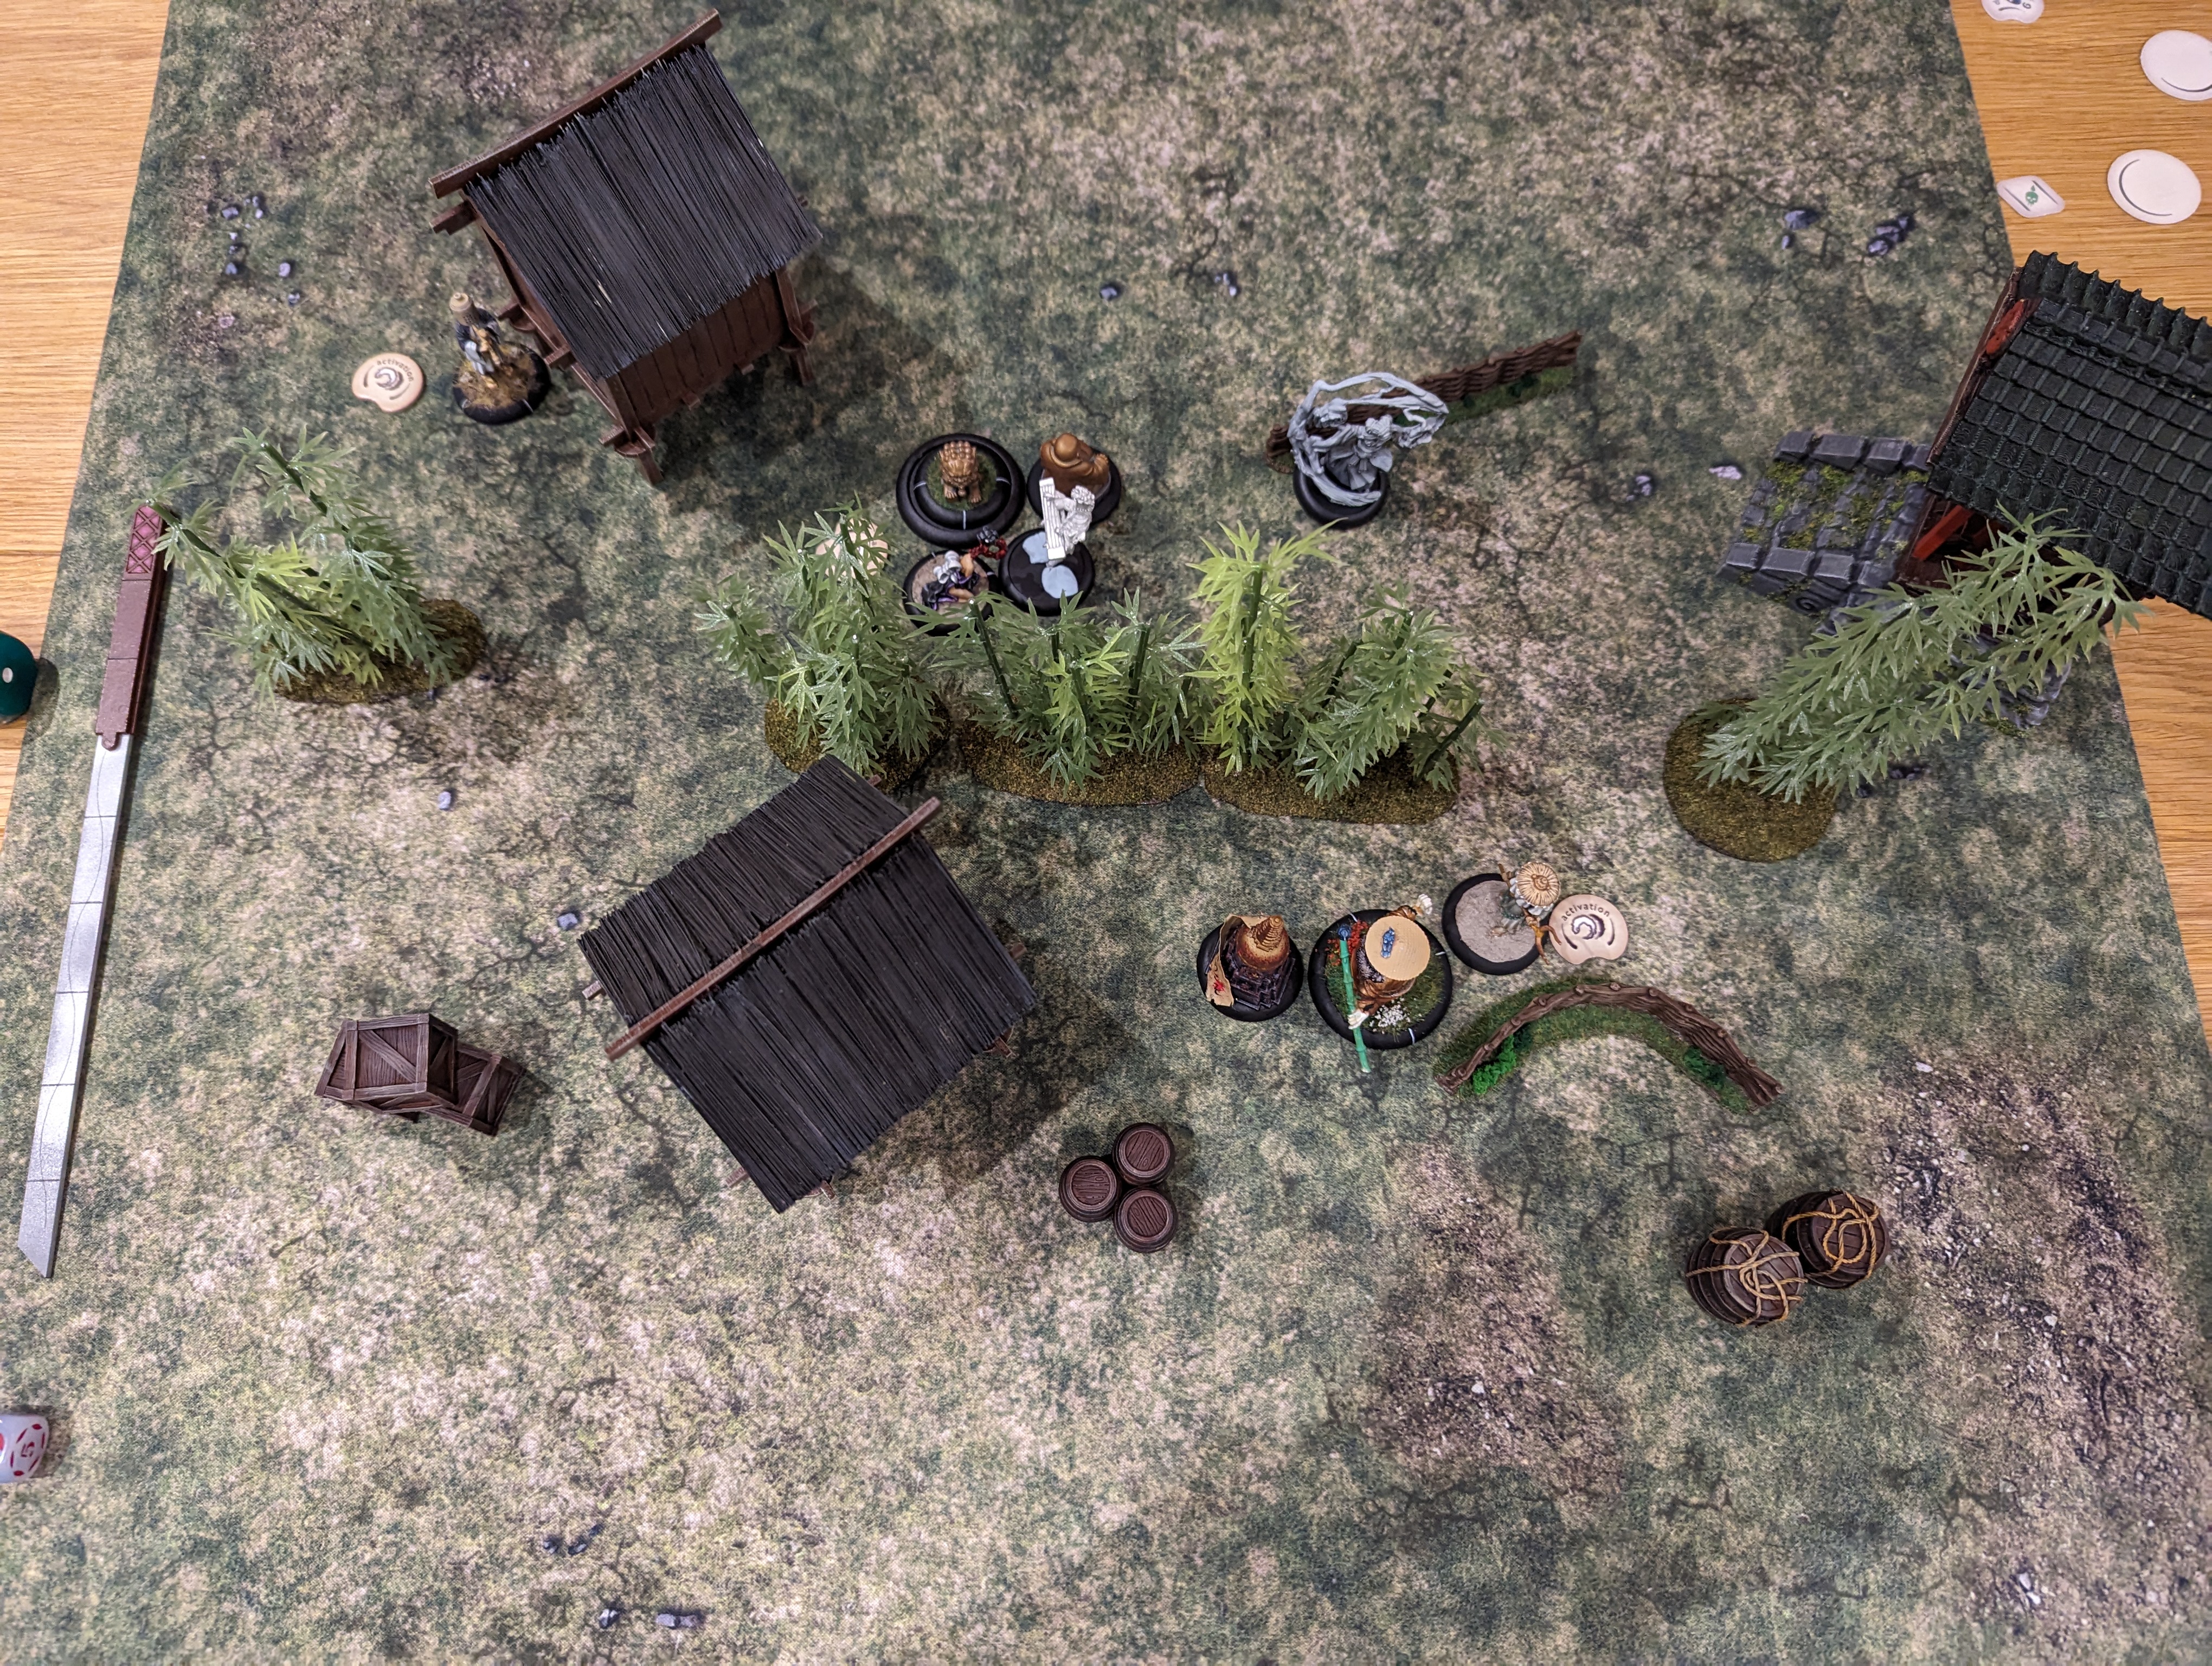
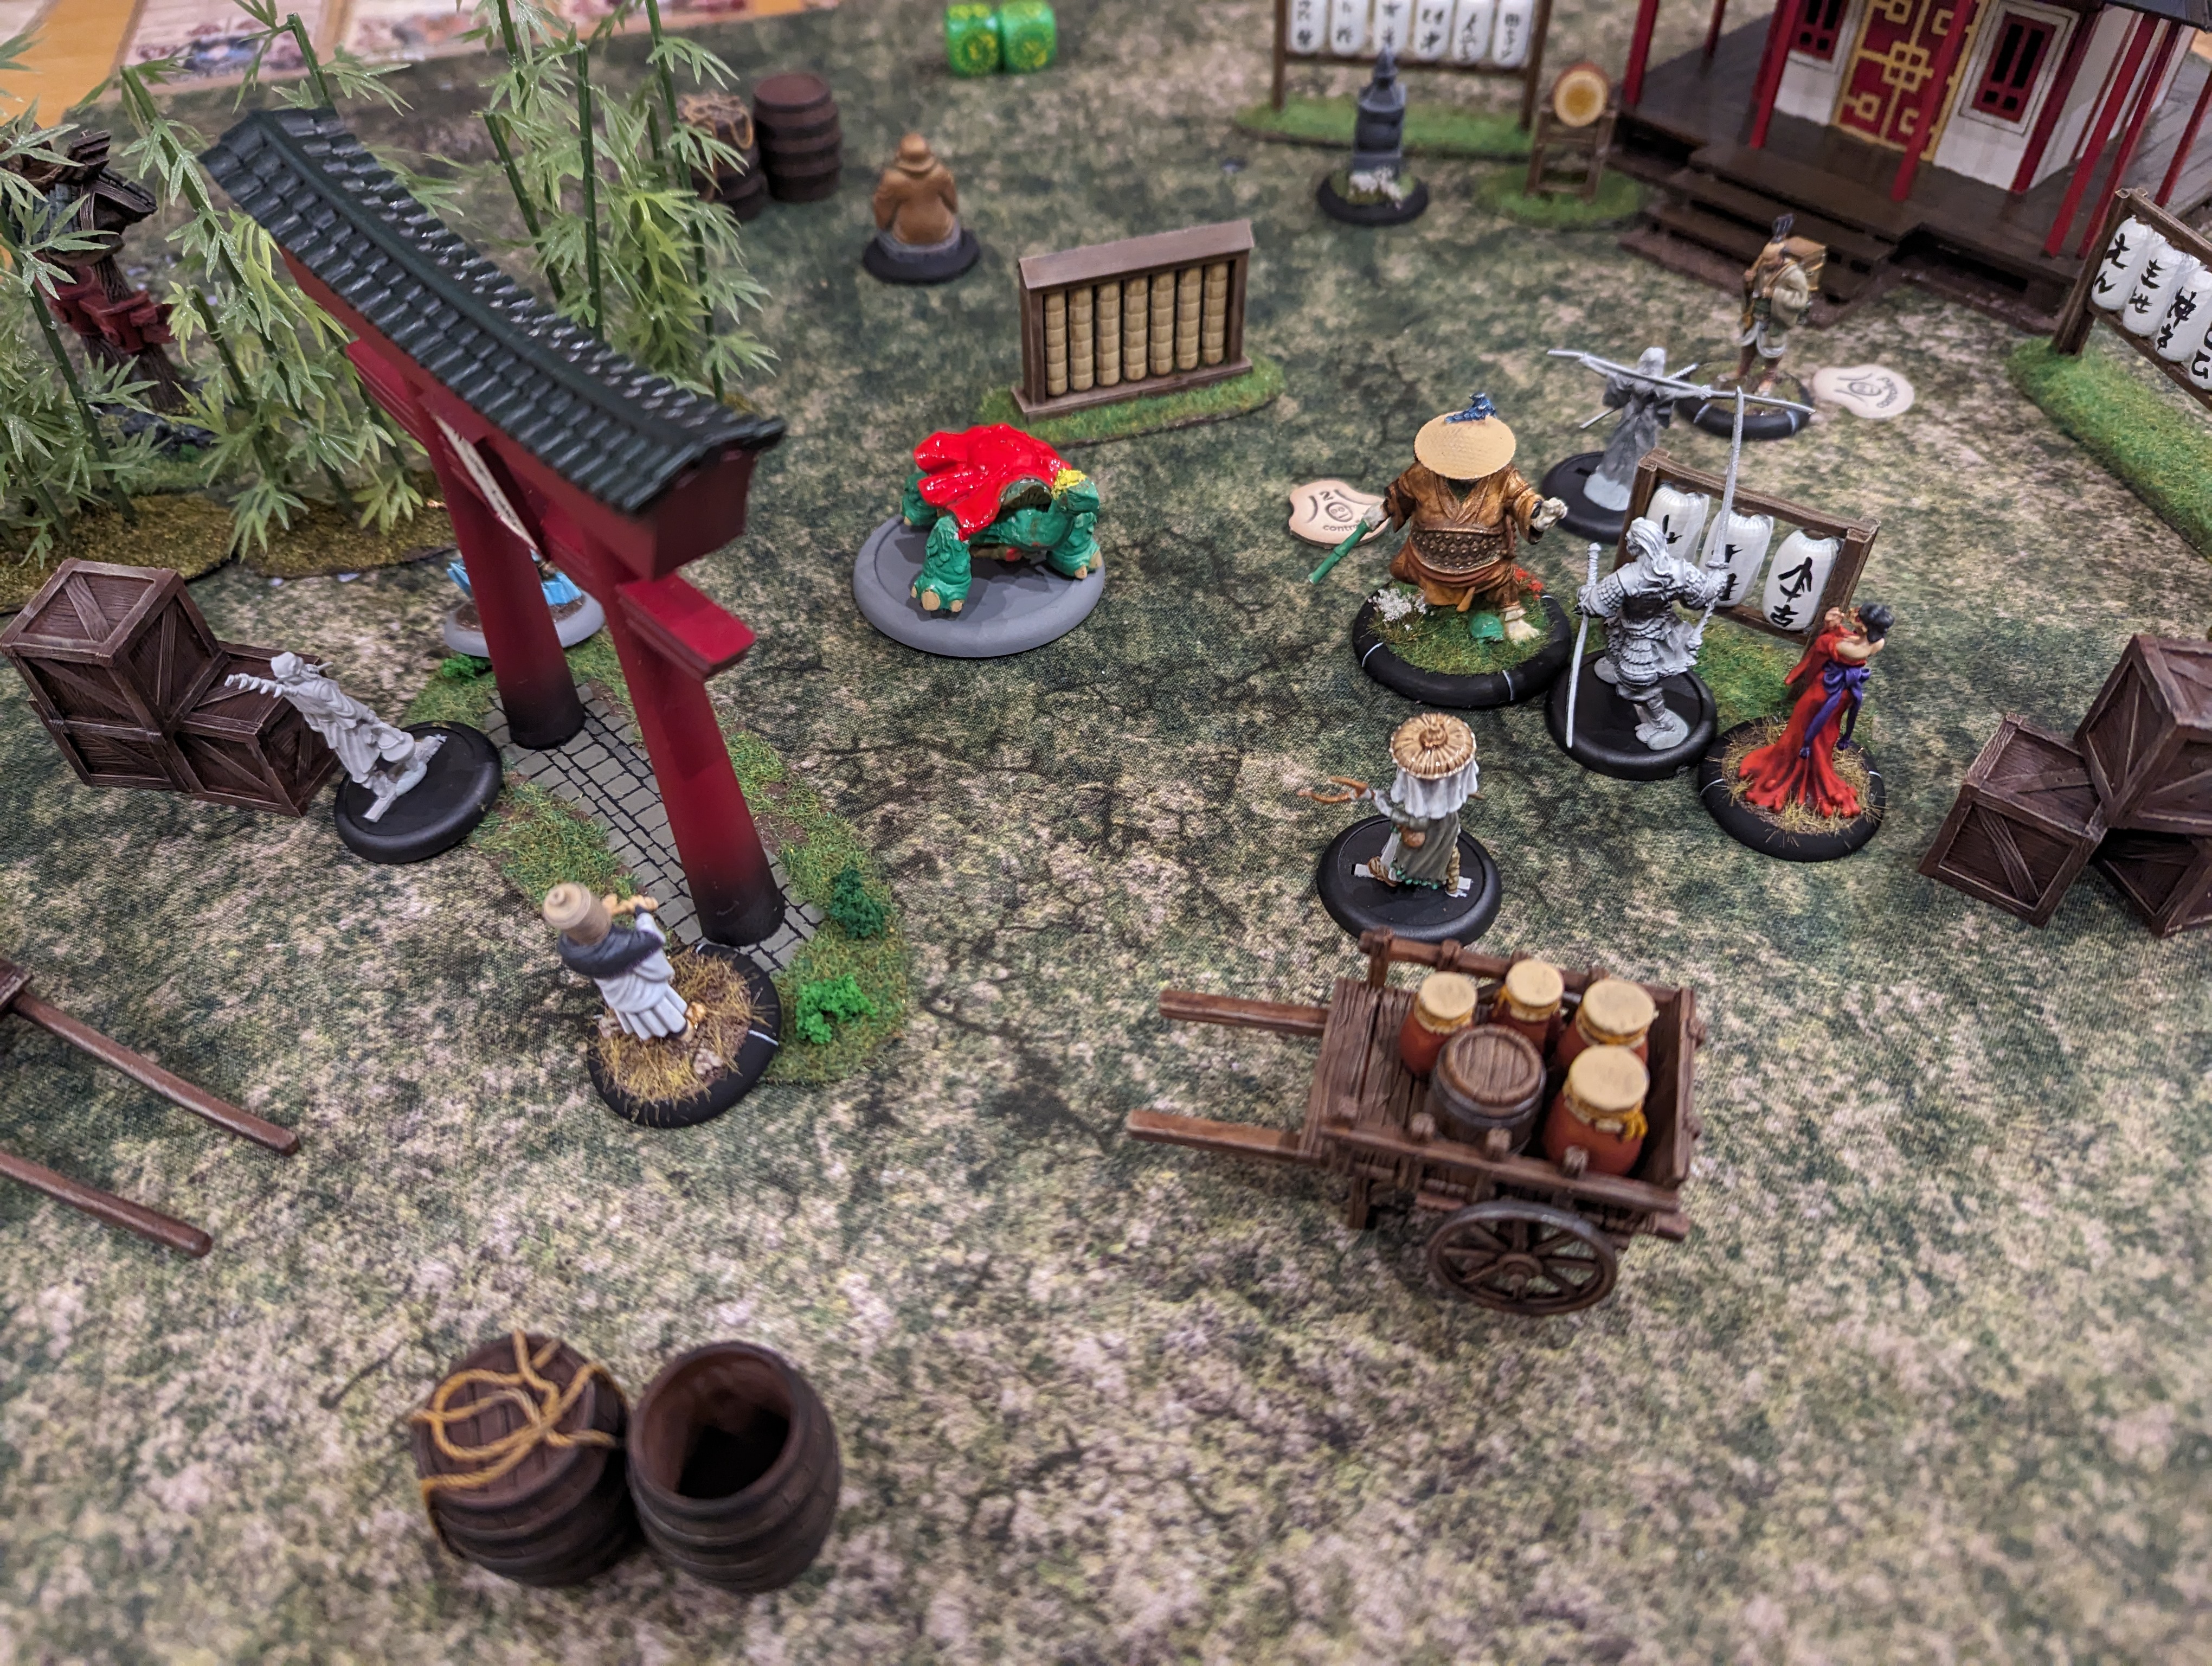
Battle Report No. 5
As we now have some new miniatures, my son was keen to see how his new ‘troops’ measured up. I decided to keep my powder dry and try to figure out my existing list before adding the new stuff in. I think there are synergies that I can get with my new models that aren’t necessarily there with my current warband. So, without any paint applied to the new models, we dived in. We opted for an 85 point game and decided on the Very Important Model scenario.
Scenario Objective. With the VIM scenario, each player secretly nominates a single allowable model as their VIM. This model has to make it across the board and exit the opponents deployment zone on turn 6 (not before). And of course you need to prevent your opponent from doing the same to their VIM.
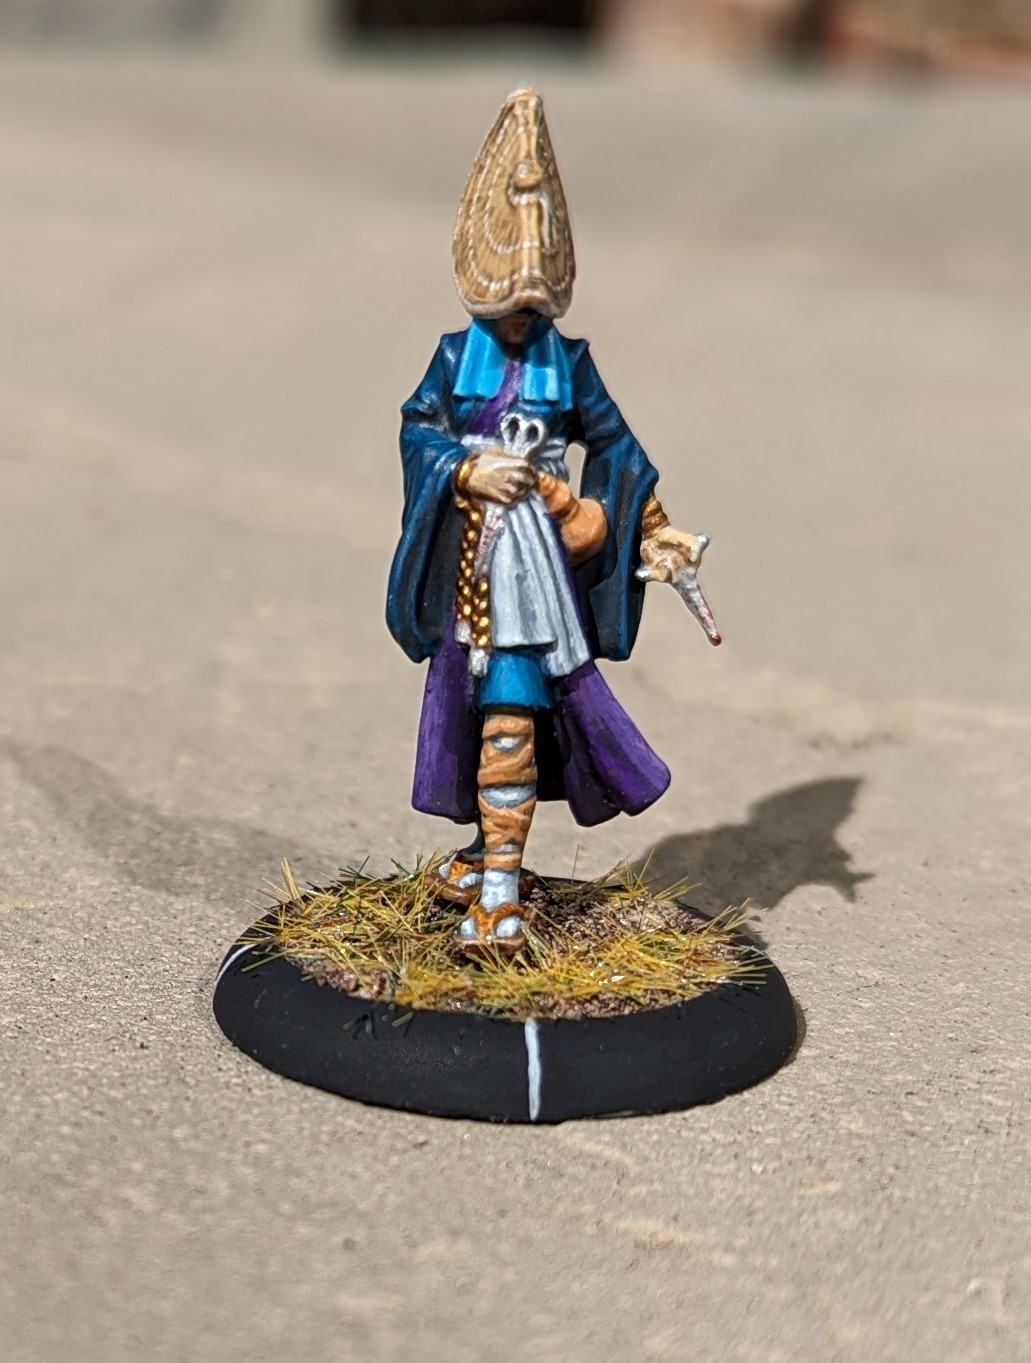
For the Cult of Yurei, I went with,
– Mokoti (dreadful in combat but can control enemy models). I elected Mokoti as my VIM, mainly because it was one of the least obvious targets
The Penanggalan (who we’ll call Penny). A vampiric head that can hold opponents in place with a successful attack
– Yama Uba
– Risu (A pitch fork wielding nutter who can poison people from afar) who I’ve also given an enhancement card Violence Fetish to provide a bigger punch in combat
– Ibara (Can handle himself in combat and can throw some fire around at range)
– 2 Plague Rats. Cheap chaff that if they do get a successful attack in can poison the opponent
Drain Spirit Event. This allows me to steal a couple of ki tokens from an enemy model
Random act of unkindness event. When played, my son must either nominate a model and I can pick an unpleasant state that this model enters. Or my son picks a state and I get to apply it to a model.
Crush the oppressed. When I play this card, all of the state markers on the enemy get doubled
Cursed Honden. This is a terrain piece. At the start of each turn, any enemy model within 4” loses a Ki token
My son went with,
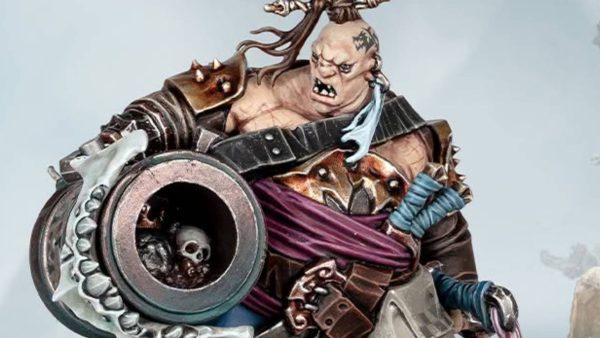
– Master Po. One of his new models and basically a fat monk who is a combat monster. He’s hard to hit and capable of handing out the pain. This was also my son’s VIM
– Tsutsumi. Another new model and another monk. This one provides a decent melee attack but more importantly, some ranged ability with a Sonic Blast ranged attack that leaves the opponent prone
– Oki Shisa. Effectively a temple statue. It’s slow but has the Durable special rule meaning that no matter how much damage to manage to deliver in an attack, it will only ever take 1 wound at a time. Very annoying
– Kiyozumi Hinadori. This is a Ronin from the 2 player starter set and a character that can Heal friendly models
A Gorinto terrain piece which allows 1 model within 6” to generate an extra ki token.
Prayer beads enhancement which allows the model it is attached to to generate 1 extra Ki per turn
Stillness medallion which stops Ki being removed from the model it is attached to
Name of the Wind which gives the attached model an extra 1” movement per turn
Master Po got all of the above enhancements
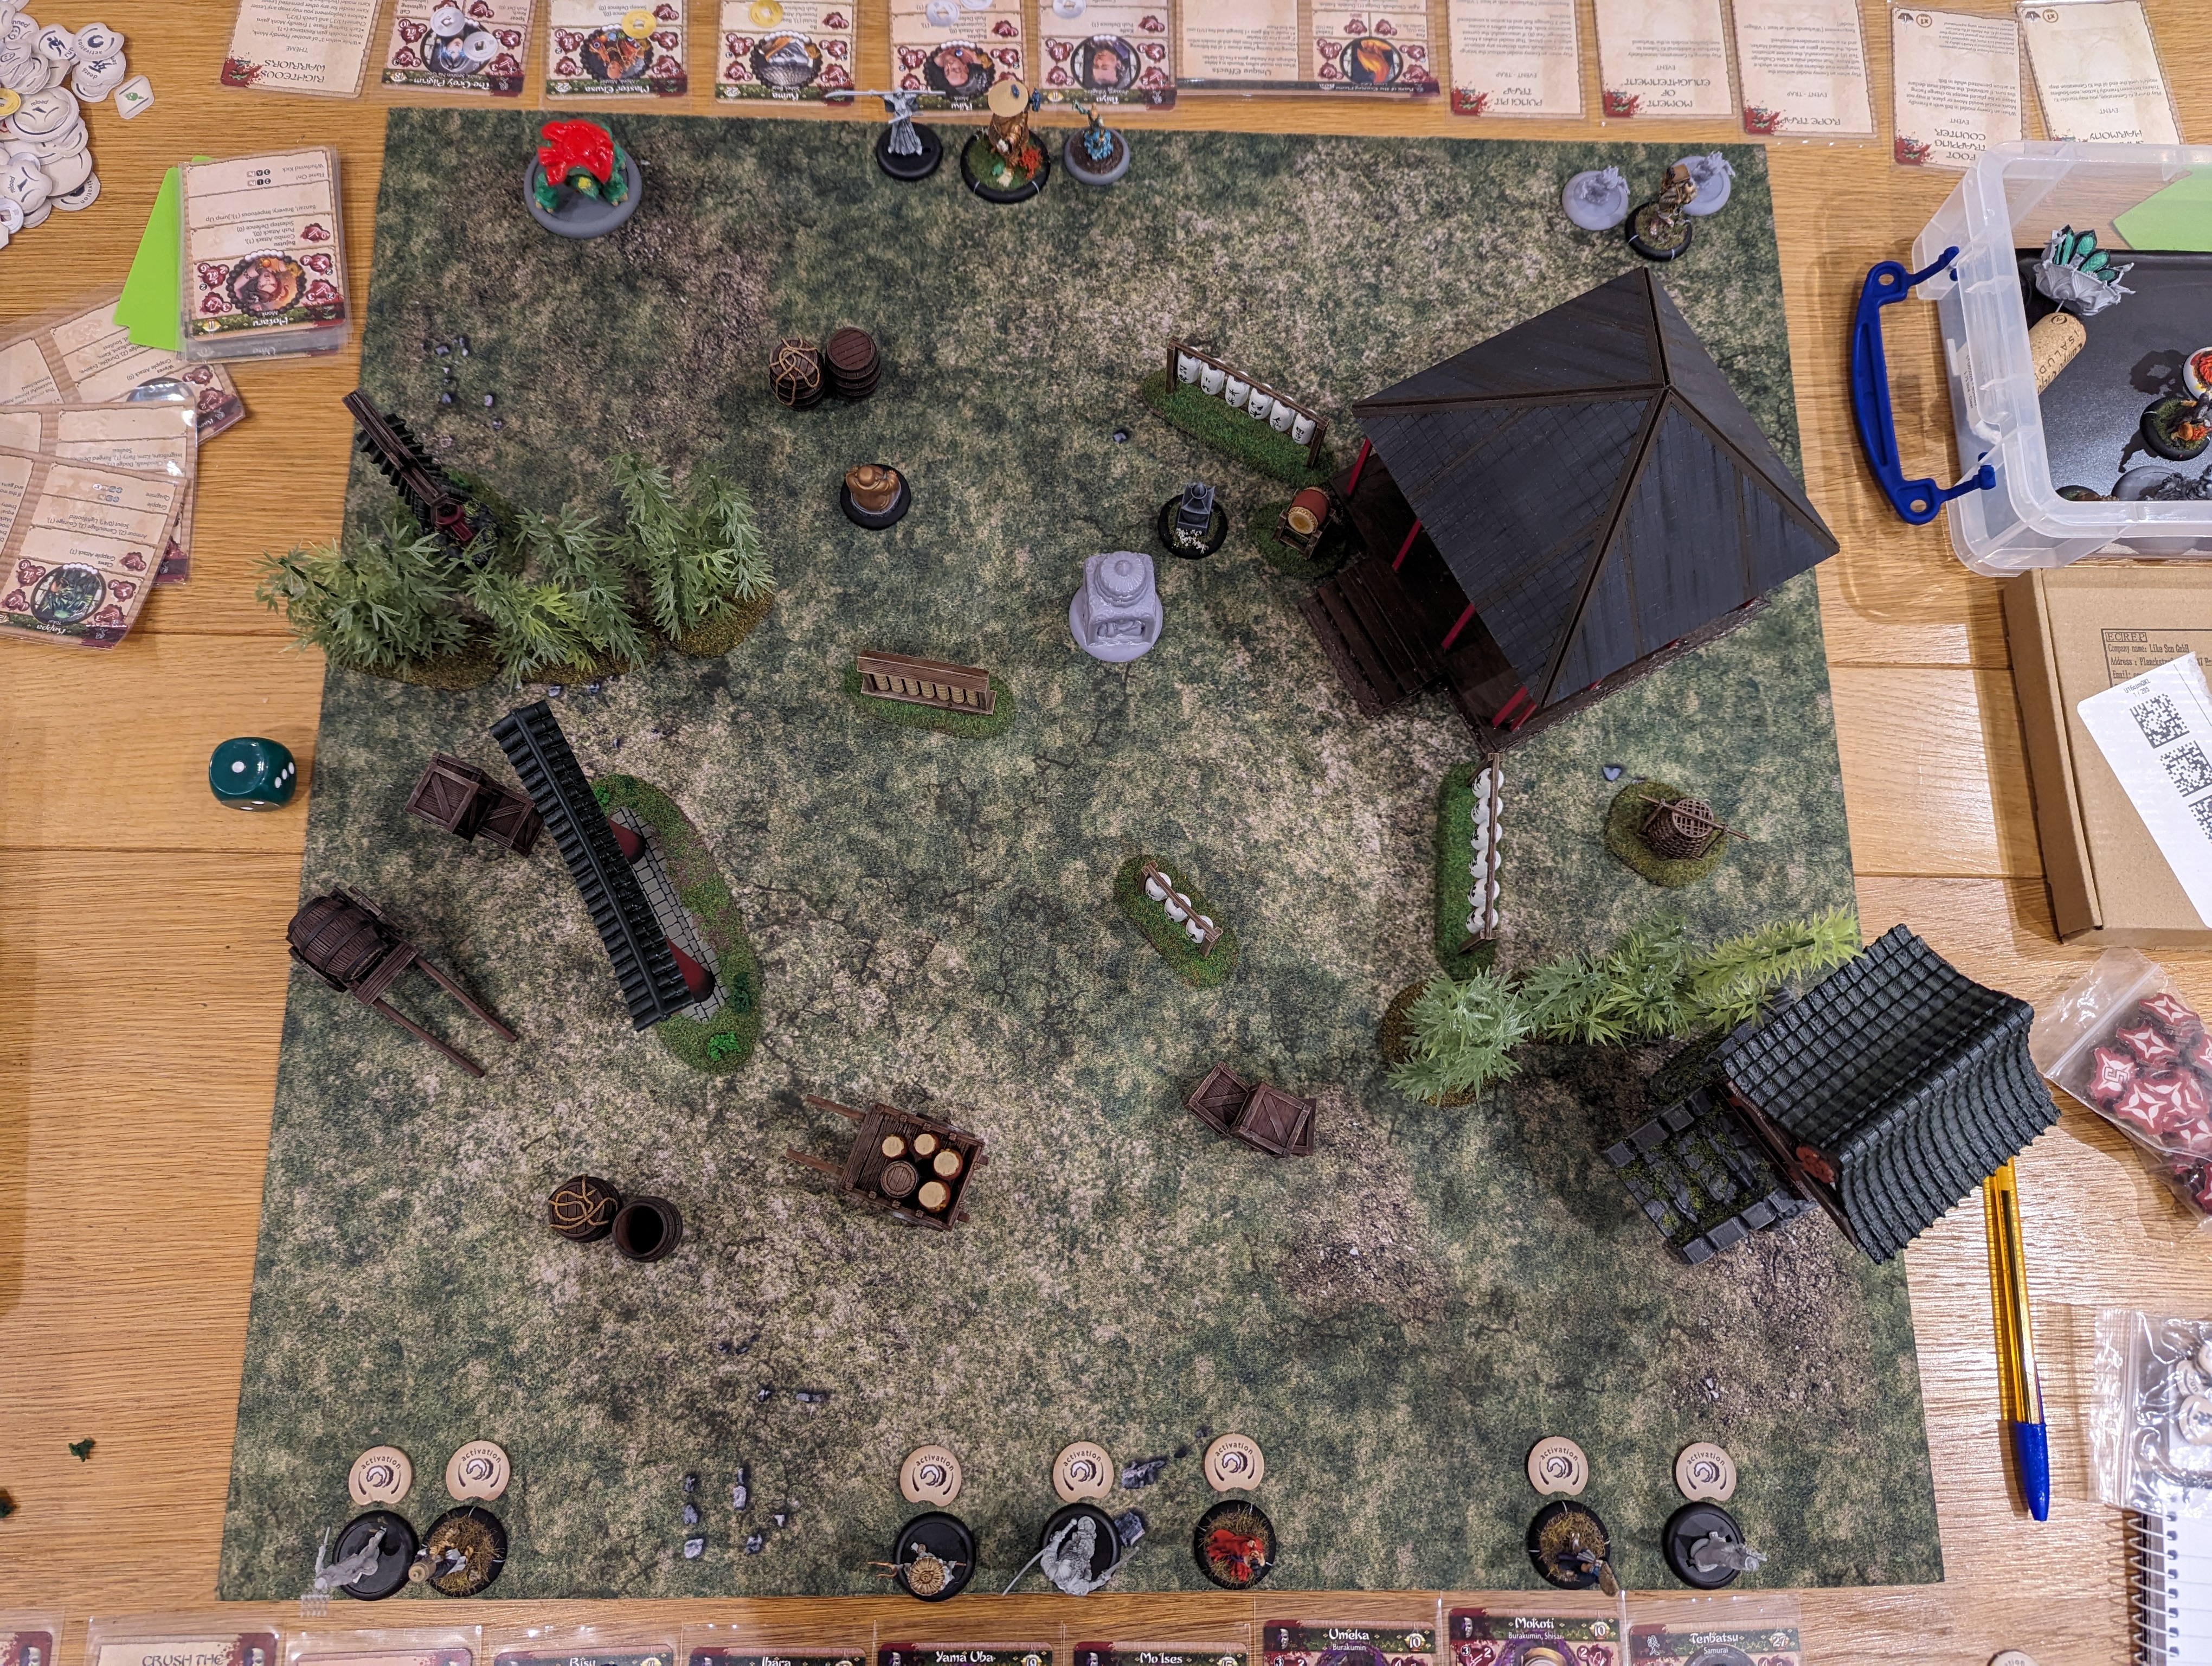
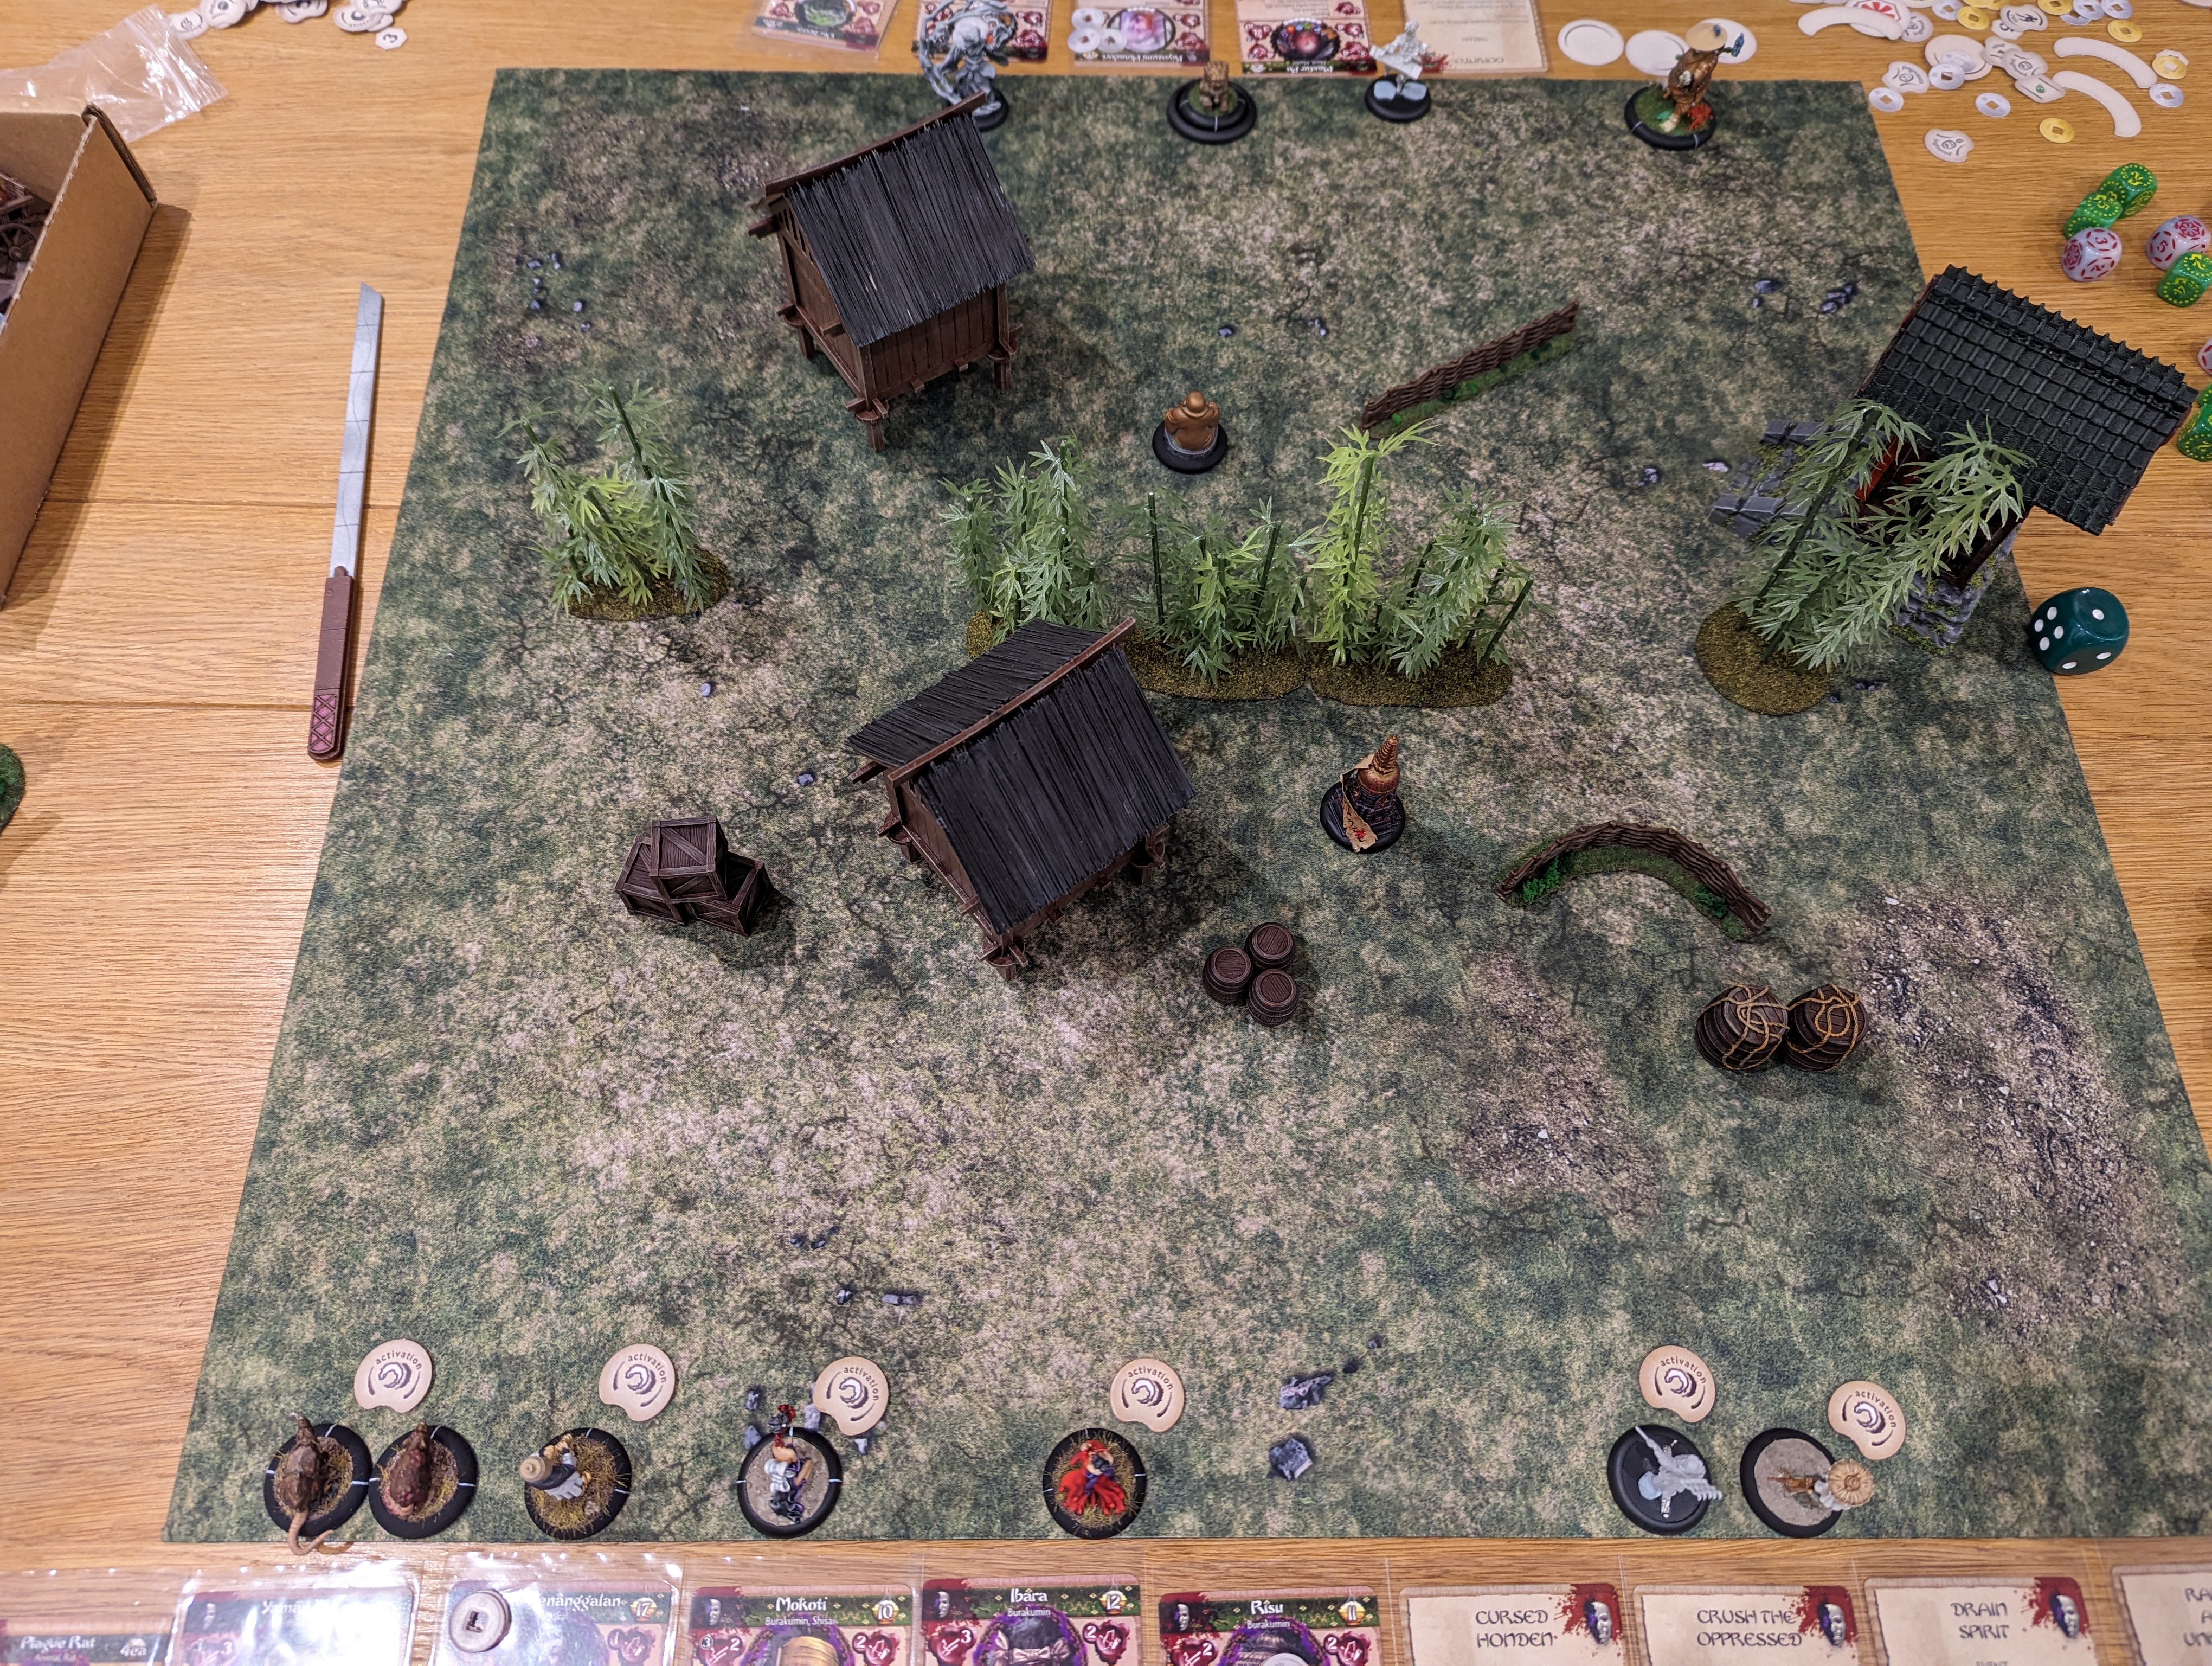 Deployment
Turn 1.
This was the usual scurrying forward to get to within engagement distance. I managed to have Ibara use their Dark Fire Ki feat on Tsutsumi but I rolled double 1’s so it failed. I then had Risu cast Mortal Corruption on Tsutsumi but this also failed. Hardly a great start
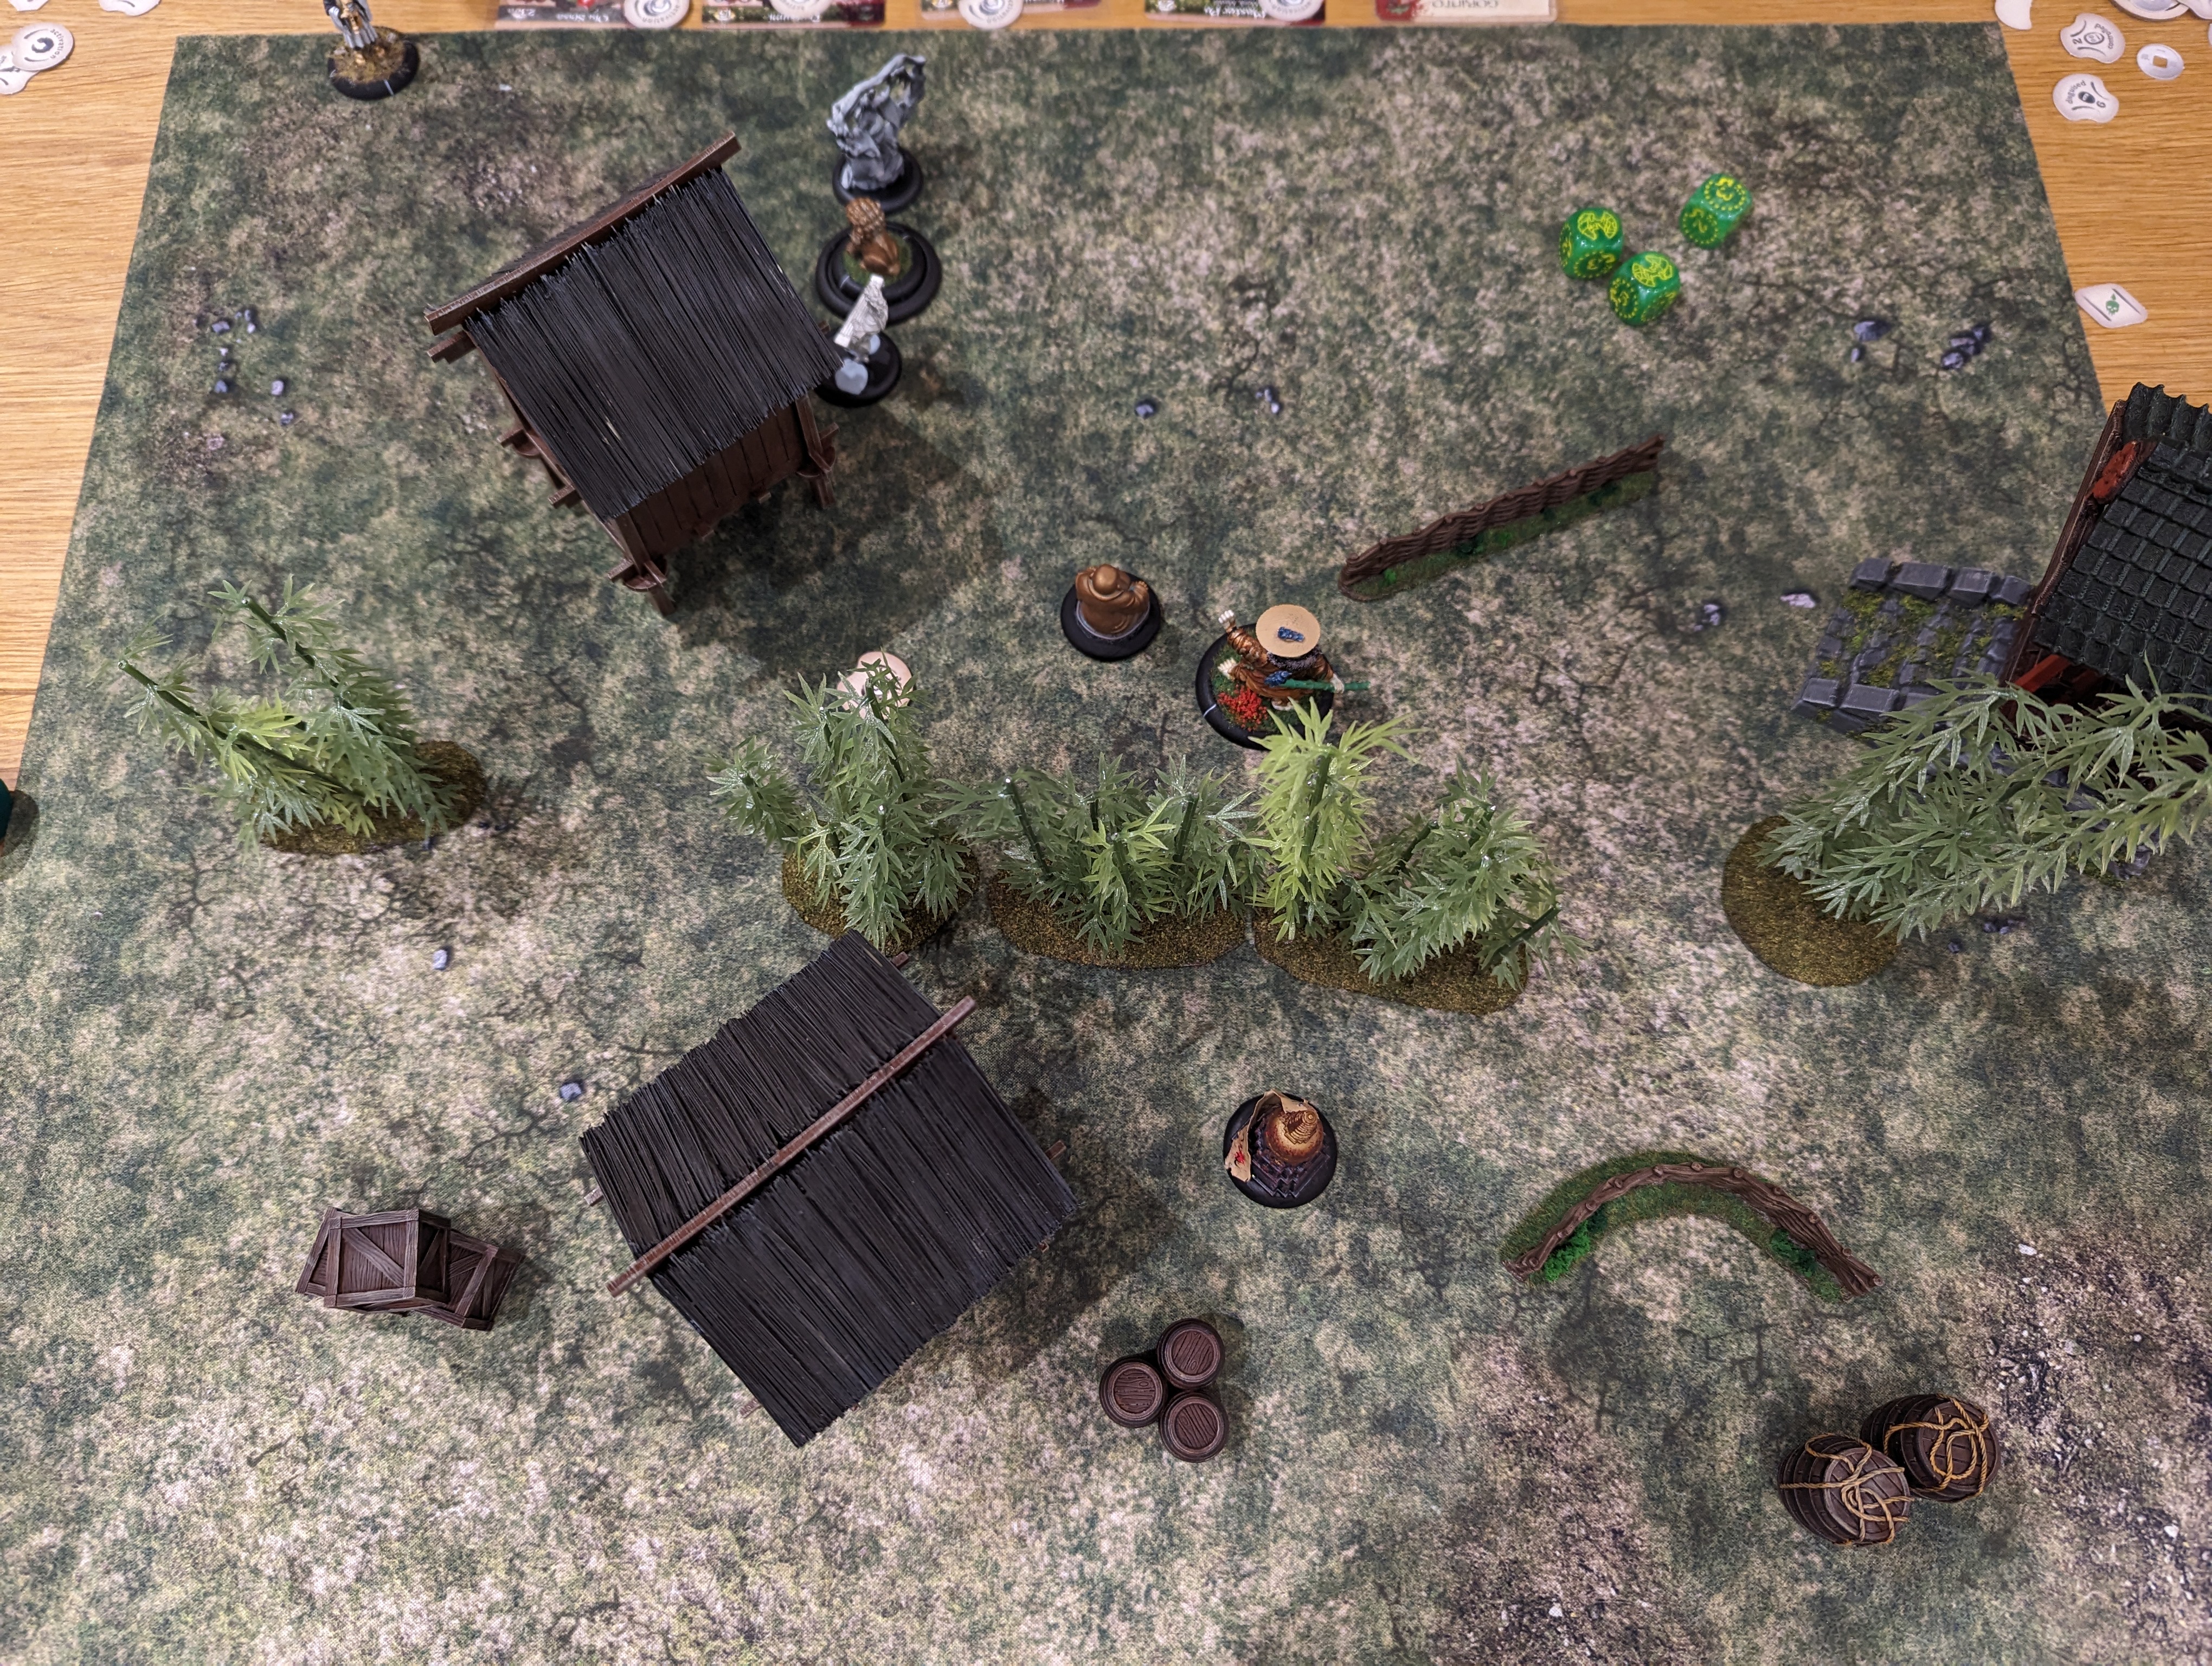
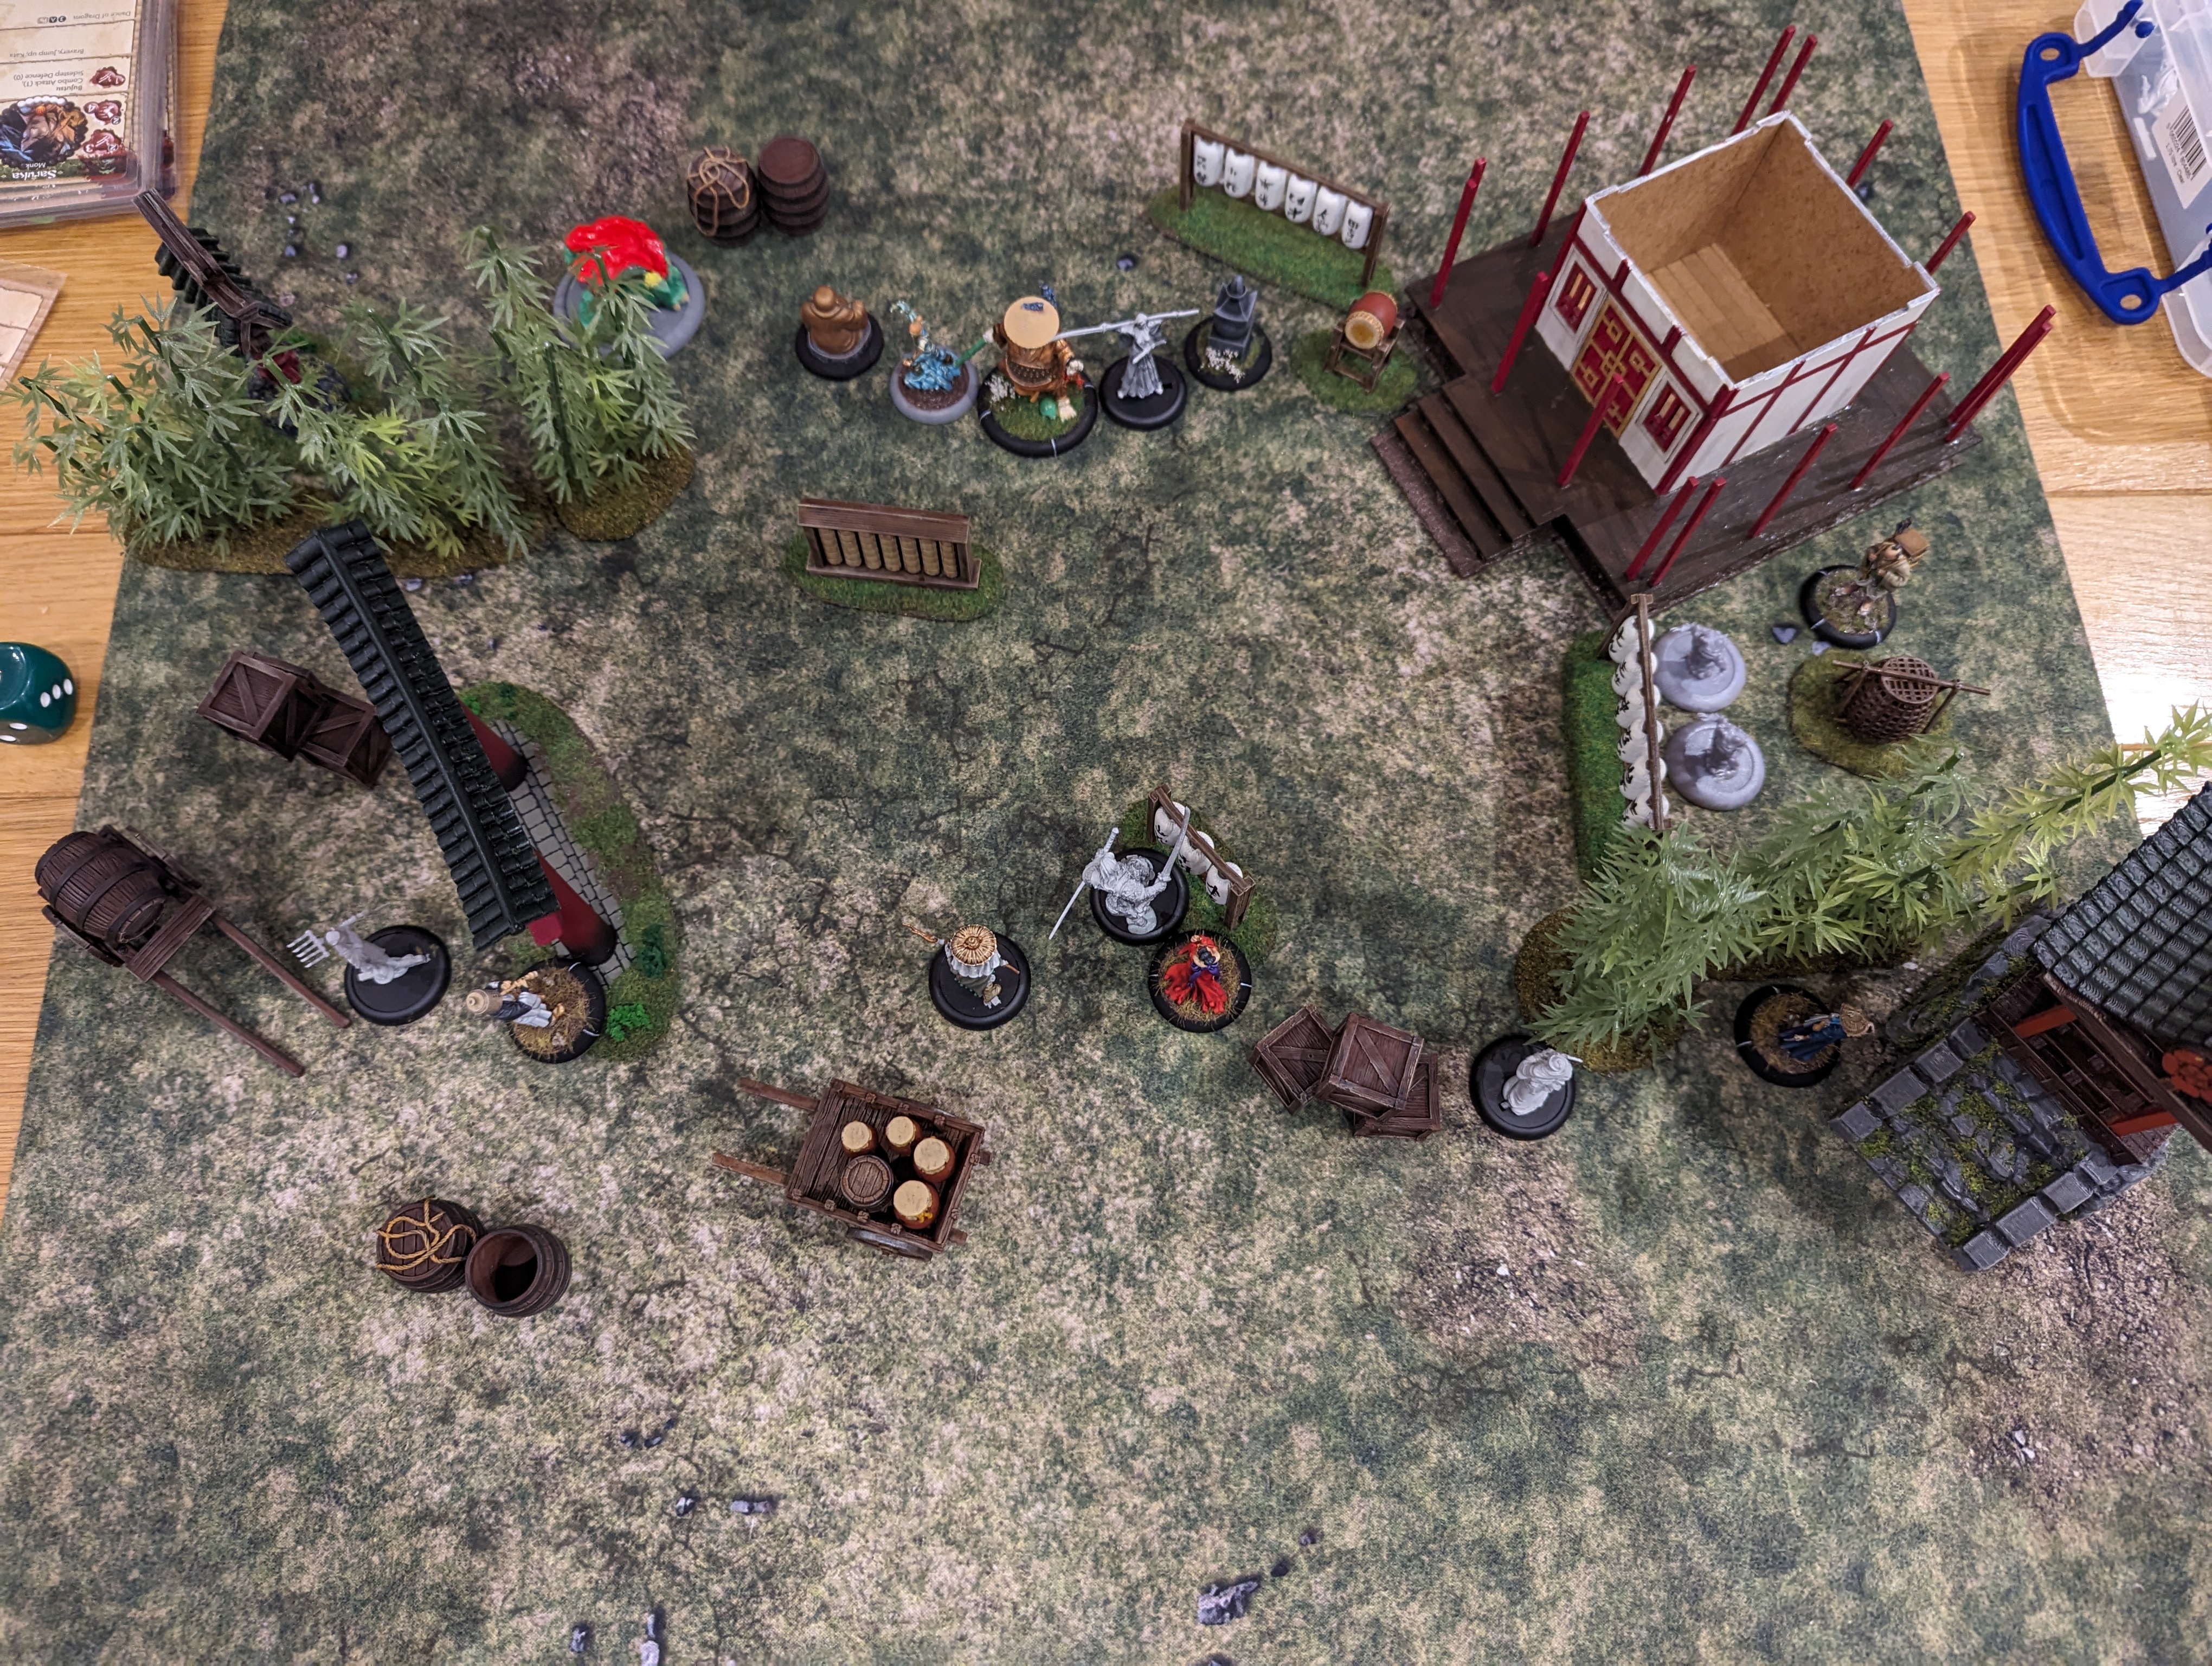
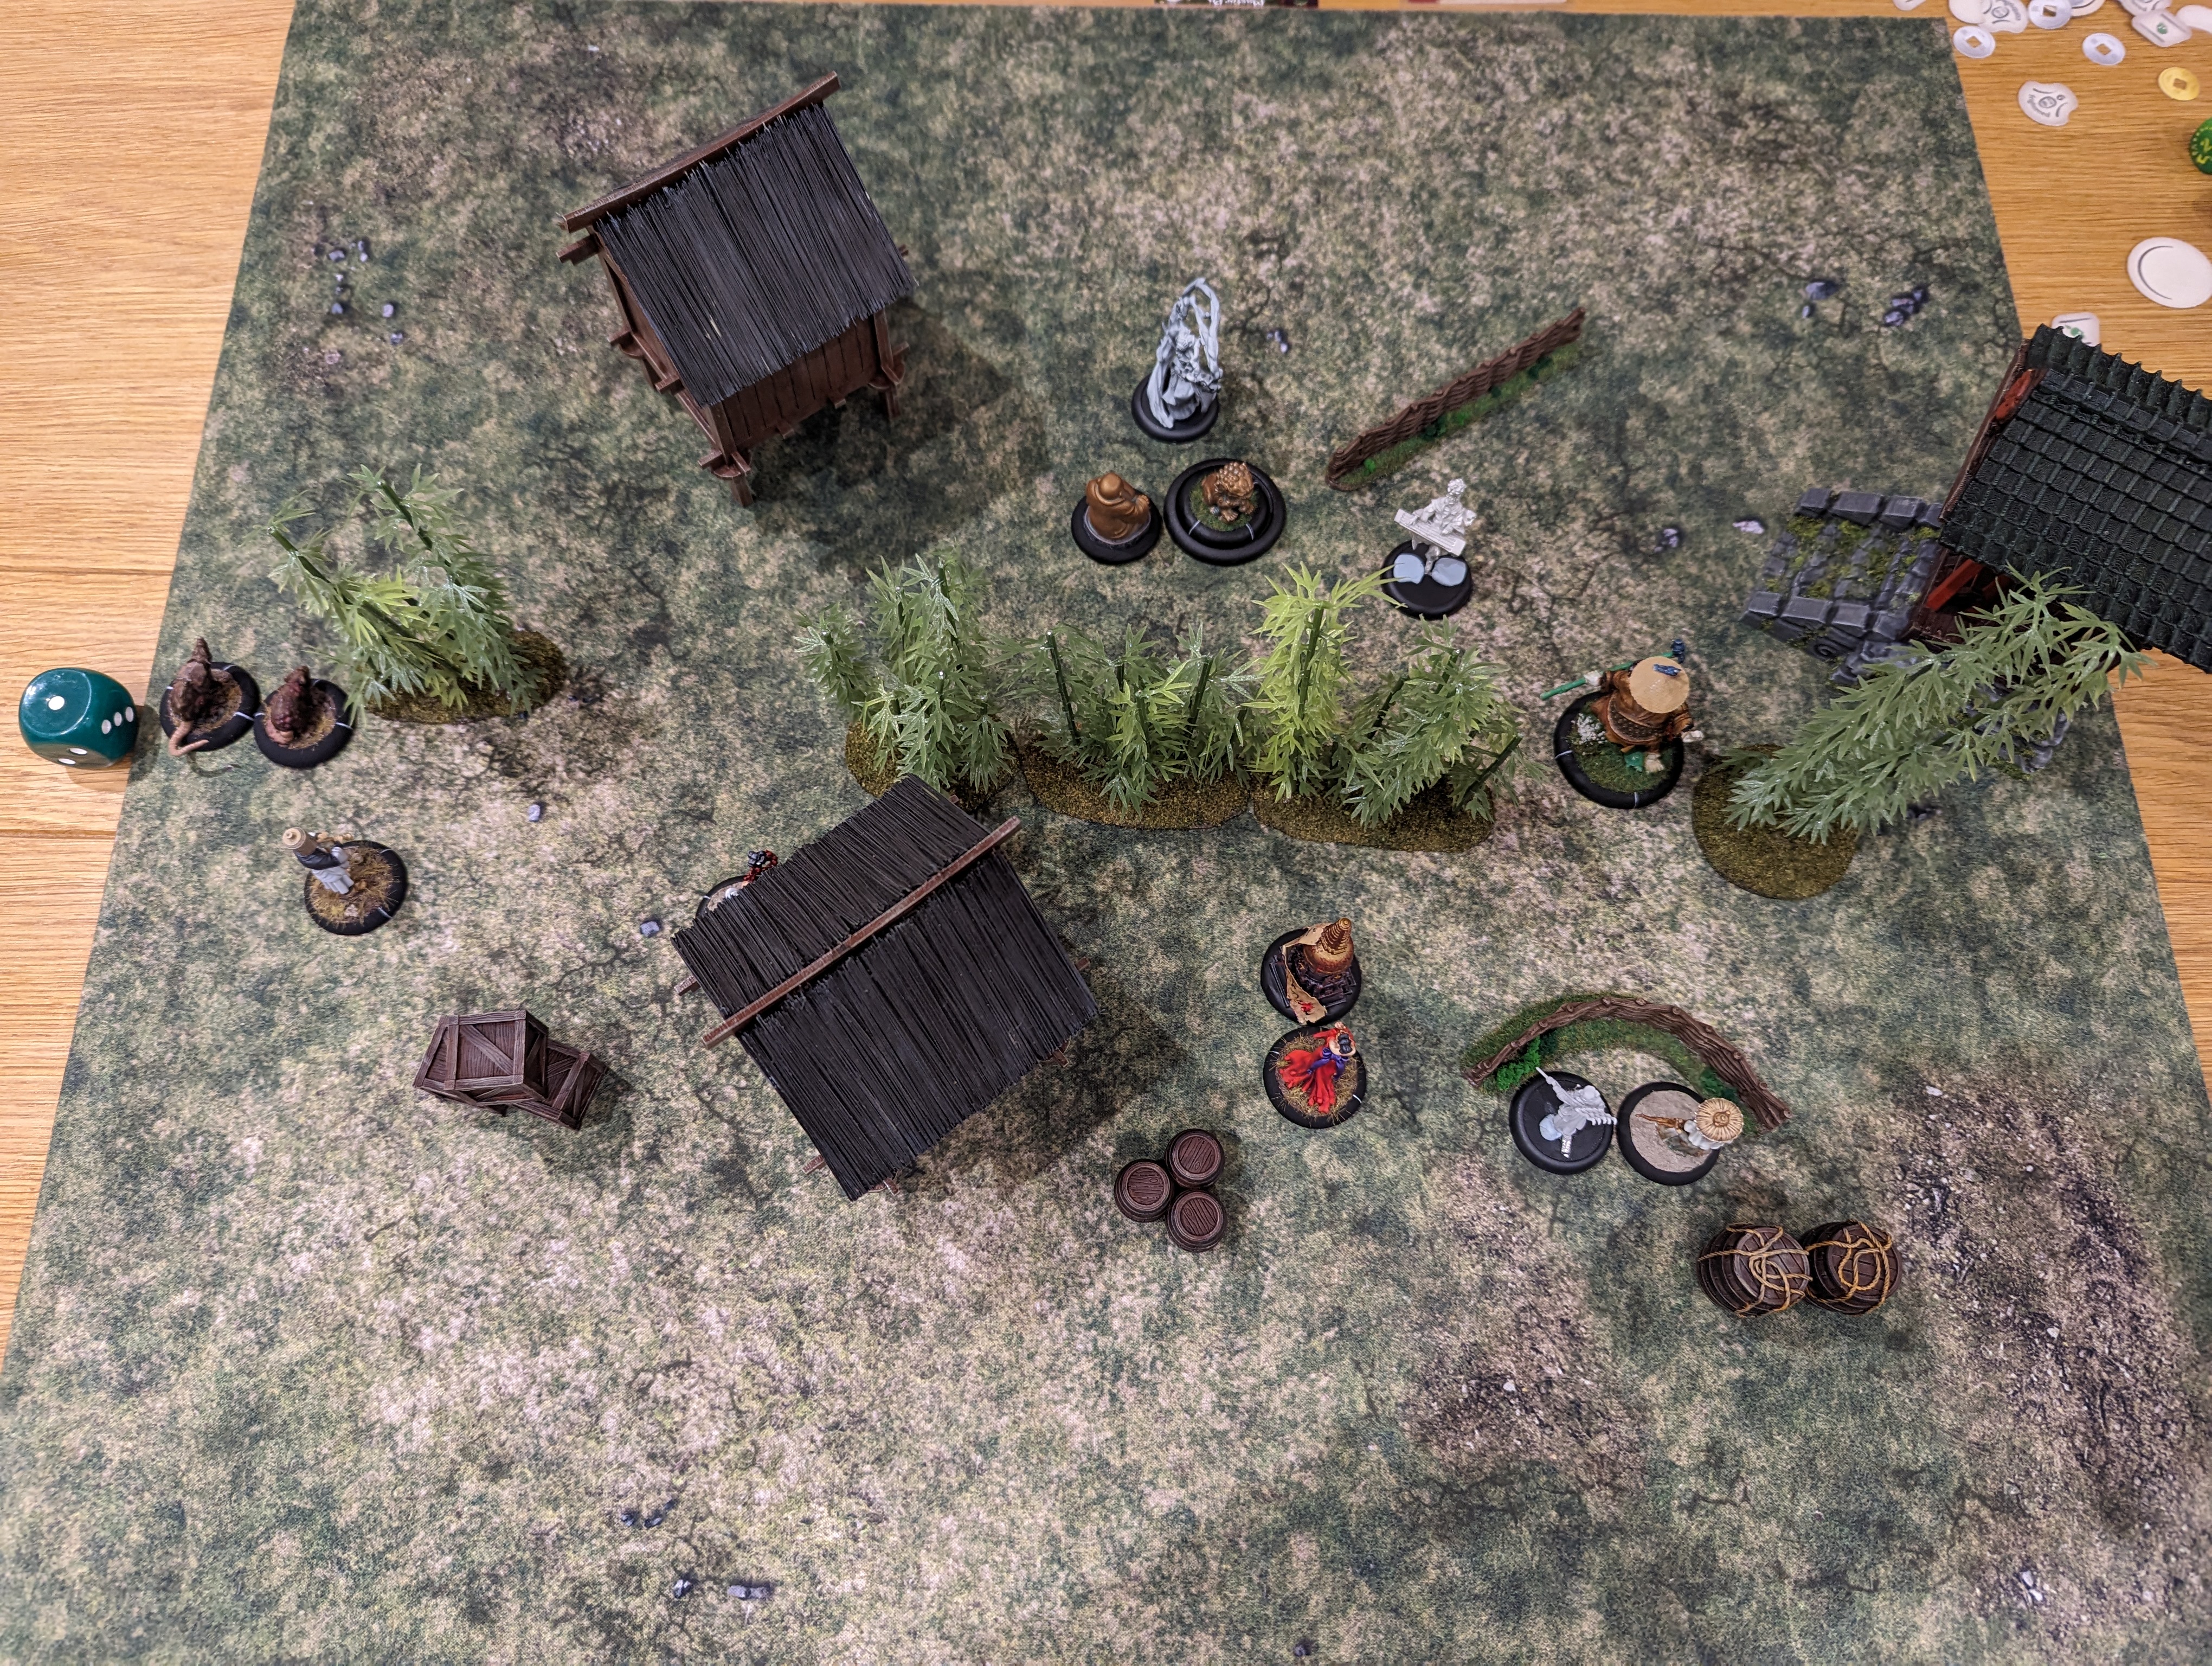 End of Turn 1
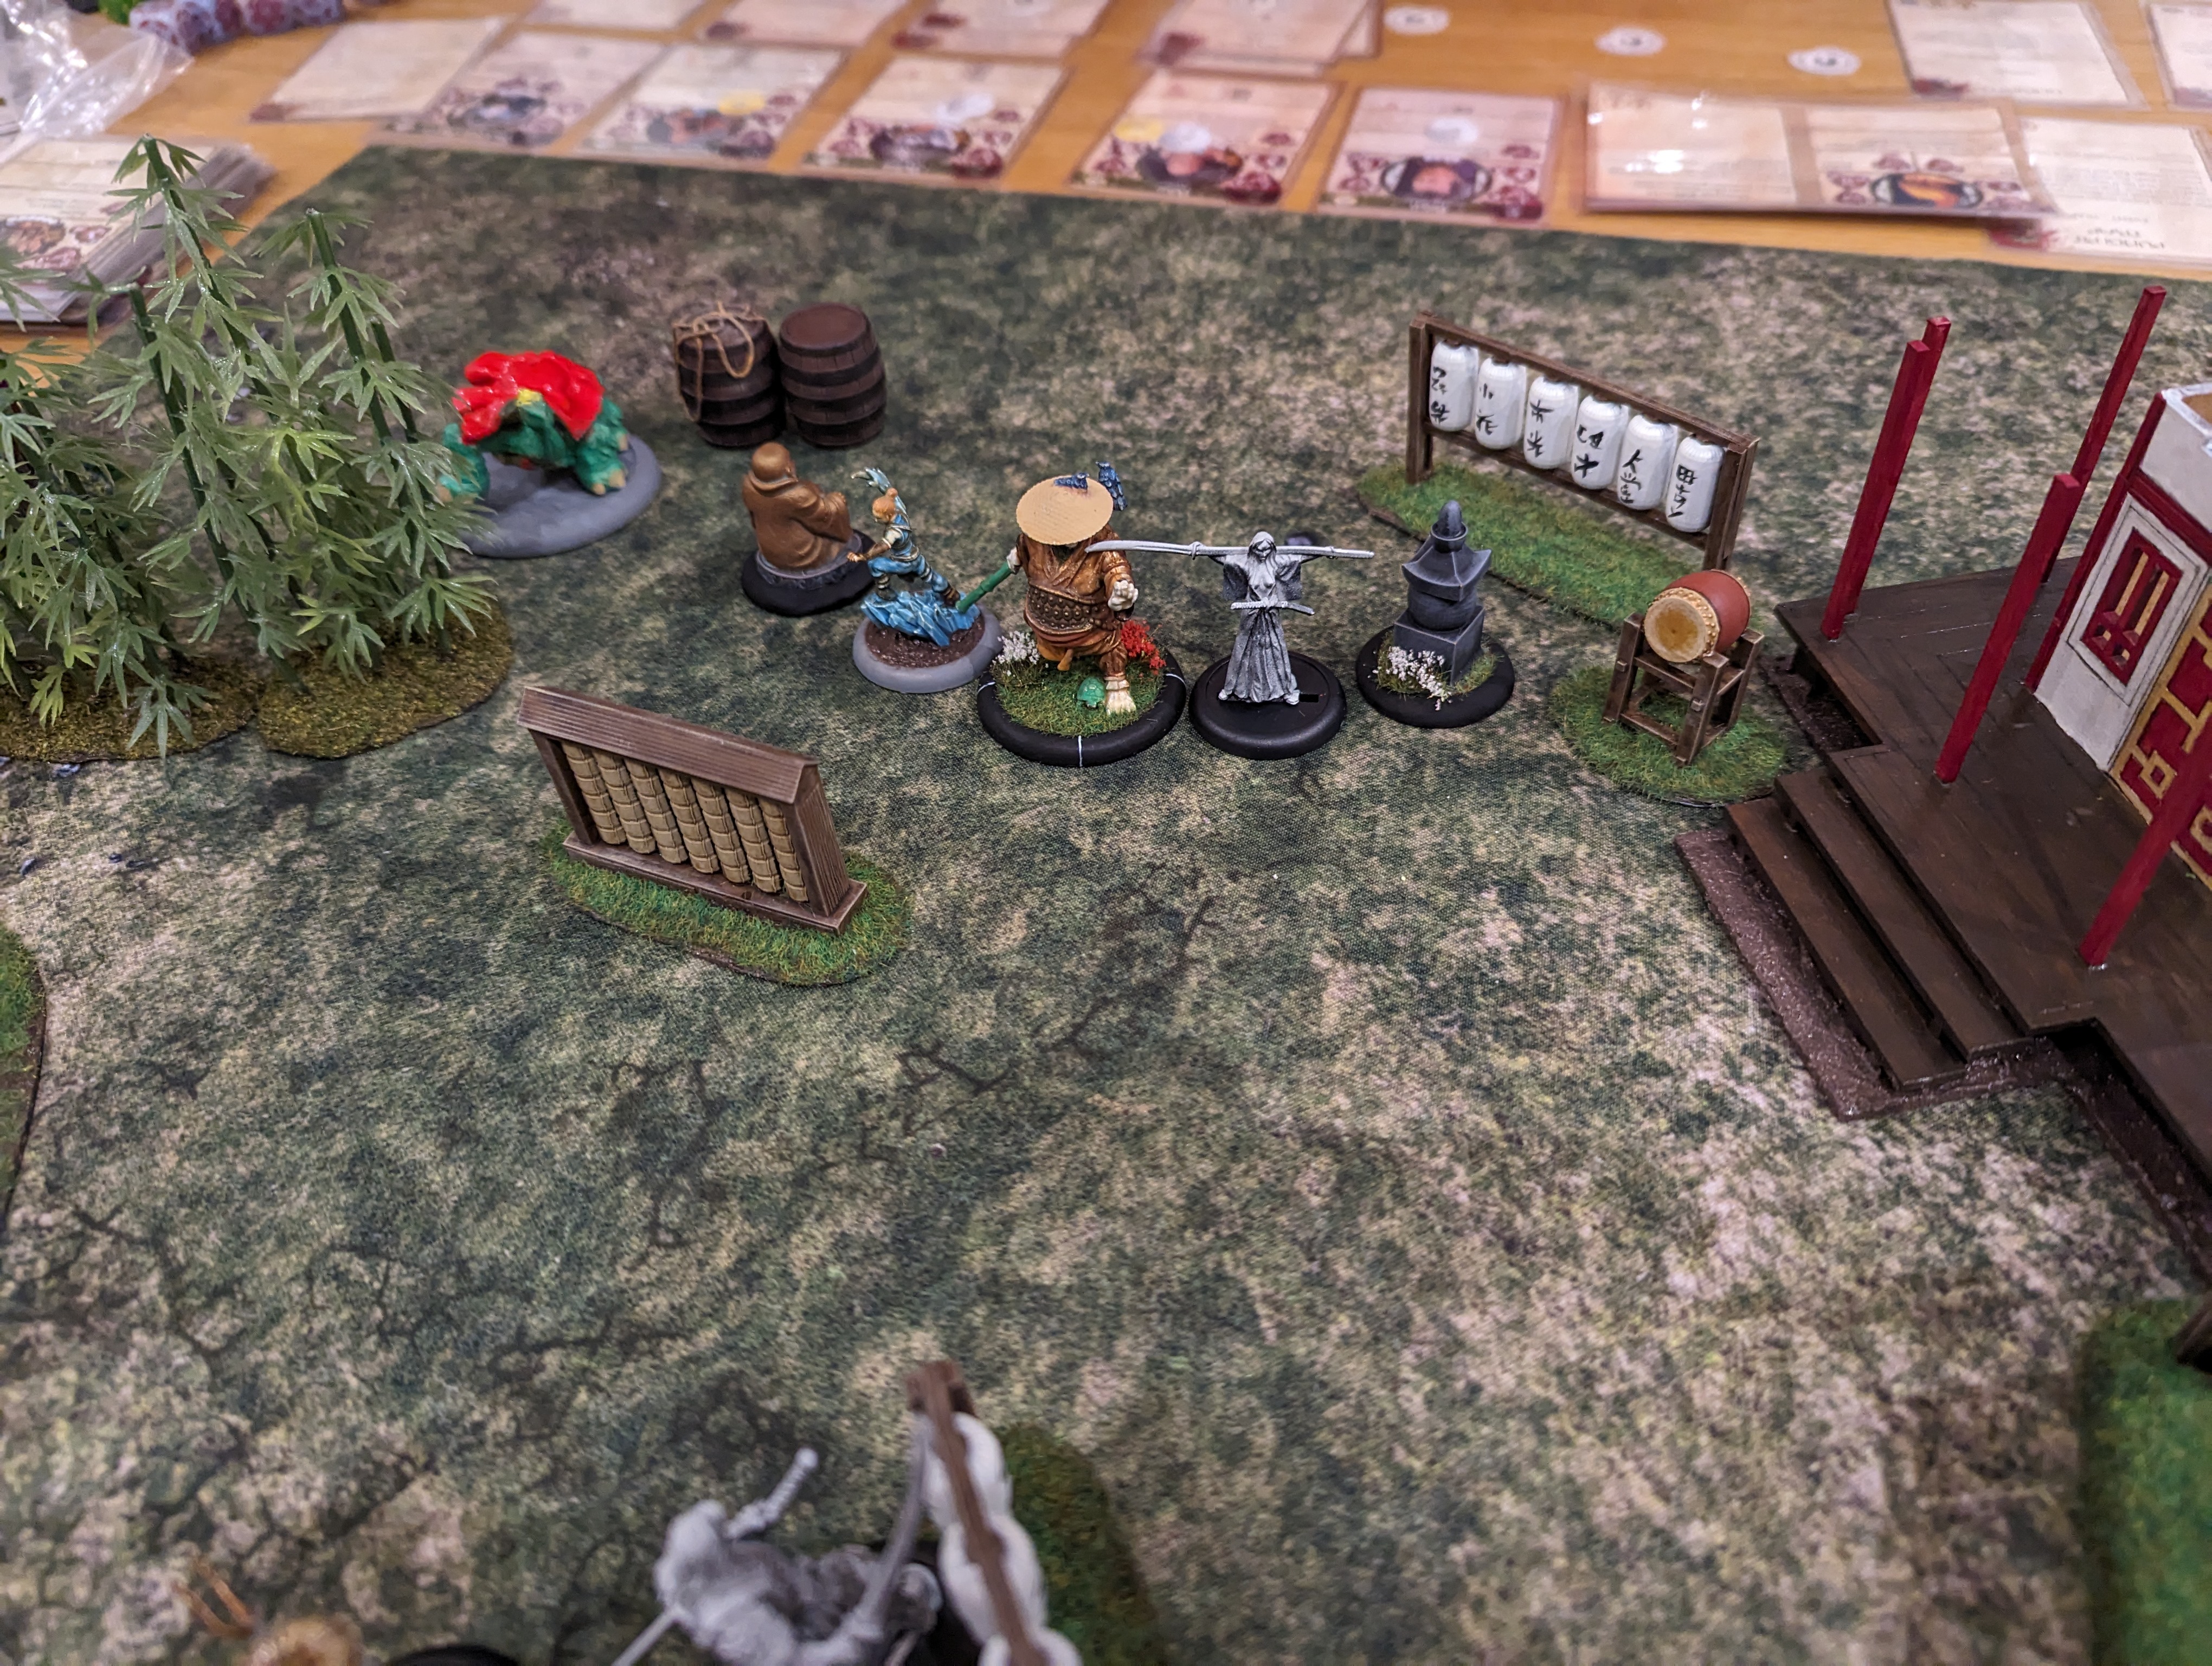
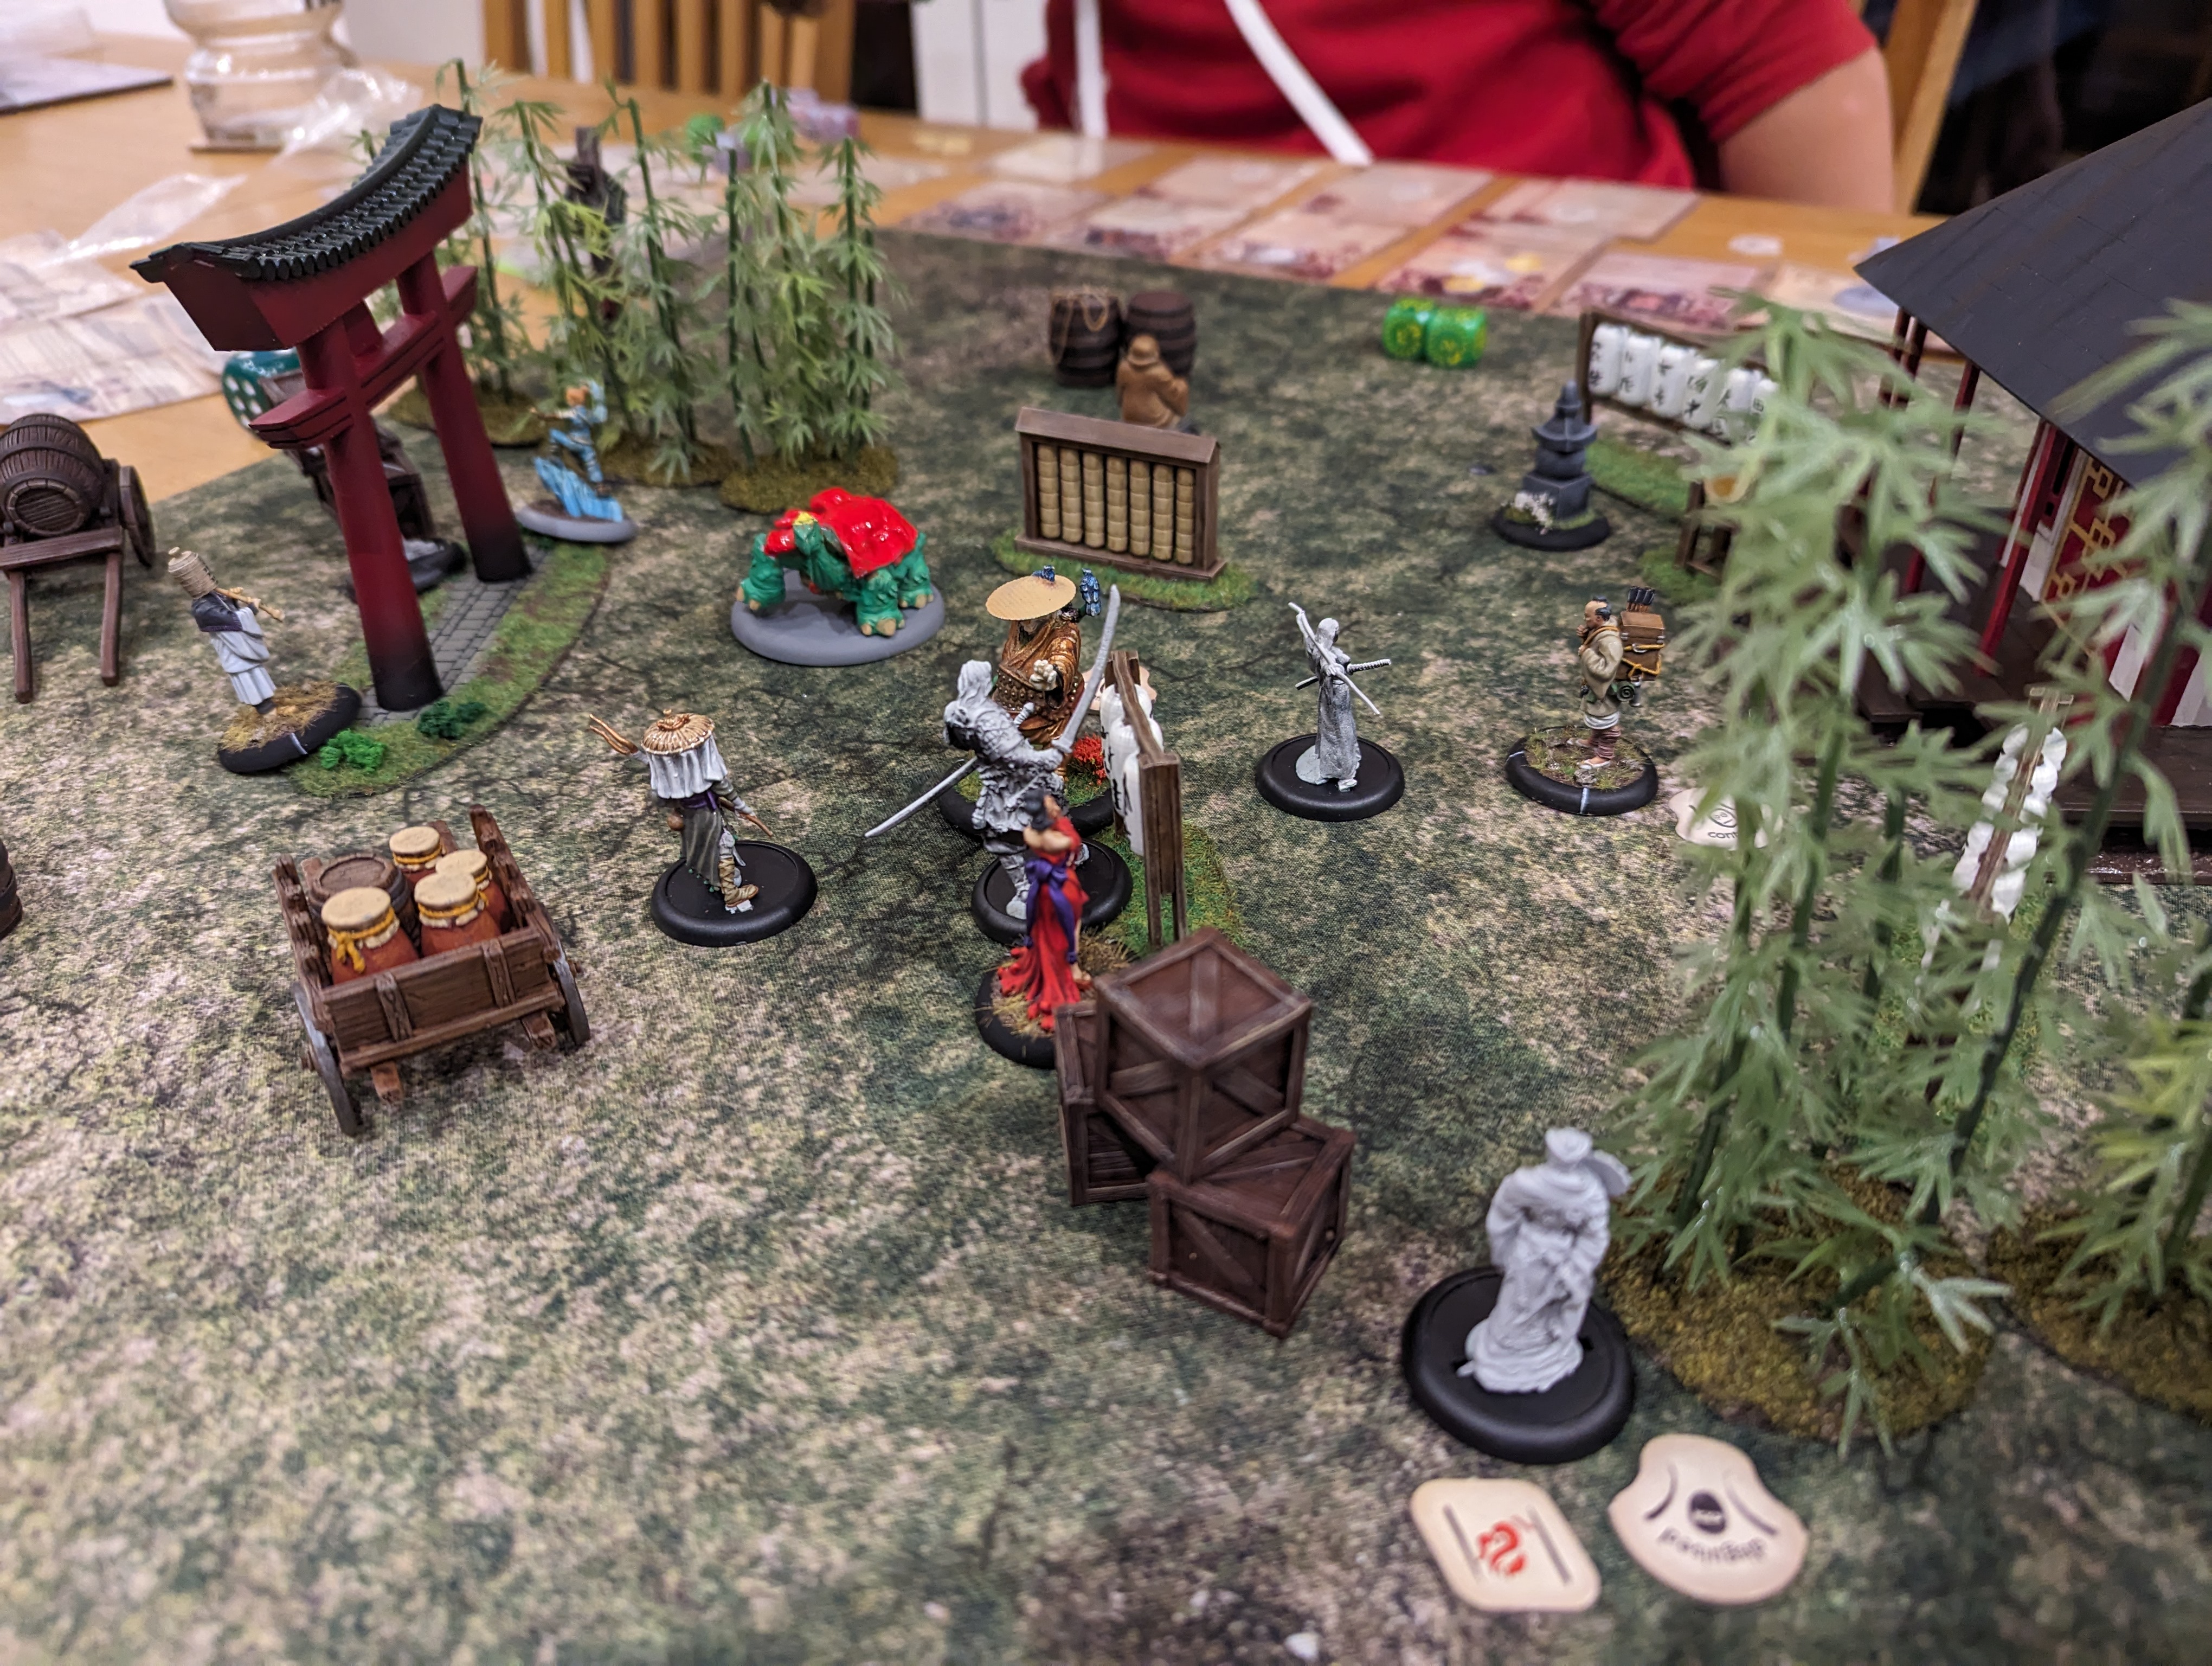
Turn 2.
My son opened the turn by charging Po into Yama Uba. Yama Uba gets to attack first in combat and Po opted to use their special defence of Counter Strike Defence. If Po successfully defends against the attack then it is possible to cause damage to the attacking model. I rolled poorly, my son rolled exceptionally and he was able to cause 2 wounds through his Defence. Po was also able to land a successful attack, causing another 2 wounds. Yama Uba only has 6 wounds, so not a great start for my most expensive model!
I decide to have Mokoti cast obey on Kiyozumi which, if successful, would give me control of Kiyozumi for one activation. I rolled double 1’s again, so failed.
Tsutsumi then got involved with his sonic blast which knocked Mokoti prone and caused a wound. Mokoti would have to use an Activation to stand up, effectively taking him out of this turn.
Ibara got into an exhausted Po and was able to cause 2 wounds to the fat fella. This was short lived as Kiyozumi activated next and cast Heal to restore the 2 wounds.
Tsutsumi then sonic blasted Mokoti for a second time doing a further 1 wound and already putting my VIM strategy under strain.
I had been advancing my rats up my left flank to bring them round the back. My son spotted this and moved oki Shisa into combat with one of the rats. This was no match up and my rat died.
Penny managed to successfully Hypno Gaze Kiyozumi causing the young lady to lose the remainder of her activations and stuns her. Meanwhile, at the back of the board, Oki Shisa, with a hunger for rats, attacked my other one and killed it. So much for the rats….
With my son now out of Activations, Penny activates and attacks Tsutsumi. He fails his Fear test and, despite him being exhausted, frightened and losing 2 melee dice, I rolled poorly again and fail to hit at all.
Finally, Ibara continues to attack Po who just uses Counter Strike Defence and causes 2 wounds to Ibara, so completely useless from my side.
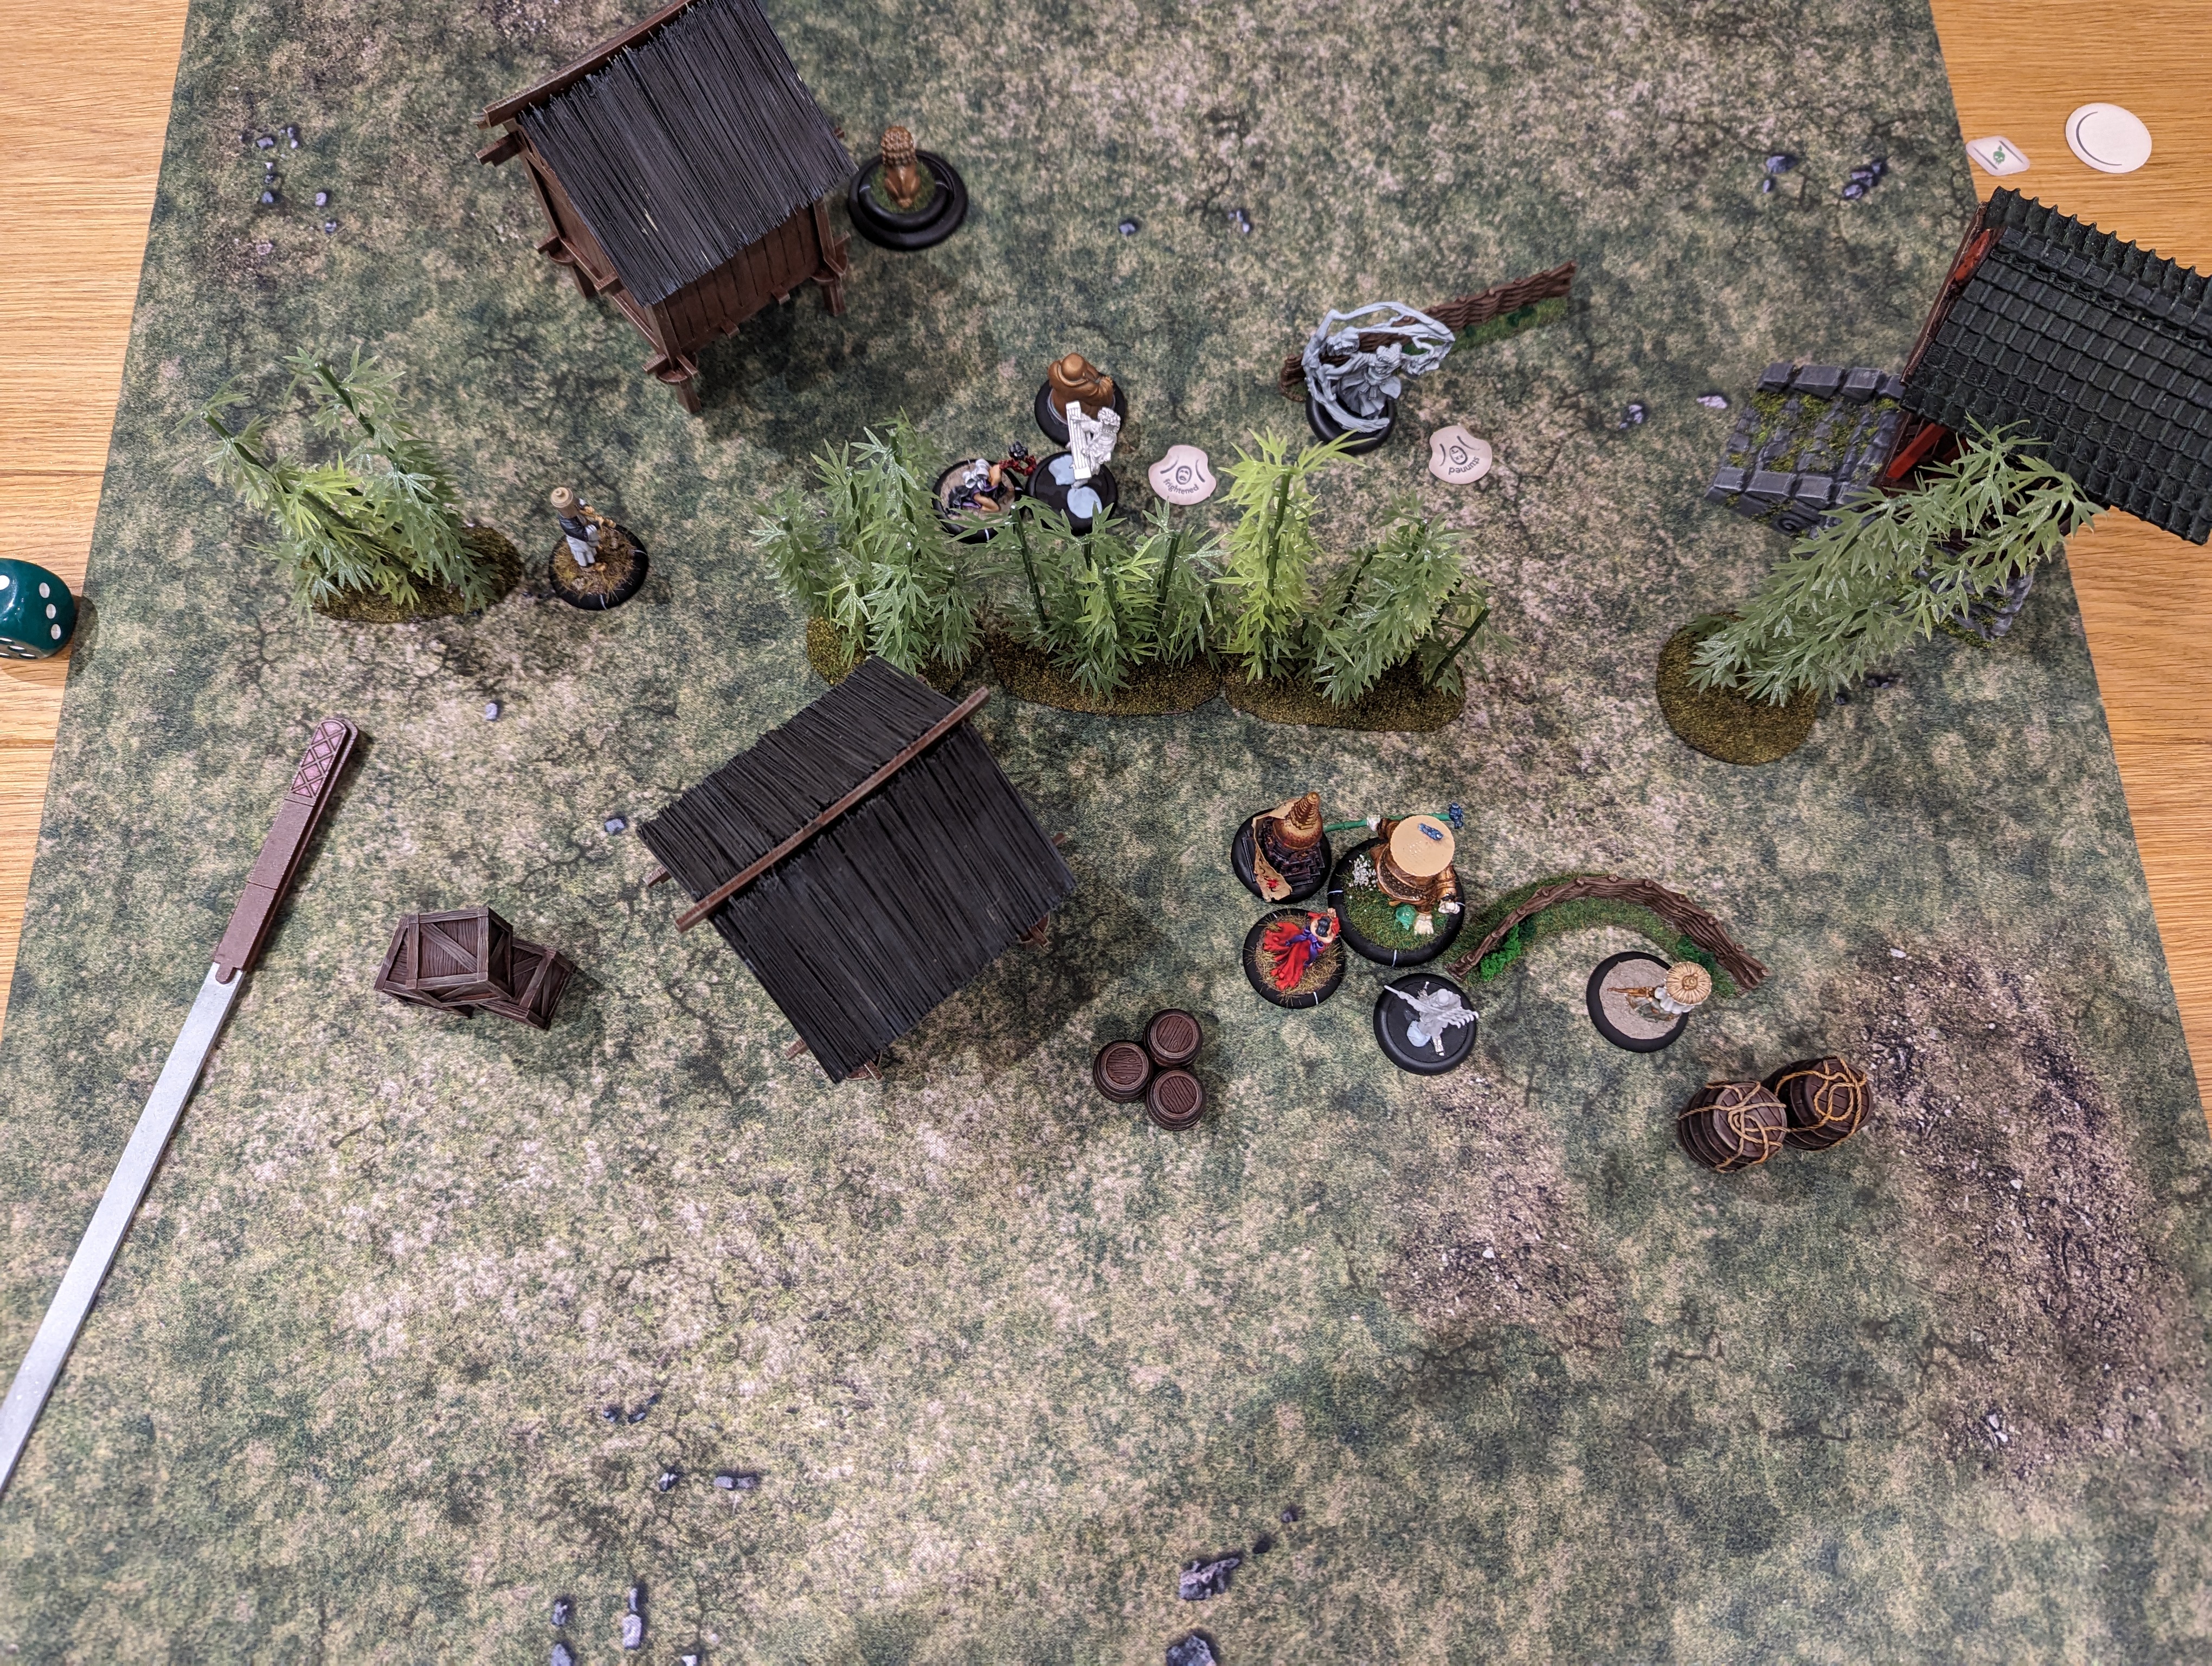 End of Turn 2
Turn 3.
Surely this turn will improve for me? I start out by playing my Drain Spirit card on Tsutsumi and taking 2 Ki and give that to Penny. I would have played this on Po but as he’s got the annoying Stillness Medallion, I can’t steal anything. It seems that my son has planned ahead….
I also play Random Act of Unkindness. My son opts for the Impetuous state which means that any model who has it has to activate first. I don’t want to give this to Po as he’ll continue attacking Ibara, so I assign it to Kiyozumi, who goes first and Heals herself.
I have two options, move someone else into combat with Po to support Ibara or try to control Tsutsumi. I opt for the latter with Mokoti using his Obey ability. Yet again, I roll double 1 and fail.
Clearly my son is confident in Po’s abilities as he activates oki Shisa first and attacks Penny. Penny isn’t able to resist and takes 3 wounds and only deals 1 in return.
I move Risu into combat with Po. Normally, with two models attacking one, the defending model would suffer a -1 dice pool penalty, but not Po, he’s got the Indomitable trait meaning that he only suffers the -1 when you get to three or more against one. Either way, Risu is not able to hit Po but Po also fails to land a hit.
I then move Yama Uba into combat with Po meaning that I now have 3 vs 1 and Po will suffer the -1 dice pool modifier. I also use Yama Uba’s Morph ability to copy Po’s Melee Statistic of 4. This will then give Yama Uba 4 melee dice against Po’s 3. Additionally, at the end of this combat, Po will be exhausted, removing another 1 from his dice pool for additional attacks! What can go wrong?
Po declares Counter Strike Defence and rolls all three dice into defence. Yama Uba rolls three in attack and one in defence. Yama Uba not only fails to beat Po’s defence dice, she fails it by enough to give Po a damage roll through Counter Strike Defence. My son rolls high and Yama Uba is dead. Things are unravelling fast.
Ibara then attacks a now exhausted Po. This also doesn’t go well and Ibara ends up dead as well. The bodies are piling up around Po.
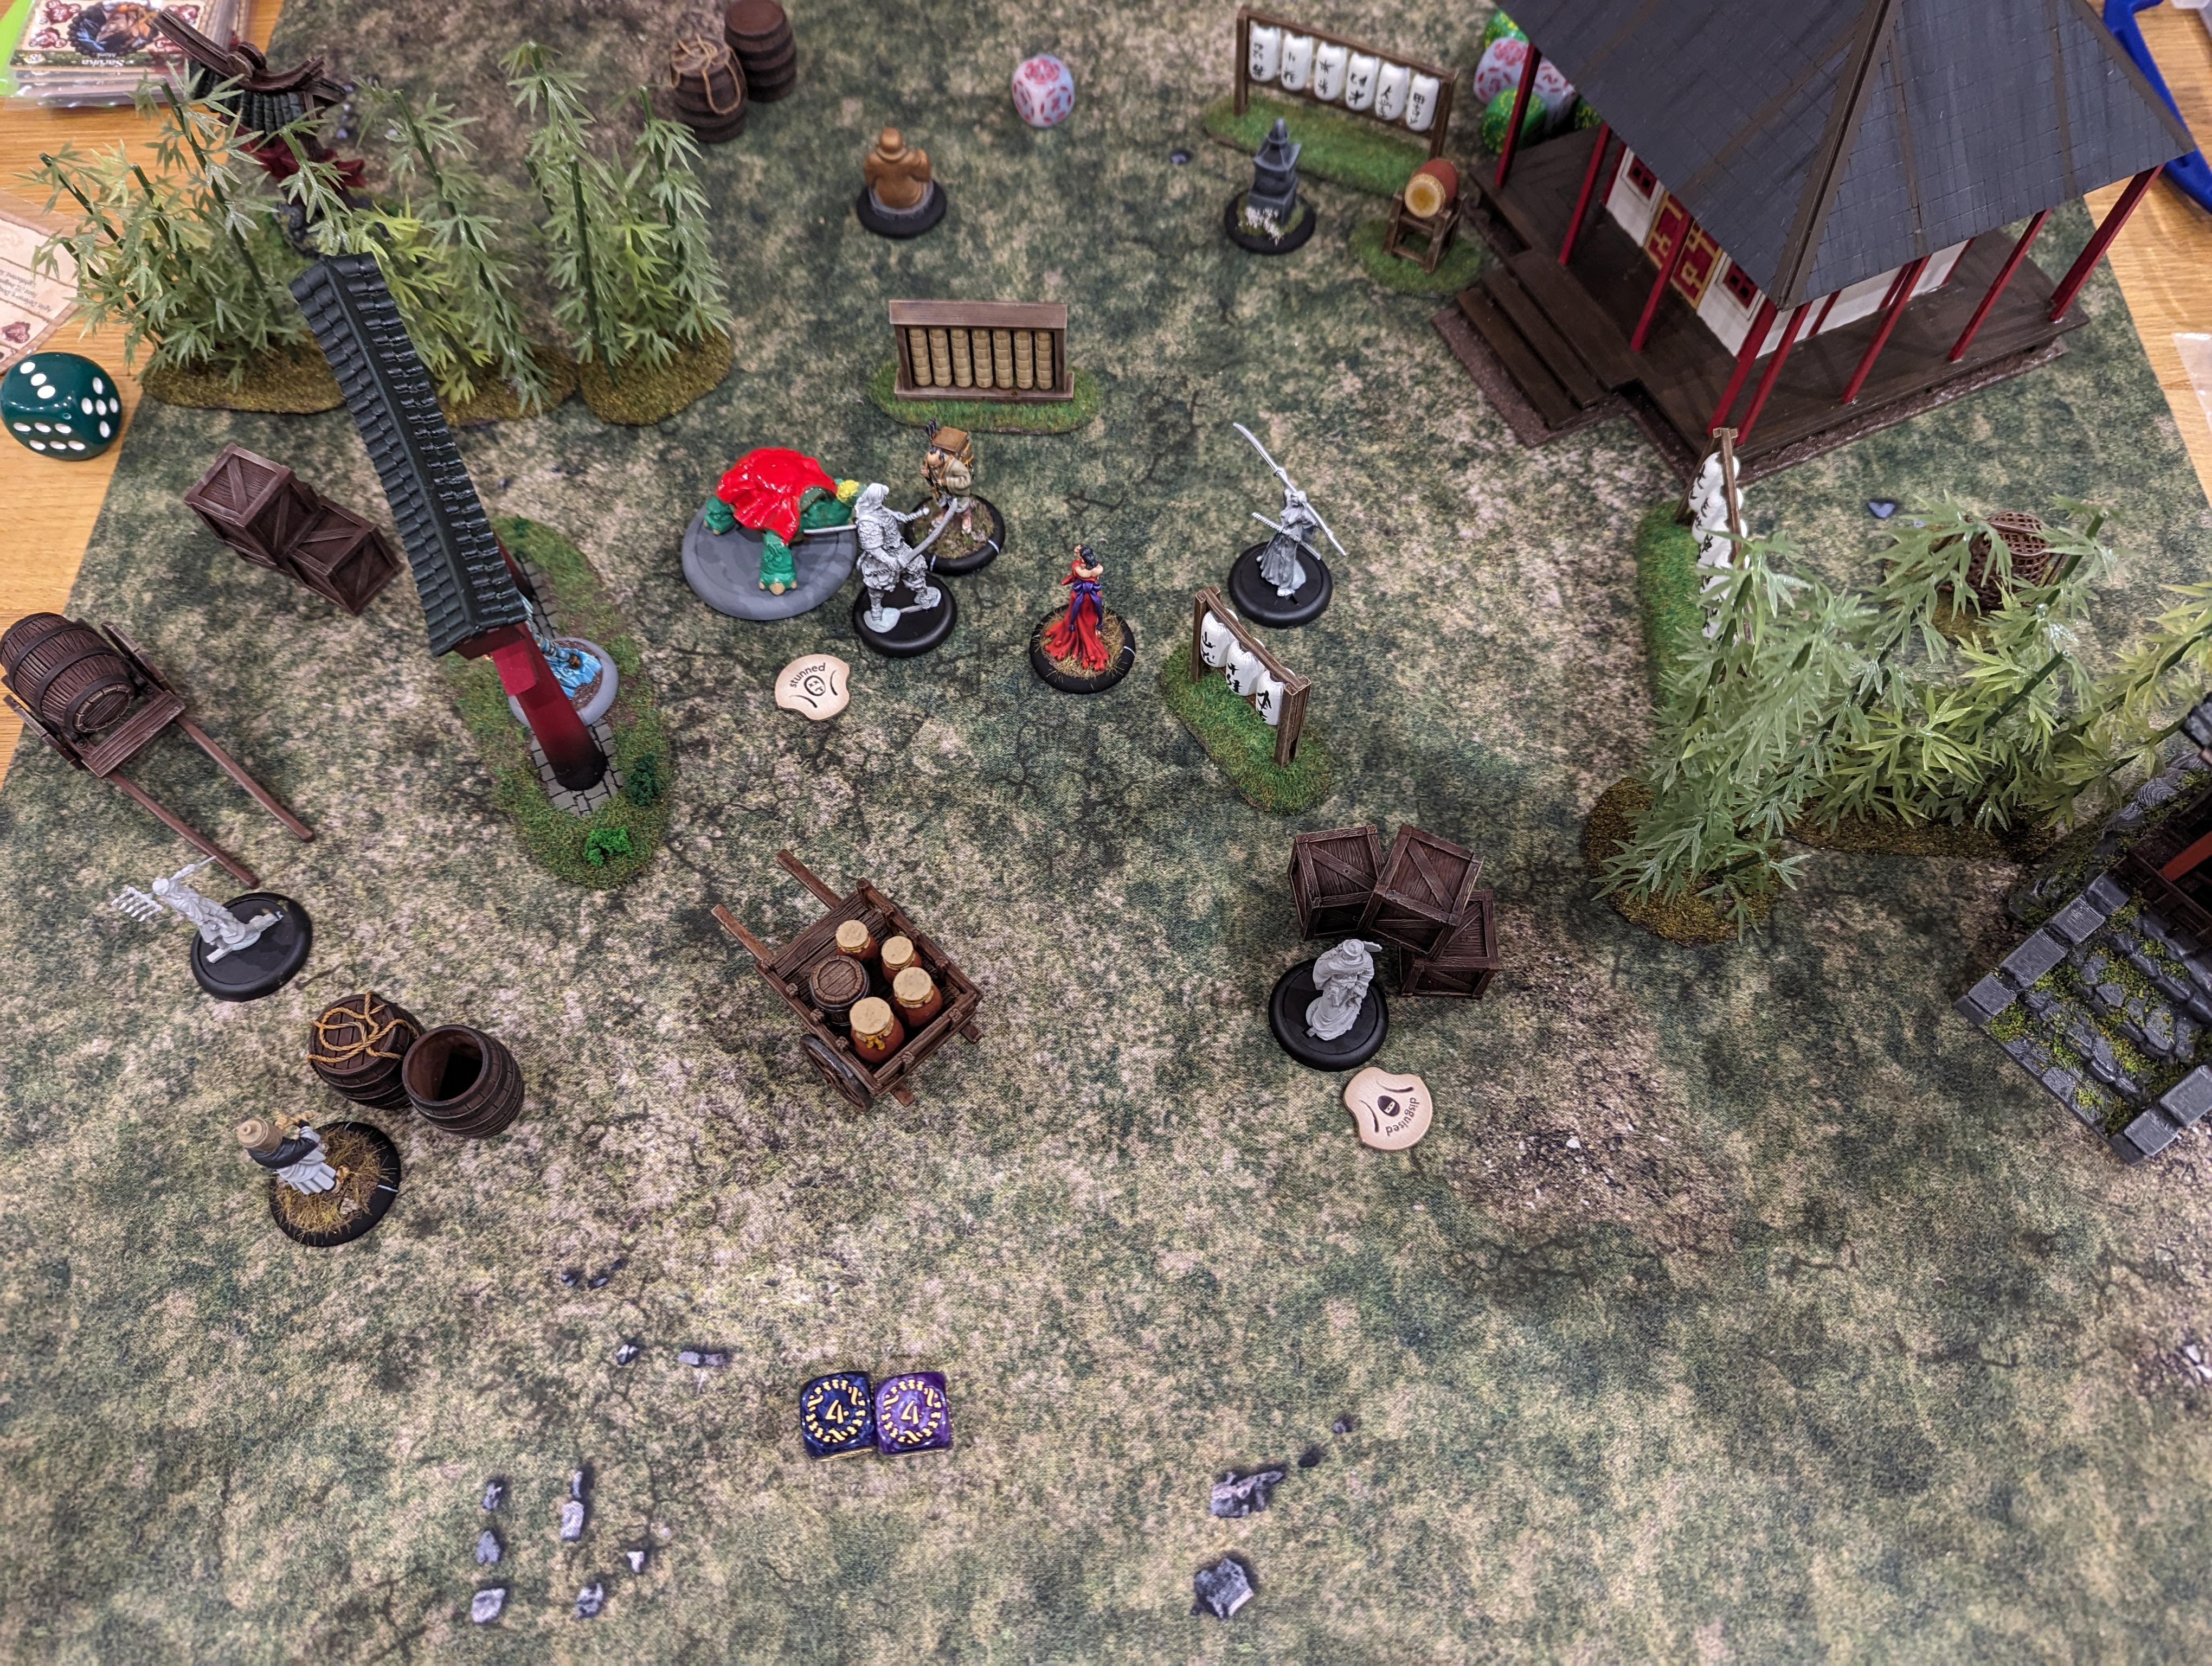
 End of Turn 3
Turn 4.
Oki Shisa goes first and makes quick work of killing Penny. I’m not left with much but if I can get Mokoti to the board edge and off on turn 6, I can at least draw, maybe win. I need to support Mokoti and use Risu as a blocking force. I try to disengage Risu from Po but this goes badly. Risu ends up dead.
I do the only thing I can do, and march Mokoti up the board.
 End of Turn 4
Turn 5.
Oki Shisa, as the nearest model, attacks Mokoti and manages to cause 1 wound. Mokoti is not looking too healthy now. Tsutsumi uses Sonic Blast to cause another wound and Prone Mokoti meaning he can’t move any further this turn. Tsutsumi tries to sonic blast again but manages to hit Oki Shisa, wounding the temple statue.
Turn 6.
By this time, Po has leapt across the board and attacks Mokoti. This is not even close to a fair fight. Mokoti tries to defend but to no avail, Po batters him and it is all over, the cult has lost.
Wrap up.
This wasn’t even close to a fair fight. My son has put together some good synergies in his list and played really well. I had no answer. I think we will be seeing a lot more of Master Po in future battles!
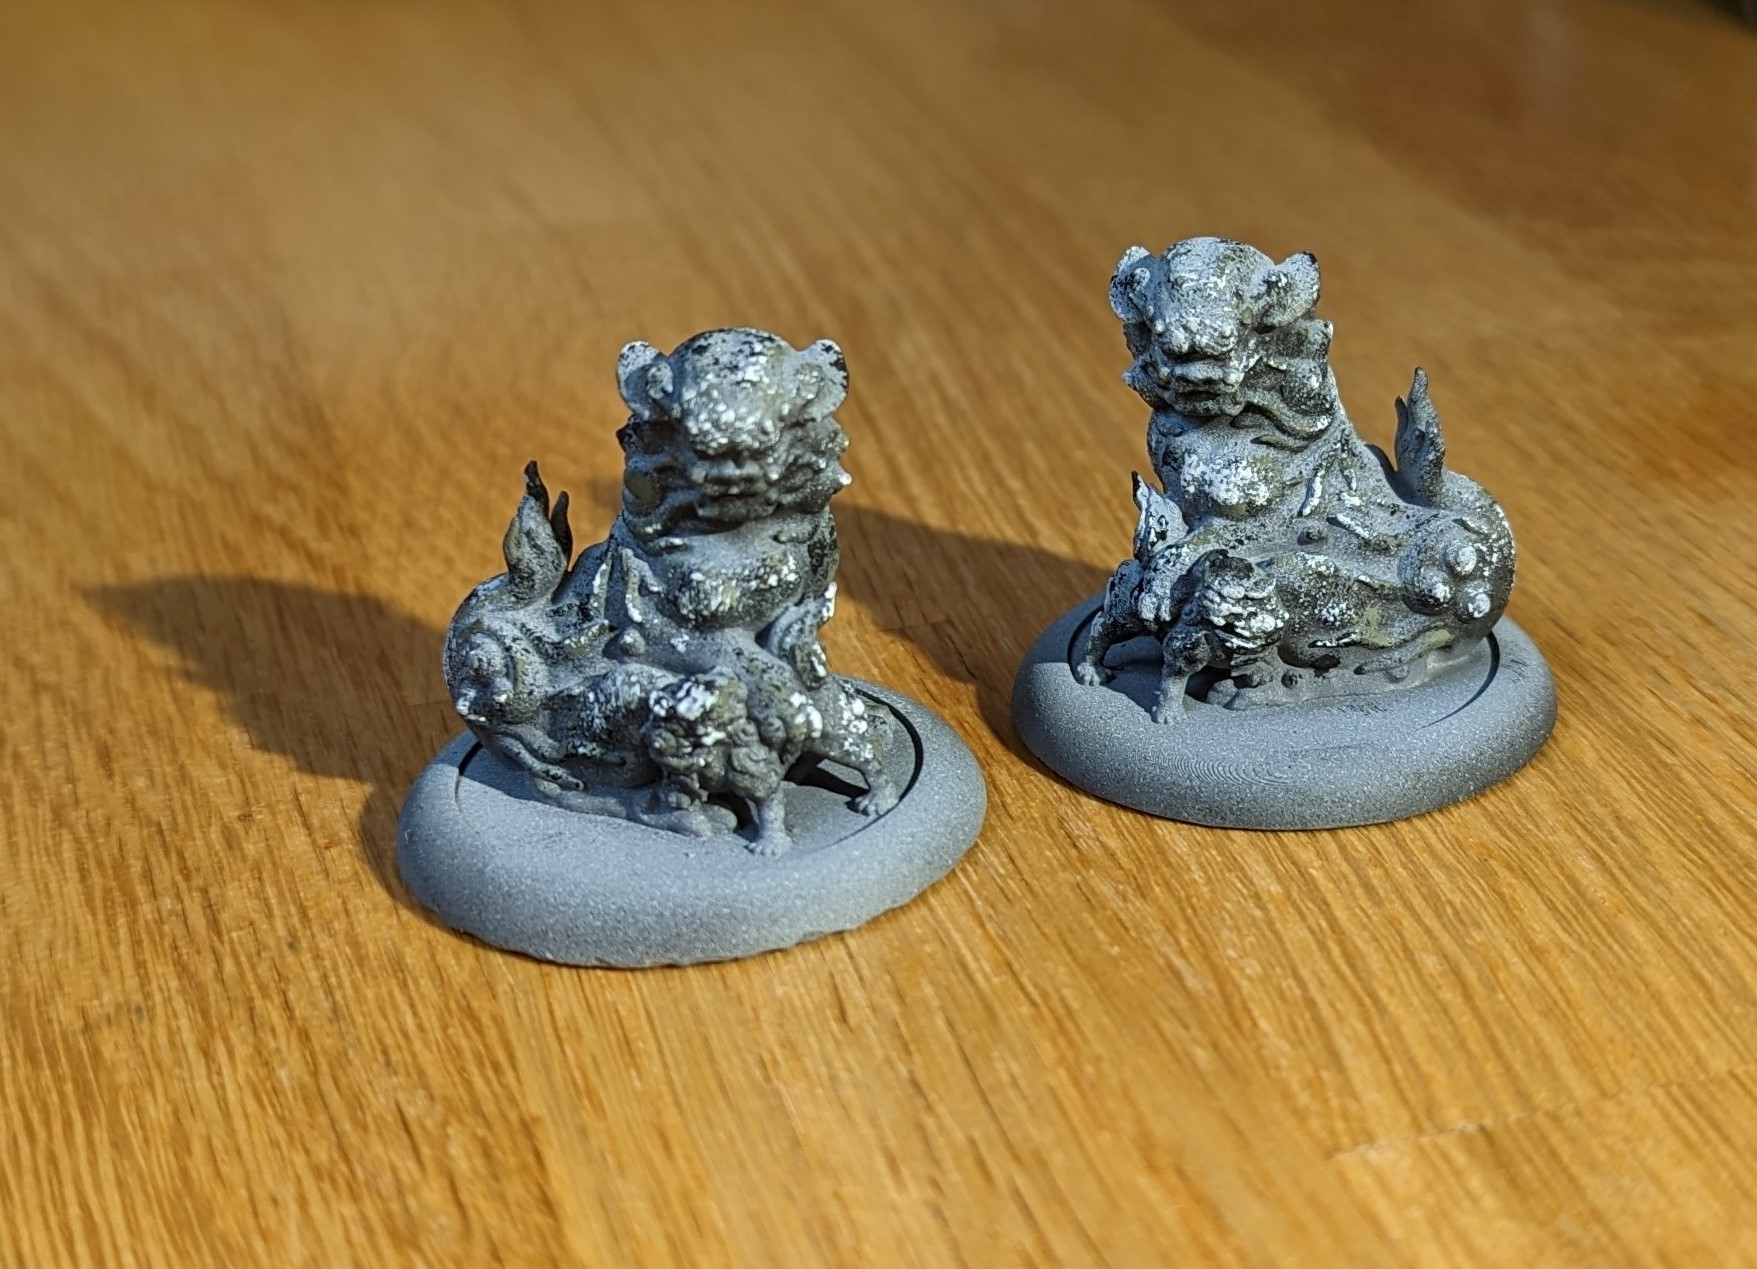
Oki Shisa
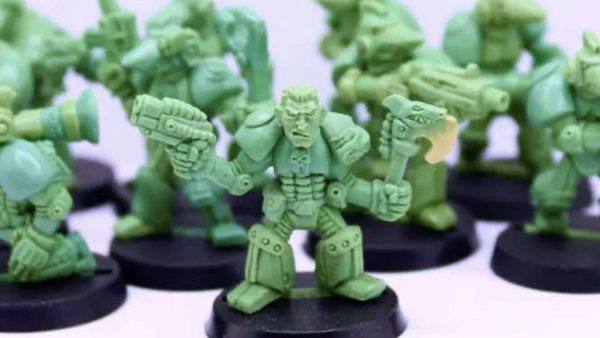
The Temple of Rokan can run some characters that are effectively temple statues. They come in two flavours, the smaller, less powerful Shisa and the more powerful Oki Shisa. Some time back, I 3d printed the Shisa and painted these up with a simple bronze effect. My son quite liked these and then wanted the bigger, ‘better’ version.
I searched the various stl file locations for a suitable file and found a free one that had been uploaded of a scan of a real world temple lion with a baby lion. Once downloaded, it was a simple job to scale it to the correct size and then virtually attach it to the correct base size (40mm round in case you were wondering). This then got printed out.
I wanted to keep the paint job simple here and given that they are statues, this should be possible. As the smaller Shisa were painted up as bronze statues, I want these to be jade in appearance.
I’ve started off with a zenithal highlight. I’ve then taken a bit of sponge and stippled the model with white and black. My thinking being that jade is not always a uniform green and the stippling will look like natural colour variation.
I’ve then given this a couple of coats of green ink. Firstly applied all over and then the second and third layers from top down. Once dry, I’ve varnished and flocked the base and job done.
It’s not the greatest paint job and could have done with a lighter touch with the stippling and perhaps a satin varnish rather than matt (I might correct this). But for a simple paint job, it works and didn’t take long.
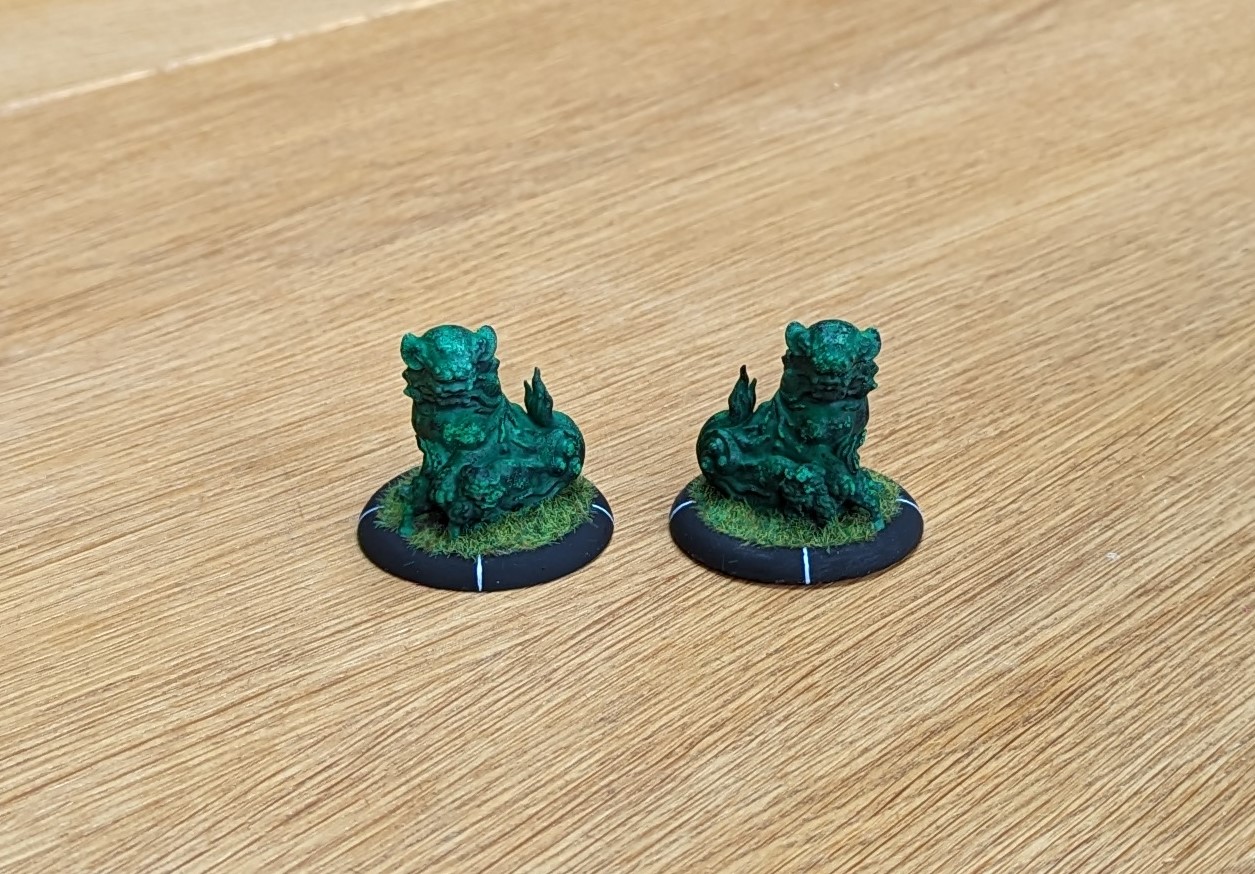 Two finished Oki Shisa
Shopping Spree
We both want to expand our force but I did put a rule in place that we should have painted, or nearly painted, our starter sets before we add to the collection. Maybe a little draconian and my son wasn’t happy with this but it does help focus the attention onto what you have and getting that ready before new shiny toys arrive.
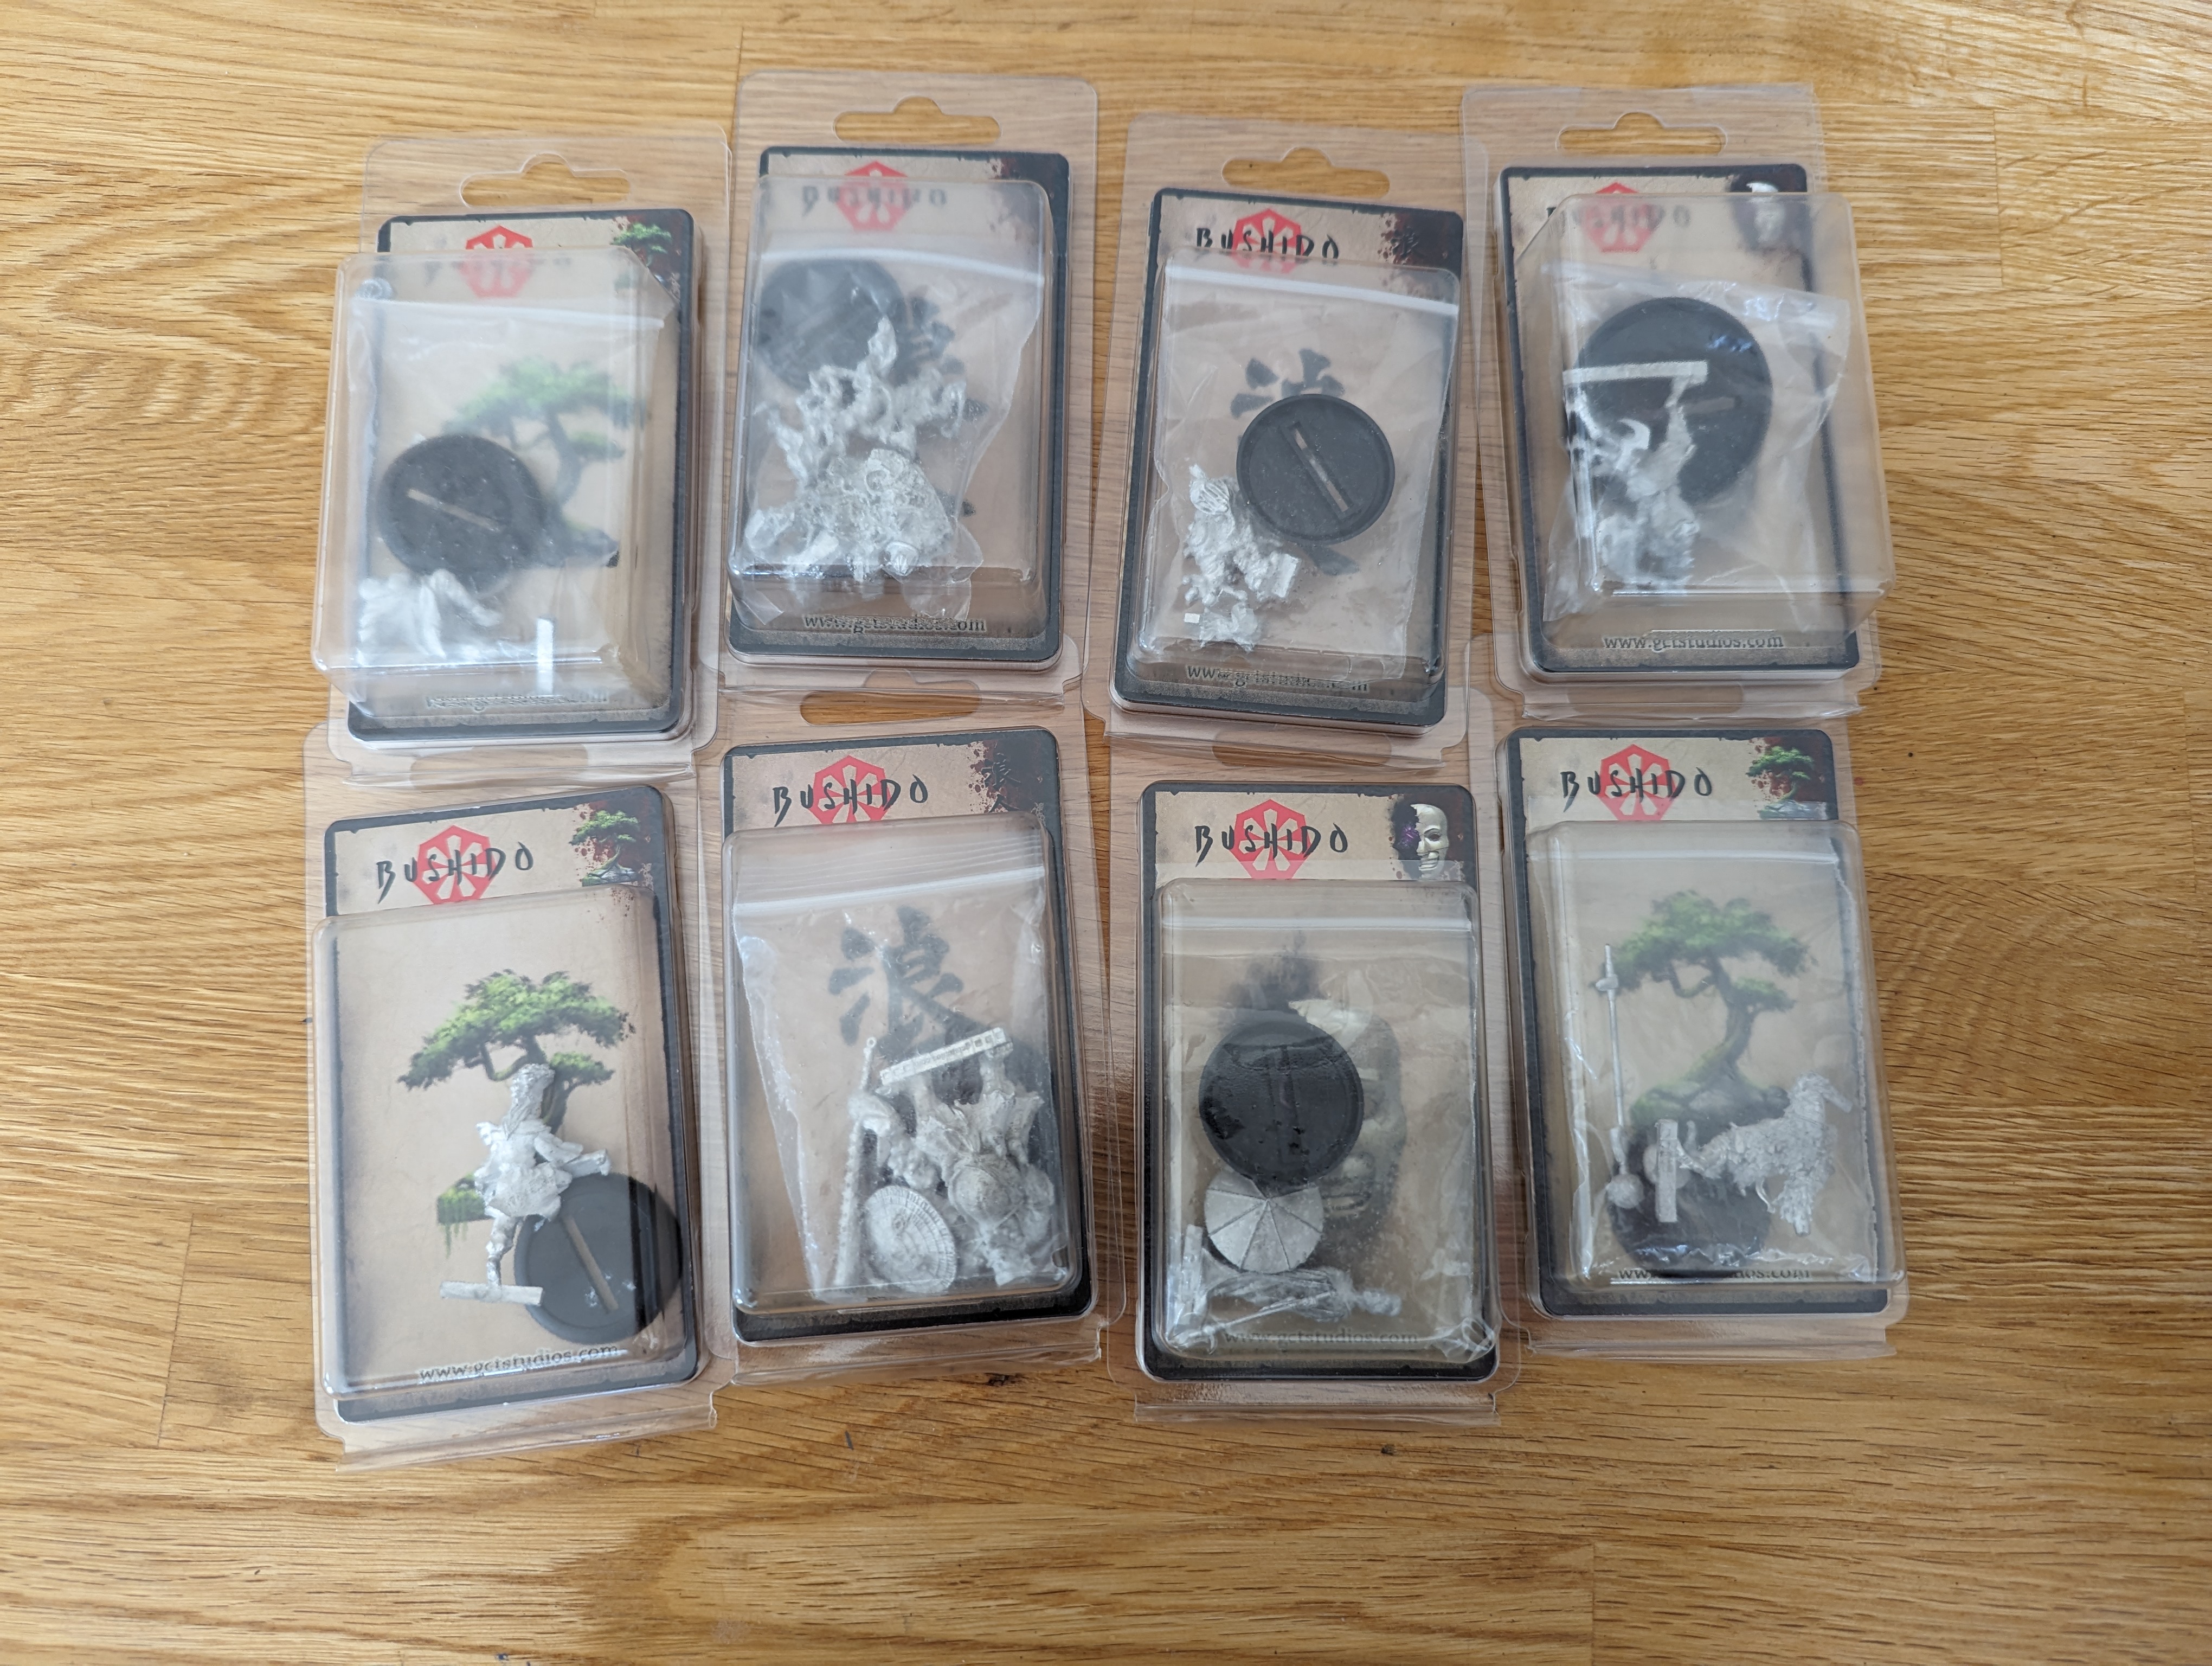
But as we are almost there on our starter sets, we decided it was time to add a few more models and this turned up earlier today.
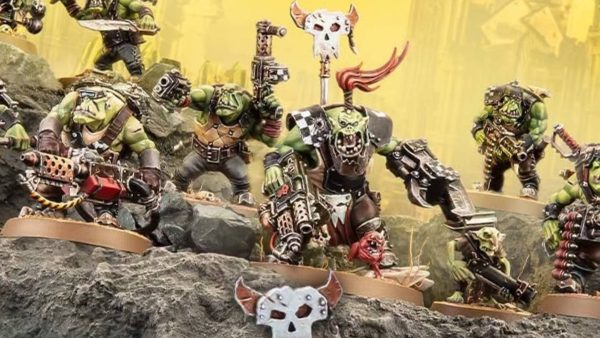
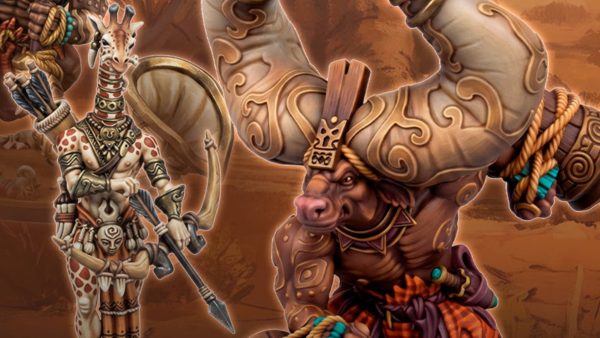
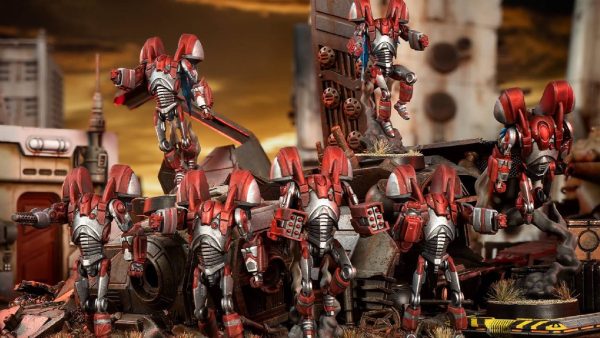
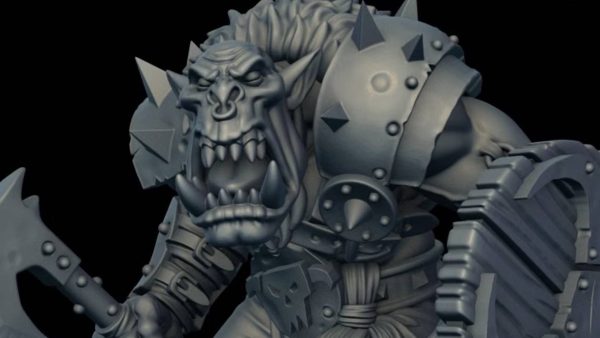
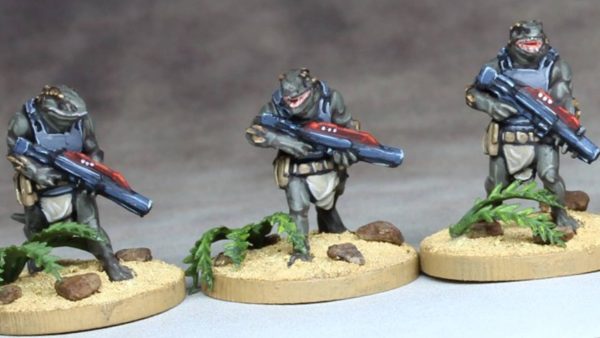
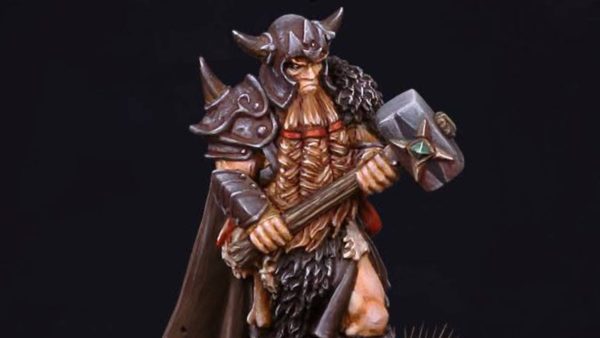
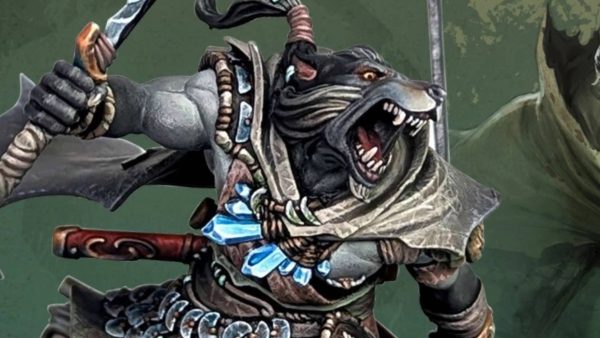
We opted for a couple of Ronin, which can fight for different factions. In this case we added 2 kami models, which are spirit models that often provide either a boost to your side or hinder your opponent. We also added Eldest Brother who is an Oni that will fight for just about anyone. This was for no other reason than we both wanted an Oni.
My son added Master Po, who looking at his stat card, looks an absolute monster and at complete odds to model who depicts a chubby fella balancing on tip toes. I’m not looking forward to facing Master Po on the table and I’m not sure I have an answer to him either. My son also added Tsutsumi who is handy in combat but also provides ranged attack in the form of Sonic Blast. Finally, he got an angry ape called Kosuke who’s wielding and enormous maul – I don’t think there will be much subtlety in how Kosuke plays.
For the Cult, I’ve added Rokuro, who is a Tengu that has fallen in with the Cult of Yurei. He’s lost the ability to fly but does come with a couple of axes than provides a bit of fighting edge that the Cult lacks. I’ve also added Fuwa Kaidan, who is a ghost and can re-spawn but also turns opponents against their own side, so handy for getting the enemy to fight for you, albeit for an activation only. Finally I’ve added Ikyiro who is a diminutive spirit lady but packs a real punch from distance with a damage dealing spell – something that I currently lack in my arsenal.
So, more shiny new models to add to the painting queue!
 Early Christmas presents for us
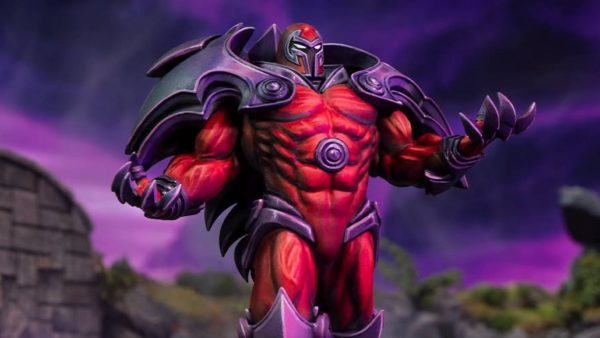
Cult Starter Set: Yama Uba
We’ve been busy painting recently and there are quite a few models and terrain pieces on the painting bench that are almost complete. So with any luck, the pile of potential should reduce this month….
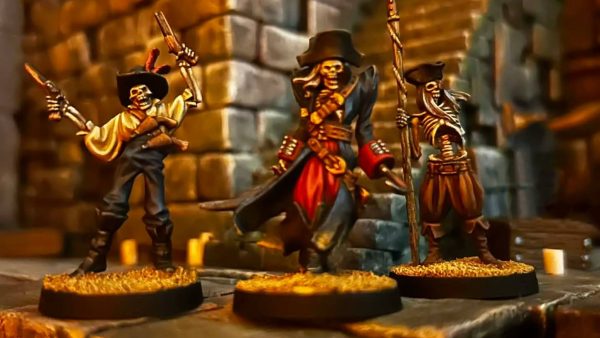
One such model that has rolled off the painting bench in Yama Uba. In Japanese folklore, there are many different tales of Yama Uba, seemingly with each prefecture having a different story. Some portray her as a young woman who wanders the hills, other stories talk of an unkempt old crone. Yet more stories talk of a woman that attacks travellers and eats those she kills through a mouth hidden in her hairline. This being the Cult of Yurei, the latter tales are likely the truest in Bushido’s manifestation of Yama Uba.
In game, Yama Uba is quite powerful, being one of the more expensive characters that can be taken by the Cult. Her stats are reasonable and her bonus skills give her fear as well as disguise meaning that if she doesn’t attack, she can close on enemy models who cannot attack her. Her Ki feats are why you take her though. Her first allows her to move 2″, even if locked in combat, so excellent for positioning and even moving behind an enemy model ready for a sneak attack into the back. The second Ki feat allows her to mimic any stat, ability or Ki feat of an enemy model that she is in base to base contact with. So simply pick an enemy model with a useful stat or ability and move Yama Uba in to copy it. Very handy!
Painting wise, I wanted a rich red. I’ve always been told that for a good red, you really need to darken the shadow areas. Normally, I shade red with a straight purple but here I’ve opted for a cavalry brown/purple mix to try to create a richer tone.
For the skin I’ve used Scale 75 Flesh Paint set and opted for a very light skin tone except around the face where I’ve gone for a more brownish hue. I usually paint my skin with a base of Golden Skin and then glaze the tone up/down from there using mixes of GS and the other colours in the skin paint set.
The sash/ribbon is the Cult purple, my theme colour to tie all of the models in the warband together. The hair is dark rubber given a black wash and then gently highlighted with a dark rubber and luftwaffe grey mix.
The basing is the same as for my other Cult models, again to create a degree of uniformity to the warband.
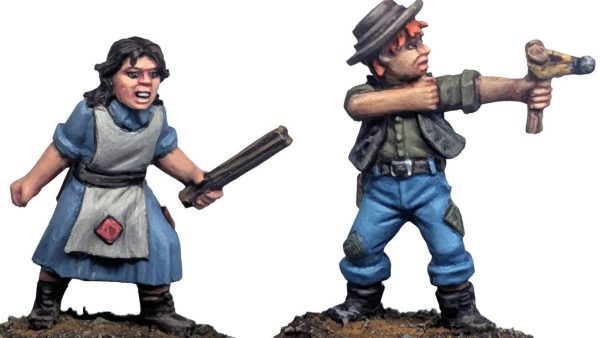
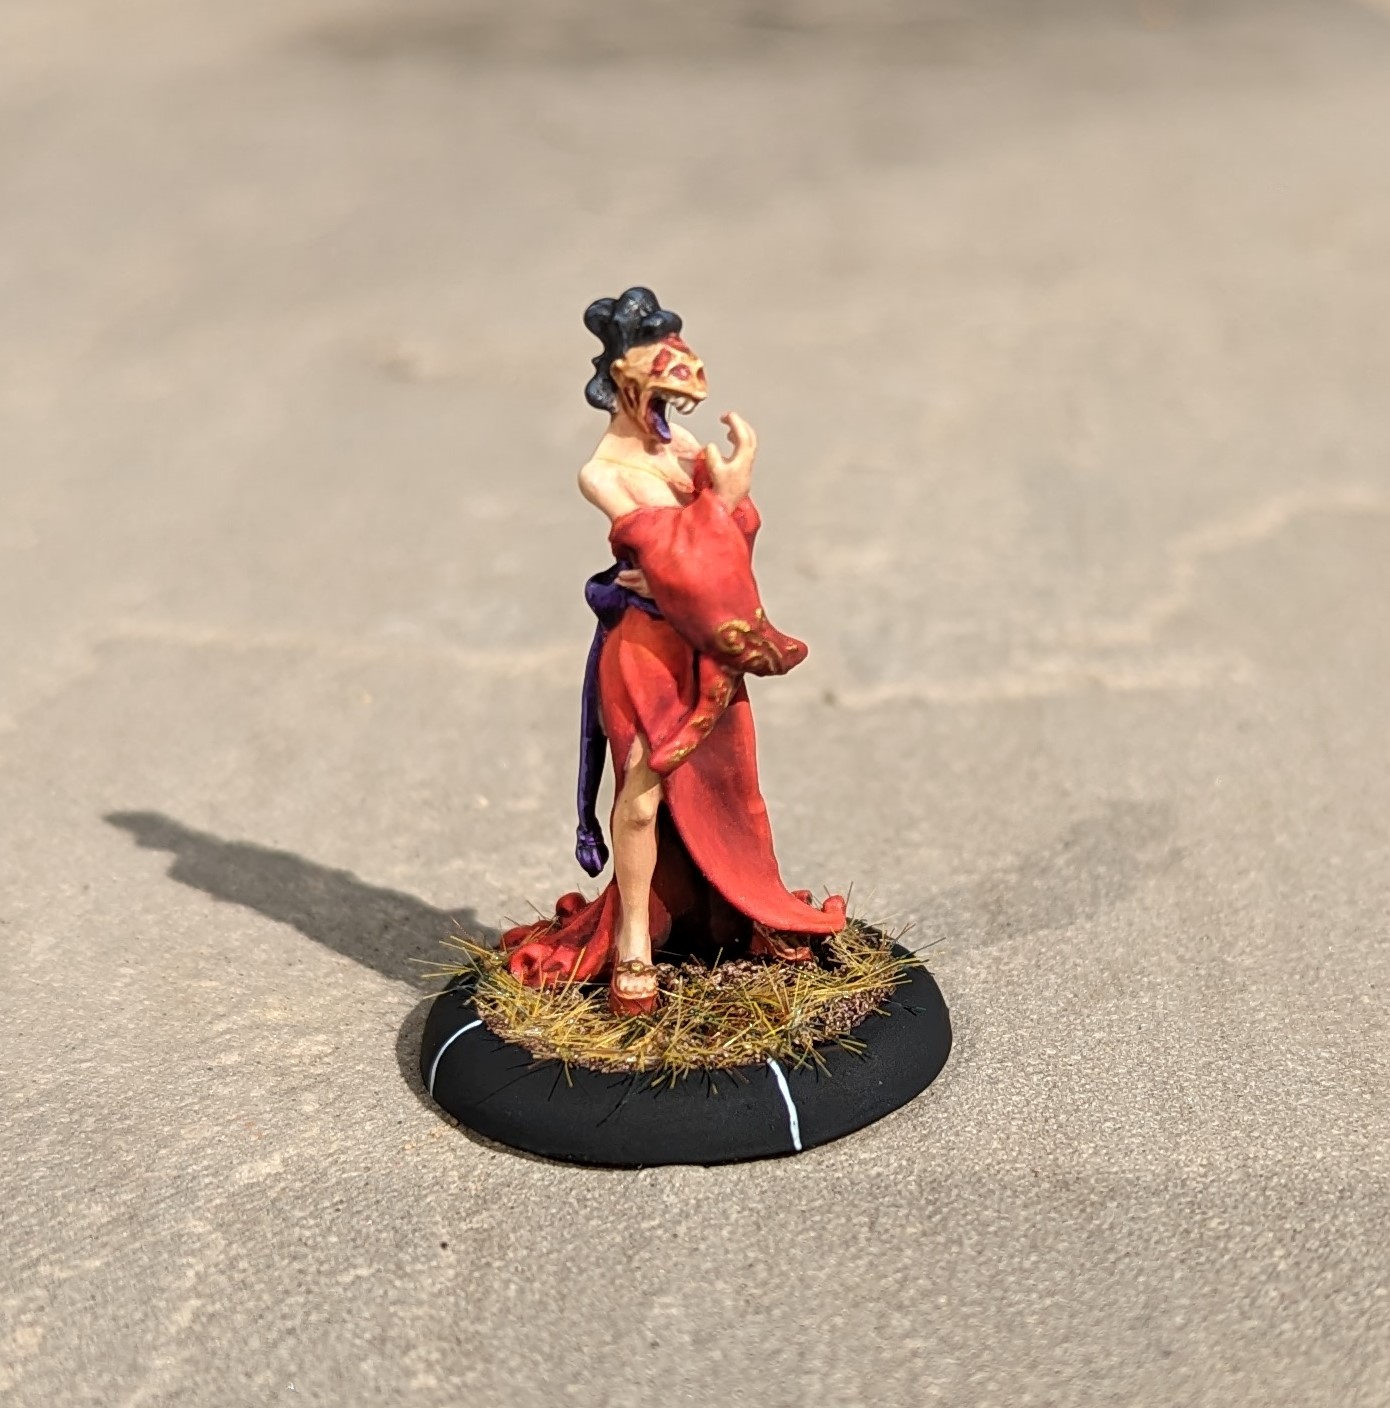 Nice dress
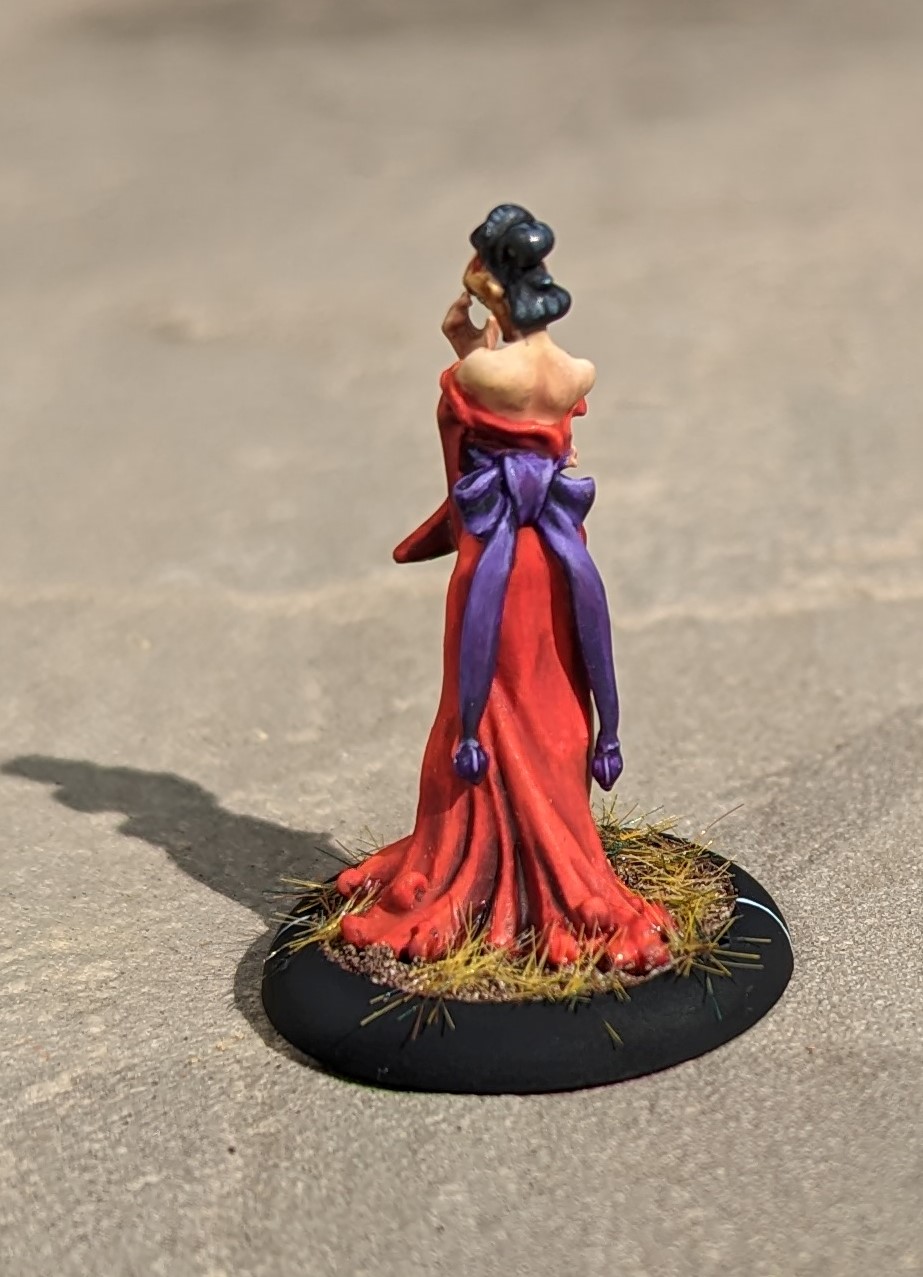 Lloyd Shot
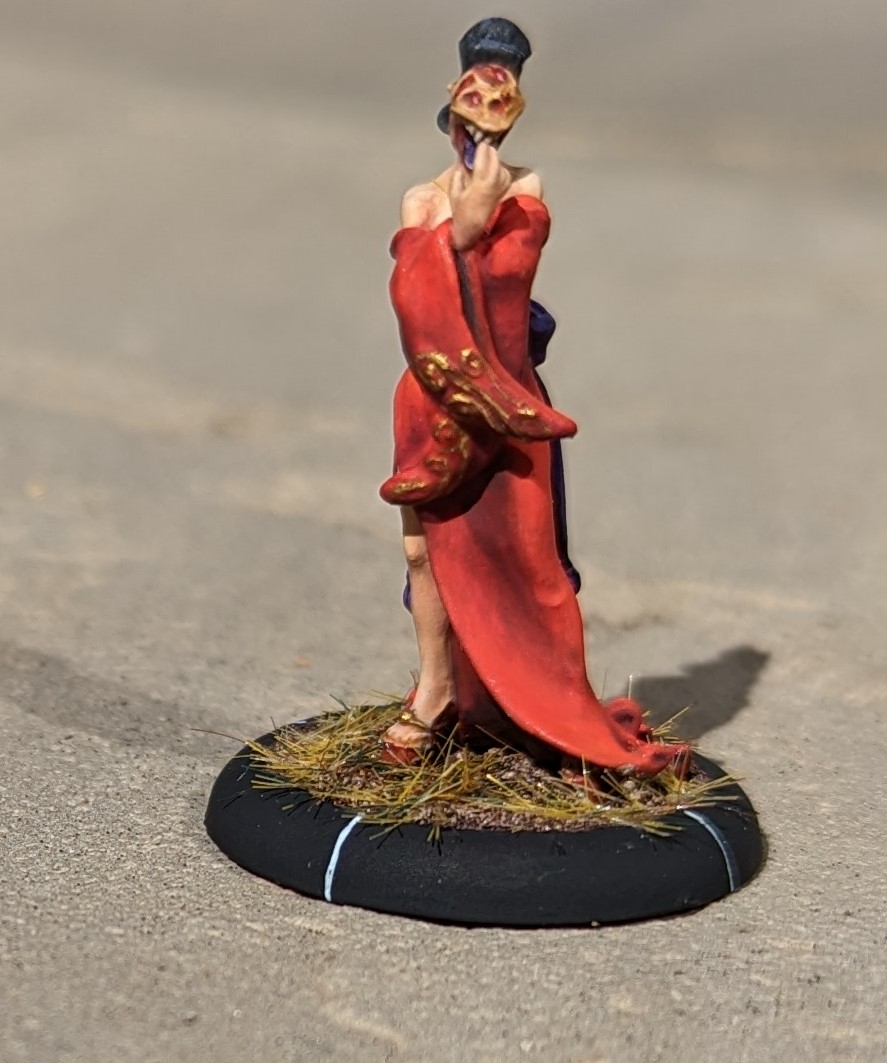 Probably takes a while to floss those teeth
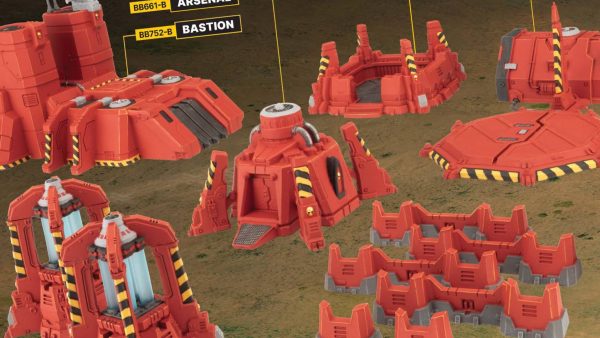
More Deployable Terrain
As my son has a couple of terrain pieces he can buy into his warband that provide him with a boost, I thought it was time that I added some options to my force. The Cult of Yurei have a few options that they can use, two of which look fairly easy to put together. Firstly there is a rubbish pile, which in game generates a small rat swarm for free every time a victory point is scored. The other terrain piece is a cursed honden. In game, this allows me to drain 1 Ki from any enemy model within 4″, which should come in quite handy against the Temple of Rokan who just love their Ki feats.
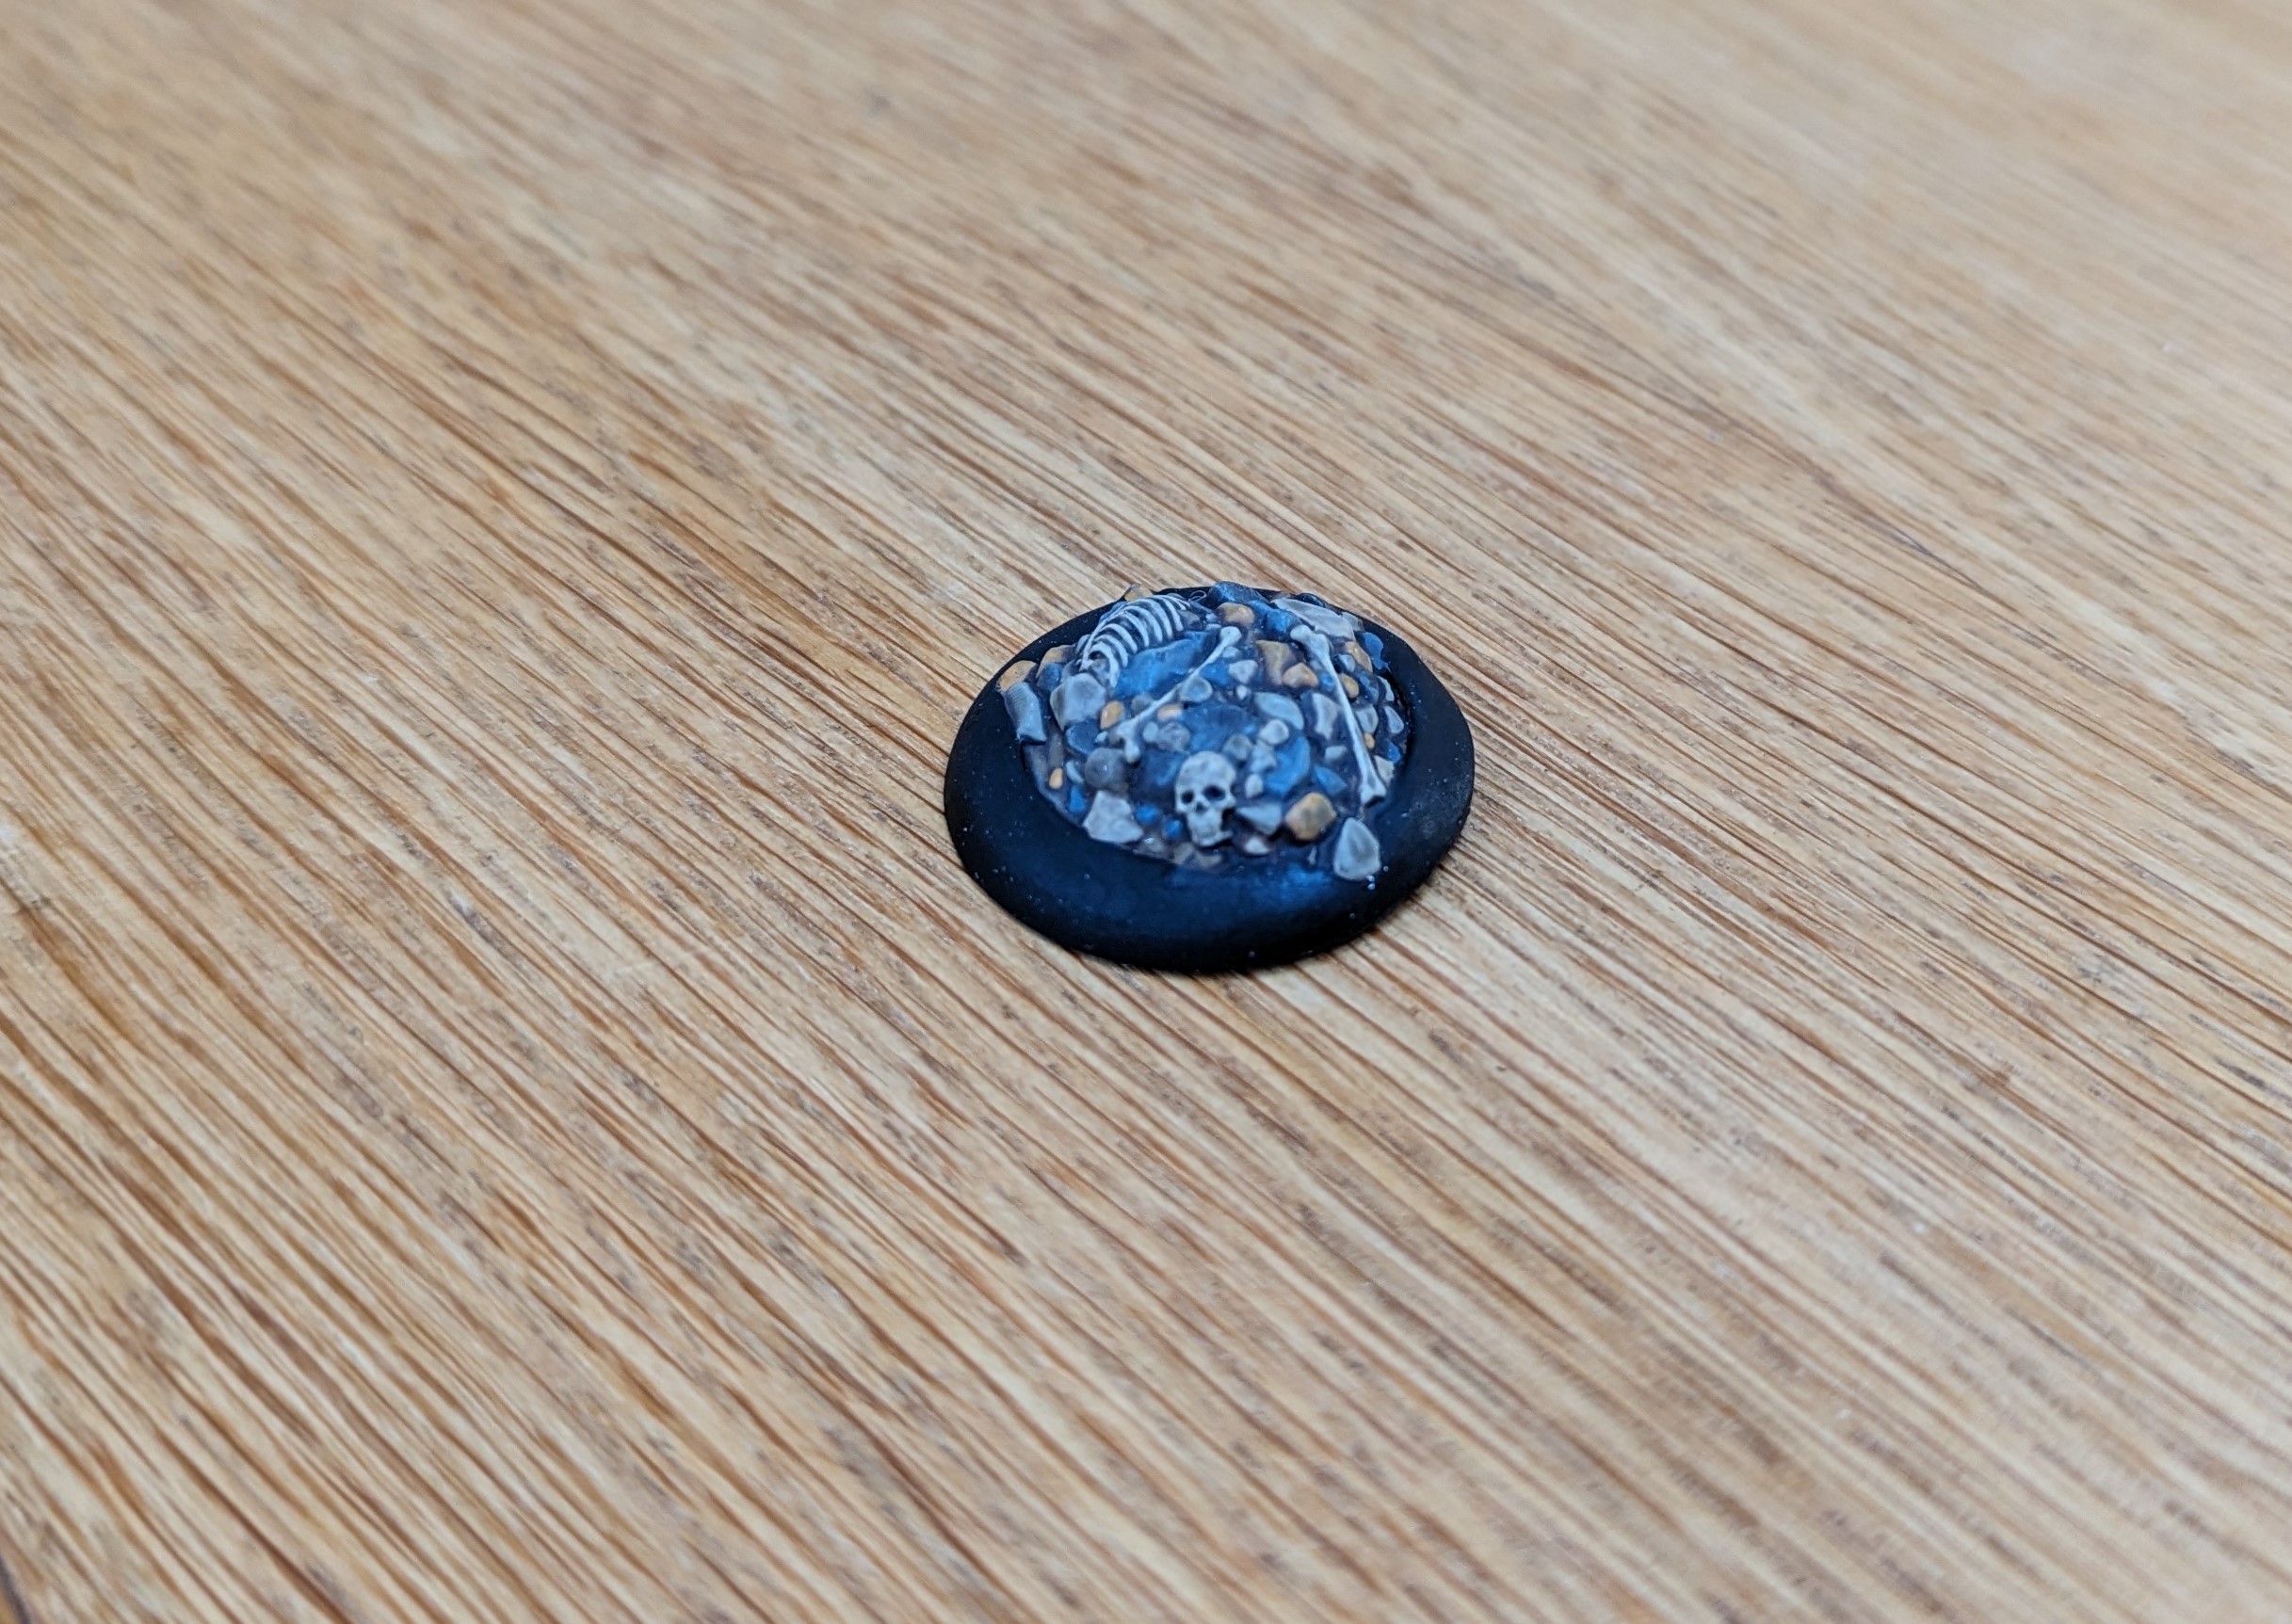
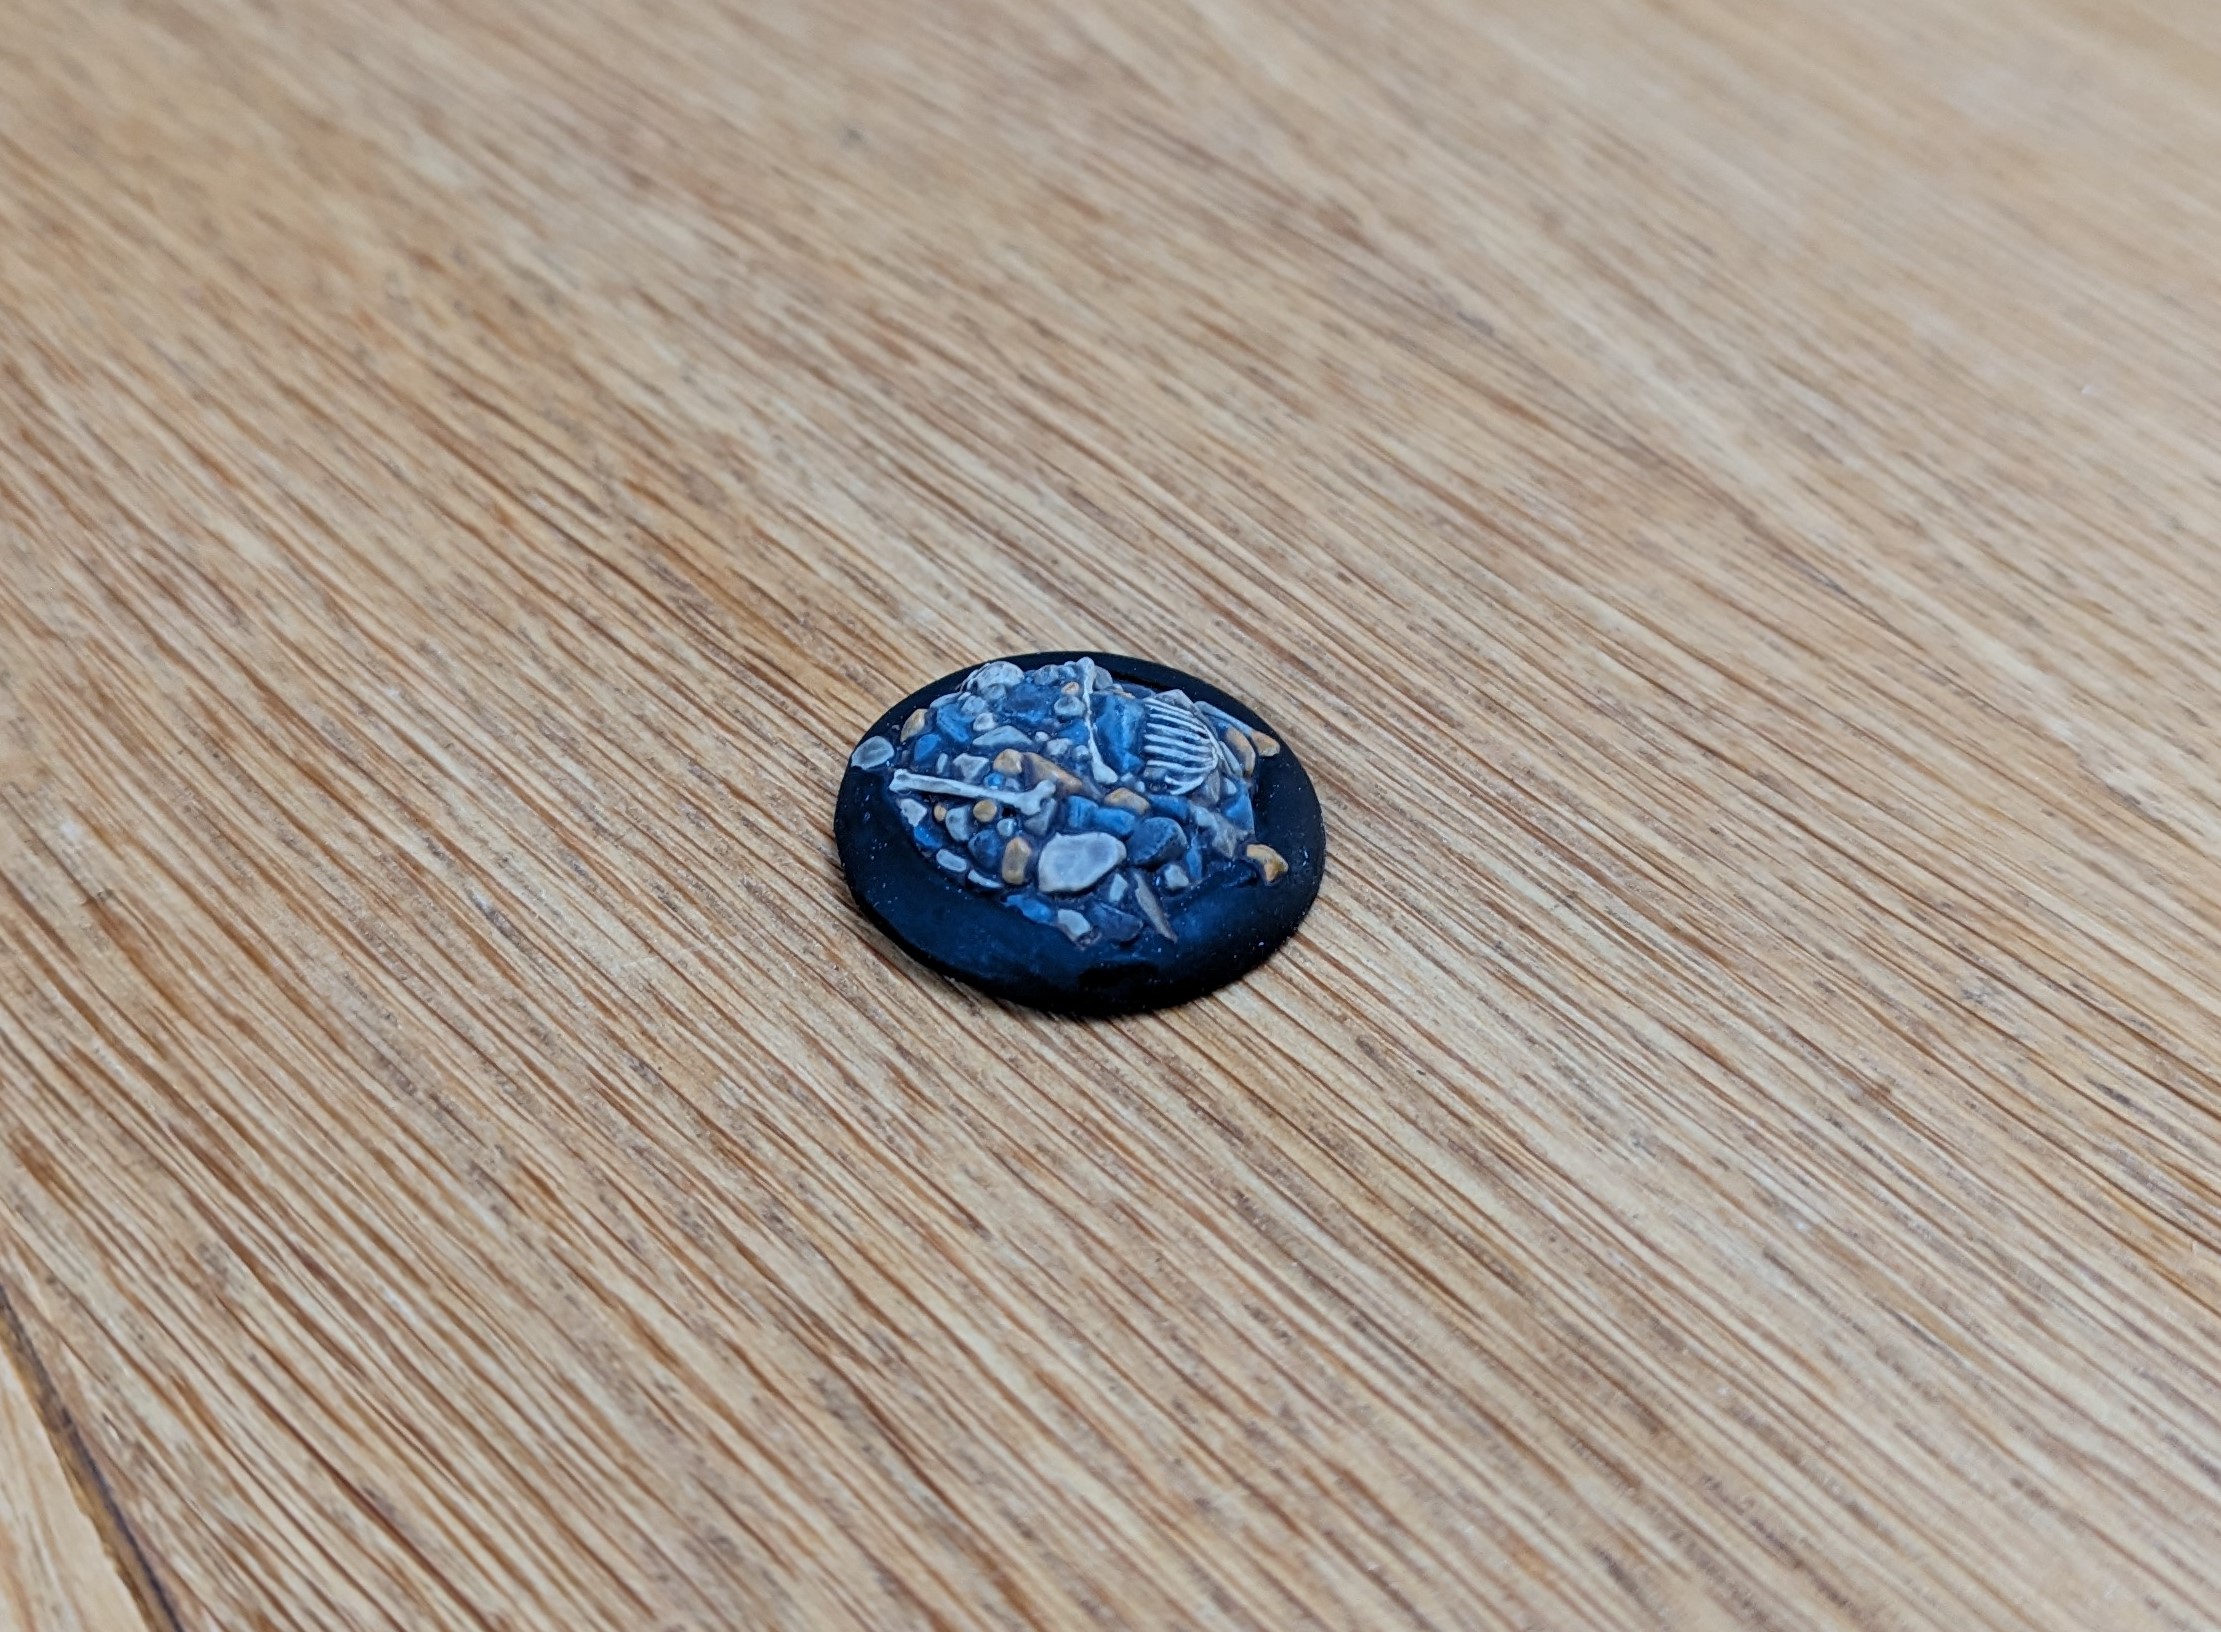
For the rubbish pile, I’ve searched the 3d printing sites for a small pile of rubble which I’ve digitally attached to a 30mm base and then printed out. I’ve picked out the various rocks with differing shades to provide a bit of contrast and then just given everything a heavy wash. It took less than half an hour to complete.
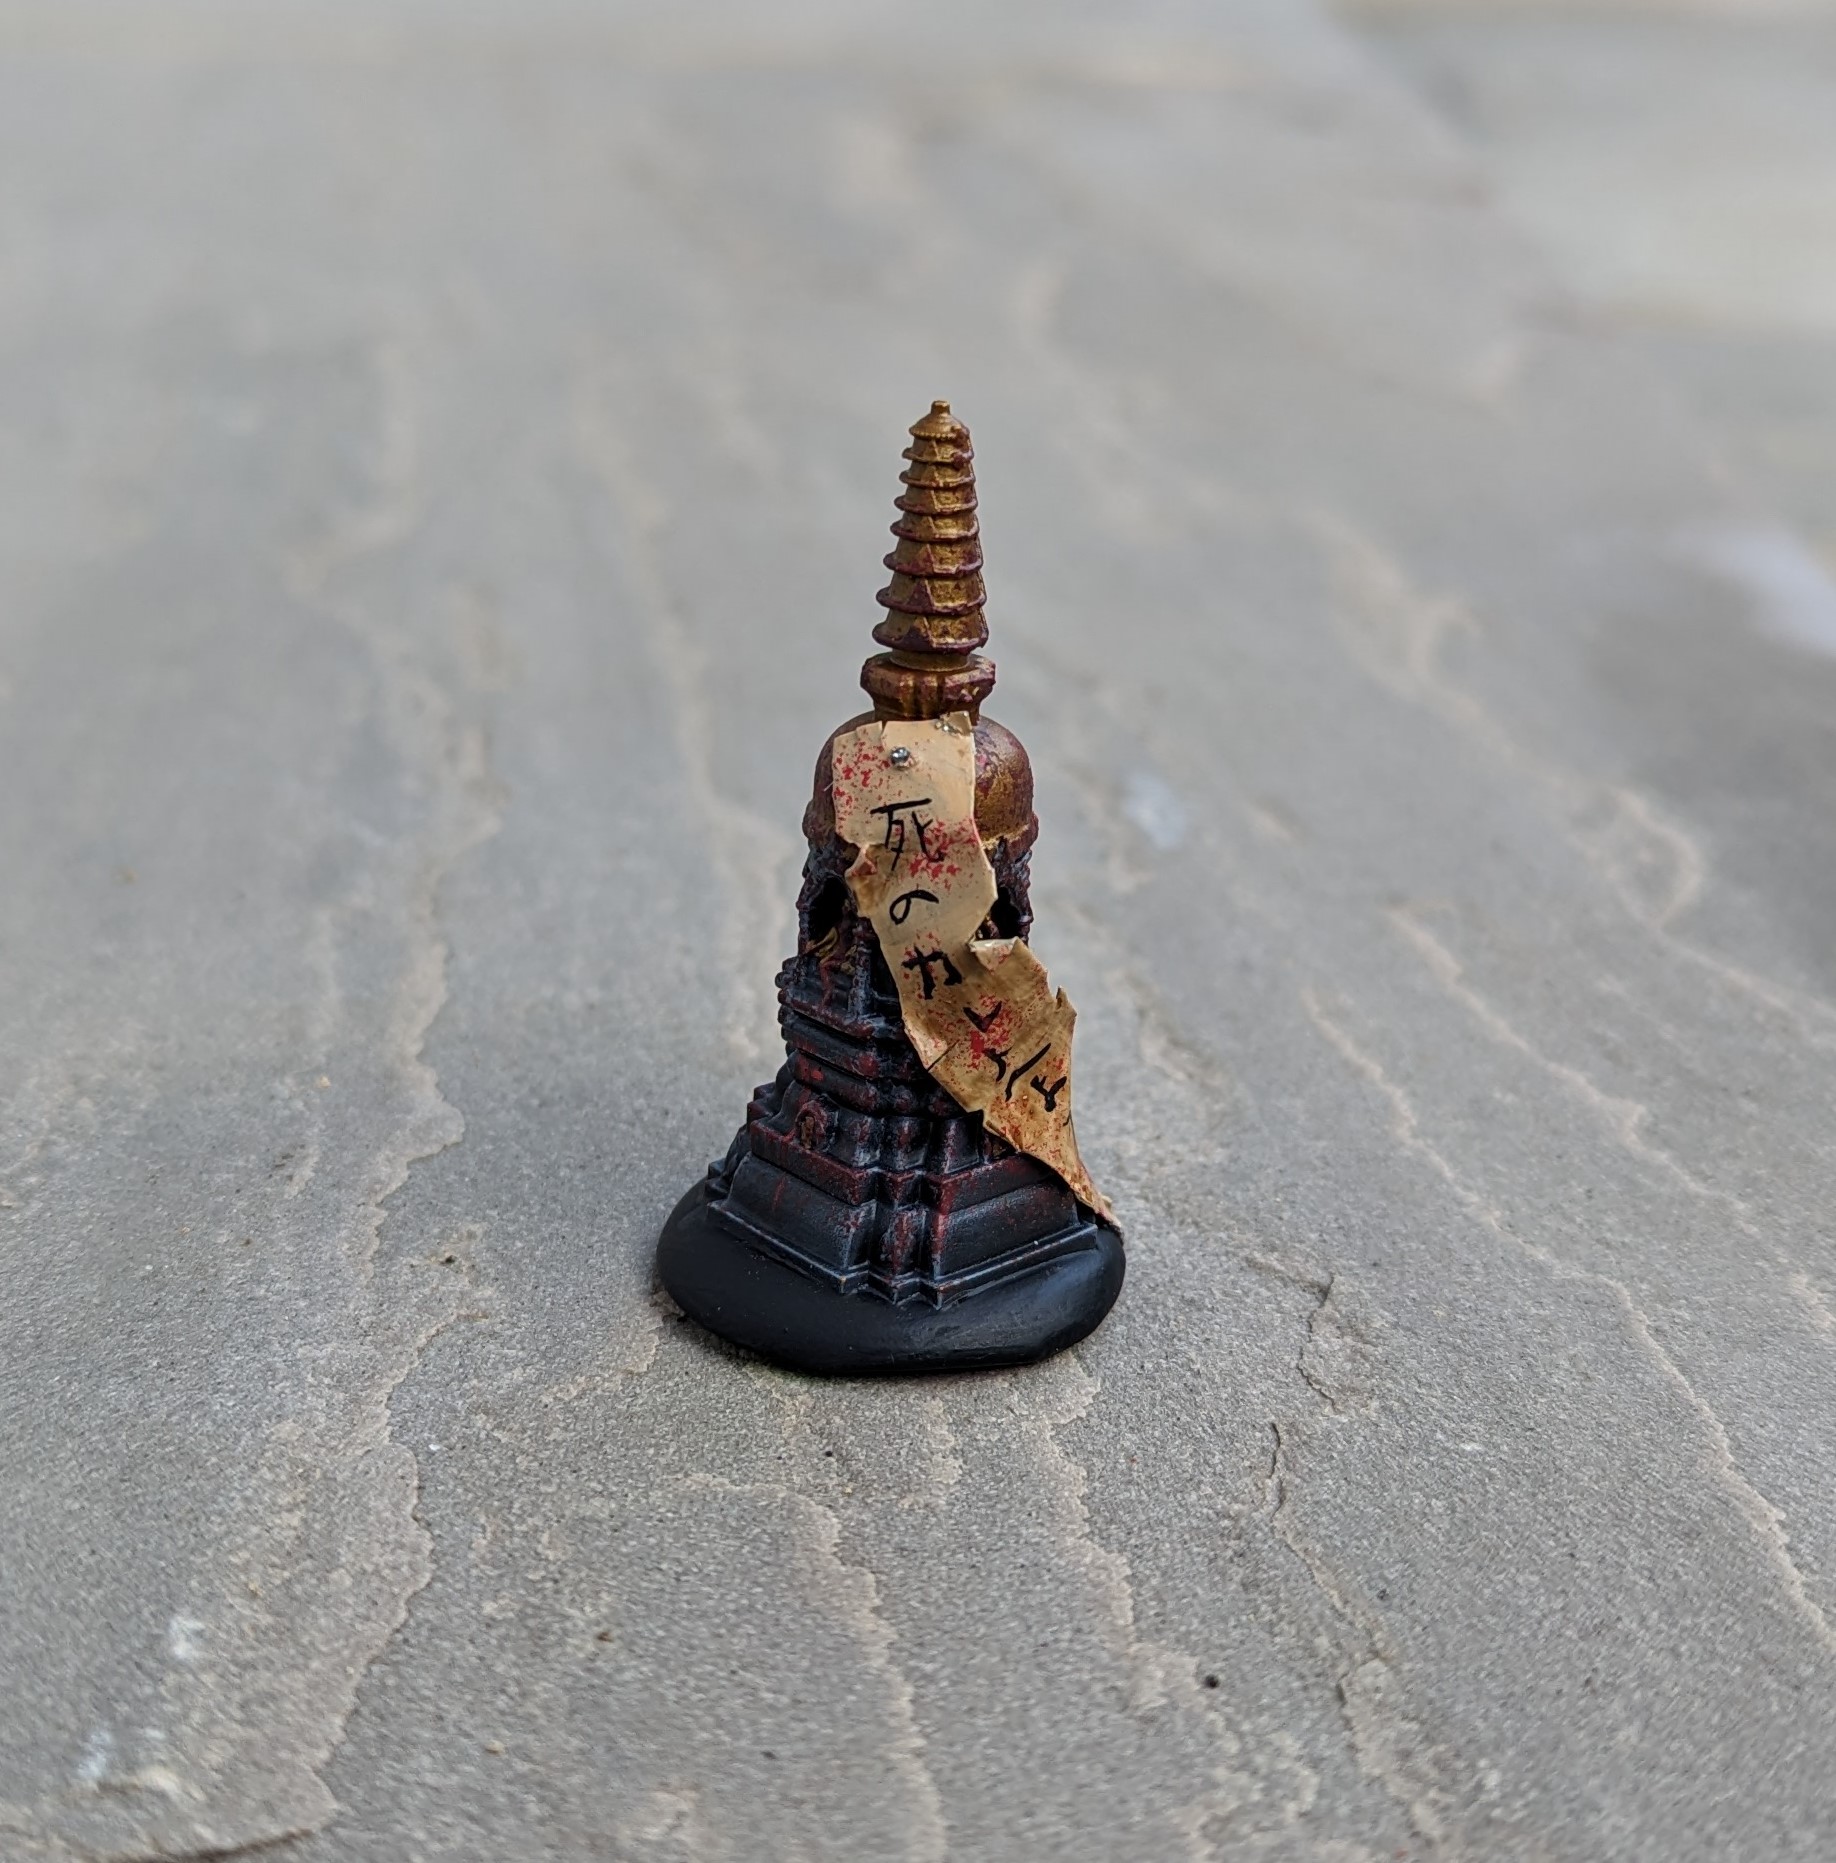
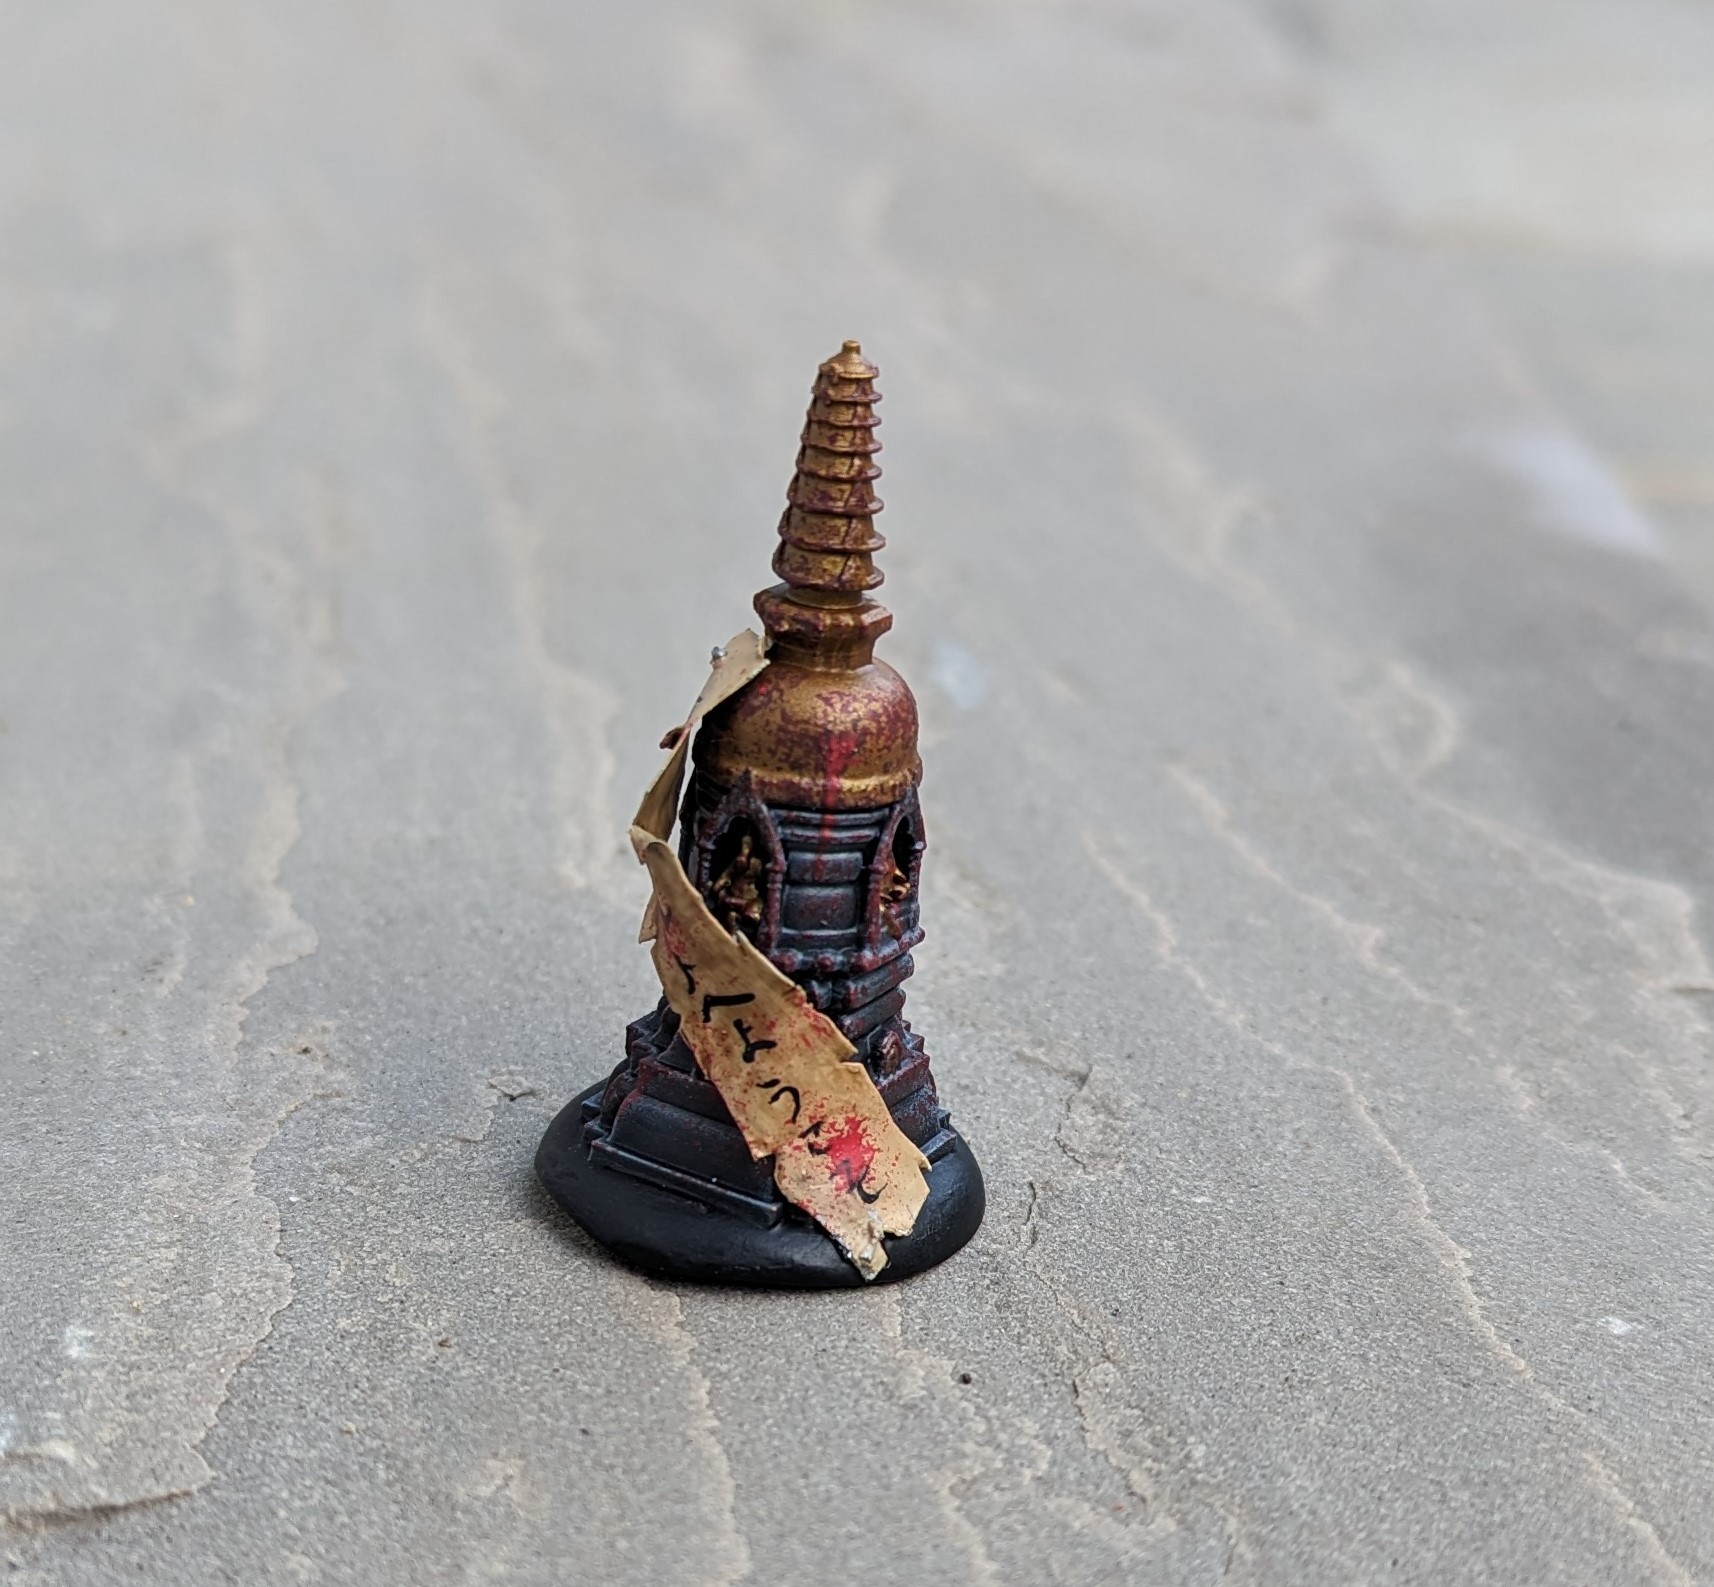
A honden is the centre of a shrine and the most holy place within it. It is usually represented by a mirror or often a statue. In this case, I’ve chosen to go with a stupa that has been digitally captured from a shrine and then turned into an stl file. I’ve not opted for a statue as there are other terrain pieces that are represented by statues and I wanted this to look a little different. Again, I’ve opted for a simple painting approach. A dark grey for the stone which I’ve given a wash of black and then a dry brush. The top is shining bronze which I’ve then gently dry brushed a grey over to take the shine off a litte.
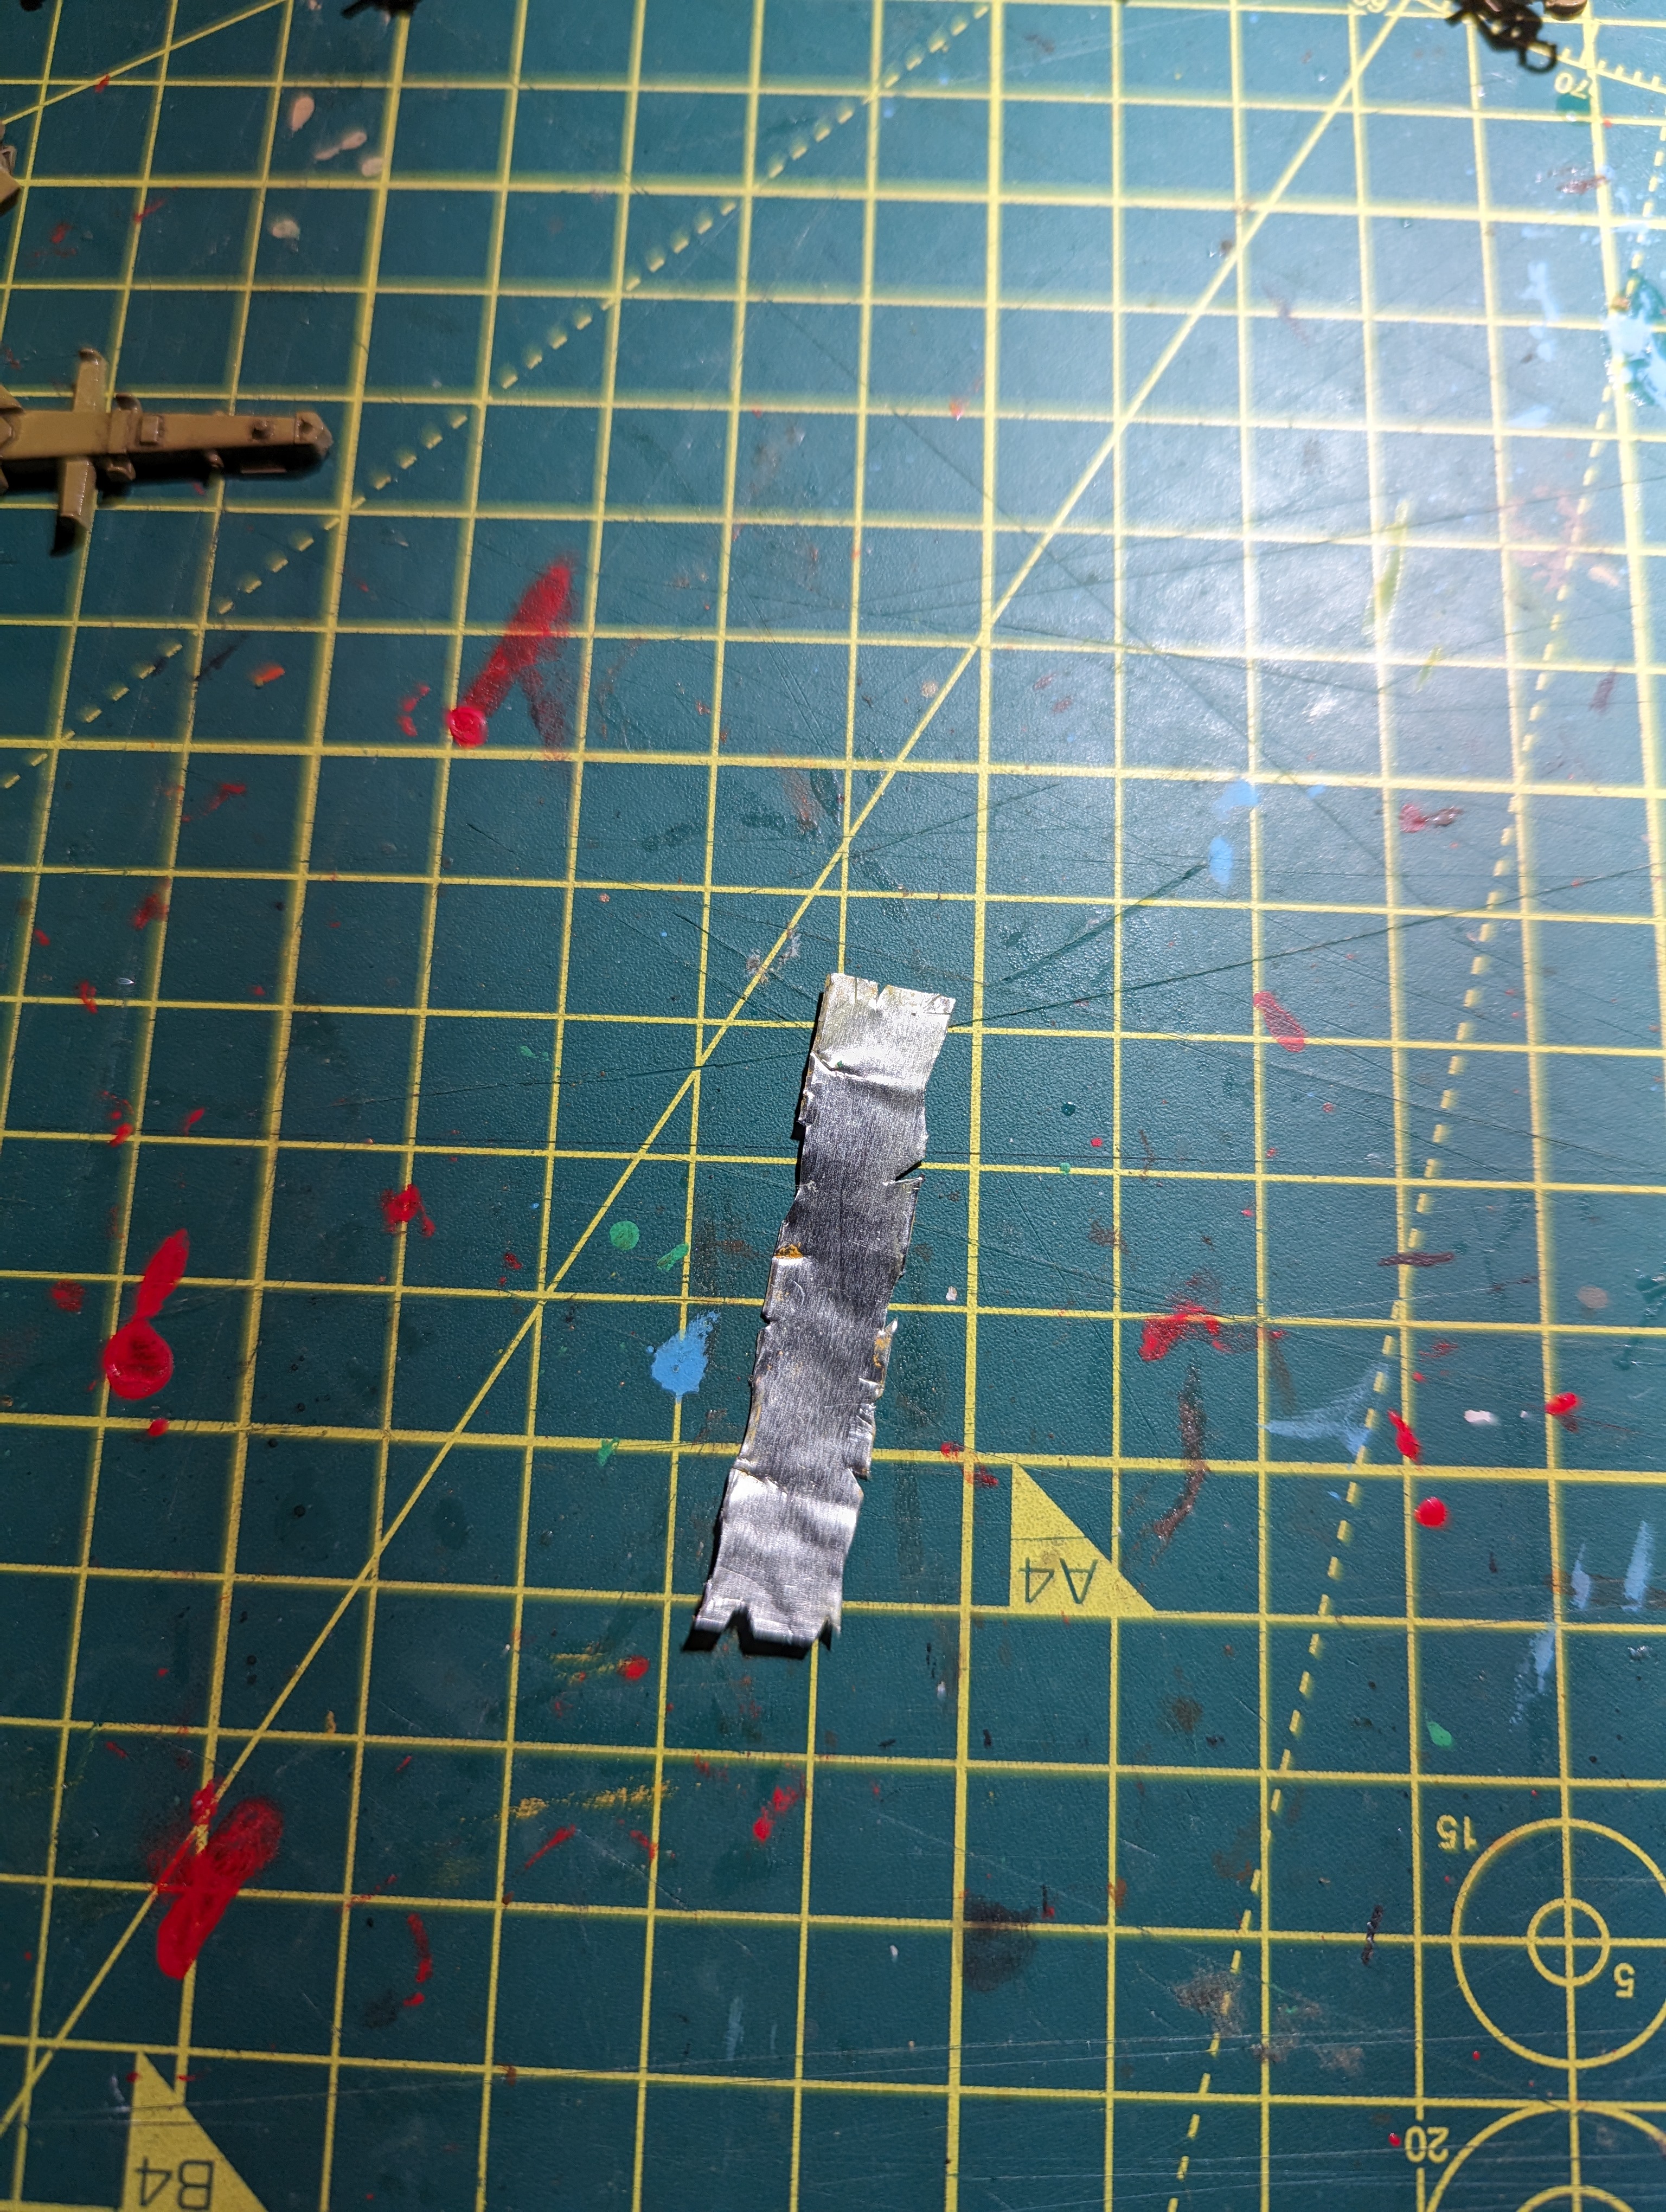
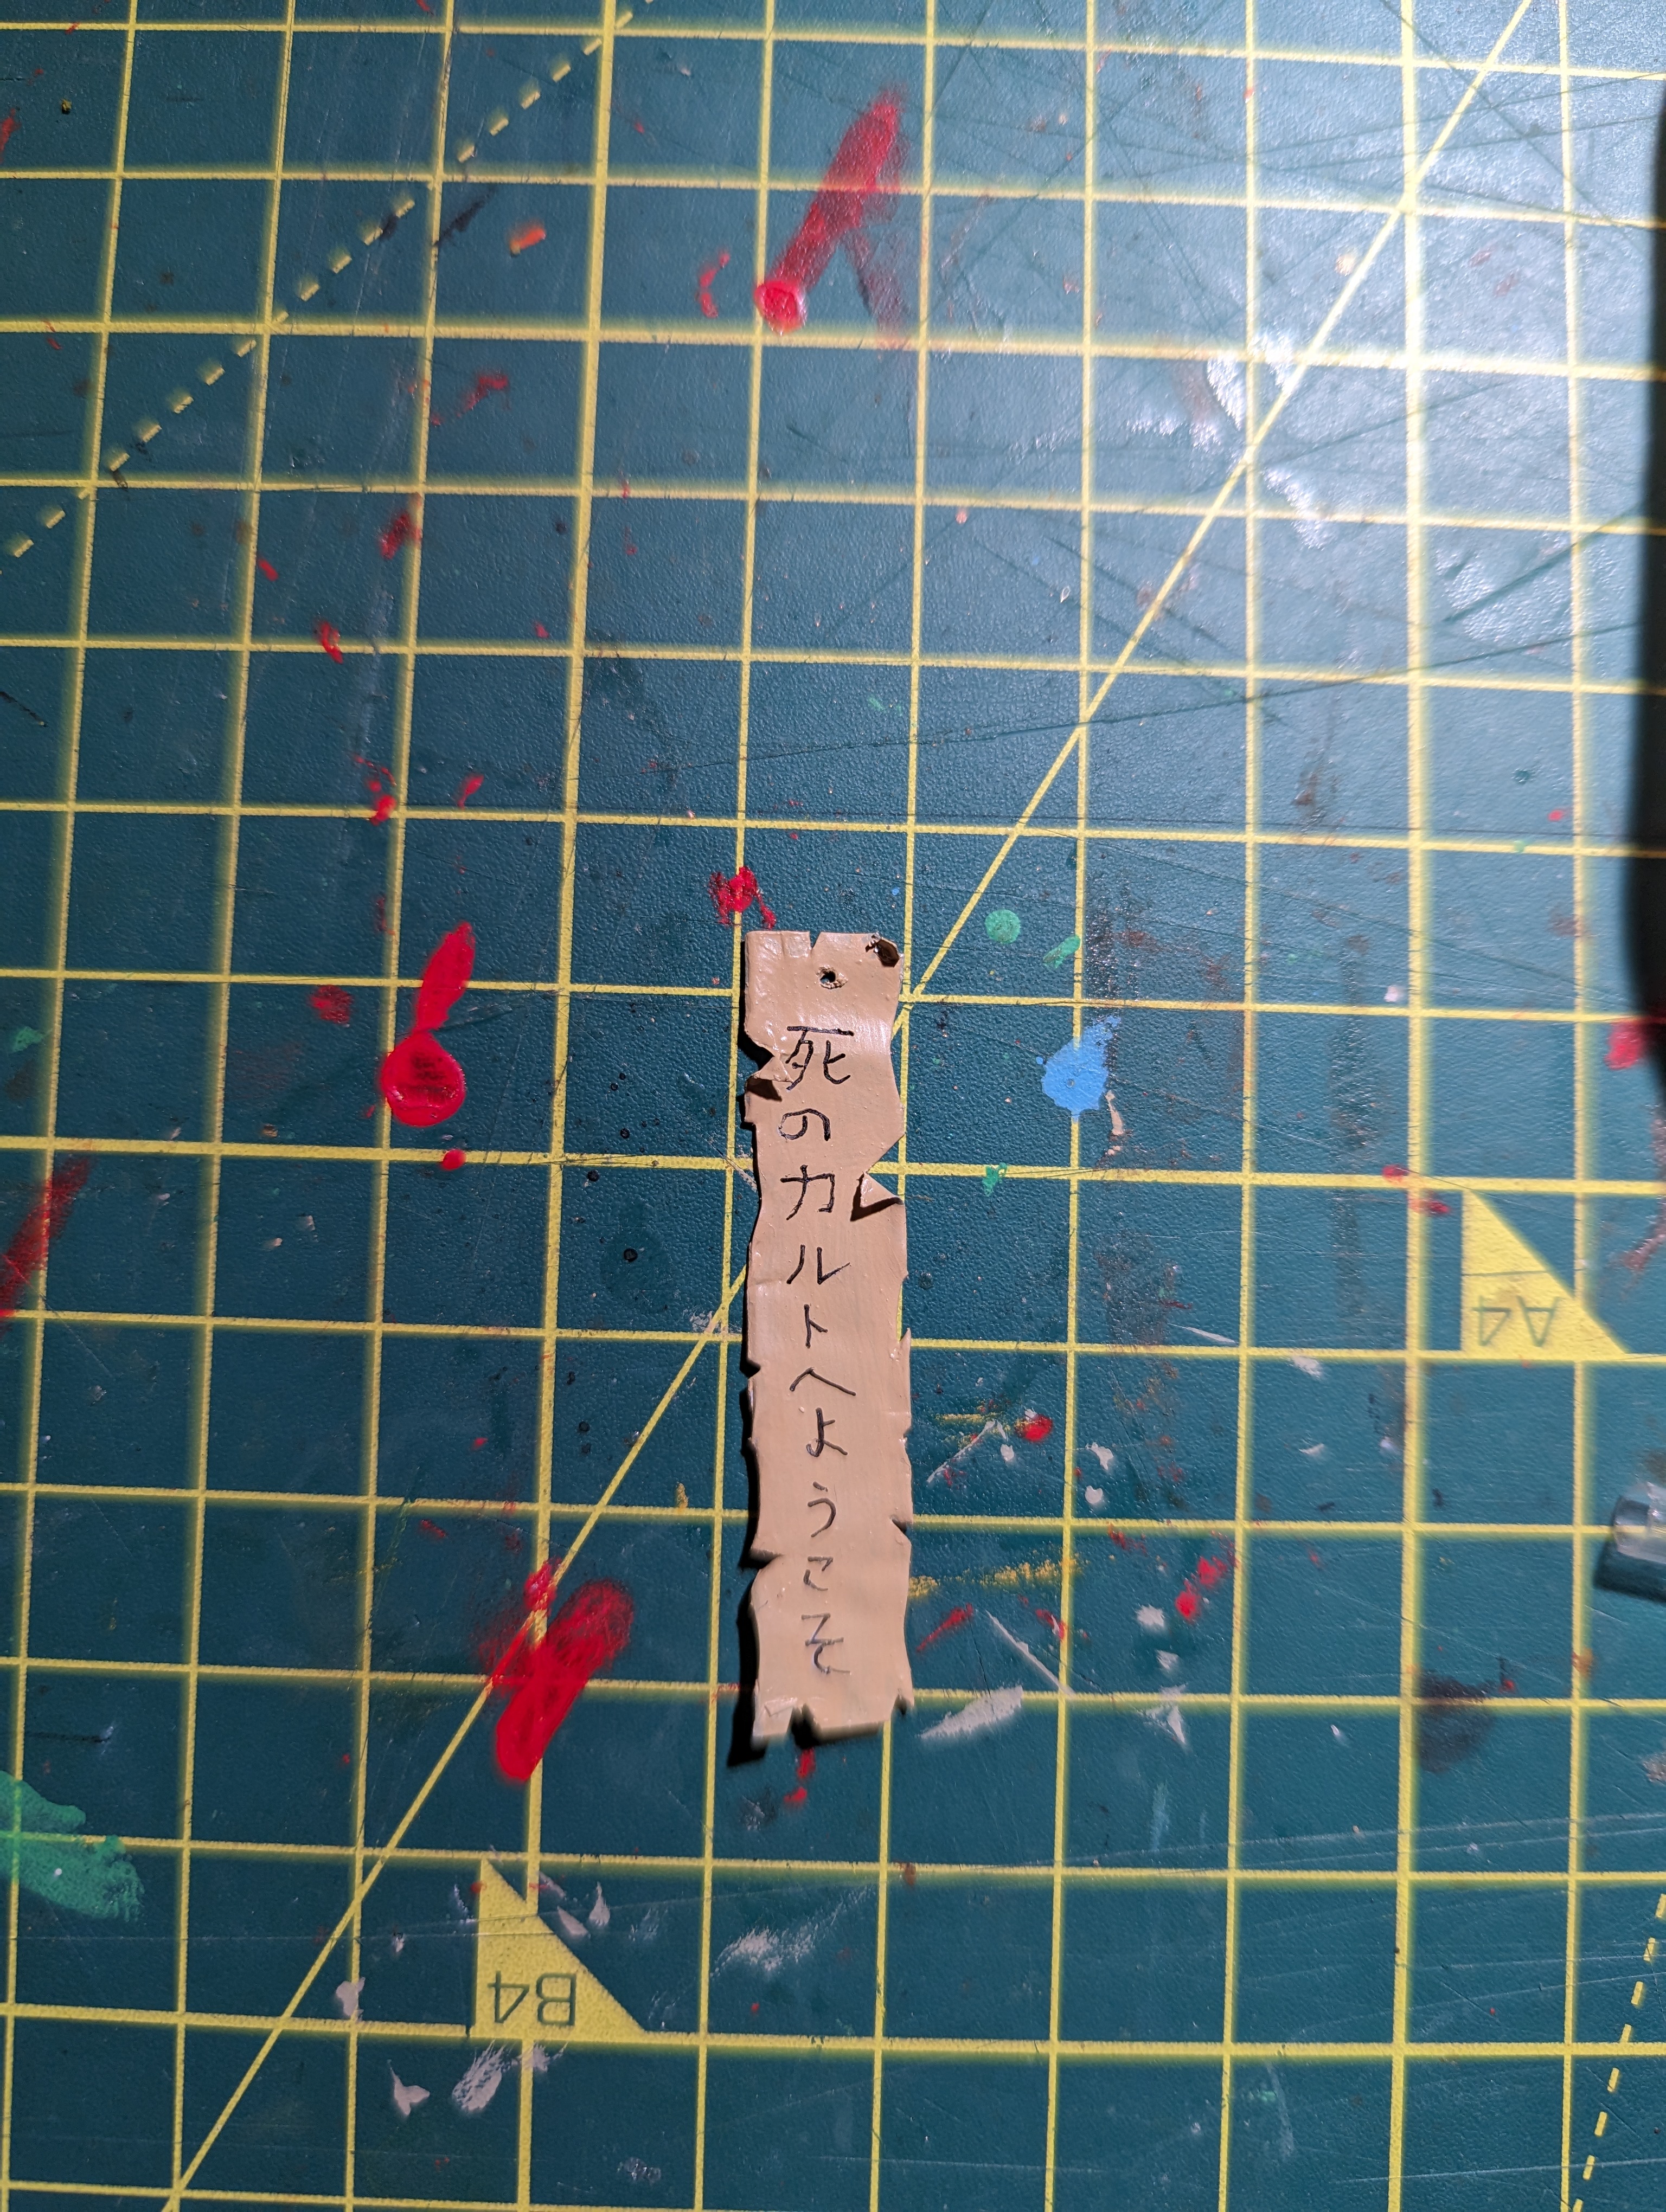
To make it cursed, I’ve stippled a reddish brown over the model using a sponge to represent dried blood followed by a lighter stippling of red as the ‘fresh’ blood. The banner is cut from the metal foil found around the top of wine bottles. This did of course mean that I had to drink the bottle of wine first, but I was prepared to make that sacrifice. After cutting the foil to the correct shape, I’ve broken up the uniformity of the edges to make it look more battered and ripped/torn. I used Google translate for the lettering, it’s supposed to say ‘join the cult’ but I’ll settle for not insulting any Japanese who read it.
Battle Report No. 4
Game 4
Time for another game. My son wanted to play a bigger game and suggested 150 points. While Bushido will stretch to that limit, it will take some time to complete. I’m also not sure I have enough Cult of Yurei models to get to 150 points, so I talked him down to 120. This should allow another couple of models per warband and/or a few more enhancement cards to be added. My son also suggested that the game should be first to destroy 50 points of enemy models, to which I agreed.
For my warband, I went with the following,
- Mo Ises (an assassin that likes stabbing people in the back)
- Mokoti (dreadful in combat but can control enemy models)
- Umeka (another assassin armed with a pair of scissors – I guess she also likes hobby crafting)
- Yama Uba
- Risu (A pitch fork wielding nutter who can poison people from afar) who I’ve also given an enhancement card Violence Fetish to provide a bigger punch in combat
- Ibara (Can handle himself in combat and can throw some fire around at range)
- Tenbatsu (another ronin who’s a combat monster)
Drain Spirit Event. This allows me to steal a couple of ki tokens from an enemy model
Feed on Fear. Every time an enemy fails a Fear test, this card gains a Ki token. When it gets to 4 ki, I lose the card and can distribute the ki across my models
Crush the oppressed. When I play this card, all of the state markers on the enemy get doubled
Cursed Honden. This is a terrain piece. At the start of each turn, any enemy model within 4” loses a Ki token
My son opted for the following,
- Master Ekusa (who’s a monk riding a tortoise and can heal, remove activation tokens and stops attacks due to his zen like demeanour)
- Taiyo (a ronin from the starter set who has a low points cost and is able to resupply friendly models. He’s also a Villager, allowing my son to take the two pit trap cards below)
- The Grey Pilgrim (a lightening wielding ronin)
- Kuma (an angry, bo staff wielding panda who can root opponents to the spot while slapping them around a lot)
- 2 Kami of the evening flame (a flame spirit that provides a boost to nearby monks with the flame speciality)
- Riku (a water monk with a massively powerful tsunami Ki feat and also quite handy in combat)
My son also took a lot of enhancement cards including his favourite trap cards and a couple of cards that allow him to generate extra Ki. The Temple of Rokan really excel when they have Ki, their Ki feats and abilities are very powerful. He also took two terrain pieces, the Gorinto which allows 1 model within 6” to generate an extra ki token. And a Roadside Idol that allows a model in base to base contact to generate Ki for an activation.
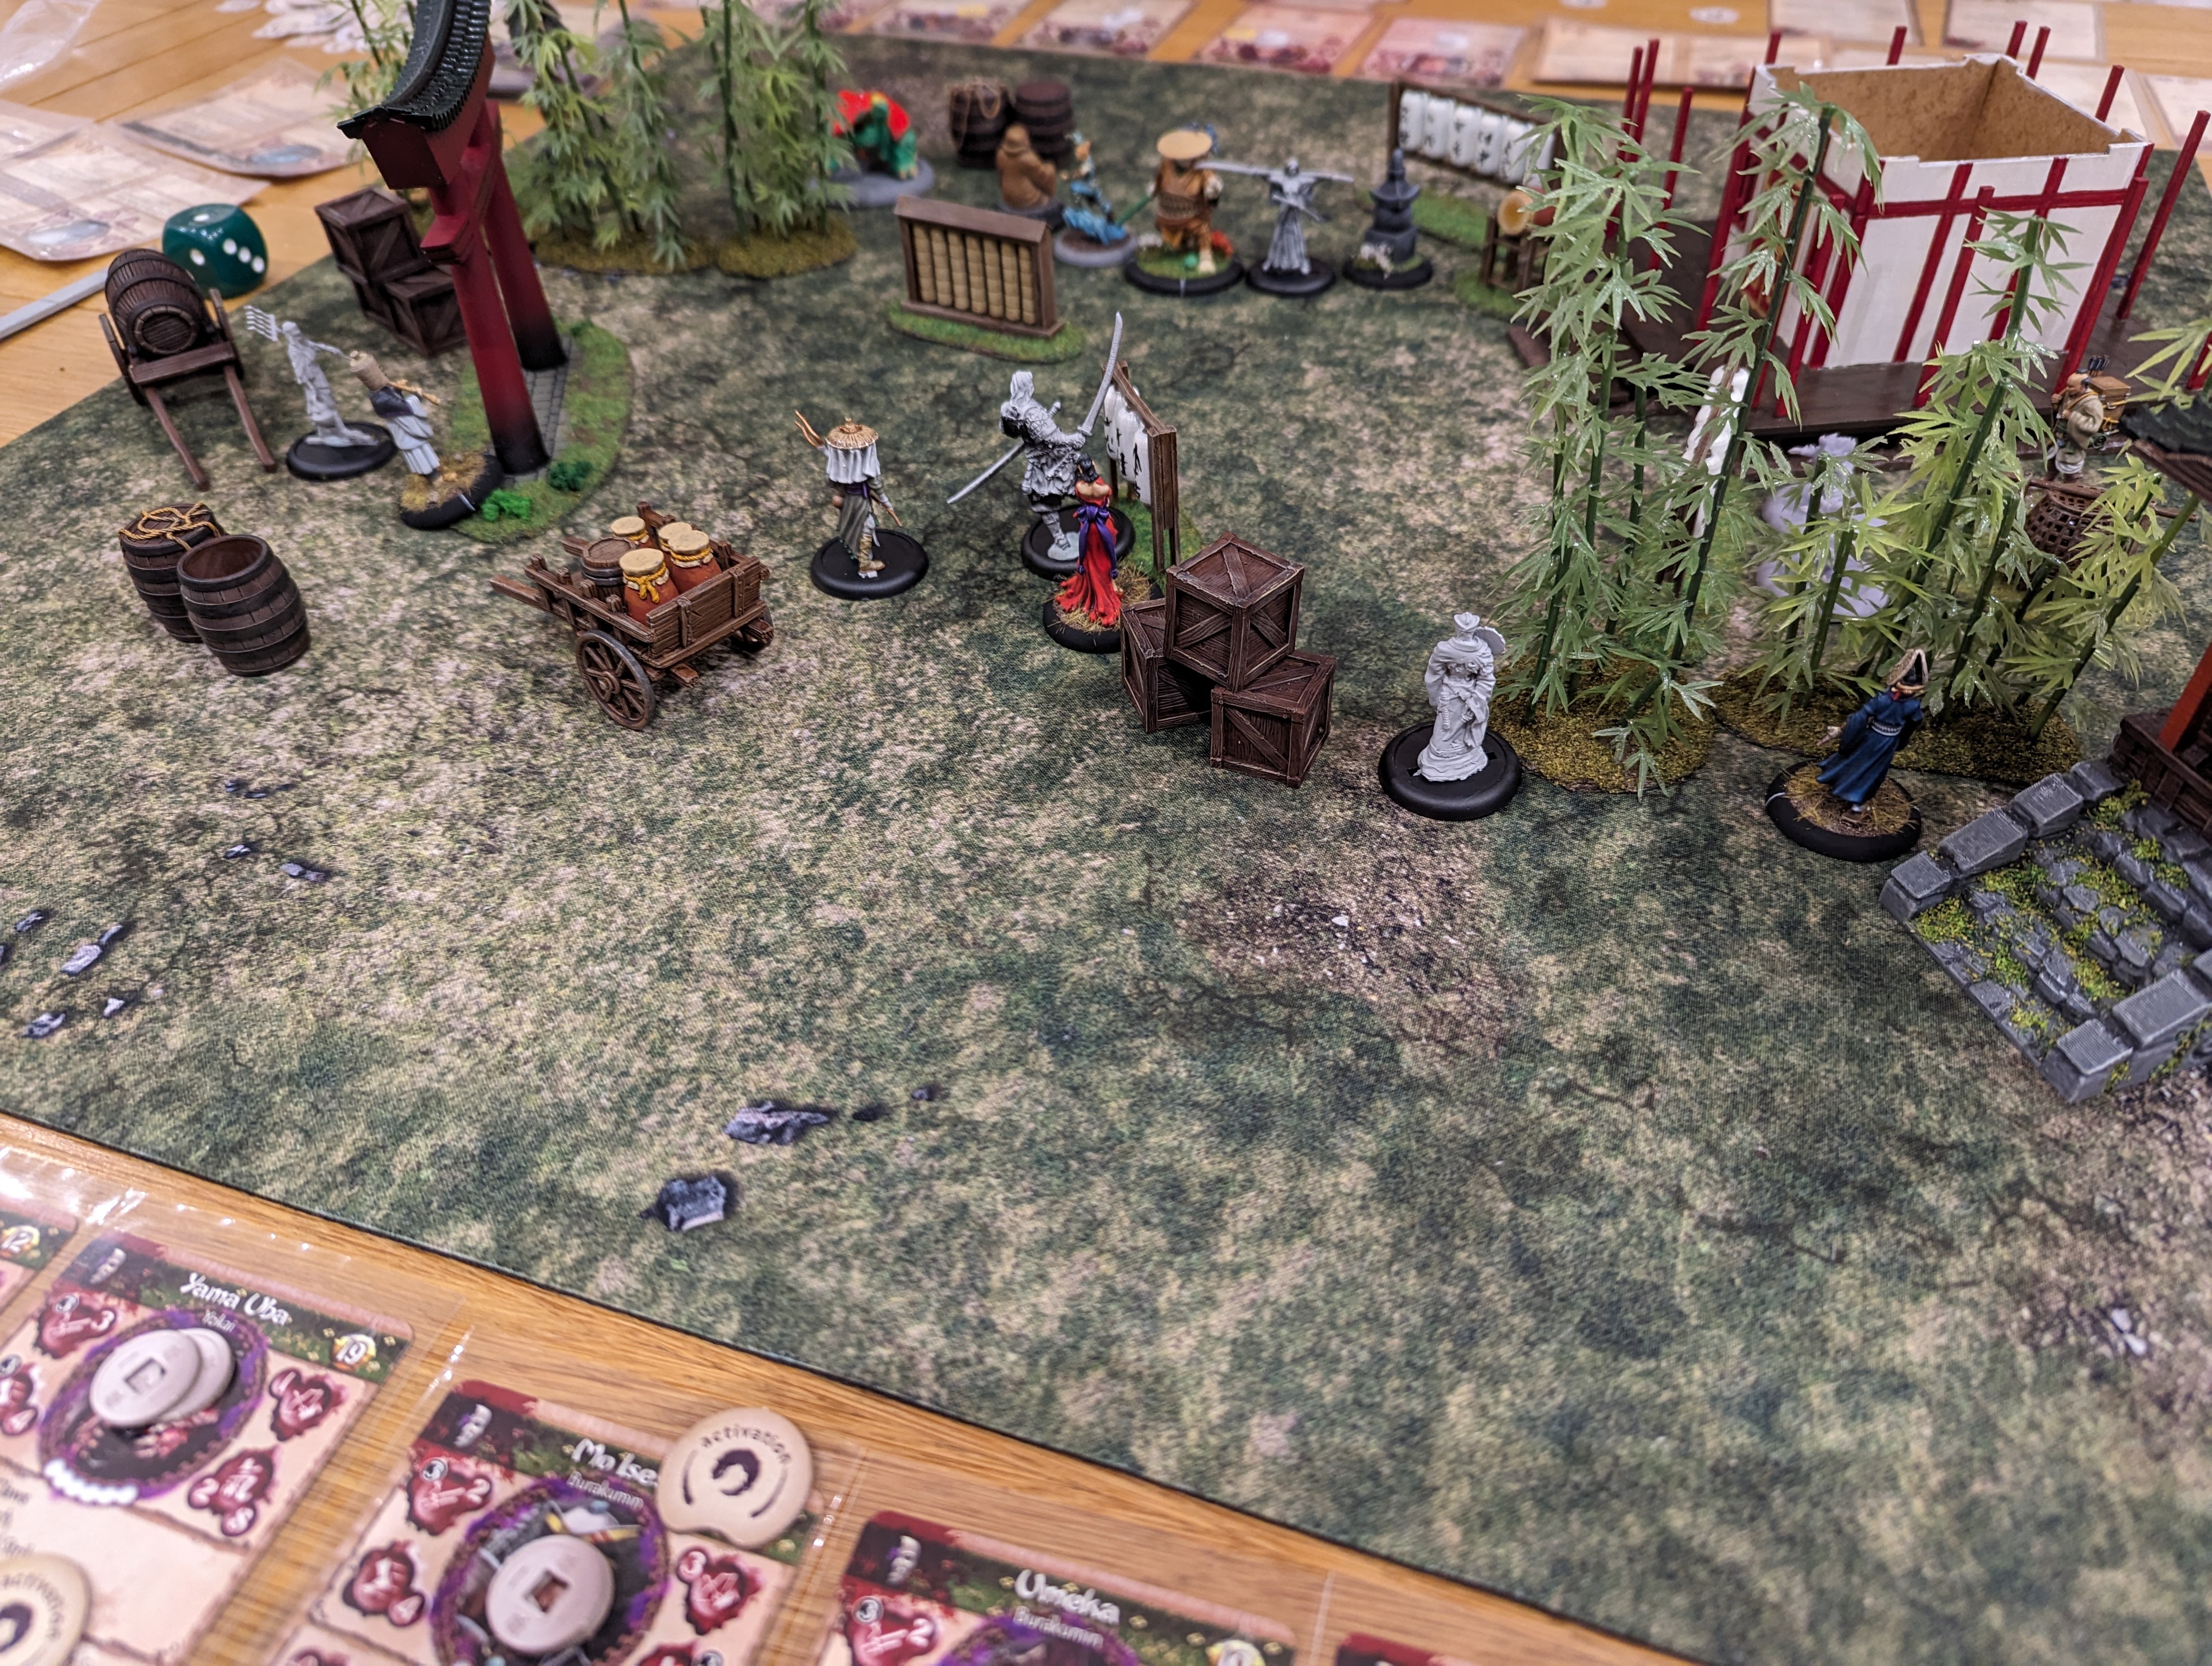
Turn 1.
My son clearly didn’t like the fact that I had bought some terrain that drains Ki from his models and went full tilt to destroy it. In hind sight, I probably deployed it too far forward as he was able to run the Grey Pilgrim forward into base contact with it and then spend an activation to destroy it. So much for my Cursed Honden, with the only small crumb of comfort being that it cost the Grey Pilgrim an activation to deal with it, so at least they weren’t going to be using their ranged weapon on my warband this turn. Otherwise turn 1 was the usual moving forward and getting in to position. Kuma was able to spend his Virtue token to generate an extra Ki ready for his next round shenanigans
Turn 2.
My son launched his fire kami attack this round. He’s clearly been doing his research and had read these cards in detail. I hadn’t. His first fire kami entered base contact with Tenbatsu and then promptly exploded. This applies a level 2 fire marker to Tenbatsu and all models within 2”. Unfortunately, I had grouped Yama Uba and Risu close to Tenbatsu as support and they also picked up a level 2 fire marker.
As retribution, Risu launched her special Ki ability of Mortal Corruption on Kuma and succeeded in giving the big panda 3 level 1 poison markers. My son then launched his second fire kami attack exploding it on Mo Ises and Umeka, who both pick up a level 3 fire marker. With most of my warband now on fire, my son moved the Grey Pilgrim forward and uses her special abilities Raijin Rage and Electrify which boosts her call lightening attack to ‘leap’ to another model within 3” of the first target and gives all attacks stun. The Grey Pilgrim then calls lightening against Tenbatsu which hits but fails to do any damage, but Tenbatsu does pick up a stunned marker to add to his fire marker. And then Raijins Rage allows my son to make a second attack against Risu which hits and does 2 damage as well as adding a stunned marker. (Stunned markers effectively require an activation to remove them or you act at reduced capacity when you do activate).
Kuma spends his virtue token which unlocks Master Ekusa’s ability to lift all tokens from a model and so Kuma loses all of his poison markers. Kuma also gains 2 Ki as well. Kuma then charges Tenbatsu and in the ensuing melee is able to inflict 2 damage on Tenbatsu. It’s clear over the games that we have played that my son has a particular dislike of Tenbatsu….
Mokoti, so far lurking around behind cover, attempts to control Kuma and succeeds in the Ki test. Kuma now picks up a control marker and, for his next activation at least, is part of my warband. I try to activate Umeka but my son plays one of his pit trap cards. Umeka is unable to pass the test to avoid it and my son rolls very well on his damage roll, killing Umeka outright. First blood (again) to my son.
Finally, I activate Mo Ises who is able to control Taiyo and give him a control marker. I then play my crush the oppressed card and double all of the markers that I have handed out this turn, meaning both Taiyo and Kuma pick up an extra control marker.
At the end of the turn, the fire markers are removed meaning that Tenbatsu, Yama Uba, Risu and Mo Ises all take 2 damage each.
Turn 3
I immediately activate Kuma and spend both control markers to have him charge the grey pilgrim but unfortunately he’s not as effective when fighting for me and does no damage. The Grey Pilgrim calls lightening again on Tenbatsu doing 2 damage and, thanks to Raijins Rage, this leaps to Risu who is hit and killed. My son has already scored 21 points (Risu at 11 and Umeka at 10).
Riku triggers his Ki feat Tsunami which pushes all models within 3” of Riku back until they hit either terrain or the edge of the board. This pushes Ibara back and way out of the fight.
Tenbatsu is now able to do his thing and attacks Master Ekusa. I pour a lot of Ki into getting extra dice and also use the Combo Attack special ability, which if my attack is successful, I get to make additional damage rolls. I’m able to break through Ekusa’s defence and deal 3 damage to the tortoise riding monk. Ekusa deals 1 damage back in return.
I activate Yama Uba and have her enter melee against a now exhausted Kuma (I spent both of his activation tokens charging the Grey Pilgrim). Yama Uba activated her Ki feat ‘morph’ which allows her to copy one of Kuma’s abilities until the end of the game. In this case she take Brutal which gives her a +1 to melee attacks. She then attacks Kuma and uses her Critical Strike attack. Yama Uba is rolling a lot of dice in this attack and succeeds in successfully hitting Kuma. With Critical Strike, a roll of a double on the damage roll automatically kills the target, regardless of how many wounds they have. And yes, a double 4 on the damage roll had me laughing and my son deeply upset with me. Kuma is dead and, at 22 points, I take the lead!
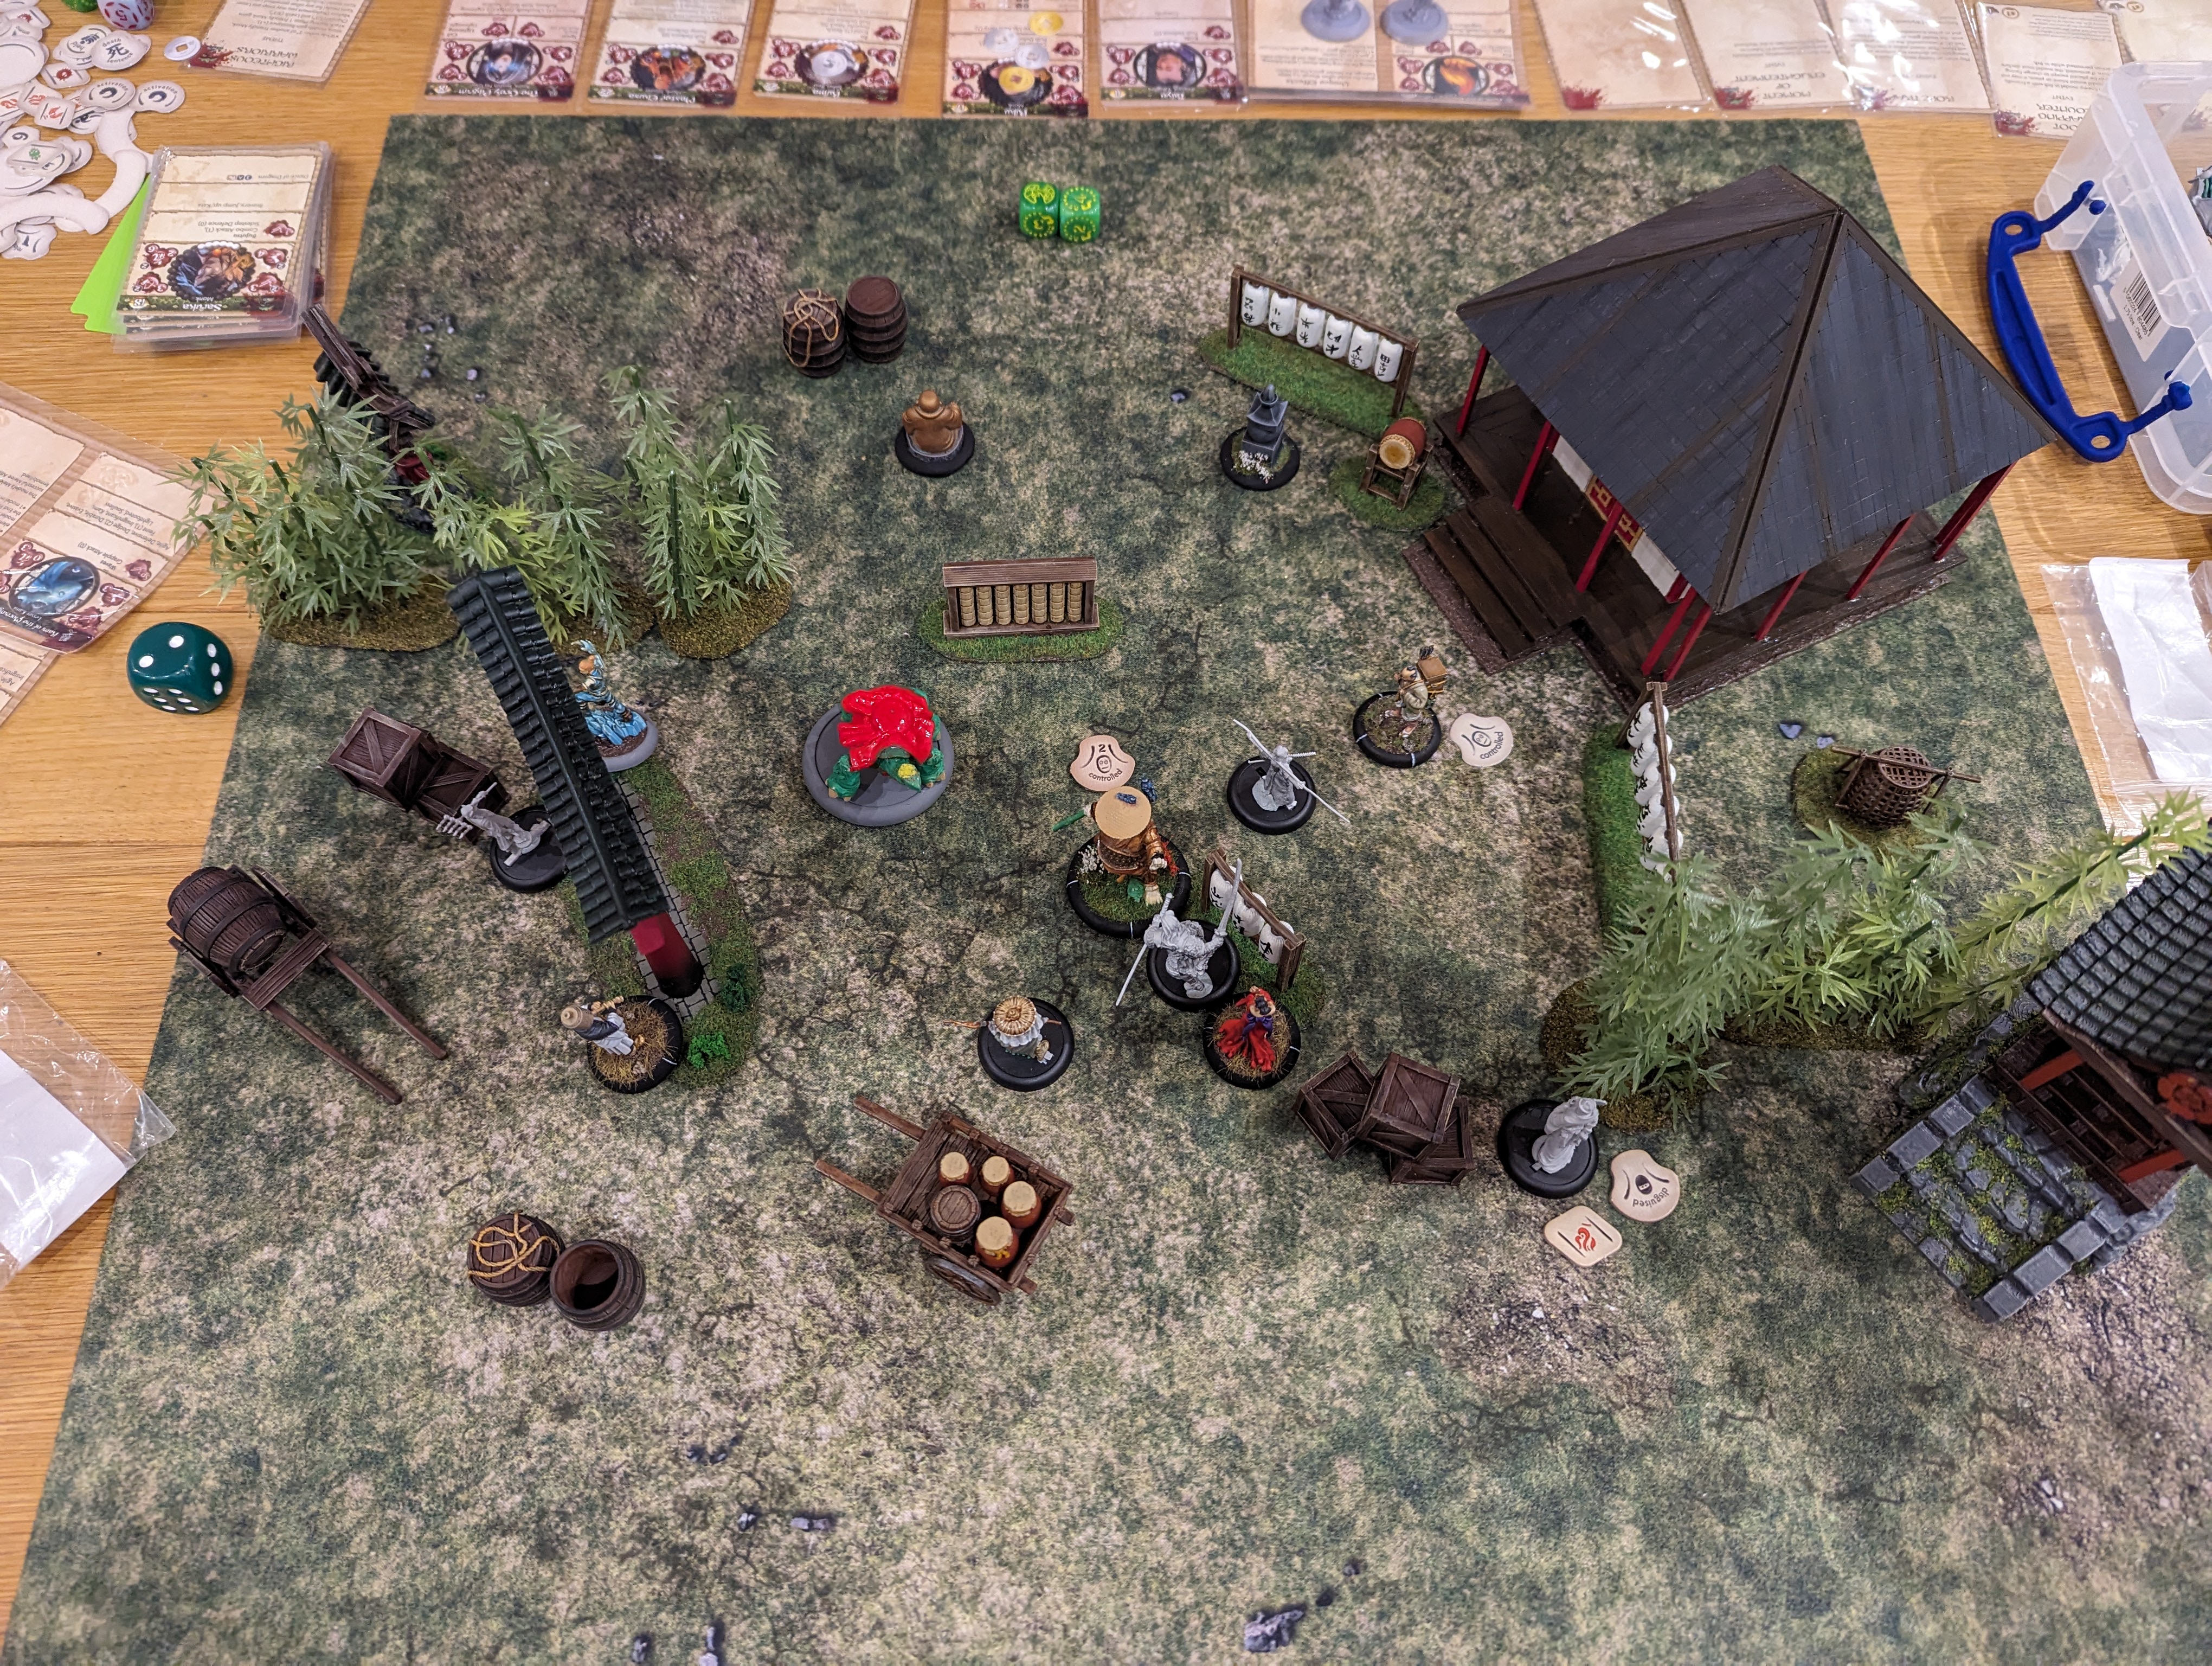
 End of turn 3
Turn 4
My son really needs (and wants) to kill Tenbatsu. He’s badly damaged and, at 27 points, he’ll be 2 points short of winning the game. With this in mind, he attacks with Riku but Tenbatsu is able to hold him off doing no damage, partly because I put a lot of dice into defence to protect Tenbatsu. Yama Uba then attacks Riku, who being on contact with two enemy models, will lose melee dice. Yama Uba is able to inflict 1 damage.
My son attacks Tenbatsu with Taiyo, creating a scrum of models in the middle. Taiyo is somehow (he’s not very good in combat) able to hand out another 1 damage to Tenbatsu. Yama Uba uses her second activation to attack Riku again. As Riku is now exhausted and outnumbered, he loses 2 melee dice giving Yama Uba (who still has Brutal) and significant advantage. It pays off as Yama Uba hits and deals out 6 damage to Riku, killing the water monk. That gives me another 17 points taking me to 39.
With Tenbatsu nearly dead, Ekusa attacks him and successfully hits. It’s enough to cause the 1 wound required to kill him and my son moves to within 2 points of victory.
My son then makes a mistake as he attacks Yama Uba, who while she has damage is a much more formidable combat opponent than other models on the table. Yama Uba also has Reach, which means that she will attack first in combat, which, coupled with Brutal, gives me a significant edge. We roll our dice and I get a significant success in the attack and the damage roll is the 2 damage required to kill Ekusa. This gives me enough points to win a very close and well fought game.
 End of the game and a win for the Cult of Yurei
The Cult Starter Set: Umeka
Umeka is a lovely lady who’s preferred weapon of choice is a pair of scissors. I assume that she likes to deliver these to the kidneys from behind. In game, she’s cheap and has the Assassin skill which gives her a boost to damage when attacking from outside of an enemy’s line of site. She also has a Ki feat that allows her to debuff enemy models making attacks against them deliver more damage. So handy to have loitering around on the sides waiting for the chance to sneak in and shank someone.
For the painting, I wanted to give her a colourful feel and opted for a deep sea blue for the coat. I opted for purple for the inner lining as this is my choice of faction colour to tie all of the models together. Both of these colours I’ve applied the base colour and then mixed up lighter and darker versions using an off-white and dark brown. This was then applied in glazes. The blue undercloth was a mix of different shades of blue, glazed on to create the highlights.
The white sash is luftwaffe grey and off white mixed together in differing amounts to create the shadow. Same for the stockings.
The hat is Iraqi sand given a wash and then a very careful picking out of the higher areas. Off white completed the ribbon in the hat.
Leg bindings are flat earth and then highlighted with light brown.
I wanted to give Umeka a sinister look, so decided to only paint the lower half of her face. The top half and the underside of the hat got painted black. I picked out the lips in a blood red to really emphasise the look.
The metal work was either viking gold or a polished metal.
In addition to the purple colour, all of my Cult figures will get the same base of a dry earth acrylic paste. This is given a brown wash and then I’ve applied some dead grass in patches.
And that’s my second model of the starter set finished.
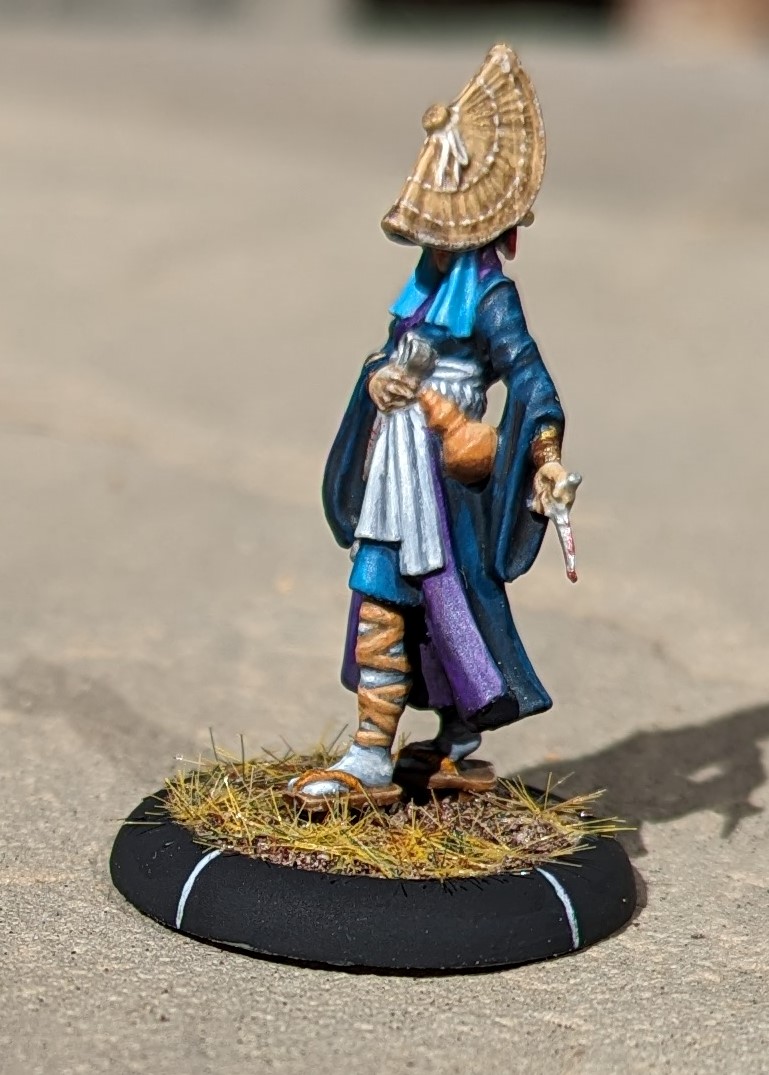
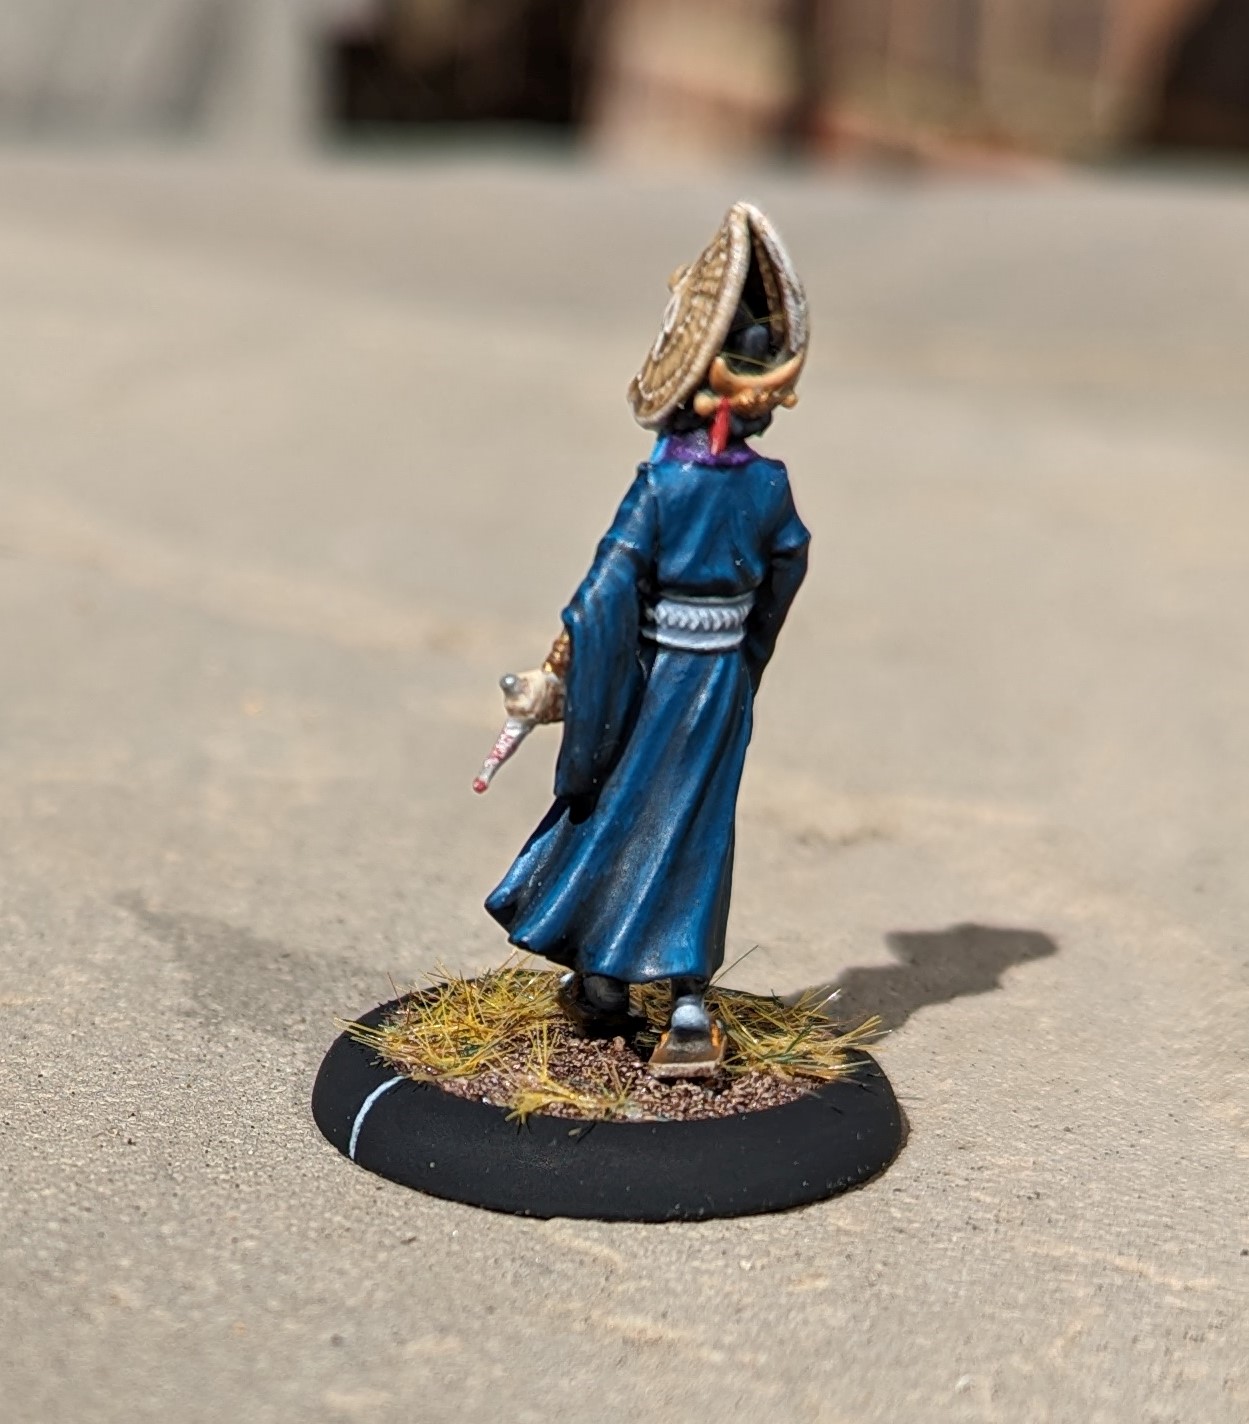
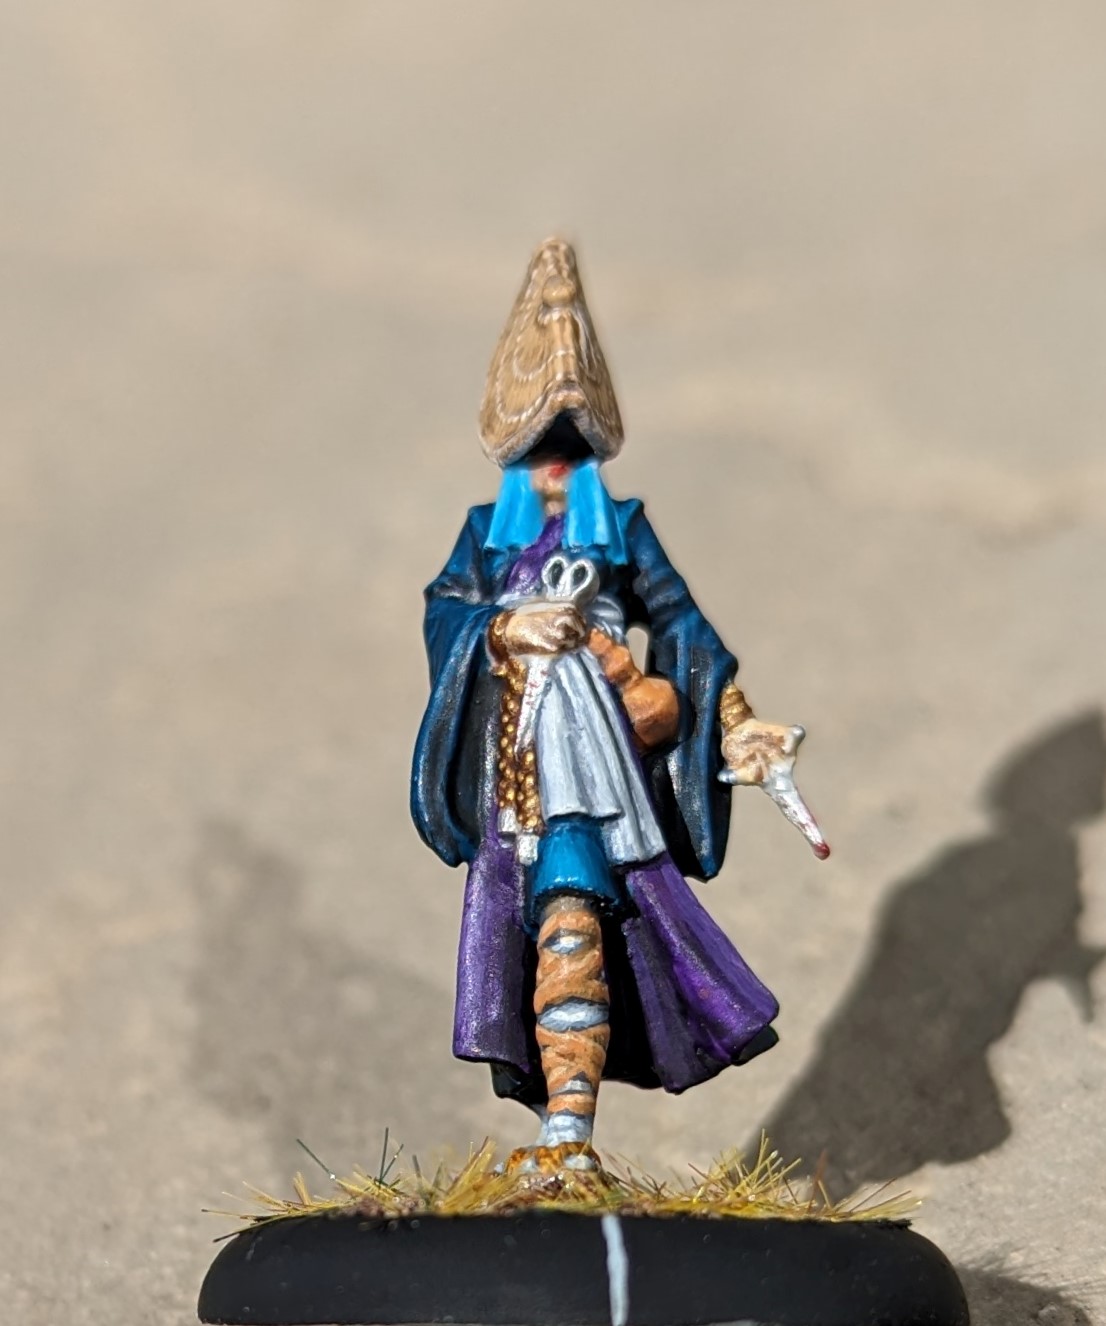 My attempt at a sinister face