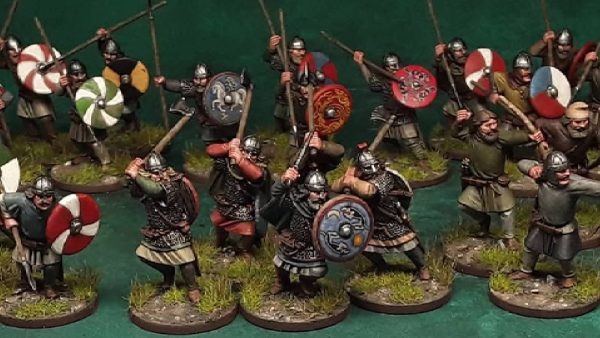


Redvers and Son Get Into Bushido


Recommendations: 1277
About the Project
My son and I were looking for a new game to get into. Something that was low on models, fun and reasonably quick to play. We decided on Bushido.
Related Game: Bushido
Related Genre: Fantasy
This Project is Active
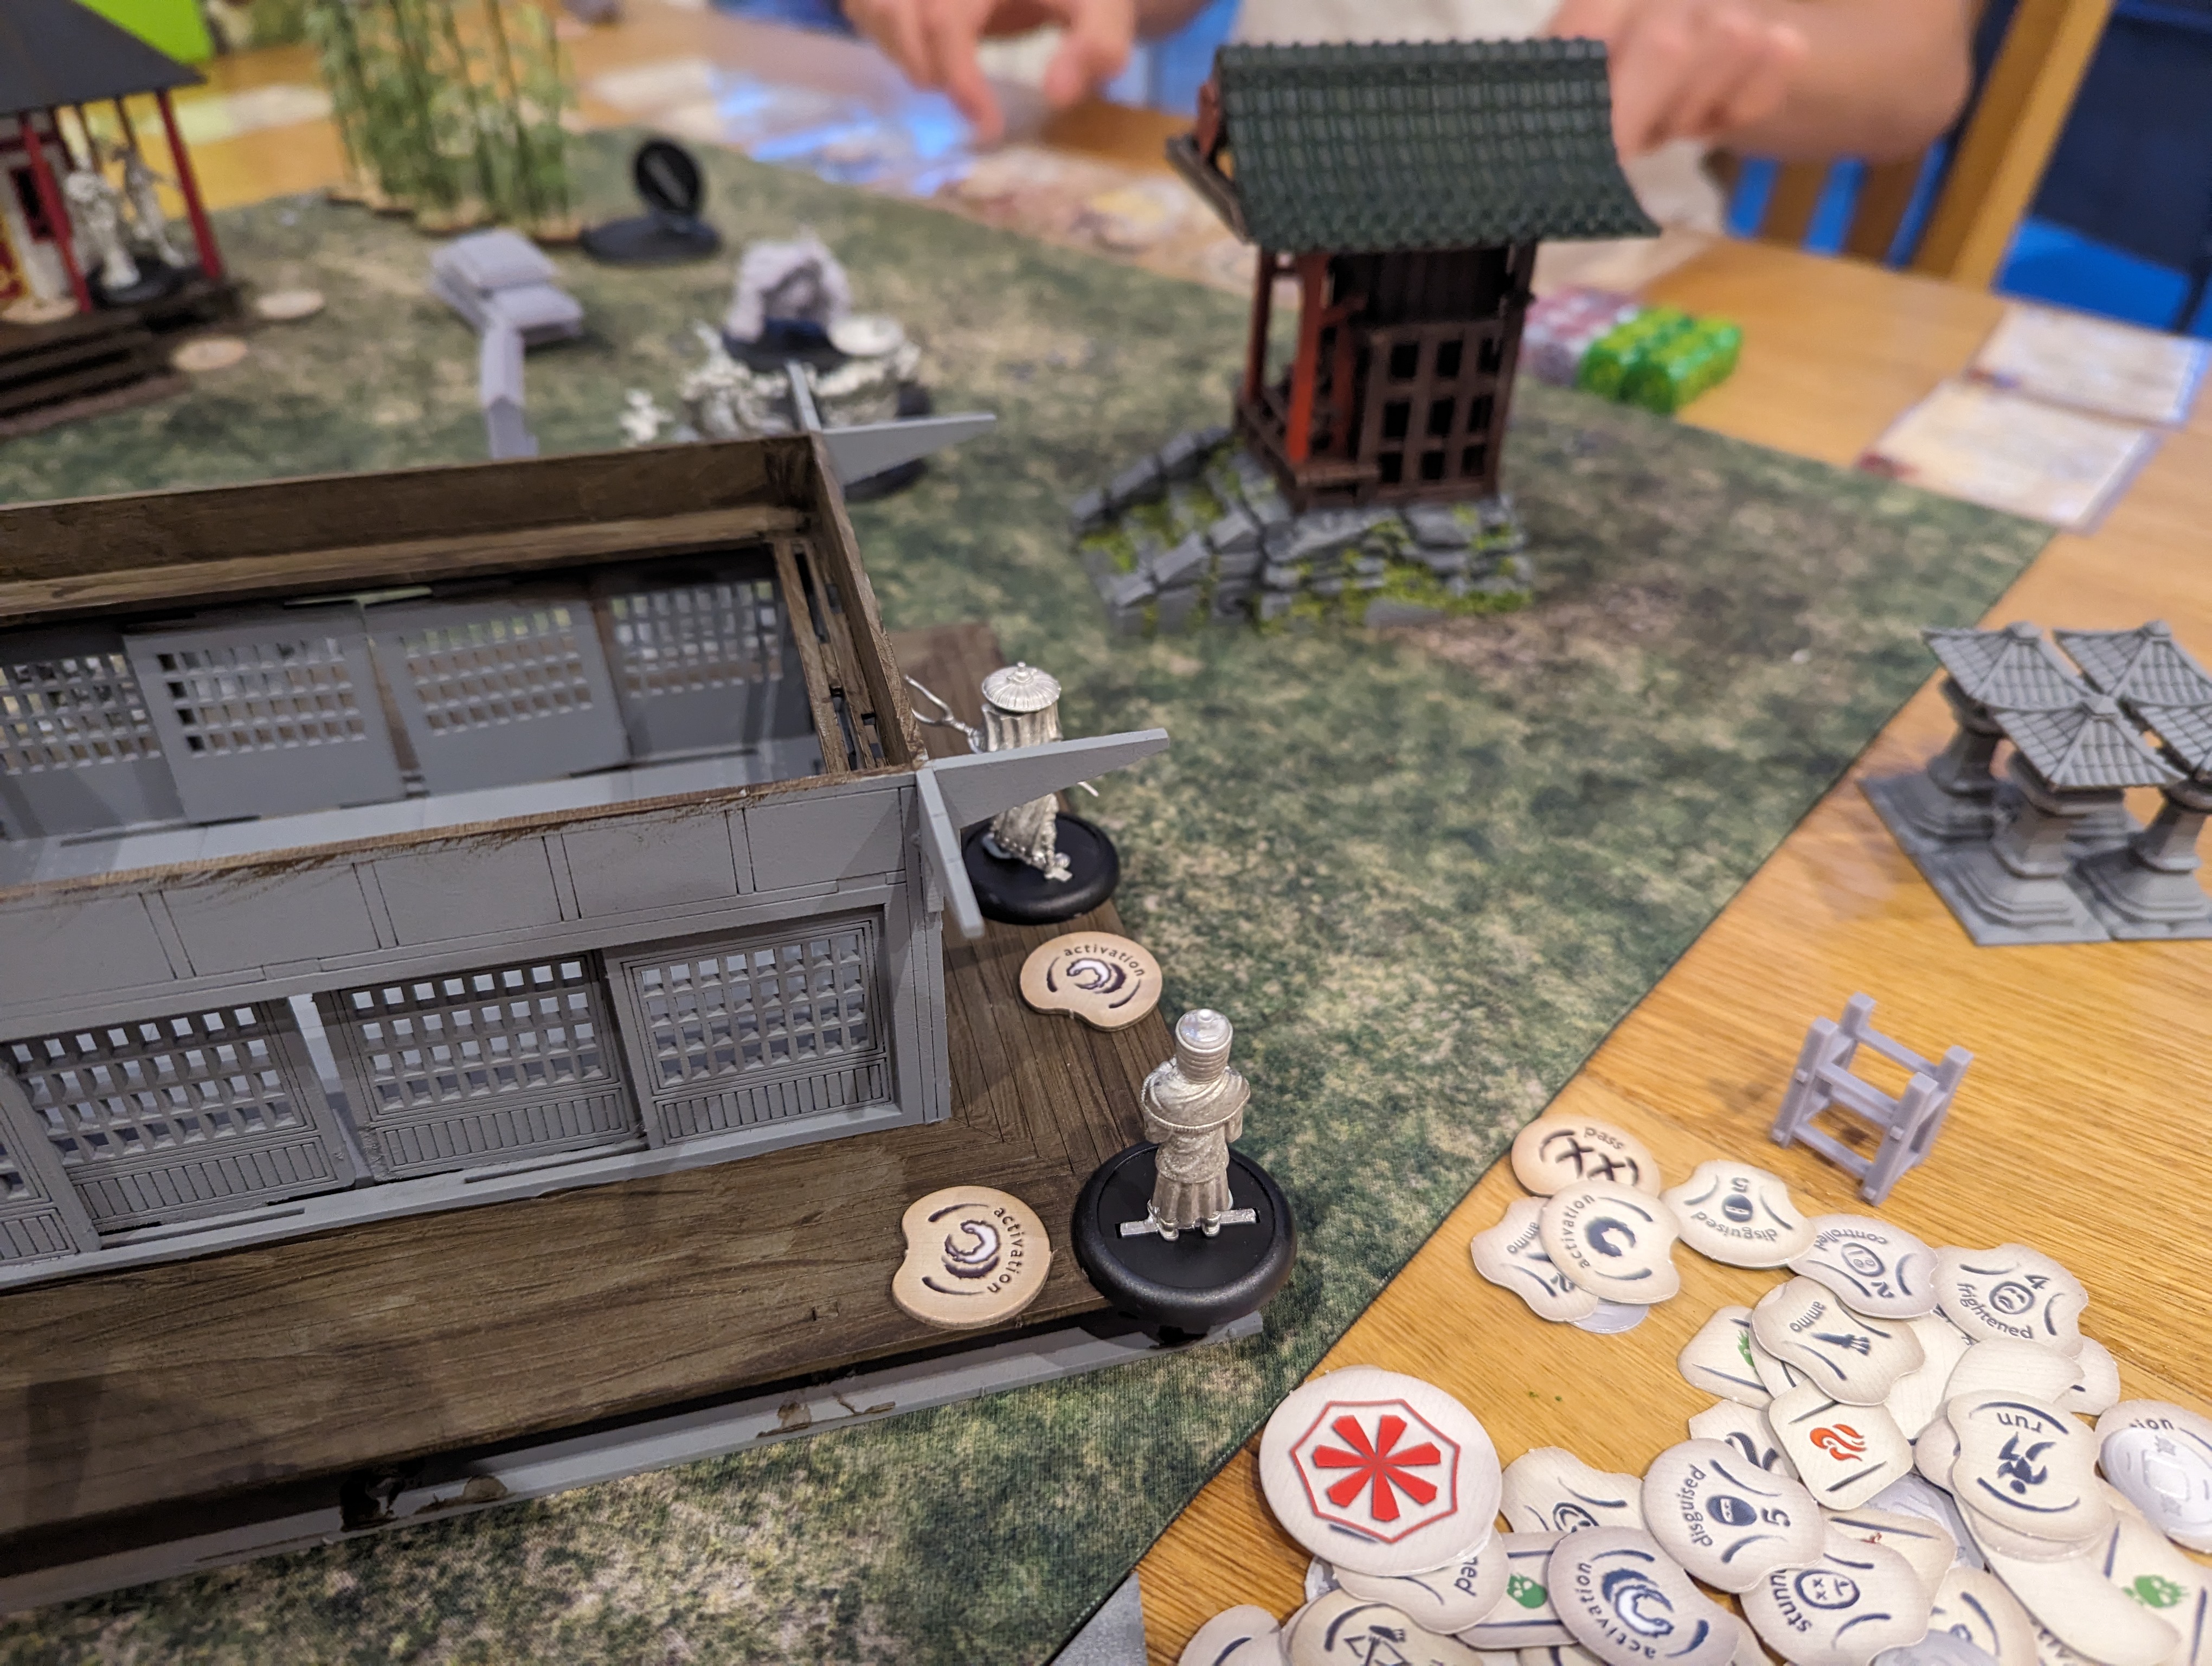
More Terrain
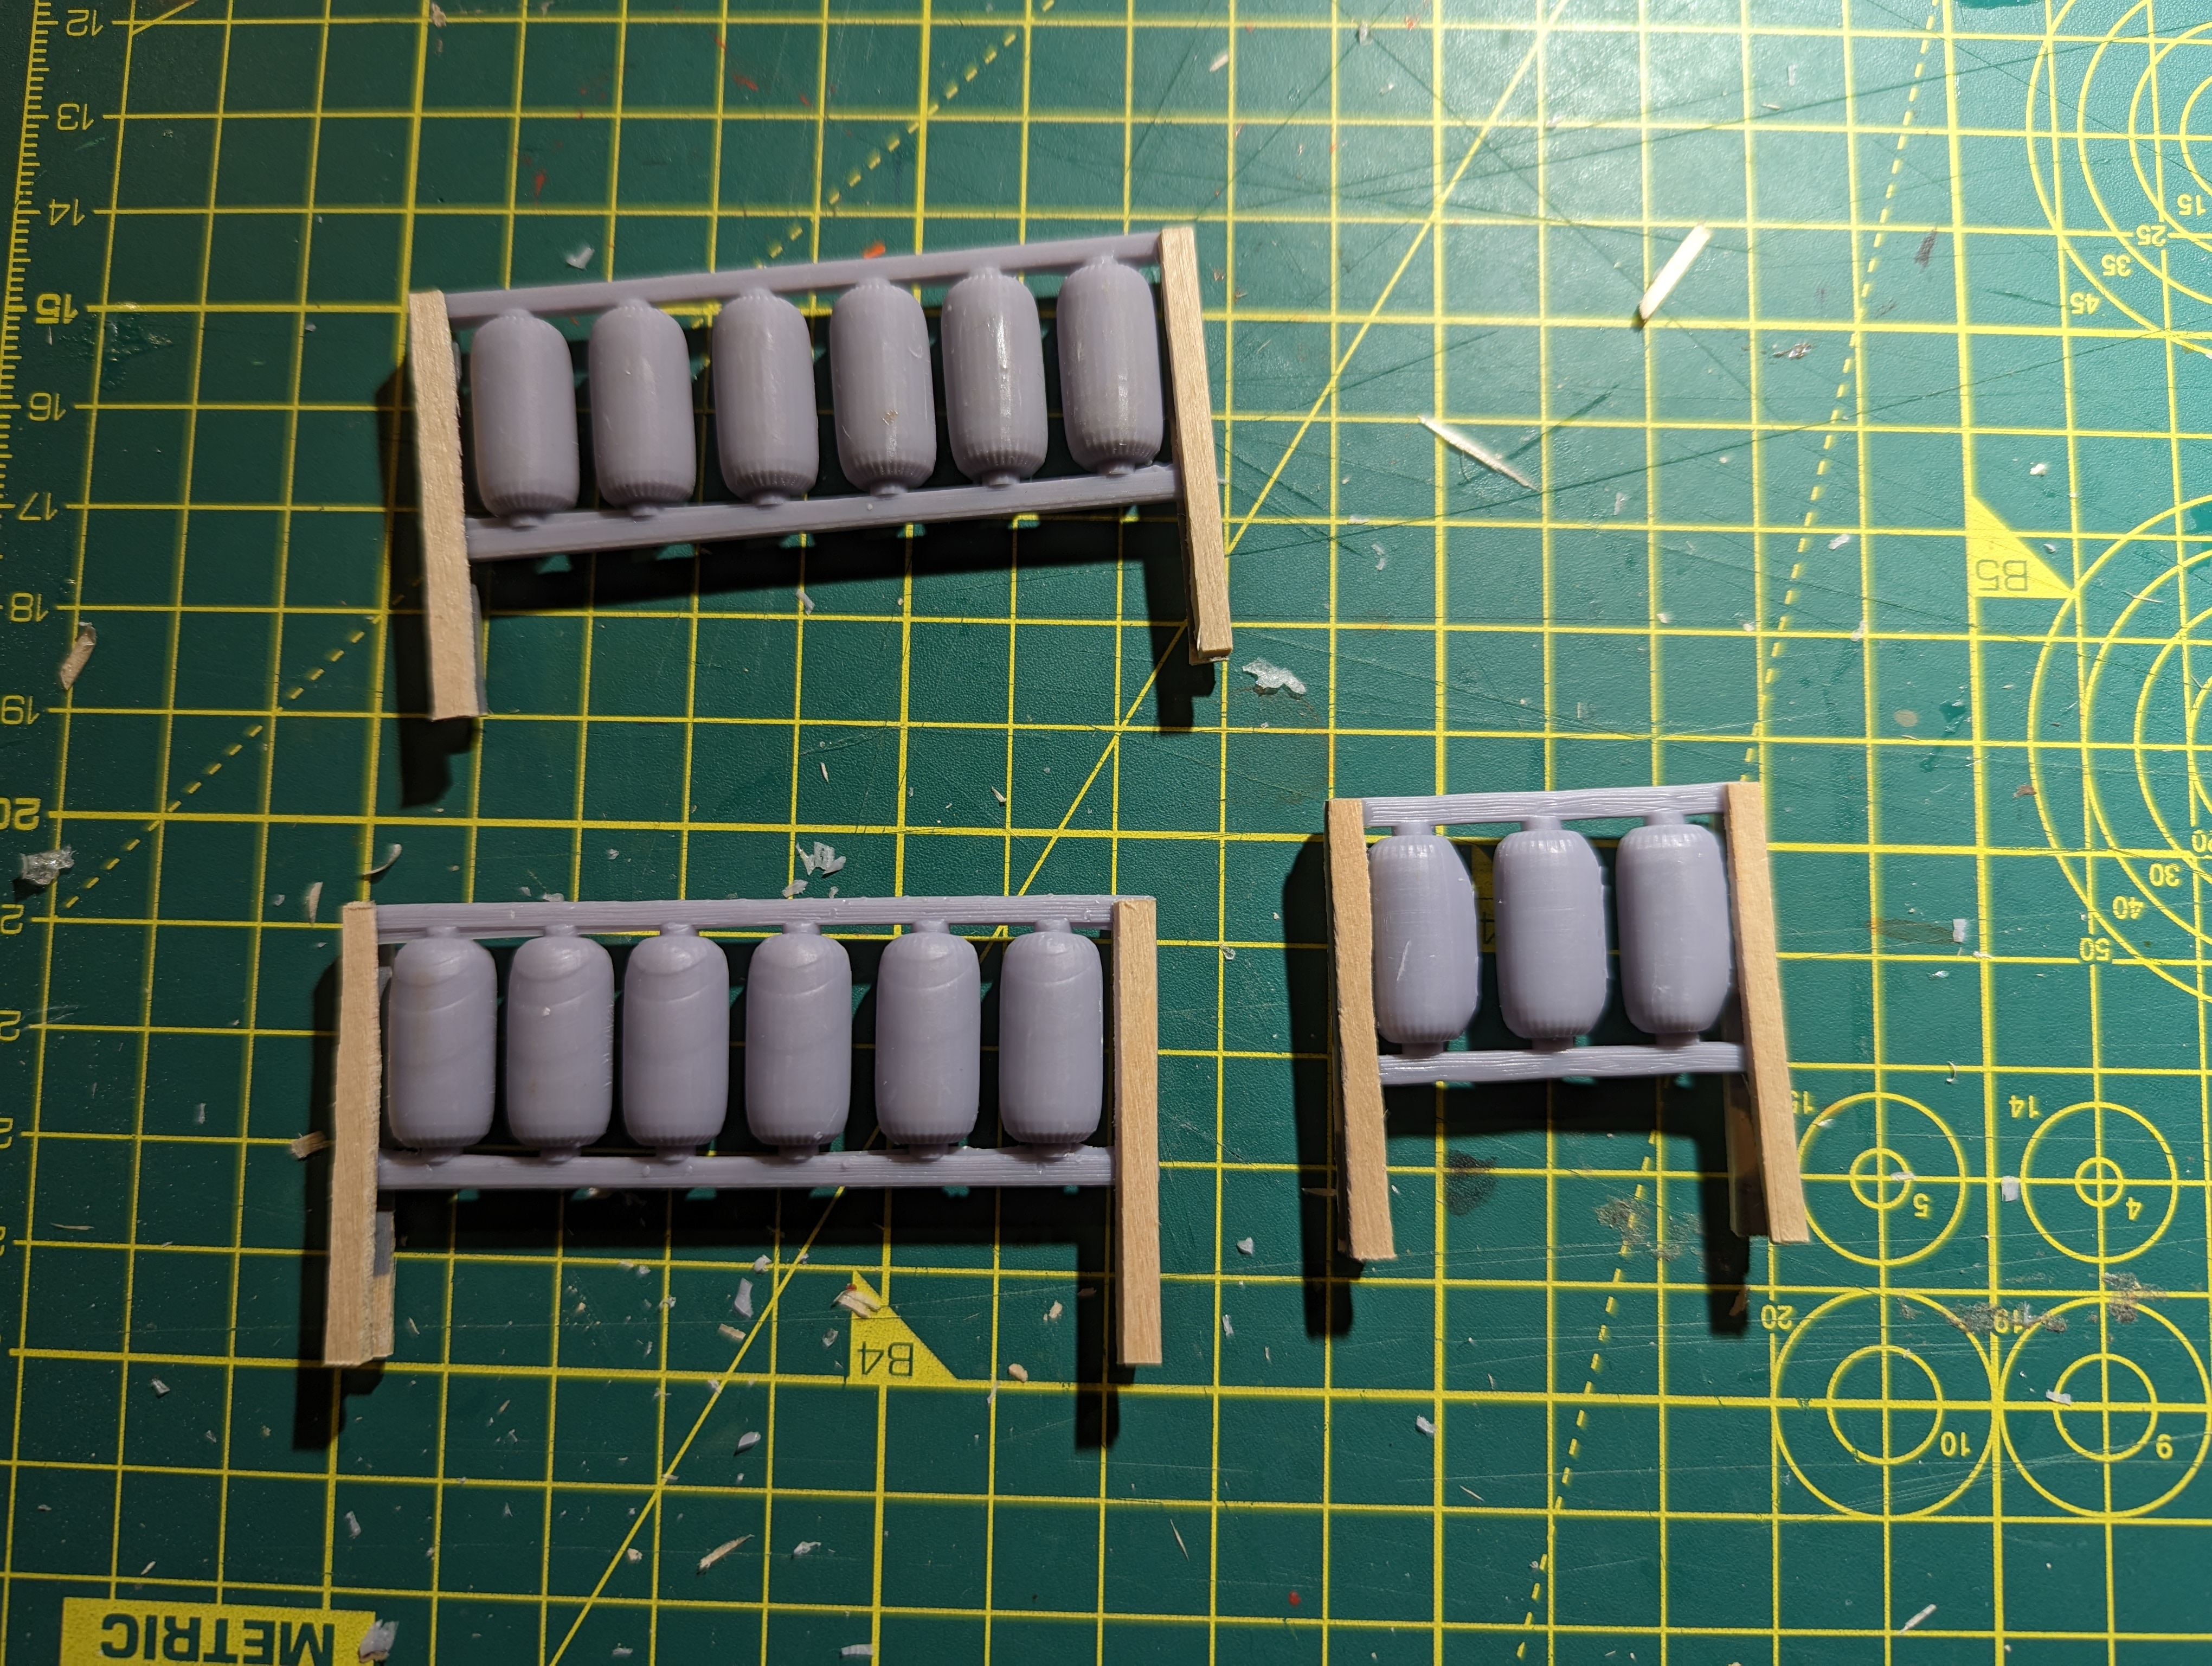
Time to add some more small terrain elements. All of the following pieces have been 3d printed with the stl files coming from Thingiverse.
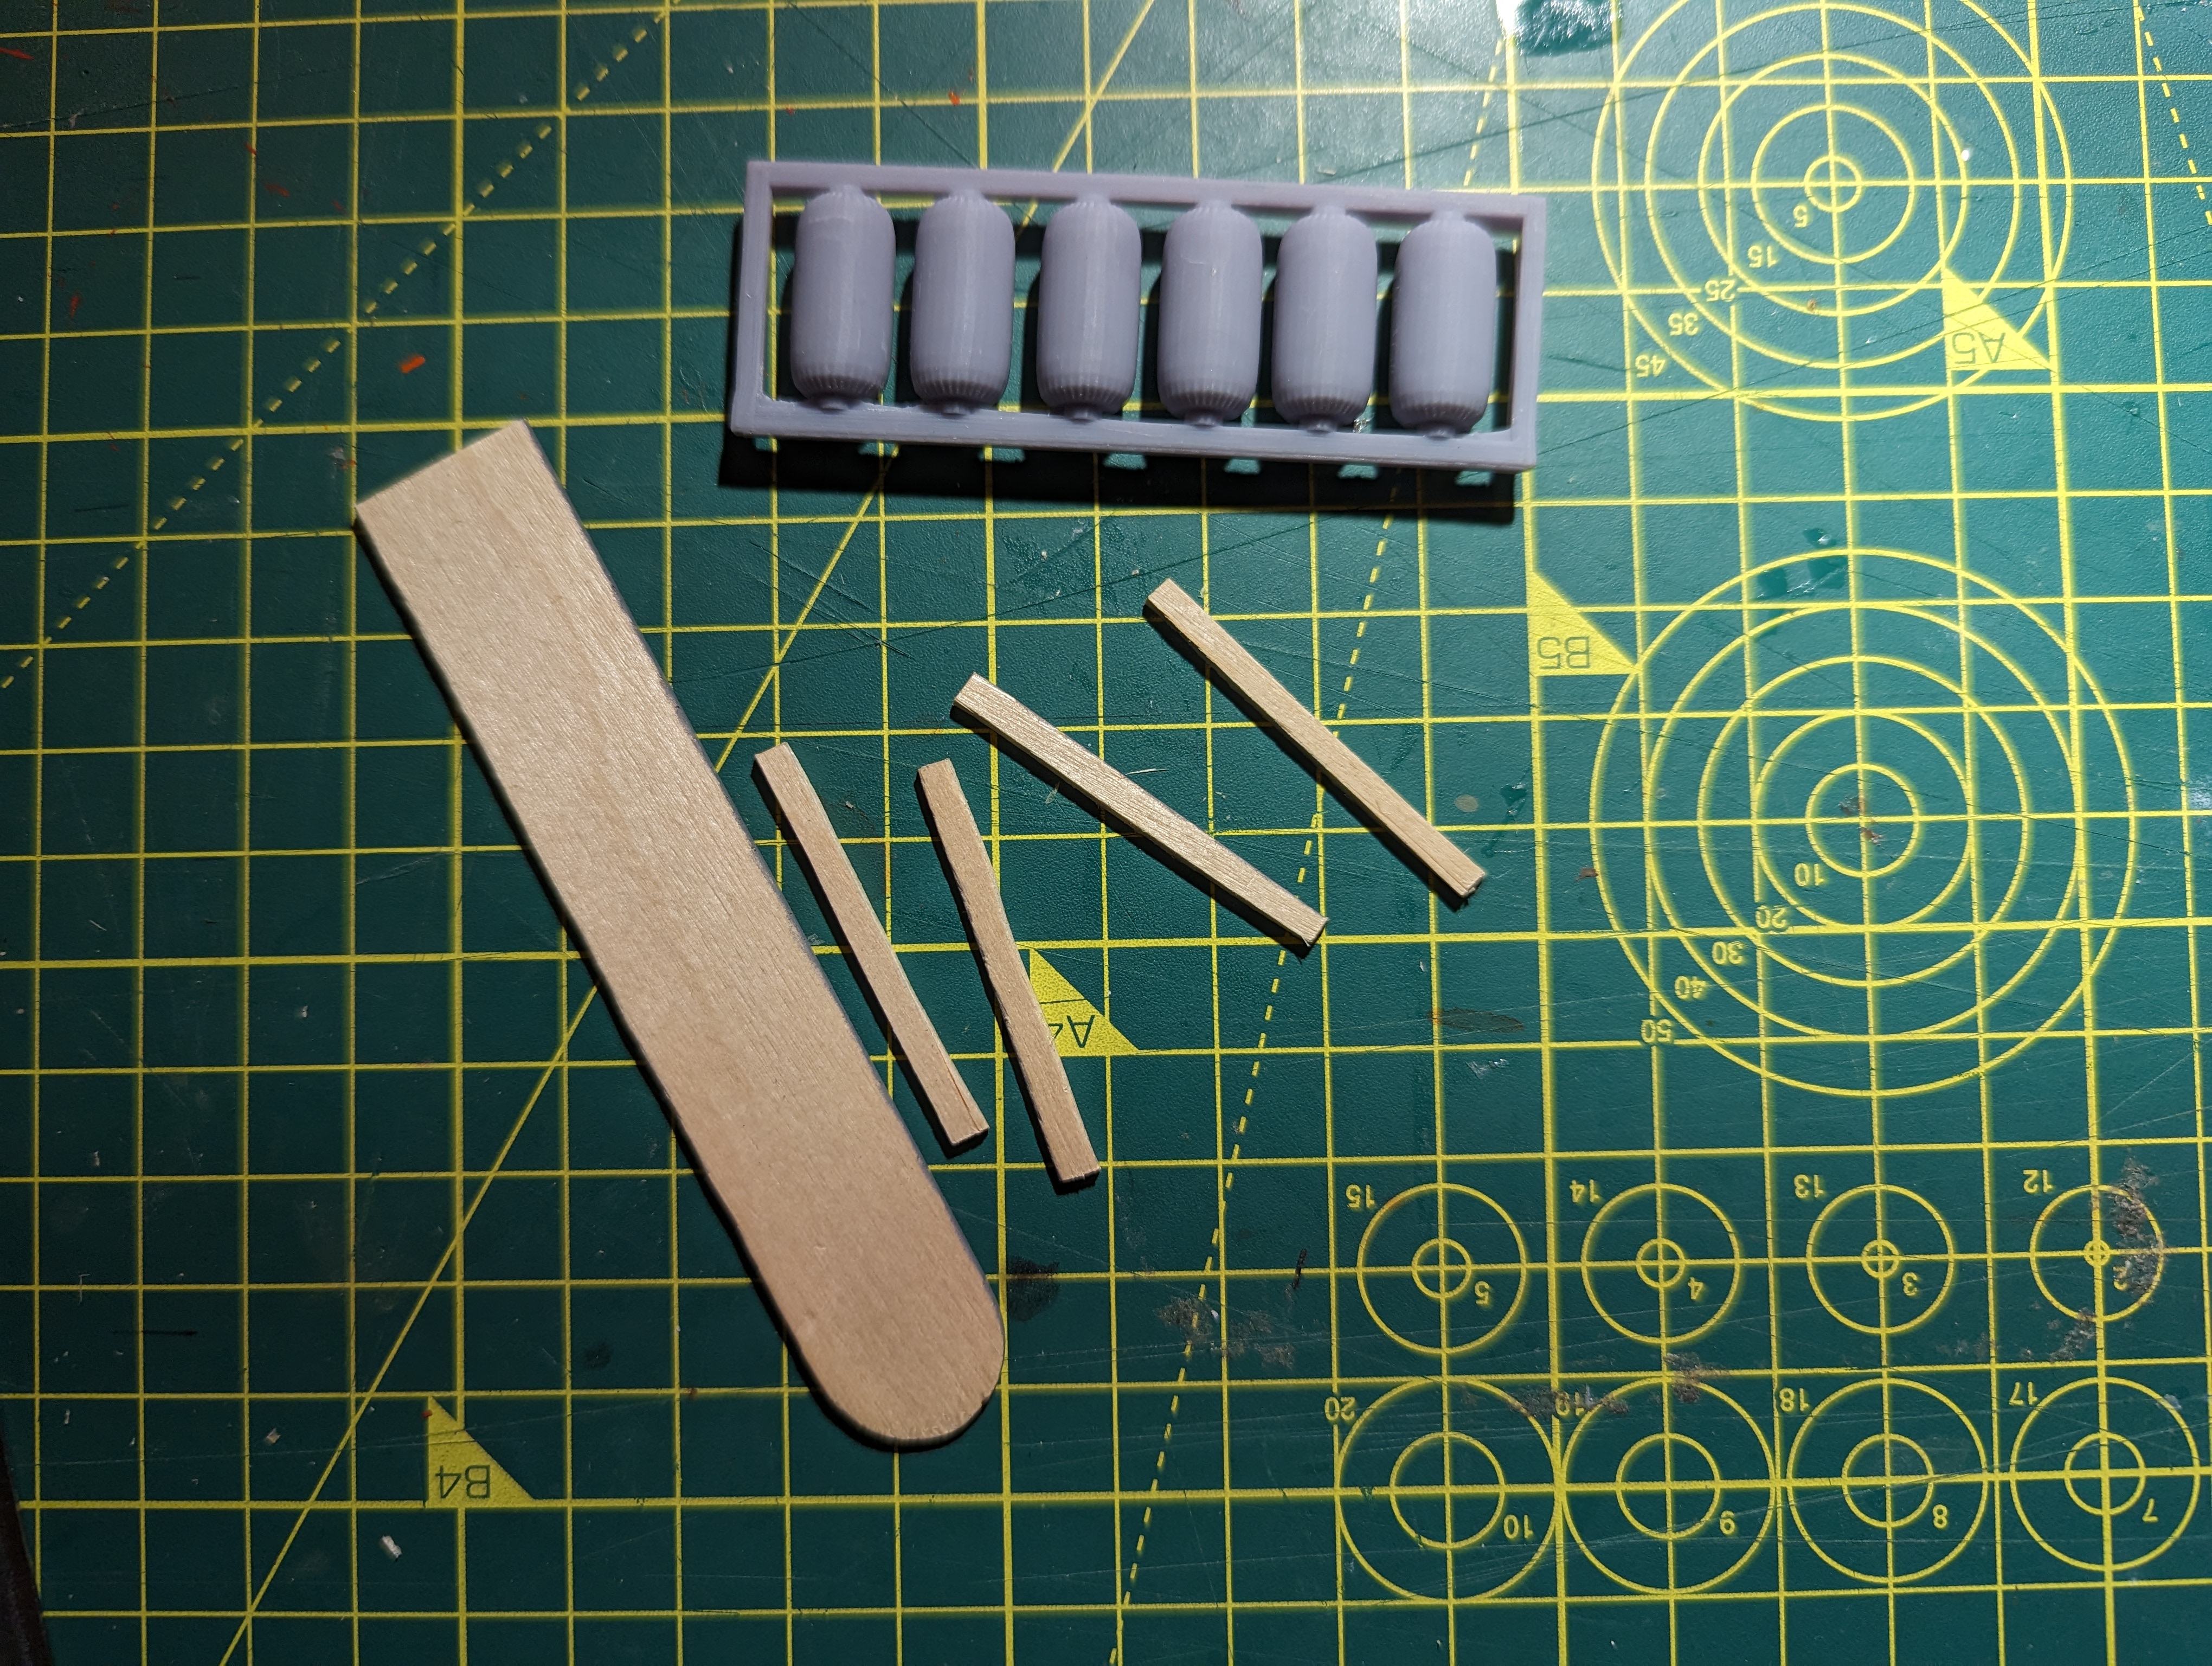
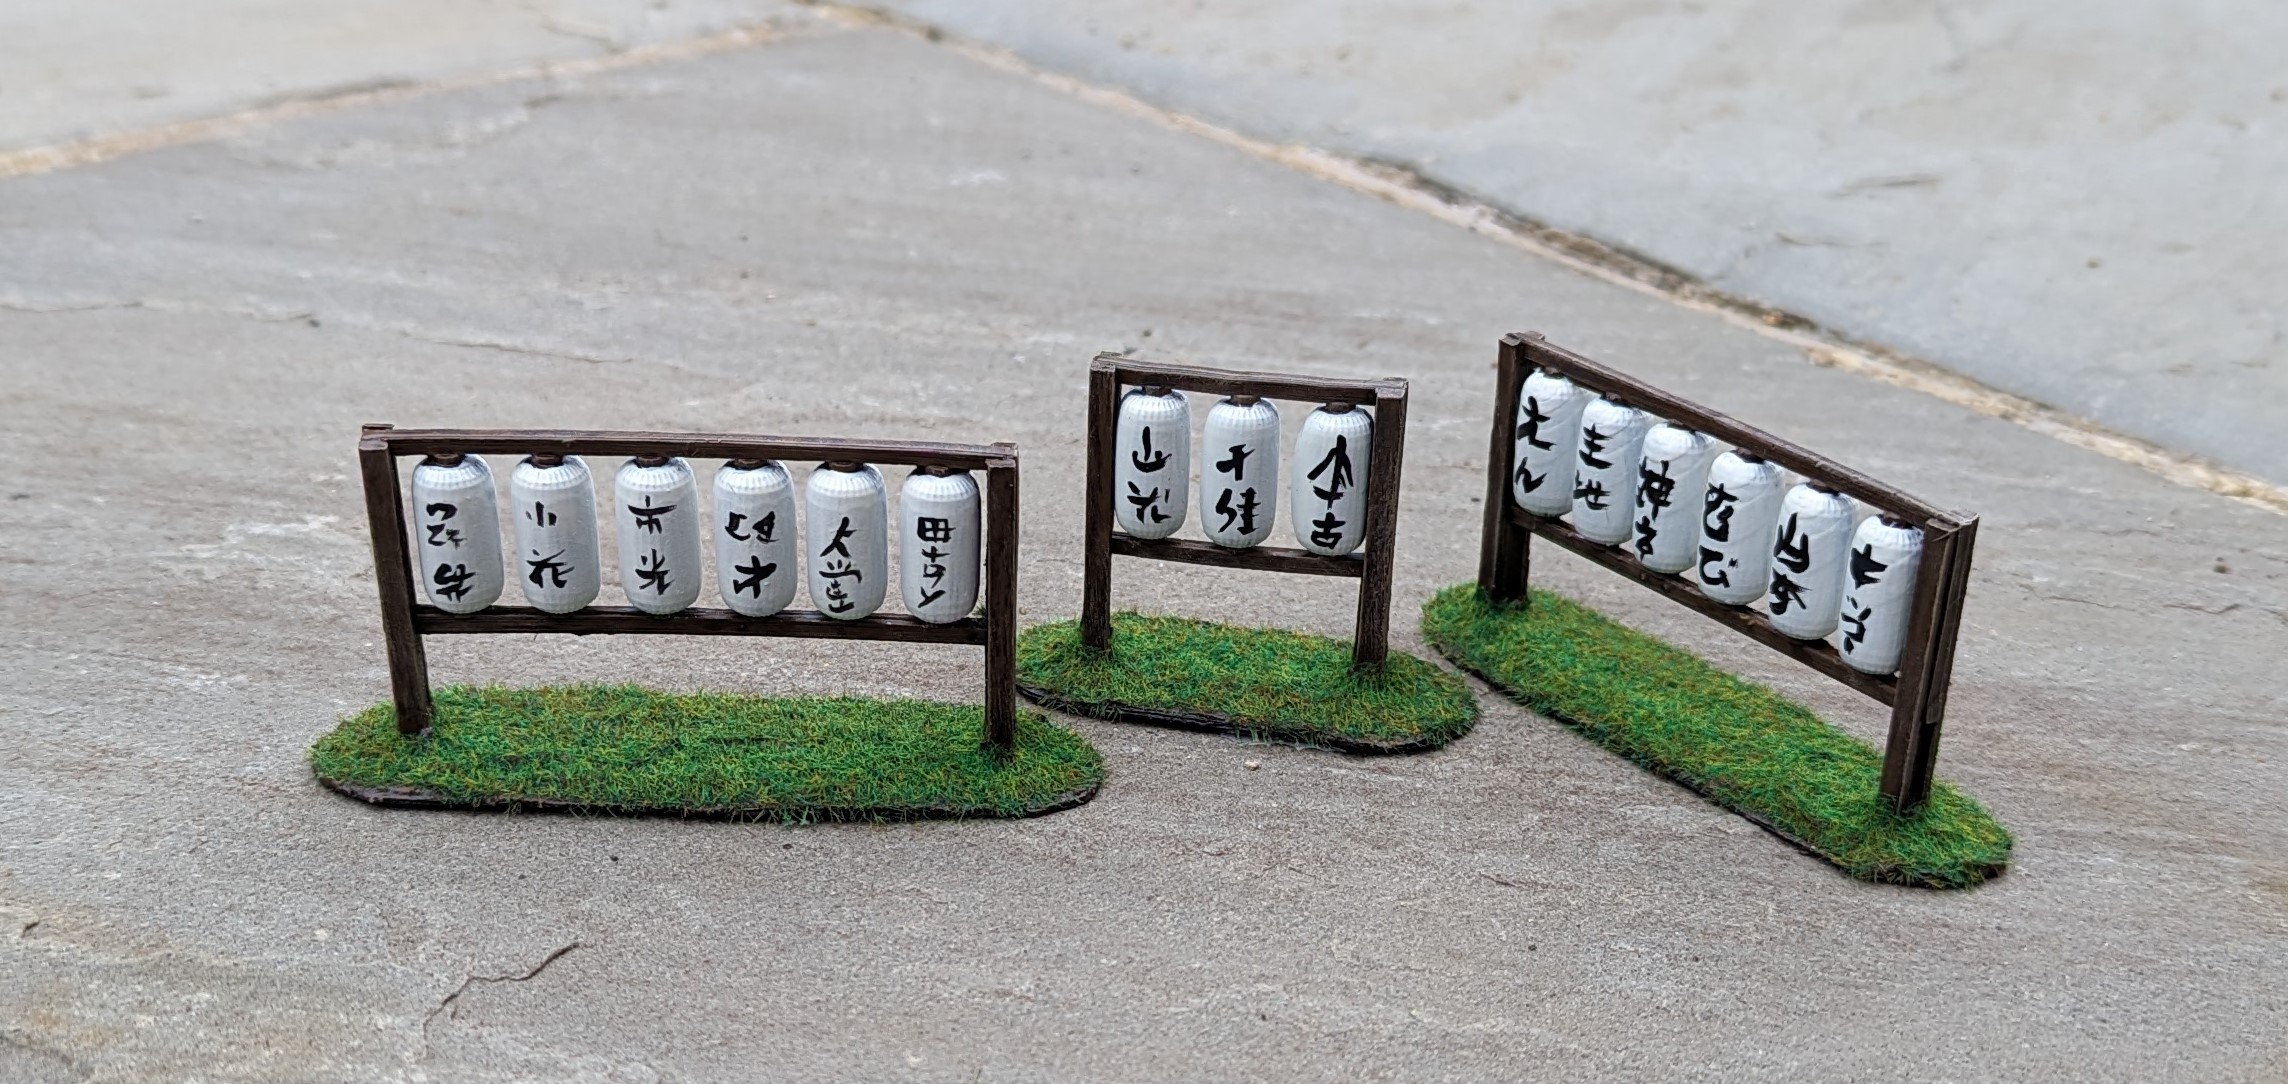
Japanese paper lanterns are a tradition and used to celebrate at festivals. They are often grouped together into racks to create a colourful display. I managed to find an stl file of the lanterns and printed this out. This then needed to be mounted as the racks did not come with legs. For this, I’ve just cut some wooden tongue depressors into the right lengths and stuck these to the rack. Once dry, it was primed and then stuck to a plasticard base and secured in place with and acrylic paste.
I’ve taken a quick approach to the painting. The wood was painted flat earth, then given a brown wash before an Iraqi sand dry brush. The lanterns were an off white with black for the writing. I’ve tried to copy some characters from internet pictures but the writing could be nothing, people’s names or something rude. Who knows but let’s hope I’m not about to start an international incident.
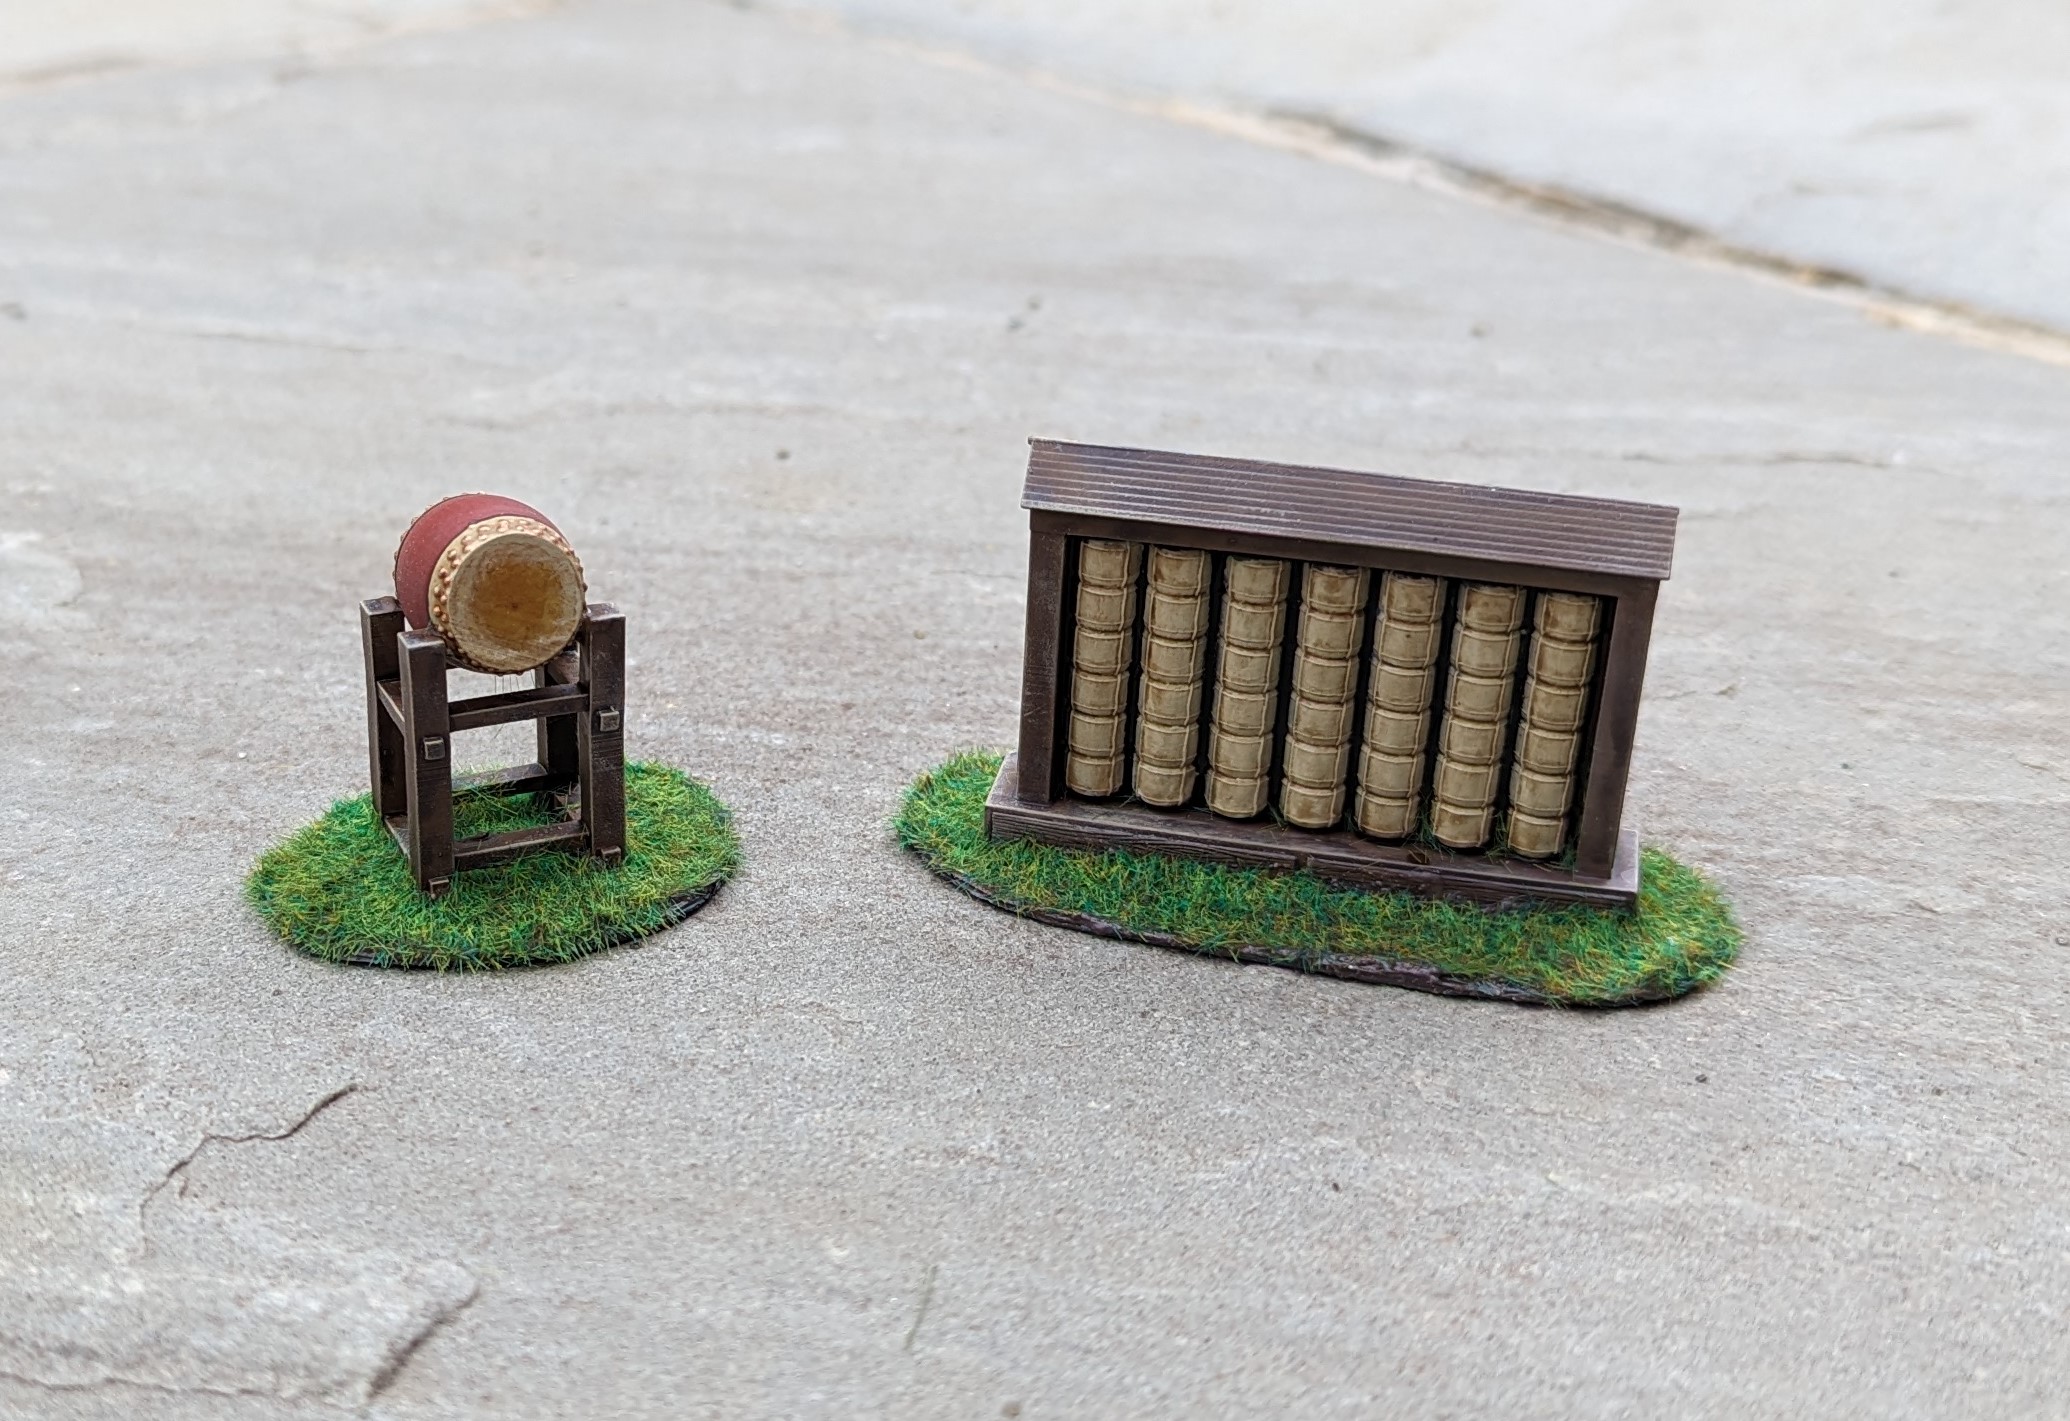
Sake racks are common to both display the barrels and allow for maturation of the drink. Drums are also used for both musical entertainment, war and communication, so both objects would lend themselves to the trappings of a small village.
The wood for both items was painted in the same way as the lanterns above. The drum skin and the sake barrels were then painted a bone colour and given a soft tone wash. The drum barrel is cavalry brown. You often see the drum skin gets discoloured where it is struck, so to replicate this I’ve used a watered down brown and gently glazed the area to reach the desired effect.
And job done (apart from the flocking – summer grass). Simple and easy.
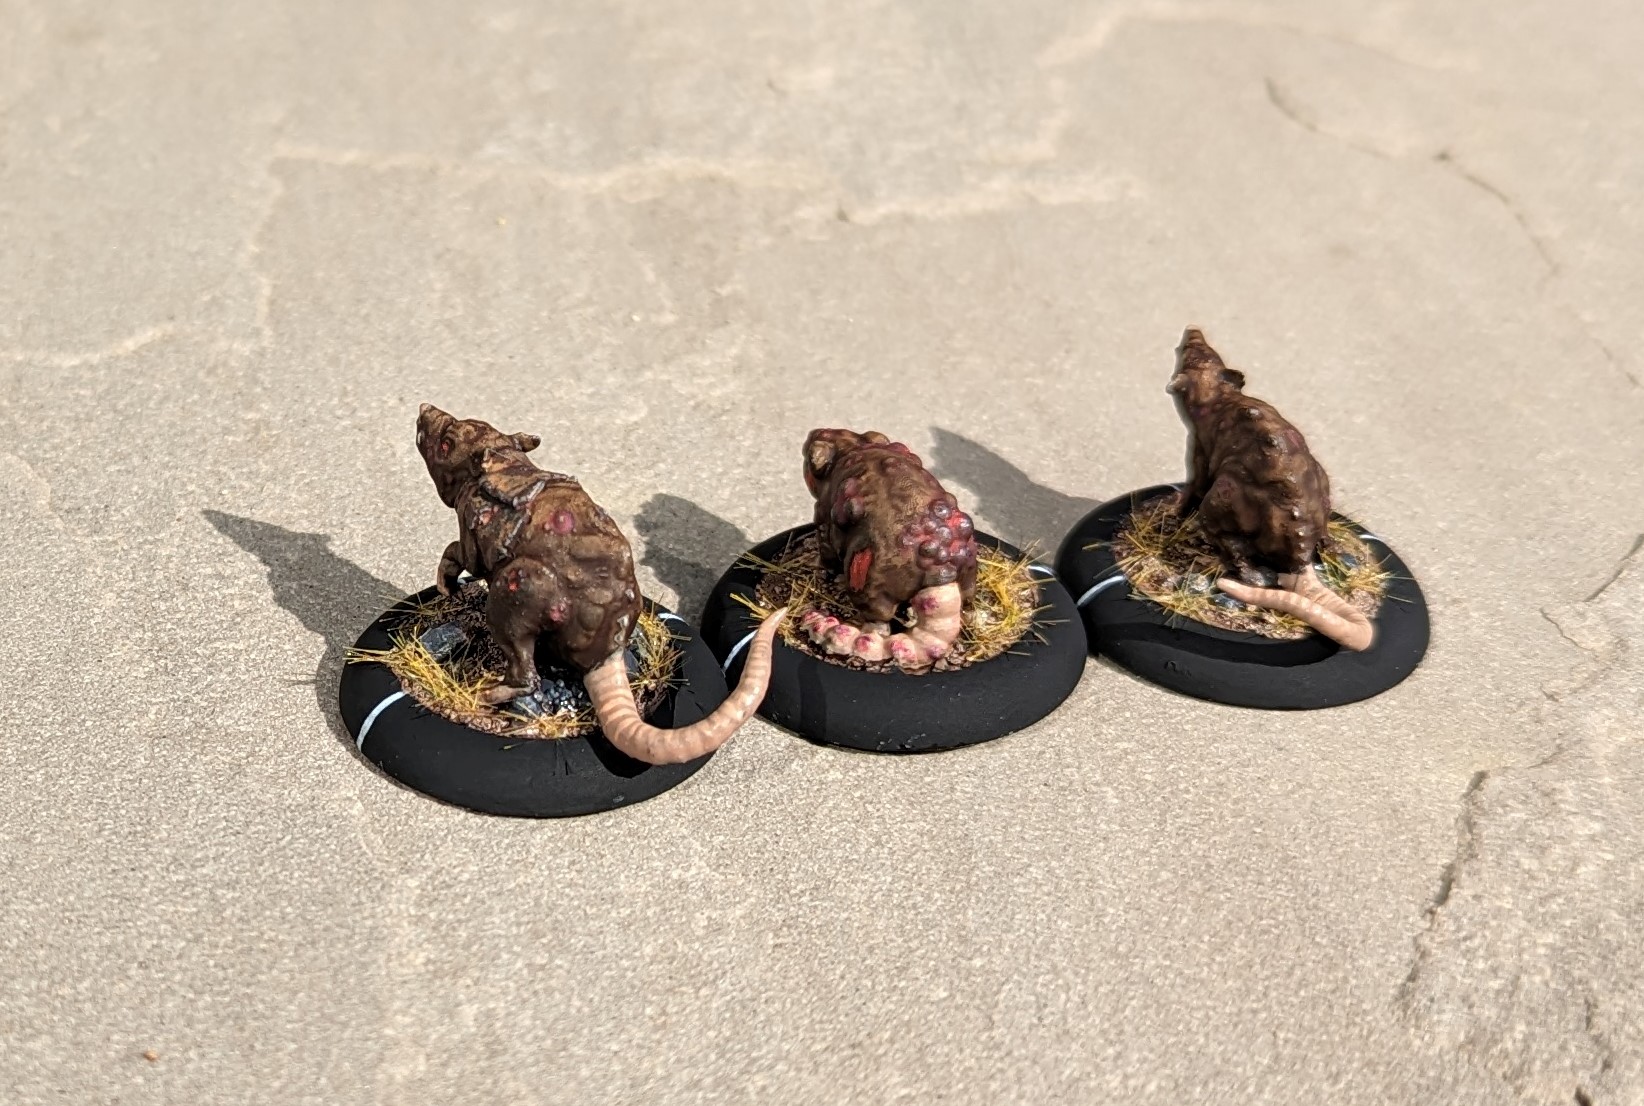
Dirty Plague Rats
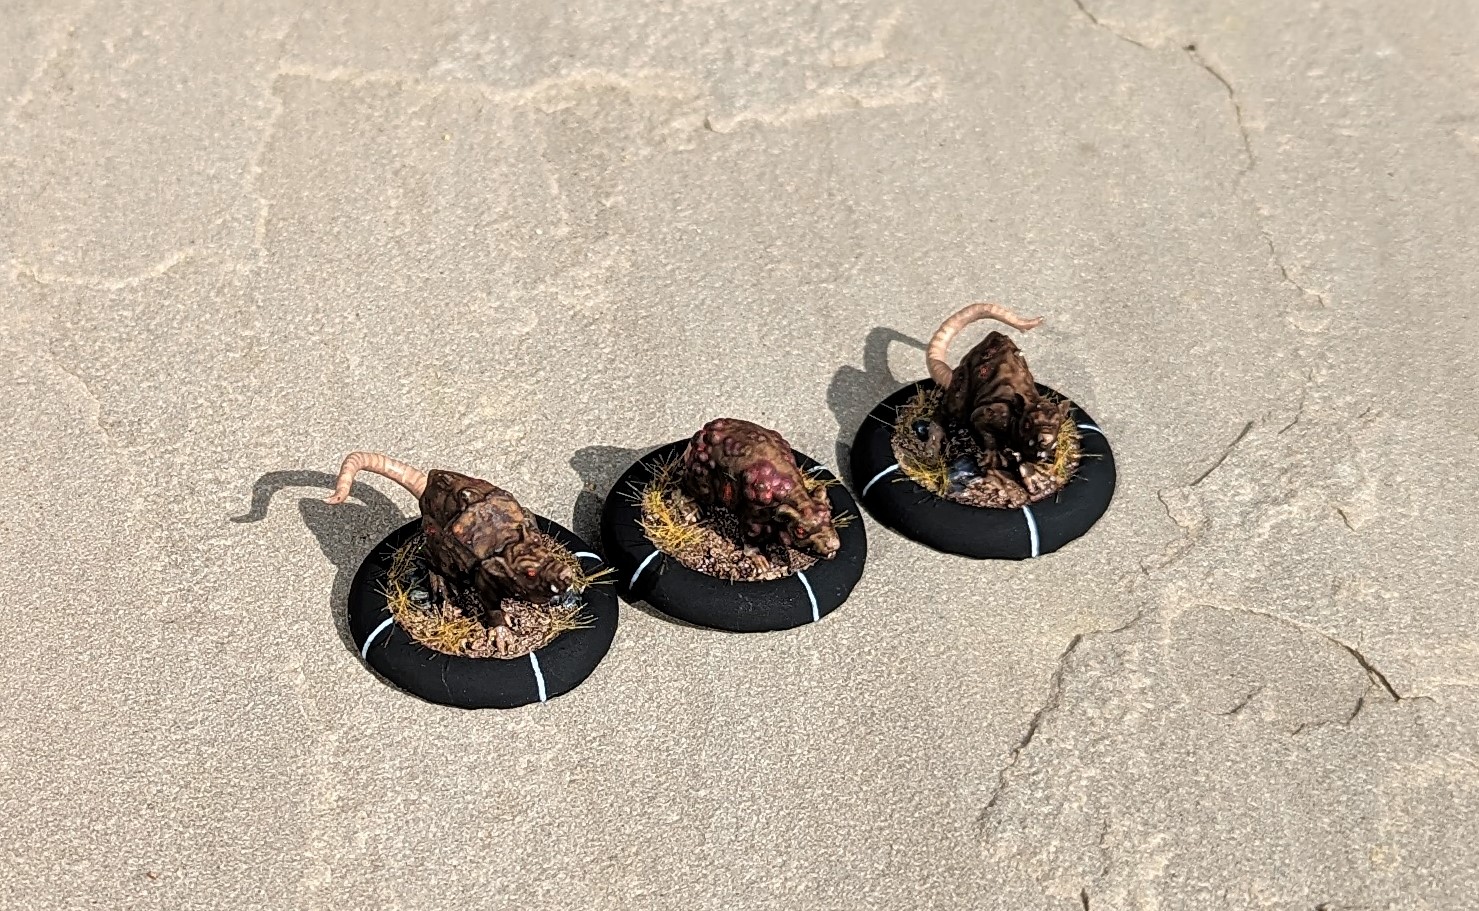
The Cult of Yurei, being all about the death and decay, can take various rats as part of their force. As you might expect, these aren’t the most powerful or formidable of characters but they do provide some chaff to block parts of the board and have your opponent activate their models before your key characters activate. One of the rat units available are plague rats of which you can field three. While not particularly powerful, if they do successfully hit in attack, they get to dish out poison markers which inflict additional damage at the end of the turn.
In this case, I searched Thingiverse (not to be mistaken for Redvers) for suitable models of which there were a few. Using Microsofts 3D builder, I was able to manipulate the files to get the right size and then attached them to 3D bases for the game. These then went off to the 3D printer.
Painting wise, I took a quick approach to these. A base of dark brown was then given a dark tone wash. I’ve then dry brushed up the highlights through successively lighter browns. Teeth/claws were off white with a yellow wash. The tail was a skin tone given a brown wash. For the boils and lesions, I’ve used a purple glaze applied several times followed by a red glaze over the highest points.
The basing is just Mig Ammo dry earth acrylic mud with a wash applied and then a light flocking of dead grass. This will be my Cult of Yurei basing across all of my models to try to tie them together.
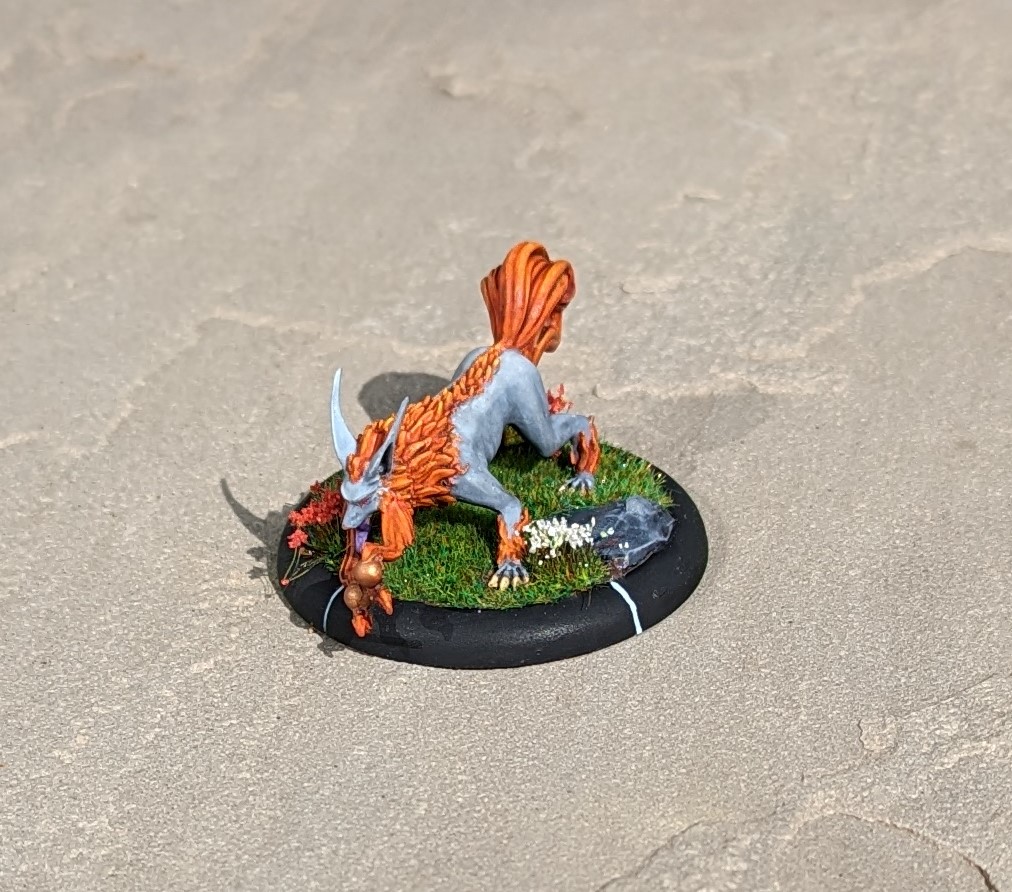
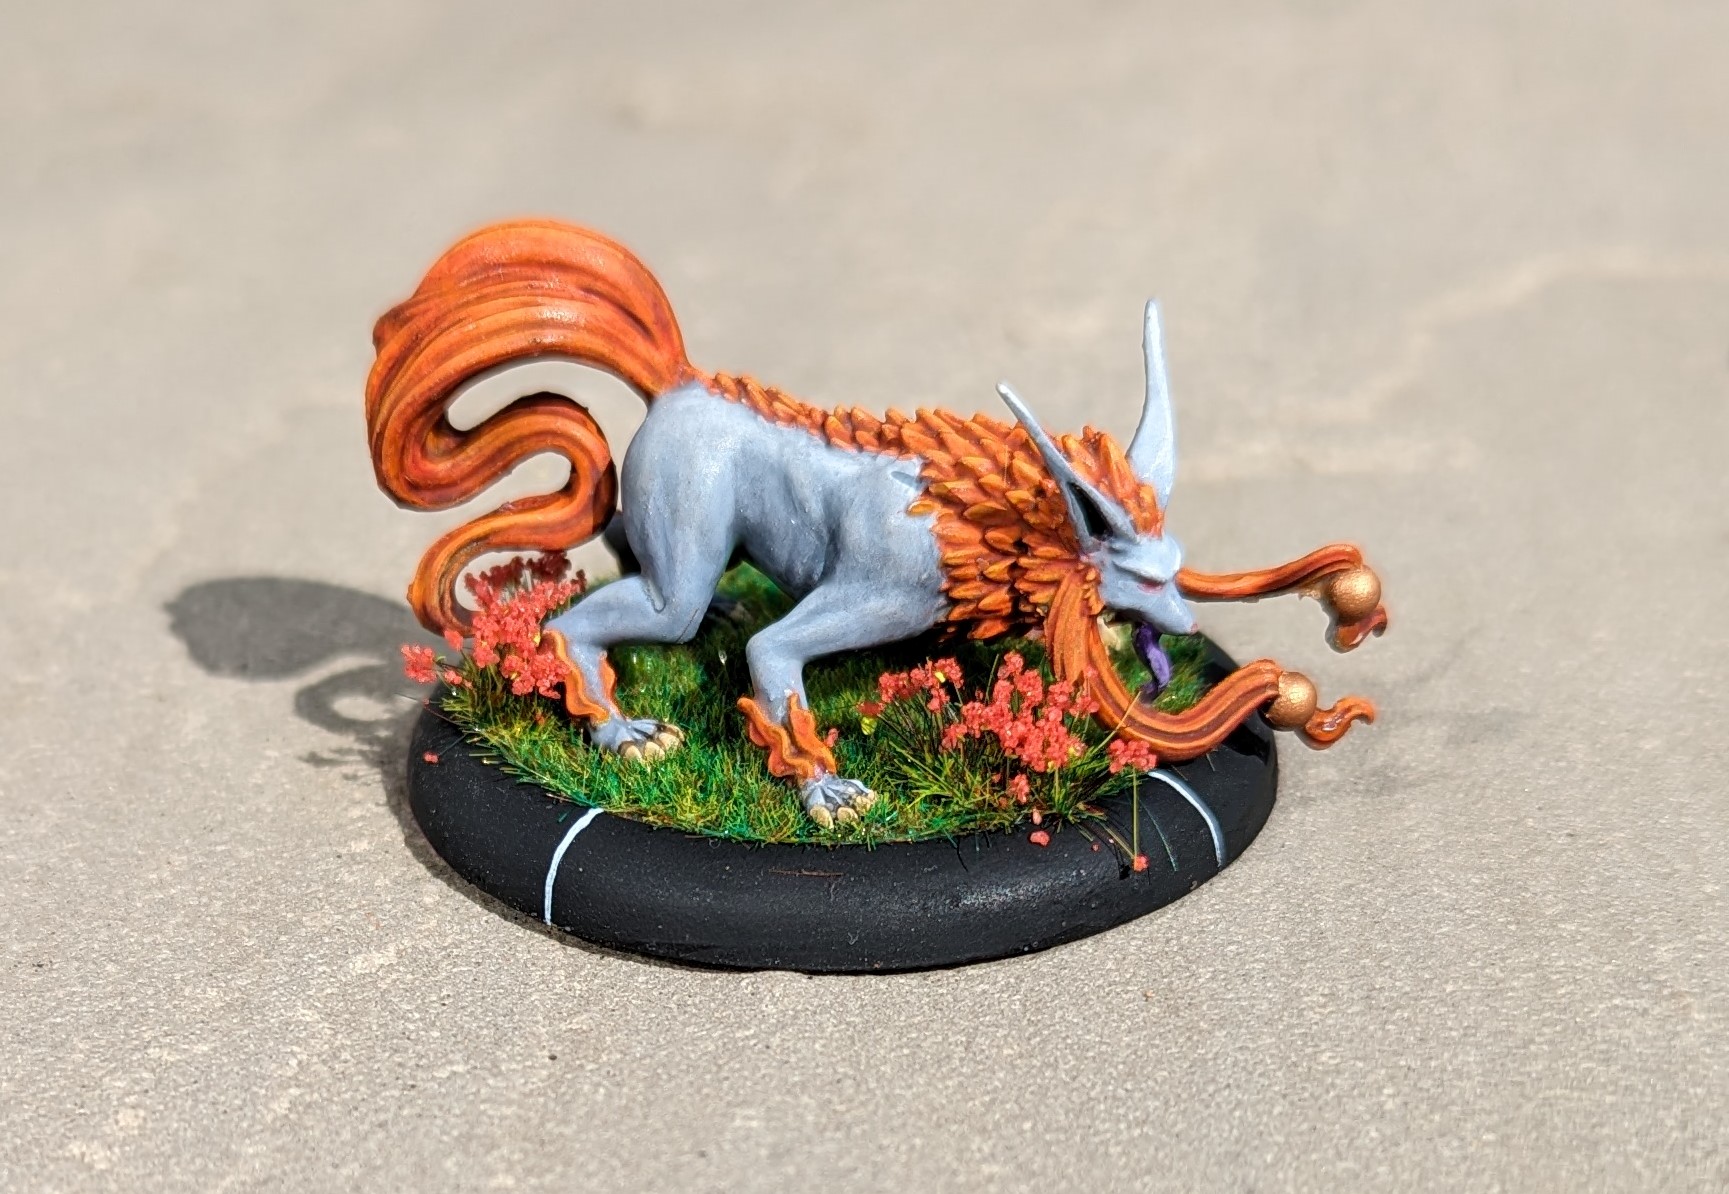
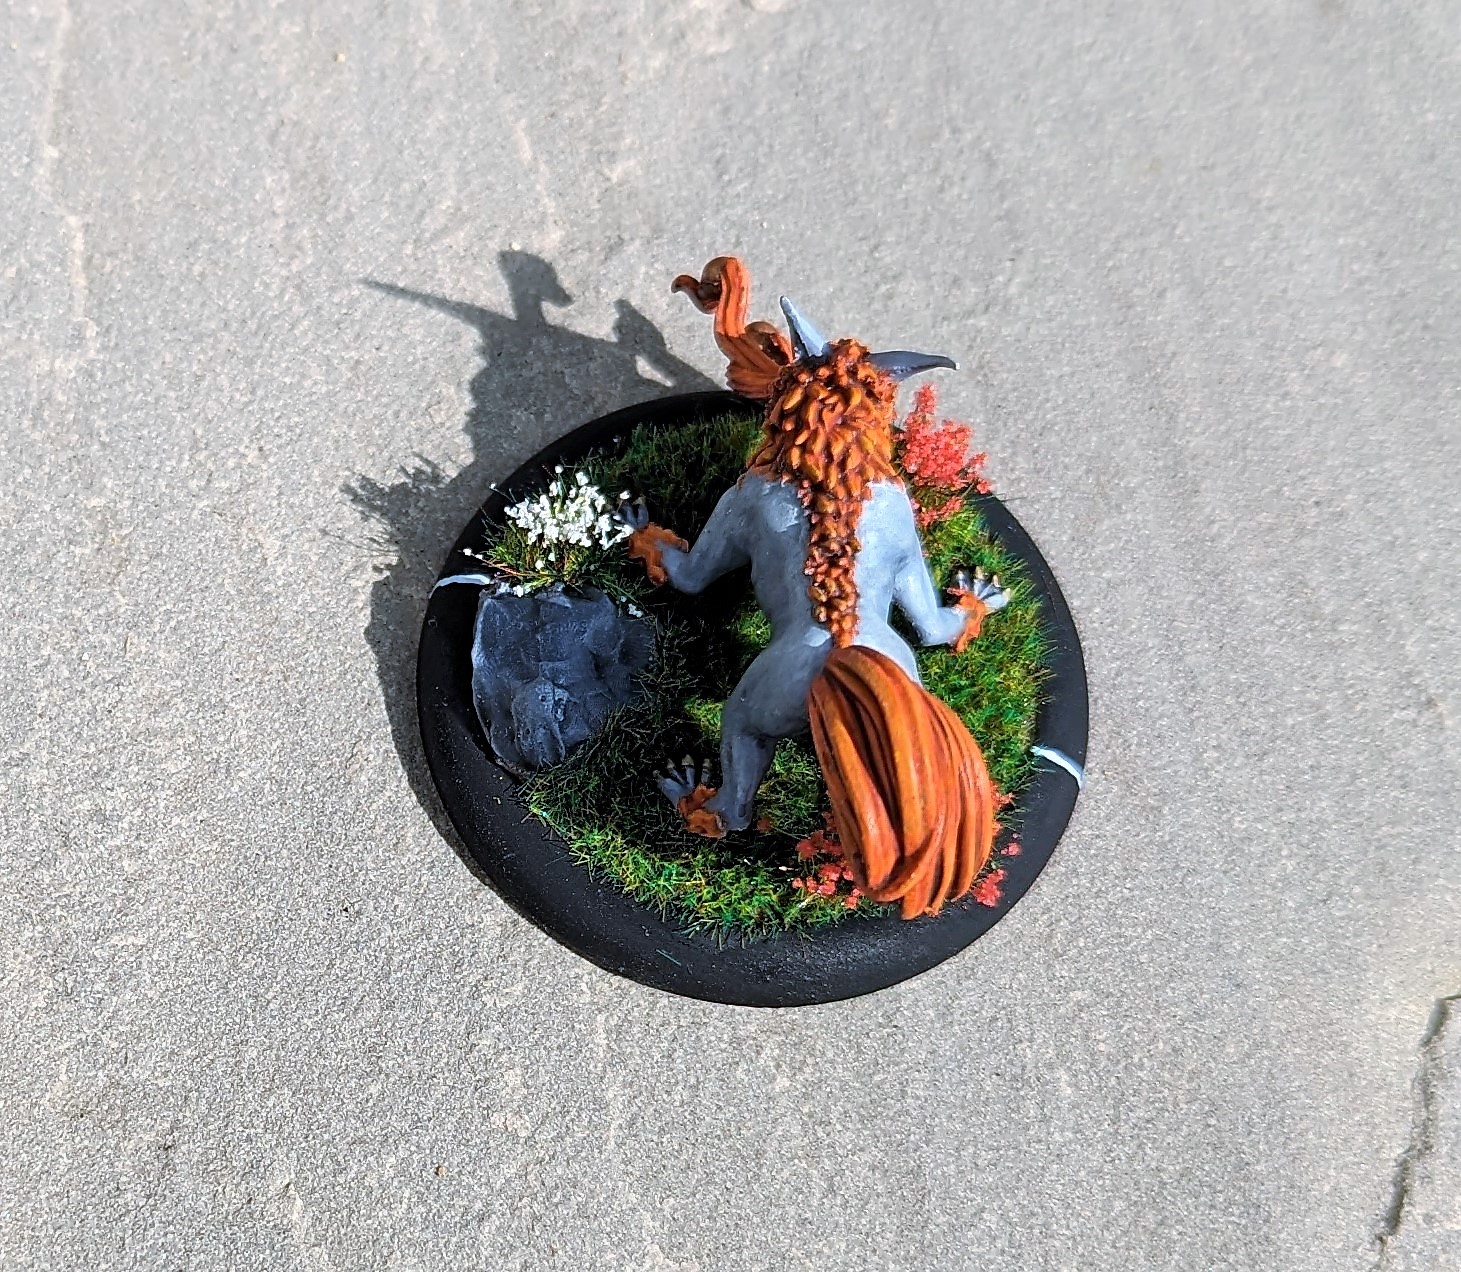
Ryokeen
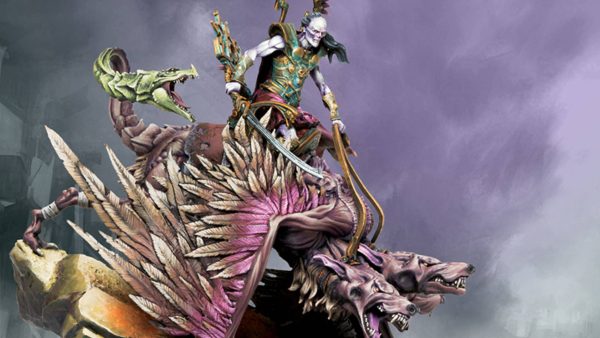
Continuing with the Bushido starter set, we’ve painted up Ryokeen. This is not to be mistaken for the ex Manchester United and Republic of Ireland midfield hard man but rather some sort of large fox type animal. In game, Ryokeen has fantastic movement and, like a certain ex Manchester United and Republic of Ireland midfield hard man, can leave opposing models prone and stunned after entering base to base contact. As a Ronin, Ryokeen can play for a number of factions including both the Temple of Ro-Kan and the Cult of Yurei, so a handy model to have painted up.
My son started to paint this model but got a bit fed up and passed it to me to finish. He started with a grey base coat and a fire orange for the fur. From there, I started to highlight the skin up using lighter levels of grey. The fur I gave a red ink wash and then highlighted with orange and yellow. That was about the sum total of the paint job – quick and easy.
The base is an acrylic mud from Mig Ammo and I’ve 3d printed a rock which I stuck into the mud before it dried. I’ve then just flocked it up with a summer grass and added some flower clumps to give it a pleasant, summery feel. Our thinking is that this is a basing theme that we will continue for the Temple of Ro-Kan.
Shameless Self Promotion
A bit late on this one, but this project is now the proud owner of a Golden Button

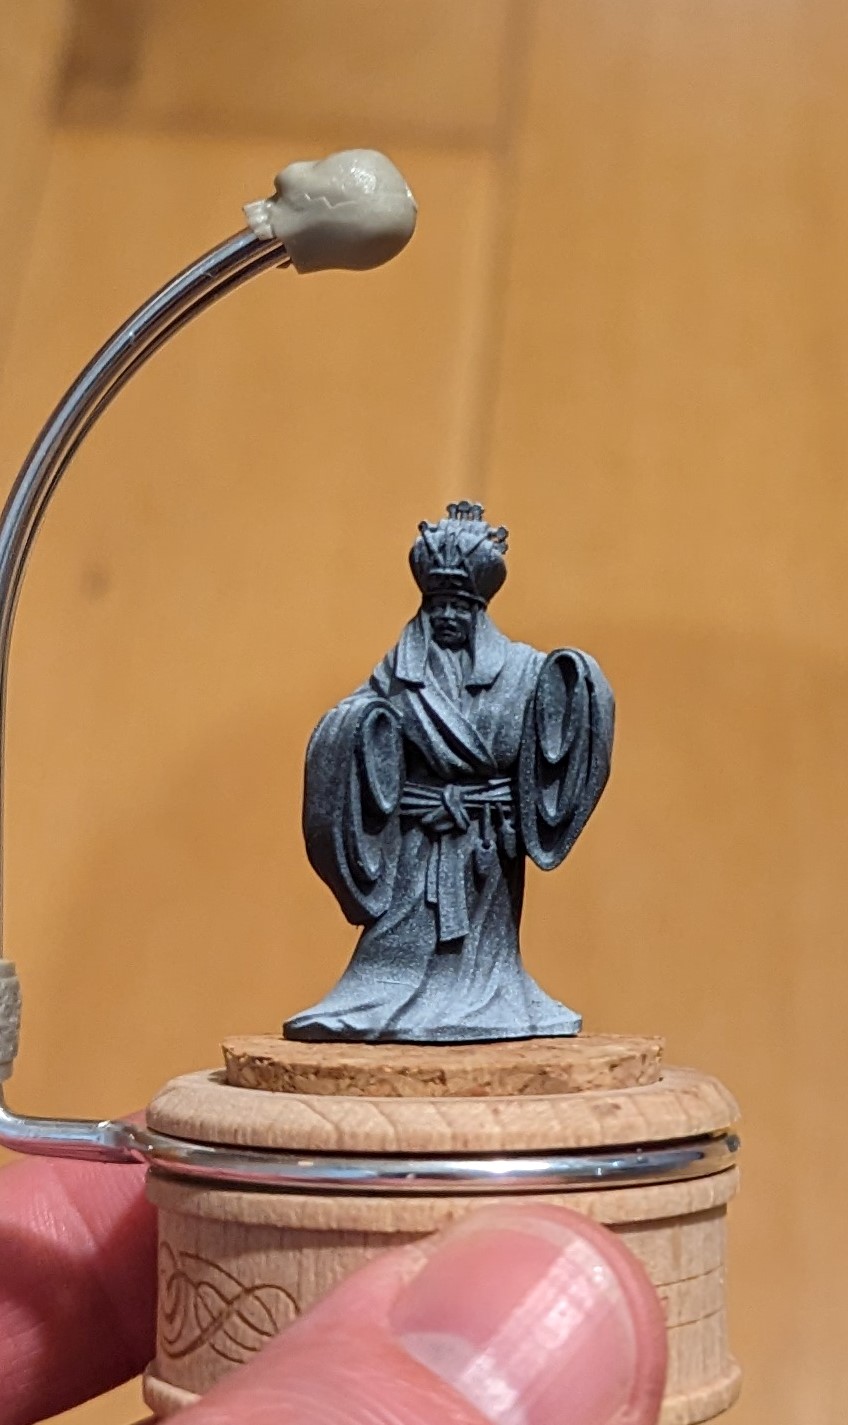
Hozumi Maha
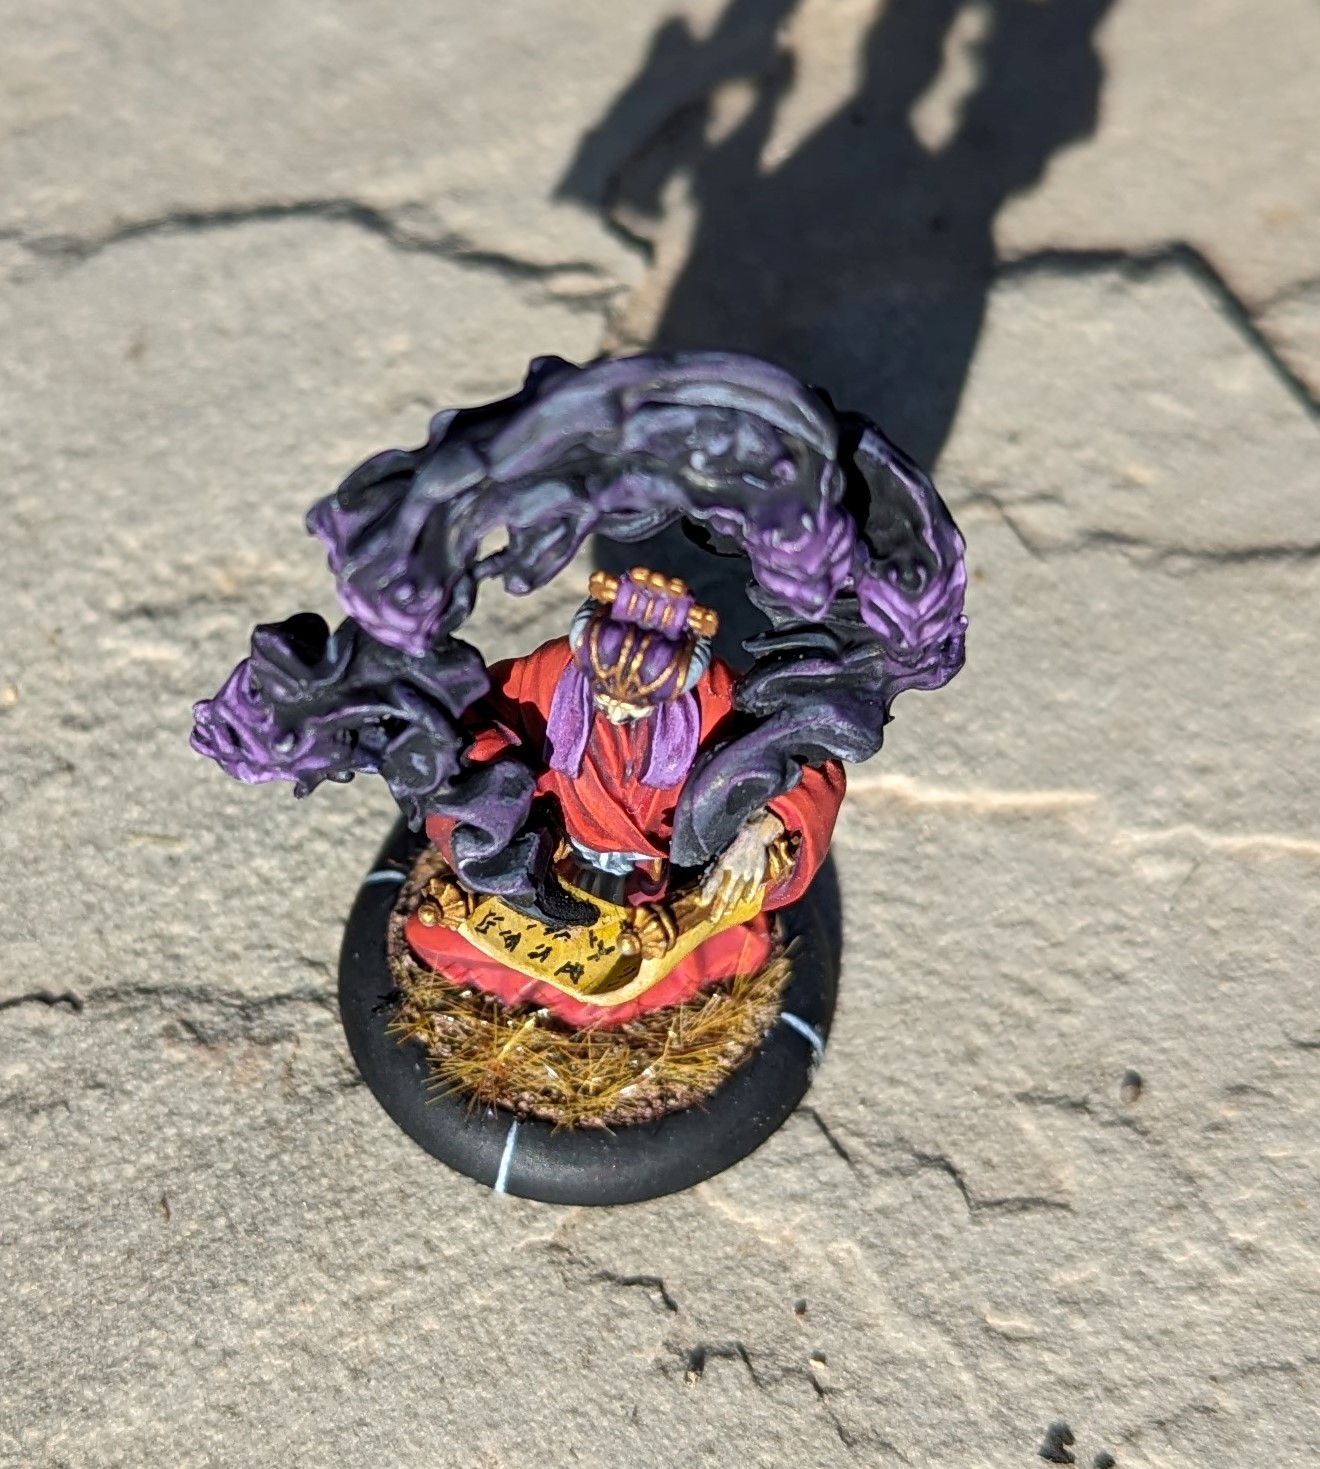
Continuing with the Ronin theme, I’ve completed another of the starter set, Hozumi Maha. This is a two part resin model, with the scroll and ghosts being separate from the main body shown below.
In game, Hozumi Maha can fight for the Cult of Yurei or the new Kinshi Temple faction. He seems a wholly unpleasant character who has managed to find a scroll that summons ghosts, something he seems all too keen to do. These ghosts are excellent for slapping frightened markers on the opponents, which limits their ability to perform certain actions. He can also cast Obey which, if successful, allows you to take control of the target model and perform an action, which can include attacking former friends and allies. The Cult of Yurei is all about control…. But you do want to keep Hozumi away from combat – he’s pretty poor in that regard and likely to end up cut to ribbons.
 Just the body of the model, zenithally highlighted
I wanted a rich red for the robes and I have a couple of different shades in my collection that were used to put down a base coat and some highlights. I seem to recall that the key to a good red is to really darken the shadows. For this, I used a deep purple, gradually mixing it into the red and applying to the areas that should be in shadow. I finally applied some glazes of darker red to the shadow areas and an almost orange to the highlight areas to tie everything together.
Based upon the fact that this character has sold his soul to Yurei, I wanted his skin to be pale and a little grey. I painted the skin in my usual way but started with a much lighter base and highlighted up from there. I then used grey as the shadow and applied a thin wash to de-saturate the skin.
I’m going to use purple to tie my Yurei models together and so applied this to the hat using a couple of shades mixed with some off white for the highlight. The off white and the grey were used for the sashes.
I wanted the swirling ghosts to really be dark and threatening. Rather than have the ghostly mist being translucent and ethereal, I wanted to create a look of never complete darkness, so I ordered some of the really black paint you can get. This black was applied to the deepest areas to try and create an impenetrable look. The higher areas I highlighted with ordinary black and grey and to emphasise the purple theme, I tried to fade the ghost faces from black into purple.
It was at this stage, I found out the the very black paint seems to have issues adhering to the model, with some parts flaking off, even after a varnish had been applied. This was frustrating as there were a few spots that required repair, even before the model was finished.
Finally, the scroll was just a beige given a brown wash. I did translate ‘summon ghosts’ into Japanese to then write it on the scroll but the characters were quite complex and the angle of the scroll didn’t lend itself to such intricate pen work. I don’t think I would have managed to fit it all on either, so I gave up and, using a fine pen, made up some characters.
The ghosts/scroll then got glued to the body and based up using Vallejo acrylic dry earth. This was washed and flocked and job done.
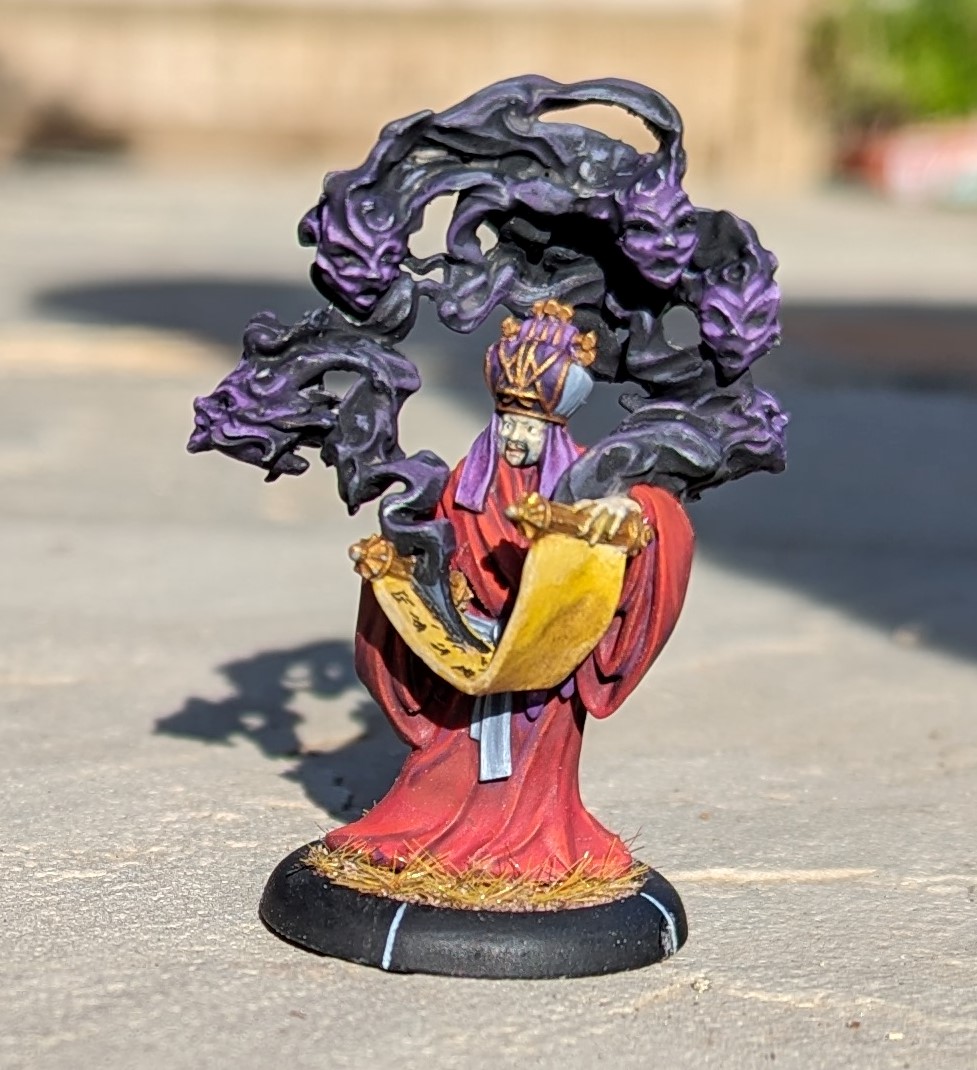 Hozumi front on
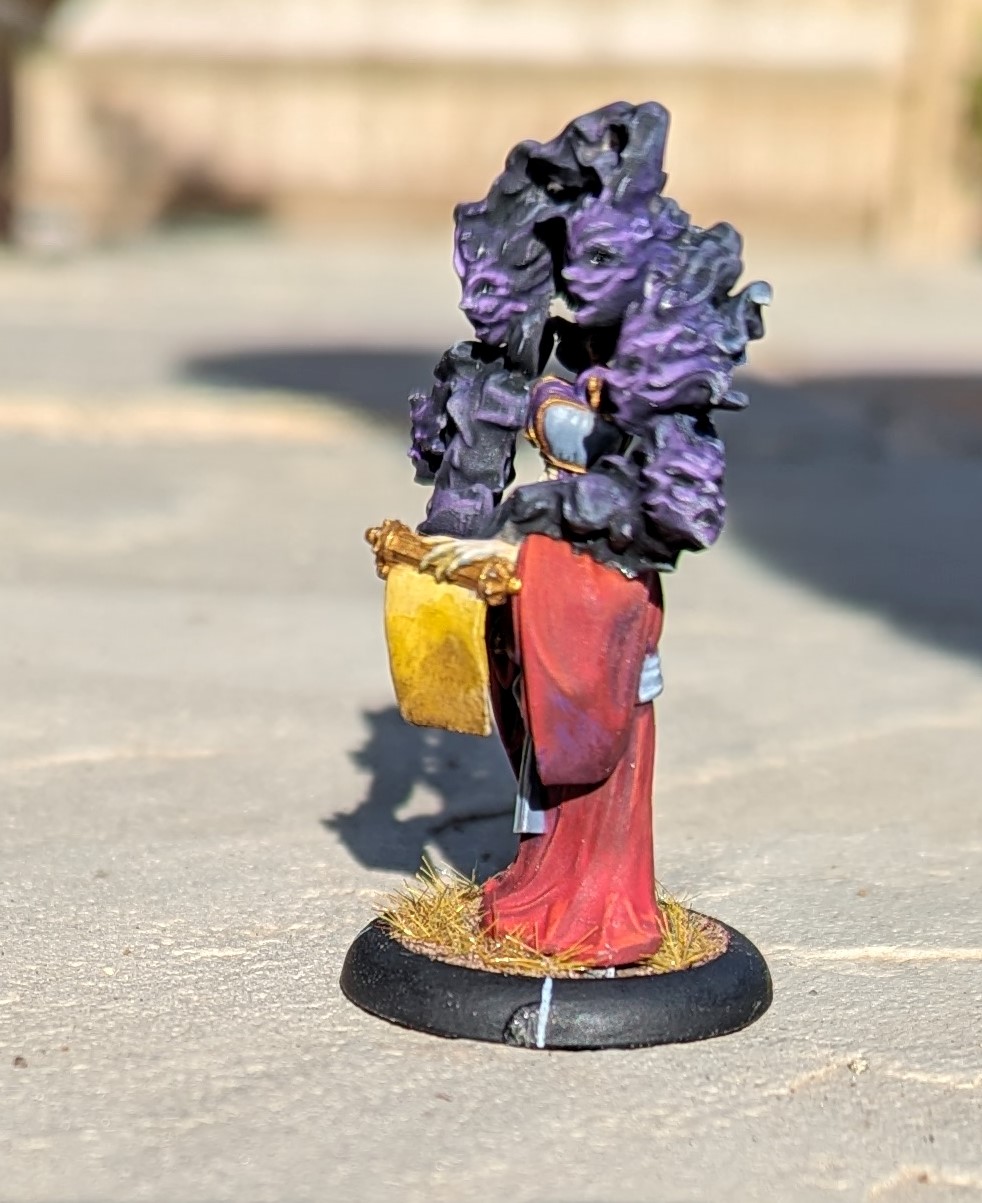
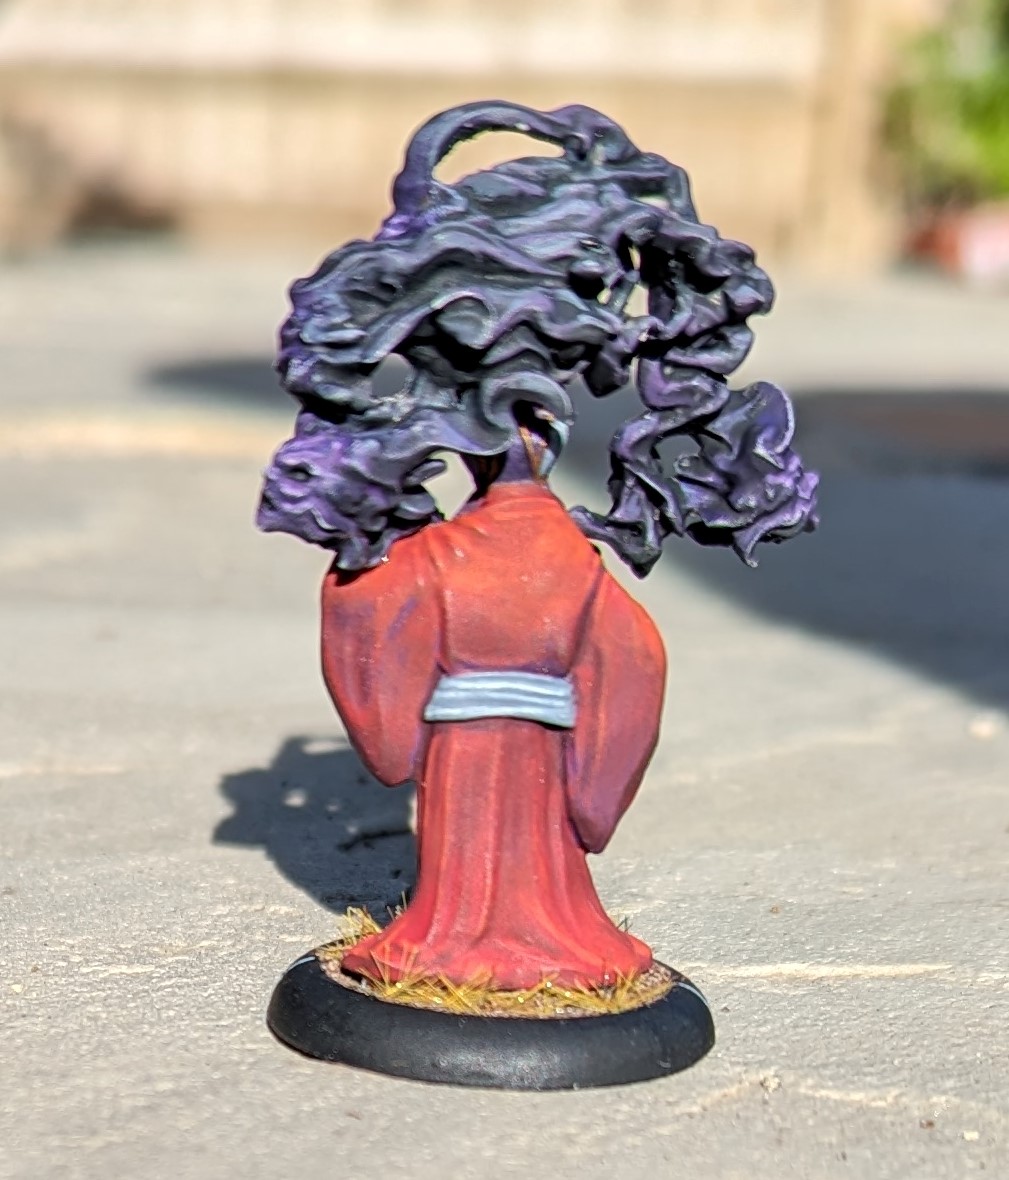 Rear shot, with motion blurred ghosts because they're really moving....
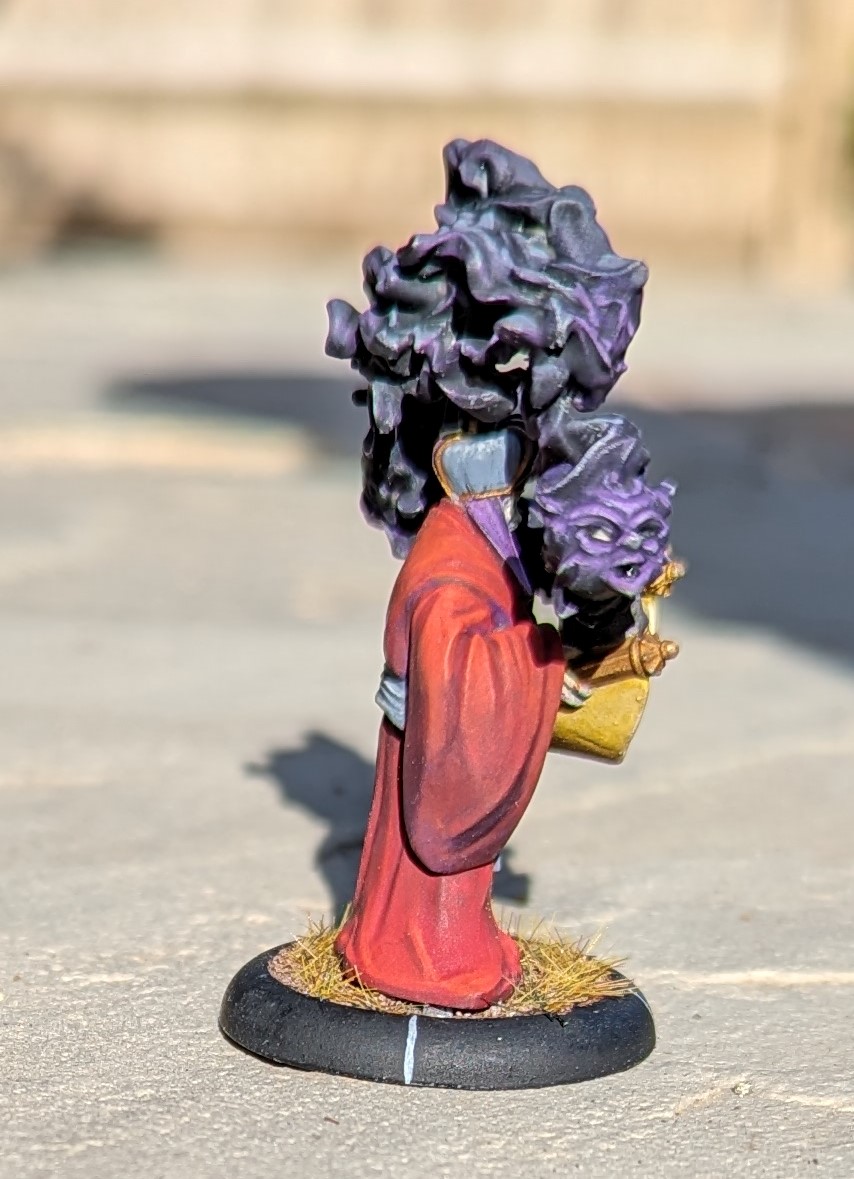
 The tricky scroll
Taiyo
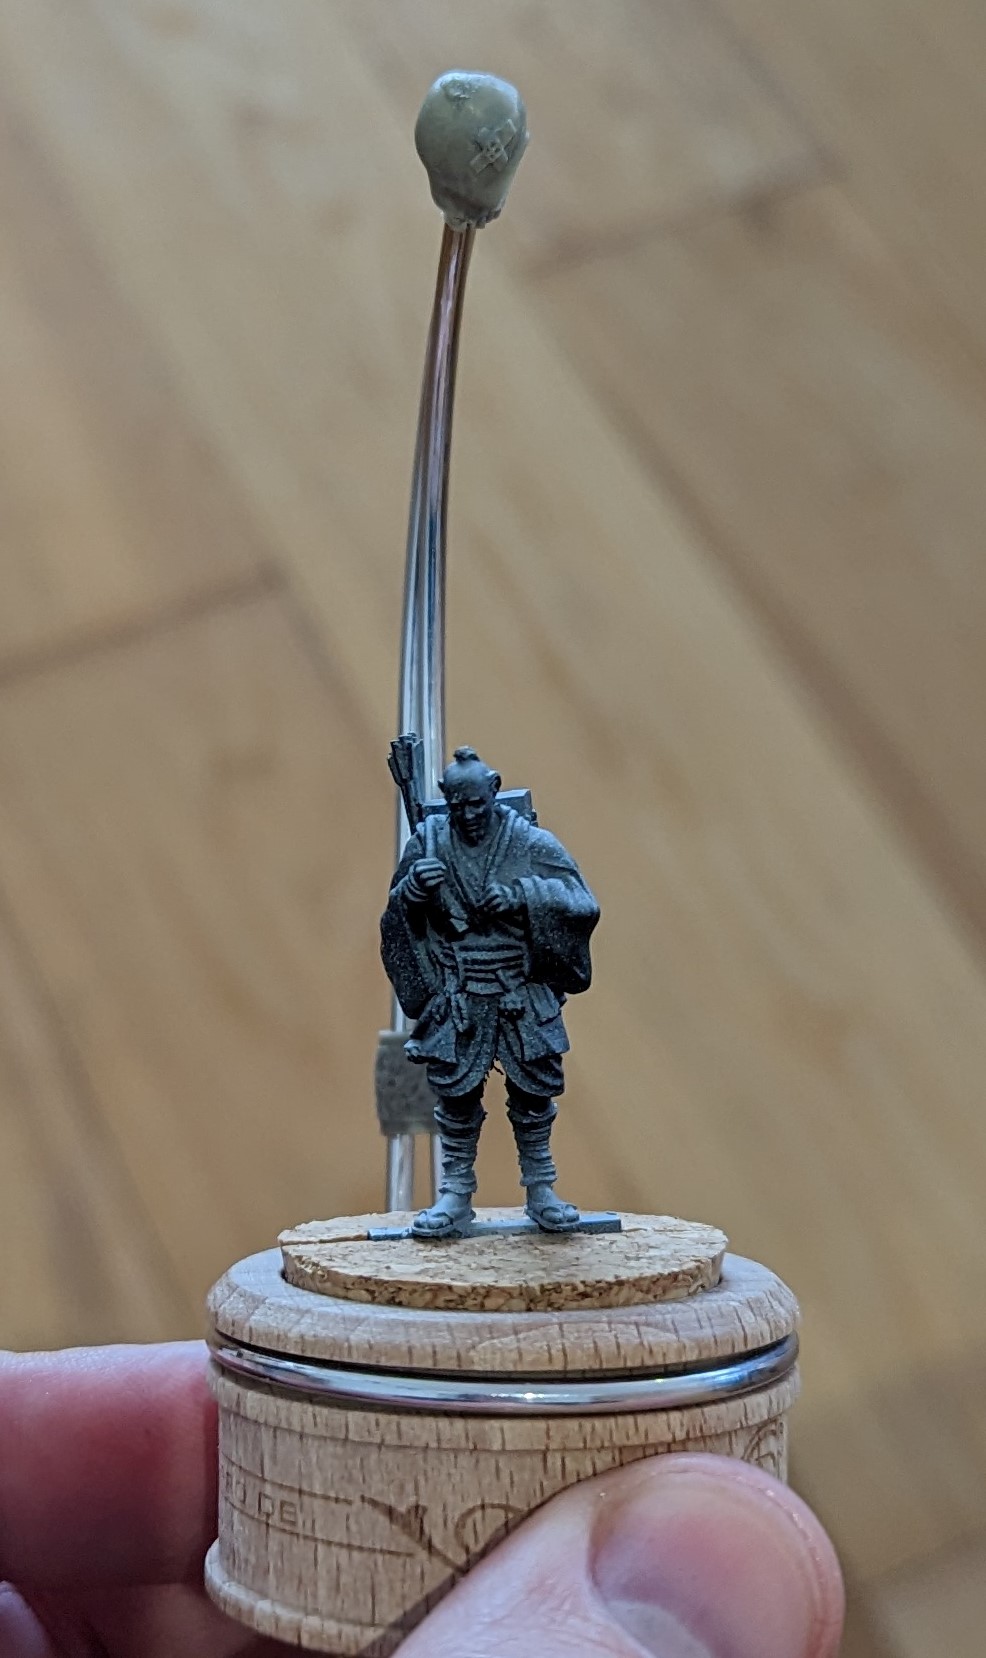
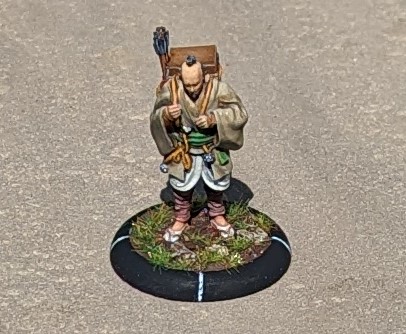
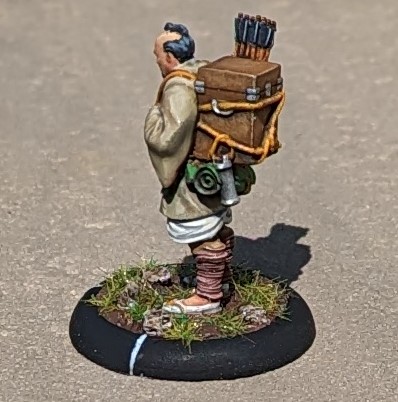
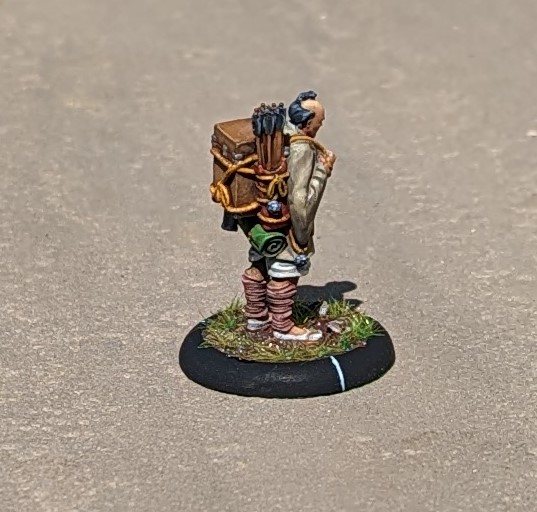
Playing with painted miniatures is better than playing with bare metal/resin miniatures, so address this situation, I have been working my way through the models that we have collected so far. I’m not the quickest painter (and my lack of success on the hobby pledge thread is evidence of just how slowly I do paint) and I usually paint 15mm FoW models, so 28mm Eastern influenced models will be both a pleasant change as well as a challenge.
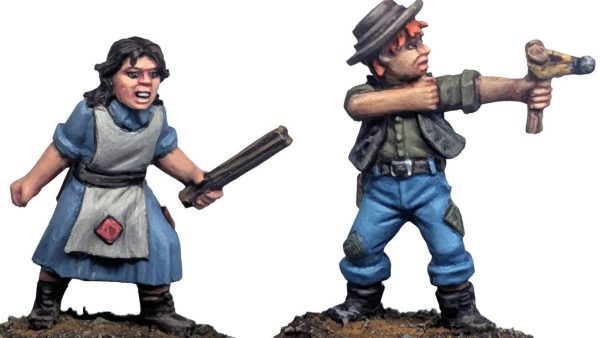
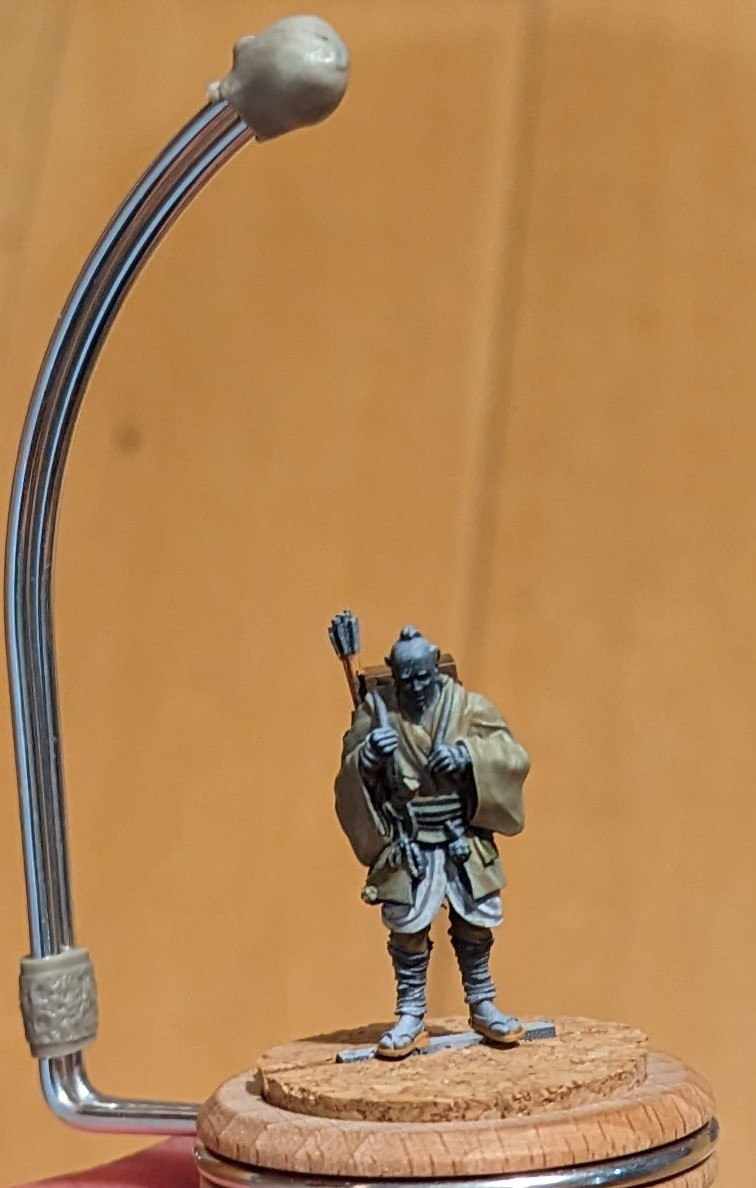
To break myself in easily, the first model that I tackled was from the Bushido starter set and is a Ronin called Taiyo. He is able to fight for the Temple of Ro-Kan but not for my Cult of Yurei. He’s very mush a support character, being able to provide ammunition to those with ranged weapons to keep them firing. He’s also listed as a peasant on his card, so no fancy clothing for him.
Taiyo is a resin model and I’ve primed him with Mr hobby grey primer and then given him a zenithal highlight.
I’m going to make the clothes quite muted (he is a peasant). I’ve gone for a light grey with white highlights for the under garments while the jacket is a camo biege. I’ve provided the shadows with glazes from a camo beige and brown mix, while the highlights are a off white/camo beige mix.
I then forgot to take photos of the next steps as this happened over several nights. But the leggings were a mid brown, washed and then highlighted. The skin I mixed up from the Army Painted skin set. The chest on the back was a flat earth, washed and then glazed with lighter brown shades to create different wood colouring and shadow/highlight – the final highlight was Iraqi Sand.
The hair was a simple grey given a couple of washes of nuln oil. Rope work was scruffulous brown with a wash and highlight of scruffulous brown/Iraqi Sand. This was then given several varnish coats starting with a gloss, then an acrylic matt and then two coats of AK Interactive’s matt varnish to really ensure there is no shine.
The base was primed and then once the model attached, I’ve used the Vallejo wet mud acrylic paste. A summer grass static grass mix was applied to the top. This was secured with a scenic cement. The rim painted black and then the LoS lines applied with an ice blue. The rim was then varnished. Finally, I stuck a couple of small magnets into the base and covered these in polyfila. This ensures that the model doesn’t move in the metal lined storage tray and it also provides a little bit of extra weight.
And job done. Taiyo ready for combat (or at least ready to supply other models in combat).

Battle Report No.2 (Yes, another one - apparently some people like them)
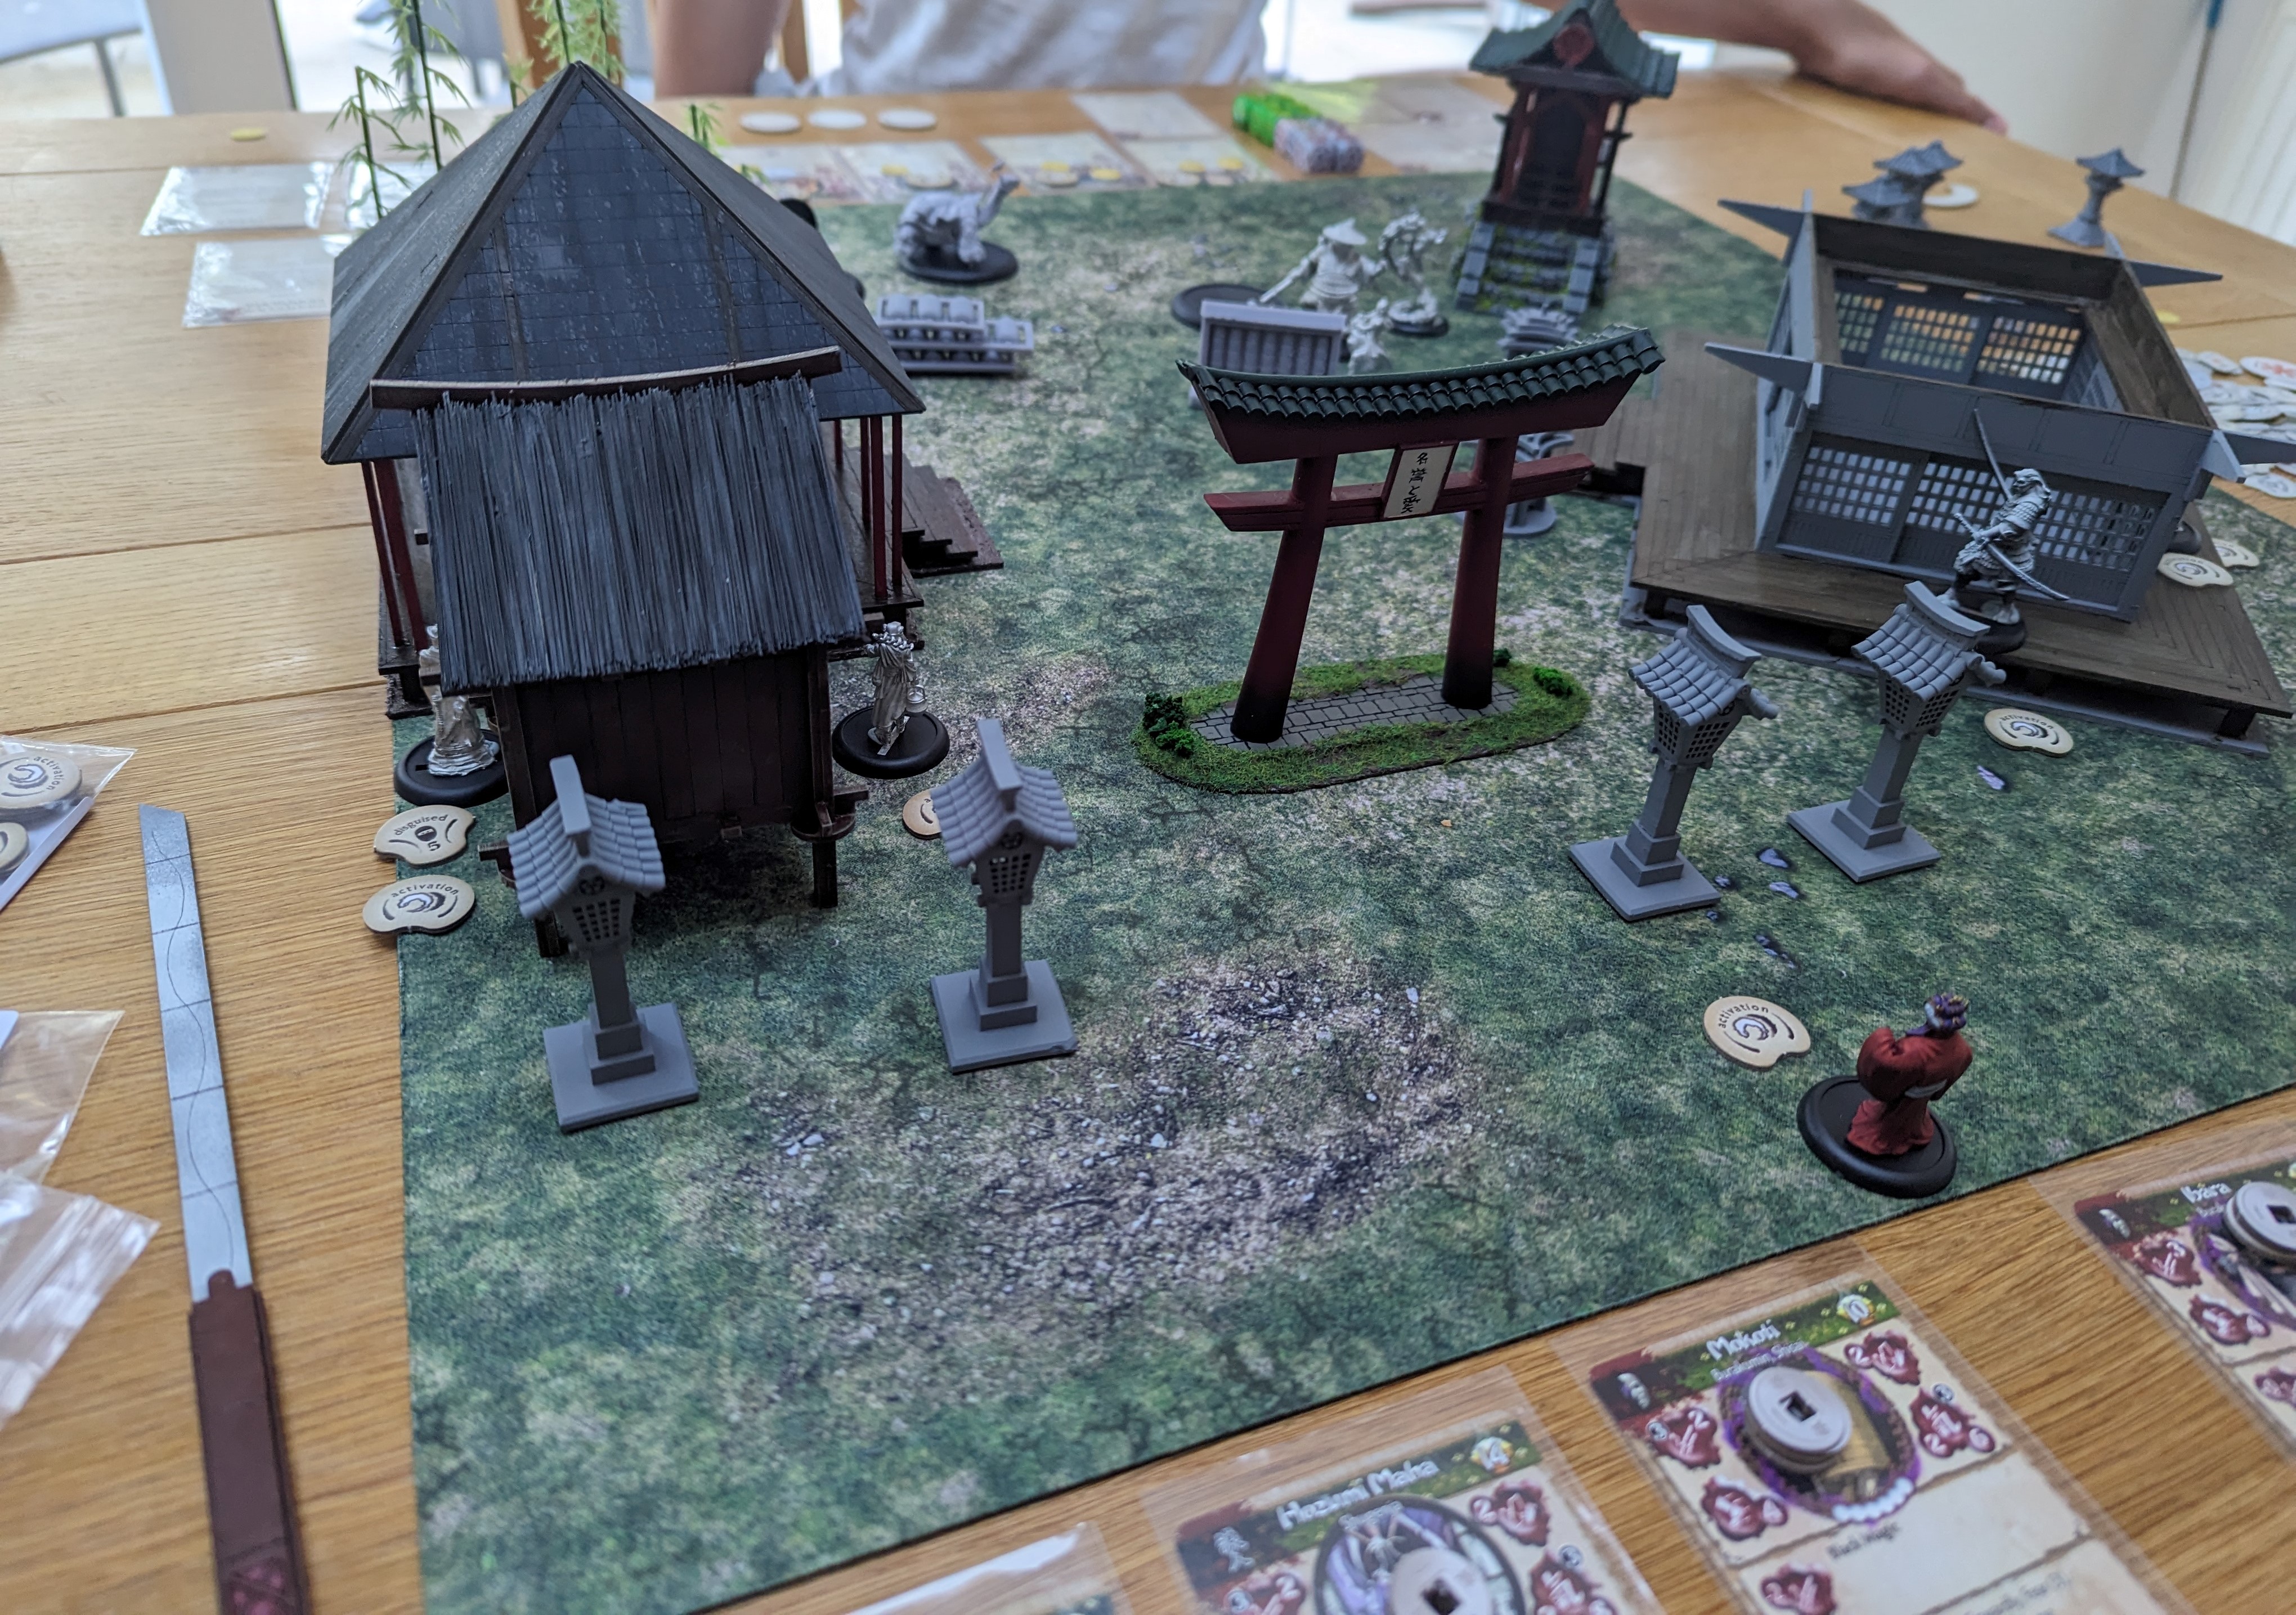
After the draw we fought out the night before, we did battle again but this time opting for one of the scenarios. The scenario calls for three tokens to be deployed across the centre line, 6” apart (these are depicted in our game by the grey resin chess pawns). The tokens all start the game as neutral however models can interact with them when in base to base contact by using an activation to ‘pray’. This allows the model to then change the status of the token by one ‘step’ so a neutral token becomes ‘friendly’ to the side that just prayed and hostile to the opposing side. Praying to a hostile token turns it neutral. At the end of each of turn 4, 5 and 6, the side with the most friendly tokens gains a victory point.
My son ran the same list as he did in his previous game but, for completeness, here it is:
- Master Ekusa (who’s a monk riding a tortoise and can heal, remove activation tokens and stops attacks due to his zen like demeanour)
- Hotaru (a monk who likes fire)
- Yim (a monk who’s strong and linked to iron)
- Saruka (another flame monk and can also cast a fireball like ranged attack)
- Kuma (an angry, bo staff wielding panda who can root opponents to the spot while slapping them around)
In addition, my son had selected a couple of terrain pieces that allow extra Ki generation for his models. Ki allows the activation of special abilities and boosts regular stats and the TRK are big Ki users. He also selected some trap cards as well.
I changed my list slightly by dropping the two plague rats and Risu and bringing in Yama Uba,
- Mo Ises (an assassin that likes stabbing people in the back)
- Mokoti (dreadful in combat but can control enemy models)
- Yama Uba (a scary ‘woman’ whose face is replaced with a teeth ringed maw and has the handy ability of being able to replicate any statistic or ability of a character they are in base to base contact with)
- Ibara (Can handle himself in combat and can throw some fire around at range)
- Hozumi Maha (a ronin who can also control enemy models)
- Tenbatsu (another ronin who’s a combat monster)
In addition, I equipped Ibara with the Violence Fetish enhancement card which gives him a boost in melee combat.
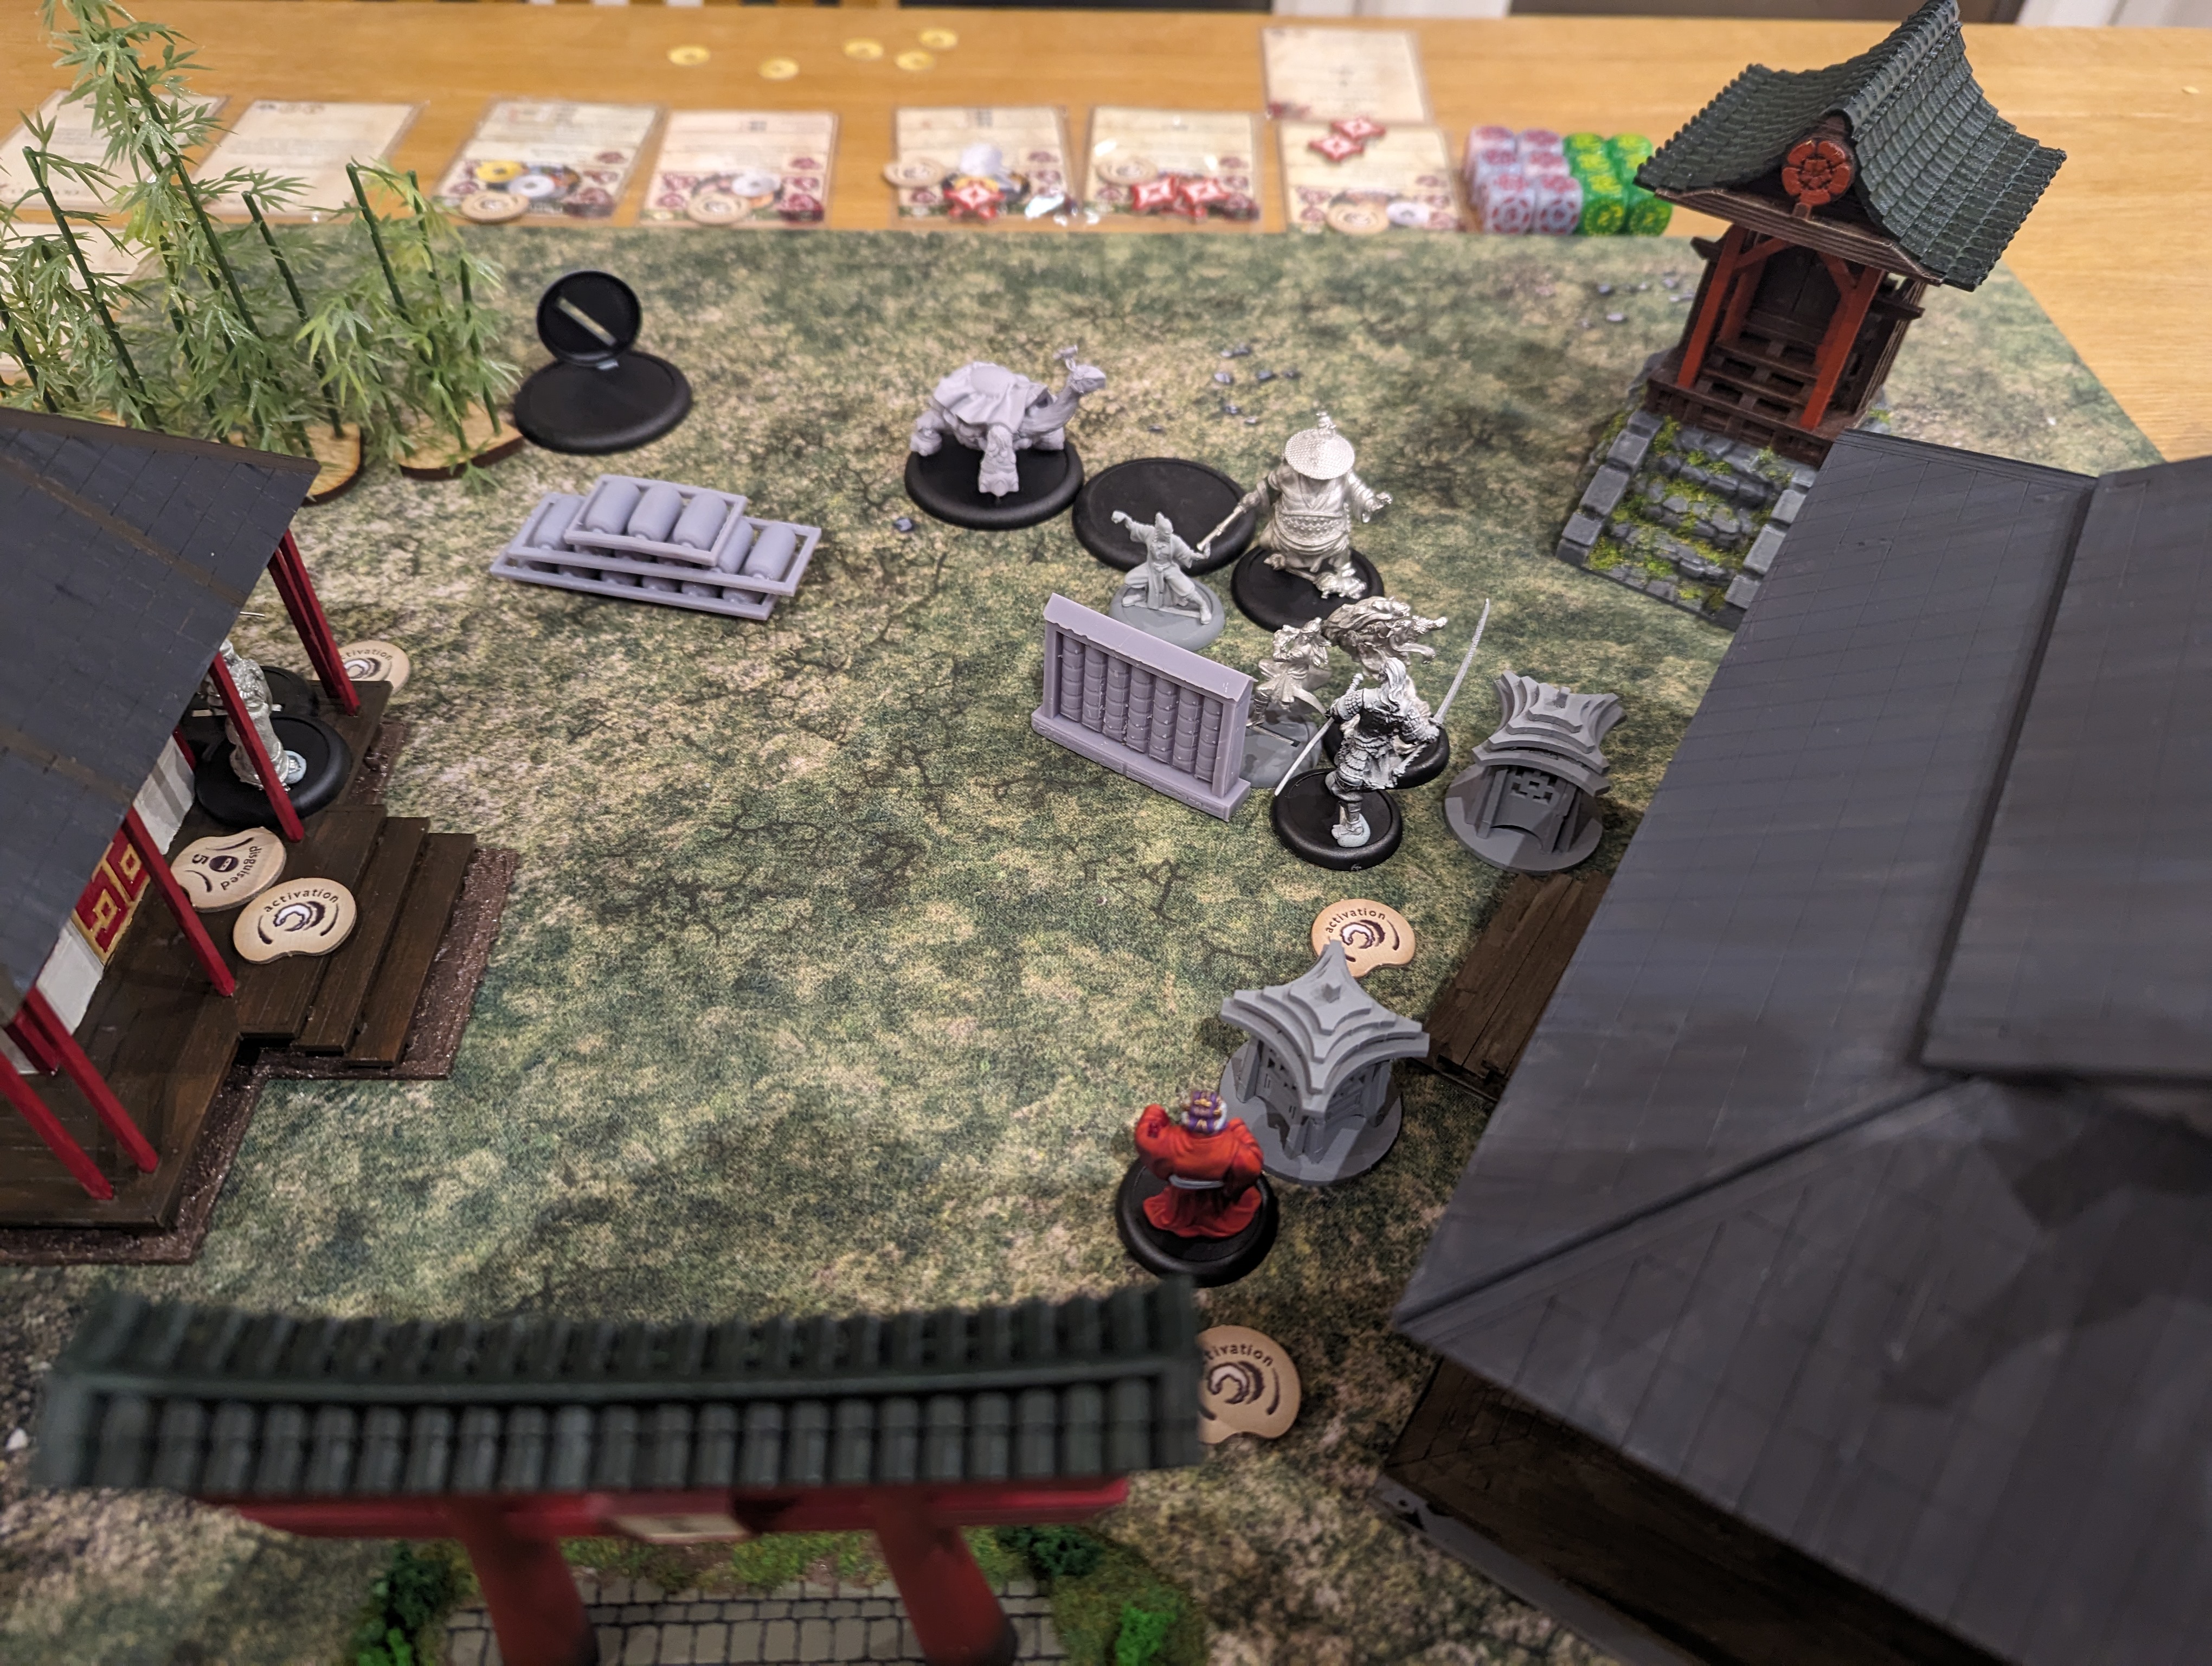
My notes and pictures for this battle are a little patchy….
Turn 1.
The usual moving up into position. Nothing significant happened.
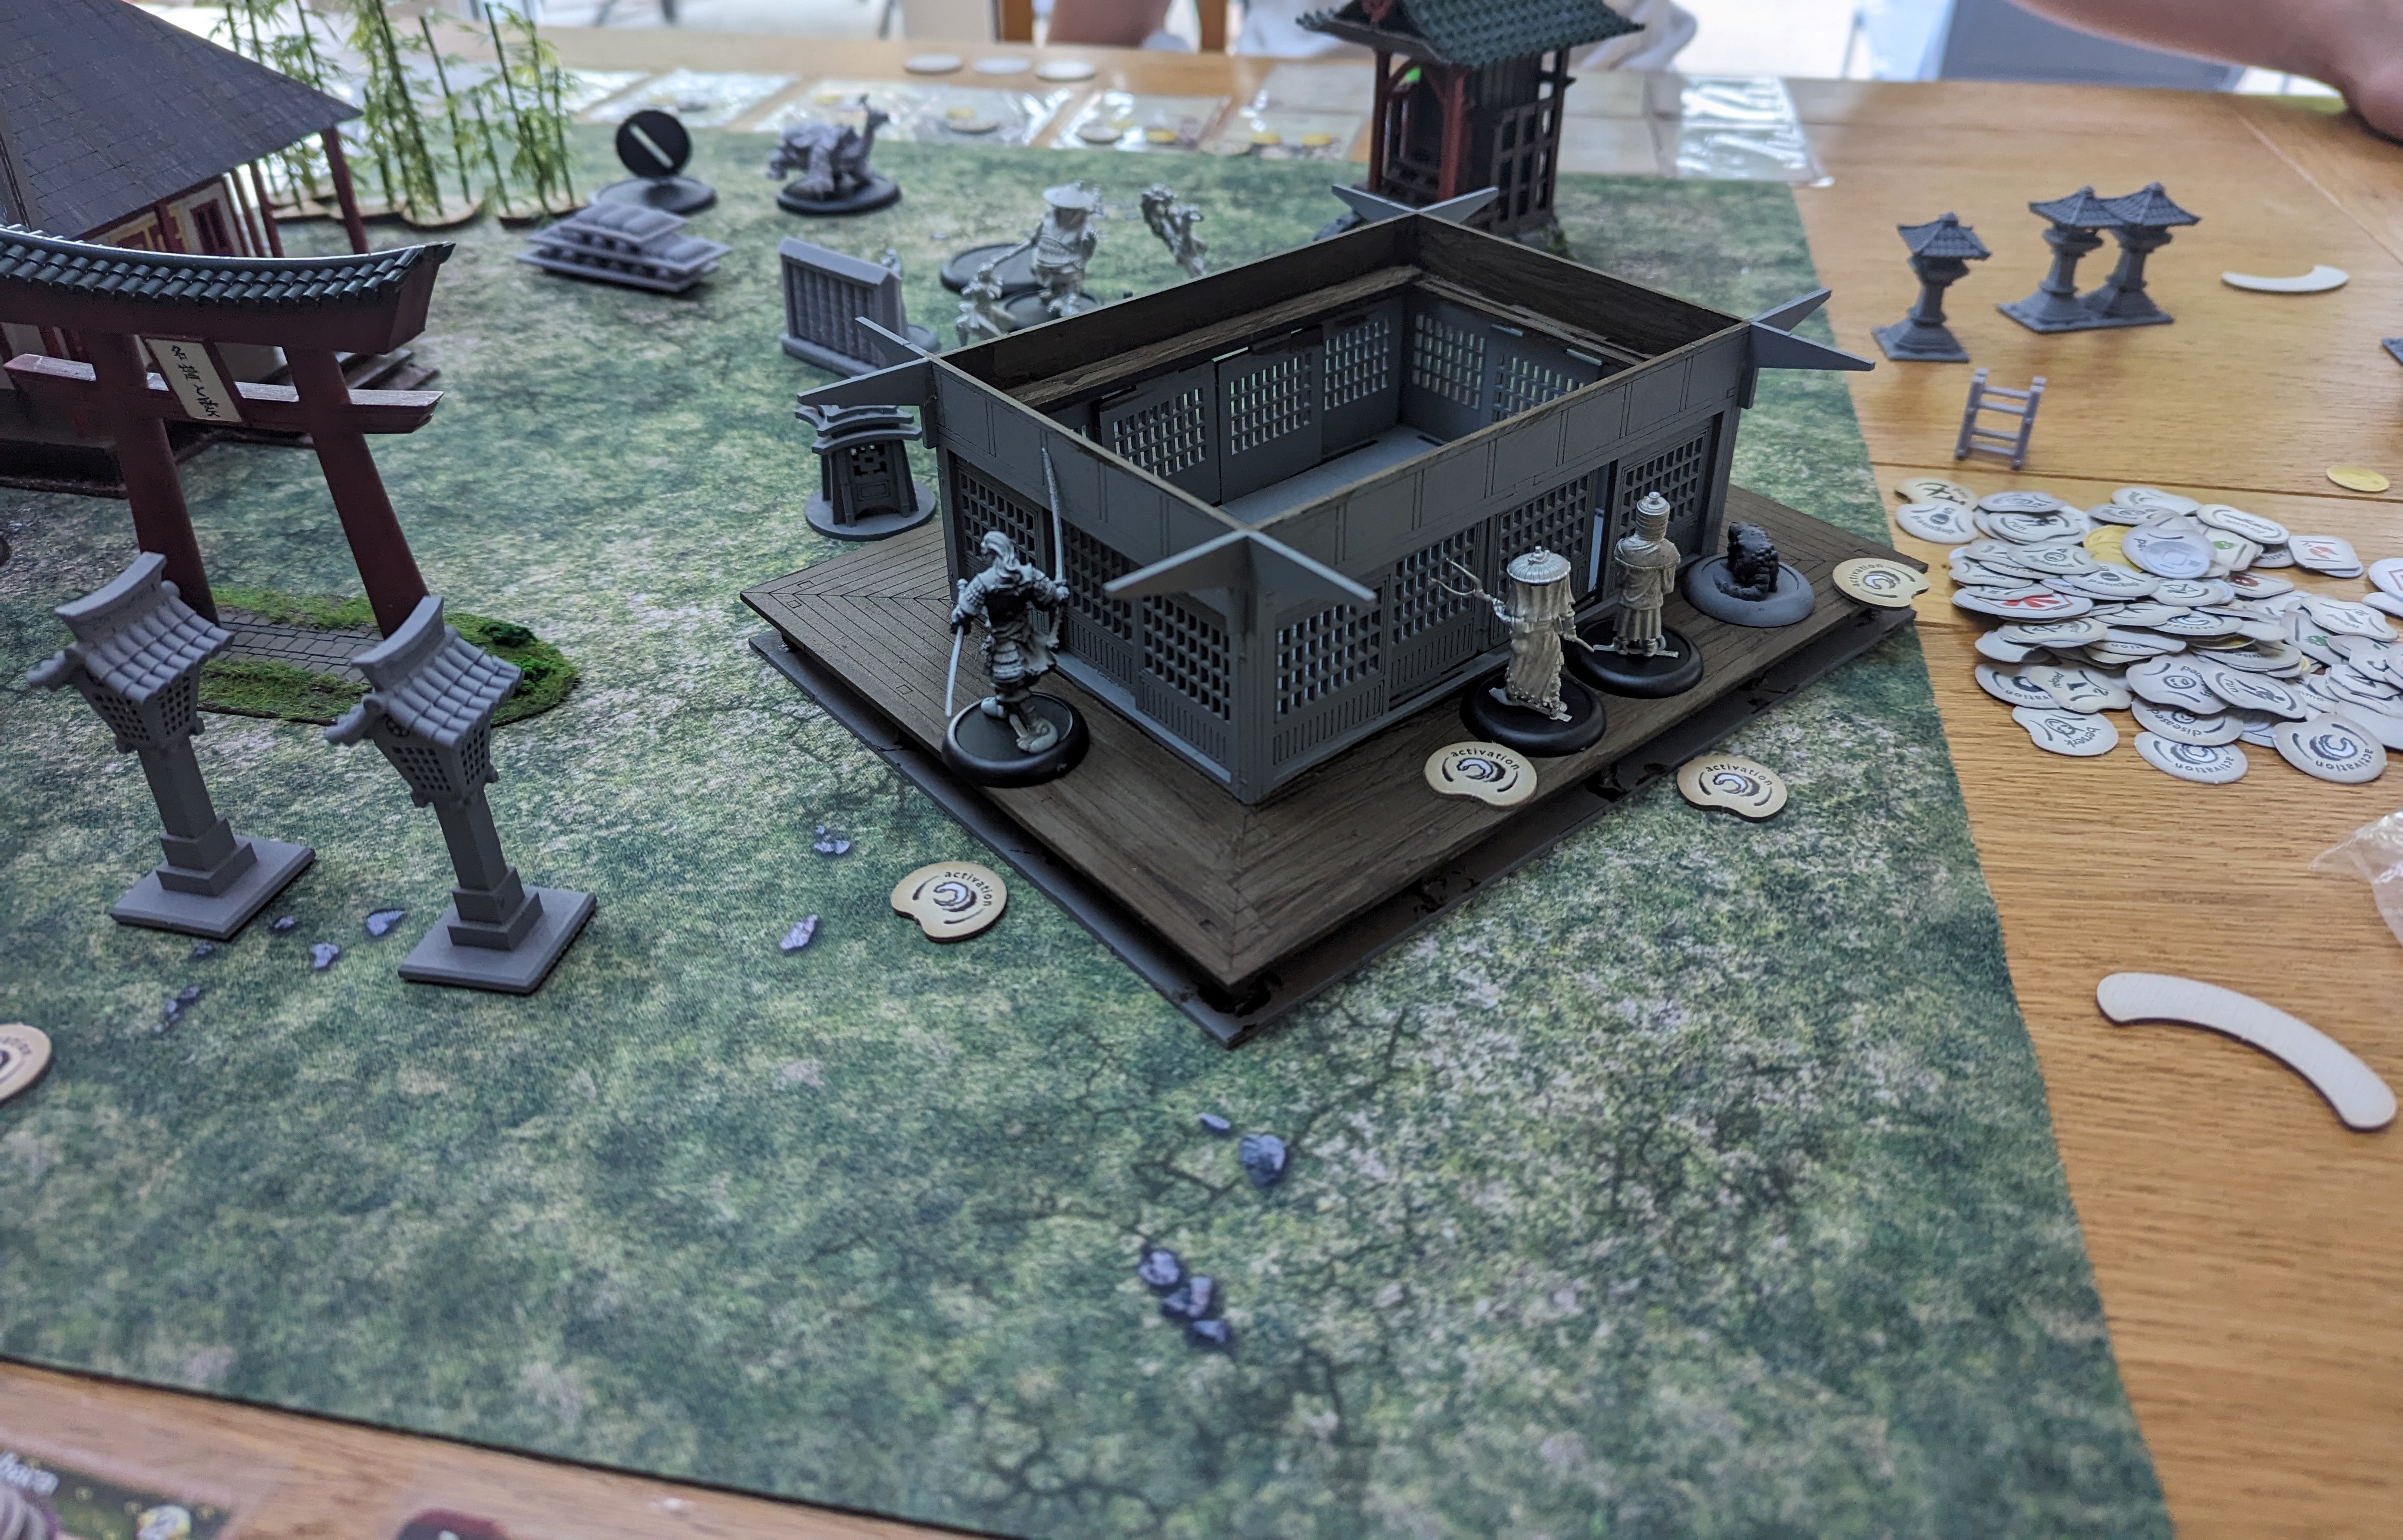
My son placed Master Ekusa on his right flank with the Kuma and the rest of the monks through the middle. I paired my team up with Tenbatsu and Ibara on my left, Mokoti and Yama Uba through the middle and Hozumi Maha and Mo Ises down the right flank. My plan is to try and loop Mo Ises round the back to open up the option of backstabbing someone.
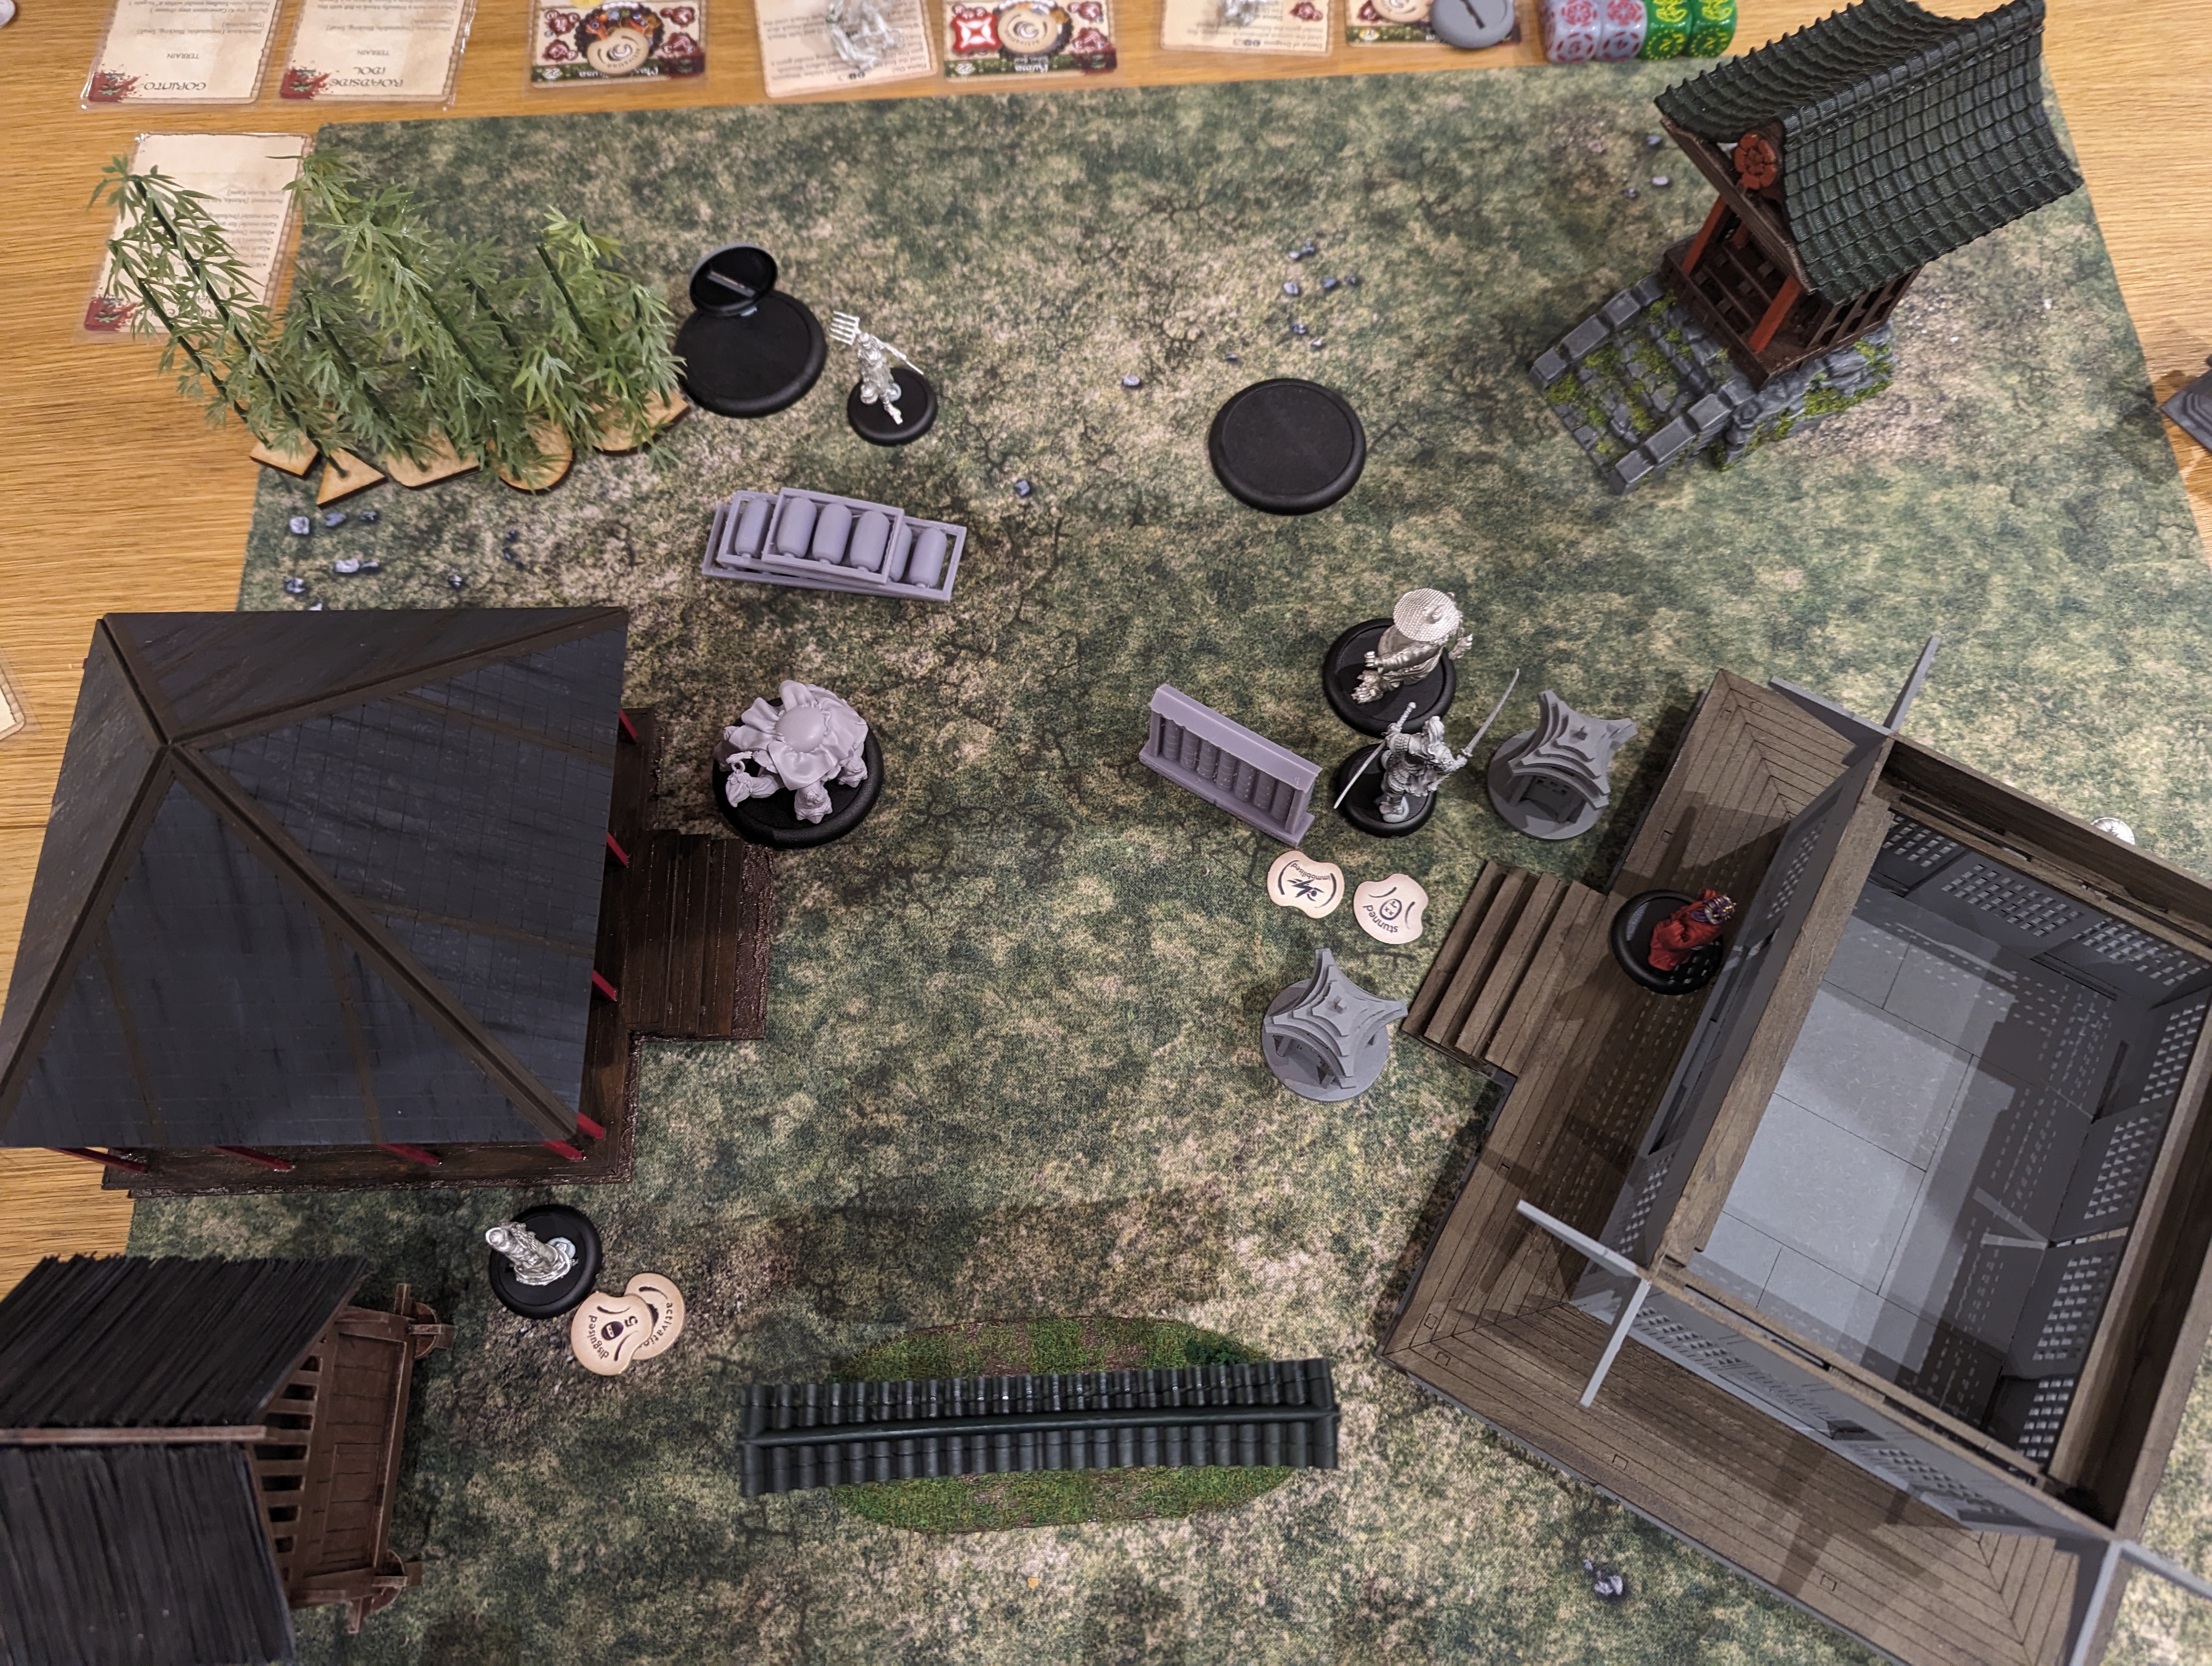
 Shortly after turn 1 had started
Turn 2.
Tenbatsu is able to attack Master Ekusa. Annoyingly, Ekusa radiates a zen aura that stops you using any attack dice however Tentabsu has the Counter Strike Defence skill that, in the event of a successful defence, you can make a damage roll. I thought this was sneaky however my son saw straight through this and used a push defence that just moved Tenbatsu out of base to base meaning that his counter strike defence automatically failed. So a bit of a waste of an action from me.
Mo Ises managed to cast obey on Kuma who then turned around and whacked Hotaru for a couple of points of damage – you’ve got to love the obey spell.
My son moved Saruka into melee with Mokoti and caused 2 damage to Mokoti. However, in doing this, he exposed Saruka’s back to Yama Uba who moved in from behind to make a surprise attack. This, coupled with the support of Mokoti allows Yama Uba to roll a lot of dice against Saruka’s 1 dice. The attack was successful and Yama Uba has the Critical Strike skill meaning that any damage roll resulting in a double on the two dice used, automatically kills. I rolled a double, Saruka is killed and my son was not happy.
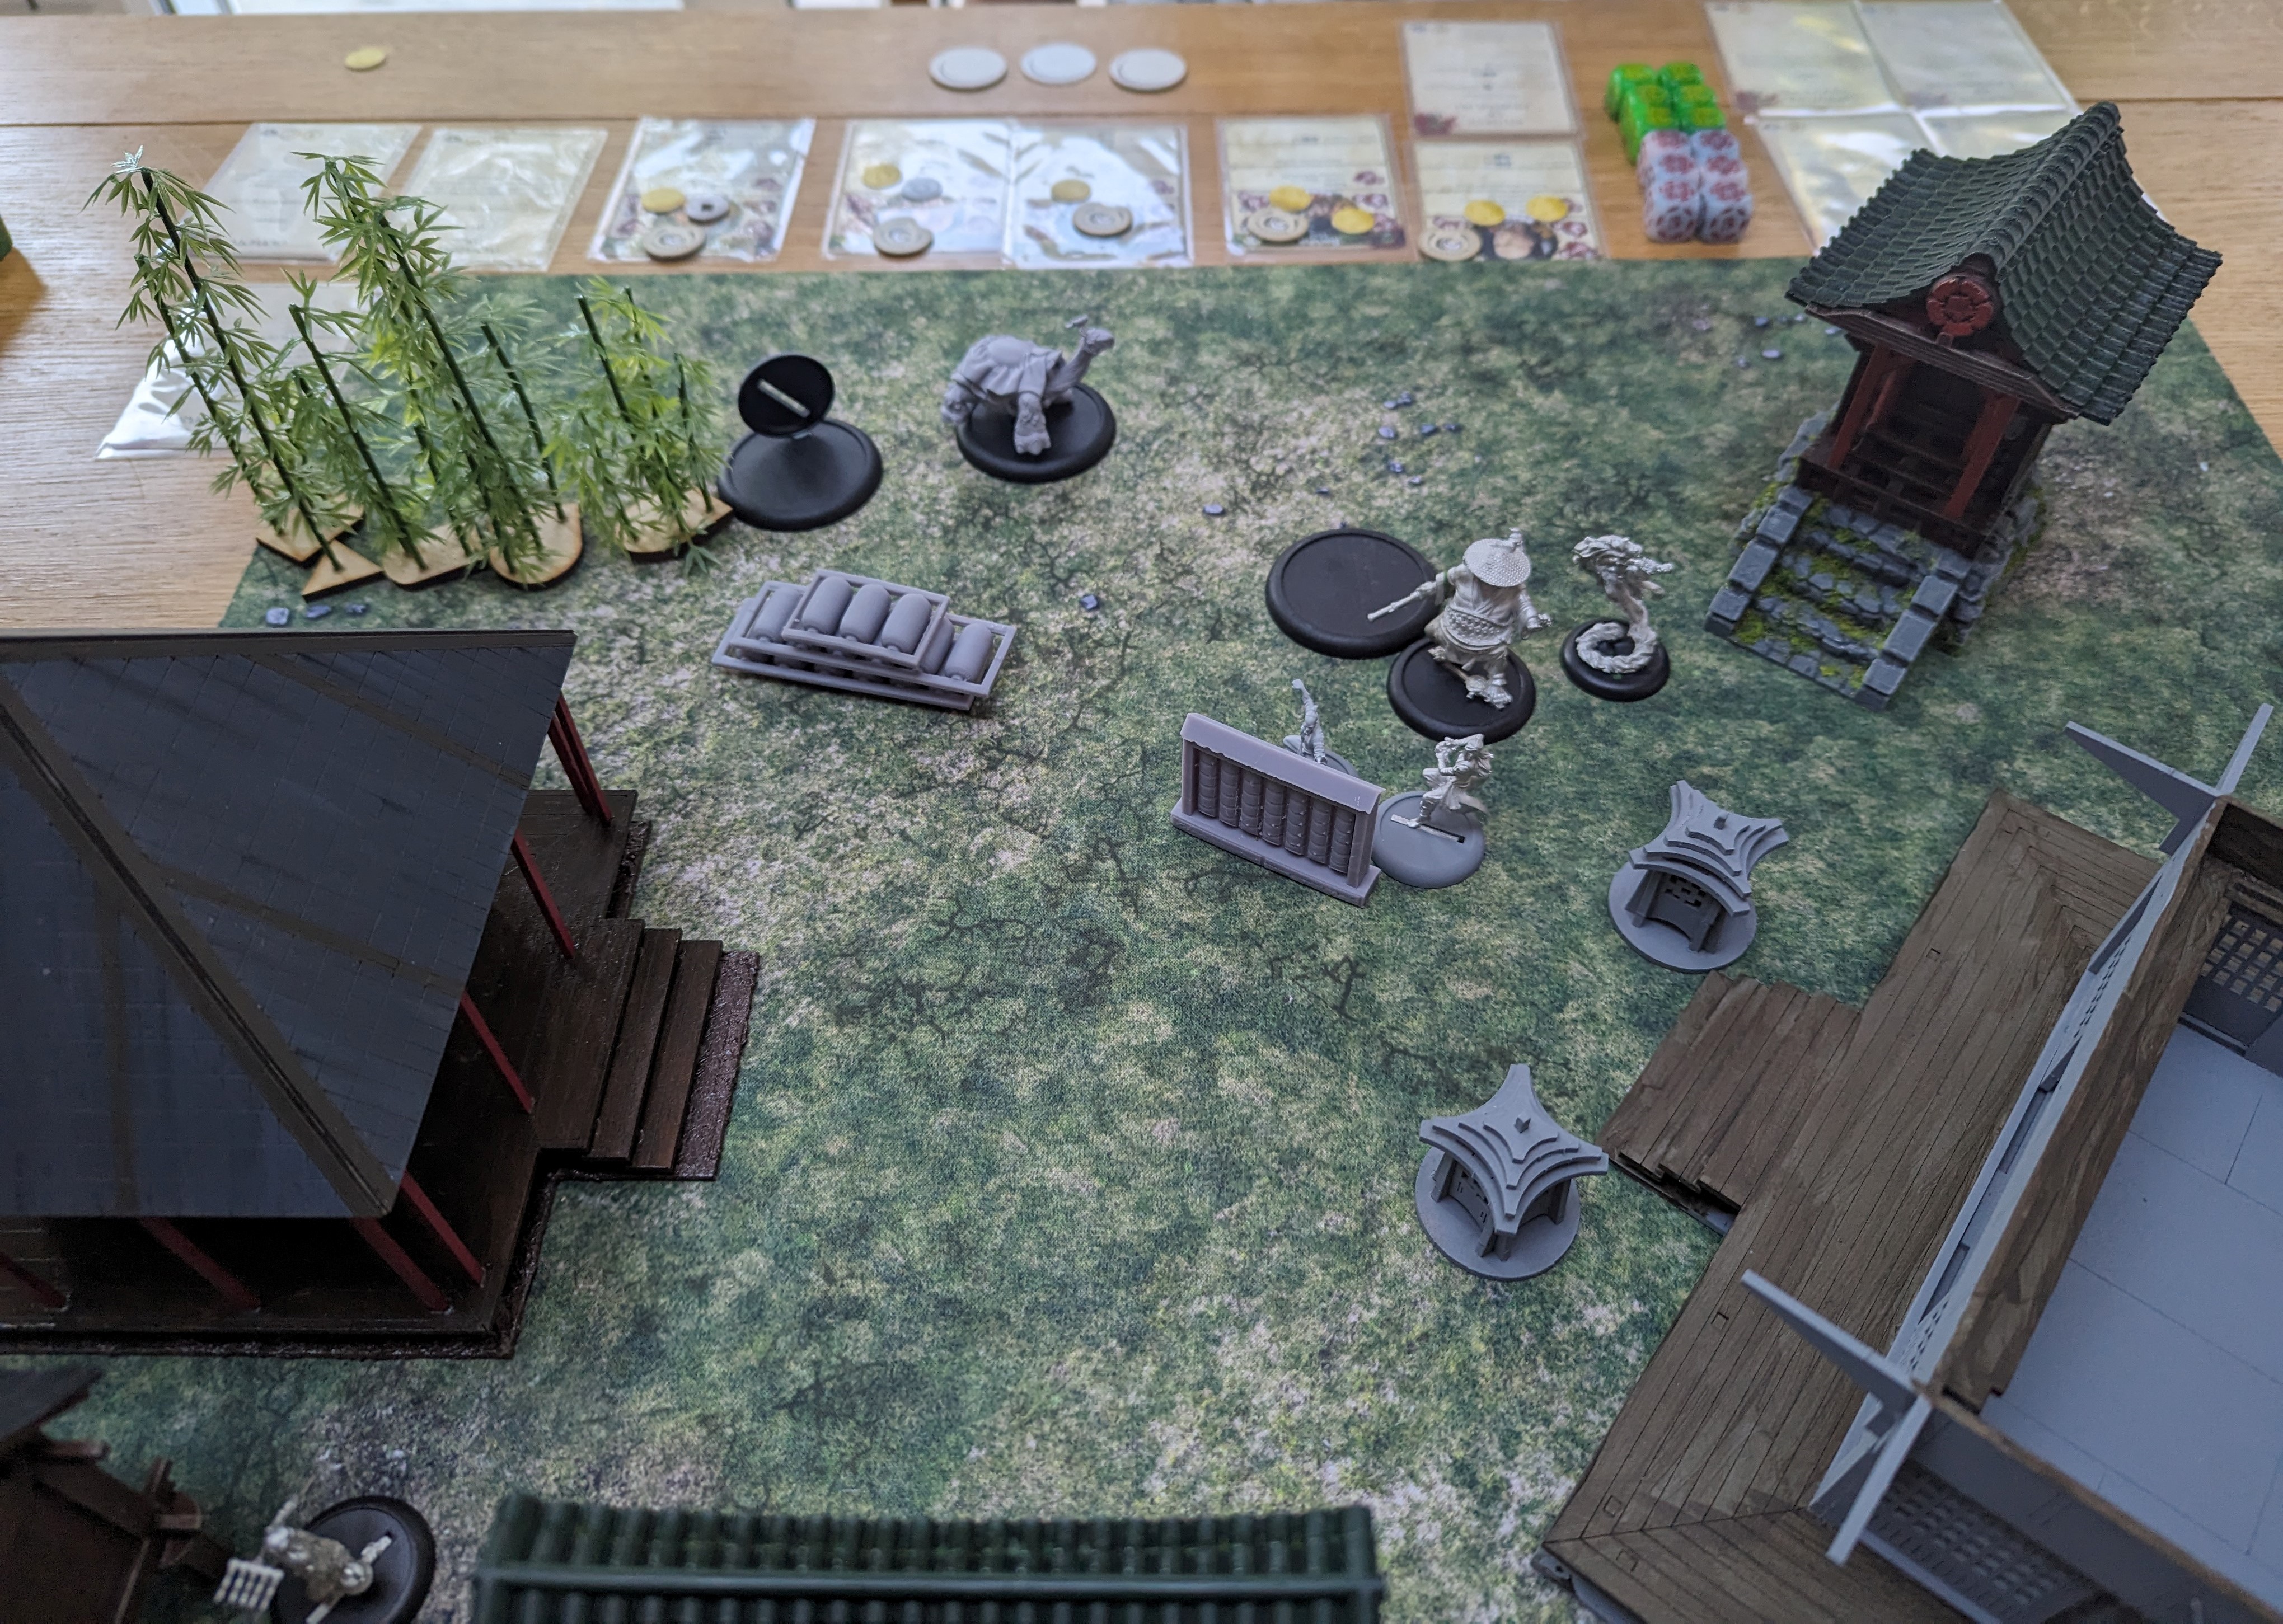
 End of Turn 2
 End of Turn 2 from a slightly different angle
Turn 3.
Master Ekusa goes first and casts his Peace spell on Tenbatsu that succeeds and removes all of Tenbatsu’s activations for the turn, rendering him useless.
Yim moves in to melee combat with Yama Uba and uses his fists of steel ability to increase his melee attack and does 2 damage.
In return, Yama Uba uses her ability to take any ability of a model in b2b and selects fist of steel. My son thinks this is very unfair, especially as Yama Uba’s attack back on Yim causes 4 damage!
Mo Ises attacks Kuma from behind and shanks him in the back for 4 damage and a further 2 poison damage (that gets taken at the end of the turn if the counters aren’t removed beforehand).
Understandably, Kuma (and my son) isn’t happy about this turn of events and so Kuma kills Mo Ises with an almighty whack with his bo staff that would have been enough to kill Mo Ises twice.
Mean while, Hotaru has interacted with one of the scenario objective to turn it friendly to the Temple of Ro-Kan (TRK).
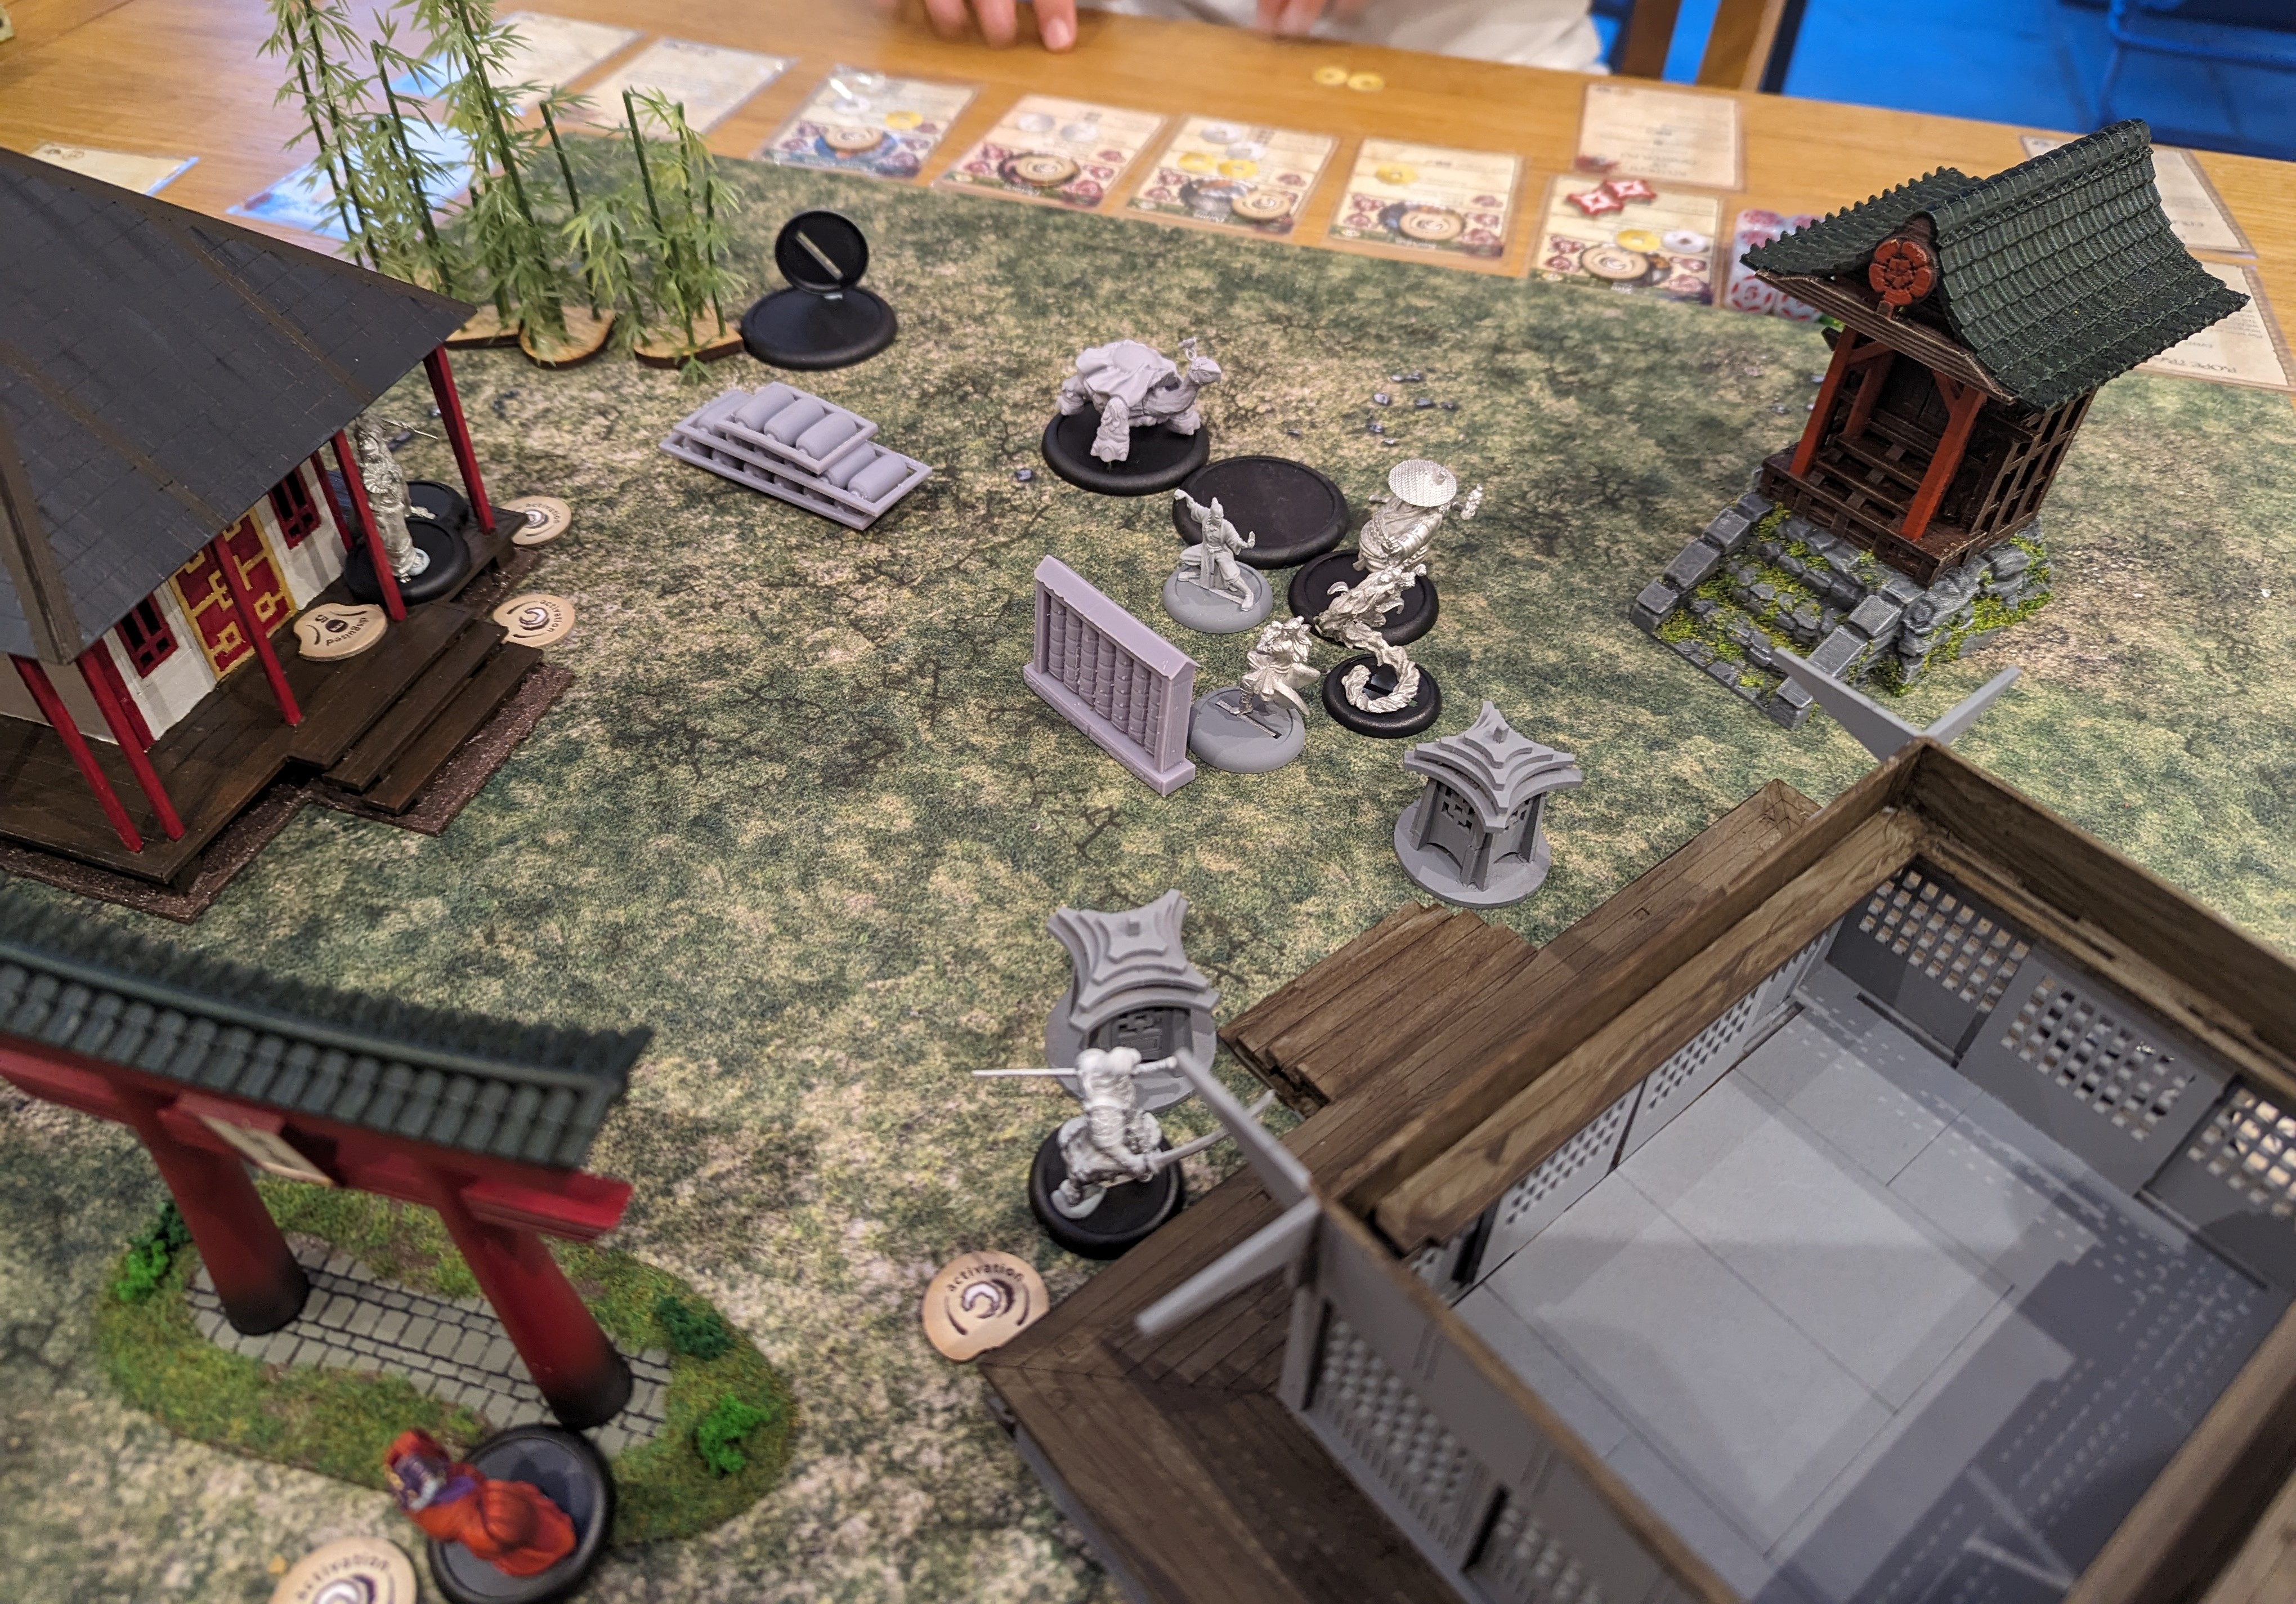
 End of Turn 3
Turn 4.
Yama Uba continues her battle with Yim, inflicting another couple of wounds (Yama Uba is quite handy in a fight!). Meanwhile, a bloodied Kuma manges to get hold of a largely useless Hozumi Maha, but Hozumi is able to sacrifice some of his ghosts that he has summoned to avoid damage.
We then have a rules issue following Yim’s return attack on Yama Uba. After spending 10 minutes reading the rule over and over again, we ruled that both parties deal damage and both end up dead being removed. (After the game I went through it again and came to the conclusion that the correct reading was that both sides would have failed and no damage would have been dealt but as we both lost a model, neither of us were particularly disadvantaged)
On the left, Ibara, Tenbatsu and Ekusa take turns in interacting with the scenario token, with the eventual result being the left token (from my perspective) is Cult of Yurei, the middle token is TRK and the right token is neutral. Therefore, at the end of turn 4, no Victory Points are issued.
Turn 5.
Kuma wastes no time in battering Hozumi Maha to death. I move Mokoti up to do something about the centre token but Horato interacts with the central token keeping it TRK friendly. I start moving Ibara across to the right to capture that token but he can only get into btb with it and doesn’t have enough activation to interact with it meaning it stays neutral this turn. Ekusa again successfully uses his Peace ability on Tenbatsu and Tenbatsu loses all of his activations and with Ekusa’s last activation, he interacts with the left token to make it neutral.
At the end of turn 5, the left token is neutral, the middle TRK friendly and the right neutral. That’s 1 VP to TRK.
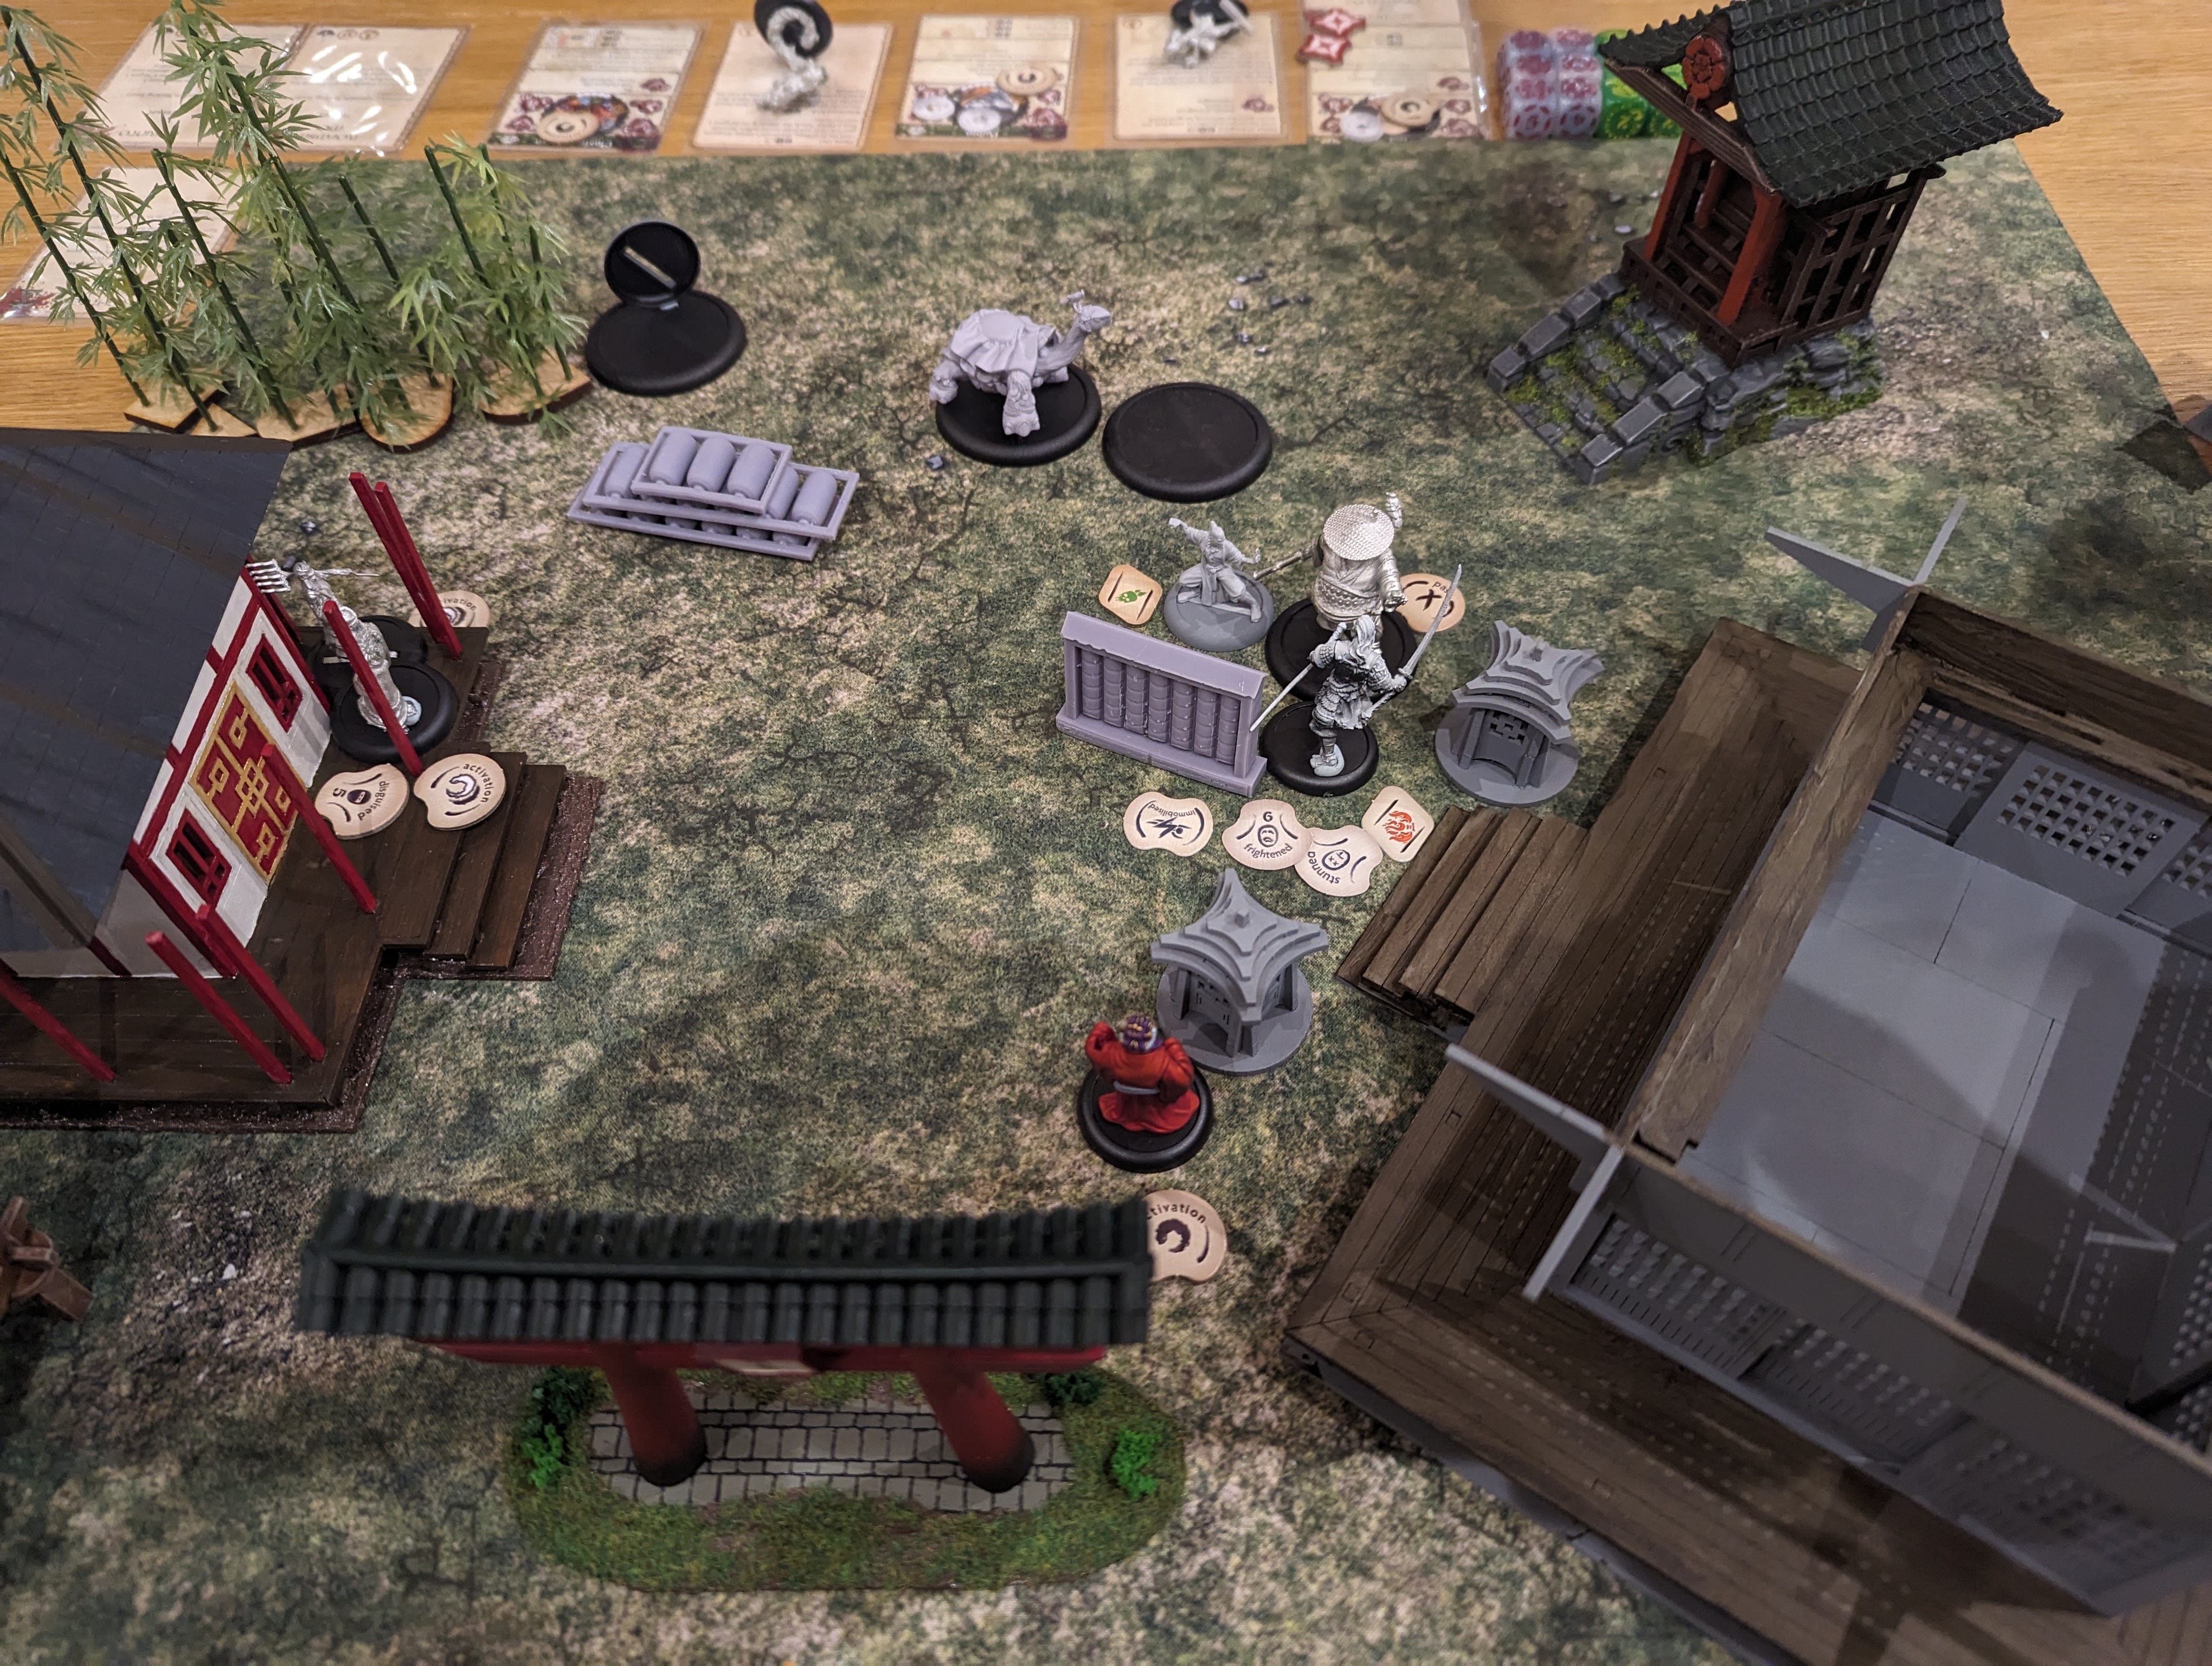
Turn 6.
Final turn and a desperate attempt to pick up a VP to get a draw. I have models in contact with all three scenario tokens so there is a chance. Ibara turns the right token friendly to the Cult but then my son charges Kuma into Ibara for the kill. Kuma really is a melee monster. Ekusa and Tenbatsu trade interactions with the left token meaning it stays neutral.
As a last throw of the dice, if Mokoti can cast Obey on Hotaru, he can move her away from the centre token and, in his last activation can turn the centre token neutral – that would mean a VP for me and a draw. We both threw all of our Ki and whatever else we could into the casting/resistance of the Obey spell. My son rolled spectacularly well and I didn’t resulting in the centre token remaining as friendly to TRK and, at the end of the turn, with 1 neutral token, 1 friendly to TRK and 1 friendly to the Cult, no VP’s were issued and my son won. He was very happy. But really, tabletop gaming was the winner, it’s not about the winning or losing but the enjoyment. But I’ll beat him next time!
 Turn 6
Battle Report No.1
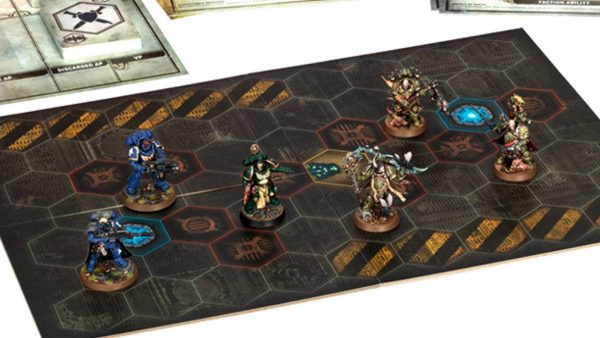
As we now have some terrain and some constructed miniatures, we can play a game. I checked the rules of Bushido, and nowhere does it state that the models have to be painted, so, with some blu-tack holding them to the base, my son and I clashed over the tabletop.
For our first game, we decided not to play a scenario but to just fight it out. My son had clearly been thinking about his forces as he had already selected a 100 point force complete with some of the additional cards you can take, including some Temple of Ro-Kan specific terrain pieces. I on the other hand had to spend 5 minutes after set up trying to quickly put together a Cult of Yurei force.
For the Temple of Ro-Kan (TRK), my son had selected,
- Master Ekusa (who’s a monk riding a tortoise and can heal, remove activation tokens and stops attacks due to his zen like demeanour)
- Hotaru (a monk who likes fire)
- Yim (a monk who’s strong and linked to iron)
- Saruka (another flame monk and can also cast a fireball like ranged attack)
- Kuma (an angry, bo staff wielding panda who can root opponents to the spot while slapping them around)
In addition, my son had selected a couple of terrain pieces that allow extra Ki generation for his models. Ki allows the activation of special abilities and boosts regular stats and the TRK are big Ki users. He also selected some trap cards as well.
For the Cult of Yurei, I picked the following,
- Mo Ises (an assassin that likes stabbing people in the back)
- Mokoti (dreadful in combat but can control enemy models)
- Risu (Handy in a fight but can cast some long range poison attacks)
- Ibara (Can handle himself in combat and can throw some fire around at range)
- 2 Plague rats (basically cheap chaff but can cause poison if they succeed in attacking)
- Hozumi Maha (a ronin who can also control enemy models)
- Tenbatsu (another ronin who’s a combat monster)
We threw some terrain down on the table and deployed along our back line.
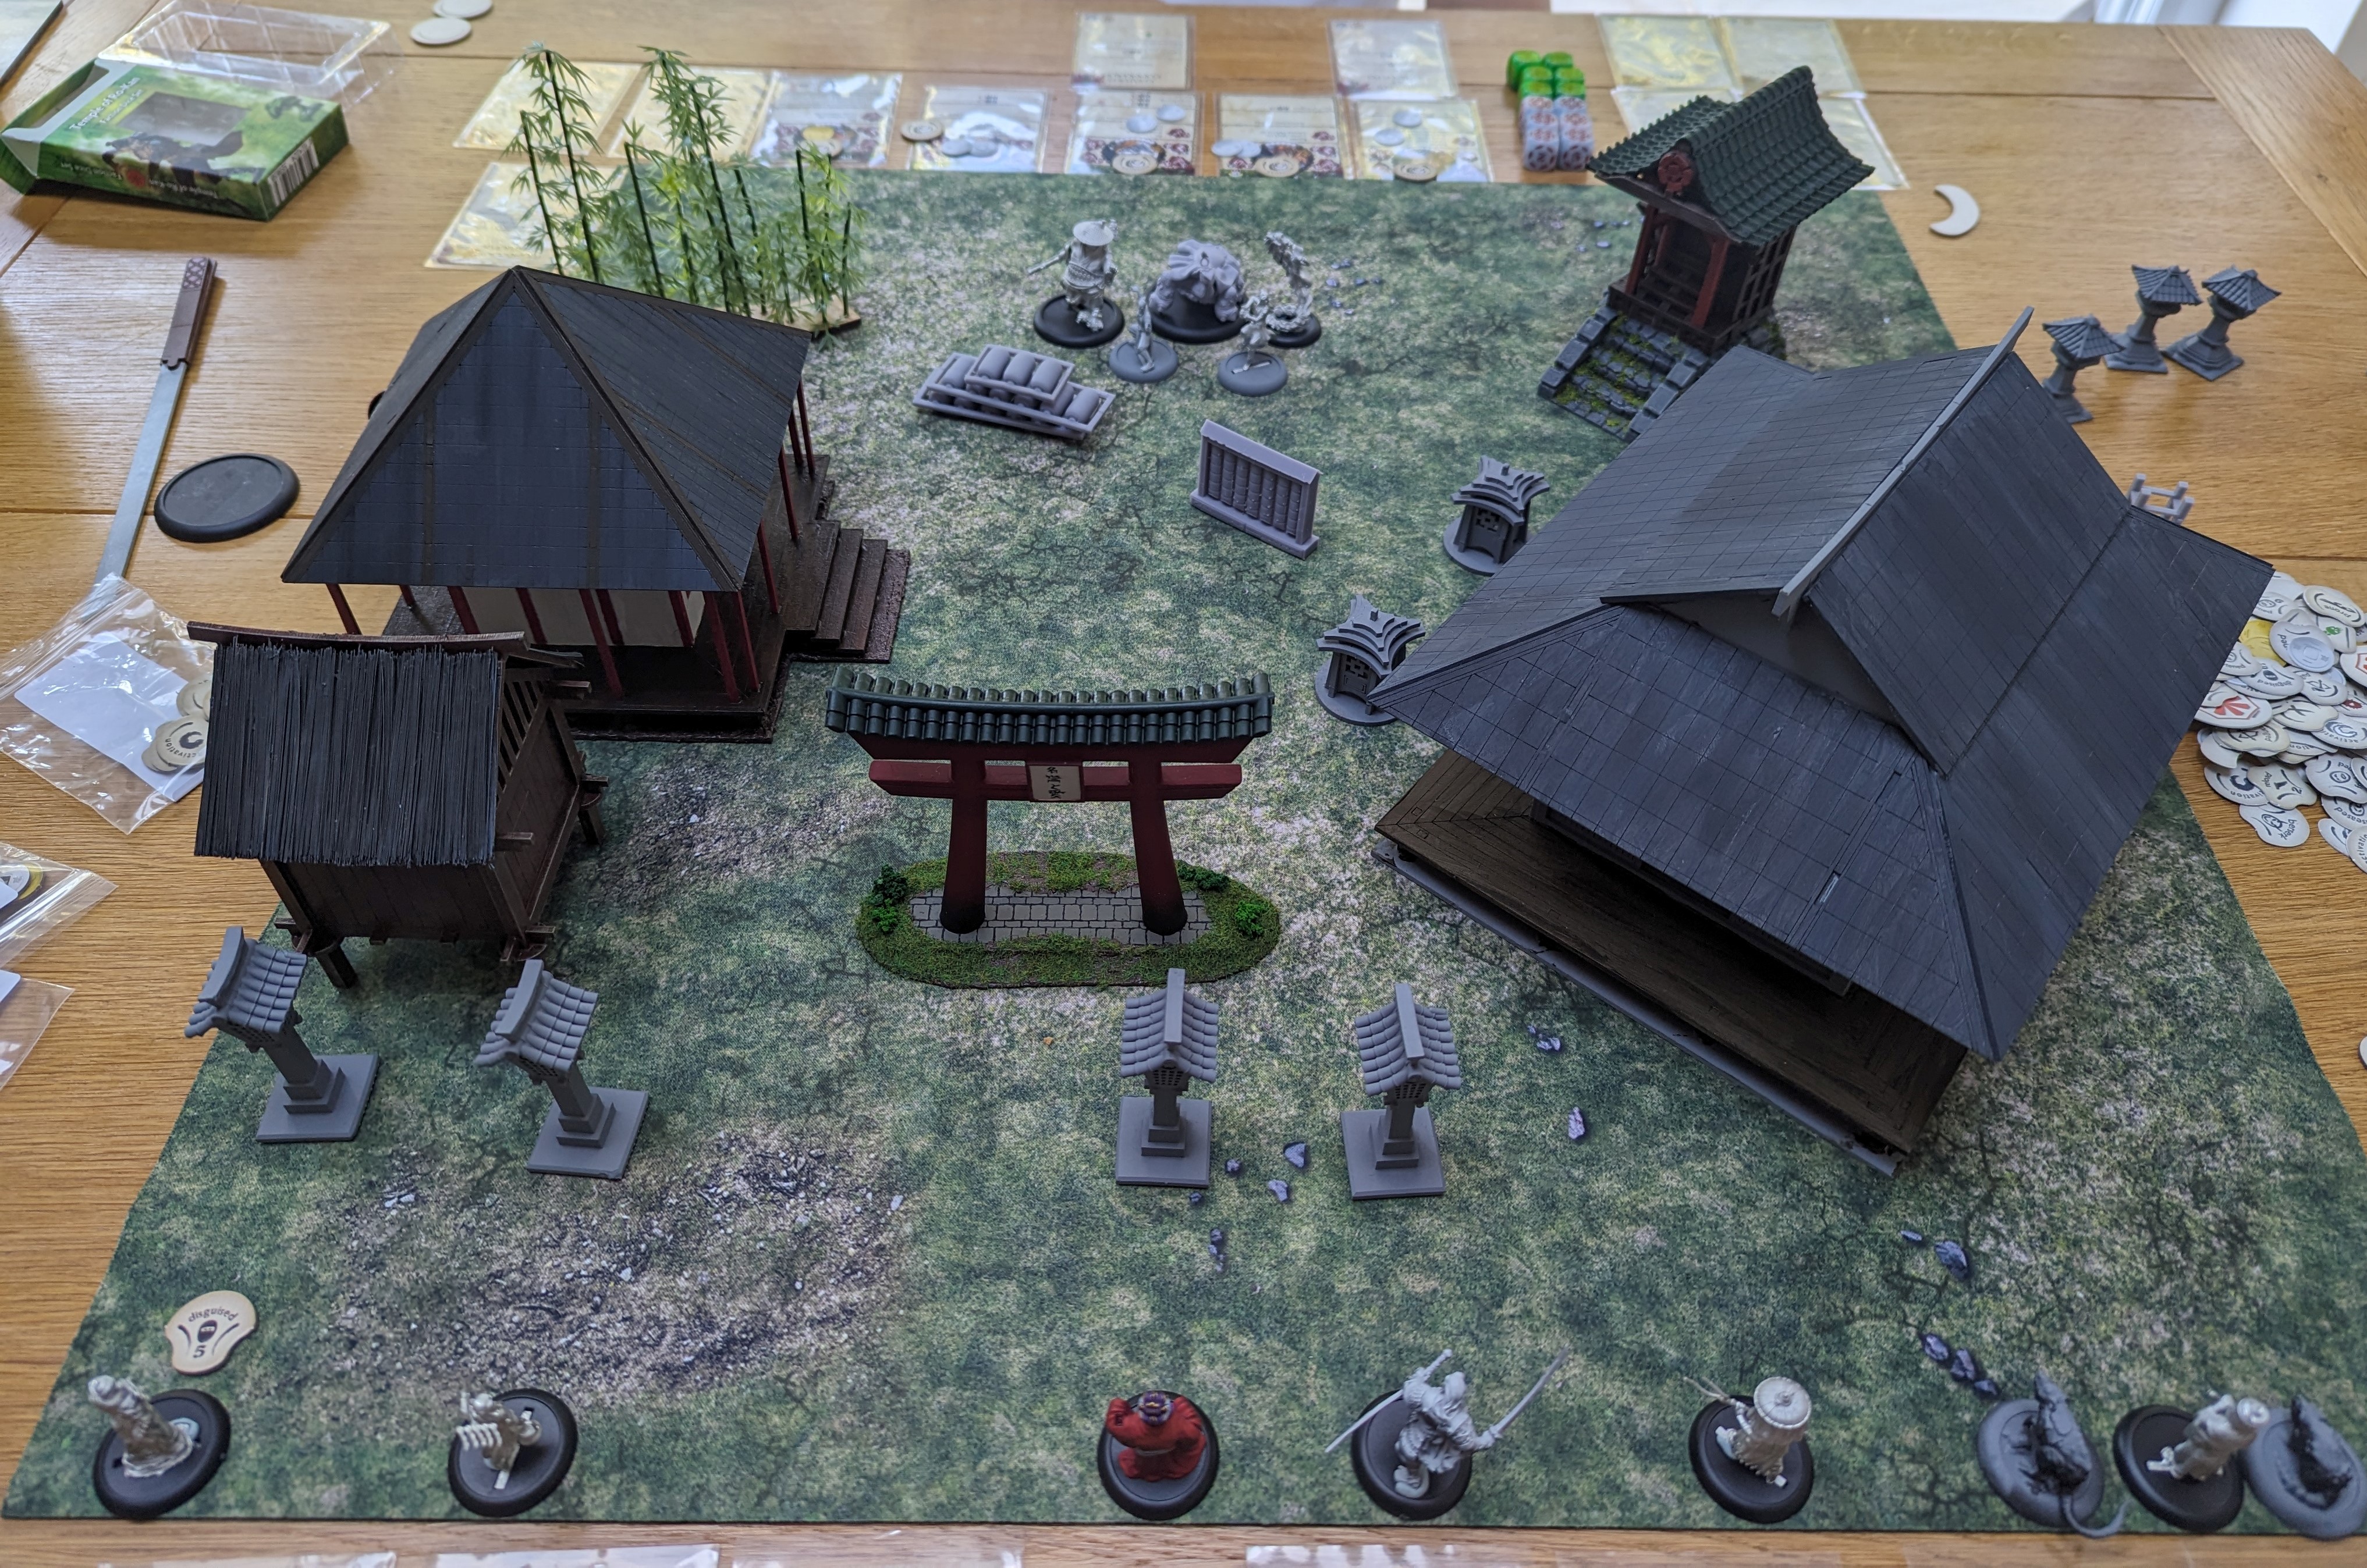 Deployment
Turn 1.
Like most games, turn 1 is about setting up for the rest of the game. I kept Hozume Maha back to focus on Ki generation so that he could unleash his command ability in later turns but otherwise advanced everyone forward behind the available cover. My son rushed forward around his terrain piece that dishes out Ki and started collecting as much as he could.
I activated a plague rat at which point my son threw down his trap card. I failed my test and my son then got to roll for damage. He’s always been lucky with his dice rolls when it counts and this was no exception as he rolled high, killing my plague rat out right – first blood to him.
Turn 2.
I advanced my other plague rat up the right side but it was charged by Hotaru and it died quickly in combat after Hotaru activated her fire ability. Mokati managed to control Saruka who I then got to attack Yim – this caused no damage but did mean that both Saruka and Yim used up their activations. Ibara is able to spray Yim with fire to cause some damage. Otherwise, the rest of the models continue to move into position this turn.
Turn 3.
I try to cast control with both Mokoti and Hozumi Maha but manage to roll snake eyes on both tests, failing completely. In reply, Kuma charges Mokoti and, in one of the most one sided battles ever, Mokoti is battered to death, taking 12 damage in one turn (he only has 6 health to start). To get some sort of revenge, I charge Tenbatsu at Saruka and cause 4 damage to her.
Turn 4.
My notes for this turn are a little brief, but Master Ekusa tried and failed to remove activations from Tenbatsu. Tenbatsu and what was left of the Cult of Yurei warband all attacked Saruka, failing to cause any damage or succeed with a command spell.
 Back end of turn 4
Turn 5.
Again Master Ekusa fails to suck an activation from Tenbatsu who finally extracts some revenge and kills Saruka in a bloody display of sword play. Hozumi Maha finally succeeds in getting a control spell off and takes control of Yim who promptly turns around and punches Hotaru in the face, causing a couple of points of damage. Hotaru then attacks Tenbatsu but Tenbatsu is no match for the young fire monk and is able to cut her down
Turn 6.
My notes get very blurry at this stage but Kuma launches a full on attack at Tenbatsu using all of his panda based magic. This results in Tenbatsu ending up stunned and immobilised which is not a great position to be in with an angry panda. Kuma is then able to kill Tenbatsu but not without taking a lot of damage in return. Ibara and Risu, who have been skulking around the side to get into the rear of the enemy, blast Yim with their ranged attacks and Yim dies a horrible poisoned, flame-ridden death.
At this point, I’m left with Risu, Ibara, Hozumi Maha and Mo Ises (who’s been largely useless so far). My son has a battered Kuma and Grand Master Ekusa. It was also getting late and so we decided to call it a draw. But both agreed to do battle the following evening as we had enjoyed the game so much.
 Somewhere toward the end of turn 5 or 6 - it all gets a little hazy at this point