


144artist paints Mantic’s Terrain Crate


Recommendations: 1615
About the Project
My Mantic Terrain Crate Kickstart rewards arrived and there is a lot of stuff there. Even though they are cast in color plastic that makes them fairly table ready I want to paint them. I tend to want to paint everything, truth be told but these look to be a lot of fun. Not only is there a lot of stuff there but a huge variety as well so this Project Blog could be going on for a while.
Related Game: Kings Of War: Vanguard
Related Company: Mantic Games
Related Genre: Game Aid
This Project is Active
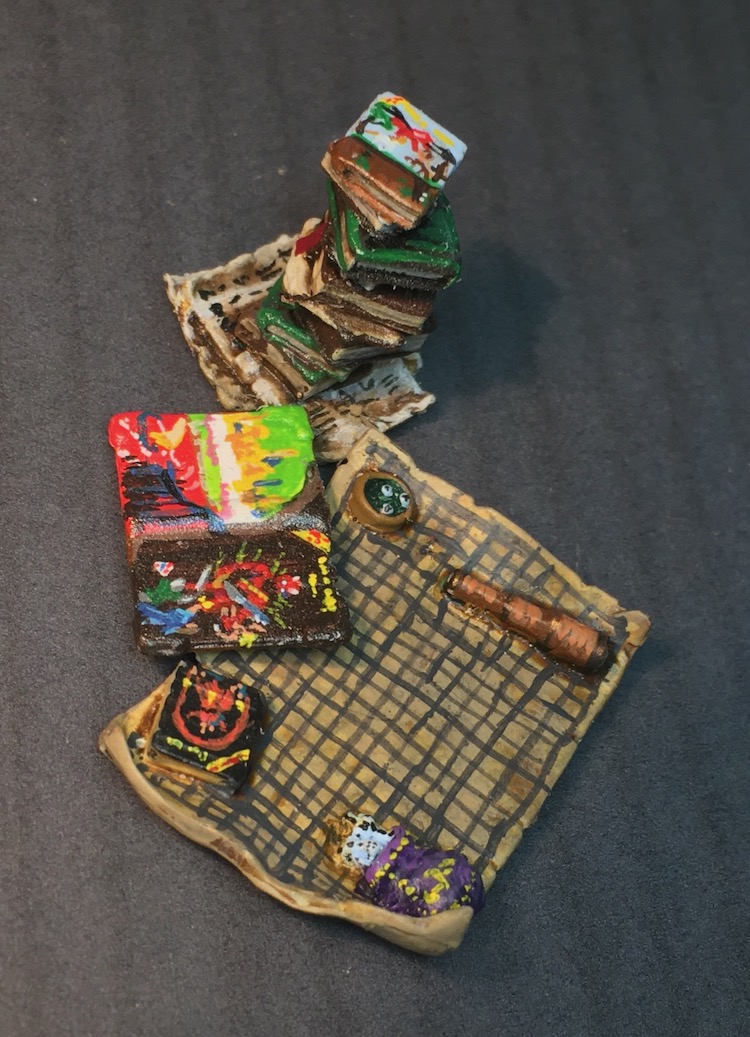
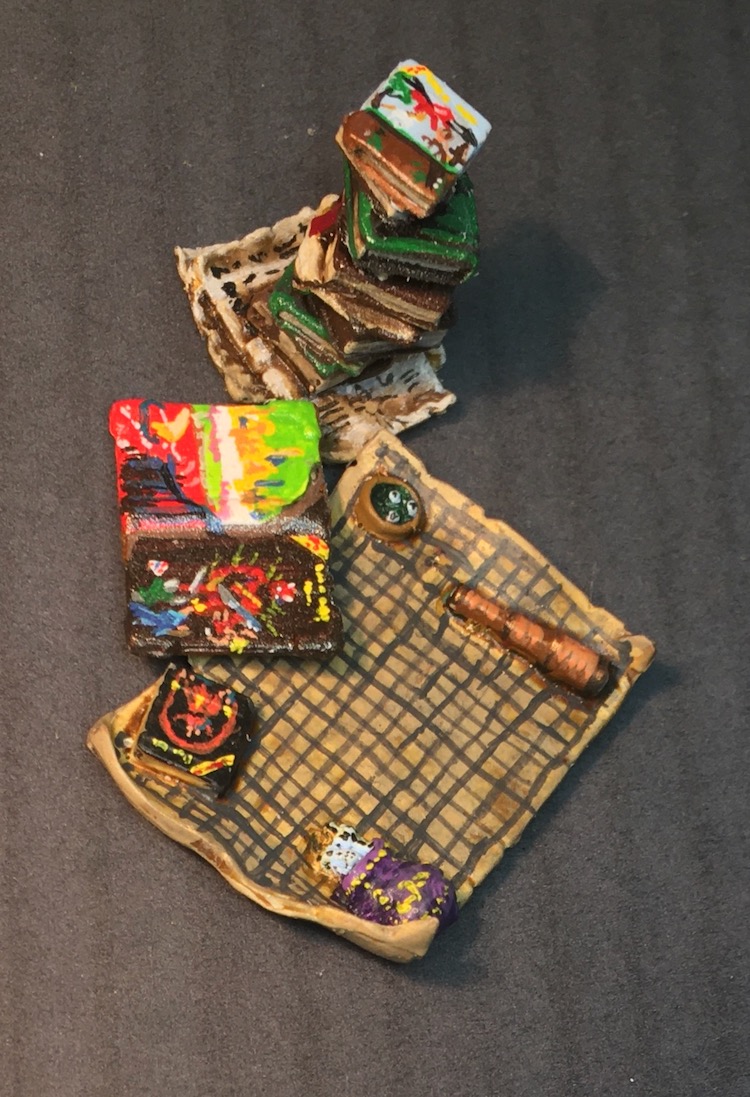
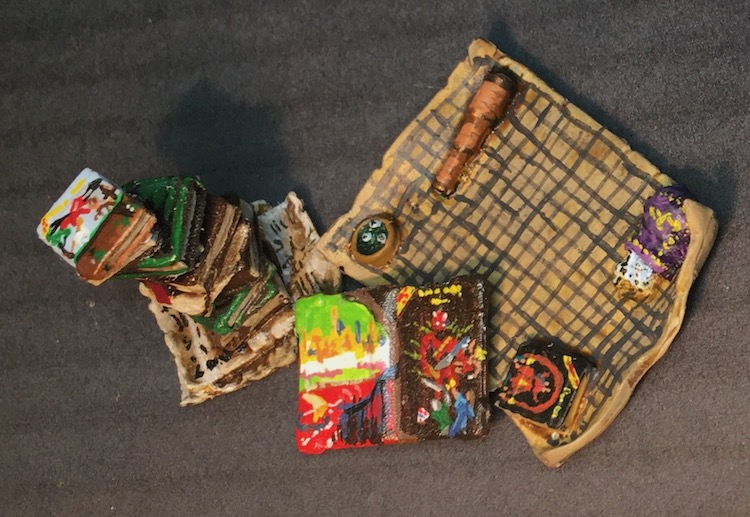
Dungeons and Dragons Books Ready For Game Night
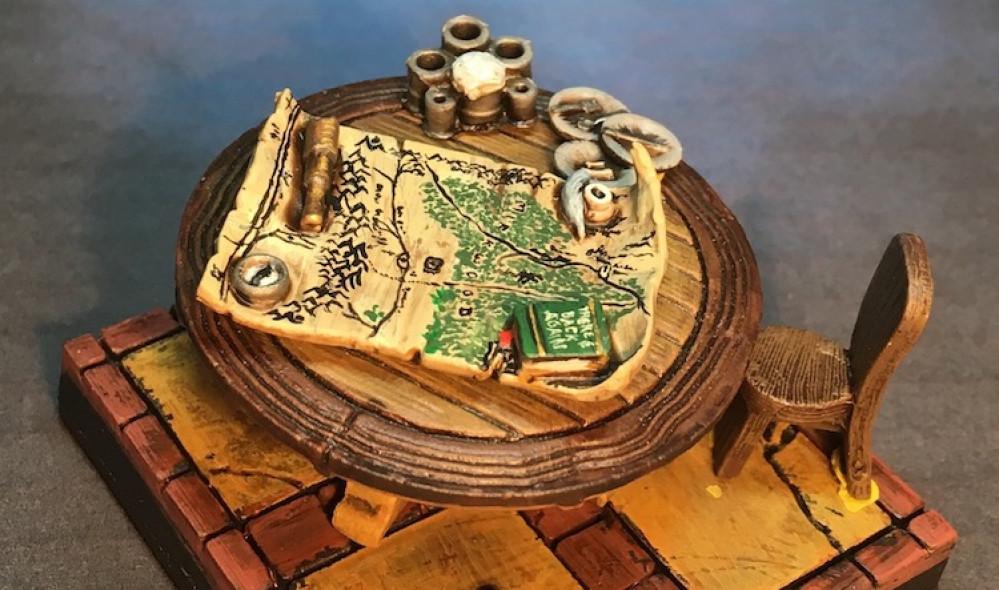
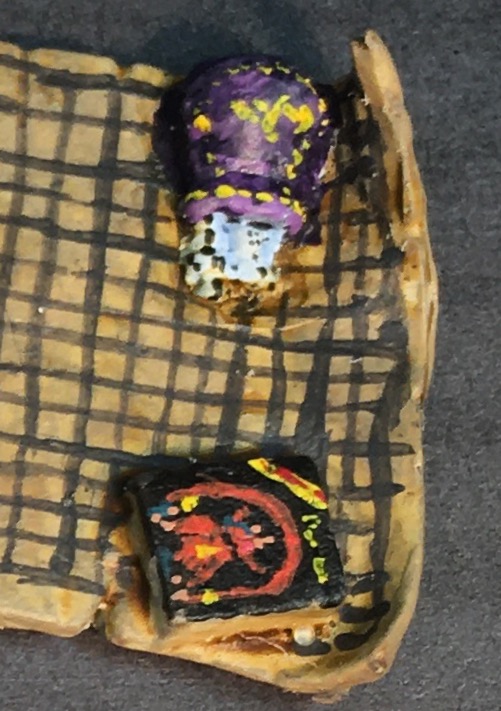
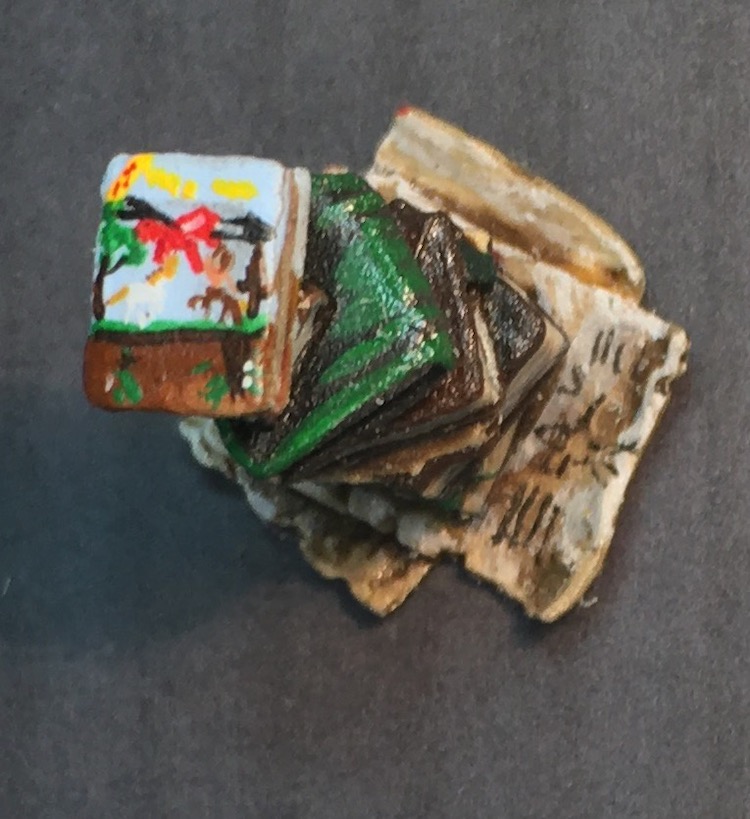
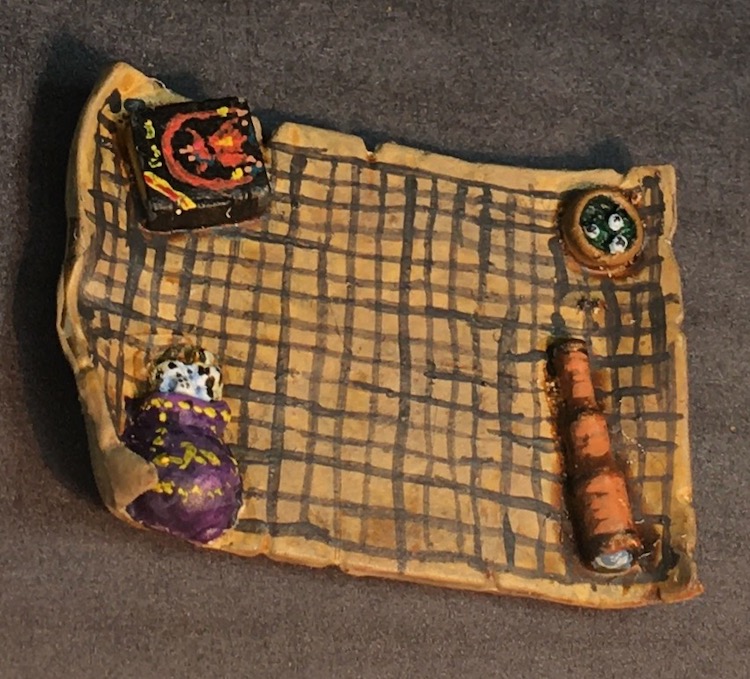
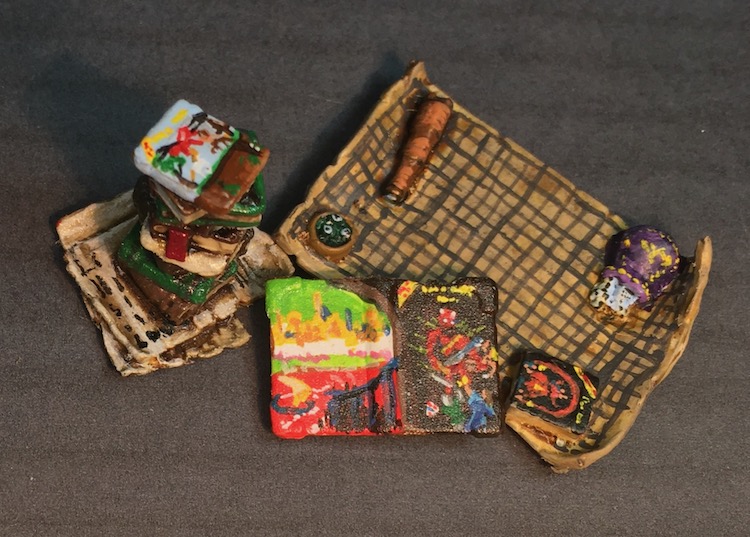
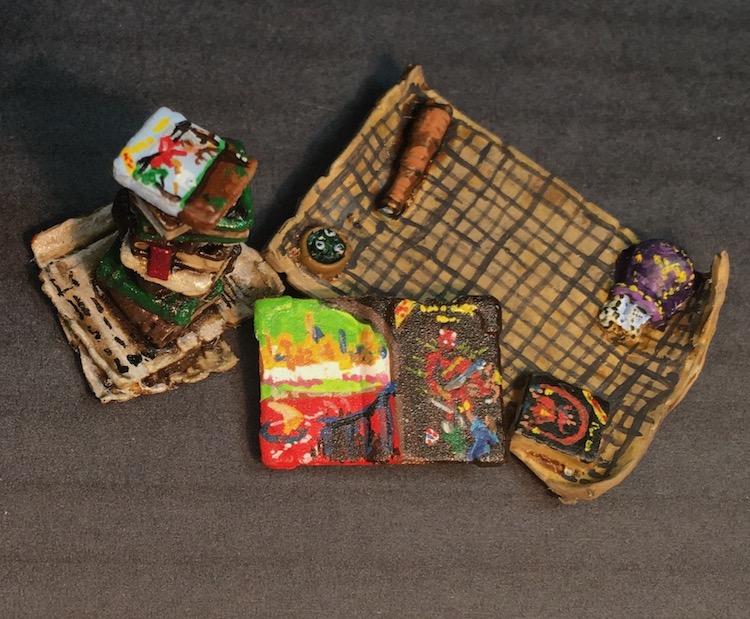
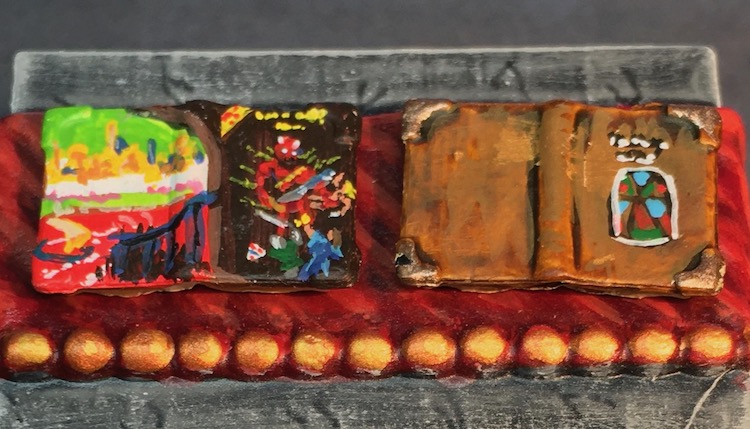
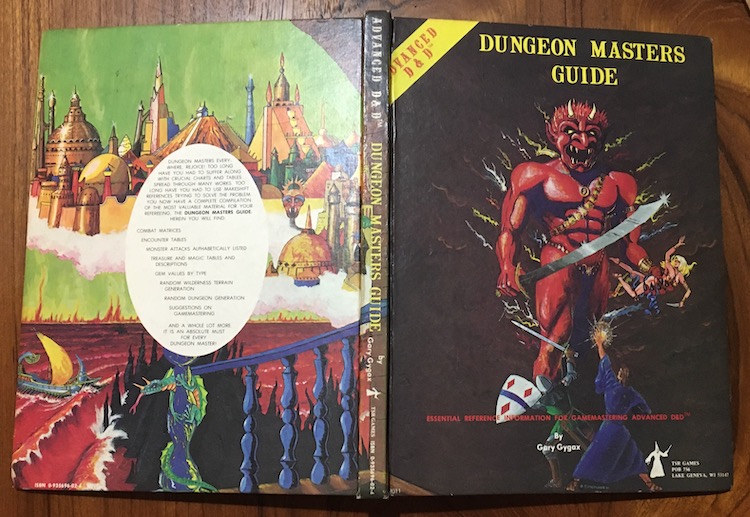
With all the tiny books included in the various Terrain Crate sets I found my imagination going into overdrive. The open tome with the Temple set was the spark that made me want to create a complete setup of the First Edition Dungeons and Dragons game books that had such a huge impact on my youth, an impact that continues to this day, obviously. I took one of the book stacks I had completed with a generic scheme and created a tiny Monster Manual as well as a character sheet under the stack. The final parchment I had to paint was perfect for a Chessex gaming mat which left that book to be the Players Handbook. It was my good friend @aronbc that pointed out that I needed to bisect every row I’d painted to really take it over the top. As usual, he was right. I cut the dial out of the compass to make it into a dice tray. Inspired by “Gerry Can: Blue Stuff the Basics” I sculpted a spilled dice bag over the quill pen and ink bottle and added a few dice to the tray. Ony when I neared the end of painting did I realize I would need to add dots to some die faces. Gotta say I got lucky there and I think they mostly read. Not wanting to try and carve or file the soft plastic, I tried to turn the telescope into a couple of markers but in the end gave up and kept it a telescope.
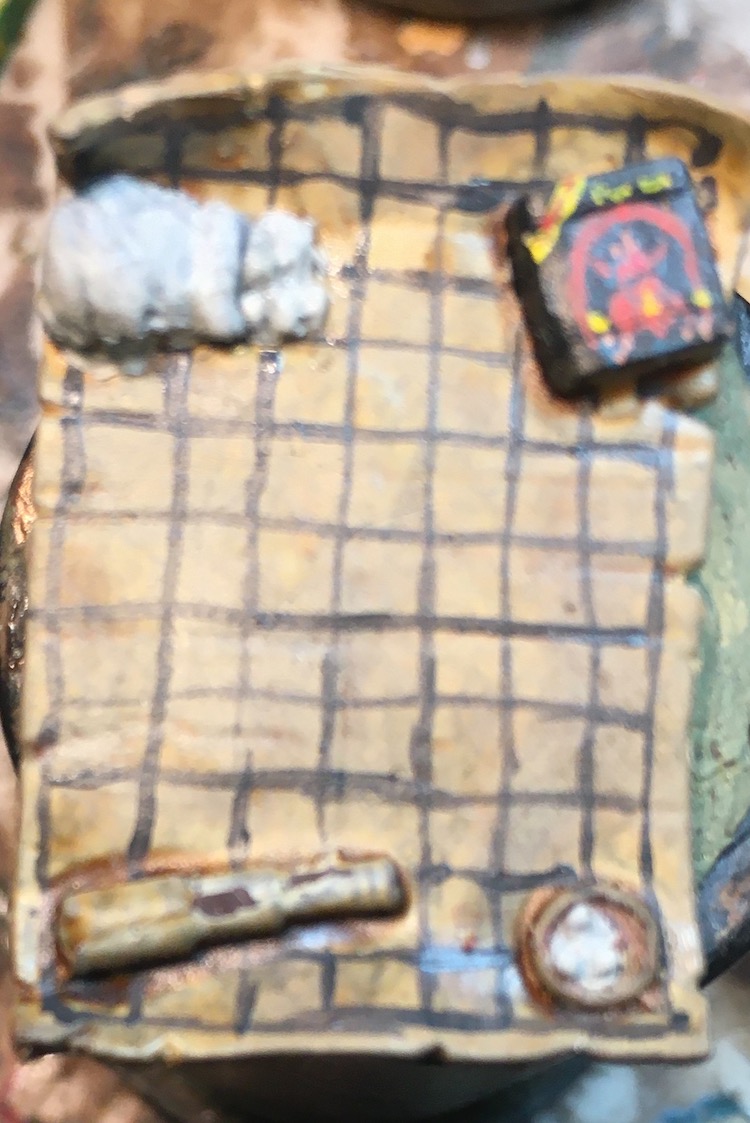
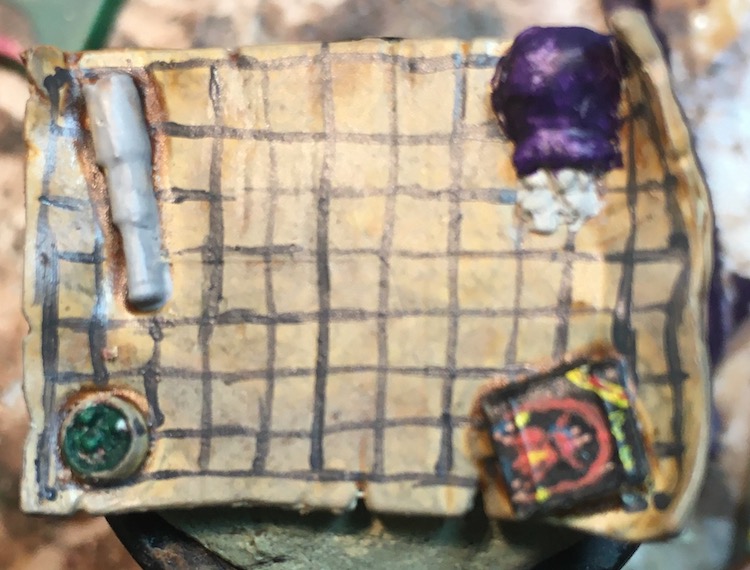

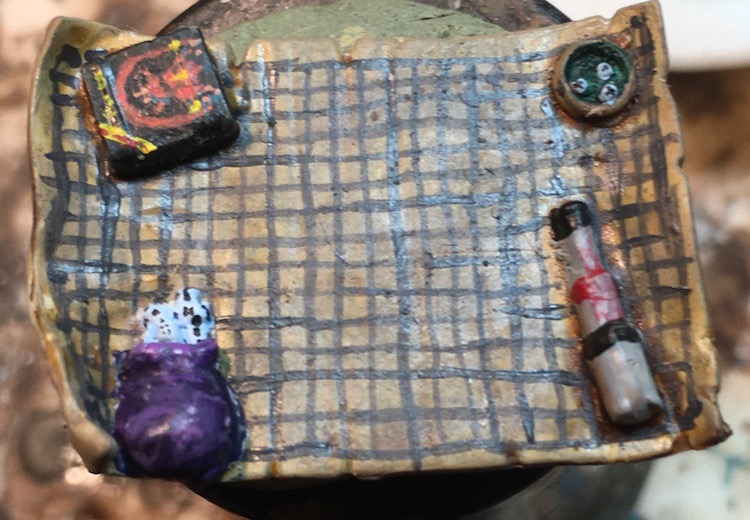
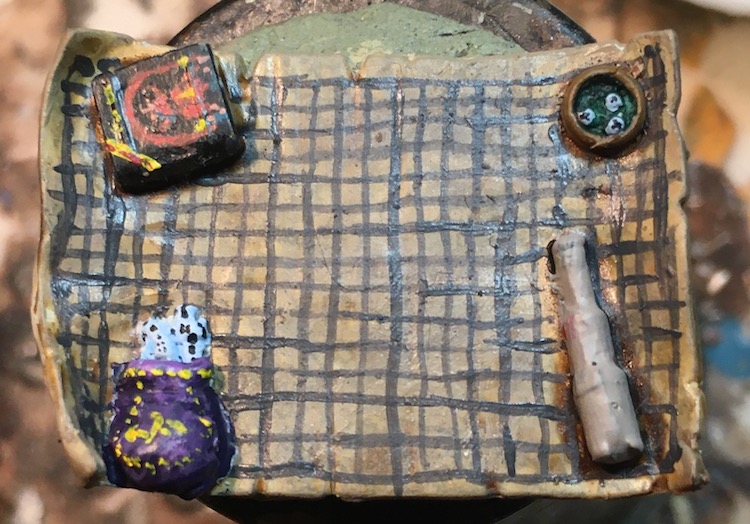
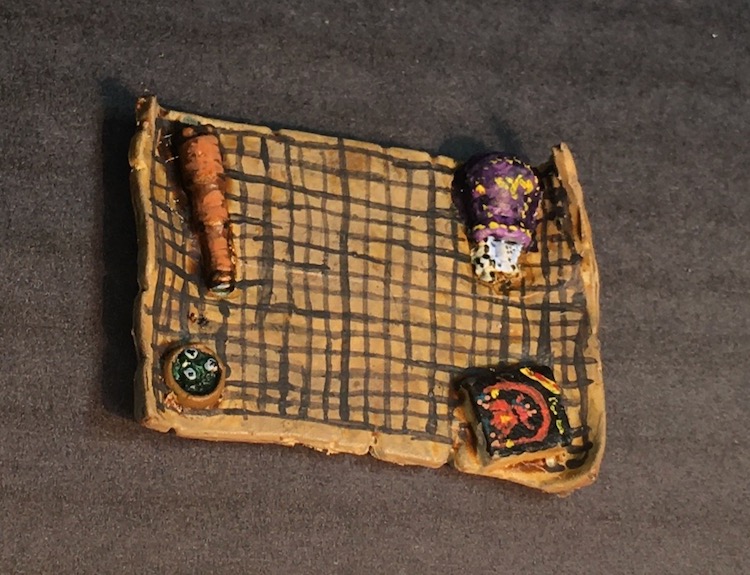
 When I was a kid, polyhedral dice were hard to come by and dice bags didn't exist. It seems like everyone of my generation used a Crown Royal bag which came wrapped around a bottle of whiskey. Not sure where I got one as my parents didn't drink but that's what I tried to paint this one as.

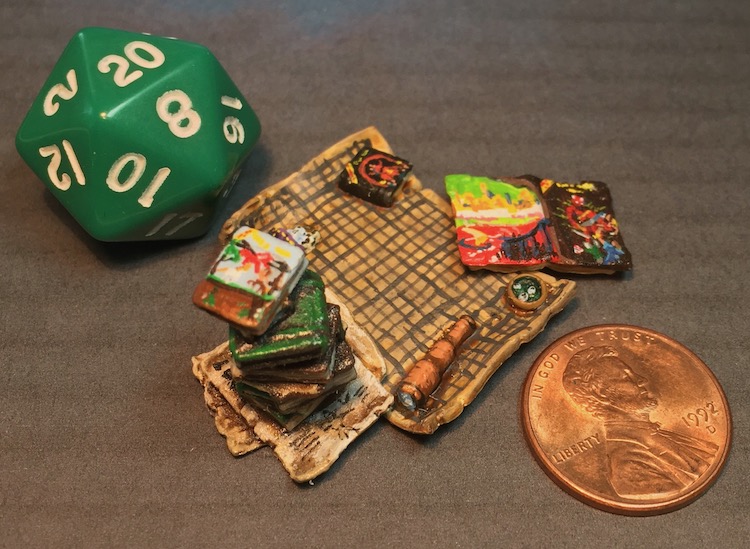 It was pointed out that I needed a shot showing scale so here are a d20 and a US penny to help with that.
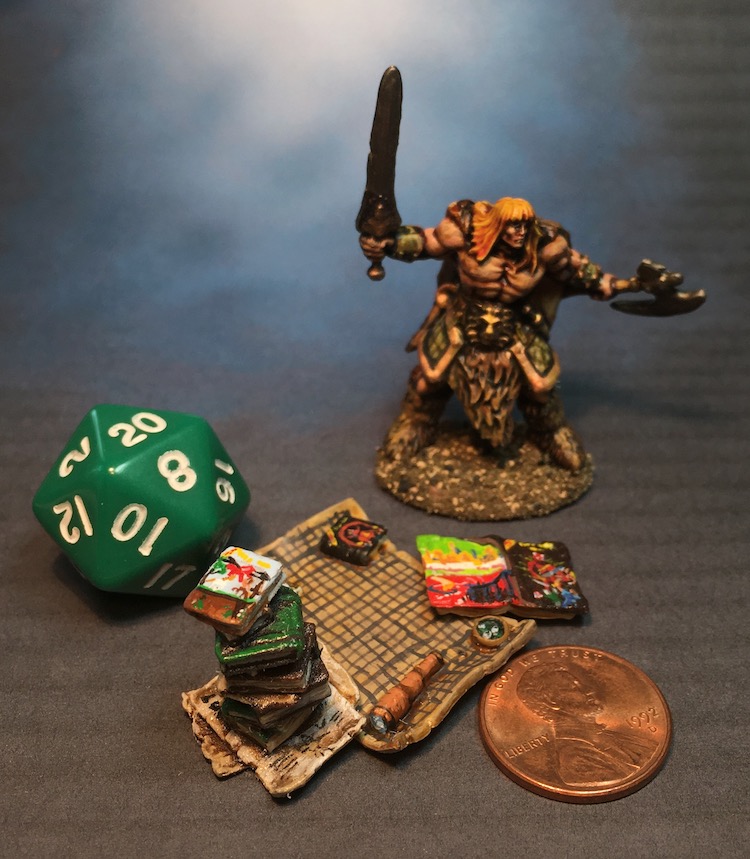 I'm rolling up a fighter...
We Have Crossed the Finish Line!
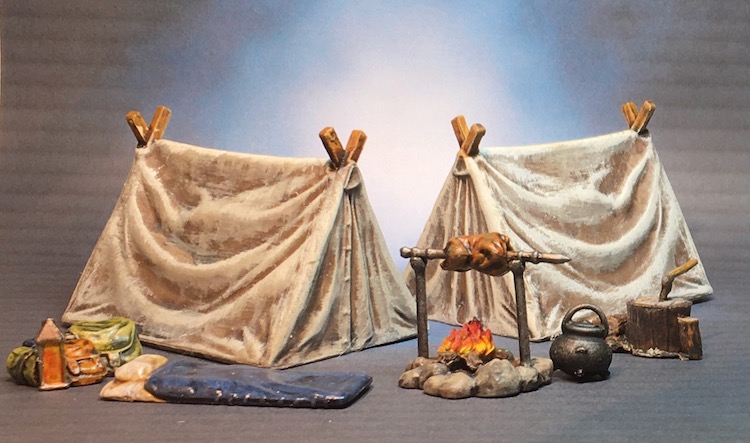
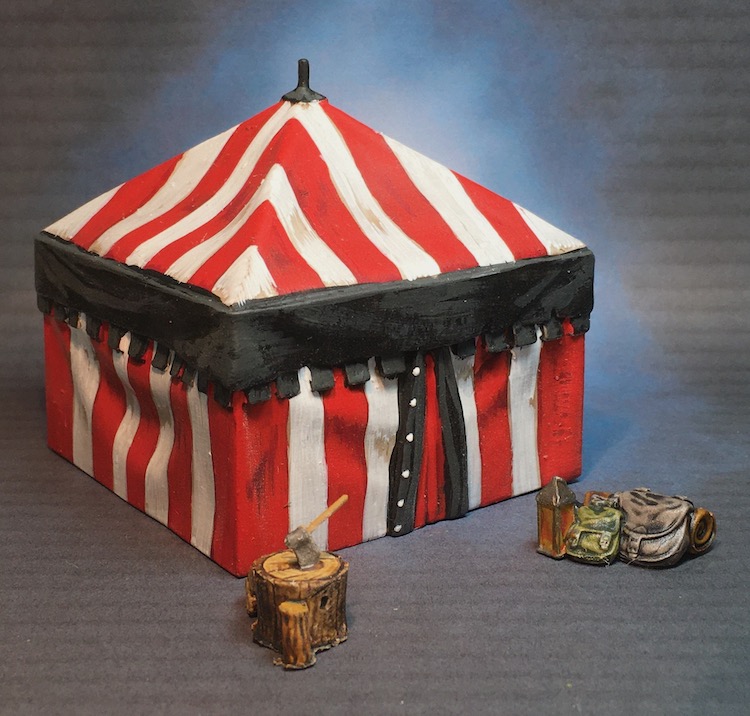
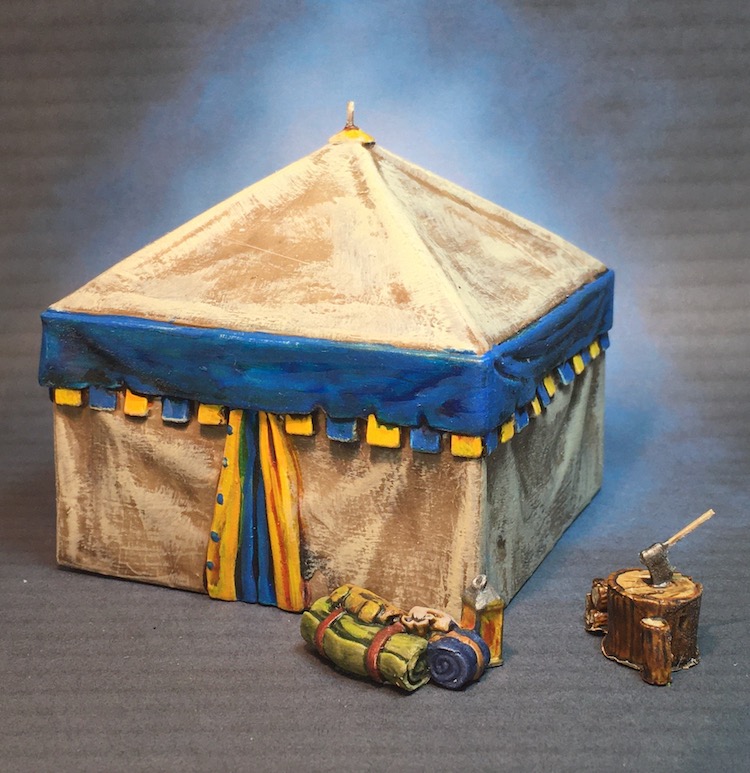
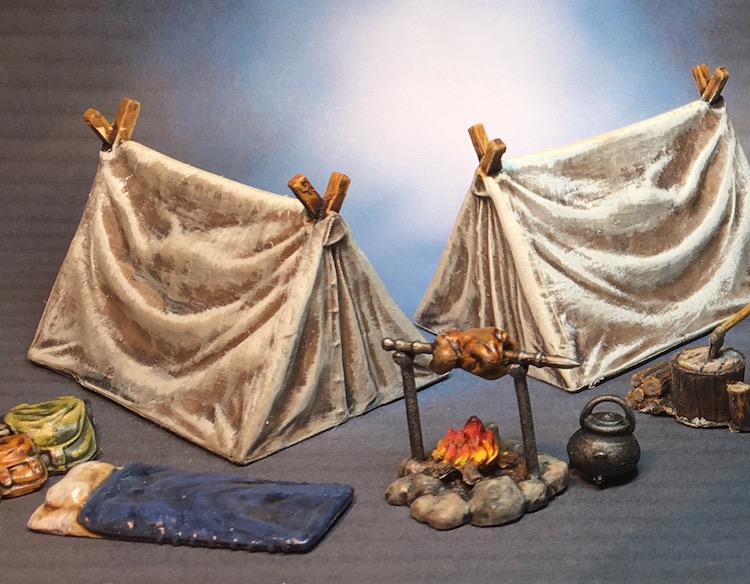
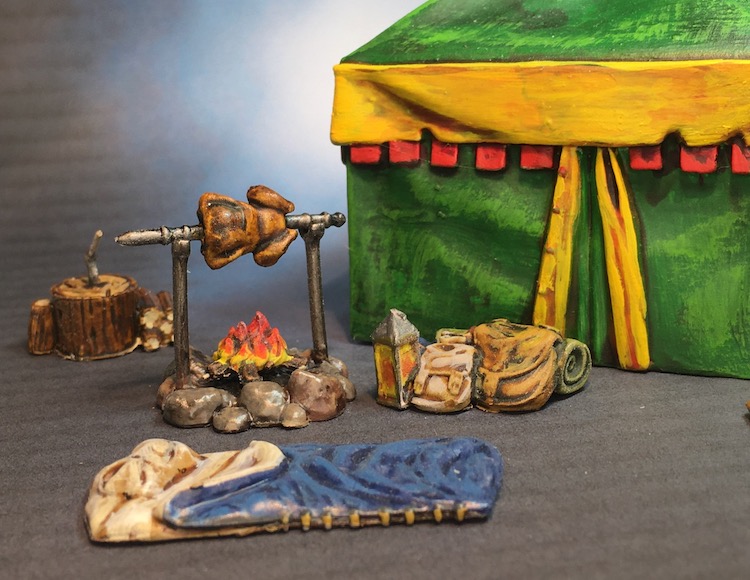
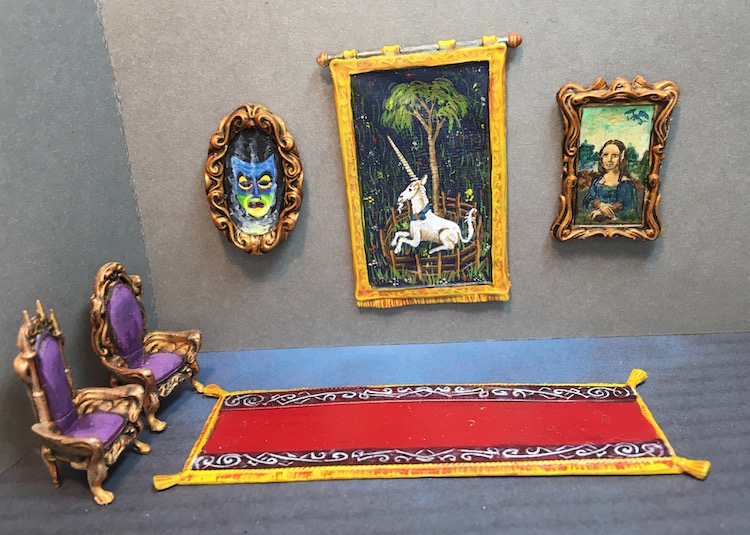
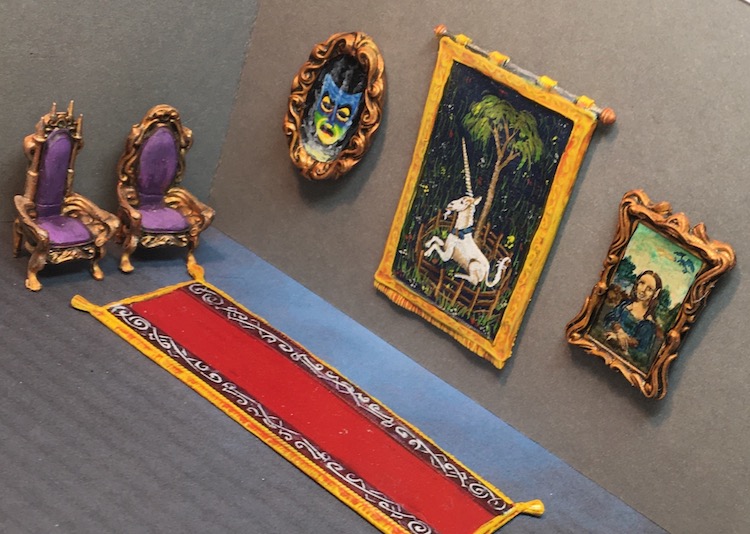
The three Campsite sets are finished as well as the Throne Room. I mixed and matched the tents and supplies in the first gallery as I found it more interesting to photograph them that way. Two of the axe handles on the chopping stumps were already broken off when I got them so were replaced with brass wire. In the end they look fine. The Throne Room came out even better than I had hoped and I believe the three pieces of artwork took my own painting skills to a new level. It is always exciting when one sees growth in one’s own work especially as we artists are notoriously hard on ourselves. The last two parchments from the Barracks sets aren’t ready to be photographed (I’m working on a little vignette) but the entire Terrain Crate 1 rewards are finished. Not sure how important that is really but the artificial goal helped get me through this time of isolation so I am thankful for it.


 I foresee more Terrain Crate painting in your future...
Decision Made
Even as my Elven Mona Lisa was drying, a big box of Terrain Crate 2 arrived on my doorstep. Even though I have two of the map/parchments to complete I am calling the first set of Terrain Crate complete. I still have to take pictures of the last three sets of Campsites but will post those soon.
I have decided to just roll my work on the new pieces into this blog rather than start a new one. I like seeing the progression in my work, if truth be told. I did think I was going to take a break from terrain pieces for a while but immediately scrubbed two bags of plastic stuff and added them to my painting queue.
 Two more boxes of the same size underneath these because there is no such thing as too much apparently..
Mona Lisa Goes Fantasy
Gerry noticed my sketched Mona Lisa during the last Hobby Hangout and I mentioned I call her Mona Elfsa as she would be finished as a fantasy version of Leonardo’s masterpiece. I’ve included my reference as it is so much easier to copy something you can look at. I wanted a dragon in the sky so knew I would have to make that area a little bigger than in Leo’s but I wanted to match both the style he painted in and the look of age. He painted in many thin, blended layers, a technique called sfumato so I did the same. It is a lot like wet blending, to put it in mini painting terms, and, after drawing the rough shapes in pencil, I worked in washes and inks for the most part. I wasn’t trying to make an exact tiny copy as I have neither the skills nor tools for such an endeavour and I value what little sanity I have remaining. The key, I find, is to match the main shapes and colors.
I aged the painting once she was complete as I think she will make a wonderful McGuffin for a Wolsung game.
 Here is a picture of the original. His countless transperant layers really paid off as her skin, if you ever see her in person, echoes the transluscence of real skin, almost glowing from within.
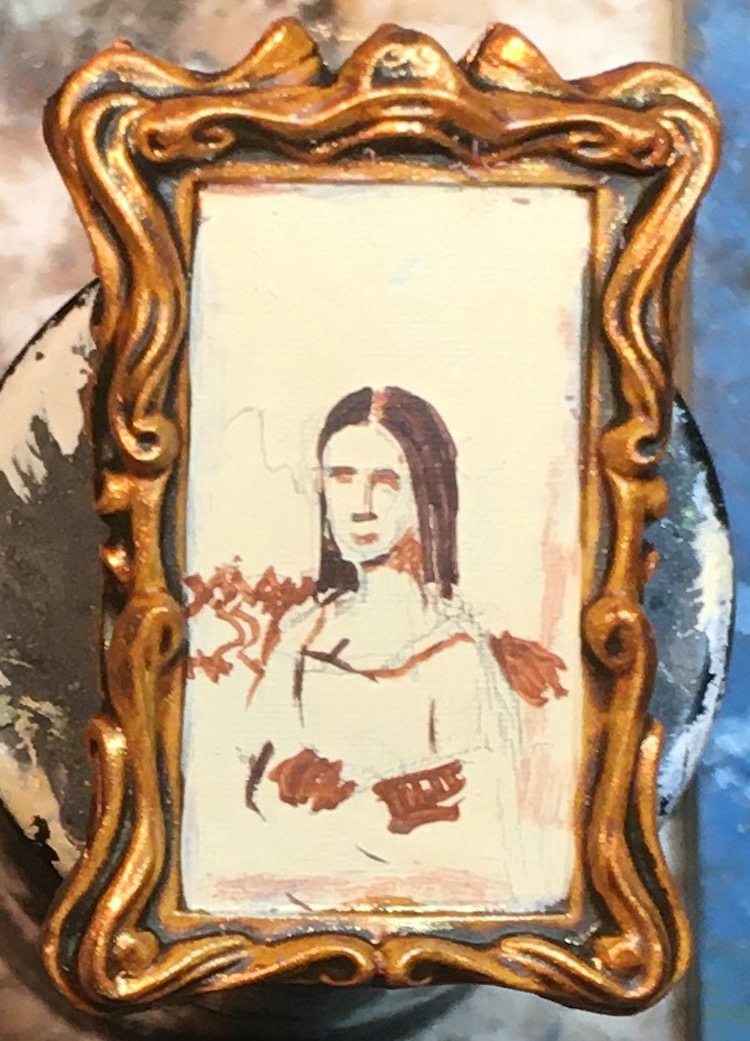 I drew the basic shapes in pencil then using two shades of brown roughed in some key color blocks like her hair, face, forearms, and a band across the background.
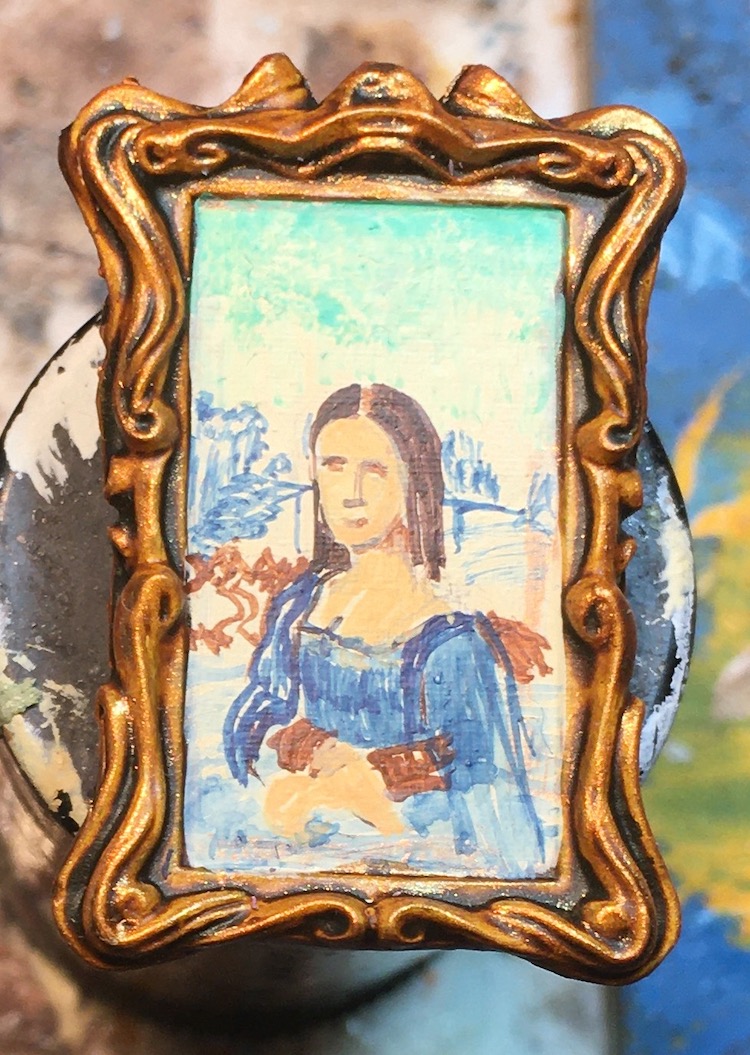 The wet pallet really helped keep the thin paints from evaporating in the Northern California dry summer heat. Here you can see where I added in small sections of color and texture to echo details in the original.
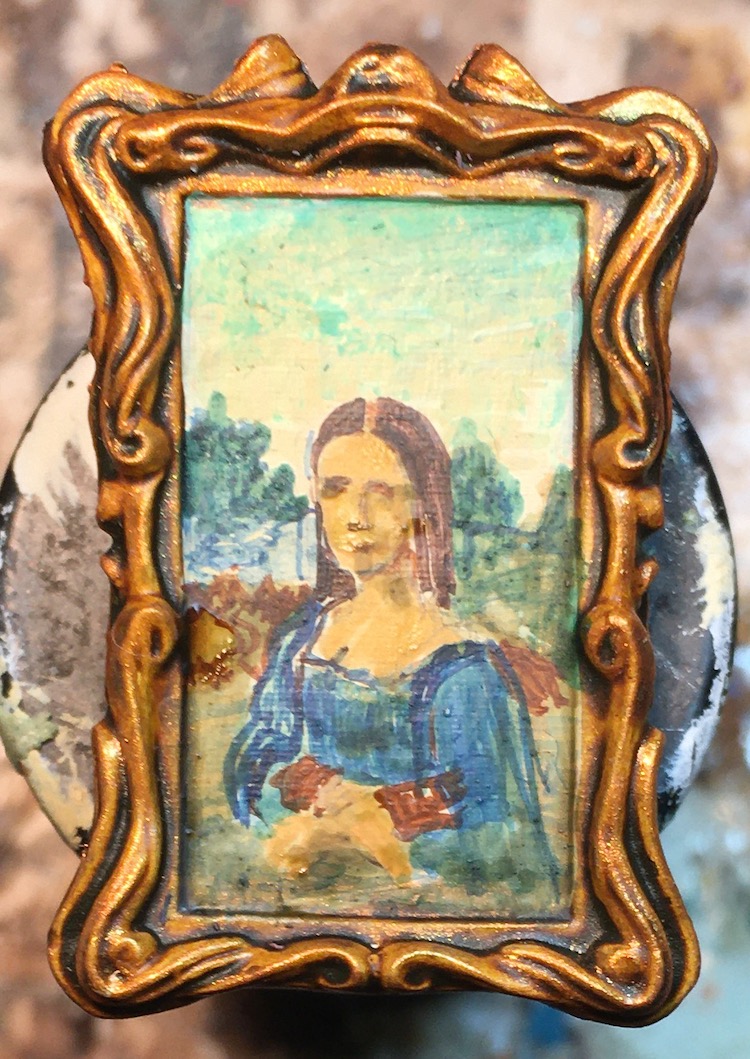 The sky is almost done here and the whole thing will need some Earthshade and Sepia to add age..
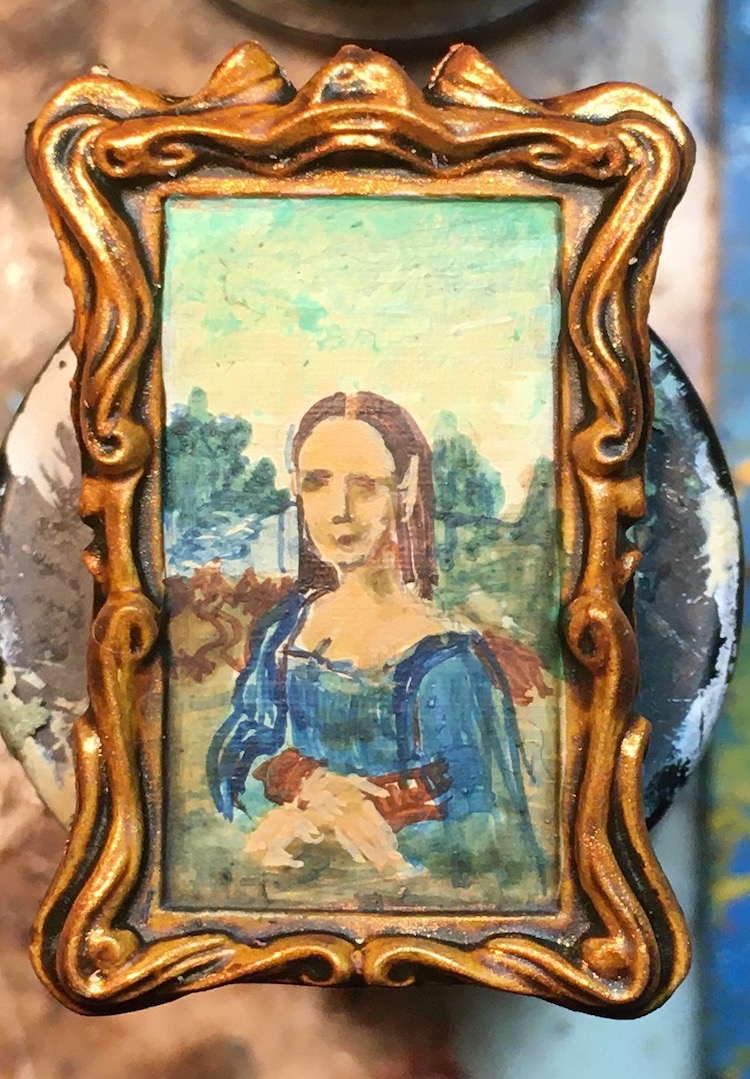 Ear added, skin continuing to be highlighted.
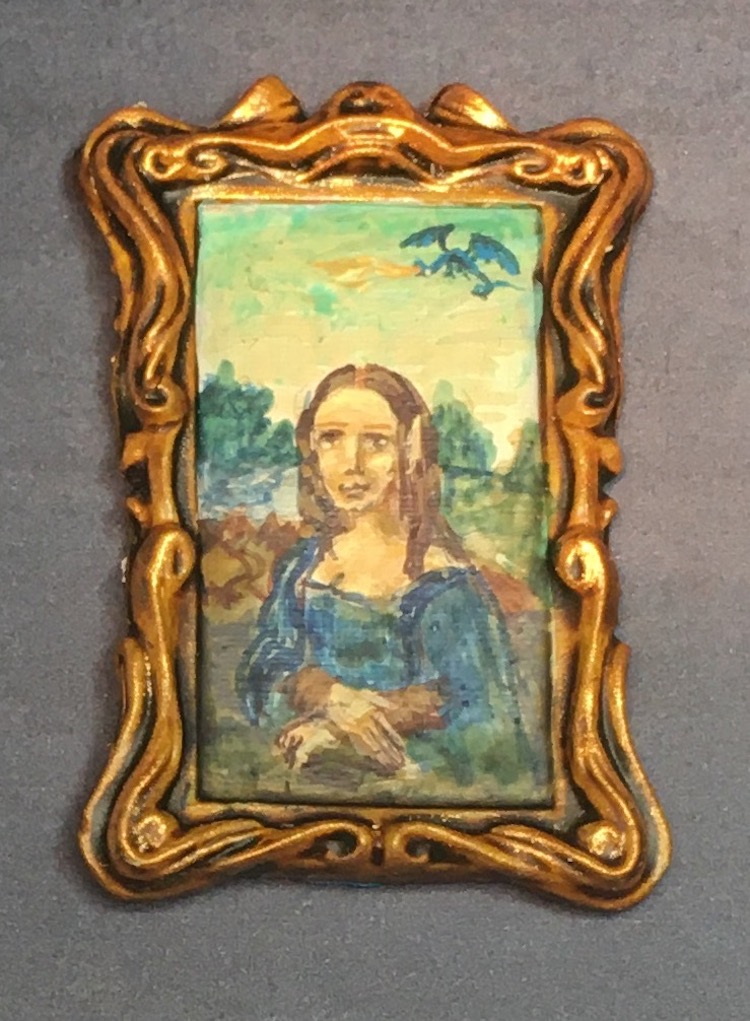 Final details, including dragon, finished and aging done.
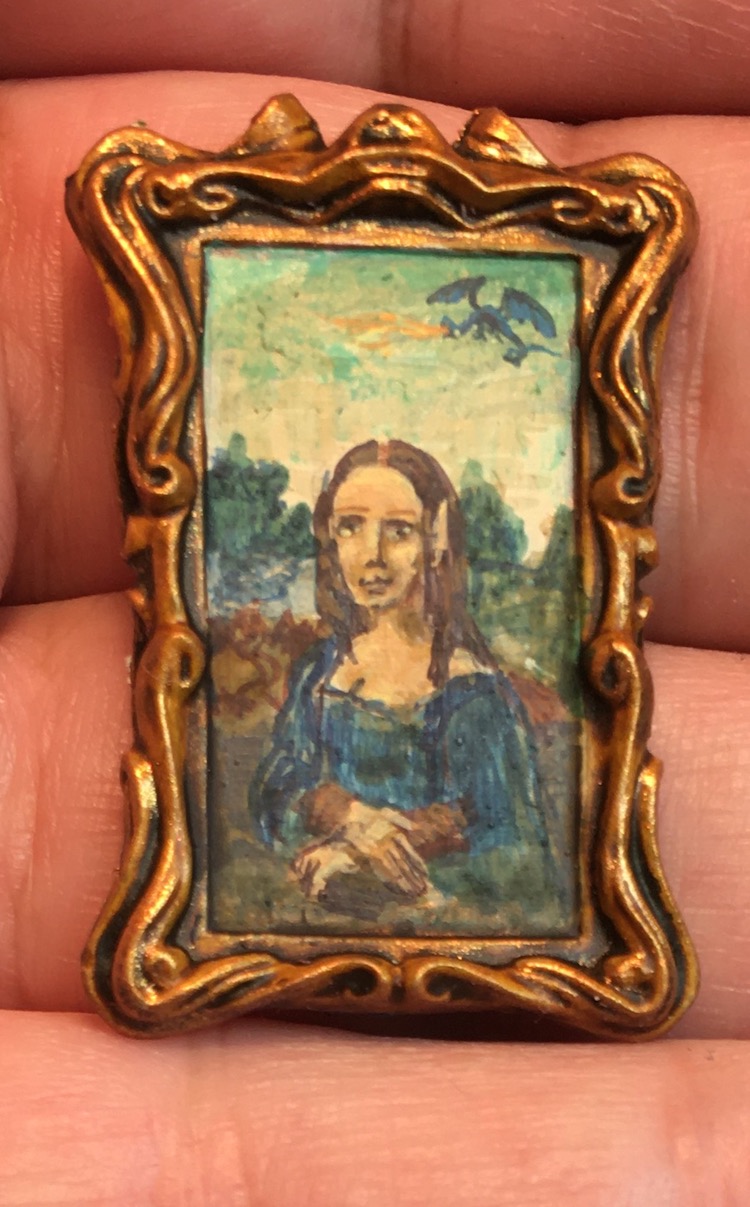 I think she really came out well, just like I pictured her.
Who is the Fairest in the Land?
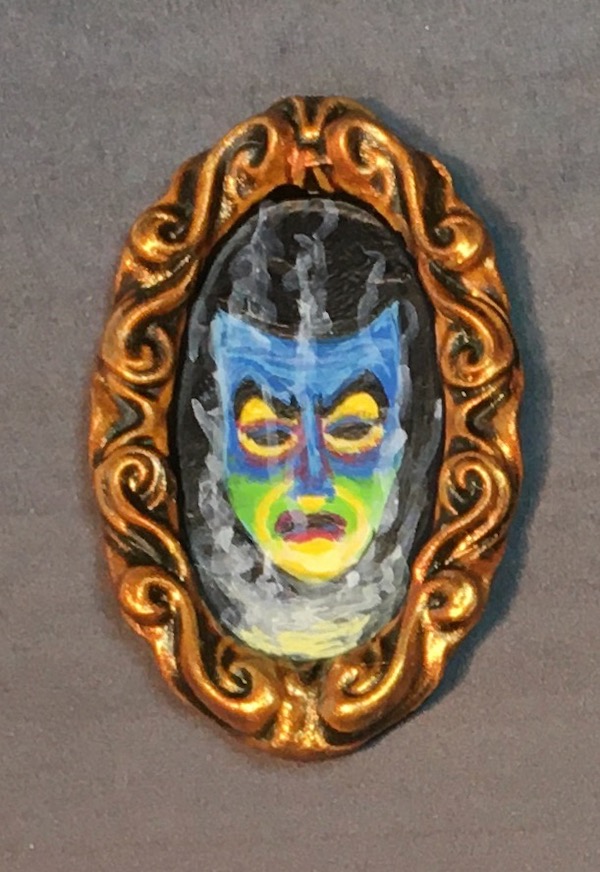
A friend suggested the Magic Mirror from Snow White as the subject for the oval picture frame. I can’t believe I hadn’t thought of it myself but it is mine now. A little google research brought up a couple of images I could combine. In addition I found a color chart for face painting the mirror’s face which was a great way to start out.
Now I have to get back to my Elven Mona Lisa…
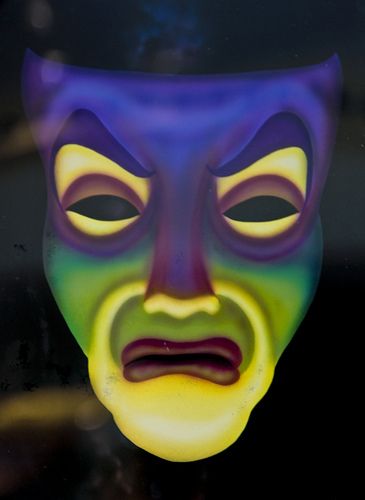 I love the contrasting colors and OSL of this image.
 I love the flames/mist of this design.
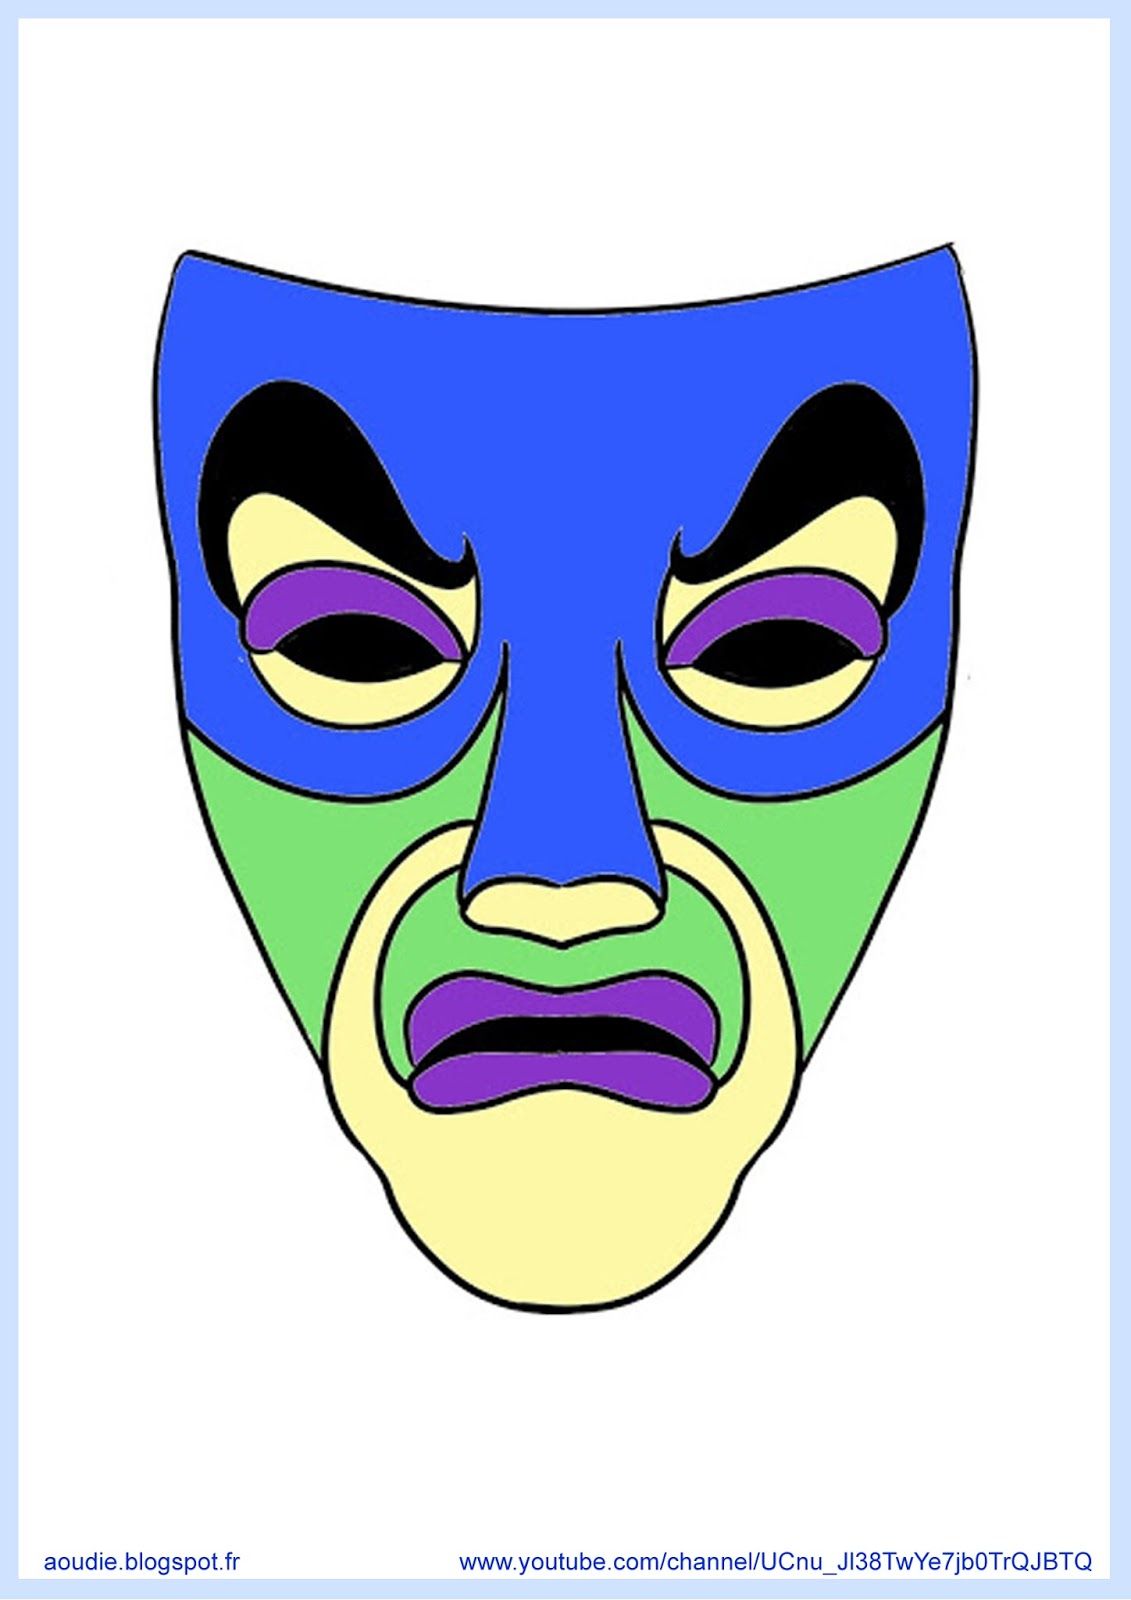 Boy did this make starting easy.
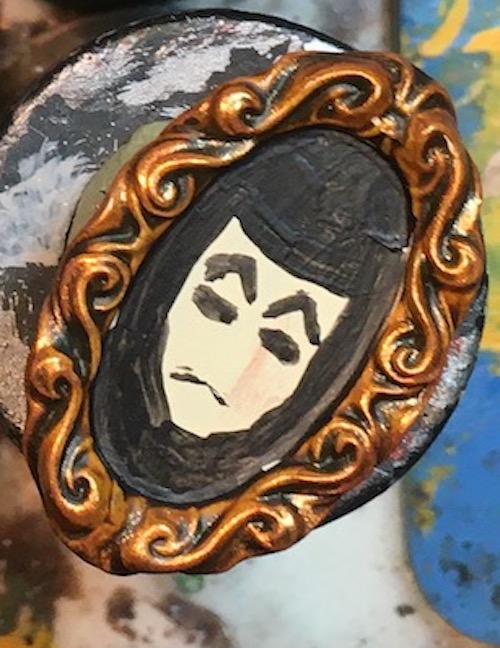 Just sketching the basic outline though this will change.
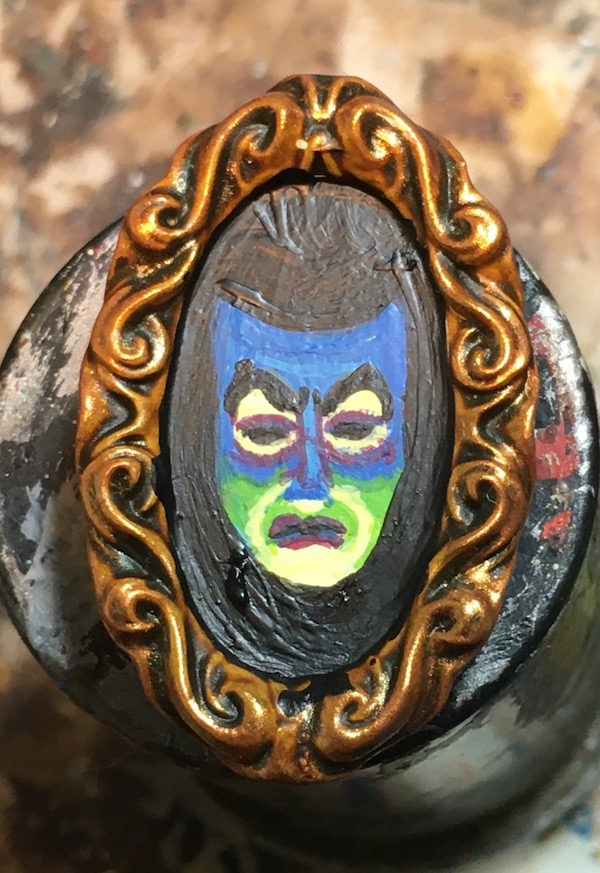 Base colors are in. Next is blending, highlighting, and smoothing out that black.
  Finally some watered down white to create mist.
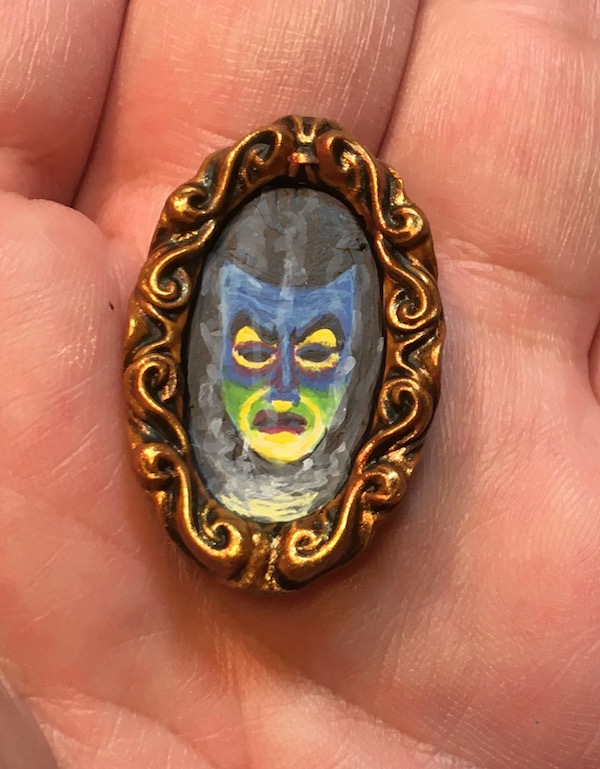 Here it is in my hand for scale.
Closing In on the End- Work In Progress
Okay, I am down to the last few pieces and Terrain Crate1 (plus a few things) will be finished and before TC2 arrives at my house (so far). Granted these pieces have the potential for the most detail work and have really set off my indecision but I am confident there are only a few hours of detail work left at this point. So here are the last remaining pieces that are on my table. In fact, here are some pictures of my table as well.
I haven’t decided if I will call this Project Blog complete when I’m done or simply roll it into the pieces from the second campaign.
 The tray of pieces waiting for sealant.
 The Painting Table with the last of TC1, note the final tent in the foreground.
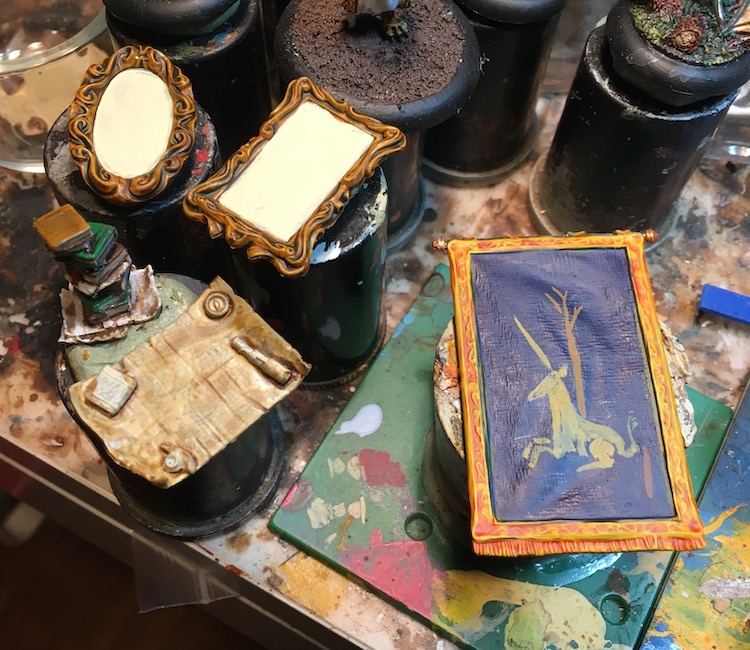 Time for some serious detail work now that the basic blocks of color are down.
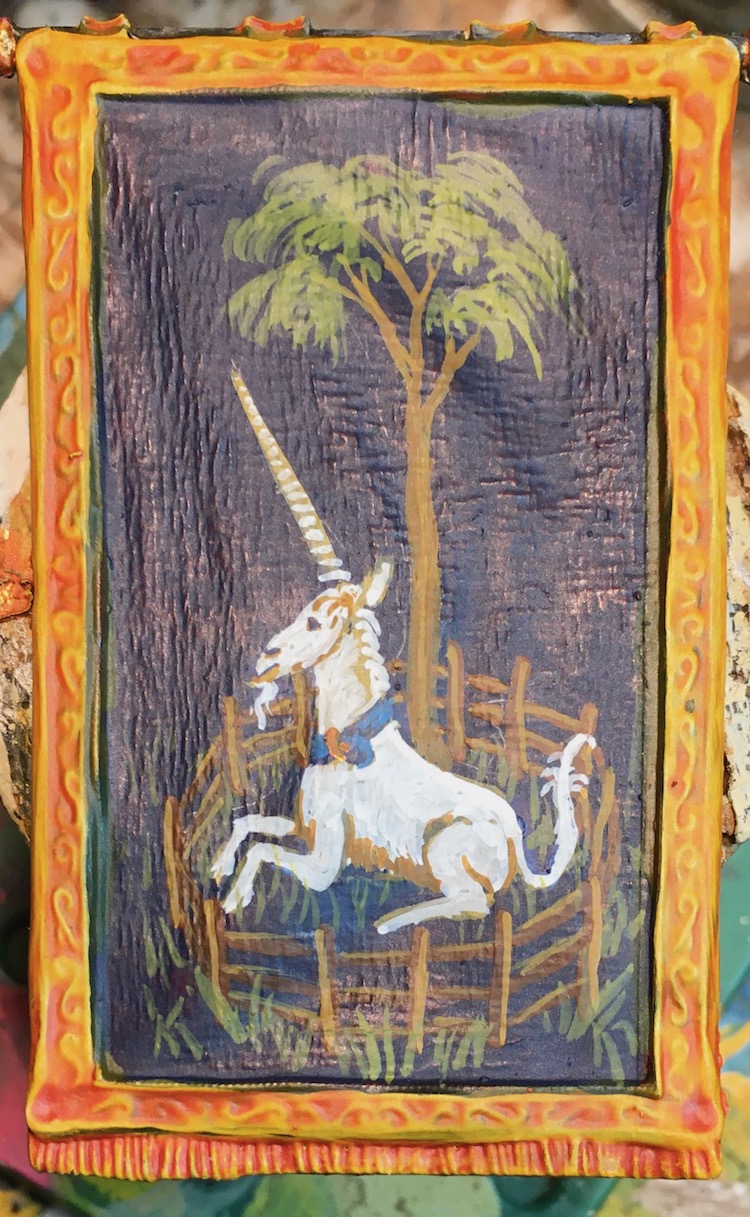 When in doubt go with classics. The wonderful woven texture is part of the casting so even painted a solid color it would look like thick fabric..
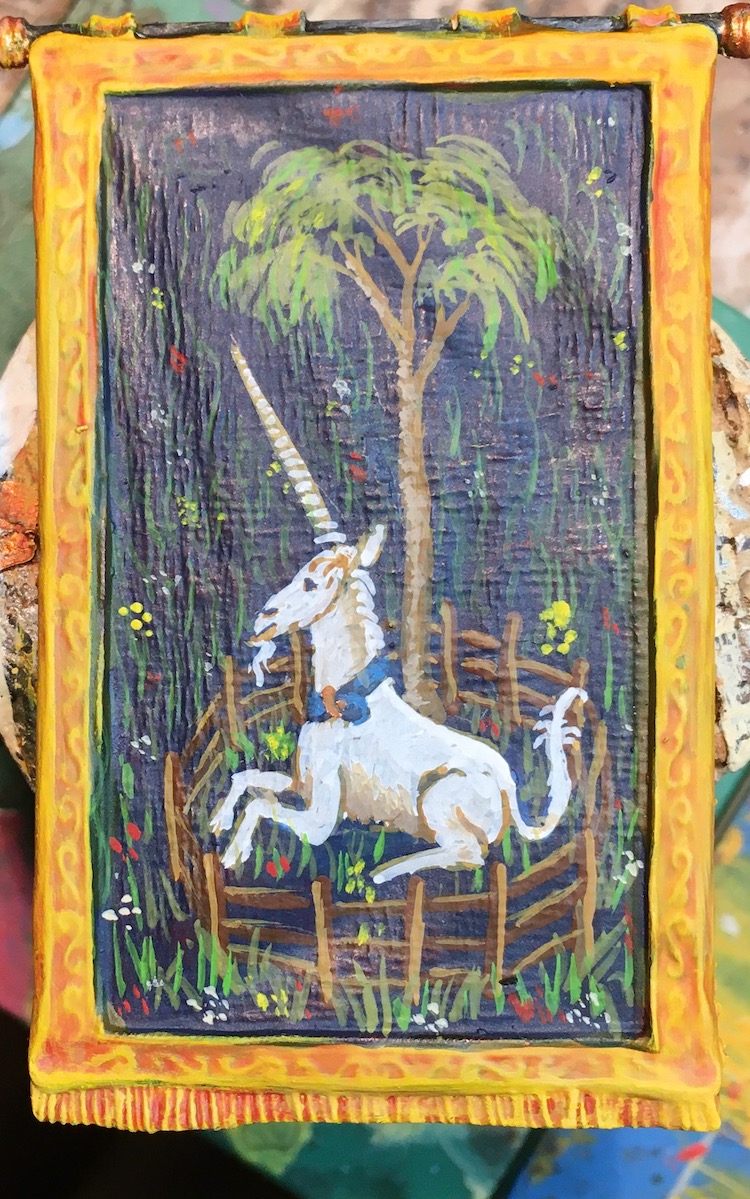 While the background of the original is covered in a rich texture of plants I wanted to reduce some of that as it would visually complicate the smaller version. By fading them out in the top half it also implies space.
 Rather attractive wall covering, I would say.
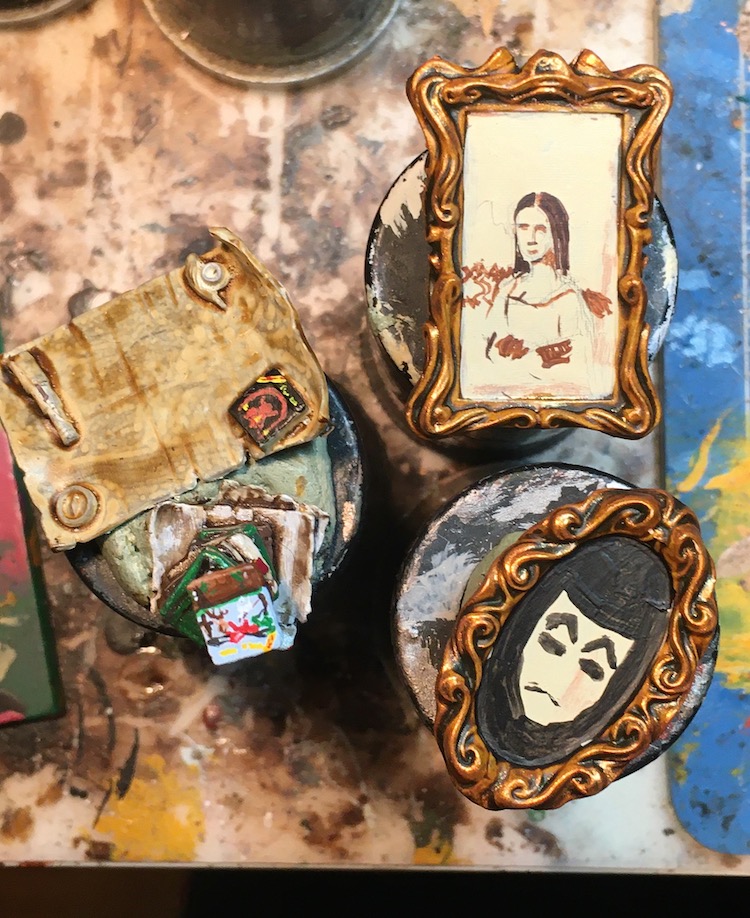 Here are the final pieces getting their base shapes blocked in.
Temple Pieces and My Personal Religion
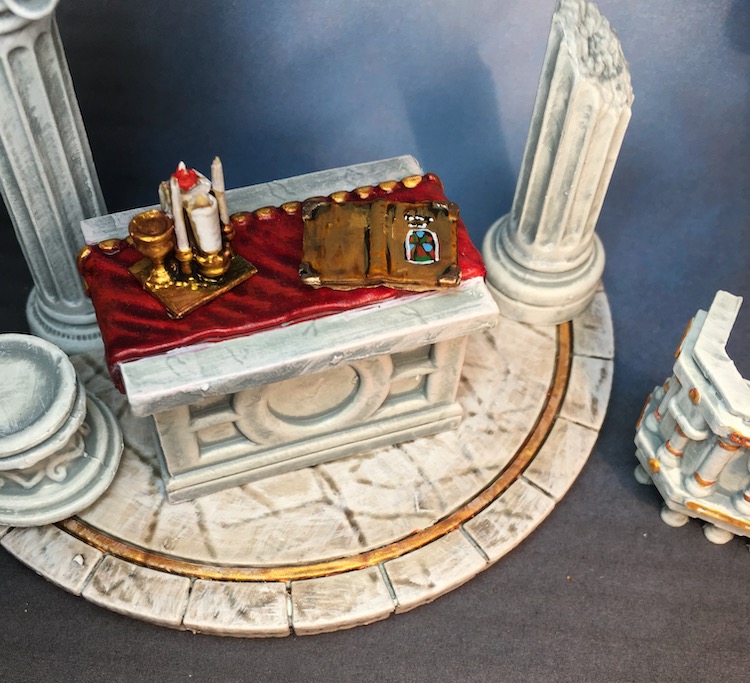
The fountains from the Temple set were already done and added to my Wolsung terrain collection but the rest of the white plastic pieces had been waiting for my attention. I painted the half circle steps the same color so I could put them together as a complete disc. The other two sets I painted differently with one in white stone and the other in grey. There are two open books in the set, one of which I decided to try and portray a personal holy tome.
 There are two of these in my collection.


 So here is the original book I was trying to make a tiny copy of
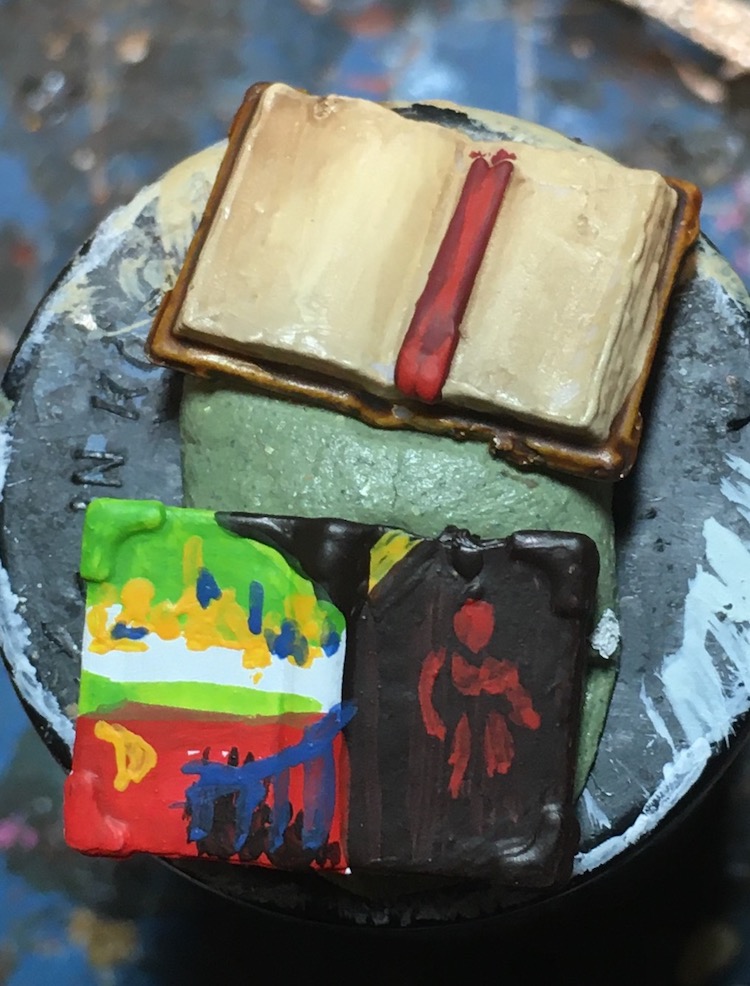 I begin with just the simpest blocks of color, a size 0 Liner brush, and really strong reading glasses.
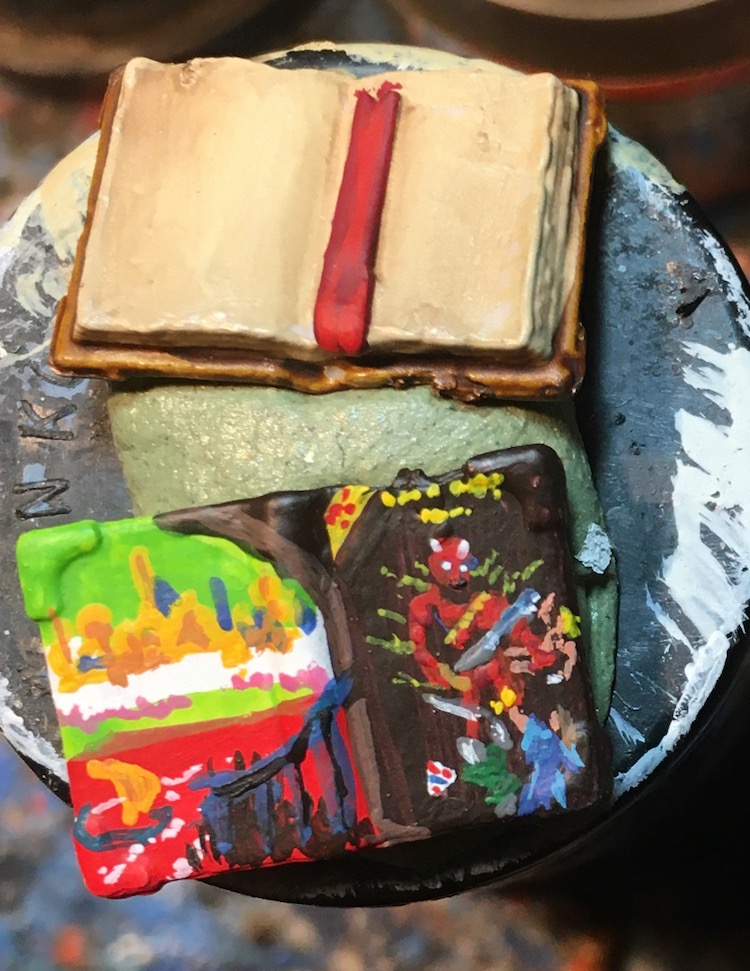 I skipped the text oval on the back of the original as it adds nothing but visual confusion.
 Considerably smaller...
 All in all, I think I pulled it off.
Dark Lord in the Tower
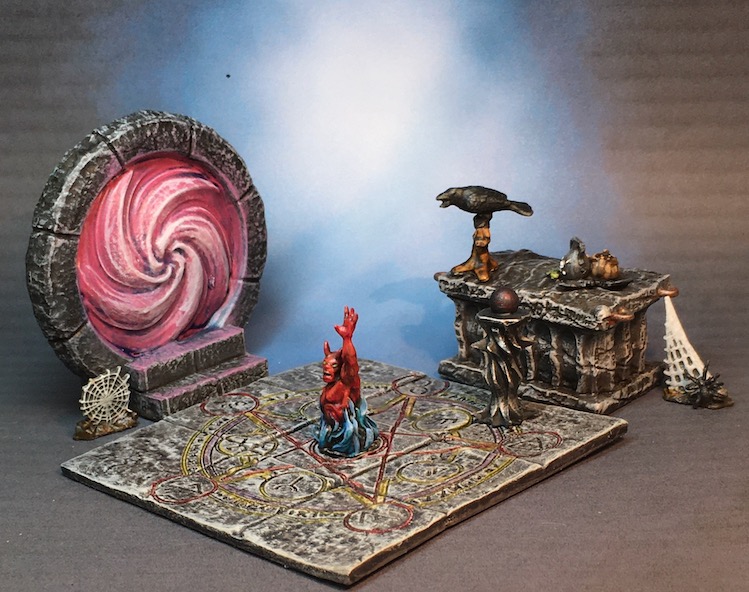
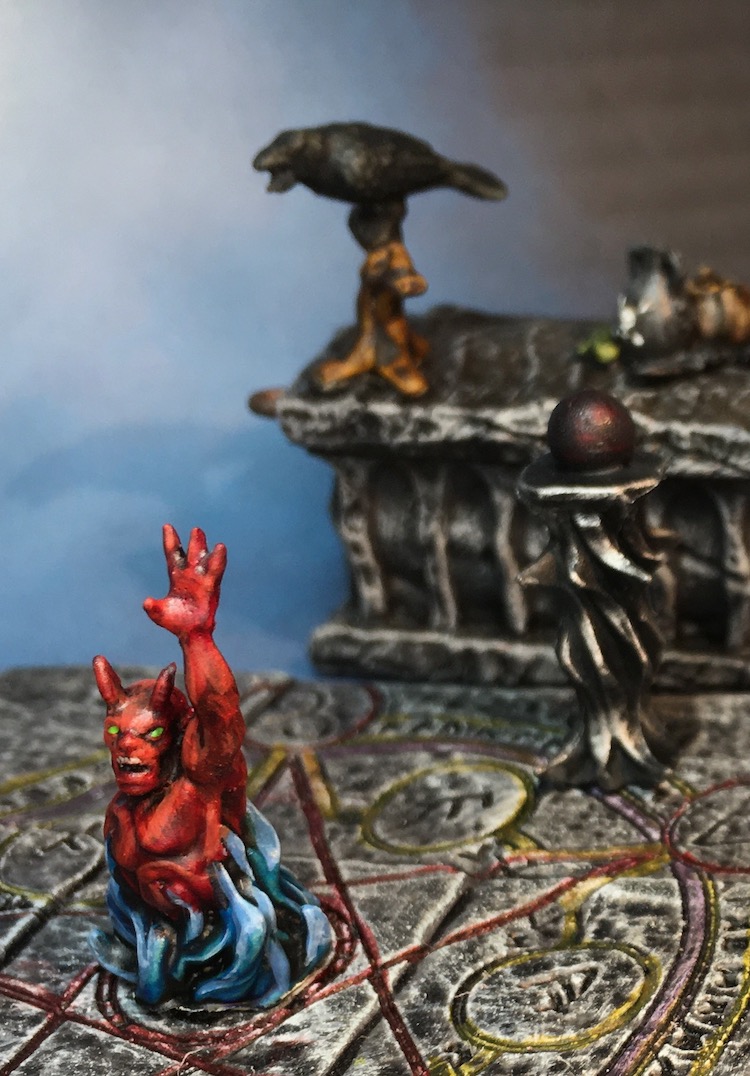
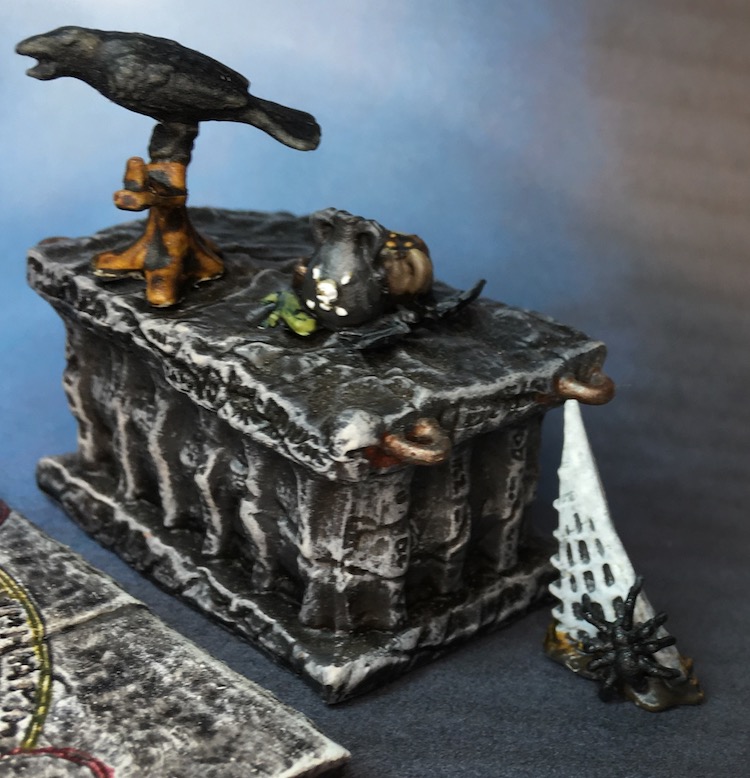
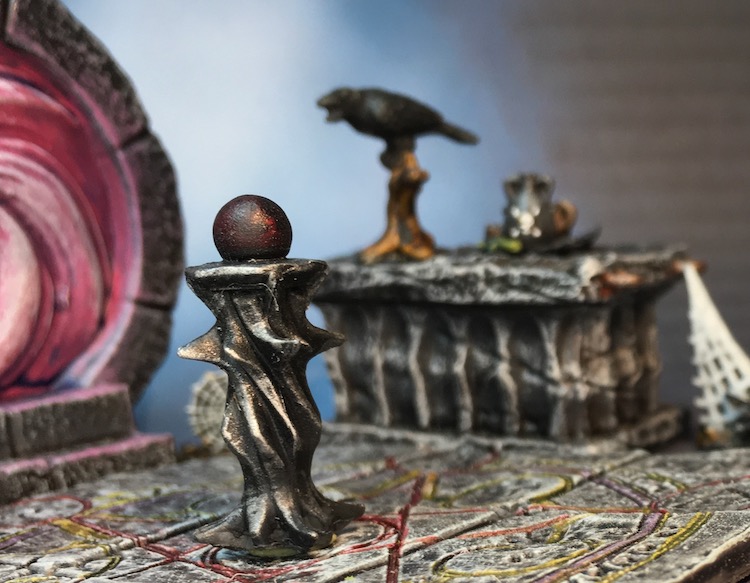
…and the Dark Lord’s Tower set is complete and it was a big one. Well, big in that it had a lot of parts, everything from a summoning circle to cobwebs to traps that deter any overly curious would be heroes. As I was assembling the parts I realized I had already painted the dark altar and packed it away. It has now rejoined the rest of the set to mollify my OCD tendencies and can be seen in the photos. I think the raven on his stand is one of my favorite details.
The all white Temple set is finished and will be posted as soon as I photograph it as I am rather pleased with one of the Holy Books. That leaves two Campsite sets and the Throne Room to finish off and their parts are all on the painting table right now. I have a solid idea of what to paint on the hanging tapestry but am still undecided (hard to believe) as to what will go on the two framed paintings.
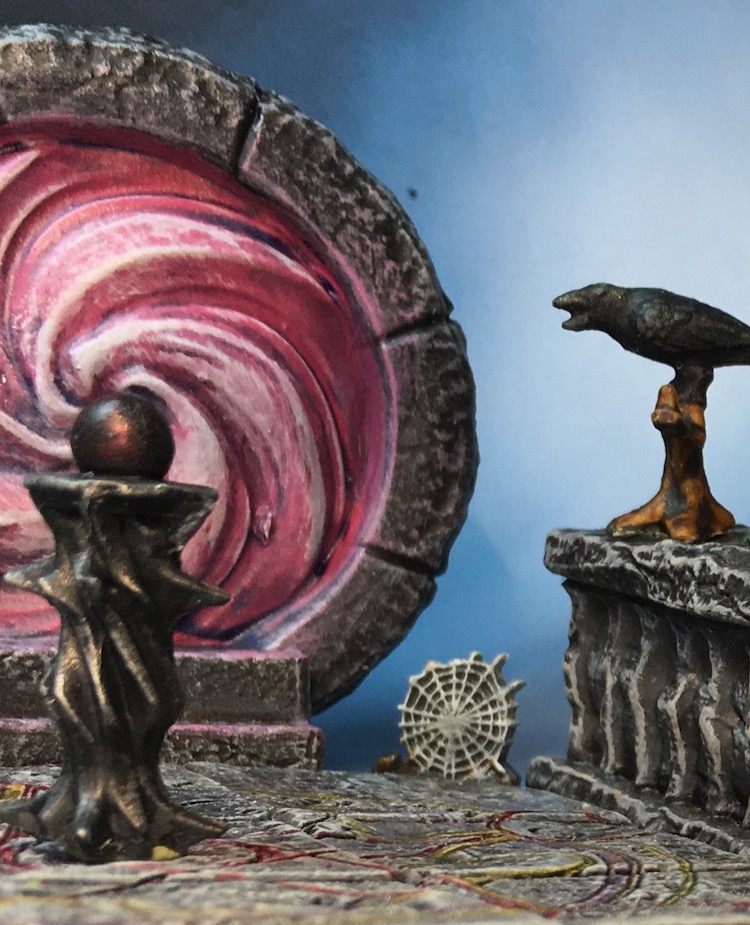
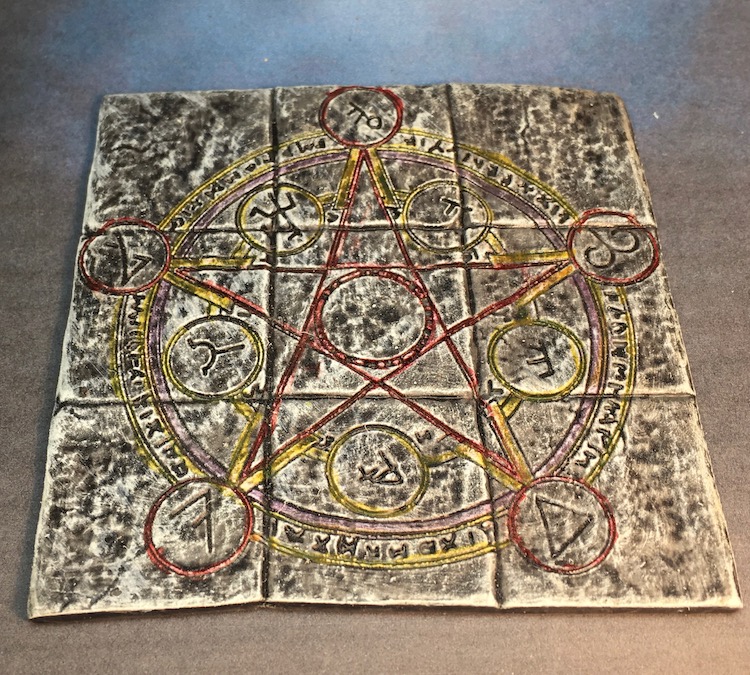 You gotta love a detailed floor piece.
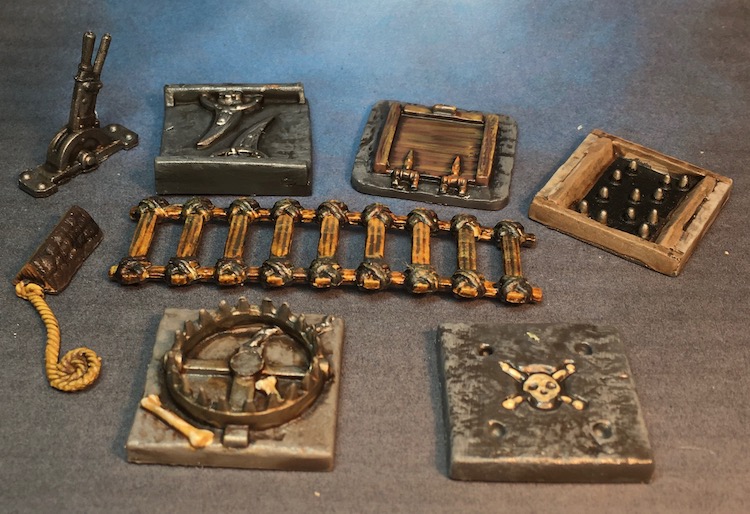 The retail set comes with a big boulder as part of the traps but I had already painted and photographed that with with the traps I received as Stretch Goals so didn't include it here.
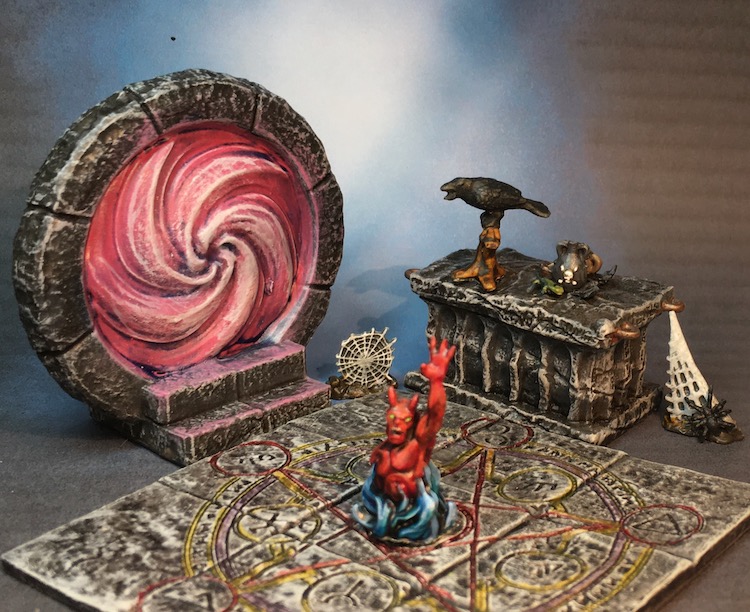 Bye for now...


![11th Edition Warhammer 40K Core Rules Now Available & More [Updated]](https://images.beastsofwar.com/2026/06/orks-new-cover-600-338.jpg)