










Ultramodern Wargaming – Ukraine 2024



Recommendations: 13004
About the Project
Lately, I've been running war games every weekend with members of the community via web conference. Players log on and play wargames with each other in real time, regardless of location, and we usually have at least a couple spectators as well. Many times it’s been Darkstar, but we’re also running wargames in Panzer Leader, Arab-Israeli Wars, and now Valor & Victory.
BoW/OTT community members @brucelea, @damon, @davehawes, and @rasmus have taken the plunge, leading battalions across thousands of meters of desert, starfleets in pitched battles across the heavens, or vicious firefights in the jungles of Vietnam, all without leaving the comfort of their home.
Hard-core, old-school command-tactical wargames can now be run (complete with spectators and recordings) in real time, with BOTH PLAYERS moving pieces across THE SAME virtual game board, thus maintaining player agency, speedy and instant results (no play by e-mail), interwoven turn sequences, any questions / feedback instantly received and addressed, and with the game being virtually recorded as it goes, a ready-made battle report can actually be created as we go.
All of this without the players having to install any new software on their computer, on any platform (PC or Mac). All that's needed is to agree on a time, a handful of dice, and a bellyful of courage!
Every weekend can now be a boot camp! All without costing me thousands of dollars in airfare, too!
Related Game: PanzerBlitz
Related Genre: Historical
This Project is Active
Gearing Up To Play Naval Command - for 1982 Falklands
Five more games played of AirWar C21. Really getting the hang of that game and how it can show the dynamics, advantages, and disadvantages on both sides in the Falklands air war.
Now switching over to the naval side. There will admittedly be a lot less here, honestly 95% of the “naval” war in the Falklands was one side or the other launching air strikes of one kind or another. So AirWar C21 will have a lot of that covered. That said, I’m also gearing up to use Naval Command system to play more of the operational aspect of the naval war.
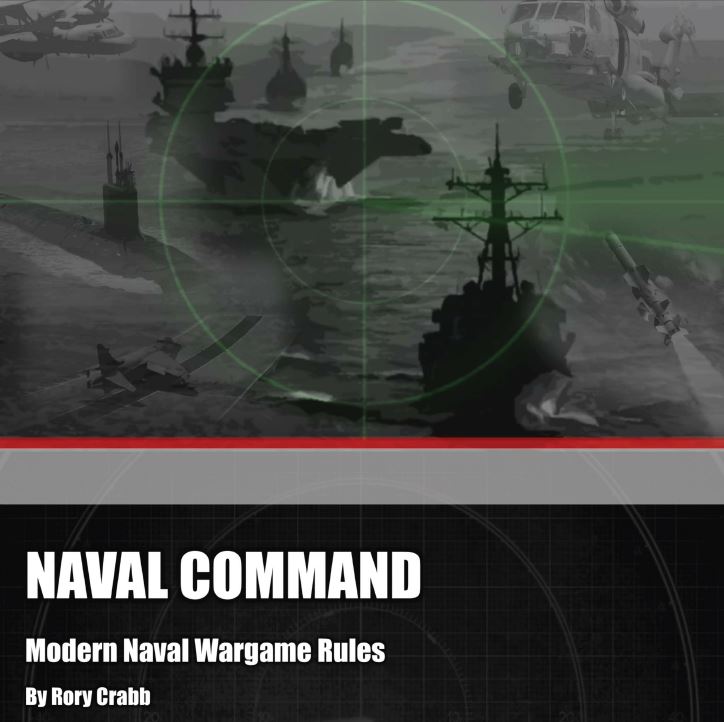 Naval Command by Rory Crabb, available on Wargames Vault.
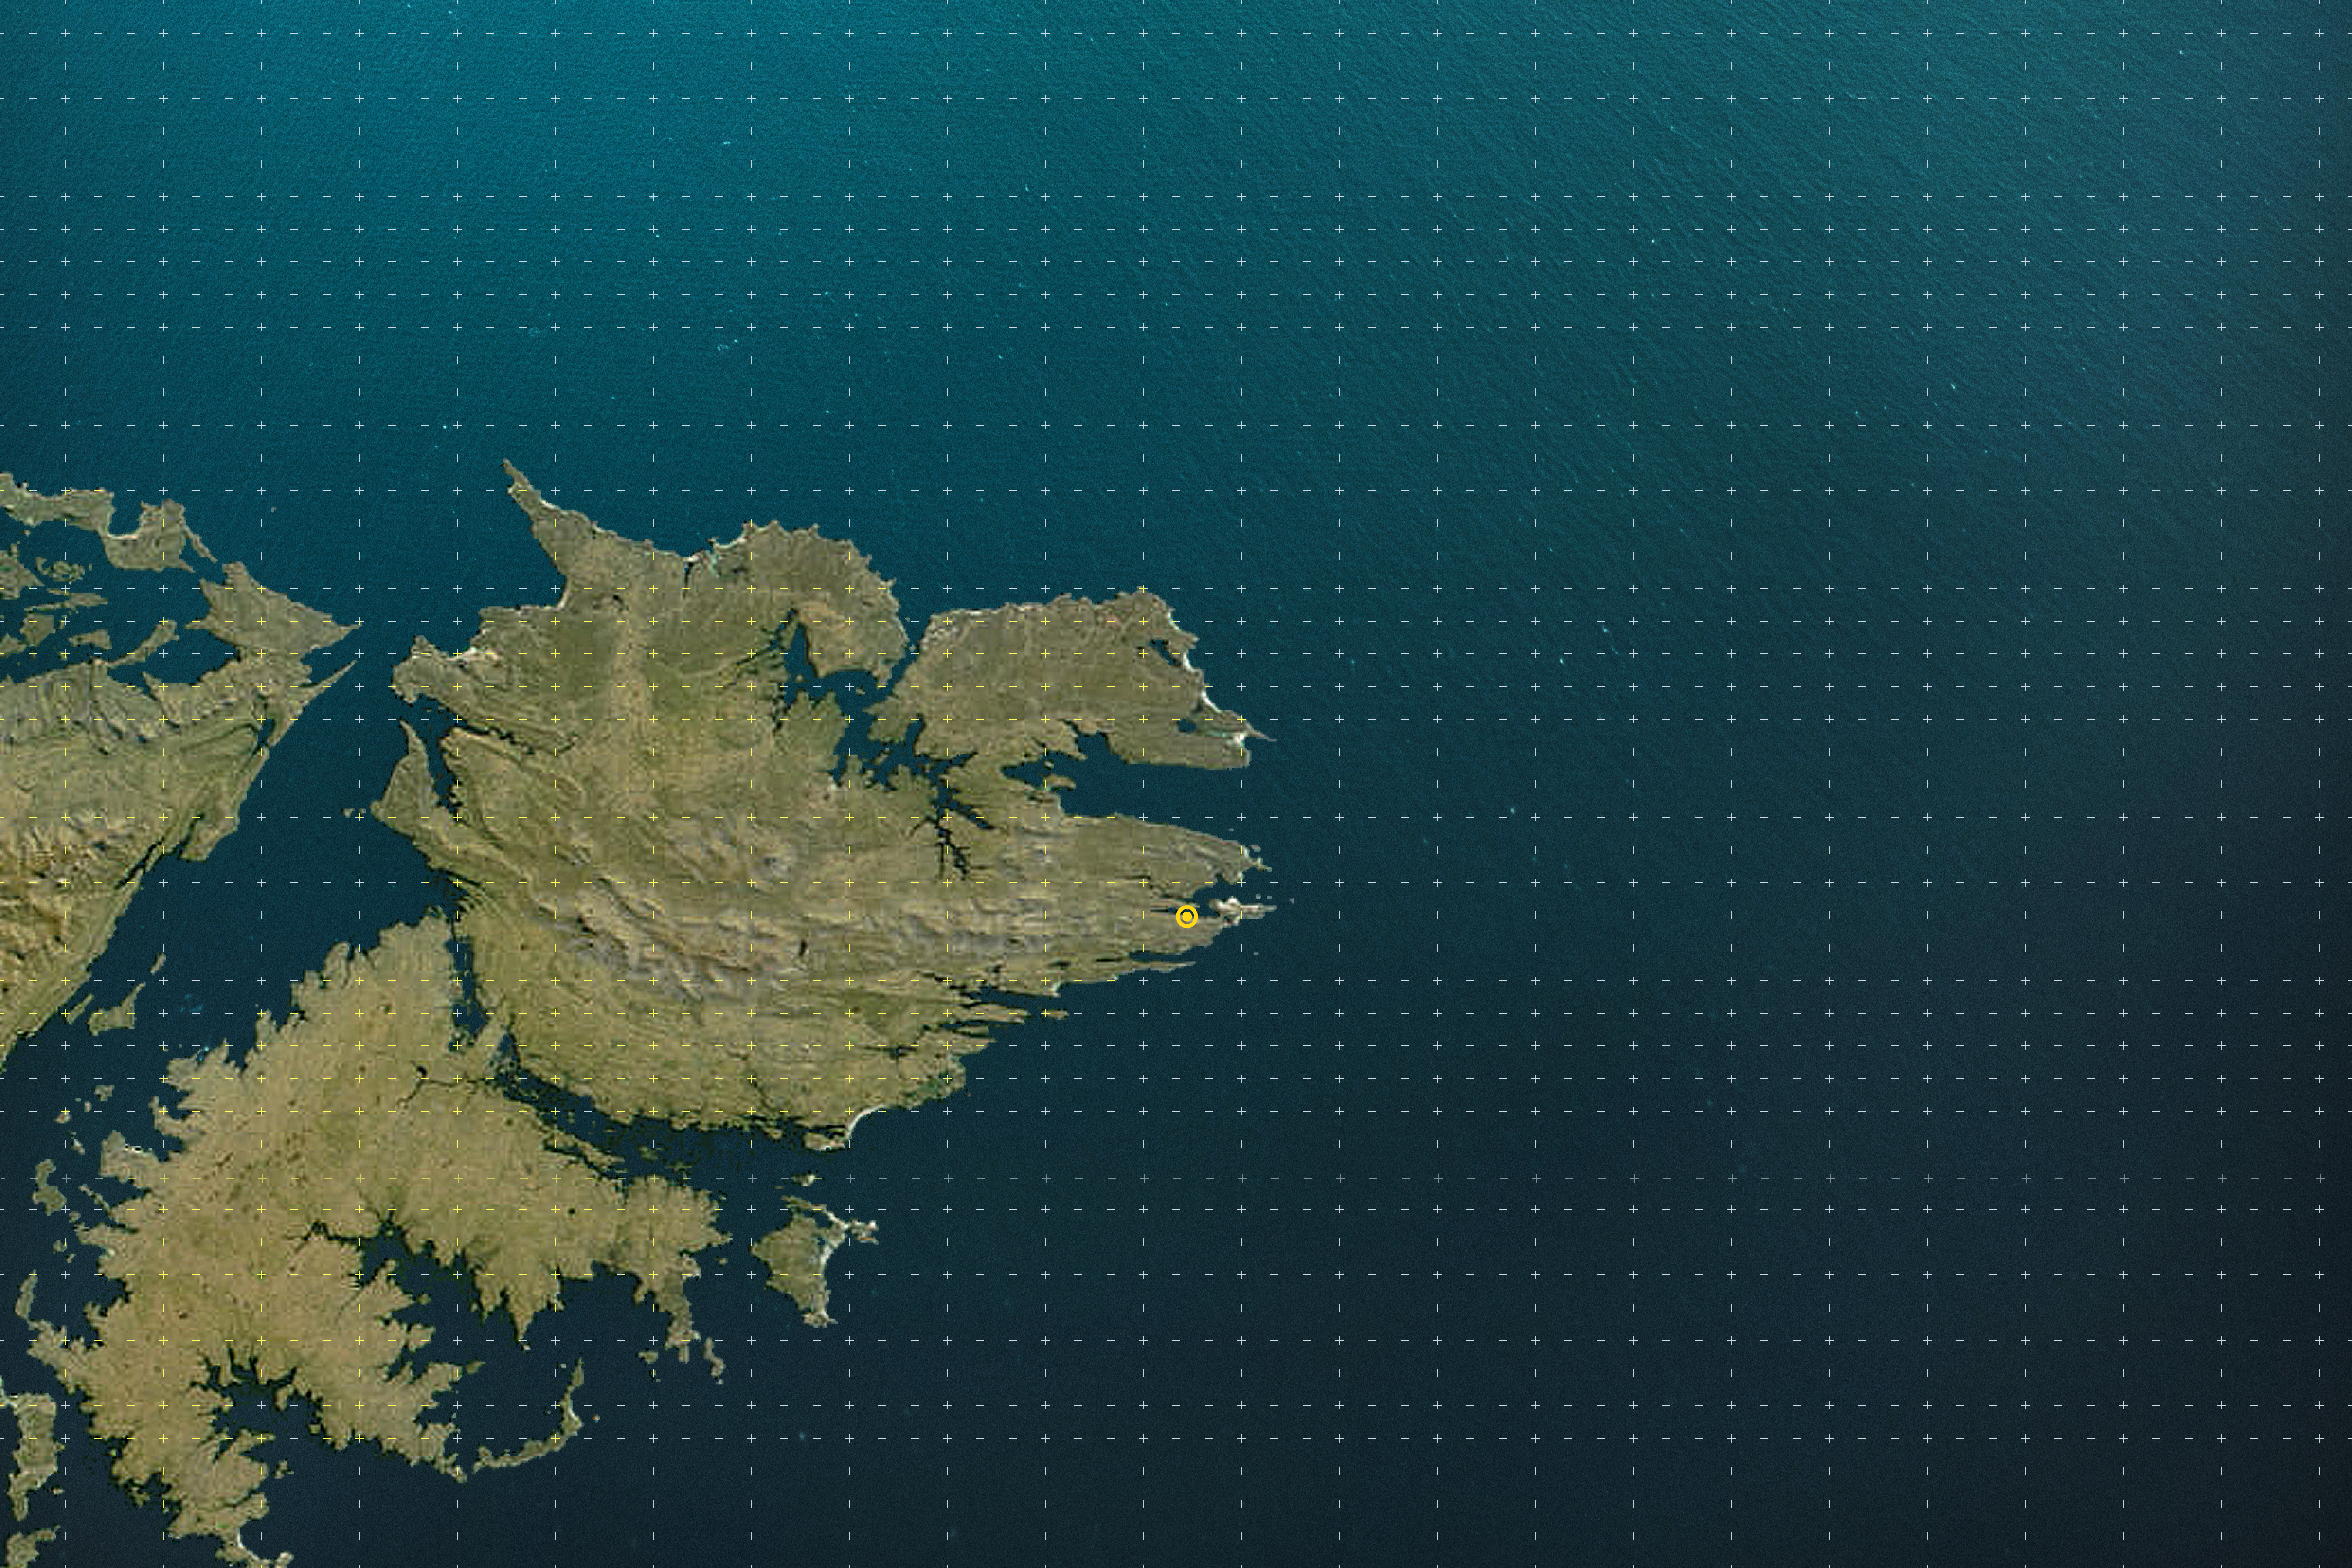 One of the maps I will use. Created myself, mostly in Photoshop. Naval Command is played on a 6 x 4 table, reflected here (72 x 48 grid). Scale is roughly 1" = 2 nautical miles. Stanley, capital of the Falklands, is in yellow. This map would only be for the initial Argentine invasion of March 31-April 1-April 2.
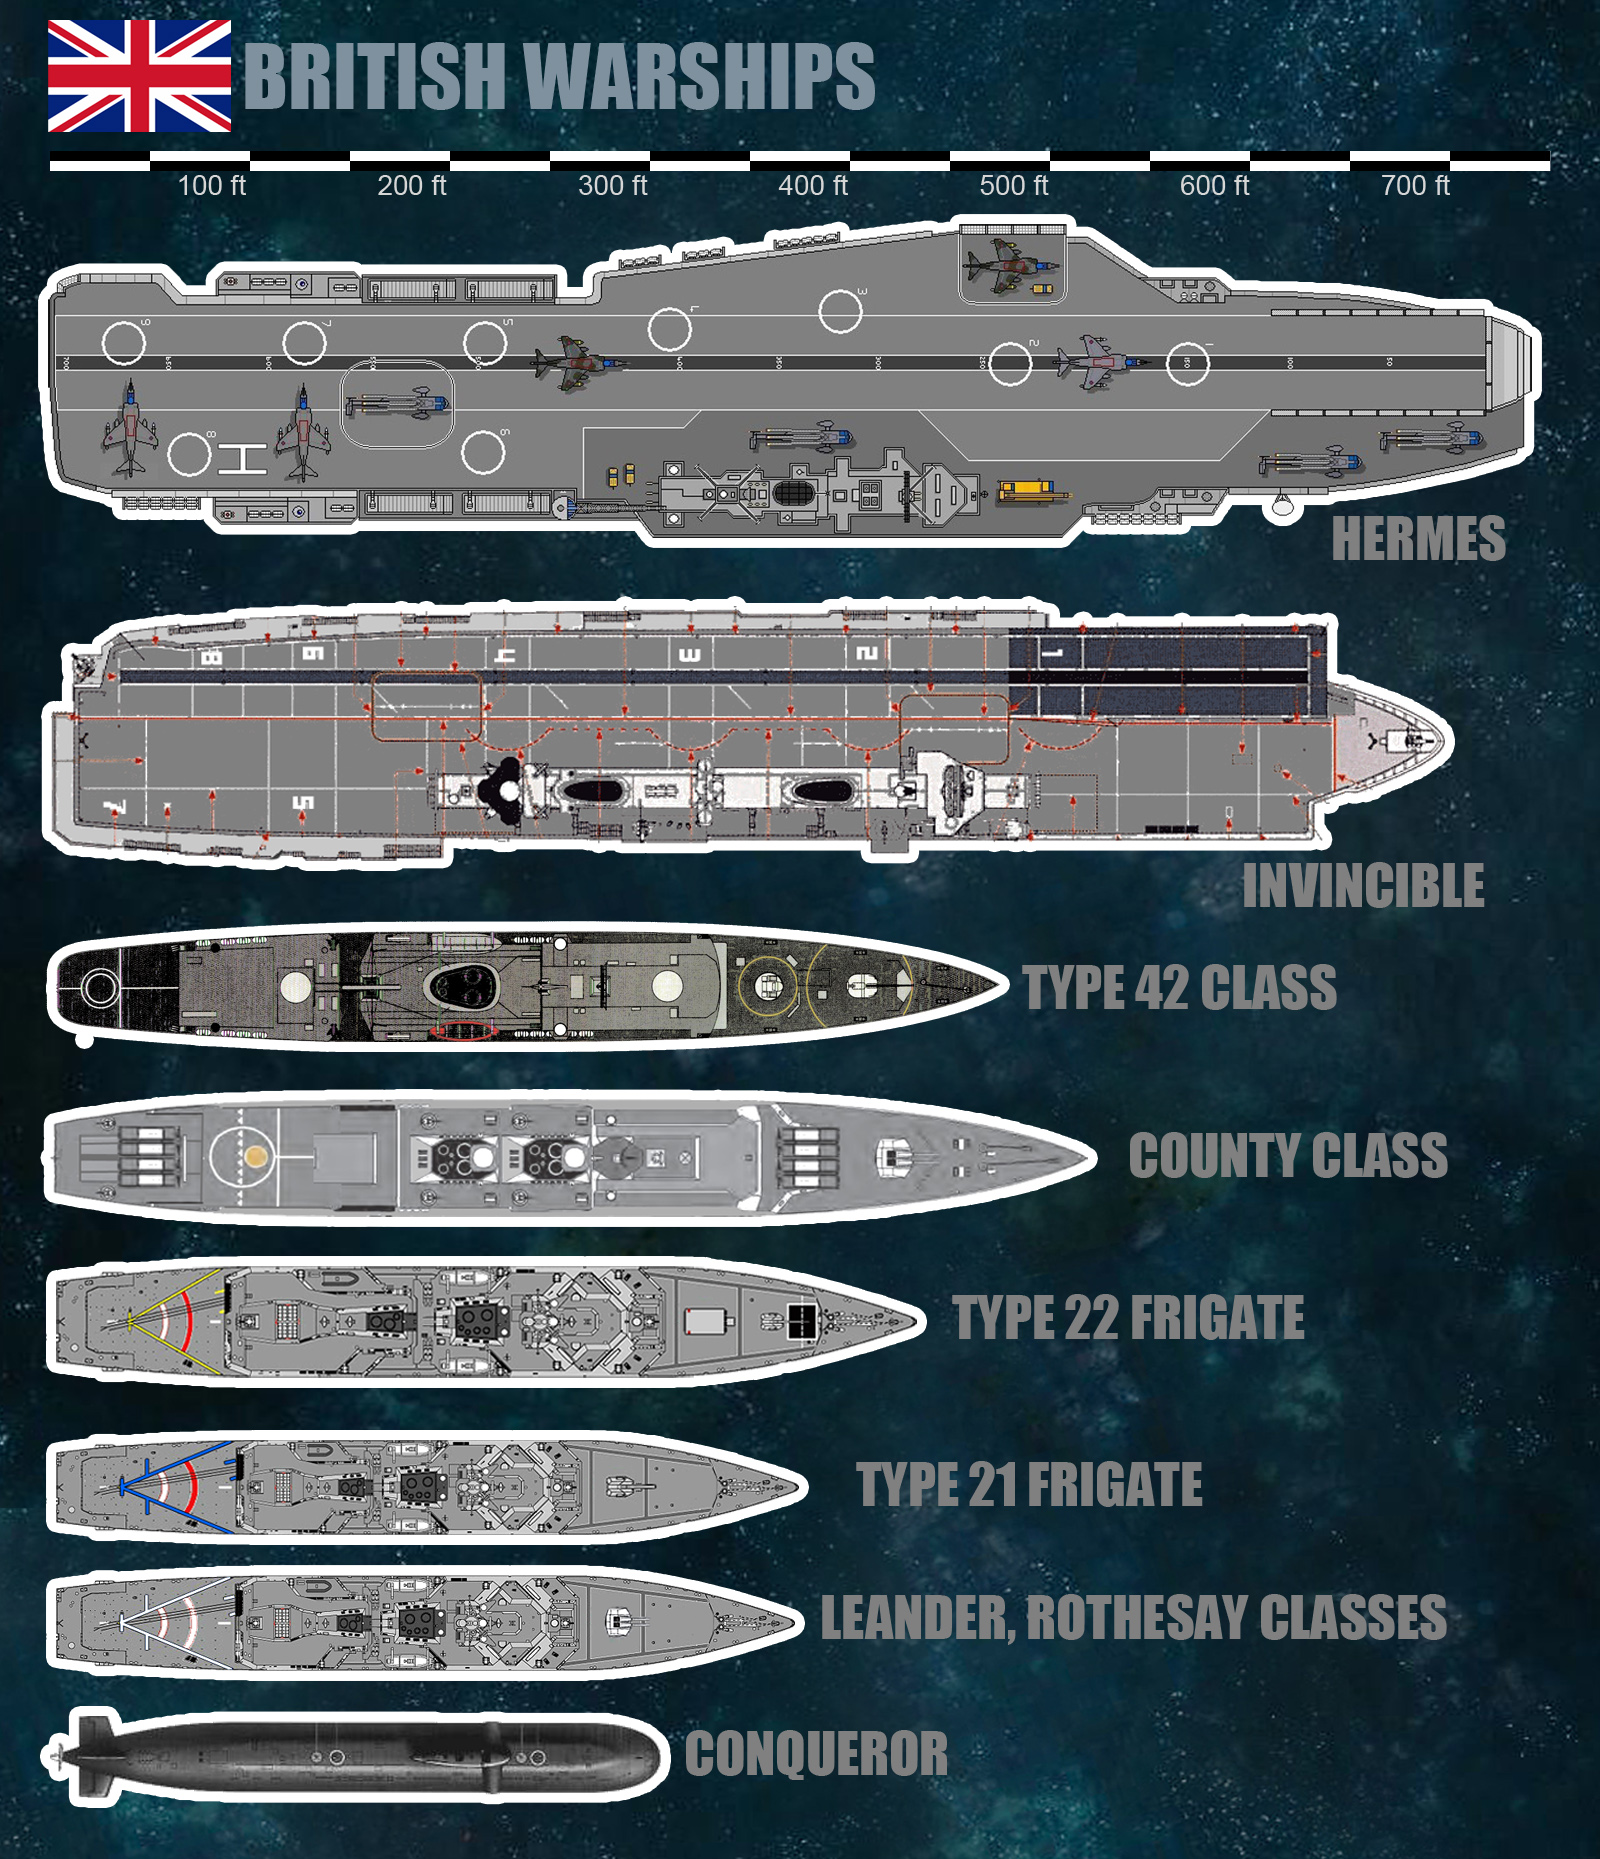 British warship counters. Please note these are APPROXIMATE. They are to scale, however, with the Hermes being just shy of 750'. The Naval Command game is usually played with 1:3000 ships (so HMS Hermes would be about 3" long)
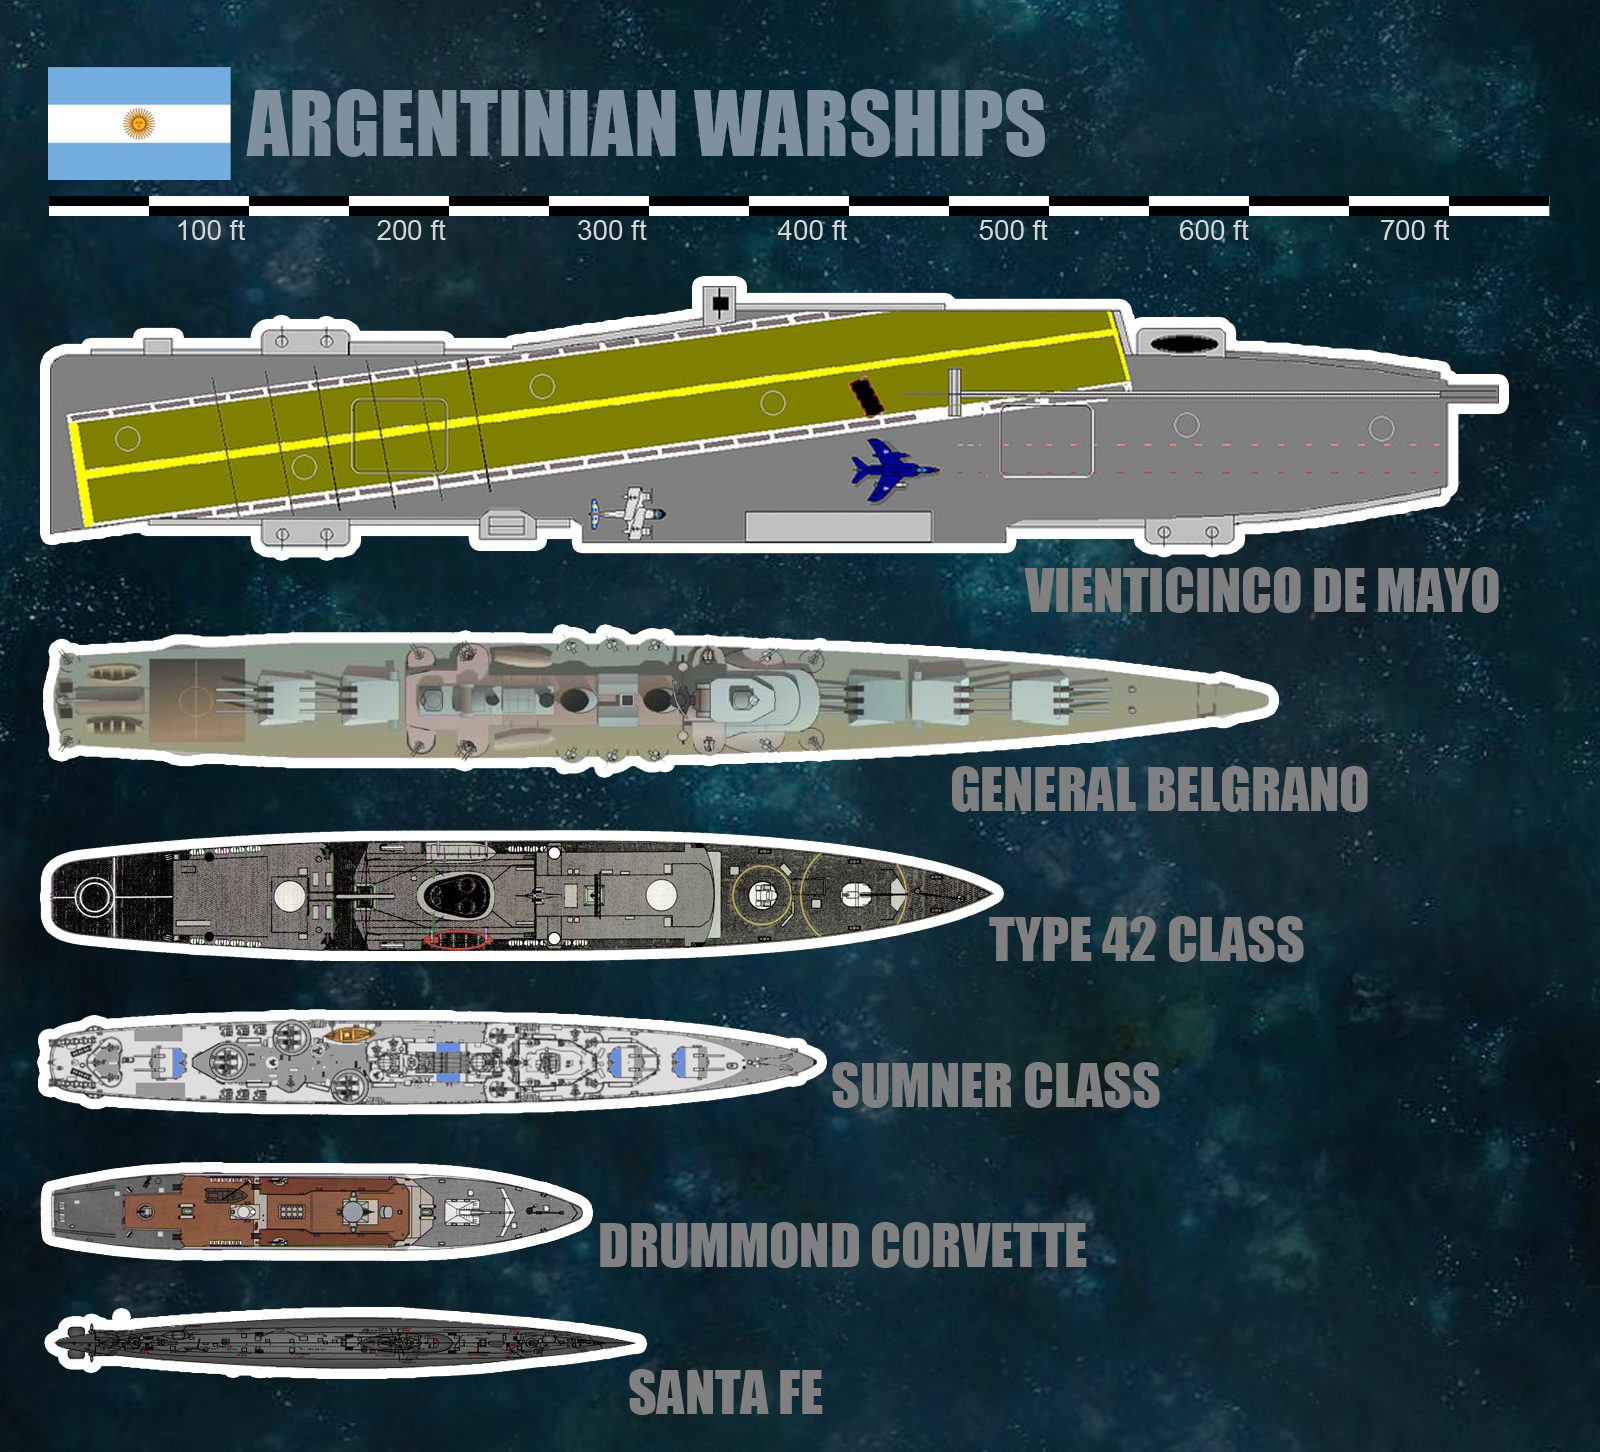 Argentinian Ships. Yes, they had Type 42 destroyers as well. And it's no accident that their flagship Vienticinco de Mayo (25th of May) looks very British. Most of the other ships were former American or built in France.
 Support ships. Very generic. Although the large container ship is scaled roughly to the size of the historical Atlantic Conveyor.
Air War C21 - Second Playthrough
Second try at Air War C21 for 1982 Falklands, this time with some improved player aids I re-designed for easier use on the virtual tabletop.
Also tried playing with +1 “Good” pilots instead of +0 “Average” pilots.
Went a little more smoothly. Still made some serious goofs with the special maneuvers (do not rely on these too heavily in this game), I straight out destroyed two Harriers on one re-done turn by attempting … and failing … a Split-S maneuver at too high a speed, I literally ripped the wings off these things and probably killed both pilots. Re-did that turn, only to blow a couple of Immelman maneuvers and quite literally “fell off the table” and inadvertently disengaged.
So still learning. Clearly this game is aiming for a “realistic” look at flying combat jets, where it is possible to “crash and burn” without the enemy even doing you the courtesy of firing at you.
That said, Argentinian guns are still a very real danger, and Harriers are getting the hang of the AIM-9L Sidewinder. And the game is very quick. This introductory scenario was about 45 minutes.
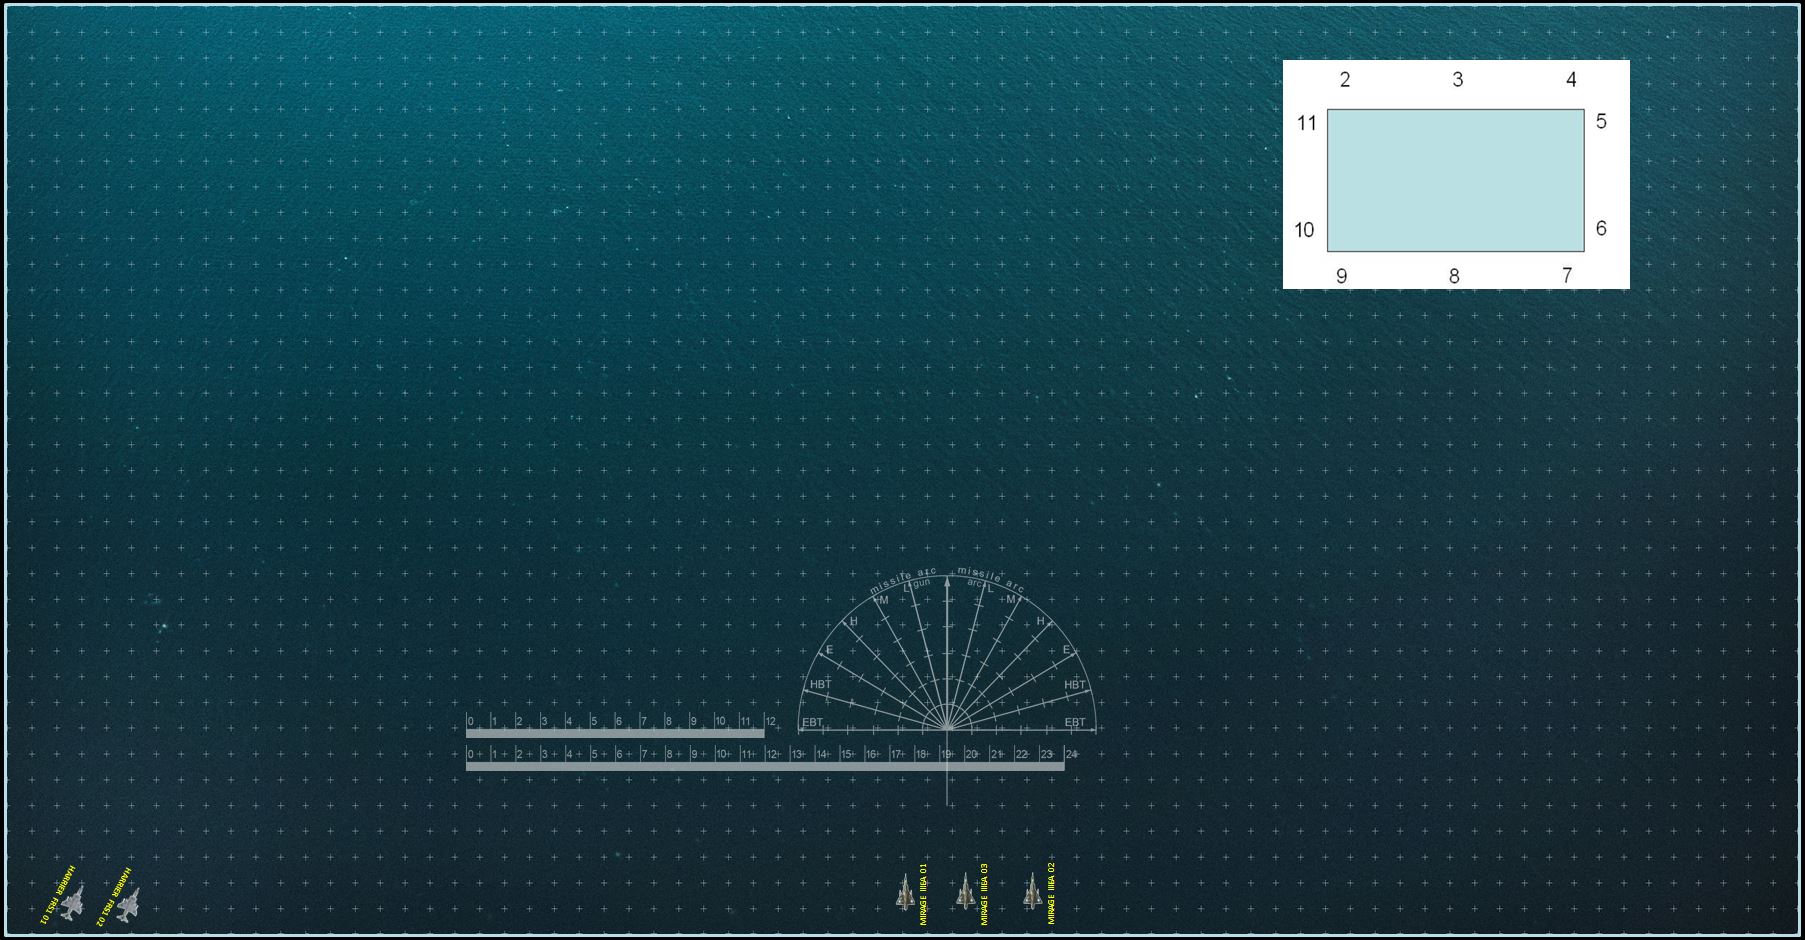 Board set up. In this scenarios, one of the first things you do is determine approach vectors, via a 2d6 roll. A result of 12 = you get to come on from anywhere you want. The Argentinians are coming hard out of the southwest, the British from the south. Argentinians lose initiative.
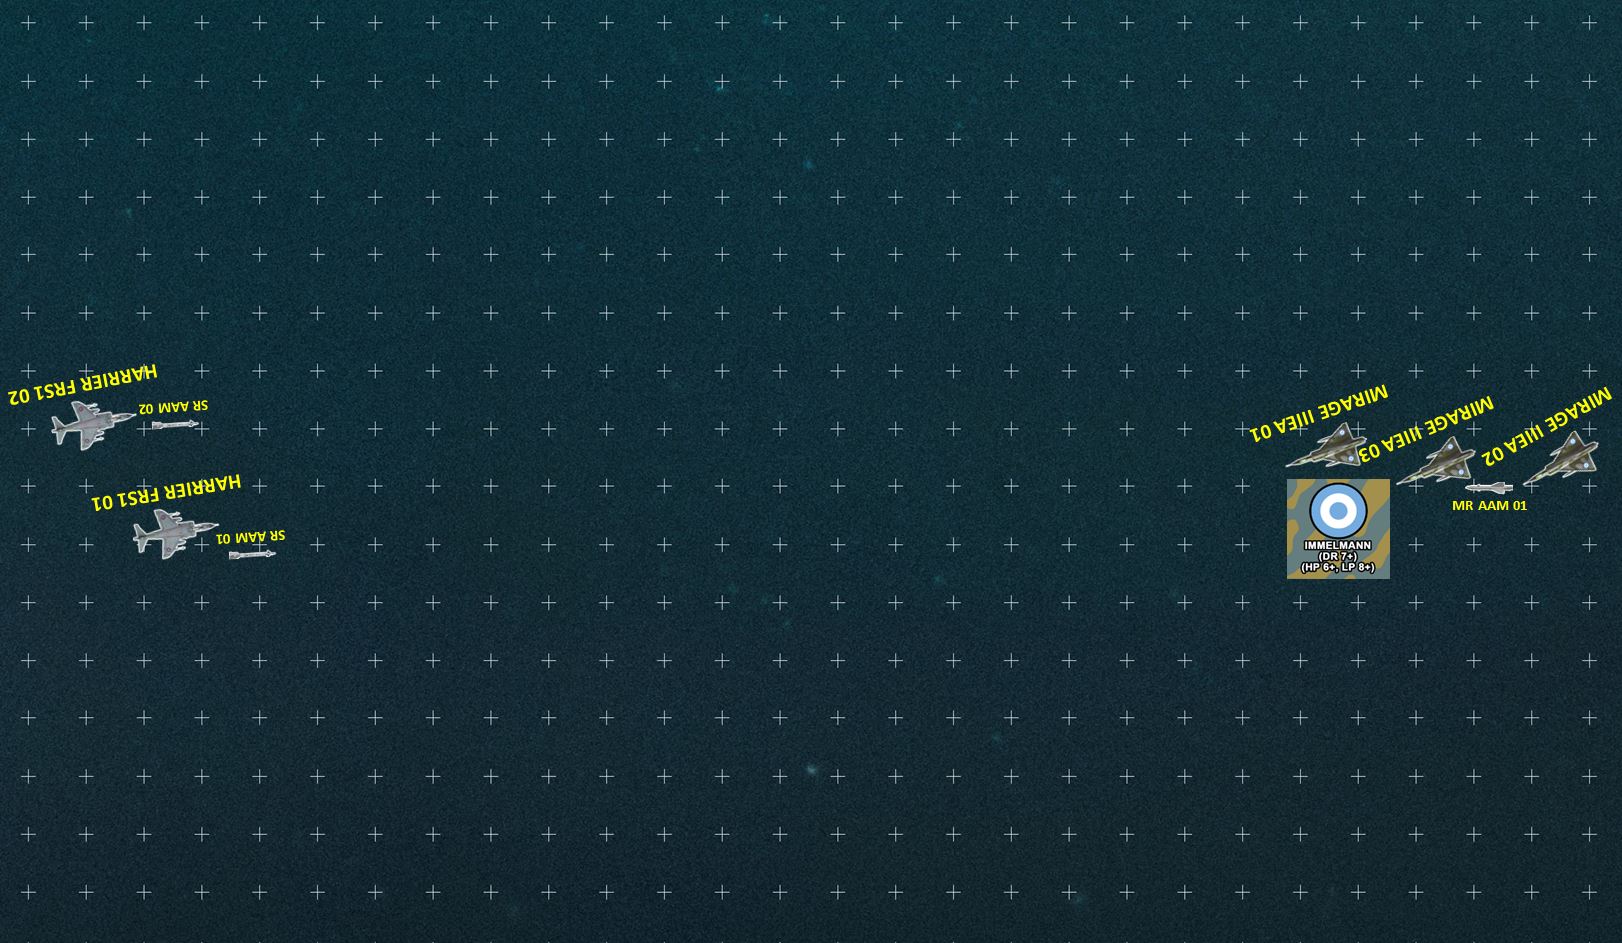 The Argentinians opt for an Immelmann maneuver, and all three of them make it! Sweet! So they pull up, go ballistic and roll, and corkscrew level with basically any facing they want. The good news is I applied power before the move, so I come out with respectable speed of about 650 knots (13"). The Harriers, having won initiative and with "Extreme" rated maneuverability, don't have to resort to such aerobatics. They simply bank right, lock on with Sidewinders, and fire. Now these American AIM-9L Sidewiders, despite being IR-guided, CAN lock on from any target aspect. Not so with the Argentinians and the R.530 Magics. So they have to try and launch their larger R.550 Mystra medium-range air-to-air missiles (MRAAMs). These are SARH (semi-active radar homing), so can attack from any angle. However, they have to use the Mirage III's onboard radar, which isn't great. Out of three, only one locks on and launches.
 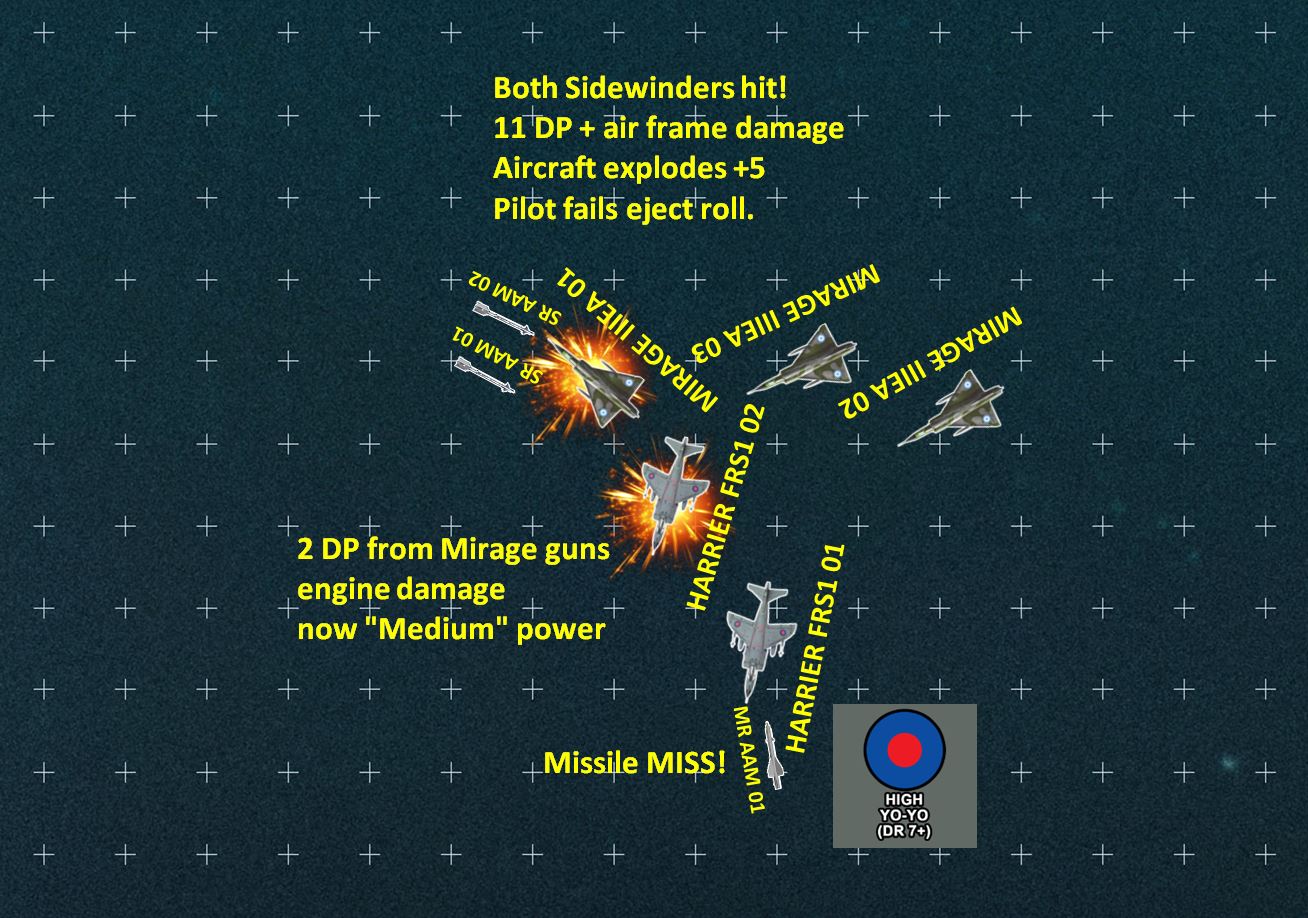 Things get very hairy on the beginning of Turn 2. I thought I could get the Harriers on the lead Mirage's tail, or at least behind his right wing, with a High Yo-Yo maneuver. I misjudged the distance, however, and overshot. An Immelmann probably would have been better here. Anyway, the two missiles hit the lead Mirage anyway, and basically blow him out of the sky. Meanwhile, the other two Mirages were able to perform a power-up and gentle S-turn, starboard then port, and make a gunnery approach behind the Harrier's left wing. Using extended bursts (triple ammo expenditure) I was able to put some holes in the Harrier, but because it was just coming out of that High Yo-Yo, there wasn't enough to shoot him down outright. Did flame out one of his engines, though. And that Argentinian Mystra predictably missed. SAHR missiles fired against enemy front arc get a -1 for bad deflection, -1 for the High Yo-Yo maneuver, +1 for pilot skill. So that's a net -1 bonus and the base to hit is poor, 7+ on 1d10 (these Mystras are old French missiles from the early 1960s). So no joy on that, either.
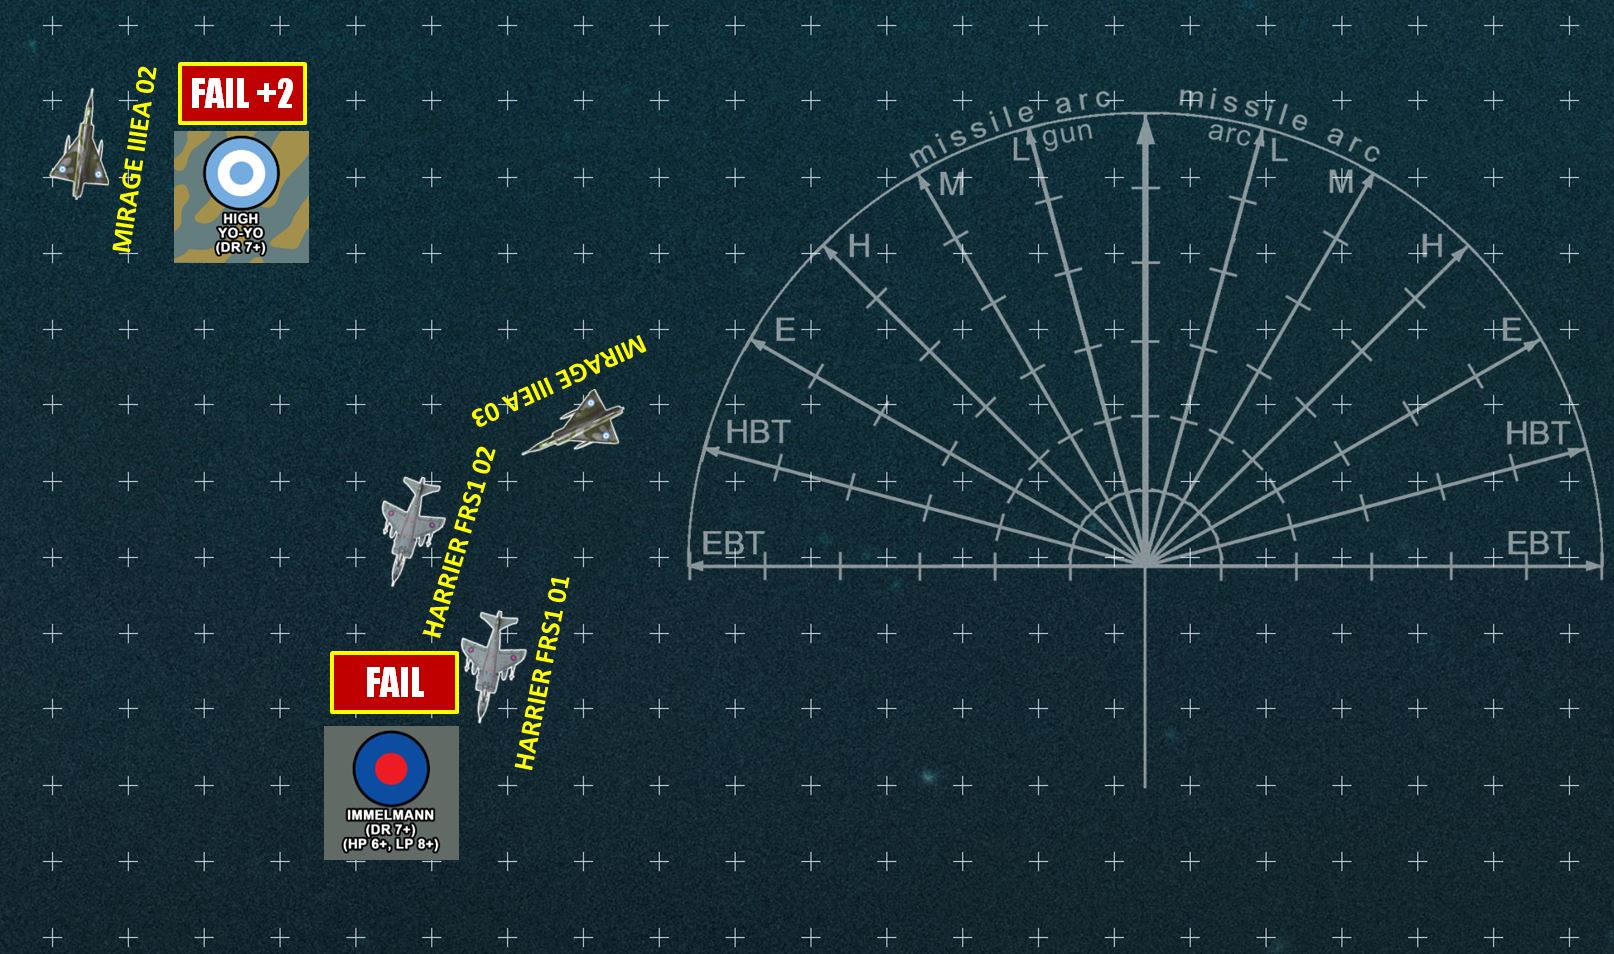 Sadly, the game ends right there. The Harriers are about to "fall" off the edge of the edge of the table. SO I try two Immelmanns, both fail (the damaged Harrier had a penalty for this check). They wind up moving half their speed forward, then facing in a random direction. They both wound up facing OFF the table, so they literally "fell" out of the battle. BUT TECHNICALLY - a British victory, with one Mirage III shot down and no Harriers lost.
 So yeah, still got a little learning to do on this, but not too much. Will try this one more time before moving to the next scenario in the Operation Corporate scenario booklet, Argentinian bombing attack on Royal Navy outside of Port Stanley, HMS Glamorgan (County Class DLG) and HMS Plymouth (Rothesay class FF)
First Play-Thru Complete - Chalk One Up For Argentina
First playthrough of Air War C21 is complete – using the first scenario presented in the Operation Corporate Falklands 1982 campaign booklet.
This was less a dogfight than a collection of drunken cats trying to fight their way out of a barrel of peanut butter – no fault of the game system at all – just me learning how the system works.
The system seems actually pretty great, really challenging the player to consider when he should take gambles, especially with his maneuvers. It also teaches some real flying fundamentals, like never forget to apply power before a difficult maneuver because whether the maneuver succeeds or fails, you’re losing speed and if you come out of the maneuver in a stall …
One things for sure … Argentinian fighters like guns. British fighters like their American-made AIM-9L “Sidewinder” SR AAMs. This results in a classic “high tech guys want to fight at long range, more numerous guys want to get into choking distance” dynamic.
 The scenario sheet from the Operation Corporate campaign booklet.
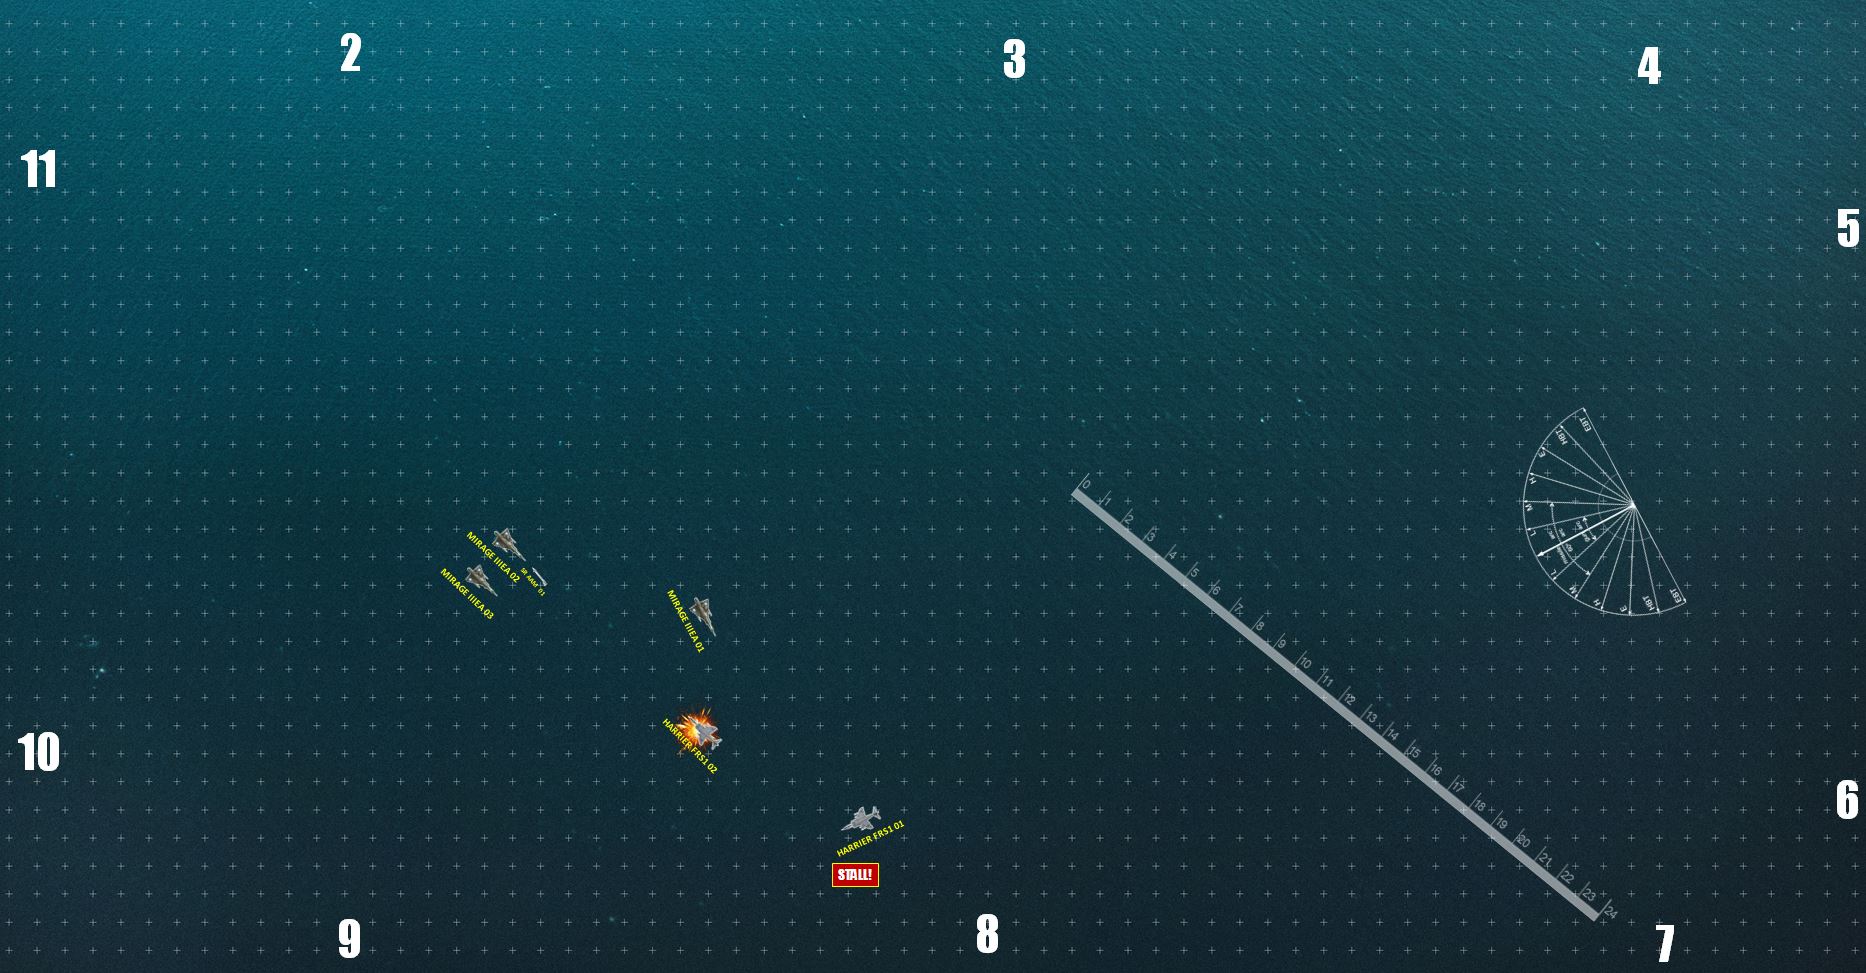 The wide-angle of the whole 72" x 36" map. The British roll 8 for entry zone. The Argentinians roll 11. The Argentinian Mirages than roll great on initiative, and the British are mostly caught flat-footed. The Mirages are very fast (in a straight line) and zoom in very hard from the northwest. The lead Sea Harrier tries a hard break to port, fails it, and goes into a stall. By the way, this break turn was unnecessary, the Sea Harrier can make this angle with normal turns (slowed but MUCH more maneuverable than Mirage IIIs) - I also didn't know to apply thrust at the beginning of movement before trying a maneuver card, so not only diud my lead British pilot try an unneeded risky maneuver, I t hen did it improperly, then whiffed the roll. Like I said, learning the game.
  Sea Harrier 02 tries to cover his leader, but earns two sustained bursts of cannon fire from two of the Mirages. Fortunately they're at extreme range, so little damage is done. Control surfaces are damaged, however, leaving the Harrier less maneuverable. He also slings a Sidewinder back at the Mirages, scores a hit (the Mirage fails his Break turn), but on a 1d10 damage roll, only rolls a 2. The Argentine pilot is WOUNDED, however. No more high-G turns for him.
  Lead Sea Harrier fails TWO more checks trying to recover that stall, finally making it at the end of Turn 2. By then, however Sea Harrier 02 has two Mirages on his six, who put two EXTENDED bursts into his tail at medium range (burning through most of their ammo). It's enough to cripple Sea Harrier 02, which means the max safe speed for the craft is now down from 13 to 7 (half). Too bad he's moving at 10, putting him at VMAX exceed of +3 = 3 more points of damage. The Harrier literally flies apart, and the pilot does NOT survive the ejection.
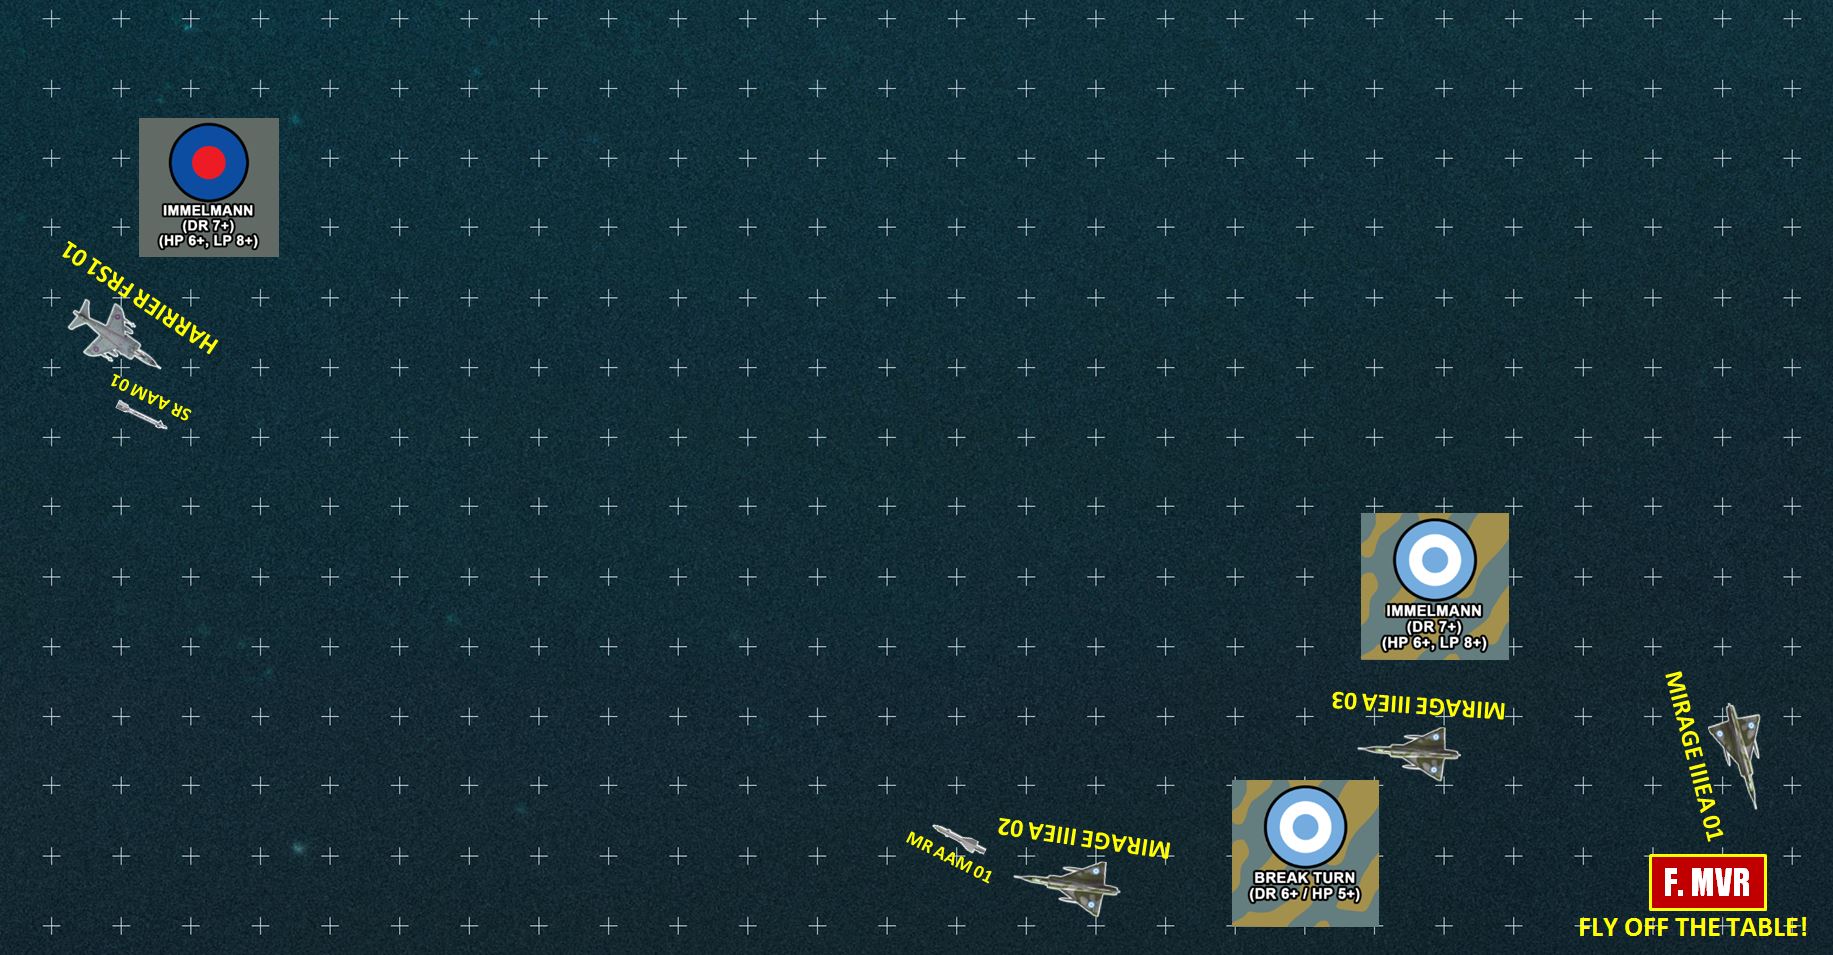 Lead Sea Harrier finally starts to get his shit together, accelerating full-power and executing an Immelman maneuver, doubling back to face the Mirages. The third Mirage actually goofs a little here and after failing a maneuver check, actually flies off the table and inadvertently disengages. Sea Harrier 01 gets a lock and looses a Sidewinder. Both Mirage 02 and 03 would love to shoot back, but their R.550 Magic IR SRAAMs can only lock on from BEHIND their target. Their longer-ranged (but less accurate) R.550 Mystra SAHR missiles can get a lock from any aspect angle, but they must use the Mirage's onboard radar for that, which isn't great. Only one gets a lock, and fires.
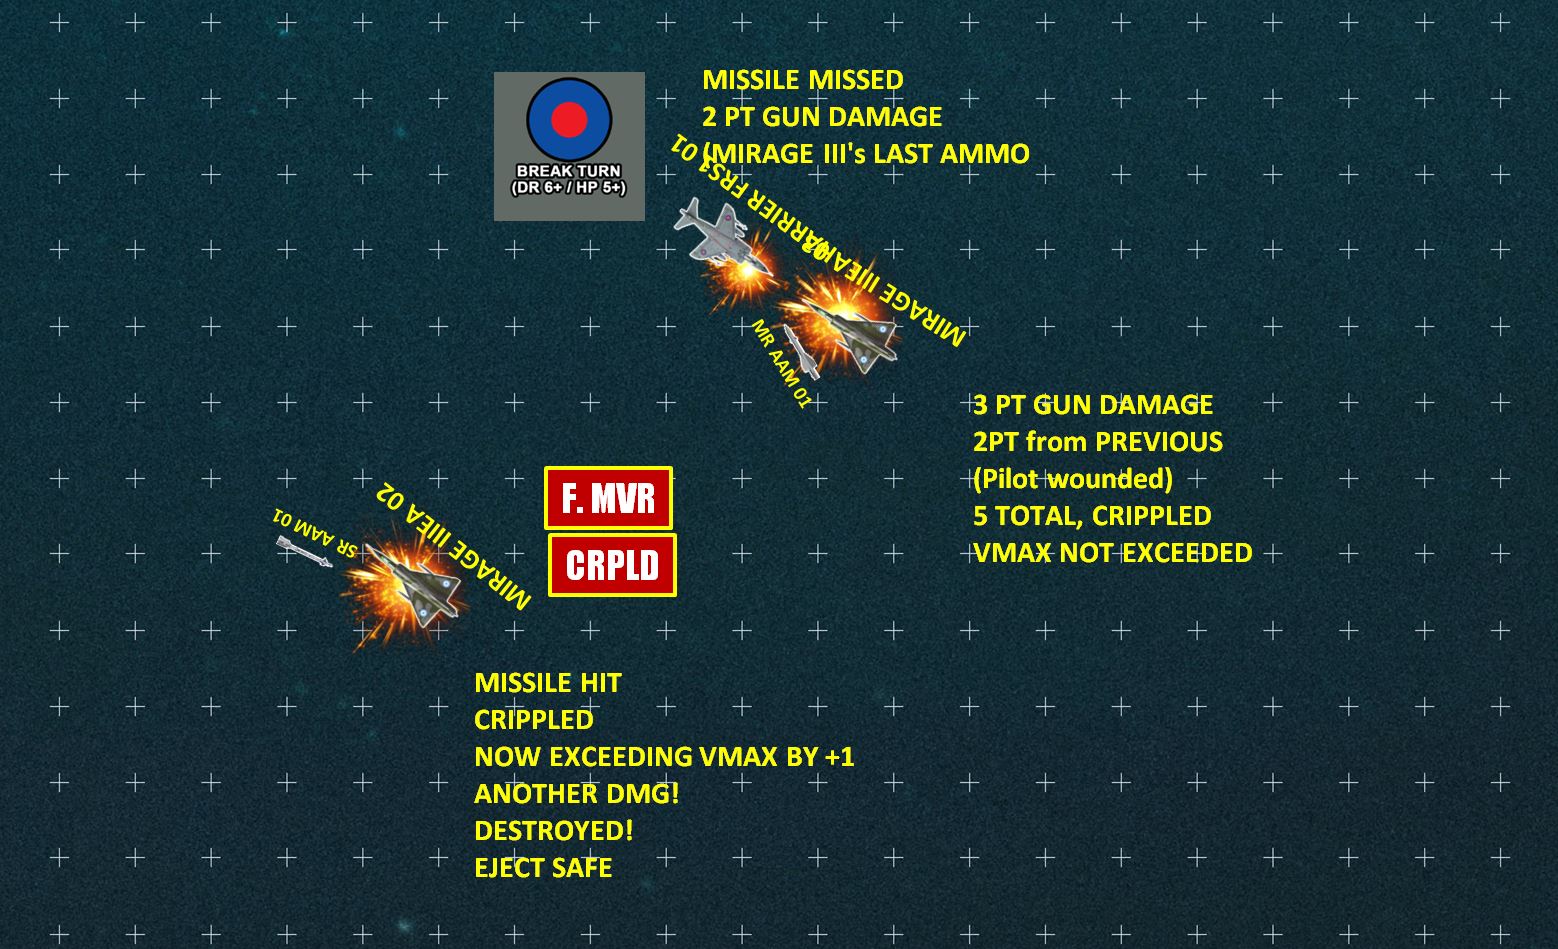 Sea Harrier 01 executes a double-break S-Turn, first to port and then starboard, sidestepping the incoming R.550 Mystra. The missile missiles. Mirage 02 tries to cut inside the Harrier, fails, and takes the Sidewinder to boot. The plane explodes, but the pilot punches clear. Further back (and having won initiative) Mirage 03 goes head-to-head with the Harrier, hoping to dump the last of his ammo into the Harrier's canopy. He hits, but doesn't do enough damage. Meanwhile, the Harrier's guns fire back, hit as well, and leave the Mirage crippled. Fortunately, the Mirage is only moving at 8, less than the new VMAX of 10 (these Mirage III EAs start with a 20). So with ONE damage point left, AND a wounded pilot, this Mirage is still in the fight.
 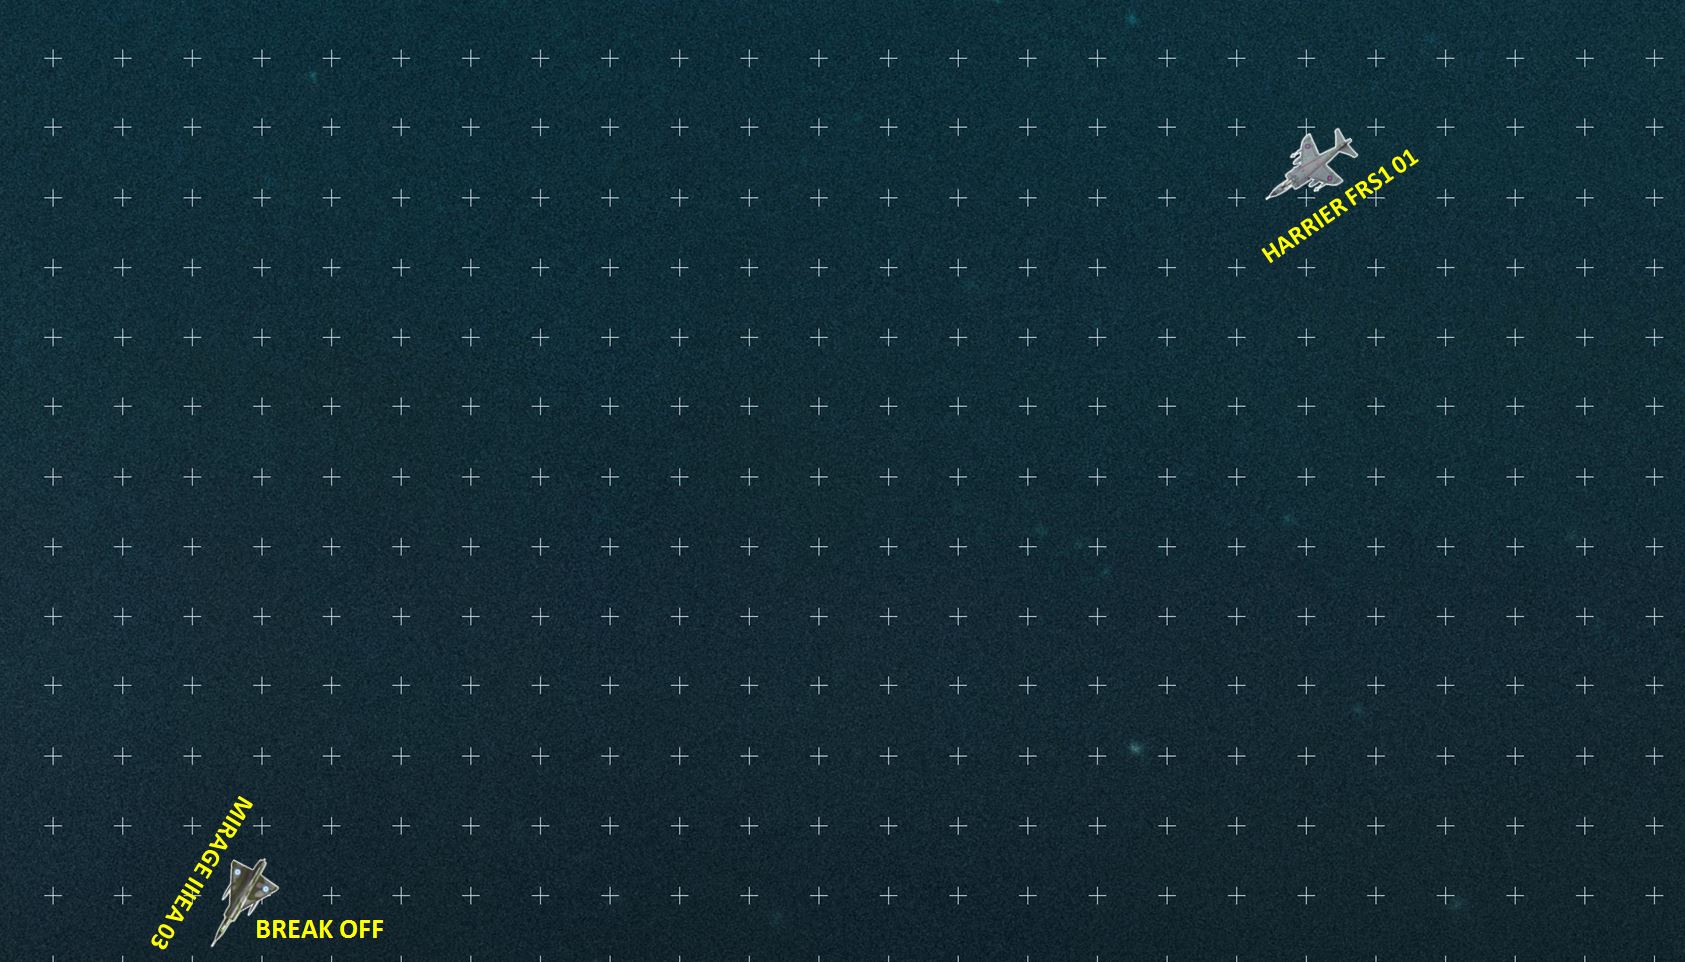 The last Mirage is desperate to get off the southern end of the board and disengage. He is helped when Harrier 01 fails an Immelman maneuver, trying to double back at the Mirage as he breaks southwest. The game ends at the end of Turn 05, with one Sea Harrier shot down, and one Mirage III shot down. Given than the whole British task force only has 20 Harriers, and the Argentinian Air Force and Navy have 200 combat aircraft between them, they can afford to trade the British 1-1. As reflected in the published scenario victory conditions, the game result is actually a partial Argentina Victory.
Air War C21 Just about Ready for First Playtest
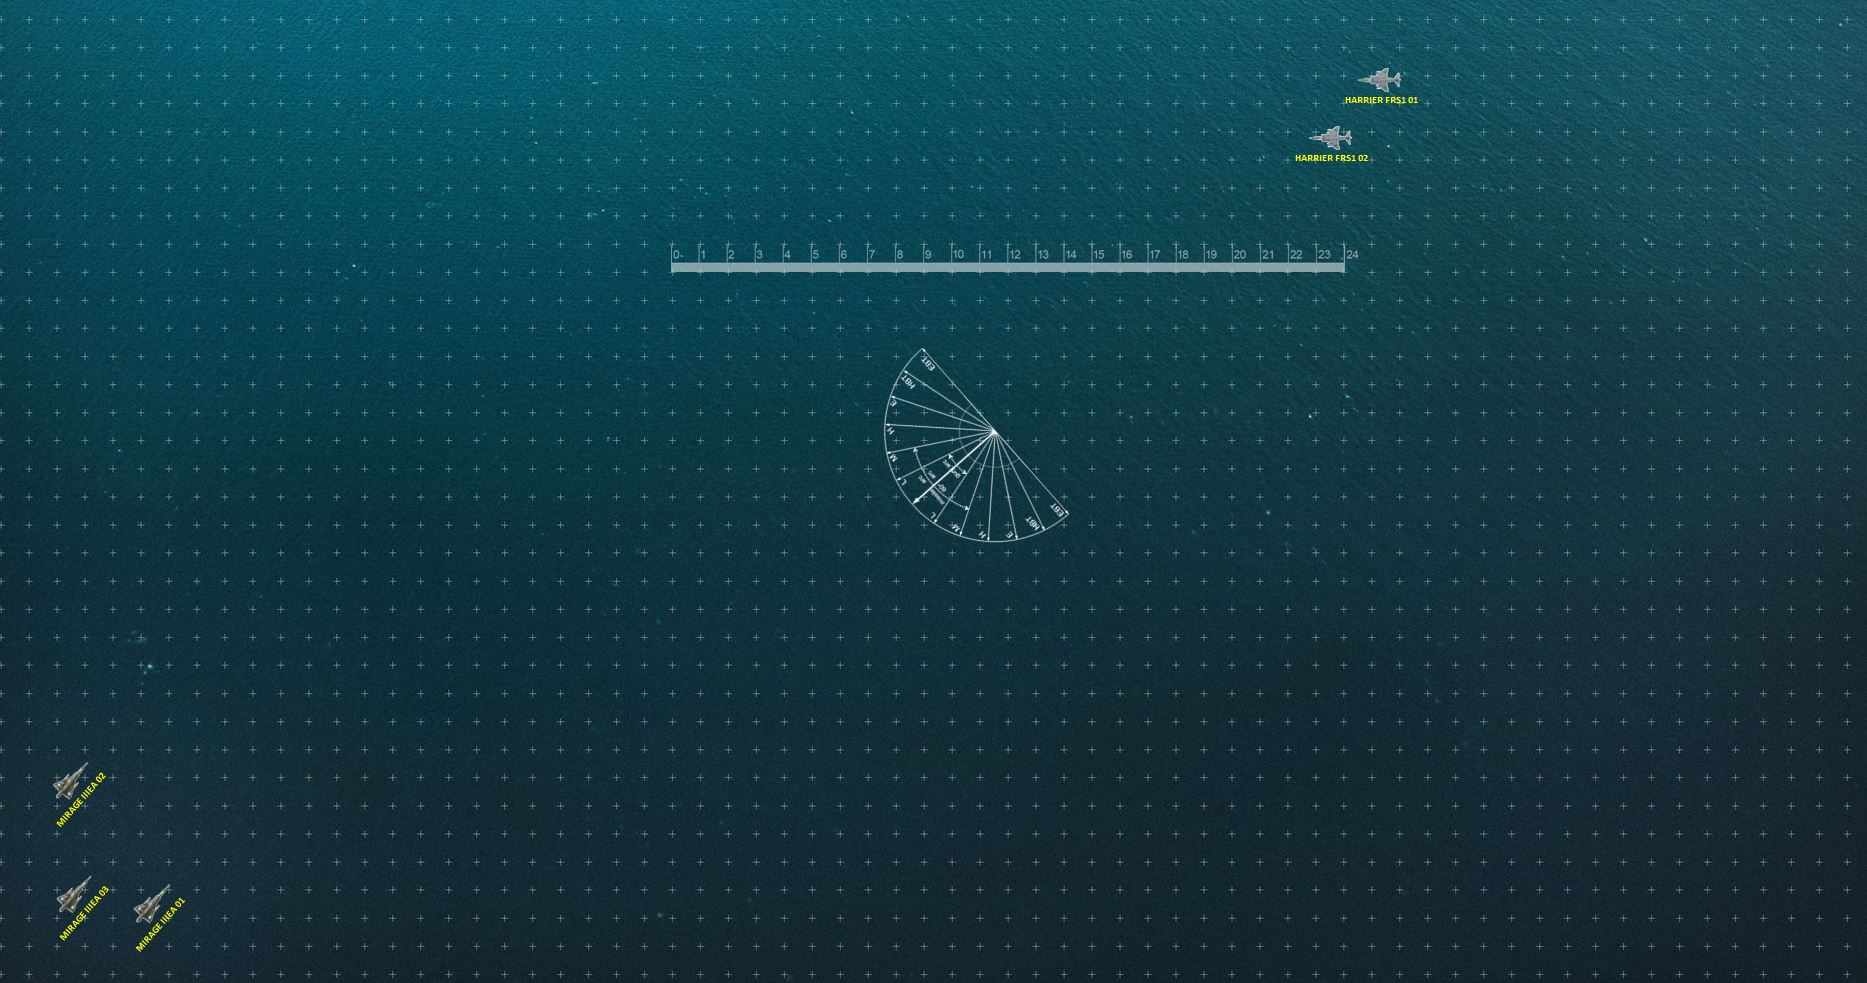 Okay, so using the system AIR WAR C21 (available on Wargamer's Vault), including their Data Annex resource and their "Operation Corporate" supplement specifically for the 1982 Falklands War, we're just about ready to start chucking dice. I'm hoping to run through the rules for the first time tomorrow, using the first scenario in the Operation Corporate scenario booklet. This is what an actual map table looks like. Each grid is 1" (so the table is 6' x 3' if physical) - range and scale is logarithmic, but can be ESTIMATED as 1" = 1/2 mile or about 1 km, each phase is 15 seconds, each 1" of speed = 50 knots. Note the vast open ocean. Air combat in the Falklands took place ALMOST exclusively over water, both sides had too much SAM or AD firepower to make dogfighting over the actual islands feasible, UNLESS there were ground targets or warships specifically targeted for strikes.
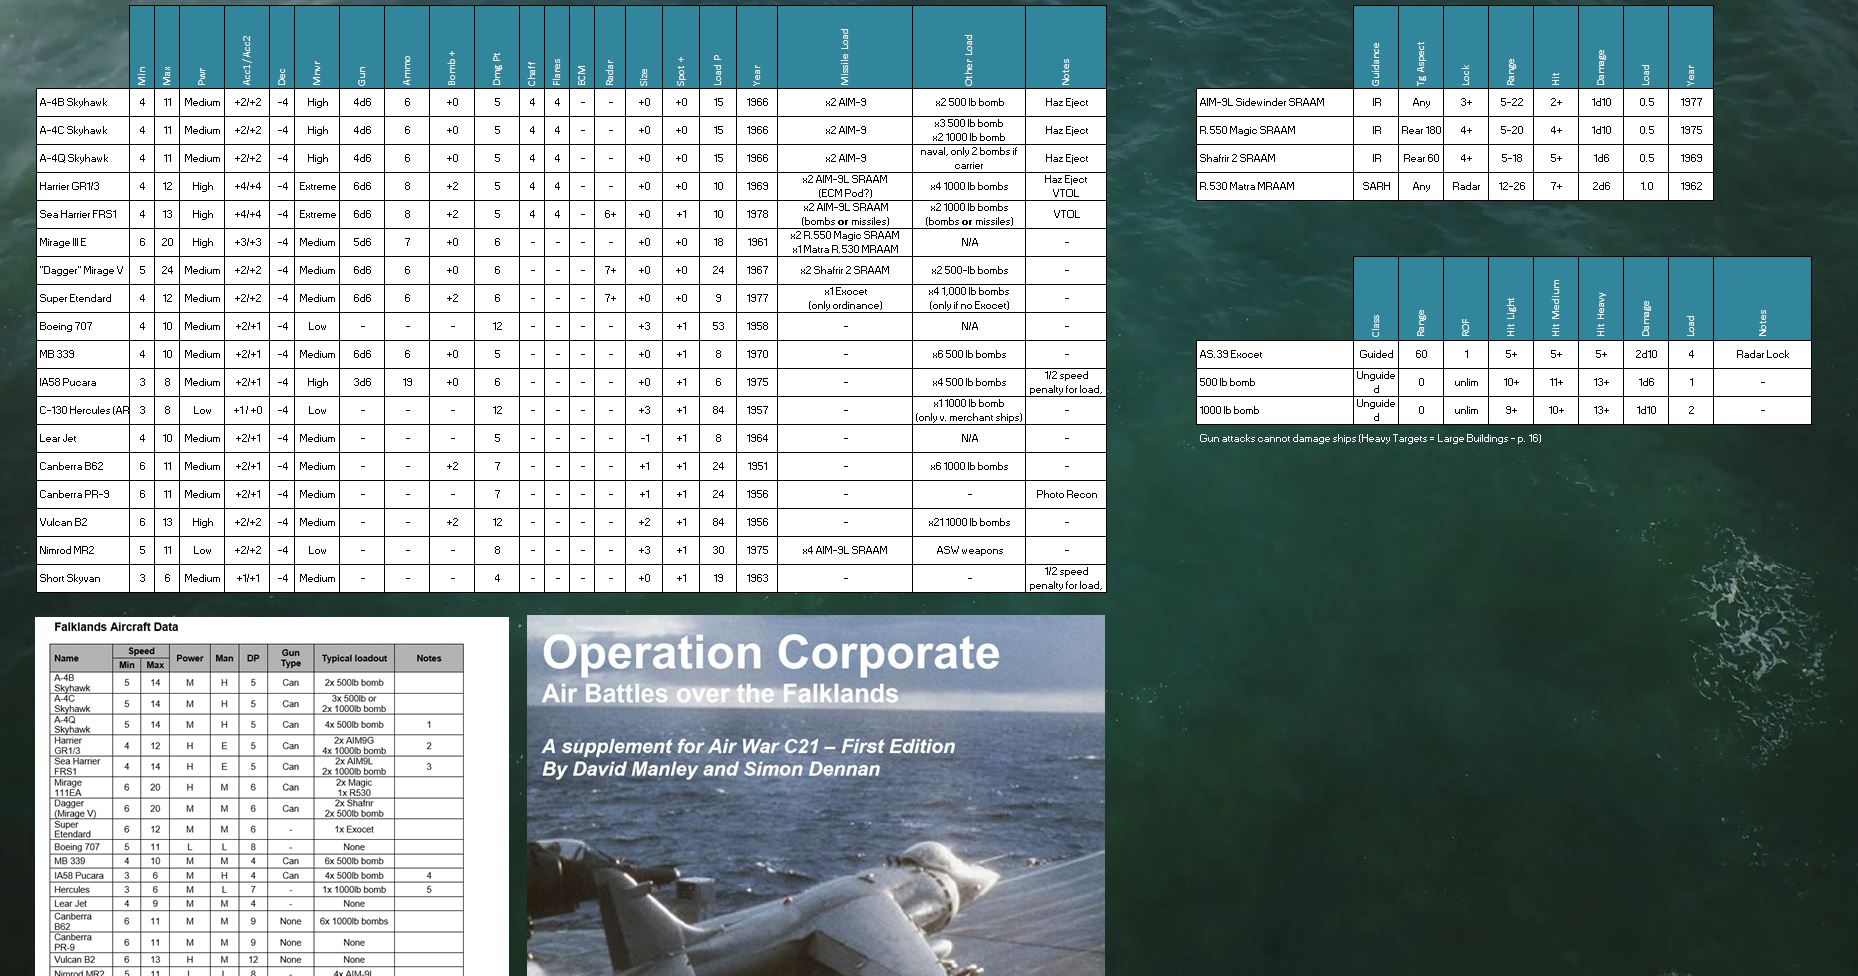 I've been picking through the 20+ pages of tech data in Air War C21, and 45+ more pages in Data Annex, plus the charts in Operation Corporate - putting everything together for a consolidated reference specifcially for what we'll need in 1982 Falklands. Warship data is already included in the Operation Corporate reference.
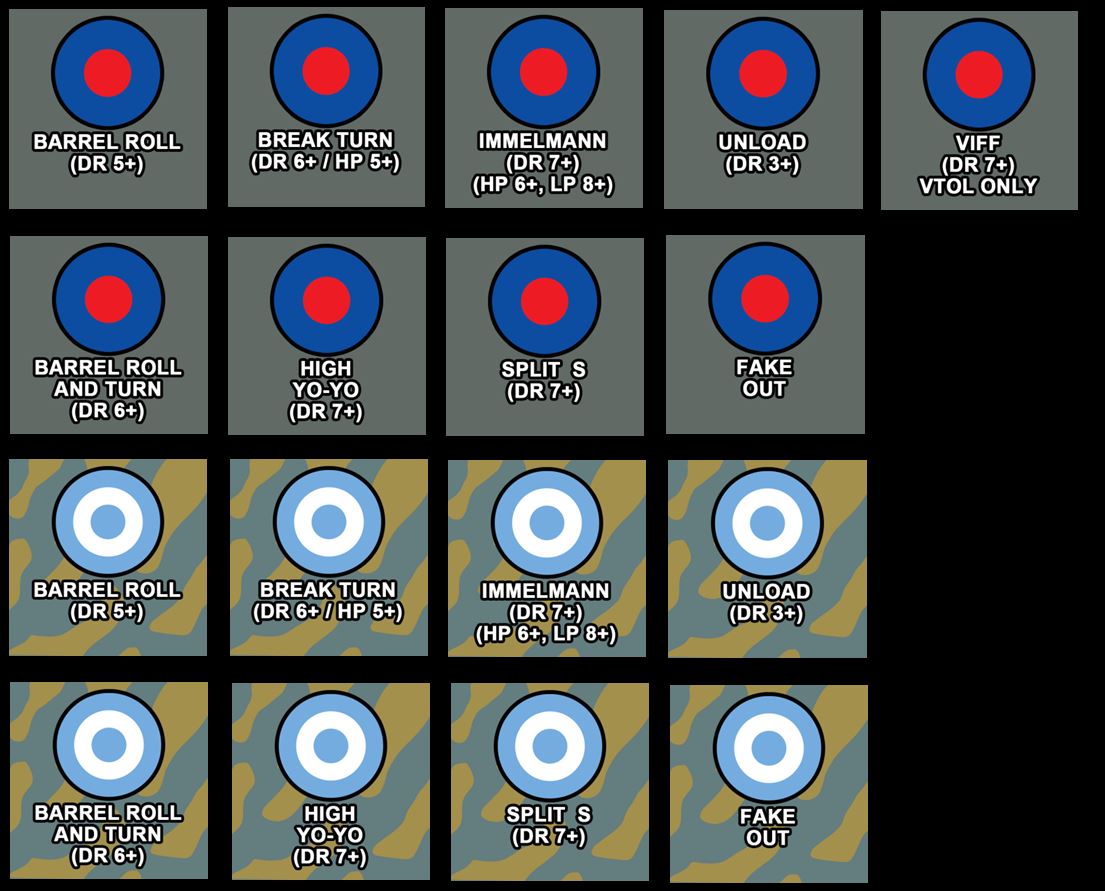 Special Maneuver cards.
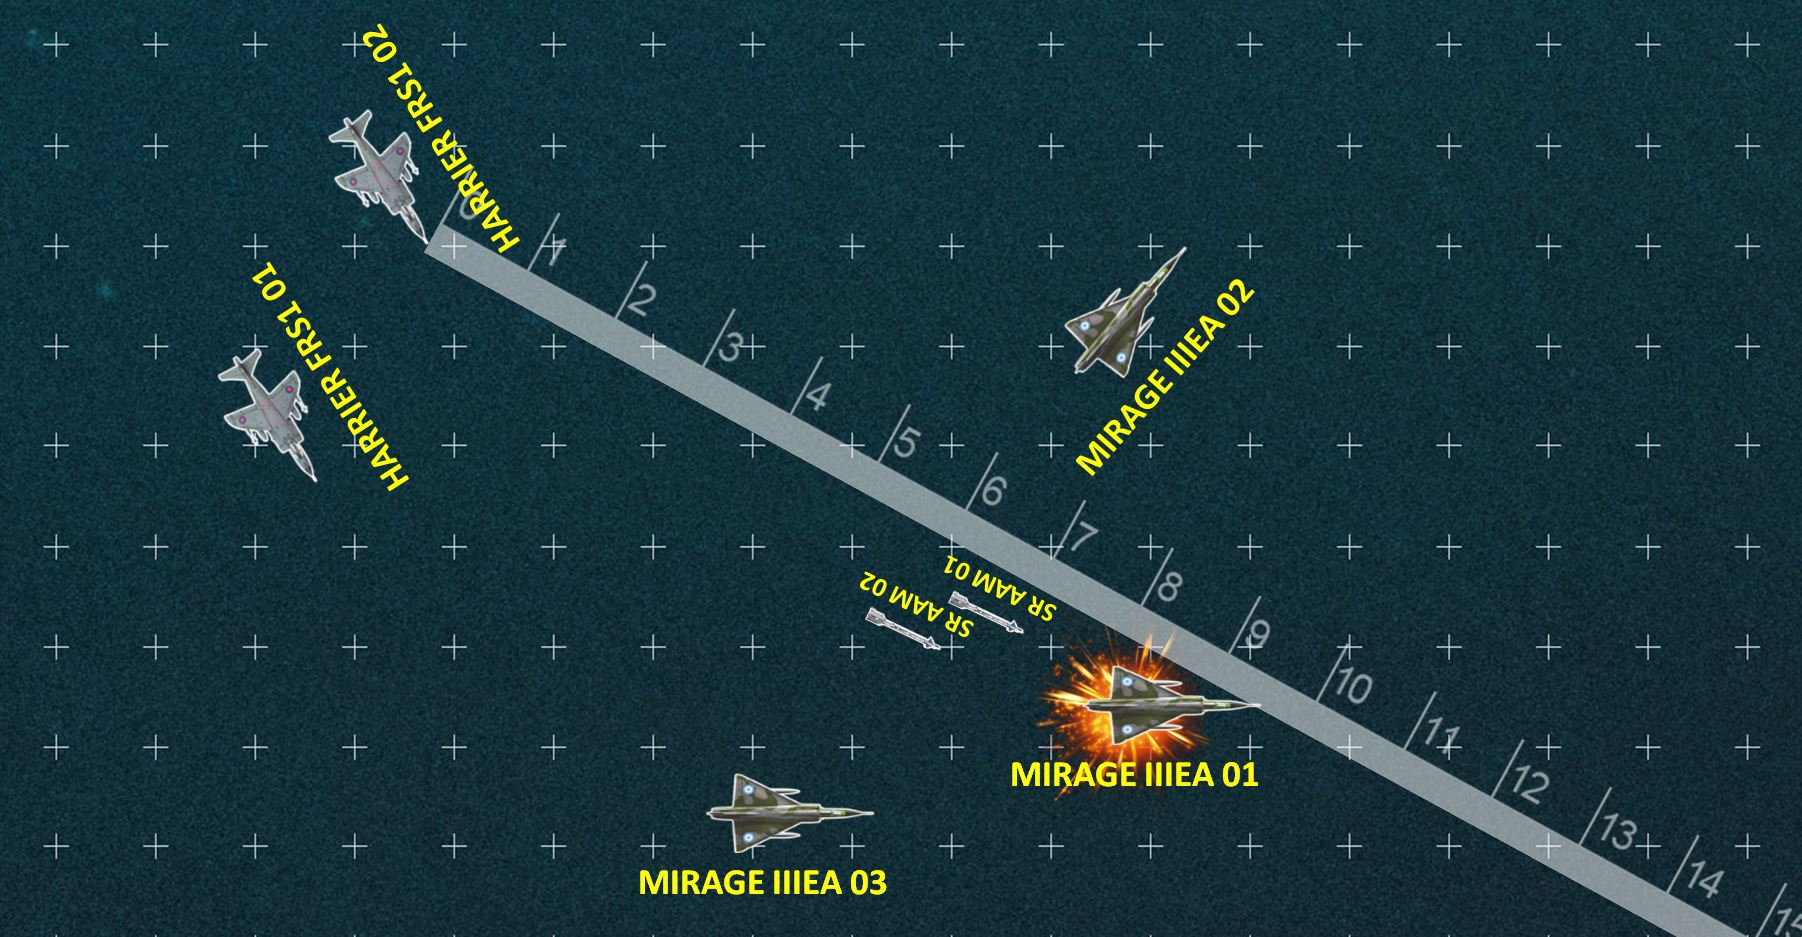 Aircraft in a close dogfight, engaged at a range of about 4 miles. American-made AIM-9L "Sidewinders" were a huge advantage for British Harriers against Mirage III and Mirage V "Daggers" still using French R.550 SRAAMs, R.530 MRAAMs, and Israeli Shafrir SRAAMs. SO WISH ME LUCK! We'll see how this goes and if it goes well, we should have some live gaming online this weekend, perhaps on Twitch.
So seriously ... who's in?
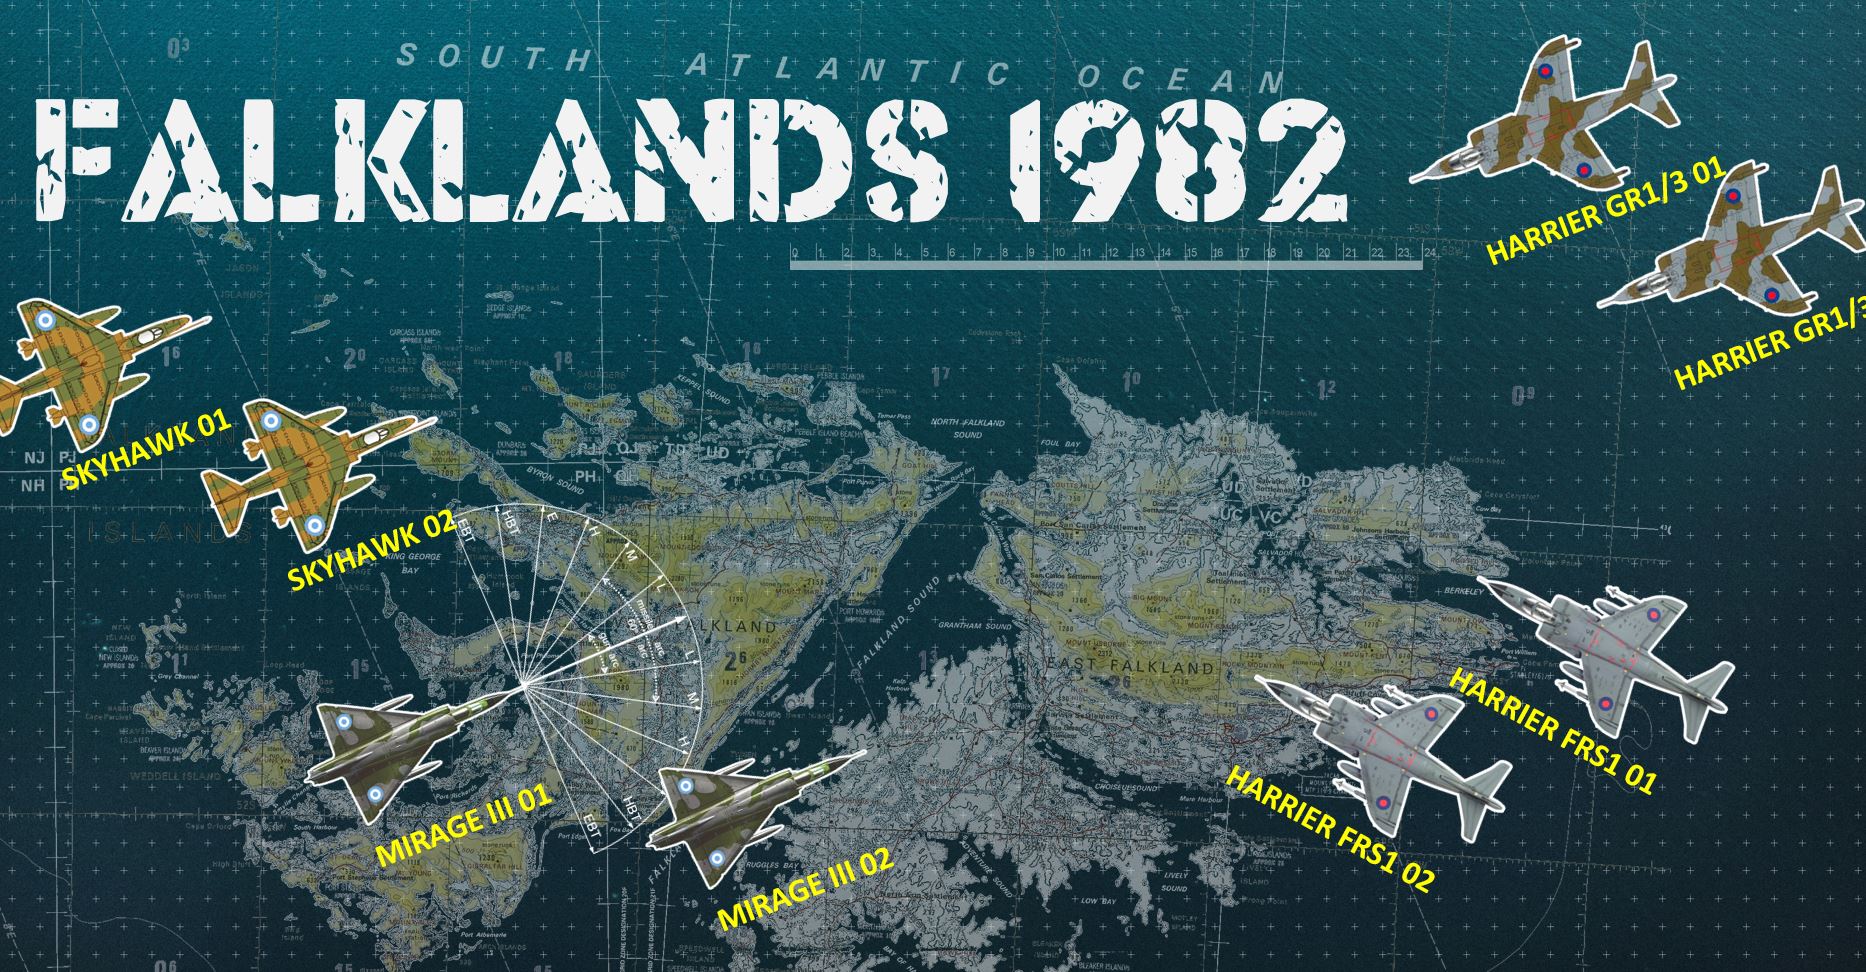
Okay, so seriously … who’s in?
System: AirWar C21 (Long Face Games)
Operation Corporate Supplement (1982 Falklands War)
Adopted to run via web conference.
Ping me a PM if you’re interested. 😀
SitRep Ops Center Episode 04 Live Tomorrow
Good afternoon, OTT / BoW!
Just a quick reminder …
Ops Center – Episode 04 goes out live tomorrow here on OnTableTop, YouTube, and Twitch!
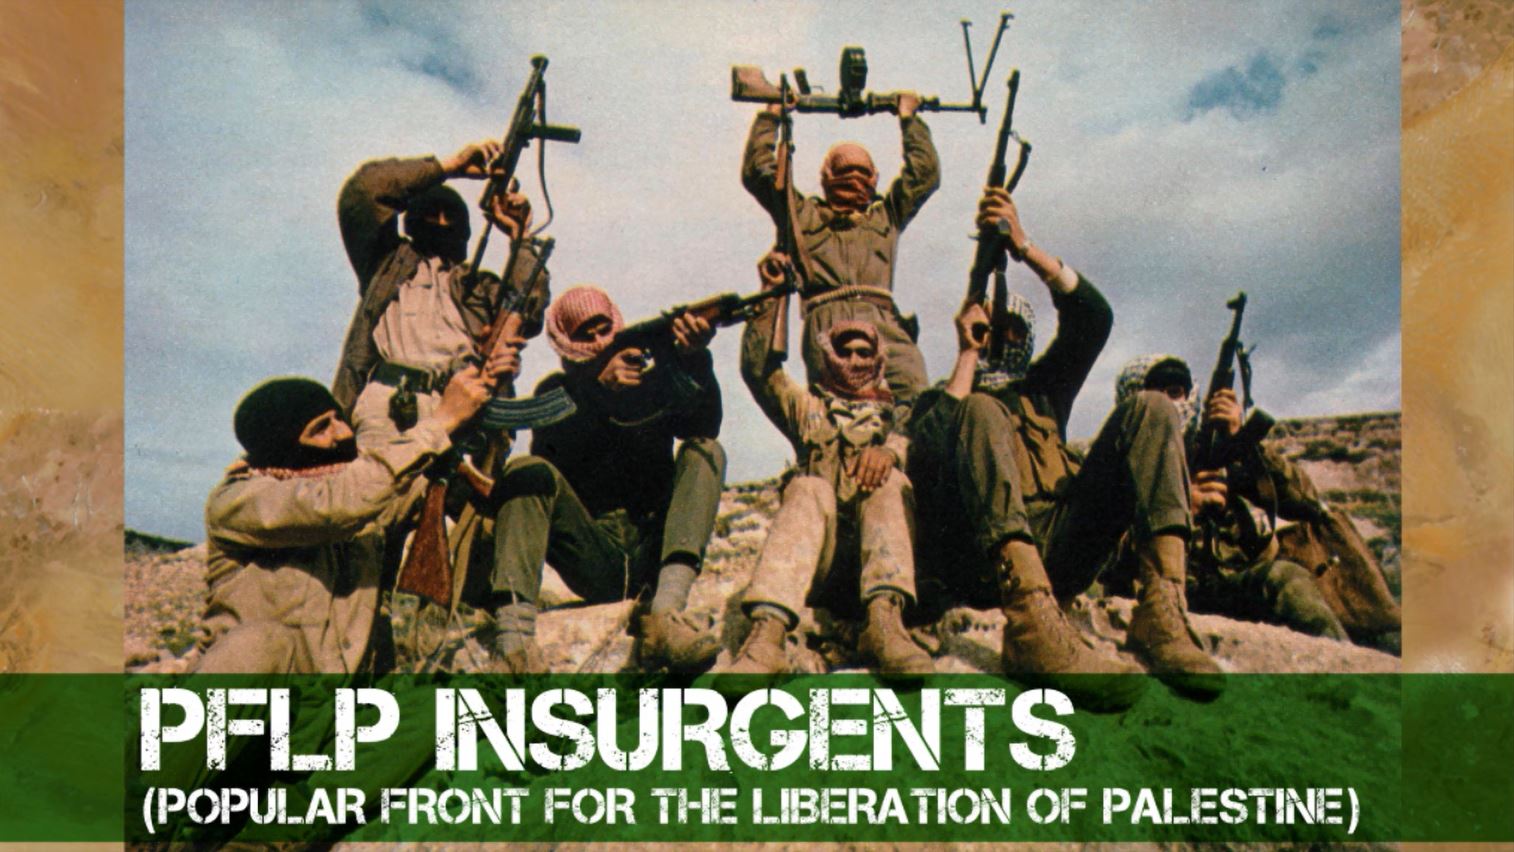
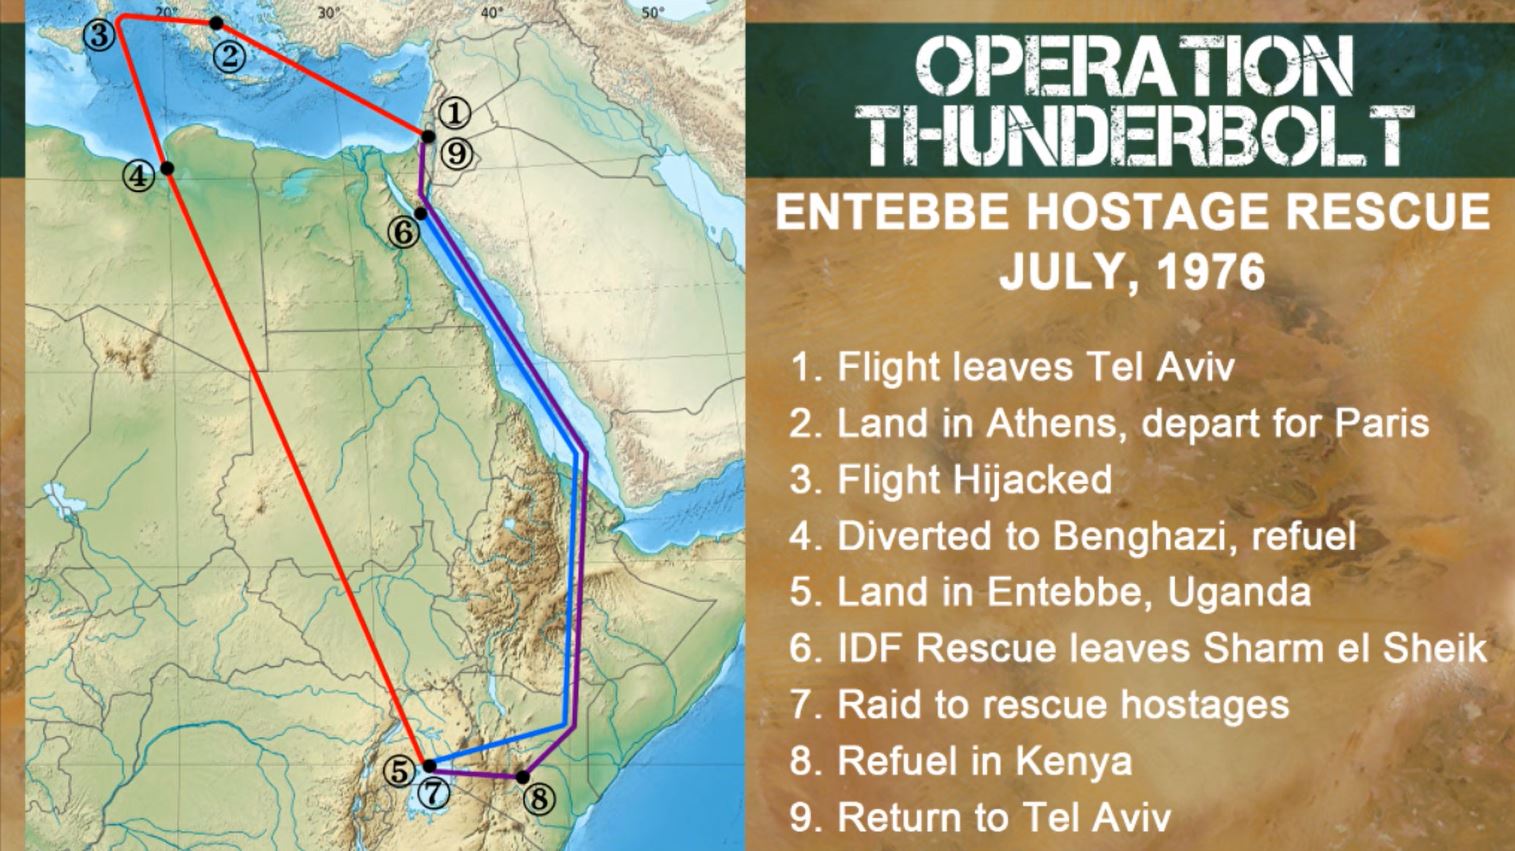
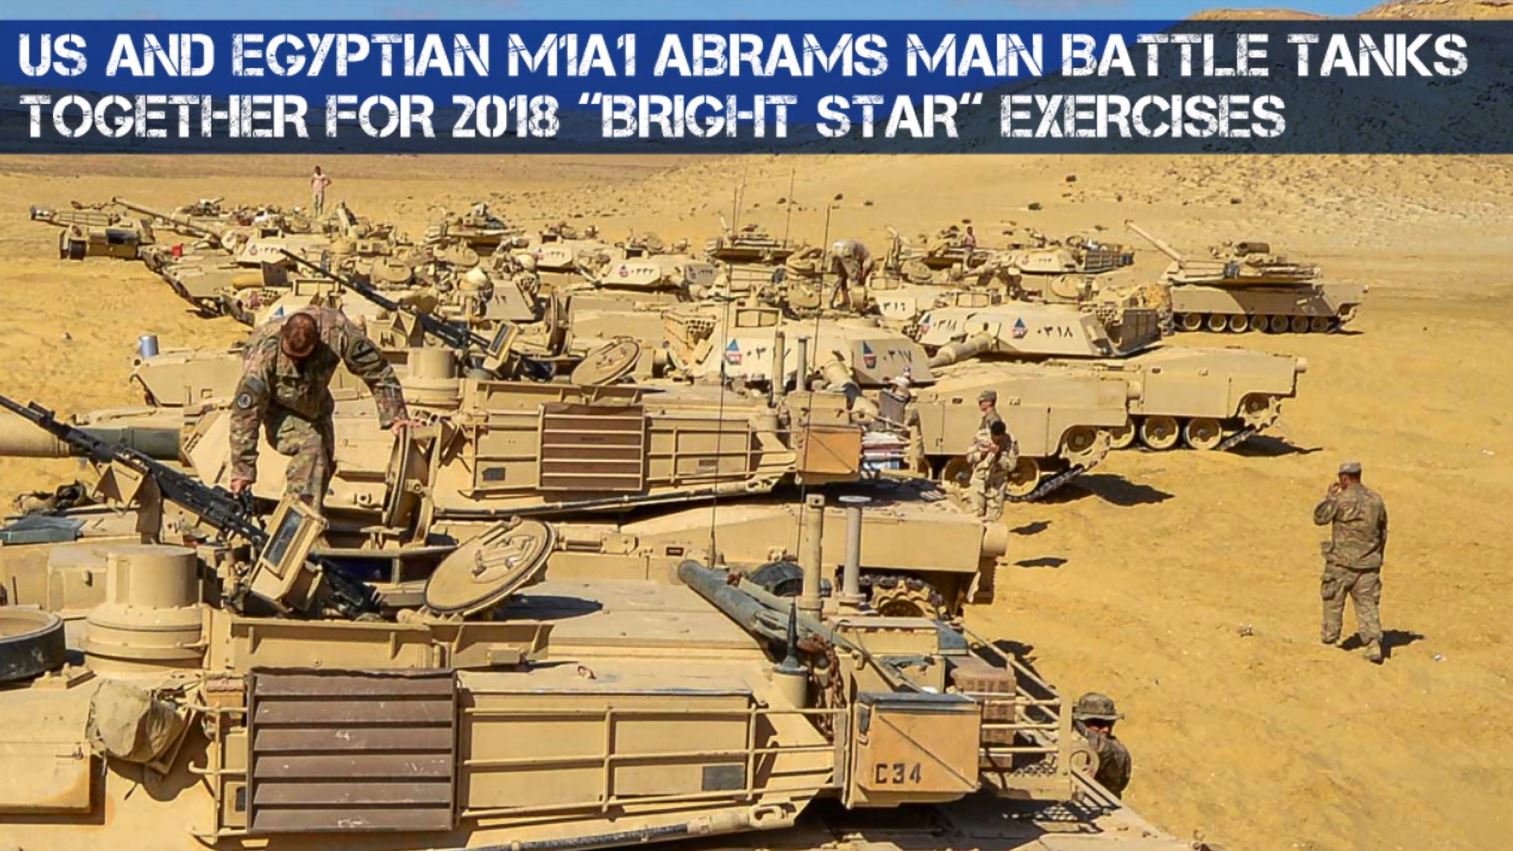
We close out the 4-part series on the Arab-Israeli Wars, with a look at the 1976 Entebbe Raid (probably the birth of modern counterterrorist operations), 1982 “Peace for Galilee,” the Intifada, the 2006 invasion of Lebanon, and what the 2011 Arab Spring could mean for Arab-Israeli relations (or potential further conflict) going forward.
Remember to drop a comment or questions (on any platform), we answer questions in the next video! And Ops Center Part 05 switches over to a new conflict, look for a hint on which one at the end of tomorrow’s video!


Thanks to everyone who stopped by!
Thanks to everyone who stopped by! That was a great stream! I was only going to stream for an hour or so, turned into 3:45:00! I will be “off the radar” next week due to EOQ at work, but i really hope to be back starting on April 6 for some live games, either Valor & Victory Lebanon, Vietnam, Panzer Leader WW2, Panzer Leader Lebanon, Panzer Leader Gulf War 1991, or of course Darkstar!
Twitch Stream Sunday 3.24.2019
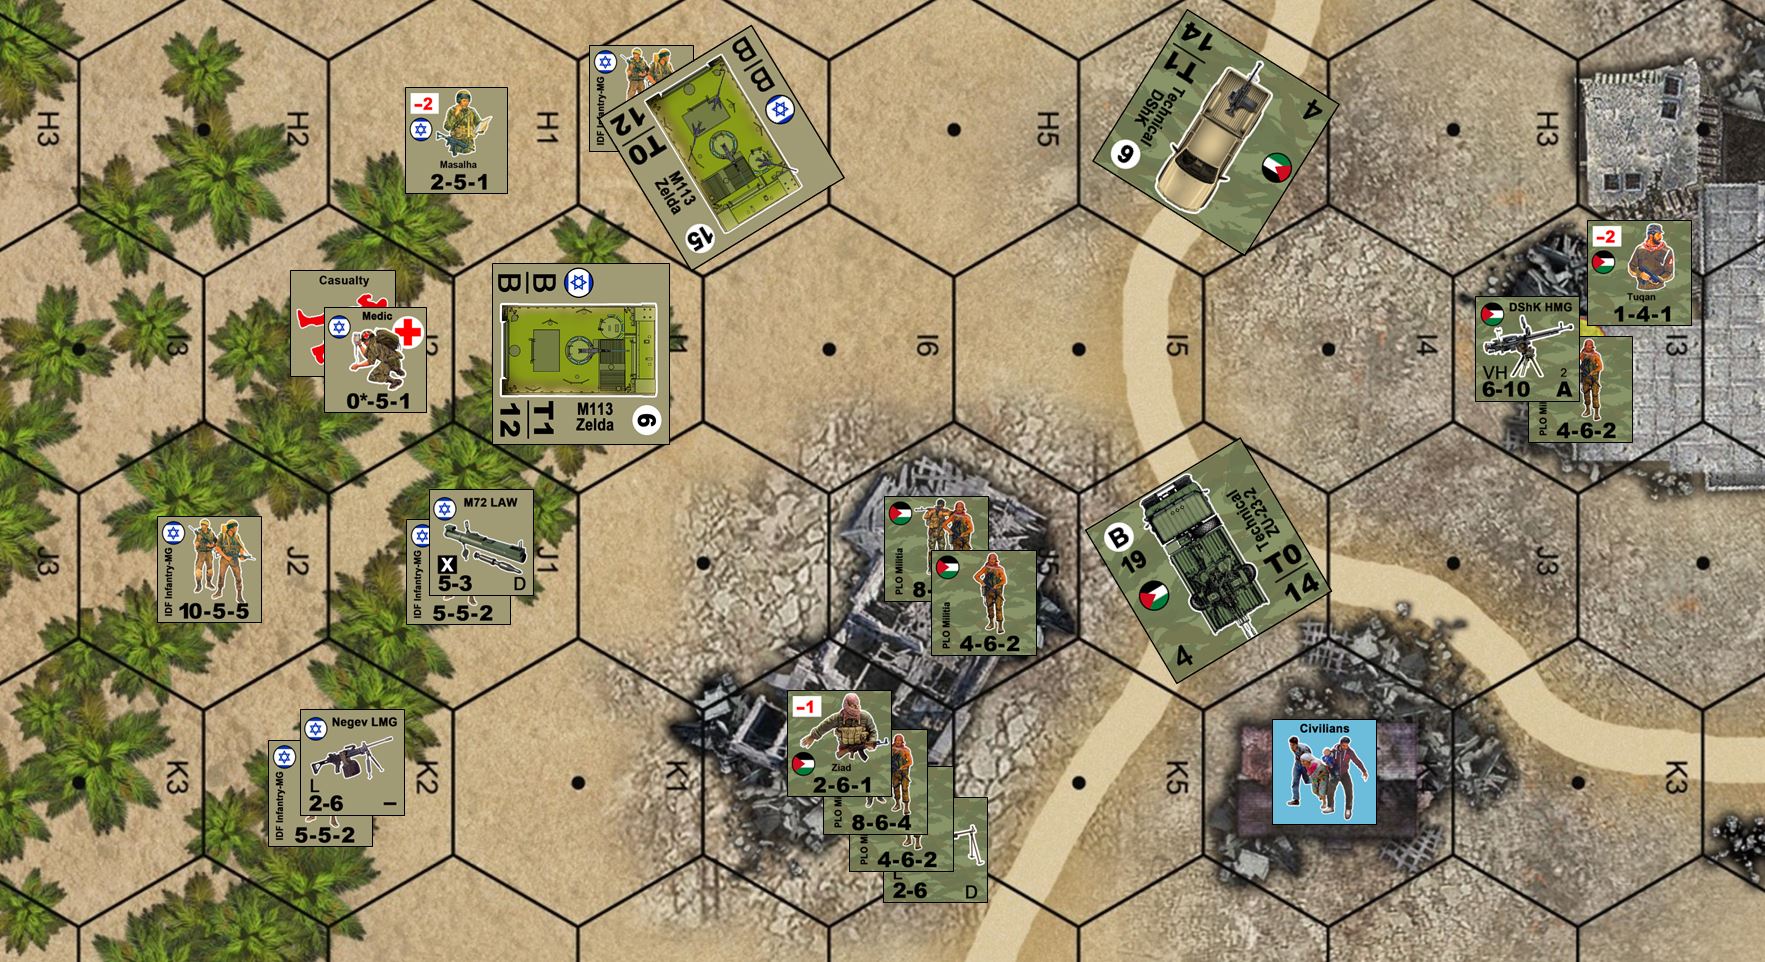
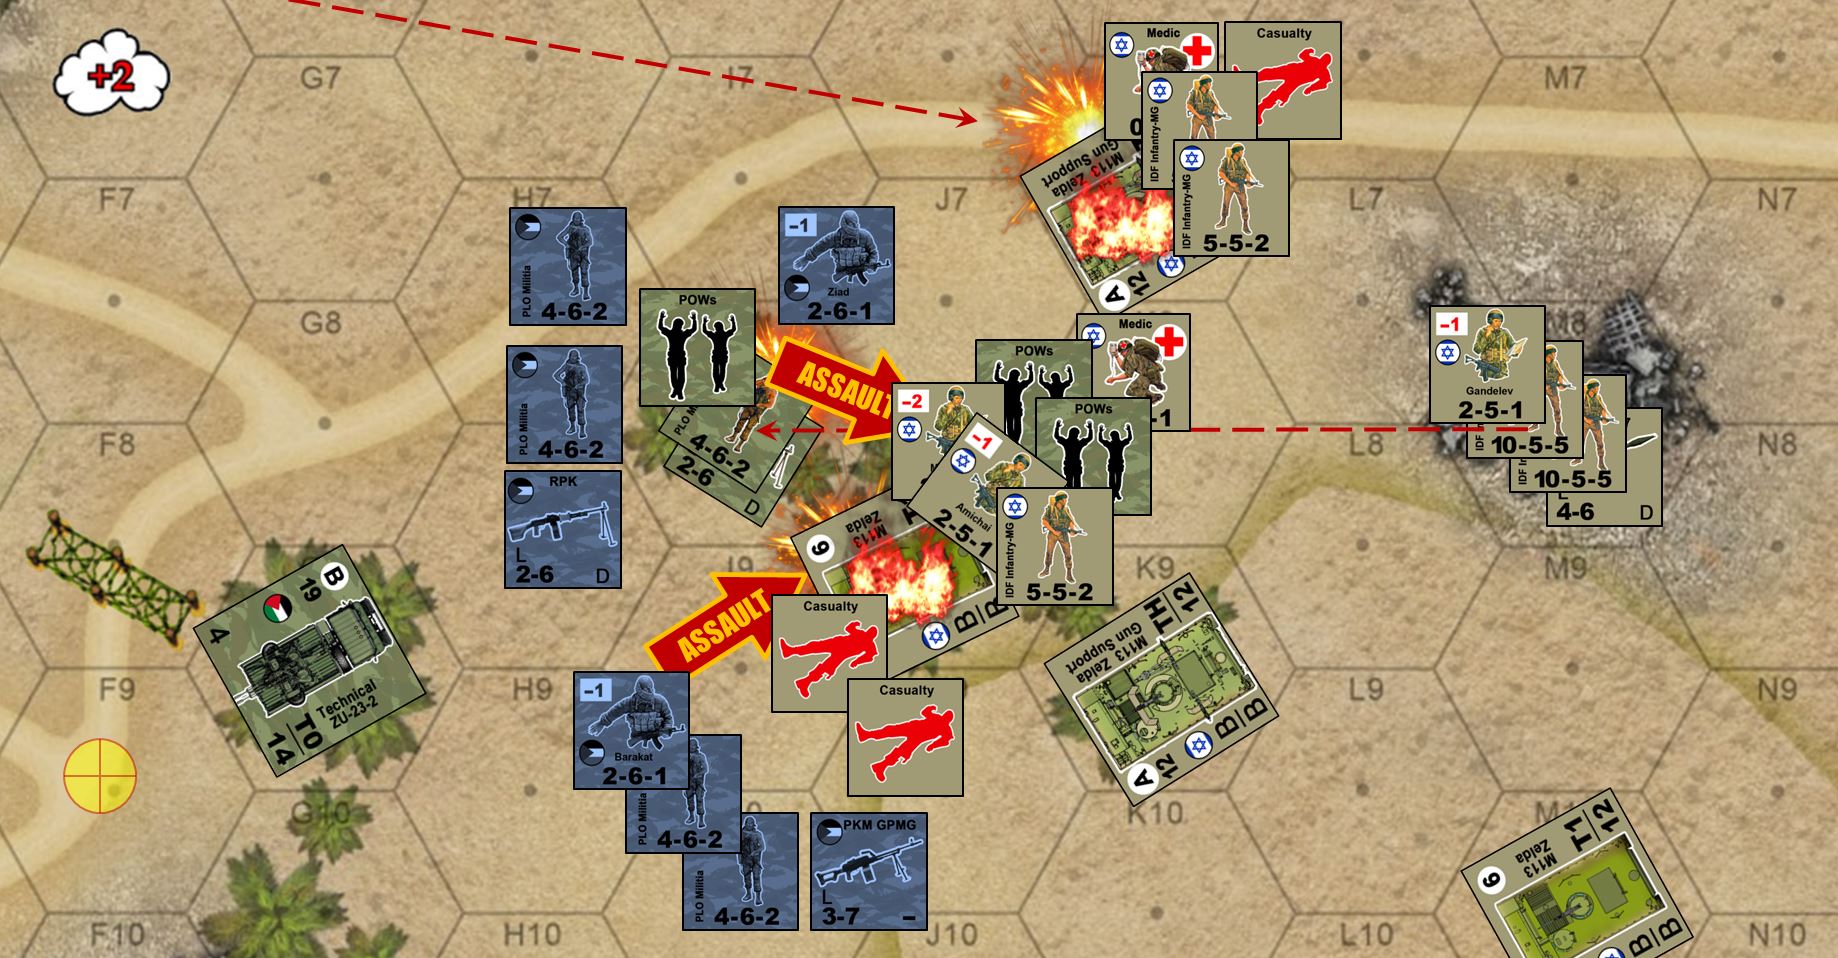 As you can see, certain spots of this game got hairy in a big hurry! This doesn't even count the two F-16 strikes (okay, they mostly missed) but the two AH-1 Cobra strikes were dead on the money, not to mention that pickle-barrel mortar round that saved not only the crew of the lead M113 killed in the open (by opening Palestinian RPG round), but also the infantry team that tried to save those casualties (and became casualties themselves!)
Sitrep Live Stream: 7PM GMT
Just a quick “hello” to say I’ll be live streaming today at 7PM GMT, hopefully playtesting new vehicles in Valor & Victory: expanded to 1982 Lebanon. We have Israeli M113 Zeldas (troops transports and gun IFVs) along with Palestinian technicals (with DShK 12.7mm HMG and ZU-23-2 twin autocannon).
Hope to see some of you there, to see how these new units work!