


The Millennium Falcon


Recommendations: 276
About the Project
I am going to make a Millennium Falcon scenery set to use with Star Wars Legion figures, that includes internal rooms and corridors. I aim to show that with a bit of imagination and skill great results can be gotten on a limited budget.
Related Game: Star Wars: Legion
Related Company: Fantasy Flight Games
Related Genre: Science Fiction
Related Contest: Star Wars Hobby Weekend
This Project is On Hold
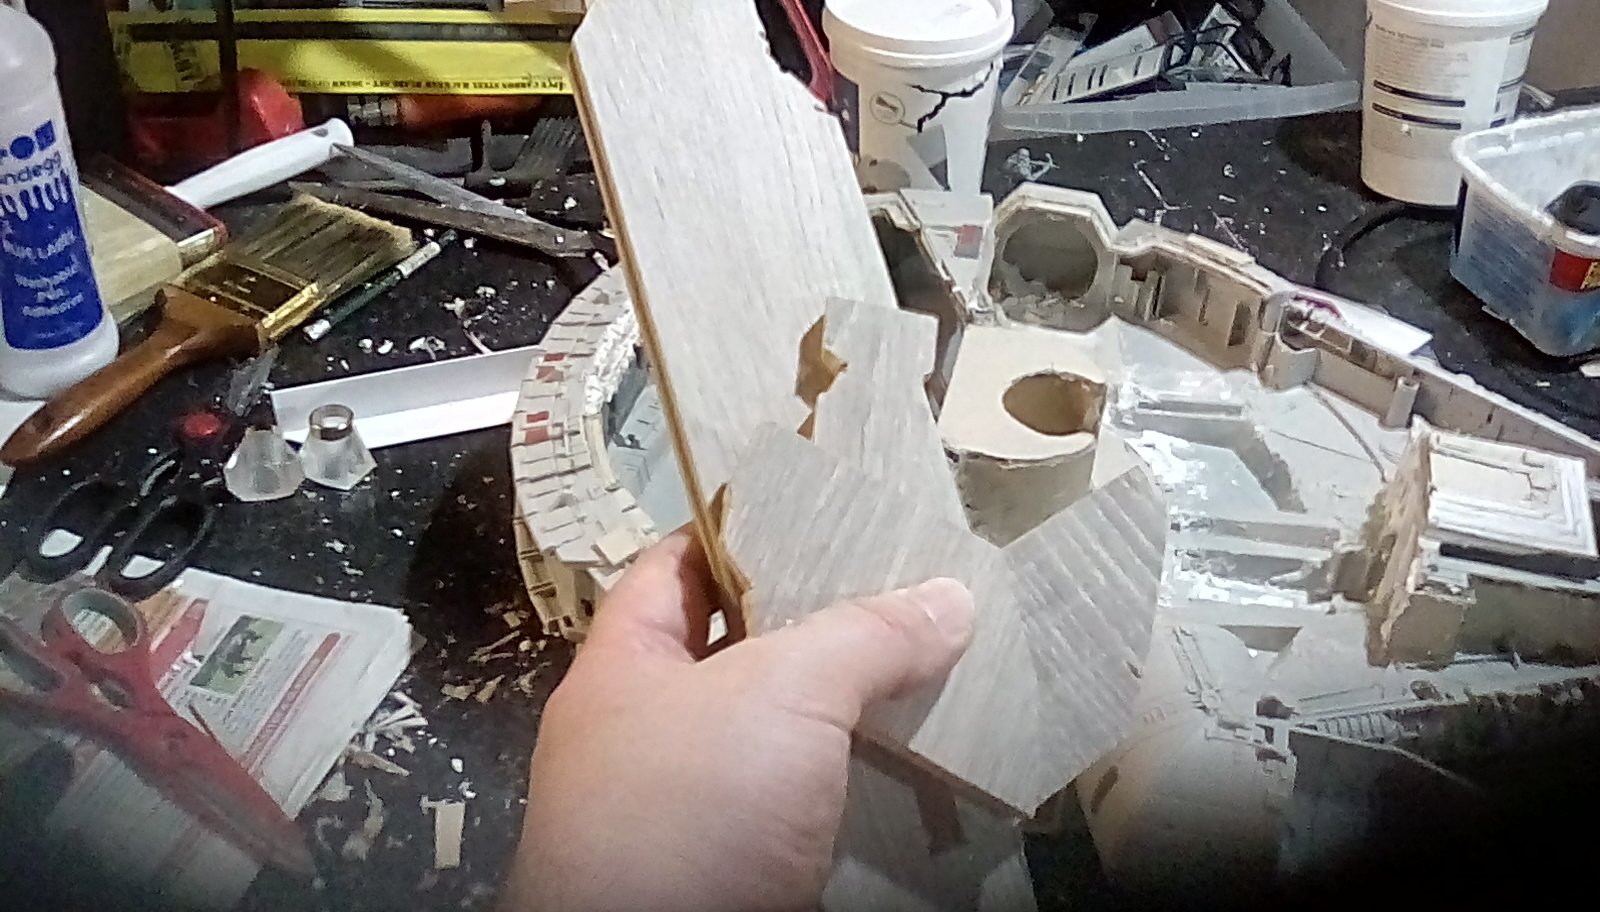
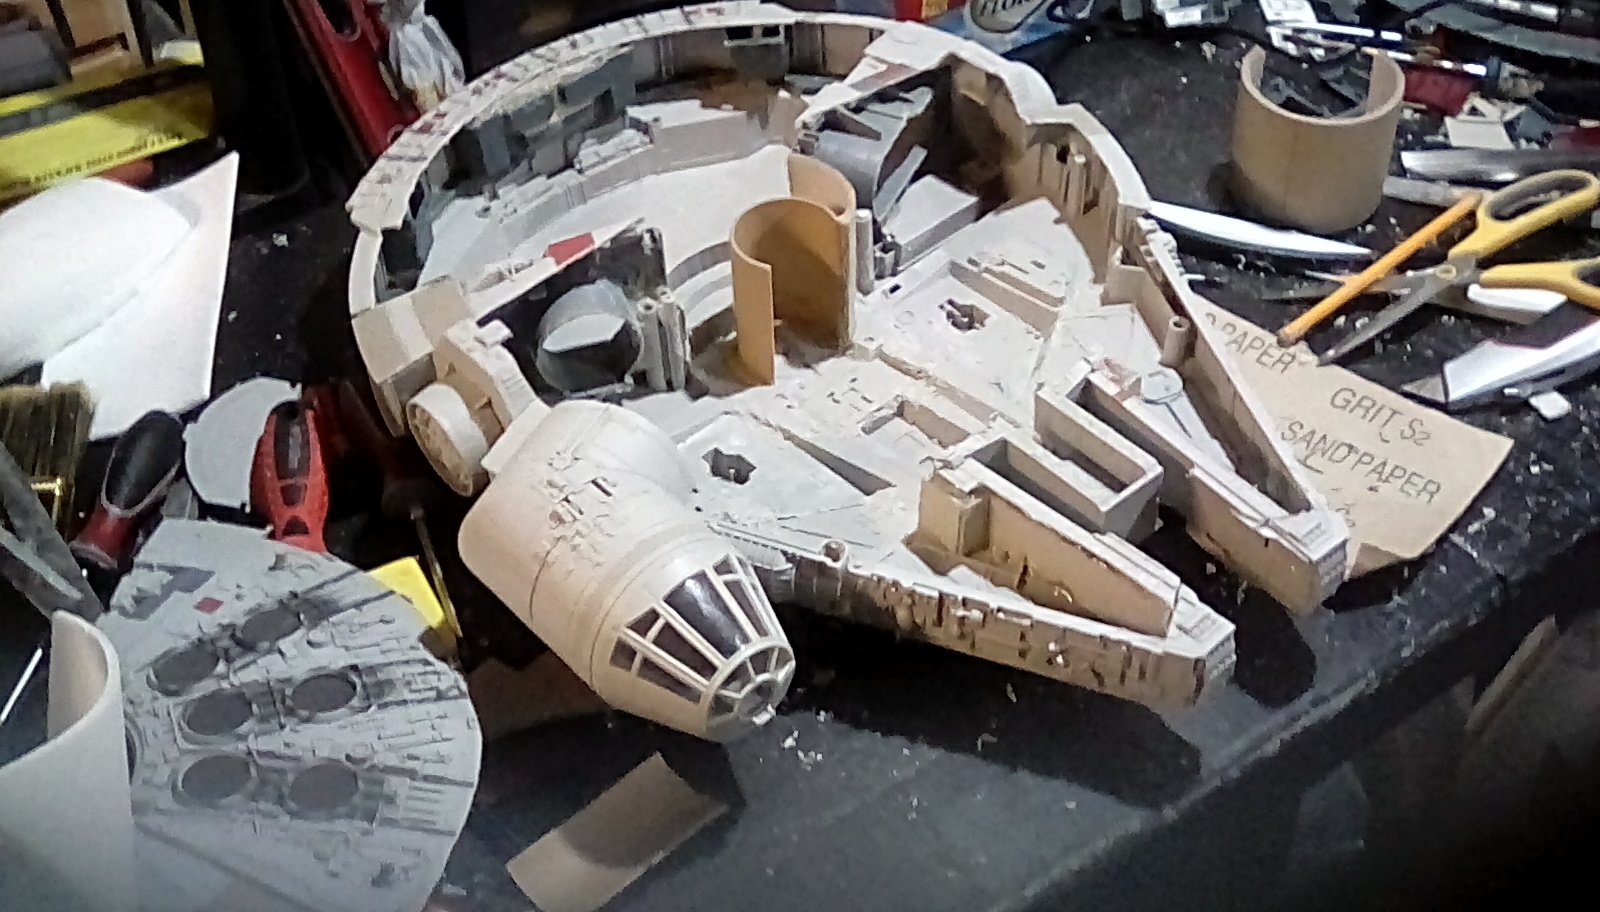
A scratch-builder's s interlude....
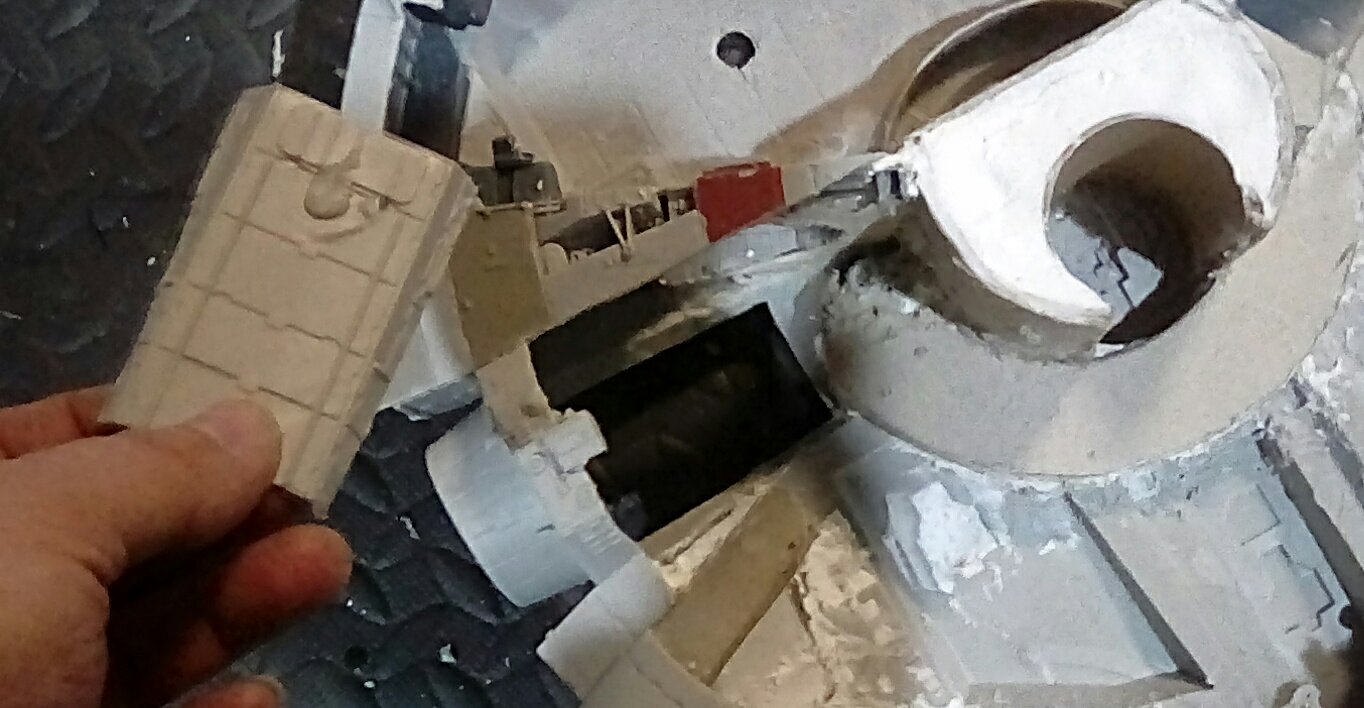
I have got to a stage where I can dispose of much of the gubbins I stripped out from inside the ship, knowing I will no longer need it. But rather than just throwing it away, I use a Dremel to remove any bits with warship details moulded into it that I might be able to reuse later….
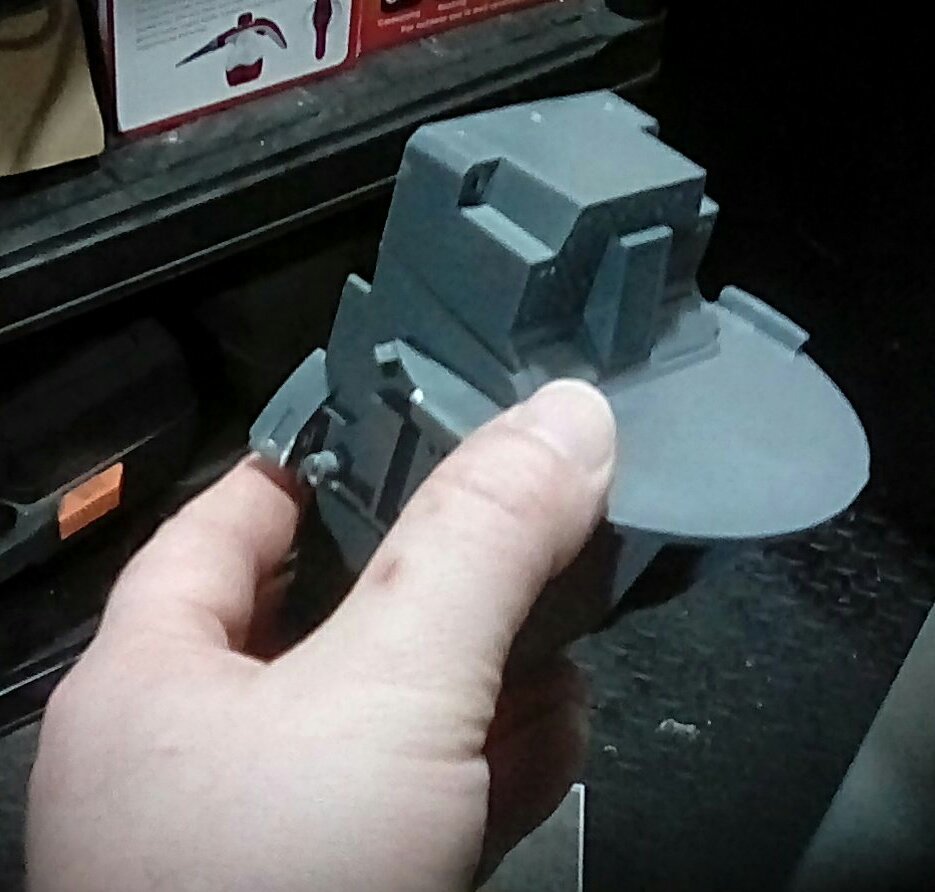 This huge piece is no longer any use to the ship... It used to hold a pivoting seat for a 5" action figure
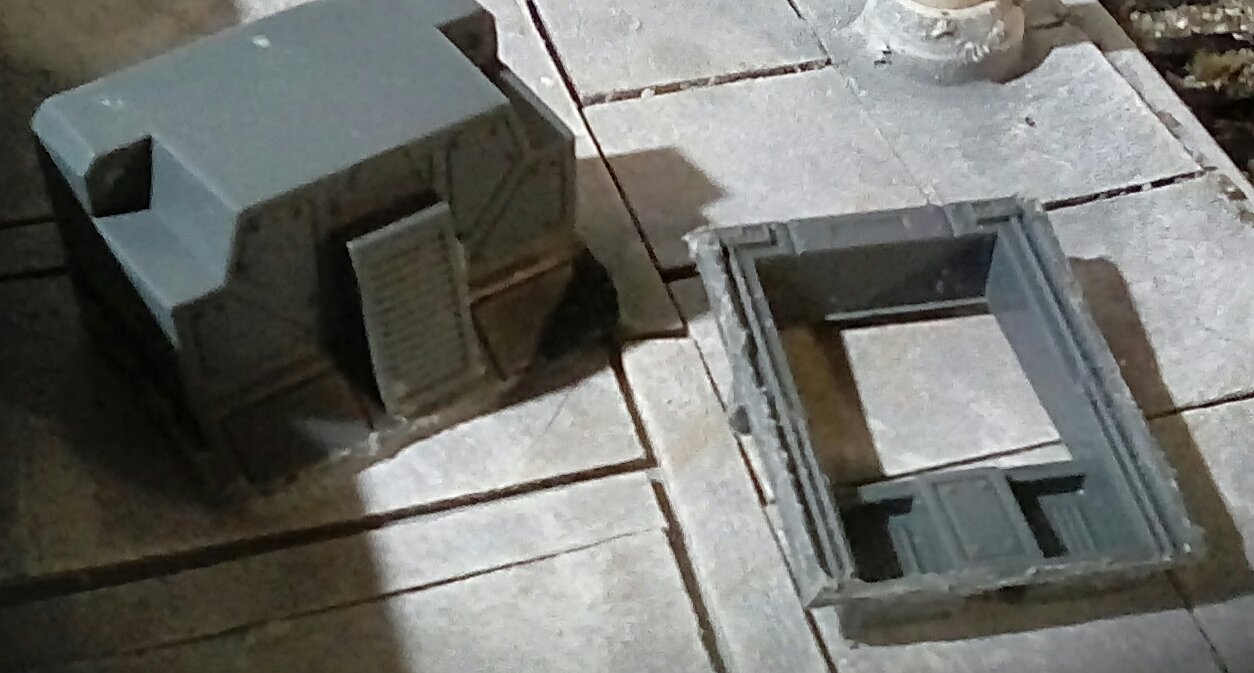 But I manage to cut a computer bank and a doorway out of it using my dremel. They may come in useful later in this build, or just get out into my bits box to use later on something else.
Starting on the legs
The legs are going to be problematic.
The toy had very shallow legs moulded into the bottom hull that are not fall enough to let a ramp open properly. I fill in a lot of recessed screw holes with filler. When I gingerly drill pilot holes where I want the legs to go I realise just how thin and weak the plastic is on the bottom of the ship – I need to strengthen this in some way, or adding legs is just going to snap the ship in two.
I remove the lightweight filler I put into the leg decreases yesterday, and replace it with traditional wall filler which will be much stronger once dried. I don’t have easy access to metal plates, and don’t really wAnt to take up all the free space putting a wooden frame inside the ship. As I am renovating my house I found some offcuts of laminate flooring that is very strong while being relatively thin. I cut some shapes out of this to fit snuggly in the floor recesses above where the legs have to go.
Once the laminate flooring is fitted I glue it in place with lots of not glue. I leave this overnight to set solid.

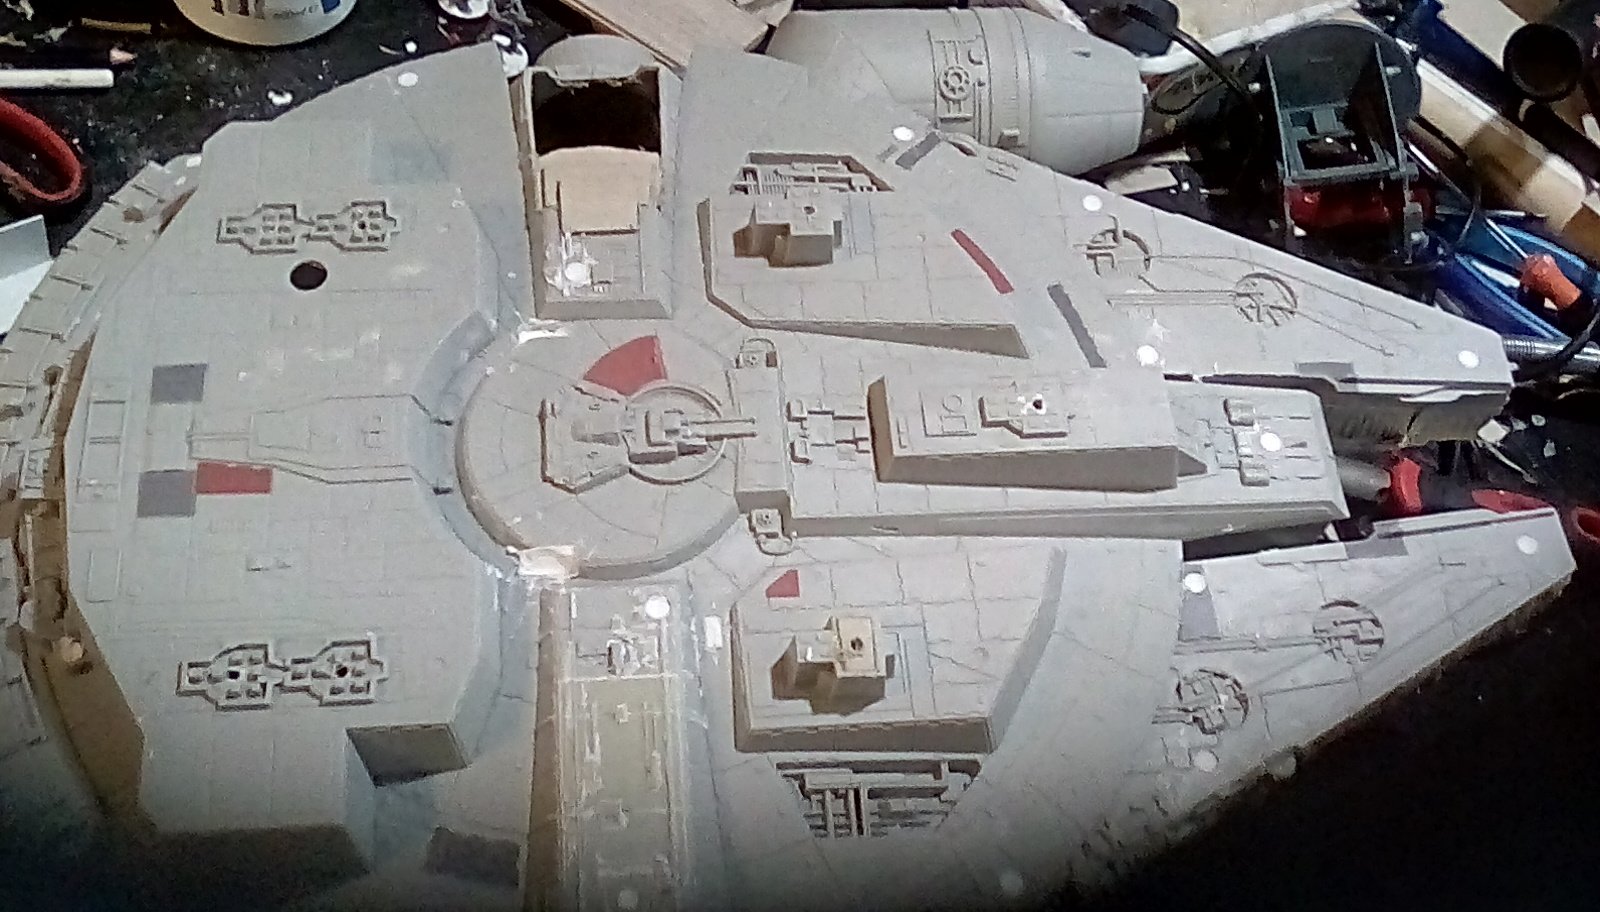
More work on Rebuilding the roof
I rebuild the from of the ship using layers of grey card. One of the reasons I got this toy ship so cheap on eBay was that this part of the ship was missing – it should have had flaps that closed over where the nerf gun used to pop up.
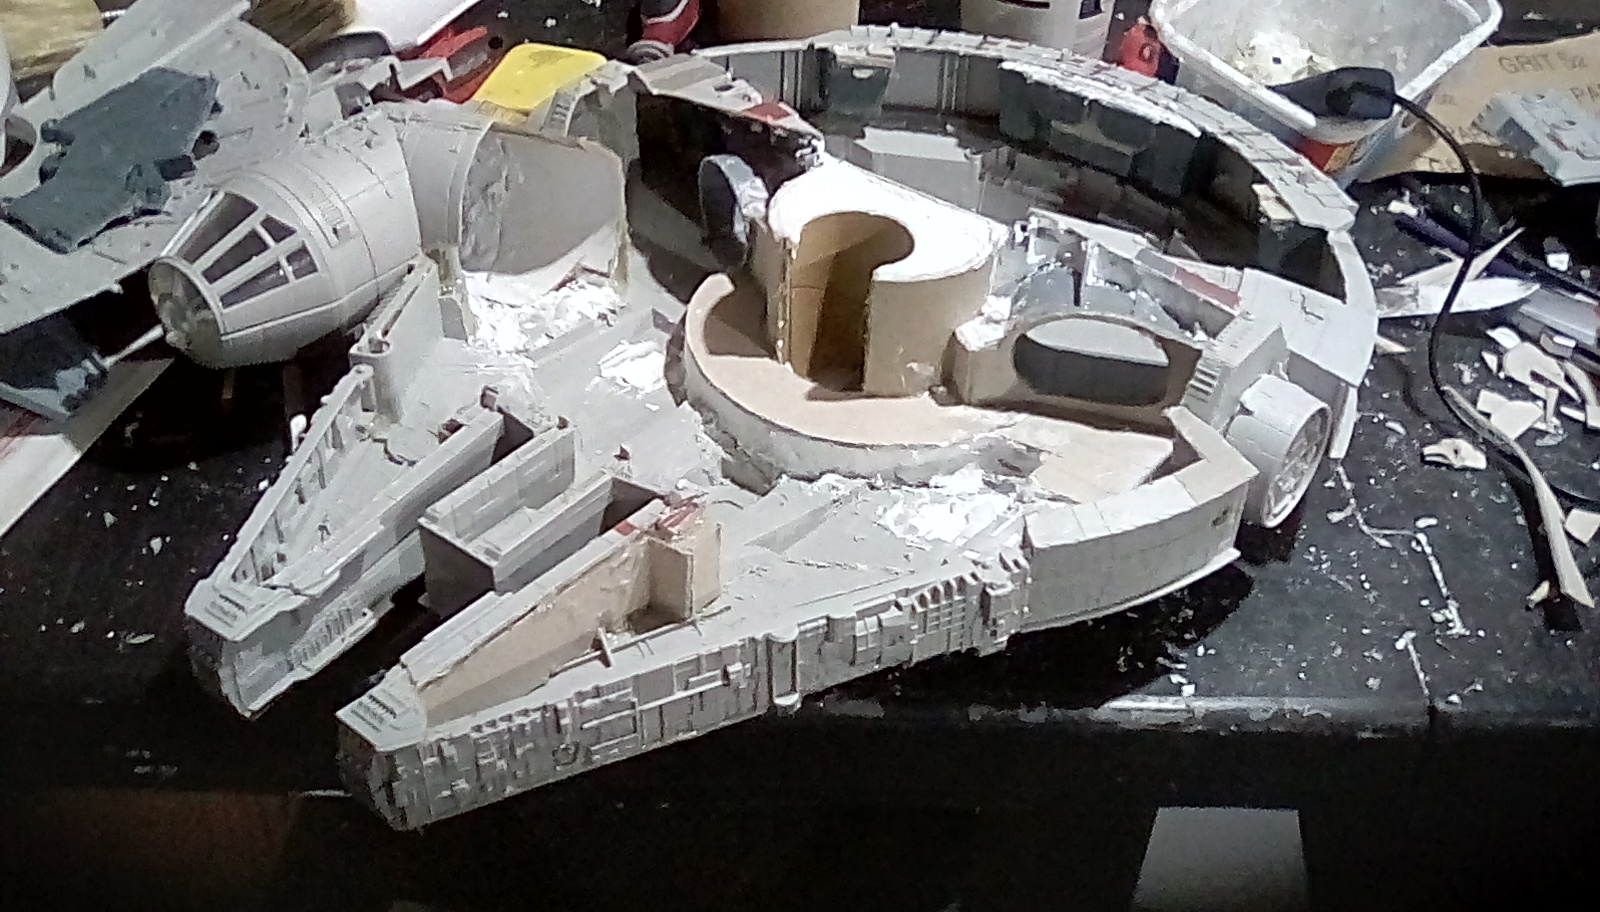
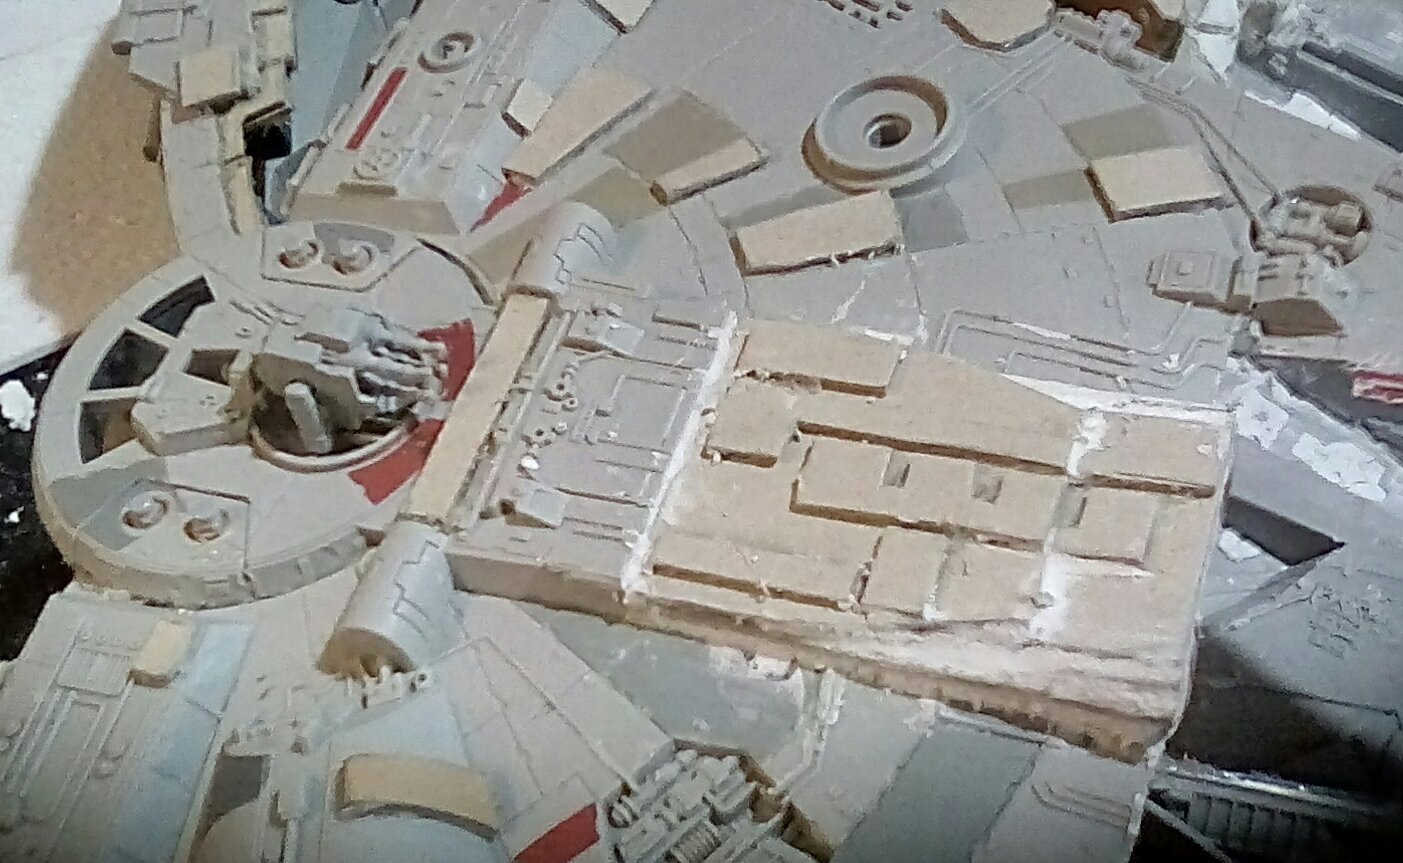 The roof is rebuilt using layers of grey card welded together with hot glue. To get the slope I want I make each layer slightly lower than the one below it ( like an Aztec pryamid) then fill in the stepped slope with filler.
Next I have to glue the circular turret gun housing back in place – easier said than done as I have removed a lot of the structure it used fit into.
 Not pretty, but filling any big gaps with a card frame, my hot glue gun comes to the rescue yet again. I can tidy this up once I get the ship's room walls built and I can see how much space space I have to play with.
 Not too, bad... I have to cut away some struts and card to let the roof sit flat again with the bottom of the round turret taking up more space than I expected.
Getting the roof ship shape
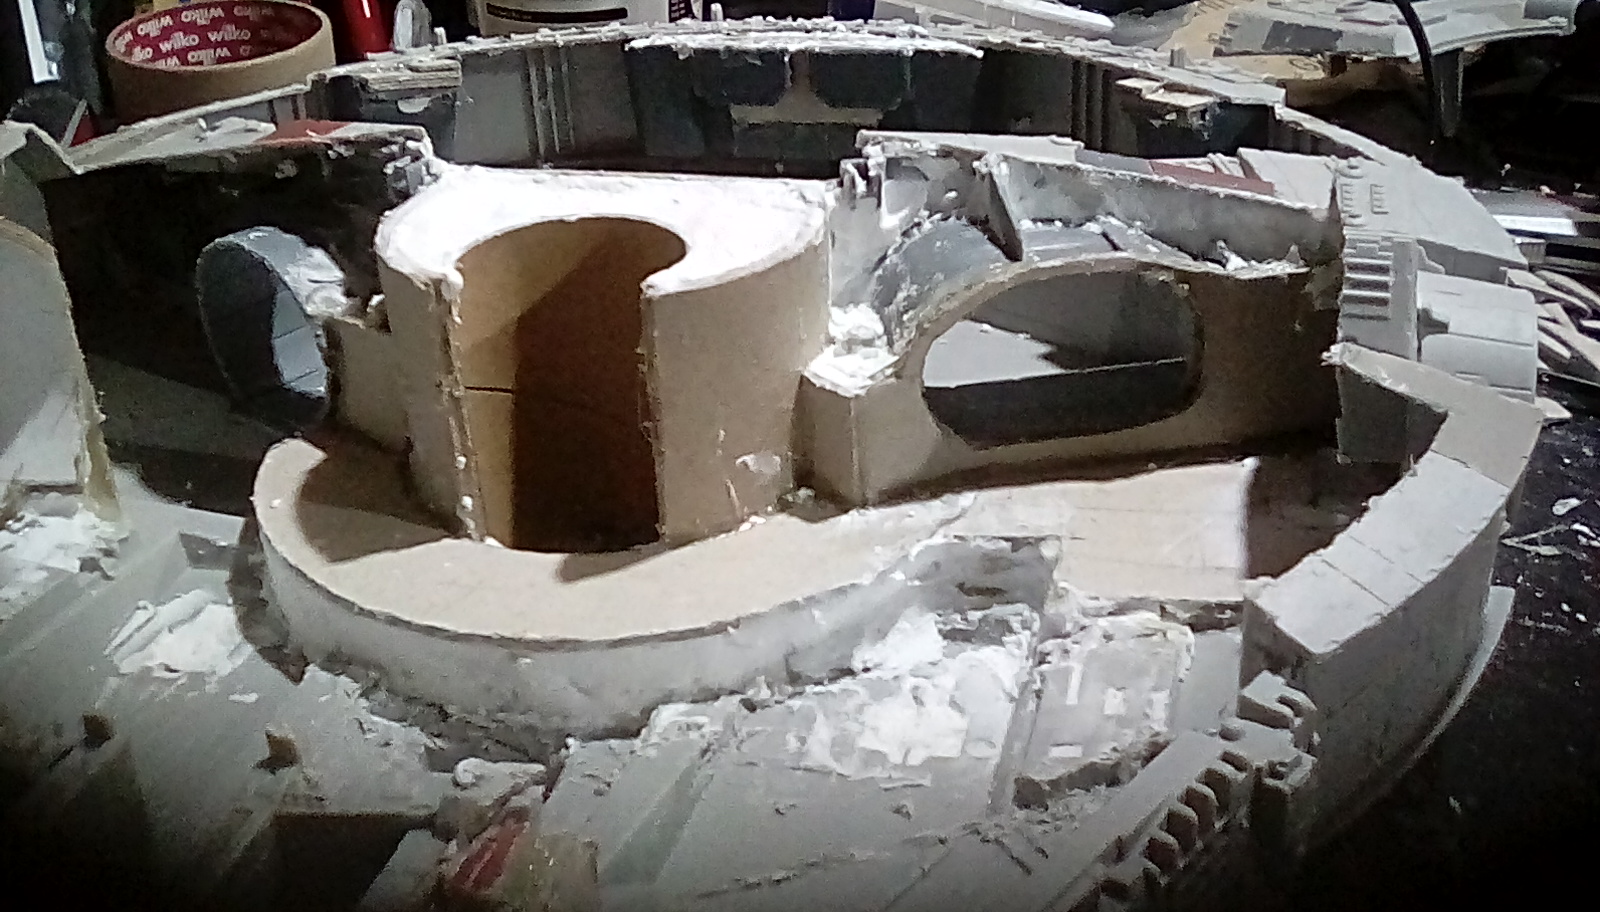
Then first task today was sealing any rough edges from yesterday with grey card. There a few areas of bare filler showing, but they should be covered by the corridor floor panels later.
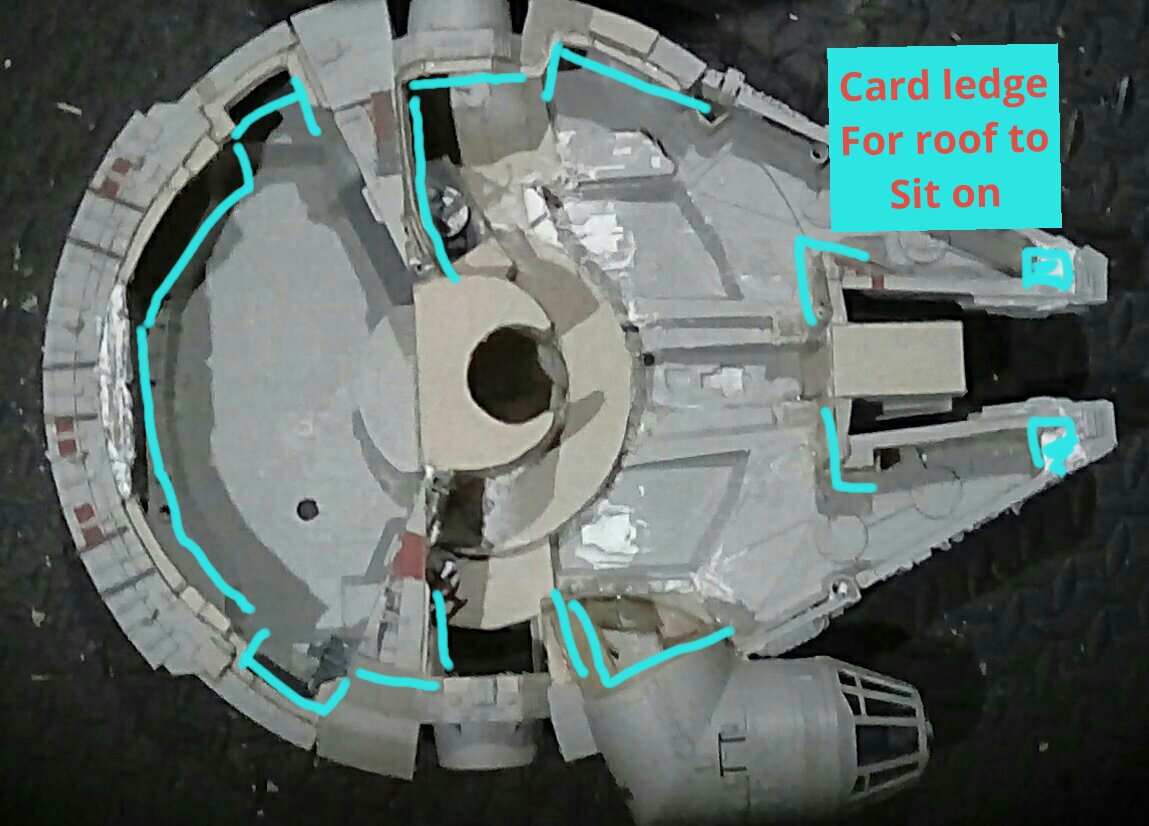
After that it was important to start on the roof of the falcon. I need this fitting nicely so I can see how high the walls dividing the internal space into rooms can be. I created a card ledge about half a centimetre wide around the hull of the ship, so the roof can sit on this without any bit gaps showing. The Dremel cutting disc is about 1mm wide so some gaps can’t be avoided, but the ledge should help stop light showing through these too badly.
I added some card panels to the edges of the roof, to disguise where I cut it out. I needed to add some.other panels in random places so the whole roof looks the same, and this should add some extra texture and variation in panel height once painted. I figure every time the Falcon takes blaster damage Chewie would just weld on another panel to repair the hole, so the panels could be overlapping in places.
I also started the process of filling in the large hole left when I removed the unwanted nerf gun. I build up a lattice of grey card, and this should be quite strong once the hot glue sets solid overnight. Then I will be able to start rebuilding the front section of the roof without fear of it collapsing under it’s own weight.
 Filling the large hole where the nerf gun used to be should also give some much needed strength to the front roof area.
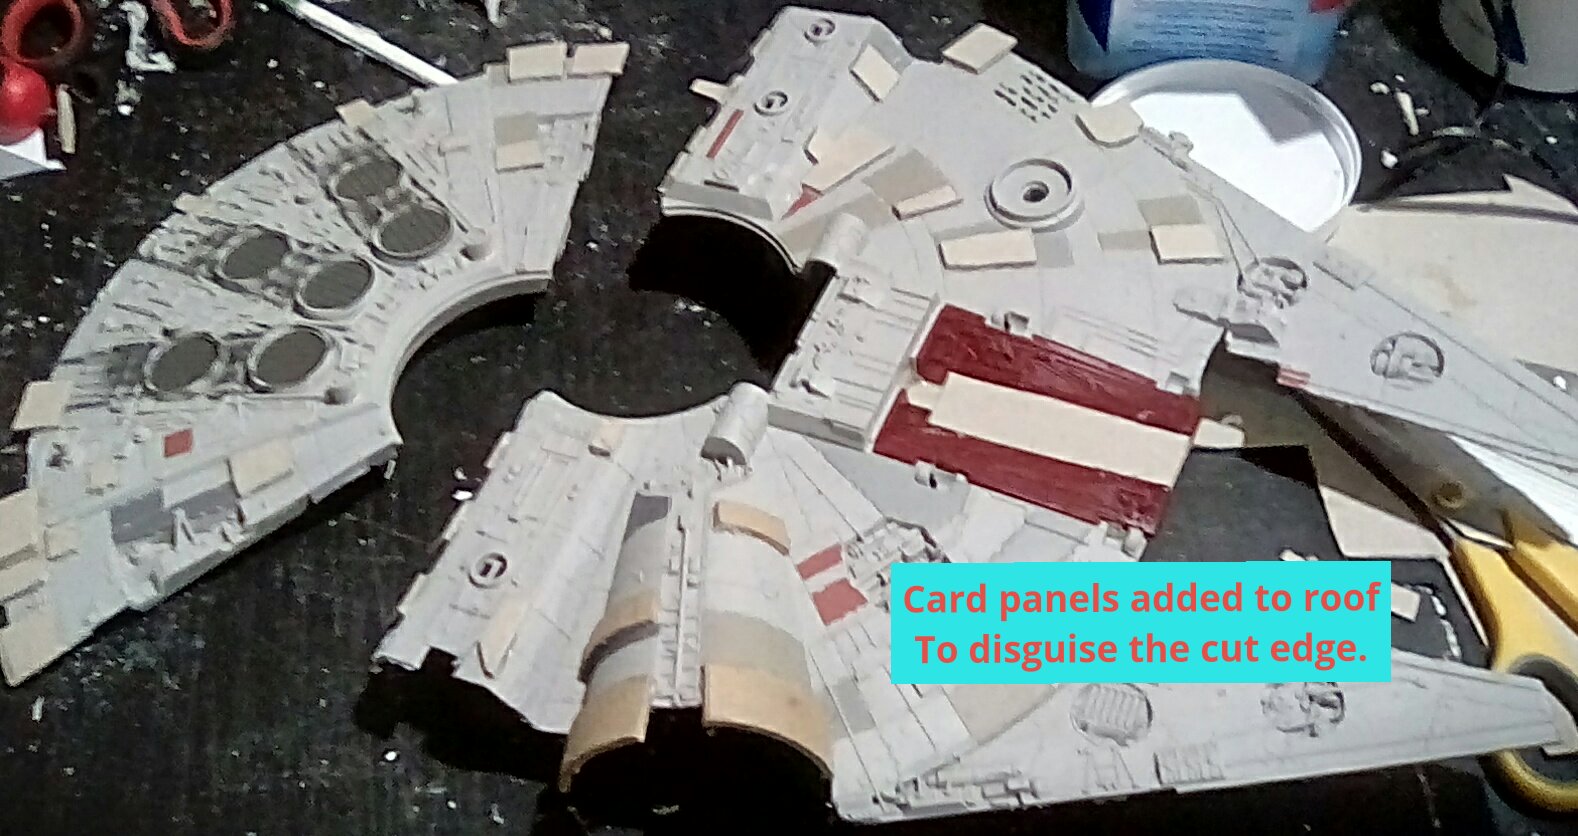
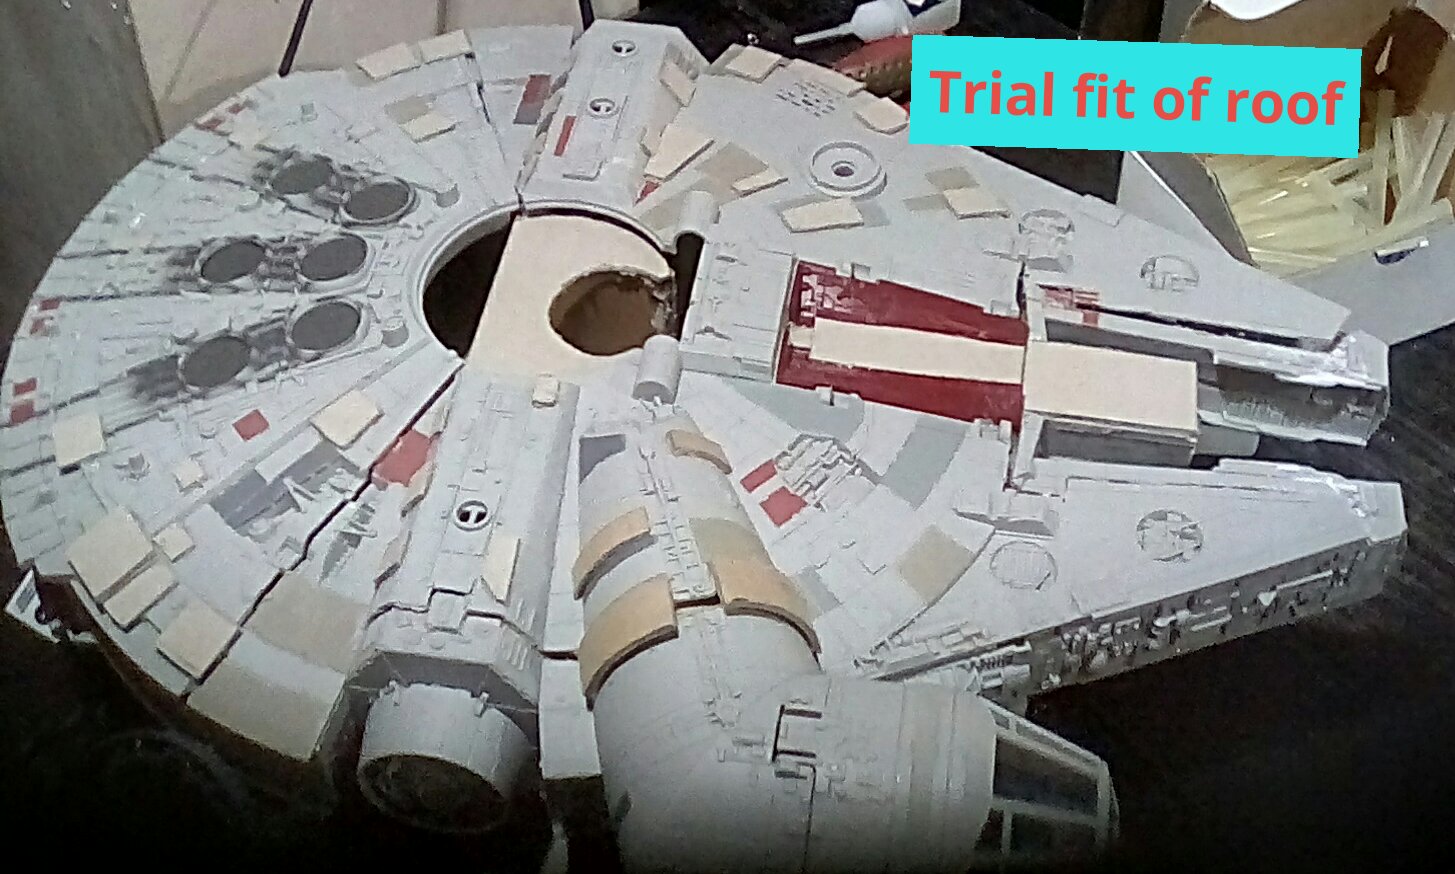
Finally, I have a quick trial fit of the roof to make sure if still fits nicely on the hull after I added the card ledge for it to sit on.
Fixing problems
It is always good to check what you did the previous day in the morning…
I’m not building an accurate diorama that perfectly recreates the Millenium Falcon in miniature. I’m building a wargaming price that represents it, and it has to be fun to play wargames in. That means my star wars legion figures have to be able to fit easily into The spaces and passageways I’m making.
So, I made some mistakes yesterday.
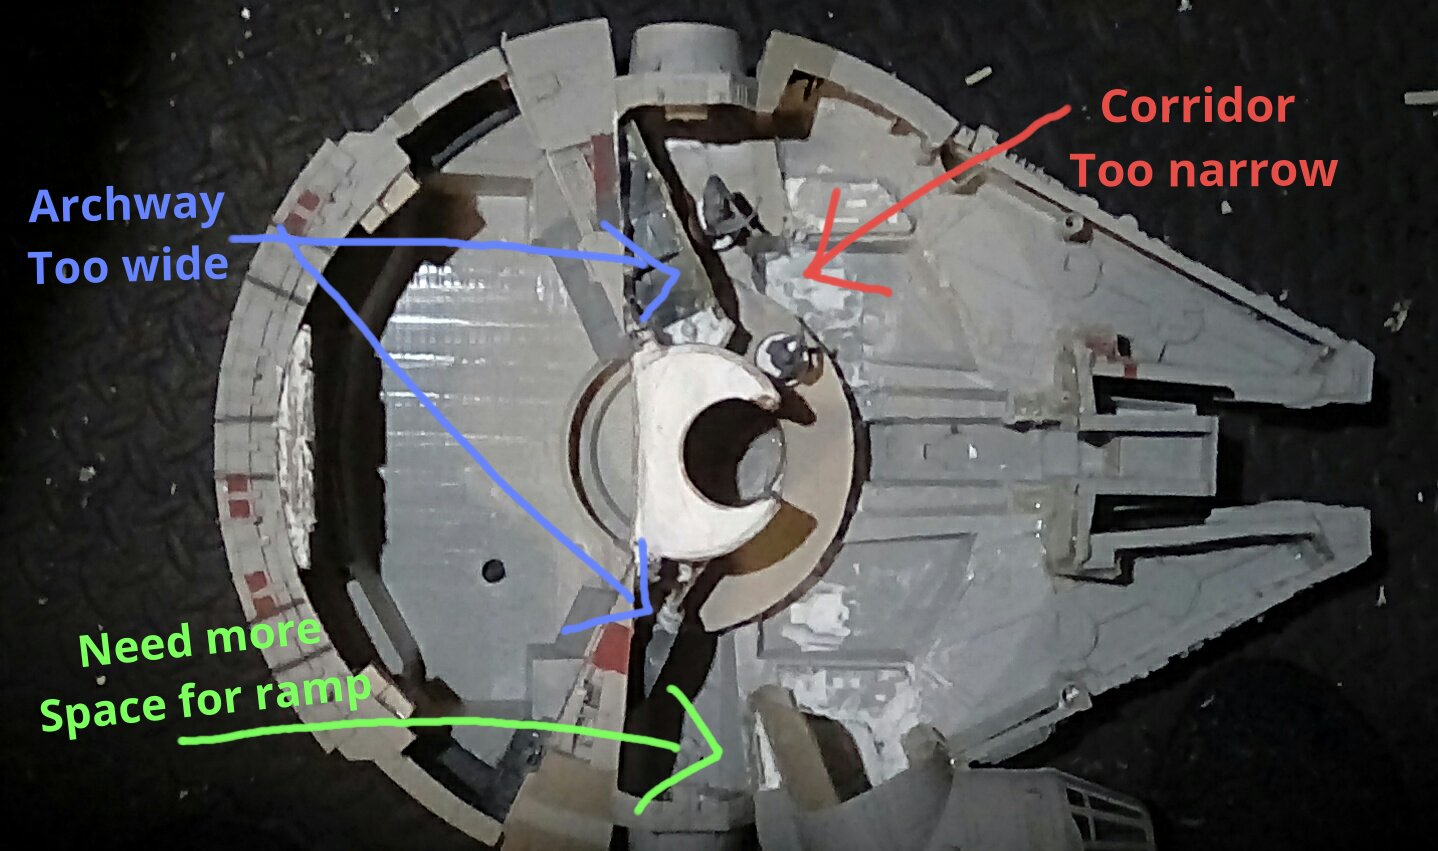
In order to keep the nice circular shape of the central corridor I made the path leading to the right hand airlock too narrow – I wanted the corridor to be single-file narrow, but it needs to be slightly wider than an Star Wars Legion infantry base.
And the preformed arches, while looking good, stop you from placing a figure in them. Also the circular arch need the cockpit is taking up too much space where the ramp has to go.
 Darn.... Problems.
The corridors widened easily enough by adding a small cardboard “retaining wall” and filling that frame with more filler.
Cutting back the arches is more worrying, as once they are cut there is no changing my mind. I’m going to try to cut them so they match the shape of the wedge of hull above them….. But “I have a bad feeling about this”….
….But it worked out fine.
The archway are more like wedge shaped crossesections in one of those books showing cutaways of stars Wars vehicles now. But my wookie and storm trooper are finding it much easier to move around the ship without banging their heads.
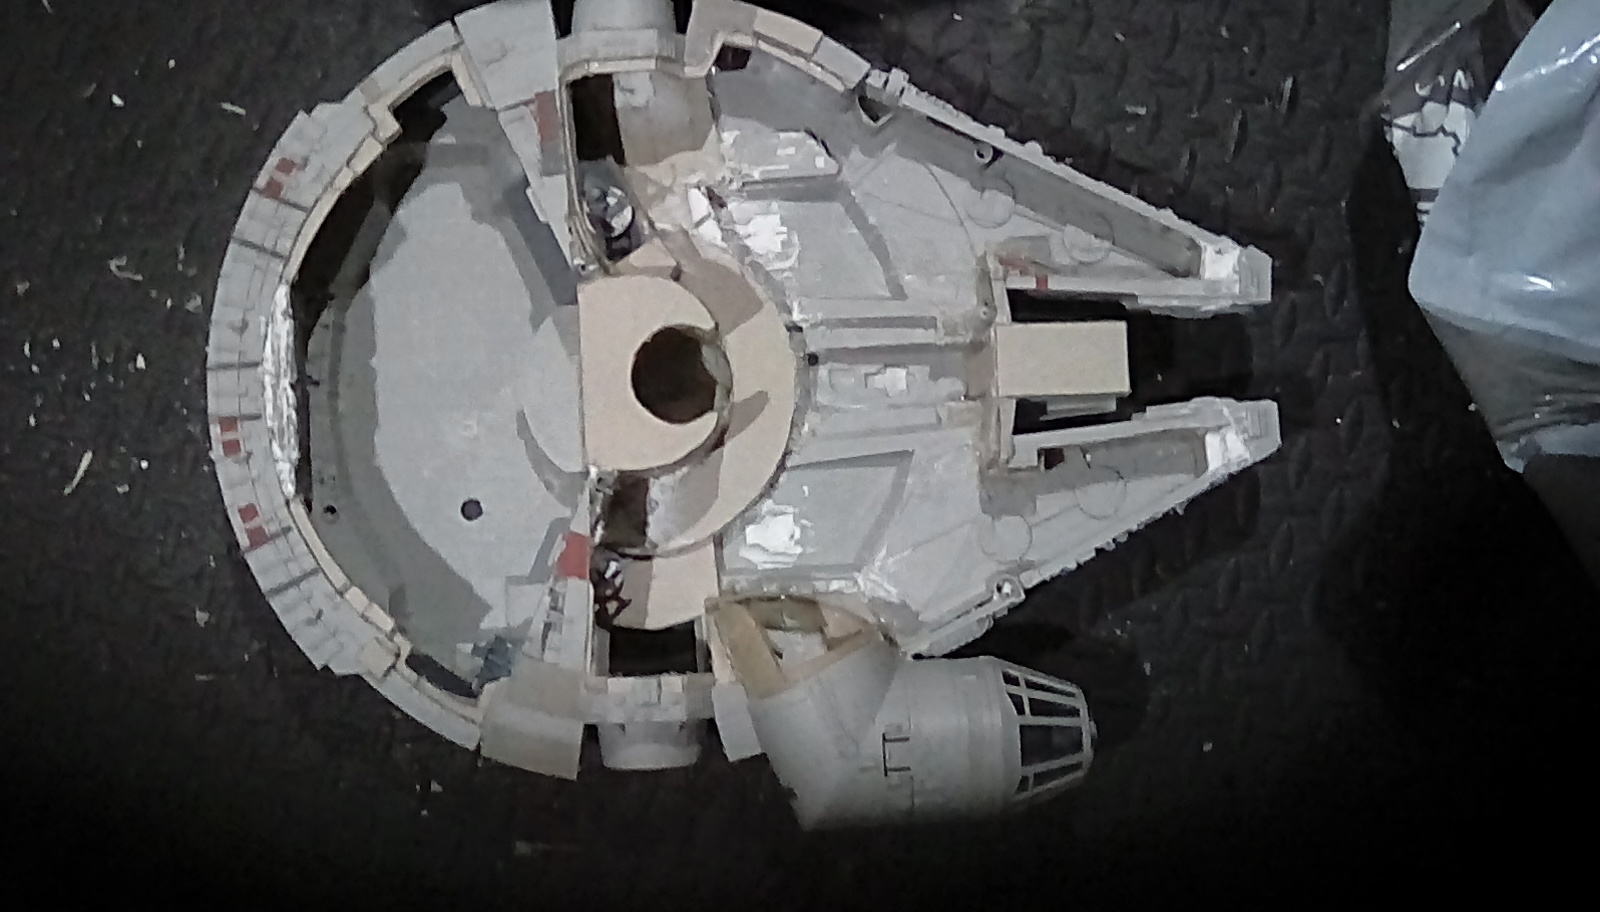
I’ve cut out the hole for the ramp, which will also give me better access to the space behind the cockpit that I still need to tidy up. The cut out piece will become the bottom of the sloping ramp – I cut it so about a centimetre of the sloping bull bottom is still attached to the edges – this helps make the access hole a bit wider, and the ramp a bit more rigid than a flat 2d shape would have been. Nobody likes a floppy ramp.
My Wookie and storm trooper inform me that it is Life Day tomorrow, so they want to down tools and go to the space pub to celebrate, so I’ll sign off and get back to work after the holiday.
Have a great Christmas folks.
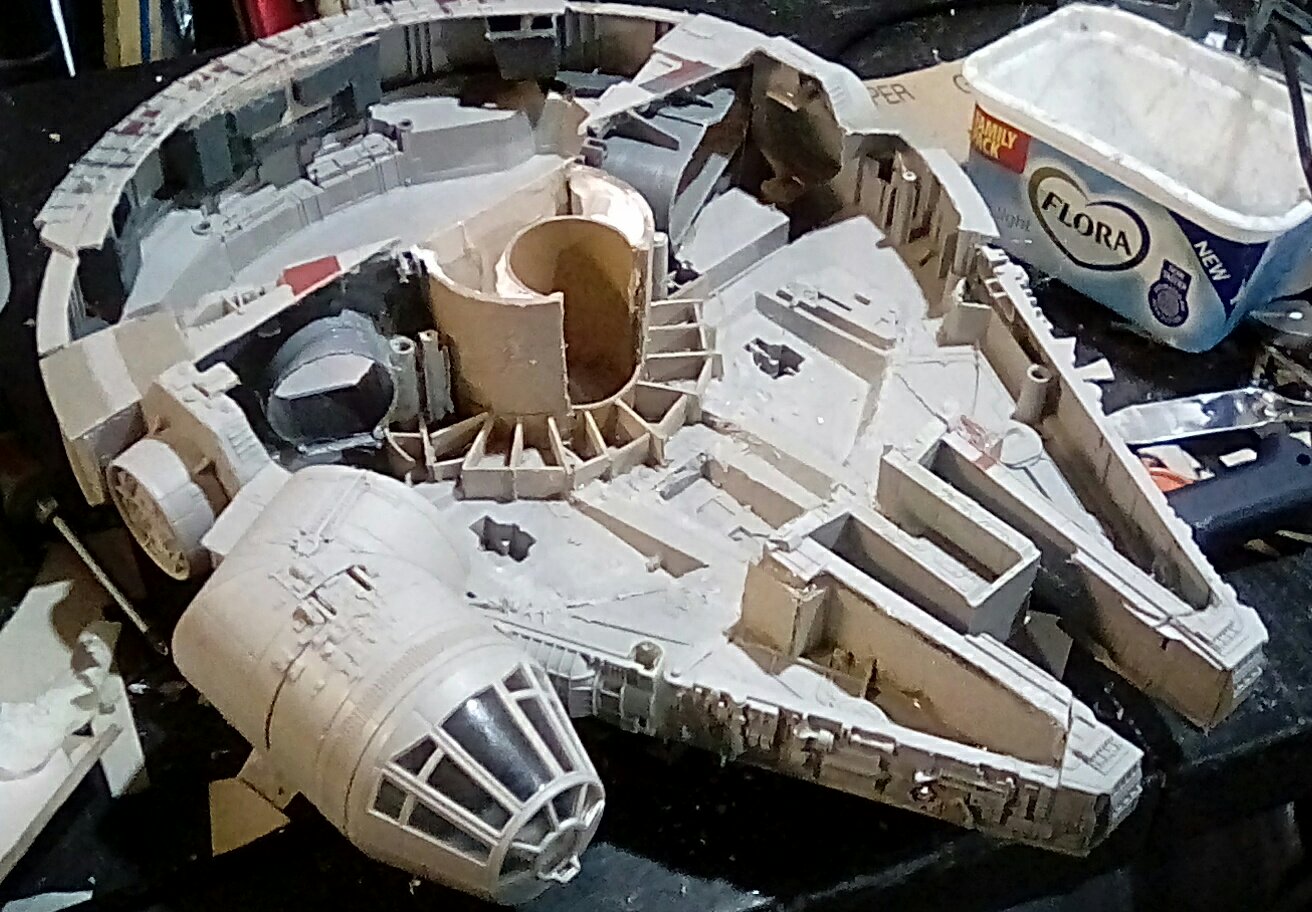
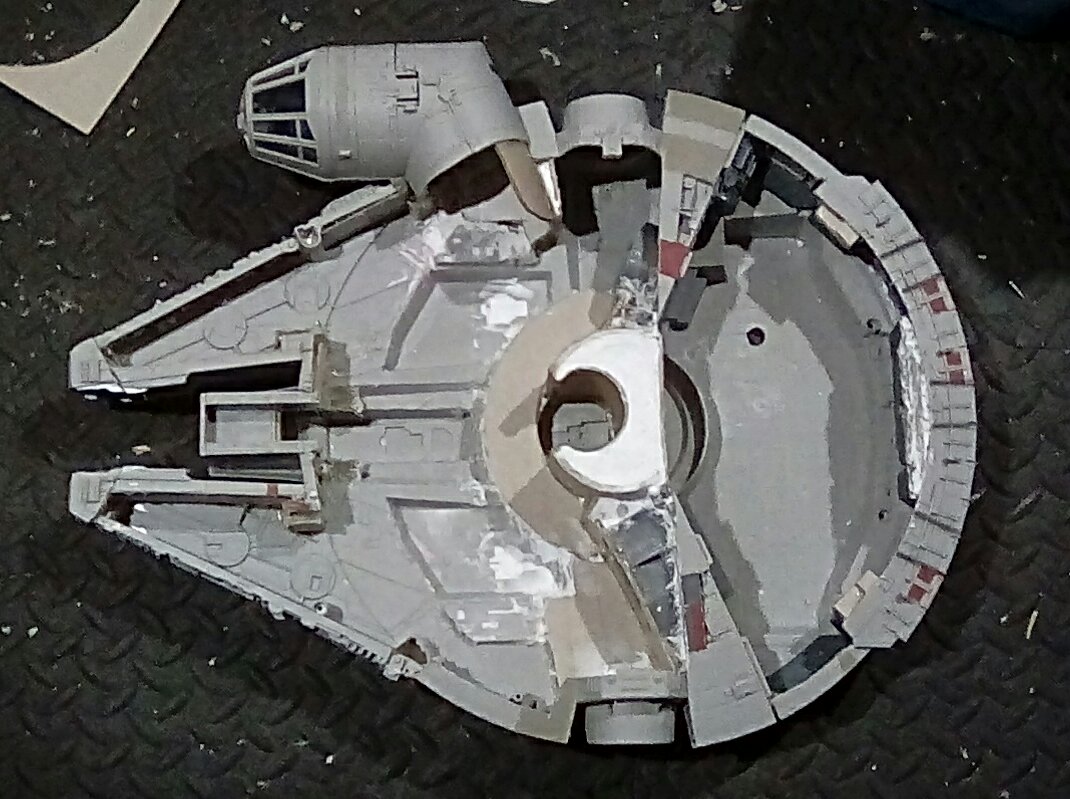
Putting it back together...
When rebuilding something like this, there is a balance between what you want to do, and what is sensible. I decided to put the 2 grey plastic inserts back in their original position so they could strengthen the now quite flimsy hull, and act as supportable the removable roof later. I did cut the backs off them so they will now act as doorways to the rest of the ship instead of being alcoves. As I fix elements into the ship, I also cut away any plastic supports that are no longer needed with a dremmel, then smoothing down with a file and then sandpaper.
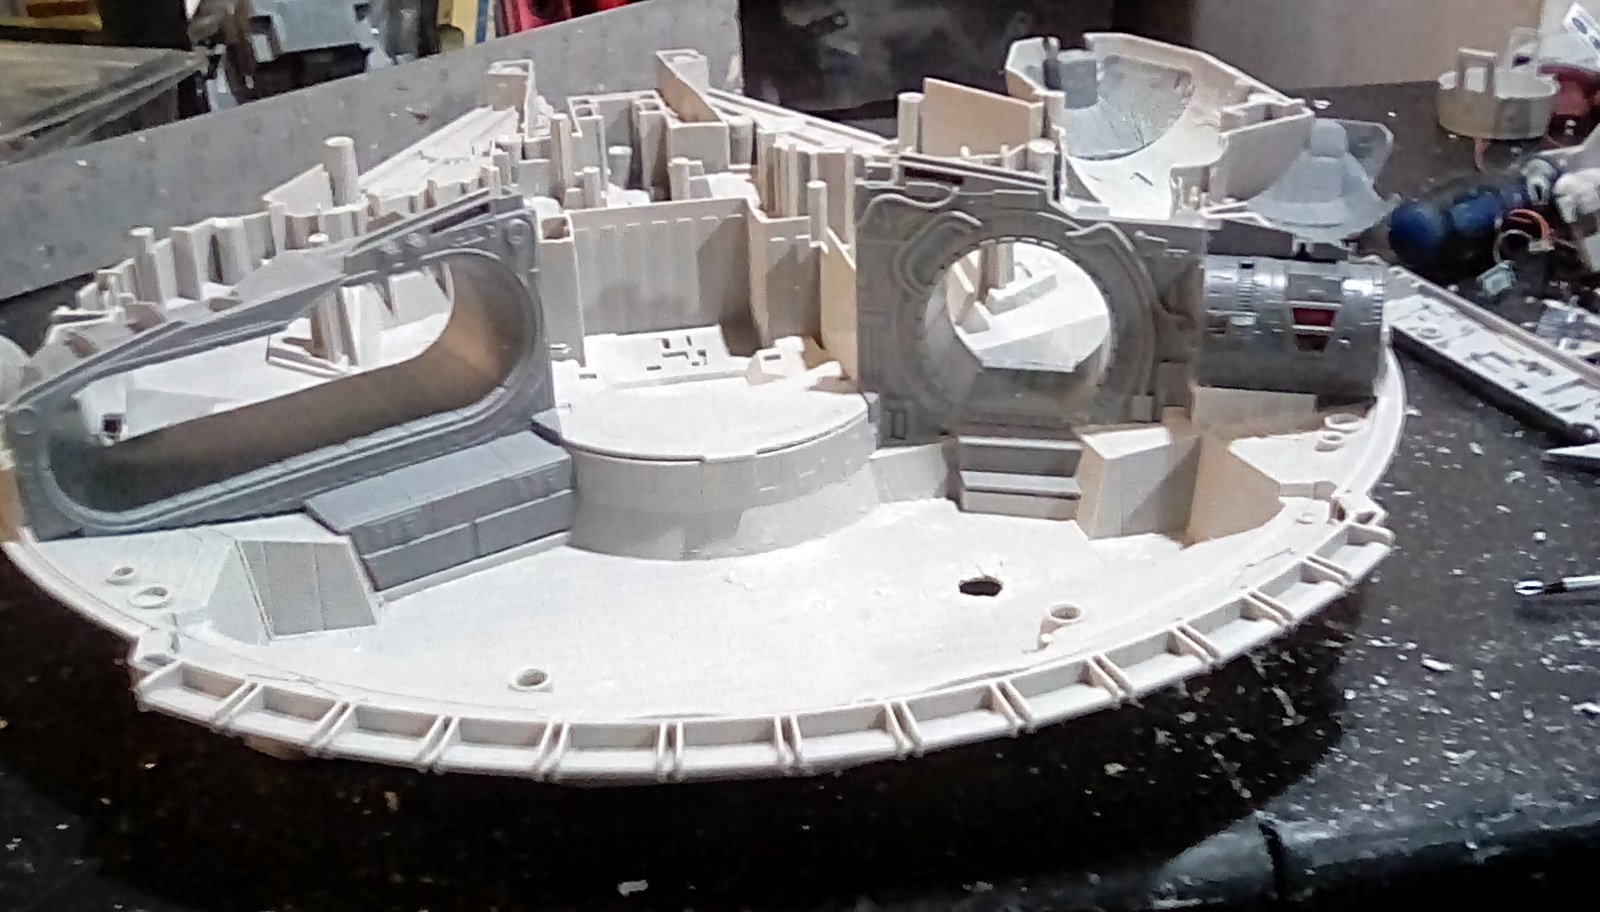

Next I rebuilt the side walls of the falcon. This involved cutting the top half of the walls away from the top half of the hull. A hot glue gun turned out to be the best way to fix this in place, as it also can be used to fill voids and gaps, and when dry adds some strength to the hull. The sections with the cockpit and the round docking hatches are cut into a shape that will cover the top of the previously fixed grey inserts. I decided to leave a “lip” of hull round the top edges of the walls, as I want the ship to be recognisable as the Millenium Falcon even when the lid is removed.

I’m quite glad with the way the curved corridor to the cockpit is shaping up – I consider that quite an iconic part of Han Solo’s ship so I wanted to include that in my model.
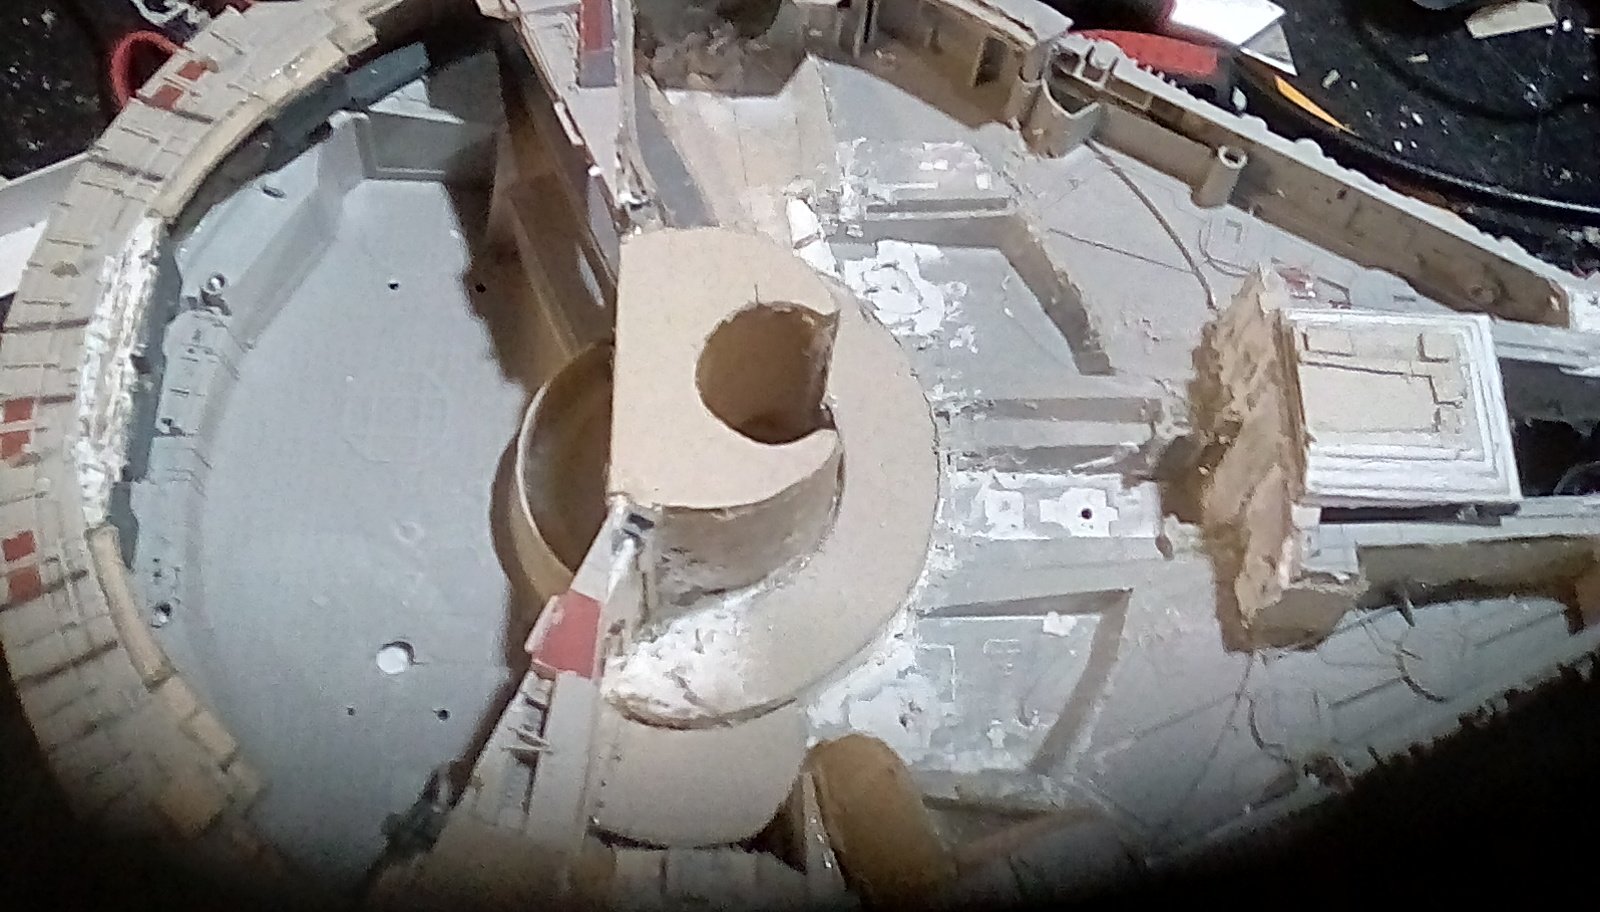
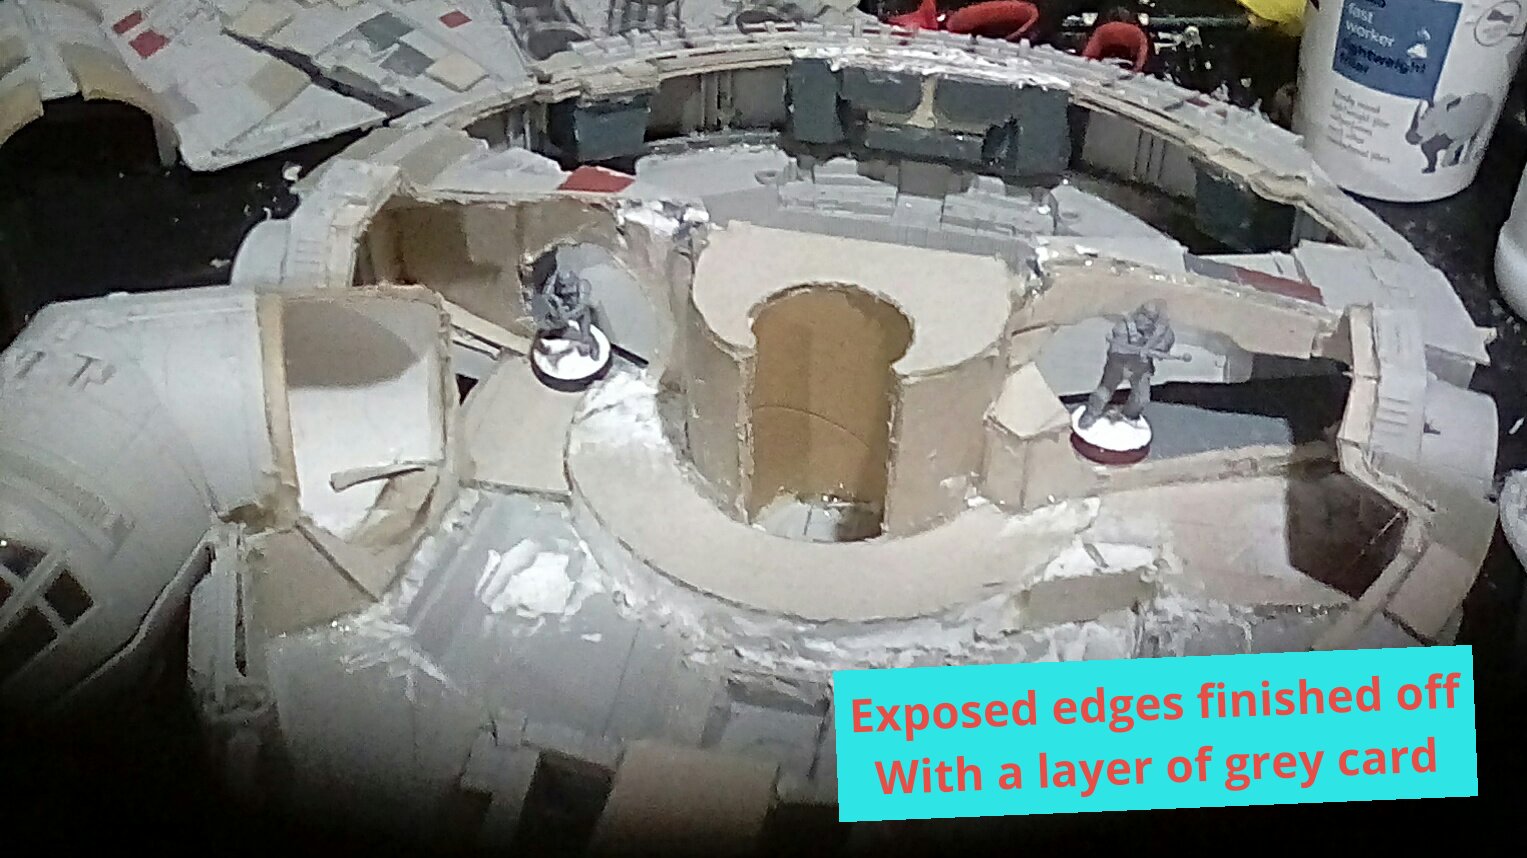
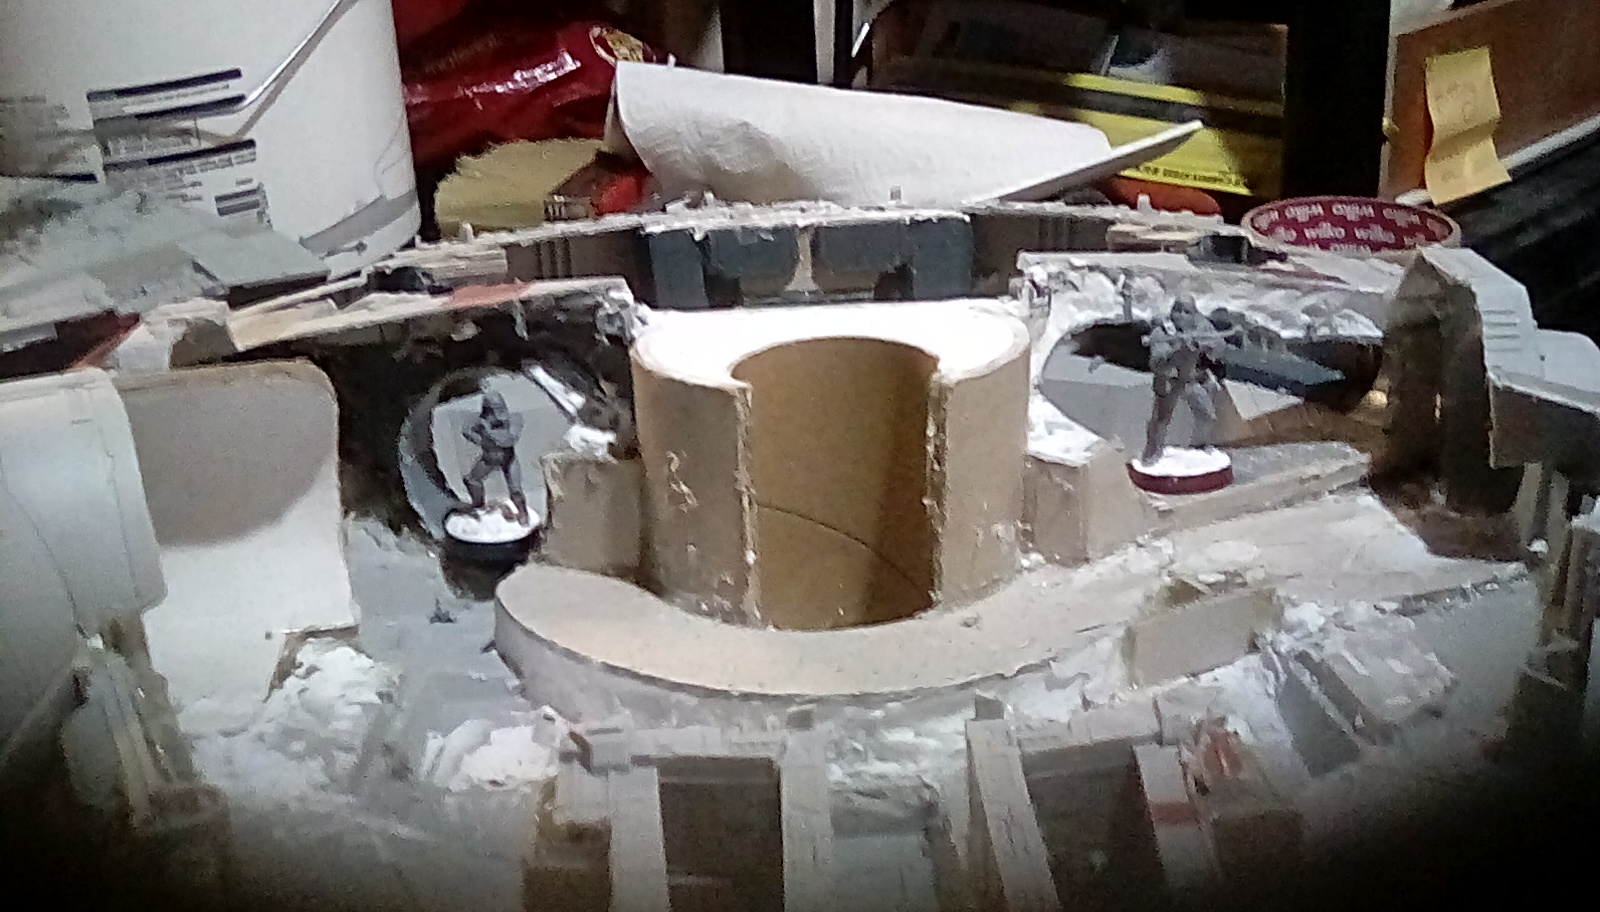
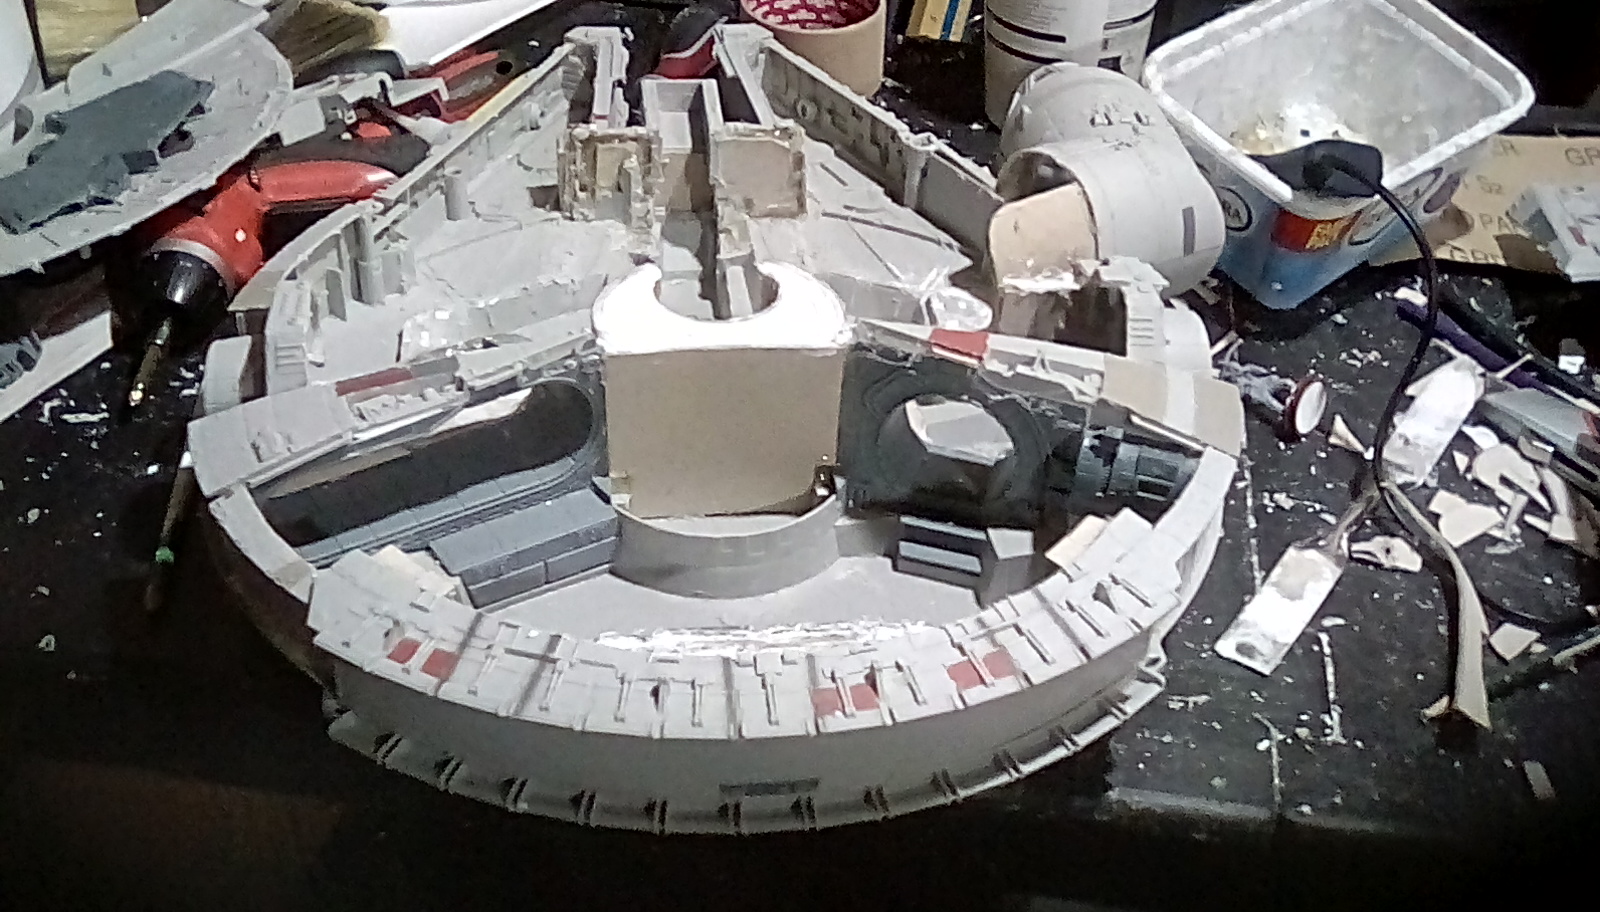
The next thing I feel any Millenium Falcon needs is a central tube leading to the guns, and a circular passageway around that. This is done using some thick cardboard tubes and grey board hot glued into place. I make a cardboard frame to support the walkway, and lightweight filler is used to.fill that frame before gluing on a.cardboard top. It doesn’t need to be a perfect fit, as later stages should cover up.any small gaps. I decided to raise the corridor not only to give a nice flat surface for my figures to stand on, but also so the central column could drop down deeper as if descending to the bottom hull gun. I’m quite keen to have lots of changes in level, as I think this will make the finished model feel like a cramped freighter with the rooms shoe horned in between the mechanics of the ship.
Grey card is quite strong, especially if layered, but the lightweight filler is important as it ensures he eventual shapes are solid and can’t cope or crease. For the time being I’m adding “vital ekements” – later I will decide on the layout of other rooms when I see how much space is left. I decided on a half-circular corridor, rather than fully encircling the central pillar, to save space. I can always add the other half of the corridor later if I decide if will fit.
(Grey card is the thick card you can buy from picture framers as it’s used as the backing to framed pictures. It’s a lot stronger and cheaper than foam board, and comes in bigger sheets. As always, it might have a different name in different parts of the world).
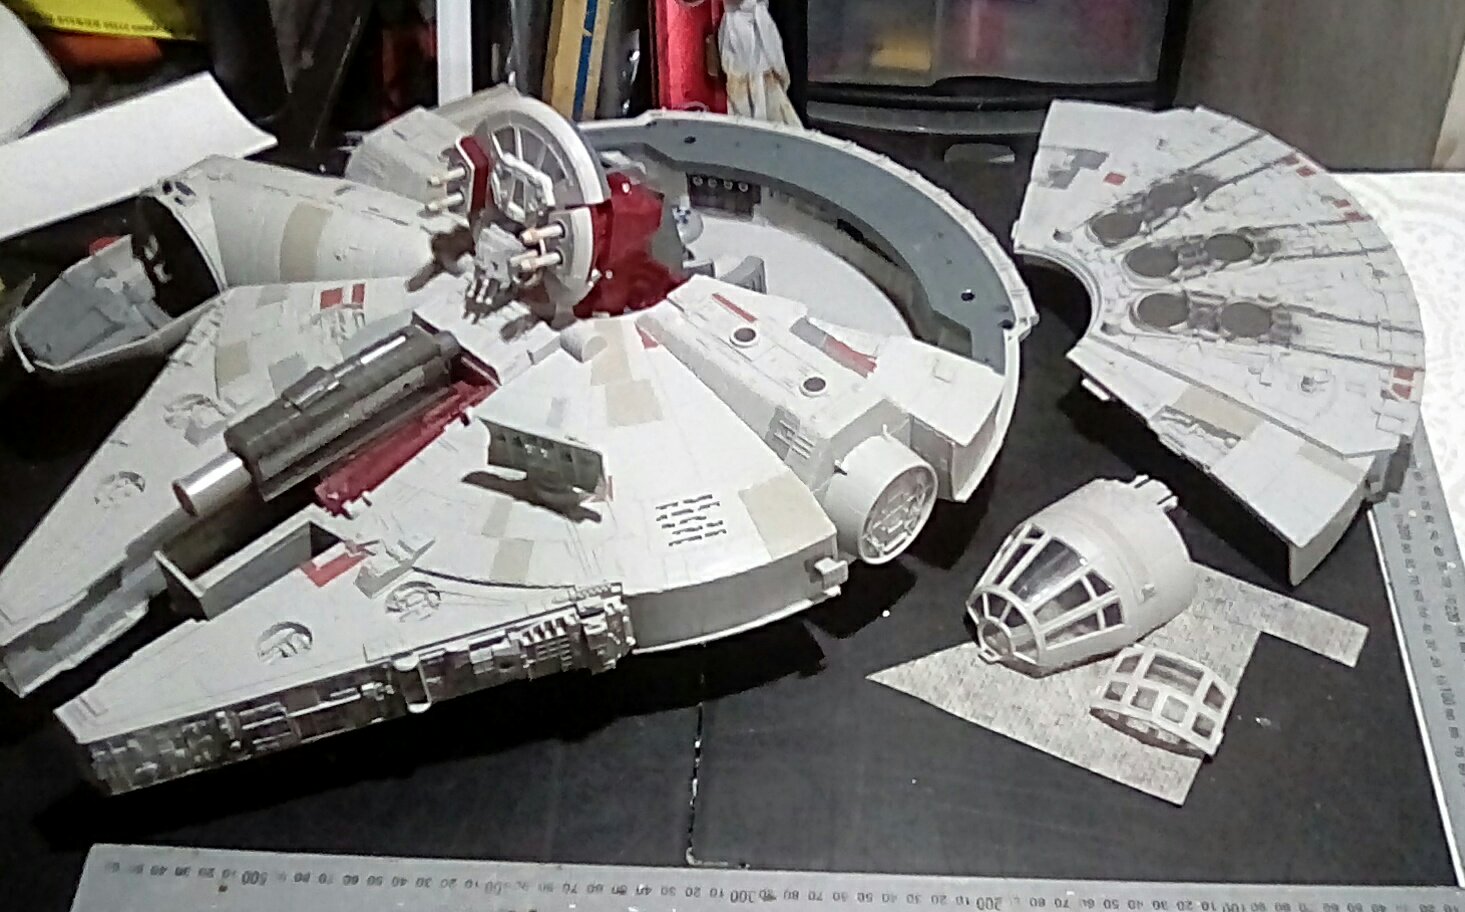
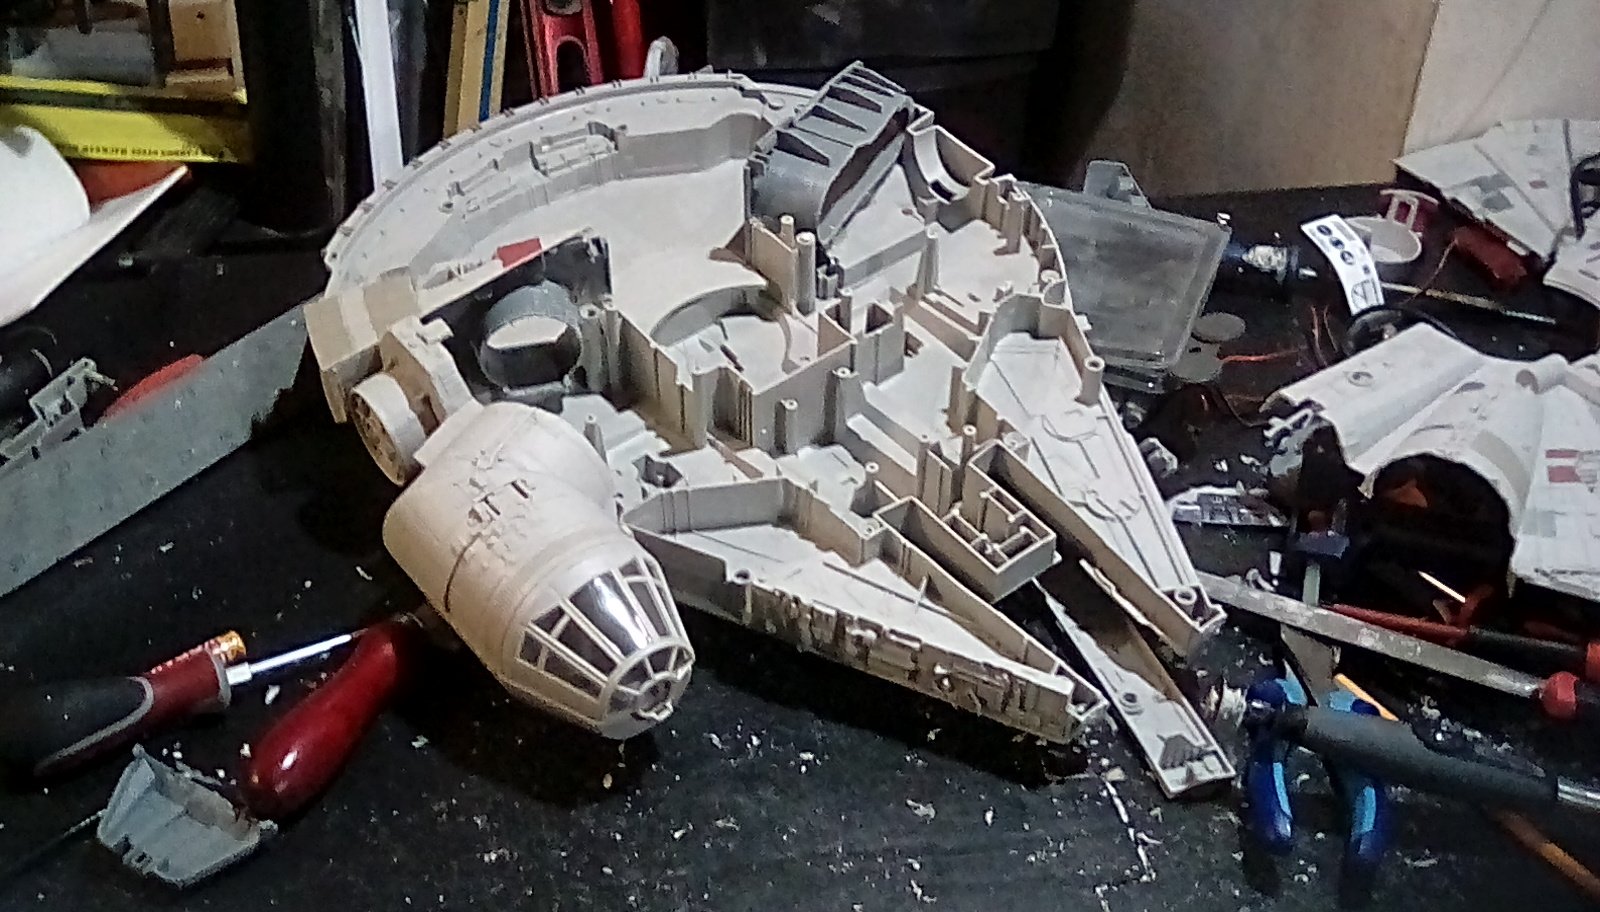
Dismantling the toy Falcon
The first task is dismantling the toy into it’s component parts.
I decided it would be easier to prime the hull in parts rather than doing it first, as I am going to have to scratch build several missing bits later, and I want the colours to match.
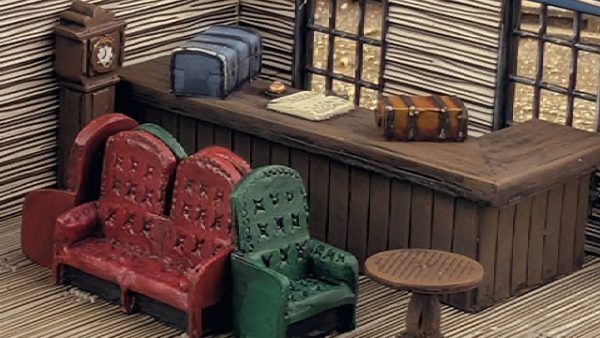
Mostly dismantling the ship is about unscrewing everything I can, and using a flat header screwdriver to lever out the snap-fit parts. There was a nice seat I wanted to reuse and cut down to be the right scale, but it was resin glued in place to I had to destroy that to remove it from the floor.
The most important tip here is to keep all the screws somewhere safe so you can find them again when you start reassembling the ship.
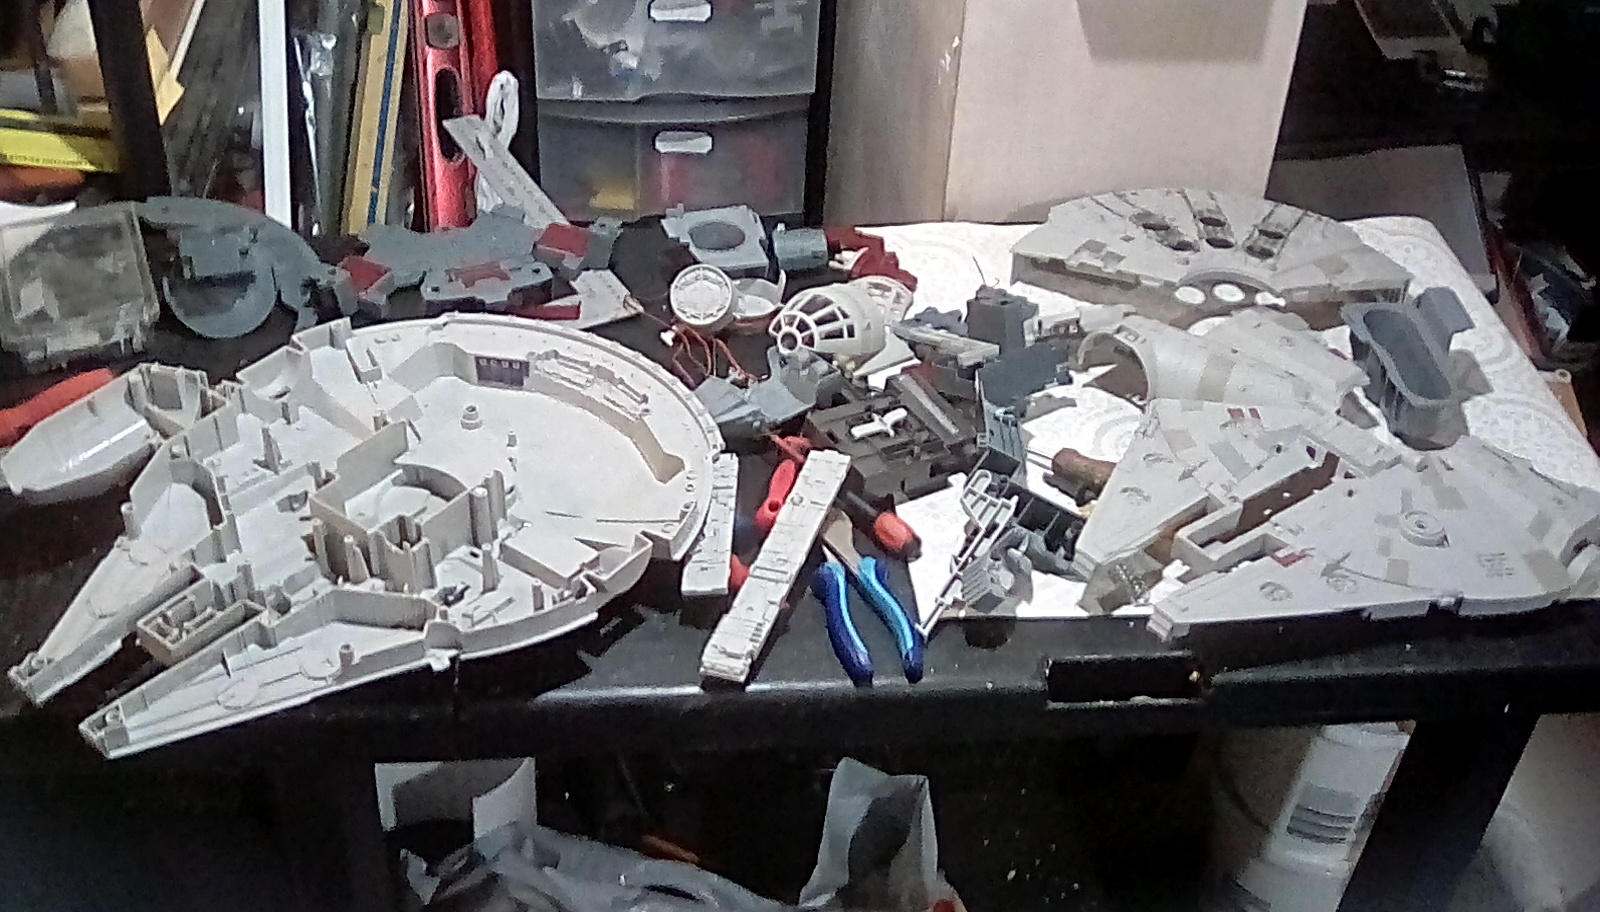 The Falcon put up a bit of a fight - some bits had been resin glued together which I suspect had been a home repair.
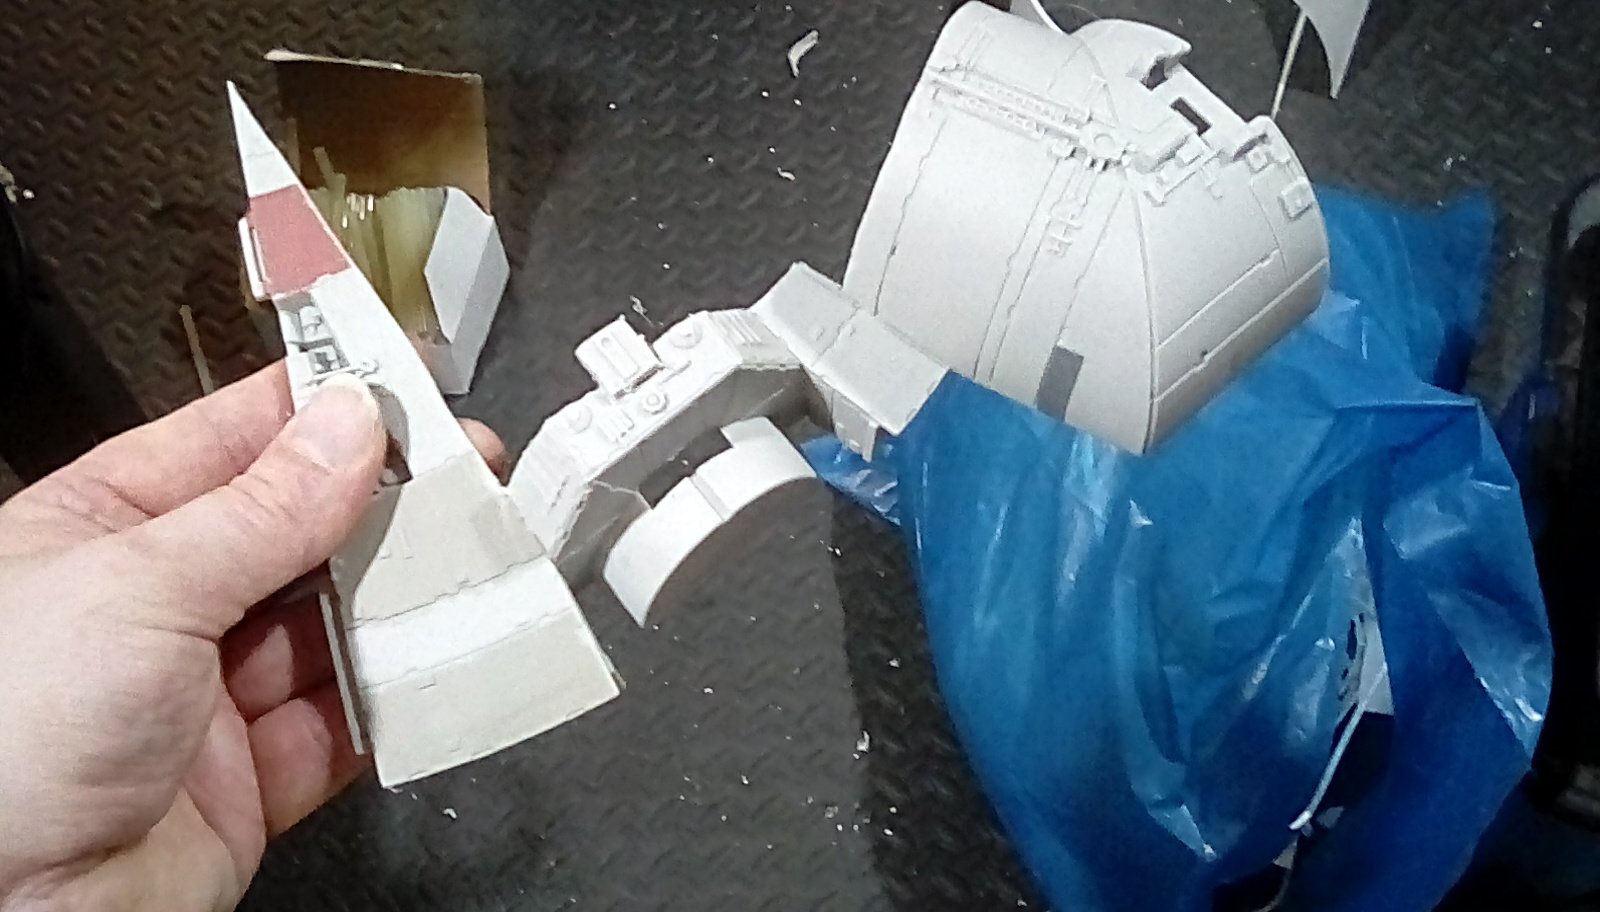
While it’s a bit early to think about a detailed room layout, I’m starting to think about which parts I might reuse to reinstate a bit of structural strength and hold the roof on. There’s a nice arch I want to reuse that as a bonus covers the battery compartment, so I won’t have to weaken the floor by cutting that out. There’s also a smug i.e.glers hidden compartment I’d like to save, and I have to think about how the cockpit cannopy is going to attach to the rest of the ship – there’s a hinge there already that I might as well reuse, but that does mean I’ll probably separate that from the rest of the roof and glue that in place permanently as an arched corridor leading to the cockpit.
The ramp is going to be difficult to do without weakening the floor. As nice as it would be to make it able to open and close, it is probably going to be stronger if I make it fixed in the open position.
I’ll put these vital elements in place, strip out any unneeded walls and clutter with a dremmel, and then design a floor plan around that when I see what space is left.
The Hull
The first thing to do, is to buy a plastic toy Millennium Falcon to strip down to use as the basic hull for this project. The kenner toys from the 1970’s would have been ideal, but my funds are limited and those have become very expensive collectors items.
More recent Millennium Falcon toys are more affordable, and I managed to find a damaged second hand one on ebay for under a tenner. As at some stage I will probably be cutting it up that was ideal for my purposes. Luckily when it arrived the scale seems right – I wanted to be able to stand 3-4 figures in the cockpit to be able to recreate those classic star wars scenes.
It hasn’t got legs or an opening ramp like the older kenner toys had, so I’m going to have to fix that, and it has a large Nerf gun that, …ahem,… Isn’t Canon 🙂 So that needs removing. The hatches that are meant to hide the gun are missing, so I will have to rebuild that part of the ship’s roof.
Also, I want my Falcon to look complete, but to be able to remove the top roof to reveal the realistic insides of the ship, so it’s going to need a removable lid for the whole ship – currently only the back half lifts off. Until I get it stripped down into parts and I can see how it’s constructed I am not sure exactly how I am going to do that…. If things go very badly my fall back position is to too make a crumpled crashed spaceship scenery price out of the toy if it just falls apart and loses all structural integrity once I start cutting bits off it – these toys are normally made as cheaply as possible and cutting a ramp out of the floor and cutting off the roof may just remove too much of the support if plastic is too flimsy.