


Cyberpunk Urban Growth with 144artist


Recommendations: 46
About the Project
Still on a journey to build my own little Bladerunneresque tabletop terrain collection. I have a solid mix of MDF and scratch built projects in mind. In addition, Mantic claims that my Terrain Crate sci-fi trees are on the way from the Kickstarter I backed AND I have a box full of Maki-tainer pieces tucked under my desk. So there should be plenty of options to work on this month including a noodle bar that's waiting for paint.
Related Genre: Science Fiction
Related Contest: TerrainFest 2023
This Project is Completed
So it Begins... Again
As I got little progress done on my Spring Clean Challenge I decided to roll it over into the Terrain Fest. So I want to finish painting the noodle bar I assembled as well a number of MDF kits I’ve collected. Having spent a day playing Space Weirdos using the terrain I’ve finished inspired me to break out the Black Site Studios kits in my (now organized) garage to get started. I’ve acquired a few more of Antenocistis’ Workshop kits as well and as the company is no more, they are cherished. Now if I can just find their Police Station kit I will be beside myself.
Finally, my friends have been giving me their filament spools from their 3D printers to make more industrial cylinder pieces.
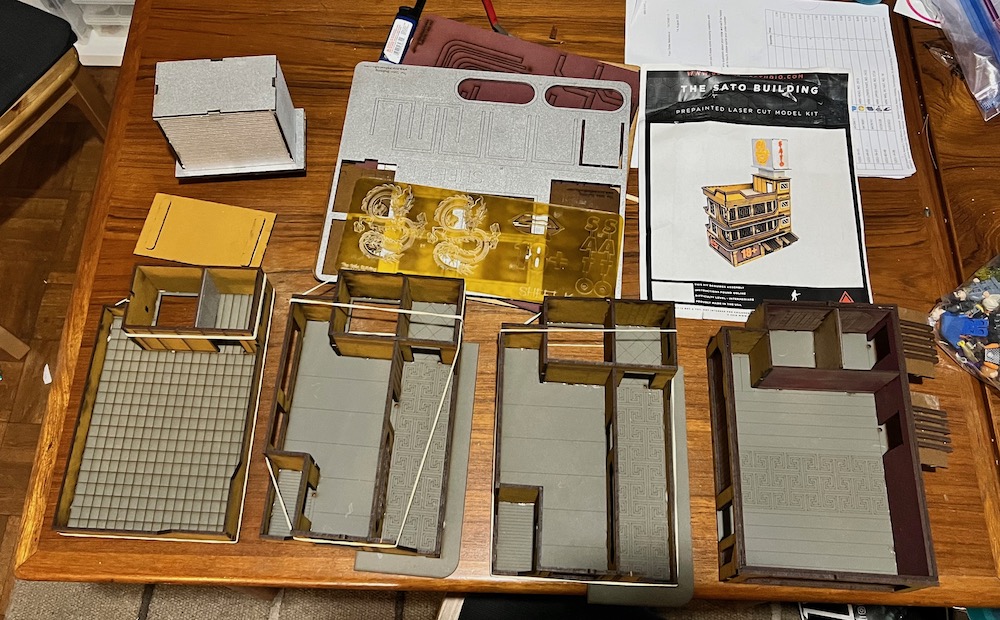
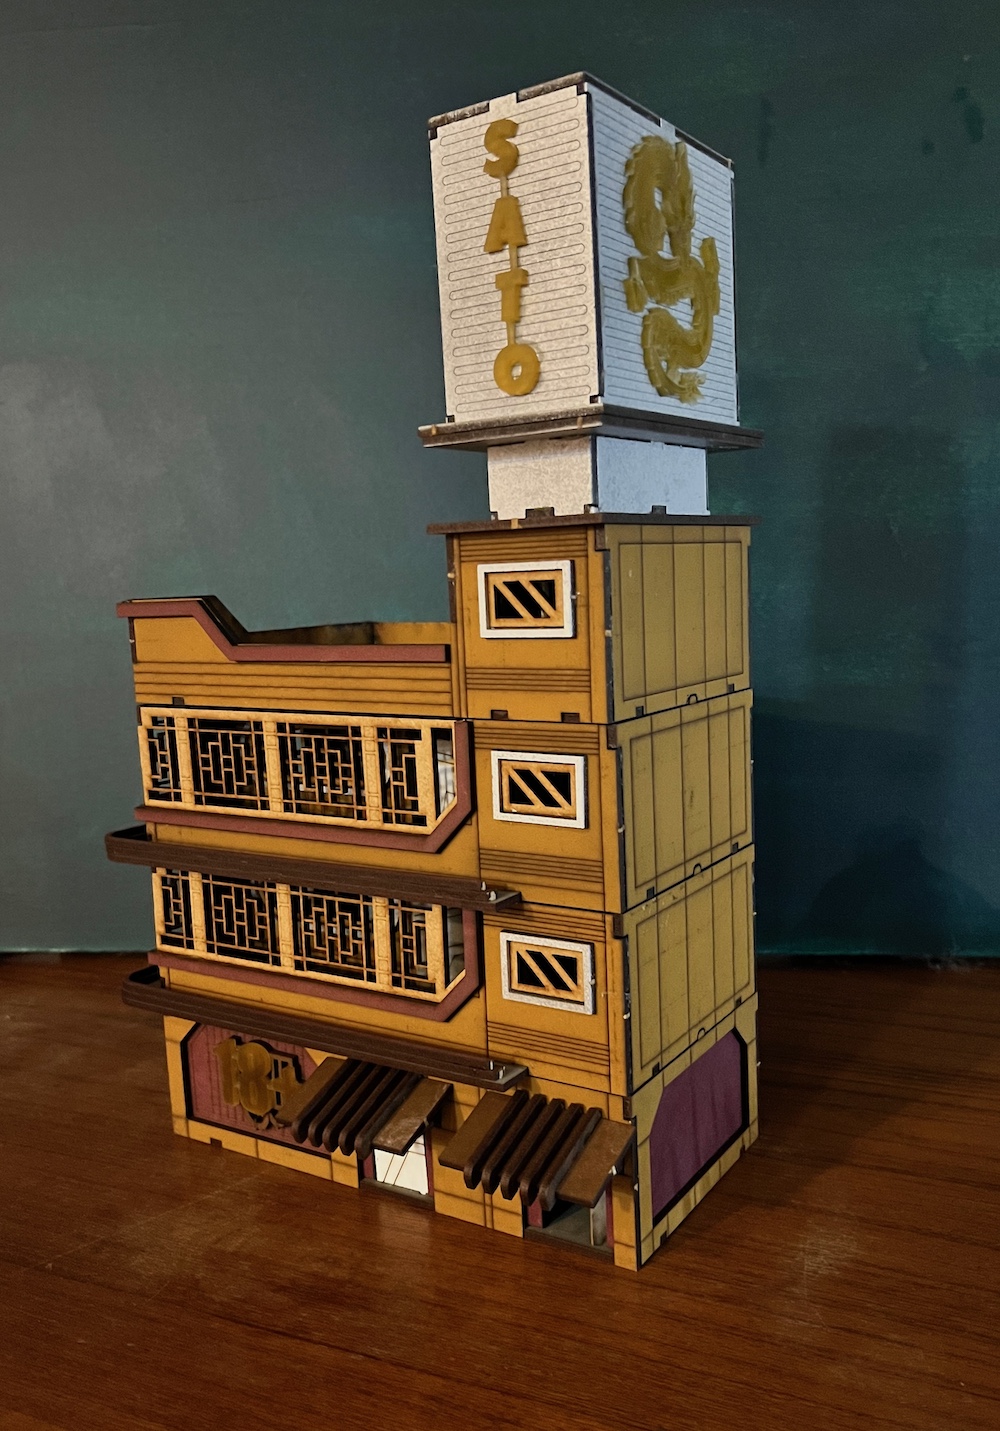
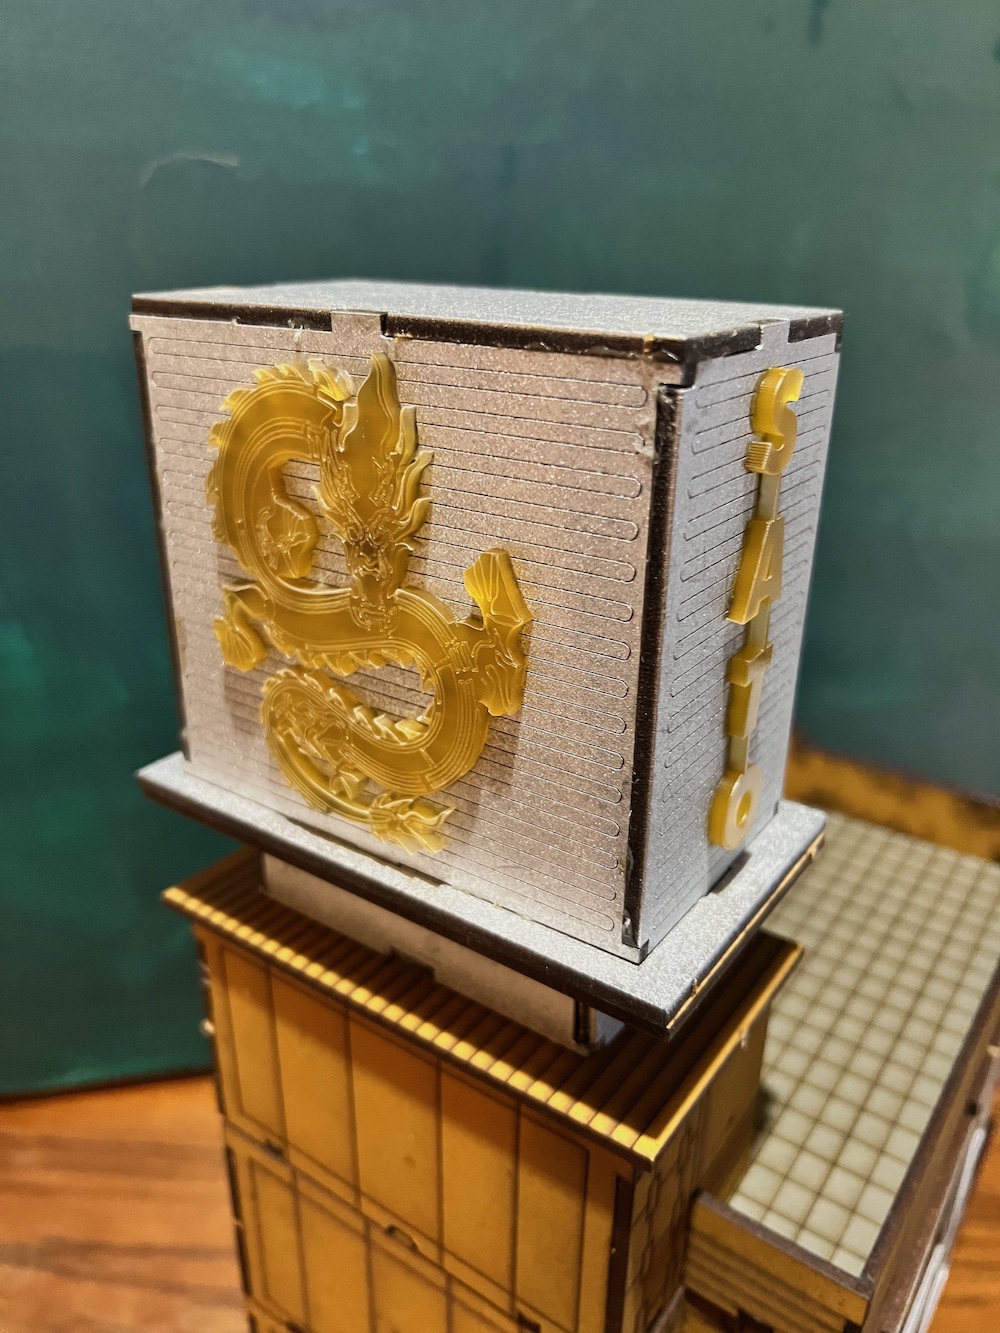
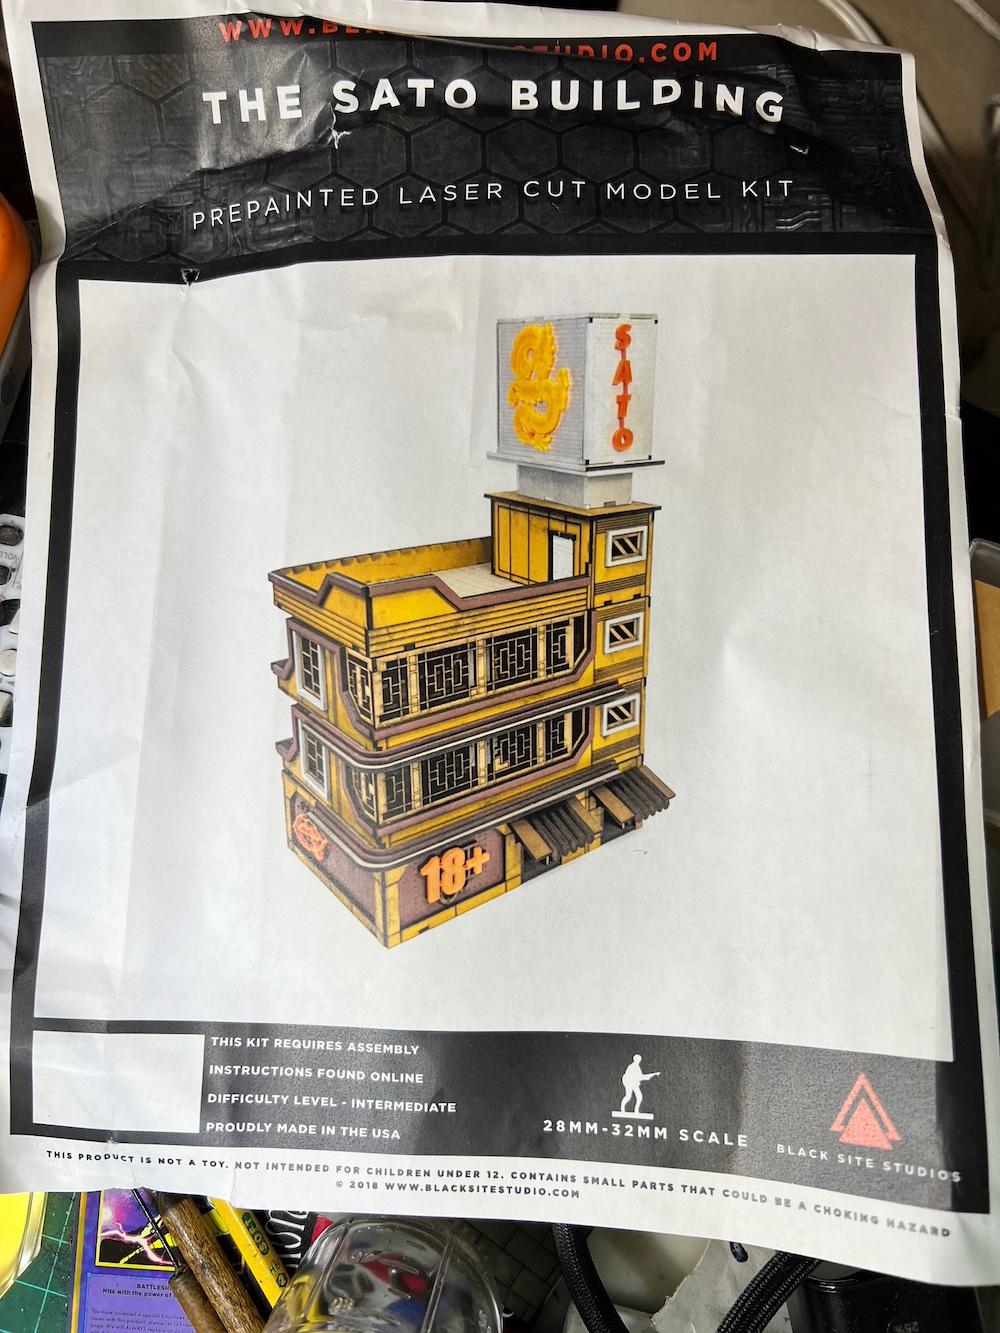 As Sato is Asame's last name in Avatar- Korra, the Sato Tower had to be near the front of my plans.
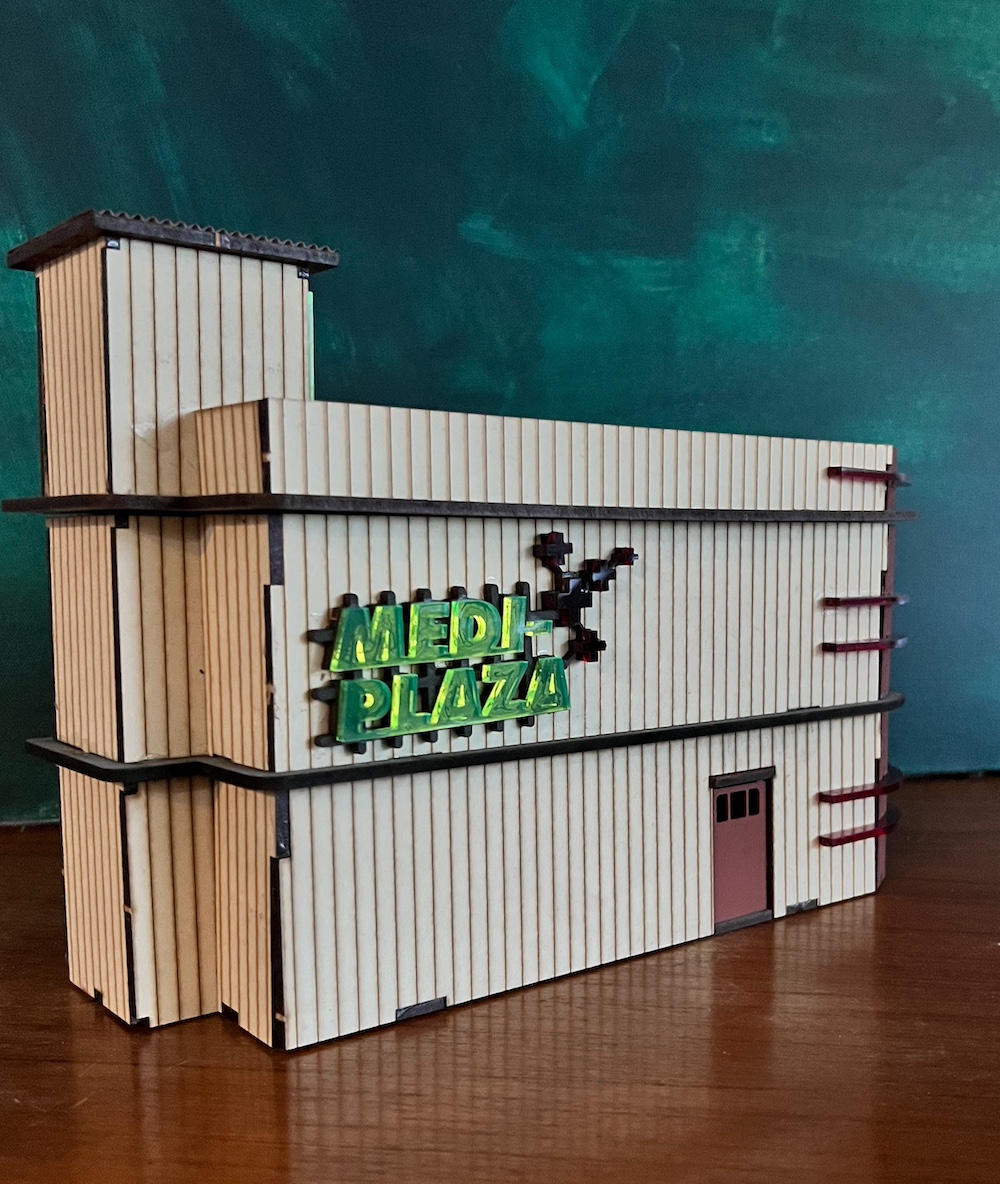
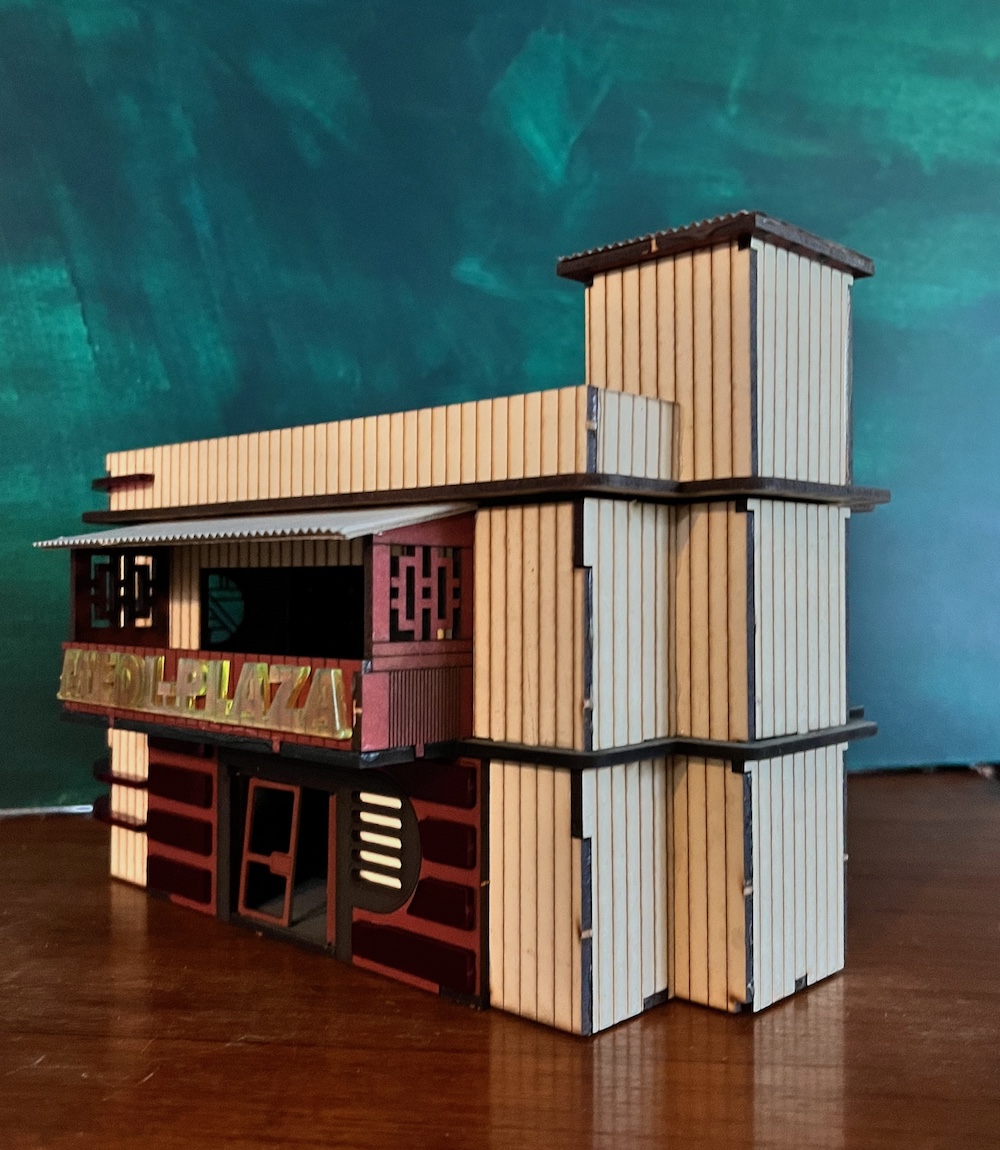
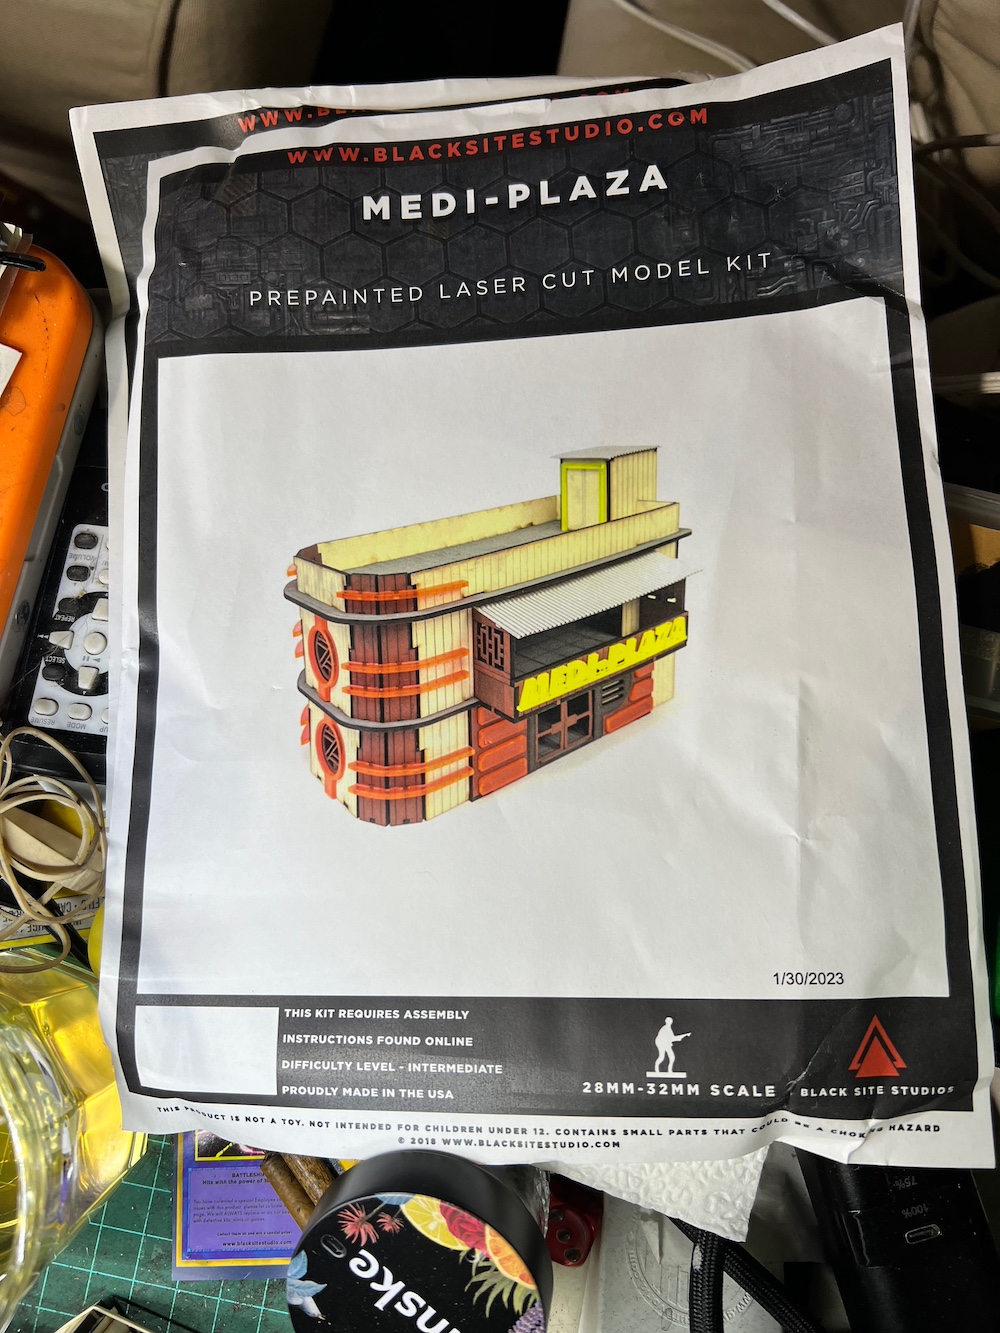 Going to need a Medi-Plaza as an objective
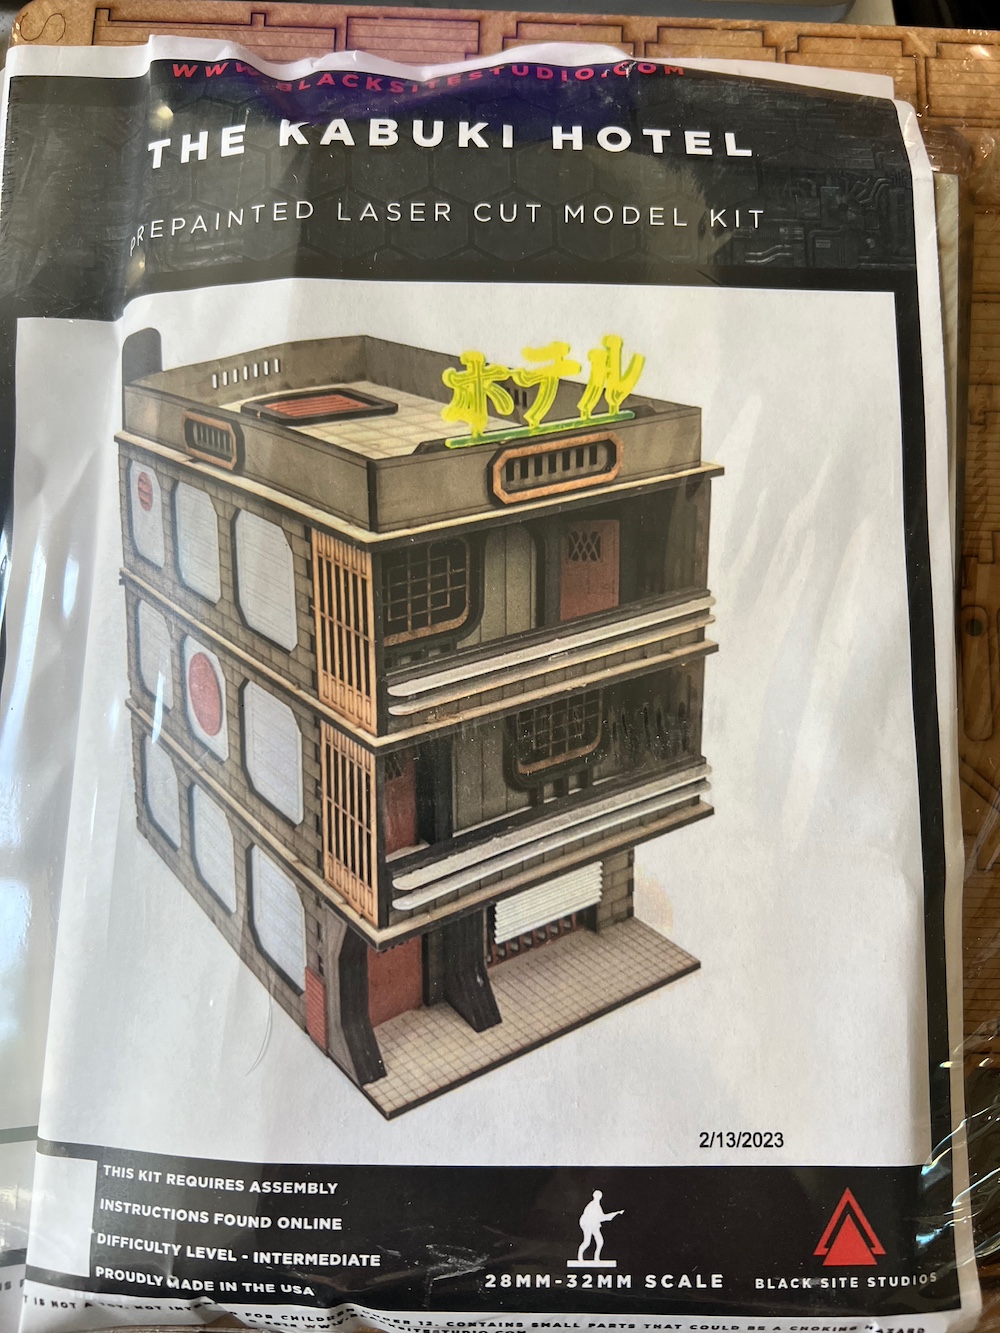 This design is similar to a number of other kits I have so should look quite natural next to them
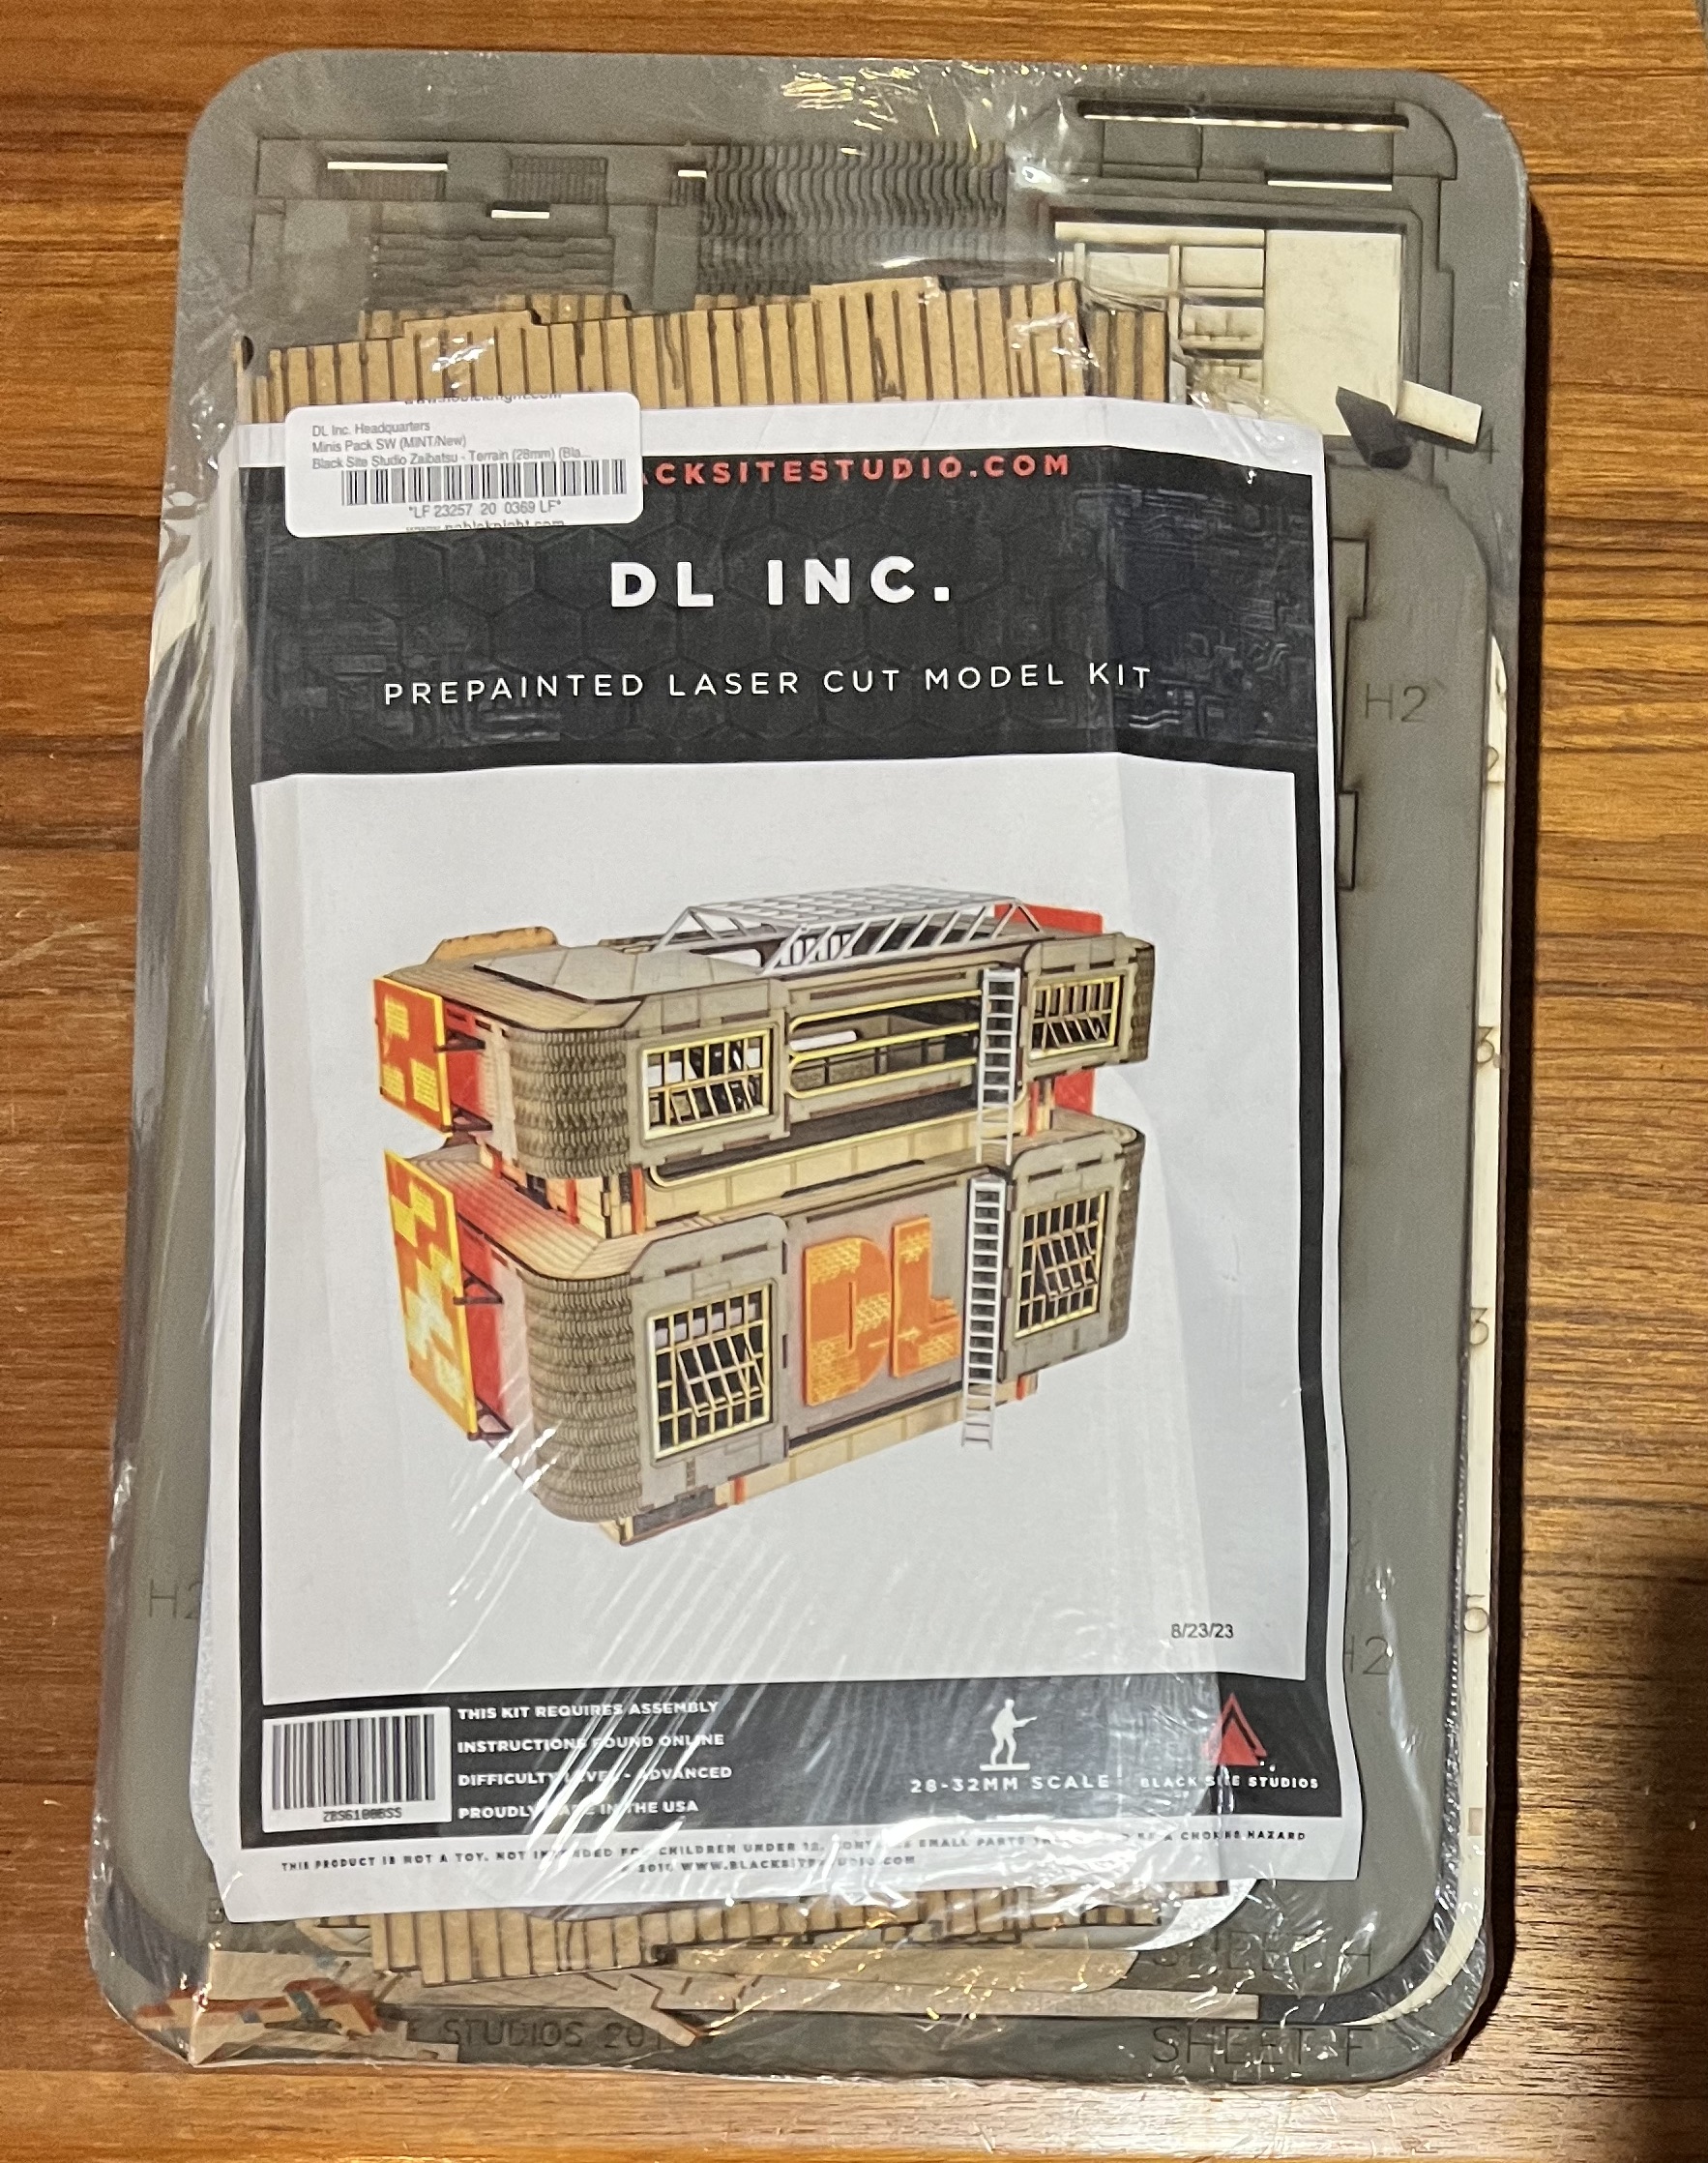 Gotta be honest, the immense size and complexity of this kit is a little daunting.
 A collection of spools to be turned into industrial terrain.
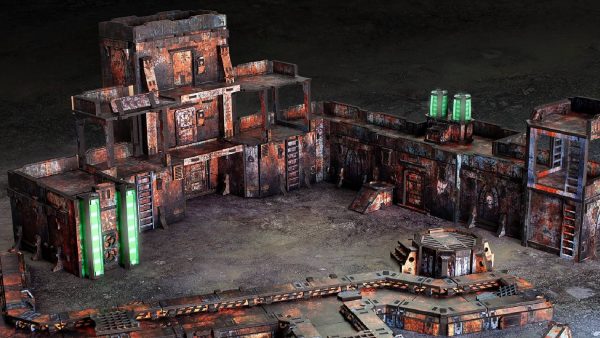
Sato Building is Open for Business
First, when building MDF kits, I can not stress enough the need to dry fit EVERYTHING. Even when I do I still find myself making dumb errors though the test fitting does make said errors fairly easy to fix.
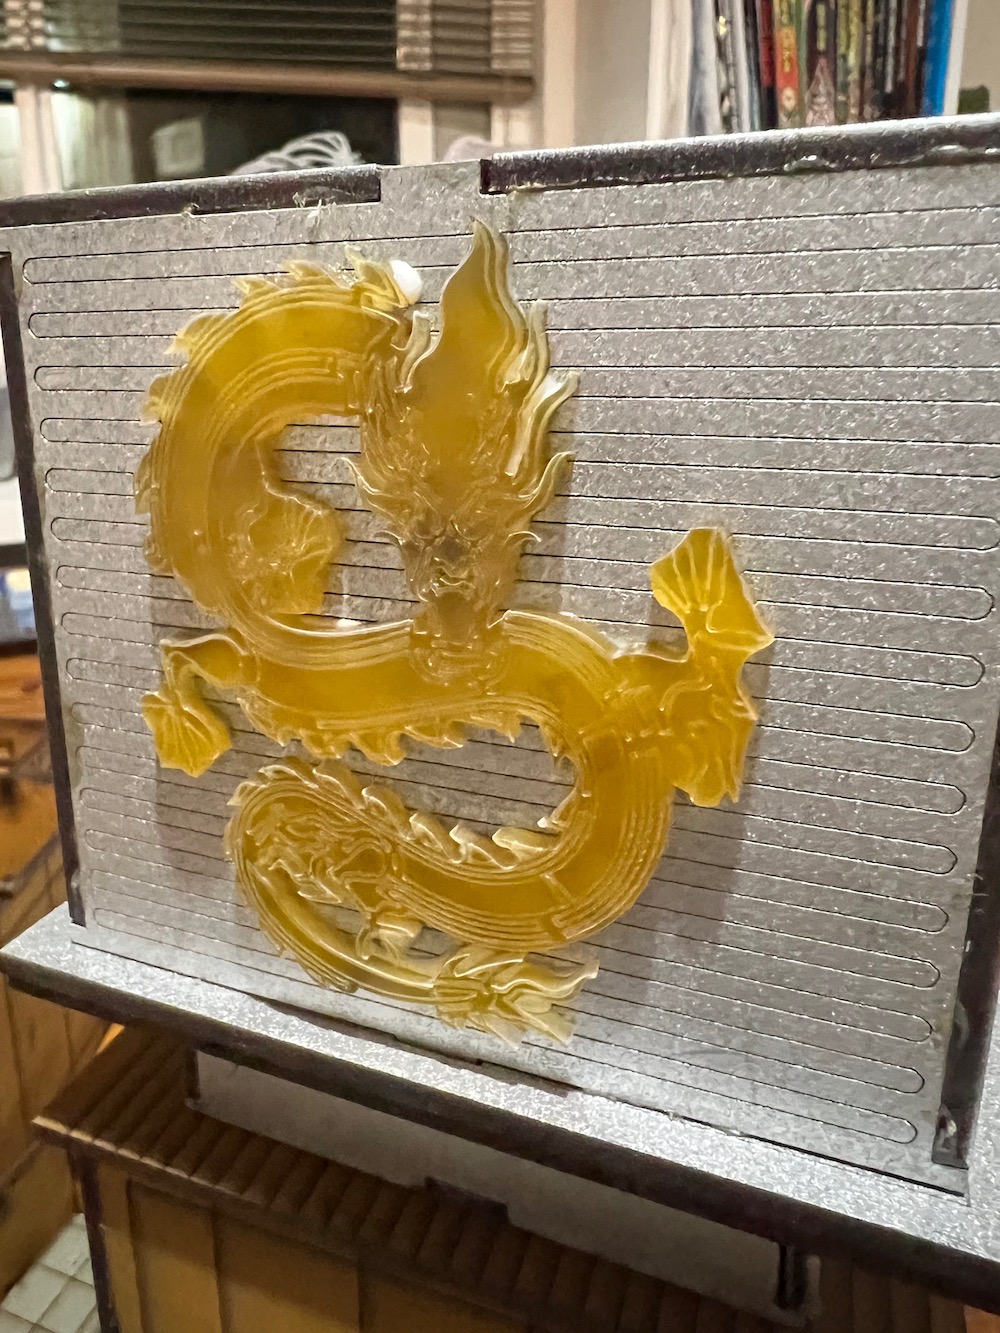
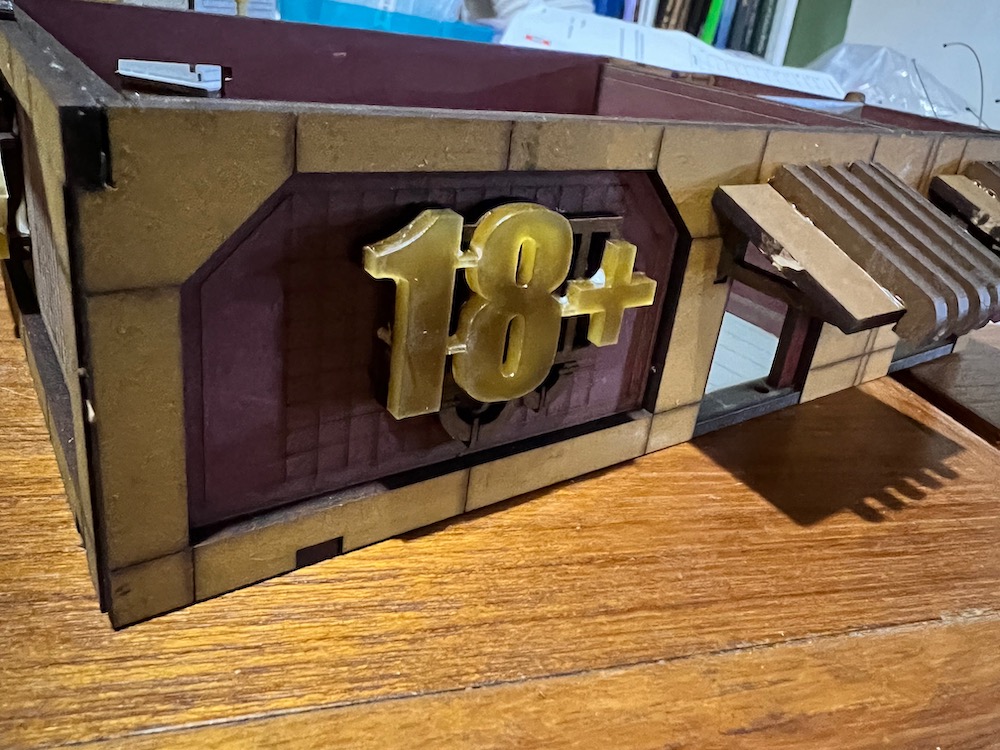
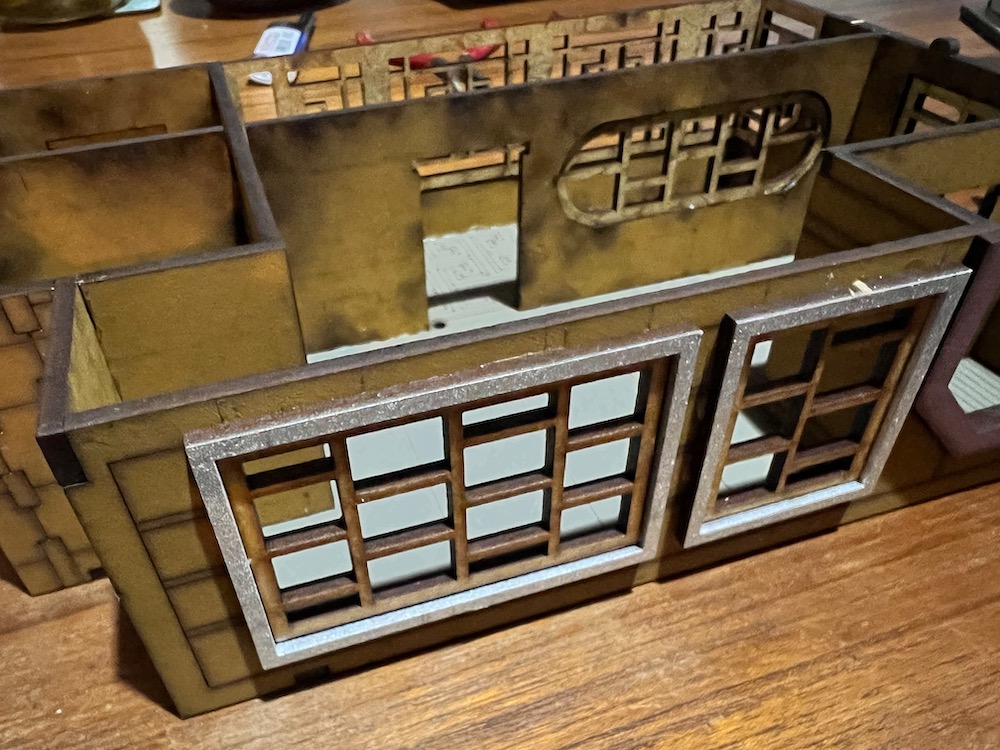
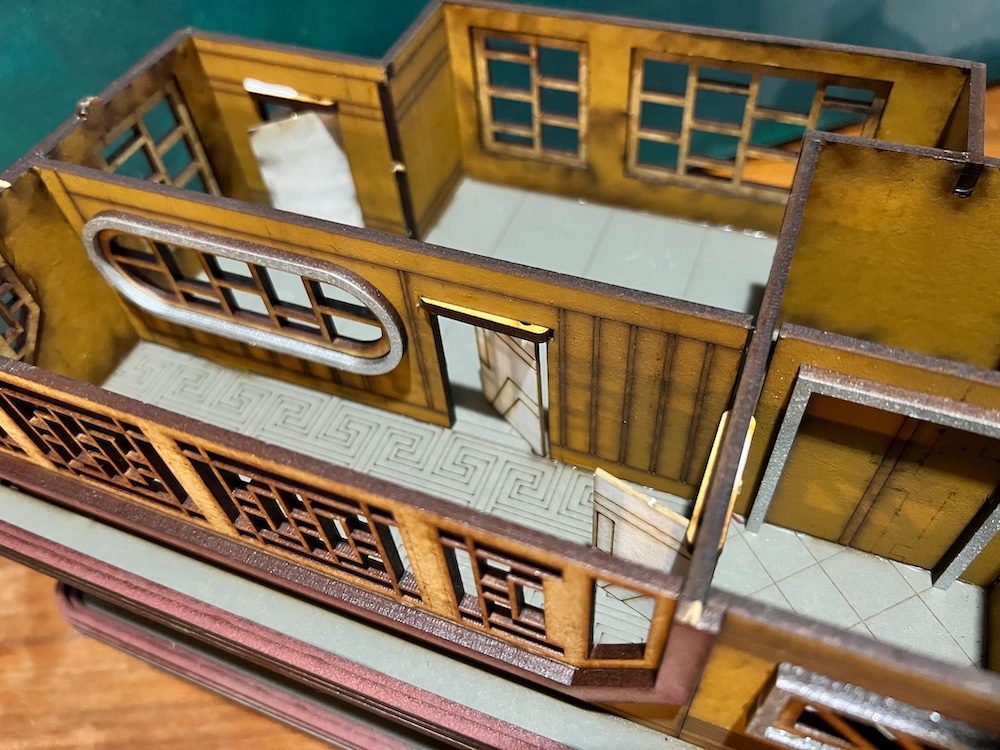
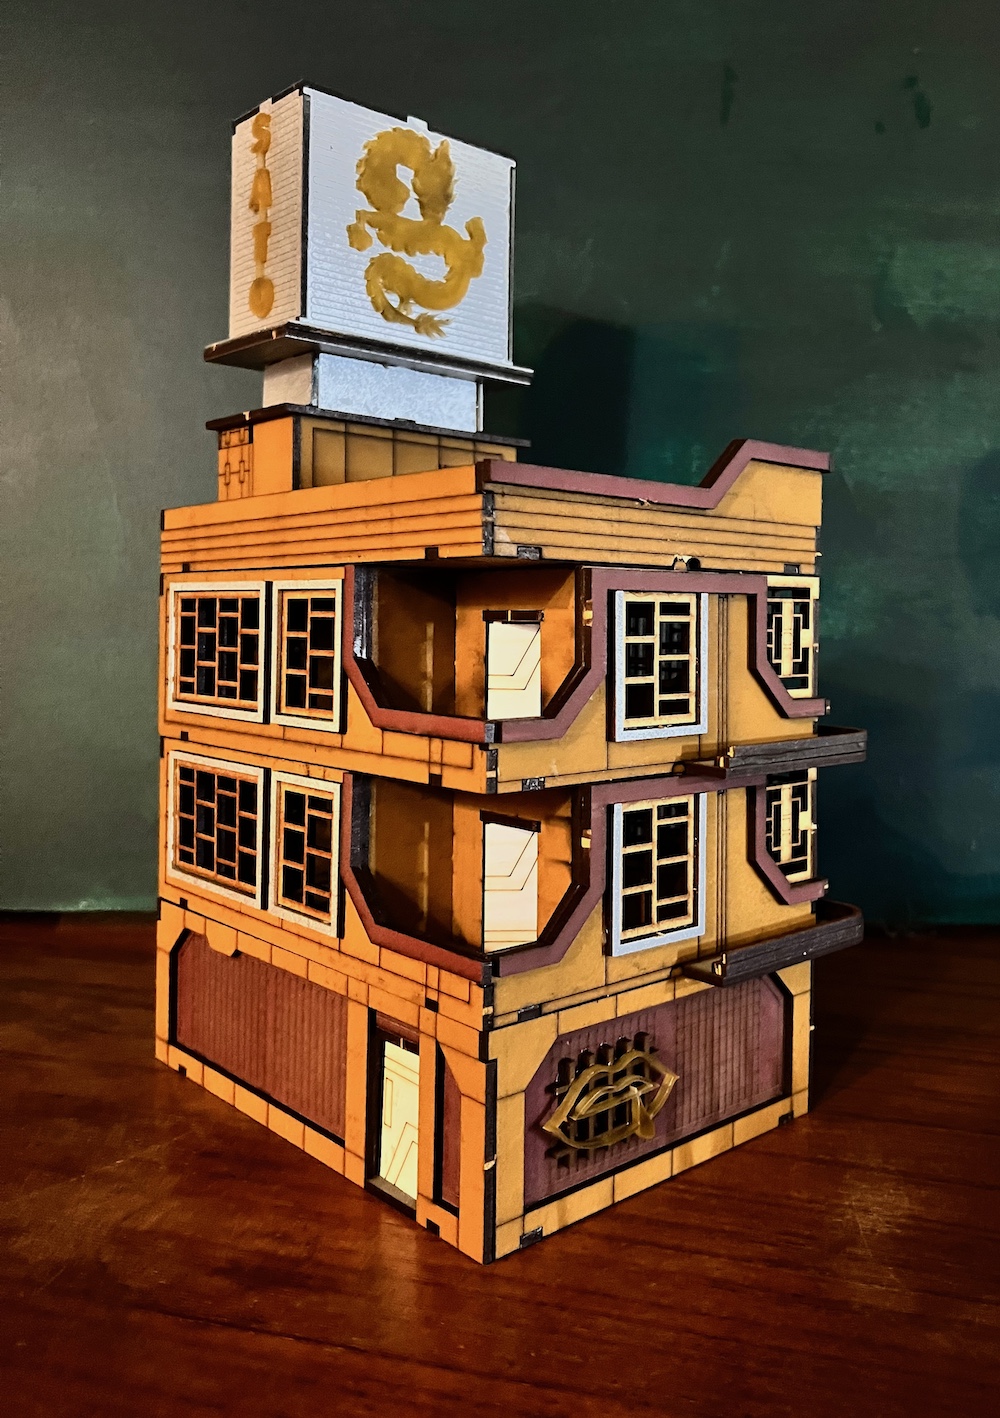
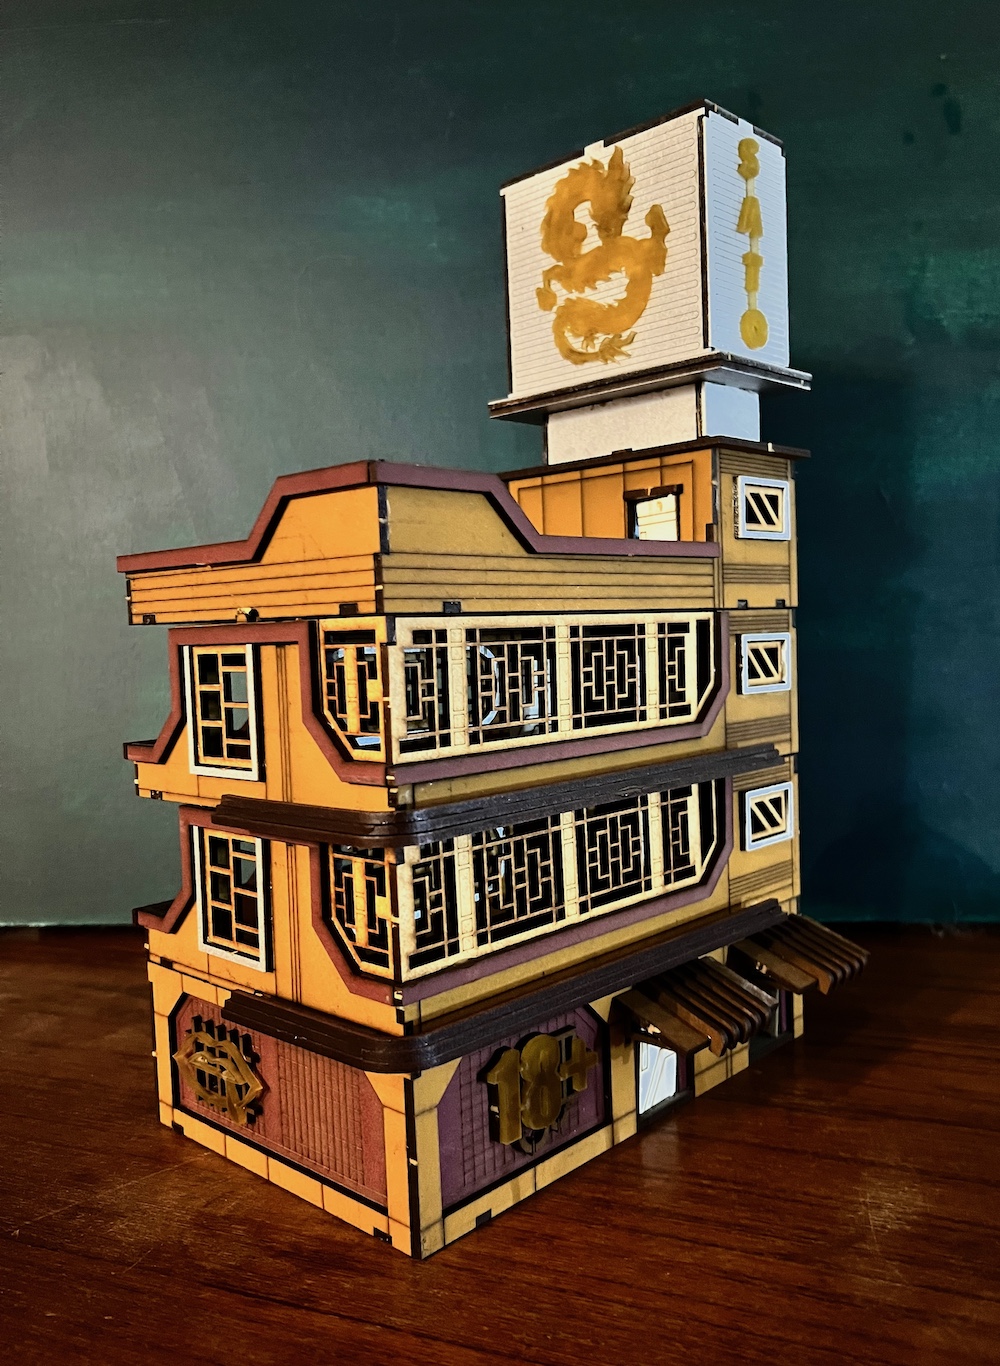
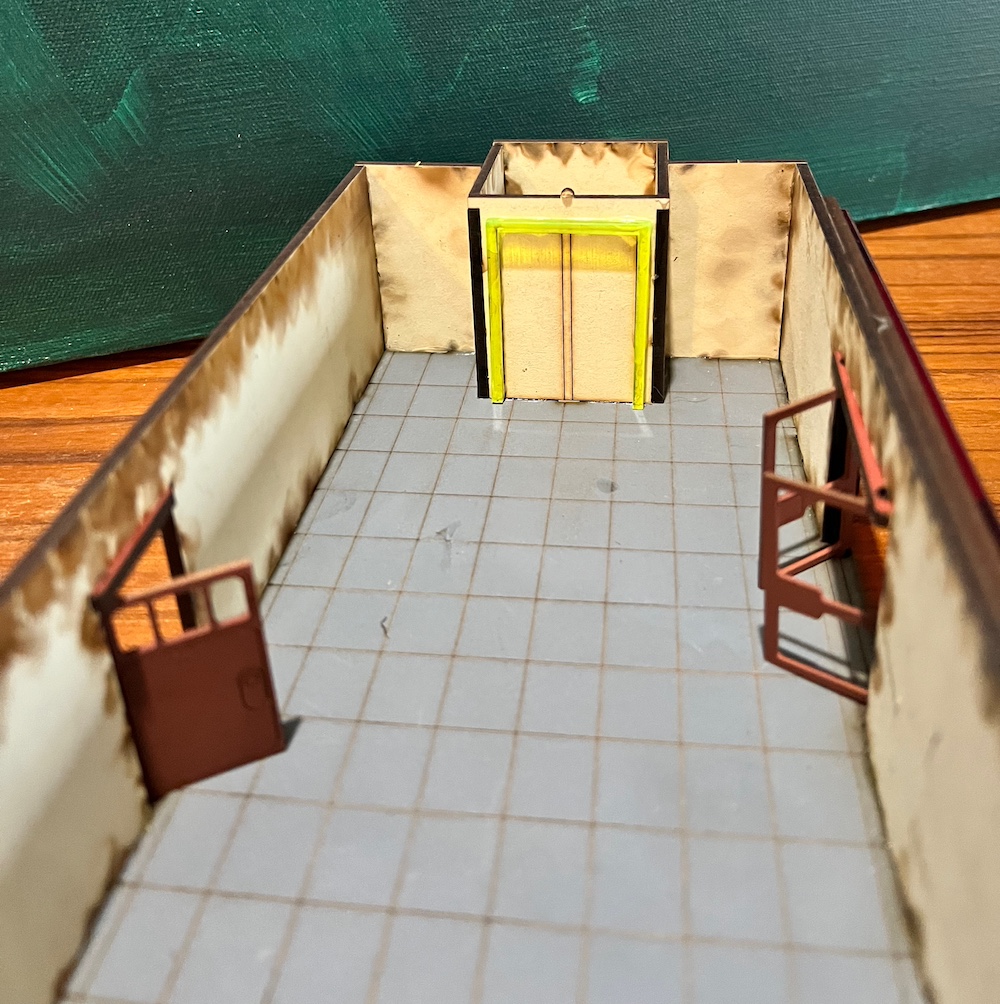
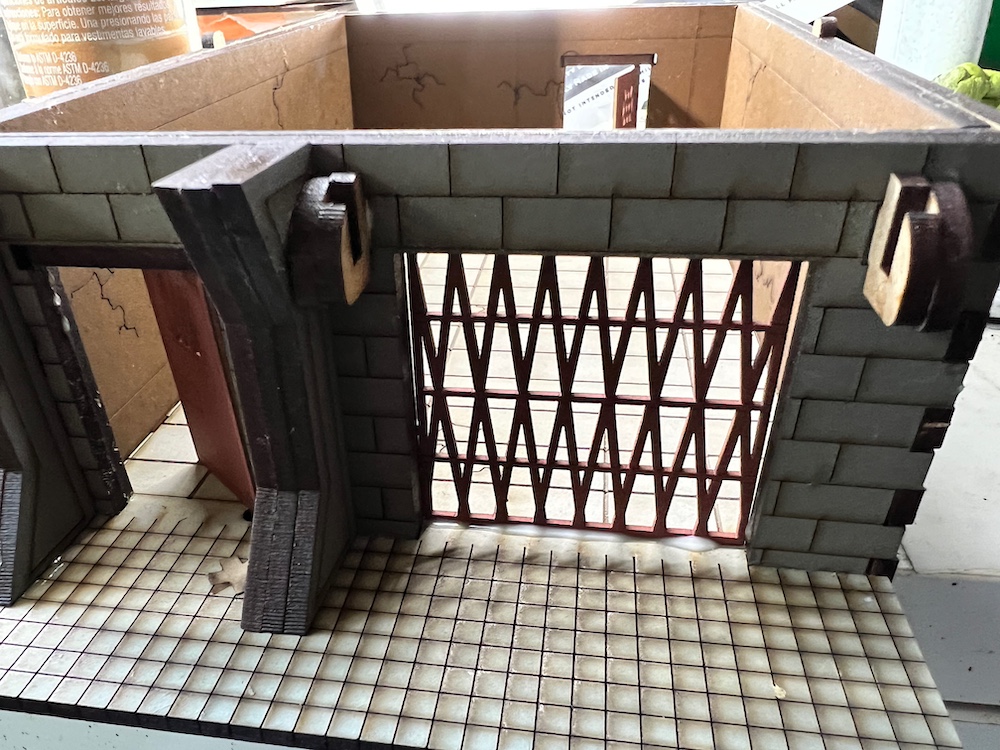
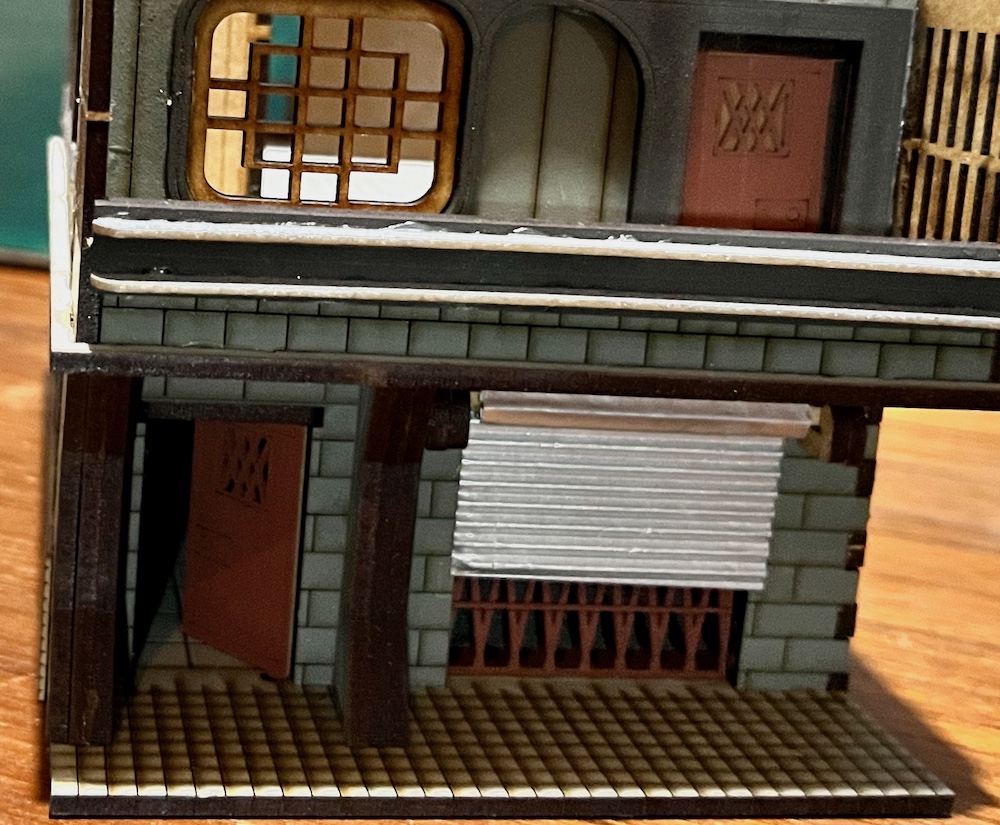
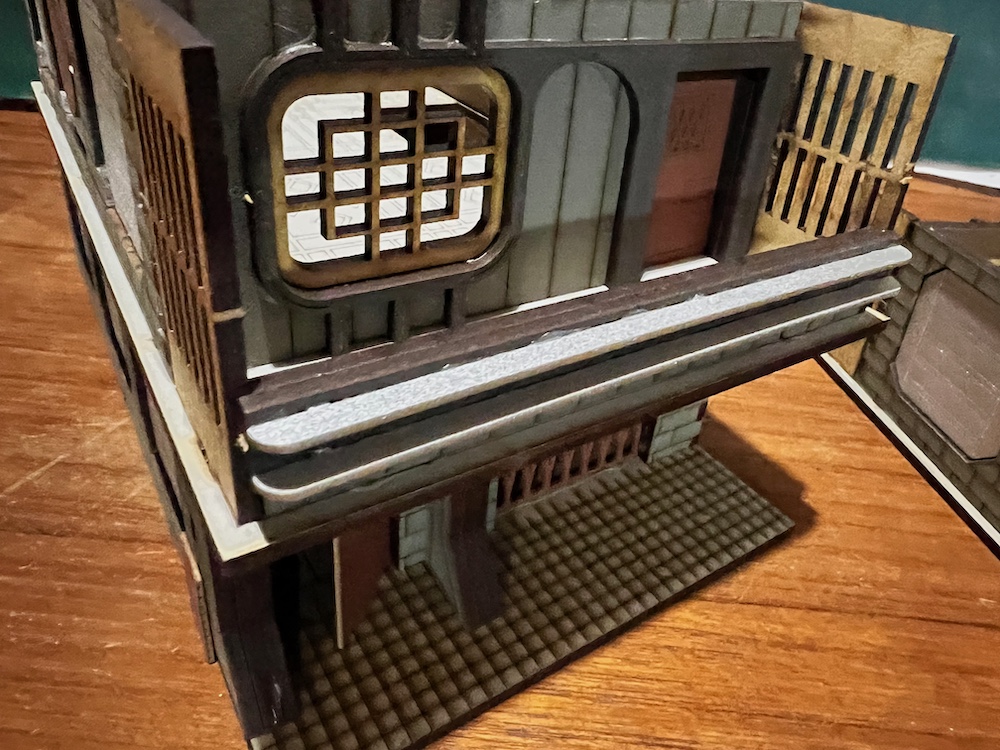
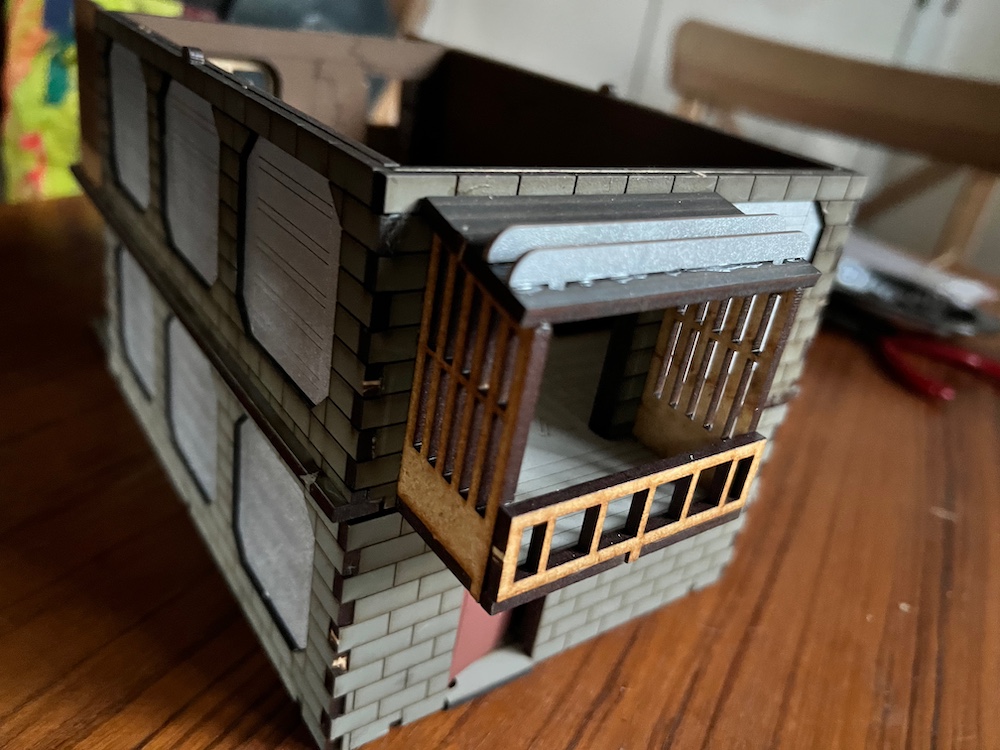
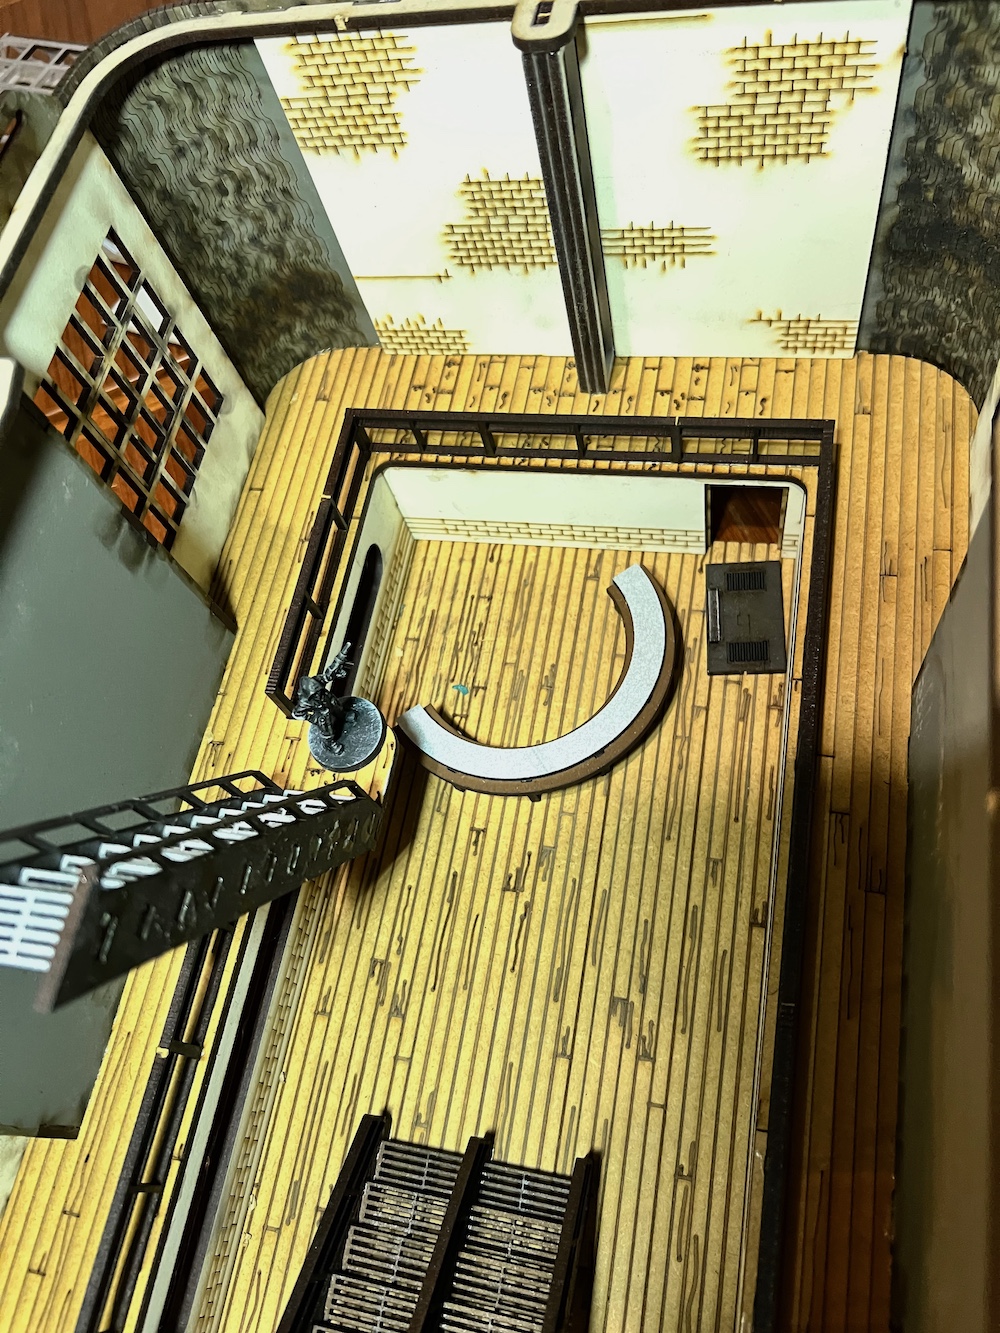
The Sato Building is a wonderfully tall construction even without the huge sign. With the sign it is probably the tallest building in my current collection. Going to be a nice sniper’s nest or target as there is no cover there. I like Black Site Studios’ kits. They don’t have a lot of the finest detail of Antenocistis Workshop, like transparent windows or multilayered doors but they do have doors that open and close as well as full interiors. I love the signage and eastern details though as it really has that Bladerunner feel I crave. All in all, my construction errors aside, I really like the look of this kit. Great lines, great details, and lots of playable space.
 The floors assembled and drying. Next step will be all the fine details and doors.
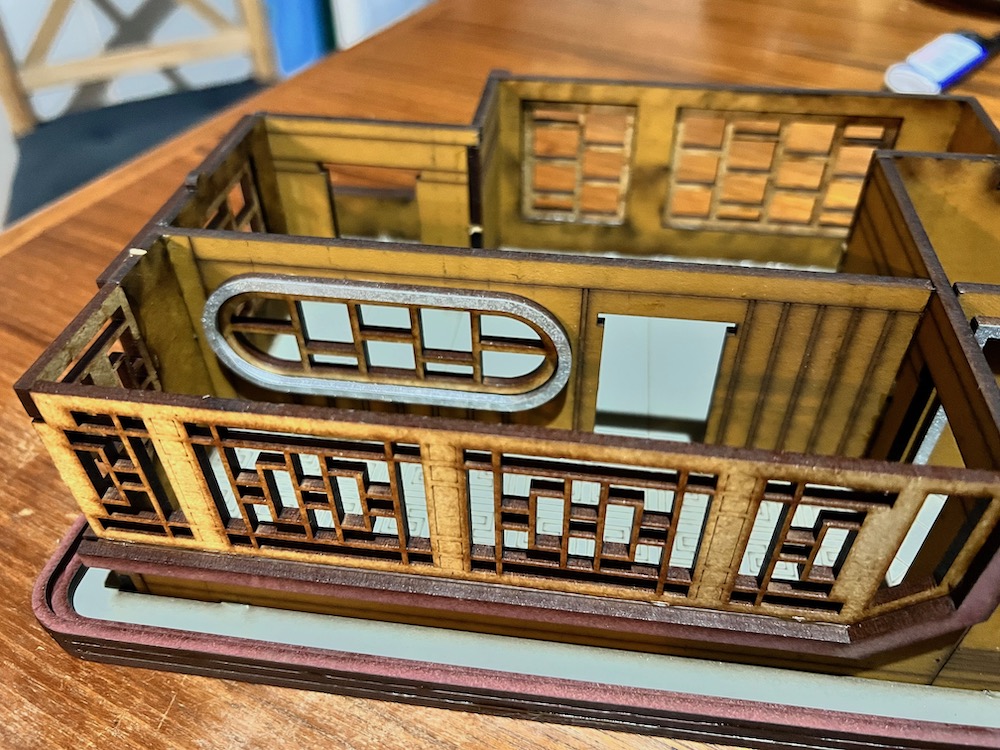


Medi-Plaza Comes online
Knowing how important miniature health care is in a miniature wargame, I initially ordered it because I saw a clear game objective. The fact I have some Mantic Terrain Crate pieces that will fit nicely is bonus. Besides, they’re already done so will show up some time in my Damacles Sector project Blog I’m sure.
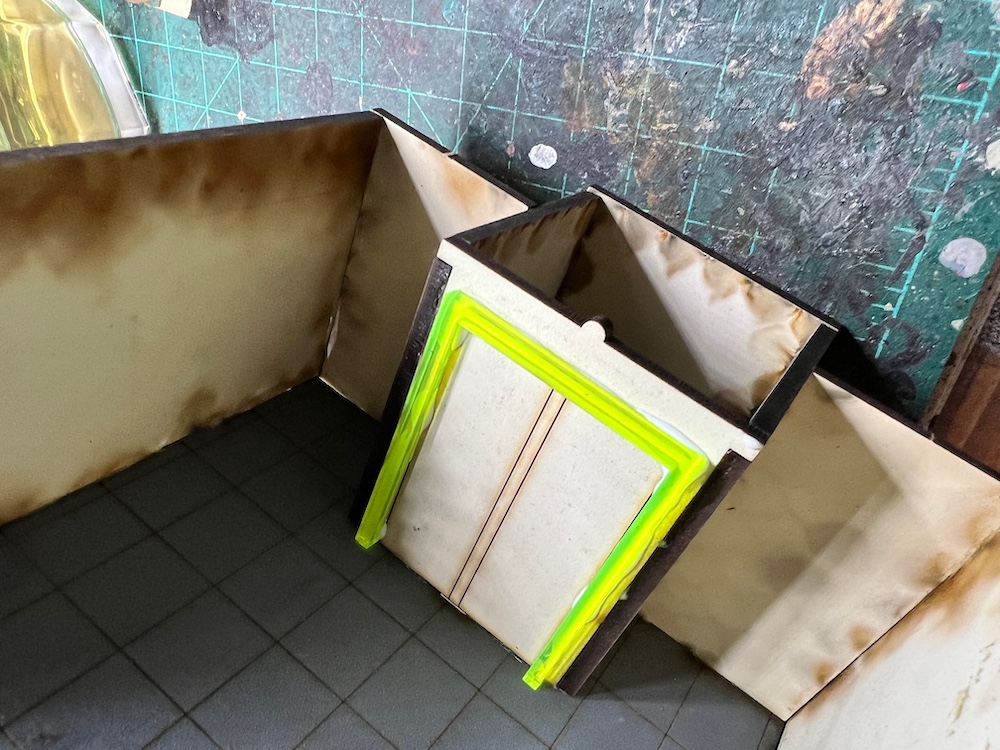
This kit is a pretty straight forward build which means a “decorated box” in my opinion, which is no bad thing. Elegance through layered simplicity has made Lego a world power after all. There is the addition of two curved corners done with angles and thin pieces which do require care when gluing but nothing too frustrating. As always, dry fitting everything before gluing is really helpful and highly recommended
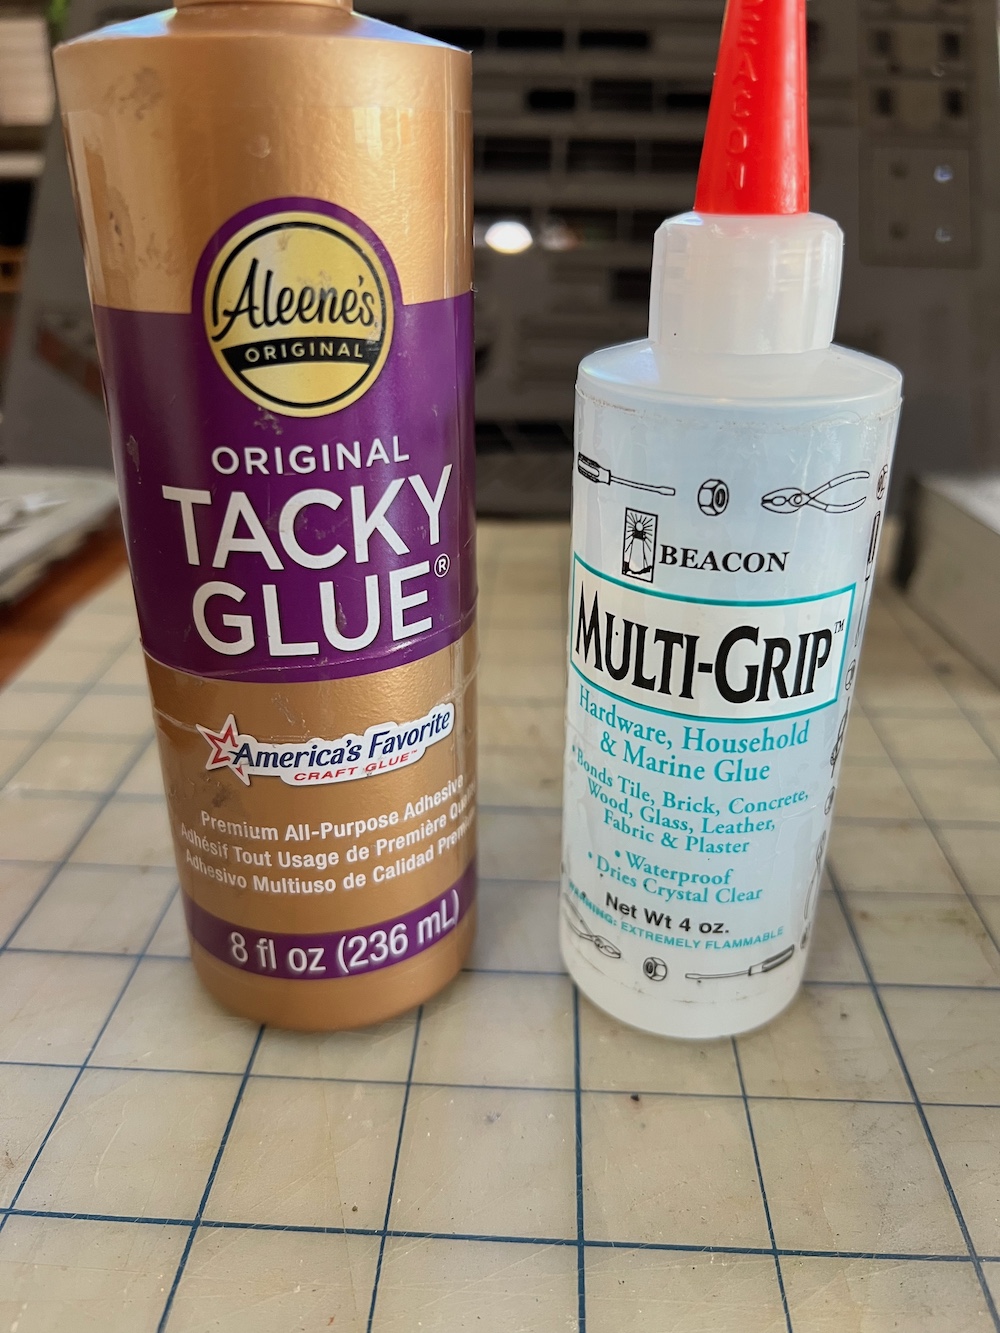
On the point of gluing, there are mixed materials in this build, something I think Black Sites Studios do very well, which mean to take care to test your glues on part on the off cut plastic before applying it to the pieces. I just use Aleene’s Tacky Glue for pretty much everything. It is much stronger than other white glues, slightly flexible, dries slow enough I can make adjustments (also called-fix my mistakes), and doesn’t fog plastics. For the transparent windows in my Wolsung kits I use Beacon Multi-Grip as it is completely transparent.
Final tip, I use Wet Wipes or just a damp rag to clean all the edges of the pieces as I cut them off their frames. This cleans up the remnants left by the laser cutting process, keeping my hands cleaner, the pieces cleaner, and leaving a better surface for the glue to attach to.
 These are my Go To glues for these kits.
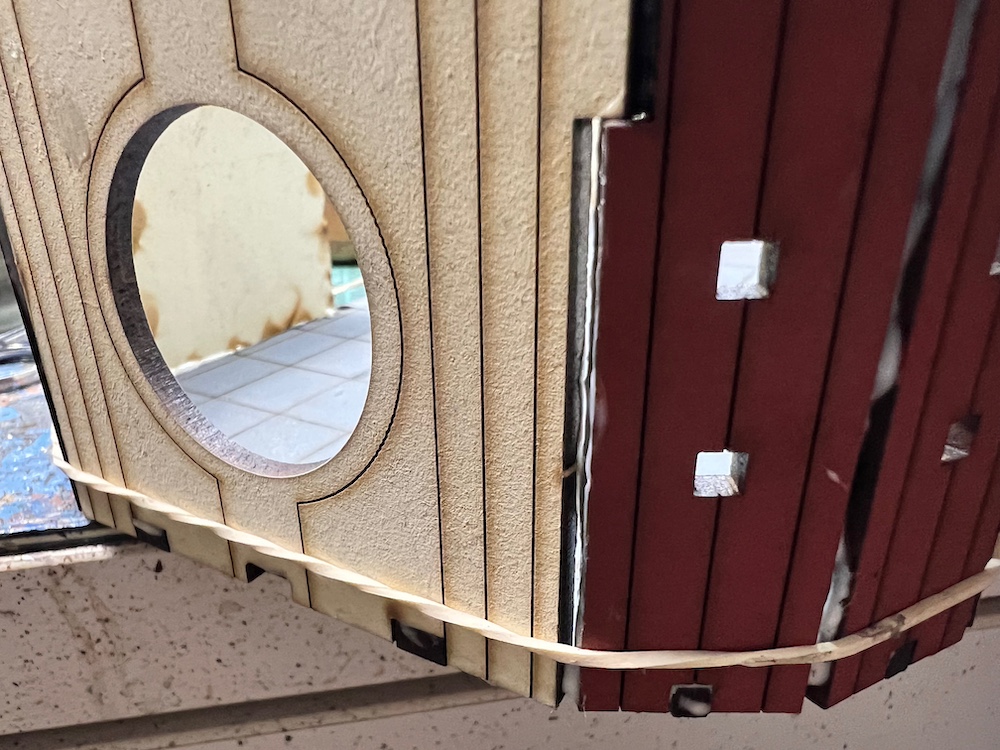
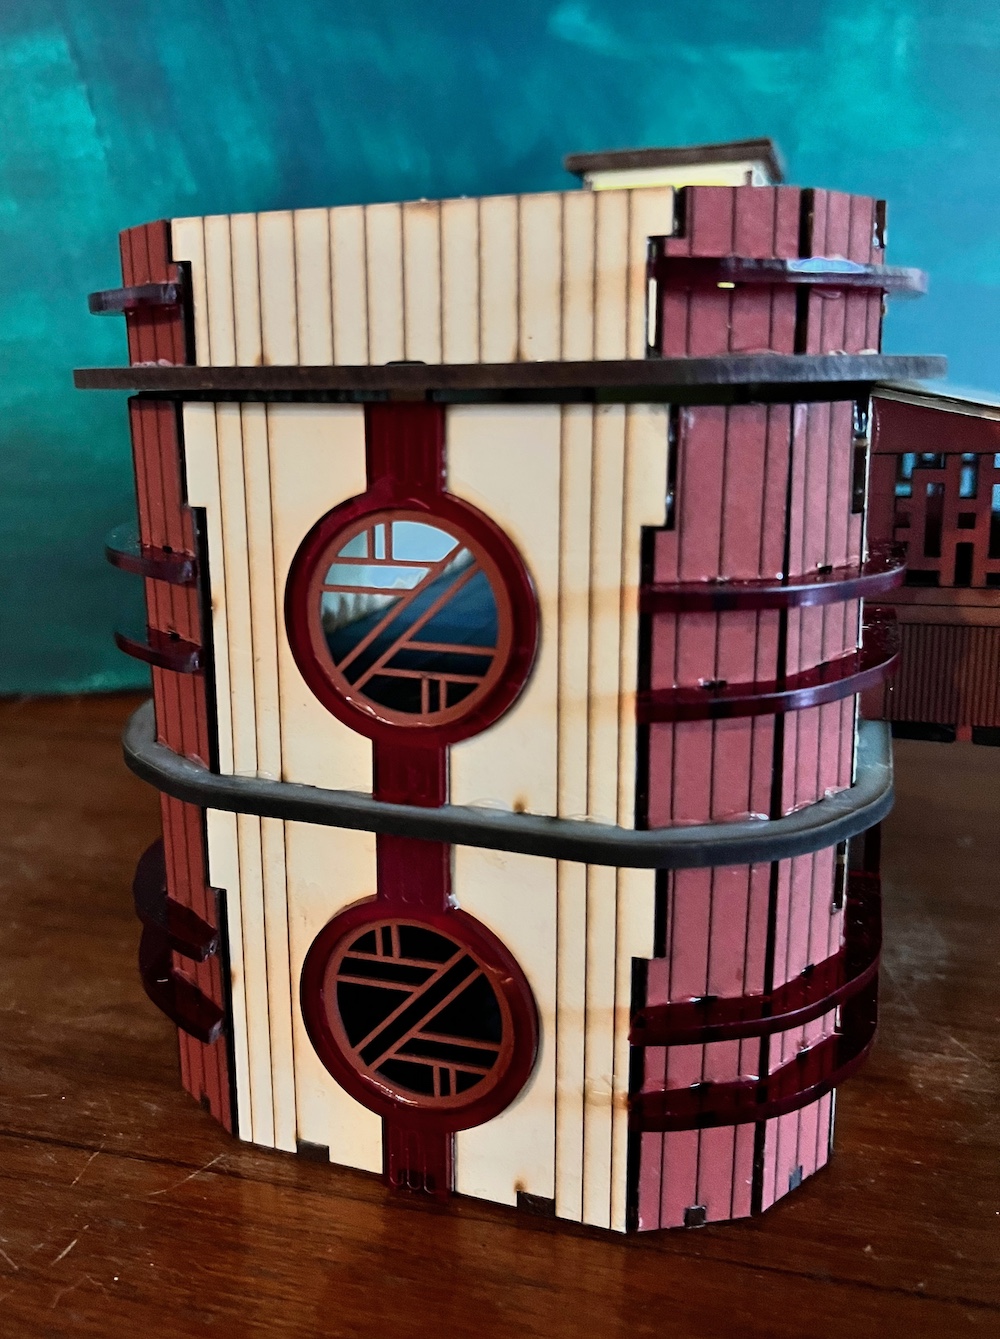

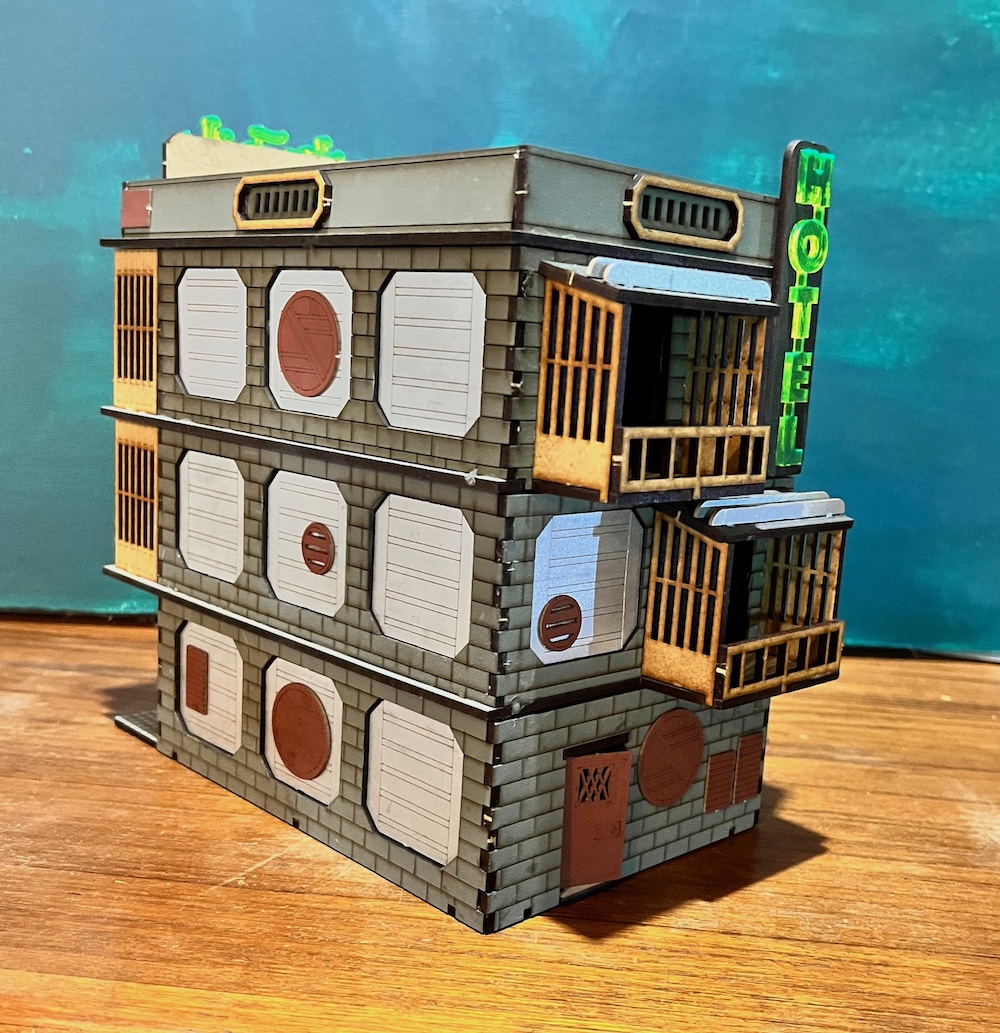
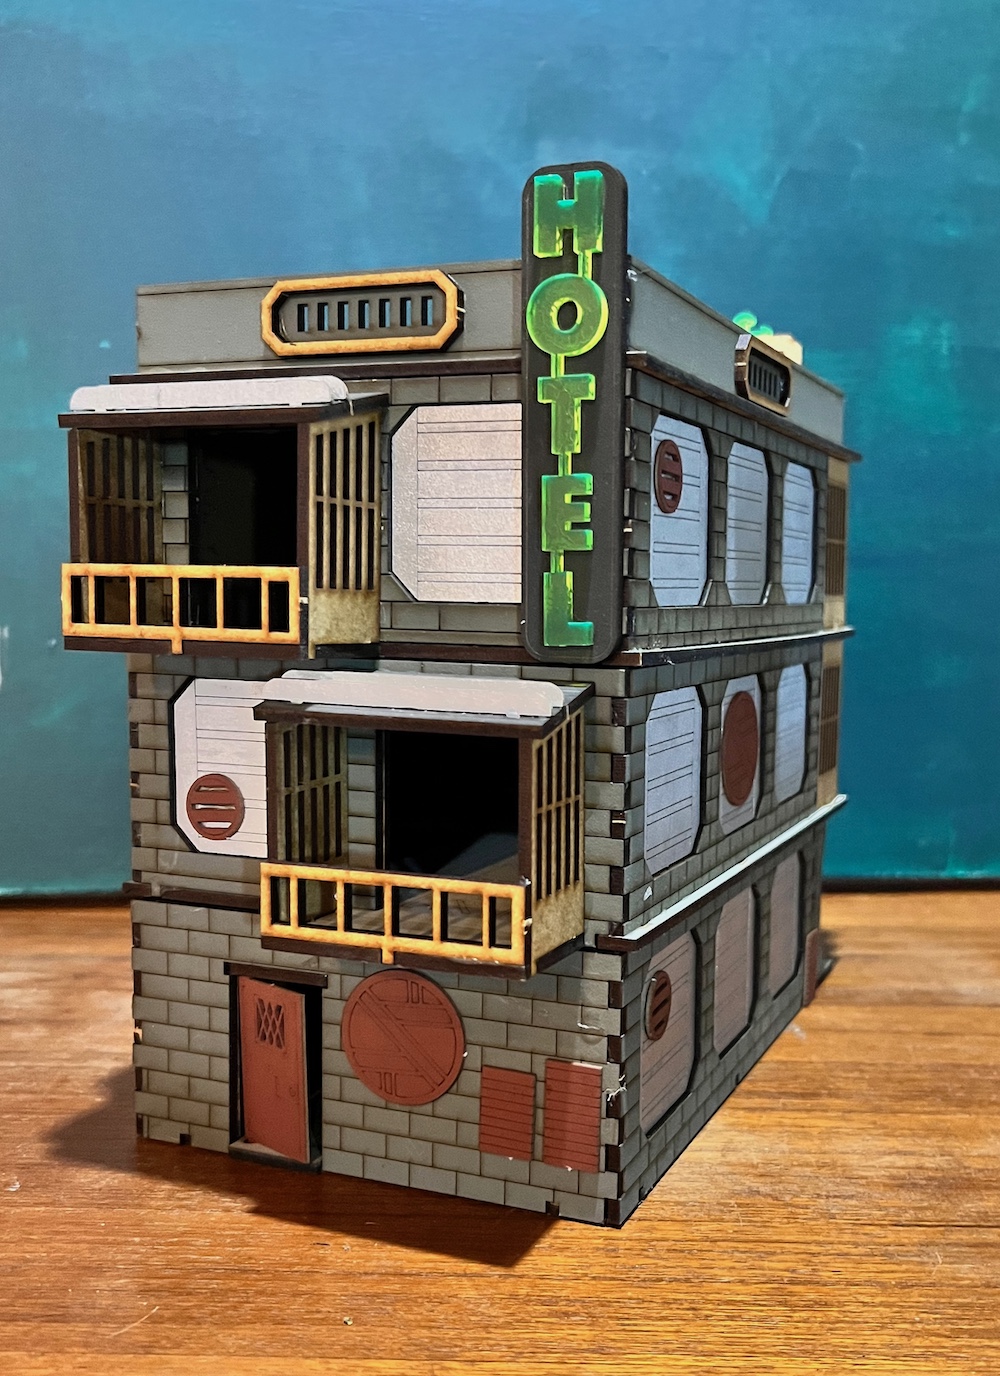
Check In Time at the Kabuki Hotel
The Kabuki Hotel is another simple construction that really comes together nicely and looks great when finished. Nothing too tricky but I do recommend double checking which floor one is using as they are nearly identical with the only real difference being where the hole is drilled for the balcony door to attach. I only noticed this the morning after it had all glued overnight. Fortunately I was able to drill a couple of new holes for the doors. Also, the corrugated paper used to make the rolled security door is a little stiff so I suggest rolling it around a pencil to soften it up a bit. Then glue it to the post in the position one wants it when finished. Set this aside, tape or rubber banded, to dry before attaching it to the building. Otherwise it will want to unroll while the glue is drying. I can actually see adding a couple floors to this structure though I’m not sure I want to order another kit.


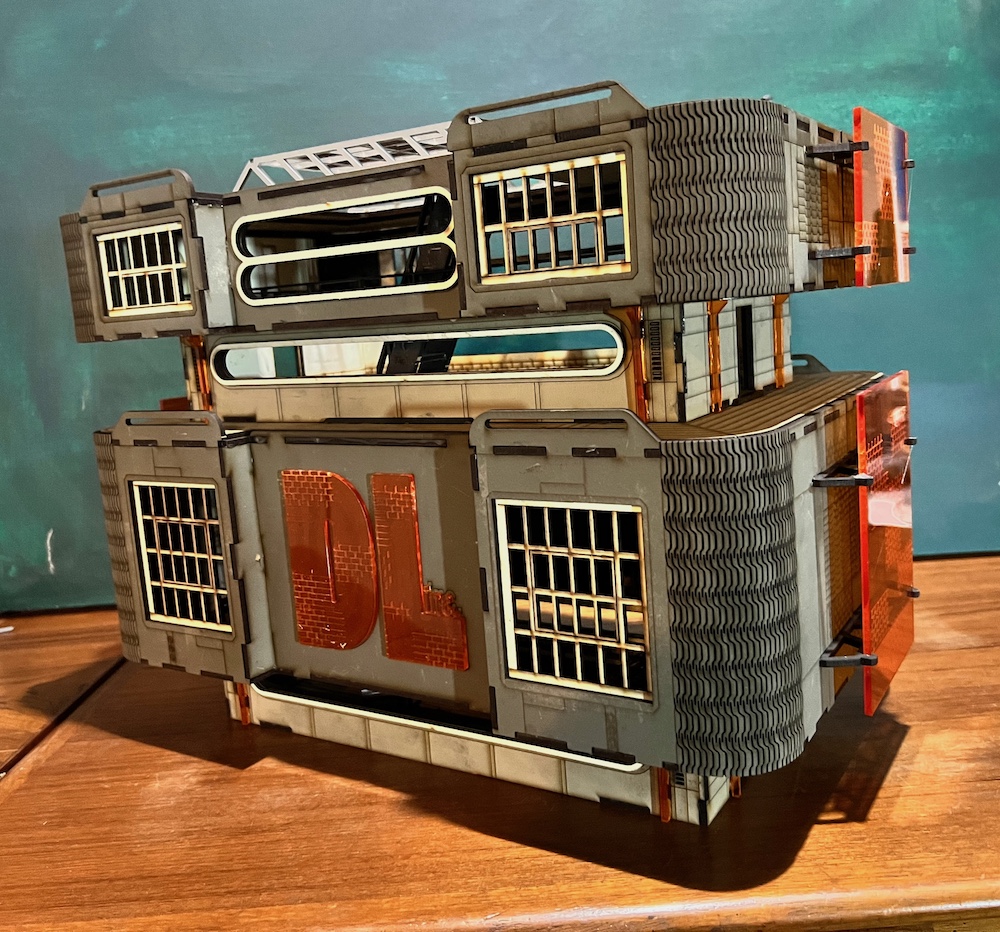
DL Headquarters Begins Construction
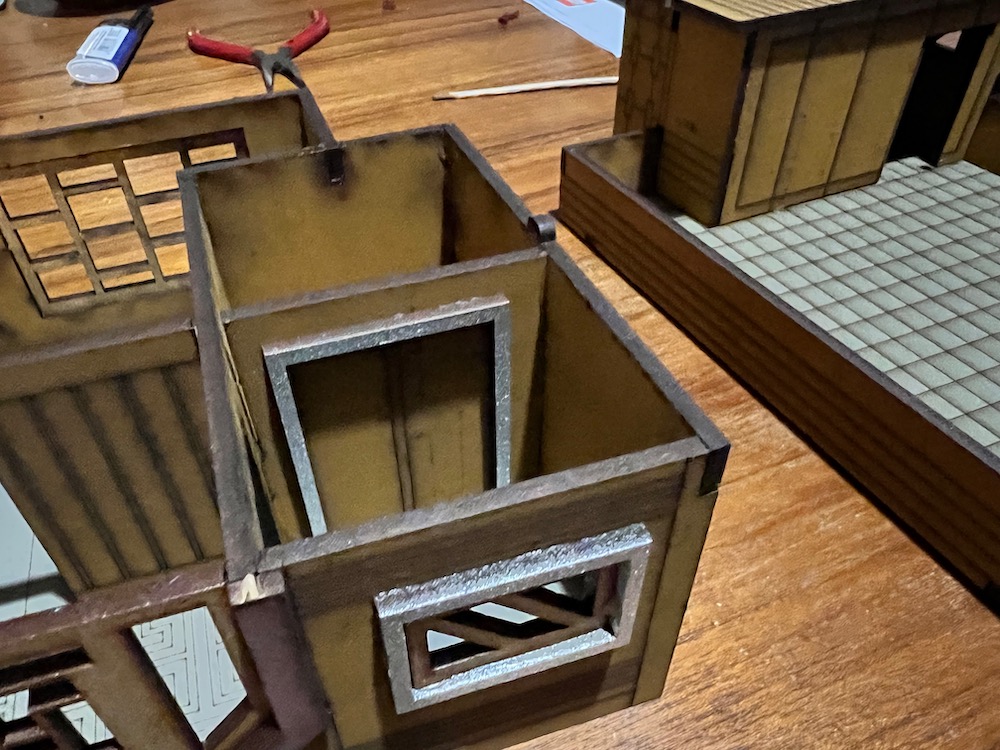
This kit is big, I mean really big. Thank goodness it is all pre-painted. First thing I did was look through the stack of frames and make sure they were in alphabetical order. The plastic pieces were set aside as I knew they would be the last parts glued on. I found it took over most of my dining room table once I sorted the frames and began gluing. I always go through the instructions at least once before I begin cutting any pieces free. I have found some minor errors in the online instructions at Black Site Studios. Nothing terrible just an occasional mislabel or lack of label for pieces. For example, the first section of the building has two thick beams that made by assembling three parts for each, one shape between two matching shapes. The instructions reverse the part numbers which is pretty easy to spot when one has the pieces in hand.
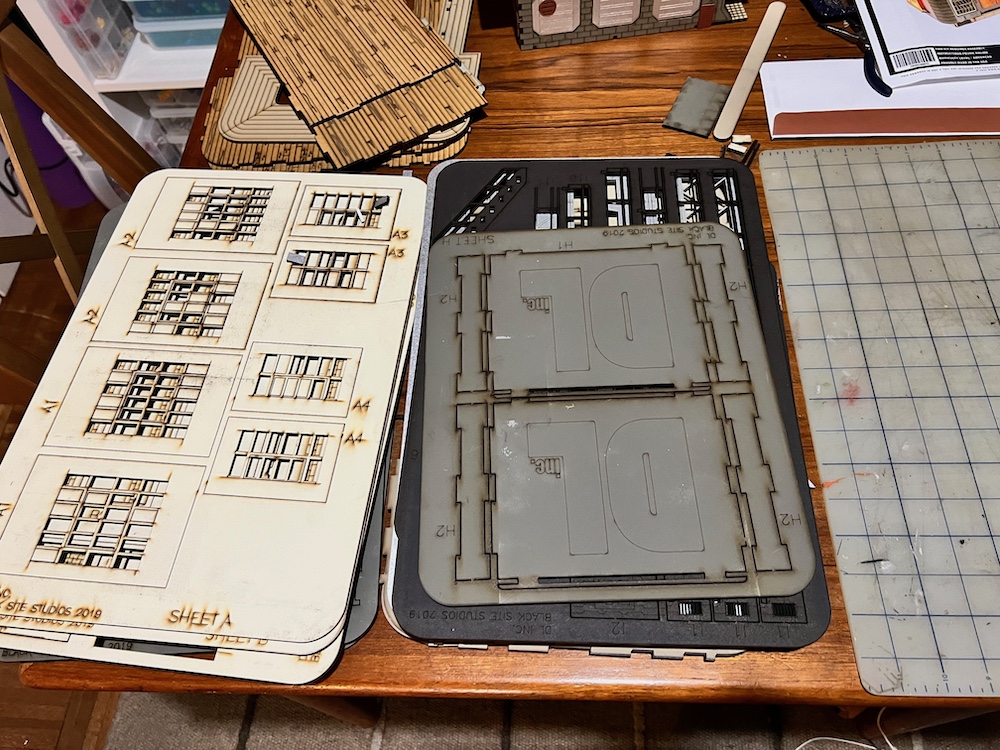 I split the stacks up to make it easier to sort through them.
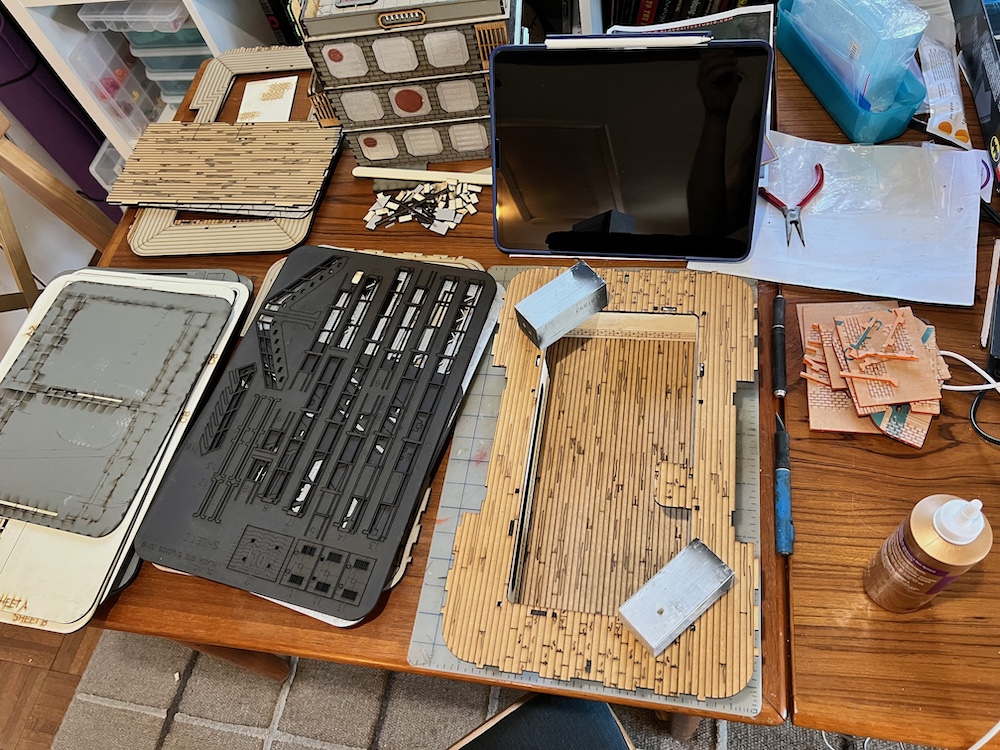 Hmmm, good thing I cleared the table off.
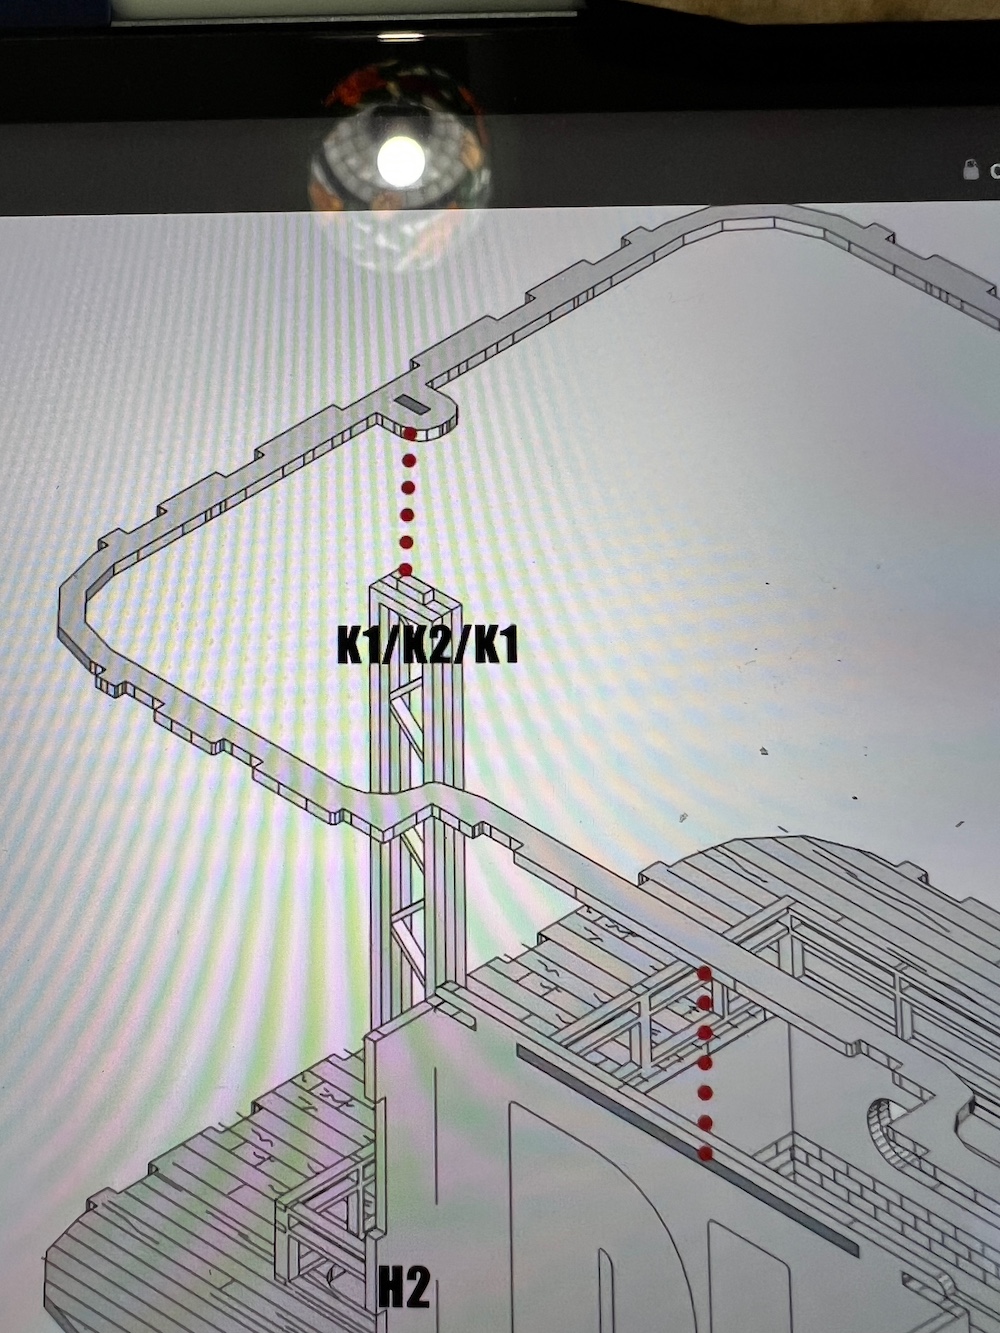 The instructions reverse K1 and K2
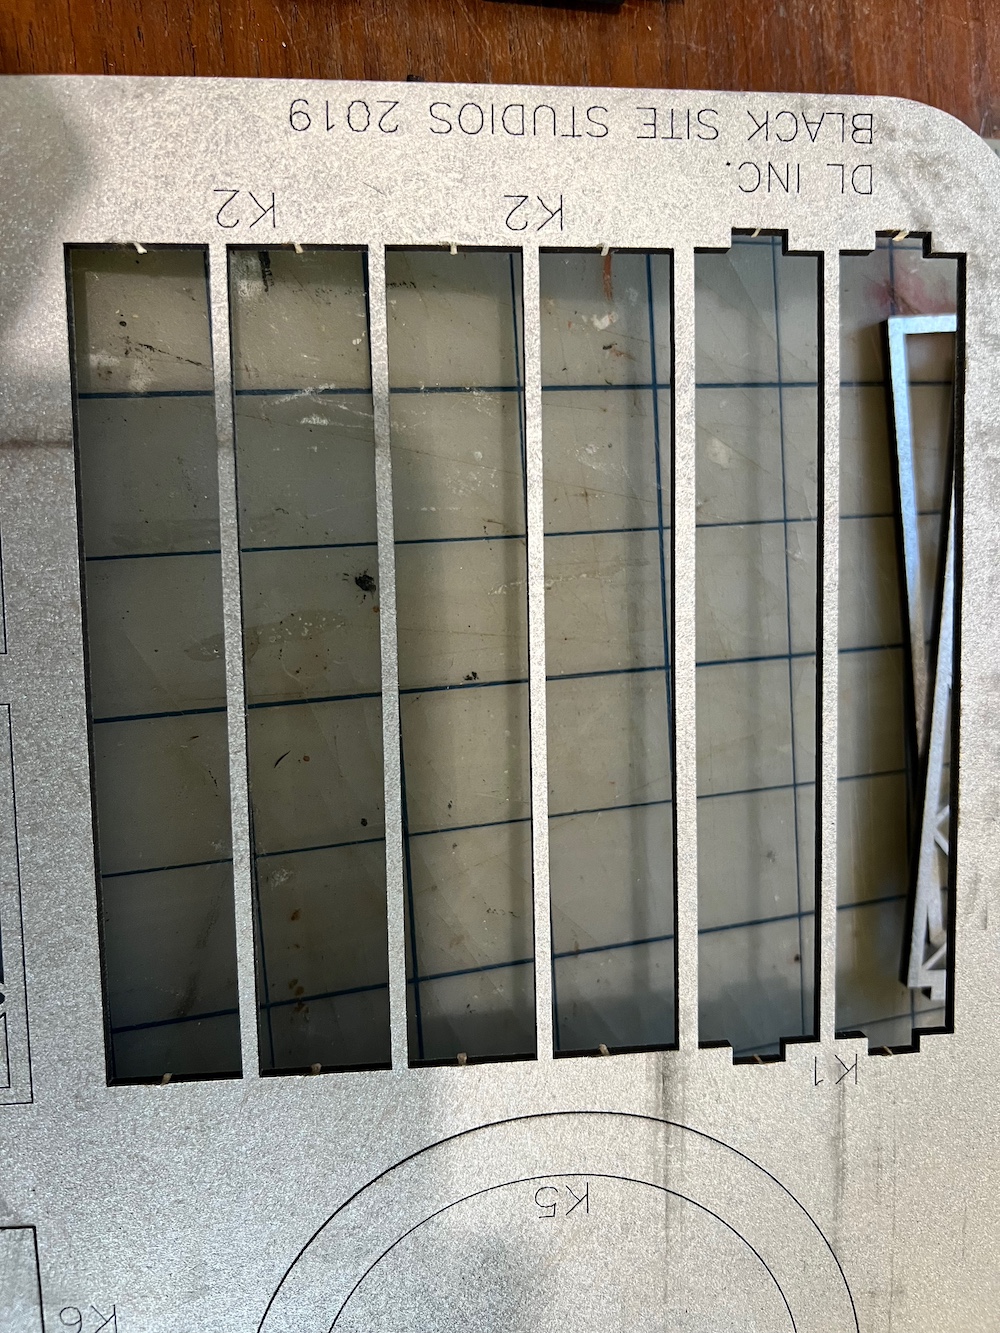 One can see the number and shape doesn't match what the instructions show.
 Pretty clear with the pieces in hand or on the board as the case may be.
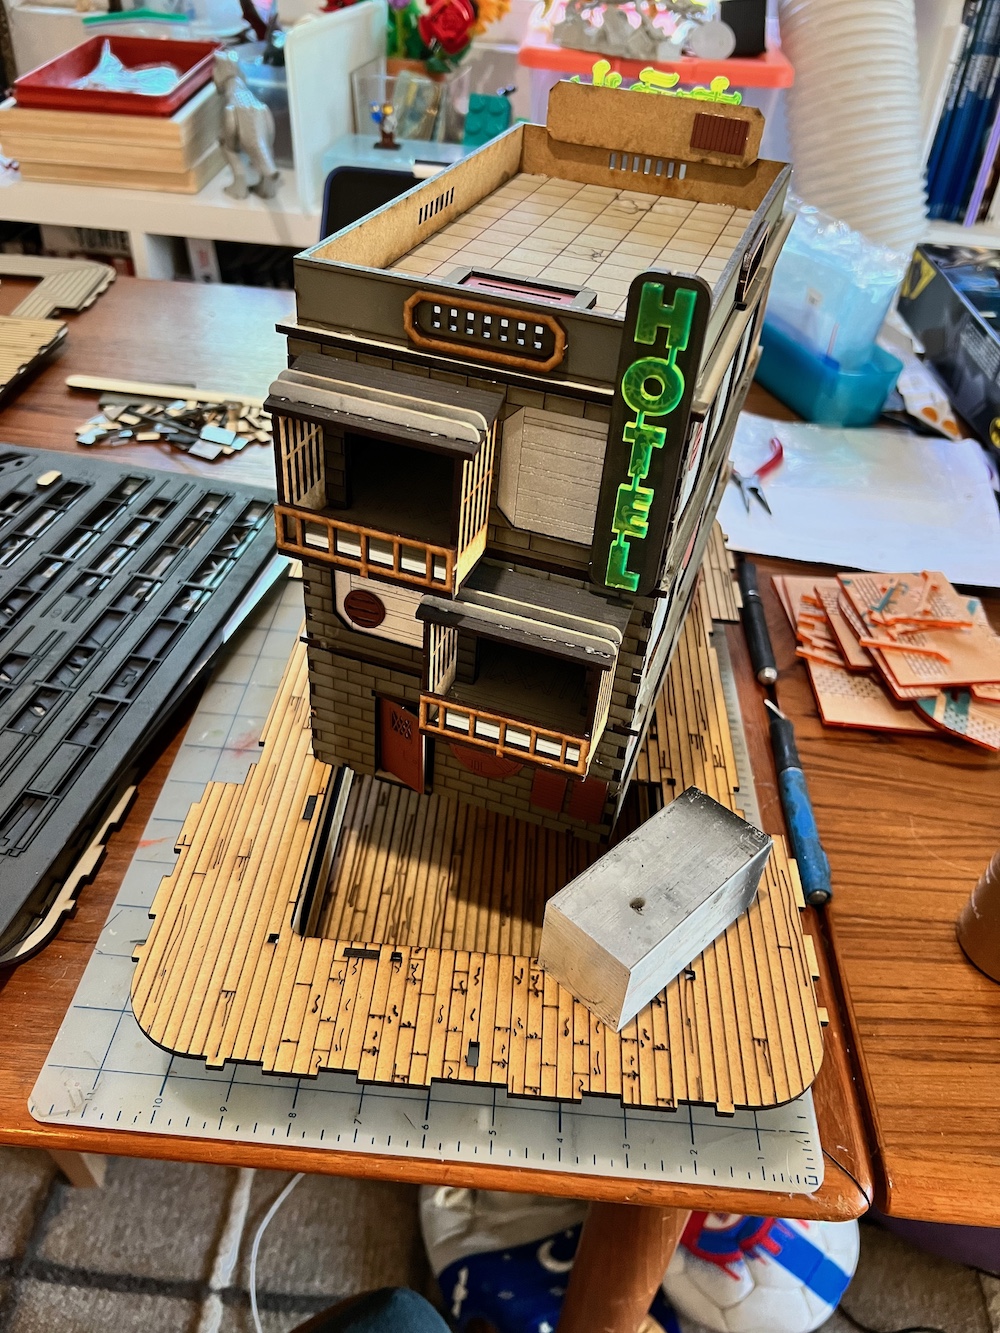 So big that the Kabuki Hotel would fit inside the space if the stair landing wasn't in the way.
 Binder clips are your friend.
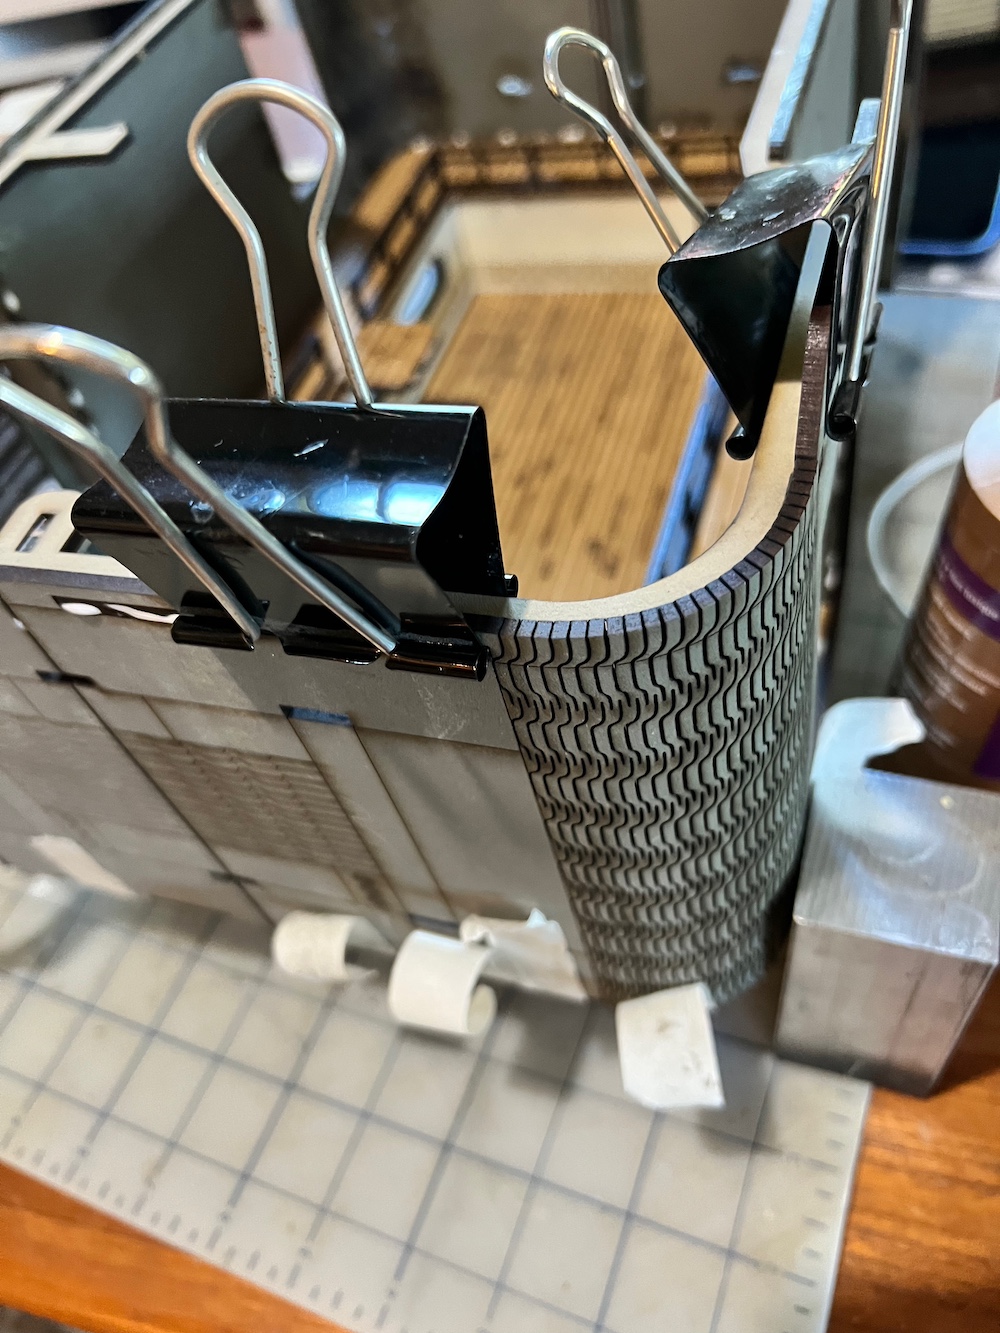 So are tape and weights.
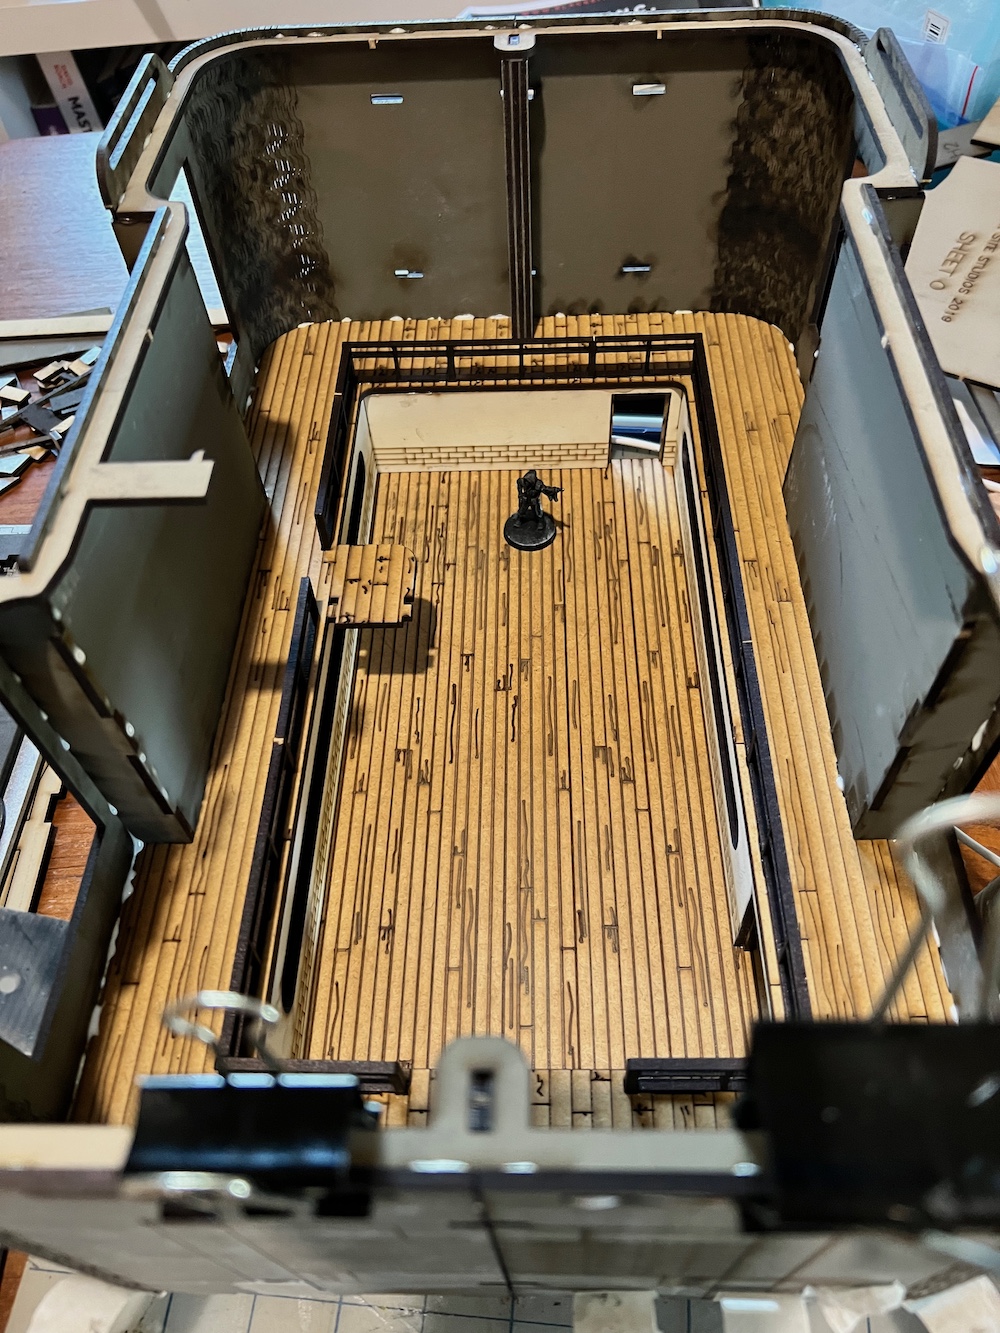 This is the first section's exterior walls. There are detailed ones for the interior as well.
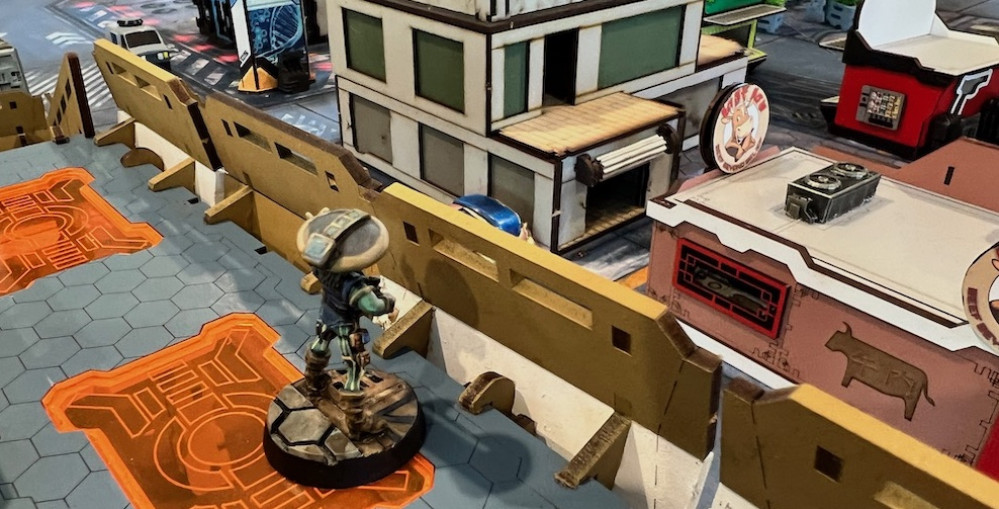
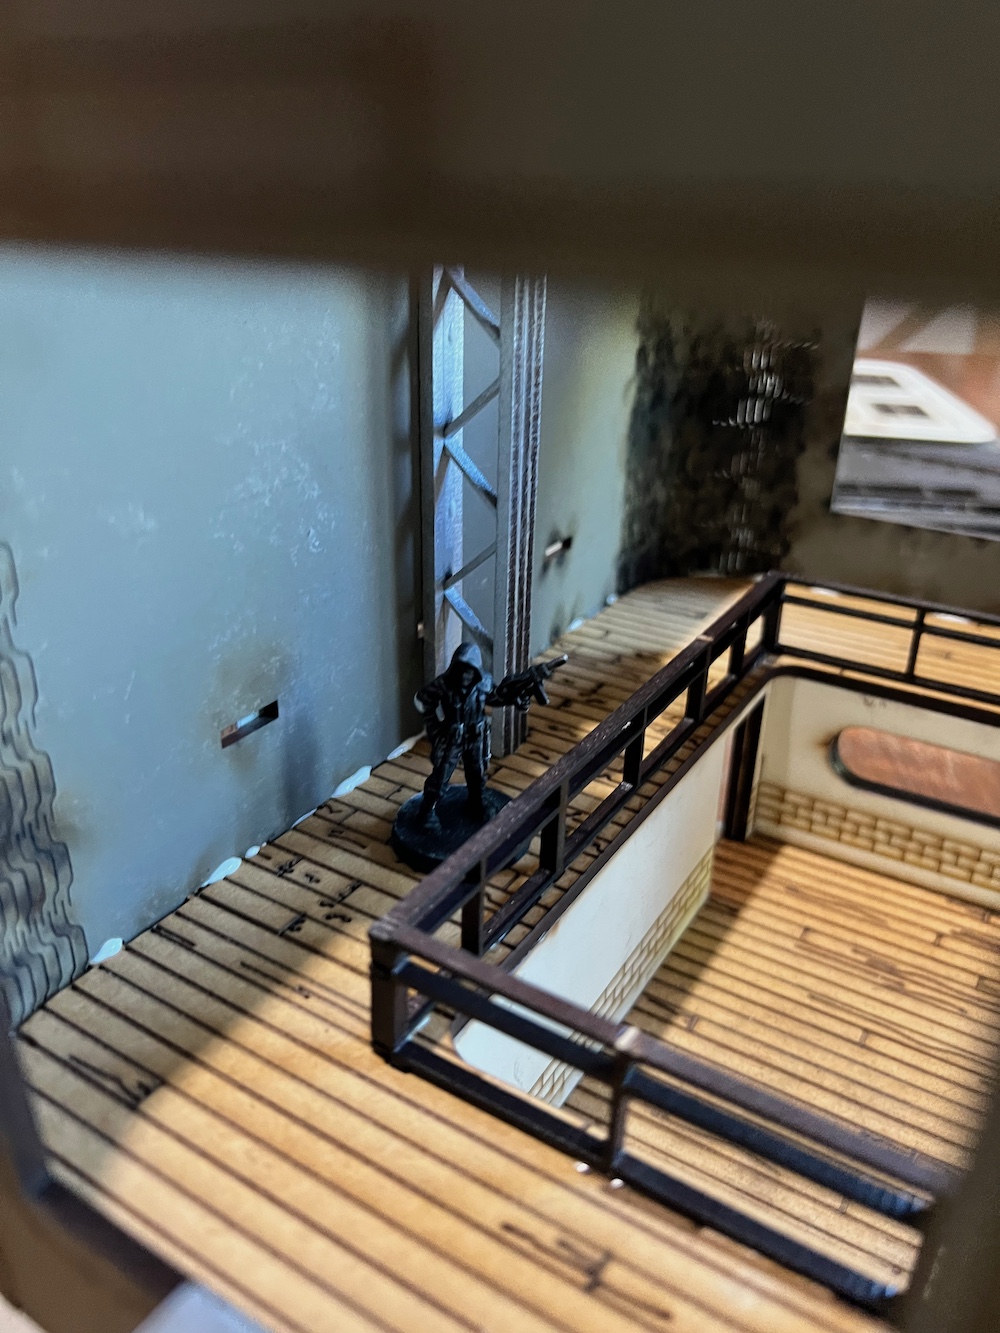 Scale Team4 is checking out the beginning of construction.
DL Headquarters Is Finished and Ready For Occupants
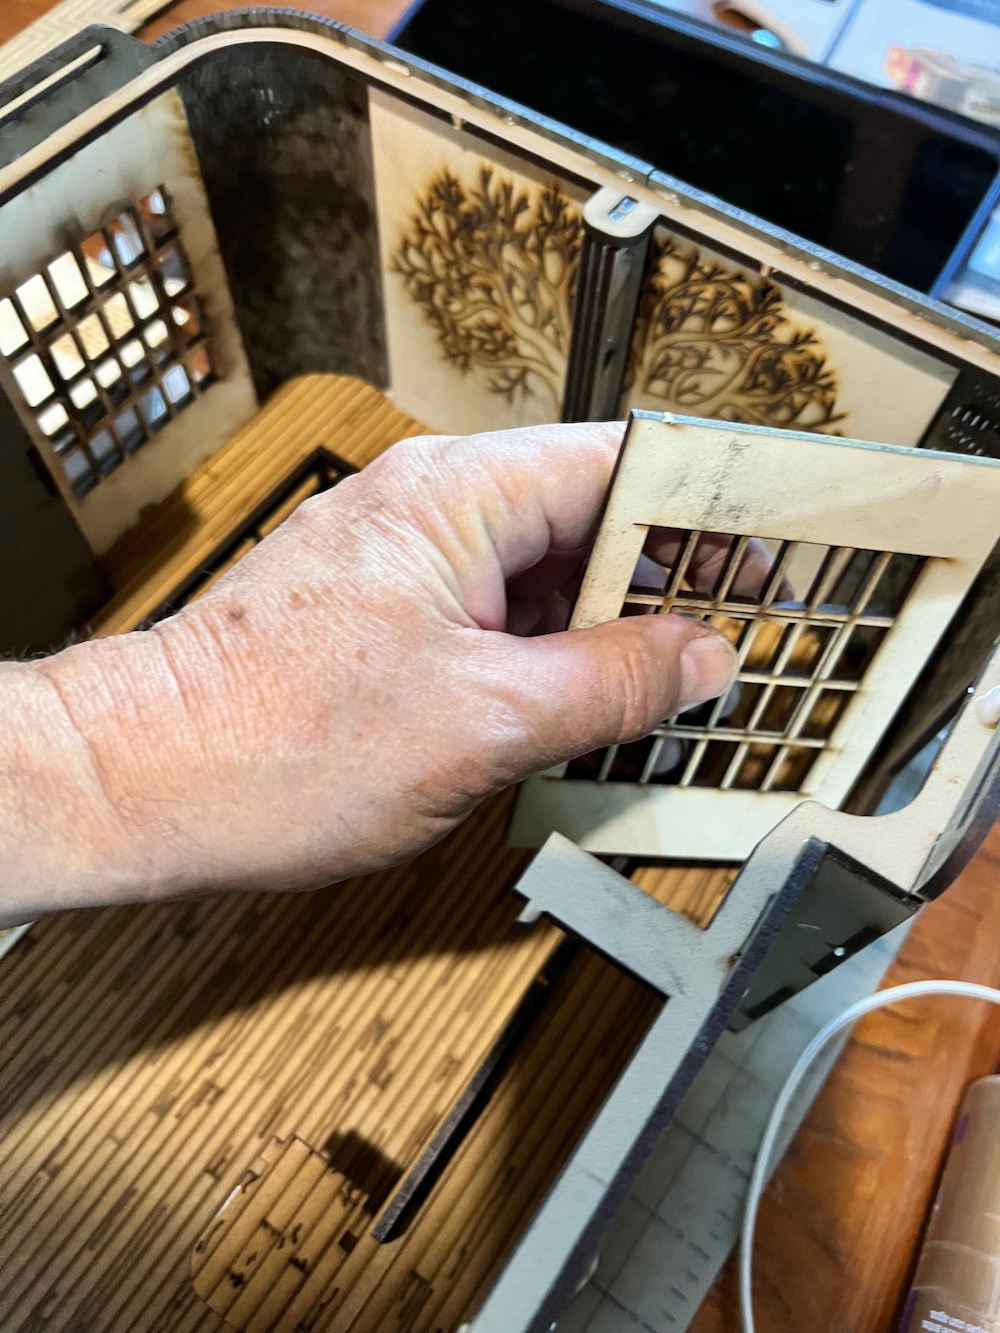
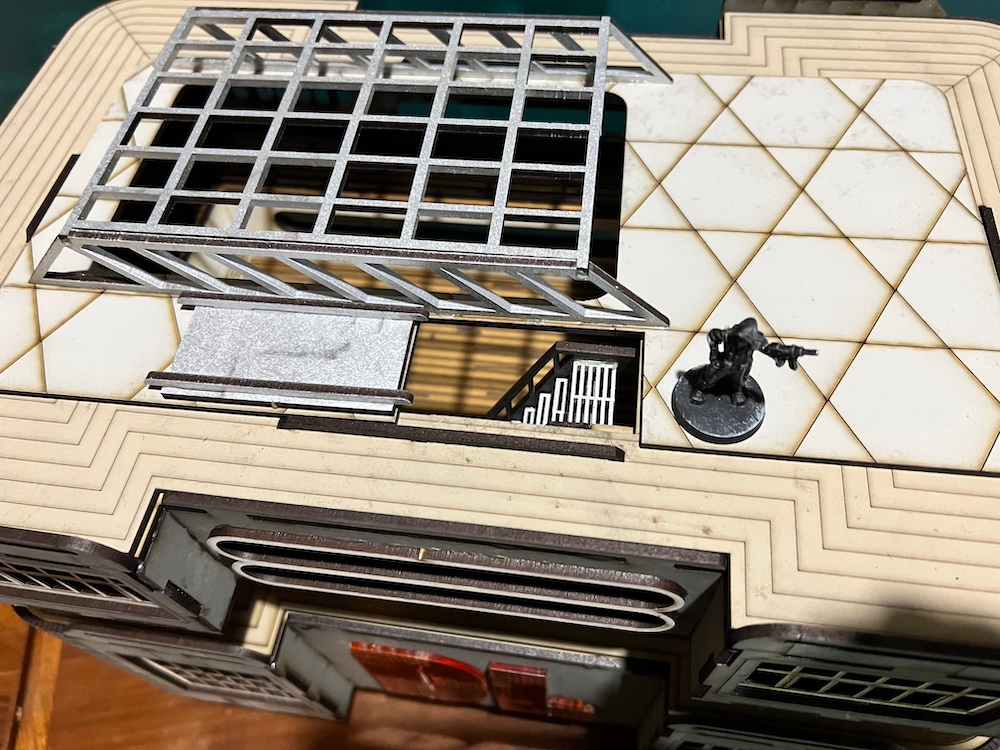
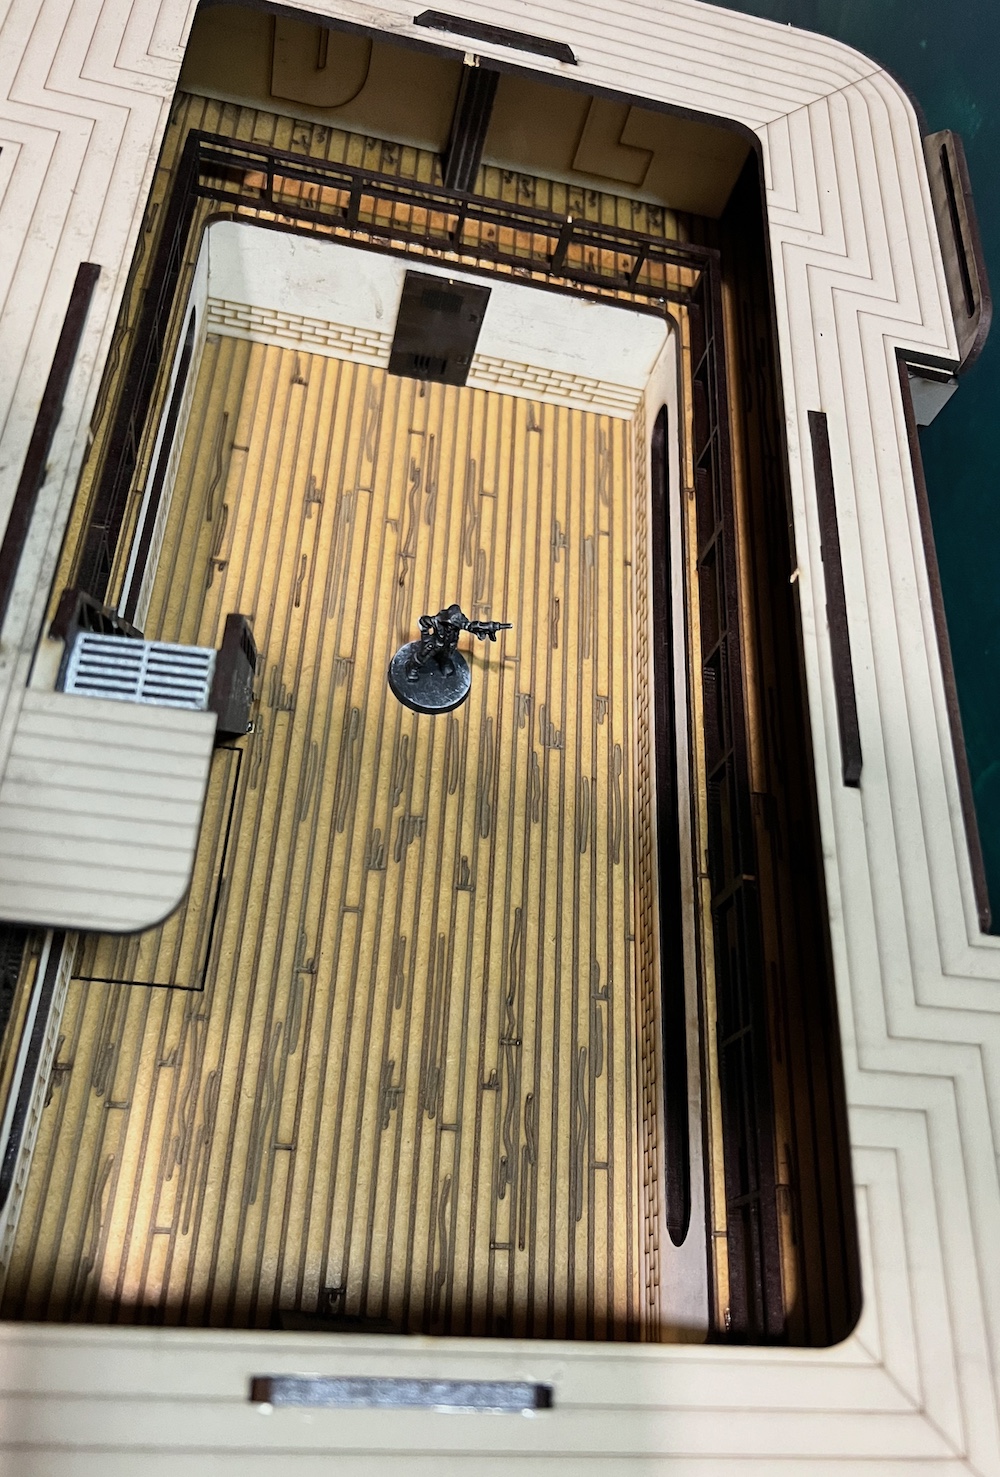
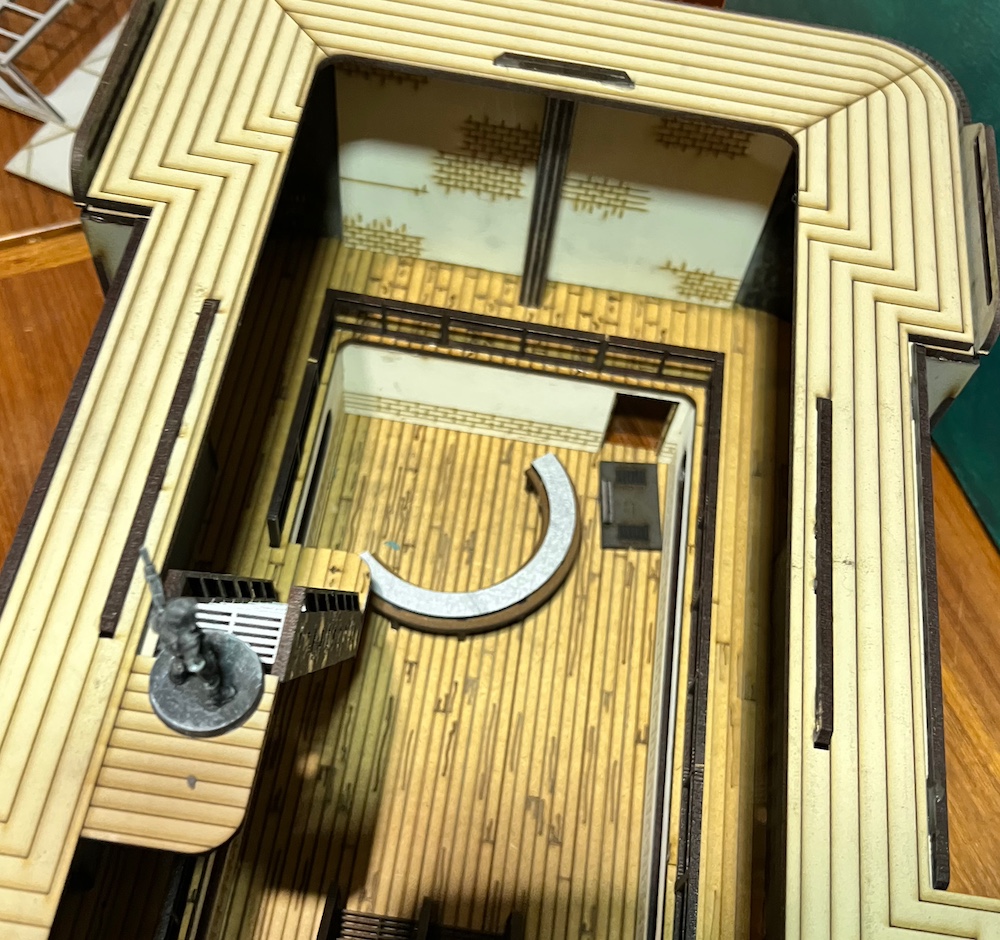
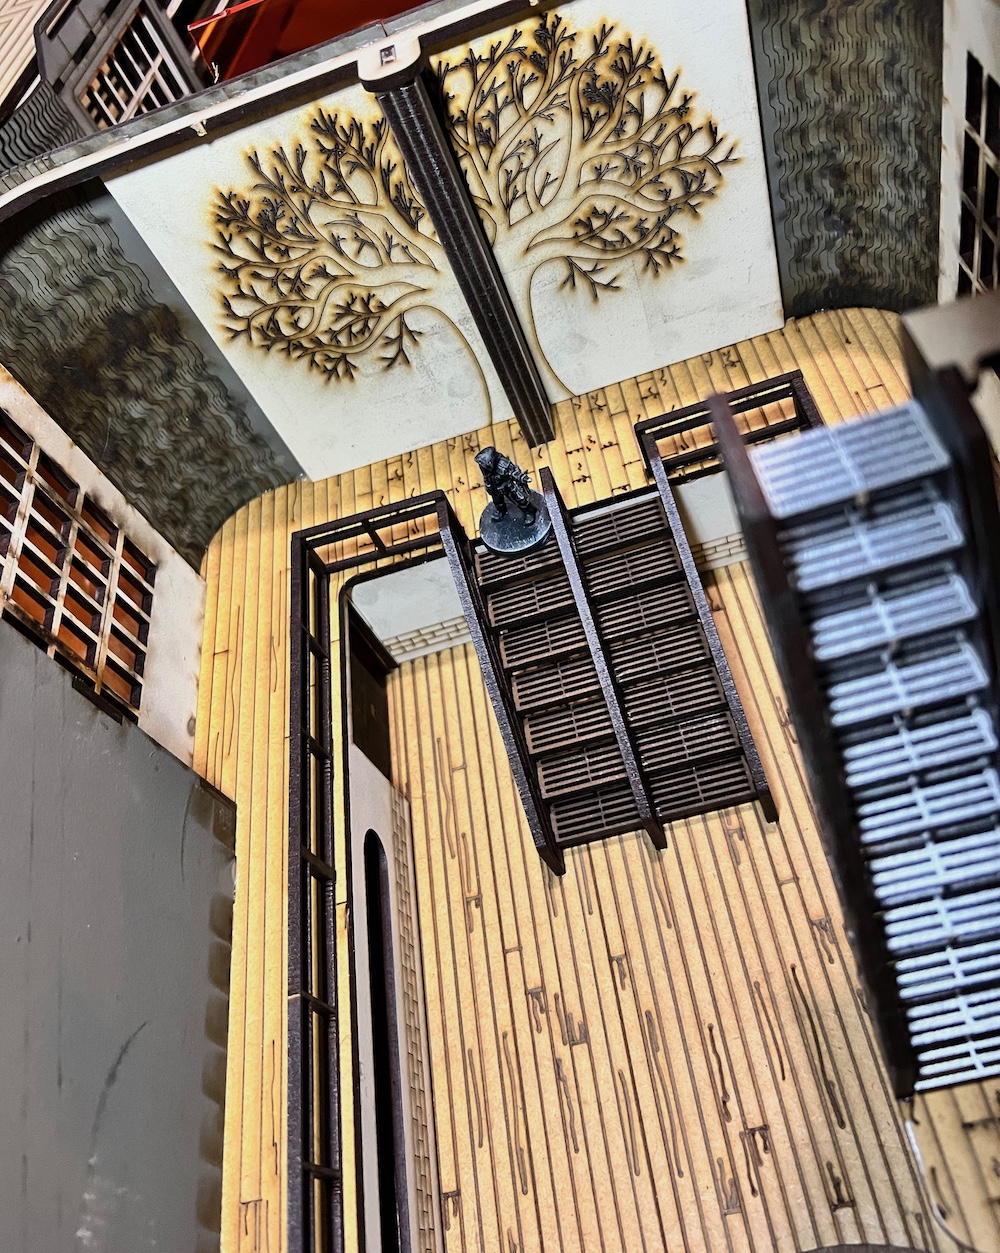
The next step was to glue the interior details into the first section. I like the laser cut tree design and the brick pattern is used throughout the model as part of the corporate identity. Pay attention not to glue down the roof pieces as these are designed to lift off to give full access to the interior. It really is big enough to be an objective room in Infinity or an entire battlefield.
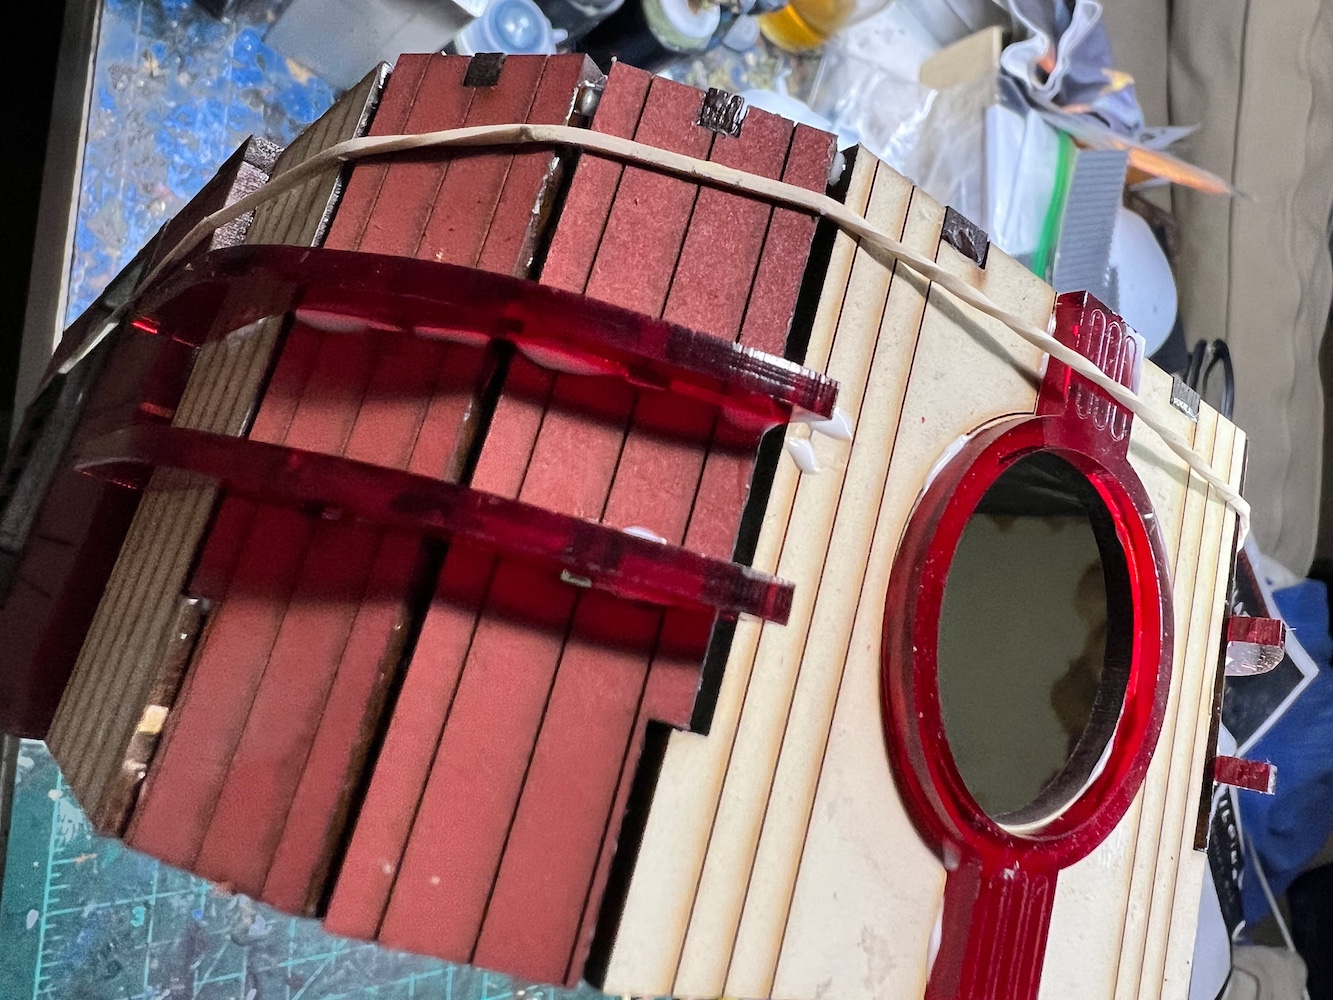
When installing the windows, definitely dry fit them as they are not symmetrical and only fit one way. The interior walls are easy to put in but each have one way and place they fit. The second section went together much as the first though it has spot where the first floor stairs come up. The piece is cut so one has the choice to remove or leave it. I took it out but will need to make a railing for it.
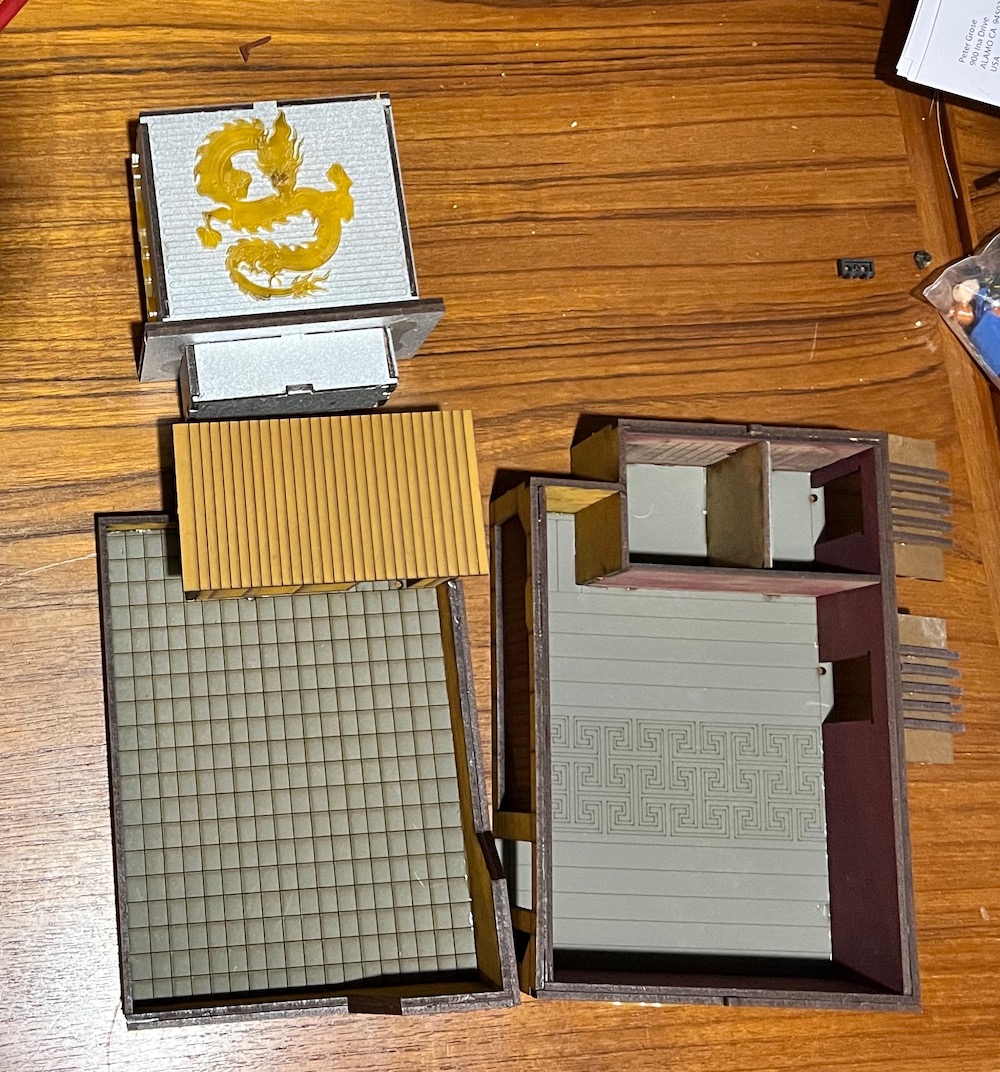
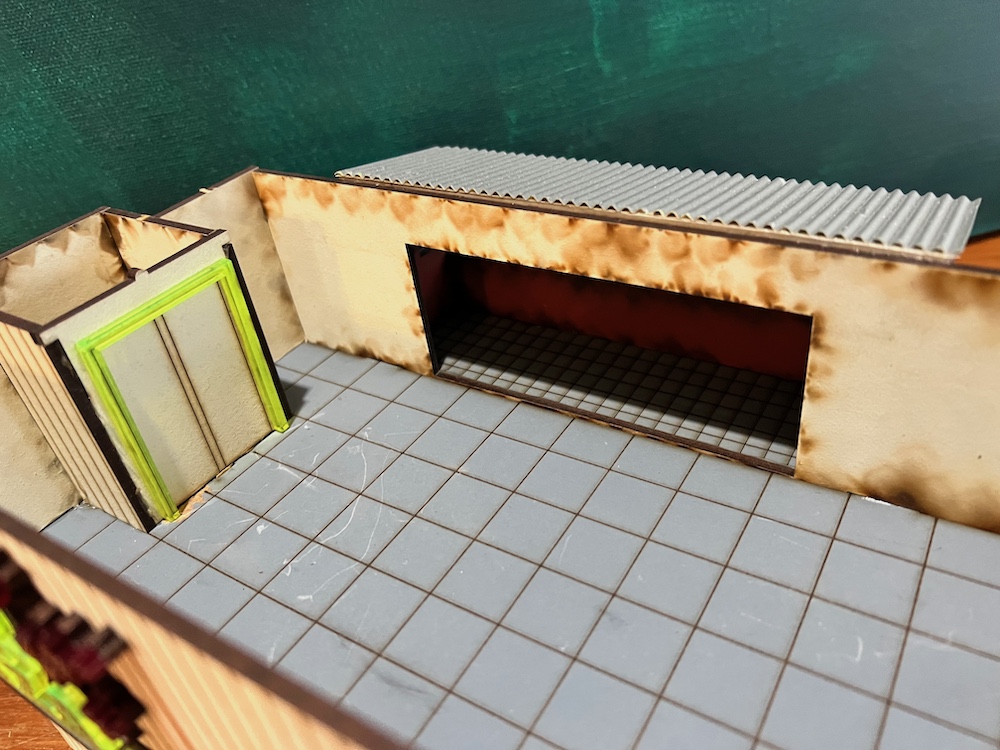
The building is finished. Sadly, once the exterior details were glued on, the building no longer fits into the standard plastic box I use for my terrain collections. I will have to find one that it does fit into. Regardless, it is a great addition to my collection and will be a lot of fun to use in games. It will also look great in pictures which is a big deal to me. Oh, and there is a second roof without a skylight so folks have the option.
 Almost glued the wrong window in.
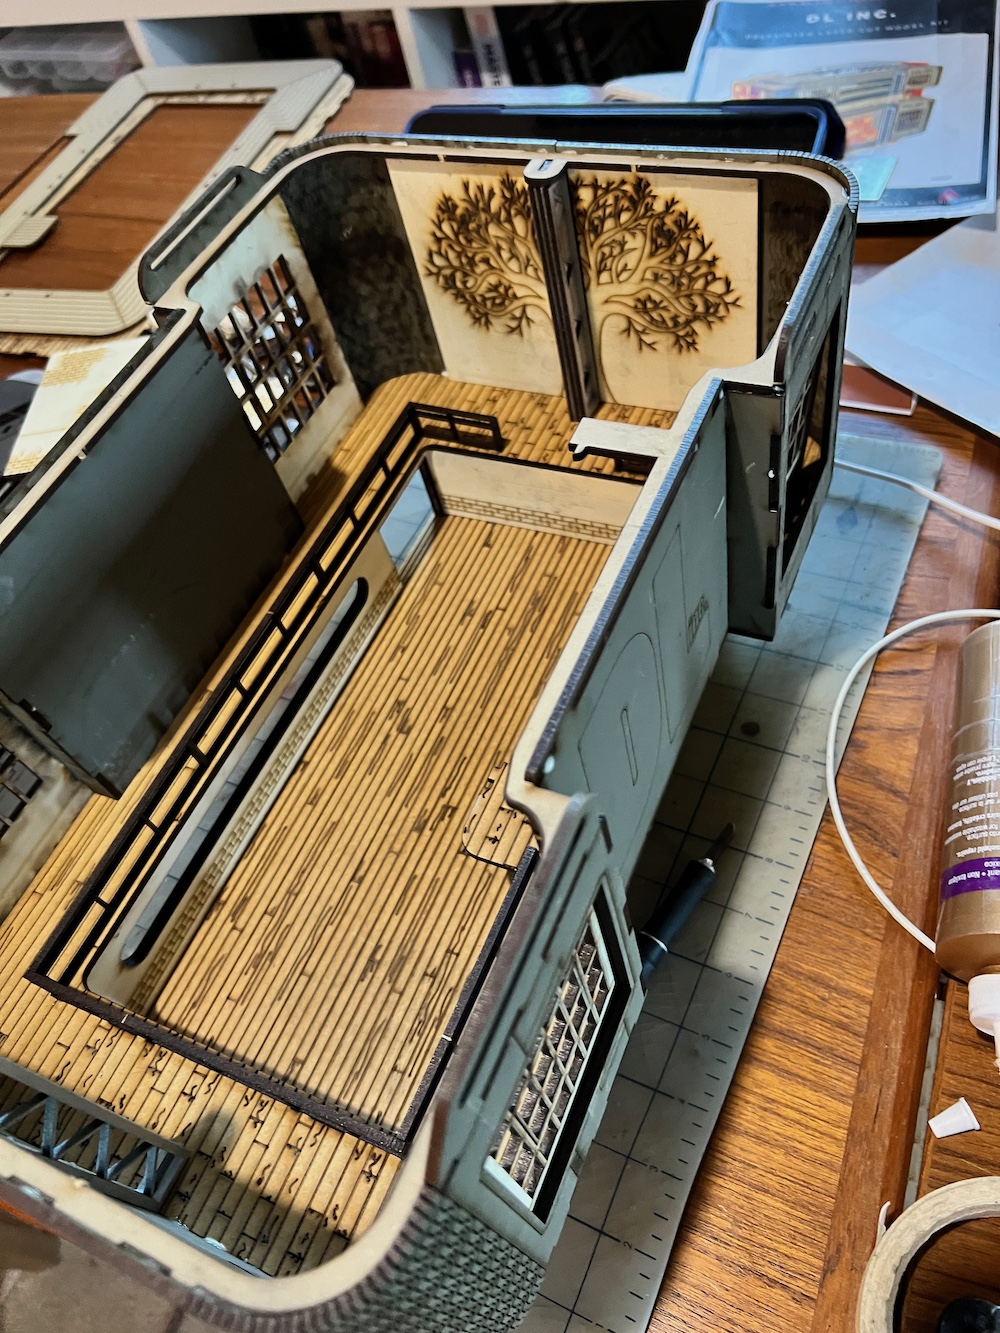 Lovely interior.
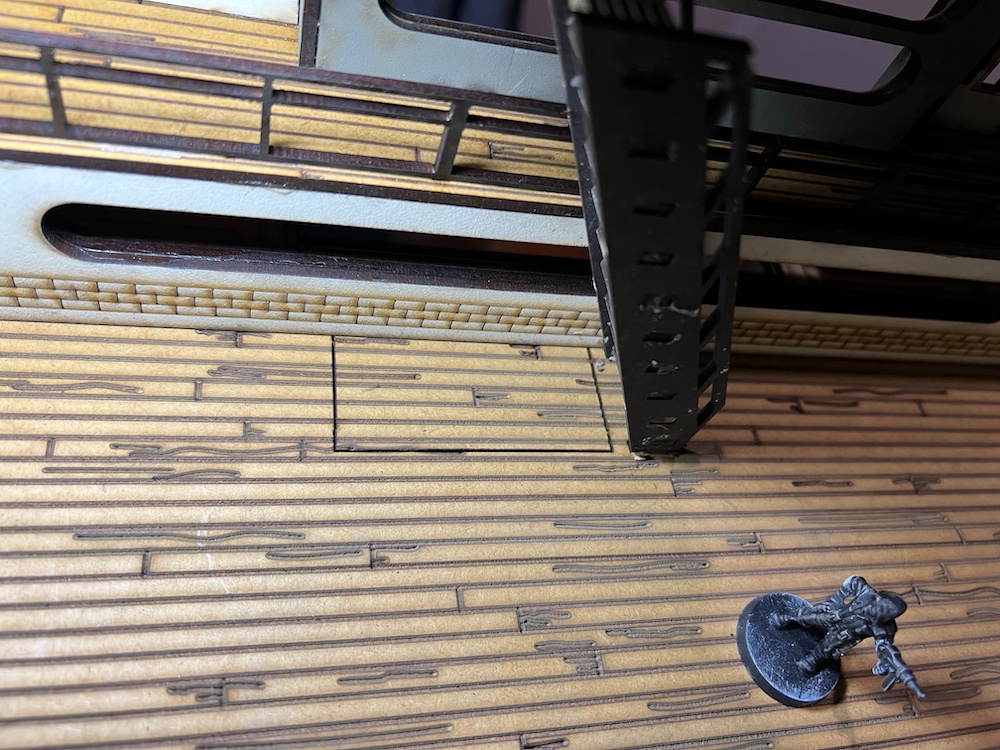 This cut out needs to come out so the minis can move through the entire height of the building.
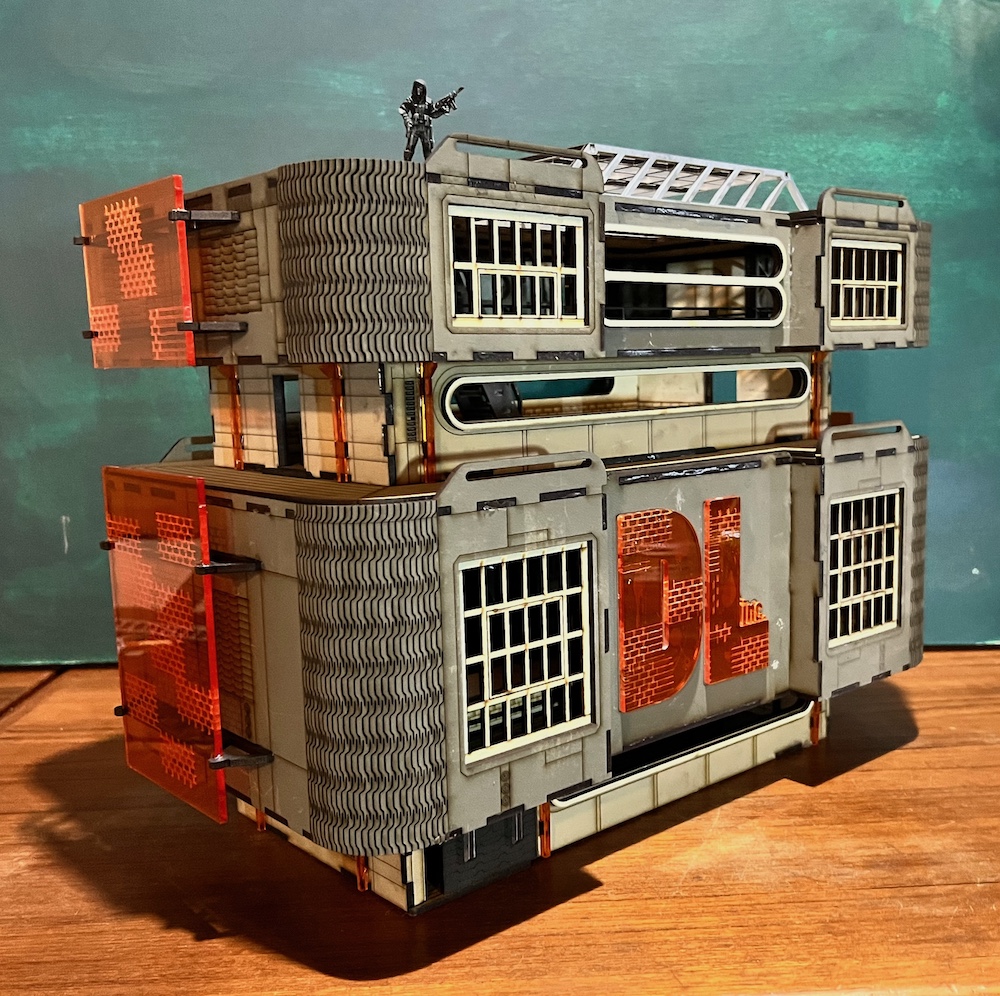
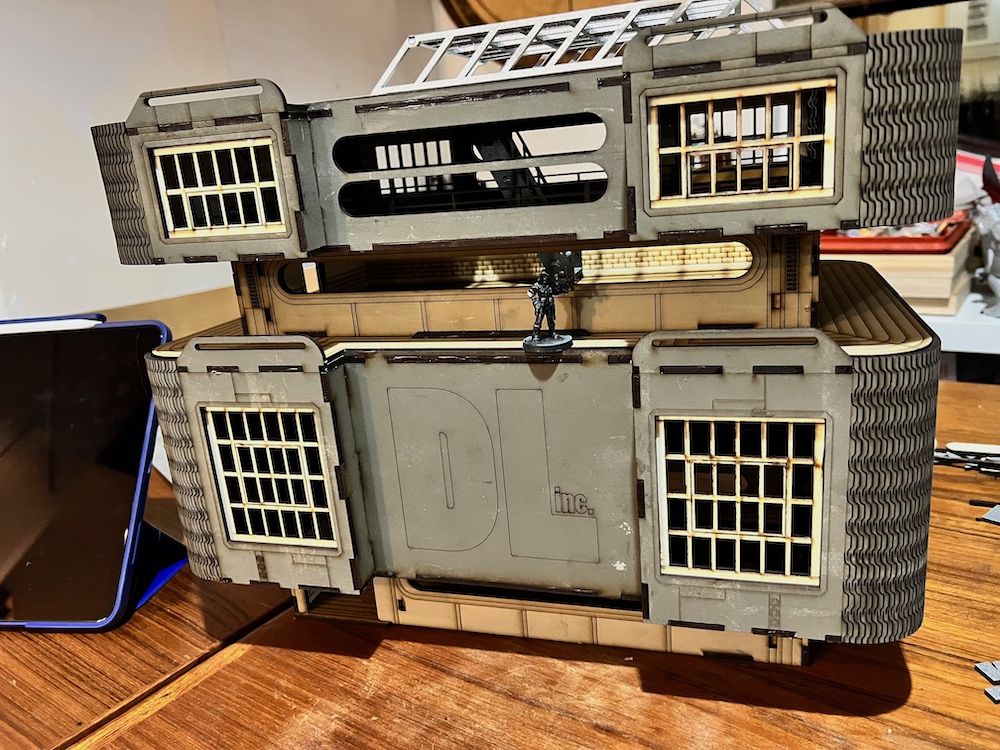 Scale Team4 is there to show how big this beast really is.
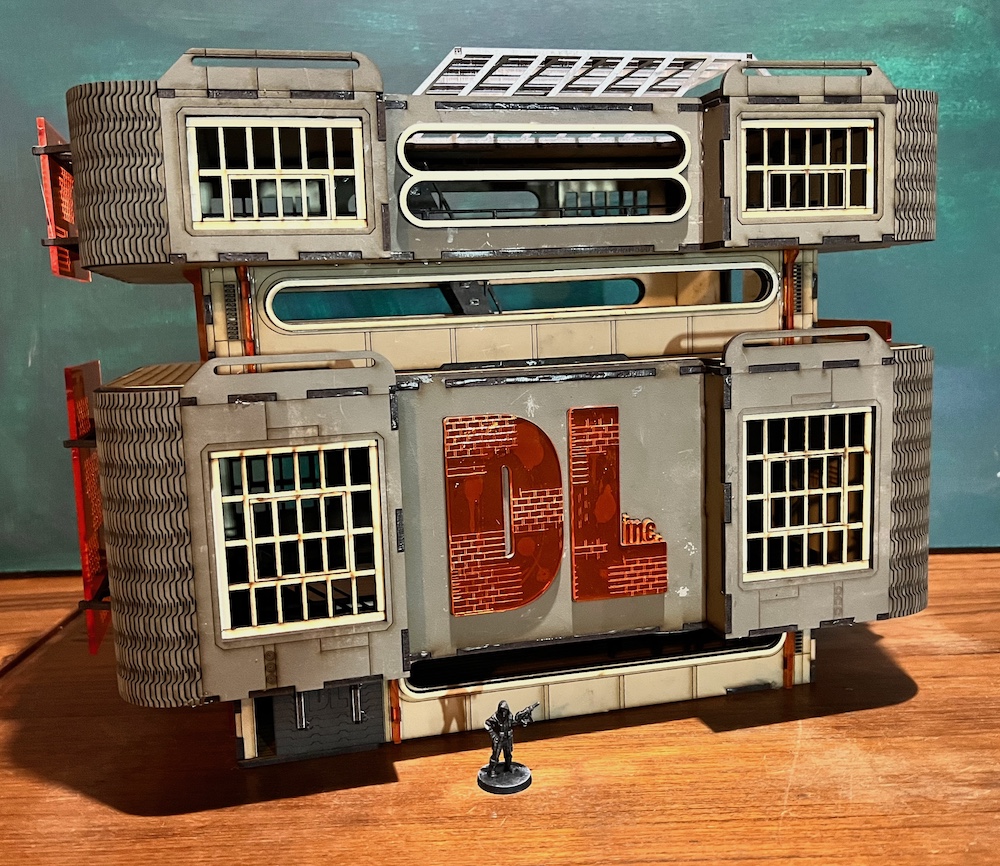
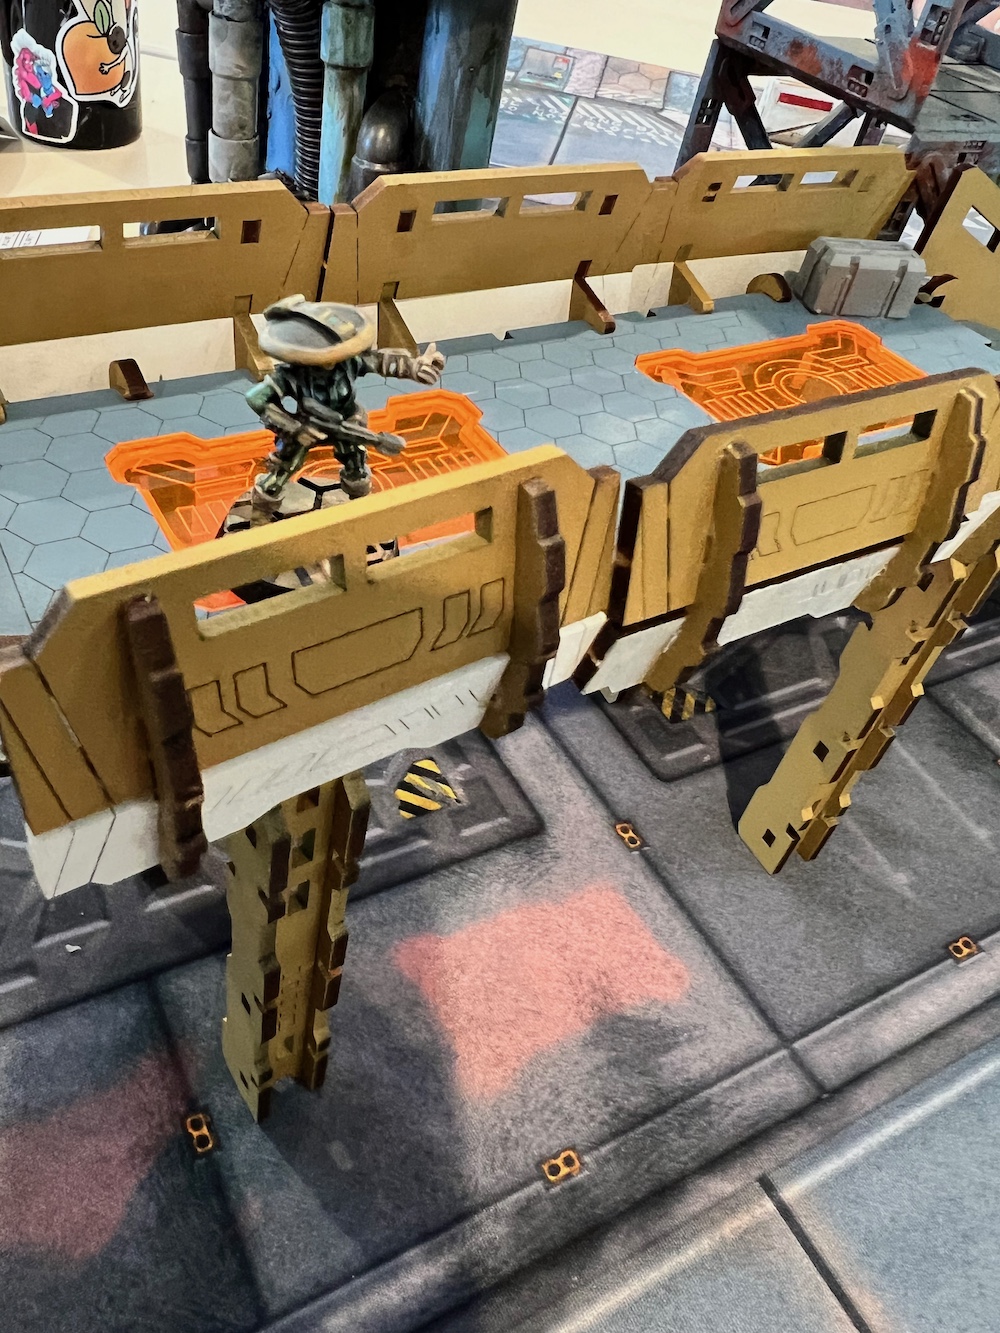
Walkway
I had painted and assembled my collection of MicroArts Walkways but stored them un assembled. This was a great space saver but when we were setting up Space Weirdos it was far from efficient. It is also hard on the MDF which isn’t the toughest of materials. I’ve got a few of the kits so have supports for tall and short walkways and one three way split piece of flooring. I decided the best thing to do was assemble sets of pieces that would be a lot easier to put together and take apart though require a new storage solution.
Next I’m back to the White Dragon Noodle Bar.
 Looks great but takes forever to assemble and disassemble.
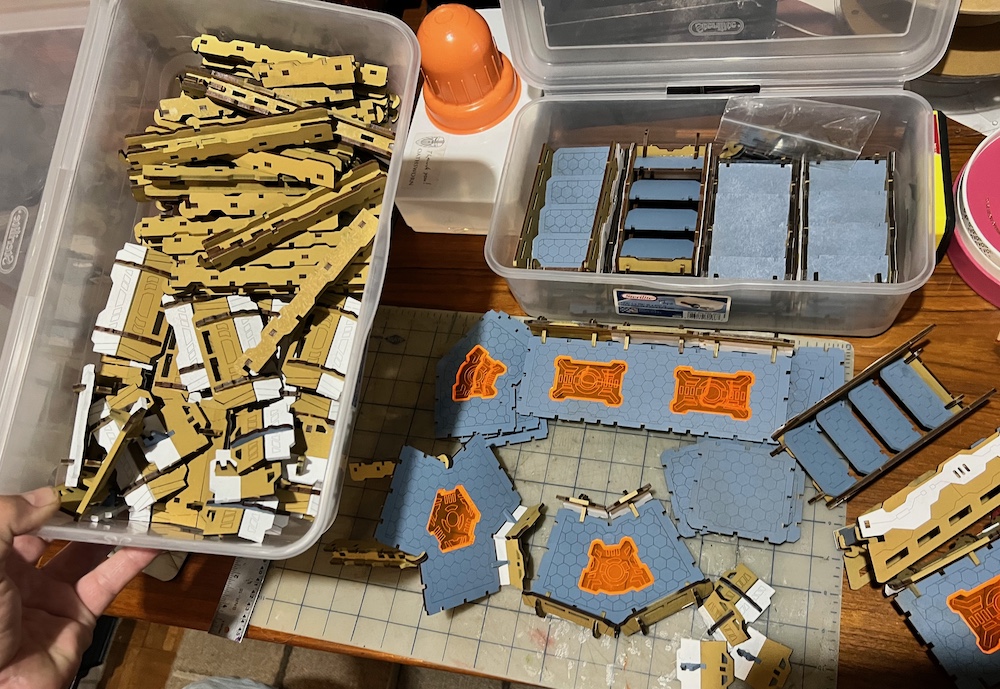 The whole set up took only two small bins to store but forever to setup.
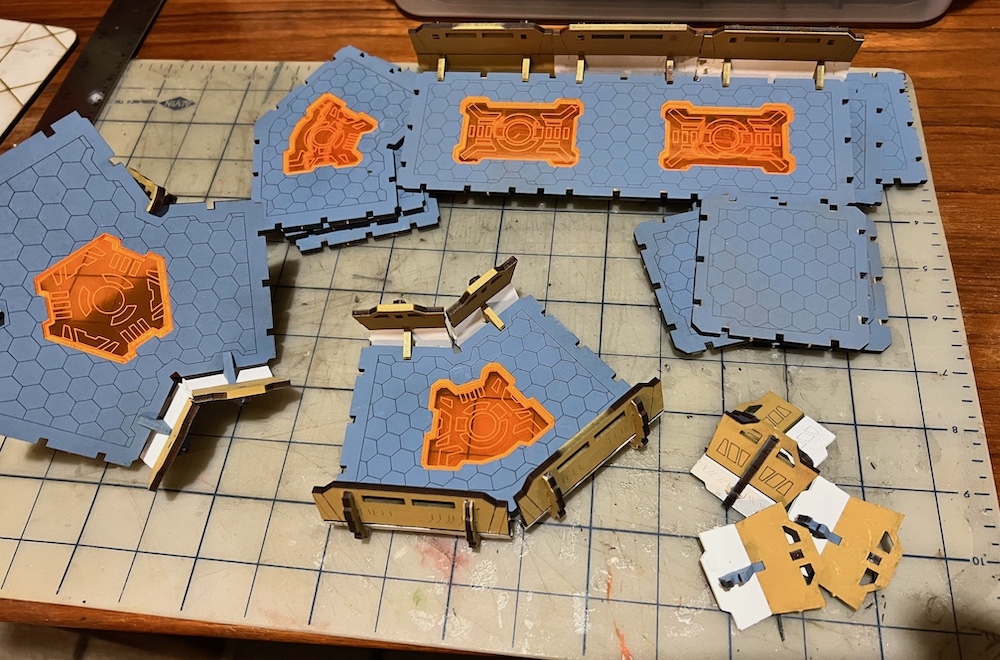 Decided the three way piece would work best with the short supports.
 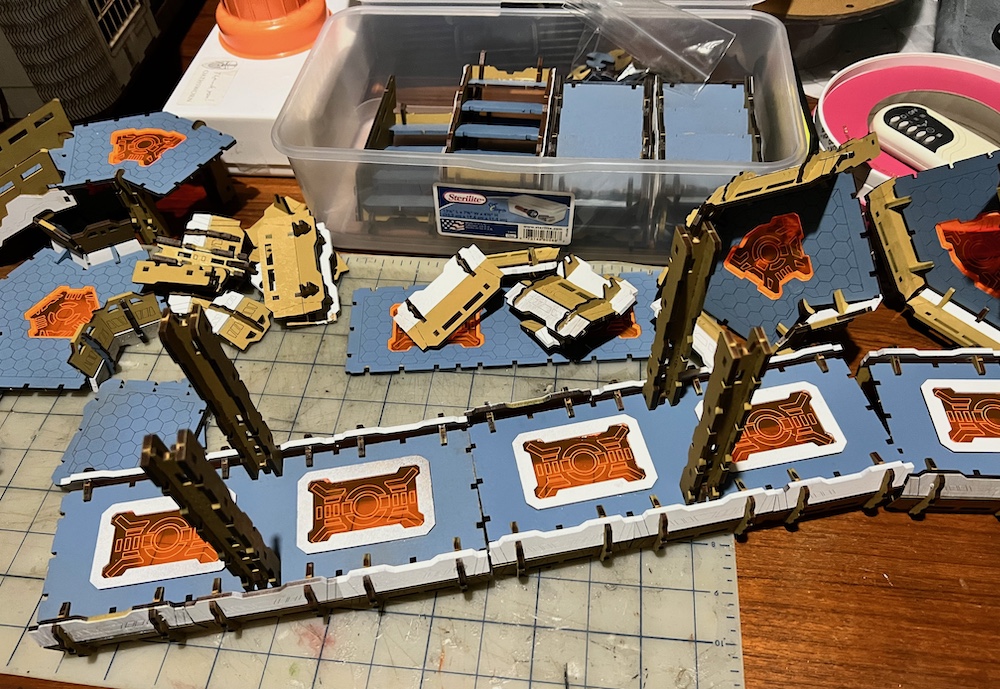 Attaching the pylons to the long sections
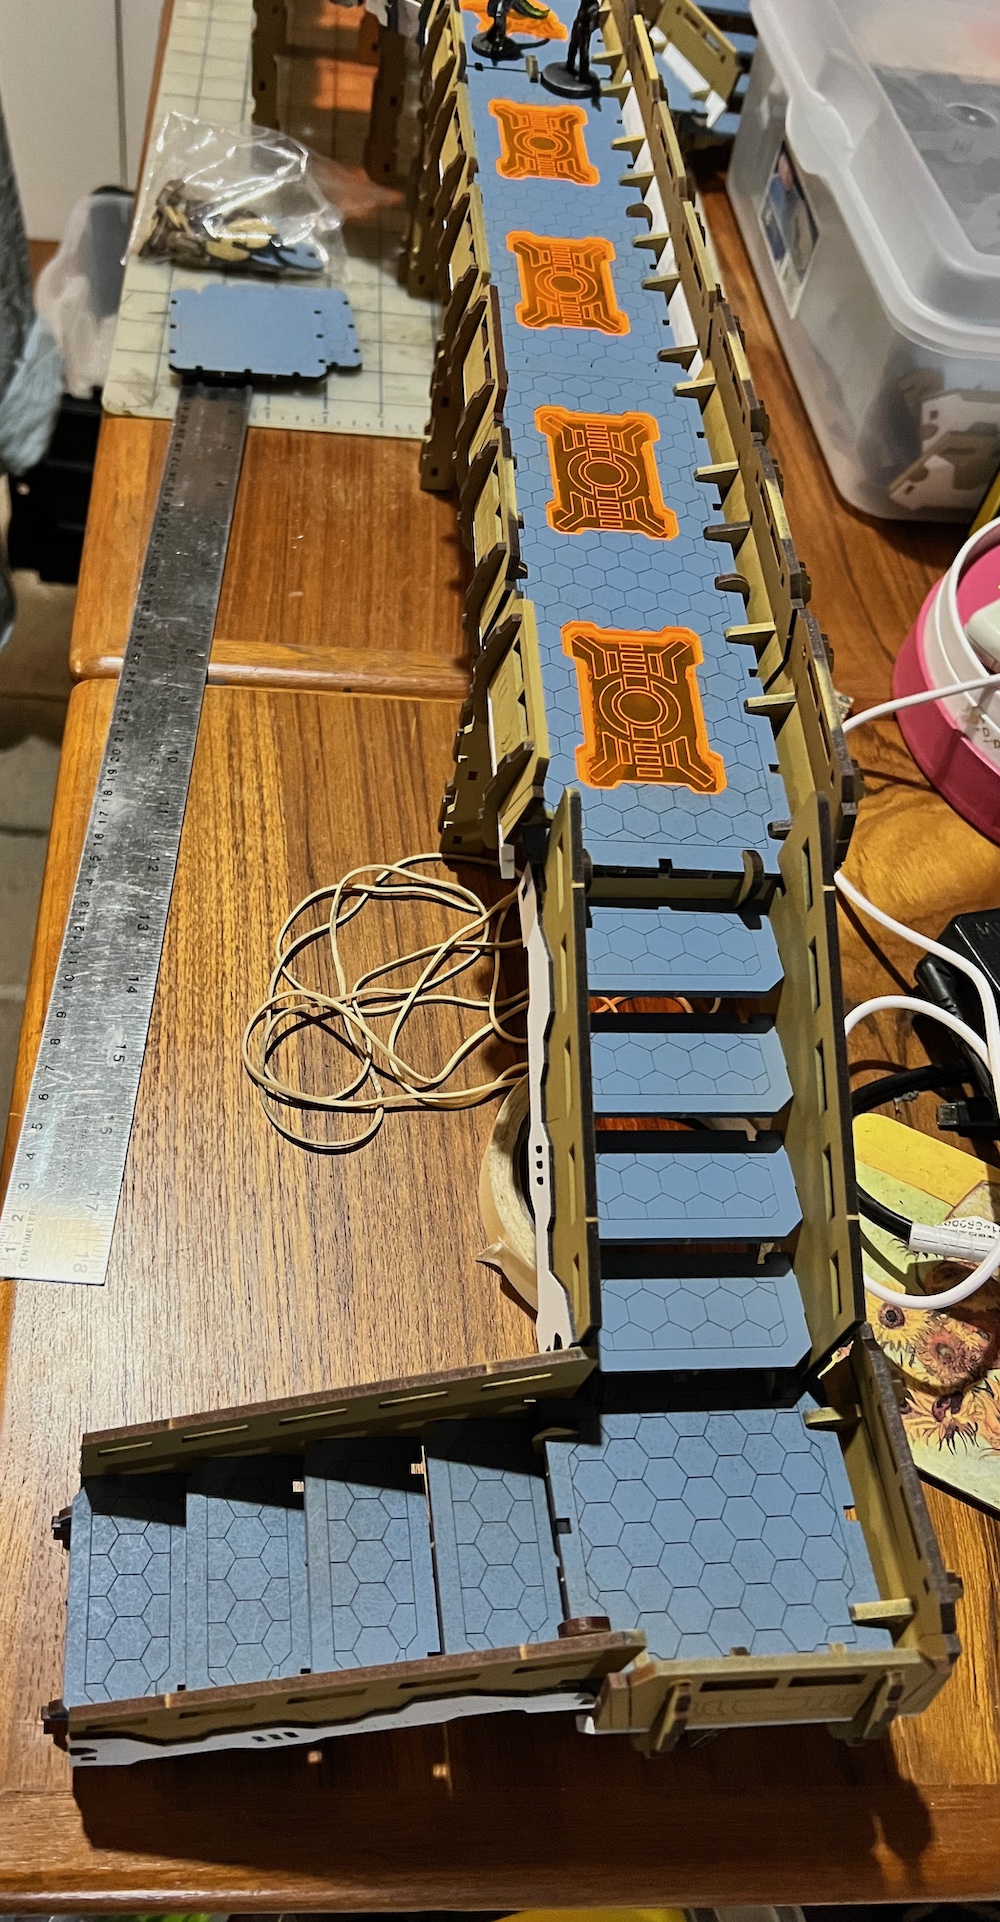 Two stair sections to reach the tall walkway
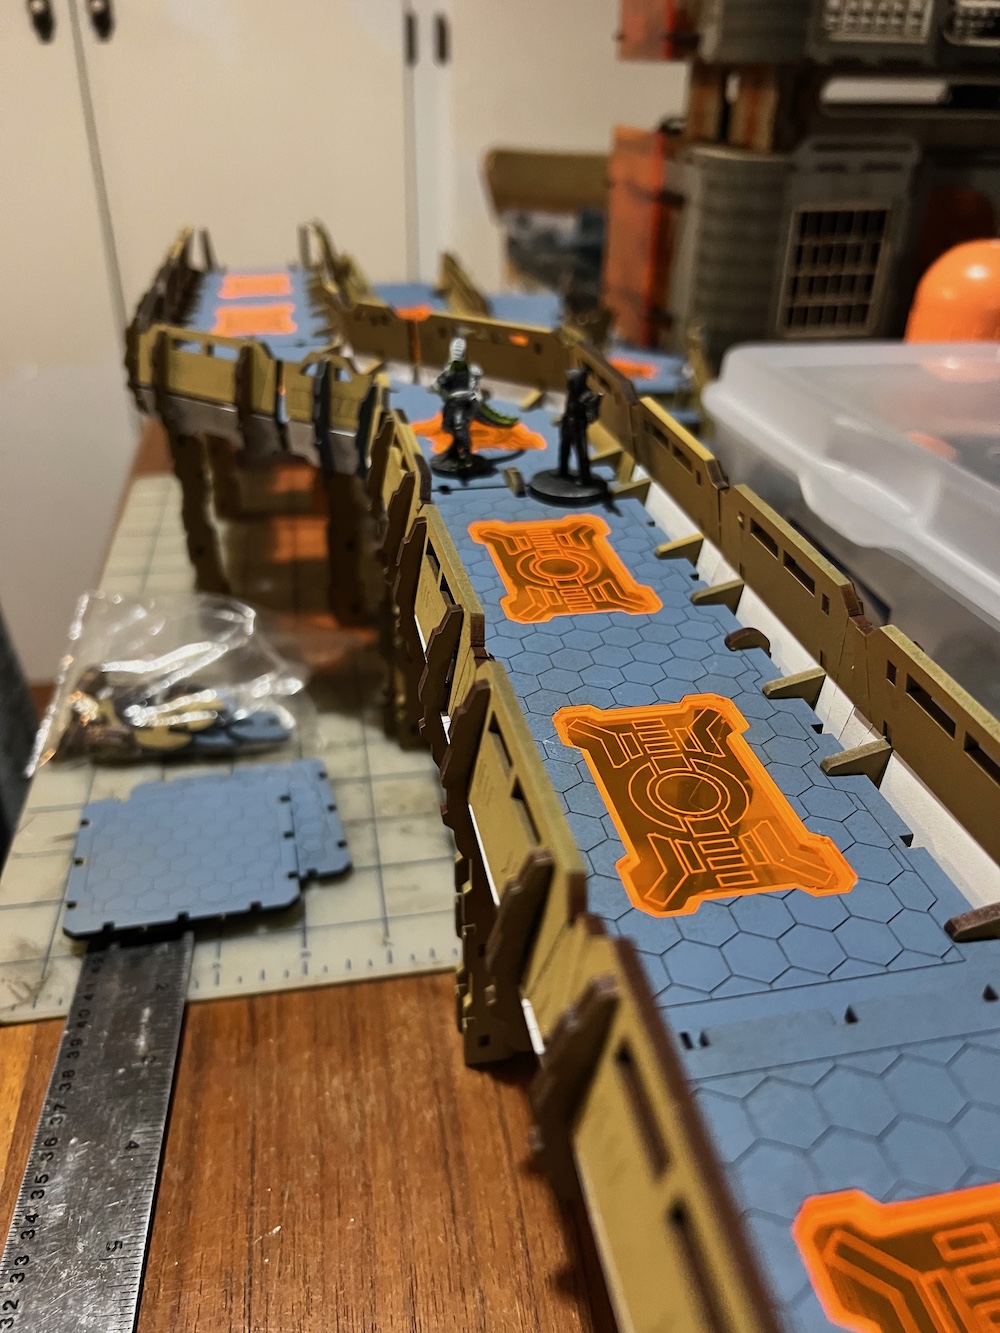 Long, long bit of tall bridge
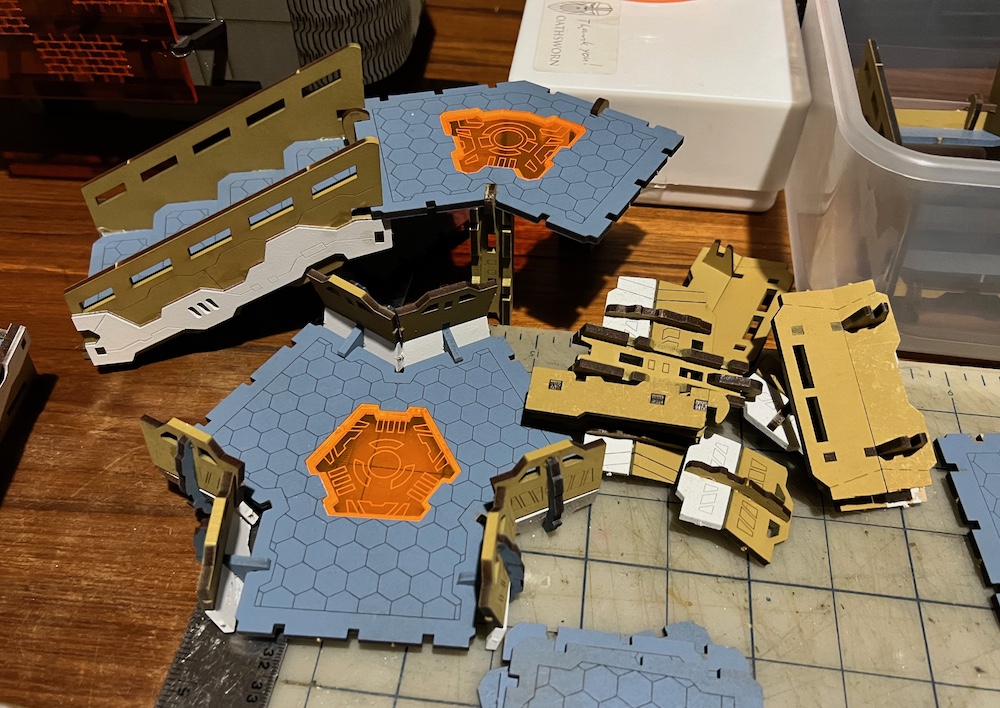 One stair section reaches the short walkways
 Short bridge plus the three way split gives one options
 Looks pretty cool, I have to say. Now to figure out how to store it all...
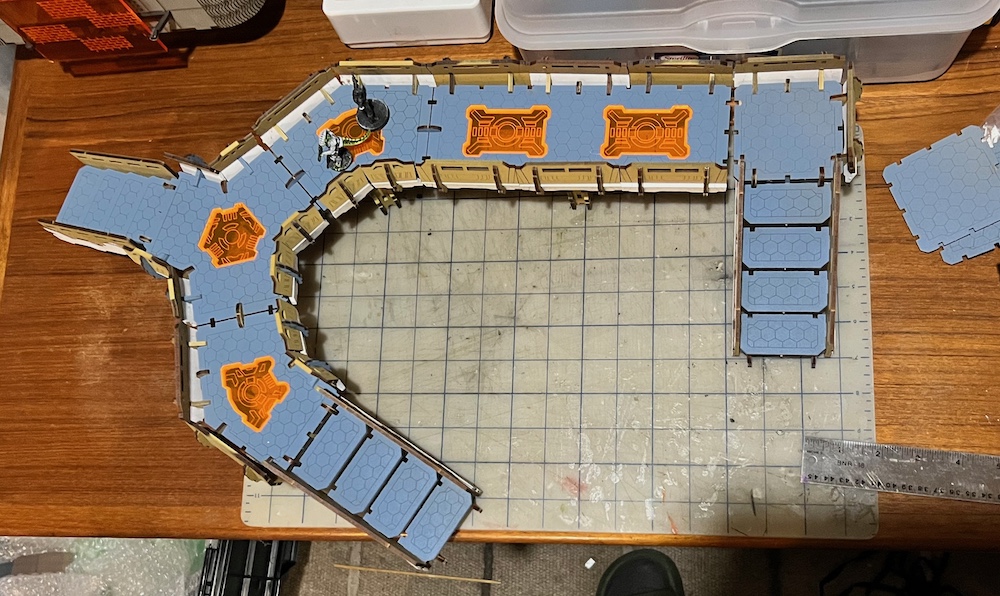 Enough short pieces to make this layout so with the tall and all those stairs I should be able to add multiple levels to any battlefield we set up..
Fungal Distraction
Just when it looked like I was making progress with reducing my pile of MDF kits, my Terrain Crate3 rewards arrived from Mantic. While I have gone crazy on the two previous campaigns, I do love me some tiny furniture, I only picked up one of the sets they created, Alien Forest, but did get two crates as I want to create forest sections. I have been happy with the majority of the pieces Mantic has created but really love these alien plant designs. They are designed to stack in different ways and even have holes cast in them for magnets. That seems rather fiddly to me as I plan on gluing everything together and then onto bases. After seeing them in person, it is clear I will be able to create a very Nausicaä forest. These should great with my orange and white habitat pieces.
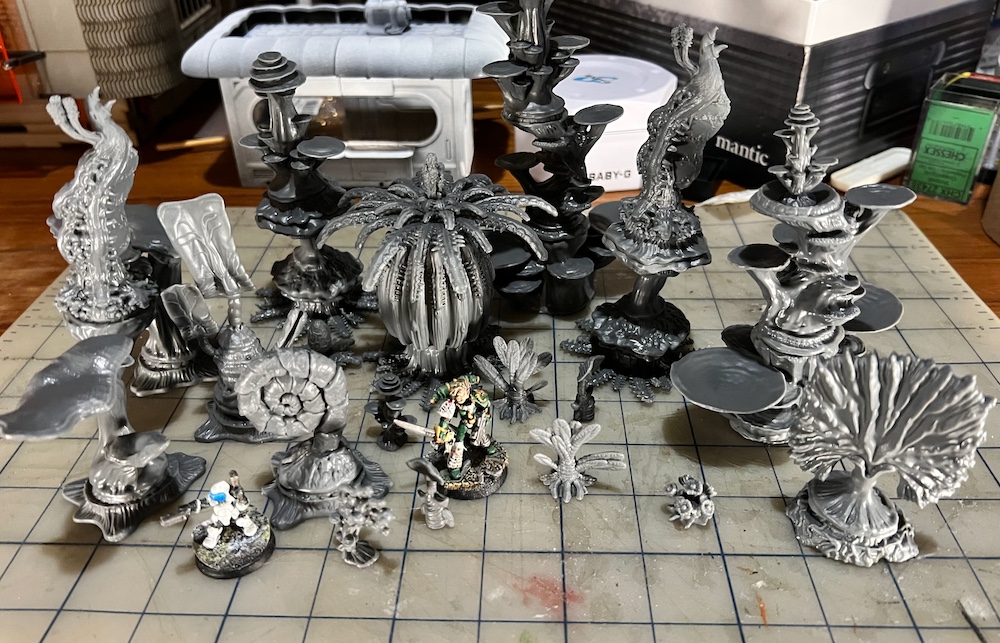 Here is a sampling of most of the pieces. This is about 20% of what I received. Note the primed Noodle Bar in the background
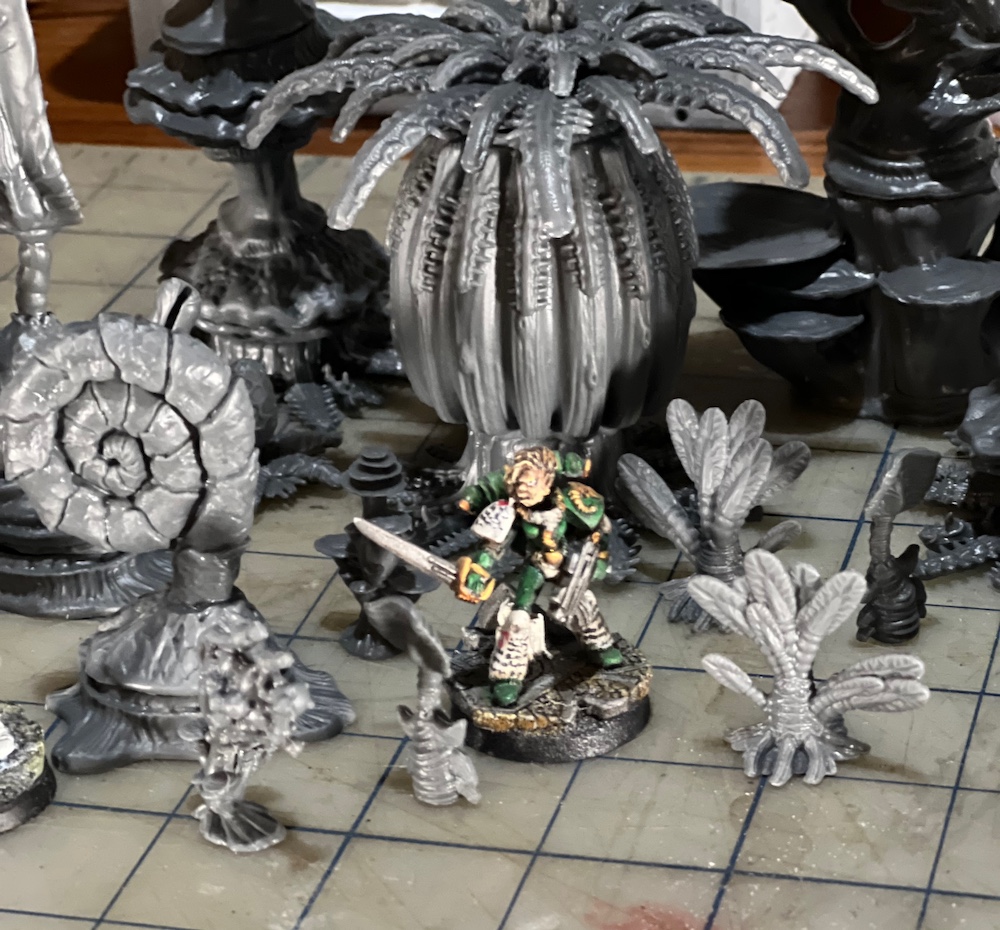 Interesting sculpts that should be fun and quick to paint.
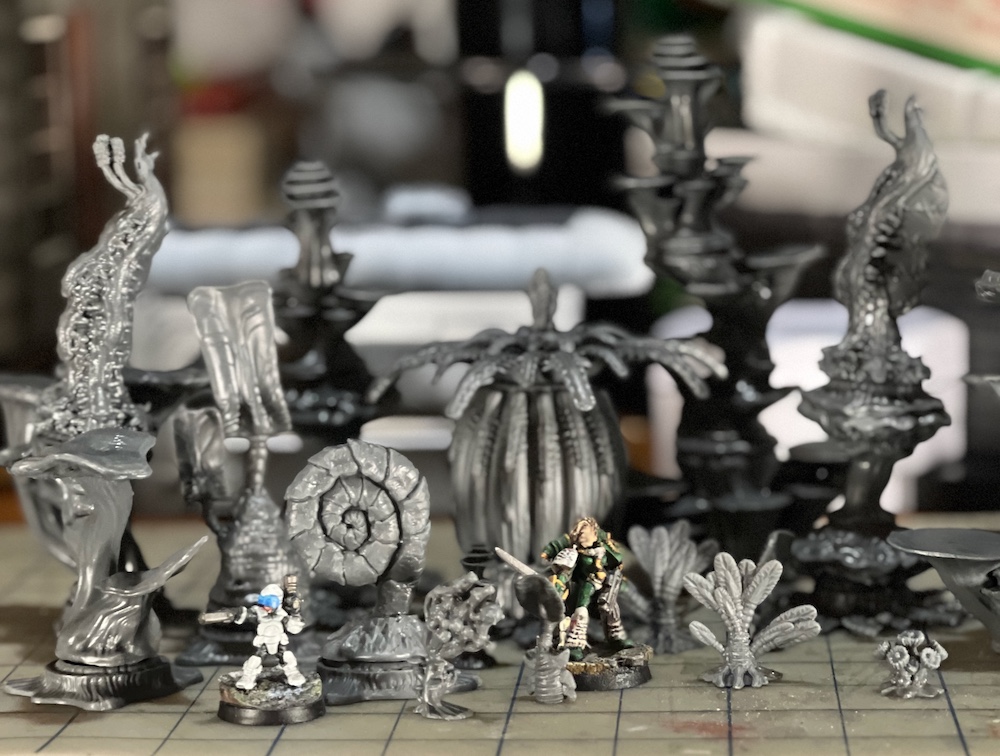 The figures show the scale of these "trees".
 I plan on painting these before assembling bases of fungus.
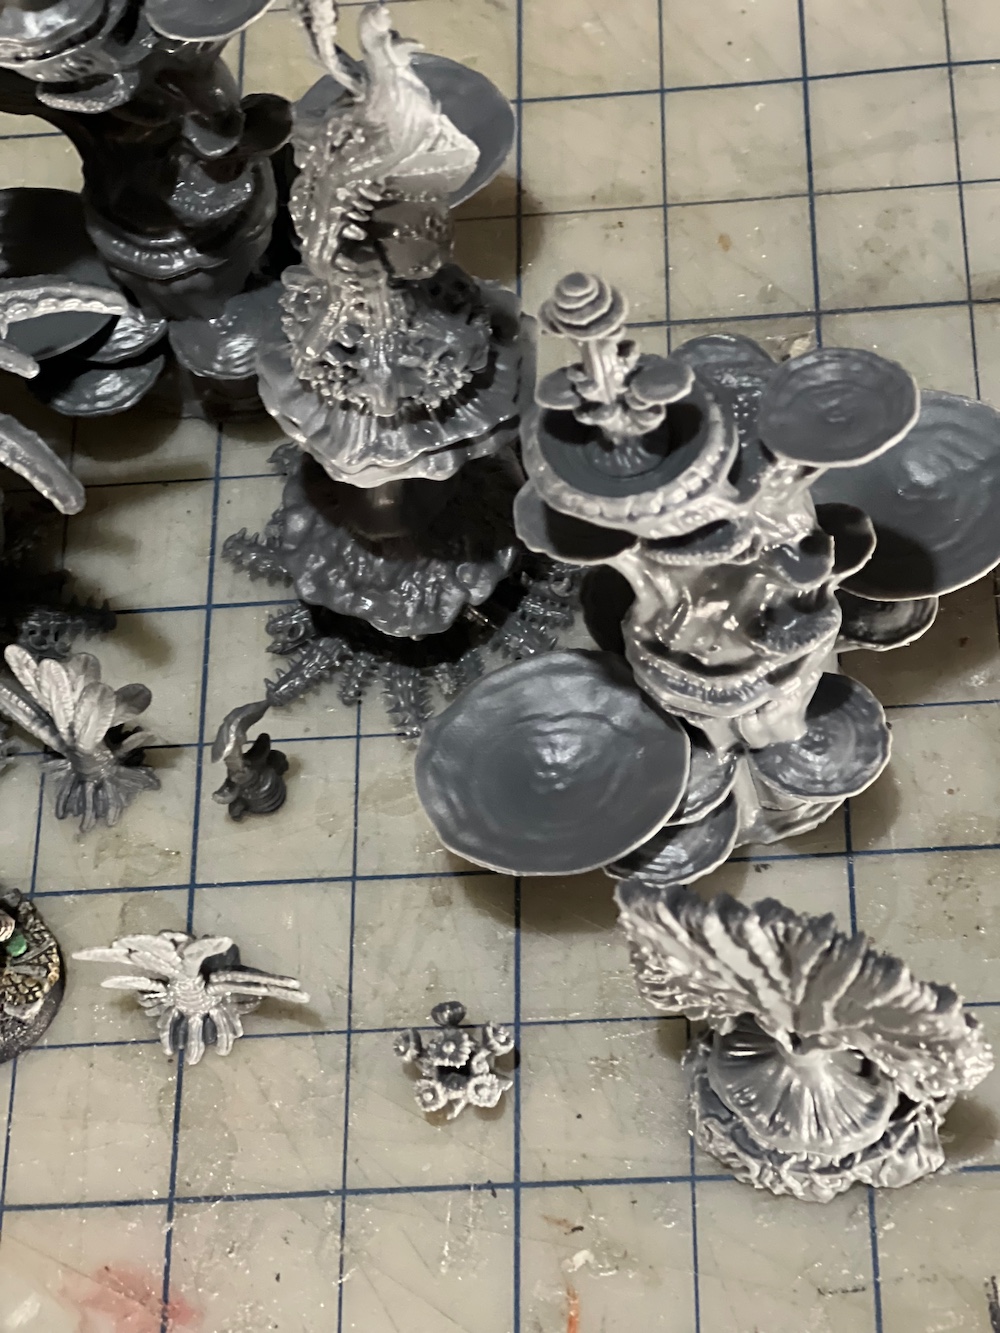 I really like the inclusion of smaller, younger versions of the plants.


![11th Edition Warhammer 40K Core Rules Now Available & More [Updated]](https://images.beastsofwar.com/2026/06/orks-new-cover-600-338.jpg)