


SAGA Challenge


Recommendations: 505
About the Project
The game SAGA has been of interest to me for years, but I’ve never taken it beyond just an interest. My young son (just turned 13) is now expressing a desire to do some wargaming more seriously, and has a liking for Vikings. So, this challenge comes at the right time to both prepare two armies, but also to build some relevant terrain and scenery. This is our journey together.
Related Game: SAGA
Related Company: Studio Tomahawk
Related Genre: Historical
Related Contest: Spring Clean Hobby Challenge 2023
This Project is Completed
Week 8 - The Saxons are coming
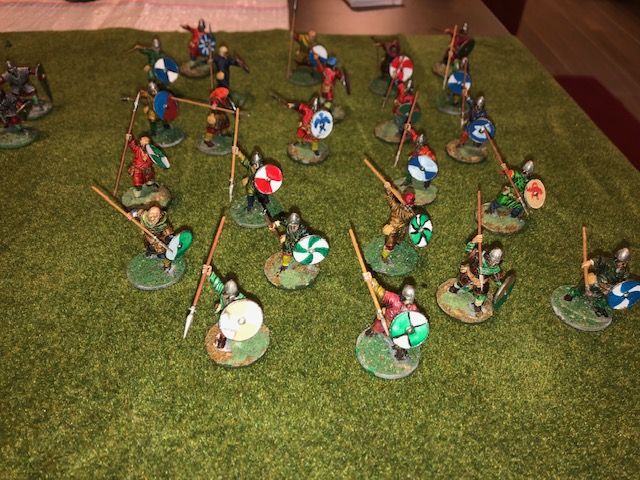
So, this week I managed to complete the Anglo-Saxon army to a quality I can live with. Table top, basic paint job which passes at 3′ viewing! Pictures follow below.
In addition though, I did some experimenting with the Contrast paints to see the effect of different colored base coats. GM say they work best with a white undercoat, which given the nature of the product seems a reasonable proposal, but what if some other colors are used?
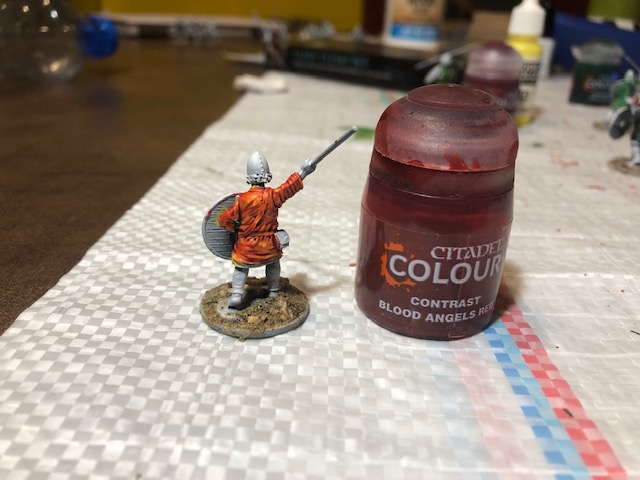
I didn’t stray too far from the “white” undercoat, and instead used some light pastel colors to see what difference (if any) was noticeable. And there are some minor changes to be seen – at least when using a Red Contrast paint.
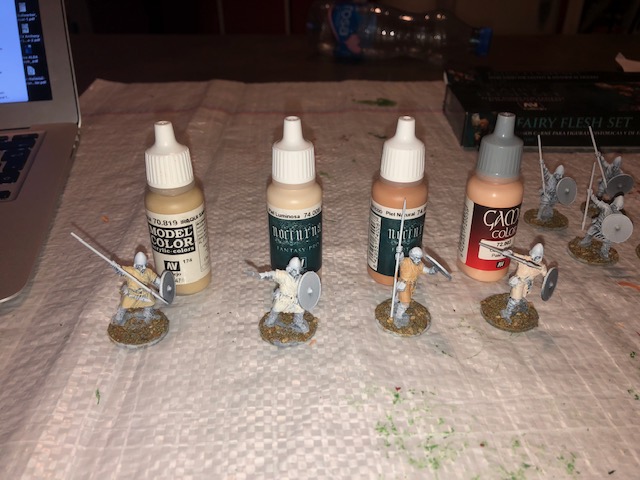
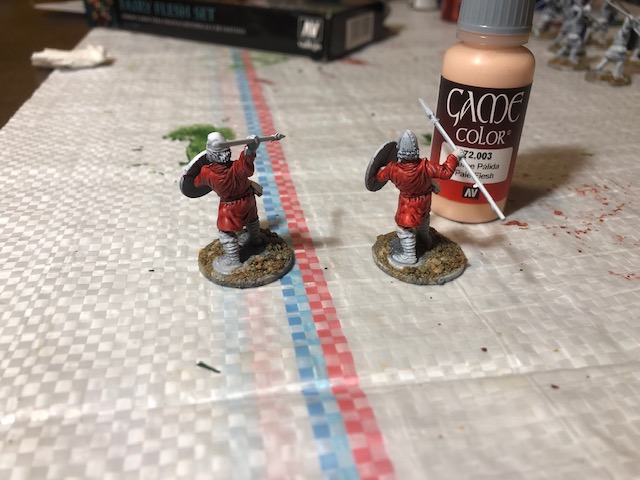
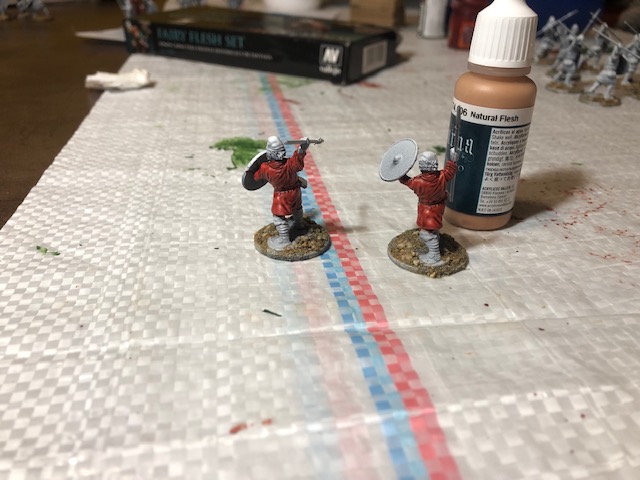
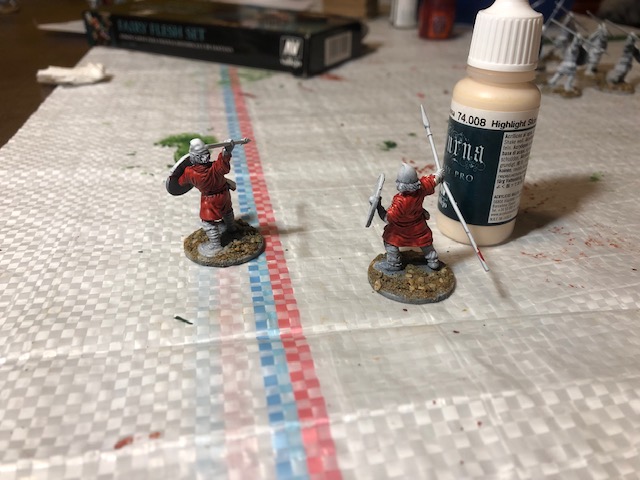
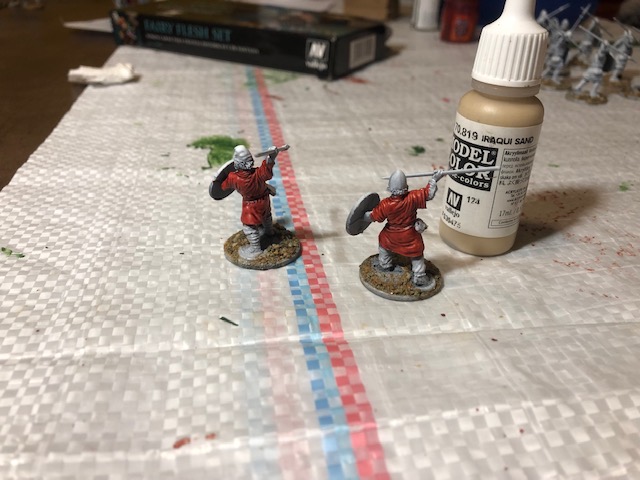
The first picture shows the figures with the four different undercoats. I used Vallejo paints for this: Pale Flesh 72.003; Natural Flesh 74.006; Highlight Skin 74.008 and Iraqi Sand 70.819. The Contrast paint Blood Angels Red was painted over these once they had fully dried. The images should be in this order.
I’m note sure how well the slight colouration shows in the pictures, and it IS only a modest change in color, but it is there. More experimentation necessary.
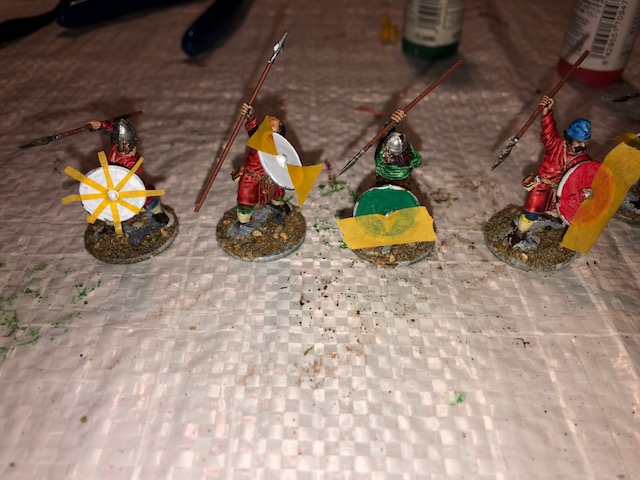
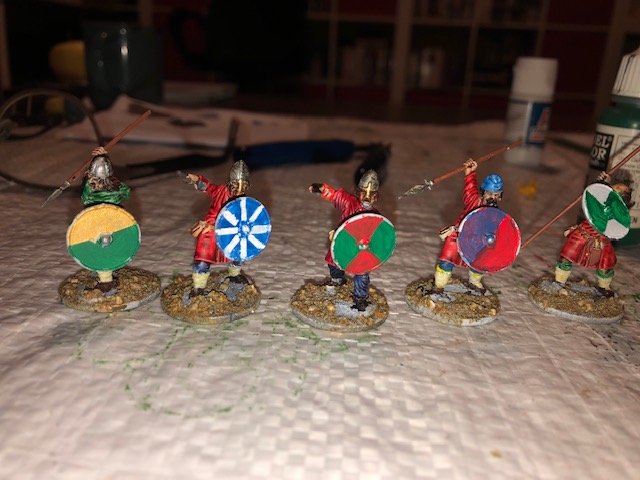
The other “experiment” came with the shield designs. I had in mind a simple geometric scheme which would be “easy” (ho ho ho!) if I used masking tape (I had some Tamiya tape handy) to block off a base color and then painted over the top, removing the tape to reveal a perfect paint job. Well that was the theory. To come extent it worked, but there was touching up to do and in the end most of the shields were hand painted.
I also tried to paint some animals/birds. My eagle looked more like a distressed pigeon, and the dragon looked like a badger (according to “mini Apple”). So, back to art school for me.
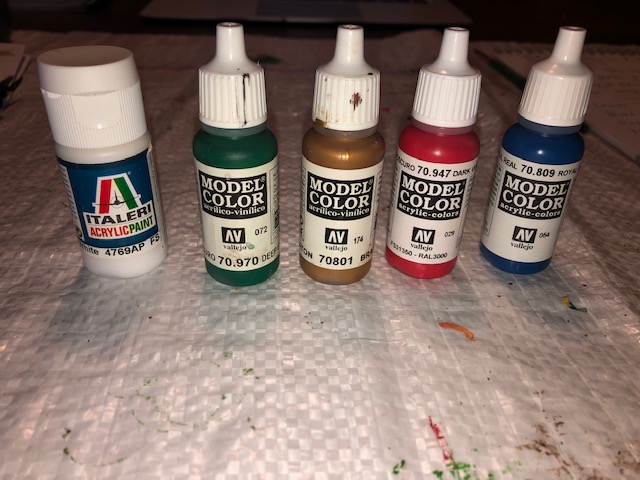
I used primary colors from Vallejo as I wanted the shield designs to be simple and bright. Not sure if this is historically correct, but en mass I think they pass muster.
Some pictures of the process follow.
Sticking to the use of base cats and Contrast paints, the final playing around was a common base coat (Vallejo Lemon Yellow) under three Contrast paints, Blood Angels Red, Ork Flesh, and Leviadon Blue.
As you’d imagine the color combinations produces their expected new color based on simple color relationships.
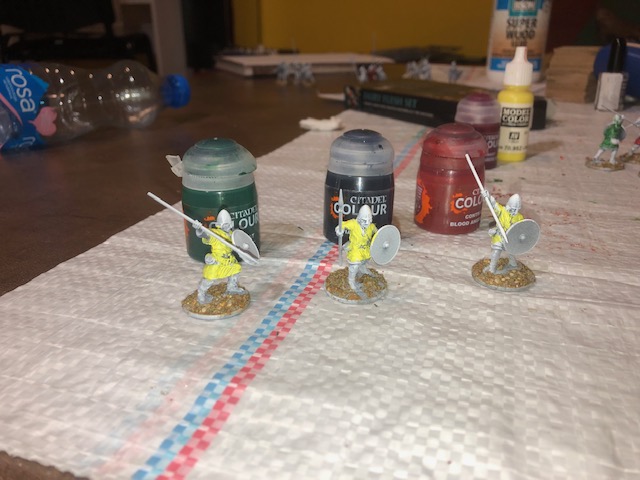

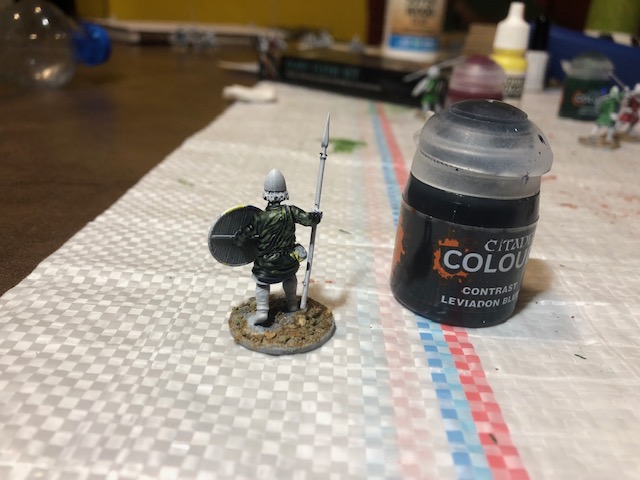
In closing, I think there is a lot to discover about using Contrast paints, and I’m reasonably happy with what they can do, but the different colors do behave differently! I found little “contrast” with the Leviadon Blue as it simply went on in a solid block of color – but that could be me. A similar issue with the Magmadroth Flame.
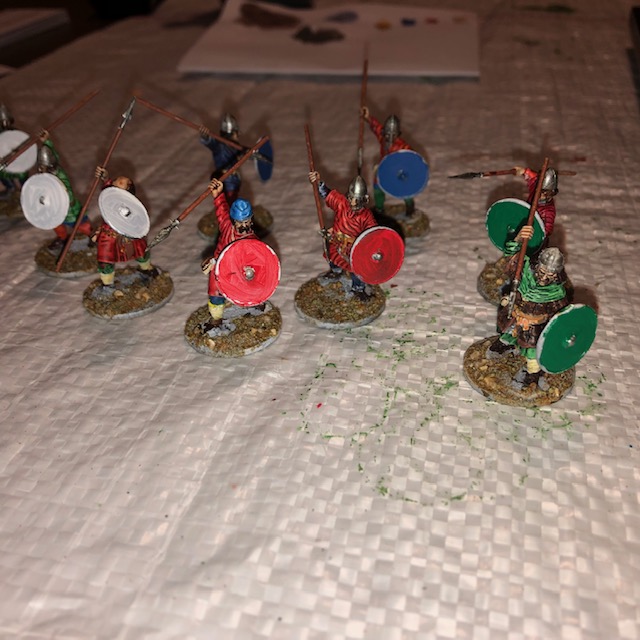
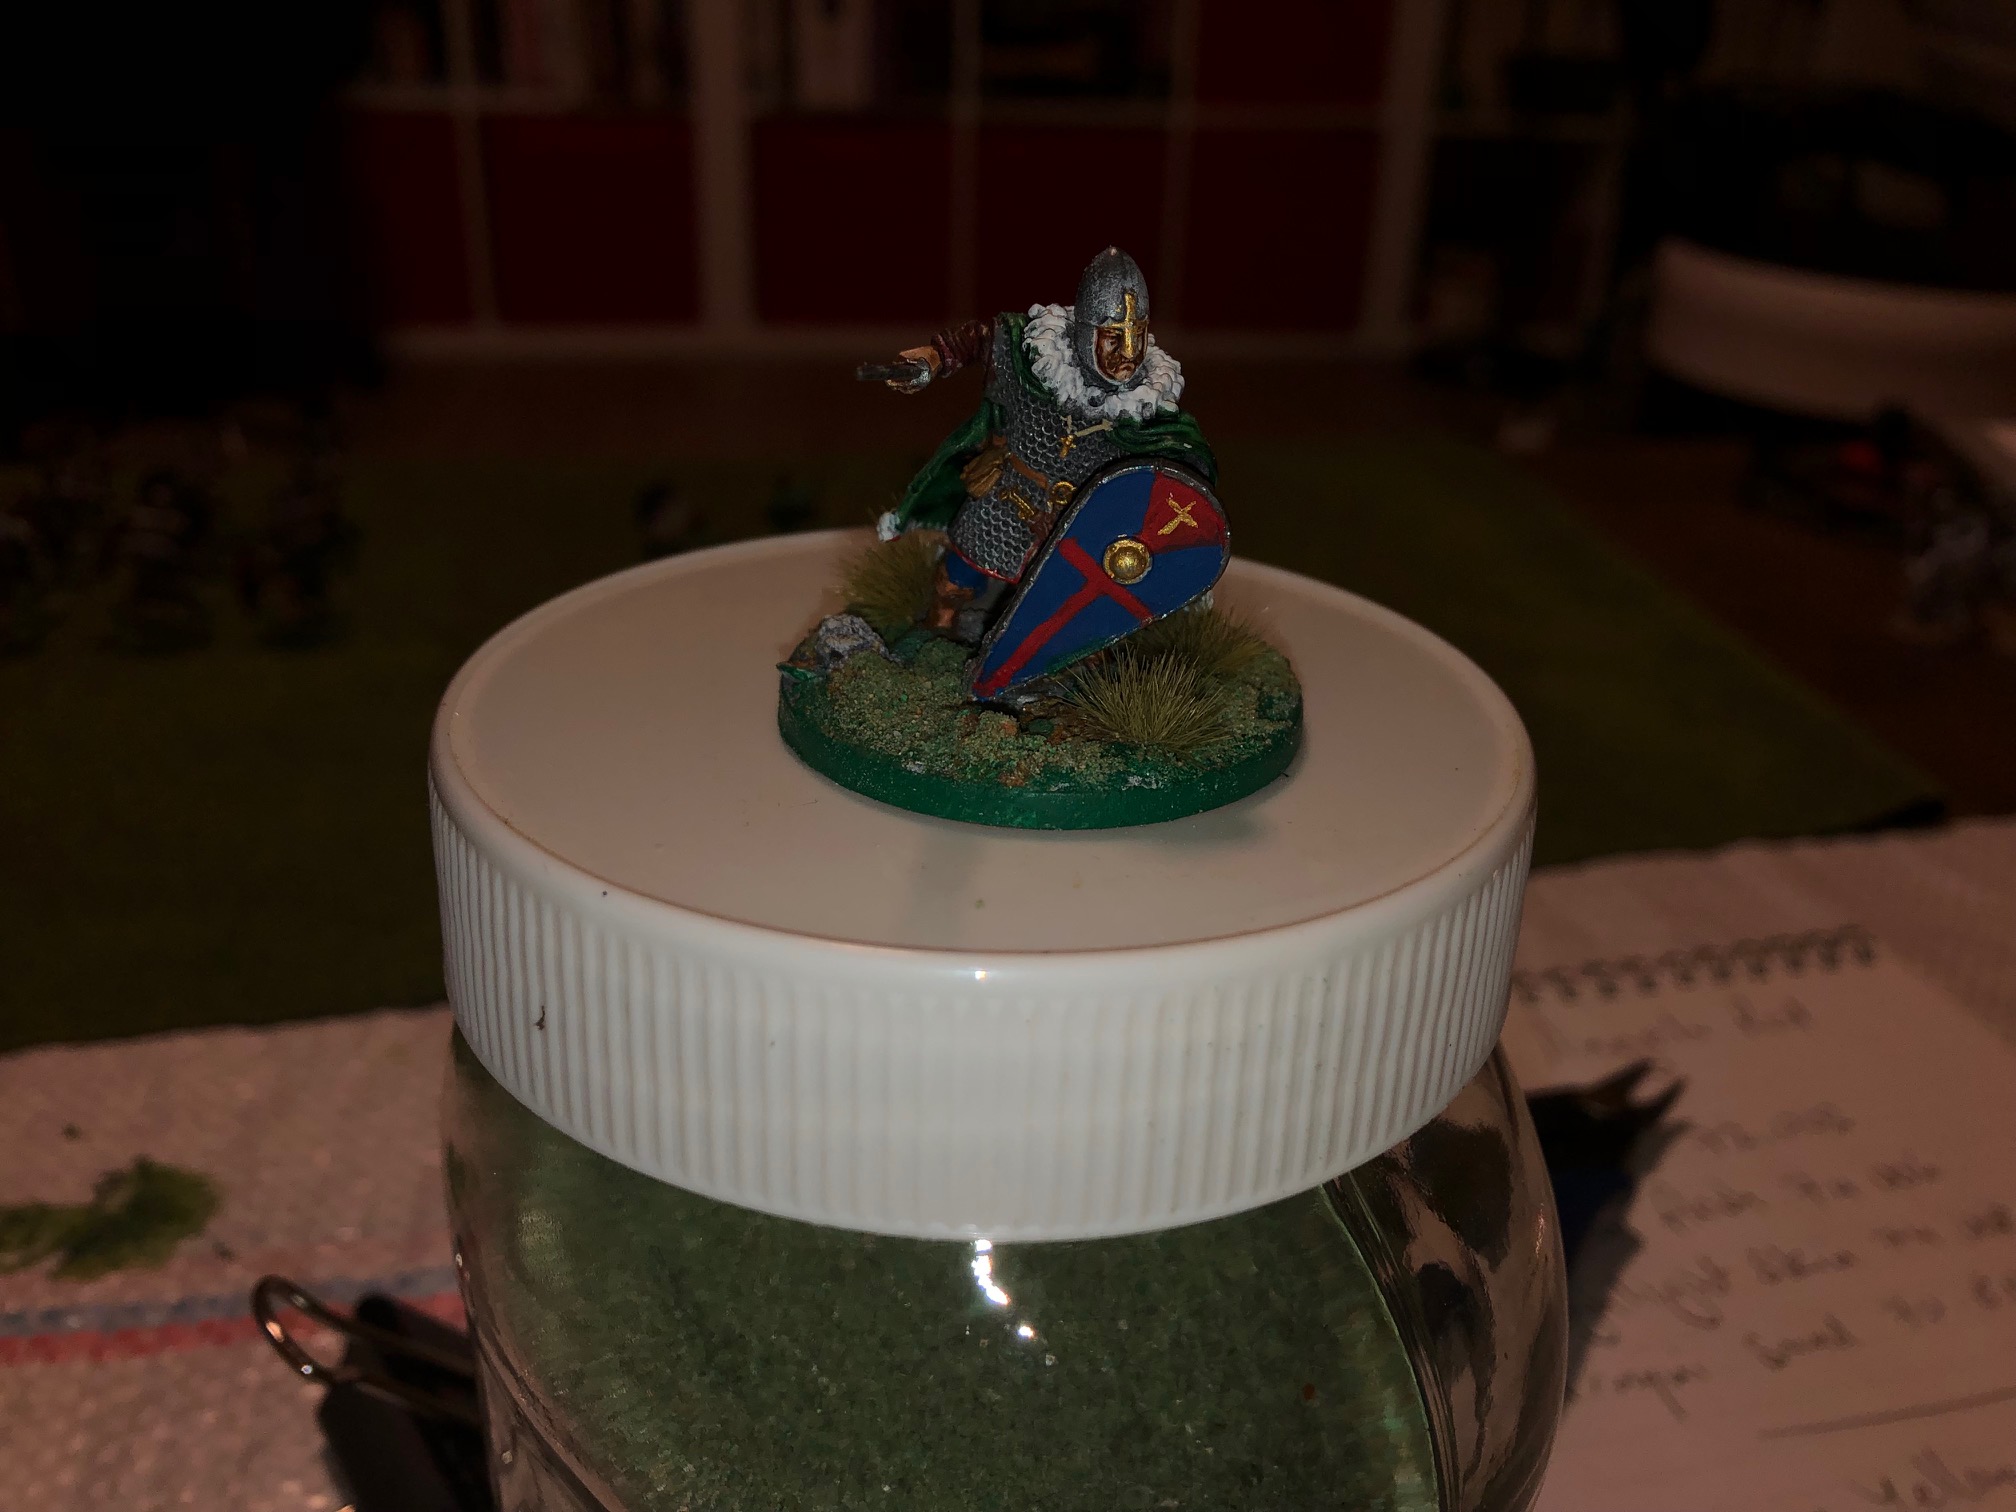
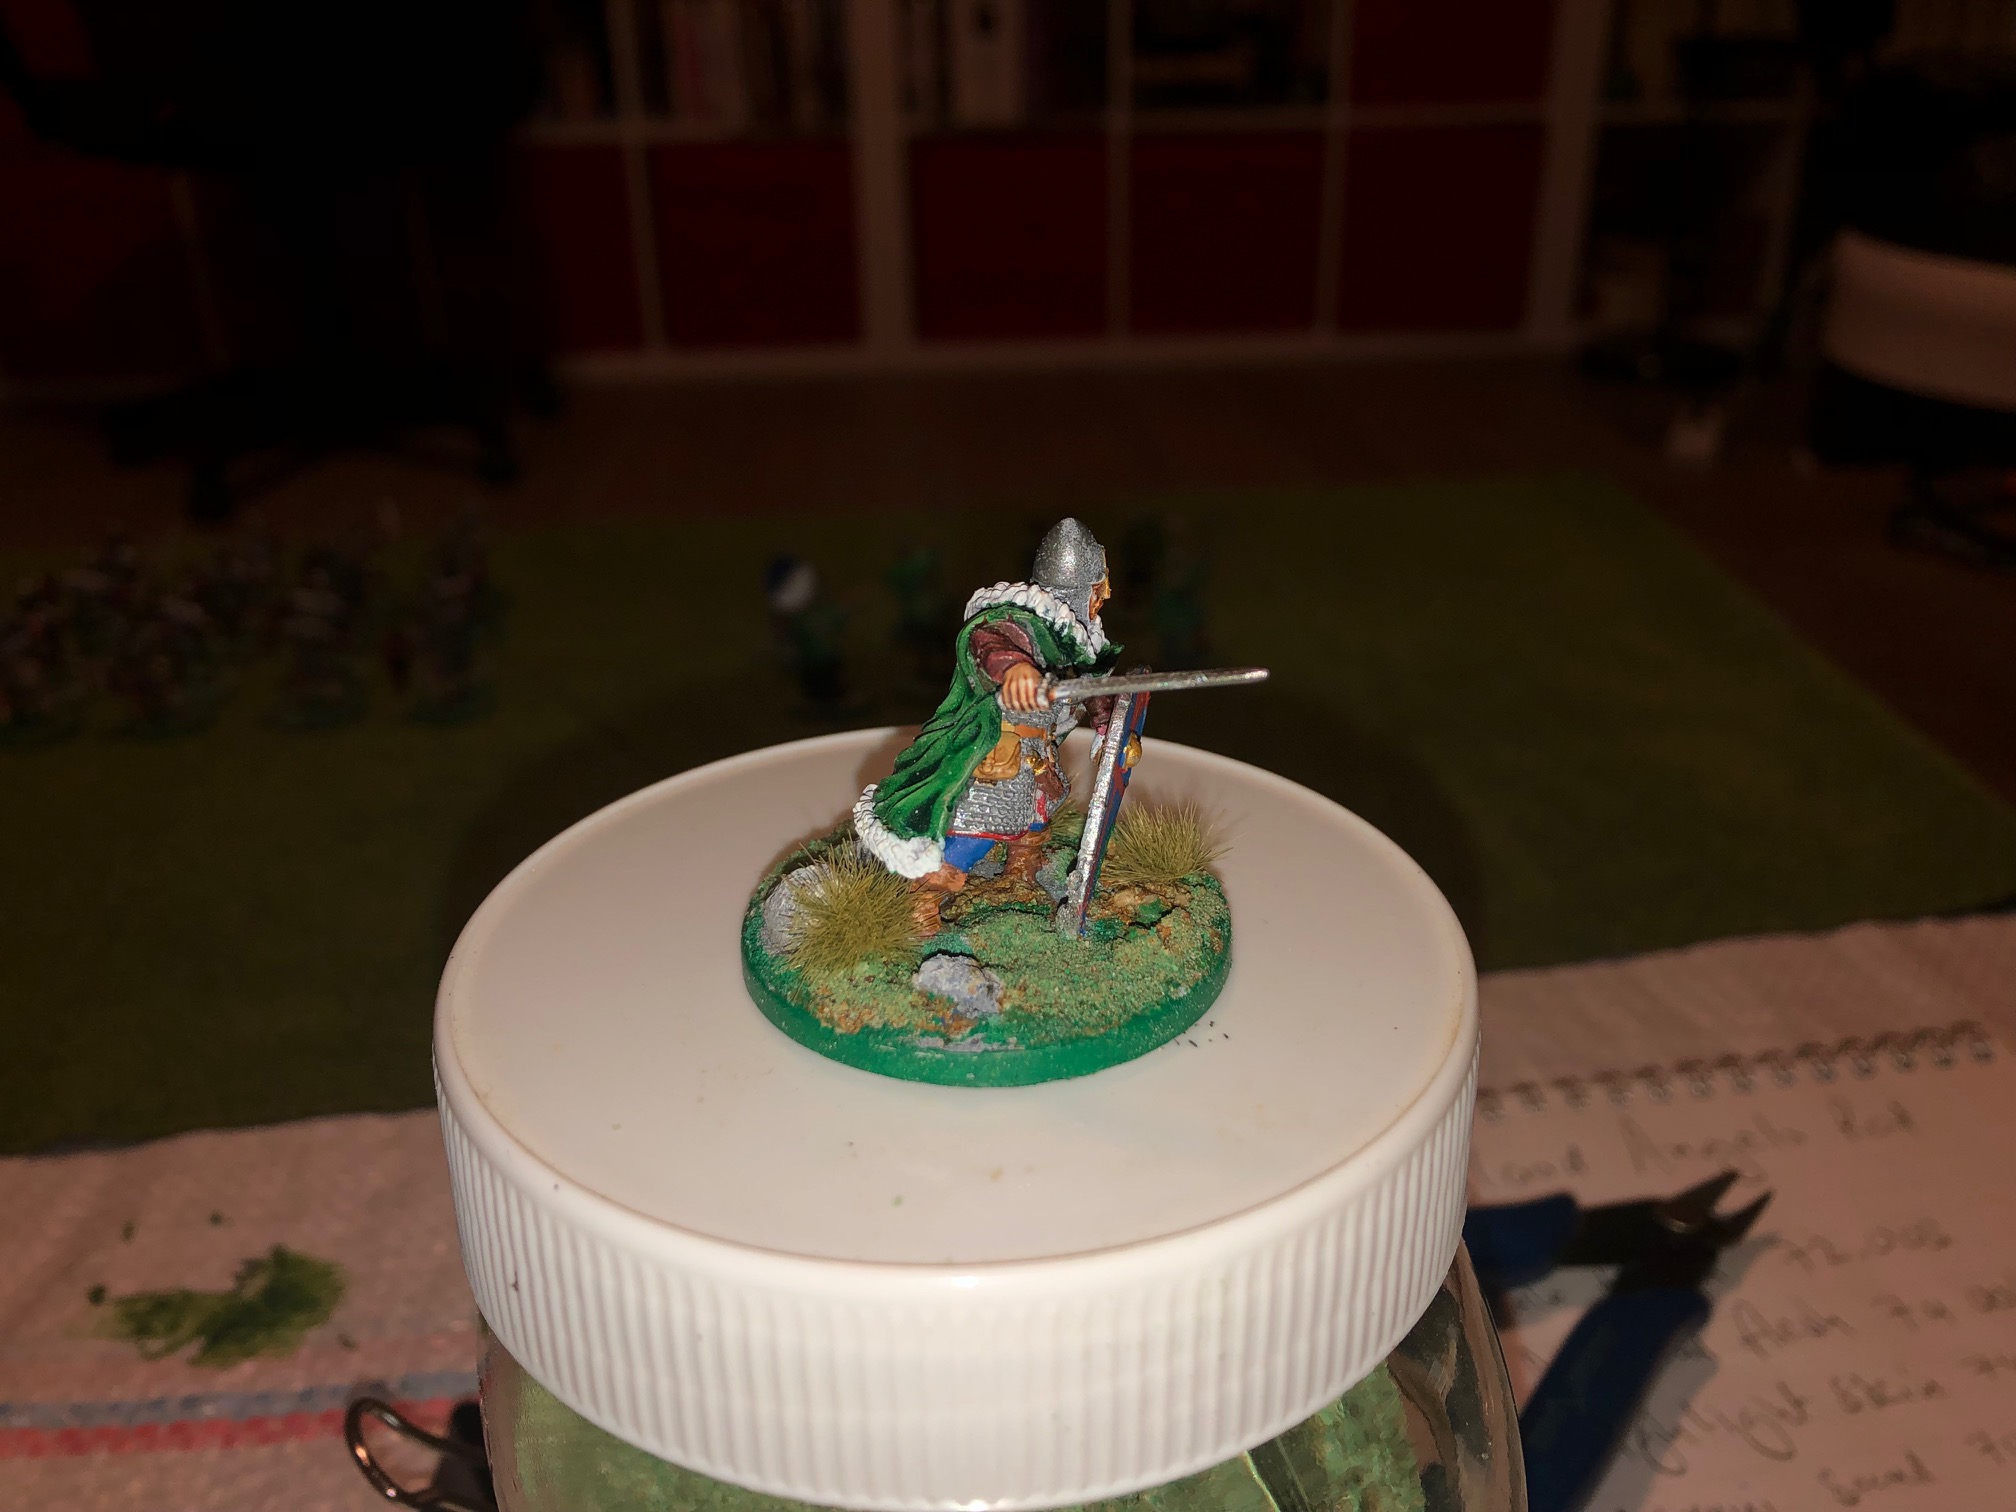
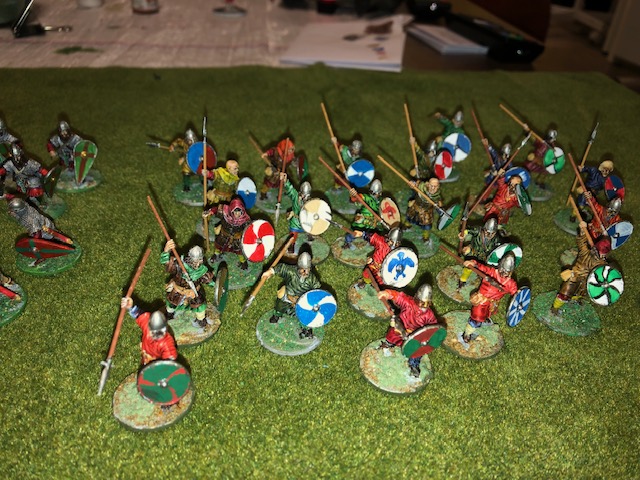
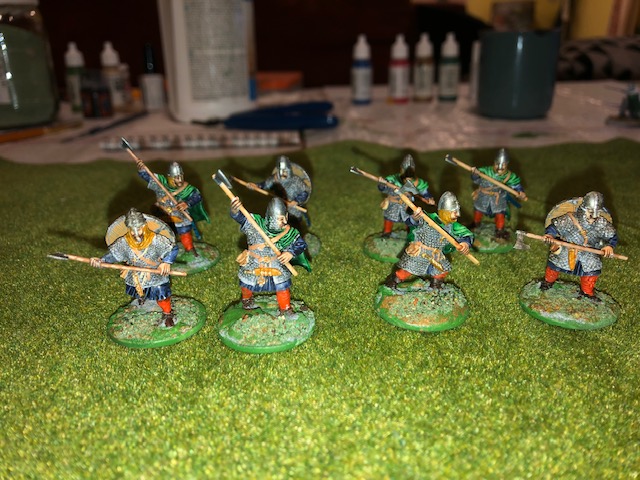
Anyway, final pictures of the completed Anglo-Saxon force. Leader/Hero, 2 x Hearthguard, 2 x Warriors, and 2 x Levies.
Happy gaming


Week 9 - Scatter Terrain
So, while the Vikings are doing their homework I felt that the table top would need some additional small terrain to make their imminent invasion just a little bit more challenging. (My son has my number – and also some extremely fortunate dice throws – and so anything to slow down my impending defeat is to be welcome).
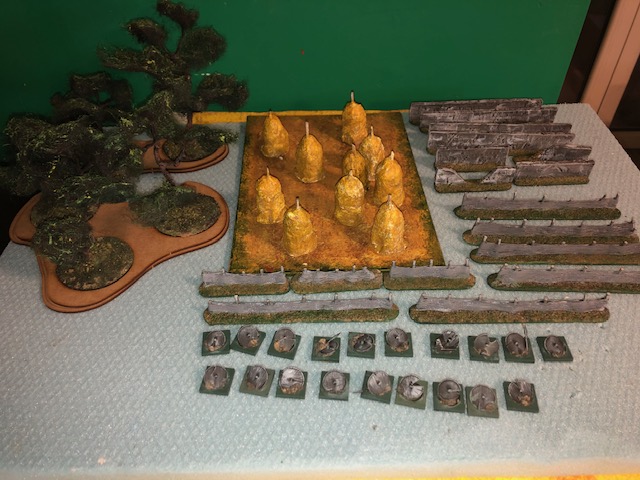
So, what do we need? More trees for sure; some haystacks for the “look” of the thing; some wattle fences and some walls? Probably all of these. And of course somewhere to live! (The houses will come later).
So to start I made some simple hay stacks based around old wine corks, DAS putty and some Mantic round bases.
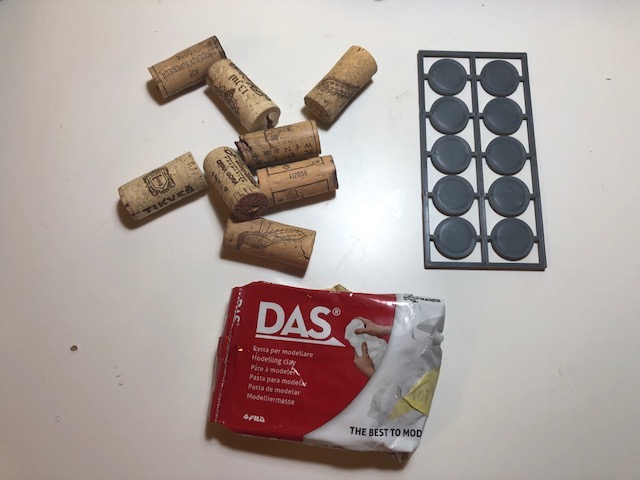 The materials. This "should" be easy!?
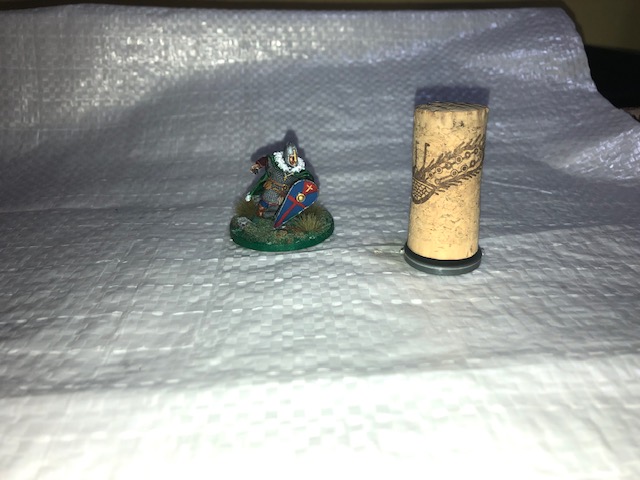
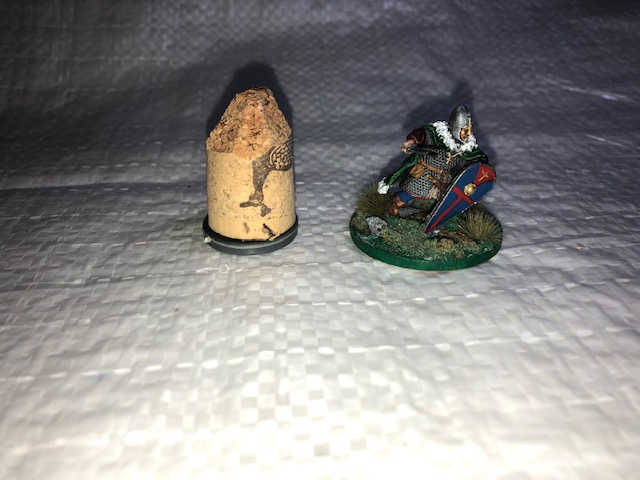

The size of the corks was too large, so after cutting them down to a more reasonable size, they were glued to the bases and once set, DAS was applied in small amounts at a time. I probably got the actual shape of these things wrong, but hopefully they will have the right “look” once they’re finished.
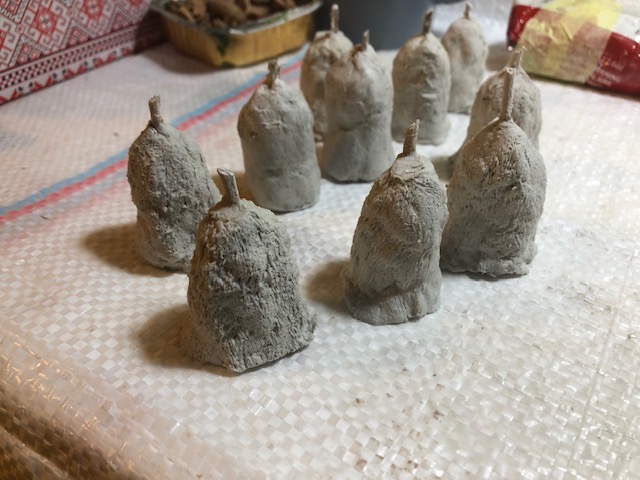
While the DAS was still slightly malleable, I used an old toothbrush to etch some groves into the DAS to represent the straw-like nature of the stack.
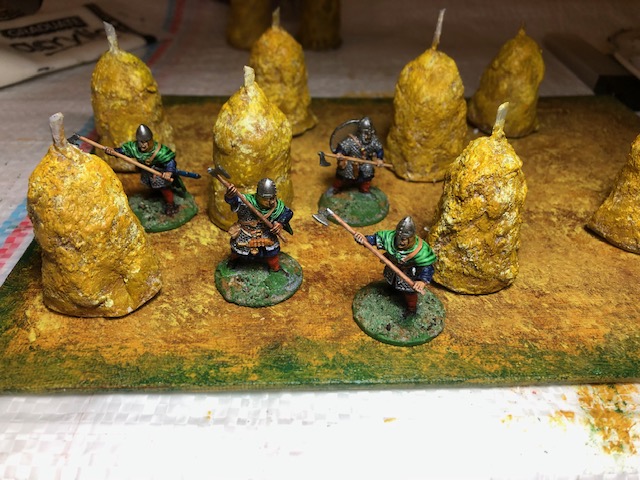
Once fully dry (I waited overnight) I gave them a grey undercoat, then successive layers of acrylic paint (the cheap £-store variety). Base on Yellow Ochre and building up with yellows and browns with final highlights of pure yellow.
These aren’t perfect, but once on a suitable hayfield I think they’ll pass.


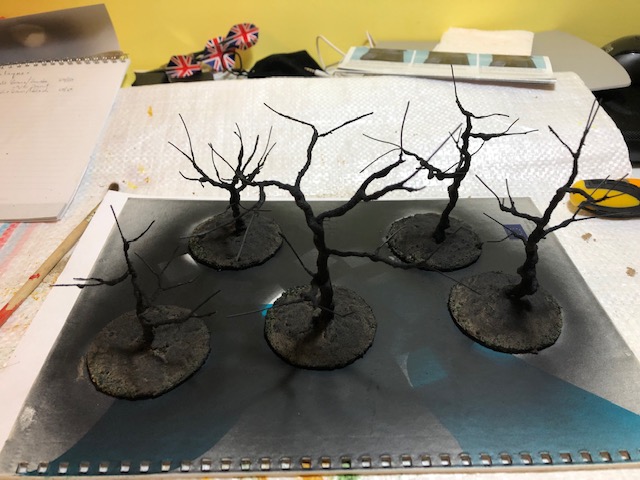
On to Trees. The core structure is twisted wire. This is a well known technique, so I won’t go into detail. The only wire I could get was a bit thicker than ideal (I’ll try to get some florist’s wire as I think that’s a far better option) but you have to play the hand you’re dealt.
I made five tree shops to start with and made some typical tree shapes, which were then glued to 60mm bases with a hot glue gun. (I have some multi-tree bases that have 60mm holes, so I can group 2/3 trees together). I then applied a thick layer of PvA glue to the wire format and dusted in some fine sand. This creates a texture on which to paint later. The bases were also treated with a sand mix of different sizes.
This was followed by spray painting them black and subsequent dry brushing of brown and grey/white.


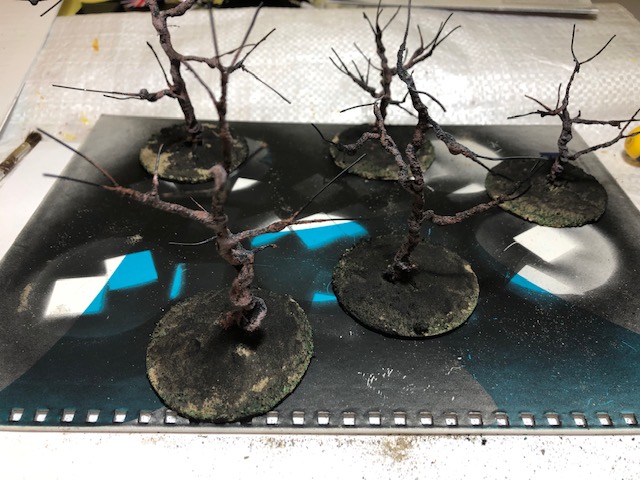
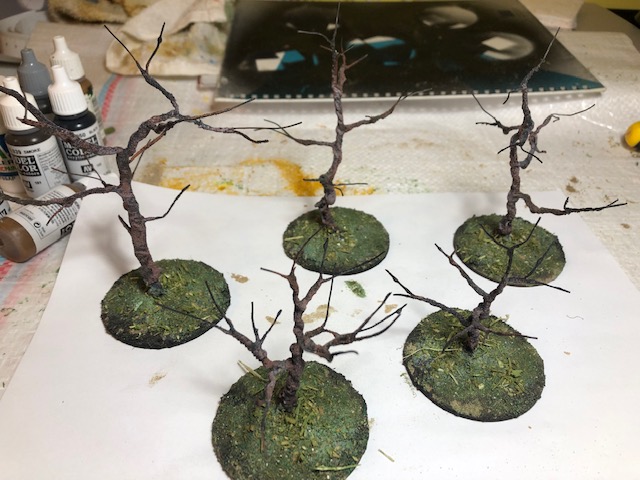
The base of the trees were given a coating of random forest scatter comprising tried tea leaves and herbal tea colored shades of green.
Foliage is a different matter altogether. I don’t have access to model shops, so instead I glued random pieces of wire wool to the branches. These were then painted with a black spray can, carefully avoiding recoloring the truck or branches.
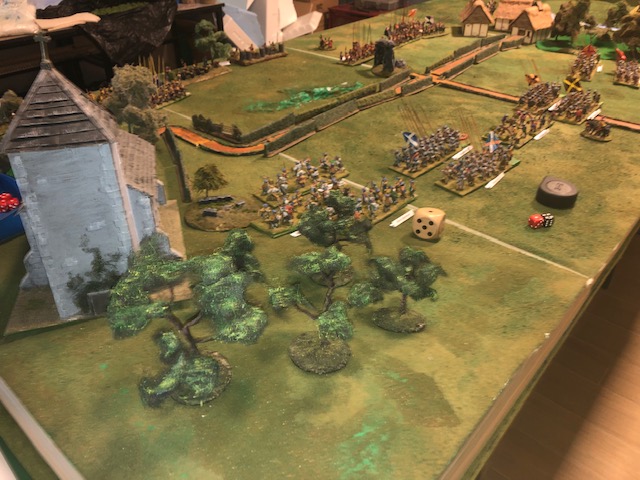
Once dried, the shapes were painted with artist acrylics in greens and yellows (other leaf colours are available).
I will later varnish them with a Matt varnish as I think they’re just a bit too bright.


I’ll update on the walls and fences asap.
Happy gaming
Week 9a -Walls, Fences and Fatigue markers
Update on the remaining terrain pieces.
I haven’t done anything remarkably different to others, but here are pictures of the process for the different terrain features.
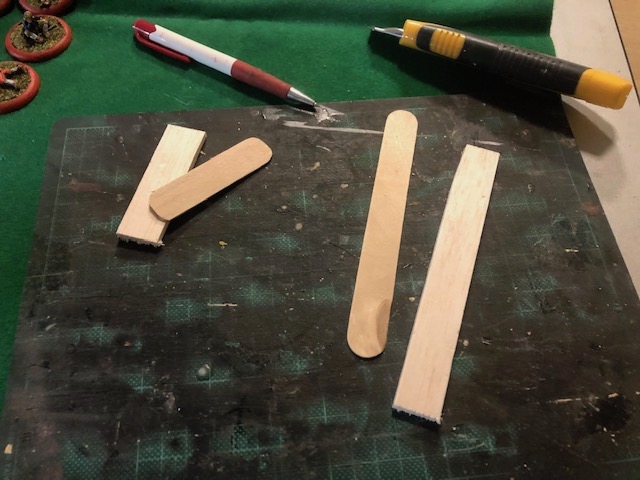
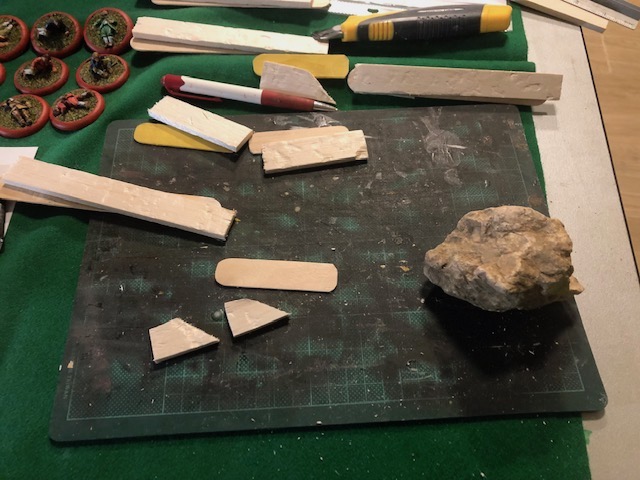
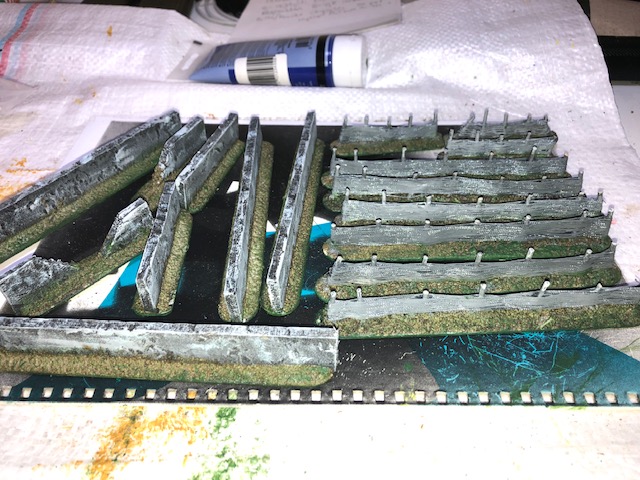
Walls were made by using balsa wood, 5mm thick and 20mm high stuck down on “tongue depressors” or art sticks, depending on where you are. These are about 6″ in length. I cut some in half and rounds the edges with sand paper (I did the same for the fences).
The balsa was “textured” by rolling a rock on the wood. As it’s so soft, it leaves an impression. On reflection, I think the result is more like concrete than stones, but it will have to do (although It is an interesting possibility fr other games such as Bolt Action or Necromunda, where concrete might predominate?)
I added a mix of PvA and sand to the bases for both texture and strength. As an aside, I have some small sand which I previously colored with green paint, and this the added to the base provides an “instant” grass look, which I later highlighted with another green acrylic paint. I think it looks OK, but comments welcome.
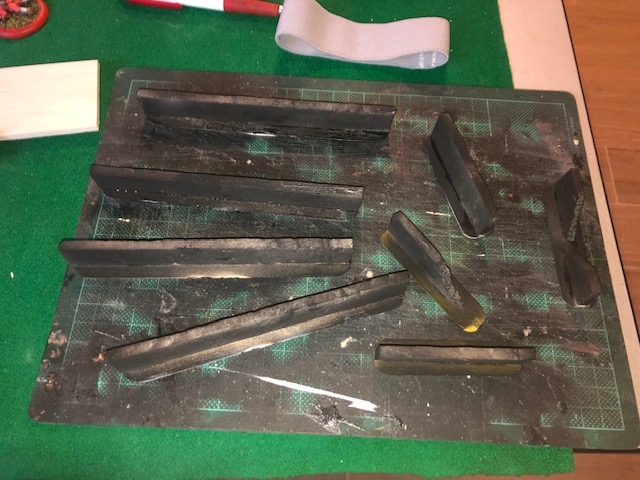
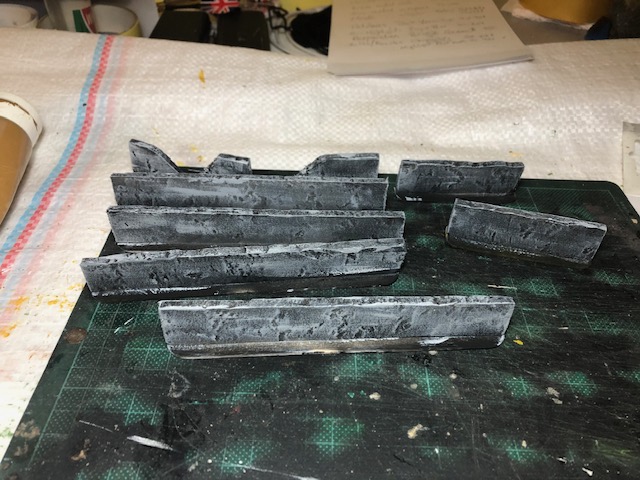
Painting the walls was straight forward: based in black then a series of grey/white dry brushing. I also tried placing some brick shapes in paint with a flat brush. Again, bot 100% happy, but it is what it is, at least for now.


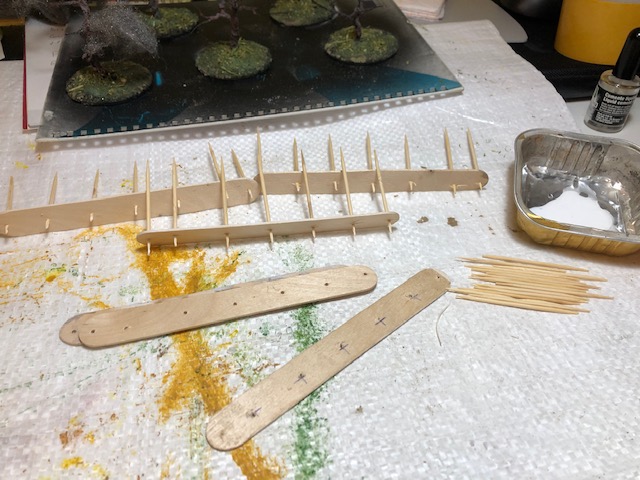
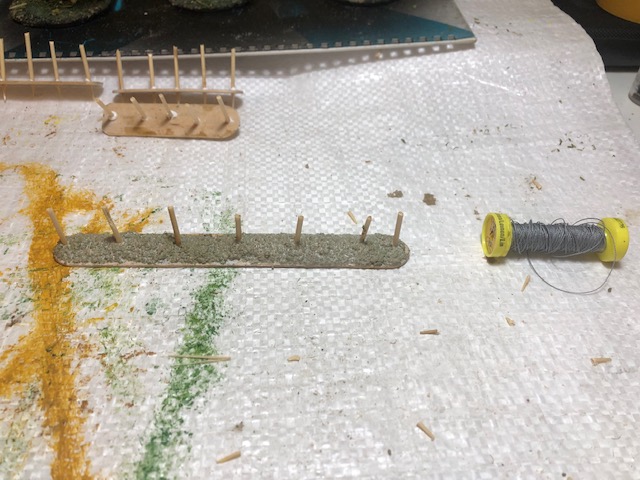
The wattle fences were made using the same 6″ art sticks. I drilled small holes every 1′ but on reflection I think the look would be better if the were every 20mm (about 3/4″).
Tooth picks were glued into these holes and once dry, cut off about half way. The wattle is actually cotton yarn. Note that this isn’t the normal thread, but is thinker and I think used for crochet work or maybe tapestry work. This can usually be found at any haberdashery. I chose a grey as this is a good neutral base color.
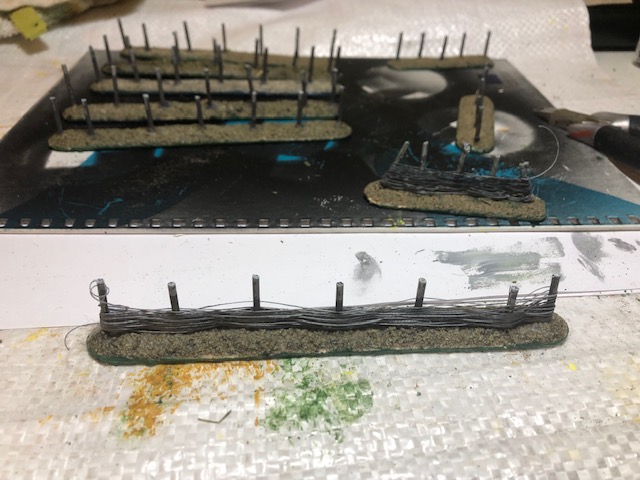
Important note: the uprights need to be an ODD number otherwise the weaving doesn’t work. Periodically I would ‘fix’ the weave with superglue (I also dropped superglue on the knot when starting the process with the yarn. I find starting in the middle hides the knot better than starting at one end. Loose thread can be snipped off later.
Once complete and dry, a grey paint is applied and can be highlighted with a lighter grey for emphasis.
The ground work is the same as with the walls.

The fatigue markers was made with Mantic small square bases, a dollop of glue/sand and a radon shield with sometimes a weapon stuck down.
A black primer followed by a white dry brush finishes the job and the base painted a green. decided that these represent fallen warriors and I wasn’t about to start painting all the shield fronts!
 Simple, but I hope sufficient for the job
So, I think that’ll do for now with the smaller terrain pieces, next on the agenda is a couple of Dark Age buildings.
 Happy Gaming
Week 10 - Dark Age building
This week I’ve been putting together a couple of squat Dark Age buildings for the Anglo-Saxons based on these images off Google.
 This is the model for the buildings
The steps will be familiar to most people, I think, but I will present my approach which is quite picture heavy.
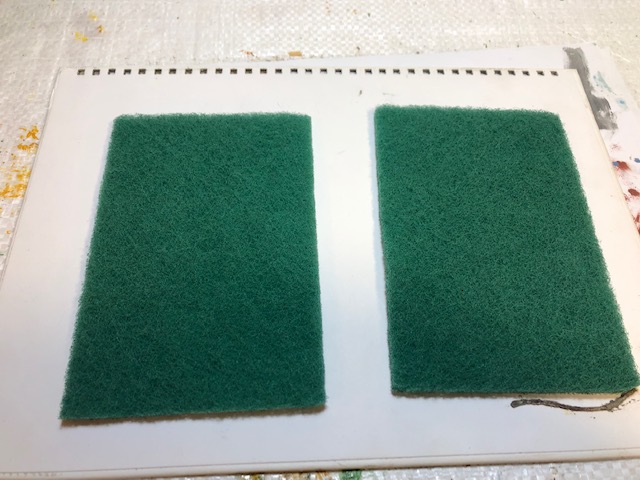
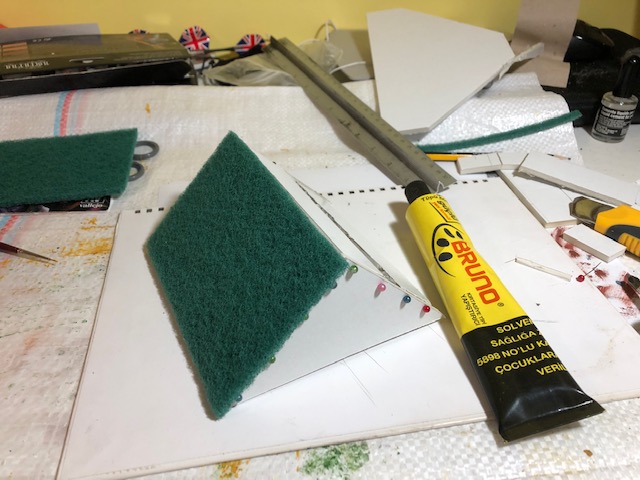
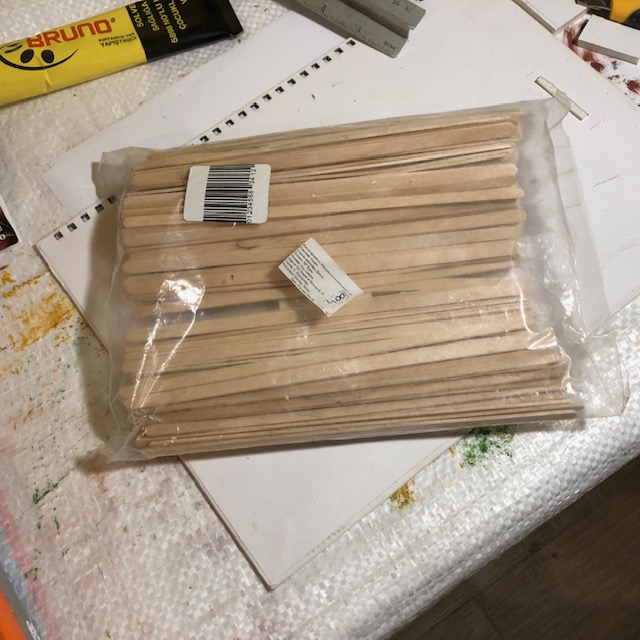
Materials are 5mm foam core; Pan scrubbers; coffee stirrers; some balsa wood; and glue. (Usually I use PvA for buildings, but I had none so used a UHU type glue instead. I don’t think it makes a particular difference.
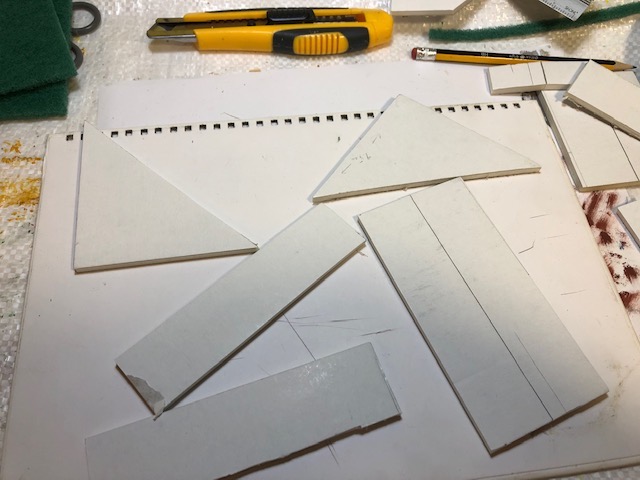
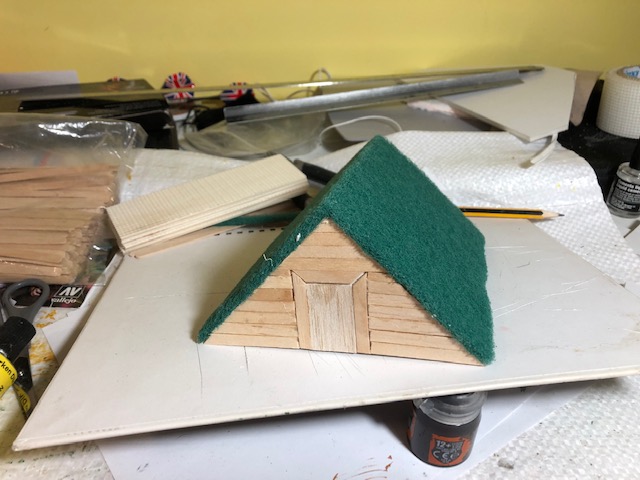
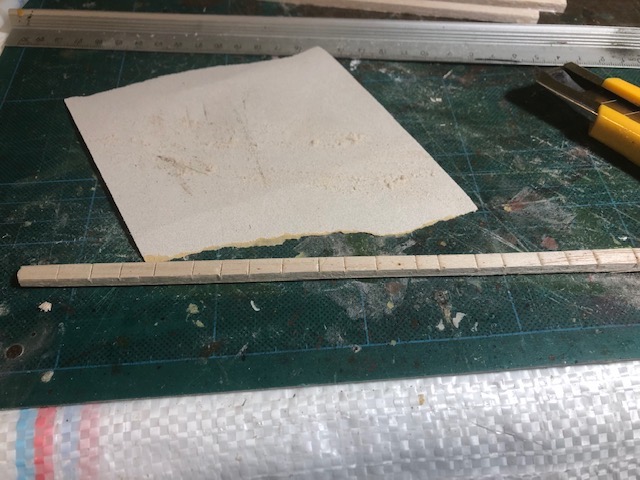
The first set of images are the materials and basic construction. The pan scrubbers are 10x15cm and about 5mm think. I trimmed off 5mm from one of the scrubbers so that they would form a need angle of equal sides when glued down.
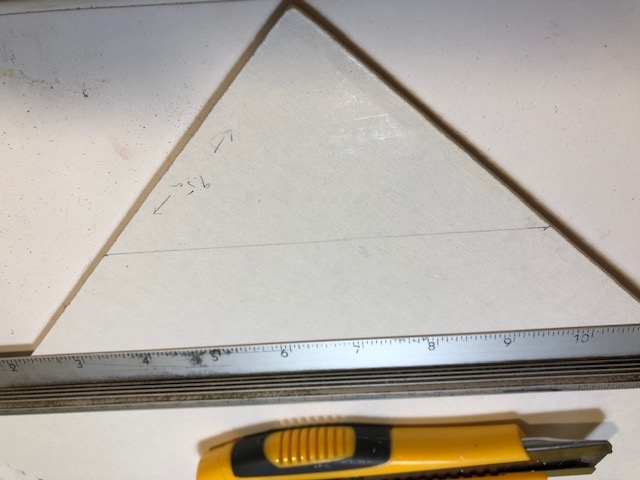
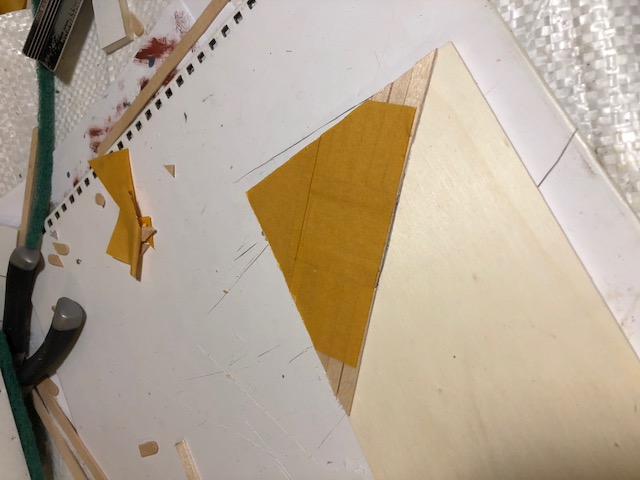
The two triangle end pieces were measured from the “inside” of the triangle formed by the two pan scrubs, and were 9.5 cm on two sides as shown.
As it turned out, I ran out f foam core, so instead of one solid piece for the roof supports, I used a couple of smaller pieces. It was still secure, so no harm done. I did not put an additional piece in the middle of the house, although that could be done to add additional support. I’m not sure it’s necessary

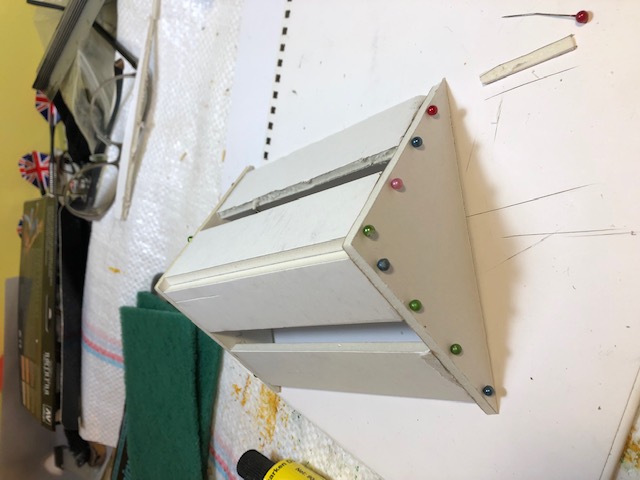
The end pieces and roof pieces were glues into place and pinned to hold the shape while the glue dried. One this was done the roof pan scrubs were also glued down individually and I left each side to fully dry with small weights on them to ensure a good bond.
Of course I realized afterwards that I should have completed the finishing of the two end walls before doing this! It just made the construction of the end walls more difficult. I’ll explain further below.

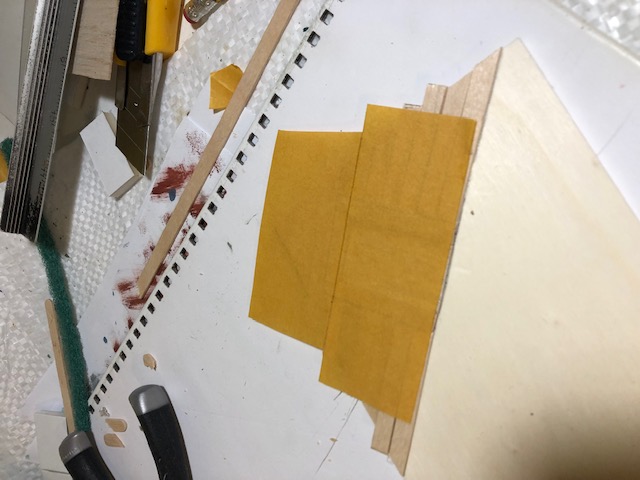
The wooden end walls were done with coffee stirrers. As I alluded to by gluing the roof on too early I had to think of a way to get the coffee sticks onto the wall supports. I think I over-thought the solution! But here’s what I did.
I measured onto a board the shape of the end walls and put a small piece of double sides tape in the middle. I used this as a template for the construction of the walls and once they were all in place, I used further double sided tape to secure the sticks together. I originally thought to simply stick these in place with the tape, but later changed my mind – so any ordinary tape would do here.
I eased off the taped wall pieces and glued these into place on the foam core, and used some small clamps to hold them in place while these dried. The “door” was a piece of thin balsa wood.


Once everything was completely dry, I removed the tape.
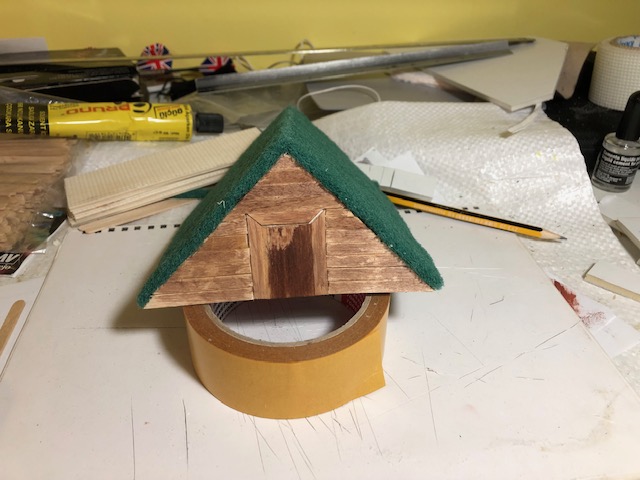
Painting was done with diluting a Contrast Brown paint into a weak wash and simply painting this wash on the wooden sticks to allow them to form their own finish. I used different paints on the door and door frame.
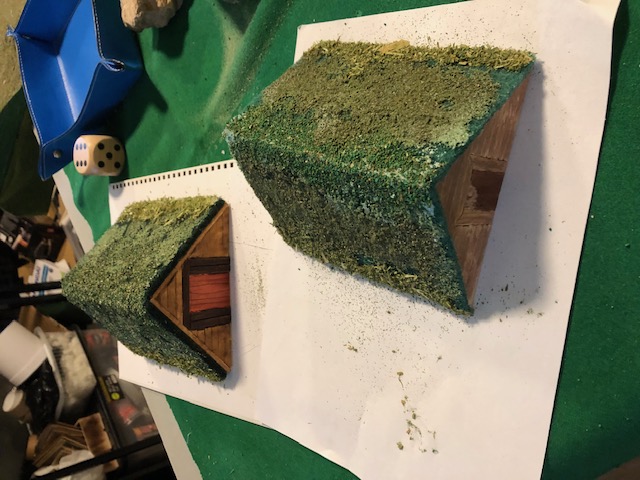
The roofs were already green from the scrubs, but I added a mix of dried herbs (from tea bags) and thin wood shavings at the bases, and different mixes of colored sand on the roofs themselves. Not sure about how accurate this is historically, but I didn’t want to paint these pan scrubs and the glue/sand seemed a decent solution.
Next up I’m thinking of making a ruined tower. I don’t know how this would fit into the period, but as there were certainly castles of some sort in the 10th century, I’m sure a half-built or ruined tower could have been a feature.
Anyway, in the meantime, Happy Gaming
Week 11 - Nothing much happening
So, only two weeks to go. The Vikings are making slow progress and we still hope to end the challenge with a BatRep (fingers crossed).
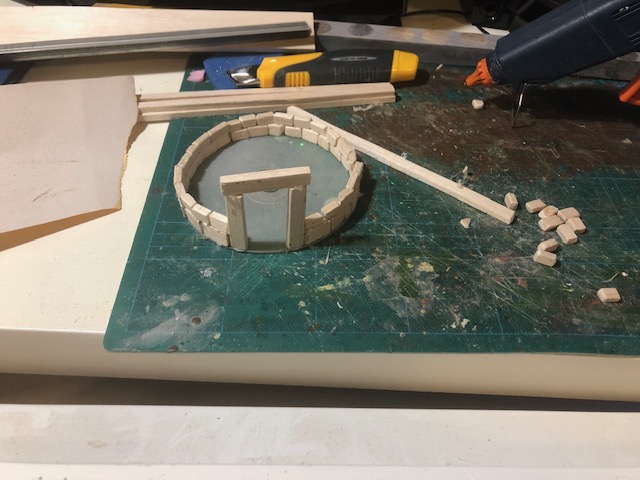
This week I discovered that not thinking has consequences. I mentioned last time that I would think of making a ruined tower. Well I started by cutting up some pink insulation foam into “brick sized” pieces, glued them with a hot glue gun, and then undercoated them without thinking and it melted!
So, this will now become a feature of a Kings of War battle as a ruined mage’s tower after a particularly effective fire missile attack!
I revisited this by using balsa wood instead. I cut lengths of thin balsa wood and smoothed the edges with sandpaper.
Pictures follow.

These were then glues with a hot glue gun to an old CD disc and built up to a small level to represent either an unfinished tower, or one that collapsed.
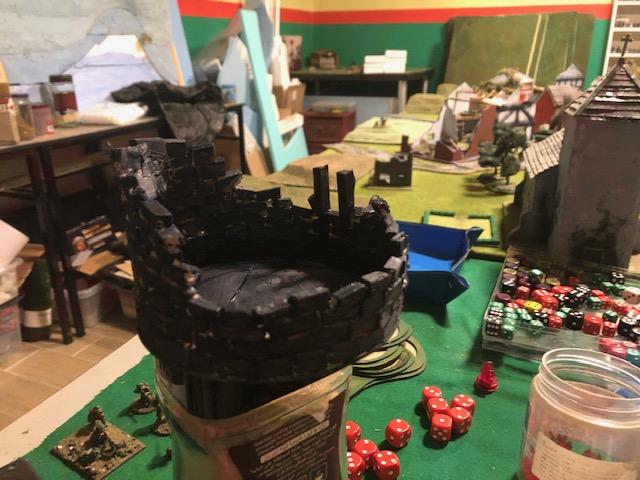
 Building underway
Once it had reached a height that I was happy with – to be completely honest, I got fed up with the entire process. A lesson here I think, be in a good frame of mind before venturing onto something that you know will be rather tiresome! (OR find a good movie to keep you going).
Anyway, after several levels were completed I painted it with a black undercoat and then applied grey and then white highlights and I hated it!
It just looked poor. So I washed I with an ochre wash and it still didn’t look right.
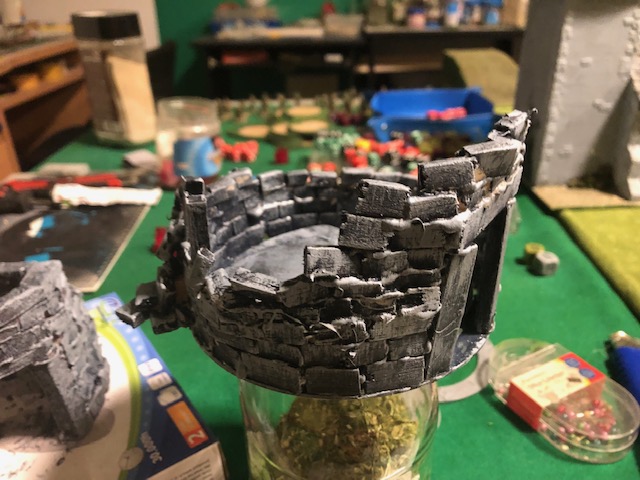
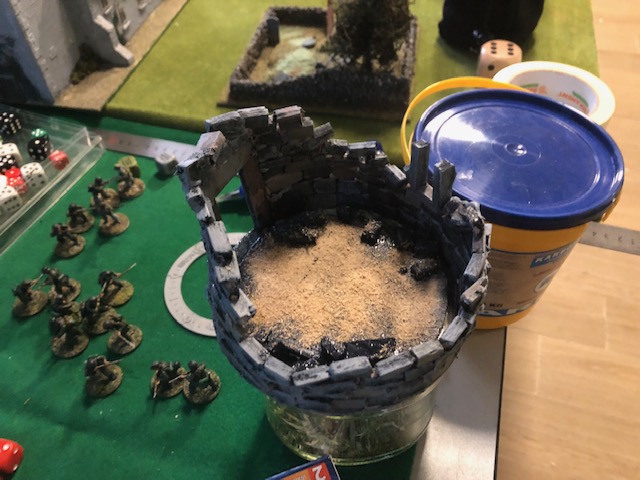

So, I’ll keep working on this during the week but am unsure where this is going.
A bit frustrated, but, that’s life sometimes.
Happy Gaming
Week 12 (Early) - How will the Vikings arrive?
While my son finishes off his wee army (It’s coming along nicely now), it incurred to me that they can’t walk to “Merry Olde England”. So putting aside my frustration with the tower, I thought they need a boat! Or to be more exact, a Viking Longboat.
So, here goes!
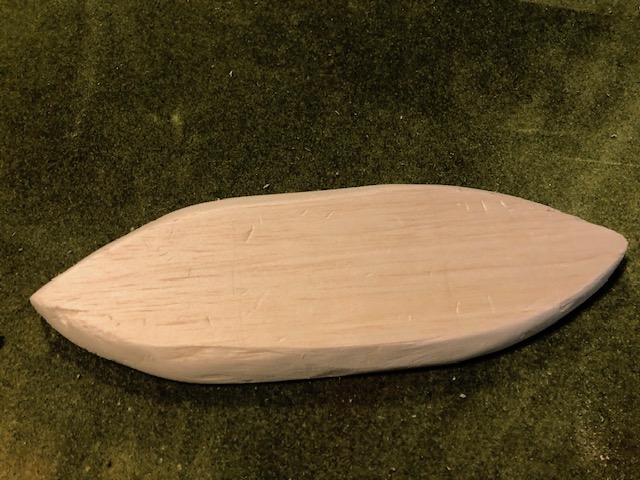
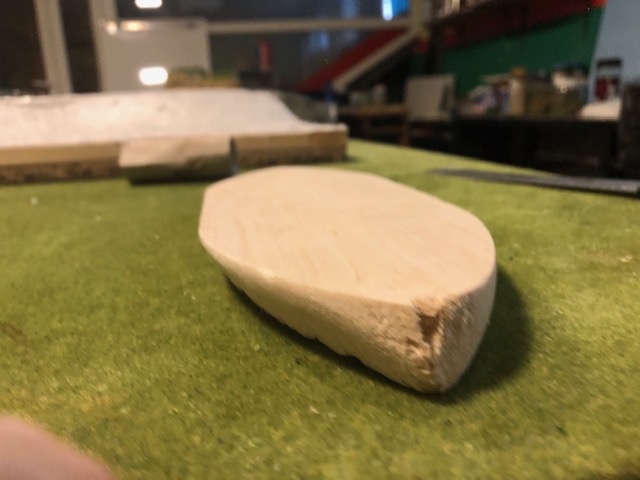
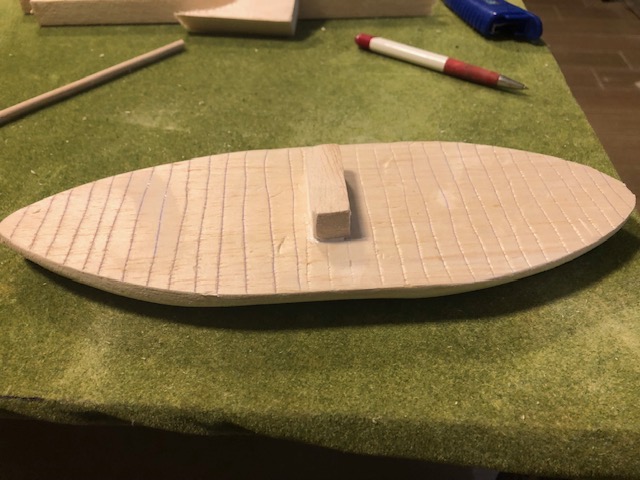
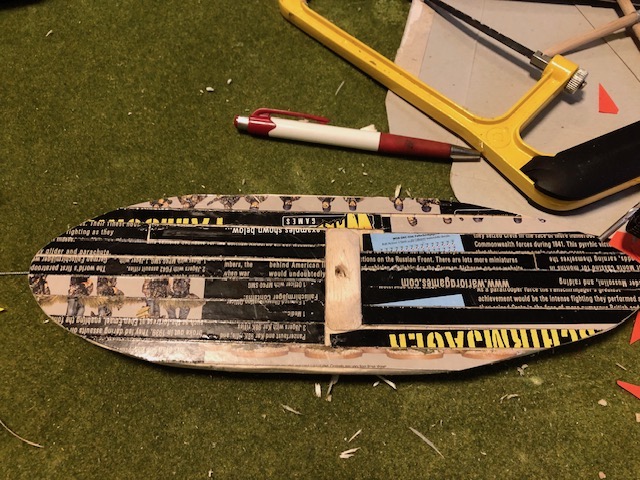
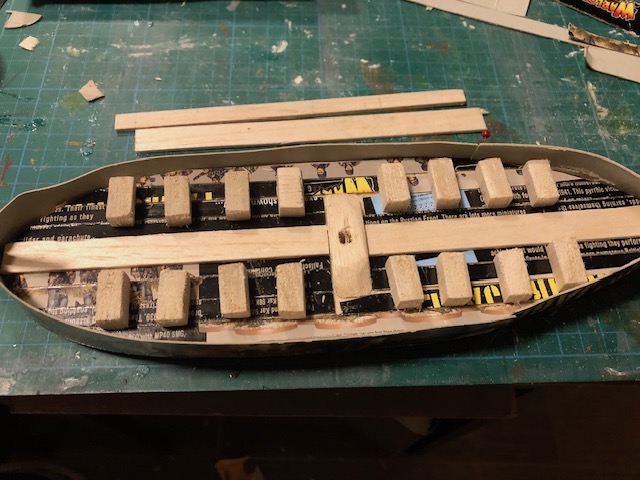
I started with a piece of Balsa wood and drew a rough ship for a “representation” of a Viking longboat, and after cutting out the basic shape, went to work with a craft knife and sandpaper to make a kind of boat shape.
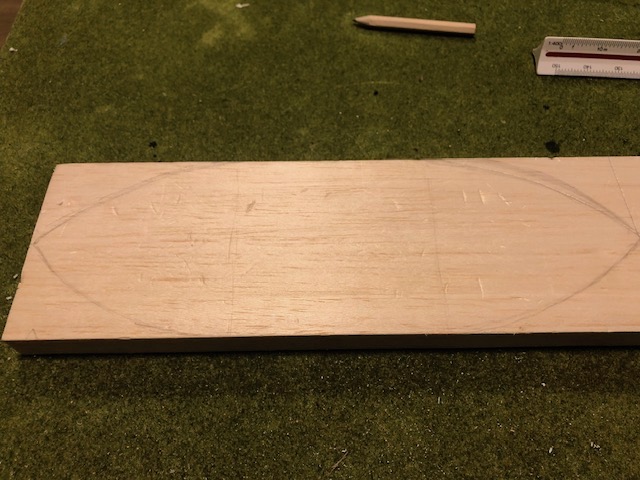
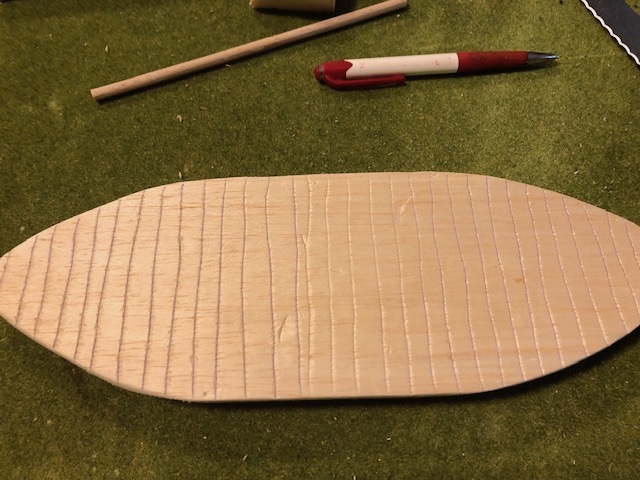
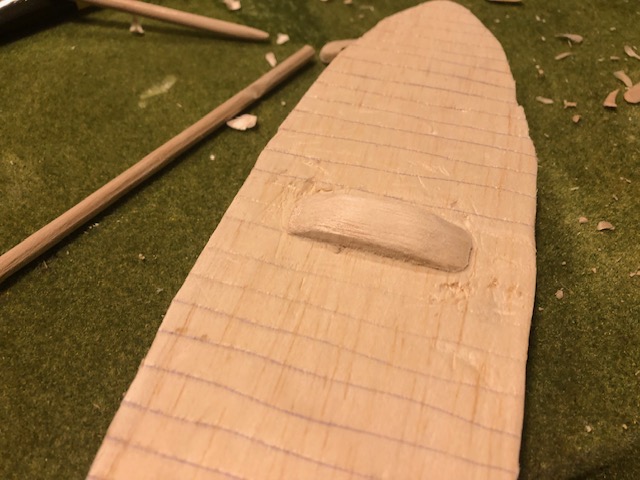
Initially I drew some “planks” on the balsa, but later changed my mind and stuck down planks running stem to stern as this seemed to be the way it was done looking at pictures.
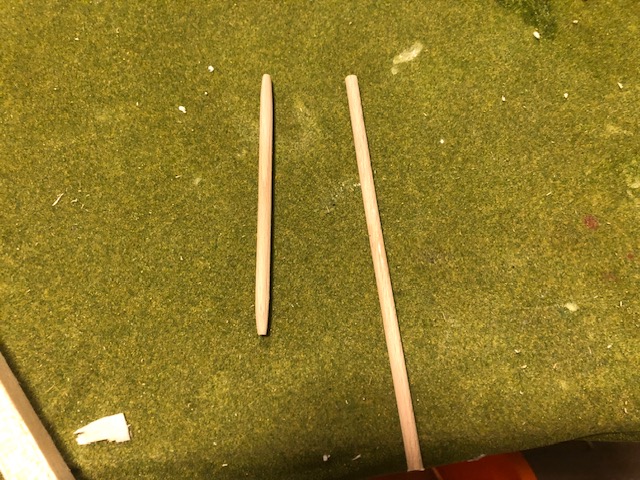
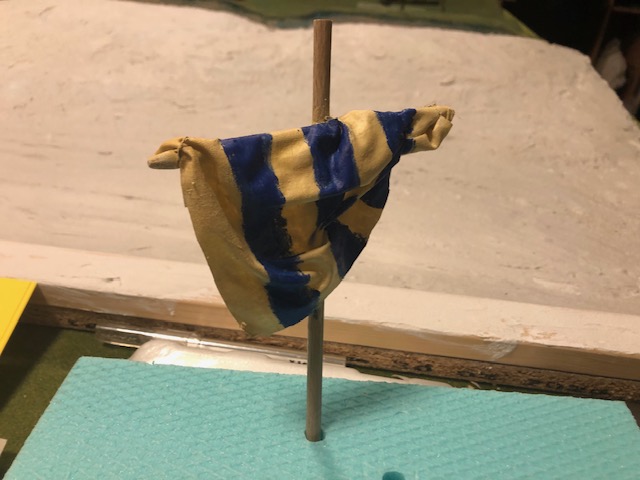
I stuck a block of balsa in the middle to support the mast, which will be a rod of dowel with a crosspiece made of the same material. This was also shaped to reduce the size and to be more in keeping with the reality.
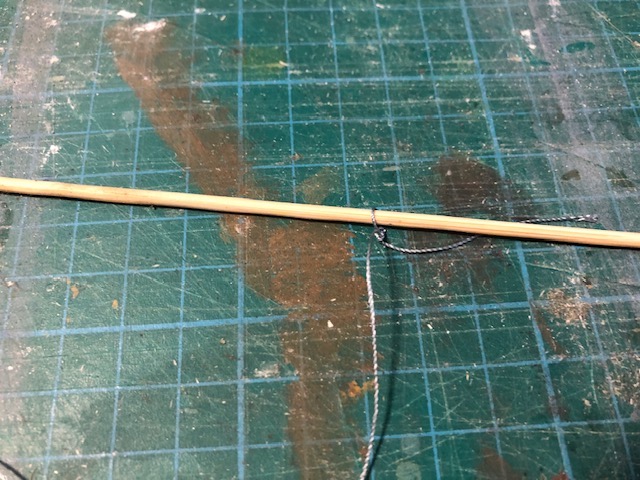
The mast cross piece I sanded down at the ends to give a more rounded shape, and cut two “guide notches” in both pieces before gluing them. I wrapped some yarn around the joint, both for some additional strength, but also to simulate rope.
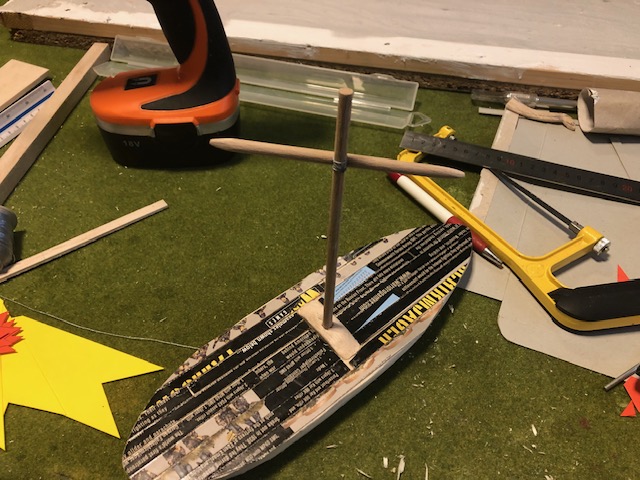
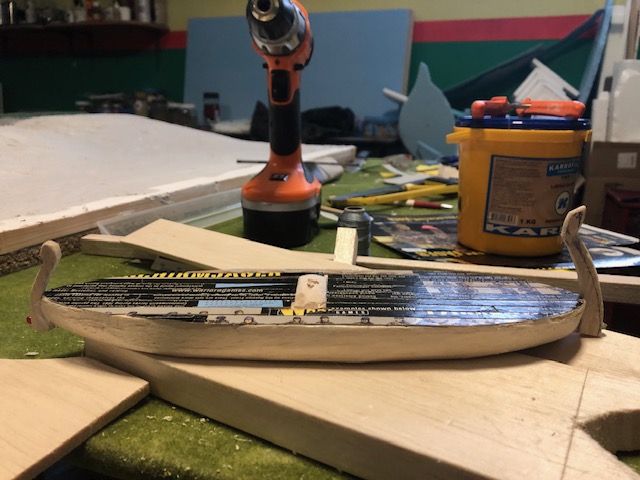
The picture above shows the mast temporally in place and the “wooden planking” made with strips of thin card. I stuck them glossy side up as I read that this side takes paint better. I guess we will see, I normally stick them “paper” side up.
I cut some stern and aft shapes out of balsa to represent the traditional look of the boats. Not sure how well they’ll stand up to play though as balsa is rather flimsy. I’ll think of a way to reinforce them, maybe just PvA and paint will be enough?
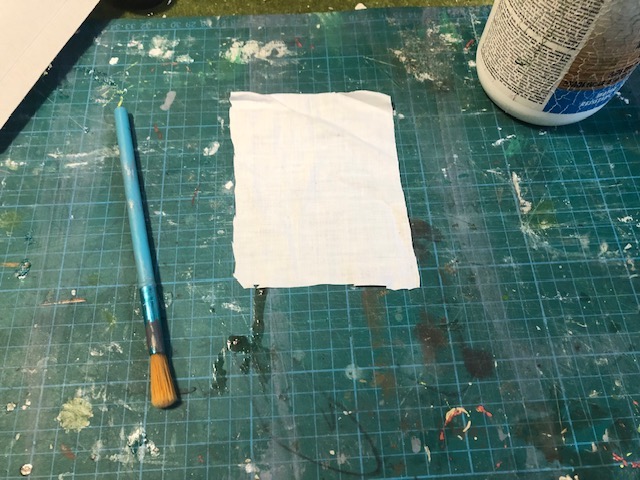
Next up was the sail. I didn’t want it fully open, as this longboat represents them just after landing, so I wanted it partly furled. I found an old piece of material which has a fine weave, and cut a roughly right sized piece. This I soaked with a PvA/Water solution (I guess about 50/50) and then roughly stuck it down on the mast.
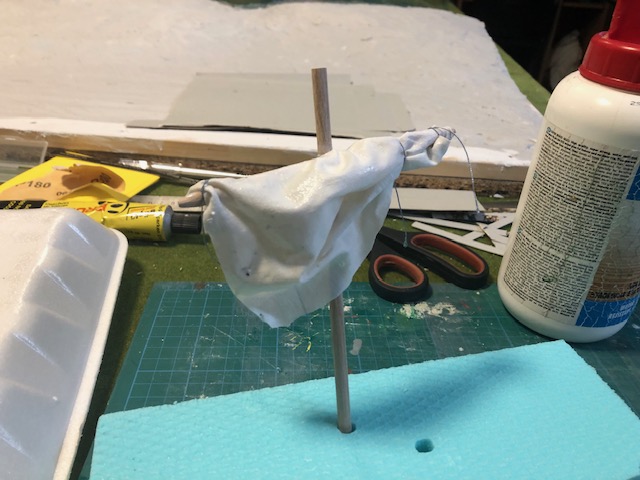
I used some of the yarn to “scrunch” up one side of the sail and also to begin to indicate ropes etc. (I will NOT be trying to make a full set of tethers for this boat!). The image below of the boat/sail is not yet find. I will glue down the sail only after finishing the planking on the sides of the boat, which I’m not yet fully clear on.

So, time to become a shipwright.
Happy Gaming
Week 12 (Proper) - Viking Longboat
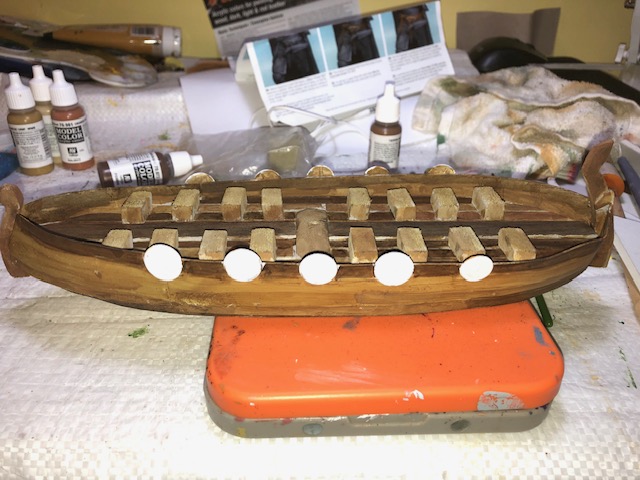
So, the work on the longboat continued. I painted the entire boat (excluding the sail/masts) with grey spray paint. The painting process for the boat and mast used Vallejo paints from the “Leather & Wood” set. The sail was painted using acrylics.
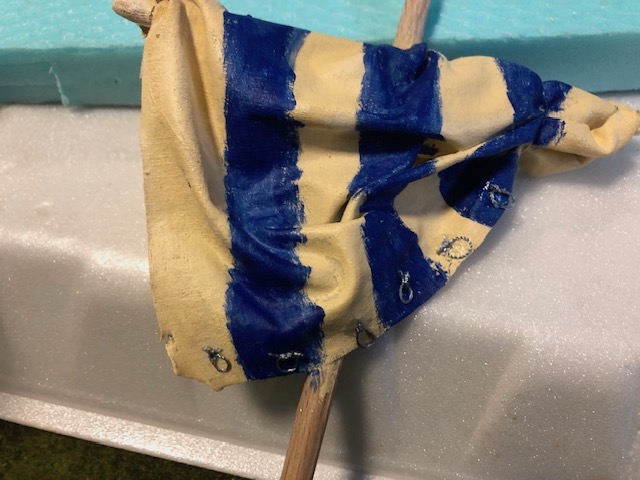
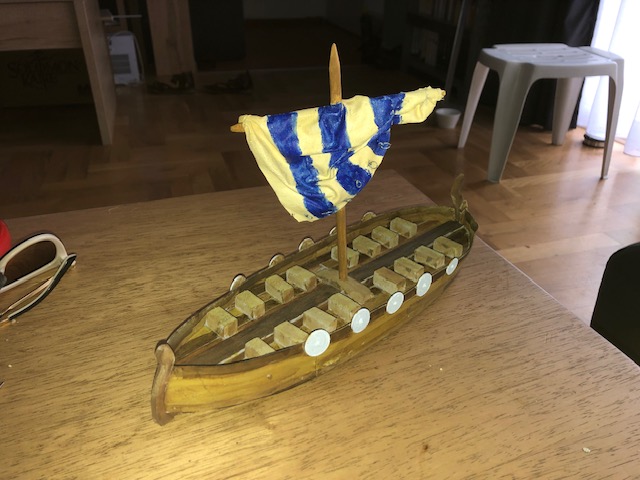
The process for the sail followed from the PvA which was used to form a rigid structure. A mix of white and Ochre was the basic color for the sail, and then strong blue stripes were added.
It was finished off with gluing some small yarn loops to simulate rigging on the sail itself. The yarn was looped around a skewer and double knots tied. This was glued on the bottom of the sail.
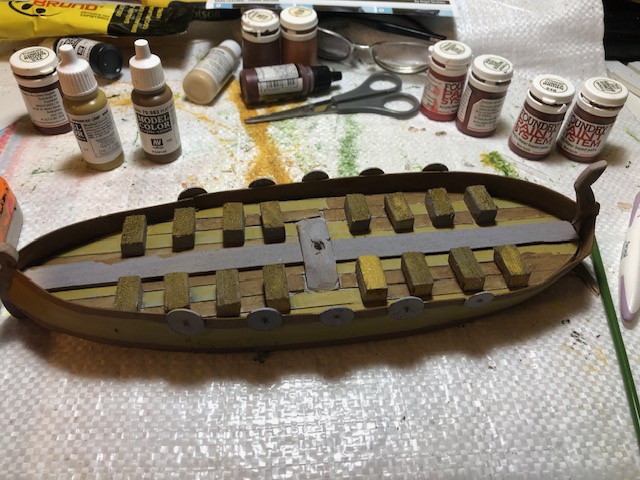
The boat itself was painted in a series of colors randomly used to represent different wood. Small balsa blocks were glued to the ‘deck’ as seating, and a central ‘plank’ was also added.
Some spare shields were glued to the side of the boat and painted white. I am thinking of buying some shield transfers so I might leave these white for now.
The painting scheme followed this pattern:
Random ‘stripes’ of “Japanese Uniform” 70.923 and Flat Earth 70.983
Wash of diluted Flat Earth over the Japanese Uniform color (#1 ref)
Wash of “Smoke” 70.939 on some of the Flat Earth ‘planks’ (#2 ref)
Wash of “Woodgrain” 70.828 on others (#3 ref)
2nd Wash on “Japanese Uniform” Chocolate Brown” 70.872 (#1 ref)
2nd Wash on “Smoke” with 50/50 Smoke & Black (#2 ref)
2nd wash on “Woodgrain” with 50/50 Smoke & Woodgrain (#3 ref)
After this is fully dry I’ll add some wood grains using a mix 90/10 of Dark Sand (70.847) and Japanese Uniform to (#1 ref)
90/10 Dark Sand & Flat Earth (#2 ref)
90/10 Dark Sand & Woodgrain (#3 ref)
The whole boat will then get a wash of Smoke to tie things together
Final Two pictures, with wood grain effect added and final wash with “Smoke”
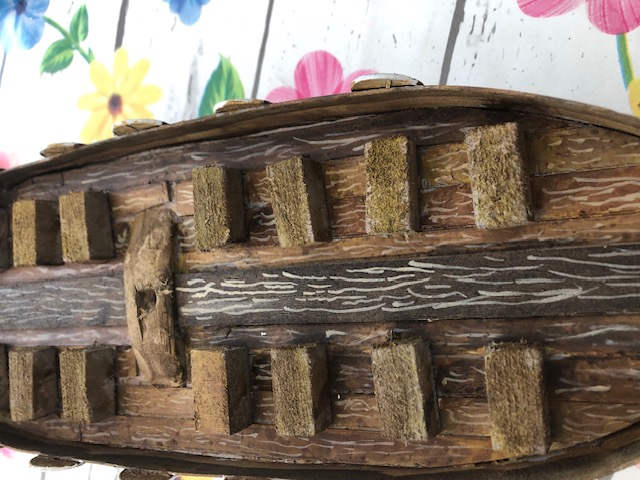 The "grain" looks very prominent before the wash
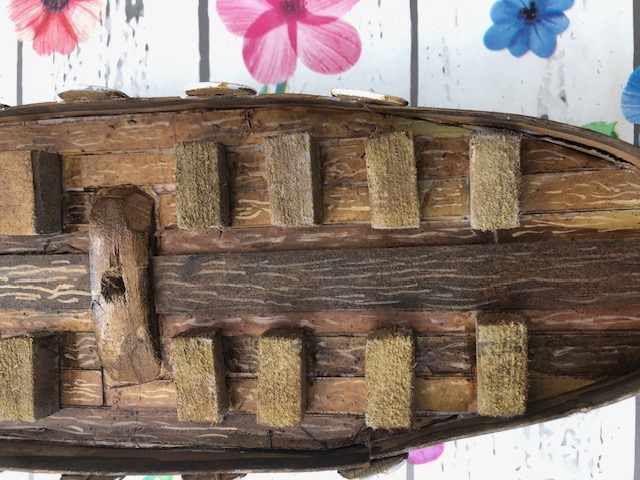 Smoke wash added and overall wood muted nicely.
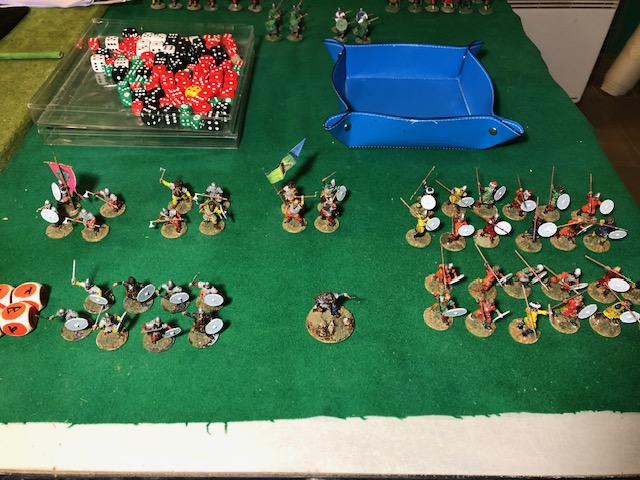
Week 13 - Viking are here
So, Anton finalized his Viking war band as far as necessary to get them on the table for a game. Pictures of the game to follow in a couple of days.
His approach was to make 6 units: 3 x Hearthguard, 1 x Warriors, 2 x Levies.
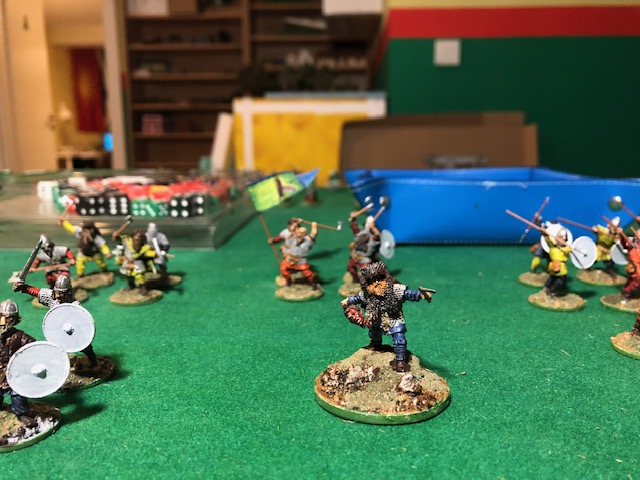
Although slightly contrary to the game “requirements” of all armed the same, he decided that the Hearthguard were the best fighters and naturally would come to war armed with the weapons they were best at! A reasonable proposal, and as we are only ever going to play casual games, I’m happy enough with that.
His paint scheme was random rather than anything like a “uniform” which again seems fitting for the period and the Vikings.
Lots of pictures to follow below.
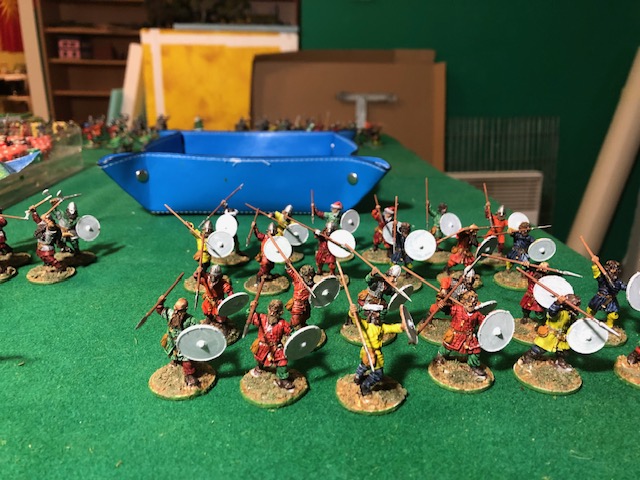
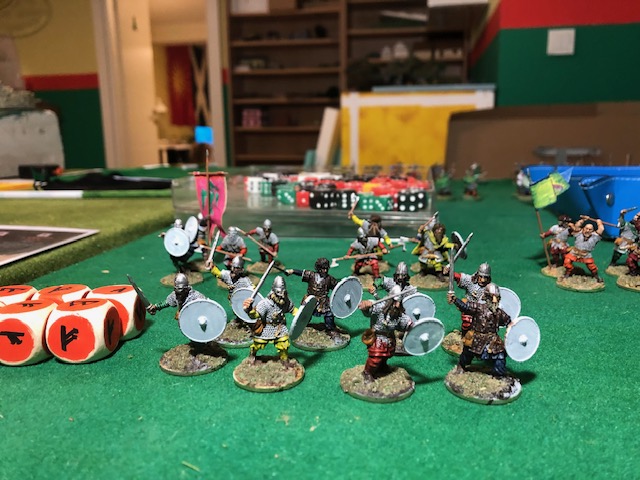

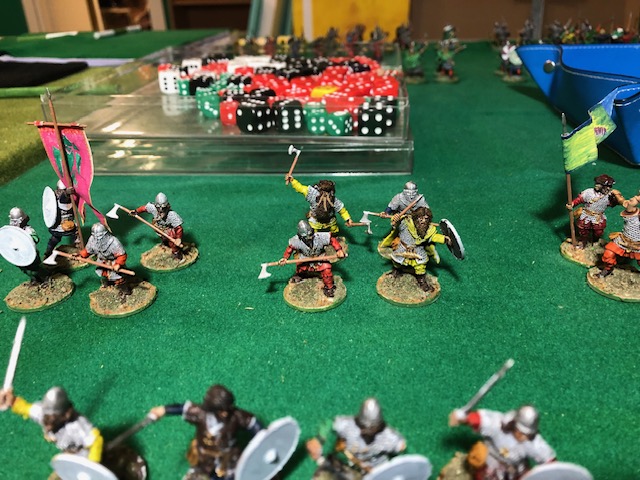
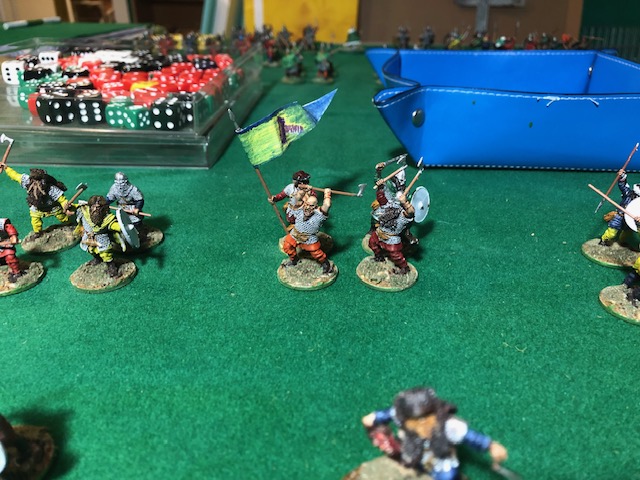
The shields have bee left white as I will try to get hold of the Shield decals rather than paint them all up myself (or himself). If I can’t, then at some point soon I’ll tackle them. But the complexity of some of the designs is beyond my painting talents!
For anyone interested, the flags were made from the same material I made the longboat sail from a small weave cloth I found soaked in a 60/40 PvA/water solution and then painted with Vallejo paints.
Our game will be played on a board I made a couple of years ago – also for a Spring clean challenge. We’ll play a 4 point game to start with.
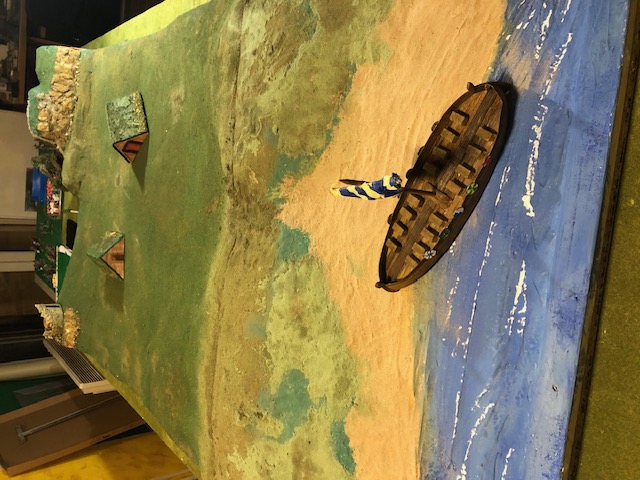

The playing area before adding Terran features.
Battle Report to come next.
Happy gaming!